Tagged Under:
Home Studio Troubleshooting Tips, Part 1: Hardware
How to diagnose and fix common hardware-related problems.
One of the best aspects of having a home studio is that you’re the boss. You get to choose the gear, and you get to make the creative decisions. But with that freedom comes the responsibility of figuring out what’s wrong when you have a technical problem, which is an inevitable occurrence in any studio.
Fortunately, you don’t have to be a tech nerd to diagnose and fix many common gear and computer issues. Sometimes the cause is obvious, but other times it could be one of many possibilities. When the latter happens, it’s essential to stay calm and methodically troubleshoot the problem.
In this two-part series, I’ll show you some step-by-step examples of how to do just that. Here in Part 1, I’ll mainly deal with hardware-based problems. Next month I’ll focus on how to overcome DAW and other computer issues.
Follow the Signal Path
When your gear isn’t working right, put on your detective hat and use basic troubleshooting techniques to find the culprit. The idea is to use the process of elimination to systematically rule out various components in your signal chain as being responsible. Eventually, you’re left with only one possible explanation.
I’ll provide a few examples here. They’re not going to cover every potential problem, but by reading the steps, you’ll better understand the thought process that goes into troubleshooting, and you can apply it globally.
The Sound of Silence
For the first example, let’s say you’re getting ready to record a vocal. You plug a mic into your audio interface and … no sound! The first thing to do is to check the input meter (and/or signal-present LED) on your interface. No movement, no LEDs lighting? Well, since the signal isn’t getting past the input of your interface, you can deduce that the problem is at the input, or even before it (i.e., a problem with the mic or mic cable).
Here are the troubleshooting steps to follow in this circumstance:
1) Confirm that you plugged the mic cable in all the way and connected it to the correct input.
2) Make sure that channel’s input volume is turned up.
3) If you’re using a condenser mic, make sure you turned on the appropriate +48V phantom power switch on the interface — this kind of mic needs that voltage in order to operate. (Click here for more information.)

4) Still no sound? It might be the mic cable. Try swapping it out for another one. (Caution: Never plug or unplug anything when phantom power is on, or it could damage your gear. And after you switch phantom power on or off, always wait a few seconds for the device to finish powering up or down before you plug or unplug anything.)
5) If a new cable doesn’t help, the problem is most likely the microphone itself. Does the mic use a battery? If so, put in a new one. Does it have an on/off switch? If so, make sure it’s switched on. As a last resort, try a different mic altogether. If it works, then you’ll know for sure that the original mic has an issue.
Nothing There
Here’s a similar scenario, but let’s say that this time, you do see signal at the interface inputs when you talk into the mic. However, you’re still not hearing anything, and the meter’s not moving on the record channel in your DAW. In this case, try following these steps:
1) Make sure you’re monitoring the correct input channel in your DAW — that is, the one where your mic is plugged in. Also, make sure you correctly configured the input in your DAW’s I/O settings. (In Steinberg Cubase, it’s called the Audio Connections window.)
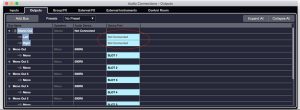
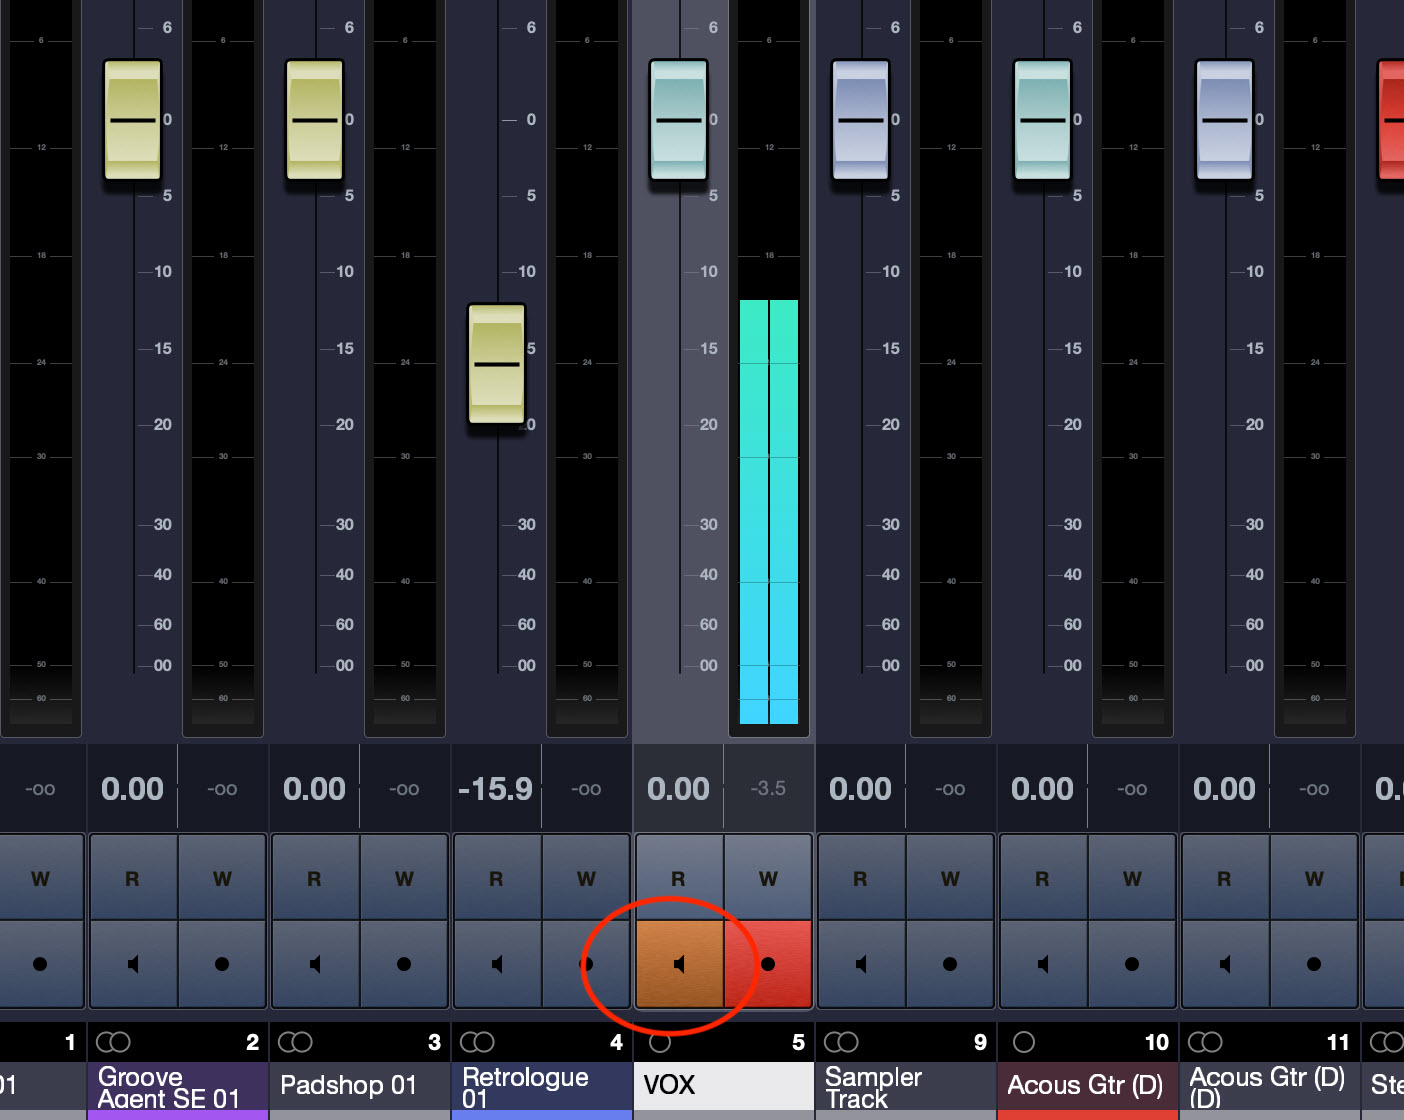
2) Assuming these are correctly set, check that the channel’s input monitoring is turned on.
3) If so, make sure the volume on the DAW input channel is turned up.
4) Still no sound? The next step is to confirm that your interface is selected in your DAW’s audio settings.
Let’s say you do see signal present in the DAW, yet you’re still not hearing anything. In that case, try the following:
1) Make sure the record channel and the master channel have the correct output assignments in your DAW.
2) If there’s a monitor or headphone gain knob on your audio interface, make sure it’s turned up.
3) If there’s still no sound, the problem could be with the speakers or the headphones. Are the speakers self-powered? If so, are they turned on? If you’re using headphones, try substituting a different pair.
All Mixed Up
If you have a mixing console in your studio, you may run into situations where you’re not getting any signal at its main and/or headphone outputs.
1) If you’re bringing a source like a mic or an instrument into a mixer, use the channel’s PFL (pre-fader listen) switch to listen to the signal before it gets to the fader. If you hear the sound when the PFL switch is pressed, the problem must be something internal in the mixer, between the fader and the outputs.
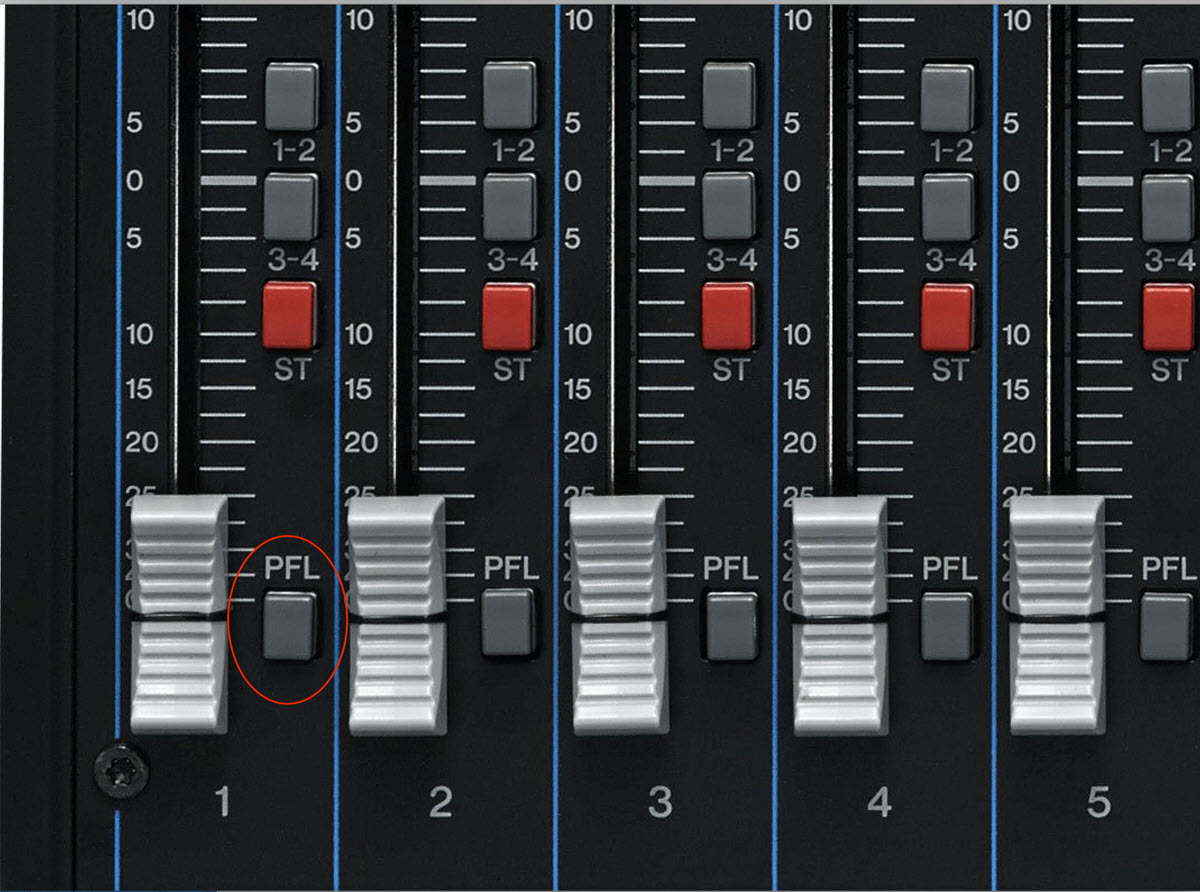
2) Make sure the channel fader is up. (It’s not unheard of to accidentally push up the wrong one!)
3) Check the output assign switch for the channel to make sure you’re sending signal to the correct destination.
4) Make sure that you don’t accidentally have another channel in solo.
5) Check that you turned the monitor and/or headphone output levels up.
If you don’t hear the sound when the PFL switch is pressed, make sure that the channel is set for the right signal type (i.e., mic, line or Hi-Z). If it’s set correctly, then the problem has to be before the mixer: either the cable is bad, or there’s an issue with the mic or the instrument (perhaps its level is turned down?). Try swapping the cable first; not only is this the most likely cause, it’s the easiest fix too.
Buzz Off
Let’s troubleshoot another typical problem: You plug a guitar or bass into an amp and you hear the signal, but it has an audible hum or buzz. Here, the most likely culprit by far is a bad cable, so start by swapping it for another one. Still buzzing away? Try these steps:
1) Does the amp have a ground or ground-lift switch? If so, flip it.
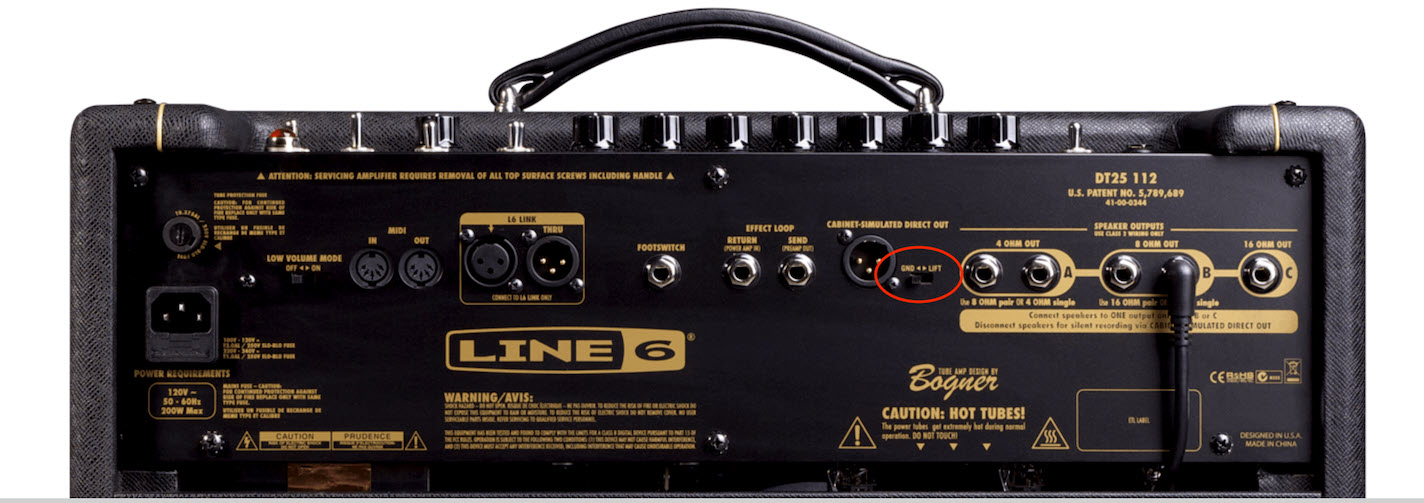
2) If that doesn’t work, try plugging the amp into a different AC circuit. The problem could be in the wall wiring.
3) If the amp is a stack (that is, if it’s connected to an external speaker), it’s possible that a defective speaker cable could be causing the buzz. Try replacing it.
4) If none of that fixes the problem, your amp may need to be serviced.
Buzz and hum problems can also occur when you connect mics or instruments to interfaces, mixers and outboard gear, or plug processors into your signal chain. The steps here are basically the same: Check the cables first, and switch the ground if that option is available on the device. (Be sure to use a DI (Direct Inject) box if you’re connecting an electric guitar, bass or keyboard; those instruments are not designed to be connected directly to line or mic inputs.) If that doesn’t help, try plugging the instrument into a different AC circuit.
The Stage is Set
Another issue to keep in mind is the concept of gain staging — setting levels throughout your signal chain correctly in order to give you healthy amounts of volume without overloading any inputs. Correct gain staging can help you avoid noise when a signal is too low, and distortion when a signal is too high.
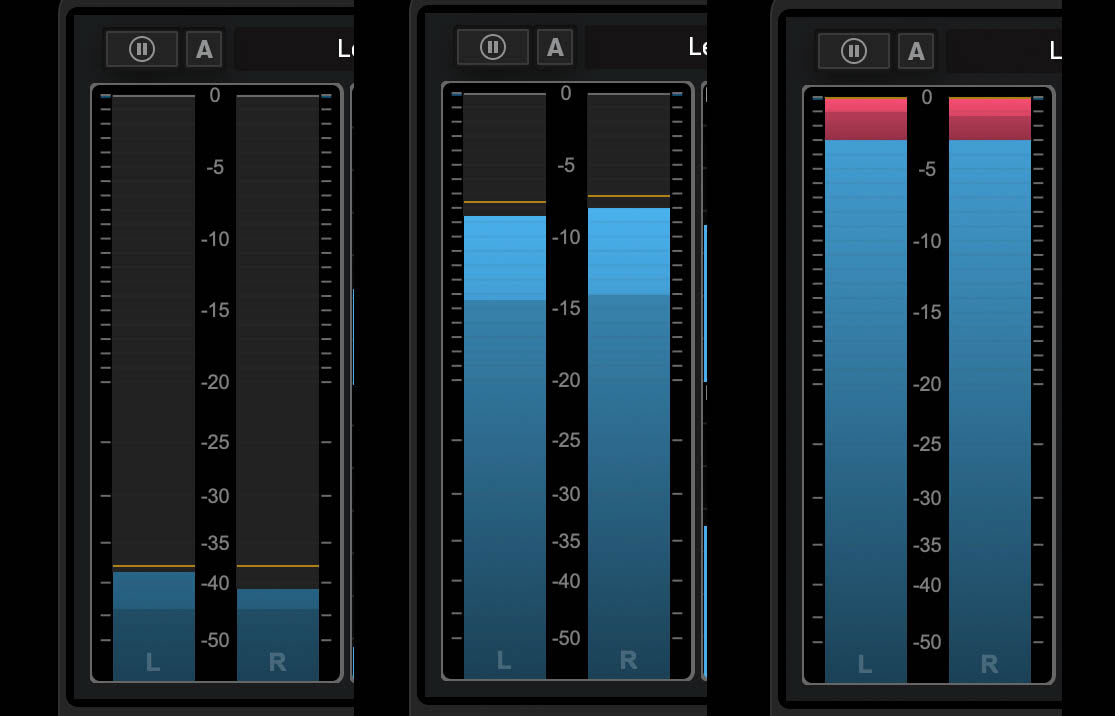
If you’re using a mixer (either hardware or software), once you get sufficient input level from the mic or instrument into the channel, correct gain staging is a pretty straightforward process. But if you’re simply connecting multiple devices together (either hardware or software), it’s unfortunately easy to end up with levels that are too low or too high.
If the signal coming into device B from device A is too quiet:
1) Ensure that the output level of device A and the input level of device B are turned up sufficiently.
2) If you still can’t get enough level, check that you haven’t created a mismatch of signal levels. For example, if you tried plugging a microphone into a line-level input, you’d barely get any signal. Mic level is extremely low in comparison to line level, which is why a microphone’s output needs to go through a component called a mic preamp (these are available as standalone devices but are also built-in to most audio interfaces and mixing consoles) in order for its signal to be raised to the proper strength. Instrument level is typically lower than line level and higher than mic level, but also needs preamplification.
Conversely, if the signal coming from device B into device A is too loud and is causing distortion:
1) Turn down the output level of device A.
2) If that doesn’t help, check that both are compatible level-wise. You might have connected a line-level output into a mic input, which would cause distortion.
In Part 2, we’ll focus on troubleshooting DAW and computer-based problems, which are more common, and sometimes a lot harder to figure out than hardware issues.
Check out our other Recording Basics postings.
Click here for more information about Steinberg Cubase.


