Tagged Under:
How to Use Inserts
How this special patch point can help improve your sound.
Ever wonder what those connections on your mixer called “inserts” do? Here’s a guide to what they are and how they are used.
Inserts In The Analog World
Many analog mixers, such as the Yamaha MGP Series, offer inserts on the input channels. They’re often found on the rear panel, like this:

An insert provides both an output (or “send”) and an input (or “return”) on a single 1/4-inch TRS (Tip/Ring/Sleeve) jack that’s internally wired as a pair of connections. Using an insert requires a special cable (appropriately enough called an “insert cable”), which has a TRS plug at one end and two TS (Tip/Sleeve) plugs at the other end.
When the TRS connector is plugged into an insert jack, the signal from the mixer channel is sent out through the tip of the TRS connector to an external (“outboard”) processor such as a compressor or noise gate. The ring of the TRS is used to return the signal from the processor back into the same mixer channel. The TS ends of an insert cable are usually labeled to indicate which one is an input (the bottom jack in the illustration below) and which one is an output (the top jack in the illustration below).
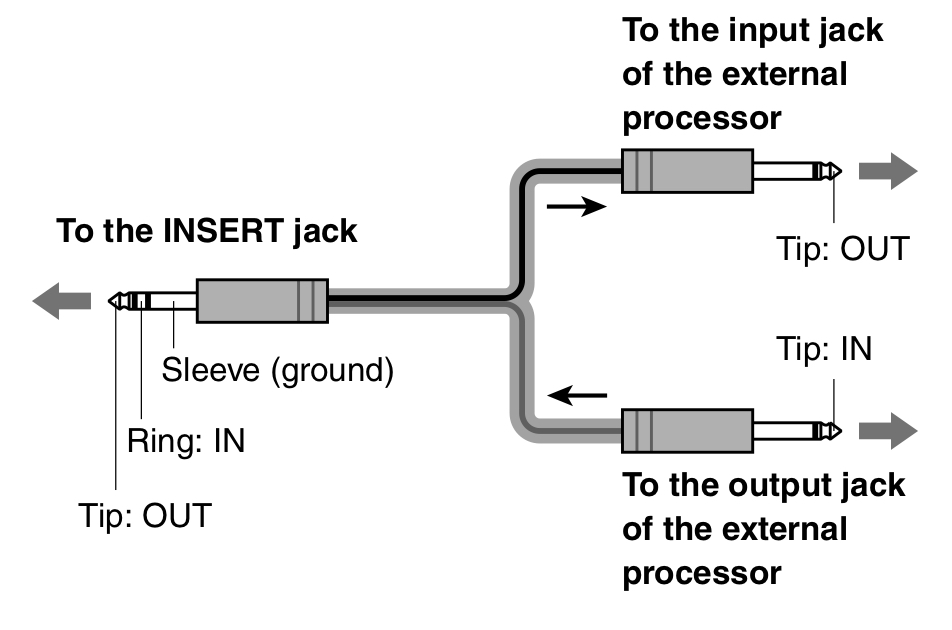
A switch inside the insert jack senses if there’s a TRS connector plugged in. If a connector is not plugged in, the insert is bypassed. But when a connector is plugged into the jack, the signal is rerouted from the mixer to the external processor. The insert usually comes in the signal path after the mic preamp, trim and equalization (EQ) circuitry, but that can vary from one manufacturer to another.
Two Plus Two Equals Three?
One unbalanced cable requires two conductors: a tip that carries the “hot” signal, and a sleeve that carries the ground. So how can a TRS insert — which has three conductors — carry two separate signals? The answer lies in the fact that the sleeves of the two TS connectors are both wired to the sleeve of the TRS so that they share a common ground.
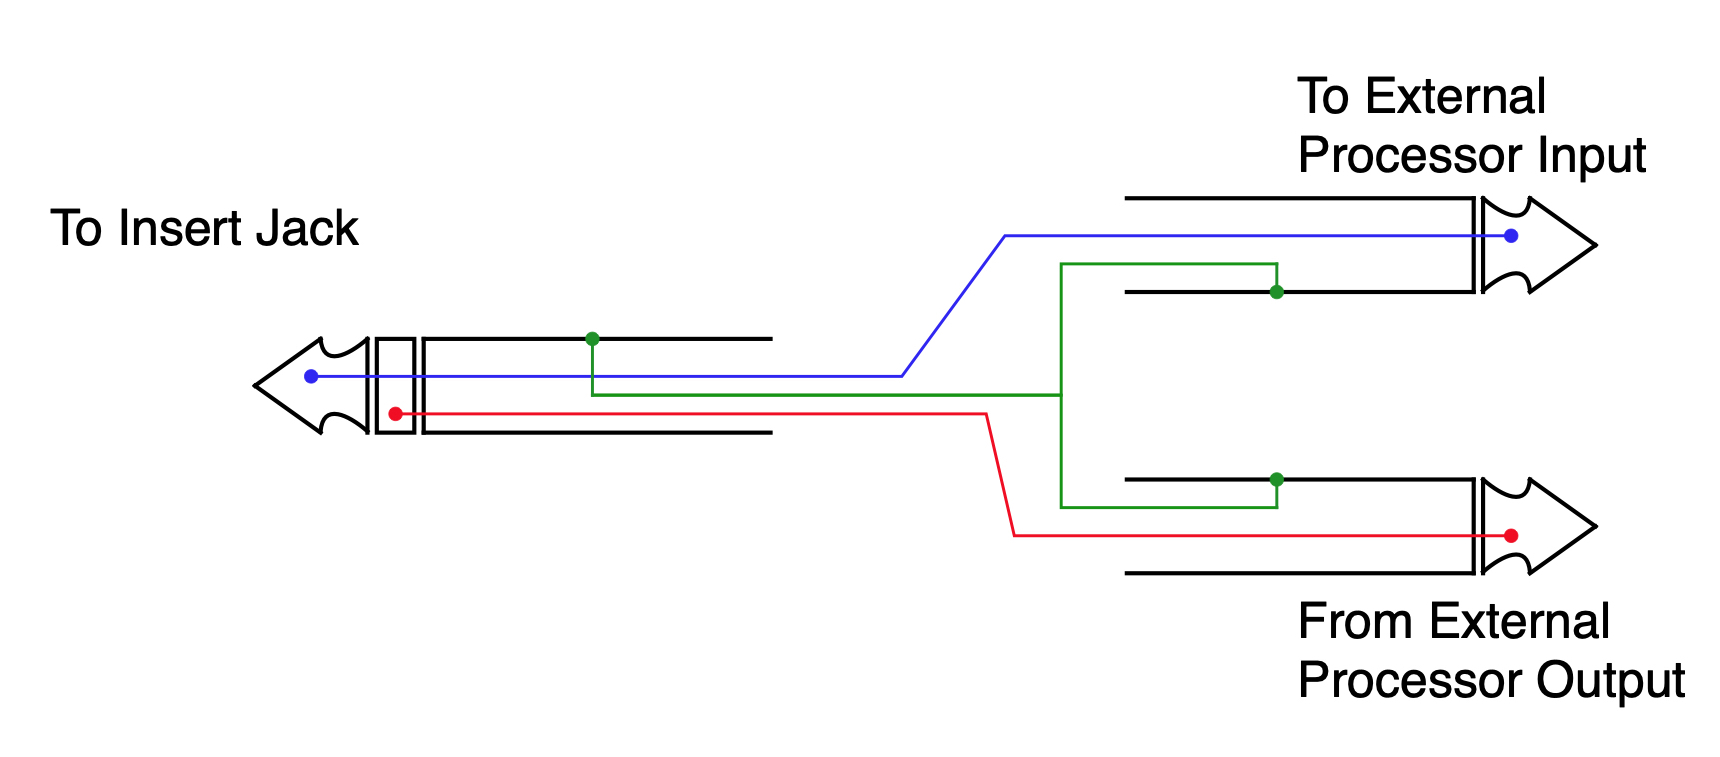
Most manufacturers use the tip of the TRS as the send and the ring as the return but some do it vice-versa, so be sure to check the manual for your particular mixer.
When To Use An Insert
Inserts are most useful when you want to process individual channels, and when you want to hear only the processed signal. Inserting a compressor on a vocal channel, for example, ensures that you hear only the compressed signal and dedicates the compressor to the vocal only. This enables you to optimize the compressor settings for the vocal before it is sent to any other buses (e.g. the stereo L/R mix or any of the aux sends), but it also means that you need more hardware if you want to process a lot of channels. Compressors (typically used on vocals, kick, snare and bass), gates (for drums) and outboard EQ processors are generally accessed via inserts and are therefore commonly called insert effects.
Reverbs and delays are not generally accessed via inserts because they often receive signals from multiple channels. These types of effects are typically accessed via an aux send, with the processed signal coming back into the mixer via an aux return, where it is blended in with the unprocessed “dry” signal.
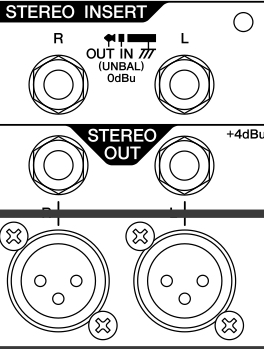
In live sound, graphic equalizers and compressors are also often used to process the full mix being sent to the stereo L/R bus. That’s why some mixers, like the Yamaha MGP24X and MGP32X, provide inserts for the stereo L/R outputs:
Inserts In The Digital World
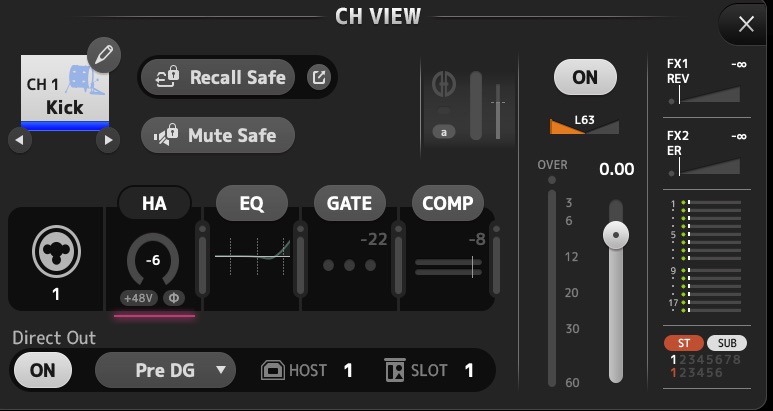
Digital mixers usually don’t have insert jacks because the processing is done internally. Yamaha TF Series digital mixers, for example, provide a four-band parametric EQ, gate and compressor on every input channel.
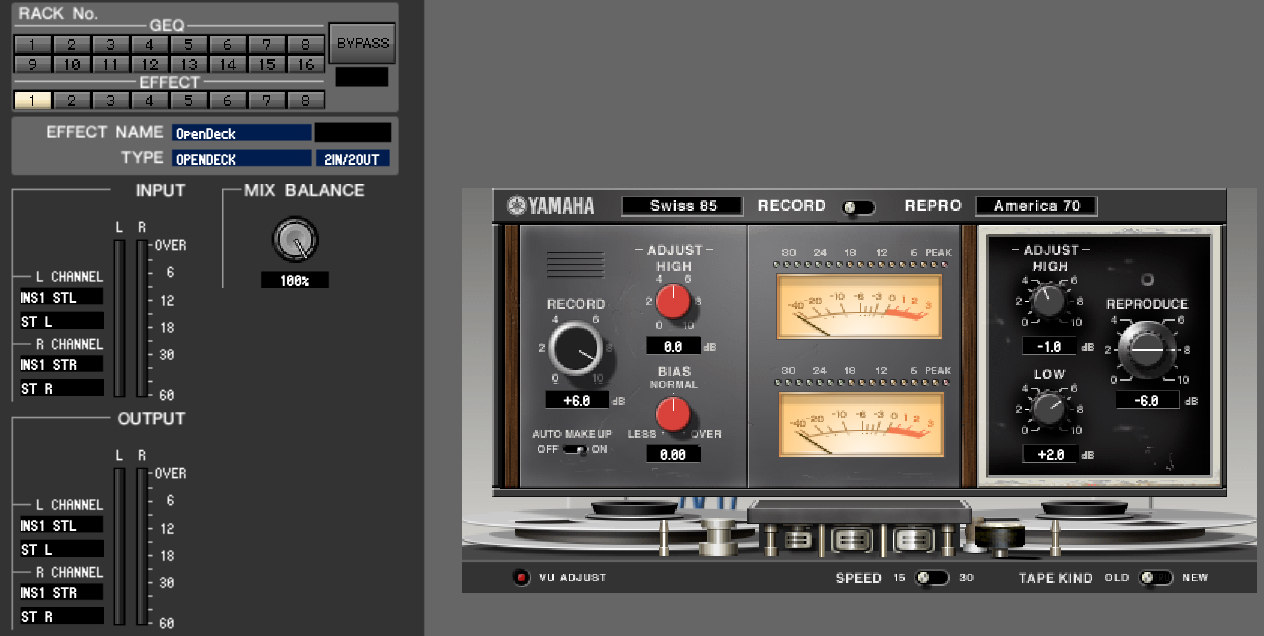
More advanced users may want additional processing and that’s why Yamaha Rivage PM, CL Series and QL Series mixers feature a virtual rack with a wide variety of effects, including graphic EQ, vintage compressor, analog tape simulator, pitch shift, distortion, flange, filter and more.
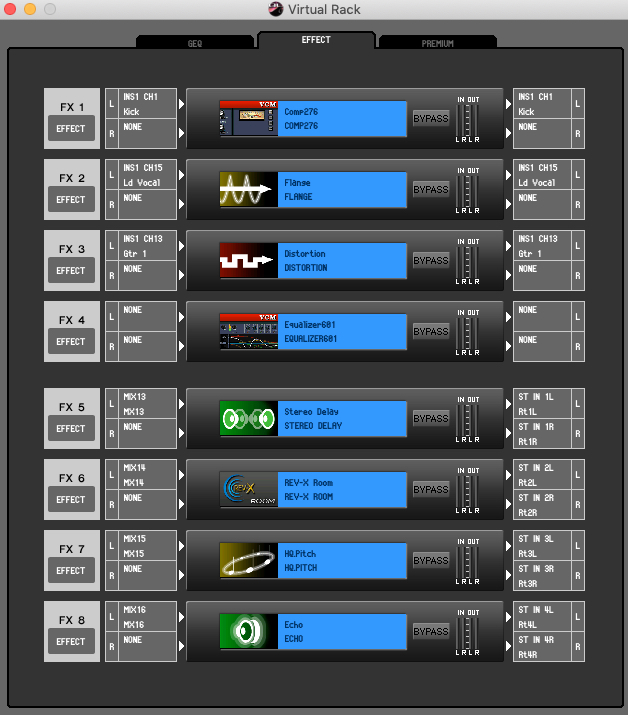
These processors can be inserted on any input channel, which opens up a world of possibilities. For example, you could insert a digital model of a vintage tube compressor on the lead vocal channel to get a different type of compression from the standard compressor offered by the mixer. Input channels on CL and QL mixers have two inserts, each of which can be set to pre-EQ, pre-fader or post-fader (post-on switch).

Effects in the virtual rack can also be inserted on any output, such as an aux send or the stereo L/R mix bus. A graphic EQ inserted on an aux output that’s being used for a monitor send can help control feedback, while a virtual tape simulator inserted on the stereo L/R bus can add analog warmth to your mixes.
Pre- Versus Post-Fader
As mentioned earlier, Yamaha CL, QL and Rivage PM mixing consoles offer the option of using an insert pre- or post-fader, and it’s important to understand the difference between these patch points, especially when using a compressor or noise gate. If you insert a compressor or gate pre-fader, then the action of the processor remains consistent regardless of fader position. This is generally good for input channels.
Inserting a compressor or gate on an output channel is a different story, and whether to insert it pre- or post-fader depends upon what you are trying to achieve. If you insert a compressor post-fader, then raising the fader increases the compression. This is great if you want to use the compressor on an aux send feeding a monitor (or, in some mixers, a dedicated “monitor send”) or the stereo L/R bus as a way of keeping the volume level from getting too loud. But if you want the “flavor” of the compressor to remain consistent regardless of the volume, then insert the compressor pre-fader. Inserting a gate post-fader is probably a bad idea because the gate may close as you lower the fader, thus cutting off soft sounds.
As you can see, inserts are an important component in live sound. They can help improve your mixes and open up creative possibilities. If you haven’t used them before, what are you waiting for?


