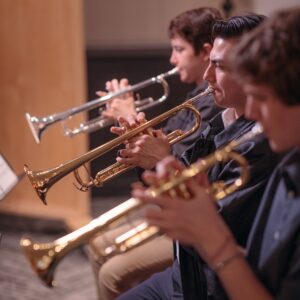
Orchestra Teacher Creekside Middle School Carmel Clay Schools Carmel, Indiana
What is the best tool that Keith Ziolkowski, Orchestra Teacher at Creekside Middle School in Carmel, Indiana, uses with his students? Being genuine. “All my students see me for who I am, which includes my knowledge, passion and excitement to teach them music. I don’t feel the need or desire to put on a show of something or someone that I am not or that our orchestras are not. I focus on genuine experience from day one,” he explains.
This includes having high expectations for his students and ensembles. “Together, we are allowed to fail, have struggles, but also succeed. There isn’t a moment in our classroom where we do not support one another through good and bad, no matter how challenging or how exciting those moments can be for students,” Ziolkowski says
At the middle school level, careful, but calculated student involvement is required. “The most important thing is to help build students up with proper foundation through technique, good, appropriate and challenging literature, and giving them chances to lead,” explains Ziolkowski. “My goal is to help mold and form students into consumers of music throughout their entire life.”
Ziolkowski also holds himself to high standards as well. Each quarter, he sets benchmarks for himself that align with the curriculum. “This has really helped to make sure that all my students are understanding, playing and having fun,” he says. “These benchmarks then stack each quarter and each year a student is in my program, and I refer to them often to make sure that I am not teaching or preparing music that is above acquired knowledge.”
Even though these benchmarks have dates and numbers with them, Ziolkowski has the flexibility to change the goals for the ensemble or individual student to make sure they are growing at a rate that is appropriate for them.
It’s vital for Ziolkowski to make orchestra interesting, achievable and fun because the arts are no longer required due to changes in the Indiana high school diploma requirements. “It’s crucial to offer a great program at the middle school that students seek out and recognize as an essential part of their education at the high school,” he explains.
He connects with other orchestra teachers and music educators through his roles in professional organizations, including the current president of the Indiana Music Education Association and past president of the Indiana Chapter of the American String Teacher Association. Ziolkowski also has a group text chain with other music teachers. “It’s important to have a community so that you are not on a teaching island,” he says. “I hold this group of educators and friends near and dear. We have been able to guide one another to appropriate literature for ensembles and to share sometimes very blunt thoughts and ideas when it comes to best practices for engaging students.”
Band Director West Junior High School Pocono Mountain School District Pocono Summit, Pennsylvania
Flexibility is the key to Sarah Williams’ success. The Band Director at West Junior High School in Pocono Summit, Pennsylvania, has been a K-2 general music teacher, junior high choral director, junior high band director and assistant with the high school marching band.
“Working at different levels and in different buildings in the same district has given me the opportunity to connect with students of all age levels,” Williams says. “The biggest challenge has been teaching new content three years in a row. Although all of these positions have been music, elementary music is different than middle school music, and choral is very different from instrumental.”
Every time Williams felt like she had a handle on what the content and class structure should be, a new position was handed to her. Last year was her biggest challenge when she taught both 7-8 general music and 7-8 chorus. “My background is primarily instrumental, so teaching vocal music at this age level meant asking my high school colleagues a lot of questions and going through my resources from workshops and conferences,” she explains. “I also had never taught guitar and other middle school general music topics. There was a lot of planning and learning for this position.”
Now, Williams is back to being a band director at the middle school and high school level. “Remembering the little tricks and techniques for all the band instruments has been a challenge, but like the old saying goes, ‘it’s like riding a bike,’” she says with a laugh.
Because of her varied experience working at different grades and ages, Williams takes a proactive role in building a stronger, more connected music program across the district. She plans to have some of her middle school band students perform for elementary school students who are thinking about joining band. She also organizes an “underclassmen night” where junior high band members can tag along with high school band students for a football game.
Williams played a key role in revising the K-12 music curriculum for the Pocono Mountain School District. “Some of the major changes that I helped with were to change the curriculum from leaning heavily into teacher-led instruction to more student-led instruction. We added more creative opportunities and proposed activities that the students could lead. For the junior high general music curriculum, the biggest change was the curriculum that focused on specific techniques on piano and guitar to more focus on the performance aspect of playing an instrument.”
Another district-level initiative has been adding more modern band opportunities. Williams is working with the Tri-M advisor at the high school to have some high schoolers come help middle school students during the after-school jazz band and rock band rehearsals.
In 2016, when Williams first started teaching elementary music, she was encouraged to learn Orff Schulwerk, a child-centered approach that blends music, speech, movement and drama. She is now Orff certified and is a regional representative for the National Board of Trustees of the American Orff-Schulwerk Association. “I am hoping to advocate for using Orff Schulwerk at the secondary level,” Williams explains. “Guided experiences, imitation, exploration and improvisation have a place in middle school band as much as they do in an elementary classroom. This is definitely a work in progress!”
Director of Bands Jefferson Middle School Fort Wayne, Indiana
Alex Whitehead’s visionary teaching helps his students thrive as musicians and be confident, disciplined young people. “I do this by being 100% genuine and constantly striving for my students to be the very best version of themselves that they can be,” he says. “I think my students are comfortable with my high standards because they know I care about them as people, not just musicians.”
This positivity has led to Whitehead’s band program at Jefferson Middle School in Fort Wayne, Indiana, growing by mor than 50%. “Our entire music department recruits as one unit to our four elementary schools. We view any student involvement in band, orchestra or choir as a win for all our programs,” he says.
In total, the band, orchestra and choir programs have a combined enrollment of more than 350 students. The elementary schools are visited several times each year by the middle school directors and students for performances, Q&A sessions, instrument petting zoos and final fittings.
Whitehead’s innovative rehearsal structures and repertoire choices help students broaden their music educational experiences. “Repertoire choice is the most time-consuming part of the job. I constantly choose literature that expands my students’ understanding of the world, appropriately fits the ability level of my ensembles and stretches them as musicians,” he explains.
Most importantly, the music must be fun and always engaging for the students. “Once the literature has been selected, I try to have an intimate knowledge of each piece and know exactly how each part should sound so I can always be engaged in the literature in front of my students. If I have not fully bought into the literature that I’m programming, I cannot bring out the best in my students,” Whitehead says.
Last year, Whitehead was able to get the 8th-grade Jazz Band to be a curricular class. “This finally allowed our students to have band twice in a school day. In class, we are able to discuss the oral tradition of jazz and develop students’ jazz language skills through an improvisation-first approach,” Whitehead says.
This jazz ensemble is one of the few middle school bands that compete in Fort Wayne’s jazz festival scene, and students have won several improvisation awards at these festivals.
On top of all the ensembles he oversees at Jefferson Middle School, Whitehead also helps with the Northrop High School marching band and jazz band. A recent highlight for Whitehead was seeing the jazz band from the middle school and high school perform at Fort Wayne Community Schools’ Music in Our Schools Month festival. “The performance was a combination of all 7-12 students involved in jazz performing together. It was incredible to see my current and past students working and performing together! Plus, it showcased the culture-building the team at Jefferson and Northrop have been doing,” Whitehead says with pride.
Director of Bands at Harrisonburg High School Adjunct Music Faculty at Bridgewater College Harrisonburg, Virginia
Some of the sayings commonly heard or read on banners in Daniel Upton, Jr.’s band room include: “We Before Me” and “All In, All the Time.” Not only do these quotes reflect the overall mentality of the band members at Harrisonburg High School in Virginia, it also signifies how “we give up on NO ONE,” Upton says. “The door is wide open for those who want to be a part of something bigger than themselves. Our program strives to honor those who have come before us, maintaining their legacy while creating our own legacy now,” he explains.
A unique aspect of Upton’s teaching philosophy is “Upton buffer time,” which means that any itinerary or plan always has extra time built in that is “rarely wasted, always needed,” Upton explains. This so-called time manipulation takes many forms. One student refers to it as “keeping us on schedule and staying locked in while traveling and at competitions.” Another says, “It’s like making time go fast when we have good music, but slowing it down when we need more time on a tricky passage.” A third recalls “crazy long band camp days that fly by because of the schedule and fun things Mr. Upton plans.”
Upton’s positivity was tested when his district built a second high school. The band director at both schools were tasked with creating a joint marching band for Harrisonburg and Rocktown High Schools. “The new director at Rocktown had been my colleague at Harrisonburg for 10 years, so we shared a vision for keeping students connected in meaningful ways,” Upton explains. “We formed a committee of students to come up with priorities and a name.”
Ultimately the joint marching band became known as the Rock City Regiment, whose name came from the greater Rockingham County area, Harrisonburg’s “Rocktown” nickname and the city school system. Nicknamed the “RCR,” the band prioritizes inclusion and diversity, while maintaining and building tradition, excellence and community. “There is a special bond within our community that many don’t understand,” Upton explains. “Now, after completing its second year, the RCR embodies all of these ideas that has spread to other Rock City programs, such as musical and dance.”
Upton even applied for a commercial driver’s license so he could drive the “band bus” to get all students to the same rehearsal space. “None of this came easily,” Upton admits. “We loaded equipment, navigated two campuses and managed countless details along the way. There were plenty of opinions from all sides about what we were doing — but at the end of the day, every student in the RCR is my student. The collaboration, the dedication, and the rewards have made every challenge more than worth it.”
This unity is reflected in every email Upton sends to parents and students, which starts with “Band Family.” Upton says that by addressing the band as family, it shows that “we are stronger together, we are there for each other and a family first.”
Upton never says, “That’s too much” or “There’s not enough time.” He looks at giving his students “every opportunity , every memory, every moment they deserve.”
This includes overseeing Virginia’s first chapter of United Sound, a program that has music students take on the role of mentors to special education students to foster social change through music. “Over the last 10 years, United Sound has transformed both our program and my teaching,” Upton says. “Our students serving as peer mentors have become more compassionate, thoughtful and inclusive. Seeing them invite their new musicians to graduation parties, attend off-campus dances together or even choose careers in special education because of this experience — with the hope of returning to co-advise our chapter — is nothing short of remarkable.
Director of Bands and Orchestras Butler Middle School Cottonwood Heights, Utah
“Effort and focus are two things we can control,” Enrique Tellez tells his class on a regular basis. The Director of Bands and Orchestras at Butler Middle School in Cottonwood Heights, Utah, shows his students that there is a time to play and a time to work. “Ultimately, I hope to teach them how to be excellent at anything they choose to do in their lives. This is what I believe teaching the whole student means.”
Tellez has been able to maintain a healthy enrollment of 300-350 in his music program since 2019, which means he didn’t lose students during the pandemic. He regularly visits feeder schools and organizes instrument petting zoos. “I think of petting zoos as a class on the different families of instruments and how they produce sound,” Tellez says. “I take a day and spend an hour at each of the four feeder schools to teach them and make a short pitch for why they should join my music program.”
He also shares a fun videothat he created during the pandemic when he couldn’t visit the feeder schools. Tellez introduces and plays different instruments in the video and puts on some silly skits along with the high school directors, which showcases the strong vertical alignment of the programs from elementary and middle school through high school.
Once students are in the program, Tellez creates a culture and environment of respect, high achievement and kindness. “I believe that every day in the classroom has an effect on recruiting and retention,” Tellez says.
Butler is on a six-by-six block schedule, but only electives have A/B classes. This means that core teachers have the same classes on A and B days. According to Tellez, this scheduling is both fortunate and unfortunate. “Fortunate because I can split up my classes into more individual groups, like beginning woodwinds, brass and percussion, rather than having them all together in one class,” he says. “Unfortunate because I have to juggle prepping for 10 classes and managing 346 students. I’m not complaining because I feel extremely fortunate to be able to split up my classes and have three levels of bands and orchestras, but I won’t lie, it is a lot of work.”
On top of his work at Butler Middle School, Tellez is also one of three directors who conduct the Canyons Youth Symphony, a district-wide youth group that has four performances each season, including a collaboration concert with a local adult ensemble. Auditions for the symphony are held once a year for students in 4th to 9th grades and rehearse once a week after school.
He is also President of Salt Lake Symphonic Winds, a local nonprofit dedicated to enriching the community with high-quality wind music. “We proudly present five free concerts each season, showcasing the finest in wind music,” Tellez says. “Additionally, we conduct two annual school outreach concerts, where our ensemble members offer clinics to students. These initiatives support our mission to provide educational experiences and exceptional music at no cost.”
Tellez’s mindset of “the grass is green where you make it” means having realistic expectations for what you have in front of you. “These students deserve the best I can give them. I’m committed to giving them my best effort and focus,” he says.
Interim Assistant Principal at Cesar Chávez High School Mariachi Director at University of the Pacific Stockton, California
Luis “Tito” Talamantes juggles being a mariachi musician and educator at the K-12 and collegiate levels — and he makes it look easy. “Mariachi is inherently intergenerational, rooted in mentorship and community, which makes that continuity possible,” says the Interim Assistant Principal at Chavez High School in Stockton, California, and the Mariachi Director at the University of the Pacific.
“I don’t see my roles as separate responsibilities — they are part of a connected ecosystem.” Talamantes explains. “My work in K–12 education informs my teaching at the university level, and my collegiate work helps shape what I build for younger students. When everything is aligned around student growth and cultural sustainability, the work becomes purposeful rather than overwhelming.”
Talamantes became a music educator because music was one of the first places where he felt seen and empowered. “I wanted to create access, guidance and lasting systems so students could thrive not just as musicians, but as leaders who carry the tradition forward,” he says.
His love of mariachi started early. Growing up, his home was full of different genres of music — from rock to R&B to country. “But the ranchera music of Vincente Fernández, Juan Gabriel and José Alfredo Jiménez left the deepest impression on me. That music carried emotion, storytelling and cultural pride in a way that stayed with me,” he explains.
When he was in 5th grade, he asked his mother if he could learn the horn that mariachis play. Two years later, she took him to his first mariachi conference and from that moment, mariachi became more than music to Talamantes — it became his purpose.
Since then, he has helped start and develop multiple mariachi programs across elementary, high school and university settings, focused on building sustainable ensembles and clear pathways, including ensembles at Fremont Elementary in 2015, Peyton Elementary in 2019, and two collegiate programs at the University of the Pacific and University California, Davis.
To start mariachi program, Talamantes says to do the following:
Identity and interest — when students see themselves in the music, engagement and ownership follow naturally.
Do your homework — attend conferences, listen deeply to the music. Study established programs. Understanding the tradition, instrumentation and pedagogy is essential, especially when resources are limited.
Start small and level appropriately — without readily available repertoire, its important to begin with accessible material and grow intentionally. Early success building confidence, retention and momentum for the program.
Build relationships and advocate strategically — garner trust with administrators by clearly communicating goals, instructional value, and long-term sustainability. Strong relationships help secure scheduling, funding and institutional support.
Leverage community and share resources — mariachi thrives on community. Partner with local musicians, educators, and organizations, and don’t be afraid to share or adapt materials. Collaboration fills resource gaps and strengthens the field as the whole.
The mariachi program at Chavez High School was already in place when Talamantes arrived, but he expanded it by designing a CTE (Career Technical Education) mariachi pathway, adding a new course and implementing leveled ensembles. In 2023, the Chavez High School band was rebranded as Mariachi Voz Campesina.
With his expanded responsibilities as Interim Assistant Principal, Talamantes continues to oversee the mariachi program.
Talamantes is seen as a mariachi resource. He willingly shares his original compositions and arrangements with others. “Mariachi music has traditionally not been leveled the way band or orchestra literature is, and that creates a real challenge for educators,” he explains. “I began leveling music out of necessity for my own programs. As I built those systems, it became clear that this work could benefit more than just my students.”
Sharing arrangements, resources and leveled catalogs is his way of supporting the broader mariachi education community. When educators have access to appropriate, well-organized materials, “they can focus less on survival and more on teaching, mentorship and musical growth,” he says. “I believe that growth happens when knowledge is shared, not protected. If I have something that another educator is willing to use, learn from, or adapt — and it helps their students — then that’s a win for all of us.”
Band Director and Vocal Music/Media Arts Teacher Gordon Parks Academy, STEM Leaders in Applied and Media Arts Wichita, Kansas
The music program at Gordon Parks Academy, a K-8 magnet school known as the STEM Leaders in Applied and Media Arts, in Wichita, Kansas, was suffering because of high teacher turnover. When Erik Stone arrived, he made a commitment to stay and always communicates to students and parents that he plans to be around for a long time. Because of this, the program grew from seven students to more than 100 in just a few years.
“During my first year at Gordon Parks, a young sibling of a current band student asked if I would be there when he was ready to be in band,” Stone recalls. “I said, ‘Yes, I will be,’ and that student is now a thriving band leader. I believe that when students know you are not leaving, they open their hearts. That trust leads to deeper learning and sustained engagement, with students choosing — and continuing — to invest in a program led by someone who shows up and believes in them”.
Stone intentionally makes his band room a place where students want to be — a space rooted in trust, consistency and care. “Music is where I come alive, and that joy is visible in every rehearsal,” Stone says with pride. “That energy, paired with strong relationships, creates a space where students — especially those who may struggle academically or behaviorally — can find success on their own terms. I celebrate every step forward and consistently champion students as they discover confidence, belonging and growth through music.”
Stone reimagined the curriculum of his beginning band to blend high expectations with creativity and community. He prioritizes tone and music literacy, using movement, rhythm and play to make learning engaging. “It’s common for students to rap their note names to original beats, move freely around the room, and perform alongside peers on different instruments,” Stone says. “We reinforce core skills through games that build trust and belonging.”
When a small group of students asked to start a jazz program, Stone told them that it would require meeting twice a week before school at 7 a.m. “They showed up — and so did I,” he says. “What started with five committed students has grown into a full ensemble of 13 to 18 musicians. Their dedication not only built a thriving program but also led to Jazz Band becoming a scheduled elective, strengthening our school’s creative community.”
Beyond the music classroom, Stone has taught the AVID (Advancement Via Individual Determination) elective. In this course, he assisted students with setting goals, community building and developing the skills and confidence needed to envision themselves as college- and career-ready long before entering high school. Stone continues to lead the career fair and has invited nearly 40 different professionals to share their educational journeys and career paths, which allows students to see what is possible.
Stone also works with the Wichita Symphony Youth Orchestras, which serves over 600 students across six separate ensembles. He began as a rehearsal assistant with the Youth Wind Ensemble and was later invited to help launch the Youth Concert Band, an ensemble geared to be an entry point into the program. This group now has nearly 70 students and includes mentorship from Wichita State University musicians and tuition waivers. “These efforts ensure that talent, not financial circumstance, allow all students access to being a part of this incredible experience,” Stone comments.
Gordon Parks Academy is unique because it’s a K-8 school and Stone is committed to create spaces where students feel seen, heard and safe to be their truest selves — “even as they are still discovering who they are,” he says. “I remind students and families that I believe deeply in the power of music, and that by making music and choosing to be champions of young musicians, we have an opportunity to make the world a better place.”
K-8 Music Teacher and 6-8 Musical Theater Director University Academy Founder, Beacon Arts Collective Panama City, Florida
Music Teacher and Musical Theater Director Shannon Stem combines storytelling, movement and music in her classroom and during performances because she teaches them as interconnected elements of expression rather than separate skills. “This integrated approach helps students understand that music and movement exist to serve the story, resulting in more authentic, compelling performances,” she says.
When she began teaching at University Academy in Panama City, Florida, middle school students had very limited electives — PE, 2D Art or general music. However, many students expressed a desire for a performing group. Inspired by that need, Stem envisioned a meaningful, engaging and sustainable Musical Theater program. She presented a proposal to the principal, who was fully supportive. In the program’s inaugural year, 40 students enrolled. Through strategic early recruitment and intentional retention, the program has grown each year. “We prioritize recruitment beginning in the 5th grade by introducing students to musical theater through outreach, campus experiences and performance exposure, which creates early buy-in and a strong student pipeline,” Stem explains. “We foster a culture of belonging and mentorship, supporting students with high expectations and individualized guidance.”
Stem also provides consistent performance and leadership opportunities across all grade levels, ensuring that students are engaged, valued and invested in the program’s long-term success. “The program was successful from the start,” she says proudly.
The musical theater productions are interdisciplinary opportunities that unite music, theater, dance and technical arts with cross-curricular support from visual arts and media classes for set design, costuming and promotion. Stem finds other ways to enhance and emphasize the cohesive nature of music. She has championed performance projects that integrate English and social studies curriculum, allowing students to connect storytelling, historical context and performance. “These initiatives promote collaboration, creativity and student ownership while strengthening school-wide engagement in the arts,” Stem says
Even though Stem teaches a range of grades, she designed her curriculum to be vertically aligned and inclusive so that every student can perform, create and lead. “Performance skills are scaffolded across grade levels, allowing students of all experience levels to grow confidently onstage. Students regularly create original work through composition, choreography and scene development, reinforcing creativity and ownership,” she explains.
She provides leadership opportunities through peer mentoring, student-directed rehearsals and performance leadership roles both onstage and behind the scenes. “By intentionally connecting skill development, creative expression and leadership opportunities, the curriculum remains cohesive while empowering every student to contribute meaningfully to the artistic community,” Stem says.
Stem’s unique ability has resulted in students with little or no musical background transforming into confident performers, collaborators and leaders. “By blending storytelling, movement, and music with high expectations and heart, I don’t just teach performances — I build communities that sustain themselves long after the curtain closes,” she says with pride.
Director of Bands Lincoln Jr./Sr. High School Lake City, Minnesota
The music program at Lincoln Jr./Sr. High School in Lake City, Minnesota, helps students believe in what’s possible. Director of Bands Eric Stashek says, “I have an instinct for bringing energy and optimism into a space and turning ideas into forward motion. By leading with encouragement, authenticity and care, I work to unite students and colleagues around a shared purpose. When individuals feel seen and supported, they take creative risks to grow together in a shared culture and create something meaningful. That belief, when shared, becomes momentum that leaves a lasting impact on students and the Lake City community.”
One way Stashek does this is by forming some fun and unique ensembles, including a community jazz ensemble, student rock band, New Orleans style brass band and a polka group. These ensembles meet students where their musical interests are, offering relevant, authentic experiences that extend beyond the traditional concert band setting. By centering student voice and embracing a wide range of musical styles, Stashek fosters deeper engagement, creativity and a lasting connection to music.
Prairie Street Jazz, the community jazz ensemble founded and directed by Stashek, unites Lake City students, alumni and local musicians to perform classic and contemporary jazz in a collaborative, high-energy setting. “These experiences have lasting impact, which motivated me to create opportunities that connect current students with the wider musical community,” Stashek says.
Another creative outlet for students at Lincoln is an emerging rock band that features keytar and horn line, providing a fresh way to engage with modern styles while building ensemble awareness, creativity and confidence. “Together, the jazz and rock ensembles allow students to collaborate across genres, stretch their musical identities and experience music beyond the traditional classroom, reinforcing the idea that music is a lifelong pursuit,” Stashek explains.
From an early age, Stashek’s musical identity was shaped by community-based music-making. Growing up in small-town Central Wisconsin, he began performing with a local polka band, the Mill Creek Ramblers, while a young teenager. That experience, making music meant to bring people together, continues to inform his approach to music education. Through creative ensembles exploring a variety of musical styles, Stashek invites students to experience music rooted in joy, connection and shared tradition, reinforcing the idea that music can be both meaningful and accessible far beyond the concert hall.
One of Stashek’s signature initiatives is the annual Lake City Junior Band Festival, which brings together mid-level concert bands from neighboring school districts for a day of performance, learning and inspiration. “My goals for this festival go beyond just making music. The festival reminds us that music is universal, it bridges differences, fosters friendships, and gives students the opportunity to celebrate creativity together,” he says proudly.
Connecting is at the root of everything Stashek does. A hallmark of the Lake City band program is bringing in guest artists who work directly with students, providing inspiration, mentorship and a window into professional musicianship. One of the most memorable guest artists was Derek Brown, a renowned BEATBoX saxophonist, known for his innovative use of extended techniques and percussive sounds to replicate the style of beatboxing on his instrument. “His energy, creativity and groundbreaking approach challenged students to think differently about rhythm, improvisation and musical expression,” Stashek says.
Brown and bands like Lucky Chops and Too Many Zooz, have been an inspiration to Stashek and was a driving spark for starting his own band, Loud Mouth Brass. “Being an active performing musician makes me a better music educator,” Stashek says. “It gives me firsthand insight into what it takes to create, collaborate, and succeed in real musical settings. Performing in professional groups such as Loud Mouth Brass and Snacklebox, as well as in pit orchestras and studio sessions, has strengthened my ability to guide students in ensemble playing, teaching them how to listen, adapt, and model professionalism, creativity, and the joy of making music.”
Co-Director of Bands and Orchestras Valley High School Clark County School District Las Vegas, Nevada
“I teach life but use music to do it,” says Dr. Andrew J. Smouse. How does the Co-Director of Bands and Orchestras at Valley High School in Las Vegas do this? He describes proud moments that come from working with students who have life stacked against them. These students often think they will never succeed, but they come to class, and Smouse encourages and keeps pushing them, often with small, easily attainable goals to create success. “The moment I see them become proud of finally playing a passage correctly, completing a concert, finding that they can do something they never thought they could and finally be a part of a team — these are the reasons I enjoy being a music educator,” he says.
Smouse always puts students and the school community first. He has created and expanded the music courses at all the schools where he has taught. “Oftentimes these classes, such as music theory, percussion/drum circle and piano, started with student inquires. After considering them, I think about how the possible course and curriculum would work, call colleagues to get their thoughts or their personal experience with the proposed class,” Smouse explains.
Then, he creates a plan and basic curriculum, researches the materials needed and calculates the costs to start. Smouse is almost always met with approval because he presents the need for the class “explaining student request for the course, student interest and how it will benefit the school community,” he says.
The band and orchestra programs at Valley High School, a Title I school in the center of urban Las Vegas, have grown to be among the largest and most respected in the city. That’s because Smouse is committed to getting quality instruments, mouthpieces, books and all materials necessary into the hands of his students. “I firmly believe that each student deserves a quality instrument that is professionally maintained so they can learn and perform at their best,” he explains. “I have been fortunate to have schools and administrators who have provided top-quality instruments to each student, beginning to advanced, professionally maintain them and have them professionally repaired.”
Smouse also works with local music stores to ensure that professional repair and maintenance, as well as great pricing, are available to his band families.
Smouse joined with several band directors in the Clark County School District to help create and grow the Southern Nevada Honor Band. “Each year. between 150 and 200 students audition for one of two honor bands. The goal is to provide an honor band experience to those students who do not have the same resources available to them in order to encourage them to work hard, play music with others who are not in their school, and learn about not only music but how a common interest can build relationships,” Smouse says.
For the past three years, he has taken on the role of administrator for the honor band, organizing etudes, judges, clinicians, directors, logistics and more.
Beyond teaching, Smouse also writes custom compositions and arrangements for his marching band, percussion and concert ensembles, “I often create custom arrangements and instrumental parts based on the instrumentation and the needs of the students. I create full band pieces, custom individual parts to existing works, and percussion cadences based on the ensemble with each part having a pedagogical purpose to help students develop necessary skills,” he says.
Smouse will also create parts so younger players and beginning band students can participate in pep rallies and football games. “I will create parts within the scope of their current abilities, including what they will learn in the upcoming weeks, that fit with the more complex parts of their other band colleagues. This allows them to participate in the events,” Smouse says with a smile.
Director of External Affairs Musical Mentors Collaborative Boulder, Colorado
Prior to the pandemic, Musical Mentors Collaborative (MMC) was a small group of volunteer musicians who taught free private lessons to elementary school students in the Morningside Heights neighborhood of New York. During the pandemic, MMC designed a teaching artist program, and today MMC has grown to serve under-resourced students across the U.S. through homeless shelters, supportive housing networks and low-income Title I schools. Teachers come from orchestras, rock bands, conservatories and corporations.
Matt Siffert, Director of External Affairs, was a touring musician and freelance educator prior to COVID. When his performances were cancelled, he looked for a way to give back and reached out to a number of nonprofits. That’s when his partnership with MMC began.
In his first four years at MMC, Siffert was the Program Director and he helped “shift our lesson infrastructure from being a short-term, pandemic-response package of offering three-months of private lessons to an academic year-long program with consistency and dependability,” he explains. “We are still operating on this academic calendar model, and it offers our students reliability and sustained mentorship over a dependable and more extended period of time.”
Siffert also created and launched MMC’s Summer Sounds program that allows for continuing education during the summer months because “education gaps often widen in the summer, and I want to make sure our community has continued access to mentorship and enrichment during this time,” he says.
Another initiative Siffert spearheaded is MMC’s Community Events program, which provided students with free tickets to concerts and dress rehearsals, access to online masterclasses and Q&As with professional musicians around the world, as well as performance opportunities. “These offerings gave students a sense of belonging in our community and real-world opportunities to get inspired by incredible musicians,” Siffert says.
Siffert worked to diversify the teaching roster at MMC by bringing in musicians from a variety of musical and demographic backgrounds. The organization looks for educators/musicians who are well-trained on their instruments, passionate about teaching, and who can bring their creative and life perspectives to create compassionate, thriving learning experiences. Working through a variety of channels — job postings, social media, email communication and social networks — MMC always offers access to a mentor whose background and experience meets the needs of the students. Whatever a student is interested in studying, “we’ll go out and find a mentor who specializes in that genre or instrument,” Siffert says. “We never say, ‘Sorry, we can’t accommodate your musical interests.’”
Siffert is a vocal cheerleader for MMC’s work because he believes so strongly in the organization’s mission. “Having spent many years as a working musician, I was able to bring a number of my relationships in the music industry to MMC’s community,” he says. “Music has always offered me a safe space to be myself and I make it a point to both communicate externally and offer programming in a way that brings joy and support to people’s lives. I find this makes other people feel similarly safe and eager to engage. I’m thankful to have so many collaborators in my community that send joy back my way!”
MMC often partners with other nonprofit organizations to help reach communities in need. During the height of the pandemic, MMC launched a collaboration with nationwide Court Appointed Special Advocates (CASAs), which offer services to youth in the foster care system. A recent expansion and grant support for Colorado’s Jefferson County CASA has made a transformative impact on that community.
Siffert’s contact at Jefferson County’s CASA shared an anecdote about Billy, who entered foster care with four of eight siblings placed in care along side him. Over time, three siblings were adopted and the remaining five moved out of state with their mother. “Billy was alone and moved from one foster home to another, unable to find stability or a sense of belonging,” the contact said. “In the midst of this uncertainty, Billy was given an opportunity that changed everything — piano lessons, something he had always dreamed of, through MMC. Despite frequent placement changes, he continued to attend his lessons. Music became his constant. It gave him joy, purpose and something that was truly his own. We often say that music can change lives. In Billy’s case, it saved one.”
Lecturer of Piano and Community Music School Piano Coordinator San Diego State University San Diego, California
Dr. Sonya Schumann builds intentional ecosystems where people, programs and values are interconnected and can thrive. “I don’t just teach piano,” says the San Diego State University Lecturer of Piano, “I orchestrate environments in which students, teachers and institutions can support one another meaningfully.”
Schumann’s college students benefit from her curriculum, which focuses on piano teaching, collaboration and work-study programs, but she also teaches students as young as 4 years. In the Piano Academy at the SDSU Community Music School, a pre-college program that provides students from age 4 to 18 conservatory-level instruction, students learn an appreciation of classical music, teamwork and discipline through individual and group piano instruction. Schumann serves as Coordinator and spearheads all activities at the Piano Academy, which has grown from 14 students to more than 70. “I oversee the placement of each piano student and ensure that each one is fit with a teacher who matches their energy and needs, as well as create a tiered system to pair them in group classes appropriate for their level and age,” Schumann explains.
In addition, she has cultivated relationships between the region’s largest artistic institutions and the Community Music School, “creating exclusive masterclass opportunities, lectures, free concert tickets and special back-stage passes for our young students,” Schumann says excitedly. “I’ve been able to facilitate these options between groups such as the San Diego Symphony and La Jolla Music Society, or with individual luminaries such as Emanuel Ax, Leif Ove Andsnes and more. These unique events are the kind that can inspire a lifetime of love and dedication to music!”
At San Diego State University, Schumann has spearheaded online learning and teaching through its award-winning Course Design Institute. She was one of its earliest Peer Mentors and has assisted dozens of her colleagues in multiple fields — to pivot from in-person instruction to online pedagogy during the pandemic, and now to create unique online courses. “Because of the need for quality online instruction, the California State University system created a certification system with which to guarantee online courses were providing effective online teaching and learning,” Schumann explains. “Because I was one of a handful of faculty at SDSU already training others to use these rubrics and metrics, my online History of Rock was the first wave of online SDSU courses to be evaluated and certified!”
Schumann’s work is not limited to the SDSU campus. In the summer of 2020, she co-founded Keys to Inclusion, a consortium of six colleges and universities that work to expand the current body of piano repertoire to include works by American composers with diverse voices. “Now in our sixth year, we have grown beyond online lectures to include in-person workshops, new commissions by living American composers and invitations to present on national stages such as the College Music Society National Conference, Music Teachers National Association Conference, the George Walker Context Conference at Eastman and the National Conference on Keyboard Pedagogy,” she explains.
She also is the Chair of AmateurPianists, a not-for-profit based in San Diego that hosts the triennial San Diego International Piano Competition & Festival for Outstanding Amateurs. “Unlike collegiate or professional competitions, ours creates space for the adult amateur to pursue their passion for learning, experiencing, performing and competing, regardless of their profession or background,” Schumann says. “AmateurPianists also presents year-round curated community concerts and masterclasses, enabling free access to piano music and music exploration for all.”
Schumann is dedicated to projects that support justice, equity, diversity and inclusivity, which led her to co-found Piano Theatre with her sister, Elizabeth, who is a concert pianist, educator and interdisciplinary artist. This organization brings “classical music to a nexus with art, theater and technology,” she explains. “Following a successful $40,000 fundraising campaign, PT released an educator-focused interactive e-book app called Piano Carnival. Created in close consultation with a national team of educators, the app and companion website incorporate music-based lesson plans that are freely available and currently in use nationally by K-12 teachers.”
Band Director Bartlett High School Bartlett, Tennessee
Band Director Trevor Rundell put a unique spin on long-term goal-setting with his students at Bartlett High School in Tennessee. He sets a Big Hairy Audacious Goal (a concept from the book “Good to Great” by Jim Collins). “When I arrived at Bartlett, we immediately were thrown into COVID, so we needed something big to work toward to jumpstart the program. Our first Big Hairy Audacious Goal (BHAG) was to become Bands of America Grand National Semi-Finalists by 2028.” His band achieved that goal in 2023 – five years early.
The BHAG has been adjusted and is now to be Grand National Finalists by 2030.
“We talk about the BHAG with the students often and at every full parent meeting,” he explains. “It gives the program a sense of going somewhere, constantly reinventing itself and improving.”
Decision-making is easy because everything the band does must be working toward the BHAG, never away from it!
Bartlett High School band has earned several marching achievements, but Rundell works hard to balance competitive success with having a well-rounded program. “We put in the time, thought and energy that most are not willing to — whether its starting a private lessons program, setting really lofty goals, going really slow in the beginning so we can go fast later, adjusting our approach to better fit the weakest performer in the room, or having excruciatingly high standards and stopping every time things are not what they should be,” he explains.
What’s invaluable is having key staff members and designers who buy into the program’s goals. “Instructionally, we are adamant in our approach to fundamentals — I think we are far more stubborn than most. Put simply, we are willing to do the boring work to improve, and the kids have really bought into that by working really, really hard,” Rundell slays.
Rundell believes that all truly great competitive ensembles are built out of their concert band program and their ability to build individual players. “We structure the program around that truth,” he says with pride. “We do everything we can to make sure the program is compatible with all the other things kids like to do because we know that band is such a huge commitment.”
To keep the program healthy, Rundell strengthened the vertical alignment of the music program within the district. “We meet with the Bartlett City Schools district band cluster about three to four times a year to talk with the middle school teachers about any potential deficits we see, share instructional practices, problem-solve and plan events together,” he explains.
Rundell has even written fundamentals sets for middle schoolers that address the skills he’d like the incoming 9th graders to have.
“I think our most successful recruiting and retention efforts have not been any specific events, but by listening and responding to how the kids feel about their experience in the program,” Rundell says. “We ask ourselves: ‘Do we more or need less rehearsals?’ ‘Do we need to change the way we split classes by ability?’ ‘Should camp days be on a Saturday or Friday?’ ‘Is it better to rehearse right after school or later in the evening?’ In this way, our approach ebbs and flows.”
General Music Teacher and Director of Bands Horace Mann School Lower Division Bronx, New York
The ability to improvise and think on his feet are essential skills for Sean Rosenberry, who teaches kindergarten and 1st grade general music classes and directs the 4th– and 5th–grade band at Horace Mann School Lower Division in the Bronx.
“I really enjoy when a student comes up with an idea in class that gives me a spark of inspiration, and I can just take that idea and run with it, sometimes abandoning my lesson plan and making something up on the spot,” he says.
To keep young students engaged, dance and movement are a huge part of Rosenberry’s curriculum. “I am a firm believer that dance and music are intimately and irrevocably intertwined — you cannot have one without the other,” says Rosenberry. “Additionally, there are so many skills — musical and otherwise — that can be taught through dance. I always ensure that every class my students are able to get up and move to music.”
The focus on movement and dance comes from Rosenberry’s training in Orff Schulwerk and Dalcroze pedagogical approaches. “Whether it’s a general music class, small group instrumental lesson or a full band rehearsal, I always let my classroom be a space where kids feel safe exploring and being playful, which is central to the Schulwerk,” and adds that “in my opinion, there is nothing that helps students truly embody and integrate music better than Dalcroze.”
One of Rosenberry’s favorite 1st-grade lessons that he developed this year starts with a folk tale and a song he wrote about how the constellation Lepus came to be in the sky and how Lepus uses different constellations as building bricks — “this helps students improvise melodies on barred instruments.”
Another unique way Rosenberry engages students is through traditional Irish music. “I’m classically trained and studied violin in college, but the reason I began playing music in the first place was because I wanted to play Irish fiddle tunes,” he explains with a smile. “I play at Irish sessions around town at least once a week, and regularly perform stage shows both solo and with other musicians. It’s absolutely my bread-and-butter as a musician. Irish music is a style of music that I get an immense amount of joy from, and I love sharing that joy with my students.”
He incorporates traditional Irish tunes and instruments into his classroom in many ways. “I use recordings for beat-keeping activities and to accompany folk dances, play different instruments (fiddle, bodhran, tenor banjo, whistle) for various lessons throughout the year. Around St. Pat’s, I often will pop into the older grades’ music classes and teach them how to play the bodhran, a traditional Irish drum, or teach a basic dance step, which the kids always find to be a lot of fun.”
Rosenberry has expanded instrumentation in the Horace Mann elementary band, adding low brass and percussion to the list of options available to students. When it comes to assigning kids to instruments, “my number one priority is to make sure kids are excited to play the instrument. A balanced instrumentation is nice, but I’d happily take a band with 12 saxophones and 3 clarinets if it meant that every child in the room was amped to play,” he says.
Orchestra Director and Music Technology Teacher at Mount Vernon High School Music Director at Washington Metropolitan Youth Orchestra Alexandria, Virginia
Opportunity is the single unifying principle that Al Rodriguez has built his orchestra program around at Mount Vernon High School in Alexandria, Virginia, and at the Washington Metropolitan Youth Orchestra. “My programs serve culturally diverse, socioeconomically varied and highly transient communities, including military-connected and immigrant students,” explains the Orchestra Director and Music Technology Teacher. Oftentimes, his students do not have access to private lessons or personal instruments. “Rather than viewing these realities as limitations, my work is grounded in the belief that talent, curiosity and musical potential are not tied to financial or cultural privilege.”
Every rehearsal, performance and ambitious project is intentionally designed to expand access and remove barriers, allowing students to see themselves as musicians capable of achieving at the highest levels. “The goal is not to bridge gaps, but rather to create learning environments where opportunity is expected, excellence is normalized, and student identity and experiences are treated as assets, not obstacles,” Rodriguez explains.
When he arrived at Mount Vernon eight years ago, the orchestra program consisted of two ensembles with 40 students. Today, there are three ensembles and almost 100 students. To foster recruitment and retention, Rodriguez spearheads the Mount Vernon Area Orchestra, an elementary ensemble for 5th and 6th graders in the district. During the eight-week event, rising elementary and middle school musicians come to the high school to meet each other, learn fun new music, and work with the middle school and high school directors. “My high school orchestra students act as mentors and buddies for our younger students, which builds a sense of community, as many of those high school students participated in area orchestra when they were younger. This creates a feeling of continuity and welcoming in our pyramid: Orchestra becomes a place that is fun, enjoyable and waiting for you when you get to high school,” Rodriguez says proudly.
Outside of Mount Vernon, Rodriguez directs the Washington Metropolitan Youth Orchestra for students in grades 9 through 12, which is part of the Washington Metropolitan Philharmonic Association. Last year, he brought the youth orchestra and the philharmonic ensemble together for a “side-by-side” concert. This event provides students “an incredibly unique opportunity to play some of the greatest pieces of classical music next to adults, many of whom are not professional musicians, but community members who value keeping music in their lives at a high level,” he says.
Rodriguez also started the Grand Staff Orchestra (GSO) during the 2023-2024 school year, which was an opportunity for any Mount Vernon staff member to learn how to play a string instrument. His orchestra students acted as teaching assistants, running sectionals and helping staff members with note reading and technique. “We had an incredible ensemble of teachers ranging in age from 24 to 60 and performed wonderful beginning orchestra pieces like ‘Jingle Bells’ and ‘Lightly Row’ at our concerts,” Rodriguez said with a smile. “The energy spread around the school like wildfire, and we saw increased attendance at concerts. We plan to run the GSO every few years to provide my students the chance to explore music education teaching opportunities.”
As all music educators know, fundraising is an important aspect of their jobs. Rodriguez started the Music Marathon, which was based on an event he participated in when he was in high school. “We ask parents, other teachers, neighbors and local business owners to ‘sponsor’ an orchestra student to show that they support the incredible things they do being part of the arts,” he explains.
Different sponsorship levels come with different gifts. The highest is the “Golden Baton” level, which grants the donor the opportunity to guest conduct the orchestra. “Guest conductors choose from a variety of recognizable short themes, get the world’s shortest conducting lesson and then jump right into the action and makes their conducting dream come true,” Rodriguez says. “We’ve been honored to have our superintendent, school board members, principals and other community business leaders join us on the podium!”
Mariachi Director Diamond Hill – Jarvis High School Fort Worth, Texas
Mariachi Director Rolando Rivera uses his unique and superior adaptation skills to build groups from the ground up and adapt seamlessly to any ensemble placed before him. “This flexibility allows me to create strong foundations, foster growth and ensure that every group I lead reaches it highest potential,” he says.
Rivera has taught at different schools in the Fort Worth Independent School District (FWISD) in the last three years. In 2023, he became the Estudiantina Director at World Languages Institute, overseeing a comprehensive program of several classes with a total enrollment of 145 students. Estudiantina is a traditional musical style that is rooted in Spain and popularized in Latin America. Rivera explains, “Estudiantina shares similarities with mariachi with two primary sections — Melodía(mandolins, occasional accordion) andArmonía(guitar and double bass, sometimes vihuela). The ensemble performs both choral and solo works.”
Rivera focused on unlocking the Varsity group’s potential by refining technique, strengthening music theory skills and establishing a culture of excellence. “To meet students where they were, I arranged music tailored to their abilities and interests, integrated audio technology and composition tools, and learned alongside them — developing my own skills on guitar, mandolin, accordion, bass and vocals,” he says. “This collaborative approach fostered confidence, adaptability and a strong foundation for success.”
In his second year, the Varsity ensemble earned superior ratings from all three judges, securing the school’s first Univeristy Interscholastic League (UIL) Sweekstakes trophy. “This achievement ignited a culture of excellence, motivating students to continue striving for success,” Rivera says with pride.
To prepare for his current position at Diamond Hill-Jarvis High School, Rivera’s first step was to build strong relationships with the community and parents. “Their support is essential for long-term success,” he explains. “Additionally, I have focused on establishing a positive and consistent culture from day one, setting clear expectations and promoting a strong work ethic to lay the foundation for excellence within the program.”
Rivera invested in his own musicianship by taking violin lessons and continuing to develop proficiency on every instrument within the mariachi ensemble. He also met and spoke to mariachi directors in the FWISD and other districts to share resources and knowledge as he embarked on his new position.
“Our campus has a rich Hispanic heritage, and the mariachi program will allow students to celebrate and connect with the cultural traditions their families hold dear,” Rivera says. “My goal is to build a program that is collaborative and well-supported, working alongside other directors to ensure mariachi becomes an integral part of our school’s music offerings.”
A vital aspect for mariachi success is selecting the right repertoire. “I focus on student ability and interest to ensure meaningful engagement. Each semester, students complete a Google form to suggest songs they would like to perform. This collaborative process empowers students to take ownership of the program and feel invested in its success.”
Beyond repertoire, Rivera creates performance experiences that connect students to cultural traditions. “For example, performing classics like ‘Volver, Volver’ in a public setting has a profound impact,” Rivera says. “Students recognize the deep cultural roots of the music and appreciate its authenticity.”
Rivera also emphasizes that the skills students learn in class extend beyond mariachi and “can apply to genres such as classical, jazz, Banda Sinaloense, Tejano, Sierreño, salsa and more. This broader perspective motivates students to engage fully, knowing that the benefits reach far beyond a single style,” he explains.
Rivera’s background in Mexican music — particularly as a freelance performer in Banda Sinaloense — has deepened his understanding of the theory and stylistic nuances within this repertoire. “Combining this experience with professional development and mentorship, I’ve been able to guide my students toward sustained growth, while continuing to learn and adapt as a director,” he says.
Director of Instrumental Music The Theater Arts Production Company School Bronx, New York
“In the purest form, teaching is all about connection,” says Catherine Plichta, Director of Instrumental Music at The Theater Arts Production Company (TAPCO) School in the Bronx. “Building strong and meaningful relationships with my students is at the center of my pedagogy.”
Not only does Plichta lead with transparency and honesty, she show her students that she is human and works on overcoming her own challenges. “The key is taking accountability and being authentic, genuine and caring,” she says.
In 2021, Plichta founded the Harp Chamber Ensemble at TAPCO in partnership with Midori and Friends and the Lyra Society. “Typically, we have 16 students per year involved in the ensemble with four of them being harpists,” she says. “We have performed and collaborated with the Mariachi Tapatio de Alvaro Paulino, the Music Will NYC Jam Fest, the Bronx Borough Arts Festival, and we even had the distinct privilege to perform with Midori herself!”
Another ensemble Plichta started was a modern band program, which means meeting students where they are, fostering their love of music and investing in the infrastructure to allow them to be successful. “It also means obtaining the instruments, gear and sound equipment needed to truly let students shine,” she says matter-of-factly. “In addition, leveraging partnerships, looking for grant opportunities, and building visibility for our program has been extremely important to our success.”
One event that Plichta looks forward to every year is the Bronx Borough Arts festival, which celebrates the talents and creativity of students and their teachers through public performances and art exhibits. “Putting on a production that involves so many diverse art forms and performers with grades K-12 is always somewhat daunting,” she says. “But when you have the right team in place — including many fellow TAPCO teachers who volunteer at the event — anything is possible! Last year, our music department was able to feature our rock band and vocalists.”
Her career has been full of special moments. “Every time a child chooses to pick up an instrument and make music instead of scrolling through social media, that is my proudest moment,” she says. “Every time a light bulb goes off when a student finally gets it after practicing over and over, that is my proudest moment. When I see a student who is being pulled onto a dark and dangerous path find their way back to the light and joy of life through music, that is my proudest moment. Every time I see a student find their own unique voice through their music, that is my proudest moment.”
Plichta builds meaningful connections with students, colleagues and fellow music educators and helping people reach the next step in their journey. Her community of dedicated music teachers from around the country has helped her grow exponentially as an educator and human. “Together, we form a kind of ‘league of superheroes,’ who uplift one another and expand what music education can be,” she says with a smile.
Director of Arts Scotland County Schools Laurinburg, North Carolina
DeVon Pickett did not plan to be a music educator — he graduated from Fayetteville State University with a degree in music performance. “I took a gamble on becoming a band director and spent three years at a middle school in Raeford, North Carolina,” he says. He clearly found his calling. He spent the following 10 years as a high school director, then two years as the assistant director of bands at the collegiate level. Pickett has been the Director of Arts for Scotland County Schools in Laurinburg, North Carolina, for the last two years. Along the way, he earned a master’s in music education from Boston University.
Part of his success is due to the way he works through denials and adversity. “When I hear ‘no,’ I don’t actually hear no. I hear ‘just not that way.’” Pickett explains that he was told “no” at least two or three times for everything he has in life. “If you don’t believe in yourself, no one else will.”
In his new position, Pickett plans to revitalize Scotland County’s Arts Education programs through district-wide collaborative performances that involve community support as well as partnerships with local universities. ”Not only has this brought awareness to the great things we are doing, but it also brings the support that is needed to push our vision. With this support, we have been able to bring back the fine arts disciplines that were not present in Scotland County Schools.”
Pickett also plans to increase student fine arts scholarships. “Scholarships are the confirmation that fine arts programs are moving in the right direction. We currently have partnerships with two universities and two foundations to ensure a solid start towards these scholarships.”
A new event that Pickett is extremely proud of is the Scotland County Schools Honors Arts Festival, which highlights all fine arts subjects and is for students who take fine arts seriously. “We call it honors because the performances and art products produced from the festival are expected to be of higher caliber,” Pickett explains. “We bring in highly qualified clinicians for each concentration, and the honors students spend two to three days in workshops with the clinicians as well as preparing performances and artwork for the final day.”
During Pickett’s decade at Hoke County High School in Raeford, North Carolina, the program struggled financially and lacked resources. “It was my goal to build a comprehensive program that students could be proud to be a part of but also bring awareness to the district that we needed the proper support to make this major stride,” he explains. “Upon winning several marching band championships, our big breakthrough came when we became one of eight bands selected nationwide (that included wind bands as well as orchestras) to participate in the National Band and Orchestra Festival at Carnegie Hall 2017. This invite brought enough awareness to our district that we were able to find funding to purchase concert band instruments.”
Pickett and his Hoke County band program traveled across the country and performed at some of the largest venues in front of huge crowds. “We were able to compile over $10 million in band scholarships during my 10-year tenure,” he says with pride.
While he was an assistant director at his alma mater, Fayetteville State University, Pickett created an opportunity for K-12 public school students to experience concert band because the Fayetteville area already focused so much on marching bands. For the WindFest concert band festival, Pickett called in favors from collegiate directors to come and adjudicate the ensembles and then present a clinic after the students’ performance. “WindFest gave students and directors an opportunity to grow immediately in real time and take some constructive criticism back to their programs as well as keep the concert band season alive longer than just one performance,” he says.
Assistant Director of Bands Vandegrift High School Leander, Texas
Kyle Norris, the Assistant Director of Bands at Vandegrift High School in Austin, Texas, stepped into a program that has a rich history of success and well-established systems. “Rather than trying to reimagine those structures, my focus has been on understanding why those systems work and then operating within them authentically, which allows me to operate in ways that feel personal and aligned with the program’s identity,” he explains. “My guiding principle is to ‘respect the old, embrace the new.’”
Norris is always in search of better tools, clearer communication and stronger systems. “The more intentional I am, the more permission my students have to become the best versions of themselves,” Norris says enthusiastically. “The quest and striving for continuous improvement are the favorite parts of my profession!”
His fresh perspective and creativity in show design gives his students a vehicle that not only challenges them, but “one that they will enjoy performing from the first football game through the final performance of the year,” he says. “We are fortunate to collaborate with designers who are also educators, which ensures that every design choice supports student growth as much as performance success.”
During rehearsals, Norris maintains a positive, respectful environment by setting clear expectations, offering solutions when critiquing and celebrating successes enthusiastically. “Students thrive when they feel seen, supported and meaningfully connected to the program,” he says.
It’s Norris’ strong rapport with students that makes him a stand-out. He leans heavily on John C. Maxwell’s quote: “Students don’t care how much you know until they know how much you care.”
“Relationships start with something so simple — knowing students’ names,” he says. “I make a concerted effort to learn every student’s name as early as possible because that small gesture immediately establishes trust. Outside of rehearsal, I prioritize genuine conversations — and I work hard to actively listen and recall details later.”
Norris leads Vandegrift’s non-varsity Symphonic Band. “Teaching this ensemble is the best part of my day. I see the Symphonic Band as a launchpad rather than a destination,” he explains. “Students in this ensemble are preparing to step into the culture, rigor and pace of the Wind Ensemble, so my focus is on developing independence and advanced individual and ensemble skills. We intentionally stay just behind the Wind Ensemble in our skill progression, so students can move up seamlessly when the opportunity arises.”
Collaboration is central to building up the Symphonic Band. The band directors and percussion director team-teach frequently, serve as extra sets of eyes and ears during rehearsals, and provide consistent feedback to the students. “Most importantly, I want students to have deeply meaningful musical experiences. Quality repertoire selection is a must. When I hear students reminiscing about pieces they played years later, I know we’ve done our job,” Norris says proudly.
In recent years, Vandegrift experienced two big transitions in head band directors. Norris was called the glue that held the program together through both changes. “During leadership transitions, my priority was simple: Students needed to see consistency modeled before they could feel it,” he explains. “I made a point to show how enthusiastic I was about the new leadership because students take their emotional cues from the adults in the room.”
Norris went on to say that the band director community in the Leander Independent School District is incredibly unique. “We are constantly talk shop and share ideas. I can’t tell you the number of times I have invited directors to my rehearsals to help me, and I’m always met with ‘Yes, I would love to help.’ There is a genuine care and vested interest in the collective good in this district that is truly special,” Norris says.
Band Director Park Vista Community High School Lake Worth, Florida
What’s the secret behind the band program at Park Vista Community High School in Lake Worth, Florida? “I often tell my students that ‘this is your band, not mine – what do you want?’ This lets them know that every decision I make is with them in mind,” explains Band Director Amrutha V. Murthy.
She reimagined band as an expressive, interdisciplinary art form rather than a single-performance activity. This viewpoint has help her build a student-centered program. Her students see music not only as a performance medium but where they build relationships. Rehearsals are focused on student-approach and camaraderie, and daily processes are not stereotypical — they change daily and they work for each ensemble.
The Park Vista ensembles have performed on international stages, including the London New Year’s Day Parade, and will be performing at the 2026 Music for All National Concert Band Festival. The marching and concert programs are innovative in their own fashion, prioritizing close relationships and motivation for musical excellence through a sense of shared community goals. “Students engage with music as narrative, understanding intention and more, but they also socialize outside of ensemble time, are family with each other, which elevates both performance quality and student investment across all ensembles,” Murthy explains.
She focuses on student leadership, access and accountability. “Students are empowered through structured leadership teams, peer mentorship and shared ownership of ensemble culture,” she says.
Any barriers are actively addressed. Murthy states, “No student is denied opportunity, whether that barrier is financial or preferential,” explaining that marching band is not required for all music students. The program includes two jazz ensembles, color guard, a wind ensemble and symphonic band — there’s something for everyone.
Lastly, “accountability is paired with care,” Murthy says. “Students are held to high artistic standards while being taught reflection, resilience and growth through challenge.”
Murthy regularly integrates collegiate-level rehearsal standards, including score study, conceptual language and reflective dialogue. “Curriculum pacing is flexible and responsive, allowing depth over speed while meeting diverse student needs,” she explains. “Setbacks are framed as opportunities for innovation, whether adjusting pedagogy, restructuring rehearsal flow, or empowering student leaders to problem-solve.”
Her students lead a lot of their own rehearsals, emphasizing chamber-music and individual ideas. “We focus on what is needed for our ensemble growth as humans and musicians, and not what any cookie-cutter model is,” she says with pride.
This approach clearly works. Since Murthy’s arrival, the Park Vista band has grown from approximately 70 students to over 180, with increased student ownership across concert, jazz and marching ensembles. “Students take pride in artistry, discipline and community impact, evidenced not only through accolades, but through sustained engagement, leadership and musical maturity across all performance areas,” she says.
Murthy also serves in leadership roles with the Palm Beach County Band Director’s Association and the Florida Music Education Association, which has strengthened her ability to collaborate, advocate and lead beyond her own classroom. “These experiences have sharpened my organizational skills, broadened my perspective on equity and access, and reinforced the importance of mentorship. Working countywide has allowed me to support students and directors holistically while continuously refining my own practice,” she says.
Music Teacher The Deron School Inc. Montclair, New Jersey
Meghan Mulligan chose to pursue special music education because of her younger brother who is autistic and was never provided the same musical opportunities that she had growing up. “I studied Special Music Education for my master’s degree at Wichita State University because I felt unprepared to make a meaningful impact on this population,” she said.
During her last semester at graduate school, she was offered a job at The Deron School, an out-of-district special education placement school, servicing students with various abilities and support need levels. She started working at the Deron, Montclair (D2) campus a week after graduating in May 2023.
At D2, every student takes general music classes. Mulligan visits middle school homerooms once a week, high school twice a week and bridge classes (for transition-aged students from 18 to 21 years old) once per week. “In general music I follow a Kodaly-based curriculum, but I use multiple methods of teaching music from Orff, Dalcroze, Gordon and others,” she says.
Mulligan has to schedule around students’ therapy schedules, work schedules and community-based instruction schedules. “Every student starts job sampling at 16 years old, and many of them leave the building for these opportunities,” she explains. “As a result, scheduling is one of the most challenging parts of my job!”
Mulligan relies heavily on the school’s paraprofessionals, teacher assistants and classroom teachers to help students truly participate in experiencing and making music. For choir, she consistently collaborates with the speech team to make sure that music vocabulary and lyrics are available to our students. “I work with our related service providers to reinforce concepts from their sessions, and they reinforce concepts from music classes,” Mulligan explains. “For some students, that means taking their lyrics to speech and/or reading sessions to practice interpreting the language.”
Mulligan and the speech team incorporate other innovative teaching approaches. They have created several versions of adapted lyrics for performances. For some students, they created a stop/go sign that prompts students when to start and stop singing; for others, they created a visual version of the lyrics so students can independently follow along. “Since I started offering multiple forms of lyrics to my AAC (augmentative and alternative communication devices) users I have had a handful of students start to approximate singing,” Mulligan says proudly. “These students have allowed themselves to be vulnerable and let me hear their voices; they’ve allowed me to hear them sing!”
A world percussion class, which was first suggested by her student teaching mentor, was a terrifying prospect for Mulligan. “But I truly fell in love with the course because I saw how accessible and motivating drumming was for my students,” she explains. “The barrier of entry is low — all students have to do is hit a drum, and they receive immediate feedback from the drum. Did the drum make a sound? Did it make a long or short sound?”
She excitedly says, “This level of independence is unheard of — just being able to carry the drum on their own is a big deal for my students. Parents and staff particularly like seeing this group perform because we get to see some of our most quiet, reserved and adult-dependent students become the center of attention, loud and independent!”
The Deron School has several community partners that permit Mulligan’s students to perform, including a local nursing home and the Mountainside Medical Center. She also encourages students to seek musical outlets, and she attends performances of her students who take lessons outside of school. “I also encourage students who have the skills, drive and support to audition for the region 1 honor choir,” she says.
What allows Mulligan to do all she does for her students at D2 is her flexibility. “True flexibility as a music teacher is being able to reframe your goals and adapt your entire concept of what music education is,” she explains. “Flexibility doesn’t just mean finding multiple ways to teach, it means being brave enough — or perhaps delusional enough — to confidently forge your own path so that your students can find success.”
Vocal and General Music Teacher Orchard Hills Elementary School Novi, Michigan
“Through music, I try to connect to my students, so we can grow together,” says Vocal and General Music Teacher Kasey Julian, who proudly embraces a unique multidisciplinary, socially conscious approach.
In November 2024, her students at Orchard Hills Elementary School in Novi, Michigan, sang for the Volunteers of America Holidays of Hope Gala to help raise funds for Operation Backpack, an initiative that provides school supplies to tens of thousands of children experiencing homelessness, poverty of foster care. “This was personally meaningful to me because I received school supplies from this same organization when I was in 5th to 12th grade,” Julian says.
Her advanced choir presented a concert with the theme of “Home.” During rehearsals, Julian had several discussions about what a home is as well as honest conversations about homelessness. Instead of donating funds to support the music program, the attendees at the concert were asked to donate snacks, underwear, socks and gift cards to the Oakland Schools’ McKinney-Vento program that supports students in need. “When we donated the snacks and clothes, my students wrote notes to be included that shared things about them and their interests so the students receiving the items would know more about them and why they wanted to donate,” Julian says.
Another example of Julian’s forward-thinking teaching is when she and her students read books about how landfills impact communities and the ocean. She highlighted how people from Paraguay and Rapa Nui use trash to make musical instruments. Then her students are tasked to create their own instruments from items they find at home (“they must have permission to use them!” Julian says) and share them with the class.
Julian is a member of her district’s DEI team and works with other teachers to set goals and develop activities in support of diversity, equity and inclusion. The district hosts a multicultural night where 30 to 40 volunteers share their culture and familial identities as well as a handful of cultural performances. “Our aim is to foster a sense of community and belonging by valuing and celebrating each other’s unique backgrounds,” Julian says. “Children often find beautiful similarities in their home lives even if their families seem very different.”
Each year, the event ends with all current and past Orchard Hills students singing, “Hello to All the Children of the World,” which incorporates many languages and unites the community together with music.
In addition to teaching about socially conscious concepts, Julian also sees her job as helping her students manage themselves, consider others and become thoughtful leaders and lifelong learners. ”In class, we value different feelings like working hard while problem solving, being at peace in a song, or finding compromises when confronted with contrasting ideas. These feelings or experiences are extremely valuable as artists and people to learn and grow from,” Julian explains
For the last three years, Julian also serves as the Chair for the Young Composers of Michigan for the Michigan Music Education Association. Each year, she invites K-12 students in the state to submit original compositions, then has professional Michigan composers listen, mentor and give feedback to each submission. Then a group of students selected by the mentor composers are invited to premier their pieces at the MMEA conference.
Even when students leave Julian’s classroom, she continues to encourage and push them. “I continue communications with their parents about opportunities I see for their age group, and I continue private voice lessons with a handful of them,” she says with a smile. “Truly, they never stop being my students! I will root for them and cheer them on for the rest of their lives!”
Assistant Professor of Practice in Saxophone Virginia Tech Blacksburg, Virginia
Virginia Tech is known as a leading research institution, but it is also “an incredible place to make music because it combines a strong culture of collaboration, cutting-edge facilities and a community that values experimentation and creativity,” says Dr. Kyle Hutchins, Assistant Professor of Practice in Saxophone.
“I’m not afraid to take risks and fail,” he explains. That’s why Hutchins pushes his students to explore new ideas and try things that might not work “and embrace the learning that comes from experimentation.”
Students have access to a wide range of resources at Virginia Tech, including performance spaces, technology labs, ensembles and interdisciplinary projects, which allow them to explore music in both traditional and innovative ways. “My goal is to help students take full advantage of this environment, guiding them to grow as performers, composers and creative thinkers while fostering curiosity, confidence and artistic independence,” Hutchins says.
His saxophone studio reflects a wide spectrum of musical interests and academic paths. “Alongside music education and performance majors, I work closely with students in music technology, composition and committed music minors studying everything from engineering to business,” Hutchins explains. “I believe in creating an environment of trust, curiosity and high expectations. Every student is encouraged to practice consistently, take ownership of their growth, and develop a personalized process that empowers them to reach their individual goals.”
The New Music + Technology Festival is a platform for new works, spatial audio, multimedia performance and improvisation. It also functions as a space for mentorship, dialogue and hands-on learning. “The festival has helped redefine the creative landscape on campus as one that values experimentation, inclusivity and collaboration across disciplines,” Hutchins explains. “It has become both a performance series and an educational laboratory, encouraging students to see technology not just as a tool, but as an active partner in artistic inquiry.”
In addition to the festival, Hutchins integrates technology and improvisation into his teaching. He requires every student to engage with repertoire that includes varying levels of indeterminacy and structured improvisation. “Students perform pieces that require them to make creative decisions in real time, developing flexibility, listening skills and artistic agency alongside technical mastery,” Hutchins says. “Each student must also perform at least one work that meaningfully incorporates technology — such as live electronics, multimedia elements or digital processing — so they gain hands-on experience working with contemporary tools and performance contexts.”
By balancing cutting-edge technology with traditional saxophone study, Hutchins’ students build a strong technical and stylistic foundation while also learning how to navigate the evolving creative landscape of today’s music.
Hutchins also advocates for diversity and inclusion because “music thrives when multiple perspectives and voices are present,” he says. He has hosted over 100 guest artists to allow his students to encounter different artistic approaches, philosophies and life experiences. “These interactions expand their understanding of what music can be and who gets to create it. It’s about preparing them to not just be excellent musicians, but also thoughtful, socially conscious contributors to the broader musical world,” he explains.
Director of Bands Princeton Community Middle School Princeton City Schools Cincinnati, Ohio
Director of Bands Heather Hurley relies on her large toolbox of strategies so her students at Princeton Community Middle School can succeed at their own pace and in their own way. “Nothing I do is random,” she explains. “Every activity has a purpose and connects to the bigger picture, allowing learning to build naturally and meaningfully over time.”
Hurley is highly prepared and organized, which drives her to teach with purpose. This intentional efficiency results in clear routines and fun, engaging ideas that keep her students excited while giving them a strong sense of structure.
The pandemic “was a time of significant disruption,” she acknowledges. “While upholding the high expectations of a 70-year-old program, I focused on accountability, work ethic and self-discipline to restore structure and ensemble culture without lowering standards. Long-standing traditions were preserved, while new, student-driven traditions were introduced by incorporating current interests with musical purpose.”
Band Night is one of these long-standing traditions. The 7th- and 8th-graders experience marching band firsthand by playing two marching band pieces and the Princeton Fight Song with the high school band during halftime at a football game. “They get to sit in the stands and play pep tunes, cheers and cadences with the high school band. This event builds community and strengthens the connection of the music program across grades 7 to 12,” Hurley says.
Hurley oversees the Zero Bell Concert Band, an advanced ensemble made up of select 7th- and 8th-grade students chosen through an audition process. The group, which consists of 65 to 75 students, meets daily from 7:05–8:00 a.m., making it an additional class beyond their regular school day.
Hurley has introduced innovative lessons into her teaching. In her 7th-grade general music class, she teaches the History of American Music, which starts with a unit on rap and hip-hop. “Students explore the genre’s cultural roots while applying their learning to write original raps using couplets, stanzas, rhymes, slant rhymes, storytelling and flow,” she explains. “Students also create original beats using music tech software and record their performances. This hands-on approach builds creativity, historical understanding and modern music-making skills.”
Hurley calls Princeton music a very special place with dedicated teachers who deeply value the program and its history, students, community and traditions. “Band teaches students responsibility — showing up prepared matters because others are counting on you. It builds work ethic through daily practice and long-term goals — students learn that effort leads to real progress. Most importantly, band becomes a family where students build their closest friendships and fondest memories together,” Hurley says.
Band Director West Milford Township High School West Milford, New Jersey
Band Director Matthew Gramata considers himself a bit unorthodox and unconventional for a music educator, and he brings a unique kind of creativity and vision to his music program at West Milford Township High School in New Jersey. “I see what doesn’t exist and have the belief and imagination to turn my fantasies into realities,” Gramata explains. “My vision and desire for what I want for my program is never stagnant and constantly evoles on a daily basis. Although I tend to drive myself crazy at times, it is the engine that fuels my passion to impact the musical experience of everyone in my program and those who are emotionally moved from our performances.”
One of the most distinctive aspects of his program is the inclusion of bagpipes and Celtic drumming. “In true Highlander fashion (our school mascot), our band program has been using bagpipes in every marching band show since 1990, and our Highlander Pipes & Drums serve as the musical ambassadors to the West Milford community,” Gramata says.
The ensemble has been featured in the New York City St. Patrick’s Day Parade, the West Point Military Tattoo and in concert with The Red Hot Chili Pipers. In the last 10 to 15 years, “we started modernizing our use of this unique section by integrating hip hop, rock and techno music. Defying the conventional framework of bagpiping into something uniquely ours has become even more woven into our identity as a program and ensemble,” Gramata notes.
To deepen their bagpipe roots, the program embarked on its first performance tour of the United Kingdom in 2001, traveling to England and Scotland. To date, the band has traveled to the UK four more times (in 2008, 2012, 2015 and 2024). “It is truly a trip of a lifetime for these students who get to immerse themselves in a true cultural experience. I can unequivocally say that these trips have deepened their love and understanding of our program’s Celtic roots,” Gramata says.
In addition to Pipes & Drums, Gramata has started a chamber music program and recital series, which has empowered students to take ownership of their musicianship in smaller, more intimate settings. “Developing confidence in my students as soloists who understand how to then assimilate into the large ensemble setting has yielded significant growth in their innate musical maturity, technical mastery and tonal development,” he explains. “We created these recitals as a way for our students to show off their collective work and place an emphasis on small group/solo performance outside the concert band setting.”
Two festivals — the West Milford Jazz Festival and the Highlander Marching Classic — have helped to put West Milford Township High School on the map. When Gramata arrived at West Milford, the program didn’t have a competitive jazz ensemble. “I tend to be a ‘Rome-can-be-built-in-a-day’ person, so I started an ensemble that I planned to have compete in the state preliminary festival immediately and develop a jazz festival at our school to provide the other programs in our area with a performance outlet,” he says.
“Directors tend to get caught up in the competitive aspect of music — and trust me, I do as well — but the jazz performance scene is so much more of a vibe (as the kids say!),” Gramata says with a smile. “At one festival, an ensemble from Lima, Peru, performed as part of their performance tour. Other local schools have recently started holding their own jazz festivals, with some citing West Milford as their inspiration!”
The Highlander Marching Classic took a lot longer to get off the ground because Gramata’s school lacked the facilities to host such an event, which led the Board of Education and administration to push to renovate the stadium. “We hosted our inaugural show in 2022, and it has since grown to be one of the premier USBands events in northern New Jersey,” Gramata exclaims. “We are one of the only schools in New Jersey that hosts a marching band competition, jazz festival, indoor percussion competition and indoor color guard show.”
All of this has led to significant growth in Gramata’s music program. While honoring the traditions the program embodies, he took the often uncomfortable step into uncharted territory — from creating new ensembles and performance opportunities, making the jump to participate at elite competitions, designing new marching band uniforms, and hosting festivals and competitions. “I attribute our program’s growth to a willingness to innovate. We’ve embraced the ‘different’ and made a constant effort to push the limits with our staff and students,” Gramata says with pride.
Music Teacher and Choral Director Mill Creek Elementary Nolensville, Tennessee
Giving back is at the heart of Elaina Gallas’ music program at Mill Creek Elementary in Nolensville, Tennessee. For the last three years, she has implemented a service project for each grade. Examples include: kindergarteners collecting soda tabs for the Ronald McDonald House; grade 1 students participating in a food drive for the local food pantry; 2nd graders cleaning up trash on walking trails and around the school; grade 3 students send notes to U.S. soldiers stationed overseas through Operation Gratitude; 4th graders donating music therapy supplies to the children’s hospital; and grade 5 students write holiday cards to local nursing home residents.
“I believe music has the power to connect people in special ways, and I hope that by giving these opportunities to do good and help others will reach our students and community in a meaningful way that will extend further than the walls of my classroom,” says the Music Teacher and Choral Director.
Gallas — who was named district teacher of the year in her county and has received three CMA Foundation Music Teachers of Excellence Awards in 2022, 2023 and 2025 — is certified to teach music from kindergarten to 12th grade, but she chooses to teach at the elementary level because she “loves laying the foundation of joy that comes from music with all students,” she says. “For most children, I provide their first — and sometimes only — experience with music education. I enjoy cultivating a love of music and the skills it takes to be a musician. Teaching them how to enjoy and understand the beauty in a piece of music is such a gift.”
Her enthusiasm shines through in some of her out-of-the-box projects, many in collaboration with classroom teachers on academic subjects. For example, in 1st grade, students learn about Cinderella stories from different cultures, so Gallas teaches a song and choreography that they perform at a Cinderella Ball. In 4th grade, the poetry unit is taught concurrently with Gallas’ songwriting lessons that includes studying rhyme scheme, rhythm notes lining up with syllables, etc. In 2nd and 3rd grade, Gallas explores the science of sound.
During the science of sound unit, 3rd graders create their own instruments from recycled materials found at school or at home. They share their creation with the class and invite the 2nd graders to see the instruments and hear them being played.
In another program Gallas created, her students select a popular song and rewrite the lyrics using what they learned about rhythm, syllables and rhyming words, and the lyrics must be about their school. “I collaborated with classroom teachers and turned it into a schoolwide project connecting reading, writing and music,” she explains. “I even created and choreographed a song with a group of volunteer teachers to surprise the students at the end of their show with a song written just for them!”
Earlier in her career, Gallas worked at a Title I school with a large non-English speaking population and low parent and community involvement. “I welcomed students to class with a ‘hello’ song in different languages. It was amazing to see students light up when they heard their own language and see their engagement change in class,” she says proudly. “This inspired me to create a world music unit that I still teach. In each class, students learn about a different country and study their music. And we learn about respecting and embracing differences.”
Music Teacher A. MacArthur Barr Middle School Nanuet Union Free School District Nanuet, New York
Imagine a middle school music program that incorporates songwriting, music tech, guitar, ukulele and Ghanaian music. That’s what Music Teacher Joshua Emanuel has created at A. MacArthur Barr Middle School in Nanuet, New York. He modernized and expanded the 10-week general music course for 8th graders focuses on songwriting, but it also includes digital audio workstations (DAWs), MIDI controllers and microphones “to create a more authentic songwriting experience,” Emanuel explains. “Students arrange instrumental tracks and record vocals, and they learn how to use the software to arrange pre-recorded musical loops into musical forms, program original MIDI patterns and record original lyrics.”
Emanuel also started teaching guitar as part of his 8th-grade general music curriculum and was able to secure a classroom set of 30 acoustic guitars, 3 electric basses and amps, method books, instrument storage and accessories through Innovation Grants during the 2024-2025 school year. His 8th graders learn how to read tab and chord diagrams, then choose songs they would like to learn and perform for the class. The goal is to incorporate guitars into the students’ songwriting.
The grant also helped Emanuel start an after-school Modern Band. Currently 15 students in grades 6 to 8 meet once a week to form bands and learn how to play guitar, bass, keyboard and drums. He also runs an after-school Music Technology Club at the high school where students explore individual projects that have included electronic composition, beat-making, DJing, AI and recording.
Emanuel’s 6th graders participate in a self-directed gamified ukulele program that he developed. “I created playlists of over 800 play-along videos from YouTube that are organized by level of difficulty — from 0 to 5,” Emanuel says. “Students can choose what songs and levels they want to learn and practice the songs either individually or with a small group and perform. If they’re able to play the song with accurate chord changes, they earn points based on the level of the song.”
After three or four weeks, students must earn at least 75 points and complete a level 2 or higher song. If students earn 200 points and complete a level 4 or higher song, they are able to listen to their peers perform and award points. “This system not only allows for student choice, but differentiated instruction, student autonomy and self-directed learning,” Emanuel says.
Students in 6th grade also learn music tech. They use Scratch, an online programming language, to design interactive virtual instruments, assign different keys on the keyboard to play sounds and create music with those sounds. Then, students use Makey Makey to create physical controllers out of recycled materials to play the instruments they programmed.
Another unique aspect of Emanuel’s program is Ghanaian music. “In 2008 and 2017, I traveled to Dagbamete, Ghana to study the culture and music of the Ewe people. My time there was personally transformative,” he says.
Emanuel brings his experience in Ghana into his 6th–grade classroom as a way to expose students to a culture, music and way of learning that may be unfamiliar to them. “We learn a traditional style of music called Gahu and its place in Ewe culture. Following this unit, students conduct research and present on a culture of their choice, many choosing to represent their own heritage,” he explains.
Emanuel is currently pursuing a PhD, and his dissertation focuses on developing his identity as a songwriter and songwriting teacher through curriculum design. “The big takeaway is that it’s difficult to be a songwriting teacher without practicing songwriting. This is a skill that I did not have until a few years ago, and I still struggle to identify as a songwriter,” he explains. “Teacher preparation programs should be introducing songwriting and songwriting pedagogy to pre-service music educators so they can begin to develop this identity earlier in their career.”
Because Emanuel is the only teacher in his district to teach songwriting, he has started to build a network of classroom songwriting teachers who meet on Zoom a few times a year to share ideas and offer feedback.
Director of Choirs Tarkanian Middle School Las Vegas, Nevada
At the heart of the choir program at Tarkanian Middle School in Las Vegas, is the belief that choral music should be both musically rewarding and deeply human. “I balance high musical expectations with genuine care for my students, creating an environment where excellence and joy coexist,” says Heather Barclay Drusedum, Director of Choirs.
When she started at Tarkanian, she was tasked with rebuilding culture while simultaneously preparing students for the district festival. “Armed with grit and determination, we grew together as an ensemble through trust, consistency and hard work. We walked away from the festival not only with stronger relationships, but with superior rathings! This experience affirmed the power of music education to build both musicianship and community,” she says with pride.
Drusedum has continued to find ways to connect people — students, colleagues and the broader music community — and then turn that connection into meaningful collaboration and sustained growth. This has resulted in choir being a cornerstone of school culture with inclusive ensembles where every student feels valued and safe regardless of experience. Drusedum has expanded performance opportunities beyond concerts — her students perform at school events, community outreach and feeder school visits. “Choir is visible and celebrated across campus,” she says.
Growing her program means working with and strengthening her feeder network by building consistent relationships with nearby elementary schools. She regularly collaborates with elementary music teachers, visits campuses and invites elementary students to Tarkanian’s concerts. “Each December, our Chamber Choir goes caroling at feeder schools, giving younger students a live choral experience while building excitement and familiarity with our program and school. This tradition helps create meaningful connections and a welcoming pathway into our middle school choir program,” Drusedum explains.
Drusedum has also cultivated student leadership in her middle school program by encouraging students to take ownership of their musical and personal growth. “I believe students learn leadership by observing the adults around them, so I strive to model accountability, humility, respect, empathy and how to learn from mistakes,” she says.
During her second year at Tarkanian, Drusedum created Tarkapella to align our program with the high school and provide students with experience in contemporary a cappella. “The group is largely student-led, which allows my kids to build independence, leadership and accountability through learning music, leading sectionals and supporting one another,” she explains.
Giving back to the music education community in Las Vegas is an important goal for Drusedum. Not only does she support colleagues and stay actively engaged in the choral profession, she serves as an audition judge and remains involved in professional organizations that shaped her own development. “I have been a member of American Choral Directors Association (ACDA) and Nevada ACDA since college and currently serve as co-chair of the Nevada ACDA All-State Choir. I continue to grow by attending workshops and conferences and by singing in community ensembles, staying connected to the joy of music-making,” Drusedum says.
Assistant Professor of Music Education Louisiana State University Baton Rouge, Louisiana
Dr. David Dockan, Assistant Professor of Music Education, says “Louisiana State University is a magical place that is located in the heart of music in America — Louisiana — where there is always a place to learn and experience music of and by the people of Louisiana.”
Part of LSU’s magic is how Dockan turns curiosity into momentum. “I’m constantly asking questions about how people learn, belong and thrive through music,” Dockan explains. “Then, I translate those questions into action, such as innovative teaching, meaningful research and programs that expand what musicianship can be.”
Curiosity keeps Dockan listening while momentum keeps him building. “Whether I’m designing new approaches to popular music education, supporting teachers or creating spaces where students feel seen and capable, I work to turn insight into impact,” he says proudly.
Dockan uses a unique teaching methodology called the Learning in Tandem Framework, which imagines teacher power through the image of a tandem bicycle. “The two seats and pedals acknowledge that both students and teachers have power that they are exerting in the classroom,” he details. “In order for a classroom to run smoothly, there needs to be an agreement on how and when that power is used. The power is conceptualized into three spaces: rules and procedures, curriculum and repertoire and pedagogy.”
At LSU, Dockan has incorporated culturally responsive and popular music pedagogies into the undergraduate coursework through two classes:
“Teaching Music in Diverse Settings” where undergraduates work on developing skills to understand the students they are serving and using their identities as pathways for music instruction.
In “Elementary Music Methods,” students use an Orff Schulwerk approach with popular music pedagogies by selecting music that students enjoy and using that music as a pathway toward musical creativity.
Orff Schulwerk’s process of Imitation, Exploration and Creation is more than just for teaching music, Dockan says. It’s also a way of life and learning outside of the classroom. “I find that what works best with the Orff Schulwerk approach is leaning into the create phase and having an open mind to what the students will create,” he says.
The create phase includes a discussion about how AI can create something that is very predictable, but Dockan asks his students to create something that AI would never imagine making! “This liberates students from the concern of what they ‘should’ do and allows them to try off-the-wall ideas,” Dockan says. “This requires the teacher to release the creating to the students and allow their creativity to soar!”
He admits that letting go of what the final result will sound like can be a hard shift for music educators, but the joy and learning that happen along the way are well worth it.
Dockan provides firsthand opportunities for his students to teach elementary and middle school students. At LSU’s laboratory school, he worked with the elementary music teacher there to create a model of modern bands for his undergraduates to observe and teach. “Each semester, there have been 10 to 20 students participating and learning to perform on contemporary instruments in band,” he explains. “The particular semester is really exciting because I am teaching an independent study of commercial music techniques, where undergraduate students will be working with beginner middle school rock band students.”
Dockan also works with the teachers and staff at Kid’s Orchestra, a nonprofit in Baton Rouge, that provides music education opportunities to students in the parish. “I provide professional development where I share ideas on popular music pedagogies, artificial intelligence and democratic music education practices,” he says.
Director of Bands Westwood High School Austin, Texas
The Westwood High School band’s mission statement is “Pride, Passion, Family,” which was established in 2017. Brittany Dacy, Director of Bands, talks about each of these three words, but spends the most time on family — and the Austin, Texas, band community has fully embraced it. “We collaborate with our orchestra program to have three full orchestras. Our students love full orchestra because of the repertoire we do but also the collaboration with the orchestra students and directors,” she said.
This family atmosphere was especially apparent during the pandemic, when the band did not lose one student. “We were 90% virtual and only saw students during events and rehearsal outside in the parking lot,” Dacy explains. “We worked hard during the pandemic to recreate the feeling of home and a safe space that students had in the actual band hall over Zoom. We wanted every student to feel like they were not alone and constantly reminded them that they were still valued as people and part of the band.”
Dacy’s ensemble selects one piece in every concert program. Students participate in an initial vote of their favorite piece, then they have to lobby the rest of the class for why or why not we should play each piece. “The class uses a set of values and considerations that the students came up with,” Dacy explains. “This gives them the autonomy to choose but it also gives them the opportunity to work together and critically consider various elements of the pieces. It’s really incredibly wonderful to witness this process.”
The positive relationship and culture of her ensembles guide her students to be better humans. “I talk a lot about how to be a good human during rehearsals and especially with our student leadership,” Dacy explains. “I had a parent tell me that their student said I make students feel like they can do the right thing and perform better even when they aren’t there yet. I want to help all my students find their voice, support them through their ups and downs and grow.”
Dacy is willing to take on extra work for her students. Westwood High is an International Baccalaureate school, where academics are a big deal. Many of her top students were not able to meet with the IB Music teacher during their advisory time. “I wanted our highest students to be able to delve deeper into music and I wanted to support our academic environment, so I became an IB teacher myself,” Dacy says.
Now students can use one of their band classes as IB Music with her. “It allows them another way to get IB credit and go deeper into music to explore in ways we wouldn’t normally be able to do,” she says.
Dacy is also open to new ideas. A conversation with a parent sparked an idea for her band students to learn about a style of music from a different culture. “For the last three years, at our marching band community performance with the middle school bands, we play a tune selected by our band family,” she says proudly. “It’s a community celebration and a way to bring different musical styles to our marching band.”
Elementary General Music Teacher Catawba Trail Elementary School Richland School District 2 Elgin, South Carolina
How does Elementary General Music Teacher Ashley Cobb make music, songwriting and arrangements accessible to young students at Catawba Trail Elementary School in Elgin, South Carolina? “Options, options, options! I try to introduce students to a variety of styles and genres, chord progressions, instruments, elements of music and musicians to build their music vocabulary,” she says.
Cobb is passionate about teaching music through approaches that value and celebrate students’ identities, communities and creativity. “While musicality and performance quality is important to me, I intentionally take time to focus on connecting with my students and the school community. That connection helps motivate the students, allowing musicality and performance quality to come naturally,” she explains.
When it comes to songwriting, she
Improvises in a specific style or uses a specific instrument family,
Uses folk songs and cumulative songs to help K-2 students start creating lyrics,
Uses rhyming words to help K-2 structure verses,
Writes parodies of existing songs in grades 3-5,
Writes chord progressions in grades 3-5 or votes on common chord progressions for K-5 as needed,
Uses Mad Libs to create lyrics,
Decides on a theme to focus lyrical content
Cobb explains that “all of these ideas can be used in small groups or as a whole class, but they often serve as an accessible introduction to songwriting.”
All repertoire that her students perform is written, arranged by or selected by students. “I intentionally plan each lesson to include creating and responding to music,” she says. “From voting on the order of our agenda, creating our own movement activities to explore form, selecting class and performance repertoire, writing and arranging their own songs, students have a lot of agency in my classroom.”
This student-centered approach provides her students with opportunities to think critically, become more independent and develop musically. She also encourages them to apply those skills outside of the music room, as well.
Cobb creatively introduces and sequentially presents instrumental instruction so students can learn, apply and perform as much as they can retain without pressure. For guitar, bass and ukulele she starts with open strings and learning tablature so students can practice string-names and get familiar with the fretboard. Then she moves on to single-strum easy (three-string) chords, single-strum full (six-string) chords and strumming patterns. Finally students apply these skills during play-alongs — they perform what they can or approximate the song, which allows them to problem-solve.
Cobb, who was named the 2024-2025 Richland School District 2’s Rookie Teacher of the Year, structures and teaches her classes in a way that allows students to develop music independence and think critically about the music they listen to inside and outside of the music room. One way she has done this was to start the first modern band at Catawba Trail Elementary and in the district in 2024. “Modern band allowed me to jumpstart the process of forming relationships with my students, get them to trust me and help them “buy-in” to making music,” she says.
Through modern band, Cobb introduced instruments that students wanted to play, made learning music fun and boosted engagement. “My modern band students organize literally everything about their performances,” she says proudly. “They select band names, create concert themes and programs, decide the band’s orchestration (with minimal assistance from me), and collaborate to arrange selected songs with creativity and accuracy in mind. My ultimate goal is helping them develop as confident, independent musicians.”
Cobb is very aware of what her students’ challenges may be, and she has created a classroom environment where students feel safe and free to express themselves. “They can feel happy or sad or angry or whatever else it is that they are carrying with them through their school day and explore them through music,” she explains. “At the end of the day, I personally believe that my job requires more than just making music, it requires creating joy.”
Director of Teaching & Learning, Music Will Adjunct Professor, University of Northern Colorado Greeley, Colorado
Music Will is the largest nonprofit music program in the U.S. public school system that provides access to music education to 1.8 million students regardless of their socioeconomic background. Mary Claxton, Music Will’s Director of Teaching and Learning, designs and facilitates workshops that empower educators nationwide to reimagine what music education can look like.
According to Claxton, “Music Will utilizes a ‘do-before-explain’ approach with multiple entry points for students to engage at their current level and challenge themselves to learn and grow.”
A Music Will classroom focuses on:
Engaging students through decision-making (repertoire selection, rehearsal leadership, showcase design) and music creation (songwriting, improvising).
Teachers are facilitators and co-creators with students by creating a safe and engaging learning environment and honoring multiple ways to be musical.
Multiple levels of community (students’ identities, school sites, geography, etc.) are honored, and there is a place for everybody.
Claxton takes a tremendous amount of time and care when it comes to designing a workshop. “Teachers’ time is precious and it’s not acceptable to take their time with something that is less than excellent,” she says.
It often takes a year to get a full-day workshop off the ground because “we want the activities to be creative but also infinitely flexible and possible in a variety of classroom settings. We experiment a lot with our sequences, song choices and more. And we revisit and refine workshops every year based on the feedback we receive,” she explains.
Claxton advocates for culturally responsive and student-centered approaches — the outcome of these approaches really speak for themselves, she says. “When people see students collaborating on music that they love, writing songs, running sound, etc. there’s no question of its value. The work for me and folks I collaborate with is to help shine a light on the amazing work that’s already happening and to help teachers and administrators envision how they can incorporate these practices alongside what they’re already doing.”
Claxton also teaches culturally responsive music pedagogy at the University of Northern Colorado where she is an adjunct professor. “I love this class because we write songs, play silly games, experiment with live sound, and get curious about the many forms music can take in the classroom,” she says.
Most of her college students are limited by what they’ve seen and done as music students, so making them aware of the many different ways that exist to teach music is incredibly powerful. “It helps them to make more thoughtful and effective choices when they start building their own school communities,” she says proudly.
During the pandemic, Claxton organized and facilitated online Music Will training sessions, daily livestreams and how-to resources. “We learned so much through that time, though it was sometimes a painful process,” she admits. “The switch to online has had some really long-lasting effects. We launched Music Will Academy, a free online platform for teachers to do self-paced learning, which allows Music Will to reach educators who previously weren’t able to attend workshops due to geography, travel challenges, scheduling issues, etc.”
On top of Music Will and her role at the University of Northern Colorado, Claxton is also a performing drummer in a mixed-gender band called The Burroughs. “The more I’m out there in the world, the less it seems novel for people to see a woman playing drums,” she said.
Claxton calls herself an effective and enthusiastic synthesizer. “I love to listen to people’s ideas and look for patterns and big ideas that we can turn into something tangible. … I am enamored with the ‘what ifs’ that people can make reality when they’re given the space and the resources,” she says.
Director of Choral Activities University of Memphis Memphis, Tennessee
Preparation — relentless preparation — is the hallmark of Dr. Francis Cathlina’s work ethic as the Director of Choral Activities at the University of Memphis in Tennessee. “I outwork the room long before I enter it,” he says. “Scores are marked, rehearsals are mapped minute by minute. I arrive having solved most musical problems so rehearsal time so rehearsal time can be spent shaping sound, refining intention and elevating students.”
This level of preparation quickly builds trust, which allows ensembles to move fast, take risks, perform beyond expectations and grow, he says. “The most meaningful growth in the UofM Choral Program has been cultural. When I arrived here, many students participated in choir because it was required. Five years later, they sing because they want to. Each year, the University Singers reach further because it stands on a shared foundation of trust, discipline and ambition.”
Cathlina explains, “The Graduate Choral Conducting Studio functions like a launchpad already in motion. Graduate students are attracted to this program because the work is demanding, the mentorship is direct and the professional trajectory is clear.”
The growth of the program has been driven by a recruitment and retention model grounded in access, rigor and visible outcomes. Cathlina also actively recruits working conductors who seek advanced training, and he designs degree pathways that make balance possible.
Because the program is centered on shared purpose, trust and artistic excellence, students remain invested not only in the music, but in one another. “That collective commitment has raised both the level of performance and the durability of the community. Growth in numbers matters, but this shift in ownership is the achievement that sustains everything else,” Cathlina says proudly.
During his first semester at the University of Memphis in 2021, Cathlina founded the Choral Invitational. “Working in close consultation with my choral colleagues, I designed a model that prioritizes access — allowing visiting ensembles to rehearse, observe and receive clinics from the UofM Choral Faculty. I launched the inaugural year with three invited choirs, establishing a sustainable framework that has continued to grow,” he says.
Cathlina also reimagined the University of Memphis Honor Choir as more than a student-only experience. “I redesigned the structure to serve singers and their directors — strengthening the Memphis choral ecosystem through intentional professional development,” he explains.
He did this by creating both a Singer Track and a Conductor Track, which ran concurrently. This required “detailed, hour-by-hour planning to coordinate clinicians, choral faculty and ensembles without overlap, while keeping directors actively engaged rather than sidelined,” he says.
The result is an Honor Choir that functions as both a transformative student experience and a meaningful training ground for conductors — one that invests in the long-term growth of the regional choral community.
Music Teacher Raleigh Oak Charter School Raleigh, North Carolina
Music Teacher Ben Byrom uses creativity to transform his classroom into a space of living music. He arrived at Raleigh Oak Charter School in North Carolina shortly after the height of the pandemic and found a community where music mattered deeply and was woven into daily classroom life. “My role became one of expanding and deepening what was already there,” he explains. “I worked to align my teaching with what students were experiencing in their classrooms while bringing consistency, experience and continuity across grades.”
Waldorfeducation, and its emphasis on teachers bringing their authentic selves into the classroom, plays a significant role in how he approaches teaching. “I teach music effectively because I genuinely love it,” Byrom says. “I share that enthusiasm openly — for sound, theory, history, instruments, repair, acoustics and musical culture.”
He has the support of a school community that trusts his unique and sometimes unorthodox ideas. For example, instead of standard ukuleles, Byrom restrung them as “mandoleles” using nylon mandolin strings. His goal was to build transferable muscle memory for orchestra-bound students because mandolins and violins share tuning.
In Byrom’s classroom, music is experienced through thinking, feeling and doing. “Students move, clap, speak, listen, imagine and reflect,” he explains. “Understanding develops in the body and emotions before it’s named intellectually.”
His classroom is a place where care and accountability coexist. “Students know that I’m glad to share my passion, but they also understand that they must do the work of learning themselves — I can’t unzip their brains and pour knowledge in,” Byrom says. “That balance has allowed students to take real ownership, including a middle school performance group that formed independently, organized rehearsals, navigated auditions and leadership changes and continues to perform at school events. Not to mention, rocking out at the school dance in front of all their friends and classmates is quite possibly the coolest feeling ever at that age!”
Across grades, students investigate sound science and acoustics through hands-on exploration of vibration and tone. Middle schoolers have participated in music history electives as schedules allow. These have included studies of early music-making civilizations across the globe (protomusicians), semi-traditional European music history and 8th-grade explorations of American music from the 1800s to the present in alignment with their social studies curriculum.
Composer studies range from Bach and Shostakovich to B.B. King, Yoko Kanno and emerging digital forms like Vocaloid, which have led to discussions about hologram concerts and what it means to perform music without a physical performer (this was before AI music exploded). “We also make connections between classic ideas like antiphonal singing and modern recording concepts like panning, which helps students see music technology not as static history but as a living, evolving language,” Byrom says.
As the school and music program have grown and evolved, so has Byrom’s teaching. “We’ve changed buildings, schedules and resources,” he explains. “Sometimes I’ve had a dedicated room, sometimes I’ve taught off a cart. Rather than limiting instruction, this flexibility has allowed me to shape content responsively.”
This includes observing how modern students already interact with technology and successfully introducing emoji-based lyric systems for kindergartners as an immediate, developmentally appropriate bridge for students learning sight words.
At the heart of his work is a commitment to sustaining wonder. “A lot of ideas come from how busy my brain is,” Byrom jokes. “I have entire worlds, at least a couple jukeboxes, an abandoned movie theater and a radio DJ in there. Sometimes my body is on autopilot while my mind is off daydreaming in sound and color until pieces click together.”
Byrom continues, “I intentionally engage my head, hands and heart in my work, refusing to let teaching become stale or copy-paste year after year. I choose to continue learning about new technologies, musical forms and cultural shifts, not to chase trends, but to remain genuinely curious — growing older and growing up aren’t the same thing at all.”
Instrumental and General Music Teacher Flower City School No. 54 Rochester City School District Rochester, New York
At the elementary school level, it’s important to show students that music belongs to and is for everyone. This belief is what the music program at Flower City School No. 54 in Rochester, New York, is built on. Zachary Arenz, Instrumental and General Music Teacher, explains, “Music is a vehicle for human connection.”
Arenz, who was named 2024 New York State Teacher of the Year, structures his classroom around trust and belonging, so everyone feels seen, heard, valued and safe. “Our program is designed as a shared community where students, families, educators and partners work together to create meaningful learning experiences rooted in access, belonging and joy,” he says.
All aspects of Arenz’s curricular decision-making is rooted in student voice and choice because “when students help drive instruction, they are far more invested in learning,” he says.
This methodology has led to some of the nontraditional ensembles that Arenz has initiated at his school. “Modern band and the ukulele ensembles are some of the newest and fastest-growing ensembles because we’re offering wholly new experiences to students who did not see themselves as musicians before,” he explains.
The modern band ensemble started in 2021 with a small set of students who struggled to find success or belonging in school. “During practice, they learned to trust, take risks and hold each other accountable. By the time they performed, it was not about perfection, it was about their growth, confidence and community. Watching them stand together, proud of what they had done, reaffirmed my belief in the power of music to change lives,” Arenz says.
During the pandemic, school communities experienced profound and often unspoken grief. Flower City School No. 54 was recognized as a “grief-sensitive school” through the New York Life Foundation, which required everyone to first learn, slow down and listen, Arenz says. “We prioritized relationships, emotional safety and routines that allowed space for loss, remembrance and healing. In my classroom, music became a steadying presence, offering students a way to process emotions when words were not enough.”
This open and compassionate acknowledgement of grief helped students and staff feel supported during and after the pandemic as trust, connection and hope were rebuilt. Arenz continues to advocate for open dialogue and support throughout his program and school. He leads with care, courage and high expectations, believing that “when we work together, every student will have the opportunity to have meaningful, joyful and excellent learning experiences.”
Last summer, Arenz traveled to Iceland and Greenland through the National Geographic Grosvenor Teacher Fellowship, which deepened his understanding of place, culture and resilience. This summer, he will travel to South Africa with the NEA Foundation as a2026 Global Learning Fellow, to continue inspiring his teaching and learning journey as a global citizen.“I bring these experiences into my music classroom through storytelling, images, soundscapes and repertoire that connect students to the people and environments I encountered. By sharing the world with my students, I invite them to approach learning with curiosity and wonder,” he says.
Director of Bands Salem Hills High School Salem, Utah
Great programs are never built in isolation, according to Ryan Adair, Director of Bands at Salem Hills High School in Utah. “Our music program is built on trust, student ownership and community,” he says. “On my own, I am just one person — but in collaboration with talented people, we are able to accomplish truly remarkable things.”
By working with colleagues and community professionals, Adair has intentionally expanded student roles beyond traditional performance. One initiative involved training students to serve as the sound crew after they expressed interest in live sound engineering. Adair asked a parent who works in the industry to mentor students who learned practical, marketable skills while taking ownership of audio production. Adair often invites parents and alumni to contribute their professional expertise and partners with community groups to support his program’s performances and events. “By framing support as an investment in student growth and community culture, we build sustained buy-in rather than one-time donations,” he explains.
Collaboration is also at the root of the growth of the music program at Salem Hills — enrollment has doubled over the past five years. Adair credits strong vertical collaboration with Valley View Middle School and Salem Junior High. Retention is driven by a “Just Do Band” culture that Adair says is rooted in Don Miguel Ruiz’s servant-leadership model that is outlined in “The Four Agreements,” as well as consistent collaboration across the performing arts.
“During marching band season, a combined high school and junior high ensemble performs our competitive show for all 5th-grade classes, creating early excitement and clear pathways into the program,” he explains. Then, at one football game, Adair leads a 300-member pep band that is a “one-night, all-hands celebration that brings together musicians from the middle school, junior high and high school,” he says.
Older students model leadership and performance standards, while younger students experience the energy of high school band. “This event has become a powerful recruitment and community-building tool. Later in the year, those same students come back together in a combined Festival Music Preview concert,” Adair says.
In addition to relationships with feeder schools, Adair has also forged a strong partnership with the football coach and team. “What sets Salem Hills apart is the reciprocal support between the band and football team,” he says.
The band supports the football team through performances at games, pep rallies and team send-offs. The football team consistently advocates for the band’s presence and recognizes the culture and energy it brings to our school. The football coach regularly praises the band at games and competitions.
“Together, we’ve established a shared stadium practice schedule that respects both programs, strengthening collaboration and allowing both teams to succeed each week,” Adair says proudly.
Adair’s goal has always been to create a program that is artistically excellent, human-centered and rooted in collaboration. He takes pride in “showing my students how to balance commitment and effort within sustainable, manageable expectations,” he says. “Empowering students with real responsibility has increased creativity, critical thinking and investment in the final product.”
2026 Yamaha “40 Under 40” — Celebrating Excellence in Music Education
This marks the sixth year Yamaha has recognized 40 outstanding music educators under the age of 40 in the “40 Under 40” music education advocacy program. These outstanding teachers are making a difference by growing and strengthening their thriving music programs.
These 40 educators showcase the following characteristics: action (anticipate what needs to be done and proactively take the necessary steps that lead to a stronger music program), courage (propose and implement new or bold ideas), creativity (show innovation and imagination in achieving plans and objectives) and growth (establish, grow or improve music education in their schools and communities).
We received hundreds of nominations from students, parents, other teachers and administrators, local instrument dealers and mentors. The selected “40 Under 40” educators below have gone above and beyond to elevate music and music-making in their students’ lives.
This year’s group includes
eight elementary school educators,
seven middle school teachers,
13 high school directors,
four who work at multiple schools within their districts or at the district level,
five university professors
and three who serve through private and nonprofit organizations.
All “40 Under 40” educators have remarkable stories behind their teaching philosophies and methods. Many embrace diverse and unique music like Matthew Gramata whose high school band includes a bagpipes and Celtic drumming ensemble; Joshua Emanuel, who teaches a unit in Ghanaian music; Sean Rosenberry, whose elementary students learn traditional Irish music and dance; and Eric Stashek who started a polka group. Meghan Mulligan was inspired by her autistic brother to pursue special music education, Tiphanie McClenton became a music educator like her father who taught for more than 40 years, and Matt Siffert brings music to students who live in homeless shelters, supportive housing networks or attend low-income Title I schools. Two educators are mariachi directors, two are board-certified music therapists, many employ Orff Schulwerk and Dalcroze approaches.
In short, all these music teachers are inspiring. Join us in applauding the 2026 class of “40 Under 40” educators.
Orchestra Director and Music Technology Teacher at Mount Vernon High School Music Director at Washington Metropolitan Youth Orchestra Alexandria, Virginia
You put on a song you want to learn, but you have a tough time piecing together the bass line. At band practice, you struggle to figure out new bass parts. You hear a monster riff in your head, but you can’t quite get it into your fingers. At jam sessions, you’re spending more energy trying to decode what’s happening than actually making music.
All these situations point to the same underlying skill: ear training.
Despite how it’s often framed, ear training isn’t academic or reserved for music theory classes. For bass players, ear training is a practical, real-world skill. It’s how you orient yourself in music quickly, support the band with confidence, and recover when things don’t go exactly as planned.
KNOW WHERE YOU ARE IN THE MUSIC AND SENSE WHERE IT’S GOING NEXT
When many bass players think about ear training, they imagine interval drills, singing exercises, or written tests with right and wrong answers. That kind of training has its place, but if you’re just starting out, ear training is more about knowing where you are in the music and having a sense of where it’s going next.
Most working bass players learn to listen for relationships between notes, chords, and sections rather than identifying individual pitches in isolation. Just as regular practice sessions make a huge difference, a few minutes of focused listening each day can have a much bigger impact than occasional marathon sessions.
SUPPORT THE MUSIC
For bass players, having good ears doesn’t mean never playing a wrong note. Our role is to connect harmony and rhythm in real time, and understanding root movement — i.e., when to play the lowest note in each chord — is our main priority. Having “big ears” means hearing those movements, feeling when the harmony changes, and recognizing phrase lengths. Ear training also helps us recover quickly when we make a guess that doesn’t quite land.
Using your ears to support the band can feel overwhelming if vocals and other instruments seem to be competing for attention. When you’re learning a tune by ear or jumping into unfamiliar music, try listening in this order:
Time and feel: What’s the tempo? What’s the feel of the music?
Root movement: What are the roots of each chord in the chord progression?
Phrase length and form: What are the smaller and larger sections of each song?
If you can feel the pulse and hear where the roots move, you can survive most musical situations. Fills and embellishments can come later. With that framework in place, here are three ear-training exercises designed specifically for bass players. Each one connects directly to real-world playing situations.
1. FIND THE HOME NOTE
One of the most useful ear-training skills a bass player can develop is knowing where “home” is in a song. Before worrying about soloing, it helps to orient yourself by finding the song’s tonic — the note that feels settled, resolved, and at rest.
Put on a song you’re learning, or even one you don’t know at all. Before touching your bass, listen for a note that sounds like it could end the song. Hum it or sing it quietly and then find that note on your instrument.
You may not land on it immediately, and that’s fine. If the note you play feels slightly off or unsettled, adjust until it feels supported by the music. That adjustment is not a mistake; it’s ear training happening in real time.
Finding the tonic comes up constantly in real-world playing. It’s how bass players find their footing when joining a tune mid-song, sitting in at a jam session, or recovering when something unexpected happens onstage. Once you know where the tonic is, every other note has context.
If you’ve spent time working on scales and fretboard shapes, ear training can help those shapes stop feeling abstract. You’re no longer practicing patterns for their own sake; you’re using them to navigate real music.
2. DO ROOT-BY-ROOT MAPPING
After you can hear where the tonic is, the next essential skill is hearing how the harmony moves. For bass players, this usually means hearing root motion clearly.
Choose a song and listen for the moments when the music shifts from one chord to the next. When you play along, limit yourself to a single note each time the harmony changes, focusing only on the root.
At first, this can feel overly simple, especially if you’re used to learning full bass parts, but this is what makes this exercise effective. By stripping a song down to its harmonic skeleton, you start to hear its structure rather than just memorizing fingerings.
This skill is invaluable in rehearsals and on gigs. You may not know every detail of a song, but if you can hear and outline the root movement confidently — and then add fifths and octaves — you’re doing your job, at least on the most basic level. Being able to track root motion helps you learn songs faster and retain them longer.
3. LEARN TO BE WRONG ON PURPOSE (RECOVERY TRAINING)
Many ear-training methods focus on accuracy, but in the real world, music rarely unfolds in perfectly controlled conditions. As your ears get better, you’ll begin to recognize notes and chords, but often what matters more than being right immediately is how you recover when you’re wrong.
Put on a song you’re practicing. When the music settles into a chord, usually at the start of a phrase or section, play a note you think might work. If it doesn’t work, resist the temptation to fix it; instead, listen to how it feels against the music. Slide or step up or down until you land on a note that feels like it fits. You’re training your ear to recognize tension and resolution, and you’re building confidence in your ability to respond musically rather than freeze or second-guess yourself.
On real gigs, wrong notes happen. What separates confident players from hesitant ones is how quickly they adjust and how intentional that adjustment sounds.
A LITTLE BIT, EVERY DAY
You don’t need hours a day to see results. A few minutes of focused listening, done consistently, can lead to noticeable improvements within a week or two. Just like effective practice routines, ear training works best when it’s regular and intentional rather than rushed or overwhelming. Small habits, repeated daily, add up quickly.
Ear training isn’t about passing tests or impressing anyone. It helps you learn songs faster, lock in better with drummers, and stay present with the music instead of stuck in your head. In the end, those are the qualities that help make you a better bassist and bandmate.
Why do some people become musicians? Why chase music when it’s hard, demanding and an uncertain career path?
In this posting, we’ll explore the shared pursuit of purpose through music and talk about the reasons why musicians push forward, even when the odds sometimes feel stacked against them.
THE FIRST SPARK: WHERE IT BEGINS
Most musicians have a clear memory of the moment music first “clicked” for them. “When I was in fifth grade, there was a day where we all got to try any instrument we wanted and I tried three,” recalls student Sarah Heimberg. “I tried the horn, I tried the clarinet, but when I tried the trumpet … I instantly knew I was never going to put it down.” Sarah says that she soon became obsessed with playing the trumpet. “I always wanted to be practicing, I was always learning new things. And I loved taking lessons.”
Sarah Heimberg.
“They say that we don’t pick music, music picks us,” adds Tower of Power trumpeter Sal Cracchiolo. “My parents said I used to sing all the time when I was a newborn. Both of [them] were music teachers and they [started] me on piano at four years old. I learned how to read music before the alphabet.” Nonetheless, he soon decided that piano was not the instrument for him … and neither was accordion, violin or drums. It wasn’t until Cracchiolo was 12 years old that he discovered the trumpet and, like Sarah, quickly fell in love with the sound of the instrument.
Early parental encouragement seems to be a recurring theme for musicians. When Grammy®-nominated producer, singer, composer and woodwind player extraordinaire Scott Mayo decided to take up saxophone at a young age, his father got him a sax “like the next day.” A couple of years later, Scott wanted to learn to play flute too. Again, he recalls, his father’s reaction was “‘Okay, no problem.’ He just went out and bought me a flute.”
Interestingly, many musicians start out on a different instrument than the one they eventually adopt. Pianist (and long-time Adele accompanist) Eric Wortham started as a drummer, for example. Tower of Power founder Stephen “Doc” Kupka began as an oboist but switched over to baritone sax in his college years because he wanted to play rhythm and blues. ToP’s famed drummer David Garibaldi initially wanted to play trumpet but found himself practicing violin instead because his elementary school band had run out of trumpets to give out. It was only when that didn’t work out that he discovered the joy of drumming.
Many musicians have similar stories, but wherever, whenever and however it happens, there is one indisputable fact: Once music grabs you, it rarely lets go.
LISTENING TO FIND YOUR VOICE
Musicians often credit their early influences — the artists, genres and sounds that shaped their musical identity — as having a major impact on their lives. On violinist Kev Marcus’s first day of lessons, his teacher gave him a tape featuring jazz violinist Stuff Smith. “It really changed my life,” says Marcus. “He was playing, but he was doing it in a way I had never heard before. I felt like when he played violin, it spoke to me. It had soul … I could hear him. I could feel him.” He shared the tape with classmate Wilner Baptiste — with whom he would found the pioneering duo Black Violin — and the sound stuck with them both. Drummer Nikki Glaspie cites the first time she heard the Nirvana album In Utero when she was in 10th grade, and recalls the musical connection she felt at that young age for artists as diverse as Van Halen, Eve 6, Rage Against the Machine, the OJ’s, and The Gap Band. Guitarist Butch Walker has a clear memory of asking his parents to take him to a KISS concert when he was just eight years old. The over-the-top performance and spectacle had a pronounced effect on the young Butch, who quickly decided to devote his life to playing rock and roll.
Perhaps the most important skill any musician needs to master is learning to listen — not just to music, but to themselves. Guitarist/composer Rich Tozzoli recounted his personal journey in that regard in this Yamaha blog posting, describing how, as his comprehension of what he was listening to improved, his tastes broadened too. “I had long loved rock, jazz, funk and reggae, but I [soon] started taking an interest in classical music as well,” he writes. Understanding the range and timbre of each symphonic instrument and the ways they interacted to form a cohesive sound was, for him, like turning on an “aural light bulb.” Educator/arranger/composer Omar Thomas explains it this way: “I would hear something and say, ‘What is that chord? What is going on there?’ I’d want to work with that chord progression and understand how it worked and see if I could manipulate it for my own uses.”
Sarah Heimberg is a firm believer that, especially in the early years, listening is crucial. “I was always listening to classical music as a kid,” she says. “One of my earliest memories was hearing Copland on the radio when I was going to preschool.” She also feels that listening is the key to crafting individual style. “So much of developing style is figuring out what you like and taking everything you can from that,” she explains. “And, as you get older, you learn to listen to yourself with wider ears.” In other words, evolving a personal sound comes from identifying, chasing and building on the music you love.
MENTORSHIP
Guidance from teachers and peers — or sometimes even unexpected mentors — is another common theme when musicians talk about their musical journey. Sarah Heimberg describes the influence of teacher David Bilger (Philadelphia Orchestra, Emeritus) as being transformational, saying that he enabled her to regain her musical voice when she felt like she had lost it at one point.
Sarah with David Bilger.
“There have been a-ha! moments for sure,” she continues, “where he’ll say something about how I’m using vibrato or how I’m articulating or how I’m using the color of my sound, and it just clicks in that instant. I go, ah, that’s it — I get it now, and then I can kind of take that and run with it.”
David Bilger was also responsible for Sarah discovering what she terms the “perfect trumpet for me” — the Yamaha Xeno Artist Model BR (which Bilger had a hand in developing, along with fellow artists Thomas Hooten and Thomas Rolfs). “It has everything I could ever dream of,” she says. “It’s in tune throughout [its entire range]. I can think a sound color, and it just comes out the bell. I remember when I first picked up this horn, I just started playing some random excerpts and I thought, oh my gosh, this is what I sound like. I felt like I sounded like me, completely.”
Yamaha Xeno Artist Model BR trumpet.
The rediscovery of your musical voice through growth and refinement can also lead to passing wisdom forward in a fulfilling cycle of learning and teaching. Sarah feels strongly that her teacher’s influence has led her to mentor others. “In the lessons I give to my students, I’m constantly repeating things that I learned,” she says, citing as an example Bilger’s simple yet inspiring explanation of music as simply being sound organized over time. “That was an a-ha! moment for me, and it’s one that I’ve repeated to my students countless times.”
FACING DOUBTS: WHEN QUITTING FEELS EASIER
It takes a thick skin to be an artist of any stripe, whether you’re a musician, a writer, a painter, or are trying to succeed in any creative discipline. You need to be able to cope with failure and rejection, as well as the sometimes crippling self-doubt that can follow. When Black Violin first started out, the idea of hip-hop violin was completely foreign. Club promoters would look at Marcus and Baptiste, instruments in hand, and often turn them away without even listening to their music, yet they persevered and eventually found success. “There are moments for everyone when something comes your way and it’s not the outcome you wanted,” observes Heimberg. “You say, well, I guess I should just quit. Clearly. I’m not good enough. I can’t do this.”
But that’s the easy way out. The harder path is to make the commitment to waking up the next day still wanting to play. “Roadblocks are very common and very normal,” observes Butch Walker. “We’ve all been there as guitar players, and songwriters especially, where it’s not easy to force any sort of inspiration.” As clinician/guitarist Robbie Calvo points out, “We aren’t machines, and as humans, our performances will fluctuate on a daily basis.” That’s why, he advises, you should “always refer to yourself kindly, knowing that you are always improving, one practice session or gig at a time. Beating yourself up won’t fix the notes or the outcome, so just move on and laugh about it over coffee with friends.” Even when a Black Violin performance doesn’t go as well as he hopes, Kev Marcus keeps his head up. “I just practice, just keep trying to be better,” he says. “Those [tough] moments may seem long [at the time], but they’re really quick moments in life, and you move on.”
GIVING MUSIC YOUR ALL
The importance of musicians delivering their best every time cannot be overstated. The power of performance when you give your whole self — the shared energy that then occurs between musicians and audience — can be truly astonishing, yet achieving that synergy is not easy. “The hardest lesson is giving it your all, even when you’re afraid,” says Heimberg. “It’s so easy to hold back, to keep your voice inside, not just because it’s scary to put your voice out there, but because there’s so much judgment in what we do. That’s why learning to go for it, learning not to hold yourself back, is really hard.”
With the benefit of hindsight, Sarah admits that she sometimes failed in that endeavor. “I can think of things I’ve recorded and auditions I’ve done where I did not prepare to my fullest and I did not give all I had because I was scared that even if I did, it still wouldn’t happen.” In sharp contrast, she remembers walking away from a performance one day that hadn’t gone completely her way, “but I knew I had given every ounce of my musical voice to what I had done, and I was so proud of that, the outcome didn’t matter.
“I used to think that I would know that I made it as a trumpet player when people either really loved what I did or really hated what I did,” she continues. “I want to be so very myself when I’m playing the trumpet that people can’t help but have an opinion.”
The goal is to be so authentically yourself that people can’t help but feel something, to put your music so front and center that it inspires others to find their own voice. For musicians, that is the very definition of success.
THE DAILY GRIND: RITUALS, FRUSTRATIONS AND JOY
To some degree, becoming a musician is part ritual. It’s important to develop self-discipline and rigorous practice routines that incorporate repetition, sometimes to the point of frustration. Yet musicians eventually learn to embrace frustration as a part of growth and to find joy in the process, even when it’s messy.
“I have my routine,” Sarah reports. “I have to warm up at the beginning of the day or I actually do not know how to function as a human being. I know some people joke about that, but for me it’s really true. Maybe that’s something I should figure out, but … I have this giant array of things that I do as a routine, though sometimes I find that different things work well for me. Sometimes I need to go into the nitty-gritty of the coordination of the fingers and the tongue and the air. Other times I just need to work on pure in-tune sound with a clean, good articulation.”
“When you practice, listen intently, identify problem areas, and make the adjustments needed until you are happy with the results,” counsels Robbie Calvo. “Practicing mistakes just solidifies the problem, so identify and eradicate them before they become untamable monsters.” Eric Wortham concurs. “You know the saying, ‘practice makes perfect’?”, he says. “I had a teacher that said, ‘perfect practice makes perfect.’ You could practice doing the wrong thing and develop a lot of bad habits. But if you practice doing the right thing [over and over again], it’ll become [a good] habit.” According to Kev Marcus, it comes down to quality versus quantity. “My teachers always said, ‘It’s not about how much you practice, it’s about how you practice.’”
SO WHY DO IT?
Ask musicians why they persevere in the face of all the odds against them and you’ll likely get a variety of answers, but perhaps none so cogent as the one given by internationally acclaimed classical pianist Sara Davis Buechner. “Music is the one constant that I’ve come to depend on, especially in times of difficulty, struggle or stress,” she explains. “It’s good to have an anchor in life, and I don’t have any better anchor than music.”
“The scariest thing is to be true and vulnerable to yourself,” Eric Wortham points out. “It takes a lot of bravery, a lot of character and courage.” So if you want to be a musician, don’t just play. Don’t just perform. Ask yourself why you chose to go down that difficult path and let the answers inform your decision-making. And remember this one guiding principle: We make music to make ourselves heard … and because it’s who we are.
Last year, I had the pleasure of recording, filming and reviewing the Yamaha TAG3 C dreadnought TransAcoustic guitar, the first of its kind featuring an onboard looper, delays, reverbs, chorus and tuner.
As you’d expect, an acoustic guitar that packs a dynamite punch like that — without the need of an amplifier — received a lot attention and well-deserved accolades.
I’m pleased to announce that the same space-age technology is now available in a smaller concert-body package … enter the TAS3 C. In this posting, we’ll take a deep dive into this remarkable guitar.
Physical Attributes
The only difference between the TAS3 C and the TAG3 C is the physical size and shape. The tonewoods, technology and finishes have been replicated on the smaller version: a testament to how well the TAG3 C was received by the guitar-playing community.
Yamaha TAS3 C (left) and TAG3 C (right).
The TAS3 C has a concert body with a solid mahogany back and sides, a solid Sitka spruce top with your choice of a natural finish or a stunning caramel sunburst finish; both have a clear pickguard.
TAS3 C in caramel sunburst finish (left) and natural finish (right).
The cutaway allows for easy access to the upper frets when soloing. The mahogany neck boasts a smooth satin finish, and the fretboard and bridge are both ebony. The sound hole rosette, in particular, is quite stunning, with lovely marquetry inlays and blue accents. Tucked inside the top of the sound hole resides a micro rotary dial for the output volume of the built-in piezo pickup and preamp when connecting the TAG3 C to an amplifier — a nice touch for live performance.
The guitar also comes with a hard gig bag for protection and transportation.
Sound Quality
Not only is this a great-sounding guitar, Yamaha has also done an amazing job with the audio quality of the effects, as well as the clarity of the loop playback. If you orchestrate your parts with care, the separation is exceptional — easily on par with a standard loop pedal. Careful blending of the effects will also reward you with incredible-sounding guitar parts for singer-songwriter performances with vocals. Again, no pedals needed!
Looper
The onboard TAS3 C looper works the same as many pedal-based loopers, except you use your hands to activate the controls instead of your feet.
To arm it, simply press the loop knob on the control panel, then press the reverb knob. (See below.) The center ring of the display will flash red indicating that the looper is ready for you to start playing. Once you’ve completed your idea, just tap inside the wood circle below the sound hole, and the guitar will go into playback mode. This circle is the looper sensor and can be used to either arm the looper or end the loop recording process.
To add further overdubs, just tap the sensor again (or you can press the reverb button). The TAS3 C will save your loop even after powering down the guitar. You can also save and recall up to ten of your favorite loops with the use of the free TAG Remote app (see below).
The Control Panel
To activate the main control panel located along the top of the guitar (facing the player), simply press and hold the center power button for three seconds; this will cause the unit to light up, showing that it’s ready for action. The “On” button lights up white when in acoustic mode, and green when a cable is plugged into the end-pin jack.
Each of the four rotary knobs in the control panel have multiple functions, as follows:
Chorus Knob
This sets the output mix of the chorus you’ve selected in the app. When this knob is depressed, the last loop part is erased. (Think of this as the looper’s undo function.)
Loop Knob
Pressing the loop knob activates the looper, causing a white LED to illuminate. Pressing and holding the loop knob also allows the TAS3 C to connect to the TAG Remote app via Bluetooth.
This dial also controls the output volume of the loop. I suggest experimenting with this for a while to perfect the looping playback volumes between parts.
Reverb Knob
This sets the output mix of the reverb you selected in the app. Pressing the knob activates the looper “ready” mode, causing the lights around the power button to flash red. You can also press it to end recording instead of touching the looper sensor.
Delay Knob
This sets the mix level of the delay you selected in the app (or the default setting if not connected). You can sync the delay time with your playing or track by tapping the delay knob in time with the music. (This is known as a “tap tempo” function.)
Chromatic Tuner
To activate the built-in chromatic tuner, simply press the delay button and hold it down for three seconds. Then, all you have to do is to watch the LEDs around the center power button: Red indicates that the note is out of pitch (either sharp or flat); when the green center LED is lit, the string being played is at the correct pitch. The default setting is A440Hz.
Onboard Effects
There are seven onboard effects in three different categories: chorus, reverb and delay.
Chorus
The TAG3 C offers two chorus types: Double Detune and 4-Voice. Double Detune allows you to create mild to wide fluctuations of pitch above and below the original notes or chords. 4-Voice provides an extremely musical and smooth modulation effect.
The app allows you to freely select and audition the two, then dial in depth, speed, tone and number of voices. The chorus knob in the control panel can then be used to blend the effect into the acoustic guitar sound.
Reverb
There are three reverb types available: room, hall and plate. Reverbs replicate the size of an ambient space and the reflection of sound created in those spaces. Room reverb creates the ambient sound produced in a small space like a room, while hall reverb replicates the ambient sound in a large space like a concert hall. Plate reverbs replicate the sound created when audio vibrates a large steel plate. Think of room and hall reverbs as an emulation of natural spaces, while plate reverbs are contrived with mechanical components.
The TAG Remote app allows you to modify the selected reverb’s decay, tone and pre-delay. As described above, the master mix output for the reverb is in the guitar’s control panel.
Delay
There are two onboard delay types: simple and analog. Delay times can be dialed in using the time control or via Tap Tempo. As described above, to use Tap Tempo, simply depress the delay knob a few times in time with your loop (or at the tempo you’ll be playing your parts), and the TAS3 C delay will sync quarter notes to the tempo of the tap.
Simple delay provides a standard mono digital delay with tonal shaping via high and low frequency damping controls, while analog delay provides a nice replication of a tape echo. This kind of delay tends to have a warm tone with a characteristic (and sonically pleasing) degradation of audio quality as the repeats fade away.
In the app, feedback determines the number of repeats, and the high damping/low damping and treble and bass controls fine-tune the brightness or warmth of the delay tones. As mentioned above, the delay knob in the guitar’s control panel determines the delay mix level.
The TAG Remote App
The ultimate way to use the TAS3 C is to harness the full power of editing and loop storage (up to ten loops) provided by the free downloadable TAG Remote app. You can also play your backing tracks, favorite songs and playlists through the guitar sound hole using your mobile device.
The screenshots below show the app’s looper and overall preferences displays. Note that the latter even includes a helpful battery level meter.
Charging
Yamaha has chosen not to use standard batteries to power the TAS3 C effects, looper and preamp. Instead, there’s a built-in rechargeable lithium-ion battery, with a magnetic power connector on the upper shoulder of the guitar. This gives the player some five hours of playing time without recharging — long enough for a live gig or songwriting session. The supplied USB cable comes complete with interchangeable plug options for charging the guitar anywhere in the world.
The Video
The key to creating a successful loop is to think like a composer, arranger and mix engineer.
This video shows me capturing a seven-layer performance on top of a four-bar phrase being looped. Each of the parts are carefully orchestrated to work well together for a complete composition.
You’ll notice that I’m adding and subtracting effects depending on the part that I’m playing. For example, the kick drum and bass guitar parts are completely dry, but I added a touch of Hall reverb to the pseudo snare part. The single-note “bubble” part bounces around nicely with the addition of delay, while the double-stops also have a touch of reverb, as do the lead fills.
It took some time to get the dynamics, effects and volumes just right for this performance, especially since I wanted to capture this all-in-one take for the video. I hope you agree that the effort was worth it!
The Wrap-Up
As you’d expect, there are sonic differences between the TAG3 C and the TAS3 C, given the size of the body chamber. In my opinion, the dreadnought-sized TAG3 C is a touch louder acoustically, produces a little more bass, and has a little more detail in the sound hole playback. But the smaller concert-body size of the TAS3 C will appeal to those of us that prefer a softer sound, smaller body bout, and compact size for travel.
Acoustically, the TAS3 C excels for fingerstyle, strumming, and those fun percussive parts, due in part to its more controlled bass response. The TAS3 C preamp also sounds excellent when recorded direct to DAW, and of course the provision of onboard effects and looper alleviates the need for a pedalboard and dedicated looping device.
The evolution of the guitar has taken a dramatic turn in recent years by leveraging technology without sacrificing tonality. There’s never been a better time to be (or become) an acoustic guitar player!
It’s NAMM time again! Can’t make this year’s show in person? Here are some of the hottest products that Yamaha will be displaying on the show floor — all of which offer intriguing new ways to make yourself heard.
Premiering at the 2026 NAMM Show is the YTR-8335IIRSKG NAMM26 Limited Edition Xeno trumpet, which offers a rare opportunity to own a piece of Yamaha history. Limited to just 100 pieces, it features a distinct “KANGAKKI” bell engraving inspired by the Japanese kanji for “wind instrument,” a specially engraved unit number, and upgraded components.
Built on the Xeno platform and designed for advanced performers and collectors alike, the YTR-8335IIRSKG NAMM26 delivers a bold, resonant tone with refined playability. Unique features include a U-shaped finger hook on the 1st slide for enhanced control and a distinct feel; phosphor bronze bottom caps that add tonal depth and visual contrast; and black mother-of-pearl finger buttons — an elegant, exclusive aesthetic not found in the current Xeno lineup.
SVC300C/SVC300F Silent Cello™
SVC300C SILENT Cello.
SVC300F SILENT Cello.
The two new Yamaha SILENT Cello models are groundbreaking instruments built to elevate every performance, rehearsal, and practice session. They provide a rich, vibrant, and realistic cello experience by combining the feel and response of an acoustic cello with the flexibility of electric expression. Their proprietary Studio Response Technology (S.R.T.) brings out the natural acoustic sound while giving the player the control to dial in the blend of the Piezo and the internal microphone.
Both models — the SVC300C and SVC300F — are lightweight and easy to transport in the included soft cases with the SVC300C model collapsing into a narrow, travel friendly footprint. The SVC300C offers show-stopping looks and expansive sound capabilities, while the SVC300F brings are more traditional, acoustic-like experience in its sound and feel. Both allow for a combination of different sound types through a blend control, onboard EQ, and easy control of multiple reverb settings, and the geared tuning pegs provide quick and easy tuning. The natural wood of the frame, body and neck showcases the beautiful grain structure on the antique brown finish, while the pearl white finish option offers a more unique, modern appearance.
EAD50 Electronic Acoustic Drum Microphone System
EAD50 Electronic Acoustic Drum Module.
DSU50 stereo condenser microphone.
Whether used at home, on stage, or in a recording studio, the new professional-grade EAD50 Electronic Acoustic Drum Microphone System elevates every aspect of your drumming , and offers incredible flexibility and expandability. It simplifies the often complicated process of miking drums and effectively combines numerous features of professional digital mixing boards and electronic drums in one, easy-to-set-up package. A Yamaha DSU50 stereo condenser microphone specially designed to be mounted on your bass drum hoop is included in the package, making it simple to quickly mic up any acoustic drum set and achieve consistent, reliable sound in any venue.
The EAD50 module offers improved sound and expanded connectivity, with a built-in SD card reader and Bluetooth® capability so you can use it with your smartphone and the free iOS/Android Rec N’ Share and new EAD Touch apps. It’s equipped with five XLR inputs and the ability to add up to 10 triggers, and signal can be routed to eight individual 1/4 inch balanced outputs and two XLR balanced outputs. LED rotary faders and Kit Modifier knobs allow the player to make on-the-fly adjustments such as changing gain, reverb, or other effects without missing a beat. The EAD50 also provides the ability to sample and create loops, and comes loaded with 250 scenes (70 preset kits, 200 user kits), 2,317 sounds, and 252 digital effects. In addition, Live Set capabilites allow you to to instantly recall prearranged kits, tempos, and audio files with one press of a button.
MODX M Synthesizers
MODX M6, MODX M7, MODX M8.
MODX M synthesizers combine expressive control, streamlined workflow, and exceptional sound in a lightweight design ideal for stage or studio. With three engines that create a stunning variety of sounds, along with shared DNA from our flagship MONTAGE M, MODX M elevates expression everywhere.
Features include 268 notes of total polyphony, plus upgraded navigation with a color touch screen, eight faders, and six display knobs for quick, intuitive sound editing and operation, as well as a Stereo A/D input with two insertion effects. There’s even a built-in USB MIDI and multichannel 10 output/4 input audio interface so you can streamline MIDI recording, virtual instrument monitoring, and multi-track audio recording through a single USB cable. In addition, the Expanded Softsynth Plugin (ESP) replicates MODX M in your favorite Digital Audio Workstation (DAW), allowing you to create, edit, and mix performances anywhere you happen to be — without the hardware — offering an unprecedented level of stage and studio integration.
MGX Digital Mixers, URX Interfaces, and CC1 Controller
Several new Yamaha MGX mixers and URX interfaces, as well as a CC1 controller, made their debut at NAMM 2026. Together, they form an innovative collection of tools built to help musicians, performers, streamers, podcast and content creators sound their best anywhere.
MGX16V.
Acclaimed for exceptional sound quality, versatility, and intuitive design, Yamaha MG Series mixers have long been an industry standard for musicians, performers, and creators. The new MGX Series builds on that foundation and steps confidently into the digital era, bringing Yamaha signature “true sound,” trusted reliability, and the flexibility modern production workflows demand. Advanced features like an intuitive digital interface, onboard recording, Simple/Expert modes, scene recall, “touch and turn” control, and built-in audio and video streaming (on select models), make it ideal for a wide range of applications such as live sound, multitrack recording, podcast production, and hybrid video shoots.
URX44.
URXinterfaces are designed for creators moving beyond entry-level — streamers dialing in broadcast quality sound, podcasters managing remote guests, gamers balancing chat and gameplay, or musicians tracking polished demos. Each model includes onboard DSP tools, effects, a touchscreen GUI, tactile knobs, and support for external controllers. Bundled Steinberg software completes the workflow, making URX a strong all-in-one hub for home studios, gaming setups, and portable production kits.
CC1.
The CC1 controller adds hands-on precision with motorized faders and ultra-responsive LCD keys. Seamless integration with OBS, Elgato, and Steinberg makes it ideal for livestream scene switching, music production automation, podcast editing, or hybrid live performances where audio and visuals need to move in sync. By streamlining complex workflows, CC1 keeps creators focused on performance — not menu diving.
Pacifica SC Standard Plus Electric Guitars
Pacifica SC Standard Plus lineup.
Designed for today’s guitarist, the new line of Yamaha Pacifica SC Standard Plus guitars offer versatile tones, smooth playability, and reliable performance in any setting. These stylish single-cutaway electric guitars take this classic shape to a whole new level of aesthetic and musical expression, with a proprietary Acoustic Design process that delivers exceptionally balanced tone.
Pacifica SCs come in a wide range of California sun-drenched colors and offer a wide array of modern features that include dual Reflectone pickups created in collaboration with Rupert Neve Designs; an H-S pickup configuration with a focus switch for the bridge pickup; Gotoh locking tuners and a black Graphtech Tusq XL nut; dual string trees on the headstock (one for the top E and B strings, and one for the G and D strings); and a round C-shape maple neck with your choice of maple or rosewood fingerboards, a natural smooth satin finish and stainless-steel frets. There’s also a unique truss-rod spoke wheel at the neck heel/ body joint that allows precision truss rod adjustments to be made quickly, without the need to remove a truss rod cover on the headstock or unscrewing the neck. This design also allows for more headstock mass, which equates to increased sustain, tuning stability, and a richer sound.
RS02CB Chris Buck Signature Revstar Electric Guitar
RS02CB.
The RS02CB is our first mass-production signature Revstar ever. Designed in collaboration with Chris Buck, the highly acclaimed Welsh blues-rock guitarist known for his unique “pick and fingers” technique, it’s based on the acclaimed Revstar Standard line, with the same body size and chambered body, but with a striking “Honey Gold” polyurethane finish, and with Chris’s signature on the rear of the headstock. It features custom inlays and a white nut, custom-voiced Yamaha Guitar Development P90 pickups, a TonePros wraparound bridge, a 1-ply parchment pickguard, amber hat knobs, and a 3-way blade pickup selector switch.
Celebrating six decades of excellence, the RSP20B 60TH Anniversary Revstar debuting at NAMM 2026 showcases a flame maple top in a refined Noble Black finish, blending luxurious aesthetics with unique character. Featuring a Göldo tremolo unit and Gotoh locking tuners, it delivers dynamic range and expressive tones with smooth playability, with a bone nut that further enhances the guitar’s natural and balanced resonance. The RSP20B also features a chambered body and carbon reinforcement developed with Yamaha exclusive Acoustic Design process to sculpt tone, reduce weight, and ensure optimal balance. Dual humbucking pickups, combined with a 5-position pickup selector and a passive push/pull focus switch, provide unique versatility for a dual-pickup guitar.
The Yamaha FG9 60TH Anniversary Edition landmark acoustic guitar embodies six decades of innovation, tradition, and uncompromising craftsmanship. Designed for discerning singer-songwriters, this limited model offers outstanding projection, shimmering highs, and a rich low-end response. The hand-selected Adirondack spruce top, supported by scalloped X-bracing, delivers a bold yet articulate sound that responds dynamically to every strum with power and nuance. Guatemalan rosewood back and sides add complexity and depth, with striking grain variations that make each instrument visually unique. Subtle Japanese design elements blend elegance with understated humility, honoring the past while shaping the future of acoustic performance.
TAS3 C TransAcoustic Guitar
TAS3 C.
Modern musicians are constantly looking for ways to push their creative boundaries. The TAS3 C, the newest addition to the revolutionary line of Yamaha TransAcoustic guitars, helps push those boundaries even further by providing reverb, delay, chorus, looper, and even Bluetooth capabilities right at your fingertips — with no necessary gear but the guitar itself. Whether you’re writing, rehearsing, performing, or recording, the TAS3 C is the perfect simple-to-use yet incredibly powerful tool for the job. High quality construction featuring a Concert cutaway-style body, solid Sitka spruce top treated with A.R.E. and solid mahogany back and sides ensures top-notch acoustic sound quality, made even better by TransAcoustic’s professional high-fidelity effect options.
We hope to see you at NAMM — and remember, if you can’t make the show in person, you can always catch the highlights here!
For more information about these and other great Yamaha products shown at NAMM, click here.
He may be best known for his energetic live performances and backflips, but there’s no question that Benson Boone is a musical powerhouse. His first two albums, Fireworks & Rollerblades and American Heart, released in 2024 and 2025 respectively, were both chart-toppers, as were the accompanying hit singles “Beautiful Things” and “Mystical Magical.” Today, he’s a major touring artist selling out arenas worldwide, with a massive online following.
Boone’s athletic abilities were evident at a young age — he was a member of his high school’s competitive diving team as well as the tennis team — but he discovered his musical talent when a friend asked him to play the piano and sing in a battle of the bands during his junior year. After graduation, he decided to focus on his music exclusively.
Benson began posting singing videos to TikTok in late 2020, eventually amassing 1.7 million followers. His debut single, “Ghost Town,” was released soon afterwards, with Boone playing drums, guitar, and piano on the recording, which charted in 14 countries, including the Billboard Hot 100 in the U.S.
In the years since, Boone has won several prestigious awards and has made many unforgettable live appearances, including opening for Taylor Swift and playing at Coachella 2025, where, using a Yamaha-created custom piano, he covered the Queen song “Bohemian Rhapsody” with original Queen guitarist Brian May joining him onstage. Benson has also appeared on numerous TV shows, including The Ellen DeGeneres Show, The Kelly Clarkson Show, and Late Night with Seth Meyers, and gave memorable performances at the 2025 Grammys and AMA shows.
THE AMERICAN HEART TOUR
In the summer of 2025, Benson embarked on his first all-arena concert tour, titled the American Heart Tour, spanning 50 shows across North America and Europe. Incredibly, 29 dates were sold out in just nine seconds.
For the tour, Boone opted to perform on two customized Yamaha pianos: a C7 Concert Grand for the main stage and a C2 Grand for the B-stage. These instruments would not only be at the heart of a landmark live moment and a consistent visual focal point across changing venues, they would play critical musical, visual, and physical roles in the live production, and so they had to be musically exceptional and designed to meet the demands of a high-energy, theatrical, emotionally driven show, while also supporting Benson’s uniquely physical performance style.
The C7 was chosen because it has a large, commanding sound suitable for arena-scale venues, as well as a visual presence appropriate for center stage and full dynamic range for expressive playing. The C2 matched the physical space and staging footprint of the B-stage, while still providing true Yamaha tone and professional playability. The two pianos — the C7 with a silver-flake finish and the C2 with a blue-sparkle finish and adorned with jewels — reflected and amplified stage lighting and motion, reinforcing the scale, intensity, and emotion of the live experience.
Because Boone physically interacts with the pianos he plays, Yamaha did significant structural planning, along with extensive testing to ensure stability during movement and jump-off moments. Both pianos were outfitted with custom legs and a reinforced lid with a special high-traction grip coating applied to the top surface, along with rubber-coated locking casters for secure staging and solidity. Also, because these are active touring pianos, custom high-durability finishes designed not to crack or dull under travel conditions were applied.
Even with all these custom visual and structural modifications, the instruments remained fully professional, fully expressive Yamaha pianos, with their action quality, tone, and responsiveness preserved. They were, after all, built to be played, not just looked at.
A Creative Collaboration
Benson Boone’s collaboration with Yamaha grew naturally as his live performances continued to scale. After working with Yamaha on select key performances, including Coachella, his production team recognized the level of craftsmanship and attention required to support an artist whose show blends music, movement, and spectacle. When planning the American Heart Tour, the team reached out to Yamaha to design custom pianos that could serve as visually iconic centerpieces while also being structurally reinforced for physical performance and durable enough to withstand a multi-continent tour.
During the tour, the C7 Concert Grand served as the bold visual and musical centerpiece of the main stage. Yamaha and Benson’s creative team worked with great attention to detail in order to ensure that the instrument would integrate seamlessly with the staging, lighting, and screen content. Piano designer Justin Elliott (who has worked on numerous projects for Yamaha) finished the piano with a custom multi-layer silver-flake paint that required 17 to 20 layered coats. Each coat used different flake sizes to create depth and varying light reflection, resulting in a highly reflective, sparkling, light-amplifying surface.
The C2 Grand was conceived by Benson’s creative team as the focus of a surprise theatrical moment, when the piano rises in darkness from below the B-stage at the far end of the runway just as an enormous chandelier is traveling from the main stage with Benson riding on it. Boone would then jump down onto the piano lid and perform atop the instrument. It was an interaction that created a cinematic visual storytelling moment and one of the tour’s most dramatic live reveals — one that garnered an explosive reaction from the audience every night. For even greater impact, the C2 was finished in a deep blue sparkle and adorned with jewels to visually match the chandelier.
Benson Boone’s rise has been meteoric, and the emotional intensity of his live shows have become a defining part of his artistry. He is an artist who thrives on connection, energy, and authenticity. His piano is not just an instrument on stage. It is central to how he performs and how he communicates with his audience.
Yamaha was honored to support Benson Boone by building custom world-class instruments that were visually iconic, structurally engineered for performance, and musically exceptional. These pianos were not background; they were part of the narrative, part of the choreography and emotional arc of each show, supporting an artist whose performances demand both musical expression and physical freedom.
The silver-flake C7 used by Benson Boone during his American Heart tour will be on display at the Yamaha booth during NAMM 2026. Stop by and check it out!
We’ve completed another revolution around the sun, and it’s time to celebrate — but it’s also time to take stock and think about how we can make the coming year even better.
Things like losing a few pounds, developing new work skills, taking that long overdue vacation — those are all pretty standard. For musicians, though, New Year’s resolutions might need to be somewhat more specialized. Here are seven suggestions that can help you improve your chops and expand your musical horizons in the months ahead.
1. Feed Your Creativity
Set a goal of writing some new music every week. This doesn’t have to be a full song — even a simple melody, riff, phrase or beat will do. The idea here is to stimulate the creative area of your brain (until recently, thought to be the right hemisphere, though some recent studies show that the left hemisphere can play a role too), and, honestly, the results don’t matter all that much: for the purposes of this exercise, a bad piece of original music is better than no piece of original music.
Like so many other things in life, this is a case where practice makes perfect. The more music you write, the easier it will become over time. Eventually you’ll find yourself stringing together those basic melodies, riffs, phrases and beats into complete musical compositions. If you’ve got a flair for lyrics (or can partner with someone who does), they can even turn into pop or rock songs that might eventually become hits! (Interested in pursuing your songwriting muse? Check out our blog postings from Grammy-nominated singer/songwriter Shelly Peiken.)
2. Expand Your Repertoire
Learn one new song or composition every ten days. If you’re good at learning by ear (a skill that also gets better with practice), all that’s involved here is finding a song you like and listening to it repeatedly until you can play the chords and melody. If not, instructional YouTube videos, sheet music and/or “fake” books can provide you with the chords and notation to just about every song and composition out there. (Yamaha offer hundreds of sheet music titles, all available for immediate download.)
3. Master Your Instrument
Make a point of tackling a new playing technique every month. This can be as simple as learning new scales or chords, or as complex as developing drumming polyrhythms or learning circular breathing techniques. Instructors can be very helpful in achieving this goal, but there are plenty of online resources to help in that endeavor too, including postings here on the Yamaha blog such as our Well-Rounded Keyboardist series and the many guitar tutorials presented by renowned educator/clinician Robbie Calvo.
4. Record Your Muse
Learn a new recording skill every other month. After all, if you want to put your music out there for the world to hear, you need to be able to record it, and the better it sounds, the more likely you are to find an audience. This can encompass a wide variety of aspects, including:
A basic understanding of sound, acoustics and microphone design
Knowing how to set levels correctly and avoid distortion
Learning the importance of room treatments and proper monitoring
Trying out different mic placements to see how they affect the sound
Experimenting with new plug-ins and advanced features offered by your DAW software
Creating mixes that sound good in all different environments and on different systems
Understanding the basic principles (and importance) of mastering
You can find lots of great tips about all of the above — and more — in our ongoing series of Recording Basics blog postings.
5. Open Your Ears
Expose yourself to a new genre of music for an extended period of time every few months. This one’s super-easy: all you have to do is listen. But you need to make a conscious decision about what you want to listen to, and you need to listen intently, to try to get “inside” the music, to understand what makes it tick.
You might want to start slowly by sticking to genres similar to the ones you already like — for example, classic rock fans will probably enjoy blues music too. After awhile you can begin to stretch things by experimenting with genres that are significantly different from your personal tastes: If you’re a classical music aficionado, try some hip-hop; if you’re a rap fan, go for some gentle folk or country music. You may not like what you’re hearing, but there’s also the possibility that you will. Either way, you’ll be expanding your musical horizons, which can only help you develop as a musician.
6. Step Outside Your Comfort Zone
Try to learn a new instrument in the coming year. Notice we said “learn,” not “master,” because it’s impossible to master any musical instrument in that short a space of time. (When asked why he still practiced at the age of 90, the legendary cellist Pablo Casals replied, “Because I think I am making progress.”)
So we’re talking about the basics here, but even getting that far will help stimulate your brain and improve your chops on your chosen instrument (as learning sitar did for Beatle lead guitarist George Harrison) … though it’s also entirely possible that you’ll gravitate to the new instrument instead. For example, Tower of Power saxophonist Stephen “Doc” Kupka started on oboe but switched over to baritone sax in his college years because he wanted to play rhythm and blues; similarly, the group’s drummer David Garibaldi initially wanted to play trumpet, but found himself practicing violin instead before discovering the joy of drumming. The alternative instrument you pick should ideally be somewhat similar to what you already know — for example, if you’re a guitarist, try taking up bass, or vice versa — as this will help you make progress more quickly. But if you’re up for a challenge, by all means go for something completely different!
7. Get Critical
Over the course of the year, develop critical listening skills so you can better evaluate your own recordings and those of other musicians. You want to be able to listen like a producer, like an arranger, and like an audio engineer. Some people are born with those skills, but they can be learned, though there are no shortcuts here — you have to put in the time.
Being a critical listener allows you to delve beyond the gut-level reaction you have when you first hear a song and appreciate it intellectually, which can only aid you in your development as a musician and as a composer or songwriter. There’s a reason, after all, why your favorite music is your favorite music … and once you develop these kinds of listening skills you’ll be able to know what that reason is and apply it to your own music-making.
After the noise and excitement from your New Year’s Eve celebration quiets down, it’s a great time to kick back and watch a film or two in your home theater. Here are eight selections with an Auld Lang Syne twist, perfect for curling up with a warm blanket and enjoying on your big-screen TV and extra speakers.
Forrest Gump
This multiple Academy Award® winner is a great-looking and great-sounding film that will have you smiling broadly from start to finish. In one sequence, Gump (played by Tom Hanks) spends the 1972 holiday season and New Year’s Day with his lieutenant Dan Taylor, whom he saved during the Vietnam War. They later run a shrimp boat together and create the Bubba Gump Shrimp Company, after which they invest in Apple® Computer and become millionaires … and those are just a couple of the plot twists and turns in this powerfully moving film. Check out the trailer here.
Trading Places
In this 1983 comedy, Eddie Murphy is a homeless street hustler and Dan Akroyd is an upper-class commodities broker who are unwittingly involved in an elaborate experiment that entwines their lives. One particularly hilarious scene takes place onboard a Philadelphia-bound train on New Year’s Eve. It involves a gorilla — and that’s all I’ll say about it for now. Check out the trailer here.
Ghostbusters II
There’s nothing like having the likes of Bill Murray, Dan Aykroyd, Sigourney Weaver and Harold Ramis entertain you with some ghostly high-decibel adventure. When slime rises from the streets of New York City on New Year’s Eve and chaos ensues, the Ghostbusters intervene. They even get the Statue of Liberty into the action and drive it through the streets of the city! Check out the trailer here.
Dick Tracy
Based upon the comic strip sleuth of the same name, this visually stunning film is set in the 1930s and features a slew of colorful mobsters, kidnappings, card games and investigations, with a star-studded cast that includes Warren Beatty (as Tracy), Madonna, Dick Van Dyke, Dustin Hoffman, Mandy Patinkin, Paul Sorvino and James Caan. In one memorable New Year’s Eve scene, Tracy faces gun battles and action galore after interrogating the bizarre criminal called Mumbles (Hoffman). Check out the trailer here.
The Godfather Part II
Directed by Francis Ford Coppola and starring Al Pacino and Robert De Niro, this sprawling 1974 classic covers a span of more than half a century. Interestingly, the film was both a sequel and prequel to the original Godfather. In 1997, the American Film Institute ranked it as the 32nd greatest film in American film history. (TheGodfather ranked 3rd.) New Year’s Eve celebrations feature prominently during the mesmerizing scene where Michael Corleone (Pacino) finds out that his brother Fredo (John Cazale) betrayed him. Check out the trailer here.
New Year’s Eve
This 2011 romantic comedy takes place — you guessed it— on New Year’s Eve, with a series of intertwining stories and an all-star cast that includes Halle Berry, Jon Bon Jovi, Robert De Niro, Sarah Jessica Parker, Michelle Pfeiffer, Ludacris and Zac Efron. Directed by Garry Marshall, it’s a feel-good film with a driving New York City energy that will leave you hungry for more popcorn. Check out the trailer here.
The Poseidon Adventure
This 1972 multiple award-winner is considered by many to be the mother of all disaster films. It takes place on an aged luxury liner on her final voyage from New York City to Athens before being sent to the scrapyard. As the ship’s band rehearses for a New Year’s Day celebration, the captain gets word that an undersea earthquake has triggered a tsunami. The vessel is hit by the wave and capsizes, leading to a saga of survival … and the need for more oxygen. Check out the trailer here.
The Horn Blows at Midnight
This black-and-white 1945 chestnut features Jack Benny as the character Athanael, who plays third trumpet in a late-night radio show orchestra. One night, as the announcer drones on, he falls asleep and dreams he is a junior grade angel and trumpeter in the orchestra of Heaven, with the mission of destroying an over-indulging Earth by blowing his trumpet at exactly midnight on New Year’s Eve. With a doomsday plot like that, it may not sound like a comedy, but it’s actually hilarious! Check out the trailer here.
Full-length versions of all the movies listed here are available on YouTube™ and Amazon Prime except “The Horn Blows At Midnight,” which is available for streaming on Max.
Your chops are in shape, your gear is dialed in, you’re feeling good about your reading skills, and you’re itching to play. Out of the blue, someone recommends you for a gig with a band you’ve never heard of, playing songs you’ve never heard, with only a couple weeks of prep time. How do you rise to the occasion?
When an East Coast indie-rock quartet needed a sub for their SoCal tour earlier this year, they reached out to their guitarist (a friend of mine), who asked if I’d consider doing the gig. I listened to the songs on the band’s Instagram page, decided it’d be fun, checked my calendar, and said yes. The next few weeks were a whirlwind!
Here are a few things to consider if this happens to you.
THE MONEY
First things first: Be clear about how much you’re getting paid. How much time do you expect to put in, and how would you like to be compensated? Can you afford to do a gig that’s interesting but doesn’t pay well, or do you need every opportunity to help you make rent? Whatever you decide, communicate clearly with whoever handles the band’s finances, and if the agreement includes reimbursement for things like gear or transportation, make sure to save all your receipts.
For this short tour, the band asked if I wanted to be paid as a hired gun (guaranteed a certain amount for every gig) or as a member of the band (given an even split of the door money). I chose to be paid as a band member, but they generously made sure I was paid well for each gig, even if there was very little money to split.
THE SONGS
When you set out to learn a band’s material, it’s tempting to plug right in and turn up, but deep listening will serve you better. I had a couple of weeks to learn 20 originals and 10 covers, so besides listening to the songs continuously, I played through the setlist at least once a day. I dug into live versions to hear how far the band strayed from their recordings, asked which versions were their favorites, and inquired how closely they wanted me to emulate the bassist I was subbing for. When I had trouble hearing exactly what the bass player was doing, I used a stem splitter and muted everything else so I could focus on the nuances.
I was ready to make my own charts, but fortunately, the drummer/musical director (also known as the MD) sent me a link to the band’s charts on Google drive. This barebones guide to the Kinks’ cool 1967 tune “Waterloo Sunset,” a staple of the band’s setlist, is one of the charts he prepared:
A chart for the Kinks’“Waterloo Sunset.”
His charts were a welcome starting point, but I had to figure out the chord qualities — mostly major, minor and dominant — by arpeggiating the chords, hearing them in context and consulting other sources, including the band’s guitarist. I also learned a lot by recording myself playing along with each tune, and I absorbed the setlist in sequence so I knew when to adjust my tone or add effects.
THE GEAR
If you only have one bass, decide what kind of strings are best suited for the gig. Flatwounds and old roundwounds have a vintage sound that’s noticeably different from the tone of bright new strings. It’s hard to go wrong with a good 4-string bass, but if you have options, determine whether the songs require a 5-string (or down-tuned 4) for low notes. Looks matter, too: what bass fits the band’s vibe? It might be a good idea to check with the MD before bringing that purple-sparkle fretless to an old-time bluegrass gig.
Choosing the right amp, effectsand playing techniquesis important, too. It’d be a mistake, for example, to lug an 8 x 10 speaker cabinet to a coffeeshop gig or show up at a 500-seat theater with a tiny practice rig. When I wasn’t playing through rented equipment or a DIon this tour, I used my 350-watt amp/1 x 12 rig, along with compression, DI, overdrive and — most importantly — a tuner. My beat-up old 4-string with flatwounds was just what these songs needed, and it was good to know that I didn’t have to play every song with a pick.
THE REHEARSAL
We’d been emailing back and forth about songs and logistics, but by the time the band flew in from New York, we only had time for one rehearsal the night before the gig.
As the saying goes, you only get one chance to make a first impression. I made sure to arrive early enough to plug in and tune up before the band arrived, and I earned a chorus of appreciation when the band saw my binder full of charts, arranged alphabetically just in case they wanted to change the setlist (which they promptly did). It was great to finally get all my burning questions answered and to observe the dynamics between band members, who were all longtime friends. I watched the drummer and listened closely so I could get on the same page about intros, groove, tempo, fills, dynamics and endings; as the MD, he knew the songs best and was the final word when it came to arrangements. In my experience, a well-run rehearsalis a surefire indicator of a band that’s organized, and the drummer kept us in line as we made our way through the setlist.
When it was over, I was grateful for the notes I’d hastily scribbled on my charts and the rehearsal recording on my phone, which gave me a clear idea of how I sounded with the band. They were relieved that I’d done my homework, and I knew precisely what I needed to improve before the next day’s show.
THE SHOW
Some rock ‘n’ roll bands prefer to not have music stands onstage, but although I had the songs under my fingers, I was glad these new friends were OK with me reading sheet music during the show. Having my charts accessible at a glance gave me confidence.
Being late to soundcheck is a big no-no, especially if the venue has a tight schedule or there are other bands on the bill. (I’ve found that aiming to arrive at a club half an hour early usually gets me there right on time.) Treat soundcheck as an opportunity to make any last-minute adjustments, and if you want to make a good impression on bandmates and sound engineers, don’t play unless you’re asked to.
As showtime approaches, it’s normal to be nervous. When I’m feeling pre-gig jitters, I take deep breaths, stretch, do pushups, warm up on my bass and go through the setlist one more time. If there’s a backstage huddle before we go on, I’m there. And when we hit the stage, I do my best to go with the flow, get acclimated to the crowd, keep my ears open and be as present as I can. I’ve worked hard to make my musicianship seem effortless. It’s important to take this moment in!
After the show, be grateful for the high points and make a note to fix your mistakes. Cultivating good vibes in those first few minutes after you come off stage is important for your mental health, as well as your bandmates’. Emotions can run high, and it’s hard to remember that your inner critic can’t always be trusted. No matter what, congratulations! You did it — and with any luck, you’ll have many more chances to do it again.
It’s that special time of year again when holiday music dominates the airwaves, stores, elevators and just about any other place you can think of — all to get us in the proper spirit to enjoy friends and family (not to mention shopping!). Here are the stories behind a dozen of the best-loved songs of the season:
1. Deck the Halls
One of the first Christmas carols, this is based on a Welsh melody from the sixteenth century, with lyrics added in 1862. Check it out here.
2. O Come All Ye Faithful
No one is really sure who wrote this! The oldest known manuscript is dated 1751 but the song may have been written as much as a century earlier. Check it out here.
3. Silent Night
This was composed by an Austrian schoolmaster in 1818. The melody that is used today differs slightly from the original rhythmically, and is also played at a slower tempo. Check it out here.
4. Jingle Bells
Written in 1857, this was actually intended as a Thanksgiving song but became associated with Christmas music in the late 19th century, when it was often used as a drinking song at parties: people would jingle the ice in their glasses as they sang. Check it out here.
5. Santa Claus Is Coming to Town
First sung on Eddie Cantor’s radio show in November 1934, this song found instant success, with half a million copies of the sheet music and more than 30,000 records sold within 24 hours. Check it out here.
6. Rudolph the Red-Nosed Reindeer
This 1949 hit by Gene Autry was based on the 1939 story of the same name popularized in a booklet distributed by the Montgomery Ward department store. Check it out here.
7. Little Drummer Boy
Originally known as “Carol of the Drum,” this was written in 1941 by composer and teacher Katherine Kennicott Davis. The most well-known recording of the song was made in 1958 by the Harry Simeone Chorale … but perhaps the most unusual was Jimi Hendrix’s cover version — his last recording prior to his tragic death in 1970. Check it out here.
8. White Christmas
Think the best-selling single of all time is a Beatles song, or perhaps something by Michael Jackson? Think again. This classic, written by iconic American songwriter Irving Berlin, has sold over 100 million copies worldwide, half of them the Bing Crosby rendition … although he had to re-record it in 1947 when the original 1942 master was found to be damaged due to frequent use. Check it out here.
9. Have Yourself a Merry Little Christmas
First introduced by Judy Garland in the 1944 movie Meet Me in St. Louis, but the Frank Sinatra version we all know and love was recorded in 1950, with slightly modified lyrics that changed the song’s focus from anticipation of a better future to a celebration of present happiness. Check it out here.
10. Blue Christmas
This was a hit for various country artists in 1950, but it was Elvis Presley’s iconic 1957 recording that cemented the song’s status as a rock’n’roll holiday classic. The King’s version is notable musicologically in that the backing vocals utilize numerous minor thirds (so-called “blue” notes) that act as a musical play on words. Check it out here.
11. Do You Hear What I Hear?
Twenty years after “White Christmas,” this was another holiday hit for Bing Crosby, even though it was actually written as a protest song in the midst of the 1962 Cuban missile crisis. Check it out here.
12. Feliz Navidad
Written and recorded by José Feliciano, this not only charted when it was first released back in 1970 but then proceeded to re-enter the Billboard Top 100 in 1998, and again in 2017 — a rare hat trick! Check it out here.
It’s that time of year… so the song goes. Music plays such an important part in the holiday spirit, and Yamaha has all of your favorite songs ready for download today.
Looking for a gift for a Disklavier owner? Yamaha offers numerous Christmas-themed PianoSoft music titles in our online store. If they’re a Disklavier Radio subscriber, we have special channels on for the entire holiday season, including “Holiday Party,” “Holiday Favorites,” “Christmas Eve” and “New Year’s Eve Party.” In addition, ENSPIRE owners can tune into a special “Original Artist Holiday Favorites” channel featuring recordings from holiday legends like Bing Crosby and Frank Sinatra.
Last but not least, if you need a backing band to play along, or would like to lead your friends and family in a holiday sing-along, choose from the dozens of Christmas Style Files we have available for downloading. Here are descriptions of a few of them:
– Christmas Style Files contains several holiday Styles with a dynamic mix of genres.
– Christmas Blue lets you play “Blue Christmas” in the style of Elvis Presley. A solid backbeat with added layers of orchestration, guitar and flute make the somber Christmas classic come alive.
– Christmas Swing 2 provides a perfect country swing style for songs like “Rudolph the Red Nosed Reindeer” or a mellow version of “Jingle Bell Rock” a la Hall & Oates.
– Ready to try mixing up your holiday songfest with a little tropical inspiration and reggae flair? Check outJamaican Christmas.
May your holiday season be filled with music and cheer!
For more information, visit the online Yamaha PianoSoft store.
Many years ago, I was searching for a thesis project idea for my Curriculum and Instruction master’s program at the University of St. Thomas. I wanted to find something that would help secondary music educators look beyond the traditional idea that class time for a large ensemble course should be used solely for rehearsing music for performance. So, I wrote a composition curriculum for my students at Chaska Middle School West in Minnesota to create their own music. Then, I took one week of classes following a mid-year performance cycle to try out the first part of this curriculum.
Original Lessons Learned
Through this process, I learned so much.
The creativity coming out of my students was like nothing I have ever seen before. Instead of the typical large ensemble rehearsal where students are wrong if they don’t play or sing exactly what is written on the page, they were able to figure out what they thought sounded great.
In some cases, students who struggled with playing their instruments excelled at composing. This was the most engaged and excited they had been about music class all year.
The “lost” rehearsal time did not affect the band’s ability to perform an amazing concert. If anything, it made students better musicians and faster learners during rehearsal. Sometimes we would replace doing a traditional band song with the students’ original compositions.
All Music
Many music educators are big proponents of “Music for All.” What happens when you turn that statement into “All Music” instead? I took my composition project to a new level by taking a few class periods to teach not only composition, but music from around the world, different genres, production and technology, and different instruments. This is where my BAND AND concept was born.
In our program, we have A-day and B-day band that meets every other day. In any given week, A-day band will meet on Monday, Wednesday and Friday, and B-day on Tuesday and Thursday. The following week, the days switch for A-day and B-day. Every Monday is “BAND AND Day,” which means that every other week, students have one class period that is not a traditional rehearsal. Instead, they learn a different element of music. Below is a list of eight different themes that I developed for BAND AND.
1. Jazz Lounge
I dim the lights, get out some battery-operated candles and put some tablecloths on a few stands and dress semi-formal to set the mood. We start class with a brief history of jazz along with a few quick videos of jazz legends like Louis Armstrong, Duke Ellington or Ella Fitzgerald. We talk about the form of a jazz standard including the part that is improvised.
That’s followed by me and/or a student or two from our jazz band performing a standard like “Satin Doll” or “One O’Clock Jump” with a YouTube backtrack. Then we get all the students involved with call and response.
Use the first three notes from a concert B-flat blues scale. Play along with a B-flat blues backtrack on YouTube to make it sound better. Follow this up with a Q&A where students can make up their own response but only using the same three notes. Then have each student solo on their own. Just one measure per student, and I tell them they must play something, even if it’s just one note. After every student has soloed, ask for volunteers to take longer solos.
2. Rock Festival
If you have some stage lights, set them up. Crank some Queen or Bon Jovi as students enter the room and dress in your best 1980s hair-band garb or 1990s grunge-rock flannel. Class starts with a brief history of rock and roll dating back to Elvis Presley and The Beatles and then classic rock of the ‘70s, heavy metal of the ‘80s, grunge and post punk of the ‘90s. Then discuss how rock and roll still lives on in this century with brief video clips of songs like “Twist & Shout,” “Bohemian Rhapsody,” “Livin’ on a Prayer,” “Smells Like Teen Spirit” and “Ain’t It Fun.”
Hand out a classroom set of guitars or ukuleles or both and teach them basic chords like G, A, C and D. You can even set up some keyboards and a bass guitar if you like. The class culminates with playing along with the YouTube videos “Sweet Home Alabama” by Lynyrd Skynyrd and “Sweet Child O’ Mine” by Guns N’ Roses (down a half step using the Google Extension “Google Transpose”). Have the students play the chords, not the riffs (which are more advanced). Both these songs are very repetitive. Other songs that work well are “The Middle” by Jimmy Eat World and “All The Small Things” by Blink-182. Don’t forget to teach the power stance and throw in an occasional leg kick.
Demonstrate how to use a digital audio workstation (DAW) like Cubase or BandLab. If you need a demonstration yourself, most DAWs have tutorials on their sites or on YouTube. A good first basic lesson is to show students how to use the beatmakers and on-screen piano keyboard to create music as well as recording their voice or live instrument. Then show them how to use the pre-programmed loops. Demonstrate how to loop and split tracks as well as control volume. Then show students how to save and export a file. Talk about how pop songs of virtually any genre have a beat, bass part, harmonic content/hook and vocals, so they should have at least these four tracks.
A second lesson might include a discussion on the typical verse-chorus-verse-chorus-bridge/solo-chorus form and then have students create a song using this form. Play a couple of examples — I like to use two contrasting genres/eras like Bon Jovi’s “Livin’ On A Prayer” and Miley Cyrus’ “Flowers.” Different songs but same form. If you are feeling courageous, create a song in front of your class — students love this!
5. Hip-Hop Club
Draw some graffiti on your white boards, crank some hip-hop and choose your favorite hip-hop styles to wear to welcome kids for this amazing day. Then talk about the history of hip-hop from the streets of New York with DJ Kool Herc in the 1970s to Run-DMC and Grandmaster Flash of the 1980s and then the explosion of hip-hop into the mainstream in the 1990s with 2Pac and Notorious B.I.G. followed by the wealth of hip-hop stars of this century like Beyonce,Eminem and Drake. Then spend some time doing the four elements of hip-hop:
Rap: Have students play a game called “I Know a Word.” Each student one at a time will say, “I know a word, and the word is …” and they say a word. The next student says the same phrase and comes up with a word that rhyme with the first word. Another fun activity is to rap children’s board books that they read when they were little. A great one is called “The Story of Rap.” Both these activities are great while using a beat created on a DAW.
DJ: This starts with creating beats, which most DAWs have. The site you.dj is great because it has a virtual DJ controller, but you must check for the appropriateness of song lyrics. If you have room in your budget, purchase a DJ controller. You can find them for under $200, and they come with Serato, which is pro-level DJ software that is very user-friendly. If you have a controller, have a couple students come up at a time and spin the hits. A final option is teaching beatboxing. There are some great tutorial videos on YouTube by TylaDubya.
Breakdancing: I usually bring in a guest artist or another staff member to teach this. Or honestly, there is always a student who knows some basic hip-hop dance that wants to try to teach their skills.
Graffiti: Some teachers shy away from graffiti because they think it has a negative connotation. Actually, it’s a wonderful form of expression and you might want to see if the art teacher can come in and demonstrate. There are also many great YouTube graffiti tutorials.
6. Drum Circle
Drum circles are a wonderful way to teach improvisation, learning music by rote and learning music from different cultures. I’m a huge fan of Will Schmid’s “World Music Drumming” books. They have so many great songs, activities and curricular ideas that will provide hours of BAND AND fun.
A drum circle activity that my students enjoy is “When is Your Birthday?” The students and I play the cadence of the words, and we go around the circle and ask each student “When is Your Birthday” and they answer. All the while, we play the rhythm and create a repetitive song.
A second activity is to teach the circle an ostinato pattern that they repeat while different students take turns improvising over the top of the ostinato. Or consider having two or three ostinato patterns that happen simultaneously, which helps students gain rhythmic independence and teaches them layers of a song.
7. Movie/Video Game Scoring Room
Start by showing your class some of the greatest movie scores and video game themes of all time like anything by John Williams or Hans Zimmer for movies or “Mario,” “Halo,” or “Tetris” for games. Then find a short clip (less than a minute) from a movie or a game and use WeVideo or another movie-editing app to take all the sound out of it. Share this with your students. Then, have them use a DAW to create their own music, making sure that they notice where transitions and big moments are so they can create a timeline of when the music should change or climax. After they export their song onto WeVideo, have them record their own voices to create dialogue, singing or sound effects. Students love this project and usually want to choose their own movie or game scene. Leave them wanting more!
8. Composers Desk
It all comes back to where it started. Have students write an eight-measure song for their instrument. Set basic guidelines like range restrictions, key and time signature options, and make sure they know that every measure must have at least one note and no measure can be repeated more than once. Add at least one dynamic, articulation and tempo. Here’s my favorite guideline: “You have to be able to play it.” Maybe you actually have them play it!
The first Composer Desk BAND AND day is on staff paper so students learn how to write notes, rests and symbols as well as placing the right number of beats in each measure. Second day is on a notation site like Dorico or Noteflight. The next project could be a duet where you talk about good intervals first. Another project might focus on themes and variations.
Outro
BAND AND has become a favorite activity for students. They can’t wait for Mondays. You will be amazed at the number of students who will randomly come up to you to say that they are now taking guitar lessons, wanting to join jazz band or showing you their new original song or movie theme. This is definitely a way to get students on fire about music.
Here’s an indisputable fact for which I can personally vouch: Electric guitars make great holiday gifts. And here’s a second indisputable fact: Recipients of electric guitars won’t fully appreciate the gift unless they’ve got an amplifier to plug into. Granted, you can kind of hear the sound of unamplified electric guitar strings as they thwack against the frets, but how much fun is that, really?
If you’re just coming to this realization the hard way — i.e., you bought your loved one an electric guitar but neglected to get an amp to go along with it — don’t worry. You’re not the first person to make such an error, and it can be easily remedied. All you have to do is find a good amplifier to add to the equation.
Doing this may seem a little intimidating if you’re a newbie, but choosing a suitable amp is actually not all that difficult. The main reason is the rise of something called “digital modeling technology,” which convincingly imitates the tonal properties of a wide variety of amp types. In other words, these days, pretty much any guitar amp can sound like pretty much any other guitar amp.
So really, the main questions you need to ask yourself concern size and power output (the latter is measured in wattage). Your principal choice will be between smaller “desktop” amps and larger (but not necessarily huge) “traditional” models — though in many cases the most traditional thing about those will be their size and shape.
Desktop Amps
Just to be clear, a desktop amp has nothing to do with the virtual desktop on your computer; it’s not a piece of software and in fact there’s nothing virtual about it. These are actual amplifiers that are small enough to fit on an actual desktop. Take the Yamaha THR10II, for example. It’s just over 7 inches high, 14½ inches wide and 5½ inches deep. There are two different varieties of the THR10II (one has a built-in wireless receiver) but both come with dual 3-inch speakers and put out 20 watts of power — more than enough for learning purposes. Perhaps even more importantly, both have auxiliary inputs and Bluetooth® capability (so they can be used with smartphones, tablets and other music players) as well as headphone outputs so your child can practice to their favorite music in complete privacy … and without disturbing you, other family members, or the neighbors.
Yamaha THR-II Series desktop amps.
Obviously, desktop amps are perfect for practicing at home, but with the THR10II Wireless and larger, 30-watt THR30II Wireless models in particular, your child can practice pretty much anywhere, since they run both on AC power and on batteries. What’s more, their use of VCM (Virtual Circuitry Modeling) means that they can produce a range of sounds much bigger than they are. There are multiple amp tones to choose from, each offering a different amount and/or type of distortion — plus settings for bass, acoustic guitar and other instruments. Add two distinct effects circuits, one for modulation effects (chorus, flanging, etc.) and one for delays and reverbs, and you’ve got an amp that sounds great right out of the box. But if your child is not satisfied with the presets, he or she can download free THR Remote editor software (available for both iOS and Android® devices) which will allow them to tweak those amp tones and effects to their heart’s content.
Another nifty feature of THR-II amps is that they provide an integrated USB port and come with a bundled copy of Cubase AI software, making it easy to take the sound coming out of the amp and turn it into digital audio — going from an actual desktop to a virtual one.
“Traditional” Amps
Line 6 Spider V 20 MkII.
You wouldn’t want to try putting most traditional guitar amplifiers on a typical desktop, and none of them run on batteries. But just as modeling technology has raised the potential of desktop amps, it’s also made a huge difference in what the so-called “traditional” amp can do. Line 6 is a company that has long been a leader in the development of modeling amplifiers, and they’re continuing their pioneering ways with the Spider V MkII Series.
There are five combo amps in the Spider V MkII line, each including a speaker and each classified principally by its wattage, from the 20-watt 20 MkII to the 120-watt 120 Mk II. As the wattage grows, so do the number of features that the amps offer. For example, the 30-watt V 30 MkII has 128 presets to the 16 in the V 20 MkII, while the V 60 MkII and the V 120 MkII have a 60-second looping device built in, allowing users to play along with parts they’ve created themselves. But no matter which size and power level you choose, every Spider V Mk II model provides more than 200 types of modeled amplifiers, cabinets and effects — meaning that your child can shift from a chiming, delay-heavy sound à la U2’s The Edge to a gritty Stevie Ray Vaughan-style blues tone with just a few button pushes. As a bonus, they also offer both a “classic” speaker mode for a traditional amp sound and a “full range” mode that lets the user plug in an acoustic-electric guitar or jam track playback.
Although desktop amps are more easily portable than traditional ones, the traditional style tends to work better in more professional settings, including the stage and recording studio. So if your loved one is planning on joining a band or is really taking his or her music seriously, you may be better off investing in a traditional amp right at the outset.
The bottom line is that today’s entry-level amps are way less cumbersome and far more versatile than ever before, making them adaptable to all kinds uses … and good for years of enjoyment to come.
Click here for more information about Yamaha guitar amplifiers, cabinets and accessories.
Click here for more information about Line 6 guitar amplifiers.
Before a sound can be produced on a drum, a percussionist must consider the physical aspects of their playing. Posture, hand and feet position, and proximity to the instruments can be applied relatively universally across many disciplines of percussion playing, but one physical aspect of drumming is notoriously multiplicitious: GRIP.
Mastering a variety of grips for a diverse range of performance environments is an essential process to becoming a well-rounded and marketable percussionist-musician. Let’s dive in and explore several grip options, their applicability and their transferability.
UNDERSTANDING FULCRUM
Before exploring our grip options, we must understand the term fulcrum, which will be used in all grip explanations. The Oxford Dictionary defines fulcrum as “the point at which a lever rests or is supported and on which it pivots.” The lever is the drumstick, and in most circumstances, it rests between the pad of the thumb and the first or second joint of the index finger and pivots back and forth using a combination of hinges — fingers, wrist and arm.
MATCHED GRIP
This is the most common grip used for today’s percussive world of instruments. Often referred to as “the grip that keeps on giving,” matched grip is popular for its ability to be transferred across most percussive mediums without much need for change. It’s called matched grip because of the identical hold used by the left and right hands. Simply grab the stick naturally as if you are picking up a small object off a desk or table.
Most percussion students start their musical journey by playing matched grip, often on practice pads or practice keyboard instruments. Matched grip can also be used when performing concert snare drum, concert toms, timpani, drum set, crash and suspended cymbals, and all major keyboard instruments, lending to its applicability across most areas of percussion playing.
To achieve the correct matched grip, address these seven checkpoints.
Proximity to instrument: Ensure that you are positioned comfortably to be able to play the instrument in the proper beating zones. Be careful not to stand or sit too far or too close to the instrument.
Front fulcrum: The stick should be held firmly by the pad of the thumb and the second joint of the index finger, about a third of the way up the stick.
Back fulcrum: The back three fingers (middle, ring and pinky) should wrap around the stick naturally and completely.
Stick direction: Underneath the hand, the stick should cross the hand diagonally with the butt end of the stick traveling across the “meaty” part of the palm
Wrist orientation: When in set position on the drum, keyboard or cymbal, the backs of the wrists should be almost completely flat, facing the ceiling
Stick angle: When playing on a single drum, the angle of the sticks should create a 90° angle. When performing on multiple drums or large intervals on a keyboard instrument, the angle of the sticks can be flexible to accommodate for the space. Stick and mallet angles should almost never go past parallel.
Bead placement: In most cases, beads or mallet heads should be placed in the center of the drum or keyboard bar. Special considerations should be made for cymbal and timpani playing.
When working on your matched grip, avoid the following common pitfalls.
Gap between thumb and hand: A firm fulcrum is one that does not leave a large gap between the thumb and the side of the hand. Ensure that the thumb is resting flat on the stick and close the hand around the stick to eliminate this common problem.
Stick directionality: Oftentimes, young players will keep the butt end of the stick either in the webbing of their fingers, or without any back finger contact at all. Ensure that the butt end of the stick is traveling diagonally across the palm, crossing the meaty part of the underside of the hand.
Choked up too far: When looking straight down at the stick when your wrists are flat, there should only be about one inch coming out of the back of your hand. If you are looking on the underside of your hand, two to three inches is appropriate.
Hanging index finger: Ensure that the index finger is contacting the stick on the second joint and is not pointing down.
When using matched grip, strokes can be achieved by utilizing wrist, arm and finger motion. For faster playing, focus on the smaller groups like the wrist and fingers. For slower, fuller playing, the fingers should remain relatively intact with the stick, and the player should focus more on the larger muscle groups to achieve their best sound.
FRENCH GRIP
In some contexts, a similar grip called the French grip is appropriate and necessary. This grip can be achieved by following all the same checkpoints as matched grip, except for one main difference: The thumbs should face upward and the inside of the palms should face each other. By implementing this wrist orientation change, players can better utilize the smaller finger muscles to incorporate faster movements into their playing. This grip is often used by timpanists but is also utilized by drum-set players as well as orchestral snare drummers.
TRADITIONAL GRIP
Stemming from the tradition of military snare drumming, which required wearing field drums on sling harnesses, the traditional grip was originally the most popular grip for marching snare drum players (dating back to the late 17th century) and drum-set players (dating back to the late 18th century). In this grip, the right hand utilizes the same overhand grip as the matched grip, but the left hand uses an underhand grip to account for the tilted angle of the sling drums. Traditional grip can be achieved by following all the steps listed in matched grip for the right hand, but the left hand requires a significantly different approach.
To achieve the correct left-hand traditional grip, follow these five steps.
Hold your left hand out like you’re shaking someone’s hand, then rotate it slightly outward.
Place the drumstick in the webbing of the hand, between the thumb and index finger.
Form a “T” shape by placing your thumb on the side of the index finger’s first joint.
Place the middle finger underneath the index finger, letting the stick travel underneath the middle finger and above the ring finger, making contact with the first joint of each finger.
Rest the pinky finger underneath the ring finger, keeping it relaxed.
When working on your traditional grip, avoid the following common pitfalls.
Index finger placement: This is where the index finger floats in the air (too loose) or is placed too far down the shaft (too tight) instead of guiding the stick in a relaxed fashion.
Lack of finger engagement: This occurs when fingers do not play an active role in controlling the rebound motion of each stroke and “ride along” with the wrist rotations.
Arm-over-wrist: To compensate for the unnatural wrist rotation required of traditional grip, players often resort to using their arm or elbow for rebound strokes, which results in inconsistent stick heights and adds fatigue and tension to the stroke.
Due to the underhand nature of traditional grip, players must develop their wrist muscles to be able to rotate back and forth (like turning a door knob). Many drum-set players, especially jazz musicians, prefer this grip for the greater level of control it gives them at the low-end dynamic levels, including executing “ghost notes” and brush strokes.
MATCHED GRIP VS. TRADITIONAL GRIP ON DRUM SET
From the inception of the drum set through the late 1950s, traditional grip dominated the style and approach from most players. This was due in part to the historical norm for drummers to use traditional grip on military sling drums, but was also necessary for the lighter, more intricate figures used in the popular music of the times: jazz. As rock and pop music took over in the late 1950s and early 1960s, famous drum set players like Ringo Starr of the Beatles and Jon Bonham of Led Zeppelin popularized the implementation of matched grip in contemporary drum-set playing. As the need for heavier backbeats of this newer style of music grew, matched grip playing in band settings became the standard, while traditional grip remained popular in jazz playing. Despite this dichotomy, traditional grip was still used by notable drum-set players like Steve Gadd, Dave Weckl, Vinnie Colaiuta and Todd Zuckerman.
MATCHED GRIP VS. TRADITIONAL GRIP ON MARCHING SNARE DRUM
The conversation between matched and traditional grip in the marching percussion world has evolved dramatically over the last half-century. Historically, traditional grip dominated marching snare performance because of the tilted playing angle required by the sling-mounted drums of early drum corps and military bands. This setup made an underhand left-hand position not only logical but necessary for comfort and efficiency. Even after the introduction of modern harness systems, many ensembles retained traditional grip as part of their stylistic identity and visual heritage.
In more recent decades, matched grip has gained traction in the marching percussion community, particularly as drumlines began leveling their snare drum playing surfaces. With a flat drum angle, matched grip offers greater symmetry, balance and power, as both hands operate with identical mechanics. This can lead to improved endurance, dynamic range and consistency of sound — especially important in today’s high-velocity, high-demand competitive environments.
However, many performers and instructors still favor traditional grip for its refined visual aesthetic and distinct tactile sensitivity. The subtle rotational motion of the left hand can allow for nuanced rebound control and a more connected feel to the drum at softer dynamic levels. Additionally, for groups emphasizing tradition or seeking a specific stylistic flavor, traditional grip remains a powerful visual and cultural symbol.
Ultimately, the decision between matched and traditional grip in marching percussion often comes down to ensemble philosophy, individual comfort and visual identity. Some programs even teach both, ensuring players are versatile enough to adapt to any ensemble setup or artistic vision.
WHICH GRIP IS RIGHT FOR YOU?
Let’s face it — there are pros and cons associated with both traditional and matched grip. Each offers its own advantages depending on the musical context, physical setup and stylistic goals of the performer.
Matched grip provides clear benefits in terms of symmetry, ergonomic efficiency and transferability across all areas of percussion playing. It’s often easier for beginners to learn and allows seamless movement between concert percussion, marching battery, drum set and keyboards.
Traditional grip, on the other hand, connects players to the rich history of drumming and offers unique expressive possibilities — especially for styles that value finesse, articulation and visual presence. Its specialized mechanics reward players with enhanced control at low dynamics and a characteristic touch that can’t quite be replicated with matched grip.
No matter which path you choose, a complete all-around percussionist should develop a working understanding of both grips. Mastery of one should not preclude familiarity with the other. The modern percussion world values versatility, and the most successful players are those who can adapt to a wide range of musical and physical demands.
In short, the best grip is the one that allows you to produce your best sound comfortably, consistently and musically. The drumstick is merely an extension of your hand, and your technique should always serve your musical intent. Keep your mind open, your hands relaxed and your sound at the forefront of every technical decision you make.
When my daughter was in preschool, she took piano lessons, which she appeared to enjoy — until she figured out where all the notes were on the keyboard and came to the conclusion that she didn’t need to learn anything else. A little later on, we bought her a half-size guitar. She liked to plink around on it occasionally but wasn’t motivated to go any further than that. Violin was a total non-starter. And despite having a beautiful voice and a good sense of pitch, she was reluctant to sing in front of people.
Then, in fourth grade, something clicked, and she discovered that she loved being in a chorus. Two years later, her shyness about singing has gone away, even when she’s doing it solo, and her confidence as a performer has grown by leaps and bounds.
All of this is just to say that there’s no sure way for parents or grandparents to predict what’s going to engage a child musically. For every kid who’s pulled like a magnet toward every instrument he or she encounters, there are many others (like my daughter) who aren’t certain what excites them most. But the fact that they are excited about music is something to support, and often that support requires trying out several options, until one clicks. When it does, a lifetime of pleasure awaits. With that in mind, here are some gift suggestions that could help spur your child on to new musical heights.
A Starter Keyboard
You can’t go wrong with an entry-level digital keyboard, especially if it’s designed to make playing simple and fun. The Yamaha PSR-E383 falls squarely into this category, with 650 sounds — enough to fuel countless hours of experimentation — plus touch-responsive keys, onboard lessons, a downloadable songbook and 260 styles of auto accompaniment. It also offers a personal favorite feature: a central display screen that shows the staff position of every note being played, along with the location of middle C — a lifeline that can really help beginners when they get lost on the keyboard.
Yamaha PSR-E383.
A Bigger Keyboard
The PSR-E383 has a lot going for it, but it only has 61 keys. If you feel your child is ready to move up to something that’s closer to a standard piano, but still has the flexibility and portability of an electronic keyboard, consider a model like the Yamaha PSR-EW425. It’s got a great feature set and it offers 76 keys, making it possible for budding virtuosi to play more demanding and far-ranging pieces.
Yamaha PSR-EW425.
A Starter Acoustic Guitar
Keyboards are nice, but what if the child on your gift list seems more like the pickin’-and-grinnin’ type? Based on my past experience as both a guitar student and guitar teacher, I strongly recommend that beginners start off using nylon-string acoustic models. Electric guitars require amplification, which adds an extra layer of hassle that beginners shouldn’t have to deal with, and nylon strings are much easier on the fingers than steel ones, leading to a kinder, gentler callus buildup. Your child should also play a guitar that matches his or her size. I once tried to teach basic chords to a seven-year-old boy on a full-size electric guitar, only to realize that his arms were too short to reach the frets. (It wasn’t a fun experience for either of us.)
Luckily, finding half-size or 3/4-size models shouldn’t be much of a challenge. The Yamaha CGS line of nylon-string acoustic guitars offers both, as well as a full-size model. Or you might consider a Yamaha APXT2, which is a 3/4-size version of the company’s APX500II — the world’s best-selling acoustic-electric guitar. It’s available in a variety of finishes and has a built-in pickup so its sound can be amplified; it also comes with a tuner and a soft “gig bag” carrying case. In general, half-size guitars are best for ages 5 to 8, while 3/4-size is ideal for 9- to 12-year-olds, but you may want to see how the different sizes actually fit your child before making a commitment.
Yamaha CGS guitars.
Yamaha APXT2 guitars.
Essential Beatkeepers
Yamaha MP-90 metronomes.
Compared to a keyboard or guitar, a metronome may not seem like such an exciting gift. But if your child has been struggling to play a piece of music without speeding up or slowing down, a metronome can help him or her reach that goal. Old-school pendulum metronomes like the Yamaha MP-90 continue to be a fine choice: they’re simple and durable and are available in a variety of colors, plus they have the added advantage of never needing a battery or a wall socket. Alternatively, you can go higher-tech and pick from a number of excellent apps for smartphones and tablets.
The Joy of Being (and Staying) in Tune
Yamaha GCT1 tuner.
Although being able to keep their instruments in tune may or may not contribute to your child’s love of music, it will definitely contribute to others’ appreciation of the music he or she makes. Clip-on digital tuners like the Yamaha GCT1 tuner make the tuning process easy and convenient. What’s more, although it has specific settings for guitar, bass, viola, cello, and ukulele, the GCT1 can be used with any instrument.
Starting on Winds
It’s just as customary for aspiring wind players to start on the recorder as it is for guitarists to start out on nylon string instruments … and in the right hands, recorders can actually sound pretty terrific. They’re also a lot easier to get a grip on — both literally and figuratively — than any other wind instrument, and for sheer portability, they’re hard to beat. The Yamaha YRS-24B recorder, made of ABS resin, is a school standard. My daughter owns one, and playing it in elementary school definitely helped her develop a better sense of pitch and overall musicality.
Yamaha YRS-24B recorder.
Another great beginner instrument for kids is the Pianica. This small, portable keyboard is super easy to play—all that’s required is to simply blow air into it while pressing down on the keys. While the resultant sound is similar to an accordion or a harmonica, it uses the same notes and familiar black-and-white keys as a piano. This makes it easy to get started right away, since your child can choose from thousands of easily available piano book and sheet music titles to learn the notes to their favorite songs. Yamaha offers a variety of Pianica models, from the smallP-25F, with its two-octave range, to the slightly larger P-32D, to the three-octave P-37D. Each comes with an extension pipe that allows it to be played on a tabletop, as well as a durable lightweight plastic case that can double as a music stand. The top-of-the-lineP-37E2 also has a three-octave range but a somewhat richer tone due to its being made from plant-based materials.
Yamaha P-37E Pianica.
Drums with a Volume Control
Kids love banging on things, and eventually some become very good at it. But a lot of parents can have a hard time with the concept of supporting a family percussionist’s development, for fairly obvious reasons like noise, noise and noise. That’s where a set of compact digital drums like the Yamaha DD75AD comes in. It’s got eight touch-sensitive pads and two assignable foot pedals that can be used to play 75 pre-programmed kits and 10 custom ones your child can create from scratch. And there’s a headphone jack! Will wonders never cease?
Yamaha DD75AD compact digital drums.
Yamaha DTX402K electronic drum kit.
If your child shows a real propensity for drumming, you can take things a step further by buying him or her a full electronic drum kit like the Yamaha DTX402K. Not only does this provide everything they need to play along with their favorite tunes and jam with their friends, it comes with 10 built-in training exercises that make learning fun, which is always a good thing. Plus, like the aforementioned DD75AD, the 402K has a headphone jack, so you can enjoy peace and quiet while your young drummer unleashes their creativity.
Better Ways to Listen
Yamaha HPH-MT5 headphones.
If your child is like most kids, they probably do most of their listening on ear buds or computer speakers. Unfortunately, the audio quality of those kinds of products leaves a lot to be desired. You can help your kids appreciate the rich sound tapestry of music — and perhaps even encourage a budding composer, producer or audio engineer — by buying them good-quality headphones or speakers. Yamaha HPH-MT5 headphones deliver a balanced sound that is faithful to the source, plus they’re lightweight and comfortable, with an extended frequency range that will allow your child to hear the entire sound, from the lowest lows to the highest highs. These headphones also include a carrying bag and a 1/4″ stereo adapter.
Yamaha MusicCast 20 wireless speaker.
The Yamaha MusicCast 20 is a wireless speaker that’s great on its own or as a part of a stereo setup. Its compact size means that it can fit in even the smallest bedroom (it’s wall-mountable too), plus it offers a variety of connection choices, including Wi-Fi, Bluetooth®, AirPlay 2® and Spotify® Connect. It provides excellent sound quality, and because it can be voice-controlled from Alexa and Google Assistant devices, or with Siri® via AirPlay 2, it’s definitely got the cool factor too.
Songs to Play
Okay, so your gift recipient’s got an instrument — maybe one of those mentioned above. Now what’s he or she going to do with it? Hint: Make sure there’s some sheet music handy. This is good advice whether the player in question is a beginner, intermediate or advanced; everybody enjoys learning a new tune or figuring out how to play an old favorite. It just so happens that Yamaha offers a wide selection of sheet music for immediate downloading. There are well over 30,000 items available, covering just about every genre imaginable, so you’re sure to find something for even the most finicky performer.
The App Zone
If your young musician is into tech, there’s certainly no shortage of apps and software out there. Sequencers, synthesizers, notation programs, digital audio workstations, you name it — these products just continue to become more powerful and easier to use. And they’re not just for the pros, either. In fact, there are a wide range of apps specifically designed for beginners. For example, Playground Sessions is a piano learning program developed in association with legendary producer Quincy Jones. The free Yamaha Chord Tracker app (available for iOS® 15.2 or higher and Android™ smart devices) helps players figure songs out by analyzing the chord progressions of recordings, and Kittar (also from Yamaha, and also free) breaks music down into phrases based on a given song’s structure. All three are remarkable in the way they approach the various pieces of the music-making puzzle.
Learning with Lenny
Watching my daughter progress through school has been further confirmation of a venerable truism: Great teachers make all the difference in a child’s life. The teachers she likes best are thrilled to do what they do, and they pass that feeling on to their students. So if your child is interested in learning more about music, its history, and all its many wonders, you should consider exploring DVD options that present that kind of information in a simple, easy-to-digest fashion …and you couldn’t find a better teacher than Leonard Bernstein.
From 1958 to 1972, the famous conductor conveyed his immense knowledge of and passion for music to millions of television viewers through his series of Young People’s Concerts with the New York Philharmonic. The inspirational spirit of these programs shows no signs of diminishing over time. You can find 25 of them on a nine-DVD set titled simply Leonard Bernstein: Young People’s Concerts with the New York Philharmonic. There are few better ways to pass an abiding love of music on to the next generation.
Piano Prodigy Ethan Bortnick on Learning Before an Audience
At age 25, a lifetime of performance and philanthropy evolves into artistry
Written by Lisa Battles
A globally recognized piano prodigy by age 9, Ethan Bortnick performed alongside artists including Elton John and Beyoncé, met almost every major television show host of the era and raised over $50 million for charities. He made the Guinness Book of World Records in 2010 for being the “World’s Youngest Solo Musician to Headline His Own Concert Tour.”
Now, at age 25, Bortnick has developed his repertoire to become a singer, songwriter and producer. With the gifts of perfect pitch and an endlessly supportive family, he’s ever grateful for both and keen on expanding his artistry, always looking up and moving forward.
Over the past five years of his early adulthood, Bortnick has attracted millions of followers on social media. It’s been as natural an evolution as possible for someone who has spent almost his entire life in front of audiences, learning and growing in real time.
What audiences see now is an artist blending introspection and new skills to shape his sonic identity. At the same time, he continues to balance his innate talent with seeking new avenues for expression and applying both toward meaningful ends.
Grounded and reflective about an exceptional life, Bortnick shares with us formative stories that have shaped what he’s up to now and next.
Baby Einstein and a toy piano
Bortnick’s origin story is not in formal conservatories with classical training but in Montessori learning at age 3 and Baby Einstein videos on repeat featuring mesmerizing puppets and music. He began imitating their melodies on a toy keyboard, and before anyone realized what was happening, he was recreating complex passages by Mozart and Beethoven from memory.
Although his parents were not musical, he says he gravitated toward his aunt, who played and taught piano. While she did not teach children younger than age 5, she made an exception when Bortnick continued to demonstrate his abilities. After a few years, she recommended he pursue more advanced teaching, which he did. During that time, he began playing many recitals and competing, the latter of which he hated. When his parents saw he wasn’t enjoying it, they pulled him out of it.
That discernment and joint decision-making have been recurring themes throughout Bortnick’s life, with his parents listening and honoring his exceptionality while keeping him grounded and preserving his love for music.
“I feel so lucky that I had such a supportive family who didn’t care about anything other than making sure that I was doing what I loved. All I knew of music was that, but I loved performing and playing for people,” he says.
From recitals to The Tonight Show to benefit shows
Although removed from competition, videos of Bortnick performing eventually made their way to “The Tonight Show” producers, who invited him to perform on the show. Then came “The Oprah Winfrey Show,” “Good Morning America” and more.
Requests to perform increased, and he began absorbing a lot of different styles of music to meet the requests. While it became a bit “all-consuming” for an 8-year-old, Bortnick says one thing that resonated instantly was seeing the impact he could make by performing for charity.
Bortnick’s brother, Nathan, was born with a serious heart condition, Hypoplastic Left Heart Syndrome, or HLHS, which means the left side of the heart is underdeveloped. All the while the young musician’s unusual career took off, his brother was undergoing a series of corrective heart surgeries. He seized opportunities to play and raise money toward research and awareness about what his brother and children like him were going through.
“That triggered something in me to where I thought, ‘That’s all I want to do. I just want to do that!’ . . . Nathan’s condition was always at the top of my mind and what really opened my eyes to how much music can change things,” Bortnick says.
Using gifts to uplift others
The benefit shows grew, and at age 8, Bortnick found himself hosting a huge benefit gala and private concert at the former American Airlines Arena in Miami, just south of his hometown of Pembroke Pines. That’s when he performed “Over the Rainbow” alongside Beyoncé and shared the stage with other stars, including Smokey Robinson and Gloria Gaynor. The event raised $12 million for research and programs at Miami Children’s Hospital Foundation.
“It didn’t really compute in my head at 8, but my dad told me how much money we had raised at that event, and when he said it was millions of dollars, it just sounded big,” Bortnick says. “When he told me where it would go and how it would help, I thought, ‘Whoah. This is cool!’”
Bortnick traveled the world early, too. In his preteens, he visited Japan in the aftermath of a devastating tsunami, performing in support of a foundation that helped children who’d lost their parents.
When he was 12, he visited South Africa to support another program that assisted children living through the residual effects of apartheid-era inequities. As part of his time there, he performed a free concert for the children, after which he had an exchange with a young woman that has stuck with him. She confronted him about the song he’d performed, titled “Anything Is Possible,” questioning how he dared deliver that message when she had a dream she couldn’t imagine ever fulfilling, considering she had no family and barely any food, water or clothes.
Bortnick asked what that dream was, and when she replied it was to become a dancer, he invited her onstage to dance, encouraging the audience to film them performing together. Afterward, he apologized for having put her on the spot. Meanwhile, a wealthy foundation sponsor saw the whole thing and committed to paying for dance lessons over the girl’s lifetime.
“I realized that music is really, really moving for people, and specifically on a human level . . . It also informed how political I also wanted to be in my music later on. I have a strong connection with a lot of artists who are, and who I really look up to,” Bortnick says.
Playing for PBS and performance hall crowds
Following his appearances on TV talk shows, Bortnick also performed on programs including “Yo Gabba Gabba!” and “Little Einsteins,” and there were even conversations about building a full children’s TV franchise around him.
This was another critical time when he and his parents had many frank talks about what that path might mean. To Bortnick, it sounded creatively restrictive, and, like the classical competitions years before, “the opposite of what I wanted from music,” he says.
Instead, he committed to PBS specials and drives and gravitated to performing arts centers, often playing to older crowds who listened attentively. He says those audiences became his training ground, as well as PBS pledge drives, which taught him how to hold a room for long stretches. Learning while experiencing became the unofficial theme of his early career, and performing live never felt daunting, he says.
“That started a trajectory that informed most of my career alongside my philanthropic work up until I was about 17,” Bortnick says. “I toured consistently every year, and I couldn’t get enough of it. I must have done somewhere up to a thousand headline shows in those years.”
He also began writing music during his teen years, picking up influences quite different from the music he performed on stage. He’d do Frank Sinatra for the crowd, then listen to everything from Death Grips to Paramore to Björk back at the hotel.
Pushing beyond performance
As he matured, Bortnick began to feel a bit restricted creatively, somewhat obligated to stick with the carefully scheduled, familiar and profitable performing arts center circuit. He then made social media an outlet, creating a separate space to experiment outside the expectations of his established audience.
Around the same time, he met collaborator Dylan Edmunds, who joined him on the road as a bass player just after graduating from Berklee College of Music, where he’d studied production. Bortnick credits Edmunds for helping him push through his struggle with songwriting. While he was comfortable with the mechanics of it, writing from a place of lived experience did not come naturally. Growing up on the road had left little room for a typical life, much less situations to fuel relatable storytelling.
He came to realize he was in a bit of a holding pattern, being musically gifted and publicly known, while not yet fully aligned with his own artistic vision.
“Dylan straight up was like, ‘Dude, you’re super boring, low key. We need to figure out what to write about and find an angle because we’re getting into corny territory,’” Bortnick says, laughing. “I was like, ‘You’re not wrong!’”
The duo focused on those angles when the COVID-19 pandemic brought a major shift in 2020, Bortnick says. The long pause made him realize things he’d missed as a teenager, while at the same time, how much he was actively missing not performing and doing what he loved.
“It was almost like a test tube for me, really pushing myself to be as honest as possible and learning a lot about writing music . . .That’s where things started to emerge,” Bortnick says.
The song that ‘cracked the code’
Over one intense week, Bortnick and Edmunds wrote 10 songs, the first of which was “Cut My Fingers Off,” a raw expression of imposter syndrome. Bortnick says it reflects how he felt like he was stepping into a new space without having earned the title of “artist.”
Ironically, that song became the moment he found his sound, he says.
His influences, including Kendrick Lamar’s “To Pimp a Butterfly,” especially, along with the great song storytellers like Joni Mitchell, Bob Dylan and Joan Baez, began to blend into something that’s becoming uniquely his own. He also learned Ableton, which gave him control of production and expanded his capabilities.
When he teased “Cut My Fingers Off” on social media, the response was immediate, and the resonance with people validated what he’d been feeling internally with the drive to pursue his own voice and sound.
“It was the first time that I had felt comfy in a song, comfy performing a song, comfy singing a song, and the lyrics were very true to me. All of it converged into this thing, and then I started doing [more of] that,” Bortnick says.
Looking up, moving forward and keeping family close
Today, Bortnick speaks of still learning and expanding boundaries while refining what he wants to say.
“My goal is to really experiment with where I can go as an artist. I have been trying different ways of writing songs and growing as a songwriter. Part of that was me stepping away from the piano for a bit . . . I think really good artists have a lot of things that people know them for,” Bortnick says.
After that period, he’s been returning to the piano, finding new and creative ways to reincorporate it. He’s even returned to some of his classical music influences while taking it in new directions.
Bortnick toured for part of 2025 and looks forward to returning to the road in 2026. When he goes, most of his family often joins. His grandmother has even been his merch girl on tour.
He wouldn’t have it any other way, and it’s a paramount part of who he is.
“I often say that I attribute nothing to my piano playing or being a musician and everything to them. There are so many talented people in this world, and there are so many people who are a thousand times better than me and a million times just more put together,” Bortnick says. “I feel like so much of the opportunities that I’ve had, the fun that I have had – and this never being like a job for me, is so much because I have my family on the road with me.”
The Three440 Artist Story Series takes you beyond the spotlight and into the real lives of Yamaha Performing Artists. Each story is a window into the creative process, pivotal moments, setbacks and victories that define an artist’s path.
The secret to building a people-first curriculum starts with the heart, not the sheet music. That’s what Coty Raven Morris strives to do in her classroom at Portland State University in Oregon. The Hinckley Assistant Professor of Choir, Music Education and Social Justice builds her curriculum around the idea that music is a vehicle to better understand yourself and each other.
“Social-emotional learning (SEL) must be woven into the lesson, not pulled out as a separate thread,” Morris explains. “So, when I plan, I’m not just thinking, ‘I need to teach blend and vowel shaping.’ I’m thinking, ‘How can this piece help my students practice self-awareness or build better relationships?’”
To illustrate her point, Morris points to “The Violet” by Mark Patterson. “On the surface, it’s a beautiful choral piece. But in my classroom, it becomes a self-awareness lab,” Morris says. “We analyze the character’s emotions in the text and then make personal connections, like ‘When have you felt overlooked but still strived for bravery like the violet?’ Suddenly, we’re not just singing notes; we’re exploring our feelings and identities while building our emotional vocabulary — all through the music. The musical technique serves the human connection.’”
What SEL Looks Like in the Classroom
Morris explains that an SEL-rich curriculum means that the classroom is less of a lecture hall and more of a workshop to practice life skills through music. “It looks like a classroom that hums with humanity!” she says.
She finds the following tactics helpful for her students, and uses them regularly:
Wellness checks as warm-ups: “We might start with a quick emotional temperature check — a ‘how-are-you-really-feeling?’ journal prompt or just holding up fingers on a scale of 1-5. This immediately honors where they’re at,” Morris says.
Breathwork as a tool: “Before a rehearsal, we don’t just dive in,” she explains. “We might do a minute of intentional breathwork, framing it as our most fundamental musical instrument and a way to manage performance anxiety. The breath powers the voice! Whether students are having a stressful day or even if the energy is just getting a bit overstimulating, this helps re-center the room.”
Student-led everything: “You’d see students running sectionals, leading discussions about the ethical ideas in a piece, and even helping to set the classroom expectations,” Morris explains. “It’s their community. In Andrea Ramsey’s ‘Three Quotes by Mark Twain,’ it says, ‘If you tell the truth, you don’t have to remember anything.’ This text provides a catalyst for critical thinking and discussion of why and when telling the truth is important. Repertoire that invites critical thinking helps students to be more independent and have better problem-solving and solution-oriented abilities.”
Strategies to Heal and Empower Students
Instructors regularly encounter students with a wide range of backgrounds, including those who are dealing with current or past trauma. Morris knows firsthand how the impact of trauma can affect learning because she was houseless from the age of 15 through her undergraduate studies. She offers these tips to help educators heal and empower students who are undergoing trauma.
Make it predictable: “People need routines, and kids dealing with trauma need to feel safe, and safety comes from predictability,” Morris says. “Start every class with the same ritual — a specific song, a breathing exercise, a check-in. That consistency is a gift.”
Give them control through choice: “Trauma takes away power, so we give it back in small, musical ways,” she says. That could be asking questions like: “Do you want to sing this phrase piano or forte?” “Should we clap this rhythm or stomp it?” “What informs that choice?” “These tiny choices are hugely empowering,” she says.
Use music for co-regulation: “If the class energy is chaotic, put on a slow, steady piece and have students just breathe with the pulse,” she suggests. “If they’re drained, do a silly, energizing call- and-response. Use the music itself as a regulating force.”
Focus on the process, not just the product: “Celebrate the messy middle! Praise the effort of collaboration, not just the final, in-tune performance,” Morris exclaims. “The goal is the journey and the joy of creating together.”
Seeing the Fruits of Her Labor Outside the Classroom
Morris, who was recognized as a Yamaha “40 Under 40” educator in 2025 and a three-time nominee for the GRAMMY Music Educator Award, says that it’s fun to watch her students use the social-emotional skills they’ve learned in choir out in the real world. “Students talk about using the breathwork we practice before a big test,” she says. “I’ve seen a student gently mediate a conflict in the hallway using the ‘I believe’ language we use in songwriting.”
The goal, she says, is to help her students internalize the concepts and use music as a personal tool for well-being. In this way, they’re not just choir students; they’re becoming more empathetic and self-aware people.
“One of my favorite moments was during ‘The Gift to Sing’ by Reginal Wright,” Morris shares. “The text is all about how singing can lift you out of sadness, and it serves as an excellent tool for self-awareness. While rehearsing this song, a student said, ‘I finally get it. On my rough days, humming in the car on the way to school is my way of ‘singing the gloom away.’”
How to Be Guides, Not Gatekeepers
“Forget the top-down model!” Morris exclaims and suggests that educators need to be guides, not gatekeepers. “Your job is to set the stage and provide the tools, then step back and let your students create. It’s about trusting them to lead the way.”
One of the ways educators can do this is by getting comfortable with silence. “Ask a question like, ‘How should we express this line?’ Then, just wait. Let them problem-solve. The first person to talk shouldn’t always be you,” Morris says.
She added that waiting for students to respond is also a way to keep yourself from becoming overwhelmed with the need to talk — and sometimes ramble — all the time. “Don’t feel the need to fill the air with words. Pause, reset and begin again. Your students will admire you for practicing self-awareness and giving them clarity,” she explains.
Developing and Refining Curriculum
A social-emotional approach to learning wasn’t always the basis of Morris’s curriculum. When she first started teaching, her curriculum was more product-oriented. “My main question was, ‘Will this sound good for the concert?’” she explains. “Now, it’s completely flipped. My central question is, “How can this music serve as a vehicle to my students’ well-being and the betterment of our community?”
This night-and-day shift is why Morris is so passionate about the SEL framework. “I don’t just teach a song; I teach a song for a reason,” she says. “We sing Kenny Potter’s ‘O Sing!’ not just for the mixed meter and theory lessons, but to practice social awareness — interpreting beyond the text to understand different perspectives. The setting of the text discusses carrying on stories and lessons of ancestors for generations — something that all our cultures have in common. It presents an opportunity for us to discuss and share how we all elevate our loved ones differently. Music is the means, and the end result is their growth as human beings.”
Putting People First
If there’s something that Morris wants people to take away from her approach to an SEL-rich curriculum, it’s that she wants everyone to know that this isn’t “touchy-feely” fluff. “Social-emotional learning is rigorous, meaningful work that, when executed correctly, results in enriching, meaningful and even playful experiences,” Morris says. “We are literally building brains and building hearts at the same time. When a student analyzes a score to connect it to their personal history, that’s critical thinking. When they collaborate to solve a musical problem, that’s real-world teamwork.”
Morris explains that this approach doesn’t replace musical excellence — it unlocks it. “By tending to the well-being of the musician, we get more beautiful, connected and courageous music,” she says.
You’ve finally decided to improve the sound coming from your TV — or you know someone who’d really appreciate better sound too — and you’ve decided that a new sound bar will make the perfect gift for them… or for yourself.
But which one to get? Here’s a quick overview of the key factors and features you should consider when buying a sound bar.
Surround Sound Capability
Despite their small form factor, sound bars can deliver immersive audio experiences. Advanced models like Yamaha True X sound bars with Dolby Atmos® provide multi-dimensional sound that surrounds you from every angle, creating a theater-like experience at home.
Signal processing is often used to generate virtual surround sound, while premium options such as True X sound bars deliver a true 5.1.2-channel audio experience for Dolby Atmos content. Before choosing, consider your room layout — closed spaces tend to enhance the effect of surround sound, while wide open layouts may require more powerful solutions.
Will It Fit?
Decide where you want to put the sound bar and check the dimensions to make sure it will fit there. Keep in mind that some sound bars can be mounted on a wall (normally below the TV), and some are meant to sit on a tabletop below the TV. If the sound bar will be sitting on a surface, make sure it is not tall enough to block the TV.
Sound bar mounted on a wall.
Sound bar placed on a tabletop.
For smaller spaces or minimalist setups, compact models like the Yamaha SR-C20A offer a great solution without compromising audio quality.
What Can I Connect To It?
HDMI®
If your TV supports the eARC or ARC function, you only need one HDMI cable to output TV audio to the sound bar. To use the ARC function, you have to turn on the HDMI Control function.
Use an HDMI cable to connect a TV that supports ARC.
CEC (Consumer Electronics Control)
Allows control of TV and sound bar with a single remote; adds convenience and reduces clutter.
Optical
Reliable digital audio connection for TVs without HDMI ARC; supports high-quality sound but no advanced features like volume sync.
Use an optical cable to connect a TV that doesn’t support ARC.
Connectivity
A sound bar is more than a speaker for a TV – it can be an entertainment source. Many come equipped with Wi-Fi, Bluetooth® or even AirPlay 2®, so you can play music from a phone or computer and listen to streaming services and internet radio through the sound bar. If enjoying music through your sound bar is key, check for connectivity options like these:
Subwoofer: Built-in or Stand-alone?
A subwoofer is a speaker that reproduces only the lowest bass frequencies. In other words, it puts the oomph in explosions and those low rumbles you can feel in your chest. It’s an integral part of any home theater system.
Some sound bars have subwoofers built in, while others come with separate subwoofers. Stand-alone subwoofers are often more powerful and effective than the built-in variety, but if there isn’t a lot of floor space where the sound bar is going to be positioned, you might want to go with one that has a built-in subwoofer. Built-in subwoofers can still sound great!
Sound bars can use built-in subwoofers or external stand-alone subwoofers.
App Control
If you’re not comfortable with voice control, but you don’t like looking between the couch cushions for your remote control, many sound bars can be controlled with an app from your smartphone or tablet. Apps are especially handy if you’re playing music from a streaming service through your sound bar and scrolling through your playlists. For example, with the free Yamaha MusicCast Controller app, you can link MusicCast wireless speakers, sound bars and receivers in other rooms and control playback throughout your home from your smartphone or tablet.
Warranty
You hope you never have to use it, but it’s good to know how the manufacturer stands behind its product. The most common warranty period is one year, with premium brands like Yamaha offering two years.
How / Where / Features
The main thing to consider when shopping for a sound bar is how and where it will be used. In addition, when doing your research and reading reviews, identify the features that are most important to you. These are the factors that will enable you to choose the sound bar that is the best fit.
Click here for more information about Yamaha sound bars.
In 1998, Line 6 introduced a revolutionary device called the Pod. This compact amplifier, speaker and effects modeler with a distinctive red color and “kidney bean” shape sat on the desktop of recording studios the world over, and soon became a “plug and play” tonal option to larger rack systems, tube amps and speaker cabinets.
Line 6 Pod.
Seventeen years later, the company released Helix, which took amp modeling to the next level by providing extremely convincing digital replicas of classic amps and speaker models, along with a comprehensive list of studio-quality effects. It also provided exhaustive programmability, I/O (input/output) options, effects loops, MIDI control, USB recording and firmware updates that regularly added more models.
Line 6 Helix.
I remember listening to A/B shootouts between a Helix guitar patch and a full-blown tube amp, cabinet and effects rig. And while I could hear minute differences between the two signals when listened to in isolation, I defy anyone to be able to tell the difference between the two rigs in a full band recording or onstage performance.
Recently, Line 6 announced the long-awaited release of their latest flagship modeler: Helix Stadium XL. In this posting, we’ll explore the many ways you can use this advanced device to add amazingly realistic tube amp tone to your electric guitar.
Line 6 Helix Stadium XL.
Helix Stadium XL Features
Stadium XL offers numerous advanced features, including a touchscreen control panel, Agoura Amp modeling, a Focus View feature and increased DSP (Digital Signal Processing), such as a “Hype” parameter. Let’s look at each in turn.
The Touchscreen
Close-up of the Helix Stadium XL touchscreen.
The ergonomic, intuitive and visually inspiring 8″ hi-res touchscreen allows you to create signal chains directly on the screen with your finger rather than scrolling through menus with rotary knobs … although you can still create your signal the “old-fashioned” way if you prefer.
Focus View
Choosing your amps, speakers and effects can also be done via the Focus View feature, which provides a realistic graphic representation of the available amps, speaker cabinets and effects in a scrolling visual menu format.
After selecting an amp, for example, you can use the Focus View feature to create the exact tone you want by sliding the center detent of the screen between each of the tonal variations shown on the four corners of the screen. This allows you to audition tonal nuances in-between any of the four suggested sounds. You’ll notice that the digital readouts above the rotary dials that control each of the amp parameters will also change with your finger locations on the screen. Absolutely amazing for dialing in sounds on the fly!
You can also use the Focus View feature to move your selected microphone models across the axis and proximity of your favorite speaker cones and change multiple parameters in an effects pedal.
Agoura Amp Modeling
The Agoura amp modeling methodology sets a new benchmark for authentic amplifier sound and responsiveness. This is why Helix Stadium is best experienced hands-on, thanks to its exceptional touch responsiveness to your playing style and dynamics … just like a real tube amplifier.
Hype
Stadium XL also adds a new amp control that Line 6 calls “Hype.” In effect, this allows the listener to morph between 0% and 100%. 0% would be an ultra-authentic amp tone, and this can be increased all the way to an extreme version of what that amp would sound like at 100% Hype.
Pair the Hype control with the numerous Focus View touchscreen parameters and you have almost endless tonal variations.
Additional Features
Helix Stadium XL retains all the comprehensive I/O connectivity offered by the original Helix, plus your original user presets can be loaded into Stadium XL via the new editor app. (Legacy speaker cabinets will automatically be upgraded to new, and better-sounding models.) But Stadium XL also provides direct WiFi and Bluetooth® connectivity so you can update the firmware without connecting to a computer. This also allows you to connect it to your mobile devices and use the onboard shuttle controls to activate and control backing tracks.
Although Stadium is called XL, the physical size is actually smaller than Helix, and the overall weight has been reduced dramatically as well.
Amp
So how do you dial in a realistic tube amp tone using a digital modeler? Well, first and foremost, you’ll want your tube amp tones to sound warm, responsive and dynamic, just like the real thing, so it’s best to approach modeler tones as if you were dialing in an analog rig.
A typical signal chain for most guitarists may look like this:
Guitar
Pre-effects
Pre-amp
Post-effects (this will emulate an all-in-one amplifier head or combo)
Power amp
Speaker cabinet
Microphone (to pick up the sound of the speaker cabinet)
That said, obviously the guitar you choose will have an impact on the tones produced — more on that shortly.
Pre-Effects
I like to use a compressor (usually the studio compressor model) and overdrive (usually the Minotaur model) before the Stadium XL pre-amp. The compressor can be used to smooth out the input dynamics, which I believe enables the signal to hit the amp better. A compressor can also “push” the input gain harder on the amp, altering the gain structure before it even hits the tone-shaping within the pre-amp.
Using an overdrive will also increase the input gain hitting the pre-amp … and of course the gain levels you choose will affect how the pre-amp reacts to the input signal.
I’d suggest judicial use of these pre-amp effects until you have an overall sense of the tone you’re trying to achieve. Perhaps even dial in the amp first, and then add the pre-effects to taste, or try switching them in and out when needed.
Pre-amp
Tube amps use vacuum tubes to amplify the electrical signal from your guitar. These tubes add a touch of natural compression, shape the tone, and, when pushed hard, can produce varying degrees of harmonic distortion … which most of us find incredibly pleasing.
This pre-amplified tone can then be further shaped by the EQ (bass, middle, treble and presence) controls. Don’t be afraid to experiment with these controls, but remember that when you add EQ to cabinet models, the bass response and overall tonality can change drastically.
A couple of additional tone stack considerations: If the sound is muddy, consider reducing the bass and middle before adding treble and presence. Reduce the treble if the sound is harsh and thin-sounding before boosting the bass.
Power Amp
Helix Stadium XL power amp window in the editor app.
A large part of tube amp tone comes from the type of power tubes a specific amplifier uses. If you have a wide knowledge of amplifiers, you’ll probably know what power amp tubes are used in those products.
If you like the sound of a particular amp model in Helix Stadium XL, research what kind of tubes are used in those physical amplifiers, and learn about their characteristics. In general, I think you’ll find that low-wattage amplifiers will feature EL84, 6V6 and 6L6 power amp tubes; high-wattage amplifiers will favor larger tubes like the EL34, KT66 and 5881. That said, some 50-watt amplifiers utilize EL84, 6L6 and 6V6 power tubes — there will just be more of them.A good approach is to create a full rig in your modeler, and if the amplifier isn’t sitting quite right, save your patch, and then try changing the amp in your signal chain instead of trying to produce a sound that a specific amplifier wasn’t capable of in the real world.
There are also ways of tweaking the overall feel of an amplifier within Helix and Helix Stadium XL. The “Sag” control, for example, can make the amp feel looser or tighter. Think of this as the responsiveness to your playing style. The rectifier tube found in some amps will create this “Sag” feeling.
The two main types of rectifiers in guitar amps are tube rectifiers and solid-state rectifiers. Tube rectifiers use a vacuum tube to convert AC to DC, creating a softer, more compressed sound. Solid-state rectifiers use diodes (semiconductors) for a faster, firmer response with less voltage drop.
Speaker Cabinet Models
Helix Stadium XL speaker cabinets window in the editor app.
As mentioned previously, the speaker cabinets you choose will impact your tone substantially.
I like to use two speaker cabinet models: a 4 x 12 cabinet (that is, four twelve-inch speakers) and a 2 x 12 (two twelve-inch speakers). The 4 x 12 model will generally produce more bass response, and the 2 x 12 more clarity. Blending the two in a stereo signal chain can sound amazing.
The type of speakers used in each of the cabinet models will also affect the sound. This is where characteristics are hard to put into words, so let your ears be the judge. For example, Line 6 has modeled well-known speaker manufacturers like Celestion, whose blue, silver, green and gold back speakers all have different tonal characteristics. A 2 x 12 cabinet loaded with “bluebacks” will sound different from the same cabinet loaded with greenback speakers.
Microphone Models
Choosing the mic model in Focus View.
You can also choose which microphones are being used to capture the sound coming from the cabinets. Both Helix and Stadium XL offer a ton of microphone models to choose from. I suggest auditioning them all before making a decision. Common choices include a 121 ribbon microphone and an SM57 condenser mic.
The axis (that is, the placement between the center cone and speaker’s edge) and the proximity (distance from the grill cloth) can be adjusted to find your preferred “sweet spot.” Here, even subtle changes will affect the tones. If you are looking for more bass response, try moving the microphone closer to the grill (at around 1.5 inches) and moving it off axis slightly. If you’d like to capture more of the room sound, move the microphone back from the speaker and add a touch of early reflections (the sound of the speaker in the room).
You can also angle the microphone model(s) for an even softer “capture” of the speaker cone. As you can see in the photo above, the microphone can be placed at an angle of 45 degrees or kept forward-facing.
Don’t underestimate these details. Real tube amps need to be recorded or captured live with the use of microphones, and are therefore an integral part of the overall sound you produce with your own rigs.
Post Effects
Post effects in Focus View.
I like to use a dual delay and reverb for my post effects. I run a hall reverb in series after the amp and speaker signal, much the same as would occur in a real amp with an onboard reverb. I keep the reverb mix pretty low … just enough for a touch of ambiance, rather than effect.
I like to run my delays in parallel (i.e., in a separate signal path). I split the signal off after the speakers to bypass the reverb. This allows me to add more delay without the sound getting affected by the reverb ambience.
Big Sounds
A word of caution: While creating a monstrous tube guitar tone in isolation can be very inspiring, remember that these massive patches can often be too overwhelming in a mix, or in the context of a live performance, so try creating realistic patches that sit well in the track or fit in with your band’s instrumentation. This can best be accomplished in Stadium XL by using the Focus View and Hype features.
The Guitars
For this video, I chose to use what I believe to be three of the best Yamaha guitars currently available. They all have unique pickup configurations and body styles that lend themselves perfectly to the blues/rock instrumental piece I’m playing.
Revstar RSS20
Yamaha Revstar RSS20.
The Revstar RSS20 features a pair of Alnico V humbucking pickups. Its pickup selector switch allows the player to select bridge, neck or both pickups, including those nice “out of phase” sounds you often hear in rhythm guitar parts.
The Revstar sounds great with the tube models in Stadium XL, and by engaging the focus switch (by pulling up on the tone pot) you can push the midrange forward and create a sound similar to that of overwound (more powerful) pickups.
The Pacifica Professional
Yamaha Pacifica Professional.
The Reflectone pickups in Pacifica Professional guitars are clean, clear and expressive — perfect for chordal shimmers using the Gotoh tremolo bridge.
I love this guitar for just about every situation. The body is beautifully balanced, the neck fast and smooth, and it covers a wide range of styles with aplomb.
The SA2200
Yamaha SA2200.
Semi-hollow-body guitars exude a unique warmth and earthy tone. The SA2200, with its laminated sycamore top, back and sides, definitely flavors the tone … in a good way. Combine those tasty tonewoods with coil-tappable humbucking pickups and you have the perfect guitar for blues, rock and jazz.
The Video
I paired the Yamaha Revstar RSS20, Pacifica Professional and SA2200 with the Line 6 Helix Stadium XL to create all the tones in this video.
I wanted the Revstar to take the lead role, main rhythm guitar part and first solo. The Pacifica Pro then comes in, adding a nice touch of sheen to the chordal arpeggios, and then the SA2200 takes over for the last two solos, double-stops and crescendo parts, adding its gorgeous, distinctive tone. I think you’ll agree that the blend of these three powerhouse guitars, along with the superb modeling provided by the Stadium XL, makes for an extraordinarily rich sound.
The Wrap-Up
In my view, we’ve reached a point where digital models of classic tube amps, speakers and effects sound just as good as the real thing … without your having to own every one of the hundreds of physical options.
Today’s advanced onboard and app-based editing allows you to put together almost any signal chain you can imagine, and re-routing can be done in seconds. The options for multiple rigs, setups and setlists on one device are almost endless.
What’s more, complete digital guitar rigs are easy to transport, lightweight and can go anywhere we go, without the need for cartage, roadies and a chiropractor! This means we can have all of our chosen guitar rigs at home, on the plane or in a hotel, backstage green room, recording studio or onstage. It’s a brave new world out there. What are you waiting for?
Congratulations on deciding to buy your first bass! There’s never been a better time to jump into the low end. No matter what style of music you want to play, there are tons of resources to help you get started — and plenty of solid, versatile instruments for every budget.
If you’re reading this, you’ve already begun the first step toward getting a new instrument: research. The internet contains an ocean of opinions about every facet of bass, some more trustworthy than others, but the facts — dimensions, colors, options, weight, prices — are easy to find, too. Besides visiting retailers, reading bass magazines, and checking out online forums, be sure to talk to your bass-playing friends, who most likely have thoughts about what’s hot and what’s not. YouTube, of course, is always useful when it comes to seeing and hearing an instrument you’re interested in.
IN YOUR HANDS
That said, the truth is that you won’t know if a bass is right for you until it’s in your hands. Visiting your local music stores to play the basses they have on display can be an important first step toward owning a great first instrument.
Here are some important questions to ask yourself as you consider whether the bass you’re trying out is the right one for you:
Is the neck the right size and shape for your hand?
Does the instrument feel too heavy or too light when you stand?
Does it balance well on your knee when you sit?
Does the bass’s control layout work for you?
Is the bass correctly intonated? (That is, do some notes sound slightly sharp or flat of what they should be?) This is something that can be easily checked with a tuner, and will be more apparent as you play higher up the neck. Poor intonation can sometimes be fixed with a correct setup, but not always, so it’s a potential red flag.
Keep in mind that basses that have been hanging in a music store and played day in and day out may sometimes need a setup to return to the optimum playing condition in which they left the factory. If the gap between the strings and the frets is uncomfortably high, for example, it could indicate that spending days, weeks, or months in the store’s fluctuating temperature has affected the neck — another potential red flag. It’s also not uncommon for a bass that’s been on display for awhile and played by many hands to have dead strings, finger grime, and dust. If you’re excited about an instrument but concerned about wear and tear, talk to a salesperson. You can also ask if the store can include a setup and/or fresh set of strings when you buy the bass.
MAKING THE TRANSITION FROM GUITAR TO BASS
Guitarists who pick up a bass for the first time will immediately notice that the necks are longer and the strings are fatter. The scale length of an electric guitar — the distance between the bridge and the nut — is usually between 24″ and 26″, but with electric bass, 34″ – 35″ is standard.
Electric guitars are strung with much thinner strings than bass, with the thickest typically being a .042 E string, while a standard EADG set for bass consists of a .100 or .105 E, an .085 A, a .065 D and a .045 G. Guitarists might therefore want to opt to substitute light- or even extra-light gauge strings on their bass, at least at first until sufficient finger strength is achieved, but just know that this comes at a sacrifice in terms of beefiness and low-end thud. And if you feel attached to using a pick, just know that some bassists use them and some don’t, but most agree that learning to play with your fingers is crucial.
FOCUS ON SONICS, NOT JUST LOOKS
The look and feel of a particular bass may be what immediately attracts you, but it shouldn’t be the end of your decision-making process. Sound is extremely important too — maybe even more so! Once you find a bass that captures your interest, try playing it through different amps so you can hear its unique voice. See if the knobs and tuners turn easily. Do you hear crackling or static when you twist the knobs or plug in a cable? This would suggest a problem with the electronics, and could be cause for concern.
Another thing to listen for is consistency in tone and volume. Do some notes buzz or sound significantly louder or softer than others, even when played with equal intensity? This could indicate a potential issue with the basic construction of the instrument, or it could be a simple fix that can be easily rectified with a setup. Either way, it’s worth having a discussion with the salesperson.
FINDING THE PERFECT STARTER BASS
Price, of course, is always a major consideration when it comes to choosing your first bass — or when making any purchase, for that matter. It used to be that, when it came to musical instruments, you got what you paid for, but the good news is that advances in technology mean that you can find high-quality starter basses today, such as the very affordable Yamaha TRBX line.
Yamaha TRBX174EW.
As an example, the TRBX174EW 4-string model is light in weight (just around 7 lbs.) yet solidly built, and it sounds great too. The three knobs — a volume control for each of the two pickups, plus a master tone control — are straightforward and make it easy to dial in the meat-and-potato tones every bass player is expected to have. The neck is slim — a bonus for guitarists looking to make the transition to bass — with access all the way up to the 24th fret, so it’s easy to reach those high notes. Adjustments you’ll have to occasionally make (such as tweaking the truss rod) are simple, and it comes strung with standard-gauge D’Addario nickel strings, which are ubiquitous precisely because they work for most styles. The TRBX174EW is also handsome, small-bodied and travel-friendly, as well as genre-agnostic: It doesn’t feel designed to cater to a particular era, style or trend.
Many of the greatest bass players began on instruments that were less than ideal by today’s standards, but your first bass will likely be far better built and more versatile than any starter bass they used. As recently as just a few years ago, many experts would have suggested that a first-time bassist should consider buying a used instrument to save money, but that’s no longer the case. In terms of price-to-performance ratio, we live in a golden age of musical instrument possibilities … and that’s good news for aspiring bassists everywhere!
Ask any seasoned director about the piece they wish they didn’t program, and you’ll see them instantly relive one of the most stressful career moments of their lives. They might say something like:
“Well, we started together and ended together. I’m just not sure what happened in between.”
“Ah yes, that piece. Great piece. I just didn’t have the group for it.”
“Why are you ruining my lunch? Please leave and never bring that piece up ever again.”
Programming for your ensemble is difficult. Ensembles change each year, and the music selections continue to grow. We consider additional variables such as strong and weak sections, rehearsal time and endurance. And that’s not even mentioning how the audience may react to our program!
Of course, we must speak about learning and growth. If you only select pieces at the grade level your kids are currently playing at, they may never get better. However, if you exclusively play music that’s too difficult, your ensemble will become frustrated, and they just won’t sound good. If the music’s too easy? Kids get bored and they get way too creative, and now you’re addressing behavioral issues you never dreamed about.
The next time you program, consider the At/Over/Under System. This is an approach that will meet your kids where they are, make them feel like pros and stretch their abilities just enough to make them feel accomplished.
The core of this system is you program one piece at their grade level, one piece above their current grade level and one piece under what they can handle. Here’s how it works. For our purposes, we will use a band that primarily plays at a grade 2 level.
Programming At Grade Level
This is exactly what it sounds like — if your band is playing at grade 2, find a grade 2 piece that fits them well. This could be the main feature of your program, or it could simply be just one of the pieces you program. Make sure it fits your ensemble well, the students react to it and you enjoy teaching it.
Programming Above Grade Level
Next, find a piece above their grade level. For younger bands, I would go up a half grade level — in this example, look for a grade 2.5 or a medium easy piece, depending on how the publisher categorizes them. With all grade levels, take special care to really research the piece. One publisher’s grade 2 may be another publisher’s grade 3.
Look for elements that will push your students a little bit but not shove them into a musical wall. For example, if your trumpet players have a range from low C to A, the piece should have them playing a few Bs and Cs — just not the whole time. Take a similar approach to rhythms and find a piece with a few more syncopated sections or challenging rhythms than the grade 2 piece.
Another thing to consider is how many aspects to work on with your students. It’s OK to select a piece that only pushes one musical element. Maybe it’s a new time signature but the range is the same. Or maybe the range is higher, but the rhythms are easier than the grade 2 piece. That’s OK! There is nothing wrong with taking things slowly (unless you program a march — kidding, kind of).
You’ll know you’ve selected a piece that hits when students begin playing this in their warm-ups or at the end of rehearsal.
Programming Below Grade Level
Now why would anyone program something easier than the kids can already play? Because this is how you can help bring students to the next level. Chances are, even if you have a grade 2 band, not all your students are at grade 2 individually. The grade 1 or 1.5 piece gives these students at least one piece in the concert cycle that they can play confidently. A band playing a piece at their grade level may be playing to their limit; they can sound great, but a few students may be in fight or flight mode just trying to get to the end of the piece.
Performing a grade or half grade below lets you dive into other musical concepts right away —you know, the fun ones like balance, intonation, and expression. You don’t have to fight as many notes and rhythms, and you can go right into working on that crescendo and phrase from rehearsal one. You can even go into some score study/harmonic analysis with the kids (sorry for causing PTSD for any director who thought they’d never have to hear those dreaded words again).
A below grade level piece can also provide other opportunities. Performing a solo can be nerve-wracking because all kids focus on is just getting through it! Why not make it more accessible for their first exposed musical performance? For my ensemble, we go another step up and have students conduct these pieces. This instantly brings the focus up. Many of my students become excited about the possibility of conducting the band someday. An easier piece presents an appropriate but comfortable approach to what could be a stressful situation.
Structuring Your Rehearsal Time
The added benefit of the At/Over/Under System is that you can adjust your rehearsal time based on the difficulty of the piece. When you program pieces that are at the same grade level, you may be tempted to give them equal amounts of rehearsal time. You can still do this by programming varying levels, but now you can focus on different aspects, such as intonation in the under-grade level piece as mentioned above.
You can also adjust. There are times where I used about 30% of our rehearsal time for the piece at-grade level, 40% on the above-grade level piece and 20% on the under-grade level piece. We spend the remaining 10% of rehearsal going over the concert dress code ad nauseam.
Post-Concert Reflection
The At/Over/Under System isn’t magic. It doesn’t require a doctorate in literature reviews or a six-hour score study session. It’s simply a structured way to make sure your kids learn, sound good and stay motivated across an entire concert cycle.
Most importantly, this approach gives your ensemble three different “wins.”
A win of identity: The at-level piece gives them confidence. They hear themselves sounding like a real band.
A win of growth: The above-level piece gives them a challenge that feels attainable. They get to step up without feeling set up.
A win of musicianship: The below-level piece lets them actually make music — balance, blend, phrasing, nuance — all the things that make the difference between pushing down some buttons and making music.
The At/Over/Under System gives you a reliable structure. Use it as a foundation and adapt it as needed. Your ensemble will change over time — sometimes dramatically — but a system built around identity, growth and musicianship will never steer you wrong.
So, the next time a colleague asks how you managed to get your group sounding so polished, you can smile and say: “We just programmed smart. And the kids did the rest.”
Congratulations on deciding to buy your first guitar! Whether you’re looking for an acoustic or an electric model, a guitar can make your life more fulfilling and fun. One of the advantages of taking up guitar, as opposed to other instruments, is that you can learn enough chords to play some songs relatively quickly. The feeling of accomplishment you’ll get is likely to inspire you to put in plenty of practice time, and like so many worthwhile endeavors, the more you put into it, the more you will get out of it.
If you’re buying a first guitar for your child, that’s great news too! Studies have shown that music education and a musical household can benefit childhood development. It can also help with spatial skills and improve test scores and IQ. Those are the measurable benefits, but the intangible “vibe” or “mojo” of being a musician is the most fulfilling part. And that feeling is easy to access any time by just picking up the guitar.
So what do you need to know to find the ideal instrument? Let’s start with some basic terminology and definitions.
Acoustic vs. Electric
There are two types of guitars: acoustic and electric. An acoustic guitar is an instrument that creates its sound without needing an amplifier. An electric guitar requires an amplifier to be heard in all its glory. Acoustic guitars always have hollow bodies made of wood; electric guitars can have either hollow or solid bodies (again, usually made of wood), though some electric models are termed “semi-hollow” because they have a solid block of wood running through the center of their otherwise hollow body.
All electric guitars use steel strings, as do many acoustic guitars. Those kinds of strings tend to be bright-sounding and vibrant. Some acoustic guitars, typically termed classical guitars, use nylon or composite strings instead, which have a gentler, more mellow tone.
There are also acoustic guitars that come with built-in electronics so you can plug them in and amplify their natural sound. Such instruments are sometimes called “acoustic-electric” guitars.
How Guitars are Built
Knowing a few things about the construction of a guitar will help you in your search for the right instrument. Here’s an illustration that shows the various parts of an acoustic guitar:
The various parts of an acoustic guitar.
In both acoustic guitars and electric guitars, the density and weight of the woods used help determine the tone and resonance that the guitar produces.
Most of the tone of an acoustic guitar gets generated from the wood in its top, which is the face of the instrument. Spruce is commonly used for steel-string acoustic guitar tops, although sometimes you’ll see mahogany. In the case of classical nylon-string guitars, you’ll occasionally encounter models with cedar and cypress wood tops. A guitar with a solid top will produce a richer tone than one with a laminate or plywood top. The wood used for the back and sides of an acoustic guitar is equally critical for tone creation. Typically, guitar manufacturers use mahogany, nato, rosewood or maple for fuller tone. Make sure to find out the composition of the wood in a guitar before buying it.
The woods used in the construction of electric guitars are usually alder, basswood, ash, pine, maple or mahogany. Some models will even use one kind of wood for the back of the body and a different one for the top. For example, you can find electrics with a maple top on a mahogany body. The type and combination of woods used has a major impact on the tone of an electric guitar.
Find Your Fit
You’ll want your guitar to be comfortable to hold and easy to play. After all, if it doesn’t meet both of those criteria, you might get discouraged from practicing! One critical factor in selecting a guitar is finding one that’s size-appropriate for you. An instrument that’s too big or too small will make learning difficult and not as enjoyable.
To determine if a guitar’s size is right for you, try sitting down and holding it in your lap. See if you can reach the far end of the fretboard (the part closest to the tuning machines) with your left hand. If you can’t do that, choose a guitar with a neck that has a shorter scale length. The scale length refers to the distance between the nut and the bridge. (Refer to the illustration above to see where those components are.) Another advantage of a short-scale neck is that it reduces string tension, making fretting (pressing down the strings) easier. The Yamaha FG800J is designed for easy playability and has a short scale length.
The Yamaha FG800J is designed for beginners.
The shape of a guitar’s body also affects comfort. For example, a concert-style shape, such as the one used by the Yamaha FS800J, is narrower across the waist and has a shallower depth than the larger Dreadnought body size (which is used in the Yamaha FG800J), making it easier to hold.
The Yamaha FS800J has a concert-style body.
The Yamaha STORIA line of acoustic guitars are also a great choice for beginners, as they all have short-scale necks, small bodies and low action. (See the “Tweaked for Comfort” section below.) Although designed for first-time players, they offer quality and features you can grow into, including built-in electronics.
Yamaha STORIA guitars combine first-time-player features with a stylish look.
If you’re especially petite or are buying a guitar for a child, you might want to consider a compact acoustic guitar such as the Yamaha JR1 or the three-quarter size Yamaha JR2. Both models are mini-versions of the famed Yamaha FG Series of acoustic guitars, delivering big tone despite their small size. They’re also ideal for practicing in the park, on the beach, or anywhere your muse takes you.
Compact Yamaha JR guitars make it easy to practice anywhere.
It’s best to try out guitars of different shapes and sizes at your local music store and see which one feels most comfortable. There’s a model out there that’s perfect for everyone!
Tuning In
Another important issue is the quality of the tuning machines (often called “tuning keys” or “tuning pegs”). They should turn smoothly and easily and shouldn’t bind or jump when you turn them.
But even when playing an instrument with the best tuning machines, beginners sometimes have trouble getting their guitars in tune. The solution is simple: make a small investment in an electronic tuner. Today’s tuners are simple to operate and can help you save time and frustration. There’s no shame in using one, either: Virtually all guitarists — even the top professionals — use them.
Clip-on tuners are the easiest to use. They attach to the headstock and sense the pitch of a string through vibrations in the wood. A good choice here is the Yamaha GTC1, which can be used not only for guitar, but other stringed instruments such as bass and ukulele too.
A clip-on tuner like the Yamaha GTC1 makes tuning easy.
Tweaked for Comfort
As stated earlier, when you buy a guitar, it should be comfortable to play. Of course, you can’t change its body size, type or scale length, but there are many aspects that can be adjusted. Most can be done on your own, but if you’re a beginner, you’re best to have them done by a qualified luthier (a craftsperson who builds and repairs guitars and other stringed instruments). Most music stores can refer you to such a person, or may even have one on the premises.
The most common problem you might encounter is that its action — the height of the strings over the fretboard — is too high. Low action, like you’ll find on Yamaha STORIA guitars, improves playability, but if it’s too low, there can be string buzz or some notes may not ring out properly (a phenomenon known as “fretting out”), so some compromise may be in order.
The lower the action, the easier the guitar is to play.
Another common problem is a guitar being unable to play all its notes in tune, which requires adjusting its intonation. In the hands of a skilled luthier, this is usually fixable if the basic construction of the guitar is sound.
If you find a repair person you like, try to build a long-term working relationship with them, similar to what you do with a good auto mechanic. You want to find someone you can trust. Someday, you may end up doing the maintenance work yourself, but in the meantime, leave it to the professionals.
Add a Case
To protect your new instrument, a case is necessary. Many beginner guitars come with one; if not, it can be bought separately. Alternatively, you can opt for a gig bag like the Yamaha AG-SC, which can have either soft or semi-rigid sides and is typically made from a heavy-duty fabric or leather, with padding for protection. Gig bags are generally lighter than cases and most offer shoulder straps. Those with a single strap allow you to sling your guitar over your shoulder; a double strap lets you carry your guitar like a backpack, keeping your hands completely free.
A hardshell case like the Yamaha AG3-HC provides the most protection from bumps or the occasional drop — although there are no guarantees your guitar won’t get damaged if you drop it while it’s in the case. However, hardshell cases are heavier and typically more expensive than gig bags, and they don’t have straps, so you can’t carry them as easily.
A Yamaha AG3-HC hardshell case (left) and AG-SC gig bag (right).
Consider a Guitar Bundle
You can simplify the process of finding and purchasing all the gear you’ll need with a bundle such as the Yamaha GigMaker. These comprehensive and affordable packages include the guitar itself, as well as a tuner, strap, cable, gig bag and even picks. There are versions available for steel-string acoustic, classical nylon-string acoustic and electric guitars; the latter also includes a practice amp.
The Yamaha GigMaker Electric package.
Click here for more information about Yamaha guitars.
You love music. You love your kids, too. But do budding musicians really have to practice so much?
Whether you are that budding musician, or are the parent of one, we’ve got a newsflash: The people within earshot could use a break once in a while. Hearing that same étude five times in a row is fine, but hearing it 20 times is starting to get irritating, and around the 30th replay everyone within listening distance may start to feel a definite headache coming on.
Okay, the logical side of you knows that musicians really do have to practice that much. But couldn’t they maybe just take it down a notch in volume?
As a matter of fact, they can. Thanks to modern technology, the volume of most major instrument types — keyboards, guitars, strings, brass, woodwinds, even drums — can be drastically reduced without diminishing players’ ability to hear themselves. And leading the way is the extensive line of Yamaha SILENT™ products. Here’s an overview of these potential sanity-savers.
Piano and Keyboards
Of course, electronic keyboards of all stripes (and from all manufacturers, including Yamaha) come with headphone jacks, making silent practice an intrinsic and important feature. But what about acoustic pianos?
SILENT piano.
At first glance, a Yamaha SILENT Piano™ looks just like a normal acoustic piano with weighted keys, pedals, strings, and hammers. But these instruments lead a double life. They can be played just like any other piano, or they can be switched into Silent mode, in which case the hammers stop hitting the strings, and the sound can be heard only via headphones. The way this works is nothing short of magic: A series of optical sensors beneath the keyboard and pedals measures the nuances of the playing and then uses them to trigger the digital sound of a piano, which can be turned up or down as desired — without disturbing anyone in proximity. SILENT Pianos are available in a variety of upright and baby grand models; some even include sounds sampled from the famed line of Yamaha CFX and CFIIIs full-size concert grands.
Drums
DTX6K3-X electronic drum kit.
Like digital keyboards, electronic drums always offer a headphone jack for private practice. These instruments are built around pads (similar to practice pads) that produce little noise but can still be remarkably sensitive. In fact, some Yamaha electronic drum kits offer pads that are divided into three separate zones, allowing for a greater variety of expression than even acoustic drums. They also include built-in practice tools such as a programmable metronome, onboard recording and training songs that allow the player to master various genres. With an electronic drum kit, the drummer in your house can thwack away to their heart’s content, producing a staggering range of sounds that only they will hear in their headphones.
Acoustic Guitar
How do you lower the volume of an acoustic guitar? By taking away its most resonant component: its body. This explains the strikingly minimal outline of the Yamaha SILENT Guitar™. Instead of having an actual front, back and sides, these instruments resonate virtually through a special pickup that uses digital modeling to replicate the sound of a typical acoustic guitar as captured by a high-quality studio microphone. The result is an instrument that produces next to no sound on its own, yet still has a realistic tone, the loudness of which is completely controllable. A number of different SILENT Guitars are available, including one based on a folk-style guitar and others styled after classical guitars. All are collapsible, making them easy to travel with.
SILENT guitars.
Guitar Amplifiers
Think that a guitar plugged into an amplifier means an inescapable blast of sound? Think again. Many of today’s practice amps, such as the Yamaha THR-II desktop series, have headphone jacks, allowing silent practice … without disturbing anyone else nearby. These amps also have the benefit of built-in digital effects such as distortion, reverb, etc. — meaning that you won’t have to spend extra on pedals or other signal processing hardware.
THR-II desktop amplifiers.
Strings
SILENT strings.
The first SILENT Violin™ was designed over 20 years ago to offer players the ability to practice in an environment where they wouldn’t disturb family or neighbors around them. Today’s lineup of Yamaha SILENT Strings™ suits a variety of player needs, including silent practice, studio recording and stage performance. There are a range of models available, from practice only and intermediate models all the way to professional performance instruments. With the ability to connect to either headphones or an amplifier and endless creative opportunities with external accessories such as pedalboards, SILENT string instruments offer something for everyone.
Brass
Brass instruments can be very loud when you get up and close and personal, but there’s already a long-established way of making these instruments quieter: It’s called using a mute. The problem is that mutes dramatically alter tone as well as volume. Yamaha has addressed that issue with its revolutionary SILENT Brass™ system, which consists of a mute fitted with a pickup that connects to a small electronic “personal studio” unit. That little box contains exclusive circuitry that simulates a standard acoustic tone, making the instrument sound as though there’s no mute being used. There are versions for trumpet, flugelhorn, trombone and French horn, as well as for tuba and euphonium, and the SILENT Brass mutes for the latter two actually have extra adaptability in that the position of the mute head can be adjusted to match different bell sizes and personal preferences — which also means that the same mute can be used on B♭, C, E♭ and F tubas. The tuba and euphonium models can also be disassembled into parts that are stackable, making storage easier.
Trumpet SILENT Brass System.
Woodwinds
YDS-150 Digital Saxophone.
The Yamaha YDS-150 Digital Saxophone plays and feels like an acoustic saxophone, but its wealth of digital technologies offer a number of enhancements, including 73 onboard sounds and a headphone jack that enables saxophonists to practice in privacy. The mouthpiece has a design just like that of an acoustic sax and the standard key layout ensures natural playability and smooth operation, plus there’s a breath sensor that detects the intensity of the player’s breath for precise control of both volume and tone. Bluetooth connectivity and a wired aux input even allow the player to jam along with music being played on an external source such as a smartphone or laptop, all in complete silence and without disturbing others in the vicinity.
When you think about it, every one of these instruments and devices is remarkable in that they achieve something that wasn’t possible until relatively recently: They give both musicians and listeners an unprecedented degree of control over what they hear. All of which means that you or your child can practice to their heart’s content at a drastically reduced volume with no corresponding loss of tone, while your long-suffering neighbors (or long-suffering you) enjoy only peace and quiet.
You’ve always wanted to play drums. Or perhaps your child or grandchild has expressed an interest in (and perhaps shown an aptitude for) playing drums and you want to encourage them. Either way, you’re a bit conflicted about it.
On the one hand, you feel ready to indulge yourself (and of course you’re always ready to indulge your kids and grandkids!), but on the other you think it’s going to be a noisy and costly activity. In addition, there’s the intimidation factor: Some folks find the prospect of buying a drum set both time-consuming and confusing, especially if they’re not familiar with the jargon and don’t know what to ask for.
The good news is that none of these things are necessarily true. Drums today can be almost completely silent, and they can be affordable, too. What’s more, thanks to online resources (like this blog!), navigating the maze of options is easier than ever before. Here’s what you need to know before you start shopping for that first drum set:
What is a Drum Set, Anyway?
A drum set (sometimes called a drum “kit”) is simply a collection of drums, cymbals and mounting hardware, similar to those you’ve seen played onstage by your favorite band. There are two kinds of drum sets: acoustic and electronic.
An acoustic drum set is made up of the following five basic components:
1. Drums: There are typically at least four or five drums in a set. Each consists of a shell (typically made of wood, but also sometimes metal), across which is stretched a drum skin or “head” (usually made of clear plastic Mylar® or calfskin) — the surface you hit with a stick. The drums that are used most of the time are the bass (“kick”) drum and snare drum, though most drum sets also include one or more tom-toms.
Yamaha Stage Custom steel snare drum.
2. Cymbals: Circular plates made of metal, used for a crashing sound. The most important of these are a hi-hat (two small cymbals mounted vertically, one inverted, that come in contact with one another when a pedal is pressed) and a “ride” cymbal. A starter drum set may also include one or more “crash” cymbals.
3. Hardware: Metal stands to hold the cymbals and drums, plus a throne (seat), a foot pedal (for the bass drum) and a hi-hat stand that includes a pedal for crashing the two cymbals together.
4. Sticks: Long wooden dowels used to strike the drums and cymbals.
5. Drum key: A small metal device used to tune the drums by stretching their skins.
In electronic drum kits, the sounds are produced via electronic, not acoustic means, so pads made of rubber, Textured Cellular Silicone (TCS) or mesh material are struck instead of physical drums and cymbals. Electronic drum kits also include a module (a “brain”) in which hundreds of different sounds are stored digitally.
Acoustic Drums or Electronic Drums?
When deciding which kind of drums to buy, one of the most important factors is the space required. In addition, you will want to consider the time of day you or your child will be practicing — will this disrupt your other family members or the neighbors?
Acoustic drum sets are much louder than electronic drums, have a much larger footprint and will require some sort of isolated room for practice.
Yamaha DTX402.
Electronic kits are smaller, quieter and easier to use since you don’t have to worry about tuning or changing drum heads. An electronic drum kit like the Yamaha DTX6 Series or DTX402 Series is often the best choice for beginners since you won’t need to soundproof the room where they are located — you or your child can use headphones to practice. Another big advantage to electronic drums are the built-in training functions they often provide. These allow an aspiring musician to improve the critical skills of timing and feel. This can include built-in songs the student can play along to, making training and practice more fun — and therefore ultimately more successful.
The Advantages and Disadvantages of Each
Acoustic drums:
The standard for both lessons and live performance.
Loud!
Take them anywhere: not tethered to a power outlet.
Instant gratification: nothing to plug in or set up. Just start hitting ’em!
Good for larger bedrooms, basements or garage … especially if the spaces can be soundproofed.
Produce one sound with various tunings.
Drums and cymbals come in various sizes.
Larger footprint: requires an average 5′ x 5′ space.
Requires lots of new sticks and drum heads as they wear.
Electronic drums:
Easily used at home but requires amplification for performance.
Quiet practice with headphones.
Good for apartments or small bedrooms.
Capable of producing various sounds and styles of drum kits.
Requires some setup and an electrical outlet.
Pads for drums and cymbals are typically smaller than their acoustic counterparts.
Smaller footprint: requires only an average 4′ x 4′ space.
Built-in training functions and metronome.
Less stick wear.
Heads don’t wear down and need replacement unless the kit uses mesh heads. (Yamaha offers replacements for these.)
Things to Look for in an Acoustic Drum Set
1. Mass: A good drum has some weight and feels sturdy. If the drum feels light, the metal and shell is of lower quality. While such drums are not necessarily bad, they are typically harder to tune and tend to need to be replaced sooner.
2. Expandability: If your skills and/or enthusiasm (or that of your young drummer) grows in future, make sure you can add extra components and order individual drums in the same color as your current set. Ask what sizes might be available.
3. Substantial features for your investment: Good drums, heads and hardware can cost a bit more, but they will also retain their value and make it easier to trade up when you or your child are ready.
Things to Avoid in an Acoustic Drum Set
1. Metal corrosion and poor workmanship: Examine the drum shell inside and out. Pay attention to the appearance of the seams. Are they well-crafted and without flaws? Is the finish smooth, with no “bubbling”? If the work is sloppy, chances are you’ll spend more time repairing or replacing things than actually playing the drums.
2. A manufacturer that doesn’t stand behind their instruments: Research drum brands ahead of time. Look for those that have gotten good reviews from users and/or impartial journalists. Lofty features and marketing claims are hard to substantiate without reviews! Things can break and get worn, but quality endures and is reflected in the way the manufacturer is perceived in the marketplace.
Things to Look for in an Electronic Drum Kit
1. Sounds: There’s usually a direct relationship between the price of a module (the central “brain” of an electronic drum kit) and the quality and variety of sounds it offers. Top-notch modules include all the standard drum sounds you would expect, but also offer many other sounds such as bells, wood blocks and non-percussion instruments, as well as special effects. High-end modules also provide the ability to edit and create your own sounds, and in some cases, allow you to download your own samples. Modules with editing and download capabilities can cultivate creativity!
2. Preset patterns: Every module has a selection of preset patterns — typically, short two-bar phrases or drum parts related to specific drum kits or musical styles. As mentioned earlier, these can be valuable learning tools, as well as a source of inspiration in creating your own unique drum parts. Many modules include full play-along tracks for both fun and practice.
3. Connectivity and expansion: If you plan to expand your electronic kit with more pads and triggers in the future, be sure the module has enough connectors to allow this. A USB port lets you send MIDI data to external PCs, digital audio interfaces and workstations, giving you access to a wide range of music software. Inputs for connecting multiple types of audio players (such as smartphones, tablets and CD players) let you practice and play along with your favorite music. Multiple outputs that can send your performance simultaneously to a mixer and recorder can be useful in both live and studio settings. In addition, be sure that the outputs will support the type of amplification system you plan to use.
4. Apps, apps and more apps: Speaking of connectivity, ancillary mobile apps can make any electronic drum kit easier to use, which makes learning faster and playing more fun. That’s why it’s important to choose an electronic kit that’s compatible with as many apps as possible. Yamaha has developed several free apps for DTX402, DTX6, DTX8 and DTX10 Series electronic drum kits and DTX-MULTI 12 electronic percussion pads. In addition, specialty apps like Yamaha Rec’n’Share can be used to capture the audio from any of those kits or an EAD10 electronic acoustic drum module and combine it with video taken with a smart device. The user can then download their performance and share it on social media, or send it to friends in a text or email. Want to learn more? Read our blog “Three Ways That Apps Can Help Your Electronic Drumming.”
5. A module “head” that is simple to use and sounds good: It should also allow you to download new kits and customize existing kits with fresh sounds and capabilities. There’s no better way to stay engaged!
6. Pads that are sturdy and have a good feel when played: There are several types of drum and cymbal pads available. When choosing, look for a good feel that pairs well with the sounds of the module. You can have a very good pad and an average module — or vice versa. Rubber pads are generally used in less expensive starter electronic drum kits, although some may offer mesh or foam. The pads you choose should have some give, but not too much rebound or bounce.
7. A rack that has sufficient weight to keep things in place yet is easy to adjust: The mounting hardware of your electronic drum kit should make it easy to keep components in place, using a standard drum key or knobs that stay tight.
8. Durability: Anything you hit with a stick should have some mass — and should feel sturdy.
Things to Avoid in an Electronic Drum Kit
1. A module with significant limitations: If it doesn’t allow you to personalize the feel of the kit or limits the number of pads you can add (due to only a few or single-zone inputs), keep looking.
2. A module that has poor sounds: Unlike acoustic drums, you can’t fix the sounds of an electronic drum kit with well-placed tape or muffling.
3. Pads that feel too hard: This can cause fatigue.
4. Pads that feel flimsy: Typically, these will not hold up under normal playing conditions — especially at the hands of a child.
5. Pads that are too bouncy: These can make transitioning to an acoustic drum set difficult.
Cost Versus Quality
Whether you’re shopping for acoustic or electronic drums, you’ll find that the market is full of affordable options. But remember, you or your child will be physically hitting the drums and many cheaper kits will fail over time due to heavy use, so make sure you look for a drum set that is robust, even if it costs a little extra. In addition, more expensive electronic drum kits feel more realistic and offer larger playing surfaces similar in size to those found in an acoustic drum set. Whichever way you go, starting with good quality instruments will make the experience more enjoyable — and can save you money down the road.
For more information, check out our three-part blog series, “So Your Child Wants to Learn to Play Drums”:
I work in Lee County School District in Alabama where the band programs do not receive a budget from the school or the school district. We rely on fundraisers and student fees. Our school district is in mostly rural areas where there is only one traffic light per town, so it is important to keep costs low. With higher band fees, we limit the number of students who can afford to be in our programs. All the band directors in our school district are constantly looking for ways to fund our band programs. Below are some ways we have worked with our school district to advocate for funding to support the music students system-wide.
ESSER Funding
Even though our band programs do not receive a budget, we have found ways to work with our school district to get funding for district-wide band events and initiatives. Our first significant success came through the Elementary and Secondary School Emergency Relief (ESSER) federal grants, which were created during the COVID-19 pandemic. The process was not overly hard, but it was long. Although this level of federal assistance is unlikely to happen again, I will share how we obtained the funding.
It began with seeing the articles written by associations where music programs could benefit from ESSER funds. The band directors in our district came up with a comprehensive plan tied to the parameters of the funding. This plan was sent to our central office, but we received no response.
Then, the January before the funding had to be sent back to the federal government, an email was sent from our district central office to all teachers inquiring about ways to spend the remaining funds. At that point, we simply copied and pasted the plan we came up with months ago. To our surprise, two weeks later the central office set up a meeting with the district band directors. After the meeting, we finalized our full plan requesting over $1.2 million across the district. To our surprise, our full plan was accepted
Furniture = $15,000
Instrument Test Kits = $7,000
Sonic Cleaning = $26,000
Instruments = $1,226,000
Summer Music Camp = Additional ESSER Funds
Honor Band = Additional ESSER Funds
Summer Enrichment Band Camps
One of the initiatives developed during our ESSER funds planning was a summer enrichment band camp. We came up with a way to hire staff for camps in June that were tied to summer school. By connecting the band camp to summer school, we ensured that students received transportation to and from school and free breakfast and lunch. Instead of having to find funding for each school to have a camp, we decided to have one camp at a central location. This was the first time our band students studied and played together across the school district.
Currently, the camp has three segments that run at different times. A beginning band camp is for students with no prior band experience. The middle school camp and the high school camp include large rehearsals and small-group instruction for like instruments. There is no cost to the students for summer enrichment band camps.
The first two years of the summer camp were funded through ESSER grants. Knowing that the ESSER funds would soon be gone, we constantly advocated our central office to keep funding this event. We are very fortunate that our central office sees the benefit of our programs and agreed to continue funding the summer cap as a budget line item for future years. Due to a change in summer school, meals are no longer provided nor is transportation back to the student’s home school. However, the camp is still free to students and includes instruction, music, materials, T-shirts and shuttle buses from their home school to the central campus.
Honor Ensembles
Similar to the summer enrichment camps, the honor ensembles were funded through ESSER grants, which meant that all costs were covered by our central office. The first year, we had honor bands for middle school and high school. Knowing that this event was only funded for one year, we had to ensure that the ensembles had strong representation from every school, which we knew was the best way to advocate for future budget-line funding. We heavily leaned into the fact that the summer enrichment band camps and the honor ensembles were the only opportunities for students from different schools in the district to learn and perform together.
After that first year of ESSER funding, we succeeded in securing funding for the middle school and high school honor bands. Then, we advocated and received additional funding for an honor choir, which started in the third year. Currently, we accept all students who apply to the honor ensembles. Our philosophy is simple: Anyone who wants to participate should have the opportunity. While this has resulted in very large ensembles, we are committed to maintaining this inclusive approach.
Advocate for Continued Funding
Securing funding for music programs requires persistence, creativity and a willingness to advocate repeatedly, which includes continued advocacy after receiving the initial funding. I have been told “no” way more often than “yes.” Throughout our experiences with ESSER funding and district support, we learned that advocacy is an ongoing process of demonstrating value, building relationships and showing how music programs strengthen the school district as a whole.
When our summer enrichment camps and honor ensembles were first funded through ESSER, we knew that federal funding was not going to be the forever solution. We used those initial years to show how impactful district-wide music collaboration could be. We aimed to ensure strong participation from every school and designed programs that were accessible and educational. We created a model that our central office could clearly see was worth sustaining after federal funding ended. This approach helped turn ESSER-funded events into recurring budget items.
Continued advocacy also meant staying engaged after initial funding. We regularly communicated with our central office by highlighting student successes and demonstrating how these events supported district goals. We invited central office staff to the band camp, honor band and honor choir performances. Our superintendent joined us for a day of learning trombone and percussion with the students. Each year, as the programs grew and more students participated, our case for sustained funding became stronger.
Advocacy is a continuous effort not a singular one. By remaining proactive, open to collaboration and having student-centered initiatives, we have been able to fund these events in a district with no built-in budget for music programs. The approach we took proved that meaningful funding is achieved not through just one conversation but through long-term commitment to speaking up for our students and music programs.
Title Funds
The makeup of the schools across our district varies greatly in size and socioeconomic status. As a result, every school in our district receives Title IV, Part A funding. The amount and allowable uses differ from school to school. This presents an additional avenue for advocating for support within music programs. For example, one school in our district was able to use a portion of their title funding to purchase instruments for every student in its band program. This eliminates a significant financial barrier for families. Another school was able to acquire several larger instruments that would have otherwise been out of reach for the program.
The allocation of title funds is determined by our central office and each school’s principal. This means that consistent and purposeful advocacy is essential. Once again, clearly communicate how music education supports school goals, such as increasing student engagement, improving academic achievement and fostering a positive school climate. Our band directors have been able to help administrators see the value in directing these resources toward band programs, which has allowed us to build stronger and more equitable opportunities for students across the entire school district.
________________________________
Our process to secure sustainable support for districtwide music opportunities has shown that meaningful change is possible when educators stay united, persistent and student-focused. Even in a rural district with limited financial resources, we have proved that advocacy grounded in collaboration and clear evidence of student benefit can open doors that once seemed closed. While the absence of a dedicated music budget continues to present challenges, our collective efforts have resulted in lasting programs that enrich the lives and musical experiences of our students. As we move forward, we remain committed to secure funding for these events in the future. Our goal is to ensure that every student, regardless of background or ability to pay, can experience the community, growth and joy that our music programs provide.
I first picked up an electric guitar when I was a teenager. I had already been playing acoustic for a couple of years, but there was something more exotic and powerful about the electric version of the instrument, with its switches, knobs and a sleek, colorful body. Once plugged into an amp, it could create an explosion of sound, power and sustain, making my acoustic guitar seem tame in comparison.
The transition wasn’t seamless, however. In fact, it took a while to get comfortable on electric. Although it shares many similarities with an acoustic guitar, its sound, playing feel and vibe are quite different.
In this posting, I’ll offer some tips and links that will help you make the transition more easily. Keep in mind that as a new electric player, it’s critical to learn solid fundamentals; otherwise, you can develop bad habits that will hold you back. The best way to ensure you’re developing those basic skills is to study with a guitar teacher. That said, there’s also a lot of good online content for learning.
(Note that this posting is written from the perspective of guitarists who play right-handed, because they’re the overwhelming majority. If you’re a lefty, simply substitute “left” when I say “right” and vice versa, when I’m talking about hands, arms or legs.)
1. GET COMFORTABLE HOLDING THE GUITAR
Holding an electric guitar when sitting is similar to the way you’d hold an acoustic, but the guitar body is usually significantly thinner.
As you can see in the picture below, the indentation at the bottom of the guitar should sit on your thigh, but the top of the guitar (the side with the strings and the fretboard) ends up closer to your body by virtue of the instrument’s thinner dimensions. The top of the guitar’s body leans against your chest, and the neck angles slightly forward and up a little.
When performing on an electric guitar, however, you’re most often going to be standing up and using a guitar strap. The experience is somewhat different than playing sitting down, so it’s good to do at least some of your practicing standing in order to get accustomed to it.
The length of a guitar strap is easily adjustable. Shortening it raises the guitar, bringing it closer to your eyes and making it easier to see the frets.
Here, the strap is relatively short.
However, many guitarists wear it lower, with the guitar’s vertical center approximately at stomach height, either because they find it more comfortable that way or because it’s considered more fashionable. For newbies to electric guitar, the most crucial factor in deciding strap height should be what’s most comfortable for playing.
A typical strap length.
2. ESTABLISH GOOD HAND PLACEMENT
When you hold an electric guitar, your picking hand should angle down from the top upper right of the guitar’s body (from the player’s perspective) and hover above the strings somewhere between the two pickups. (On a three-pickup electric guitar, such as a Yamaha Pacifica model, you’d typically place your hand just in front of or behind the middle pickup.)
Keep in mind that a pickup’s location impacts significantly on the tone. The closer a pickup is to the bridge, the brighter it sounds, and the closer to the neck, the rounder it sounds. This principle also applies to where your right hand encounters the strings, regardless of whether you’re using a pick or playing fingerstyle. In other words, hand placement affects tone too.
As you get more proficient as an electric player, you may find yourself occasionally moving your hand closer or further from the bridge to alter the tone strategically. But as a beginner electric player, it’s best to find a comfortable spot and keep your strumming/picking hand there consistently.
For consistent tone, center your picking hand between the pickups.
3. LEARN CORRECT FINGERING
Perhaps the most essential fundamental for an electric (or acoustic) guitarist to master is correct fingering when fretting notes and chords. To that end, it’s critical to involve your pinky when playing scales and chords. This might feel awkward at first, but it will get easier over time.
For scales, the concept of “one finger, one fret” is crucial. It means that, when in a given scale position, it’s most efficient to use the index finger over one fret, the middle finger over the next, the ring finger over the next one and the pinky on the last one.
In the fretboard diagram of an A-major scale shown below, the numbers refer to which fingers to use (1 = index, 2 = ring, 3 = middle, 4 = pinky). Notice the “one-finger, one-fret” concept is in effect here.
There are plenty of scale positions that cover more than four frets, such as the example below, where the first finger has to briefly move out of position for one of the notes. But the idea is to stick to “one-finger, one-fret” whenever possible.
You can find additional examples with fingering, as well as many other handy tips that also apply to electric guitar in this posting on learning acoustic guitar.
4. CHOOSE THE STRINGS AND PICKS THAT BEST FIT YOUR NEEDS
Guitar strings come in a variety of gauges (thicknesses) that affect both tone and playability. Guitars come set up for particular string gauges, but of course you can opt to put on different strings if you like (though that may require a new setup — see below).
Guitarists typically refer to their string sets by the gauge of the high-E string. So, for example, a “10s” set has a high-E string with a gauge of .010, a low E of .046, and the rest in between. Those are also referred to as “light gauge.” A “9s” set has a .009 high E and is often called “Extra Light.”
Choosing a string gauge involves a trade-off. The heavier (thicker) it is, the fuller the tone. The lighter it is, the easier it is to fret, and especially, to bend. The size and adjustment of the guitar’s neck will also impact the feel of different string gauges.
Because an electric guitar gets a good part of its tone from the amplifier, using thicker strings for tonal reasons is not as necessary, so electric players mostly go for thinner string gauges (8s, 9s or 10s) that make both fretting and bending easier.
Lighter gauge strings are easier to bend.
Strings don’t last forever and should be changed periodically. Otherwise, they lose brightness and slip out of tune more often. If you play regularly, you should change your strings at least once a month.
If you decide to switch to different string gauges, you may want to have a guitar tech adjust the intonation (the guitar’s ability to play in tune across the neck) and action (string height). Even if you stay with the same gauge that your guitar came with, it’s good to bring it to a guitar tech every year or two for a setup, especially if it becomes difficult to play in tune at different frets.
Although some electric players use their fingers to pick the strings, most utilize picks. Typically made of nylon, picks come in three basic gauges: thin, medium and heavy. Thin picks bend easily and are best for strumming. Heavies don’t bend at all and are best for fast picking. True to their name, mediums are halfway between and suitable for all-around playing. Experiment to find the gauge pick that’s best for you. You can always change them!
5. DEVELOP YOUR OWN SOUND
One of the coolest aspects of being an electric guitar player is the virtually endless sound-shaping options available from a full electric guitar rig (guitar, amp and effects), or from a digital equivalent. The musical style you play will likely influence some of your tonal choices. For example, the typical jazz guitar sound is clean, while rock tones tend to be at least somewhat distorted.
But before even considering how amps and effects can impact your tone, explore the wide range of sounds your guitar offers on its own. The first stop for tone adjustment is the guitar’s pickup selector switch. It lets you choose which pickup or combination of pickups is active. As a general rule, double-coil pickups (also known as “humbuckers”) sound thicker than single-coil pickups. As mentioned previously, pickup placement affects tone: the neck pickup is brightest, and the bridge pickup is the most round-sounding.
In the following audio examples, I play the same passage on the neck, middle and bridge positions of the five-way pickup selector switch of a Yamaha Revstar RSS02T electric guitar, which has single-coil pickups. Notice the tonal change as I do so.
All electric guitars have control knobs: two that you’ll always find are a master tone and a master volume. (Some three-pickup electrics have an additional tone knob.) On a two-knob guitar, the tone knob sets the guitar to its brightest setting when turned fully clockwise and its warmest setting (for the roundest tone) when turned fully counterclockwise.
The tone knob lets you easily roll off the high end.
The volume knob adjusts the guitar’s output level. The highest setting sends the hottest signal, which drives outboard gear like amps and effects harder and offers the most sustain. As a result, rolling off the volume knob slightly can clean up the sound, which can be handy when finishing a solo and switching to a rhythm part.
6. FIND YOUR FAVORITE EFFECTS
Guitar effects, most commonly found in pedal form (“stompboxes”), allow you to shape your tone in creative ways.
Ambient effects, such as reverband delay (sometimes called “echo”), add space and dimension to your sound. Reverb, which is often built into guitar amps, simulates how sound bounces around in a room or larger space.
In this audio clip, you’ll hear a rhythm guitar part with no reverb.
Here’s the same part with some subtle reverb added:
Delay simulates the discrete echoes you hear in a large space, and you can adjust the speed, the number of echoes and more to fit the music you’re playing. Here’s a lead line with a long delay added, more as a rhythmic special effect than to add ambience.
Distortion effects alter a guitar’s tone by adding grittiness, fatness and sustain. One way to get it is to overload a tube amp’s input. But even if your amp is only capable of clean tones, you can distort your sound with pedals. You’ll find many flavors of distortion effects, designed to mimic the effect of overdriven tubes, broken speakers and more. They use different technologies, but all cause the sound to break up.
In the following three audio clips, you’ll hear the same passage, first clean through an amp, then with overdrive added and finally with fuzz instead of the overdrive. All three also have reverb.
Other effects, such as chorus, phaser and tremolo, subtly modulate the pitch, level (or both) of the sound. The following audio clips feature the same musical passage — the first time with no modulation effects, the second with chorus, and the third with a phase shifter. All three have reverb as well.
Pitch effects such as pitch shifter and octaver (which is really just a pitch shifter set to go up or down octaves) change the pitch by specific intervals and allow you to mix in the shifted and original note to create harmonies. In this next audio clip, an octaver creates a much bigger sound by adding an octave below the original.
There are also filter effects like “wah”, as well as EQ pedals for changing tone and tuners for tuning your guitar. A tuner is a must-have effect for every guitarist. Typically, it lets you mute the output so the audience doesn’t have to hear you tuning, and uses a visual display to guide you as you turn the tuning pegs on your guitar to the correct pitches.
7. CONSIDER A PEDALBOARD FOR YOUR EFFECTS
If you’re thinking about performing or rehearsing with a group, or you just want to experiment with more than one effects pedal, a pedalboard of some type will be beneficial. It’s a flat, rectangular board, usually angled up on the end facing away from the guitarist and equipped with a power supply to run the pedals.
You can buy a purpose-built pedalboard in a variety of sizes, many with the power supply built in, which you can then populate with individual effects pedals. Alternatively, you can go DIY and make your own board using a piece of plywood and attach a separate power supply along with the pedals. (Tip: Velcro works well for attaching gear to your board.)
Another option is a self-contained multi-effects unit, such as the Line 6 POD GO. The advantage of these devices is that they’re loaded with many effect choices in every category, are digitally controlled, and allow you to save custom effect settings and combinations.
The Line 6 POD GO is a self-contained multi-effects pedalboard.
8. FAMILIARIZE YOURSELF WITH THE PARTS OF THE ELECTRIC GUITAR
When other guitarists, guitar teachers or online postings and videos mention certain parts of an electric guitar, you’re going to want to know what they’re referring to. Therefore, it’s essential to learn the names of the various parts and controls on the instrument. Here’s an illustration that shows the main ones:
The parts of an electric guitar.
Once you’re comfortable with the basics of playing and the gear you’ll need, you’ll find that electric guitar is not only fun to play, but offers incredible potential for creativity, both in technique and sound. So what are you waiting for? Grab a pick and start playing!
All audio examples played on a Yamaha Revstar RSS02T electric guitar.
The holidays are here! So if you’re ready to help your loved ones make themselves heard, here are some suggestions from Yamahathat are sure to please the musician or music lover in your life.
GUITARS
C40II Full-Size Classical Guitar
The C40IIis the perfect starter acoustic guitar. This affordable full-size nylon-string classical model offers excellent tone and easy playability, with quality construction that ensures durability, making it a real bargain for beginners and budding guitar students alike.
GigMaker Deluxe Acoustic Guitar Package
Our GigMaker starter kits incorporate everything you need to start playing immediately — a Yamaha guitar, along with a protective nylon gig bag, strap, digital clip-on tuner, and a supply of picks. The GigMaker Deluxe acoustic guitar package includes a premium solid-top steel-string FG800J guitar for superior tone and projection.
Revstar RSS02T Electric Guitar
Inspired by iconic café racer motorcycles, Yamaha Revstar electric guitars are sure to help the guitarist in your life stand out from the crowd. They have chambered mahogany bodies, rosewood fingerboards, jumbo frets and gloss finishes — even ivory-colored tuners that complement the unique headstock shape. With its custom tailpiece and dual P90-style single coil “soapbar” pickups (nicknamed because they look like bars of soap), the RSS02T model has a distinctive “old-school” vibe. It offers five-way pickup switching and a Focus Switch push/pull tone control that adds a passive boost similar to that of overwound pickups. Plus, four new color options were just added, giving the Revstar line a more striking look than ever.
Pacifica Standard Plus Electric Guitar
Yamaha Pacifica guitars have long been renowned for their versatility, making them a favorite among top session players and one of the most popular electric guitars worldwide. The newest line of Pacificas released in 2024 raised the bar further still, utilizing advanced technology that incorporates 3D modeling to maximize body resonance, along with Reflectone pickups co-developed with famed audio manufacturer Rupert Neve Designs. The Pacifica Standard Plus model delivers impressive tonal balance and a smooth sound. It’s available in several different finishes and has a comfortable contoured alder body and a slim, C-shape maple neck with medium frets and a rosewood or maple fingerboard.
TRBX304 Electric Bass Guitar
Yamaha TRBX basses are high-quality yet affordable. The TRBX304 model has a sculpted, ultra-comfortable solid mahogany body and a five-piece maple/mahogany neck for strength and stability. Active EQ circuitry, coupled with dual ceramic humbucking pickups, enables you to easily dial in a wide range of stage-ready tones. There’s even an EQ switch with five presets so you can instantly go from locking in with the drummer to taking a solo, or from playing slap bass to using finger or pick technique.
KEYBOARDS
EZ-310 Portable Keyboard
The Yamaha EZ-310 Portable Keyboard is an extraordinary beginner’s keyboard that has 61 lighted, touch-sensitive keys for easy learning and dynamic playing. Even if you’ve never touched a keyboard, the EZ-310 makes it simple to start with keys that literally light your way — no need to read music, just follow the lights! It comes with over 150 songs that you can learn step by step, at your own pace. You can also select from a menu of hundreds of musical instrument Voices that sound stunningly realistic.
P-145BT Portable Digital Piano
The P-145BT Portable Digital Piano has 88 weighted keys and is designed for easy playability. It offers Bluetooth® audio and ten different Voices, including strings, electric pianos, organs, harpsichord, and vibraphone, as well as the sound of a Yamaha concert grand piano, with a damper resonance function that reproduces the rich sound you hear when pressing the damper pedal. And, since this is a digital piano, it doesn’t require tuning!
SEQTRAK Mobile Music Ideastation
SEQTRAK is a music creation station that allows you to capture ideas quickly with its lightning-fast, all-in-one system that includes drums, synths, sampling, and sequencing, all packed into a portable lightweight design. With SEQTRAK, you can easily create original music, then refine it with deep editing using a free smartphone app. You can also quickly shift octaves while playing, perform quantized transitions and extend pattern length — even use external MIDI devices to trigger animations, adding dynamic visuals to your performances. And when you’re ready, you can share your sounds, collaborate with other artists, and connect with fans around the world using SEQTRAK’s powerful performance features and video creator.
DRUMS
FGDP-50 Finger Drum Pad
Yamaha FGDP Series electronic finger drums allow anyone to drum with their fingertips, anywhere, any time — no drums, no sticks needed. The FGDP-50 provides 18 ergonomically designed pads and eight assignable RGB pads loaded with 48 preset kits and 1,500 drum, percussion and instrument samples, as well as an internal speaker and a USB terminal that allows you to capture your performances and play music stored in a connected flash drive. There’s even an auto-accompaniment function that plays bass, guitar and other instruments alongside your performance. The FGDP-50 is an all-in-one solution that makes it easy to play any genre of music with more expression.
DTX6K5-M Electronic Drum Kit
Housed within a rack system that enables a wide variety of configurations and additional components, the DTX6K5-M is an excellent choice for drummers looking for a kit that grows with their musical progress. The four tunable REMO two-ply mesh heads provide playing surfaces with outstanding noise reduction, durability and feel when hit. The snare pad features three sensors that precisely respond to delicate stick work, and the three-zone cymbal pads offer independent edge, bow and bell triggering, as well as choke and mute functionality. And the powerful DTX-PRO “brain” delivers standout sounds across many musical genres, while providing vital practice functions.
Stage Custom Hip Drum Kit
The Stage Custom Hip drum kit has a small footprint that makes it ideal for teaching, rehearsal, recording, and performing in tight spaces such as small club venues or home studios. Its dimensions reflect its compact design: a punchy 20″ x 8″ bass drum (suitable for use on its own or even as a subkick for larger bass drums); a 13″ x 5″ snare drum; a 10″ x 5″ tom-tom; and a multi-use 13″ x 8″ floor tom, which provides a snare bed with an on/off throw that allows drummers to bring different styles of playing to life. It’s portable and lightweight too: in fact, the entire Stage Custom Hip drum set can easily be packed up in a single over-sized bass drum bag.
Tour Custom Drum Kit
Designed for the working drummer, Yamaha Tour Custom drum kits are used by some of the world’s top touring artists. They sound great and play well in any musical style, with all-maple drum shells that provide a warm, bright tone. Tour Custom drum kits are available in six different size variations and five different satin lacquer finishes, all with an extra thin coating that maximizes the resonance of the maple wood. In addition, the included Yamaha Enhanced Sustain System (YESS) mounts are designed to minimize contact between the shell and the mount to deliver a wider dynamic range and longer sustain.
EAD10 Electronic Acoustic Drum Module
The EAD10 instantly transforms any acoustic drum set into a hybrid kit. Simply mount its sensor unit (which contains a pair of high-quality condenser microphones and a kick drum trigger) on the bass drum hoop. The microphones capture the entire kit, and the kick trigger can play any of the hundreds of drum or percussion sounds built into the EAD10 module. In addition, multi-zone snare and tom trigger inputs on the module can accept the output from a clip-on drum trigger or drum pad, making it possible to layer electronic sounds with the acoustic sound of the drums, or to expand your acoustic kit with electronic percussion, cymbals, or effects.
WINDS
SILENT Brass™ System
Kids love playing brass instruments like trumpet and trombone, which is why they are among the most popular instruments in school music programs. But, as every parent knows (or eventually finds out), brass instruments can be very loud when you get up and close and personal. Yamaha provides the perfect solution with its revolutionary SILENT Brass system, which consists of a specially designed mute fitted with a pickup that connects to a small electronic “personal studio” unit that clips onto the player’s belt. Versions are available for trumpet, cornet, Flugelhorn, trombone, French horn, euphonium, and tuba. A great gift for kids and parents alike!
YDS-120 Digital Saxophone
Our YDS-120 digital saxophone makes sax playing more accessible than ever before. It eliminates restrictions on where and when you can play, while offering the same tonal diversity, deep low notes and delicate highs of an acoustic instrument. It comes loaded with 56 soprano, alto, tenor, and baritone saxophone Voices, plus an additional 17 non-sax sounds — all delivered with the variety of expression only a saxophone can provide. It’s easy to play, too, with the same key configuration as an acoustic sax, plus a breath sensor that detects the pressure of your breath. The YDS-120 can be used with either a USB power source or with batteries, and it comes with a headphone terminal and an Aux in jack. It’s also fully compatible with a free smartphone app (requires connection with USB cable to device) that further expands its performance with intuitive instrument settings and sound editing.
YDS-150 Digital Saxophone
The YDS-150 digital saxophone allows anyone to play the saxophone anytime, anywhere. Though it has a lot in common with acoustic saxophones, it offers numerous innovations such as silent practice capability and 73 preset voices that include both standard sax sounds and non-saxophone sounds. And with the use of a free smartphone app, you can control everything from pitch transposition to key response — even create custom sounds. Best of all, any beginner or pro can pick up the YDS-150 and make a great sound right away. It feels just like an acoustic sax since it uses a similar key layout, mouthpiece, ligature and a synthetic reed. And like an acoustic sax, it even has a brass bell that provides the player with physical feedback similar to that of an acoustic instrument.
AUDIO
True X Speaker 1A Portable Speaker
The size of the True X Speaker 1A may be small, but its expressive range is huge — in fact, this handheld powerhouse packs all the high-quality sound of a full-sized speaker into a small footprint. Its exterior design fits and enhances any interior, lending style and great sound wherever you go. And, since it’s wireless and has IP67 grade waterproof performance, it can be placed anywhere, even outdoors. You can pair the True X Speaker 1A with any Bluetooth device or use it with a Yamaha True X sound bar to add rear surround sound anywhere in your room.
YH-L500A Wireless Headphones
Grab some popcorn. There may be no better way to enjoy your favorite movies, TV shows and music this season than with YH-L500A wireless over-ear headphones. Featuring exclusive Yamaha Sound Field technology that immerses you in cinema-like sound, the YH-L500A can be paired with all your Bluetooth-enabled devices, including your phone, tablet, computer, or TV. It’s exceptionally lightweight too — only 9.3 ounces — and offers a fatigue-free fit, making it the perfect companion when you’re ready to do some serious binge-watching.
For more information about these and other great Yamaha music products, click here.
You’re not lazy. You’re not missing something obvious. You just can’t catch everything in the middle of rehearsal chaos — and it’s hard to fix what you don’t hear. Here’s one small change that can make a big difference: Record your rehearsals.
Not to post for the public. Not to beat yourself up. Just to get a clearer picture of what’s really happening. It’s one of the fastest ways to improve your ensemble — and your teaching. I haven’t found anything else that gives more return on time.
Hit record during a full piece — or even just the first two minutes.
Drop the file in a Google Drive folder called “Rehearsal Logs.”
That’s it. You’re done. This takes less than a minute, but it instantly gives you another set of ears — one that’s not buried in a score or scanning for posture or making sure kids figure out the new digital hall pass. That outside ear will catch things you simply can’t in real time.
Yes, those first few recordings might be rough. The balance might be off. You’ll probably notice things you didn’t even know were issues. That’s the goal. Now you’re working with information, not assumptions.
Step 2: Listen (But Not Right Away)
Don’t listen immediately after rehearsal. Wait until you’ve stepped away for a bit and your brain has had time to reset. On your first listen: Just press play. No score. No notes. Imagine you’re a parent in the audience. What sticks out? Then go back once more — this time, with the score — and jot down three quick things:
What sounded better than expected?
What clearly needs attention?
What’s missing that you thought was there?
That’s it. You’re not doing a deep dive — just a quick check-up. Resist the urge to fix every little thing. Focus on what’s actually worth your rehearsal time. We’re looking for consistent or repeated issues — not one-time flukes. If your euphoniums crack one note out of 90 — skip it. If your flutes are 20 cents flat for eight bars — that’s worth your time. This is what keeps this process useful.
Why you can’t hear it in the room: Sometimes directors feel bad that they can’t hear everything going on. This isn’t because you don’t know what you’re doing. It’s because you’re juggling a dozen things at once:
Taking attendance
Scanning for broken reeds
Fixing missing mallets
Watching posture
Fielding call slips
Answering questions about the bus on Friday
Tracking entrances while counting rests in your head
Meanwhile, your third clarinets are playing a rhythm that doesn’t exist. Even with great ears, you won’t catch it all. That’s not a skill issue — it’s an energy issue. Recording gives you the opportunity to hear what you missed the first time.
Step 3: Use It to Plan
This is where your reflection becomes actionable. That 3-minute clip? That’s your next lesson plan. You don’t need a new rep plan or method book. You just need to respond to what you actually heard. Examples:
Balance issues? Adjust seating or mark in dynamics.
Sloppy cutoffs? Have students mark what beat to release on, and practice breathing to keep the volume strong throughout.
Dragging entrances? Rethink the count-in and isolate the transition.
Pick three things. Not 10. Just three. Write them down. Use them to start tomorrow’s rehearsal. If your next 10 minutes reflect what you heard today, you’ll start to hear changes — fast.
Set aside one short review block — 20 minutes or less.
One listen = three targets = hours saved. This turns “What do I fix next?” into “Let’s go after these.” It doesn’t feel good to guess. But knowing exactly what section to rehearse and then fixing a problem quickly? That’s when you move from a “let’s-run-through-it-again” teacher to an accomplished music director.
Yes, listening is uncomfortable at first. The first time I listened to a full rehearsal, I almost turned it off halfway through. Wrong notes. Strange phrasing. Long stretches of musical wandering. It made me question everything — my teaching, my ears, even my rep choice. I remember thinking, How did I not catch this in the room? But the recording wasn’t personal. It didn’t critique me. It didn’t talk poorly about me. It showed me what was actually happening. A musical lie detector, right in front of me. And this helped me to know what direction to take to begin fixing things.
Step 5: Try Video (Once Audio Becomes Easy)
Start with audio. That’s plenty. But once that’s part of your process, try filming one piece — especially something with transitions or heavy percussion. You’ll notice things you didn’t even think to listen for:
Are transitions actually working?
Who’s standing around?
Are percussionists reacting or waiting?
Are you stopping too much?
Are you doing more talking than teaching?
Five minutes of video will give you plenty of insight.
Before you start filming, 1) check your district policy, 2) get parent permission, if needed and 3) set up a tripod — the angle doesn’t need to be perfect. Then watch a short clip. No need to analyze every second — just let it play while you’re eating lunch or sorting music. This view may change how you rehearse!
Step 6: Let Students Hear Themselves
Want to show progress? Record your group’s first sight-reading of a piece. Then wait. Six weeks later, play it back. Your students will laugh, cringe … then, they’ll listen and realize: Whoa, we actually sound better now! That kind of progress is hard to explain in words. So let the kids hear it for themselves. You only have to do this once for each concert cycle.
Bonus: What to Listen For
Here’s a fast cheat-sheet for playback:
Balance: What’s buried? What’s present? What’s a little too present?
Rhythm: Who’s ahead? Who’s late? Who’s not quite sure what they are playing?
Releases: Together or messy?
Energy: Where does the group start to fade? Are they finishing phrases, or are some sections only holding a whole note out for two counts, maybe three?
You: Are you over-explaining? Repeating yourself?
You’re not grading this. You’re collecting clues to make tomorrow’s rehearsal more focused.
You’ll Become a More Focused Teacher
Listening back gives you a second shot at what you missed. It lowers your stress, sharpens your priorities, and tightens your rehearsal strategy. And it helps you let go of the pressure to catch everything in real time. Because you won’t. Even seasoned veterans don’t hear it all. That’s okay. Now you’ve got tools that help you catch it later — and fix it faster. This isn’t some trendy hack. It’s not new. We’ve just avoided it because it feels a little uncomfortable. But try it anyway. That 30-minute listen might save you days of aimless rehearsal. And when you know what to do, you’ll feel better about yourself and make an even bigger impact on your students.
AV receivers act as the central hub in your home system and live up to the acronym in their name by supporting multiple audio and video formats. If you enjoy watching movies and television shows at home, they’re pretty much a necessity, as they do the important job of distributing video to your big-screen TV, monitor and/or projector, along with routing audio to your speaker system.
But there are so many models to choose from! How do you know which one is right for you? Here’s a guide to picking the best AV receiver for your needs.
I/O
The first question you should ask yourself when choosing an AV receiver is, “How many inputs and outputs will I need?” Modern AV receivers typically offer a wide variety of connectors, including one or more HDMI® inputs for connecting video devices such as cable or satellite TV boxes, game consoles, Blu-ray™/DVD players and/or streaming devices such as Roku™ or Apple TV®. There will also be a number of audio ins and outs, including speaker outputs for stereo and/or multichannel systems and possibly a dedicated phono input for connecting turntables — a must if you’re into vinyl. Don’t make the mistake of assuming that you’ll only need a handful of inputs and outputs; even if your current system is on the modest side, there’s a pretty good chance you may want to expand it in future. It’s always best to plan ahead, so that you don’t quickly outgrow the gear you buy.
As an example, the entry-level Yamaha RX-V385 AV receiver allows the connection of up to five speakers (front left, right and center, along with rear left and right) and a subwoofer for a total of 5.1 channels (the “.1” is the subwoofer). It also provides three analog audio inputs, three digital audio inputs/outputs and four HDMI video inputs, as well as an HDMI output.
Yamaha RX-V385.
The RX-V4A model offers similar I/O connectivity, but gives you the ability to add a second subwoofer so you can enjoy a 5.2-channel listening experience.
Yamaha RX-V4A.
The mid-level RX-V6A expands on that further still by allowing you to connect two additional speakers for 7.2 channel playback, along with providing four analog audio inputs, a dedicated phono input and seven HDMI video inputs.
Yamaha RX-V6A.
And then there’s the top-of-the-line RX-V8A, which provides full 11.2 channel playback, along with ten analog audio inputs, a dedicated phono input and seven HDMI video inputs.
Yamaha RX-V8A.
Power Rating
The more power an AV receiver has (measured in wattage), the louder the playback can be. Having a receiver with an excess of power is generally desirable since it provides extra headroom, meaning that it can get a lot of loudness out of your system without having to be turned up very high, so there’s less chance of distortion. On the other hand, you don’t want the power rating to be so high that you run the risk of damaging your speakers.
The best rule of thumb is to match the power capacity of your AV receiver to that of your speakers as closely as possible. 50-100 watts per channel will provide more than enough volume for most home listening. (Bear in mind that wattage ratings are logarithmic, not linear, meaning that 100 watts is not twice as loud as 50 watts — in fact, it’s only slightly louder.) The aforementioned Yamaha RX-V385 offers 70 watts per channel; the RX-V4A offers 80 watts per channel; the RX-V6A offers 100 watts per channel; and the RX-V8A offers 150 watts per channel, making each of these models eminently suitable for most home theater applications.
Surround Sound Decoding and Processing Capability
Stereo may be fine for casual music listening, but if you want a true cinematic experience when watching your favorite movies and TV shows, you’ll definitely want to opt for a surround sound system. This means that your AV receiver will have to have multiple speaker outputs (as the RX-V385, RX-V4A, RX-V6A and RX-A8A all do, as noted above) and it will also need to be capable of decoding the various surround sound formats commonly used for streaming audio and video.
These formats include Dolby TrueHD®, Dolby DigitalPlus® and DTS-HD Master Audio™ — all supported by the RX-V385, RX-V4A,RX-V6A and RX-V8A; the latter two also provides support for DTS:X™, Dolby Surround® and Dolby Atmos®. (The RX-V6A and RX-V8A even offer Dolby Atmos Height Virtualization technology for the extra envelopment of height channels … but without having to add any additional speakers.)
Audio processing (sometimes called DSP — short for “Digital Signal Processing”) is utilized by most contemporary AV receivers to enhance audio signals in a variety of ways, including being able to isolate dialog so that you can make it louder or softer without altering background music and/or sound effects. Technologies such as Yamaha SILENT CINEMA (offered by the RX-V385, RX-V4A, RX-V6A and RX-A8A) can also simulate various sound spaces when listening with headphones, optimized for a variety of categories in both video and music — for example, Adventure, Drama, Sci-Fi, concert hall, club, or small room. If you only have stereo speakers, you can simulate surround sound with the Virtual Cinema DSP feature offered by many Yamaha receivers, including the three models discussed here.
DSP can also be used to automatically adjust dynamic range — the difference between the loudest and softest sounds. In Yamaha AV receivers such as the RX-V4A, RX-V6A and RX-V8A, this is called Adaptive DRC (Dynamic Range Control). It’s especially important when connecting gaming consoles to an HDMI input on your AV receiver, since it will ensure that, whatever game you’re playing, the volume doesn’t exceed an optimal listening level during the loudest moments.
Wireless Connectivity
It’s important for an AV receiver to be able to connect to the internet via your home network — in fact, it’s a necessity for streaming online content. A network connection also lets you access music libraries and other content you have on your mobile devices or home computers. Many contemporary AV receivers, including the Yamaha models described here, provide Bluetooth® support, allowing you to stream music wirelessly from smartphones, tablets, laptops and other devices into your receiver and then route it to your speakers.
In addition to Bluetooth, the Yamaha RX-V4A, RX-V6A and RX-V8A offer numerous wireless streaming options, including Wi-Fi, AirPlay 2® and Spotify Connect. These allow you to easily listen to your favorite music on services such as Pandora®, Spotify®, Amazon Music, SiriusXM, TIDAL and Deezer. They also provide support for Yamaha MusicCast multi-room technology, which enables you to control all functions remotely from a free app, as well as giving you the ability to connect optional wireless surround sound speakers.
Some MusicCast-enabled AV receivers (such as the RX-V6A and RX-V8A) also provide support for multiple zones, meaning that in addition to your main listening room, you can also listen to the same, or a different, source in another room or zone. If, for example, your family room or home theater room is where your AV receiver lives, you can designate that room as your main zone and outdoor speakers on the patio as Zone 2, allowing you to easily send music from your receiver to the patio simply by pressing a few buttons.
Other Audio Features
Another important audio feature is eARC (short for “enhanced Audio Return Channel”), which you’ll find in all three of the Yamaha AV receivers described here. You may already be familiar with ARC, which allows audio to be sent from your TV to your AV receiver through the same HDMI cable that carries the video signal in the other direction, from your AV receiver to the TV. The “enhanced” part of eARC increases bandwidth, which allows the transmission of full high-res multichannel audio without downmixing the signal to two channels as a means to conserve bandwidth. In addition, eARC allows surround sound signal to be sent uncompressed to your receiver, so you can enjoy theatrical 3D immersive sound from movies offered by Netflix®, Amazon Prime® Video and many other streaming services. And because you don’t need extra wiring to get sound from TV-based apps to play through your receiver, you can use your smart TV as your main streaming video source and enjoy full surround sound through a single HDMI cable.
Some AV receivers, including the three models listed here, also allow you to automatically tune your system based on the acoustics of your room. In the case of Yamaha AV receivers, this technology is called YPAO (short for “Yamaha Parametric room Acoustic Optimizer”).
And audiophiles will appreciate the Pure Direct mode offered by many Yamaha AV receivers, including the RX-V4A, RX-V6A and RX-A8A. When engaged, it feeds sound directly to the onboard amplifier and bypasses any DSP processing that might otherwise color the signal, ensuring the best possible high-fidelity sound from all audio sources — even those coming via USB and HDMI inputs. The end result is a more realistic sound and a deepening of the listening experience, making it more enjoyable than ever.
Video Features
Of course, picture quality is paramount. If you have a recently purchased a big-screen TV or are planning on buying one in the near future, you’ll definitely want to pair it with an AV receiver that has the ability to send incoming video to your TV or projector in up to 4K resolution. Such is the case with all three receivers listed here. The RX-V385 also provides support for several enhanced video modes that offer even better picture quality, including 4K Ultra HD, HDR10, Dolby Vision, Hybrid Log-Gamma and BT.2020; the RX-V4A, RX-V6A and RX-A8A models up the ante with 8K HDMI passthrough and support for HDR10+, which delivers four times as much brightness as standard HDR.
Gaming Support
If you’re an avid gamer, you’ll want to choose an AV receiver that provides features specifically designed to improve the gaming experience, such as ALLM (Auto Low Latency Mode) and VRR (Variable Refresh Rate), both supported by the Yamaha RX-V4A, RX-V6A and RX-A8A.
ALLM, sometimes known as “gaming mode,” tells the receiver to turn off all of its video processing so that the delay (latency) to display gaming video is minimized. VRR gives the AV receiver the ability to automatically vary the frame rate to match the output of the onboard graphics processor (GPU). It enables more fluid and detailed gameplay by reducing or eliminating lag and judder — jittery images caused by upscaling to the 60 frames per second (fps) required by a 60 Hz television and above — plus it reduces or eliminates frame tearing, which occurs when the frame rate exceeds the monitor or television’s refresh rate.
The end result? More realistic visuals to accompany the great audio being delivered by your surround sound system. Game on!
Your group sounds off. Not painful — just not quite right. You tuned, you balanced, you begged them to listen, but it’s still muddy.
Remember your undergrad years? You probably took the ceremonial tuning pitch and then went on with rehearsal, adjusting as you heard something. But chances are, you didn’t start that way. You developed that skill over time.
The students in front of me may not be music majors, but they can handle playing in tune. They just don’t know what “in tune” sounds like yet. Your job? Show them, one step at a time.
1. Fix Tone First
First, you can’t tune a bad tone. So, if you have trumpet pinching, airy flute sounds, thin violin tones, stuffy clarinets, etc., work on tone first. I know you want to get right to playing in tune, but we cannot skip this step. It will only lead to frustration for everyone within a five-foot radius of your group. That means long tones, breathing work, mouthpiece or headjoint exercises. Whatever gets you to a clean, focused sound.
In my room, we do tone work every day. It’s not always fun or interesting, but it’s the core of our foundation. Occasionally, I have skipped this at the beginning of rehearsal. After 15 minutes, I realized the errors of my ways, and we do what we should have done at the beginning of class: long tones, lip slurs and chromatics.
Reminder: The more characteristic the tone, the easier it is to match. You cannot tune a bad tone.
2. Start With Unison. Period.
Okay, now our trumpets sound like trumpets — we have a good tone. So, let’s move slowly. Don’t start with chords. Don’t start with intervals. Just pick one pitch and get the group to match it together. For bands, concert F and concert Bb are solid choices — familiar, stable and all over your repertoire. For string players, pick any of your open strings.
If it sounds like chaos, it’s not an intonation issue — it’s a control issue. Stay here until it locks in. Some days this takes two minutes. Other days, it takes 15 — and I fight the urge to move on because when we stay here and it clicks? It changes everything.
Goal: A consistent pitch students can hold, hear, and match. Blending comes before balance.
3. Use the Tuner
“You use tuners? Ever heard of ‘listening’?” I heard this from a band director as we sat in a director’s lounge at a conference. This director clearly did not approve of any tuner use. The kids should simply listen and adjust. He was very clear that his kids did not use tuners. And I hate to say this, but when you listened to his group, you could tell.
If you’re reading this, chances are you have something in common with me: You have a music degree or two, and chances are, none of your students have a music degree. And this isn’t to say that a degree automatically gives you great ears, but it does assume some level of experience. What I’m trying to say is that your kids probably don’t even know what in tune actually is, and a tuner can help them experience this.
For beginners all students, the visual helps. They can’t fix what they can’t hear, and a tuner gives them something concrete to react to. I provide a clip-on tuner to every single student the first week of school. We then tune a unison pitch, usually concert F, so we can hear what in tune actually sounds like.
Tip: Pair a tuner with a drone. Eyes + ears = better results.
4. Stick to F, Bb and Open Strings
I mentioned this earlier but want to emphasize: Don’t overcomplicate tuning. Keep your tuning notes grounded in the keys your music actually uses. Focus on concert F, concert Bb or open strings — they’re everywhere in concert band and orchestra literature. I’ve seen tuning routines bounce between six pitches with no connection to the music. Keep it simple. Tune what your kids play every day.
Think: What do my students play every day? Tune that.
5. Teach Mouthpiece/Headjoint Pitch
For brass, we do quite a bit of buzzing to help students adjust pitch. All students, including percussion (timpani in particular), hum to help internalize pitch. For woodwinds, you can do mouthpiece “buzzing” as well, as long as you have them play to a specific pitch.
Quick references:
Clarinet (mouthpiece + barrel): concert F#
Flute (headjoint): concert A
Alto sax (mouthpiece): concert G or A (depending on experience)
The first time we tried this, it sounded like a bad New Year’s Eve party. Many students had difficulty adjusting their air, mouthpiece angle or embouchure to get the correct pitch. But after a few weeks, pitch was becoming solid, and students were stabilizing sustained pitches much easier.
Reminder: A good mouthpiece pitch sets the tone for the rest of the horn.
6. Teach Them to Disappear
Every time I tell a kid to “lose yourself” for good intonation, I think of the Eminem song, “Lose Yourself.” I can’t put the lyrics here because it has bad words in it. This is just one of the things that goes on in my head during rehearsal (I’m sure you have your own idiosyncrasies …).
Anyway, kids may ask, “If I can’t hear myself, am I playing?” The answer is “Yes, and it probably means you’re doing it right.”
The goal of tuning isn’t to hear yourself better. It’s to blend into the group sound so well that you’re not sure which part is yours. It’s uncomfortable for kids. Some think if they’re not cutting through, they’re doing it wrong. But remind kids often that if it sounds weird, like you’ve lost yourself, that’s good!
Teaching line: “If you’re hearing everyone else more than yourself, that’s a good sign.”
7. If It’s in Tune, Don’t Touch It
Sometimes, things will just be in tune. Not always, and maybe not even that often, but when this happens, leave it alone. If the pitch is solid, leave it. You can acknowledge it, praise your students, but if ain’t broke, don’t fix it just to feel useful.
Rule: Only adjust if you’re sure it needs adjusting. Otherwise, let it go.
8. Try Player Adjustments Before Moving Equipment
After making sure that the tuning slide or headjoint is in the right place, try these fixes:
Adjust space in the mouth — spread the teeth
Raise or lower the tongue
Adjust the embouchure shape
These micro-adjustments give students control and help them learn to self-adjust by feel. You can also incorporate these in the warm-ups. Try a descending concert F Remington-style warm-up. Go from F to E natural, but instead of fingering for the E natural, have students (brass players in particular) bend the pitch down. This is a great way to work on adjusting for intonation.
Quick guide: Pitch is flat? Raise your eyebrows up. Pitch is sharp? Frown. Simple but surprisingly effective.
9. Move to Fifths
Once unison is locked in, start building interval awareness. Perfect fifths are stable, forgiving, and fairly easy to adjust in tune once you have a solid unison foundation. Ultimately, we’re trying to eliminate any waves in the sound. For fifths, you can tell students to raise their eyebrows up, and this is often enough to get this the 2 cents sharp it needs to be in tune with the root.
Remember Step 7. Why? Because a lot of instruments play sharp. If your root is in tune and a student plays a fifth a little bit sharp? Leave it alone.
10. Then Teach Chords and Harmonic Roles
Once your ensemble can match pitch and blend intervals, you’re ready for chord tuning. Start small:
Identify roots, thirds and fifths
Assign roles clearly
Balance around the root
Explain how the third may need to sit slightly lower (and be about 20% quieter).
If you don’t spell this out, students will just guess, and guessing leads to waves in the sound, which leads back to a muddy sound. Use a drone or keyboard to model it first. Let them hear what “in tune” sounds like before you ask them to create it.
Say this: “Let’s hear what the chord could sound like. Then we’ll try to match it.”
The first time I used one, I had no clue what half the buttons did. It still made a big difference. I played a pure chord, had the group match it, and they could feel it lock in. That made me a fan. If you’re unfamiliar with the Harmony Director, take a look at the various YouTube videos available demonstrating its uses.
One Note at a Time
Your students won’t magically “get” tuning. Neither did you. And yes, they need reps, but most importantly, they need a system. So, start small. Pick one pitch. Get it stable. Build from there. Ultimately, intonation is about helping students care about what they hear and giving them the tools to change it.
Managing a classroom requires more than expertise. You must also develop meaningful relationships with students, have strong organizational skills and provide clear expectations. A successful classroom or music program thrives when relationships and structure work together. As educators, our goal is to create a learning environment where every student feels supported, challenged and motivated. After this learning environment is established, you can begin meaningful teaching. Here are some strategies to build and maintain a positive, productive and student-centered classroom.
Relationships are the Foundation
Effective classroom management begins with relationships. Students will be far more engaged and responsive when they feel seen and valued. Take the time to get to know each student, which includes learning their name, interests, other activities and background. As you spend more time with students, learn about their favorite pieces of music or art, their personal goals and how they plan to improve. This will help build trust and rapport.
I had the pleasure of working with a small band program of 80 students in 5th-12th grades, and I was able to get to know my students very quickly. Currently, I oversee a band program of over 550 students in 7th-12th grades. When I started working with the larger program, it was impossible to immediately learn everything about my students. I was disappointed that I did not know my students as well. However, I was determined to glean this information about each student over their time in our program through daily greetings, check-ins and informal conversations. These interactions show students that they matter as individuals. When strong relationships exist, discipline and motivation will naturally follow.
Clear and Consistent Expectations
The backbone of a well-managed classroom is to set up students for success with clear and consistent expectations. It’s important to establish routines from the very first day, including warm-up procedures, instrument storage, transitions and rehearsal etiquette. At the beginning of the school year, students learn expectations for how to enter the classroom. If they do not enter correctly on subsequent days, they are all taken back outside the classroom to try again.
Expectations should be communicated verbally, visually and through modeling so students understand exactly what is required of them. Reinforcing these expectations regularly, even when things are going well, helps maintain predictability and confidence. Consistency reduces confusion, minimizes behavior issues and creates an environment where students know what to expect each day. Students are successful and thrive when they know the expectations. It is the teacher’s responsibility to ensure that students know the expectations and to hold them accountable.
Plan for Consequences
Another essential element of maintaining structure in the classroom is to have a plan for consequences. This plan should be communicated to students at the beginning of the school year. Clearly defining what happens when expectations are not met ensures that students understand the boundaries of acceptable behavior. Consequences should be applied evenly and without emotion. It is vital that students understand there are consequences to their actions, and that consequences apply to all students.
You may choose to have a progressive system that begins with a verbal reminder, moves to a private conference, then parent contact and finally escalates to administrative support when necessary. My goal is to handle any form of discipline in the classroom. Administrators know that if I bring them a situation, then I have already followed corrective steps. Keep documentation of behavioral concerns in order to help you identify patterns, support interventions and aid in communication with parents and administrators.
Addressing Problem Students
Most classroom management issues will be addressed easily and quickly when you have relationships, clear and consistent expectations and a plan for consequences. However, there will always be that one or sometimes a handful of students who test the boundaries in your classroom. Addressing problem students requires patience, understanding and collaboration.
In the past, if I had an issue with a student, I would talk to their other teachers to see if they were having similar issues. These conversations helped me understand if this was an isolated issue in band or a larger issue. From there, I would choose my course of action with the student and parent.
As a young educator, I constantly had discussions with mentors on how to handle particular situations. Seeking advice from veteran teachers offers new strategies and different perspectives.
Other helpful tools include taking time to learn what motivates a student, what triggers frustration and where their strengths lie. This allows for more effective and compassionate intervention. Building a relationship before resorting to punishment ensures that students feel supported rather than targeted. Many behavior issues improve dramatically when students feel understood and valued.
An Organized Classroom
The physical organization of a classroom, especially a music classroom, plays a significant role in classroom management. A well-organized space with clear traffic flow, clear understanding of where all equipment goes and easily accessible materials minimize issues. In the event there is a problem, you will be able to get to the student quickly.
Teaching students how to care for the classroom fosters shared responsibility and pride in their environment. This is also a huge time-saver for busy teachers. When the classroom is orderly, rehearsals or classes run more smoothly, discipline issues decrease and students are more prepared to learn. A well-organized classroom also fosters the ability to use proximity control, which is a big help when managing individual student behaviors.
Differentiated Instruction
In a music classroom where students’ skill levels are varied, you must have daily differentiating instruction. We put students on different instruments or parts to meet the needs of that individual student. We are also encouraging to our top students to audition for honor bands or participate in solo and ensemble events. This allows the needs of all students to be met. Beginners to advanced musicians require different supports. Flexible grouping through sectionals, peer tutoring and student-led work encourages collaboration and ensures that every student receives instruction that matches their needs. Differentiation instruction keeps all students engaged and will minimize classroom behavior issues.
Positivity Makes a Difference
A positive atmosphere plays a critical role in creating a safe and welcoming classroom. Encouraging students during rehearsals, celebrating growth and recognizing character as much as talent helps build confidence and motivation. We tell our students that they cannot be a good musician without being a good person first. That is a fundamental character trait we expect from our students. Positive reinforcement in the classroom increases student buy-in and creates a space where students feel safe taking risks and pushing themselves. When students feel supported, they work harder and achieve more — and there are fewer classroom management issues.
Positive Feedback to Parents and Celebrate Student Accomplishments
Positive communication with parents strengthens the partnership between home and school. Reaching out through email, phone calls, the school portal and quick shoutouts after concerts help parents stay connected to their student’s progress. In addition, this communication builds trust in you and the program. Positive communication ensures parents hear from you even when everything is going well, and not just when there is a concern.
Celebrating student accomplishments fosters pride and strengthens the culture of the program. Recognizing achievements such as All-State selections, solo and ensemble success, leadership roles or personal improvement encourages students and builds enthusiasm within the program. Sharing this information through emails, social media or website posts showcases the success of the student and positive visibility of the program. Celebrating these accomplishments reinforces the value of hard work and determination to all your students.
By creating a consistent, positive culture rooted in relationships and consistency, educators can build classrooms where every student has the opportunity to succeed!
You thought it was the right pick because another director recommended it. The reference recording sounded great. It checked a lot of boxes — playable ranges, solid pacing, even that “Editor’s Choice” distinction online. But three weeks in, and you have to admit to yourself that it’s just not working.
The low reeds are bored. The flutes just can’t quite get that section. The percussionists are making up parts. You’re managing more than you’re rehearsing — and worse, nobody seems to care. In fact, whenever you announce the piece, the kids groan.
You start asking yourself: Did I choose this piece because it fits my students or because I didn’t ask the right questions?
Like most of us, I used to pick music by scrolling publisher catalogs and listening to recordings late at night. I’d get excited by familiar names, clean recordings and that magical “Editor’s Choice” badge. But I was really listening for something else: The version of the group I hoped I had. If kids practiced, if everyone showed up and if they could just sound like the reference recording, this piece would be perfect. I was already warned by my mentors to teach the kids in front of you, and not the kids you “wish” you had. Otherwise, you’re just wasting everyone else’s time.
Now, before I pick anything, I ask these 10 questions.
1. Does this match where my students are right now — not where I wish they were?
When you program from a who-is-in-front-of-you perspective, rehearsals feel productive. It doesn’t mean you have to pick easy music, but you do have to know what’s attainable for the group in front of you today.
If the trumpets are 75% freshmen who picked up the instrument last fall, I’m not choosing the same opener I used when I had five all-staters — no matter how much I love how the piece sounds.
Even if a piece could be a great stretch eventually, I’d rather pick something one tier down and actually teach it well. There is nothing wrong with underprogramming and overperforming.
2. Does every section have something meaningful to do?
When a third of your ensemble is counting measures or stuck on two-note lines, they check out (every percussionist who’s ever “performed” on a ballad is nodding right now). Kids don’t join music to sit. Sure, you can have features and solos but make sure to balance your program to ensure everyone has something to work with and grow.
3. Is the piece professionally engraved?
This is a tough one, but I also have to make sure that the piece is formatted in a way that my students can quickly understand. The vast majority of the time — I mean, like 99% — you won’t encounter this problem, but when you do come across a piece that just isn’t formatted well, it can derail your whole rehearsal.
Rehearsal marks in odd places, rhythms formatted in odd patterns — most of the time we encounter this with commissioned pieces or student-arranged pieces. Other times, a piece will be engraved fine, but there will be one or two measures that are just hard to read. Don’t be afraid to change a ¾ bar to 6/8 if it makes sense and works for your ensemble.
4. Does this support the skills we’re focused on right now?
Every cycle has a focus — tone, literacy, confidence, blend, independence. If we’re rebuilding tone at the beginning of the year, I’m not picking something full of meter changes and constant counting. If we’re working on reading, I want fluency without overwhelm.
One fall, after a hybrid year, students had giant gaps in confidence. I picked a slower, more expressive piece that forced us to talk about breath, shape and sound. It wasn’t very technical, but it helped us rebuild.
5. Will students enjoy playing this or will they just deal with it?
Some pieces are more trouble than they’re worth. Not because they’re hard, but they’re just not satisfying. One year I picked a piece that looked cool. In rehearsal, nothing felt good. The transitions were awkward, the parts didn’t sit right and the kids couldn’t wait to turn it in. Things don’t have to be “fun,” but if the process is miserable and the payoff is forgettable, skip it.
6. Does this reflect my ensemble culturally, musically, socially?
Look at your students. Then look at your rep. Do they match?
If your school is 70% Latinx and you’ve never programmed a Latinx composer, that’s a missed opportunity. You don’t need themed concerts, but the pieces you present on stage should match the people you teach.
7. Does this push my strongest players without losing the rest?
I want to challenge my top players, but not at the expense of everyone else. So, I design for the middle and then look for opportunities for the exceptional: solos, divisi, alternate lines. We also have the option of finding other opportunities for above-average players, such as solo ensemble and district or state festival auditions. Push your strongest kids, but don’t forget the 80% who actually define your ensemble sound.
8. Is this something I can teach with the time and support I have?
I have selected pieces that needed sectionals I didn’t have time to run and percussion we didn’t own. That’s not because I didn’t want to work hard. I just needed to be realistic about the resources I actually had. If a piece requires resources you know you won’t have, just pick something else.
9. Will I hate this by Week 6?
You’re going to hear this piece at least 50 times. Probably more. I’ve started looping recordings before I commit. If I’m annoyed by Listen #12, it’s out. Same goes for music that only works because of one cool moment. If the lead-up isn’t worth it, you’ll find yourself counting pages, and your kids will feel that. Pick something you won’t dread. If you’re bored, students will be too.
10. If I swapped the title and composer, would I still want to do this?
It’s easy to get pulled in by big names or great marketing. If the title and composer disappeared, would you still pick it? Kids don’t care who wrote it (usually — we do have a few fans of specific composers). They care how it sounds and how it feels to play. I’ve picked pieces because they felt like “the right thing to do,” and they tanked. I’ve also picked obscure pieces with zero prestige, and the kids loved them. No awards. No lists. Just good music.
Programming Is Teaching
Your program is your curriculum. It tells students what matters, what’s worth their time and what kind of group they’re becoming. And you? You have limited time and can only perform so many pieces. Asking the right questions can help you use the most of the precious rehearsal time you have.
There is nothing quite like the joy of playing a real piano. The feel of the keys and the beauty of the tone — produced by felt hammers striking metal strings resonating through a massive wood soundboard — is an experience that is difficult to replicate with a purely digital keyboard.
When shopping for an acoustic piano, you should of course pay close attention to the touch and tone of each instrument that you audition. Naturally, you’ll also consider the instrument’s size, durability and style and finish of the cabinet, as well as the cost.
But there are other important issues to consider when it comes to today’s pianos, where technology can play a major role in your enjoyment of the instrument you purchase. In this posting, we’ll take a look at some of them.
Practice in Privacy
Wouldn’t it be great to be able to play your piano whenever you feel like it — and not bother neighbors or members of your household?
Imagine that you could put on headphones and play the very same grand or upright piano you’ve fallen in love with – and not be heard by anyone!
This is a feature you can find on some modern acoustic pianos, including numerous Yamaha models such as the Disklavier™, SILENT Piano™ and TransAcoustic™. In fact, nearly every size of a grand and upright piano that Yamaha makes is available in at least one of these series of technology-equipped instruments. There are even two Bösendorfer models available as Disklaviers.
Here’s how it works: When you engage silent mode, a bar inside the piano that prevents the hammers from hitting the strings is automatically moved into place. Remarkably, the action feels exactly the same — the only difference is that there is no sound of hammers hitting the strings. Instead, when you put headphones on you’ll hear the digitized sound of a real concert grand piano — a sound that matches the expectations of your ears and enables quiet, private enjoyment of your instrument.
Add a Volume Control
Or suppose you’d like to play without headphones but somehow turn down the volume. Of course, you could lower the lid of the piano, but that only gets you so far. How about having a volume knob that can do the job?
The Yamaha TransAcoustic piano does just that. By injecting the sound of a digitized 9-foot concert grand piano directly into its own soundboard, you can alter the blend of the two to your liking, giving you a variety of options:
– Play an upright or small grand piano and sound like you’re playing a large concert grand. Simply adjust the relative volume of the concert grand piano with the volume knob.
– Get your piano in tune… even if it’s actually out of tune. Turn on the Silent feature (so the hammers don’t hit the strings) and send the digitized sound of the concert grand into the soundboard. Instant perfectly tuned piano!
– Ready for quiet practice? Just put on headphones and enjoy the concert grand experience all to yourself.
– Go back to the totally “pure” sound of the piano itself. Easily accomplished: Just turn off the digitized sound.
Live Performance Enhancement
The Silent feature can also be used in the exact opposite way: to amplify your piano. This allows you to easily perform in a large public space, such as a church or performance venue where the acoustics require amplification. As an alternative to using microphones, you can connect your instrument directly to the venue’s sound system.
Interact With Your Apps
If you’ve been to a concert or two in the last couple of years, you may have noticed that sheet music is going digital. It’s not uncommon to see musicians reading music off a tablet instead — the same kind of tablet, in fact, that you may already own.
A tablet can replace hundreds or even thousands of printed pieces of sheet music, plus it fits nicely on the music desk of any acoustic piano. Add a wireless connection between the piano and the tablet — another feature you’ll find in several Yamaha models — and your playing can interact with the music on the screen. You can then use an app that helps you learn a piece, or one that provides a musical accompaniment that actually follows your playing.
Not only does Yamaha provide a way of connecting acoustic pianos directly to these interactive apps, we’ve pioneered a method of doing so wirelessly, using a Bluetooth®MIDI adapter called the MD-BT01.
Record Yourself
Creating a beautiful audio recording normally requires a combination of expensive microphones, careful mic placement and audio expertise. Yet some of today’s pianos allow you to make an audio recording without external microphones.
Most Yamaha technology-equipped pianos offer this feature. The basic idea is that the piano uses its internal digital sample of a 9-foot concert grand to turn your playing into an audio recording. The recording is free of room noise and hiss and will always be in perfect tune — even if the piano itself is actually out of tune.
Enjoy Performances from Artists the World Over
Let’s take things a step further. How about the idea of inviting fine artists from around the world into your home — virtually — to play your piano, at any hour of the day, any day of the week? That’s something you can do if the acoustic piano you purchase includes a record-and-playback system.
The full-featured Disklavier models offered by Yamaha have such a system. This means that you can record yourself and the piano will actually reproduce your performance by moving the keys and pedals the same way you did when you played!
This also gives you the opportunity to play back recordings that were made by other people on other pianos. For example, you can enjoy a piece of music being performed by a master artist or the original composer, or you can practice a piano duet by playing along with an absent partner.
The controls offered by the Disklavier are quite extensive. You can adjust the speed of playback or transpose the performance. You can even use a mobile device to record yourself with synchronized video or to enjoy a live concert that is streamed to your piano from a distant location.
Just a few years ago, these would be the makings of science fiction. Today they are reality. So when you’re ready to purchase an acoustic piano, be prepared to enter a brave new world. These aren’t your grandmother’s pianos!
Click here for more information about the Yamaha Disklavier.
Click here for more information about Yamaha SILENT Pianos.
Click here for more information about the Yamaha TransAcoustic Pianos.
It is almost impossible to describe the feeling of watching the Yamaha Young Performing Artists (YYPA) walk on stage to the thunderous applause of thousands of music students and teachers cheering them on to a performance of a lifetime.
I have a vivid memory of watching a young Patrick Bartley rehearse — he won the YYPA award for jazz saxophone a few years ago. His playing and sound were big, developed and deeply soulful. This was clearly a talented young man getting ready to jump into the world of music. He was a masterful musician with a humble soul, searching for guidance on how to navigate his journey. I see Patrick in social media posts or popping up performing with stars worldwide from time to time, and I take quiet pride in knowing that the YYPA Program may have played a small part in helping him design a career on his own terms. It’s great watching him unfold as a beautiful musician and man!
The YYPA experience is one of a kind and has the potential to move a young musician to the next level of professionalism, while connecting that musician to fellow future stars and top industry professionals.
John Wittmann, Associate Vice President for the Yamaha Artist Relations Group, engages in a workshop with 2024 YYPA winners.
What is YYPA?
The Yamaha Young Performing Artists Program recognizes remarkable young musicians studying music in the United States. The Competition phase is just the beginning of a unique and life-changing experience for those welcomed as Winners each year. Winners of this music celebration and competition are invited to attend an all-expenses-paid weekend at the Bands of America Summer Camp, presented by Yamaha, and receive a collaborative, once-in-a-lifetime performance opportunity, national press coverage as well as a recording and photos of the live performance. They also get to participate in workshops, given by seasoned music industry professionals and performers, designed to launch a professional music career. The fun and connection don’t stop there, though.
YYPA winners take one final breath together, basking in the joys of the YYPA Celebration Weekend before preparing for the Celebration Concert.
What YYPA REALLY Is
The YYPA Program has been positioned as a “competition” for many years. And while the competition does help us select our classes of Winners, YYPA is more of a fellowship — a bonding, inspirational and uplifting experience, which has lifelong impact on the future of rising stars. The workshops are small, intimate and offer real-life advice on topics such as dealing with self-doubt and mental health, managers/agents, personal mission and goals, collaboration skills and best business practices. There is also a strong focus on preparing audition materials, developing a press kit and refining interviewing skills. This YYPA fellowship is uniquely beneficial because it offers young musicians long-lasting skills and connections that are so much more relevant than a check and a photo op. The winners are responsible to form the program through collaboration and professional responsibilities and communication with each other.
The pinnacle of the Celebration Weekend is the annual Yamaha Young Performing Artists Concert — where the winners envision and deliver a world-class musical experience together. It is challenging and rewarding beyond words!
Yamaha Artist and world-renowned saxophonist, Grace Kelly, performs with 2023 YYPA Jazz winners.
Why teachers should care
If you’re an educator, and you have a special student who has promise, dedication and remarkable musical skills, this program might be a great opportunity to build on the great foundation you have laid. Your encouragement and refinement of them as musicians should be recognized and rewarded, and applying for the YYPA Program may be an amazing next step for your student. Encourage them to apply on time, write a strong letter of recommendation and help them put together a great application package. Applicants do not need to play Yamaha instruments to apply or win.
If you know an eligible, outstanding young musician, talk to them about applying to the YYPA Program. Even the act of putting together a solid application package is an incredible educational experience that builds skills!
If you’re a student between the ages of 18 and 22 studying in the United States and looking to take your journey to the next level, apply! Nicole Liu, the 2025 YYPA Piano Winner, said that YYPA was an unforgettable experience, and that “it wasn’t just about performing but about finding inspiration, community and the purpose to keep growing as an artist.”
A moment of musical mentorship captured between John Wittmann and 2017 Drum Set winner Stephen Morris.
Why I love YYPA
Working with the Winners is life-giving, but what is even more fulfilling is the quiet peace I feel when I receive a handwritten note from a Winner thanking us for helping them along their life’s path or seeing posts on social media from past Winners accomplishing great things. A source of great joy is seeing them perform in concerts with other musicians who they met through YYPA!
I started working full time at Yamaha in 1997, and YYPA was one of the first projects I oversaw. My first experience seeing the transformation of these bright, young, promising musicians from great players into confident, prepared and experienced rising stars lit a fire in me that still burns hot.
Top photo: YYPA’s 2023 winners, Jory Lane and Subin Cho, play an electrifying duo with collaborative pianist Casey Dierlam Tse.
You’ve made the decision to buy a piano, and you’re eagerly anticipating the many hours of musical pleasure it will bring you and your family. But pianos come in so many different sizes and shapes, it can be difficult to know which is the best one to purchase.
Of course, you want your new instrument to sound great and look great. But first and foremost is the size consideration: after all, the piano has to physically fit in the allocated space. What’s more, the size of the room — along with the placement of the piano in it and other factors — will have an impact on sound quality.
Fortunately, there are some easy guidelines to follow that will help you determine the best piano for your space, whether you live in a cozy apartment or an opulent home. Let’s dig in!
Piano Types
As described in a previous blog posting, there are two basic types of pianos: grands and uprights. The most obvious difference is size (grand pianos are larger), but they also have different characteristic shapes due to the positioning of their soundboards, across which are stretched the strings. Because the soundboards of grand pianos are mounted horizontally, those instruments have a bigger “footprint” and a sleeker profile than uprights, which can look a little boxy by comparison.
Grand piano.
Upright piano.
Grand pianos are usually the choice of professional musicians in that they offer a richer, more dynamic sound than uprights, though there are exceptions, such as Yamaha YUS Series uprights, which offer a broad range of sonic tonalities more reminiscent of a grand piano. But uprights take up much less space and tend to be considerably less expensive than grand pianos, making them a favorite of music students and a staple of schools and conservatories all over the world.
Piano Sizes
Grand pianos vary in size from “Baby grand” models that can be as little as 4 1/2 feet in length, all the way up to “Concert grand” models, which can be 9 feet in length or more. (Note that grand piano length is measured from the key slip — the piece of wood in front of the keys on the keyboard — to the very end of the lid.)
Upright sizes range from small “Spinet” models (popular decades ago but rarely made today) to larger “Console” and “Studio” models that vary in height, up to 52″ or so. Interestingly, almost all pianos — both grands and uprights — are approximately 5 feet wide. This is due to the fact that they all provide a standard 88-note keyboard.
Yamaha upright pianos range from compact, entry-level P22 and b Series instruments to the U Series — the world’s most popular upright — to the aforementioned flagship YUS Series. The height of these pianos varies from 45″ to 52″, and their depth varies from a mere 21″ to 26″. This last dimension is particularly important since, as we’ll see, upright pianos are designed to be placed up against walls.
The Yamaha U1 is 4′ high.
Which Piano Size Is Right for Me?
Needless to say, room size is a major determinant in deciding which piano is right for you: The larger the room, the larger the piano it can accommodate — and, in general, you should purchase the largest piano that your room will comfortably allow. Seems simple enough, but it turns out there’s a lot more to it.
For one thing, the increased surface area of the soundboard and the greater length of the strings in larger pianos translates to more vibrational energy, which increases projection — in other words, larger grand pianos can sound a lot louder than smaller ones. That said, most non-professional pianists don’t play with the velocity required to make larger pianos project to their highest potential, so it’s unlikely you’ll be filling a large room with sound when playing leisurely. (Interestingly, larger grand pianos can also be played more softly than smaller ones. This is due to the longer key length, which supports better physical control over hammer velocity. That’s why a concert grand piano is easier to play at lower volumes than a baby grand.)
You’ll also need to factor in whether or not other people in the room (or in adjoining rooms) will be disturbed when you’re playing. This leads to the issue of room treatments: If there’s lots of soft furniture in the room (such as sofas or easy chairs), carpeting on the floor and/or drapes or curtains on the walls or windows, the piano will be a lot quieter (and the sound will travel a much shorter distance) than if the room has a hardwood floor with little furniture, drapes or curtains to absorb the sound. A grand piano might be overbearing in a room like that, whereas an upright would probably sound fine.
That said, there’s no ignoring the fact that grand pianos often have a more pleasing aesthetic than uprights. If you’re set on buying a grand rather than an upright, and your room has the space to accommodate it, that’s fine, but you’ll probably be better off with a baby grand, or one of the smaller full-size grands, as opposed to a larger model.
Here’s why: The physics of sound propagation leads to the rule of thumb that, for optimum sonics, the total length of the walls of the room should be at least ten times bigger than the length of the piano. A 9-foot concert grand piano, for example, should ideally be placed in a room that has 90 feet or more of total wall length … and few living spaces meet that criteria!
A very large grand piano is therefore usually not a good choice for a typical living room. That’s one reason why these instruments are called “concert” grands — they’re really designed for the concert hall. Their sound doesn’t fully propagate for many feet, so someone standing nearby (or someone seated at the piano, playing) will not hear the instrument at its best, whereas an audience member in the tenth row of a large venue would. This is true regardless of how well made the instrument is, and even if the room is equipped with all the necessary materials to absorb sound.
Tip: It can be helpful to get a large piece of drawing paper and trace an outline on it of the dimensions of the piano you’re considering purchasing. (Dimensions like the ones shown below are readily available from the manufacturer or dealer.) Be sure to add an extra 2 feet to the depth of the outline to allow for when the bench is pulled out while you’re playing.
Yamaha GB1K baby grand piano dimensions.
Yamaha P22 upright piano dimensions.
Piano Placement
As mentioned previously, upright pianos are designed to be placed against a wall. This positioning not only yields optimum sound, it also gives you the best use of available space, particularly in small rooms. (There’s an aesthetic consideration too, in that the backs of upright pianos are rarely finished.)
Upright pianos are designed to be placed against a wall.
Grand pianos, on the other hand, sound best when they’re out in the middle of a room, or placed at a 45-degree angle in a corner of the room. However you position it, you’ll want to ensure that the pianist — especially if it’s you! — will be able to see the rest of the room (or perhaps even out a window) instead of having to face the wall.
Grand pianos are designed to be placed out in a room.
It’s also important to protect your piano from any sudden climate changes that can harm the instrument. For example, you should never place a piano under direct sunlight. While having it near a window may look aesthetically pleasing, the heat of the sun could easily damage it. Similarly, it should not be placed near air vents, as any temperature changes will affect the instrument.
Piano AR
Yamaha offers an amazing online augmented reality tool called Piano AR that can help you decide where to place your piano … even before you buy it!
Piano AR superimposes a virtual image of the Yamaha piano model of your choice in your room.
Simply go to the Piano AR website on your mobile device’s browser and select the Yamaha upright or grand piano model you want to view, then tap the “View In Your Room” button and scan the area where you would like to place the selected piano. You’ll be shown a virtual image of the piano as it would appear in your room — you can even rotate the piano or change the finish color so you can see how it will blend in with your décor, then take a picture of how it would look as you explore different options. With Piano AR, it’s never been easier to envision the piano of your dreams in your home.
The Digital Option
If you have your heart set on owning a grand piano but your available space only allows for an upright (or if you already own a grand but are downsizing to a smaller space), there’s an easy solution: Consider purchasing a digital piano instead. Not only do many digital pianos offer the sound of a grand (in addition to many other kinds of instrument sounds — a feat of technological wizardry that not even the finest acoustic piano can provide), they also take up much less space than even an upright. They also allow you to practice silently by simply plugging in a set of headphones, and are much easier to maintain than acoustic pianos — for one thing, you never have to tune them!
Yamaha offers many different digital pianos, from portable models to beautifully crafted ARIUS YDP Series instruments to the full-featured Clavinova line, available in both upright and grand piano cabinets. Many include digital samples of the revered Yamaha CFX and Bösendorfer Imperial concert grand pianos found on the finest concert stages the world over.
Yamaha Clavinova.
And then there are hybrid instruments like Yamaha SILENT Pianos™ and the TransAcoustic Pianos™. These have the genuine sound and feel of an acoustic piano … but they also allow you to decrease volume or even mute the sound altogether, making them capable of fitting into anyone’s lifestyle.
Whichever type of piano you end up purchasing — grand, upright or digital — you’re sure to enjoy many happy hours of making music. Time to start measuring!
Teachers are the one profession that makes all other professions possible. Fundraisers are companies that make all purchases possible. When do these two groups intersect? If you teach music long enough, it’s when this question comes up: “Who should we trust to help us raise money?”
You’ll get flyers, emails and promises of quick cash from all kinds of companies. Some look legit. Some are charming in a “90s clipart” kind of way. Most skip a pretty important question: Do they actually understand how schools work? Or more importantly: Do they understand how your school works — with boosters, activity accounts, approval processes and music program needs?
What sounds like easy money can turn into paperwork, an uncomfortable conversation with your principal or a PR mess if they don’t get how your school actually works. That’s why picking a fundraising partner isn’t a quick transaction — it’s more like hiring someone to join your team.
Would you hire another director just because their resume had flashy graphics and said they were “fun to work with”? No. You want someone who follows through, respects the rules and makes your job easier.
Start With What You Need — Not What They’re Selling
Before you hop on a sales call or pass a flyer to your boosters, pause. Make sure you understand what your program actually needs by asking yourself:
Is this a one-time fundraiser for a trip, uniforms or festival fees?
Or are you looking for a long-term partner to support a full season of events?
Do you need something fully managed, or do you have parents who can take the lead?
Will the company handle student data, payments or parent communication?
Also, loop in your activities director or admin. Some districts require vendor approvals, privacy agreements or reporting procedures that fundraising companies must follow. Most have heard the saying, “ask for forgiveness, not permission.” When it comes to money and compliance, this is not the time to just “Try something out.” A great fundraiser builds momentum. A bad one burns hours, frustrates families and puts your program at risk.
Five Smart Questions to Ask Every Fundraising Company
You don’t need to be a lawyer. Just ask these five questions — and watch how they answer. A good company won’t flinch. A sketchy one will.
1. How do you handle student and donor information?Some states have student privacy laws in place. But even if your state doesn’t, any company that collects names, emails or payments must have policies in writing and be ready to follow your district’s rules. Ask for specific policies. Look for:
“We don’t store student data without written consent.”
“All payment data is encrypted and deleted after processing.”
“We’ll sign your district’s vendor or data agreement.”
If they get defensive, vague or confused, then it’s time to say “thank you” and move on. Your families are entitled to their privacy.
2. What’s your pricing and payout structure? Every company takes a cut. That’s fine. But how they explain it tells you a lot. Ask for:
A clear percentage that goes to your program
Any fees (credit card, platform, admin, shipping, etc.)
When and how you’ll get paid
Ask to see a sample payout report. A good company will show you. A shady one will say, “Well… it depends.” Again, if it’s not clear and easy to understand, move on.
3. How do you represent our school and program? If they will contact parents or donors on your behalf, that’s a big deal. Their communication becomes your communication. Ask to see samples of emails, flyers and websites or social posts.
Do they sound like something you would send? Is the tone respectful? Do the visuals reflect your school community? You’ve worked hard to build trust with band families. Don’t let a third party blow it with cringey graphics or constant spam.
4. What experience do you have with school music programs? Selling chocolate bars for a soccer team isn’t the same as raising $15,000 for travel to Midwest or Bands of America. Ask for references, especially from other music programs or schools like yours. “We’ve worked with schools like yours” is an okay answer. But “We helped a suburban band raise $12,000 in three weeks with a donation-based campaign and matched funds” is a much better one.
I always ask fundraising companies to name two nearby schools that they have worked with. If they can’t, and they’re an established company? Red flag. And if they can? I call those directors.
5. Can you walk us through your process start to finish? This one’s huge. The best companies have a plan. You shouldn’t have to piece things together. Look for:
A clear timeline
Templates for messaging
Wrap-up reports
Clarity on who handles questions, deliveries or refunds
If it feels vague or like “we’ll figure it out as we go,” that’s exactly what will happen. Unfortunately, I’ve had to make apologetic phone calls to families and supporters when a company delayed shipping several times. Everyone eventually got their products, but it would have been more appropriate had the company kept consistent communication.
Pro Tip: Use This Script
Here’s a simple way to set expectations early: “Before we move forward, our district requires all vendors to meet our data and transparency standards. Can you send over your privacy policy and a sample payout report?” This communicates that:
You’re serious
You have your district’s backing
You have standards — and you’re not afraid to walk away
All privacy policies won’t look the same, but what’s important is that one exists. And no, you usually don’t need a privacy policy if you are selling chocolate bars or similar products; this is mainly for larger fundraisers like luxury item auctions or phone/text pledges.
Loop In Your People
Include 1) your activities or athletics director, 2) any assistant principals who oversee fundraising and 3) the person who handles payments and approvals in your building.
Even if you’re allowed to make booster decisions solo, it’s better to have buy-in early than to backtrack later. One or two emails ahead of time is much less work than finding out you have to fill out a whole bunch of paperwork and background checks later on.
What the Right Partner Feels Like
A great fundraising company doesn’t just help you raise money — they help you save time, communicate better and feel like a real partner. You’ll know you found the right one when:
They bring answers before you even ask
They offer tools you can actually use
They protect your program’s reputation and make your life easier
It should feel like adding a team member — not managing another section. One of the best companies we worked with sent a full comms plan: emails, social posts, printables — all written in our voice. All I had to do was hit send. That’s the goal.
Action Step: Interview Smarter
Make a short list of companies. Use the five questions above in every call or meeting. Take notes. Ask for documentation.
If this is your first time, bring a veteran teacher or booster parent into the conversation or talk to a school that’s used the company before. It’s not about being suspicious. It’s about protecting your program, your students and your time. It may be uncomfortable to ask these questions, but it’s even more uncomfortable to explain this to parents and administrators when something doesn’t go well. So why not make your future a little easier?
Around the holidays — well, actually all year long — I get phone calls, emails and texts (thank goodness carrier pigeons have gone out of fashion) from friends who want to buy a guitar, but don’t know much about them. Their questions sound something like this:
“Hey Tom, my (son or daughter) wants to play guitar. What’s the best one?”
“Hey. I’m at (pick a store) and they have a guitar here — would this be a good one for (me/my son/daughter/niece/nephew)?”
As much as I’d love to post my cell number and be everyone’s personal guitar shopper, this blog is meant to start you in the right direction and arm you with the information you need to find the right guitar to gift a loved one (or yourself).
Here are the four things you need to know to give a holiday gift that can bring a lifetime of enjoyment.
One: Get ‘em what they want to play
If you are buying a guitar for someone who knows what they want — great! Much of your work is done. The single most important decision is selecting an instrument that will make the person want to play. So if they want an electric guitar (don’t freak out — we’ll address the different types of guitars in just a minute), buy them an electric. If they want a classical guitar, buy them a nylon string model.
But what if they don’t know what they want? In that case, you’ll need to do a bit of detective work. It’s easy: Simply find out what kind of music they love and want to play. Determine what musicians or music genres they listen to, and then see what type of instrument those artists usually play. If your gift recipient is a fan of contemporary pop or country music, an acoustic steel-string guitar will fit the bill. If they are enamored with classic rock bands, an electric guitar is probably in order. If they’re into folk or classical music, a nylon string guitar is your best bet.
Two: Types of guitars to consider
The second thing you need to know is just a bit about the different types of guitars you can choose. The good news is, there are really just three of them:
Acoustic steel-string guitar. This is the most popular style for a new player. As the name suggests, this guitar makes sound without an amplifier, so all you need is the guitar itself to make music. It also has steel strings, which have a distinctive sound. You may have heard that steel strings are hard on the fingertips, and this is true to a point, but most people adapt quickly.
Yamaha FG800J regular body acoustic guitar.
If you are considering a steel-string guitar, I have two important tips. First, choose a size that’s right for the player-to-be. Folks with smaller hands and bodies will find a smaller body guitar easier and more enjoyable to play. Young teenagers, children and some adults find this to be the best choice.
Yamaha FS800J small body acoustic guitar.
Secondly, if the person to whom you are gifting the guitar has aspirations of performing or recording, an acoustic-electric guitar is a good way to go, since this type of guitar allows them to play acoustically and also plug in and play amplified.
Yamaha FGX800C acoustic-electric guitar.
Classical (nylon string) guitar. As the name implies, the strings of these instruments are made of nylon. This type of guitar has a distinctive sound that is associated with classical music, and also some folk music. You may hear that it’s best to start with a nylon string guitar because it’s easier on the fingers, but as I mentioned earlier, most people adapt quickly to whatever kind of guitar they are given. Also, nylon string guitars often have wider necks, which can make it more difficult to play for some folks with smaller hands.
Yamaha C40II nylon string guitar.
Electric guitar. For this type of guitar, you’ll also need an amplifier, since the guitar itself doesn’t make much sound. That adds somewhat to the initial expense and takes a bit more effort to plug in and play — but not much. On the other hand, beginners sometimes find electric guitars a little easier to play than acoustic guitars, since the strings may be closer to the neck (in the jargon, their “action” is lower), so less finger strength is required.
Yamaha Pacifica PAC012 electric guitar.
Yamaha THR-II desktop amps.
Three: It pays to accessorize
Home stretch. All the hard parts are done. Adding a few items to your gift can help your player start off strong.
The most frustrating part of learning to play guitar used to be tuning it! But no more. You can download a number of tuning apps for your smartphone that work great. There are also clip-on tuners that sell for well under $20. The important thing to know is that a tuner is a critical tool for any guitarist.
Yamaha GCT1 clip-on tuner.
For most styles of music, a guitar strap is a great investment. The important function of a strap is that it lets a new player get their guitar in the right position right away.
And, if you’re buying for a burgeoning musician who will be taking their guitar to school, friends’ house or lessons, a case is really important too. For most purposes, a lightweight, soft case known as a “gig bag” works well and is not very expensive.
Four: Put a bow on it (with a teacher)
If you REALLY want to get your new guitar player off on the right foot, gift them a month of lessons with a qualified guitar teacher. A teacher will start them off right in terms of holding, tuning and playing the guitar. You can learn to play songs watching YouTube, but a real, live teacher makes a difference. Hit up your local music store — most offer lessons — or Google it.
Finally, a brief visit from the Ghost of Christmas Past. What if you have a guitar hanging around in a closet someplace. Is that OK to gift? I’d give that a definite maybe. It could be totally fine with a new set of strings and a slight adjustment or two, or it could be a one-way ticket to frustrationville for your player-to-be. My advice? Take it to a local music store and have them check it out for you.
Have fun finding that gift that can bring a lifetime of music! It lasts way longer than chocolate.
When purchasing your first digital keyboard, there are several factors to consider: size, budget, sound quality, the number of onboard sounds, touch, built-in learning features, recording capability, and connectivity to devices and computers — to name a few. In this posting, we’ll try to simplify your shopping decisions by exploring each of these.
Short On Space? Go Portable.
Small digital keyboards are sometimes called portable keyboards. They are exactly that — portable. These instruments take up very little space, and can be set up or stored anywhere. Most have 61-note non-weighted keys, although some models feature 76 keys, sometimes with slightly weighted actions. Many people prefer a keyboard that is touch sensitive, which allows better musical expression, similar to a piano. On those instruments, the harder you play the key, the louder the sound.
Just about every digital keyboard provides a headphone jack. This is a great feature that allows you to make music in privacy at any time of the day or night. And even entry-level instruments offer a large variety of onboard sounds — dozens or even hundreds of them. Quality can vary, though, so be sure to listen carefully as you audition them. In addition, many digital keyboards support Styles that automatically provide elaborate accompaniments. Again, quality can differ from instrument to instrument, so take a little time to try them out.
Any of the Yamaha PSR-E Series portable keyboards would be good choice for the beginner. Select PSR-E models have a built-in feature called “Keys to Success,” which is based on teaching techniques shared with Yamaha over many years. You can select just the key phrases (“steps”) of a song — the ones you like most or need to work on — and practice them one by one. Each time you play all the way through the current step, your performance is evaluated.
Yamaha PSR-E283 portable keyboard.
Connectivity to computers and portable devices such as smartphones is another important feature to look for. Several digital keyboards provide a USB TO HOST port for this purpose, allowing you to record high-quality audio or MIDI without the need for a separate interface. A wide variety of creative and educational apps are available online from Yamaha and other developers.
Looking for More? Consider a Digital Piano.
Portable keyboards are great for the hobbyist and beginner. However, you may prefer to purchase a more advanced digital piano. These instruments offer many of the qualities of an acoustic piano, including a full 88-note weighted keyboard — but at a significant savings in cost — and without the need for regular (and sometimes expensive) upkeep. In addition, they often provide functionality you won’t find on the typical acoustic piano, such as recording capability, connectivity with devices and computers, learning tools and more.
Yamaha offers a wide range of digital pianos, including these:
P-Series compact digital pianos like the P-525 are a great option if space is an issue and are suitable for both practice and live performance.
Yamaha P-525 compact digital piano.
Our Portable Grand digital pianos combine portability with weighted keyboards. Some of them also offer wireless connectivity for iOS smartphones and tablets using optional wireless adapters.
Yamaha DGX-670 portable grand digital piano.
Yamaha ARIUS instruments include a number of digital pianos with built-in consoles, ranging from basic models to those with advanced features.
Yamaha ARIUS YDP-105.
Clavinova is the premium Yamaha digital piano product line, combining authentic touch, tone and look with cutting-edge technology. There are three different series of Clavinovas available: the CLP, the CVP, and the CSP.
Yamaha Clavinova CSP-255.
Choosing your first digital keyboard may seem overwhelming at first, but with a little research and a visit to a local music dealer or two, you’re sure to come up with the ideal solution. And remember: Always buy not just the instrument that fits your budget, but the one that best fits your needs.
For more information about Yamaha portable keyboards, click here.
To find out more about our digital keyboards, digital pianos and Arranger instruments (including Genos2), click here.
It’s that special time of year again! Here are some great audio gift ideas from Yamaha for the music lover or movie aficionado in your life.
Headphones
YH‑L500A
Looking for a gift that turns everyday listening into an experience? The YH‑L500Ais perfect for movie buffs and music lovers alike. These wireless headphones offer Yamaha Sound Field technology to create a spacious, three-dimensional soundstage that makes holiday movie nights feel like a trip to the theater. Switch to Cinema mode for crystal-clear dialogue or Music mode for rich, immersive audio.
Lightweight and comfortable for long sessions, the YH‑L500A offers up to 20 hours of battery life, Bluetooth® multipoint pairing and support for high-quality codecs like aptX Adaptive. Add in advanced features like Listening Care and app-based customization, and you’ve got a gift that combines luxury and practicality — ideal for anyone who loves great sound.
AV Receivers
RX-V4A
The RX-V4A 5.2-channel surround sound audio-video receiver brings the theater experience to your living room, with the latest in HDMI video compatibility and advanced audio technology, including Dolby Digital Plus and DTS-HD Master Audio decoding.
A whopping 80 watts per channel provides plenty of power, and there are numerous onboard wireless streaming options, including Wi-Fi®, AirPlay 2® and Spotify Connect, allowing you to easily listen to your favorite music on services such as Pandora®, Spotify®, Amazon Music, SiriusXM, TIDAL and Deezer. There’s support for enhanced media and gaming, as well as Yamaha MusicCast multi-room technology, which allows you to control all functions remotely from a free app, as well as giving you the ability to connect optional wireless surround sound speakers. What’s more, built-in YPAO automatic room calibration can be used to analyze the acoustics of your listening and viewing space so that the sound you hear is the absolute best it can be.
Speakers
NS-777 Floor Standing Speaker
Every fan of great sound will be thrilled to receive this gift. The NS-777 is a floor-standing three-way bass reflex speaker that can handle up to a whopping 250 watts of music power. It incorporates a pair of 8″ cone woofers, a 5″ midrange cone driver and a 1″ aluminum dome tweeter for full-range sound from 30 Hz all the way up to 35 kHz. For improved imaging, the midrange and tweeter utilize Yamaha-exclusive waveguide horns that reduce reflected sound and increase the proportion of directly generated sound waves reaching your ears.
The NS-777 cabinet has a high gloss black piano finish that provides solid construction with minimal sound diffraction, and the included speaker stand provides the solid footing necessary for full floor contact, enhanced stability and minimal vibration resonance.
NS-C444 Center Channel Speaker
The NS-C444 two-way acoustic suspension speaker is specially designed to carry critical center channel information (which is usually dialog) in home theaters. It incorporates dual 5″ cone woofers and a 1″ aluminum dome tweeter that utilizes an exclusive Yamaha waveguide horn for a clear and precise sense of sound direction and placement.
The NS-C444 can handle up to 250 watts of music power with a frequency response of 65 Hz to 35 kHz. The cabinet has a high gloss black piano finish, which provides solid construction with minimal sound diffraction, and the grill cloth provides an attractive and acoustically transparent protective cover for the drivers.
NS-333 Bookshelf Speakers
The NS-333 two-way bookshelf speaker system is ideal for both music listening and home theater applications. It incorporates a 5″ cone woofer and a 1″ aluminum dome tweeter, and thanks to its bass-reflex design, can be used for main or surround channels. For improved imaging, the tweeter utilizes a Yamaha-exclusive waveguide horn.
The NS-333 can handle up to 150 watts of music power with a frequency response of 65 Hz to 35 kHz. The cabinet has a high gloss black piano finish, with an attractive and acoustically transparent grill cloth to protect the speaker drivers.
Home Theater in a Box (HTIB)
YHT-5960U
While there’s something to be said for assembling a home theater with hand-selected individual components, there’s no question that a complete turnkey “Home Theater in a Box” system like the YHT-5960U is a lot easier and more convenient — the ideal gift for movie and TV enthusiasts everywhere.
The YHT-5960U includes a full-featured 5.2-channel Yamaha RX-V4A AV receiver, along with a powerful subwoofer and complete set of surround speakers. The RX-V4A offers the latest in HDMI video capability and a whopping 80 watts of power per channel, along with advanced audio technologies like Dolby TrueHD and DTS-HD Master Audio. It also supports enhanced media and gaming, YPAO automatic room calibration, and wireless streaming via Wi-Fi, Bluetooth, AirPlay 2, Spotify Connect and Yamaha MusicCast. The included front, rear and center speakers place easily in your room, and there’s a dedicated subwoofer for powerful bass, plus speaker wire perfectly matched for each speaker.
Ready to learn more about these great products? Check out our online store.
Annie Ray was named the 2024 GRAMMY Music Educator partially for creating the Crescendo Orchestra program, which creatively personalizes music education to the specific needs of each student with physical and intellectual disabilities. “Crescendo has been such a long learning process, and I’ll never stop learning from the students and the experts in the field,” says Ray, the Orchestra Director and Performing Arts Department Chair at Annandale High School.
Photo by Aidan Demolli/Benson Park Photography
A Once-In-A-Lifetime Opportunity
Ray will never forget the twin brothers she taught in elementary school several years ago: Both had significant intellectual disabilities, and she felt frustrated with herself because they were in her mainstream strings class that met once a week, and the boys were struggling to learn how to play.
“I felt like I was absolutely failing them,” Ray recalls. “Until one day I kept them after class and worked with them one on one and realized that they knew everything I was teaching but were just processing and showing me their learning in different ways.”
Then the COVID-19 pandemic struck in 2020, and students were grounded at home. When kids gradually started to return to school, students with significant disabilities were some of the first ones to arrive back at campus. Ray found that she had missed working with students with disabilities. Together with paraprofessionals, general music teachers and caregivers, she put together a music education program called Crescendo that was designed specifically for students with disabilities.
Annie Ray (Photo by Aidan Demolli/Benson Park Photography)
Using a lot of trial and error and improvisation, Ray and special education professionals wrote a curriculum that enables students to learn to play the violin, viola, cello or bass through meeting each one of them where they are at. With the slowdown of the pandemic, Ray was able to put a lot of time into creating imaginative lessons.
“It was this entire period of freedom,” Ray says. “There was nobody looking over my shoulder to see what I was doing. I had this entire school year to create.”
Now in its fifth formal year, Crescendo has 15 students, who work with Ray and instructional assistants in 80-minute classes just like their general education peers. The students have a variety of physical and intellectual disabilities, and each receives a tailored approach that plays on their strengths and minimizes their limitations. Ray rewrites the program and pushes the boundaries every year, so it meets every student where they are at. The Crescendo Orchestra students play in all four annual concerts alongside their peers in general education, so they get exposure and recognition, and some even go on to join the main school orchestra.
Adaptions and Learning
In Crescendo Orchestra, many students have physical or sensory disabilities that impact how they interact with traditional instruments. This has given Ray the opportunity to explore creative adaptations, customizing instruments and approaches to support each student’s unique strengths and needs. For example, for students who experience sound sensitivity, Ray may assign lower-pitched instruments that sit farther from the ears or provide noise-reducing headphones to create a more accessible environment.
“The things I’ve had the most fun are unique approaches like super-gluing a cello to an old marching drum harness for a student who has lower muscle tone. It worked!” Ray says. “That’s the cool thing about Crescendo — there are no rules! We just get creative in figuring out what playing violin or viola or cello looks like,” Ray says.
Kids, both in general education and the Crescendo program, get nervous about learning to play an instrument at first. They don’t want to sound bad — but, that’s simply a part of learning. Everyone sounds bad at first, Ray explains, and hands-on, in-person instruction and practice is required to learn to play an instrument and to improve.
“Music is so personal,” says Ray, who was recognized as a 2025 Yamaha “40 Under 40” music educator, says. “To improve, you have to accept that you’re going to sound really bad at first. All kids want to do is be on TikTok and hide away. In every other subject, they can do that. In orchestra, they can’t do that. Music is one of the last sanctuaries in the education system where we don’t have devices in the way. If students are playing, they can’t be on their devices.”
Virginia’s U.S. Representative Don Beyer visits Annie Ray’s Crescendo Orchestra rehearsal. (Photo by Paige Fremder)
Music educators, Ray says, have a responsibility to meet students where they are — especially in a program like Crescendo, where students have special needs and need an individualized approach. And learning, in all its challenges and messiness, is where music is made; the recitals and concerts are just the end product.
“Everything I do is about the process, not the product,” Ray says. “Music is not the universal language, but the act of making music is. It is one of the most unifying and humanizing experiences.”
One student, Kevin, was not happy to be in the orchestra at first because it was far outside his usual routine. But when he drew the bow across the string for the first time, Kevin’s eyes welled with tears as he felt the vibrations. After graduating, Kevin returned to co-teach Crescendo Orchestra alongside his godfather Scott Engdahl, a tireless volunteer for the group.
Photo by Aidan Demolli/Benson Park Photography
Giving Students a Voice
Many parents have shared with Ray about how much Crescendo Orchestra has benefitted their children. She remembers one boy named Dean, who had severe intellectual and physical disabilities. In her Tedx Talk, “The Sound of Success,” Ray explained that Dean is a mobility device user and uses augmentative communication devices and gestural communication. Through Crescendo, he was able to engage his gross- and fine-motor skills in the creation of sound.
“Music can come from anyone, anywhere — you just have to be willing to give them a voice,” Ray says in her Tedx Talk.
Together with her paraprofessional team, Ray helped Dean access music education terminology through a word wall of sticky notes with different symbols and terms. Dean was able to identify “100% of the time if a note was high or low, fast or slow and various musical notations.”
After diving through general music curriculum and scaffolding holding instruments with practice instruments, it was time to move on to traditional instruments. Rather than focusing on what Dean couldn’t do, the team leaned into what was possible. Together, they brainstormed creative ways to adapt the instrument so that it would meet Dean where he was both physically and musically. One solution was surprisingly simple and deeply effective: Duct tape a violin to a sturdy stand, which allowed him to play without needing to hold it. This small act of ingenuity opened a new world of sound and expression for Dean and became a symbol of how flexible thinking and teamwork can unlock opportunities for every student to participate fully and joyfully in music-making.
“It’s about the musicking (the act of making music coined by Christopher Small); it’s about the ‘in-betweens,’” Ray says in her Tedx Talk.
Dean’s family gave Ray thank-you flowers and a note she hung up on her bathroom mirror that said: “Thank you for believing in Dean.”
“I’m just grateful for that family for allowing me the joy of spending time with him,” Ray says.
“We have to redefine what success is,” she says. “The majority of our students are not going to become the next Yo-Yo Ma, but it does not mean their music-making is any less equal to a professional musician. It’s fundamentally about connecting with others.”
All-Around Benefits
Even when a student with a disability isn’t in Crescendo Orchestra specifically — such as one student on the autism spectrum who participates in a different orchestra class — the benefits of music education are still profound.
“His mom shared that since he joined orchestra, his grades have improved across the board,” Ray says. “The skills he’s building in music, like focus, pattern recognition and perseverance, are transferring to his other classes.”
Beyond academics, this student’s participation has supported growth in social-emotional and executive functioning skills. Through ensemble work, he’s practicing collaboration, managing transitions and developing confidence in a group setting. “Music is where he feels successful,” Ray adds. “And that sense of success is spilling over into every part of his school day.”
Crescendo students perform at every concert alongside their general education peers and experience a real sense of self-confidence
“You can see it on the kids’ faces when they hear cheers at a concert — their first time getting to be on stage and celebrated,” Ray says. “Parents are telling me: ‘Thank you, thank you, thank you!’ And I say: ‘No, thank you! Everything that your child is has fundamentally changed who I am as a teacher.’”
Ray gets these reminders of how she impacts young lives every day, and she feels so lucky. “I get to just be this lovely observer,” she says.
Collaborative Community
Ray emphasizes that Crescendo involves the efforts and hard work of many adults and children, and not just her. She puts it this way: “The GRAMMY isn’t mine.”
“I just want to stress that Crescendo is the culmination of so many people’s work and knowledge coming together,” Ray says. “I am not the only music educator out there doing this work. My hope is that we can all come together and work together to amplify this. This should be the norm instead of the exception.”
She is especially appreciative of the Annandale Special Education team as well as her instructional assistants Anna-Maria Awad, Nick Jacky, Anai Moreno and Viann Tran for their collaboration and partnership.
Ray encourages other music teachers to start Crescendo-like programs. Many resources and organizations exist that could help like United Sound, and Ray is available, too.
“If anyone ever wants help, just contact me and I will give you everything I have!” she says.
In Part 1 of this two-part series, we described major, minor and diminished modes. This time, we’ll look at the pentatonic scale and the symmetrical diminished scale, as well as the most commonly used modes of the melodic minor and harmonic minor scales.
Keep in mind that there’s always more than one way to finger a sequence of notes. I’ve chosen the ones I consider easiest to play on a four-string bass with standard tuning, but you have more options if you detune or use a five-string bass. And although we’d usually stick with either sharps or flats as we spell out a mode, we’ve mixed our accidentals to make things easier to understand: It might be more theoretically correct to call a note “G♭” based on where it is in the scale, for example, but we’ll call it F# to keep things simple.
Before we get back to modes, though, let’s explore two scales that are just as common as the minor and major scales: the pentatonic minor and pentatonic major, both of which contain just five notes.
THE MINOR PENTATONIC SCALE
If you’ve listened to the blues, rock or jazz, you’ve heard the minor pentatonic scale. In the key of G, it consists of the notes G, A, B♭, C and D. Here’s a two-octave minor pentatonic scale in G:
And here’s an audio clip that demonstrates what it sounds like:
(Note that each two-octave scale or mode played in these audio clips is accompanied by an organ drone in G and a metronome click at 60 beats per minute.)
Here’s a reggae bass line that takes full advantage of the minor pentatonic flavor:
THE MAJOR PENTATONIC SCALE
The major pentatonic scale in G consists of the notes G, A, B, C and D.
As with the minor pentatonic shape, you’ll come to recognize the major pentatonic box, too. Here’s what it sounds like:
And here’s an old-school funky blues groove that uses the major pentatonic scale:
The next scale is a cool color that’s most at home in jazzy situations.
THE SYMMETRICAL DIMINISHED SCALE
Symmetrical diminished scales are eight-note patterns that alternate between whole steps and half steps. There are two types: the whole-half scale and the half-whole scale. Here’s the whole-half sequence:
This scale starts on the root, goes up a whole step, and then alternates between whole steps and half steps until it reaches the octave. In the key of G, the notes are G, A, B♭, C, D♭, E♭, E, F# and G.
Most songwriters use diminished chords mainly as transitions between diatonic chords, but film composers take full advantage of their unsettled, eerie feeling, as demonstrated below.
The half-whole scale starts on the root, goes up a half step, and then alternates until it reaches the octave. In the key of G, the notes are G, A♭, B♭, B, C#, D, E, F and G.
Diminished scales go well with dominant chords, and many bass players use them for interesting fills.
On this mysterious-sounding interlude, the bassline slides into notes from a half-step above:
Ready to learn more? Here’s John Patitucci talking about playing diminished scales in a jazz context.
THE HARMONIC MINOR SCALE
Your ears are most likely accustomed to the major, minor, dominant and half-diminished (m7♭5) chords we discussed in the previous column, but the diminished, augmented and minor/major flavors we hear in harmonic and melodic minor modes can take us into new sonic territory.
The minor scale we discussed in Part 1 can be called the natural minor scale. The only difference between the natural minor scale and the harmonic minor scale is the seventh: The natural minor scale has a minor seventh, while the harmonic minor scale has a major seventh. In the key of G, that’s G, A, B♭, C, D, E♭, F# and G.
Here’s what it sounds like:
This mode has been used in countless songs, from the Eurythmics’ “Sweet Dreams (Are Made of This)” to No Doubt’s “Don’t Speak.” Here’s a distinctively cinematic interlude grounded by a bass ostinato:
Next, let’s take a look at two of the seven modes of the harmonic minor.
LOCRIAN (natural 6)
The second mode of G harmonic minor is a Locrian scale that begins on A. Think of a Locrian sequence — a diminished scale with a flatted second, flatted third, fourth, flatted fifth, flatted sixth and flatted seventh — and then make the flatted sixth a natural sixth. The A Locrian natural 6 mode consists of the notes A, B♭, C, D, E♭, F#, G and A.
You may also see this scale called a Dorian♭2 ♭5 or a Locrian #6.
Many classic metal songs (such as Rainbow’s “Gates of Babylon”) make great use of the Locrian natural 6. Here’s an evocative interlude that uses this mode:
PHRYGIAN DOMINANT
The fifth mode of G harmonic minor is a Phrygianmode that begins on D. Start with a Phrygian sequence — a minor scale with a flatted second and a flatted sixth — then raise the third a half step and lower the seventh a half step. The D Phrygian dominant mode consists of the notes D, E♭, F#, G, A, B♭, C and D.
You may also see this scale called a Phrygian natural 3.
If the Phrygian dominant sounds familiar, you might’ve heard it in the traditional Jewish folk song “Hava Nagila” or as part of the main riff of Muse’s “Stockholm Syndrome.” Here’s a jazzy example:
THE MELODIC AND JAZZ MINOR SCALES
Unlike other scales we’ve looked at, the melodic minor scale ascends one way and descends a different way. On the way up, it has a major seventh, like the harmonic minor scale, as well as a sixth instead of a flatted sixth. On the way down, it has the same notes as a natural minor scale. In the key of G, it ascends G, A, B♭, C, D, E, F#, G and descends G, F, E♭, D, C, B♭, A, G. As you can see, most of the notes are the same except the ascending (green) and descending (blue) ones.
Here’s how it sounds in the key of G:
Classical music uses both ascending and descending forms of the melodic minor scale, but in jazz, most musicians use the “jazz minor” scale, which uses the ascending version — 1, 2, ♭3, 4, 5, 6, 7 — both up and down. (You’ll sometimes hear the jazz minor referred to as the melodic minor scale.) Here’s a two-octave G jazz-style melodic minor scale (G, A, B♭, C, D, E, F#):
It can be helpful to think of it as a Dorian shape with a major 7.
Muse used the harmonic minor scale in the pop tune “Plug In Baby,” but it works in jazzier contexts also.
Here’s a fun overview of the modes of melodic minor, but let’s take a look at a couple of the most commonly used flavors.
LYDIAN DOMINANT
The fourth mode of G melodic minor is a Lydian dominant (or Lydian ♭7) that begins on C. Think of a Lydian scale — a major scale with a sharped fourth — and flat the seventh (hence the “dominant” tag). The C Lydian dominant mode consists of the notes C, D, E, F#, G, A, B♭ and C.
The combination of the sharped fourth and the flatted seventh helps give the Lydian ♭7 its particular sound.
Many jazz standards, including “Take the ‘A’ Train” and “The Girl from Ipanema,” use the Lydian dominant tonality. Here’s a jazzy organ groove inspired by the Lydian ♭7 mode:
SUPER LOCRIAN
The seventh mode of G melodic minor is a Locrian scale that begins on F#. Think of a Locrian scale — a diminished with a flatted third, a flatted fifth and a flatted seventh — and then add a flatted second, flatted fourth and a flatted sixth. The F# Super Locrian mode consists of the notes F#, G, A, B♭, C, D, E and F#.
Here’s what it sounds like:
This sequence is also called the Locrian ♭4. Every degree is altered, which is why this sequence is also known as the Altered scale. You’ve probably heard it in Björk’s “Army of Me” or the intros to Rush’s “XYZ” and Metallica’s “Enter Sandman.”
Here’s another example of the Super Locrian sound:
OPEN YOUR EARS
Yes, it’s a lot of information … and it’s only the beginning. The best way to absorb all of this is to keep playing until you can hear each scale before you play it. Map the chords on a keyboard if you have access to one, outline the arpeggios on your bass, and let your ears guide you. The finer points of when to use each scale can wait; for now, enjoy the sound and the stretch.
Note: All audio clips played on a Yamaha BBP35 bass.
Key upgrade considerations for sound engineers and audio managers in live sound, HoW, Corporate, Events, Education and Theater
Summary For over a decade, Yamaha digital consoles have set a benchmark for stability, sound quality, and intuitive operation. Today’s productions demand more – higher channel counts, expanded DSP, immersive tools, and seamless integration with streaming and networked audio – without disrupting workflow.
The Rivage PM Series and DM7 Series deliver next-generation performance, rider-friendly flexibility, and trusted sonic integrity, offering an approachable yet powerful platform for engineers upgrading within Yamaha or transitioning from other platforms.
Rivage PM: Scottie Baldwin, FOH Lady Gaga, Prince, JJ Lin transitions from Yamaha CL to Rivage
Scottie Baldwin built his reputation on Yamaha’s CL and QL consoles, calling them “the scaffolding for my sonic identity.” He even mixed a stadium tour on a CL – “which everyone didn’t think was possible.” That familiarity made moving to Rivage PM feel natural: “You can feel comfortable moving over to Rivage the day of show – but it’s not the same. It’s just better in every way.” For Baldwin, the upgrade wasn’t just about scale – though Rivage’s 288 inputs and 72 mix buses opened new creative horizons. It was about musicality. “When you want to move up that notch and really get into clarity, depth, focus – everything is wider, deeper – Rivage delivers.” Features like Rupert Neve Silk and Dynamic EQ 6 let him mix stadium shows entirely in the box: “It’s musical, not just technical.” His verdict? “There’s no console before or since that has locked it in like Rivage – I feel completely at home. “It’s a whole different system, but it feels familiar – it’s part of the Yamaha family.”
On upgrading from a mid-sized console to a more powerful mixing desk
Rivage PM Series and DM7 Series build on a sonic legacy with next-generation DSP, advanced processing, and immersive-ready architectures designed for modern production ecosystems. With flexible system design, rider-friendly confidence, and an intuitive workflow that welcomes engineers from any platform, they expand what’s possible – empowering next-generation power and flexibility without leaving your experience or your team behind.
J. Summers, FOH Jellyroll, Harnesses Yamaha RIVAGE PM 10 for Jelly Roll’s packed arena shows
For Jelly Roll’s arena-sized, guest-heavy shows, Monitor Engineer J. Summers depends on Yamaha’s RIVAGE PM10 to deliver next-generation power without sacrificing the workflow he knows and trusts. “Nothing feels better than to hear my artists smiling,” Summers says, describing his commitment to flawless IEM mixes. RIVAGE PM10 combines Yamaha’s natural sound with advanced DSP, immersive audio tools, and rider-friendly specs. Its intuitive matrix system lets Summers adapt instantly—whether adding extra RF mics, patching new instruments mid-show, or managing multiple rigs across high-profile events. “On this show, there’s no deer-in-the-headlights moment. It is calm and cool—go, go, go,” he explains. For Summers, RIVAGE isn’t just a console—it’s the backbone of a system that transforms organized chaos into surgical precision, ensuring Jelly Roll, the band, and every guest sound perfect night after night.
Live Sound: Speed, Power, and Sonic Excellence
Rivage PM was engineered for the pressure of touring, offering 288 inputs, 96 kHz audio, and Rupert Neve SILK coloration. Engineers describe the move as instantly transformational. Brad Divens, FOH for Enrique Iglesias, Linkin Park recalls realizing right away that “this is it… this is beautiful.” Kane Brown’s FOH engineer David Loy had been searching for something “powerful but stable,” and found the PM3 delivered that balance with its compact size, deep DSP, and consistent connection to the performance. Stephen “Pato” Pattison (FOH for Hozier) praises its completeness, freeing him up from cumbersome outboard gear – the console has “everything I need,” and because of that, “there’s nothing to go wrong.”
For tighter footprints, DM7 brings impressive muscle: dual touchscreens, split – mode operation, and a 64 – channel Dugan Automixer that lets one console handle FOH, monitors, and streaming at once. Touring engineer Gene Kim notes that the DM7 “really helps because the footprint is small, but it’s packed with output capabilities and local I/O.” That combination proved essential during Tyler, The Creator’s pop – up barge show, where Landon Storey and Paul Wichmann relied on DM7’s near – identical workflow to Rivage PM to deliver seamless, high – quality audio in a notoriously unforgiving environment.
21 Pilots FOH and MON: From Arenas to Clubs – Small can be beautiful
When Twenty One Pilots set out on a secret club tour, their engineers faced a challenge: deliver arena – quality sound in spaces a fraction of the size. FOH engineer Kenny Sellars and monitor engineer Cliff Skinner, accustomed to Yamaha’s flagship Rivage PM systems, needed a solution that was compact yet uncompromising. Enter DM7-EX – a console that mirrors Rivage PM’s workflow while packing serious muscle into a smaller footprint. “The console has allowed us to maintain the highest possible standard in the smallest possible footprint,” Cliff explains. With 120 channels, dual touchscreens, split – mode operation, and a 64 – channel Dugan Automixer, DM7 handled FOH, monitors, and streaming seamlessly across five cities. The transition was effortless thanks to Yamaha’s ecosystem. “My layout’s almost exactly the same as Rivage PM,” Kenny says. “It feels just like home.” That familiarity, combined with Dante networking and local I/O, meant no compromise in quality or creativity – even under tight constraints. “The band didn’t want us to scale down and not be as good. We had to say trust us,” Kenny adds. And trust paid off: every show delivered the clarity and consistency fans expect, proving that small can be beautiful when it’s engineered right.
House of Worship: Broadcast – Quality, Volunteer – Friendly
Modern churches operate like hybrid performance – and broadcast studios, and Rivage PM and DM7 are designed to support that complexity while remaining volunteer – friendly. At First Baptist Church Woodstock, Jamie Karnes describes the new head amps and plug – ins as “huge game changers,” and says the SILK feature in particular lifts every source. Saddleback Church’s team echoes that sentiment, explaining that they needed a system capable of handling worship, broadcast, and translation feeds “without compromise” – and Rivage PM delivered exactly that.
The Ark Church Chooses Yamaha RIVAGE PM7 for Reliable, Warm Audio
The Ark Church in Conroe, Texas recently upgraded to a Yamaha RIVAGE PM7 to serve its 10,000 – member congregation. “Our 7+ year old console was having issues,” says Technical Director Chris Allgood. “We looked at every brand and settled on the PM7. Workflow is amazing and simple… the sonic quality is incredible – so much warmer and easy to listen to.” With RPio racks and SILK processing, Allgood adds, “When you turn on the transformer and dial in SILK, it adds depth and quality that’s awesome.” Future – ready networking sealed the deal: “Yamaha will be our platform of choice across our campus.”
Universities and corporate venues must support everything from lectures to concerts with minimal staff and no room for error. DM7’s routing power and flexible interface make it ideal for these constantly shifting environments. The University of Birmingham’s Richard Mitton says the DM7 “ticked all the boxes,” giving the venue confidence that “there’s nothing likely to come… that the DM7 can’t do.” William Paterson University found the same, noting that DM7C expanded their routing and processing while helping a small team maintain high production standards.
University of Birmingham Powers World – Class Events with familiar workflow and Yamaha DM7 Series
The University of Birmingham’s Bramall Music Building needed an upgrade to match its world – class ambitions. “The previous audio mixer was at the end of its life and massively limiting,” says Live Events Technical Manager Richard Mitton. The solution? Yamaha DM7 with Dante networking. “The capacity of the DM7 made it perfect for us… features like 64 channels of Dan Dugan Automixer and split mode are incredibly useful.” Familiar workflow was key: “You can walk up to the latest model and within 10 minutes you’re up to speed.” The DM7 now powers concerts, conferences, and even BBC Radio 3 broadcasts. “Choosing the DM7 was a no – brainer… there’s nothing that’s likely to come to this venue that it can’t do.”
Theater: Precision for Complex Live Productions
Theater demands fast navigation, accuracy, and absolute reliability. Rivage PM’s Theatre Mode, overlay filters, and immersive tools give engineers control at a level that keeps pace with rapid scene changes and dense sound design. Stephen “Pato” Pattison (FOH for Hozier) puts it simply: the console has “everything I need,” and with that completeness, “there’s nothing to go wrong.” For engineers who cannot afford hesitation, Rivage PM is the trusted choice.
RIVAGE PM5 Brings Magic to Harry Potter on stage
Harry Potter and the Cursed Child live performances demanded a console that could handle 150+ inputs, 500 cues, and full digital audio flow. The solution was Yamaha RIVAGE PM5, chosen for its advanced theatre software and flexibility. “Dual monitor mode made for a much simpler signal flow,” says sound designer Gareth Fry. Performer library proved essential: “You can instantly switch settings for different actors. Without that, this production wouldn’t have been possible.” Local associate Satoshi Tateishi adds: “Having only one mixing surface saved space and made it easier to manage.” With A/B switching and Bricasti reverbs onboard, Gareth notes: “The PM5 combines everything we liked about previous consoles – and more.”
Why Upgrade Now?
Legacy platforms across the industry remain widely used, but today’s live sound landscape is moving quickly toward systems with deeper DSP, immersive tools, modern workflows, and rider-friendly scalability. DM7 and Rivage PM deliver all of this while honoring the Yamaha sound engineer’s trust. With intuitive operation, proven reliability, and a workflow that feels instantly familiar – even for those coming from other consoles – upgrading isn’t a disruption, it’s a future‑proofing decision that elevates both creative potential and production capability.
DM7 and Rivage PM aren’t just successors – they represent a new benchmark. Designed for productions that demand more, these systems redefine expectations for sound quality, flexibility, and confidence, inspiring what the next generation of live experiences can be.
We are here to help Ready to connect with our B2B sales team, discuss system needs and Request a Quote? Click here to get the conversation started: Request a Quote
The choice of engineers and owners for legendary sound, intuitive control, flexibility and proven reliability
Summary Rivage PM sets the standard for live sound with premium audio quality, advanced control, and Yamaha’s legendary tone. Designed for touring, corporate events, worship, theater and broadcast, it combines intuitive workflow with next – gen power. Built for the toughest environments and proven on the world’s biggest stages, Rivage PM delivers reliability, scalability, and sonic excellence – making every performance seamless and unforgettable.
Michael “Coach“ Conner, FOH Steely Dan, Paul Simon: Recreating Studio Magic Live with Rivage PM
Michael “Coach” Conner, FOH for Steely Dan and Paul Simon, calls the challenge “formidable – what was hard enough to achieve in the studio becomes even more intricate when performed live.” Rivage PM gives him the tools to make it happen. “We use around 55 microphones… I have 25 – 30 instances of DaNSe. It really does change everything. It’s probably my favorite thing on the desk. That’s my game – changer.” Premium plug – ins like Bricasti Y7 and OpenDeck help him achieve mixes that “rival the well – known studio recordings.” Virtual sound check is critical: “It’s both a blessing and a curse… I put on my headphones or in – ears, start soloing up, and realize what I truly heard the previous night.” For Conner, this feature lets him fine – tune every nuance: “Before, whatever happened vanished into space. Now, I can dive in and make it better.” Rivage PM is “the key to capturing that magic live.”
Rivage PM Series – Redefining Premium Mixing
The Rivage PM Series represents Yamaha’s flagship live sound platform, designed for the most demanding productions. At its core are Hybrid Microphone Preamplifiers, combining analog warmth with digital precision, and Rupert Neve Designs SILK processing for rich, musical tone – so voices and instruments sound natural and detailed, with the warmth of classic studio gear and the clarity of modern technology.
“This Is It. This Is Beautiful.” – Brad Divens, FOH for Enrique Iglesias, Linkin Park, Garbage
Brad Divens, FOH notes that Rivage PM changed everything: “When I tried the RIVAGE PM system, I found there was nothing digital sounding about it… This is it. This is beautiful.” For him, the magic starts at the front end: “The first and foremost feature I really love is the hybrid mic preamps, because to me the front end of a console is everything.” Add Rupert Neve SILK, Portico EQ and compression, plus familiar studio tools like Eventide and Bricasti: “It’s things you know and love from the studio. It’s that familiar sound.” With massive channel capacity, premium plug – ins, and 96 kHz processing, Divens sums it up: “All I need is the RIVAGE PM… everything is ready.”
Key Features That Set Rivage PM Apart
Massive Channel Capacity with up to 288 input channels, 72 mix buses, and 36 matrices gives you the flexibility to manage large concerts, multi – speaker panels, or worship teams without adding extra hardware.
Premium Plug – Ins like Rupert Neve EQ and compression, Eventide harmonizers, and Bricasti reverbs deliver studio – quality sound shaping and effects right inside the console, eliminating the need for external processors.
96 kHz Processing ensures high – resolution audio for pristine clarity and depth, so every detail of music and speech comes through clean and accurate.
Dan Dugan Automixer automatically balances multiple microphones, making it ideal for corporate panels or worship services where consistent levels are critical.
Noise Suppression (DaNSe) intelligently removes HVAC hum and crowd noise, keeping speech intelligible and music clear in any environment.
Genius.lab accelerates workflow customization, enabling engineers to design tailored control layouts and functions—streamlining complex tasks for faster, more intuitive mixing in any environment.
Immersive Audio Tools like AFC Image enable spatial sound design, creating a natural, engaging listening experience for theaters and large venues.
David Loy Elevates Kane Brown’s Live Sound with Yamaha RIVAGE PM3: Power, Precision, and Creative Freedom
FOH engineer David Loy drives Kane Brown’s genre-blending shows with Yamaha RIVAGE PM3, harnessing its massive channel capacity and premium DSP to deliver pristine, immersive sound. “I was really impressed with the way it sounded,” Loy says after pushing the console to its limits. With up to 288 inputs, 72 mix buses, and 36 matrices, he handles complex setups without extra hardware. Built-in Rupert Neve EQ, Eventide harmonizers, and Bricasti reverbs keep mixes “musical without over-processing,” while 96 kHz processing ensures clarity. Features like Dan Dugan Automixer and AFC Image help tame challenging thrust stages and maintain vocal intelligibility. “I love having a small footprint and a single screen—it lets me stay connected to the performance,” Loy adds. For him, RIVAGE PM3 is a creative engine that transforms every show into an unforgettable sonic experience.
Connectivity & Reliability
Dual Network Options – TWINLANe for ultra – high channel counts and Dante for easy integration – allow Rivage PM to work seamlessly with existing infrastructure while scaling for future needs.
DSP Mirroring provides redundant processing engines for mission – critical reliability, ensuring your event continues even if hardware fail
Touchscreen Interface & Centralogic Navigation combine our familiar layout with advanced control, making the console easy for volunteers yet powerful for seasoned engineers.
Theatre Mode & Overlay Filters allow quick adjustments for changing performers or scenes, saving time during live productions.
Wireless Integration lets you monitor and control Shure, Sennheiser, and Sony receivers directly from the console, simplifying setup and reducing complexity.
Recording & Virtual Soundcheck
128 – Channel Recording at 96 kHz captures every detail for streaming or post – production without additional gear.
Nuendo Live Integration streamlines virtual soundchecks, ensuring faster setup and consistent mixes between rehearsals and live shows.
From stadium tours to corporate, rental, production and worship services, Rivage PM Series is more than a console – it’s a complete mixing ecosystem designed for sonic perfection and operational confidence.
Stephen “Pato” Pattison, FOH Hozier – One Desk is Everything I Need
Stephen “Pato” Pattison, FOH relies on Rivage PM to manage Hozier’s lush, layered soundscapes with simplicity and confidence. “No, just one lonely desk – nothing else around it. No extra gear, no extra plug – ins, nothing to worry about. There’s nothing to go wrong because the console already has everything I need.” With Dante networking for flexibility and Yamaha’s intuitive Centralogic interface, Pato can adapt quickly to any venue. Built – in tools like premium plug – ins and hybrid preamps eliminate outboard racks, while 128 – channel recording and Nuendo Live integration make virtual soundcheck indispensable for consistency: “It ensures we have enough time to prepare and perfect the show.” For Pato, Rivage PM means reliability, scalability, and sonic excellence – without compromise.
RIVAGE PM: Confidence for Worship, Events, and Rider-Ready Productions
Rivage PM Series delivers premium sound and intuitive control for Houses of Worship, corporate events, and high-pressure productions. Hybrid mic preamps with Rupert Neve SILK ensure natural warmth for sermons and music, while tools like Dan Dugan Automixer and DaNSe noise suppression keep speech clear in challenging spaces. Centralogic navigation and touchscreen workflow make it easy for volunteers yet powerful for seasoned engineers.
For rental and production companies, Rivage PM is rider-friendly and eliminates outboard racks with built-in Rupert Neve EQ, Eventide harmonizers, and Bricasti reverbs. Dual networking (TWINLANe and Dante), DSP mirroring, and Nuendo Live integration provide scalability, redundancy, and virtual soundcheck for flawless execution.
Whether mixing worship services, corporate panels, or major tours, Rivage PM offers a complete ecosystem—premium audio, operational confidence, and reliability under pressure.
Flagship Power for High – Pressure Events
At Nashville’s Country Radio Seminar, CTS AVL faced three days of rapid – fire performances and corporate sessions with zero margin for error. “It’s effectively multiple different events in the same space, with little time between each,” says audio manager Mark Kimmel. For FOH engineer Jonathan Schwarz, Rivage PM was the backbone: “Engineers can bring in a show file, or we have a pre – programmed festival file ready to go – step in and mix.” Dual RPio racks and independent systems ensured flexibility: “If they need their own gain staging or Rupert Neve SILK processing, they can do that without affecting FOH.” Schwarz loves introducing newcomers to Rivage: “It’s exciting to show them features like SILK – unique to this product.” For CTS AVL, Rivage PM means reliability, speed, and sonic excellence under pressure.
We are here to help Ready to connect with our B2B sales team, discuss system needs and Request a Quote? Click here to get the conversation started: Request a Quote
YAMAHA DM7 SERIES – TAKE YOUR FOH TO THE NEXT LEVEL
Legendary sound, power and flexibility in a smaller footprint with intuitive and familiar workflow
SummaryYamaha DM7 Series delivers great sound and flexibility for touring, theater, worship, and more – all in a compact, cost-effective design. With dual touchscreens, split-mode operation, small footprint and familiar workflows, it’s easy to use and powerful. Compatible with all generations of Yamaha I/O racks, DM7 makes upgrading simple and redefines digital mixing without compromise.
Compact Power Meets Big Expectations for Gene Kim, FOH Johnnyswim
Gene Kim, FOH for Johnnyswim, Phil Wickham and Pat Barrett, knows the pressure of live events where flexibility and reliability are non – negotiable. “For a compact console, it really helps because the footprint is small, but it’s packed with output capabilities and local I/O,” he says of Yamaha’s DM7 Compact – a design philosophy shared by Rivage PM for large – scale productions. Dual power supplies give “peace of mind: if one goes down, the rig keeps running.” Like Rivage PM’s DSP mirroring and Dante/TWINLANe networking, DM7’s portability and robust processing make it ideal for fast turnarounds. “The console lets you start from a good, clean place,” Gene adds, praising onboard Portico tools and multiband compression. Whether FOH or monitors, Yamaha consoles deliver reliability and sonic excellence – no extra gear, no compromise.
DM7 Series: Redefining Digital Mixing
Yamaha DM7 Series redefines digital mixing, meeting the ever – evolving needs of audio professionals with a perfect blend of innovation and usability. Designed for those upgrading from Yamaha’s CL or QL consoles or switching to mid – sized desks, DM7 offers an intuitive, seamless transition. Balancing professional – grade performance with a compact design and accessible price point, DM7 Series is tailored for medium – sized venues and productions, making it a versatile solution for diverse audio needs.
DM7 Powers Tyler, The Creator’s Most Unconventional Shows: Compact Design, Big Capability For Tyler, The Creator’s most unconventional shows – including a pop-up on a floating barge – engineers Landon Storey, MON and Paul Wichmann, FOH chose Yamaha DM7 for its compact footprint and powerful features. “The workflow feels like RIVAGE PM, so the transition was seamless,” says Landon. Working inside shipping containers, they relied on DM7’s dual touchscreens and built-in processing to handle dynamic vocals and effects-heavy mixes. Paul even mixed remotely via StageMix: “I literally ran the show off an iPad—it was slick.” Despite tight space, two DM7 consoles and playback fit on a 12-foot table, proving its portability and power. From Hudson River barges to packed arenas, DM7 delivers exceptional sound and flexibility anywhere.
DM7 Design Vision
Representing more than just a mixing console, Yamaha DM7 Series is a step forward in design and functionality. Built on decades of trusted engineering and sonic excellence, DM7 merges familiarity with innovation, offering tools that address modern audio production challenges.
The vision driving DM7 was clear: Create a future – ready platform that embraces existing users, encouraging exploration of new creative possibilities while ensuring an easy and welcoming transition.
From Familiar to Future: Brian Frost, FOH Transforms Corporate Audio for Apple, Amazon, and Starbucks with Yamaha DM7
Brian Frost, FOH for major corporate and keynote events, spent over a decade on Yamaha CL5 before moving to DM7. “I wasn’t sure I wanted to add another layer of complexity,” he admits. But the switch was seamless: “Within maybe a minute or two for everything I was trying to find, it just instinctively came.” Dual touchscreens and expanded channel capacity were game changers: “I appreciate the ability to view more information at a glance.” Running at 96 kHz, DM7 gave him clarity and headroom: “It allowed me to push the technology to the edge.” With Dante integration, Brian managed complex setups effortlessly: “I like to have a lot of matrices… going to DM7 now, having twelve was a great step up.” For Frost, DM7 means power, flexibility, and confidence – without the learning curve.
Cost – Effective Integration with Existing Infrastructure
One of the DM7 Series’ most appealing aspects is its ability to integrate with existing infrastructure and improve performance without costly I/O upgrades.
Key Benefits:
Compatible with all generations of Yamaha R Series I/O racks
Upgrade from 48 kHz CL or QL Series to DM7 for 96 kHz functionality
Unlock superior audio performance, reduced latency, and increased channel counts
Upgrade a rig that’s more than a decade old without changing I/O – saving tens of thousands of dollars across live sound, events and HoW.
LCBC Church: Seamless Transition to DM7
When LCBC Church moved from a Yamaha CL5 to DM7, Broadcast Audio Coordinator Brian Tru was impressed by how intuitive the console felt: “It feels like audio engineers designed it for audio engineers – it just makes sense and is very intuitive, even the first time you sit down.” Volunteers agreed: “They love having two screens instead of one and appreciate the ability to put all the user – defined keys right on the touchscreen.” The upgrade delivered more onboard outputs for monitor mixes – no extra hardware needed – and pristine 96k audio. “My music director told me the mix sounds much cleaner – and I can only attribute that to what’s happening inside the DM7.” For LCBC, DM7 means simplicity, flexibility, and sonic clarity for worship and broadcast.
Innovative Features That Elevate Your Workflow
Streamlined Livestreams: Broadcast software package and split – mode operation mix FOH and livestreams from the same surface.
Expanded Processing Power: More freedom for reverb, plug – ins, and Automixer. Includes Rivage plug – ins like DaNSe, Dynamic EQ4, Analog Delay, and more.
Premium Plug – Ins: Access exclusive plug – ins like DaNSe and Rupert Neve processing, or integrate third – party VSTs (Waves, Universal Audio).
Enhanced Usability: Dual 7 – inch multi – touch screens for flexibility and efficiency.
Show File Conversion & Rack Mount: CL/QL Series show files can be converted and imported. DM7 Compact is rack – mountable and a great fly-pack choice.
The DM7 Series delivers legendary sound quality and cutting – edge features that audio professionals demand.
We are here to help Ready to connect with our B2B sales team, discuss system needs and Request a Quote? Click here to get the conversation started: Request a Quote
Seamless upgrade to Rivage PM & DM7 with training, support, and confidence in every performance
Summary Transitioning from a CL/QL workflow to Rivage PM or DM7 has never been more seamless. Yamaha makes the move simple with intuitive interfaces, comprehensive training resources, and a design philosophy that feels instantly familiar. Whether you’re an experienced audio engineer or part of a volunteer team, the learning curve is refreshingly short.
Training Made Accessible
DM7 and Rivage training is available on YouTube and official Yamaha platforms, giving teams the flexibility to learn at their own pace. From quick-start guides to deep-dive tutorials and YouTube videos, these resources ensure that both professionals and volunteers can master advanced features confidently – anytime, anywhere.
Through Yamaha Audio Lab clinics, detailed articles, and hands-on sessions, professionals gain confidence in mastering advanced features – while volunteers appreciate the approachable layout and guided workflows. The result? Faster onboarding, fewer mistakes, and the ability to deliver professional-grade sound without missing a beat.
As the only company that designs across the entire signal chain, Yamaha knows what audio should sound like – and what true professionals demand. That expertise is built into every Rivage PM and DM7 Series console, ensuring uncompromising quality from input to output.
For live touring, production and rental companies, venues, theaters, amphitheaters, houses of worship, education and facilities planning permanent installations, Yamaha backs your investment with robust support:
2-Year Warranty via authorized dealers
Extended Coverage available through registration
Parts & Labor for defects during warranty period
Firmware Updates + Advanced Remote Tools included
Yamaha Authorized Pro Audio Centers for service and expertise
Proof of Purchase Required for warranty claims
With Rivage PM and DM7, you’re not just upgrading your console – you’re gaining confidence and a partner vested in your success – one beat at a time, every note, every night, every performance, every time.
Yamaha Pro Audio understands every system is unique. Our experienced team is ready to help you design solutions for today and tomorrow. When you’re ready to discuss your needs, click here to start the conversation.
Compare Rivage PM Series, DM7 Series, CL and QL features and specs
Summary Upgrading from Yamaha CL or QL Series to DM7 or Rivage PM delivers a major leap in performance and flexibility. With 96 kHz audio processing for superior clarity, advanced DSP for premium plug-ins and Rivage-grade tools, and split-mode operation for FOH and livestream mixing, these consoles redefine efficiency. They integrate seamlessly with existing Yamaha I/O racks for cost-effective upgrades, offer dual multi-touch screens for intuitive control, and provide enhanced reliability with redundant power and DSP – plus Rupert Neve SILK processing for studio-quality sound.
We are here to help Yamaha Pro Audio understands every system is unique. Our experienced team is ready to help you design solutions for today and tomorrow. When you’re ready to discuss your needs, click here to start the conversation.
This chart compares Yamaha CL, QL, DM7, and Rivage PM Series consoles, highlighting key specifications and differences to help demonstrate how DM7 and Rivage PM deliver superior performance for innovative productions. Product page links below for a deeper dive or connect with our sales team to explore solutions.
RIVAGE PM Mixes Country Music Radio’s Big Annual Event
Supreme Nashville Sound with CTS AVL
Summary At Country Radio Seminar, CTS AVL relied on Yamaha RIVAGE PM consoles to deliver flawless, flexible sound for three days of performances by country music’s biggest stars.
Nashville’s annual Country Radio Seminar brings together a wide range of country music artists and industry leaders for three days of performances, seminars, meetings and more. For 20 years CTS AVL has been the event’s audio partner, relying on Yamaha digital mixing consoles to deliver stellar performances from the latest new talent to the industry’s biggest stars.
The 2024 Country Radio Seminar took place at the Omni Nashville Hotel, with its ballroom the setting for everything from breakfast meetings and executive luncheon performances to evening shows which go on long into the night. The show features a wide variety of artists and an intense program of performances. Long-time audio product production partner CTS AVL needs to deliver consistently great sound, yet be flexible enough to suit very different musical styles in minutes. CTS AVL knew that Yamaha digital mixers could satisfy these difficult demands and deliver their long-time motto ‘Move The Room, Move The World’.
“We were brought in by Scott and Julie De Vos of De Lux Productions, who have produced the show for many years,” says CTS AVL president Mike Taylor. “They knew from our track record that we could deliver great sound for any musical style and switch between styles quickly with no loss of quality.
“The key part of the brief is that this is radio’s event. The artists are invited to perform and show the radio personalities and executives what they’ve got, but it has to be a 100% neutral environment, with everybody getting exactly the same opportunity. We treat them all equally, everyone gets the full production.”
The company initially used Yamaha PM1D digital mixing consoles, moved to PM5Ds and now have RIVAGE PM10s at front of house and monitors, plus a RIVAGE PM3 as a production console for video playback and wherever else needed. Two RPio I/O racks take care of all inputs and outputs, with all systems on a shared network.
One of the challenges faced by the CTS team is that it’s essentially a corporate event, but the format of the performances changes continually throughout the three days, with extremely fast changeovers. This puts a lot of pressure on the audio team.
“Every year we spend a lot of time in team discussions about the flow of the event, because it’s effectively multiple different events in the same space, with little time between each,” says CTS AVL audio manager Mark Kimmel, who has worked the Country Radio Seminar for 11 years.
“There are different aspects to each of them that are challenging and different timeframes that things have to be executed within, so we treat each event like it’s the biggest one. And overall, because of the corporate nature of it, everything has to be tidy. Our snakes and delay cabling have to be flown on truss, so we work closely with the in-house rigging team. Through collaborations like that, we can deliver consistently from year to year.”
The variety of scenarios is a particular challenge for Jonathan Schwarz of Schwarz Sound, who manages the CRS front of house sound for CTS AVL.
“They’re constantly rearranging the room. There will be a luncheon with tables, then the next session it might be chairs. Some of the higher profile artists will do a longer set and bring their own engineer, then there are sessions where, for example, a record label may have 10 artists that it wants to showcase, each doing one song and I’ll mix all of them,” he says.
“You can have laid-back songs that are more soulful or twangy, then you’ll have full-on honky-tonk rock ‘n roll. We have to figure out how to give the artist the power and impact that they want from a performance, while recognizing that it’s a corporate-style event. You’re entertaining radio personalities, managers, there’s a lot of networking going on. You have to translate the music and create that emotional impact where people go ‘I want to play that on the radio,’ while not making plates rattle.
“We don’t want to make people spill their soup,” he adds, with a smile.
With a tight schedule, multiple artists and little soundcheck time, as well as delivering great sound, front of house needs a universally accepted mixing console which any engineer can use with no issues.
“The Yamaha RIVAGE PM backbone facilitates that,” says Jonathan. “Engineers can bring in a show file, or we have a pre-programmed festival style show file with their inputs and things ready to go, so all they have to do is step in and mix.
“We actually have two complete systems with separate RPios going through monitors, which can operate independent of front of house. So if they have to make their own gain staging or do anything with the transformer emulation and RND SILK processing, they have the opportunity to do that independently of what the front of house engineers are doing.”
One of the things Jonathan enjoys about the event is giving engineers who may not have previously used the Yamaha RIVAGE PM series the opportunity to mix on it.
“Some of the younger artists in particular may not have had the chance to mix on a flagship product like the RIVAGE PM system. So it’s exciting for me to show them what it’s like, the features like the Rupert Neve Designs SILK processing. It’s such a cool feature, which is unique to this product,” he says.
“Then we have others with experience on RIVAGE PM and that’s great as well. I love watching other engineers come in, seeing their methodology, their workflow and the little tips and tricks they do for their artists which are unique to their mixing style. Something different than maybe I would do, because there are a lot of really cool ways to do anything on the system.”
Another Yamaha family product which has proved popular is the NEXO PS8, two-way point source speaker.
“The PS8 is fantastic because it sounds great, it’s very low profile and the rotatable horn means we can lay it on its side,” says Jonathan. “The stage is fairly compact, and we have a thrust. Being able to place PS8s on stands around the front of the stage means we can have great functional coverage, with the volume, tone and clarity to keep up with the rest of the PA, but they’re out of the way of the artist.”
With another successful Country Radio Seminar concluded, CTS AVL is already looking to next year’s event, again using Yamaha and NEXO.
“Every year we look at how can we improve upon on the previous one,” says Mark. “After 20 years we’ve got the production really fine-tuned. And everybody is always relieved to hear that we have the RIVAGE PM system.”
Company president Mike agrees, adding, “The Country Radio Seminar is a very important event for both the country music radio industry and the many artists who are invited to perform. We have a really deep relationship with all of our customers involved and we strive to deliver the highest quality production for both the performers and the audience. Yamaha digital mixing is an integral part of it and it’s always a fun one for us to do.”
Ready to connect with our B2B sales team, discuss system needs and Request a Quote? Click here to get the conversation started: Request a Quote
Summary Twenty One Pilots’ secret club tour demanded arena-quality sound in tight spaces. FOH and MON engineers used Yamaha DM7-EX for power, flexibility, and portability.
In May 2024, global superstars Twenty One Pilots played five secret club dates in Berlin, London, Mexico City, New York and their hometown of Columbus, Ohio, in anticipation of their upcoming album release and worldwide arena tour. Sound engineers Cliff Skinner and Kenny Sellars were faced with the challenge of how to shrink the band’s arena-sized audio system into small clubs without compromising audio quality. The answer was built around Yamaha’s DM7-EX digital mixing console.
The short An Evening With Twenty One Pilots tour was booked in anticipation of the band’s new album, Clancy, to be released in late May, and a world arena tour which kicks off in August.
Front of house engineer Kenny Sellars and monitor engineer Cliff Skinner are used to mixing arena shows on our flagship RIVAGE PM5 and PM10 digital mixing systems using our Genius.lab software and the Open Sound Control (OSC) protocol to create highly customized setups. They faced a major challenge because of the band’s commitment to delivering the best sounding show possible.
“The band care about being perfect – it doesn’t matter where we are. In the past, whether it’s an arena or a club, we were bringing in triple width racks with full size consoles,” says Kenny. “This time we needed a compact and also cost-effective package, knowing we wouldn’t be selling 20,000 tickets every night.”
Having seen a demo of the Yamaha DM7 at Clair Global’s Lititz headquarters, Cliff realized that the DM7-EX (the DM7 coupled with the DM7 Control expansion controller) would have the capacity and flexibility they needed, in a small, physically manageable format. “Being in the Yamaha family, and with the similarities between it and the RIVAGE PM systems we’re comfortable with, it was the obvious choice,” he says.
“To be honest, I was a little hesitant at first. Sound engineers don’t always like change! But Cliff was like, ‘Dude, you’re gonna love this’,” smiles Kenny.
“I was kind of worried about some of my workflow, but it’s only got a few less faders than a RIVAGE PM control surface. My layout’s almost exactly the same, the layers and center section are the same, and it programs just like the RIVAGE PM system. I was like, wow, this feels just like home.”
He continues, “The band didn’t want us to scale down and not be as good. We had to say trust us, we feel comfortable making it happen on these consoles. It’s the first time we’ve been able to say that – we can take a smaller console and still give the band what they need, with all the tools to do the things that we need for the show.”
The two DM7-EXs were on the same Dante network, along with a Rio3224-D2 I/O rack, eight channels of Axient digital wireless microphones and playback. Every input in the system was either local I/O on each desk or from the devices on the Dante network.
“There are only two people on stage, but we have a lot of communication between techs and band members. We’re hitting 70 channels before we’re even talking about returns and everything else,” says Cliff.
Meanwhile, Russ Long at Yamaha has been available to help. “Russ will always get an answer for me right away. Working with Yamaha has been a great, great experience,” says Kenny. “Everyone at Yamaha has been great, working with us to help implement things better,” agrees Cliff. “Having that relationship, the trust between us and their support has enabled us to be more creative.”
As the club tour ended, both engineers described the experience of using the DM7-EX as completely positive. “The console has allowed us to maintain the highest possible standard in the smallest possible footprint. I never expected to have 120 channels available on something this small, which didn’t feel claustrophobic. The familiarity with the Yamaha ecosystem has allowed the transition between the RIVAGE PM to DM7 and back to be seamless,” says Cliff.
“The DM7-EX has everything I need. It’s the perfect solution to keep me comfortable in the Yamaha world, and fit the bill for these club shows in four different countries,” concludes Kenny.
Ready to connect with our B2B sales team, discuss system needs and Request a Quote? Click here to get the conversation started: Request a Quote
From CL/QL roots to mixing icons like Lady Gaga, Prince, and JJ Lin
Summary Scottie Baldwin, FOH for Lady Gaga, Prince and JJ Lin, among others, honed his craft on Yamaha CL and QL consoles before stepping up to Rivage PM – delivering clarity, flexibility, and creative control for some of the biggest stadium productions worldwide.
Scottie Baldwin is a world-renowned front-of-house engineer whose career spans global tours with artists including Prince, Lady Gaga, JJ Lin, and Jolin Tsai. Known for his precision, creativity, and deep musical sensitivity, Baldwin has built a reputation for turning complex live productions into immersive sonic experiences. His workflow merges technical precision with musical intuition, and his long relationship with Yamaha consoles – evolving from the CL and QL series into the Rivage PM platform – shows how foundational tools can shape a philosophy, and how innovation in talented hands can unlock new frontiers in sound design.
Laying the Groundwork: CL and QL as Sonic Stepping Stones
Before Rivage PM, Baldwin’s approach was built around Yamaha’s CL and QL consoles. These systems, with their Dante networking, onboard Premium Rack effects, and intuitive layout, became the scaffolding for his sonic identity. Early in his career, he mixed an entire stadium tour on a CL console – a decision that raised eyebrows at the time. “I mixed a stadium tour on a CL, which everyone didn’t think was even possible,” he recalls.
Those consoles gave Baldwin the confidence to take on virtually any gig, even under tight budgets or demanding expectations. For one tour with The Revolution, he even downsized a CL show file to fit on a QL console, turning skeptics into believers when they heard the result. He laughs remembering stage crews asking where his console was, only to see it roll in a compact road case: “When you can get a big sound out of a tiny console, it’s even more impressive.”
CL and QL introduced Baldwin to Yamaha’s scene management, onboard processing, and workflow logic – tools that made him faster, more consistent, and ultimately more musical. He learned to work almost entirely in the box, saying he’s “never used outboard gear with Yamaha – maybe auto-tune, but that’s it.” That minimalist, efficient mindset became the foundation for everything that followed.
The Leap to Rivage: Expanding the Horizon
When Baldwin transitioned to the Rivage PM5, it wasn’t just about more channels or processing – it was about expanding visual control and creative space. “I did it live without a net,” he recalls. “New country, new artist, new console – and Rivage made it possible to think in big terms. I said, ‘OK, I can do this.’”
A self-described visual thinker who values order and clarity, Baldwin immediately appreciated Rivage PM’s larger screen real estate and configurable interface. His layout typically places inputs and DCA groups on the left, scenes and dynamics in the center, and EQ and overview data on the right – giving him instant visibility across hundreds of parameters.
“You can feel comfortable moving over to Rivage the day of show,” he explains. “That’s how familiar it is – but it’s not the same. It’s just better in every way.” And when it comes to sonic impact, he adds, “When you want to move up that notch and really get into clarity, depth, focus – everything is wider, deeper – Rivage delivers.”
Technical Expansion: What Rivage Adds to the Equation
Rivage PM didn’t just expand Baldwin’s workflow – it fundamentally redefined it. Moving from the CL5’s 72 input channels to Rivage’s 288 opened up the ability to manage complex multi-input sources, broadcast feeds, and parallel effects chains simultaneously. The 72 mix buses and 36 matrix outputs give him the routing flexibility to design both stereo and immersive configurations without compromising DSP resources.
At the core of that performance is Yamaha’s TWINLANe network – a proprietary coax or fiber system capable of carrying up to 400 channels of 96 kHz audio with sub-millisecond latency. Baldwin describes the difference as “insanely small,” adding that it’s “powerful and reliable – you just have to bring good cables.” Combined with RPio racks, the platform provides modular I/O flexibility and even supports legacy MY cards. “I can still use MY cards I’ve had for 20 years,” he says. “That’s insane in today’s day and age.”
In-the-Box: Plugins That Perform
One of Rivage PM’s biggest advantages for Baldwin is its fully integrated plugin suite. The Rupert Neve Designs Silk circuit in the RPio Stagebox, for example, has become a staple of his mix template. “The Rupert Neve Silk emulation is stunning,” he says. “The more red I dial up, the less EQ I have to do. It’s musical, not just technical.”
He also calls the Dynamic EQ 6 “the most versatile, most beautiful EQ” he’s used, explaining that it lets him respond to vocal intensity dynamically, keeping the tone consistent whether an artist is whispering or belting. With tools like these running on Rivage’s FPGA-based DSP at 96 kHz, Baldwin is able to mix fully in the box – even for stadium-scale productions – without latency or compromise.
Baldwin approaches each show as a collaboration between engineer and artist. “There’s no console before or since that has locked it in like Rivage – I feel completely at home,” he says. “I always feel like I’m standing in front of a musical instrument.”
For Baldwin, Rivage isn’t just a control surface – it’s a creative partner. “Yamaha puts the musical things forward,” he explains. “You only look at what you need to work on the most musical aspects of each mix.”
On one tour, he used the PM5 to create a 12-channel immersive mix in which reverb physically moved through the venue. “It sounded like one long reverb,” he recalls, “but it traveled from front to back.” It’s this kind of real-time artistry – using technical flexibility to deepen the audience’s connection – that defines Baldwin’s work.
Real-World Impact: Value for Production and Touring
Baldwin’s approach to Rivage PM also brings tangible value to production companies and touring operations. “I can go anywhere with a USB stick and make shows that sound spectacular,” he says. “You’re saving the tour, the church, the black box theater money on rental. That money should go to you – not the gear.”
That level of portability and consistency makes Rivage an asset across scales – from major stadium tours to regional festivals – proving that sound quality and efficiency can coexist at the highest level.
Familiarity Meets Mastery
Despite Rivage PM Series expanded architecture, Baldwin says the transition felt natural. While he initially experimented with Yamaha’s console file converter to migrate CL show files, he ultimately rebuilt everything from scratch to take advantage of stereo aux sends, expanded mix buses, and the console’s advanced dynamics engine. “It’s a mistake to say Rivage is just a CL on steroids,” he explains.
“It’s a whole different system, but it feels familiar – it’s part of the Yamaha family.”
That familiarity, combined with Rivage PM’s deeper toolset, allowed him to approach mixing with fresh creative intent rather than treating it as a technical upgrade.
A Platform for Sonic Excellence
Scottie Baldwin’s evolution from CL and QL to Rivage PM reflects Yamaha’s core philosophy: to design tools that inspire engineers to make music, not just mix sound.
Baldwin sums it up simply – Yamaha, he says, “listens carefully and responds musically.”
When he steps behind a Rivage, Baldwin doesn’t see a console – he feels an instrument. And with that, every show becomes an act of performance, precision, and sonic storytelling.
Ready to connect with our B2B sales team, discuss system needs and Request a Quote? Click here to get the conversation started: Request a Quote
Summary Stephen “Pato” Pattison, FOH for Hozier, relies on Yamaha RIVAGE PM to deliver pristine mixes of the band’s rich soundscapes, backed by Yamaha’s global support and innovation.
In live sound engineering, few names command as much respect as Stephen “Pato” Pattison. Renowned for his meticulous ear and innovative approach, Pato is the sound engineer behind Hozier’s celebrated live performances. Handling the complexity of the band’s lush soundscapes requires not only talent but also the right tools. For Pato, those tools come in the form of Yamaha’s RIVAGE PM Series.
Adopting RIVAGE PM for Hozier FOH
With RIVAGE PM at the core of his setup, Pato expertly balances Hozier’s ensemble, which includes everything from Andrew Hozier-Byrne’s soulful vocals to strings, layered guitars, and dynamic percussion.
The RIVAGE PM Series’ flexibility, superior hybrid preamps, and onboard processing allow Pato to craft a pristine mix that remains true to the band’s sound, no matter how challenging the venue. His configuration also incorporates our Dante networking for added flexibility. He even utilizes a Yamaha MS101-4 on his doghouse as his shout-back speaker.
When asked about using external plug-ins or hardware to shape the sound, he laughs and says, “No, just one lonely desk—nothing else around it. No extra gear, no extra plug-ins, nothing to worry about. There’s nothing to go wrong because the console already has everything I need. Anything I’d get from external plug-ins or hardware is already built in.”
A Relationship Built on Communication
For Pato, the key to our success lies in its open communication and global support.
“The relationship with Yamaha is great because there are people you can talk to and people who will listen and offer ideas or ask questions back,” notes Pato, highlighting that our team doesn’t just respond – they engage, often following up with questions that open the door for collaborative problem-solving.
This level of service transcends time zones. “Doesn’t matter what time of day it is or what time zone I’m in, someone will get back to me, and that’s amazing,” Pato shares. Whether he’s in the US, at his home in the UK, or anywhere else in the world, Our team is still accessible, “offering ideas and solutions no matter the hour. They get pestered with ideas I sometimes have, and they go, ‘Oh, I never thought of that,’ and it might actually become a thing.”
Collaboration Sparks Innovation
Touring with Hozier – a band known for its rich, soulful sound – Pato handles various audio challenges, from balancing Hozier’s baritone to amplifying diverse instrumentation. The performances feature acoustic and electric guitars, piano, percussion, and strings, creating a layered sound that demands adaptability. This is where Yamaha’s open dialogue and gear excel.
Yamaha’s commitment to feedback has led to real improvements. Pato recalls suggesting a stereo overdrive feature for a keyboard, a key element in several of Hozier’s tracks. “I wanted to overdrive a keyboard, but the overdrive was just mono. Then, without me knowing, they implemented a stereo option,” he says, a testament to Yamaha’s willingness to listen and evolve.
“They definitely believe in the product and want it to be the best,” Pato emphasizes. For him, this partnership goes beyond mere functionality – it’s about shared values. “If you have an idea and they implement it, that’s where you want to be.”
Tools of the Trade: Custom Solutions for Unique Needs
Pato is discerning when it comes to equipment. With Hozier’s diverse instrumentation – including everything from carbon fiber cellos to traditional string instruments – achieving clarity is critical. When amplifying strings, Pato uses pickups but adjusts depending on the environment.
“The strings have their own pickups, but in extreme conditions like heat, we might use the carbon fiber cello,” he explains. Despite occasional tweaks, Pato aims for simplicity. “I just roll off some low end and a little around 4K, but nothing drastic.” His approach highlights Yamaha’s ability to elevate natural sound without over-complicating it – a crucial factor when managing the unique blend of orchestral and rock elements in Hozier’s music.
Advice for the Next Generation
For aspiring engineers, Pato’s advice is simple: trust your ears. “Don’t mix with your eyes, use your ears,” he says, urging engineers to focus on sound over visual cues. “If it sounds great, it sounds great. No one in the audience cares how much you’ve adjusted the low, mid, or high. “Pato also highlights the importance of hearing the sound from the audience’s perspective. “Go where the audience is and check how it sounds there,” he advises. Finally, Pato urges young engineers to experiment. “Ask questions, turn the dials, play with the encoders—they’re there to be turned.”
Conclusion
For Pato, the partnership with Yamaha is more than a transactional relationship – it’s a collaboration where innovation is encouraged, and solutions are developed together. With a brand that listens, adapts, and continually pushes its products forward, Pato feels empowered to deliver the best possible sound every night. “They only want their product to be the best,” he says—and for an engineer at the top of his game, that’s exactly the kind of partner you need.
Ready to connect with our B2B sales team, discuss system needs and Request a Quote? Click here to get the conversation started: Request a Quote
Summary J. Summers, Monitor Engineer for Jelly Roll, uses Yamaha RIVAGE PM10 and surgical precision to deliver flawless IEM mixes for high-energy arena shows and guest-packed sets.
With decades of technical mastery and a passion for thriving in live sound, J. Summers ensures every Jelly Roll performance delivers unmatched energy, precision, and seamless connections between the Artist, Band, Guests and Audience. He is the harmony in every song.
Introduction
For J., stepping into the role of Monitor Engineer with Jelly Roll is the culmination of years spent mastering his technical skills, navigating unpredictable challenges, and embracing the ever-changing energy of live performances. Summers comes fully equipped with a whatever it takes, can-do attitude and is committed to delivering the highest-level of sonic nuances to his Artists IEM’s. “Nothing feels better than to hear my Artists smiling.”
Audio Setup and Team Dynamic
The heartbeat of Jelly Roll’s touring success lies in a finely tuned synergy between its Sound Image Crew members and all other departments. Summers describes their seamless teamwork: “Ron Gardner (TM/FOH) mixes the show and is our Captain of the ship, ensuring smooth navigation and Team collaboration. Brendan Hines, our System Designer, System Engineer, Crew Chief and Bus Ambassador, always looks ahead and keeps us informed, our Gibraltar. My role as Monitor Engineer is the setup of Mons World, mixing and making sure everything sounds perfect for Jelly and The 36 Hour Band.” This collaborative, team-first approach ensures every piece of the puzzle fits and keeps things running with clockwork precision.
This precision is put to the test nightly. Jelly Roll performs on a bespoke 3-tiered arena stage, 2 runway thrusts stretching deep left and right into the audience and the B-stage as well, Summers embraces the unique sonic challenges of managing the inputs, room, crowd, and stage. “The energy from the crowd and the intensity of Jelly Roll’s performance pushes us to find new ways to adapt. Having an artist 60 feet in front of the PA isn’t easy—but that’s part of what makes every night special. Dare I say, a more “intimate” evening in an arena. Brendan and I spend time walking Jelly’s RF mic around the stage every day. Keeping ahead of any sonic anomalies.”
Technical Setup and Flexibility with Guests
Sound Image’s meticulous preparation forms the backbone of every performance. At the core of this workflow is the RIVAGE PM10 mixing system. There are 3 mirror image rigs built and ready to gig when the call comes in. “We have done some serious cross-country travel and international flight hops to our A, B and C rigs. In NYC we had all 3 rigs running at once, with multiple gigs in various locations across town. We even had Police escorts in between venues to get us there on time. MSG, SNL, The Global Citizen’s Festival, Jimmy Fallon and then Jelly and I popped over for a Duet with Kelly Clarkson on her programme, all in a 3-day weekend. Full On!”
It’s that spontaneity of live performances—and the revolving door of guest appearances—that keeps Summers sharp. At Nashville’s Bridgestone Arena, a hometown finale for Jelly Roll, Summers and the team faced their biggest test yet. Originally set to end weeks earlier, the tour extended by popular demand. “We can’t end here in Jacksonville, we have to bring it home.” Jelly Roll declared, setting the stage for an unforgettable final night in Nashville.
Summers prepared accordingly: “We always have 2 Guest RF mics and 2 discrete mixes ready to go. For Bridgestone, we added more because we knew it was going to get wild.”
On show day the Guests came fast, “We had Alexandra Kay, Ernest, Struggle Jennings, Skylar Grey, Yelawolf and Snoop Dogg. Keith Urban has his own dedicated inputs in our rig as we’ve seen him along with his Tech Chris Miller so much this year. Shinedown’s Zach Meyers needed an acoustic patched in during the show. No worries. This is why we always need to have a clean and clearly designed stage patch system with plenty of options open. We love options!”
Summers thrives in what he calls “organized chaos, handled with surgical precision.” Thanks to Yamaha’s carefully designed matrix system, Summers ensures flawless execution. “Jelly’s got a main and spare IEM, then there are feeds into the Band spares. Guest mixes are always their own discrete frequencies. Everything’s designed so we can adjust on the fly without blinking.” RF Tech Bill Black plays a crucial role, always one step ahead. “Bill’s got our RF world sorted, he doesn’t miss a beat.”
Summers summarizes it simply: “On this show, there’s no deer-in-the-headlights moment. It is a calm and cool-go, go, go gig. Three extra IEM packs? Gotcha. Darbuka input? Done. More RF mics? Ready. It’s about being prepared for anything and trusting the Team to execute at lightning speed.”
The Bridgestone Arena show proved not only Summers’ technical expertise but also his adaptability—ensuring the on-stage IEM sound matched the moment, leaving the Artist, Guests and Audience with an unforgettable experience.
Touring Experiences and Sonic Philosophy
Summers’ career has taken him across the globe and into a vast array of unique venues. Each space, no matter how unconventional, challenges his understanding of sound and reinforces his deep respect for its power.
“I’ve been to some beautiful places, with Sting we performed in Roman amphitheaters and ancient temples around the world” Summers reflects. “With Sigur Rós, we did a recording in the caves outside of Paris, using the natural reverb of the mined chambers. You can’t forget those moments—they’re alive with sound.”
These extraordinary experiences have shaped Summers’ approach to live sound. For him, it’s about more than technical perfection—”it’s an organic connection with the environment and my Artists that makes the music come alive and immerses the audience in waves of sonic emotions.”
Passion and the Right Tools
Summers credits Yamaha for providing the reliability he needs to perform at the highest-level night after night. “Yamaha gives me the confidence to ensure my artists are happy on stage, which translates to a great performance for them and the audience.”
Summary
Summers’ journey as an audio engineer is one of passion, adaptability, and technical excellence. From managing the IEM’s for Jelly Roll’s high-energy shows to crafting soundscapes in historic, otherworldly venues, Summers combines preparation with artistry to bring music to life. His ability to balance technical precision, team coordination, and an unshakeable understanding of the Artist’s vision ensures every performance resonates deeply with audiences and the Artist.
For Summers, live sound isn’t just a science—it’s an art form, one that bridges the gap between artist and audience, leaving an impact that lingers long after the final note fades.
Ready to connect with our B2B sales team, discuss system needs and Request a Quote? Click here to get the conversation started: Request a Quote
Summary Gene Kim, FOH for Johnnyswim, Phil Wickham & Pat Barrett, relies on Yamaha DM7 Compact for pristine sound, portability, and powerful processing across diverse venues.
Gene Kim, a highly respected front-of-house (FOH) engineer known for his work with Johnnyswim, Phil Wickham and many others, has made our DM7 Compact digital mixing console his go-to for live sound. Now on tour with Pat Barrett, Gene relies on the DM7 Compact to deliver pristine sound and seamless performance in churches, clubs, and iconic venues like Nashville’s Ryman Auditorium.
Features and Portability
Gene first encountered the DM7 Compact during a Trio acoustic show in LA. “For a compact console, it really helps a front-of-house engineer because the footprint is small, but it’s packed with output capabilities and local I/O,” he explained. The console’s portability, fitting easily into a Pelican case, proved invaluable for Gene, who frequently handles fly dates and mobile setups. “It just makes things really easy.” One standout feature for Gene is the DM7 Compact’s ability to simultaneously handle both FOH and MON duties effortlessly. “It’s really easy to get monitors up and going quickly,” he noted, a key advantage on fly dates where he often manages both roles.
The DM7 Compact’s intuitive design also allowed Gene to handle complex setups efficiently. “There are so many user-defined keys, making it easy to manage layers. I haven’t needed a ton of faders,” he shared. This efficient layout has been especially beneficial for larger band shows with choirs. “The GUI is clear, it’s bright, and the touchscreen is really responsive.”
“For a compact console, it really helps a front-of-house engineer because the footprint is small, but it’s packed with output capabilities and local I/O.”
Gene also emphasized an often-overlooked feature of Yamaha consoles: dual power supplies. “It’s not something you immediately think about, but when engineers see two power supplies, it gives peace of mind. If one goes down, the rig keeps running.”
Processing Power and Sound Quality
Gene was particularly impressed by the DM7 Compact’s onboard processing capabilities, including the reverbs, multiband compressors, and the Rupert Neve Designs’ Portico processing tools. “The onboard reverbs, the multiband, the FET limiter, the U76, and I love all the Portico compressors,” he stated. “As far as sound goes, it’s just really flexible and transparent. I really enjoy that because nowadays with music, you’re often asked to add things. You can’t make something clear and clean on a mic pre with a ton of color. “This transparency allows Gene to begin with a clean slate and have the ability to shape the music to fit the artist and venue. “The console lets you start from a good, clean place, which is exactly what I need.“
Flexibility Across Diverse Venues
On Johnnyswim’s tour, Gene mixed at venues of all sizes. In Nashville, shows ranged from the intimate Bluebird Cafe to the renowned 3rd & Lindsley club and the legendary Ryman Auditorium. “We did the Bluebird, a club show, and then the Ryman—same console for everything,” Gene recalled. “The house guys chuckled when I set it next to the Rivage [the Ryman’s FOH console is a RIVAGE PM5]. They asked, ‘Are you sure?’ I said, yeah, and even mixed the openers. It was a lot of inputs, but I did it. It was great!”
Gene Kim’s experience with the Yamaha DM7 Compact highlights its versatility and adaptability. Whether handling FOH or monitors, Gene consistently delivers high-quality sound in diverse venues, proving the DM7 Compact’s reliability. From intimate church settings to iconic venues like the Ryman, the DM7 Compact empowers engineers to create unforgettable live sound experiences.
Ready to connect with our B2B sales team, discuss system needs and Request a Quote? Click here to get the conversation started: Request a Quote
Summary Brad Divens, FOH for Enrique Iglesias, Linkin Park, Garbage & more, relies on Yamaha RIVAGE PM for warm, intuitive mixing without outboard gear.
Brad Divens, renowned for his work as a Front of House (FOH) engineer, has forged a legendary career collaborating with major artists such as Enrique Iglesias, Linkin Park, Garbage, Bob Seger and the Silver Bullet Band and Jane’s Addiction, among others. Recently, Russ Long from Yamaha Pro Audio caught up with Brad at Bridgestone Arena in Nashville to talk during a sound check.
Early Career and Transition to Digital Systems
Divens’ journey began with analogue mixers, and over time, he transitioned to various digital systems. His significant shift occurred upon the recommendation of Luke Bryan’s FOH engineer Frank Sgambellone, who convinced him to try the Yamaha RIVAGE PM series. “Frank kept telling me, ‘Look Brad, just plug an SM58 into it and listen to your voice. That’s all you need to do, and you will want to check it out.’ We had a long conversation about it because he’s one of my peers and I trust his opinion when it comes to mixing,” Divens recalls.
Following a demo with Yamaha in Nashville, Divens immediately appreciated the system’s capabilities. A major benefit of RIVAGE PM was the elimination of the outboard racks he previously relied on. “When using other digital desks, I immediately felt that I needed to add something because they are a little on the sterile side. But when I tried the RIVAGE PM system, I found there was nothing digital sounding about it,” he explains.
“Once I was only using the RIVAGE PM system, I was like ‘This is it. This is beautiful. It’s exactly what I knew I could do with it,” he says. “I just feel less is more. All I need is the RIVAGE PM, a USB stick with my show file and everything is ready. It justified the decision, and I knew I’d made the right choice.”
Technical Approaches and Favorite Tools
Divens is renowned for his use of the Yamaha RIVAGE console, particularly the P2MB Master Buss Processor plug-in. He shares, “I think my favorite plug-in on the RIVAGE I think would have to be the Master bus processor. I can put it on groups; I can choose blue or red silk depending on what tone I want for the guitar groups.” This tool allows him to apply nuanced compression and tonal adjustments, providing flexibility and enhancing the final sound quality.
In addition to the Mix Bus Processor, Divens employs several other technical approaches to achieve his signature sound:
– Dynamic EQ and Multiband Compression: To manage varying frequency content and dynamics, Divens uses dynamic EQ (DynamicEQ4) and multiband compression (MBC4) to keep the mix balanced and clear.
– Parallel Compression: This technique is used to add power and presence to vocals and drums without overwhelming the mix. By blending a heavily compressed signal with the dry signal, he maintains natural dynamics while enhancing impact.
– Reverb and Delay Effects: Divens uses reverb and delay to create space and depth in the mix. These effects help to position instruments and vocals within the stereo field, giving the audience a more immersive listening experience.
Creative Process and Challenges
Divens thrives on the creative process of mixing live sound, noting, “The biggest joy I get out of mixing I would have to say is probably the creative process of taking what the band is giving me and putting the music together and then watching the crowd react to something that I’ve done.” However, managing crowd noise remains a significant challenge. He explains, “The biggest challenge for me is probably the crowd noise. I mix at around 98db, 99 tops, maybe peak at a hundred, and the crowd can be at 105 sometimes, and there’s no way I’m competing with the audience. It’s a delicate balance.”
Favorite Features and Technical Approaches
Divens highlights the hybrid mic preamps as a standout feature. “The first and foremost feature I really love is the hybrid mic preamps, because to me the front end of a console is everything,” he states. He also praises the onboard Rupert Neve Designs processing, including the Portico II Master Buss Processor, the Portico EQ and compressor, and familiar studio tools like the Eventide H3000 and Bricasti reverb. “It’s things that you know and love from the studio. It’s that familiar sound.”
Divens finds the system comfortable to mix on. “The more you get used to something the easier it becomes,” he adds. “I found that it’s a very comfortable system to mix on and get the show to where things just sound good. I never need to look outside of that.”
Advice for Aspiring Engineers
For those new to the field, Divens emphasizes the importance of listening to the music over relying solely on technical tools. “The best advice I can give to somebody starting out that wants to mix and do what I do is don’t forget that you have to listen to the music,” he advises. By focusing on selecting the right microphone, placing it correctly, and using a good mic preamp, aspiring engineers can significantly improve their results.
Personal Routine and Conclusion
After a show, Divens maintains a simple and healthy routine. “I really stopped eating after-show food. It’s probably a handful of almonds and then I go to bed,” he shares. Divens emphasizes the importance of maintaining a healthy level of wellness amidst the demands of his profession, recognizing that proper nutrition and rest contribute to his ability to consistently deliver exceptional performances.
Conclusion
After hanging up his bass guitar in the early days from his time in bands like Kix and Wrathchild America, Brad Divens’ experience as a FOH engineer highlights the blend of creativity, technical skill, and adaptability required in live sound engineering. His utilization of the Yamaha RIVAGE PM system along with his advanced mixing techniques, combined with his profound understanding of music, has enabled him to deliver remarkable and inspiring audio experiences to audiences worldwide. Divens’ dedication and innovative spirit not only continue to inspire, but also to pave the way for the next generation of sound engineers.
Ready to connect with our B2B sales team, discuss system needs and Request a Quote? Click here to get the conversation started: Request a Quote
Capturing the Live Essence of Steely Dan and Paul Simon
Summary Michael “Coach” Conner, FOH for Steely Dan and Paul Simon, discusses Yamaha RIVAGE PM and using its advanced tools to recreate studio-perfect sound for live audiences.
While many FOH engineers refine their mix by playing back Steely Dan’s sounds, Michael “Coach” Conner makes it a reality nightly on tour with the band. Captivating audiences with unparalleled sonic fidelity, he achieves this through meticulous preparation and innovative use of both analog and digital tools. Conner seamlessly translates complex recordings into live experiences that rival the originals, ensuring every performance sounds as close to the studio recording as possible. With a decades-long career working with icons like Donald Fagen, Steely Dan, and Paul Simon, he has earned acclaim from both artists and fans alike.
On reproducing complex studio arrangements
Recreating Steely Dan’s trademark studio sound, renowned for its intricate arrangements and meticulous production standards, live on stage presents a daunting challenge for Conner. Night after night, in various arena-sized venues, he faces the task of translating this complex sound into a live experience.
Through rehearsals, sound checks, and collaborative feedback from the band, Conner leverages both analog and digital equipment, including notable tools ranging from the Bricasti M7 reverb and Summit Audio’s TLA-100A and DCL-200 compressors to Yamaha’s DaNSe, Bricasti Y7 and OpenDeck plug-ins to achieve a level of sonic and tonal fidelity that rivals the well-known studio recordings (Coach recorded 2021’s live Donald Fagen and Steely Dan albums). This dedication garners acclaim from both the band and audiences, who appreciate the seamless transition from studio to stage.
Coach was a quick adapter to Genius.lab having created a macro to switch from external to internal processing allowing him to recover from 3rd party hardware issues seamlessly and instantly.
Microphone Mastery
Another way Coach achieves the sonic perfection of Steely Dan live is through meticulous microphone selection and placement and the precise use of Yamaha’s DaNSe Noise Suppression plug-in. “We use around 55 microphones, with the rest being direct inputs. I have 25-30 instances of DaNSe. Anywhere I have noise floor off an amplifier or a vocal mic there’s DaNSe in play. It really does change everything. It’s probably my favorite thing on the desk. That’s my game-changer.”
“Noise reduction is applied either on the group or individual input, but it’s done very lightly. There’s an art to using it-you can’t be too aggressive, or you’ll create a mess.” Conner continues, “For example, I apply noise reduction to the horn section by routing them to group processing. Again, it’s a delicate balance. Being too aggressive can compromise tonal quality. Once it’s dialed in, I can set it and forget it. Constantly relearning and adjusting thresholds nightly isn’t practical—it introduces too much margin for error.”
Full Sound Checks
Coach and the band allocate time for full sound checks each day. “We do a full sound check each day, usually having at least an hour to do so. Sometimes, we even run through the entire set during sound check for various reasons, such as substituting musicians. This means we often end up performing the entire set twice. It’s pretty handy as it ensures we have enough time to prepare and perfect the show.”
These sound checks are clearly a delight for Coach. During this interview by Russ Long from Yamaha Pro Audio, they shared multiple laughs and insider banter, all while Coach expertly dialed in the sound of Steely Dan. It’s evident that Coach is a master at work, and he embodies the joy that a career in audio engineering can bring. He even jokes about the necessity of becoming an expert at finding laundromats if you’re a touring live engineer… but that’s another story.
Virtual Sound Checks: A Blessing and a Curse
Michael “Coach” Conner also carves out time during his day to regularly conduct virtual sound check, leveraging the on-board recording technology of Rivage PM. This feature allows him to fine-tune the mix and analyze nuances, ensuring optimal sound quality during the live performance.
“Virtual sound check has become indispensable for me now, but it’s interesting to reflect on how I achieved results before. Back then, we relied solely on live shows, blissfully unaware of any imperfections. The combination of the environment and the adrenaline masked any issues.”
“But with virtual sound check, it’s all laid bare. I put on my headphones or in-ears, start soloing up, and realize what I truly heard the previous night—sometimes strange or unexpected. It’s both a blessing and a curse to have an archive of past performances. While it adds work and time to my day, it ensures continuous improvement. Before, it was like whatever happened the other day vanished into space. Now, let’s dive into today and see what happens.”
Even at Coach’s level of experience, he muses, “So much satisfaction… yet it’s never 100% correct,” highlighting the ever-evolving nature of the work and his passion and drive to constantly improve the sonic experience for both the artist and the audience.
Engineering for Paul Simon
Despite his self-deprecating humor and humble approach, Coach’s lauded and sought-after sonic ability to recreate complex in-studio mixes benefitted from demanding engineering challenges in recreating the sounds of Paul Simon. “Paul Simon’s music spans a wide range of styles and incorporates a variety of instruments and vocal arrangements. Achieving a cohesive and balanced sound in a live setting requires versatility and a deep understanding of the music.”
“Paul, like Donald (Fagen), derives immense satisfaction from recreating complex studio arrangements in a live environment. The challenge is formidable—what was hard enough to achieve in the studio becomes even more intricate when performed live. Yet, they persist, striving to capture that magic for audiences. It’s a testament to their dedication and the artistry behind their music.”
Conner customized his approach to suit the unique requirements of Simon’s diverse catalog. This included tailored microphone setups for different instruments and vocalists, as well as specific EQ settings for various songs.
During live performances, Conner constantly monitors and adjusts the mix to respond to the dynamics of the music and the acoustics of the venue. His ability to make precise, real-time adjustments ensure that the sound remained clear and balanced.
Working closely with Paul Simon and his band, Conner’s goal is that that the live sound reflects the artist’s vision. This collaborative approach extends to rehearsals and sound checks, where he fine-tuned the mix based on feedback from the musicians.
The Coach Approach
Nicknamed “Coach” for his leadership and problem-solving abilities, Conner excels under pressure, quickly addressing any issues that arise during live performances. His passion for music and sound drives him to continually refine his skills and stay updated on the latest audio technology.
In sharing his wisdom with aspiring audio engineers, Conner emphasizes, “If you’re passionate about audio, go straight to the people who do what you want to do. It’s easier than you think to get a job – you may not land the one you want right away, but you’ll get a tap on the shoulder because you’ve positioned yourself with the right people to do what you love.”
Michael “Coach” Conner’s career exemplifies the art and science of FOH engineering. His ability to enhance the live music experience through meticulous preparation, real-time adaptation, and collaboration has set a high standard in the industry. As a mentor and leader, his insights and practical advice continue to inspire aspiring engineers, cementing his legacy as a true luminary in live sound engineering.
Ready to connect with our B2B sales team, discuss system needs and Request a Quote? Click here to get the conversation started: Request a Quote
Summary University of Birmingham adds Yamaha DM7 to its world-class music department, enhancing performance, study, and event capabilities.
THE CHALLENGE
Opened 12 years ago, the Bramall Music Building finally completed the 1900 vision of the university’s first Chancellor, Joseph Chamberlain. From the outside, it is a building which visitors would think has been there all the time. Funded by the Bramall Foundation, the £16 million facility includes state-of-the-art teaching, research, performance and rehearsal facilities, with a 450-seat auditorium at its heart.
Designed to be the most flexible performance space at a UK university, the auditorium is suitable for all types of music, from solo voice to a full symphony orchestra, as well as being the home for contemporary audio pioneers Birmingham Electroacoustic Sound Theatre (BEAST). When not being used for music, it is also a high-profile location for prestigious lectures, presentations, conferences and more.
“As well as a teaching and performance facility, it is also used for internal and external commercial activity,” says Richard Mitton, the university’s Live Events Technical Manager. “The University is big enough for us to easily facilitate large events – we have our own hotel on site and also the Great Hall, which can hold nearly a thousand people.”
With the University on an ambitious program of expansion, a recent major upgrade to the Bramall Building’s infrastructure has been designed both to improve its teaching facilities and to sell the venue as a world class resource.
“The previous audio mixer was at the end of its life and massively limiting in terms of what we needed from channel counts and so on,” says Richard. “We started by sketching out what we wanted the upgraded system to do. The flexibility and power to easily handle a wide variety of events was vital, as well as the reliability to be in constant use and familiarity of the architecture and control for visiting engineers.”
THE SOLUTION
The chosen solution was a Yamaha DM7 digital mixing console, with a Dante network installed throughout the building. The DM7 system, supplied by Redditch-based 22live, includes the DM7 Control expansion controller, which allows features like user defined controls, scene memory and monitor control to be accessed even more quickly and conveniently.
“The capacity of the DM7 made it perfect for us,” says Richard. A lot of what we do is very mix bus heavy, with modern corporate events often requiring multiple streams, recordings and video feeds, as well as various monitor mixes and backstage/green room outputs. Features like 64 channels of Dan Dugan auto mixing are incredibly useful – we frequently have conferences that require extremely high numbers of radio mics, as well as multiple lecterns and large panel discussions. The split mode is really useful as well.”
One of the key purposes of the upgrade has been to build a core infrastructure which technical staff are not having to reconfigure all the time. Here the DM7’s Theatre Mode software is very useful for the university’s many regular presenters. Settings for each one can be stored in the software’s actor library, then Richard’s team can simply recall the event type and the presenters to achieve optimum settings in seconds.
The familiarity of the DM7’s user interface and architecture mean that visiting engineers also don’t waste any time in getting to work.
“The really difficult trick Yamaha has pulled off is to maintain the core workflow across the years. One of the first Yamaha mixers I used was an 02R. But you can walk up to the latest model and within about 10 minutes you’re up to speed,” says Richard. “There is that consistency, everybody knows them. The build quality and reliability as well – it just feels like a step up from all the alternatives.”
Another major benefit of the DM7 is that it allows events to be hosted which weren’t possible before, as Richard explains.
“We had a recent concert that formed part of our Crosscurrents new music festival, which was being recorded for BBC Radio Three. Both direct and ambient microphone feeds from a string quartet on stage were routed to the console, then straight back out for real time processing as part of the performance. From there the feeds were routed back on separate channels to the DM7, for mixing to the main house PA, several effects loudspeakers and on stage monitoring.
A full channel split was then sent to the BBC for broadcast. The DM7 enabled us to quickly and easily route what was effectively three different versions of every input in, out, back in and out again.”
He continues, “The BBC likes the acoustics of the space and, where in the past an outside broadcast truck has been needed, engineers now just bring a small rack of interfaces and hook up to our infrastructure via Dante. It’s a huge saving in cost and time. There is also a permanent four-way PTZ camera system in the hall, so we can sell prospective clients the ability to broadcast, stream and do multi-track recordings of a live event, and do a full multi-camera shoot as well. Everything is all in one place.
“For all of these reasons, choosing the DM7 was a no-brainer. It ticks all the boxes with us. Without it we simply couldn’t support a lot of the concerts or conferences and events we host, which going forward there will be more and more of.
“There’s nothing that’s likely to come to this venue that the DM7 can’t do. It makes us ready for anything.”
Ready to connect with our B2B sales team, discuss system needs and Request a Quote? Click here to get the conversation started: Request a Quote
“The first thing right off the bat that I really like about this console is the user interface and just the overall workflow. Everything that I need is right there on the home screen in a way that makes sense.”
“…it feels like audio engineers designed it for audio engineers …” – Brian Tru, Broadcast Audio Coordinator at LCBC Church, Manheim, PA
The Yamaha DM7 Digital Mixing Console has received the Church Production Road Tested Certification.
As part of Church Production’s Road Test User Experience, Tru and his team put the DM7 through its paces at LCBC Church’s Manheim, Pennsylvania broadcast campus and during the church’s summer youth camp. Tru serves as broadcast audio coordinator for LCBC, which operates 24 campuses across Pennsylvania.
He immediately noticed the benefits of the higher sample rate.
“I really like that it feels like audio engineers designed it for audio engineers—it just makes sense and is very intuitive, even the first time you sit down,” Tru says.
Coming from a CL5 environment, the expanded outputs stood out.
“Having more onboard outputs let us create several monitor mixes right on the console. On the CL5, you needed a RIO for those analog outputs. With the DM7, we had everything natively, so our musicians and singers could choose onboard mixes instead of personal monitor systems.”
The jump to 96k also impressed him.
“One of the things I loved about moving to the DM7 is mixing at 96k instead of 48k on the CL5. My music director told me just the other day that the mix sounds much cleaner—and I can only attribute that to what’s happening inside the DM7.”
Tru’s biggest concern was volunteer usability at the broadcast campus. Those worries quickly disappeared.
“All the volunteers love the console,” he says. “They love having two screens instead of one, and they really appreciate the ability to put all the user-defined keys right on the touchscreen.”
Ready to connect with our B2B sales team, discuss system needs and Request a Quote? Click here to get the conversation started: Request a Quote
Engineering Unforgettable Sonic Spaces for Kane Brown
Summary FOH engineer David Loy powers Kane Brown’s genre-blending shows with Yamaha RIVAGE PM3, delivering bold, immersive sound night after night.
Kane Brown is redefining modern country – blending genres, breaking boundaries, captivating audiences. At the core of his live shows is FOH engineer David Loy, whose instincts and skill bring Kane’s bold sound to life. Loy honed his craft with Sturgill Simpson, Blackbear and others. Today, his innovation discipline, and creativity deliver immersive audio night after night, arena after arena.
Chasing Something New
In early 2023, David Loy made a bold move. After years of working on other platforms, he made the decision to up his mixing skills. “I chose to go with Yamaha in early 2023. I was trying to find something new. I was trying to challenge myself,” he says. Loy had heard great things from peers: “A lot of my friends had said, ‘You’re gonna love the sound, you’re gonna love the front end, but the software itself is also incredibly stable and really, really powerful under the hood.’”
So, he called Yamaha. Not for a demo or a brochure – but to get his hands on the gear. “I asked if I could come by and program, and if I could learn what the software is like, what the onboard DSP is like.” What followed was five days of full-band rehearsals where he built a show file from scratch. “We said, ‘Okay, hey, let’s sit down. Let’s play the hits.’ I was really, really happy with the product at the end of the week. It made me realize, ‘Okay, you know what? This actually has some legs. I’m gonna take this for the tour and see how it goes.’”
Designed for the Road
Loy chose the RIVAGE PM3 surface – a decision driven by both sonic goals and practical logistics. “I love a small footprint. I love having a single screen. I love having a space for PA control right on the surface,” he says. With a compact setup that fits on a single PMC pallet, he can scale up or down with ease. “We can do shows like this in arenas, we can do shows in stadiums, we can do shows anywhere we need to and not eat up a ton of space. At the end of the day, your Production Manager appreciates that, and your Freight Logistics appreciate that.”
That flexibility came into play at Nashville’s Bridgestone Arena, where once again, the show ran flawlessly. “I’m watching the stage and watching what’s going on and trying to mix with my head up,” he says. “The PM3 lets me stay connected to the performance.”
Taming the Thrust
This tour introduced a particularly tricky stage design: a horseshoe-shaped thrust that wraps the stage around the audience. It makes for intimate performances – but introduces serious sonic challenges. “Those conversations started months in advance,” Loy recalls. “We really wanted to figure out how to get the vocal, which is the most important source of the show, to sound clean and clear without a ton of PSE [primary source enhancer] products on it or having to ring it out so aggressively that there’s no HF left.”
The solution? A strategic rethinking of the PA. “We pushed the PA downstage 16 feet and arced it 10 degrees.” That subtle repositioning dramatically reduced feedback and enhanced clarity for both artist and audience. At Bridgestone Arena, it paid off: “The hottest spots on the thrust are the sides, but once Kane gets in the middle, it’s pretty clean and great.” A center hang of Clair CO-8s was added to reinforce the Clair CF28s surrounding the pit to ensure every fan got the full experience, no matter where they stood.
What really excites Loy is that it works just as well for others. “Every opener, despite console choice and processing technique, has had success on our thrust. That means the math is applying to everyone, not just us. I don’t want people to come out on our tour and have a bad time.”
In-the-Box to Beyond
Loy’s mix begins in-the-box, a conscious decision to push RIVAGE PM to its limits. “That was important to me. I really wanted to see what it could do. And again, I was really impressed with the way that it sounded.” As the tour evolved, he incorporated select outboard gear but kept flexibility top of mind.
“I’m still summing outboard, still doing inserts outboard, but it’s very easily switched with a button press,” he says. That resilience was tested in Mexico, when damaged gear forced a last-minute shift back to in-the-box mixing. “I was able to bypass all of that and continue on with the show without any issues, and everyone remained happy.”
The Vocal Chain
For Kane Brown’s vocal, Loy has dialed in a finely tuned signal path: Shure Axient transmitter with a DPA 4018VL capsule, hitting the RPio with Transformer Emulation enabled and Blue Silk dialed in, then into a Rupert Neve Designs Shelford Channel. “I use a DynamicEQ as my PSE, tailored to Kane’s voice for clarity,” he says. Every component in that chain is carefully chosen to deliver a clean, punchy vocal that cuts through dense arrangements and diverse venues.
Sonic Signatures and recording
Some venues carry a sonic signature all their own. “Using the Silk processing allowed me to adapt the mix to the natural acoustics. A lot of problems can be solved with Silk before you even touch EQ or compression.” Over time, Silk has become one of his go-to tools, offering a subtle but powerful way to shape the mix. “I’ve really tried to dive into the Silk aspect, changing it per room and input,” he says. “It lets you shape things musically without over-processing them.”
Capturing each show is just as important to Loy as mixing it in the moment. “We’re recording 110 channels straight into Logic, archiving everything for future use,” he notes. The RIVAGE PM’s MADI integration makes this process seamless, allowing the team to easily access recordings for social content, post-show reviews, or even remixes. “It’s all right there,” Loy adds.
Advice from the Desk
For those looking to follow a similar path, Loy stresses the importance of listening – with intention and humility. “Always remain a listener and a student,” he says. “Listen to the source, the people above you, and what’s going on in the room. Do your homework, be observant, and stay one step ahead.”
And perhaps most importantly, Loy believes that a great mix begins with understanding the artist. “You’ve got to know what they’re trying to say. What are they trying to share with the audience? That’s your job – to translate that.”
Conclusion
For Loy, live mixing is a powerful form of storytelling. With meticulous preparation and a relentless drive to evolve, he uses the Yamaha RIVAGE PM system to create rich, resonant soundscapes. “Every time I find something new or discover a new way of doing things, it inspires me to dive deeper into the creative side,” he shares. “When I find a reverb effect, plug-in, or preset I like, it excites me… I love trying new things because it changes the entire sound, and that excitement carries over to the show. It’s incredibly enjoyable, and I think it inspires others to explore the surface more too.” For Loy, each performance is not just an opportunity to mix – it’s a chance to ignite creativity, break through limits, and forge a deeper connection with the audience through the power of sound.
Ready to connect with our B2B sales team, discuss system needs and Request a Quote? Click here to get the conversation started: Request a Quote
Choosing repertoire is one of the most important things directors do. The process is exciting, but it’s also difficult to find the right program for your ensemble. Directors have their own tastes and they also know what their students enjoy. Here are some things you should consider when choosing that perfect program for your performance.
What to Look For
When choosing repertoire, it’s helpful to think about the components of music that made you fall in love with playing music. You might not be able to program some of the heavy-hitters that are standard for most bands, but there is music at every grade level that can provide the same excitement you felt when you played in high school or college.
Start with some composers you like. What do you enjoy about their music? Does their music have the components you want — the components you hope your students will respond to like you did? If you don’t believe in the music you’re programming, neither will your students. Your excitement about the music will excite them, and they will want to perform it at a high level.
Not every piece that you like and are excited about will have the same impact on your students. For example, I planned to program “Incantation and Dance” by John Barnes Chance, one of my favorite pieces to perform when I was in high school. However, every rehearsal dragged on when we worked on it. Regardless of how much energy I put in, it was clear that student buy-in was very low and the majority of the ensemble were simply unexcited about the piece. So, I pulled the piece from our program.*
Was it too difficult for them? No. Could I have done something differently? Maybe. Was it worth forcing my students to love what I did when I was in high school? Not at all. No one, especially my students, wants to be like high-school me. I know that there will be a new class of students who will enjoy “Incantation and Dance,” and we will all have a better experience with it.
* Disclaimer: This is the only time I pulled a piece. I wouldn’t make this a habit because you will always find students who don’t like a particular piece. I make it clear that regardless of what you think of the music, it is your job to convince the audience that it is good by the way you play it.
How to Curate a Program
There are a number of things to consider when picking a program. There may be certain concepts you are trying to teach through the music. There may be certain time signatures or key signatures. You may typically want to balance the program to include a good opener, a nice lyrical middle and a flashy closer (or something to that effect).
Some programs are easier to put together than others. Students and audiences engage more with performances that have a clear connection between the pieces. My typical approach to programming begins with just one piece, which is the cornerstone work that inspires the theme. I think about what possible themes this one piece could inspire and begin putting other works into the program.
Last spring, we presented a program that was one of my proudest (saddest, embarrassing, silliest, most fun, cringey — pick any adjective). The cornerstone work was “Diamond Tide” by Viet Cuong. My original thought for a theme was something about caves. So, I included a premier of a work titled “Obsidian” by a close friend of mine, Michael Shun. The last piece was “Illumination” by David Maslanka. Knowing that I enjoy a good theme for a concert, my students enthusiastically asked, “Is this a Minecraft concert?”
Diamonds? Obsidian? Light? I may have just made the most and least incredible concert program of all time! Of course, this was not my intent, but I did lean into it. My students were so excited that we called our concert “CRAFTED”!
Student Input
Why should you ask your students for input on the music that you program? Because they might give you good insight on what they are interested in playing based on the music you’ve programmed in the past. For example, my students enjoy playing a lot of Percy Grainger — although I think they mainly liked hearing the bizarre stories about Grainger that I shared. Student opinions and ideas are worth listening to when appropriate. You won’t know what they like and don’t like unless you ask! Utilizing student input is invaluable in gaining buy-in for the music you are working on — but, of course, you should find merit in it as well.
Program Balance
Balance in a program means different things to different directors. My philosophy is to balance our standard band literature with newer works over the course of the whole season. I could go on a lengthy tangent about the history of the wind band, but I won’t put you through that.
It’s important for students to play classic band repertoire because it is our job to educate our students on band and its history. However, wind bands are typically the champions of new music, so you would be doing a disservice by not exploring new works.
Photo by PietFoto/Shutterstock
Core Repertoire
There are long lists of core band repertoire that you can find anywhere. This is one of my favorite parts of my job. Feel free to contact me to chat about repertoire — although if you are looking for a short response, you might regret it. Here are some components of our core band repertoire you might consider performing.
MARCHES: A number of years ago, I used to think marches were “just marches.” That was very naive of me — I have matured since then. A significant part of band history, marches have so much character and provide great depth for music-making. If I had a time machine, I would scold my younger self for not appreciating them much sooner.
ORCHESTRAL TRANSCRIPTIONS: These are another significant part of the development of wind band music. Pieces like “Four Scottish Dances” by Malcom Arnold (trans. John Paynter), “Galop” by Dmitri Shostakovich (trans. Donald Hunsberger) and “Variations on America” by Charles Ives (arr. William Shuman, trans. William Rhodes). They are also a great way to provide students with knowledge of music history that they might not otherwise get. And who doesn’t love the lush beauty of a Romantic era orchestral work?
ORIGINAL, SIGNIFICANT WORKS FOR BAND: Some of the heavy-hitters I mentioned earlier are great if you have the horses to play them. Pieces like “Lincolnshire Posy” by Percy Grainger, “Canzona” by Peter Mennin and “Pageant” by Vincent Persichetti. These works have helped the advancement of the wind band and provide students with a lot of context for band music. Even if you can’t perform “Lincolnshire Posy,” your students can listen and learn about it while you work on another Grainger piece like “Irish Tune from County Derry.”
NEW WORKS FOR BAND: It seems like there is a new piece for band promoted every day. Music being written within the last 10 years or so have helped develop the genre as we know it today. As noted earlier, the wind band has long been a champion for new music and will continue to further advance the genre. If we only program music from the 1950s (don’t get me wrong, that was a great year for band music) we are failing to provide a broad picture of the history of the wind band. Additionally, how cool is it to have a living composer work with your students on their music? But, please, someone let me know if they have Holst’s email.
DIVERSE REPERTOIRE: This is a topic that I could go on and on about, but I’ll share only a few thoughts here. One of the biggest reasons diverse repertoire is extremely important is that the music your ensemble plays should reflect the population of your students. However, in Maine where I teach, a diverse program of marginalized composers doesn’t reflect my student population. However, it does provide me an opportunity to promote inclusivity and reflect a more broad community that goes beyond the borders of Maine.
Where to Find New Music and Composers
You probably have a list of composers whose works you have played or programmed throughout your experience as a musician and director. Through online algorithms, you have probably expanded your lists of new literature and composers. How can you keep up with the large number of new composers composing for band right now?
SOCIAL MEDIA: Follow composers on social media and see what they are promoting. A lot of composers know each other and share their contemporaries’ music. Follow them, too!
NEWSLETTERS FROM PUBLISHERS AND COMPOSERS: Publishers often send out emails featuring one of their composers and their music, including new works. It’s fun to keep up with composers and learn about them as well as their music. Could you imagine learning what Gustav Holst was doing in his free time?
ATTEND CONFERENCES: Check out reading sessions and concert performances to see what music groups are playing. I find that a live performance — compared to listening to it online — provides a more meaningful impact on what I find to be compelling music. There’s nothing better than live music.
CHECK OUT CONCERT PROGRAMS ONLINE: University wind ensembles and bands will often share their programs online or on their live stream. Even if you don’t have time to catch their performance, take a look at the program!
TALK TO YOUR COLLEAGUES: I’d much rather talk to fellow music teachers about what music they’re playing or have heard recently than how to respond to that annoying email or deal with that broken instrument. I trust my friends and their recommendations of new music and composers.
Finding new music is part of our job as directors. The music does not necessarily need to be new literature — it can be music that is new to you. Currently, I’m exploring composers and music from various regions of Europe and look forward to finding that right piece for my groups! We do our students a disservice by programming the same music on a predictable rotation just because we are familiar with it.
Commissioning Music
In a previous article, I wrote about commissioning music and included tips on how you can approach it yourself. Commissioning is a great way to curate a program that is unique to you and your program. If you’re looking for music to celebrate an anniversary of an event, celebrate a person, tell a unique story or whatever it may be, commissioning is a great way to do so. Additionally, your students and community will be excited to bring a new piece of music to life.
___________________________________
This article includes content that I prepared for an online course on BandCourses.com. This course is free and includes resources, rep lists and interviews with my own students who give their candid thoughts and opinions on the music that we play. I do not get any kickbacks for this. I just enjoy sharing my thoughts and passion with all of you!
Do you know someone who has a secret desire to play songs and make their own music, but doesn’t know where to begin? Is there a child in your life who would thrive with the benefits a musical education brings to a growing brain? If so, a Yamaha Pianica might be the perfect gift!
The Pianica is a small, portable keyboard that’s breath-powered; all that’s required is to simply blow air into it while pressing down the keys. While the sound it makes is similar to an accordion or a harmonica, it uses the same notes and familiar black-and-white keys as a piano. This makes it easy for anyone to get started playing the instrument, since they can choose from thousands of easily available piano book and sheet music titles to learn the notes to their favorite songs.
In a Pianica, air blows across thin metal reeds to make each note.
Yamaha first introduced the Pianica way back in 1973. It’s the company’s version of what is known more broadly as a melodica or a keyboard harmonica. Actually, “keyboard harmonica” is a great way to describe these instruments, since that’s essentially how they work. Like a harmonica, sound is produced when air blows across a thin strip of metal called a reed in order to make it vibrate. But while a harmonica requires you to carefully blow into small holes to play a specific note, the keys on a Pianica redirect the air to blow across the individual reed that’s tuned to that note.
So how difficult is it to play a Pianica? Not difficult at all! In fact, just about every elementary school student in Japan learns to play music on a Pianica. The standard piano-like keyboard makes it intuitive to learn scales, chords, and the relationships between natural notes and accidentals (sharps and flats). And because these instruments are made from lightweight and durable plastic, they’re easy to carry around. Several Yamaha Pianica models even include color-matched durable plastic carrying cases that are tough enough to last in a child’s hands.
Pianicas can be played in two different ways. For those who prefer a traditional two-handed piano approach, the instrument can be laid flat on a table, with both hands used to work the keys. In this configuration, air is blown into a long flexible tube to get the sound started. Alternatively, if the player prefers to be mobile, the Pianica can also be held and played vertically, with the air blown into a fixed mouthpiece. This is a great choice for playing on stage or while walking around — it even allows the player to act as traveling troubadour at a party!
The Pianica played flat on a table.
For more experienced players, the Yamaha P-37E2 models come with a soft zippered carrying case that makes it easy to take the instrument anywhere. These instruments were built to appeal to a more mature player, with internal design changes that produce a softer and more mellow sound quality than the brighter models often used in schools. All of this combines with a sleek and stylish look to make an instrument that fits in with the décor of anyone’s home as well as onstage.
Whether you’re buying a gift for a friend or relative hoping to discover or rediscover the joy of making music, or you’re a parent who wants to introduce your child to music for the very first time, Pianicas are an easy and fun way to get started.
Check out the video:
Click here for more information about Yamaha Pianicas.
When a player sits down at their drum set kit, the configuration they face is more than just a collection of drums and cymbals — it’s a carefully chosen instrument built around the musical style they wish to serve. The chosen gear and setup establish a clear path for growth, comfort and musical identity. Below we’ll explore the logic, benefits and considerations of three levels of drum set configurations while exploring their applicability in common musical genres.
At the beginner level, the goal is clarity, comfort and quick traction. A simple, well-balanced kit removes distractions and allows the novice player to build basic coordination, timing and feel. The layout is typically compact, the number of pieces modest, and the hardware stable and forgiving.
This setup is ideal for broad-based styles like pop, rock, country and general contemporary band playing. These genres demand groove, steady time-keeping, straightforward fills and solid foundational beats rather than extreme sonic textures or hyper-complex rack configurations.
With this modest layout, a beginner has access to core tom, snare, bass and cymbal voices without overwhelming choices. A beginner’s kit should foster confidence, so having fewer variables will make practice simpler. With less distractions, the drummer can focus on timing, groove, coordination between hands and feet, and developing a consistent sound.
Genre (rock and country) application
Rock or country music typically requires a strong backbeat on 2 and 4, dynamic contrast for verses and choruses, occasional fills and transitions. The straightforward layout of a beginner’s kit supports these tasks. For example, country drumming often uses simple tom to snare fills, subtle cymbal patterns and crisp hi-hat work. This limited kit keeps the drummer grounded in groove rather than chasing exotic sounds. Meanwhile, for rock, the same kit supports the classic “boom-crash” drive: bass on 1 and 3, snare on 2 and 4, and ride or hi-hat patterns providing momentum.
Setup tips
Place the rack tom at a comfortable height so the player doesn’t have to reach far.
Adjust the hi-hat so foot and hand movement are ergonomic.
Choose medium cymbals (neither extremely bright nor extremely dark) for versatility in multiple styles.
Teach beginners to tune the drums to a balanced sound (clear toms, snare with some crack, bass drum with some low-end punch) so they learn the value of tone early.
Once the player has gained confidence and can play solid grooves, fills, transition between song sections and adapt to different styles, the next step is an intermediate drum set kit. This configuration expands the sonic palette, provides more toms and cymbals, and allows greater flexibility so the player can explore stylistic nuance and begin to develop a more distinct voice. It bridges the gap toward more specialized setups and helps drummers raise their musicianship.
This level fits genres such as blues‐rock, funk, Americana, modern country and lighter forms of progressive rock. The setup gives the drummer enough variety to color the songs without reaching the complexity required for full-on metal or fusion.
Typical components
22” kick drum
10” or 12” rack tom plus 14” or 16” second rack tom
14” snare drum (experiment with other timbres like a metal shell or hybrid)
14” or 15” hi-hat
16” and 18” crash cymbals
20” or 22” ride cymbal
optional splash cymbals (10” or 12”) or China cymbals
double bass pedal for stylistic flexibility
This intermediate kit introduces additional drums and cymbals, enabling more tonal variety, options for fills and dynamic control.
Why this works
With two rack toms and additional floor toms, the intermediate setup gives drummers more melodic percussive possibilities like cascading tom fills, richer transitions and varied drum voices. The extra crash and accent cymbals allow drummers to decorate the groove and build more expressive playing.
Genre (blues-rock, modern country, funk) application
In blues-rock or modern rock settings, you want to drive a song but also add color. For example, a drummer might start on the ride cymbal for the verse, switch to crash then to tom fills for the chorus. The intermediate kit supports that. In modern country, the production often includes fuller drum sounds (more toms, a second crash, maybe splash accents), so the player with an intermediate setup can mimic that studio feel live. For funk and Americana, the extra cymbals and toms help craft more dynamic breaks and melodic tom passages.
Setup tips
Tune the toms in a descending pitch so the toms sound fluid.
Place the second crash at a reachable height for comfortable accent transitions.
If using a splash, mount it near the ride or crash for quick access.
Maintain ergonomic spacing. With more hardware, it’s easy to over reach so keep the cymbals and toms within comfortable reach to preserve technique.
At the advanced level, the drum set becomes a professional instrument tailored for specific genres demanding a wide dynamic range, high quantities of drums and cymbals, advanced coordination and often extreme sonic possibilities. This is the realm of metal, progressive rock, fusion, large-scale live productions and studio drumming, where the drummer is not only keeping time but creating textures, layering rhythmically complex fills, odd time signatures, double bass or multiple pedals, and using exotic cymbals and auxiliary percussion.
Here, the setup becomes strongly genre-linked: a metal drummer’s kit will look very different from a jazz/fusion drummer’s. We’ll focus on rock/metal advanced usage as an example.
24” kick drum (or twin 22” or 18” for extra punch) or dual kick drums
two rack toms (10” and 12”) plus two or three floor toms (16”, 18”, 20”)
additional auxiliary drums like a gong drum
snare with a high budget shell, plus a second snare with an alternate sound
hi-hat (14” or 15”) plus a secondary hi-hat pedal or remote hi-hat
large ride cymbal (22”-24”) or multiple ride options, plus multiple crash cymbals (18”, 19”, 20”, 22”) and special cymbals like chinas, splashes and cymbal stacks
double bass pedal or twin bass drums, multiple pedals
integration of electronic pads
This very large kit gives maximum flexibility — many voices, many accent points, subtle and extreme tonal options.
In advanced playing environments, the technical requirements are high. The drummer might need to manage rapid double-bass patterns, odd tempo fills, complex interplay with keyboards, guitars or other instruments. The layout must support quick transitions, multiple foot operations and a broad tonal palette because the drummer effectively becomes a multi‐instrument percussionist on a unified kit.
Genre (Metal / Progressive Rock / Modern Studio Drumming) application
For metal, the double bass (or twin bass drums) is essential. Access to multiple floor toms enables thunderous fills and cascading patterns. Many crash and stacked cymbals allow rapid accenting and heavy hit styles. A drummer in a metal band might move from rapid ride patterns to tom runs to crash accents within one passage — an advanced kit supports that. In progressive rock, odd meters and extended instrumental sections demand more voices and flexibility — so, the extra toms and cymbals are musts. For studio drumming across genres, the advanced kit also gives more options to craft sounds for different songs: The drummer can pull from a rich palette rather than being limited.
Setup tips
Plan for ergonomics and accessibility — with so many drums and cymbals, spacing becomes critical to avoid fatigue.
Use angled rack toms descending in height and increasing in size to create fluid fill motion.
For double bass, place pedals and secondary drums such that both feet can reach comfortably to ensure smooth solo fills.
Keep primary ride and crash cymbals within easy reach and place special cymbals slightly farther away, but still accessible without overextending.
Consider sound isolation, room acoustics and potential triggers or electronic integration if playing in large venues or recording.
Maintain a consistent tuning plan: With many toms, keeping tones coherent is key for a professional sound.
Putting It All Together
The beauty of this tiered approach is that drummers move to larger, more complex kits as their skills grow. By building from a beginner kit through intermediate to advanced, drummers develop technical facility, musical feel, tuning sense, ergonomic habits and a personal sound. In educational terms: Start with fundamentals then expand the toolkit then specialize and refine.
In beginner mode, drummers internalize groove, tempo, coordination and basic fills. At the intermediate level, they begin to explore stylistic nuance, embellishment, dynamic contrast and interplay. At the advanced level, they use the kit as an expressive vehicle — capable of supporting high tempo, complex arrangements, dramatic transitions and genre-specific demands.
For each genre, the kit reflects the musical language. A country drummer wouldn’t typically need three floor toms and multiple Chinas; the simpler kit serves the musical story. A funk drummer might benefit from an intermediate kit to accent chops and ghost notes. A metal drummer practically demands the advanced layout to keep up with the intensity.
Moreover, the progression through kit sizes fosters good habits: tuning, setup ergonomics, cymbal choice, seat height, pedal technique and stick trajectory — all of which are easier to manage and refine when the setup is appropriately scaled for the player’s level.
A drum kit is not gear, it’s a musical instrument. The size, number of drums, cymbals, pedals and accessories define what the drummer can do, how they respond to the music, and how they present themselves in the band context.
Final Thoughts
If you are guiding a student drummer (or are one yourself), think about the musical style you aim to play, the venues you’ll play in, the grooves you’ll support and the transitions you’ll navigate. Use that to inform your kit choice. Just as educators craft smart learning plans and ensemble frameworks to steer student growth, you can craft your drum‐kit roadmap: Start simple, learn your fundamentals, expand your kit as your skills and musical ambitions grow, and match your setup to the style you want to serve.
In short: Choose the right kit for your level and genre, tune it well, set it up ergonomically and let the instrument reflect your musical identity.
There’s Johnny Cash’s heartfelt “A Thanksgiving Prayer” at one end of the spectrum and Adam Sandler’s wacky “The Thanksgiving Song” at the other, but the truth of the matter is that there really aren’t many songs specifically written about Turkey Day. That said, here are the stories behind five of the best-known songs of gratitude … and one bonus Beatles factoid about an essential Thanksgiving condiment.
1. I’ve Got Plenty To Be Thankful For
Popularized by Bing Crosby, this was composed by iconic songwriter Irving Berlin for the 1942 musical Holiday Inn — a film that also included “White Christmas,” the best-selling single of all time. Check it out here.
2. What A Wonderful World
Originally recorded in 1967 by legendary trumpeter Louis Armstrong, this song found new life when it was used in the 1988 film Good Morning, Vietnam and re-released as a single, making the then 87-year old Armstrong one of the oldest artists ever to top the charts. Check it out here.
3. Thank You (Falettinme Be Mice Elf Agin)
This quintessential Sly and the Family Stone 1970 hit features an instantaneously recognizable slap-bass riff from the inimitable Larry Graham. The title is an intentional mondegreen — a fancy word for a phonetic spelling. (Say the song’s title out loud if its meaning isn’t obvious.) Check it out here.
4. We Are Family
Written by Bernard Edwards and Nile Rodgers (their first for any act other than their own band Chic) and performed by Sister Sledge, this feel-good celebration of friends and family came to epitomize the disco-influenced sound of the ’70s. Check it out here.
5. Thank You For Being a Friend
A modest hit for singer/songwriter Andrew Gold in 1978 (he once called it “just this little throwaway thing that took about an hour to write”), this was made famous seven years later when it was re-recorded by jingle singer Cynthia Fee as the theme song for the TV sitcom The Golden Girls. Check it out here.
Bonus Beatles Factoid
The urban myth is that John Lennon mumbles the chilling words “I buried Paul” during the fadeout of the group’s single “Strawberry Fields Forever,” but what he is actually saying is “cranberry sauce.” It was late November 1966 when the vocal was being laid down, and between takes the Fab Four were chatting about American Thanksgiving traditions — something that was clearly on John’s mind as he improvised on an open mic. Check it out here. (Lennon’s ode to Turkey Day occurs at precisely 3:58.)
It’s third period rehearsal. The flute section’s intonation is questionable, someone in the clarinet section forgot a reed, and your email is already full of messages with the subject line “Quick Ask!.” You’re halfway through warm-ups when one of your freshmen puts their instrument down and starts to quietly cry. You pull them aside, assuming it’s a bad grade or a friend fight. But it’s not that. They haven’t eaten since yesterday.
So, you do what any decent person would do: You dig out a granola bar from your desk drawer, offer it to them, and let them sit in the back to regroup. Meanwhile, you’re back on the podium trying to tune a chord while keeping one eye on the kid who just needed someone to care.
These are the moments that they don’t prep you for in teacher training. No one says, “Hey, you’ll be sight-reading chorales while also figuring out which students need food, which ones need to head to a cool-down room, and make sure these two kids don’t interact since they have a no-contact order.” You just end up doing it because you have to.
Sometimes, it’s not just one student. It’s three. Or five. Or more.
I’ve had days when I felt like I was running a conflict management workshop while pretending to run a rehearsal. This kid’s upset today, this one hasn’t slept, that one’s off their meds because the pharmacy is out — all while trying to decide if we should “take it again from the top!” Is this a rehearsal or a medical clinic?
I hate saying this, but sometimes we need to stay in our lane. We can be a supportive adult. We can care. But we’re not the parent, and if we really look around, we aren’t the only helper. This is hard for music teachers to accept, but there may be someone else in the building who is better equipped to work with students in crisis. And that’s OK because working in a community and letting everyone do their job will keep you from burning out.
You’ll have days when five different students need five different kinds of support, and you’ll feel like a terrible person for not having enough time or food for all of them. You’re not heartless. You’re just one person.
Kids may come up to you with huge issues -— things beyond needing food or dealing with a panic attack. It is OK to think, “I am not equipped for this.” Report it and pass this situation to someone with expertise or at least a little more experience so the kid gets the help they need.
Passing things isn’t a failure. It can often be the exact right thing to do. I know it’s hard to let go — especially for the band students you care about. Letting go doesn’t mean you stop caring. It means you’re still here tomorrow.
It took about two weeks of quiet use before someone asked, “Can I take more than one thing?” I told them, “Take what you need.”
That bin saves many kids from having many awkward conversations each year. The kind where students pretend they’re not dealing with basic needs because they don’t want to feel exposed.
I also lean on school resources. I regularly talk to our counselors, school psychologists, social workers, nurses — anyone whose job is better aligned with handling the bigger stuff. I’ve learned who to call, how to file reports and what situations I need to escalate.
That part took time. I made mistakes — I underreported or overreported. I sat on things too long because I wasn’t sure, but eventually, I learned.
And when a student just needs to sit and breathe? I let them sit. Not forever — just for a bit. No big production. No overexplaining. Sometimes a chair and a few quiet minutes are all that’s needed. Do some kids take advantage of this? Sure. But I adapt.
Know the Line Between “Noticing” and “Fixing”
When something is serious, you always refer. Abuse, mental health concerns, instability at home, pass it up the chain. Don’t sit on it. Refer immediately.
But not everything is a crisis. Sometimes a student just needs to know they’ve been seen and that they don’t have to put on a happy face all day. They need to know that someone in the building doesn’t think they’re a problem.
I’ve had students come in and say things like, “I don’t think I can do rehearsal today.” Not in crisis, but clearly not OK. So, I make sure someone from our student services team knows, but I also don’t skip the part where I check in directly. “I’m glad you said something. Let’s make sure you have the help you need.”
It’s easy to get numb, especially when it’s constant, but I try to notice anyway. Even if I don’t have time to solve it.
There’s an odd balance here, too, because once students know you’re a safe adult, they come to you more. That’s a good thing, but it can also feel like you’re the sponge soaking up everyone’s stress. So now I ask myself: “Is this something I can listen to, or is this something I need help with?”
It means you’re doing your job in a place where the needs are high and the support is thin.
Some days I go home thinking, “We didn’t really do as much rehearsal as I wanted.” Then, I remember that sometimes, what we did was hold it together for at least a few students.
It’s normal to feel tired and overwhelmed. It’s OK to protect your time, your energy, your prep period and your sanity. If you burn out, your students lose another consistent adult — and they don’t need one more person disappearing on them.
You’re not their parent, and you don’t need to be. You are, however, the one who notices when something’s off. You’re the one who keeps a snack or a spare deodorant stick handy. You’re the one who stays steady, even when the rest of their world is anything but.
You knew it wasn’t ideal when you read the music teacher job posting for an after-school program. The interview confirmed it. The pay was small and the hours were late. The expectations were vague — “just get something going again.”
You tell yourself, I can do this. You imagined a scrappy little group of kids staying after school to make music and maybe fall in love with band the way you did. But first, reality sets in. You’re standing in a room full of stands that won’t stay up and dented instruments. The bell rings, and the building empties. You’re waiting to see who is going to show up.
This is the moment where you think: Why am I even doing this? Is it worth it?
Yes, it is, but not for the reasons you were hoping. You’re not here to rebuild the program you wish existed. You’re here to create something real for the students who are here — with the time, tools and support you actually have.
Let’s talk about how to do that without burning out.
Start Small. Then Go Smaller. Then Start There.
Your instinct might be to go big and prove that this program deserves a school-day slot. Advertise. Recruit. Announce a concert date. Show everyone that band is “back.”
Please don’t do that. If your program is on life support, going big too fast almost always means it collapses. You burn out. Kids vanish. Admin will assume that this is why music was cut in the first place.
Try this instead: one group once a week. On time. Every time.
You might get push back. “Can’t we meet twice a week?” “Are we doing sectionals?” “When’s the concert?” The pressure might come from inside your own head. You want to prove this music program is worth more. You want to show progress. However, more often than not, the strongest thing you can do is hold the line. Same day. Same time. Every week.
That’s simply not the phase you’re in right now. Focus on reliability over reach. Teach music the students like. Keep it light, fun and easy to prep. If they ask to play the “Star Wars” theme, let them. If they want to work on a TikTok loop — great. You can teach tone and technique on any song.
I had a group that was obsessed with “Seven Nation Army” one semester. Did it get old? Yes. Did it hold their attention? Also, yes. And that’s what counted. They worked on balance, articulation and dynamics — not because I forced it, but because they actually wanted to sound good.
One kid even arranged a trumpet duet version for fun. (It wasn’t good, but it was theirs. We also only had one trumpet …)
You’re not building a program yet. You’re building a habit. Build that first. Think about growth later.
Make Friends With the People Who Run the Building
There will be a temptation to start advocating right away. You might think, If I can just get 15 minutes with the district office … But the people who will actually keep your program alive aren’t in that office. They’re down the hall.
Talk to your custodians. Let them know when you’re rehearsing. Thank them when they unlock your room or sweep around your stacks of music instead of through it. Ask about their day. Be the teacher who doesn’t just leave music stands scattered across the room every week.
Check in with food service. Ask if there are any leftover snacks. Some of your students will stay late and will be hungry. Other kids just want anything extra, and I’m not against bribing kids with food.
Make sure the office staff knows your rehearsal schedule. They’ll help with late buses, announcements, room keys — and they’ll do it faster if they like you.
If you’re running evening rehearsals, connect with admin or security. Make sure someone knows you’re still in the building. You don’t want to have to finish rehearsal by cell phone lights when all the lights shut off and the doors lock.
You don’t need the school staff to love music or even understand what you are doing. You just need them to trust you. Say thank you and mean it. Bring coffee for them now and then. If they stop by your room, invite them in and let them see what’s happening.
You’ll be amazed at what one office assistant can do when they see your kids perform at a staff meeting. Suddenly your email about bus transportation doesn’t sit at the bottom of their inbox. Your room requests get approved quickly.
Programs don’t grow in isolation. They grow when people want to help. And people want to help other people who do a good job AND make them feel good.
Forget Prestige. Focus on Predictability.
This may not be what you imagined when you signed on. There are no fancy concerts, no festivals, no honor ensembles, maybe not even matching uniforms. But this can still be a program worth the community’s time.
What matters most at this stage is predictability. Same day. Same time. Every week. No surprises.
If you say rehearsal is Tuesday at 3:15 p.m., be there. If you say it ends at 4:15 p.m., end on time — even if you’re dying to run one more section. Show your students (and your admin) that this thing has structure.
They’re already skeptical. You know it. Everyone knows it. The best way to flip the narrative is to be unshakably consistent.
Set expectations clearly. “Here’s when we meet. Here’s what showing up means. Here’s what we’re working toward.”
One year, I made a half-sheet syllabus with a QR code to our calendar and handed it out to every kid and parent who walked through the door. It looked low-budget (because it was) but it worked. No one asked, “Wait, when do we meet again?” after that.
Then, celebrate the small stuff. Play for the school board. Perform a piece at the spring art show. Post a video of your group playing “Hot Cross Buns.” Remind your community what your kids are actually doing.
That same support staff we talked about earlier? Perform for them. Bring your kids to the main office or the custodians’ break room. Give them their own performance. Heck, take requests for the next performance if you can. These moments will give you more traction than any email you can send.
People believe in what they see consistently. Not what they hear might happen “once the program is up and running.”
You’re not just teaching students — you’re rebuilding access. That kind of change moves slowly. It might take years. And someone else might get the credit. That doesn’t make your work meaningless. It makes it necessary.
Keep records. Save the rosters and the flyers. Build templates you can reuse next semester. Start a Google Drive with materials and notes for the teacher who comes after you whether that’s in five years or five months.
Don’t wait until you’re burned out to do this. Document it while you still care.
There’s a good chance that when this class finally earns a school-day slot, you won’t be the one conducting it. You’ll be the name they mention in passing: “This all started when Mr./Ms. So-and-So brought back after-school band.”
Loop in families when you can. One vocal parent asking, “Why isn’t this during the school day?” is more effective than 10 emails from you.
One time, a parent casually mentioned to a board member at a football game that their daughter’s after-school music group was “the best part of her week.” I found out about it secondhand, but it led to a budget conversation that hadn’t happened in years. And by budget, I mean we received an actual budget for the first time.
You can’t force this, but you can create the kind of experience that makes families want to speak up. Play the long game. It’s the only one that actually works.
This Isn’t the Program You Wanted. That Doesn’t Mean It Isn’t Worth It.
It’s easy to feel like you’re not really teaching, like you’re babysitting instruments after school and calling it music education. But your students don’t see it that way.
They see that you show up. They hear themselves getting better. They notice when you remember their names and ask about their day. And although it may be a small group, they will build and develop their own culture.
You might feel like you’re just holding things together, but your students feel like they’re part of something.
So, if you’re in a job where the infrastructure isn’t there, and you’re doing your best to build something meaningful anyway — please know that’s not a failure. It’s the work that’s necessary.


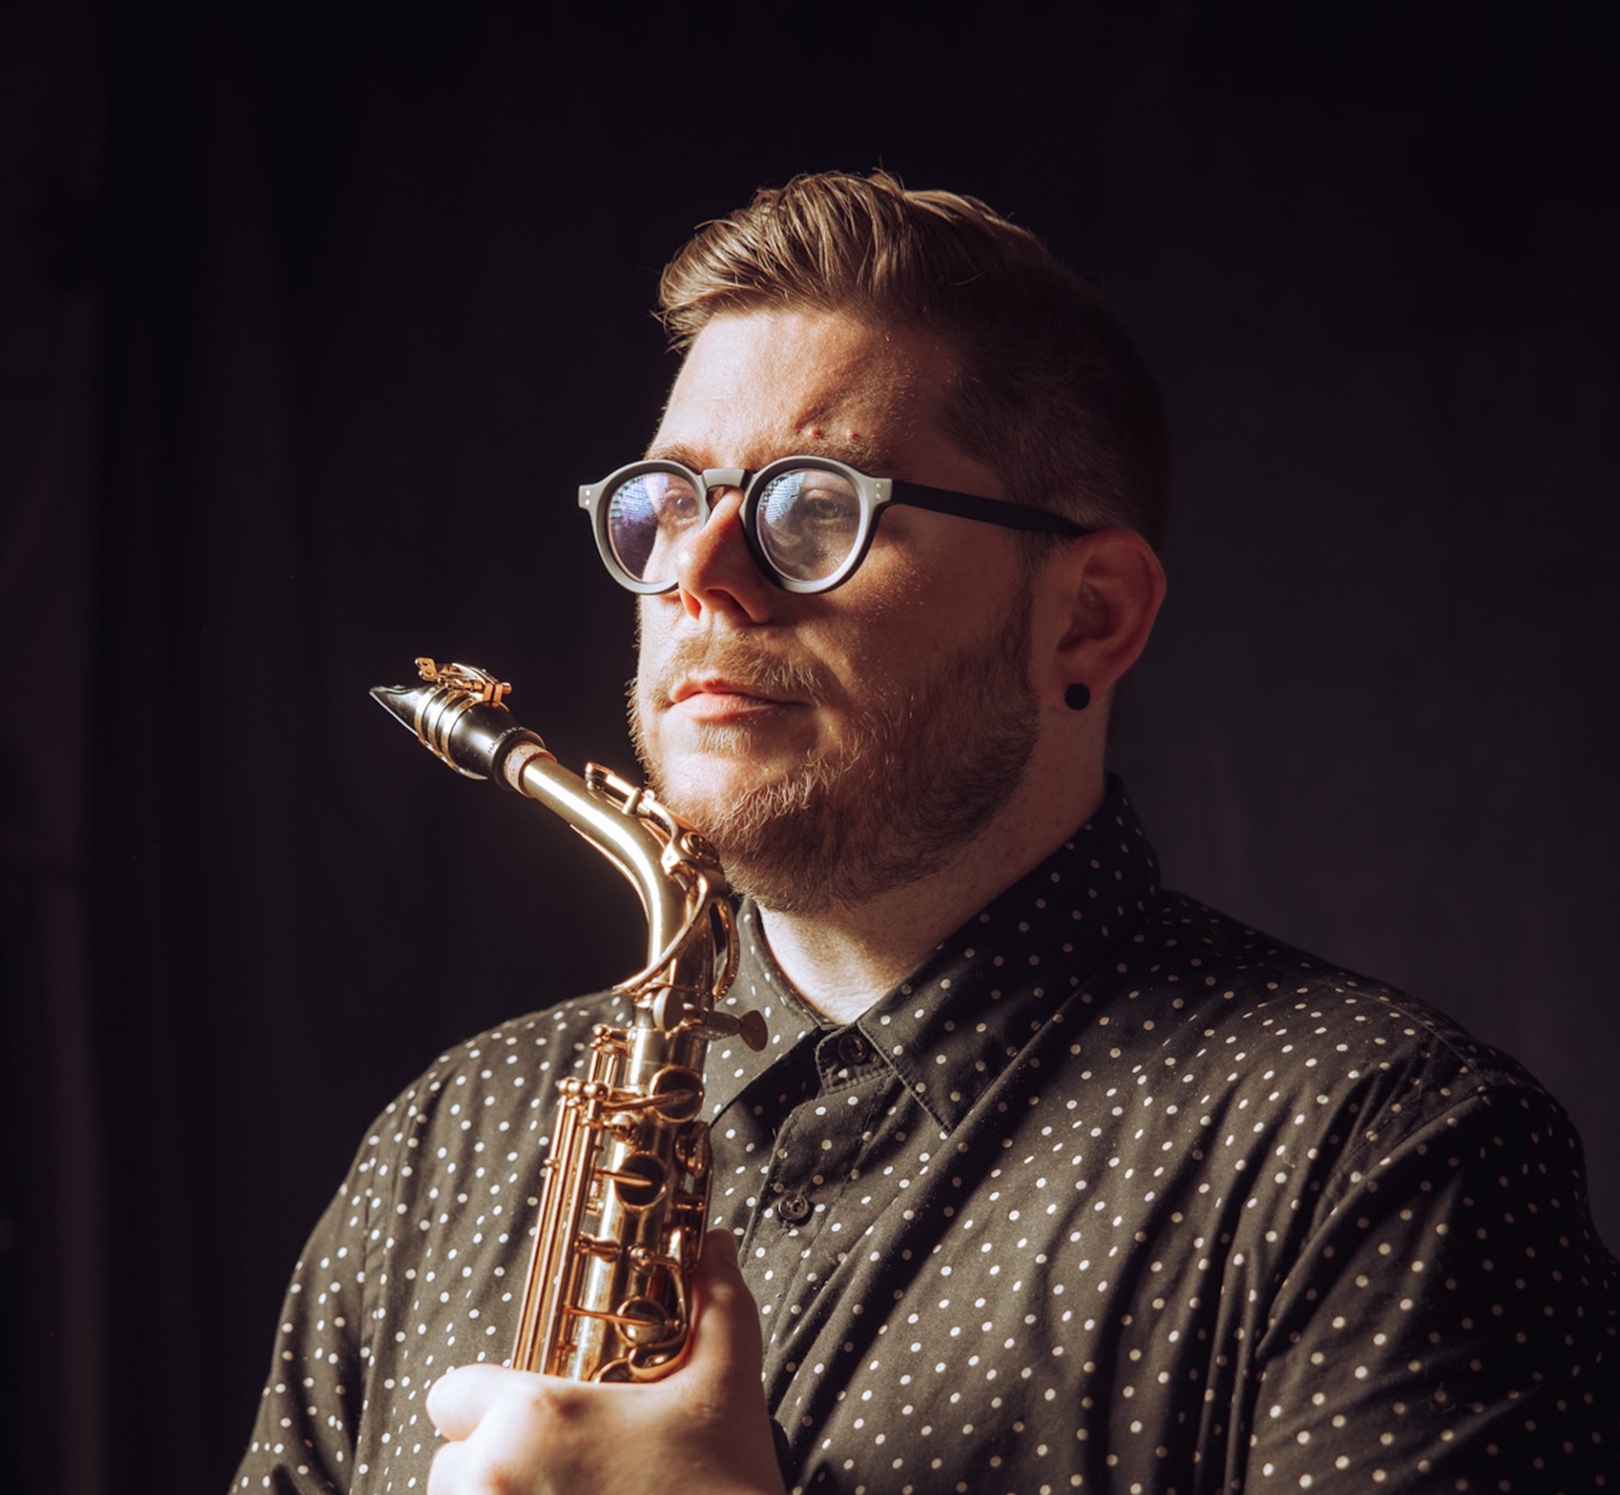


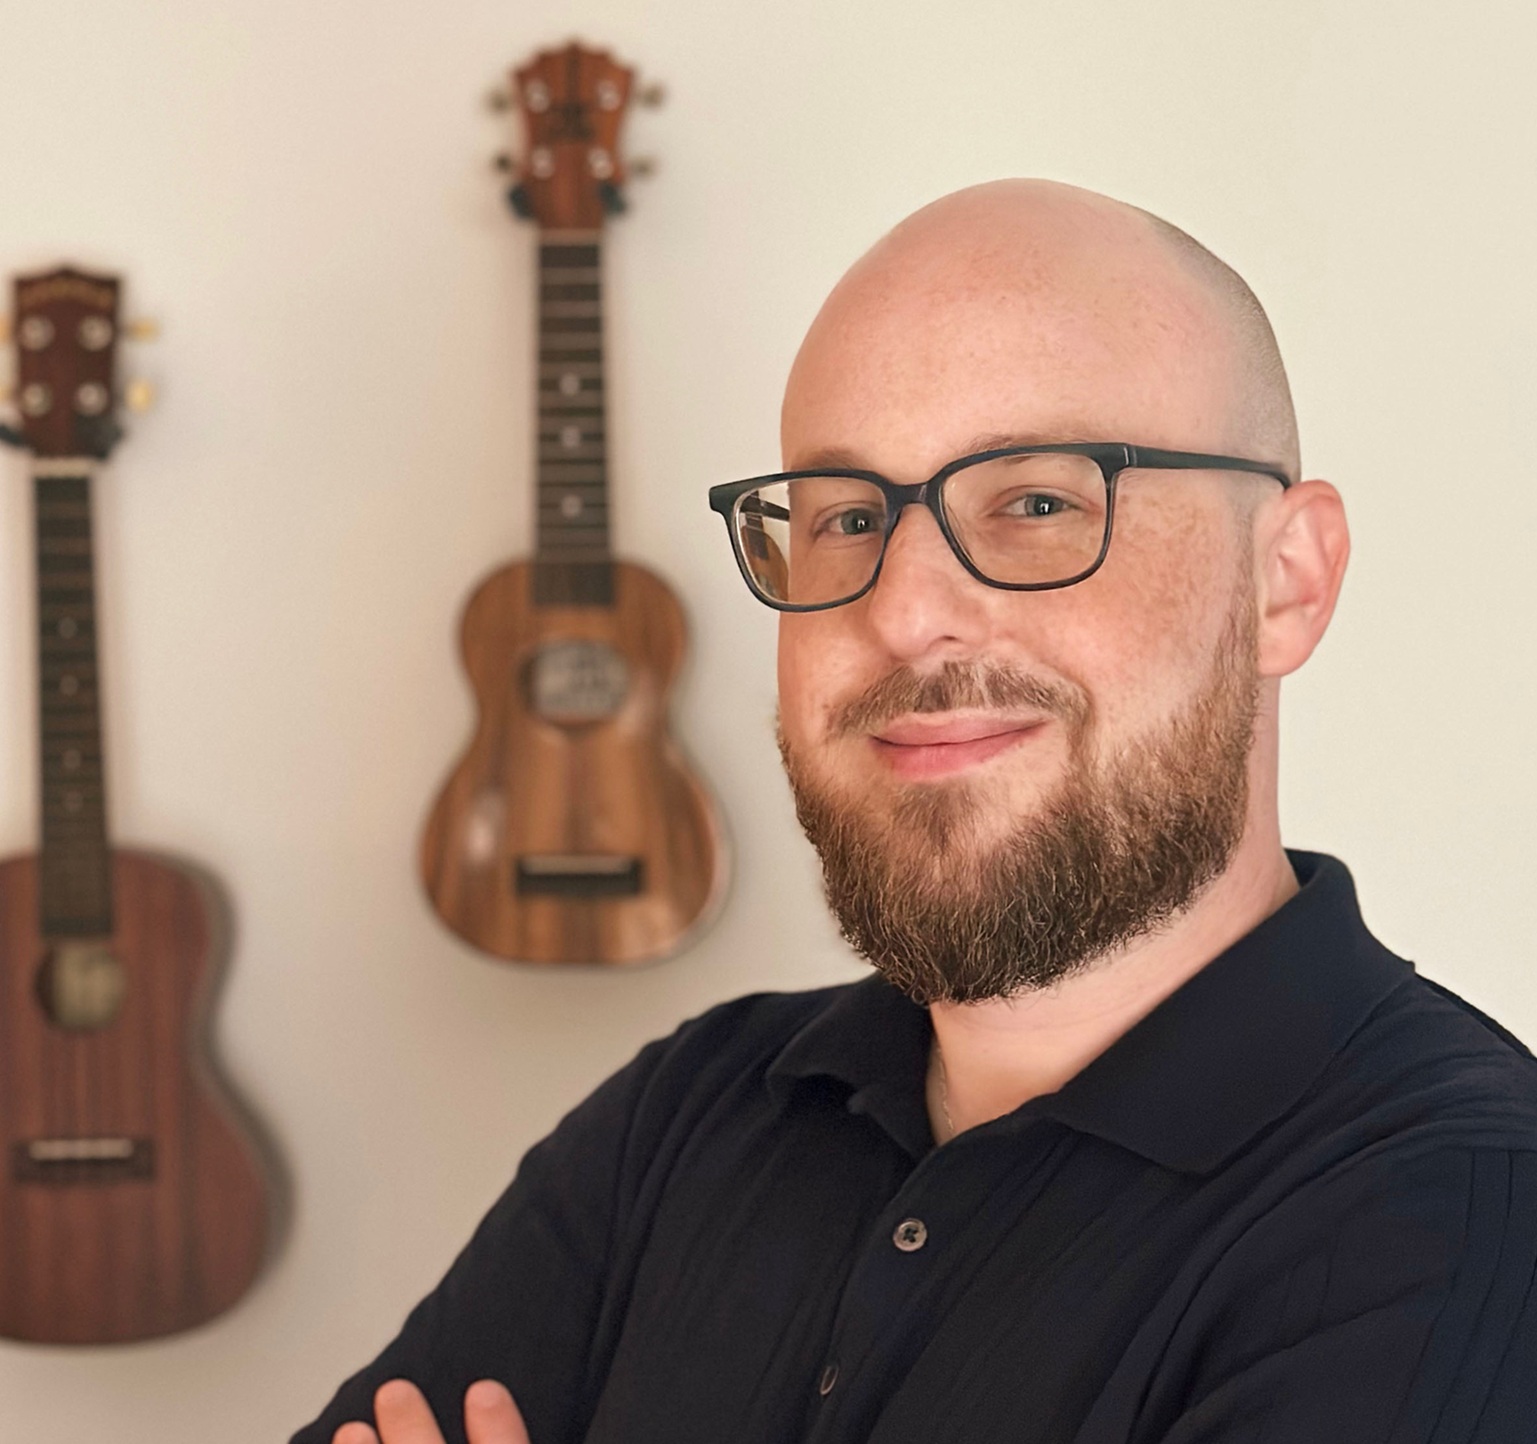


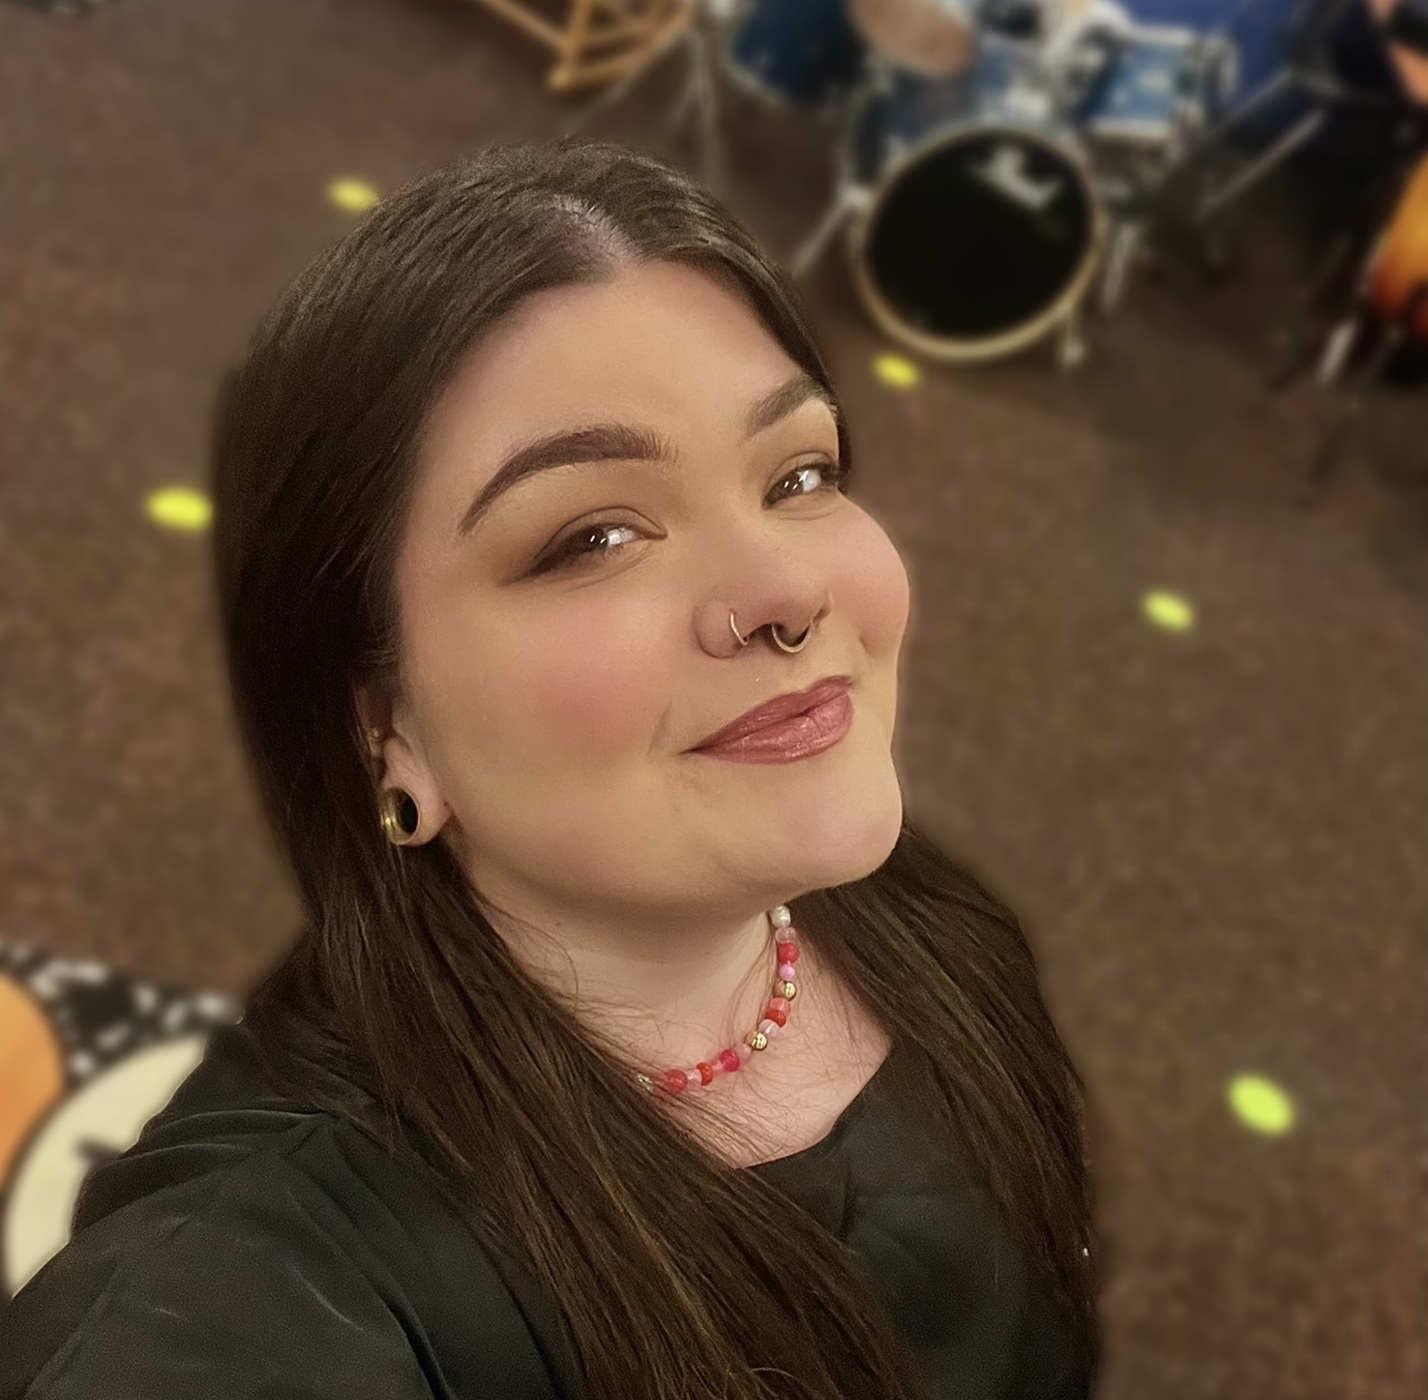


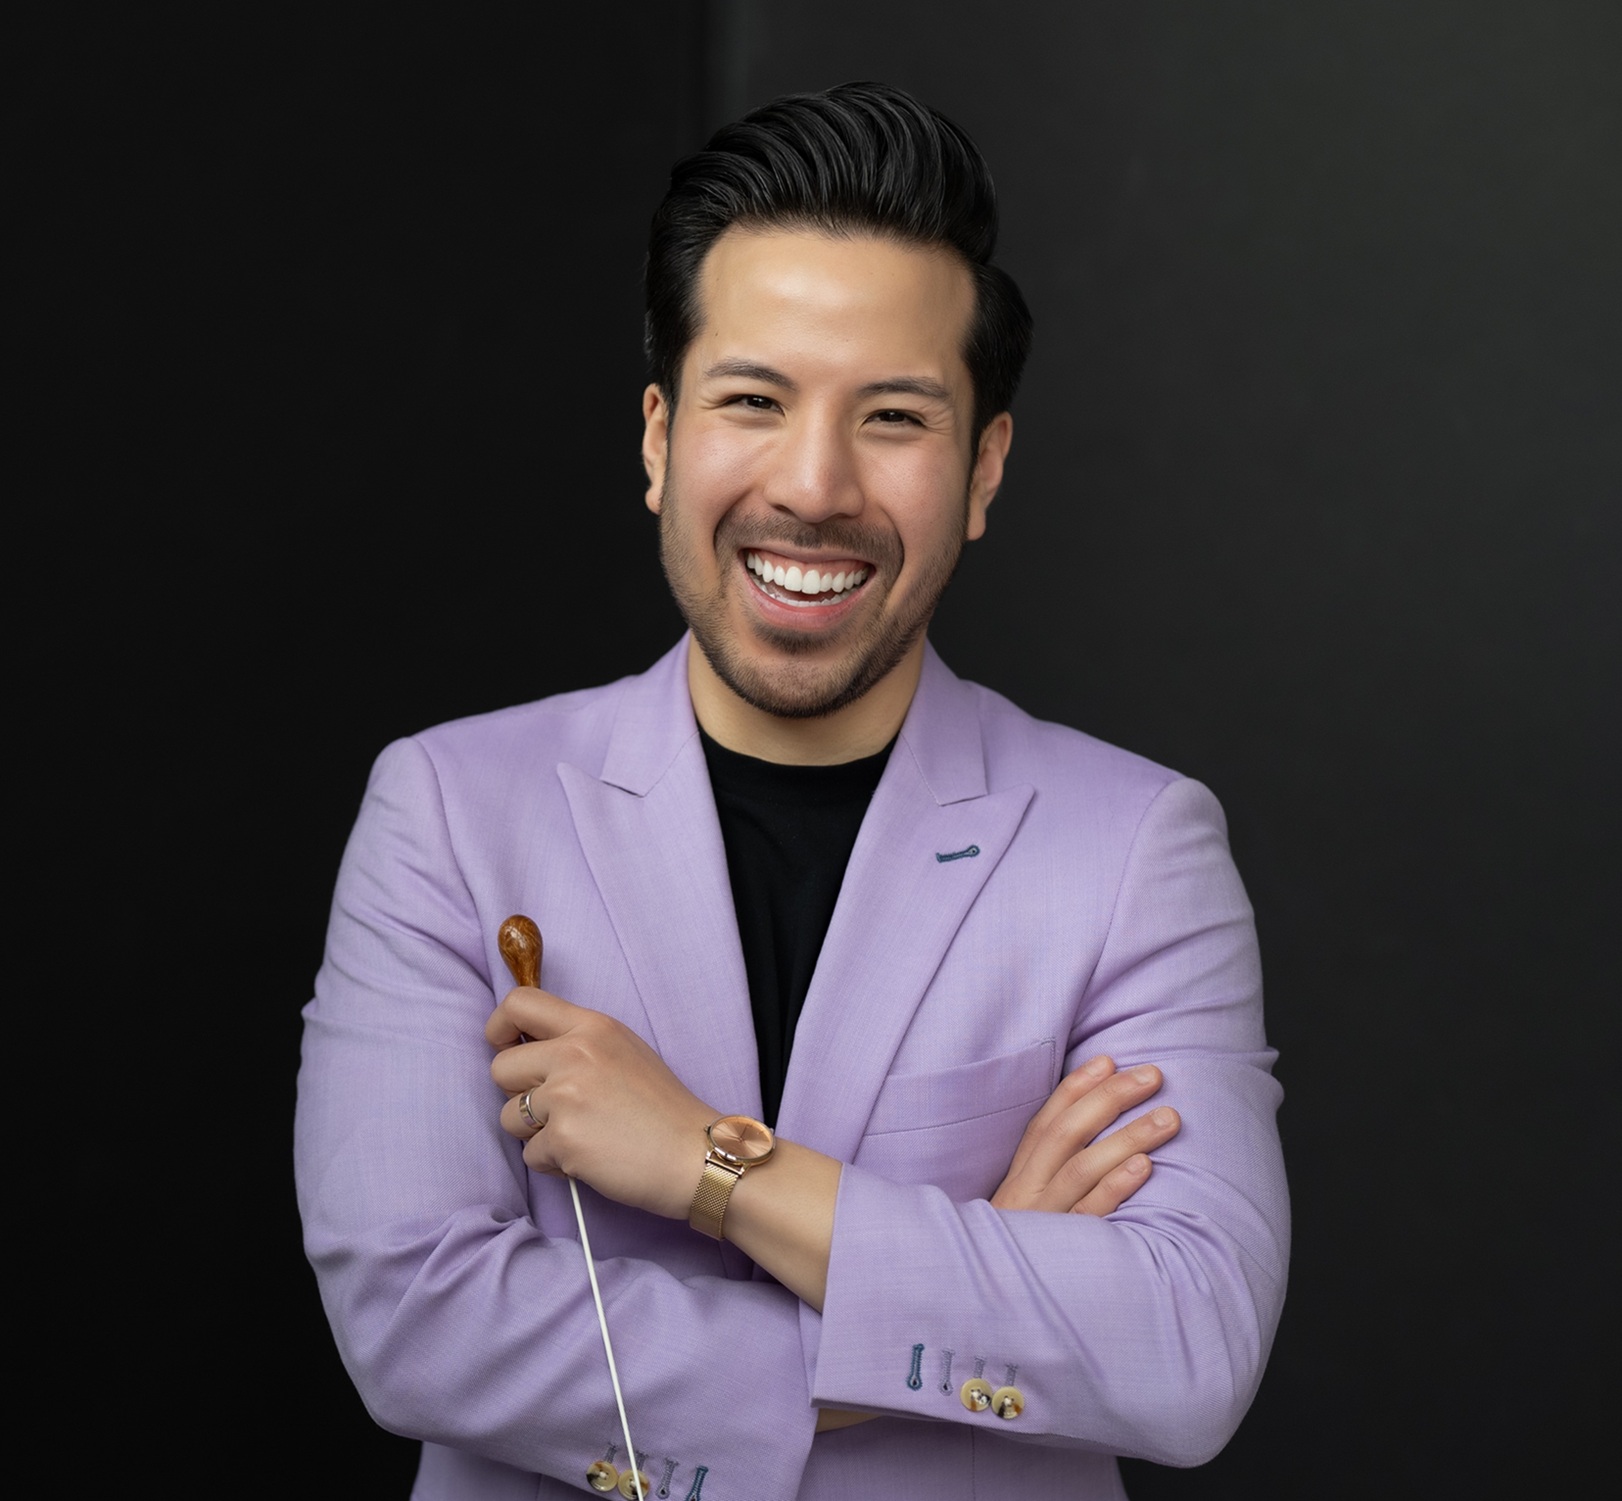


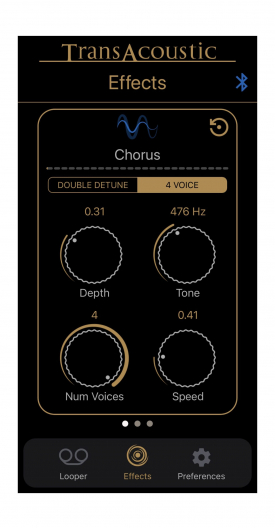
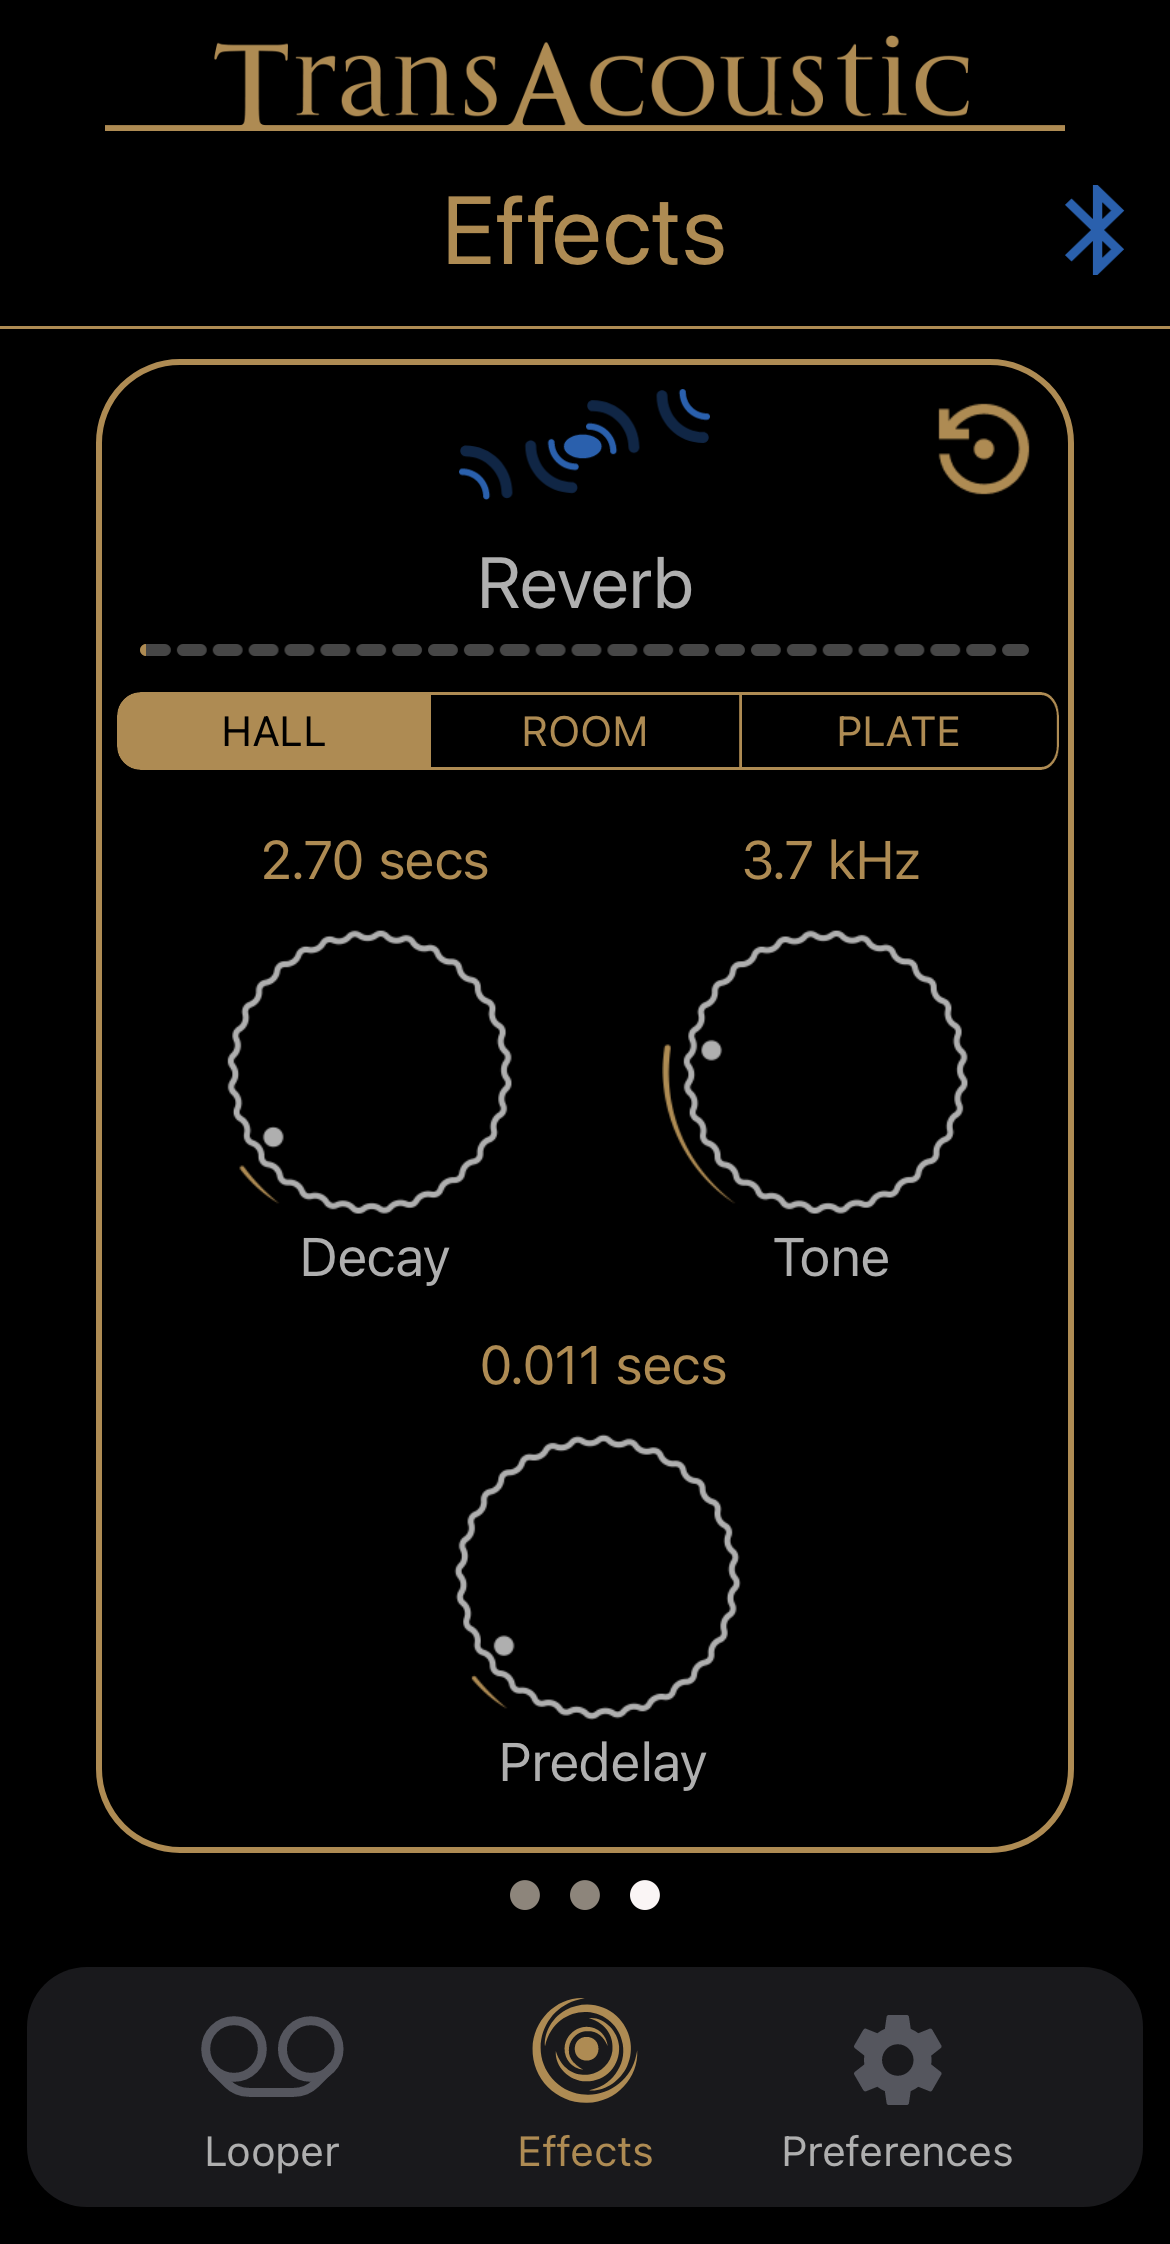
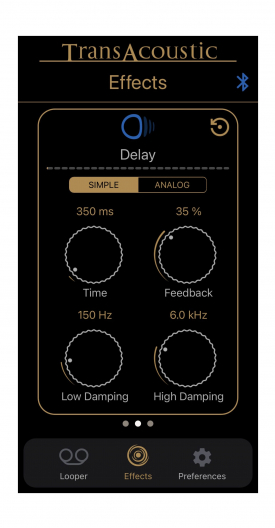

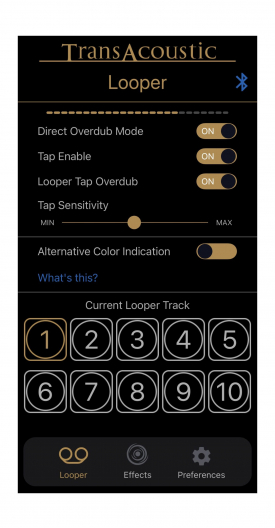


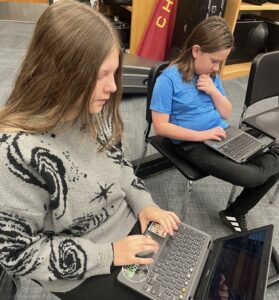
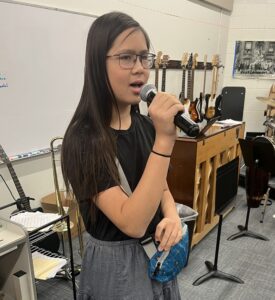
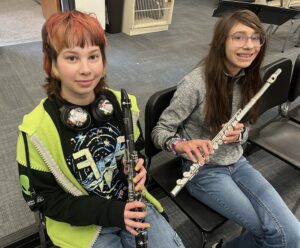
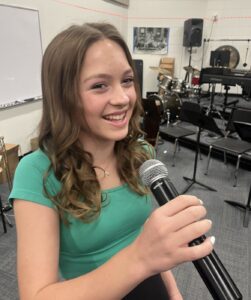


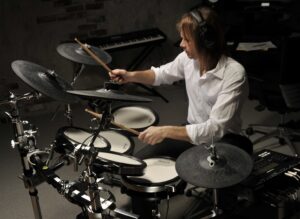


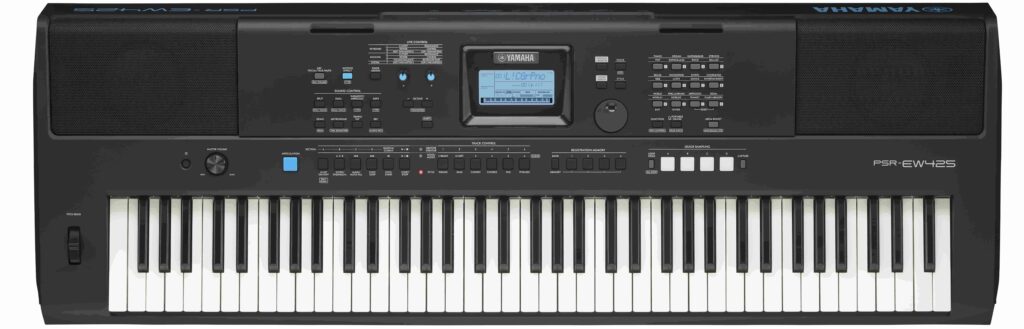


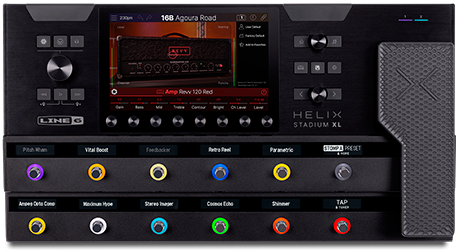
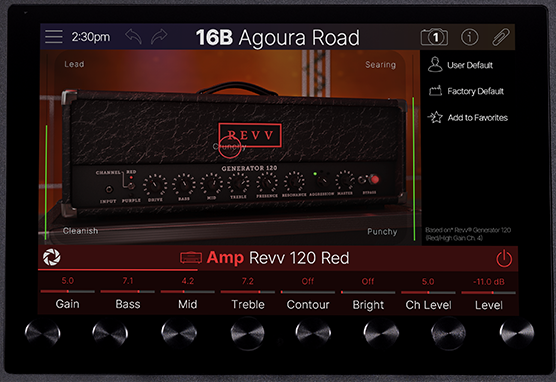

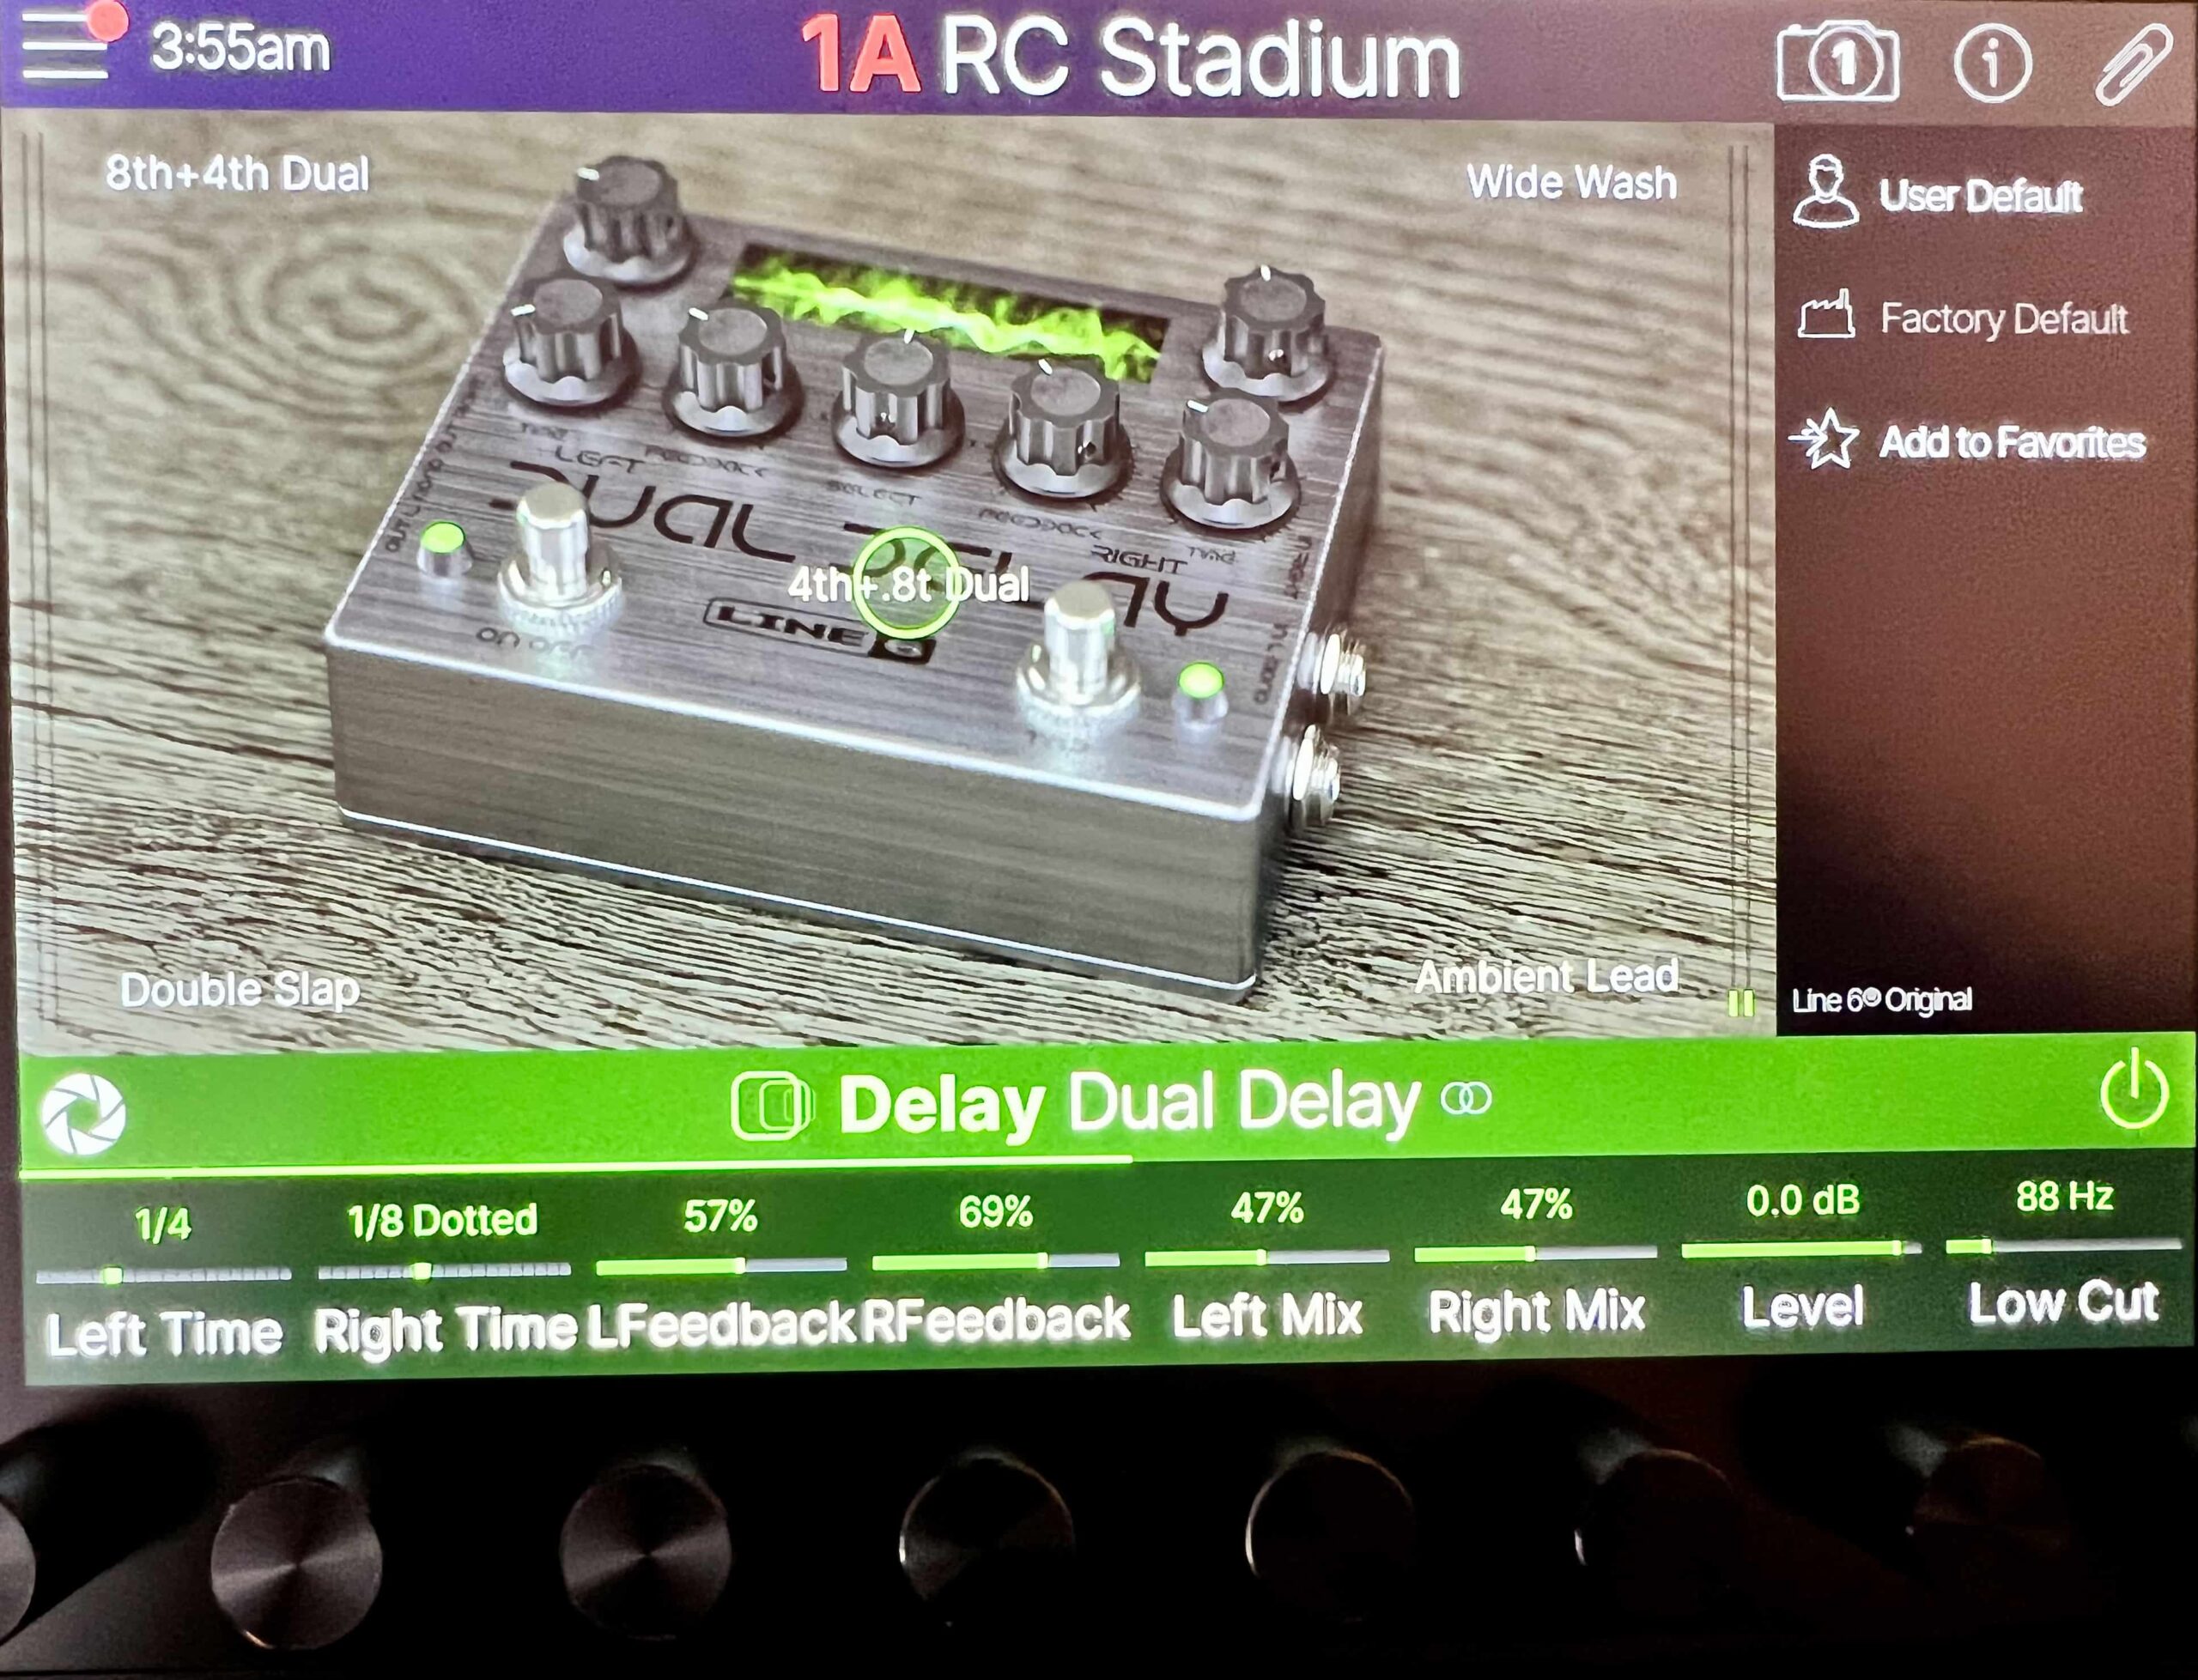


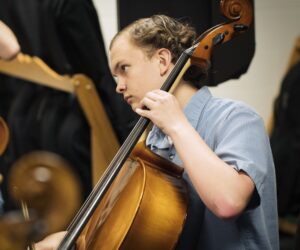
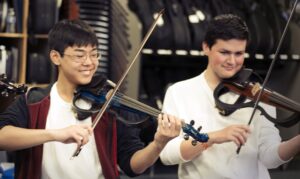


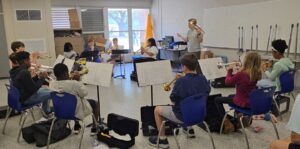
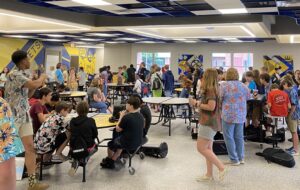
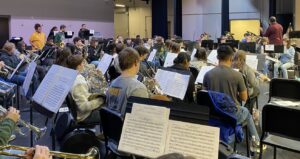
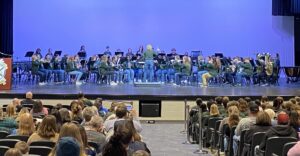

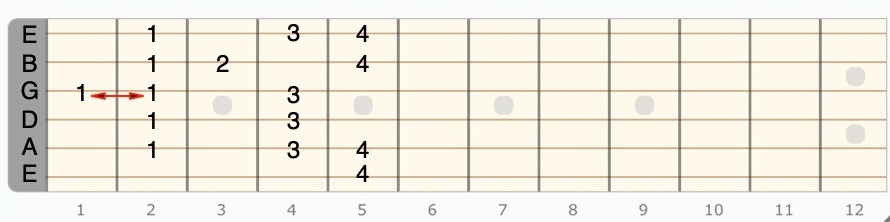
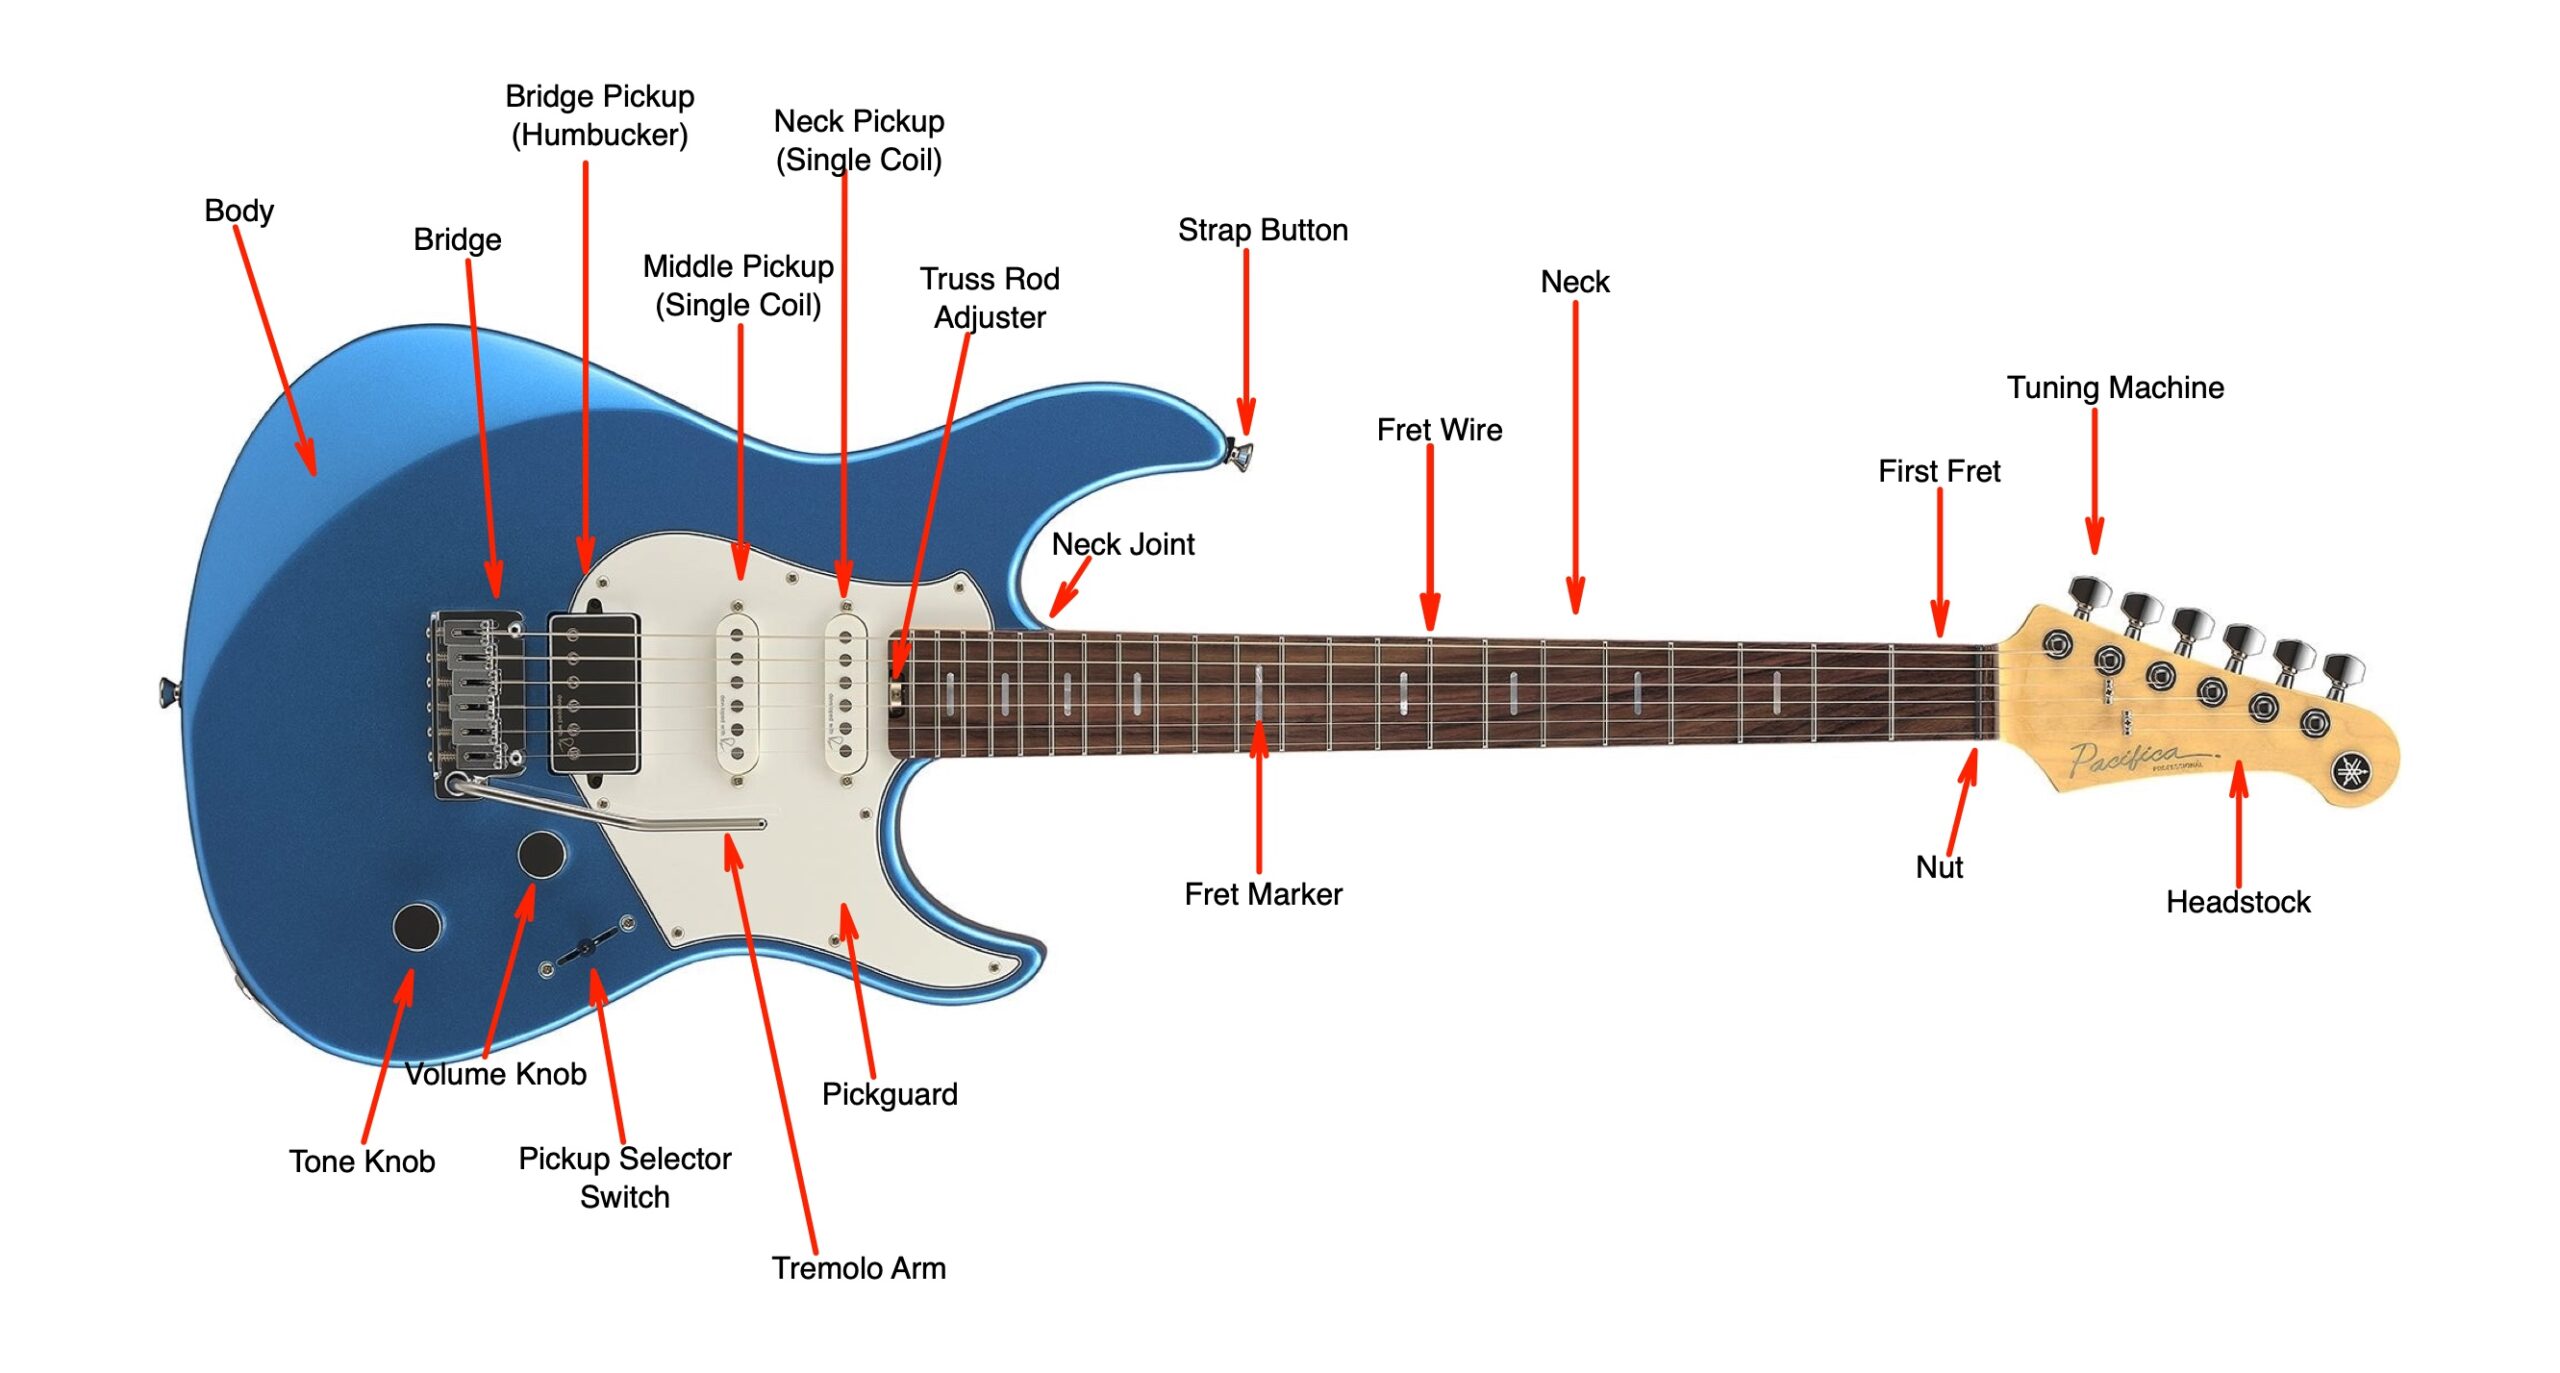


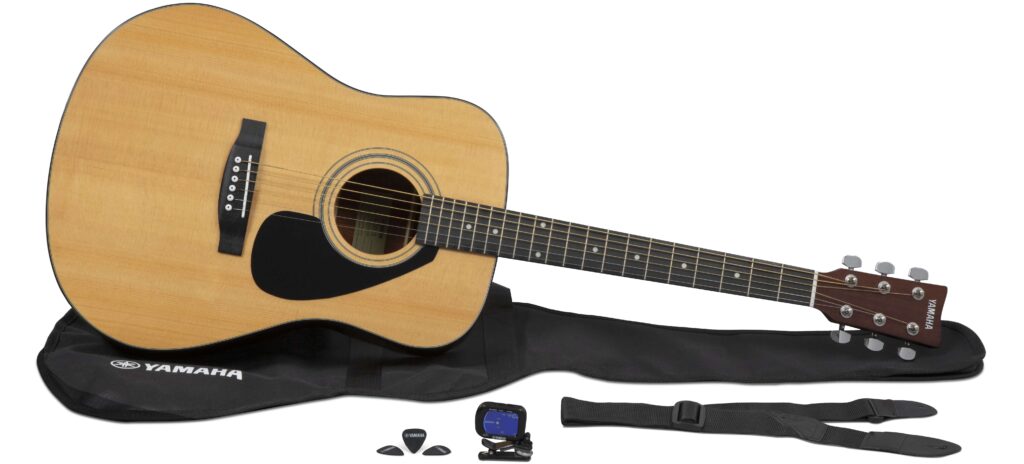
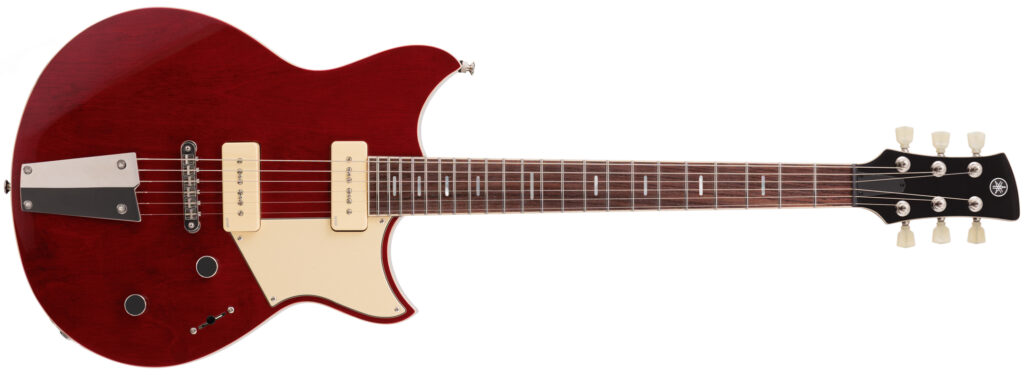
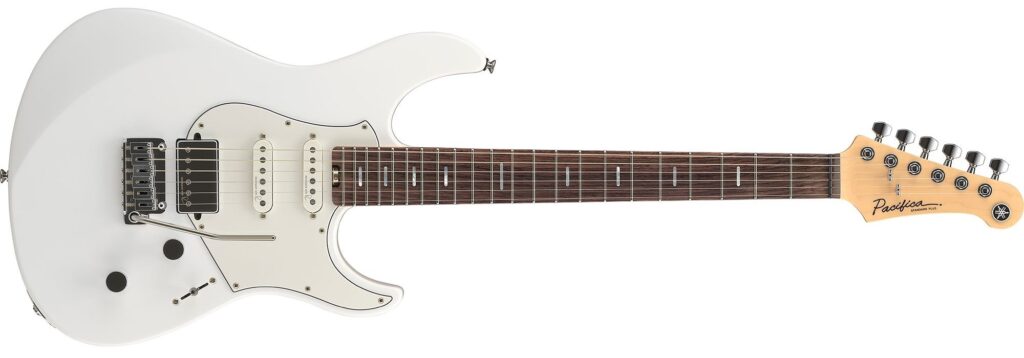


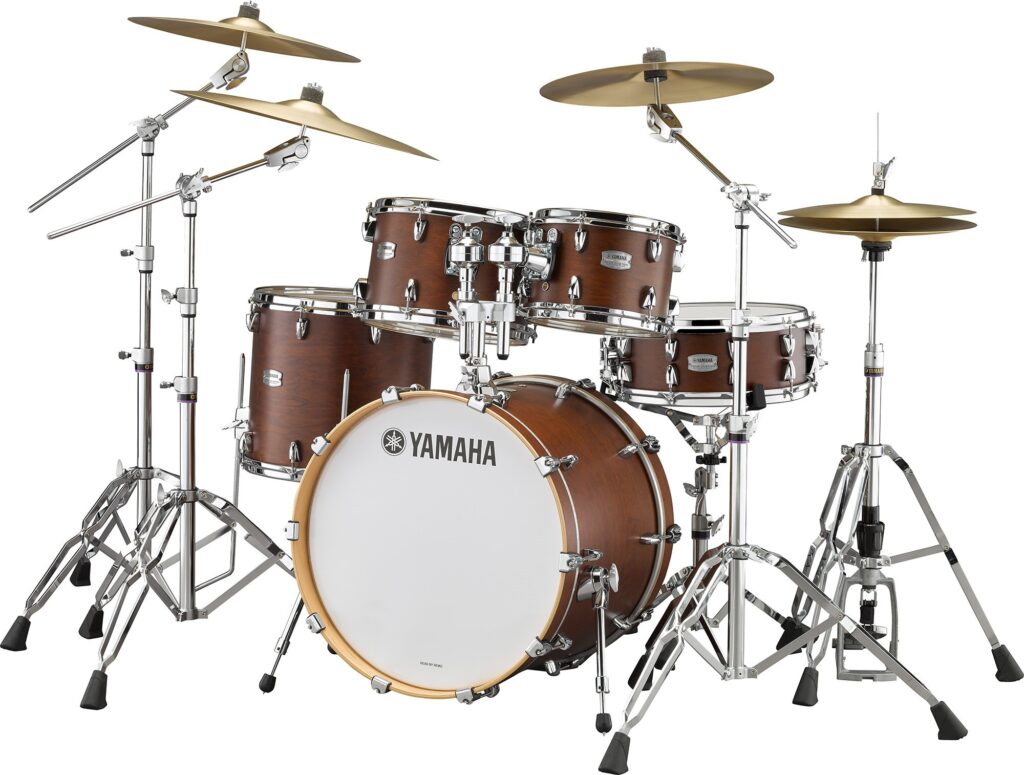
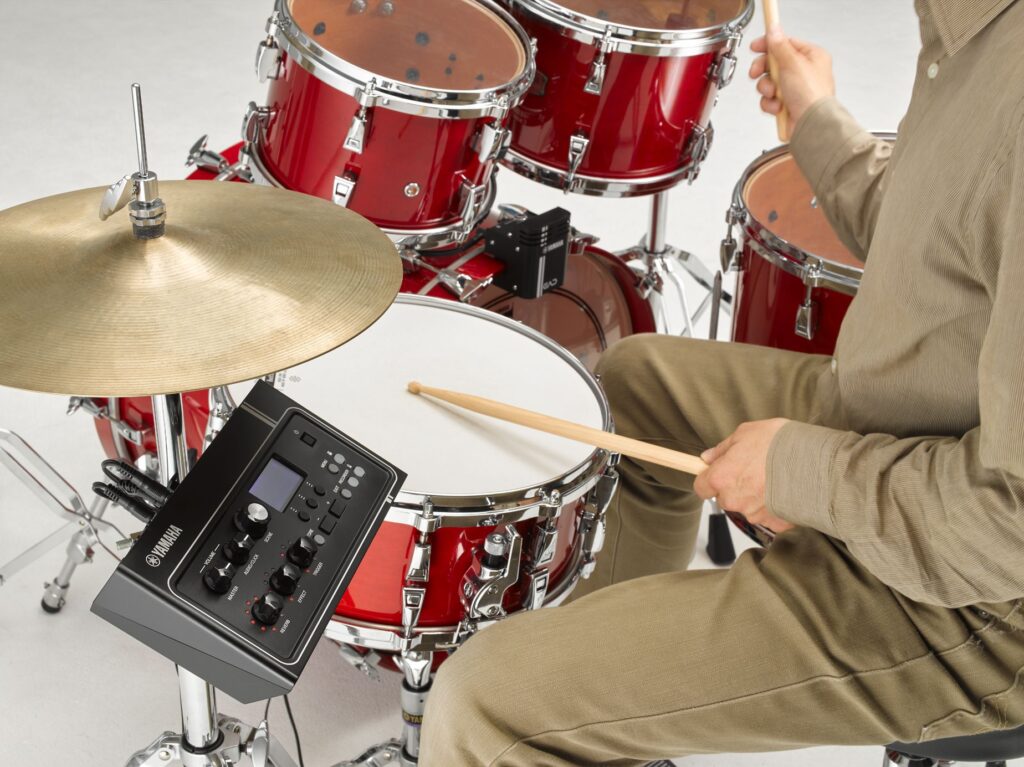


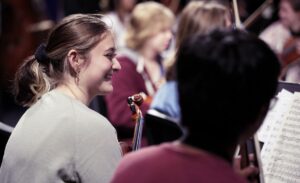


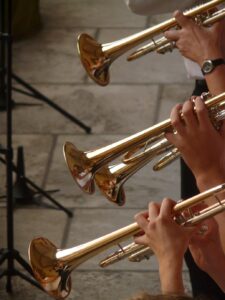
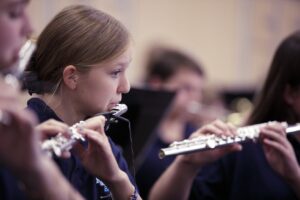
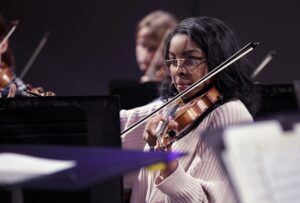


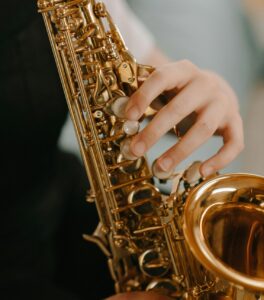
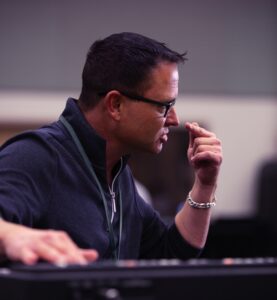


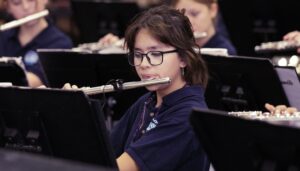

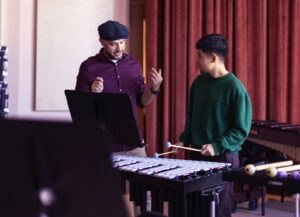


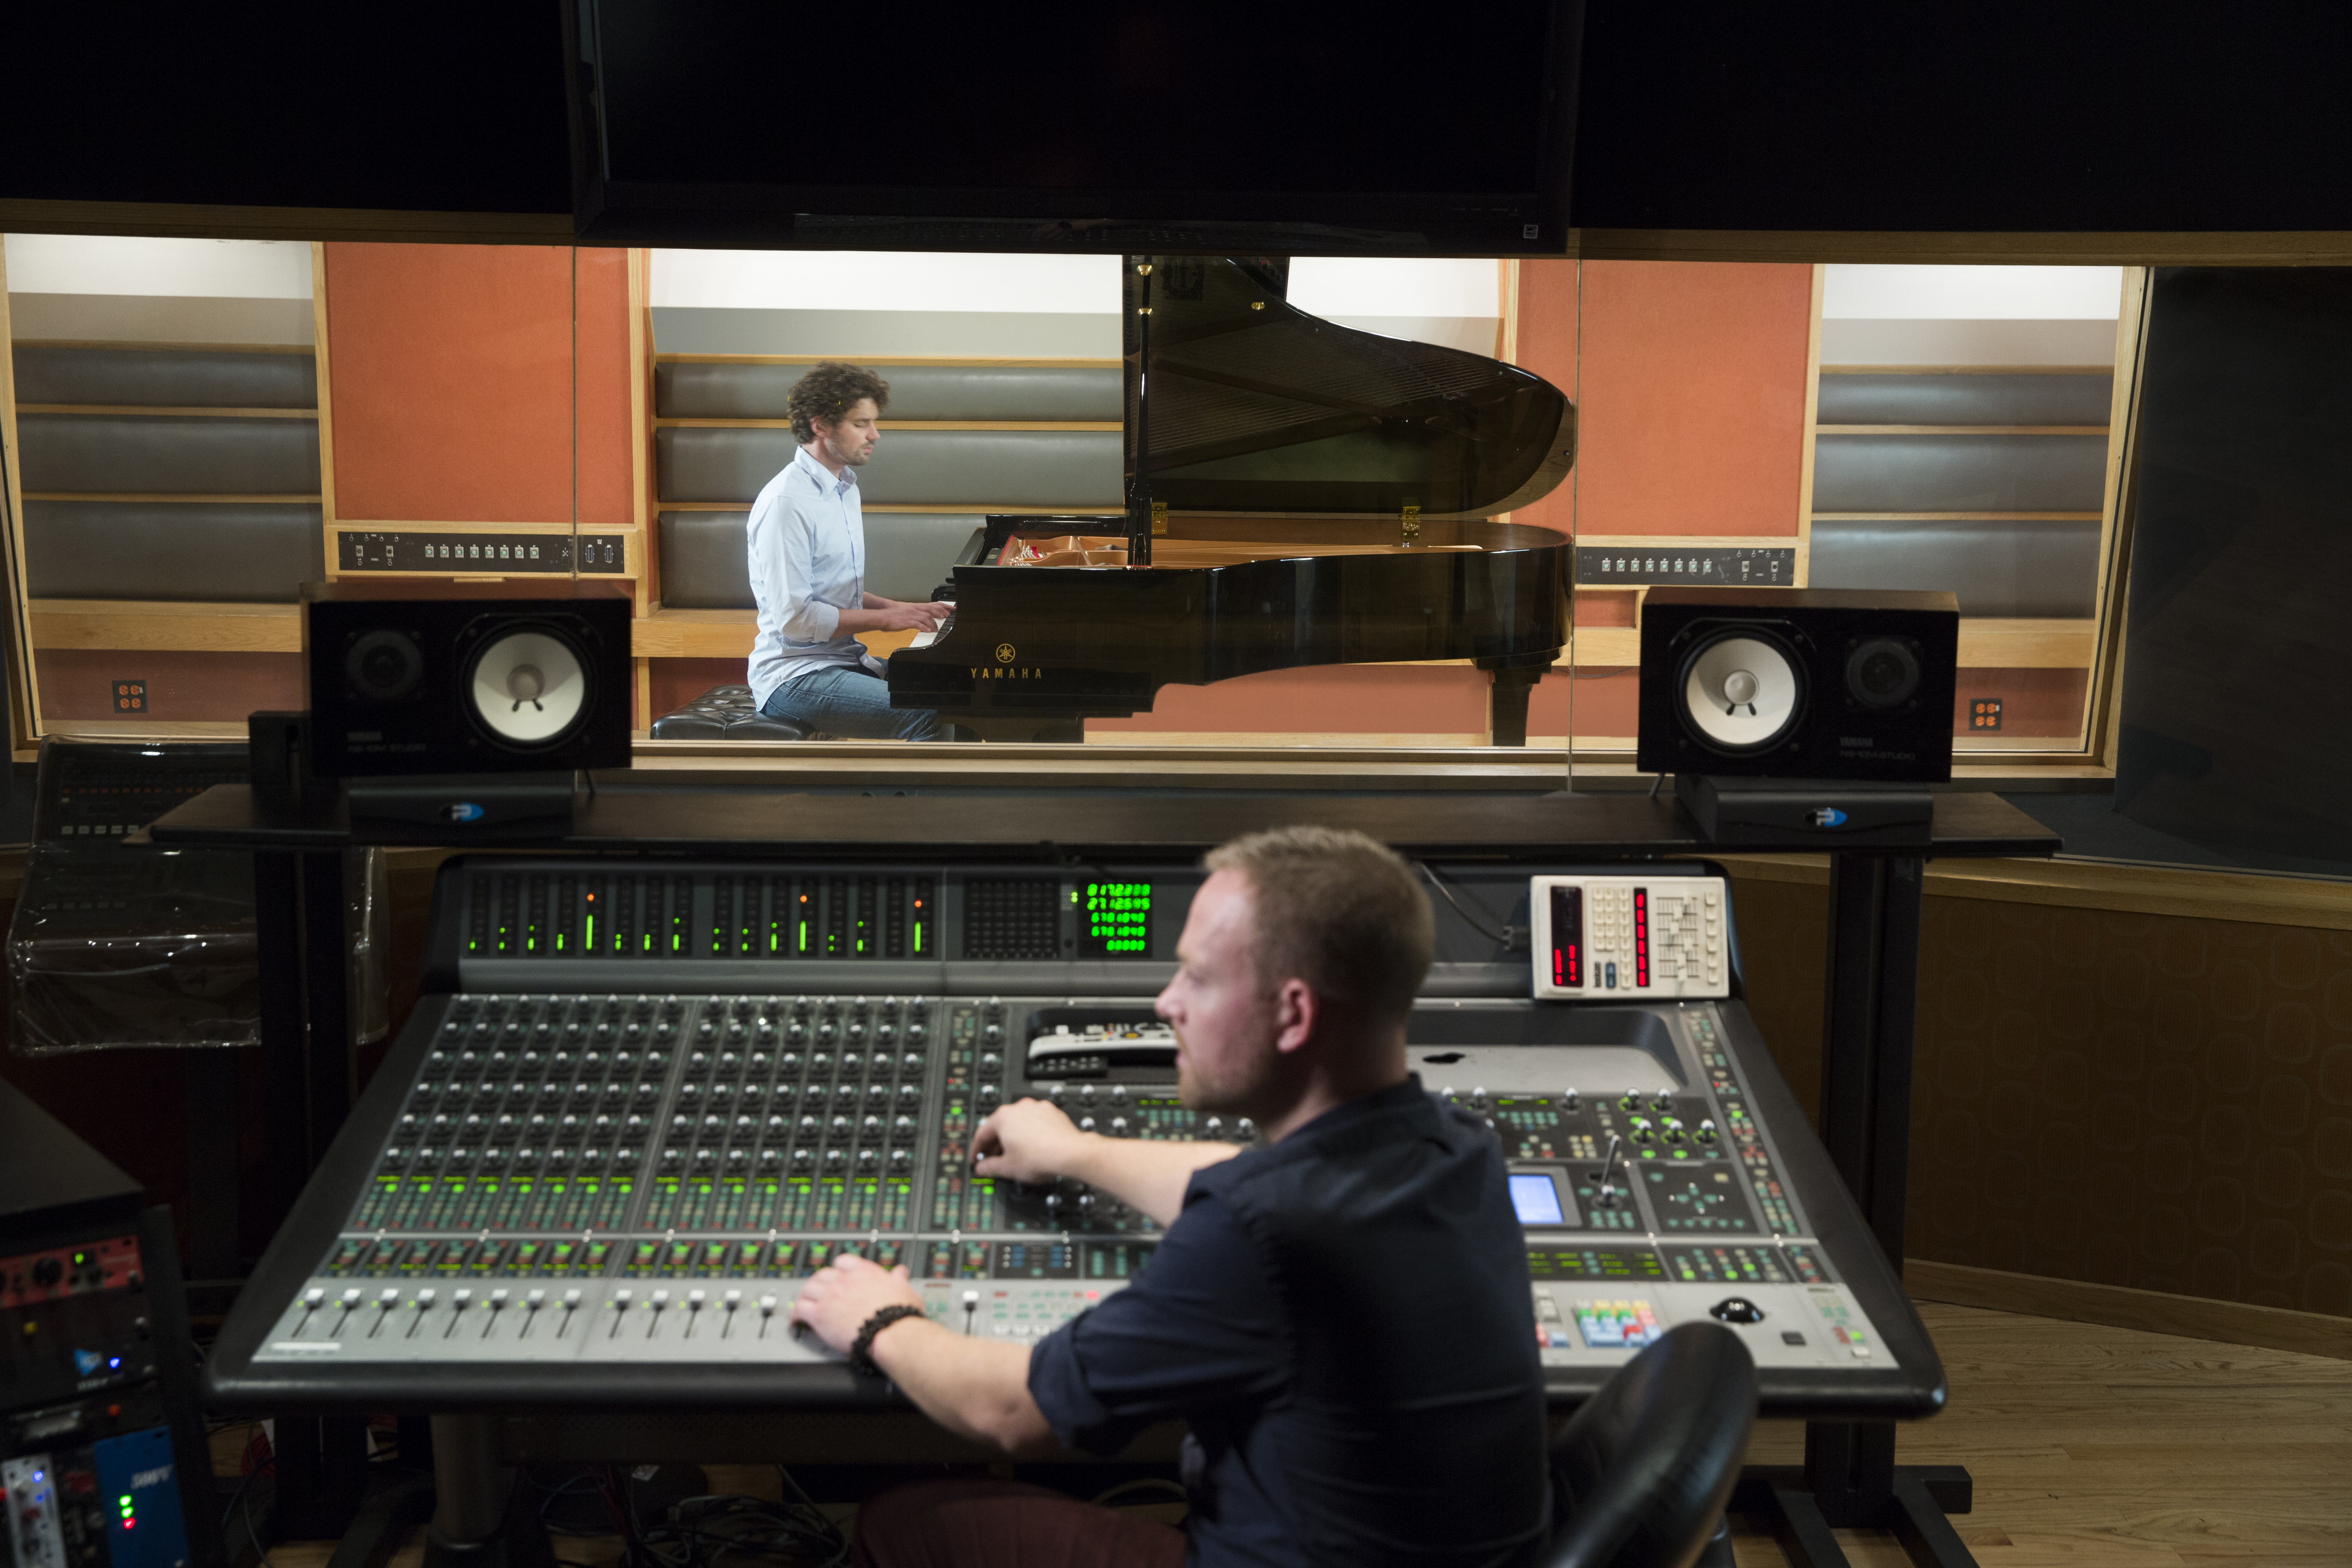


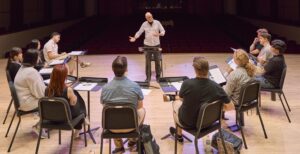
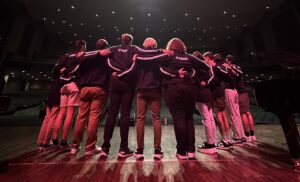
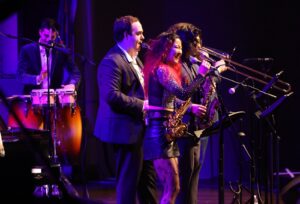
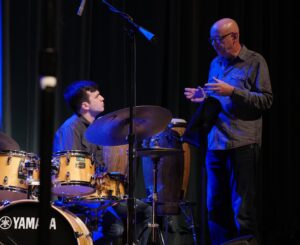


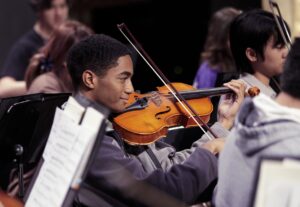


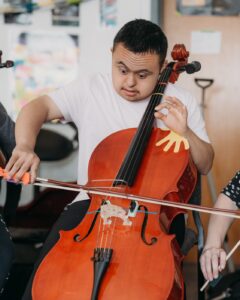
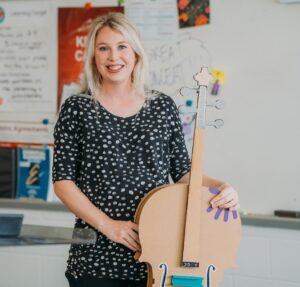
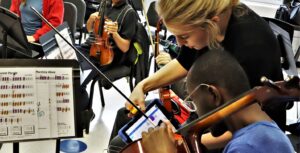

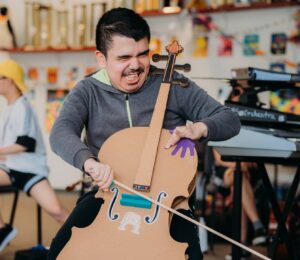
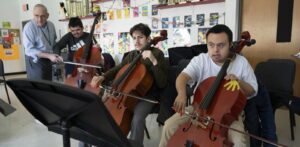


 Rivage PM: Scottie Baldwin, FOH Lady Gaga, Prince, JJ Lin transitions from Yamaha CL to Rivage
 J. Summers, FOH Jellyroll, Harnesses Yamaha RIVAGE PM 10 for Jelly Roll’s packed arena shows
 21 Pilots FOH and MON: From Arenas to Clubs – Small can be beautiful
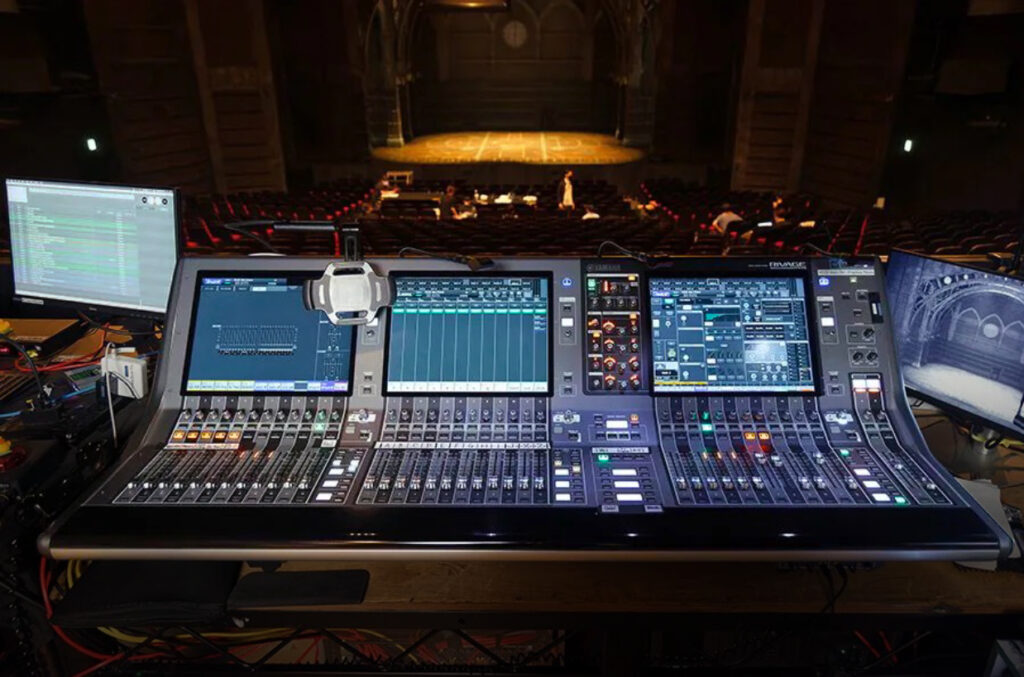

 Michael “Coach“ Conner, FOH Steely Dan, Paul Simon: Recreating Studio Magic Live with Rivage PM
 David Loy Elevates Kane Brown’s Live Sound with Yamaha RIVAGE PM3: Power, Precision, and Creative Freedom
 Stephen “Pato” Pattison, FOH Hozier – One Desk is Everything I Need
 Flagship Power for High – Pressure Events
 Compact Power Meets Big Expectations for Gene Kim, FOH Johnnyswim
 DM7 Powers Tyler, The Creator’s Most Unconventional Shows: Compact Design, Big Capability For Tyler, The Creator’s most unconventional shows – including a pop-up on a floating barge – engineers Landon Storey, MON and Paul Wichmann, FOH chose Yamaha DM7 for its compact footprint and powerful features. “The workflow feels like RIVAGE PM, so the transition was seamless,” says Landon. Working inside shipping containers, they relied on DM7’s dual touchscreens and built-in processing to handle dynamic vocals and effects-heavy mixes. Paul even mixed remotely via StageMix: “I literally ran the show off an iPad—it was slick.” Despite tight space, two DM7 consoles and playback fit on a 12-foot table, proving its portability and power. From Hudson River barges to packed arenas, DM7 delivers exceptional sound and flexibility anywhere.
 LCBC Church: Seamless Transition to DM7