
The SILENT Guitar Speaks

Stylized image of an electric guitar with clear body on a guitar stand with control panel in foreground.

My first experience with a Yamaha SILENT Guitar™ was back in 2012 while filming a new guitar instructional course for the online video company Truefire. We wanted to capture the sound of a classical/nylon string guitar as quickly as possible and a SLG100N was on hand in the studio. I turned the guitar on, set all of the controls to center detent, fine-tuned the guitar using the onboard tuner, set input levels and we recorded the guitar using its onboard reverb and delay effects for a little ambience. The session ran smoothly, we captured some great sounds that day and the guitar looked much better than I did on camera!

Since then, I’ve been a fan of the SILENT Guitar, using my SLG200N for studio sessions, live performance and travel.

SILENT Guitars are packed with features, including a chromatic tuner, reverb, chorus, tone controls, an SRT mic and piezo blend control, and an aux input for smartphones and MP3 players. Monitoring all of these features via the supplied headphones makes this the ultimate guitar for everything from rehearsal warm-ups to late night jamming with tracks. They can also be used for stage performances without the fear of feedback because there isn’t a sound hole to produce those resonant frequencies … making them the ultimate loud guitars too!

Pairing It with Helix

The Yamaha SILENT Guitar technology is proven and well established, but how does it pair with the new modeling technologies of the Line 6 Helix® guitar processor, for example, and how do you create a classic nylon string tone for studio and stage?

My first instinct is to consider the instrument and its properties in order to determine what the signal chain needs to be to produce a great sound. In the case of the track shown in the video at the end of this article, I felt that all I needed to add to the already pristine nylon string sound the SILENT Guitar was producing was a little more presence and sustain.

Accordingly, I used the Helix Rack and created a signal chain consisting of Deluxe Compressor (to even out the dynamics and add sustain), followed by the Studio Tube Preamp with a low gain setting (to keep the signal nice and clean). Next came two 2 x 12 cabinet models with Celestion blue and silver speakers, with models of ribbon mics placed 1.5″ from the cone to retain depth in the tone. Then I added a sprinkle of dual delay run in series to soften the effect, with Chamber reverb in parallel added to taste, depending on the guitar part. Here’s a screenshot of the final chain:

Screenshot of control screen.

(To produce a nylon string finger-style sound, consider using less ambient effects and for the top line melodies add more effect to let the notes sit nicely in the track.) The SLG200N controls were all set “flat” and the blend control placed evenly between piezo and mic modeled sounds. No onboard effects were used. A stereo output from Helix was connected to my computer’s audio interface and from there, to my DAW (Digital Audio Workstation) software.

Signal chain routing and rerouting is also super simple. Let’s say you’d like to hear the compressor after the studio preamp instead of in front of the amplifier. Simply select the compressor block, press the “action” button and toggle the effect sideways to a new location.

No need to use a patch bay or move pedals on a pedalboard: Edits can be made in seconds, auditioned and saved to taste.

Going Steel

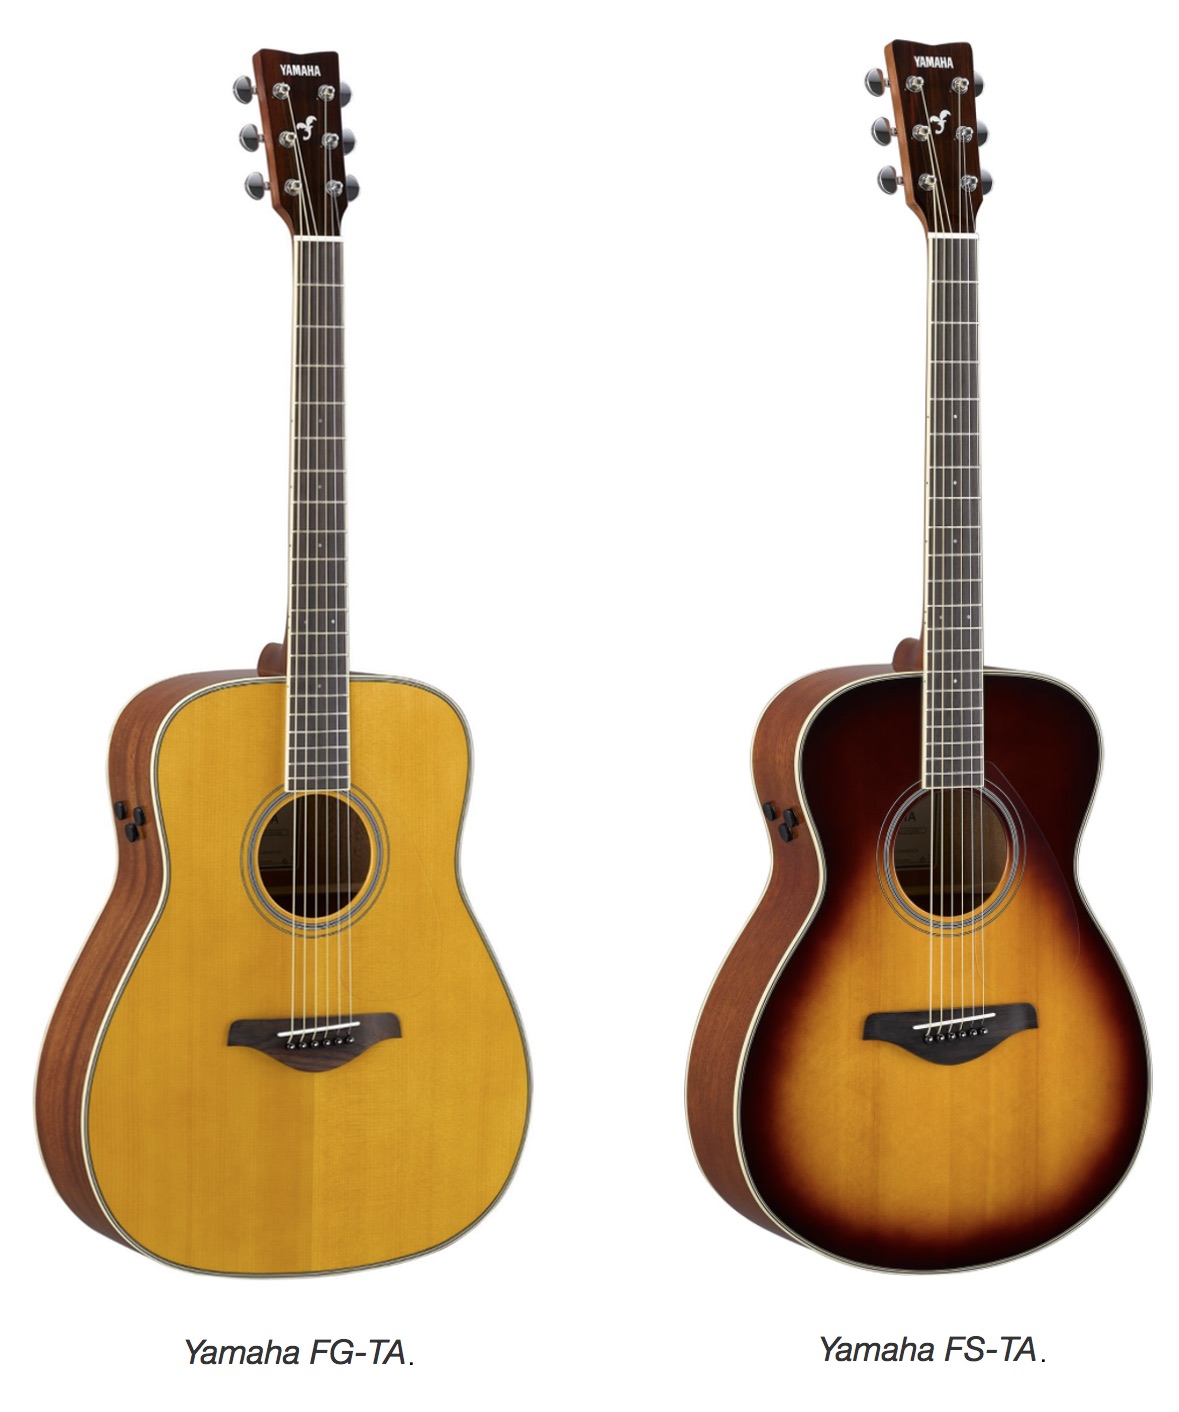
Switching over to the Yamaha SLG200S steel string SILENT Guitar couldn’t be easier. This model offers the same controls and dimensions of the SLG200N, except it uses acoustic steel strings so it inherently sounds like a steel string guitar. (It’s louder than an SLG200N too!)

I ran the SLG200S into the same exact Helix guitar patch as the nylon string SLG and tweaked the effects. Chamber reverb was switched to Hall reverb for a smaller, less ambient sound and I dialed in the delays to match the tempo of my track. I was then able to save the edited sound in a new location in Helix as a steel string acoustic guitar template.

Electric guitar with open body on side on table next to sound boards and sound equipment.

The Wrap-Up

Yamaha SILENT Guitars paired with the Line 6 Helix will replicate the same sound consistently due to the technologies producing the sound. Edits can be made, saved to your preferred setlist and the only elements that will fluctuate will be your performance … and that is something we can all appreciate and use creatively for years to come!

The Videos

Here’s my demo of the SLG200N:

And here’s a video of me at a recent Pro Dealer workshop for Yamaha Guitars, where an attendee asked me to add a little overdrive to the sound I was demonstrating on the SLG200S. I leaned down to the Helix floor unit, added a new block in my signal chain for an overdrive and played a gritty delta blues:

Photographs courtesy of the author.

Check out Robbie’s other postings.


Click here for more information about the Yamaha SILENT Guitar.

Click here for more information about the Line 6 Helix.

Guide to Brass Mouthpieces, Part 4: Weights and Finishes

(This is the final installment in our four-part series about brass mouthpieces.)

In Part 1 we talked about choosing the right mouthpiece for your needs.

In Part 2 we explored the impact of the mouthpiece cup and rim dimensions.

In Part 3 we examined how the hidden dimensions of the throat and backbore affect the sound and feel of the instrument.

So far we’ve looked at the obvious physical characteristics of mouthpieces — the various shapes, sizes and cuts that most players focus on when deciding what to use. But there are other aspects of a mouthpiece that may also affect the sound and feel, including the underlying material, the overall weight and mass, and the external finish. While the impact of these features may be less dramatic than the size of the cup or the openness of the backbore, they are still important to consider in your search for the perfect fit!

Material

The vast majority of brass instrument mouthpieces today are made from — you guessed it — brass! Brass is relatively easy to work with and has acoustic properties that make it an obvious choice as the base metal. If you’re a brass player, chances are most of the mouthpieces you’ve ever played are primarily brass underneath their shiny silver exterior. But brass isn’t the only option. While not especially common, it is possible to make mouthpieces from any number of different materials, each of which will have a different impact on the sound, feel and responsiveness.

Some older mouthpieces, especially French horn mouthpieces, were made from nickel silver. This is a very hard material compared to brass, which tends to keep more of the energy from your lip buzz focused into the instrument (instead of being partially absorbed by the mouthpiece itself). The resulting sound was generally considered to be more powerful, but also very bright and cutting. Some more modern mouthpieces have been made from other “hard” metals similar to this, such as stainless steel and even solid Sterling silver, both of which tend to provide similar powerful but brilliant-sounding results.

Other manufacturers have experimented with completely different materials, including various types of woods and plastics. These mouthpieces tend to have opposite characteristics from the hard metal options, with sounds that are perhaps less powerful or brilliant, but with a warmer tone. Non-metal mouthpieces also have some advantages in extreme weather conditions, since they are less likely to freeze or burn the lips in very cold or hot environments. Some players may feel that these mouthpieces are more comfortable on the face, especially during extended playing sessions, and they also provide an option for anyone who is allergic to metals or finds that their skin is easily irritated by regular mouthpieces.

Weight and Mass

Close-up of a custom mouthpiece.
Heavy mouthpiece with extra mass behind the cup.

When compared to a standard mouthpiece, a mouthpiece that has extra material added to make it heavier will generally have a more focused and powerful sound, but without as much of the cutting brilliance you’d find if it had been built using a harder metal. This can be especially useful for players who need to make their sound project without the benefit of microphones or amplification, but want to preserve a warm tone quality. The trade-off for this extra potential power may be slightly reduced flexibility and agility, so articulations and lip slurs might require some extra effort.

This extra weight is commonly added to the back of the cup and around the throat, giving these types of mouthpieces an unmistakable profile. If you’re trying to be heard over a 50-piece string section and a regular mouthpiece isn’t getting the job done, a heaver mouthpiece may give you the extra boost that you need!

Finish

Silver plating is by far the most common finish for brass instrument mouthpieces. When properly applied, silver plating is extremely durable and will provide many years of reliable performance. Silver is also relatively affordable, keeping the overall cost of the mouthpiece reasonable.

A gold-plated finish will make a mouthpiece considerably more expensive, but there are some benefits that make this more than just a flashy luxury. For many players, a gold-plated rim and cup feel smoother and more slippery on the lips, with less of a grip on your skin than silver. This can actually help improve lip flexibility and control, and may be more comfortable if you play long sessions. Gold is also less reactive than silver, so it keeps its natural shine much longer without tarnishing. In addition, anyone that finds their skin breaking out in a rash with a standard silver-plated mouthpiece may find that gold plating alleviates that kind of allergic response (although if you think you’re having an allergic reaction it’s always best to check with your doctor!)

One thing that a gold-plated finish probably WON’T do is change your sound. It’s a common misconception that gold plating makes a mouthpiece sound darker or gives the player a warmer tone than silver, but the reality is that the very thin layer of gold has such a small impact on sound that for most players it’s essentially not an issue. The gold may FEEL more comfortable, and it’s a very impressive look to be sure, but if there’s a difference in sound from a silver mouthpiece, chances are it’s because some other characteristic has changed.


Click here to learn more about the extensive lineup of Yamaha mouthpieces.

Pros and Cons for Pickups, Microphones and Electric Strings

We orchestral string players are used to playing acoustically … until we’re asked to play in a situation where the sound from our instrument isn’t going to project enough or cut through a louder group of instrumentalists.

The good news is that there are a few different ways to solve the problem. One rather drastic option is to add a pickup to your instrument, but doing so may require a physical alteration that could degrade the instrument’s sound or decrease its value. Other options, which are far less invasive, include using a mic — either by placing a microphone on a stand a distance away or with the use of a clip-on mic. Alternatively, you can simply play an electric string instrument instead.

So which works best? Let’s look at the pros and cons of each.

Add a Pickup to Your Acoustic Instrument

The decision to add a pickup to your beloved instrument can be a difficult one. As classical string players, we aren’t used to modifying our instruments other than adding a mute or using a different bowing technique to increase or decrease volume. But if you are considering installing a pickup, here’s some important information.

Pickups come in a variety of shapes, sizes and technologies. Some are permanent installations that are added to the body and bridge of the instrument, in which case you might want to consider owning a second fiddle (no pun intended!). Some pickups are less permanent, usually requiring a bridge swap, a stick-on or clip-on bridge pickup, or the addition of a jack at the side or under the chinrest to accommodate an output cable. All of these extra parts and pieces take some getting used to, and they can change the feel and weight of your instrument. Permanently installed pickups tend to provide a more reliable output and consistent tone; the less permanent ones may not be quite so good at delivering such consistency, but they do offer a less intrusive option.

Pros:

  • Keep playing your acoustic instrument for feel, looks and sound
  • Amplifies the genuine acoustic sound of your instrument

Cons:

  • Acoustic instrument needs permanent or partial modification
  • Output can be inconsistent, especially in nonpermanent installations
  • No ability to eliminate the acoustic sound completely

Amplify with a Microphone

Microphones are very sophisticated these days and come in a variety of shapes and sizes. The mic can be mounted on a stand positioned near or directly above the musician, or it can be a small clip-on mic mounted on the side of the instrument’s body or directly on the bridge.

Pros:

  • Small and portable
  • Least invasive option for occasional use
  • Continue playing your regular acoustic with no permanent installation

Cons:

  • May pick up potential surface noise, e.g. wind or coughing
  • If improperly positioned, may result in uneven sound
  • Can limit physical movement when playing
  • May require additional battery pack or power source

Playing with a microphone can be a quick and convenient way to get through the occasional gig that requires amplification. You may not feel ready to invest in another instrument or to permanently install a pickup (which can provide more reproducible sonic results). It’s also possible that your situation requires you to “look” acoustic. In these circumstances, a microphone will work fine for simple stage use where you don’t need to move around too much.

But what happens when your environment is less controlled or you need freedom of movement?

Play an Electric Stringed Instrument

That’s where electric stringed instruments can provide the best option. There are many different models available. Choosing one that is right for you is much like choosing a traditional acoustic stringed instrument — look, feel, features, price point and ease of playing will all affect your decision. Electric violins, violas and cellos have their own personality, just like acoustic instruments.

Once you have chosen an electric that feels right for you, you’re ready to plug in and play!

Pros:

  • Amplifies directly and cleanly — with no surface noise like wind or coughing
  • Easy to add effects like reverb or distortion
  • Resilient in outdoor environments
  • Control volume from your instrument — including muting for quiet tuning, etc.

Cons:

  • Different sound than acoustic
  • Needs a power source — active (batteries) or passive (amp power)
  • Slight adjustment playing a second/different instrument
  • Learning curve to optimize sound

One of the biggest advantages of using an electric instrument for amplified playing is that it is designed for exactly this purpose. You can easily make electric stringed instruments wireless, too.

Instinct and Training

Are great musicians born and not made? Or can anyone become a master of their instrument?

I began reflecting on those questions a few weeks ago, when I got a new puppy. Beyond the joy (not to mention the exhaustion) she has brought to my life, this little bundle of energy has also taught me an important lesson: the value of both instinct and training.

Even at her currently very young age of three and half months, Sophie already knows all the basics for survival — the need for food and water and the desire to clean herself, move around and chase prey (currently consisting of a rubber bone, a tennis ball and the assistant to the assistant editor, pictured below) — and she didn’t have to be taught any of these things. I know also from experience that there are other instinctual aspects that will blossom (or be revealed) as she matures: Will she be independent or clingy? Outgoing or shy? Obedient or forever prone to mischief? An airborne devotee of the frisbee like my previous German Shepherd or happier keeping all four paws on the ground?

German shepherd puppy playing with a toy.
The new Assistant Editor, with the assistant to the Assistant Editor.

Human babies are born with similar basic instincts (okay, maybe not cleaning themselves … and perhaps only a handful enjoy chasing prey), along with others that develop as they get slightly older. One of the latter is an instinctual attraction to music. Some infants are fascinated by Brahms or Drake; others could care less. Some — no, let’s face it, most — children prefer sports or video games to practicing piano or trombone … and there’s absolutely nothing wrong with that. Those same kids may in fact turn out to be good pianists or trombonists who get a lot of enjoyment from music for the rest of their lives. But will they turn into professional musicians?

Without the impetus necessary to keep them on that long, arduous path, I would say it’s pretty unlikely.

Unlikely … but not impossible. Given the proper encouragement and the right instructors — and perhaps an influential mentor or two along the way — their potential could be limitless. But I would argue that having an inborn affinity for music improves the odds considerably.

With training, I’m hopeful that Sophie will turn out to be a model canine citizen — friendly with people and other dogs alike, and devoid of her current predilection for treating the world as her personal chew toy. But if she turns out to be genetically shy and withdrawn (which she’s not, at least not yet), it’s improbable that even the best dog trainer in the world can make her completely confident, though they can certainly do much to increase her assurance level. Similarly, the best music instructor may only be able to take a child so far if their student doesn’t have an inborn gift for appreciating and assimilating music … though certainly every budding musicians should be given every opportunity to become the exception that proves the rule.

I was lucky enough to be blessed with good musical instincts from my earliest years, though with hindsight I can see that I didn’t have the commensurate talent to become a virtuoso, or anywhere close. Instead, my career took a number of left turns — from touring/session musician to producer/engineer to music journalist to author to editor of this blog — all of which have proven to be immensely satisfying. The question is: Would I have taken that road if I didn’t have those instincts?


Check out Howard’s other postings.

May the Fourth Be With You: The Best Moments from the Star Wars™ Saga

Every film buff knows the thrill of seeing their favorite franchise on the big screen. But once movies leave the theater, it’s up to us to find a way to recapture the magic we felt during that first screening. Every May 4 — known to many as Star Wars Day — many fans do exactly that.

If you’re already outfitted to watch movies your way at home with a top-notch sound system and giant flat-screen, you may want to crank up the volume and dim the lights while enjoying these eight cinematic highlights from the Star Wars saga (warning: spoilers ahead). May the Fourth be with you!

1. The Opening Crawl – Episode IV: A New Hope (1977)

Needless to say, there would be no Star Wars saga without the original film, which immediately grabs the attention of viewers with the opening title crawl, from the blue text of “A long time ago in a galaxy far, far away …” to the Star Wars title card and subsequent text explaining the current state of things in the story. It’s hard to argue that, between the combination of that stunning introduction and the surprise factor of the first blaring note from the orchestra (the opening salvo of John Williams’ Oscar-winning score), fans everywhere were hooked from that moment on. Check out the trailer here.

2. Destruction of the Death Star – Episodes IV: A New Hope (1977)

Like few films before it, the final battle sequence to destroy the first Death Star offers many highlights that have had fans mesmerized for decades. The visual effects created by the newly-established Industrial Light and Magic (ILM) for the X-wings, Tie Fighters and the explosion of the Death Star itself — along with the sound effects that would become iconic in their own right — make the scene a stand-out moment in the original trilogy. Check out the trailer here.

3. Darth Vader Father Reveal – Episode V: The Empire Strikes Back (1980)

Given both the lightsaber duel that precedes it and the scene where Darth Vader (listed as the American Film Institute’s third-greatest villain of all time) tells Luke his true lineage, this one’s a no-brainer. Also worth noting are the sound effects accompanying the lightsabers in action and the set design, all of which contributed to making this a very special moment. Check out the trailer here.

4. Forest Speeder Chase – Episode VI: Return of the Jedi (1983)

Seeing and hearing the zipping speeders chase each other through the forest of Endor’s Moon on a big screen will make anyone’s pulse quicken. And given the imaginative and original visual and sound effects used to create the chase, you’re sure to enjoy this scene in a home theater setting too. Check out the trailer here.

5. Vader Slaughters the Rebels – Rogue One: A Star Wars Story (2016)

Fans everywhere waited a long time to see Vader in action like this. Previously in the franchise, he had only been seen moving slowly towards his opponents when wearing the suit. But thanks to the filmmakers’ last-minute decision to do re-shoots, the scene was added to give Vader his shining moment. From his force-flipping rebels onto the ceiling to the horror-esque style in which the cinematography and soundtrack was composed, you may find yourself turning to the Dark Side in support of this Sith Lord’s violent act. Check out the trailer here.

6. Luke vs. The First Order – Episode VIII: The Last Jedi (2017)

While this film stirred controversy amongst fans and critics, from a cinematic standpoint, seeing Luke Skywalker take on the entire First Order by himself was arguably one of the most jaw-dropping moments in the saga. From the laser blasts having no effect to the final reveal where Luke lets his force projection vanish before the eyes of Kylo Ren, this scene is constructed in such a way that the viewer is hooked from start to finish. Check out the trailer here.

7. The Pod Race – Episode I: The Phantom Menace (1999)

Between the eye-candy of crashing pods and the sound effects of each pod flying past the camera’s perspective, this entire race is memorable. If you’re watching it for the first time, take note of the fact that the film score is on hold until the final moments of the race — a clever trick that helps enhance the dramatic conclusion where Anakin wins. Check out the trailer here.

8. The Falcon Returns – Episode VII: The Force Awakens (2015)

After waiting 32 years, fans were finally treated to the return of the ship that made the Kessel Run in less than 12 parsecs: the Millennium Falcon. During Fin and Rey’s chase scene, viewers were surprised to see the Falcon sitting in a junk yard, covered by a tarp. The duo chooses it only after their chosen ship is blown up by a pursuing Tie Fighter. The chase sequence that follows offers up explosions, tight turns and the roaring engines of the Falcon, all accompanied by great sound effects. Check out the trailer here.

Learn more about how to create the perfect home theater.


Click here for more information about Yamaha home theater systems.

Eight Great Tips for Practicing Piano

Whether you’re just learning to play the piano or trying to master a composition by Chopin, practice is key. Here are eight great tips that will help you along the way:

1. Set aside at least 20 minutes each day to practice. That’s 20 minutes minimum — the more you can practice the better. If you do have more time available, try breaking your practice into 20 minute intervals throughout the day so it doesn’t feel too daunting.

2. Don’t forget to warm up. Have you ever tried to send a text message while your fingers were freezing? It’s nearly impossible to type quickly and without mistakes because your fingers are stiff. The same goes for playing the piano. It’s important to warm up your hands and fingers so you can fluidly play the keys. This is especially important when you are learning because you will stumble upon enough mistakes even without clunky stiff fingers!

3. Don’t try to take on too much. Unless you’re a piano virtuoso, it’s highly unlikely that you will be able to master an arrangement the first time you play it. Instead of taking on the entire piece, break it down into manageable sections. Depending on your level of ability, this can range from just one measure to one page. Whatever you or your teacher decide is achievable for you, set your practice goal and stick to it.

4. Avoid the tendency to always start at the beginning. The very beginning isn’t always a good place to start. When you start at the beginning each time you sit down to practice, you only master the beginning before your allotted practice time is up… without ever giving yourself time to tackle that difficult section.

5. Practice slowly. Rushing through the piece means that you might make mistakes, and then you run the risk of learning those mistakes. Instead, play each note deliberately until you are sure of your fingering. With most digital keyboards, you can even record at a practice tempo and play back at a faster tempo to see how it will sound when you’ve mastered the song.

6. You don’t need a piano to practice. While this advice might seem bizarre, you can actually practice piano keystrokes anywhere. Practicing the fingering of a difficult section away from the piano can help your muscle memory when you do sit down to practice.

7. Listen to the song when you’re not playing. Knowing the tune of a song can often help your fingers move along the keys. Download the song you’re trying to master onto your smartphone or tablet and listen to it often — even when you’re away from the piano. Having the song in your head can also help get you inspired to sit down at the piano and practice it yourself.

8. Pick a piece that you want to play. It may seem obvious, but you’re far more likely to practice a song that you like. You’re going to be playing the song over and over, so make sure it’s something that you want to hear! That’s where the Yamaha MusicSoft Sheet Music library can help. It’s filled with thousands of songs, so you’re guaranteed to find something that appeals. You can even easily customize purchased music, so if you want to transpose the key or change the notation, you can doA so before you print it out.

Now you’re ready to discover for yourself how practice makes perfect!

Vibraphone Lessons with Rusty Burge, Part 1: Pedaling Technique and Grips

This is the first of three video lessons on vibraphone performance technique by Yamaha Performing Artist Rusty Burge.

Many young students have difficulty transitioning to vibraphone because it has a sustain pedal. Here, Rusty introduces exercises and techniques to use the pedal to its fullest extent:

In this second video, Rusty talks about two 4-mallet grips that are used on the vibraphone — the Burton Grip (developed by jazz vibraphonist Gary Burton) and the Musser/Stevens grip:

Rusty Burge is Professor of Percussion at the Cincinnati College-Conservatory of Music and is also a member of Percussion Group Cincinnati, with whom he has performed extensively throughout North America, Europe and Asia. He was formerly principal percussionist with the West Virginia Symphony and plays extra with the Cincinnati Symphony. Burge received his undergraduate degree from the Eastman School of Music and a master’s degree from CCM, where he teaches percussion and jazz vibraphone in addition to directing the CCM Steel band. He has performed with Peter Erskine, Ted Nash, Rich Perry, Dave Liebman, Rufus Reid, Steve Allee, Roland Vazquez and Michael Spiro. His new book, Method for Vibraphone, will be released this coming fall.

Click here for Part 2: Using Patterns in Improvisation.

Click here for Part 3: Basic Jazz Voicings.


Click here for more information about Yamaha vibraphones.

What Guitar Playing Means to Me

By the third grade I had life figured out: Girls wanted to be with the guitar player in the band, and guys wanted to be him … although John Taylor, the bassist in Duran Duran, seemed to be the exception.

So my dad (who was a lighting designer with some serious rock ’n’ roll cred — he had, among other things, created Gene Simmons’ flying harness) hooked me up with an electric bass to help set me on my path for future spreads in Tiger Beat. After that, I can’t tell you how many times I faked an illness in school so I could get sent home and play along to MTV videos, but my mom can vouch. A few years later, when The Power Station came out with “Some Like It Hot” and “Bang A Gong,” I realized that I was going to have to up my game if I wanted to miss out on class that day. I can still remember seeing Andy Taylor — dressed in all black with this killer cross-chested bullet armor thing that would surely make my next Christmas list — shredding all over the place and doing all these whammy bar tricks I had never seen before. I was like, “What kind of sorcery is this?” Soon after, my mom finally fell victim to my incessant Jedi Mind Tricks and got me a six-string electric guitar.

My life would never be the same again.

Soon enough I was rocking my first band in middle school, somehow getting thwarted into the role of lead singer and lead guitar player. High school followed. My guitar was everything to me and my mom knew it. Every time I messed up in class or didn’t show up to flip burgers at my after-school job, she promised the guitar would go away, but guess what? It never did. Here we were, these 15- and 16-year old kids making demo tapes, playing clubs, somehow winning every Battle of the Bands competition, opening for countless touring national acts throughout parts of Texas, even getting some radio airplay. By the time I hit my senior year we were showcasing for major producers and record labels.

After a deal fell through with one bigshot producer, I realized that being the fastest player in your high school could only get you so far, so my focus switched to songwriting. This forced me to take a whole other approach to guitar, but it proved to be my wheelhouse and it helped my band win VH-1’s Rock Across America Best Unsigned Artist competition in the U.S. We were flown to the Rock and Roll Hall of Fame where we got to open for John Fogerty.

But even though I got to tour and work with some amazing producers and engineers, as the years went on it somehow wasn’t fun anymore. With increasing frequency, the promises I was made turned into empty ones. The music business had officially unplugged more than my guitar — it unplugged my soul. For the first time in my life, I resented my guitar. I ended up selling most of my gear and walked away from music for almost a decade. I even switched over to talk radio.

Even though I became more than bitter, my guitar never gave up on me. She pleaded with me to take her out from underneath my bed so she could help breathe some life back into this “shell” of a human being. Then one day the thought hit me: Instead of chasing elusive record deals, maybe I should try just enjoying playing music for a change. Whatever happened to being motivated to play guitar because it was fun? Why should I keep reminiscing with my ex-bandmates about how we built our own stage ramps in the garage and thought Tiki torches could work for pyro?

That’s when I did it: I convinced myself to audition for a ’90s cover band in town. I was beyond nervous because I hadn’t played guitar in years. But I did my homework, and I hadn’t even gotten halfway home when my phone rang, saying I landed the gig. Just like that I was back on the horse!

Soon I was having fun again and being pushed outside of my comfort zone. As my confidence grew I found myself doing things on the guitar I was never able to do before, even back in the day. Then I decided to put together a Duran Duran tribute band and the next thing you know we’re getting all sorts of attention. For years I was this down-in-the-dumps has-been that never was, then all of a sudden I’m being invited to NAMM and getting to jam with some of my boyhood idols!

My life had come full circle.

We all have to grow up, pay bills and become responsible adults. But the moment we let that little kid in us die — the same little kid who used to rock out in front of the mirror pretending to be whoever it is you wanted to be — it can cause severe damage to your soul. So if you’ve lost your inspiration, go find your inner Andy Taylor and rediscover how your guitar can make you happy!


You might also want to check out:

What Playing Keyboards Means to Me

What Drumming Means to Me

Getting the Most Out of Audio To Score

Logo for Yamaha app Smart Pianist that shows a graphic of a piano viewed from above and the lid is multiple layers like a pages of a book that are in motion.

The primary “promise” of the CSP Clavinova is its ability to help you learn and play along with your favorite songs — that is, those in your smart device’s music library. To accomplish this, the accompanying Smart Pianist app does something remarkable — it uses a form of artificial intelligence to evaluate the audio to create three distinct things for each song:

1. A chord chart

2. A piano score

3. Stream lights

Smart Pianist does this with considerable accuracy, but songs that feature a full band and a regular beat translate the best. That said, some of the chord choices it makes are open to interpretation, and you may have a desire to modify those interpretations. To get the most out of the Smart Pianist Audio To Score feature, you are going to want to edit the chords, the score and the stream lights to best suit your needs. In this article, we’ll talk about how to do so.

(Note: As discussed in a previous blog posting, in order for Smart Pianist to evaluate audio, songs must be purchased and must reside in your iTunes® library. Songs from streaming services such as Spotify and songs that were downloaded into iTunes as part of Apple Music® cannot be evaluated by Smart Pianist.)

Chord Edits

In music, chords can accurately be notated in numerous ways. For example, a C6 chord could also be notated accurately as an Am7/C chord. As the lawyer in “My Cousin Vinny” said while clapping his hands together: IDENTICAL!

Screenshot showing C6 equals Am7 on C.

If you don’t agree with a chord choice made by Smart Pianist, you can change it. With the song paused, simply double-click on the chord you want to change. You will be presented with two other choices the app was considering, plus an “Other” option that allows you to enter any chord you want:

Screenshot of app choosing certain chord on left with how the app translates that to specific notes on right.

To select a chord not listed, press “Other” and select the chord symbol in the left column, the “type” of chord in the center column and the “on chord” or bass note in the right column:

Screenshot of app showing choice of "other" made and how app interprets that.

If you don’t want any chord listed, go to the center column and select “No Chord” at the bottom of the list:

Screenshot of app showing results of choosing "No Chord".

If you don’t want an “on bass” chord, simply scroll to the top of the right column to unselect an “on bass” note for the chord:

Screenshot of app showing results of choosing a note in one key and how that translates.

Before selecting “DONE,” click on the speaker symbol to have the app play the chord out loud so you can check your work.

If you find yourself editing and changing the same chord over and over throughout the piece (or if you want to “undo” or delete an edit), press and HOLD a chord symbol. When you release it, you will see options for COPY / PASTE / DELETE / UNDO:

Screenshot of app showing results of choice.

Finally, if the chords don’t quite line up as you would expect them to, select the “re-valuate” symbol in the top left corner of the CHORD CHART:

Screenshot highlighting choices made and resulting action.

Here you can:

1. Change Tempo to 1/2 (more chord symbols per measure) or 2X (less chord symbols per measure)

2. Change Meter from 4/4 to 3/4

If the chords are still not lining up properly and are off by a few beats, or if the key signature is wrong, select the “Detail Setting” tab to:

1. Shift the entire song by individual beats (Beat Shift), or

2. Change the Key Signature:

Screenshot of apps with specificoptions highlighted.

Score Edits

After you have the proper chords for a song, select SCORE to see these chords come to life as music notation. The default choice is the “BASIC 1” score accompaniment pattern, which directly translates to music notation, assuming one notated chord per chord symbol in the chord chart:

Screenshot of app on left with choices impact on musical annotation on right.

If you want to generate a more advanced score part (i.e., one that would be more challenging to play), you can “level up” and select a different score accompaniment pattern, in this case from “BASIC 1” to “BASIC 3,” which is essentially one chord for every beat:

Screenshot of app showing impact of choices made.

This generates an accompaniment score pattern that looks like this:

Musical annotation on left with changes applied on right.


If you consider all meters, there are 60 different piano accompaniment scores to choose from!

Stream Light Edits

The Clavinova stream lights correspond directly to the notes in the Score, with one stream light for each and every note in the Score. As we discovered above, the notes in the score are dependent upon the score accompaniment pattern that you choose. If you want fewer lights, choose an accompaniment score pattern that is less complicated.

Also, you can change the speed of the lights in the Play Option menu:

Screenshot of app showing changes.

Choosing a slower speed indeed slows the lights, but often shows more lights at one time, allowing you to more easily see repeated notes.

Note that all of the changes described in this article are automatically saved in Smart Pianist, allowing you to create highly accurate audio to score conversions over time.


Smart Pianist works with the Clavinova CSP-150 and CSP-170.

Audition Advice

Musicians are always auditioning. Here are a dozen tips that will improve your chances of being successful at your next audition …plus a few bonus ones if you happen to be a percussionist.

General Advice

1. Play through your entire repertoire several times before your live audition. Don’t let the audition be the first time you play through everything in order!

2. Rehearse your audition music in front of an audience and video the performance.

3. Dress appropriately. No jeans. No tennis shoes. No shorts. No track suits. No sweats. (I have seen all  of these on auditions!) First impressions count. Ties are optional. Be professional.

4. Practice performing in the outfit that you are going to wear to the audition.

5. Know the names of the people you are auditioning for.

6. Do some research about the school and have some questions for the panel/teacher.

7. If possible, come a couple of days early and talk to current students to get an idea of the program. It is also advisable to take a lesson with the director of the program and attend some rehearsals.

8. Prior to the audition, practice sight reading for 15 minutes every day.

9. When you get to the sight-reading section of the audition, take 15-30 seconds to scan through the piece before you start. Once you start, do not stop. Pick a tempo that you think will allow you to play through the entire piece.

10. Figure out the order in which you want to play your pieces before the audition. Don’t come in and say, “Uh, so what do you want to hear?” You don’t have a lot of control over what happens in the audition. Asking if you can play the pieces in a logical order gives you some degree of control; as a result, you will feel more relaxed.

11. Have a copy of the audition music for the panel. Organize the music in a binder and put it in the order you want to play it. Make two or three copies of the music. If you are playing a lot of pieces, use tabs to split up the music so it is easy for the committee to find the piece you are playing.

12. Take a couple of private lessons with a teacher other than your instructor. It’s good to get an unbiased opinion of your playing before an audition. It’s also good for alleviating any nervousness you might have when playing for a new teacher.

If You Are a Percussionist…

… here are some bonus tips that will help you pass your audition:

1. While it’s great to play a flashy piece, it’s more impressive to play something musical.

2. If possible, play on a variety of different instruments before your audition. (For example, play your marimba piece on four or five different brands of marimbas).

3. Make sure you play a concert snare roll when you are playing a concert snare drum solo. No double stroke rolls!

4. Play a marimba and snare drum piece that has rolls.

5. Practice rolls with dynamics (soft to loud to soft).

6. Play a 2-mallet and a 4-mallet solo. Excerpts are great.

7. If you’re playing a timpani piece, make sure it includes some timpani-specific techniques (rolls, dampening, crossing/shifting) and doesn’t have a lot of tuning changes (you never know which type of pedals will be on the timpani). Practice your tuning — make sure you can tune 4ths, 5ths and octaves, and don’t play a piece that requires five timpani. (Most schools will only have four.)

And always remember this: Your first audition is always the hardest one.

Good luck!

Equalization

One of the most important tools in live sound is called equalization. It may sound a bit tech-y but equalization (“EQ” for short) is actually just a fancy word for “tone control.” EQ allows you to change the tonal quality of a sound, making it, for example, “brighter” or “more bassy.” We’ve all had the experience of adjusting the tone controls on a car stereo. That’s a simple form of EQ. Mixing consoles typically offer more advanced versions.

In this article, we’ll take a closer look at the various kinds of EQ controls you’re likely to encounter when doing live sound — as well as the best ways to use them.

Basic EQ

Let’s start by taking a look at the basic channel equalization offered by the entry-level Yamaha MG06X analog mixer:

Drawing of sound dials one setting Hertz at 0 or "Low" and the other showing "High"

This is called a “two-band” EQ because it gives you control over two frequency areas, labeled High and Low. Note the triangle at the 12 o’clock, notched position. That’s the “0” point, where the control has no effect. To the left and right you can see “-15” and “+15.” This indicates how many decibels (dB) you are boosting or cutting the selected frequency. (A decibel is a unit used to measure sound level.) If you turn the knob clockwise you’ll be “boosting” (raising) a frequency; if you turn it counterclockwise you’ll be “cutting” (reducing) a frequency.

At this point you may be asking yourself the question: What frequency? (Or perhaps even “What is a frequency?”) Well, you may have noticed that the Low EQ is also labeled “100 Hz.” (Hz — short for “Hertz”— is a measure of the number of wavecycles per second, which defines the frequency, or tonal area.) The lower the number of Hz, the lower the frequency, and 100 Hz happens to be pretty low, which is why you can think of this control as a broad “bass” control, same as the one in your car stereo. When you turn the Low knob on this EQ you will raise or lower the sound level at 100 Hz (and some of the neighboring frequencies too), while leaving other portions of the signal untouched.

Similarly, turning the High knob raises or lowers the sound level at 10 kHz. The “k” means times a thousand, so 10 kHz is the same as 10,000 Hz, which is pretty high, making this control roughly the same as a treble control on a car stereo.

When you see simple equalization controls like these labeled High or Low (sometimes called “HF” and “LF” for High Frequency and Low Frequency, respectively), they are almost always a type called a shelf EQ. The name comes from the shape of the EQ curve. The illustration below shows what happens to a sound when you raise the level of a 10 kHz shelf EQ:

Sound wave graphic with wave at high end of range.

Notice how the curve rises up and then levels off, gently boosting all the frequencies above a certain point (in this case, starting at around 2 kHz, or 2,000 Hz below the specified 10 kHz frequency). Affecting a broad range of frequencies above or below the specified frequency is what makes a shelf EQ easy on the ears.

In contrast, this is what happens when you use a 10 kHz shelf EQ to cut instead of boost:

Sound wave with high end of curve below the shelf line.

Shelf EQ is useful when you want a broad stroke of EQ — for example, if you want to make a sound brighter. Basic shelf EQs allow you to boost or cut, but you can’t change the frequency. More advanced mixers like the digital Yamaha TF Series allow you to set the frequency area you want to affect, allowing precise control over the sound.

Some mixers offer three-band equalization that adds a Mid (midrange) frequency area. Here are the EQ controls provided by the intermediate-level Yamaha MG16 and MG16XU:

Drawings of four sound dials for low, mid and high ranges.

Notice that there are two controls for the Mid: one for the amount of boost or cut, and another that lets you choose the frequency area to be affected (known as the “peak” or “center” frequency). This type of EQ is called a peak/dip or peaking EQ. Peak EQ concentrates on a smaller, more specific frequency area than shelf EQ. The ability to “sweep” the frequency control is why it is also sometimes called a sweep EQ.

Here’s the effect of boosting a peak/dip EQ with a center frequency of 500 Hz:

Sound wave with peak of wave at center.

As you can see, this affects a range of frequencies from approximately 220 Hz up to about 1.1 kHz. The curve drops to 0 on both sides, so it has no effect on the very low or very high frequencies.

Peak/dip EQs are useful for making a slight correction to a sound, or to prevent one sound from stepping on another. For example, you might find that a piano is fighting for space in your mix with a guitar. A dip of a few dB on the piano EQ in the region around 300 Hz can help reduce this problem. Or if you find that a vocal is not cutting through a mix, adding a few dB around 2 or 3 kHz can help … but be careful because adding too much EQ in this region can make the vocal sound harsh.

It’s important to understand that when you boost with equalization, you are not adding frequencies to a sound. Yes, you’re amplifying the signal, but you’re amplifying only a certain range of that signal. For example, boosting at 100 Hz does not add 100 Hz to the signal. It amplifies 100 Hz and some of the neighboring frequencies, while leaving other portions of the signal untouched.

Advanced EQ

Most digital mixing consoles (and some advanced analog ones) offer a more precise form of equalization called parametric EQ. This is similar to peak/dip equalization but adds another control called bandwidth (sometimes known as “Q”) that determines how wide or narrow a range of frequencies are going to be affected.

The next illustration shows a peak boost similar to the one above, but here the bandwidth has been narrowed, allowing you to zero in on a smaller range of frequencies. In live sound, parametric EQ is especially useful for reducing feedback without changing the overall sound — just cut a small area where the monitor or PA system is feeding back.

Sound wave showing a very narrow peak at center.

Many consoles also provide filters. A filter is a simple type of equalizer that removes a particular range of frequencies. High-pass filters (HPF for short) remove all frequencies below a certain point, while low-pass filters (LPF for short) do the opposite, removing all frequencies above a certain point. (LPFs are much less common in live sound consoles than HPFs.) Sometimes a high-pass filter will be fixed, meaning that you can turn it on or off but you can’t change the frequency. More advanced mixers give you the ability to set the frequency where the filter starts working.

And here’s the effect of a high-pass filter set to 100 Hz:

Sound wave with first part of curve starting below the 0 line and escalating to flatten out at zero.

As you can see, frequencies below 100 Hz are being gently rolled off (notice that this actually begins a little bit higher than 100 Hz). You’ll find high-pass filters on most Yamaha mixers because they are very useful for removing unwanted low frequencies from vocal microphones, and that helps increase intelligibility. They also help control excessive low frequencies on guitar amps, and can eliminate the kind of low-frequency rumble that travels through mic stands.

Suggested EQ Settings

Finally, here are some starting points for EQ’ing common instruments:

  • Lead vocal: HPF on; Low: 0 dB; Mid +2 to +4 dB at 200 Hz to add warmth and body; High: 0 to +2 dB to add presence, or cut -2 to -4 dB to reduce feedback
  • Piano: HPF on; Low: 0; Mid: -4 to -6 dB around 200 Hz to reduce boxiness. High +2 to +4 dB to add presence and sparkle in the mix
  • Acoustic guitar: HPF on; Low: +3 to + 4 dB to add thickness or -3 to -4 dB to reduce boom; Mid: -2 to -4 dB at 1.8 kHz to reduce ‘nasal’ quality, or +2 to +5 dB at 5.5 kHz to emphasize pick on strings; High: +3 dB to add presence
  • Electric guitar: HPF on; Low: 0 dB; Mid: -2 to -4 dB between 1 to 2 kHz to reduce harshness; High: 0 dB
  • Bass: HPF off; Low +2 to +4 dB; Mid: +3 dB at 2.5 kHz for more attack, or -3 to -5 dB at 300 Hz to reduce interference with kick drum, High: 0 dB
  • Bass drum (“kick” drum): HPF off; Low: +3 to +5 dB; Mid: -4 to -6 dB at 250 Hz; High: 0 to +2 dB
  • Snare drum: HPF on; Low: 0 dB: Mid: -3 to -6 dB at 280 Hz if it sounds wooley or +2 to +4 at 200 if it sounds thin; High: +3 to +5 dB at 4 to 5 kHz if it gets lost in the mix
  • Toms: HPF off: Low: +2 to +6 dB; Mid: -4 to -8 at 250 to 350 Hz (reduces ‘cardboard’ sound); High: +2 to +4 dB to add attack
  • Overheads: HPF on; Low: -6 to -10 dB; Mid: 0 dB; High: +2 to +4 for a bit of sparkle
  • High hat: HPF on; Low: -6 to -10 dB; Mid: +2 to +4 dB at 4 to 5 kHz to add sizzle; High: 0 dB


Check out our other Tools of the Trade postings.


Click here for more information about Yamaha mixing consoles.

Steinberg Videos, Part 2: How to Do Editing in Cubase

Offering pristine sound quality, intuitive handling and a wide range of advanced tools for complete music production, Steinberg Cubase is one of the most popular digital audio workstations out there. In this series of videos, we’ll show you exactly why!

Here, product specialist Greg Ondo demonstrates basic audio and MIDI editing in Cubase. You’ll learn how to move, cut, copy and paste events, create fadeins and fadeouts, do time-stretching and more.

Click here for Part 1: “How to Do Your First Recording In Cubase”


Click here to find out more about Steinberg Cubase.

MusicCast Wireless Surround Sound for Your 5.1 Home Theater

Anyone who’s had a surround sound home theater system knows the challenges of adding rear speakers into the mix. First there’s the issue of where to place them. Then you need to know how to run the speaker wire so it’s out of sight and not a risk for being tripped on — something that’s usually dealt with either by using rugs, drilling into the floor (impossible if they’re marble!) or running wiring up the walls.

Now MusicCast Surround provides a wireless alternative that takes all the stress out of setting up surround sound.

The word MusicCast with aset of stacked curved lines to look like broadcast type waves capping the "i". Below that word is the word "surround".
Look for this logo.
Oval shaped speaker viewed from an above angle.
MusicCast 50.
Cylinder shaped speaker.
MusicCast 20.

Designed with flexibility in mind, two Yamaha MusicCast 20 wireless speakers (or one or two MusicCast 50 wireless speakers) can be connected to any MusicCast-capable AV receiver and used as rear speakers (surround left and surround right) along with the wired speakers for the front channels (front left, center, front right) to create a full 5.1-channel surround sound system right in your home:


Two MusicCast 20s used as rear speakers.
Two wireless MusicCast 50s used as rear speakers.
A single MusicCast 50 used as a rear speaker.

These speakers provide plenty of placement options since they can be placed on speaker stands, in bookshelves, or on tables — they’re even wall-mountable. Even more importantly, they offer a rich, powerful sound that adds a well-rounded audio experience to your home theater. (Just remember that the speakers only work with a 5-channel setup, not 7-channel or more.) The MusicCast 20 and MusicCast 50 can also be used with other MusicCast functions, including stereo and multi-room capabilities for streaming music or other audio content — all you need is a nearby AC outlet for each speaker.

View of a small table small plant, vase of flowers and a small cylindrical speaker next to them. The lower shelf has books adjacent to a subwoofer just slightly smaller next to a chair with a small piece of rug in front and a landscape painting above.

A great addition to this setup is the MusicCast SUB 100, which provides the impactful low end you’ll need to enjoy your favorite movies, TV shows, music and video games. This unobtrusive wireless subwoofer is designed to be placed anywhere in the room to give you added flexibility.

And with the MusicCast Controller app and Amazon Alexa devices, you can simplify things even more by using voice commands to control your system. Just download the MusicCast Smart Home skill or MusicCast skill from Amazon and follow the steps to set it up. (For more information, see our blog posting “How to Use Alexa Voice Control with MusicCast”.)

So take the stress out of setting up your home theater and start enjoying all the benefits of surround sound!


Click here for more information about Yamaha MusicCast products.

Music Makes You Happier, Smarter … and Healthier Too

Music touches us all deeply, in ways that range from the obvious to the inexplicable. It can make us feel happy, sad, reflective, anxious, thrilled, angry, excited, joyous and/or relaxed. This much is obvious to us all.

But did you know that music can also improve your attention span, enhance your memory and help heal the human body, mind and spirit in ways that medicine cannot?

I recently came across a fascinating online video that explains the science behind all this. It describes how music activates certain regions in your brain — nerve pathways that are involved in movement, planning, attention and memory. (Listening to music during a math test can improve performance by 40%!) Music releases a chemical in your brain called dopamine, which improves your mood and reduces your anxiety, and it can also help in the production of the stress-reducing hormone cortisol, so it induces pleasure, joy and motivation. Music also boosts your immune system and can create positive emotional experiences — it even helps relieve pain. Relaxing music can lower high blood pressure and can help people suffering from migraines and chronic headaches; listening to classical music before bedtime can even reduce sleeping problems.

That’s a lot of power with just a few notes!

Music also plays an important role for those with special needs. For example, it helps individuals with severe brain injuries recall personal memories, and improves math skills in children with ADHD (Attention Deficit Hyperactivity Disorder). Intrigued, I reached out to my brother Michael for additional insight. (Michael is a trained social worker, psychotherapist and CEO at West Bergen Mental Healthcare in Ridgewood, New Jersey.) “Music therapy has an important place in the treatment of various mental health challenges,” he told me. “Most therapists agree that treatment methods which include music and art therapy can help clients with ADHD, autism and the chronically mentally ill. [It allows them to] express themselves in non-verbal ways that are important and can be quite effective.”

And if you are a musician or someone who enjoys playing an instrument, your brain not only fires symmetrically when you listen to music, the corpus callosum area (the connective tissue between the left and right hemispheres) increases in size, allowing for enhanced communications between your logical and emotional self. Studies also show that musicians have distinctly recognizable brains that are enlarged in the auditory cortex, which is the region of the brain responsible for hearing.

Mind-boggling. And who knows what secrets future research will unlock about the power of music?

Check out the video.


Check out Rich’s other postings.

Kenneth Tse: Master of the Saxophone

When Dr. Kenneth Tse joined band for the first time at the age of 13, he intended on playing trumpet; however, he was told that he had the right hands and teeth for making an ideal sound on the saxophone.

Only later did Tse find out that his director had simply needed a second alto player.

That director must have been on to something though, because Tse has since emerged as one of the most renowned sax players in the world today.

Early Years

Growing up in Kowloon, Hong Kong, Tse was influenced by a musical family. His mother was a music teacher who encouraged Tse to pick up the violin and piano.

With the saxophone, Tse was self-taught for much of his early career. “I just really enjoyed music and playing saxophone, playing in band with all my friends,” he says.

Not limiting himself, he listened to all kinds of music — singers, orchestras, piano, cello — anything he could get his hands on. Without a saxophone specialist to teach him the intricacies of his instrument, Tse relied on his ear, spending hours with saxophone recordings and emulating what he heard.

Orchestra on stage performing with conductor and featured saxophone playing in the foreground.

“I would try to mimic the feel of a song by playing my own instrument,” he explains. “One of the hardest things to do was the diminuendo. I would try a bunch of things until I finally got it to sound the way it did on my recordings.” Through it all, Tse never felt discouraged. He would come home from the Hong Kong Academy for Performing Arts, where he studied for two years after high school, and practice for hours.

“I was only one of two saxophone majors at the Academy,” he remembers. “We only had clarinet teachers — [there were] no saxophone teachers — so they could only teach us basic things for our instrument. They also only had an orchestra, no concert band, so we didn’t usually get to play with an ensemble. But I never got discouraged.”

Tse can’t articulate what drove him to work so hard; he just chalks it up to his own love of music and routines engrained into him from playing various sports alongside pursuing his musical interests. Yet throughout the years, he never felt too concerned with where he was headed as a musician. And eventually his hard work paid off. World-class saxophonist and teacher Eugene Rousseau hosted a master class in Hong Kong, and Tse was invited to perform for him. Rousseau was impressed with what he heard, and Tse — after seven years of self-tutelage — had finally found himself a dedicated saxophone teacher.

From Student to Teacher

Tse studied with Rousseau for five years at Indiana University, where he earned a bachelor’s degree, master’s degree and Artist Diploma. Tse later earned a doctorate from the University of Illinois, Urbana-Champaign.

“I was always very much inspired by [Rousseau’s] playing,” he says. “His teaching style and my learning style worked very well together. I was used to fixing my technical issues on my own; Rousseau never tried to control my learning, forcing me to do this or that, because I did it all myself. He would teach me the musicality [and] helped me refine my sound.”

With a New York Artists International Award and a critically acclaimed debut recital at Carnegie Hall in 1996, Tse was hailed as a young virtuoso. Since then, he has been a prolific performer, traveling around the world for dozens of concerts every year.

In addition, Tse has embraced the world of teaching. He notes that his self-tutelage, combined with Rousseau’s refinement of his musical style, helped him define his teaching style, giving him the drive and motivation to benefit prospective musicians in the same way that he was helped in his college years.

“I enjoy the responsibility, and because I struggled as a young man without a proper teacher, I had to find out a lot of things by myself,” he explains. “Through that process, I think that I’ve gained a lot of experience, and I felt that I could help a lot of people with their own issues. That’s my mission.”

Currently, Tse is professor of saxophone at the University of Iowa. Though he enjoys a rewarding teaching career, Tse puts a great deal of value in staying active as a performer, both to improve his own musical talents and to demonstrate to his students that performing and teaching are equally important.

“Your students need to see that you’re not just lecturing to them; you’re going out and doing the things you tell them to do,” Tse says. “I need to keep myself sharp, and I can only do that by performing regularly. It may take time away from them, but in a way, it gives time back to them as well because I’m still learning. If I’m learning, I can pass that on to my students, and they’ll learn what I’ve learned.”

In addition to his teaching pursuits, Tse is a community leader, operating as the president-elect of the North American Saxophone Alliance (NASA), vice president of the International Saxophone Committee and founder of the Hong Kong International Saxophone Society, which hosts the Hong Kong International Saxophone Symposium every two years. Tse places a great deal of value in giving back to the communities that helped him get to where he is today.

“I wasn’t born a natural leader, and it doesn’t come easily,” he confesses. “However, just from working with a lot of friends and enjoying it, I’ve gained a lot of support. A lot of times you don’t really choose to be there, but people put you there because they trust you and your work. I’m very grateful for that.”

Iconic Sound

Central to Tse’s iconic sound is his saxophone; in fact, he has used just three horns on a regular basis. His first horn throughout high school in Hong Kong was a dull, rusty instrument. Eventually, Tse decided that he wanted something newer, to match the shiny, well-kept horns his peers had. The horn he chose and used for 25 years was a Yamaha. “I played it, and I just fell in love with the sound,” he reports. “I actually used that horn until just this year, as a matter of fact.”

Tse recently began playing on a new Yamaha model and carefully considers how his horn affects his sound. “The majority of the sound comes from the player; that’s what I believe,” he says. “Nonetheless, how well the instrument is designed does affect intonation and timbre a significant amount, and it can really make or break your sound. Yamaha horns really help give me the sound and response that I was hearing in my head.”

Tse’s career has been a lucrative and fulfilling one. From a self-taught young performer without a mentor to an iconic, world-renowned virtuoso of an instrument he didn’t even intend to play, his journey is one that exemplifies the creed of “hard work generates results.”

“Every coin you put in the piggy bank, so to speak, those will add up, and you can cash in when you have the chance,” Tse says. “It’s a long-term commitment, but if you’re prepared for it, you’ll succeed.”

Wisdom for Other Instructors

Tse’s advice for directors of all career paths is simple: inspire your students and set an example for them.

“Inspire them. Take them to local concerts or a recording [studio] … inspiration will always point your students in the right direction. You need to set an example for your students to follow. There’s no use talking about music all the time without being in the field. They need to see you in action.”

Photos Courtesy of Dr. Kenneth Tse.


This article was originally published on the Yamaha Educator Suite blog.

Jazz Immersion

In the blog post, Case Study: Crafting a Jazz Studies Program, Janis Stockhouse, director of award-winning jazz ensembles Bloomington (Indiana) High School North, embraced teaching jazz.

Are you new to jazz instruction? Don’t panic! Here are some tips to quickly learn about jazz from Stockhouse.

Tip 1: Buy and Listen to Classic Jazz CDs: Stockhouse encourages new jazz instructors to start by listening to “Kind of Blue” by Miles Davis as she did, then check out John Coltrane’s “Ballads” album. “If that hooks you, keep discovering other classic recordings,” she says.

Tip 2: Learn to Improvise Yourself: Purchase Jamey Aebersold’s play-a-long book “Maiden Voyage: Fourteen Easy-to-Play Jazz Tunes” and learn how to solo over these fairly easy but great jazz pieces.

Tip 3: Attend a Jazz Workshop: Stockhouse suggests the Jamey Aebersold Summer Jazz Workshops, offered as week-long or two-day courses in Louisville, Kentucky.

Tip 4: Network with Jazz Artists: Go to the Jazz Education Network convention held each January and other conferences in the national or state level. Seek out more experienced jazz directors and artists and ask them all of your questions.

This article originally appeared in the 2017 V1 issue of Yamaha SupportED. To see more back issues, find out about Yamaha resources for music educators, or sign up to be notified when the next issue is available, click here.

Percussionist Julie Hill’s Unique Teaching Strategies

In Percussionist Julie Hill Brings the World Home, we outline how Hill inspires percussionists on many levels: as a university educator, performer and past president of the Percussive Arts Society (PAS).

Many of her philosophies and strategies can be implemented on a smaller scale at your school. Here are three of her out-of-the-box ideas.

Set the Example: Let your students see your musical life outside of the classroom. Hill invites her university students to concerts where she performs with various ensembles. Her students see her work ethic and the results it yields, and they ultimately gain respect for her.

Step Outside Your Comfort Zone: Hill believes that having new experiences are necessary for growth as a person and an educator. For her, that involves traveling around the world and learning about new cultures. She incorporates her newfound knowledge of international musical styles into her teaching. Attending conferences and events such as the Percussive Arts Society International Convention also allows her to learn new ideas, network with other teachers and find guest instructors for her classroom.

Pay It Forward: When Hill’s own progress could have faltered due to lack of resources, a teacher helped her focus on the music, not the money. Now Hill uses her circle of influence to advocate for students who may not have access to opportunities. Hill and her students also give back to their community through performing for younger musicians.

Photo ©  2017 Nathan Morgan

This article originally appeared in the 2017 V1 issue of Yamaha SupportED. To see more back issues, find out about Yamaha resources for music educators, or sign up to be notified when the next issue is available, click here.

New to Teaching Strings?

After years of teaching band, you must now teach beginning orchestra, too. Panic sets in as you realize you don’t know how to position your fingers, and you fear making screeching sounds in front of your students.

Don’t worry. You are not alone.

Switching to string education is not a rare occurrence. In fact, a 2008 study titled “Perception Differences of String-Trained and Non-String-Trained Educators Who Teach Strings in Iowa and Nebraska” found that nearly one-third of music educators in those states teaching string or orchestral classes were not native to the string family.

Here are five tips from seasoned strings educators that will enable you to effectively transition to become a first-rate string educator.

Tip 1: Learn the Instrument with Your Students

Bob Phillips
Bob Phillips

While teaching students to play a string instrument is a fundamentally different experience than teaching band or choir, the inherent externality of the instrument also has its advantages. “The act of playing a string instrument involves lots of large muscle movement in a way that the other two disciplines do not,” says Bob Phillips, director of string publications for Alfred Music Publishing and a former president of the American String Teachers Association (ASTA). “You can actually see the muscles that are moving and how they’re moving, so it’s much easier to identify what’s happening — although those movements are much more complex.”

Teaching string instruments “relies upon modeling and showing and demonstrating,” says Kirk Moss, chair of the department of music and theatre at the University of Northwestern-St. Paul in Minnesota. Therefore, he says that it’s particularly important for string educators to become proficient on at least one string instrument as quickly as possible in order to be able to teach with an instrument in hand.

While it may seem a little awkward at first, an effective way to continually improve on your own playing is in the classroom along with your students. Putting yourself in your students’ shoes will provide you with insight about their challenges. “The interesting thing from a pedagogical standpoint is when we have a secondary instrument in our hands, as a music educator, we’re processing that ourselves,” Moss says. “The same things that I might struggle with are the same things that my students might struggle with.”

Tip 2: Focus on the Bow Hand

Kirk Moss
Kirk Moss

Going back to the basic mechanics of the instrument with your string students may not be particularly glamorous, but it’s incredibly important as a retention tool. “If, fundamentally, the sound of the instrument isn’t good, they don’t like and enjoy playing,” says Phillips.

Moss recommends that teachers focus on the right hand. “The right hand and the bow arm are analogous to the breath of the singer,” he says. “At a very basic level, a lot of that comes down to the placement of the right thumb. As a general principle, the thumb and second finger on the right hand are opposite each other and should form a relaxed oval shape when holding the bow. Maintaining that bow and placement is kind of a cornerstone.”

In addition, teachers should help students get rid of tension in the bow hand by making sure the fingers curve naturally. Focusing on these little things will make a big difference in your students’ sound production. “The more we can work with the students’ bow hand, the better the sound,” Moss says.

Tip 3: Develop a Community of Resources

Nancy Campbell
Nancy Campbell

Integrating method books such as “Orchestra Expressions,” “Essential Elements for Strings” and “Sound Innovations” can provide a useful structure to map out the path your students will take throughout the year. Not only do these books include important information for students, but some also include useful tips for educators such as how to evaluate students, how to set up your orchestra room and more.

“Some of the lessons are so well scripted that if you’re prepared ahead of time, you can feel really confident,” says Nancy Campbell, orchestra director at the School for Creative and Performing Arts in Lexington, Kentucky, and at the Central Kentucky Youth Orchestra.

ASTA is another exceptional resource. With state chapters, regional conferences and a new mentorship program started in 2016, the opportunities to learn from exceptional educators throughout the string community are endless. “There’s a wealth of information, and there’s a wealth of people out there that really want to help and are really good role models for teachers,” Campbell says.

YouTube™ is also a great place to look for demonstration videos, both for your own sake and also for your students to watch.

Even special interest groups on Facebook can be a powerful way to get teaching tips from other educators. Campbell belongs to Kentuckians for the Arts and Violas on the Verge, among others.

THE YAMAHA EDUCATOR NEWSLETTER: Energize your creativity as you build your music program!

Tip 4: Find a Mentor

Developing a community of string professionals that you can turn to with questions will prove extremely useful if you’re not native to the string family. Darryl Gregory, a trombonist turned string educator at Schaghticoke Middle School in New Milford, Connecticut, believes string mentors are especially useful for teachers in more remote locales or districts without a large string program. “Even if it’s not a mentor that’s local but just somebody that you can call up or you can email or FaceTime®, it can be a really good resource.”

Don’t know how to begin looking for a mentor? Universities and music stores are great places to jump-start your search.

Tip 5: Stay Optimistic

Even though teaching an unfamiliar subject may feel like an insurmountable task, try not to view it as such. Before you can be an effective teacher, you need to let go of your reservations. “Even if you can’t make a decent sound on a string instrument, you can still demonstrate and hold the instrument correctly and show how it should be held properly,” says Gregory.

Equally important is staying positive and enthusiastic, regardless of the circumstances. In the end a teacher’s purpose is to make a difference in their students’ lives. “If you can help kids to just be happy with where they are at this moment and work hard, I think that’s probably the biggest thing,” Campbell says.

Tip 6: Keep Learning

Darryl Gregory
Darryl Gregory

When Gregory took over at Schaghticoke Middle School in 2012 after nearly 30 years in band education, he had to take on a new role as the orchestra teacher, a challenge he faced head on. “I borrowed a cello and violin from my school, and I tried to do as best I could over the summer, at least getting familiar with the beginning aspects of teaching strings to be prepared for the beginning of the school year.”

Although Gregory’s first year as an orchestra teacher was successful, it was not until he took a pedagogy class the following summer that he realized just how unique orchestral education is. “It was eye-opening; there were things that I had no idea about that made me feel like I didn’t know anything about strings,” he says.

Gregory walked away from this class armed with new information about bow grip, the proper way to tell a child how to hold the instrument and a deeper understanding of string instruments in general. Since then, he has continued to learn and evolve as an orchestra educator.

“I’m still researching and thinking about things and looking at different ways of telling kids to do a certain bowing or a certain way of approaching the music.”

Top Photo by Jordan Mixson on Unsplash

Photos courtesy of Alfred Music Publishing, University of Northwestern-St. Paul, School for Creative and Performing Arts and Schaghticoke Middle School.

This article originally appeared in the 2017 V1 issue of Yamaha SupportED. To see more back issues, find out about Yamaha resources for music educators, or sign up to be notified when the next issue is available, click here.

Crafting a Jazz Studies Program

Janis Stockhouse’s confidence was high on her first day as director of bands at Bloomington High School North in Indiana. Then her jazz students showed up. “They were tossing out vocabulary and words, and I was stumped,” Stockhouse says. “It made me feel really bad that I couldn’t teach them anything. I wanted to run home.”

Stockhouse was so rattled that she tendered her resignation a month later, but fortunately her principal refused to accept it. Instead, Stockhouse persevered and immersed herself in the jazz world, teaching herself not only to appreciate the art form but also to excel at it. Since then, she and her jazz ensembles have received numerous awards and accolades.

What’s that Sound?

When Stockhouse accepted the director position at Bloomington High School North in 1981, the school was only 10 years old, but its music program was already shrinking. Replacing one and a half directors, Stockhouse taught two jazz bands, two concert bands and the marching band — five classes in all.

Knowing she was destined to be a band director, she had immersed herself in the concert and marching band programs while earning a music degree at Indiana University, but she had no interest in jazz. “I didn’t know why it sounded like it sounded,” she says. “It was kind of foreign to me, the long solos. I didn’t understand what was going on. If you don’t understand something, then you often don’t like it.”

But while at Bloomington, Stockhouse knew that she owed it to her jazz students to learn all she could about jazz. “I had to figure out what jazz is, what’s improvisation?” she says.

She sought help from David Baker, the late renowned jazz composer and professor from Indiana University’s music department. He agreed to come out to teach her jazz classes. “You would have thought it was the dream jazz band,” says Stockhouse. “He knew what tunes to pick, he knew how to teach and relay things. I just sat in the back of the room and watched.”

Baker schooled Stockhouse on jazz articulation and modes, or variations on scales. He told her to listen to Miles Davis’s “Kind of Blue“. She bought the album that night. As she listened, she took notes on what the rhythm section was playing and how the soloists were improvising. “It was like a whole world opened up to me,” she remembers. “I must have listened to that album five times that night.”

To further increase her knowledge of jazz, Stockhouse would visit the local music store, picking the brain of the owner. With so many CDs to choose from, she was overwhelmed at first and wondered what would be the next logical progression after “Kind of Blue.” She found “Maiden Voyage” by Herbie Hancock.

Janice Stockhouse conducts one of her jazz ensembles“‘Kind of Blue’ was the late ’50s and then ‘Maiden’ the mid ’60s. There was a huge change in the performance of jazz between those two albums,” Stockhouse explains. After all, “jazz reflects society.”

In addition to poking around the local CD shop, every Monday night she would attend a jazz concert at the local college. With the evening’s program on her knee, she’d jot down the names of the pieces she wanted to try with her jazz ensemble. On Thursdays she’d go to the local jazz club to listen to gigs. She was searching for pieces that she could introduce her to small combos and looking for ideas on how to teach the art of improvisation. “I was really liking what I was doing,” Stockhouse reports.

Possibly the most important decision Stockhouse made on her journey to jazz band director came in the summer of 1982, when she attended a jazz workshop in northern Wisconsin. For two weeks she improvised in a jazz combo and in a big band. “After that I felt better; I felt maybe I know a little bit now, and I could compose a blues for big band and arrange it. I learned a lot about history and all the different kinds of styles and repertoires. It was comprehensive. It was fantastic. My anxiety was more or less gone even though I was still a newbie.”

Over the years Stockhouse continued to grow into her jazz director position by attending endless conventions and clinics and asking a lot of questions to the jazz artists. She still seeks out as much live jazz as she can and reads countless books on the subject. “It’s an endless passion,” she says.

Several years ago Stockhouse co-wrote a book about female jazz musicians, titled “Jazzwomen: Conversations with Twenty-One Musicians.” Through the process of interviewing these talented musicians, she learned a great deal about jazz studies and jazz performance.

Feel the Music

Bloomington’s four jazz ensembles are leveled not by grade but rather by ability. Ninth graders can play in the top ensemble if they have the chops, but for the most part, students progress through the four levels. Jazz ensemble classes at Bloomington are 90 minutes long. Stockhouse spends two-thirds of that time teaching big band charts. The rest of the time she works on improvisation, memorization, scales, patterns, transcription of pieces into other keys, listening skills and jazz history.

Her favorite activity is to take an arrangement of a big band chart that has an open solo section, such as “Blue Bossa,” and require the entire band to memorize the head, or main theme, as well as the chord changes. She insists that her students listen to various artists’ interpretations of the tune and the solos so they can gain an appreciation of Dexter Gordon’s version.

NEWLY REDESIGNED: The YTR-2330 Bb Trumpet

When students listen, “they get to really learn the tune,” Stockhouse explains, “so they don’t just learn the trombone three part of ‘Blue Bossa’; they learn ‘Blue Bossa.’ As I’m playing my trombone three part, I can appreciate the tune more as a musician.”

Chris Parker, who studied under Stockhouse from 2011 to 2015 and is currently studying jazz and music education at Indiana University, says Stockhouse really stresses listening to the music, a skill often overlooked by other jazz educators. One time Stockhouse played a recording of Count Basie’s “It’s Oh, So Nice” and turned the lights off in the jazz room, Parker recalls. She asked her students to tap their toes and “feel the music,” he adds.

During the chorus, Parker says that Stockhouse had her students stand and walk around the room to the beat. Being high school students, many were shy and reserved. “But by the end of it, everybody was really into it. The difference between before we did that activity and after we did it [was startling]. We were a million times better as a whole. We were feeling the beat more because we were able to move to it. She understands you have to listen to the masters to perform jazz at a high level.”

Stockhouse takes her ensembles to participate at festivals; however, she never puts pressure on her students to win and views these events more as learning opportunities than competitions. “Students love performing; they also enjoy traveling and hanging out with each other,” she says. “And if there are clinics and live concerts, it’s fun to see how they react to these and how some get extremely motivated. Live music is so much better than just listening to YouTube.” She also encourages her students to take risks through improvisation, a skill she teaches through scales. As students become more familiar with the scales and their instruments, they gain the technique necessary to improvise.

Learning to be a jazz improviser could possibly be the pinnacle of what a student can experience as a teenager in high school, Stockhouse says. “For those individuals who have the mind and know their instruments and have fallen in love with jazz, it’s what they live for. I’ve seen that with so many students. It’s everything to them. They love it. It’s so creative.”

In addition to learning to improvise, jazz students need to form combos. These smaller groups allow rhythm players the opportunity to learn volumes about the music and about performing, Stockhouse says. To date, Bloomington jazz ensembles have performed at the International Association for Jazz Education (IAJE), Jazz Education Network (JEN) and Midwest Clinic conferences. Bloomington has also won the Lionel Hampton Jazz Fest at the University of Idaho on many occasions.

Grow the Program

The key to building a relevant jazz program is to integrate it into the high school curriculum rather than beginning it after marching season or making it an extracurricular activity, according to Stockhouse. “If you don’t start your jazz program until after Thanksgiving, all you’ll be able to do is teach three pieces of music,” she says. “You won’t be able to teach improvisation because you don’t have time. Having it in our school day has been our saving grace.”

Janice Stockhouse on stage as one of her jazz ensembles performs

Stockhouse generates excitement for her jazz program by exhibiting her palpable love for jazz to her students. That’s not hard to do when she owns more than 2,000 jazz CDs and tunes her radio to the jazz station 24/7. She introduces her freshmen to high-energy music, like “Watermelon Man” and “Cantaloupe Island,” explaining, “Herbie Hancock is a good entry level for 14-year-olds.”

Another way to ensure a jazz program’s success is to physically separate it from the concert and marching bands. In 2005 Bloomington built Stockhouse a jazz ensemble room. Before then, her jazz students set up in the corner of the band room. The drum set, the piano and amplifiers were always in the way of the concert band. “Now we have a room dedicated to our jazz ensembles. It made a huge difference,” she says.

Create a Bigger Buzz

Since discovering her own personal passion for jazz, Stockhouse has made it her goal to keep jazz programs relevant in Indiana. When IAJE came to a close in 2008, Stockhouse looked for ways to preserve a statewide coalition. She teamed up with a group of educators to form the Indiana Jazz Educators Association (IJEA) and has served as a president of the organization.

The goal was to keep all-state jazz ensembles and jazz combos moving forward. “We succeeded,” Stockhouse says. “I worked pretty hard for five years organizing things.” For all of these efforts in the classroom and in the greater jazz world, Stockhouse received the 2015 John LaPorta Educator of the Year Award from JEN and was named a 2014 Jazz Hero by the Jazz Journalists Association.

In addition to building Bloomington’s jazz program, Stockhouse also ran the school’s marching program for 20 years. Today the marching band is under the direction of Thomas Wilson, although Stockhouse still heads up the brass section. The Bloomington North Cougar Marching Band has marched in the Tournament of Roses Parade and the Macy’s Thanksgiving Day Parade and has finished in the top 10 in Indiana State School Music Association (ISSMA) competition 10 times. The Symphonic Band has also been an ISSMA finalist for all but two years since 1985.

When Stockhouse accepted the director position at Bloomington, jazz was a mystery to her. Today, it’s a significant part of her life. Through hard work, open mindedness, and perseverance, Janis Stockhouse and her ensembles have transformed into jazz powerhouses.

“Jazz is America’s contribution to the world of music,” she says. “Jazz is passion combined with genius and creativity.”

Photos courtesy of Bloomington High School North, Alan Burdett

This article originally appeared in the 2017 V1 issue of Yamaha SupportED. To see more back issues, find out about Yamaha resources for music educators, or sign up to be notified when the next issue is available, click here.

Percussionist Julie Hill Brings the World Home

As a child in the small town of Martin, Tennessee, Dr. Julie Hill dreamed of traveling the world.

She befriended international and exchange students, listened to world music and took an interest in things that differed from her everyday life.

Hill soon found herself performing percussion music in Brazil, Mexico, Peru, France, South Korea and all across the United States, but she never expected that her dream job would be in her own backyard.

Now in her 12th year as director of percussion studies and recently appointed music department chair at the University of Tennessee at Martin (UTM), Hill uses her vast, worldly knowledge and experience to give back to students in her hometown. After spending her life venturing outside her comfort zone, Hill’s goal is to make sure that her students seek out every musical opportunity they can.

Through her additional role as immediate past president of the Percussive Arts Society (PAS), she also works to make those opportunities available to all musicians, regardless of background. “I think of myself as the kind of student I want to help,” she says.

Hunger for Knowledge

Percussion first captivated a 4-year-old Hill when she attended her older brother’s middle school Christmas concert. As she watched her brother play the clarinet, the back-row percussionists caught her eye. “They were active and busy and making really big gestures,” she remembers.

When she entered sixth grade, Hill began playing percussion in her school’s band program. However, practicing and performing was not enough to satiate her growing hunger for musical knowledge, so the high school band director arranged for one of the senior percussionists to tutor her. “He would work with me on skillsets, so I would have some extra things to practice,” she explains. “That was enough to keep me motivated.”

Everything changed when Nancy Mathesen, a professor from UTM, came to speak with the high school band. Hill instantly took a liking to Mathesen and wanted to learn more from her; however, Hill’s family faced difficult financial constraints and could not pay for private lessons. “I said, ‘My parents are broke. We’re about to lose our house,'” recalls Hill. “She told me that if I practiced 10 hours a week minimum, she’d teach me for free.”

Hill proved her dedication immediately. She jumped at the only time slot — 6:30 a.m. on Friday mornings — that Mathesen had left for lessons. “Nancy said that through hard work, anything could be accomplished,” Hill says. “She despised laziness and those who made excuses. She was and always will be an inspiration to me.”

That relationship opened up a world of opportunities. During her senior year of high school, Mathesen took Hill to the Percussive Arts Society International Convention (PASIC), which inspired her to commit to percussion as a career choice. “I was thinking about becoming a chemistry major,” Hill says, “but I came back from that conference and knew I wanted to play percussion forever.”

After attending the conference’s concerts and clinics, Hill felt motivated to emulate the other percussionists’ work ethics. “Being in that environment where you see what it takes for people to be successful, seeing how great those people were and reflecting inward at my current status … I [knew I had] a lot of practicing to do. It’s inspiring to know there are a lot of people better than you are.”

Coming Full Circle

Julie Hill speaks to a large group of students

The loyalty Hill felt to Mathesen led to her enrolling at UTM for her Bachelor of Music Education degree. Hill then went to Arizona State University to earn her Master of Music in Percussion Performance. Soon afterward, she moved back to Tennessee to be with her terminally ill mother. While there, she started playing in a funk band called 27 B Stroke 6. Some of the group’s noteworthy performances include opening for Bob Dylan and Paul Simon.

Hill also began teaching band to fifth and sixth graders at Bellwood Elementary School in Murfreesboro, Tennessee, where she founded an after-school steel percussion program, Steel de Boro, which still exists today.

Steel de Boro’s beginnings were humble. The group grew from a need for better instruments in the school’s band program. “We had instruments that were falling apart,” explains Hill. Because she was new to the district, Hill did not feel that she could ask the school board for thousands of dollars for new instruments. She found an alternate solution: Hill brought in a variety of percussion instruments from her personal collection at home.

Using her own instruments, Hill taught the students rhythm, then arranged a world percussion piece for the students to rehearse. Her students performed at a school board meeting and amazed the administration. The next thing Hill knew, the administration was offering her assistance and funding to acquire new wind and percussion instruments for the band. “You have to create a little magic and build a little trust before you start asking for things,” she says.

Performing and Traveling

When looking for help to run Steel de Boro, Hill found Amy Smith and Julie Davila, who also held advanced percussion degrees. Hill soon realized that she’d been spending most of her time teaching and not enough time performing, so the three decided to form a group, calling themselves the Caixa Trio. This extra-curricular activity helped satisfy Hill’s desire to travel; the ensemble would go on to perform shows and percussion festivals around the United States as well as in Mexico, South America and Asia.

One of the Caixa Trio’s goals is to showcase the wide variety of musical styles that percussion instruments can achieve. “We try to have really diverse programs,” Hill explains. “We don’t want to just play world music or rudimental styles. Percussion is anything you can strike, shake or scrape.”

Hill’s love of travel and success performing abroad stems from her fearlessness when it comes to the unknown. “I am a person who believes that being out of one’s comfort zone is the only way for personal growth to occur,” she says.

When traveling abroad, Hill breaks down cultural barriers by fully immersing herself in the place she is visiting. “For example, [in Brazil], I choose pousadas [small hotels] in urban neighborhoods rather than large ‘American-friendly’ hotels. Why go to a place to experience what you already have back home?”

Though Caixa Trio and 27 B Stroke 6 perform a little less these days, Hill always makes sure that her students are able to see the groups in action. “Play for [your] students,” she advises. “Sometimes, students are not aware of this other life we have.”

Hill’s other life has now expanded beyond her groups. This season, she became the Paducah Symphony Orchestra‘s principal percussionist. She is also a member of the X4 (pronounced “Ten-Four”) Percussion Quartet. X4 won first place in the 2016 PAS Italy Percussive Arts Web Contest in the Percussion Ensemble category.

But no matter how busy she is performing, Hill always finds a way to bring it back to her students. She likes to arrange master classes, concerts or festival performances for her students to attend at least once a year. X4 performed at UTM in the past and will soon be returning, and because the Paducah Symphony Orchestra offers discounted tickets for college students, many of her students are able to see her perform there as well. “It creates a second level of respect,” Hill says. “They see me in the practice room, working on music like they are. That inspires them. I walk the walk every day. I want to teach them to be life learners through my example.”

Making Percussion Accessible to All

After attending PASIC for the first time during her senior year of high school, Hill couldn’t wait to return. In addition to the clinics and concerts, Hill was excited by all of the friendships she formed. “When you come here, you make new friends,” she says. “Percussionists are giving, social people. We like to be together.”

These new friendships have led to important musical connections for Hill, helping her secure guest teachers and clinicians for her students. She frequently serves as a guest at other schools to teach Brazilian percussion, and in exchange, the instructor from that school will teach his or her area of expertise at UTM. “It’s common to trade skill sets,” she explains. “Everyone’s students get something, and it doesn’t cost the program anything. Almost every door that has been opened has been because of someone I met at PASIC.”

Hill also encourages educators to attend PASIC with their students, advising them to attend as wide a variety of events as possible. She makes a point of sitting down with her own students to give them her recommendations about which events she thinks they should attend. “Students gravitate toward what they already love,” she says. “A lot of students don’t think, ‘I’m [going to] go to that panel discussion,’ but it’s important for them to see how they can assert themselves as professionals.”

As PAS immediate past president, Hill advocates for initiatives that help students. “We started streaming the convention [online], so those who don’t have the money to get there can be a part [of it] from home,” she says. “We’ve created low-priced group memberships for young people and made PAS much more affordable for international chapters.” Additionally, Hill helped launch the new PASIC International Scholarship. “PAS is an international organization, but with the convention always being in the USA, it’s difficult for members from around the world to [attend],” she explains.

To further encourage inclusivity, Hill created PAS’s ad hoc Diversity Alliance committee. This committee works to increase the visibility of minority groups in the percussive community, such as women, people of color and LGBTQ members. PAS also runs Rhythm! Discovery Center, an interactive percussion museum in Indianapolis. Hill is currently working with the organization to create virtual exhibits so that individuals can still get the museum’s educational benefits without traveling to Indianapolis. “I want students to have everything they need,” she says. “If they’re hungry, I want to feed them.”

Hometown Hero

Julie Hill performing on drums

After working on her Doctor of Musical Arts from the University of Kentucky, Hill moved back to Martin to be closer to family. Mathesen had recently retired as director of percussion studies at UTM, and when Hill received the job offer for the position, she eagerly accepted.

After spending years performing an eclectic mix of styles with the Caixa Trio and researching musical styles from Brazil, West Africa and more, Hill has a wealth of knowledge on the diversity of percussion to pass along to her students. “We study everything from drum set to marimba to global musical styles and much, much more. The students are really marketable when they finish.”

Hill is currently teaching a new world music class that is open to all music majors, not just those specializing in percussion. She also leads the university’s world percussion ensemble, which performs musical styles from a myriad of different countries. Last year, the ensemble won the PAS World Percussion Ensemble Competition.

Beyond her evident musical influences, Hill also loves passing on her pay-it-forward mentality to her students. “A big passion of mine [is] making sure students have access to opportunities,” she says. Each fall, Hill and the world percussion ensemble travel around Tennessee to perform for thousands of elementary students in a two-and-a-half-day tour called Roots of Rhythm. “It’s a good way for my students to teach and learn how to give back as well,” she explains.

UTM also hosts the Honor Percussion Ensemble each spring. At this event, top high school percussionists from Tennessee and surrounding states come together for a giant percussion festival and finale performance. “It’s good for recruiting and creating opportunities for students who don’t have them,” Hill says.

Whether she is performing in another country or teaching at her alma mater, Hill spreads music and opens doors for others. “Some people need status. I need purpose,” she says, drawing inspiration from a quote often attributed to Mahatma Gandhi: Be the change you want to see in the world. “I say that to my students a lot,” she explains.

Growing up with an intense hunger for knowledge and a desire to break free of her small hometown, Hill never expected that her journey would lead her right back to where she started. “I don’t think I would’ve said 25 years ago that my dream job was teaching at [UTM],” she reflects. “Your dream job might be where you already are.”

Photos © 2017 Nathan Morgan and Stephen Downing, All Rights Reserved

This article originally appeared in the 2017 V1 issue of Yamaha SupportED. To see more back issues, find out about Yamaha resources for music educators, or sign up to be notified when the next issue is available, click here.

Is Your Booster Program Healthy?

Ever notice the energy and excitement we all feel when we anticipate the arrival of a new calendar year? I enjoy those times! The opportunity to start fresh is exhilarating. As you complete one season of your orchestra and band program and look forward to the start of another, the timing seems right to conduct an annual or biannual checkup of your parent booster organization. This diagnosis can often lead to a healthier overall partnership.

When was the last time your parent board sat down with you to determine goals and objectives for the coming school or calendar year? If it took you longer than two seconds to remember, you’re overdue for a booster shot.

Work on a Plan

I am a big proponent of planning. Whenever the Association of Music Parents (AMP) is called on to assist a band booster program, my most frequent reply is: “Show me your plan.”

Planning meetings help open lines of communication and encourage everyone to get on the same page. They support honest, productive dialogue. They expose organizational weaknesses while capitalizing on opportunities to seize.

Playing it by ear is a dangerous way to manage a booster organization. Clearly defined goals and action plans must be established to plot strategies in the areas of fundraising, public relations, marketing, special events, travel, volunteer recruiting and involvement, logistics and much more.

Share Your Vision

Before group planning starts, you, as the instrumental music director, must sit down with your booster president to share your vision of where you see the program going.

After this conversation, you and the booster president should have similar meetings with all of the organization’s officers. Communication between the director and officers is an essential step to building the healthy band booster program that you want and that your parent volunteers desire.

Welcome Productivity

Author Paul J. Meyer once said of productivity: “Productivity is never an accident. It is always the result of a commitment to excellence, intelligent planning, and focused effort.”

So as you begin to check the health of your band booster program, please remember that the examination shouldn’t be one to dread or avoid. Rather, it should be one you and your booster officers and the other parent volunteers gladly welcome as you elevate the excellence and service of your program.

Checkup Checklist

AMP recommends that you discuss the following questions in a positive, honest, realistic and non-threatening environment:

  1. What activities did our music parent organization undertake that worked well and didn’t work so well, and why?
  2. Of these activities, are there any we should attempt again or not, and why?
  3. How can the music director and band booster organization work collaboratively to become better advocates for our children’s music program?
  4. How well does the booster organization recruit and retain volunteer members? Are there any new opportunities or ideas we should consider?
  5. How well do we engage band, choir or orchestra alumni in the program? Do we have a defined role for them?
  6. How well do we communicate with our music parent organization’s membership, the school and school district, and local community? Where and how can improvements be made?
  7. How professional are we in planning and executing fundraising projects? Where do we succeed, and where can improvements be made?
  8. How do we develop and mentor volunteer leadership? How can improvements be made?
  9. How can the band booster organization best assist the music director in the months ahead?
  10. How do we make it fun and meaningful for parents and community members to belong?

This article originally appeared in the 2017 V1 issue of Yamaha SupportED. To see more back issues, find out about Yamaha resources for music educators, or sign up to be notified when the next issue is available, click here.

Build Your Jazz Music Library and Knowledge

In Case Study: Crafting a Jazz Studies Program, Janis Stockhouse, director of jazz ensembles at Bloomington High School North, didn’t know much about jazz when she was tasked with teaching it.

She stresses the importance of building your jazz knowledge. Here are five resources she highly recommends for band directors who are entering jazz from another musical discipline.

1. “Teaching Music Through Performance in Jazz” from GIA Publications — Available as a book or CD set, this title contains some of the most significant works ever composed for developing and intermediate jazz band.

2. Aebersold Publications  —  Jamey Aebersold’s Play-A-Longs have made it possible to create an interactive jazz environment in a classroom. Aebersold has produced more than 130 volumes of jazz recordings and books along with various supplemental items, carving out a new avenue for jazz education.

3. Sierra Music Publications Inc. This jazz-specific music publisher offers more than 600 big band charts from established composers like Stan Kenton, Bill Holman, Count Basie and Maynard Ferguson. In addition, Sierra has commissioned music from many new composers, including Dan Haerle, Ellen Rowe, Fred Stride, Fred Sturm and others.

4. The Midwest Clinic International Band and Orchestra Conference As a band director, you’re likely already attending the Midwest Clinic International Band and Orchestra Conference. If you’re new to jazz, though, make sure to check out the jazz-specific clinics and concerts. This past December, sessions included “‘Latinizing’ Your School Jazz Ensemble” and “The Jazz Combo – An Inside Look.”

5. Jazz Education Network (JEN) Website and Convention — This organization is dedicated to building the jazz arts community by advancing education, promoting performance and developing new audiences. Membership in JEN offers many benefits including networking, performance opportunities, and discounts to magazines and goods from strategic partners.

Photo Courtesy of Bloomington High School North 

This article originally appeared in the 2017 V1 issue of Yamaha SupportED. To see more back issues, find out about Yamaha resources for music educators, or sign up to be notified when the next issue is available, click here.

Altered Tunings, Part 1

It happens to every guitar player at some point or other: You get bored with what you’re doing. You feel unchallenged and unhappy. You don’t like the way your instrument sounds anymore. You can’t come up with any new ideas, or maybe you can but they don’t excite you. In short, you’re stuck in a rut.

Luckily, there’s an easy way to fix this problem, and no, it doesn’t involve buying new gear. All you have to do is change the way your guitar is tuned.

Take a guitar out of standard tuning and you instantly change both your instrument’s harmonic resonance and your own way of thinking. When open strings ring out pitches other than E-A-D-G-B-E and notes don’t fall where you expect them to, the music you make stops being familiar. You don’t always know what you’re playing, and that’s a good thing for your creativity.

In practical terms, the benefits of altered tunings are myriad. By expanding or shrinking the intervals between strings, you give yourself the ability to come up with chord shapes and single-note lines that would be difficult or impossible to execute in standard tuning. If you choose to tune to a chord, you make it easy to move chords up and down the neck with a single-finger barre. Altered tunings also allow you to further exploit the ring of open strings at unexpected times, and to add more depth to your playing with drones and pedals.

With this in mind, I’ve selected a dozen altered tunings that you may find particularly useful — six here in Part 1 of this article and another six in Part 2,  with brief examples of each one in action. They’re arranged in order of how many strings you have to take out of standard tuning, starting with one and working up to a full six. All tunings are listed from the guitar’s lowest string (6) to its highest (1); the tablature in the music examples indicates where notes should fall on the fretboard in the given tuning.

Two quick things before we get started:

1) One practice we won’t discuss here is wholesale detuning of the instrument, i.e. tuning all six strings down a half-step, whole step, or more. This is a common tactic — in rock music alone, you can find plenty of examples, from Jimi Hendrix to Queens of the Stone Age — but although it changes the sound of the guitar, it doesn’t really change the way a player approaches the instrument, and that kind of creative transformation is what we’re looking for.

2) As you play through the examples, try to let notes ring beyond the duration notated whenever possible. Altered tunings bring out different frequencies in a guitar, and if you cut your notes off too soon, you won’t get to fully enjoy those new vibrations.

Retuning One String

D-A-D-G-B-E (Drop D)

This is probably the most familiar altered tuning, in part because it’s so easy: Just detune your bottom string a whole step. It’s been used in countless songs over the years; one of the best known, the Beatles’ “Dear Prudence,” is the springboard for this example, which demonstrates two handy features of this tuning. In the first two bars, the open strings on the bottom half of the guitar generate a low drone (a pedal) that stays the same while the chords on top change. In the second two bars, you can see how the tuning simplifies the formation of root-and-fifth power chords, which now lie horizontally across a single fret.

Four measures of musical annotation.
E-A-D-E-B-E (E modal)

Take your 3rd string down a minor third from standard, and you’ve got this wonderfully drony tuning. Playing the open strings by themselves, you can’t tell whether you’re in a major or minor key (that’s the simple explanation for why it’s called “modal”), and the tuning makes a great virtue out of this ambiguity. Ed Sheeran is probably the most famous current user of E-A-D-E-B-E, and the example below was inspired by his song “Tenerife Sea.”

Check out the unison in bar 3: A fretted note on one string resonates against the same note played open on the next string, creating a chorus effect. Try hammering on and/or pulling off the fretted notes for more of a Celtic-folk feel. To play this just like Sheeran would, attach a capo to the 4th fret; the part remains exactly as written here, but the notes will sound in the key of A-flat instead of E.

Four measures of musical annotation.

Retuning Two Strings

D-A-D-G-B-D (Double drop D)

The logical next step from drop D is to drop the other E string down a whole step as well. This gives you a drone on the bottom and top of the guitar, spanning two octaves. It’s a big, heavy sound, one that Neil Young has exploited to full effect on a number of songs, including “Cinnamon Girl,” which is referenced in the example below. Unisons come into play again, this time in nearly every bar; at one point, a D note is being played in three different octaves on four out of six strings.

Four measures of music annotation.

Retuning Three Strings

D-A-D-G-A-D (D modal)

Similar to Ed Sheeran’s E-A-D-B-E but deeper due to the greater number of detuned strings (three versus one), this is one of the most popular altered tunings, and you can hear why: It’s got both the heaviness of double drop D and the exciting major/minor ambiguity of E modal.

Some claim that D-A-D-G-A-D tuning (commonly pronounced “Dadgad”) was invented by British folk guitarist Davey Graham in the early 1960s; it’s probably more accurate to say that he popularized it. In any case, many guitarists have used it in the decades since.

A song by one notable Graham disciple, Paul Simon’s “Armistice Day,” was the inspiration for the example below. It emphasizes minor-second intervals between fretted and open strings, several of which (like the opening clash between A and G#) couldn’t be played on a standard-tuned guitar. Be sure to let these close-ringing notes overlap each other at least a little bit — that way, you’ll make the guitar sound more like a harp.

Four measures of musical annotation.
D-G-D-G-B-D (Open G)

The first of our altered tunings to form an unambiguous major chord, this one is especially nice for slide players because it puts all the key notes of a chord on the same fret. But you don’t need to wear a metal bar on your finger to get something good out of open G; rhythm players of any stripe will appreciate it.

Without doubt, Keith Richards is the top user of this tuning, and several songs that he plays with the Rolling Stones — including “Brown Sugar” and “Happy” — inform this example. There’s nothing unusual about these chords in themselves, but the tuning occasionally brings out major-second intervals (between the high A and B in bar 1, for instance) that give them a distinctive jangle. Note that the bottom string is never used here. Richards feels that it gets in the way, and so he often puts only five strings on his guitar when playing in open G. You may not wish to go to such an extreme, but be aware that the low D is optional.

Four measures of music.
E-B-E-G#-B-E (Open E)

Another open major chord, employed by another legendary user of altered tunings, Joni Mitchell. This example, inspired by her “Big Yellow Taxi,” makes use of the same kinds of major-second intervals and easily movable shapes that we saw in the previous example. But because the three retuned strings go up in pitch rather than down, the guitar sounds brighter and more vibrant.

Tunings like these can make some guitarists antsy, because of the extra pressure they put on the instrument’s neck and the possibility that you could break strings as you tune them up past standard pitch. If you’re troubled by such considerations, try tuning down to D-A-D-F#-A-D (open D) and then putting a capo on the 2nd fret; the result will be basically the same.

Four measures of musical annotation.


In Part 2, we explore guitar tunings that alter the pitch of four, five, and six strings.

The audio examples in this article were performed on a Yamaha FG-TA guitar. For more information on how they were recorded, check out our blog posting “How to Record TransAcoustic Guitar Effects.”


Click here for more information about Yamaha guitars.

Appreciating Vinyl Records … and the Best Way to Enjoy Them

The way we listen to music has changed. Before the digital revolution, people went to retail stores and bought albums one at a time, often not knowing how it would sound until they opened the package and played it on their CD player, cassette deck or turntable. With a variety of low-cost streaming sources available to the world, listening to music today requires only a computer or mobile device and a set of earbuds. But for some people, listening to music via compressed digital files leave something to be desired.

That’s where vinyl comes in … and there’s no doubt that vinyl is making a comeback. According to global measurement and data analytics company Nielsen, vinyl record sales experienced a renaissance in 2017, making up 14 percent of all physical album sales for the year.

A man's hands as he selects a particular album out of a record store bin of albums.

Don’t believe it? Just visit your local record store and ask the clerk how sales have been. More proof lies in the popularity of Record Store Day, an annual event started in 2007 to celebrate the culture of independent record stores and the nostalgia of the days when listening to music was a true experience and not just something meant to boost your work flow or accompany your home cleaning chores.

So whether you’re just now getting into vinyl or already have a bulging collection of records that’s surging dangerously close to your front door, having the right equipment is just as important to your listening experience as buying a record itself.

For Starters

Why is vinyl considered a better way to listen to music? Some say it’s because the sound is superior, but there’s a technical reason too: vinyl records produce analog audio, which is a continuous signal, versus digital formats that break down the sound into discrete “slices” of ones and zeroes (bits). And a quality stereo receiver is needed to properly process that kind of signal.

A hi-fi receiver viewed from front panel of controls.

The Yamaha R-N303 is a good starter option. It offers a phono input (which is actually a built-in preamp for turntables that converts their low-level output to a hotter line-level signal), two channels of 100 watt high-power output and a sleek design that works well in any home. For speakers, you might want to check out the Yamaha NS-333 bookshelf home theater models, which are well-suited for capturing the best of any vinyl record. For a sonic upgrade, consider the Yamaha NS-555 floor standing tower speakers, which are much larger than the NS-333s but are designed to capture all the subtle nuances of your favorite albums.

Pair of small audio speakers one with the filter cover removed to show the speaker and subwoofer.

A Modern Upgrade

If you already have a legacy audio system, you can get added value by adding a Yamaha R-N303 thanks to its wireless streaming capabilities. In conjunction with the free Yamaha MusicCast app, this receiver can send the turntable’s audio signal to other MusicCast-enabled wireless speakers or sound bars in your home. You can also link those speakers together via the app to have your record playing simultaneously in every room where a speaker resides so you can move around the house without missing any part of your favorite song.

Listen Up

Equally important to the acquisition of quality sound components is how they are positioned in your home. If you have limited space to play with, it’s recommended that you keep your turntable in a stable area (i.e., on top of a cabinet) close to your receiver, with your speakers mounted separately on stands so the vibration of the music doesn’t disrupt the needle and cause the record to skip.

You should also position your seats in the center of the room if possible. Of course, the seating arrangement in most dens or living rooms is configured without speakers in mind, but when you’re ready to listen intently, try to face your chair or couch towards them so as to get the most sound to both of your ears.

Now comes the fun part: Listen to your records! Regardless of how you have your system set up, if you keep these tips in mind when creating a new system or upgrading an existing system, you’ll be able to enjoy music the way it was meant to be heard, while impressing friends with your ever-growing record collection at the same time.

Line 6® Videos, Part 1: HX Effects

Looking to add some great effects to your pedalboard?

Here are a couple of short videos that introduce HX Effects™, the new compact multi-effects pedal from Line 6®. Created for guitarists and bassists who want our flagship Helix® effects for traditional amp and pedalboard setups, HX Effects features the same HX Modeling technology used in Helix and includes the full array of Helix effects plus legacy effects from the Line 6 M-Series and DL4™, MM4™, FM4™, and DM4™ pedals.

Check out this 3-minute overview:

And here’s Paul Hindmarsh as he demonstrates some of the sounds built into HX Effects:

Click here for Part 2: “Helix LT”


Click here to find out more about HX Effects.

The Benefits of Bringing Electric Violin to Summer Camp

Attending a summer music camp can be one of the most exhilarating and memorable experiences we have in our lives. It gives you a chance to meet and interact with creative, interesting and talented people – all of whom open you up to new ideas, challenge your status quo, break down mental barriers and take you out of your comfort zone.

If you’re a string player, summer music camp is a great time to try new repertoire and new techniques, and so it follows that it’s also a great time to bring along a second instrument – your electric. Even if your summer music program doesn’t have an electric string program per se, bringing your electric instrument with you to camp opens up more playing opportunities than with your acoustic alone.

Silent Practice

First of all, you can practice silently at all hours in your dorm/cabin/room without disturbing anyone. You can work out that tough Tchaikovsky passage before tomorrow’s rehearsal without anyone hearing you!

Try Something New

Bringing an electric instrument to camp can also open the door to mastering new playing techniques with input from your peers and the instructors. After all, more and more orchestral players are gravitating to non-classical playing in addition to the standard repertoire, and so there is much to discuss creatively! While you can literally play anything you want on an electric (including classical music), these kinds of instruments naturally inspire players to try new effects, learn to play “less classically” by using less vibrato, add new bowing techniques, and experiment with a wide variety of tones and volume ranges.

Jam Away!

Perhaps the best part of having an electric instrument with you at music camp is the opportunity it provides to jam and improvise with non-string players. Playing an electric puts you at the center of a standard rock or jazz ensemble, where you can be easily heard alongside brass, electric guitar, bass and drums. Besides, your new electric guitar friend at camp is going to give you a ton of stage amplification tips and tricks! Soon enough, your fellow string players who didn’t bring an electric with them to camp will be asking YOU for the how-to’s so that they can join in the jam… next year.

Happy jamming!


Check out this related blog article:

What’s the Difference Between a Silent Violin and an Electric Violin?


Click here for more information about Yamaha electric stringed instruments.

How to Record TransAcoustic Guitar Effects

Yamaha TransAcoustic (TA) guitars are unique in that they provide reverb and chorus effects that project directly from the instrument, without the need for an external amplifier.

Yes, you read that right: No amplifier required.

That doesn’t mean you can’t use an amp with a TA guitar. To the contrary — all TransAcoustic guitars (there are several models to choose from) are equipped with a piezo pickup system, which lets you plug in a standard 1/4″ cable and send the signal, with chorus and/or reverb if desired, to the amplifier of your choice.

That said, there’s something really special about the sound of the TA effects hanging in the air all around you as you play. In this article, I’ll describe how to capture that sound using a microphone and the DAW of your choice. (“DAW” stands for “Digital Audio Workstation” — software that allows you to record on your computer.)

Make the Commitment

The first rule of recording is that there is no right or wrong way. The only rule I follow in that regard is, “if it sounds right, it is right.”

In many instances, getting started recording the TA effects can be just that easy: Turn them on, play a bit, make some adjustments and see what sounds right for the type of production you’re going for. The TransAcoustic effects are controlled from three knobs on top of the guitar. To turn the effects on, simply push in the Line Out Volume knob for a second or two, then adjust the Reverb and Chorus control knobs to taste. With the Reverb knob, anything past the 12 o’clock position is a Hall effect, and anything below 12 o’clock is a Room effect. With the Chorus knob, turning it up increases the intensity of the effect, while turning it completely counterclockwise switches the effect off.

Easy enough. However, there are a few things that need to be thought through before you begin. First of all, the effects that you capture will be committed to the recording, meaning that they cannot be removed afterwards. Since most acoustic guitars do not have effects built in, they are traditionally added after recording, either inside your DAW with digital plugins, or with the use of hardware effects devices such as stomp boxes.

That said, you can always add to the effected sound afterwards, so think through how much you want to capture in the first place. Again, if it sounds right, it is right, so if you like what you hear out of the guitar and in your headphones, get it down. If not, just record the guitar dry; additional types of effects can always be added later as need be.

Choose Your Weapon and Position it Correctly

I strongly suggest that you use the most neutral-sounding microphone in your arsenal so as to translate the natural sound of the TA guitar with minimal influence coming from the mic itself. If you choose to use something like a classic “desert island” dynamic mic like a Shure SM57, bear in mind that it’s got a fairly midrange tonality that may sound great on amps and drums, but will not deliver the full natural sound of an acoustic guitar.

With that in mind, I personally prefer to use low noise, high quality condenser mics such as the Earthworks QTC50 or DPA 4006, both of which translate the sound of acoustic guitar openly and naturally. I tend to choose omnidirectional mics for this purpose because they also capture the sound of my room in a nice 360-degree pattern, but the focused sound of a cardioid pattern may be a better choice if your room is not acoustically treated.

Of course, other microphones can be used as well. I’ve gotten good results with the sE Electronics sE8, Audio Technica AT4033/CL and Rode NT1-A (all condenser models), as well as the Royer R-10 dynamic ribbon mic. If budget allows, go for a high-end mic like the Neumann U87, TLM 103 and KM184, AKG 414, C451 and C12, or the Schoeps CMC5. All of these deliver excellent results on acoustic instruments, especially acoustic guitars.

After considerable experimentation, I found that I got the best results by placing an Earthworks QTC50 omnidirectional mic about four inches away from my FG-TA guitar, pointed approximately where the sound hole meets the fretboard. Here’s a picture of that setup:

Someone holding a guitar ready to play with a microphone positioned at base of neck where meets the hole on frot of guitar.

The Best of Both Worlds

With acoustic instruments that have a built-in pickup (such as Yamaha TA guitars), I often use the combination of a microphone and the internal pickup. This tends to give me more production options in the mix stage, and can help deliver a bigger sound. To route the pickup signal to your DAW, simply plug in a 1/4″ cable and connect it to any input on your computer’s audio interface.

Give a Listen

Here are some examples of the way I recorded my FG-TA on a recent TV scoring session for a major cable channel, using a an Earthworks microphone plus the signal from the FG-TA’s pickup, connected to a Line 6 Helix guitar processor with no amp, cabinet or effects models engaged (I just wanted the pure, direct sound).

First, here’s the sound of the guitar with only the Room effect engaged. In this example, the microphone signal is panned hard left and the pickup signal is panned at around 2 o’clock (midway between right and center):

Next, here’s the guitar with only the Chorus effect engaged. The pickup signal is on the left, panned at 10 o’clock (about midway between left and center) and the microphone signal is panned hard right:

Double Down

One great way to thicken up your acoustic guitar parts is to double them. Yes, you could copy the same track and offset it by a few milliseconds, or effect it differently, but it tends to sound better when you simply play it again and pan the overdub to the opposite side. This way, the slight differences in your performance create a “rub” that sounds natural.

In this audio clip, the guitar on the left has the Room effect only, and the guitar on the right has a little Chorus effect — just enough to add a nice shimmer and sense of depth:

Full Mix

Looking to achieve a full, wide open sound? Try doubling the track naturally, using the TA Room effect on one pass and the Chorus effect on a second pass, then pan the two slightly opposite one another. This audio clip presents the full mix; I’ve done nothing but pull down some of the low end with an EQ just to clean up the production, since there are other instruments (drums, percussion, bass and a slide guitar) involved. But as you can hear, the combination of the TA Room and Chorus effects adds a great deal to the overall feel of the track:

Solo Example

Finally, here’s a clip of me doing some solo playing on my FG-TA. Here, I’ve turned on some of the guitar’s Hall and Chorus effects, once again capturing the sound with an Earthworks microphone and the pickup through the Helix with no amp, cabinet or effects modeling. It was all recorded in a single pass, with the microphone panned hard left and the DI panned hard right:


Needless to say, the key to getting the most out of the TA effects is to experiment to see what sounds best, always depending on the needs of the track and the overall focus of the production. You’ll find that, in almost every instance, adding some TransAcoustic reverb and chorus will add depth and interest to your guitar parts.

Photograph courtesy of the author.


Click here for more information about Yamaha TransAcoustic guitars.

Wondering how the TransAcoustic effects are created? Click here to discover the answer.

Introducing Venova

The Venova™ is a completely new type of instrument — one that we’re calling a Casual Wind Instrument. But just what is a “casual wind instrument?” Are you expected to serve light hors d’oeuvres to your audience? Should you play it while wearing jeans and tennis shoes?

Well, maybe. The Venova is intended to be super accessible and fun to play, without requiring years of practice and private lessons to learn. It’s a hybrid instrument that blends the simplicity of a recorder with the sound of a saxophone. It has easy fingerings that are very similar to the notes that students learn in elementary school on the recorder, so even someone who has never played a wind instrument can get started with the Venova right away. But it also uses a real soprano saxophone mouthpiece and reed, so a more experienced player can make it feel and sound like a sophisticated clarinet or saxophone.

Picnic basket on sand on the beach with various jars and tablecloth and a plastic reeded instrument sticking out of the top of the basket.

While you could probably play the Venova in a formal concert setting, the truth is it’s going to be more at home in places that you’d be unlikely to find a traditional instrument. Stick it in your backpack and take it to the park or to a barbeque, or toss it in your suitcase and take it along on a business trip or on vacation — it’s small enough and lightweight enough to go anywhere with you. And since it’s made from plastic and has synthetic pads, the Venova is durable too. You won’t have to run to a repair shop if it gets wet or exposed to the elements — just let it dry out and you’re ready to go. You can even wash it in the sink — something you’d never do with a clarinet or a saxophone!

With respect to our friends in Hawaii, maybe the best comparison is to think of the Venova as a wind instrument version of a ukulele. Both are a lot of fun to play, and both are very portable, so you can take them anywhere. A ukulele isn’t expected to replace a full guitar, just like a Venova probably won’t replace a real clarinet or sax. But someone starting on a ukulele might eventually decide to take up the guitar, and someone trying a Venova may find themselves wanting to try other wind instruments in the future.

If you’ve ever been drawn to the sound of a saxophone, but were intimidated by the thought of actually having to learn to play one, the Venova might just be the perfect way to get started!


Click here to see and hear the Venova in action.


The Making of a Drum Sound

Ever wonder why a drum sounds the way it does, and how the sound itself is produced?

At its essence, it’s simple. Striking the head of a drum changes its shape and compresses the air inside the shell. In turn, the air presses on the bottom head and changes its shape. These changes are then transmitted to the drum shell and reflected back, and this action is repeated over and over again, creating vibrations of the top and bottom heads, which in turn create vibrations in the air, which we perceive as sound, until eventually, as the head vibrations die down in intensity, the sound diminishes and finally disappears.

But there’s more to it than just that simple explanation. For example, tuning plays a very important role.

Tuning Is Key

Percussion instruments do not have the clarity of pitch found in wind and stringed instruments, but the more drums there are, the more important tuning is to creating a smooth, pleasing sound. So the term “drum tuning” does not mean tuning the drum to a pitch like “C” or “D” but rather to the drum’s resonant frequency — a certain tone preferred by the drummer. If the tightness of the head is not uniform, the tone of the drum will change depending on where the drum is struck, and it will be muddy at that. That’s why the drum head must be tightened so as to produce the same tone when struck in different places.

The top head and bottom heads are also tuned to different tensions. If both the top and bottom heads are given the same tension, the sustain of the tone is long, but the volume is low. If, however, they are given different tensions, the drum becomes louder. In addition, if the bottom head is tighter than the top head, the tone rings longer. However, if the bottom head is looser, the tone does not ring so long, and the tone is flatter. The greater the difference in tension between the two heads, the greater the change in tone.

Here are a couple of videos that demonstrate what we’re talking about:

It’s also important to tune drums to one another. For example, if the tom-toms are close in tone, the sound will be unclear — that’s why they’re generally tuned differently. Several tom-toms are sometimes tuned to a musical scale and used to play a melody.

The Relationship Between Diameter, Depth, and Tone

The tone, sustain and projection of a drum is affected by the shape of the shell.

The primary role of the drum is to resonate with the vibration of the head. The larger the volume of the resonating body, the lower the characteristic frequency, and the easier it is to resonate in the lower frequency band, while the smaller the volume, the easier it is to resonate in the higher frequency band. In other words, the larger the diameter, or the deeper the shell, the thicker and heavier the tone; the smaller or shallower the shell, the brighter and lighter the tone:

Diagram explaining how height and diameter of drum body affects sound.

Drummers select drums with certain diameters or depths to match the style of music they perform, and they tune the drum heads to their liking to express a rainbow of tonal qualities in their music.

Now you know how drum sounds are produced, and how important tuning is to the sound you hear!


This posting is adapted from the Yamaha Musical Instrument Guide.

For more information about Yamaha drums, click here.

Creating Country Music and Blues in Genos

Genos is our newest and most powerful Digital Workstation keyboard ever. Whether you use it for songwriting, live performance or recording, Genos will help inspire your musical creations.

Into country music? Genos can handle that:

Ready to lay down some serious blues? With its stunningly realistic C7 acoustic piano samples, Genos is your perfect performance companion:


Click here to find out more about Genos.

Here’s What to Do When Your Marching Drums Get Wet

At some point during the school year, it’s likely that your high school or college drumline will get caught outside in the rain during a football game, a parade or a rehearsal. In this posting, we’ll tell you what to do when that happens.

Your marching band drums are made of wood and metal — two materials that water really loves to wreak havoc upon. If this happens, you will surely want to take the time to service your drumline in order to get those instruments ready to go before the next rehearsal or performance.

First, let’s review how to prepare for wet conditions … assuming you know that bad weather is on the way.

Be Prepared

The old Boy Scout motto is the way to go. Be sure you know the details of your playing environment wherever you will be performing or rehearsing. Ask yourself the following questions:

– Is there a chance of rain, snow or moisture of any kind?

– If it does rain, can the drumline take cover relatively fast?

– If we must play in the rain, what steps can we take to protect the instruments while playing?

– How soon can we get out of the rain after the event and how do we get them dry fast?

– What resources will we have to help dry the gear immediately?

Snare drum heads being struck by drumstick while in pouring rain.

Things To Do

1) Bring drum covers. They’ll help keep a good amount of the water off your gear while it is raining. Measures should still be taken after the rain has begun to ensure the drum is protected.

If playing in the rain is unavoidable, at least bring the covers and have them in a place where you can get to them quickly during the performance. Don’t leave the covers on an equipment truck — keep them in a place where you can get to them fast. Make sure you have the prop crew or a band booster group member standing by to quickly gather the covers and put them on the drums.

2) Bring towels. They’ll help you intermittently wipe down the drums while you are in the stands. Instructional staff should keep towels handy to wipe drums any chance you get.

3) Have people ready to help. This means staff, parents, friends, etc. — whomever is nearby. They need to be at the ready to get covers, find a place to take cover, hold the towels and do whatever else is needed.

4) Bring a pop-up tent just in case. This is great to use for indoor percussion competitions where you need to warm up and rehearse in the lot before the performance. Be sure to bring sand bags as well to hold the tent down. When it rains, it gets windy, so those sand bags are essential!

Marching band's drumline marching and playing on a field while rain falls heavily.

Playing in the Rain

Let’s say you get caught and did not prepare. Do not fear! If you take some very simple steps, your drums will survive the downpour.

1) Prep your players for the steps they’ll need to take. After the performance, don’t let your drumline members take off without helping to clean and dry the drums. Let them know your plan to get the drums dry and cleaned up before everyone leaves. The first and most important step is to get those drums dry right away.

2) Dry the drums. Take all the heads off and use a dry towel to wipe down all the drums, inside and out. If there’s a hair dryer handy, use it to speed up the process. If the school has large, oversize floor fans, put them next to the drums and turn them on full blast. Let the air circulate inside and around the drums at least overnight.

3) Don’t put wet or damp drums in a case. This could be your biggest mistake! By putting wet or even slightly damp drums in their cases you run the risk of ruining your gear. Your hardware could rust and your shells could be soaked. The latter is a big deal because the wet shells could begin to pull apart, leading to warping of the shells or allowing mold and mildew to set in.

If you can, discourage your band director from scrambling everyone to “hurry up, get the drums in the cases and get on the bus.” If you don’t have time to fully dry the drums before putting them in their cases for traveling — for example, if you have to quickly load them on a truck to get out of the rain — at least wipe the drums down to get off as much water as possible, then do a more thorough job as soon as you get back to the band room, the hotel or your next rest stop.

4) Put it all back together. Once you know everything is dry, be sure to:

a. Inspect all the drums and wipe down the heads again really well.

b. Put the heads and hardware back on the drums.

c. Replace the grease on the tension rods.

d. Put the gravity guards back on to the bottom side of your snare drums.

e. Put all the drums back in their cases.

Young drummers tend to not take as good care of their drums as, say, a trombone player would of their trombone. As an instructor, you have a duty to make sure your kids take good care of their gear. It all starts with you to help them understand how and what to do. And don’t forget the parents: your band boosters are equally responsible to help protect the gear.

Always remind yourself and your students that marching percussion instruments are first and foremost musical instruments. Like anything else in life, the better you take care of what you have, the longer it will last.

Photos by MMB Photography


This article was originally published on the Yamaha Educator Suite blog.

Challenge Accepted

Challenges are everywhere. Some are a manifestation of your own desires, while others are offered to you, but they all serve a similar purpose. My most recent challenge was presented to me as a surprise, and I had to overcome it.

Challenge Issued

During an after hours discussion in the office, my boss casually mentioned that I was cleared to make a trip to San Francisco.

“For what?” I asked, surprised.

“To produce social media video content for Steinberg at the Game Developers Conference,” he replied.

Upon hearing those words, my excitement drifted into nervousness, and everything in between. Since I’m not actually a videographer or video editor by trade, you could imagine how this was a bit alarming to me.

Preparation Ensues

Over the course of the following week, I wanted to do what I could to ensure that I was properly prepared to get the job done. I started my preparations by chatting with a coworker about the gear that he uses for mobile video shoots. He gave me the rundown along with some tips, and he even ended up letting me borrow some gear to use as well. (Thanks, Chris!) What I didn’t know was exactly how I was going to tie everything together to produce videos that were up to par with expectations. Clearly, I needed to learn, and learn fast.

What’s the best way to learn how to do something? To do it, of course. But if you can, do it early, and that’s exactly what I did. After receiving the gear, I dove in and staged my own practice sessions in our speaker testing room to help ease my worries about filming (both audio and video), lighting, editing and more. Although I wasn’t in the exact environment that I would be in at the show, the practice sessions, as well as some tutorial videos, were enough to help me feel somewhat comfortable with all of the tasks at hand. I wished I had more time to prepare, but sometimes you just have to play the hand that you are dealt.

Judgement Day

After a night of packing, I woke to the sound my alarm clock at the crack of dawn. It was a cold and dark morning, fitting for judgement day. By 9:30 a.m. (flight delay…) I arrived in rainy San Francisco, where I met up with my boss. We then headed straight to the Moscone Center, where the Game Developers Conference (GDC) was being held. Once we got there and dropped our bags off, we kicked off filming by improvising some B-roll shots (i.e. supplemental/alternate footage) as we made our way to our booth. It was a sight to be seen (and heard!), with impressive booths, enormous walls of LEDs, people gaming left and right, plenty of Virtual Reality (VR) headsets and even a mechanical bull, among other eye-catching attractions.

Eventually we made it to our booth and immediately began setting up our multiple cameras, lighting and microphone to prep for a feature with Stephan Schütze, an influential expert on all things VR. Before I knew it, we were capturing Stephan speaking about the VR book that he recently published, and things were going as planned, thankfully. That first shoot came to an end, and I breathed a sigh of relief, but there was another thing on my mind — I still had to edit all of the shots together before the show opened the next day.

Editing video is a whole different beast than shooting it, but I drew upon the very little knowledge that I had — and my “experience,” ahem, watching videos — to try and create something that I personally would enjoy. After making it to the hotel, I spent hours going through the footage, piecing shots together and selecting music, all while learning the editing program as I went. By that evening, I had created a video that I was proud of, and I sent it off for approval. It was approved by my boss and my German counterparts at Steinberg, so I was elated about overcoming the first part of the challenge.

However, on day two, I was informed that two more videos were expected.

One of the videos was a general GDC recap video, while the other was another feature of Stephan Schütze. Both were more challenging than the first due to the complexity of the content, but once again I put in the hours to create something that I personally would enjoy.

A man video recording two other men at a tradeshow booth. One of the subjects in booth is using his hands and speaking to indicate something that is happening on computer screens on shelf on booth wall.
Here I am doing my first-ever video shoot at the 2018 GDC.

The Importance of Perspective

Whether it’s in your personal life or professional career, challenges serve to help you grow. Oftentimes these challenges will take you out of your comfort zone and put you in risky situations, but it’s during those times that you need to push yourself to do things that you may not have ever done before. This perspective is important because it has led me to realize that I have potential with new skills that I had never tapped into before … and you certainly do as well, as long as you have a positive attitude about it.

Create your own challenges, greet them with open arms, and see what magic happens. You can do more than you think.

Check out Sean’s video of Stephan Schütze:

Photographs courtesy of the author and Nithin Cherian.


Check out Sean’s other blog posts.

A Brief History of Yamaha Pianos

The distinctive sound of Yamaha pianos can be heard today in concert halls, recording and rehearsal studios, places of worship, and educational institutions of every level.

But this success was far from sudden; in fact, it’s been more than a hundred years in the making. Here’s a brief history that shows how one man’s dream to craft the world’s finest concert grand pianos became a reality, thanks to the efforts of a century’s worth of skilled craftsmen and musicians.

1900 – 1949

The first piano to be made in Japan was an upright built in 1900 by Torakusu Yamaha, founder of Nippon Gakki Co., Ltd. — later renamed Yamaha Corporation. Just two years later, the Nippon Gakki factory resonated with the tones of its first grand piano. During this early period, the company focused on manufacturing instruments for the Japanese market, where interest in Western classical music was still relatively new. Even so, Torakusu did send one of his pianos to the 1904 St. Louis World’s Fair, where it received an Honorary Grand Prize.

An antique grand piano on a small elevated circle display.
Yamaha grand piano c. 1902

By the 1920s, Yamaha craftsmen were regularly traveling overseas to gain knowledge of the latest European piano production techniques. In 1926, the company invited Ale Schlegel, an expert piano technician from Germany, to visit with the craftsmen at the Nippon Gakki facilities in Hamamatsu, Japan and discuss piano making in exhaustive detail. Schlegel’s advice yielded a much improved product. Before long, well-known European pianists were taking favorable note of Yamaha instruments, among them Arthur Rubinstein and Leo Sirota.

1950 – 1959

In 1950, Yamaha released the FC concert grand piano to great acclaim. Spurred on by that model’s success, the company built one new facility after another in its continuing quest to make an even better piano. In 1956, the company completed work on Japan’s first computer-controlled artificial drying room, where the moisture content of wood — a vital factor for any piano — is adjusted to the optimum level after the natural drying process is complete. In 1958, Yamaha set up a grand piano assembly line at its Hamamatsu headquarters.

Man in scrub coat with hard hat sitting at an older computer panel.
Computer-controlled wood drying in the Yamaha factory.

1960 – 1969

At the start of the 1960s, Yamaha made a major move, creating a new company in the U.S.A. to import and distribute its pianos: Yamaha International Corporation. By 1965, Yamaha was producing more pianos than any other manufacturer.

In that same year, Cesare Tallone, one of Europe’s most respected piano technicians, came to Japan and visited the Yamaha factory. Deeply impressed by its facilities and employees, he elected to work with the company on the development of a new world-class concert grand. Over the next two years, Yamaha craftsmen-built prototypes that were evaluated by several highly regarded pianists; their feedback was then incorporated into further new designs. Finally, in November 1967, the CF concert grand piano was unveiled during a banquet at Tokyo’s Hotel Okura. Playing the piano on that occasion was Wilhelm Kempff, who went on to call it “one of the top pianos in the world.”

The CF, along with the simultaneously introduced C3 grand piano, took the world by storm — with a little help from an all-time great. Sviatoslav Richter’s first encounter with a CF occurred at a January 1969 concert in Padua, Italy. The Russian maestro chose to play one again later that year at the Menton Music Festival in France, after testing several pianos from different manufacturers during rehearsal. Richter played (and praised) Yamaha pianos from that point forward, marking the beginning of a relationship with the company that would last for the rest of his life.

1970 – 1979

During Sviatoslav Richter’s first Japanese tour in 1970, he performed at the Osaka World’s Fair on a CF bearing the serial number 1000000 — the one-millionth piano manufactured by Yamaha. One by one, European music festivals adopted the CF as their official piano, including the Antibes, Saint Tropez and Menton Festivals in France. Samson Francois, Tamás Vásáry, Byron Janis, Lívia Rév, Alexis Weissenberg and Georges Cziffra were among the many pianists who favored the CF, as its fame around the world continued to spread.

1980 – 1989

Another legendary pianist was drawn to Yamaha in 1980. Glenn Gould purchased two CFs that year and used them on the final three albums he made before his tragically early death in 1982 at the age of 50, including his second reading of J.S. Bach’s Goldberg Variations, now regarded as an all-time classic.

With new concert halls springing up all over Japan at that time, Yamaha craftsmen were inspired to develop a concert grand piano for a new generation. Building on the CF’s successes, they again went to work developing a series of prototypes, each of which was evaluated by top pianists. Krystian Zimerman was so pleased with his that he took it with him on a European tour. After further improvements, Yamaha craftsmen unveiled the CFIII in 1983. It was an instant hit, designated as the official piano of East Germany’s International Johann Sebastian Bach Competition, Poland’s International Chopin Piano Competition and the Soviet Union’s International Tchaikovsky Competition.

Yamaha also created a new kind of piano in the 1980s with the Disklavier, which made its American debut in 1987 (an earlier model called Piano Player was introduced in Japan in 1982). Originally designed as an acoustic piano outfitted with electronic controls for recording and playback, it has been updated and refined as technology has evolved in the decades since.

1990 – 1999

In 1991, Yamaha reached the impressive manufacturing milestone of five million pianos. The company also introduced the successor to its CF and CFIII concert grand pianos: the CFIIIS, which underwent two further upgrades in 1996 and 2000. At the Moscow Conservatory in July 1998, a young Russian pianist named Denis Matsuev took the International Tchaikovsky Piano Competition’s top prize performing on a CFIIIS.

2000 – 2009

The Japanese music world celebrated in 2002 when Ayako Uehara won the 12th International Tchaikovsky Competition. She was both the first Japanese winner and the first female winner in the contest’s history — and she did it on a Yamaha CFIIIS. A decade that marked the 100th anniversary of Yamaha’s piano production also saw the CFIIIS become the official piano of more than 20 major international competitions.

2010 – Present

After 19 years of research and development, the Yamaha CF Series concert grand piano, successor to the CFIII, made its debut in May 2010. Later that year, the winners of both the National (U.S.) and International Chopin Piano Competitions made history playing a CFX piano. In 2016, Yamaha celebrated the Disklavier’s 30th anniversary by releasing its seventh iteration, the ENSPIRE. That same year, Yamaha received a prestigious “Top 100 Global Innovator” award from Thomson Reuters for the third consecutive year. 2017 saw the launch of the SX Series, a premium grand piano line that incorporates A.R.E., the wood-reforming process used in top product lines of other Yamaha divisions.

A grand piano alone on a stage in a concert hall.
Yamaha CFX grand piano.

What will come next? If the past hundred-plus years are anything to go by, you can be certain that Yamaha will continue to make pianos of the highest quality for a long time to come.


Click here for more information about Yamaha pianos.

What Are Style Files?

Graphic overlay of words "Pop Style File" on hand gripping microphone on stand.

Style Files allow you to play your Yamaha keyboard along with complete backing tracks that you control! These files can be used for playing hit songs in a variety of musical genres, for creating original new music, or for refining your improvisational skills.

How They Work

Styles are controlled by the chords you play with your left hand. When you play a chord on your Yamaha keyboard, an entire backing ensemble will join your performance based on the structure of the chord being played. From rock to jazz, classical to country, easy listening to R&B, Style Files will make you sound like a pro!

Here’s a brief video tutorial demonstrating how they work:

When you’re ready to take a whole band with you wherever you go, check out all the available Styles.

Looking for a Student Violin? Here Are Six Important Questions to Ask

You’ve decided to start your child out on the violin. Congratulations! The violin is a great choice for young players, since it builds discipline and confidence, as well as setting them up for a lifetime of musical enjoyment.

If you’ve begun looking for an instrument for your child, that search may well have raised more questions than answers. How much does an instrument cost? Should we rent, or buy? What are all these instrument brands that I haven’t heard of before? What do we really need to get started?

Fortunately, there’s a lot of information on the subject to be found online in the form of articles by knowledgeable bloggers and experienced retailers. But to save you a bit of time, here’s a list of the top questions you really need to ask in order to get started.

1. Is It Well-Made?

Is the violin going to last? A well-made instrument will be skillfully crafted by a well-known maker or manufacturer; this assures consistency and quality assurance. It should be made with durable spruce and maple wood materials for resonance and resilience, with a high-quality finish containing no unsightly smudges or distracting odors. In addition, it should be fitted with a fingerboard that will stand up to frequent use, along with parts made with high-quality materials like ebony pegs and fingerboard.

2. Is It Easy to Play?

Can your child play the instrument easily and effectively? A properly set-up violin — one that has a properly cut bridge and parts that turn and function well, and that has been checked and adjusted by an expert — makes it easier for your child to make progress, and more quickly. One thing you don’t want is for your child is to get discouraged when parts don’t work, or when a poor set-up is making them struggle with playing in tune or with bowing. Think of it as riding a tuned-up bicycle versus riding one that’s been sitting around the garage for a long time.

3. Is the Manufacturer Socially Responsible and Eco-Friendly?

What is this instrument’s impact on the environment? This may seem like an unusual question when it comes to musical instruments, but it’s increasingly important in today’s manufacturing landscape. So ask yourself these questions: Does the brand that you’re choosing follow environmentally-friendly manufacturing and design processes? Do they source materials responsibly and ethically? Find out how Yamaha does it here.

4. Is It the Right Size?

Is your child straining to hold the violin? Make sure you’re selecting an instrument that your child can actually play comfortably. You want to avoid any unnecessary discomfort, which can lead to a child growing frustrated and not wanting to continue. Take a measurement from your child’s neck to roughly the center of their palm, with their arm extended. It’s fairly easy to make your own measuring stick, or you can ask a music store to measure your child; Yamaha provides a “Find Your Fit” ruler to authorized dealers.

5. Does It Sound Good?

Are you hearing a thin, muffled or scratchy tone, or a tone that is clear and solid? If you have the opportunity to hear the violin before you purchase it, have someone at the store play it for you; alternatively, have your child’s teacher play it for you. Listen primarily for clarity, warmth and the instruments’ ability to project. Also ask about quality strings — one of the things you can do to improve the sound of a student instrument is to upgrade the strings to a name brand like D’Addario or Thomastik-Infeld. If the instrument sounds good, your child will be able to hear themselves more clearly and will enjoy making music even more.

6. Do You Trust the Brand?

Have you heard of it before? There are a dizzying number of labels, brands and names when it comes to beginner violins. Most instruments are imported from traditional violin-making countries throughout Asia and Eastern Europe, and some are adjusted or finished locally. Be aware that some of the European-sounding names that you see in labels may simply be a trademark instead of the name of a single maker; the instrument may have actually come from a workshop made up of numerous workers. The way to feel secure in your investment is to purchase from reputable retailers, and to select a brand that you know and trust — one that can be easily reached for customer questions, warranty and support.

Ready to answer a few questions that will help you decide which violin is best for your child? Let us help! Take the beginning violin quiz here.


The Numbers Game

Most of us react viscerally when we listen to music: You either like/love what you’re hearing, or you dislike/hate it — or perhaps you’re just neutral about it.

It’s mostly just musicians or technicians (such as audio engineers) who tend to take a more analytical approach, but however you look at things, the fact remains that, at its essence, music is a numbers game.

What do I mean by that? Well, as every music student learns early on, each octave represents a doubling of pitch, and each note (in Western music) is roughly a twelfth of an octave. Each song consists of a fixed number of bars, and each bar consists of a fixed number of beats, played at a certain tempo (described by the number of beats per second). Even tonal quality — something called timbre — is determined by the number and type of overtones, which are whole (harmonic) and non-whole (inharmonic) multiples of a sound’s fundamental frequency (the predominant component that gives a musical sound a discernible pitch). Most instruments also produce resonant undertones, which are whole and non-whole number divisions of its fundamental, adding low-end heft to their sound.

Man at sound recording studio's sound board.
Tony Visconti

Producer Tony Visconti, who worked with David Bowie for many decades (including Bowie’s 2016 farewell album Blackstar), described in an interview I did with him how he uses numbers to improve the sonics of the recordings he makes. Knowing that Tony is himself a bass player, I asked him to talk about his general approach to shaping the tonality of the instrument through the use of equalization. His answer?

“I don’t do anything especially radical,” he said, “except that I look up the frequency of the key that the song is in. Say if it’s in the key of F, I know that the low F on the bass string is something like 48 cycles, so I’ll pinpoint that frequency and boost it. In fact, you can often get more clarity — you can make the low end seem more apparent — if you boost it again an octave higher. So if I’m boosting it at 60 cycles, I’ll also do a slight tweak at 120, and I might even go to 240. Sometimes that’s where the definition lies — it’s not just in the low end. When I discovered this principle, I found that if you go a little higher up, you can actually hear not just the warmth of the note, but the clarity of the note.”

Visconti takes the same approach to other instruments as well. As an example, he pointed to bass drum, which typically has a fundamental down at around 50 cycles (Hz). “That’s a frequency you’re not really going to hear,” he explained. “In fact, it’ll wreck most speakers — it will rip a car speaker apart if you boost it too much. So I’ll find the octave of it — which will be 100 or 200 Hz — and by boosting that frequency instead, the sound of the kick [bass drum] is both fat and clear.

“In opera,” Tony added, “a voice has its tessatura — the range where it sounds most pleasant. A singer might have a four-octave range, but there’s maybe one octave that’s golden, and you want to [have them] sing things in that register. The same thing with instruments. Technically, with its undertones, a guitar will go down to 40 Hz because that’s an octave lower than the low E string. But does it sound good down there? Do you really want to boost those frequencies, or do you want to go where the guitar sounds most pleasant, to the area it was built for? Every instrument has got its range that’s beautiful, and that’s what you want to find.”

The importance of mathematics to music was underscored further still when I had the opportunity to interview Nashville engineer Clarke Schleicher, who revealed that prime numbers (that is, numbers which can be divided only by 1 or by themselves) play an important role in how we respond to music, at least when it comes to delay times.

Man smiling and holding a microphone facing the camera.
Clarke Schleicher

“Regardless of tempo, prime number delays always work especially well,” Clarke told me, as he reminisced about an analog delay unit popular in the 1970s and 1980s called a Prime Time, which would spit out delays of 31 ms, 37 ms, 41 ms, etc. — but not 32, 36, or 42 ms. “It was always interesting to me how those delays added an extra dimension to the music,” he said.

“Like all other engineers,” Schleicher added, “I use a lot of delay times that are in time with the tempo: eighth notes, sixteenth notes, triplets, and the like. Those help underlay and reinforce the groove. But I also use prime number delay times. I always put a 29 or 31 ms delay on a vocal, for example: I just like the way it gives the vocal depth, regardless of what the tempo is. Similarly, I use 61 or 71 ms delays on guitars a lot.”

“Why do you think that is?” I asked him. “Why would a 31 ms delay sound better than a 32 ms delay? Is there a physical explanation?”

His refreshingly honest answer: “I don’t know. All I know is that it sounds a lot better to me, and I can hear a big difference between a 31 ms delay and a 32 ms one.”

When I returned to my home studio, I tried it out for myself, and you know what? He was absolutely right. I’ve since learned that this is a secret “trick of the trade” employed by many pro recording engineers … albeit one that they are sometimes reluctant to share with outsiders.

I personally was never good at math in school. (In fact, calculus completely baffled me. It was the first college course that I flunked with flying colors.) Yet I was always pretty good at comprehending what goes into making music; in fact, it was my passion, and remains so to this very day.

I’m sure I’m not the only musician who has such a limited affinity for mathematics, despite numbers being at the heart of all music and musical sound. And I’m equally certain there are plenty of people out there who excelled in algebra and geometry yet are tone-deaf and can’t play an instrument. Why this disparity? Perhaps it comes down to genetics, or perhaps it’s just a matter of instinct: the blessing of being able to take pleasure from even those things we don’t understand.


Check out Howard’s other postings.

Home Theater on a Budget, Part 1: Starter System

If you’re on a tight budget, creating the perfect home theater experience might not seem like a realistic goal. But, armed with a little knowledge, it’s entirely possible to assemble a quality home entertainment system at an affordable price.

It comes down to knowing what to look for and how much to spend on each element of your system. Here are some suggestions that will enable you to build a great-sounding 5.1-channel starter system without breaking the bank.

AV RECEIVER

AV receiver.
RX-V385 AV receiver.

At the heart of every home theater system is an AV (Audio-Visual) receiver. The Bluetooth®-enabled Yamaha RX-V385 is a great starter receiver for any listening environment. It offers 5.1-channel surround sound, meaning you can use up to five speakers (three front and two rear) and one subwoofer. Or consider the Yamaha RX-V485, which adds extra power and Wi-Fi capability.

MAIN SPEAKERS

Two stereo speakers next to each other - one with the filter cover on; the other with the speaker and subwoofer exposed.
NS-333 bookshelf speakers.

Yamaha NS-333 bookshelf speakers are a good choice for your main front right and left channels, as well as your rear surround channels. They offer several features that allow them to mesh well with any home theater setup, including a high-gloss piano finish, a two-way bass reflex design that make them flexible enough for both main and surround use, and magnetic shielding so they can be placed next to a TV or video monitor without degrading the picture with stray magnetic fields. NS-333 speakers come in sets of two and are internally wired with Monster Cable™ to ensure optimum sound quality.

CENTER CHANNEL SPEAKER

Horizontal speaker.
NS-C444 center channel speaker.

To complete the front end of your home theater, you’ll need a center channel speaker designed to help boost the dialog in a movie that might otherwise get lost in the shuffle of the other two front speakers. The Yamaha NS-C444 is specifically designed for this purpose. It incorporates two-way acoustic suspension and features a speaker grill, a high-gloss piano finish and a waveguide horn that allows the sound waves to reach your ears without getting reflected off the walls.

SUBWOOFER

Small square speaker.
NS-SW100 subwoofer.

No home theater audio system is complete without a powerful low end. An excellent choice here is the Yamaha NS-SW100 powered subwoofer. Its special Twisted Flare Port is designed to create a smooth flow of air around the edge of the port (versus the turbulent air flow around a conventional port). With its gently shaped form and slanted front surface, the NS-SW100 is also a stylish addition to any household.

ACCESSORIES

One last note: Make sure to make room in your budget for speaker wire, HDMI cables, speaker stands and other accessories you might want to include with your system.

You’ll find that even on a limited budget you can create a home theater experience so nice that you’ll likely think twice before heading to the movie theater. The only thing you’ll have to do is pop your own popcorn!

Part 2 of our “Home Theater on a Budget” series, covering intermediate systems, can be found here.


Click here for more information about Yamaha AV products.

Five Things You Never Knew About the Clarinet

Here are five cool facts that even many clarinetists don’t know about their instrument:

1. It’s One of the Newer Orchestral Instruments

The clarinet is a relative newcomer among woodwind instruments. It is generally believed to have been invented by the Nuremberg instrument maker Johann Christoph Denner at the start of the eighteenth century. A similar instrument — the chalumeau — was already in existence at that time. However, the chalumeau only sounded good mainly at the lower registers, while the clarinet boasted rich sound quality at both low and high registers. Possibly for this reason, the name “clarinet” originally meant “small trumpet” (“clarino” means trumpet).

The clarinet produces sound by means of a single reed attached to the mouthpiece. A number of physical finger keys are attached to the cylindrical section (known as the body) and are used to vary the pitch. Up until the first half of the eighteenth century, the clarinet had only two finger keys. However, more were gradually added to the instrument to enable the clarinetist to play chromatic scales and clean notes more easily.

Clarinet laying on a flat surface.
Clarinet finger keys.

The configuration that is now standard was perfected by Klosé in the mid-nineteenth century, based on the ideas of Theobald Boehm. Since the instrument is based on Boehm’s system, it is called the Boehm clarinet.

2. It Has an Extensive Family Tree

The clarinet family is comprised of a number of similar instruments. It includes instruments of various sizes, such as the piccolo (or sopranino) clarinet and the alto clarinet, as well as instruments whose construction is slightly different, such as the basset horn. The basset horn, with its curved tube, was invented in the latter half of the eighteenth century and was chiefly used in works by classical composers.

There are also clarinets of similar size in different key pitches, which have tubes of varying length. For example, there are several types of soprano clarinets, in keys ranging from C (which has the shortest tube) to G (which has the longest). However, the B♭ soprano clarinet and A soprano clarinet are the most popular.

A modern bass clarinet showing full instrument from mouthpiece to bell.
Bass clarinet.

3. There’s a Bass (And Contrabass) Version Too

The first evidence of the existence of a bass clarinet comes from France toward the end of the eighteenth century, when a man named Gilles Lot created an instrument called the Basse-Tube. It did not enjoy much success at first.

The bass clarinet as we know it today, with its large keys and straight tubular body, was first made by Adolph Sax (inventor of the saxophone) in 1838. That’s when the instrument first took its current shape.

The first piece of music to feature the bass clarinet was Meyerbeer’s Les Huguenots, which contains a long solo for the instrument in the fifth act.

4. Clarinets Have Been Made from Various Materials

Most early clarinets were made of boxwood or ebony — the same materials that were also used to make recorders. In those days, the reed was secured in place by windings of string instead of being attached by a ligature.

Today, grenadilla is now the most commonly used material for clarinet making. It has a higher relative density than boxwood, giving the instrument a rich and beautiful tone. In addition, it provides a wider dynamic range — when playing quietly, the sound becomes soft and gentle instead of becoming weak.

5. It’s Been a Major Source of Inspiration to Composers

The distinctive richness of the clarinet’s timbre and the instrument’s expressive power has long stirred the emotions of composers.

Mozart, for example, wrote a magnificent work for clarinet, the Clarinet Concerto in A major, Köchel 622. It is said that he was greatly inspired by meeting the clarinetist Anton Stadler. In those days the clarinet had only just been invented, so Mozart must have been eagerly writing pieces for it in order to find out how best to employ this new instrument in performances.

In his later years, Brahms also wrote many works for the clarinet. As had been the case with Mozart, it was meeting an influential clarinetist — Richard Mühlfeld — that aroused his creative urge and gave rise to his Clarinet Quintet in B minor, considered a masterpiece among great classical works.

One of the most outstanding American composers of the twentieth century was also captivated by the instrument. Aaron Copland wrote his famed Clarinet Concerto for popular clarinetist Benny Goodman. Against the backdrop of a colorful orchestration, the work features virtuoso passages and is tinged with jazz elements to suit Goodman — the master of swing jazz. Incidentally, Goodman’s playing attracted many composers, with Bartók’s Contrasts and a Hindemith concerto dedicated to him as well.


This posting is adapted from the Yamaha Musical Instrument Guide. For more information about Yamaha clarinets, click here.

Steinberg Videos, Part 1: How to Do Your First Recording in Cubase

Offering pristine sound quality, intuitive handling and a wide range of advanced tools for complete music production, Steinberg Cubase is one of the most popular digital audio workstations out there. In this series of videos, we’ll show you exactly why!

Here, product specialist Greg Ondo demonstrates how easy it is to do your first recording in Cubase, including making interconnections, file organization, and setting buffering and monitoring options:

Click here for Part 2: “How to Do Editing in Cubase”


Click here to find out more about Steinberg Cubase.


Kooky Karaoke

kar·a·o·ke (kerēˈōkē) noun

1.      a form of entertainment, offered typically by bars and clubs, in which people take turns singing popular songs into a microphone over pre-recorded backing tracks.

2.      Origin: Japanese,  literally means ‘empty orchestra.’

kook·y (ko͞okē) adjective

1.     strange or eccentric.

2.     when someone does something a little strange, or when something is not quite right.

kook·y kar·a·o·ke (ko͞okē kerēˈōkē) software

Software for CVP and CSP Clavinovas that will:

1.      add harmony and/or vibrato to your voice.

2.      modify your voice to sound like famous singers.

3.      display lyrics on the screen of your Clavinova.

4.      correct your pitch even when you sing the wrong notes!

Karaoke has been around since the ’70s. Love it or hate it, karaoke is quite popular and some people take it very seriously.  The problem for me, however, is that I don’t sing (at least not very well). As a result, I have never stood in front of people in a karaoke bar and belted out a song.  I’m afraid that if I tried to sing “Yesterday” or “My Way” (two of the most requested karaoke songs), people would laugh. And trust me, they would!

Imagine my concern when a karaoke function was added to Clavinovas several generations ago, and I was asked to help introduce this new feature. I was mortified until I came up with an idea: Let me make software where people are supposed to laugh — and call it “Kooky Karaoke”!

In its basic form, the Kooky Karaoke software (which works with the CSP Clavinova and any CVP Clavinova model that has a microphone input) retains the essential characteristics of karaoke: You sing into a microphone when you see the highlighted lyrics on the built-in Clavinova screen, while the Clavinova plays along, providing the backing tracks.

However, it also includes a number of unusual twists that make singing more fun, more exciting, more foolproof … in other words, more “kooky.”

The Clavinova has several exclusive features (such as voice modification, vocal harmonization, vocal effects and pitch correction) that make this possible. By combining all of these into one “Kooky Karaoke” MIDI file, you can get some amazing results.

For example, by using the Clavinova voice modification features, I can make anyone sound like a different person. Even when using your normal voice to talk or sing into the microphone, what comes out is quite different! I experimented for hours and eventually came up with myriad voices like Barry White, Bing Crosby, Shirley Temple, Popeye, the Grinch, the Chipmunks, and Munchkins, to name just a few.

To complete the process, Kooky Karaoke includes the backing tracks for famous songs that go along with each voice. For example, there’s “You Were Always On My Mind” with a Willie Nelson voice, and “How the Grinch Stole Christmas” with a Boris Karloff voice.

Screenshot.

I also utilized the vocal harmonization feature so that you can sing along with up to three “clones” of your voice, each in a different pitch. The specified pitches are contained within the song’s Kooky Karaoke MIDI file. One good example is “Puff the Magic Dragon,” where you hear Peter, Paul and Mary singing backup harmonies, all based upon your original voice. This is also how I was able to have Chipmunks Alvin, Simon and Theodore back you up in three-part harmony as you sing their classic hit song, “Witch Doctor.”

In addition, Kooky Karaoke can add vibrato to your voice for you — important if, like most untrained singers, you sing with no vibrato. For example, when you play the Kooky Karaoke version of “God Bless America,” you’ll sound remarkably like Kate Smith when the Clavinova automatically adds that huge, wavering deep vibrato characteristic of the singer who was so well-known for her rendition of the Irving Berlin classic.

With the CVP-709, Yamaha added a way for the Clavinova to pitch correct your voice, which adds even more functionality to Kooky Karaoke files. This is done by muting your actual “live” voice coming into the microphone and substituting a pitch corrected voice assigned to one of the harmony tracks duplicating the melody. No matter how far you sing out of tune, the Clavinova forces your voice to the pitch of that melody. Four half steps off? No problem!

As cool as this feature is, I suggest that you try both pitch-corrected and non-pitch-corrected versions of the Kooky Karaoke songs. I find that sometimes I prefer having complete control of the pitch since it gives me some more freedom to have fun with the silly voice. Other times, I appreciate the help of the pitch correction, which allows me to concentrate on simply singing the right lyrics.

How do you use Kooky Karaoke?

It’s easy! Just plug a microphone into your Clavinova and make sure the switch next to it is set to “MIC,” not “LINE.” (The microphone input and MIC/LINE IN switch are located next to the headphone jacks, under the left portion of the keyboard.) Then slowly turn up the volume as you test the microphone.

Shows microphone cable plugged into "mic/line in" for Clavinova.

Select any Kooky Karaoke file to automatically load the special voice modification data without starting the song. I suggest you try out your new voice by simply talking into the mic, so your audience can get to “know” your alter ego before you begin singing the actual song.

Remember to always use your regular voice. When people sing into the mic and first start hearing the low Barry White voice coming out of the Clavinova speaker, they have a tendency to start making their own voice even lower. Resist doing so! Use your regular voice and you’ll get better results. Also, when performing Kooky Karaoke songs that already add vibrato to your voice, make sure to sing without added vibrato. Otherwise, the two vibratos often “fight each other” … making the results, well, less than desirable. (Okay, maybe comical is a better word.)

What type of microphone should I use?

Look for a good quality model that has some weight to it and an on-off switch so you can put it down on the bench or music rack and not have it feed back into the Clavinova speakers. It’s also important to choose a mic that is “uni-directional” (as opposed to “omni-directional”) so that it only picks up your voice and not the sounds of the Clavinova (in which case it would try to modify and harmonize those sounds, too!).

Where do I get Kooky Karaoke?

Simply go to yamahamusicsoft.com and search for “kooky.” Kooky Karaoke is most often sold as volumes of several songs, although there are a few special single releases like “Monster Mash.”

Begin by purchasing the software and downloading the MIDI files to your computer. Next, move the folder containing the Kooky Karaoke MIDI files to a thumb drive and insert the drive into your Clavinova. Go to the SONG area of the Clavinova and load one of the Kooky Karaoke songs. Then let the fun begin!


Check out these related blog articles:

How to Add New Songs to Your CSP

Learn to Play Your Favorite Songs

MusicCast and Bluetooth® Team Up for Privacy … and Sharing

A man wearing headphones, relaxing.

There are times when you just need a little privacy. Wouldn’t it be great if you could listen to music in bed without disturbing your wife who’s enjoying her book? Or suppose you’re watching TV with the family, and grandpa needs the volume to be a little louder. What if you could turn up the volume just for him without blasting everyone else?

You can! With MusicCast products and a pair of Bluetooth® headphones, you and grandpa can have your own listening spaces. MusicCast products use Bluetooth to broadcast sound. As with any Bluetooth transmission, there can be a slight delay in the audio, which shouldn’t affect your experience if you’re listening to music or if you’re watching a game where the commentator isn’t visible on the screen.

The Road to Privacy Starts Here

Here’s how to connect your MusicCast product to a pair of Bluetooth headphones:

First, make sure the Bluetooth headphones are in pairing mode.

Then, in the MusicCast app, tap the room whose sound you want to broadcast.

Next, tap the Now Playing bar at the bottom of the screen, then tap the Sound and Bluetooth Settings icon in the bottom right corner:

Smartphone screen showing the first two steps for setting up MusicCast app for broadcasting via Bluetooth.

Tap Bluetooth Transmission, then tap it again on the next screen. Finally, tap your Bluetooth headphones on the list, then tap Done:

Mobile screens showing the MusicCast app screens with steps 3 and 4 for setting up Bluetooth broadcasting indicated.

(Keep in mind that MusicCast products can only send Bluetooth or receive Bluetooth at any given time — they can’t do both simultaneously. Also, you can only send Bluetooth to one device at a time.)

Party On!

Listening in privacy over a pair of earphones is a great way to relax, but there are other times when you want to crank up your sound system and share your music with the world.

Group of men and women laughing and holding plates of food next to a grill in a backyard.

For example, at your next barbecue, wouldn’t it be great if you could hear the score of the game while you’re outside manning the grill? No problem! Just follow the steps above to connect the MusicCast AV receiver or sound bar that is playing your TV’s sound to your portable Bluetooth speakers in the backyard.


Connecting to Bluetooth devices is just one of the ways MusicCast provides wireless multi-room audio for your home. Click here to learn more.

Gain Staging

A big challenge for anyone doing live sound is something called gain staging. This refers to the way signal levels are set between the various components in an audio system. Poor gain staging results in high levels of noise and distortion, as well as a decrease in headroom. But when gain staging is set properly, you can get every last decibel out of your PA system, with minimal noise and maximum clarity.

The first step in achieving proper gain staging is plugging your gear into the correct jacks! This isn’t nearly as silly as it sounds. Mixers provide a variety of inputs to accommodate microphone and line-level signals. (Sometimes there are direct inputs for instruments, too.) Line-level signals (which typically come from smartphones, tablets, computers, CD players and outboard effects, etc.) are much stronger than microphone signals, so mic inputs incorporate a preamp that raises that weak signal up to line level, enabling it to pass through a mixer to a power amp or powered speakers. (Instrument level falls between mic and line level.)

Mic inputs typically use XLR connectors, but line inputs are usually quarter-inch TS (or TRS) jacks. (“TS” is short for Tip-Sleeve, while “TRS” is short for “Tip-Ring-Sleeve.”) Since instrument cables also use quarter-inch TS connectors, it’s tempting to plug a guitar or bass into a line input but this results in poor gain staging — a line input is generally not sensitive enough for an instrument, so you’ll end up cranking the mixer’s gain knob to the point where noise becomes an issue. Also, a line input does not have the correct impedance for guitar or bass pickups, so there’s likely to be a loss of sound quality.

Using an XLR-to-quarter-inch adapter to plug a microphone into a line input is another big no-no. You’ll have to crank the gain really high just to be able to hear the mic, adding noise. On the other hand, if you plug a keyboard into a mic input, you’re probably going to overload the input, resulting in distortion even when the gain is turned all the way down.

Mixing board.
Yamaha MG16.

Once you have the source matched to the input, it’s time to set the input gain or trim control. This is like the main water valve in your home. You want to open the valve enough for sufficient flow (ensuring a good signal-to-noise ratio), yet not create too much pressure (distortion). If you mess this up, the signal is never delivered properly to the rest of the audio chain. If the gain is down too far, you can raise the fader as high as you want, but you’ll get nothing but noise. Conversely, if you have the gain way up and the fader way down, chances for distortion are much higher and you effectively lose the ability to use the fader’s position to mix.

Many compact mixing consoles don’t provide a dedicated meter for each channel simply because it’s too expensive. A typical alternative is a two-color LED with green for “signal present” and red for “overload.” In that case, adjust the gain control until the LED blinks red briefly, and then back it off by about 15 percent. Other mixers offer “ladder” meters, with several segments indicating signal strength. In those cases, a red LED will still indicate overload (it’s often labeled “Peak”), and there may also be one or more yellow LEDs to show when you’re approaching that point but not quite there. In those cases, adjust the gain until the loudest signals cause the yellow LEDs to light, making sure that the red Peak LED does not light at all.

Close-up of the power level and meterage on a sound mixer.
MG16 main meters.

Many mixers provide a switch on each channel called PFL (short for “Pre Fader Listen” or “Pre Fader Level”). Pressing this button temporarily allows the main output meter to show the level of that one channel before its fader. In other words, it’s measuring the water pressure at the main valve, but before the kitchen faucet. A good way to set levels is to put each channel into PFL and adjust its gain knob while watching the meter. (A bonus on Yamaha mixers is that, when you push the PFL switch on a channel input, it automatically sends just that signal to the headphone output for audition.) You’ll want to leave a bit of headroom — the safety margin between average signal level and the ceiling or distortion — to get the signal to read roughly -6 most of the time. If you set the gain on a lead vocal mic to read 0 dB when a singer is at average volume, the signal may distort when they get loud.

What if you turn the gain control down all the way and the meter is still at “0”? Look for a Pad switch on the channel and use it. A pad lowers the sensitivity of the input so that a microphone does not overload it, reducing the possibility of distortion. Some microphones have built-in pads designed for use on a loud source like a kick drum or a guitar amp. If so, use the pad on the microphone first because the microphone’s internal circuit is the initial “gain stage.” If you’ve overloaded the microphone, you’ll get distortion even when the input level reads well below 0.

A variation on PFL is known as Solo, though this is more commonly found on mixers designed for recording, as opposed to those designed for live sound. When a channel is soloed, the meter usually shows post-fader (as opposed to pre-fader) level, so the fader must be set at unity gain while you adjust the gain or you won’t get an accurate reading. This is the spot — usually marked next to the fader with a “0” or a small arrow — where the fader is putting out exactly what it is receiving, neither boosting nor cutting the signal. If gains are set correctly, most if not all of the channel faders should be at or near unity gain while you are mixing. Conversely, if all of the faders are very low or very high, that’s a sure sign that something is wrong with your gain structure.

Keep in mind that other “valves” affect the audio signal, such as the main mix fader — which should normally also be set at or around 0. Also, adding EQ or compression to a signal will change the gain staging. In the case of a compressor or limiter, you may need to use the its output control (sometimes called “Makeup Gain”) to reduce or make up the difference.

As you’re doing gain staging, start with the power amp controls set around halfway. If the volume in the room is too loud, it’s better to reduce the level controls on the power amp than to change any of the mixer settings. If you need to bring the master fader (and/or any of the channel faders) all the way up to get adequate volume in the room, either the power amp levels are set too low or your system is underpowered.

Check out our other Tools of the Trade postings.


Click here for more information about Yamaha MG mixers.

Build Your Jazz Music Repertoire

Here are five excellent resources for band directors who are entering jazz from another musical discipline:

1. “Teaching Music Through Performance in Jazz” from GIA Publications. Available as a book or CD set, this title contains some of the most significant works ever composed for developing and intermediate jazz band.

2. Aebersold Publications. Jamey Aebersold’s Play-A-Longs have made it possible to create an interactive jazz environment in a classroom. Aebersold has produced more than 130 volumes of jazz recordings and books along with various supplemental items, carving out a new avenue for jazz education. 

3. Sierra Music Publications Inc. This jazz-specific music publisher offers more than 600 big band charts from established composers like Stan Kenton, Bill Holman, Count Basie and Maynard Ferguson. In addition, Sierra has commissioned music from many new composers, including Dan Haerle, Ellen Rowe, Fred Stride, Fred Sturm and others.

4. The Midwest Clinic International Band and Orchestra Conference. As a band director, you’re likely already attending the Midwest Clinic International Band and Orchestra Conference. If you’re new to jazz, though, make sure to check out the jazz-specific clinics and concerts. This past December, sessions included “‘Latinizing’ Your School Jazz Ensemble” and “The Jazz Combo – An Inside Look.”

5. Jazz Education Network (JEN) Website and Convention. This organization is dedicated to building the jazz arts community by advancing education, promoting performance and developing new audiences. Membership in JEN offers many benefits including networking, performance opportunities, and discounts to magazines and goods from strategic partners.

Photo Courtesy of Bloomington H.S. North (Indiana)


Cover of Support ED magazine with a headshot of band teacher Julie Hill and headlines for other articles. This article originally appeared in the 2017 V1 issue of Yamaha SupportED. To see more back issues, find out about Yamaha resources for music educators, or sign up to be notified when the next issue is available, click here.

Visit the Yamaha Grand Concert Custom Shop

Classical guitar construction has come a long way since the original four-string instruments of the 1400s. It wasn’t until 1883 that it evolved into the basic “modern” form that we know today, thanks largely to Spanish master luthier Antonio de Torres (1817-1892), the father of modern classical guitar design. His influence is ever present in the work of today’s world class luthiers. There is also no doubt that this organic progression came from the evolution of guitar music in popular culture.

Yamaha classical guitars are descendants of a proud lineage that began with de Torres. We are honored to have been involved in the modernization of the classical guitar, under the direct tutelage of renowned Spanish luthiers Eduardo Ferrer and Manuel Hernandez, as well as working with some of the worlds most distinguished artists such as Andrés Segovia and Baden Powell.

Our world-renowned Grand Concert GC82, GC42 and GC32 models are designed and built at our 130-year-old custom shop in Hamamatsu, Japan, with a process and methodology that is carried over to the GC22 and GC12 models that are handcrafted at our Hangzhou, China, factory.

Ready to take a virtual guided tour of the Yamaha Grand Concert Series custom shop? Check out the video below:

Click here for more information about Yamaha Grand Concert Series guitars.

5 Tips to Reinvent a Music Program

In the blog posting “Case Study: Reinvent a Music Program,” we described the numerous innovations introduced by Dr. Melissa Gustafson-Hinds, director of bands for O’Fallon Township High School in Illinois.

Here, she offers five keys for building a successful band program.

1. Offer a variety of programs: One reason that the O’Fallon Township High School band program attracts so many students is the variety of ensembles it offers. Gustafson-Hinds oversees several concert and jazz band groups for different skill levels, so that all students can participate.

2. Connect with prospective students: Gustafson-Hinds runs clinics with the band programs at feeder middle schools. She also puts on joint concerts for middle and high school students. This early interaction stirs younger students’ interest in the high school band.

3. Connect students with each other: O’Fallon offers a private lesson program where high school students teach private lessons to students from feeder schools. This program teaches high school students leadership skills and prepares middle school students for high school band.

4. Offer big opportunities: Gustafson-Hinds organizes a variety of trips around the country for her band program. She makes sure that each year’s students get to do something new and exciting, whether it’s a parade, a bowl game or a major concert hall performance.

5. Be humble: Despite the program’s success, Gustafson-Hinds chooses to remain humble. She teaches her students to take their success in stride and to be grateful for the opportunities they have. This quality has also made her receptive to others’ advice, which leads to improvement.

Photo courtesy of Lisa Blankenship, LB Photography

This article originally appeared in the Fall 2016 issue of Yamaha SupportED. To see more back issues, find out about Yamaha resources for music educators, or sign up to be notified when the next issue is available, click here.

Black Violin’s Kev Marcus Offers Teaching Tips

In the blog post, Black Violin Dares Students to Dream Big, Kev Marcus shared how he formed Black Violin with Wil B. Marcus learned many valuable lessons from his music teachers throughout the years.

These are the three keys that he regularly passes on to young musicians.

Focus Your Practice: Avoid simply running through your music for an extended time. Instead focus on how you are playing. “My teachers always said, ‘It’s not about how much you practice, it’s about how you practice,'” Marcus says.

Add the Familiar: If there’s a really hard passage, incorporate something familiar or likable instead of getting frustrated. “My college professor was really big on that,” Marcus says. “He would always encourage me to give it a hip hop beat, ’cause that’s what I like. …It makes you get into the practice more.”

Try New Things: You should always be willing to try new things and always be free with your music. It takes away the nervousness. “Let it all hang out and have fun with it,” Marcus says.

This article originally appeared in the Fall 2016 issue of Yamaha SupportED. To see more back issues, find out about Yamaha resources for music educators, or sign up to be notified when the next issue is available, click here.

Get Parents Involved!

Wouldn’t you like to find new ways to get parents more involved with their students’ home practice and progress? Of course you do. We all do! According to the Harvard Family Research Project, parental engagement is universally associated with higher achievement on grades, test scores and teacher rating.

How do we encourage parents to be active with their own children’s instrumental music progress and success? Engaged parents read to their children and listen to their children read. They check math homework and proofread English papers. Certainly it is reasonable to expect that same kind of child/parent relationship in beginning band classes, but not all parents have prior experience in music. So how do we get started?

Playing Makes Perfect

middle school students playing the tuba

It is essential to provide the parents with something to listen to. Encourage students to play recognizable melodies from memory for their parents. Even “Hot Cross Buns” is amazing for beginners! Suggest students discover “by ear” favorite tunes: “Happy Birthday,” nursery rhymes, simple patriotic tunes or college school songs, for instance.

When a playing test is coming up, remind students that it is valuable to play the assigned lines for parents before the big day. An informal “dress rehearsal” at home can help work out simple errors and nerves.

Raise the stakes by challenging students to give mini-concerts for family. This practice performance can go beyond the house. Don’t forget to explore social media applications. Videos can be shared with family members via email or Facebook, and far-away grandparents will be delighted by such a FaceTime event. The pathway to progress is steeped in play, play, play.

Learn to Listen

Offer the parents suggestions (perhaps a checklist) on how to listen and what to listen for. Progress will flux, and some practice sessions will be better than others, so encourage them to praise effort as well as results. When parents hear a child struggling, they should guide practice by asking the student to play challenging spots in the music three times in a row without a mistake.

Parents should monitor their children’s levels of satisfaction or frustration with their playing. After concerts, performances or lessons, parents can ask their children to tell them the things they didn’t like or identify where improvement is needed. Asking their children how they plan to practice to improve is a valuable learning experience.

Set Up for Success

Give parents a checklist of “good practice habits” they can monitor. If using printed music, does your child have a music stand and chair for practice? Good posture is critical, even when practicing at home. If they have a room with glass windows or a full-length mirror, they should be utilized to see posture and horn angles.

Parents must make certain the instrument is in good playing condition and that all necessary supplies are on hand. A metronome can be an invaluable tool for improving a particular passage, and practicing with a tuner can improve tone quality.

Don’t forget that in today’s digital age, recording practice on a phone or tablet is great for self-evaluation and feedback. Never underestimate the value of recording and then evaluating progress.

Super Structure

three members of middle school band

Give parents and students these practice structure tips.

1. Several shorter practice sessions are universally more productive than a practice marathon, and taking a break from practice when frustrated can be a good thing. Parents should discourage an epic practice session. They never end well.

2. Develop the skill of isolating problems. Parents can listen and remind their children to break it down rather than simply playing the assignment over and over. When you feel like you’re at an impasse, try working backwards. Learn and practice the last measure first, then the last two measures, and so on.

With these tips, students will hopefully be enthusiastic about their musical progress. But if a particular student is getting truly discouraged, suggest that parents contact the director and the child’s private teacher, if possible. Many students who exit their band program do so because they believe that they are “not good enough.” A watchful eye and ear from parents and the director can circumvent this problem.

I have personally seen how parents and family can make or break a child’s musical progress and help the overall program thrive. Parental engagement and encouragement is priceless. Promote it at all costs!

Photos © Lanette Kinnaird, Photographers of Westlake

This article originally appeared in the Fall 2016 issue of Yamaha SupportED. To see more back issues, find out about Yamaha resources for music educators, or sign up to be notified when the next issue is available, click here.

Leadership Opportunities with First Concerts

The start of a new school year always presents an opportunity to set the course for a successful year of music-making, and nothing is better for charting that course than effective leadership from directors and students.

Empowering our young people to have a voice in their own education not only generates action, it provides real-world leadership and decision-making experiences as well. As we think about kicking off the coming school year, there will be a number of ways in which we can empower our student leaders to make a difference by challenging them to help build the culture of our programs.

Let’s take a look at how just one event — the year’s first concert for beginning students — can provide opportunities for our more experienced students to add value to this very special occasion. At the middle school level, the more advanced students could help with planning/executing this initial concert for the beginning level students. Providing an “informance” concert is as much about getting the parents excited as it is the students. It’s also an effective way to showcase to these “beginning parents” how quickly  students can acquire music-making skills. In addition, parents will see firsthand some of the more long-lasting results of being in the program, i.e., the older classmates exhibiting both leadership and musical skills. So what roles can our more experienced students play? Although your students will certainly come up with their own ideas, here are a few to help prime the pump:

1. Ask your more experienced students to come up with short, humorous skits to demonstrate the musical growth from one year to the next, and then insert appropriately within the various parts of the concert. One idea might be to select a few measures from the beginning level method book for a first-year student to perform, then transition to a second-year student performing the same few measures demonstrating improved playing skills, then the third-year student doing the same with, for example, added ornamentation. Another skit idea might be developed to demonstrate effective practicing at home, where one student is practicing in a noisy environment (i.e., TV is on, brothers and sisters playing in the background, etc.), working under poor lighting conditions while lying on the floor, contrasted with another student in a quality practicing environment — appropriate chair, lighting, music stand, attentive parent, etc. Your student leaders will come up with a variety of creative ideas. All you have to do is give them the opportunity.

2. Put your best foot forward by asking some of your student leaders to welcome the audience at the door with an inviting smile and warm greeting. Dressed in their uniform with name badge attached, they could distribute programs and/or NAMM’s advocacy brochure, “Why Learn to Play Music?” This beautifully designed brochure has been revised to include the newest research and statistics highlighting the many benefits of music education and is available in English and Spanish. You can order these free brochures through your local music dealer or online by clicking here.

3. Working with the high school director, arrange for high school student leaders to assist the beginning-level students with tuning, organization and preparation (i.e., appropriate unified appearance of uniforms such as tucking in of shirts) prior to the start of the concert. Extra sets of hands are always needed, and the beginning-level students will enjoy the attention they get from the high school students who they view as “rock stars.”

4. Another way to involve high school students is to ask them to provide introductory performances (solos, duets or small ensembles) prior to the formal start of the concert. These performances could take place on the stage or in the lobby as the audience enters the venue. The concert could also conclude with the entire high school marching band making a surprise entrance in full uniform while playing the school fight song or another appropriate selection. The high school students could then “high-five” the beginners and congratulate them on their first performance. What an exciting way to end the event!

5. Finally, if you haven’t used “First Performance for Band” or “First Performance for Orchestra,” you might consider using it this year. These comprehensive resources are available through your local dealer or directly from Hal Leonard. These turn-key packages provide a framework for a short (30 minute) introductory, informance concert and also feature a written narration, sheet music, parts, sample letter, plus programs and certificates for beginning band/orchestra students.  They are designed to be used after just seven short weeks to get the students playing right away!

We get only one chance to make a first impression, so let’s make the most of it by giving our more experienced music-makers leadership opportunities in what will be a memorable first concert for our beginners and their families. The result will certainly net years of additional music-making experiences for those who are beginning this coming year and who, in future years, will help craft the First Performance Concert for others.

This article originally appeared in the Fall 2016 issue of Yamaha SupportED. To see more back issues, find out about Yamaha resources for music educators, or sign up to be notified when the next issue is available, click here.

Black Violin Dares Students to Dream Big

While in high school in the 1990s, Kevin Marcus Sylvester programmed his cell phone to play a Busta Rhymes rap song.

The customized ringtone amazed his orchestra-mates, who eventually transcribed the whole piece and played it regularly together in class.

Their director, James Miles at Dillard High School in Fort Lauderdale, Florida, encouraged this free-thinking fun. “He was always open to us trying new things,” Marcus recalls. “Some orchestra directors shun the hip hop, shun the alternative stuff … [but he] allowed us to be ourselves.”

Miles trained his students on classical music but taught far beyond the basics. “He made everyone believe in themselves and had confidence in their abilities,” says Marcus. “And sometimes that’s more important than scales and arpeggios. Most times, actually.”

This encouragement to trust oneself would turn out to be a vital source of inspiration for Sylvester and classmate Wilner Baptiste. Now known as Kev Marcus and Wil B., the duo has gone on to form the group Black Violin, enthralling audiences with a unique musical genre that blends classical sounds and hip hop beats. At the same time, their music challenges stereotypes and brings people of different generations and cultures together in mutual appreciation.

Soul Searching

Marcus began his journey with the violin in fifth grade orchestra. His mother enrolled him in music class in hopes that the commitment would keep him away from a troubling group of friends.

At first, Marcus played violin only because his mother wanted him to play. He might not have stayed with music at all if his natural talent hadn’t been fostered and acknowledged by his teachers. “I started getting really good at it, and I liked the attention that I was getting,” he says. “It builds a lot of confidence in you to become good at things, and people recognize you for doing something at a high level.”

Marcus was accepted at Parkway Middle School, an arts magnet in Lauderhill, Florida, and eventually landed at Dillard High School, where he transitioned to viola and met Baptiste. He then received several full-ride scholarship offers for music degrees, accepting one at Florida International University. He was concerned, however, that his options as a professional musician would be limited. “I had just assumed it would have to be under a classical umbrella of some sort,” Marcus says. “I really never heard any other kind of violin music before.”

Black Violin is Born

Marcus’ professor, Chauncey Patterson, quickly dispelled this notion. On Marcus’ first day of lessons, Patterson gave him a tape featuring jazz violinist Stuff Smith. The album title: Black Violin.

“It really changed my life,” says Marcus. “He was playing, but he was doing it in a way I had never heard before. I felt like when he played violin, it spoke to me. It had soul … I could hear him. I could feel him.” He shared the tape with Baptiste, and the sound stuck with them throughout their college careers.

The eventual blend of hip hop and strings came naturally. “The idea was just something that always was in us,” Baptiste explains. “We were hip hop before we were classical. And hip hop’s whole thing is being creative and expressing yourself. For us, it was natural to do that on the violin.”

A failed demo contract with a performer made Marcus and Baptiste decide to form their own group. As for a name, Baptiste had an answer ready: Black Violin, as homage to Stuff Smith, the man who had sparked the soul behind violin. Within the group, Marcus plays violin, and Baptiste plays viola.

Black Violin, the album, had shifted Marcus and Baptiste’s perspectives on what string music could be. Black Violin, the band, would shift the world’s perspective as well.

Dream Bigger

Kev Marcus and Wil B. of Black Violin
Kev Marcus (left) and Wil B.
Looking back, Marcus attributes a lot of his success in music to the immense opportunities he was given in school and the encouragement he received from his professors to continue. “Music education is the reason why I am who I am,” Marcus says. “I can’t understate it at all. Music education has provided a better life for me and my family. I have my career, I have my calling, I do what I love for a living because of it.”

Marcus and Baptiste strive to give similar opportunities and encouragement to students. “We know that we have a responsibility … not just to music education but also trying to instill confidence in kids and trying to get them to think in different ways,” Marcus says.

While on tour, the duo often invites local youth orchestras to perform a song with them. “We try to do that a lot because those kids will never forget that,” says Baptiste. “And dreaming will be a little easier now because of that [experience].”

Making the instrument your own is an important theme that Marcus tries to pass along to young musicians. “Try to find ways to educate kids and make this instrument theirs, so it’s not just Bach’s or Beethoven’s; it’s theirs,” Marcus advises. “When my instrument finally became mine, I would never let it go. And I would always be working to try different things and trying new ways to make it different and to really take it to another level.”

Additionally, Marcus always sends the following message to young musicians: “Use the time you have wisely because when you get older, the time you [used to] have to sit around in a shed and practice, you don’t have [any more]. Your time to practice is limited, so use the time you have now.”

This perseverance and success is embodied in the way Marcus practices and performs — habits stemmed directly from his professors. “My teacher would always say five minutes of focused practice is better than an hour of just playing around,” Marcus says. “We use every instance that we play to practice. It’s all about if you’re going to play something or if you’re going to concentrate on what you’re playing. Right now I feel like my bow isn’t going as straight as I would like and my pinky finger is flaring on my right hand. These are the things that I’m thinking about constantly when I’m playing.”

Even when a performance doesn’t go as well as he hopes, Marcus keeps his head up. “I just practice, just keep trying to be better,” he says. “Those [tough] moments may seem long [at the time], but they’re really quick moments in life, and you move on.”

Building an Academy

Marcus and Baptiste are currently in the development phase for opening a Black Violin Music Academy to provide music lessons in their hometown of Fort Lauderdale. The curriculum will feature classical training as well as help students determine their musical passions. The hope is to gather the students into a full orchestra. “We want it to be 40 to 45 minutes of complete fundamental classical … but the last 15 has to be whatever each individual student wants to do,” says Marcus.

The plans include a studio where Black Violin can record and produce their own tracks and videos, allowing students to watch. Students will also be able to reserve rooms for practicing, jamming together or developing their own songs and ideas with teachers and other classmates. “We would use it to do our professional stuff, but students would be able to come in and see behind the scenes,” Marcus explains.

For students, Marcus already has exceptional advice. “Always try to think about things differently. A lot of what our focus is and what our mission is, it’s more thought process than it is musical mastery … to be everything you could ever be, to reach and dream and think big about everything you could possibly do.”

Stay True

Kev Marcus

The keys to success for Marcus and Baptiste were persistence and staying true to themselves. When Black Violin started, the idea of hip hop violin was completely foreign. Club promoters and prospective clients would look at the two of them, instruments in hand, and often turn them away without listening.

However, Black Violin strove to break the mold. When shunted from a club, Marcus and Baptiste would camp outside the building instead, playing on the streets. The response was so overwhelmingly positive that club owners would often have no choice but to reconsider. “We were very ambitious,” Marcus says. “We worked very hard. We wouldn’t take no for an answer.”

They soon found themselves onstage performing Amateur Night at New York’s Apollo Theater for the 2004 season, taking home first place. Using this as their launching pad, Marcus and Baptiste soon began recording and touring. Black Violin has since toured with Linkin Park in addition to embarking on its own tour around Europe, Thailand and the United States. The group has also been featured on numerous television shows and is currently working to develop a program for Fox.

Black Violin also received the honor of playing at the inauguration of President Barack Obama. “That was one of the experiences that you can never really top

A Powerful Message

Black Violin’s most powerful message is to think differently, whether it’s in music or in life. One of the group’s biggest hits, “Stereotypes,” challenges listeners to overcome preconceived ideas.

Whether it’s a kid from Florida becoming a world-renowned violist or the concept of violin making a significant break in the hip hop world, the message of Black Violin has always been the same: Be different, value your education, and use it to express who you are.

“It’s really interesting to step away and change people’s perception of what’s possible,” Marcus says. “The reason why people pay to see us isn’t because we’re the best violinists in the world. The reason people pay to see us is because we’re thinking about it in a way that most people haven’t and won’t. And to me, the people in this world that do amazing things … are not necessarily the smartest; they’re just the ones that approach it from a different angle.”

All photos © 2016 Colin Brennan, All rights reserved

This article originally appeared in the Fall 2016 issue of Yamaha SupportED. To see more back issues, find out about Yamaha resources for music educators, or sign up to be notified when the next issue is available, click here.

Case Study: Reinventing a Music Program

At O’Fallon (Illinois) Township High School, when school ends, music can still be heard drifting through the halls as high school musicians guide middle schoolers in after-school private lessons.  The program is just one of many opportunities created by Dr. Melissa Gustafson-Hinds — known as Dr. G — to connect band students of all ages together.

Throughout her eight years as director of bands at O’Fallon, Dr. G has gone above and beyond the usual job description to give students access to music at all levels. She has reinvented her school’s jazz program, saved local middle school musicians from the disastrous effects of budget cuts and taken her high school students to prestigious competitions, festivals and bowl games.

A Place for Everyone

Gustafson-Hinds

O’Fallon’s band program, which features a marching band, four concert bands, three jazz bands, a pep band and a percussion ensemble, has something that will appeal to every musically inclined student, regardless of age or skill.

When Gustafson-Hinds first began teaching at O’Fallon, the jazz program had been defunct for about a year. Today, there are three jazz groups that cater to different interests and abilities. The smallest, called the “early bird” band, focuses on learning improvisation. The other two groups perform big-band tunes and are separated by skill level.

“I met with Dr. G and talked about what she envisions for her program,” says Dr. Martha Weld, O’Fallon Township school district’s assistant superintendent. “For jazz band, [we] created an additional level to make sure we were hitting kids at their skill levels. Some were under-challenged, some were over-challenged, and so we [separated] them.”

In addition to supporting Gustafson-Hinds as an administrator, Weld has also been a band parent for the last four years. Her daughter, a member of the marching band, concert band and pit orchestra for the school musical, graduated from O’Fallon in June 2016.

At events like Bands of America, Gustafson-Hinds makes connections within the band community.

The concert band program at O’Fallon is broken into four ensembles based on skill and ability. Because O’Fallon has a separate campus just for freshmen students, one of these ensembles consists of freshmen exclusively. Next is the symphonic band for students who enjoy music as a hobby. “They really enjoy band but don’t see the seriousness of being in [private] lessons,” Gustafson-Hinds says.

The top two concert bands are made up of mostly upperclassmen with a strong dedication to music. Most members are in the marching band and take private music lessons as well. “Our top ensemble just performed for the Music for All Concert Band Festival,” reports Dr. G. “Most of them are my student leaders in marching band. [They] are required to have private lessons.”

The band program also features a variety of smaller groups, such as a percussion ensemble run by her husband, Evan Hinds; a pit orchestra; a back-up band for the show choir; a madrigal brass band that performs with the choir; and a student-run flute choir.

When Gustafson-Hinds first arrived at O’Fallon, the marching band had about 150 students. Now, it averages 220 members per year. “Kids don’t have to be in marching band, but [they do] if they want to be in the top concert ensemble,” she explains. When football season is over, marching band students join the pep band and perform at basketball games.

Gustafson-Hinds encourages students in other ensembles to break out of their shell and try marching band. “I’ll reach out to them, especially if I see they’ve got the personality of a marching band kid,” she says. “Some of these kids just need a little encouragement.”

Uniting a Community

Gustafson-Hinds has grown the band program over the years with a mix of successful recruitment and leadership strategies. She believes in the power of personal connection, which is why she is so involved with middle school students before they get to O’Fallon.

“We have a handful of joint feeder events,” she explains. “We do a combined halftime show with them. We do a Christmas concert. I do clinics with those bands. I try to attend as many [of their] concerts as I can. I try to be visible to those kids. That bridges the gap.” O’Fallon also hosts a joint band camp event for middle school students to learn about high school marching band.

A few years ago, Gustafson-Hinds stepped up and became a hero to a group of middle school musicians. When funding was cut at one of O’Fallon’s feeder middle schools, extracurricular programs like music and athletics were immediately eliminated. Wasting no time, “at the very next board meeting, I had a plan put together [to] run that program with my band staff.”

That program, called the O’Fallon United Community Music School, was operated through the local park district, and O’Fallon band parents put on a variety of fundraising events to help, including a parade, a comedy night and bake sales. “As band parents, we became actively involved in fundraising for that program,” Weld says. “We were happy to do it because we know the impact it has on our children when they get to the high school.”

Within a year, the middle school was able to allocate funds for music again, and the band program was reinstated, allowing the O’Fallon United Community Music School to come to an end. “Looking back, that was a pretty remarkable thing we did,” says Gustafson-Hinds. “I’d do the same thing again if it happened.”

Running the O’Fallon United Community Music School gave Dr. G a renewed perspective on the importance of being involved with feeder schools. “I talk to junior high teachers weekly,” she says. “We’ve got our students teaching kids who come to the high school to get lessons. Before kids get [there], they know [about] the band.”

Beyond improving relations with feeder schools, Gustafson-Hinds’ strong fundraising activities have created new opportunities for the high school band program. Over the past few years, band fundraisers have included a school-wide craft fair, a 5K race and a silent auction dinner. The band has also performed at a St. Louis Cardinals game and raised money through ticket sales.

High-Profile Performances

O’Fallon’s band marches at the 2015 Tournament of Roses Parade.

With a dedicated set of students and a plethora of fundraising opportunities, Gustafson-Hinds has been able to take the band all around the country to perform at places such as Carnegie Hall in New York; Pearl Harbor in Honolulu, Hawaii; Walt Disney World in Orlando, Florida; the BattleFrog Fiesta Bowl in Glendale, Arizona; and the Tournament of Roses Parade in Pasadena, California, with an upcoming trip planned to the Capital One Orange Bowl in Miami Gardens, Florida.

“A lot of performances we’ve done have been building up,” Gustafson-Hinds says. “The better the band gets, the more of these select events we get to do.”

The band has also performed at numerous Music for All marching competitions and national festivals over the past eight years. This participation has given Gustafson-Hinds the opportunity to network and gain respect within the band community. “I do a lot behind the scenes for the kids,” she reports. “I tell them I’m their agent.”

Dr. G believes these connections have helped the band strengthen their applications for more prestigious performance opportunities. The band’s strong track record also comes from its ability to be humble and accept feedback. Previously, the O’Fallon band had applied for but was not accepted to participate in the Tournament of Roses Parade. The parade committee gave O’Fallon feedback on what to improve — it wants bands to tell a story and to show what makes its group unique.

Another factor that makes O’Fallon unique is its proximity to Scott Air Force Base. Roughly 40 percent of the school’s students come from military families, which Gustafson-Hinds emphasized in her successful application to the Tournament of Roses the following year. The band put together a repertoire of military music to play at the parade, including the “U.S. Air Force Song” and jazz renditions of traditional patriotic music.

For Gustafson-Hinds, directing a band is about constant improvement for her students. “Being a teacher is being a service to others,” she says. “The best teachers are the best learners.”

Even with all of the journeys the O’Fallon band program has taken, the satisfaction felt by students and parents often comes from within. “My proudest moments aren’t what the community would recognize,” Weld, a graduate of O’Fallon herself, says. “[They’re] when you see [the students] at the end of an eight-hour practice, and it’s 105 degrees, and Dr. G is asking them to give 100 percent, and they’re still giving it.”

Photos courtesy of Lisa Blankenship, LB Photography

This article originally appeared in the Fall 2016 issue of Yamaha SupportED. To see more back issues, find out about Yamaha resources for music educators, or sign up to be notified when the next issue is available, click here.

What Playing Keyboards Means to Me

Playing keyboards means many things to many people, but for me it means healing.

I’m a pretty happy person in general. But, like most people, I experience moments of anguish, loneliness and aggravation — whether it’s from work or from my personal life. And, like most people, those times tend to set my emotions off balance, at which point I look for a way to re-center myself.

There are, of course, various well-known methods to cope with such feelings, from pounding on a pillow to meditation. But when I go through these moments, I’m draw to my keyboard for comfort.

Once my playing abilities got beyond basic sight-reading, I discovered that I could use my emotions to guide the moods that a piano can create. Then, when I made the transition to digital keyboards, I found that the multitude of sounds and effects they provide helped to enhance these moods further still. Sure, an acoustic piano can sound amazing by itself, but when you can add in the accompanying sound of a whole orchestra — complete with the reverb of a concert hall — it makes the experience even more moving.

Interestingly, the lowest moments have yielded the sweetest music from me. In those moments, I find that I am able to play with pure emotion. During one of the most challenging times in my life, I found myself going through moments of very high highs followed by very low lows. The emotional see-sawing finally got so intense that I ended up moving to a new town where I knew no one … which only added loneliness on top of everything else I was going through!

I realized that I needed to get myself in balance once again. That’s when I found myself drawn to playing sad love songs on my keyboard — songs like Chris Isaac’s “Wicked Games,” One Republic’s “Apologize,” and Imogen Heap’s “Hide and Seek.” I laugh when I think about it these days, now that I’m in a better place. But at the time it was important that I go through playing those songs, along with other emotionally charged pieces that I wrote myself. Just the act of bringing my inner struggles to the keyboard and hearing them manifest as music made me feel better. It allowed me to experience those raw feelings for what they really were and to be honest with them.

The product of those cathartic playing sessions was to bring me peace. They helped me let go of feelings that were eating me up inside. And, interestingly, I found that once they finished serving their purpose, playing those same sad songs later on did little for me. Just like a child that grows out of playing with dolls, I was ready to move on and make room for happier things in my life.

Playing a musical instrument is an intensely personal experience. For me, it has provided a powerful means to help recover from negative feelings. Best of all, I know that when my healing is complete and there is no longer that great urge to play sad pieces, my keyboard is still there to allow me to express the new-found happiness in my life.


Check out these related blog articles:

What Drumming Means to Me

What Playing Guitar Means to Me

Revstar: Great Look, Great Sound

You may already know that Revstar guitars are available in a variety of great-looking finishes, including seven new colors introduced at the 2018 NAMM show.

But what you may not know is that they also offer several different pickup types. Our development engineers carefully tested dozens of variations, with the goal of creating the perfect tone for each of the eight Revstar models. And while these pickups are all fairly standard sizes and have classic specifications, don’t let that fool you: they are each designed and custom-wound to perfectly match the character of each guitar.

The Materials

Magnet types are either ceramic or Alnico. Ceramic magnets are generally very hot, delivering high output and bright, punchy sounds. Classic Alnico magnets offer a very warm, vintage-style tone.

Wire coatings. There are three different wire coatings in Revstar pickups: Plain enamel, known for a dark and very focused tone; heavy Formvar coating, which is balanced, super smooth and warm … though at times can be a touch too bright; and polyurethane, used in some of the designs for a warmer, more open tonality.

Baseplates. This component is often overlooked when scoping pickups, but they can make a huge difference sonically. For instance, brass plates have a much brighter tone than German silver ones. Guitars that are overly bright can therefore benefit from pickups with a German silver baseplate to warm up the sound and create some balance.

The Models

The Revstar RS320 features YGD HH3 humbuckers. These utilize a ceramic magnet combined with a brass baseplate. This combination ensures a bright, punchy tone that is perfectly balanced for a guitar such as the 320, which features a solid nato body (nato is a wood similar to mahogany) with a set-neck construction.

Body of an electric guitar laying face-up with the pickups clearly showing.
RS320 pickups.

The RS420 features YGD VH3 humbuckers. This design is custom-wound, with Alnico 5 magnets and German silver plates, which gives you a versatile and impactful medium output tone with true character.

Body of a blue and silver color electric guitar laying face-up showing the pickups clearly.
RS420 pickups.

The RS502 and RS502T models come with YGD V5 P90s. These are custom wound P90-style pickups with Alnico 5 magnets, German silver baseplates and plain enamel wire for a rich and focused tone. They have a moderately high output, with a DCR (short for “DC Resistance,” a measurement of pickup output) of 9.3k and 8.3k (for the 502 and 502T, respectively), which is very similar to a humbucker.

Body of a black electric guitar with silver details lying face-up to show the pickups.
RS502 pickups.
Body of a green and yellow electric guitar lying face-up to show the pickups.
RS502T pickups.

RS720 Revstars feature YGD V5 custom pickups. These are unique Filtertron-style humbuckers with Alnico 5 magnets, under-wound polyurethane wire and brass baseplates for an ideal balance of warmth and brightness. With a low output DCR (4.3k [neck] / 4.9k [bridge]), these yield super clean, clear and shimmering tones on low-gain sounds, contrasted with dirty and raw tones on high-gain sounds. Unmistakably classic, but completely different — with character by the bucketload.

Body of a pale wood toned guitar lying face-up to show its pick-ups and pick guard.
RS720 pickups.

The RS620/820 YGD V5 humbuckers are rooted in tradition, but with a modern design. Constructed with Alnico 5 magnets, German silver baseplates and heavy Formvar wire for rich, open, balanced vintage/modern tones, they offer a DCR of 8.3k (neck) and 8.8k (bridge). Educated players love the sound and versatility of this humbucker because it delivers outstanding clarity at any gain level — especially useful in the gigging domain.

Body of a dark gray electric guitar lying face-up to show it's pick-ups and pick guard.
RS620 pickups.
Body of a brown and beige electric guitar lying face-up to show it's pickups.
RS820 pickups.

The RSP20CR YGD V7 humbuckers also feature Alnico 5 magnets, German silver baseplates and heavy Formvar wire, but this pickup is voiced for a slightly more dynamic, articulate tone. The DCR measurement here is around 8.4k (neck) and 8.8k (bridge), resulting in the perfect balance between gain and clarity.

Black electric guitar laying face-up showing the pick-ups.
RSP20CR pickups.

Dry Switch

A new feature developed specifically to complement Revstar pickups is the “Dry Switch.” Using a familiar push/pull tone pot, this is a passive circuit designed to filter out low frequencies and give your guitar the punch and clarity of a single coil pickup, but without the hum and hollow tone often associated with split humbucking pickups. The Dry Switch works on both humbuckers and P90s for a  unique tonal experience.

Small metal dial that is slightly raised above the body of the guitar face where it attaches.
Dry Switch “on” position
Close-up on small metal dial lying flush on a guitar face.
Dry Switch “off” position


Click here for more information about Revstar guitars.

Want to know more about the history of guitar pickups? Click here.

Creating a Movie Score and a Ballad in Genos

Genos is our newest and most powerful Digital Workstation keyboard ever. Whether you use it for songwriting, live performance or recording, Genos will help inspire your musical creations.

Here’s a video that shows how Genos can create a full-blown movie score:

Genos also provides all the necessary tools to craft a classic pop ballad, as shown in this video:


Click here to find out more about Genos.

Awareness of the Unknown

A typical first week at a new job consists of getting acquainted with coworkers and gradually easing into things, right? Wrong. Well, at least not for me at Yamaha …

Picture of author - a young man in a logo'd short sleeve shirt leaning on the packing cases for the equipment.
Hanging out in our warehouse with a NEXO line array.

An Unconventional Beginning

My first week on the job was a whirlwind, in a good way. On my very first day, I went through the normal orientation that new hires are required to attend, and took care of the formalities of starting a new job — paperwork, presentations, office tours, various introductions, etc. The day went as expected, and I was excited about new beginnings, but I was already starting to feel a little anxious, too.

On my second day, I was up early, but it wasn’t to get to the office on time. I had a plane to Orlando to catch! That’s right, I just started my new job and I was already being sent to my first ever trade show, which just happened to be the behemoth that is InfoComm, one of the largest held in North America.

It would turn into an experience that solidified my unconventional beginning.

My Eyes Get Opened

While at InfoComm, I did my best to try to “drink out of a fire hose,” as some say around the office. The whole pro audio market was brand new to me, so there were countless things for me to discover and learn about, which was a bit intimidating at first. Despite this, I took the show head-on and let my curiosity run wild.

Through my booth explorations and demo room listening sessions, I learned about the companies, their products, the types of products out there, product applications and much more.

Even though I’ve been to countless concerts, I never knew that there was a term for the speakers that hang in a column on each side of the stage (they’re called a line array). I also didn’t know that there was a metric for measuring loudness (SPL, which stands for Sound Pressure Level), or that there are companies that specialize in wireless audio for commercial purposes. These types of things all contributed to what I can truly call an eye-opening experience — one which then opened up a whole new world.

The New Frontier

What’s important about this is that this trip evolved my basic knowledge into a vast frontier of the unknown that I’m continuing to explore today. If I hadn’t been put into that intimidating situation, I wouldn’t have grown from the experience, and I wouldn’t even have the simple awareness of those things that I want to learn more about.

The moral of the story? Put yourself out there and find your own new frontier to explore!

Photo courtesy of the author.


Check out Sean’s other blog posts.

Three Reasons to Add a Subwoofer to Your Sound Bar

If you’re like me and you’ve rocked a sound bar as the primary audio source of your home entertainment system for a solid stretch of time, you might think that’s all you need. But since adding a subwoofer to my system, I’ve learned better. In fact, I’ve come to the conclusion that no home entertainment center is complete without it.

Even if the basic sound bar you’re currently using came with a built-in subwoofer, it’s okay to want more bass. After all, only a subwoofer gives you the low end you need when a T-Rex stomps around in Jurassic Park. Only a sub provides the rumbling bass that completes any battle scene in Game of Thrones. And if you’re a music lover into hip-hop, EDM, heavy metal or other bass-heavy genres, a subwoofer will not only become your all-time favorite audio component ever, it will make your friends want to visit more often.

Still not convinced? Here are three reasons why you should add a subwoofer to your sound bar:

Depth of Sound

Have you ever come home after seeing an action movie at your local theater and wished your system could reproduce the bone-shaking rumble you felt during the big finale? It can, once you add a subwoofer, which is able to recreate the low bass signals that you can’t get with just a sound bar.

While not quite as powerful as the monster speakers they use in theaters, the Yamaha NS-SW100 powered subwoofer helps recreate the cinematic feeling you get in a traditional movie theater by incorporating innovative technologies like a Twisted Flare Port that maximizes the low-end thump coming from its 10″ woofer.

Small square subwoofer.
The NS-SW100 powered subwoofer.

Size Matters

We all know the struggle with placing furniture in a small living room or den. But because low frequency sounds are largely omnidirectional (that is, for the most part you can’t tell exactly where they’re coming from), there are always lots of options when it comes to the placement of a subwoofer.

To both maximize the audio experience and take up the least amount of space, many people opt to place their subwoofer on the floor, right next to their entertainment center, with the sound bar directly underneath the TV (mounted or on the cabinet itself).

The Yamaha NS-SW210 is a bit taller than the NS-SW100 but half as deep, allowing it to be tucked nicely next to your entertainment cabinet. If you have a space issue and are interested in upgrading from an older model sound bar to a new one, consider the Yamaha YAS-207, which comes with a wireless subwoofer and gives you plenty of power in a slim design.

Entertainment area of a living room setup with a sun shaped clock on wall, a wood credenza with a flat screen TV and sound bar on top and a subwoofer and a floor lamp on rug on floor.
For those looking to upgrade to a new sound bar and subwoofer combo, the YAS-207 is a solid option.

Look and Feel

Its appearance as a simple black box below your line of sight, placed in a spot that doesn’t typically get a lot of eyes on it, allows pretty much any subwoofer to blend in well with virtually any home environment. You’ll find that there are plenty of options out there to choose from, including the uniquely shaped Yamaha YST-FSW150, which can be mounted horizontally or vertically.

Ready to go out and buy a new subwoofer? Great! But first you’ll want to make sure it’s compatible with your sound bar. You can do this easily by checking the back of your sound bar. If it has a subwoofer output jack, it will work perfectly with any powered subwoofer. All individually sold Yamaha sound bars are compatible with this function, including the YAS-107, YSP-5600 and ATS-1070.

Back of a sound bar with subwoofer showing the various connection points.
Check the rear of your sound bar to ensure there is a compatible subwoofer output to pair with the subwoofer’s input, as seen here on the back of the Yamaha YAS-107.

Enjoy that extra low end!


Click here for more information about Yamaha sound bars.

Click here for more information about Yamaha subwoofers.

BB: Beyond Classic

For 40 years, the Yamaha BB series have been the instruments of choice for some of the biggest names in bass. Through the decades, we’ve incorporated what we’ve learned from these artists into every aspect of the BB’s design, construction and legendary tone.

Man playing bass guitar during concert with drummer in background.

The latest in the storied line of BB bass guitars deliver the superb sound and build quality that the instrument has long been known for, but in a smaller body with even better playability. They feature Alder/Maple/Alder construction for faster transmission of sound from the strings to the body and neck, a firmer 6-bolt miter neck joint for improved stability, and custom-wound pickups that achieve higher output gain while retaining the classic BB voicing.

Artist Videos

Here’s a video showing Abraham Laboriel, Sr. going through some of the new Yamaha BB models to demonstrate how his distinct style merges with our latest designs:

Not long ago, John Fogerty bassist James LoMenzo met with us at S.I.R. Hollywood to play a new BB for the very first time. Check out the video:

And here’s Corey McCormick (Neil Young, Promise of the Real), who brought his looping pedal along to Village Recorders so he could jam with a new BB and capture the interaction that happens within his own band:

Click here for more information about the latest Yamaha BB series bass guitars.

The Venova: Game Changer for Elementary School Students

I’ve always been enthusiastic about new technologies in musical instruments and their applications for students.

closeup of Venova mouthpiece

When videos for the new Yamaha Venova™ began appearing on YouTube™ in Japan, the first thing I thought was, “Can I take this instrument and teach little kids to play?”

I am a clarinet and saxophone teacher/performer, youth orchestra director and long-time K-12 ensemble music educator, and one of the greatest challenges that I face is that I often get students in the K-3 grade range who are interested in playing clarinet or saxophone but are far too small to hold and play the standard-sized instruments. I experimented with some of the different scaled-down plastic children’s instruments available on the market but was always disappointed with the complexity and tone quality.

The Venova has finally reached general availability in the United States, and I was delighted to recently see it in my local music store. The Venova is billed as a “casual wind instrument” and its role in the music marketplace as being akin to the ukulele, which lots of folks find more accessible and portable than the guitar. I think this is a spot-on characterization.

I now own two Venovas and spent some time learning to play them and experimenting with clarinet and saxophone techniques. While I found the included soprano saxophone mouthpiece — essentially the stock Yamaha 4C model — effective to use, I wasn’t quite as happy with the response of the synthetic reed provided with it. Since then I have used a Legere Signature Soprano Saxophone reed in strength 3.0 and believe that this is the exact “sweet spot” for a player with an established embouchure. With a beginner, I would try the 2.0 and 2.5 strength versions.

Game Changer for Young Students

closeup of someone playing the Venova

The size, weight, and general simplicity make the Venova much easier to work with for a K-3 student. My 5-year-old son tried it out and was able to achieve a characteristic sound on the very first try. The low cost of the instrument — around $100 — also makes it much more accessible. Anyone who has tried a $100 clarinet or a $200 saxophone knows that those barely qualify as real instruments, yet the Venova is a fully chromatic instrument with a very impressive, complex tone quality that belies its size and appearance.

Most importantly, compared to a recorder, the Venova’s soprano saxophone mouthpiece, reed and ligature allow a young child to develop the appropriate musculature for a future clarinet or saxophone embouchure. The setup lends control to the tone and voicing on the instrument that a recorder simply does not have, and the smaller size of the mouthpiece is more appropriate for younger children with smaller mouths for which a standard clarinet or alto saxophone mouthpiece are far too large to deal with.

As music director of a youth orchestra, I have the privilege of working with 150+ talented young musicians every season. More recently, through the efforts of my wife, Chika, and our friend and colleague, Jenny Visick, we have launched a string program that offers instrumental instruction to violin and viola players as young as 3 and 4 years old. We are now looking at introductory woodwind classes using the Venova, and plan to launch a K-3 beginning woodwinds course shortly. I will soon be writing/arranging custom arrangements for Venova solo and ensembles in preparation for our class launch.

The Venova NAMM Experience

I attended the 2018 NAMM Show in February as a guest artist and spent time at the Yamaha Venova exhibit, where I had the pleasure of playing a variety of repertoire from Bach, Gershwin and John Williams for attendees. The most significant thing about my experience during my three days there was the genuine shock and smiles that came from people once they heard the Venova’s true potential. My overall impression was that the expressive qualities of the Venova went far beyond their expectations, at a cost that makes a fully chromatic woodwind instrument extremely accessible.

Click here for more information about the Yamaha Venova.

Yamaha Mallet Resource Guide

We created this guide to help students learn more about mallet percussion and help them develop their knowledge and musicality, thus establishing a solid foundation on which to build technical and musical skills. It is designed to act as an effective supplement to any classroom method book and includes exercises, scales and études.

The Yamaha Mallet Resource Guide is split into the following five sections:

1. Music Fundamentals

An introduction to music fundamentals, including the treble clef, major scale, note values, dynamics, the circle of fifths and a glossary.

2. Hand Warm-Ups

Basic exercises to get the student’s hands moving.

3. Major Scales

All of the major scales are notated for easy reference.

4. Scale Patterns

These exercises can be used to strengthen the student’s knowledge of the major scales.

5. Études

These short études will help the student develop their musicality.


Click here to download the Yamaha Mallet Resource Guide.

The Key Is Key

I recently came across a video on YouTube that made me laugh.

Nothing unusual there, I know, but this one also did something else: It made me think.

The imagery was the famous high school gymnasium promo video that was made back in the early 1990s for Nirvana’s classic hit “Smells Like Teen Spirit,” but the accompanying audio was a very cleverly redone version of the music played in a major key.

What you hear is a well-crafted pop song (Kurt Cobain was nothing if not a skilled songwriter) in the vein of a Weezer or a Goldfinger … but, despite the familiar visuals, it has absolutely none of the emotional impact of the original.

I quickly discovered that both YouTube and Vimeo offer dozens of such videos — familiar songs like “House of the Rising Sun,” “Losing My Religion,” “Sweet Dreams,” even the theme from The Godfather, transformed (in some cases by humans, in other cases by computer algorithm) from a minor to a major key.

What an eye-opener! In every instance, the original intent of the song — to make the listener feel a certain way — had been rendered impotent. Not that you necessarily get a wash of good vibes when you hear these reworked versions … but you certainly don’t experience the same sense of connection, either.

Something even more striking occurs when you take a familiar song written in a major key and convert it to minor: The “sadness” of the minor scale manifests itself with an overly heavy hand. John Lennon’s normally inspirational “Imagine” becomes a dreary exercise in doom and gloom; Bobby McFarrin’s endlessly cheerful “Don’t Worry, Be Happy” turns into a dirge; “Wonderful World” will have you in tears … for all the wrong reasons. And once you hear “Happy Birthday” in a minor key, well, let’s just you may never want to celebrate another one.

Switching between major and minor keys within a song can be used to tremendous effect. The Beatles were masters of that trick, even in their early days. In their song “We Can Work It Out,” the verses (written by Paul, with optimistic lyrics) are in a major key, while the bridge (written by John, with a distinctly pessimistic slant) is in a minor key. Another great example is Paul’s “And I Love Her,” which moves between major and minor throughout its duration, creating tension and ambiguity … until it ends on a triumphant major chord that leaves the listener with a distinct sense that there is hope after all.

Clearly the decision to compose a song in a major or minor key has a big impact on how it is perceived by the listener, but the specific choice of key in which it is played (i.e., C versus B♭, etc.) can play a large role too. Over the centuries, certain keys have become to be associated with subjective terminology. For example, C major is described as “open and noble”; E♭ major “solemn and imperial,” etc. Whether or not this is objectively true, there is little doubt that the choice of key has an impact on the listener’s response to the music being performed.

There are several reasons why. For one thing, certain keys will naturally sound better on particular acoustic instruments due to their physical construction. As an example, the keys of E, A, D, and G work especially well for pop songs since they conform to the open strings of guitar and electric bass, which tend to “ring” and therefore cut through better than fretted notes. Similarly, violinists usually prefer playing in the key of C, which has maximum open strings. Playing in other keys — even in D♭, just a half-step away, not only makes it harder to play in tune, but the most important notes do not resonate as well. The same is the case for other instruments — even, surprisingly, digital keyboards, where you can easily change keys at any time simply by pressing the transposition button.

In addition, most musicians have better improvisational chops in some keys than they do in others — only the most advanced players have equal facility in all keys. Irving Berlin, who wrote standards like “White Christmas” and “Alexander’s Ragtime Band” back at the turn of the 20th century, composed on piano despite the fact that he could only play in the key of F♯, where the black notes predominate. (He got around this limitation by using a transposing piano that employed a mechanism to physically move the hammers over the strings. This allowed him to hear his music in a variety of different keys while continuing to play solely in F♯.)

Perhaps the people most affected by the choice of key are vocalists, who may not even be able to reach the highest or lowest note of a song (think about some of the horrendous renditions of “Star Spangled Banner” you’ve heard) if it is not played in the optimum key.

Portrait of Arif Mardin.
Arif Mardin.

This was brought home to me by none other than iconic producer Arif Mardin (Aretha Franklin, Chaka Khan, Bee Gees), whom I interviewed a few years before his untimely passing in 2006. During our conversation I asked him what advice he would give an artist making their first commercial recording in a professional studio. I thought he might respond by talking about the importance of choosing the right songs, or avoiding common mixing pitfalls. But his answer — especially the second part of it — surprised me.

“First, read the lyrics of the song you’re recording,” he said. “Ask yourself, what is the song about? What kind of musical setting is required by the melody? Secondly, the producer must get together with the singer and find out how he or she sounds when performing that song. The selection of the key is very important. A song may sound fantastic in a key that forces the singer to strain, but it may sound terribly unimportant when the singer is very comfortable in a lower register — or vice versa. Barry White songs, for example, may sound awful in a high key. For me, a record is almost like a mini-film: you have to invoke imagery.”

Imagery. That’s really what it all boils down to when making music, or even when just listening to it. And there, more than anything, the key really is key.

Photo by Julie Mardin, courtesy of Joe Mardin.


Check out Howard’s other postings.

Discover Yamaha TransAcoustic Guitars

For acoustic guitar enthusiasts, playing a TransAcoustic guitar is quite an experience. Imagine hearing a lush chorus or ambient reverb coming from the guitar’s sound hole, without the use of an external effect box or amplifier.

When TransAcoustic technology was first introduced two years ago in our handcrafted L Series instruments, it caused a major stir in the guitar world. And now it’s available in the legendary line of Yamaha FG and FS acoustic guitars too!

Where Does the Magic Come From?

There is one commonly asked question when it comes to TransAcoustic guitars: “How does it do it?”

The answer lies in a small metal device called an actuator, installed on the inside surface of the back of every TA guitar. This reacts in response to the vibrations of the strings when the guitar is being played. The actuator then transfers those vibrations to the rest of the guitar and to the air in and around the body, generating authentic reverb and chorus effects that project acoustically through the sound hole.

Small round metal disc held in place against a wooden frame with a metal bracket.
TransAcoustic guitar actuator.

All this is controlled by three simple knobs that let you adjust the amount of chorus and reverb, as well as a line out volume level for the built-in piezo pickup — which, again, is not needed to create the TransAcoustic effects, although the effected sound can indeed be sent to an external amplifier if you like.

Woman's hand resting on the side of the body of an acoustic guitar pointing to three little plastic knobs on the side of the guitar..


Click here for more information about FG-TA and FS-TA guitars.

MONTAGE 2.0 Is Here!

The MONTAGE OS v2.0 firmware update adds new sound, control and workflow enhancements, including:

  • Voice and Performance compatibility with MOTIF XS, MOTIF XS and MOXF so you can easily move sound content from your older MOTIF to MONTAGE and experience new DSP, the Pure Analog Circuit output and Motion Control Synthesis with classic content
  • 99 New Performances that use fewer Parts, making them perfect for customizing with your own sounds or use with a DAW
  • A new Overview function for controller source and destination visualization
  • Improved Control Assign simplifies Super Knob, Motion Sequencer and Envelope Follower assignment
  • Performance on boot — perfect if you have a favorite sound or are doing extended work on a particular song
  • User and Library Audition phrases that allow you to add custom demo phrases to your Performances
  • New Global override settings that allow you to maintain tempo and A/D set ups between different Performances

… and much, much more!

Check out the video below:

Click here for information about (and links to download) MONTAGE OS v3.5 and MODX OS 2.5.


For more information about Yamaha synthesizers, visit yamahasynth.com

How to Add New Songs to Your CSP

Logo for Yamaha app Smart Pianist that shows a graphic of a piano viewed from above and the lid is multiple layers like a pages of a book that are in motion.

In last month’s blog posting, I discussed how the Smart Pianist app, in conjunction with the new CSP Clavinova, allows you to learn to play your favorite songs by creating a piano accompaniment score, a chord chart and StreamLights above the keys … and all this just from the audio file!

Typically, you don’t need to “load” songs into Smart Pianist, because content is normally derived from your iTunes® library. In other words, when you buy new songs from iTunes for your computer, tablet or smartphone, you are actually also buying new songs for your CSP. (I didn’t realize this the first time I opened a prototype of Smart Pianist during development and looked at the Music Library. I remember being amazed that the engineers had included content that exactly matched my musical tastes, until it dawned on me that I was just looking at my iTunes library! Duh….)

Screenshot of app's menu with two columns. On left is a column of choices headed by "Song Select" with the "music library" choice indicated as chosen. On right hand side are the the items for that choice with a list of artists' names and their image.

You may be wondering if you can load additional songs into Smart Pianist without buying new songs in iTunes. You sure can! In fact, there is memory inside the app for just that purpose. It’s in an area called User Songs, located directly beneath the Music Library, as shown in the illustration below:

Screenshot of app showing menu with "user songs" indicated as chosen.

There are several ways in which you can load audio songs — or even special MIDI files like Kooky Karaoke, CueTIME and Follow Lights — into the User Songs area without using the iTunes gateway. In this posting, we’ll describe how it’s done.

Here’s What Won’t Work

While you may be tempted to copy audio or MIDI songs onto a flash memory device and use one of the USB “To Device” ports on the CSP to load songs, that’s not a procedure that will work. That’s because these USB ports are not for loading data, but for connecting to the iOS device running Smart Pianist as well as accessories like the Wireless Lan Adapter (UD-WL01) that come with the instrument. The only way to load songs into the CSP is through Smart Pianist. In other words, you don’t load new songs into the Clavinova; you load songs into the app, and the app does the loading of the songs directly to and from the CSP.

Here’s What Will Work

Fortunately, there are several ways to get additional songs into the CSP User Songs area, all made possible by existing Apple® iOS file exchange protocols. Here’s a list:

1. Dropbox (access is built-in to the app)
2. Airdrop from one Apple device to another
3. Emailing attachments
4. Texting attachments
5. Syncing using iTunes File Transfer
6. Downloading directly from websites into Smart Pianist

Let’s talk briefly about each:

Screenshot of upload page for files.

1. DROPBOX – This was the main portal that engineers had originally intended for loading additional songs into Smart Pianist. The process is simple: From within Smart Pianist, go to System > Utility > Dropbox and sign into your Dropbox account. (If you don’t have an account, get one! It’s free and the Dropbox “basic” account includes 2 GB of storage space.)

You only need to do this once, by the way. Signing into Dropbox from within the app will automatically create a folder and subfolder in your Dropbox account called “Apps” and “SmartPianist,” respectively.

If you then put .mid, .wav or .m4a files (i.e., MIDI, WAV audio, or MPEG4 audio) into your “Smart Pianist” Dropbox folder, they can be accessed directly by Smart Pianist and, from there, downloaded to your CSP. (Note that the CSP will not display songs that are not compatible). Here’s how it works:

Graphical symbol indicating download file of a black arrow pointing downward into a black outlined box.

To retrieve a song from Dropbox, go to the User Songs folder in Smart Pianist, then download from Dropbox by touching your iOS device’s IMPORT symbol, shown on the right:

You will then see the following dialog:

Screenshot of app with a pop up box with instructions for importing files.

Touch OK and you’re done.

You can also send files from Smart Pianist to Dropbox by using EXPORT: the files will automatically go into the designated folders when you select “EDIT.” (Note that the EXPORT symbol is not active until you select a song.) In short, think of Dropbox as your “cloud storage” for CSP. This EXPORT to Dropbox procedure is actually the only way to get songs out of the app for sharing. No more saving to a thumb drive!

2. AIRDROP – This is actually the option that I prefer. Using this Apple-exclusive technology, you don’t need to use any external service like Dropbox to get songs into your CSP. However, this can only be done between two Apple devices, like a laptop to an iPhone®, or iPad® to iPad. First, you must make your receiving iOS device available to “Everyone,” which means that all nearby iOS devices using AirDrop can see your device. To do this, go to Settings > General > AirDrop and make the selection “Everyone”:

Screenshot of Airdrop menu with options of Receiving Off, Contacts Only, Everyone.

Also, you must make sure that Bluetooth® and WiFi are set to “ON” in both the sending and receiving devices. Note that you do not need to pair with any other Bluetooth devices, and you don’t need to join any wireless networks, either — both Bluetooth and WiFi simply need to be “ON.” This allows both devices to “see” each other in the same room (at a distance of up to 30 feet). Then, when you “Accept” the file from the other device, Apple temporarily creates an Ad-Hoc WiFi connection between the two devices — no pairing or passwords required.

Once that’s done, simply find a file you want to send, then select the symbol for Download or Import. The other device will then appear above the other sharing options. When you select that device, a notification will appear on the receiving iOS device asking you to “Accept” or Decline”:

Screenshot of Airdrop interface with image of Sting and buttons to accept or decline the download.

When you “Accept” the file transfer on the receiving device, the receiving device will give you several choices to “Open with” and list all the programs that can use the file format you have selected. As long as you are sending a .mid, .wav or .m4a file, Smart Pianist will be listed as one of the choices. (If it isn’t listed, you’ve sent a different file type.)

Screenshot of Airdrop interface listing the options to use for opening the file, icluding iMovie, iTunes U, Dropbox, Smart Pianist or Cancel.

Once completed, go to the Smart Pianist User Song area and you will see your file listed.

3.  EMAIL – Sending a song as an attachment in an email is an easy way to use a technology we all use every day. To do so, either “add attachments” from your iCloud drive, or highlight a file in the new FILES folder of iOS 11 (or any other database of songs), then select the EXPORT or UPLOAD icon and select MAIL as the option. When your recipient receives the email, they will see the attachment. After downloading the attachment by tapping on it, they then press and hold the attachment in the email to see a dialogue that lists several apps to use. As long as you have emailed a .mid, .wav or .m4a file,“Import with Smart Pianist” will be one of the options.

4.  iMessage – You can even send a file as an attachment in a text iMessage. Similarly to receiving an email, all the recipient has to do is tap once to download the file and it will open. Again, all they have to do is select the EXPORT or UPLOAD option. As long as you have sent a .mid, .wav or .m4a file,“Import with Smart Pianist” will be one of the options:

Screenshot of iCloud interface with an mp4 file name showing and options for opening the file.

5.  iTunes File Sharing – This is my least favorite option, because there are so many steps, but I’ll tell you about it anyway. If you connect your iOS device to iTunes via a laptop or desktop, you can use the iTunes File Transfer function selectively to send files to the File Sharing area in apps like Smart Pianist. (In fact, if you use any of the methods listed above to get your files into Smart Pianist, the files are placed in the File Sharing folder.) This technique allows you to send multiple files all at once, but requires a little more sophistication with Apple iTunes, which can be a little kludgy at times. (If you have a Mac laptop or desktop, consider buying an app called iMazing to make file sharing a lot easier.)

6.  Downloading directly from websites/servers – If a website provides the ability to directly download .mid, .wav or .m4a files (even if they are zipped), Smart Pianist is able to accept these files — it can even do the unzipping automatically. When you click on the dialogue to “Start Download,” you’ll see Smart Pianist listed as an option, as long as the files being sent are compatible .mid, .wav or .m4a format.

Enjoy your new songs!


Smart Pianist works with the Clavinova CSP-150 and CSP-170.

How to Use a Noise Gate

As its name implies, a noise gate (often just called a “gate” for short) reduces or mutes low volume signals that can contain a significant amount of noise. In live sound, gates are typically used to turn down inputs that aren’t being used, so they can improve the performance of your PA system. By lowering (or turning off) microphones that aren’t needed in the mix, the system is better able to amplify without feedback. The rule “less open microphones equals more volume before feedback” is one to live by!

Gates were originally outboard gear that had to be physically inserted into the channel you needed to turn down (this was done by literally plugging in a patch cord). These devices had to be racked up near your console so you had easy access to all the controls, and they were fairly costly too.

Today, most digital consoles (including all models made by Yamaha) provide a gate on every input, so getting good results is way faster and easier than it used to be. In addition, you can save your gate settings (as well as all other settings) on the console, allowing them to be instantly recalled.

Here’s the basic gate page provided by Yamaha TF Series consoles:

Screenshot of the gate page on the console showing an area graph and other adjustable measures.

Let’s take a closer look at each of these controls:

  • Threshold. Once the input signal falls below the threshold level you set, processing starts and the gate begins to close. Generally, the threshold should be set fairly low so that the gate is open whenever signal is passing through it.
  • Attack time. This is the time it takes for the gate to fully open once the signal exceeds the threshold level. You’ll want to experiment with attack time so as not to cause the gate to open too quickly. Setting the attack time correctly requires some practice. A fast setting might cause a click as the gate opens, but too slow and the audio might not be attenuated quickly enough. Practice makes perfect here!
  • Hold time. This is the time that the gate remains open after the signal level has fallen below the threshold; this is also the minimum time that the gate will remain open. It can usually be adjusted between zero and several seconds. On Yamaha digital consoles, an indicator is provided that lights up during the hold phase.
  • Decay time, sometimes referred to as Release time, is the opposite of attack time. This is how long a gate takes to go from its open, unprocessed state (i.e., no attenuation) to the processed state where the signal is attenuated or muted. Decay times are typically considerably longer than those available for attack, since longer times allow a more natural trail-off.
  • Range. This sets the amount of attenuation you want applied to the signal. Instead of either being completely on or off with no in-between, setting the range control somewhere in the middle can help if you have instruments or vocals with long decay times. This helps avoid the disruption of having sounds cut off mid-performance.

There’s also both input and output metering. The meter under the GR (for “Gain Reduction”) output shows the amount of attenuation the gate has applied to the signal.

Since gates use VCA (voltage-controlled amplifiers) or, in the case of digital consoles, DCA (digitally controlled amplifiers), they add no color at all to the sound, which allows them to adjust level only. Very stealthy…

Gating Applications

Here’s an example of how to use gating on drums. A floor tom commonly resonates in the lower midrange EQ region and when it is not being played, those resonances can rumble throughout the entire performance, thus causing unwanted “decrease in gain before feedback.” Since damping the floor tom might color the sound, using a gate here will protect the integrity of the desired tone. Other toms can benefit from gating as well, since you can decrease the bleed or leakage of nearby drums into that input. Drums have a fairly fast attack, so you should set that accordingly on your gate. In practice, lower frequency drums require a longer release time than, say, a high rack tom.

Another place where gates are very helpful is background vocals, where the backing singers often sing just parts of the chorus and not the rest of the song. Applying a gate here will help keep the main vocal more prominent in the overall mix. Gates applied to vocals should have a slower attack setting than those used with drums, and rather than a sharp attenuation, sometimes just 10-15 dB can be very helpful.

When Not to Use Gates

There are also times not to use gates. Don’t use them on:

  • Vocalists with very wide dynamic range.
  • Keyboards and other direct instruments. These inputs are already nice and quiet, so there is no need for gating.
  • Electric guitars. They have such long sustain and decay that a gate is of little help. If there is a noise issue with the pickups on an electric guitar, moving the instrument will often relieve (or at least reduce) the problem, and you’ll still get the full decay of a long, sustained note.

Remember also that gates are level-dependent, so if the ones used on drums are set for a hard playing rock style song, and for the next tune the drummer uses brushes on a ballad, you’ll need to adjust accordingly. This is a lesson I learned the hard way!


Check out our other Tools of the Trade postings.

Click here for more information about Yamaha TF Series consoles.


Is Bigger Always Better?

When audio enthusiasts praise a set of speakers, they often say that they were “blown away.” The classic mental image this conjures up is of someone standing between two giant speaker columns cranked to the max and being hurled across the room by high-impact sound waves, hair flying in the gale. Of course, no one literally gets blown away by speakers, and most people wouldn’t want to experience such a thing — though there are always exceptions. But the fact that this image comes to mind so automatically suggests that many of us have three built-in assumptions when it comes to speakers:

1) Bigger means louder

2) Louder means better

and therefore 3) Bigger is better

The weakest link in this chain of argument is the second one. If you really believe that louder is always better, well, there are more than a few audiologists who’d be ready to argue otherwise. Assumption number one, however, is impossible to refute. It’s basic physics, after all: The bigger a speaker cone is, the more surface area is available to vibrate, and the more surface area you have, the stronger those vibrations can become.

On the face of it, this means that if you’re in search of higher highs, lower lows, and the capacity to handle top volume with ease, you should buy the biggest speakers you can. So even if you get rid of assumption number two, assumption number three still stands, right?

Not quite. The reason is that real-life situations tend to be complicated, not simple. There are plenty of extra variables to consider: how much space you’ve got, for instance, and what you’re planning to do with the speakers. And thanks to technological advances, today’s speakers can do a lot with a little.

Home Truths

That last point is worth noting even if you’re putting together a good old-fashioned stereo system for home listening — the type of use that traditionally would call for larger speakers. At first glance, the Yamaha NS-F901 Soavo floor-standing speaker clearly fits the bill, measuring 10-5/8″ wide and an imposing 41-3/4″ high. But take a closer look and you’ll notice that its biggest speaker cones are only 6-1/2″ in diameter. What makes the difference here isn’t the size of the cones but the fact that there are four of them — one tweeter, one midrange driver, and two woofers — working together to deliver an impressively detailed response to the highest-resolution audio signals.

Tall slim rectangular speaker.
Yamaha NS-F901 floor standing Soavo line speaker.

You can also find dual woofers in much smaller, bookshelf-size speakers. The Yamaha NS-B310, for example, fits two 3-1/8″ aluminum cones into a 7-7/8″ package, perfect for people who want premium-quality sound but don’t have a lot of room to spare.

Small rectangular speaker.
Yamaha NS-B310 bookshelf speaker.

Compact Bliss

So much of today’s speaker use revolves around laptops and mobile devices. If this applies to you, then it follows that you probably prefer a system that’s compact and portable. There once was a time when you’d have to sacrifice some fidelity to make this possible, but speakers like the Yamaha NX-50 prove that’s no longer the case. Although it only weighs in at about two pounds and is just over seven inches high, its range of frequency response is more than respectable (55 Hz to 20 kHz), and its slanted design, coupled with an automatic loudness control, helps push bass signals out into the room.

Two speakers that are short and rectangular on their face but viewed from side, angle upward on front.
Yamaha NX-50 premium computer speakers.

Blending In

The current vogue for wireless speakers puts a further premium on units that are small and visually unobtrusive but sonically superior. The Yamaha WX-010 MusicCast speaker has that equation covered with its compact size (it’s just 6-1/4″ tall) and its ability to handle a variety of high-resolution audio formats, including WAV, FLAC, and AIFF, up to 192 kHz. With support for WiFi, AirPlay®, and Bluetooth®, the WX-010 can be placed more than 30 feet away from its controlling device.

Small rectangulare speaker in a light color with rounded corners.
Yamaha WX-010.

Pro Needs

If you’re a musician and are planning to record and mix your own music, you’ll want to use speakers that offer a flat frequency response — meaning that neither the highs nor the lows are unduly emphasized. The operating principle is that if your tracks sound good through this type of speaker, they’ll sound good on just about any system. It’s largely for this reason that Yamaha’s NS-10 studio monitors, manufactured between 1978 and 2001, were a recording-industry standard reference for decades. And at 15 inches high (or wide, depending on how you placed them), NS-10s weren’t very big, either.

Following in the path of the NS-10 are modern Yamaha HS Series powered nearfield reference monitors. The HS7, for example, stands just over 13 inches high (even smaller than the NS10), yet delivers a big sound with a nearly flat frequency response from 43 Hz – 30 kHz. It also offers a number of bells and whistles important to recordists, including onboard high-performance 95 watt power biamplification, Room Control and High Trim response controls, and XLR and TRS input jacks that can accept balanced or unbalanced signals.

Front face of a rectangular speaker.
Yamaha HS7 powered studio monitor.

Big Boom, Small Speakers

Home theater enthusiasts who want to feel the rumble of movie sound effects at their deepest will probably want to add a subwoofer to their system. (See our “How to Shop for A Subwoofer” blog posting for some tips on how to choose the best one.) That, in turn, makes it less necessary for the main speakers to be large. In the Yamaha NS-P20 5.1 surround sound speaker system, for instance, a 6-1/2″ sub takes care of the aural basement while the drivers in the other speakers are all less than three inches in diameter, making them small and light enough to be hung easily on a wall.

Large square speaker flanked by two pairs of smaller ones with a long thin speaker in front center.
Yamaha NS-P20 5.1-channel speaker system.

Yes, it’s great to be blown away by a pair of speakers, if only figuratively. But it’s even better when that reaction comes not simply from how big they are but from the quality of sound they produce.


Click here for more information about Yamaha AV speakers.

Click here for more information about Yamaha HS Series speakers.

Genos Styles and Multipad Presets

Here’s the first of a four-part series of cool videos that demonstrate the versatility of Genos — our newest and most powerful Digital Workstation keyboard ever. Whether you use it for songwriting, live performance or recording, Genos will help inspire your musical creations.

Ever wonder what Styles are all about? Here’s a video that answers the question:

And here’s one that shows how Genos MultiPad presets can be used to add extra flavor to your live performance:


Click here to find out more about Genos.

Jazz Trombonist Wycliffe Gordon’s Teaching Tips

In the blog post, Trombonist Wycliffe Gordon Does it All, we shared Gordon’s dedication to teaching young musicians. Gordon works to continually evolve his techniques but relies on a few tried-and-true philosophies.

1. Don’t define yourself by one teaching style: Remain open to new ways of teaching a concept, which to Gordon means “learning while you teach.”

2. If you can sing it, you can play it: Utilize singing and dancing to help students grasp difficult rhythms, melodies and harmonies. “Have the students sing together before playing,” Wycliffe suggests. “This way, they’re on the same level of comfort.”

3. Get the administration involved: Teach the administration — along with other teachers — the importance of supporting a program. One surefire way to improve your relationship with administrators is to invite them to performances, Gordon says.

4. Accept that you can only do so much as a music educator: Some children will inevitably fail to grasp the importance of working together. “If I can’t get a student to cooperate, then [he or she] is out of the ensemble,” Wycliffe says, “regardless of his or her musical ability.” When this happens, don’t beat yourself up about it. At a certain point, you must accept that you’ve done all you can do.

Photo Courtesy of Wycliffe Gordon

This article originally appeared in the Summer 2016 issue of Yamaha SupportED. To see more back issues, find out about Yamaha resources for music educators, or sign up to be notified when the next issue is available, click here.

Build Bridges: Work with Administration, Parents and Other Teachers

A school’s music program can be a catalyst for uniting the community with ensembles serving as ambassadors not only around campus but also around town. To achieve this kind of success, support is required on all fronts.

At Fishers High School in Indiana, ensembles perform at events such as African American History Dinners, Race for the Cure and other galas presented within the school and surrounding community in addition to the regular concerts, contests and sporting events. As associate director of bands, I must constantly collaborate with our principal, parents, the athletics director and other performing arts teachers to ensure proper planning and communication to allow our vision to be cast, implemented and achieved.

Administration

Chad Kohler conducting bandThe relationship between the music directors and principal is key. At Fishers, we have more than 900 students in our music program with six band classes, five orchestras and six choirs during the day as well as many extracurricular ensembles. So it is absolutely vital to share the progress and happenings of our program with the principal. A regular stop by the office builds trust and rapport and opens the door for clear communication with administration.

As music teachers, we reach students academically and emotionally. We have the opportunity to travel to competitions and take additional trips, therefore creating more than just a classroom environment. As a result, we have more influence on the students as well as the parents and community. Because of this impact, it is important to let the principal and other administrators know about the music program’s activities, both in and out of the classroom.

For example, last year our school hosted a cancer awareness event that provided a cross-disciplinary opportunity for the students. In addition to a musical performance, students were able to share their writings, drawings and research. When we have a chance to go above and beyond our normal day-to-day activities to help the community, it shines a good light on our program and school. As a result, our administration has been extremely supportive with our needs for new uniforms or instruments.

THE YAMAHA EDUCATOR NEWSLETTER: Join to receive a round-up of our latest articles and programs!

Boosters

band practiceMany schools have a booster organization for the entire performing arts program; others have separate parent groups for band, orchestra and choir. Whatever the case, make sure your program establishes an organization that is student-focused and holds monthly meetings to keep parents connected regarding ensemble happenings.

Booster organizations play an important role in building a strong relationship with the administration. Booster members should attend board of education meetings to understand the school district’s vision and maintain a presence for the band. Sometimes our students perform at meetings, so the board members can see and hear firsthand the talent and accomplishments of our ensembles. Additionally, the booster organization can send thank you cards to the school board and administration for supporting the music program. With these efforts, the administration will see the unity among the music program’s students, parents and director.

Athletics

Let’s face it: The marching band today wouldn’t exist without our athletic program. It is absolutely vital for the band director and athletic director to form a strong partnership. Schedule quarterly meetings with the athletic director to discuss how the music and athletic programs can support each other.

At the games, it’s apparent how the band, cheerleaders and sports teams are connected. The band’s role is to use music to engage the crowd to rally around our student musicians and athletes.

Because more people will see the marching band in one week than the concert band in an entire year, the marching band’s visibility and positive impression help the music program. Administrators see the cooperation between the band and athletic teams, and they are proud that we have created a united front in educating our students in music, athletics, academics, community and life.

Other Performing Arts Teachers

Teachers in the music department should look for ways to connect on a regular basis. Having a common lunch hour or monthly meeting promotes sharing of information about concert plans, budget concerns, extra accommodations and room requests for upcoming activities.

The performing arts program enriches the lives of students, teachers, parents and the community. When the program is in step with the administration and other school personnel, it will flourish and grow for all those participating in and benefiting from it.

This article originally appeared in the Summer 2016 issue of Yamaha SupportED. To see more back issues, find out about Yamaha resources for music educators, or sign up to be notified when the next issue is available, click here.

6 Tips for Ear Training

“Tonight, we are young. So let’s set the world on fire …” There’s a minor sixth in Fun.‘s hit song “We Are Young.”

The guitar riff in the “South Park” theme song? That’s a tritone. And when YouTube’s viral teen Rebecca Black says, “Friday,” it’s a major second.

Music educators are always looking for new ways to connect with students, and with an increased focus on theory and intonation, ear training can be a surprising engagement tool to help ensembles improve their sound.

“It’s all about the ears,” says Rob Myers, coordinator of fine arts for the Arlington Independent School District and a former high school band director at Flower Mound High School, both in Texas. “Anything that you can do in an ensemble to sensitize the student’s awareness of what they’re doing or their responsibility in that ensemble comes back to the ears.”

Better listening skills can also create a more relaxed performance. Students won’t be as stressed once fitting into the ensemble sound starts to become subconscious.

“When you are focused on listening so intensely every day, the sound of the ensemble and your own individual sound relaxes because you can’t overblow or play with tension and still hear the pitch that you’re supposed to match,” says Michael Martin, trumpet player in the Boston Symphony Orchestra and a clinician who works with some of the nation’s top high school music programs such as Kennesaw Mountain (Georgia) and Avon (Indiana). “Ear training forces you to hear other things around you.”

Tip 1: Try Drones

Music educators have many ways to teach ear training. Some bands use keyboard drones to emit a concert F for the students to match. A drone can keep playing as long as necessary and isn’t subject to human inconsistencies, like tuning to a tuba or low reed player.

“The directors who … are the most consistently successful … work daily with drones,” says Martin, who is also the brass caption head and arranger for the Cavaliers Drum and Bugle Corps in Rosemont, Illinois. “They have big speaker systems set up in their band rooms and classrooms.”

Tip 2: Sing or Hum It

The first step in teaching pitch is getting students to internalize it. “Kids are constantly reinforced to match what they hear through singing, and for brass players through buzzing, and everyone through playing their instruments,” says Martin.

Singing is a helpful method, but sometimes students are hesitant or embarrassed to sing in front of their peers. “If they’re uncomfortable with singing … start by humming,” Myers says. “Have them place a hand over their chest, which will create a vibration when they hum. Get them to vibrate more by adding air to the vocal cords and opening their mouths. They’ll be singing and making a beautiful sound at that point.”

Tip 3: Connect Using Popular Music

When teaching about intervals, Martin suggests connecting with students’ current musical interests. “I’ve had a lot of success relating popular music to whatever interval or melodic material that I’m [teaching],” Martin says. “Pop music, rap music, movie scores, anything that I know 100 percent of the students are going to know and remember and be able to sing back to me because of how many times they’ve heard it.” For example, Martin uses the iconic first notes of the “Star Wars” theme to illustrate an open fifth or “Somewhere Over the Rainbow” for an octave leap. Challenge students to find more intervals in their favorite songs and bring them in for extra credit or another small incentive. Not only can educators share these with the class, but their library of examples to use will steadily grow.

Tip 4: Isolate Sections

With chords, Myers stresses the importance of isolating the sections in a wind ensemble setting.

“If the group is really struggling, then … isolate the woodwind choir and the brass choir,” he says. “You can have the brass hum or sing and have the woodwinds play, and then vice versa. It’s important for each of those choirs to get an opportunity to hear themselves in the ensemble setting to establish that choir sound.”

Tip 5: Mix it Up

Teachers may have a hard time shifting a school’s culture to incorporate more ear training. How do you keep students focused on these techniques if they’re uninterested or laser-focused on competitions? It takes patience and imaginative variety.

“Students are smart; they want to be good, and they’re going to recognize that they play better as an ensemble now because they’re better in tune,” Myers says. “I think the challenge is to bury the daily drill enough, or have new varieties to the daily drill that will pique the curiosity of an intelligent student.”

Myers recommends keeping ear training to about one-third of the rehearsal time (example, 15 minutes out of 45 minutes).

Tip 6: Focus for a Short Time

If at first you don’t succeed, Martin suggests trying to work on ear training for an even shorter amount of time.

“For students who are really not into it, I just barter with them … and say, ‘Give me five minutes of dedicated work on this concept of ear training, and then we’ll move onto something more exciting and can apply it in a more practical way,'” he says. “If the students are able to really focus for five to 10 minutes every day on something like this and see its importance, it won’t take long for them to see the results. They’ll start to play better and notice it, and they’ll be more enthusiastic about that engagement in the future.”

Use the Yamaha Harmony Director

A great tool to help students with ear training is the Yamaha Harmony Director (HD-200). This user-friendly instructional keyboard allows teachers to demonstrate beginning and advanced ear training techniques in an ensemble setting.

“The Harmony Director is the one-stop shop for everything,” says Martin. “You can use just intonation or perfect intonation based on exactly what you’re teaching. It’s like the coolest, nerdiest tool — and to me, cool and nerdy are the same.”

Develop a Lifelong Skill

Ear training is a lifelong skill, and every student’s learning curve is different.

“Don’t be afraid of it,” Martin says. “The pace of any classroom setting or rehearsal is the most important thing you need to focus on. Don’t worry about making it perfect every single day. Just do enough that you can continue to work on it the following day.”

As a program’s focus shifts to incorporate ear training, there will be some trial and error for the students and director alike.

“Directors [need] to recognize that they’re going to make mistakes, and it’s OK to acknowledge those mistakes to the students,” Myers says. “Just have the courage to try something.”

In the end, ear training, music theory and aural skills taught in high school provide an extreme advantage for students planning to study music in college and beyond. For Martin, learning ear training during his junior and senior years gave him an edge over others that helped propel him forward in his collegiate studies.

“Being proficient at ear training and being able to sing back something that you hear … I would say the higher your proficiency at that, the more enjoyable your musical career will be,” he says.

This article originally appeared in the Summer 2016 issue of Yamaha SupportED. To see more back issues, find out about Yamaha resources for music educators, or sign up to be notified when the next issue is available, click here.

5 Tips to Grow an Orchestra Program

In “Case Study: How to Grow a High School Orchestra Program,” we described the steps taken by Kenny Baker to expand the orchestra program at Robert McQueen High School in Reno. Here are his five tips for success.

1. Create interest in students of all ages: The McQueen High School Orchestra’s yearly Zone Concert brings together more than 500 student musicians from elementary to high school levels, inspiring younger students to stay in the program. “They think it’s the coolest thing ever to work with the high school director [and] my high school kids,” says Baker. “They get to see where it’s going to lead.”

2. Network with other instructors: As a Yamaha Certified String Educator, Baker attends and presents at national conferences, where he exchanges advice with other string teachers. He also invites other Yamaha educators to conduct clinics with his students. Baker says he believes in using his connections to “get good music educators in front of kids.”

3. Collaborate with colleagues: Baker’s collaborative mindset has helped him build rapport with administrators, sports coaches and other teachers. Musicians can participate in sports and honors classes. Guidance counselors and administrators help students fit all of these activities into their schedules.

4. Gain parent support: Baker works directly with the orchestra booster organization to raise the funds needed to perform around the country and abroad. “It’s a very cohesive, symbiotic relationship between the board and Mr. Baker as the director,” says booster president Caryn Tijsseling.

5. Have a vision: Baker’s inspiration came from his hometown of Rapid City, South Dakota. After performing in its school orchestras and citywide concerts, Baker knew he wanted to make Reno “a place where kids could have that kind of experience,” he says. “The [Rapid City] string program is absolutely top-notch. As a music educator, I look to their pursuit of excellence as an inspiration.”

Photos © 2016 Skye Snyder, M.D. Welch, All rights reserved

This article originally appeared in the Summer 2016 issue of Yamaha SupportED. To see more back issues, find out about Yamaha resources for music educators, or sign up to be notified when the next issue is available, click here.

Case Study: How to Grow a High School Orchestra Program

The halls of Robert McQueen High School in Reno, Nevada, are buzzing with excitement and anticipation for the summer. It’s not the typical end-of-the-school-year eagerness that has these teenagers bouncing in their seats.

Kenny Baker

It’s a 16-day tour of Europe, featuring the McQueen High School Orchestra. In July 2018, orchestra students will embark on their second European tour, where they will perform in London, Paris, Switzerland, Austria and Germany. This tour comes on the heels of their performance last year at the American String Teachers Association (ASTA) National Orchestra Festival in Salt Lake City, in addition to their regular concerts in Reno. Under the leadership of director Kenny Baker, the McQueen High School Orchestra has become a major cultural component in Reno.

When Baker arrived at McQueen right after receiving his bachelor’s degree in music education from the University of Nebraska-Lincoln in 2004, the orchestra consisted of 57 students who performed a few concerts in the school gymnasium each year. Since then, Baker has transformed the group into a 136-member orchestra that he is proud to take around the city, country and world.

In the Zone

Upon his arrival at McQueen, Baker instantly realized that there was room for growth. “The orchestra was a third of the size of the band and choir,” he explains. “The band was going to the Fiesta Bowl. The choir was traveling all over. I had this vision that that’s what the orchestra needed to be.”

Baker expanded the orchestra by effectively recruiting and retaining members. Every year, Baker hosts a Zone Concert, where McQueen orchestra members collaborate with students from their feeder elementary and middle schools to put on a giant concert featuring more than 500 participants. This concert introduces elementary and middle school students to the orchestral opportunities available to them at the high school level. In addition to its concert orchestra, McQueen has specialty groups such as the sinfonia, chamber, festival and honor orchestras as well as an electric strings ensemble and a guitar ensemble.

Booster club president Caryn Tijsseling recognizes the Zone Concert’s impact. “Our program gets bigger every year,” she says. “A lot of kids who started at middle school stay in orchestra through their senior year.”

Rehearsal Strategies

McQueen High School orchestra stands on grass in front of schoolMcQueen teacher and orchestra parent Christopher Case cites Baker’s efficiency as a reason he is able to maintain so many members. “The kids aren’t inundated with endless rehearsals and time spent doing something again and again,” he says. “Kenny’s done something that’s difficult in education: increase size but increase quality and commitment at the same time.”

Baker’s rehearsals are devoted to making sure students develop the necessary skills to meet their musical goals. “A typical rehearsal focuses on the process of learning music and improving technique, not the product,” he says. “If a student has skills, the music will take care of itself.” His approach includes breaking down musical components so that students understand them before applying them to music. “I teach students how to dissect a rhythm, so they know how [it] works. I don’t just tell them how it sounds or play it for them.”

Once his students understand the components of rhythm, they are able to figure out the rhythms in their music much more quickly, reports Baker. The same holds true for intonation, shifting and dynamics.

Baker and his students also work well together because of their mutual respect for each other’s time. “They could be anywhere else — with their friends, playing video games … but they choose to be at rehearsal,” he says. “Therefore, I respect their time by moving as quickly as possible.”

In turn, the students give Baker their complete focus and attention. “They want to work; they want to learn,” he says.

Collaborative Effort

Despite Baker’s obvious impact on the success of the orchestra, he is humble in his approach. “It’s not just me,” he says. “It’s the [other] teachers, parents and the administration at our school.”

School administrators and guidance counselors support the orchestra program as well, giving all interested students the means to participate. “Counselors make sure that kids who need to be in orchestra are there,” explains Baker. “Our assistant principal tries to get as many kids into orchestra as she can with her master schedule. She sees the importance of music.”

Even athletic coaches have helped Baker maintain the size of the orchestra by working with students to balance music and sports. “A lot of kids had the misunderstanding that they couldn’t be in music and a sport at the same time,” he says. “It took a lot of working with coaches, so the kids know they can do both. Most of my kids are in at least one sport.”

Baker also works closely with the parent booster club, which plans events, performances and fundraising initiatives. “We have fantastic parent support,” he reports.

Community Influence

group photo of one of McQueen High School's orchestra all holding bows up as director Kenny Baker raises a cello in the airOver the course of Baker’s tenure at McQueen, one of his major goals has been to get the orchestra more community recognition. “People understand marching band,” he explains. “They go to parades, to football games. They understand what a jazz band is. People don’t understand orchestra. That’s a huge hurdle I’ve had to face.”

Due to Baker’s collaborative efforts with music parents, the McQueen orchestra has been able to gain prominence. “The boosters get them into places where they can sound their best and let the community see,” Tijsseling says.

For example, the community can experience the orchestra at its yearly Fall Fusion Concert at the Pioneer Center for the Performing Arts, home to the Reno Philharmonic. This concert showcases a variety of genres, from traditional concert literature, like Vivaldi, to more eclectic styles of music, like fiddle tunes and string renditions of pop songs.

These performances at the Pioneer Center started three years ago when the orchestra needed a new stage to accommodate its growing size. The school gymnasium, while large enough to host the much more laid-back Zone Concert, doesn’t have the proper acoustics for a formal concert like Fall Fusion. “The kids can’t do any nuances in the music,” Baker says. “The dynamics, the expressiveness … you lose that in the gym.”

For Fall Fusion, Baker wanted a space where his students could put on a more professional performance, which the Pioneer Center offered, with its large stage and in-house sound and lighting technicians.

Securing the Pioneer Center as a performance venue was not difficult. “We were welcomed with open arms by their executive director, Willis Allen, and his entire staff,” Baker reports. “They are absolutely wonderful to work with.”

Reflecting on the positive impact the McQueen orchestra has had on the community, Case says, “Reno has found a way to hold onto orchestra programs in the toughest economic times. We are very blessed to live in a community that has a large music program.”

Lasting Impact

Though teachers, administrators, parents and the community at large have all worked together to ensure a successful orchestra, the program could never succeed without its dedicated student musicians.

“We do a lot because the kids can do it!” Baker says. The McQueen orchestra now performs about once a month, totaling around nine performances a year. Many students continue to perform beyond high school. “I have students who go on to be performance majors, education majors,” he reports.

Students from McQueen have also played for the Reno Philharmonic and the Reno Pops. But even for students who don’t pursue music professionally, the orchestra still leaves a lasting impact. “[The kids] have an appreciation of music and art and what they can contribute to the culture of our city,” says Tijsseling.

Case knows that this program helps students develop a strong work ethic. “My daughter practices all summer, all Christmas break, and it’s not because we told her to,” he says. “To see the product of all that work on stage warms my heart.”

Tijsseling has seen the orchestra encourage teamwork and camaraderie. “They’re like a family, really,” she says. “They pull together to make amazing things happen.”

Pulling together is a common theme for all involved in the McQueen High School Orchestra. Due to the initiative of Kenny Baker and the hard work of the students, parents, teachers and administration as well as the support of the community, the McQueen orchestra accomplishes a major goal of all music ensembles — to bring different types of people together and create something truly beautiful.

Photos © 2016 Skye Snyder, Caryn Tijsseling, M.D. Welch, All rights reserved

This article originally appeared in the Summer 2016 issue of Yamaha SupportED. To see more back issues, find out about Yamaha resources for music educators, or sign up to be notified when the next issue is available, click here.

Trombonist Wycliffe Gordon Does it All

On a seemingly normal mid-April day, a group of jazz students at Columbia College Chicago are fixated on the man who’s talking, world-class jazz trombonist Wycliffe Gordon.

Their excitement is palpable. The lights shine down from above while the Artist-in-Residence’s master class takes place. Gordon is so close that the students can see their reflection in his trombone.

Following the weeklong residency, Gordon performs with the Good Times Brass Band at Gospel Nation Christian Fellowship in Powder Springs, Georgia, in a setting much like that of his youth. Even though the details are different, the nostalgia is overwhelming. While his father played piano in church, the son is now on stage with his instrument of choice — the trombone — performing in support of a local charity, Calvary Children’s Home.

Fast forward one week to April 30 and May 1. Gordon is halfway around the world, a featured soloist with the Tuxedo Big Band and Grimethorpe Colliery Band in two separate concerts at the Limoux Brass Festival in France. It’s a busy life, but to Gordon, it’s the norm.

Early Influences

Gordon’s initial exposure to music came from his father, Lucius Gordon. The elder Gordon was a classical pianist who regularly performed with the local church, so Wycliffe found himself surrounded by church members who found solace in the music, which he, too, experienced.

Later, he followed in the footsteps of his older brother — Lucius Gordon Jr. — in choosing the trombone as a primary instrument. It was a classic case of the younger sibling trying to emulate his big brother. “Whatever he did, I wanted to do,” recalls Gordon. “He played trombone, so I just wanted the trombone because he had one.”

Critical Acclaim

Wycliffe Gordon with two trombones
“It’s a horn that was made specifically for the way I like to play,” Gordon says about his most oft-used instrument, the YSL-891Z.

Today, Wycliffe Gordon is recognized as one of the most skilled jazz trombonists in the world. He has received the Jazz Journalists Association Jazz Award for “Trombonist of the Year” eight times and was named “Best Trombone” in DownBeat Magazine‘s Critics Poll from 2012 through 2014.

Gordon’s musical experiences span the professional gamut. As a former long-time member of the Wynton Marsalis Septet, he was a globetrotter surrounded by some of the world’s top musicians. He credits that time in his career as “one of my greatest musical experiences to date.”

Gordon is also a former member of the Jazz at Lincoln Center Orchestra and has performed with many other jazz musicians including Dizzy Gillespie, Lionel Hampton and Branford Marsalis. While trombone may be Gordon’s main instrument, he actually plays 23 instruments, including the trumpet, euphonium, flugelhorn, tuba and even the didgeridoo. In fact, DownBeat Magazine’s Critics Poll honored Gordon with the “Rising Star” award in 2014 for his mastery of the tuba.

In addition to performing, Gordon is a composer and arranger for many accomplished groups and organizations worldwide. In 2011, Gordon was commissioned by New York’s famous Apollo Theater to write a piece that commemorated its 75th anniversary. And among his most popular compositions is a Muhammad Ali tribute, titled “I Saw the Light.”

From the Stage to the Classroom

Wycliffe Gordon in front of a small group of music students

In addition to his time in the spotlight, Gordon has devoted a substantial portion of his career to educating the next generation of musicians. He has taught at the Manhattan School of Music in New York and currently serves as an Artist in Residence for Augusta University in Georgia.

Along the way, he has learned a lot about what makes an educator successful and effective at teaching young musicians. Gordon believes that education does not end upon receiving a degree.

Instead, music educators must evolve as teachers even while they are on the front lines of the classroom. Successful educators, says Gordon, strive to constantly improve themselves. “Don’t get caught in the rut of just having one technique for teaching,” he says.

Gordon regularly uses the “sing-it-first” technique, emphasizing that instruments are merely an extension of the voice. The ability to sing the rhythms, melodies and harmonies of a song helps students internalize the music. “If you can sing something, you can play it,” he says.

Gordon also incorporates dance into his music classes as a way to get his students engaged. Imagine a band room full of self-conscious students swaying with abandon to jazz music. One student may automatically get into the music while another takes a bit more coaxing, but eventually, all the students begin to feel the rhythm.

To Gordon, “any type of music has movement,” and jazz is no exception. Sub-genres of jazz such as the waltz, foxtrot and swing are all dances as well. So in everything Gordon discusses, he tries to implement some type of movement.

The environment in which students learn is also important, so Gordon works hard to ensure his programs are properly supported. A proven method to increase administrative support is to invite key personnel to performances. If administrators experience firsthand the transformative effects of music, they are much more likely to support the music program. “Have them take the temperature with the public and their perception of the band program,” Gordon says.

Cooperation is Key

Wycliffe Gordon plays trombone on stage

As a child, Gordon found music’s community focus to be among its most appealing aspects. “Being in band meant you were working with a bunch of other students every day, and you had the chance to make music with lots of people.”

Today, he attempts to instill in young musicians the importance of working together. “The band only works when everybody does their part,” Gordon tells his students.

But teaching young musicians this lesson is not easy—and sometimes impossible. When Gordon encounters students who are unable or unwilling to cooperate with the ensemble, he works to draw them out, but at a certain point, he sometimes has to accept that he’s done all he can.

“Accepting that there are some students who you’re not going to be able to teach” has been among the biggest lessons of his educational career, Gordon says.

Although Gordon has learned a lot in his time as a music teacher, his biggest takeaway is much more fundamental. Music is the “great equalizer,” he says. “Music is the one language that connects all people. It helps us celebrate our likenesses and be more accepting of our differences.”

Photos Courtesy of Wycliffe Gordon 

This article originally appeared in the Summer 2016 issue of Yamaha SupportED. To see more back issues, find out about Yamaha resources for music educators, or sign up to be notified when the next issue is available, click here.

How to Choose the Best Amplifier for Your Electric String Instrument

Perhaps you are a violinist, violist, cellist or bassist considering the world of electric strings. After deciding to “plug in,” your next question is probably: “Plug in to what?”

If you’re a traditionally trained acoustically-grounded musician, the world of amplification can conjure up a healthy dose of technophobia. It may seem like it will take you years to understand all the knobs, lights, switches and foreign terminology involved in the process.

In reality, it isn’t as complicated as it seems. All you have to do is ask yourself a few questions. The answers you come up with will lead you in the right direction.

1. What do I want my instrument to sound like?

Tube or solid state?

Amplifier circuitry originally included vacuum tubes. Despite the fact that tubes got very hot (which caused them to eventually burn out), they imparted a warm sound that was appealing. Later, when transistors were developed, circuitry moved to solid state, which was more reliable and yielded a cleaner sound.

– If you’re looking for a classic, powerful rock sound, you might want to invest in a tube amplifier.

– If you favor a clean sound that shows off the acoustic properties of your instrument, solid state circuitry will better suit your needs.

Acoustic or electric?

Guitar amplifier designs have traditionally developed down two main pathways: those meant to amplify acoustic guitars, and those meant to amplify electric guitars. Acoustic amps produce a richer tone that allows a greater range of harmonics to be heard. Electric guitar amps are often more cutting and favor the harsher frequencies that come from effects such as overdrive and distortion. Which one you go with depends on your own personal preference.

– If you expect to be playing edgy rock sounds with a lot of effects, consider electric guitar amps; they’ll deliver the punch you need.

– If you’re looking for something less gritty and more pure jazz, fiddle or classical- sounding, go for an acoustic guitar amp, which can reproduce a wide range of harmonics with just basic tone adjustments.

Modeling or analog?

With the advance of technology, modeling amplifiers have become more affordable. These are able to digitally emulate the sound of almost any vintage analog amplifier. For instance, the Spider 5 by Line 6 offers an array of over 200 different built-in amplifier models, giving you the option to select both traditional tube amplifiers and modern-day solid-state amps.

– If you think you’ll need to access a wide variety of different tones, definitely check out modeling amps, which offer a tremendous amount of versatility.

– If you expect to only be playing in one particular genre, an analog amplifier that delivers the sound you want will probably be the way to go.

2. How big should I go?

When it comes to picking the right amp for your electric string instrument (as in other aspects of life!) there’s always the question of not enough versus too much. When it comes to amplifier size, a lot depends on where you’ll be playing. If you’re only expecting be performing in small to medium-sized venues such as clubs, a travel-friendly model such as the lightweight Yamaha THR10II desktop amp (which comes with built-in speakers and can be battery powered) may be all you require. But if you’re going to be playing in a rock band – with the need to keep up with the guitars and drums – you might want to instead explore larger amplifiers such as the Yamaha THR Head, which, when paired with one of our large speaker cabinets, can wake the neighbors for blocks around!

3. What about watts?

Guitarists have long debated the question of how much power an amp has to provide in order to meet a player’s needs. The simple answer is that power and design go hand in hand. For instance, a 100 watt amp with 2 x 12 speakers (in other words, two 12-inch speakers in one cabinet) will have a much louder sound than a 120 watt amp that has a single 10-inch speaker, simply because the two 12-inch speakers move a much greater volume of air. If all you are looking for is an amp to practice with and perform in small settings, power may not be as important as it is for the violinist who plays in a rock band and needs to keep pace with guitars and drum kits.

Once you have a handle on what kind of amp to look for, you may also find that you have a better idea of the style of player you are – or wish to be. Whether you need an amplifier for a practice space or for an arena, you’ll be able to make an informed selection in choosing the perfect partner to go along with your electric string instrument.


For more details, resources and product specifications, check out some of these great Yamaha and Line 6 amplifier products:

Yamaha THR-II Desktop Amps
Yamaha THR Head
Line 6 DT25 Tube Amps
Line 6 Spider Series Modeling Amps


Click here to learn more about Yamaha electric string instruments.

How to Add Streaming to Your Legacy Audio System

Twenty years ago you bought your dream home audio system, complete with all the bells and whistles that were available back in the day. Today, you’re still using that same system — and why not? It still sounds great!

The preamplifier.
Yamaha WXC-50 streaming preamplifier.

But let’s face it, times have changed. Your old cathode ray tube television has probably morphed into a flat-screen HDTV, and you’re almost certainly listening to music on your computer, smartphone and/or tablet.

If you’re ready to take that next leap forward into the 21st century, but don’t want to abandon your gorgeous-sounding legacy audio system altogether, there’s a solution. Instead of replacing it, update it with a Yamaha WXC-50 MusicCast wireless streaming preamplifier.

Why Go Wireless?

The WXC-50 is specifically designed to allow systems with older amplifiers to play back music from streaming services like Spotify, Pandora, and Napster — even high-res ones like Deezer and TIDAL. It also provides you with access to the audio files stored on your home computer, USB flash drives with preloaded music, or any devices connected via Wi-Fi™, AirPlay®, Bluetooth® or Spotify Connect. All are controlled from our free MusicCast app, which even gives you the ability to create playlists and save your favorites as you go.

How to Connect

View of the back side of the amplifier showing the various connection points for other music components.
The compact WXC-50 has a straightforward design and offers a wide range of input and output jacks that makes interconnection quick and easy.

The WXC-50 gives you a number of different ways to connect it to any standard audio setup (such as one containing a legacy 2-channel amplifier or stereo receiver). Its various rear-panel jacks allow you to use your choice of analog, digital or optical cables, depending on what your amp requires. (Remember, it’s good practice to always connect all audio cables prior to plugging in the main power cable.)

If you’re using a Yamaha integrated amplifier, make sure to connect its “Trigger In” to the corresponding “Trigger Out” on the WXC-50. This will allow you to control both units with a single remote.

Setting up MusicCast

Even if you’ve never used the MusicCast Controller app before, the process is fast and user-friendly. First, download it from the Apple® App Store or Google Play™ and install it on your iOS or Android™ device. Then open the app, tap “Setup” and follow the remaining instructions to establish your network connection.

That’s it! Now you’re ready to begin playing music throughout your entire house via other MusicCast products.

For more information about Yamaha MusicCast wireless multi-room audio products click here.

Creative Assessment: Project-Based Learning in the Instrumental Music Classroom

You can tell from their playing whether a student is progressing, but can you really get a read on whether or not what we have been teaching is really sinking in?

Playing tests are fine — they can be quick and easy to assess — but you can have students demonstrate how much they have learned about the bigger picture of studying music via more comprehensive types of projects that have the added benefit of stimulating their creativity in new ways.

When you consider that music makers are some of the most creative members of the school’s student body, it doesn’t take long to realize that project-based learning will provide appropriate inspiration and open up a whole new world of assessment options. It’s also just plain fun for both teachers and students alike.

Adding project-based learning to your program doesn’t have to be cumbersome or intimidating. Students could start with something as simple as arranging 8-bar “cheer” songs for their marching band section to play at football games.

With an infinite number of possibilities, there will be an endless stream of innovative projects that students will certainly enjoy creating — all that has to be done is to provide the opportunity.

Prime the Pump and Help Inspire the Process

Try it: Ask students to create their own instrument and perform an original piece or arrangement of a song of their choice. (This also makes a great group project.) The key is for students to demonstrate their understanding of how sound — and ergo, music — works. For example, Blue Man Group has motivated many high school percussionists to come up with their own PVC instruments.

Watch it: See how one young inventor performs his original composition “Cargo.”

Watch it: Get your students motivated with any one (or all) of these videos, showcasing eight incredible created instruments.

Try it: Ask students to use unconventional materials to make a new version of their own instrument. Students from Cateura, Paraguay, found a way to craft their own instruments using recycled trash.

Watch it: The Recycled Orchestra of Cateura gained national attention after being featured on “60 Minutes” and inspired a documentary film, “Landfill Harmonic.”

Try it: Encourage the use of technology in the classroom by asking students to choose a partner or group to form a duet, trio or ensemble and to either compose or arrange a song to be performed in the manner of their choosing. Inspire them to incorporate technology in any creative manner that showcases their performance. Students could also provide live performances if time permits.

Watch it: Encourage your students to think outside the box by showing them examples like Eric Whitacre’s Virtual Choir and Jason Collier’s “Isn’t She Lovely.”

Once project-based learning becomes part of the established procedure for assessment, students will come up with all sorts of ideas on their own. This could even be a project idea unto itself: ask students to come up with their own projects to demonstrate their understanding of music-making. This more creative type of high-level, free-form type of learning might be specifically reserved for seniors, with the final project eventually posted on the music department’s website or YouTube page.

Cover of Support ED magazine with a headshot of band teacher Julie Hill and headlines for other articles.


This article originally appeared in the 2017 V1 issue of Yamaha SupportED. To see more back issues, find out about Yamaha resources for music educators, or sign up to be notified when the next issue is available, click here.

How to Use Alexa with MusicCast

Meet Alexa, Amazon’s cloud-based voice service that can be used to control all kinds of devices — even MusicCast products!

MusicCast is a wireless multi-room audio system built into many Yamaha AV receivers, sound bars and wireless speakers. It allows the devices to be connected through your home Wi-Fi® network and controlled by an app on your smartphone or tablet. Now, with Alexa, you can kick back on your couch and ask to play music on your MusicCast AV receiver without lifting a finger.

Alexa lives in the cloud, so it’s always getting smarter, adding new capabilities that are delivered to your device automatically. Using Alexa on your MusicCast product is simple and hands-free — just ask, and Alexa will respond instantly. For example, crank up the music in your kitchen by asking, “Alexa, turn up the volume in the Kitchen.” (Or “Living room,” etc.)

Skills

Alexa provides capabilities (called “skills”) that enable customers to create a more personalized experience. You can download skills from the Alexa Skills store, or simply by saying “Alexa, enable [skill name].” Since they are cloud-based and don’t take up space on your device, there’s no limit to the number of skills you can enable. There are two Alexa skills that work with MusicCast: the MusicCast Smart Home skill and the MusicCast skill.

  • The MusicCast Smart Home skill lets you use standardized Alexa commands for the most commonly-used control functions such as power on/off, volume control and play/pause/skip. For example, to turn on the AV receiver in your living room, you just say, “Alexa, turn on the Living Room.”
  • The MusicCast skill goes beyond the basics, giving you control of unique MusicCast functions, like linking/unlinking rooms and direct access to playlists and favorites. In order to access the MusicCast skills, you need to add “ask MusicCast to” after “Alexa”: for example, “Alexa, ask MusicCast to link the Living Room to the Kitchen.”
Graphic table with three columns: first column are common things people want to do ("power on/off"); second column lists the corresponding MusicCast Smart Home Skill "common commands" ("Alexa, turn on the Kitchen.") and the third column are the MusicCast custom commands ("Alexa, ask MusicCast to turn of all rooms.")ds.
Commonly used MusicCast Smart Home skill commands and MusicCast skill commands.

Setup

To use Alexa with your MusicCast products, here’s what you’ll need:

  • Any MusicCast product
  • Any Amazon Echo product
  • The Yamaha MusicCast app (Go to the app store on your mobile device and search for “MusicCast app”)
  • The Amazon Alexa app (Go to the app store on your mobile device and search for “Alexa app”)

Next, download the Setup Manual and learn how to set up your apps and skills for MusicCast and Alexa.

Helpful Tips

Once you have your apps and skills set up, you’re ready to voice control your MusicCast products. Here are some tips for success:

  • Keep some space between your Echo and your MusicCast speaker or sound bar so Alexa can hear you.
  • Familiarize yourself with the complete list of MusicCast Alexa commands. (Click here, then scroll down to  the “Alexa Commands” section.) You’ll be surprised at what Alexa can do!
  • Use the default room names that come with the MusicCast app. You may have to rename some rooms to make sure that none of your MusicCast devices have the same name.
  • Set up MusicCast favorites and playlists so Alexa can play them easily.

Alexa, let’s get started!


Check out these links for more information about Alexa and MusicCast:

MusicCast + Alexa

MusicCast and Alexa FAQs (includes all available commands)

Alexa Skills Store

The Domino Effect

Trying to land a new job is a daunting task, much like learning about audio — but it doesn’t have to be. (OK, maybe landing the job is, but you know what I mean).

Starting the Process

I applied for my current position on the Yamaha Careers website, had a first phone interview, and then I was asked to put together an outline of a marketing campaign with a high-level distribution strategy for a consumer promotion — specifically for one of our digital mixers. As you could imagine, I got a little stressed, but I wanted to think it through so I could keep it cool.

Digital mixers — how complex could they be? Turns out they’re pretty complicated! Not as in rocket science complex, but it was still a little intimidating for an audio newbie like me.

Anyway, I immediately started doing my research, and I quickly came across some things that I hadn’t heard of before, like this thing called a “stage box.”

Hmmm…

The Domino Effect

Do you know what a stage box is? I sure didn’t. But I figured it would be important for me to know, so I learned about it.

Turns out that, typically, all the audio cables (from microphones, instruments, etc.) on stage are connected to a single device — the stage box. The box then sends the sounds from those cables out through a “snake” (which is just slang for a bunch of individual cables grouped together inside one thick, bulky cable) to the mixing console. This allows for the console to be positioned far from the stage, without the hassle of having to run each individual cable out to it.

Looking into stage boxes brought up something called Dante, and things started snowballing. The assignment created a kind of  “domino effect” where one thing led me down a rabbit hole of various topics that I didn’t know about before.

Lesson Learned

Young man posing for casual business picture with a female videographer in a photo studio.
Here I am learning how to do a video product demo.

After turning in the finished assignment — followed by three more interviews, landing the job, and now three months into working at Yamaha — I can report that the domino effect of learning has grown exponentially and continues to evolve. Sound like a pain in the you-know-what? It isn’t. In fact, it’s awesome! I really love the fact that I’m just getting my feet wet in a whole new side of the music industry.

So the moral of the story is that it’s important to keep learning — no matter where you are in your life … and it’s equally important to be open-minded in any situation because you may be able to grow from it in some way.

Photo courtesy of the author.


Check out Sean’s other blog posts.

Craft a Music Proposal for New Instruments

In much the same way that a sports team needs skill players to perform specific tasks, quality school bands and orchestras need a given ratio of instrumentalists to carry out their defined functions in the ensemble. In both cases, the excellent condition of the component parts is key to putting together a winning team.

Unfortunately, creating balanced instrumentation is a concept that is unfamiliar to many principals, superintendents and school boards. As a leader in your instrumental music program, it is up to you to craft a clear, easy-to-understand “play book” that will guide the program — and the stakeholders who will fund, approve and administrate it — to success. A critical factor is developing a multi-year replacement plan to manage your inventory of instruments. Teachers who fail to plan for regular, structured cycling of inventory can find their programs held hostage to changing politics, budget and personalities.

In future blog postings, we will cover many of the steps required to creating the actual plan. But to set yourself up for success, take some time now to gather the tools you need to create a compelling plan. And even before you start writing, get organized.

Here are three steps that will prepare you to write a comprehensive proposal that helps your supervisors understand your request — and hopefully leads them to appropriate the needed resources:

1. Research the scope of your needs. Start by capturing the projected growth in your program. Factor in population changes in your district, as well as the efficacy of feeder programs.

2. Get a baseline for your current inventory. Your needs are driven not only by the future needs of your program, but also by the current state of your inventory. Accurate and comprehensive inventories are key to accurately doing so. Now is the time to get your instruments collected and organized, so the assessment process will go smoothly.

3. Think about the needs of your plan’s audience. School boards are comprised of community members who want programs built and organized on a sound foundation. Unless the decision-maker was also a music-maker at some point, it is likely that this information is new to them. Planning must go beyond summarizing needed items to explain the rationale for the purchases.

Abraham Lincoln is credited with saying, “Give me six hours to chop down a tree, and I will spend the first four sharpening the axe.” Now is a great time to sharpen your planning process!

Cover of Support ED magazine with headshot of Jeff Coffin holding his saxophone and headline


This article originally appeared in the 2017 V3 issue of Yamaha SupportED. To see more back issues, find out about Yamaha resources for music educators, or sign up to be notified when the next issue is available, click here.

Getting Amplified

Say the words “music technology,” and you’ll most likely think first of laptops, mobile apps, and the internet. But technology played a major role in music-making long before computers. For example, the guitar became the most popular instrument of the 20th century largely because of technology — the invention of the amplifier, the loudspeaker, and the small but essential device we’ll be discussing here: the pickup.

Before Pickups

By the time scientists learned how to harness electricity, guitars had already been popular for hundreds of years, and not just with wandering troubadours. A major composer of the 19th century, the French Romantic Hector Berlioz, wrote all his best-known works on guitar. (He never learned to play piano.) But listen to his Requiem or Symphonie Fantastique and you won’t hear a note from his favored instrument. Why? The guitar had a problem. It was only loud enough to be heard in a relatively small, intimate performance setting. Adding it to the huge symphony orchestras that Berlioz liked to write for would have been pointless; the other instruments would drown it out.

The dawn of the Jazz Age in the early 20th century shone an even brighter spotlight on the guitar’s weaknesses. It was simply no match for the volume of a jazz brass section or drum kit, and its place as a rhythm instrument was soon usurped by the banjo. For guitarists, and the companies that manufactured guitars, to be shut out of a rapidly growing new style of music was a bleak prospect indeed. What could be done?

Musical Magnetism

Two answers to this question were forthcoming. First, in the 1920s, was the debut of the archtop guitar — a fascinating subject in itself, but one for another article. Second, in the 1930s, came the first magnetic pickup, so called because it both “picked up” the vibrations of guitar strings and raised (that is, “picked up”) the instrument’s volume.

Essentially, a magnetic pickup is a set of magnets arranged in a straight line, with a coil of fine copper wire wrapped around it. (The coil is formed by turning the wire around the magnets several thousand times.) When a metal string vibrates near the pickup, that vibration changes the magnetic field, which then induces a voltage in the wire coil, creating an electrical signal. Sending that signal through a cable, amplifier, and speaker (all of which were fairly commonplace items at the time thanks to the rise of radio technology) produces a sound that is much louder than the one originally made by the string’s vibration.

With jazz great Charlie Christian leading the way, guitarists in all genres of music quickly went electric, either adding magnetic pickups to their existing acoustic instruments or buying new guitars with pickups pre-installed. By the early 1940s, the sound of acoustic guitars began to seem old-fashioned. Clearly, when it came to guitars, electricity was the future.

Image of the guitar.
Yamaha Pacifica PAC200.

Bucking the Hum

Nonetheless, early magnetic pickups didn’t provide a perfect solution. Amplifying a guitar could gave rise to undesirable sonic byproducts: the howl of feedback and the hum and buzz of static and signal interference. The invention of the solid-body electric guitar in the early 1950s took care of the feedback issue, but as for hum, that came down to the pickups themselves — specifically, to the single coils of wire that they contained and the orientation of the magnets inside them. It turned out that when you connect two single-coil pickups to each other and change the polarity of the magnets in the second one (by pointing their north pole away from, rather than toward the strings), you dramatically reduce electrical hum. And that’s why double-coil pickups are better known to the world as humbuckers.

Since they’re essentially two pickups in one, humbuckers tend to be louder and have a warmer, fatter tone than their single-coil counterparts. However, many guitarists still prefer the brighter, more shimmery sound of single coils, especially when playing country and alternative rock. Most Yamaha electric guitars — such as those in the REVSTAR, SBG, and Hollow series — feature humbuckers, but the Pacifica PAC100 and PAC200 offer the best of both worlds, with single-coils in the neck and middle positions and a humbucker near the bridge.

Acoustic Options

Magnetic pickups, in both single-coil and humbucking varieties, work great with archtop or solid-body guitars. But if you stick one on a regular flat-top hollow-body acoustic guitar and plug into an amp, you basically get the sound of an electric guitar. For players who want to be amplified but love the distinctive sound of acoustic instruments, that’s a problem. Of course, you could always mic up your guitar, but that limits your movement while playing and adds the possibility of unwanted feedback.

Luckily, over the past several decades, huge advances have been made in pickup design, and several options are now available for guitarists in need of an amplified acoustic sound that’s true to the instrument’s original tone. Two of the most common are piezoelectric pickups and transducer pickups.

Piezoelectric pickups — piezos (pee-YAY-zohs) for short — are thin crystal strips that are typically placed under the saddle of a guitar where the strings cross the bridge. The vibration of the strings compresses the crystals, which creates an electrical signal that can be converted into audio. (The name for this process comes from the Greek word piezein, which means “to press.”) Largely because of their placement by the bridge — a guitar’s brightest-sounding point — piezos do a good job of capturing an acoustic’s brilliant high end. But on their own, they can sound trebly and harsh. That’s why they’re generally used in combination with a transducer pickup, a kind of mini-microphone placed inside the guitar, either directly against its top or back.

Some players use multiple transducers in their guitars, while others throw a good old-fashioned magnetic pickup into the mix too. Then there’s the intriguing new wrinkle introduced by the Yamaha TransAcoustic line of acoustic guitars, which pairs a piezo system with a metal actuator built into the instruments that not only amplifies their sound, but also creates realistic reverb and chorus effects, whether or not you’re plugged into an amp.

Turn It Up

The electric guitar was indisputably one of the most important music technology achievements in the first half of the 20th century. The creation of pickups that could actually do justice to the tone of an acoustic guitar was a crowning glory of its second half. What it all means to us here in the 21st century is that no matter what kind of guitar we play, we can always feel free to get loud.


Click here for more information about Yamaha electric guitars.

Students Help Teach Music to Students with Disabilities

United Sound is a school-based instrumental music club for students with intellectual or developmental disabilities and their peers.

Dedicated to promoting social involvement through shared ensemble performance experience, the organization enables music students with and without disabilities to learn and perform in band or orchestra together.

The program is run primarily by a school’s band or orchestra director and a special education teacher, with support from United Sound in the form of specialized training, financial support and organizational resources. Students who participate in United Sound programs are called “New Musicians.” With assistance from student volunteers known as “Peer Mentors,” they learn to play the instrument of their choice at a personally modified level. Working first in lesson format and ultimately transitioning to rehearsals with recorded music, the New Musicians learn a piece of music that they then perform live in concert, once per semester, along with their Peer Mentors and a full instrumental support ensemble.

Making music together is a powerful force for learning, growth, friendship and understanding. Music is a language that transcends disability and the relationships formed through this unique program truly resonate with all children involved.

See how the United Sound programs benefit teachers, students and parents:

Please join Yamaha in supporting United Sound to bring music education to all students!

Photo courtesy of United Sound

In Rhythm

Lately I’ve been reflecting on just how important timing is.

Rhythm is, in fact, one of the cornerstones of music. Look up the Merriam-Webster dictionary definition of “music” and here’s what you’ll find:

“the science or art of ordering tones or sounds in succession, in combination, and in temporal relationships to produce a composition having unity and continuity”

This is just a fancy way of saying that music consists of a specific series of tonalities (timbre) and pitches (melody), combined together in a certain way (harmony) and played in a certain fixed order (rhythm). In future postings, I’ll be talking more about timbre, melody and harmony, but let’s take a closer look here at rhythm.

First of all, with some exceptions, the tempo of most music — both classical and popular — falls into the 60 – 168 bpm (beats per minute) range, which roughly corresponds to the rate of our heartbeats. A typical normal resting heartbeat for most individuals is 60 to 70 beats per minute, while some moderate activity like a brisk walk can elevate the heart rate to 110 to 120 beats per minute; a strenuous workout can easily push your heart rate up into the 160+ beats range. That’s almost certainly the reason why we find these tempos to be the most “natural” and appealing when composing or listening to music, especially when you consider that we all spent the first nine months of our lives in our mother’s womb listening to her heart beating.

Secondly, as none other than the late, great producer George Martin observed during an interview I did with him some years ago, music is a unique art form in that it needs time to develop. Think about it: music requires someone at the other end to listen to it. Here’s what he had to say on the subject:

Sir George Martin.

“You can’t look at it and say, “What a nice piece of music that is.” You’ve got to spend a bit of your life in order to appreciate it. Every time you listen to a symphony, you invest forty minutes of your life. You’ve only got a finite amount of time on this earth, and you’ve just spent forty minutes of it listening to a symphony, or to an album.

“The fact is that music doesn’t exist at all without time; time is the dimension which makes it work. [That’s why] music is the most sublime of all the arts. It’s the most intangible, it’s a mystery, and it’s been with us since we were primeval. Human beings were making music tens of thousands of years ago, before they could talk. I think it’s the most fundamental part of our lives; without rhythm, we wouldn’t exist. Your heart is pumping out a rhythm, and when it stops, you don’t live anymore, so rhythm is actually the difference between life and death.”

Everything, as Sir George pointed out in the conclusion of the interview, has a rhythm — not just we humans, but the sun, the moon, the stars, everything. And that’s probably the reason why music is indeed the universal language!

Photo by Robert Essel, courtesy C A Management.


Check out Howard’s other postings.

Blending Brass

With so many superhero movies hitting the theaters, it’s ironic to hear ensemble directors tell their students “don’t be a hero” when someone is sticking out in the overall sound. Because of the brass instruments’ powerful directional abilities, blending the sound and dynamics of an ensemble can sometimes seem like an epic battle!

But Hollywood has taught us that an entire team of superheroes working cohesively is much more powerful than one rogue crusader working alone. Here’s how to tame your brass section to craft a blended ensemble sound.

Testing Powers and Limits

Male teacher conducting a school band class of teenagers.
Dr. Ward Miller takes the baton.

Testing the limits of strong airflow is an important first step. “Start with a full, forthright sound because you can’t play soft with a good and blended sound unless there’s airflow,” says Dr. Ward Miller, music education consultant, arranger and associate director for the Macy’s Great American Marching Band in New York for the last 10 years. “If you start them too soft, they’re never going to develop the air flow later to play in different dynamics with a good sound.”

Once a good sound is established at louder levels, the ensemble can begin developing the technique of playing softer but with just as much power. Miller, who is also brass caption head of the Blue Stars Drum and Bugle Corps from La Crosse, Wisconsin, likens the difference to two types of whispers. “There’s the [typical quiet] whisper, and [then] there’s, ‘Hey, I’ve got a secret I want everybody to know! Everybody lean in and listen to me!’” he says. “That’s a really more engaged air even though it’s soft. That seems to really resonate with a lot of younger students.”

Beyond the dynamics and air, members of the ensemble must learn to match the tone and color of their sound. “One of the phrases I use a lot is playing ‘in tone and in tune,’” says Dr. Chip Crotts, director of jazz studies and assistant director of bands at the Georgia Institute of Technology in Atlanta. “I talk a lot about matching the same color and sound and matching the same energy or strength, which is a little different than just trying to play in tune or playing in the same dynamic.”

To bring this concept to life, Miller suggests an exercise utilizing a lead player as an example. “If we have someone who has a really, really good model sound, then it’s a good idea to have them play while everyone else buzzes or while everyone else sings through the instrument, and then have them connect their sound to that person,” he says.

Be the Hero They Need

Band leader conducts practice on a football field with young brass player in foreground.
Dr. Chip Crotts rehearses the Santa Clara Vanguard Drum and Bugle Corps.

Directors admit they can be guilty of telling a loud player, “We don’t need heroes,” or giving them, as Miller describes it, “the stop sign hand” more often than they’d like. “The truth is, as long as they’re not sticking out with a bad sound, you want everyone else to come up to their level,” he says.

According to Crotts, the key is to be more specific with feedback. He warns against a generic, “Hey trumpets, I need more!” and instead suggests mentioning which specific trumpet or which part of the chord needs to be brought out. When instructions are too generic, “the players who are already playing loud enough are going to play louder, and the ones who weren’t playing loud enough are not going to play strong enough,” says Crotts, who is also the brass caption manager with the Santa Clara (California) Vanguard Drum and Bugle Corps. “Make sure that you’re clear about what you want,” he adds. “Bringing the younger players up and using more air and playing with a fuller sound is a more ideal way to balance [the ensemble]. It just encourages more confidence from the younger musicians, and it promotes more of a confident performance throughout.”

Lead players may feel like they have to save the rest of the band with their sound. One way to keep them busy is to give them more listening responsibility. “Train the leaders to listen to the other leaders of the other brass sections, so that the lead trumpet is listening to the first chair French horn, who is listening to the first chair trombone, euphonium, tuba, etc.,” says Suzanne Dell, associate band director at L.D. Bell High School in Hurst, Texas. “Then get the players within the section to understand their responsibilities for how their parts support what is oftentimes the lead voice.”

Female band teacher conducts practice with brass players in a large room with carpet.
Suzanne Dell conducts a student ensemble.

Define the Roles

With some students, ego can be the reason for overplaying because they may fear relegation to a lesser role. Clearly defining roles and emphasizing all parts helps to avoid these challenges.

Dell suggests rotating roles occasionally, so that everyone knows what it’s like to be first, second or third chair. Realizing how and why each part is important will prevent overplaying and sticking out. She also recommends an emphasis on small ensemble or chamber playing, where each part is very important so that this skill will be reflected in the larger ensemble.

Directors must create an environment where students perform the way they practice. Players need to understand that blending and balance make a better performance overall — they shouldn’t do it just to prevent the director from correcting them during rehearsal.

“We’ve all been in bands where you practice one way, and then everybody gets to the game and they just play completely different,” Crotts says. “You have to make sure that the way that they practice and perform is consistent, and that you’re having everyone play up to each other.”

Miller plays a game with his students where they take a passage of the piece and only play when they think they have the melody or most important part. The results can be illuminating. “People either don’t know that they’re the most important thing, they’re not aware of how important they are, they’re not aware they’re in the foreground, or they think they’re the foreground and they’re not,” he says. “It results in so much more clear balance and clarity for the audience to know exactly what they should be listening to at that moment.”

Consider the Logistics

While the students are working hard to play with a more blended sound, remember to consider logistics that can give your ensemble an advantage during performances. “Take into account the [concert] setup and be mindful where it is that you’re performing and how you physically use your space,” says Dell.

For example, you may need to put some of the brass with front-facing bells up on risers, or position the French horns in an area that can reflect their sound forward. Just because the group sounds great from the podium doesn’t mean the balance is right from the audience’s or judges’ standpoint. Dell suggests listening and recording from different locations around the room, and Miller agrees. “If you’re not somewhere where somebody can come in and be an extra set of ears for you, record and send it off to someone who can help you,” he says. “Send it to a college mentor, a friend, another band director or bring a guest in.”

Creating a blended sound among the brass takes hard work, but when you bring together all the different elements, you can have a sound worth fighting for. “It’s not achieved by individual players playing at their loudest, but by everyone matching energy and everyone being at the center of pitch and tone,” Dell says. “That’s how you sound bigger and fuller. It’s not by force, and it’s not by one or two players being the hero.”

Photo credits: Justin Brenneman, Cameron Kostopoulos, courtesy of the Blue Stars Drum and Bugle Corps. Copyright 2016. All rights reserved.

Trumpet Trivia

From prehistoric times to modern day, the trumpet is an instrument that has a rich and intriguing history. Want to know more? Read on…

Origins

The origins of the trumpet can be traced back several thousand years. However, since primitive trumpets were extremely basic wind instruments that the player sounded simply by moving his lips, they cannot clearly be distinguished from the forerunners of instruments such as French horn, which produce sound the same way.

Trumpets of old were made out of various materials, including wood, bamboo, bark, clay and metal — even human bone! Found on every continent, they are thought to have been used in religious ceremonies and even sorcery. In ancient Greece and Rome, trumpets were used for marching in wartime — a task for which they were well-suited! Eventually, almost all European royalty had trumpet bands that played military music.

But it wasn’t until the seventeenth century that the trumpet came to be used primarily in musical ensembles. At that time, however, it was still a so-called natural trumpet, which means the instrument could only produce the notes of the natural harmonic scale, so it wasn’t yet able to fully function like the modern trumpet. These trumpets had a very simple shape, with no valves — just a flared bell at the end. The only way a player could produce different notes was by varying his lip movement and the speed of his breath.

Enter the Valve

Before there were valves, whenever a trumpeter needed to play songs in different keys — such as C major and G major, for example — he would keep a C major trumpet and a G major trumpet on hand. Needless to say, looking after all these instruments and carrying them around was a lot of work! Accordingly, in around 1810 the valve was invented as a means for easily changing the length of the tube.

A valve is simply a device that changes the path taken by the trumpeter’s air. Additional tubes were added to the middle of the instrument and valves were attached at the point where they joined. These valves controlled which tube the trumpeter’s air would pass through, making it easy to change the length of the tube and enabling chromatic scales to be played.

A Trumpet with Keys?

As we’ve seen, the only technique that early trumpeters could rely on was lip control. As a result, the instrument was also limited in terms of the notes that it could produce. The trumpets of that era couldn’t play complex phrases filled with semitones; instead, they could only play simple notes such as C, E, and G.

Fortunately, there will always be people who will try and overcome limitations. Anton Weidinger — an outstanding Viennese trumpeter of the Classical period — was one such man. By adding keys to the tube, he devised an instrument that could play semitones. Weidinger asked a number of composers to write concertos for this new trumpet, including Joseph Haydn and Johann Hummel. Although Weidinger’s keyed trumpet was rendered obsolete by the appearance of the more functional valve trumpet in the mid-nineteenth century, it was due to his spirit of enterprise that the two greatest trumpet concertos in classical music came to be written.

What’s the Highest Note a Trumpet Can Produce?

There are many varieties of trumpet, and they also vary in range. The most common is pitched in the key of B♭, where the highest note that can be played is generally considered to be one octave higher than the C just above the middle line of the treble clef.

But there are ways to produce even higher notes. It’s actually not a question of the highest note that a trumpet can physically produce, but a matter of the highest note that can be played. In fact, performances by skilled musicians often extend up to two octaves higher than the instrument’s “highest” note. What’s the highest note YOU can play?


This posting is adapted from the Yamaha Musical Instrument Guide.

For more information about Yamaha trumpets, click here.

Passing the Baton

You’ve got a child that’s interested in learning to play keyboard. Great news! The question then becomes, how much should you invest in their curiosity? You don’t want to discourage them, but what if they lose interest after awhile? The answer is to purchase a quality instrument — one that’s more than a toy — at an affordable price.

Electronic keyboard
Yamaha YPG-235.

Over the past eight years, more than a million parents worldwide found the perfect solution in the Yamaha YPG-235, which became the most popular portable keyboard in history. There are many reasons why. For one thing, most lower-priced keyboards have just 61 keys, where the YPG-235 offered 76 — a lot closer to the 88 keys offered by a real piano. In addition, the keys are touch sensitive, which means the harder you strike them, the louder they sound, just like on a piano. And finally, there are enough features that, once practice time is done, the aspiring musician can play, experiment and create by auditioning hundreds of Voices (sounds), drums and drum patterns, and then recording their efforts right on the instrument itself — no extra hardware required.

Sooner or later, however, every company needs to replace even their best-sellers with products that offer the latest technologies — passing the baton, if you will. Enter the PSR-EW300, a powerful yet cost-effective new instrument that builds on what made the YPG-235 so popular.

Like its predecessor, the PSR-EW300 also features 76 touch-sensitive keys, hundreds of sounds and recording capability, but it adds some newer features that have come along in the last few years, the biggest one in the area of connectivity. Both keyboards have USB for storing songs and connecting to computer devices, but the PSR-EW300 adds audio capability over USB that allows you to take crystal clear digital audio and send it directly to your favorite device for recording and sharing with friends or uploading your performances to music sites — a feature that is generally found only in professional synthesizer products. In addition, there’s an AUX IN, which allows you to play along with your favorite music player, and a Melody Suppressor feature that cancels the vocal or melody track on songs, allowing you to play or sing the melody yourself.

The PSR-EW300 provides 574 Voices (as opposed to 489 on the YPG-235) and offers a whopping 48 notes of polyphony (the YPG-235 had 32) to make sure there are no dropouts, even when playing lots of notes at the same time.

Why do you need so much polyphony? After all, you only have ten fingers. Well, if you have the Style engine going — which is basically a backing band that follows your chords — the keyboard could be using quite a few notes for bass, guitar, and drum tracks, in addition to the notes you’re playing yourself. In addition, there’s a Duo mode that allows you to layer two sounds at a time, such as Piano and Strings. Those kinds of combinations sound wonderful … but they eat double the notes. The bottom line is, more polyphony is better.

The PSR-EW300 comes with 154 built-in Songs (the YPG-235 had 30, plus another 70 on CD-ROM) and, in addition to the “Listen & Learn,” “Chord Dictionary” and “Waiting” on-board lessons found on the YPG-235, it adds new ones, such as “Keys To Success,” “Chord Progression” and “Touch Tutor.” These are all powerful tools to not only help make learning fun and easy but to put your child on the path of a lifetime of music enjoyment.

And, when all is said and done, isn’t that the true value of any musical instrument?


Click here for more information about the PSR-EW300.

Brooks Robertson In the Studio

Note: This is the second installment of a two-part “Yamaha A Series Videos” series.

“Whatever the guitar itself sounds like, I want that to come through in the recording,” says artist Brooks Robertson, “and a guitar like this already sounds great acoustically, without being plugged in at all.”

The guitar Brooks is talking about is the Yamaha A Series, and as he demonstrates in this video, it’s ideal for recording as well as for live performance, thanks to the nuances provided by built-in microphone modeling and the ability to freely switch between different models on the fly — something that can’t be done with any other acoustic guitar. “The A Series is helping me sound better and play better,” he concludes. “It just sings on its own, which is really nice.”

Click here to view Part One: A Series On Stage.

Click here to find out more about Yamaha A Series guitars.

How to Shop for a Subwoofer

Subwoofers are speakers with a singular, but important job: to reproduce the ultra-low bass frequencies that standard speakers can’t handle. They’ve been around since the 1960s, but came into their own with the wide use of cinematic surround sound in the ’80s and ’90s. If you want to hear (or, more accurately, feel) the impact of sound effects while watching a big-budget action film at home the same way you experience them in a movie theater, you need a subwoofer. And if you listen to a lot of contemporary pop, hip-hop and EDM, a sub is essential to capture that music’s full club-shaking punch.

A Question of Size

Before making an investment in a subwoofer, it helps to have a sense of how much physical space you want it to take up. Don’t assume that bigger automatically means better. In fact, developments in speaker technology have made it possible for relatively tiny subwoofers to achieve powerful lows. Yes, a twelve-inch speaker cone can push more air than an 8-inch one, but that doesn’t matter so much if it isn’t pumping out the right frequencies (see below).

The most compact of all the subwoofers offered by Yamaha is the YST-SW012, which measures just 11 3/8″ wide x 11 3/8″ high x 12 7/8″ deep. Other Yamaha subs with a small footprint but big sound include the YST-FSW150 and YST-FSW050.

Most Yamaha subwoofers are either square or rectangular and horizontally, rather than vertically, oriented. One exception is the NS-SW210, which has a tall, thin profile (6½” wide by 17¾” high) that can match up well with certain types of flat screens.

The Big Crossover

Once you’ve gotten past size and shape issues, the biggest thing to consider when shopping for a sub is frequency response. A particularly important point to bear in mind is something called the crossover frequency — essentially, a kind of borderline that indicates where low frequencies stop being handled by your regular speakers and start being produced by the subwoofer. The most common crossover setting on an A/V receiver is 80 Hz, but generally speaking, the bigger the woofers are on your regular speakers, the lower the crossover point should be for your subwoofer. If you engage all your speakers (including the sub) and hear plenty of lows but can’t tell exactly where they’re coming from, you’ve got yourself a successful crossover.

Every Yamaha subwoofer has a broad enough frequency range to set the crossover wherever you feel most comfortable. The model with the widest range overall is the NS-SW050, which delivers frequencies from 28 Hz to 200 Hz. If you want your sub to hit absolute bottom, you may want to consider the NS-SW1000, which is powered by a 1,000-watt amplifier and can reach depths of 18 Hz, which is about as low as is possible for a human to hear.

Compact subwoofer
Yamaha NS-SW050.
Subwoofer
Yamaha NS-SW1000.

One Sub or Two?

Some home theater receivers, including many made by Yamaha, allow for the use of two subwoofers. Depending on the amount of additional speakers you have, this would make your system 5.2 (the number after the decimal place indicates how many subs there are), 7.2, 9.2 or even 11.2.

Left/right separation isn’t really a factor when it comes to low frequencies, so there’s no specific need to have two subwoofers; in fact, both subs in a “.2” system will generally be putting out exactly the same signal. That said, sometimes more is more, and having one sub behind you and another one in front can make for a truly bone-rattling experience! Just make sure that the two subs are not firing directly at one another (which can cause phase cancellations that reduce their effectiveness) and that they are working with one another as well as they do with the other speakers in your system. If one sub sounds noticeably different from — or louder than — the other, it can spoil what you’re going for: that glorious feeling you get when you’ve been catapulted right into the middle of a whole world of sound.

Special Features

It’s also worth considering any special features that a subwoofer may have. For instance, most subs on the market today have a port (a hole cut into the cabinet that helps increase the speaker’s ability to respond to low frequencies). But the Yamaha NS-SW series features a unique design called Twisted Flare Port, which — as its name suggests — has a gently twisting shape that creates a smooth air flow around the port edge, allowing those lows to ring out even clearer. (Rather counterintuitively, a standard circular port has a more turbulent air flow.)

In addition, all Yamaha subwoofers utilize something called Advanced YST II. YST stands for Yamaha Active Servo Technology, and at its heart are negative-impedance converters. Without getting too technical here, we’ll simply say that in certain electrical devices, negative impedance can amplify a signal. Obviously, this is an important trait for speakers, and Yamaha’s ANIC (Advanced Negative Impedance Converter) circuitry ensures that sub-bass frequencies are replicated with consistent accuracy.

Finding a Place

Once you’ve purchased a subwoofer, where do you put it? First of all, subwoofers are commonly placed on the ground to help convey the feeling that those deep lows are emanating from your floor (and potentially rattling it as well — a good thing, assuming you don’t live in an apartment).

In terms of positioning, most people tend to put their subwoofer somewhere in the middle of the stereo soundstage — that is, in-between the front left and front right speakers (though you’ll get best results if it’s a little off-center). But this practice isn’t one you need to follow, since low frequencies are pretty much unidirectional, meaning that you generally can’t tell where they’re coming from. In fact, the optimum location for a subwoofer in any environment depends mostly upon the room dimensions. The key to its successful placement is that its location not be apparent. If you’re able to perceive the direction that the low frequencies are coming from, that’s a sure sign that the sub is not positioned correctly.

Last but not least, if the subwoofer provides a phase switch, experiment with different settings until the smoothest bass response is heard. If it does not have such a switch, try rotating the sub in 90-degree increments until it sounds best. In certain circumstances, you’ll find that not having it face directly at you yields the best sonic results.

For more information about Yamaha subwoofers click here.

Learn to Play Your Favorite Songs

I did something the other day that I have never done in my career as a musician: I sat down and played along with all the music in my phone’s iTunes® library.

Why hadn’t I ever done this before? Well, one reason is that the songs I listen to in my off hours are different from the ones I perform professionally. My iTunes library contains the music I grew up listening to as a child, as a teenager and as an adult. It’s designed to be the “music of my life” — in fact, it could almost be considered my life’s soundtrack. As it turns out, I have rarely worked up any of my own arrangements of these songs for my professional appearances since my personal preferences are not necessarily the same music that I would use to introduce a product.

Another reason is that it is often difficult to find the music for these songs. Certainly, it is much easier to do nowadays with the advent of online sheet music. But it still can be tedious and time-consuming to find a matching arrangement for the version of the song on my device in the right key, not to mention the expense involved.

logo for Yamaha Smart Pianist app

That’s all changed with the Yamaha Smart Pianist app. When I first used this remarkable iOS app along with my CSP Clavinova, I found that I suddenly had access to ALL of the chords and accompaniment scores for ALL of the songs in my iTunes music library.

Boom!

I spent the next three hours playing along with the “music of my life.” I loved it! It was an experience that was at once cathartic, enjoyable and invigorating — so much so that the time flew by without my even noticing it. And for one brief moment, there were five Beatles performing on my Clavinova: Paul played bass, George played lead guitar, John played rhythm guitar, Ringo played drums, and, yes, Craig played piano. We were amazing!

With this app, Yamaha seems to have accomplished what was considered impossible not that long ago. They have figured out a technology that converts the audio of a song into several different playable formats for anyone, regardless of their reading ability (or lack thereof), to learn and play along to their favorite songs.

Let that sink in for a moment.

1. If you READ MUSIC:

–  you read and play the accompaniment patterns notated in the “audio generated” SCORE.

2. If you READ CHORDS:

–  you create and play your own accompaniment patterns based upon the “audio generated” CHORD chart.

3. If you DON’T READ MUSIC and you DON’T PLAY CHORDS:

–  you play by following the Stream Lights generated from the accompaniment pattern you selected in SCORE.

That pretty much covers everyone!

Let’s go into each in detail.

If You Read Music…

Smart Pianist generates a Piano Accompaniment Score for the selected song in your iTunes library by evaluating the musical and harmonic structure of each song and figuring out all of the harmonies that are being used from beginning to end:

Screen capture from Smart Pianist App demonstrating the app interface as it evaluates the incoming audio for "Let It Be" by The Beatles.

It then creates a piece of sheet music, complete with right and left hand parts — a score that you could literally give to a piano player that reads music to enable them to accompany the original audio file:

Visual of the onscreen sheet music on the Smart Pianist app for Let It Be

Does this mean it scores the actual melody? The answer is no. It generates accompaniment music for you to play, so you can meaningfully play along with the musicians you are listening to. Let Paul McCartney sing the melody and the Beatles play their instruments. Your job is to accompany them, not play over them! In effect, you are joining the existing band.

Astonishingly, Smart Pianist allows you to choose from over 60 different piano accompaniment patterns to display different right and left hand parts, depending on how difficult you want the arrangement to be. Select “Basic 1” and the app will generate a score with one chord every measure. Select “Basic 3” and you will see notation for one chord on every beat:

Smart Pianist screenshot of both the accompaniment score pattern for Basic #3 and resulting sheet music

If you are bold, select from other more advanced patterns. For example, you could choose one that scores your left hand playing a single bass note on beats 1 and 3, while your right hand plays chords on beats 2 and 4. You can even select arpeggios of the chords, with each and every note dutifully written out in the score for you by the app. You select from among the various patterns, depending upon how well the pattern matches the music or how simple or complex you want the arrangement to be:

screenshot of both the accompaniment score pattern onscreen for "Easy Arpeggios 2" option in Smart Pianist and resulting sheet music

If You Read Chords…

At this point, some of you might be asking, “What if I don’t read notated music, but I do know how to play and read chords?” Simple: Just look at the chord chart that Smart Pianist generates from the audio by selecting the chord symbol at the bottom of your iOS screen. This is perfect for jazz musicians and hobbyists who taught their fingers to play chords using symbols like Cm7, or Adim or G/D:

Screenshot of the Smart Pianist app's chord chart for "Let It Be" by The Beatles.

No app is perfect, of course, but if you find a chord that wasn’t analyzed accurately, or that doesn’t sound quite right, Smart Pianist lets you edit the chords directly in this screen. Say you want to change how the app displays a C6 chord, changing it to an Am7/C instead. Simply double-click on the chord symbol you want to change, then select from other suggestions provided by the app, or select the exact chord you want using the dials:

Visual from Smart Pianist app showing how that change looks on screen.

You can even create “on” chords, where you display chords with different non-root bass lines. You will notice there are also more advanced options provided here for the more advanced musicians, chords like m7b5 or “13th” chords. Also, be aware you can also COPY and DELETE from this screen by pressing and holding any chord instead of double-clicking on it.

There is an additional benefit to this screen chord chart screen. In the top left-hand corner there is a symbol that looks like a heartbeat. This is a symbol for “re-analyze audio.” This is where you go to make adjustments to songs that didn’t analyze 100% accurately:

Screenshot from Smart Pianist highlighting the symbol referenced plus how to change the tempo or the meter.

In this re-analyzation area, you can also adjust the meter (3/4 or 4/4) and the numbers of chords per measure by adjusting the “tempo” to double-time or half-time. There are even options to adjust the key signature and/or “Beat Shift” the arrangement to make the chords line up to the measures.

If You Don’t Read Music and You Don’t Read Chords…

You can still take advantage of this amazing technology even if you don’t read music OR chords. That’s because each and every note generated in the Smart Pianist score — and all the accompaniment variations, too — are reflected in the Stream Lights above the keys of a CSP Clavinova. As a result, you can simply watch the Stream Lights show which which keys to play.

To make this easier to do, and to give you a chance to anticipate what notes are “coming down the pike,” Yamaha added four lights per key rather than just one light per key, giving you a chance to move your hand and fingers to the right position to anticipate playing the correct notes:

Photo showing light on above key on keyboard showing current note to play and the next one pianist should play.

Bear in mind that the Stream Lights reflect the pattern you selected in the “score accompaniment pattern” area of the app. In other words, if you select the “Basic 1” pattern (one chord per measure), the Stream Lights will light up the same data above the keys, with one chord appearing every measure; if you select the “Basic 3” pattern (one chord per beat) the Stream Lights will do so one beat in every measure. They can even reflect arpeggios and other more sophisticated accompaniment patterns, possibly turning this into the ultimate “video game.” (Almost like trying to shoot those asteroids before they reach you. I know, I’m dating myself with that analogy…).

Since we are talking about video games, OK, it can be argued that this is a form of gamification. It’s true that this is a technology that certainly allows you to learn how to play along with your favorite songs, and get better over time. And like a game, you can even choose different “levels” by selecting different accompaniment patterns in the score area, which will be reflected exactly in the Stream Lights.

Still, I can’t wait to turn my little nephew loose on some of the music in my iTunes library! I’ll simply ask him if he wants to play a new video game on my Clavinova. Put that way, he definitely won’t say no to practicing.

Smart Pianist works with the Clavinova CSP-150 and CSP-170.


Learn about  how to get new songs (both audio and MIDI) into SmartPianist.

NAMM 2018 Highlights

Every January, the entire musical instruments industry — manufacturers, dealers, artists, fans and the merely curious — convenes in Anaheim, California for the annual NAMM® (National Association of Music Merchants) show. It’s quite an event. A wide assortment of music-related products and technologies are put on display, orders are placed for the coming year, autographs are gathered, and concerts and parties run long into the night.

If you weren’t able to make it to this year’s extravaganza, here are some of the hottest new offerings from Yamaha.

Clavinova CSP

The Clavinova CSP-150 and CSP-170 digital pianos are the world’s first musical instruments to use game-like elements that allow you to instantly play your favorite songs along with the original artists, without any fear of failure or boring practice. Simply use a smart tablet running the free Yamaha Smart Pianist app to analyze the chord structure of any song in your music library and produce a piano score. Then connect it to your CSP, which teaches you how to play the song via interactive Stream Lights — a ladder of four cascading LED lights above each key that illuminate in rhythmic sync with the song’s tempo. Learning’s never been so much fun!

A keyboard with lights above it.

FG TransAcoustic Guitars

Making their debut at NAMM were two FG TransAcoustic guitars — the FG-TA dreadnought and its concert-size counterpart, the FS-TA. These groundbreaking instruments combine the durability and affordability of the best-selling FG and FS series guitars with award-winning Yamaha TransAcoustic technology that utilizes a vibrating metal “actuator” hidden inside the guitar to create authentic reverb and chorus effects — all without the need for any external amplification or effects.

Two Yamaha guitars.

EAD10

Ideal for rehearsal, recording and performance, the EAD10 allows drummers to easily record and enhance their playing using a combination microphone/trigger sensor that mounts on the bass drum, along with a central “head” module. The microphone effectively captures and reproduces the natural, dynamic sound of an entire acoustic kit, and the module allows you to add effects such as flanging, phasing and a variety of different reverbs. The EAD10 even comes with a free Rec’n’Share iOS app that enables you to record your drums on top of your favorite music, while at the same time capturing a video of your performance that can be shared on YouTube™ and other social media platforms.

A drum set with electronic drum module.

Genos

Genos is the most powerful Digital Workstation keyboard ever offered by Yamaha — the perfect songwriting and performance companion. With nearly 2 gigabytes of stunningly realistic sounds and accompaniment Styles, Genos is essentially an entire orchestra in a box! It offers a multitude of advanced features such as enhanced DSP effects, extensive real-time control and a large 9″ color touchscreen, along with Articulation Element Modeling (AEM) technology, which automatically chooses the correct articulation (that is, the way an instrument sounds depending on how it is played) according to your keyboard technique.

An electronic keyboard.

Venova

Also on display at NAMM was the Venova YVS-100, a compact and lightweight “casual wind instrument” that’s perfect for taking to the beach, on a camping trip, to a barbecue — virtually anywhere. Affordable, easy to learn and fun to play, Venova uses advanced technology to combine the sound of a saxophone with a simple fingering similar to recorders, offering extraordinary expressivity (including the ability to bend notes) and a full chromatic two octave range.

A Yamaha Venova casual wind instrument.

New Revstar Finishes

Guitarists love the look of their guitars, and Yamaha unveiled seven bold new colors for the Revstar line of solid-body electrics, including Black, Ice Blue, Vintage Japanese Denim, Maya Gold, Vintage White, Snake Eyes Green and Shop Black. All Revstar guitars have been designed with painstaking attention to detail and include hand-wound pickups and materials that perfectly match each instrument’s character.

Seven electric guitars.

Alexa Integration with MusicCast and Disklavier

The Yamaha exhibit area also featured ongoing demonstrations of the ultimate in smart home integration: Amazon Alexa with the Yamaha Disklavier ENSPIRE reproducing piano and MusicCast Multiroom Audio System. This combination of advanced technologies makes it possible for the piano to play beyond the four walls of a single room to any room in the home — or even outside — all controlled by spoken commands.

See you at next year’s NAMM — and remember, if you can’t make the show in person, you can always catch the highlights here!


Click here for 2019 NAMM highlights.


For more information about these and other great Yamaha music products, click here.

Brooks Robertson On Stage

Note: This is the first installment of a two-part “Yamaha A Series Videos” series.

Yamaha A Series acoustic guitars are crafted from the ground up to be perfectly suited to life on the road. Watch and listen as master guitarist Brooks Robertson demonstrates the dependability, versatility, playability and sonic range of the A Series in live performance, with a discussion of the new SRT2 pickup system with mic modeling and the built-in Auto Feedback Reduction control.

“When I’m onstage I want my acoustic to sound like an amplified version of what it sounds like on my couch,” he explains. “The A Series is about eliminating the things that can go wrong and giving you all the best qualities in a guitar.”

Click here to view Part Two: A Series In the Studio.

Click here to find out more about Yamaha A Series guitars.

Home

Yamaha Educator Suite: Building the Next Generation of Music Educators


  • mariachi ensemble on stage holding sombreros over their heads

    Launch a Mariachi Program

    In its first few years, the Las Vegas High School Mariachi Program released a CD and performed for many dignitaries including President Joe Biden and Vice President Kamala Harris.   

    Read More

  • student playing guitar on stage

    The Power of Pop Music

    Student initiative is pervasive throughout the Huntington Beach High School’s pop music program, which emphasizes students’ ability to forge their own musical path. 

    Read More

  • band members in a huddle before a performance

    Teach Student Leaders to Teach

    Empower your student leaders to be instructors and peer tutors, and they will take more ownership of your program.    

    Read More

  • two students playing the flute

    Start a Flute Choir

    A specialized flute choir has incredible range and can play music that was originally composed for full orchestras, choirs or wind ensembles, which is nothing short of amazing! 

    Read More

  • Subscribe!

    Get access to the latest information on music education by subscribing to the Yamaha Music Educator newsletter today! 

    Join Now

  • frustrated woman with hand on her forehead

    Avoid Burnout

    When your attitude toward your career wavers,  don’t succumb to burnout. Stay inspired and inspiring rather than self-combusting.

    Read more

  • computer mouse on sheet music

    Creative Composition Activity

    Ignite creativity with this lesson, which teaches composing and arranging as well as sight reading. 

    Read more

  • timpani

    Timpani Teaching Tips

    Try these expert tips on fixing common errors that timpani students make. 

    Read more

  • Reduce Performance Anxiety

    How can we help our students deal with nerves and anxiety before a performance?   

    Read more


Case Study: Strategic Storage and Scheduling Solutions

At Nutley Public Schools in New Jersey, the band program finds creative solutions to space and scheduling constraints. 

Read more


yarn-covered mallets

How to Choose the Right Mallet

The mallet you need will depend on the instrument, music, repertoire and style. Do your homework before starting your mallet collection. 

Read more


Pablo Rieppi

Pablo Rieppi’s Passion for Percussion

A single-minded focus drove Pablo Rieppi to become an inspirational performer and dedicated educator. 

Read more


computer with Dorico on the screen

Import Notation Files into Dorico

Create a complete library of your old scores, worksheets and arrangements by importing them into Dorico. 

Read more


winds ensemble

Navigating Vibrato on Woodwinds

Try this unconventional approach with your high school winds section to master vibrato. 

Read more


Al Bernstein

Q&A with Sportscaster Al Bernstein

Known as the “voice of boxing” and as an inductee into the International Boxing Hall of Fame, Al Bernstein is also a singer! Find out how this sportscaster started this side gig.

Read more


woman playing the violin

My String Instrument is Making a Weird Sound — What is It?

Quick ways to diagnose and fix vibration and buzzing on violins, violas and cellos.

Read more


Crowdfunding for the Classroom

Eighty percent of teachers say that funding is the main hurdle they face in music education. With often limited funding from schools and districts, music teachers spend an average of $945 of their own money every year on essential music supplies for their classrooms.

Jeff Coffin, professor and saxophonist with the Dave Matthews Band, is addressing the issue in partnership with Yamaha. He recently went on the road with the Yamaha Band & Orchestral division to raise support for school music programs, surprising students at his alma mater, Spaulding High School in Rochester, New Hampshire, where he spoke and performed at an event to promote teacher and citizen donor involvement in DonorsChoose.org, an online crowdfunding platform.

After encouraging students to apply the values learned in music classes, Coffin presented the school with a new Yamaha YX-500F xylophone. In addition, Yamaha donated $10,000 in Coffin’s name to DonorsChoose.org — monies that Coffin will disburse to public school teachers to fund music education projects for the new school year.

“As a Yamaha Performing Artist, I have been given the opportunity and potential to share the many benefits of music education with future generations of students and educators,” Coffin says. “I am forever grateful for the meaningful support and friendship.”

Currently in the second year of its #MusicEssentials partnership with DonorsChoose.org, Yamaha has donated more than $250,000 in matching funds, generating $500,000 worth of supplies for classrooms around the United States.

To find out how crowdfunding can help your program, visit www.DonorsChoose.org.


Magazine cover.

This article originally appeared in the 2017 V4 issue of Yamaha SupportED. To see more back issues, find out about Yamaha resources for music educators, or sign up to be notified when the next issue is available, click here.

The Mouthpiece Gap

As trumpet players advance in their abilities, many make an effort to understand the finer nuances that make their instrument work better. One aspect that makes a trumpet play and respond the way it does is the space that exists from the end of the mouthpiece to the beginning of the leadpipe, known as the “gap.”

The basic function of the gap is to set up response, playing resistance, and to a certain degree it also helps in “centering” or “slotting” the sound (i.e., playing easily on pitch). While some are of the opinion that no gap is the perfect setup, over the years it has been my experience from repairing and customizing brass instruments that a gap is preferred and needed by almost all players.

The majority of trumpets manufactured today all have a gap built into the design of each instrument. One reason manufacturers do this is to ensure that just about any trumpet mouthpiece will fit even if the shank is worn badly. Many manufacturers have adopted an approximately 1/8″ gap. This appears to be an industry-wide standard — one that provides most players a subtle amount of playing resistance for a slotted / centered feel, but with flexibility and a warm sound character. Gaps smaller than 1/8″ have less resistance and less slotting while playing (i.e., it is easier to slur), but with slightly less security and warmth to the sound. Some players who blow with more effort may like this better as they create their own playing resistance because of the way they use their air. I have found that adjusting the gap to zero (where the mouthpiece touches the leadpipe) creates what most trumpet players feel as less “center” or “slot,” with the upper range feeling and sounding less secure. Playing in the lower range, however, feels very free with little resistance, with the response being more spread and harder to control.

There are some trumpets designed with gaps larger than 1/8″, which seems to provide players with more slot or centering while playing in the upper range. This particular design incorporates a lower leadpipe entrance ledge, so the design makes the function of the gap different than standard. It is difficult to compare this design style to standard setups because this large gap — paired with the design — lessens the resistance overall.

Different mouthpiece designs also add their own influences into the effect of the gap as well as the leadpipe opening dimension. It is difficult to generalize that a gap of a certain distance will give a player a certain result, but the effects of the gap described here are from using average mouthpiece and leadpipe designs.

Many factors need to be taken into account before you have the mouthpiece gap adjusted to better suit your playing needs. The procedure itself is a simple one for any experienced repair technician; however, it involves unsoldering the receiver and the rear bell brace and repositioning the receiver to the desired location.

Whenever I make this adjustment for a player I take into account the trumpet design, how the player plays (more specifically, how they use their air), and how well the instrument centers or slots notes across its range. After discussing the good and bad aspects of their trumpet with the player, a decision can be made as to whether altering the gap will make a positive difference and address the problems a particular player is experiencing.

Remember that adjusting the gap is only one small procedure that can be used to fine tune your trumpet to better fit you as an individual player. Each mouthpiece will have its own gap that will work better for a particular player and help improve response and sound quality.


Click here for more information about Yamaha trumpets.

Kenneth Tse: Master of the Saxophone

When Dr. Kenneth Tse joined band for the first time at the age of 13, he wanted to play the trumpet; however, he was told that he had the right hands and teeth for making an ideal sound on the saxophone.

Only later did Tse find out that the band director had simply needed a second alto player.

That director must have been on to something though, because Tse has since emerged as one of the most renowned sax players in the world today.

Early Years

Kenneth Tse playing saxophone with orchestra

Growing up in Kowloon, Hong Kong, Tse was influenced by a musical family. His mother was a music teacher who encouraged Tse to play the violin and piano.

With the saxophone, Tse was self-taught for much of his early career. “I just really enjoyed music and playing saxophone, playing in band with all my friends,” he says.

Not limiting himself, he listened to all kinds of music — singers, orchestras, piano, cello — anything he could get his hands on. Without a saxophone specialist to teach him the intricacies of his instrument, Tse relied on his ear, spending hours with saxophone recordings and emulating what he heard.

“I would try to mimic the feel of a song by playing my own instrument,” he explains. “One of the hardest things to do was the diminuendo. I would try a bunch of things until I finally got it to sound the way it did on my recordings.” Through it all, Tse never felt discouraged. He would come home from the Hong Kong Academy for Performing Arts, where he studied for two years after high school, and practice for hours.

“I was only one of two saxophone majors at the Academy,” he remembers. “We only had clarinet teachers — [there were] no saxophone teachers — so they could only teach us basic things for our instrument. They also only had an orchestra, no concert band, so we didn’t usually get to play with an ensemble. But I never got discouraged.”

Tse can’t articulate what drove him to work so hard; he just chalks it up to his own love of music and routines engrained into him from playing various sports alongside pursuing his musical interests. Yet throughout the years, he never felt too concerned with where he was headed as a musician. And eventually his hard work paid off. World-class saxophonist and teacher Eugene Rousseau hosted a master class in Hong Kong, and Tse was invited to perform for him. Rousseau was impressed with what he heard, and Tse — after seven years of self-tutelage — finally found a dedicated saxophone teacher.

Hardworking Student

Tse studied with Rousseau for five years at Indiana University, where he earned a bachelor’s degree, master’s degree and Artist Diploma. Tse later earned a doctorate from the University of Illinois, Urbana-Champaign.

“I was always very much inspired by [Rousseau’s] playing,” he says. “His teaching style and my learning style worked very well together. I was used to fixing my technical issues on my own; Rousseau never tried to control my learning, forcing me to do this or that, because I did it all myself. He would teach me the musicality [and] helped me refine my sound.”

With a New York Artists International Award and a critically acclaimed debut recital at Carnegie Hall in 1996, Tse was hailed as a young virtuoso. Since then, he has been a prolific performer, traveling around the world for dozens of concerts every year.

Dedicated Teacher

Kenneth Tse with student, both with saxophones

In addition, Tse has embraced the world of teaching. He notes that his self-tutelage, combined with Rousseau’s refinement of his musical style, helped him define his teaching style, giving him the drive and motivation to benefit prospective musicians in the same way that he was helped in his college years.

“I enjoy the responsibility, and because I struggled as a young man without a proper teacher, I had to find out a lot of things by myself,” he explains. “Through that process, I think that I’ve gained a lot of experience, and I felt that I could help a lot of people with their own issues. That’s my mission.”

Currently, Tse is professor of saxophone at the University of Iowa. Though he enjoys a rewarding teaching career, Tse puts a great deal of value in staying active as a performer, both to improve his own musical talents and to demonstrate to his students that performing and teaching are equally important.

“Your students need to see that you’re not just lecturing to them; you’re going out and doing the things you tell them to do,” Tse says. “I need to keep myself sharp, and I can only do that by performing regularly. It may take time away from them, but in a way, it gives time back to them as well because I’m still learning. If I’m learning, I can pass that on to my students, and they’ll learn what I’ve learned.”

Giving Back

In addition to his teaching pursuits, Tse is a community leader, operating as the president-elect of the North American Saxophone Alliance (NASA), vice president of the International Saxophone Committee and founder of the Hong Kong International Saxophone Society, which hosts the Hong Kong International Saxophone Symposium every two years. Tse places a great deal of value in giving back to the communities that helped him get to where he is today.

“I wasn’t born a natural leader, and it doesn’t come easily,” he confesses. “However, just from working with a lot of friends and enjoying it, I’ve gained a lot of support. A lot of times you don’t really choose to be there, but people put you there because they trust you and your work. I’m very grateful for that.”

Iconic Sound

Central to Tse’s iconic sound is his saxophone; in fact, he has used just three horns on a regular basis. His first horn throughout high school in Hong Kong was a dull, rusty instrument. Eventually, Tse decided that he wanted something newer, to match the shiny, well-kept horns his peers had. The horn he chose and used for 25 years was a Yamaha. “I played it, and I just fell in love with the sound,” he reports. “I actually used that horn until just this year, as a matter of fact.”

Tse recently began playing on a new Yamaha model and carefully considers how his horn affects his sound. “The majority of the sound comes from the player; that’s what I believe,” he says. “Nonetheless, how well the instrument is designed does affect intonation and timbre a significant amount, and it can really make or break your sound. Yamaha horns really help give me the sound and response that I was hearing in my head.”

Tse’s career has been a lucrative and fulfilling one. From a self-taught young performer without a mentor to an iconic, world-renowned virtuoso of an instrument he didn’t even intend to play, his journey is one that exemplifies the creed of “hard work generates results.”

“Every coin you put in the piggy bank, so to speak, those will add up, and you can cash in when you have the chance,” Tse says. “It’s a long-term commitment, but if you’re prepared for it, you’ll succeed.”

Wisdom for Other Instructors

Tse’s advice for directors of all career paths is simple: inspire your students and set an example for them.

“Inspire them. Take them to local concerts or a recording [studio] … inspiration will always point your students in the right direction. You need to set an example for your students to follow. There’s no use talking about music all the time without being in the field. They need to see you in action.”

Photos Courtesy of Dr. Kenneth Tse

This article originally appeared in the 2016 Spring issue of Yamaha SupportED. To see more back issues, find out about Yamaha resources for music educators, or sign up to be notified when the next issue is available, click here.

Five Tips to Plan for a Guest Artist

Bringing a guest artist to work with your students can be a win-win for all involved. Students and teachers have the chance to learn new skills and be inspired, while your administration and community will see your work firsthand.

I personally enjoy visiting schools because I can create meaningful connections and make a big impact on students, parents and communities.

Here are some steps you can take to properly plan for a visit from a clinician.

1. Figure Out the Finances

There are many ways to pay for the event, whether from your school’s budget, fundraisers, ticket sales, grants and/or sponsorships. If an artist lives far away but is touring in your area, you should be able to request a “routed cost” since travel costs and time are mitigated and the artist has an incentive to work during filler days.

2. Decide on Event Format

Will you have private clinics and/or a public concert? Will you combine forces with other schools within or outside your district? Know the artist you’re working with. Is the artist more likely to excel as a guest performer or as a classroom teacher? If you can find both, you can maximize the experience by allowing the kids to benefit from classroom learning in addition to an exciting concert.

My “Creative Strings” outreach offerings include everything from one 1-hour clinic to a residency of up to five days. I enjoy working with the students in the classroom, then showing a public audience what we’ve learned. In my residencies, I use three days for hands-on interactive clinics with middle school and high school orchestras. These classes have curricula that are totally separate from rehearsals for the culminating concert. I ask the teachers to prepare concert repertoire prior to my arrival, so that I have two rehearsals max. I also offer 30- to 40-minute assemblies at the elementary schools.

A teacher training session is another great activity. My collaborative concerts are always student-centered. On the selections I perform with the students, I feature myself sparsely and will sometimes simply sit in the section and play along. I perform three to five solo pieces, or about 20 minutes in a 75-minute show.

3. Promote Early and Often

For a public concert, a common mistake first-time promoters make is in assuming that an audience will come. Do everything you can to let parents, press, school administration, board of education members and community members know about the event well ahead of time. When I visit schools, I always offer them a boilerplate press release and let them simply fill in the details of their school name, location, date of event and a couple personalized quotes. Use this press release — or write one yourself — to invite your local press.

Also make sure to promote to your colleagues at nearby schools or in your competition circuit. Create and display an event poster at music stores, local schools, community bulletin boards, etc. Involve your students. They live in the media world. Ask them to help you promote on your webpage, create a Facebook event and link to videos of your guest artist/clinician. In general, choose a team of booster parents, students and/or administrators to promote the event and take care of the smaller logistics. For a private clinic only, you can still attract media coverage, making it a great way to nurture support from your community.

4. Prepare Your Students

When I visit schools, I send them online courses I have created, so they can study my teaching before I arrive and after I leave. You can ask your guest artist if they have instructional materials or recommended resources. You can show videos of the artist performing or teaching. It’s a great opportunity to discuss things you normally wouldn’t, like how an artist’s work reflects his or her personality.

5. Remember to Follow Up

Send thank-you notes to your guest as well as to those who helped with planning. Remember to take photos and send them along with a paragraph about the event to your media contacts, principal, school superintendent and school board. We always send photos to all our industry friends, supporters and especially any sponsors. Have a post-event meeting to evaluate what went well and what could be improved.

Photo Courtesy of Christian Howes

This article originally appeared in the 2016 Spring issue of Yamaha SupportED. To see more back issues, find out about Yamaha resources for music educators, or sign up to be notified when the next issue is available, click here.

Case Study: Mobilizing a Community to Win Yamaha Instruments

Mobilized by band director Sean Furilla, the community of Canton, Georgia, came together in a widespread show of support for the Marie Archer Teasley Middle School band.

Parents, staff and community members worked together to win five brass and woodwind instruments from Yamaha worth $20,000.

“There’s still a buzz around our community,” Furilla says. “[It] created support for our music program that continues to grow. Yamaha not only donated instruments, but it charged our community with an awareness of how supporting music education can change the lives of students and families.”

Program Expansion

The prize came at an especially crucial time for the Teasley band. Furilla became director in 2012 with 150 band students. Many of their instruments had been in use since 1986 — the year the school opened.

Furilla grew the program to 250 students in 2013. Then in September 2014, the school moved to a new campus, adding sixth graders. Band enrollment increased to almost 500 students. “It is a good problem to have!” said Dr. Susan Zinkil, Teasley’s principal, in a district press release. “We are so proud of how far our band program has come.”

School-Supplied Instruments

Teasley is a Title I school with 53 percent of its 1,400 students on free and reduced lunch. Many students and families in the band program rely on borrowing school-owned horns.

“I tell them, ‘Anybody can be involved in band; it doesn’t matter the financial state of your family, it doesn’t matter whether you can find an instrument or not. I will find an instrument to put in your hands,'” Furilla says.

Because of Furilla’s mission to include everyone regardless of financial constraints, students sometimes need to take turns playing instruments in class with some just blowing through their mouthpiece and mimicking the fingerings.

The new Yamaha horns — two tubas, two bass clarinets and one French horn — have made a big difference in giving more playing opportunities for the students. “Now I’ve got a sixth grade class with eight tuba players, and each one of them is able to have a tuba in their hands,” Furilla says. “If it wasn’t for Yamaha and those two tubas that I got, I would have two students that would be playing on their mouthpieces and not have an instrument to play on.”

Playing a new instrument right out of the packaging has led to increased dedication from some of the benefitting students. “By creating a situation where we have new instruments in the hands of students that care deeply about music, it gave them a bigger sense of pride,” Furilla says. “It was great to see the students opening the cases, seeing their faces as they’re unwrapping the instruments from the cases. That whole process gave them more of a connection and a sense of pride not only to the instruments but also to our music program.”

Eventually Furilla hopes to have enough instruments, so that students in different class periods won’t have to share, and each student could take an instrument home to practice. The school needs to purchase at least 30 instruments.

“I’m still in the process of trying to create the funds to buy more instruments because I don’t have enough funds to have each tuba player have a tuba at home,” Furilla says. “We’re still working toward that.”

The Quest for Music Education

director Sean Furilla with music student

Teasley won the instruments in May 2014 through a Yamaha online contest, “The Quest for Music Education.”

Furilla had extensive experience performing with Yamaha instruments as a member of The Cadets Drum and Bugle Corps staff based in Allentown, Pennsylvania. He first heard about the contest from a fellow instructor at the Yamaha-sponsored drum corps.

“I can think of no better company for consistent high-quality instruments than the Yamaha Corporation,” Furilla says.

For the competition, bands recruited adults in their communities to complete online quests on a variety of topics, including Yamaha Artists, Yamaha internships and music advocacy. “Because the Quest was educationally charged, they got information on backgrounds of musical instruments, different families of musical instruments, composers,” Furilla says. “The Quest was more than just [an online voting contest].”

At Teasley, Furilla convinced the school to devote faculty meetings to participating. But beyond the staff, teachers and booster parents (both at the middle school and local high school), he also used his ties to small business owners in downtown Canton, where his wife runs a company.

“Every opportunity that I was at a microphone, I was mentioning the Quest and the difference it could make in getting instruments into the hands of our students,” Furilla says.

Under Furilla’s direction, the band students spread the word to families and neighbors across the small town. “The most important thing for me was to get as much of the community involved in it as possible,” Furilla says.

“What I went after were instruments that we were in great need of,” Furilla says. “Both of the tubas that we had were from the ’80s, and they were put together with duct tape.”

Winning the Quest has helped with some of the more difficult instruments to find. “I really went after the instruments that were more expensive and harder for people to donate,” Furilla says. “It’s easier for me to get clarinets, trumpets, saxophones and flutes … but much harder to get some of those unique instruments.”

For his prize, Furilla selected two YBB-105WC tubas, two YCL-221II bass clarinets and one YHR-567 French horn.

A Giant Spark

The excitement and publicity that Furilla generated from the Quest led to even more support beyond participation in the contest. For example, the band’s prior winter concert attracted 1,200 audience members, and many generously donated money and instruments.

“Families, community leaders and local businesses have jumped on board in support of music education because they believe in its power to mold our children and change our world in a better way,” Furilla says. “It’s still a daily battle. Our program is still in an ongoing effort to provide instruments for students in need, but [this] lit a giant spark that propelled us forward with our mission.”

Other Quest Winners

Other Quest winners were Arroyo Valley High School in San Bernardino, California; San Diego State University; Somerset Academy Canyons Middle School in Boynton Beach, Florida; Round Rock High School in Round Rock,Texas; VanderCook College of Music in Chicago; MacArthur Fundamental Intermediate School in Santa Ana, California; and Broad Run High School in Ashburn, Virginia.

Top photos: © 2015, Scott Reece, All Rights Reserved

Bottom photo: Courtesy of Cherokee County School District 

This article originally appeared in the 2016 Spring issue of Yamaha SupportED. To see more back issues, find out about Yamaha resources for music educators, or sign up to be notified when the next issue is available, click here.

What Drumming Means to Me

Music is beautiful.

It’s powerful, it’s lifting, it’s emotional. And it’s extremely personal. Music can help people express who they are as an individual and give them their own identity.

I know this, because that’s the effect it had on me. I started playing the drums at the age of 15, and I can honestly say that drumming has changed my life.

What Made Me Start Drumming

It all started one evening when I was watching television with my dad, Mike Rizun. During a commercial, he turned to me and for some reason asked if I’d ever thought about wanting to play an instrument. My response was, “Yes, I have, but I’m not sure what instrument.”

Without saying a word he reached over to our movie cabinet and pulled out an old VHS tape that was labeled “Lee Aaron Live: City TV Toronto 1983.” He put the tape in our video player and pushed play. To my astonishment, I saw my dad behind the drums making incredible music with this great singer while having the time of his life.

That moment was so powerful, it lit a fire inside me that I am sure will never burn out. To this day, that video still plays back in my mind; it will always remind me of why I started playing the drums.

My First Drum Kit

Not long afterwards, I went to the local music store with my dad to buy my first drum kit. I settled on a beautiful 5-piece cherry wine finish drum set with hi-hats and cymbals. As soon as I got home I couldn’t wait to set it up and start playing! Yet when I’d finished assembling everything, I just sat there in disbelief. I just couldn’t stop looking at it — the chrome hardware, the finish, the cymbals. Everything was perfect. I felt like the coolest kid on the block!

Over the coming weeks, I discovered new drummers, new techniques and music that I never knew existed. I started learning rudiments, time signatures, and how to put it all together. I practiced for months on end, reading through syncopation to improve my playing. In short, I learned how to become a musician.

I did everything I could to progress into becoming a better drummer. I would practice fills until I nearly passed out from exhaustion. I would watch videos of all of the pros and take in all of their styles and techniques, then alter them to make them my own. I put in hours upon hours of sweat, tears and sometimes even pain, constantly trying to find new ways to express myself, to shape my own identity. As much as I admired other drummers, I wanted to create my own path.

My First Gig … and Nearly My Last

I can still remember my very first gig and what I had to go through to make it happen. It was an extremely cold winter night in the middle of January — so cold that the grease on my drums’ tension rods had become frozen solid during the drive to the club in my parents’ van. As I was setting up my bass drum pedal, I noticed that the chain had broken due to the pedal being crushed by a hardware stand when I dropped my hardware bag on the stage floor. I was stunned, and I wasn’t sure what I was going to do. We had just 15 minutes until we were supposed to start the show!

As I thought about what I could improvise to repair the pedal, it suddenly dawned on me that I had a few zip ties in my cymbal bag because the handle was ripped. I took two of them out and put them together, then took off the broken chain and replaced it with the zip ties. Then I prayed for it to all hold together … and it did.

After our first set, we stopped to take a break. I remember sitting behind my kit for a moment looking out at the crowd, thinking to myself, “If I hadn’t figured out how to fix this pedal, I wouldn’t be playing this gig tonight. I would be packing up and going home miserable because I couldn’t do something that I love doing.” It was then that I realized that it’s all about taking action and doing whatever you can to make your dream come true.

Taking the Musician’s Point of View

I’m proud that I’ve become the kind of drummer that takes a musician’s point of view. Whether I’m recording, jamming or playing in a live setting, I’m always listening to the music as a whole, listening to what everyone else is playing while being open-minded in my approach. I’ve found that this is one of the most important tools in any musician’s toolbox, along with dedication, motivation, practice, effort and passion. Having those qualities will make it a lot easier for you to express yourself at any given time, no matter the type of musical situation you’re in. They will also open doors you never could have imagined and keep you ready for those once-in-a-lifetime opportunities.

Today I can take a step back and realize what an impact drumming has had on my life. If I had said no to watching my dad’s VHS tape, I wouldn’t have discovered this beautiful instrument. If I didn’t quickly figure out a way to fix that bass drum pedal, I never would have experienced what it’s like to play a live show. Those experiences, plus all of those long hours practicing rudiments and learning technique, have shown me what drumming is truly about. It’s about doing something that you love and giving it all that you have. It’s about taking the chance to make something of yourself and put your name out there.

Drumming makes me want to wake up every day and discover something new, something no one has ever thought of doing. It brings me the utmost joy, pleasure, and excitement every time I get behind my drum set. I still try to practice every day for at least 4 – 5 hours, always making sure to stick to a particular rudiment or fill for the week. I have this voice inside me that constantly tells me that I need to step it up so I can become a better drummer. Every time I pick up my sticks, I’m putting my entire heart and soul into my drumming.


Check out these related blog articles:

What Playing Keyboards Means to Me

What Guitar Playing Means to Me

How to Make Your Percussion Camp a Success, Part 2

In Part 1 of this article, we talked about the preparation required for successfully hosting a percussion camp. Now let’s talk about how to promote it, and what you need to do the day of the event, and afterwards.

Launching a Marketing Campaign

Here are a few tips for creating an effective marketing campaign for your event. Bear in mind that promotion can be costly, even when done strictly on a local level, so know what you are getting into:

  • Fliers and posters – These can be produced inexpensively at any copy center. Ask local businesses – especially music stores – to place them prominently in high traffic areas.
  • Local advertising – If budget allows, create a print and/or electronic ad (if you have permission to do so, include the school logo in the ad) and run it several times: ideally, two months prior, one month prior, and again one week prior to your event. Target the media where you run the ad: the state music education magazine, for example, might be a good place to start, although such publications may require extended lead time (contact them well in advance to obtain their advertising schedules). Use a consistent message in all advertising to maximize retention.
  • Website – If you already have a website, create a special place on it to advertise your camp. (If you don’t, what are you waiting for?) Use your school’s website for this too, if you are allowed.
  • Social media – Create an event on Facebook. Use your social media profiles to send out your message, then repost and re-share regularly. Use hashtags sparingly.
  • Press release – Write a press release and send it to the education editor or city desk of your local newspapers, your state music educator publications and any other appropriate regional newsletters. Provide a photo of a previous year’s camp, or of a featured clinician at the upcoming event. Be sure to follow up with a phone call or email and invite the media to cover the event.
  • Promotional packet – Produce a packet of materials with the following components and send it to local area band directors (it can also be included with the press release sent to media). The packet should be mailed out at least six weeks before school breaks to allow educators, parents and students adequate time to plan their schedules.
    • Cover letter
    • Details about the camp clinician(s)
    • School educational philosophy
    • Camp flier
    • Registration form with photo release (must be signed by parents if the attendee is under 18 years of age)
    • Directions to the site of the event
  • Brief your staff – It is important that each member of your staff be knowledgeable about the details of the upcoming event. There is nothing more deflating to a potential participant than to hear, “I don’t know anything about the camp. You’ll have to talk to ‘so and so’.” If your staff does not care about the event, how can you expect other people to get excited about it? An informed staff member can answer questions promptly and encourage potential students they speak with to participate.

Some Additional Suggestions for Making Your Camp a Day to Remember

  • Drawings – Hold a drawing for a prize at the end of the day. A new instrument or accessory product such as sticks or mallets is always a crowd-pleaser. Use numbered tickets and distribute them to participants as they register.
  • Have a contest – This can come in the form of a percussion-related question and answer session, with accessories or in-store coupons from local music dealers for prizes.
  • Giveaways – Every participant should receive a memento of the event. This is the perfect way to distribute a promotional item made specifically for your store or organization.

The Day of the Event

Okay, the big day is finally here! What do you need to do now?

  1. Plan to be on site from several hours before the start of the event to several hours afterwards. The importance of being hands-on and immediately available cannot be understated!
  2. Expect the unexpected. As the saying goes, “Whatever can happen, will happen.” Be flexible and ready to deal with a wide range of issues.
  3. If you don’t already have complete permissions to use photos taken at the camp – including getting parent approval for students under the age of 18 years old – make sure you get all remaining paperwork signed during the event.
  4. Stick to the schedule. Things rarely end early, so be prepared to diplomatically move events along so that none of your attendees is shortchanged. As an example, here’s a sample schedule for a two-day event:
Students sitting on a field with marching bass drums.

DAY ONE
8:00-9:00 Registration
9:00-9:10 Welcome and introductions
9:10-10:30 Clinic for all attendees
10:30 Break
10:40-12:00 Individual auditions; staff teaches essential exercises to attendees
12:00-1:00 Lunch
1:00-3:00 Sectionals (“ability” groups)
3:00-3:10 Break
3:10-5:00 Sectionals/Full Ensemble as needed

DAY TWO
9:00-9:45 Full Ensemble clinic/rehearsal
9:45-12:00 Sectionals – include one break at discretion of instructor
12:00-1:00 Lunch
1:00-1:30 Full Ensemble clinic/rehearsal
1:30-3:00 Sectionals
3:00-3:15 Break
3:15-4:00 Full Ensemble: prepare for performance
4:00-5:00 Performance for parents, friends, families. Immediately prior to the performance, talk briefly to the audience about the school music program, the camp, the importance of music education, etc. Then introduce each staff member, who will take their section/group through whatever it is that they can play comfortably.
5:00 Dismissal

What to Do Post-Camp

First, take a little time to enjoy your success. Then do the following:

  • Send your favorite photos from the camp to local media. Action photos of students playing percussion instruments are always of interest.
  • Contact members of the media (especially those who attended) to see if they need any more materials or information. If they are undecided about writing an article about the camp, your actions may push them to do so.
  • Contact any music manufacturers or local music stores you dealt with and offer a brief report on your camp.
  • Send a hand-written thank-you note to the clinicians and staff. There’s no better way to encourage their return for future events!
  • Talk to your staff and volunteers who worked at the camp. Ask them what worked – and what didn’t. Make a list of the things that went right and the things that went wrong. This will allow you to take steps for making your camp better next time around.

Have a great event! And remember, it’s never too early to start thinking about next year’s camp. . .

Yes, You Can Play Classical on an Electric Violin!

Have you ever wondered what kind of music you should play on your electric stringed instrument? There is an assumption that these kinds of instruments are only used for jazz, rock and pop genres, but that’s simply not true! In fact, you can take your classical repertoire to new places with a few interesting tools and tricks.

In the video below, jazz violinist and Yamaha Artist Toshi Nakanishi gets creative by playing and layering all the parts to Pachelbel’s Canon in D by using his Yamaha electric violin (YEV) and a looper effects pedal.

Here’s how he does it:

Step 1 – Set up your rig

You’ll need an electric violin (like the Yamaha YEV), some effects pedals, a looper pedal and an amplifier.

Step 2 – Study the parts

Several guitar footpedals.

“Canon in D” is a staple of the classical repertoire and quite possibly the most famous eight-note melody of all time. With this tune in your mind, you’ll be able to structure your approach by separating and then playing the different layers of the canon.

Step 3 – Add each part one at a time

As Toshi demonstrates in this video, add each part on top of the previous one, with effects as needed, starting with the bass line. It’s a great technique that allows you to perform each piece as a one-person chamber ensemble!


More videos featuring Yamaha Artist Toshi Nakanishi:

Making Sound

Changing the Sound

Leaping Bow & other unique effects

Piano Maestro and the Clavinova CSP

Piano Maestro by Joy Tunes is a powerful app for piano teachers, piano students and anyone who wants to play the piano. Using a game-like platform, it’s fully compatible with the Clavinova CSP-150 and CSP-170 and provides teaching songs from over 50 method books, including Alfred’s Premier Piano Course, Jennifer Eklund’s Piano Pronto and Daniel McFarlane’s Supersonics Piano, allowing users to progress at their own pace.

By offering real-time feedback to create engaging experiences, Piano Maestro significantly shortens the learning process. From playing a single note, to learning rhythm and sight reading, to timing of complete melodies, most students absorb the material in about half the time expected.

Simply download the Piano Maestro app from the app store to get started. Different levels of subscriptions are available, depending on whether you are using the app on your own, or in conjunction with a Piano Maestro connected teacher. (See the Joy Tunes website for details.)

Using Piano Maestro with your Clavinova CSP-150 or CSP-170 is simple:

  • Power on your CSP
  • Connect your iPad to your CSP
  • Launch the Piano Maestro app
  • That’s it — no setup needed!

Once launched, any new content since you last opened Piano Maestro will be displayed. New content is added regularly.

Screenshot.

Next, select the category you would like to explore:

Screenshot.

Categories

Piano Maestro offers two main categories:

1) “Journey” mode, which is student driven. Here, students need to unlock new sections by mastering the chapter’s content. Each chapter adds new notes and techniques with fully orchestrated backing tracks. (You can find each chapter’s curriculum objectives at https://teachers.joytunes.com/resources.)

2) “Library” mode, which contains over 2,500 songs, hundreds of exercises and method books. Here’s where you’ll find Songs, Exercises and Method content, including:

  • TV and Game Themes
  • Classical and Sacred Music
  • Pop and Rock
  • Exciting new music from the hottest new composers around the world!

New content is added monthly, such as the “Holiday Songs” category pictured above.

Using Piano Maestro

Start the lesson by selecting a category. In the example below, I chose “Songs”:

Screenshot.

Then select a category — for example, “Free Holiday Songs”:

Screenshot.

Finally, choose a song. In this example, I selected “Jingle Bells”:

Screenshot.

“Play” will play the entire song, while “Learn” will take you one line (or one step) at a time.

Once “Play” or “Learn” has been selected, you will be shown the “Select Instrument” screen:

Screenshot.

Select the MIDI Keyboard option, and you will be asked to play a certain note on your CSP keyboard (the one colored in green) to confirm that it is communicating with your iPad.

After the correct key has been played, you will be given the first step of the song. After each step has been mastered, Piano Maestro will take you step-by-step through the rest of the song until you have learned it in its entirety:

Screenshot.

Once the song has been mastered, the app gives you lots of positive feedback on your progress:

Screenshot.

You’ll also get a certificate and a recording that can be shared with friends and family via email!

Screenshot.

For more information about Piano Maestro, visit http://www.joytunes.com


Click here to learn more about the Clavinova CSP-150.

Click here to learn more about the Clavinova CSP-170.

What Do Piano Frames and Motorcycle Engines Have In Common?

The strings of a piano are stretched under tremendous tension — from 16 to 20 tons altogether — so an extremely strong and stable frame is required to withstand the stress. Modern frames are made of cast metal, and are essential in sustaining the brilliance and beauty of notes played on the piano. The frame is such an important part that can be termed the “cornerstone” of the piano.

There is a story that a certain motorcycle manufacturer was trying to develop the ideal cast metal material for the cylinders of an engine. In the end, for some reason, it turned out to have the same composition as the cast metal in a piano frame.

So then, does the similarity lie in the fact that they are both devices that make loud sounds? No, it’s something different. If the only function of a piano frame was to support the tension of the strings, being strong and sturdy would be enough. But the frame also affects the sound by transmitting the vibrations of the strings, so it must also be elastic enough to vibrate a certain amount itself. In other words, the properties a frame must have are contradictory, namely, that the exterior be hard while the interior is somewhat soft.

The same applies to the cylinders in motorcycle engines. They must be strong enough to withstand the intense friction of the pistons, but at the same time, they need to have sufficient flexibility to cope with the heat deformation that results from the combustion of gasoline at high temperatures. Because they share these requirements, the conditions that the ideal material must meet are the same. This is the real reason why the composition of the metal castings of piano frames and motorcycle engine cylinders are similar.

This posting is excerpted from the Yamaha Musical Instrument Guide.


Click here for more information about Yamaha pianos.

How to Make Your Percussion Camp a Success, Part 1

You’ve decided that you want to host a percussion camp. After all, many school music programs are in need of expert percussion instruction to prepare for parades, halftime shows and other marching band activities. You think maybe a one- or two-day event would be just right.

Now what?

If you haven’t led an event like this before, you may not be certain how to begin planning to ensure that all goes smoothly. Done correctly, a percussion camp can be an unforgettable experience that provides top-notch instruction to the attendees while bolstering the relationships between local percussion educators and artists.

So where do you start?

Set a Goal

The first step is to define what you want the camp to accomplish. Ask these important questions:

  • What is the criteria for attendance?
  • How many students should attend? Is my goal to accommodate 25, 50 or 100 attendees?
  • Do I need to break even on the camp fees/costs, or can I afford to lose money on it? Does money exist in a budget somewhere to support this?
  • Will this provide students an opportunity to learn from someone new? (i.e., someone who is not usually accessible to them.)

Write down your answers with specific details. For example, one clinic might be structured like this:

  • Attendance will be open to local high school students in drum corps and/or marching bands who are looking to improve their competition technique.
  • Each student will receive a box lunch and a T-shirt.
  • We need a minimum of 20 students to break even on a one-day event, or 30 students to break even on a two-day event.
  • We can physically accommodate up to 50 students.
  • The students will learn from top notch DCI instructors – people I already know and with whom I have a relationship.

Once you determine these elements, you can begin planning.

Students with marching drums.

Before the Event

1. Recruit a team and identify the “go-to” people. Decide who will be in charge overall (this might well be you!), and who will be responsible for specific items, such as:

  • Looking after the clinicians.
  • Ordering and distributing food.
  • Making payments.
  • Coordinating marketing and promotion.

Hold those people accountable with clear directions and due dates on their tasks.

2. Establish a date for your camp. Pick a date that works best for the schools in your area and be sure to avoid conflicts with other regional events that may attract the same audience (i.e. marching festivals, band camps, Super Bowl™, local elections, truck/tractor pulls, etc.).

3. Locate and secure the venue for the camp, such as a high school or college campus. With the help of an onsite coordinator, ensure availability and access – who has the key? Be sure to get all necessary approvals from your school or district administrator, and identify all specific facilities that may be required, such as:

  • An auditorium and or band room.
  • Multiple rooms for percussion sectionals, each large enough to handle a small ensemble (i.e. choir room, multipurpose room, cafeteria, etc.).
  • Shaded outdoor rehearsal areas, especially during the summertime.
  • A large outdoor area for full ensemble rehearsal and performance, as well as a sizable indoor area in case of inclement weather.

4. Choose and confirm key clinicians and any additional instructors:

  • Get approval in writing from all clinicians and staff for the payment amount, the time frame allotted, hotel needs and those expenses that will be covered.
  • Recruit local percussion instructors to assist at the camp. I suggest planning on one instructor for each section: snares, tenors, bass drums, cymbals, and pit, and one for every 8-12 students. These instructors will most likely encourage their students to attend, thus increasing enrollment.

5. Launch a local marketing campaign with fliers, advertisements, press releases, social media announcements and other activities. This is such an important topic, we’ll be addressing it in detail in Part II.

6. Make arrangements to ensure the availability of all necessary instruments for the students and instructors to use.

7. Follow up regularly with local band directors, area instructors, etc. to confirm the number of students that will be attending.

8. Create a list of registered students, their instrument and ability level. This will help organize ensemble and sectional rehearsals, and allow the check-in process to proceed smoothly. The more quickly students are separated into skill levels, the better.

9. Prepare a camp packet for each student (a band folder provided by the school or a local music dealer can work well). The packet should consist of the following:

  • Music book(s).
  • Schedule of each day’s events.
  • Clinician biographies.
  • Organization literature.
  • A Certificate of Completion personalized for every student (given out at the conclusion of the event).

You might also consider including a T-shirt if budget allows.

Students and a teacher on a field with marching drums.

Final Pre-Event Checklist

  • Clinician housing and travel arrangements; attendees housing (if needed).
  • Camp packets assembled in band folders (includes books, schedule, etc.).
  • All instruments tuned and in playable condition.
  • Stage area set up as per clinician specifications.
  • A device for music playback.
  • All necessary sound reinforcement equipment.
  • Music stands.
  • Blackboard(s) with chalk.
  • Amplified metronome(s).
  • Additional help (i.e., ushers, hosts, runners, security).
  • A photographer.
  • Water coolers, cups and refreshments, especially on hot days.
  • First aid kit.
  • A game plan for inclement weather.

Suggested Timeline

5-6 months out:

  • Set camp dates.
  • Secure clinicians.
  • Secure facilities with school approval.
  • Appoint overall camp coordinator and on-site camp coordinator.

4-5 months out:

  • Create materials for promotional packet.
  • Mail promotional packet to area schools, etc.
  • Deliver an event poster to area schools, etc.

3-4 months out:

  • Send a press release to local media.
  • Schedule local advertising.

2 months out:

  • Run local advertising.
  • Follow up with local area band directors.
  • Send an email to all registrants promoting the event.

1 month out:

  • Send a reminder email to all registrants again.
  • Run local advertising again.

1 week out:

  • Confirm clinicians’ travel schedule.

The day before:

  • Do an initial tuning and then fine-tune every day of the camp.
  • Allow time to assemble the percussion carriers and set up the stands.

Be sure to check out Part 2 for details on how to put together an effective marketing campaign for your percussion camp, as well as what to do during and after the event itself.