Assistant Professor of Music Education, Choir Director, Music Education Coordinator, Vocal Music Coordinator Grambling State University Grambling, Louisiana
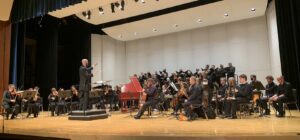
The Grambling State University Concert Choir was founded in 1947 as a glee club. Over its 78-year history, the choir has released two acclaimed albums and garnered significant recognition. Its rich history, diverse repertoire and unwavering commitment to choral excellence were honored when it was named the Best University Choir at the Sound Awards in 2023.
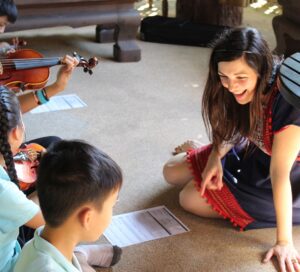
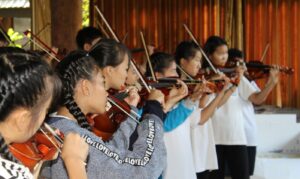
When Dr. Cordara X. Harper, Assistant Professor of Music Education and Choir Director, first arrived at Grambling, the choir consisted of about 18 students. “I entered the choir room on day one with a message of optimism, singing with the belief that we could create a space where every student felt welcome,” he says.
Harper worked to connect with singers across campus. Today, the choir has grown threefold to over 60 students. “Our success came from improving visibility by consistently delivering exceptional music, both on campus and within the community,” he exclaims. “We spread the joy of choir wherever we go, inviting others to experience the power of music with us.”
He integrates Kodály-, Orff– and Dalcroze-inspired approaches, which provides him the freedom to create and improvise while guiding his students through the “vocabulary of music.” Harper has completed Level 2 training in the Kodály Methodology and all levels of Orff-Schulwerk. “I have the unique opportunity to engage students through movement, making the learning process dynamic and immersive,” Harper explains. “As a natural storyteller, it brings me so much joy to watch the story of their musical journey unfold through intentional, hands-on engagement with these integrated teaching methods.”
At Grambling, the choir consists mostly of non-music majors and is not a traditional, auditioned ensemble. Harper says, “It’s a welcoming space where everyone can belong. This means some students join the University Concert Choir with little to no prior music-making experience, and as their professor, I’m committed to meeting them where they are.”
Harper also stared a Choir Leadership Council to give students a voice and gather valuable insights from them. The choir maintains an active performance schedule, showcasing its talent on campus, in the local community and across the United States.
Director, Shedthemusic Commercial Music Teacher Oak Lawn Community High School Oak Lawn, Illinois
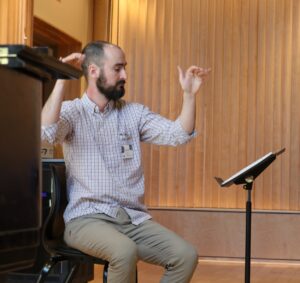
Bob Habersat, the Commercial Music Teacher at Oak Lawn Community High School in Illinois, first started recording instructional videos to help his piano students grasp concepts like the bass clef when they missed class. “This allowed them to learn independently, freeing me up to focus on individualized or advanced instruction,” he explains.
Over time, those resources grew into a larger online platform that Habersat runs called Shedthemusic.com, which now includes full-course sequences for guitar, music technology and music theory. “Students can log in to review missed lessons, reinforce challenging concepts, or explore enrichment materials — the platform meets a variety of learning needs while fostering autonomy. The standardization of musical concepts like rhythm and pitch reading has really helped students who take multiple music classes as well,” he says.
The primary goal of Shedthemusic is to reach the 80% of students who aren’t in traditional band, choir or orchestra programs. “We want to provide comprehensive curricular for teachers so they can confidently provide students meaningful pathways to create music in genres that truly interest them,” Habersat says proudly.
The website’s offerings mirror many of the courses he developed for Oak Lawn, which has a diverse student population. “I want educators to feel comfortable running student-centered, project-based classrooms in subjects like music technology, guitar, modern band, piano and theory,” Habersat says.
He also wants to legitimize the study of popular music and foster better continuity across elementary, middle school, high school and college programs through the pedagogical approaches offered on the site.
Habersat travels to music education conferences across the country to present Shedthemusic courses and methodologies and highlight the available resources. He also hosts free online professional development sessions and offers a newsletter that shares updates and new opportunities. “There’s also a dedicated community for anyone using our Electronic Music Elements curriculum, allowing educators to connect, collaborate and support each other throughout the year as well,” he says.
Oak Lawn Community High School hosted the Illinois Music Education Association’s first Commercial Music Festival last year where teachers attended sessions on commercial music and technology. Students were invited to submit compositions which were reviewed by a committee of music tech teachers, and student- or teacher-led pop ensembles performed for a panel of judges.
In addition to the commercial music program, Oak Lawn has strong band and choir programs, as well as multiple guitar courses. “Our top-level guitar ensemble performs a range of music — classical, jazz, pop and orchestral — throughout the year,” Habersat explains. “We emphasize collaboration, particularly through our student-led entertainment label, Morning Show Media. Every Friday, they host a concert in our media center, handling everything from promotion on social media to running sound and lights, recording the events and sharing them online. This has significantly increased student engagement and visibility for our music department.”
Assistant Professor of Voice Butler School of Music. University of Texas, Austin Austin, Texas
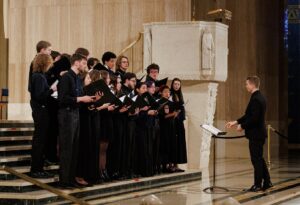
During Dr. Liliana Guerrero’s year as a Teaching Artist for the Austin Opera, she went to local elementary schools to introduce students to the concept of opera by telling them stories, singing some arias and explaining the artform. The program was well-received, but she wanted to make it available to a larger audience. “Austin is known as the ‘live music capital of the world,’ but we have what I call ‘arts deserts,” she explains. “Some communities in our larger metropolitan area don’t have access to quality children’s music programming.”
Guerrero and a colleague wrote a grant proposal and secured over $14,000 in funding to start Meet the Opera, a free six-week series of workshops for kids, presented at local libraries, that teach them about opera. “We were able to serve hundreds of children by bringing the magic of opera from downtown to right around the corner,” she says.
Kids were able to make sounds on tubas, create props, and learn choreographed songs and dances. “As a child of immigrants, I didn’t know what opera was, and I didn’t have access to it as a child,” she explains. “I knew that if kids could see someone who looked like them doing this type of music, they would fall in love. And they did! We’ll be back at the library this summer, and I can’t wait.”
The University of Texas — Austin is a Hispanic-serving institution, and Guerrero takes her mentoring responsibilities very seriously. “Latinas make up 1% of all full-time college faculty in the United States,” the Assistant Professor of Voice says. “I am often the only in the room – the only woman, the only Latina, the only young person. It is my duty to show my students how to move in spaces they’ve never been in with dignity, grace and compassion. I am honored to connect with my students who have similar backgrounds, especially those of us who are ‘culture straddlers,’ known in Spanish as ‘ni de aquí, ni de allá.’”
Guerrero is passionate about the intersection of music and social justice. Around 2017, she co-founded a grassroots performing arts collective in Chicago that focused on themed fundraising concerts. “We raised money for organizations including Chicago Books to Women in Prison, Chicago NOW and Girl Forward. I believe in the power of music to affect change, and I believe that the music of our time tells us the story of who we are,” she says proudly.
She regularly commissions and premieres works by marginalized composers so her students can feel seen and heard in their music education curriculum. “My students are Black and brown and queer and trans, and I want them to see that they have a place in this story,” she exclaims. “It’s essential to me that I lead by example, that I lift while I climb, and that my students feel empowered by the stories we highlight in the classroom.”
As a result, Guerrero has presented clinics nationally on how to use music to create civic engagement opportunities for students. “This spring I will be recording my debut album and the repertoire is all music by Latinas, including a commission for my grandmother,” she says. “You can’t be what you can’t see!”
Visiting Assistant Professor of String Music Education University of North Carolina Greensboro, North Carolina
Last summer, as the Director of Music Programming for ArtsQuest, Dr. Marissa Guarriello helped organize a new conference for music educators. “Some of the senior leadership at ArtsQuest was interested in starting a conference for educators, potentially similar to SXSW, that ran concurrently with Musikfest, the largest free music festival in the country hosted by ArtsQuest,” she says.
The result was the Musikfest Education and Industry Conference, a two-day event in Pennsylvania that focused on music education, popular music and business leadership. “ArtsQuest did charge a nominal fee for the event, but not enough to cover the costs because we wanted it to remain accessible to anyone who wanted to attend,” Guarriello explains. “They ended up absorbing most of the costs, and we also received sponsorship from Zeswitz Music, a local instrument supplier that supports music education professional development.”
Guarriello was well prepared to help put on the Musikfest Education and Industry Conference because one of her current research projects explores the intersection of the music industry and music education. She is also studying and researching creativity in secondary classrooms and reframing uncertainty/failure in music classrooms.
As a Visiting Assistant Professor of String Music Education at the University of North Carolina at Greensboro, Guarriello integrates creativity in her teaching, and many of her approaches are presented in a book she co-authored, “The Creative String Orchestra. “Start by introducing creativity in fun and accessible ways,” she recommends. “Often, people think of jazz as being the creative/improvisatory music genre, but in reality, creativity is useful in all music contexts. I like to get students to be creative in a classroom without them realizing it, then I’m able to tell them what they just did. It becomes a lot more fun because they’re already successful!”
Activities she suggests include trying to play what a color sounds like or trying to arrange a composition with the entire ensemble in the moment — what she describes as “being messy in the classroom.”
Guarriello has established a growing network of educators and musicians who embrace creative approaches to music and music education. “My time spent with musicians and educators have shown me that people learn and teach music in completely different ways,” she exclaims. “It’s fascinating to work and talk with these people. They have opened up a whole new world of what music education is and could be.”
For the 2025-2026 academic year, Guarriello will be joining the Department of Music and Human Learning at The University of Texas — Austin as an Assistant Professor.
Band and Choir Director Bethel-Tate Middle School Bethel, Ohio
Band and Choir Director Paul Glader put his classroom motto on the wall for all his students at Bethel-Tate Middle School in Ohio to see: 1) be kind, 2) strive to be better and 3) love music. “That means having the ability to create, make decisions and understand the ‘why’ behind the music,” he says. “I try to convey that it is positive to always look for ways to improve yourself.”
When Glader started at Bethel-Tate, the music program was relatively unknown and an afterthought to the student body and the community. Student participation was at about 25%. This year, the participation rate has grown to 55% of the school population, and the school has received three national awards (two from NAMM and one from Music for All).
Glader played a large part in getting the program what it needed. He wrote a 12-page proposal to use $50,000 of ESSER funds to address the learning gap created by the pandemic in 2020 when students did not receive band/choir instruction during the curricular school hour. The funding was used to purchase equipment — choir risers, sound equipment and instruments (tuba, bass clarinet, percussion equipment) — which has set up the program for long-term, sustained success.
Many of his students come from low- to middle-class, rural families, and parents recognize and appreciate when quality education and effort are put into their children. “Because of this, I describe our program as ‘meaningful,’” Glader explains. “Our program may never be the highest echelon in the state in terms of accomplishments, but we are a meaningful part of these student’s lives and educational experience.”
He goes on to say that the culture in the building in regards to music is “amazing, not only in terms of the increased participation rates, but also amongst the collaboration with teachers, support from the administration, and pride among the students.”
In 2022, Glader’s students encouraged him to create a TikTok account. “I started with no agenda other than connecting with my students at their level,” he explains. “It has grown organically through examples of student achievements, warmups, attention-getters, skits, performance content, dances, teacher tips and more.”
Glader currently has almost 250,000 followers/subscribers across TikTok, YouTube and Instagram (all @TheDarthGlader) with over 100 million views and millions of likes.
Assistant Director of Bands Barberton CIty Schools, Barberton, Ohio
Lee B. Gibson, the Assistant Director of Bands at Barberton City Schools in Ohio, knows how music education can transform lives. Something as basic as putting instruments in the hands of students can seem to be an insurmountable obstacle. Luckily, Gibson’s music program provides high-quality instruments to every student who signs up for band at no charge to them. The Barberton Band Boosters have purchased instruments throughout the years, and the district covers the cost of repairs.
Gibson himself secured a grant to purchase trumpets and to bring guest trumpet clinicians to a beginning band class he started. “We have a full range of instruments for students from beginning up to professional quality instruments for our upper-level kids at the high school,” he says.
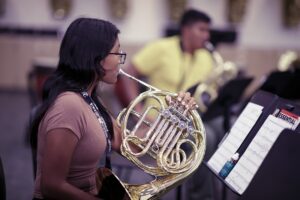
Gibson goes above and beyond for his students, which include 6th-, 7th- and 8th-grade bands as well as the high school marching band and pep band. He also oversees several small ensembles — saxophone quartets, clarinet quintets, brass quintets, etc. “Woodwinds and brass instruments produce beautiful and unique sounds, and more people should be exposed to them,” Gibson explains.
He also created TheBandRoom YouTube channel to provide interesting and exciting ways for his winds students to practice materials that otherwise are monotonous and boring. Videos cover a range of topics including rhythm, breathing, lip slurs, tone development, articulation and scales.
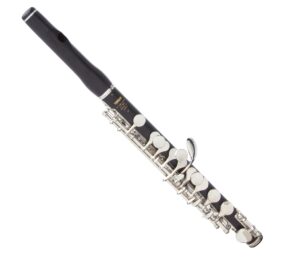
After attending several Piccolo Christmas events started by Lynn Stukart Ogden in Iowa, Gibson started an Akron version. Flute players come together and play Christmas music on a one-day practice and performance basis. “It involves all types of flutes from piccolo to concert flutes, alto flues, bass flutes and contrabass flutes,” Gibson proudly says. “There are over 100 musicians who participate every year. It offers a way for professionals to network in a fun way, and it also gives local students the opportunity to see, hear and play with our area’s top musicians.”
Assistant Professor of Practice of Music Education Virginia Tech Blacksburg, Virginia
Dr. Catheryn Shaw Foster, Assistant Professor of Practice of Music Education at Virginia Tech, saw a need to help and coalesce music teachers in rural areas, so she co-founded the Rural Band Director Alliance (RBDA). “It started as a way to create a safe space for rural music educators to seek out help and share ideas,” Foster explains. “We want to provide resources and opportunities for rural directors and their students. We also want to spotlight the hard work they do in their communities. Many times, they are a one-person show who runs everything, and they should be celebrated!”
Foster also hosts the “Rural Band Reflections” podcast that highlights rural directors and provides them with access to people like college directors and composers who they might not have a chance to meet and work with. The podcast also elevates minorities — women, BIPOC, LGBTQ+ — in the music profession. “Composers and rural directors have shared their stories, successes and advice,” Foster says proudly. “My hope is that directors will be inspired by the podcast guests and that it will offer a glimpse of the hard work rural directors do every day.”
A sought-after clinician, Foster often presents information from her book, “Developing Error Detection Skills in the Wind Band Educator.” Three key points she emphasizes on this topic are: 1) when young directors step up on the podium, it is easy to become overwhelmed with a “wall of sound.” The book details a process for learning how to detect errors in the rehearsal setting. 2) Error detection is a learned skill. It is absolutely possible to get better – IF you work toward it. The book allows learners to work on one musical element at a time (i.e., rhythm, pitch, articulation, dynamics) before combining everything. 3) In addition to providing a process for learning this skill, the book also includes 400+ recordings to practice as you go – recordings range from solos, duets and quartets to full band examples.
At Virginia Tech, Foster broadens her students’ perspective beyond field experience and student teaching. She brings in local K-12 music educators to speak to her students about their experiences. “For example, we have a local middle school band director who specializes in ELL (English Language Learners), so she shares resources with my students to help prepare them for the classroom,” she says.
Foster tailors her program to meet each student’s goals. “It is not a one-size fits all model,” she explains. “If a student wants to be an elementary general music teacher, I make sure their experiences are crafted to meet that goal.”
Job placement rates among her graduates are near 100% because Foster helps her students navigate the job market as well as the application/interview process. “We do interview preparation in class, I share job postings, I connect them with potential employers. I want them to know that they are not alone,” she says.
Foster wants her program to have the reputation of being practical and well-rounded. She ensures that her students learn from master educators and receive real-world experiences. “You can talk about teaching music all day long, but until you get out there and do it, it’s just talk,” Foster exclaims. “Yes, our graduates can rehearse an ensemble, but they can also plan a trip, create a budget and write a purchase order, all while working to be a culturally responsive and inclusive educator. Even when student teaching days are long and the work is piling on, I always try to bring my students back to their why.”
Director of Bands, Assistant Professor of Music Gardner-Webb University Boiling Springs, North Carolina
When Dr. Sarah Fabian, Assistant Professor of Music and Director of Bands, arrived at Gardner-Webb University in Bolling Springs, North Carolina, she revamped the recruitment strategy. She visited high schools, attended music festivals and met with music educators to promote the music program at Gardner-Webb. She also made a conscious effort to personally connect with prospective students. “Whether through phone calls, emails, lessons, meetings or Zoom, I aimed to show potential students what Gardner-Webb offered in terms of personalized education, performance opportunities and mentorship,” Fabian says.
Her strategic, multifaceted approach focused on increasing visibility and creating a culture of excellence and excitement around the music ensembles — and she achieved significant growth in the number of music majors, and members of the marching band, pep band and symphonic band. “I emphasized that the marching band was not just a musical group, but a community where students could find belonging, develop leadership skills and build lasting relationships,” Fabian explains.
High schoolers were invited to band day events and were able to experience game day at GWU. The band performed at more school events, exhibitions and sports games, so students saw the value of joining a group that had a wide range of opportunities.
“The pep band became a more inclusive group by broadening the type of instruments we included, allowing nontraditional band students to join,” Fabian explains. “The pep band was moved down to the court for more visibility, and they sure bring the energy!”
A key to all of these initiatives was instilling a sense of excellence, pride, fun and a sense of belonging. Fabian continued, “I made sure my students understood the value of their hard work, and I’m proud to say that faculty, staff, students and community members often reach out to share their praise!”
In addition to attracting prospective students and engaging current students, Fabian also rebuilt alumni relations and reestablished connections with the local community. She used multiple channels — emails, phone calls, social media — to reach out to alumni and created personalized invitations to concerts and sporting events. The program’s social media pages were redesigned so people could easily stay connected.
Fabian also strengthened and rebuilt ties with the local community — and continues to do so. “Gardner-Webb has been reestablished as a resource and a positive presence in the area. We’ve hosted numerous concerts, events, clinics, masterclasses and more where we invite local residents and schools to attend,” she explains. “I continue to adjudicate in the area to meet new band directors and put Gardner-Webb’s name back out there.”
This same level of commitment is brought into her classroom and rehearsals. By maintaining high expectations while also creating a supportive, energetic environment, Fabian’s students reach their potential and enjoy the journey along the way. Her approach focuses on five areas: 1) a sense of community, 2) an engaging process, 3) tailored approach for each student, 4) a love of performance, 5) be passionate and present.
Eisenreich designs and oversees the initiative that “emphasizes active participation through singing, movement, instrumental exploration and creative expression — all rooted in play-based learning and developmentally appropriate practices,” she explains. “The initiative aims to make music education accessible, engaging and culturally inclusive, ensuring that all children feel welcomed and represented.”
Under Eisenreich’s guidance, SRU music education majors plan and facilitate these community-based sessions, and they develop teaching skills, explore innovative pedagogical methods, and learn to adapt lessons to meet the diverse needs of young learners. “This hands-on experience prepares future educators to lead classrooms with confidence and creativity while emphasizing the importance of community engagement in education,” she says.
Eisenreich also collaborates with local schools, community organizations and families to build partnerships that support music education as a vital component of early childhood development. Ongoing partnerships with the Pittsburgh Symphony Orchestra Fiddlesticks Concerts, Children’s Museum of Pittsburgh and more, enrich the initiative’s offerings and ensure a lasting impact on the community.
Another innovative SRU program is the certificate in Culturally Relevant and Sustaining Music Education, designed to equip educators with the tools and knowledge to create inclusive, equitable and culturally responsive music classrooms. The music education faculty collectively worked on creating the certificate’s coursework, which “prepares educators to teach in ways that sustain and celebrate cultural identities, encourage social-emotional growth and reflect the dynamic realities of today’s music students,” Eisenreich says.
A cornerstone of the certificate program is Eisenreich’s Popular Music Pedagogy class. “This course empowers educators to embrace popular music as a vital element of contemporary music education,” she explains. “Students explore songwriting, production, improvisation and performance within popular music genres while developing skills in technology, such as digital audio workstations and recording software. The course also emphasizes student-centered learning strategies, encouraging educators to guide students in discovering and expressing their unique musical voices.”
Other Modern Band offerings at SRU include the Music Education for Diverse Learners: Modern Band Unit that emphasizes inclusive strategies and differentiated instruction; General Music Modern Band Teaching that integrates modern band techniques into general music classrooms; and Popular Music Ensembles that offer students the opportunity to perform in student-led groups that explore popular music styles. All provide a contemporary approach to music education, preparing students to teach popular music genres while embracing diverse learners and environments.
Eisenreich also directs the SRU Flute Ensemble that performs a diverse repertoire that spans classical to contemporary works, often highlighting global music traditions and modern genres. The Honors Flute Ensemble, which she leads, provides young flute students with advanced performance opportunities.
In addition to her work at SRU, Eisenreich is the principal flutist with the Butler County Symphony Orchestra and performs with the award-winning Beta Quartet, a chamber ensemble known for innovative and socially conscious programming.
Modern Band Teacher Lower Manhattan Community Middle School, New York City Public Schools New York, New York
“My program is fueled on community and joy,” says Laura Del Rosso, Modern Band Teacher at Lower Manhattan Community Middle School in New York. “I believe that music-making should be FUN, from process to product, and I strive to make each and every day in music class fun and engaging,” she says. “For me, that has been the key to creating a vibrant program where my students feel safe, joyful and loved every day.”
The two components of popular music pedagogy that Del Rosso emphasizes are student choice and equity. “In a popular music classroom, students choose the music they play, the instruments they use and the method through which they learn music,” she explains.
These choices can be through technology, various types of iconic notation or standard (Western) notation. “Making all these choices allows students to be successful in their musical endeavors quickly, and does not restrain them to one type of music-making.” Del Rosso says. “This makes the classroom highly equitable because everyone is able to access success using the tools and methods that work best for them.”
To foster creativity, Del Rosso sprinkles songwriting activities into her curriculum throughout the school year. “I get mixed reactions to the process,” she says with a smile. “Some students have a lot to say and like to get their thoughts out through lyrics. Others can conceptualize an arrangement with more ease. We’ve performed one of my student’s original tunes at a concert, and I hope to have many more of those in the future!”
Del Rosso is always seeking ways to expand access for her modern band students, which often means advocating for the addition of a modern band ensemble to existing programming. “That was the genesis for the Salute to Music Modern Band program,” Del Rosso explains.
The program, which is in its third year, provides popular music education to students across all five boroughs on Saturday mornings. “In many cases, these students do not have modern band programs at their middle schools, and this is their only chance to play in a rock band with their peers,” she says. “I love seeing students from all over the city make music together and develop friendships. I’m thankful to the DOE Arts Office and to my co-director, Dawn Sotello, for making it happen with me every Saturday!”
Somehow, Del Rosso finds time to help other music educators as an Arts Office Lead Music Teacher and NYC Music Will Ambassador. She hosts professional development opportunities and meet-ups for music teachers to be in community with one another and connect with resources. “One of the best ways to improve your personal practice is to ‘talk shop’ with other educators,” Del Rosso explains. “At every meet-up, PD and event, I learn something from one of my colleagues that I bring back to my classroom and use to make myself a better educator. I feel so lucky to be a part of the vibrant music education community in NYC!”
Artist Faculty, Musical Theatre Voice, The Chicago College of Performing Arts at Roosevelt University Professor of Musical Theatre Voice, Loyola University Chicago. Owner of Chicago Music & Acting Academy Executive Director and Founder of Downstage Art
Expressing artistry is at the core of the teaching philosophy of Lindsay Cummings, who teaches musical theatre voice at The Chicago College of Performing Arts at Roosevelt University and at Loyola University Chicago. “A lot of teachers get hung up on teaching technique, which is great — don’t get me wrong! But, we must encourage students to show up as their full self, and tell stories that they are passionate about,” she exclaims. “I encourage storytelling immediately in the voice studio, at all ages, to create thoughtful and curious artists.”
Cummings does this by teaching students how to listen to musical phrases, the melody line, the accompaniment and the spaces between the singing, and how they all work together to tell the story. She also developed a program along with her team called Storybuilders, which uses theater to build confidence, collaboration and communication skills in students. “Through a series of teacher-led games, writing activities, prompts and creative play, students write and perform their own original material throughout a semester,” Cummings says.
In addition to her work in higher education, Cummings offers two outlets for younger students interested in music and acting. She started Chicago Music & Acting Academy in response to a need of after-school music and theater programs. “When I worked for other programs in the city, companies would try to make kids memorize 50-page scripts and complicated songs after a seven-hour school day,” she explains. “The kids were not having fun -— they were stressed! My team and I developed programming that allowed students to take the lead in the creative process and write their own stories and songs. This turned into a much more fun and creative outlet for the students.”
Currently, Chicago Music & Acting Academy serves over 200 students in its after-school programs and 100 students in the studio programs.
The second outreach program that Cummings co-founded is Downstage Arts, a performing arts nonprofit organization that provides free college audition prep to high school juniors and seniors. This program provides students with voice lessons, acting coaching, dance classes, professional mentorship, financial aid coaching, and all the information and guidance they need to prepare for the college audition process. “Downstage Arts is in its fifth year and has admitted 100% of its participants to higher education programs throughout the country,” Cummings says proudly.
Director of Orchestras Nyack High School, New York Lecturer of Music Education, Brooklyn College Music Director, Crescendo Orchestra of New York Youth Symphony
According to Tanatchaya “Tanya” Chanphanitpornkit, the Director of Orchestras at Nyack High School in New York, her main goal with her students is building more than just musical skills. “We’re creating a supportive community where students inspire each other to excel and find deeper meaning in their artistry,” she says.
Her Mentorship for Musicians program does just that. Chanphanitpornkit says that there was a “critical need in our diverse Nyack community because many talented young musicians face financial barriers to accessing private music instruction, which often serves as a gateway to prestigious opportunities like All-County ensembles.”
High school students step in to help younger musicians, and they in turn discover profound meaning in their musical journey through teaching. “These relationships transform music from an individual pursuit into a shared journey of growth, where both mentor and mentee find joy and purpose in their musical development,” Chanphanitpornkit proudly says.
Another way that her program stands out is in the repertoire she chooses. “I approach repertoire selection with the same intentionality as an art curator designing an exhibition,” she explains. “I recognize that my choices have the power to either reinforce or challenge the traditional canon, and I deliberately use this platform to amplify historically underrepresented voices.”
Some of her favorite pieces that her students have played include Chin’s “In the Dreams of Zhou,” Sung’s “Chorale for String Orchestra” and Newbold’s “Orion and the Scorpion.” “Through these programming choices, I create performances that showcase our students’ musical abilities while broadening their understanding of what constitutes ‘important’ music,” Chanphanitpornkit says. “By introducing works outside the traditional canon, students recognize that musical excellence exists in many forms.”
Her teaching approach is as unique as her musical choices. Instead of treating music as an isolated subject, she weaves storytelling throughout the learning to help students understand how music reflects and enriches our daily lives. “When we explore a piece of music, we often pause to share stories about the emotions it evokes, the memories it connects to, or the way it mirrors experiences in our own lives,” she explains. “These conversations help students understand that music isn’t just notes on a page, but a way of expressing and understanding our human experience.”
She tells many stories and hopes that her students will learn that their own stories and voices matter.
Nyack High School Chamber Orchestra collaborated with EcoTones, an innovative ensemble that weaves together live instrumental music and natural spaces. Chanphanitpornkit’s students experienced how music creates connections between performers, audiences and the environment. “Students performed alongside professional musicians in one of Nyack’s public nature spaces,” she says. “The experience transformed their understanding of composition — they saw firsthand how music could respond to and enhance a specific place, creating intimate connections between performers and audience members.”
Last year, every student in her orchestra program also performed at a memorable and historic performance space — Carnegie Hall. “While the performance was exceptional, what moved me most deeply was seeing our students step onto that prestigious stage with confidence, knowing that they had earned their place there – not just as visitors, but as artists who had worked tirelessly to achieve the highest level of musical excellence,” Chanphanitpornkit says with pride.
Director of Bands Smiths Station High School Smiths Station, Alabama
Dr. Gene Butler is only the third Director of Bands at Smiths Station High School in Alabama since 1972. The other two — Mr. Rick Teel and Dr. Rusty Courson — were Butler’s band directors during his middle school and high school years. As the first SSHS alumnus to serve as Director of Bands, Butler, along with his colleagues, has focused on growing the music program, which serves students in grades 7 through 12. These recruitment efforts have increased enrollment by over 50% — from 316 students to 478 — and the marching band is expected to exceed 200 members next year. “When I arrived at Smiths Station, there was no elementary music program, so we began working with our elementary school teachers, visiting their classrooms multiple times a year to engage with elementary students,” Butler explains.
A successful strategy was having students take an informal music assessment test followed by contacting individual parents about their child’s music potential. “This personal contact proved valuable because it gave us the opportunity not only to discuss the value of band participation but also to address any questions parents had, particularly about conflicts between band and athletics in middle school,” he says.
Butler also spearheaded the creation of summer music camps for all Lee County Schools. Prior to COVID-19, there was limited collaboration among the four band programs in the district. The challenges of virtual learning prompted the band directors to work together. “In the summer of 2023, we partnered with our central office to offer band-specific camps for all students across the county,” Butler says proudly. “These camps were held alongside summer school, providing students with access to free meals and transportation.”
Building on the success of the summer band camps, Butler and his colleagues continued to collaborate, creating the Lee County Honor Band in January 2024. In its first year, the district had a middle school and high school honor bands with about 150 students participating. This year, a choir component was added, and more than 200 students from all attendance zones in Lee County Schools took part. “While the events have the title of honor band and honor choir, we welcome any student who chooses to apply. The primary goal is to help every student learn and be successful,” Butler states.
The district band directors collaborated again to create a plan for ESSER funding. The first time they submitted their proposal, they received no response. About a year later, when the administration had remaining funds to allocate, Butler and the other band directors resubmitted the plan. “We requested the purchase of $900,000 worth of instruments and $300,000 for additional support services,” he explains. “Our request was fully approved!”
In addition to recruitment and funding, Butler has also started several new ensembles at SSHS. “Being a well-rounded musician involves three key components: large ensemble, small group and individual practice or lessons. To be a complete musician, participation in all three is important,” Butler says.
The SSHS band program offers large ensemble opportunities through concert bands and marching band. Initially, the only small group was jazz band, but Butler has since expanded. “The development of our chamber ensembles began through partnerships with local universities, where music education students volunteered to teach after school once a week,” Butler explains.
Students participate in a masterclass for the first hour, followed by chamber music rehearsal for the second hour. “This initiative significantly improved our students’ musical knowledge and performance skills,” Butler says proudly.
During the 2020-2021 school year, students had the option to attend school virtually or in person. Remote students were not allowed on campus during the school day, but they could participate in after-school activities. “One of our biggest concerns for virtual band students was how they could continue in an ensemble after marching band season ended.,” Butler says “To address this, we created the Extracurricular Concert Band, which met once a week after school. This band included virtual students on their primary instruments and in-person students on a secondary instrument.”
Seeing the success of students on secondary instruments, Butler wanted to continue this idea and proposed transitioning the group into the Smiths Station Community Band. “We opened this band up to anyone within driving distance who could play an instrument, and the group now has around 70 members, ranging in age from 14 to 81. The community band puts on several concerts each year, bringing music to our local area,” Butler says proudly.
Assistant Director of Bands Franklin High School Franklin, Tennessee
Nick Blue was recently named the Assistant Director of Bands at Franklin High School in Tennessee. The school’s band is a seven-time Tennessee State Marching Band Champion and has marched in the Tournament of Roses Parade, twice in the Macy’s Thanksgiving Day Parade, and in the NYC St. Patrick’s Day Parade. Blue would like to grow the band program at Franklin High by continuing to engage with the schools in the cluster, and to provide students with opportunities and instruction that will allow them to experience musical excellence.
This is exactly what he did during his time at Grassland Middle School, one of the high school’s feeder schools. He grew the program there from 120 to over 230 students. “Recruiting is all about relationships and enthusiasm,” Blue explains.
He visits all 4th- and 5th-grade music classes, and when these students come to Grassland to tour the campus, they’re already familiar with what the band and orchestra offer. “When students recognize you and know ahead of time how awesome playing an instrument is, it’s a no brainer for them to join your program,” Blue explains. “Students remain in music when they experience magic in the classroom every day, and when they feel celebrated for their successes. I try to do that for every student, every day.”
When Blue started teaching in Williamson County, he realized that while there were numerous summer opportunities for high school band students, almost none existed for middle school students. So, he created one! “I partnered with several band directors across the county to advertise the camp and developed an experience that would be beneficial for students and fulfilling for the instructors,” Blue says proudly. “The camp has become a great way for students to keep their playing chops up over the summer, for our band programs and students to develop closer ties, and for the staff to fellowship with one another and make connections with even more students.”
Blue also worked closely with Susan Abell, the Orchestra Director at Grassland. “We developed a method of collaboration that allowed all stakeholders to know that we were a team, and we wanted every child to be in the music ensemble that is best for them,” he says.
Both Blue and Abell were intentional advocates for each other’s students and even swapped classes on occasion. “We always presented a united front to parents and administration, and were always highly visible at community events. We found that we had more interest from the community, more enthusiasm from students, and a bigger seat at the table with school administration,” he says.
Blue acknowledges that teaching music is a great joy and privilege. “I would be content for my work to remain anonymous, but to be recognized for my efforts is very rewarding,” he humbly says. “This is a great reminder that what we do is absolutely worth it and really does make a difference to so many.”
Assistant Director of Mariachi Las Vegas High School Las Vegas, Nevada
Imagine being invited to perform at the White House with your ensemble! That’s what happened to Michael Blanco, Assistant Director of Mariachi at Las Vegas High School. In the fall of 2024, Mariachi Joya, the school’s award-winning group, was invited by President Joe Biden and First Lady Dr. Jill Biden, at the recommendation of Nevada Senator Catherine Cortez-Masto, to perform at the White House Celebration of Hispanic Heritage Month. “Mariachi Joya was the first school mariachi to ever receive an honor such as this,” Blanco explains. “It was a surreal experience, and I am grateful to the community, the rest of the team I work with, and our administration of their support.”
In addition to their once-in-a-lifetime performance, the students toured the West Wing and saw the Oval Office and the Situation Room.
Blanco is not one to rest on the laurels of Mariachi Joya’s success and popularity. He saw that the bow placement and technique of the violinists in the group needed to improve. “Students can easily develop bad habits in their personal practice,” he explains. “When I joined the team at LVHS, I made it my mission to go back to the basics in terms of violin bow technique. We worked on exactly what ‘hinges’ to use (wrist, then elbow, then shoulder). I brought in my interpretation of mariachi violin playing, being extremely picky about how each style of mariachi song should be played.”
Along with the mariachi teaching staff, Blanco created a new warm-up sequence for all instruments and vocals. “There aren’t a ton of method books for mariachi education. So, we developed new routines. Now, scales and arpeggios are part of everyday rehearsal as well as a rigorous vocal warm-up,” he says.
Outside of his work at Las Vegas High, Blanco is the director of Mariachi Paloma Azteca, a community mariachi group. “It has been a privilege to lead these musicians and give back to the community that raised me,” he says proudly. “While helping lead a school group is a big passion, it is wonderful to lead a community group as well. We perform every weekend at parties and events, and we also go on tour once or twice a year for large competitions and shows.”
Executive Director, We Make Noise Assistant Professor and Director of the Popular Music Program Arizona State University
Empowerment is a core value for Erin Barra, the Executive Director of We Make Noise and an Assistant Professor and Director of the Popular Music Program at Arizona State University.
“Empowerment seeps into all facets of my life — it’s why I gravitate toward education and advocacy work, it’s how I parent, and it’s the foundation of my relationship to music,” she says. “My parents always reinforced that I could do and be whatever I wanted, so whenever I’m confronted with the opposite sentiment, my impulse is to rage against the machine. As my career has evolved, I’ve learned to harness that energy and use it to empower people and change systems.”
Her teaching philosophy is built on three pillars:
Education — giving people the skills and information they need in order to do work.
Community Building — creating social networks and support systems since they are necessary for success in any industry.
Professional Development — giving people real opportunities to work and get their foot in the door.
“I believe that when we focus on these outcomes and create the right environments for them to exist, then the rest falls into place,” Barra says.
In 2013, Barra founded We Make Noise, an organization that blends music creation, technology training, community building and career development to advance global gender equity and equip communities with tools that cultivate limitless potential. “There came a point in my career as a woman in music tech where I felt like I was one of one,” she recalls. “The more visible I became, the more othered and isolated I was. However, in the same breath, the more visible I became, the more people who shared my story and experiences were reaching out to me for support.”
We Make Noise started with a single classroom on the outskirts of Manhattan. Now, it operates in over 55 cities across six continents, in partnership with many regional leaders and collaborators. “There are a lot of people who have come through We Make Noise who are now working as engineers, producers, writers, playback engineers, educators, etc. Their success is what I’m most proud of,” Barra exclaims.
Director of Choral and Piano Activities Cibola High School Albuquerque Public Schools New Mexico
Collaboration is a key component of Evan Aguilar’s music program at Cibola High School in New Mexico. As the Director of Choral and Piano Activities at Cibola as well as at Albuquerque Public Schools, Aguilar has worked with people at the school and in the community to provide more opportunities for his students.
Last year, the drama and choir departments worked together on “Mamma Mia,” and the production was awarded Best Production at New Mexico’s Enchantment Awards. “This process involved hours of rehearsals, auditions, training students in their stagecraft and giving kids the tools to unleash their artistry on stage,” he proudly says.
This year, Quintessence, a group Aguilar sings with, brought their composer-in-residence to talk with his students about composing. Aguilar also invited the University of New Mexico Concert Choir, which gave him his wings to sing when he was in college, to perform with his students.
Another collaboration was with Dr. Jisook Park, a visiting professor at Eastern New Mexico University. Together Park and Aguilar performed a four-hands music recital of Brahms, Mozart and Pizaolla, after which Park presented a masterclass to the students at Cibola and another district high school. “We wanted to show how fun piano literature can be and how much fun performers can have collaborating,” Aguilar explains.
Creativity is another key element in Aguilar’s program. He spearheaded a piano orchestra where students were assigned parts and played on different voice settings on keyboards to create an ensemble. “Kids were overjoyed to play synth strings, woodwinds and world instruments. We performed arrangements I made of Taylor Swift songs, Disney tunes and pieces written by my former piano teacher, Dennis Alexander, for piano ensemble,” Aguilar explains. “We performed our works, and students were engaged with one another, accountable to the ensemble, and they had a group effort that was unique — especially for a pianist. I am doing my best to develop piano orchestras into a movement!”
Aguilar also uses an innovative recruitment tool to build interest in his program. On its Instagram page, @CHS_A2Studio, students brainstorm video concepts and then post them. “It has turned into a fun, off-the-wall way to assess playing and singing, and it provides students the chance to shine in a way they are not normally used to. I have seen so much excitement build for my program through ventures like these,” he says.
As the Elementary Festival Choir Conductor for Albuquerque Public Schools, Aguilar connects with students at Cibola’s feeder schools. He has his high school students work with elementary students across the district to model positive behavior, vocal technique and the importance of singing throughout their lives. “My high schoolers get the chance to remember just how important music advocacy is, how much they’ve grown since elementary school, and how their volunteering can better local music,” he explains. “More locally, we’ve done an ‘informance’ at the elementary school up the street, and we’ve done tours and joint performances with our middle schools to vertically align our programs.”
According to Aguilar. “Cibola’s music program is a hub of developing young artists who are kind, motivated and self-sufficient in their learning. Community is key here, and we’ve got an amazing one!”
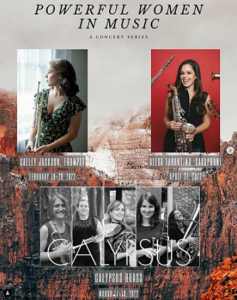
2025 Yamaha “40 Under 40” — Music Education Excellence
Yamaha launched the “40 Under 40” music education advocacy program in 2021 to celebrate and recognize outstanding young music educators who are making a difference by growing and strengthening their music programs. Now, we celebrate our fifth group of remarkable educators whose classrooms are safe spaces where musicality, creativity and innovation thrive.
These 40 educators — all under the age of 40 — showcase the following characteristics: action (anticipate what needs to be done and proactively take the necessary steps that lead to a stronger music program), courage (propose and implement new or bold ideas), creativity (show innovation and imagination in achieving plans and objectives) and growth (establish, grow or improve music education in their schools and communities).
We received hundreds of nominations from students and parents, teachers and administrators, local instrument dealers and mentors. The 40 educators below emphasize care and compassion with their students above all else as they elevate music and music-making in their schools and communities — like Dr. Liliana Guerrero, who introduces opera to elementary school students; Annie Ray, who started an orchestra for students with significant and severe disabilities; Michael Blanco, who took his award-winning mariachi ensemble to the White House to perform for President Joe Biden; Coty Raven Morris, who designed a houseless choir in her community; and Laura Del Rosso, who started a Saturday program to introduce middle school students to popular music education.
All the “40 Under 40” educators have remarkable stories , and you’ll be inspired by all of them.
Join us in applauding the 2025 class of “40 Under 40” educators.
Professor of Musical Theatre Voice, The Chicago College of Performing Arts and Loyola University, Chicago Owner, Chicago Music & Acting Academy Executive Director and Founder, Downstage Arts
Assistant Professor of Music Education, Choir Director, Music Education Coordinator, Vocal Music Coordinator Grambling State University Grambling, Louisiana
Performing Arts Director Dresden High School Dresden, Tennessee
The music program at Dresden High School in Tennessee went from “zero to hero” in the time that Jacob Abbott has served as its Performing Arts Director. Before Abbott came to Dresden, there was only one Music Appreciation class offered. Now, there are several General Music classes, Contemporary Music (ROAR), Choir and the resurrection of the concert band (The Pride of Dresden).
The lack of opportunities for his students was Abbott’s greatest motivator in transforming the program. “Growing up, I had access to a traditional band program and the ability to play in garage bands with my friends. The students at Dresden didn’t have that when I started. Regardless of their ultimate level of achievement, all schools should provide the opportunity for students to explore music,” he explains.
Abbott built the General Music curriculum to cater to students who had no musical experience. “Over the course of the school year, I build complete musicians. These students learn basic rhythm through body percussion and bucket drumming, pitch through boom whackers, piano, ukulele and guitar, and finish the year with various ensemble configurations,” he says.
The sum of their learning is showcased at a performance in the theater in front of a packed crowd of their peers.
In his Contemporary Music class, students are part of ROAR, a cover band, and learn guitar, bass, keys, and drum set through popular styles of music. ROAR serves as the pep band for multiple home basketball games, performing between quarters and during halftime. “This year, we began learning how to record both full group and individual tracks with a DAW [digital audio workstation], and many students have begun writing their own songs,” Abbott says proudly.
Outside of basketball games, ROAR performs at multiple local events each semester, such as the amateur wrestling fundraiser at Dresden Middle School. “Anywhere I can find a crowd who likes rock and pop music, we show up,” Abbott says with a smile
The idea of bringing back the traditional band started at the middle school level. Rebecca Steele, the Assistant Band Director, was initially hired as a general music teacher for Dresden Middle School. Her class numbers exploded over the first few years, which prompted discussions about bringing back the traditional program. “Initially, we were going to offer it exclusively at the middle school and let the students trickle up to me,” Abbott explains. “However, the 8th graders that year were very vocal about not missing out on the opportunity, so we scheduled both the middle school and high school concert bands simultaneously in 2023. Currently, we have 35 to 40 students in our middle school program, and I have 20 at the high school.”
According to Abbott, the school district provided the necessary funding for his plans for growth, including and materials to get started. “The district purchased a tuba, euphonium and various percussion instruments for each building and created a budget that we have used to overhaul the older instruments left from the original band program,” he says. “Most of our students are renting their horns through Amro Music, but many need a school-owned instrument. Without the district’s support, this band program would not exist.”
The community has also been a source of funding and support. Every public concert has a large crowd, and many local organizations have made donations, which Abbott has used for instruments and materials. “The local paper covers our events regularly, and many individuals and businesses have come forward wanting to support our efforts,” he says. “We are starting to see community members with no direct connection to the schools show up and support the students!”
One of Abbott’s proudest moments happened with his choir. Every December, the choir spends a day caroling at nursing home facilities. “A few years ago, we sang ‘White Christmas’ for a man who was recovering from a stroke. He couldn’t speak, but as we sang, tears started running down his face,” Abbott recalls. “I don’t know how we were able to finish the song because eventually, we were all crying. I found out a few weeks later that the man had passed away right after Christmas, and I am beyond proud that my students made one of his last days so special.”
A turnaround, also called a “turnback,” is a sequence of chords or notes (usually two to four bars in length) that leads back to the beginning of the main chord progression, or sometimes to a new section of the tune. Think of it as a musical way to say, “Here we go again!” Turnarounds are a key part of many styles of music, especially jazz and blues, and they’re a great way to keep your bass playing interesting and connected to the harmony.
Here are some tips for constructing effective turnarounds.
GOING TO THE FIVE
The best way to get back to the I (the root chord of a song) is by going to the fifth chord of the key —“the V” or the dominant — first. The tension and release of going from V to I is called a perfect cadence in classical music, and you’ll hear it at the end of many pieces of music, from the crashing end chords of Beethoven’s Symphony No. 5 to Prince’s “Starfish and Coffee,” where the third and fourth chords in the repeating four-chord progression are V-I. The perfect cadence has such a strong sense of completion that even when you tamper with it by using inversions, suspensions, substitutions or chromatic alterations, it still works.
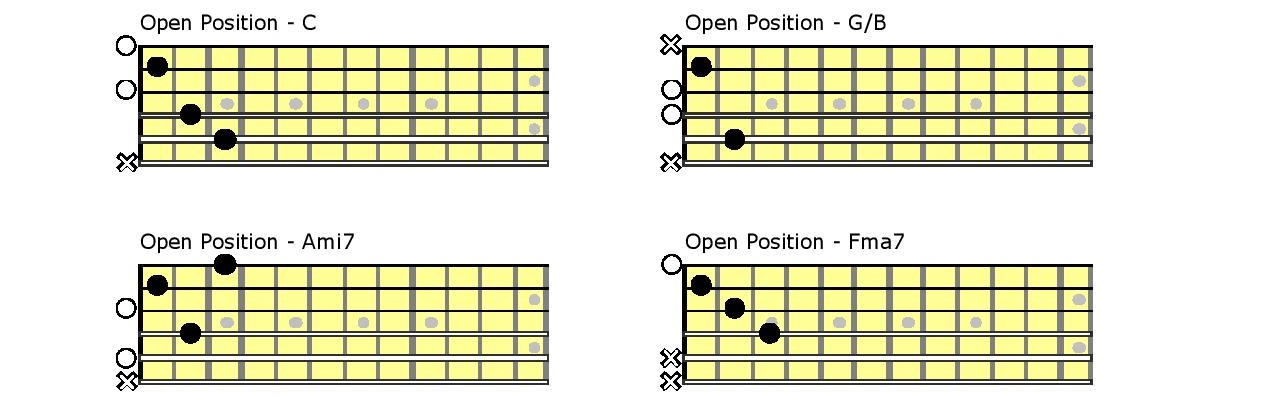
Basic turnarounds are simply various ways to get to the V. Without a turnaround, for example, a 12-bar blues in E looks and sounds like this:
This sounds fine, but we can make things interesting by replacing the last two bars of E7 with a I–vi–ii–V turnaround, with each chord lasting for two beats. Listen to how bars 11 and 12 now set us up to get back to the top of the form:
E7 (I) → C#m7 (vi) → F#m7 (ii) → B7 (V)
Another option, the iii–vi–ii–V-I turnaround replaces the I with the iii chord, G#m7:
G#m7 (iii) → C#m7 (vi) → F#m7 (ii) → B7 (V)
You can also take two bars to walk down from the vii (D) to the V (in the key of E, that’s B)…
… or walk up from the iii (G#) to the V (B):
POP TURNAROUNDS
Classic pop music uses turnarounds too. One great example is in Stevie Wonder’s “I Was Made to Love Her,” where James Jamerson doubles a guitar part for the vocal-less break in bar 4 of every verse. Some might consider Jamerson’s part a fill, but fills can function as turnarounds too, if they happen during a return to the top (or next section). Check out Verdine White’s cool line at the end of choruses in Earth Wind & Fire’s “Sing a Song” and Thundercat’s juicy turnback at the 1:00 mark in Mac Miller’s “Five Dollar Pony Rides.”
Many of today’s pop songs have the same four changes for both verse and chorus, but there’s still usually some way to discern between the two sections, even if it’s with production, like a band break, a new synth, a specific accent or a rhythmic phrase (think Bad Bunny’s “NUEVAYoL”). When bassists step up their turnaround game, as did this unidentified player on Otis Kane’s “Breathe,” the results can be spectacular.
HOW TO PRACTICE TURNAROUNDS
Start by playing the root of each chord. Keep it simple so you can lock in with the drummer and feel the pulse. Once you’re comfortable with root notes, try connecting them by walking up or down the scale to the next root or using chromatic passing tones (like E → D → Db → C when moving from E7 to Cm7). Play with rhythm; instead of just playing straight quarter notes, experiment with syncopation or different rhythms that add some personality. The best way to learn, of course, is to loop the end of a section and experiment with various approaches.
Now that you’re tuned into turnarounds, you may find yourself noticing how bass players end sections and signal the upcoming ones. Next time, we’ll talk about chord substitutions, which will add spice, variety and so many more options to your bag of turnaround tricks.
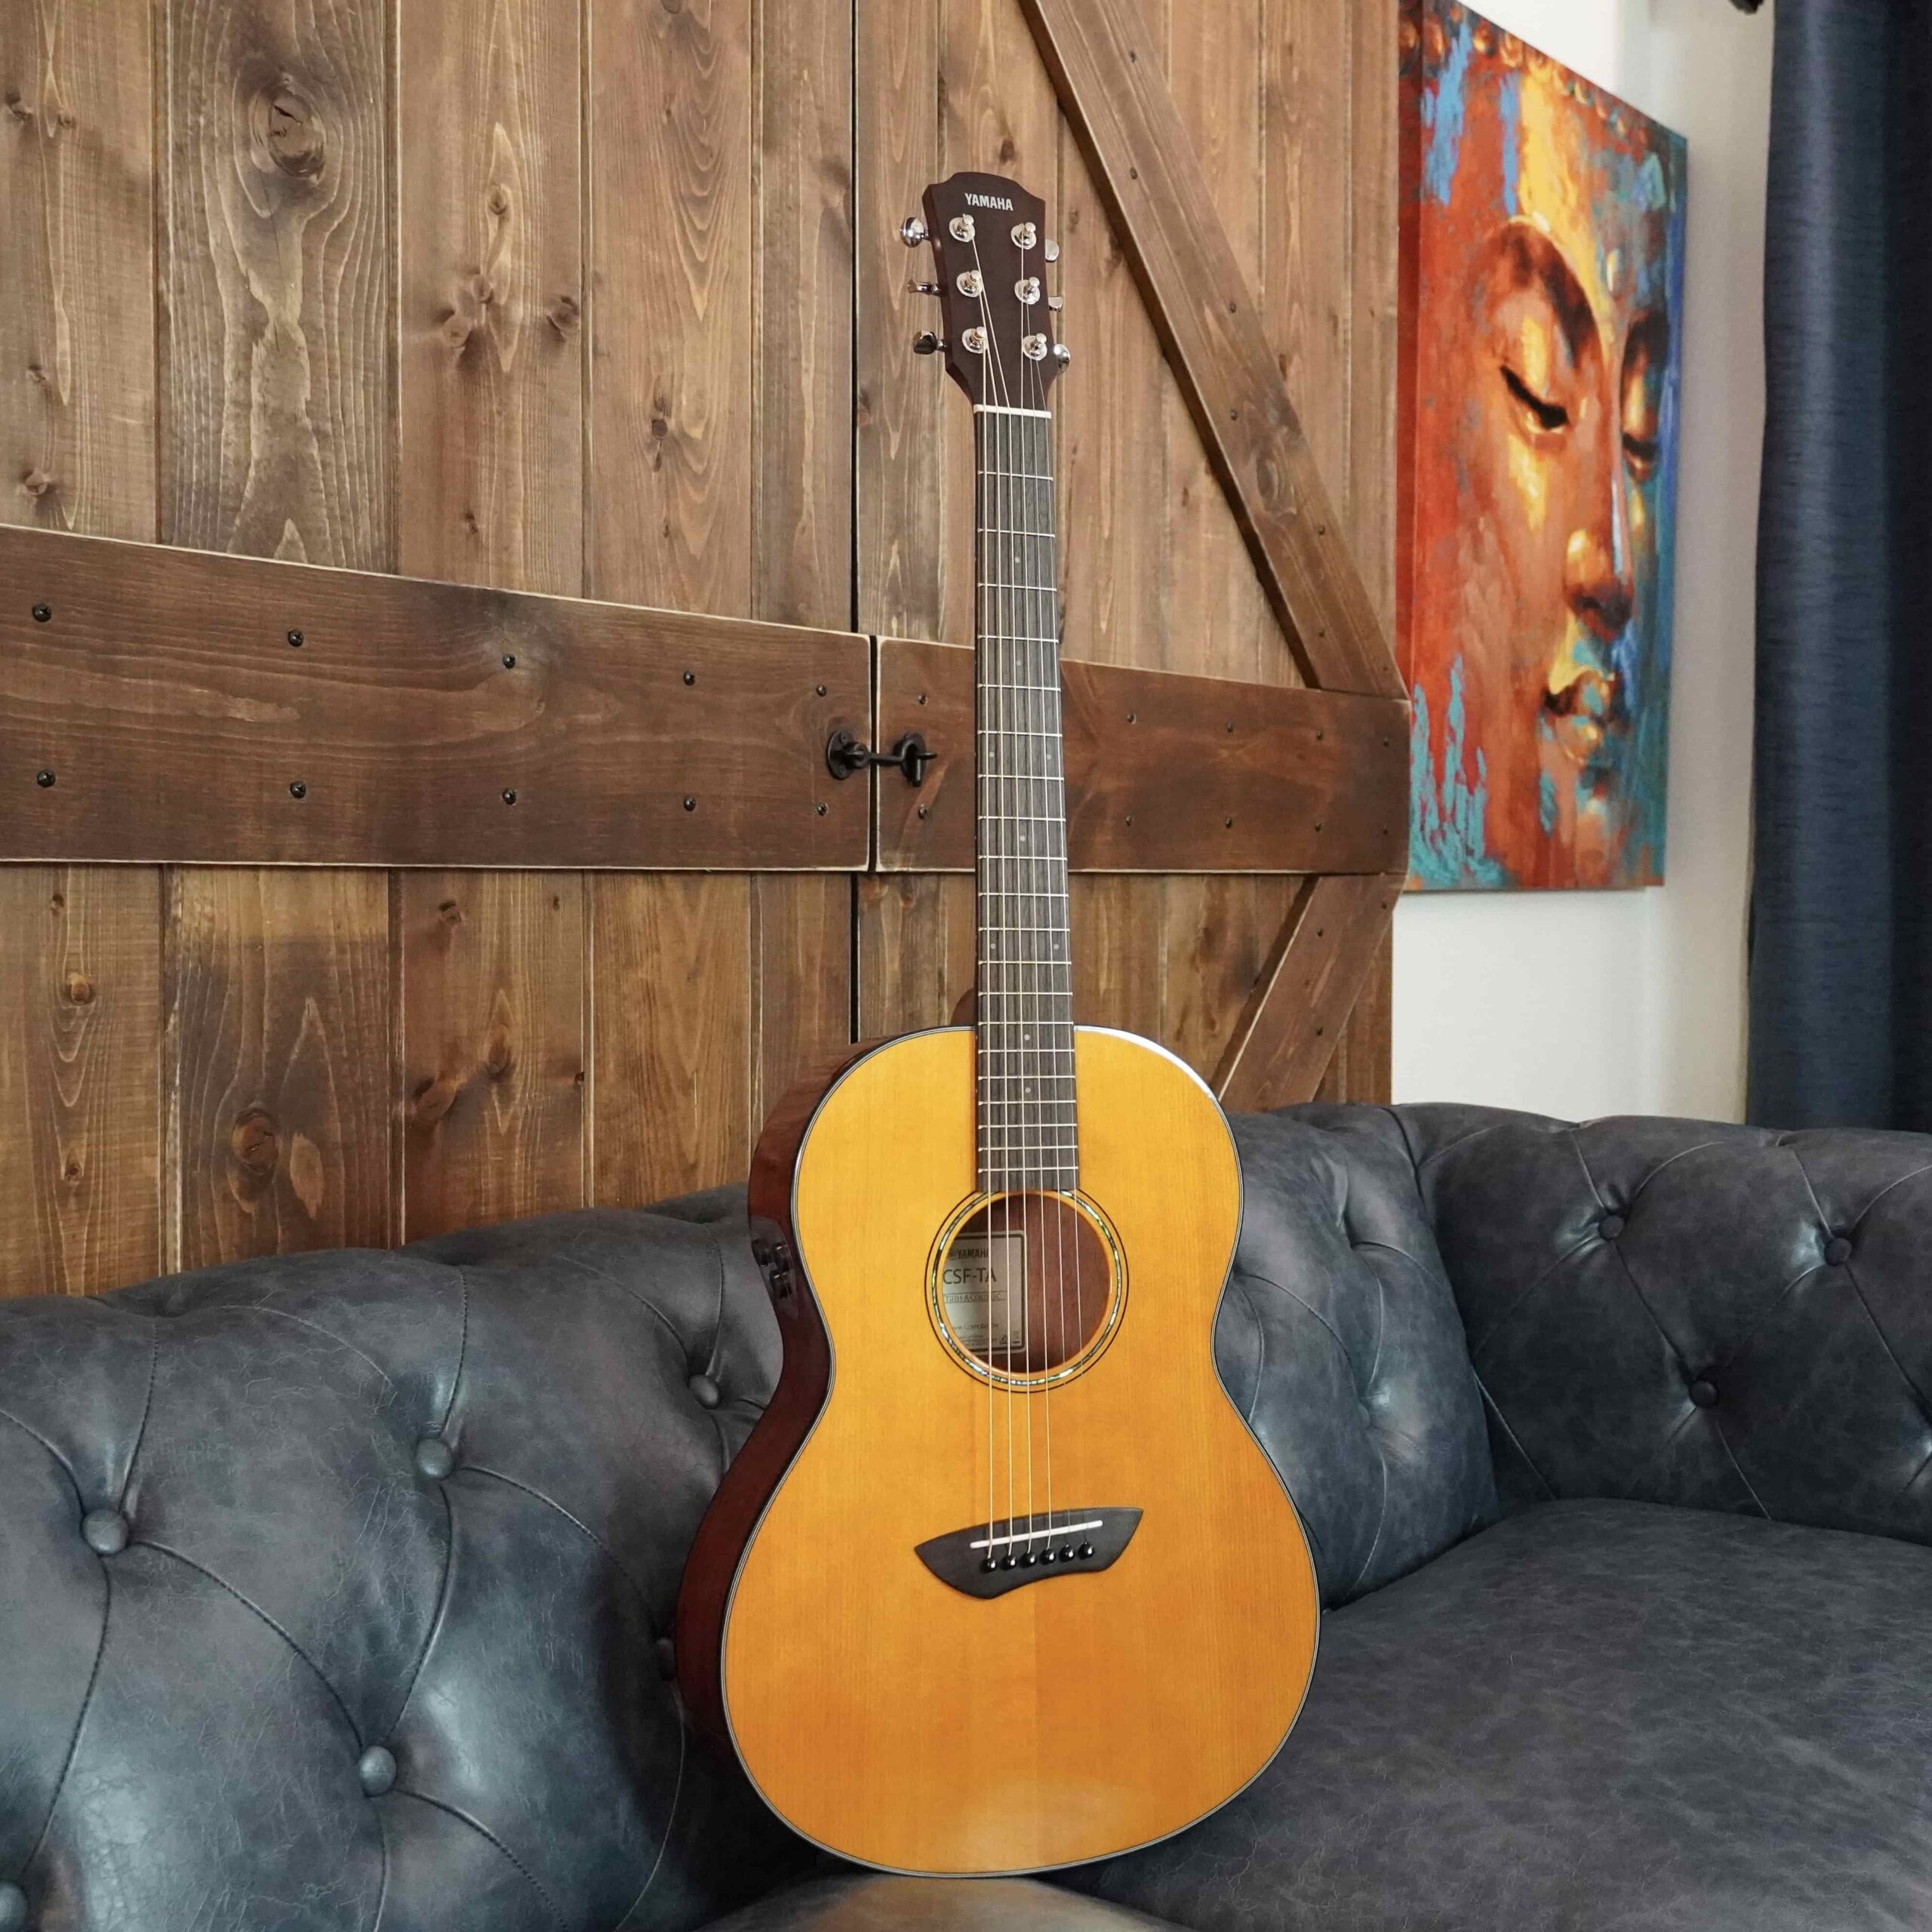
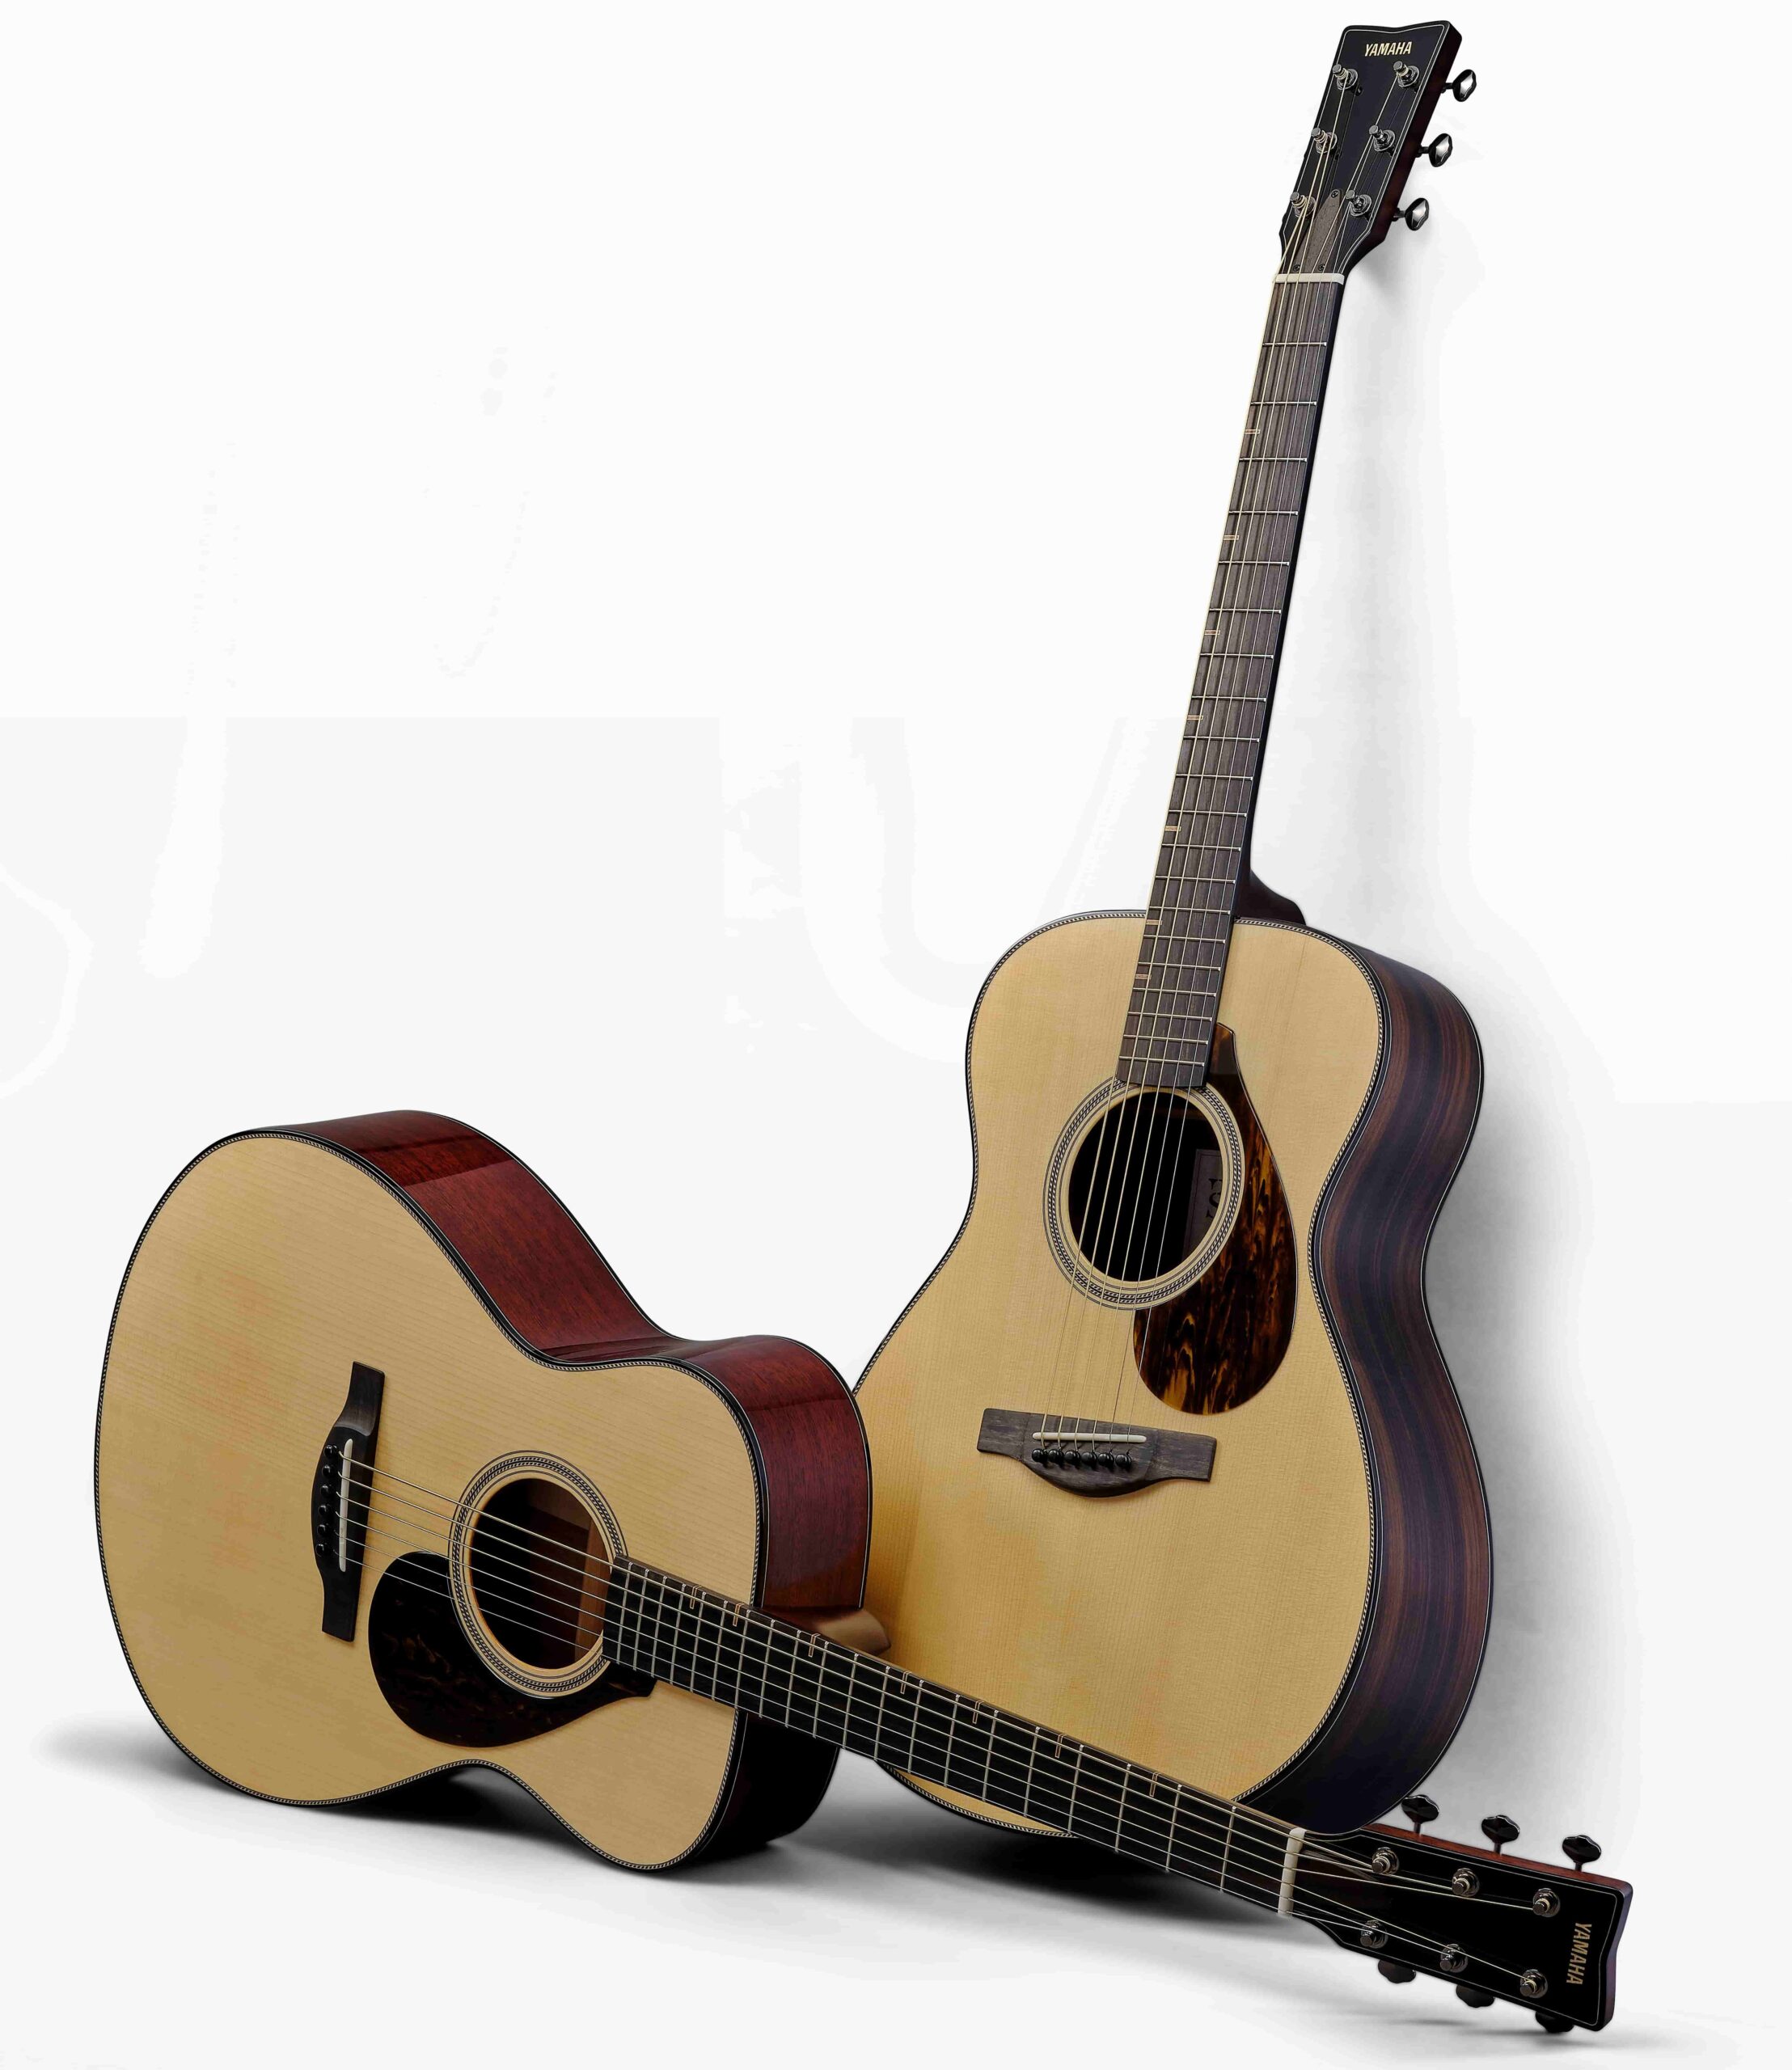
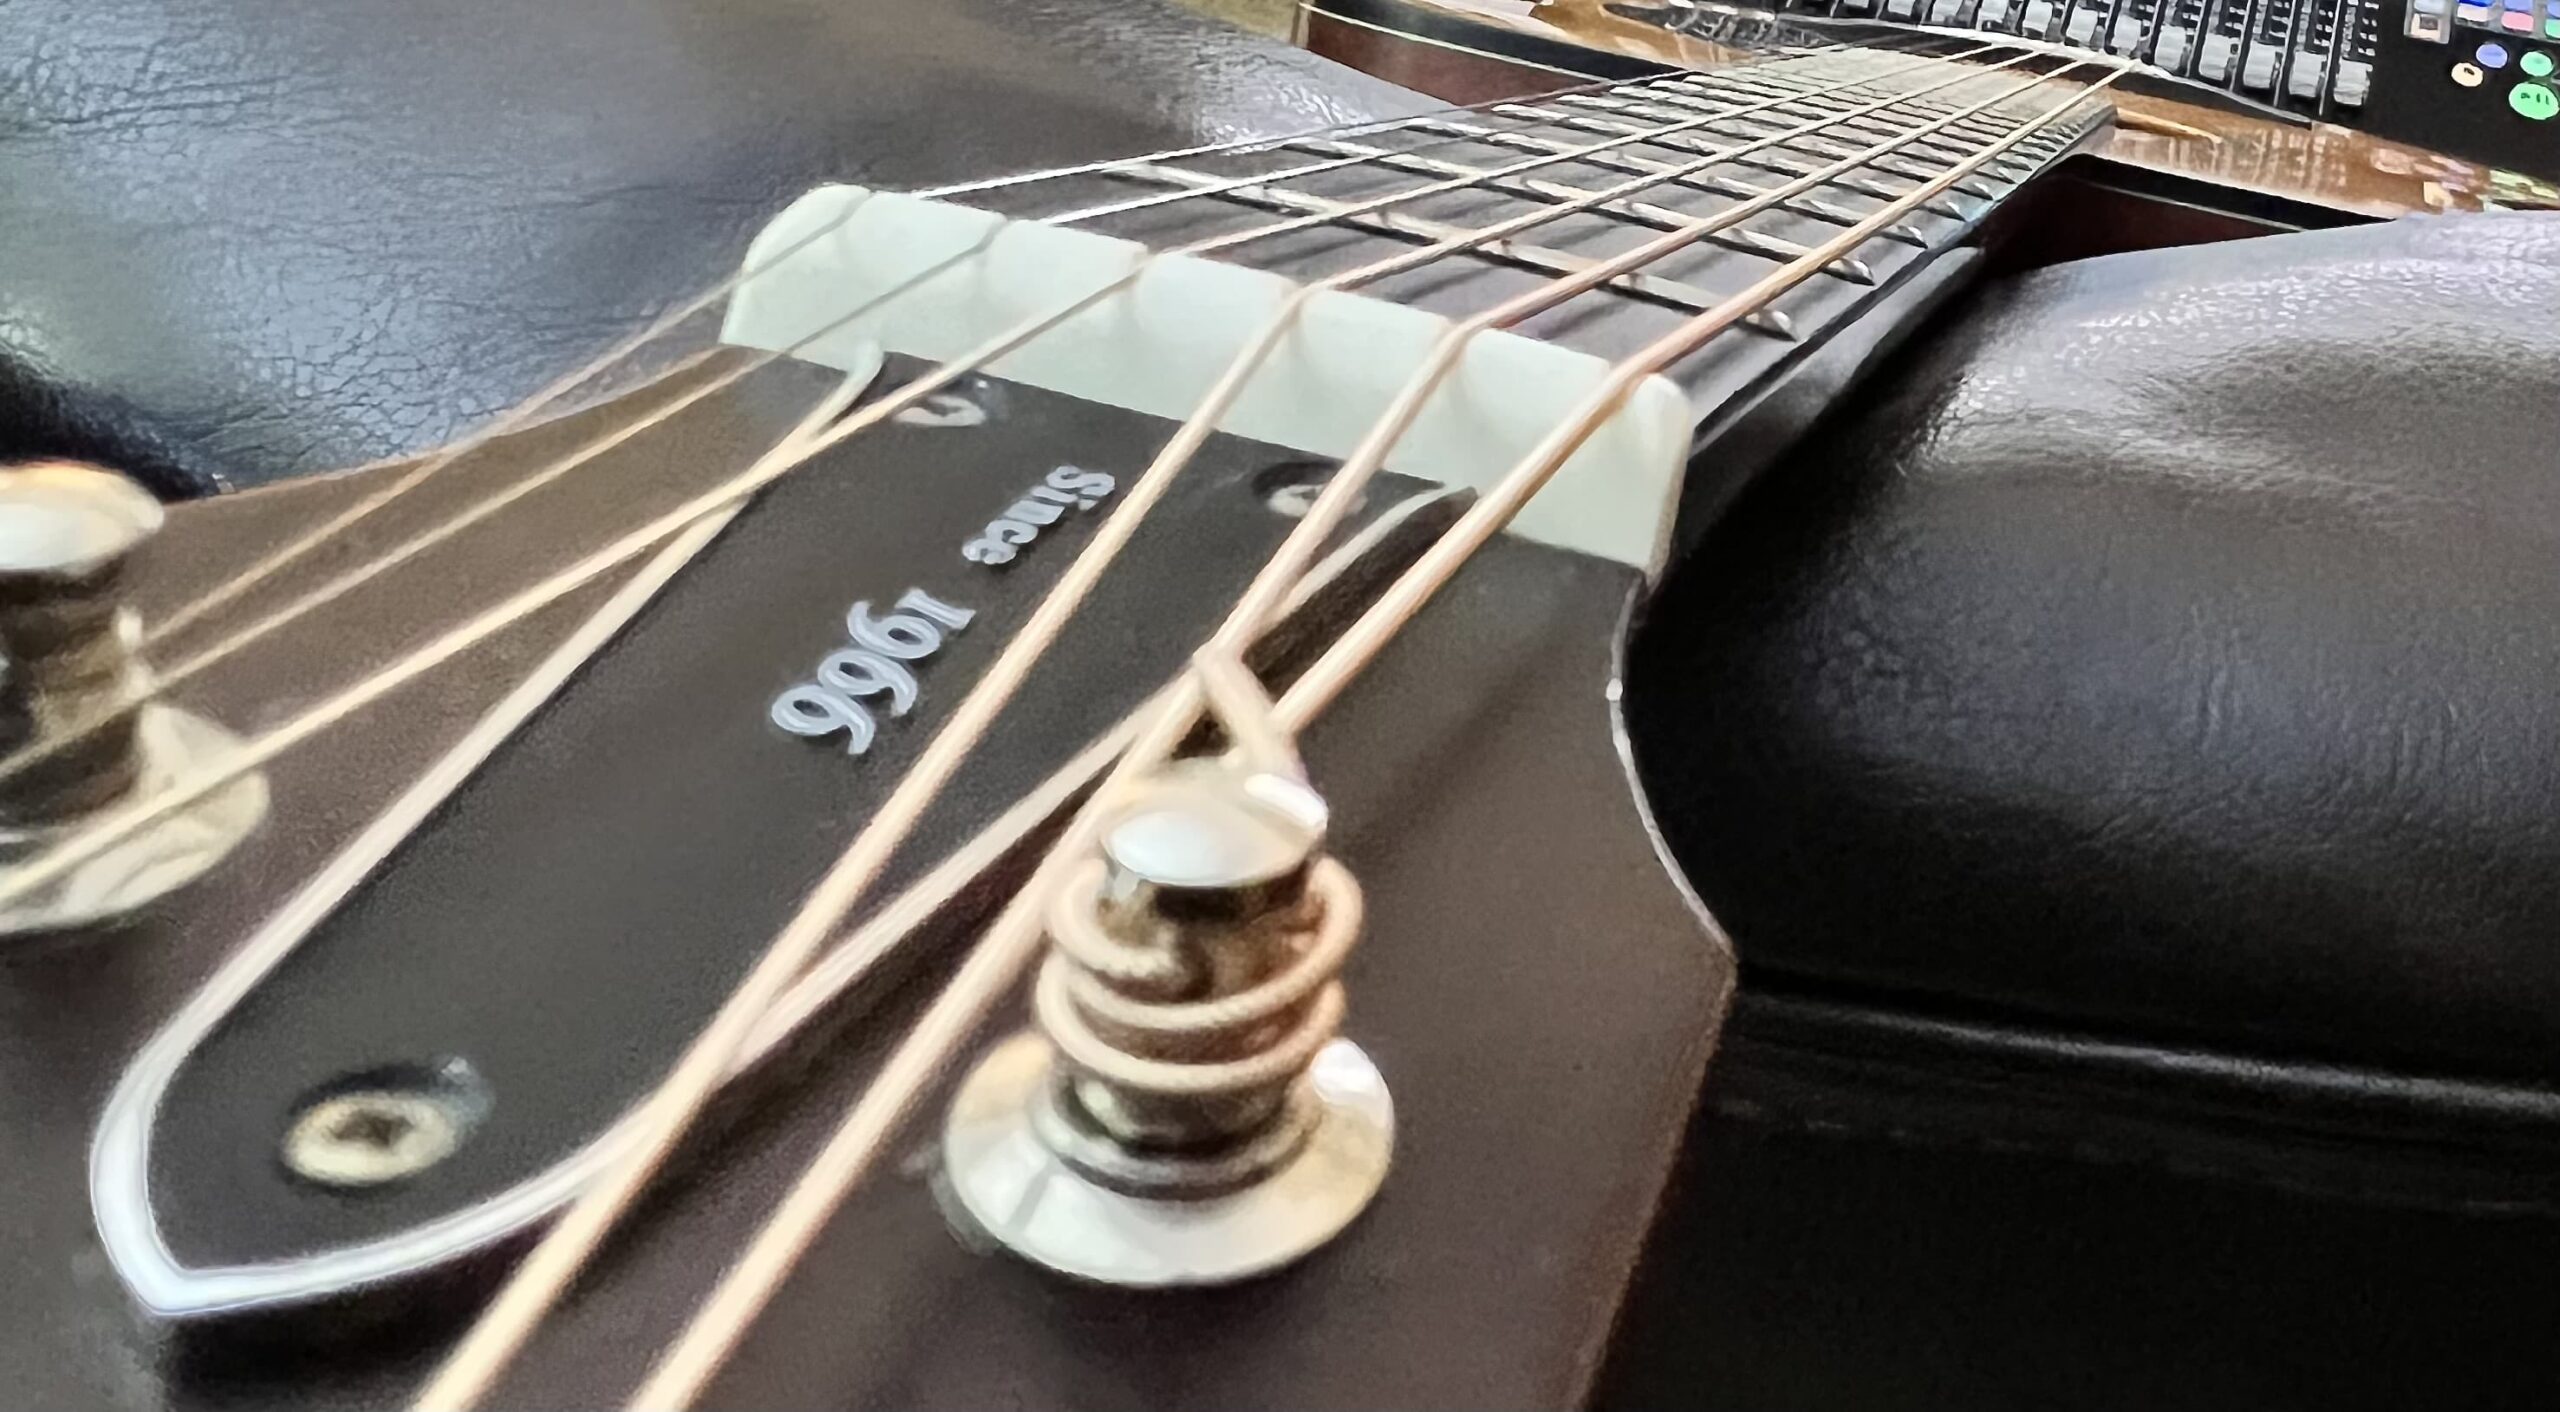
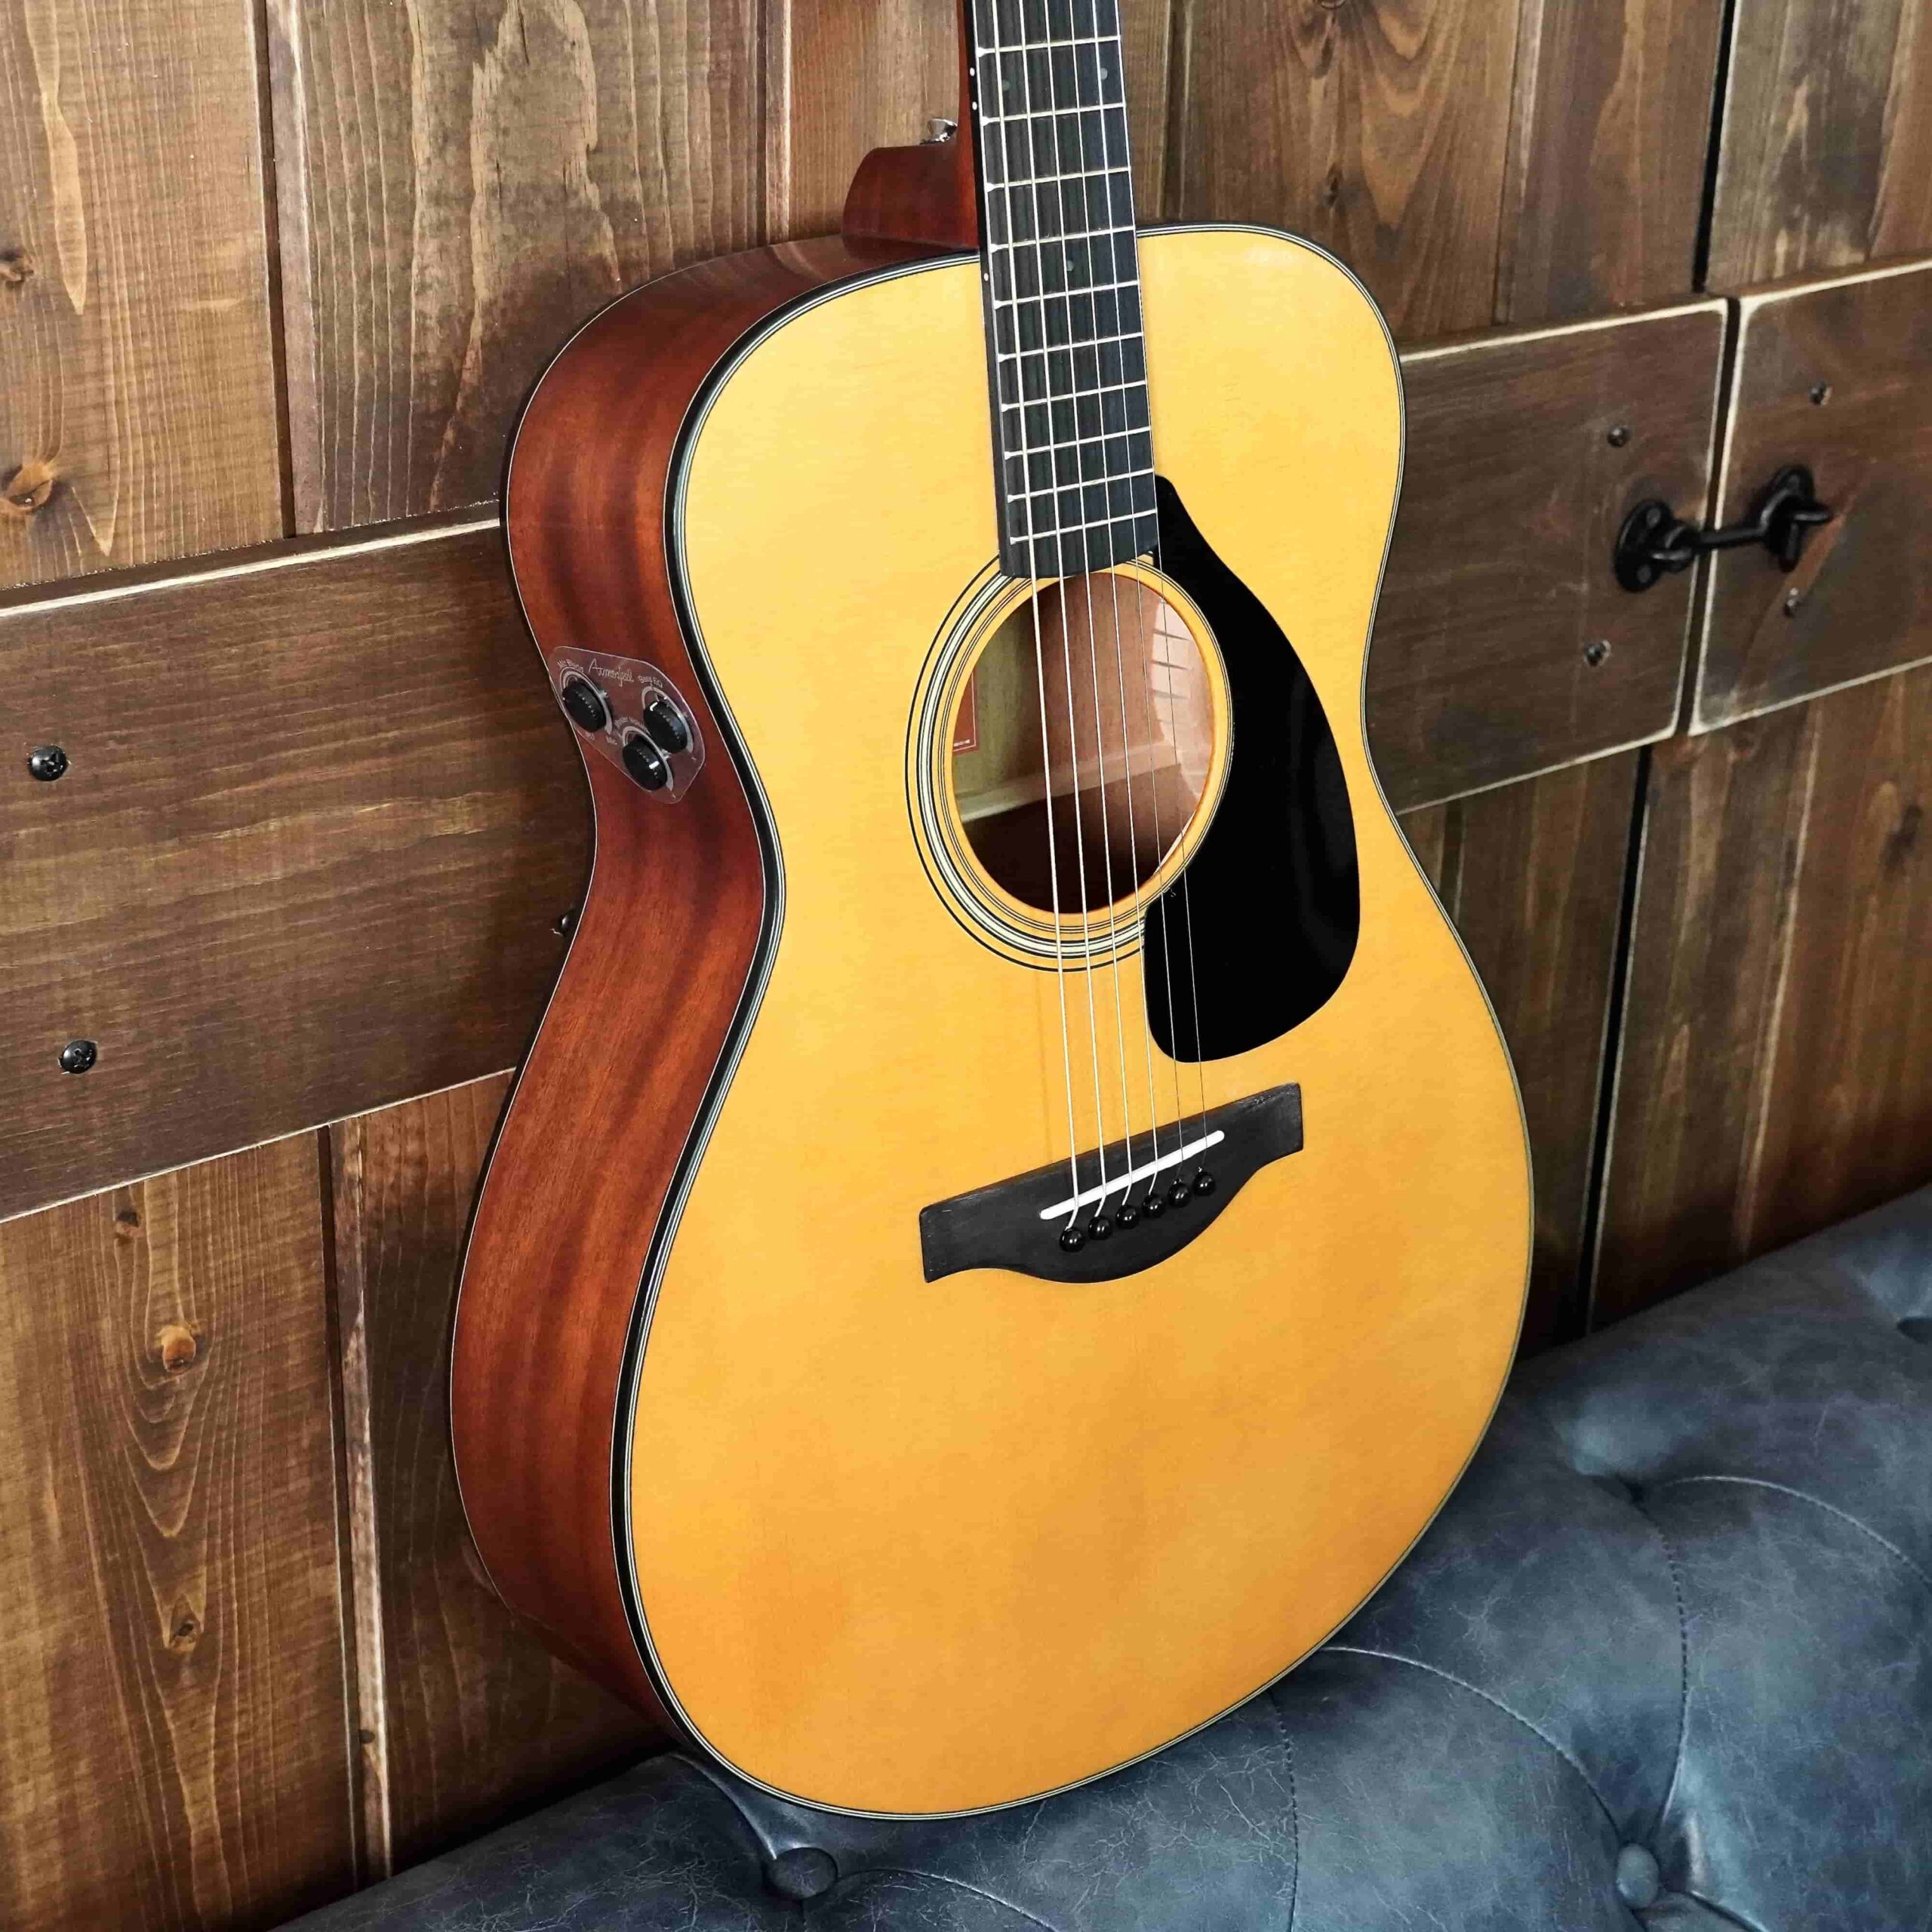
In 2023, Yamaha launched their flagship line of FG9 dreadnought acoustic guitars, followed in 2024 with the smaller concert-body FS9.
Both guitars represent the pinnacle of Japanese craftsmanship and acoustic tone. They feature a solid Adirondack spruce tops, with the option of either solid Indian rosewood or solid African mahogany back and sides.
These lightweight, handcrafted instruments quickly found favor with the acoustic guitar elite, professional player and serious semi-pro looking for the absolute best in acoustic tone. I have had both guitars in my studio, and can validate just how beautiful they sound in front of a microphone.
But what happens when you’re playing live and the microphones available are of less than optimum quality? (This sometimes happens even in home studios.) Enter the just-released FG9 X and FS9 X, both of which enable you to amplify that great tone onstage without the need for microphones at all.
That’s because the FG9 X and FS9 X are identical to their all-acoustic siblings, but come equipped with the amazing Atmosfeel™ pickup system. Intrigued? Read on …
What is Atmosfeel?
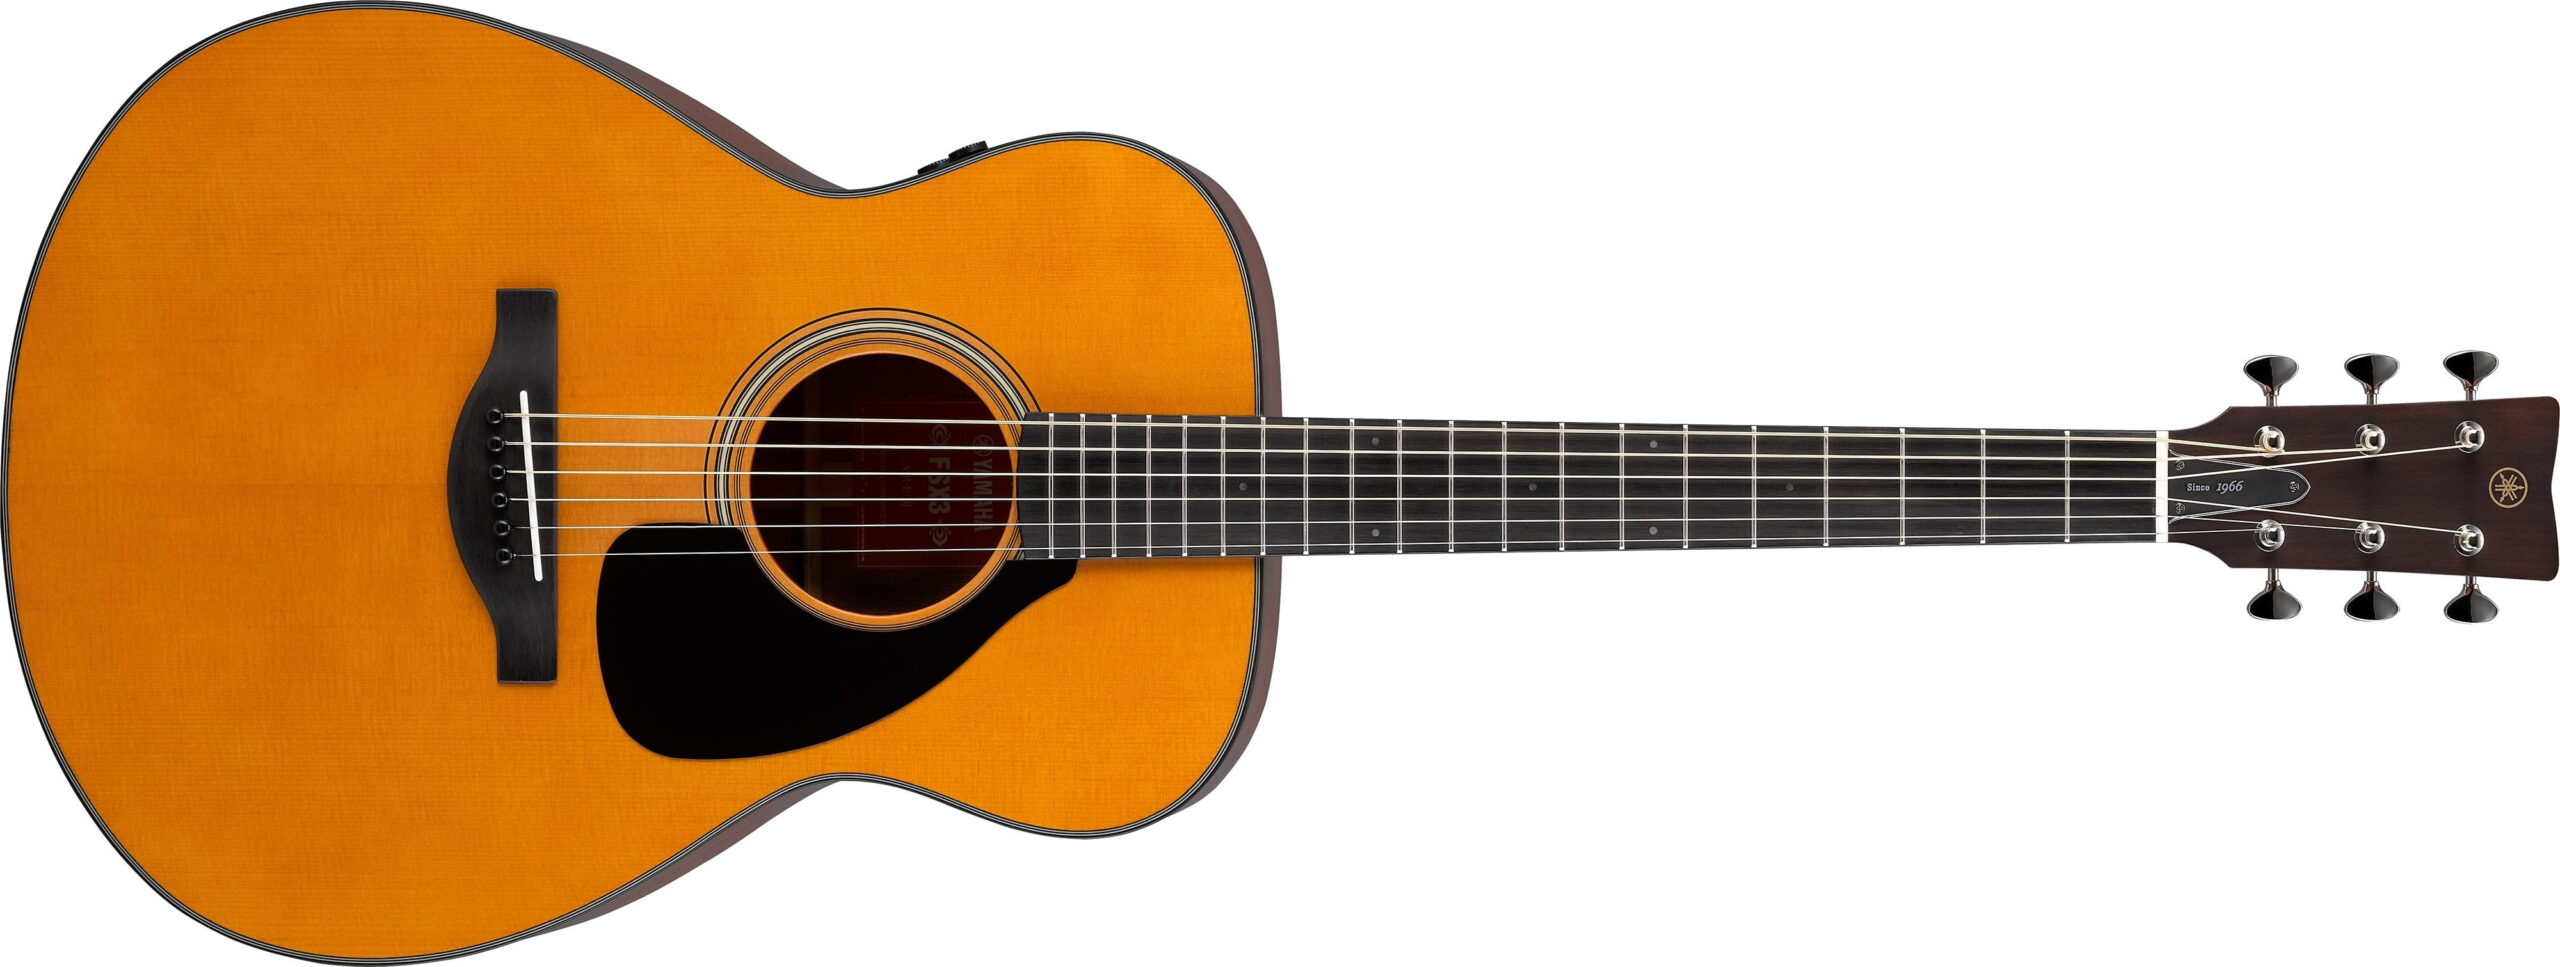
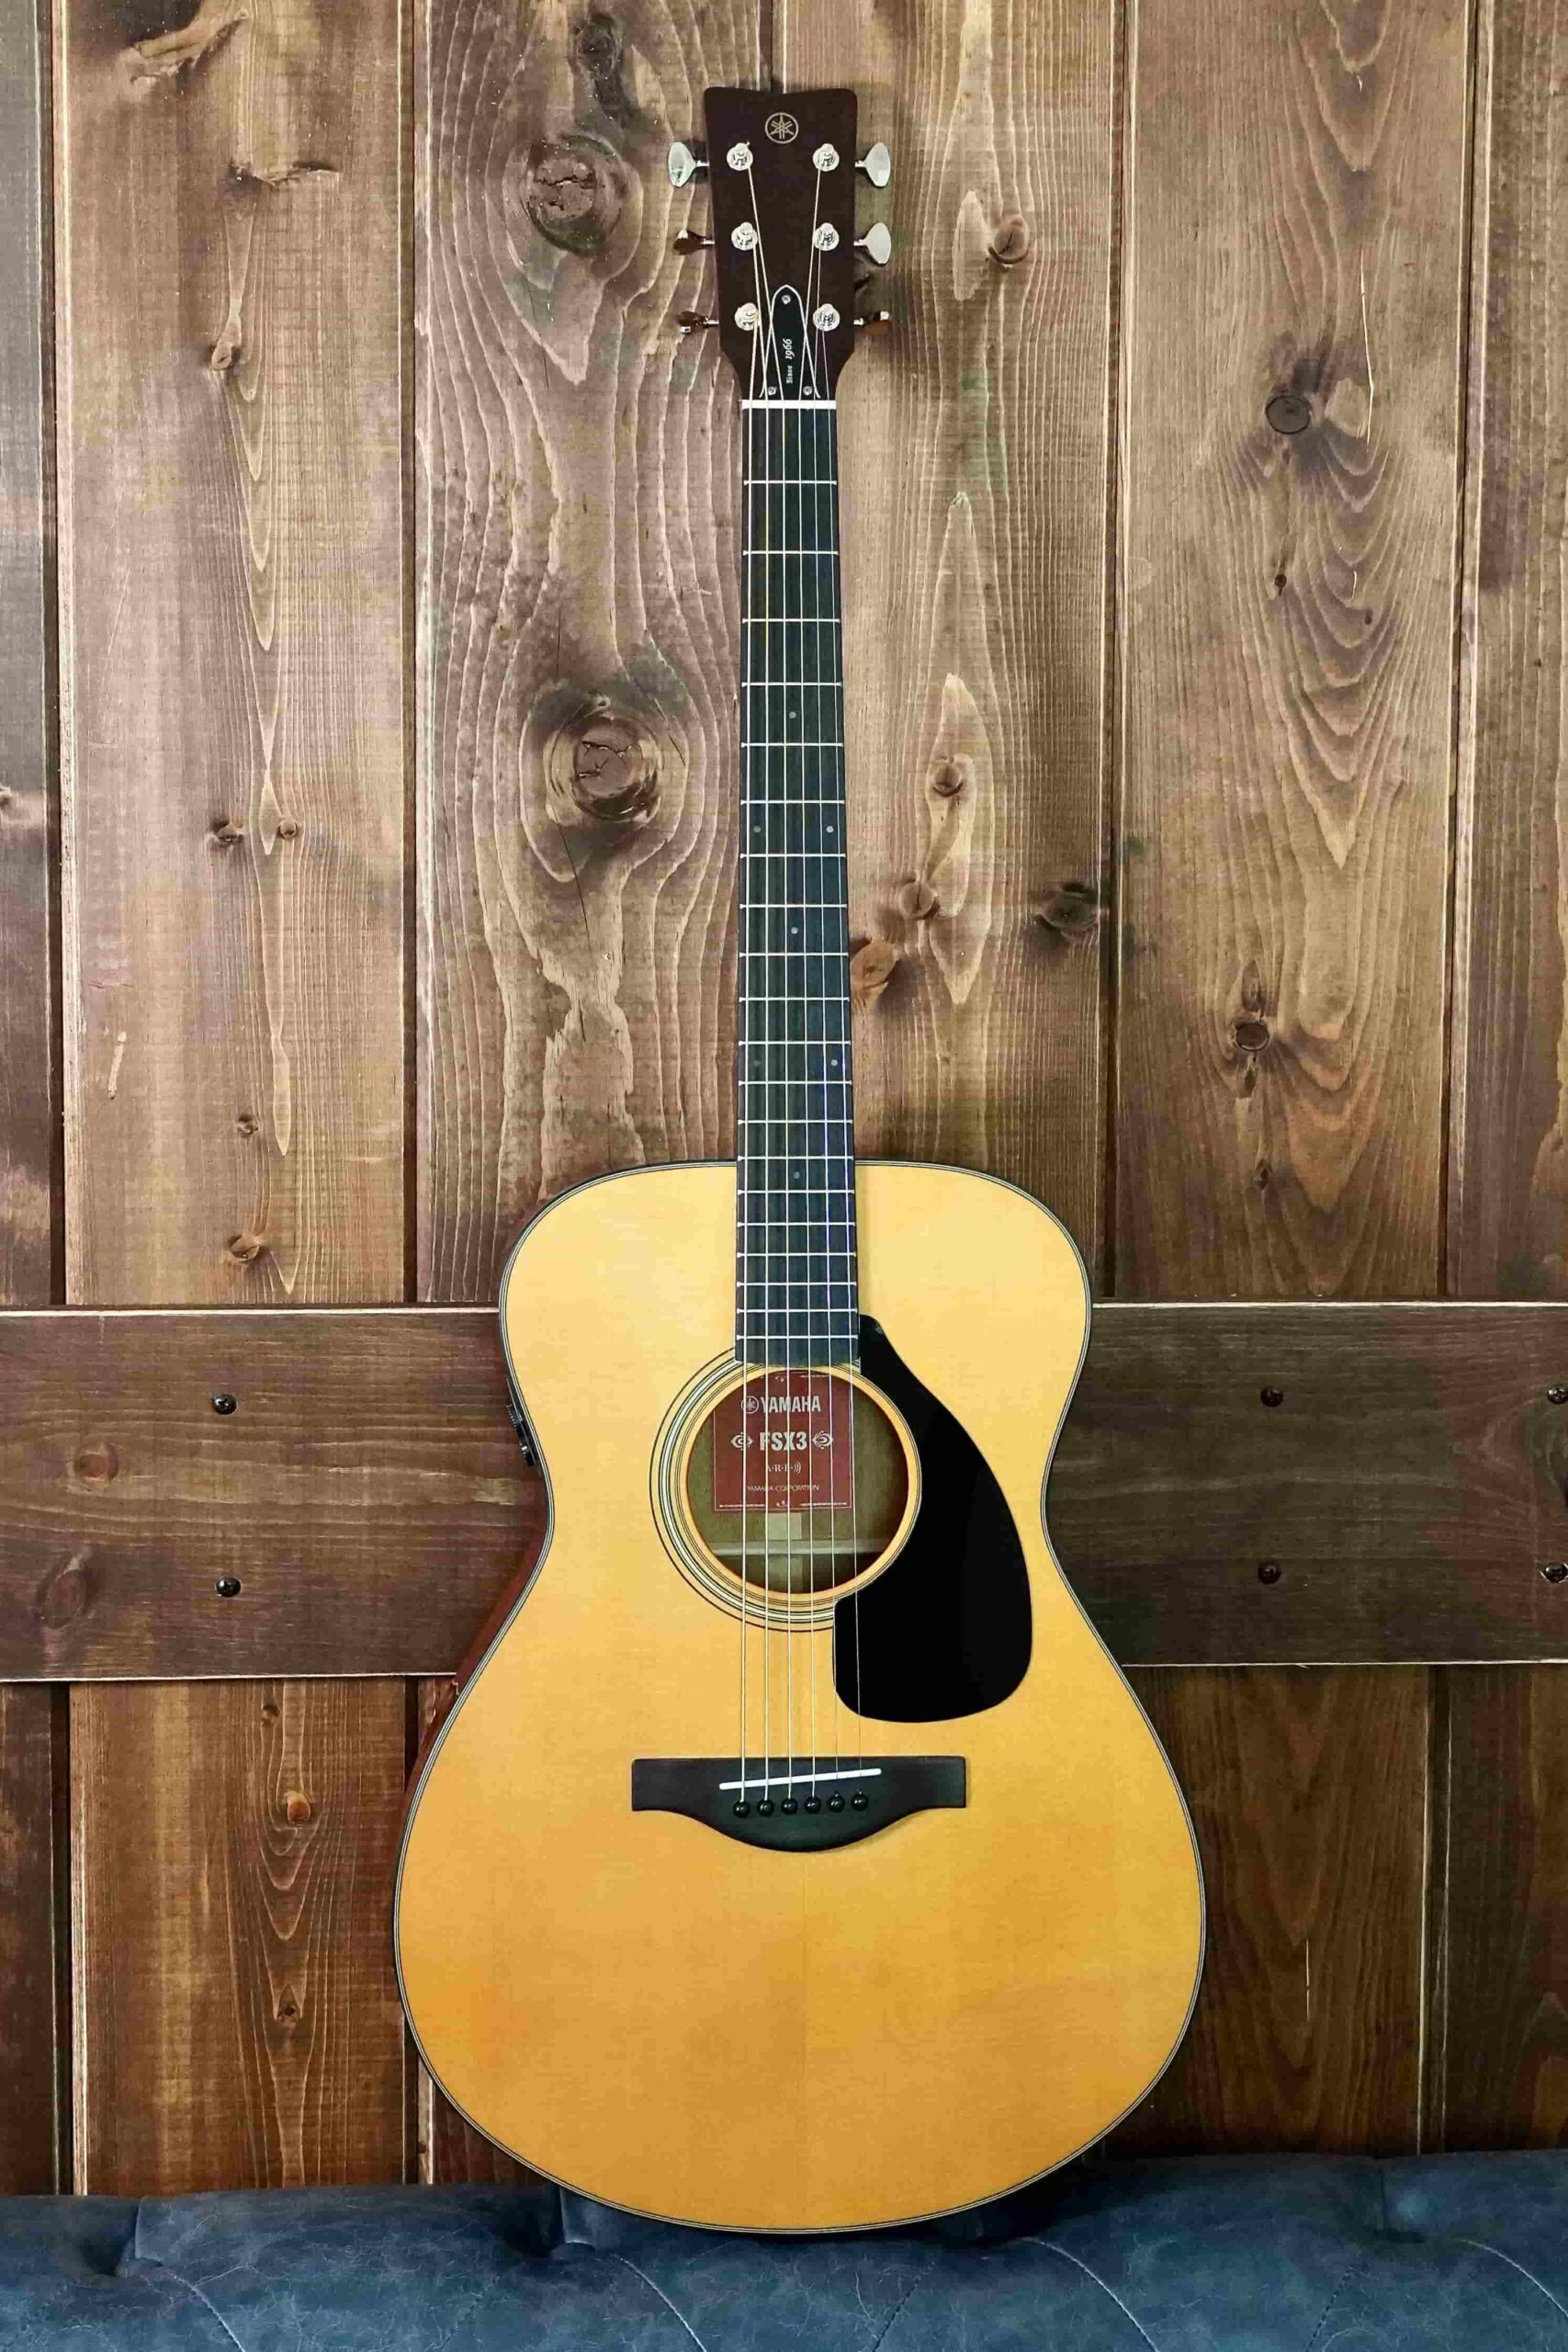
Anyone who’s been following my postings on a regular basis will know that I often rave about FSX and FGX Red Label Series acoustic guitars (particularly the FSX3 — a workhorse both in my studio and onstage), which also come equipped with Atmosfeel — the name Yamaha gives to their proprietary three-way pickup system.
Here’s how Atmosfeel works:
Under the bridge, there’s a piezo sensor to capture the low frequencies
There’s also a small built-in microphone to capture the midrange frequencies, as well as some of the lows
Finally, there’s a thin sheet sensor to capture the high frequencies coming from the guitar’s Adirondack spruce top
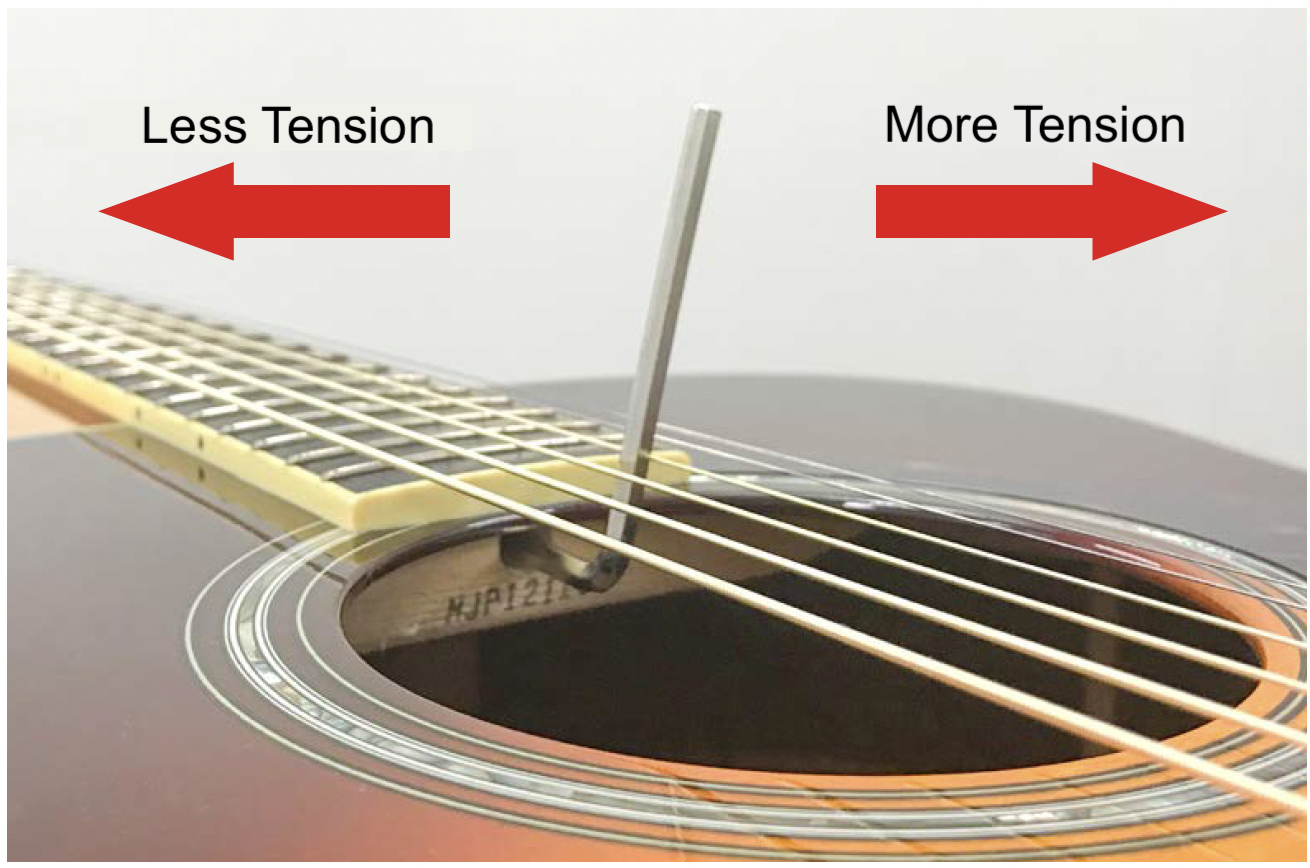
There are three Atmosfeel rotary dial controls, all located on the upper side of the guitar (facing the player). The first allows you to blend the microphone signal with the output of the two sensors. This way, you can choose to not engage the microphone at all, or to blend in as much microphone as you want.
The second rotary dial is the master volume. A green LED lights up on this control when you plug a jack into the end-pin socket.
The third rotary dial governs the bass frequency. This is a set bass frequency that you can choose to cut or boost from its center detent.
All Atmosfeel controls are super intuitive and easy to access during live performance. All you need to do is adjust them based on what you’re hearing from your guitar amp, monitoring system and/or P.A.
Atmosfeel Isn’t Just for Live Performance
I’m lucky in that I have a selection of microphones that I can use to capture the sound of acoustic instruments and vocals in my studio, but sometimes I just want to capture ideas quickly and add other instruments later.
I think most people would agree that, in general, pickups don’t always do a good job of translating the natural sounds of acoustic guitars. Well, let me tell you, the Atmosfeel system in FG9 X and FS9 X guitars sounds absolutely incredible both onstage and when directly recorded to my laptop DAW (Digital Audio Workstation).
It literally takes seconds to dial exactly what you are hearing acoustically into the sound you’re hearing on my studio playback system. In my case, all I had to do was set the bass control to around 11 o’clock (thus cutting the low frequencies slightly); this allowed strumming and picking parts to sit better in the mix. I also like more of the microphone blended into the mix, so I set that at around 2 o’clock on the rotary dial.
Remember that if you opt to use the microphone in your recorded signal, you should monitor it over headphones, as the built-in FG9 X / FS9 X mic is sensitive enough to capture other acoustic sounds in the room and/or the sound of instruments coming from your speakers. On stage you may choose to use less of the microphone, especially at higher volumes, as it may cause feedback problems. (Yamaha provides a sound hole cover to rectify this, if needed.) Also, if you’re an accompanist who plays solo lines, you may find that boosting the bass frequency helps single notes stand out.
Tonewoods
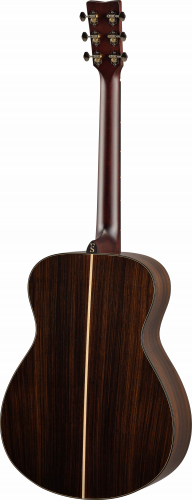
Like their all-acoustic cousins, FG9 X and FS9 X guitars feature solid Adirondack spruce tops. The FG9 MX / FS9 MX models have a solid African mahogany back and sides, while the FG9 RX / FS9 RX has a solid Indian rosewood back and sides. (The X indicates the onboard Atmosfeel pickup system.)
FG9 MX.
FS9 RX.
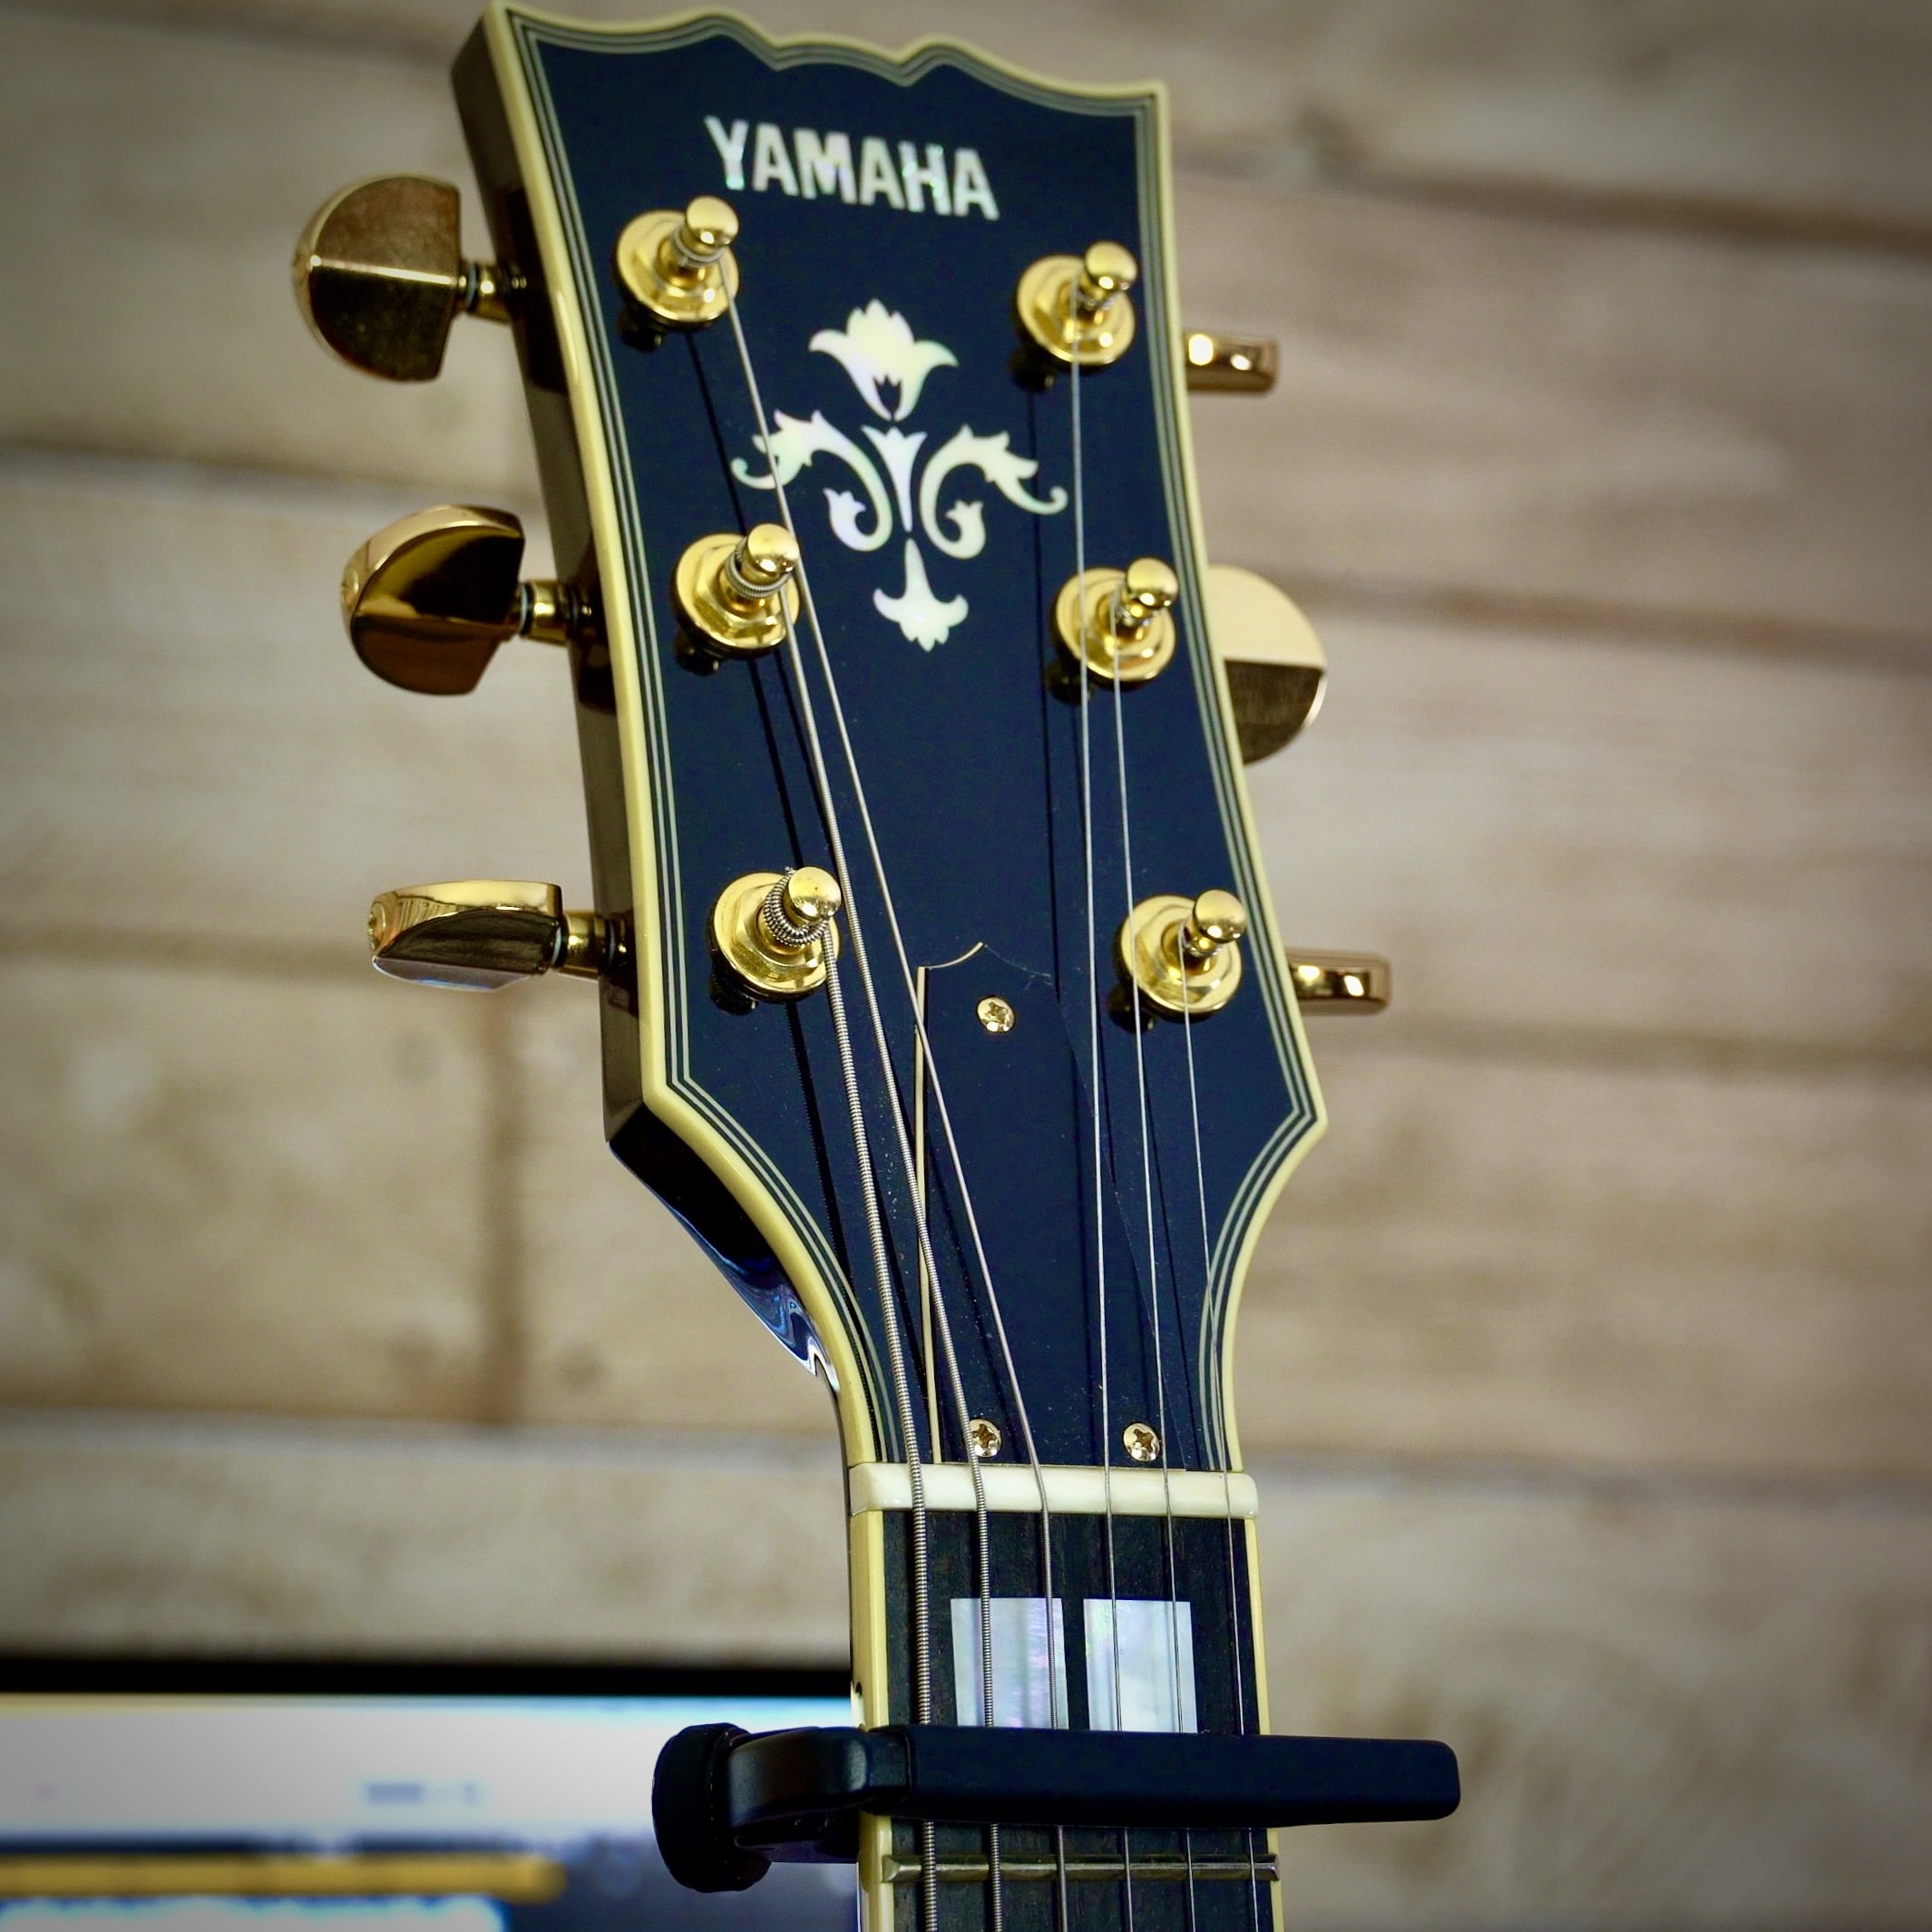
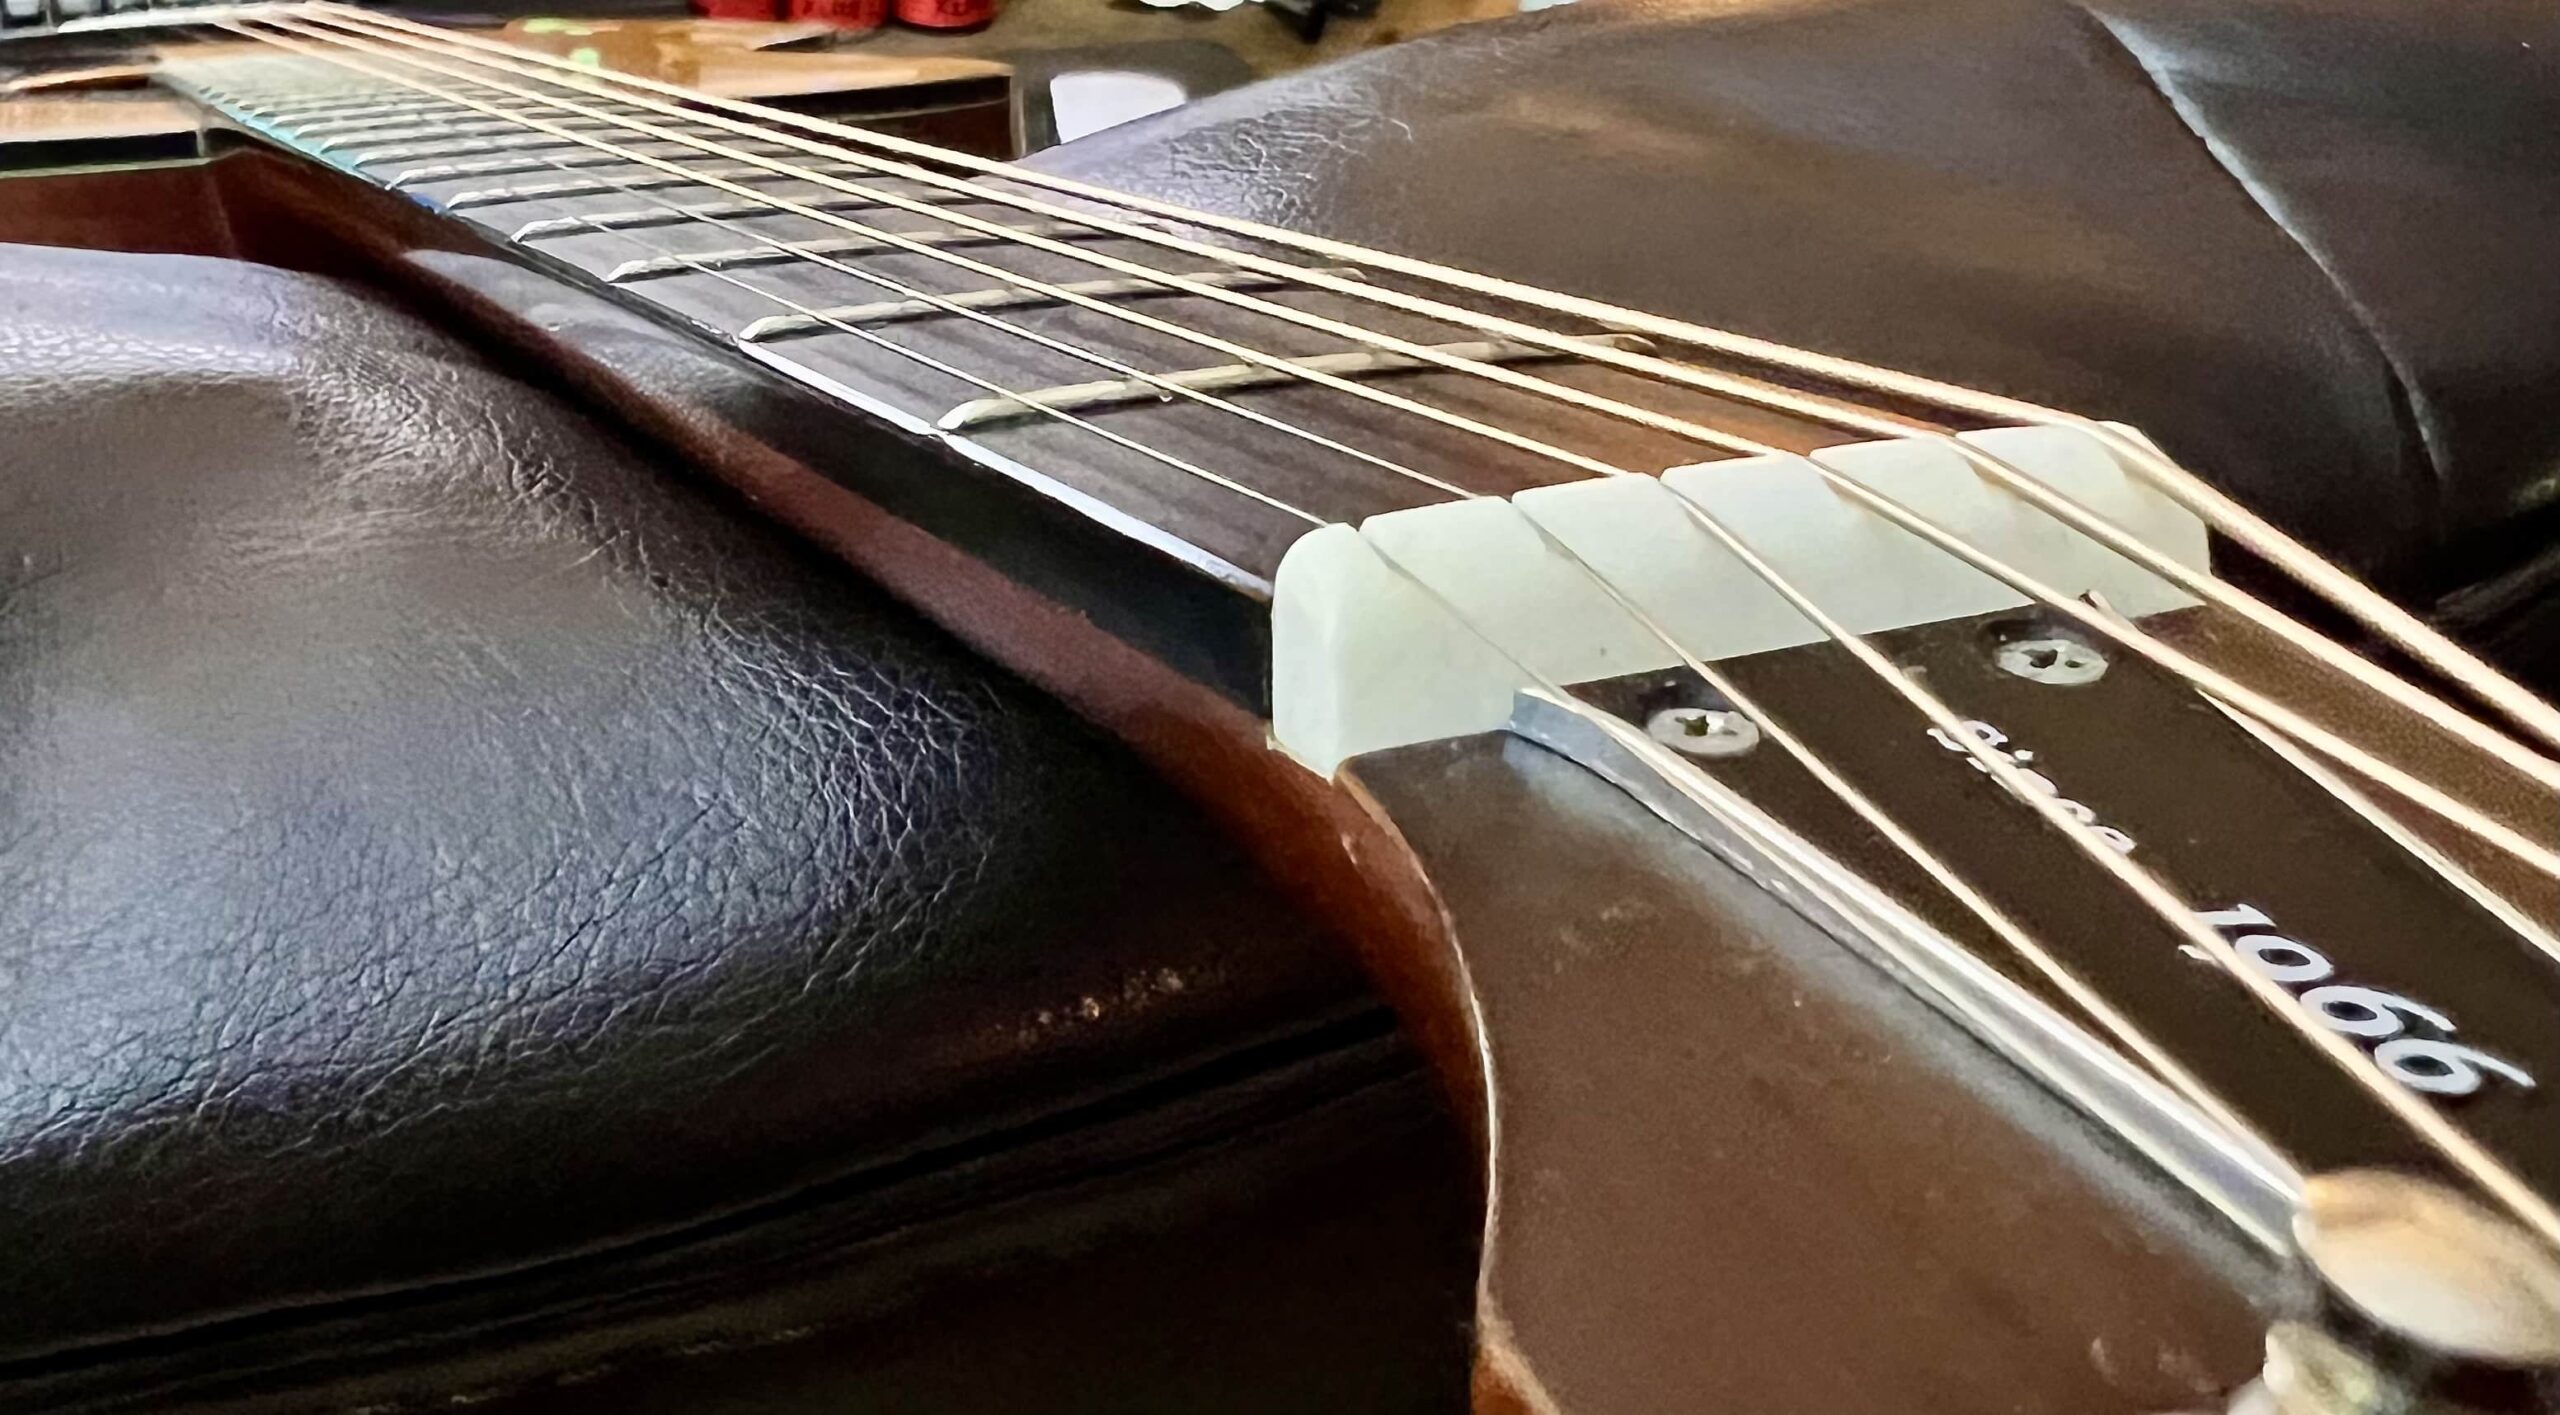
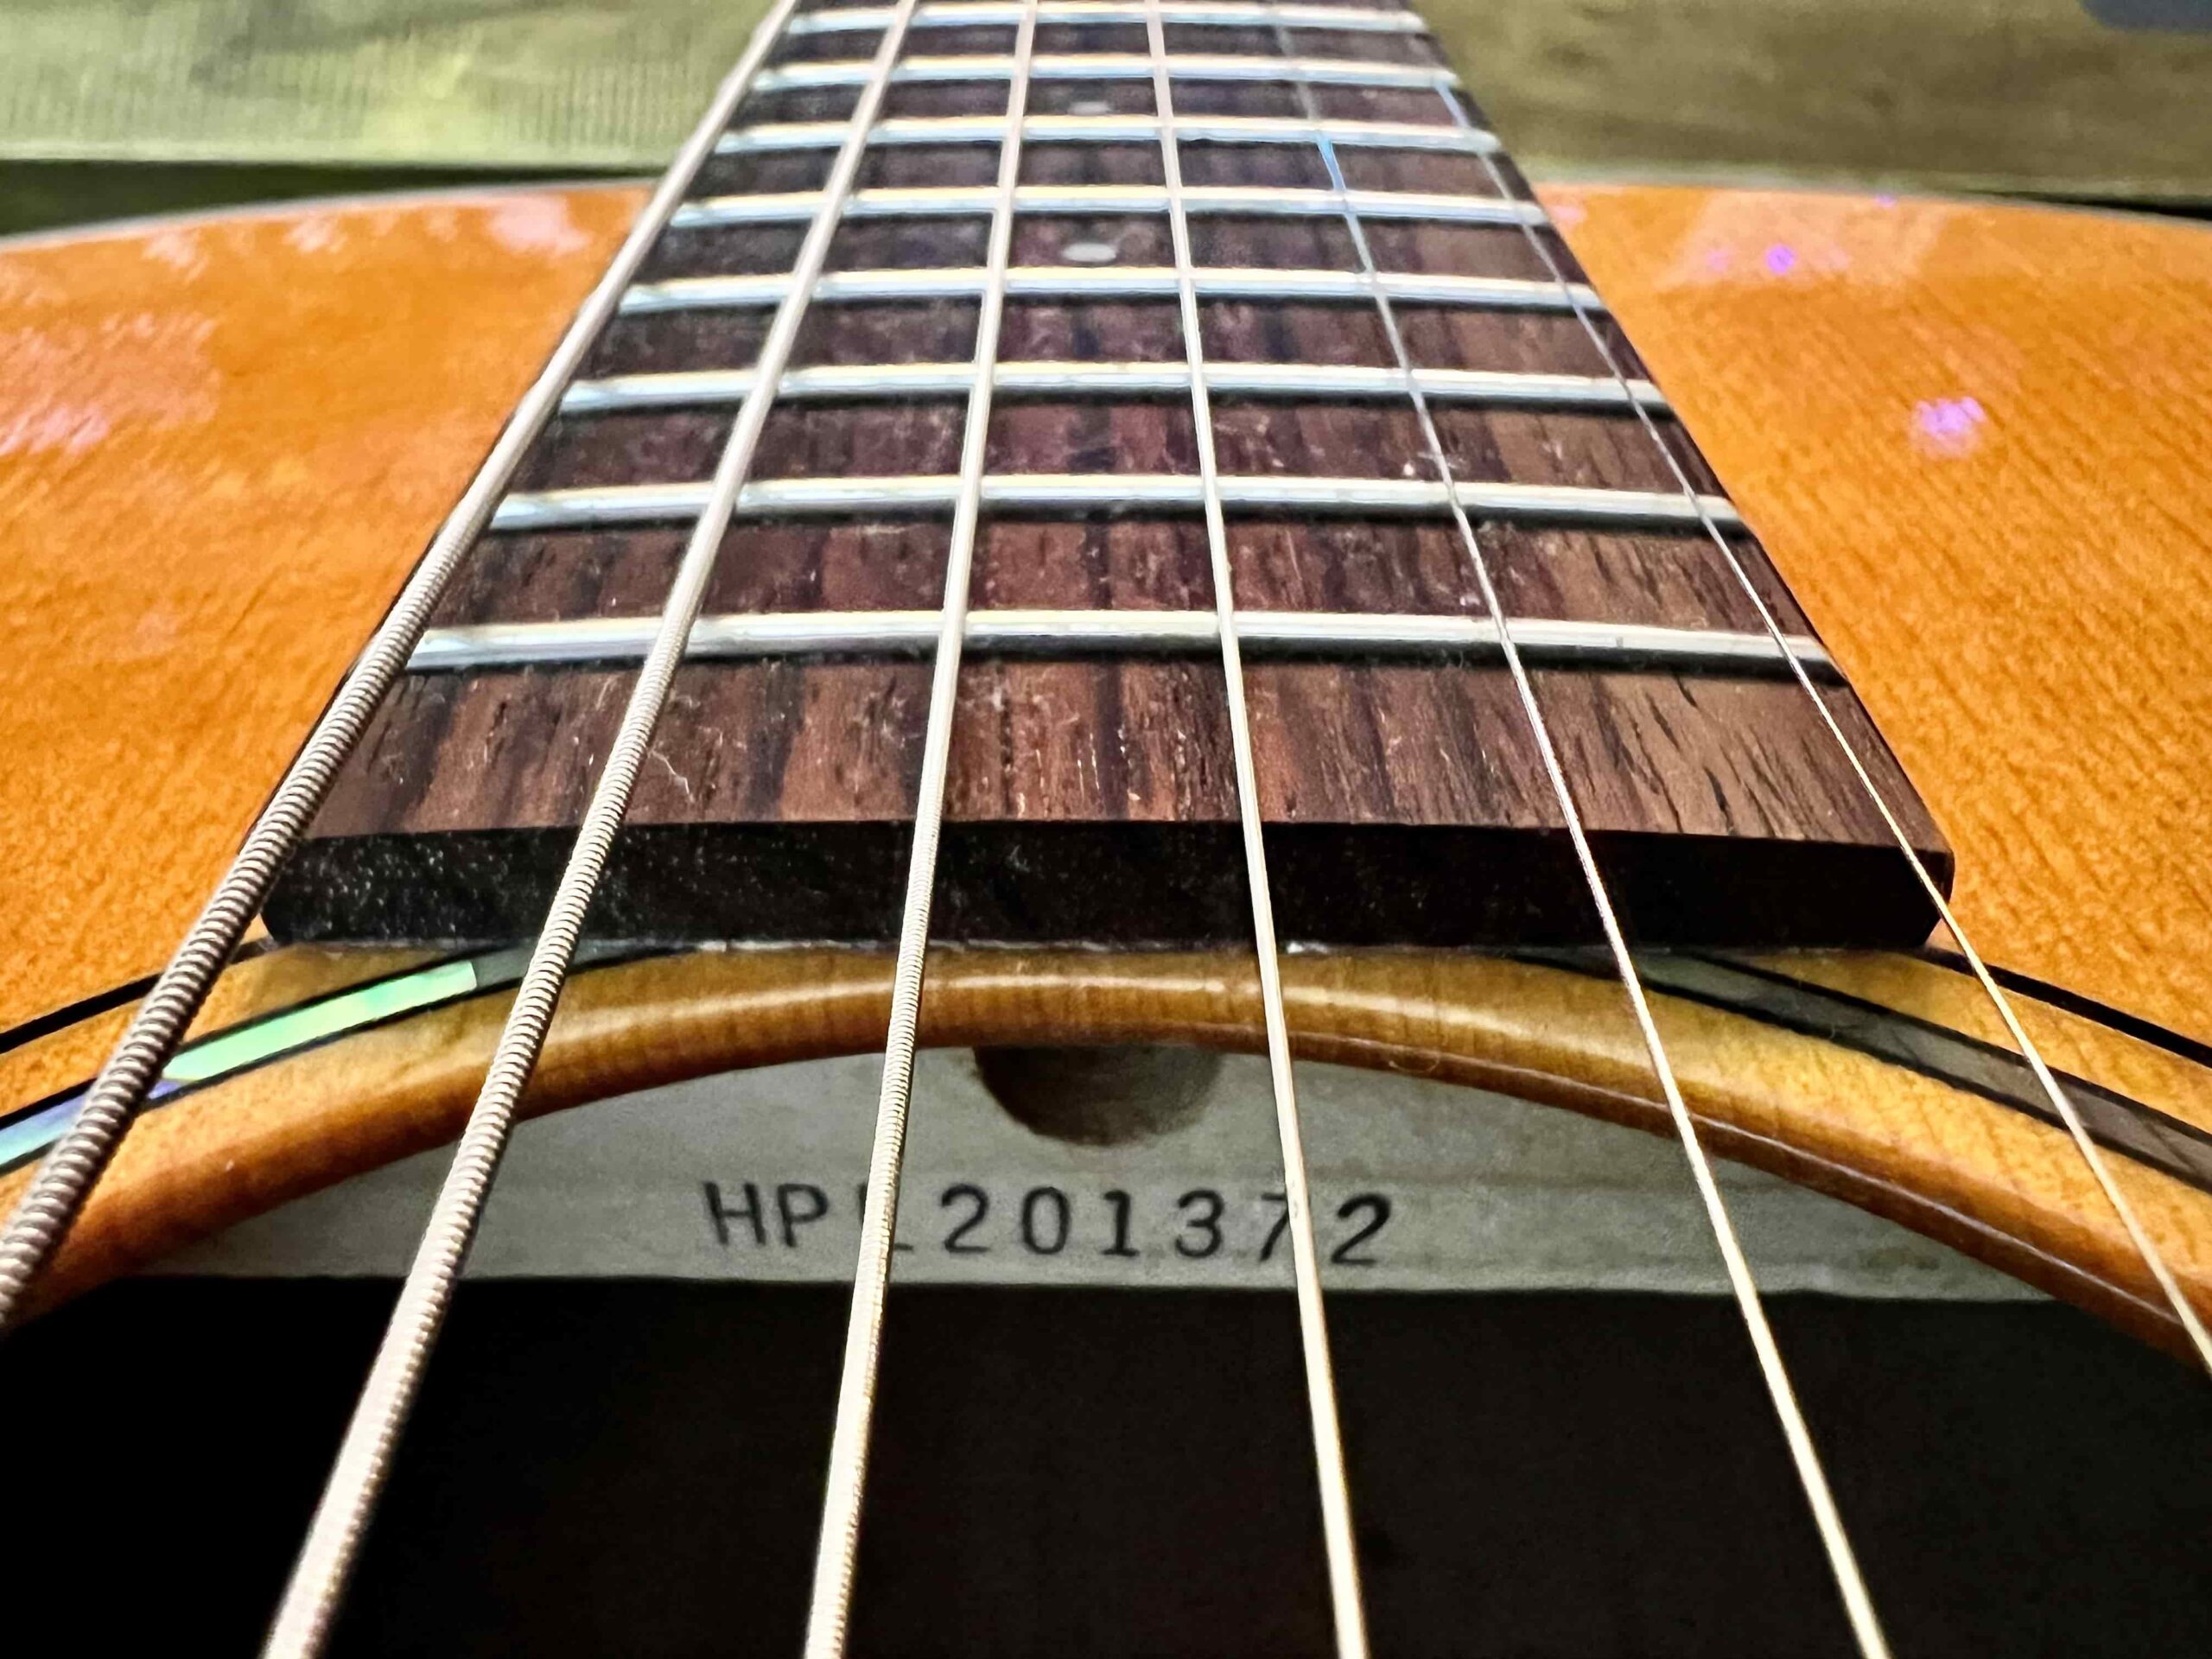
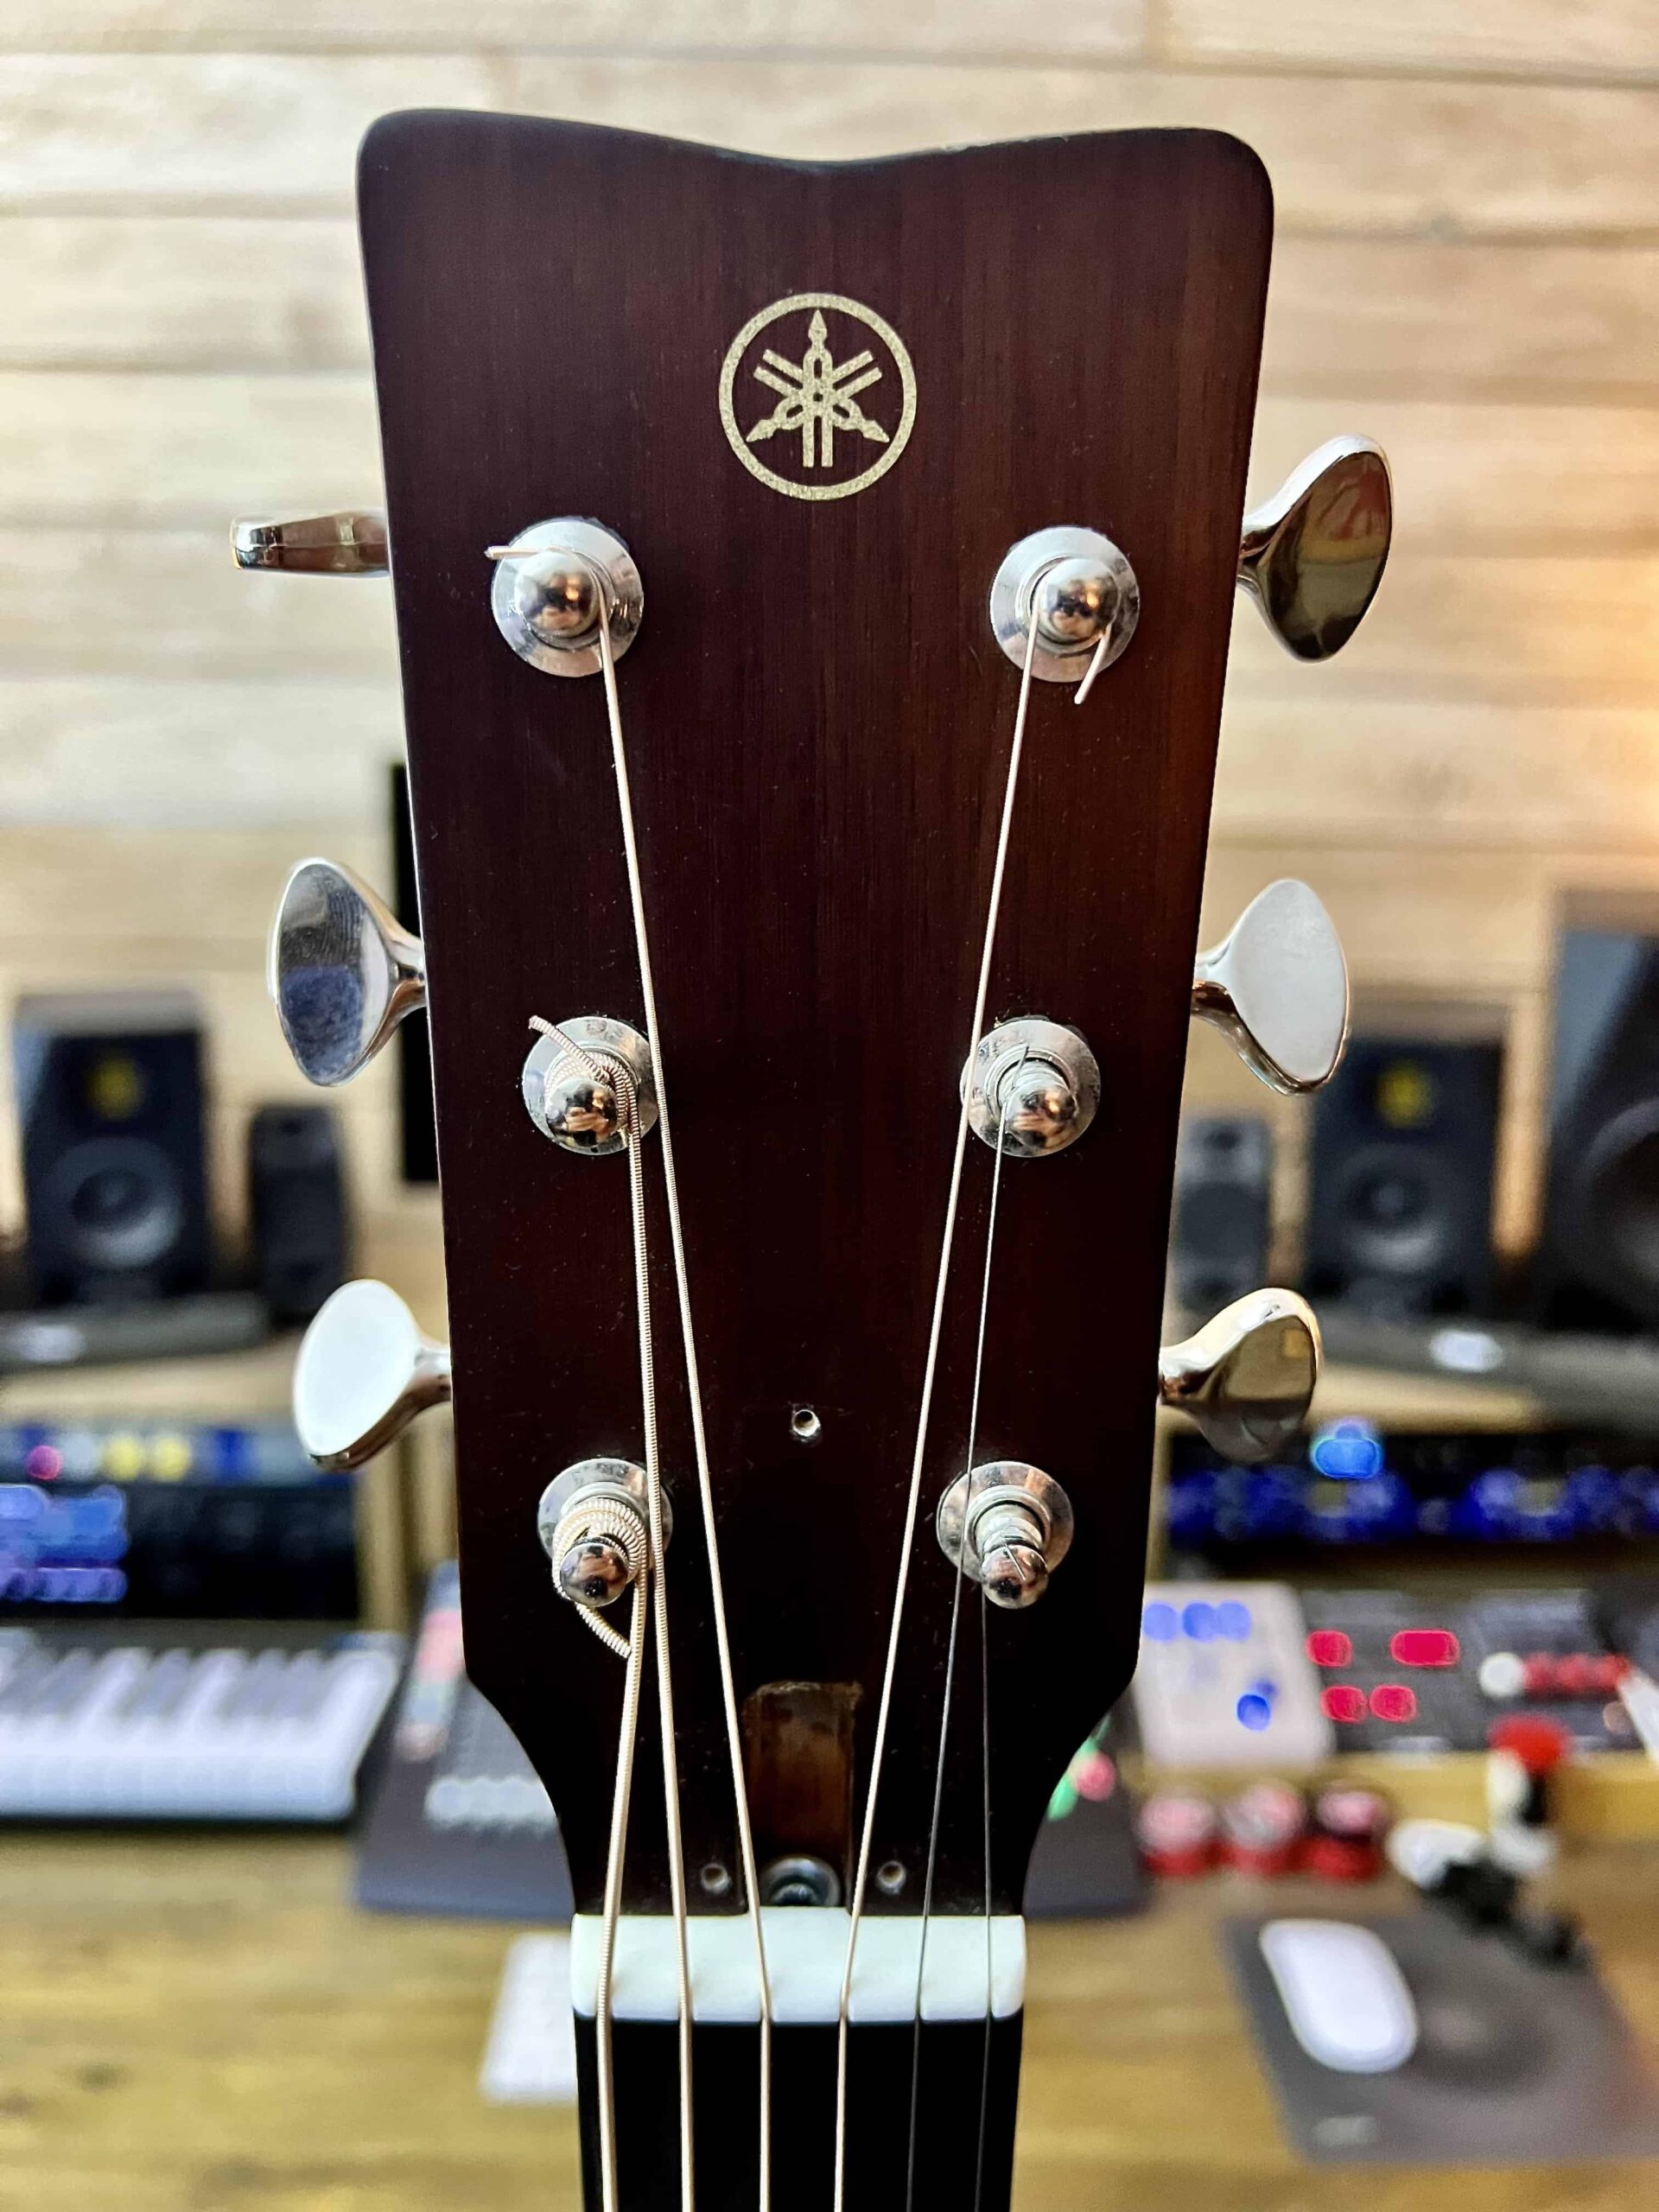
The necks are bolt-on and glued one-piece mahogany with ebony fingerboards, bone nuts and open-gear tuners. The headstock facing on both guitars is ebony with a spruce inlay for the Yamaha logo.
The bridges are also ebony, with a compensated bone bridge saddle.
Playability
The solid mahogany neck on all “X” models is finished with a satin nitrocellulose, which makes transitions along the fretboard smooth and stick-free. The fretwork is impeccable, as is the intonation in every position: open, mid-way along the fretboard, and in the upper regions.
The neck dimensions are comfortable for even the newbie guitar player, as well as the electric player making transitions between electric and acoustic guitar onstage or in the studio.
Aesthetics
Yamaha has kept the “bling factor” to a minimum on these understated yet stunning guitars. The tonewoods have something of a natural illumination due to their premium quality, and the thin nitrocellulose finishes not only look great but allow the guitars to resonate fully. All models have highly figured straight grain on their tops, which is visually striking in person and on camera.
The sound hole and purfling are adorned with a traditional Japanese rope-shaped motif, while the fingerboard inlays resemble Kumiki woodworking for each of the fretboard position markers.
In addition, the mahogany neck on the “R” (rosewood) models has been shaded to transition between the two tonewoods, which is a really lovely touch.
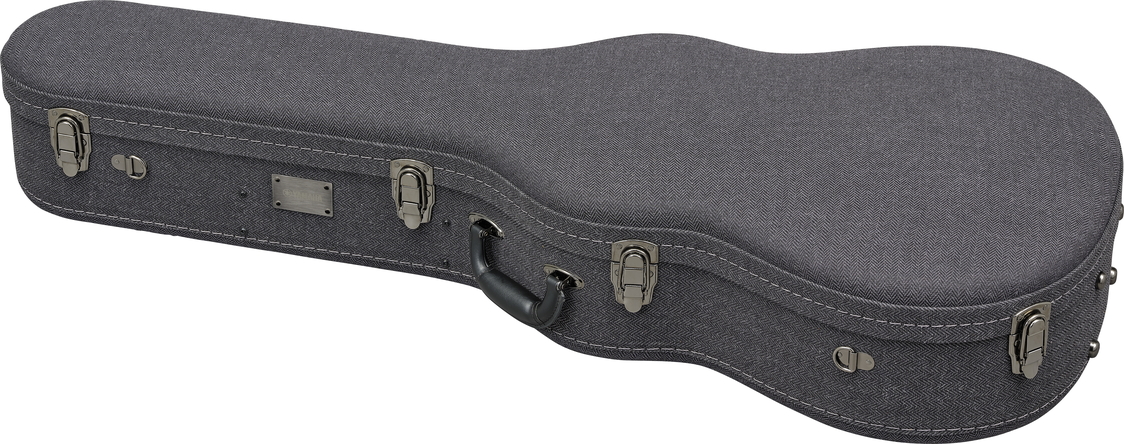
Finally, all FG9 X and FS9 X guitars come standard with a tweed hardshell case — the first I’ve seen from Yamaha. Very nice indeed!
Tonality
The larger FG models exude more bass frequencies than their smaller FS concert-body brethren regardless of the body tonewood being used. I also found that FG X guitars were warmer for both picking and strumming passages than their equivalent FS X models, although the latter cut through a little better.
Of course, everyone’s tonal preferences are subjective, so I think you’ll be able to draw your own conclusions from the music and isolated sound samples in the video below.
The Video
To give you a solid comparison between the two guitars, I created this video, with me playing the exact same parts on an FS9 RX and an FG9 MX, including all overdubs and solo lines.
First up is the FS9 RX. I start with a fingerstyle passage, followed by a strumming part and solo slide lines with an added harmony a third above. Next, I play the same exact parts on an FG9 MX. The pickup settings on both guitars were exactly the same, and weren’t changed for any of the parts played.
Later in the video you’ll hear the main rhythm parts isolated for further comparison.
The Wrap-Up
I’ve been lucky enough to play and own some very nice acoustic guitars. The downside to every one of them was the quality of the amplified tone.
With the original FG9 and FS9, Yamaha crafted amazing guitars for the discerning player. The new “X” models add the ability to translate their extraordinary acoustic tones faithfully, either directly through a guitar amp, P.A. system or audio interface using the Atmosfeel pickup system.
If you value and demand playability, acoustic tone and ultimate flexibility from your acoustic guitar, the FG9 X and FS9 X should be very high on your list.
Will Wells on the second movement of his career and the intermission that’s made it so meaningful
Written by Lisa Battles
Following his studies in film scoring, music production and engineering at Berklee College of Music, Will Wells established a relatively astonishing list of credits over a decade.
He served as the electronic music producer for “Hamilton.” He was the executive producer and co-writer for Cynthia Erivo’s debut album, and Anthony Ramos’ first EP and subsequent first two full albums. He’s music directed the Heisman Trophy ceremony live broadcasts for years and composed its first theme song. He’s also held many musical direction, performance and production roles touring with artists such as LMFAO, Nikki Yanofsky, Imagine Dragons and Logic. These highlights scratch the surface.
Then Wells took a long beat. From August 2022 to the following summer, he stepped away for an intermission that set up the second movement of his career, now underway and progressing beautifully. While there are times when the pace is as rigorous as ever, he’s established a more deliberate dynamic and tone – fully living in his purpose and bringing more thought and intention to every moment.
Wells recently shared insights from then to now in a talk that followed eight days of nearly nonstop work. He’d been in the studio for a yet-to-be-announced album, separately reviving another exciting collaboration with Ramos, and directing music for the 2024 Heisman Trophy Ceremony – all during unexpected and emotional circumstances impacting him and his family. He says the demands of the week reminded him of how his life used to be and also revealed how his mindset shift prepared him for things he never expected.
“What I can say with every fiber of my being is that it was 100 percent worth it,” Wells says. “ […] There’s a moment in the second movement of ‘Karelia Suite [Op. 11]’ by Sibelius where the ensemble just holds a note and lets it sit and lets it breathe. You have to wait for it. And then it opens up and swells into the most gorgeous chorale. I am in a place in my life where I’m just letting the notes breathe a little bit more. I’m letting myself breathe a little bit more.”
Enchanted trajectory
It took keen self-awareness and a lot of inward work to get to this place, not to mention a fair amount of courage to pause when he did. Most would agree Wells’ early career seemed almost charmed by a series of fortunate events.
Within one week of moving to LA after graduating college, Wells landed a job working for Alex Lacamoire as a music department assistant on “Bring It On: The Musical” at the Ahmanson Theatre. His work on that production introduced him to writer and actor Lin-Manuel Miranda and choreographer Andy Blankenbuehler – and ultimately the opportunity to work on “Hamilton.”
“It felt like an enchanted trajectory,” Wells says. “Imagine that, literally within a week after arriving in Los Angeles, these are the people I was so fortunate to be in a room with day after day, which led to some incredible opportunities later in life.”
More opportunities opened while working for and being mentored by Richard Gibbs at Woodshed Recording, where he forged working relationships with some of the world’s most celebrated artists. Those connections often led to touring gigs, songwriting collaborations and production projects.
Meanwhile, having made a fast friend and collaborator in Ramos during their work on “Hamilton,” Wells executive produced the artist’s first EP and two subsequent albums. He also co-produced the highly acclaimed song, “Stand Up,” performed by Cynthia Erivo in her leading role in “Harriet,” the 2019 biographical film about Harriet Tubman. That same year, former ESPN Vice President of Production Kate Jackson (now Netflix Director of Sports) extended the opportunity to compose the first-ever theme music for the Heisman Trophy Presentation, which he seized and directed live with a flourish. He then executive produced Erivo’s debut album, “Ch. 1 Vs. 1,” released in 2021.
While the successes kept coming, Wells’ finely tuned ear eventually turned inward to notice something was off.
Following the feeling
The Eureka moment came when he was en route to direct music for the 2021 ESPN Sports Humanitarian Awards, he says. Wells called his mother in tears and said he missed his friends and family.
“The irony being that my band was some of my closest friends, and they were all flown out to perform for this ceremony,” Wells says. He adds that when these types of performances ended, allowing everyone time to relax, he’d skip socializing and head back to the studio to write more music.
“Leading up to some of these really incredible and special moments is that my internal dialogue would be saying ‘I have the Heisman ceremony on Saturday. I can’t wait for Sunday.’ You know, what a profound way to disrespect the beauty that is that moment. That I get to contribute music to a night that will be so important not just for the finalist who wins but for all the people around him,” Wells says. “I want to be there. I want to feel that energy and that celebration, as well. I don’t want to be drained. I want to be fully there. I want the ensemble I am so fortunate to have committing time to performing with me to feel that from the top down: I am excited about what we’re about to do, and that I honor these gifts that we have been blessed with.”
Wells adds that he equates not being present in that way to “abusing his blessing” and in some regards was “teetering on abuse and self-abuse” for the latter part of those first 10 years of work.
“That was really the catalyst for taking a moment, taking an intermission, to think about my intentions for every single thing I did next,” Wells says. “There is always room for magic, but [I realized] if I can be intentional about what I accept, what I don’t accept, what the sacrifice is, it would help me understand what is and what is not worth it.”
Stating his purpose
Wells says he immediately paid more attention to his mental and physical health, including starting therapy. Another first step was to call and book a meeting with a mentor, renowned organizational consultant Pat Richie of The Table Group, a former longtime chaplain to the San Francisco 49ers.
“He is just an incredible thinker and leader. The first question he asked me while in his backyard in Houston was, ‘So Will, what’s your purpose?’ And I was like, ‘Oh, that’s where we’re starting? That’s a huge question!’” Wells says.
The work to arrive at a clear purpose statement called upon him to inventory his life highlights and consider when he felt most alive and satisfied. Wells recalls several:
On creating an impromptu string arrangement of the Heisman Trophy theme’s second movement: “I will never forget at that moment, I thought ‘This is it!’
On co-producing Erivo on “Stand Up”: “The wave of energy that we shared while making that record, was so palpable, it was almost tangible. I remember putting everything I had in that moment into bringing that record to completion with our collaborators.”
On his time with students at Berklee: “There were some really incredible moments with the students when I thought, ‘Okay, I understand why people dedicate their life to this work.’”
On approaching Ramos to collaborate back in 2015: “Every time he would sing that simple line in ‘Hamilton,’ … ‘Raise a glass to freedom, something they can never take away!’ there was something so honest about it.”
Wells found that honesty was the common thread between these moments. It’s a quality he’s tuned to receive, what most strongly resonates within him and ignites his collaborative talents to yield the most satisfying results.
His purpose statement?
Amplifying honest voices and touching the soul.
Honoring the energy
To stay true to his purpose, Wells frequently asks himself a favorite question he learned in therapy: “How can you honor yourself right now?”
That can mean deciding whether to continue spending time with someone or simply acknowledging he’s tired and catching some sleep instead of staying up three more hours to finish a project. This particular week it meant going to dinner after the Heisman Trophy broadcast and enjoying quality time with the friend who initially gave him that opportunity. It also meant being present with his family at a difficult time, even while writing some music in the quiet moments.
“This has all been patience plus lessons and an even greater amount of faith, and I believe it’s faith that is the biggest and most important ingredient here. No matter what anybody believes, this is [important] for everyone,” Wells says. “It’s that thing that can’t quite be harnessed. There’s an intangibility to it, and you need it. It’s that belief that you are doing all of this for a reason, and it will lead somewhere. […] It’s been important to have that faith that it is all leading me in the direction that I am supposed to go and that all of these things are ultimately allowing me to live in and act out my purpose.”
Wells is incredibly excited about a new adventure with Ramos – a project they recently revived since its inception in 2018.
“We have been working on a musical, and it feels like one of the most important – if not the most important – things I have ever done, musically and just all around. What I have noticed is, again, I have paid attention to how I feel as I am doing it. It feels profoundly different from anything I have ever done. As we sometimes say, ‘This one feels different.’ […] This one checks every box for ‘Yes, this is something that is important to me to put my energy into because of how I feel while I do it.’”
Resonating notes
Wells offers a thought to anyone on a creative journey: “Pay attention to how you feel and don’t be afraid to check in. Your instincts are powerful. A lot of times we condition ourselves to use logic or reason over those instincts. I just encourage people to not forget the magic of those instincts because oftentimes, great things happen when people follow those instincts.”
Alicia Keys is jazzed. “This might be one of my favorite pianos ever!” she enthuses.
The piano she is referring to was created by Yamaha for her 2023 Keys To The Summer tour. In fact, two pianos were built for that tour — a custom Yamaha grand, which Keys used on the main stage, and a custom Yamaha upright, used on the B-stage at the halfway point in the concert, where she would perform several intimate piano solo pieces. Both pianos allowed her to make herself heard, whether commanding the spotlight with power and grace or connecting with the audience in moments of quiet vulnerability.
The Alicia Keys grand piano.
The Alicia Keys upright piano.
Alicia had long wanted an acrylic piano. She had played on many around the world, but she wanted one that she could call her own, and she wanted it to be unique. Accordingly, she and her team reached out to Chris Gero, Vice President and Chief Artist Relations Executive of the Yamaha Entertainment Group, who brought in the Florida-based custom design firm J. Elliott & Co., with whom they had collaborated on many high-profile projects over the years, including the famed Yamaha Prince purple piano.
THE PROCESS
Remarkably, the total process from inception to final delivery took less than six months, during which time Keys decided to have Yamaha create a second piano, this one an upright.
Justin Elliott, who serves as chief designer at J. Elliott & Co. along with his wife Jina, describes how the project moved forward. “I met with Alicia at one of her rehearsals, where we talked over the many different things she wanted in the piano,” he says. “Alicia knows exactly what she wants. It’s great to work with someone who has that mindset instead of having to show them a thousand renderings before they finally pick one.
“We had to consider a lot of different elements,” he continues, “including logistics for shows. For example, the pianos have to travel safely, so we have to think through all the process of how are they being handled off and on stages to make sure they stay in pristine condition and so that the artist can perform on them every single night without a problem.”
KEEPING THE YAMAHA SOUND AND TONE
Other than the exterior Lucite™casing, the interiors of both Alicia Keys pianos are Yamaha wood and steel construction. The core of the grand is a stock Yamaha C6X with an integrated SILENT™ system; the core of the upright is a Yamaha b1 with an SC3 SILENT system. “Alicia wanted to keep the Yamaha sound and tone,” says Justin, “because that’s what she loves. She has a great ear, with her own preferences about voicing, touch weight and action regulation. Every instrument has its own characteristics, and we dial into how the artist likes it.”
As Elton John was when it came to designing his million-dollar piano (another Yamaha innovation), Keys was also focused on how her pianos would look onstage — and since the tour was going to be in the round, it was critical that she have good line of sight. “But then sonically you also have to make that work because Lucite doesn’t carry that much resonance,” Justin explains. “So you have to make sure it is still a pure acoustic instrument and you have to make it sing. There was the balancing of those two aspects.”
Tonally, both pianos match well with the original wood versions. “Every piano has its own unique characteristics, so they all sound slightly different,” Justin says, “but these pianos we made for Alicia, they sing, they’re lively. When I build pianos, tonality is the thing that comes first and foremost. Design comes second. That’s my approach with every instrument I build because if the design element ruins the sound, I’m not going to do it. But you can make anything beautiful if you spend enough time on it.”
The SILENT mechanisms, as with the Prince piano, also played a role since her audio engineers were going to feed the P.A. system a blend of the acoustic sound of the piano and the silent voices being triggered — a major reason why many touring artists are drawn to Yamaha SILENT instruments. Elliott reports that the Alicia Keys pianos were not miked any differently than their wooden equivalents. “That’s why she selected a C6X,” he says, “because normally she uses a C6 or C7 on tour, so her audio people know exactly what they’re getting. Obviously they spend time to figure out the sweet spots to put the microphones and whatnot, but Alicia had her trusted audio team, led by longtime engineer Ann Mincieli, on tour with her, and they know the drill with those pianos well, so they were able to dial in the sound she wanted very quickly. Ann was a big part of this entire project, from concept to reality. She always knocks it out of the park!”
UNIQUE DESIGN CONSIDERATIONS AND CHALLENGES
Acrylic instruments weigh significantly more than all-wood ones, and that was another aspect Justin had to factor in. “Lucite is much denser than wood,” he explains, “and it’s a solid-state resin so you do not have fibers imparting a grain and space.” A normal C6X weighs approximately 900 pounds, but Elliott estimates that he probably added a good 300 more pounds to it, making for a whopping 1,200 lbs. “Because the grand piano was in the center of things and was on a rotating platform, Alicia’s production team had to lift it up every single night by hand,” says Justin.
There were other technical challenges as well. For one thing, internal fasteners are required to attach the acrylic casings to the wooden body of the pianos. “As a designer, you have to think about things differently,” Justin explains. “The way it bonds, the hardware you’re using, it’s all going to show because it’s completely transparent. Even the glues you use to attach the casings are totally different than those you would use with a wooden instrument.”
EASTER EGGS
In addition to all the other design specifications, Alicia Keys wanted “Easter eggs” on the pianos — special elements to inspire both her and the audience as she rehearsed and performed. One of these was having see-through acrylic sharps and flats on the keyboard so she could feel like she was elevated and soaring as she played in the center of a 360-degree soundstage. This had the added benefit of making it look like her fingers were dancing on top of the keys. To achieve this goal, the design team made those keys out of full transparent acrylic with just a thin 2mm layer of ebony on top. “That way,” Justin explains, “if you have a camera angle that’s looking down the keys, which they always have for a concert, it looks like her fingers are floating because you see right through those keys.”
“Floating” sharps and flats.
The view from above.
“This piano — you and me — we’re going crazy,” Keys tells all her fans as she wraps up the video below. “Big love to Yamaha!”
Coming to NAMM? Be sure to visit the Alicia Keys pianos (both the grand and the upright) at the Yamaha exhibit on the third floor of the Anaheim Convention Center.
It’s NAMM time again! Can’t make this year’s show in person? Here are some of the hottest products that Yamaha will be displaying on the show floor or online — all of which offer intriguing new ways to make yourself heard!
TAG3 C TransAcoustic Guitar
TAG3 C.
The newly released second-generation Yamaha TAG3 C TransAcoustic guitar integrates the entire process of playing, creating and listening to music in one instrument. Merging technology with tradition, this revolutionary guitar offers built-in reverb, chorus and delay effects that radiate organically from the instrument itself — with no need for pedals or an amplifier. Bluetooth® support allows you to wirelessly connect your smart devices and play your favorite songs directly through the guitar, and a built-in looper enables you to effortlessly record and play back your performances, layer melodies over backing tracks and even create percussive beats by tapping the guitar. Pair it with the free TAG Remote app (compatible with both iOS and Android) to fine-tune effects and manage loop phrases directly from your smart device, putting total control at your fingertips. With the TAG3 C, the creative possibilities are endless.
SEQTRAK Music Creation Station
SEQTRAK.
SEQTRAK is a groundbreaking music creation station that empowers you to unlock your creativity from wherever you happen to be. Capture ideas quickly through its lightning-fast, all-in-one system that includes drums, synths, sampling and sequencing, all packed into a compact, lightweight design. Create original music with two versatile sound engines, then refine with deep editing, custom samples and video creation using the intuitive SEQTRAK app. When you’re ready, share your sounds, collaborate with other artists, and connect with fans around the world using its powerful performance features and video creator. And with the recent release of OS v1.2 software (available as a free download), workflow is improved even further, with autosave and new loop and mute modes that allow you to create a more unique and personalized sound. In addition, a count-in function during real-time MIDI recording has been added so you can achieve the perfect take with ease. You can also quickly shift octaves while playing, perform quantized transitions and extend pattern length while automatically copying the existing content — even use external MIDI devices to trigger animations, adding dynamic visuals to your performances.
9600 SERIES Marching Drum Carriers
Yamaha has been crafting industry-standard drum set hardware for more than half a century and empowering top-tier ensembles with exceptional marching instruments. MC-9600 Series Field Corps marching drum carriers are the culmination of that vast experience. They offer a form-fit design, with wedged shoulder and back bar padding that comfortably sink inward and lock into place, allowing complex body movements and choreography. The high-performance padding is made from athletic moisture-wicking fabric that promotes airflow to keep players cool while resisting odors, and recessed drum key bolts protect uniforms from excessive wear and tear. Each component can be adjusted with a standard drum key while wearing the carrier, making customization quick and easy. Torso height and tilt are adjustable to provide a comfortable fit for a wide variety of body types and allow the carrier to serve as a tilted or flat playing surface for snare drums.
YEV Pro Electric Violins
YEV104Pro.
YEV Pro electric violins are newly developed high-end instruments that strive to achieve authentic acoustic violin sound and playability, combined with an elegant design for impressive on-stage presence, whether performing solo or with an ensemble. Like traditional acoustic violins, they feature a hollow chamber body with a spruce top and maple back, resulting in rich resonance that is roughly equivalent to that of an acoustic violin, along with a similar weight. The bridge offers improved sound and response, thanks to A.R.E. (Acoustic Resonance Enhancement), an innovative wood-reforming technology developed by Yamaha. Both the four-string YEV104PRO and five-string YEV105PRO models are outfitted with a built-in piezo-electric pickup for connection to any standard amplifier or P.A. system, and are available in three different colors: Deep Red, Natural and Brown, and Natural and Black. They also come equipped with Wittner Finetune Pegs, which have internal gears for precise and quick tuning.
YX-2035PR Xylophone
YX-2035PR.
YX-2035PR xylophones offer premium features in a compact instrument that’s perfect for students deepening their involvement in the world of percussion playing at school or at home. The three-and-a-half-octave playing surface is outfitted with premium Pao Rosa bars that provide bright tones similar to that of Yamaha professional rosewood xylophones, while wider 1.5″ bars improve playability for beginners and intermediate students. In addition, a gas spring height adjustment system promotes player comfort and proper technique, while also making the instrument easier to transport.
DHR15M Powered Loudspeaker
DHR15M.
The DHR15M two-way powered loudspeaker is perfect for use as an onstage monitor. It pairs a 15″ woofer with a 1.75″ high frequency driver in a compact, low profile plywood enclosure with a polyurea coating for a robust, scratch-resistant surface. The custom-designed coaxial driver delivers precise, smooth phase and frequency response, and the powerful built-in 1000-watt amplifier and high performance DSP ensures best-in-class sound quality. While typically placed on the floor, the DHR15M also comes equipped with a pole socket for use on a stand.
NS-800A Bookshelf Speaker
NS-800A.
NS-800A bookshelf speakers fuse rich aesthetics with the latest advanced technology. The unique diaphragm material produces exceptionally unified tone, while the large-capacity cabinet delivers spacious sound — all topped off with a beautiful grand piano-like finish for an even more luxurious music listening experience. This uncompromising two-way system pairs a 6-1/2″ woofer with a 1-1/4″ dome tweeter, enclosed within a chamber designed to suppress unwanted resonance, with a patented Acoustic Absorber that eliminates standing waves so that the original realism of music is reproduced with full energy and dynamics. Solid brass speaker terminals provide secure connection and a luxurious feel, and the crossover circuitry utilizes high-quality componentry for faithful reproduction of all musical instruments. The NS-800A also incorporates a Twisted Flare Port that reduces air flow noise, providing accurate frequency response with clear, tight bass reproduction.
R-N2000A Network Receiver
R-N2000A.
The R-N2000A is a next-generation network Hi-Fi receiver that’s compatible with all lossless and high-resolution music sources, including streaming services. It offers breathtakingly beautiful sound thanks to an innovative design that incorporates a floating, balanced power amplifier and a Toroidal power transformer, along with an ESS Ultra DAC for high-performance digital-to-analog conversion. In addition, symmetrical construction and the utilization of mechanical ground maximizes rigidity for expressive and rhythmic bass. A rear panel HDMI ARC terminal assures excellent TV sound, and the speaker terminals are cut from pure brass for highly secure connection. Precision EQ and YPAO®-R.S.C. (Yamaha Parametric room Acoustic Optimizer with Reflected Sound Control) allow you to customize the frequency response for your particular listening environment, and front-panel level meters convey dynamics and music pulse with a nostalgic Hi-Fi era look. The R-N2000A is also Yamaha MusicCast-compatible for interfacing with other devices in your home, as well as easy access to a variety of streaming services such as Amazon Music HD and Spotify®.
62 SERIES Limited Edition Saxophones
YAS-62SK.
YTS-62ASK.
The limited edition 62 Series alto and tenor saxophones combine stunning visual aesthetics with the iconic sound of the New 62 models. These special saxes feature a gorgeous contrast between the player’s choice of gold (SK models) or amber lacquer (ASK models) and silver-plated keys. The addition of the Yamaha Atelier Special ASP neck screw adds comfortable ergonomics and an increased stability to the playing feel. Combine these features with the unique “Kangakki” engraving on the bell with the legendary Yamaha 62 series sound, and you have an instrument designed for any sax player to take their performance to the next level.
DTX6K5-M Electronic Drum Kit
DTX6K5-M.
The latest addition to the Yamaha DTX electronic drum lineup is the DTX6K5-M. This kit combines the power of the DTX-PRO module with the larger mesh and cymbal pads found on the DTX8. The tunable REMO 2-Ply mesh heads offer snare and tom playing surface sizes of 12″ / 10″ / 10″ / 10″ respectively, with outstanding noise reduction, durability and feel when hit, as well as exceptional rebound. The snare pad is equipped with three sensors that precisely respond to delicate stick work, and the 3-zone PCY155 ride cymbal pad offers independent edge, bow and bell triggering, as well as choke and mute functionality. The included DTX-PRO module is packed with hundreds of studio-quality acoustic and electronic voices and easy-to-use kit modifier knobs for a wide range of tonal possibilities. The DTX6K-5 is also fully compatible with the free DTX Touch app, which allows the adjustment of parameters such as muffling, pad layering, trigger levels/velocity, mix EQ, modify panning and other effects, all in real time.
Rio3224-D3 / Rio1608-D3 Third Generation I/O Racks
Rio3224-D3.
These third-generation R Series I/O rack units deliver outstanding sonic transparency and built-in Dante networking. Compatible with all Yamaha Rivage digital mixing systems as well as DM7 Series and DM3 Series consoles, they offer freedom of placement and the ability to create multi-unit combinations, with dual internal power supply units for high reliability, and primary and secondary connectors for redundancy. The Rio3224-D3 model adds 32 analog inputs and 16 outputs, along with 8 AES/EBU digital outputs, while the Rio1608-D3 adds 16 analog inputs and 8 outputs. Both provide a mini-LCD display with setup functions to simplify workflow and provide local control of gain and other parameters. New features include a Delay/Polarity/Gain function on the Output port, a dedicated Network port, and a headphone jack that allows soundcheck directly from the rack.
We hope to see you at NAMM — and remember, if you can’t make the show in person, you can always catch the highlights here!
For more information about these and other great Yamaha products shown at NAMM, click here.
After the noise and excitement from your New Year’s Eve celebration quiets down, it’s a great time to kick back and watch a film or two in your home theater. Here are eight selections with an Auld Lang Syne twist, perfect for curling up with a warm blanket and enjoying on your big-screen TV and extra speakers.
Forrest Gump
This multiple Academy Award® winner is a great-looking and great-sounding film that will have you smiling broadly from start to finish. In one sequence, Gump (played by Tom Hanks) spends the 1972 holiday season and New Year’s Day with his lieutenant Dan Taylor, whom he saved during the Vietnam War. They later run a shrimp boat together and create the Bubba Gump Shrimp Company, after which they invest in Apple® Computer and become millionaires … and those are just a couple of the plot twists and turns in this powerfully moving film. Check out the trailer here.
Trading Places
In this 1983 comedy, Eddie Murphy is a homeless street hustler and Dan Akroyd is an upper-class commodities broker who are unwittingly involved in an elaborate experiment that entwines their lives. One particularly hilarious scene takes place onboard a Philadelphia-bound train on New Year’s Eve. It involves a gorilla — and that’s all I’ll say about it for now. Check out the trailer here.
Ghostbusters II
There’s nothing like having the likes of Bill Murray, Dan Aykroyd, Sigourney Weaver and Harold Ramis entertain you with some ghostly high-decibel adventure. When slime rises from the streets of New York City on New Year’s Eve and chaos ensues, the Ghostbusters intervene. They even get the Statue of Liberty into the action and drive it through the streets of the city! Check out the trailer here.
Dick Tracy
Based upon the comic strip sleuth of the same name, this visually stunning film is set in the 1930s and features a slew of colorful mobsters, kidnappings, card games and investigations, with a star-studded cast that includes Warren Beatty (as Tracy), Madonna, Dick Van Dyke, Dustin Hoffman, Mandy Patinkin, Paul Sorvino and James Caan. In one memorable New Year’s Eve scene, Tracy faces gun battles and action galore after interrogating the bizarre criminal called Mumbles (Hoffman). Check out the trailer here.
The Godfather Part II
Directed by Francis Ford Coppola and starring Al Pacino and Robert De Niro, this sprawling 1974 classic covers a span of more than half a century. Interestingly, the film was both a sequel and prequel to the original Godfather. In 1997, the American Film Institute ranked it as the 32nd greatest film in American film history. (TheGodfather ranked 3rd.) New Year’s Eve celebrations feature prominently during the mesmerizing scene where Michael Corleone (Pacino) finds out that his brother Fredo (John Cazale) betrayed him. Check out the trailer here.
New Year’s Eve
This 2011 romantic comedy takes place — you guessed it— on New Year’s Eve, with a series of intertwining stories and an all-star cast that includes Halle Berry, Jon Bon Jovi, Robert De Niro, Sarah Jessica Parker, Michelle Pfeiffer, Ludacris and Zac Efron. Directed by Garry Marshall, it’s a feel-good film with a driving New York City energy that will leave you hungry for more popcorn. Check out the trailer here.
The Poseidon Adventure
This 1972 multiple award-winner is considered by many to be the mother of all disaster films. It takes place on an aged luxury liner on her final voyage from New York City to Athens before being sent to the scrapyard. As the ship’s band rehearses for a New Year’s Day celebration, the captain gets word that an undersea earthquake has triggered a tsunami. The vessel is hit by the wave and capsizes, leading to a saga of survival … and the need for more oxygen. Check out the trailer here.
The Horn Blows at Midnight
This black-and-white 1945 chestnut features Jack Benny as the character Athanael, who plays third trumpet in a late-night radio show orchestra. One night, as the announcer drones on, he falls asleep and dreams he is a junior grade angel and trumpeter in the orchestra of Heaven, with the mission of destroying an over-indulging Earth by blowing his trumpet at exactly midnight on New Year’s Eve. With a doomsday plot like that, it may not sound like a comedy, but it’s actually hilarious! Check out the trailer here.
Full-length versions of all the movies listed here are available on YouTube™ and Amazon Prime except “The Horn Blows At Midnight,” which is available for streaming on Max.
One of the main differences between a novice and a pro is confidence. Putting in the work will help you lose the aura of a beginner, and the more you practice and play with others, the more confident you’ll become. Here are a few tips to take your bass playing to the next level.
1. KEEP IT SIMPLE
Fills can be cool, but a bassist who plays too many of them is either nervous or prioritizing ego over the song. It takes confidence to play only what’s needed, and executing foundational lines well is our #1 job. Simple and strong is better than tentative and fiddly any day.
2. LEARN TO LISTEN
Experienced players are expert listeners. Aim to support the story the singer is telling, and even if you don’t double guitar parts, understand how your basslines work with them. Ask whether the keyboardist is playing chord voicings with or without roots (and notice whether they’re playing down in the bass register, in which case you should place your notes elsewhere). Our primary task is to lock in with the drummer, but the best bass players are all-around musicians who are aware of everything happening around them.
3. FOCUS ON TIME AND GROOVE
Even the simplest basslines sound great if your timing is solid, so practice with a metronome and/or backing tracks to get better at not speeding up or slowing down. That said, at the end of the day, it’s not about metronomic perfection — it’s about breathing with the ensemble. Developing your groove and your familiarity with different types of feels enables you to interact effectively with the rest of the band.
Yamaha MP-90 metronome.
4. PLAY DYNAMICALLY
In conversation, it’s normal to raise or lower your voice, pause for dramatic effect, and add extra sounds to get your point across. Playing bass is a conversation with your bandmates, so pay attention to the dynamic possibilities of each moment. Try keeping things simple in the intro, bringing up the energy in the verses and adding drama during pre-choruses or bridges … and be sure to get things pumping when you play the chorus. You should also consider dropping out strategically and changing the position of your picking hand when doing so enhances the song.
5. GET TECHNICAL
Buzzing notes make you sound less confident, and timid plucking can make even the right notes sound weak, so put a microscope on your technique. Get your fingers in shape. Press just behind the fret, not on top or too far back. Practice consistency in your two-finger plucking technique. If you play with a pick, keep your upstrokes and downstrokes clean. Analyze your slapping to make sure it’s efficient and on-time. Use your plucking hand to mute unused strings so that you don’t get unwanted string noise. Your approach should convey confidence in the notes you’re playing. Mistakes are inevitable, but knowing how to quickly and smoothly recover makes you a pro.
6. BE A PRO
Dial in the bass tone that’s right for the gig. Practice effectively. Record yourself, then listen back and adjust accordingly. Show up early for rehearsals and gigs, and communicate conflicts as early as possible. Don’t make the mistake of thinking that rehearsal is for learning songs: Learn your parts before getting together with the rest of the band and be ready to record and/or take notes during band practice. At a gig, making noise between songs or playing unnecessarily during soundcheck are also dead giveaways that you’re just starting out.
Being able to read and write music, as well as having a rudimentary understanding of harmony, quickly lifts you out of the newbie zone. Speaking of which, nothing says “I’m new here” like scrambling to find the right notes, so learn the fretboard inside out so that when it’s time to fly, you can make great choices (or at least safe ones). And although it seems over the top to practice things in all 12 keys, it’ll go a long way toward making you feel like you truly know where the notes are.
7. HAVE THE RIGHT GEAR
Investing in a well-built, dependable instrument like the Yamaha BB435 is an important part of elevating your bass playing. And once you have the right bass, get it set up so you don’t have to fight it; if you have a “dirty” volume knob that crackles when you turn it or a jack that’s intermittent, get it fixed.
Always be sure to have a tuner and extra strings on hand, as well as working cables that are the right length; in addition, try to carry a backup bass if you can. On the road, a hardshell case is a must; around town, a good gig bag will do. You may also be expected to show up with a reliable, durable amp that’s loud enough and right for the gig. (Learning to be comfortable with unfamiliar amps is part of the job, too.) If you use effects pedals, get them in the right order — and be prepared to continue playing if they decide not to work.
It’s that special time of year again when holiday music dominates the airwaves, stores, elevators and just about any other place you can think of — all to get us in the proper spirit to enjoy friends and family (not to mention shopping!). Here are the stories behind a dozen of the best-loved songs of the season:
1. Deck the Halls
One of the first Christmas carols, this is based on a Welsh melody from the sixteenth century, with lyrics added in 1862. Check it out here.
2. O Come All Ye Faithful
No one is really sure who wrote this! The oldest known manuscript is dated 1751 but the song may have been written as much as a century earlier. Check it out here.
3. Silent Night
This was composed by an Austrian schoolmaster in 1818. The melody that is used today differs slightly from the original rhythmically, and is also played at a slower tempo. Check it out here.
4. Jingle Bells
Written in 1857, this was actually intended as a Thanksgiving song but became associated with Christmas music in the late 19th century, when it was often used as a drinking song at parties: people would jingle the ice in their glasses as they sang. Check it out here.
5. Santa Claus Is Coming to Town
First sung on Eddie Cantor’s radio show in November 1934, this song found instant success, with half a million copies of the sheet music and more than 30,000 records sold within 24 hours. Check it out here.
6. Rudolph the Red-Nosed Reindeer
This 1949 hit by Gene Autry was based on the 1939 story of the same name popularized in a booklet distributed by the Montgomery Ward department store. Check it out here.
7. Little Drummer Boy
Originally known as “Carol of the Drum,” this was written in 1941 by composer and teacher Katherine Kennicott Davis. The most well-known recording of the song was made in 1958 by the Harry Simeone Chorale … but perhaps the most unusual was Jimi Hendrix’s cover version — his last recording prior to his tragic death in 1970. Check it out here.
8. White Christmas
Think the best-selling single of all time is a Beatles song, or perhaps something by Michael Jackson? Think again. This classic, written by iconic American songwriter Irving Berlin, has sold over 100 million copies worldwide, half of them the Bing Crosby rendition … although he had to re-record it in 1947 when the original 1942 master was found to be damaged due to frequent use. Check it out here.
9. Have Yourself a Merry Little Christmas
First introduced by Judy Garland in the 1944 movie Meet Me in St. Louis, but the Frank Sinatra version we all know and love was recorded in 1950, with slightly modified lyrics that changed the song’s focus from anticipation of a better future to a celebration of present happiness. Check it out here.
10. Blue Christmas
This was a hit for various country artists in 1950, but it was Elvis Presley’s iconic 1957 recording that cemented the song’s status as a rock’n’roll holiday classic. The King’s version is notable musicologically in that the backing vocals utilize numerous minor thirds (so-called “blue” notes) that act as a musical play on words. Check it out here.
11. Do You Hear What I Hear?
Twenty years after “White Christmas,” this was another holiday hit for Bing Crosby, even though it was actually written as a protest song in the midst of the 1962 Cuban missile crisis. Check it out here.
12. Feliz Navidad
Written and recorded by José Feliciano, this not only charted when it was first released back in 1970 but then proceeded to re-enter the Billboard Top 100 in 1998, and again in 2017 — a rare hat trick! Check it out here.
It’s that time of year… so the song goes. Music plays such an important part in the holiday spirit, and Yamaha has all of your favorite songs ready for download today.
Looking for a gift for a Disklavier owner? Yamaha offers numerous Christmas-themed PianoSoft music titles in our online store. If they’re a Disklavier Radio subscriber, we have special channels on for the entire holiday season, including “Holiday Party,” “Holiday Favorites,” “Christmas Eve” and “New Year’s Eve Party.” In addition, ENSPIRE owners can tune into a special “Original Artist Holiday Favorites” channel featuring recordings from holiday legends like Bing Crosby and Frank Sinatra.
Last but not least, if you need a backing band to play along, or would like to lead your friends and family in a holiday sing-along, choose from the dozens of Christmas Style Files we have available for downloading. Here are descriptions of a few of them:
– Christmas Style Files contains several holiday Styles with a dynamic mix of genres.
– Christmas Blue lets you play “Blue Christmas” in the style of Elvis Presley. A solid backbeat with added layers of orchestration, guitar and flute make the somber Christmas classic come alive.
– Christmas Swing 2 provides a perfect country swing style for songs like “Rudolph the Red Nosed Reindeer” or a mellow version of “Jingle Bell Rock” a la Hall & Oates.
– Ready to try mixing up your holiday songfest with a little tropical inspiration and reggae flair? Check outJamaican Christmas.
May your holiday season be filled with music and cheer!
For more information, visit the online Yamaha PianoSoft store.
Here’s an indisputable fact for which I can personally vouch: Electric guitars make great holiday gifts. And here’s a second indisputable fact: Recipients of electric guitars won’t fully appreciate the gift unless they’ve got an amplifier to plug into. Granted, you can kind of hear the sound of unamplified electric guitar strings as they thwack against the frets, but how much fun is that, really?
If you’re just coming to this realization the hard way — i.e., you bought your loved one an electric guitar but neglected to get an amp to go along with it — don’t worry. You’re not the first person to make such an error, and it can be easily remedied. All you have to do is find a good amplifier to add to the equation.
Doing this may seem a little intimidating if you’re a newbie, but choosing a suitable amp is actually not all that difficult. The main reason is the rise of something called “digital modeling technology,” which convincingly imitates the tonal properties of a wide variety of amp types. In other words, these days, pretty much any guitar amp can sound like pretty much any other guitar amp.
So really, the main questions you need to ask yourself concern size and power output (the latter is measured in wattage). Your principal choice will be between smaller “desktop” amps and larger (but not necessarily huge) “traditional” models — though in many cases the most traditional thing about those will be their size and shape.
Desktop Amps
Just to be clear, a desktop amp has nothing to do with the virtual desktop on your computer; it’s not a piece of software and in fact there’s nothing virtual about it. These are actual amplifiers that are small enough to fit on an actual desktop. Take the Yamaha THR10II, for example. It’s just over 7 inches high, 14½ inches wide and 5½ inches deep. There are two different varieties of the THR10II (one has a built-in wireless receiver) but both come with dual 3-inch speakers and put out 20 watts of power — more than enough for learning purposes. Perhaps even more importantly, both have auxiliary inputs and Bluetooth® capability (so they can be used with smartphones, tablets and other music players) as well as headphone outputs so your child can practice to their favorite music in complete privacy … and without disturbing you, other family members, or the neighbors.
Yamaha THR-II Series desktop amps.
Obviously, desktop amps are perfect for practicing at home, but with the THR10II Wireless and larger, 30-watt THR30II Wireless models in particular, your child can practice pretty much anywhere, since they run both on AC power and on batteries. What’s more, their use of VCM (Virtual Circuitry Modeling) means that they can produce a range of sounds much bigger than they are. There are multiple amp tones to choose from, each offering a different amount and/or type of distortion — plus settings for bass, acoustic guitar and other instruments. Add two distinct effects circuits, one for modulation effects (chorus, flanging, etc.) and one for delays and reverbs, and you’ve got an amp that sounds great right out of the box. But if your child is not satisfied with the presets, he or she can download free THR Remote editor software (available for both iOS and Android® devices) which will allow them to tweak those amp tones and effects to their heart’s content.
Another nifty feature of THR-II amps is that they provide an integrated USB port and come with a bundled copy of Cubase AI software, making it easy to take the sound coming out of the amp and turn it into digital audio — going from an actual desktop to a virtual one.
“Traditional” Amps
Line 6 Spider V 20 MkII.
You wouldn’t want to try putting most traditional guitar amplifiers on a typical desktop, and none of them run on batteries. But just as modeling technology has raised the potential of desktop amps, it’s also made a huge difference in what the so-called “traditional” amp can do. Line 6 is a company that has long been a leader in the development of modeling amplifiers, and they’re continuing their pioneering ways with the Spider V MkII Series.
There are six amps in the Spider V MkII line, each classified principally by its wattage, from the 20-watt 20 MkII to the 240-watt 240 Mk II and 240HC Mk II. As the wattage grows, so do the number of features that the amps offer. For example, the 30-watt V 30 MkII has 128 presets to the 16 in the V 20 MkII, while the V 60 MkII, V 120 MkII, and V 240 MkII all have a 60-second looping device built in, allowing users to play along with parts they’ve created themselves. But no matter which size and power level you choose, every Spider V Mk II model provides more than 200 types of modeled amplifiers, cabinets, and effects — meaning that your child can shift from a chiming, delay-heavy sound à la U2’s The Edge to a gritty Stevie Ray Vaughan-style blues tone with just a few button pushes. As a bonus, they also offer both a “classic” speaker mode for a traditional amp sound and a “full range” mode that lets the user plug in an acoustic-electric guitar or jam track playback.
Although desktop amps are more easily portable than traditional ones, the traditional style tends to work better in more professional settings, including the stage and recording studio. So if your loved one is planning on joining a band or is really taking his or her music seriously, you may be better off investing in a traditional amp right at the outset. That said, if you’re looking for a happy medium between the two styles, consider the Spider V 240HC MkII. It’s a 240-watt “head” (the part of an amplifier that does the actual amplifying) that, when plugged into a speaker cabinet, has enough power and punch for almost any venue. But the head doubles as a combo; in other words, it has speakers of its own built in as well. Two 4-inch speakers, to be exact, allowing for stereo sound reproduction with no cabinet required at all, and with physical dimensions that are comparable to the Yamaha THR-II amps.
Line 6 Spider V 240HC MkII.
The bottom line is that today’s entry-level amps are way less cumbersome and far more versatile than ever before, making them adaptable to all kinds uses … and good for years of enjoyment to come.
Click here for more information about Yamaha guitar amplifiers, cabinets and accessories.
Click here for more information about Line 6 guitar amplifiers.
When my daughter was in preschool, she took piano lessons, which she appeared to enjoy — until she figured out where all the notes were on the keyboard and came to the conclusion that she didn’t need to learn anything else. A little later on, we bought her a half-size guitar. She liked to plink around on it occasionally but wasn’t motivated to go any further than that. Violin was a total non-starter. And despite having a beautiful voice and a good sense of pitch, she was reluctant to sing in front of people.
Then, in fourth grade, something clicked, and she discovered that she loved being in a chorus. Two years later, her shyness about singing has gone away, even when she’s doing it solo, and her confidence as a performer has grown by leaps and bounds.
All of this is just to say that there’s no sure way for parents or grandparents to predict what’s going to engage a child musically. For every kid who’s pulled like a magnet toward every instrument he or she encounters, there are many others (like my daughter) who aren’t certain what excites them most. But the fact that they are excited about music is something to support, and often that support requires trying out several options, until one clicks. When it does, a lifetime of pleasure awaits. With that in mind, here are some gift suggestions that could help spur your child on to new musical heights.
A Starter Keyboard
You can’t go wrong with an entry-level digital keyboard, especially if it’s designed to make playing simple and fun. The Yamaha PSR-E473 falls squarely into this category, with 820 sounds — enough to fuel countless hours of experimentation — plus touch-responsive keys, onboard lessons, a downloadable songbook and 290 styles of auto accompaniment. It also offers a personal favorite feature: a central display screen that shows the staff position of every note being played, along with the location of middle C — a lifeline that can really help beginners when they get lost on the keyboard.
Yamaha PSR-E473.
A Bigger Keyboard
The PSR-E473 has a lot going for it, but it only has 61 keys and they’re not full-size. If you feel your child is ready to move up to something that’s closer to a standard piano but still has the flexibility and portability of an electronic keyboard, consider a model like the Yamaha PSR-EW320. It’s got a great feature set and it offers 76 keys, making it possible for budding virtuosi to play more demanding and far-ranging pieces.
Yamaha PSR-EW320.
A Starter Acoustic Guitar
Keyboards are nice, but what if the child on your gift list seems more like the pickin’-and-grinnin’ type? Based on my past experience as both a guitar student and guitar teacher, I strongly recommend that beginners start off using nylon-string acoustic models. Electric guitars require amplification, which adds an extra layer of hassle that beginners shouldn’t have to deal with, and nylon strings are much easier on the fingers than steel ones, leading to a kinder, gentler callus buildup. Your child should also play a guitar that matches his or her size. I once tried to teach basic chords to a seven-year-old boy on a full-size electric guitar, only to realize that his arms were too short to reach the frets. (It wasn’t a fun experience for either of us.)
Luckily, finding half-size or 3/4-size models shouldn’t be much of a challenge. The Yamaha CGS line of nylon-string acoustic guitars offers both, as well as a full-size model. Or you might consider a Yamaha APXT2, which is a 3/4-size version of the company’s APX500II — the world’s best-selling acoustic-electric guitar. It’s available in a variety of finishes and has a built-in pickup so its sound can be amplified; it also comes with a tuner and a soft “gig bag” carrying case. In general, half-size guitars are best for ages 5 to 8, while 3/4-size is ideal for 9- to 12-year-olds, but you may want to see how the different sizes actually fit your child before making a commitment.
Yamaha CGS guitars.
Yamaha APXT2 guitars.
Essential Beatkeepers
Yamaha MP-90 metronomes.
Compared to a keyboard or guitar, a metronome may not seem like such an exciting gift. But if your child has been struggling to play a piece of music without speeding up or slowing down, a metronome can help him or her reach that goal. Old-school pendulum metronomes like the Yamaha MP-90 continue to be a fine choice: they’re simple and durable and are available in a variety of colors, plus they have the added advantage of never needing a battery or a wall socket. Alternatively, you can go higher-tech and pick from a number of excellent apps for smartphones and tablets.
The Joy of Being (and Staying) in Tune
Yamaha GCT1 tuner.
Although being able to keep their instruments in tune may or may not contribute to your child’s love of music, it will definitely contribute to others’ appreciation of the music he or she makes. Clip-on digital tuners like the Yamaha GCT1 tuner make the tuning process easy and convenient. What’s more, although it has specific settings for guitar, bass, viola, cello, and ukulele, the GCT1 can be used with any instrument.
Starting on Winds
It’s just as customary for aspiring wind players to start on the recorder as it is for guitarists to start out on nylon string instruments … and in the right hands, recorders can actually sound pretty terrific. They’re also a lot easier to get a grip on — both literally and figuratively — than any other wind instrument, and for sheer portability, they’re hard to beat. The Yamaha YRS-24B recorder, made of ABS resin, is a school standard. My daughter owns one, and playing it in elementary school definitely helped her develop a better sense of pitch and overall musicality.
Yamaha YRS-24B recorder.
Another great beginner instrument for kids is the Pianica. This small, portable keyboard is super easy to play—all that’s required is to simply blow air into it while pressing down on the keys. While the resultant sound is similar to an accordion or a harmonica, it uses the same notes and familiar black-and-white keys as a piano. This makes it easy to get started right away, since your child can choose from thousands of easily available piano book and sheet music titles to learn the notes to their favorite songs. Yamaha offers a variety of Pianica models, from the smallP-25F, with its two-octave range, to the slightly larger P-32D, to the three-octave P-37D. Each comes with an extension pipe that allows it to be played on a tabletop, as well as a durable lightweight plastic case that can double as a music stand. The top-of-the-lineP-37E also has a three-octave range but a somewhat richer tone due to its being made from plant-based materials.
Yamaha P-37E Pianica.
Drums with a Volume Control
Kids love banging on things, and eventually some become very good at it. But a lot of parents can have a hard time with the concept of supporting a family percussionist’s development, for fairly obvious reasons like noise, noise and noise. That’s where a set of compact digital drums like the Yamaha DD75AD comes in. It’s got eight touch-sensitive pads and two assignable foot pedals that can be used to play 75 pre-programmed kits and 10 custom ones your child can create from scratch. And there’s a headphone jack! Will wonders never cease?
Yamaha DD75AD compact digital drums.
Yamaha DTX402 electronic drum kit.
If your child shows a real propensity for drumming, you can take things a step further by buying him or her a full electronic drum kit like the Yamaha DTX402. Not only does this provide everything they need to play along with their favorite tunes and jam with their friends, it comes with 10 built-in training exercises that make learning fun, which is always a good thing. And when you purchase a DTX402 Series kit from an authorized Yamaha dealer, your child receives three free months of Melodics — a fun and easy-to-use training app that does a great job of encouraging kids to play and helps build their skills and confidence. Plus, like the aforementioned DD75AD, the 402 has a headphone jack, so you can enjoy peace and quiet while your young drummer unleashes their creativity.
Better Ways to Listen
Yamaha HPH-MT5 headphones.
If your child is like most kids, they probably do most of their listening on ear buds or computer speakers. Unfortunately, the audio quality of those kinds of products leaves a lot to be desired. You can help your kids appreciate the rich sound tapestry of music — and perhaps even encourage a budding composer, producer or audio engineer — by buying them good-quality headphones or speakers. Yamaha HPH-MT5 headphones deliver a balanced sound that is faithful to the source, plus they’re lightweight and comfortable, with an extended frequency range that will allow your child to hear the entire sound, from the lowest lows to the highest highs. These headphones also include a carrying bag and a 1/4″ stereo adapter.
Yamaha MusicCast 20 wireless speaker.
The Yamaha MusicCast 20 is a wireless speaker that’s great on its own or as a part of a stereo setup. Its compact size means that it can fit in even the smallest bedroom (it’s wall-mountable too), plus it offers a variety of connection choices, including Wi-Fi, Bluetooth®, AirPlay 2® and Spotify® Connect. It provides excellent sound quality, and because it can be voice-controlled from Alexa and Google Assistant devices, or with Siri® via AirPlay 2, it’s definitely got the cool factor too.
Songs to Play
Okay, so your gift recipient’s got an instrument — maybe one of those mentioned above. Now what’s he or she going to do with it? Hint: Make sure there’s some sheet music handy. This is good advice whether the player in question is a beginner, intermediate or advanced; everybody enjoys learning a new tune or figuring out how to play an old favorite. It just so happens that Yamaha offers a wide selection of sheet music for immediate downloading. There are well over 30,000 items available, covering just about every genre imaginable, so you’re sure to find something for even the most finicky performer.
The App Zone
If your young musician is into tech, there’s certainly no shortage of apps and software out there. Sequencers, synthesizers, notation programs, digital audio workstations, you name it — these products just continue to become more powerful and easier to use. And they’re not just for the pros, either. In fact, there are a wide range of apps specifically designed for beginners. For example, Playground Sessions is a piano learning program developed in association with legendary producer Quincy Jones. The free Yamaha Chord Tracker app (available for iOS® 15.2 or higher and Android™ smart devices) helps players figure songs out by analyzing the chord progressions of recordings, and Kittar (also from Yamaha, and also free) breaks music down into phrases based on a given song’s structure. All three are remarkable in the way they approach the various pieces of the music-making puzzle.
Learning with Lenny
Watching my daughter progress through school has been further confirmation of a venerable truism: Great teachers make all the difference in a child’s life. The teachers she likes best are thrilled to do what they do, and they pass that feeling on to their students. So if your child is interested in learning more about music, its history, and all its many wonders, you should consider exploring DVD options that present that kind of information in a simple, easy-to-digest fashion …and you couldn’t find a better teacher than Leonard Bernstein.
From 1958 to 1972, the famous conductor conveyed his immense knowledge of and passion for music to millions of television viewers through his series of Young People’s Concerts with the New York Philharmonic. The inspirational spirit of these programs shows no signs of diminishing over time. You can find 25 of them on a nine-DVD set titled simply Leonard Bernstein: Young People’s Concerts with the New York Philharmonic. There are few better ways to pass an abiding love of music on to the next generation.
You’ve finally decided to improve the sound coming from your TV – or you know someone who’d really appreciate better sound too – and you’ve decided that a new sound bar will make the perfect gift for them… or for yourself.
But which one to get? Here’s a quick overview of the key factors and features you should consider when buying a sound bar.
Surround Sound Capability
Despite their small form factor, sound bars can create virtual and true 3D surround sound. Digital sound projector sound bars do this by bouncing discrete beams of audio off the walls and ceiling of your room to create sound that comes from all around you. This method works well for rooms that have solid walls on all sides, but not as well for rooms that are more open.
Signal processing creates simulated virtual surround sound, while digital sound projector sound bars can create true 7.1.2-channel surround sound for Dolby Atmos® and DTS:X™ content.
Other types of sound bars use signal processing to simulate side and rear effects for virtual 7.1-channel surround sound. These sound bars work well in all rooms, but aren’t as effective as a digital sound projector sound bar in a room with four solid walls. So start by asking yourself the question: How is your room (or your friend’s room) configured?
Will It Fit?
Decide where you want to put the sound bar, and check the dimensions to make sure it will fit there. Keep in mind that some sound bars can be mounted on a wall (normally below the TV), and some are meant to sit on a tabletop below the TV. If the sound bar will be sitting on a surface, make sure it is not tall enough to block the TV.
Sound bars can be mounted on a wall or placed on a tabletop.
What Can I Connect To It?
Consider what devices you want to connect to the sound bar. If the TV supports Audio Return Channel (ARC), you can connect it to the sound bar with an HDMI® cable.
Use an HDMI cable to connect a TV that supports ARC.
If the TV does not support ARC, you will need to use an optical cable to connect it to the sound bar.
Use an optical cable to connect a TV that doesn’t support ARC.
If you will also be connecting a game console, Blu-ray Disc™ player or a streaming media player (like an Apple® TV) to the sound bar, you will need more HDMI inputs on the sound bar, or you will need to connect the devices to the TV instead of the sound bar.
Connectivity
A sound bar is more than a speaker for a TV – it can be an entertainment source. Many come equipped with Wi-Fi, Bluetooth® or even AirPlay 2®, so you can play music from a phone or computer and listen to streaming services and internet radio through the sound bar. If enjoying music through your sound bar is key, check for connectivity options like these:
Subwoofer: Built-in or Stand-alone?
A subwoofer is a speaker that reproduces only the lowest bass frequencies. In other words, it puts the oomph in explosions and those low rumbles you can feel in your chest. It’s an integral part of any home theater system.
Some sound bars have subwoofers built in, while others come with separate subwoofers. Stand-alone subwoofers are often more powerful and effective than the built-in variety, but if there isn’t a lot of floor space where the sound bar is going to be positioned, you might want to go with one that has a built-in subwoofer. Built-in subwoofers can still sound great!
Sound bars can use built-in subwoofers or external stand-alone subwoofers.
Voice Control
In this era of the smart home, remote controls are so yesterday. Voice control is becoming more and more standard with Alexa, Google Assistant and Siri® (via AirPlay 2) able to control many sound bars and speakers. Some sound bars like the Yamaha YAS-209 have Alexa built-in, meaning that you don’t need an external Alexa device to control them — you can talk directly to a YAS-209 and ask Alexa to turn up the volume or play music from a streaming service.
App Control
If you’re not comfortable with voice control, but you don’t like looking between the couch cushions for your remote control, many sound bars can be controlled with an app from your smartphone or tablet. Apps are especially handy if you’re playing music from a streaming service through your sound bar and scrolling through your playlists. For example, with the free Yamaha MusicCast Controller app, you can link MusicCast wireless speakers, sound bars and receivers in other rooms and control playback throughout your home from your smartphone or tablet.
Warranty
You hope you never have to use it, but it’s good to know how the manufacturer stands behind its product. The most common warranty period is one year, with premium brands like Yamaha offering two years.
Extras
You should also determine if there are other special audio and video features or compatibility that sets one sound bar apart from another. As an example, since the Yamaha YAS-209 has Alexa built-in, you can control an Amazon Fire TV Stick directly from the sound bar, asking it to play your favorite TV show or Amazon Prime movie.
How / Where / Features
The main thing to consider when shopping for a sound bar is how and where it will be used. In addition, when doing your research and reading reviews, identify the features that are most important to you. These are the factors that will enable you to choose the sound bar that is the best fit.
Click here for more information about Yamaha sound bars.
Congratulations on deciding to buy your first bass! There’s never been a better time to jump into the low end. No matter what style of music you want to play, there are tons of resources to help you get started — and plenty of solid, versatile instruments for every budget.
If you’re reading this, you’ve already begun the first step toward getting a new instrument: research. The internet contains an ocean of opinions about every facet of bass, some more trustworthy than others, but the facts — dimensions, colors, options, weight, prices — are easy to find, too. Besides visiting retailers, reading bass magazines, and checking out online forums, be sure to talk to your bass-playing friends, who most likely have thoughts about what’s hot and what’s not. YouTube, of course, is always useful when it comes to seeing and hearing an instrument you’re interested in.
IN YOUR HANDS
That said, the truth is that you won’t know if a bass is right for you until it’s in your hands. Visiting your local music stores to play the basses they have on display can be an important first step toward owning a great first instrument.
Here are some important questions to ask yourself as you consider whether the bass you’re trying out is the right one for you:
Is the neck the right size and shape for your hand?
Does the instrument feel too heavy or too light when you stand?
Does it balance well on your knee when you sit?
Does the bass’s control layout work for you?
Is the bass correctly intonated? (That is, do some notes sound slightly sharp or flat of what they should be?) This is something that can be easily checked with a tuner, and will be more apparent as you play higher up the neck. Poor intonation can sometimes be fixed with a correct setup, but not always, so it’s a potential red flag.
Keep in mind that basses that have been hanging in a music store and played day in and day out may sometimes need a setup to return to the optimum playing condition in which they left the factory. If the gap between the strings and the frets is uncomfortably high, for example, it could indicate that spending days, weeks, or months in the store’s fluctuating temperature has affected the neck — another potential red flag. It’s also not uncommon for a bass that’s been on display for awhile and played by many hands to have dead strings, finger grime, and dust. If you’re excited about an instrument but concerned about wear and tear, talk to a salesperson. You can also ask if the store can include a setup and/or fresh set of strings when you buy the bass.
MAKING THE TRANSITION FROM GUITAR TO BASS
Guitarists who pick up a bass for the first time will immediately notice that the necks are longer and the strings are fatter. The scale length of an electric guitar — the distance between the bridge and the nut — is usually between 24″ and 26″, but with electric bass, 34″ – 35″ is standard.
Electric guitars are strung with much thinner strings than bass, with the thickest typically being a .042 E string, while a standard EADG set for bass consists of a .100 or .105 E, an .085 A, a .065 D and a .045 G. Guitarists might therefore want to opt to substitute light- or even extra-light gauge strings on their bass, at least at first until sufficient finger strength is achieved, but just know that this comes at a sacrifice in terms of beefiness and low-end thud. And if you feel attached to using a pick, just know that some bassists use them and some don’t, but most agree that learning to play with your fingers is crucial.
FOCUS ON SONICS, NOT JUST LOOKS
The look and feel of a particular bass may be what immediately attracts you, but it shouldn’t be the end of your decision-making process. Sound is extremely important too — maybe even more so! Once you find a bass that captures your interest, try playing it through different amps so you can hear its unique voice. See if the knobs and tuners turn easily. Do you hear crackling or static when you twist the knobs or plug in a cable? This would suggest a problem with the electronics, and could be cause for concern.
Another thing to listen for is consistency in tone and volume. Do some notes buzz or sound significantly louder or softer than others, even when played with equal intensity? This could indicate a potential issue with the basic construction of the instrument, or it could be a simple fix that can be easily rectified with a setup. Either way, it’s worth having a discussion with the salesperson.
FINDING THE PERFECT STARTER BASS
Price, of course, is always a major consideration when it comes to choosing your first bass — or when making any purchase, for that matter. It used to be that, when it came to musical instruments, you got what you paid for, but the good news is that advances in technology mean that you can find high-quality starter basses today, such as the very affordable Yamaha TRBX line.
Yamaha TRBX174EW.
As an example, the TRBX174EW 4-string model is light in weight (just around 7 lbs.) yet solidly built, and it sounds great too. The three knobs — a volume control for each of the two pickups, plus a master tone control — are straightforward and make it easy to dial in the meat-and-potato tones every bass player is expected to have. The neck is slim — a bonus for guitarists looking to make the transition to bass — with access all the way up to the 24th fret, so it’s easy to reach those high notes. Adjustments you’ll have to occasionally make (such as tweaking the truss rod) are simple, and it comes strung with standard-gauge D’Addario nickel strings, which are ubiquitous precisely because they work for most styles. The TRBX174EW is also handsome, small-bodied and travel-friendly, as well as genre-agnostic: It doesn’t feel designed to cater to a particular era, style or trend.
Many of the greatest bass players began on instruments that were less than ideal by today’s standards, but your first bass will likely be far better built and more versatile than any starter bass they used. As recently as just a few years ago, many experts would have suggested that a first-time bassist should consider buying a used instrument to save money, but that’s no longer the case. In terms of price-to-performance ratio, we live in a golden age of musical instrument possibilities … and that’s good news for aspiring bassists everywhere!
Congratulations on deciding to buy your first guitar! Whether you’re looking for an acoustic or an electric model, a guitar can make your life more fulfilling and fun. One of the advantages of taking up guitar, as opposed to other instruments, is that you can learn enough chords to play some songs relatively quickly. The feeling of accomplishment you’ll get is likely to inspire you to put in plenty of practice time, and like so many worthwhile endeavors, the more you put into it, the more you will get out of it.
If you’re buying a first guitar for your child, that’s great news too! Studies have shown that music education and a musical household can benefit childhood development. It can also help with spatial skills and improve test scores and IQ. Those are the measurable benefits, but the intangible “vibe” or “mojo” of being a musician is the most fulfilling part. And that feeling is easy to access any time by just picking up the guitar.
So what do you need to know to find the ideal instrument? Let’s start with some basic terminology and definitions.
Acoustic vs. Electric
There are two types of guitars: acoustic and electric. An acoustic guitar is an instrument that creates its sound without needing an amplifier. An electric guitar requires an amplifier to be heard in all its glory. Acoustic guitars always have hollow bodies made of wood; electric guitars can have either hollow or solid bodies (again, usually made of wood), though some electric models are termed “semi-hollow” because they have a solid block of wood running through the center of their otherwise hollow body.
All electric guitars use steel strings, as do many acoustic guitars. Those kinds of strings tend to be bright-sounding and vibrant. Some acoustic guitars, typically termed classical guitars, use nylon or composite strings instead, which have a gentler, more mellow tone.
There are also acoustic guitars that come with built-in electronics so you can plug them in and amplify their natural sound. Such instruments are sometimes called “acoustic-electric” guitars.
How Guitars are Built
Knowing a few things about the construction of a guitar will help you in your search for the right instrument. Here’s an illustration that shows the various parts of an acoustic guitar:
The various parts of an acoustic guitar.
In both acoustic guitars and electric guitars, the density and weight of the woods used help determine the tone and resonance that the guitar produces.
Most of the tone of an acoustic guitar gets generated from the wood in its top, which is the face of the instrument. Spruce is commonly used for steel-string acoustic guitar tops, although sometimes you’ll see mahogany. In the case of classical nylon-string guitars, you’ll occasionally encounter models with cedar and cypress wood tops. A guitar with a solid top will produce a richer tone than one with a laminate or plywood top. The wood used for the back and sides of an acoustic guitar is equally critical for tone creation. Typically, guitar manufacturers use mahogany, nato, rosewood or maple for fuller tone. Make sure to find out the composition of the wood in a guitar before buying it.
The woods used in the construction of electric guitars are usually alder, basswood, ash, pine, maple or mahogany. Some models will even use one kind of wood for the back of the body and a different one for the top. For example, you can find electrics with a maple top on a mahogany body. The type and combination of woods used has a major impact on the tone of an electric guitar.
Find Your Fit
You’ll want your guitar to be comfortable to hold and easy to play. After all, if it doesn’t meet both of those criteria, you might get discouraged from practicing! One critical factor in selecting a guitar is finding one that’s size-appropriate for you. An instrument that’s too big or too small will make learning difficult and not as enjoyable.
To determine if a guitar’s size is right for you, try sitting down and holding it in your lap. See if you can reach the far end of the fretboard (the part closest to the tuning machines) with your left hand. If you can’t do that, choose a guitar with a neck that has a shorter scale length. The scale length refers to the distance between the nut and the bridge. (Refer to the illustration above to see where those components are.) Another advantage of a short-scale neck is that it reduces string tension, making fretting (pressing down the strings) easier. The URBAN Guitar by Yamaha, which was created in collaboration with superstar Keith Urban, is designed for easy playability, has a short scale length, and even comes with an interactive lesson app.
The URBAN Guitar by Yamaha is designed for beginners.
The shape of a guitar’s body also affects comfort. For example, a concert-style shape (such as the one used by the URBAN Guitar) is narrower across the waist and has a shallower depth than the larger Traditional Western or Dreadnought guitar, making it easier to hold. The URBAN Guitar also features a cutaway (an indentation of the body where it meets the neck), which lets you more easily reach the upper frets on the high strings.
The Yamaha STORIA line of acoustic guitars are also a great choice for beginners, as they all have short-scale necks, small bodies and low action. (See the “Tweaked for Comfort” section below.) Although designed for first-time players, they offer quality and features you can grow into, including built-in electronics.
Yamaha STORIA guitars combine first-time-player features with a stylish look.
If you’re especially petite or are buying a guitar for a child, you might want to consider a compact acoustic guitar such as the Yamaha JR1 or the three-quarter size Yamaha JR2. Both models are mini-versions of the famed Yamaha FG Series of acoustic guitars, delivering big tone despite their small size. They’re also ideal for practicing in the park, on the beach, or anywhere your muse takes you.
Compact Yamaha JR guitars make it easy to practice anywhere.
It’s best to try out guitars of different shapes and sizes at your local music store and see which one feels most comfortable. There’s a model out there that’s perfect for everyone!
Tuning In
Another important issue is the quality of the tuning machines (often called “tuning keys” or “tuning pegs”). They should turn smoothly and easily and shouldn’t bind or jump when you turn them.
But even when playing an instrument with the best tuning machines, beginners sometimes have trouble getting their guitars in tune. The solution is simple: make a small investment in an electronic tuner. Today’s tuners are simple to operate and can help you save time and frustration. There’s no shame in using one, either: Virtually all guitarists — even the top professionals — use them.
Clip-on tuners are the easiest to use. They attach to the headstock and sense the pitch of a string through vibrations in the wood. A good choice here is the Yamaha GTC1, which can be used not only for guitar, but other stringed instruments such as bass and ukulele too.
A clip-on tuner like the Yamaha GTC1 makes tuning easy.
Tweaked for Comfort
As stated earlier, when you buy a guitar, it should be comfortable to play. Of course, you can’t change its body size, type or scale length, but there are many aspects that can be adjusted. Most can be done on your own, but if you’re a beginner, you’re best to have them done by a qualified luthier (a craftsperson who builds and repairs guitars and other stringed instruments). Most music stores can refer you to such a person, or may even have one on the premises.
The most common problem you might encounter is that its action — the height of the strings over the fretboard — is too high. Low action, like what you’ll find on the URBAN Guitar by Yamaha, improves playability, but if it’s too low, there can be string buzz or some notes may not ring out properly (a phenomenon known as “fretting out”), so some compromise may be in order.
The lower the action, the easier the guitar is to play.
Another common problem is a guitar being unable to play all its notes in tune, which requires adjusting its intonation. In the hands of a skilled luthier, this is usually fixable if the basic construction of the guitar is sound.
If you find a repair person you like, try to build a long-term working relationship with them, similar to what you do with a good auto mechanic. You want to find someone you can trust. Someday, you may end up doing the maintenance work yourself, but in the meantime, leave it to the professionals.
Add a Case
To protect your new instrument, a case is necessary. Many beginner guitars come with one; if not, it can be bought separately. Alternatively, you can opt for a gig bag like the Yamaha AG-SC, which can have either soft or semi-rigid sides and is typically made from a heavy-duty fabric or leather, with padding for protection. Gig bags are generally lighter than cases and most offer shoulder straps. Those with a single strap allow you to sling your guitar over your shoulder; a double strap lets you carry your guitar like a backpack, keeping your hands completely free.
A hardshell case like the Yamaha AG3-HC provides the most protection from bumps or the occasional drop — although there are no guarantees your guitar won’t get damaged if you drop it while it’s in the case. However, hardshell cases are heavier and typically more expensive than gig bags, and they don’t have straps, so you can’t carry them as easily.
A Yamaha AG3-HC hardshell case (left) and AG-SC gig bag (right).
Consider a Guitar Bundle
You can simplify the process of finding and purchasing all the gear you’ll need with a bundle such as the Yamaha GigMaker. These comprehensive and affordable packages include the guitar itself, as well as a tuner, strap, cable, gig bag and even picks. There are versions available for steel-string acoustic, classical nylon-string acoustic and electric guitars; the latter also includes a practice amp.
The Yamaha GigMaker Electric package.
Click here for more information about Yamaha guitars.
You love music. You love your kids, too. But do budding musicians really have to practice so much?
Whether you are that budding musician, or are the parent of one, we’ve got a newsflash: The people within earshot could use a break once in a while. Hearing that same étude five times in a row is fine, but hearing it 20 times is starting to get irritating, and around the 30th replay everyone within listening distance may start to feel a definite headache coming on.
Okay, the logical side of you knows that musicians really do have to practice that much. But couldn’t they maybe just take it down a notch in volume?
As a matter of fact, they can. Thanks to modern technology, the volume of most major instrument types — keyboards, guitars, strings, brass, woodwinds, even drums — can be drastically reduced without diminishing players’ ability to hear themselves. And leading the way is the extensive line of Yamaha SILENT™ products. Here’s an overview of these potential sanity-savers.
Piano and Keyboards
Of course, electronic keyboards of all stripes (and from all manufacturers, including Yamaha) come with headphone jacks, making silent practice an intrinsic and important feature. But what about acoustic pianos?
SILENT piano.
At first glance, a Yamaha SILENT Piano™ looks just like a normal acoustic piano with weighted keys, pedals, strings, and hammers. But these instruments lead a double life. They can be played just like any other piano, or they can be switched into Silent mode, in which case the hammers stop hitting the strings, and the sound can be heard only via headphones. The way this works is nothing short of magic: A series of optical sensors beneath the keyboard and pedals measures the nuances of the playing and then uses them to trigger the digital sound of a piano, which can be turned up or down as desired — without disturbing anyone in proximity. SILENT Pianos are available in a variety of upright and baby grand models; some even include sounds sampled from the famed line of Yamaha CFX and CFIIIs full-size concert grands.
Drums
DTX6K3-X electronic drum kit.
Like digital keyboards, electronic drums always offer a headphone jack for private practice. These instruments are built around pads (similar to practice pads) that produce little noise but can still be remarkably sensitive. In fact, some Yamaha electronic drum kits offer pads that are divided into three separate zones, allowing for a greater variety of expression than even acoustic drums. They also include built-in practice tools such as a programmable metronome, onboard recording and training songs that allow the player to master various genres. With an electronic drum kit, the drummer in your house can thwack away to their heart’s content, producing a staggering range of sounds that only they will hear in their headphones.
Acoustic Guitar
How do you lower the volume of an acoustic guitar? By taking away its most resonant component: its body. This explains the strikingly minimal outline of the Yamaha SILENT Guitar™. Instead of having an actual front, back and sides, these instruments resonate virtually through a special pickup that uses digital modeling to replicate the sound of a typical acoustic guitar as captured by a high-quality studio microphone. The result is an instrument that produces next to no sound on its own, yet still has a realistic tone, the loudness of which is completely controllable. A number of different SILENT Guitars are available, including one based on a folk-style guitar and others styled after classical guitars. All are collapsible, making them easy to travel with.
SILENT guitars.
Guitar Amplifiers
Think that a guitar plugged into an amplifier means an inescapable blast of sound? Think again. Many of today’s practice amps, such as the Yamaha THR-II desktop series, have headphone jacks, allowing silent practice … without disturbing anyone else nearby. These amps also have the benefit of built-in digital effects such as distortion, reverb, etc. — meaning that you won’t have to spend extra on pedals or other signal processing hardware.
THR-II desktop amplifiers.
Strings
SILENT strings.
The first SILENT Violin™ was designed over 20 years ago to offer players the ability to practice in an environment where they wouldn’t disturb family or neighbors around them. Today’s lineup of Yamaha SILENTand Electricstrings includes three models of violin, a SILENT Viola, three SILENT Cellos and three SILENT Basses. This gives budding musicians the opportunity to form complete Electric Ensembleswhere SILENT and Electric string players can practice and perform together, create meaningful music and express themselves, all while plugged into headphones.
Brass
Brass instruments can be very loud when you get up and close and personal, but there’s already a long-established way of making these instruments quieter: It’s called using a mute. The problem is that mutes dramatically alter tone as well as volume. Yamaha has addressed that issue with its revolutionary SILENT Brass™ system, which consists of a mute fitted with a pickup that connects to a small electronic “personal studio” unit. That little box contains exclusive circuitry that simulates a standard acoustic tone, making the instrument sound as though there’s no mute being used. There are versions for trumpet, flugelhorn, trombone and French horn, as well as for tuba and euphonium, and the SILENT Brass mutes for the latter two actually have extra adaptability in that the position of the mute head can be adjusted to match different bell sizes and personal preferences — which also means that the same mute can be used on B♭, C, E♭ and F tubas. The tuba and euphonium models can also be disassembled into parts that are stackable, making storage easier.
SILENT trumpet mute.
Woodwinds
YDS-150 Digital Saxophone.
The Yamaha YDS-150 Digital Saxophone plays and feels like an acoustic saxophone, but its wealth of digital technologies offer a number of enhancements, including 73 onboard sounds and a headphone jack that enables saxophonists to practice in privacy. The mouthpiece has a design just like that of an acoustic sax and the standard key layout ensures natural playability and smooth operation, plus there’s a breath sensor that detects the intensity of the player’s breath for precise control of both volume and tone. Bluetooth connectivity and a wired aux input even allow the player to jam along with music being played on an external source such as a smartphone or laptop, all in complete silence and without disturbing others in the vicinity.
When you think about it, every one of these instruments and devices is remarkable in that they achieve something that wasn’t possible until relatively recently: They give both musicians and listeners an unprecedented degree of control over what they hear. All of which means that you or your child can practice to their heart’s content at a drastically reduced volume with no corresponding loss of tone, while your long-suffering neighbors (or long-suffering you) enjoy only peace and quiet.
Regardless of the level of playing you’ve attained so far, there will always be periods of time when you feel like your progression as a musician is on hold, or that you’re simply coasting on the same plateau of achievement.
This may be particularly frustrating for the beginner who’s passionately trying hard to sound like a professional in a short space of time. But, unless you are exceptionally gifted, improvement will take time … and quite often, a lot of study and hard work.
In addition, you can’t buy experience, so every challenge you take on — regardless of its outcome — becomes a notch in the fretboard that you can use to attain seasoned-guitarist status. This is called “paying your dues.”
That said, there are some simple techniques and approaches you can implement to elevate your playing rapidly. In this posting, we’ll explore seven of those ideas — ways of getting extra “mileage” out of what you already know.
1. SET YOUR INTENTION
I’m a huge advocate of setting your intention before every practice session. In other words, decide what you are going to practice before you even pick up your guitar. After all, you can only arrive at a destination if there is a pathway towards it, a roadmap of sorts.
One way to implement this plan is to make a list for each practice session. Here’s an example.
Today’s practice routine is:
Five minutes playing the seven chords of the C major scale in sequence. As you are playing them, name all seven chords and the notes in each one.
Five minutes playing one major scale pattern. This time, name and sing the notes while playing them.
Five minutes creating a chord progression from the seven major scale chords, then sing a melody over the chord progression and learn the melody on the guitar.
Obviously, you’d tailor this sample routine to fit your own personal goals. The important thing to keep in mind is that when you set your intentions and stick to them, you get results. Take this initiative daily, and you’ll progress faster than you could have ever imagined.
2. EXPAND ON SIMPLE TONALITIES
In general, guitar players learn chords in open position (i.e., those that contain one or more unfretted strings) first, but rarely expand upon the values of those shapes in other positions … or manipulate them by adding or subtracting fingers to and from those initial shapes.
For example, a C major chord becomes a C major seventh (Cma7) chord by simply lifting your index finger off the B string, as shown in the illustration below. It becomes a Cadd2 chord by placing your pinky on the third fret of the second string, and it becomes a C6/9 by moving your finger from the fourth string on the second fret to the third string on that same fret (leaving the D string open):
These simple finger movements create melodic shifts within your chords and can sometimes change the harmonic value too … which means your guitar and vocal melodies now have new, exciting resolutions to target within the chords. Not only that, but you are improving the dexterity of your fretting hand!
3. EVEN EXOTIC CHORDS CAN BE EASY
Guitarists use a series of chord and scale shapes to create music. Those standard shapes can sound incredible as is, but what if you want them to sound more “expensive” — you know, like the ones the professionals use?
Playing exotic-sounding chords doesn’t have to be hard. Here are a couple of shapes that give you that “wow” factor … without the “ow” (hurt) factor.
First, shift a D major chord up to the fifth fret and simply lift the second finger off the top string:
This simple two-fingered shape sounds amazing, especially if you arpeggiate the top four strings. What kind of chord is it? It’s a Dmi9, or you could think of it as an Fma7/D. Try replacing a standard Dmi or Fma chord with this instead, and watch your bandmates fist-bump you at rehearsal!
Here’s another top-shelf “fifty-dollar chord”:
To achieve this, play an Fma7 chord at the third fret, put your pinky on the third string, fifth fret, and use the open A string as your bass note. The end result is a very fancy Ami11. Try using this shape instead of a standard Ami or Ami7.
Chord shape alternatives like these can always be used to bring spice and flavor to standard overused chord progressions.
4. FINESSE THE STRINGS
The difference between an average player and a world-class player is that the dynamics, finesse, tonality and musicality are on two completely different levels.
We guitarists pretty much all have the same shapes and tools at our disposal, but we’re talking about the difference between an apprentice and an artisan. The artisan uses experience, skill and finesse to stroke, guide and intentionally place notes with the dynamic precision needed to evoke the ideal emotional response.
If you find yourself strumming away on the chords that you know without giving any thought to the dynamic attack of your rhythms, the clean, articulate placement of your fingers, or the emotional effect your playing may (or may not) have, take the time to record yourself playing.
As you listen back to your performance, adjudicate whether you’d enjoy what you hear if you were a member of the audience.
The key to developing a high level of sophistication is learning how to dynamically spread the downbeat of your chords, practice the light and shade of volume in the picking hand, and the chord-tone resolution of your melodies. (Even practice implementing vibrato on the top note of your chords.) As an apprentice, sure, you want to learn from the master sensei, but you should also understand that you yourself can be your own best teacher. Listen, and advise yourself accordingly.
5. DON’T BE AFRAID TO TURN THE KNOBS
Like everyone else, most guitar players are turned on by the flashing lights, array of dials and bright shiny products that flash across our media screens every day. Of course, we are all looking for the next best thing — or in our case, that one guitar that will be the lightsaber in the darkness — the one device that will promote us to guitar godliness with the tap of a finger.
In some cases, that may be true. New products can bring us enlightenment, inspiration and enhanced musicality, but I’ve also witnessed knob-turning paralysis in many guitar players, too. What I mean by that is the unwillingness to try new settings on the gear they already own. This often leads to contempt for the gear without even trying to get better results.
Amplifiers are pretty simple pieces of equipment, really. If you don’t hear enough bass, maybe try lowering the treble instead … or blend the mids to meet the desired level of bass somewhere in the middle.
I’ve always looked at tone controls as the architectural design of frequencies. The bass is the foundation; it should support the structures above. The mid frequencies add warmth and body, and should cross over somewhere above the bass in a very pleasing way. Treble controls are there to either boost or cut the high frequencies. If your tone is too piercing, reduce the treble so that it sits better on top of the middle ground. If that means your amp knobs are dialed completely off-center, that’s fine. After all, your amp’s tone shouldn’t be based on the symmetry of the rotary dials.
Take the same approach to effects settings, and don’t be afraid to crack the manual open or watch a YouTube video when you get stuck.
6. IF SOMETHING ISN’T WORKING … FIX IT!
Let’s face it, we’ve all had a cable that cuts in and out, a volume or tone pot that “scratches” when we turn it, a pedal we keep using even though we hate how it sounds, or a chord change we “fluff” every time we play it … and yet we never do anything about it!
If any of those things happen to you, it’s time for change. Toss that bad cable snake into the trash. Go to the hardware store and buy some pot cleaner spray and lubricant. Take a photo of the pedal you hate and list it for sale.
Similarly, isolate the chord change that you have problems with. Identify what makes it difficult to pull off, and slowly re-program your fingering. Use visualization to see the change you want to make in your mind’s eye, and your fingers will eventually follow your commands.
7. BE KIND TO YOURSELF
Last but by no means least, it’s important to note that we aren’t machines, and as humans, our performances will fluctuate on a daily basis. Always refer to yourself kindly, knowing that you are always improving, one practice session or gig at a time. I’ve had amazing gigs, and ones that I never want to re-live again. Trust me, beating yourself up won’t fix the notes or the outcome, so just move on and laugh about it over coffee with friends.
When you practice, listen intently, identify problem areas, and make the adjustments needed until you are happy with the results. Practicing mistakes just solidifies the problem, so identify and eradicate them before they become untameable monsters.
THE VIDEO
This video shows both of the excellent Yamaha FG9 models being used in a full-blown production. Listen to how well these acoustic guitars sit in the mix with the other instrumentation and vocals, and take note of how I finesse the strings with my picking hand, use dynamics in each of the song sections, and articulate the single-note melodies with a harmony above the original melody.
THE GUITAR
The FG9 dreadnought is the flagship handmade acoustic guitar in the Yamaha FG family.
FG9 R back.
FG9 M back.
The solid Adirondack spruce top pairs beautifully with either a solid rosewood (FG9 R) or mahogany (FG9 M) back and sides. These guitars resonate beautifully thanks to their internal scalloped bracing, are super light-weight and a dream to play. The FG9 embodies everything a top-notch acoustic guitar should be.
THE WRAP-UP
When we pay attention intently, employ musical discipline and truly love what we do, ascension to the next level of performance happens as a matter of course.
What’s more, the early identification of problems allows you to circumnavigate years of hurdles, and a focused drive towards a destination or desire allows you to climb that mountain one step at a time.
You’ve made the decision to buy a piano, and you’re eagerly anticipating the many hours of musical pleasure it will bring you and your family. But pianos come in so many different sizes and shapes, it can be difficult to know which is the best one to purchase.
Of course, you want your new instrument to sound great and look great. But first and foremost is the size consideration: after all, the piano has to physically fit in the allocated space. What’s more, the size of the room — along with the placement of the piano in it and other factors — will have an impact on sound quality.
Fortunately, there are some easy guidelines to follow that will help you determine the best piano for your space, whether you live in a cozy apartment or an opulent home. Let’s dig in!
Piano Types
As described in a previous blog posting, there are two basic types of pianos: grands and uprights. The most obvious difference is size (grand pianos are larger), but they also have different characteristic shapes due to the positioning of their soundboards, across which are stretched the strings. Because the soundboards of grand pianos are mounted horizontally, those instruments have a bigger “footprint” and a sleeker profile than uprights, which can look a little boxy by comparison.
Grand piano.
Upright piano.
Grand pianos are usually the choice of professional musicians in that they offer a richer, more dynamic sound than uprights, though there are exceptions, such as Yamaha YUS Series uprights, which offer a broad range of sonic tonalities more reminiscent of a grand piano. But uprights take up much less space and tend to be considerably less expensive than grand pianos, making them a favorite of music students and a staple of schools and conservatories all over the world.
Piano Sizes
Grand pianos vary in size from “Baby grand” models that can be as little as 4 1/2 feet in length, all the way up to “Concert grand” models, which can be 9 feet in length or more. (Note that grand piano length is measured from the key slip — the piece of wood in front of the keys on the keyboard — to the very end of the lid.)
Upright sizes range from small “Spinet” models (popular decades ago but rarely made today) to larger “Console” and “Studio” models that vary in height, up to 52″ or so. Interestingly, almost all pianos — both grands and uprights — are approximately 5 feet wide. This is due to the fact that they all provide a standard 88-note keyboard.
Yamaha upright pianos range from compact, entry-level P22 and b Series instruments to the U Series — the world’s most popular upright — to the aforementioned flagship YUS Series. The height of these pianos varies from 45″ to 52″, and their depth varies from a mere 21″ to 26″. This last dimension is particularly important since, as we’ll see, upright pianos are designed to be placed up against walls.
The Yamaha U1 is 4′ high.
Which Piano Size Is Right for Me?
Needless to say, room size is a major determinant in deciding which piano is right for you: The larger the room, the larger the piano it can accommodate — and, in general, you should purchase the largest piano that your room will comfortably allow. Seems simple enough, but it turns out there’s a lot more to it.
For one thing, the increased surface area of the soundboard and the greater length of the strings in larger pianos translates to more vibrational energy, which increases projection — in other words, larger grand pianos can sound a lot louder than smaller ones. That said, most non-professional pianists don’t play with the velocity required to make larger pianos project to their highest potential, so it’s unlikely you’ll be filling a large room with sound when playing leisurely. (Interestingly, larger grand pianos can also be played more softly than smaller ones. This is due to the longer key length, which supports better physical control over hammer velocity. That’s why a concert grand piano is easier to play at lower volumes than a baby grand.)
You’ll also need to factor in whether or not other people in the room (or in adjoining rooms) will be disturbed when you’re playing. This leads to the issue of room treatments: If there’s lots of soft furniture in the room (such as sofas or easy chairs), carpeting on the floor and/or drapes or curtains on the walls or windows, the piano will be a lot quieter (and the sound will travel a much shorter distance) than if the room has a hardwood floor with little furniture, drapes or curtains to absorb the sound. A grand piano might be overbearing in a room like that, whereas an upright would probably sound fine.
That said, there’s no ignoring the fact that grand pianos often have a more pleasing aesthetic than uprights. If you’re set on buying a grand rather than an upright, and your room has the space to accommodate it, that’s fine, but you’ll probably be better off with a baby grand, or one of the smaller full-size grands, as opposed to a larger model.
Here’s why: The physics of sound propagation leads to the rule of thumb that, for optimum sonics, the total length of the walls of the room should be at least ten times bigger than the length of the piano. A 9-foot concert grand piano, for example, should ideally be placed in a room that has 90 feet or more of total wall length … and few living spaces meet that criteria!
A very large grand piano is therefore usually not a good choice for a typical living room. That’s one reason why these instruments are called “concert” grands — they’re really designed for the concert hall. Their sound doesn’t fully propagate for many feet, so someone standing nearby (or someone seated at the piano, playing) will not hear the instrument at its best, whereas an audience member in the tenth row of a large venue would. This is true regardless of how well made the instrument is, and even if the room is equipped with all the necessary materials to absorb sound.
Tip: It can be helpful to get a large piece of drawing paper and trace an outline on it of the dimensions of the piano you’re considering purchasing. (Dimensions like the ones shown below are readily available from the manufacturer or dealer.) Be sure to add an extra 2 feet to the depth of the outline to allow for when the bench is pulled out while you’re playing.
Yamaha GB1K baby grand piano dimensions.
Yamaha P22 upright piano dimensions.
Piano Placement
As mentioned previously, upright pianos are designed to be placed against a wall. This positioning not only yields optimum sound, it also gives you the best use of available space, particularly in small rooms. (There’s an aesthetic consideration too, in that the backs of upright pianos are rarely finished.)
Upright pianos are designed to be placed against a wall.
Grand pianos, on the other hand, sound best when they’re out in the middle of a room, or placed at a 45-degree angle in a corner of the room. However you position it, you’ll want to ensure that the pianist — especially if it’s you! — will be able to see the rest of the room (or perhaps even out a window) instead of having to face the wall.
Grand pianos are designed to be placed out in a room.
It’s also important to protect your piano from any sudden climate changes that can harm the instrument. For example, you should never place a piano under direct sunlight. While having it near a window may look aesthetically pleasing, the heat of the sun could easily damage it. Similarly, it should not be placed near air vents, as any temperature changes will affect the instrument.
Piano AR
Yamaha offers an amazing online augmented reality tool called Piano AR that can help you decide where to place your piano … even before you buy it!
Piano AR superimposes a virtual image of the Yamaha piano model of your choice in your room.
Simply go to the Piano AR website on your mobile device’s browser and select the Yamaha upright or grand piano model you want to view, then tap the “View In Your Room” button and scan the area where you would like to place the selected piano. You’ll be shown a virtual image of the piano as it would appear in your room — you can even rotate the piano or change the finish color so you can see how it will blend in with your décor, then take a picture of how it would look as you explore different options. With Piano AR, it’s never been easier to envision the piano of your dreams in your home.
The Digital Option
If you have your heart set on owning a grand piano but your available space only allows for an upright (or if you already own a grand but are downsizing to a smaller space), there’s an easy solution: Consider purchasing a digital piano instead. Not only do many digital pianos offer the sound of a grand (in addition to many other kinds of instrument sounds — a feat of technological wizardry that not even the finest acoustic piano can provide), they also take up much less space than even an upright. They also allow you to practice silently by simply plugging in a set of headphones, and are much easier to maintain than acoustic pianos — for one thing, you never have to tune them!
Yamaha offers many different digital pianos, from portable models to beautifully crafted ARIUS YDP Series instruments to the full-featured Clavinova line, available in both upright and grand piano cabinets. Many include digital samples of the revered Yamaha CFX and Bösendorfer Imperial concert grand pianos found on the finest concert stages the world over.
Yamaha Clavinova.
And then there are hybrid instruments like Yamaha SILENT Pianos™ and the TransAcoustic Pianos™. These have the genuine sound and feel of an acoustic piano … but they also allow you to decrease volume or even mute the sound altogether, making them capable of fitting into anyone’s lifestyle.
Whichever type of piano you end up purchasing — grand, upright or digital — you’re sure to enjoy many happy hours of making music. Time to start measuring!
When it comes to wireless headphones, it’s easy to get overwhelmed by the ocean of options, but a little knowledge and planning will narrow down the field considerably. Whether you’re buying them for yourself or as a holiday gift, let’s take a look at what you need to know to make an informed purchase.
Headphones, Earphones or Earbuds?
For the purposes of this blog, we’ll use the generic term “headphone” to include earphones and earbuds as well. However, there are two types of headphones: over-ear and on-ear. The difference between the two is as follows:
– Over-ear models like the Yamaha YH-E700B provide the maximum sound isolation. As the name implies, these kinds of headphones fully enclose the ear with soft cushions. One caveat, though: If they are too heavy, tight or restricting, it can be uncomfortable to wear these kinds of headphones for long periods of time. The Yamaha YH-L700A features plush memory foam for an excellent seal and soft fabric on the adjustable headband for long-lasting comfort and listening sessions.
Yamaha YH-E700B over-ear headphones.
Yamaha YH-L700A over-ear headphones.
– On-ear models like the Yamaha YH-E500A have cushions that sit on the outer ear, as opposed to enclosing the entire ear. Many people find these models — particularly those with adjustable headbands — to be the most comfortable when listening for extended periods.
Yamaha YH-E500A on-ear headphones.
Earbuds like the Yamaha TW-E3C are worn in the ear with no wired connection to anything (“true wireless”). These are the lightest weight and most unobtrusive of all kinds of personal listening devices.
Yamaha TW-E3C true wireless earbuds.
How Will You Be Using Your Headphones?
This is the first consideration that will help narrow down your choices, so start by asking yourself this question: Will you be using your headphones for …
– Listening to music on your home audio system? As mentioned above, quality over-ear headphones can offer the maximum in sound quality.
– Listening on the go? Earbuds are great for creating a personal space when you’re on the go, while on-ear headphones allow you to enjoy your music without disturbing those around you in the workplace.
– Exercising, jogging or working out? Here, earbuds are more suitable due to their unobtrusive size. Just make sure they’re water- and sweat-resistant.
If you can’t decide how you’re likely to be using your headphones most of the time, it may be that you need more than one. But there are many other factors to weigh as well, such as:
Fit
Good fit is a must! No matter what other features your headphones have, the way they sit on your head or in your ears defines how comfortable they are and how long you can wear them. In addition, how well the headphones fit over your ears or seal your ear canal affects the quality of the sound reaching your ears. Look for headphones that offer a customizable fit, whether it’s swiveling earcups for over-ear models, or several sizes of eartips for earbuds. Here’s how to get the best fit from earbuds and headphones.
Active Noise-Cancelling (ANC)
The problem with listening on the go — that is, away from a controlled environment like your home — is that your music is subject to all kinds of noise from loud conversations, traffic and other intrusions from the outside world. Headphones with a feature called ANC (short for “Active Noise-Cancelling”) address that problem by removing unwanted noise from the music you hear. But be aware that there are various methods for noise-cancelling and some headphones, and some are more successful at it than others. Yamaha Advanced ANC technology uses sophisticated processing and internal microphones to carefully separate and remove the noise, leaving your music pure. Yamaha YH-E700B and YH-L700A headphones, as well as EP-E70A earphones, feature Advanced ANC.
Ambient Sound
Think of Ambient Sound as the opposite of ANC. Some headphones allow you to choose when to let in sounds from your environment, like traffic sounds or public transit announcements, for safety reasons. A simple button push might keep you from missing your train stop!
Sound Quality
For those who are all about getting lost in their music, the best choice is over-ear or on-ear headphones, since the isolation they provide is optimal for delivering high-quality audio and an immersive experience. That said, when headphones are worn as a fashion accessory, sound quality may seem like a secondary consideration. But you can still enjoy high-quality audio while making a statement about who you are.
Before you consider sound quality, however, understand how subjective it is: What sounds good to one person may sound just “meh” to someone else. If you can’t pay a visit to a store, read reviews or try to get suggestions from friends and family as to what kind of headphones they use, and why they like those particular models.
Look for insight on the overall balance. Do reviews talk about the headphones coloring things, or bringing out certain aspects they may have never heard before? That can be a good thing or a bad thing, depending on the content and personal taste. Things to look for in reviews and try to avoid: obvious distortion, or a sound that’s too boomy or overly bright. Any of those sonic symptoms will quickly lead to listener fatigue. The goal is to purchase headphones that will be used often, not ones that will end up on a shelf.
When it comes to making any kind of purchase, recommendations can often be helpful, though bear in mind the source; if the person offering suggestions doesn’t use their headphones the way you will, you might consider following your own path.
Battery Life
Freedom ain’t free. The cost of being wireless and free to roam about untethered is charging time. If you can’t be without your music, consider how long the battery lasts in your wireless headphones and how long it takes to fully charge. Ideally, you’ll want to choose a model that won’t have you searching for a charging station everywhere you go.
Bluetooth®
Many wireless headphones connect to music sources using Bluetooth. The latest version, Bluetooth 5, addresses problems with earlier versions such as dropouts and limited sound fidelity. If you listen to music streaming services, Bluetooth headphones that feature aptX HD or aptX Adaptive technology offer high-quality, glitch-free audio, which makes them great for gaming too.
Water Resistance
If you’re planning on using your earbuds for working out, make sure they’re water- and sweat-resistant. A water resistance rating of IPX4 or higher should allow you to work up a sweat without damaging your earbuds. The Yamaha TW-ES5A True Wireless Sports model offers the highest IPX rating of the company’s earbuds. Learn more about IPX ratings here.
Bonus Features
Aside from these main features, look for extra benefits in your headphones that might separate one model from the pack. For example, most Yamaha wireless headphones incorporate Listening Care, which allows you to hear the details in your music without turning the volume up to potentially harmful levels. Some models also feature Listening Optimizer, an adaptive technology that analyzes the fit of your headphones and the wearing conditions in real time to optimize the sound for the best listening experience possible.
In addition, the Yamaha YH-L700A features 3D Sound Field with head tracking. This technology transforms traditional two-channel listening into a 360-degree sound field with the push of a button, allowing listeners to experience movies and videos on their mobile devices with cinema-like realism — immersing them in the action onscreen.
Another factor that might be important to you (or the person you’re buying headphones for) is voice assistance. Digital assistants like Alexa, Google Assistant and Siri have become an integral part of our lives because of their ubiquitous presence on our phones and smart home devices — and they’re even found on some headphones. If you’d rather ask than push buttons, these voice assistants can perform basic functions like controlling volume and taking phone calls.
Last but not least, don’t forget about carrying cases and accessories that might tip the scale toward your final decision. With so many headphones to choose from, every little feature matters!
Photograph courtesy @officialjackel.
Click here to learn more about Yamaha wireless headphones.
You’ve always wanted to play drums. Or perhaps your child or grandchild has expressed an interest in (and perhaps shown an aptitude for) playing drums and you want to encourage them. Either way, you’re a bit conflicted about it.
On the one hand, you feel ready to indulge yourself (and of course you’re always ready to indulge your kids and grandkids!), but on the other you think it’s going to be a noisy and costly activity. In addition, there’s the intimidation factor: Some folks find the prospect of buying a drum set both time-consuming and confusing, especially if they’re not familiar with the jargon and don’t know what to ask for.
The good news is that none of these things are necessarily true. Drums today can be almost completely silent, and they can be affordable, too. What’s more, thanks to online resources (like this blog!), navigating the maze of options is easier than ever before. Here’s what you need to know before you start shopping for that first drum set:
What is a Drum Set, Anyway?
A drum set (sometimes called a drum “kit”) is simply a collection of drums, cymbals and mounting hardware, similar to those you’ve seen played onstage by your favorite band. There are two kinds of drum sets: acoustic and electronic.
An acoustic drum set is made up of the following five basic components:
1. Drums: There are typically at least four or five drums in a set. Each consists of a shell (typically made of wood, but also sometimes metal), across which is stretched a drum skin or “head” (usually made of clear plastic Mylar® or calfskin) — the surface you hit with a stick. The drums that are used most of the time are the bass (“kick”) drum and snare drum, though most drum sets also include one or more tom-toms.
Yamaha Stage Custom steel snare drum.
2. Cymbals: Circular plates made of metal, used for a crashing sound. The most important of these are a hi-hat (two small cymbals mounted vertically, one inverted, that come in contact with one another when a pedal is pressed) and a “ride” cymbal. A starter drum set may also include one or more “crash” cymbals.
3. Hardware: Metal stands to hold the cymbals and drums, plus a throne (seat), a foot pedal (for the bass drum) and a hi-hat stand that includes a pedal for crashing the two cymbals together.
4. Sticks: Long wooden dowels used to strike the drums and cymbals.
5. Drum key: A small metal device used to tune the drums by stretching their skins.
In electronic drum kits, the sounds are produced via electronic, not acoustic means, so pads made of rubber, Textured Cellular Silicone (TCS) or mesh material are struck instead of physical drums and cymbals. Electronic drum kits also include a module (a “brain”) in which hundreds of different sounds are stored digitally.
Acoustic Drums or Electronic Drums?
When deciding which kind of drums to buy, one of the most important factors is the space required. In addition, you will want to consider the time of day you or your child will be practicing — will this disrupt your other family members or the neighbors?
Acoustic drum sets are much louder than electronic drums, have a much larger footprint and will require some sort of isolated room for practice.
Yamaha DTX402.
Electronic kits are smaller, quieter and easier to use since you don’t have to worry about tuning or changing drum heads. An electronic drum kit like the Yamaha DTX6 Series or DTX402 Series is often the best choice for beginners since you won’t need to soundproof the room where they are located — you or your child can use headphones to practice. Another big advantage to electronic drums are the built-in training functions they often provide. These allow an aspiring musician to improve the critical skills of timing and feel. This can include built-in songs the student can play along to, making training and practice more fun — and therefore ultimately more successful.
The Advantages and Disadvantages of Each
Acoustic drums:
The standard for both lessons and live performance.
Loud!
Take them anywhere: not tethered to a power outlet.
Instant gratification: nothing to plug in or set up. Just start hitting ’em!
Good for larger bedrooms, basements or garage … especially if the spaces can be soundproofed.
Produce one sound with various tunings.
Drums and cymbals come in various sizes.
Larger footprint: requires an average 5′ x 5′ space.
Requires lots of new sticks and drum heads as they wear.
Electronic drums:
Easily used at home but requires amplification for performance.
Quiet practice with headphones.
Good for apartments or small bedrooms.
Capable of producing various sounds and styles of drum kits.
Requires some setup and an electrical outlet.
Pads for drums and cymbals are typically smaller than their acoustic counterparts.
Smaller footprint: requires only an average 4′ x 4′ space.
Built-in training functions and metronome.
Less stick wear.
Heads don’t wear down and need replacement unless the kit uses mesh heads. (Yamaha offers replacements for these.)
Things to Look for in an Acoustic Drum Set
1. Mass: A good drum has some weight and feels sturdy. If the drum feels light, the metal and shell is of lower quality. While such drums are not necessarily bad, they are typically harder to tune and tend to need to be replaced sooner.
2. Expandability: If your skills and/or enthusiasm (or that of your young drummer) grows in future, make sure you can add extra components and order individual drums in the same color as your current set. Ask what sizes might be available.
3. Substantial features for your investment: Good drums, heads and hardware can cost a bit more, but they will also retain their value and make it easier to trade up when you or your child are ready.
Things to Avoid in an Acoustic Drum Set
1. Metal corrosion and poor workmanship: Examine the drum shell inside and out. Pay attention to the appearance of the seams. Are they well-crafted and without flaws? Is the finish smooth, with no “bubbling”? If the work is sloppy, chances are you’ll spend more time repairing or replacing things than actually playing the drums.
2. A manufacturer that doesn’t stand behind their instruments: Research drum brands ahead of time. Look for those that have gotten good reviews from users and/or impartial journalists. Lofty features and marketing claims are hard to substantiate without reviews! Things can break and get worn, but quality endures and is reflected in the way the manufacturer is perceived in the marketplace.
Things to Look for in an Electronic Drum Kit
1. Sounds: There’s usually a direct relationship between the price of a module (the central “brain” of an electronic drum kit) and the quality and variety of sounds it offers. Top-notch modules include all the standard drum sounds you would expect, but also offer many other sounds such as bells, wood blocks and non-percussion instruments, as well as special effects. High-end modules also provide the ability to edit and create your own sounds, and in some cases, allow you to download your own samples. Modules with editing and download capabilities can cultivate creativity!
2. Preset patterns: Every module has a selection of preset patterns — typically, short two-bar phrases or drum parts related to specific drum kits or musical styles. As mentioned earlier, these can be valuable learning tools, as well as a source of inspiration in creating your own unique drum parts. Many modules include full play-along tracks for both fun and practice.
3. Connectivity and expansion: If you plan to expand your electronic kit with more pads and triggers in the future, be sure the module has enough connectors to allow this. A USB port lets you send MIDI data to external PCs, digital audio interfaces and workstations, giving you access to a wide range of music software. Inputs for connecting multiple types of audio players (such as smartphones, tablets and CD players) let you practice and play along with your favorite music. Multiple outputs that can send your performance simultaneously to a mixer and recorder can be useful in both live and studio settings. In addition, be sure that the outputs will support the type of amplification system you plan to use.
4. Apps, apps and more apps: Speaking of connectivity, ancillary mobile apps can make any electronic drum kit easier to use, which makes learning faster and playing more fun. That’s why it’s important to choose an electronic kit that’s compatible with as many apps as possible. Yamaha has developed several free apps for DTX402, DTX-MULTI 12 and DTX700 series electronic drums. In addition, specialty apps like Yamaha Rec’n’Share can be used to capture the audio from a Yamaha DTX6 Seriesor DTX402 Series electronic drum kit or EAD10 electronic acoustic drum module and combine it with video taken with a smart device. The user can then download their performance and share it on social media, or send it to friends in a text or email. Want to learn more? Read our blog “Three Ways That Apps Can Help Your Electronic Drumming.”
5. A module “head” that is simple to use and sounds good: It should also allow you to download new kits and customize existing kits with fresh sounds and capabilities. There’s no better way to stay engaged!
6. Pads that are sturdy and have a good feel when played: There are several types of drum and cymbal pads available. When choosing, look for a good feel that pairs well with the sounds of the module. You can have a very good pad and an average module — or vice versa. Rubber pads are generally used in less expensive starter electronic drum kits, although some may offer mesh or foam. The pads you choose should have some give, but not too much rebound or bounce.
7. A rack that has sufficient weight to keep things in place yet is easy to adjust: The mounting hardware of your electronic drum kit should make it easy to keep components in place, using a standard drum key or knobs that stay tight.
8. Durability: Anything you hit with a stick should have some mass — and should feel sturdy.
Things to Avoid in an Electronic Drum Kit
1. A module with significant limitations: If it doesn’t allow you to personalize the feel of the kit or limits the number of pads you can add (due to only a few or single-zone inputs), keep looking.
2. A module that has poor sounds: Unlike acoustic drums, you can’t fix the sounds of an electronic drum kit with well-placed tape or muffling.
3. Pads that feel too hard: This can cause fatigue.
4. Pads that feel flimsy: Typically, these will not hold up under normal playing conditions — especially at the hands of a child.
5. Pads that are too bouncy: These can make transitioning to an acoustic drum set difficult.
Cost Versus Quality
Whether you’re shopping for acoustic or electronic drums, you’ll find that the market is full of affordable options. But remember, you or your child will be physically hitting the drums and many cheaper kits will fail over time due to heavy use, so make sure you look for a drum set that is robust, even if it costs a little extra. In addition, more expensive electronic drum kits feel more realistic and offer larger playing surfaces similar in size to those found in an acoustic drum set. Whichever way you go, starting with good quality instruments will make the experience more enjoyable — and can save you money down the road.
For more information, check out our three-part blog series, “So Your Child Wants to Learn to Play Drums”:
There is nothing quite like the joy of playing a real piano. The feel of the keys and the beauty of the tone — produced by felt hammers striking metal strings resonating through a massive wood soundboard — is an experience that is difficult to replicate with a purely digital keyboard.
When shopping for an acoustic piano, you should of course pay close attention to the touch and tone of each instrument that you audition. Naturally, you’ll also consider the instrument’s size, durability and style and finish of the cabinet, as well as the cost.
But there are other important issues to consider when it comes to today’s pianos, where technology can play a major role in your enjoyment of the instrument you purchase. In this posting, we’ll take a look at some of them.
Practice in Privacy
Wouldn’t it be great to be able to play your piano whenever you feel like it — and not bother neighbors or members of your household?
Imagine that you could put on headphones and play the very same grand or upright piano you’ve fallen in love with – and not be heard by anyone!
This is a feature you can find on some modern acoustic pianos, including numerous Yamaha models such as the Disklavier™, SILENT Piano™ and TransAcoustic™. In fact, nearly every size of a grand and upright piano that Yamaha makes is available in at least one of these series of technology-equipped instruments. There are even two Bösendorfer models available as Disklaviers.
Here’s how it works: When you engage silent mode, a bar inside the piano that prevents the hammers from hitting the strings is automatically moved into place. Remarkably, the action feels exactly the same — the only difference is that there is no sound of hammers hitting the strings. Instead, when you put headphones on you’ll hear the digitized sound of a real concert grand piano — a sound that matches the expectations of your ears and enables quiet, private enjoyment of your instrument.
Add a Volume Control
Or suppose you’d like to play without headphones but somehow turn down the volume. Of course, you could lower the lid of the piano, but that only gets you so far. How about having a volume knob that can do the job?
The Yamaha TransAcoustic piano does just that. By injecting the sound of a digitized 9-foot concert grand piano directly into its own soundboard, you can alter the blend of the two to your liking, giving you a variety of options:
– Play an upright or small grand piano and sound like you’re playing a large concert grand. Simply adjust the relative volume of the concert grand piano with the volume knob.
– Get your piano in tune… even if it’s actually out of tune. Turn on the Silent feature (so the hammers don’t hit the strings) and send the digitized sound of the concert grand into the soundboard. Instant perfectly tuned piano!
– Ready for quiet practice? Just put on headphones and enjoy the concert grand experience all to yourself.
– Go back to the totally “pure” sound of the piano itself. Easily accomplished: Just turn off the digitized sound.
Live Performance Enhancement
The Silent feature can also be used in the exact opposite way: to amplify your piano. This allows you to easily perform in a large public space, such as a church or performance venue where the acoustics require amplification. As an alternative to using microphones, you can connect your instrument directly to the venue’s sound system.
Interact With Your Apps
If you’ve been to a concert or two in the last couple of years, you may have noticed that sheet music is going digital. It’s not uncommon to see musicians reading music off a tablet instead — the same kind of tablet, in fact, that you may already own.
A tablet can replace hundreds or even thousands of printed pieces of sheet music, plus it fits nicely on the music desk of any acoustic piano. Add a wireless connection between the piano and the tablet — another feature you’ll find in several Yamaha models — and your playing can interact with the music on the screen. You can then use an app that helps you learn a piece, or one that provides a musical accompaniment that actually follows your playing.
Not only does Yamaha provide a way of connecting acoustic pianos directly to these interactive apps, we’ve pioneered a method of doing so wirelessly, using a Bluetooth®MIDI adapter called the MD-BT01.
Record Yourself
Creating a beautiful audio recording normally requires a combination of expensive microphones, careful mic placement and audio expertise. Yet some of today’s pianos allow you to make an audio recording without external microphones.
Most Yamaha technology-equipped pianos offer this feature. The basic idea is that the piano uses its internal digital sample of a 9-foot concert grand to turn your playing into an audio recording. The recording is free of room noise and hiss and will always be in perfect tune — even if the piano itself is actually out of tune.
Enjoy Performances from Artists the World Over
Let’s take things a step further. How about the idea of inviting fine artists from around the world into your home — virtually — to play your piano, at any hour of the day, any day of the week? That’s something you can do if the acoustic piano you purchase includes a record-and-playback system.
The full-featured Disklavier models offered by Yamaha have such a system. This means that you can record yourself and the piano will actually reproduce your performance by moving the keys and pedals the same way you did when you played!
This also gives you the opportunity to play back recordings that were made by other people on other pianos. For example, you can enjoy a piece of music being performed by a master artist or the original composer, or you can practice a piano duet by playing along with an absent partner.
The controls offered by the Disklavier are quite extensive. You can adjust the speed of playback or transpose the performance. You can even use a mobile device to record yourself with synchronized video or to enjoy a live concert that is streamed to your piano from a distant location.
Just a few years ago, these would be the makings of science fiction. Today they are reality. So when you’re ready to purchase an acoustic piano, be prepared to enter a brave new world. These aren’t your grandmother’s pianos!
Click here for more information about the Yamaha Disklavier.
Click here for more information about Yamaha SILENT Pianos.
Click here for more information about the Yamaha TransAcoustic Pianos.
Around the holidays — well, actually all year long — I get phone calls, emails and texts (thank goodness carrier pigeons have gone out of fashion) from friends who want to buy a guitar, but don’t know much about them. Their questions sound something like this:
“Hey Tom, my (son or daughter) wants to play guitar. What’s the best one?”
“Hey. I’m at (pick a store) and they have a guitar here — would this be a good one for (me/my son/daughter/niece/nephew)?”
As much as I’d love to post my cell number and be everyone’s personal guitar shopper, this blog is meant to start you in the right direction and arm you with the information you need to find the right guitar to gift a loved one (or yourself).
Here are the four things you need to know to give a holiday gift that can bring a lifetime of enjoyment.
One: Get ‘em what they want to play
If you are buying a guitar for someone who knows what they want — great! Much of your work is done. The single most important decision is selecting an instrument that will make the person want to play. So if they want an electric guitar (don’t freak out — we’ll address the different types of guitars in just a minute), buy them an electric. If they want a classical guitar, buy them a nylon string model.
But what if they don’t know what they want? In that case, you’ll need to do a bit of detective work. It’s easy: Simply find out what kind of music they love and want to play. Determine what musicians or music genres they listen to, and then see what type of instrument those artists usually play. If your gift recipient is a fan of contemporary pop or country music, an acoustic steel-string guitar will fit the bill. If they are enamored with classic rock bands, an electric guitar is probably in order. If they’re into folk or classical music, a nylon string guitar is your best bet.
Two: Types of guitars to consider
The second thing you need to know is just a bit about the different types of guitars you can choose. The good news is, there are really just three of them:
Acoustic steel-string guitar. This is the most popular style for a new player. As the name suggests, this guitar makes sound without an amplifier, so all you need is the guitar itself to make music. It also has steel strings, which have a distinctive sound. You may have heard that steel strings are hard on the fingertips, and this is true to a point, but most people adapt quickly.
Yamaha FG800J regular body acoustic guitar.
If you are considering a steel-string guitar, I have two important tips. First, choose a size that’s right for the player-to-be. Folks with smaller hands and bodies will find a smaller body guitar easier and more enjoyable to play. Young teenagers, children and some adults find this to be the best choice.
Yamaha FS800 small body acoustic guitar.
Secondly, if the person to whom you are gifting the guitar has aspirations of performing or recording, an acoustic-electric guitar is a good way to go, since this type of guitar allows them to play acoustically and also plug in and play amplified.
Yamaha FGX800C acoustic-electric guitar.
Classical (nylon string) guitar. As the name implies, the strings of these instruments are made of nylon. This type of guitar has a distinctive sound that is associated with classical music, and also some folk music. You may hear that it’s best to start with a nylon string guitar because it’s easier on the fingers, but as I mentioned earlier, most people adapt quickly to whatever kind of guitar they are given. Also, nylon string guitars often have wider necks, which can make it more difficult to play for some folks with smaller hands.
Yamaha C40II nylon string guitar.
Electric guitar. For this type of guitar, you’ll also need an amplifier, since the guitar itself doesn’t make much sound. That adds somewhat to the initial expense and takes a bit more effort to plug in and play — but not much. On the other hand, beginners sometimes find electric guitars a little easier to play than acoustic guitars, since the strings may be closer to the neck (in the jargon, their “action” is lower), so less finger strength is required.
Yamaha Pacifica PAC012 electric guitar.
Yamaha THR-II desktop amps.
Three: It pays to accessorize
Home stretch. All the hard parts are done. Adding a few items to your gift can help your player start off strong.
The most frustrating part of learning to play guitar used to be tuning it! But no more. You can download a number of tuning apps for your smartphone that work great. There are also clip-on tuners that sell for well under $20. The important thing to know is that a tuner is a critical tool for any guitarist.
Yamaha GCT1 clip-on tuner.
For most styles of music, a guitar strap is a great investment. The important function of a strap is that it lets a new player get their guitar in the right position right away.
And, if you’re buying for a burgeoning musician who will be taking their guitar to school, friends’ house or lessons, a case is really important too. For most purposes, a lightweight, soft case known as a “gig bag” works well and is not very expensive.
Four: Put a bow on it (with a teacher)
If you REALLY want to get your new guitar player off on the right foot, gift them a month of lessons with a qualified guitar teacher. A teacher will start them off right in terms of holding, tuning and playing the guitar. You can learn to play songs watching YouTube, but a real, live teacher makes a difference. Hit up your local music store — most offer lessons — or Google it.
Finally, a brief visit from the Ghost of Christmas Past. What if you have a guitar hanging around in a closet someplace. Is that OK to gift? I’d give that a definite maybe. It could be totally fine with a new set of strings and a slight adjustment or two, or it could be a one-way ticket to frustrationville for your player-to-be. My advice? Take it to a local music store and have them check it out for you.
Have fun finding that gift that can bring a lifetime of music! It lasts way longer than chocolate.
When purchasing your first digital keyboard, there are several factors to consider: size, budget, sound quality, the number of onboard sounds, touch, built-in learning features, recording capability, and connectivity to devices and computers — to name a few. In this posting, we’ll try to simplify your shopping decisions by exploring each of these.
Short On Space? Go Portable.
Small digital keyboards are sometimes called portable keyboards. They are exactly that — portable. These instruments take up very little space, and can be set up or stored anywhere. Most have 61-note non-weighted keys, although some models feature 76 keys, sometimes with slightly weighted actions. Many people prefer a keyboard that is touch sensitive, which allows better musical expression, similar to a piano. On those instruments, the harder you play the key, the louder the sound.
Just about every digital keyboard provides a headphone jack. This is a great feature that allows you to make music in privacy at any time of the day or night. And even entry-level instruments offer a large variety of onboard sounds — dozens or even hundreds of them. Quality can vary, though, so be sure to listen carefully as you audition them. In addition, many digital keyboards support Styles that automatically provide elaborate accompaniments. Again, quality can differ from instrument to instrument, so take a little time to try them out.
Any of the Yamaha PSR-E Series portable keyboards would be good choice for the beginner. Select PSR-E models have a built-in feature called “Keys to Success,” which is based on teaching techniques shared with Yamaha over many years. You can select just the key phrases (“steps”) of a song — the ones you like most or need to work on — and practice them one by one. Each time you play all the way through the current step, your performance is evaluated.
Yamaha PSR-E283 portable keyboard.
Connectivity to computers and portable devices such as smartphones is another important feature to look for. Several digital keyboards provide a USB TO HOST port for this purpose, allowing you to record high-quality audio or MIDI without the need for a separate interface. A wide variety of creative and educational apps are available online from Yamaha and other developers.
Looking for More? Consider a Digital Piano.
Portable keyboards are great for the hobbyist and beginner. However, you may prefer to purchase a more advanced digital piano. These instruments offer many of the qualities of an acoustic piano, including a full 88-note weighted keyboard — but at a significant savings in cost — and without the need for regular (and sometimes expensive) upkeep. In addition, they often provide functionality you won’t find on the typical acoustic piano, such as recording capability, connectivity with devices and computers, learning tools and more.
Yamaha offers a wide range of digital pianos, including these:
P-Series compact digital pianos like the P-525 are a great option if space is an issue and are suitable for both practice and live performance.
Yamaha P-525 compact digital piano.
Our Portable Grand digital pianos combine portability with weighted keyboards. Some of them also offer wireless connectivity for iOS smartphones and tablets using optional wireless adapters.
Yamaha DGX-670 portable grand digital piano.
Yamaha ARIUS instruments include a number of digital pianos with built-in consoles, ranging from basic models to those with advanced features.
Yamaha ARIUS YDP-105.
Clavinova is the premium Yamaha digital piano product line, combining authentic touch, tone and look with cutting-edge technology. There are three different series of Clavinovas available: the CLP, the CVP, and the CSP.
Yamaha Clavinova CSP-255.
Choosing your first digital keyboard may seem overwhelming at first, but with a little research and a visit to a local music dealer or two, you’re sure to come up with the ideal solution. And remember: Always buy not just the instrument that fits your budget, but the one that best fits your needs.
For more information about Yamaha portable keyboards, click here.
To find out more about our digital keyboards, digital pianos and Arranger instruments (including Genos2), click here.
It’s that special time of year again! Here are some great audio gift ideas from Yamaha for the music lover or movie aficionado in your life.
Earbuds
TW-E7B True Wireless Earbuds
Our flagship TW-E7B True Wireless earbuds deliver astonishing sonic realism, detail and clarity that makes you feel closer to the artist. There are a full complement of Yamaha-exclusive features too, including Advanced ANC (Active Noise-Cancelling) technology that leaves your music pure and untouched; a Listening Optimizer that corrects the sound in real time, adapting to you and your environment; Ambient Sound that lets you choose when you need to be aware of your surroundings; and Listening Care intelligent equalization for full-range sound at low listening volumes.
TW-E7B earbuds also deliver crystal-clear phone calls thanks to their advanced mic design and Qualcomm® cVc (Clear Voice Capture) technology, as well as stable wireless connectivity with Qualcomm TrueWireless Mirroring. They offer up to 22 hours of total battery life, and are water and sweat resistant so they can be worn outdoors as well as indoors.
TW-E5B True Wireless Earbuds
High-performance yet cost-effective TW-E5B earbuds provide next-level sound and style, with extraordinary realism, detail and clarity, along with crystal-clear calls thanks to advanced mic design and Qualcomm cVc (Clear Voice Capture). They offer up to 30 hours of total battery life, and are water and sweat resistant so they can be worn outdoors as well as indoors.
Features include Ambient Sound that lets you choose when you need to be aware of your surroundings and Listening Care intelligent equalization for full-range sound at low listening volumes.
TW-ES5A True Wireless Bluetooth Sports Earbuds
TW-ES5A sport earbuds are specially designed for use in all activities and weather conditions, delivering dynamic sound that drives you to your best performance. Their unique shape with silicone fins ensures a secure and comfortable fit, plus they’re waterproof and sweat resistant, making them the ideal companion on the playing field, between the hoops or in the gym.
Features include Ambient Sound that lets you choose when you need to be aware of your surroundings and Listening Care intelligent equalization for full-range sound at low listening volumes. They’re also especially long-lasting, with up to 34 hours of total battery life, along with stable wireless connectivity and crystal-clear calls thanks to their advanced mic design.
AV Receivers
RX-V4A
The RX-V4A 5.2-channel surround sound audio-video receiver brings the theater experience to your living room, with the latest in HDMI video compatibility and advanced audio technology, including Dolby Digital Plus and DTS-HD Master Audio decoding.
A whopping 80 watts per channel provides plenty of power, and there are numerous onboard wireless streaming options, including Wi-Fi®, AirPlay 2® and Spotify Connect, allowing you to easily listen to your favorite music on services such as Pandora®, Spotify®, Amazon Music, SiriusXM, TIDAL, Deezer and Napster. There’s support for voice control, enhanced media and gaming, as well as Yamaha MusicCast multi-room technology, which allows you to control all functions remotely from a free app, as well as giving you the ability to connect optional wireless surround sound speakers. What’s more, built-in YPAO automatic room calibration can be used to analyze the acoustics of your listening and viewing space so that the sound you hear is the absolute best it can be.
Speakers
NS-777 Floor Standing Speaker
Every fan of great sound will be thrilled to receive this gift. The NS-777 is a floor-standing three-way bass reflex speaker that can handle up to a whopping 250 watts of music power. It incorporates a pair of 8″ cone woofers, a 5″ midrange cone driver and a 1″ aluminum dome tweeter for full-range sound from 30 Hz all the way up to 35 kHz. For improved imaging, the midrange and tweeter utilize Yamaha-exclusive waveguide horns that reduce reflected sound and increase the proportion of directly generated sound waves reaching your ears.
The NS-777 cabinet has a high gloss black piano finish that provides solid construction with minimal sound diffraction, and the included speaker stand provides the solid footing necessary for full floor contact, enhanced stability and minimal vibration resonance.
NS-C444 Center Channel Speaker
The NS-C444 two-way acoustic suspension speaker is specially designed to carry critical center channel information (which is usually dialog) in home theaters. It incorporates dual 5″ cone woofers and a 1″ aluminum dome tweeter that utilizes an exclusive Yamaha waveguide horn for a clear and precise sense of sound direction and placement.
The NS-C444 can handle up to 250 watts of music power with a frequency response of 65 Hz to 35 kHz. The cabinet has a high gloss black piano finish, which provides solid construction with minimal sound diffraction, and the grill cloth provides an attractive and acoustically transparent protective cover for the drivers.
NS-333 Bookshelf Speakers
The NS-333 two-way bookshelf speaker system is ideal for both music listening and home theater applications. It incorporates a 5″ cone woofer and a 1″ aluminum dome tweeter, and thanks to its bass-reflex design, can be used for main or surround channels. For improved imaging, the tweeter utilizes a Yamaha-exclusive waveguide horn.
The NS-333 can handle up to 150 watts of music power with a frequency response of 65 Hz to 35 kHz. The cabinet has a high gloss black piano finish, with an attractive and acoustically transparent grill cloth to protect the speaker drivers.
Home Theater in a Box (HTIB)
YHT-5960U
While there’s something to be said for assembling a home theater with hand-selected individual components, there’s no question that a complete turnkey “Home Theater in a Box” system like the YHT-5960U is a lot easier and more convenient — the ideal gift for movie and TV enthusiasts everywhere.
The YHT-5960U includes a full-featured 5.2-channel Yamaha RX-V4A AV receiver, along with a powerful subwoofer and complete set of surround speakers. The RX-V4A offers the latest in HDMI video capability and a whopping 80 watts of power per channel, along with advanced audio technologies like Dolby TrueHD and DTS-HD Master Audio. It also supports enhanced media and gaming, YPAO automatic room calibration, and wireless streaming via Wi-Fi, Bluetooth, AirPlay 2, Spotify Connect and Yamaha MusicCast. There’s even voice control with Amazon Alexa, Siri® and Google Assistant. The included front, rear and center speakers place easily in your room, and there’s a dedicated subwoofer for powerful bass, plus speaker wire perfectly matched for each speaker.
Ready to learn more about these great products? Check out our online store.
There’s Johnny Cash’s heartfelt “A Thanksgiving Prayer” at one end of the spectrum and Adam Sandler’s wacky “The Thanksgiving Song” at the other, but the truth of the matter is that there really aren’t many songs specifically written about Turkey Day. That said, here are the stories behind five of the best-known songs of gratitude … and one bonus Beatles factoid about an essential Thanksgiving condiment.
1. I’ve Got Plenty To Be Thankful For
Popularized by Bing Crosby, this was composed by iconic songwriter Irving Berlin for the 1942 musical Holiday Inn — a film that also included “White Christmas,” the best-selling single of all time. Check it out here.
2. What A Wonderful World
Originally recorded in 1967 by legendary trumpeter Louis Armstrong, this song found new life when it was used in the 1988 film Good Morning, Vietnam and re-released as a single, making the then 87-year old Armstrong one of the oldest artists ever to top the charts. Check it out here.
3. Thank You (Falettinme Be Mice Elf Agin)
This quintessential Sly and the Family Stone 1970 hit features an instantaneously recognizable slap-bass riff from the inimitable Larry Graham. The title is an intentional mondegreen — a fancy word for a phonetic spelling. (Say the song’s title out loud if its meaning isn’t obvious.) Check it out here.
4. We Are Family
Written by Bernard Edwards and Nile Rodgers (their first for any act other than their own band Chic) and performed by Sister Sledge, this feel-good celebration of friends and family came to epitomize the disco-influenced sound of the ’70s. Check it out here.
5. Thank You For Being a Friend
A modest hit for singer/songwriter Andrew Gold in 1978 (he once called it “just this little throwaway thing that took about an hour to write”), this was made famous seven years later when it was re-recorded by jingle singer Cynthia Fee as the theme song for the TV sitcom The Golden Girls. Check it out here.
Bonus Beatles Factoid
The urban myth is that John Lennon mumbles the chilling words “I buried Paul” during the fadeout of the group’s single “Strawberry Fields Forever,” but what he is actually saying is “cranberry sauce.” It was late November 1966 when the vocal was being laid down, and between takes the Fab Four were chatting about American Thanksgiving traditions — something that was clearly on John’s mind as he improvised on an open mic. Check it out here. (Lennon’s ode to Turkey Day occurs at precisely 3:58.)
Do you know someone who has a secret desire to play songs and make their own music, but doesn’t know where to begin? Is there a child in your life who would thrive with the benefits a musical education brings to a growing brain? If so, a Yamaha Pianica might be the perfect gift!
The Pianica is a small, portable keyboard that’s breath-powered; all that’s required is to simply blow air into it while pressing down the keys. While the sound it makes is similar to an accordion or a harmonica, it uses the same notes and familiar black-and-white keys as a piano. This makes it easy for anyone to get started playing the instrument, since they can choose from thousands of easily available piano book and sheet music titles to learn the notes to their favorite songs.
In a Pianica, air blows across thin metal reeds to make each note.
Yamaha first introduced the Pianica way back in 1973. It’s the company’s version of what is known more broadly as a melodica or a keyboard harmonica. Actually, “keyboard harmonica” is a great way to describe these instruments, since that’s essentially how they work. Like a harmonica, sound is produced when air blows across a thin strip of metal called a reed in order to make it vibrate. But while a harmonica requires you to carefully blow into small holes to play a specific note, the keys on a Pianica redirect the air to blow across the individual reed that’s tuned to that note.
So how difficult is it to play a Pianica? Not difficult at all! In fact, just about every elementary school student in Japan learns to play music on a Pianica. The standard piano-like keyboard makes it intuitive to learn scales, chords, and the relationships between natural notes and accidentals (sharps and flats). And because these instruments are made from lightweight and durable plastic, they’re easy to carry around. Several Yamaha Pianica models even include color-matched durable plastic carrying cases that are tough enough to last in a child’s hands.
Pianicas can be played in two different ways. For those who prefer a traditional two-handed piano approach, the instrument can be laid flat on a table, with both hands used to work the keys. In this configuration, air is blown into a long flexible tube to get the sound started. Alternatively, if the player prefers to be mobile, the Pianica can also be held and played vertically, with the air blown into a fixed mouthpiece. This is a great choice for playing on stage or while walking around — it even allows the player to act as traveling troubadour at a party!
The Pianica played flat on a table.
For more experienced players, the Yamaha P-37E models come with a soft zippered carrying case that makes it easy to take the instrument anywhere. These instruments were built to appeal to a more mature player, with internal design changes that produce a softer and more mellow sound quality than the brighter models often used in schools. All of this combines with a sleek and stylish look to make an instrument that fits in with the décor of anyone’s home as well as onstage.
Whether you’re buying a gift for a friend or relative hoping to discover or rediscover the joy of making music, or you’re a parent who wants to introduce your child to music for the very first time, Pianicas are an easy and fun way to get started.
Check out the video:
Click here for more information about Yamaha Pianicas.
It’s the time of the year when bass players, like everyone else, look forward to holiday parties, New Year’s gigs, and cool new gear under the Christmas tree. With that in mind, here’s a list of 10 recommendations for bassists of all stripes: the beginner, the intermediate player and the pro alike.
1. A NEW BASS
Entry level
If there’s someone on your gift list who’s ready for their first bass, Yamaha TRBXmodels are a great choice. The TRBX174EW is lightweight (less than 9 lbs.), and its 34″ scale length, ergonomic body design and 19 mm string spacing make it easy to play. To top it off, the exotic mango top sets this one apart from the pack with its beautiful wood grain.
Yamaha TRBX174EW.
Intermediate
Selected Yamaha TRBXbasses offer upgraded body tonewoods(alder/maple and mahogany), maple/mahogany necks and fancier tops, plus more colors, more body-design options, and superior pickups and EQ options, as well as the ability to switch between active and passive modes. With its alder/maple body, flame maple top, maple/mahogany five-piece neck, three-band EQ and battery alert LED, the TRBX604FMfour-string is a great option for the bass player whose beginner days are in the rearview mirror.
Yamaha TRBX604FM.
Professional
Yamaha BBbasses are the first choice for many pros. These solid alder- and alder/maple/alder-bodied basses, available in several cool finishes, stand out from the crowd thanks to their distinctive look, 5-piece necks, and six-bolt neck joints. The BBP34four-string model boasts a wide variety of tones, and thanks to Yamaha I.R.A. (Initial Response Acceleration) technology, it feels “played-in” right out of the box.
Yamaha BBP34.
Professional Plus
What about the bass pro who’s got everything? Consider one of the signature models inspired by four longtime Yamaha endorsers. Fans of punk and Peter Hook’s singular tone will love the BBPH; rock legend Billy Sheehan has created the Attitude 30th and the Attitude Limited 3; jazz maven John Patitucci, a six-string inspiration for over four decades, plays the TRBJP2; and studio icon Nathan East’s BBNE2has everything it takes to support a band at the highest level. Each of these basses pulls off the neat trick of being distinctive but versatile.
Yamaha BBNE2.
2. AN ACOUSTIC BASS GUITAR
Guild’s fretted, fretless and jumbo models of its acoustic bass guitars are great for songwriting, acoustic jams and solos around the campfire. With a solid Sitka spruce top, an arched flame maple back and an ebony fingerboard, the Jumbo Junior Bass aims for tone that’s both deep and clear. It can be played using the onboard preamp or completely unplugged — either way, this 23 3/4″-scale beauty will come in handy.
Guild Jumbo Junior Bass.
3. A MINI-BASS
Full-size basses usually take up more space than a guitar, but if you need something that fits into the overhead compartment of a plane, look no further. The 22 7/8″ scale length Cordoba Mini II Bass MH-E, which could easily be mistaken for a ukulele, is strung with phosphor-bronze strings, tunes to standard E, and just might inspire something completely different from the bass player in your life.
Cordoba Mini II Bass MH-E.
4. STRINGS
Choosing the right strings is so important that we’ve devoted a whole blog posting to it, and to make matters more interesting, it’s common for different bassists to have completely opposite experiences with the same set of strings! If you aren’t sure what strings to buy for your favorite electric bass player, my recommendation is that you head over to the Dunlop bass strings website, which has something for everyone. Their Hybrid Nickelset is my favorite; it manages to be warm and direct, with juicy mids and just the right string tension.
Dunlop Hybrid Nickel bass strings.
5. A STRAP
Beyond being a fashion statement, a good strap doesn’t slip, is adjustable to your ideal height, and helps cushion your shoulder instead of digging in. Levy’s Leathers offers many options, from itty-bitty skinnies to ultra-wides; their cool 3 1/4″-wide Signature Legacy Series strap, a perennial favorite, features leather-wrapped 1/4″ foam padding, and it’s adjustable from 38″ to 52″.
Levy’s Leather Signature Legacy Series strap in black.
6. A NEW BASS AMP
Ampeg is one of the original kings of the bass-amp jungle, and the SVT just might be the most famous bass amp on earth. TheSVT-CL, a standout from the company’s Classic line, delivers 300 watts of juicy tube tone that’ll (almost) make you forget that it weighs 80 lbs. Need the perfect matching speaker cabinet? The SVT-410HLF is a 4×10 that’s deep, powerful … and 74 lbs all by itself. You might need a little extra help getting this amp stack under the Christmas tree, but your hard work will not be in vain.
Ampeg SVT-CL head.
Ampeg SVT-410HLF cabinet.
7. A MULTI-EFFECTS PROCESSOR
Bassists who want to dive deep into the world of effects will appreciate the Line 6 HX Stomp’s 14 bass amp models, 37 cabinet models, 16 microphone models and 200 effects. Other similar products from Line 6 include theHX Stomp XL, which offers even more options, and the Helix Effects (HX-FX), with just effects, no cab models.
Line 6 HX Stomp.
8. A BASS PEDAL
If the bassist in your life is into portability, he or she will love the Line 6 POD Express Bass, which offers seven amp models, seven cab models, four compressors, four synths, four distortions, three modulation effects and a delay — all in a box that weighs less than a pound and runs on three AA batteries. In short essential sounds that are easy to find and use, in a single compact device that fits in any backpack.
Line 6 POD Express Bass.
9. HEADPHONES
Everyone appreciates a good pair of headphones, and bassists are no exception. A good gift choice would be the Yamaha HPH-MT7. Inspired by the classic Yamaha NS-10 studio monitors, these closed-back headphones offer clinical, pro-level reference sound with low end that is solid but not exaggerated, making them ideal for practicing, recording and mixing bass.
Yamaha HPH-MT7.
10. A KEYBOARD
As discussed in a previous posting, playing keys makes you a better bass player. Yamaha offers plenty of ways to get started. One of the most accessible options is the reface CS, a 37-key polyphonic mini-keyboard that’s flexible and fun yet non-threatening to newbies. Playing a reface CS is an easy way to develop any bassist’s knowledge of chords and work on their synth bass chops, too.
Yamaha reface CS.
No matter what you choose to give the bass player in your life, here’s hoping that it’s received in the spirit of the season — with good will, joy, gratitude and optimism. Happy Holidays!
As we near the halfway point of the school year, the day-to-day interactions with students can become a bit mundane, even tedious. We’re past the celebration of a fresh start and beyond the excitement of the initial sights and sounds of our seasons.
This is what I call “ordinary time” — the days when there’s nothing to do but show up and go to work. For both students and teachers, it’s OK to be bored. While we love the idea that every day will be one of growth, change, joy and triumph, in reality, many days are routine, uneventful, status quo, challenging and even a bit dull.
It’s up to us to recognize that some of our most routine, predictable days will lead to some of our finest moments in teaching. Consistency and predictability are key ingredients to growth. Repetition, repetition and more repetition are powerful tools for students to improve at their craft. Oftentimes, we are not teaching, rather, we are “supervisors of organized practice sessions.” These ordinary days, if put to their best use, will lead us and our students toward the most extraordinary results.
Everyone is a Champion on August 1
One of my favorite quotes that I learned early on in my teaching career was from Manny Maldonado, my colleague at Claudia Taylor Johnson High School in San Antonio, Texas. He would say to our band, “Everyone is a champion on August 1st. What are you going to be like on October 1st?”
His message was simple. August 1 is known as “Drill Day” in Texas. It marks the start of band camp for many groups and the first day of a new season. Manny’s point is that it’s easy to start strong when there’s excitement about a new year and lots of energy surrounding dreams and goals for the season. However, when the mid-season slump rolls around, how many students will still have the same excitement about finishing strong during those later “laps of the race”?
While teaching The Cadets, we talked to the members often about the difference between interest and commitment. We explained that commitment meant following through long after the initial interest and joy subsided. We see the same issues with abandoned New Year’s resolutions, fitness goals or the challenge of pursuing any new habit. We see it on Christmas and Easter at church when the pews are full, but on June 1 or September 1 during “ordinary time,” church attendance is thinner. In our world of band or drum corps, the challenge of pushing through the day-to-day can be daunting.
Finding Joy in Consistency
We see pictures on social media of people who look joyful in their classrooms and attend in-service sessions in hopes of finding motivation and rejuvenation. When I’m in the middle of the grind, I wonder, “Am I the only one who isn’t enjoying this right now? I’m bored, grumpy and over it.”
Cue another of my mentors, Joe Dixon, who wisely preached, “Children need to learn to be bored.” Learning to work through boredom is a powerful skillset for young musicians in their quest to become excellent at their craft. I often must remind myself, “I need to get better at being bored.”
Of course, music isn’t boring. It’s our passion — that’s why we teach and share our gifts. I go back to “ordinary time” and think about how these often boring, typical days are the ones that can lead us to extraordinary results … if we use them correctly. How often have we reached the end of a season and wished we had used time differently? Or, after the final contest, we promised ourselves, “Next year, I am going to be sure to …”
Here’s the best part about the moment we are in — it’s not too late to be the best version of ourselves. And it starts with accepting that it’s okay to be bored sometimes.
photo by MonkeyBusiness/Adobe Stock
You Don’t Have to Do the Same Thing to Do the Same Thing
We’ve all told our students that “consistency is key” to achieve the desired result. But here’s the thing: You don’t have to do the same thing to do the same thing. Take daily drills — as a euphonium player or brass instructor, I think a daily diet of breathing, a long tone, a lip slur and a tonguing drill are really important for musicians. Long tones to develop sonority and endurance, lip slurs to build flexibility and range, and a tonguing drill to work articulation. Of course, air is our fuel — how many of us really practice breathing every day in our individual practice? Or with our bands? We know we should, but that’s easier said than done.
The truth is you don’t have to practice the same Remington the same way every day to practice Remington. You can change up the key, the starting note, the length of each note, the speed of the exercise, or even the articulation. You don’t have to do the same slur every day to practice lip slurs, and you don’t have to practice the same tonguing drill the same way every day to practice tonguing. Of course, if you have the patience and discipline to do it the same things every day and train your students to work through the monotony, then you have mastered a special level of discipline.
Play different chorales instead of perfecting the same one. It’s OK to mix up the process or the routine as long as you’re still covering the basis. Your fundamentals are your foundation, and they need daily attention. Don’t give up on them because you’re bored or pressured to work on music or drills.
The Boston Crusaders baritones rehearsing.
Develop Discipline
Consistency and predictability are key for continued growth. Repetition, repetition and more repetition can be powerful tools for students to improve their skillset. Often, we are not teaching in the traditional sense. Rather, we are supervisors of “organized practice sessions,” to borrow a term from Gino Cipriani, the Assistant Director of the Boston Crusaders.
Teachers who spend class time, rehearsals or sectionals turning on a metronome and practicing for students over days and weeks may find that students learn how to practice correctly through that process. Often, the best work gets done with fewer words and more reps, slow and then fast.
Think about your own individual practicing on your instrument, of an etude, a jury piece, a solo or any technical excerpt — it’s hard work. And it’s solitary work that may not involve many words or motivational speeches, just a lot of grinding it out. As coaches, we should consider practicing etudes or band music with our students. Pace their practice. Help them learn how to break things down. And then do it over and over again — day after day. Doing so may give students a chance to develop the discipline to do the things that must be done when they need to be done.
Delayed Gratification
Progress in band is incremental. Growing up in a cranberry farmer family, I’m prone to agricultural references. The most obvious is if we think of a cornfield, we don’t see corn grow 6 feet high in a week. It starts with clearing the field, planting the seed, careful maintenance and patience. Over time, we see the tiny sprout grow into mature corn that is eventually ready for harvest.
Too often, crop failure occurs when we miss a step in the process — not enough water or fertilizer or extreme temperatures. In other words, if you neglect the basics or the temperature is too hot or cold in your band hall — your “crop” is toast.
Your students won’t necessarily notice their increase in range, flexibility or speed of technique in a single day or week. Still, they will see incremental gains with patience, going slowly and repeating the process repeatedly. As a coach, I patiently guide them through their boredom and frustration to achieve the desired results. I often think about delayed gratification and the idea of teaching students to “rest” when they are tired, rather than quit.
The Vandegrift High School band at BOA.
Ordinary Days Can Lead to Extraordinary Results
On my first day of spring training with the Boston Crusaders this year, I vividly remember thinking:
“Finals is so long from now.”
“I wonder when we will be good?”
“How am I going to get through the next week of doing the same thing every day?”
“How will the students get through 12 weeks of it?”
All normal thoughts at the beginning of a long journey. Of course, summer went by in the blink of an eye, and on finals night, watching the corps was its usual emotionally charged experience filled with smiles, some tears and many celebratory hugs. The day after finals, as I sat on my flight home, I reflected on the many hours during our spring training, breaking down the same technique and warmups day after day, feeling like we would never get away from the monotony.
The longer I have taught, the more I have learned to find joy in those dull, long days that have become a key ingredient in our success. While I don’t always look forward to them, the knowledge of what’s to come reminds me that those ordinary days can lead us toward the most extraordinary results when put to their best use.
Musicians are constantly looking for inspiration, new sounds, and devices that expand their sonic palette, technique or personal performance. Guitar players, in particular, have lots of options when it comes to the types of instruments available, plus we arguably live in the greatest era for amplifiers and effects processors.
So when it comes to holiday gift ideas for guitarists, it should be pretty easy to find something to widen the eyes and broaden the smile of your favorite axe slinger. Here are my top 10 suggestions.
1. A NEW GUITAR
Entry level
When it comes to acoustic guitars, a great choice for beginners is the Yamaha STORIA line, which was created with first-timers in mind. These cost-effective yet aesthetically pleasing concert-body guitars offer ease of playability, a thinner body width and a nice low action for the fingers, and also come in three stylish finishes. There are three models, each equipped with a passive undersaddle piezo pickup so they can be connected to an amplifier, as well as played acoustically. STORIA I has an off-white solid spruce top and a mahogany back and sides; STORIA II has a natural solid mahogany top, back and sides; and STORIA III has a chocolate brown solid mahogany top, back and sides. Here’s a video that shows them in action.
When it comes to entry-level electric guitars, my gift suggestion would be the Yamaha Revstar RSE20, which features a double-cutaway mahogany body and a mahogany neck with a rosewood fingerboard, and comes outfitted with two humbucking pickups for extra versatility. (There’s even a left-handed model for southpaws.)
Its tone control can also be pulled out to engage a “dry switch” feature that essentially reduces some of the bass response of the pickups — useful when you are looking for extra brightness. Newbies may also find the RSE20 easier to play than many other electric guitars, due to its shorter 24 3/4” scale length and a satin-finished neck that allows for smooth position changes along the entire fretboard. Here’s a video of me putting the RSE20 through its paces.
Intermediate
The parlor-sized YamahaCSF-TA TransAcoustic guitar is one of my favorite acoustic guitars for travel, recording and songwriting sessions. Its solid spruce top is paired with a solid mahogany back and sides for a warm, full tone, and its short scale length helps with ease of string tension. One of the most amazing things about this instrument (and all Yamaha TransAcoustic guitars) is that hall and room reverb, plus a lush chorus can be blended with the natural acoustic tone without needing an effects pedal or amp, although all of the effects and acoustic tones can also be amplified through a P.A. system using the built-in piezo pickup. Here’s a video of me doing a live performance in Australia on my CSF-TA.
In terms of an intermediate-level electric guitar, you can’t go wrong with the Yamaha Pacifica Standard Plus. Its unique coil-tappable single-coil pickups were co-designed with Rupert Neve Designs for a crisp, tuneful tone that sits perfectly in any musical genre or composition. In addition, the locking tuners keep everything nicely in tune, even when using the floating tremolo bridge for chordal shimmers and dive bombs alike. The slim c-shaped neck and carved heel joint make for exceptional playability, and the delicious tones and color palettes that can be coaxed from this beautiful instrument are sure to stimulate the senses of any discerning musician. Here’s a video of me playing one of these superb guitars.
Professional
The newly released Yamaha TAG3 C is a groundbreaking acoustic guitar that features an onboard looper, delays, choruses, reverbs and a chromatic tuner — all without needing an effects pedal or amplifier. This all-solid tonewood acoustic sounds amazing (even without the effects engaged), plays like a dream, and offers portable, performance-ready tones just about anywhere you want to play music. In addition, a dedicated app allows for detailed editing of effects and the storage of up to ten user-created loops. The TAG3 C should be very high on your list of options, for any guitarist at any level of proficiency, whether playing for fun or doing professional recording or live performance. You can read my first take on this amazing instrument here, and be sure to check out this video of me demonstrating the TAG3 C’s onboard looper.
Finally, if you’re looking to gift a professional-level electric guitar, the SA2200 is, in my opinion, the finest one that Yamaha makes, although it’s currently somewhat hard to find. Handcrafted in Japan, this semi-hollow body double-cutaway instrument features a sycamore top, back and sides, along with jumbo frets and dual Alnico V humbucking pickups. What’s more, the SA2200’s short scale length, slim neck and ebony fingerboard make chordal passages easy to navigate, even for smaller hands. As you might expect from a semi-hollow body guitar, jazz passages sound smooth and perfectly intonated, but rock, blues and pop solos also soar thanks to the coil-tappable humbucking pickups. As a bonus, the stunning sunburst finish also looks amazing onstage and under the camera lights. Here’s a video of me demonstrating the extraordinary sonic capabilities of this extraordinary instrument.
2. STRINGS
A guitarist can never have too many strings. It’s not just about changing strings every so often: Guitarists should always carry a couple of spare sets or single strings in their case or gig bag, just in case one breaks in the middle of a live performance or recording session. (The top three strings are the most likely to break, so have a few of each available should that happen.) While the specific choice is very much subjective, I suggest you consider gifting a variety of Savarezstrings, available for both acoustic and electric guitars.
Wiping down your strings after each practice session, jam or gig will also prolong their life, so an additional gift suggestion is a string cleaner/lubricant like the D’Addario XLR8.
3. A CAPO
Although extremely inexpensive, a capois pretty much a must-have for any guitarist. It allows guitar players to quickly change the pitch of chords, scales and arpeggios without retuning. Here’s a video of me demonstrating how one of these handy add-ons can be used to create a complex arrangement.
4. A SLIDE
Slide guitar playing is a very distinctive technique used for blues, country and rock styles, and it can be done on both acoustic and electric guitars. The smooth sound of a glass or steel slide against the strings allows for long legato lines, double-stops and even chords to resonate in a very unique way. Here’s a video in which I show how clean and precise passages can be played with a slide.
5. A CLIP-ON TUNER
The importance of having your guitar in pitch and in tune cannot be overstated. There are pedal-based guitar tuners that run on batteries or pedalboard power supplies; however, these require you to plug a cable into your guitar. The easier way is to use a headstock (clip-on) tuner such as the Yamaha GCT1. These small, inexpensive devices need no AC power and allow you to tune both acoustic and electric guitars without plugging in; you simply clamp the tuner onto the instrument’s headstock. It then picks up the vibrations of each string and indicates the pitch on a brightly colored screen.
6. A DESKTOP AMPLIFIER
The desktop amplifier is a concept originated by Yamaha some years ago and exemplified in the company’s current THR-II Series. This kind of amp has nothing to do with the virtual desktop on your computer; it’s not a piece of software, and in fact there’s nothing virtual about it. These are actual amplifiers that are small enough to fit on an actual desktop.
My personal choice for gift-giving is the THR30IIA WL model, which offers 30 watts of power — plenty for home practice, band rehearsal and even small club gigs — and boasts features like acoustic mic modeling, Hi-Fi audio playback and stereo imaging; there’s even an input for a vocal microphone. You can edit and save your favorite tones via a free mobile app, then recall those saved presets via five buttons on the amp’s top panel. It comes with a rechargeable battery for up to five hours of performance time, and it also has a built-in chromatic tuner and a tap tempo feature for the onboard effects. As a bonus, you can even play your favorite playlist through the THR30IIA in stereo via either wireless Bluetooth pairing or a wired cable from your mobile device. This makes playing along to tracks super-easy, facilitating learning. Best of all, the THR30IIA sounds absolutely amazing whether you use it with acoustic or electric guitars.
7. A MULTI-EFFECTS PROCESSOR/MODELER
As their name implies, multi-effects processors are capable of generating many different effects such as reverb, delay, chorusing, flanging, phasing, etc. Those that offer modeling capabilities are also able to emulate the sounds of various popular amplifiers and/or microphones. My nomination in this category is the flagship Helix® Floor from the company Line 6. This innovative device utilizes dual-SHARC® processing and HX® Modeling to deliver the authentic sound and feel of analog amps and effects, and its player-friendly interface sets the industry standard for ease of use. Features include a large color LCD, built-in looping, capacitive-touch footswitches, customizable scribble strips, extensive analog and digital I/O, and an onboard expression pedal. You can think of it as a programmable stereo digital guitar rig for the semi-pro or working professional guitar player. I’ve been using Helix products in my studio for electric guitar, acoustic guitar, bass and nylon-string tones for nearly a decade, and it’s still my “go-to” rig. Here’s a video showing Helix Floor being put through its paces.
8. A STOMP BOX
A stomp box like the one I’m recommending here — the Line 6 HX One — allows you to access one effect in a single pedal that can be easily incorporated into a custom pedalboard. The HX One differs from most in that it offers options for more than 250 effects taken from the company’s HX® family of multi-effects processors, such as delay, chorus, tremolo, flanger, overdrive and pitch shifting. You can also initiate patch and program changes via MIDI — a great help during live performance. Here’s a video showing the HX One in action.
9. HUMIDITY CONTROL PRODUCTS
Humidity is the enemy of every guitar — in fact, of every instrument made of wood. If the air is too dry or too moist, the neck could warp, the finish could crack … or worse. For that reason, it’s important to have the ability to regulate and control the humidity of the environment in which guitars are stored. D’Addario Humidipaksare an excellent choice for both electric and acoustic guitars: Simply place one in the sound hole of your acoustic guitar or in your guitar case to automatically absorb, maintain or restore moisture to ensure the ideal humidity level for your guitar.
Another excellent gift option in this category would be a Cordoba HumiCase guitar case. These are designed specifically for acoustic guitars of various body types.
10. NEW PICKUPS
Replacement guitar pickups are a an excellent way to upgrade an electric guitar, especially if a guitarist loves the instrument’s playability and look, but feels the tone is lacking in punch, clarity or warmth. There are multiple manufacturers offering industry-standard pickup sizes and shapes, like humbuckers, single-coils and P90s, so a direct replacement should be available, without the need to drill larger holes in the guitar.
Do some research for the type of sound these pickups impart. Listen to audio clips on manufacturer websites and watch YouTube videos before making this kind of investment. I’d also highly recommend that a qualified luthier (a craftsperson who builds and repairs guitars and other stringed instruments) install the new pickups, unless you’re sure that the gift recipient is confident with a soldering iron.
The Wrap-Up
Every one of the gifts listed here will provide the guitarist in your life with top-notch tones, inspiration, and decades of performance satisfaction. All the acoustic and electric guitars highlighted here can be paired with any multi-effects processor, modeler or stomp box to create a nearly infinite variety of lush sonic soundscapes, and then played back in stereo from a desktop amplifier.
There’s something here for everyone who loves playing the guitar! I’d definitely be happy to receive any one of these items as a gift this holiday season.
Differentiating instruction for a variety of instruments all in one group can be tricky because you must keep all students engaged. I use a number of rehearsal techniques that apply to all instruments, therefore engaging everyone.
Start with the Warmup
The warmup is when most of our instruction on fundamentals takes place. My warmups vary depending on things like how much time we have, where we are, who is missing, etc. Most of the time we work out of a warm-up book. I encourage you to look for two things in a warm up book: 1) it should have more exercises than just scales for everyone, and 2) it should have chorales in various keys. If your book does not have those, supplement to make sure your students are getting what they need.
For example, the book we use includes lip slurs for brass that are harmonized by the woodwinds and vice versa when the woodwinds are playing embouchure studies. Chorales provide a fundamental understanding of tone, balance, blend, tuning, etc. We make sure to do a chorale every day during warmup.
Use flexibility in your warmup. If you have an exercise that is a major scale in eighth notes that goes up to the ninth scale degree, but it doesn’t include articulations, make up your own! If it has articulations written in, play those. Then make up your own! Try slur two, tongue two. Slur three, tongue one. Tongue one, slur two, tongue one. Slur up, tongue down. The possibilities are endless. Now you have introduced articulation into your warmups and demonstrated your students’ ability to be versatile in their articulation abilities, which will come in handy when it comes to the repertoire.
Sometimes, I don’t even use a warm-up packet or book. When choirs warm up, I have never seen them use a prescribed book of warmups to find their sound. Some exercises I use I stole from my colleague’s vocal warm-ups! My hope in doing this is that students are thinking about what they are doing. Especially if you are doing the same warmups from the book every rehearsal (or even if you don’t, they are bound to repeat soon!) students can go on autopilot and ignore important aspects of the warmup. By describing the warmup to them (usually using solfege syllables), students now are thinking about what key they are playing in and how they are playing it. How is my balance? How is my blend? Am I matching articulation? Teaching a handful of warmups to students can come in handy when you are at a festival or an away performance and you need to warm up quickly as a group. You can very easily say “let’s play (insert warm up here) in (insert key here)” and everyone (well, let’s hope everyone) is on the same page.
Photo by GRZEGORA.jp/Adobe Stock
Breathing
The breath is the most important component of playing a wind instrument. Breathing is something humans do so naturally that we think we know how to do it, but when it comes to playing an instrument, we somehow do it poorly. When something like breathing happens instinctually, it is very easy to ignore it when playing an instrument. The No. 1 issue I need to address in my wind students is breathing through their nose. When I see this happen, I stop and explain why we need to breathe through our mouths. When it continues, I simply remind them. It’s a very easy thing to see students doing wrong. It is also very easy to hear! The difference in sound when students breathe correctly is night and day!
Incorporate breathing into your warmup! I have found that this positively impacts students’ performance in two ways. First, they start thinking about their breath and are training their lungs and muscles related to breathing. This improves their breath support, and as a result improves their playing. After a break from breathing exercises in our warm-up, a student came to me and asked if we could add them back in because of how much he felt it helped his playing! Remember how important the breath is! Second, I have found that it improves focus during rehearsal. Breathing exercises are great for mindfulness and focus. Even if students aren’t aware of it, there are days their incorrect breathing could make or break me…err, I mean, the rehearsal. By having all students focus and regulating their breathing, we start rehearsal from a place of silence, not chaos.
Pitch Tendency Charts
One of the things I take time to do at the beginning of the year is to create pitch tendency charts. Each student will fill out a chart for every pitch on their instrument that indicates if a note is sharp or flat and how sharp or flat that note is. This becomes a resource for students for tuning their instrument. Now, when you tell the clarinets that the note they’re playing is sharp, they will (hopefully) know that the answer is not to pull out your barrel. Guess what, now that the note is in tune, the others are not! Students will need to work with a partner and a tuner. What is important is that the student playing cannot see the tuner. If they do — even though they may not think they are — they will adjust naturally to move the needle. That is what we want them to do when they hear, not see, that they’re out of tune!
I have done this lesson in a couple of ways. First, you can have students pair up. They don’t even need to be the same instrument! Hopefully, they won’t mess around. They take turns completing the task. Another option is to have one student (let’s call them the “tuner watcher”) work with all the members of their section. Then there are two students away from a section at a time and the other students can run a sectional or remain in your rehearsal. The “tuner watcher” will need someone else to become the tuner watcher for them to complete their chart. If you’re like me and hate wasting time with a study hall when you are absent, this is a great lesson plan. Now you can waste their time by helping them play in tune.
I’m sure you’re thinking, “Wait, what will my percussionists do? They play in tune.” You’ll have to wait until my next article.
Rehearse Like They Will Practice
This is one of the most important things I emphasize in rehearsals. Like all music educators, I find that my students need to practice more. Mind. Blown. If this isn’t an issue for you because you have the answer, please let me know.
I believe the biggest issue students have with practicing is that they don’t know how to practice, or how to do it efficiently. If they are anything like me when I was young, they just play their music over and over again, top to bottom, and call it a day. I have (and by that I mean I stole or maybe borrowed) a list of practice tips and techniques. These are strategies that I use in rehearsal, and I’m sure many of you do, too. These strategies will hopefully help students slowly understand how to practice. They can make the connection from “when I’m having trouble with this, I can do that to make it better.”
Here are some (but not all) of my favorites:
Work backward: Start with a measure or half a measure or even a beat and slowly add to it until you have a full phrase. We sometimes focus too much at the beginning and somehow forget that the audience will also hear the end. Ignore the middle because if the beginning and end are good that’s all they’ll remember. I’m kidding — fix it all.
Eliminate rhythm: This is a great way to ensure that you can hear harmonies for tuning. This is also very valuable for brass instruments that might be playing wrong partials.
Eliminate pitch: This helps with rhythmic alignment and articulation. Isolating music is great, but far too often, we isolate a measure to fix it, when we can also isolate components like pitch and rhythm.
Looping: I do this a lot in rehearsal. This is great for technical passages. Isolate the measure and keep doing it over and over, slowly increasing tempo.
Hold a note: This is great for rhythmic alignment and, at times, intonation. Play a passage and choose a note to stop on. Hope you arrive together. Pick a trouble note in this passage, too. Hope it’s in tune.
It’s like the old saying “give a man a fish, he lies on his practice logs; teach a man to fish, he might actually practice.”
Use Analogy
This is a hot-topic debate. Depending on your students’ age and grade level, using analogy to explain what you are hearing or how you want them to play can be hit or miss. Perhaps they are too young to understand, or maybe they feel they’re too mature to buy into what you are saying. I hope the latter is not the case. Some players prefer being told directly how you want the music played. Louder, softer, shorter, longer. Being direct with my instruction like this is generally how I fix things in rehearsals. However, at times I like to use analogies to explain what I am hearing. This can be effective to get the students listening to how it sounds and thinking about why it sounds that way. “How is my playing making the music sound the way he described it?” From there I will explain how it should sound and include direct instruction that explains how to achieve that.
For example, we were working on a piece where the melody was very exposed in one or two instruments with a chordal accompaniment with long note values. Having played exposed parts like that, I know how important it is to feel supported by the sound of that foundation. They were playing sort of timidly and unsupported and as a result it sounded very thin. I asked them “if the way you just played was a blanket, would that blanket keep you warm? Is it a weighted blanket, or is it one of those blankets your grandmother knitted that has gaping holes in it?” Here I might say, “now play it like a weighted blanket” or “use more air and play 10% stronger to give the melody support.” Either way can work. Students will either make the decision on how to achieve that on their own or take the direct instruction and apply it. Regardless of how they achieved the sound, at that part of the music, they will have better connection to that moment. They will remember that that part should sound like a warm blanket. They are less likely to make that connection if I simply said, “That needs to be louder.”
I see using analogies as an important tool to connect students to the music on a more personal level. Especially in a school setting, it is part of our job to help students create a sonic image for the music they are playing. Giving them examples can help them develop their own image. Sometimes telling them every answer isn’t the answer. And sometimes just saying “do it better,” does the trick. I’m serious, it does.
Rely on Your Students
I will be the first to admit that I don’t know everything. Now, if I admitted that at the beginning of this article, you might not have made it this far. As a trumpet player who picked the trumpet because there were too many buttons on a saxophone, I still feel that way. When it comes to things like alternate fingerings, trill fingerings, etc., I get lost sometimes. Okay, most of the time.
This is one example of when I rely on my students to help each other. They are the ones playing the part, and on most instruments, they are doing it at a higher level than I can (you do not want to hear me play clarinet). I trust that they can make decisions on the best way to be successful playing their instrument. Additionally, giving students a chance to teach and learn from their peers is beneficial.
At times throughout rehearsal, we might get to a part where I tell students, “Take 30 seconds and work that out on your own.”
Students might play it a few times to get it under their fingers, but they can also use that time to help others in their section. This can work for a variety of issues, including fixing notes, finding best fingerings, picking places to breathe, etc. You can even ask students to do this quietly while you work with another section.
We have all dealt with students having side conversations. Again, if this isn’t an issue for you because you have the answer, please let me know. By asking students to work together quietly, I am giving them a chance to have a brief side conversation about the music. They all say they’re talking about the music, but now they actually have to!
______________________
This is far from a comprehensive list of how to work with your winds. I will keep adding to this list as time goes on. Hopefully this article gives you a place to start in your rehearsals that will help improve your students and their engagement. As always, feel free to take some or all my tips, or ignore everything I said. Disagreeing with me is just as valuable in developing your own rehearsal techniques as listening to me is! I’m always open to chatting about my always-evolving rehearsal process!
When Brad Hart, instrumental music teacher at Peter Johansen High School in Modesto, California, noticed that the school has a large portion of students in special education classes, he also realized how little accommodation most music programs — including the ones he participated in as a student — have for students with special needs. Because the school has three full-time special ed classes, Hart decided to find ways to get those students engaged with music. “Every student deserves a quality music education,” says Hart.
While many schools have inclusion as a goal, Hart noticed a lack of tangible solutions. “In terms of inclusion, it was very much like, ‘You should include people!’ But then there are no tips, no tricks, no real way to do it, no process to do it,” he says.
Now in his 13th year of teaching, Hart has created a process for including special needs students in his music program at Johanson in two unique ways: 1) through creating accommodations for special needs students in his concert band class and 2) through pioneering a bucket drumming ensemble for special education classes.
State Standards, Student Standards
The plan to commit to inclusion in music classes first came to Hart during a school faculty meeting. An administrator explained that the state of California was requiring special education students to complete a certain number of minutes in general classes, which included music.
Hart realized that including new students in his classes was going to require some adjustments and accommodations. “We couldn’t just throw a kid into a band or guitar class and pretend that just putting them in the class means that they’re learning music in an appropriate way,” Hart says.
If students have a physical disability that limits their hand mobility, Hart could not teach them to pluck a guitar the way he could with an able-bodied student. If students have a developmental disability that prevents them from focusing on fast-paced changes, then they may not thrive with traditional ensemble instruction.
Without accommodations, these students would be left behind. “That means that we have a kid who’s enjoying the music, which is nice, but not meeting any standard,” Hart says. “It’s not really allowing them to express themselves through music. It’s been a joy to find more ways to get students to express through music.”
Bucket Beats
One of the ways that Hart has helped disabled and special education students learn to express themselves through music has been a bucket drum class, which meets once a week during his prep period. This class has a substantial population of students from Johansen’s severely handicapped classes and has taught students how to understand rhythms, perform rhythms and even create their own rhythms. “They end up finding grooves and combinations of rhythms that they like,” Hart says.
The 2023-2024 school year marks the third year of the bucket drum class, which includes all three classes of severely handicapped students, plus their paraprofessionals and special ed teachers. “They gave me that support system,” Hart says.
The bucket drum class meets for about 30 minutes once a week, and Hart has been able to make the most of this limited time. He keeps the class fast-paced, focusing less on theory and more on practice time. “It’s a lot more kinesthetic repetition,” he says. “I make sure there’s enough repetition of a singular concept in multiple ways so that students are likely to retain it.”
Hart is always finding new ways to modify his instruction to meet students where they are. “Last year for the drum class, we instituted holding up a stop sign,” Hart says. “It helped some of the more visual students, especially from a farther distance, know that we were stopping.”
Musical Modifications
In addition to the bucket drum class, some special education students are involved in the concert band ensemble as well. Regardless of where they perform, students always have access to accommodations for their specific needs.
In the concert band class, these accommodations come from a mentorship program set up by the organization United Sound, which provides educational resources like books, games, flash cards and more to reach music students with special needs.
Johansen High School follows United Sound’s program, which allows band students to volunteer as “peer mentors.” Each peer mentor is paired with a “new musician,” often a student with special needs who is new to the music program.
Hart explains that this mentorship program has the added benefit of allowing more students to gain leadership experience. He prefers to assign peer mentor roles to students who have shown interest in leadership but aren’t already holding another role, like drum major or section leader.
In concert band, mentor musicians help new musicians gain necessary modifications. For example, a trombone players with mobility had difficulty when trying to move the slide fast enough. Hart says that the peer mentor helped rewrite this student’s parts to “make sure that his note changes happen with enough time in between so he can safely move the slide.”
Some peer mentors help students with mobility issues through a practice called “hand over hand,” where mentors put their hands on the new musicians’ hands to play piano keys, move a trombone slide, or any other movements that the new musicians might need assistance with.
New Performance Opportunities
Accommodations aren’t just for class periods and practice time; with more special education students in his music classes, Hart, who was recognized as a 2024 Yamaha “40 Under 40” music educator, is finding ways to make sure every student gets as many performance opportunities as possible.
At Johansen, band students perform at a winter and a spring concert. The band is also planning a trip to perform at Disneyland in June 2024. Because Hart wants to take as many students along as possible, he is already thinking about accessibility considerations. “Making sure a charter bus can accommodate a student in a wheelchair is a little different; it takes a different set of expectations and work,” he says. “We’re doing to give these are students and families performance experiences … [all] students and families deserve that same experience.”
Last year, Hart’s bucket drum class performed the song “Sweet Caroline” at Johansen’s homecoming pep rally. “The marching band played behind them, and it was a lot of fun,” Hart says. “You have all these kids who normally might observe the rally, who now had the opportunity to be part of the rally in a meaningful way.”
Feedback from students in the audience showed Hart that the bucket drummers were a valuable part of the rally. This year, the bucket drummers did not perform at the homecoming rally, and the Johansen student body was disappointed. “Kids came to me and asked, ‘Mr. Hart, where were the bucket drums? It was my favorite part of the rally last year!’” Hart says.
The Importance of Inclusion
Transitioning to an inclusive environment wasn’t difficult for Hart, because the focus for him is always on student fulfillment in music education itself, rather than on winning awards or competitions. Still, he emphasizes the importance of keeping the focus on the individual student’s educational needs, rather than on numerical grades or scores, for a truly inclusive environment. “So much of it is just changing your viewpoint,” he says.
For Hart, success in music is not about grades or ensemble ratings; it’s about how much each individual student can progress. “It’s a matter of, ‘How can we get them to learn as much as possible?’” Hart says.
Most important is remembering that inclusion means all students, not just the ones who show musical aptitude from the beginning. “It really is a long-term philosophy — the idea that every student deserves a quality music education means everybody,” Hart says.
Most high school music programs contain a variety of ensembles, from concert band, to jazz band, to orchestra, to choir. At Middleton High School in Wisconsin, in addition to having a variety of ensembles, the music department also features what Director of Bands Douglas Brown affectionately calls “non-sembles” — opportunities for music education that fall outside the norm.
These non-traditional music classes include three levels of digital music production, plus a class focused on hip-hop music. By offering these options, Middleton High School has seen its music program nearly double; in addition to the 300 students in traditional concert band and 150 in orchestra, Middleton also has 130 students in hip-hop and about 170 in digital music. “Through all these classes that are nontraditional, we have seen a substantial growth in our program,” Brown says.
While studies have found that many high schools only have about 20 to 30% of the student body in the music program, Brown estimates that about 65 to 70% of the Middleton student population is involved, in part due to diverse music options. “In my mind, everyone can learn to love music,” he says. “We just have to find the right outlet for them.”
Teens Already Love Music
Brown spent much of his early career playing drum set as a gig musician. “The mindset as a drummer helped me realize that there are a lot of other art forms that can inspire people to make and engage with music,” Brown says. “They’re all equally valuable.”
When observing students around his school, Brown saw that students everywhere were already engaging with music in many different ways, both inside and outside of the school curriculum. For example, at his first teaching job, students brought their own guitars from home to practice in the school courtyard during breaks. At Middleton, he’s noticed kids showing an interest in rap and wanting to make their own beats.
After reading Williams’ article, Brown asked himself: “What are we doing as music educators to capture that other 70 to 80% to help them engage in music?”
Because the research presented in the article indicated that many students who stop participating in music by high school likely won’t pick up music again in their adult life, Brown wanted to intervene and capture that other 80%. His solution was to create classes that matched the interests students were already displaying. “One of my goals has been to try to find creative ways to engage students, instead of forcing them into our boxes,” Brown says. “What boxes can we create that they already want to participate in?”
Mixing Genres
After introducing digital music and hip-hop classes, Brown noticed that, once kids are interested in music classes, their minds begin to open to even more possibilities. While students may originally join a wind ensemble or a hip-hop class depending on their initial interests, many students end up trying out more than one style. “We found that a lot of kids might take two or three years of hip-hop, and then they’ll join the band, or they’ll come play in the jazz band,” he says.
Brown doesn’t feel the need to keep the ensembles and non-sembles separate. In fact, a lot of their performances are collaborative. For example, the orchestra will record loops for hip-hop students to use in their songs. Often, band and orchestra concerts will include digital and hip-hop elements. “You bring the walls down when the jazz band does a funk hip-hop collaboration,” Brown says.
One of Middleton’s largest cross-department collaborations was a halftime marching band show that incorporated electronic elements. The show’s was about the evolution of music from acoustic to electric, and it featured a student DJ at center field. A wall of speakers was set up behind the DJ, and the marching band’s drill moved around the DJ setup. The show also included a hip-hop student as a vocalist rapping along with the band.
”There were times when the wind instruments would play, and that sound would be captured by the DJ, and then looped, sampled and put through the DJ system,” Brown says. “The opposite would happen, too. A DJ would play a loop that would then get picked up by the woodwind section, and they would play live loops on the instruments.”
Brown explains that, by having a speaker system in front of the ensemble, plus a speaker wall behind the DJ, the audience was forced to question if they were hearing acoustic or electric music throughout the show. “It was a creative amalgamation from students’ work,” says Brown, who was recognized as a 2024 Yamaha “40 Under 40” music educator. “I was proud of it, and it was unique.”
Real-Life Lessons
Middleton’s nontraditional classes have also expanded students’ performance opportunities, many of which translate to real-life work experience. For example, instead of hiring professional DJs for school dances, a student from the digital music classes was selected and paid a stipend. “They get to display their learning in front of all their peers,” says Brown. “And they get to look super cool!”
Similarly, students can gain work experience through a paid internship at Middleton’s Performing Arts Center, which has a recording studio that is booked by local musicians. Digital music students can work at the studio and help out with the recordings — and they gain work experience and earn a little extra money.
These real-world work opportunities have translated to success in students’ lives beyond high school. “We have kids who have gone on to [receive] degrees in recording engineering at some of premiere colleges,” Brown says.
Digital music has been a way to get hundreds of students involved with music as both educational enrichment and as a career possibility. “I think we should have far more digital music and hip-hop music programs throughout the country,” Brown says. “We should be responsive and make sure that everyone can engage in music, no matter what their interests are.”
It’s time for the apparitions to make their annual appearance! If you’re looking to put a spooky soundtrack to the ghostly comings and goings, here are our recommendations … as well as the stories behind some iconic Halloween songs.
I Put A Spell On You
Screamin’ Jay Hawkins (can you think of a better name for an artist on this list?) may have written this as a simple love song back in 1956, but the ensuing recording session transformed it into something very different. “The producer got everybody drunk,” Hawkins later recalled, “and we came out with this weird version … I found out I could do more destroying a song and screaming it to death.” Even the classy 1965 Nina Simone cover version couldn’t completely remove the sinister overtones. Listen to the original here and the Nina Simone version here.
Monster Mash
This half-sung, half-spoken 1962 graveyard smash by Bobby “Boris” Pickett rocketed (or flew on a broomstick) to the top of the charts just before Halloween that year. Pickett was an aspiring actor with a knack for impersonations who sang with a band called the Cordials. During a performance one night, he did the monologue to the song “Little Darlin’” in the style of horror movie actor Boris Karloff. The audience loved it, and a career was born. Listen to it here.
Season of the Witch
This Donovan song is not so much eerie as it is ethereal, but it’s been used/overused so much in horror movies and suspense TV shows that it deserves a place of honor here. The original 1966 recording features haunting guitar work courtesy of Jimmy Page, then a London session guitarist who was still several years away from finding fame and fortune with Led Zeppelin. Listen to it here.
Black Magic Woman
Most Americans are familiar with the 1970 Santana version of this spooky song, but Brits of a certain age remember it as a ’60s hit single by Fleetwood Mac … years before Stevie Nicks and Lindsey Buckingham joined the group. Listen to the original here, and the Santana version here.
Scary Monsters (And Super Creeps)
No listing of super-creepy recordings would be complete without the title track from David Bowie’s 1980 album. Featuring nails-on-a-chalkboard atonal guitar from King Crimson’s Robert Fripp, the lyrics (sung by Bowie in an exaggerated Cockney accent and effected heavily) describe a woman’s descent into madness. Listen to it here.
Thriller
This short film by Michael Jackson not only revolutionized music video back in 1982 but also spawned a hit single, complete with howling werewolves and an unnerving voice-over (accentuated with a burst of ghoulish laughter) from horror movie mainstay Vincent Price. Watch and listen to it here.
Ghostbusters
The theme to the 1984 film of the same name, this was not without its controversy. Songwriter/performer Ray Parker Jr. was later sued by Huey Lewis (he of The News) for plagiarizing his song “I Want a New Drug.” While the subject matter is quite different, there is undoubtedly a distinct resemblance! Watch and listen to it here.
Joel Tetzlaff, Product Marketing Manager for the Yamaha drums and percussion department, discusses the exciting world of marching percussion as well as the cutting-edge Yamaha marching hardware products, scheduled to hit the market in early 2025 (they will be showcased at the 2024 Percussive Arts Society International Conference in Indianapolis). Tetzlaff unveiled the innovative design and manufacturing processes behind these game-changing products, revealing how they will elevate the experience for both marching performers and educators.
Q. How does this new line of marching hardware from Yamaha differentiate itself from existing products in the market?
A. This new line of products will include both carriers and stands for marching snare drums, marching tenor drums and marching bass drums.
In this new line, we focused on developing hardware specifically for the marching arts. Marching hardware has evolved significantly over the years, and we aimed to take it a step further by focusing on simplicity and durability.
We gather continuous feedback from educators, and some of their suggestions have been incorporated into our new designs. For example, after hearing from band directors, we minimized the number of components on the hardware to ensure quick and efficient adjustments. We also focused on the reliability of these carriers and stands so that performers can focus more on music rather than worrying about the efficiency of the hardware.
Q: Tell us about the MC-9600 Field Corps Carriers.
A: Our previous models of carriers did a good job of being dynamic with body styles and offering a range of adjustments. However, we recognized that too many adjustments can detract from the player experience, so, the MC-9600 Field Corps Carriers are both adjustable and comfortable. We reduced the number of components with only four player-side main adjustments, making set up a lot more straightforward and customizable. The flexible shoulders and wedge-shaped back bar provides confident movement.
We also reimagined the padding on our carriers. Understanding that they’re worn during long practices and performances, we developed a breathable fabric for the padding that dries quickly, enhances airflow, and resists moisture and odors, thanks to its plastic core. The padding is also removable and washable and features a C core inner padding that provides comfortable compression. This attention to detail ensures that we get our customers the best experience.
Q: Can you provide specifics about the MS-8200 Field Corps Marching Stands?
A; In developing these stands, we took shared elements from our drums department, but we didn’t just take the base of a drum stand and put marching configurations on top. We designed these stands specifically for the marching arts.
The hexrack core incorporates a slotted rail that perfectly balances lightweight construction with sturdiness, providing a stable foundation that’s easy to transport. The wide body legs and front leg adjustment are specifically sized to accommodate all terrains. And the twist-lock mounting system and height adjustment memory lock allows players to set their drum angles independently from the carriers, allowing them to “set and forget” their adjustments, which makes our stands ideal for marching.
We’re really proud of the seamless integration of our carriers and stands. Overall, we view these carriers and stands as integral to the instrument. Our carriers feature a more athletic approach while our stands provide a solid and lightweight foundation that meets the needs of modern marching performers. Rather than being another accessory, our new line of hardware products is designed to effortlessly integrate with the instrument itself.
Q: How do these new products contribute to the company’s history of innovation?
A: We took a lot of shared knowledge we have between the different divisions of Yamaha, from racing to our music departments. What sets our company apart is our diverse manufacturing capabilities, specifically with metal. This allows us to create a shared database of our experiences, highlighting what has worked and what hasn’t.
For example, Yamaha Racing creates products designed for optimal performance in motorsports, reaching speeds of hundreds of miles per hour on a track. This brings up important considerations like the sturdiness and durability of materials, as well as their tensile strengths. I won’t dive too deep into the technical details, but this is what makes our manufacturing process truly incredible. We have resources at our fingertips, so we can ask questions like: “Do you think these two metals would work well together?” “Do these materials work well in this environment?”
This shared knowledge is what makes our hardware not just an accessory we import. Instead, all the products we design and build go through extensive research to help the make our instruments easier to use. As I mentioned before, this new line is built on the philosophy that our products are designed with a focus on simplicity and durability, which makes them reliable.
Q: Tell us about the extensive field research you did on these products.
A: Our new carriers and stands were taken out this summer for testing. Our first pretest was with Pulse Percussion, a Yamaha-sponsored indoor group. Our research was focused on adapting the carriers to various body types and determining how the carriers could be adjusted to comfortably accommodate a range of performers. After finding the middle ground, we took the carriers to the Cavaliers to be tested.
I accompanied our research and development team to visit the Cavaliers, and we focused on how these products would perform during the intense drum corps season. I believe that if a product can last through one drum corps season, it should hold up for five to seven years in a band room. The drum corps rehearse for six to eight hours a day in the heat and often perform that same evening, using the same products for both practices and shows. This intense schedule allowed us to put our new products to the test. We referred to this as our “Formula One test,” and I’m proud to say that we were very successful with the Cavaliers.
The performers reported that the carriers were comfortable, and they provided positive feedback throughout the season. Our team from Japan and I assisted with sizing the carriers, and we walked the Cavaliers through the different functions of the stands. We also checked up on them every two to three weeks, which helped me connect with many of the performers throughout the season.
According to the drum corps members, the standout feature was the padding. Some performers said it dried quickly during water breaks. Others were impressed that the carriers didn’t retain odors and provided enough comfort that they didn’t feel the metal. They also felt that the lightweight stands were easy to carry around their different stations.
Overall, our educators had a positive response to the tests as well. Many expressed relief and asked, “What took so long?” Educators said that the new carriers and stands were the finishing pieces to their Yamaha marching gear.
After testing, we identified a few areas for improvement — and we made about five to eight minor tweaks. None of these issues were major, but we felt that addressing them was crucial so we could get the best products out to our educators and performers. Part of our philosophy at Yamaha is that we don’t want to have one-time customers, we want to have them for a lifetime.
Q: What can educators do to ensure longevity and optimal performance?
A: Percussion is something that sits in the back of the room. What’s interesting is that the carriers or stands used by players is often specifically assigned to them for the season, but they don’t own them — unlike a saxophone that a musician uses to practice daily. So, it’s crucial for educators to instill a sense of ownership of these products in their students by emphasizing the idea: “This is my carrier. There are many like it, but this one is mine.” This helps students take responsibility for their equipment, ensuring that they report any loose parts or issues.
I always tell educators to conduct an inventory check at the end of each season. Maybe designate a responsible student or drum instructor to handle this task. It’s important to review the equipment and note any missing parts or issues that arose during the season. This way you can order any replacement parts ahead of time like lugs or bolts for the carrier, or wing nuts for the stands so the equipment is ready for summer. By taking inventory after each season, you can ensure that you are prepared for the next one. Also, if you anticipate needing new equipment or if you’re planning on adding a few more students to the roster, make sure to order it in advance.
Q: How can this new line enhance student development, performance, practicality and comfort?
A: An important step in using the new carriers is ensuring that they are sized correctly for the performers. It’s crucial that the carriers are comfortable. Students and educators must keep in mind that when you first put on a carrier without a drum, it will feel different once the weight of the drum is added. So, make sure to revisit the sizing and make necessary adjustments after the drum is added. Don’t hesitate to adjust aspects like the belly plate height or the shoulder fit. These small tweaks can significantly enhance the performers’ experience.
It’s one thing to wear a carrier for a few minutes as opposed to hours. This summer, I observed the Cavaliers, and they were in their carriers most of the time. I believe the comfort of our carriers played a significant role in this.
The new padding plays a key role in providing this comfort. As I said earlier, we really took a more athletic approach in developing this new line. Also, our new shoulder design securely locks the back bar in place, which allows movement to originate from the core, meaning that when the performer turns, the drum moves with them. Lastly, the simplicity of the products highlights a crucial aspect of supporting student development. With fewer moving parts, there’s less risk of things getting loose during rehearsals or performances. Once everything is tightened and locked in place, minimal maintenance is needed.
At the end of the day, it’s all about kids having fun while playing music. I get into the specifics of the gear because I love the gear, but the more time students can spend practicing, rehearsing and enjoying these products, the better it is for everyone.
Photo by Scott Bowers
Q: What sets Yamaha marching products apart?
A: What sets Yamaha apart is how we create our products. When you choose a Yamaha, you can expect a level of consistency and quality that truly stands out.
There are other great options for hardware, but I think what makes our new products special is that they’re designed for exceptional durability, fit and finish. We’ve put a lot of thought into this new line of hardware, from the comfort and practicality of our carriers to how our stands are specifically built for the marching arts.
We believe in leading by example. Our focus is on creating high-quality products that elevate the experience of the performers and educators using our gear day in and day out.
Walking basslines create a sense of forward motion, or “walking,” by outlining chord changes in a smooth, connected way, usually one note per beat in a 4/4 time signature. A steady, flowing bassline helps drive the rhythm section, gives soloists a strong harmonic structure to improvise over and ties the whole band together.
Understanding chord progressions is essential to learning how to play walking bass lines. There are many common chord progressions used in different musical genres — including the ii-V-I, circle of fifths and minor ii-V-I that are often used in jazz — but learning to play a basic 12-bar blues is a great way to get started.
12-BAR BLUES
A 12-bar blues progression is based on the I, IV and V chords of a key. In the key of E, these chords are E7 (the I), A7 (the IV) and B7 (the V). Notice that they’re all seventh chords, which is why this progression is also known as I7-IV7-V7 blues; however, these are all dominant 7th chords instead of major 7ths.
The basic 12-bar blues structure is broken down into three four-bar sections. Bars 1 – 4 are E7, the root chord; bars 5 and 6 go to A7, the IV chord; bars 7 and 8 return to E7; bar 9 goes to the V chord, B7; bar 10 returns to A7; bar 11 is E7 again; and bar 12 is back to B7. Here’s what that chord progression sounds like on piano:
START WITH ROOTS
Begin by playing just the root of each chord on every beat, which will give you a sense of how to connect the harmony with the rhythm. Here’s what that looks like on a chart:
On a four-string bass, you can play the E at the seventh fret of the A string, the A at the fifth fret of the E string, and the B at the seventh fret of the E string. On a five-string bass, as shown in the video below, you can play the E at the fifth fret of the B string (or the open E).
Here’s what it looks and sounds like when you play just those roots on each bar:
ADD FIFTHS AND OCTAVES
When you’re comfortable with roots, try adding fifths. (You can actually get a lot done with just roots, fifths and octaves). On an E7 chord, this means playing E (the root) and B (the 5th); on an A chord, play both A and E; and on a B chord, play B and F#.
On a four-string bass, you can play the E at the seventh fret of the A string, the A at the fifth fret of the E string, and the B at the seventh fret of the E string. On a five-string bass, as used in the video below, you can play the E at the fifth fret of the B string (or the open E).
Start by hitting the root on beats 1 and 2 and the fifth on beats 3 and 4, as shown in the chart and video below.
ADD OTHER CHORD TONES
Besides the E and B, an E7 chord also includes G# (the 3rd) and D (the flatted 7th). Similarly, an A7 also contains C# and G, while the B7 chord has a D# and an A#:
Playing these chord tones as ascending arpeggios up to the 6th nicely outlines the harmony, as demonstrated in the video below:
USE PASSING TONES
Playing passing tones — the notes between chord tones — helps create smoother transitions between chords. Once you have your quarter notes down, play with rhythm and rests; approaching chord tones a half-step or whole step above and below can sound great, too.
Most bass players choose which techniques they want to use from moment to moment, mixing it up to keep it fresh for themselves, the other musicians, and the listeners. Here’s a video that shows a combination of several approaches:
PLAY ALONG
One of the best ways to learn walking is to listen to bassists you admire. In addition to listening to classic recordings, check out duo performances — bass and guitar, for example, or bass and piano — to hear great bass players clearly outline chord changes.
In addition, experiment with note length and explore different chord types, chord progressions, feels, tempos, and time signatures. Practicing with a metronome (as well as apps, loops or a minus-one backing track like this, with drums and guitar but no bass) — will help keep your time steady.
CHORD SUBSTITUTIONS AND TURNAROUNDS
You’ll notice that some play-along tracks (like this one and this one) substitute the IV chord instead of staying on the I chord in bar 2; others, like this one, also substitute chords in bars 8 and 9 before ending with a two-bar figure known as the turnaround, which takes us back to the beginning. Having a good knowledge of chord substitutions and learning turnarounds are crucial skills for every bass player, and although it may be more prevalent in jazz than in blues or other genres, understanding the concept will allow you to be comfortable in every situation that calls for you to confidently connect chords.
Happy walking!
For more information on creating walking basslines, check out this blog.
Yamaha TransAcoustic guitars are acoustic guitars that come with onboard reverb and chorus effects that are added to the natural tone of the instrument without the need of an amplifier. (Want to know how the magic is achieved? Click here.) The immersive sound these guitars produce is so astonishing that when most people try one for the first time, they can’t believe what they’re hearing!
The first TransAcoustic guitar was the LL-TA, a dreadnought model introduced back in 2016. Since then, Yamaha has released a full range of TransAcoustic guitars, including several steel-string models and a nylon-string classical, in a variety of body sizes. I’ve played every one of them, and they never cease to impress me (and my audiences!). What’s more, I have found these instruments to be inspirational to my songwriting, live performances and recording.
Now Yamaha has taken TransAcoustic technology to a whole new level with the debut of the TAG3 C cutaway dreadnought guitar. The TAG3 C offers two onboard chorus effects, three reverbs, two delay types and a chromatic tuner, plus a built-in looper … and it sounds absolutely incredible.
To give you even more customization options, there’s a dedicated (and free) TAG Remote app that wirelessly connects your mobile device to the guitar via Bluetooth®. The app also provides extra loop storage and allows you to play the songs, backing tracks and playlists in your smartphone through the TAG3 C’s sound hole, enabling you to jam along literally anywhere, even at the beach or outdoor barbecue … again, without the need for an external amplifier.
In this posting, we’ll take a first look at this extraordinary instrument and all these incredible features … and yes, there’s a video of me performing a nine-layer loop all in one take so you can see and hear how it all works.
Physical Attributes
The TAG3 C has a dreadnought body with a solid mahogany back and sides; a solid Sitka spruce top with a beautiful sunburst finish and a clear pick guard; an ebony fingerboard and bridge, with a cutaway for easy access to the upper region of the fretboard; and a satin-finished mahogany neck. The neck profile is super comfortable, and the satin finish really makes a big difference to fast articulations.
The sound hole rosette, in particular, is quite stunning, with lovely tonewood inlays and blue accents. The circular inlay surrounding the sound hole serves as the looper sensor for initiating and ending loop sequences. (See below.)
Inside the sound hole resides a micro rotary dial for the output volume of the built-in piezo pickup and preamp when connecting the TAG3 C to an amplifier — a nice touch for live performance.
As a bonus, the guitar comes with a hard bag for protection and transportation. From my own personal experience, these gig bags hold up well for extensive travel.
Sound Quality
Not only is this a great-sounding guitar, Yamaha has also done an amazing job with the audio quality of the effects, as well as the clarity of the loop playback. If you orchestrate your parts with care, the separation is exceptional — maybe even better than I’ve heard from any looper pedal.
Careful blending of the effects will also reward you with incredible-sounding guitar parts for singer-songwriter performances with vocals. Again, no pedals needed!
Looper
The onboard TAG3 C looper works much the same as many pedal-based loopers, except you’re using your hands to activate it instead of your feet. To arm it, simply tap the circular inlay below the sound hole (this serves as the looper sensor) and start playing. When you’ve completed your idea, just tap the sensor again to put the looper into playback mode. You can also arm and complete a loop by pressing the reverb knob in the control panel. (See below.)
To add further overdubs, just tap the sensor again (or you can press the reverb button). The TAG3 C will save your loop even after powering down the guitar. You can also save and recall up to ten of your favorite loops with the use of the app. Brilliant!
Control Panel
To activate the main control panel located along the top of the guitar (facing the player), simply press and hold the center power button for three seconds, causing the unit to light up for action.
Each of the four rotary knobs in the control panel have multiple functions, as follows:
Chorus Knob
This sets the mix output of the chorus you’ve selected in the app. When this knob is pressed, the last loop part is erased. (Think of this as your undo function on the looper.)
Loop Knob
Pressing this starts the looper recording; a white LED will illuminate when the looper is active. This dial also controls the output volume of the loop. I suggest experimenting with this for a while to perfect your looping playback volumes between parts. Pressing and holding the loop button also allows the TAG3 C to connect to the app via Bluetooth.
Reverb Knob
This sets the output mix of the reverb you’ve selected in the app. Pressing the knob activates the looper “ready” mode, causing the lights around the power button to flash red. You can also press it to end recording instead of touching the looper sensor.
Delay Knob
This sets the mix level of the delay you’ve selected in the app (or the default setting if not connected).
Chromatic Tuner
Pressing and holding the delay knob for three seconds activates the onboard chromatic tuner. All you have to do is watch the LEDs around the center power button: Red indicates that the note is out of pitch (either sharp or flat); when the green center LED is lit, the string being played is at the correct pitch.
Onboard Effects
There are seven onboard effects in three different categories, as follows:
Chorus
The TAG3 C offers two chorus types: Double Detune and 4-Voice. Double Detune allows you to create mild to wide fluctuations of pitch above and below the original notes or chords. 4-Voice provides an extremely musical and smooth modulation effect.
You can freely select and audition each, dialing-in to taste using the depth, speed, tone and number of voices parameters in the app. The chorus knob in the control panel can then be used to blend the effect into the acoustic guitar sound.
Reverb
There are three reverb types available: room, hall and plate. Reverbs replicate the size of an ambient space and the reflection of sound created in those spaces. Room reverb creates the ambient sound created in a small space like a room, while hall reverb replicates the ambient sound in a large space like a concert hall. Plate reverbs replicate the sound created when audio vibrates a large steel plate. Think of room and hall reverbs as an emulation of natural spaces, while plate reverbs are contrived with mechanical components.
The TAG Remote app allows you to modify the selected reverb’s decay, tone and pre-delay. As described above, the master mix output for the reverb is in the guitar’s control panel.
Delay
There are two onboard delay types: simple and analog. Delay times can be dialed in using the time control or via Tap Tempo. To use Tap Tempo, all you have to do is depress the delay knob a few times in time with your loop (or at the tempo you’ll be playing your parts), and the TAG3 C delay will sync quarter notes to the tempo of the tap.
The simple delay provides a standard mono digital delay with tonal shaping via high and low frequency damping controls, while analog delay provides a nice replication of a tape echo delay. This kind of delay tends to have a warm tone with a characteristic (and sonically pleasing) degradation of audio quality as the repeats fade away.
In the app, feedback controls the amount of repeats, and the high damping/low damping and treble and bass controls fine-tune the brightness or warmth of the delay tones. As mentioned above, the delay knob in the guitar’s control panel determines the delay mix level.
TAG Remote App
The ultimate way to use the TAG3 C is to harness the full power of editing and loop storage (up to ten loops) provided by the free downloadable TAG Remote app. If that isn’t enough, you can also play your backing tracks, favorite songs and playlists through the guitar sound hole using your mobile device. This means that you can take your TAG3 C literally anywhere — even to the park or a bonfire jam — and when the playing is over, you can amplify your playlist through the guitar for background ambience.
Charging
Yamaha has chosen not to use batteries to power the TAG3 C effects, looper and preamp. (You can, of course, always simply opt to play the TAG3 C as a purely acoustic guitar too.) I’d imagine this amount of horsepower in one guitar would drain regular batteries pretty quickly and thus become very expensive.
Instead, there’s a built-in rechargeable lithium-ion battery, with a magnetic power connector on the upper shoulder of the guitar. This should give the player five plus hours of play time without recharging — long enough for a gig or gathering.
The Video
This video provides a one-take looping performance with multiple layers to demonstrate the TAG3 C audio quality and ease of use, as well as the way in which the onboard effects seamlessly blend together.
I’m using a basic microphone to capture the acoustic sound coming from the sound hole, and blending that with the output of the pickup system direct to my DAW. You’ll notice that I’m leaving space between parts and thinking about the frequency range of each.
Timing is everything, so make sure your initial part and loop is perfectly in time before building the layers!
The Wrap-Up
Especially considering all the advanced features, the TAG3 C may well be the best guitar I’ve played in a long time. The acoustic tones are superb, the playability, build quality and finishes are excellent, and the effects, looper and tuner add a delicious frosting on an already masterful cake.
This guitar basically replaces multiple pedals, along with being an inspirational instrument for writing in the hotel or playing to an audience. The TAG3 C is simply exceptional in every way!
Have you ever gone to a musical or play, and read in the playbill that “tonight, the role of Mr. Brooks will be performed by another actor”? An understudy or another performer comes in to save the day when the star is unable to make the performance. They are just as professional, just as talented, and the show goes off without a hitch.
What about our situations with bands? We can do the same thing in band, just with a little more planning.
Why Switch?
“And tonight, the role of marching mellophone will be performed by flute one.”
We may promote a switch in instruments for students for many reasons. For example, some students may be stronger on another instrument, we may not have enough instruments in one area, etc.
I’m always about practicality, so if we think about switching instruments to help outdoor ensembles out, our reasons become pretty simple: compositions and volume.
Compositions: We should switch some students to different instruments to perform musical arrangements for an outside venue (football field, stadium, town square, etc.)
Volume: We want to think about projection. In other words, we want the band to be heard outside
In short, we want to be able to perform the written compositions as close to the intentions of the composer, and we want the kids to be heard outside.
How To Switch
I won’t go into a whole lot of methodology of how to select students to switch instruments or the proper methods, etc. There is a lot of information out there about this. Search the Yamaha Education blog for more or attend sessions at your state’s MEA.
However, here are eight tips to help you.
Photo by Adobe Stock/5Kfoto
Tip 1: Consider Your Ensembles and Program Structure
For our purposes, let’s say that your band program consists of the following:
If I have an extracurricular marching band, I would consider my concert ensemble instrument first, and then I would focus on making my marching band instrumentation focused on projection (sorry, flutes, this is why we see a lot of flute players switch to different instruments or color guard).
However, if my marching band is curricular and is the focus of my program during most of the first semester, then I would have to be practical and think of the marching instrumentation first.
Your music selections can really help you determine where your instrument need is. If you are performing some marching arrangements for a show band or collegiate style band, you’ll find that most of the melody is written for trumpets, clarinets and flutes. If I’m lacking in trumpets, I may ask some flute players to consider taking up trumpet for marching band as it will help project the sound a little more.
We also want to consider the difficulty of the music. If you have a lot of students who are playing different instruments for an ensemble, consider programming music a grade or half-grade below what you normally program. You can also adapt some parts if necessary, provided you aren’t changing the overall piece.
Tip 3: Have a Set of Beginner Books
Find a set of beginning books and videos and stick with these. We typically use the books the students are already familiar with, such as Essential Elements. Also look at The Yamaha Advantage and the Hal Leonard Methods series. The students and I read the embouchure and instrument carriage information together as we go through one of these beginning books.
Videos: I am a fan of the Bravo Wind Training Series. There is a DVD for every instrument, and these DVDs/videos have been great resources for students on how to create a professional tone.
Tip 4: Have Some Instruments Available
“Hey, Bobby, can you switch to trombone?”
“Yes, I’d love to!”
“Great, that will be fifty bucks a month for the rental!”
If you are asking (or voluntelling) some kids to switch instruments, try to have an instrument for them to play. If there is a rental fee, consider waiving this fee. It can be difficult to say, “I really need this from you, and now you have to pay more!”
Tip 5: Give Student an Initial Lesson
The student switching to a new instrument should have an initial lesson with either the band director or a trusted teacher in your area. This can help get the student started with the right habits and routines, and it allow you to address any concerns.
You may not have the time or resources to continue providing individual lessons, but there is another way…
Tip 6: Use Your Teaching Assistants
I am the only director in my program. Yet, I have over 100 teaching assistants.
Don’t be afraid to have some of your stronger players work with someone who is switching an instrument. I often find that students enjoy this work, do a good job and even end up forming some new friendships and bonds.
I mention above that the student switching instruments should have an initial lesson with the band director or lesson teacher. Consider having any student helpers sit in on this lesson as well so everyone can be on the same page.
Tip 8: Work On Including Students in the Large Ensemble
When a student begins a new instrument in the fall during marching season, it can be difficult for them to feel like they can catch up to play with the ensemble. We work with these students as much as we can to make them feel comfortable. If the student can only play a portion of the marching show but is showing signs of progress, we do what we can to get them on the field as soon as possible.
We often find, not only with new performers, but even younger students, that proximity helps. A lesser-musically-skilled student between two strong musicians will often progress very quickly.
Photo by Adobe Stock/Naomichi
Plan Ahead: Use Jazz Band and Chamber Ensembles
My best personal method to switch instruments for outdoor ensembles? The jazz band.
Many of our flute and clarinet players perform on saxophone, trumpet and trombone in the jazz band. We perform music that is challenging enough for the ensemble but also meets the students where they are. By the end of the school year, these students can then naturally transition into performing this instrument for marching band, and the added plus is that we often need more trumpets, saxes and trombones in our outdoor performance.
Another option is to create some lab-based group. For example, you may run a jazz band that is auditioned, but then you would have a second group called jazz lab. This group would be open to anyone, but students who are in the auditioned jazz group must play a secondary instrument to be in jazz lab. This may fit in line better with a program that has a fairly competitive or high-tier jazz program.
Debunking Myths
I hear a lot of myths ¬about switching instruments. Below are the four I hear the most — and they are simply not true!
Myth 1: This will screw up their embouchure!I often hear this, but I’ve never met a kid who got worse when they started to play another instrument. Sure, there’s a transition period if they are going back and forth between clarinet and trombone (which can be a difficult switch to pull off due to the embouchure change), but I don’t recall seeing any permanent or even short-term damage.
Myth 2: You need to stick to one instrument to actually get good at something! This depends. Is the student looking at a career in music teaching or performance? Then I may say to stick to one instrument and get really good on that. This helps the student focus more on their audition, helps them build resiliency, and makes sure they are in it for the long haul. But most students? I think this depends on their goals. We typically have a handful of kids who just want to learn every instrument imaginable and several who really focus on their primary instrument and maybe one additional instrument in pep, jazz or marching.
Myth 4: If the kids play jazz or mariachi, it’s going to screw up their tone or embouchure! Again, there is a transition period sometimes, but we have many students involved in mariachi and jazz, and they have become much stronger members of our concert and marching bands. Plus, they really enjoy being a part of these ensembles, and that’s not a bad thing at all for music teachers to consider. If you notice any difference of tone or style, this is yet another opportunity to teach! Plus, wouldn’t it be great if our kids could perform in a variety of styles?
In the realm of percussion, the goal for every music educator is to create a percussionist who is also a well-rounded musician. As teachers, we dream of a highly disciplined group of students in the back of the band hall who are every bit as accomplished as their brass, woodwind or string counterparts.
Yet all too often we are roused from this wonderful dream by the eardrum-shattering sounds of the dreaded bell kit. Many of us experience the sound of a dozen or more first year percussionists playing on these tiny hearing-loss creating devices and say, “There has to be a better way.”
Now there is. The tabletop xylophone has taken the place of the bell kit and has become a useful tool to help create young percussionist-musicians. Here’s why:
Sound Quality
Yamaha XY-1030PR with optional stand.
Because bell kits have such a high-pitched and displeasing sound, some students (and their parents!) have been so turned off that they have been discouraged from practicing altogether. And even if they do persevere, students often strike the bars in a very timid fashion — a stroke that doesn’t create the correct technique or muscle memory. Designed specifically for easy playability and handling, the Yamaha YX-1030 tabletop xylophone offers full-size bars made of real Pao rosa wood for a true characteristic tone. As a result, students using the proper stroke with this instrument will create the desired sound from day one. Proper strokes are analogous to tone production in wind instruments. If students are practicing on a beginning instrument that does not promote this, they will be creating poor performance habits. The YX-1030PR can be played with a full stroke since it produces a superior sound to other alternatives.
A Boon to Technique
Mallet percussion reading and technique is vital to the development of every young percussionist-musician. For beginning players, the ability to keep their eyes on the music and be able to hit the bars accurately is enhanced by full-sized bars. Bell kits, with their tiny bars and mounting screws, are very difficult to hit with any consistency or exactness. The larger bars of a tabletop xylophone such as the Yamaha YX-1030PR more closely imitate the peripheral vision playing situation of a full-sized instrument and create the proper muscle memory, vital for accuracy. Students who practice playing scale patterns on a tabletop xylophone will have little or no trouble transferring to a performance instrument. This cannot be said of a student who practices on a bell kit.
Because most tabletop xylophones (including the Yamaha YX-1030PR) are three-octave instruments, students in their second or third year of instruction can perform virtually all of the études found in band method books, concert band literature and District Honor Band audition music. Students can practice all of their major scales in two-octave patterns, as is often required of auditions. Even beginning four mallet technique can be started on a tabletop xylophone.
Home Use
The ability to give students an instrument that enables them to do focused, deliberate and accurate practice at home is an immeasurable advantage to any alternative currently available.
Any beginning student with a tabletop xylophone under his or her bed or stored in the closet has a fully functioning tool for high-quality practice in just seconds. The YX-1030PR has a frame with rubber feet that can be stored upright in a limited space and set up just about anywhere. (There’s even an included drop cover.) The advantage of this favorable at-home scenario over the bell kit option — or attempting to find practice time on a school owned instrument before or after school — is profound. Students will become self-reliant with their practice habits and excuses for not practicing will be eliminated.
Use in the Classroom and Practice Room
In addition to being a useful tool for beginning students, the tabletop xylophone is also a huge asset in the classroom. A few additional sets of instruments such as the YX-1030PR in the classroom can allow entire classes of percussionists to perform at the same time — a cost-effective way to have enough mallet resources for every student. In addition, small practice rooms that may not be able to fit a full-sized instrument can certainly fit a three-octave xylophone. A school outfitted with these instruments creates even more opportunities for their young percussionists to hone their skills.
Click here for more information about the Yamaha YX-1030PR tabletop xylophone.
Click here to read about and download the Yamaha Mallet Resource Guide, which provides information about music fundamentals, along with exercises, scales and études for students.
The light starts to change in the fall — the sun’s rays become more slanted as they peek through the changing leaves, the sunsets creep up earlier and earlier. It signals the start of spooky season, and for those of us who place Halloween at the pinnacle of our holiday traditions, we delight in the longer shadows.
Make the most of this liminal season with your music students, by creating lessons that delve into some of the world’s greatest sound mysteries. Mystery sounds can be used to teach pitch, tone, frequency, perception of sound, how acoustical waves move, and other interesting topics. Plus, it gives music educators an opportunity to play with humor and history, weaving them into music curriculum. Here are a few ideas to get you inspired.
The Groaning Mummy
The staggering, bandage-draped mummy that lurches at kids has been a familiar trope for generations. Learning about real-life mummies can be memorable too, although most mummies are, well, quiet.
Not so with the mummy of Nesyamun, an Egyptian priest who lived 3,000 years ago and first unwrapped in England in 1824. Also called the Leeds Mummy for the museum that houses the mummified remains, Nesyamun has contributed to science in a rather unusual way.
Using CT scans of the mummy’s mouth and throat, scientists created a 3D printed larynx, then used computer software and a loudspeaker to recreate what Nesyamun’s voice sounded like during his lifetime.
The results were a less-than-enthused sound: “Ehhh.” Who knew the ancient world was populated with Larry David types?
The sound bite is so small because “this acoustic output is for the single sound for the extant vocal tract shape; it does not provide a basis for synthesizing running speech,” explain the researchers. Still, this is an excellent opportunity to discuss the human vocal tract and how air and movements cause the sounds that we call speech and singing.
Here’s a video from LiveScience that has Nesyamun’s sound repeated, as well as slowed down, making it easier to hear it clearly.
The Death Whistle
Another archaeological dig, this one in 1999 in Mexico, brought to surface an unusual ceramic, palm-sized instrument, clutched in the hand of a male skeleton.
It was dubbed an “Aztec Death Whistle” because it is shaped like a skull. Was this ancient Mexican sound generator used in warfare to terrify opponents with its shrill noise? Maybe. Or was it used for other purposes, such as religious ceremonies, since it was discovered at a temple associated with Ehecatl, the wind god?
Research continues, but many replica “Aztec Death Whistles” have made the rounds on Amazon and social media, with 3D printed or ceramic models popular, so your students may be aware of them. Here are some materials for creating a music lesson about this intriguing pre-Hispanic instrument:
Read about how a contemporary musician reinterpreted the whistle into the composition “Death Whistle,” for the piccolo.
Ghostly Seneca Drums
If mummies and death whistles are a little too intense, here’s an idea for younger students.
For hundreds of years, residents and visitors of Seneca Lake, one of the Finger Lakes in western New York, have been reporting strange sounds. Sometimes called the Seneca Drums, or the Lake Drum, the Lake Gun or the Seneca Guns, this auditory phenomenon is a “deep, hollow, distant, and imposing sound” like a cannon going off in the distance, reported the famous author James Fenimore Cooper in 1850.
The indigenous population of the area chalked it up to the voice of Manitou, or Great Spirit, and incorporated the sound into some of their mythology. Modern scientists have proposed that the sound may be a bursting of natural gas bubbles that were previously trapped in the glacial lake’s bottom.
Ask students, what ghostly drums would sound like? Have them create their own patterns and tempos.
Seneca Drums can also be a jumping off point to talk about the drums, flutes and rattles used by native Americans from that region, including the Iroquois nations of the Seneca and Cayuga. PBS has a learning module featuring renowned Iroquois flute maker and musician Tsa ne Do ‘se that includes a nine-minute video, background reading suggestions and support materials for students.
Spooky Animal Sounds
Another fun sound exploration for younger students is to delve into the bizarre sounds found in the animal kingdom.
Weird animal sounds offer up ways to talk about topics like pitch, volume and timing. Can your students mimic the sound? Can they create a movement that accompanies the sound? Can they draw a picture of an imaginary monster that could be associated with the sound?
Hopefully these ideas have inspired you to make the most of spooky season and conjure up some fall sound mysteries for your students.
Music directors often lament that they wish they had more time for score study. This usually means that they wish they could get away from administrative tasks and the non-musical items of their job. At a recent clinic, a student asked a college band director what the hardest part of being a music educator was. The professor said, hands down, taking time away from teaching and getting into the music because of administrative tasks. Many people feel like these administrative tasks are never-ending.
I am here to tell you that they are correct. These tasks are never-ending, and you’ll never completely finish that to-do list. This is good news! If these tasks are never-ending, then you know that they’ll always be there when you need to get back to them.
Yes, of course, I know that these items are necessary to our job, but so is preparing our lessons by score studying. My advice on these items is simple and direct: Put the needs of you and your ensemble before the other tasks get attention.
So, let’s put score study first and make sure that we are more prepared for our students than ever before!
Step 1: Prepare Your Space for Score Study
Set the stage for the next day: Unless you have considerable time today, prepare your materials for tomorrow. Ensure a clean workspace.
Gather your materials: Set out your scores, pencils, highlighters and small Post-Its. Have access to fingering charts or diction guides, a metronome and a physical musical dictionary.
Duplicate scores: Purchase two original copies of scores. Keep one at school and one in your bag or use one as a mark-up copy. This benefits you if you have guest clinicians.
Optional equipment: If you have a small keyboard, have it available. If not, consider using a Yamaha Harmony Director.
Number measures: If the score is not numbered, write in measure numbers for the complete score. You can pay students a dollar a score to number them if you’re short on time (district policies permitting).
Identify keys: Identify and write the keys below the score.
Check for errata: Search for any errors in the score and parts using the search term “NAME OF PIECE errata.” Mark in these changes if applicable.
Step 3: Define Musical Terms
Translate terms: Go through your score and pencil in every translation that you don’t immediately remember.
Teaching considerations: Think about how you would define and teach these terms to your students. Consider how to manipulate instruments or voice to ensure proper tone and intonation, and how articulation or diction may need to be altered.
Step 4: Plan for the Next Day
Set up your workspace: Close your score and set it in the middle of your desk, on top of your keyboard or mouse. Congratulations, you’ve just done a little bit of score study today.
Photo credit: Adobe Stock/Anthony Brown
The Next Day: Score Study Session
1. Enter Your Workspace:
Time allocation: Enter with enough time to study, starting with just five to seven minutes.
Minimize distractions: Do not turn on your computer, put your phone on do not disturb, and potentially put your phone away in a drawer.
2. Tasks for Day One:
Read program notes: Read through the program notes in the score and underline or highlight important items. Summarize the piece in two sentences or less.
Play or sing one line: Using your keyboard or humming along, play, hum or sing the entire first line of the score. Place a small checkmark next to this line at the beginning.
3. Continued Study:
Daily practice: If you have more time, continue to the next line of music. Keep going through the piece, plunking out or singing/humming the notes.
Sectional study: For long pieces, break them up into sections and study them progressively.
Step 5: Observe and Mark
Identify similar lines: Note similar lines across different instruments or voices.
Highlight melodies: Use highlighters or pencils to mark melodies, countermelodies and other significant parts. Be consistent with your system.
Step 6: Harmonic Analysis
I thought harmonic analysis went away after college. Turns out, it can bring an ensemble to the next level!
Start simple: Identify tonic (I) and dominant (V) chords. Mark them either underneath the score or in the middle if it’s a larger score.
Accidental sections: Pay extra attention to sections with accidentals as they may indicate modulations or unique chords.
Step 7: Rinse and Repeat!
For tougher pieces, I go back and do this process again. The nice part about starting it again is that it usually becomes quicker the second and third time. This also allows you to check your work and make sure those chords are analyzed correctly.
I often find new musical ideas I missed the first time!
________________________________________
Summary Checklist
Prepare your space: Clear your desk and have all your materials available. A good score study session begins the day before.
Protect your time: Schedule score study sessions, and do not allow interruptions. If necessary, find a quiet place away from your usual workspace.
Number measures and check errata: Ensure your score is numbered and any errata are marked.
Play or sing through lines: Go through each line of the score multiple times.
Harmonic analysis: Identify tonic and dominant chords on the first pass.
Score studying is important for being a good music educator. I don’t know of anything else that helps you really understand the music you’re teaching. By following these steps, you can make sure you’re using your time well and balancing the admin stuff with the crucial practice of score study. Remember, small and consistent efforts lead to big improvements in your teaching and your ensemble’s performance. Embrace these strategies, and you’ll find yourself more prepared and less stressed, which is a win-win for both you and your students.
Above all else, the music students in the Abington School District in Pennsylvania, love to perform, wherever and whenever they can. When COVID lockdowns threatened their performance opportunities, music industry teacher Kevin Longwill found a solution that grew into even bigger and better performance opportunities than anyone could have imagined.
Longwill, who teaches music classes for Abington’s middle and high schools, originally taught students digital recording as a way to keep them engaged in music while school was virtual in 2020. During the years since, digital music instruction has grown into a program called Modern Music Makers, also known as M3. This co-curricular music program for middle and high school students has four total divisions: management, media, marketing and mentorship. Through M3, students develop a variety of skills in performance, songwriting, technical production, show development and other facets of the professional music industry.
A Process of Adaptation
When COVID lockdowns began in the spring of 2020, Longwill noticed the impact virtual schooling had on his music students. “A lot of our kids were losing one of the things that makes music fun — playing music with their friends,” he says.
After watching videos of virtual music ensemble performances, Longwill was inspired “to bring back the ensemble experience, whether or not you’re in the same room.”
Longwill then approached the Abington administrators, explained he had a background working in technology, and asked if he could start teaching his students how to record. “Not only did this provide the opportunity for kids to make music together again, but it also would teach them a new form of digital literacy,” Longwill explains.
After receiving administrative approval, Longwill began a project where each student recorded a part of a song, then passed the file onto another student, who would then add their own recording to the mix, and then continue down the chain. During that first year, 25 students participated in the collaborative recording. The following year, that number grew to 60.
Longwill used this opportunity to teach students how to work with a digital audio workstation, or DAW, and give them the basics of editing individual tracks.
A second round of adaptation was necessary when school came back to being in person full-time. Some students started to lose interest in the recording project because they no longer needed to record their parts in order to perform together. Longwill, who was recognized as a 2024 Yamaha “40 Under 40” music educator, still saw the benefit to music technology, so he decided to pivot the program’s focus: The program evolved to incorporate live performance and the production skills which align to its development, while also retaining the original focus of create music in digital platforms.
There’s More to Music
During the past four years, these digital music classes became the M3 program, which has expanded to include different areas of music industry experience — from a show’s lighting, video, and sound design, to the logistics behind booking your own gigs as a musician. Additionally, the program continues to help students develop their individual and small group projects through recording, mixing and editing, and ultimately distribution through their record label, M3 Records.
Longwill describes M3 as a co-curricular program, meaning that certain pieces are offered as elective classes students can take for a grade, while the program also offers pieces outside of school. Many students participate in both.
Curricular pieces of the program include four music technology classes: Music Tech 1, Music Tech 2, Honors Music Technology 3 and a class called AMPD, which stands for Advanced Music Production and Design.
Longwill describes the AMPD class as intense, with students producing work equivalent to a thesis. “It’s like a capstone class,” he says. “We really dig deep into music technology and literacy plus songwriting, the music business and preparing students for the real world.”
Even students who aren’t interested in music performance can participate in M3, which includes instruction on the multimedia parts behind a concert. Longwill cites big stadium concerts as his inspiration; one of his goals is to teach students how to put on an entire show, operating every element from the lights to on-stage visual and audio effects.
School music programs have the potential to be as varied as athletic departments. Longwill compares the kids in his M3 program to student athletes: “You can be on the basketball team, the soccer team, the tennis team. There are so many options,” he says. “But with school music programs, there’s band, chorus or orchestra — it’s very much one big group.”
He explains that with M3, “There’s a huge portion of kids who like playing guitar or making beats. There are even kids who don’t want to do any of these things but are interested in being a part of the show or the studio.”
Longwill’s goal is to make sure all these students are equally involved with the music department. “Everyone can be part of our school music community,” he says. “Everyone is welcome to have a seat at the table.”
Learning Leadership
To prepare students for life after high school, the M3 program fosters skills that help ease students into more adult leadership positions. For example, some students have begun booking their own shows, both for ensembles they’ve formed with other M3 kids, and for their own solo performances. “We supervise them in doing that and provide them with whatever they need to be successful,” Longwill says.
Students also work at M3 fundraisers to help pay their own expenses, such as the cost of renting a performance facility. Longwill recalls that one of his student groups scheduled a performance at a local pizza spot. “Aside from just confirming the venue, they ran the whole thing themselves,” he says. “Once you start to develop these skills, you can further expand on them.”
Another student booked a performance at a local music hall with 150 seats, which she sold out. Longwill supervised the process, but the student took the lead in reserving the venue and finding other students to collaborate with as supplemental acts in her show.
Having different M3 teams — like marketing, media and mentorship — allows Longwill to play to each student’s strengths. “We have some kids who are super invested in social media,” he says. “Working on the marketing team gives them a chance to do something constructive with it, instead of doom-scrolling.”
M3’s mentorship program connects high school and middle school musicians in a mutually beneficial partnership. “If you’re a 6th-grade guitarist, and you have a senior coming down to work with you, you have someone to look up to,” Longwill says. “The high schooler can see that this is where they were four or five years ago, and then they can bring that focus back when they’re working with their peers.”
Giving high school students extra leadership roles has helped them improve focus during their own rehearsals. “If you’re the one running a rehearsal for someone else, and you see someone goofing off, you take things a little more seriously,” Longwill says.
One Big Happy Concert
Whenever Longwill asks his students what kind of high school music experiences they want, the answer is always simple: They want as many opportunities to perform as possible.
Longwill has considered taking students on a Disney trip to perform, but he’s found that M3 students prefer more of a “touring lifestyle” — they want to attend events where they can perform every night.
Longwill noticed that a lack of performance opportunities was a widespread problem for teen musicians. “You can play in your school auditorium. You can play in front of your parents and friends,” he says. “But you’re not really going to get a chance to expand your audience.”
Similar to his approach during COVID, Longwill had to get innovative once again to solve this problem. His solution was the Modern Music Invitational, an event that brings multiple high schools together so students can perform for one another.
The Modern Music Invitational combines the nightly performances of a tour with daytime clinics and speaker sessions of an educational conference. Both Friday and Saturday nights give students opportunities to perform. On Friday night, students in solo and small groups can sign up to perform, while Saturday features masterclasses from professional musicians, studio engineers, and others actively engaged and working in the industry, while Saturday night features a massive band concert where all participating schools get to perform for one another.
The MMI, which takes place on the Abington High School campus, is in its second year. During the first year, eight schools participated, with a total of about 350 students. So far, the 2024 invitational has 15 schools registered, totaling more than 500 students. “At the conclusion of every show, I sit back awestruck at what the kids just did,” Longwill says.
Longwill hopes the M3 Invitational will continue expanding, even if it means looking for larger venues to host it in future years. “The invitational is a thousand percent the highlight of my career so far,” Longwill says. “Just to see that many kids playing for and with each other … that is as authentic as it can get with what they want to do.”
As we saw in Part 1of this two-part posting, knowing how to play jazz on bass involves many of the same steps as mastering a new language: Knowing the basics, learning to express yourself, consistent practice, improvisation, conversation and putting yourself out there.
Here in Part 2, we’ll discuss what it takes to achieve true proficiency in the practice room, rehearsal hall, studio and onstage.
LEARN THE STANDARDS
As you play with other musicians, you’ll develop a repertoire in much the same way a frequent traveler gathers knowledge about the cities and countries they visit. Great musicians know a wide range of standards and many ways to approach them; listening closely to the way other bass players have handled these tunes is an illuminating (and often humbling) experience. Although there are hundreds of standards in the jazz canon, being familiar with jazz harmony, common chord progressions like ii-V-I, and common turnarounds will help you see how many tunes are related to other tunes.
DEVELOP TECHNIQUE
The goal of learning any new language is to be able to express yourself as fluently as you do in your native tongue. Becoming a serious jazz bassist requires holding up a magnifying glass to your fingering, picking hand and fretting hand, as well as your control of dynamicsso you can use various playing techniques appropriately. Paying close attention to the economy and ergonomics of your hands will help you play what you hear in your head.
PRACTICE, PRACTICE, PRACTICE
Taking a language class can add structure and regularity to your learning experience, but you have to do the homework too. In a previous posting, we discussed how to get the most out of your bass practice sessions, but if you’re planning to learn how to play jazz (which is one of the more challenging genres), the slow and steady climb has just begun. Trying an ironclad “twenty focused minutes a day, seven days a week” practice routine might seem daunting at first, but doing it for six months can be incredibly rewarding.
SOLO
Collective improvisation is the heart of jazz, and taking a solo is your chance to comment on the main melody of the song. In jazz, soloing is the rule, not the exception. It’s not unusual, in fact, for bass players to solo on every tune. “Trading fours,” in which you dialogue with the other musicians in a four-bar back-and-forth, is both conversational and fun. Depending on the situation, it could be a show-stopping spotlight where everything else fades away, or as casual as an off-hand comment over dinner with friends. Get inspired by planning your solo and analyzing great jazz bass solosto hear how technique, improvisation and expression come together.
SIT IN AND JAM
Testing your language skills by talking to native speakers is one of the best ways to get better, and sitting in at a jazz jam session gives you the feeling of playing in a band without actually being in one. One caveat, though: If you get up the nerve to join a band onstage, make sure to observe the proper etiquette. If all goes well, you might meet future bandmates too.
JOIN A BAND
If you’ve done your language-studies homework, you’ll be improvising as soon as you land at your foreign destination, greeting strangers, checking into your hotel, hailing cabs and finding restaurants. In the same way, playing with a band shows you how far you’ve come … and what to work on next. Ideas that might have seemed abstract in the practice room — such as navigating charts, transposing songs to a new key and following song structure — will come into sharp focus. You’ll also get practice in communicating your ideas, supporting the rest of the ensemble, effectively using dynamics, rehearsing with purpose, choosing the right instrument, and eventually gigging.
GIG
For many jazz musicians, playing live is what it’s all about. Although knowing the setlist and having good group communication are crucial, there’s nothing like the full-body experience of playing for jazz fans, many of whom harbor a deep love and encyclopedic knowledge of the genre.
RECORD
If you’ve already been recording yourself during practice sessions, you’ll have a head start on this one. Going to a recording session is its own kind of gig, but without the audience reaction (unless it’s a live recording), and with a microscope on your fills, your technique, your relationship to timeand your tone.
PLAY OTHER INSTRUMENTS
The Yamaha SLB300 SILENT Bass boasts excellent upright tone.
The acoustic bass, also known as an upright, is central to the sound of classic jazz. Many players play both acoustic and electric, but even if you only play electric, you may be asked to emulate the sound and feel of an upright bass. If you can, take an upright for a spin — the sheer physical effort of playing acoustic may inspire you to play just the essential notes, which is a useful perspective to bring to electric.
In addition, we bassists are constantly interacting with the drummer, so spending even a little bit of time behind a drum set can secure that bond, and it can also help you get rhythms, “odd” times and syncopation in your body and in your ear.
If you only have time to spend on one instrument, make it keyboard or piano. Jazz harmony (music theory that applies specifically to jazz) and concepts like the circle of fifths, voice-leading and chord substitution make a lot more sense on keyboard. You don’t have to be a virtuoso, but being able to spell out chords and play basic progressions on pianoor other kinds of keyboardsexpands your ears and dramatically increases your chances of playing harmonically interesting bass lines.
If you can get around on bass, drums and keyboards, you’ll be in great company: Drummer Jack DeJohnette also plays piano; pianist Chick Corea knew his way around drums; and besides being one of the all-time great jazz bassists, Jaco Pastorius also wrote and arranged at the piano (that’s him playing both bass and drums on Weather Report’s recording of his tune “Teen Town”).
STAY OPEN
Like mastering a new language, truly understanding jazz is a lifelong pursuit. Taking these steps on your own and with other musicians will give you the tools to be able to play jazz on bass, but keeping your ears open to your own unique pathway is crucial to becoming expert. Welcome to the journey!
Although guitars are inanimate, silent objects, without our physical touch, their appearance and playability may shift over time due to changes in heat, humidity, and general wear and tear. These changes may be so subtle that you don’t notice them in the short term, but you will almost certainly hear and feel them over a long period of time.
In this posting, we’ll explore some of the maintenance protocols that can be employed to keep your beloved guitar(s) sounding, looking and playing just the way you like. As a bonus, when you keep a close eye on your six-stringed counterparts, you connect with them on a higher level, but if they are not firing on all four cylinders, your playing may suffer too.
General Maintenance Tips
Keep guitars out of direct sunlight and away from heat sources. Sunlight can fade and bleach your guitar’s finish. The direct heat may cause glue between components to soften and can also dry out the moisture content of your guitar, which may result in cracks in the wood.
Try to maintain a constant temperature between 66 – 77° F (19 – 25° C) and ideal humidity levels between 40-50 percent. I know we can’t all have humidity-controlled rooms, but just be aware that extreme temperatures and geographical climates will affect wood instruments. (Check out this blog posting for more information.)
Place your guitars on stands or hanging wall brackets that have a neck support and rubber retainer, as shown below. Leaning a guitar against a sofa, amp or wall can be disastrous! Keeping your instrument in eye-view will also inspire you to pick it up more often.
Keep guitars in tune and at a concert pitch of A440Hz to maintain the correct string tension. If they are tuned too low or high, it can put unnecessary strain on the neck, bridge, and top of your guitar.
Replace broken or rusty strings immediately and trim excess string lengths at the tuning peg with wire clippers.
Use string cleaner, pre- and post-practice sessions or rehearsals. Cleaning strings will remove oil, sweat and acidity placed on them by your fingers. This will also prolong string life and facilitate smooth articulation.
Regularly apply a small amount of guitar polish with a soft lint-free cloth to the back of the neck, body, top and headstock and rub gently. I always feel more inclined, and inspired, to play a nice, clean guitar.
Re-string your guitars with a full set of new coated strings (these last a lot longer than uncoated strings) on a regular basis. Stretch the strings and tune to concert (A440Hz) pitch. How often you re-string your guitar will depend on how much you play, the type of strings you use, hand strength, pick dynamic and the makeup of your bodily secretions. (Some people destroy strings daily!)
Quarterly Maintenance
Place guitars in their cases with a Humidipak sachet for a few days to reduce, increase or maintain correct humidity levels. D’Addario manufactures three Humidipak products (Restore, Absorb and Maintain) that you can place in your guitar case or the sound hole of an acoustic guitar. Gauge your need for this based on how dry or humid your playing environment is.
D’Addario Humidipaks.
Placing a Humidipak in the sound hole.
Inspect your guitars for any cracks or disfiguration in the form of swelling on the top, back and/or sides. Guitars that are too dry may crack, split along the seams and permanently disfigure due to failing glue joints. Guitars that contain too much humidity may start to sound dull and lifeless. In addition, tonewoods may swell up due to excess moisture, causing problems between the instrument’s main components.
Sight down the neck from the headstock and ascertain if the neck reliefis within your preferred parameters. These changes can happen so gradually you don’t notice it for a while. If you work with a luthier, have them take specific measurements of your perfect setup. That way you can have them dialed back in if the playing action changes.
Tune any guitars that you haven’t been playing regularly and check their intonation using open chord voicings, and by fretting each of the six strings at the twelfth fret (one octave higher). Neck relief will definitely affect the intonation of your strings, as can worn frets, especially in the areas of the fretboard you play in most. Using different string gauges or a worn nut and saddle can also have an adverse effect on tuning stability and overall intonation. If you are hearing tuning discrepancies, even with new strings that are in tune, have a luthier check the open string intonation and fretted notes.
Semi-Annual / Annual Maintenance
Apply a fretboard conditioner or lemon oil to the fretboard, and let it soak in. Remove the excess conditioner or oil with a soft, lint-free cloth. Unless you have an electric guitar with a maple fingerboard, it’s highly likely your fretboard will be unfinished rosewood, ebony or other hardwood species. These close-grained hardwoods are extremely resilient to atmospherics and other contaminants like finger sweat, grease and oils, which is why they are used so often. However, a semi-annual, or annual application of a fretboard conditioner and/or string lubricant will keep your fingerboard in tip-top shape … and feel good under your fingers too.
Restring the guitar and make sure all the strings are holding their pitch. If any of the strings are getting caught in the nut or bridge, have a luthier recut the nut slots. Strings will wear down the bridge and nut slots over time, so it’s worth keeping an eye on those coupling points to maintain smooth, resistance-free movement for all six strings.
Check the neck relief for minimal neck bow, and, if necessary carefully (and slowly!) adjust the truss rod using the Allen wrench that came supplied with your guitar. (You’ll usually find the truss rod adjuster underneath the headstock plate cover, as shown below.) Turning it clockwise reduces a concave bow; counterclockwise reduces a convex bowed neck. Go just a quarter turn at a time, and re-check until set. If you are unsure on how to adjust the neck relief, have a qualified repair shop or luthier do this for you. It’s well worth having your guitar checked once a year anyway.
The Video
This video features the Yamaha FSX3 Red Label acoustic guitar, played through the company’s innovative THR30IIA desktop amplifier, designed especially for acoustic guitars. Maintaining your guitar as described above will allow you to articulate the arpeggios, chord spreads and the nice clean slide guitar parts I play in the video. Note that the complex finger moves further up the fretboard could also run the risk of intonation problems if the strings are old or rusty. In addition, all the parts become harder to play if the action is set too high at the nut or bridge, or if the guitar has an exaggerated neck relief.
The Guitar
The Yamaha FSX3 is a concert body-sized acoustic guitar that sports a mahogany back and sides, along with a solid spruce top. When I initially received this guitar, I had it set up to my exacting specifications, substituting a slightly lighter set of strings than those that come standard with the instrument.
My FSX3’s playability has remained constant since that setup, which I think is partly due to the solid tonewoodsused in the instrument, along with regular string changes and humidity maintenance.
The Wrap-Up
Modern instruments have usually undergone rigorous quality-control checks before they leave the manufacturer, and may undergo even further adjustments at the guitar store before you purchase it. But regardless of those initial setups, personal alterations may still need to be made to get your guitar playing just the way you like.
It’s definitely worth taking the time to assess and do some routine maintenance of each of your guitars on a regular basis. A well-maintained instrument will last a lifetime, or at the very least will protect your investment for years of playing pleasure.
Julie Anne Russell is known for her off-the-wall concert ideas and her playful methods of teaching music, which she says, result from dreaming really big.
“I make it fun,” Russell says, describing her teaching philosophy. “If it is fun, I can teach the nitty-gritty.”
Russell, who has been the orchestra director at Blythewood High School in South Carolina for about six years, says, “The music is real. It’s just done in a more lighthearted way.”
Skip Ad Concert
Russell’s zaniest idea was the “Skip Ad” concert, which she put on two years ago. The idea came to her when she was sitting in her office and listening to music on YouTube, which was interrupted by a forced ad break. Viewers must watch these ads for a few seconds before they can click on “skip” and return to their video.
Russell had an epiphany: Why not create a concert that feels like watching YouTube for the audience? She and some students learned to play songs that the kids’ parents loved when they were young like “Ghostbusters” and “The Final Countdown.” Students painted a tall, skinny poster and decorated it like the recommended video stills on YouTube.
During the concert, audience members could choose what happened next. In order to the next piece, they had to watch an ad or donate money to the school’s music program and skip the ad. Students studied ads like those for Liberty Mutual insurance and medications, and made up their own funny ads. They even created an ad for a make-believe musical medicine called “Orchestrina,” which could help if you were feeling blue, needed a tune-up or were feeling out of sync with friends. The side effects of Orchestrina? Better posture, better test scores and friends that will last forever.
“We tried to make it as weirdly accurate as possible,” Russell says with a chuckle at the memory. “The kids just loved it!”
Family members did, too, including little brothers and sisters who usually have a hard time sitting through 90 minutes of classical music; they welcomed the novelty breaks.
Choose Your Own Adventure
Another unique concert was based on the classic book series where readers create different stories by choosing plot options. This suited Russell because she likes to give students and even audiences choices.
“I’m a big ideas person,” Russell says. “I love having a very small idea and having students in my office, saying ‘Why don’t we do this?’ Students will throw out ideas, and we end up with this interesting idea.”
In December, Russell, who was recognized as a 2024 Yamaha “40 Under 40” music educator, invited Blythewood alumni to perform at a concert. She had her students hold up signs after each piece; one said “Circus” and the other sign said “High Seas.” An audience member would choose a sign, and the orchestra would comply and play the type of music the sign represented. Then, the alumni would talk to current students about the adventures they had chosen for their lives after high school. This inspired Russell’s students, she says.
“We have a great time in orchestra; we have a really phenomenal program,” Russell says. “However, my main goal is to shape musicians who are appreciators of music. These kids are not necessarily going to conservatory, but they can hear about how music played such an important role in the lives of alumni. The concert was really fun, and at the end, we had all 91 students plus graduates circle around the auditorium.”
Music educator Julie Anne Russell and her son after a concert that promoted children’s literacy.
Childrens’ Book Literacy
Russell’s dedication became even more evident during the pandemic, when daily life was upended in 2020. Teaching a subject that doesn’t do remote learning as well as some other subjects, Russell realized how hard she would have to work to retain students in the orchestra. “How do I convince parents to have their kids stay the course?” Russell asked herself.
She wanted parents to tell their children who wanted to quit orchestra to say, “No, this is a good thing for you.”
“I have never met an adult in my life who says, ‘I am so glad my mom let me quit playing the cello,’” says Russell. She repeats this comment at every concert.
Russell wanted to get all of her students into the same place at the same time playing the same piece of music, and for them to work with a professional. How would she accomplish this? Russell and a teacher friend wrote a grant and brought in Netta Hadari, a renowned violinist and conductor from Connecticut, who worked with the kids as they each composed their own short pieces based on a children’s book. Each student wrote out the music by hand.
“We were able to tie in literacy — not just musical literacy, but how well were they able to understand the book and the literature side of it,” Russell says. “It was a huge undertaking.”
Through this project, Russell showed parents the progression their children will experience if they keep playing an instrument.
“Students were able to schmooze with some professionals,” she says. “All around, it was probably one of the most exciting things I’ve done in my life.”
Giving Back
Russell carries on the school’s Painted Fiddle Project, which began in 2009 when one of the orchestra parents, who is an artist, made wooden fiddles and sold them at concerts. In 2018, one of her students asked if she could revive the program as a senior project, and Russell enthusiastically agreed.
Russell and her father, Jim Wilson, cut out fiddles from maple plywood and members of the school’s National Honor Society painted the fiddles and auctioned them off at each concert. The proceeds support the orchestra program, and at the end of the year, the school donates money to the University of South Carolina’s string projects as a way to give back to the community.
Thanks to grant money, Russell’s students also had the privilege of participating in a workshop and enjoying a concert by Violins of Hope, a group that collected violins, violas, and cellos after World War II. Many of the instruments belonged to Jewish people before and during the war, and families of Holocaust survivors donated many of the instruments. Learning about this period of history was moving for Russell’s students.
Beyond These Walls
Russell’s motto is “beyond these walls,” because of the ubiquitous nature of music. “Music is not just something we do during my 40-minute class; music is all around us,” she says. “Past the walls of our building, there is so much more.”
Her passion for music goes back to her teen years, when a teacher play a record by the band They Might Be Giants. “It just stuck with me my entire life,” Russell says. “He said, ‘Everything in music theory is happening here.’”
Now, Russell gets to teach the next generation, with kids who are consuming so much music ranging from Taylor Swift to Kanye West. The variety is wonderful, as many people think of music education as limited to Bach, Beethoven and other classical composers.
“They have their AirPods in all day long,” Russell says. “They really want to show that that there is so much more than Top 40 and dead white guys.”
Anyone who owns a guitar knows how much joy this beautiful and functional work of art can bring to us through music. Learning to play the guitar is not only a serious investment in your development as a musician, but it is also a commitment to take proper care of the instrument itself.
Think of yourself as an artisan whose tools — your instruments — are an extension of the hands that use them. A well-maintained instrument will provide the potential for flawless performances and a lifetime of service, as long as you employ a few regular maintenance checks and guidelines.
If you’re a guitar educator, you are responsible for the health and safety of multiple instruments in your classroom. I’d suggest taking stock of each instrument in the breaks between each school quarter, so that any repairs, string changes and adjustments can be made before classes resume.
Most of the maintenance tips below can be implemented by the instructor, parent or student, however, it’s a good idea to find a local luthier or guitar store for help with detailed repairs or adjustments.
I always recommend keeping your guitar on a guitar stand that supports the neck of your guitar. A stand with a rubber neck retainer is also useful to prevent the guitar from falling from the cradle. I advocate a guitar being out of its case for a couple of reasons.
You’re more likely to practice if the guitar is visible, and easy to pick up and play, plus the guitar will gradually adjust to the room temperature, and naturally acclimate to its environment. A well-acclimated guitar will generally afford better long-term tuning stability.
Never leave instruments in direct sunlight or near heating sources like radiators. Extreme heat can weaken the glues used in construction, dry out the tone woods, and cause premature color fading of the finishes.
It’s important to note that an extremely dry guitar may start to show signs of cracking along the top, back and sides.
Conversely, a guitar with high levels of moisture content may start to sound less resonant, swell and disfigure, causing glue joints to fail, and protective finishes to lift away from the tone woods. This can leave the guitar permanently damaged, even after repair.
Humidification
Generally speaking, the perfect environment for a guitar is 66-77 °F (19-25 °C) and the ideal humidity levels between 40-50%.
Unless you have a dedicated studio, these ranges are harder to achieve, especially in classroom located in states with extreme weather patterns and seasonal challenges.
The good news is that guitar humidification is available for individual guitars by way of D’Addario Humidipaks. These small humidification bags can be placed in your guitar case or hung inside the guitar sound-hole of an acoustic guitar when it’s not in use.
Humidipaks are two-way humidity-control packs that automatically maintain the ideal humidity level for your guitar.
There are three types of Humidipak.
Use Humidipak Restore if your instrument is dry and needs additional moisture,
Use Humidipak Absorb if you are in a high-humidity environment and need to reduce the relative humidity of your instrument.
Use Humidipak Maintain if you are looking to sustain the proper levels of relative humidity within your instruments.
I recommend putting your guitars in their cases with the appropriate Humidipaks for a couple of days to correct any imbalances. Do this on a regular basis, and you should achieve stable humidity levels within all your instruments.
Strings
String maintenance is critical. I recommend coated strings because they last longer, provide resistance to oil and acidity from the player’s sweat, and prevent premature rusting of the unwound strings.
As strings age, three very important aspects to playability — intonation, tuning stability and clarity — diminish.
Elixir and D’Addario both provide excellent coated strings for acoustic and electric guitars. They may cost a little more than regular strings, but they’ll last five times longer and sound consistently better during that time.
String lubricant and cleaners like the D’Addario XLR8 are excellent for wiping down guitar strings before and after a practice session. They also provide smooth, squeak-free glissandi during position changes along the fretboard.
Keep some on hand at all times.
Classical guitars equipped with nylon strings require regular cleaning, and string changes. Nylon strings won’t rust, but the wound strings (E, A, D) may start to deteriorate after the windings become worn.
Fretboard Care
Fretboard tone-woods, such as rosewood and ebony, can be found on most acoustic, electric and nylon-stringed guitars. These close-grained hardwoods are usually left unfinished and will require moistening with a hydrating oil on a semi-annual basis to prevent them from drying out.
Many guitar manufacturers recommend lemon oil for this purpose. You can also use D’Addario Hydrate fretboard conditioner.
I recommend applying a small amount of this fretboard conditioner every other time you change strings. Simply apply the conditioning oil with a soft cloth, let it sit for a few minutes and remove any residue. Buff to finish.
Electric guitars with maple fretboards are usually finished with polyurethane or nitrocellulose lacquer. These fretboards can be cleaned with a good quality furniture polish during every string change.
If you use lemon oil to condition your fretboards, avoid making contact with the other finishes, as this may damage them.
Intonation
Ensemble guitar teachers always stress the importance of stable tuning within a classroom environment. There are many factors that contribute to stable tuning, such as perfectly tuned, clean strings; well-installed strings that don’t slip or get caught in the nut; and the intonation of the instrument itself.
New strings can be lightly stretched before use to reduce detuning while being played. Nylon strings will take longer than steel strings to settle in. If a particular string or multiple strings consistently go out of tune, check for a few things.
Check that the string is seated properly on the saddle and in the correct nut slots. Strings may also get stuck in a poorly cut nut slot, and then release, which detunes the guitar while it’s being played. Have a luthier cut the nut slots cleanly, allowing the strings to pass through them without sticking.
Make sure the strings have been installed with a suitable winding around the tuning post. I recommend winding the string around the tuning post three times.
If the nut slots are cut too high, it may cause students to push down too hard on the strings to obtain clean, buzz-free chords. This will make the strings go sharp, especially the B string. Have a luthier re-cut the nut slots so that they are closer to the top of the first fret. Also, check that the overall string action (height of the strings from the fretboard) from the nut to the saddle is playable. Reducing the playing action can dramatically improve a student’s progress and the overall intonation of the instrument.
Check that the neck relief on each guitar only provides enough “relief” (a tiny concave bow away from the strings) to allow for the strings to resonate without buzzing. You can check this relief by sighting down the fretboard from the nut to the bridge. Hold down the low E string at the first fret and last fret. Sight down to the middle of the string and make sure there’s a small gap between the bottom of the string and the top of the fret wire. The truss rod on your guitar will allow you to reduce or increase the neck relief using a small Allen, or hex, wrench. If you aren’t used to making these adjustments, have the guitar serviced by a professional.
Cleaning the Finish
I clean my guitar finishes every couple of weeks to remove the daily dust, finger grease and sweat that may build up on the surfaces during regular practice sessions. There are many proprietary guitar polishes on the market, but you can also use a good quality wood and furniture polish. Cleaning your guitar will bring you closer to loving it and keep you aware of any other issues or maintenance concerns that may arise.
The Wrap-Up
Modern instruments have usually undergone rigorous checks before they leave the manufacturer, and they may receive more adjustments at the guitar store.
Personal alterations on a per student basis may still need to be made. Keep a keen eye and ear out for student struggles, ensemble tonality, tuning stability, and the overall playing environment in which your guitars reside.
Take the time to assess each guitar on a regular basis, and pair that with some simple routine maintenance checks within the school holidays.
A well-maintained instrument will last a lifetime, and so will the joy and academic benefits of a music education.
As a parent, you want to help your child to grow and develop into a well-rounded person. And when many parents think about preparing their kids to excel in school, they tend to focus on how to advance their reading, math and science aptitude, or on getting them involved in sports and gymnastics to help develop their strength, coordination and team building. Often overlooked are the arts, and specifically playing a musical instrument.
Which instrument to start with is largely a matter of personal taste; certainly, if your child shows an affinity for one particular instrument, it’s good to encourage that interest because it makes it more likely they will accept music lessons with enthusiasm. But if there’s no particular leaning, piano is a great choice for kids, as it is easy to produce a satisfying sound right away: No having to figure out how to blow properly into a wind instrument, or learning to bow a stringed instrument. (While drums are certainly a fun activity, not every family wants to endure the tumult of a kid bashing on a drum set every day!) In addition, piano is a part of many styles of music, so your child will be able to participate in lots of musical activities as they grow and develop.
Here are four things parents can do to help support their child in starting to learn piano.
1. Create a Musical Environment
This one’s easy: listen to piano music in your home, and talk about how much you enjoy it. All the major music streaming services have playlists of piano music. You can search for them by using terms like “classical piano,” “pop piano,” “jazzy piano,” etc., or simply enter the name of your favorite pianist. Making piano music part of your everyday life shows your child that it is a cool and positive activity.
Similarly, make it a point to watch films and TV shows that feature the piano. Baby boomer parents likely remember watching this classic Bugs Bunny piano performance. The inimitable Chico Marx often got a piano feature in Marx Brothers films, and many pianists cherish his visually playful technique. And everyone enjoys this classic scene from the movie Big. Clips like these help to associate piano playing with fun.
2. Introduce Your Child to Musical Games
A great way to bring music into a child’s home life is through the use of musical toys and software games. Who hasn’t had fun as a kid playing Simon®? Be sure to focus on the notes, not just the colors, so your child will try to listen to and follow them.
There are some excellent software titles that let children get involved in making sounds as they play, and this can nurture their creativity and enjoyment of music-making. A few that I like are:
The next logical step is getting your child lessons. For small children (younger than eight), it is very important to find a teacher that specializes in teaching young kids. As every parent knows, youngsters have short attention spans, so a teacher needs to be skilled in dealing with that age group. At this stage of a child’s development, the most important thing is to stimulate their interest and enjoyment of music, not just try to teach them notes and fingerings. Ask at your child’s school for recommendations, visit your local music store and/or ask other parents to find someone proven within your community.
It’s important that you be involved in the lessons as well. You’ll need to know what the teacher is teaching, and what the assignments are so you can act as a surrogate to guide your child through their activities. This is actually a great thing — you are sharing precious time with your child focused on a creative activity! Just bear in mind that most kids — especially the young ones — can’t be depended upon to put in the necessary practice time, so you’ll need to actively encourage them. (20 minutes or so each day is plenty.)
4. Help Design Creative Lesson Activities
Kids need positive reinforcement and fun stimulation during both their lessons and practice time. When they play a piece well, give them lots of praise! Some teachers like to give stickers, stars or small gifts for good work. A young child will only practice a piece a few times before getting bored, so it’s important to find ways to keep things interesting. Have them move to different ranges of the piano to hear how it sounds higher or lower. Ask them to play the phrase very slowly, and then a little faster; as quiet as they can, then loudly. If you have a digital piano, you can also change the sound to that of another instrument to let them hear how different it sounds. (This is usually a surefire way to hold their attention!) And remember: Your child’s practice doesn’t have to involve only playing the piano. Have them stand up and play games like clapping different rhythms, marching in rhythm, or singing to help to vary their activities and keep them from being bored.
When I gave lessons to small children I would make up accompaniments to their pieces so they could hear the song sounding like rock and roll, boogie-woogie or other styles of music. I would ask them what their favorite song was, and I would teach it to them in a simplified fashion so they got direct and relevant involvement with playing music. What is most important in the first year of lessons is to create a positive, fun and rewarding experience for the child so they want to continue playing piano. More technical aspects, such as learning to read music, along with proper hand position and fingering, can come later, after the teacher (and you!) have made playing and lessons a positive experience in your child’s life.
Each violin, viola, cello and bass is crafted using parts that are able to fail in a particular way that, if caught quickly, can be easily repaired by a qualified luthier (stringed instrument repair person).
Tuning
Most skilled players will begin tuning their instrument by loosening the fine tuners as far as they can, allowing them to utilize the pegs to their fullest advantage and then fine tuning the instrument to true pitch and keeping the player from over-tuning and possibly breaking the strings. (read the blog post, “How to Restring a Violin”).
Tuning also gives the player a great opportunity to assess the instrument!
Check that the pegs are turning smoothly and fit properly.
Are the strings wound on the legs properly (evenly spaced with no overlap)? Are any strings dented or frayed?
Ensure that the fine tuners and the tailpiece are working properly.
Cracks and open seams are relatively common on stringed instruments. Changes in humidity and temperature effect both the tonewood and the adhesive used to connect the front, back and sides. Catching these issues early is vital to repairing them effectively.
Be sure to check over all glued contact points. This includes all seams, the fingerboard, nut and saddle.
Look for splits and cracks along the wood grain surrounding the soundpost contact points (front and back of the instrument).
Check pegs and neck for warping, twisting or splintering wood.
Using a clean, untreated microfiber cloth to gently remove rosin from your instrument after each use can greatly improve instrument health and allow you to regularly check for any issues that may arise.
Orchestral stringed instruments utilize maple bridges that are made to fit each individual instrument. An improper bridge fit can cause serious damage! The inside of the instruments are hollow, with only the soundpost distributing the pressure of the strings pushing on the bridge to keep the violin (or viola, cello or bass) from collapsing in on itself! Check to make sure the bridge is well-maintained and positioned properly on the top of your instrument to ensure pure tone and longevity.
Check to make sure your bridge is positioned properly. The bridge should be set along the arched top in the middle of the fingerboard, with the “feet” centered between the notches of the “f” holes.
Look for any visible decay in the wood of the bridge. Is the coloring nice, bright and flamed? Is the wood holding its shape or is it warping/curving on the top or sides? Is the maple firm and not soft and squishy?
Make sure the feet of the bridge fit flush against the top of the instrument. Any gaps can create a difference in pressure, affecting not only tone but structural integrity.
Look at the height of the bridge. Does it look too high or too low? Are the strings really hard to push down the closer you get to the bridge? Do the strings buzz when you press them against the fingerboard?
Soundpost
The soundpost is a small, carefully crafted maple dowel located on the inside of the instrument close to the bridge. The soundpost has two functions; it works as a support for the top of the instrument and it also controls sound! Having a properly fit and placed soundpost is integral for the stability and tone of your stringed instrument.
Always check that your soundpost is upright and in its proper position just behind the treble foot of the bridge.
In the case of a fallen soundpost, you may hear or see it rolling around the inside of the instrument. Immediately loosen all the strings and remove the bridge from the instrument to prevent cracks and visit a qualified luthier to refit the soundpost.
Bow
Stringed instrument bows are just as important to care for as the instrument itself! Bows should be thought of as an extension of the instrument, not an accessory. Keeping your bow in good working order will ensure easy playing and good technique.
Tighten the hair on the bow to playing tension using the screw at the bottom, making sure the hair tightens and loosens smoothly.
When tightened, look straight down the stick from the screw to the tip. There should be a slight curve upward toward the tip. Any side to side curvature or warping should be checked by a luthier.
The hair on the bow should be full and light colored (unless using black hair on a bass bow). Look for any frayed or missing hair and discoloration (usually rosin build-up) near the frog and tip.
Check the tip plate. Is it cracked or missing?
Check the frog for cracks and dings.
Always loosen the bow hair when not in use. Leaving the hair tightened can cause hair breakage, over-stretching, stick warping, frog and tip damage, or even cracking in wooden bows.
Stringed instruments should be evaluated by a luthier twice per year even if no problems are apparent. The general rule is to have this done in June and January as playing habits, temperature and humidity levels can affect these sensitive instruments. Remember, happy instruments make happy players!
I routinely witness music educators taking to social media to vent about a lack of support from school administrators. I have been there. Early in my career at an independent college-preparatory school, a newly hired headmaster attended my first choral concert of the semester and slept through a good deal of it. Much to my surprise, he called me into his office the following school day to tell me that the hour-long concert was “too long and too religious.” There was no conversation or space to provide rationale, only directives about what would be different moving forward.
The concert was in fact dominated by secular music and none of the sacred selections were devotional in nature (the only sacred repertoire on the program was a Mozart motet in Latin, a Mendelssohn anthem in German and an African-American spiritual), so I was not anticipating a need to defend my curriculum to a disapproving employer that morning! After stomaching the criticism, which was opposed to every measure of success that I had been taught, I left the meeting feeling frustrated and at an impasse.
Whether the particular frustration is regarding course offerings, scheduling, budget, administrative red tape, district-wide initiatives, program expectations, enforcement of policy and procedures, or teacher evaluations, music educators will undoubtedly experience some of these vexing encounters. The good news is: There is much that can be done to ensure a thriving relationship with your administration and mitigate unsupportive encounters!
Though the tenure of the administrator in my example was short-lived, I learned a valuable lesson. Quality teaching alone is no guarantee of administrative support. This particular interaction could have been averted if I had done some intentional advocacy work on the front end. Now, I’m in higher education, and I encourage my music education students to foster a close-knit relationship with their future administrators in several ways.
Dr. Hutton conducts a performance of Handel’s Israel in Egypt oratorio.
VISIBILITY
Because educators in the performing arts teach content that is specialized with methods that also require a specific set of skills, they are too frequently left alone and trusted to “do their thing” — particularly if they are well-qualified and well-liked. Early on in my career, I perceived this hands-off approach of my administration to be an indicator that things were going well. No news is good news! Also, who wants a micromanager for a boss? However, I learned that this approach can create several hurdles:
Educators in the performing arts can often feel isolated without colleagues in the building who truly understand their needs, their curriculum or their approach.
With distant leadership, successes may go unnoticed while challenges may linger.
When issues arise, a trusting relationship based on direct experience is not established.
As I matured in my career, I realized the importance of keeping my instruction visible to administrators in a proactive, almost pestering, manner. At that independent school, I had never been observed in my music instruction, not a single lesson after my initial interview. As a result, my evaluators knew nothing of what I was doing apart from secondhand accounts or attending performances.
Inviting administrators into the classroom became a cornerstone of my advocacy strategy. Rather than waiting for required observations, I extended personalized invitations on a regular basis, encouraging them to witness firsthand the dynamic interactions and learning experiences taking place within the music program. And I asked that it be documented (which would become wonderful artifacts for future employers). In this way administrators will track growth, not only the final product. This proactive approach not only provided leadership with direct insight into the curriculum and pedagogy, but it also fostered a sense of investment and appreciation for the work being done.
Sharing the achievements and successes of my students became another vital component of my advocacy efforts. From simply announcing every student honor and recognition to highlighting every milestone of our choral program, great and small. I made a concerted effort to keep administrators informed and engaged. Do not be afraid to brag on your accomplishments and celebrate them publicly to demonstrate the tangible impact you are making. Flood your administrators’ email inboxes with the amazing things you and your students are doing and take-over the school announcements with kudos for your music students.
Outstanding choral student receiving an achievement award.
INVOLVEMENT
In addition to classroom engagement, I seized opportunities to involve administrators in my program’s special events, such as serving as chaperones for a choir tour that included attending a performance of “Hamilton” (my principal jumped at the opportunity). Personally invite them, and provide comp tickets, to the honor choir concert. Take your choir to their office to serenade them with “Happy Birthday!” Ask them to be a “practice audience.” These experiences will not only allow principals, assistant principals and deans to witness the passion and dedication of your students, but they will also foster personal connections and emotional ties to the music program. And if it so happens that on the bus to the choral festival you have an opportunity to highlight a tangible need — so be it! By bridging the gap between the administrative office and the music room, I was able to cultivate a supportive relationship that championed the success and growth of our program.
Dr. Hutton rehearsing Nevada All-State 2022 Tenors and Basses.
EDUCATION
Over time, I recognized the importance of taking initiative to educate administrators about the rationale for my curriculum and pedagogical approach. Before the year gets going, request a meeting to talk through any areas that could potentially cause heartburn. Why is it of value to learn and perform a mass movement by Franz Schubert? Why is a retreat for my Advanced Choir worth the investment? How will a subscription to a sight-reading technology impact the musical literacy of the 9th graders? Why might a co-curricular concert take priority over an extra-curricular sports practice? I worked to debunk some of the misconceptions regarding music education and, at the same time, garner their support and understanding. Through intentional dialogue, I was able to convey my expertise as well as the value and impact of music education on student development.
An ACDA reading session geared toward future choral educators.
ALIGNMENT
I initiated annual conversations with administrators to discuss their goals and expectations for the music program, aligning them with my own objectives and aspirations. This collaborative approach not only ensured alignment of priorities but also provided a platform for mutual understanding and accountability. By actively involving administrators in the planning and decision-making, I fostered a sense of ownership and investment in the success of the music program. It is incredibly valuable to sit down, dream and visioncast. I proactively highlighted opportunities for growth and development, drawing attention to initiatives implemented in other schools that weren’t yet an opportunity at my school but could be adapted or adopted to enhance our program. By keeping leadership abreast of emerging trends and best practices in music education, I positioned myself as a proactive and forward-thinking educator, dedicated to continuous improvement and advancement.
In reflecting on my journey as a choral director, I have come to appreciate the transformative power of advocacy in building strong and supportive relationships with school administration. For me, advocacy meant keeping music education visible, involving administrators in every way I could, proactively educating them and aligning their goals with mine. Make the administrator’s office a space you frequent often — 90% of this time should be on your own initiative and 10% on theirs. In this way, I have experienced success cultivating a culture of support and collaboration that has enriched the educational experiences of my students. As music educators, we must recognize the importance of advocating for our students, our programs and our profession. And we must strive to foster meaningful partnerships with school administration that will ultimately strengthen the fabric of our school community.
Imagine that you are moving to a new country and want to learn the language. You might watch videos to absorb the country’s history, culture and current events or take a course that connects you with other students. With regular practice and guidance, you’d eventually be reading, writing and having conversations with native speakers, well on your way toward true proficiency.
Jazz is a language, and learning it requires many of the same methods. In this first of a two-part series, we’ll explore several important steps bassists should take if they want to master this challenging musical genre.
LISTEN
There are many branches of the jazz tree, from bebop and big band to free jazz and fusion, so exploring different styles and eras will help you decide what appeals to you. Get to know the history of blues and jazz (blues was the foundation for jazz). Make playlists of the artists and songs you like, and listen closely to your favorite rhythm sections. Even in the same subgenre, bass players can take vastly different approaches to tone, timekeeping and harmony. If you’re already knowledgeable about a particular bassist or school of jazz, begin to articulate what inspires you and what skills you’d like to develop.
EXPERIENCE IT IN PERSON
You can learn a lot by watching videos and reading books, but there’s nothing like experiencing jazz in a live setting. Go to shows and jam sessions so you can hear local players work on their craft, and make it a priority to catch touring jazz musicians who swing through town. Check out the audience at any jazz club, and you’ll most likely see students like yourself learning about improvisation (the cornerstone of jazz) in real time.
FIND A TEACHER
Another benefit of going to see live jazz is that you radically increase your chances of meeting an experienced bass teacher. Not every great musician knows how to teach, but if someone makes a strong impression on you, they probably have knowledge to share.
Teaching yourself to play jazz on bass is possible (especially if you avail yourself of the many online resources out there), but if you’re on the fence about taking lessons, remember that a good teacher can support you when things get tough, keep you accountable, steer you away from bad habits, and introduce you to concepts you might not have otherwise encountered. In addition, a good curriculum will pace your learning with well-planned structure, which is the surest way to progress.
WALK BEFORE YOU RUN
Once you’ve begun studying, it can be tempting to shoot for the stars, but as any experienced teacher will tell you, it’s important to have a solid grasp of the basics like roots, fifths and octaves. Understanding notes, intervals, scales, chords and chord progressions will strengthen your foundation as you learn to read, play walking basslines, solo, and become familiar with the jazz repertoire.
KNOW YOUR ROLE
Being in a rhythm section is an important task. We bass players serve as the bridge between harmony (most clearly defined by chordal instruments like guitar and piano) and rhythm (drums and percussion). Doing our job well means outlining the harmony with chord tones and laying the foundation, usually by playing the root of each chord (in addition to related notes to form an interesting bassline). We’re also intimately connected to the kick drum, where you and the drummer are partners in keeping time.
LEARN TO READ MUSIC
Reading music is a crucial part of being a jazz bassist. You may not always be expected to instantly read and play complex figures at fast tempos, but knowing how to quickly scan a lead sheet, or, more specifically, a jazz chart for essential information — things like the key signature, the “head” (main melody), unison lines, modulations, turnarounds, repeats and the overall form — is a must. Charts are the most basic way jazz musicians communicate the shape of a tune, and if you don’t know how to swiftly get all the info you need, you’re setting yourself up for failure. Sure, if you have “big ears,” or if you closely watch the pianist’s hands, you might be able to fake it (which is another ability entirely), but reading a chart is beyond useful when it comes to playing jazz; in many ways, it’s the price of entry.
In addition, developing your sight-singing, a skill frequently mentioned alongside sight-readingand ear-training, will allow you to look at a chart and hear the melody in your head; knowing common chord progressions (like the ii-V-I), song forms (like AABA, ABAC, and 12-bar blues) and common phrases goes a long way too.
PLAY LICKS
If you were learning a new language, you might start with short phrases like “please,” “thank you” and “where’s the restroom” before working your way up to, “I’m looking for the best inexpensive vegan pizza place near my hotel that’s open after midnight.”
Similarly, learning jazz licks — bite-sized melodies, intros or phrases that connect chord changes — will sharpen your ears while helping you get jazz phrasing under your fingers. A technically challenging lick can inspire you to practice until you get it, which can be quite satisfying; learn to play it in all twelve keys, and you’ll have a new addition to your solo tool bag.
TRANSCRIBE
Just as important as figuring out the notes being played is taking the time to decipher how and why a bass player took a particular approach. In the old days, this process involved repeatedly playing a short section of a record until you could hear all the details, but software has made it easy to slow down and loop a piece of music while amplifying the bass part. Learning to hear all the elements of a performance is perhaps the best way to deeply absorb jazz basslines played by the greats and add those skills to your musical vocabulary.
TRAIN YOUR EARS
Like reading music, ear training is an essential skill for jazz musicians. Learning to identify song structures, intervals (the space between notes), chord qualities and harmony and chord progressions will make all the difference to you as a performer, accompanist and soloist. There are many ways to train your ears, so find a method that works for you and stick with it.
In Part 2, we’ll continue the journey with some more helpful tips for learning to play jazz on bass.
Benjamin Bergey’s brand-new degree program — the hybrid major called Music and Peacebuilding, offered at Eastern Mennonite University in Harrisonburg, Virginia, since 2021 — will graduate its first student this year, with four more students nearing completion. Yet as word has spread, more and more students are interested in this unique degree program that combines a traditional music education with elements of diplomacy, facilitating dialogue and conflict transformation.
“The hardest part is getting people to know that it’s here,” says Bergey, an Assistant Professor of Music and Director of Orchestra and Choirs at EMU. “Once people are aware of it, they say, ‘Hey, that’s awesome.’”
A Tool for Intercultural Competence
The program, which Bergey started and built, combines two areas of study to form a powerful tool for intercultural competence. Music and Peacebuilding can prepare students for a variety of careers, as many organizations are using music to help people in high-conflict areas, he says.
“It can be useful in any scenario where there’s people,” Bergey says. “And where there’s people, there’s conflict. That’s not inherently a bad thing, but it’s just a fact.
“I’ve found that this is actually an emerging field,” says Bergey, who was recognized as a Yamaha “40 Under 40” music educator in 2024. “On the peacebuilder side, people who have already done this have long known the benefits of using the arts in their work. But musicians haven’t necessarily had similar training to see how peacebuilding theories and frameworks can benefit our work as well.”
Finding Common Ground in High-Conflict Areas
Seeing a need there, Bergey became interested in incorporating peacebuilding training into music education. While working on his doctoral degree at James Madison University, he researched the subject for his dissertation while spending time in Jerusalem during 2017; he also went to the Middle East to study abroad in 2010 during his undergrad years.
Bergey studied groups in Israel and Palestine that used music to bring together Arabs and Jews by making, learning and sharing music as well as engaging in professionally facilitated dialogue. In particular, Bergey spent time observing the Jerusalem Youth Chorus, which has both Jewish and Arab teenagers from different parts of the city who meet together at the YMCA in downtown.
Choir members first sing together, then have dialogue about a variety of topics and then end their sessions with more music. This provides a bonding experience for these kids, whose cultures have major clashes.
“They find humanity in each other and realize: We like similar things, and some words in our languages are more similar than we realize,” Bergey says. “It’s a really fascinating experience that they have, and they turn out to be quite formative.”
According to Bergey, music provides a fun common ground for kids, and it helps soften the conflict in heated discussions. “They want to learn about each other and why one might feel a certain way about something,” he says. “Some sessions are not all happy and butterflies.
Making music together can help break perceptions of dissimilarity because of a shared experience, which can build empathy. “With this act of music-making, people at least have a better shot at more fruitful dialogue and creative collaboration,” he says.
The Social Aspect of Music-Making
Bergey now practices what he learned in the Middle East by leading retreats and meetings where people combine music with peacebuilding. One common activity is hosting a drum circle, where Bergey and students go into a community park and set up buckets to serve as drums. They invite anyone to come and participate, with or without a music background. People sit in the circle, talk to each other, and play the buckets like drums, which is a cathartic, fulfilling experience, he says. Even just realizing that there are other humans in the circle promotes empathy.
“Seeing a bunch of random people come together like this is pretty awesome,” Bergey says. “It’s musical empathy and preventive peacebuilding, pre-conflict. It’s the ability to build human connections or social capital prior to any conflict.”
Students who get a Music and Peacebuilding degree at EMU can use these relational and music skills in a variety of jobs, Bergey says. Some work for nonprofits, while others work in education. Some might go on to graduate school for music therapy, he says. Whatever Music and Peacebuilding graduates do, they are “able to use these theories and to understand the social aspect about how people work and how to mitigate conflict,” Bergey says.
EMU Chamber Singers at the Basilica of the Shrine of the Immaculate Conception in Washington, D.C.
The Impact of Belonging and Philosophy
For Bergey, his faith has influenced his career significantly. It is important to create a sense of belonging at the school, and Bergey brings that into his classrooms.
“For me, it’s important to have a space where people feel they can bring themselves and have their voices heard — and in choir, it’s literal voices,” he says. “It’s a very vulnerable act to let others hear your voice. Creating that space where people can do that is a very human, moral and kind thing. And I feel it leaves the world better than we found it.”
Bergey echoes this sentiment in his philosophy about music education. “For me, teaching music is about providing opportunities for everyone to contribute and learn and be a part of that expression. To do that, we need to be able to recreate space for each person to bring their authentic self and to realize how we together are creating something that is better than any individual part,” he says. “That’s the beauty.”
Whether you’re looking to have your child start a new learning-enriching activity or you’re a retiree who is up for a new challenge, here are some amazing benefits that come from playing piano.
It Can Make Your Child a Better Student
Parents take note: When your child learns a musical instrument, they become a better student all around. There are numerous studies that have verified this astonishing fact. For example, a Psychology Today article citing research done at the University of British Columbia in 2019 states that “Students who learned to play a musical instrument in elementary [school] and continued playing in high school not only score significantly higher but were about one academic year ahead of their non-music peers with regard to their English, mathematics and science skills … These exam-based statistics were consistent across the board, regardless of socioeconomic background, gender, ethnicity, or prior learning in science, math, and English.”
This extends to language skills too. “It appears that some of the auditory skills learned from piano playing enhance specific aspects of the perception of spoken language, even beyond that gained from additional experience in reading,” writes renowned cognitive neuroscientist Dr. John Gabrieli in this blog posting. “The benefits from music (which has no direct relation to language) [are] similar to those from reading (which relates directly to language).”
You Can Start Learning It At Any Age
Unlike some other musical instruments, piano is something you can learn — and learn well — at any age. In his blog posting “Express Yourself,” musician, bestselling author and cognitive psychologist Daniel Levitin says that, “For older adults, the instrument I recommend is the piano (or any similar keyboard, such as organ or synthesizer). The reason is that getting a good tone out of a keyboard is not at all difficult: anyone can sit down at a piano and play a C-sharp as well as a Rubinstein, an Alicia de Larrocha or an Elton John. Putting the notes together is the challenge, but it’s a challenge you can start addressing right away. The other advantage of the piano is that it’s easy to visualize scales and chords — they’re all there in front of you, laid out linearly.”
Learning piano as an adult actually has some distinct advantages. For one thing, even simple piano lessons for beginner adults can help you deal with stress. In fact, I’ve found playing piano to be the ultimate stress reliever. And when I say “play,” I mean simply playing, with no particular end goal in mind — in other words, just enjoying the process of “noodling around.” I find that by allowing my fingers to glide over the keys without the pressure of having to create something or improve my technique, I can let the instrument take me somewhere for the musical joy of it.
Playing Piano Can Make You Healthier
“As humans, we are hard-wired for music,” says Barry Bittman, MD, Chairman and CEO of the Yamaha Music and Wellness Institute, a non-profit organization engaged in education and research, “Music gets through where words do not pass. Recreational music-making reduces the impact of stress on many levels and allows healing to begin. It actually alters gene expression pathways in patients with coronary heart disease.”
In addition, learning to play an instrument as an adult stimulates your brain; your neuroplasticity can see some significant improvements, meaning that your brain starts making new connections and remapping the old patterns. Whenever I sit down at the piano, it feels as if my brain does indeed light up with excitement. I simply feel better after playing, even if I only idle over the keys for a short period of time. That may be because I only started to learn to play piano a few years ago (I’m a lifelong guitarist); my training on the instrument is minimal enough that I don’t know exactly what I’m doing. As Zen Master Shunaryu Suzuik once said, “In the beginner’s mind there are many possibilities. In the expert’s mind there are few.”
So whether you want to learn a single song for your own pleasure or go deep into performance technique, playing the piano has healing benefits for your (or your child’s) mind, body, spirit and soul. Best of all, it’s fun!
Anyone who’s ever seen me perform live knows that I often use a capo. If you’ve watched any of the acoustic video performances on my YouTube channel, it’s likely you have seen me employ a capo there too.
Why do I favor this simple device so much, and why do I think you should know how to use one? The answer is multi-faceted, and there are some surprising uses that you may not have even thought of!
In this posting, I’ll share some basic applications and best practices for using a capo, and also explore the different types of capos available.
Origin of the Name “Capo”
The Italian phrase “Da Capo” means “from the beginning”; it also can mean “the head.” When used in sheet music, it’s a verbal signpost instructing the player to go back to the beginning of the piece and start all over again.
In physical terms, a capo temporarily replaces the nut of your guitar, allowing you to raise the pitch of your open strings without retuning them.
From low to high, the open strings on your guitar are normally tuned E-A-D-G-B-E. Place a capo at the first fret, and you take all those tones up in pitch one semitone, to E#-A#-D#-G#-B#-E#. It’s like moving the nut of your guitar up one fret.
Now let’s explore the many amazing uses for this powerhouse guitar accessory.
Open Chords
We’ll employ the following simple chord progression to illustrate what a capo does to chords played in open position (that is, those containing open strings):
II: C G/B I Ami7 Fma7 :II
Let’s say you’re learning a song that uses these chords, but the original pitch is too low for your voice. Place a capo at the first fret, and the same chord shapes are now one semitone higher in pitch, changing the key from C to C#, which may be a much better fit for your voice:
II: C# G#/B# I A#mi7 F#ma7 :II
Now take the capo away and try to learn and play the new chords without it. As you can see from the illustration below, it’s not impossible, but also not practical, or even attainable for a novice that only knows a handful of basic chords. What’s more, two of those new chords require a barre technique (i.e., laying your index finger across a fret), making them much harder to play … and why would you do that if you can simply use a capo to achieve better results within seconds?
In essence, then, a capo allows you to play any series of chords in multiple keys without needing to know how to transpose or learn new chord shapes. Using a capo will often affect the sound of your guitar too, since open strings tend to ring out differently (usually becoming more “jangly”) when raised in pitch.
The Importance of a Capo in Live Performance
Most guitar players who sing will agree that playing and singing is much easier when the chords are all in open position.
When we sing in live performance, we face the audience, and our mouths are faced towards the microphone. This means you can’t always look at your guitar’s fretboard. Try playing an Ami7 as a barre chord at the fifth fret without looking at the fretboard. Not easy, is it?
Here’s another scenario to ponder: You’re at your gig, and a female singer asks if she can sit in and sing a song with you. You have no objection, but the female voice is generally pitched a fourth above where male vocalists sing. No problem: Simply take your capo and place it at the fifth fret, and you’ll now have the same chord shapes pitched a fourth above the original key … without having to transpose in your head to new and possibly unfamiliar shapes.
Open Tunings
As noted earlier in this posting, the open strings on guitar are normally tuned E-A-D-G-B-E (from low to high). Open tunings are those where open strings are tuned to a specific chord, which creates a lovely drone of complementary tones. Popular open tunings for guitar are drop D, open G and open E. These all require detuning several strings to another pitch.
Drop D
Here, you detune the first (lowest) and sixth (highest) strings down a whole tone, from E to D, yielding the following notes:
D-A-D-G-B-D
Open G
This is similar to drop D tuning, but with the fifth (A) string also lowered a whole tone (to G):
D-G-D-G-B-D
Open E
In this tuning, the fifth (A) string is raised a tone (to B), and the third (G) string is raised a semitone (to G#):
E-B-D-G#-B-E
Any of these open tunings can easily be changed to another open tuning by using a capo. For example, if you place a capo at the third fret on a guitar in open G tuning, you’re now in open B♭ tuning, as shown below, but still with all the wonderful open-string drones. Try tuning to open B♭ without a capo!
Open B♭
F-B♭-F-B♭-E♭-F
Playing New Chord Shapes With a Capo
Using a capo is a great way to create alternative, second, or even third guitar parts with a series of new chord shapes. For example, start with this chord progression, played in open position. (I’ve denoted the scale position those chords occupy within the C major scale below the progression using roman numerals, where I = the tonic [root] chord, V = the fifth [in this case played over the seventh degree of the scale], VI = the sixth, and IV = the fourth.)
II: C G/B I Ami7 Fma7 :II
( I V/VII VI IV)
You’ll need to play different chord shapes to maintain the I – V/VII – VI – IV relationship. For example, if you place a capo at the third fret, you’ll need to play these chord shapes to attain the same pitch as the original chords:
II: A E/G# I F#mi7 Dma7 :II
If you move the capo up to the fifth fret, you’ll need to play these chord shapes to attain the same pitch as the original chords:
II: G D/F# I Emi7 Cma7 :II
The diagrams that follow show how the capo raises the pitch of those new chord shapes; below each are the chord name and the new pitch it represents when using the capo at the indicated fret location. For example, when the capo is at the third fret, I’m employing an A major shape for the I chord. That’s because the capo raises the pitch of both the open and fretted strings to create a C major chord when the A major shape is used. (Essentially. the capo is playing the barre of this chord shape.) Similarly, when the capo is at the fifth fret, I’m using a G major shape for the I chord; the capo raises the pitch of both the open and fretted strings to once again create a C major chord, this time when the G major shape is used.
Why is this worth doing? Well, the new shapes provide a higher pitch, as well as different chord voicings to the original sequence, which creates very musical results. (“Voicing” refers to the order of notes from low to high within a chord.) This is a great way to separate frequencies in a dense mix, add interest to two-guitar parts and capitalize on alternate techniques — for example, strumming the original chords and fingerpicking the higher voicing, or vice-versa.
By the way, guitar parts can be layered multiple times using this capo technique giving you many different sonic options to choose from. The three options shown above are used in the video later in this posting, so you can hear how these alternate shapes, used in combination with a capo, affect the overall sound.
Nut Height
The more you press down on guitar strings, the higher the pitch goes up, so you should always check your guitar’s nut height and intonation to make sure all notes are in tune when fretted.
I prefer to have the string height at the nut cut as low as possible so that it takes less pressure to fret the notes while still allowing for a clean buzz-free tone in open position. Often, the reason your acoustic guitar is out of tune when using a capo is because the nut height has been set too high.
Adjustable Tension Capos
The capos a lot of singer-songwriters use on their guitars during live performance are spring-loaded and have a set tension, which means you have no control over the amount of pressure applied to the strings. I always cringe when a performer places one of these types of capos on the desired fret location and starts to play their song … even though the guitar is now way out of tune.
Instead, I suggest purchasing a capo that allows you to adjust its tension. Typically, it will feature a rotary dial that you turn to increase or decrease the tension of the capo without compromising tuning stability. These adjustable capos are great for multiple guitars too, including electric, and you’ll soon acclimate to the amount of tension needed to keep your personal guitars in tune.
An adjustable capo.
There are also partial capos that only depress specific strings (chosen by you). These allow the player to create interesting tunings. They’re great for experimenting, but I’d recommend first getting used to a capo that transverses all six strings.
Different Capos for Different Guitars
The capo is usually associated with steel-string acoustic guitar applications, but it can also be used on electric guitars, nylon-string guitars, banjo, mandolin and even ukuleles. However, it’s important to take into account the fretboard radius of the instrument on which it will be employed.
Vintage electric guitars often have 7″ or 9″ radius fretboards, which means there is a pronounced curve to the fretboard. So, if you are using a capo designed for an acoustic guitar with a flatter radius, you’ll have to tighten it to depress the low and high strings. This can cause tuning problems on the middle strings. Once the outer strings are in tune without rattling, the middle strings are often too tight, causing their pitch to go sharp.
That’s why you should try and find a capo that matches the radius of your guitar(s). This means you may need to use one capo for acoustic guitars and a different one for electric guitars.
In addition, electric guitar strings are usually thinner (i.e., they have lower string gauges) than acoustic guitar strings. You’ll find that the B string, in particular, has the lowest tension compared to the other five strings. Over-tightening the capo may sharpen the B string to the point where it’s noticeably out of tune with the other strings. If this happens, try detuning the B string back to pitch without loosening the capo.
It’s also worth noting that, in contrast to electric and steel-string acoustic guitars, nylon-string guitars have an almost flat radius. If you plan on using a capo on your classical or nylon-string guitar, purchase one designed specifically for a flat radius. These kinds of capos are readily available.
The capo on the left is designed for nylon-string guitars; the one on the right is designed for steel-string guitars.
The Video
In this video, I play the chord progression using the two capo positions described in the “Playing New Shapes With a Capo” section above.
I start by strumming the progression on a Yamaha FSX3 acoustic guitar using open position chord voicings:
II: C G/B I Ami7 Fma7 :II
I then move the capo to the fifth fret and fingerpick the chords on the FSX3 using the new shapes described above.
II: G D/F# I Emi7 Cma7 :II
Next, I place the capo at the third fret and pluck the new chord shapes, this time using a Yamaha SA2200 semi-acoustic electric guitar.
II: A E I F#mi11 Dma9 :II
Finally, I add a simple but melodic solo motif (played on the SA2200) for a complete arrangement. I coil-tapped the humbucking bridge pickup for the chords and solo lines to provide extra clarity and punch.
The Guitars
The FSX3 has a really well-balanced low-end response, so overdubs stay clean and tight. Its three-way Atmosfeel pickup system also translates well when recording direct to a DAW (Digital Audio Workstation), as I did in the video above.
Yamaha FSX3.
The excellent SA2200 semi-acoustic electric is one of my favorite guitars. Not only is it a pleasure to play, it imparts a warm, “woody” tone thanks to its design, large body dimensions and acoustic chambers, along with its soft maple center-block construction and Alnico V (coil-splittable) humbucking pickups.
Yamaha SA2200.
The Wrap-Up
A capo allows for instant key changes while using the same chord shapes, or retaining the same key using new and exciting chord shape substitutes further up the fretboard. There are also chord voicings and open-string tunings that aren’t available without the use of a capo, plus it can subtly alter the sound of your guitar by making it more “jangly.”
A capo can be used to inspire great musical effects when you understand how to transpose harmonic structures using the major scale formula. Personally, I’m never without a capo at a recording session, gig, or when I travel. It truly is an essential part of my guitar-playing toolkit … and it should be part of yours too!
What began as a Girl Scout Gold Award project with one of her high school students turned into a 501(c)(3) nonprofit that gathers young female musicians for an honor band that performs an annual concert, fights gender-based inequality in music, and fosters friendship.
In 2021, Kacee Sanders, director of band at DuPont Hadley Middle School in the Nashville area for two years, started working with Mya Foley, who was an exceptionally bright music student from Sanders’ previous job teaching high school. Sanders served as project adviser for the Girl Scout, who graduated in 2023 and is now a freshman at Middle Tennessee State University. Both Foley and Sanders are percussionists, and they noted that percussion instruments stereotypically are for boys. Why should they be?
That question led to another one Foley and Sanders discussed: What if that whole section were women? Better yet, what would a whole ensemble of women musicians be like?
“There are some weird band stereotypes that have evolved in some places,” says Sanders, who shares this firm belief with her middle school students: “It’s about what you like and what you want to play!”
Sanders says, “There is no ‘boy instrument,’ and there is no ‘girl instrument.”
An Honor Band for Women
Foley and Sanders came up with the idea of putting together an honor band — featuring woodwinds, brass and percussion instruments — for young women in their undergraduate college years and teenage girls in high school from states in the Southeast. The participating band members rehearsed their individual parts remotely, and then put on a symposium concert in December 2022. It was intended to be a one-time event, but something special happened there.
“We had this collective moment as we were cleaning up after the concert,” Sanders recalls. “We had this moment sitting around the table, and we said: ‘This was incredible!’ None of us had ever experienced being in a room of only women musicians. We were all overwhelmed with the emotion. We all agreed this can’t be the only time this happens.”
The women behind SWIMS: Kacee Sanders, Mya Foley and Dr. Brittan Braddock.
Launching SWIMS
Sanders, Foley and other participants agreed to repeat the symposium. In the summer of 2023, they officially founded the Southeastern Women in Music Symposium (SWIMS). Sanders is the executive director of the young organization. With the proceeds from the first symposium, SWIMS commissioned Ashley Knox, a previously unpublished female composer, to write a song for the next symposium. The group performed Knox’s piece — “Daydream,” which Sanders describes as a beautiful and intense ballad with a grand ending involving every musician — at the December 2023 symposium. SWIMS will only use pieces composed by women, Sanders says, and concerts include of wide mixture of types of songs.
To recruit new members, Sanders and her fellow SWIMS leaders reach out to every high school and university band director in Tennessee, Georgia and Alabama, to ask for recommendations. After registration closes, SWIMS pushes out the music to the young musicians digitally. They rehearse on their own for several months, and don’t play together until the end-of-year symposium.
SWIMS plans to continue to host the symposium every year. Sanders hopes to see more musicians join, and to split the group into two ensembles based on ability level with the top ensemble requiring an audition. Sanders, who is a 2024 Yamaha “40 Under 40” music educator, is optimistic about growth: The first year, the group had about 20 women musicians participate. Last year, it practically tripled to 75.
Independence in the Classroom
Sanders’ teaching philosophy is to prod her young musicians — who, in the early adolescence of middle school, are rapidly changing — to maturity and self-reliance. “Within my classroom, I feel that my primary goal is just to be the person to initiate the rehearsal,” she says. “It is my ultimate goal that my students are developing into independent musicians and independent singers.”
One of Sanders’ techniques is grouping students for brief section meetings, which they run themselves. She doesn’t appoint any student leaders; the students themselves collaborate and create a hierarchy, she says.
“This provides students a lot more ownership, and also their maturity as musicians skyrockets,” Sanders says. “It’s so special being able to see them really come into their own as humans. That’s why I love the band room; here, these students find who they are.”
Sanders feels such a passion for her career as a music educator — especially watching the progression and growth of youths, both as musicians and as people.
“Seeing student growth and watching students grow from the first time you interact with them to when they leave your classroom is, by far, the most rewarding part of being a band director,” she says. “Most of the students who are in band will not go on to play professionally and that’s totally OK, but seeing them grow as humans and seeing the incredible people in these chairs … It is so worthwhile to see people really find themselves here.”
Is your child joining band or orchestra for the first time? Embarking on this rewarding journey brings many things to consider for your family. To help you navigate the experience, we’ve gathered insights from seasoned band and orchestra parents to create a list of tips for surviving your first year.
(Be sure to check out the ‘Meet the Parents’ section below to read and hear firsthand experiences from the parents themselves.)
TIP #1: BE PREPARED TO PARTICIPATE
Joining a school music program not only builds lifelong skills but also creates a sense of belonging and community, allowing your child to grow their musical abilities and develop meaningful connections. Equally important is the participation and commitment of parents, who provide a stable and supportive foundation for their children to thrive. Your level of participation has a direct impact on their level of commitment. What’s more, active parental involvement enhances a child’s enthusiasm for their musical endeavors, instilling a sense of pride and motivation.
Parents who show interest in their child’s musical education help create a positive learning environment, reinforcing the values of dedication and practice. Studies and testimonies have shown that students with engaged parents are more likely to excel academically and develop better social skills, making parental support in music programs an essential component for a child’s overall growth and success. Participating in the parent community, whether by volunteering to build props, supporting the band mom or hosting team sleepovers for a group of hungry teens, can significantly enhance the experience for both you and your child. This involvement helps create a fun, supportive environment that fosters camaraderie and a sense of belonging within the group.
Here are some helpful ways you can expect to participate to make it a more rewarding experience:
Attend all performances at concerts, recitals and competitions
Participate and even help facilitate fund raisers
Bring snacks to events for all the students
Volunteer to carpool with other parents
TIP #2: COMMUNICATION IS KEY
Building a support network by staying in touch with music teachers and instructors while also encouraging your child to connect with their teachers and peers is crucial. Understanding the expectations for both you and your child can greatly benefit the entire group. This sense of responsibility and teamwork not only enhances the group’s performance but also creates a supportive and accountable environment among the students.
During peak seasons, such as performance and competition times, it is important for parents to stay connected and communicate with one another. This ensures that everyone is informed about schedules, changes, and requirements, fostering a sense of community and teamwork. Staying in touch allows parents to coordinate support efforts, such as carpooling, volunteering, or sharing responsibilities for events and rehearsals. Moreover, the shared experience and advice from seasoned parents can be invaluable for newcomers, helping them navigate the complexities of peak season with greater ease. By maintaining open lines of communication, parents can help strengthen the overall cohesion and success of the ensemble.
Here are some ways to establish relationships with the school music community:
Utilize school communication tools and platforms to connect with other music parents for advice and support
Join parent-teacher associations or music booster clubs
Encourage your child to communicate their progress and challenges
Engage in the band/orchestra parent community to support each other throughout peak seasons
TIP #3: STAY ORGANIZED
As with any sport or extracurricular activity, organization is key. For your child, this means consistently attending practices and performances while balancing schoolwork and other activities. Practice schedules can vary depending on the instrument and ensemble requirements. In time, your child will learn the importance of time management and how to do it on their own. But booster parents and band moms (and dads) can also play a significant role in maintaining organization by keeping track of rehearsal and performance schedules, coordinating transportation, and managing communication among parents, students and instructors.
Parents should utilize tools like shared calendars, reminder apps and group messaging to stay on top of important dates and deadlines. Keeping detailed records of your child’s progress, music pieces and performance attire can help avoid last-minute scrambles. Additionally, staying organized allows you to better support your child’s musical journey, ensuring they have the necessary materials, time for practice, and a balanced routine.
Here are some ways you can help your child to stay organized:
Establish a daily routine that includes practice time
Use a family calendar to track rehearsals, performances and deadlines
Encourage your child to use planners or digital calendars to manage their time
TIP #4: CREATE A SPACE FOR PRACTICE
Creating a dedicated practice environment for your child can significantly enhance their learning experience and overall musical development. It minimizes distractions, allowing your child to focus entirely on honing their skills, and also helps them establish a routine, thus promoting discipline and consistency — both essential elements for progress in music.
By providing a well-organized and supportive practice area equipped with necessary instruments and materials, you encourage regular practice and demonstrate the importance of your child’s musical pursuits. Ultimately, this nurturing atmosphere helps your child build confidence, improve their performance, and foster a lifelong love for music.
Here are some ideas for a productive practice environment:
Designate a room or area for practice. Their room, garage, basement or other quiet space will suffice.
Schedule a family “concert” where your child gets to perform their pieces. This provides a goal to work towards and makes practice sessions more meaningful.
Incorporate technology by using an interactive music app (such as Tomplay) that allows them to loop difficult passages and record their performances, then play them back in order to evaluate and improve their skills.
TIP #5: KNOW THE BASICS
While you don’t need to be a musical expert, understanding the basics of your child’s instrument can greatly benefit you. Once they have decided on an instrument, do your research to make sure they get one that fits them and is high quality so it’s built to last. You can get helpful advice from their music instructor or your local dealer to find the best instrument for your child and whether it makes more sense for you to buy or rent.
The next step is to make sure your child knows how to care for their instrument. To maintain the playability and lengthen the life of their instrument, it is critical that they learn to incorporate a regular cleaning and maintenance routine. This will go a long way in helping you avoid costly repairs and at the same time enable them to stay engaged with their instrument as it will be easier to play and will sound better.
Here are some tips:
Understand the basics of instrument care
Schedule regular check-ups and repairs
Know the importance of proper storage
ENJOY THE JOURNEY!
Becoming a first-time music parent is an adventure filled with a mix of excitement, anticipation and learning opportunities. It involves navigating new experiences such as understanding the dynamics of band and orchestra programs, supporting your child’s musical journey, and engaging with a vibrant community of parents and educators. It’s a rewarding activity marked by attending performances, learning about different instruments, encouraging practice routines, and being part of fundraisers and events that support the music program. Above all, it’s about witnessing your child’s growth in their musical ability and sharing in their joy and achievements.
MEET THE PARENTS
Eric
Eric Aparicio, a band parent for eight years, had two high schoolers who started on the cymbal line and moved to the drumline. His daughter also played saxophone for a year in jazz band, and his son is self-taught on guitar.
Eric recalls his daughter organizing study sessions for her bandmates to ensure that everyone met academic standards. She understood that the success of the ensemble depended on each member’s dedication, both musically and academically. Through their active involvement and strong commitment, Eric and his wife played a vital role in their children’s musical achievements. Their dedication and organization provided a solid foundation, fostering personal growth and success for their children in band.
Eric and his wife also formed lifelong friendships through their involvement. Eric reflects, “I truly enjoyed it — the social aspect, watching the kids achieve, and seeing them find a safe place where they all belong. High school can be tough for teenagers. It was also wonderful to see the kids grow and mature. I have two lifelong friends that I met in band, and I know they’ll be my friends until my last breath on this earth. The more that you engage [as a parent], the more you’re going to really enjoy the experience. And the more you enjoy the experience, the more your child’s going to get out of that experience.”
While Eric’s children did not pursue careers in music after high school, the connections they made through their musical experiences have left a lasting impact. His daughter, now a police officer, attributes her strong sense of discipline and leadership to her time in band. Eric’s son maintains friendships with his former bandmates, one of whom was even his best man at his wedding. The relationships and skills they built continue to enrich their lives in meaningful ways.
Dave
Dr. Dave Gerhart and his wife have lifelong careers in music and are parents of two middle schoolers who showed an early interest in music. Both children started on piano, one son now plays cello and the other plays both piano and violin.
Dave remembers that when his kids were growing up, he and his wife encouraged them to play and explore music, and not in just one genre. “In mom’s car they listened to classical music and dad’s car was everything from Caribbean to rock.” He feels that playing music should come naturally and not forced. When his children began creating music, he recalls, “they just kind of wrote stuff. They saw what mom and dad were doing [as musicians] and started creating their own music, then they’d play it for us, similar to writing a story [and reading it back].”
Although Dave’s children are still in the midst of their musical journey, he has already observed a notable increase in their confidence, musical growth and overall character development. He fondly remembers when his son volunteered to wash dishes, a responsibility he embraced during summer music camp. Above all, Dave is thrilled that his children have found a passion and have dedicated significant time and effort to improve their skills.
Finding representation in the professional world that mirrors one’s own identity is a profoundly meaningful experience. Growing up, I was fortunate to have a strong female role model in my mother, a dedicated police officer. However, when I began my musical studies at the collegiate level, I quickly noticed the scarcity of women in my field. As I delved deeper into my studies, I discovered a greater number of women pursuing similar paths than I had initially realized. Although it was heartening to know they existed, opportunities to collaborate with and learn from female peers were limited until I began my doctoral studies at the University of North Texas.
At UNT, I had the privilege of working with Tanya Darby and Raquel Samayoa, two formidable women who excel in a field historically dominated by men. Witnessing them was not only empowering but also served as a testament to the progress toward gender equity. However, it also underscored the ongoing need for further advancement. It was during this time that I made a personal commitment to showcase and celebrate the successes of women in my profession and to amplify their voices, thereby showcasing to the world the wealth of talent that exists within our ranks, ultimately inspiring future generations.
The Women Composing for Trumpet Competition
In 2020, the world faced many struggles with COVID running rampant and everything shutting down. In addition to that, two hurricanes — Laura and Delta — made their way directly through Lake Charles, Louisiana, the home of McNeese State University, where I taught. The campus suffered severe damage, and students, faculty and every member of the campus were displaced. Even with all this chaos, I made it a point to continue the mission I set for myself and started seeking opportunities and funding. This led to my first large-scale project, The Women Composing for Trumpet (WCFT) Competition. I applied for and was awarded the Juliet Hardtner Women in Arts and Humanities Professorship. Through this, I received funding to start a competition that would celebrate the music of some incredible composers.
The WCFT Competition was created to add to the list of “standard” trumpet repertoire composed by women. While there are many incredible compositions by women for solo trumpet, the only one that is considered standard by the trumpet community is Concerto for Trumpet and Orchestra by Alexandra Pakhmutova, written in 1955. It was my goal to bring light to this matter through the WCFT Competition, as well as give modern women composers the opportunity to contribute to this list of standards and be recognized for their accomplishments.
Once the vision and mission were clear, I compiled a panel of judges comprised of avid advocates for women in the trumpet community including Dr. Pancho Romero, Dr. Raquel Samayoa, Dr. Peyden Shelton and Dr. Ellen Shinogle. Compositions were submitted from all over the world, providing further evidence of the fact that high-quality music written by women does, in fact, exist, and must be showcased and celebrated. I was thrilled to be able to give the award of $2,000 to two grand prize winners: Madeline Lee (“Wind O’er the Highlands”) and Katie Jenkins (“Radiate”), as well as a recording of their work and a publishing deal with Murphy Music Press. The runners up received an honorable mention and included Maria C. Fuller (“Resolution from Fractals”) and Dorothy Gates (“Unseen Things”).
To further celebrate the winners and other extraordinary works for trumpet composed by women, I held an online benefit concert. Having the concert online not only made it available to everyone since we were still experiencing the effects of the pandemic, but it also made it accessible so we could share this music with as many people as possible. The WCFT Benefit Concert included musicians from all over the world including Mary Bowden (Seraph Brass), Robert Garrison, the judges from the competition and more. All funds raised from the concert were donated to the International Women’s Brass Conference with the hopes of helping to provide more support to women brass players across the world.
Since the announcement of these winners, trumpet players across the country have sought out these works to perform. It is my goal to bring the competition back every five years or so to keep working toward this mission, as well as showcasing more extraordinary women composers and musicians.
Powerful Women in Music Concert Series
I remained inspired by what was made possible through the WCFT Competition, and with COVID restrictions lifting, I knew that this was the time to do something in person. I applied for another grant and was awarded the Juliet Hardtner Women in Arts and Humanities Professorship for the second year in a row to fund what I called the “Powerful Women in Music Concert Series.” The objective of this project was to continue to initiate ways to change the fact that underrepresentation of women is prominent in the music profession by featuring women soloists and groups of women performers from various genres, backgrounds and ethnicities.
The first featured artist was Caeley Jackson, trumpet player with the United States Navy Band. Throughout her career, Jackson had toured with the Orchestra of the Americas throughout Poland, Ukraine, Scotland and Germany. She also performed on tour with Seraph Brass, an award-winning all-female brass ensemble. During her residency for the concert series, Jackson gave lessons to music majors and non-majors, as well as provided an in-depth masterclass to the entire music department. This masterclass inspired the students especially with the discussion about how musicians who are a part of military bands can be section players, principal players and soloists as well, resulting in endless options for what is possible with a career in the military. Her concert at the end of her residency included not only our collaborative pianist HaeJu Choi, but also our guitar professor, Jay Kacherski. Her choice in music exposed the students to an incredibly high level of musical artistry through many different genres and styles including pieces originally for trumpet, as well as transcriptions.
Directing the Jazz Ensemble at McNeese State University gave me the opportunity to incorporate the Powerful Women concert series into the curriculum and involve my students. Alexa Tarantino was my first choice when it came to choosing a high-level musician who would be an inspiration for my students. She tours worldwide with Cécile McLorin Salvant, Wynton Marsalis and the Jazz at Lincoln Center Orchestra, and the Alexa Tarantino Quartet. She is also passionate about music education and represents Jazz at Lincoln Center as a visiting educator for various programs with students of all ages and levels. Tarantino was immediately excited when I reached out about this initiative, and provided an inspiring masterclass for the Jazz Ensemble before diving straight into a concert that not only featured her as a soloist, but also many of her original works.
The final feature for this concert series was Calypsus Brass. Founded in 2021 and now a non-profit organization, this professional chamber ensemble performs new works recitals, creates high-level professional recordings for composers, and works with chamber musicians at all levels. The five founding members are avid performers and educators who tour around the world, give masterclasses and recitals. This groundbreaking musical group, founded by five women who earned doctoral degrees in music, is committed to recording and performing works of historically marginalized composers. To further this mission, Calypsus Brass is proud to be the ensemble in residence for Rising Tide Music Press, an organization that publishes and promotes Black, Brown, Indigenous and Asian musicians in their first 10 years of professional-level work as composers and arrangers. Calypsus Brass provided the longest residency for the Powerful Women in Music Concert Series and gave masterclasses to each of the specific brass studios, as well as an in-depth discussion with the brass methods class. Their residency closed with a concert that featured many new commissions including works by Zoe Cutler, Katahj Copley and Cait Nishimura.
The impact of the WCFT Competition and the Powerful Women in Music Concert Series in inspiring and showcasing women musicians across the world have been a resounding success. It’s evident that the music profession’s commitment to this cause remains steadfast. Moving forward, I am dedicated to sustaining this momentum, striving to create even more opportunities for women in music to ensure their voices are celebrated and heard on a global scale. It is my hope that together we will continue to advocate for diversity, inclusion and empowerment in the music community, paving the way for a brighter future for all musicians, regardless of gender.
“By failing to plan, you are preparing to fail.” — Benjamin Franklin
Music teachers spend a lot of time at school, and many of them don’t live near their schools. Situations will occur, and it’s best to be prepared. For personal medical emergencies, make sure that you know where the nearest hospital or quick care is located. However, there are plenty of days when I have needed supplies for non-emergency situations. I recommend having the following items at your disposal. Consider storing them in a drawer, cabinet or even a small crate in your car.
1. Dress clothing: Consider having a set of dress clothing in your office or in your car if you are a traveling teacher. I have used these on occasion when a district employee came over for a picture with the group, and I was dressed for marching band rehearsal or instrument repair day. An extra set of dress clothing can also help in case you spill or tear your clothing right before the concert.
2. Deodorant: Keep a stick in your desk drawer for those times that you feel “unsure.” Or, keep one in a travel bag. It’s not recommended to keep one in your car. I am still cleaning out melted deodorant from the center car console.
3. Non-perishable food: Somedays, you may forget your lunch or your lunch money. Consider having a few cans of soup or some other prepackaged food that you can rely on for those days. If you have a school lunch line that allows you to prepay, you can also put a few dollars on here and use this as a backup plan.
4. Water bottle: Some people bring water bottles back and forth. If you are able, consider keeping an extra one at school, or even one that you exclusively use at school in order to cut down on the items you have to travel with.
5. Travel hygiene items: In addition to deodorant listed above, consider other small travel items for “just in case events,” including a toothbrush, toothpaste, or, if you’re a contact lens wearer, contact lens solution.
6. Flushable wipes: I’m not going to go into any reason why. I’ll just say to always have freshness as a priority.
7. Lint roller: Helpful for making sure you are presentable for your concert, board meeting or parent meeting.
8. Feminine hygiene products: If your school doesn’t supply these in the bathroom, throw a few in your desk drawer.
9. Hairbrush or comb: Again, we’re just making sure that we’re presentable for our professional job.
10. Pain relievers: such as ibuprofen or aspirin. Just be sure to not keep these accessible to children.
11. Backup shoes: If you often wear dress shoes to school, consider having a backup pair of comfortable shoes for days that end up having quite a bit of walking. If you’re attending a festival, definitely bring comfortable shoes for those off-stage moments. On the contrary, if your footwear is typically casual, have a quick set of nicer shoes for the moments listed above.
12. Coat/jacket: If possible, I recommend having an extra one that you can either hang in your office or keep in your car. It can help you manage sudden weather changes in the event you have to leave the building during the day.
13. Safety pins: I’ve had a few instances of buttons coming off clothing or small tears. A safety pin helped me at least get through the day.
14. Cell phone charger: I typically keep one connected in my office. For traveling teachers, consider a cord connected to a standard plug, or even a rechargeable power bank.
15. Instrument repair items: I keep crochet needles, small screwdrivers and even plastic drinking straws around to help with instrument repair emergencies. For even more on this, check out my article on Instrument Repair Hacks.
And what’s the most important thing to have? A realistic expectation that you’ll never be able to plan for everything, and that’s fine. The best stories never start or end with “everything went to plan!”
Effects pedals offer dozens of ways to subtly (or radically) shape your bass tone, making it easy to put a distinctive stamp on your playing. With the right effects, you can recreate the sounds of other instruments, introduce sound effects, and even accompany yourself.
We’ve covered the top 10 bass effects before, but if you use more than one pedal, the order in which you place them (that is, the signal chain) can make all the difference. In this posting, we’ll explore some of the many options available to you.
TUNER
Plugging your bass into a tuner at the beginning of your signal chain (i.e., before any effects) is pretty much a universal rule, as it ensures that the tuner accurately determines your pitch. Many bass players choose tuners that are buffered bypass or true bypass, which means that when the pedal is not engaged, the bass signal completely bypasses the pedal’s internal circuitry, thus avoiding potential noise. The two most important goals for effective pedal sequencing — preserving the strength of your bass signal and avoiding unwanted static and hum — begin with the tuner.
DYNAMICS AND PITCH
As your signal makes its way from your bass to your amp, pedals that need a hotter signal function better closer to the source: your bass. Wah pedals fall into this category, as do compressors, which fatten your signal and make it more even; limiters, which provide a more drastic form of compression; sustainers, which help your notes ring out longer; octavers (also known as “octave dividers”), which generate notes an octave below what you are playing, thus adding anything from extreme bottom end to a bit of menace; harmonizers, which add intervals to your notes; and pitch shifters, which can lower or raise your pitch. Synth bass and envelope filter pedals also work best when placed soon after the tuner and before other effects.
DIRT
Fuzz, distortion and overdrive need plenty of signal, too, so it’s common to place them after a compressor or other signal booster. Explore the full spectrum of dirty options: An overdrive pedal like Ampeg’s Scrambler Bass Overdrive can conjure the sound of a gently overdriven tube amp, while an aggressive pedal with lots of buzzy highs makes it easy to completely obscure your clean bass tone. Develop an ear for the way other combinations — like octave divider/distortion and fuzz/compression — might or might not work for you.
EQ, VOLUME AND NOISE GATE
If you’re playing an active bass and have used your onboard bass preamp to add bottom and/or mids to your dirt pedals (which usually contain lots of high-frequency information), an equalizer (EQ) pedal can help you dial things in before your signal reaches the time-based effects. It’s not unusual to add a boost, preamp or volume pedal here, and it’s also common to add a noise gate after your dirt pedals to tame unwanted noise by cutting off the signal whenever it drops below a certain threshold.
TIME-BASED EFFECTS
These effects — which include chorusing, phasing (“phase shifting”), flanging, tremolo, ring modulation and “repeater” pedals (which can provide anything from echo to a version of tremolo to a looper) — need a bit less signal than dynamics, pitch and dirt. Some players add a compressor before these pedals so that their tone is even, while others prefer the dynamic variation and detail that comes from low compression settings or no compression at all. Many bass players have made great use of chorusing, flanging and phasing as standalone effects (as, for example in the O-Jays classic “For the Love of Money”), but placing these kinds of pedals later in the signal chain allows them to add a bit of shimmer to the sound coming from any pedal(s) earlier in the chain.
DELAY, ECHO AND REVERB
Like time-based effects, delay is less dependent on pure signal. Placing it near the end of your signal chain gives you the opportunity to expand your fully effected signal; similarly, reverb and echo can add a sense of space and ambiance to your overall sound. Most (but not all) players prefer to put delay before reverb; try it both ways.
REMIX AND LOOPER
This family of effects — which includes slicer, stutter, glitch, reverse, sampler and looper pedals — makes the most sense at the very end of your signal chain. That said, adding an effect to whatever you’re looping and remixing can work too. A reverb or pitch-shifter after any of these pedals, for example, can dramatically alter the original sound.
MIX AND MATCH
Expressed in shorthand, an ideal sequence of the most commonly used bass pedals might look something like this:
Alternatively, you can prioritize sending a strong signal to your dirty pedals before adding complex flavors and controlling volume before it gets to your amp, like this:
Not having a compressor means that you can preserve the full dynamic range of your playing, from delicate chords and flamenco-style strums to thunderous plucks and slaps.
Pedalboard order is a matter of personal preference. Using good cables and your amp’s effects loop are two more ways to avoid degradation of signal, or as bassists usually put it, “tone suck”; also consider trying an effects switcher (sometimes called a “loop switcher”), which will give you the ultimate freedom in pedal sequences. By experimenting with your signal chain, you can find what works for you; consider these tips as a starting point that gives you the best chance to maintain a strong bass tone, avoid unwanted noise and give each of your pedals a chance to shine.
For school districts that chose to utilize distance education in 2020, pivotal in-person experiences were missed, such as rehearsals, concerts, field trips, recruiting and a general presence in the community. If you’re like me, memories of scrambling to get my entire curriculum online are quickly fading. At this point, coworkers remind me of the afternoons we spent coercing students to turn on their cameras to prove that they were actually drumming along to an activity. This conversation makes me realize that elementary schools only have two more years of “COVID students” — wow! Of course, middle and high schools have a longer road to travel, so let’s look at where the students impacted by distance education will be during the 2024-2025 academic year.
2024-2025 School Year
March 2020
2020-2021 School Year
12th
7th grade
8th
11th
6th grade
7th
10th
5th grade
6th
9th
4th grade
5th
8th
3rd grade
4th
7th
2nd grade
3rd
6th
1st grade
2nd
5th
Kinder
1st
4th
Pre-K
Kinder
3rd
3 years old
4 years old
2nd
2 years old
3 years old
1st
1 year old
2 years old
Kinder
Birthyear
1 year old
This chart shows where next year’s students were in March of 2020 when most schools shut down as well as the following school year. Many approaches were taken with distance education, including different return dates, so it’s impossible to describe the impact on every American student, but this information can help you conclude how much of each school year was missed in your area.
My school district — Clark County in Nevada — participated in distance education from March 2020 to March 2021, returning in a hybrid model for volunteer students for the remainder of the 2020-2021 school year. My 4th and 5th graders at that time did not get my normal send off to middle school, and according to the chart, they will be freshmen and sophomores in high school in 2024-2025.
Photo by Raw Pixel / Adobe Stock
High Schoolers
Though I would love to focus on the elementary music teacher perspective, my interest in this topic takes me to high school. Recruiting and retention have been the hot topics since in-person learning has returned because the pre-COVID system worked so well. The transitions from elementary to middle school and middle school to high school have been a well-oiled machine of promoting the benefits of continuing your music education and the perks of being part of your musical family. Next year’s high school students missed these important hand-off years from school to school.
Look at the chart. Next year’s seniors were in 7th grade when schools shut down, and they missed the end of their middle school years, were recruited to join music classes during the online era and returned to in-person education as freshmen in high school. Their experience in online music classes may have stifled them from rejoining music in high school.
Next year’s sophomores missed the end of their 5th grade year and were recruited to start a brand-new instrument via Zoom in 6th grade, not experiencing a live rehearsal until 7th grade.
But it’s not all bad news.
Yes, I’m excited that in two years, elementary school students will not even know what COVID is. And in two years, high school freshmen will have had in-person music classes since 6th grade. These students will have more ensemble time during their formative years than the students older than them, which will hopefully positively impact their tuning, intonation and listening skills.
Middle School Students
Middle school students are in a gray area where they missed the middle chunk of elementary school, but they all had a full year of 5th grade before transitioning to middle school, resulting in a successful recruiting campaign to join a music ensemble. Of course, they missed a large chunk of elementary music curriculum but signing up for a music ensemble is more than half the battle when it comes to recruiting.
My current 5th graders missed the end of 1st grade and all of 2nd grade. Though that is a large deficit, they have received the most amount of preparation and recruiting out of any students since 2020 because the middle school band can again travel to perform at the elementary schools, demonstrating all the available fine arts options. As much as I want to comment on the social-emotional skills that still need to be polished, I don’t have a degree in psychology to back up my theories.
Photo by Prostock Studio / Adobe Stock
Elementary School Students
In 2024-2025, students entering 1st, 2nd and 3rd grades joined the public school system after in-person learning returned. Should they be absolutely normal? Probably. But it doesn’t take a Ph.D. to know that although these children weren’t in school, they were still raised in homes that were impacted by a global pandemic. My current kindergarteners have absolutely no fear walking up to my smart board and commanding it around like a giant iPad. I can only guess that increased screen times and access to phones and tablets are the root of this new efficiency. Instead of ridiculing, I can now ask students to perform tasks on the board that I wouldn’t have attempted five years ago.
The bottom of the chart shows that next year’s kindergarteners were born during the COVID quarantine. I have a coworker who gave birth twice during the COVID protocols in the hospitals — something she doesn’t recommend. Though her children were born with limited guests and strict contamination guidelines, their lives at home since have been quite the opposite. The following year gave her family more time to be at home with the babies, her in-laws a reason to stay in Vegas while they worked remotely, and my friend had a chance to be near her children more than if she was working in-person. This was not everyone’s experience, but it is a ray of positive hope that today’s youngest students might have received more facetime with their families during these early years than any generation before.
My daughter experienced a similar upbringing, where my wife and I were home for over a year, playing dolls and dressing up with her, making meals together, and generally living together in our house 24/7. When it was time for her to start kindergarten, saying goodbye at the gate was devastatingly rough as it was the longest time we had spent apart since birth.
———————————————————–
I encourage you to reflect on where your students were during distance education and ask yourself if there is a noticeable gap in their musicianship, emotional wellness or maturity. Just kidding, we already know that we were all affected by COVID. Give yourself some grace. If you’re able to let your pandemic memories fade, I am happy for you. I hope the new school year begins with tons of potential and happy music-making.
When it comes to learning an instrument, fine motor skills are key. It takes quite a bit of skill to play the keys on a French horn, for example, or move fingers quickly on a clarinet. Want to improve your music students’ fine motor skills? Steal a page from the P.E. teachers and incorporate physical exercise into your rehearsals.
Everyone from elite athletes to physical therapists have been using a tool called “exercise priming” — the concept that movement can help prime the brain for skill development.
Boost Neuroplasticity
Now, research from the University of Copenhagen has given further validation to the idea of exercise priming. Its 2024 study found a 10% improvement in a person’s ability to remember a learned motor skill, such as playing the violin, if they have exercised before or after playing the instrument.
“This is probably because physical activity increases the brain’s ability to change, which is a prerequisite for remembering,” wrote the study’s co-author, Jesper Lundbye-Jensen, of the university’s Department of Nutrition, Exercise and Sports. The brain’s ability to change is also referred to as “neuroplasticity,” which means that the brain rewires, literally adapting its neural networks in response to stimulants.
Older research had previously found that music lessons themselves have a positive effect on neuron development. For example, a 2010 study from Northwestern University found that music training prior to age 7 boosted neuroplasticity and allowed for better auditory processing.
Exercise Before and After Learning
The new study from the University of Copenhagen used riding on a fitness bike as the form of aerobic exercise. Participants biked enough to raise heart rate — but not at a too intense rate (think exertion, not exhaustion). The study found that exercising either before or after learning a skill both improved results, but results were even better when the subjects exercised before and after.
While the study’s participant pool was limited to men ages 18 to 35, the researchers believe the skill-boosting effect applies to other ages, such as children, adolescents and older adults, too.
Interestingly, the study specifically excluded professional musicians. That’s because “people with extensive experience in practicing motor skills typically start at a different level,” wrote Lasse Jespersen, Ph.D., the first author of the study. “While the motor task used in the research study were unknown to all, involving experts would have changed the dynamic from the get-go. But that doesn’t mean they wouldn’t benefit from the effects we’ve shown.” In fact, Jespersen says a future study on people with elite-level fine motor skills would be fascinating.
Tips to Build Fine-Motor Skills
So, based on the information that physical exercise helps build those vital fine-motor skills your students need, how can you extrapolate this for use in your teachings? Here are some ideas:
Let’s start with adult students. For example, you could suggest to your piano or cello student that they do their daily workout — whether it’s cardio like a brisk walk or strength training — either just prior to practicing their instrument or just afterward. Explain the research behind your request and ask for their feedback to see how they feel after trying the technique.
Do you teach band or chorus? Have the group do some squats and arm circles prior to starting rehearsals.
For wigglier, smaller children, throw a dance party. Play music and encourage freestyle dancing or teach simple choreography for the group to get blood pumping prior to settling down to the instruments. Smaller kids are less likely to feel self-conscious, too, with movement requests like, “Everyone do five pushups!”
Short on classroom space? Have kids run in place or even hop on one foot — whatever you can do to raise their heart rates a bit.
If your school setting permits a “school without walls” lesson, try this: If the weather is nice, are there ways to spend a few minutes on playground equipment before segueing into a music class under the shade of a tree?
Check in with administrators and your fellow teachers about creative class pairings that might benefit all. For example, can recess be directly before or after music class for some students? Could gym glass pogo-sticking or hula hooping lead to a better music class, and vice versa? Moving around schedules will obviously work better for some schools than others but is worth exploring.
Another idea, if budget permits: use classroom movement materials such as wobble stools or standing desks, encouraging movement throughout the day, not just in music classes.
Whatever physical activity you incorporate into your music education, be sure to periodically change up the activities, and consider students who may have challenges with movement and need accommodation.
I recently spent six weeks traveling through Indonesia, Australia and the Philippines. The trip involved ten flights, two inter-island ferry transfers and two speedboat rides, plus multiple Tuk Tuks (a motorized three-wheel taxi), regular taxis, shared van transfers, and of course, lots of walking. (Sometimes running to make the next connection!)
On my way to Bali.
In this posting, I’ll tell you about that amazing experience and describe the preparations I made in advance, along with some general tips for taking your guitar on the road.
Choosing the Right Guitar to Take on the Road
Like most people who travel, I’d planned on taking one small suitcase for clothes, plus a backpack for my computer, phone charger etc. But, unlike many folks, when I travel, I usually end up performing too, so I also needed to take along a guitar that I could plug into any PA system or amp. Obviously, the physical size and overall weight of the guitar had to meet airline carry-on guidelines. (More on this below.) I also often write songs on the road, so having a guitar that was tonally inspirational was important too.
After careful consideration, I chose to take a Yamaha CSF-TA TransAcoustic guitar with me. This remarkable instrument is small and easy to play, is relatively lightweight, and comes with a durable hard bag with adjustable shoulder straps. Best of all, it sounds incredible, with onboard effects and a piezo undersaddle pickup system. In short, it filled all my requirements.
The parlor-size Yamaha CSF-TA TransAcoustic guitar.
Checklist Before Departure
In preparation for the trip, I put new coated Elixir strings on the CSF-TA and put a spare set in the case. I also made sure to place a supply of picks, a capo, a headstock tuner, a small pair of wire clippers and string cleaner in the guitar pouch too.
I knew that Indonesia and the Philippines would be extremely hot and humid, while Australia would be hot, with a dry climate. For that reason, I put humidi-packs inside the sound hole to regulate the instrument’s humidity. This also automatically adds/removes moisture from your guitar as needed while it’s inside the case.
I also took into consideration the fact that, if the flight crew would not allow me to take the guitar on the plane and it was instead put into the hold of the aircraft, the surrounding temperatures would be much colder than in the cabin areas. What’s more, I knew that the guitar would be going from hot taxi rides to air-conditioned hotels within short periods of time. Given all these temperature extremes, the shorter scale length of the CSF-TA would likely provide a better tuning platform than a full-size guitar.
Air Travel Tips
We’ve all heard horror stories about how the airlines treat guitars, and baggage in general, and I have personally had several bad experiences of my own. Here’s some advice to anyone who wants to take a guitar with them on their travels:
Smaller domestic flights and aircraft throughout the U.S. and Asia generally have smaller overhead bins. Think ahead when you fly and see which aircrafts you’ll be flying on. The larger the aircraft, the larger the overhead bins, and therefore the better the chance of taking your guitar into the main cabin. The smaller the guitar, the better the chances are too.
If you have a full-size acoustic, soft bags generally raise eyebrows less than a hardshell case. That being said, if your guitar is worth thousands of dollars you’ll have to decide if you trust a gig bag to protect your investment.
Pay for priority boarding if you can afford it. First come, first served … and if my guitar is in the bin, I win. (Note that underpants won’t get crushed in the hold if another passenger runs out of space in the bins.)
I never offer to check my guitar when I’m at the bag drop and check-in desk, but comply when asked. Check-in counter staff are generally very nice, but often tell you that their policy is to not let guitars on the plane and that you’ll therefore need to check your guitar in. I’m always polite and ask them to label the guitar with a fragile sticker and have the guitar walked to the plane with the other oversized items. In the United States, some airlines will allow you to take your guitar to the gate and “gate-check” the guitar. This is where wheelchairs and baby strollers, etc. get left before boarding. The staff there will walk the guitar down to a special area in the hold for these items. They’ll also bring it up to the same area for you upon de-planing. This means the guitar won’t go on the conveyor belt and dumped alongside other heavy bags, where there is a potential risk that it could be mishandled by ground staff.
Fighting with the staff won’t get you anywhere, but you’ll also find that a lot of the decision-making comes from the airlines’ staff manager. I asked the flight crew manager in Denpasar, Bali if my guitar could go in an empty seat and she said yes, provided that it was an empty window seat. Score.
If your guitar is put in the hold, collect it promptly upon arrival, and open the case to make sure nothing is damaged. Report any damage to the airline staff before you leave the airport.
Foot Traffic
As many of you know, navigating airports, changing planes, and general travel requires a lot of walking and dodging other passengers. Having a small, lightweight guitar in a gig bag with shoulder straps is a godsend in these scenarios. One hand is likely wheeling a suitcase, one shoulder can carry a backpack, and the other hand or shoulder can carry the guitar.
Just remember that no travel is without timing issues, check-ins, boarding, de-planing, immigration, passport control and customs lines. How you juggle the gear you travel with can reduce the frustration when you’re trying to find boarding passes, visas and hotel information.
The bottom line is this: Plan ahead, and double-check everything.
Water Travel Tips
One of my favorite locations in the Philippines is the beautiful and secluded resort, Cauayan Island. The day started with a taxi ride in Cebu; a small plane hop to El Nido, Palawan; a shared van ride to the boat docks, and then a speedboat to the island.
Cauayan Island, Palawan, Philippines.
Travel by inter-island ferry is very common in the Philippines. Most luggage can be checked in and stored outside the cabin, although the undercover outside storage compartments looked a bit fragile to me. Fine in good weather … not so good in torrential rain on the ocean.
I took my guitar and backpack onto the ferry, but found there weren’t any overhead bins; onboard luggage is instead placed at the front of the cabin. This is fine in calm weather, but remember: other passengers have heavy bags there too. Place your guitar upright and without anything on top, just in case it gets rough on the open seas.
And, if you check your luggage, make sure not to lose your ticket! It’s absolute chaos at the arrival port, so stay aware, and make sure you keep an eye on your belongings at all times.
Land Travel Tips
I found that most taxi drivers were very helpful; however, they would always want to put my guitar upside down in the trunk of the car. My advice is to take the guitar into the back seat with you, where it’s climate controlled, and you can personally handle it with the care it deserves. I also did this on any shared van transfers … assuming, of course, that space allows.
I had such a blast riding around in the Philippines in the open air Tuk Tuks. You really get to experience the local way of life on the roads between towns and in the city streets and provincial rural areas. Again, I put my guitar on the back seat with me. There’s limited space back there, so I suggest you hire a personal driver rather than a shared ride.
Never leave your guitar in a hot automobile! Glue can soften in extreme heat, and delicate parts may warp beyond repair if heat damaged. Likewise, avoid extremely cold climates for prolonged periods of time.
Climate Changes
As expected, Asia was hot and humid, but the CSF-TA remained stable and held its tuning well from location to location. Australia was hot and dry during the daytime, but temperatures could drop quite a bit during the evening.
My CSF-TA guitar is over three years old and has acclimated to mild temperatures and moisture changes; however, the humidi-packs definitely help when you keep the guitar in the case … which is something I’d recommend whenever it’s not being played.
The Video
I performed at several locations during my trip. One morning my niece in Australia asked me to sing everyone a song at breakfast time. She filmed me singing one of the cover songs I play at my gigs — John Mayer’s “Say” — using the CSF-TA without any of the onboard effects engaged. This video shows my impromptu performance captured on a smartphone, along with some of the stunning locations from my travels.
The Guitar
The parlor-size Yamaha CSF-TA TransAcoustic guitar features a solid spruce top, along with a mahogany back and sides. Many players may find the smaller body size and short scale much easier to play than a dreadnought guitar, and it’s certainly easier to travel with. It also has a built-in piezo pickup and allows the user to add two types of reverb and variable amounts of chorus without the need for amplification or pedals.
On the beach with my CSF-TA.
The Wrap-Up
It’s always great to perform in another country, or at least capitalize creatively on the inspiration you’ll find at new destinations. However, airports are getting busier, and travel isn’t as luxurious as it used to be (unless you have a private jet or travel first class, both of which are unavailable to most of us).
I’m happy to report that my CSF-TA survived multiple temperature changes and other challenges during my recent journey, and I’m confident that, with careful forethought and detailed planning, you can travel comfortably with your guitar too, keeping it perfectly safe while dealing with all the rigors of the road.
Imagine this: What if a tough moment only ruined a couple of hours of your day instead of the whole week? That angry parent email comes in at 8:10 a.m., and you’re over it by noon. Or that rehearsal was a complete disaster, full of interruptions, instruments seemingly falling apart as you look at them, and your soloists and back up soloists are absent; by the next period, you’re back on track? Or your group is about to take the stage at a festival, and your snare drummer sends another student up to you to break the news that they definitely have their sticks, but they left the snare drum back at the school? Wouldn’t it be great to move on and not have to stop yourself from giving dirty looks to Mr. Air Drummer?
Stress-Free Doesn’t Exist
Stress and conflict only occur when people are involved. If you are going to be around people, stress will be present.
We can stress ourselves out by wishing for a situation that will never happen. We must release the desire, wishes and ambitions for a stress-free life because it doesn’t exist. The kicker is that the quicker we accept this, the better we will be able to handle the stress that comes our way. We need to have some stress. It tells our body when situations require our attention. What we don’t want is a full system overload where every decision becomes stressful. We typically find that new or unfamiliar situations that require our decision can cause a lot of stress.
The First Time is Always the Hardest
Remember that first time you stepped in front of the classroom? You were bubbling with anxiety, speaking with a little shake in your voice and trembling as you held the whiteboard marker. The next day? A little better.
Talking to a good friend or your significant other? Easy. It’s like we’ve always known each other. But that first conversation or approach? A knot in our stomach, and an endless supply of “what if” questions running through our brains.
The same can be said for any situations with conflict or that require a decision. Posting those audition results the first time? Nearly debilitating for some. I don’t know if this ever gets to a point of feeling good, but it does become manageable and even predictable. Or that first meeting with a parent. You’re 20 years old and speaking to a 40-something parent who entrusts you with their most prized possession. That’s a little nerve-wracking. But it keeps getting more manageable each time you interact. You notice that you still get a little nervous before parent-teacher conferences, but it’s only the hour before as opposed to all day. We’re looking for progress everywhere we can get it.
Rehearse for Stress and Conflict
If it’s always going to be hard the first time, then we can manage stress and conflict by rehearsing, just like we prepare for a concert.
My colleagues and I love playing the “what if” game.
“What if a parent bursts in right now and demands to see us in rehearsal because we didn’t perform a piece the parent performed in high school?”
“What if the principal asks us to give the solo to the school board member’s son?”
“What if our star students all get caught up in a test scandal, and they’re out for the festival tomorrow?”
We can go on for days, and some of these become pretty humorous, but they all have a common theme: an issue that has must be solved that may not have a clear-cut solution. We talk these issues out, workshop a few different solutions, understand the repercussions and ultimately come up with a few scripts that could play into the Breath, Reflect, Respond method (see below).
We find that situations typically come up in the following categories: students, administrative, colleagues, parents and community. Talk with a friend and play “what if.” You may find that your collective responses help you to approach these situations in ways you didn’t think of.
You may also find that some of the most off-the-wall scenarios you come up don’t even hold a candle to what really happens! I wish I had thought about what I would do when I found out that students were sneaking in George Foreman grills to cook breakfast sandwiches behind the lockers and sell them for a quick profit, and how this might be an OSHA issue and a violation of the school’s food-service contract. But this particular “what if” never came up.
Breathe, Reflect, Respond
In most cases, we don’t have to respond as quickly as we think. Emergency situations, yes, but let’s make sure we define what a real emergency is. Some broken bones or a true safety situation? Absolutely. A parent who demands, “We need the fundraiser information now!”? Nope. At least, not my emergency.
Let’s say two students come up to you. They’re fighting over who gets to play the piano today, or they’re arguing over playing the solo, who sits on the end or who gets to take the classroom pet home today (which is a stuffed frog named Nothing But Treble). If you’ve dealt with this before, you probably have some initial solutions, and realize how much of a nothing situation this is. However, if it’s your first time, these situations can absolutely drain your energy while they filleth your cup of stress. So, try this.
Breathe: That’s right. Breathe. As long as the kids aren’t being a safety risk to themselves or others, just take a breath. In through the nose, out the mouth. Find a word that brings you some peace and say it in your head as you exhale, like water, beach, wind. My word is “cabin” because when people are arguing around me, I think about being alone in a cabin in the snowy mountains for some peace and quiet. That, or I imagine that they are in the cabin for a time-out.
Reflect: Now, we’re going to reflect based on the information we have. In new situations, if possible, you want to give yourself some time. It helps to have a script before entering this phase.
“Hey, thanks for bringing this to my attention. I need to think about this and then I’ll get back to you, OK?”
If you have a class coming up or some more urgent matters, write down the issue with some notes. This will help you to remember the details later, but the primary goal is to just get it out of your head for now so you can free up space for other issues.
Then sit down and reflect on this. How long? It depends on the issue. For a small disagreement, I tend to spend no more than 10 minutes ruminating on the issue. Larger situations may need an hour or two with some deliberation amongst colleagues. Huge issues? Most often these need to become the responsibility of someone above me, such as an administrator.
Respond: It’s time to either invite the parties back to discuss further, or I just deliver the decision. I understand that some unpopular decisions may lead to a little more stress: parents emailing to disagree with the decision, for example. If that happens, I handle that situation. I respond based on my core responsibilities — a primary focus on safety and education, along with the moral, ethical and legal obligations tied to these responsibilities. That’s a mouthful, but it’s important because educators are responsible for acting with authority in some gray areas.
Sometimes we need to breathe-reflect-breathe-breathe-breathe-reflect-breathe-again-then-respond!
Plan For Five Things to Go Wrong
So, we have given up on wishing for stress to just disappear, and we’re rehearsing how to deal with stress. Now, we can begin to expect it. One trick that has greatly helped me is planning for at least five things to go wrong each day. Just knowing that things won’t be perfect and that challenges will come up that will require my expertise and response puts me in a much better place. I’m not always calm, but I’m not out of control and don’t have to spend energy regulating myself.
What about when the sixth thing goes wrong? That’s when I start stressing a little bit. We all need to let it out at some point. Just make sure that you directly communicate to a colleague that you need to vent.
Expecting a small number of things to go wrong helps immensely when traveling with a group or participating in any new experience. If you’re new to the profession, at least double this number. Don’t expect things to be perfect. Besides, no one ever sits around the dinner table talking about how things went to plan. Our most interesting stories and interactions come from the unexpected and our ability to respond in the moment!
Here are some more sample scenarios to consider. What would you do in the following situations?
The Box Cutter: You discover that one of your most reliable students has a box cutter in their backpack during a routine check. This student works at the local big-box store overnight to help support their family. The school’s policy is very strict on this. Also, you have a concert tomorrow, and this student has an important solo that no one else can cover. How do you handle this situation?
One possible answer: School policy states that teachers must report these items, regardless of intention. Chances are, the school will still enact their consequences; however, the teacher can still share the student’s story with counselors, administrators and other decision-makers to highlight the student’s character. Policies are important, but they should be applied with context in mind. Unfortunately, we must act as our school requires.
The Field Trip Sabotage: An upset colleague attempts to undermine a meticulously planned music field trip. How do you address internal conflicts without compromising student experiences?
One possible answer: This is a case of two colleagues who care about their classes and programs — you and the upset colleague. Try to understand and acknowledge their feelings. In this case, I would speak directly to the colleague — no email or phone call, just set up a meeting. Try to find common ground and address any valid concerns. Keep the focus on what is best for the students.
Inclusion Causing Discontent: Striving for inclusivity, a student with special needs joins the ensemble. Other students, however, feel this is a distraction and want to quit. How do you approach this situation responsibly and ethically?
One possible answer: This can be a difficult situation for everyone involved. I would consider speaking with the concerned students. Work together to come up with solutions, such as having a peer buddy or even adjusting rehearsals while still making sure that you are working on behalf of all students in your classroom. In some cases, it may be worth working with the school counselors to make adjustments to where students are placed to ensure success at all levels.
The Battle Over Budget: You and your colleague face off in a heated debate over the allocation of a limited department budget. How do priorities align with program needs?
One possible answer: Some decisions are above our heads. If you are not a department chair or someone involved in allocating the expenses, then there is not much you can do. In the case above, one music teacher received more money than another for their program. I would be open to hearing the colleague out and potentially look for solutions where you can work together. In this case, I find it helpful to work with the other colleague and let them know how they can request funds in the future from administration.
The Overzealous Music Booster: A music booster parent bypasses the director, making decisions that could alter the course of the program. Where does the line between support and overreach lie?
One possible answer: It’s great to have support, but there’s a fine line between helping and overstepping. The director makes the decisions. This could start off as a friendly conversation to thank them for their support while reminding them of the importance of following the proper channels. Encourage parents to share ideas with you, but let them know that not every idea will be able to be enacted. Unfortunately, if there is pushback, you may need to speak to administration about this.
Whether you’re a seasoned saxophonist or a passionate learner, here’s a curated list that promises to infuse your summer with the soulful sounds of the season. From the bouncy melody of Miley Cyrus’ “Flowers” to the classic charm of Ella Fitzgerald’s rendition of George Gershwin’s “Summertime” to the uplifting beats of Pharrell Williams’ “Happy,” this playlist is your perfect companion for the season.
And with our partner Tomplay, mastering these melodies for the summer is a breeze! Tomplay is a digital sheet music app and online platform designed for musicians. It offers a wide range of interactive sheet music for various instruments, including saxophone, trumpet, clarinet and more. Tomplay distinguishes itself by providing features that enhance the learning and practicing experience for musicians, such as :
Synchronized Professional Accompaniments. Musicians can effortlessly listen to and perform alongside professionally recorded piano accompaniments
Tempo Adjustment. Users have the flexibility to modify the tempo of audio accompaniments, tailoring practice to their skill level
Passage Looping. Musicians can loop specific sections of music, for more focused and efficient practice
Self-Recording. The app offers a self-recording feature, allowing users to record their performances and review their progress
Annotation Tools. Musicians can annotate scores with fingerings, bowings, customized highlights, text additions and more
Sharing and Collaboration. Users can easily share their annotations and recordings with their music teacher, promoting collaborative learning between lessons.
Each song in the list below is accompanied by a link to its Saxophone Sheet Music page, which includes a professional recording of the song, synchronized with the sheet music to enhance your learning experience.
1. Flowers by Miley Cyrus
“Flowers” is a song by American singer Miley Cyrus, released in 2023. You may have already heard it, as it broke streaming records. The lyrics of the song are directly inspired by the singer’s personal story. Stemming from her breakup with actor Liam Hemsworth, this ‘revenge song’ highlights a strong and independent woman who is recovering from a difficult breakup and learning how to love and accept herself. Its upbeat melody and affirming message have made it a favorite for summer playlists, inspiring many to embrace their strength and inner beauty.
Practicing the melody on the saxophone can be a great way to bring the song’s vibrant energy to life. On Tomplay, you can find various arrangements of “Flowers” suited to different skill levels, whether you play soprano, alto or tenor saxophone. The platform allows you to adjust the tempo to your liking and provides a professional audio recording to guide your practice, making it easy to master this hit and share its empowering vibe with your audience.
2. Summertime by George Gershwin (as performed by Ella Fitzgerald
Composed by George Gershwin with lyrics by DuBose Heyward, “Summertime” was first performed in 1935 as part of the opera Porgy and Bess. Gershwin created the song to capture the essence of a lullaby, drawing on elements of African American spirituals and folk music. Singer Ella Fitzgerald, known for her impeccable vocal style and improvisational prowess, recorded her iconic rendition of “Summertime” in 1958, solidifying the song’s place in jazz history. Since then, the song has been covered by over 25,000 artists!
Tomplay features like self-recording and loop passages allow you to master this classic.
Released in 2013, “Happy” by Pharrell Williams quickly became a global sensation with its infectious melody and upbeat lyrics. The famous singer crafted this song for the soundtrack of the animated film Despicable Me 2, and it went on to top charts worldwide, spreading joy and positivity wherever it was played. The song’s catchy rhythm and cheerful vibe have made it a staple of summer tunes.
Playing “Happy” on the saxophone is a great way to channel its exuberant energy and bring smiles to your audience. Tomplay offers various arrangements for different skill levels. Slow down the tempo and speed it up as you work on the piece to perfect this amazing hit!
“Sunny,” composed and performed by Bobby Hebb, was released in 1966 and became an enduring classic celebrated for its uplifting melody and positive lyrics. Hebb wrote the song in response to personal tragedies, including the assassination of President John F. Kennedy and the death of his brother. Despite these dark inspirations, the song conveys a message of hope and resilience.
Discover multiple arrangements of “Sunny” with Tomplay. The sheet music is suited to different skill levels, complete with a top-notch accompaniment track. Annotate your scores and use the on-screen saxophone as a visual aid to get to grips with the piece.
“Manhã de Carnaval”, also known as “Black Orpheus,” is a bossa nova song composed by Antônio Carlos Jobim and Luiz Bonfá for the 1959 film Black Orpheus. It recounts the Greek myth of Orpheus and Eurydice set during Rio de Janeiro’s Carnival. The story follows Orfeu, a charming musician, and Eurydice, a young woman fleeing a mysterious stalker personified as Death. They fall in love, but tragedy strikes as Eurydice dies while escaping her pursuer, and Orfeu, stricken with grief, ultimately meets a tragic end himself. “Manhã de Carnaval” was one of the first compositions to bring bossa nova to an international audience, helping to popularize the genre outside Brazil.
Tomplay provides multiple arrangements to accommodate all proficiency levels and allows you to perform the rich melodies of this song with a professionally recorded orchestral accompaniment.
“Sittin’ on the Dock of the Bay,” composed by Otis Redding and Steve Cropper, was recorded song just days before Redding’s tragic death in a plane crash in 1967, and released the following year. The song captures a reflective mood, with Redding’s soulful voice conveying a sense of longing and contemplation as he watches the tide roll away. The signature whistling at the end was added as an impromptu fill-in because Redding hadn’t yet written the final verse, and it has since become an iconic element of the track.
The soulful melody of this wistful song is perfect for the summer!
“Despacito” was composed and performed by Luis Fonsi featuring Daddy Yankee in 2017, and quickly became a global phenomenon. This reggaeton-pop fusion is characterized by its infectious rhythm, with an upbeat tempo and romantic lyrics that celebrate the sensuality and passion of Latin music. The song became the first Spanish-language song to top the Billboard Hot 100 since “Macarena” in 1996. Its popularity surged even further with a remix featuring Justin Bieber, making it one of the most-streamed songs of all time.
Master this modern hit on the saxophone alto, tenor or soprano with Tomplay. Simply hit the play button and start playing along with a high-quality accompaniment track.
LOOKING TO ENHANCE YOUR SUMMER SAXOPHONE SESSIONS?
Explore the extensive catalog of Yamaha saxophones and saxophone gear to find the perfect instrument for your needs. From the sleek and innovative YDS-150 digital saxophone, which offers exact saxophone fingering and authentic sound, to a wide range of professional and student models, Yamaha has something for every level of player.
Whether you’re jamming to summer hits or practicing new pieces, Yamaha saxophones provide superior quality and playability. Plus, with your purchase or rental of a Yamaha brass, woodwind, string or mallet keyboard instrument, you’ll receive three months of free premium access to Tomplay, offering over 80,000 sheet music titles with backing tracks to play along to. Elevate your musical experience this summer with Yamaha and Tomplay … and let the summer festivities begin!
In just five years, the Winter Guard International (WGI) indoor winds program at Westfield High School in Indiana, has progressed from competing in Scholastic A Class to competing in Scholastic World Class, in a transcendence that occurred during one of the most trying times for competitive band programs: the COVID pandemic. Because the program has progressed so quickly, some students have had the unique opportunity to perform in three different competitive classes — A Class, Open Class and World Class. In 2019, 8th-graders performing for Westfield competed in A Class; now, in 2024, those same students are high school seniors, spending their final year competing in World Class.
“I can’t think of other examples of programs that have grown so fast that students have had the opportunity to be there for every season to get to World Class,” says Westfield Director of Performing Arts Andrew Muth. “The kids bought into excellence.”
Muth attributes his program’s rapid growth to long-term planning, short-term goal-setting and a mindset focused on tackling one obstacle at a time. “What is excellent today isn’t excellent tomorrow,” Muth says. “The standard is going to grow and evolve.”
From Pandemic to Performances
Westfield’s indoor winds program first began during the 2019 school year. After just one year of competition, the 2020 COVID lockdowns ended the following season early. When students returned for the 2020-2021 school year, rehearsals faced a series of modifications, including requirements for students to wear masks, stand five feet apart and fill out health forms on an iPad to confirm they had no COVID symptoms before entering the rehearsal space.
The pandemic posed an obstacle to Westfield, as it did to every band program in America. However, despite a year of lost practice and competition time, the pandemic helped the students at Westfield develop a resilient mindset to come back even stronger.
Muth explains that band rehearsal was the highlight of the day for students and music teachers alike. Everyone was excited to return after months without practice. “For me personally, going to rehearsal, working with everybody, that felt normal. Even though we wore in masks, even though we were socially distancing, even though it wasn’t exactly how we wanted it to be, we were working on something together,” Muth says. “It felt so good to come back and do a rehearsal, even five feet apart in masks.”
A season without band served as a motivator. Muth, who was recognized as a 2024 Yamaha “40 Under 40” music educator, and his students learned a lot about how important it is not to take the band experience for granted. “We knew at any point our season could be done,” he says. “So, we were going to make the most of every single thing we did.”
Concepts like gratitude for each performance and taking responsibility for each day of practicing are not unique to the COVID lockdowns. Even years removed from the quarantine, Muth still stresses the importance of breaking down each piece of performance to its details. If each piece of the puzzle fits into place, it will create a whole. As a result, the Westfield indoor winds program has many pieces that work together like a well-oiled machine.
The first puzzle piece is nailing down each detail of the show with music selections, staging and costuming. “There’s no such thing as too detailed,” Muth says.
The next piece is making sure the band staff is working in tune with one another. Because of Westfield’s growth, the indoor winds staff has expanded from three members back in 2019 to 13 in 2024. New staff members include a recently hired choreographer, plus indoor winds alumni who Muth hired to help out.
The third piece of the puzzle is perhaps the most important, the students. Success for students, just like for staff, comes down to the details. Muth challenges his students to give their best effort during every step of the process, not just during their performances. “This includes [being] good at unloading and loading the trailer in the parking lot of the show,” Muth says. “We’re good at walking into warmup and setting up. We’re good at getting on the floor. We’re good at performing because obviously that’s the main goal, but everything matters. There’s not a detail of what we do that isn’t important.”
Parents are the last piece to complete the puzzle. If parents are fully on board with the commitment that the indoor winds program requires, they play an important role in helping the students perform to their full potential.
As the program has grown, parents’ initiative has grown as well. While five years ago, parents were volunteering to learn the process, parents are now making their own suggestions for improvement. Without being asked, Westfield band parents regularly take on tasks like setting up pre-performance meals in the parking lot, organizing uniform dry cleanings between shows, and noticing when to alter uniforms to fit better. “They’re constantly raising their own bar, just like the kids are,” Muth says.
Marching One Step at a Time
In addition to the importance of teamwork, Muth emphasizes that progress is slow and gradual, but it’s important to embrace every step of the process. “It’s an old saying, but it’s true: Rome wasn’t built in a day,” Muth says.
Muth doesn’t focus on making the first performance perfect; instead, he looks to establish good habits and patterns for long-term growth. “We’re a slow burn, and we know that,” he says. “The Westfield band you see in week one is not the band you’ll see at the end of the season.”
Part of Muth’s growth as an instructor has come from understanding the hierarchy of the band’s priorities. “When I was a 23-year-old band director, I wanted to fight every fight and die on every hill,” Muth recalls. However, during his teaching career, Muth realized: “It’s about the war, not the battle. You can’t die on every hill. You must take it in parts and pieces.”
Setting Goals
Those parts and pieces often go back to the basics — a regular focus on improving marching technique and music rehearsals. For Muth, those pieces also include being willing to delegate more tasks among staff. “I’ve let go of a lot of things that I used to be responsible for,” he says.
Instead of trying to lead every piece of the program himself, Muth spends time training staff members to take on more responsibility. “We’re not only educating our students,” he says. “We’re educating our staff.
Goals for students must be tangible, measurable benchmarks. “Students can say, ‘I want to play better. I want to move better,’” he says. “But what are some larger, big ticket boxes that we can check?”
For example, during the program’s third year, Muth and his students set a goal to make it to WGI finals. After accomplishing that goal, Westfield won Open Class during year four. “It was never the goal to win,” Muth says. “The goal was to be in a place where it could happen, where we had the level of training and excellence where [winning] was in the cards for us.”
To reach those goals, Muth recommends forming mentorships and alliances with other schools and their band directors, plus going to watch other schools’ rehearsals. “I haven’t yet met a successful band director who is not willing to let you come in, watch the rehearsal and see how the sausage gets made,” Muth says.
Watching other bands rehearse can help a band director identify areas where their own band has similar struggles. “It’s eye-opening. You’re like, ‘Oh! They’re telling their kids to play in the key signature and get their toes up just like we’re doing,’” Muth says. “It contextualizes it for you and makes you realize that you’re not alone.”
One of the fastest and least expensive ways to step out of your comfort zone and explore new territory is to change the way you tune your bass. Electric bassists have inherited E-A-D-G tuning from the upright bass, but there are many other options. In this posting, we’ll explore a number of them, but first, a little history.
STANDARD TUNING
Basses (and the bottom four strings of guitars) are tuned in fourths, which means that each string is four semitones apart. Most other stringed instruments, including cello, violin, viola, mandolin and tenor banjo, are tuned in fifths: Cellos and violas are tuned C-G-D-A, while violins and mandolins are tuned G-D-A-E.
In the 1800s, the upright bass was tuned in fifths, too, but many players found that this made it harder to shift positions. Today, acoustic bass players who have gone back to tuning in fifths say the strings have richer overtones and fit in better with the rest of the string section; they also find the interval of a tenth is easier to play. In addition, the C-G-D-A tuning gives them a low C without the special extender they’d need to use on a standard-tuned bass. (See the “Go Low” section below for more information.)
BE OPEN
Classical composers have been employing alternate tunings, which they called scordatura (“mistuning”) as far back as the 17th century. They prized being able to use the power and resonance of an instrument’s open strings, and when composers wrote in unusual keys or with nonstandard tonalities, they sometimes asked that string players adjust their tuning to play the composition. Many contemporary songs written on guitar, in fact, are in E, A, D and G because many of the notes in these keys can be played on open strings.
Another reason musicians re-tune their instruments is to make difficult parts easier to play; if a particular lick is a big stretch on adjacent strings, for example, tuning one of the strings up or down by a half-step makes it one fret easier to reach.
GO LOW
Some bass players outfit their instruments with piccolo bass strings designed to be tuned an octave higher than normal, yielding the same pitches as the lower four strings of a guitar. This can offer interesting possibilities in a solo context, but it’s safe to say that tuning down is more prevalent than tuning up.
One of the most common reasons to reasons to tune down is to access lower keys and go below a bass’s normal range. In metal and hard rock, many guitarists (and their accompanying bassists) tune down a half-step, use D standard (a four-string tuned down a whole step to D-G-C-F), C standard (C-F-B♭-E♭, a major third lower than usual) or B-E-A-D tuning (the standard tuning of the lowest four strings on a five-string bass) on a four-string.
But this kind of so-called “drop tuning” is hardly confined to metal. As far back as the 1980s, Anthony Jackson was tuning his bass down to C standard on sessions with Chaka Khan, and Ross Valory was using B-E-A-D tuning with Journey. In addition, many gospel and R&B bassists tune down to accommodate songs in flat keys.
The more strings you have, of course, the more options there are. Common variations on standard five-string B-E-A-D-G tuning include F#-B-E-A-D and E-A-D-G-C, and some gospel bassists tune their six-string instruments to A-D-G-C-G-B♭ for especially thunderous impact.
In these tunings, you can still use standard scale and chord fingerings, but that changes if you detune just one string. “drop D” tuning means lowering the E string to D and leaving all the other strings just as they are. To achieve this quickly during live performance, some bassists use an extender, a lever that can drop their E string as far down as B.
USE THE RIGHT STRINGS
With all these possibilities, it can be easy to forget that your bass is made of wood that expands and contracts. Lower tunings can work with a standard .45 – .105 gauge four-string set, but if you go all the way down to B-E-A-D, it’s simpler to use the lowest strings of a standard five-string set, with a low B that’s .125 gauge or thicker. Several companies sell heavier-gauge strings for down-tuning (.50 to .110, for example), lighter gauges for piccolo bass (such as .20 to .52) and mixed sets that can accommodate a wide variety of tunings. In rare cases, you might need to buy a single string that deviates from the rest of the pack.
TAKE IT TO A TECH
If you’re serious about exploring a substantially lower or higher tuning, I strongly suggest you take your bass to a professional tech who can tweak your truss rod, dial in your string height, check your intonation, and adjust your nut for new string sizes.
START SMALL
Experimenting is fun, but you can also be strategic: Can your lowest string match the lowest note of the song? Is there a passage that could be easier to play if you change the tuning of one or more strings? If tuning down to D standard feels too extreme, just tuning down the E string alone might do the trick. If you have more than one bass, consider keeping one bass in a particular tuning. For inspiration, listen to bass players like Michael Manring, who has explored alternate tunings more thoroughly than most.
Sometimes, it’s the seemingly insignificant moments that hold the greatest lessons. I was watching a cooking and travel series called “The Chef Show” that featured actor, director and aspiring chef Jon Favreau and renowned chef Roy Choi. During a mundane scene of the men chopping onions or making some stock, Favreau asks, “Are there any shortcuts?”
Choi responds, “If you cook with shortcuts, it will taste like shortcuts.”
This statement struck a chord with me and turned into a guiding principle for me personally and professionally. I noticed that anytime I took the time to work at something — spend the time to plan things out — it didn’t feel like I cut any corners. However, when I took shortcuts and skirted around things, occasionally I would get lucky and no one would notice, but ultimately, the shortcuts were obvious.
Confronting Conflict Head-On
Take conflict resolution, for example. Avoiding difficult conversations, whether with colleagues, students or administrators, might seem appealing. Our minds often persuade us to steer clear of potential discord. However, reality is starkly different. Facing tough situations directly not only resolves them more effectively but also prevents any lingering stress that comes from avoidance. A challenging conversation today can save weeks of underlying tension. In my book “Harmonizing Ethics and Education,” my co-authors and I don’t promise to eliminate stress; rather, we provide techniques that can help you manage conflict so that instead of ruining an entire week or more, it’ll only ruin a few hours.
Think about things that loom in the back of your mind. Maybe it’s a tough situation with a colleague or administrator, posting audition results or working through a challenging section of the music. These are often the things we want to avoid, want others to do for us, or even just hope that they work themselves out. But deep down, we understand that the actions we want to avoid are necessary.
Our brains may say, “I’m conflict averse. I don’t want to have this difficult conversation with my colleague because I don’t think it will go well.”
Reality: You need to have this tough conversation. In fact, avoiding it may lead to more discord and unresolved tension.
Our brains may say, “I don’t want to spell this out and spoon feed it to the kids — they just need to practice this transition section!”
Reality: You need to spell it out and spoon feed it to the kids because they won’t practice.
As long as you work with people, there will always be some stress involved. Why not choose a shorter burst of intense stress (that measures a 6 out of 10) that lasts a few hours to a day instead of dealing with a low-grade level of stress (maybe a 3 or 4) that lasts several weeks or even months. The intense burst may tire you out and stress you out quite a bit, but I believe that consistent stress or conflict that isn’t managed over multiple weeks or months may be more detrimental than larger, focused bursts. Think about the times you had an argument with someone that actually led to more understanding and even brought you closer to someone.
The Detailed Craft of Score Preparation
The principle of avoiding shortcuts manifests clearly in score preparation. Learning a score on the podium is a shortcut with tempting immediacy. Yet, the true understanding comes from immersing yourself in every part of the score and understanding what the students are truly doing.
I worked with one of my student teachers recently on shortcuts — or rather, not taking them. We always start with score prep. What is the shortcut? Learning the score on the podium. What is the simmering process? For us, it’s taking the score and playing every single part on the piano. That’s what I said. Every. Single. Part. And do it three times. What does mean? For a band score, we start with the flute or piccolo part, and we play the whole part on piano. Then we move to flute two and do the same thing. Then we go to oboe, and so on.
Then we do it again. And then one more time.
Does it get boring and mundane? Absolutely! By the end of this laborious process, we have spent so much time with the score — even specific parts of the score — that our understanding of it, the intricacies of why it was written that way, and our ability to detect errors and suggest solutions has become much more efficient than simply figuring it out on the go. The result? You end up really feeling like you know what you are doing!
From a professional standpoint, it feels really good to hear an issue and say, “Alto twos: check your part. It sounds like we’re a step off. Try this instead.” Standing in front of an ensemble as a new teacher with no score prep can feel like opening a car hood after hearing a clunk, and going, “Yep, there’s an engine in here.”
Best- and Worse-Case Scenarios
Addressing common shortcuts directly, such as avoiding conflict or neglecting detailed score preparation, illustrates potential pitfalls. Best-case scenarios might offer temporary relief, but worst-case scenarios can lead to significant setbacks. The aim is to encourage a mindset that seeks thoroughness and dedication, recognizing the long-term benefits over the fleeting allure of shortcuts.
Missed call times, loss of trust (in one case, I know of a director who showed up to a college with his band for a clinic on the wrong day. Two years in a row!).
Spending even more time and resources to fix the issue and other issues that arose from not addressing the original issue.
Does it Get Easier?
Yes! On one hand, spending more time in this process does make it and the journey more enjoyable (after all, the more onions you cut, the less you cry; but only if you remove the bulb and don’t nick it with your knife). The other advantage with not taking shortcuts at the beginning is that your skills improve a lot. Yes, you are playing the long game, but you are truly investing in your skills. Sure, there are those people who can read transposition for F horn right away, but chances are that most just spent a lot of time doing the work, and you only see the final result.
Spending more time on these items actually may help you find the other “shortcuts” and processes that help. Spend time playing through every part by a specific composer. What do we now see? Patterns on how this specific composer voices parts. The process then becomes more enjoyable. You can fly through a part without worrying about the transposition because you’ve worked through it already. Your skills improve on plunking out parts and you don’t have to go back to fix things.
You understand that going through the extra process of confirming with the district office that your buses will in fact be here in two days to take you to the festival saves you the added stress of wondering exactly where they will be on Saturday.
By embracing this “no-shortcuts” approach, we not only enhance our skills and resolve conflicts more effectively but we also discover a deeper satisfaction in our endeavors. The long road might be more demanding, but it is undeniably more rewarding.
Last year, I was lucky enough to get to play and write about the latest flagship Yamaha acoustic guitar: the FG9.
Having the chance to experience this extraordinary handcrafted instrument literally changed my opinion on what an acoustic guitar should look and sound like. That said, both FG9 models (the FG9 M and FG9 R) have fairly large dreadnought bodies, and my personal wish would be for a smaller size. With the recent release of the FS9 M and FS9 R concert body guitars, my wish has been granted!
FS9 M (left) and FS9 R (right).
Both models have the same design aesthetic as the FG9, so it should come as no surprise that they sound and look just as incredible as their larger cousins. Let’s take a deep dive into the reasons why these all-acoustic guitars (which, like the FG9, have no onboard pickups) are, in my humble opinion, instant classics.
Tonewoods
Both FS9 models feature solid Adirondack spruce tops with tapered edges (a feature that allows the body to vibrate more efficiently), a one-piece bolt-on solid African mahogany neck, an ebony bridge and fingerboard, bone nut and saddle.
The FS9 R features a solid African rosewood back and sides, while the FS9 M features a solid African mahogany back and sides. These two tonewoods have slightly different sonic characteristics … but they both sound great!
FS9 R.
FS9 M.
Design Aesthetic
Yamaha kept the design aesthetic for the FS9 deceptively simple. The solid Adirondack spruce top and sound hole are outlined with a beautiful rope motif, while the distinctive fingerboard inlays resemble traditional Japanese Kumiki woodworking.
The company’s logo at the top of the guitar is also Adirondack spruce, and the truss rod cover is unfinished ebony to match the fingerboard and bridge. The scratch plate has a tortoiseshell pattern. One of the nicest touches on these fine instruments can be found on the neck heel by way of the spruce inlay and “FS” logo marquetry.
Technical Specifications
FS9 concert-body guitars have a slightly shorter scale length than their dreadnought counterparts: 25″ versus 25 9/16″. The string spacing and nut width have remained constant, however, at 11 mm and 44 mm respectively. They also offer the same high-precision Gotoh SXN510 Cosmo Black open-geared tuners found on the FG9.
In addition, like the FG9, both FS9 models come supplied with a hardshell case.
Playability
I’m a big fan of the FS9 for several reasons. First, I find the smaller bouts provided by the concert-body size easier to manage when strumming. Secondly, the picking hand placement feels more comfortable to me; essentially the smaller size allows your shoulder to find a more natural resting place. Of course, this is relative to your physical size, but I think most players will find this aspect easier to manage than on a dreadnought or jumbo guitar. And, while it’s true that the FS9 does not have a cutaway — neither does the FG9 — the fact of the matter is that acoustic guitarists rarely play above the 12th fret, so I honestly don’t miss it at all.
The slightly shorter scale length on the FS9 (as compared to an FG9) also reduces string tension somewhat — a very desirable attribute for players with less hand strength, or those who spend a lot of time on their dedicated instrument.
I found the neck to be extremely comfortable to play; in fact, I didn’t really need any time to adjust to its dimensions and string spacing. The fret edges are beautifully dressed, to the point where you don’t feel them at all during changes in position.
In addition, the satin-finished neck allows for easy slides and glissandi along the fretboard without it ever feeling sticky or sweaty. I’m so glad guitar manufacturers like Yamaha are aware of how much players appreciate these finer details … as they should on a premium guitar like this.
Tone
I recently spent a couple of weeks with the FS9 M in my studio, which gave me time to make some comparisons with my other acoustic guitars.
I was expecting the mahogany back and sides to emit less bass-end response than my rosewood guitars, but that wasn’t the case at all. In fact, I found the FS9 M bass response to be well-tailored to the size of the guitar. In addition, the midrange response was clear and musical, and the top end added just the right amount of sparkle to chords and arpeggios without ever sounding too bright.
Of course, what the player hears, compared to a listener ten feet away, is often completely different … but I think most players would lose themselves in the quality of tones coming from this guitar and fall in love with what it can do to inspire your musical performances, songwriting and recording sessions.
I thought the best way for me to see if the guitar would work well for songwriting was to record how it sounded both with a pick and my fingers in a multi-track recording. I also wanted to see if the FS9 would sound good when applying other acoustic guitar techniques and stylistic approaches like bottleneck slide and single-note lines, so I produced a track using the FS9 M exclusively to capture what this guitar can do in a real-world recording session with a rhythm section plus male and female vocals. You can hear and see the result in the video below.
The Video
Here, I’m playing a Yamaha FS9 M on an original song, “Rain Down On Me.” I think this presentation gives you a good idea of how the guitar sounds in a modest home studio setup, for what I consider a singer/songwriter acoustic guitar demo.
After the song concludes, I discuss the guitar specifications, show photographs of both the FS9 M and FS9 R models, and present isolated strumming and fingerpicking sound samples from the FS9 M.
The Wrap Up
FS9 concert body guitars are a terrific addition to the pinnacle “9” range of Yamaha all-acoustic guitars. They are extremely expressive instruments that allow the player to precisely create dynamics with either their fingers or a pick … without ever losing details across the low, mid and high-end frequency ranges.
Experienced guitar players will appreciate the versatility these instruments offer; the ability to seamlessly transition between articulate arpeggios, finger styles and strumming, all in one musical passage, is rare on many acoustic guitars. Add the clarity of solo lines, fills and bottleneck slide to the mix and you have an acoustic workhorse worth double its weight in gold. Singer/songwriters will appreciate the overall size, light weight, ease of playability and the harmonic support the FS9 provides to either male or female vocals.
So if you’re looking for a dedicated acoustic guitar that will sit front and center both in your studio and onstage, look no further than the excellent FS9.
Music education degree programs are unique in the breadth of content areas addressed and in the intensive study of music and music performance — all intended to prepare graduates to teach and meet state licensure requirements. In most states, music educators are certified as PreK-12 music content specialists. This includes, but is not limited to, instrumental band, orchestra, choir, general music, modern band, music technology, composing, conducting and more. Within a four-year undergraduate teacher-preparation program, there is no way for teacher educators to address all these content areas. It’s no wonder that many undergraduate music education majors learn best through hands-on learning experiences that connect theory to practice.
Through all the coursework, performances and eventual pursuit of a career in music teaching, it is essential for undergraduates and novice music teachers to reflect on challenges and personal motivation along their journey. Below are nine recommendations for pre-service music education majors as well as novice in-service music educators to consider as they navigate their degree programs and enter the teaching profession.
1. Collect Resources
According to research, it is essential for music education majors to actively engage in learning opportunities to explore hands-on music education. These opportunities will make learning memorable but may not be able to address all areas of need surrounding a particular topic or area of interest (Vaughan-Marra, 2017). Alongside these experiences, maintaining organized materials and resources from coursework, professional development sessions, conference attendance and workshops will be invaluable during in-service teaching.
2. Connect with Teacher Preparation Programs
Professional development does not stop with the completion of an undergraduate degree. Music educators continue to learn alongside their students in their classrooms. This learning can expand to supporting pre-service music education majors when in-service music teachers connect with teacher educators. This can be through hosting fieldwork or practicum courses or through coordinating to bring an ensemble or class to a local university. Music educators working in higher education settings often welcome the opportunity to visit school sites of alumni, work with PreK-12 music makers, and support professional development that directly impacts teachers with their students. Novice music educators should contact local universities to request clinics or professional development with the help of faculty.
3. Connect with Professional Organizations
Music education degree programs often encourage students to participate in collegiate chapters of state, national and international professional organizations. Active members of collegiate chapters get opportunities to network with in-service educators as well as participate in additional professional development.
While fieldwork and practicum courses require visiting a range of schools and communities as part of undergraduate teacher preparation, new in-service music teachers may find it challenging to schedule time to observe colleagues or master teachers during their first years in the profession. Though it can be challenging to plan for substitutes or request funding for professional development, many districts encourage teachers to seek professional development throughout the school year. When possible, taking time to visit another school site or observing colleagues teaching similar content areas will help music teachers develop ideas that they can bring back to their own classrooms.
5. Connect with Music Teacher Mentors
Successful new music teachers demonstrate a willingness to connect with mentor teachers. In music education, finding content-specific mentors can be challenging due to a lack of consistent contact opportunities with music colleagues. A music teacher mentor can help a new music teacher navigate their first five years in the profession. This may include the social-emotional support needed to communicate with administrators, colleagues and parents. It may also include invaluable support in the classroom that helps refine teaching. When combined with rehearsal and lesson review, mentoring can evolve into rich opportunities to refine teaching.
6. Set Professional Goals
Most students set goals toward completing their undergraduate degree programs, but it’s also helpful for them to have a sense of what type of teaching position or career path they want post degree completion. Some new music teachers begin with goals related to their first teaching position. Though it can be helpful to narrow interests to help support learning during the degree program, it is vital for music education majors to remain flexible to different ways a future teaching assignment may be constructed. In addition to teaching assignments, I recommend including goals for pursuing an advanced degree. Expanding learning to areas such as philosophy, research and curriculum design change as music educators teach within their own classroom (Conway et al., 2021). There is no better way to reflect upon or grapple with these ideas than within a robust master’s program.
7. Consider Your Motivation to Learn
“Motivating Students to Learn” is a framework by educational researcher Jere Brophy (2004) . Within this framework, how students approach learning experiences and identify meaning and intended benefits are most important. He contends that this is a way of bridging casual exploration with focused learning. During an undergraduate music education degree program, majors may face challenges related to projects and curriculum requirements that are less interesting or personally enjoyable. Students who reflect upon practice sessions, coursework and required assessments through the degree program as learning opportunities are more able to develop professional goals and utilize strategies for learning in ways that extend beyond other forms of motivation such as rewards, grades or praise alone.
8. Understanding Feedback
Part of professional growth includes learning to understand the ways feedback can be approached. Musicians, like athletes, develop habits around how they prepare for and accept feedback. Due to the personal nature of musical performance and self-expression, it can take years for young musicians to develop self-reflection skills that support a growth mindset around their musical development.
Similarly, music education majors and novice music educators will face challenges related to their own learning, lesson planning and teaching, as well as the challenges and successes of their own students. Throughout their undergraduate degree program, music education majors may consider the ways that they are most receptive to feedback. This will enhance communication skills with faculty and peers, and it will constructively impact their performance. Though feedback can produce an emotional reaction, it is powerful to remember that feedback is information, and music education majors should look at systematic practice to demonstrate what is currently absent to the assessor. If a novice music educator can develop a growth mindset regarding their own learning, they will model this with their future students as they participate in music performance-based assessments.
9. Refine Your Adaptive Expertise
Hatano and Inagaki (1986) define adaptive expertise as the flexibility an individual has in relation to work and content areas of specialization. Routine expertise functions as the predictable patterns of behavior or habits. In music education, these forms of expertise are developed through coursework but also by working with students. Routines are vital for educators because they help teachers refine their self-confidence in their curricular choices. Having said this, adaptability is potentially more critical for music educators to develop due to the breadth of content and areas of specialization within the profession.
__________________________________
How music educators approach their own learning may impact the experiences of their students and how they develop curriculum. Starting within the undergraduate teacher preparation experiences, music education majors must consider how they navigate the development of their expertise both routine and adaptative. This lays the groundwork for future opportunities to learn in their classroom and includes how music educators pursue professional development throughout their career. Undergraduate teacher preparation is the first step into the profession. From there, connecting with professional organizations, music teacher mentors, colleagues for collaboration and advanced degrees like a master’s in music education or paralleled programs, help music educators refine and evolve with the needs of their students, school district and community. Music educators who are willing to adjust, listen, try new ideas, while also balancing these skills with prior knowledge, will flourish in the profession.
Hatano, G., & Inagaki, K. (1986). Two courses of expertise. In H. Stevenson, H. Azuma, & K. Hakuta (Eds.), Child development and education in Japan (pp. 262–272). New York: W.H. Freeman.
Angela Ammerman recalls the serendipitous moment in 2018 when a colleague talked about going to Thailand to teach music to children at Hope House Children’s Home. She spontaneously said, “I’ll go!”
Ammerman, who’d always felt compassion for children in difficult situations, packed up violins and flew with them to Thailand, where she spent 10 days at the rescue home for abused, abandoned and neglected children. She taught children in grades 4-12 how to play the violin. However, Ammerman faced a major obstacle: The kids didn’t speak a word of English, and she didn’t speak a word of Thai. How could she teach them when she couldn’t communicate with the kids verbally?
Spoiler alert: At the end of their time together, kids were playing Canon in D and performed a little concert for the community.
Finding Ways to Communicate
How did Ammerman make that happen? She figured out a way to communicate with the students, who spoke tribal dialects, through body language and using a lot of call and response. Ammerman would stomp her feet, one foot at a time, to demonstrate the proper posture for playing, and use arm gestures while playing the violin, so that kids would start to associate those movements with the instrument.
She would teach students a few key music words in English, like “Bravo!” which she would say when they did things correctly. The children caught on to her modeling and repeated after her. Soon, the kids would say “Bravo!” themselves as a happy word. The older kids would help teach the younger kids, using the same methods as Ammerman.
Ammerman also made the effort to learn a few words of Thai dialects, and she tuned in to the kids’ sound effects. One quirky thing the Thai students did was tease each other with what sounded like “Ding, ding, ding!” in reference to scorpions. Ammerman used that running joke by making the same sound in her violin lessons.
“That brings the connection between the violin and who they are socially together, so that they see themselves in my lessons — and now, they are part of the curriculum,” says Ammerman.
The results were phenomenal. Ammerman recalls an especially touching story about a young girl, who had experienced trauma and wouldn’t speak, progressed socially; by the last day, the girl was playing with good posture rather than hunched shoulders. Another child, after days of practicing, told Ammerman: “I’m not feeling tired and sleepy anymore.”
At the end of the last day, Ammerman taught the Thai students to say: “I love violins!”
“They said it to me, and I just lost it,” she says. “All these things are very clear signs to me that their confidence was being boosted.”
Working with the Youngest Students
Ammerman, who now lives in Fredericksburg, Virginia, uses almost identical techniques when teaching young music students at Art Time 4 Kids. Her youngest classes range in age from toddlers to babies, who absorb the music they hear.
Like she did in Thailand, Ammerman pays attention to what her students say. She takes the natural babbling and sound effects the children make with their own friends and families and makes an effort to put those same sounds to music.
“All of a sudden in a music class, students start to speak the words they’ve been working on,” says Ammerman, who uses exaggerated lip and mouth movements, and intentional eye contact with struggling students. “Parents and grandparents are floored.”
Both families and Ammerman — who also guest conducts with high school orchestras — see a strong progression in language skills as students learn via music.
“I see it and I hear it from parents all the time,” she says. “Overwhelmingly, parents will tell me over and over again: ‘I can’t believe the development since our kids started these music classes.’”
Teaching All Ages
Ammerman, who completed her Ph.D. in music education from George Mason University in 2018, has enjoyed a lifelong passion for music. She’s wanted to teach music for as long as she can remember, and a college professor’s impact on her confirmed her desire to pursue teaching after graduation.
“I knew that I wanted to teach teachers,” Ammerman, who was recognized as a 2024 Yamaha “40 Under 40” music educator, says. “The impact you have teaching the teachers is exponential!”
When she first started teaching, Ammerman’s dream job was teaching music in elementary school, so she started there. Then, she moved to teaching orchestra in middle school and high school. When she and her husband had their son, who is now 3, Ammerman became fascinated by early childhood development. Because she wanted to stay home with her son more, Ammerman started teaching one day a week at Art Time 4 Kids.
“It’s the most crucial time in a child’s life,” she says about ages birth to 3. “If we can impact them at this stage, the benefits are phenomenal for the rest of their life.”
Outside of teaching the little ones, Ammerman also works as an adjunct professor at George Mason University. She teaches two days a week online, and on Fridays, she goes to the Fairfax campus in person. She teaches a radical age mix of students during a typical week, but Ammerman says she loves the variety of this hodgepodge of classes, and she feels like she has come full circle.
“It’s fascinating and so fulfilling,” she says. “I’ve become fascinated with development over time and the trajectory of life.
“If you asked me what my favorite age is, the answer is: I love them all,” Ammerman says. “What many don’t expect about teaching is that teachers truly get more out of teaching than the kids. We learn so much from them.”
Angela Ammerman shows a student the proper way to hold a bow.
Shifting Gears
She has become good at dramatically shifting gears quickly: On some days, right after teaching the early childhood classes, she logs on to teach a virtual college class in professor mode.
No matter the student’s age, Ammerman says that music education should, above all, be fun. “To me, the biggest thing is that it doesn’t feel like work,” she says. “Music is so much fun and it just feels like you’re playing.”
Another key element of music education happens when music is a social activity. “I know we can enjoy music independently, but music is more fun when we are together,” she says. “I believe so firmly that that sense of belonging is a key component.”
Learning to play shuffles is a fundamental skill for any drummer, which makes it indispensable for bass players too. In this posting, we’ll show you how to get into the shuffle groove.
SHUFFLE VARIETIES
There are many different varieties of shuffles, but they’re all rooted in the blues and are all triplet-based. Shuffles can be identified by feel (i.e., the “half-time shuffle,” which places the snare on beats 2 and 4), associated with a drummer (such as the “Gadd shuffle,” named after famed Yamaha Artist Steve Gadd), tied to a region (the “Texas shuffle”), named by genre (the “jazz shuffle”), or even by its association with a record label (the “Motown shuffle”). Here are some of the most popular shuffles and the dynamic duos who helped make them famous.
THE 12/8 SHUFFLE
The slow pulse of legendary bluesman Muddy Waters’ “Mannish Boy” is (arguably) in 12/8 time, but the weight of the quarter notes makes it easy to feel as if it’s 4/4, with implied triplets coming from the drums. Notice how bassist Charles Calmese only plays on the song’s signature riff, leaving plenty of space for drummer Willie Smith to lay down the groove.
The big, bad feel of “Mannish Boy” is the foundation for many tunes, including George Thorogood’s “Bad to the Bone,” though here, bass player Billy Blough hugs drummer Jeff Simon’s kick drum and doubles the main riff. This 12/8 shuffle also underpins songs like Tears for Fears’ “Everybody Wants to Rule the World,” which perfectly syncs Curt Smith’s synth bass line with Manny Elias’s drum part.
THE PURDIE SHUFFLE
With its syncopated ghost notes on the snare, Bernard Purdie’s signature shuffle has inspired countless variations. Chuck Rainey’s bass parts have accompanied the Purdie shuffle as far back as 1970, when the two musicians played on Aretha Franklin’s “Heavenly Father.” Perhaps the best-known examples of Purdie-Rainey synergy are Steely Dan’s “Home At Last” and “Babylon Sisters,” both of which benefit from interactive bass parts that support the band’s jazzy harmony while accentuating each song’s reggae-ish lilt. (Be sure to check out this minus-vocal clip of “Home at Last,” which allows you to hear all the instrumental parts especially clearly.)
THE BONHAM BEAT
On Led Zeppelin’s “Fool in the Rain,” bass man John Paul Jones leaves lots of room for this prototypical example of drummer John Bonham’s trademark shuffle. Even when Jones leaves his main C major part for a Latin-flavored break, he’s still right in time with Bonham’s rock-solid shuffle; the samba-ish section halfway through the song gives them both a chance to jam, and Jones stretches out, right up until they return to the half-time shuffle. Although he introduces new touches and revisits the Latin flavor in the last minute of the track, Jones never loses his connection to Bonham’s thunderous groove. (Check out this isolated bass/drum clip.)
THE “ROSANNA” SHUFFLE
Drummer Jeff Porcaro said his approach on Toto’s “Rosanna” was a combo of the Purdie shuffle, the Bonham beat and the Bo Diddley beat. As you can hear in this isolated rhythm section track, Toto’s then-bassist David Hungate, a studio veteran, pairs the complexity of Porcaro’s part with a straightforward bassline that hugs the kick on hits, matches the drummer’s dynamics and livens things up with a slap bass part. As the song reaches its conclusion, Hungate mirrors the kick for maximum effect. “Rosanna” is a masterclass in dynamics, simplicity and a rhythm section working closely together.
THE TEXAS SHUFFLE
Double Trouble, the magical combo of bassist Tommy Shannon and drummer Chris Layton, is best known for supporting Stevie Ray Vaughan. A shining example of the Texas shuffle can be found in Vaughan’s “Pride and Joy,” where Shannon’s bassline bounces right along with Layton’s precisely sloppy feel. The kick, snare, ride and bass part are tied so tightly together that hearing the isolated bass track is a revelation.
THE GADD SHUFFLE
The smoothly swinging jazz shuffle most associated with drummer Steve Gadd — a backbeat and ghost notes on the snare coupled with a steady bass drum (sometimes four on the floor), along with signature hi-hat and ride moves — is an invitation to play strong quarter notes and walking basslines with tasteful ornamentations. In this video, Gadd demonstrates several shuffles, one played with fellow studio legend Will Lee on bass (and harmonica). And on David Grusin’s “Shuffle City,” Gadd and bassist Anthony Jackson balance iron-clad time with ultra-creative improvisation.
SHUFFLE SUCCESS
When it comes to shuffles, repetition and simplicity are powerful tools. As demonstrated in the audio clips below (all played on a Yamaha BB435 bass), try different note lengths: If the drummer is playing the ride cymbal, long bass notes can match the cymbal’s sustain, while short notes can accentuate a chunky hi-hat/snare/kick groove.
Playing quarter-note walking basslines like these can allow you to “float” over a shuffle, while matching the kick keeps things grounded, as demonstrated in these audio clips:
You can also learn how other bassists handle shuffles in genres outside blues and jazz by listening to playlists like this one, which provides a fascinating overview of half-time and four-on-the-floor shuffles in pop music. And don’t forget to search YouTube for examples of grooves (like the ones demonstrated in this video), isolated tracks, instrumental versions and bass-less versions of songs that catch your ear. They’re all great approaches to mastering the art of shuffling on bass.
Ah, the piccolo — the little woodwind that is quite possibly the most joked-about orchestral instrument. However, the piccolo has always held a special place in my heart despite its reputation for being difficult to play, shrill, and piercing. I enjoy controlling the highest of the high-end into mellow pianissimos.
I first learned to play the piccolo out of necessity. On a fateful day when I was a first chair flute player in 9th grade, my band director handed me a small case. I spent the rest of the rehearsal endlessly blowing air and not making a sound. That was my first sign that the piccolo was very different from the flute.
While many flutists double on the piccolo, the little instrument has a separate history and setup from its larger counterpart.
Here are five things you probably didn’t know about the piccolo.
1. It Has a Conical Bore
The piccolo’s unique internal shape changes the core of its sound. Many conical-bore woodwinds, such as the medieval double-reed instrument called the shawm, were originally used to project very loudly over noisy or spacious environments. The sound of instruments like the shawm and piccolo can travel long distances, even when played outside.
Most flutes, on the other hand, are nearly entirely cylindrical with just the slightest taper on the far left side of the instrument at the end of the headjoint.
While some metal piccolos have cylindrical bores, most professional piccolos have a conical bore, which changes the soundwave it produces. The result is a unique timbred instrument with a rich and even range of sound.
Other instruments that have conical bores include the French horn and saxophone.
2. Its Name Causes Confusion
The word piccolo simply means small, but the instrument’s older name, the flautino, caused some confusion because it was the name of another small woodwind. The flautino was an instrument that came before the piccolo; it was a small recorder that was often used in the Baroque era.
This means that there is a chance that the piccolo part in Handel’s “Rinaldo,” which is believed to be the first classical piccolo part to be written, might actually have been played by a small recorder instead.
It’s difficult to decipher whether composers intended for the pieces to be played by the transverse (piccolo) or the vertical recorder, both known as flautino. Similarly, small duct flutes called flageolets were also sometimes described as flautino.
The piccolo has had many other names, such as flauto traverso oder à l’octave (transverse flute at the octave), ottavino (which means eighth in reference to the instrument being eight notes higher than the flute), and petite flûte (little flute).
Often described as a flourish or “garnish” instrument, the piccolo commonly represents the fleeting motif of a bird or cricket. The piccolo represents bird calls alongside the violin in Ravel’s “Daphnis et Chloe.” Similarly, in Stravinsky’s ballet, “The Firebird,” the piccolo represents the mythical creature taking to the sky. And in Telemann’s “Grillen Symphony,” also known as the “Cricket Symphony,” utilizes the piccolo to create a quirky feeling.
The piccolo has also been used to represent wind, water, howling, and lightning in various compositions. Operatic music from the 1800s often used the instrument for special effects with one of the most notable examples being the lightning in Verdi’s “Rigoletto.”
Other common uses for the piccolo include in operatic overtures (especially Rossini) and even for military entrances (such as in Mozart’s opera, “Die Entführung aus dem Serail”).
4. Its Use Changed Over the Centuries
The precursors to the piccolo, which were called military transverse flutes, were used in military battles starting around the Middle Ages. This iteration of the small flute had just 6 open holes. Eventually, instrument makers began adding keys. By the early 1700s, the instrument had grown into something close to the piccolo we know today.
It was around this time that composers like Handel and Vivaldi began using the piccolo in concert music. The first known concert piece to use the piccolo was supposedly Handel’s “Rinaldo,” which premiered in 1711, but due to the confusion over the instrument’s name, the first piece for piccolo may have been a bit before or after this time.
Beethoven is also known for being one of the first composers to use the piccolo in a symphony. The last movement of Beethoven’s “Fifth Symphony” has bombastic brass music. This section of music was the piccolo’s first cameo in a symphony.
As the piccolo became more common in orchestras (and orchestras grew as the romantic era approached), the instrument began doubling violins and adding soaring melodies or countermelodies on top of the flute. The use of the piccolo is a far cry from its original intention, which was to signal an incoming army/battle.
5. It Was Commonly Found in D-flat
When people think of the flute, they picture the C concert flute, but there are alto flutes (G) and the much less common flute d’amour (in Bb or A). The piccolo usually comes in C today, but one special piccolo, the Db piccolo, was made for a specific purpose — playing in bands with brass (think Sousa marches).
Before flutes and piccolos were standardized, the Db piccolo was common in military bands. You may even see the rare Db piccolo today, as it is much easier to play difficult excerpts like the solo in “Stars and Stripes Forever.” The Db piccolo is more friendly because brass bands often played in keys with multiple flats, so the fingerings and transitions were easier.
Every player knows that mastering an instrument takes years of practice and dedication. But what if the key to unlocking your full potential as an instrumentalist lies in your voice?
Singing isn’t just for singers. When instrumentalists incorporate vocal techniques into their practice routines, they don’t merely hone their vocal abilities, they build fundamental skills and deepen their emotional connection to music. Here’s a look at how singing can improve your overall musicianship.
A BETTER GRASP ON PITCH, RHYTHM AND HARMONY
Renowned vocalist and vocal coach Jaime Babbitt has sung with legends like Barbra Streisand, Willie Nelson, Leon Russell and Miley and Billy Ray Cyrus, as well as on hundreds of national TV and radio spots for major brands. She is a sought-after lecturer and educator and the author of the book Working With Your Voice: A Career Guide to Becoming a Professional Singer. Babbitt feels strongly that singing enhances pitch accuracy and intonation while also fostering a deeper rhythmic awareness.
Jaime Babbitt.
“From a rhythmic standpoint, it can open one’s mind a lot, no matter what type of instrument they play,” she says. “If they play a chordal instrument, there are times when keeping both vocal and musical rhythms steady is tough and takes practice, but boy, does it solidify your polyrhythmic chops.”
For musicians who play chordal instruments like piano or guitar, singing can deepen an understanding of melody and harmony, even unlocking new songwriting possibilities. “I tell my voice clients it would behoove them to learn a chordal instrument, as I believe it solidifies their relationship to pitch,” Babbitt explains. “Why wouldn’t the converse be true for instrumentalists?”
MAKING A DEEPER CONNECTION WITH MUSIC
Singing isn’t just about hitting the right notes — it’s about connecting with the heart of music itself. “Singing is of the most emotional acts one can perform in this life,” says Babbitt. “Look at the place singing has held throughout history, from one culture / era / epoch to the next. We sing for joyful occasions, sorrowful occasions and everything in between!”
By tapping into the emotional power of singing, you’ll infuse your playing with greater depth and expression, and you might even open a path to more meaningful storytelling in your songwriting.
GREATER CONFIDENCE
Does singing improve stage presence? “I think that depends on the person,” says Babbitt. “For some, it can be a distraction, especially if their instrumental chops have been around far longer than their singing chops. That might be more anxiety-producing than anything. For others, having another avenue of expression can be fiercely liberating.”
According to Babbitt, the degree of improvement comes down to three factors: How much time you can devote to practice, what your realistic commitment level is and where your financial comfort level is with regard to hiring a vocal coach.
USING THE BODY AS AN INSTRUMENT
Being able to conjure notes with your body requires a different skillset — and a different mindset — than playing notes on an instrument, so embrace a beginner’s perspective.
“From my experience with musicians, just because they can play the notes doesn’t mean they can always sing the notes accurately,” Babbitt explains. “When you try to intonate yourself physically, it’s a process happening inside your body, versus using, say, a violin bow. Without the muscle memory of knowing how to use your body to form pitches — how you physically have to do a million things to produce a particular note — you have to get used to that to produce sound with your body.”
Babbitt adds that those who play non-fretted or non-keyed instruments — strings or trombone, for example — tend to have a more fluid relationship to vocal pitch. “They should try not to be surprised if there’s a bit of sliding around the pitch!”
Because of bone conduction and body resonances, your voice sounds different inside and outside your head, which can be a psychological barrier. “Musicians often don’t like the timbre or sonic quality of their recorded voice compared to the voice inside their own heads,” says Babbitt. “Vocalists don’t always like it, either, believe me! It’s just that they’ve had so much more practice getting used to it.”
Getting comfortable with the sound of your voice from every vantage point means spending time actively listening to both your “inside” voice and your recorded voice. This is where having a good vocal coach/teacher can really make a difference, according to Babbitt, especially with regard to healthy, efficient and in-pitch sound production.
INCORPORATING SINGING IN PRACTICE
If you’re new to singing, start with basic vocal exercises to familiarize yourself with your vocal range and capabilities. Breathing exercises, pitch-matching exercises and vocal warm-ups can help you establish a solid foundation for vocal development.
“Alternate playing a line, then singing it,” Babbitt suggests. “If that’s challenging, start with an ear-training app that matches pitches. Many apps will record you so you can start to hear when you’re closer or farther off.” Then move to interval training, singing the root to the second, root to the third, root to the fourth, etc. “Find mnemonic devices by associating songs you know that contain those intervals,” Babbitt advises.
Experiment with playing and singing simultaneously to get comfortable with pitch relationships, sharpen coordination and dexterity and improve improvisational skills. “Just as Ella Fitzgerald was an instrumentalist, I think musicians can become like Ella!” Babbitt says. “If they play chordal instruments, they can take a page from the George Benson playbook and sing their lead melodies. If they play non-chordal instruments, recording themselves playing scales and then singing over those scales can be a great exercise too.”
Vocal exercises can help wind players improve their breath control, stamina, tone and phrasing. Babbitt’s favorites are called SOVTs: Semi-Occluded Vocal Tract exercises. These include straw phonation (making sound through a straw), lip and tongue trills, and humming. “They’re the best things that ever happened to me and to my own vocal practice and I swear by them,” says Babbitt, who also recommends taking advantage of free online resources such as ear-training apps, singing apps and beginner tutorials. She suggests singing along to karaoke tracks using the free Transpose Chrome plug-in to vary the pitch of any YouTube video, and she’s a big fan of yoga and meditation. “Everyone thinks yoga is great for flexibility and longevity, and it is, but ultimately, it’s about the breath,” she says. Working with a coach can accelerate your progress and ensure that you’re practicing effectively.
FOCUS ON THE POSITIVE
Finally, focus on the positive. “People are so easy to point out what they are bad at,” Babbitt says. “They’ll sing a song, and then we’ll talk about it and they’ll go right down the list of what sucked. I urge them to always look at what they’re doing well because that’s what you’re going to learn from. When you’re doing something like singing, which requires muscle memory, if you do something that that wasn’t good, why would you keep reinforcing it? Look at the things that you’re doing well and capitalize on that.”
Incorporating singing into your instrumental practice isn’t just about mastering a new skill — it’s about realizing your full potential as an artist. With dedication and practice, you’ll harness the transformative power of your voice, build confidence and reach new levels of musicianship in the process.
Award-winning musician and educator Jeremy Bartunek has released two full-length albums and co-composed five musicals. But perhaps his greatest accomplishment happens when a struggling child overcomes performance anxiety because of his leadership.
Bartunek, who directs the children’s choir for grades 1 to 5 at Greenbriar School in the Northbrook 28 school district located north of Chicago, became concerned about how many students he saw who became terribly anxious about performing in the winter concert. Even though they were recruited to do this every year in December, these kids felt pressure and experienced social anxiety about performing for an audience of other kids. They would seek soothing from the social worker or just stay home on concert day. It clearly wasn’t a sustainable situation.
“It was not good or healthy,” says Bartunek, a quarterfinalist for the2024 GRAMMY® Music Educator Award. “¬¬So many kids were physically unable to perform in front of their peers ¬¬— it was burning out the social worker and the school counselor.”
Knowing that the fear stemmed from a lack of confidence, Bartunek knew that he needed to work hard to earn the children’s trust. That trust would help him foster confidence in his students as the semester unfolded in a new school year.
“The last thing anyone wants is to have kids having panic attacks in the school counselor’s office on the day of the show,” says Bartunek. “I’m trying to identify them early.”
Stage fright stems from different reasons, such as students’ inherent personalities, their home life and past experiences. The key is to treat them well. “I foster an environment of respect — throughout my kids, throughout my classroom,” Bartunek says. “I respect them as learners. Even when they see me walking through the hallways, I am always setting an example.
Playing Games
Bartunek likes to use playful games to connect with children. For example, instead of reading books silently, he has students sing the words to the book out loud with expression — just like reading a book out loud, but with singing.
“Working through that process gives kids confidence so they realize that they know what they’re doing,” Bartunek says. “Some kids are stronger readers than others, but they all know how to read.”
Bartunek, who was recognized as a Yamaha “40 Under 40” music educator in 2024, extends this melody-tinged speaking to conversational singing, which is fun. He will sing, “Hello, how are you?” in any tune, instead of saying the words, and the kids respond in kind. That often gets them laughing, which put them at ease and helps them develop their musical sense.
“My goal is to have kids singing for 80 percent of the class period,” he says. “That’s where your musicianship comes from: your singing and your ear.”
Preparation
Bartunek finds that preparing students for performing and talking them through their fears is a good way to help them cope.
“I tell them ahead of time: ‘You’re going to do this in front of your peers and you might be nervous. How do you feel?’ And I work with them,” he says.
“They know they are in a safe space,” says Bartunek, who is working on a doctorate degree in musical arts from Boston University remotely. “We acknowledge their feelings and discuss them. I’ll say: ‘What does that feel like? That is an interesting feeling, isn’t it? Does anyone else feel that way?’ That way, students find out that other kids are in the same boat.”
Anxious kids often ask Bartunek: “Can we just sing in front of you?” But that’s not a good idea, he says. Students may sound great in private with him, but they still are unable to get up on stage and perform in front of their peers, so one-on-one practices do nothing to solve the problem.
Bartunek’s techniques have worked well. This year, out of his 5th grade class of 60 students, every single one of them tried out for a singing solo in the musical, and many of them are involved in his “Something More” chorus. This group of about 45 students in 4th and 5th grade are highly committed to after-school music rehearsals and performances around the community at least once a month.
“At the end of the day, I want everybody to be on stage and singing,” Bartunek says. “I know that not everyone is going to be a star, but if I can give them the courage and desire to get up there and try their best, then I’ve done my job.”
Teaching Philosophy
Bartunek, who received a Golden Apple Award for Excellence in Teaching in 2020, is passionate about nurturing the inner musician in each child, which is very important in elementary school because only some kids take music electives in middle school and high school. “Every person is musical; everyone can do it,” he says. “I believe that the best musicians should be teachers, and the best teachers should teach the youngest students. The early childhood years are so important. There is a chance that for the six years I have with these kids, I’m the only musical influence in their lives.”
According to Bartunek, there are four things that students need in music class: well-trained minds, well-trained hands, well-trained ears and well-trained hearts.
“All four of these things need to be developed in young children — everything follows from that,” Bartunek says.
I have been teaching junior high band in the public school system for 12 years. In that time, I have discovered what it takes to be a strong leader in my classroom while also having a deep understanding of the students in front of me. Here are five specific points that highlight essential aspects of being an effective director.
1. Embrace the Daily Grind: A Labor of Love
Teaching band is not for the faint of heart. Many music educators enter the field because we have a passion for playing our instrument, and we want to pass that on to our students. However, when you are in the day to day of the job, you realize that sometimes this is the smallest part of what you do. I recently told a student teacher, “This job is a daily grind. It is hard, but the end result can be worth it.” Their response, “That isn’t very encouraging.”
They aren’t wrong, but it is reality. From early morning rehearsals to late-night planning sessions, our dedication to fostering a love for music is what sets the foundation for success. Young music educators or those considering the field must recognize that it takes a lot of hard work, and it is this consistent effort and passion that you invest in your students that makes a lasting impact.
2. Discover and Refine Your System
Every successful director understands the importance of having a system. This has nothing to do with lesson plans and rehearsal schedules. It’s about understanding your students’ needs, creating a positive learning environment and setting clear expectations. First, take time to discover what methods work best for your unique group of students — it could be a specific teaching technique, rehearsal structure or communication strategy. Then, refine your system to maximize efficiency and create a cohesive learning experience for your students.
Here are a few examples of what I do:
Communicate in various languages. I get much more involvement from families if I reach out in a language that they are comfortable communicating in. ChatGPT and Google Translate have come a long way. Sure, there are a few grammatical errors, but these provide a fantastic starting point.
The daily expectations remain the same. Every. Single. Day. Yes, even during what I call the “dark days” of January/February.
Provide the pencil. How many times do we fight students on supplies? If it is the expectation and your student population does not meet it, provide it. If it is that important to you, make it happen. Show them with your actions that you are serious. Rehearsal does not start until a pencil is on every stand. Trust me, they will learn.
Keep your personality in your classroom. Do I do a daily pencil check? Yes. Do I sometimes put on the opening ceremony theme for the Olympics and slowly raise a pencil and wait for all students to do the same? Yes. I still require the pencil, every day.
3. Consistency is Key: Stick to Your System
Once you have identified a system that resonates with your students and enhances their musical development, consistency becomes paramount. Students thrive in an environment where expectations are clear, routines are established and the director’s approach remains steady. While it may seem tempting to experiment with new methods, resist the urge to constantly reinvent the wheel. The wheel is fine — you know what works, so just do it. Sticking to your tried-and-true system not only fosters a sense of security for your students, but it also allows them to focus on honing their musical skills without unnecessary distractions.
What’s that you say? You just went to a conference, and you are all fired up to completely change your program, which you know will be the key to what you consider success? Stop, look at what you currently do and pick one item to change. That is the only item you change this school year. Reevaluate in May.
You must give change time to settle in and then look at the results, good or bad. You wouldn’t receive an antibiotic from a doctor and not finish the full dosage. I suggest six months minimum of consistency before revisiting the decision/implementation.
Here’s a true story: Three years ago, I took a look at “Important Ingredients: A Daily Warm-up and Development Method for High School Symphonic Bands.” I quickly realized that younger students could do this as well. Why did I pick this particular method book? One of the best directors in my area not only wrote it, but he implemented it into his program. When someone is consistently going to the top festivals in your state and being recognized, it speaks for itself. “Important Ingredients” is a 24-page packet of everything your students need to reach an extraordinarily high level of musicianship. My 8th graders are playing scales with just intonation and every single student could tell you how they need to adjust the scale degrees. We have been working on it since August. Each year, I add in one — yes just one — more exercise for daily or weekly focus for every grade. There is a major (and minor) scale sheet in the book that breaks down scales. You must read the director companion to understand it is meant to be read vertically measure by measure instead of left to right. Is it hard? Extremely. Are my 6th graders already reading key changes better than my 8th graders? Yes. When they become 8th graders, I can only imagine their potential.
4. The Ensemble is a Mirror: Understand Your Impact
When I assess my career in music education, I always have one specific phrase in mind, which one of my mentors, Brian Wis, shared with me: “An ensemble is a direct reflection of the director.” Every single thing — from classroom management to how our students play — is on us. This is a lot, but it’s also amazing. We have complete control over the outcome of our group. Don’t believe me?
I used to be a yeller in the classroom, I was very quick to raise my voice. When I transitioned to a new school where I was the head director, I kept a piece of paper on my stand that said, “Don’t get louder, get closer.” That piece of paper stayed on my stand for three years. It was a daily reminder to pause and react differently. Now, I have a different reminder on my stand that says two things: “Be the awesome teacher they expect you to be EVERY DAY” and “If they are not engaged, DISENGAGE.” This helps me stop when the students are off. Before, I would continue speaking and teaching even when the students were off track. Remember, from students’ playing ability to how they enter your classroom is on us.
It is essential to recognize that your ensemble is a direct reflection of your leadership. The mindset you bring to rehearsals, the expectations you set and the passion you convey all contribute to the overall success of the ensemble. Understand that the collective sound and performance of your students are indicative of the guidance and inspiration you provide. Accepting this responsibility can be challenging, but it’s a crucial aspect of being a strong director. Embrace the opportunity to positively shape the musical journey of your students and take pride in the growth and achievements of your ensemble. Students see it, too, and it matters. We don’t have to be perfect and we don’t have to be the total package right away — we just have to work at it consistently.
5. Mindset Matters
In just about everything in life, mindset plays a pivotal role in shaping the overall experience. Some music teachers may struggle to accept that the ensemble’s success is a direct reflection of their mindset. Have there been days where you were upset and came into the band room in a foul mood, and your students gave it right back to you? Have you ever been upset that your partner didn’t unload the dishwasher? Were you passed over for a district leadership team position? Did you take it out on your kids? Sounds ridiculous on paper, and we would never plan to do this, but these things do happen. This is the difference between students who have trouble managing their emotions because of their age and teachers who should be managing their emotions.
Cultivate a positive and growth-oriented mindset, not only for yourself but for your students. Encourage a culture of continuous improvement, where mistakes are viewed as opportunities to learn and grow. Foster a supportive community within your band, where each member feels valued, and the pursuit of musical excellence becomes a shared goal.
The journey of a music educator is marked by dedication, consistency and a profound impact on students’ lives. The ability to find joy in the routine and accept the challenges with resiliency is what defines a strong director. So, embrace the daily grind as a labor of love, discover and refine your unique system, and understand the profound connection between your mindset and the success of your ensemble.
As we have discussed throughout this series, music programs in high-need schools serve as anchors for creativity, discipline, community, collaboration and musical excellence. We also know that resource allocations and student demographics continue to shift, so sustaining these programs is a challenge. Music education at its core is about fostering creativity and strategic thinking. In the final article of this series, I urge all music educators to prioritize sustainability in all music programs, particularly within high-need schools. Please consider the following best practices as we highlight indicators that ensure music program longevity and sustained success.
Be Adaptable
One thing we know is that change is constant. Rather than be in a position where we must react to changes in our school, administration, students or larger community, we should watch trends and plan for numerous combinations of possible futures. By educating ourselves on the social, political and economic factors that directly impact our schools, we can become proactive and use these shifts to sustain our programs. By posting open forums to community stakeholders, offering listening sessions for our colleagues and parents, and elevating student voices within the organization, we can help our programs move forward even in times of change and uncertainty.
I have recently seen music programs create their own governing boards, create succession plans and develop resources for emergency operations all in order to “future-proof” the organization. Seth Pendergast explores the structural, interpersonal and intrapersonal factors that can contribute to program sustainability in his article “Understanding Participation in Secondary Music Classes: A Literature Review.” These and other strategies can help music teachers feel confident that when they leave their program, there is a blueprint in place for future teachers to access for continued success.
Empower Students
Though I credit much of my initial professional development to my alma mater, Florida A&M University, it was actually in various leadership positions while in high school at Columbia High School in the metro Atlanta area where my spark for teaching was first ignited. Every time we approach the podium, we have the opportunity to empower our students to lead in numerous ways. Whether it was serving on committees for different aspects of the program, leading rehearsals and conducting at concerts, or developing our motto or mission statement, my high school and college directors prioritized placing us at the center of the operations of the program. That’s why I tried to do the same with my students. We never know how those experiences can change students and spark their interest in someday becoming a music teacher. National Association for Music Education (NAfME) recently released “A Blueprint for Strengthening the Music Teaching Profession,” which details the major phases of music teacher recruitment, training, placement and support throughout the early years of working in the profession. We as teachers stand in a critical position to inspire the next generation of music teachers.
Another vital aspect of student empowerment comes through engaging in our own continuous improvement. When we listen, have discussions with our students and use their feedback to lead substantive change, we show how much we value them not only as musicians, but as people. These interactions serve as the foundation for effective peer-to-peer learning and authentic approaches to program improvement that can increase engagement and enhance student achievement.
Exceed Expectations
One of the goals I had for myself as a K-12 teacher (and it remains a goal for me) was to always “over-deliver” and exceed the expectations of our community stakeholders. I would take time each year to assess my program, see how we were excelling, and research what other programs in our district and around the country were doing that we could incorporate. Then, I would share my ideas with my students and parents so that they could see what the next level of success could look like for us, so long as we were willing to work for it as a collective. My students and parents would sometimes show me what other local programs were doing or places they were going, and we would work together to create vision boards and discuss how we could pursue and achieve it.
Having buy-in from the community and school administration, along with equity among students and parents through shared decision-making, can help to fuel even greater success. I believe that my students and parents always had their sights set on what was next, and this energized me to continue to strive for the highest in musical excellence.
_____________________________
Sustainability is not merely a goal, but a journey toward ensuring that music programs in high-need schools thrive and enrich the lives of students for generations to come. Throughout this series, I have attempted to highlight best practices in recruitment, retention, fundraising, teaching, learning, musicianship, access, diversity and community building. I know that each of our schools can create vibrant and inclusive music programs that adapt to change, empower students and exceed even our highest expectations for success all while instilling a lifelong love for music in our students. Let us commit ourselves to sustainability through our work as music educators as we continue to mold minds, move hearts and change lives.
On a recent vacation in Bali, the manager of the resort I was staying at surprised me one night by asking if I would perform a few songs, impromptu, for the guests at the beach restaurant.
The resident performer handed me his guitar. I sat down, adjusted the microphone height, and got ready to launch into a few of my favorite tunes … and then it dawned on me that the strings were unplayably high up off the fretboard (some were rusty too) and the intonation was way off, yet I was now obligated to perform for everyone.
In these scenarios, all you can do is figure out a way to simplify chord voicings, shorten the song length, and smile through the pain and dissonance. There are also times when you inherit a guitar from a friend or relative, find one at a pawn shop, or play a brand new one that just isn’t set up the way you’d like it to be.
In this posting, I’ll tell you about some simple adjustments that can make any acoustic guitar really nice to play. A couple of caveats, though:
These steps have to be taken ahead of time. There’s really nothing you can do in the short term to remedy rusty strings, high string action or a less than optimal neck; and
If in doubt as to your fix-it abilities, I strongly suggest having any work undertaken by a professional luthier.
1. Adjust the Action
A guitar action refers to how close the strings are to the fretboard. If the action is too high, it may take an inordinate amount of effort to press the strings down, thus making the instrument virtually unplayable — especially if you’re a relative newcomer and have not yet developed sufficient hand muscle strength. If it’s too low, some notes may buzz or may not ring out correctly. The optimum is somewhere in the middle, though some players (especially beginners) prefer that the action be set as low as possible.
If the action seems off, start by looking down the neck from the headstock to the bridge saddle on both the bass side (i.e., where the low E string is) and treble side (high E string) of the neck. Luthiers call this sighting the neck.
Neck sighting (bass side).
Neck sighting (treble side).
Check to see how much space (“neck relief”) there is between the strings and the fretboard. Ideally, the neck will be relatively straight, with a tiny amount of concave relief. This will allow the strings to be fretted everywhere along the fretboard without buzzing. Place a capo at the first fret, then place your first finger on the sixth string (low E) past the last fret. With your other hand, tap the middle of the string to see if there is a small space between the bottom of the string and the tenth fret. This will determine if there is enough concave relief on the neck to allow the strings to vibrate freely.
If, however, you see a large concave bow away from the middle of the strings, there’s too much relief and you’ll have to add tension on the neck to alleviate the problem. If the bow is convex and touches the strings, you’ll need to relieve tension on the neck so the strings won’t buzz and rattle against the fretboard.
These adjustments are made by adjusting the guitar’s truss rod, a metal rod that runs inside the entire length of the neck and fretboard. Depending upon the model of acoustic guitar, Allen key truss rod adjusters are located either inside the sound hole, at the headstock under the plastic cover plate above the nut, or less commonly, at the heel of the neck.
Truss rod adjuster inside the sound hole.
Truss rod adjuster under the headstock cover.
Turning the truss rod clockwise will straighten a concave bow by adding more tension to the neck, while turning the truss rod counter-clockwise will relieve a convex bow and reduce tension. Note that these adjustments have to be made very slowly, no more than a quarter turn at a time, or you risk doing permanent damage to the guitar neck. Again, if in doubt, give this task to a qualified luthier.
2. Adjust the String Height
Even if the neck is straight, the strings might be too high. Ideally there should be just enough space between the strings and fret wires to slip a regular business card between them without sticking.
Guitar nut slots are sometimes cut to allow for rattle-free fretting of chords in open position, but in my experience, this can make the action too high. If necessary, a luthier can re-cut the nut to adjust string action. (This is not a do-it-yourself job!)
It’s not uncommon for the string action at the bridge to be set too high for most players. Of course, this depends on your hand strength, playing dynamic, the thickness of the string gauge and the type of music you play. (Bluegrass players, for example, often prefer higher actions.)
The good news is that the bridge saddle simply comes out of the bridge housing slot, enabling a luthier to sand the underside of the bridge, reducing its height until a desirable playing action is obtained. The bridge saddle string slots can also be re-cut to accommodate larger string gauges. (Again, these are not do-it-yourself jobs.)
If you are reducing the string gauge (see below), sometimes a new saddle or nut blank can be cut to replace the existing saddle and nut.
3. Put on Lighter Strings
It’s true that heavier strings (i.e., those with larger gauges) will give you more volume, and subjectively, better tone. That said, I have found that the string gauges used on most acoustic guitars (usually 12-53 or 13-56 gauge) are way too heavy for beginners or finesse-based players. Lighter-gauge strings will also have a lower tension to them and often allow you to set your playing action a little lower.
I want to play my guitars, not fight them, so I choose lighter-gauge strings for my acoustic guitars. Personally, I like 11-52 gauge phosphor bronze strings. I think choosing ease of playability over volume and tone is the best way to go … at least to begin with.
4. Adjust the Intonation
Intonation refers to the accuracy of tuning across all strings at all frets. A well-manufactured acoustic guitar should have perfect (or at least good) intonation right out of the box.
However, if you’ve changed string gauges as suggested above, you may find that the nut and saddle slots need to be cut in order to compensate for any intonation discrepancies. Again, this is a job for a luthier.
You should make a point of telling the luthier what string gauge you’d prefer prior to any work being done. That way, they’ll adjust everything based on the string gauge, nut and saddle heights you prefer. I even tell my luthier how gently I play the guitar and ask them to set everything up to accommodate my light playing touch.
5. Check the Tuning Pegs
Check that the tuners are working properly by tuning each string up, and then down again. You’ll want the strings to stay in tune without slipping, and to be able to finely adjust the tuning of each string in small, smooth movements.
If the strings slip out of tune, it may be that the tuning peg itself needs replacement, but quite often it could just be an insufficient winding of the string around the post. Check out this blog posting and video for more information.
The Video
In this video, I layer four distinct guitar parts on a Yamaha FSX3, much like that of a looping performance. Each part was recorded direct to my DAW (Digital Audio Workstation), demonstrating the sonic versatility of the instrument.
Note how my right-hand finesses the strings with light spreads and percussive subdivisions to accent each chord change. I also wanted to define the bass movement in each chord, so I added a simple bassline on the low E-string using sixteenth notes.
The third, arpeggiated guitar part utilizes chord fragments from the first guitar part … proving that even the most basic overdubs can be extremely musical.
The melody line is a simple melodic motif using the C major scale, making sure that the melody line resolves to the chord tones of the last chord within the progression (G major).
The Guitar
I’m a huge fan of Yamaha Red Label Series guitars — in particular, the FSX3 model. Its concert body size is perfect for me, allowing my picking hand to rest comfortably on the lower boutof the guitar without stress to my shoulder.
Yamaha FSX3.
In addition, the satin-finished neck of the FSX3 is slim and fast, giving a similar feel to that of my electric guitars. This allows me to transition between acoustic and electric with minimal adjustments to my fretting hand.
The solid mahogany back and sides, combined with the solid spruce top, provide clarity and warmth for both strumming and fingerstyle playing. Red Label guitars are treated with the proprietary Yamaha A.R.E. treatment (Acoustic Resonance Enhancement), allowing the tonewoods to resonate freely, much like that of an older, played-in instrument.
Acoustically, the FSX3 creates a wonderful volume balance between the guitar and my vocals. What’s more, its Atmosfeel three-way pickup system combines a body sensor, microphone and piezo undersaddle pickup to create extraordinary plugged-in acoustic tones.
FSX3 Atmosfeel controls.
The Wrap-Up
Sometimes we find an acoustic guitar sitting in the corner of a second-hand store, or in the attic of our parents’ house, that seems at first glance to be unworthy of our time or effort. Yet small body cracks, missing binding, and aesthetic wear and tear usually won’t affect its tone or playability. And with the right attention to specific details and a little tweaking (possibly with the assistance of a qualified luthier), even the roughest diamond in the rough can often be restored to its former glory and become one of your go-to instruments.
I’ve often struggled with my health, particularly during stressful times. I also noticed that the least healthy periods of my life occurred when I was starting or changing jobs. At the beginning of my teaching career, I was in what I considered a healthy spot, but I quickly resorted to eating poorly, giving up exercise and not taking care of my mental well-being. This pattern followed me in all my subsequent job changes. The positive outcome of realizing this pattern? With some healthier habits, asking for help and keeping myself in check, I could get back to a place that was both healthier for me and beneficial for those in my charge.
Below are five tips to keep your health in check during your teaching career.
1. Failing to Plan is Planning to Fail
Teaching and leading extracurriculars or coaching is demanding. Without a solid plan for meals, exercise and mental health, it’s easy to fall into unhealthy habits.
Meal prep and fast-food options: I couldn’t always afford to live in the town where I taught, so I often had long drives to and from school. Meal prepping became a lifesaver, particularly with my long commute and after-school rehearsals. The convenience of having a healthy meal ready meant I was less tempted by fast food (and it was easier on my wallet). However, when things were stressful and being so far from home, I didn’t have the option to turn around if I forgot my lunch. So, I made sure to create a list of menu items from local restaurants and fast-food chains as a “just-in-case.” For me, this consisted of Jimmy John’s Unwiches or high-protein, low-carb meals. This little emergency plan helped me avoid dietary pitfalls and maintain my energy levels throughout the day.
Ask for help: I also helped myself by looking at my schedule each week and determining whether I could actually get all my work done. If not, I did the toughest thing I could imagine: I asked for help. Students, music parents, friends, etc., were always willing to help as long as I was clear with my requests. This had the added benefit of building some positive connections. This planning kept me from scrambling at the end of the week.
2. Finish Your Medicine!
I had a position once where administrative issues were consistent. During this stressful time, I contacted my school’s employee assistance program and scheduled some therapy sessions. Just when I thought I was “fixed,” I would stop only to be in the same boat a few weeks later. I learned that following through, and maybe even going to a few extra sessions than I thought I needed, helped me truly understand the ebb and flow of my stress, anxiety and mental health. So, when you think you’re on top of things, stay the course just a little bit longer. And, a little routine maintenance every once in a while never hurt anyone.
3. Establish Boundaries and Stick to Them
I’ve experimented with setting boundaries and found a lot of different things. Sometimes I was public with my boundaries, which allowed others to support me, but there were some people who wanted to test me to see if I really meant it. Other times, I kept my boundaries private, which was easier at times because I didn’t have to explain myself. Yet, some people wanted to dig in to find out why I was making a certain choice when it came to my time. You will find out what works for you at your specific time in life and school.
My first boundary was based on that phrase that some of us heard growing up: “The bell doesn’t release you; I release you!” I was never a fan of this, as this wasn’t how scheduling worked for me. My desire to finish the “perfect phrase” is not more important than a kid getting stressed out about being late to the next class. So, I started setting a boundary of only working during my scheduled contract time or specific scheduled times for my stipend/extracurricular work.
Try this: Make rules and schedules and stick with them for a week. You may be surprised at how efficient you can be. Or, you may be surprised to find that there are some items that just don’t get done and can wait until the next day or even the next week. I always rushed to answer emails from my administrators to show them how good of a communicator I was. I then realized that the good administrators understood that my job was teaching, which always came first. If I responded to them in 24 hours, or even if I sent an email that stated, “I’ve seen this message and I’ll respond tomorrow,” it was always understood.
4. Too Much, Too Soon
Would you rather succeed at one item or fail at three? If you are attempting change, chances are it’s much harder to handle multiple items. As teachers, we believe we can do it all! However, we don’t want to get burned out, and becoming disappointed or stressed can have a negative snowball effect.
During my first year of teaching, I had a goal of being healthier and I did not meet this goal. I focused on three main goals: lose weight, gain strength and change my eating habits. Those are three substantial goals! As you can imagine, I lasted maybe a week before failing at all three.
Consider gradual change. “I will take a walk outside or on a treadmill for 10 minutes per day for 20 days.” That’s it! It may not seem like a lot but imagine the state of mind you’ll be in on day 20. I would bet that you would then be in a stronger position to add “eat one healthy meal per day for 10 days.” And so on.
5. Go Away!
You can’t miss something if you’re always there. My schedule left little time to relax at home because I was often at school. I found some balance in stepping away from school during breaks, either driving to a quiet spot or taking a walk. Other times, I took a day or two each month to schedule some coffee visits with friends or phone calls with mentors during the time in between school and a rehearsal. These times took some effort to set up, but I found myself a little more recharged after I stepped away from my classroom. It’s easy to get excited about teaching and all the possibilities, but we have to take action to protect our passion from burning out.
The Takeaway
Our health is important, but taking care of ourselves is a time-consuming task, and it can be especially stressful when we feel like we have to do so much work. Many health issues don’t happen overnight, and the same can be said for improvement. With some planning, patience and perseverance, we can be in a healthier place for ourselves and those in our charge.
String players in classical music — most notably, violinists — have been using harmonics for hundreds of years. More recently, acoustic guitar players like Lenny Breau and Tommy Emmanuel have employed harmonics with great sensitivity and melodic imagination. And ever since Jaco Pastorius set the bass world on fire in the 1970s with dazzling harmonics in songs like “Portrait of Tracy,” “Okonkole y Trompa,” Weather Report’s “Birdland” and Joni Mitchell’s “Coyote,” bass players have used these bell-like tones to add sparkle and spice to their lines.
NATURAL VS. ARTIFICIAL
Natural harmonics are chime-like sounds that occur at the halfway point of each string — on bass, that’s the 12th fret — where you’ll find a “node,” a spot on the string that doesn’t vibrate. It’s the same note as the open string, only an octave higher. Dividing the string again, the node at the seventh fret gives us a note that’s an octave and a fifth up from the open string. (On the G string, that’s a D.) Finally, the fifth fret produces a note two octaves up.
There are many places to play harmonics, but some of the strongest harmonics begin at the third fret and occur at odd-numbered frets. Many basses, including all Yamaha models, have fret markers at the third, fifth, seventh, ninth, 12th and 17th frets, which are great spots for harmonics. The illustration below shows the most robust and commonly used natural harmonics on a five-string bass. The patterns repeat beyond the 12th fret: The 15th and 19th frets have the same harmonics as the third and seventh frets, and the 17th fret mirrors the fifth and 12th frets.
Natural harmonics at the third, fourth, fifth, seventh, ninth and 12th frets.
Natural harmonics happen on open strings, whereas fretted notes that produce harmonics are called artificial (or “false”). To play a natural harmonic, touch the open string lightly at the desired fret, as shown in the video below of me playing a Yamaha BB435 five-string bass:
To produce artificial harmonics, fret any note, then tap or “pinch” the same note on the same string an octave higher (12 frets away), as demonstrated in this video by Yamaha Artist Billy Sheehan playing his signature Yamaha Attitude Limited 3 bass. (Billy also demonstrates the technique at the beginning of this video.) The great thing about artificial harmonics is that you aren’t limited to natural nodes — you can generate them anywhere on the fretboard.
TUNE UP
Many bass players use natural harmonics at the fifth and seventh frets to get in tune. If you’ve never done it, try it! It’s easy and reliable.
As shown in the video below, start by using a tuner to make sure your G string is in tune. When you’re ready, place your fretting-hand index finger on the G string directly on top of the seventh fret. Press lightly while playing the note with your picking hand. You’ll hear a D harmonic. Now play the fifth-fret harmonic on your D string, which is also a D harmonic, and tune your D string until they match without hearing any audible beating between the two tones. Do the same on the rest of your strings: Tune the seventh-fret harmonic on your D string to the fifth-fret harmonic on your A string, and then tune the seventh-fret harmonic on your A string to the fifth-fret harmonic on your E string. If you have a 5-string, tune the seventh-fret harmonic on your E to the fifth-fret harmonic on your B.
With a little practice, tuning a bass using harmonics becomes easy, and it’s especially useful if you’re playing alongside a piano that’s out of tune: Simply tune the A at the seventh fret of your D string to the piano’s A below middle C, then tune the rest of your instrument to match.
Dead strings and too much low end get in the way of clean, chiming harmonics, so don’t hesitate to put on fresh strings and dial in some highs; if your bass has two pickups, use the bridge pickup when tuning.
Here’s a video of a short improvisation played on a Yamaha TRB bass that uses natural harmonics with fretted notes in-between. (While Yamaha no longer makes the TRB, the TRBX is its contemporary 34″ scale cousin.)
LISTEN AND EXPERIMENT
Now that you’re familiar with harmonics, listen to how innovative bass players like Victor Wooten, Squarepusher, Randy Coven and Alain Caron have used them, and then marvel at how a violinist like Hilary Hahn employs harmonics in an orchestral setting.
As you begin to explore, listen for the many other, more subtle harmonics available on your bass, in addition to the natural ones shown in the illustration above. An easy way to find them is to simply move your fretting-hand fingers lightly over a string while playing with your picking hand. You’ll discover that you can play each open string’s major triad — for example, D, F# and A on the D string — by playing at the fifth, fourth and third frets, and again, at the 12th, ninth and seventh frets. Finding the distance from a harmonic to its matching fretted note can help you map harmonics on the fretboard. At the fourth fret, for instance, the harmonics are a fifth away on the next highest string. Try playing two or three harmonics at once to form ringing chords. Add effects like reverb, chorus and distortion to make them really stand out. As you experiment, new sonic vistas will be revealed, and your basslines will be greatly enhanced.
Most historians agree that the piano was invented in the early 1700s by Bartolomeo Cristofori, but its lineage actually goes back much further than that — all the way to ancient times.
Let’s take a look at the long and fascinating evolution of the modern piano — one of the most popular musical instruments ever created and a mainstay of so many different kinds of music, from classical to jazz, pop and beyond.
Progenitors of the Modern Piano
The development of the modern piano can be traced to 2650 B.C., when a Chinese instrument called the ke was introduced. It had strings strung over a movable bridge on a wooden box that could be plucked to produce various tones.
In 582 B.C., Pythagóras began experimenting with musical sounds and mathematics, inventing the monochord. Some 400 years later, a movable bridge was added to the monochord allowing for increased intonation. By approximately 1000 A.D., clavis (keys) were applied to the monochord, used to prick strings on a scale division. (You can hear the meditative sound of a monochord in this video.)
Some time in the 14th century, a successor to the monochord — the clavicytherium — made its first appearance. This instrument was also played with a keyboard, but had its strings arranged in a harp-like triangle.
Although the piano is best classified as a string instrument due to the fact that the sounds come from the vibration of strings, it can also be classified as a percussion instrument because a hammer strikes those strings. In this way, it is similar to a hammered dulcimer, an instrument that originated in the Middle East around 900 and spread to Europe in the 11th century.
Hammered dulcimer.
The hammered dulcimer is a type of zither that uses small mallets called hammers to strike wires stretched across a simple resonating box. It was widely used throughout Europe during the Middle Ages and can still be heard in some modern folk music today.
Because it was the first instrument to use strings, a soundboard and hammers to produce musical tones, the hammered dulcimer is considered by many to the direct ancestor to the piano. However, there were to be several intermediate stops along the way.
The Clavichord, Spinet and Harpsichord
One such instrument was the clavichord, which first appeared in the 14th century and became popular during the Renaissance Era. The clavichord used the same stringed components of the hammered dulcimer, but it incorporated a keyboard that triggered metal blades, called tangents, to strike the strings. It had more strings than the clavicytherium (for a range of four to five octaves) and had pins fastened to the keys; eventually, a cloth was placed between the strings that acted as a damper. Lap versions of the instrument were played on tabletops while others were built on stands varying from 3 1/2 to 5 feet in width. However, because clavichords were not loud enough for large performances, they were mostly used as practice instruments or for composition.
Clavichord.
In the early 16th century, adaptations of the clavichord led to the introduction of a new instrument called the spinet, named after inventor Giovanni Spinnetti, though it was later called a “virginal” by musicians in England, often housed in an ornate cabinet. This was a longer-stringed clavichord with tangents that pricked the strings using a quill fastened to a jack. Unlike the clavichord, the spinet had no expression or way to manipulate the pressure or strength of the tone.
The limitations of the spinet resulted in numerous attempts at modification so as to obtain greater volume and depth of tone, with many European instrument makers introducing spinets in a case shape similar to that of a harp. This triangular harp-like appearance is essentially the shape of grand pianos today.
In 1521, a new keyboard instrument called the harpsichord was introduced as an offshoot of the spinet. When a harpsichord key is pressed, a quill plectrum attached to a long strip of wood called a jack plucks a string to make a sound. Its invention began as an experiment to improve the sound quality of the spinet, and its longer strings produced the desired volume, but the string plucking on the larger scale increased the intensity of the wiry and harsh tone.
Early harpsichord, c. 1521.
Later period harpsichord.
Over the years, many attempts were made to improve the sound of the harpsichord, such as lengthening its case and the use of leather buffs and stops to soften the tone. By the end of the 16th century, harpsichords with dual keyboards were introduced, making it easier to play complex two-handed musical arrangements. Nonetheless, the instrument had serious limitations. Though the harpsichord is louder than the clavichord, its volume cannot be varied: The strings are plucked with uniform loudness no matter how hard or soft the player plays, and they are immediately damped when the key is released. However, its system of strings and soundboard, as well as its overall structure, resembles that of the piano, which is why many people view the harpsichord as the immediate progenitor of the modern piano.
Introduction of the Piano
Born out of the need to improve the sound quality of the harpsichord, the piano combined many ideas that had first been tried on the clavichord and harpsichord. Inventors began adding hammer actions to restore the smooth tone of the clavichord on the frame and case design of the harpsichord, but the individual generally recognized as the father of the piano was renowned harpsichord maker Bartolomeo Cristofori, whose gravicembalo col piano e forte, or “harpsichord that plays soft and loud,” was unveiled in 1711. Eventually, the name was shortened to fortepiano or pianoforte, and then, finally, piano.
The first pianos were actually very similar to a harpsichord, with one crucial difference. In a harpsichord the strings are set into motion by plucking (as in a guitar) and the loudness of the resultant sound is independent of how forcefully a key is depressed. In a piano, the strings are struck with a hammer and Cristofori invented a clever mechanism (called the piano “action”) through which the speed of the hammer and hence the volume of a tone is controlled by the force with which a key is pressed. This allows the player to vary the loudness of notes individually — something that was not possible with the harpsichord — and gave the piano new expressive capabilities that were soon exploited by composers such as Mozart and Beethoven.
The Cristofori action.
Little is known about Cristofori’s life, but the few surviving examples of his work provide evidence that he refined the design of his piano over the years. Three of his instruments survive today and can be seen at the Metropolitan Museum of Art in New York City (shown below), the Museum of Musical Instruments in Germany, and the Museum of Musical Instruments in Italy.
An original Cristofori piano.
The first pianos were made by hand, and the music written for them was initially mostly confined to the aristocracy. However, the instrument became popular with the general public following the French Revolution in 1789, and demand increased. This led to the rapid industrialization of piano manufacturing. In addition, the music that had previously been enjoyed in the courts of aristocrats was now being performed in concert halls that were built to hold a thousand or more people. This, in turn, led to a desire for pianos with louder volume and longer sustain. The strings were strung under higher tension, and a sturdy iron frame began to be used to support them. The age had arrived when pianos could no longer be made completely by hand.
The Square Piano
In 1760, the square piano was introduced by Johannes Zumpe in London, England as a smaller alternative to the wing form design of the early grand pianos (see below). It was essentially a clavichord with metal strings, a hammer action and a reinforced frame.
A square piano.
In 1781, the position of the hammer action was changed to improve the resonance and make the sound louder (previously a downfall of the square shape). Further changes were mostly regarding the material from which frames were being made to achieve a better tone. The English makers were attempting all-iron and iron hybrid frames to allow for heavier strings and louder, more sonorous tone emanation, while German makers were devoted to traditional wooden frames, claiming the sound was too metallic and wiry when the strings were connected to an iron frame. Square pianos remained popular for the next 100 years before being supplanted by upright pianos.
The Upright Piano
Even as the square piano was rapidly rising in popularity, several unconventionally-minded inventors began experimenting with an upright piano. The first one is believed to have been made in Austria by Johann Schmidt in 1780 but the first upright with diagonal strings was introduced by British inventor Robert Wornum in 1832, and his design was to change the landscape forever. German manufacturers later improved on Wornum’s upright by building an iron frame with three strings for each note, which produced a robust sound and improved the overall tonal quality.
Since it took up less space than a grand piano, the upright piano — often elaborately decorated — quickly became popular. By 1860, nearly all square pianos in Europe were being replaced with uprights thanks to the increasingly industrialized city planning that mandated smaller, more compact pianos for urban spaces and in-home enjoyment. At around this time, American piano manufacturers began to shift their attention to developing uprights that could accommodate the square piano market. By 1880, the upright piano had completely replaced the square piano in America.
Torakusu Yamaha, founder of Nippon Gakki Co., Ltd. — later renamed Yamaha Corporation — started manufacturing upright pianos in 1900.
An early Yamaha upright piano (c. 1904).
Upright pianos continue to be a popular choice for pianists with smaller budgets and tight spaces, making them perfect for schools, practice studios, homes, and public places like cafes and nightclubs. Models such as the Yamaha U Series (the most popular upright piano in the world), as well as the YUS Series (which incorporate many features from the company’s flagship CF Series grand pianos) and b Series are held in high regard by performers, teachers and students alike, and are found in many top music schools.
A modern Yamaha upright piano.
The Grand Piano
The early pianoforte designs utilized a “wing form,” similar to that of a harp laid down horizontally. By the late 1700s, manufacturers were beginning to understand the advantages of that design for superior sound quality, volume and engineering. The grand piano came to the forefront of piano making in 1776.
The natural horizontal plane utilized by the grand piano lent itself to the best action (the mechanism of the piano that causes hammers to strike the strings when a key is pressed) and string orientation for optimum playability, volume and tone. English inventor Robert Stodard’s action created for the first “Grand Pianoforte” in 1777 set the baseline for future grand pianos. Three years later, Viennese manufacturer Johann Andreas Stein and his daughter, Nanette Stein-Streicher, improved upon the original grand piano design to create a tone so desirable that Mozart, Beethoven and other composers wrote pieces specifically to be played on their instruments. This new action combined a forceful, direct strike with a slight wisp across the string that created an elegant tone that other makers could never achieve.
When pianists began competing with embellishments such as trills or fast arpeggios, or by repeating fast passages, there was an increased need for more responsive instruments. The revolutionary new action that answered that need and made it possible to repeat notes in rapid succession was invented in 1821 by Sébastien Erard of France. His double escapement repetition mechanism was a major development, and one that is in use, in a refined form, to this very day. The Erard mechanism allowed the pianist to quickly repeat a note without having to fully release the key. Up until its introduction, when a key was depressed, the hammer rose and struck the string but was not ready for the next keystroke, until it had fallen back to its at-rest position. Erard’s invention made it possible to prepare for the next keystroke even though the hammer had not completely fallen back.
The Erard double escapement mechanism.
In 1838, Erard added to his accomplishment with the invention of the capo tasto, which was a pressure bar that increased the rigidity of the strings, providing a counter-pressure to the hammer, thus improving the tone. This bar is now standard on nearly all grand pianos today.
By about the middle of the 19th century, the principles of the piano mechanism, and the devices that comprise it, had reached a certain level of perfection. Thereafter, the efforts and goals of piano makers would turn almost entirely to improving quality. Piano strings became even thicker and were wound with wire, and as a result the overall tension also increased, necessitating their need to be strung on a cast iron frame.
Many case improvements followed. In the 1860s, English manufacturers began adding veneer to a wooden frame that was made from power machines, as opposed to the previous method of hand-planing the case to the desired thickness. This was more economic and guaranteed a consistency to the case-making that ensured quality of sound and desired acoustic properties.
A modern Yamaha grand piano.
Yamaha has a long and rich history as one of the world’s leading manufacturers of pianos. The company released their first grand piano in 1902, one of which was sent to the 1904 St. Louis World’s Fair, where it received an Honorary Grand Prize. Today, we offer a wide range of models, ranging from “baby grands” (under 5′ in length) like the GB1K, GC1 and GC2, to larger instruments like those in the CX Series (the most recorded piano in history) to stunning 9′ concert grands like the flagship CFX. (For more information, see the “Yamaha Pianos” section below.)
Yamaha CFX Concert Grand.
Key Range Expansion
The first piano invented by Cristofori had only 54 keys. Most of the keyboard music of J. S. Bach can in fact be played on the 49 notes of the first pianos, but composers soon wanted more, and instrument designers responded. By Mozart’s time in the late 1700s, most pianos had 61 notes (a five-octave range). They expanded to 73 notes (six octaves) for Beethoven in the early 1800s, and eventually to the 88 notes (7 -1/4 octaves) we have today. Liszt was the first major composer to make unrestrained use of the expanded note range and increased sound volume that resulted. (Curious as to why a piano has 88 keys, and not more? Read this posting.)
Yamaha Pianos
As mentioned previously, the first Yamaha pianos were an upright built in 1900, followed two years later by the company’s first grand piano. By the 1920s, many well-known pianists were taking favorable note of Yamaha instruments, among them Arthur Rubinstein and Leo Sirota. In 1950, Yamaha released the FC concert grand to great acclaim. Eight years later, Yamaha set up a grand piano assembly line at its Hamamatsu headquarters. By 1965, the company was producing more pianos than any other manufacturer.
In 1967, the CF concert grand piano was unveiled, along with the C3 grand. Their successors, the CFIII and the CFIIIS, were released in 1983 and 1991, respectively. CF Series concert grand models made their debut in 2010, followed seven years later by premium SX Series grand pianos.
The latest line of Yamaha pianos is represented by the next-generation CFX Concert Grand, introduced in 2022. It incorporates advanced A.R.E. wood-curing technology, along with new means of connecting joints to minimize vibration loss. In addition, its soundboard has been completely redesigned and reshaped to improve the mid-bass frequencies crucial to producing a warm, rich and resonant tone.
The player piano (sometimes called a “pianola” or a “reproducing piano”) was first invented in 1896, giving people a way to have a self-playing piano in their homes during the early and mid-20th century. Composers used a special “arranging piano” to punch individual notes of songs onto a master roll. The roll would then be used to trigger full songs on the piano, with motors instead of the human hand depressing the keys.
With the debut of the Disklavier in 1987, Yamaha took a quantum leap forward. (The term “Disklavier” is a combination of the words disk [as in floppy disk] and Klavier, the German word for keyboard; at the time that the first Disklavier was introduced, recordings were stored on 3 1/2 inch floppy disks.) A Disklavier is a real acoustic piano outfitted with electronic sensors for recording and electromechanical solenoids for player piano-style playback. Sensors record the movements of the keys, hammers and pedals during a performance, and the system saves the performance data as a Standard MIDI File (SMF). On playback, the solenoids move the keys and pedals and thus reproduce the original performance.
Yamaha Disklavier.
Disklaviers also allow the user to change tempo or key with the touch of a button, thus facilitating learning even complex piano pieces. They have been used extensively in music education, including colleges, universities, conservatories, community music schools, K-12 institutions and private studios. Yamaha has also converted numerous performances recorded by prestigious composers such as George Gershwin into MIDI data, allowing those performances to reproduced with complete accuracy decades or even centuries later.
Modern Disklaviers include an array of electronic features such as a built-in tone generator for playing back MIDI accompaniment tracks, as well as built-in speakers, MIDI connectivity that supports communication with computing devices and external MIDI instruments, and additional ports for audio input and internet connectivity — there are even streaming services such as Disklavier Premium Pass designed for the instrument.
In 2016, Yamaha introduced its seventh-generation Disklavier system, the ENSPIRE, available in numerous piano sizes ranging from 48-inch uprights to a 9-foot concert grand. There are three variations in the ENSPIRE line: CL, ST and PRO. The CL is a playback-only model, while the ST and PRO models add recording and SILENT Piano™ functionality. PRO models are also capable of capturing and reproducing up to 1,024 steps of key-on and key-off velocity articulations, as well as 256 steps of incremental pedaling.
From 2650 B.C. to 2024 A.D.— that’s over 4,600 years of development. No wonder the piano is one of the most beloved instruments of all time!
For many, the term “color guard” conjures up images of soldiers in dress uniform standing briskly at attention or marching in step.
But for many high school and college-age students, color guard is less about regimented military marching and more about creative, choreographed performances featuring dance, movement and athletic manipulation of flags, sabers and mock rifles.
Color guards are often part of high school and college marching bands, which typically perform during football season. The organization Drum Corps International (DCI) also provides an opportunity for color guards to join drum corps that compete in the spring and summer. And thanks to Winter Guard International (WGI), color guard participants get to shine independently between January and April every year, without being tethered to a drum corps or marching band — executing their elaborate routines to recorded music.
“There are great color guards that perform with drum corps and in almost every high school and college band,” says Dennis DeLucia, a member of both the DCI and WGI Halls of Fame, a judge at WGI competitions and a longtime Yamaha Artist. “But winter color guard is an activity unto itself.”
The History of WGI
According to the WGI website, its purpose is “to create a standard set of competition rules, establish a unity in judging techniques, and provide a national championship event,” but some historical context is helpful to understand how the organization came to be.
“Competitive drum and bugle corps started as a VFW and American Legion activity right after World War I, when both organizations were enjoying huge post-war enrollments,” explains DeLucia. “All the competitions were sponsored and governed by those organizations, and the rules were military-based. For example, in percussion, you were prohibited from using accessories like cowbells, maracas and tambourines, which were all deemed illegal. You weren’t allowed to use mallet percussion. You were playing on snare drum, single tenor drum, bass drum or cymbals — and that was it.”
Starting in the 1960s, many people involved in drum and bugle corps wanted to loosen the rules, which eventually led to the founding of DCI in 1972. “The first thing that DCI did was abandon all the rules set forth by the military organizations,” DeLucia says. The success of DCI helped spur those involved in winter color guard activity to form their own governing body, and in 1977, WGI was born.
WGI Structure
WGI, whose tagline is “Sport of the Arts,” is not just for color guards. It also oversees competitions in two other categories: Percussion and Winds ensembles; the former are essentially indoor drumlines, while the latter are comprised of brass and woodwinds with stationary percussion support. (DCI competitions only allow brass instruments.) The participants in these categories also perform choreographed routines, but play their own music live rather than using recordings.
The Percussion category incorporates the marching percussion and front ensemble (“pit”) components of a marching band. Winds ensembles also march but have a freer reign over instrumentation. “Winds were added a few years ago to include ensembles that wanted to use brass and woodwind instruments and feature them rather than percussion,” DeLucia says, “although many groups use grounded percussion at the back of the gym floor — timpani, mallet percussion, or a drum set.”
WGI is organized into a rather complex set of classifications. Within each of the three categories — Color Guard, Percussion and Winds — are two divisions: Scholastic and Independent. Scholastic groups are connected to high schools, while groups in the Independent division comprise non-affiliated organizations. “They are individual organizations that run their programs like nonprofits,” explains DeLucia. The Independent groups have to fundraise for their equipment, whereas the Scholastic groups can use the instruments owned by the high school to which they’re connected.
Here’s how WGI describes the various classes within each category and division:
Regional A Class – Novice programs and performers with basic skills (Color Guard only)
A Class – Beginning programs and performers
Open Class – Intermediate level programs and performers
World Class – The most advanced programs and performers
Concert Class – A Class, Open Class and World Class (Percussion only)
Most WGI participants are high school or college age. “It’s similar to DCI in that you age out at the end of your 21st year,” says DeLucia. However, there’s one exception: World Class Color Guards, who abandoned the age rule a few years ago.
Despite the different skill levels, multiple classes sometimes compete at the same event. “When I judge a WGI show,” DeLucia says, “I might judge eight A Class Scholastic, six Open Class Scholastic, four World Class Scholastic, and three independent classes.”
WGI Judging
Each WGI category has its own set of rules and judging criteria. Generally speaking, judges look for factors such as quality of sound or movement, overall presentation, complexity of equipment or instrumentation, and visual effect.
The factors that judges evaluate in Winds competitions include Clarity of Program Concept, Artistry, Musicianship and Audience Engagement. Color Guard competitions are based on performance, movement, equipment and effect. Those judges compartmentalize the difference between the movement of the groups with their bodies and the equipment that they use — the flags, rifles or sabers that they are holding in their hands and throwing — plus the total effectiveness of the program.
DeLucia gives this example of the General Effect judging category in Percussion competitions: “The General Effect judge sits at the top of the stands or near the top and evaluates the whole product. One of the things he or she will assess is whether the performance elaborates on its stated title — say, ‘Rhythm in Blue.’ Does the show reflect the title? Does the visual interpretation match what the judge sees and hears? They’re judging the whole thing together as one performance, whereas the other judges in that competition have specific areas they’re evaluating.”
WGI Competitions
The WGI season begins in late January and is organized as a tournament that starts with regional competitions and culminates with the World Championships in Dayton, Ohio in April. Even with the winnowing down that happens in the regionals, 300 Color Guard, 200 Percussion and 40 Winds ensembles end up at the World Championship events, which occur at various Dayton area venues. Champions are crowned in each of the categories, divisions and classes.
DeLucia points to many benefits for participating in WGI. “First of all, it’s a goal-driven activity. It teaches about the seriousness of purpose, plus it’s a collaborative effort: Students must master their individual tasks in order for their section — and ultimately the entire group — to succeed. Participants learn how to rehearse, travel, perform and help each other reach their common goal.”
There are other aspects, too, according to DeLucia. “Boys and girls participate equally, with shared responsibilities, as do both honor roll students and those who struggle academically, because at the end of the day, it’s about the artistic endeavors. In addition, the camaraderie and bonding among the kids and staff is so powerful that it forms the basis for social life in school and beyond. Seniors welcome and care for incoming freshmen. Lifelong friends are made.”
The Future of WGI
DeLucia is optimistic about the future of the organization. “I believe that the WGI model will prosper moving forward,” he says. “It’s mostly scholastic-based, giving guards and drumlines a home in which to rehearse, recruit and perform. This is important to both school districts and to the parents’ groups that raise money and support their children in every way imaginable, through fund-raising, transportation, help with props and costumes, etc.”
As DeLucia points out, kids interested in color guard or indoor drumline have easy access to online resources like FloMarching, with WGI providing a solid national governing body for those with a psychological predisposition to participate in competitive art. But perhaps the most compelling argument for WGI’s future success is the simplest one of all: It’s exciting, challenging, inclusive and fun … and nobody sits on the bench!
There are many reasons why you might need or want to change the strings on your violin. They could be broken, dull-sounding or “false” (hard to tune), or maybe you just want to change up the feel and tone of your instrument. We’re here to help!
How to Choose Your Strings
There are many different types of strings you can choose from, and each has its own unique sound and playability factors. Choosing the right set may seem complicated, but once you understand how violin strings are made it’s much easier to choose the type that fits your particular playing style.
Violin (and viola, cello, and bass) strings consist of a “core” that is wrapped with metal winding. There are three main types of violin strings: gut core, steel core and synthetic core. Each has its own unique tone and feel.
Gut Core
Gut strings have been around since the very first stringed instruments were made, thousands of years ago. They were originally called “catgut” strings, but no cats were ever harmed! Instead, they are made from the intestines of sheep, and modern versions will have metal windings around the core. These type of strings have a rich, warm, tone with complex overtones. Mostly used by professionals, more sophisticated, nuanced bowing is needed to command the slower response of gut strings.
Examples: Eudoxa, Oliv, Passione.
Steel Core
Steel core strings have either a solid or stranded steel core. They have a brilliant, clear, and crisp sound with a very stable pitch. Their fast response makes them a popular choice for beginning players.
Examples: Helicore, Zyex, Spirocore.
Synthetic Core
These type of violin strings were first introduced in the 1970s and utilize a core of nylon or other synthetic polymers. Think of them as a cross between gut core and steel core; they are more stable in pitch than gut strings, with fewer overtones, but are warmer and smoother in tone than steel core strings. Their versatility makes them popular with all types of players, from beginners to professionals.
Examples: Dominant, Evah Pirazzi, Infeld.
Helpful Tips and Tricks
Here are a few things to keep in mind each time you change your strings.
Make sure you purchase the correct size strings for your instrument. If you play a 3/4 violin, you’ll need 3/4 size strings.
Be careful not to overtighten your strings. If it’s your first time changing a string on your own, it’s best to do so with a teacher or stringed instrument expert such as a luthier standing nearby to help if needed. Violin strings can be a bit pricey, so it’s always a good idea to err on the side of caution!
Change strings one at a time — do not remove them all at once, because that can cause your bridge or soundpost to fall. If this happens, immediately loosen all strings and consult a string expert as soon as possible. A fallen soundpost (you’ll see or hear a little dowel rolling around inside of your instrument) can cause numerous problems, including top or back cracks, which can be very complicated (and often very expensive) to repair.
Wipe down your strings after every use with a clean untreated microfiber polishing cloth. Gently removing the oils and rosin this way will help prolong the life of your strings and ensure good tone and playability.
If you notice that your strings are pushing against the side of the peg box or if the instrument is difficult to tune using the pegs, it’s a good idea to take the instrument to a string expert. They may need to rework the pegs to provide optimal smoothness while turning. You should never need to force a peg into the pegbox to tune your violin — all that should be required is just a bit of gentle pressure. The pegs are fit with such precision they are not glued in place, but over time (and depending on storage and humidity conditions) they will need regular maintenance to keep them in peak condition.
If the strings you are replacing are not broken, save them! It never hurts to have an extra string or two on hand in case you break one during a performance and need a quick fix.
All strings have a “secret code” to tell you what they are. The colors of the top and bottom of the strings (called silking) are different for each string and will tell you the manufacturer, brand, and string itself (E, A, D or G for violin). There are many websites with this information, so utilize those resources!
Check Out the Video
If you’re a beginner, changing your own strings might seem intimidating, but the video below demonstrates how easy it can be. As you can see, all you’ll need is a set of new strings, a digital tuner or tuning fork, a wire cutter and a clean, untreated microfiber cloth to remove the fingerprints and rosin when you’re done. Happy playing!
I’m often asked what the differences are between Yamaha Pacifica and Revstar guitars. The short answer is: Quite a lot. Although they are both double-cut instruments, that’s really where the similarities end.
Pacifica PACP12.
Revstar RSP02T.
In this posting, we’ll discuss the main differences between the two, and why you might choose one over the other. But before we start, it should be stated that both the Revstar and Pacifica guitar ranges have multiple variations within their respective lineups. I’ll lean into any of those details when I feel they are important.
Tonewoods
Pacifica and Revstar guitars have a vastly different body styling, as well as varying tonewood combinations, which is a big part of the reason why they sound so different from one another.
Pacificas utilize a finely sculpted alder tonewood for the body. Alder is lighter than the mahogany used by Revstar guitars and has a more open grain pattern within the timber. This provides a softer, open, airy character to the tones it produces.
600 Series Pacifica guitars like the PAC612VIIFMX also feature a flame maple veneer. This veneer may change the tone slightly, but it is used more for its visual appeal rather than any tonal distinction.
PAC612VIIFMX.
Revstar guitar bodies are mahogany with a maple top (sometimes called a cap) — a classic, tried and tested tonewood combination. The mahogany adds weight and warmth to the sound, while the maple brings clarity and bite.
Pacifica Standard Plus / Professional chambered body.
Revstar chambered body.
The bodies of Pacifica Professional and Revstar Professional guitars are also treated with Yamaha I.R.A. (Initial Response Acceleration). This unique process applies specific vibrations to release stresses between the instrument’s components, giving the guitar a played-in sound and feel even when brand new. I’ve played guitars with and without the I.R.A. treatment, and you can definitely feel more responsiveness, resonance and sustain in the former.
Weight
If you play seated for extended periods of time, or stand up for three-hour gig engagements, the weight of your go-to guitar may be worth considering. In general, Revstars are slightly heavier than Pacificas, but this will vary between models.
Neck
All Revstar guitars have mahogany necks and rosewood fingerboards. These are both extremely dense tonewoods that impart a warm tonality.
Pacifica guitar necks are crafted from maple, which provides a brighter sound than mahogany. Some Pacificas are also available with rosewood fingerboards, and this adds a touch of the aforementioned warmth to the overall tone.
The satin finish and full “C” shape on the necks of the new Pacifica Standard Plus and Professional models feels really comfortable and should be welcoming to most guitar players. The medium fretwork is stainless steel, which makes them bright, durable and well-intonated. I also like the 10″ to 14″ compound radius employed by Pacifica Professional necks; it really does make a difference to the fretting hand when making chord shapes in open position, and for sustaining full-tone bends above the twelfth fret.
Revstar guitar necks are relatively chunky and feel very positive in the hands. I really like the jumbo frets on these guitars too — a personal preference of mine. Revstars also have a neck-through-body design. This is meant to improve resonance between those two elements by eliminating a neck pocket and metal screws. However, this also means that a neck reset or replacement is not an option without a lot of work.
Pacifica guitars, on the other hand, employ a bolt-on neck construction. If coupled correctly with a nice snug joint, the resonance between the body and neck should be just as good as that of the neck-through-body design employed by Revstars. The new Pacifica Standard Plus and Professional models also sport a complete redesign to the neck heel, allowing for even greater access to the upper frets.
Scale Length
Revstar guitars have a 24 – 3/4″ scale length. This allows for a lower string tension and brings the first fret of the guitar closer to the guitar player.
Pacifica guitars have a 25 – 1/2″ scale length, adding a little more tension to the strings than Revstar, along with a slightly longer distance between the nut and bridge.
Scale length does not affect the tone, but it will have an impact on playability (see below), so it’s well worth trying out both scale lengths to see which one feels best to you.
Bridge
The bridge systems used by these two guitars are very different. Revstar bridges are either wraparound stop tailpieces (as in the Revstar RSP20 model shown below), or utilize a bridge-and-trapeze tailpiece design like those on the Revstar RSP02T. (The “T” in the model number represents the trapeze tailpiece design.) I find that there is actually a subtle tonal difference between the wraparound bridge and the trapeze tailpiece-equipped Revstars, so that may also be something to pay attention to when deciding which model is best for you.
Revstar RSP20 bridge.
Revstar RSP02T bridge.
Most Pacificas come with a two-point Gotoh or Wilkinson tremolo bridge, the exception being the PAC611HFM model, which has a hardtail bridge. The hardtail design functions similarly to the Revstar bridges, while the tremolo systems have the strings going through the body of the guitar, which in my opinion drastically changes the tone, adding more treble to the sound of the instrument, albeit in a very good way.
Pacifica two-point tremolo bridge.
Pacifica hardtail bridge.
It’s worth mentioning that tuning a Revstar (or a Pacifica with a hardtail bridge) to an altered tuning will be relatively easy since the bridges of those guitars provide a relatively stable environment across all strings, regardless of which ones you detune down or up.
If you prefer a tremolo bridge, detuning your guitar between songs may be problematic. Even just dropping the low E string to D will cause the other strings to go out of tune, and it may take several moments to get everything back into pitch — something definitely worth considering if you use open tunings during live performance!
Pickups
Electric guitar pickups, of course, play a major role in how the instrument sounds. Humbuckers and P90 pickups produce a fat, warm tone ideal for jazz, rock and blues, while single-coils are brighter and cleaner, but also cover the complete genre spectrum between pop and dirty blues grit.
Humbucker (left) and P90 (right) pickups.
While various Revstars and Pacificas are available with humbuckers and P90s, only the new Pacifica Professional and Standard Plus models offer the unique sound of the Reflectone humbucker and single-coil pickups designed by Yamaha in collaboration with audio manufacturer Rupert Neve Designs. This innovation really does evolve the Pacifica tonality into new territory, with clarity, definition and balanced delivery across all six strings that is quite remarkable.
Reflectone pickups.
The HSS (humbucker/single-coil/single-coil) pickup combination offered by Pacifica Professional, Standard Plus and PAC600 Series guitars may well be the most versatile tonal configuration available in one guitar. If you are using a single guitar to play multiple styles of music — a situation where tonal versatility is crucial — one of these workhorses could be a perfect fit for you.
Tonality
If you’re looking for a great two-pickup guitar that delivers a fat and focused tone for playing rock, blues and jazz, you really can’t go wrong with any of the Revstars. Can the Revstar cover other styles too? It certainly can, and if you want the open “airy” sound of single-coil pickups, the RSS02T and RSP02T with P90s would be a great choice.
Pacificas also cover a lot of ground stylistically, and thanks in part to their three-pickup design, are incredibly versatile instruments. You’ll find the tones brighter and less mid-rangey than a Revstar, and if your style requires chordal shimmers or tremolo effects, you’ll definitely love the smooth-action Gotoh or Wilkinson tremolo found on the new Pacifica models; in addition, their locking tuners will help keep everything buttoned-up nicely in the tuning department.
Playability
Both Revstar and Pacifica guitars are eminently playable, though each has its own signature “feel.”
Revstar guitar necks feel very positive in the hands, with jumbo fret wires that make fretting easy. In addition, their lower string tension is really nice if you like a spongy, more relaxed feel on your six-string.
The new Pacifica Standard Plus and Professional models have a smooth satin finish on the back of their necks that makes it easy to glide between fretboard locations, and their neck joint gives you easy access to the 22 stainless steel frets. In addition, the compound radius on the Professional fretboards allows for clean chordal fretting in open position and choke-free bending in the upper regions of the neck.
The Videos
Here are four videos that demonstrate the tonal differences between various Pacifica and Revstar guitars, as well as the tonal and aesthetic differences between models. You may even notice a difference in how I approach playing each of these guitars!
Pacifica Professional
Pacifica 612VIIFM
Revstar Standard RSS20
Revstar Element RSE20
The Wrap-Up
Over the years, I’ve played multiple Revstar and Pacifica models, and have always found the tones I needed for the gig in all of those instruments. However, when it comes down to specific requirements and tones for a performance, session or video, I’d likely choose one over the other, if I had them both on hand.
If you are a player that likes the straight-ahead rock ’n’ roll Cafe Racer spirit and aesthetic of Revstar guitars, you’ll love the many vibrant finishes and pickup combinations Revstars offer.
On the other hand, if you need the ultimate tonal versatility that comes from the combination of a humbucker, dual single-coils and tremolo system, the rich legacy of Pacifica guitars — and the advanced technologies the new Professional and Standard Plus models offer — should definitely be on your radar.
Ultimately, it comes down to choosing the guitar that best suits your musical needs and also makes you proud to be its owner. Pacifica or Revstar? You can’t go wrong with either.
Some of the first known musical instruments, dating back to prehistoric times, were objects struck by hands and fingers to enhance story-telling through use of rhythm and melody. Since the introduction of castanets (over 3,000 years ago) and finger cymbals (over 1,000 years ago), finger drumming has come a very long way and has taken some huge leaps, most of which happened in the past 40 years.
Castanets and finger cymbals.
Acoustic percussive instruments that incorporate some level of finger dexterity, such as congas, djembes, tablas and cajons, have long been a part of music, with electronic hand-controlled drum devices first appearing in the mid-1960s. MIDI drum pad controllers made their debut in the 1980s, but the 1990s and early 2000s saw an explosion of these devices as DJs and musicians began using them extensively in the hip-hop, R&B and Electronic Dance Music (EDM) scenes.
Today, drum pads and other beat-making devices played with the fingers are a part of almost every musical genre. The number of these kinds of products available on the market today is staggering, and for someone looking to get into finger drumming it can be a very daunting world to jump into. Many such devices are either complicated to use or require the purchase of additional products (such as a computer, speakers, and, in some cases, additional sounds), and those that are all-in-one — meaning they have built in speakers and preloaded sounds — tend to cost a lot of money.
Until now.
Enter the FGDP
The recently released Yamaha FGDP finger drum pads includes the FGDP-30 and FGDP-50 models, each of which provides standalone all-in-one solutions in a very affordable package. Let’s take a deep dive into these unique instruments.
FGDP-30 Finger Drum Pad.
FGDP-50 Finger Drum Pad.
Key Features
Both FGDP models are extremely portable and lightweight. Even the larger FGDP-50 measures in at just 8.77″ x 8.77″ x 2″ h (223 × 223 × 51 mm), meaning it can easily fit in a backpack or small bag. Both models have built-in speakers and a headphone jack, so there is no need to purchase an additional sound system. In addition, a rechargeable battery provides up to three hours of nonstop untethered playing, allowing you to take the FGDP anywhere and play it anytime you want, without worrying about where to plug it in.
To make these devices even more self-contained, they come with dozens of preset kits (39 in the FGDP-30 and 48 in the FGDP-50), so you can start playing right out of the box without having to purchase or download any sounds. These kits are configured using the 1,500 Voices (sounds) built into FGDP-50 or 1,212 Voices built into the FGDP-30; the Voices are a mixture of recordings of actual Yamaha acoustic drum sets, electronic sounds developed for Yamaha DTX Series e-drums, and additional sounds created exclusively for the FGDP.
Both the FGDP-50 and FGDP-30 are compatible with the free Yamaha Rec’N’Share app so you can play along with your favorite songs, record your sessions, and share your performance with your friends and/or on your social channels.
There are also several advanced features that are only available with the FGDP-50. For example, while both offer USB ports, the FGDP-50 also has a Host to micro-USB terminal that allows you to import up to 100 of your own sounds and samples — even stereo ones such as complete musical phrases. Samples can be as long as 600 seconds if mono (300 seconds if stereo). This same port also allows for the transmission and reception of MIDI message to or from a PC or smart device for recording performances in a DAW.
FGDP-50 connections.
Another feature unique to the FGDP-50 is the ability to assign Note Repeat to pads. This enables more dynamic playing and allows you to loop a sound, either by holding down the pad or by setting the pad to start and stop the loop on each hit. For instance, say you want to set a hi-hat to continue playing every quarter note: simply set it to note repeat and it will continue to play the hi-hat sound (synced to the BPM of the onboard metronome), freeing your fingers to play other pads while the hi-hat continues to play until you press the pad a second time. You can also add Humanize features to this, which creates subtle variations in terms of how quickly the note is played and how loud or soft it is played, making your beats sound more natural and less computer-generated.
The FGDP-50 also allows you to save more user kits and call them up with the touch of a button. These “Registrations” (four on the FGDP-50 vs. two on the FGDP-30) save preferences, pad settings, custom-built kits and any changes you make to voices, such as tuning, adding effects, reverb, chorus and more.
A Better Way to Play
In addition to all these great features, FGDP finger drums are also extremely easy to use, thanks to their unique advanced ergonomic design. Yamaha engineers began by studying what comes naturally to a percussionist’s hands when playing. For example, it was found that most finger drummers place the hi-hat and ride cymbal sounds on the top row, so that they can be accessed by the middle and ring fingers. The snare is commonly played with the pointer finger, so the snare pads were usually placed directly in the middle, and the bass, most often played by the thumb, was placed at the bottom.
FGDP ergonomic design.
Accordingly, all the FGDP pads were configured that way, though breaking from the industry standard grid shape (something that does not feel natural to many users when playing) and instead placed in a more intuitive curved position, enabling more fluidity and less pecking when playing.
The FGDP pads are also ultra-sensitive and highly responsive, allowing you to create more expressive drum beats that include things like flams and ghost notes, and to place accents on notes when desired. Because you can assign any sound to any pad, you can configure the FGDP in a way that works best for you. Some of the default settings even have multiple “mirrored” pads with the same sounds assigned, so you can perform incredibly fast drum rolls and fills without loss of control, and while avoiding something known as “machine gunning” — the term for when a drum roll is played quickly on an electronic drum set and the notes all come out at the same volume, thus sounding like a machine gun.
In short, these great new products have everything you need, bringing the world of finger drumming to established and aspiring musicians alike with a slew of unique, accessible and easy-to-use features … and at a cost that is within reach. Check out the video below for more information.


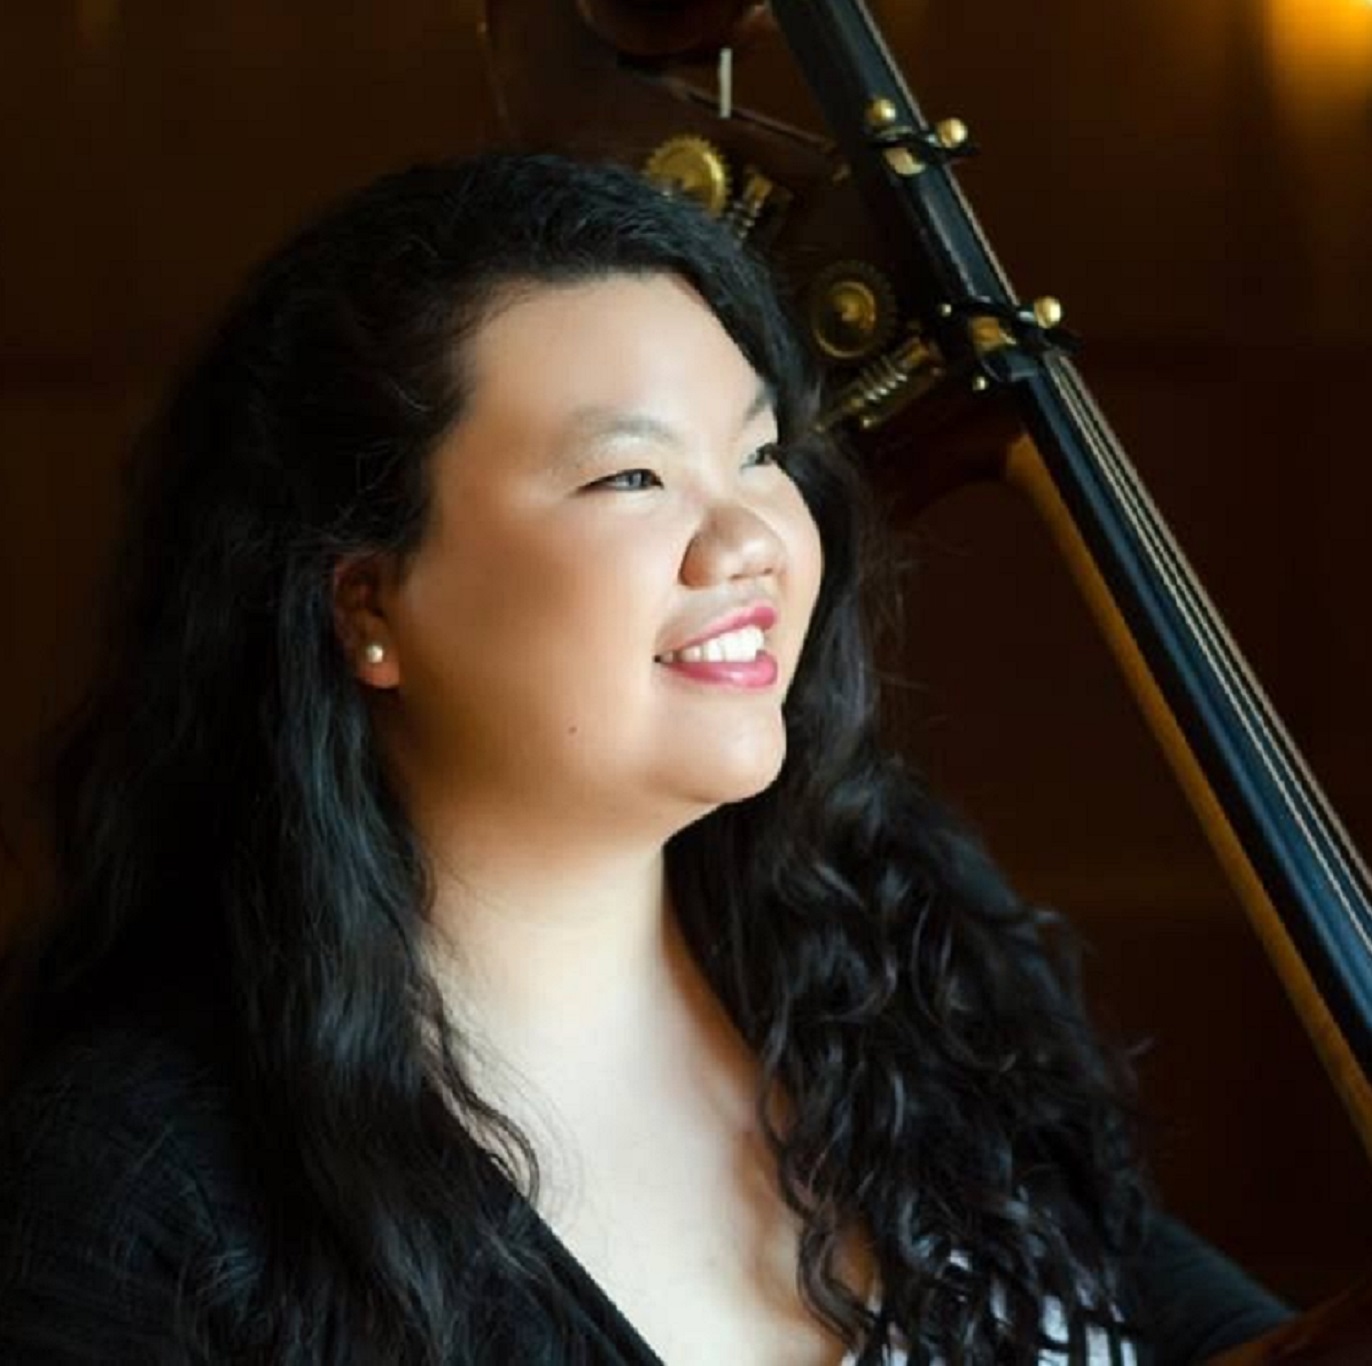
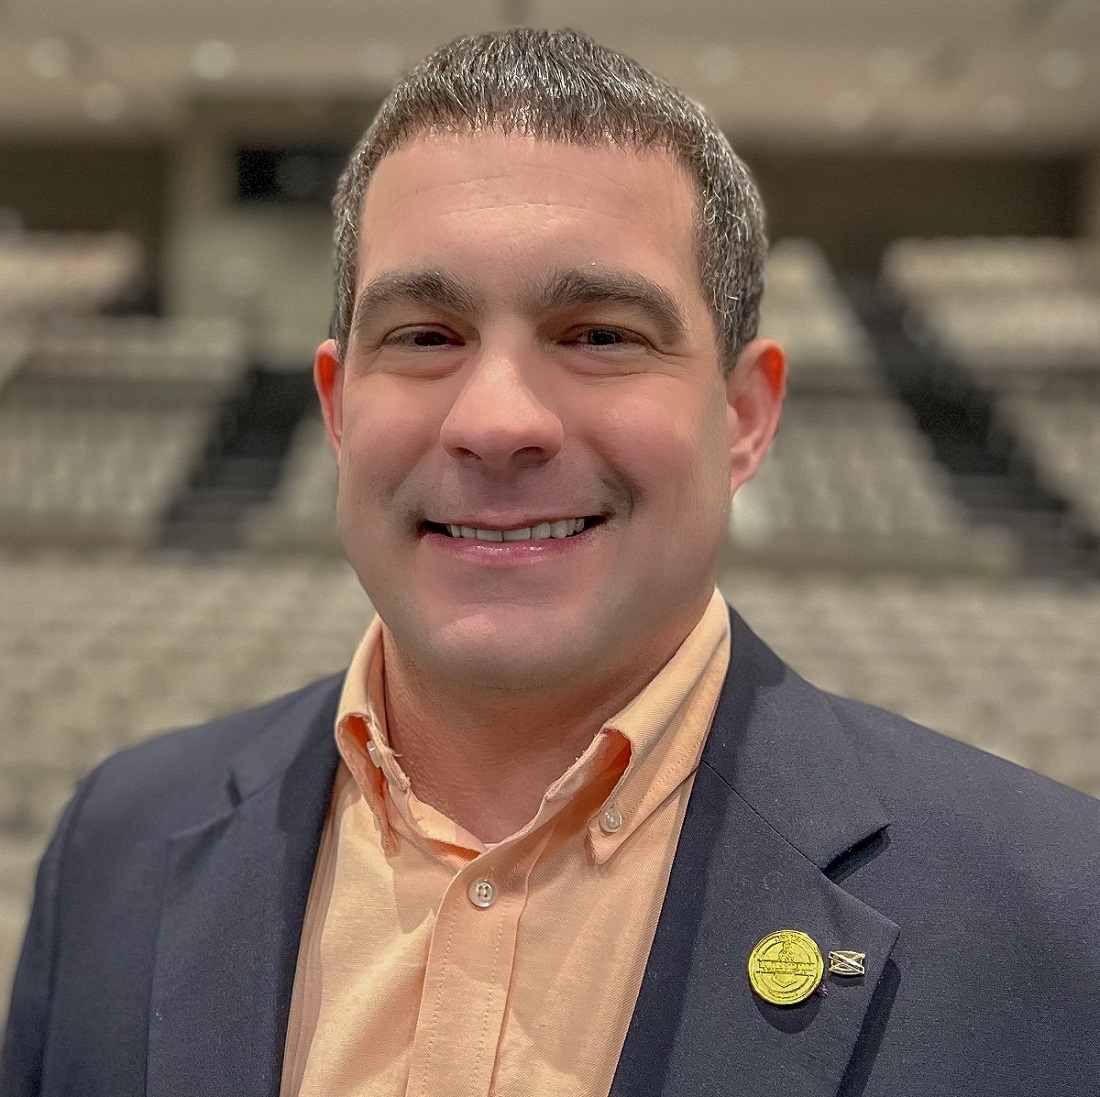


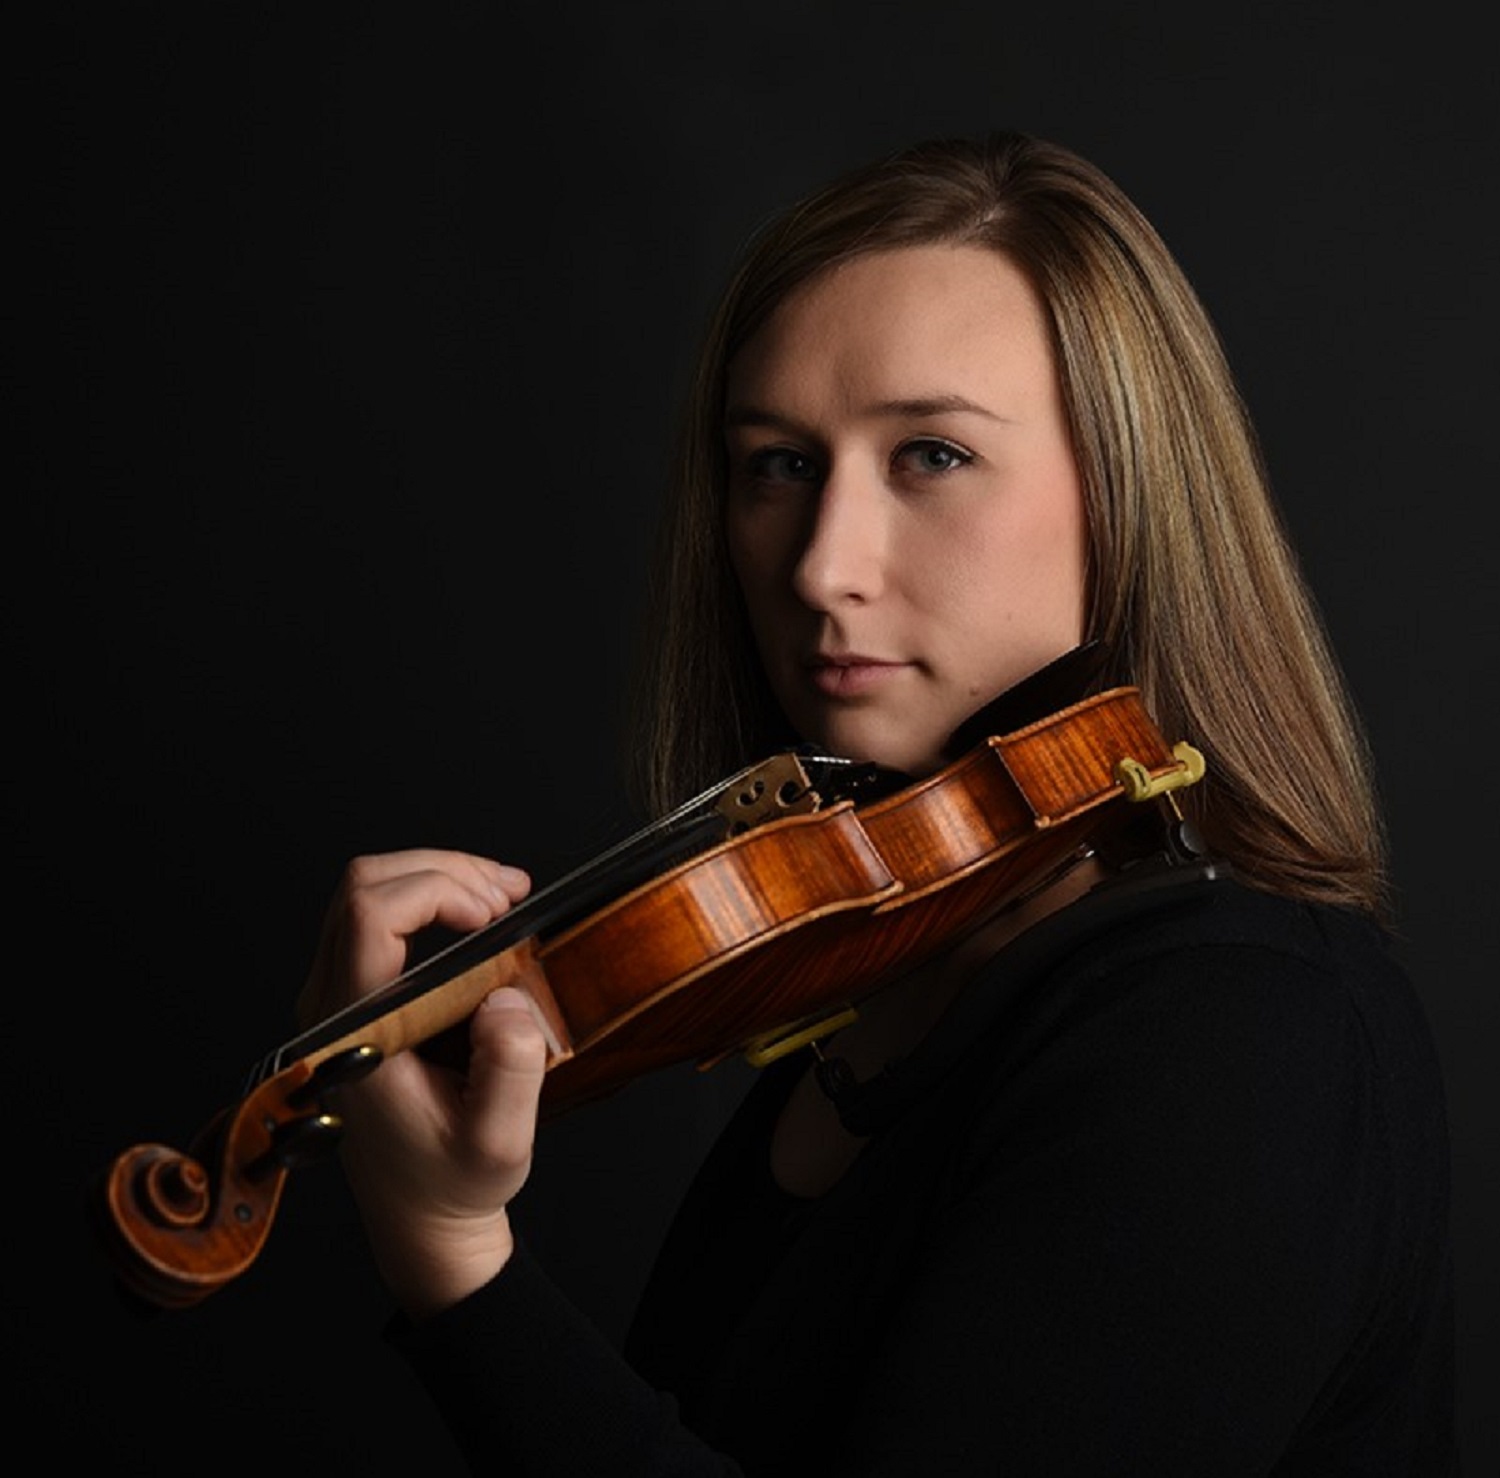


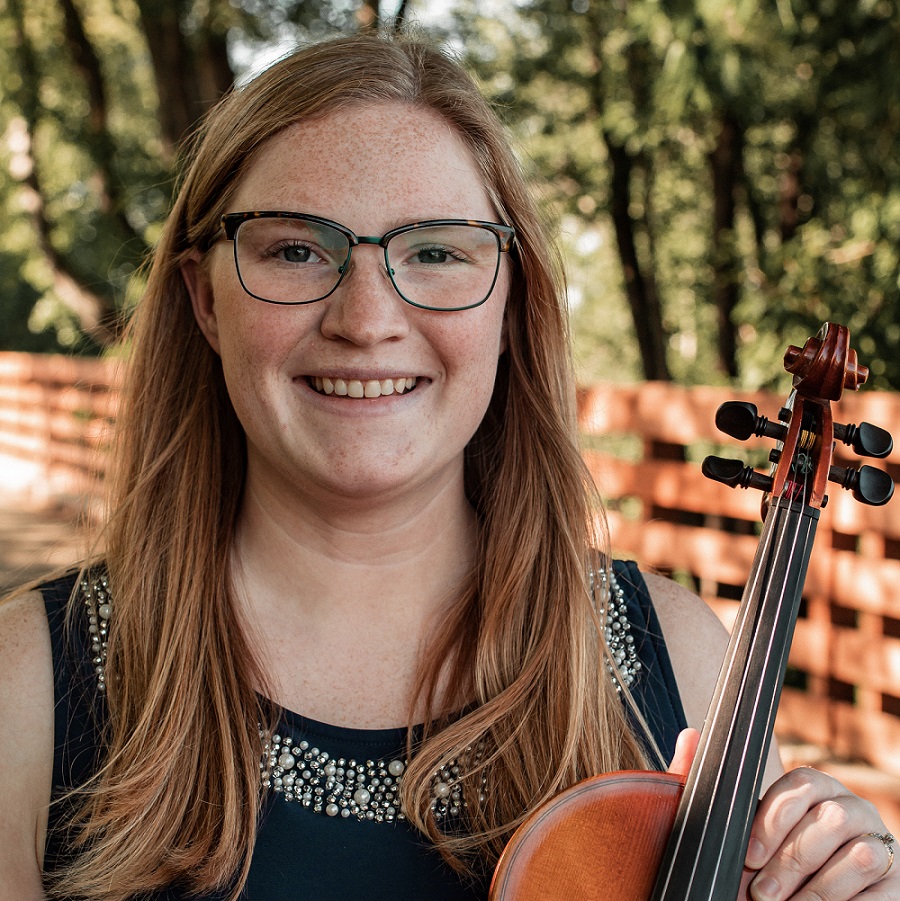


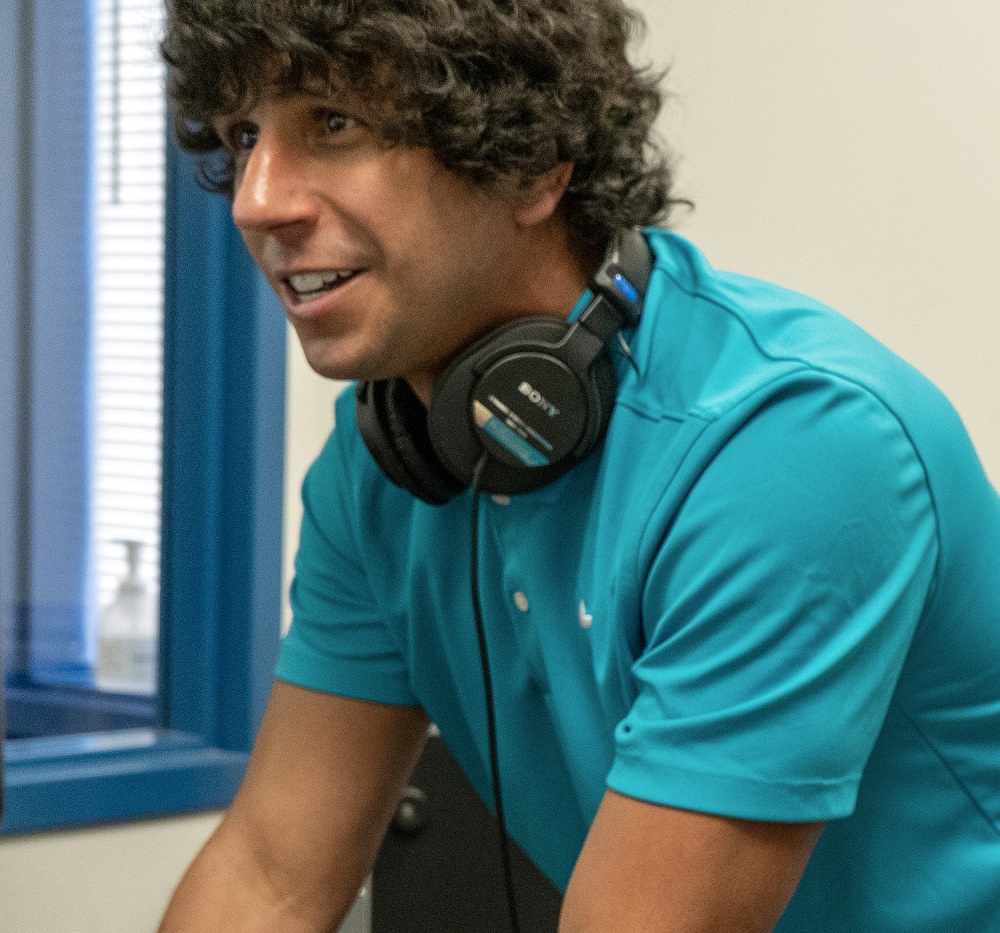


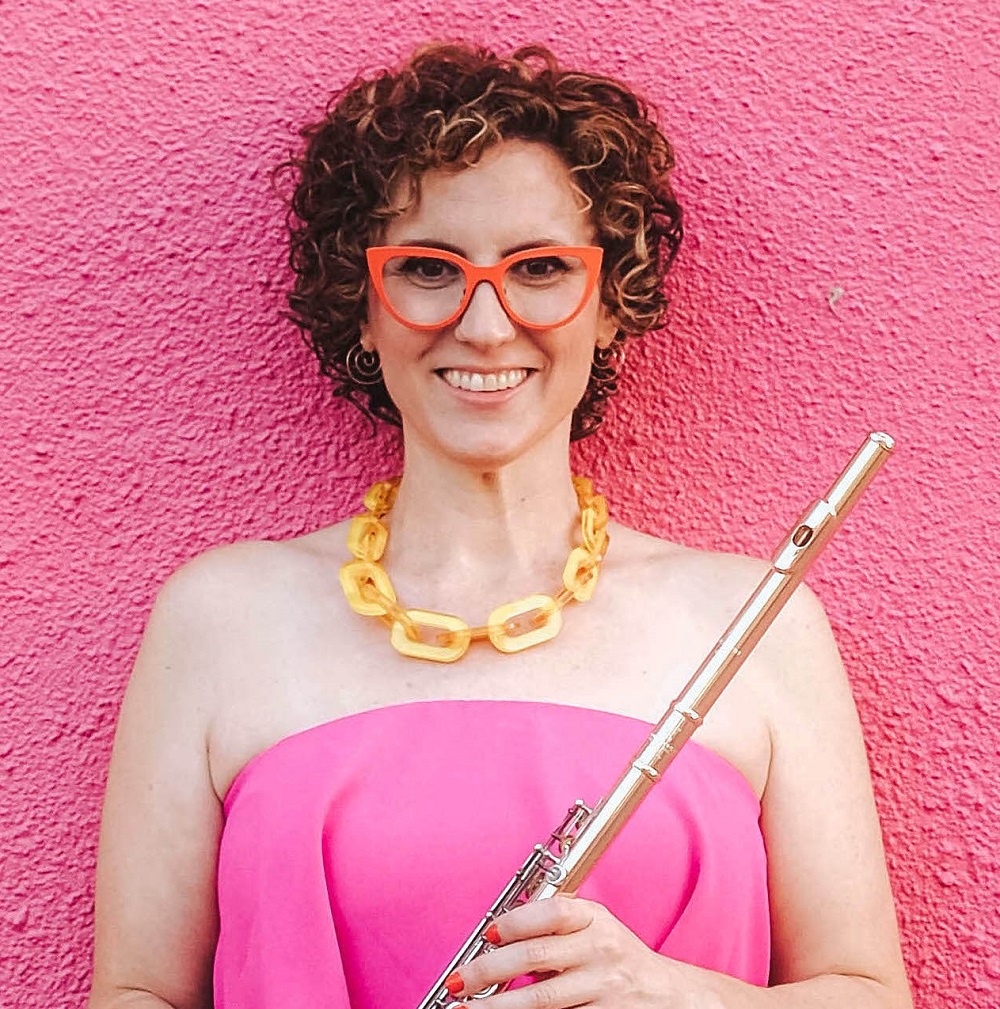


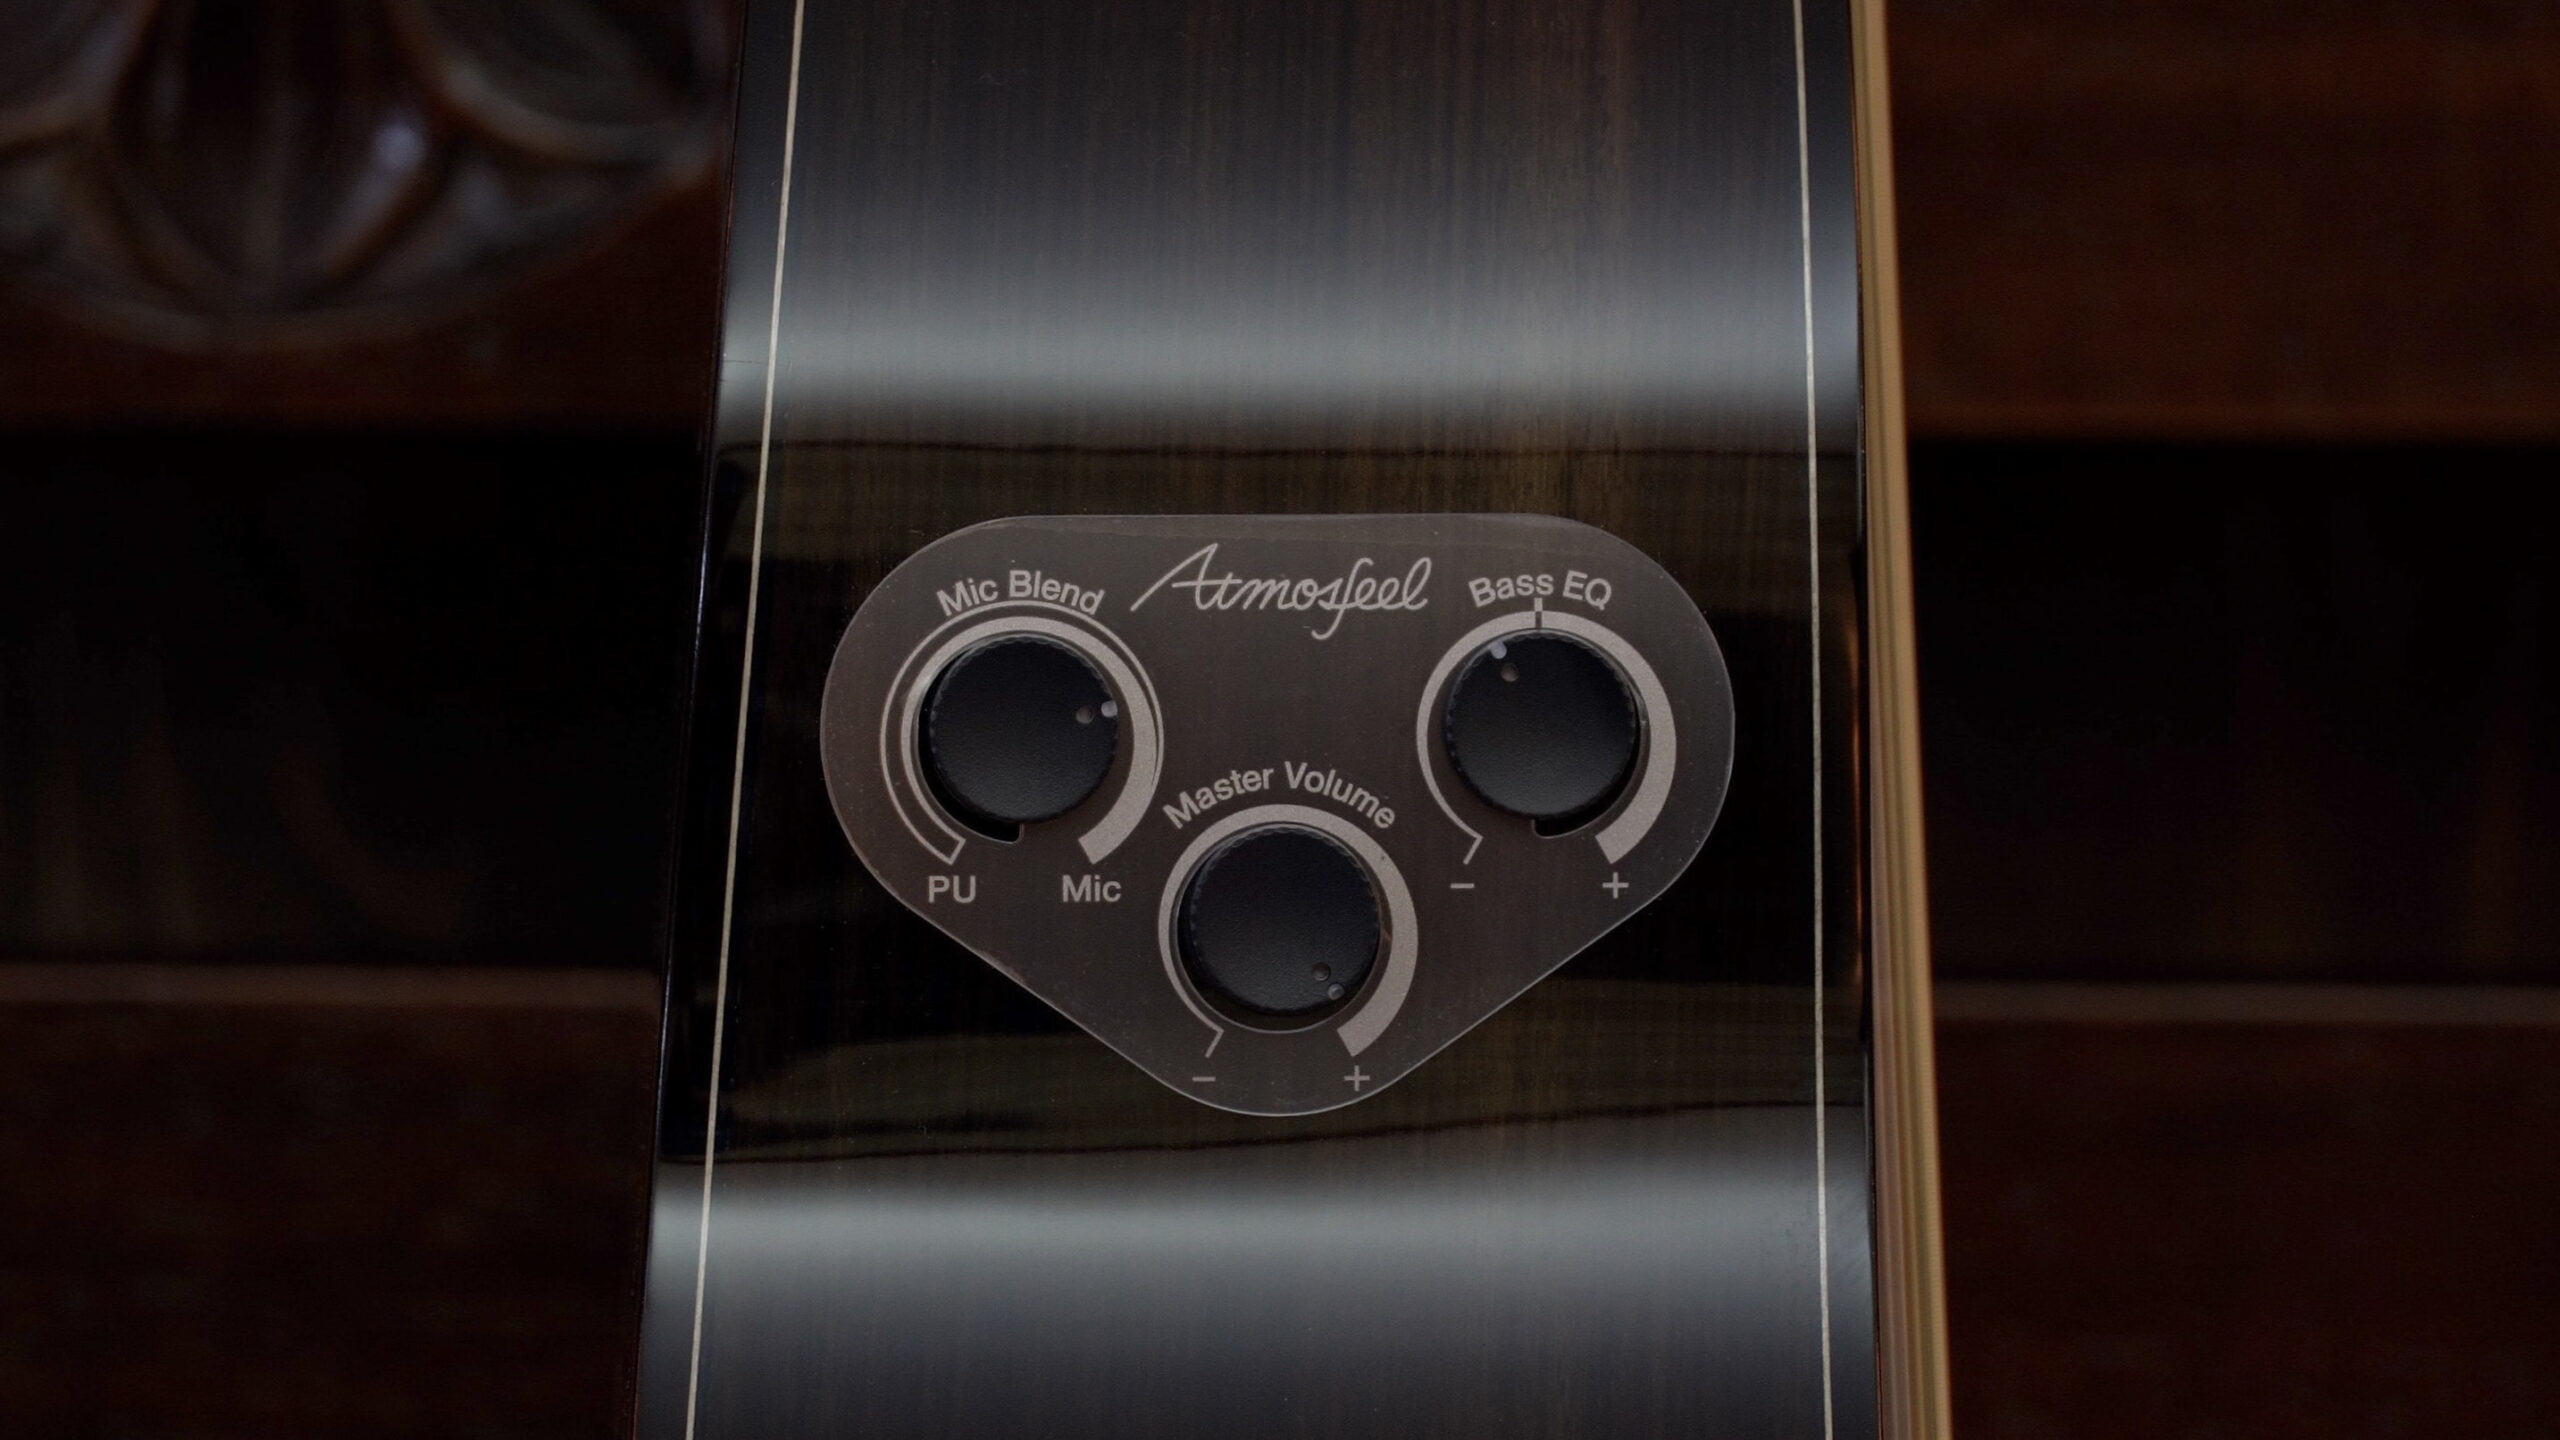
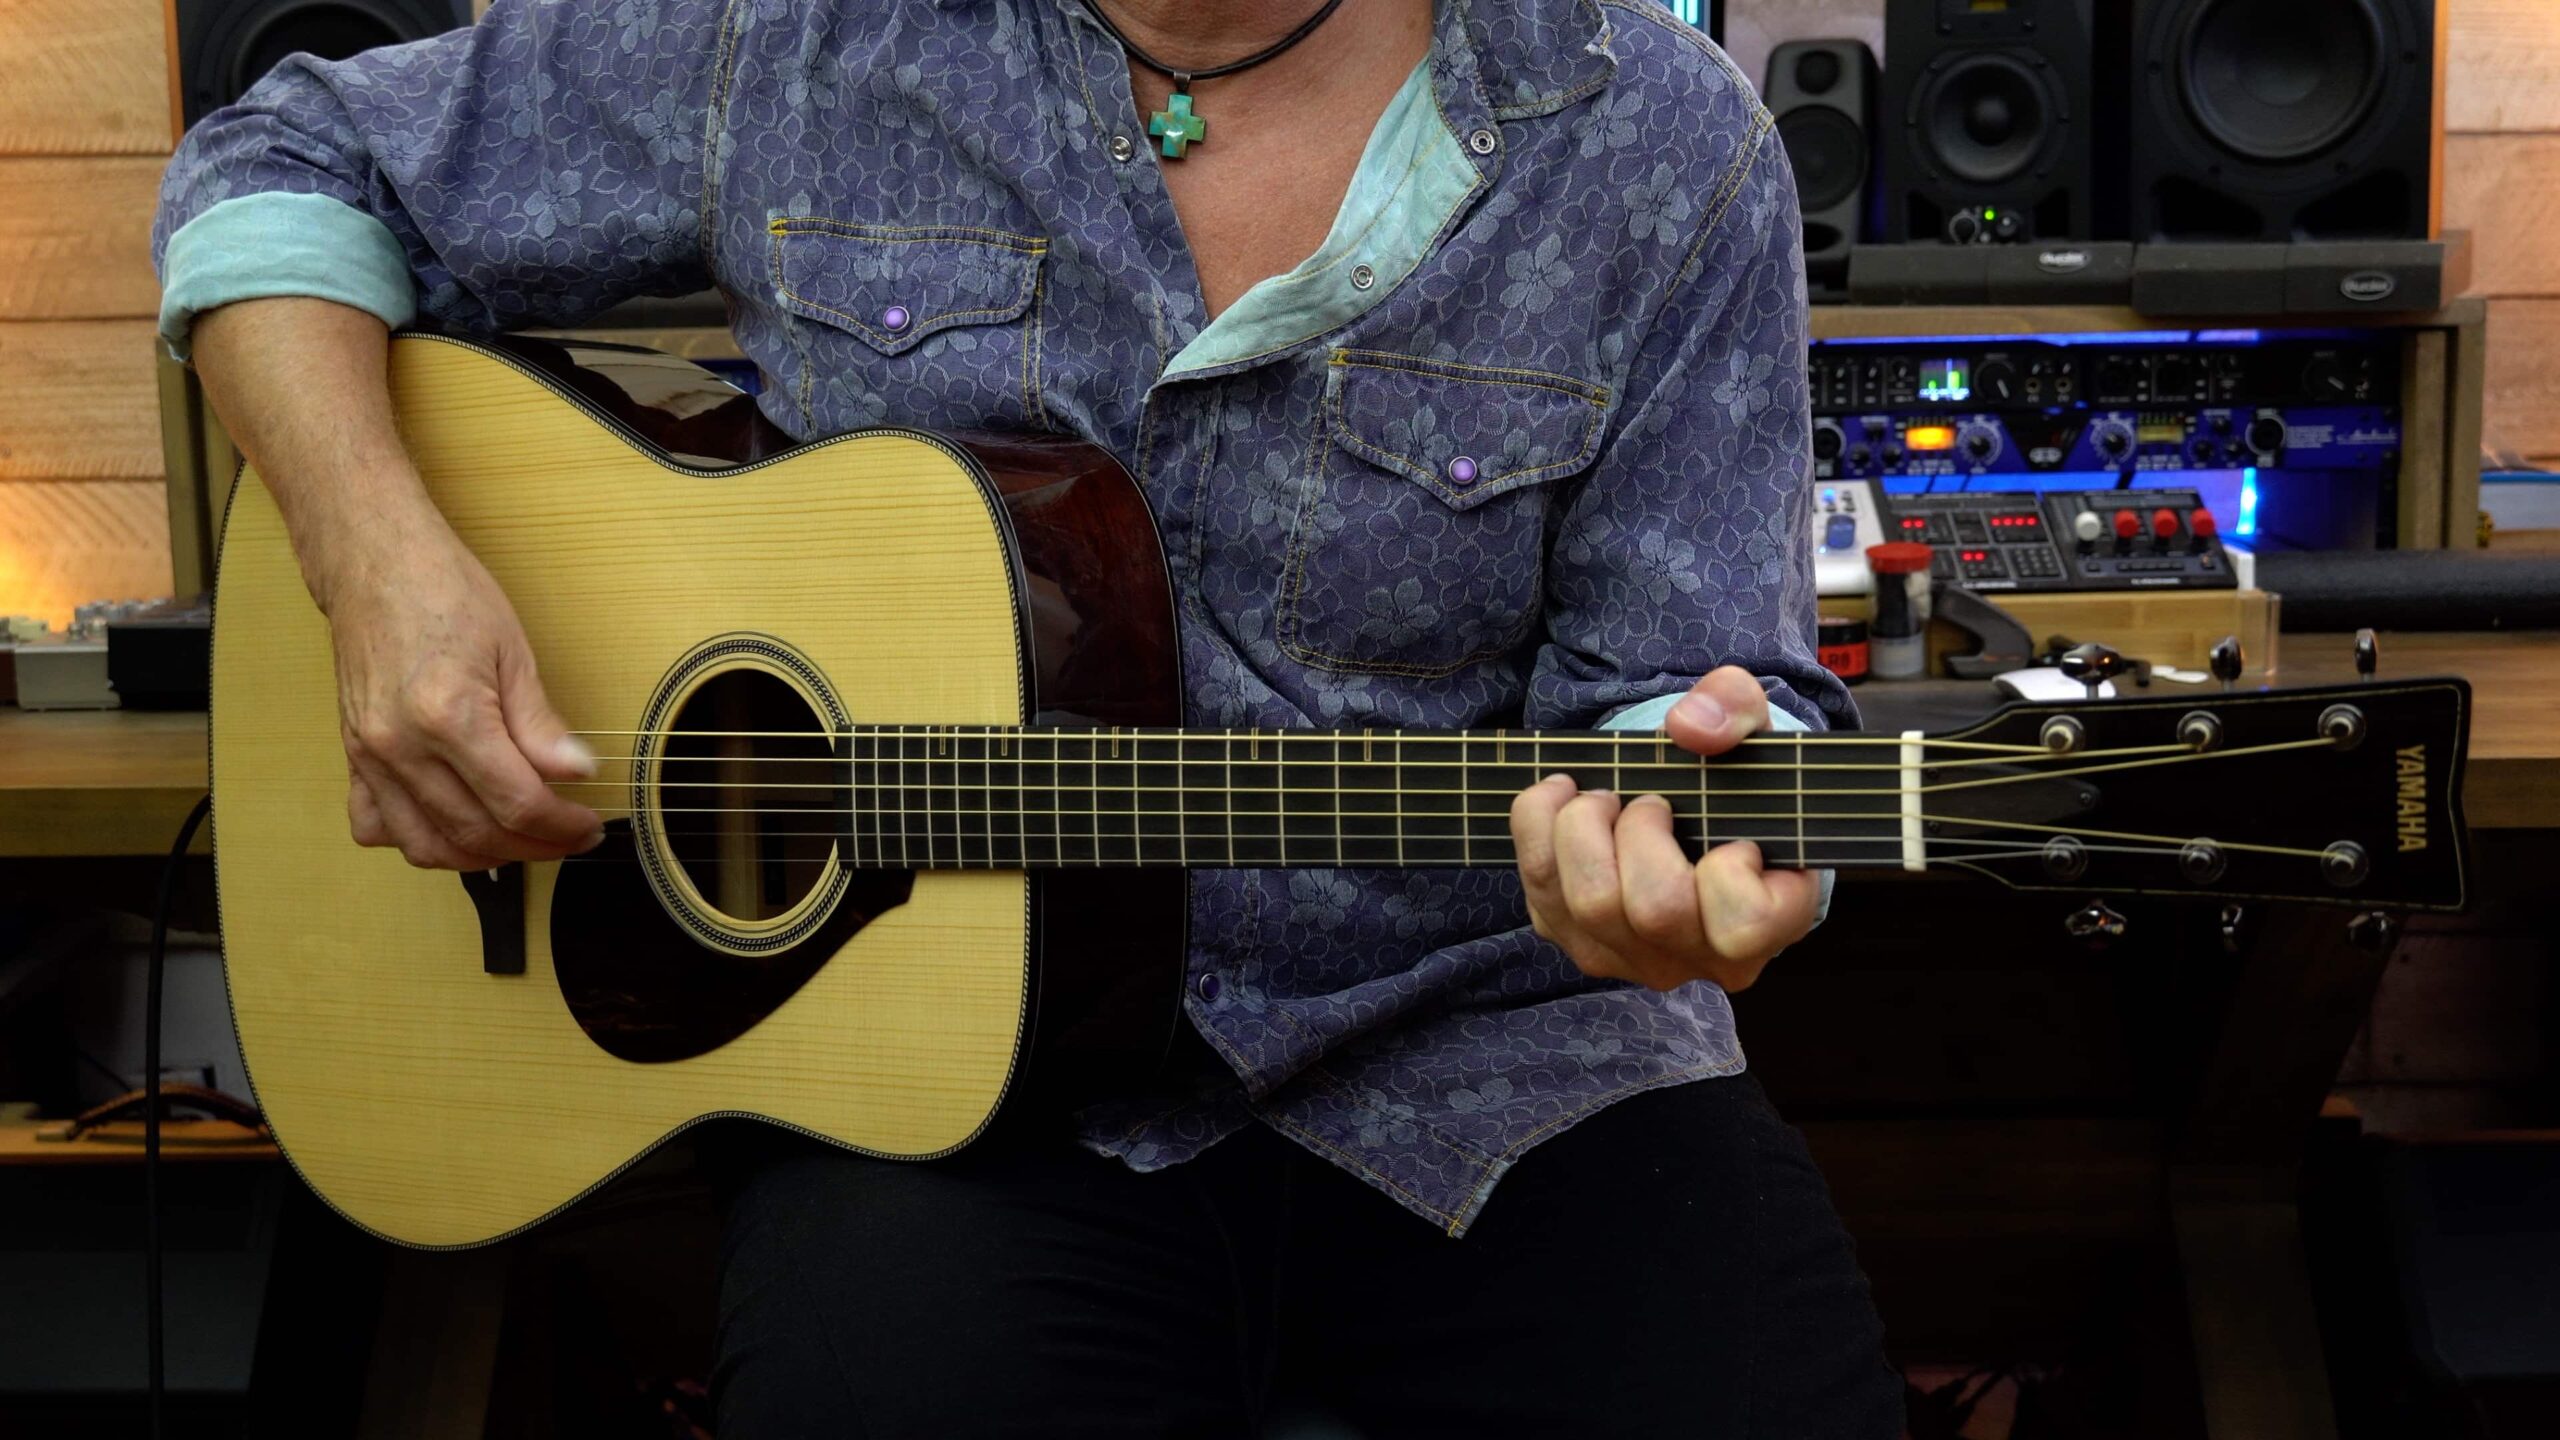
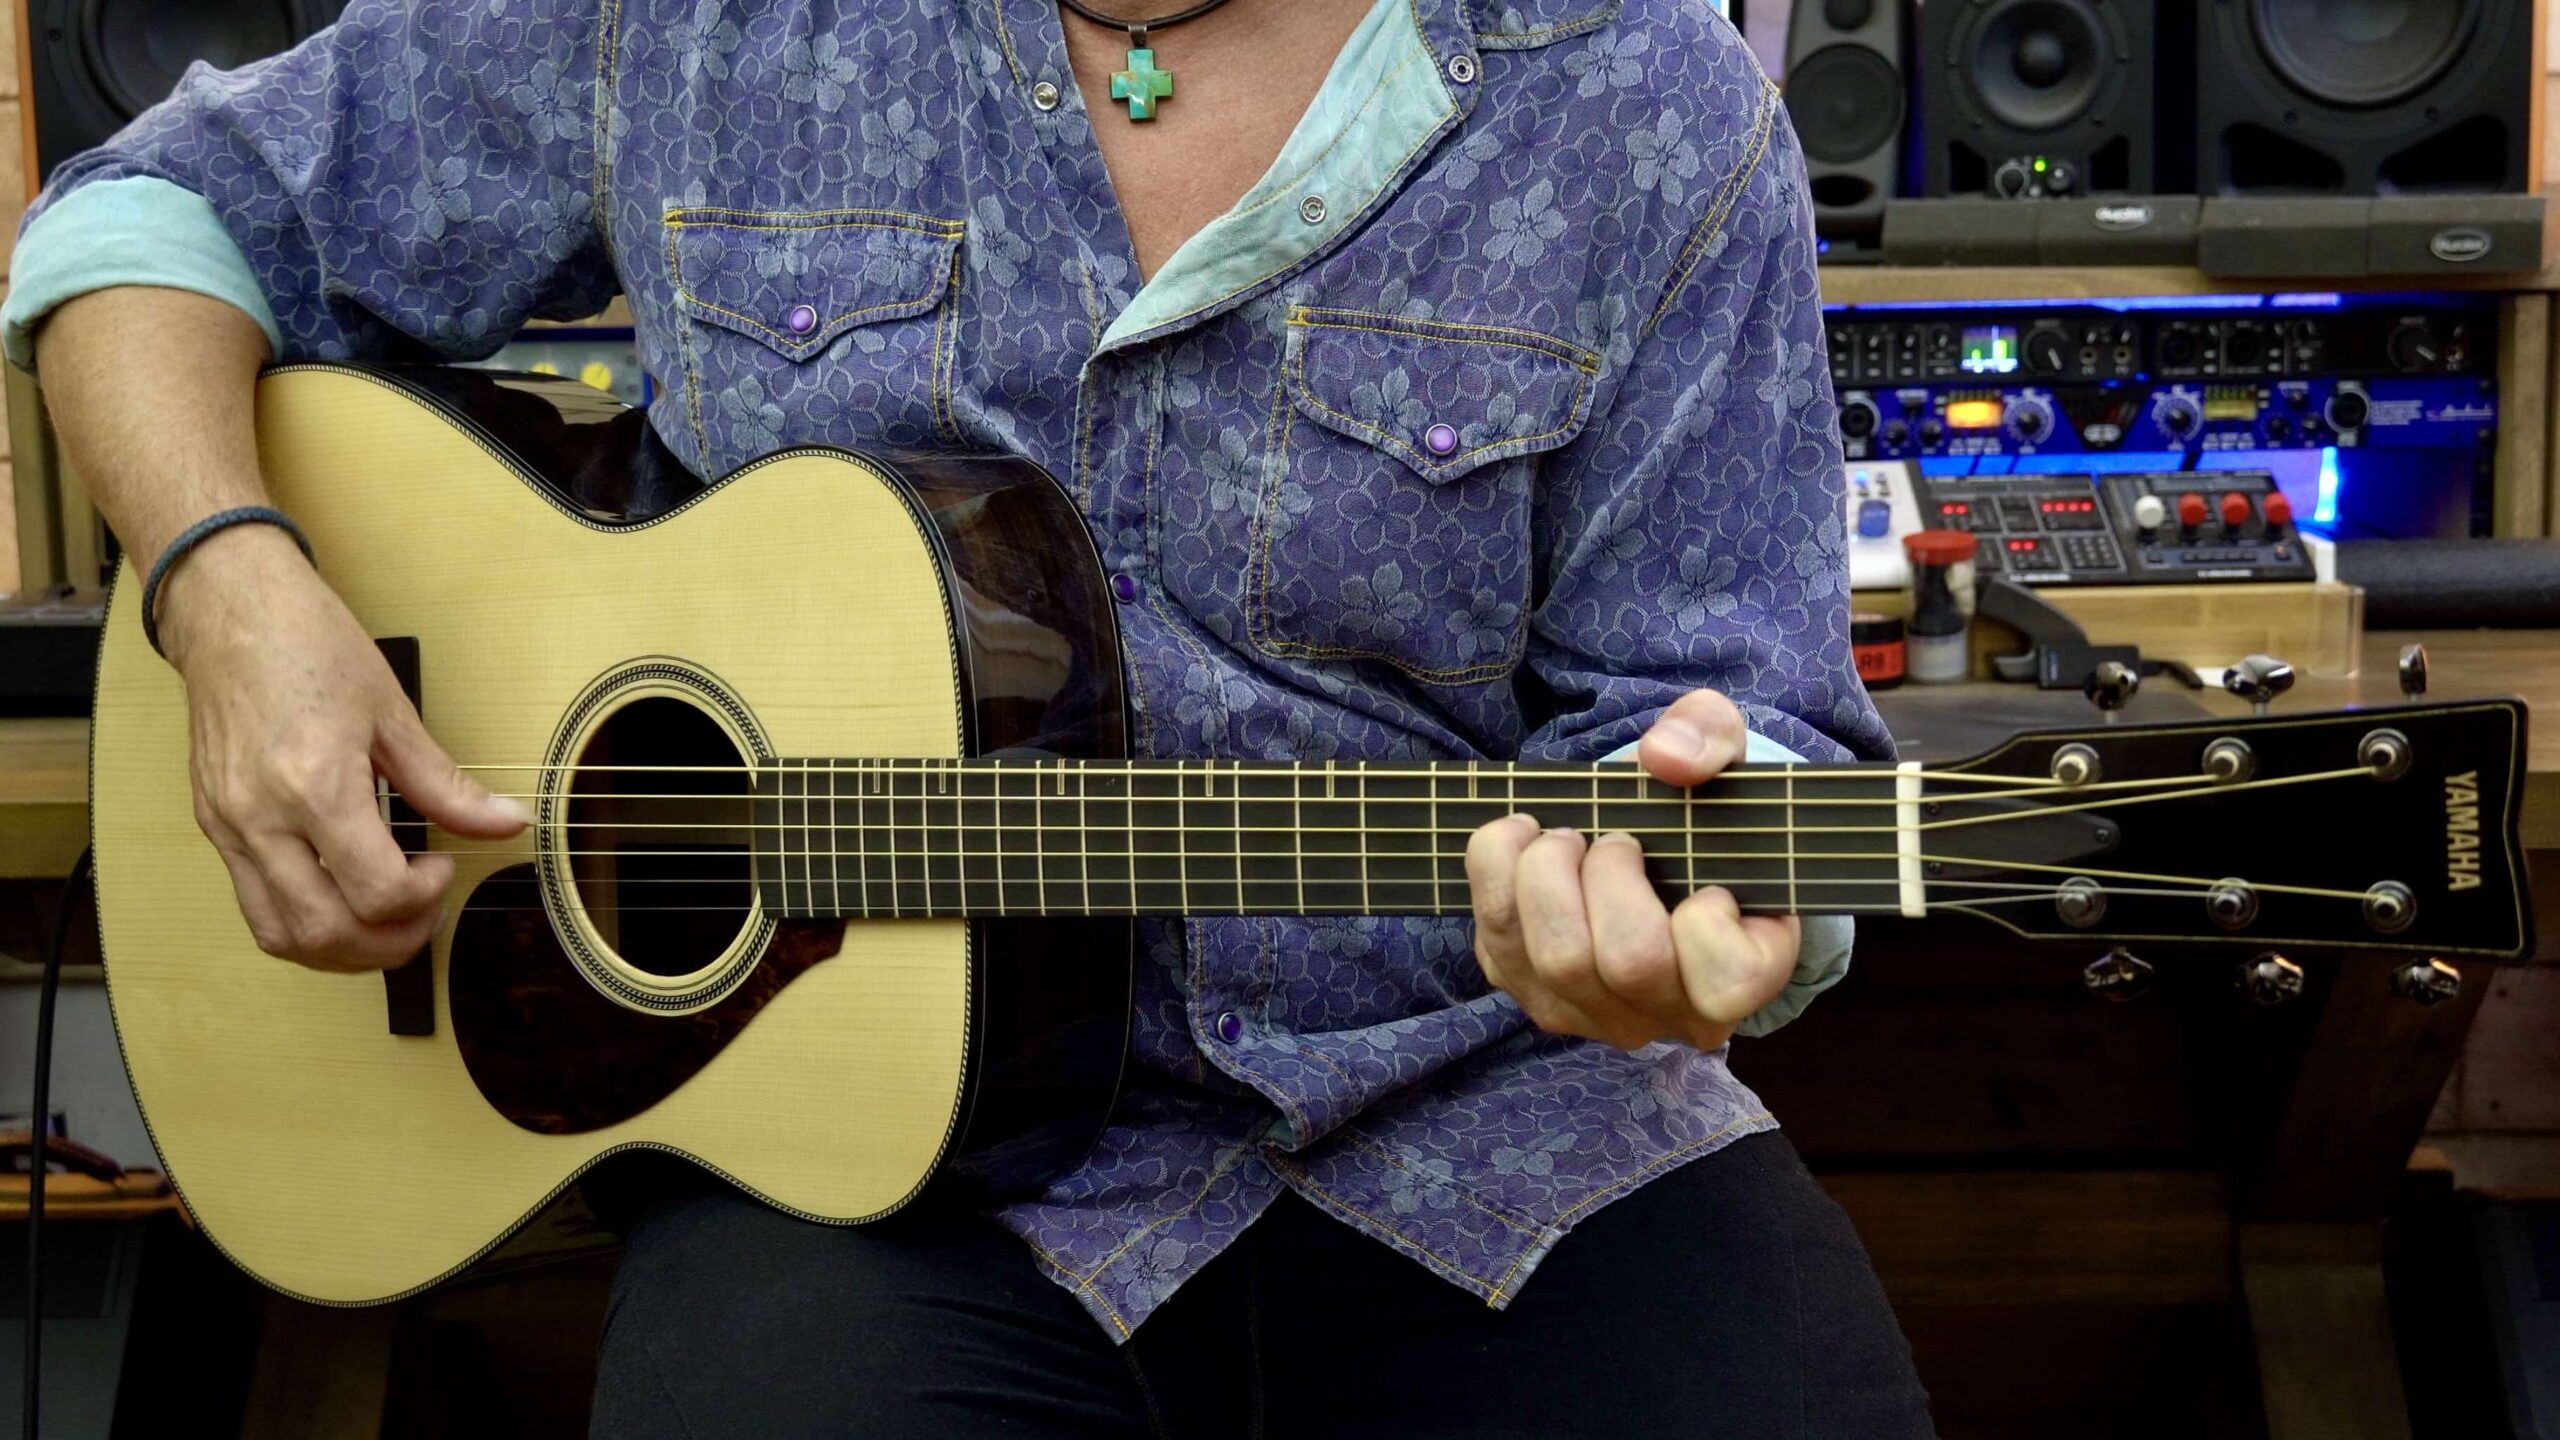
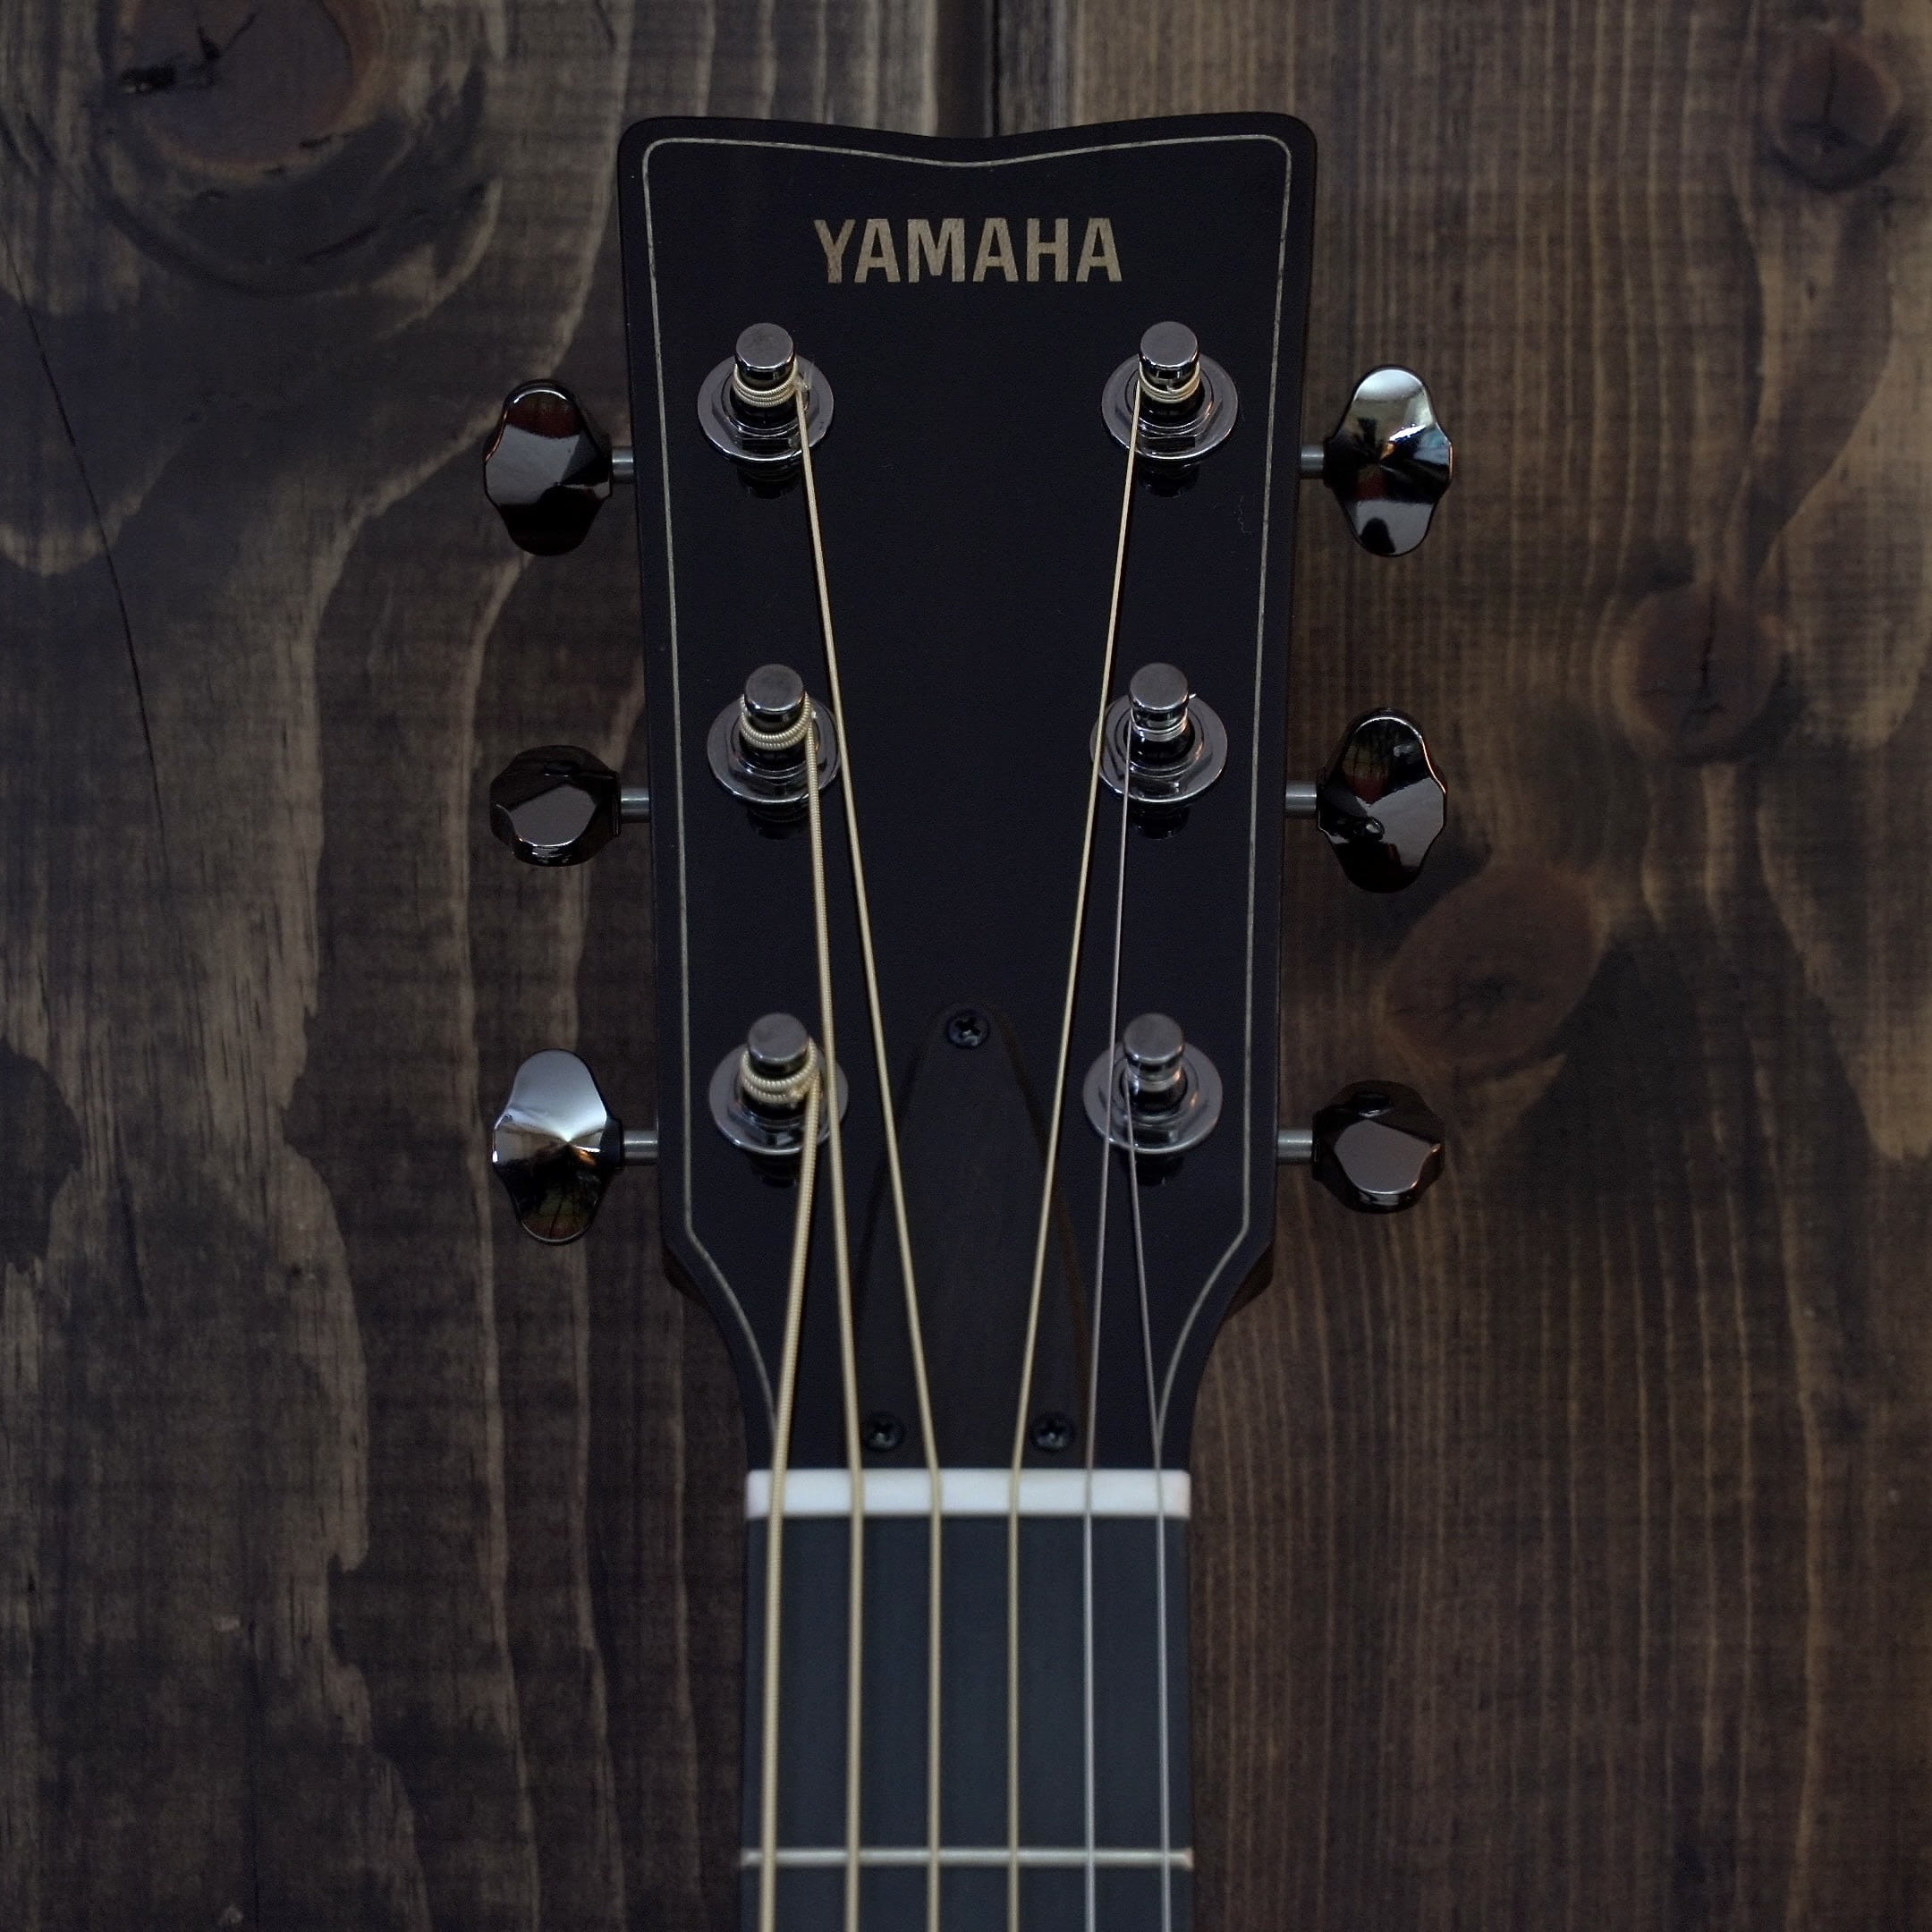
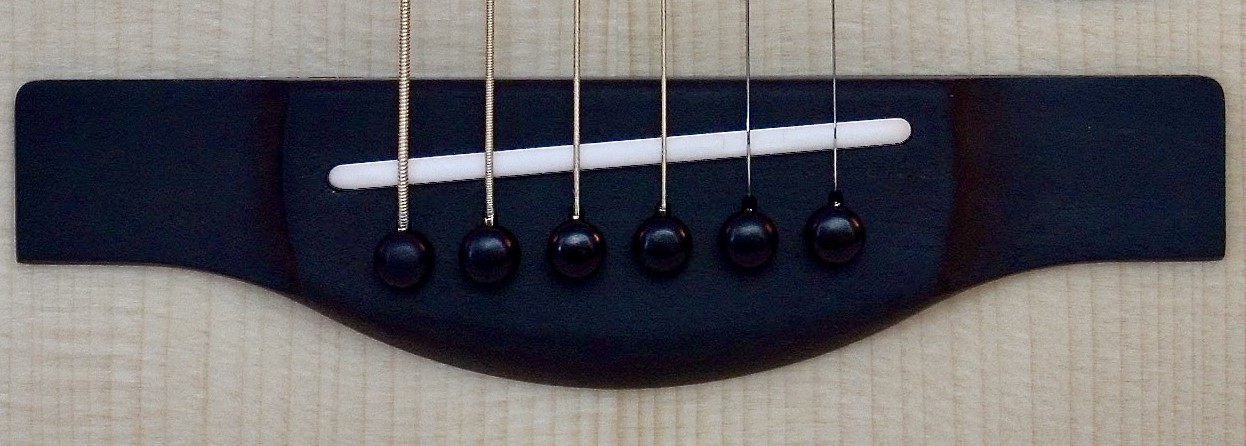

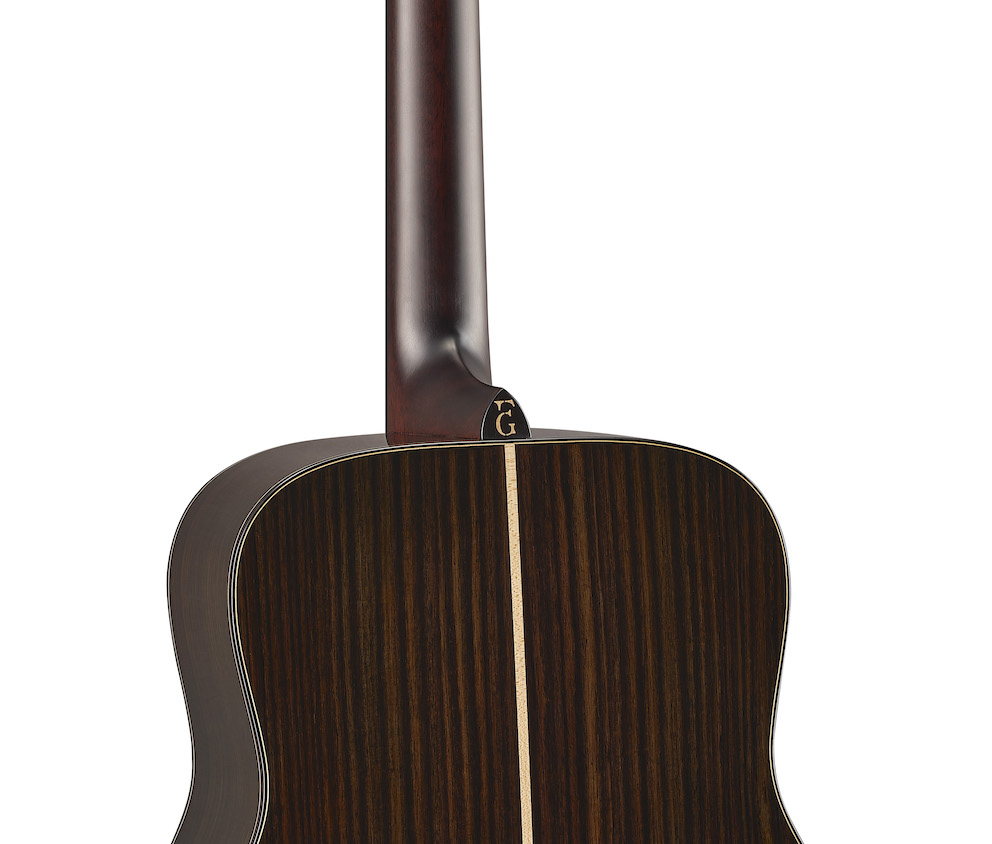


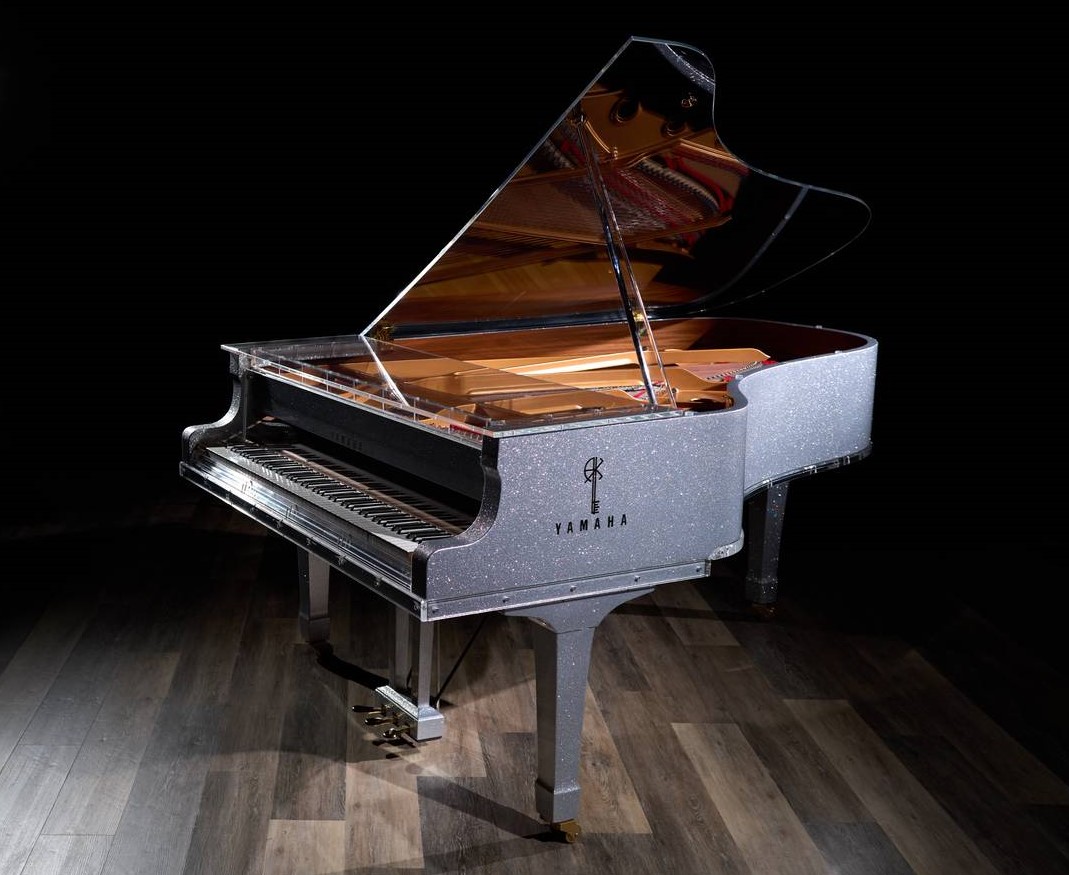
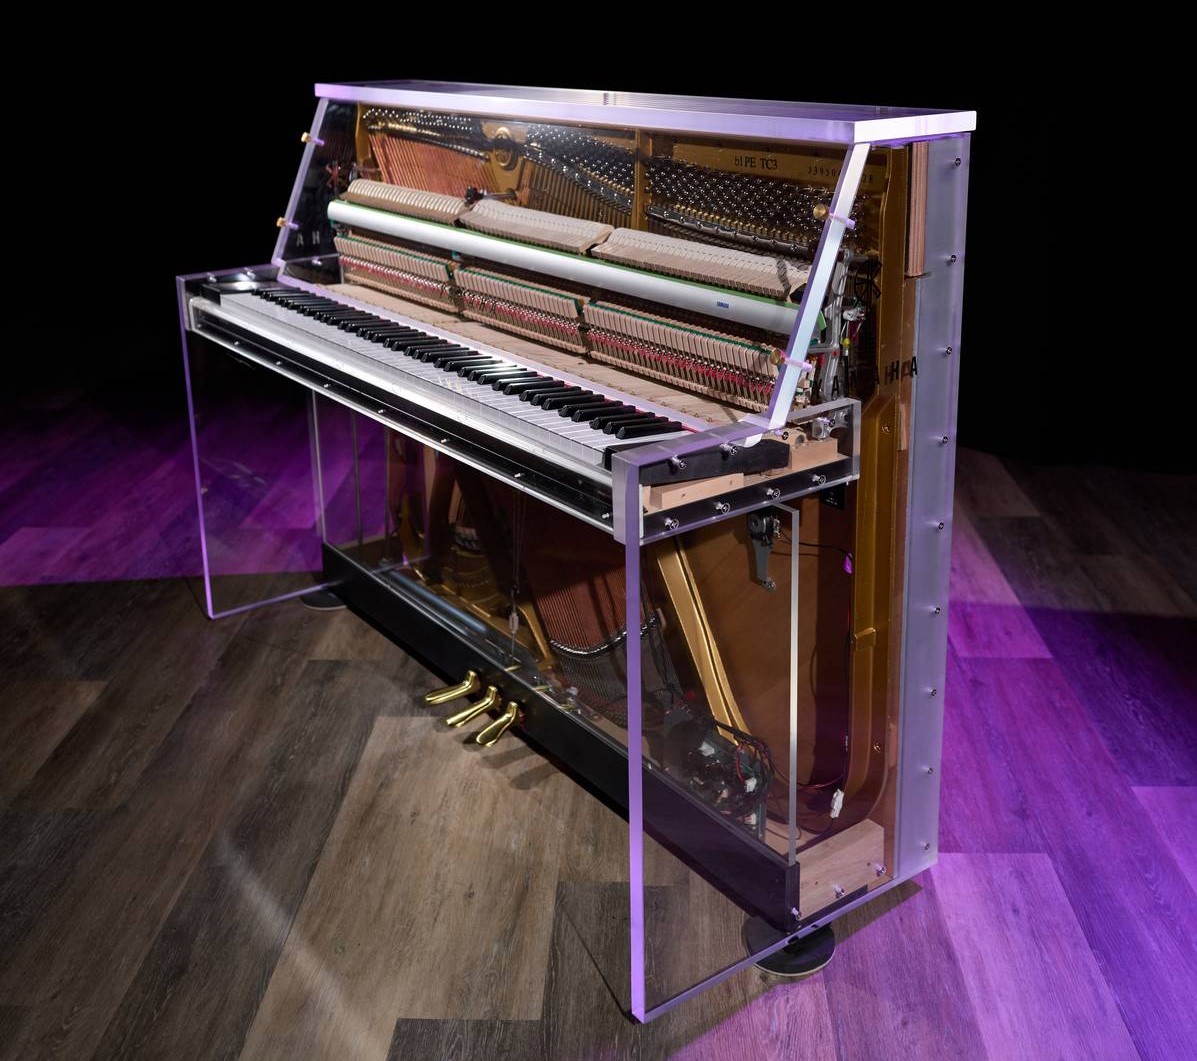


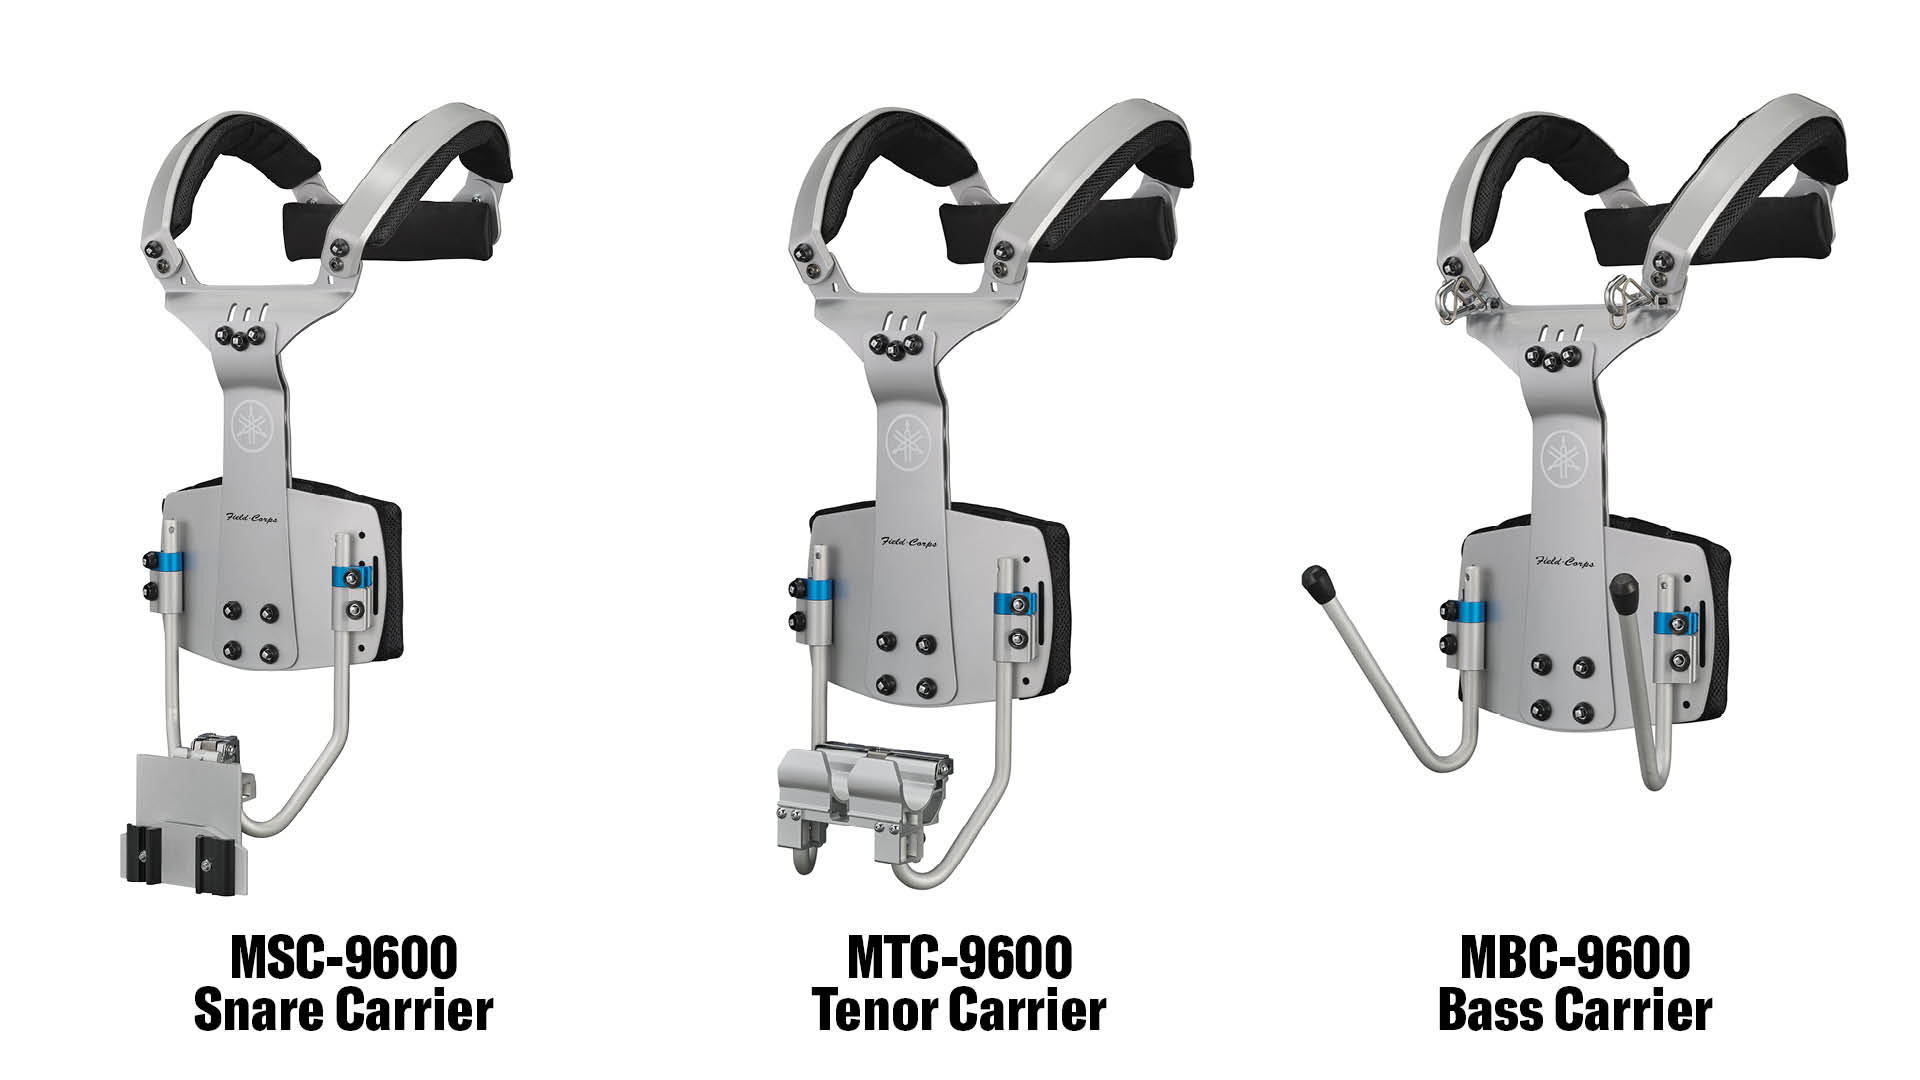
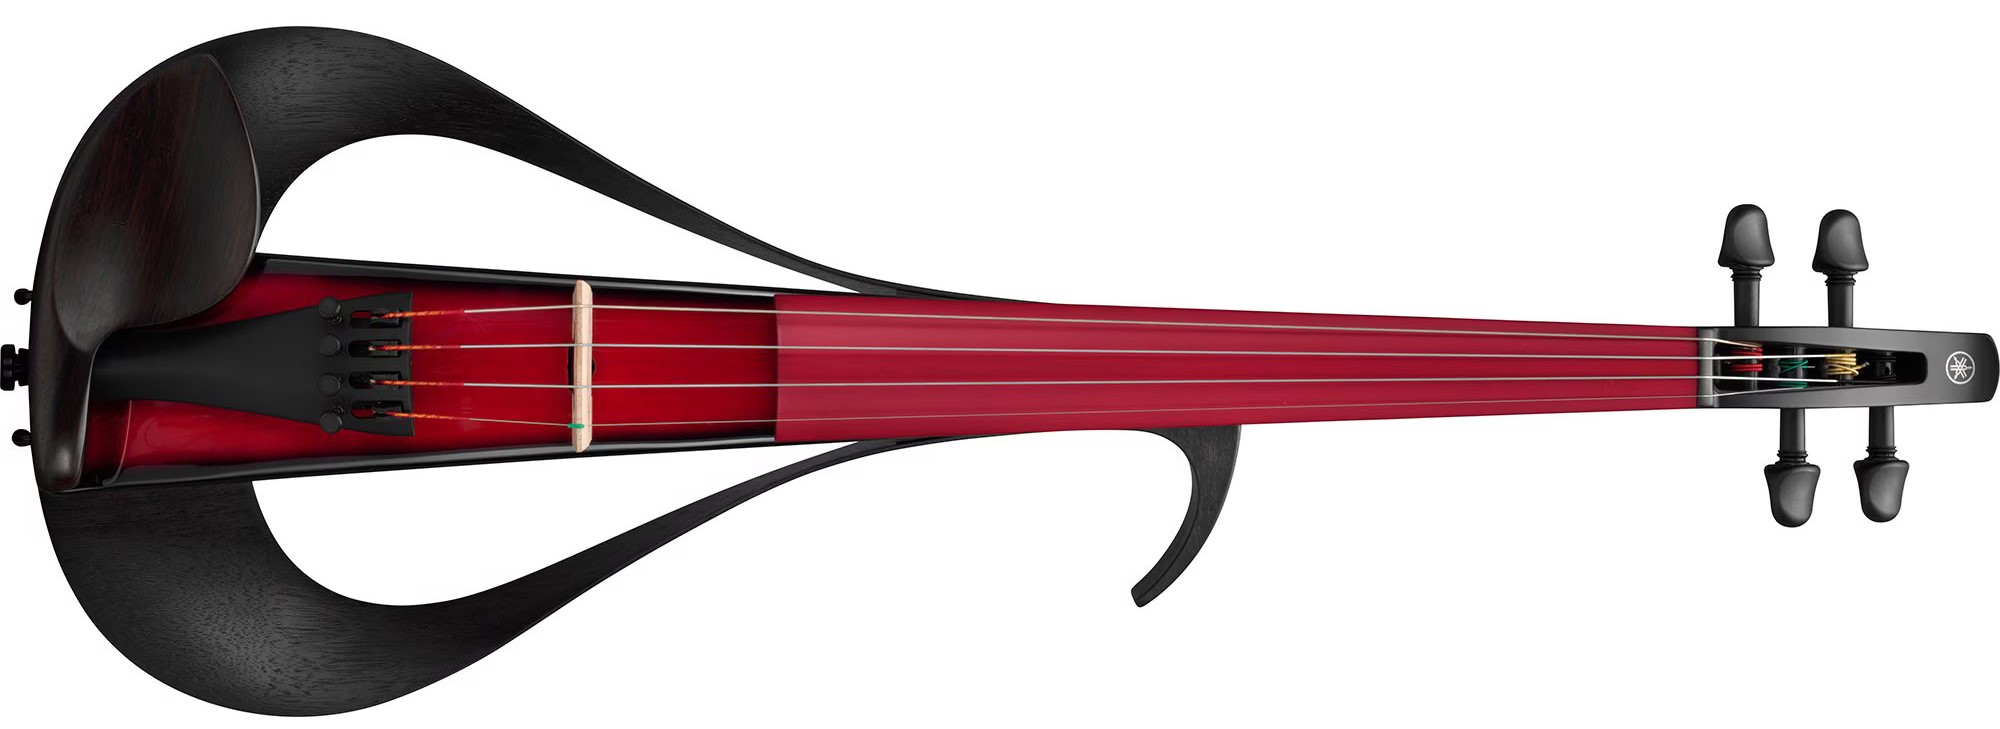

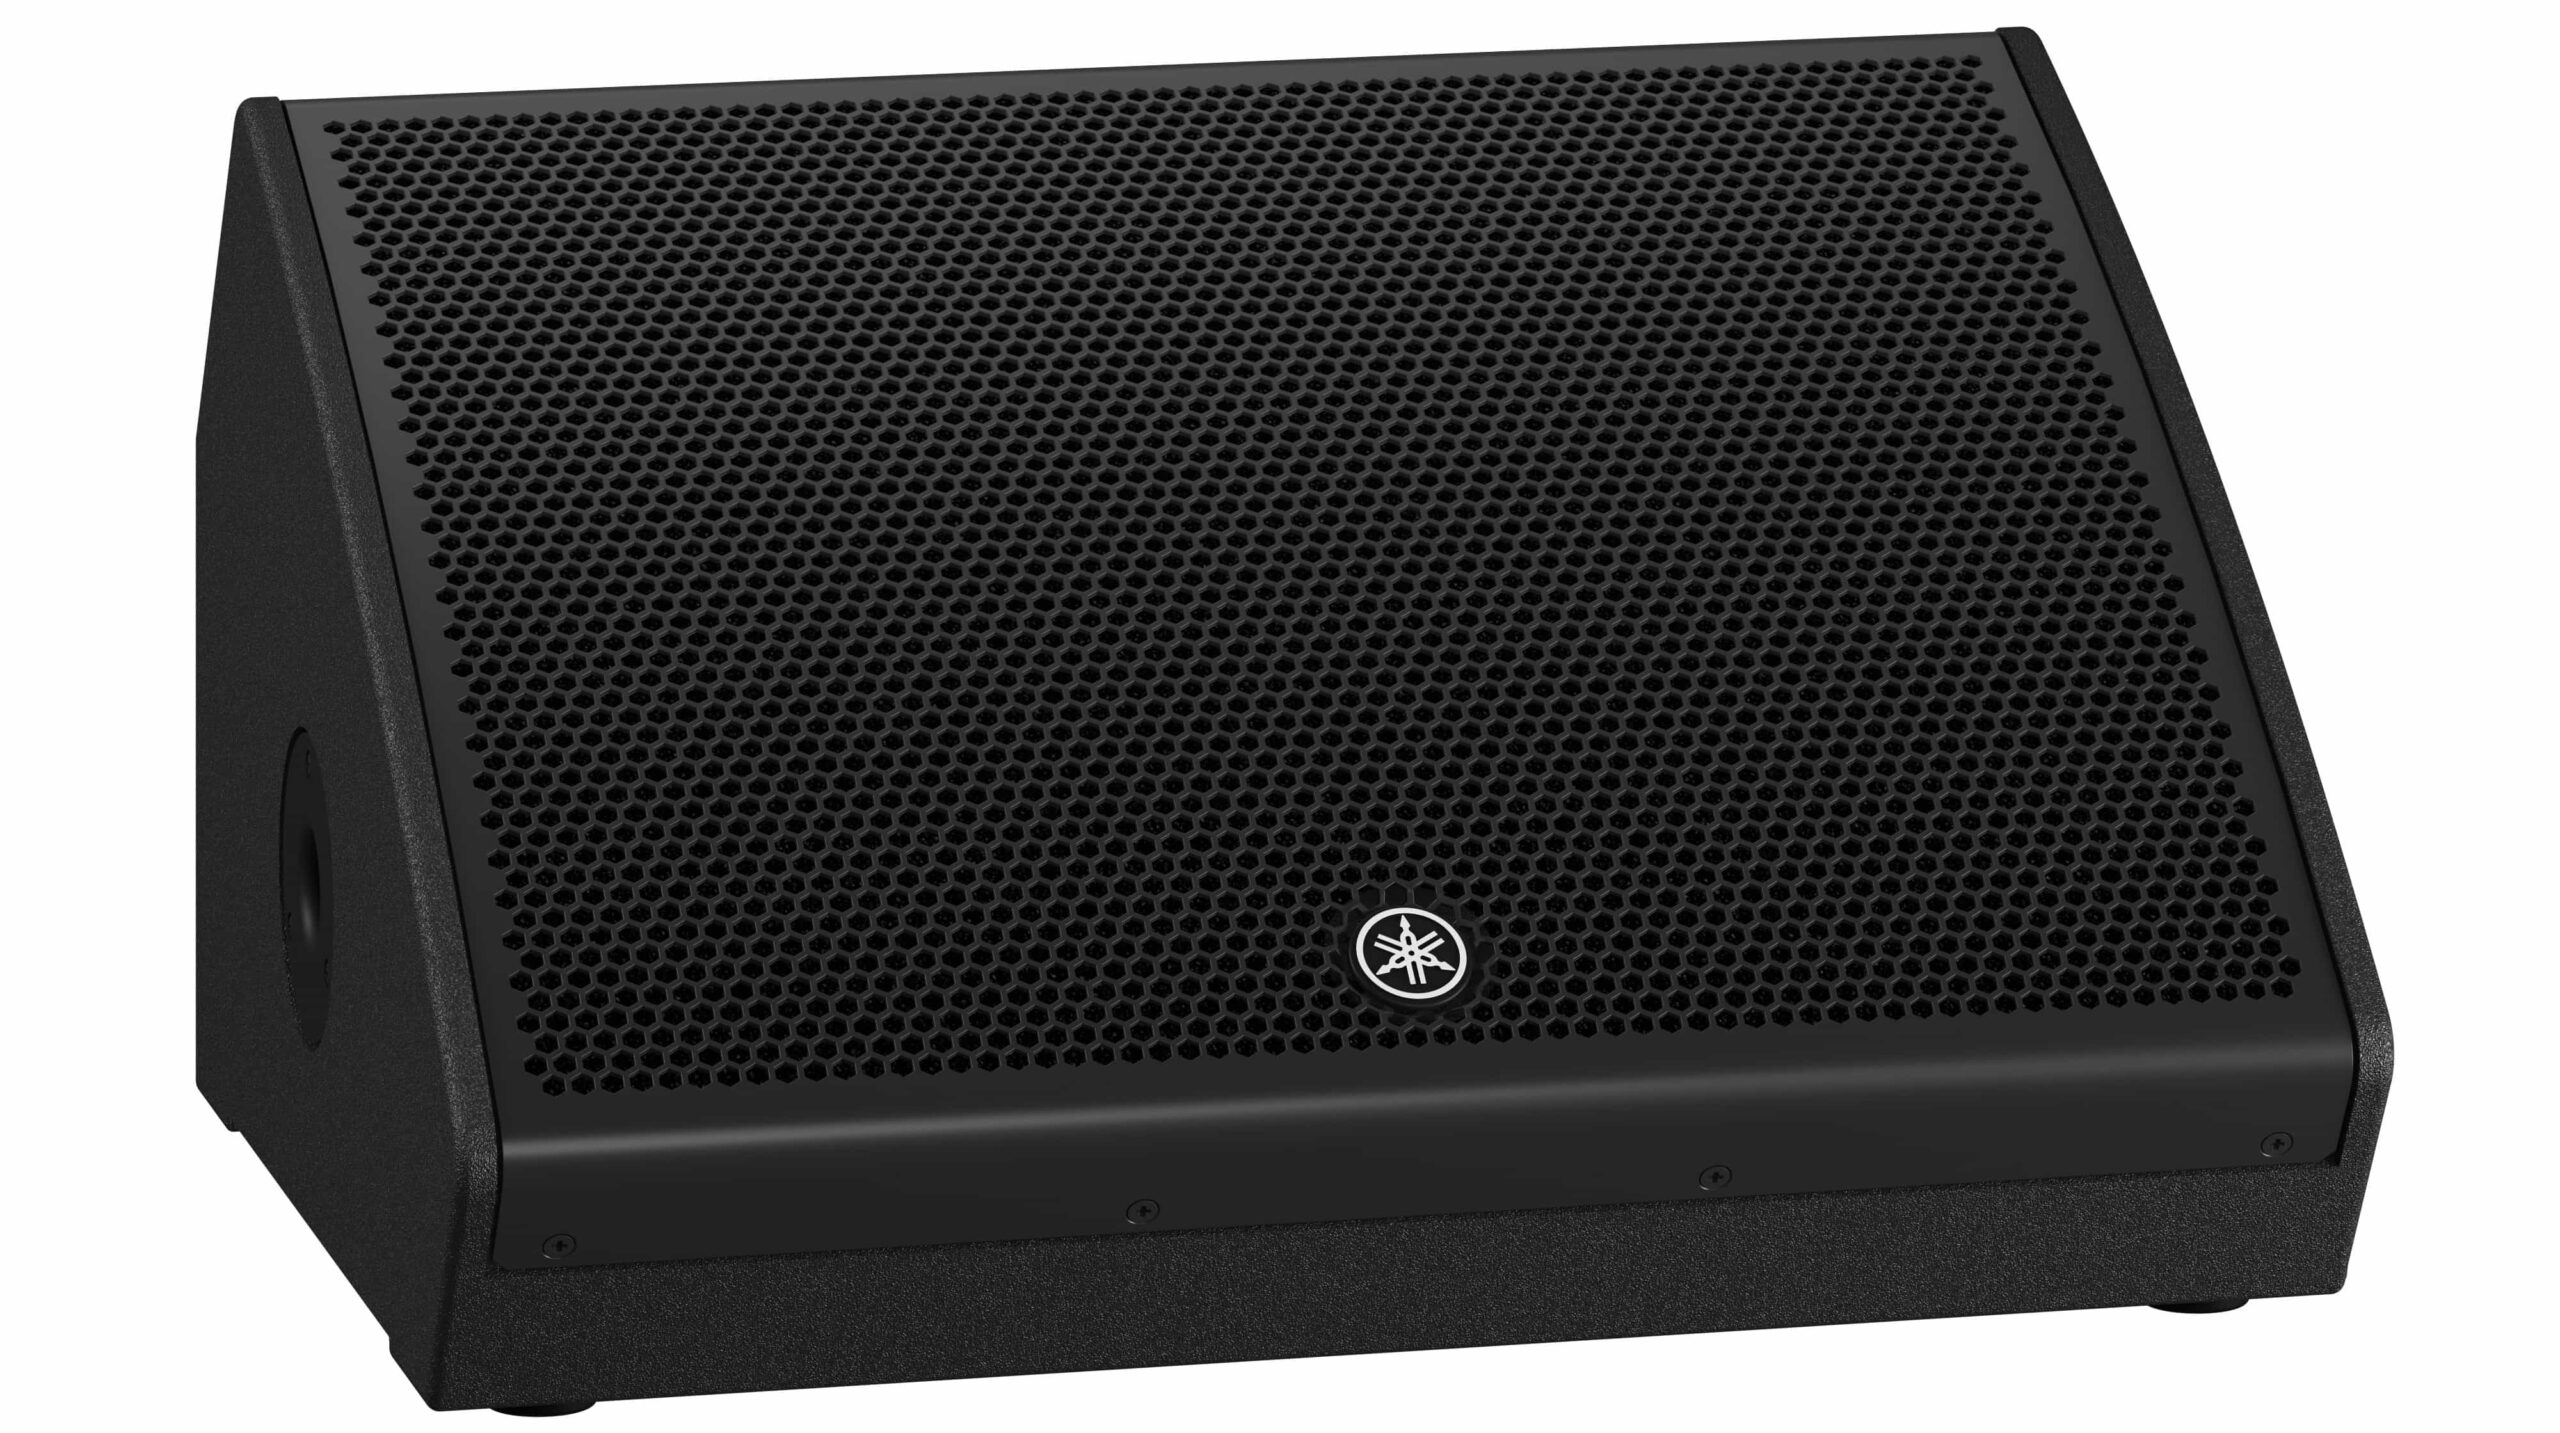
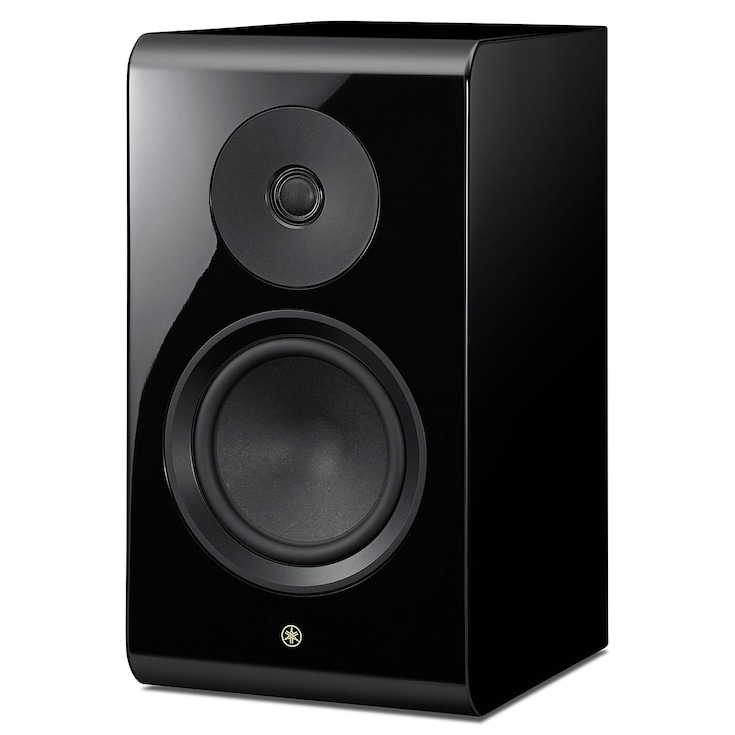


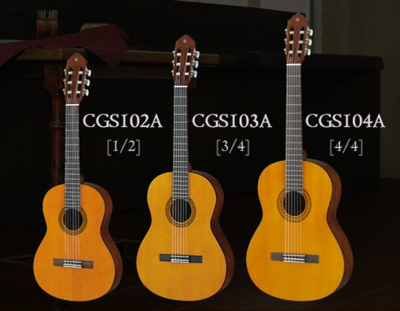
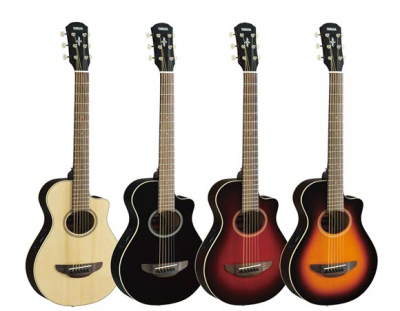


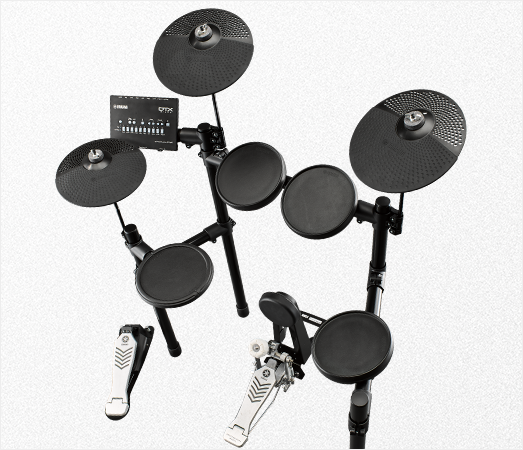


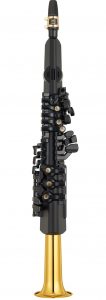


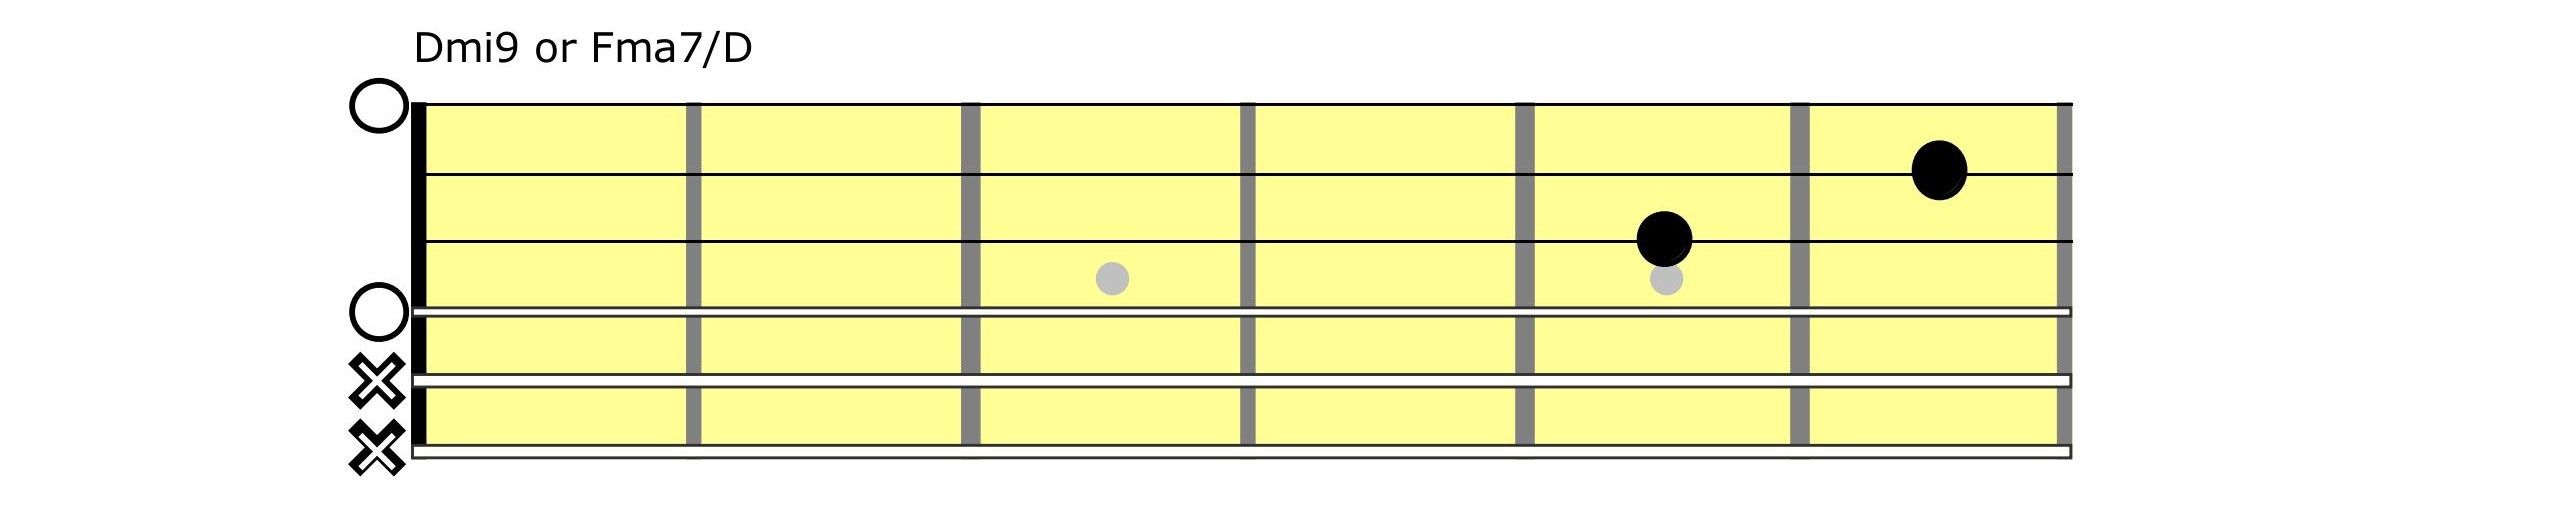

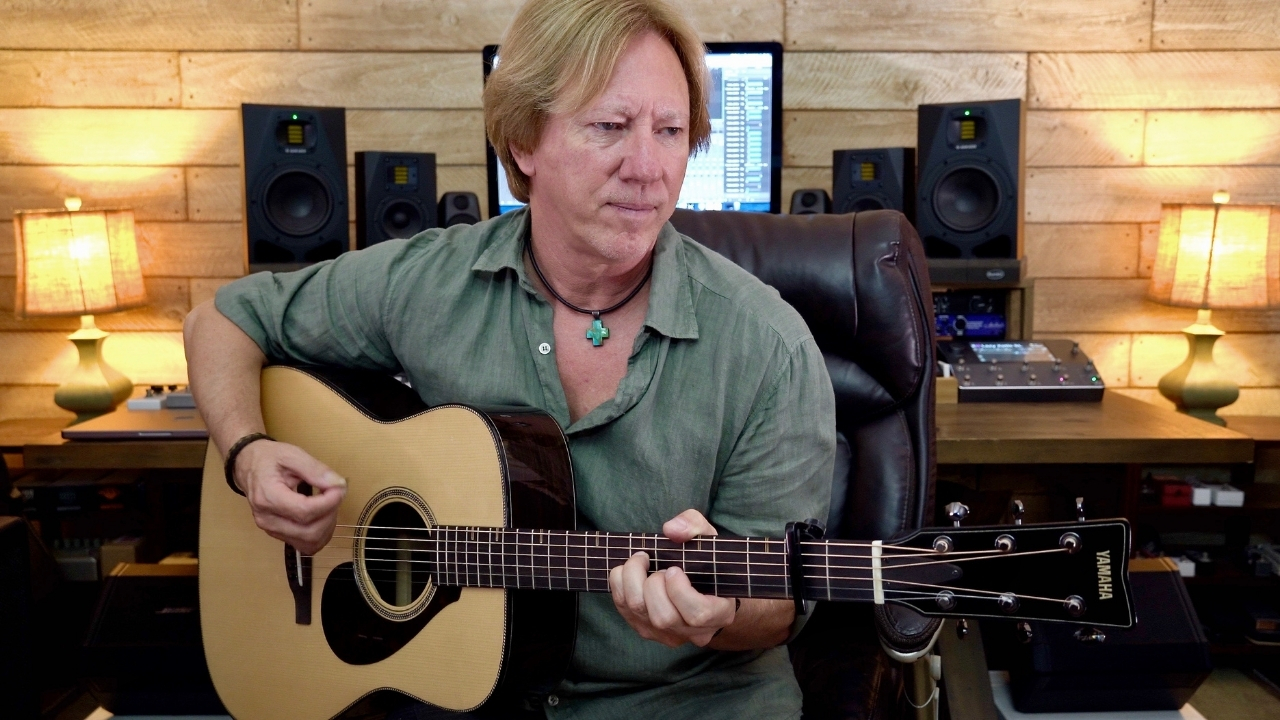
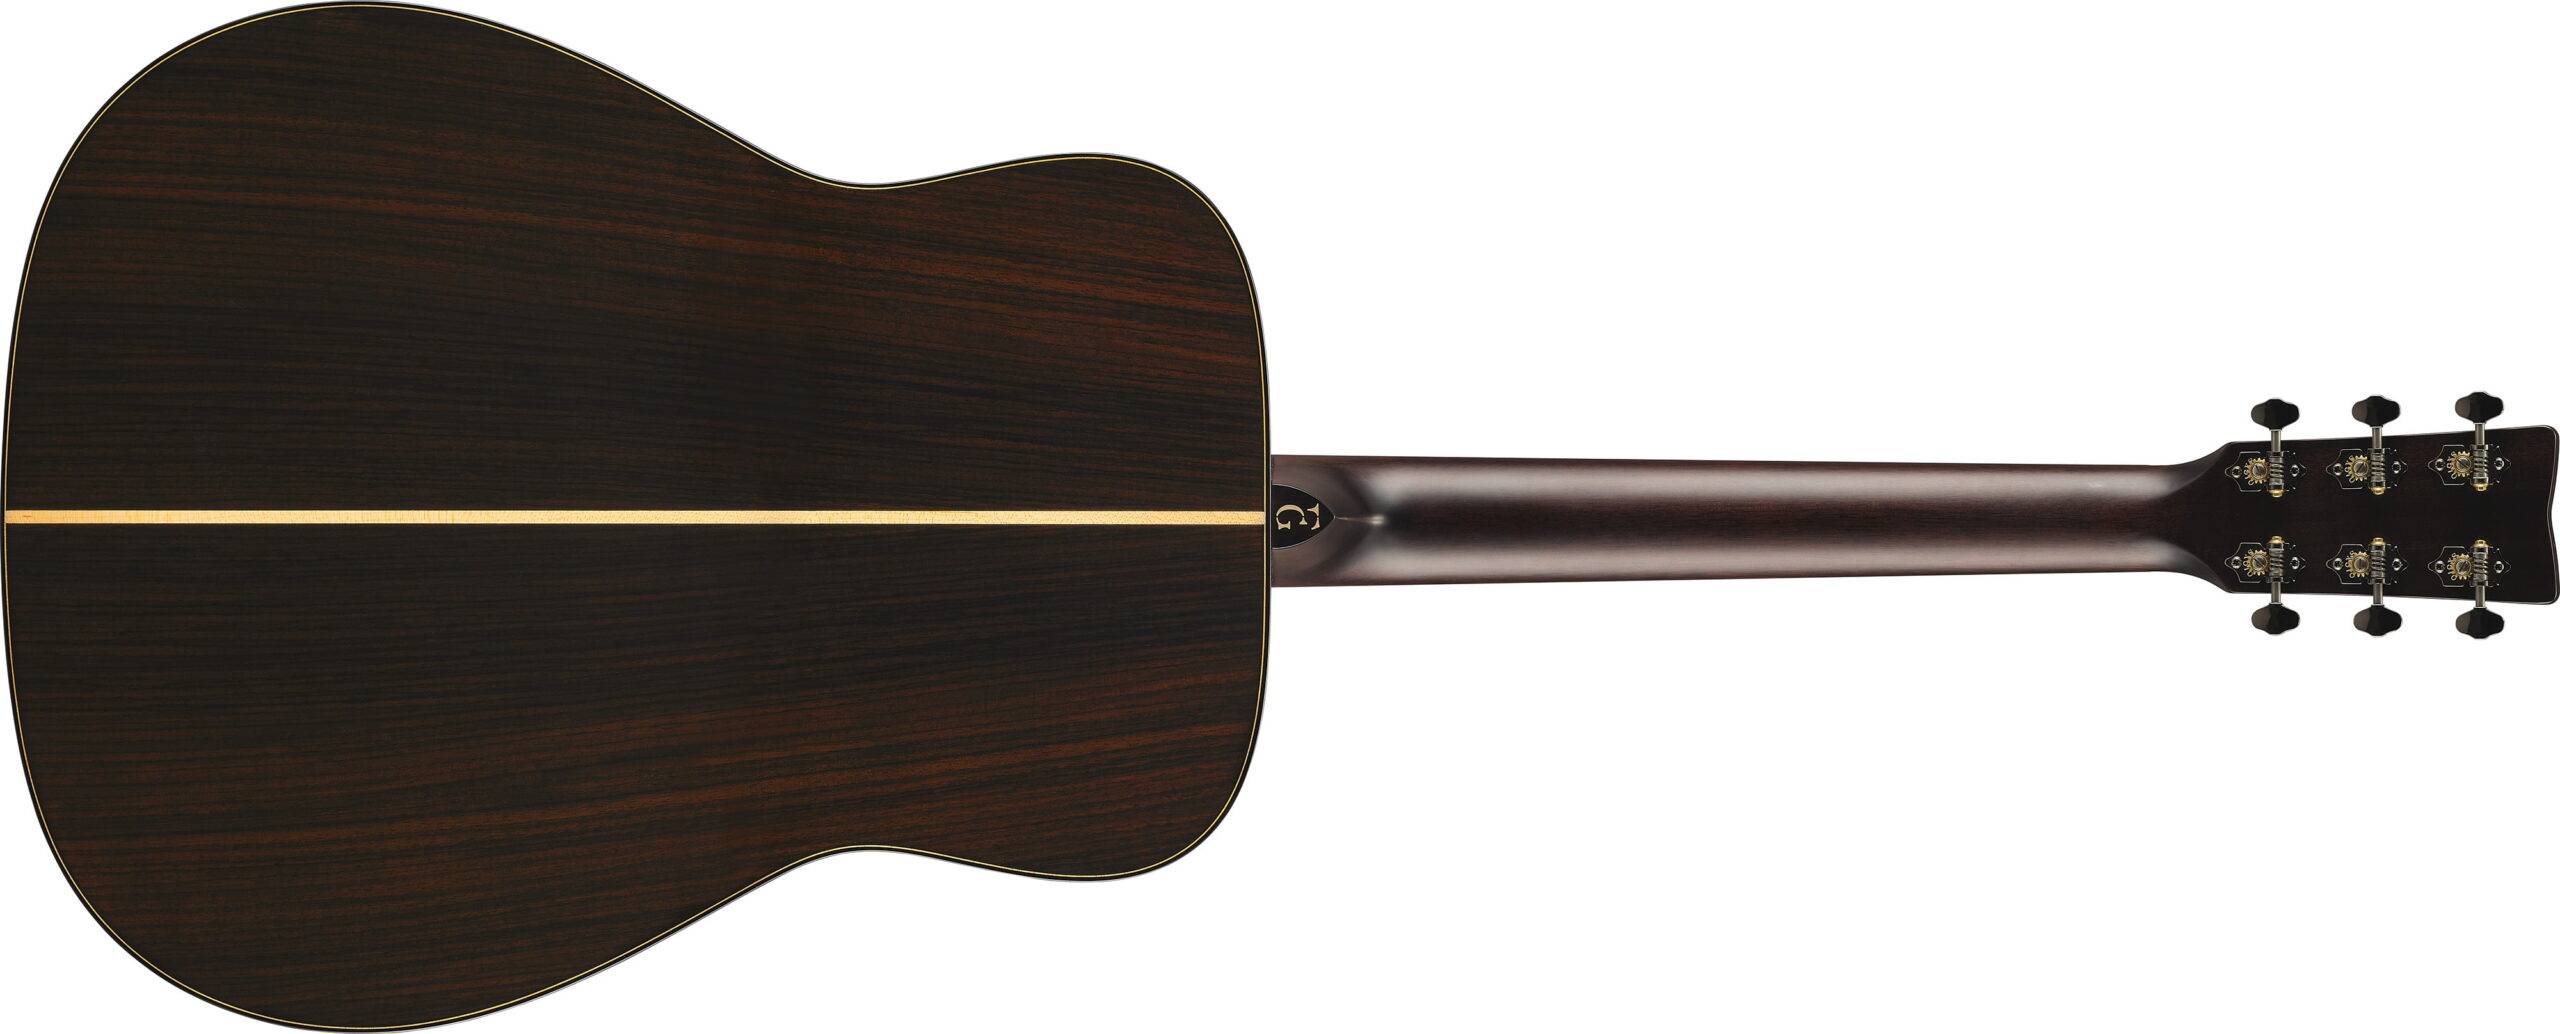
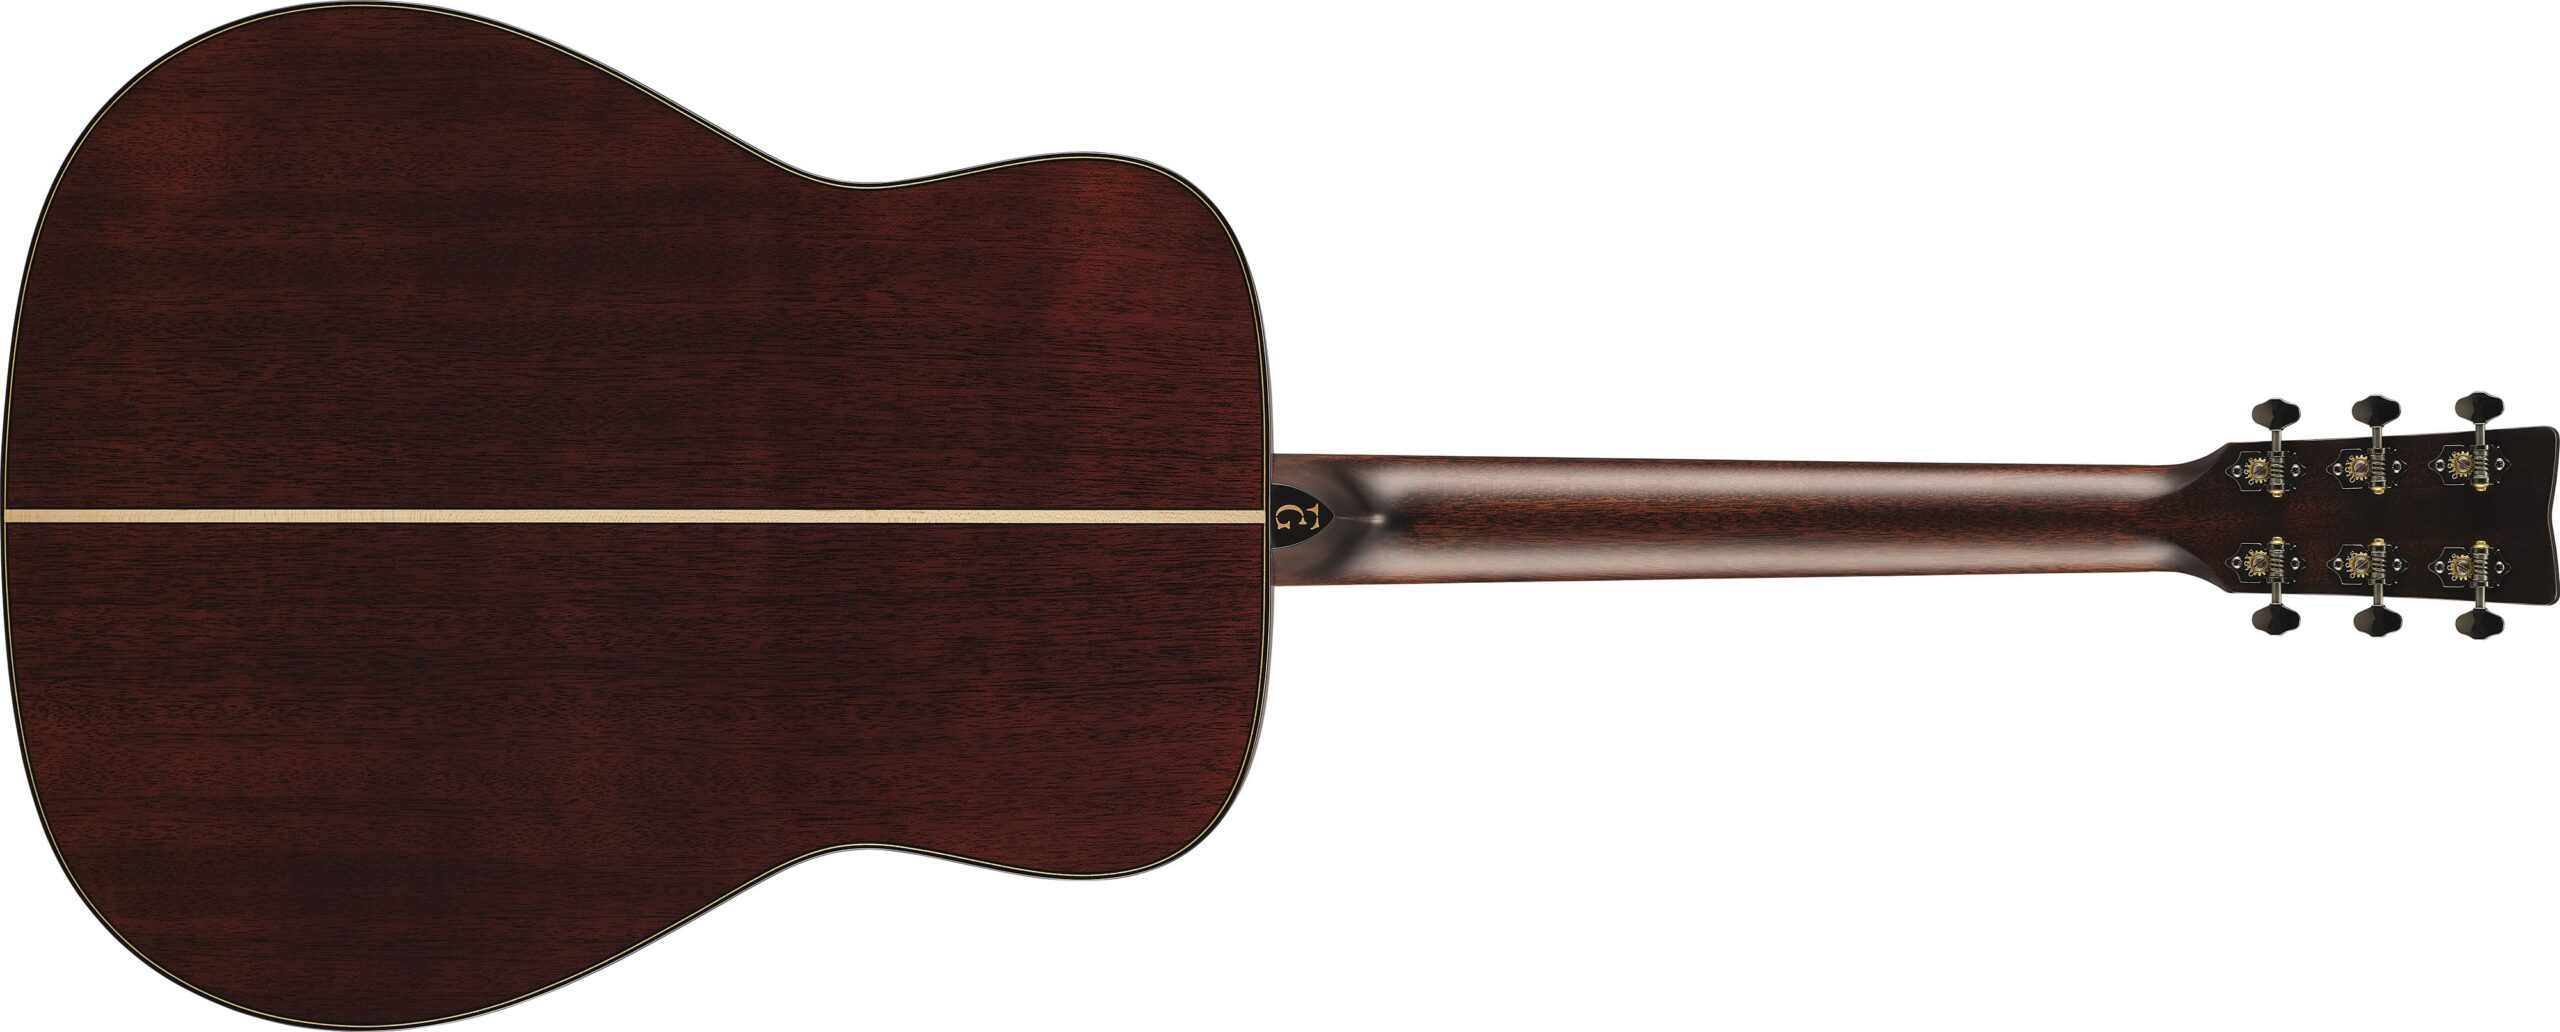

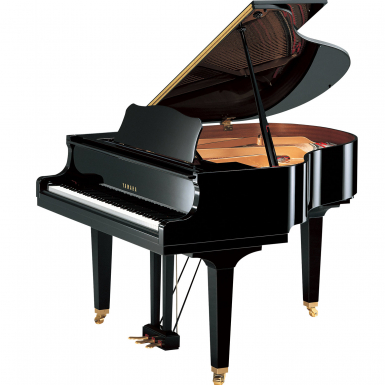
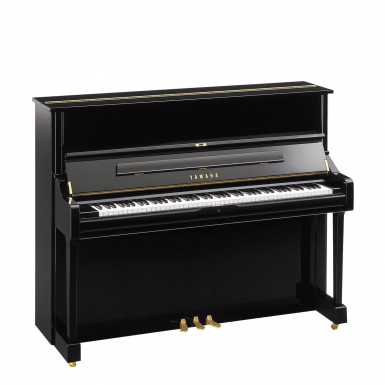


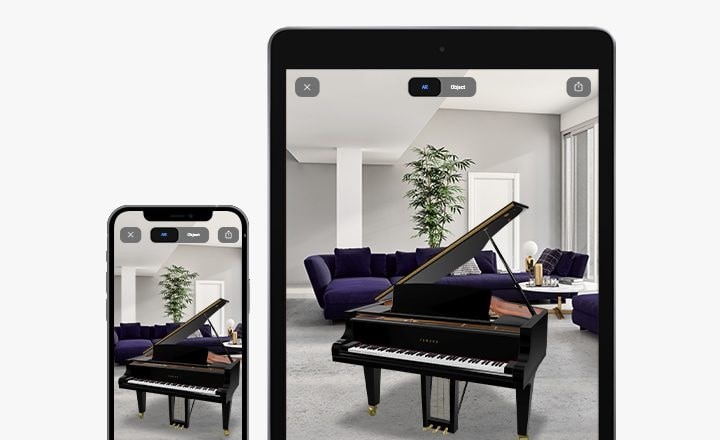


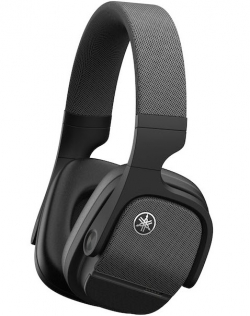


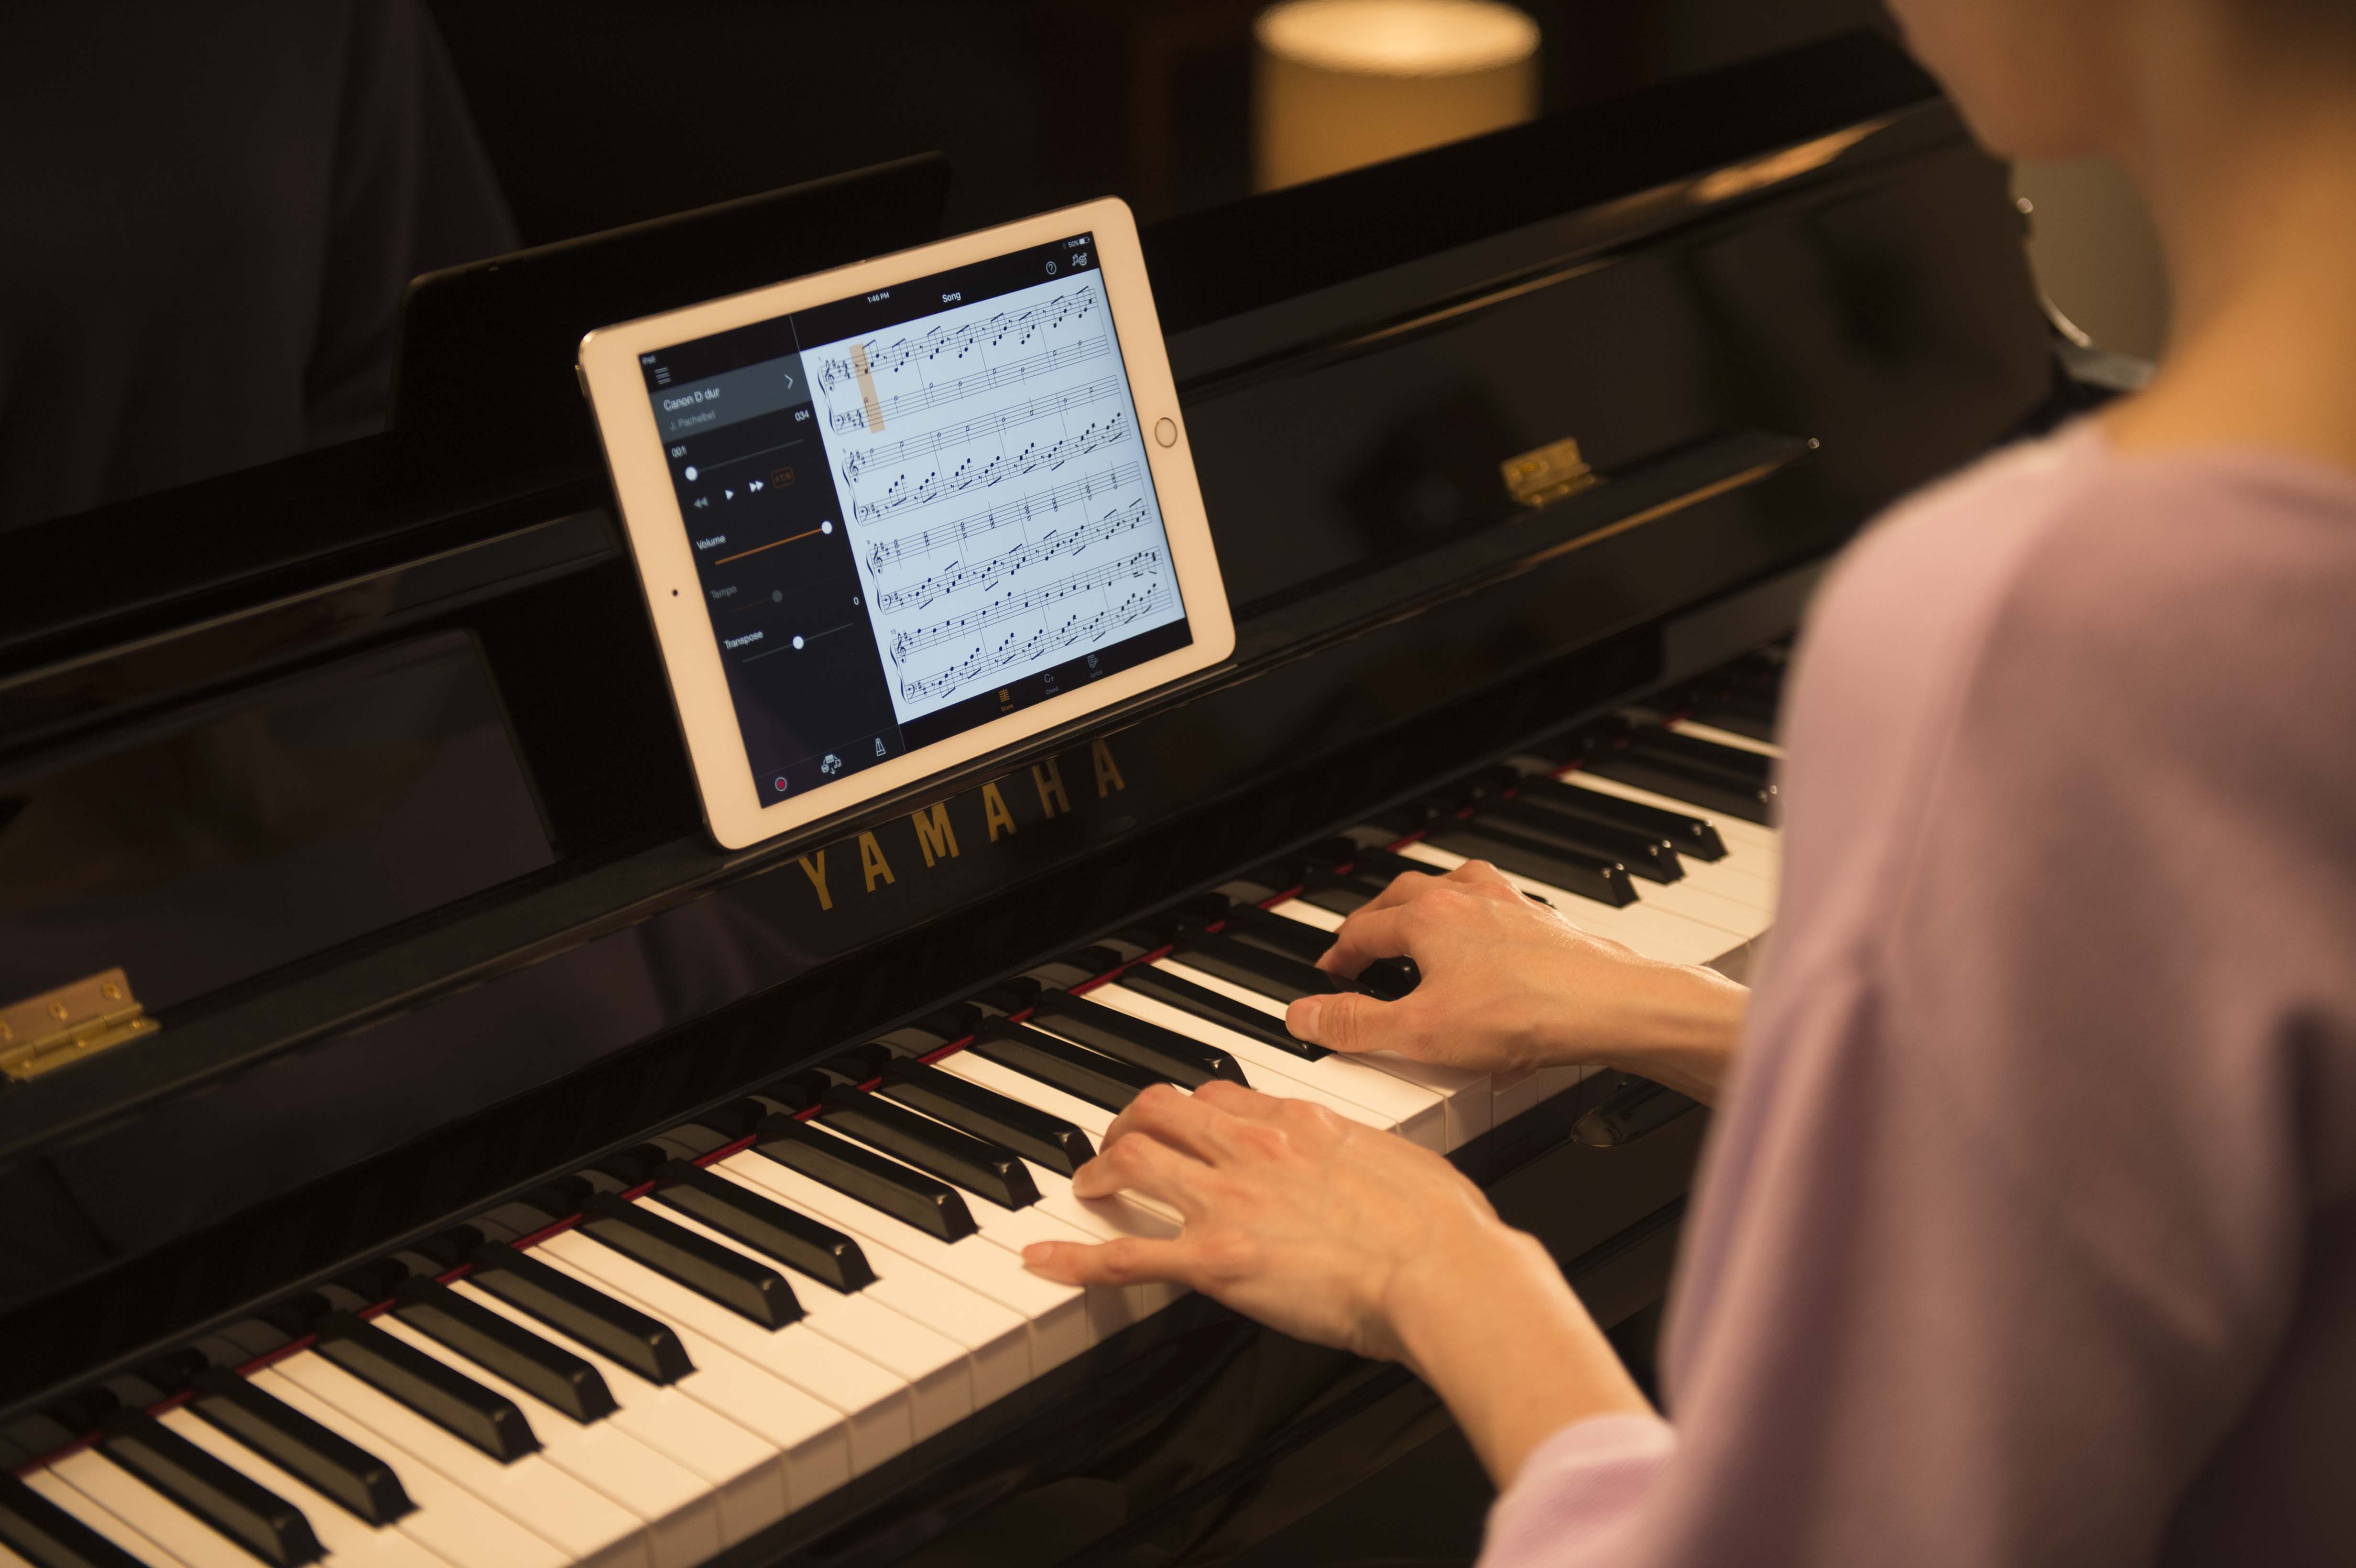
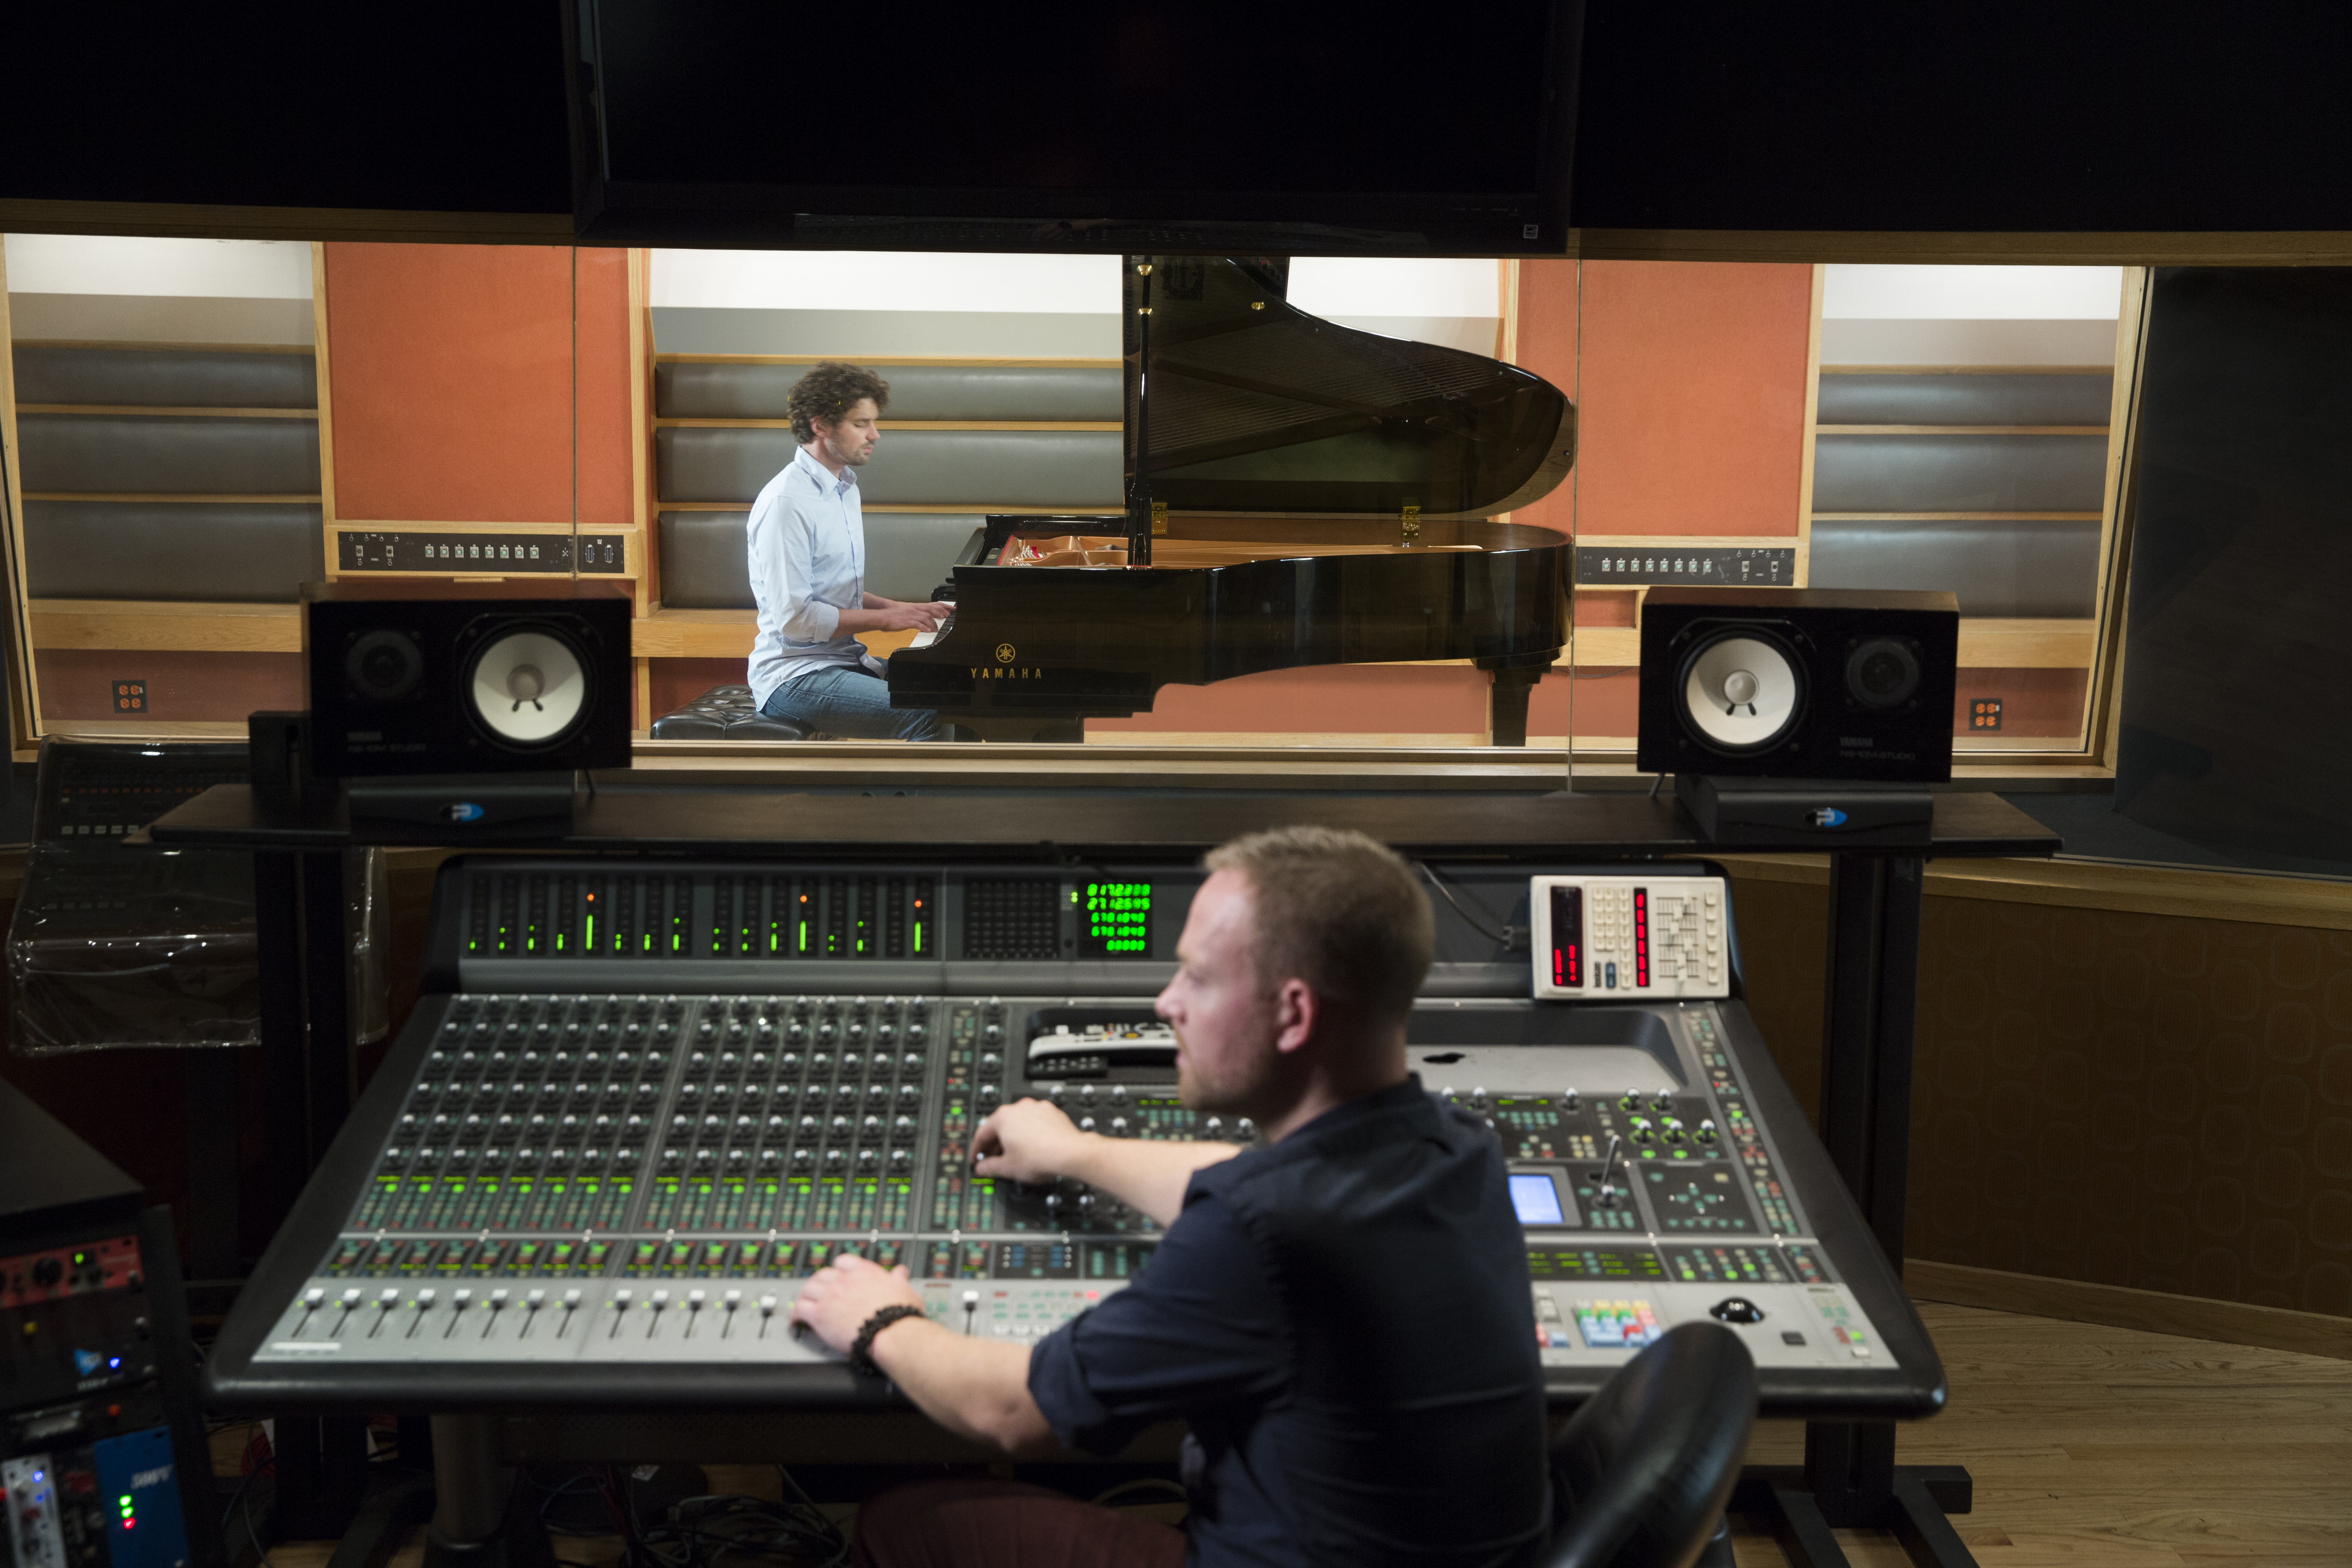


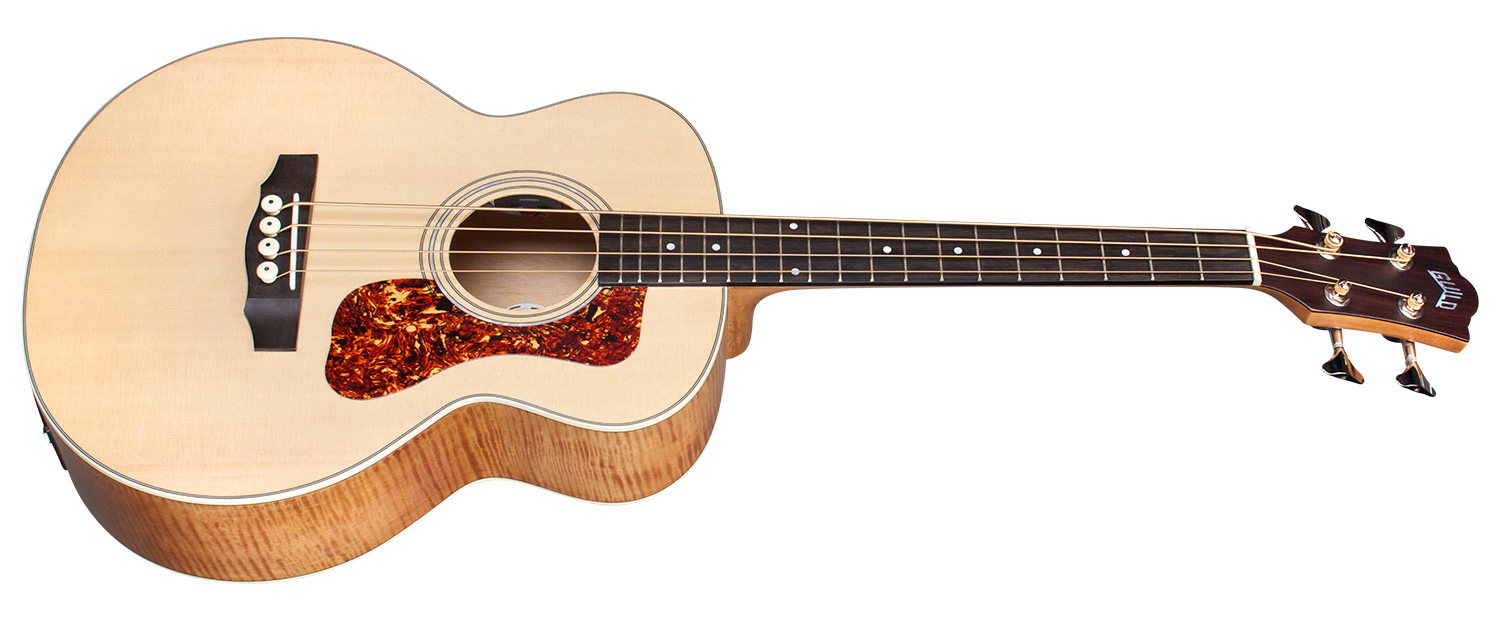


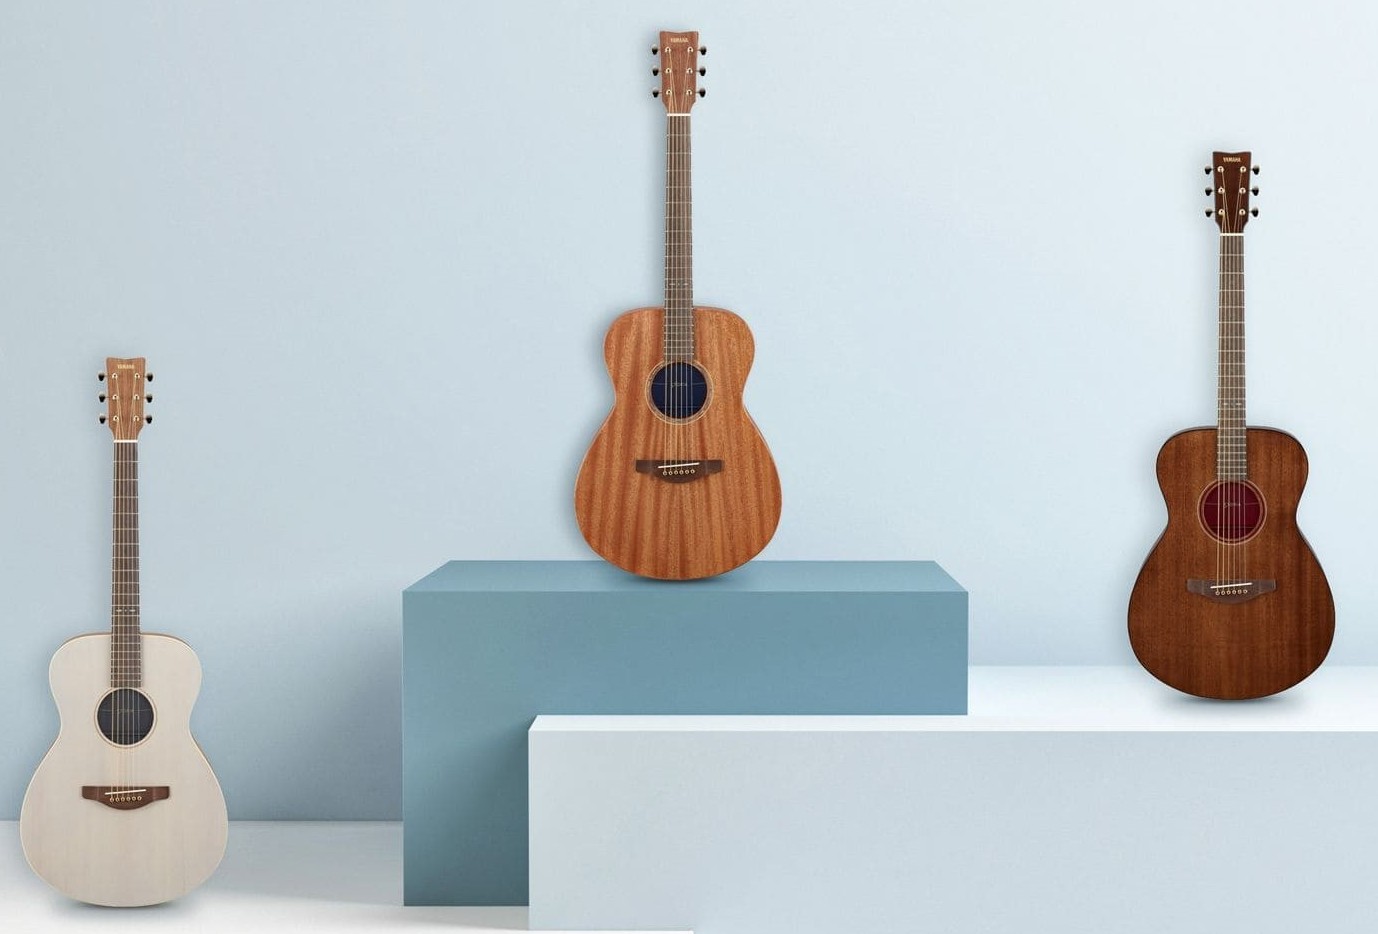
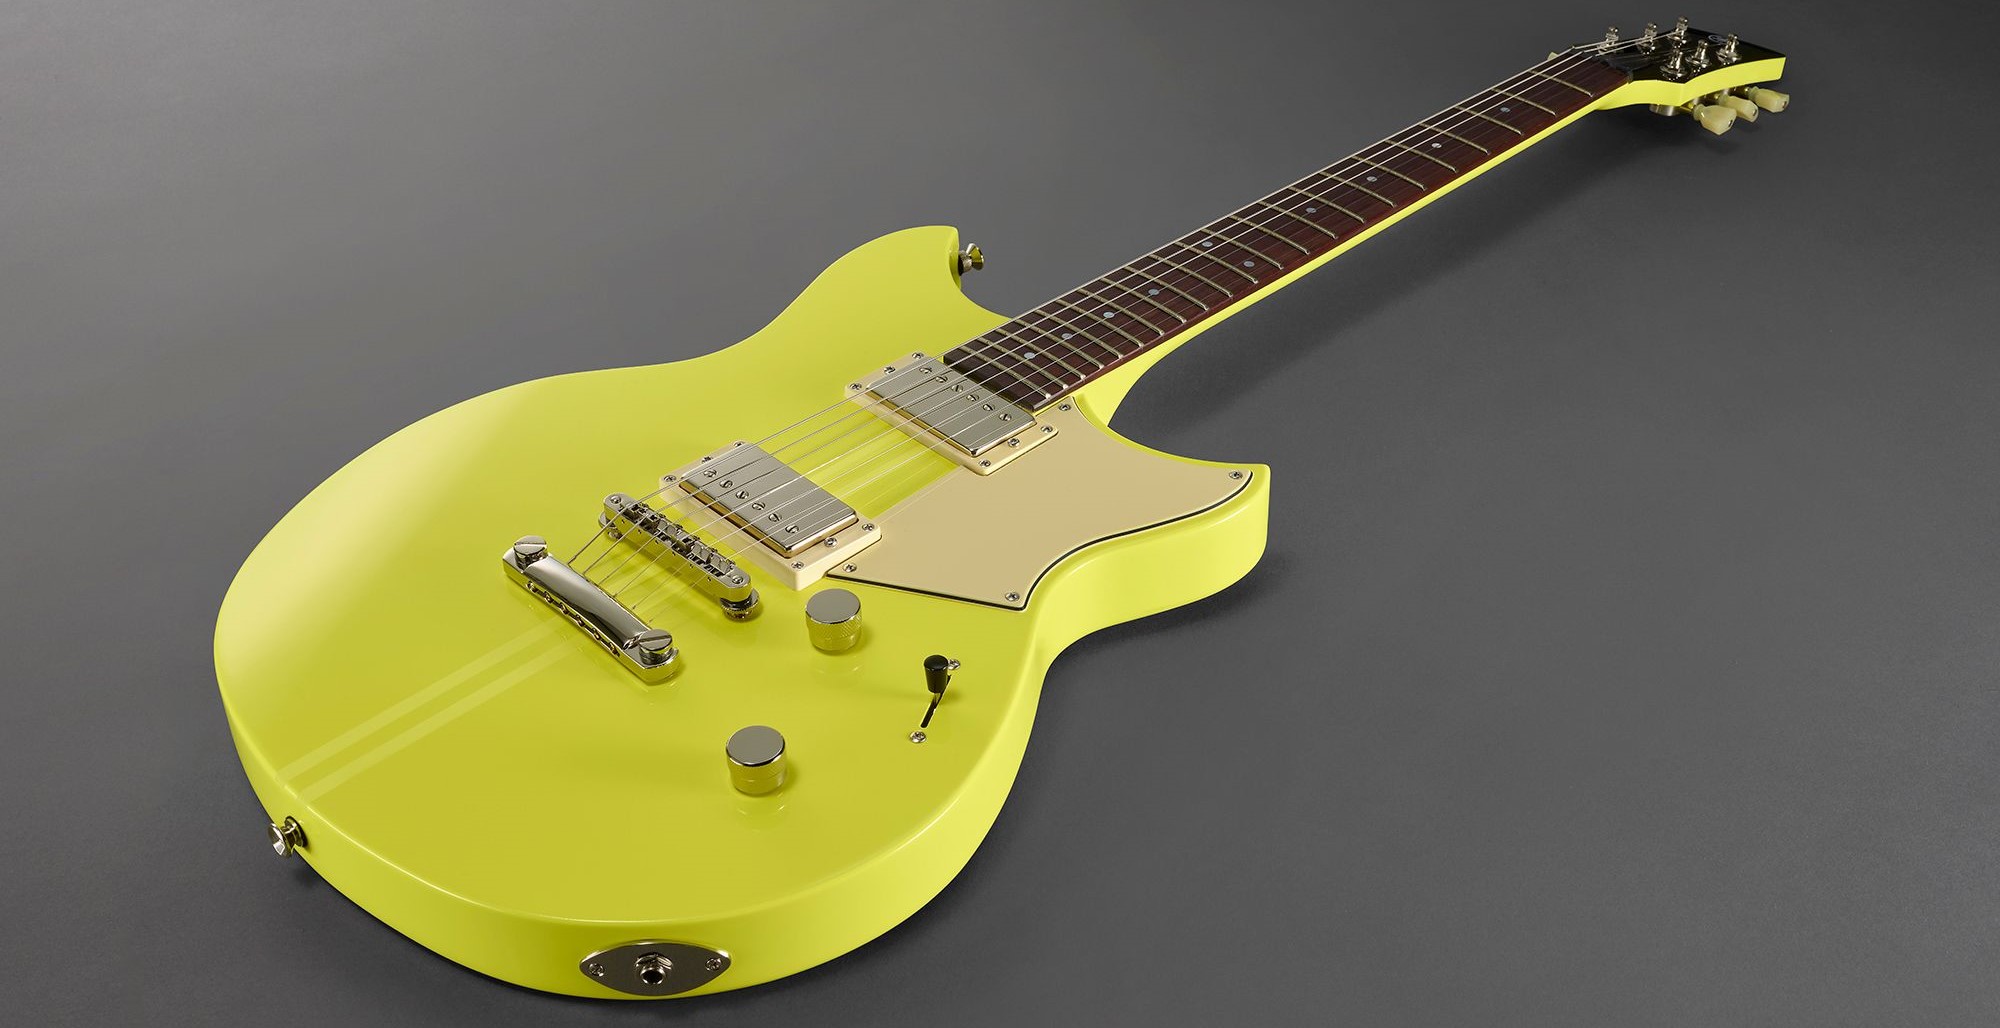


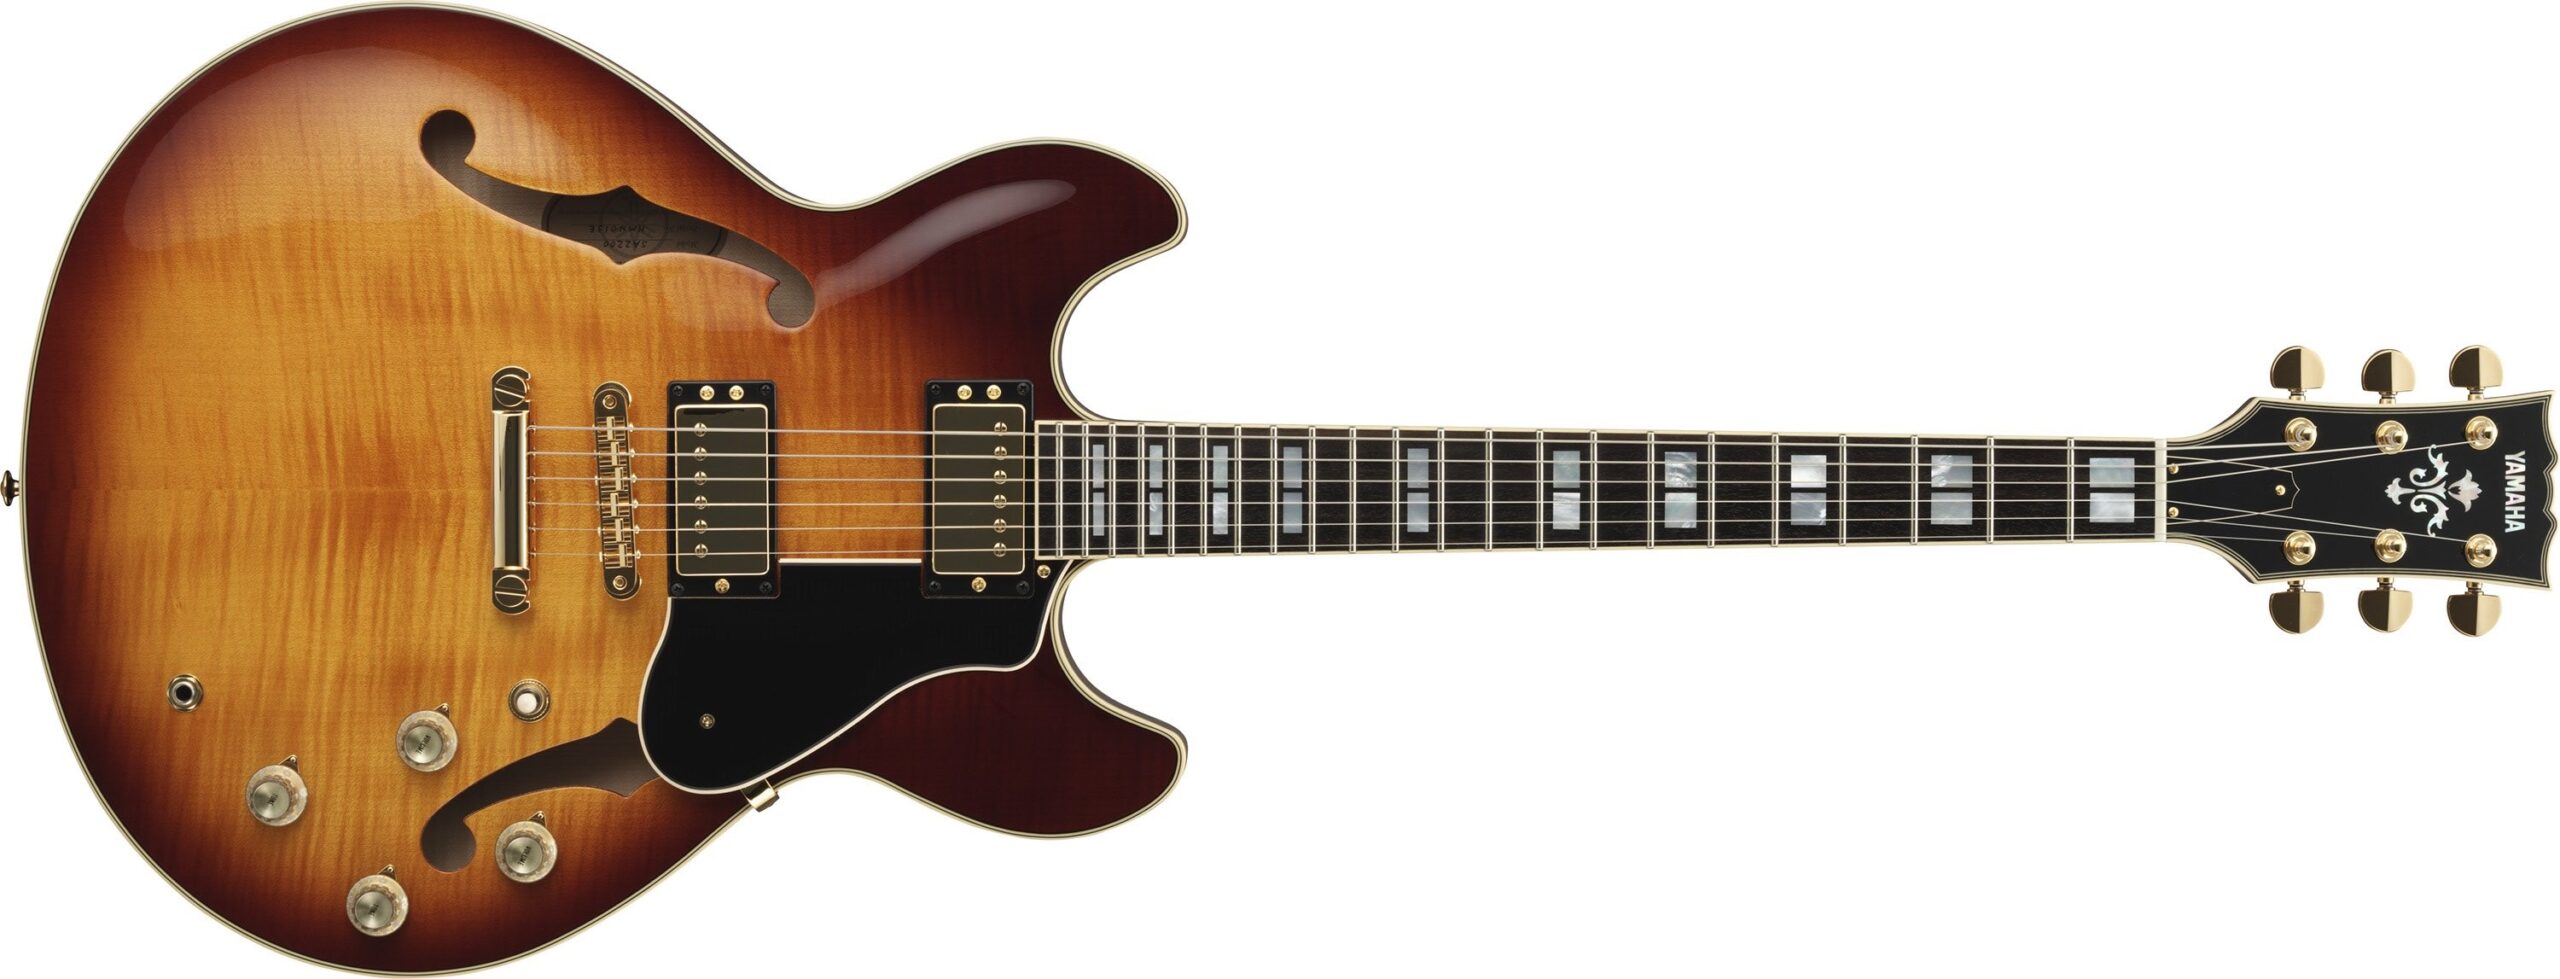


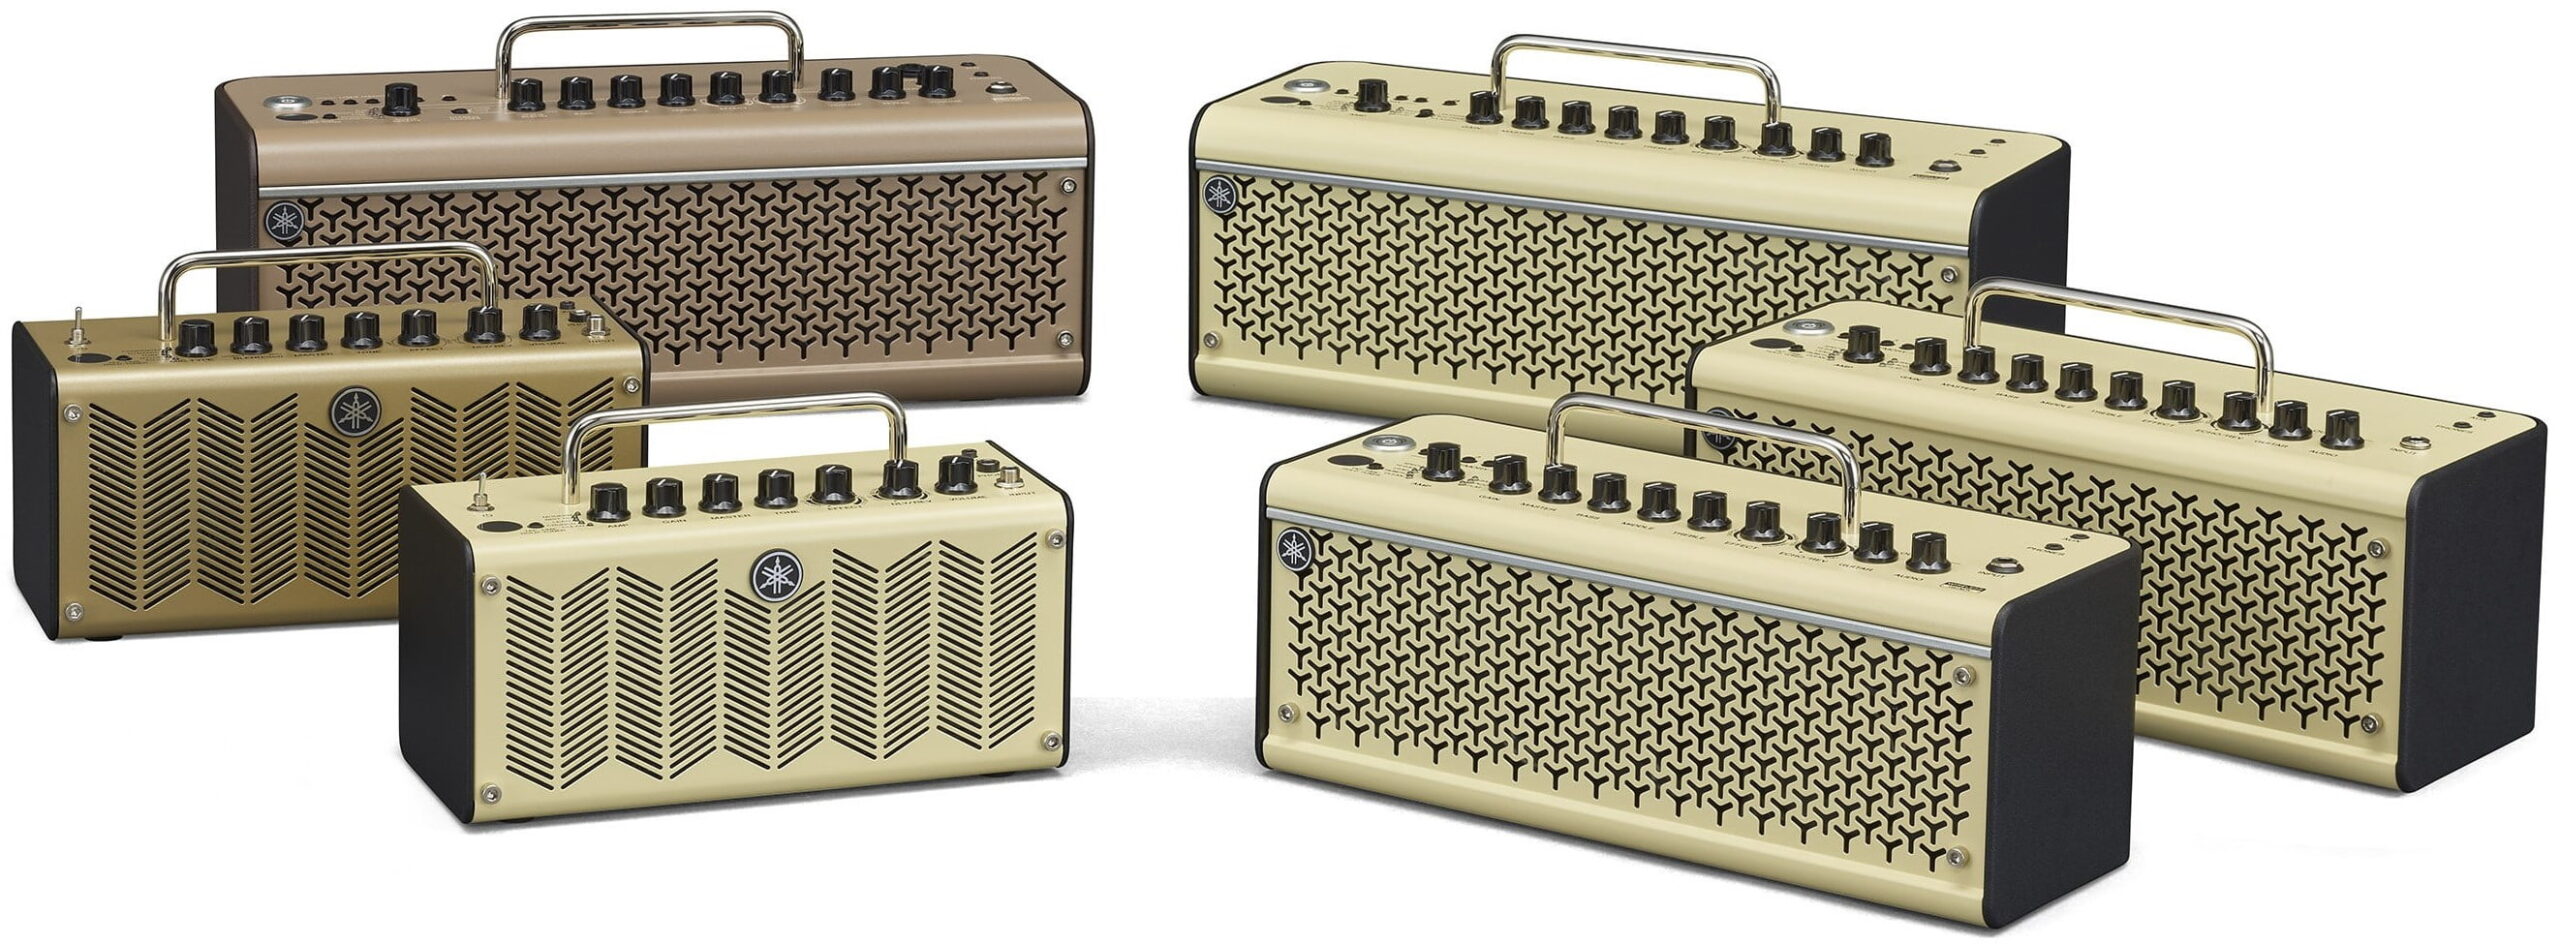
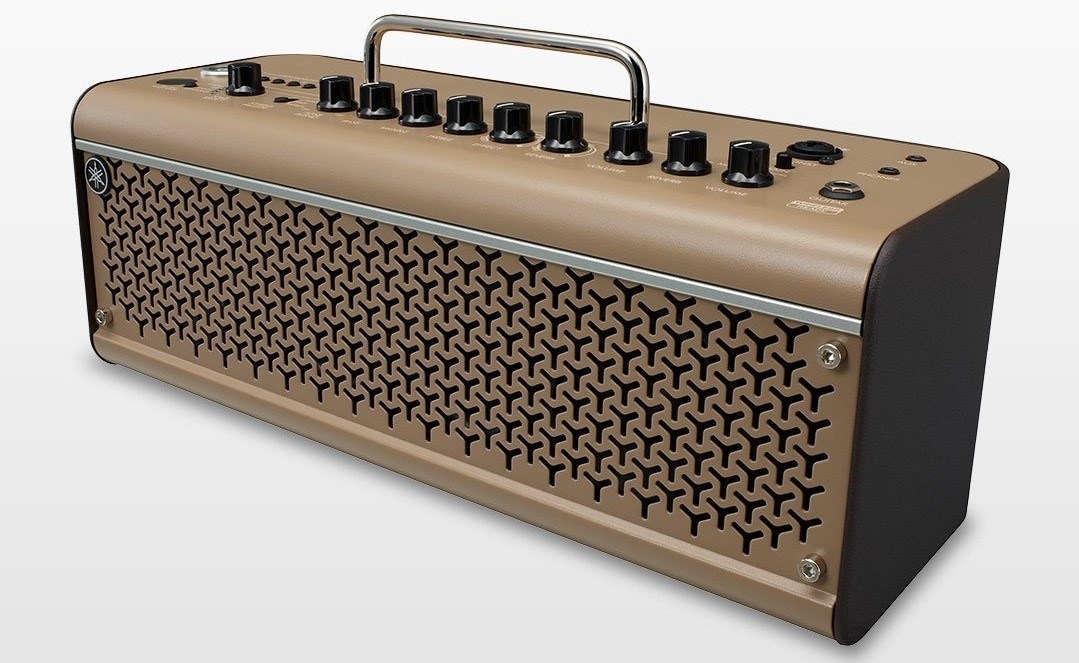
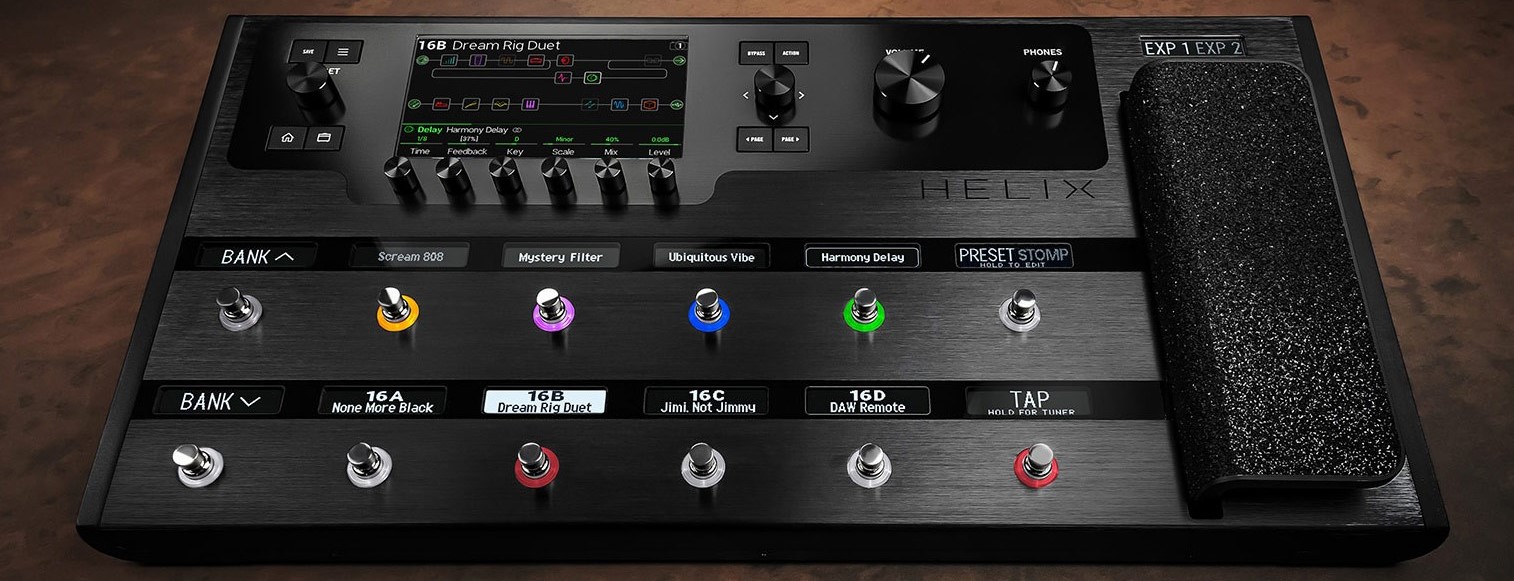


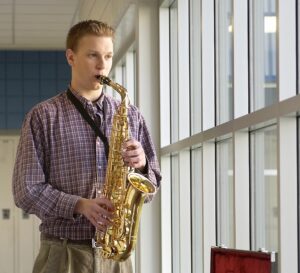


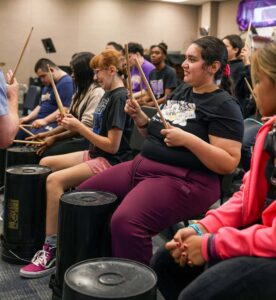
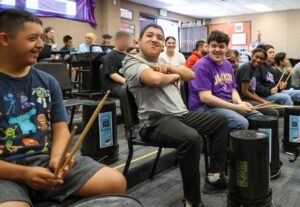

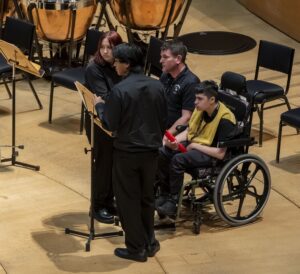


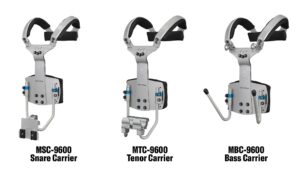
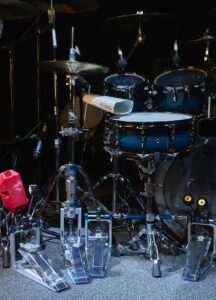


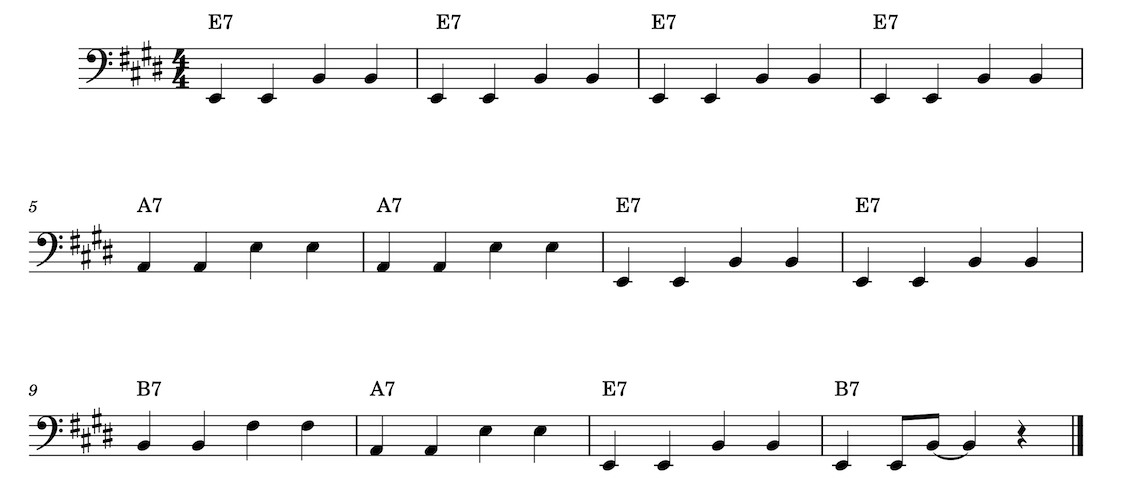
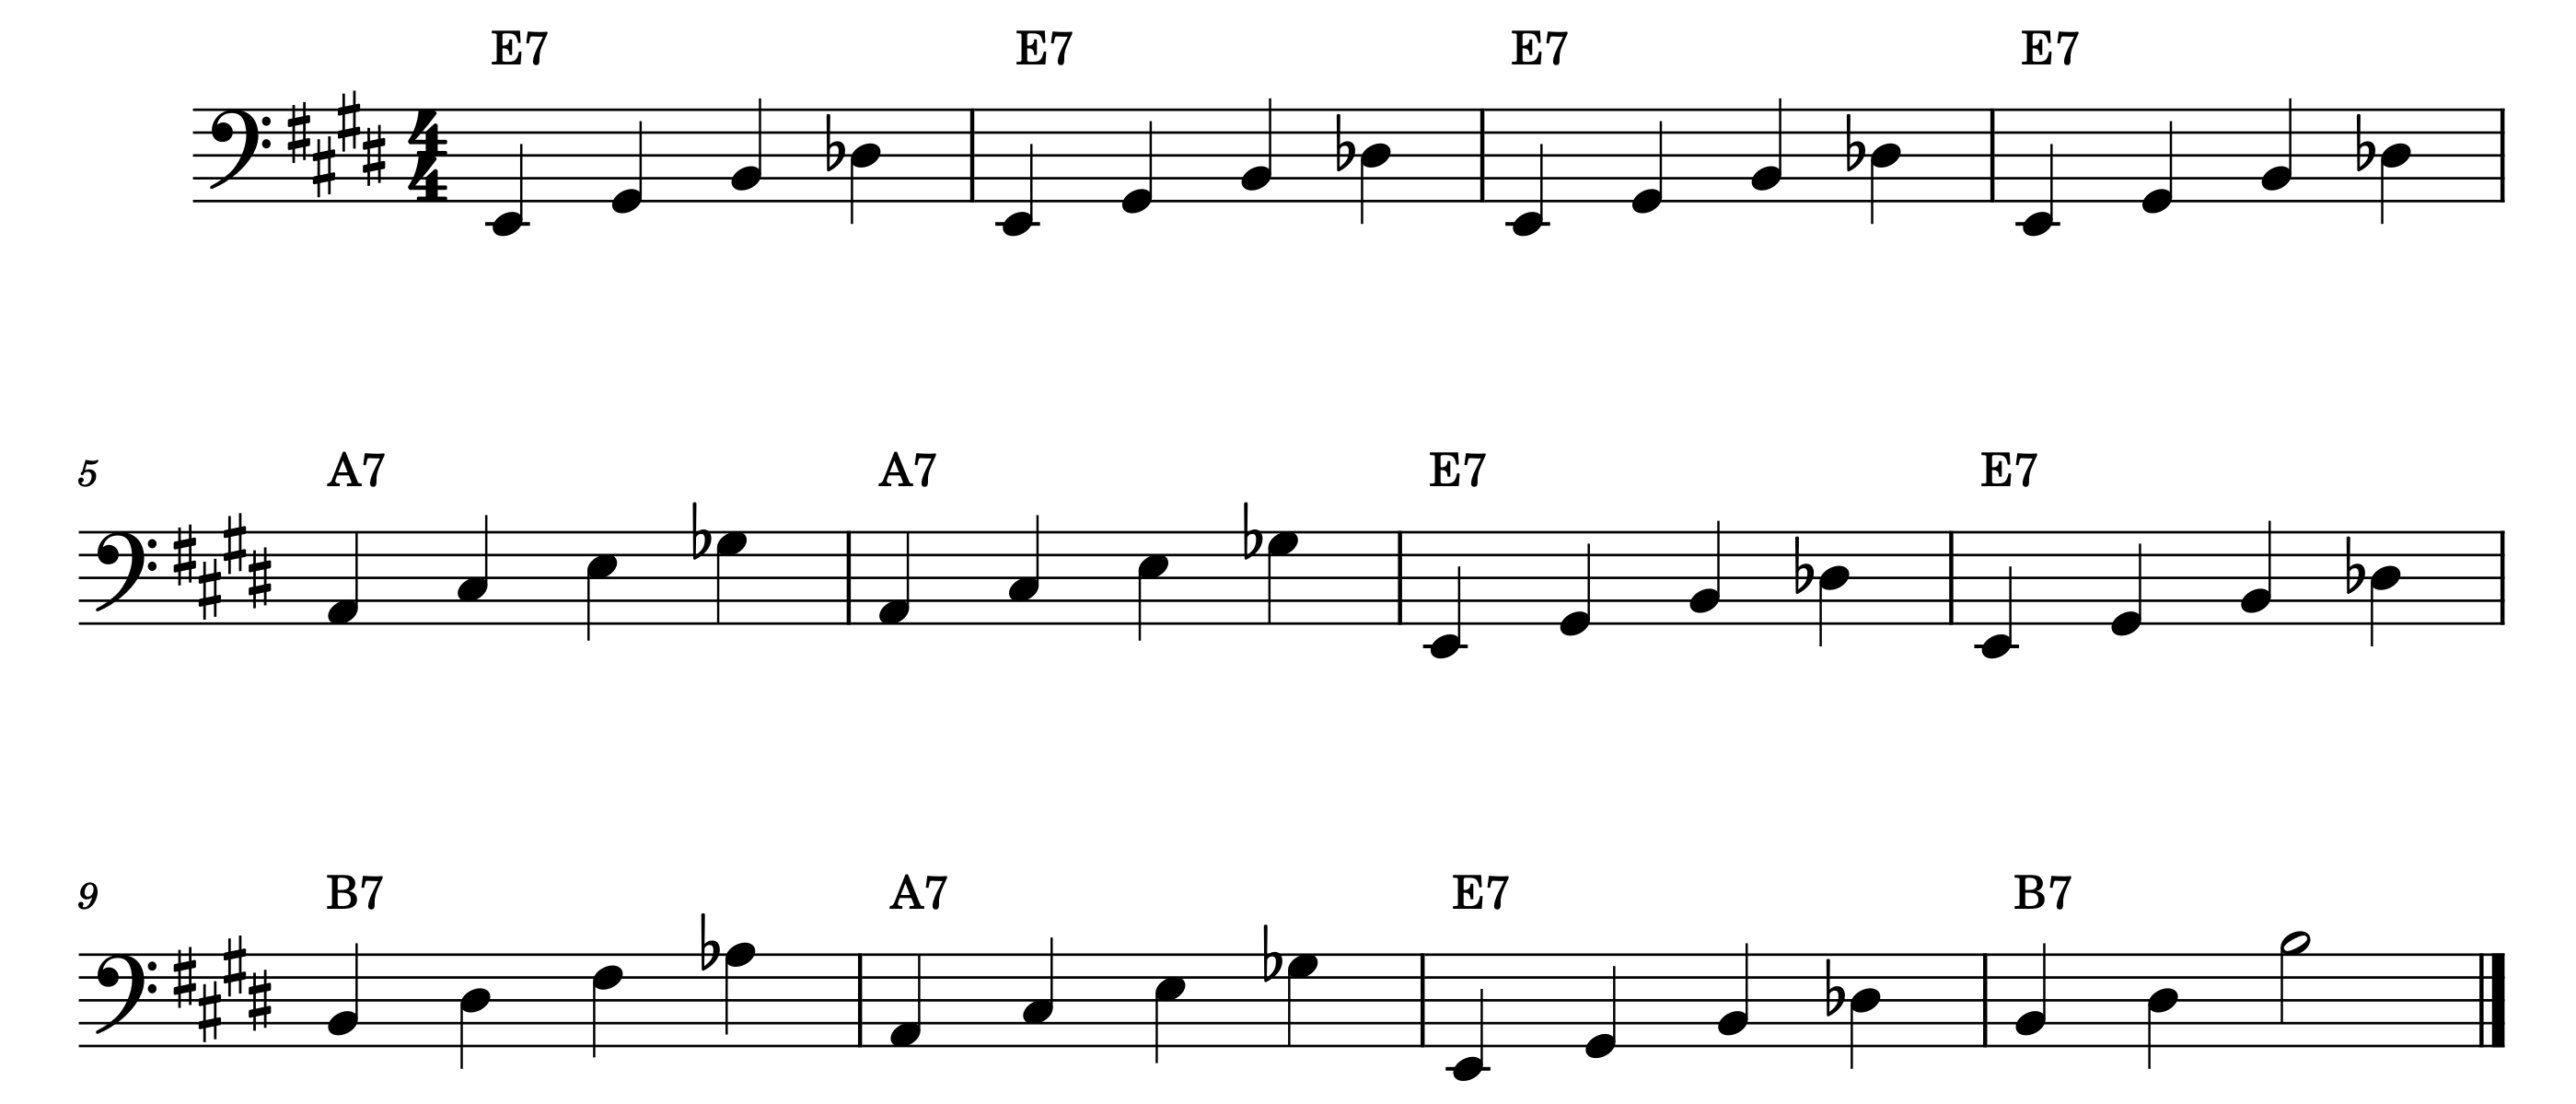

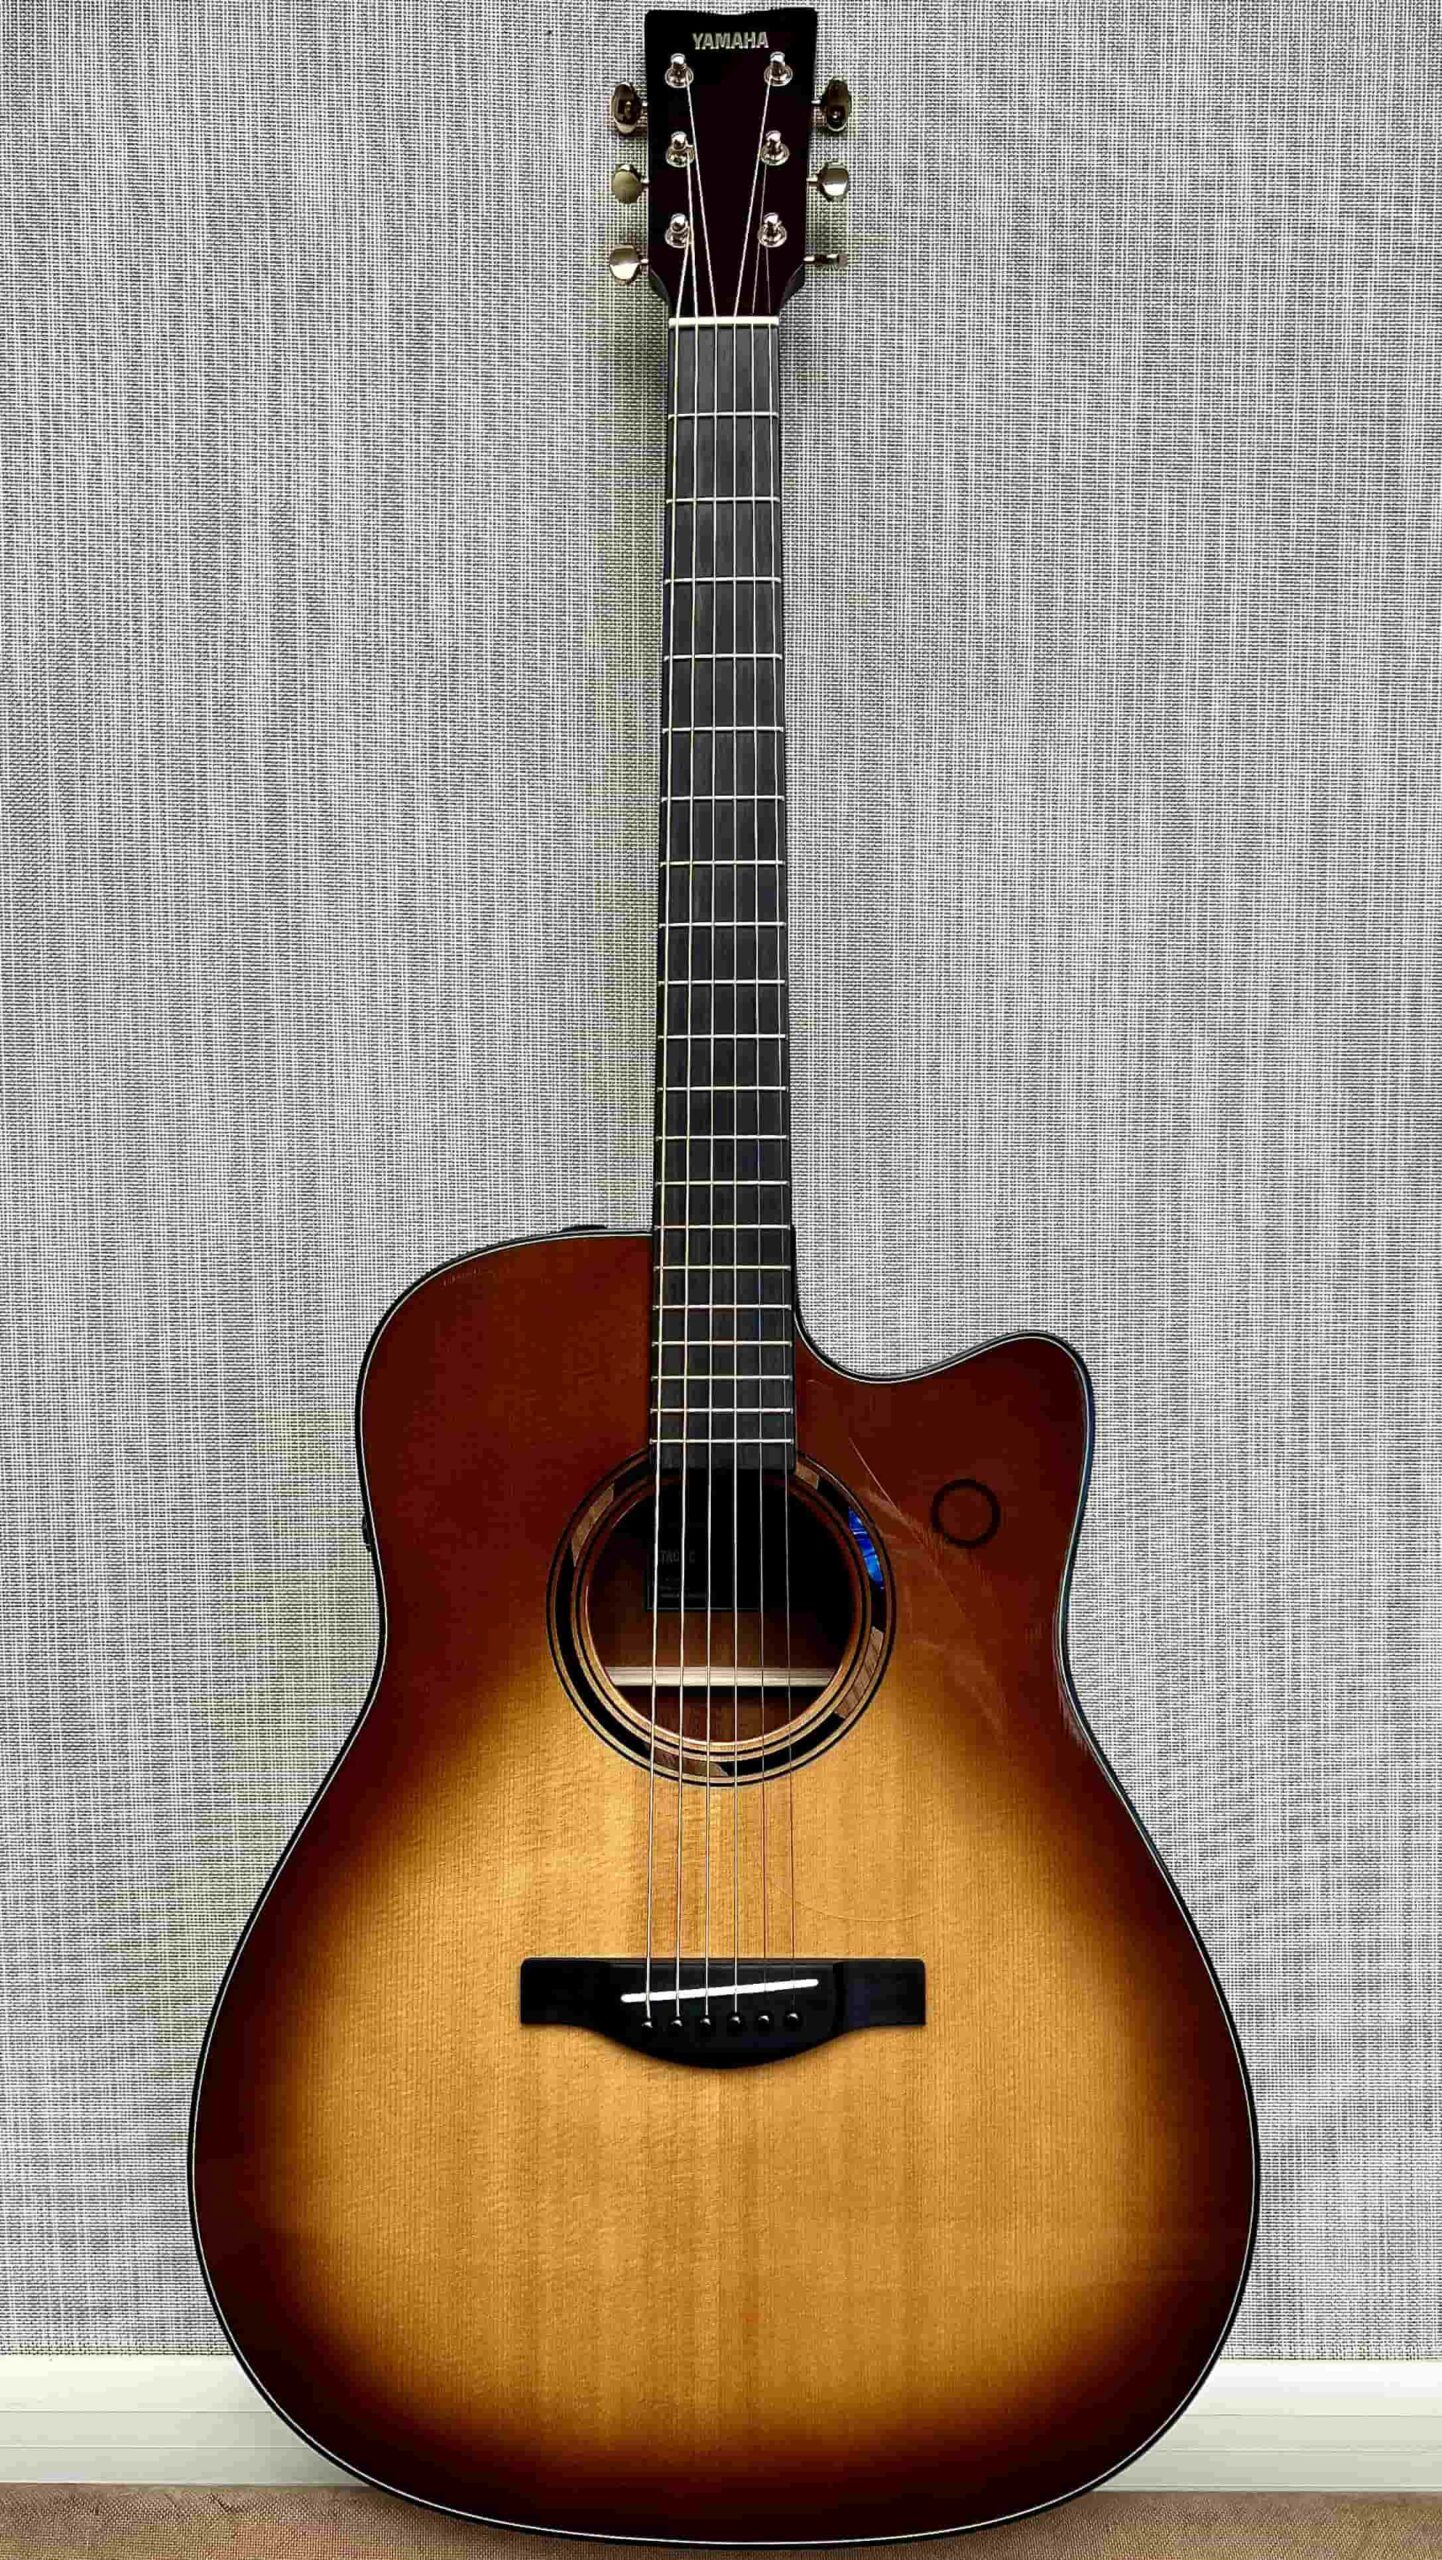
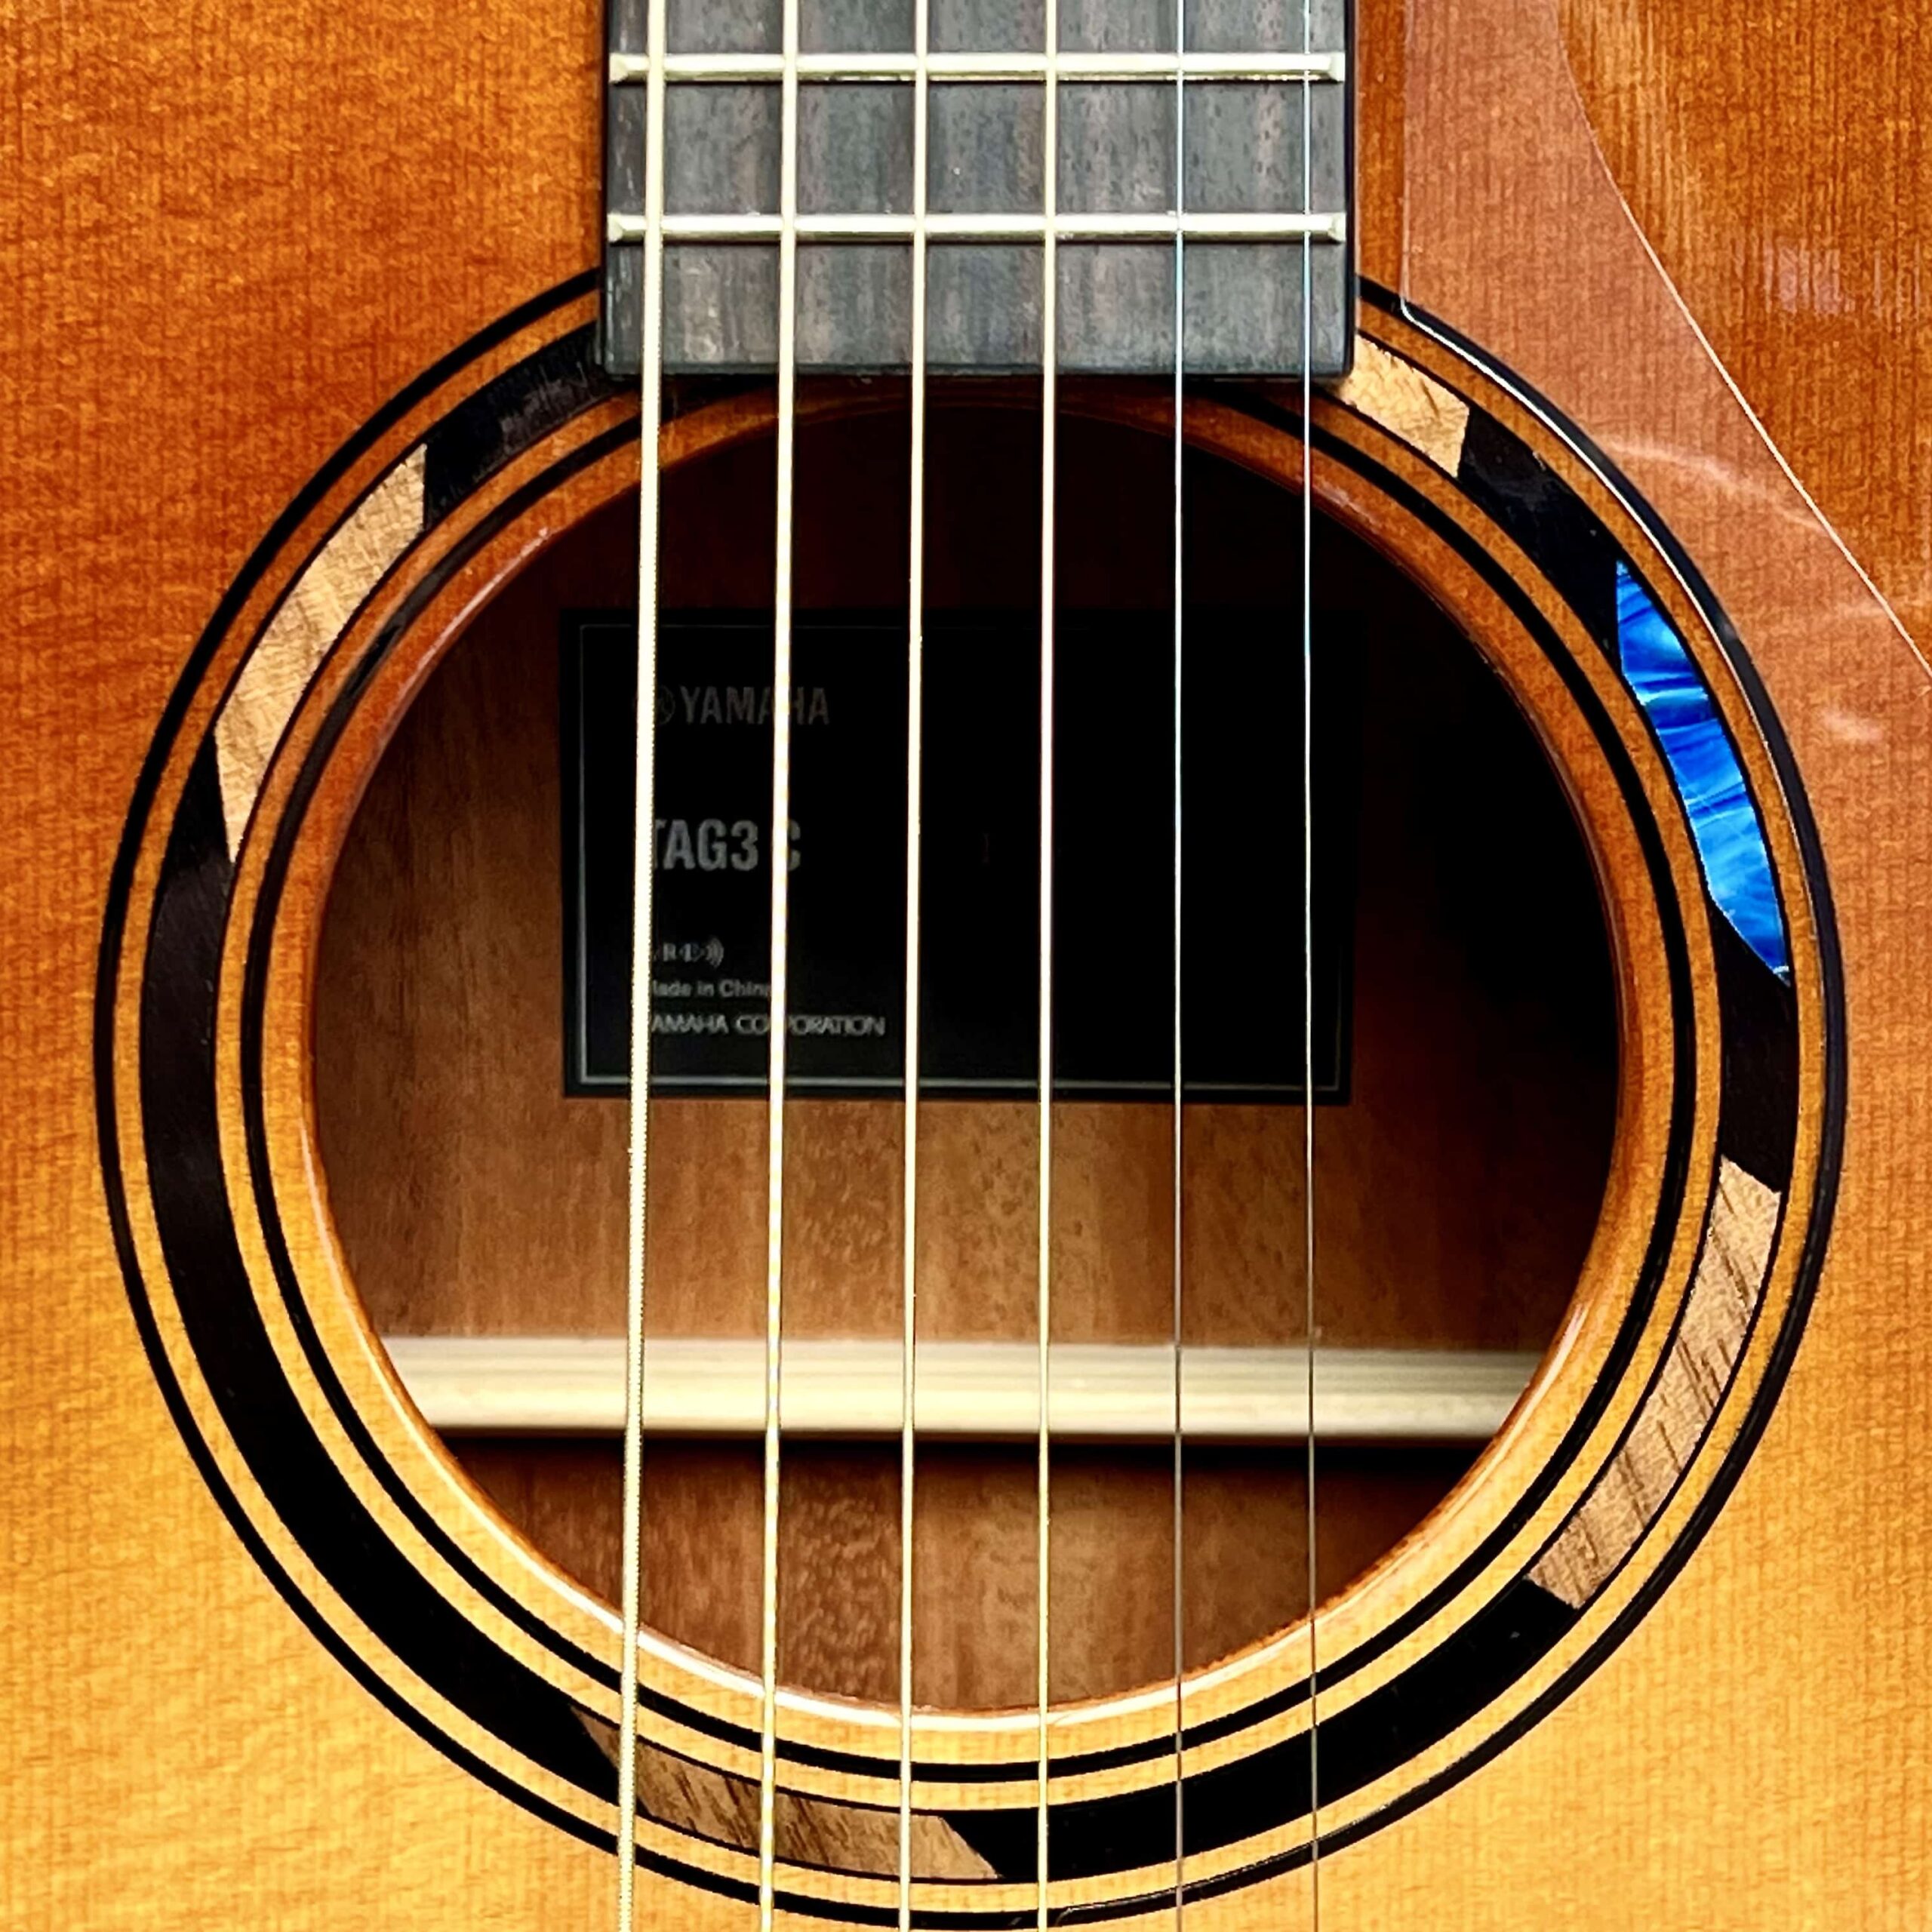
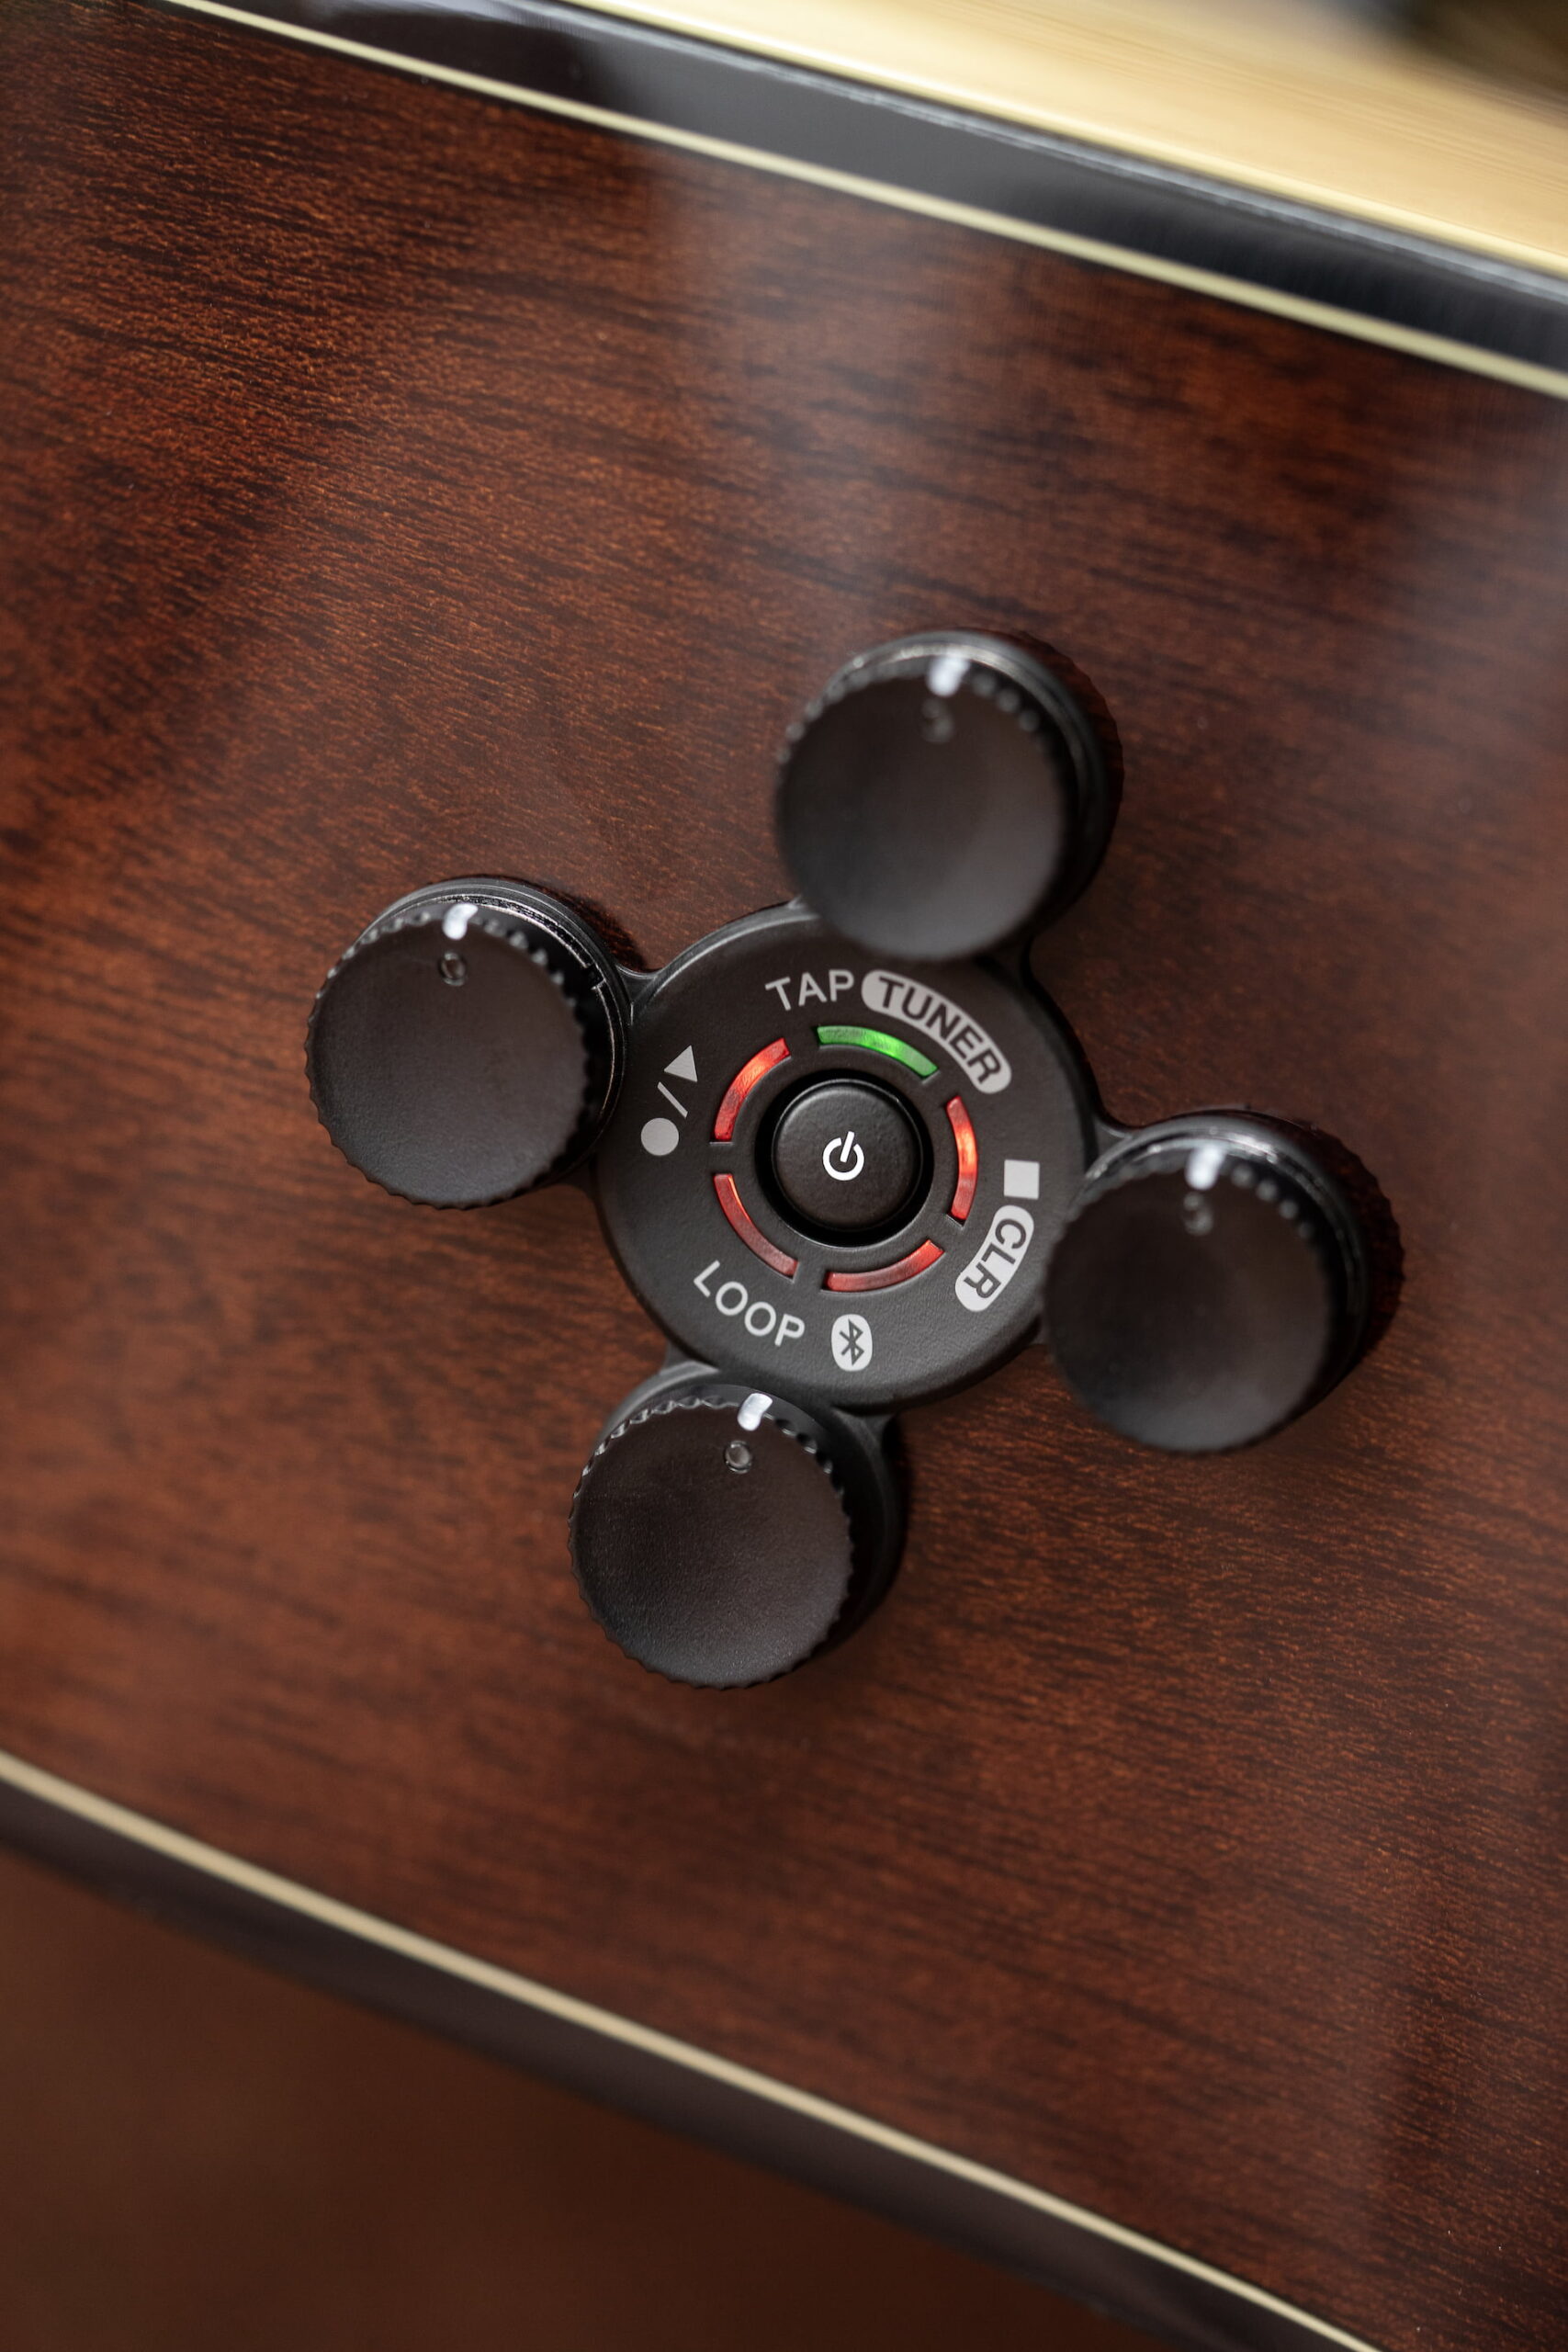
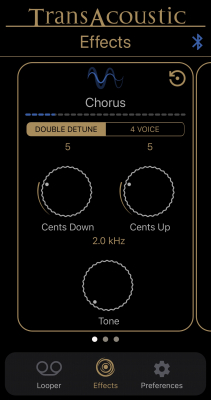
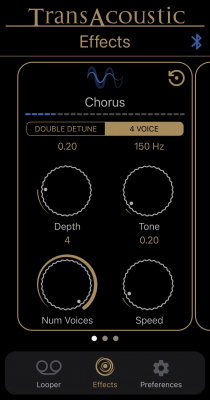
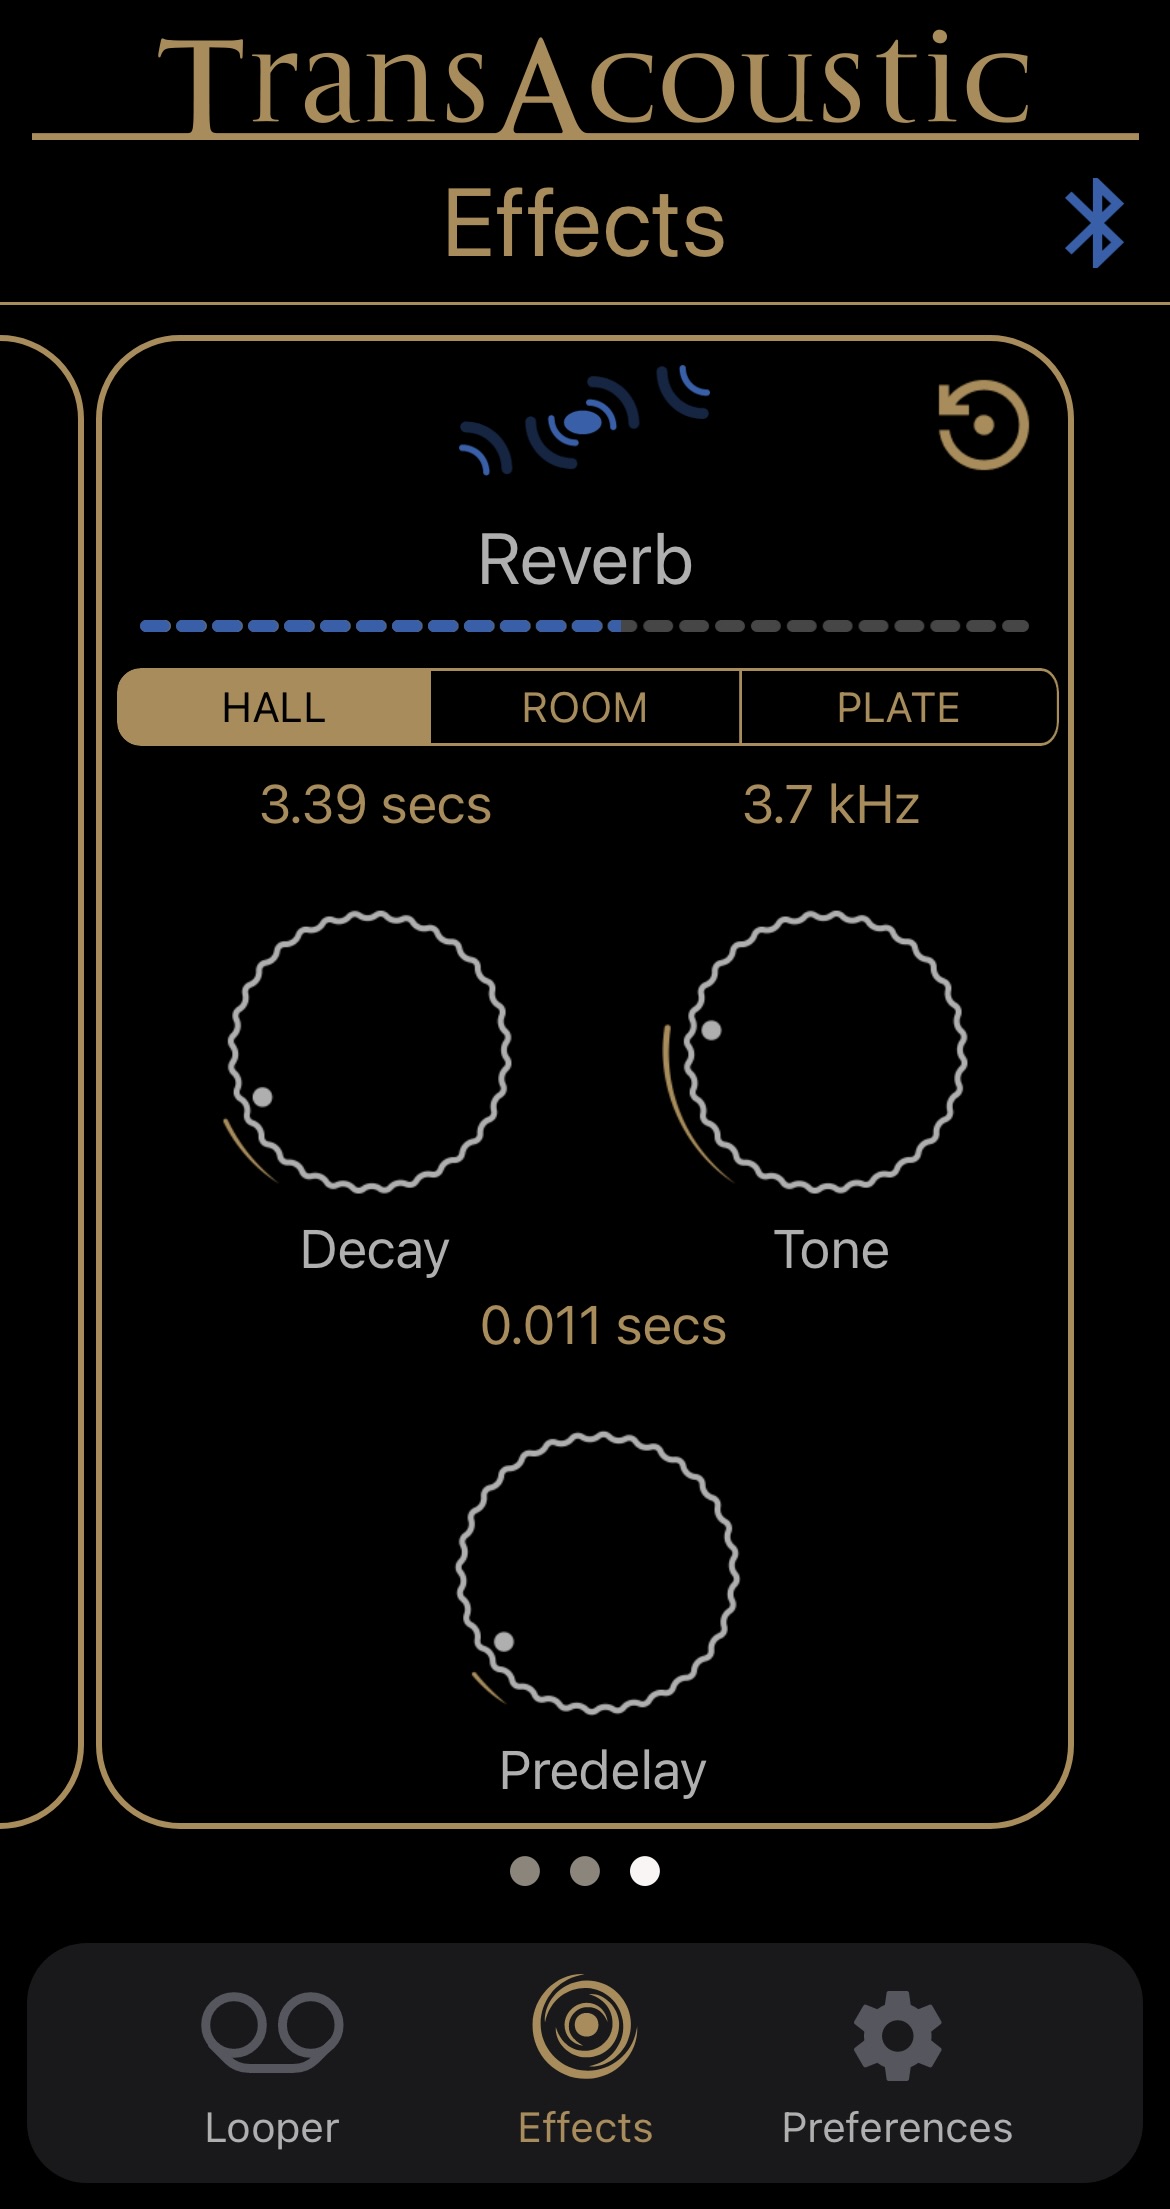
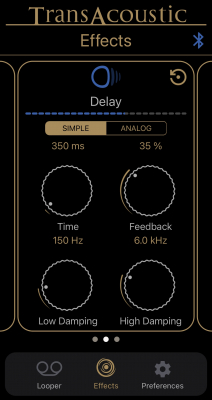
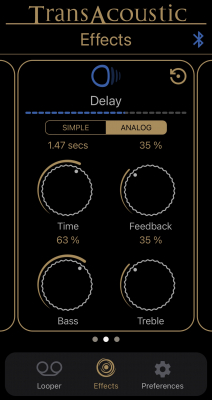
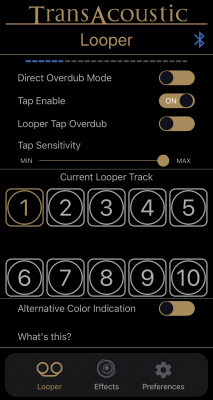
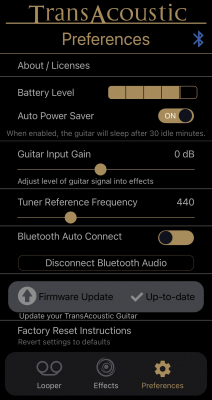
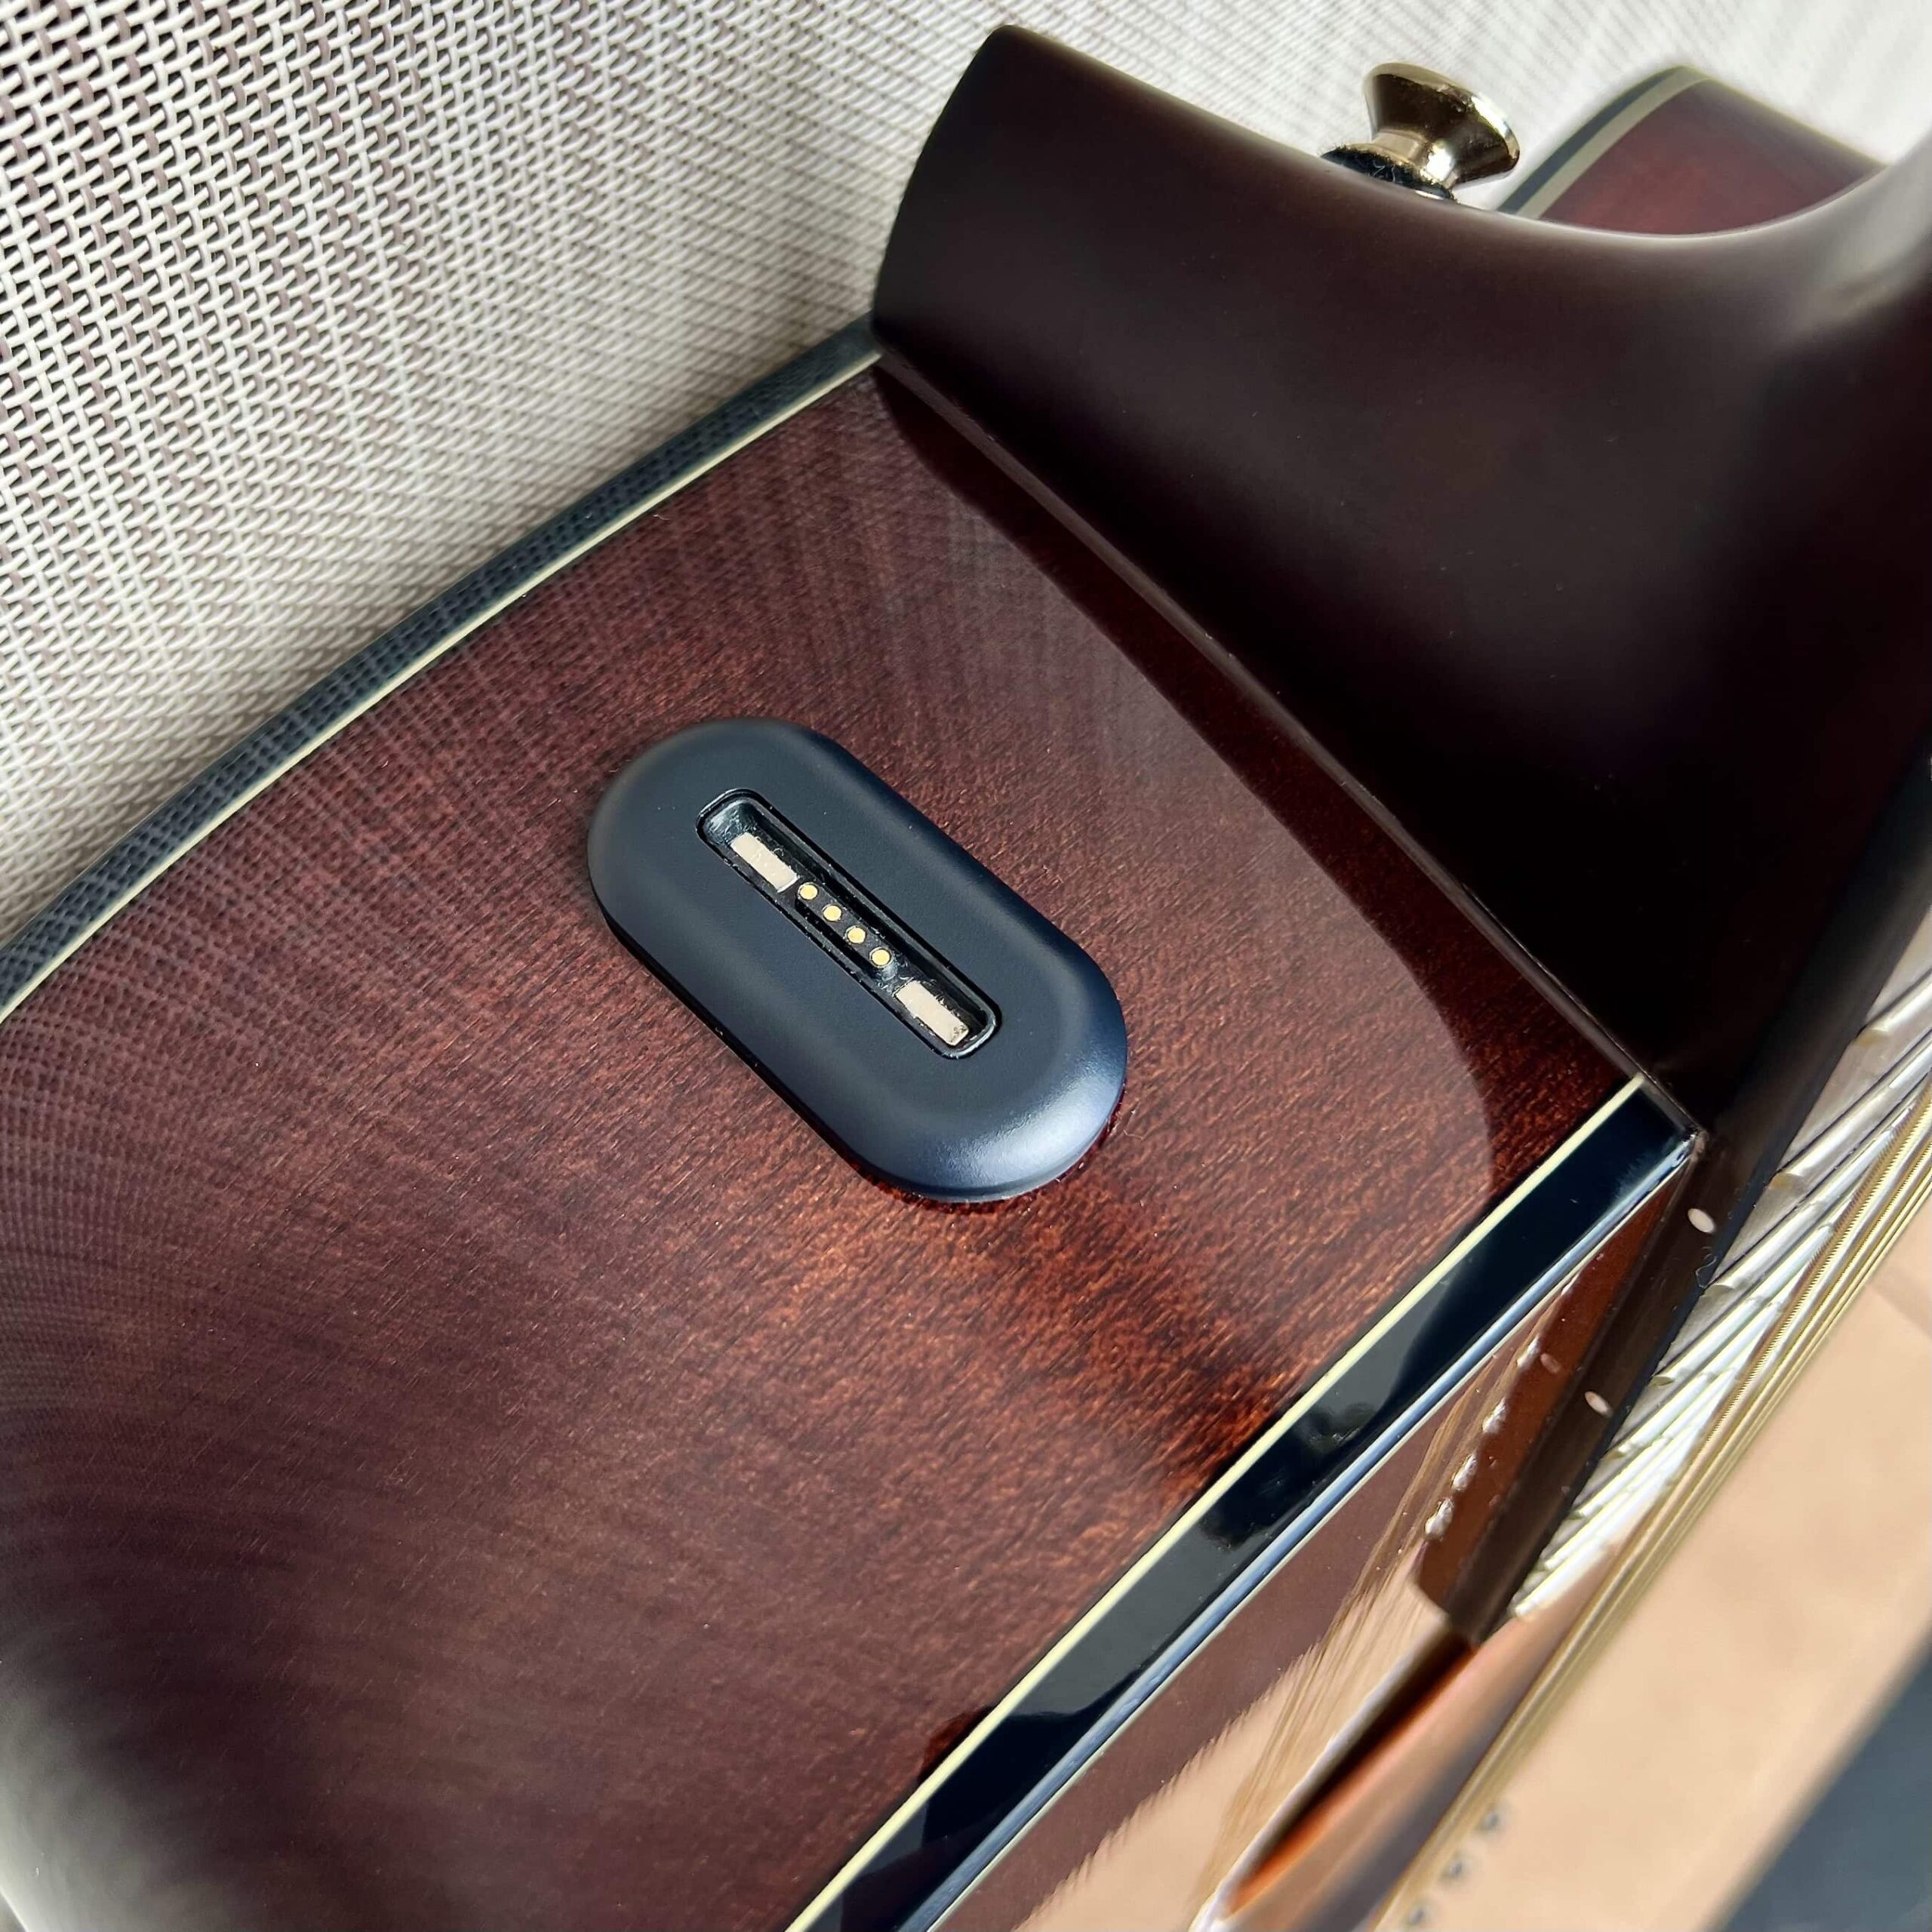


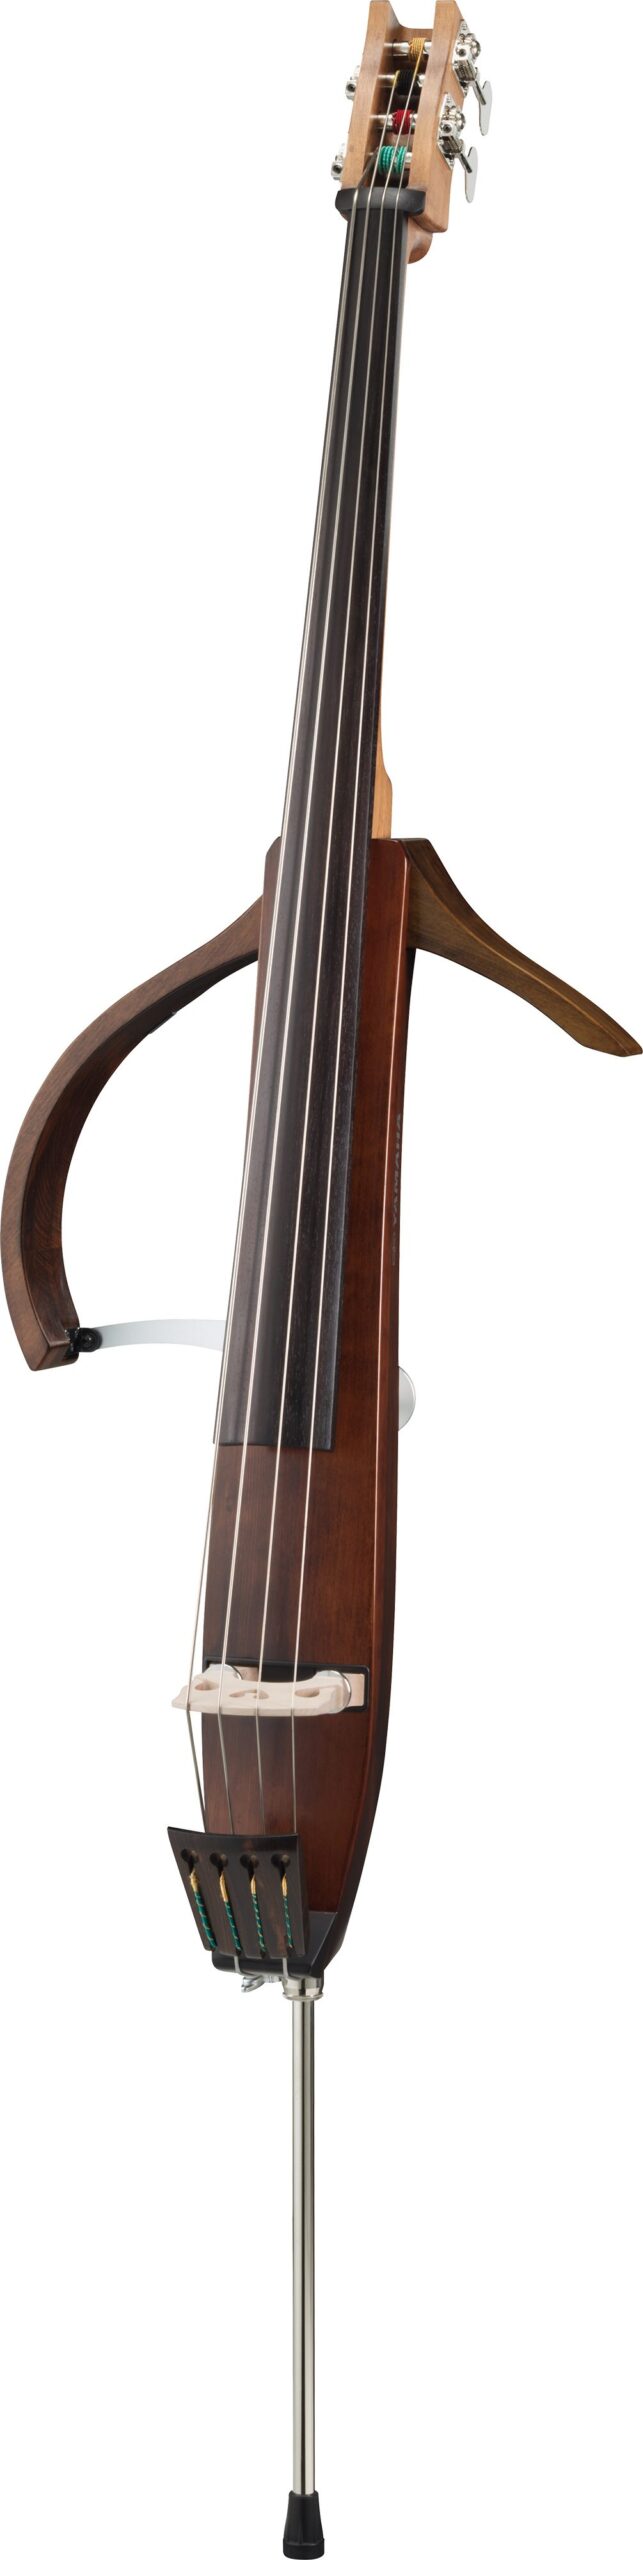

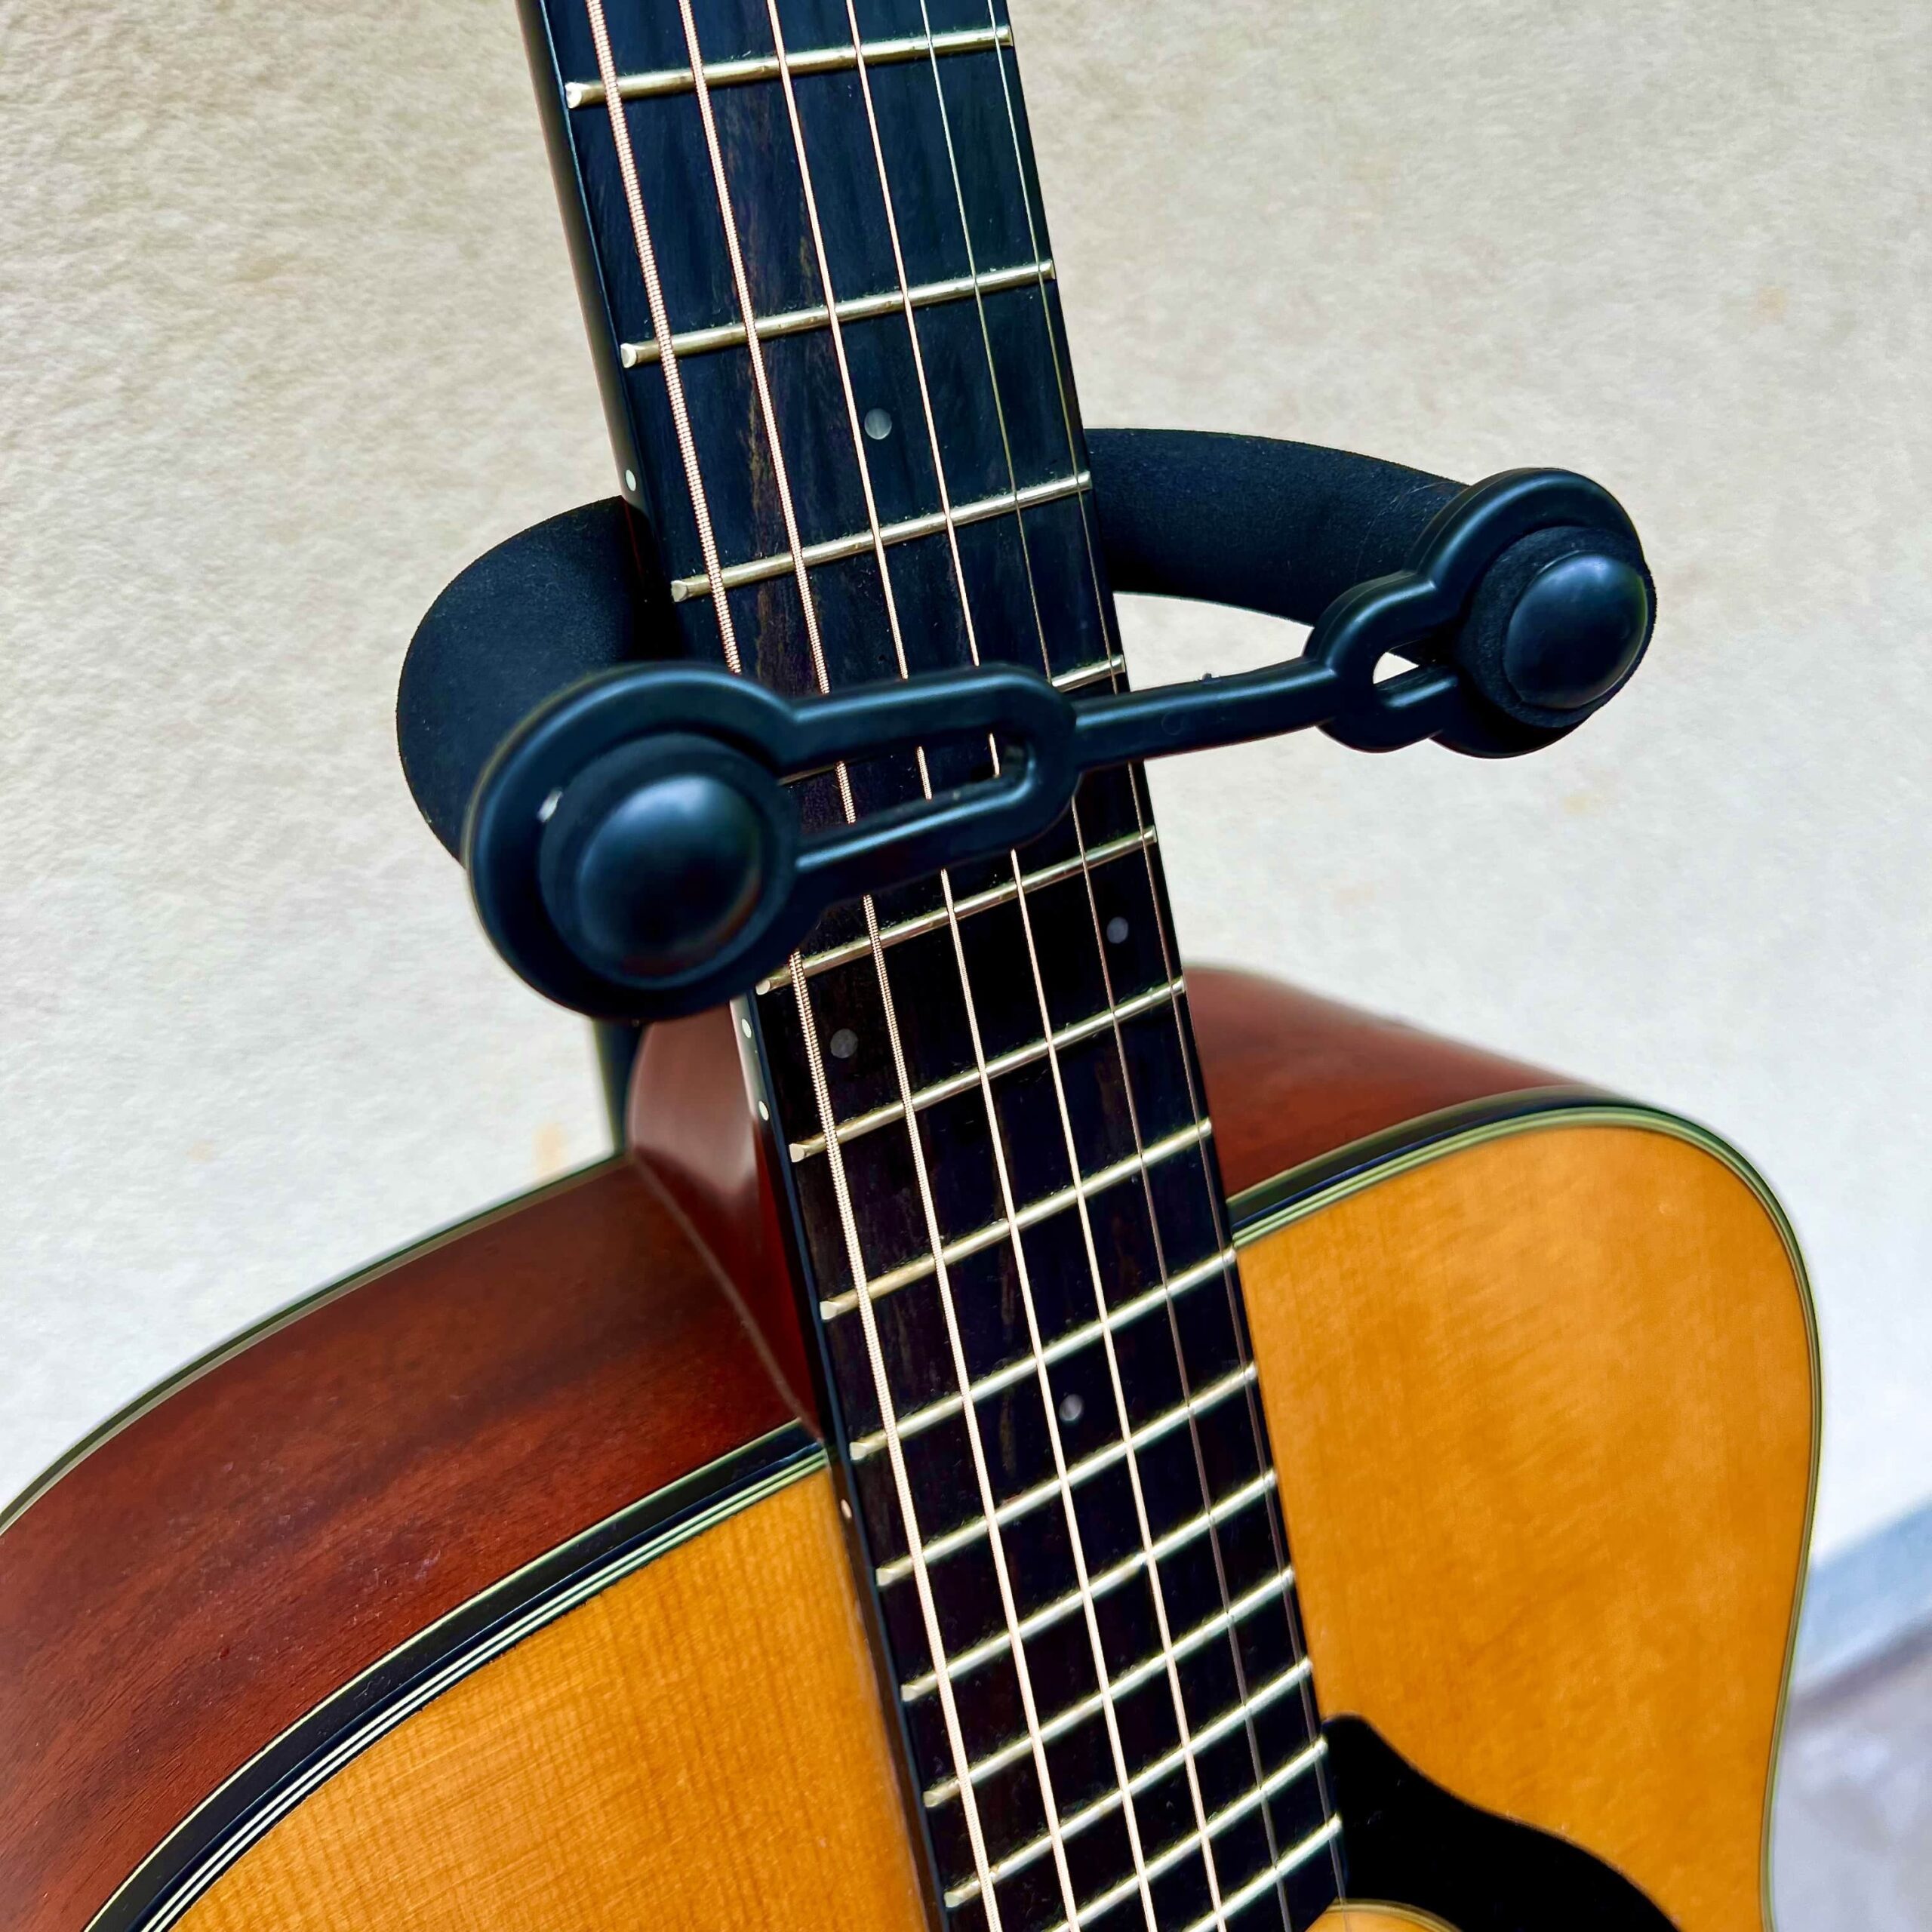
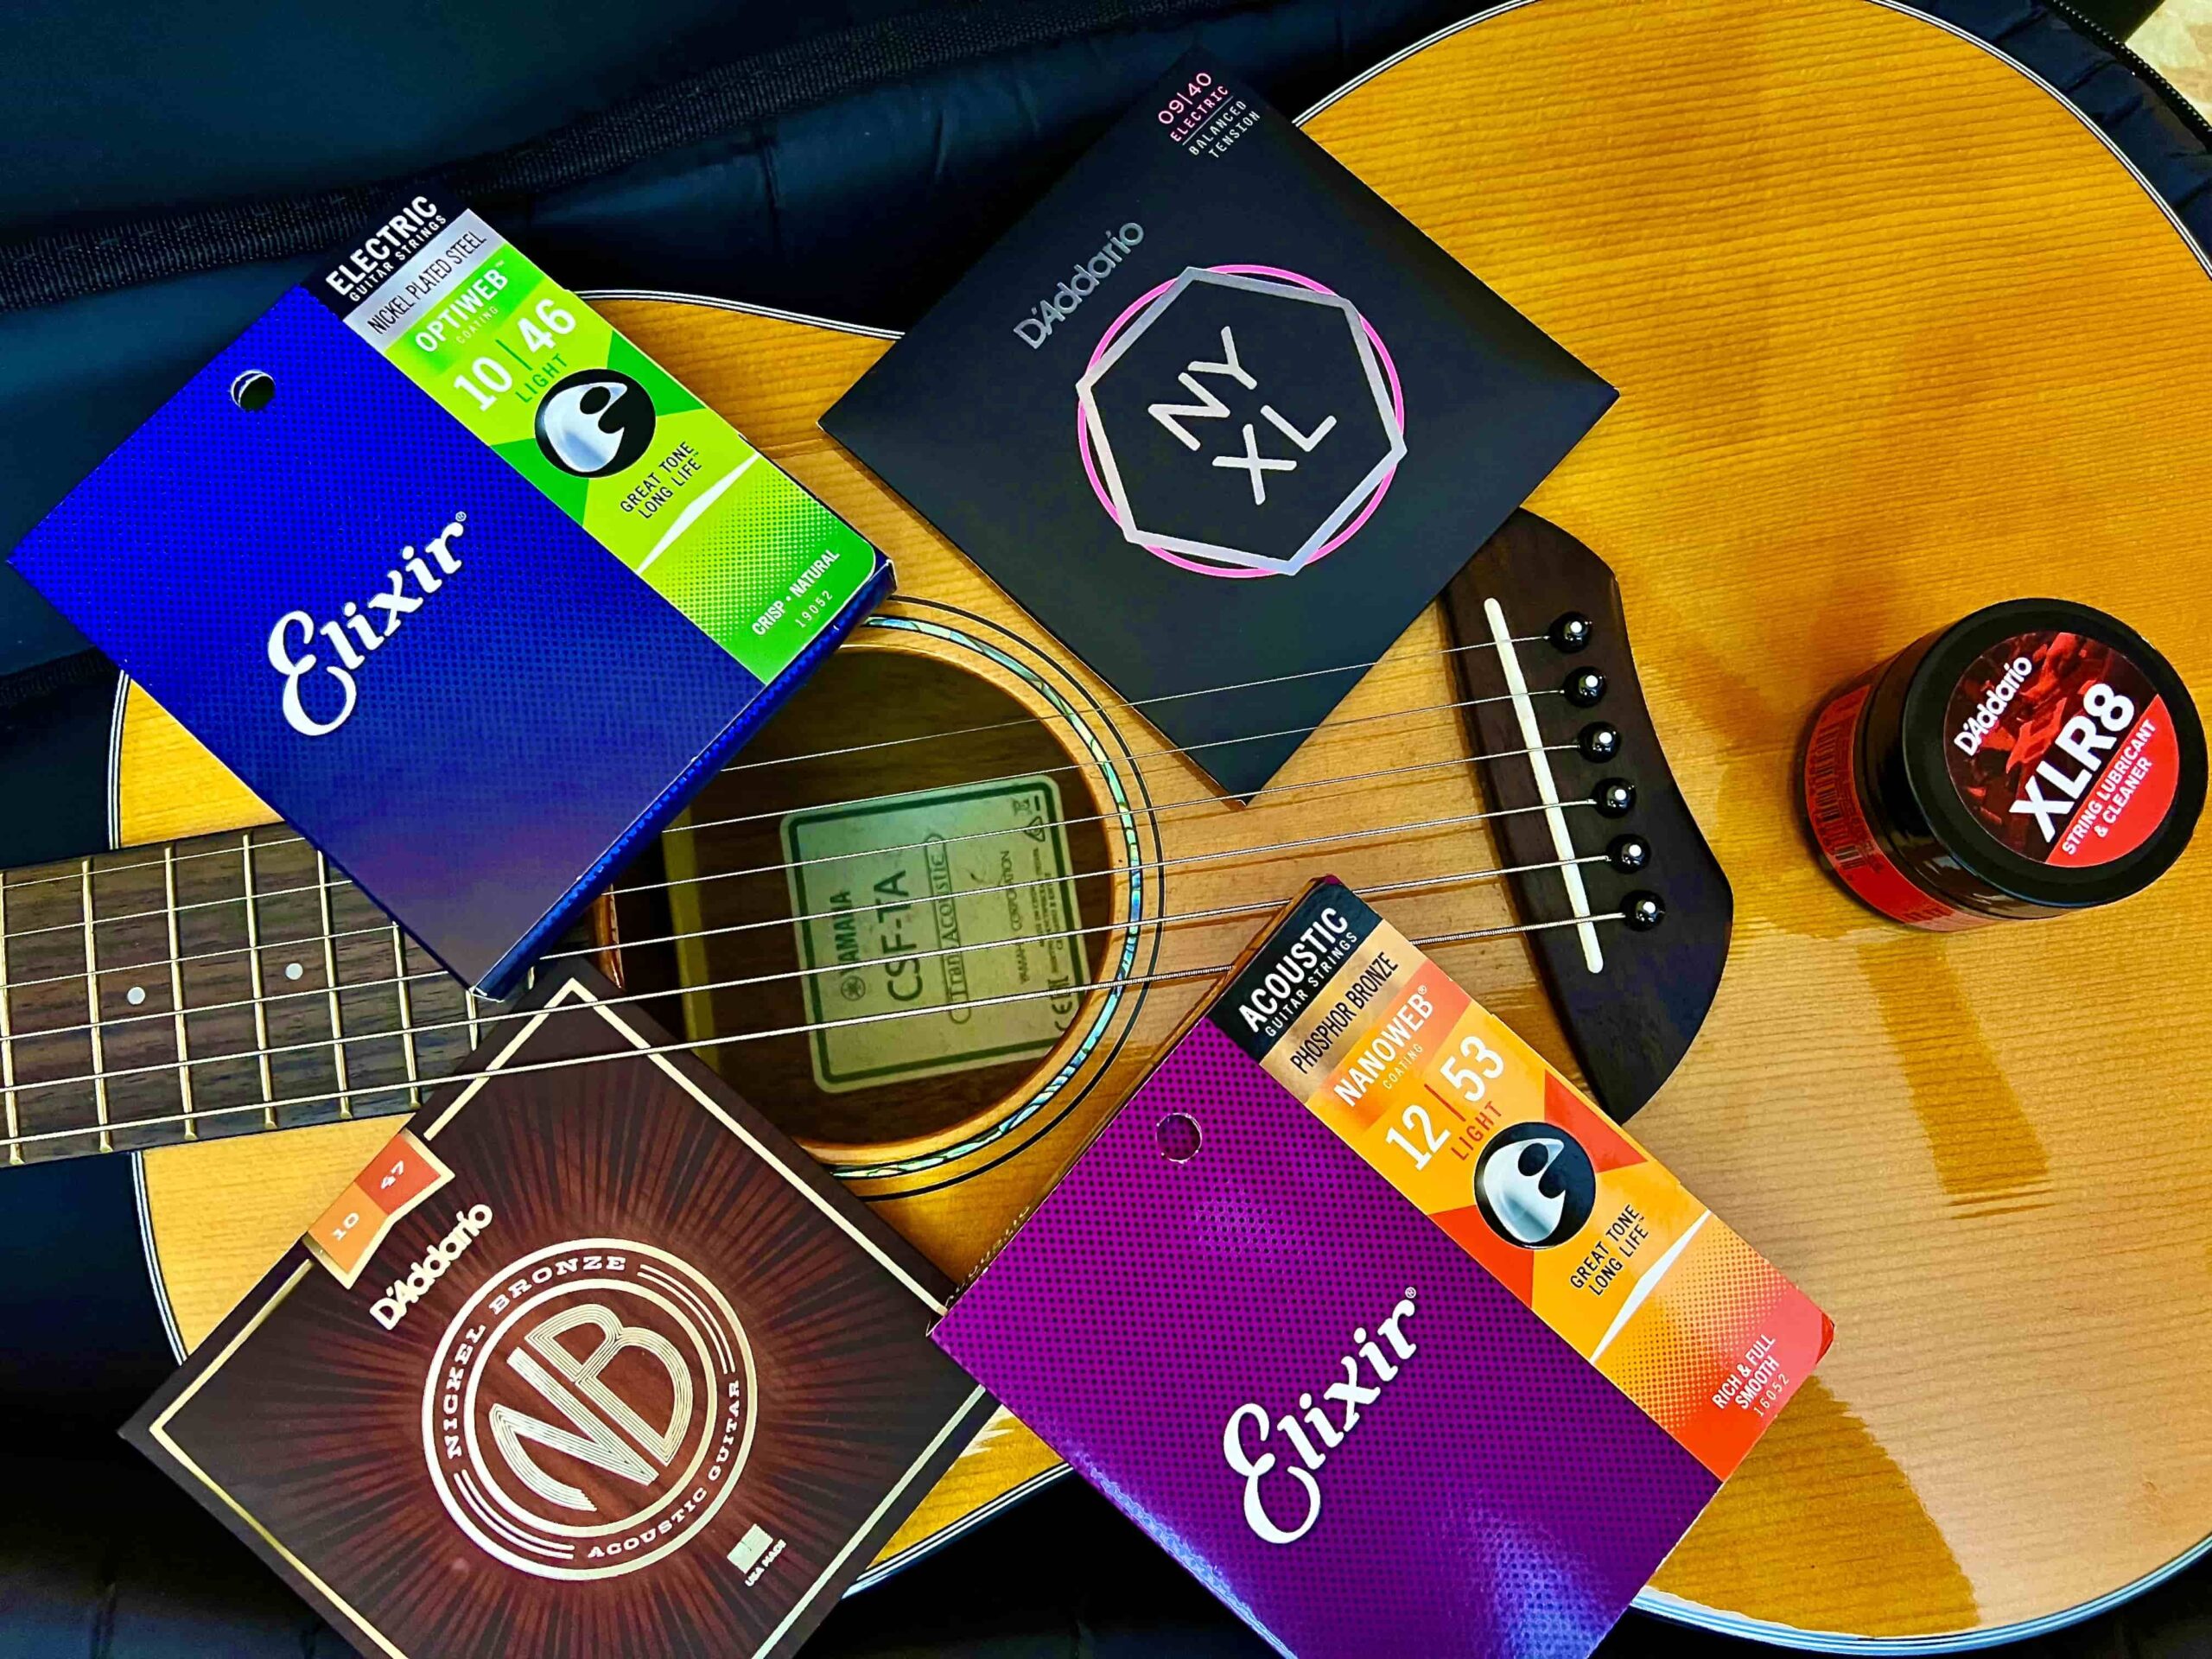

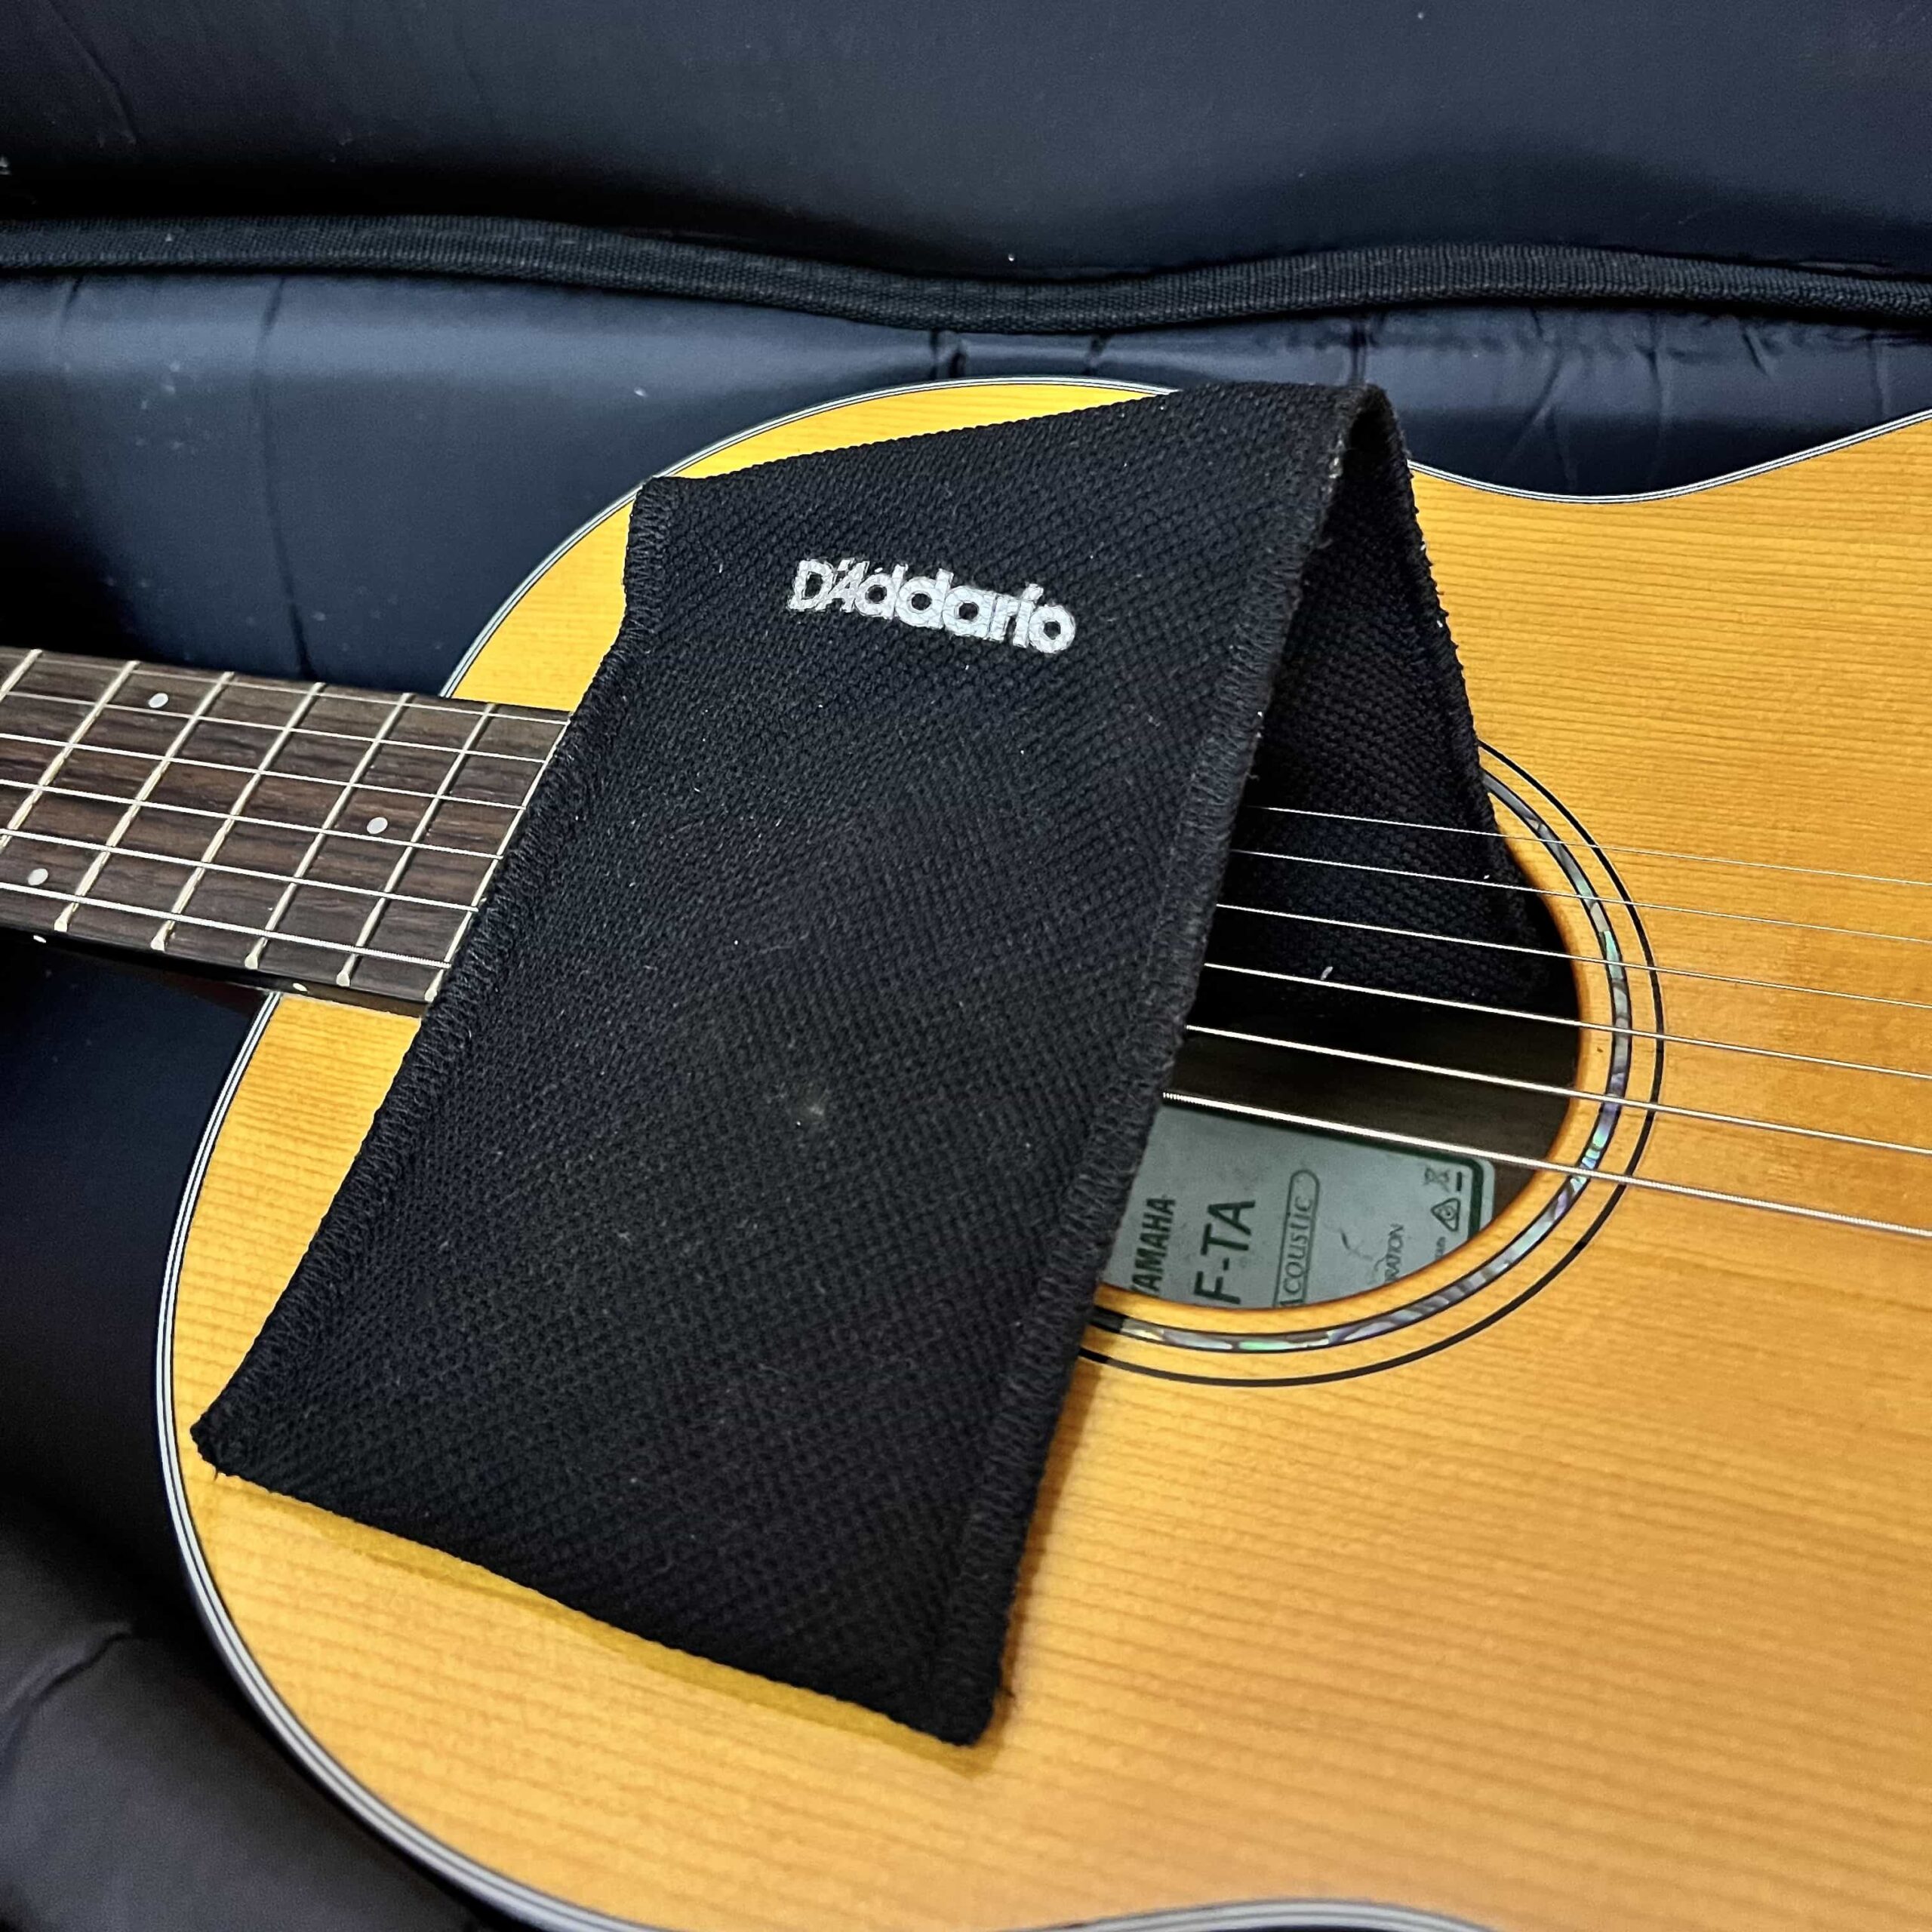
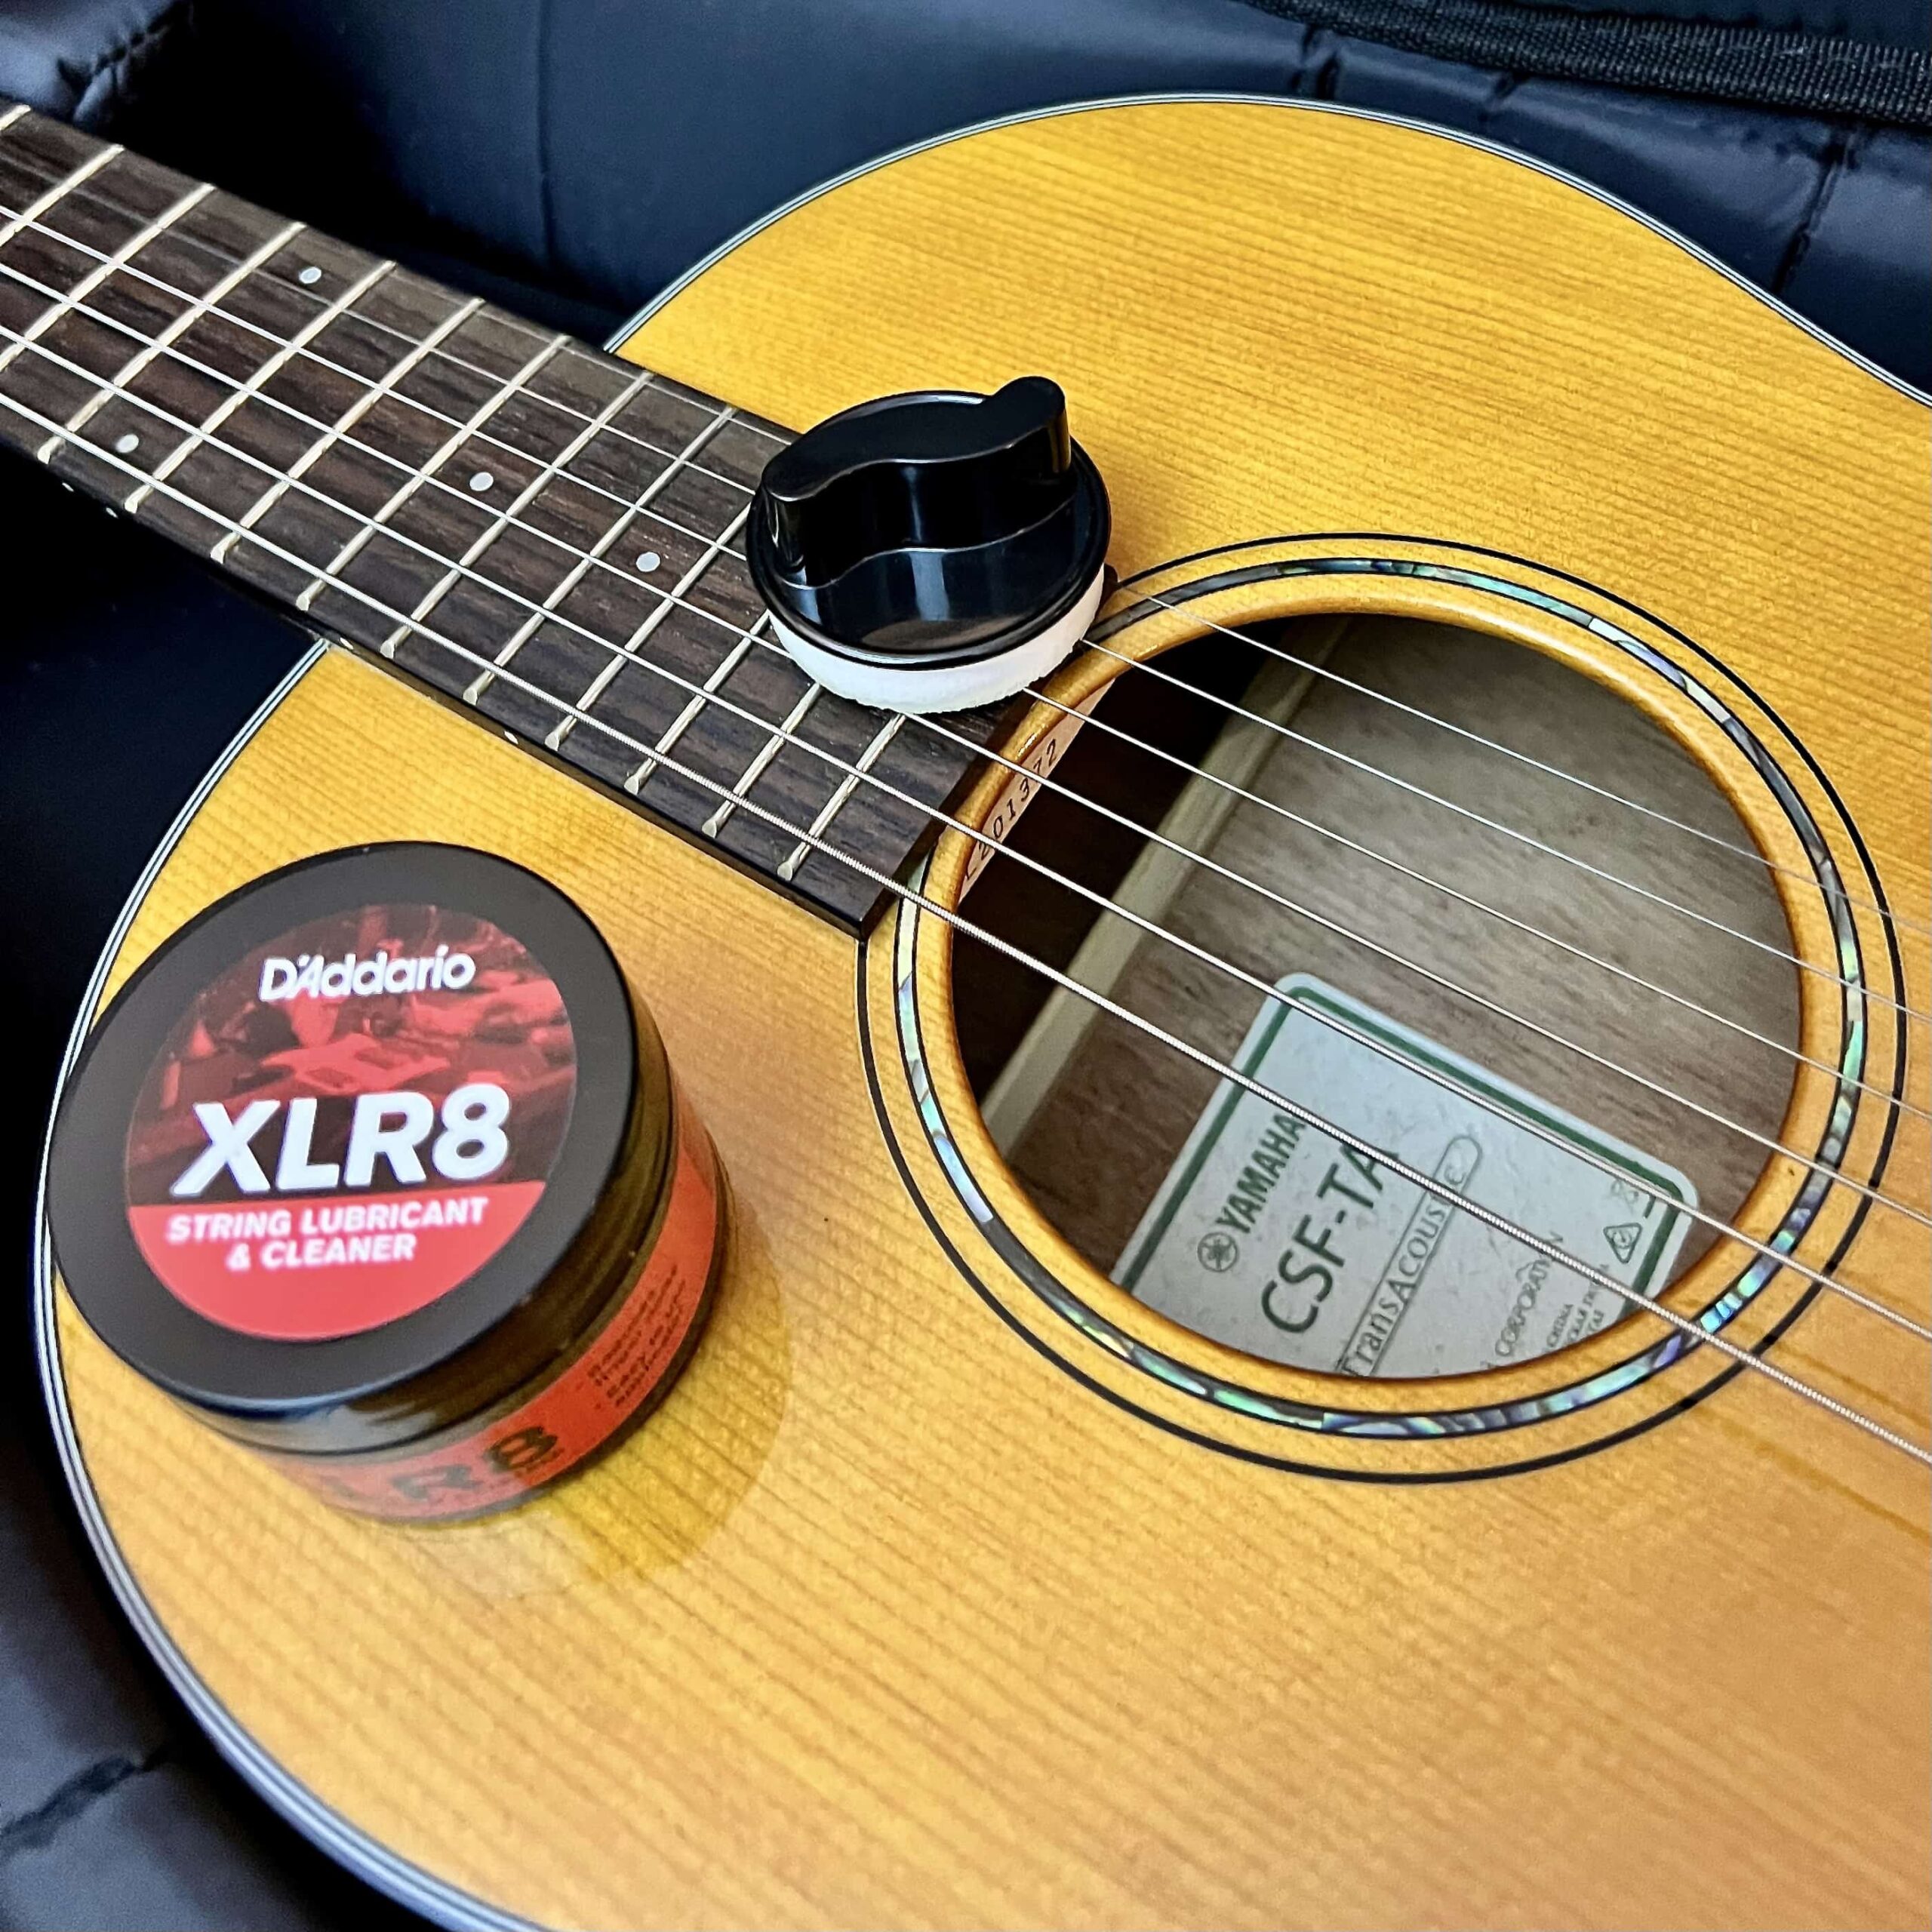
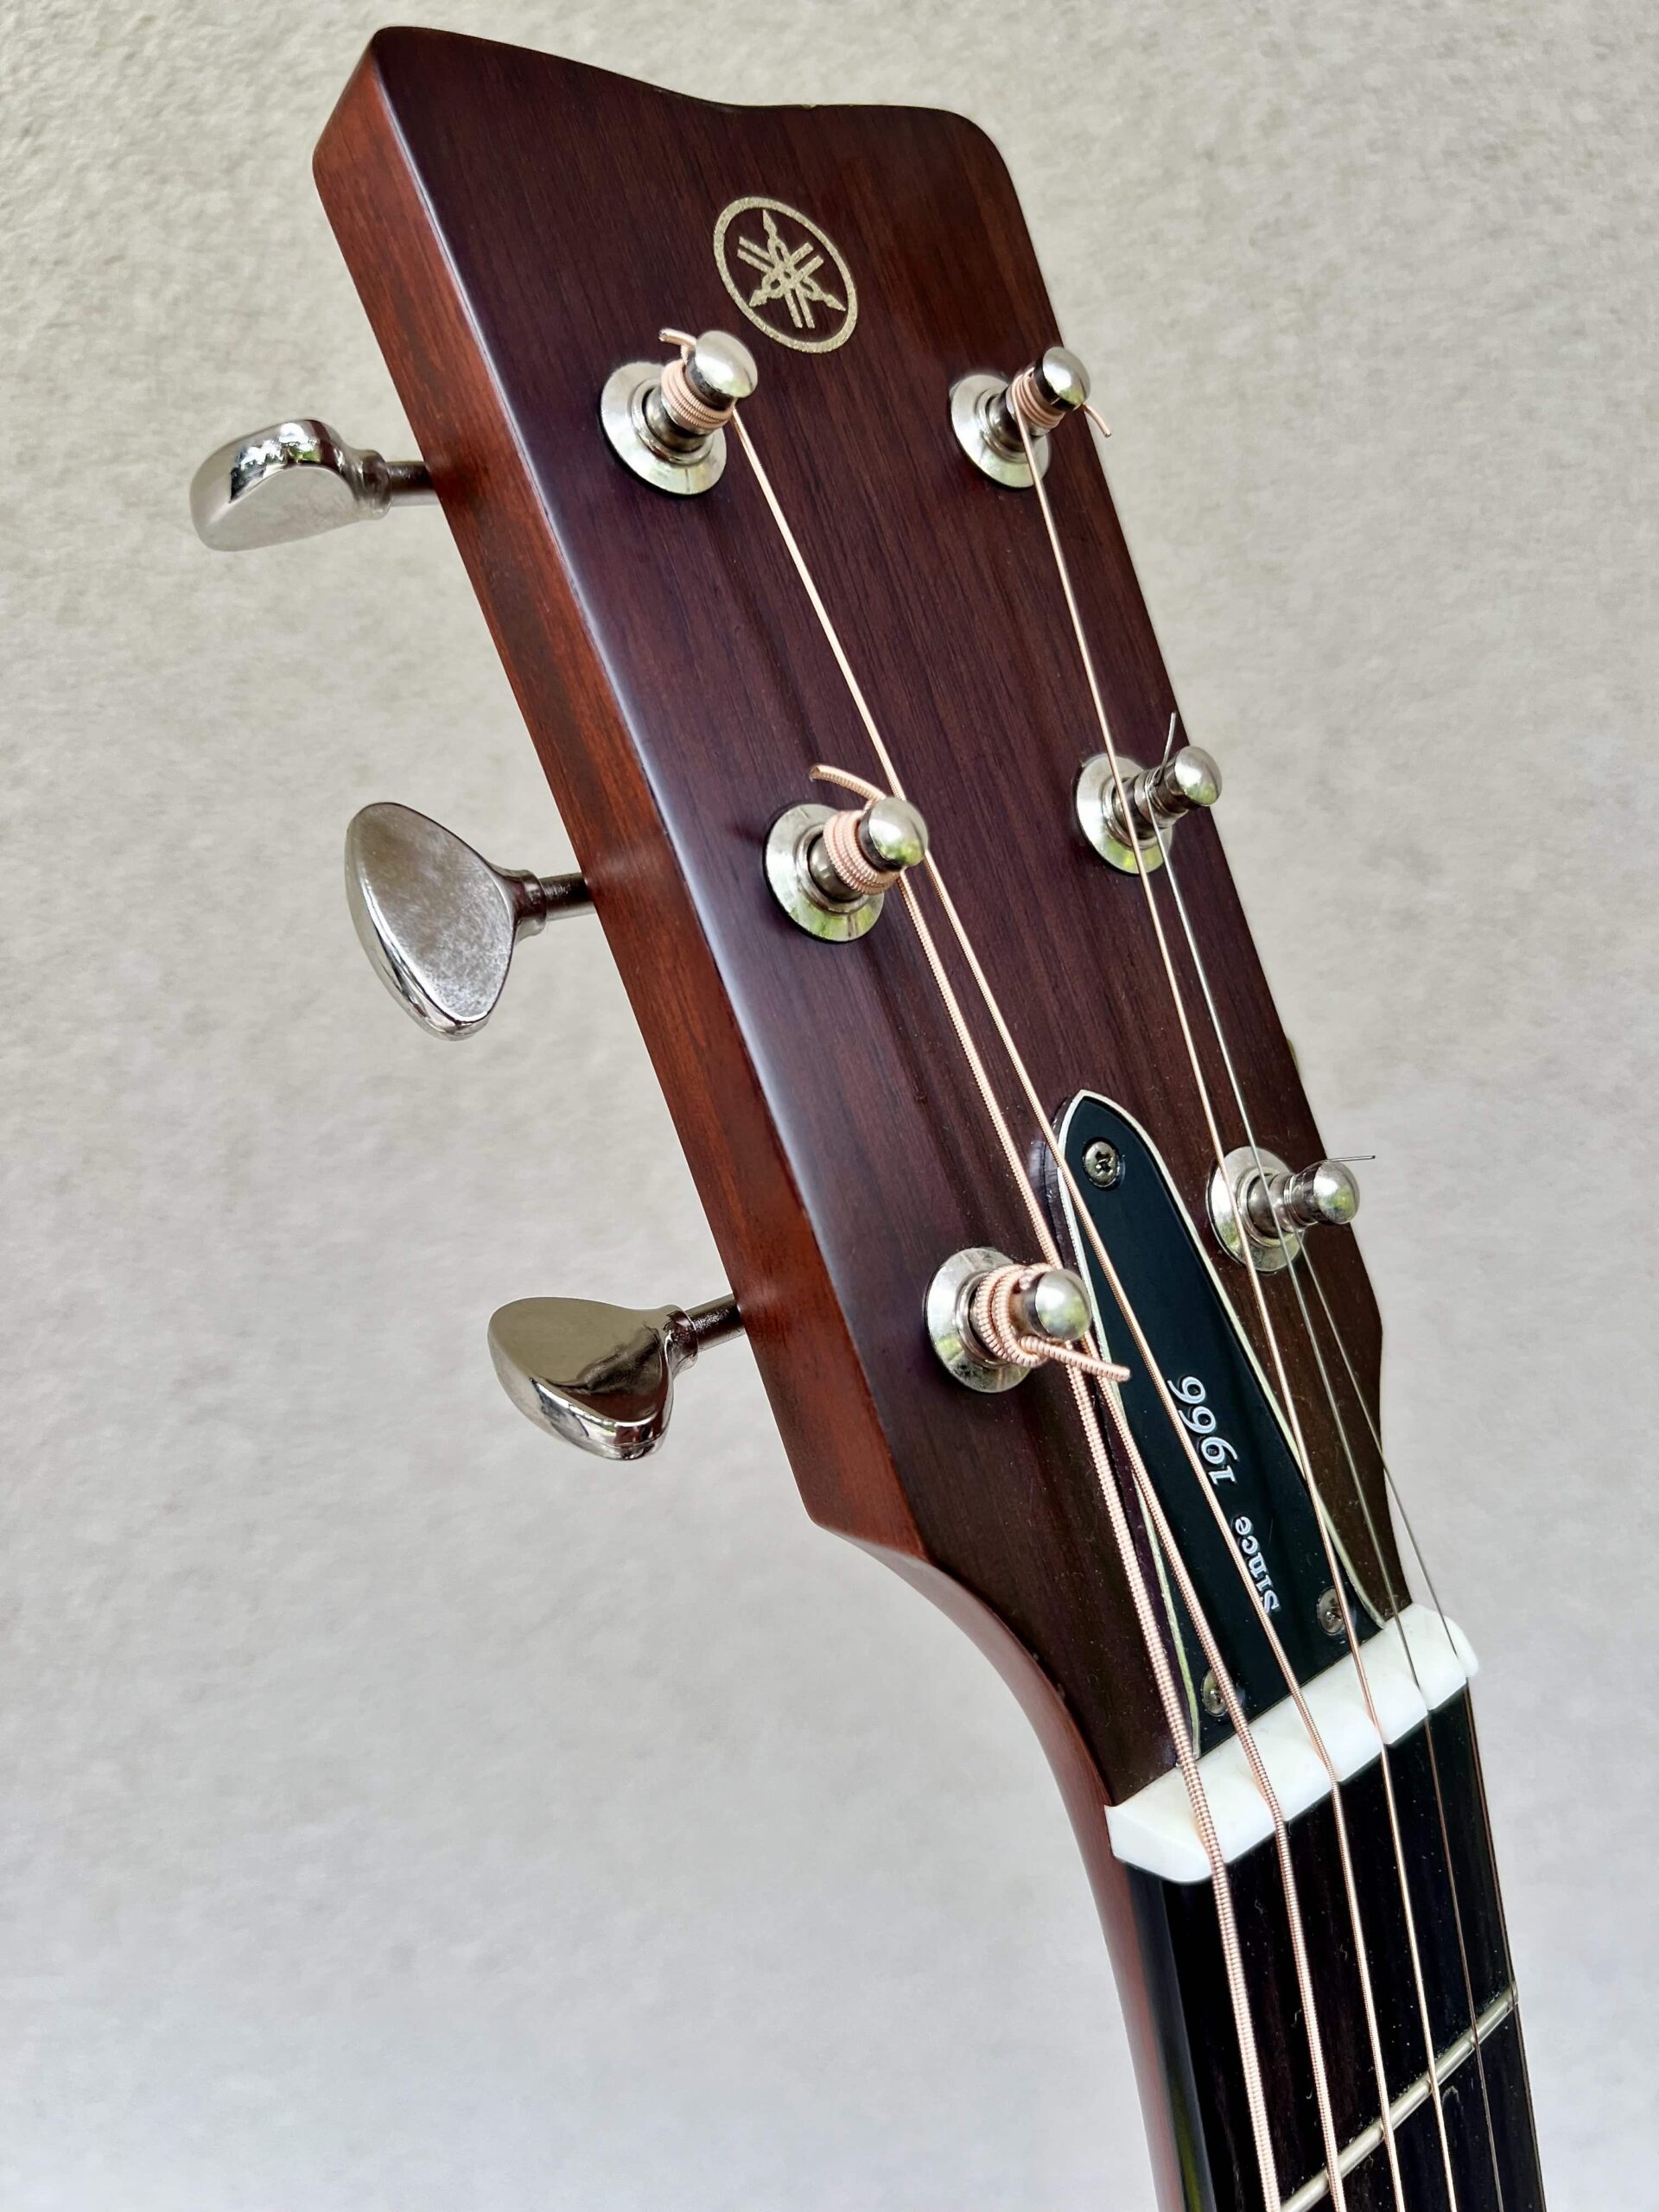
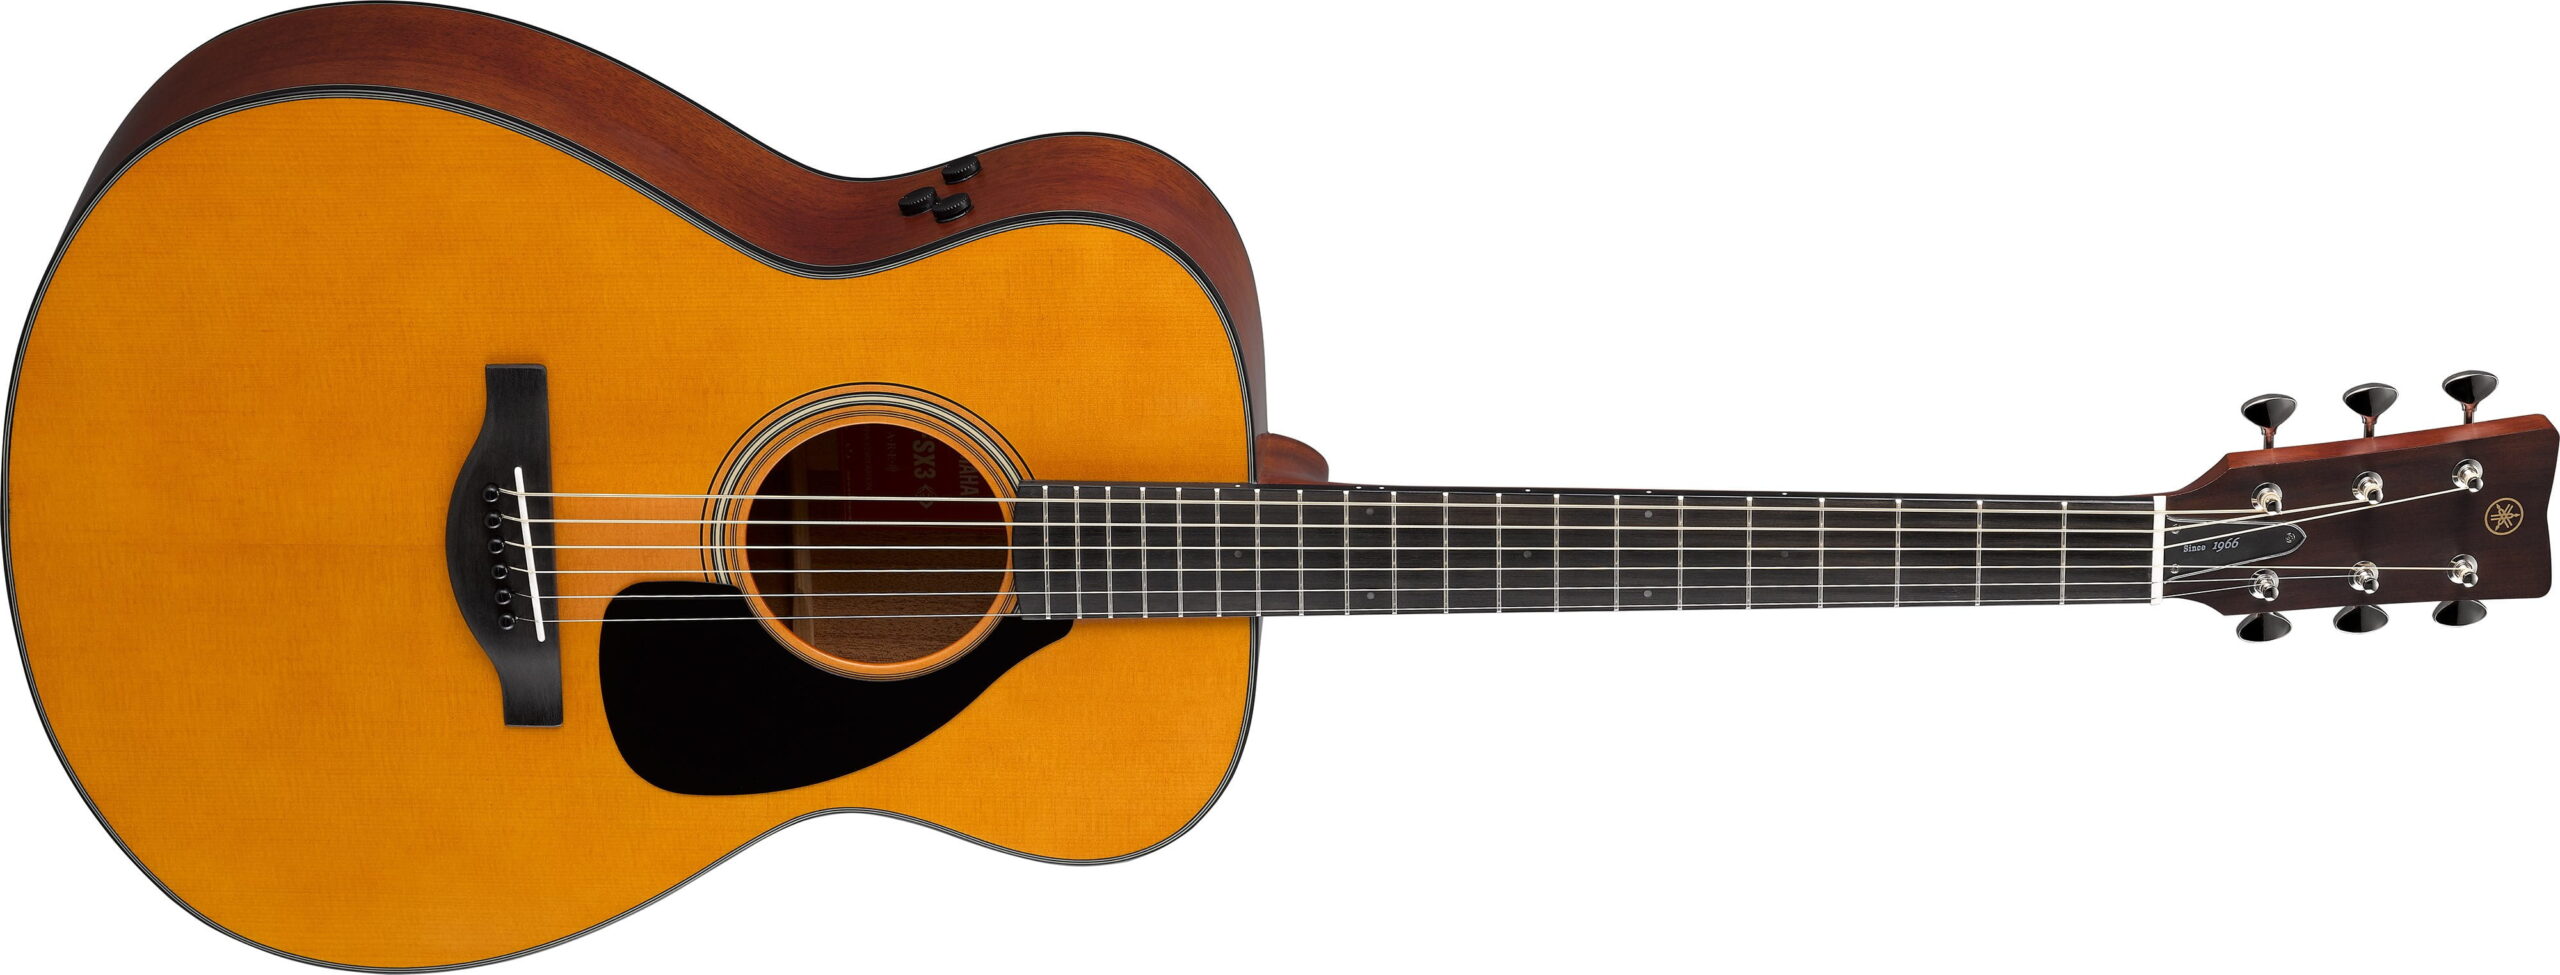

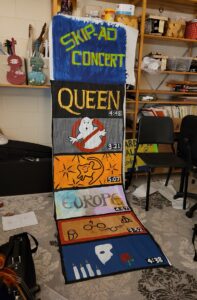

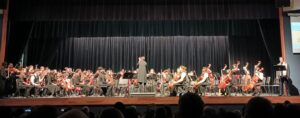


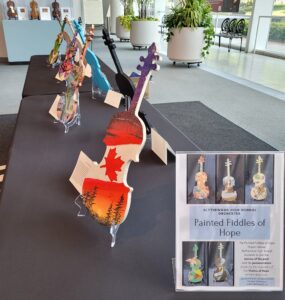


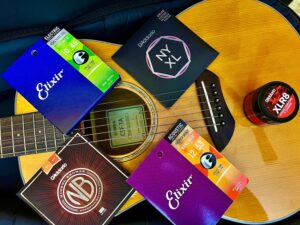
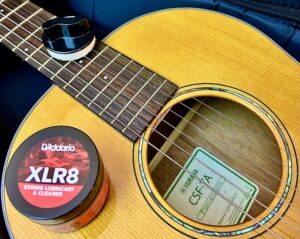
 Many guitar manufacturers recommend lemon oil for this purpose. You can also use