Have you ever noticed that your acoustic guitar sounds big, full and rich in some rooms but less so in others? The reason is the variation in acoustics from one space to another. Those differences are influenced by room size and shape as well as the wall and floor materials — even, to some degree, the type and placement of furniture.
In this posting, we’ll talk about how those variables impact the sound of your guitar and offer some tips on how to improve a room with subpar acoustics. By controlling a room’s acoustics, you can enhance how the guitar sounds not only from your perspective as the player but also how it sounds to listeners in the audience and/or a microphone (or microphones) when you’re being recorded.
MAKING WAVES
The sound hole is not the only place where sound waves emanate from an acoustic guitar; they also radiate out from all over the instrument, particularly the top (front) of the body, as shown in the illustration below.
Sound waves emanate from all over a guitar’s body, not just the sound hole.
As with any sound waves, the ones coming from your acoustic guitar are categorized as direct or reflected. Direct sound consists of the waves that reach your ears (or a microphone) before they hit another surface. Reflected sound waves (usually called “reflections”) bounce off objects like walls, ceilings, floors and furniture before your ears detect them.
A direct sound wave (red) has a shorter path to your ears than a reflected one (white).
Because of their non-direct path, reflections arrive slightly later than direct ones. The first reflected sound waves to hit your ears are called early reflections. Unless you’re in a massive space, your ears won’t perceive the discrepancy in arrival times as an echo (we’re talking just thousandths of seconds of difference), but they will impact how you hear the guitar.
Not surprisingly, waves that arrive after the early reflections are called late reflections. Late reflections cue us as to the size of the room and define its reverberant characteristics.
An extreme example of late reflections would be those you’d hear if you were playing your guitar in a cathedral or a gymnasium. The combination of large size and hard surfaces would cause the reflections to arrive later than they would in a smaller room, and your ears would perceive a perceptible echo.
A larger room will have more natural reverb, while a smaller one will raise the ratio of reflected sound to direct sound that you (or your microphone) hear.
DESTRUCTIVE INTERFERENCE
Like other types of waves in nature, sound waves go in cycles. Sound waves arriving at your ears at slightly different times can make your guitar sound thinner and less clear. This happens when the waves interact with each other in a way that degrades their clarity, as shown below:
Reflected waves arrive later than direct waves, in this case degrading the sound.
When sound waves reach your ears at slightly different times in their cycles, they are said to be out of phase with each other. (See our blog posting “What is Phase” for more details.) When the difference is less than 25 milliseconds (thousandths of a second, usually abbreviated as “ms”), a phenomenon called comb filtering occurs. It causes some frequencies to be cancelled (destructive interference) and others to be reinforced (constructive interference), resulting in a change in timbre that often sounds nasally or honky. Differences of greater than 25 ms are perceived as diffuse reverb or discrete echos (often called “delays”).
ROOM MATERIALS AND SHAPES
It’s not only the size of a room that impacts its reflections, but also the materials used to construct the wall, floor, ceiling and furniture. Hard surfaces like brick or concrete generate the most reflections because sound waves mostly bounce off them rather than being absorbed by them. For example, your acoustic guitar would sound very reverberant if played in a space like the one pictured below.
Absorptive materials such as carpets, acoustic ceiling tiles or panels filled with insulation generate fewer reflections because the sound essentially goes through them instead of bouncing off. For example, the sofa, throw rug and curtains (especially when fully drawn) in the room pictured below ensure that there will be little reflected sound.
In addition, the shape of a room can create a phenomenon referred to as standing waves, which can also degrade the sound of your acoustic guitar. These are sound waves that bounce back and forth between parallel walls. Standing waves cause low (bass) frequencies to be significantly reinforced or diminished (especially if you’re standing near corners or close to walls) and will affect the sound of your guitar to some degree.
As an example, the hard wall and floor surfaces in the room pictured below would cause many reflected waves to be generated, making for a great deal of reverb, plus the parallel walls would likely create standing waves. Together, both would probably have a deleterious effect on the sound of your guitar.
To demonstrate, let’s look at a couple of spaces in which your acoustic guitar would likely sound good. In the relatively small room shown in this first example, the sofa, throw rug and curtain provide a nice absorptive contrast to the wood table, hard walls and floor, plus the small cabinet in the corner might serve as an effective bass trap to some degree.
In the much larger space pictured below, the wall-to-wall carpeting will help offset the reflected waves coming off the hard walls and windows, plus the bay windows ensure that there will be no standing waves. Your guitar would probably sound amazing in this room!
IMPROVING ROOM ACOUSTICS
The good news is that even if there are some issues with the space you’re playing in, there are steps you can take to improve the room’s acoustics. For example, if you’re recording your acoustic guitar, a simple way to reduce destructive interference by increasing the direct-to- reflected sound ratio is to shorten the distance between the guitar and the microphone.
As an example, here’s the sound of an acoustic guitar recorded with the mic placed about a foot away from the instrument:
Contrast that with the sound of the same guitar recorded with the same microphone, but this time placed two and half feet away. Notice the change in tone caused by the additional reflected sound.
The closer the mic is to the instrument, the fewer reflections it will pick up. However, because an acoustic guitar’s sound comes from its entire body, you typically don’t want to get closer than about eight inches, or the mic won’t get as complete a sonic picture.
Whether you’re playing live or are in a recording situation, that’s easily done, but there’s no practical way in either situation to change the distance between the guitar and your ears. However, you can certainly try moving to a different part of the room — you might be surprised by how much that can affect the sound. It’s best not to sit or stand directly in the center, though, especially in a room with symmetrical dimensions, because it can affect the bass response. Instead, if possible, position yourself about 40 percent of the way between the walls.
Beyond your positioning, the best defense against subpar room acoustics is trying to control reflections with what is known as acoustic treatment, which we’ll cover shortly.
People sometimes conflate acoustic treatment with soundproofing, but they’re not the same. Soundproofing a room requires creating a barrier so that sound from inside is kept from getting outside and vice versa. Soundproofing uses heavily absorptive materials and techniques like decoupling (construction techniques that reduce vibrations) to block the sound waves.
Acoustic treatment is intended to improve the sound by controlling reflections and reducing phase issues and standing waves. Yes, traffic and honking horns may interfere with your gig or recording session, and some of your playing may escape to the outside world, but it will sound a whole lot better to everyone (including you) inside the room!
ACOUSTIC TREATMENT
There are three main types of acoustic treatment. The first are known as absorbers. These are panels made of an absorptive material such as fiberglass, acoustic foam or mineral wool, and are used to reduce a room’s reflections. Commercially available absorbers are typically rectangular frames filled with one of the aforementioned materials.
Absorbers are usually placed on walls and the ceiling above your playing position (or in a studio, above the mix position) to control the early reflections. That way, you hear more direct sound and less reflected sound. If you don’t want to invest in dedicated absorbers, you can improvise with careful placement of cushioned furniture such as sofas or beds, or by placing a throw rug beneath your feet and/or hanging thick drapes in front of windows (glass is highly reflective, in the aural sense as well as the visual) and on the walls — even egg cartons glued to the wall behind you and ceiling above you can be used in a pinch.
Whether you’re installing commercial absorbers or are using DIY equivalents, they should ideally be placed at the first reflection points on your walls. An easy way to figure this out is to go to your playing position in the room and have another person hold a mirror as they move along each wall. The spots where your guitar body is visible to you in the mirror are where you should place your absorbers.
That being said, sometimes a room with carpeting, soft furniture and absorptive ceiling materials may have too few reflections and therefore sound “dead.” In those situations, diffusion is called for. A diffuser is a panel made of material designed to scatter sound waves. An important point to remember regarding both absorbers and diffusers is that they primarily work on mid- and high-frequency sound waves, but not those in the low-frequency range. For that you need bass traps, preferably placed in all corners of the room.
Commercially available bass traps are acoustic panels filled with material that’s thicker and denser than what’s in absorbers. Rolled-up carpet remnants or throw rugs are a good substitute for dedicated bass traps and sometimes work just as well.
This studio has absorbers at the first reflection points on the walls and on the ceiling, plus bass traps in the corners.
By understanding how the acoustics of a room affect the sound of your guitar, you can determine how to make your acoustic guitar shine in any environment. You may be amazed at the end result!
Yamaha has been supplying drum corps with quality instruments for over 40 years now. At first it was just marching percussion, then brass. Now our Pro Audio systems are also being used. We are proud of the drum corps who have played Yamaha instruments over the years, and of their place in our shared history. This trip down memory lane provides insight into the drum corps, their success at Drum Corps International (DCI) and the related innovations that have come from Yamaha.
Here are some of the accomplishments each year, along with a timeline. As you can see, each drum corps has been notable in its achievements:
Longevity: The Madison Scouts and Yamaha are now celebrating 40 years of working together. The Cavaliers began using Yamaha products one year later in 1986, beginning their own storied legacy.
Placement: The corps that use Yamaha instruments have consistently done extremely well, having won 18 DCI Championships, 15 Fred Sanford Best Percussion Performance Awards and 14 Jim Ott Best Brass Performance Awards.
Commitment: In the beginning there were a limited number of groups using Yamaha Percussion, and the competition was tough among music instrument manufacturers. Since then, the number of groups using Yamaha instruments has grown from zero to over 34. In fact, more drum corps play Yamaha Percussion than any other brand of percussion instrument.
Product Development: Over the years, the number of Yamaha products available to drum corps has grown. Yamaha has taken its time, completed the required testing and ensured that the products that are released to the marketplace are the best possible instruments with the most advanced music technology available.
In 1986, the Blue Devils begin using Yamaha Percussion and win the DCI Championship and High Percussion Award.
Year
Drum Corps Playing Yamaha
Product Innovations
2024
• Bluecoats win the DCI Championship and the Jim Ott Best Brass Performance Award • Carolina Crown places 5th • Santa Clara Vanguard places 6th • Blue Stars place 8th • The Colts place 9th • The Cavaliers place 11th • Madison Scouts place 12th
2023
• Bluecoats place 2nd • Carolina Crown places 3rd and wins the Jim Ott Best Brass Performance Award • The Cadets place 5th • The Cavaliers place 8th and win the Fred Sanford Best Percussion Performance Award • The Colts place 9th • Blue Stars place 11th • The Crossmen place 13th • Madison Scouts place 16th
DM3 and DM7 Series Digital Mixers are introduced.
2022
• The Bluecoats tie for 2nd place and win the Fred Sanford Best Percussion Performance Award • Carolina Crown place 4th • Santa Clara Vanguard place 5th • The Cadets place 6th • The Blue Stars place 7th • The Cavaliers place 9th • The Colts place 11th
2021
The MS-9414 SFZ Marching Snare Drum is introduced.
2020
2019
• The Bluecoats place 2nd • Santa Clara Vangaurd place 3rd and win the Fred Sanford Best Percussion Performance Award • Carolina Crown place 4th and win the Jim Ott Best Brass Performance Award • The Cavaliers place 5th • The Boston Crusaders place 6th • Blue Stars place 8th • The Cadets place 9th • The Crossmen place 11th
2018
• Santa Clara Vangaurd wins the DCI Championship, Fred Sanford Best Percussion Performance Award, and Jim Ott Best Brass Performance Award • The Bluecoats place 3rd • Carolina Crown places 4th • Boston Crusaders place 5th • The Cavaliers place 6th • The Cadets place 7th • The Blue Stars place 8th • Crossmen place 12th
2017
• Santa Clara Vanguard place 2nd and win the Fred Sanford Best Percussion Performance Award • Carolina Crown place 3rd and win the Jim Ott Best Brass Performance Award • The Cavaliers place 4th • The Bluecoats place 5th • The Boston Crusaders place 6th • The Cadets place 7th • The Blue Stars place 10th • Crossmen place 11th • The Madison Scouts place 12th
2016
• The Blue Stars come back to Yamaha, making them the 8th All-Yamaha Drum & Bugle Corps in DCI World Class • The Boston Crusaders move to Yamaha, making them the 9th All-Yamaha Drum & Bugle Corps in DCI World Class • The Blue Coats win their first ever DCI Championship • Carolina Crown place 3rd and wins the High Brass Award • The Cavaliers place 5th • The Cadets place 6th • The Blue Stars place 9th • The Crossmen place 10th • Boston Crusaders place 12th • The Scouts place 13th • The Colts place 16th
The MONTAGE synthesizer is introduced.
2015
• Carolina Crown place 2nd • The Bluecoats place 3rd • The Cadets place 4th and win the High Brass Award • Santa Clara Vanguard place 5th • The Madison Scouts place 8th • The Cavaliers place 9th • The Crossmen place 12th
The TF Series mixer is introduced.
2014
• The Bluecoats place 2nd • The Cadets place 3rd • Santa Clara Vanguard place 4th • Carolina Crown place 5th • The Cavaliers place 6th • The Madison Scouts place 11th • The Crossmen place 12th
The 9300 Series Snare Drums and 8300 Series Multi-Toms and Bass Drums are introduced.
The 6300 Series Timpani, 8000 Series Concert Toms and 9000 Series Concert Bass Drums are introduced.
2013
• Carolina Crown wins the DCI Championship and the High Brass Award • The Cadets place 3rd and win the High Percussion Award • Santa Clara Vanguard places 4th • The Bluecoats place 5th • The Cavaliers place 7th • The Madison Scouts place 9th
2012
• Carolina Crown place 2nd and wins the High Brass Award • The Cadets place 4th • Santa Clara Vanguard place 5th • The Bluecoats place 6th • The Cavaliers place 7th • The Madison Scouts place 9th
2011
• The Cadets win the DCI Championship • The Cavaliers place 3rd and win the High Percussion Award • Carolina Crown place 4th and wins the High Brass Award • Santa Clara Vanguard place 6th • The Bluecoats place 7th • The Madison Scouts place 10th
2010
• The Cavaliers place 2nd • The Bluecoats place 3rd • Carolina Crown place 4th • The Cadets place 5th • Santa Clara Vanguard place 7th • The Madison Scouts place 10th
2009
• Carolina Crown place 2nd • The Cadets place 3rd • The Cavaliers place 4th • Santa Clara Vanguard place 5th • The Bluecoats place 6th • The Troopers place 12th
2008
• The Cavaliers place 3rd • Carolina Crown place 4th • The Cadets place 5th • The Bluecoats place 6th • Santa Clara Vanguard place 7th • The Madison Scouts place 12th
2007
• The Cavaliers and Yamaha celebrate the 20th Anniversary of the corps using Yamaha, placing 3rd overall • Carolina Crown begin using Yamaha brass and percussion and become the next Top 12 DCI Drum Corps to play Yamaha exclusively, placing 6th overall • The Troopers begin using Yamaha brass and percussion and become the next DCI Drum Corps to play Yamaha exclusively • The Cadets place 2nd • Santa Clara Vanguard place 5th • The Bluecoats place 7th • The Colts place 10th
2006
• The Cavaliers win the DCI Championship as well as High Brass • The Cadets place 5th • The Vanguard place 6th • The Bluecoats place 4th, the corps highest placement ever • The Madison Scouts purchase Yamaha Brass instruments becoming the next “All-Yamaha” drum corps and place 9th • Spirit place 12th
2005
• The Cadets win the DCI Championship as well as the High Brass and the High Percussion Award • The Cavaliers place 2nd • Yamaha and the Madison Scouts celebrate the 20th Anniversary of the corps using Yamaha and place 6th • Spirit from JSU place 12th • The Bluecoats begin using Yamaha and become the next Top 12 DCI Drum Corps to play Yamaha exclusively. They place 5th, the corps’ highest placement ever • The Colts begin using Yamaha and become the next top 12 DCI Drum Corps to play Yamaha exclusively
The Tuba-Shield is introduced for marching tubas.
“Battery Pack” percussion bags are introduced.
Ten drum corps play on Yamaha Pro Audio equipment.
2004
• The Cavaliers win the DCI Championship • The Cadets place 4th • The Madison Scouts place 8th • The Crossmen place 10th
The YEP-202M Euphonium is introduced.
The YMRD-2900A, a 4.5 octave Acoustalon marimba with Multi-Frame II, is launched and used by four drum corps.
Eight drum corps begin using Yamaha Pro Audio equipment.
2003
• The Cavaliers place 2nd • The Cadets place 3rd and win the High Percussion Award for the 3rd year in a row • The Madison Scouts place 8th • The Crossmen place 9th • Spirit from JSU place 12th
New 8200 Series Field-Corps Marching Toms and Bass Drums I introduced.
The Tough-Terrain Frame for concert bass drum, chimes, and gongs is also introduced.
2002
• The Cavaliers win the DCI Championship and the High Brass Award • The Cadets place 3rd and win the High Percussion Award for the 2nd year in a row • The Crossmen place 9th • Spirit from JSU place 10th
The YBB 202-M Tuba and the Multi-Frame II for pit percussion instruments are both introduced.
2001
• The Cavaliers win the DCI Championship • The Cadets begin using Yamaha Percussion, place 2nd, and win High Percussion • The Crossmen begin using Yamaha Brass and Percussion and place 7th • The Madison Scouts place 11th
The Tough-Terrain Frame for pit percussion instruments is introduced.
2000
• The Cadets begin using Yamaha brass • The Cadets are named the DCI Co-Champion and win the DCI High Brass Award • The Cavaliers are named the DCI Co-Champion and win High Percussion • The Madison Scouts place 10th
First year of Yamaha B♭ instruments in DCI use.
New products introduced included: YMP-203M mellophone, the MTS Marching Snare Drum, and the Blue Forest line of percussion stains.
1999
• The Blue Devils win the DCI Co-Championship • The Cavaliers place 3rd • The Madison Scouts place 6th
The Multi-Frame I for pit percussion instruments is introduced.
1998
• The Blue Devils place 3rd • The Cavaliers place 4th • The Madison Scouts place 6th
1997
• The Blue Devils win the DCI Championship • The Cavaliers place 5th • The Madison Scouts place 6th
Yamaha begins distribution of Randy May Carriers and Stadium Hardware products.
1996
• The Blue Devils win the DCI Co-Championship • The Cavaliers place 4th • The Madison Scouts place 6th
1995
• The Cavaliers win the DCI Championship and the High Percussion Award • The Blue Devils place 3rd • The Madison Scouts place 4th
1994
• The Blue Devils win the DCI Championship • The Cavaliers place 4th • The Madison Scouts place 6th
The Red Forest line of percussion stains is introduced.
1993
• The Blue Devils place 4th • The Cavaliers place 5th • The Madison Scouts place 6th
The SFZ Marching Snare Drum and the Black Forest line of percussion stains are both introduced.
1992
• The Cavaliers win the DCI Championship and the High Percussion Award • The Blue Devils Place 4th • The Madison Scouts place 5th
1991
• The Cavaliers place 2nd • The Blue Devils place 5th • The Madison Scouts place 7th
1990
• The Blue Devils place 4th • The Cavaliers place 2nd • The Madison Scouts place 9th
Corps-Custom Marching Snare Drum is launched.
1989
• The Cavaliers place 3rd • The Blue Devils place 4th • The Madison Scouts place 7th
1988
• The Madison Scouts win the DCI Championship • The Blue Devils place 3rd • The Cavaliers place 5th
1987
• The Cavaliers begin using Yamaha and place 3rd • The Blue Devils place 4th • The Madison Scouts place 6th
1986
• The Blue Devils begin using Yamaha Percussion and win the DCI Championship and High Percussion Award • The Madison Scouts place 7th
1985
• The Madison Scouts becomes the first drum corps to use Yamaha percussion and place 4th • The Velvet Knights begin using Yamaha and place 11th
First Year of Yamaha Marching Percussion Instruments in DCI use in White, Chrome, and Silky Silver.
In 2000, the Cadets are named the DCI Co-Champion and win the DCI High Brass Award.
Top photo: The Velvet Knights in 1985, the first year they started using Yamaha instruments.
The Fourth of July is all about fireworks, picnics and patriotism. Let’s take a look at the history of the five patriotic songs most closely associated with this proud holiday tradition.
1. The Star-Spangled Banner. Written in 1814 and inspired by the bombardment of Fort McHenry in Baltimore during the War of 1812 — a battle ultimately won by the U.S.—this was not actually made our national anthem until 1931. Lawyer and amateur poet Francis Scott Key — an eyewitness to the event — wrote the lyrics, which were later set to the tune of a popular British song written by John Stafford Smith. Interestingly, Key’s original poem had four stanzas, though only the first is commonly performed. With a range of 19 semitones, the song is notorious for being very difficult to sing, as many attendees to sporting events can testify.
The bombardment of Fort McHenry.
Samuel Francis Smith.
2. My Country ’Tis of Thee. The lyrics to this song were written by Samuel Francis Smith in 1831, when he was just 23 years old. The source of the melody, however, may surprise you: It’s the same as that of the national anthem of the United Kingdom, “God Save the Queen.”
3. You’re A Grand Old Flag. This spirited march was composed by vaudeville song-and-dance man George M. Cohan in 1906 for his stage musical George Washington, Jr. It was made famous by James Cagney, who portrayed Cohan in the 1942 movie Yankee Doodle Dandy — a song also penned by George M.
Original sheet music for “You’re A Grand Old Flag.”
Kate Smith.
4. God Bless America. Composed by famed songwriter Irving Berlin in 1918, his 1938 revision was made famous by singer Kate Smith during World War II and in the post-war years. Interesting factoid: It was the official campaign song for President Franklin Delano Roosevelt in 1940, as well as his Republican opponent, Wendell Willkie.
5. This Land Is Your Land. Interestingly, this was written in direct protest to “God Bless America,” when Woody Guthrie decided in 1940 that he was sick of hearing Kate Smith sing it endlessly on her radio program. Guthrie penned the lyrics, which he then set to the melody of a Carter Family tune called “When the World’s on Fire.” The song became an anthem for many of the folk artists of the 1960s, and was covered by Bob Dylan, The Kingston Trio, The New Christy Minstrels, Pete Seeger, and Peter, Paul and Mary, among many others.
That’s what I thought after spending most of my prep period writing an email about concert attire. You know the one: black pants, black shoes, no sneakers, please don’t make me explain what “plain black” means again.
Then, for fun, I asked ChatGPT to write it. In 10 seconds, I had a somewhat more polite email with fewer exclamation points. That was the moment I stopped rolling my eyes at AI. Not because it was magic, but because I realized I was spending way too much time on things that didn’t need to be that hard.
AI can be scary — both for what it can do, and what we think it might replace. Now, I’m typically optimistic, and I don’t think our particular field of teaching is at risk of being replaced by AI. People still want live interaction, art and entertainment in music, and we need people sitting in the space at the same time to accomplish this. By utilizing AI, we can get to that communal aspect a little quicker.
Let the robots handle the boring stuff
We all have a task graveyard. For me, it’s rubrics, newsletters and emails that start with “Just a quick reminder…” These are the things that eat up my time — not because they’re hard, but because they’re annoying. I’ll put off writing a grading scale longer than I’ll put off cleaning the instrument storage room (and ours closely resembles Narnia — and not the pretty parts).
Enter AI.
When I need a quick draft of something basic, I let ChatGPT take the first stab. Recently, I needed to write a behavior expectations sheet for a field trip. Normally, I would spend 30 to 40 minutes copying and pasting past versions and second-guessing phrasing so I don’t sound like a tyrant.
This time, I asked ChatGPT to: “Write a one-page code of conduct for a high school band trip, covering behavior, curfew, hotel expectations and consequences that is written in a firm but friendly tone.”
I still added a section called “Don’t make me call your mom at midnight,” because that’s very much my voice. But I didn’t have to build the whole thing from scratch.
Use AI for things like this. If it’s something a reliable student could do but it must come from you, give it to the robot.
You’re still the teacher
It felt weird when I first started using AI — like I was somehow not doing my job. A voice in my head was saying, “Shouldn’t a real teacher write all this themselves?” Then a different, more practical, voice in my head responded. No parent is applauding my band trip packing list. Nobody is giving you a standing ovation because your grading scale has perfect formatting and fonts.
Your job is to teach. Connect. Lead. Listen. You know — the hard stuff that a robot can’t do. Would you rather spend 40 minutes wrestling with formatting when you could be lesson planning, running sectionals or grabbing lunch with a colleague?
AI doesn’t replace your effort. It redirects it.
Take the weekly newsletter. I used to dread writing it because it took so long to sound natural and not like a robocall. Now I ask AI for a draft, then I go in and make it mine.
I don’t think this is laziness. I’m not working any less. In fact, I’m sometimes tempted to work more because now I feel like I’m making a bigger impact.
You only need one win to start
Here’s where most teachers get stuck: the assumption that you need to “learn AI.” Like it’s a whole new certification. You don’t.
You need one win. One moment where it saves you time and brainpower and reminds you that your to-do list doesn’t have to be endless.
Here’s what my first few AI attempts looked like:
Email drafts: I started by having AI write a thank-you email to a parent who donated snacks for a trip. Took 20 seconds.
Sight-reading quiz: I gave AI the parameters — key of Bb, dotted quarter note rhythms, mostly stepwise motion. It spit out three options.
Concert intro: I asked AI to write a two-sentence blurb for each piece on our program in student-friendly language. Some were off, but two were good enough to use as-is.
The trick is to try something that’s low risk. Don’t start with your course syllabus. Start with something like: “Draft a rehearsal outline for a woodwind sectional on balance and blend.” Then change what you don’t like. That’s the beauty of it — you’re not handing over control. You’re speeding up the start.
You can also go a little meta with this and simply ask ChatGPT to create step-by-step instructions for whatever you need to learn.
And here’s a pro tip once you do get something you like: Ask AI to generate a prompt that will give you the same kind of output next time. Seriously. Just say: “That was great — what exact prompt should I use to get this again? Act as an AI prompt generator expert.” It’ll give you a reusable formula that you can copy and paste later. This has saved me hours. I now have a file labeled “Good Prompts” that includes:
Band trip letter templates
Sight-reading quiz generator
Rehearsal plan writer
It’s like having a clone of yourself that does paperwork.
Use it as a tool, not a crutch
This part matters: I don’t use AI for person-to-person communication unless it’s just a starting point. Why? Because when I’m writing to a colleague, a parent I know or an administrator I need to connect with — tone matters. A lot.
Everyone is going to know if you’re using AI for everything. We’ve all seen the “navigating the educational landscape” dead giveaways.
Continue working on building relationships on trust, not templates.
Teach your students the same way
I’m not the only one using AI. Students are using it too — and very badly. I’ve had kids submit reflections that clearly weren’t written by them. One even turned in a concert review that read like it was written by someone who’s never been to a concert.
So now, I teach it. We talk about what AI can do — and what it shouldn’t do. I’ll say: “If you’re stuck on the first sentence, go ahead and use AI to get moving. But then make it yours. Read it out loud. If it doesn’t sound like something you’d say, rewrite it.”
I even show them how I use it: “Here’s the AI draft of our weekly newsletter. Here’s what I changed and why.” Once they see that I use it as a helper — not a shortcut — they get it. And they’re less likely to try and pass off a generic essay as original thinking.
And by the way — the pendulum always swings back and forth. If you want an honest concert reflection? Require it on paper and pencil, just like kids had to do back in the day.
You’re not lazy. You’re leading.
If you’re using AI to lighten your mental load, you’re not failing. You’re modeling what it means to use tools wisely. You’re saving energy for the parts of teaching that actually require your full self.
I still teach tuning (although I use a robot tool — a tuner and a Yamaha Harmony Director). I still fix wrong notes. I still sit with kids who are struggling and help them figure out how to find their place in the ensemble. But I don’t spend an hour writing a list of what shoes not to wear on stage anymore. Because I have better things to do. Like teaching or eating lunch or answering the eighth kid who asks if they have to wear plain black socks.
Try it For Yourself
Here are some helpful prompts to begin using AI.
PROMPT 1: I’m hosting a one-day festival with 400 middle school students rotating through three performance spaces and two clinics. Ask ChatGPT to outline a sample schedule that includes:
Group arrival times
Warm-up room usage
Performance slots
Lunch breaks (staggered)
Awards and departure
Efficiency Tip: Ask AI to format it as a table or color-coded blocks. Then follow up with: “Can you list five things I should triple-check the day before the festival to avoid chaos?”
PROMPT 2: I have an Excel or Google Sheet with this format: LAST NAME, First Name, Instrument, Grade. Tell AI that you need to:
Capitalize names correctly
Split into separate columns for name, instrument and grade
Sort by instrument, then grade
Apply a unique fill color to each instrument section
Efficiency Tip: If you’re using Excel or Google Sheets, you can follow up with: “What formulas or steps can I use in Excel to do each of these tasks without a script?” or “Write a quick Excel macro that sorts and color-codes by instrument group.”
PROMPT 3: I have 30 minutes of downtime and the following five tasks: 1) Choose correct chord voicing for tuning exercise, 2) Draft festival day schedule, 3) Fix and format Excel file (names, instruments, grades), 4) Create a checklist before the festival, 5) Create 10 bell-ringer prompts for rehearsal. Ask ChatGPT to:
Reorder these based on energy level required (lowest to highest)
Recommend the best order to complete them in this time
Provide step-by-step instructions or AI prompts to complete each one efficiently
Most of the time, bassists play one note at a time, and when we think of chords, we outline them by playing arpeggios. But playing chords as chord shapes — and two-note double-stops, which imply chords — can add cool options to your toolkit while deepening your knowledge of the fretboard and helping you understand songs better.
BASS CHORDS 101
First things first: Chords and double-stops sound better up high on the bass. Down low — say, below the seventh fret on a standard 4-string bass — chords can get muddy. A chord voicing refers to the way you arrange and space the notes in a chord, and the lower you are, the simpler your voicing should be. Besides, as you get closer to the pickups, there’s less space between frets, which makes it easier to play chord shapes.
As we talk about notes on separate strings, we’ll use the words “up” and “higher” to refer to a string that’s higher in pitch and closer to your knees. A string is “lower” when it’s lower in pitch and closer to your chest. Similarly, a fret is “higher” when it’s closer to the bridge and “lower” if it’s closer to the headstock. In other words, your D string is higher than your A string, and your fifth fret is lower than your twelfth fret.
DOUBLE-STOPS
Intervals like thirds, fourths and fifths are the building blocks of double-stops and chords. The fingering diagrams below illustrate the various exercises I’ll be describing in this section.
Start by playing a G major scale at the tenth fret:
We’re looking for notes on separate strings, so we won’t be playing the G and the A strings. Instead, play the G and the B strings, which are a major third apart (one string up and one fret lower), as demonstrated in this audio clip:
Similarly, there’s a perfect fourth interval (one string up, same fret) between G and C:
The distance between G and D is a perfect fifth (one string up, two frets over):
From G to E is a major sixth (two strings up, one fret lower):
If you play G and F# together, you’ll hear a major seventh (two strings up, two frets higher):
Finally, the G at the tenth fret and the G at the twelfth fret are an octave apart:
To summarize, here’s what it sounds like if you play an interval as a double-stop every two bars:
MORE INTERVALS
We’ve talked about the intervals between G and every other note in the major scale, but let’s look at the relationship between each note and its third, which tells us whether a chord is major or minor.
In the key of G, three chords are minor (A and B, the ii and iii chords, as well as E, the vi); two chords are major (G, the I chord, and C, the IV); one chord is dominant (D, the V); and one chord is half-diminished (F#, the vii). The fingering diagrams below illustrate the various exercises I’ll be describing in this section.
As we’ve mentioned, the distance between G and B is a major third. The distance between A and its third (C) is a minor third, as you can hear in this audio clip:
The distance between B and its third (D) is also minor:
However, the distance between C and its third (E) is major, as you can hear in this audio clip:
The distance between D and its third (F#) is also major:
The distance between E and its third (G) is minor:
The distance between F# and its third (A) is minor, followed by the major third interval between G at the seventeenth fret of the D string and the B on the sixteenth fret of the G string, as demonstrated in this audio clip:
Playing each note of the scale with its third ties it all together, as this audio clip (played using just the neck pickup of my Yamaha BBP35) demonstrates:
Moving the third an octave higher, with roots on the E string and 10ths on the G, is a great way to warm up your hands and ears. For further contrast, I used the BBP35’s bridge pickup for this audio clip:
THREE-NOTE CHORDS
Once you’re familiar with double-stops, it’s easy to build three-note chords, which commonly add the seventh to the root and third. (In most cases, fifths aren’t as crucial unless they’re flattened or sharped.) The fingering diagrams below illustrate the various chord shapes I’ll be describing in this section.
This first video shows an easy G major7 chord shape:
Here’s a good go-to shape for Gm7 chords:
Next, a common G dominant chord shape:
And finally, here’s a way to play a half-diminished (m7♭5) G chord. This consists of the root, ♭3, ♭5 and ♭7 intervals, although the voicing in the video below uses just the root, the ♭5 and the ♭7:
On keyboards, the arrangement of the black and white keys means that chord shapes can be quite different from one another. The shape of a B♭maj7 chord, for example, is quite different than the shapes for Cmaj7 or F#maj7. But on bass, once you know a chord shape, you can move it anywhere.
To wrap things up, here’s what it looks and sounds like when you play the G major scale using all the three-note shapes described above:
MAKE THEM YOUR OWN
Many great electric bass players have used chords and double-stops in their bass lines, but one of the first to make them part of his signature sound was studio legend Chuck Rainey, who played on thousands of songs in a long and successful career. Listen to how he employed them in “Summer in the City” with Quincy Jones (starting at around 0:33), Steely Dan’s “Kid Charlemagne” (check this isolated basslinefor a closer glimpse), and the theme from the 1970s TV show “Sanford & Son.”
We’ve only briefly touched on major and minor intervals in this posting, but exploring other intervals like tritones, digging into other chords and scales, playing with inversions (i.e., starting the chord on a note other than the root), trying other chord voicings, and experimenting with four-note chords are all pathways to new sonic terrain.
The best way to learn chords and double-stops is to play chord progressions on your bass. Stay open to new possibilities, and they will surely present themselves. Then you can make them your own by using them as the foundation for fillsor solos.
Note: All audio clips played on a Yamaha BBP35 bass.
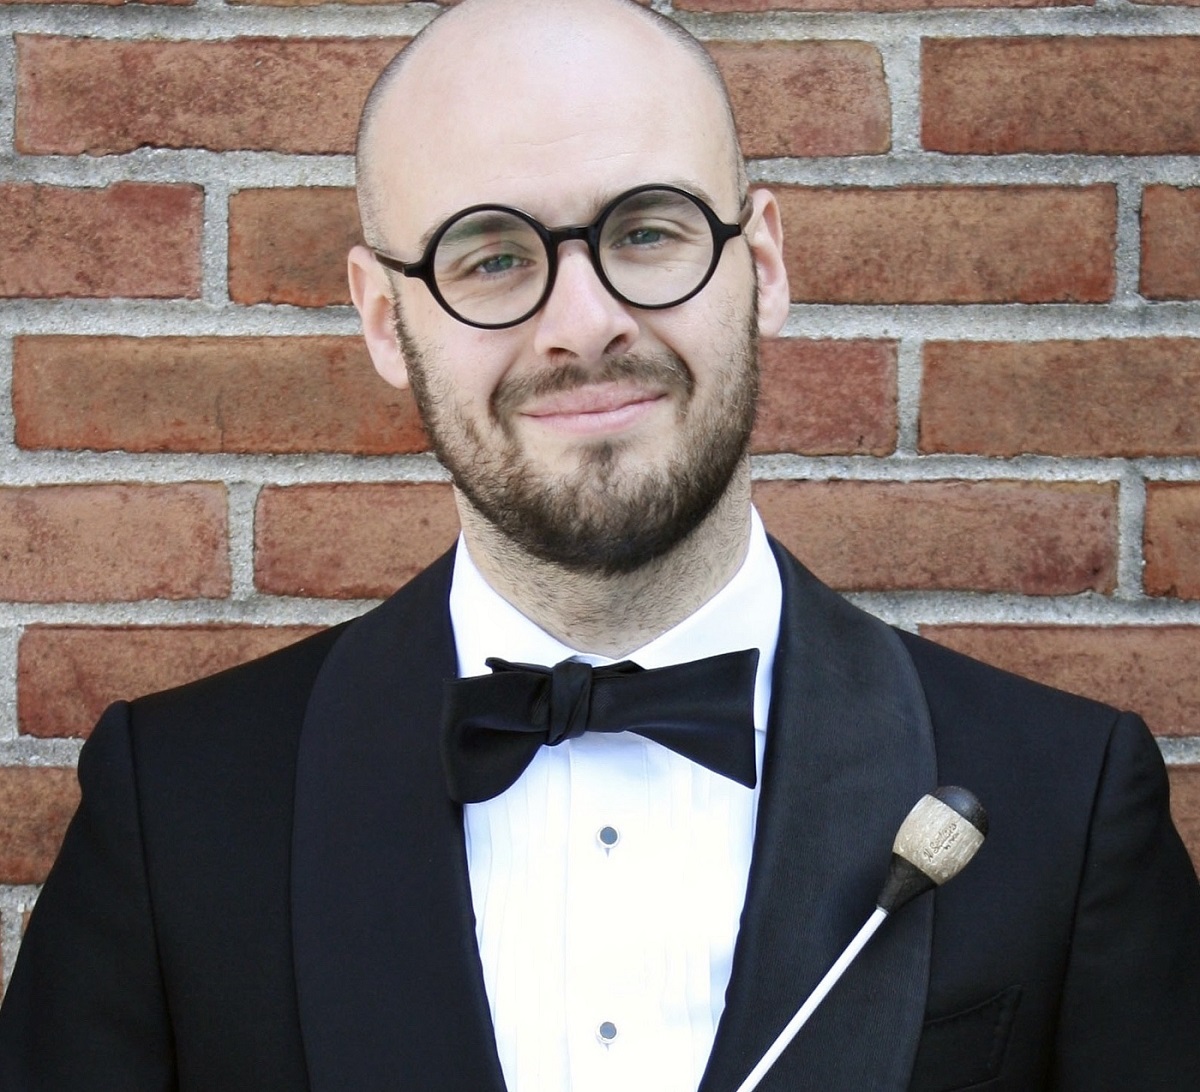
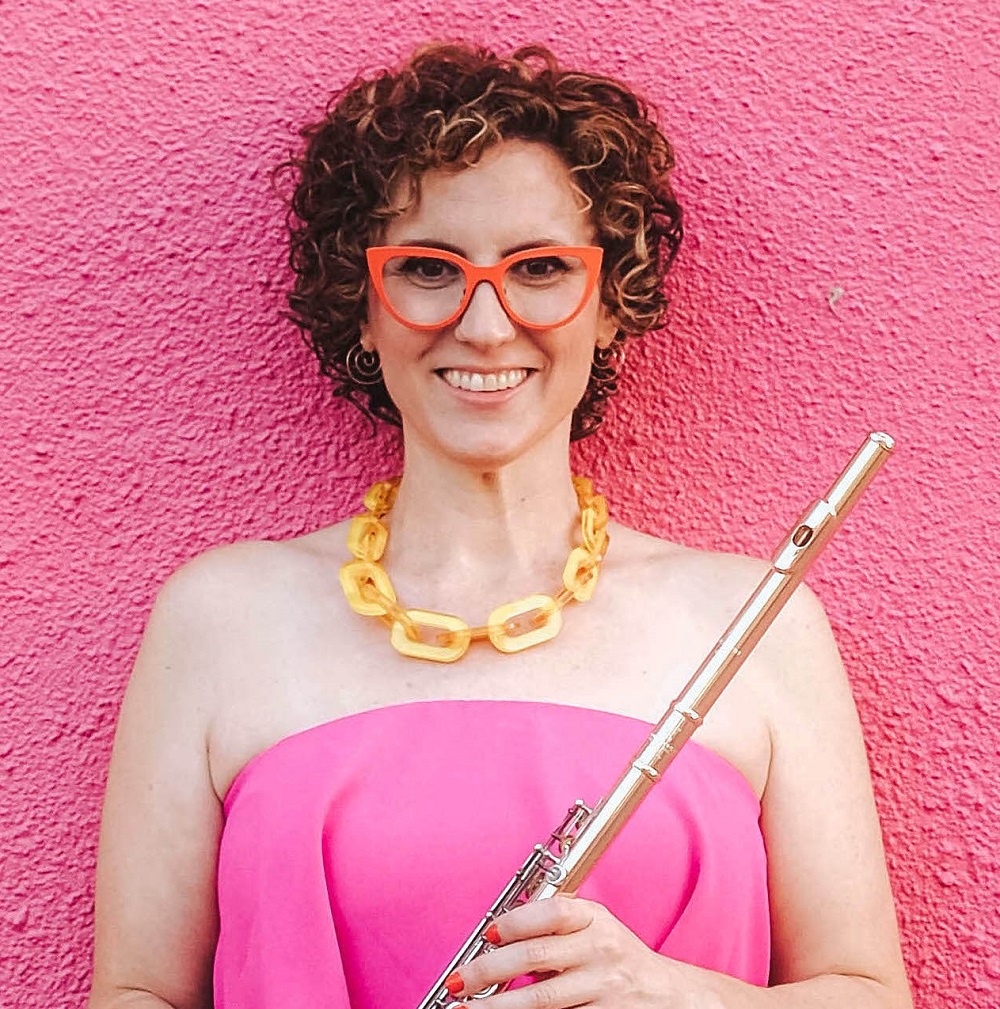
Annie Ray — an award-winning teacher in the Washington, D.C. suburb of Annandale, Virginia — wears many hats in her daily life, both as a teacher and a mother of two young girls. This extraordinary teacher has earned recognition for leadership in several areas, and she was even named the 2024 Grammy Music Educator.
Ray’s accomplishments are varied and far-reaching. In addition to founding Crescendo Orchestra for students with disabilities, she was inspired by her mentor Brian Coatney to start a parent orchestra , so parents can learn to play instruments like their children. But one of her most impactful programs is Motherhood and Music Education (M&ME), which provides resources and support for music teachers on extended leave.
Supporting Each Other
Ray and Alexandra Blaine, a friend and colleague, were pregnant at the same time — Blaine with her first baby and Ray with her second. The timing was a godsend, Ray says, for the support and camaraderie.
Together, the two women supported each other through the day-to-day experience of expecting a baby, problem-solving and balancing their personal lives with work duties. One of the biggest hurdles both women faced was finding a long-term substitute teacher for at least six weeks.
Ray and Blaine noticed an alarming problem: a lack of resources for all caregivers to take extended leave from their jobs for maternity, paternity or bereavement. That isn’t fair to teachers.
Ray said that teachers returning to their jobs after a period of absence would often hear, “Oh, I didn’t expect you to come back.”
Providing Helpful Tools
Blaine said staying home with her newborn during maternity leave brought great joy, but presented a huge, daunting task: How do I prepare someone to step into such a specialized, nuanced role?
“We both had a very hard time finding long-term subs with a music background,” says Blaine. “This is where we see so many people leave the profession.”
Ray and Blaine had their babies over the summer, and during the 2023-2024 school year, they started working together to combine resources and create templates and substitute plans to share with other teachers. They applied to speak at educator conferences about the benefits of supporting mothers, and they gave a presentation on the topic at a Virginia Music Educators Association and the American String Teachers Association.
In April 2024, they officially started Motherhood and Music Education (M&ME), which falls under Ray’s LLC called Annie Ray Sounds. This program, run in close partnership with the nonprofit Fairfax Arts Coalition for Education, provides resources to performing arts teachers in the Fairfax County Public School System.
“I think the biggest thing is that we want mothers to have the tools to know that they can make it through these early childhood years,” Blaine says. “The bottom line is, we want to save more people in the profession and keep them in the classroom.”
Resources for the Care-Giving Community
“Alexandra and I worked to pull together resources to make leave time easier,” Ray says. She has two daughters: Eloise, 4, and Millie, 20 months. “We’re stronger together.”
Guiding the Motherhood and Music Education initiative was this question: “How can you be a parent or caregiver, specifically through the lens of a woman, and still pursue what you’re passionate about?” says Ray, who took about 10 weeks of maternity leave.
A key component of M&ME is creating quality plans for substitute teachers, so that students can still get a solid lesson, even if the sub is not a professional music teacher. Because music teachers’ jobs are so specialized, not just anybody can cover for them well, Ray says. But, with quality lesson plans and premade “plug-and-play” resources, the mental load will be taken off their plate.
“For the majority of the school districts, there is no person writing curriculum full-time for the district,” she says. “The goal of Motherhood in Music Education is to fill that gap. The aim is to create a collection of these premade things, so the answers are already there for people.”
When a music teacher goes on leave, they need to know that a sub will be equipped to handle their special subject, which is very hands-on rather than intellectual and abstract, Ray explains.
“The music education field is so much more than just a classroom,” she says. “You’re basically running your own nonprofit and being involved in every aspect of it.”
In addition to lesson plans, M&ME supports all caregivers – not just those who identify with the term “mother” – as they navigate the challenges of balancing caregiving and careers in music education. At the organization’s website and on its Facebook group, caregivers share pumping schedules, hacks, rights and practical strategies for balancing parenthood with professional responsibilities, Ray says.
“We are in the business of nurturing and raising children, whether in our own homes or in our classrooms,” she says. “Our community supports everything from mental wellness and work-life integration to advocating for family-friendly policies in educational institutions.”
By providing real-life solutions and a supportive network, M&ME empowers caregivers to thrive both at home and at work while making the child-raising profession more accessible and inclusive.
Work-Life Balance
Nobody will completely figure out the tricky life equation of work versus life, Ray says. Both work and family life are demanding, but she has a system that works well for her in her everyday life.
In the morning and early afternoon, she is at work at Annandale High School. When she comes home, though, she focuses on spending time with her husband and girls. Ray often brings work home with her — she doesn’t have enough free planning periods during the day — but she doesn’t touch it until the girls go to bed in the evening.
“I really make a hard line between my personal and professional life,” Ray says. “If there’s a thing I have to do for my kids at school in the evening, I open my laptop and do it, but that’s a choice.”
Even though they are separate, sometimes her professional and personal lives influence each other. Ray received the 2024 Grammy Music Educator Award, which came soon after she had her second daughter. In an interview with Washington Family Magazine, she said her teaching career has influenced her parenting style as a mother and vice versa.
“Motherhood is the greatest teacher of my life,” Ray told the magazine. “It and teaching don’t have to be a ‘you have to choose one or the other’ situation. Teaching makes me a better mother, and being a mother makes me a better teacher. The two roles go hand in hand.”
Future Goals
Ray’s and Blaine’s vision is for M&ME to “grow into a truly inclusive and empowering space for all caregivers in music education.”
“We want M&ME to become a go-to hub where caregivers can access not just lesson plans and classroom strategies, but also real-life resources for balancing the unique demands of caregiving and music education careers,” Ray says.
She wants to expand the M&ME community, which has accumulated a group of about 450 caregivers, to offer more workshops, live discussions and resource-sharing on topics like navigating maternity and paternity leave, and mental wellness. Ray hopes to develop a student-centered classroom to pull the weight off a director’s shoulders, along with creative solutions for managing rehearsals and family life. Some other music teachers have reached out and said they are interested in helping with M&ME, which Blaine and Ray hope will continue to happen in the future.
“Most importantly, we want to amplify voices from all caregiving backgrounds, not just mothers, to reflect the diversity of experiences in our field,” Ray says. “Ultimately, we hope M&ME inspires a cultural shift in the profession, where caregiving and career growth aren’t seen as opposing forces but as interconnected paths that can be embraced and supported.”
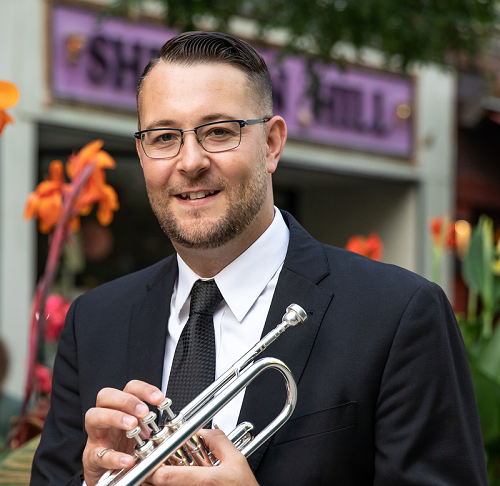
When Marissa Guarriello, Assistant Professor of Strings at the University of North Carolina at Greensboro, first took a job in music programming at ArtsQuest, she felt prepared. After all, she had undergraduate and graduate degrees in music education, plus teaching and performance experience.
However, upon starting her new job – which included reviewing musician contracts, working at live performances and facilitating merch sales – Guarriello realized that she had trouble understanding even basic conversations among her coworkers. “The first thing that caught me off-guard was the terminology,” she says. “I had no idea what people were talking about half the time, and it’s stuff pretty specific but basic to the entertainment industry.”
This experience made it clear that even though Guarriello had an education in music, she wasn’t prepared for various on-the-job skills required for assisting in other areas of the music business. Because most music education programs focus on performance, she worries that many students will have a similar experience once they start a job in the music industry.
“You must have a good understanding of what it takes to put on a concert in any setting,” Guarriello says. “It would be a really good idea to have these core concepts worked into our secondary music education.”
Guarriello began promoting expansive music education, which includes introducing students to elements of a concert beyond just the performance itself. Now, she regularly hosts clinics and speaks at conferences about ways educators can incorporate expansive music education into their programs for a richer overall student experience.
Musicking: Expanding the Definition of a Musician
Core to the practice of expansive music education is the theory of “musicking,” a term coined by musician, educator and author Christopher Small that reorients the word “music” from a noun to a verb — to music. Musicking posits that everyone involved in the facilitation of a musical performance is making music.
“When you go to a rock concert, not only are the performers on stage musicians, everyone else is, too” Guarriello says. “The person who bought the talent and cut the deal with agents, the band manager, the bus driver, the people taking tickets — they’re all considered a musician because they’re helping to facilitate this experience successfully.”
Guarriello supports this expansive definition of what is means to make music. She says that broadening the scope of the word “lends a lot of dignity and responsibility to those who act as the facilitators of music.”
Plus, increasing the reach of musicianship provides more educational opportunities for music students, which can better prepare them for a career beyond high school. While most music students will not become full-time professional performers, they may still find a career in another music discipline on the business or organizational side.
Many schools are already expanding their music program’s offerings. “It’s this idea that we’re moving beyond what’s traditional,” Guarriello says. “We’ve always seen general music, band, choir and orchestra. However, in the past decade, there’s been an emergence of guitar, piano classes and modern music, particularly at the secondary level.”
The next step to get more students involved is to introduce a more expansive approach to what it means to be a musician in the first place. Bob Habersat’s article, “Reaching Nontraditional Students,” and Jameyel “J. Dash” Johnson’s “6 Real Ways to Reach the 80%” discuss reaching students who do not participate in traditional school music offerings of band, orchestra and choir — this is the exact sentiment that Guarriello is echoing. “I was not part of the 80% — I was very much in the 20% of students who was involved in traditional school music and loved it, and I still do,” she says. “However, as a teacher, it was evident I wasn’t reaching most students despite what I thought I knew, what I was taught, and what I personally loved. I had to reflect and make changes as a teacher to give my students the best education possible. That reflection and subsequent changes to my class continue every day to make sure I am being as responsive as possible to the learners and musicians sitting in front of me at any given time. Ultimately, that has meant expanding what I offer in my music classroom.”
Theory Meets Practice
While “musicking” is a theory often discussed in music educator circles, teachers also need to find practical approaches to introduce it in their classrooms. Guarriello leads clinics at high schools and presents at conferences about basic music industry topics. “Every time [I speak on the topic], people are shocked,” Guarriello says. “People, including teachers, never quite realize what goes into this side of the industry.”
While working at ArtsQuest, Guarriello’s role focused on booking talent for the venue. She uses this experience, plus others, to introduce both students and teachers to the various roles available. “We’re focusing on live music,” she says. “We break down the basics of the performance: who’s touring with the band, who’s on the venue side. We look at what it looks like to contract and buy talent and where the money goes.”
During Guarriello’s tenure at ArtsQuest, she participated in the creation of Music Industry Day, a field trip for students to see what goes into various elements of a live performance. “Students learn about the media, the marketing, the talent buying, the production,” Guarriello says. “They see just a snippet of what goes on behind the scenes.”
Guarriello also worked on the Musikfest Education and Industry Conference while at ArtsQuest. Like most conferences for music educators, this event featured presentations from teachers on a variety of different topics; the difference was, these presentations focused on elements beyond music performance.
“The goal was [to educate attendees] on how the industry works so they can go back to their classrooms and inform their kids,” Guarriello says.
Attendees learned about diverse topics like songwriting and the impact of artificial intelligence on the music industry. “The first step was to make sure teachers understood the importance of incorporating these topics in their classes and passing along their knowledge to their students with concrete steps on how to take action in big and small ways,” Guarriello says.
Some of those “small ways,” she says, can include “having students help run a concert, go through the process, and then reflect on it.”
Ideally, Guarriello, who was recognized as a 2025 Yamaha “40 Under 40” music educator, says, students should be able to see what they learned from the experience. “It’s not just, ‘I’m helping my teacher,’” she explains. “Instead, students can ask themselves, ‘How did I contribute to the music-making of my community?’”
If students can understand how these behind-the-scenes actions helped to facilitate music, they will be more likely to see this side of music as a potential career path.
Guarriello recommends that teachers reach out to local venues for partnerships. “See if they would be willing to work with you on a project, a unit or some service learning, so students can get a real-life look behind how the music industry work,” she says. “We wouldn’t hesitate to take our orchestra class to a symphony concert, so why can’t we do the same thing for other career paths?”
Challenge the Status Quo
While Guarriello sees obvious benefits in expansive music education, she also acknowledges that change doesn’t come easily. Getting educators on board with expansive music education can be challenging, especially when most people still view music education as a traditional program for winds, strings and choir.
“One of the challenges that music education faces is that we’ve been so established in this performance-centric mode of teaching and learning for so long,” she says. “There are people who firmly believe that’s what music education is, and that’s all it should be.”
However, new music teachers are starting every year, meaning that music education will continue to evolve. “I’m hopeful that as new generations of music educators come through the system, they will maintain an open mind,” Guarriello says. “They might be open to modern music or music production or music administration. They’ll do things that welcome their students into their classroom.”
One of the biggest short-term benefits of expansive music education is the large number of students it has the potential to reach. By expanding the definition of musicianship, teachers can inspire a wider variety of students to give music a try.
“There are a lot more students to engage,” says Guarriello. Guarriello will be joining the Department of Music and Human Learning at The University of Texas at Austin beginning in the 2025-2026 academic year. She looks forward to being in the center of a city known for its live music scene and booming music industry with endless opportunities for her future students. If you want to learn more about this topic, Guarriello is teaming up with her former colleagues at ArtsQuest to organize the second Musikfest Industry and Education conference in August of 2026 which will run in tandem with Musikfest, the largest free music festival in the United States.
In 1964, IBM announced the System/360, an industry-changing computer system that was eventually used to process data for the Apollo 11 moon landing. It was powerful for its time but mammoth in size, occupying an entire room.
From that impressive beast to desktop computers, laptops and smartphones, technology has steadily evolved into a smaller, more personal form that now even includes wearables. It’s no surprise then that home theater technology has evolved from full-blown multi-channel surround sound with multiple speakers to the latest Yamaha wireless headphone technology: 3D Sound Field, which enables you to enjoy an immersive listening experience wherever you are. Now, whether you’re watching a football game or concert video on your phone, or streaming content from Netflix® or YouTube™ on your tablet, you can enjoy a cinema-like experience. It’s like being in your own completely portable personal theater!
Intrigued? Read on …
YH-L700A
Yamaha YH-L700A.
The first product to incorporate 3D Sound Field is the new Yamaha YH-L700A wireless noise-cancelling over-ear headphones, which use something called a Head-Related Transfer Function (HRTF for short) to mathematically model how your ears receive sound from a point in space. This sophisticated processing considers your head and ear shape and size, among other individual details, along with knowledge of the way our brains process sound and use cues to determine where sounds are coming from. Together, this enables the localization of particular sound sources.
Next, 3D Sound Field takes the wireless Bluetooth® signal, which is stereo or two-channel, and expands it to five channels, with dialogue in the center and sound effects to the left and right as originally intended.
Yamaha engineers applied their considerable expertise with home audio sound field processing, gained over decades of developing technologies like YPAO™ and CINEMA DSP HD3, to create different 3D Sound Field modes, similar to the sound programs on Yamaha AV receivers. Seven available modes, from Cinema to Music Video to Concert Hall, provide the optimal headphone listening experience for every type of content.
Seven 3D Sound Field Modes
Playback can be customized based on the type of content and a listener’s preference:
Modes for Movies and Shows: Cinema, Drama
Modes for Music Videos: Concert Hall, Outdoor Live, Music Video
Modes for Music Only: Audio Room, BGM
Here’s a video that demonstrates how each of these modes recreates sound in a three-dimensional space:
3D Sound Field works with any stereo content from virtually any source, including both iOS and Android™ devices, as the audio processing is handled inside the headphones.
Click here for more information about Yamaha YH-L700A wireless headphones.
In 2006, I came back from a summer trip to Paris with an amazing story to tell.
On one day – it happened to be June 21 – thousands of musicians started showing up on street corners, taking out their instruments, and playing. As I walked across the city, an endless procession of music came into my ears: individual accordion players, a brass quintet, kids playing Suzuki pieces on a digital piano, some kind of Scandinavian rock band, a hip-hop cypher, a choir of retired women singing pop songs, with hints of even more music around every other corner. It was impossible to miss. The city had turned into a huge open-air stage for what’s known as the Fête de la Musique (or Faites de la Musique, which translates as “Make Music”). All this, I learned, was taking place that day not just in Paris, but in every city in France … and it had been going on for decades.
A few days later, I landed back home in New York. Instead of hearing music on the streets, I heard the familiar sounds of sirens and horn honking. But it didn’t have to be this way. Surely, I thought, New York is teeming with musicians – amateurs and professionals of the most diverse kind – who would love to come outside for a day to meet each other, play together and share their music, if given the chance.
I started telling people about the “Make Music” day that I had witnessed, and how we should do it in New York in 2007. I talked it up to my musician friends, old colleagues, cultural institutions, music schools, city officials, community organizers, media outlets, and everyone else I could think of.
What surprised me most were the blank looks. Even among cosmopolitan New Yorkers, almost no one had heard of the Fête de la Musique. I showed pictures I had taken of performances in Paris, recited statistics from the French Ministry of Culture, and still there was a feeling of disbelief. It almost seemed too simple. You mean, you tell people they can come outside and play music? And then … they do?
All the way up to June 21 that year, I spoke with hundreds of people making plans for the first “Make Music New York” day and I felt that same hesitation. An older woman in a Harlem apartment building was going to wheel her upright piano into the elevator, and down onto the street for a Make Music New York block party. That sounded amazing, but a heavy lift for someone barely five feet tall. Would she really go through with it? I told her about Carnegie Hall’s plans for the event, and about all the young rock bands coming out in Williamsburg. The message I was trying to convey was: You are not alone! You’re not going to be the only one at the party! But even I wasn’t sure what to expect.
And then the big day came. I brought my saxophone over to a West Village street that had been closed off for Make Music Day. More than a hundred musicians had gotten there before me, and had already started playing Terry Riley’s In C. On the sidewalk near my office, some teenage tap dancers set up and had a recital. A friend reported that a Brazilian Samba band had been briefly rained on but they went under some scaffolding and had a terrifically loud time. An official from City Hall told me that she had seen a woman playing an upright piano that had been wheeled out onto the street in Harlem. All in all, 560 outdoor musical events took place for the first Make Music New York. It was not as many as in Paris, but it was a start.
Over the following years, Make Music New York grew in size, reaching a peak of 1,355 participatory musical events in 2014. Each year, the blank looks became less blank. Now that people had seen it, the idea seemed straightforward, even obvious.
And as word got out about the New York event, and the NAMM Foundation started to promote it, Make Music Day began to expand across the country. It is now celebrated in over 85 cities in the United States on June 21st, encompassing over 5,000 events. Make Music China began in 2016, adding another 4,000 events to the calendar. Make Music Day UK, Make Music Argentina, Make Music Australia, and Make Music Lagos each launched in the last few years and are growing quickly.
Every year, this holiday is spreading to more and more of the world, taking the form of the local musical culture everywhere it goes. (Editor’s note: We mark the day each year with performances by local bands comprised of our employees and a friendly “Yamaha Idol” competition.) You no longer need to go to France in order to experience every kind of music on June 21. Just grab an instrument, step outside, and follow your ears!
Photos by Kris Connor/Getty Images for Make Music Day and Brad Barket/Getty Images for Make Music Day
Click here for more information about Make Music Day.
You love spending time outdoors in the summer. The warm air, the cool breezes, the longer days, ahhhh … the only thing that could make it better is a little music.
A pair of outdoor speakers are exactly what you need. But are they easy to install? After all, you don’t want to be sweating over your sound system when you could be relaxing instead.
Well you’re in luck! Installing Yamaha outdoor speakersis faster and easier than you think. Just follow these simple step-by-step instructions and before you know it, you’ll be enjoying your favorite tunes in the sun!
Preparing
1. Make sure you have all the parts you need. You should have:
2 speakers
2 brackets
4 knobs
8 mounting screws (not included)
2. Once you have all the parts gathered, pick an installation spot and run speaker wire from your amplifier/receiver to that spot. (Don't connect anything just yet.)
Installing the Mounting Bracket
3. Hold the bracket up to the installation spot, and verify that it’s level. You can use a hardware level tool, or there are useful bubble level apps available for your smartphone.
Installing the Mounting Bracket - (continued)
4. Mark four screw holes with a pencil.
Installing the Mounting Bracket (continued)
5. Use appropriate mounting screws to attach the bracket securely to the wall/ceiling.
Connecting to Your Amplifier/Receiver
6. Make sure your amplifier/receiver is powered off.
7. Remove about 3/8" of the insulation from the end of the wire.
8. Loosen the terminal knob, and insert one exposed wire into the hole on each side of the terminal.
9. Observe the speaker polarity. Red is positive (+), and black is negative (-).
10. Tighten the terminal knob to secure the wire.
Mounting the Speaker
11. Place the speaker in the bracket and use the two knobs provided to secure it.
The Finishing Touch
12. Put the finishing touch on your speaker by rotating the Yamaha emblem so that it’s parallel to the bottom edge of the speaker.
Voila! Now you can enjoy those balmy days even more with your favorite tunes playing in the background.
As the school year kicks off, many students are excited to start their musical journey by picking up a wind or string instrument for the first time. Choosing the right one is a huge decision — it directly impacts a student’s learning experience and connection with music.
Whether it’s the melodious flute, the powerful tuba or the rich sounding clarinet, selecting the right instrument can make all the difference in fostering a love and passion for music. In this posting, we’ll introduce some of the best wind and string instruments for those starting out. These instruments are designed to support beginners in their musical growth and provide a solid foundation for years to come.
Woodwinds
Flute
Flutes are considered woodwinds despite the fact that they are made of metal instead of wood. They’re categorized as transverse-style instruments because the player holds the flute to the side and blows air across the sound hole, not directly into it. Their distinct, airy tone make them a standout melody instrument in orchestras and a compelling lead voice in jazz ensembles.
Crafted for both learning and performance, the Yamaha YFL-222 student flute is designed with features that help beginners master proper breath control, including a lip plate that guides airflow and keys with carefully considered dimensions and angles for optimal balance and playability.
YFL-222 student flute.
YCL-255 clarinet.
Clarinet
Clarinets are single-reed wood-bodied instruments known for their distinctive tones, which can range from mellow to bright to strident. With a pitch range of four octaves (the widest of all woodwinds) the clarinet is a highly versatile instrument. It features a cylindrical shape with a small, flared bell at one end. While clarinets come in several varieties, the most used is the B♭ soprano clarinet.
Many beginners find the Yamaha YCL-255 B♭ clarinet a great place to start. Its durability and ease of play make this standard clarinet an excellent choice for students.
YOB-241 student oboe.
Oboe
Oboes are double reed instruments with a conical bore and a small bell at the end. They have a range of about two-and-a-half octaves and can produce a wide range of tones depending on whether they’re played in their lower or upper registers: warm and smooth with their low notes, bright and shrill in their high notes. The oboe is mostly used to play melodic passages.
The YamahaYOB-241 student oboe utilizes a simplified Conservatoire key system and is made of durable plastic, making it easier to play for the beginning oboist. It projects a characteristically warm oboe tone which sounds almost exactly the same as a professional instrument, allowing even a complete beginner to quickly develop a beautiful tonality.
YAS-26 student saxophone.
Saxophone
The saxophone, though made of brass, is considered a woodwind because its mouthpiece uses a single reed to create sound. The four main saxophone types — soprano, alto, tenor, and baritone — all have a two-and-a-half octave range. A skilled saxophone player can play slow and soulful or extremely quick, bend notes, and create growling and fluttering effects. As a result, saxes are excellent as melody or lead instruments. The Yamaha YAS-26 student E♭ alto saxophone delivers the response, intonation, and tone needed to help developing musicians achieve success. Its low B-C# connection, combined with legendary Yamaha durability makes this a great way to start your journey.
The first time I saw my teaching contract, I felt rich.
I was 23, fresh out of college, and my starting salary had a comma in it. I remember thinking, “I could buy all of those Lego sets I couldn’t afford when I was younger.” Clearly, my priorities needed some work.
I had no sense of taxes, insurance, retirement contributions — none of it. All I knew was that the number was bigger than anything I’d ever earned in my life.
Three weeks into the school year, I was eating peanut butter sandwiches for dinner (I ran out of jelly) and calculating whether I had enough gas in the tank to make it to Friday. I wasn’t living large — I was just living without a plan.
You can work hard, mean well and still be underwater financially if you don’t take it seriously early on. I’m not talking about being fancy. It’s not about buying a house in your 20s or retiring by 40. This is about taking your life — and financial peace — seriously. Because if you don’t, it will catch up to you. Probably at the worst time.
Your Paycheck Is Not a Plan
I used to check my bank account the way I checked the fridge when I was hungry — to see what was in there. If the number was positive, I figured I was fine.
Turns out, that’s not a budget.
I once heard, “If you don’t tell your money where to go, it will make the choice for you.” At the time, I laughed, but now, I think about this a lot.
During my first year of teaching, I spent money the way I spent energy: reactively. Fast food between rehearsals. School supplies no one reimbursed me for. Last-minute Amazon orders. One Christmas, I bought gifts for everyone … and then had to scramble to pay rent in January. I was well-intentioned but was also suffering at the end of every month.
I didn’t need more money (well, more money would have helped). I needed a map.
Eventually, I started using a free budgeting app — not perfectly, but consistently. I tracked everything and set limits. I even gave myself “fun money,” so I didn’t feel like I was punishing myself. It didn’t fix everything overnight, but for the first time, I felt like I was in control.
You don’t need to be good at math. You don’t need a finance degree. You just need to start paying (pun intended!) attention. We often attach emotions to money, but it’s just resources and numbers that we need to add and subtract. (We also need to adjust those years of habits and beliefs!)
Loans Aren’t Evil, But Ignoring Them Is
I had student loans. Still do, honestly. Most of us do.
For a while, I ignored them. Not because I didn’t care — I was overwhelmed. The emails made me anxious. The login portal was a mess. I figured, “I’ll deal with it later.”
You know what happened? My loans grew. Interest accumulated. My grace period ended, and I didn’t even realize it. I was on autopay and autopilot.
I wasn’t irresponsible. I was unprepared.
Eventually, I called. I asked dumb questions. I made a spreadsheet. I learned about Public Service Loan Forgiveness. I set up a plan so I could see when I would be able to get out of these loans.
The relief I felt after that first call was ridiculous. It was like someone had been chasing me for months, and I finally turned around and asked, “Fine, what do you want?”
If you have loans, don’t let them lurk in the shadows. Turn on the lights. Ask questions. Make a plan — even if it’s just paying $20 more a month. Your future self will thank you.
Live Like a Broke Teacher Even If You Don’t Feel Broke Yet
You’re finally making real money. Maybe for the first time ever. And the temptation is to upgrade everything.
You want the decent apartment, the new car, new clothes. Maybe a few dinners out, a fall candle haul from Target, and a mini-vacation over spring break to reward yourself for surviving marching season.
You’ve worked hard. You’ve earned some comfort. Right?
But it’s a trap! It’s called lifestyle creep. It happens quietly. Your spending rises to meet your paycheck, and suddenly you’re wondering why you still feel broke. You’re living paycheck to paycheck — but now with nicer shoes.
I’m not saying to live miserably, just be miserly. Give yourself a one- or two-year “low-friction” period. Don’t upgrade just because you can. Live like a college student a little longer. Save what you can. Build breathing room.
We often compare ourselves to those we look up to like a mentor or our parents. I always envied the beautiful living room set at my mentor’s house. Everything matched and was pristine. But they had photos from 20 years before, where they piecemealed furniture based on what they could afford. I saw their accomplishments — I did not see the work they had to do to get there.
Your Future Self Is Counting on You
When I was 24, someone said, “Start saving for retirement now. You’ll be glad later.”
I smiled and nodded. I was still figuring out how to save for groceries. But they were right.
You don’t need to max out an account. You don’t need to hire a financial advisor. Just start. Even $25 a month into a Roth IRA or 403(b) is a huge win.
Why? Because you’re building a habit. And habits turn into systems, and systems are what save you when things get busy.
Same goes for an emergency fund. I didn’t think I needed one until my car broke down, and I had to borrow money to get to school. That felt worse than the actual repair bill. And bad things always come in threes! A car breaking down goes nicely with a broken furnace and a side of being sick for a few days.
Now, I keep a separate account with a buffer — nothing huge. Just enough to make sure one bad week doesn’t become a bad month.
It’s not about “getting rich.” It’s about not feeling trapped. It’s about being able to breathe.
What If You Grew Up Without Money?
Not everyone started at the same financial line. Some of us grew up in families where money was tight — or never talked about at all. Some of us learned that financial stress was just part of life. Some of us thought budgeting meant “being yelled at for spending too much.”
Start with curiosity, not shame. Ask questions. Read a book. Find a podcast. Talk to a colleague who seems like they have it together. (Spoiler: Most of us don’t, but some of us have at least started.)
Your financial background isn’t a barrier, it’s a case study. Learn from it. We’ve heard this before: It’s not our fault, but it is our responsibility.
Money Doesn’t Make You a Better Teacher — But Peace of Mind Does
You didn’t go into teaching for the money, but that doesn’t mean you have to suffer financially. Taking your money seriously is not “selling out.” It’s protecting your energy.
Because when you’re not panicking about overdrafts or saying yes to every gig just to stay afloat, you get to show up more and in a better state for your students. You’re able to plan rehearsals with a clear head. You get to be present.
I loved playing music live, but it soon became a matter of survival. I had to accept every gig and every marching band tech spot I could fit into my schedule. More money? Yes. Any downtime to recoup? No, which led to issues with my health, relationships and time. Worst of all? It made music-making feel like a chore.
So, start now. Start with something easy like a $20 savings transfer and a free budget app. Because the best time to get your money together was probably a few years ago.
The acclaimed artist shares how a search for self-identity led to amplifying the voices of others
Written by Lisa Battles
Pianist Lara Downes holds a place, places even, that few classical musicians occupy today. Her approach to life and work is akin to quantum mechanics, with subtle interconnections, strength in duality, embraceable uncertainties and powerful outcomes.
While she doesn’t describe it this way, her music and career yield evidence that her lens of discovery, both of herself and others, is inherent and difficult to measure.
Multifaceted musical presence
Downes’ presence is like a play of light across media, venues, organizations, genres and audiences, with NBC News calling her “a musical ray of hope” and other critics praising her for pushing music forward while breaking down conventional perceptions about classical music, its place in history and those who create it.
She takes on historic scores and newer compositions, blending genres and delivery to reach people far beyond concert halls.
Named NPR’s 2022 Classical Woman of the Year, she herself created and hosts the hugely popular NPR video series “Amplify With Lara Downes.” She’s topped Billboard charts as a recording artist. Meanwhile, she continues a steady stream of live performances with orchestras from Philadelphia to Los Angeles, and on stages from New York’s Lincoln Center to Berkeley’s Cal Performances. Currently, she’s one year into a three-year appointment as the Los Angeles Chamber Orchestra’s first Creative Partner.
Downes has even been a “New York Times” crossword clue. That fact is near the top of her bio, an accomplishment that speaks to her passion for connecting classical music to as many people as possible, far beyond the concert hall.
Uncovering her own story
The internal drive to write that personal story has always been at the heart of what she’s accomplished and still aims to achieve. With a markedly nontraditional background, there’s been much to uncover, she says.
As one of three daughters to a scientist father of Jamaican descent who grew up in Harlem and a mother who was a lawyer and “Jewish girl from Akron, Ohio,” Downes and her siblings all began piano lessons as soon as they could play in San Francisco. Their parents chose to raise and homeschool them there, perhaps “trying something utopian,” she says. Her father died when she was a preteen, and eventually her mother chose to move the family to Europe, where Downes stayed for seven years.
There, Downes says, “Growing up was a weird, homeschooled music bubble and for so many reasons, I just didn’t think about it. And then in Europe, a lot of things made sense and connected themselves again, via the pathway of music. There was that tradition that is real there – present and important. Just meeting so many other young people for whom this was the center of the universe was very grounding and comforting in so many ways. But on the other hand, we were also always ‘the American girls.’ So when I came back here [at age 21], it was just time to break away from my family and figure some things out. And I realized that I had a lot of things to figure out, and I had no idea what it meant to function in this country, either personally or artistically.”
Embracing unexpected advantages
When Downes arrived in the U.S., she began exploring American musical traditions to uncover her heritage and find her place within them. The journey has forged a career that blends her diverse experiences while bringing what she’s discovered to new audiences. In considering how nonlinear her approach has been, she reflected on how her homeschooling had felt like “unschooling.”
“It was not very structured at all. I had learned from the age of five or six just to find a book if you wanted to know something. Nobody was feeding information to me. So my journey into American music was very much like, ‘I need to go out and figure out where this stuff is,’” Downes says.
At times, she grappled with not having a conservatory network like most of her peers, while appreciating that her experience and curiosity led to unique opportunities that may not have presented themselves otherwise.
“There’s something really strange about not knowing, not having the experience that most people have of curriculum and structure and linear pathways in learning. If you don’t have that, you also don’t know what other people don’t know. So it’s like everything is new. It was like being an alien who had just gotten here,” Downes says.
Changing perceptions about classical music
Her process led to a major shift when she finally discovered the history of women and people of color in the classical music tradition. While her work in this space has brought recognition for resurfacing lesser-known musicians and forgotten compositions, she is emphatic about framing that experience accurately.
First and foremost, it was a search for identity and discovering how she fit into the picture of classical music throughout history. She says it was also a pure search for history and sound versus a tidy fit into a social justice category, which was not her primary intent.
“And then it did become an understanding that if this music exists and it speaks to me in this way, then think about all the other people that it speaks to because it can crash through those barriers of [thinking that] classical music is boring, old, dead, white and for rich people. Look at all these people who’ve been part of it,” Downes says. “But it had nothing to do with solving racism in America. I’m feeling so urgently the need to be really clear about that. It’s a privilege that I’ve found this music, that I’m able to share it, and that more people know it. It’s not that I’m doing this music any favors … I just think that music is vitally important [and] it’s not right that everyone doesn’t get to experience it if they want to.”
Reframing values through voices
Her latest initiative, The Declaration Project, commemorates America’s upcoming 250th anniversary through spoken, written and musical storytelling about the foundational concepts of life, liberty and the pursuit of happiness. The project encourages individuals from all walks of life to reinterpret these ideals from their perspectives, moving beyond historical narratives to envision a collective future.
Through regional residencies and workshops and the project’s website, Downes is gathering and compiling submissions into a national digital archive with stories featured in a video installation that will accompany her multimedia concert, DECLARATION, premiering in New York in July 2026, and featuring new works for piano and orchestra by Grammy Award-winning composers Valerie Coleman, Arturo O’Farrill and Christopher Tin. Each composition will be a contemporary musical exploration of one of the three principles.
The project embodies the kind of work Downes sees as most valuable because it can be catalytic for reflection, dialogue and transformation.
“I really feel so clearly and deeply the role that music can play in opening up dialogue in all the places where I go and among all the people that I meet. And the more evident it is how completely impossible that is in most arenas, I try to make the most of that superpower,” Downes says. “There is no piece of music that doesn’t touch on one or two or all three of those concepts. So the project is meant to mark this moment in time, but I think more it’s meant as a pathway, again, for me just to get out there and find ways to create conversation and communication that is otherwise really hard to come by. I think probably the worst problem we have is the inability to just listen to other people and other perspectives. So I love it. I mean, it’s turning into something so massive that it’s taking on new dimensions every day.”
The school year — my 16th in the classroom — is winding down. It’s the end of my “reboot” year.
It doesn’t feel possible that it’s almost over. The question that I’m asked most often after 18 months out of the classroom is, “How is it going? Are you happy?”
After a short pause, I always respond, “I am happy and so grateful to be teaching again. I really missed it.”
Still, the end of the school year always feels fast and furious with auditions, concerts, graduations, May band camps, and a significant amount of work to close out the school year. Some days, we are the heroes in the story when concerts and banquets end up being the happiest moments of the year. On other days, we are the villains when auditions and leadership results don’t go as some students and families hope.
I often think how band directing or teaching in general is like Shel Silverstein’s book, “The Giving Tree,” a beautiful story of friendship, empathy, and selfless love. The book is also a cautionary tale and a reminder of what can happen if we constantly give to others without taking care of ourselves in the process. As educators, we invest so much time and energy into our students, our community, and our job. We practice self-sacrifice and serving a higher calling, and sometimes, it can leave us feeling like the stump at the end of Silverstein’s book.
While my musings have clarified things for me during my reboot year, I hope that they can help you if you find the need to refocus, reassess and reestablish priorities.
The Last 18 months
During my 18 months out of the classroom, I started my doctorate in Education Policy at the University of Texas at Austin, and I ran for the District 9 seat on the San Antonio City Council. I lost the election, but I learned so much through the process. For most of 2023 and 2024, I threw myself into my studies, my work with the Boston Crusaders, and full-time consulting in band halls all over Texas through my company, Bandworx.
During this time, I realized how much I missed teaching my own students and ensembles every day. By spring 2024, I was actively looking to return to teaching. When the Vandegrift High School opportunity opened up, I immediately pursued it, and by the end of March, it was set.
Through my time away from Claudia Taylor Johnson High School (CTJ) and joining the program at Vandegrift, I have spent a significant amount of time reflecting on why I left, what the position of Head Director means, and why I came back.
The position of high school band director is one that people work toward for a long time, and the learning curve from being an assistant or working as a middle school director is steep. There is no manual or handbook. It is on-the-job training, and it is a pressure cooker. Like any job, there are challenges and rewards. Most of the time, people only see the rewards from the outside looking in because we rarely share the challenges.
Jarrett Lipman (right) with Vandegrift assistant band directors.
“Stay Hungry, Stay Foolish”
I became the Head Director at CTJ in 2010 when I was 25 years old. In truth, it was the best possible scenario because I was young, ambitious and totally ignorant of the job’s challenges. I followed Steve Jobs’s advice in his 2005 Stanford commencement speech, “Stay hungry, stay foolish.”
Luckily for me, I had three master teachers guiding me — veteran educator, Alan Sharps, who had been teaching for 20 years prior in Virginia Beach and at Winston Churchill High School in San Antonio; Mark Chambers, my Fine Arts Director/lead mentor, who was fresh off of running the Ronald Reagan band program in the early 2000s; and the incredible Manny Maldonado, a veteran teacher from Cedar Park High School in Leander ISD. Thanks to these incredible educators, I had a vision of how to run a successful 6A program. They lifted me through difficult days, guided me through challenging moments, and celebrated with me during high times. Whether you’re 25, 35, 45 or 55, it’s crucial to have a core group of people who support you in this role, answer questions, help you navigate challenges and to act as a sounding board.
While great assistant directors can make the job easier, fun and rewarding, it helps to have some folks in your corner who have lived the role and understand every aspect of what goes into the job. If you ARE fortunate enough to have an assistant who has served in a prior leadership role, make sure to channel that energy because it is special.
Relationships with Administrators and Colleagues
In my 15 years at Claudia Taylor Johnson, I was blessed to have three incredibly supportive principals who valued the band program in different ways. I realize that many of my peers work with principals who may not fully understand or value what they do. Dring my last few years at North East Independent School District (NEISD), I learned the importance of forging relationships with district administration, even when it’s difficult.
Retired NEISD Executive Director of Fine Arts Diana Schumacher taught me to “educate” administrators on the value of my programs by sharing, enlightening, and taking the time to explain what I do and my program’s value. This was huge. Unfortunately, some administrators were not in band or fine arts and don’t fully understand how amazing these programs are. They also may see fine arts as low-hanging fruit when it comes to budget cuts.
Early in my career, I wasn’t the best at supporting other campus organizations like athletics, dance, etc. For many principals, love and support for the campus is the most important thing. While band directors want to put energy into University Interscholastic League (UIL) and Bands of America (BOA), most principals prefer to see us invested in our community. I became better at community support the longer I was at CTJ, and it is a huge priority for me at VHS. I would tell the 2010 version of myself, “Spend more time investing in your relationships with coaches, the dance director, the choir director, and put more into parades, community performances, and things that grow a love for campus culture.”
It’s vital to invest in your relationships with your principal, the coaches, your colleagues — it matters so much. Even if your administrators don’t totally “get it,” keep working to build strong relationships with them. Invite them to your performances and events. Don’t get frustrated when people question you about things that they don’t fully understand. Instead, help them see how your program positively impacts students and adds value to the community.
My Never-Again List
To help maintain my passion and energy, I made a list of “never agains” when I arrived at Vandegrift. This list included things, thoughts, and mindsets that drove me to lose joy and feel worn down at CTJ. Most of the items were self-inflicted – so, since returning to teaching, I have focused on being driven as well as healthier.
Some of the highlights of my list include (in no specific order):
Stop stressing about “the draw” for performance order at contest
Stop stressing about competition results
Stop stressing about how other bands are performing
Stop stressing about being something we cannot be or are not yet
Stop stressing about more than I can do in a day
Stop stressing about the eight-minute UIL clock
Stop stressing about electronic malfunctions this week or at the contest show
Stop stressing about everything in the show being perfect when I watch the show
Stop stressing about things not going my way
Stop stressing about saying “no”
Stop stressing about too many opinions
Stop stressing about what the kids will think if we don’t do as well as they want to
Stop stressing about parents being upset about the day
Stop stressing about criticism to how I run the day or the rehearsals
Stop stressing about the kids being tired and cranky
Stop stressing about money and raising enough of it
Stop stressing about enrollment / course sign up – some kids will quit and it’s ok
Stop stressing about kids sharing negative feedback about my teaching or the program
All my “never-agains” are not listed here, but you get the general idea. To create your own list, consider some of the areas or triggers that you could set boundaries for.
Jarrett Lipman (center) with two graduating seniors.
“Put the Cup Down”
When I came back to teaching, I talked with a retired band director who asked me what I would do differently this time. He reminded me that the world does not really care about the results at marching contest. He advised me to stay focused on students and on teaching music, which is easier said than done.
I want kids to love music. I want the staff to love work. I also am driven toward excellence and teaching at a high level. Finding a way to balance all this is challenging. In truth, I’ve never really believed that balance is actually possible or something worth pursuing.
However, I am determined to actively take steps to protect myself during my reboot because I realize that as teachers, we cannot pour from an empty cup. A principal at CTJ used to say, “Put the cup down,” which meant that you didn’t have to stop working hard, but you do need to rest from time to time. His wisdom is invaluable.
Here are the most valuable takeaways from year 1 of my reboot:
Being back with students every day, working towards a common goal
Making music with students
Enjoying hanging with the staff and having conversations about how to be better at band
A football state championship
A UIL state marching silver medal
Jazz band performances
Seeing kids smile
Seeing kids improve
Going home at the end of the day, feeling confident that I made the right decision coming back to teaching
While a few of the highlights are related to competition, most are about sharing the joy of music with students and peers. Whenever I start to feel doubt, I review my “never again” list and make a commitment to “put the cup down.”
Try it! You’ll find that this mindset helps you make a pact with yourself to set a few boundaries and stay close to the things that will keep you going. Finding ways to stay fresh and energized about our profession enables us to keep sharing our gifts and giving freely — just like “The Giving Tree.”
Fusion is a type of music that takes two or more genres and combines them. Using fusion in the classroom can be a great way to bridge the gap between the hits your students know and the realms of classical, jazz and world music that you need to teach within. To quote an article from the International Society for Music Education’s Dr. Chee Hoo Lum, “Fusion can function as a conduit to bridge the learning of a new musical language.”
Why Use Fusion?
Fusion can help you and your students get out of ruts. One day I was feeling particularly sour after attending a symphony concert that was barely passable — the dated programming and uptight atmosphere felt a bit out of touch for 2024, and it got me thinking about fusion music.
There are far too many teachers and musicians who impose stiff rules onto music, creating an energy-depleting habit for everyone involved. In a world of limitations, I wanted to break free. That day, I took Mozart‘s “The Magic Flute” and added it to a boom-bap beat with orchestral I-V hits. After that, I didn’t feel so put off anymore. Yes, the music was familiar, but it was also more accessible.
Our students aren’t so different from us. Integrating classical music with pop elements can get us and our students out of old habits and help create lessons and experiences that are lively and engaging.
Rather than saying, “Sit down and listen to what I know about this or that,” why not bring something our students can tell us about into the mix?
Listening Exercises: How to Start
Try fusion listening exercises in the classroom. The beauty of Fusion music is that it can combine the familiar with the unfamiliar. This allows for opportunities to hear about what your students think about something in their wheelhouse, and to teach them something from your wheelhouse. I love using classical-pop fusion to teach concepts and history.
My 3-step process to keep students’ attention with fusion listening exercises is simple.
Step 1: Connect
Step 2: Explore
Step 3: Educate
For a listening exercise in fusion, choose a piece that has elements of music both old and new. For example, I might choose The Piano Guys’ “Titanium / Pavane” if I wanted to teach about Romantic music or composer Gabriel Faure.
Start by talking about “Titanium” by David Guetta, a song that most teens will recognize. Discuss what they like about the song, what it feels like. Once you have connected with them, you can bring in new information. For example, I might say, “The second half of the material used in this mash-up is ‘Pavane’ by Faure. This piece was written in the late 1800s, was originally for piano and was based on an old style of Spanish court dance.”
This would be a great opportunity to branch out into the history of Spanish dance music, a topic that would have originally been inaccessible and unrelatable to students in the music classroom in 2024.
Even more modern examples include pop-classical artist Cody Fry and jazz-pop-indie artist Laufey — both musicians perform with live orchestras. Fry’s “I Hear a Symphony” combines a feeling of a ballad-pop-love song with romantic feeling moving string lines and dramatic orchestral swells.
In an interview in Timeout, Laufrey said, “My fans come [to my shows], and often it’s their first time seeing a live orchestra play – my hope is maybe they’ll come back next week and listen to a Mahler symphony or something.”
World Music Fusion
Music educator Chee Hoo Lum asked, “When will we get past the ‘basics and fundamentals’ when we decide to introduce new musical genres of the world to students? Or do they often remain ‘exotic’ and trapped in some representative bubble?”
I use fusion to introduce world music like raga. This Tiktok video shows using Western scales to explain ragas in an accessible way. Artist Raga the Rnb takes Western songs like “Arcade” and turns them into Hindi-RnB style covers with an ornamental vocal style.
Fusion gives students the sense that music is meant to be combined, played with and enjoyed by everyone.
Jazz Fusion
In a similar way, jazz fusion listening exercises provides talking points on both jazz and rock. Frank Zappa performed both rock and jazz fusion. The band, Return to Forever, combined jazz and rock, with the quintessential pianist Chick Corea at the forefront. Laufey also has a very jazzy sound in her song, “From The Start,” which would make an excellent talking piece for Bossa-Nova rhythms. Then there’s Postmodern Jukebox, a musical collective dedicated to making popular songs sound like different eras of jazz.
If you want to teach jazz to rock lovers, try jazz fusion. If you want to teach classical ideas to pop-lovers, try classical fusion. Whatever new style you’re trying to introduce has a gateway genre.
Teach Music Analysis
It’s also easy to teach music theory and musical analysis with fusion.
Let’s go back to the example of “Titanium / Pavane.” You could use this mashup to introduce the concept of the motif because the running eight-note theme runs throughout the song. Around 4:22 the pianist takes a preexisting idea of “Titanium” and turns it into a theme and variations.
This idea could be fleshed out into a myriad of lessons, especially if you add visual elements like Smartboard lessons on music theory or visual worksheets with the names of the new concepts.
Mashups: Have Students Create Something New
As I mentioned earlier, creating fusion mashups can make you and your pupils feel engaged.
Give your students a list of songs in the same key and have them create a new fusion mashup using music technology like free digital audio workstations (DAWs). For younger students, you could do the heavy lifting and create a mashup as a lesson on a projector or Smartboard.
For middle schoolers, you may want to select a few songs that your students can choose from. On the back end, line up the tunes and make sure the BMP (tempo) and key signatures are aligned. Unless you’re teaching an upper-level high school composition class, be prepared to make the options narrower and plan for some prep time. Songs already close to the same tempo and key work the best for this project. You can find a lot of separated-out stems on YouTube, or you can splice up the song using tools like melody.ml. The opportunities for new combinations are nearly endless — so start exploring and have fun!
You can also ask students to write a short paper about the piece of music from the mashup that they know the least about.
Free online DAWS and free downloadables like Nuage, Garageband, SoundTrap, Audacity, FL Studio and more can be invaluable tools in teaching your students how to compose and record.
More Classical Fusion Artists and Mashups
Finally, I’d like to point you to some of the most popular fusion artists in addition to the artists already listed in this article.
Fusion and mashups are great tools to use in your classroom or private lessons when introducing genres that are unfamiliar to students. Combining familiar music with unfamiliar music will make students step outside their comfort zone and start listening to something new. From the Adele-Mozart and Dubstep-Tchaikovsky mashups above to jazz-rock fusion, there is a lot to hear and analyze.
The pitch at which you tune the open strings on your guitar determines the shapes used to create chord, scale and arpeggios on the fretboard.
The standard way of tuning a guitar, from the low E-string to the high E-string, is as follows:
E – A – D – G – B – E
Many guitarists use this tuning exclusively throughout their entire careers, and over the hundreds of years that the guitar has been in existence, a musical “vocabulary” was created using standard tuning.
In standard tuning, the open strings, when strummed, produce an Emi11 (E minor 11) chord, but a world of different chords is created when you use the fretboard to selectively hold down various strings at various fret positions. Of course, you can always alter the tuning of individual open strings — just remember that changing the tuning of even just one string will also change the chord, scale and arpeggio shapes.
One important reason why you might want to change the tuning of your guitar is to create what are called open tunings, where open strings are utilized to create wonderful common-tone drones that sound within a series of chords. This, in turn, allows you to explore new sonic horizons. Our two-part blog series entitled Altered Tunings describes many of the most commonly used open tunings, but in this posting, we’ll take a closer look at some of the more esoteric ones that guitarists sometimes employ.
TUNING TO A SPECIFIC CHORD
As described in Part 1of the Altered Tunings blog posting, Open G and Open E are two popular open tunings. In Open G tuning, the six strings are detuned as follows:
D – G – D – G – B – D
This creates a G major triad across all six strings, with the second-lowest string (G) acting as the root note. Open G tuning is so popular with Keith Richards of the Rolling Stones that he literally removes the low E-string from some of his guitars altogether!
In Open E tuning, the six strings are detuned this way:
E – B – E – G# – B – E
Here, the pitch of the A-string is raised to B (the fifth of an E major chord), the D-string to E (the root) and the G string to G# (the major third). Essentially this tuning creates an E major triad across the six strings.
But here’s the real magic behind both Open G and Open E tuning: you can play all the other major chords along the fretboard by simply placing your first finger across any given fret. Here’s the way this works with Open G tuning:
Being able to create full chord tones across one fret makes it easy to hit the right notes when you play slide guitar — it can be really difficult to play slide in standard tuning, especially when it comes to navigating the B-string. Open G and Open E tunings are also used often when playing blues and blues rock.
MAKE MINOR CHANGES
If you want to change major open tunings into minor tunings, it’s easily done. For example, you can create an open G Minor tuning by simply lowering the major third in the tuning from B to B♭:
D – G – D – G – B♭ – D
Similarly, you can create an open E minor tuning by lowering the G# to G:
E – B – E – G – B – E
ADD CHORD EXTENSIONS
What about changing a chord tone within the open tuning to a chord extension like a second/ninth or a thirteenth (sixth)? There are duplicate tones within each tuning we’ve described so far, so my suggestion is that you change one of those. For example, start with an Open E tuning, then raise the top E-string to F#, which produces a ninth, two octaves above the low E, for an E(add9) chord:
E – B – E – G – B – F#
Or you can create an E7 chord by lowering the top E-string to D, the minor 7th (flat seventh) and raising the G string up to G# (the major third):
E – B – E – G# – B – D
NASHVILLE AND HIGH STRUNG TUNING
One of the coolest things I learned while recording sessions in Nashville was the Nashville tuning, sometimes called “high strung, “high string” or ”angel hair” tuning, although the latter three are slightly different. Essentially, this technique mimics the sound of a twelve-string guitar on a six-string instrument.
You’ll need a spare acoustic or electric guitar to create this tuning, as you’ll be using a hybrid stringing technique.
Here’s how to do it:
Leave the high E- and B-strings in place on the guitar
Replace the low E-string with a D string and tune it up to E an octave higher than usual
Replace the A-string with a G-string and tune it up to A an octave higher than usual
Replace the D-string with a B-string and tune it up to D an octave higher than usual
(Required for Nashville tuning, optional for high strung tuning) Replace the G-string with a high E-string and tune it up to G an octave higher than usual
You now have three (or four) strings that are tuned an octave higher than they would normally be in standard tuning. Note that some players use the octave strings from a 12-string set for this kind of tuning; I personally just use regular strings as described above and find that the results are just as good, if not better.
This tuning sounds a little bizarre on its own, but when you double strumming parts or fingerpicked passages that are in standard tuning, you create a gorgeous top-end sparkle that really sweetens the sound of an acoustic guitar part.
Using a shorter scale acoustic guitar like the Yamaha CSF3M allows for that extra tension on the strings. You may also want to consider using a light gauge set of electric strings on the acoustic for this tuning, which is what I did for the video below.
Be careful when tuning the E and B strings up a minor third, and be extra light with your strumming hand when performing those high-string parts so as to not break those high-tension wires. Here are a few audio clips that demonstrate standard tuning and how well it can combined with Nashville tuning. We’ll start with the basic part, played on a Yamaha FS9 RX in standard tuning:
Now here’s a counterpoint, played on the aforementioned CSF3M in Nashville tuning:
Finally, here are both parts, played together:
USE A CAPO
Whatever tuning you decide to use, remember that you can change the key of that open tuning by using a capo. For example, the open G tuning can become an open B♭ tuning by placing a capo at the third fret, or an open A♭ tuning by placing a capo at the first fret. The options are endless.
Creating a chord vocabulary of shapes within these new tunings is where the fun begins. Below are some really nice voicings within the Open G tuning for you to learn, but the best way to create something special is to move finger shapes around until you find something fresh and exciting to your own ears. You may love the sound of Open D Minor, for example, and decide to stay there for inspiration while writing songs or discovering harmonic fragments.
THE VIDEO
This video demonstrates a piece of music I wrote specifically to demonstrate a few of the ideas discussed in this article. The main fingerstyle guitar part is performed on a FS9 RX tuned to Open G and then capoed at the third fret, so I’m actually playing an Open B♭ tuning.
The high string guitar part is played on the CSF3M using Nashville tuning, also capoed on the third fret. I’m literally doubling the part I played on the FS9 RX and creating that lovely faux twelve-string guitar part on the descending lines.
The electric rhythm parts are played on a Yamaha PACP12M Pacifica Professional in standard tuning, capoed at the third fret … which again puts the guitar in the key of B♭. The solo lines are also in B♭, but played without a capo.
THE GUITARS
Yamaha FS9 RX.
The FS9 RX used to create those sweet-sounding fingerpicked lines features a solid Adirondack spruce top and an Indian rosewood back and sides. Its Atmosfeel™ three-way pickup system translates guitar tones faithfully using a sheet sensor on the top of the instrument, an internal microphone and an undersaddle transducer. Here’s what the Atmosfeel controls look like:
I usually record the FS9 RX direct to my DAW. I set the microphone level to around 2 o’clock on the dial, back the bass control down to about 11, and the guitar sounds like it’s being miked up in an expensive studio.
Yamaha CSF3M.
The CSF3M parlor size guitar has a short 23 5/8″ scale, making for a lower string tension, and is therefore a great choice for those high string guitar parts. Its solid Sitka spruce top and solid mahogany back and sides project a huge sound for such a small instrument, and the undersaddle passive piezo pickup allows me to capture everything direct to tape through the end-pin jack with zero fuss.
Yamaha PACP12M.
The Pacifica Professional may just be the perfect electric guitar for recording sessions. Chordal shimmers sound smooth and articulate using the Gotoh two-point tremolo system, and its Reflectone pickups (created by Yamaha in collaboration with acclaimed audio manufacturer Rupert Neve Designs) have a unique tonal clarity that lets the chords ring and the single notes shine, making it suitable for just about any style of music.
THE WRAP-UP
There are so many ways to tune guitars for different sounds, and many of the world’s top guitar players utilize open tunings (or create unique new ones) specifically to write a song or craft a musical arrangement.
Don’t expect instant results, but do expect the unexpected to happen if you stick around long enough to find a few nice chordal passages. Often shapes will repeat further along the fretboard or have similar shapes on different groupings of strings, allowing you to develop ideas into fully formed songs.
So if you’ve been looking for a way to explore new sounds outside of the standard set of tunings, consider exploring this new realm of shapes and possibilities using open tunings and a capo. I think you’ll be pleased with the results!
I didn’t take the traditional path into music. At 4, I heard my sister practicing Beethoven’s Fifth Symphony and decided to try it myself — by ear. The look on my mom’s face was priceless. In high school, I played percussion in the marching and symphonic bands, but after that, I veered off the beaten path. I majored in computer engineering at the University of Florida, yet I found myself sneaking into practice rooms, mimicking music majors.
I don’t have formal sheet music skills or deep music theory knowledge. I didn’t attend Berklee College of Music or Julliard, but I have built a successful music career. My song “WOP” went double-platinum, and I’ve sold millions of records worldwide. I’ve created original compositions for TV, film and sports. Now, I run SlapDash Productions and founded the Twylight Zone, an arts discovery platform headquartered in Austin, Texas, designed to connect artists of all modalities in collaboration while exposing them to new audiences.
None of that would have happened without my early musical mentors. My high school teachers helped me find my lane. They challenged me in a way that cultivated creativity without intimidating me with the vast amount of musical knowledge that I didn’t have.
My experience has taught me something crucial: Most students won’t become music majors, but that doesn’t mean music isn’t for them. In fact, school music programs enhance life outcomes for everyone. Studies show students in schools with music programs have 90% graduation rates, compared to about 73% in schools without music. Music students attend class more and stay out of trouble. So, how do we ignite a passion for music in the 80% of students who have never seen themselves in it?
Let’s challenge the narrow, traditional view of musical ability and celebrate diverse ways of learning and expressing music. Here are six real strategies I’ve discovered, from the perspective of someone in the 80%.
1. Make Room for Ear Players
Some kids hear music in their heads before they read notes. They play by ear. The engineer in me says that’s not a bug, it’s a feature. Instead of penalizing them for bypassing sheet music, give them time to improvise and play what they hear. This promotes inclusion and equity in music education.
Use call-and-response by ear: Clap or play a short rhythm or melody and have the class echo it back by ear. This not only trains listening skills, but it shows that there’s room for making music immediately without printed notes.is
Include “free play” jams: Once in a while, turn on a backing track (or play drums) and let any student solo in their way. An “ear player” might light up in this free moment.
Teach chords simply: Instead of just treble clef lines, point out a few basic chords and let them experiment. Even sharing a webcam view of the keys while you play chords helps ear learners “see” the sounds.
I started with no sheet music at all, just feeling music. Teachers who let me learn by listening changed everything. Research even says building aural skills can enhance learning for all students, so make aural learning part of your toolbox. If a kid can hum or clap it, let them be heard.
2. Let Them Lead
Students have their own musical voices and ideas, so let them use them. Give them opportunities to lead, whether it’s running a warm-up or teaching a chord progression to classmates. These small moments of ownership build confidence and deepen their investment in the music program.
Song choice power: Occasionally, let students vote on a piece or genre to work on. Even analyzing a pop song’s structure gives them ownership of learning.
Student-led sections: Give skilled students a chance to conduct or cue the band for one number. This builds confidence and shows you trust their knowledge.
Open projects: Try a unit where students form their own small bands or ensembles. Each group decides what they’ll learn and then teaches it to the class at the end.
3. Embrace Technology and Production
One of the biggest “rule-breaking” shifts in my music journey was learning music on a computer. I was 13 when Timbaland and Magoo dropped “Up Jumps Da Boogie,” and the moment I heard it I thought, “I don’t know how they made that, but I want to spend the rest of my life figuring it out.”
I didn’t have a studio, but I had software and a MIDI keyboard and that was enough. Today’s students have even more powerful tools in their hands; keep encouraging them to use them.
Introduce apps and DAWs: Tools like GarageBand, Soundtrap, BandLaband Nuagelet kids make beats and melodies easily. Show them how to use loops or record a vocal track.
Digital music club or projects: Let students record their own tunes. You might give an assignment like: “Compose a 16-bar beat or song on the computer.” If budget allows, supply a few MIDI keyboards or smartphones.
Tech crossovers: Blend music with coding or engineering. For example, constructing DIY instruments with Makey Makey or using Make Music Count, which allows students to improve their math skills by playing the latest popular songs on a digital piano. Any tech hook keeps them curious.
4. Bring Music to Their World
Most students listen to current genres or find music on social media. Meet them there. Use pop, hip-hop, gospel or even video game and movie soundtracks in your teaching.
Pop and hip-hop examples: Teach music using songs they already know. For a steady beat lesson, try tapping the rhythm of a chart hit together. Analyze a rap verse structure to teach verse/chorus form. Students will realize that music class isn’t so separate from what they hear every day.
Cultural tunes: Ask students about the music in their families and communities. Invite them to share a song with personal cultural relevance and connect it to classroom learning.
Storytelling and media: Another way is through storytelling in music. After scoring the film “83 Days,” I learned how deep the link was between music and the emotional appeal of a film. Perhaps have students write a short soundtrack for a class video or a storyboard project.
The key is to use relevant content. When students see themselves in the music — whether it’s their popular favorites or their own heritage — they listen. Let that connection spark their curiosity and creativity.
5. Celebrate Creativity and Culture
Music is personal. Let each student’s identity shine.
Songwriting and poetry: Try writing workshops. Play a simple beat and ask students to write a verse about their life or hometown, or compose music based on a poem. Celebrate those creations publicly, like in a school showcase, to boost confidence.
Include non-Western music: Bring instruments or recordings from different cultures or playlists of world music. Discuss how music is universal yet tied to culture. This shows respect for every background.
Share your story: Finally, don’t be afraid to share a piece of your own journey or family roots. It makes a connection. For example, if you come from a culture with specific musical traditions, teach a song from it.
No two students are the same, so one size won’t fit all. The more we celebrate each kid’s voice, the more they will feel that “this place is for me.” Even an album project or a student-run podcast on music encourages those voices to come out.
6. Get Creative with Resources and Partnerships
You don’t have to do it all alone. There are programs and funding to help reach those 80%.
Apply for grants (Title I/IV): Many of your schools qualify for federal funds under Title I and Title IV-A of the Every Student Succeeds Act (ESSA). These can be used for music classes and instrument purchases. For example, the National Association for Music Education (NAfME) highlights how Title IV funds are meant to promote a “well-rounded education” including music. Work with your administration to earmark some of that funding for your program.
Connect with nonprofits: Organizations like Save the Music Foundation partner with Title I districts to provide instruments and curriculum support. In other words, if your school has mostly low-income students, Save the Music might help furnish your band room or start a tech music program.
Local partnerships: Many cities have youth music programs or “adopt-a-band” opportunities. A local college band program, church or community arts council might lend instruments or have musical mentors visit classes. I know music teachers who have alumni come back to coach the percussion section one day a week. Even a hardware store might donate items for a STEM-music project.
Involve the community: Sometimes a simple fundraiser or instrument drive does wonders. If some students have no access to an instrument at home, ask parents or local music stores for help. Schools that engage families often see more support, whether it’s volunteers for a beginner club or donations of old keyboards.
__________________________________
In the end, reaching and teaching the 80% means moving beyond the traditional path. It means seeing each student’s potential. I wasn’t the typical band kid, yet I found my place in music and your students can, too. Give them the freedom to explore their passion before prescribing a single path to making music.
I learned to play piano by ear, jammed in blues bands at 12 and recorded my first viral hit in a college dorm room. I didn’t follow the standard path, but I had educators who saw potential beyond the traditional mold and that made all the difference. Today, through initiatives like the Twylight Zone, I’m committed to helping others find their place in music, too.
So, to all the educators out there: Keep pushing boundaries. Keep embracing the unconventional and keep believing in every student’s unique musical journey. You never know which one might be the next to change the world through music.
“You sound just like your old band director.” This was meant as a compliment. I knew that. But I still flinched when I heard it.
I was in my second year of teaching, and we were one week out from a performance. I was running around like a stressed-out version of the teacher who trained me — same phrases, same gestures, same “you-better-have-your-music-marked” tone. I was doing everything the way that I had been taught.
It wasn’t working.
My students were going through the motions. I was just checking boxes and getting increasingly frustrated. At the end of rehearsal, I sat in my office and stared at my lesson plan. It looked good on paper. So why did I feel like I was failing?
The truth was simple and uncomfortable: I was trying to run someone else’s program. And it was time to stop.
I copied my old band director, Ted Lega, who was an incredible teacher, the kind people write entire tributes about. I copied his cadence, his rehearsal structure and even how he held his baton. I had zero shame about any of this — I was proud of it. I felt like I was honoring Mr. Lega’s legacy while holding it together long enough to survive the day.
The bad news is that mimicry has a shelf life.
Eventually, I hit a point where I was no longer confident; I now felt constrained. I was frustrated when something didn’t work — not because it was a bad strategy, but because I had no idea why I was doing it in the first place. None of it was rooted in my students, my school or my instincts. It was just a script that I had memorized.
Every new teacher will eventually run into this situation. The point where imitation no longer answers the question, “What do these kids need from me right now?”
That question can’t be answered by channeling someone else. It can only be answered by you.
The Blueprint Doesn’t Fit the Building
There’s a dangerous assumption built into early teaching: If you do what worked for your mentor, it will work for you, too. Unfortunately, teaching isn’t plug-and-play. Context is everything.
Your old band director may have had a decades-long legacy, multiple feeder schools, an auditorium that didn’t leak and maybe a full-time assistant. Or maybe he or she didn’t.
None of this matters. Look at what you have — 50% attendance, no budget and a practice room that doubles as a storage closet.
I tried recreating my mentor’s exact rehearsal plan with students who had never even played in middle school. I handed them the same scales, the same chorales, even the same warmup sheet — typed out in the exact same font. These students weren’t connecting with the process. Not because they didn’t care, but because the process wasn’t designed for them.
One of my percussionists finally asked me, “Why are we doing this again?”
I didn’t have an answer — just a vague “this is how it’s done.”
That moment stuck with me. I was prioritizing tradition over intention. I was spending so much time trying to be “right” that I forgot to be present.
When I finally stepped back and started building routines based on what this group needed — not what my mentor’s program needed — I began to see a shift. We weren’t more advanced, but we were more connected. We were more honest. And it felt like we were building something together, not just rehearsing someone else’s legacy.
Also, I shouldn’t leave out this monumental fact: What I thought my teachers had was not even close to the truth. They didn’t have the perfect system. They went through more challenges than I imagined. I just saw their late-stage process and composure.
Look at it this way: Your grandparents may have a nice matching and complementary set of furniture in their living room now. What you didn’t see? The early years when their front room was decorated with an avocado green sofa, a burnt orange recliner and two mismatched end tables.
Find Your Own Voice, Even If It’s Quieter
Here’s what nobody tells you: Don’t be your mentor. You don’t need to be a legend. You just need to be someone real.
Instead of repeating what I was told as a student, I started explaining concepts in ways that made sense to my current students. I asked for more input during rehearsals. I let go of the need to be the most important voice in the room. Guess what happened? My students started listening more.
I also became more open with my own process. I’d say things like, “I’m trying something new today. Let’s see how it goes.” Or, “This piece is new for me, too. Let’s figure it out together.”
That vulnerability changed the culture in our room. Students felt safer taking risks because they saw me doing the same. Eventually, one student told me, “You kind of remind me of my old band director — but you smile more, and you don’t yell.”
This wasn’t something that ends up being engraved on a trophy, but it made me pause. Because it meant I wasn’t invisible. I wasn’t an echo. I was becoming someone they’d remember for being me and doing things on my own terms.
What to Keep and What to Let Go
Honoring your teachers doesn’t mean copying them. It means learning from them and making choices based on your values, your students and your strengths.
Here’s a filter that helped me sort that out:
Keep the values: If your mentor showed up early, stayed late and cared deeply about students — hold onto them because those values don’t expire.
Adapt the methods: Rehearsal strategies, performance calendars, behavior systems — borrow them, but test them. If they don’t work for your students, don’t force them.
Drop the guilt: This one’s huge. If you’re not marching a full show, if your sight-reading is rough, if you’re skipping a festival this year — it doesn’t mean you’re failing. It means you’re making decisions based on your current reality. That’s leadership, not laziness.
And here’s the simple truth: No one gets it all right. Not your mentor. Not your peers. Not even you, 10 years from now. Just remember to stay rooted in why you’re doing what you’re doing, and you’ll build a program that fits your students — and you.
You’re Not a Clone. You’re a First Draft
One day, you’ll be the teacher a student remembers fondly as “my old band director.” They won’t be comparing you to anyone else. They’ll remember how you showed up. How you explained things. How you looked out for them when they bombed a solo (thanks, Mr. Lega). How you gave them a second chance. How you taught them something that stuck.
They won’t care if your concert cycle looked like your mentor’s. They won’t remember if you used “Foundations or Essential Elements” or wrote your own warmups from scratch. They’ll remember you.
You don’t need to be a carbon copy of the person who inspired you. You just need to be consistent, thoughtful and honest. And if you’re not there yet, that’s fine too. Most of us aren’t. Because teaching isn’t about perfection. It’s about presence.
Here are five fun facts about string instruments even some experienced players don’t know:
1. Violins Come in Seven Standard Sizes
That’s because it’s not unusual for string players to begin at a very young age. The popular and widespread Suzuki Method, for example, promotes learning in children as young as three years old. Instruments are therefore scaled down to fit young violinists as necessary. The standard sizes are:
Arm measurement from neck to middle of palm:
Violin size:
14 1/8"
1/16 size
15 3/8"
1/10 size
16 7/8"
1/8 size
18 1/2"
1/4 size
20 3/8"
1/2 size
22 1/4"
3/4 size
23 5/8"
4/4 size
There is one additional size outside of the standard: The 7/8 size violin, which fits in-between the 3/4 and 4/4 sizes. These instruments are made specifically for adults who are petite and therefore cannot comfortably play a full-size violin. Yamaha makes a “fit stick” for its dealers to quickly and accurately fit their customers with the correct sized instrument:
2. Antique Violins Often Need to Have Longer Necks Grafted On
The technique of grafting a new neck on to an old instrument, as well as adding a longer bass bar to increase the stability of the instrument, is one of the evolutions that allowed preciously crafted instruments to survive for centuries so that we may still enjoy their sound today. Noted luthier Charles Rufino of the Long Island Violin Shop, explains how this became accepted practice:
“In the early 19th century, the treasured 18th century instruments faced several challenges. Modern, larger performance spaces demanded greater volume and projection. New music written in ever-higher positions was difficult to play on the original shorter and thicker Baroque-style necks. Grafting the head of a violin onto a new neck by cutting a tapered mortise into the bottom of the pegbox allowed luthiers to insert a new neck while preserving the original head of the instrument. The result was a thinner and longer neck with a longer fingerboard that increased the tension on the strings, giving greater sound as well as permitting musicians to perform the thrilling passagework of the great 19th century concertos we all love.”
3. The Bass is the Only String Instrument Not in the Violin Family
An internet search for instruments of the violin family will probably include the bass. However, the family originally only contained the violin-shaped instruments: the violin, viola and violincello. At some point, the bass developed, likely from the Viol Da Gamba family, but no one really knows for certain. Its sloping shoulders and large body have gone through many variations over time. It’s also tuned in fourths to the pitches E-A-D-G, as opposed to the tuning in fifths of the violin family. Perhaps the bass is only a cousin to the violin family, but it’s nonetheless a welcome member!
4. String Instruments are Surprisingly Resistant to Temperature Variations … Though Not to Sudden Shifts in Humidity
Ever been told not to allow your violin, viola or cello to experience extreme heat or extreme cold? Temperature has very little to do with it. Wood is a hygroscopic material, meaning it always contains some water. As the humidity of the environment around it changes, it will absorb or release water, making it shrink or swell. In contrast to their resistance to temperature change, string instruments react harshly to rapid humidity changes. A slow change can cause string clearances to vary. That’s why cellists will often carry a winter and a summer bridge that they can swap out in order to match the level of humidity their instrument is reacting to. Under fast humidity swings, the movements of the wood can become so erratic that glued seams can pop open, or worse, wood cracks will form that can necessitate expensive repairs. Keeping stringed instruments in a stable climate or protecting them with a humidity device is important for the long-term health of the instrument.
5. The Beautiful Spiral of a Violin Scroll Occurs Widely in Nature … and in the Universe
The traditional spiral scroll of the violin family instruments is one of the most recognizable shapes in the world … or in the universe, for that matter. The shape follows a mathematical formula known as the Fibonacci Spiral, or Golden Spiral. It is a combination of the sums of a sequence of numbers:
Here are some of the places where nature has put this equation to use:
A hurricane:
A flower:
The human ear:
A sea shell:
Click here for more information about Yamaha acoustic stringed instruments.
Summer offers a much-deserved reprieve from the stresses and demands of the school year for teachers and students. Even though we all look forward to the time off, it’s important to consider what musical opportunities are available to our students. Often, music ensembles provide a vital sense of community and belonging for many students, and it can be easy for students to feel isolated from that community during the summer. Furthermore, many students lack the drive or discipline to dust off their instrument case and play every now and then throughout the summer, and they return to school in the fall feeling rusty and out of practice.
A summer music camp can be a fantastic way to keep students engaged in their music community, assist them in building relationships with new students and teachers, and provide them with a musical outlet that not only helps them keep up their chops over the summer but allows them to continue to use music as a source of self-expression and enjoyment.
The IMPACT! Middle School Summer Band Camp is in its third year in Williamson County, Tennessee, and attracts roughly 180 students from schools across the county. Although the camp has only been held for a few years, our team has developed a robust foundation for what the camp is and how it is run. This article will provide tips on what to consider if you are planning to start a summer camp as well as a timeline of tasks as camp approaches.
Photo: Shutterstock/Structured Vision
Before You Start
First, consider a few basic, yet essential, details about your camp. Then you can proceed with the nuts and bolts of getting your camp started.
Why do you want to have a summer camp? What kind of experience do you want to create? What will be the main focus of your camp? Will it be sectional based, concert-band based or a mix of both? What about jazz or chamber music? Is it important for students to have ample social opportunities, recess or games? You must decide what experiences are most relevant for the students who will attend the camp (more information on that below). Every band program and area of the country is different, and there is not a one-size-fits-all approach that will work for everyone. Build your camp around the types of programs you have in your area, and on what you and your colleagues value in music education.
What facilities are available to host the camp? There are several factors to consider when choosing a facility for your camp. Regardless of what kind of camp you’re planning and how many students you anticipate, the space and location of your facilities will potentially determine or limit your options. You must have a space large enough to hold all campers for announcements and other camp-wide activities. You likely will need several smaller areas for “break out” sectionals or activities. Other helpful spaces include a cafeteria or designated area for meals, a performance space (if you plan to present a performance), a gymnasium for indoor-recess time, and a camp headquarters area equipped with a copy machine and similar office essentials. Ideally, all these spaces should be centrally located or in a similar section of the building or school. If you use a school campus, many districts will place restrictions on which students are allowed to participate in campus activities due to insurance limitations or similar concerns. Make sure you know what these policies are and take them into account as you decide which facility to use.
Which students will be eligible to register for camp? This depends on what kind of experience you plan you create. Is your camp for students who are new to their instruments, or students with experience? Is the camp for middle school or high school students or both? Once you know this, you’ll be able to define which grade levels and experience levels you will invite to your camp. You must also clearly define which schools’ and/or school districts’ students will be allowed to participate. The main concern here is related to insurance and liability concerns because some districts’ insurance only applies to students who are zoned to attend schools within that district.
When will you hold your camp? Be aware of other student opportunities in your area during the summer (athletic organizations, church groups, etc.) to avoid scheduling conflicts. It’s also important to consider when area high school bands might be holding their summer marching band rehearsals, as this may impact your ability to hire staff and instructors for your camp. Avoid the weeks before and after Independence Day and Memorial Day because many families travel during those times.
What is the budget for your camp? Will you charge students to attend? Do you plan to pay your staff? The answers to these questions will vary from situation to situation, but it is strongly recommended that you compensate your staff members (and yourself!). Nobody wants to work for free, particularly those high-quality individuals who you want to work with your students! Because you’ll need to pay your staff, you will likely need to charge students a registration/tuition fee. Investigate what similar camps in your area charge for tuition and charge a comparable rate. Also consider what other expenses you may incur. Will you provide T-shirts for students? What about lunch? How much will the facilities cost? Get these answers before you determine how much you will charge for camp. I collaborated with school district officials to determine the budget for the camp, including how much each staff member would be compensated and what expenses were covered.
Six Months Before Camp
Reserve facilities: Make a list of all the spaces you will need during camp and find a location that best serves your needs. Search in locations that are central to the students who will be eligible to attend. Be ready to communicate the dates/times you will need the facilities (make sure to account for set up and tear down time!), as well as a list of spaces you’ll need to reserve. Complete the necessary paperwork and obtain the necessary signatures to finalize your reservation.
Complete paperwork with your school district: This might include facilities paperwork (if you are hosting the camp on school property) and fundraising approvals (to collect registration fees). It is also important to make school administration aware of your plans so they are not caught off guard by requests for paperwork.
Outline a list of staff positions you will need: These might include conductors, ensemble chairs, sectional staff, a camp nurse and others. Remember, you will need assistance during lunch and recreational time to monitor the students and lead activities, so, you must decide if the sectional staff or conductors will be responsible to help during these times in addition to their teaching responsibilities. It may be helpful to designate some staff members as “counselors” for this purpose. Depending on who you hire to work for your camp, you may not want to ask them to complete these tasks (for example, if you’ve hired the principal flutist of your local symphony to work with students, you probably don’t want to ask her to also supervise students while they eat lunch).
Become familiar with the onboarding procedures your school district has for hired staff: Each district has different procedures, but you can generally expect that staff will be required to have a completed background check on file, in addition to some kind of payment/compensation form to record their hours worked, a tax form (likely a W9) and other forms required by your district. It is your responsibility to know the details of these processes, communicate expectations clearly to your staff and ensure that they are followed.
Reach out to the bookkeeper/treasurer of whichever organization you will be running funds into and out of (likely your school, but possibly a local music educators association): It’s essential to communicate with them regarding collecting registration fees, disbursing staff payments and covering all expenses you may have during your camp. The band directors in our county have an association that houses funds for certain county-wide events — so, we ran the camp finances through that association. Because of this, we did not have to apply for grants or do any special fundraising to get the camp started.
Photo: Shutterstock/REDPIXEL.PL
Five Months Before Camp
Begin to gather copies of the documents that your staff must complete for onboarding: Create folders on your computer to keep things organized, and create a spreadsheet to track everything. Save blank copies of these forms for convenience.
Begin to create the documents that will serve as the “infrastructure” for your camp: These might include:
A Camp Registration Form: This is how you will collect information about the students who register for your camp. A Google form is a convenient option. Provide as much information about the camp as possible at the beginning of the form. Collect the following information: student’s legal name, student’s grade, parent/guardian name/email/phone, home address, emergency contact name/phone number; relationship of emergency contact to the student, school student attends, student’s instrument and student T-shirt size. You may also want to provide a media release statement allowing the school district to publish photos, videos and other media that may be taken at the camp.
A Camp Budget Spreadsheet: This is how you will track how much money the camp brings in and all the expenses the camp incurs, including staff compensation. List the names and roles of all staff, their employee status, whether they have completed onboarding and the amount they’ll be paid. Create formulas for the total amount spent on staff payments and populate it into a column that lists all camp expenses. Also create formulas for the amount of funds the camp brings in depending on how many students register. This will allow you to keep track of all aspects of the budget easily.
A “Save-the-Date” Flyer: Even though you may not be ready to open registration at this point, it’s important to advertise the camp and get the word out. Many people travel during the summer or send their kids to other camps, so it’s important to get your camp on your community’s radar sooner rather than later. The flyer should be colorful and include only the most important information about camp: when and where it will be held and which students are eligible to register and attend. Share this flyer with all the school music teachers whose students will be eligible to attend.
An Email Advertising the Camp to Potential Campers and Their Families: Prepare to get the word out! This email will likely be long because you want to provide as much information about the camp as possible to attract as many students as you can (and avoid potential questions!). Include the date, location and time that the camp will be held, as well as a brief overview of what students might expect from the camp. Include information about how to register and pay camp fees. Share this message with school music teachers and private tutors in your area and ask them to forward it to their students’ families.
A Camp Logo to Help Advertise and Brand your Camp: Design a logo that is unique but simple and recognizable. You will be able to put this on camp documents, fliers, shirts and other items.
Four Months Before Camp
Open registration! Now that all the essential details of your camp have been established, share the information with the teachers of eligible students and ask them to forward it. Collect registration fees. If your school district has a platform to collect fees and payments online, utilize it.
Begin to formulate the daily schedule for your camp: This will largely depend on what you have decided will be the focus of your camp. If your camp will be concert-band focused, you will need a balance of sectional and full ensemble time. If your camp is chamber-music focused, you must schedule individual practice time and coaching sessions. If your camp is jazz focused, you’ll need time with full ensemble and sectional instructors as well as improvisation lessons or music theory. Students will need time to transition between activities, younger students will need “brain breaks” or recreation time, and students should have at least 30 minutes (or longer) to eat lunch.
Begin to reach out to potential staff members for your camp to see if they are interested and available to help: Talk to music teachers at local schools, local private teachers, members of your local professional music education association, retired music teachers, or members of local community orchestras or bands. Be prepared to communicate what their role with the camp will be, the dates and times you’ll need them to teach, and the compensation you have budgeted. Once you receive confirmation from them, forward them any and all information and onboarding paperwork required by your district. If some potential camp instructors are not available, ask them if they can recommend anybody else.
Three Months Before Camp
Continue to advertise the camp: Keep sending information about your camp to potential campers! Just because you have sent one email doesn’t mean that everyone opened it or read it closely. I recommend one email every 10 days or so.
Monitor registration: Keep tabs on how many students have registered, which instruments they play, and their grade levels. You will likely have decently balanced instrumentation, but this is not guaranteed. The students who attend will largely determine which repertoire you play, and potentially even how you group them into ensembles.
Start to decide on repertoire: Coordinate with the instructors/conductors you have hired to lead the camp ensembles to determine repertoire. It will be important to have a general idea of the skill level of the students and provide the instructors/conductors with suggested pieces that may be appropriate to aid them in their selection. Other factors to consider as you select repertoire include whether anyone in your school district has the pieces being considered in their library, how much rehearsal time there will be during camp and whether campers will perform the music.
Two Months Before Camp
Finalize repertoire selection: Order the music, if necessary.
Finalize camp staff and complete paperwork: Confirm with all staff members that they are available to work at camp and complete any necessary paperwork to ensure they are onboarded correctly as per the rules of your school district.
One Month Before Camp
Close registration: The deadline to register for camp should be roughly one month before the first day of camp. This allows you to make final preparations based on the number of students you have attending, their skill level, instrumentation, etc.
Tell camp staff about enrollment and instrumentation: Your sectional staff will appreciate knowing how many students they can expect to teach, and your conductors will certainly need to know the instrumentation of their ensembles to create seating charts and potentially change musical selections, if necessary.
Collect health information: Send an email to all campers asking about any allergies or other health conditions they may have, as well as any medications they may need administered during camp. Your school district may require that certain forms be on file in order to hold or administer medications. If you will have a nurse at camp, include him or her in these discussions.
Finalize the daily schedule: Based on the number of students attending the camp, finalize the daily schedule. On the first day of camp, have a camp-wide meeting with all students and staff to welcome them, go over expectations, make introductions, etc. You will need to adjust your schedule for the first day to accommodate this welcome meeting. If you plan to present a performance on the last day, you will need to adjust the camp schedule for that day as well.
Finalize the use of spaces at your facility: Make final plans for where certain activities will take place – where will you have full ensemble rehearsal? Sectionals? Recess? Lunch? Where will students check in on the first day? Make sure you have a designated location for every activity and rehearsal that will take place.
Finalize equipment needs: Make a list of all the equipment you will need including percussion instruments needed, chairs and music stands, and any electronics needs you may have. You may need to borrow equipment from another school, so reach out to the music teachers there and kindly ask if they would be willing to share their equipment for the camp.
Reserve a box truck to haul equipment: If you borrow equipment from another school or need to transport anything to the site of your camp, reserve a box truck and plan to transport the equipment the day before camp starts AND the day camp ends.
Order camp T-shirts: If you plan to provide students and staff with a camp T-shirt, contact a local apparel company about options. Place your camp logo on the front, and the logos of any sponsors or partners you want to recognize on the back.
One Week Before Camp
Prepare all materials for distribution: Assemble a folder for each student containing various items when they arrive at camp. This folder might include a copy of the daily schedule, a map of the facilities with key locations labeled, copies of their music, a fingering chart, a name tag to wear during camp, a music stand name tag to use during rehearsals, plus any other materials that they will need to be successful at your camp. This process can be long and arduous — recruit other music teachers who have students attending camp to help and have a folder-stuffing party!
Make plans for student arrival and dismissal: Where will students be dropped off in the morning? Where will they be picked up? How will you manage the flow of traffic to keep students safe and to cut down on parent frustration? Will you require students to check in on the first morning (you should!)? If so, where will that take place? Where will students go when they arrive on the first day? Make sure you have answers to these questions so you can effectively communicate with students and staff.
Communicate final details to students: Send all campers an email with a copy of the daily schedule, as well as other key information that they will need to have a successful camp experience. Provide a list of items they will need to bring each day and explain in detail the procedures for camp arrival and dismissal each day.
Pick up camp T-shirts.
The Day Before Camp
Transport all equipment to your facility.
Set up all camp spaces: Get all spaces you will use for camp set up with the necessary equipment. Set up full ensemble spaces as indicated by seating charts provided by the conductors. Place signage on streets near your facility to assist parents with traffic flow. Prepare the check-in area with rosters and materials for distribution.
Create a text thread with camp staff: This will allow you to communicate with your staff throughout the week, and enable you to make changes to the schedule on the fly if needed.
During Camp
Stay calm and be flexible: Although you’ve meticulously planned for the camp to go smoothly, be prepared for unexpected challenges with logistics, the facility, arrival/dismissal flows, confused or angry parents, etc. Trust yourself and your staff to handle issues as they arise and keep a level head to ensure that your staff and students have a good experience.
Complete any remaining staff paperwork: If you have any remaining paperwork to complete to ensure staff are paid in a timely manner, complete that before camp ends. If paperwork remains to be completed, it will likely be an hourly timesheet or something similar.
Communicate with the treasurer/bookkeeper regarding payments and reimbursements: Keep all receipts for any expenses covered out of pocket so that you can be reimbursed. Populate a list of staff, their names, their employee status and the amount they are to be paid —provide this list along with any necessary paperwork to the treasurer. It’s important that this documentation is detailed and completed ahead of time to ensure that your staff is paid in a timely manner.
Provide updates to parents regarding how camp is going: Parents will appreciate updates on how camp is going at the end of each day. Let them know that campers are having a positive experience and provide any updates or reminders they will need for the following day.
After Camp
Return all areas of the facility to their original state: Clean up the spaces, take out any trash and return all furniture to its original location before you vacate the space. Transport all borrowed equipment back to its home school.
Communicate with your staff regarding payments: Send an email thanking your staff for working at the camp, and let them know when they can expect to be paid. Let them know that you plan to hold the camp again next summer and that you’d love to have them back!
Reflect and make notes on what went well and what you may need to adjust for next year.
I was cleaning my office while answering an email and printing off a score that I hadn’t marked yet. The bell rang, and I heard chairs scraping the floor. Rehearsal hadn’t started, but my students were already watching me.
One student raised an eyebrow and asked, “Mr. Stinson… are you okay?”
I froze, standing in front of a stack of junk, holding a dented mute in one hand and a half empty bag of pretzels in the other. I laughed it off. “Of course, I’m fine. Just … multitasking.”
But the truth? I was fried.
That morning I’d spent 15 minutes trying to find a stapler. My warm-up plan was scribbled on a sticky note. I had three emails flagged “urgent,” a festival on the calendar, and a mental to-do list that kept looping louder than the trumpets in chorale.
I wasn’t okay. But I thought I had to look as if I was.
(Good luck faking this. I’m not sure what gave me away to the student — could it have been all the junk in my hands, stuff all over the room or my thousand-yard stare?)
You Can Be a Mess and Still Be a Great Teacher
There’s this invisible pressure early on — especially in your first three to five years of teaching — that you need to prove yourself. So, you show up polished, show that you’re organized and show that you have a system. In other words, you show that you belong.
If you’re a newer teacher stepping into an established program, multiply that pressure by 10. You feel like you’re not just maintaining a legacy — you’re defending it.
The problem is that trying to look put together takes real time and energy away from actually being present for your students.
Let’s cut to the present. Some days my desk looks like a brass explosion. I still plan, but I don’t obsess. I still stay late sometimes, but not to polish something no one asked for. When I stopped pretending to be fine all the time, I had more space to actually teach.
And I still have no clue which instrument is home to this random single valve that has been sitting on my desk for three years.
Here are a few corners I’ve learned to cut — without guilt:
Rehearsal visuals: Your whiteboard doesn’t need four colors of Expo ink. If you get the order right and spell everything mostly correctly, you’re good. (I know at least three people who will feel personally attacked by this. I really enjoy your colorful whiteboards, but I simply cannot handle more than one marker).
Warmups: A consistent, effective warmup routine beats a brand-new exercise every week. Repetition is not laziness — it’s structure. If you need some variety, consider an A, B and C set.
Email perfection: Stop rereading every email to a parent like it’s a dissertation. Be clear. Be kind. Be done. I wrote this tip mainly for myself, but if this helps you save some time, great!
Paper clutter: Pick one drawer to be the “I-can’t-throw-it-out-yet” drawer. It’ll save you hours of over-sorting.
And if someone else’s corner-cutting system works for you? Steal or borrow it without shame. Most of what’s saved my sanity came from another teacher who said, “Here, just do this.”
Students Don’t Need Your Best Performance — They Need Your Real Self
I often say that no one sits around talking about the times that were perfect.
You know what students remember?
That time you made a mistake and owned it.
That moment you told them you were tired but excited.
That morning you said, “We’re changing our plan today because last night didn’t go as planned.”
That time you stayed calm when everything went off the rails.
One student said, “You don’t act like a teacher all the time. You act like a person.”
That comment stuck because once I stopped performing the role of director and just started showing up as myself, the connection deepened.
Admins Notice Something Else Anyway
Early on, I thought I had to be impressive during walkthroughs. I’d stand straighter, tighten up, talk more. It was like a weird little audition every time someone walked in with a clipboard.
Now I just keep teaching. I ask questions. I move around the room. I might even pause to explain something casually to a student while the rest are rehearsing. When I really feel confident, I even talk to the administrator and involve them in the lesson (plus it distracts a little bit from writing so much …).
Funnily enough, I get better feedback now than I ever did when I was “on.”
In the article, “Your Teacher Identity,” I unpack how we all shift from imitation to authenticity — and how powerful it is when we finally stop trying to play someone else’s role.
You’re Allowed to Be a Work in Progress
Here’s something I wish someone had told me during my first year of teaching: You can be a great teacher and still be figuring it out. You can show up tired and still make someone’s day better. You can have a bad rehearsal and still have built something lasting.
Your students don’t need a perfect teacher. They need a present one.
And some days, that just means showing up — even if your score study isn’t done, your warmup was shaky and your desk looks like a landfill.
You don’t need to have it all together. You just need to keep showing up. That’s what your students will remember. And that’s more than enough.
Every music lover has a preferred way to listen to their favorite artists. Maybe it’s via a streaming service and wireless speakers, or for a more private experience, over a pair of headphones or ear buds. But for those who want to hear the artists’ music the way it was originally intended, a good quality two-channel (stereo) Hi-Fi system is the only way to go.
One of the key components in a Hi-Fi system is known as an integrated amplifier. What is it and what does it do? Let’s take a closer look.
Components of Sound
For Hi-Fi aficionados, the pinnacle of playback requires what are called “separates” — i.e., separate components. These include “source” devices (so-called because that’s where the signal originates) such as a radio tuner, phonograph, reel-to-reel tape recorder, cassette player, a CD player, and, in modern systems, network sources such as streaming services.
These are all wired to a preamplifier (sometimes called a “control amplifier”), or preamp for short. This component allows the user to switch between source devices for playback and also provides phono equalization, tone controls, balance and, of course, volume control circuitry. The output of the preamp is routed to another component called a power amplifier (amp for short), which raises the audio to a sufficient level to be sent over wires to speakers. The end result is a harmonious listening experience.
Audio hobbyists love this type of “separate” configuration because upgrading is easy and cost-effective. If you want more power, all you need to do is buy a bigger power amp — no need to replace the entire chain. This gives the hobbyist an opportunity to keep tinkering with the system without breaking the bank every time they want to change something out. A good example of a modern “separate” system is the Yamaha Flagship Hi-Fi 5000 Series, which includes four state-of-the art components: the GT-5000 turntable, C-5000 preamplifier, M-5000 power amplifier and NS-5000 speakers with stands.
The Yamaha Flagship Hi-Fi 5000 Series provides high-end “separates.”
Those looking to save space with fewer components have the option of purchasing either a stereo receiver or an integrated amplifier. A stereo receiver such as the Yamaha R-N800A has most components built into one box: A power amp to drive the speakers, a preamp to control volume, tone controls, input switching and a few common sources like an AM/FM tuner and network streaming services. Everything is easily controlled by a single remote control or from your smart device running a user-friendly app. A stereo receiver connected to a set of speakers is the easiest way to enjoy Hi-Fi audio.
R-N800A.
An integrated amplifier is very similar — minus the tuner or other sources.
Audio, Integrated
The term “integrated amplifier” refers to the integration of the preamp and power amp, plus phono EQ and tone controls, in a single component. This allows you to save space on your Hi-Fi rack without sacrificing power or capability.
A look inside the Yamaha A-S3200 integrated amplifier.
The engineering advantage of having all amplification functions in a single box is that it allows the source signals — which are typically very low-level — to remain isolated from the integrated amplifier, which is doing some serious power boosting, with a huge transformer and massive power transistors.
Another advantage is that the source signals can be cleanly generated with the use of small low-noise power supplies that are specifically designed to not interact or interfere with one another, thus delivering low distortion audio to the preamplifier stage.
A good example of a high-end integrated amplifier is the Yamaha A-S3200, which provides inputs for an external tuner, CD player and turntable, as well as the ability to toggle between two different sets of speakers in two different rooms. There’s also a “Pre Out” that allows the A-S3200 to be used strictly as a preamplifier so you can easily add a separate amplifier to your system for more power.
The rear panel of the Yamaha A-S3200 integrated amplifier.
You also might want to check out the Yamaha A-S1200 and A-S2200 integrated amplifiers, as well as some of our other Hi-Fi components. All will provide the kind of listening experience that will make you the envy of even the pickiest Hi-Fi fan.
Here’s a fun fact: All major sporting events are broadcast in HD, and sometimes even 4K UHD. The pictures are overflowing with detail. You can clearly see the distorted wince on a quarterback’s face as he’s being sacked for a loss, the tracking of a 1.6-inch golf ball through its entire 350-yard flight down an immaculately manicured fairway, even the clear rotation of a basketball as the game-winning shot drops through the net from behind the 3-point line. These fantastic images are simply mesmerizing — but the fun doesn’t stop there.
The right audio setup at your home — whether it’s a sound bar or AV receiver — can serve to perfectly complement the action you’re seeing on the screen. Just as a great surround sound movie soundtrack can suck you into the story and make you feel that you’re in the scene, the same can happen when watching live sports events at home … even though it can sometimes be a little trickier to optimize the settings for your sound bar or receiver.
That’s because not all live sporting broadcasts are mixed the same. There are simply too many variables — such as different venue sizes, sound levels and whether the event is occurring indoors or outdoors — for one setting to work optimally for them all. Are we watching the final hole of a championship golf tournament or the final seconds of the college basketball game-of-the-year? These are completely different sound tracks with different expected results.
That said, your AV receiver and/or sound bar will probably offer number of “modes” (preset settings) that can bring out the best audio experience for every type of sporting scenario. Here are some tips that will help you do exactly that.
Tips for AV Receivers
AV receiver remote PROGRAM buttons.
Most AV receivers will have a Straight Mode that provides the exact, unaltered decoding of the digital sound track. This is a good place to start, but won’t always yield the most exciting results. If there’s a Multi-Channel Stereo Mode (where the front stereo signal is mirrored to all connected speakers in pairs), this can work well if you’re having a party and people are watching the action from different areas of the TV room since it helps you hear the audio fairly equally in all of the speakers in your setup.
Most Yamaha AV receivers have a specially designed surround sound “Sports” Mode. This takes the digital bitstream from the broadcast and splits it up into 5.1 or 7.1 channels, but before sending that information to the speakers, some DSP magic is applied to the surround information, which makes it bigger and more enveloping while keeping the commentator’s voice focused in the center channel next to the TV screen. Sports Mode does a great job of making the stadium or arena crowd noise appear to come from all around, giving you the feeling that you are actually sitting in the stands watching the action live.
But the most important overall tip is this: Don’t be afraid of trying any of the available modes, and don’t limit yourself to using the mode as labeled. One of the so-called “movie” modes might give you the sound that’s perfect for a particular sporting event. To access different modes, cycle through the PROGRAM buttons on your AV receiver’s remote control. If you find your team isn’t winning with the current selected mode, it might be worth trying a new one to see if they can turn it around with that!
Tips for Sound Bars
Sound bar remote MODE buttons.
If you’re using a Yamaha sound bar such as the True X Bar 50A, there are several modes that can contour your system for the content you’re watching in order to provide the most realistic experience possible. As with Yamaha AV receivers, some Yamaha sound bars offer a Sports Mode, and in many cases, this is the best choice for general sports viewing. But as we’ve mentioned, there are so many variables that sound engineers have to work with that there’s no one mode that works best all the time, so don’t be afraid to check out Movie Mode or even Game Mode. The goal is to be enveloped by the ambiance of the venue while having the announcer’s voices generally focused on the screen.
Regardless of which surround mode sounds best to you, activating the Clear Voice function will often be the icing on the cake. This technology isolates dialogue, such as a commentator’s voice, and emphasizes it above crowd noise.
Yamaha True X Bar 50A with wireless subwoofer.
Whether you’re using a sound bar or an AV receiver, a quick exploration of the available settings and modes can enhance your viewing experience and bring you into the onscreen action. It’s all part of the fun of owning a quality surround system for your home entertainment. Enjoy the game!
Click here for more information about Yamaha AV receivers.
Click here for more information about Yamaha sound bars.
Click here for more information about the Yamaha True X Bar 50A sound bar.
The author’s love of guitar started when he was a child.
My first instrument was a guitar case. I would pretend to play it around the campfire while my dad and his friends strummed real guitars and sang songs. It took me a couple years to learn the guitar, but the joy of playing with my father set me on my musical journey.
Throughout elementary school, I formed bands and played mini shows. My 5th-grade Christmas present was a Tascam 8-track recorder and a couple of Shure SM57s, which sparked my passion for writing and recording. When it came time to join band in elementary school, I signed up right away because I loved music, but I never felt like I belonged. In school, we recreated music from long ago, while outside of school I wrote, played and recorded with rock, metal and punk bands — where I felt I could truly be myself, playing my own music.
I went to college to become a music educator and eventually began teaching as a general music teacher at Oak Lawn Community High School in suburban Chicago. One day, I noticed students playing guitar in the breezeway between the band and choir rooms, and I was taken back in time. These students and many more were like me — we loved music but didn’t feel comfortable participating in traditional school ensembles.
Guitar, Music Theory and Music Production Classes
At that moment, I vowed to create a space for these students. We started with a guitar ensemble club that met after school. Eventually, I took over the Guitar 1 classes, added a second-level guitar class and created a year-long course called Guitar Studio that students can take for multiple years. This culminated in a full four-year sequence for guitar players, where they learn not only the instrument but also genres ranging from classical and jazz to rock and funk. I believe it’s important to show students how to play the music they love and to give them the tools to write their own music. Incorporating songwriting into these classes has significantly increased student engagement.
In addition to the guitar classes, I aimed to enhance musicianship beyond traditional theory by providing functional music theory that students can use to play jazz, arrange their own songs and write music. This led to the creation of our Honors Modern Music Theory classes.
Today, we offer two levels each of Honors Modern Music Theory, Music Production and Piano, along with the full four-year guitar sequence. In the introductory level of these courses, students learn drums, bass and chords on their respective instruments, giving them the foundation to perform in any role within a band’s rhythm section. We form bands in class, record songs together and even establish songwriting cohorts. The universal level of knowledge among these students enables meaningful collaboration and group formation.
The Morning Show weekly concert is run by students who handle all aspects of the show, including setup, lighting, sound, promotion and performing.
Weekly Concerts
Last year, we launched a weekly concert series — The Morning Show — held on Friday mornings in our media center. The concerts have been a huge success. Students interested in running the shows formed a club called Morning Show Media, which now functions as our student-run entertainment label. Representatives from each act meet with the team to discuss setup, lighting, sound and promotion for the show. On show day, students run sound, manage lights, record the performance using our mixer, and we post the recordings on social media.
I feel blessed to be a part of this process. When students work with their peers on music they love, they become intrinsically motivated and even practice outside of school. I heard last week about this metal band who has a weekly gig at a coffee shop. My students went there, brought a demo tape and now they play there every Thursday. How cool is that!
Director-Facilitated Ensembles
In addition to our student-run groups, we offer two director-facilitated ensembles that perform covers and originals with a high-level excellence. We take these ensembles to local performances; last year, one group played at C2E2 — the Midwest version of Comic-Con — and later at the Illinois Music Education Association State Festival.
When I see these students, I see my younger self — they represent the other 80% of students who aren’t in traditional music ensembles. It all started with a before-school jam, and now we have a full student-run entertainment label and host the Illinois Commercial Music Fest! The guitar/music theory/music production program has engaged more students and changed the culture of Oak Lawn Community High School. Seeing the transformative power of music, and its positive impact on students’ lives has been rewarding and inspirational.
Try It for Yourself
I recognize that not every school has the flexibility or expertise in commercial music to develop the proper curricula. That’s why I developed a curriculum hosted on my online platform, ShedtheMusic, to support guitar, music theory and music production. These courses are used at our school, and most lesson resources are accessible on student devices, which allows teachers to focus on meaningful interactions that help students achieve their creative goals.
Our newest course, Electronic Music Elements, was developed in collaboration with Eric Jao (DJ Enferno). It uses Soundtrap’s non-performance-based tools to enable students of any background to succeed in composing and recording their own music. I’ve witnessed students with developmental disabilities, those who typically struggle to connect with peers, and even experienced musicians thrive in this program. It fills my heart with joy to see students connect with music the way I did as a child — whether they become all-state trumpet players or simply discover an interest in creating music.
Learning to play many different genres of music is one of the great joys of being a musician. Every type of music has stylistic hallmarks, and if you aspire to masterfully communicate your feelings through your instrument, the opportunity to dip into a fresh sonic universe can be both energizing and inspiring.
In that spirit, here’s a primer on seven musical genres that every versatile bass player should be able to groove in. We’ll keep each section brief, focusing on tone, feel, rhythm, harmony and artists you should know, plus we’ll provide an audio example. Needless to say, it makes all the difference to have an instrument that can conjure any flavor you need; the Yamaha BBP35 used on all the audio clips here is easy to play and as tonally versatile as they come (as is its four-string cousin, the BBP34).
Yamaha BBP35.
Yamaha BBP34.
BLUES
Let’s start with the blues, which is the foundation for every genre on this list. The classic 12-bar form has many variations, but this swampy Delta blues in D chugs along on these changes:
I7 / I7 / I7 / I7
IV7 / IV7 / I7 / I7
V7 / ♭vi-IV7 / I7 / V7
Notice the brief stop on the flatted sixth chord, B♭, in measure 10. If you’re playing chorus after chorus of blues, you can keep things interesting by varying your note length, experimenting with ways to approach the I, the IV and the V. You can also mix things up by arpeggiating your chords or staying minimal, as I did; take your cues from the guitarist and drummer.
GOSPEL
Like every other genre on this list, this has many subgenres. Gospel boasts a combination of sophisticated harmony and earthy appeal, and the flavor is so distinctive that even a tiny dose can bring weight to a standard pop progression.
The audio clip below gives you a few moments of “Bless That Wonderful Name of Jesus,” a hymn that’s been a staple in Black churches for decades. This version, in A♭ major, starts with a turnaround (in this case, V-vi-ii-V-I) before walking back up to the V. After staying on the I chord for four bars, we visit the IV for two bars, then head back to the I chord, doubling the organist’s vi-ii-V-I turnaround. Two bars of I lead to a walkdown from A♭ to the vi chord (Fm), which launches us into a iii-vi-ii-V turnaround and that walkup to the V.
Here’s what it looks like:
I7 / I7 / I7 / I7
IV7 / IV7 / I- vi-ii-V
I7 / I7 / I7 / vi
iii-vi/ii-V / I
Turn up your lows, squash the highs, dial in the mids and stay on top of the beat while keeping an eye on the keyboardist’s left hand.
FUNK
Thanks to great players like Larry Graham, Louis Johnson and Flea, slapping and popping are essential items in any funk bass player’s vocabulary — but that doesn’t necessarily mean you have to take up lots of room.
This throwback track with horns begins on a C7 groove that seemed perfect for a fingerstyle call-and-response between the low C (on the first fret of the B string) and the high C at the 17th fret of the G string. When the track settles into the C-B♭7-Am7(11)-B♭7 chorus, opening up both pickups on my BBP35 and turning up the tone knob, along with a syrupy slow slap line, delivered the vintage vibe the producer needed.
R&B
There’s nothing like the languorous feel of an R&B ballad, and the bass player’s responsibility is to make it feel good. This isn’t the place for flurries of notes or busy slapping: If you’re deep in the pocket, you can get away with just playing roots, fifths and octaves, leaving room for the occasionally spicy fill. Lay back, enjoy the long notes and be ready to approach the track as a keyboard bassist would; with all the highs shaved off, the BBP35 makes a fine substitute for synth bass.
REGGAE
Most working bass players who’ve had to play reggae understand the cardinal rules: Be melodic, lay waaaay back and do whatever it takes to never, ever have treble in your tone. Understanding the chord changes will help you outline chords appropriately, and being in sync with the drummer is crucial. An electric bass with flatwounds or old roundwounds is most commonly used here. For inspiration, listen to Aston “Family Man” Barrett, best known for playing with Bob Marley and the Wailers and Robbie Shakespeare, the session kingpin who co-led Sly & Robbie.
Basslines in reggae can be quite sparse, but the busier approach in the audio clip below matches the insistent “four-on-the-floor” drum pattern. In addition, I muted with my palm for an extra-thick tone as I riff on G minor.
SAMBA
Samba is a broad term for many of the rhythms that underpin the Brazilian musical genres that originated in Afro-Brazilian communities in the late 19th century and early 20th century. The kick drum is the heartbeat of a modern samba feel, and the bass parts, most commonly root-V, wrap themselves around the kick.
The audio clip below starts with an up-tempo, active piano part in C. I was tempted to complement it with a busy bass part, but decided instead to hold back so I would have somewhere to go as the track progressed. This spacious approach reinforces the C root with a low C on the first fret of my BBP35’s B string, alternating with the fifth (G on the third fret of the E string), and the C at the third fret of the A string. In the next section, which has a C7 (maj7, 9, 11) feel, the bass climbs up the C major scale by playing C (and its V, G), D (and its V, A), F (and its V, C) before heading back to the top and ending with a fill.
DANCE
If you’re asked to play on a track with kicks on the quarter notes, let the four-on-the-floor beat give you the freedom to be as repetitive or as melodicas you want to be. Depending on which subgenre you’re visiting, the chords may be stark and minimal or lush and soulful, and you can easily make either electric or synth bass fit. Playing roots and chord tones is always a safe bet, but instead of outlining the chords in this Fmaj-Gmaj-Am progression, I soloed the BBP35’s back pickup and played a melodic Gmaj figure, repeating it with slight variations.
There are lots of ways to pick up new styles: Listen extensively, play along with music you like, study charts and method books, and watch videos by bassists you respect. If you are inspired by a particular tone or feel, try replicating it on your instrument. No matter the genre, pay attention to the drummer’s foot and the keyboardist’s left hand. Playing even a little bit of keyboard can also make a big difference.
During the COVID-19 pandemic in 2020, when schools became remote, Alabama music teacher, Dr. Gene Butler, faced the challenge of teaching what is a very hands-on, in-person subject virtually. When students were able to return to school, many chose to learn remotely, and those students were not allowed on campus during school hours.
Wanting to connect students to make in-person music, Butler thought up a solution: How about launching an after-hours extracurricular concert band? And, why not expand this band beyond Smiths Station High School and open it up to the community, with musicians of all ages welcome to join?
Dr. Rusty Courson
Butler called his old band teacher at Smiths Station and mentor — Dr. Rusty Courson, who retired in 2016 — and ran the idea by him.
“Before you say no, I want you to consider starting a community band,” Butler told his longtime mentor.
“Before even thinking about it, I said yes,” says Courson, who is currently a representative for the Lee County Board of Education. “Neither of us had time before, but I was retired now.”
They both were excited about the idea, and the educators launched the Smiths Station Community Band — a lively group that averages 60 to 80 players. Courson does most of the teaching, while Butler handles the bulk of the administrative work. Most of the students in the community band play a secondary instrument — something many of them have wanted to try — while continuing to play their primary instrument at school.
Now approaching the end of their fourth season, the Smiths Station Community Band meet weekly from mid-October to May and perform in three concerts: in December, March and May. The players — who come from school districts around the county and beyond, including from nearby Columbus, Georgia — range from young teens to college students, middle-aged adults and even octogenarians! The band members come from all walks of life.
Fun and Camaraderie
This community band has provided the perfect way to get musicians together in a sparsely populated area, Butler says. Smiths Station is so rural that it has only two traffic lights.
“It is a great opportunity for everyone to collaborate and communicate together,” says Butler. He received his bachelor’s and master’s degrees at Troy University, where he served as drum major for the “Sound of the South” Marching Band.
“It is a neat experience for people in high school to see that there are people in their 50s or 60s who are still playing their instruments,” Butler says. “Older students get excited about the next generation coming up and to work together in a collaborative environment.”
The idea is to have fun and make music without the pressure, says Butler, who got his Ed.D. in Curriculum and Leadership from Columbus State University. “That really is what we try and do in the community band: just making it where it’s an enjoyable experience, and it’s open to all ages, and it creates a welcoming environment for everybody.”
You don’t need to audition to become a member of Smiths Station Community Band, Courson says. It’s a laid-back, noncompetitive atmosphere of people having fun making music together. “If you enjoy making music, we want you to come and play,” he says.
Learning Opportunities and Making Music
The band has weekly rehearsals during the season on Tuesday nights, and the kids often sit next to experienced adult players who act as hands-on mentors, Courson explains. His goal is for every student to play a solo this season.
Students and adult members of the Smiths Station Community Band, which performs in venues like schools and churches, get different things from their involvement, Courson says.
“For the adults, it’s an opportunity to relax and make music and get away from the stress of life for a couple of hours every week,” he says. “As for the kids, they just love to play, and they’ll take every opportunity that they can to do so.”
The live, hands-on music experience, taken for granted before the pandemic, is unbeatable, Courson says. “I want people to come in on Tuesday nights and have fun,” he says. “What I want is to turn that into a learning opportunity for students. You get much more out of actually participating in a performing art as opposed to just scrolling on your phone or watching TV.”
High Achiever
This past year has been an exciting one for Butler, who was elected president of the Alabama Bandmasters Association, an organization that promotes the exchange of ideas and educational achievement among school band directors in the state. Smiths Station High School named Butler the Teacher of the Year, and the Lee County School District named him Secondary Teacher of the Year.
Humbly, Butler gives a lot of credit for his success to the larger team. “It’s definitely not just me — it’s a community that is around me that has generated this success,” he says. “I have a lot of mentors, and I have a large circle around me.”
His father-in-law — composer and author Dr. Larry Blocher — has had a big influence on Butler, as have colleagues who are supportive of the mission of teaching music. And, of course, Butler credits his hard-working students as making all the difference.
“Rusty Courson especially made a large impact on me, and that’s what I hope to make on my students,” Butler says about his mentor and co-director of the community band.
Collaborative Mindset
Now, Butler, who was recognized as a 2025 Yamaha “40 Under 40” educator, is working on promoting music education as a career path for college students. “The world needs more good music teachers,” he says. “I’m really trying to generate more interest in the field of music education. Our practicing educators are the ones who will influence the next generation of music educators.”
Butler’s love for music started when he was a child, and in high school as a member of the marching band, he knew that he wanted to be a music teacher and direct the band someday. As it turns out, he is only the third Director of Bands at Smiths Station High School — and he is the first alumnus to come back to his high school and take the job! Today, about 185 students participate in marching band, concert band, symphonic band and wind band.
“Gene is the real deal,” Courson says. “It’s a point of pride for me because he was my former student. … Gene has not only maintained but taken the band to next level.”
Before Butler came to Smiths Station about nine years ago, he worked at Trinity Presbyterian School in Montgomery, Alabama, where the band grew from 39 students to more than 80 during his tenure. Butler’s bands have consistently received superior ratings in contests throughout the southeastern states.
He describes his classroom teaching philosophy like this: “I want to create a welcoming environment for all students to focus on bettering themselves through musicianship and life skills, as we work collaboratively together.”
Now and then, the lines may blur between funk, R&B and (gasp) disco, but it’s a genre that’s guaranteed to get the party started and/or keep it going into the wee hours of the morning.
If you’re ready to get down and funk it up, here are 10 classic vinyl albums you’ll want to have close to your turntable.
1. Computer Games – George Clinton
There is no funk without George Clinton and his band, Parliament/Funkadelic. Clinton’s first solo album features a lot of help from ex-P-Funk members and spawns a couple of his biggest hits: “Atomic Dog” and “Loopzilla.” With the necessary beats on hand, this record goes down a different path with some incredible synth riffs. Like a great film, Computer Games is so densely packed, you’ll need to spin it a few times just to catch all of the tidbits. You only need to revisit some of your favorite hip-hop tracks to see how heavily this record has been sampled over the years.
2. The Payback – James Brown
Many called James Brown the hardest working man in the music business, but was there truly anyone funkier? This two-record, 73-minute set is full of so much funkiness, you might not be able to take it all in in one listening session. The Godfather of Soul transitions effortlessly from jazz to R&B and back to hardcore funk, making some of these tracks sound almost like a Grateful Dead jam session. “Payback” may just be the most essential funk recording ever. Huuuuuuh!
3. Greatest Hits – Sly and the Family Stone
There are so many great Sly and the Family Stone albums, and Greatest Hits has all the top tracks, plus it was recently remastered and re-issued on vinyl. It’s a terrific party record, sure to inspire a lot of singalong and hands in the air, and the track “Thank You (Falettinme Be Mice Elf Agin)” is by far one of the funkiest tunes ever put on wax.
4. Blam! – The Brothers Johnson
Blam! may be the perfect funk record in that it incorporates all the elements of the genre for the beginning enthusiast, yet has enough punch for the aficionado. Produced by Quincy Jones (four years before Thriller), this one doesn’t stop, from the first track to the last. And if there was ever a great reason for physical media, the album artwork is definitely something to be savored.
5. Word Up! – Cameo
In constant rotation on MTV during the summer of ’86, this album still sounds fresh today, especially when listened to on vinyl. The opening bass line will instantly burrow into your consciousness — what a riff! — as will the track (and hit single) “Candy.” An alltime favorite, to be sure.
6. AWB – Average White Band
Other than the remake of the Isley Brothers’ “Work to Do,” the rest of the songs on this self-titled first record from the iconic Scottish funk outfit are all original. Full of catchy hooks, great beats and killer horns reminiscent of Tower of Power, AWB even crossed over to the R&B chart with their number one single “Cut the Cake.”
7. Rags to Rufus – Rufus featuring Chaka Khan
Chaka Khan and Rufus teamed up for this vinyl classic that includes a cover of Stevie Wonder’s “Tell Me Something Good,” which features one of the heaviest, dripping wet bass lines you’ll ever hear (in case you haven’t noticed yet, funk is BIG on bass), matched perfectly by Khan’s soulful voice. Bathe in the funkiness that is present here.
8. Stretchin’ Out In Bootsy’s Rubber Band – Bootsy Collins
This one’s a little off the beaten path, but if you dig into the album notes (if you can stop dancing long enough to pick the album cover up, that is), you’ll see that many of the accompanying players on this record (which includes Maceo Parker and Bernie Worrell) went on to funk and R&B greatness, and you’ll discover that this masterpiece was produced by none other than George Clinton. Clearly, Bootsy’s time with James Brown and Parliament/Funkadelic was well spent.
9. Headhunters – Herbie Hancock
This timeless record is usually thought of as being Herbie Hancock’s initial foray into fusion jazz, yet it still tops most “best funk record” lists. The 15:45 opening track, “Chameleon” may be the reason why — it’s a funk symphony, not to be missed. If you ever watch Herbie Hancock being interviewed, notice his big smile whenever Headhunters is mentioned.
10. An Evening With Silk Sonic – Silk Sonic
So far, all the choices here have been albums from the ’70s and ’80s, but funk is alive and well today. Anderson, Paak and Bruno Mars fully embody the sprit, the sound and even the look of the classic funk masters with this record. The production may be a little smoother, but the grooves are as heavy as anything back in the day.
Radiating Warmth: José Sibaja on transcending fundamentals and formalities to keep music alive
Written by Lisa Battles
Warmth radiates through every part of acclaimed trumpet player José Sibaja, from his music to his mindset. Rooted deeply in his Latin American heritage and with decades of rich experience, he champions humanity, humility and humor.
An 18-year member of Boston Brass, the Costa Rica-born Sibaja has played as an international soloist with many major symphony orchestras and wind ensembles, teaches master classes worldwide and is an associate professor at Blair School of Music in Nashville, Tennessee.
Training the ear and mind
While Sibaja instructs students on fundamentals, he says his greater goal is to show how mastering them is the starting point for greater possibilities in their artistry and life.
“We’re going to be as good as we are able to hear, and I think that also applies to life. We’re going to be as wise and empathetic as we’re able to hear and listen to others,” he says.
Deep values for inclusion and accessibility form the core of Sibaja’s philosophy, driving his approach to make music more relatable, human and open. He believes music loses its magic when it becomes elitist or detached from everyday people and was always meant to transcend cultures and socioeconomic status.
“Music has always been created and played for celebration or communication. We made it serious … Music didn’t start happening in the music hall. We did that. Music was always either a song or a dance. You were trying to enamor somebody or celebrate the fact that you were with people, together,” Sibaja says. “And then to go way earlier, when we had only singing and percussive noises, those were used to communicate between tribes. We were the ones who made it serious with all our expectations in life.”
“The word ‘expectation’ in my life is very important. I try to keep my hopes really big but my expectations low with everything. So I think that gives me an edge on being relaxed. In my opinion, expectation is the number one enemy of a healthy relationship, be it humanly or musically.”
This idea permeates everything Sibaja does. Whether he’s in a concert hall, an intimate gathering or teaching a class, he aims to resonate with people in ways that connect them to a greater awareness of being, no matter their background.
Early life influences in Latin America
Sibaja says his experience growing up in Costa Rica and early adulthood in Miami and Venezuela shaped his perspectives on music and how it resonates across different cultures and classes of society.
“I am a true believer that music is made for inclusion and for unity,” he says.
It all began for him at age 13, when he fell in love with the trumpet sound in the Latin music that filled his childhood home. He picked up the instrument and started his training at the Youth Program of the National Symphony Orchestra in Costa Rica. Eventually, he earned a scholarship to the University of Miami to study classical music. He pursued his studies there for two years before taking the opportunity to become the principal trumpet player in the National Symphony Orchestra of Venezuela.
He stayed with the orchestra for two and a half years before venturing more into commercial music and recording, which took him to New York for a while. Then December rolled around.
“I was recording a really late-night session in Manhattan. I went down to the subway, and it was two in the morning. The train was late. I was freezing. Right then, I made the decision that was not for me. I had to go back to Miami,” Sibaja says.
Another important factor in his decision to return was mentor and professor Gil Johnson at the University of Miami.
“He helped me understand how important your work ethic is, not only for music, but just in general in life, and if I accomplish anything, or not. I am blessed that way a lot because of him. Not only musically speaking, he really took me under his wing and shaped me literally to have a work ethic,” Sibaja says. “Talent is nothing. You can be the most talented person in the world, but if you don’t work, nothing happens.”
Dancing between classical and commercial worlds
Back in Miami, Sibaja got to work, re-entered school, picked up recording projects, played principal in the Miami Symphony and the Palm Beach Orchestra, and took on some commercial music work. Local connections led him to Ricky Martin, whose band he joined at around age 24.
Off he went touring the world for about a decade, while also recording with Martin and other famous Latin artists, including Alejandro Sanz, Gloria Estefan, Celia Cruz, Luis Enrique, Rey Ruiz, Marc Antony and more.
During this time, Sibaja did a stint with Dallas Brass, a quintet experience that piqued his interest when he learned of an opportunity with Boston Brass. He auditioned, won the spot and has been with the group ever since, touring and supporting its mission to perform great music while also “leaving a footprint” wherever it goes, Sibaja says.
Dancing between the classical and commercial music worlds was not something he imagined for himself in the first few years of learning his instrument, he says. His mental shift about it happened around age 16, when he attended a concert by Mexican artist Luis Miguel.
“Until then, all I wanted to hear was classical music. A friend of mine invited me to go, and I didn’t want him to go alone. I wasn’t into it [but] once I got in there and the band started playing, I was like, ‘Whoa, whoa, wait, wait, wait! There’s more to this dude than I thought there was going to be!’” Sibaja says. “And then, of course, he’s one of the most incredible singers you’ll ever hear in your life, and the band was sounding great. That day, my perspective on music changed. I was really happy.”
Another amazing influence on his early non-classical musical discoveries was the Cuban band “Irakere” and one of his trumpet heroes, Arturo Sandoval.
“Music with that much soul and honesty is an experience hard to recreate, but immensely rewarding and transformative. When I first heard Arturo play, I was in awe and didn’t know you could do that with a trumpet. The fact that he played the trumpet like that, that he spoke the same language I spoke, and that he came from a small Latin American country, was a big boost of inspiration, hope and energy for me as a young musician.”
Discovering both artists taught him huge lessons about not boxing in or stereotyping oneself or others, and how suspending that kind of judgment can lead to satisfying personal discoveries and uniting people, he says.
Passing along a mindset
Even with a relentless work ethic, Sibaja prizes authenticity over perfection, doesn’t take himself too seriously, and strives to pass those values to others through his teaching opportunities.
“Music has to be sincere. We are not here to be perfect, and nobody’s perfect. So if my aim is to be perfect, I am missing the point, and my music becomes stiff and contained. I want to be as human as possible with music. If I make mistakes, as long as people are enjoying themselves and having a good time, it’s OK. I think that’s our job. That’s the most important thing to me,” he says. “And I want to bring that to students, [the knowing] that they have a license to make a mistake. When we give freedom to our minds, the way we perform improves dramatically, and we start being ourselves. In my opinion, that’s what you need in music.”
When asked what gets him up in the morning, Sibaja’s answer is simple: the blessing of being able to make music. As for what helps him sleep well at night, it’s his commitment to how he goes about it.
“I just want to be remembered as a fun person. That’s it. Hopefully, I can contribute something positive to your life. If I happen to play the trumpet a certain way and you remember that, that’s great. I would love it if when people think of me, it brings a smile to their faces,” Sibaja says. “To me, that’s much more important or transcendental than people thinking that I was smart or I was a virtuoso or if I was this or I was that … It’s a lot about respect, respecting others, respecting people and staying true to who you are.”
When it comes to choosing the best components for your drum set — from cymbals to the drums themselves — making the right decision can be difficult.
The same is true when it comes to drum hardware. Here are five questions to ask before deciding what to buy:
1. Where are you playing?
The best place to start is to determine what kind of drumming you’ll be doing. For example, if you’ll be mostly doing small gigs (such as in clubs) and carrying your own gear everywhere, you’ll want the lightest hardware you can find, though it should still be braced and rugged. The Yamaha 700 Series is a good option since it offers a streamlined design and outstanding stability. Or you might want to check out the Yamaha HW-3 Crosstown pack, which weighs only 17 pounds and even comes with its own carrying bag, making setup and teardown easy.
The Yamaha HW-3 drum hardware pack.
If you expect to be playing outdoor shows where there may be gusty winds, you’re going to need heavy-duty double-braced hardware that won’t blow over or move around. That’s also the case if you are mounting heavy cymbals (like 20″ crashes) high up, as you’ll need something with bottom weight that can offset the weight at the top. A good option to consider here is the Yamaha 800 Series, which is suitable for everything from small club gigs to large festivals.
Yamaha 800 Series drum hardware.
2. Is it versatile?
Having hardware you can mix and match is important — in fact, for gigging drummers, it comes in handy on almost a daily basis. That’s exactly the thinking behind the Yamaha “System Hardware” concept that utilizes standardized pipe with a center tube diameter of 7/8″ (22.2 mm) in both 700 and 800 Series hardware, as well as in the HW-3 Crosstown pack and for tom holders, cymbal booms — even cowbell holders. This enables your kit to grow and evolve as your taste and needs change. For example, you can drop a double tom in the base of any stand and add cymbal holders — or pretty much anything you want — to T-fittings.
Drum set utilizing Yamaha System Hardware.
3. Is it durable?
Yes, money is often an issue, but settling for poorly made hardware usually ends up costing you more in the long run. An inexpensive cymbal stand is likely to break down on you sooner rather than later (and probably at the worst possible moment!), and so you’ll find yourself having to purchase a replacement, then another and another. Better to spend a little more and own a piece of hardware that will stand the test of time.
A major reason why Yamaha drum hardware is so durable is the usage of the same zinc castings and chrome plating used to make handlebars and mufflers for Yamaha motorcycles — parts that have to be able to withstand extreme wear and tear. In fact, the blue accents on FP9 Series bass drum pedals and the HHS9D hi-hat stand are a nod to Yamaha motorsports. Yamaha also backs their products with a written five-year warranty to ensure that purchasers get to enjoy their instruments and equipment for years to come.
Yamaha DFP-9D Double Foot Pedal.
Yamaha motorcycle.
4. Is it the right fit?
Especially when you first learn to play drums, having good posture is crucial. You want to be as efficient as possible when you play, so it’s important to use hardware you can easily adjust to create your optimal drum setup. This means you want everything to feel natural — you shouldn’t have to over-extend to reach anything in your drum set.
Yamaha hardware makes it easy to get your toms, cymbals, etc. right where you want them to be. The company’s tom mounting hardware is simple to adjust (over a range of 360 degrees) and stays put, so you don’t have to worry about toms slipping out of place while you’re playing. This means you can have different heads on the top and bottom, and even flip your tom around completely to play it with different sounds or at different pitches!
That covers everything your arms can reach, but what about the space around your feet? Yamaha offers four distinct pedal drive options to accommodate various musical styles and player preferences: direct, single chain, double chain, and belt drive.
For working drummers, the combination of an HHS9D hi-hat stand and CWHSAT9 multi-use clamp provides near-limitless flexibility within your setup. By clamping the stand to your kit’s bass drum hoop, its independently adjustable legs may be completely pushed aside – freeing up vital room to perform. This is especially beneficial for larger drum configurations that include a double bass drum pedal, side snare, and/or a pedal clave.
Yamaha tom mounting hardware.
5. Is there attention to detail?
People appreciate attention to detail. Especially musicians!
For example, thick felts (as provided with all Yamaha cymbal and hi-hat stands) are not only great for getting cymbals really tight, but as a bonus, you can cut them thinner if necessary. Want to float your cymbals a little more? Simply slice the felts in half. This may seem like a minor detail, but drummers understand that small things can make all the difference when playing.
Through the years, Yamaha has introduced numerous innovations in drum hardware that provide that same attention to detail. For example, the company’s “hide-away” boom stand design allows you to add a splash or small effects cymbal to your drum set without taking up a bunch of floor space with a full stand. Another Yamaha original is the locking high-hat clutch: Once you get the top and bottom cymbal where you want them, you can lock the assembly into place so it doesn’t move.
The bottom line is that having the proper drum setup — something that starts with choosing the right hardware — will help you play better. So choose wisely!
Click here for more information about Yamaha drum hardware.
The music teaching profession continues to face an ongoing challenge recruiting new music educators into the profession. K-12 music teachers have the opportunity to take an active role in helping to remedy this situation by encouraging current music students in their programs to consider music teaching careers. See the six areas at the bottom of this article on ways to engage and encourage current music students music education in college.
The field of education is currently facing a significant challenge recruiting new educators, which directly impacts the quality of instruction students receive. The ongoing teacher shortage affects core academic subjects as well as specialized disciplines, including music education. When vacant teaching positions remain unfilled, schools often reallocate resources and redistribute instructional units. A critical step in addressing this issue is increasing the recruitment of new teachers. It is essential to encourage students to pursue music education degrees to ensure the sustainability and growth of music programs in schools.
Extensive research has demonstrated that K-12 music educators play a pivotal role in influencing students to consider majoring in music education at the collegiate level. In “Developing Tomorrow’s Music Teachers Today” (2003), Martin J. Bergee and Steven M. Demorest examined the factors influencing career choices among music education majors. Their findings indicate that fostering student engagement in music programs can strengthen ensemble identity, ensure greater representation of the student population and contribute to the overall growth of music education enrollment. The study highlights the importance of creating a musical environment that nurtures a deep appreciation for artistic expression while allowing students to develop a connection to the discipline through meaningful participation. When educators convey their passion for both music and teaching, students are more likely to consider pursuing careers in the field.
These studies collectively highlight the powerful influence that educators have in fostering student interest in music education and shaping their long-term career decisions. In addition to the research, this advocacy aligns with the NAfME Music Teacher Profession Initiative.
Among the most critical factors influencing a student’s decision to major in music education are teacher encouragement, student interest, and a positive and engaging learning environment. To address the shortage of music educators, current teachers must take an active role in recruiting students by cultivating a classroom atmosphere that nurtures curiosity, artistic growth and enthusiasm for music. By implementing instructional strategies that promote deep engagement, providing mentorship and creating meaningful performance opportunities, educators can inspire the next generation of music teachers. Practicing music educators in today’s classrooms serve as the primary catalysts for increasing the number of students who choose to pursue music education as a career.
Here are six key areas of focus for fostering student development in music education. These areas serve as valuable opportunities for educators to engage with students in meaningful discussions about their interest in pursuing music education. Through hands-on activities and guided experiences, students can develop essential skills, explore leadership roles and gain deeper insights into the teaching profession.
By incorporating these focus areas into your music classroom, you can create an interactive and supportive environment that nurtures students’ passion for music while providing them with practical experiences that align with the responsibilities of a music educator. These activities not only strengthen musical and leadership abilities but also encourage students to consider music education as a viable and fulfilling career path.
Key Area 1: Section Leader Training
Students are often given leadership titles without receiving the necessary training to succeed in these roles. To ensure their effectiveness, it is essential to provide structured guidance and support. Assign students to be section leaders and equip them with the skills needed to assist their peers in music preparation, organization and rehearsal techniques.
Beyond musical responsibilities, effective leadership requires the development of key qualities such as patience, clear communication and the ability to provide constructive feedback. By actively teaching these skills, you can empower student leaders to foster a positive and productive rehearsal environment. When properly equipped, student leaders will enhance the overall performance of their sections as well as gain valuable experience in teamwork, responsibility and mentorship.
Key Area 2: Peer Mentoring and Tutoring
Peer mentoring can be used in many capacities for all music classrooms. Pairing experienced students with newer or younger musicians serves as an effective mentorship program that enhances technical proficiency and builds confidence in developing musicians.
A structured peer mentorship initiative creates a collaborative and supportive learning environment where all students feel valued and motivated. It strengthens ensemble cohesion, promotes a culture of mutual respect and enhances overall classroom engagement. By instilling accountability in mentors and mentees alike, this program prepares students for leadership roles in both music and other areas of life. When implemented correctly, peer mentoring becomes a powerful tool for nurturing future leaders.
Key Area 3: Student-Led Rehearsals
Encourage students to take on leadership roles by allowing them to lead warm-ups, sectionals or even full ensemble rehearsals. This hands-on experience helps them develop initiative, refine conducting skills, and practice clear and effective communication with their peers.
It is essential for you to provide clear guidance regarding the rehearsal’s goals and objectives for this process to be truly beneficial. Simply asking a student to “run a rehearsal” is not sufficient unless they have a structured plan in place.
To ensure focus and productivity, consider implementing a system where student leaders submit a list of action items outlining their sectional or rehearsal goals. For example, requiring section leaders to submit their plans by a designated deadline, such as noon on the day of rehearsal, allows you time to review their objectives and provide constructive feedback. This approach helps students develop organizational and planning skills as well as ensures that their leadership efforts align with the overall vision and instructional goals of the music program.
Key Area 4: Musical Decision-Making Committees
Establishing student-led committees within the music program provides a structured opportunity for students to take on leadership roles while actively contributing to the success of their ensemble. These committees can be responsible for a variety of essential tasks, including selecting repertoire, organizing concerts and performances, planning community outreach events, managing fundraising efforts and overseeing social or team-building activities for the ensemble.
By participating in these leadership roles, students develop critical skills such as teamwork, decision-making, organization and event management. They learn to collaborate effectively with their peers, communicate their ideas clearly and take responsibility for various aspects of the music program. Additionally, involvement in these committees fosters a sense of ownership and pride in the ensemble, helping students feel more invested in the program. Teachers play a crucial role in guiding these committees by providing mentorship and ensuring that students have the necessary resources to carry out their responsibilities successfully.
Key Area 5: Conducting Opportunities
Providing students with the opportunity to conduct a piece during a rehearsal or performance can be one of the most impactful and memorable experiences in their musical journey. This hands-on leadership role allows students to develop a deeper understanding of the critical role of clear and effective leadership in music-making. By stepping onto the podium, students gain firsthand experience in shaping musical interpretation, maintaining tempo and communicating with their peers in a meaningful way.
In recent years, I have incorporated an additional layer of mentorship by involving my current intern in this process. While the student conductor leads the rehearsal, the intern observes alongside me, allowing for a dual learning experience. This approach provides valuable leadership training for the student and also enhances the intern’s ability to analyze and guide ensemble direction. By fostering this multi-level mentorship structure, both students and aspiring educators gain essential skills, reinforcing the importance of leadership development within the music program.
Key Area 6: Student Leadership Council
Create a student leadership council within your music program. To further enhance their growth, encourage students to set personal leadership goals and regularly reflect on their progress. This can be facilitated through structured activities like journaling, guided group discussions or periodic self-assessments focused on leadership qualities they are developing. By fostering a culture of reflection and continuous improvement, students gain a deeper understanding of their strengths, areas for growth and the impact of effective leadership within the ensemble.
_____________________________________
In each of these activities, it is essential for you as the music educator to take an active and intentional role. Providing guidance and mentorship ensures the success of these initiatives and creates opportunities for meaningful discussions with students who may be considering a future in music education. The most influential recruiters for the next generation of music educators are the teachers already in the classroom, inspiring students daily through their passion and dedication. It is our collective responsibility to advocate for and nurture aspiring music educators by fostering an environment that encourages students to explore teaching as a rewarding and impactful career path.
Guitarists, like keyboardists (and players of most instruments), can benefit from some knowledge of music theory. In this posting, we’ll look at the basic building blocks of music — notes, scales and key signatures — and describe how they are constructed using two very important tools: The Circle of Fifths (sometimes called the “Cycle of Fifths”) and the Circle of Fourths.
Ready to dive in? Okay, here we go …
Notes and Key Signatures
The white keys on a piano keyboard represent the seven natural notes in music. (By “natural,” we mean notes that are neither sharp nor flat — see below.) Those seven natural tones form the C Major Scale: C – D – E – F – G – A – B.
The black keys represent the in-between “accidental” notes — the sharps and flats. Sharps are a semitone higher than the note to the left, while flats are a semitone lower than the note to the right. For example, the black key between C and D is C sharp (indicated by the symbol “#”), and at the same time, is D flat (indicated by the symbol “♭”). Sharps are used when the pitches are ascending, and flats are used when the pitches are descending.
The key signature indicates which notes throughout a written piece of music are to be played as sharps or flats. This allows composers to write music notation without having to use individual sharps or flats on every accidental note.
Formal music notation includes a key signatureto inform us of the key that a piece of music is to be played in. This is done by placing sharp or flat symbols directly after the treble and bass clef symbol. As shown in the illustration below, no sharp or flat symbols on the stave indicates the key signature of C major; one sharp symbol indicates the key of G major; two sharp symbols indicate the key of D major, etc. Similarly, one flat symbol indicates the key of F major; two flat symbols indicate the key of B♭ major, etc.
The Major Scale Interval Formula
The C Major scale adheres to an interval formula that allows us to move that scale shape on the guitar into other keys. “Interval” refers to the distance in pitch between two tones. For example, a whole-tone is two frets on the guitar (a whole step), whereas a semi-tone distance is only one fret (a half-step).
In order to better understand the Major scale interval formula let’s start by laying out the C Major scale in a linear fashion. Between each note (on the line above) I have placed a W or an H. The W represents a whole-tone (two fret) distance between the two pitches, while the H represents a half-tone (one fret) distance:
W W H W W W H
C D E F G A B C
As you can see, there is a half-tone distance of one fret between the third- and fourth-degree notes of E and F, and between the seventh- and eighth-degree notes of B and C. All the other interval distances are a whole-tone (two frets).
Once you understand this formula, you can start moving the C major scale into other keys. Here’s how:
Creating the Sharp Keys
The seven sharp keys can be easily built by simply shifting the starting point. For example, to create the key of G, simply start the C Major scale on the fifth degree (G) and use those notes to form the G Major Scale (with one caveat — see below), like this:
W W H W W W H
C D E F G A B C
W W H W W W W
G A B C D E F G
As you can see, there is a whole-tone interval between F and G, but the Major scale formula requires a half-tone interval. So in order to meet the pitch requirements, we need to raise the pitch of the F note to an F#:
W W H W W W H
C D E F G A B C
W W H W W W H
G A B C D E F# G
We can now see that the key of G major contains one sharpened tone F#, which is why you’ll find a single sharp symbol in the clef when musically notated.
You can continue the process to create the next sharp key by starting the G major scale on its fifth degree, the note D:
W W H W W W H
C D E F G A B C
W W H W W W H
G A B C D E F# G
W W H W W W H
D E F# G A B C# D
Once again, you have to raise the pitch of the C note to C# in order to retain the Major scale interval formula.
Similarly, you can build the next sharp key by starting on the fifth degree of D, the note A, to form the key of A major:
W W H W W W H
G A B C D E F# G
W W H W W W H
D E F# G A B C# D
W W H W W W H
A B C# D E F# G# A
As you can see, the C# and F# are retained from the key of D, while the G is sharpened to G# in order to retain the Major scale formula.
Keep going in the same way to create the other four sharp keys:
Just as there are seven sharp keys, there are seven flat keys. Here, we start each new key from the fourth degree of the previous scale, like this:
W W H W W W H
C D E F G A B C
W W H W W W H
F G A B♭ C D E F
This time, you have to flatten the B note to B♭ by a half-step to adhere to the Major scale interval formula. The resulting key of F therefore has one flat, B♭, which will be indicated by a single flat symbol in the stave when musically notated.
Now let’s create the next flat key:
W W H W W W H
C D E F G A B C
W W H W W W H
F G A B♭ C D E F
W W H W W W H
B♭ C D E♭ F G A B♭
This B♭ major scale is created by starting the F major scale on the fourth degree. The E needs to be lowered in pitch by a semi-tone to E♭ in order to follow the Major scale interval formula.
Simply continue the process to create the remaining five flat keys (E♭, A♭, D♭, G♭, C♭):
When these key shifts are mapped out in a circular fashion instead, they form what are known as the Circle of Fifths and the Circle of Fourths, which looks like this:
As you can see, the sharp keys (those keys that have one or more sharp symbols in the clef) are on the right side, while the flat keys (those that have one or more flat symbols) are on the left side. The sharp keys are created by moving in fifths clockwise from C natural, while the flat keys are created by moving in fourths counterclockwise from C natural.
Inside the circle are shown the relative minor keys —those that share the same key signature with their relative major keys.
If you’re wondering how we create 15 keys, when there are only 12 notes, that’s because three of the key signatures are enharmonic. In those keys (shown at the bottom of the circle), the musical pitches are the same, but they’ve been designated another name within the sharp or flat key signatures. The three enharmonic keys are:
C# / D♭
F# / G♭
B / C♭
The Video
This video features a solo I’m playing on a Yamaha Revstar RSE20. The bluesy, fat tone is coming from the humbucking neck pickup, processed slightly through a Line 6 Helix.
I’m playing the solo in the key of E major (which has four sharps) but using a lot of E major/C# minor pentatonic scale lines. Pentatonic scales are derived from the major scale, so they will also adhere to the key signature designations of the four sharps even though they only contain five notes. (D# is not present in the E major pentatonic scale, which consists of the notes E – F# – G# – B – C#.
By the way, if you’re curious as to why the solo sounds so laid back and relaxed, it’s because every one of the phrases starts on the downbeat of two. This leaves a nice amount of space between phrases. Try this approach next time you practice — I think you’ll like it.
The Guitar
Yamaha Revstar RSE20.
The Yamaha RSE20 electric guitar combines ultimate playability with world-class tonality. The jumbo frets, satin-finished neck and 24 3/4″ scale length make this guitar so easy to play! Fast lines are smooth, bending is slick, and the intonation is spot-on.
The two Alnico-V humbucking pickups are perfect for rock, pop and blues. The three main pickup selections can be further enhanced by pulling up on the tone control. This engages what Yamaha calls the “dry switch.” Think of this as a bass filter that reduces low frequencies to produce a cleaner, brighter version of the full humbucking sound.
This guitar is rock solid for travel too. Put an RSE20 in a gig bag along with an HX Stomp modeler, and you have a travel rig that weighs in at under 10 lbs.
The Wrap-Up
If you thought music theory wasn’t for you, I hope this posting helped to change your mind. The Circle of Fifths may seem a little intimidating at first, but it actually provides a very easy way to create the seven sharp keys used in music, just as the Circle of Fourths makes it easy to create the seven flat keys.
The bottom line is that the more knowledge you accumulate within the language of music, the broader your vocabulary becomes on guitar … or any musical instrument, for that matter.
A few short years ago, school music programs across the country faced a mountain of unprecedented challenges caused by the COVID-19 pandemic. Performances were cancelled and classes were converted to virtual formats. Detailed plans for leadership auditions, end-of-year banquets and summer training camps were thrown out the window. Students and teachers were abruptly separated from music-making environments, and the magic of live music creation disappeared. Anticipating the attrition rates on the horizon, music educators around the world waited with bated breath for in-person instruction to become safe once again.
School districts nationwide had varying responses to COVID-19. I was grateful for the opportunity to resume in-person instruction relatively quickly here in Forney, Texas. The fall 2020 semester looked so different, but it provided a much-needed sense of normalcy as we welcomed many students back into the band hall. While several families made the difficult, yet understandable, choice to remain virtual, a majority of our students couldn’t wait to be back in school — in person — with their friends. With enhanced sanitization procedures, drill-dots strategically placed six feet apart, and hundreds of customized FB (Forney Band) neck-gaiters, the Forney High School Marching Band showed resilience through our appropriately titled 2020 production, “Rise.”
Members of the Forney High School Percussion section perform their 2020 show “Rise” at Memorial Stadium in Mesquite, Texas, in November 2020.
As the anomalous and surprisingly successful 2020 marching season came to a close, I was dismayed with the outlook of the upcoming spring semester, which lacked substantial performance opportunities for our concert band students. I was particularly worried that our youngest students — already navigating complicated and confusing lives as 7th and 8th graders — would fall out of love with the extracurricular activity that they had committed to mere months before the pandemic uprooted their lives. Understanding how crucial these formative years are to the overall development of student musicians, I became skeptical when picturing the uncertain trajectory of our student’s upcoming musical journey. With their future in mind, I frantically brainstormed new ways to provide meaningful musical experiences for middle schoolers in the months ahead.
Outreach to Other Music Educators
Luckily, the music education scene in North Texas is robust with outstanding school music programs and a seemingly endless amount of resources, including educators who are more than willing to share their expertise. Since moving to the area after graduating from college in 2017, I knew that several percussion educators had established percussion clubs at their schools. Through my research, I found Jeff Ausdemore, the Director of Percussion at Colleyville Heritage High School from 2003-2014. He is most often credited for the inception of the percussion club concept as it exists today.
“The Grapevine-Colleyville ISD Percussion Club was founded in 2004 and served all the percussion students from grades 6 through 12 in the district,” Ausdemore says with excitement. “The club’s primary objectives were to foster a deeper love and appreciation for the percussive arts; strengthen student relationships across the district; and provide opportunities for clinicians, mentorship and guest artists to help inspire our young musicians each and every week throughout the year.”
Intrigued by Ausdemore’s format, I continued my quest to come up with a solution that best fit the needs of our middle school students. One of our strongest program attributes at the high school level was our participation in the indoor drumline activity each spring. Commonly referred to as “percussion theater,” indoor drumline productions feature compelling music, movement and an overarching show theme that guides the design of uniforms, props and imagery on a large digitally printed vinyl tarp, on which students perform drill and choreography.
“Indoor Drumline is a great way for students to progress in their mastery of marching and keyboard percussion in the spring semester,” says Shannon Jacobs, the Percussion Specialist at Forney High School since 2006. “Students are separated by ability-based band classes during the day in the spring semester, so they look forward to coming together as a full percussion section before and after school each week to work toward a common goal.”
The Forney High School Indoor Drumline performs their 2025 show “Hypnotica” at the NTCA Percussion/Winds State Championships in Forney, Texas, in April 2025.
Laying the Groundwork
The more I reflected on the importance of indoor drumline in our high school program, I felt more confident that I had found the answer to my initial question. With a renewed sense of determination, I began to lay the groundwork for a new ensemble for our middle school percussion students: the Forney ISD Middle School Indoor Drumline.
Like any extracurricular activity during the COVID-era, securing permission to rehearse and travel with students in person came with some additional challenges. Thankfully, our middle school band directors and administrators were excited by the possibility of the new ensemble, and for the opportunities it would provide our students. As long as we agreed to follow all current health guidelines, we had their full support. Additionally, we intentionally created a budget for the program that kept costs as low as possible by utilizing previously used vinyl tarps, arranging classical music already in the public domain, and sourcing uniforms from Amazon.
The structure of the FISD MS Indoor Drumline mirrored the program that existed at Forney High School, which consisted of a marching percussion section (known as the “battery”) and a standstill percussion section (known as the “front ensemble”). I arranged the music for the front ensemble and enlisted Mr. Jacobs, the high school Percussion Specialist, to write the battery music and the drill.
We rehearsed one night a week after school for two and a half hours, and attended four Saturday contests hosted by the North Texas Colorguard Association (NTCA), the local circuit governing all indoor percussion units in North Texas, which currently consists of 40 performing ensembles in various classifications. In January 2021, we hit the ground running with the first Forney ISD Middle School Indoor Drumline production, entitled “The Way of the Warrior.”
Unforeseen Benefits
While my initial motivation to start the FISD MS Indoor Drumline was to address the lack of performance opportunities during the pandemic, several unforeseen benefits revealed themselves to us as we began our journey. Common competition-day tasks like loading the equipment truck safely and efficiently, getting on the bus, warming up outside and behaving as an audience member following a performance were all things I didn’t realize would contribute to the positive experience our middle schoolers were receiving through their participation in the ensemble. In the years that followed, I noticed that because of these seemingly inconsequential experiences, our students were arriving in their first year as a high school band member with a heightened sense of maturity and awareness.
However, the most valuable of these unforeseen benefits was the involvement of our high school students as our volunteer instructional staff for the middle school ensemble. Each week, between six to eight eager high school percussion students attended the middle school indoor rehearsals. They assisted with the setup for rehearsal, the warm-up routine, teaching music and drill to students, and even leading small-group sectionals.
The inaugural Forney ISD Middle School Drumline performs their show “The Way of the Warrior” at an NTCA competition in Mansfield, Texas, in March 2021.
Successfully Bridge the Gap
In the coming weeks and months as we progressed through our inaugural season, I began to realize that we had created something truly magical. During our rehearsals, I noticed our high schoolers gaining confidence in the way they were communicating information to our middle schoolers.
Bella Esquivel, a senior percussionist and Front Ensemble Section Leader at Forney High School, was a member of the middle school drumline and is now one of the high school instructors. “As an original member of the Forney ISD MS Indoor Drumline, serving as an instructor for the ensemble has given me a unique perspective on the challenges faced by music teachers,” she says. “Realizing my ability to help younger players improve musically has instilled a confidence in me that I will take into the next phases of my life. It has been extremely rewarding to see the middle school students I’ve mentored continue on in band at the high school level, where we continue to refine our craft as teammates.”
In conjunction with our high school instructors’ improved teaching abilities, there is a growing sense of trust and admiration displayed by our middle school students toward their high school counterparts. This trust undoubtedly helped pave the way for many of them to continue in band as high schoolers. While most freshmen are nervous about being accepted in a new environment, our freshmen percussionists are welcomed into the Forney High School Band family with open arms by their former instructors-turned-classmates. Today, the Forney ISD Middle School Indoor Drumline has grown to almost 30 middle school performers and 15 volunteer high school instructors.
I understand that starting a middle school indoor drumline may not be the best fit for every program, but for music educators looking for a way to bridge the gap between their middle school and high school programs, I hope this article will inspire you to get creative in how you achieve your goal.
English language learners often face challenges in the classroom, particularly in subject areas like music that rely heavily on verbal communication and language comprehension. According to the U.S. Department of Education approximately 77% of English language learners speak Spanish, but nationally there are over 400 different languages spoken by students in schools across America.
I teach at Heritage Middle School in Painesville, Ohio, which has a vibrant Latino community. At our school, 54% of our students self-identify as Hispanic/Latino, and through our state tests, just over 25% of the school population are classified as English language learners. Heritage is a Title I School, so all students receive free breakfasts and lunches. Our school population is drastically different from the predominantly white middle-class neighbors in the rest of our county, which provides unique opportunities and challenges when it comes to our bands. In the music classroom at Heritage Middle School, teachers must be aware of the needs of English language learners and implement strategies to support their learning and participation.
Challenges
English language learners who are immigrants, the children of immigrants or migrants may face a number of challenges that can affect their ability to learn in their new environment. These challenges may include cultural differences, past trauma, limited language proficiency, economic challenges and social isolation. For example, students who are new to the English language may struggle to understand and express themselves in their new environment, which is an obvious barrier to learning. Additionally, immigrant and migrant families may have limited financial resources, which can affect their ability to afford educational materials and resources, and some students help care for younger siblings at home.
A 7th grader who had just moved to Painesville from Mexico wanted to join band but had limited English proficiency and was classified as “beginner” by our English Language Development (ELD) Department. The interesting thing about teaching kids how to read music is that they are all learning this new language. Learning music notation together equalizes students regardless of their language fluency.
Due to the socio-economic demographics of our district, we provide instruments to about 85% to 93% of our students every year. Some students rent or purchase instruments as they become more dedicated, but the vast majority use school-owned instruments. We are fortunate that as our band program has grown, our administration has been able to help increase our inventory so that we do not need to turn away students who want to play. Instrument availability and class size are all variables, and sometimes students do not always get assigned their first instrument choice. Over the past few years, we have successfully earned local grants from our chamber of commerce, local nonprofits and our alumni association.
When planning after-school rehearsals, concerts and other activities, it is important to make allowances for students living in multigenerational homes who may need to miss or come late to events. Many of my students have caretakers who work second shifts, and they need as much advanced notice as possible to arrange for after-school events. Many students struggle with punctuality, especially if they rely on extended family for rides. If they miss the pre-concert warm-up but show up to perform, I happily greet them to make sure they understand that I am happy that they showed up. For our most recent concert in December, I called a few parents to help them arrange a carpool to help get students to the performance. Educators must be aware of these challenges and provide support and accommodations to ensure equity in access to all opportunities offered.
Translating Materials
Title VI of the Civil Rights Act of 1964 guarantees parents and guardians the right to receive information about a child’s education in a language that they can understand, and the 2015 Every Student Succeeds Act (ESSA) also requires states and local education agencies to provide language assistance to parents who are limited English proficient, including the provision of translated materials and interpretation services.
To meet this requirement, many schools and education agencies provide translated materials, such as handouts, school newsletters and other information, in a variety of languages. These materials are typically translated by trained professionals or through the use of translation software. Because we have such a large bilingual population, every building in our district has at least one bilingual secretary in the main office. Each grade level in the middle school also has a translator who assists with translating teachers’ print materials and instructions posted to Google Classroom. When these resources are unavailable, Google Translate or ChatGTP do an excellent job in translating music programs, program notes and letters home. Even with minor grammatical or dialectal errors, the information will be understood.
However, these programs cannot translate music-specific vocabulary like key signature, 4/4 time, whole step, etc. In your instructional planning, your goal should be to teach grade-level appropriate content with supports in your students’ native language(s). For “beginners” and “long-term learners,” I use a reference sheet from the Louisiana Music Educators Association. Use content language that students may know (sometimes their native language helps them learn and understand) and English at the same time. At my middle school band concert I have students help write, translate and read the program notes to introduce each song. This ensures that parents who have limited English proficiency can understand what the songs are about and hear updates about our band program during performances. This demonstrates an interest in English language learners’ native cultures and develops a mutual respect for their home languages and commitment to their growth in class.
Hands-On and Language-Rich Activities
One of the most effective ways to support English language learners in the music classroom is to use visual aids and hands-on activities. For example, using graphic notation, physical gestures and manipulatives can help students understand and internalize musical concepts without relying solely on verbal explanations. My word wall of common music notation vocabulary includes color grouped subcategories and images that help to explain or define the words when possible. In band class, I pair a “novice” or “beginner” ELL with a bilingual student who is confident on their instrument to help translate and model. I play instruments during band classes daily, often switching between clarinet, sax, trumpet or baritone. When language is a barrier to instruction, modeling is often most effective. Luckily, music class is often a hand-on activity where teachers can demonstrate new skills to their students.
It can also be helpful to use bilingual dictionaries and to incorporate authentic materials, such as music from the students’ native countries, into lessons. There are many free resources available online and on website such a Teachers Pay Teachers. Here are some of the ones that I have found helpful in my classroom:
Another important consideration is the use of language-rich activities that engage students and help them develop their language skills. This can include movement activities, singing and listening games that involve verbal communication and collaboration. It is also helpful to provide students with the opportunity to work with lyrics in the target language, as this can help them develop their vocabulary and comprehension skills.
All students, not just English language learners, will make language errors. When working to develop fluency, offer guidance and correction in a non-judgmental way without interrupting their flow of speech. This may involve repeating the correct form of the word or phrase, modeling the correct pronunciation in your immediate response to the student. When students are struggling to find the right word or phrase, be patient and give extra processing time instead of immediately offering a suggested word.
In addition to these strategies, be mindful of the language demands of the music curriculum and provide support as needed. This may involve breaking down complex tasks into smaller steps, providing additional language scaffolding or working with an ELD (English Language Development) staff member in your district to modify the curriculum or specific activities and assignments.
Language Proficiency Levels
Working with an ELD teacher in your district can help you develop strategies that best fit the demographic of your classes. In many ELD Programs, English language learners are assessed by their ELD teacher using local- or state-approved proficiency assessments to determine what level and accommodations are appropriate for the student. While there are many ways to measure English language proficiency in English language learners that vary from state to state, there is a widely accepted model called the Interagency Language Roundtable (ILR) scale. The ILR scale consists of five levels of proficiency:
Novice: At this level, learners have a limited ability to understand and use isolated words and phrases in very familiar contexts.
Intermediate: Learners at this level can understand and use basic phrases and sentences, and can communicate in simple and routine tasks requiring a simple and direct exchange of information.
Advanced: At this level, learners have a general mastery of the language and can communicate effectively in most standard social and professional situations.
Superior: Learners at this level have a full mastery of the language and can use it with a high level of fluency, accuracy and appropriateness in any situation.
Distinguished: This is the highest level of proficiency and is achieved by only a very small percentage of learners. At this level, learners have a native-like command of the language and can use it with complete fluency, accuracy and appropriateness.
In my district, students are classified as “beginners” or “newcomers,” “intermediate,” “advanced” or as ‘long-term learners.” Beginners or newcomers have pre-functional or limited English skills. They are often in self-contained ELD classes and will receive assignments in English and their native language. When possible, they receive help on assignments from a bilingual paraprofessional.
Intermediate and advanced English language learners receive ELA instruction in a co-serve setting with a mainstream ELA teacher and an ELD teacher.
Long-term learners are students who have been learning English for an extended period of time, but they have not yet reached a high level of proficiency in the language. These students may be struggling to make progress in learning English and may be falling behind their peers academically. There are a variety of factors that can contribute to this, including limited opportunities to use and practice the language, lack of support, learning difficulties, and social and emotional challenges. Educators must identify long-term learners in order to provide appropriate support and interventions to help them succeed. Long-term learners may receive specialized ELA/ELD instruction in a small group setting to provide them additional intensive support to improve their reading, writing, speaking and listening proficiencies.
Regardless of how English proficiency levels are defined, they are not necessarily tied to specific grades or age groups, as a student’s proficiency level will change over time as they continue to learn and practice the target language.
Incorporate Cognates
To further support English language learners in the music classroom, it can be helpful to incorporate cognates — words that sound similar in two languages — into lesson plans and materials. Many Italian musical terms share Latin root words with Spanish, which many of my students already know. For example, tempo can be related to tiempo, which means time. Find little tricks that help to build the connections for your students.
Many western musical instrument names are cognates in many languages as well. Here is certainly not an exhaustive list of English cognates in Spanish but some common musical terms include:
melody/melodía
harmony/armonía
orchestra/orquesta
composer/compositor
piano/piano
music/música
band/banda
chord/acorde
chorus/coro
concert/concierto
Director/conductor or conductora, director or directora) * Maestro is usually used to mean teachers of any subject.
guitar/guitarra
instrument/instrumento
percussion/percusión
symphony/sinfonía
tempo/tiempo
violin/violín
chromatic/chromatico
note/nota
trio/trio
duo (duet)/duo
echo/eco
Incorporating cognates into lesson materials can help English language learners make connections between their native language and the target language. This can also help to build their vocabulary and content area comprehension.
Create a Welcoming Environment
It is essential to create a welcoming and inclusive classroom environment for English language learners. This includes using positive reinforcement, providing individualized support, and encouraging students to share their cultural backgrounds and experiences through music. Supporting English language learners in the music classroom requires a multifaceted approach that includes the use of visual aids and hands-on activities, language-rich activities and modifications to the curriculum as needed. When programming repertoire for concerts or any songs you use in your classroom, be sure to include materials from your students’ native cultures. According to Geneva Gay’s extensive writings, culturally responsive teaching fosters a sense of community in the classroom, which, in turn, can increase student engagement with the content. By incorporating cognates and visual definitions to reinforce vocabulary, you can effectively support students’ language acquisition while teaching grade-level content and skills.
Educational research has shown that best practices for English language learners are best practices for all. Lev Vygotzgy’s Zone of Proximal Development demonstrates that scaffolding strategies designed for ELL also help struggling native readers. The Center of Applied Special Technology (CAST) developed Universal Design for Learning (UDL) which demonstrates that offering content in “multiple means of representation” benefits all students, not only ELLs. This can be accomplished by incorporating visuals in your word walls, modeling good embouchure or performance techniques, or any other instructional method that provides for a variety of learning types. A 2011 study by Calderón, Slavin and Sánchez showed that explicitly offering vocabulary instruction benefits ELL and native English speakers alike by improving reading comprehension. These may seem like strategies for lessons in an ELA class but students must have the language to describe and interpret the music they are playing in band or any other music class. By implementing these strategies, music teachers can create an environment in which English language learners are able to fully participate and succeed in the music classroom.
Several years ago at the Bands of America Summer Camp (formerly Music for All Summer Symposium), Educational Psychologist Fran Kick had an idea to engage with the leadership weekend attendees — ask an anonymous question about anything that you have always wanted to ask your band director. Since then, leadership weekend attendees are given this same opportunity.
Music Educator Jerell Horton
Some students ask very specific questions that only their band directors can answer. However, most attendees ask questions that are relatable to any student. These anonymous questions are shared with a partner and rated. This process is repeated several more times. Questions with the highest ratings agreed upon by the campers are then organized and answered by the leadership weekend clinicians, who draw from their varied experiences as teachers, facilitators and even color guard choreographers.
Here are 10 memorable student questions and our answers.
Q1: How do I let go of the fear of not being good enough?
As a young band director, this question frustrated me. When I worked at my first school, I remember telling the seasoned head band director, “I absolutely HATE being a YOUNG band director.”
Here’s what I do. I actually try NOT to think of the big picture. If I think about all the things that I must do for a performance or a Midwest recording or a BOA Regional, my head would explode. Instead, I look at things as simply following procedure. For me, this means to first set a desired outcome: How, what, where, when do we want to play? Next, set as specific a timeline as possible — day of a show, one day out, one week out, two weeks out, one month out, etc. This timeline offers digestible chunks that I can achieve in very fixed sets of time. Finally, I put all this in one place, such as a document or a calendar, and I share it with everyone involved so we can hold each other accountable.
Once I break things down, I don’t feel lacking in my abilities. This process refocuses everyone’s efforts into how WE can achieve great music-making. (answered by Bobby Lambert)
Q2: How do I handle the intense male culture as a female leader?
As a man, I can’t imagine what this truly feels like, but I can understand how prevalent and powerful it can be. I am the father of two daughters, and I already see the toxic culture that permeates gender stereotypes. I try to cooperate completely with my female Wando High School Band counterpart, Lanie Radecke. We are both band directors (along with Dr. Andrew Blair), and we each have opinions and desires that weigh equally into the equation. Also, we each have our specialities, but we aren’t the only one, so there is redundancy. For example, I NEVER run a music rehearsal with the full marching band. That is always Lanie Radecke. If I want to change something, I ask her. Awareness and sincere kindness, not placation, are key. (Bobby Lambert)
Q3: How do you gain respect from section leaders/friends when I become a leader?
Communicate honestly and with as little emotion as possible. We often take every action from someone else as being calculated, when in actuality, that is not the case. Ask questions rather than give commands. Only ask someone to take on a task that you are willing to do yourself. (Bobby Lambert)
Q4: What is the best way to handle not having the best relationship with the other drum major?
See above. We don’t have to like one another to respect one another. We must be able to work together. If you can’t, then you should step down. Talk with your director as they often have the most insight into BOTH your personalities. However, you must be willing to take their criticism. In the end, if you truly care about the band, you can let go of some of the idiosyncrasies of your partner. (Bobby Lambert)
Q5: What do you do when you trust your band director with sensitive information, and they didn’t respond to it the way you thought they should?
First, ask yourself why your director would do that, and spend time in that place. If you can’t come up with an answer, go back to your director with kindness and sincerity. Try to see it from their point of view. If you are still struggling, go to another adult, namely a staff member or parent, to discuss. Do NOT involve other students because this is a sure way for your sensitive information to spread. That situation is a difficult one, but most solid resolutions are. (Jerell Horton)
Q6: How can I continue to participate in music if I don’t see it as a career?
Music is about life and experience. No one learns to be a band director or professional musician in high school or even during their undergraduate years. Through music, you have access to deepen the human experience. Music is a multifaceted experience — it is intellectual, it is physical, it is psychological and it is spiritual. No other activity brings that wealth of knowledge and experience to the table. This is why so many adults who are non-professional musicians still play in community groups and volunteer ensembles. Music is life and life is music. The longer you participate, the most connected you are to life. (Bobby Lambert and Jerell Horton)
Q7: I am facing a director change at my school. What role can I play in the transition?
Change is a part of life. The band room is a safe space, and let’s be honest, no one likes when change happens in our most comfortable space. Keep a couple of things in mind. First and foremost, take the time to get to know your new director and encourage your peers to do the same. Rapport is such an important element in the development of strong culture and the fostering of group achievement. It’s much easier to do the hard work with people who we really know.
Second, who knows the most information concerning your program? The people who have spent the most time in it — you! It might be a good idea to collect information from the leadership team that may be helpful to your new director, such as traditions and processes that are unique to your band. If your new director has a better perspective of the day-to-day dealings of the band program, the transition will be less stressful for everyone. The leadership team could present a list of items to your new director or schedule a meeting to discuss these things. Remember, your job is to relay information NOT to tell your director how to do their job. Any opportunity to establish a we/us environment will yield a great result. (Jerell Horton)
Q8: How do we combat older students/members who carry on with negative attitudes or harsh leadership tactics?
When dealing with negative attitudes, members or behaviors, I remind my students, “if you give an actor a stage, they will put on a show.” Most people will repeat behaviors that are allowed, acknowledged or celebrated. It’s hard to manage the social atmosphere of our music programs, but it simply comes down to deciding what you will and won’t accept.
Next, the leadership team must make the same decision. Once everyone is on the same page then the hard work begins. If you do not engage or allow space for negative talk, behavior or inappropriate leadership, the behavior will lessen and eventually end. This is a process that takes quite a bit of time, so once you start, do NOT abandon the process. You do not have to be ugly or unkind, just choose not to particip tate. You can even create a code language to help other student leaders stop buying tickets to the “negative” show. One of my favorites is “we don’t do that here.” (Jerell Horton)
Q9: How can I deal with the awkwardness that comes from working with people who auditioned for the leadership position that I currently have?
Let’s be honest. Everyone wants to be seen, heard and accepted. When it comes to choosing leaders, it is usually a difficult decision. Understand that your band director took the time to choose the proper skill set for the job. This doesn’t mean that the chosen person is the ultimate supreme ruler. It does mean that the chosen leader has now been tasked with making decisions that will help advance the goals of your school, band program and your band director.
I believe in a concept that I call “Lego leadership.” Everyone has a unique skill set that when shared with the people on the left and right, the entire group benefits. We are not all the same, and this fact is the strength of our groups. Keep this concept in mind, and take the time to recognize and acknowledge the great skill sets and beautiful brains that surround you. Instead of you (the leader) always displaying or evaluating a skill, allow those people who may have auditioned for your job to help in some way. Genuinely use these opportunities to acknowledge what your colleagues bring to the table. For example, if that same person has a great forward march and you’re working on that skill, let that person be the model or better yet allow them to lead the session. In this way, you are fostering a collaborative environment that can yield great success. (Jerell Horton)
Q10: As the Drum Major (or any student leader), how do I handle disagreements that may arise between other leaders?
One piece of advice that I share with my leaders is that you can always find a way to have difficult conversations filled with respect. The key to navigating these conversations is to first establish a neutral time and space. The rehearsal environment is not the best place to handle difficult conversations. It’s very important to temper emotions as much as possible in order to lessen the probability that someone will say or do something that is out of character.
Having good rapport with the leadership team will make difficult conversations easier to navigate, although that rapport does not make the problems go away. It may be a good idea to establish protocols for these types of conversations at the beginning of your season or during leadership training so that you will not have to “build the plane while flying.” Remember to include in your protocol the importance of mutual respect in conversation. There may be times when you may have to agree to disagree, but you must still work together for the good of the program. If you find that these strategies do not work, it may be necessary to involve your band director or appropriate staff member who may act as a mediator. (Jerell Horton)
As you can see, most of these questions deal with how students perceive themselves and others, and how they can uncover their leadership potential. We encourage teachers to engage with students in conversations that allow students to communicate their fears, curiosities about leadership, and questions concerning culture. We know that our students will not all be professional musicians but they will all be professional people, and the band room is fertile ground to grow and nurture tomorrow’s leaders. For more information about the Bands of America Summer Camp Leadership Weekend please visit camp.musicforall.org.
April 22, 2025 marked the grand opening of the new centerpiece of the Yamaha Corporation of America headquarters in Buena Park, California — a unique space for employees, artists and customers to come together and make themselves heard.
A Welcoming Experience
Created for those who are passionate about expressing themselves through music and sound, the new building was designed by Gensler — one of the most innovative architecture companies in the world. It includes a two-story open-concept collaboration area as well as indoor and outdoor cafés surrounded by landscaped terraces.
The two-story open-concept collaboration area.
The indoor café.
The outdoor café.
Visitors to the new space enjoy a welcoming experience, from the new tuning fork-adorned arrival driveway to prominent signage that makes it easy and intuitive to find their way around.
A tuning fork-adorned arrival driveway greets visitors.
Inspiration is provided by the select world-renowned Yamaha musical instruments and audio tools that are artfully displayed throughout the lobby.
Yamaha instruments are artfully displayed throughout the lobby.
Unique Collaboration with Yamaha Design Laboratory
The lobby also features a unique art piece created in collaboration with Yamaha Design Laboratory at the Japan headquarters. Its stunning design is themed around the “exploded” view of a musical instrument — in this case, the Yamaha FGX3. This acoustic-electric guitar features the advanced Yamaha Atmosfeel™ pickup system, which houses a built-in electronic circuit board. By revealing the inner workings of the instrument, the art piece offers a new perspective on the hidden beauty and technology behind the sound.
The lobby also features a unique art piece created in collaboration with Yamaha Design Laboratory.
A close-up view of the art piece.
A Focus on Sustainability and Employee Well-Being
The entire Yamaha campus is solar-ready, with over 14,000 square feet of space for solar photovoltaics, reflecting our dedication to renewable energy. We’ve planted over 150 new trees and integrated biophilic experiences, bringing nature into the workplace to boost creativity and reduce stress. With 19 electric car charging stations, we support our employees’ eco-friendly commuting choices.
Bringing nature into the workplace to boost creativity and reduce stress.
Car charging stations support our employees’ eco-friendly commuting choices.
A quarter-mile walking path is also provided for our employees, promoting physical activity and relaxation. In addition, water conservation is a priority, with low-flow fixtures installed throughout the campus. We’ve also recycled over 10,000 yards of concrete as part of our ongoing commitment to reducing waste.
For over 100 years, Yamaha has been offering ingenious solutions to the community of musicians and music lovers. The new Yamaha campus is all about making both visitors and employees feel like they belong. After all, isn’t that what music is all about?
I speak to various school districts and at a number of MEAs, and I often end my presentations with what I call the “hard realities of teaching.” Most of my points usually resonate with other music teachers and even administrators. Of course, there is also a positive flipside to each of these hard realities. After all, we must work with what we have!
See if you can relate to any of these teaching situations.
1. Our Background Can’t Be Used as an Excuse for Progress and Success
Flipside: We have the same capacity to learn and grow, just like everyone else.
It might take longer, but the sooner we stop using school status, budget or student demographics as an excuse, the sooner we can get to work. Yes, some things will be harder or take more time, but it’s just that — hard, not impossible. I teach at a Title I school. I could use every excuse possible or I could do my best to work within my situation.
One of the best assets in music education is the ability to approach challenges with optimism. If we don’t tell our students something is hard, they won’t think it is. We just get it done.
2. No One Will Care as Much as You Do About Where Your Students Are Coming From
Flipside: Once we remove external validation seeking, we can focus on what really matters.
This is a tough one. We either want to protect our students or make everyone else understand how great they are. But if your goal is to prove yourself — to your admin, other teachers, parents or on social media — you’ll always lose, even if you win. It won’t lead to the same kind of fulfillment that comes from having a great rehearsal or achieving that aha moment.
3. A Goal that Your Ensemble Knows it Can Easily Achieve is Not a Good Goal
Flipside: You’ll never lose going after an appropriate challenge.
Give your students goals that push them, such as a new level of repertoire or a public performance that stretches their skills. Let them feel the weight — and the pride — of meeting these goals. If there isn’t enough of a challenge, students will become bored or think that they aren’t capable of more. If it’s too difficult, then we risk discouraging students, so try just slightly out of reach.
4. Your Students Will Test You to See If You’re the Real Deal
Flipside: You are the real deal, and passing these tests will benefit them.
Keep repeating to yourself:
It’s not personal.
It’s not personal.
It is NOT personal.
That kid who enters your room every single day with their hood up and chewing gum? They’re not resisting you — they’re searching for consistency, safety and leadership.
Be calm, cool and collected. Have a script of what you’re going to say so you don’t have to react emotionally. For some kids, it may take months — or even years.
5. You Won’t Love Every Moment in the Classroom — and the Kids Will Know It
Flipside: Groups struggle, but they work together.
This happens almost every year, right before spring break. “All of you — I really enjoy you, and I enjoy this job. But I think we need some time apart,” I say through exaggerated gritted teeth.
The group gets it — families, friends and groups can fight, but they often come back together when it matters.
Model healthy emotional regulation by being honest, calm and in the moment. Help students realize that we don’t always have to get along, but we do have to be respectful and continue working toward our goals.
6. People Don’t Always Know That You Actually Care
Flipside: Find individual ways to show appreciation and gratitude.
“Hi everyone — just a reminder: You started band or orchestra late because you just moved here, you don’t have a great support system at home, and our school is in a sketchy neighborhood. OK — let’s start at measure 17!”
Students don’t need daily reminders of what they lack — they need reminders of their value.
By offering authentic musical experiences, we elevate them to create something greater than themselves. Focus on the student and their potential. Show, tell and don’t assume.
7. People Have Two Responses to Complaining: I Don’t Care or Glad it’s Not Me
Flipside: People will help when you are clear with your requests.
A mentor once told me, “People have two responses to complaining: 1) they don’t care or 2) they’re just glad it’s not happening to them.”
I thought this was pretty dark at the time, but it helped me shift my thinking. Complaining can feel good every once in a while, but it’s often not very useful — especially if it becomes a habit. What really solves problems? Outlining exactly what you need.
Whether you need instruments, time or volunteers, ask directly. Be specific. You’ll be surprised at who shows up.
“I’m overwhelmed and no one helps.” vs. “The band is in need of two parent volunteers to help stuff 40 thank-you notes.”
Which one would you respond better to?
By the way, there’s nothing wrong with a good venting session every once in a while. Just make sure the listener:
Knows you just want to vent and don’t need a fix.
Knows you aren’t mad at them.
Agrees to the vent session.
8. An Ensemble Is a Direct Reflection of Its Director
Flipside: An ensemble is a direct reflection of the director. (Yes, I meant to repeat this.)
Our classroom reflects who we are as the teacher, and this can be a tough pill to swallow — or it can be a great thing. We may not be able to control the schedule or budgets, but we have the ability to set the tone for our students, rehearsals and programs.
It’s easy to feel overwhelmed. There’s always someone with a bigger budget, more support, better facilities or fewer challenges. But here’s the truth: You are not less capable. You are not less worthy. And your students are not less deserving.
__________________________________
In every school I visit, I meet teachers just like you who are doing incredible things with limited time, tight funding and a whole lot of passion. The work you do matters more than you may ever fully see.
These “hard realities” might sting a bit, but they’re not meant to discourage you. They’re reminders that we can lead our students to success, even when things aren’t ideal (and things often aren’t ideal!). So, as you head into rehearsal tomorrow, remember:
The room reflects you.
Your students are watching.
And the music you make — together — is more powerful than any excuse.
I am a music teacher educator at Virginia Tech, and several years ago, I came to the realization that we sometimes make assumptions about our preservice teachers. A big one is that they know what good teaching looks like. We assume that they had fantastic K-12 music teachers prior to entering college, but we must remember that those experiences were viewed through the lens of an ensemble member or class participant, not necessarily a future music teacher. This is one of the reasons that led me to implement guided observations.
Guided observations provide an opportunity for students to observe a quality teacher with my help. During my secondary methods class each fall, we take two field trips — one to a middle school band class and one to a high school chorus class. Students come equipped with their technology to answer the following prompts:
lesson procedures (What activities did you observe?) and
discussion points (Thoughts on student/teacher interactions. Were the lesson objectives met?).
While students are observing the lesson and taking notes, I stand behind them pointing out teaching strategies and techniques that they should include in their written account so we can discuss them later. Ideally, following the observation, students will get to discuss the lesson with the middle school or high school teacher. These illuminating discussions show me what my students are finally seeing through their “teacher eyes” as well as the strategies that they question.
Here are some of the takeaways from these guided observations.
1. Good Teaching Includes Routine and Procedures
In other words, practice makes permanent.
One of the things that I stress to my students is that good classroom management is not about discipline, it is about routine and procedures. What are the most chaotic times during the school day? Class transitions. So, it is vital for students — especially young students — to know how to enter class and the procedural expectations. Do they line up outside of the classroom, or do they walk right in? Upon entering the room, do they get their instrument and music, or do they sit and wait for you to dismiss them in small groups? These may seem small and insignificant, but they can make a big impact on the tone of the class. When young teachers feel like they are struggling with classroom management, the conversation usually goes like this:
Teacher: My students are just wild! They come in the classroom acting crazy, and it takes me forever to get them to stop talking.
Me: Do you have procedures set in place for how they should come in the room?
Teacher: Yes, but they don’t always do it.
Me: Then you should practice.
Teacher: (blank stare) Won’t that take up rehearsal time?
Me: You are already sacrificing rehearsal time to correct inappropriate behavior. Remember, whatever we don’t do well, we practice. This goes for everything from the B-flat scale to how to enter the classroom. And, we practice it until it is right.
2. Good Teaching Often Involves Repetition
Here are things I have said 50,000 times in my career:
Please spit out your gum.
Everybody sit up nice, straight and tall with both feet flat on the floor.
Play that measure again.
One question that often comes up after a guided observation is: “Why did you make them play that one section five times before you moved on?” The answer is because we are building skills and reenforcing good habits, and both of those take time.
Good teaching always includes repetition with feedback sprinkled in between the performance opportunities. Play that measure again, but this time with more air … sing that section once more, but softer … do that one more time, and make the articulation clearer.
The point of purposeful repetitions is to fix a problem, not to just “do it again.” Chances are, you won’t fix all the issues in one day, but you must work under the mindset that we are growing musicians. The goal with repetition is to simply get better.
3. Good Teaching Moves Fast!
Just keep swimming, just keep swimming! Just keep teaching, just keep teaching!
Pacing can be a struggle for young teachers. We can get caught up in trying to execute the “perfect lesson” that while we spend five minutes with the flute section to get that one measure just right, we failed to notice that the clarinet section is having a debate over who has the coolest water bottle, the trombone section has fallen asleep and the percussionists are trying to build a fort out of auxiliary instruments. This is definitely an example of poor pacing leading to classroom management issues!
Great lessons are fast-paced while still accomplishing learning goals. In tip #2, we discussed the importance of repetition, but at what point are the repetitions slowing down the pace of the class? Keep in mind, the goal is not perfection in one class, it is to get better each day. Five repetitions may accomplish that instead of 10. Good pacing also requires teachers to have a plan and know the score. Unfamiliarity can also slow pacing as we try to remember the next step in the lesson or who has what part. Preparation directly impacts pacing.
Dr. Catheryn Shaw Foster (in pink) with her student during a guided observation.
4. Good Teaching Includes Actionable Feedback
How specific can you get to the measure, the note and the performer?
Music educators are required to recall large amounts of information at a moment’s notice (That’s why it’s important to pay attention in those methods and technique classes!). Our ability to give actionable feedback is directly linked to our familiarity with each instrument, each voice part and the proper techniques for all the above. So, what is actionable feedback? Simply put, it’s the type of feedback that relays how to fix a problem instead of only identifying a problem. Here are some examples:
Feedback: Trumpets, someone played a wrong note.
Actionable Feedback: Trumpet player 4, the note on beat 3 of measure 4 is a B-flat not B-natural, so use your first finger instead of your middle finger.
Feedback: Going over the break is hard, clarinets. Keep working to make it sound better.
Actionable Feedback: Clarinets, as you go over the break, remember these three things: make sure your top teeth are on the mouthpiece, firm up the corners of your mouth and use more air.
The ability to give actionable feedback is demanding of the teacher. It requires us to detect errors, and it challenges us to be as specific as possible to the measure, the note and the performer. These are teaching skills that we must work on so that our students become better musicians.
5. Good Teaching Means Teaching the Students Who Walk Through Your Door
This strategy — creating realistic expectations — may seem like a no-brainer, but it encompasses many things. The first is meeting students where they are. In a perfect world, every student would practice, and we wouldn’t have to review the same measure 19 times because they would have fixed the issue at home. However, this is not a realistic expectation for all our students. What if they can’t get their tuba home on the bus? What if there are noise restrictions in their apartment complex? What if they have dance, soccer and loads of homework, and your class is just something they do because they enjoy it? Sometimes the best strategy is to make the bold assumption that none of our students have practiced and just teach the music. Meet them where they are.
The second part of this strategy has to do with building relationships with your students. We need to know our students as musicians (How well do they play/sing? What are their weaknesses?) and as human beings who have a life outside of our classroom (What other activities are they involved in? What is their home life like? Do they take feedback easily, or do I need to sugar coat it?). This knowledge directly impacts how we teach them. It is our responsibility to know how each student learns and what teaching strategies work best for each of them; it can’t be a one-size-fits-all model.
After a guided observation, Dr. Foster’s class meets with the music educator.
6. Good Teaching Means Loving Music and Loving Teaching
In a recent guided observation with my secondary methods class, one of my students remarked, “It looks like Mr. Graham really loves teaching middle school band.”
It was evident how much the teacher we observed enjoyed what he was doing. He was patient, helpful and genuinely happy. He modeled for his students on his trumpet. He became excited when the young musicians did something well. He was encouraging when they struggled with a skill. He was firm, but kind.
When he spoke with my students after class, he shared resources that helps him be a better teacher (i.e., lists of books and podcasts). He spoke of ways he continues to make music outside of teaching middle school band.
It’s important that our students see that we love what we do and that we love teaching them. It demonstrates that we care about them, their successes, their areas for growth and what we can accomplish as an ensemble.
__________________________________________
Although these were some of the takeaways from our guided observations, it’s important that we remember these things throughout our teaching career. It is easy to get caught up in the next big performance or collecting order forms from the cookie dough fundraiser, but at the end of the day, our students deserve good teaching. The goal for us as well as our students should be to get better each day.
Cinco de Mayo is not just about margaritas and Mexican food. Here are five iconic songs (what other number could we possibly choose?) that celebrate Mexico’s rich cultural heritage.
1. La Bamba
This Mexican folk song has long been an anthem of cultural pride and resistance — and it’s also the very first song sung in Spanish to hit No. 1 in the United States. The seminal 1958 recording by Richie Havens, a then 17-year-old kid from the San Fernando Valley, was similar to the popular rendition sung by Andrés Huesca in the 1940s, but with a distinctive rock’n’roll beat. Nearly thirty years later, the cover version by East LA band Los Lobos topped the charts … and their music video would win a 1988 MTV Video Music Award too. Listen to the Andrés Huesca version here, the Richie Valens version here, and the Los Lobos version here.
2. Oye Como Va
Written in 1962 by Tito Puente and popularized by the rock group Santana in 1970, this feel-good song will have you doing the cha-cha in no time flat. Carlos Santana’s arrangement dispenses with the brass section in the original version, but adds Hammond B-3 organ and rock drums, with his electric guitar front and center, soloing up a storm and carrying the main melody — a melody that in Puente’s version is played by piccolo. Listen to the Tito Puente version here and the Santana version here.
3. Bidi Bidi Bom Bom
No Cinco de Mayo playlist would be complete without a Selena track. The chorus of this catchy 1994 tune suggests the palpitating heartbeat of the lovestruck. After a shot of tequila, you might even try to bust out your best Selena dance moves. Word to the wise: Don’t. Listen to it here.
4. Amor a la mexicana
Thalía has been dubbed the “Queen of Latin Pop” with good reason: she has sold over 25 million records worldwide. This sultry pop cumbia (a style of music that originated in South America, with sensuous dance movement as an important element) became one of her biggest hits upon its release in 1997. The lyrics celebrate love, Mexican-style, with “horse, boots and sombrero; tequila, tobacco and rum.” Listen to it here
5. Parrandera, Rebelde y Atrevida
This 2005 song, written and sung by the late Jenni Rivera, features lyrics that are at once defiant and liberating. Early in her career, Rivera was criticized for performing traditional banda music — not least because it’s a genre that has long been male-dominated — but she persevered, and by the time of her tragic death in a 2012 plane crash, she had become one of the best-selling, and best-loved Mexican-American artists of all time. Listen to it here.
Vinyl has enjoyed a remarkable resurgence in recent years as people reconnect with albums old and new. It’s a refreshing change for audio enthusiasts — one that has inspired a fun, engaging mode of home entertainment.
But why save all that enjoyment for weekends and after-hours? Why not also spin vinyl at the office, where many people spend the majority of their time?
These were the thoughts of the Yamaha Content Marketing team when they decided to install a MusicCast VINYL 500 Wi-Fi Turntable at the company’s corporate headquarters in Buena Park, California and link it to MusicCast wireless speakers positioned throughout offices, conference rooms, and other common areas in the building.
MusicCast VINYL 500 turntable at the Yamaha office.
The team members had some trepidation about the installation, to be sure. How would their co-workers react to being surrounded by music? How would it impact their morale, and how would it influence their creativity? Would music make a real difference to productivity and efficiency, or would it fall on deaf ears?
Connecting, Sharing and Reminiscing
For the first few days, they kept the turntable spinning with their own picks, trying a variety of different albums to see what resonated.
Then something remarkable happened. People started talking. They began connecting, sharing and reminiscing. And because it is based on Yamaha wireless multi-room MusicCast technology, the installation paved the way for even more engagement, allowing employees to selectively stream music to speakers via their own mobile devices and operate the system via voice commands.
What’s Old is What is New
Listening to music while working is nothing new. A Pandora survey of over a thousand employees in various industries found that roughly 42% listened to music throughout the entire workday, with nearly four out of five believing that it helped them get more done. This likely hasn’t changed. But what has changed is how music is delivered and consumed. Just as music playback has shifted from physical media to digital streaming, music listening has evolved from a solitary activity enjoyed by donning earbuds or headphones to a communal sensory experience that can be broadcast throughout an entire home or office via an audio distribution system similar to the MusicCast setup at Yamaha headquarters. And as people return from remote work-at-home to shared in-person offices, music has become the ultimate ice-breaker.
The positive effect this has had on Yamaha employees may be purely anecdotal, but it aligns with all the scientific data about music’s impact on office employees. A landmark study published in 1972 was one of the first to suggest a direct correlation between music and productivity. It showed that factory workers performed at a higher level when upbeat, happy tunes were played in the background.
But it’s not just productivity that improves. Background music also reduces stress and anxiety, elevates mood, and establishes a healthier, more enjoyable work environment. The day goes by faster and employees have more fun at work when music is playing. It also helps to spark creativity and improve concentration.
Taking it to the Next Level
But getting the most out of music at the office involves more than simply hitting play and walking away. The volume, cadence and style of music influence its overall impact, as does when and where it’s played. The marketing team found that people seemed to work better when listening to classical music rather than songs with heavy vocals, especially first thing in the morning; livelier music and movie soundtracks seemed to be a good pick-me-up in the afternoons.
Although the team hasn’t yet gone so far as to curate and automate the delivery of custom playlists to keep pace with the mood of the office, it’s a step some companies are starting to take. They, like Yamaha, recognize that tailoring music around work activities and the time of day yields better results than distributing random songs at the same volume level to every huddle space, conference room and cubicle. An intelligent, programmable audio system goes several steps further, altering what, when, where, and how the music plays to evoke the ideal ambiance for better health and wellness, productivity and efficiency, collaboration and communication, along with job satisfaction and retainment.
An office’s “sonic signature” can take many forms. While the employees of one company might like to start the day with a compilation of quiet, relaxing sounds, those at another place of business might work better when the tunes are lively and energetic. The music needs to align not only with the preferences of employees, but with the design of the office as well. Here’s where a multi-zone audio system like MusicCast can help. It allows different streams of music set at different volume levels to travel simultaneously to different areas, so, while collaborative spaces can be filled with instrumental background music, loudspeakers in the lobby can simultaneously broadcast a series of warm, inviting tunes; high-traffic areas and break rooms, meanwhile, can resonate to the sounds of upbeat, invigorating pop songs.
Then there are individual employee offices. Being able to synchronize their own playlists with the system allows the occupants to play what they want, when they want it, on their own speakers. Some systems are so smart, they can kick-start the perfect piece of music automatically as employees enter a room, then turn it off when the room empties. This capability, along with pre-scheduled and zoned delivery, affords a slick, fresh, modern approach to office audio that seamlessly establishes the right mood, ambiance, and energy.
Achieving this level of audio sophistication doesn’t happen via Wi-Fi connectivity alone. There are a number of acoustical parameters and technological details that need to be explored and mastered for optimal performance. Professional AV integrators possess the necessary specialized knowledge and have the skills to turn planning into reality, making them a key part of the design, programming and installation process. These professionals can recommend the right system, configure and install it properly, and transform ordinary office spaces into engaging and inspiring work environments.
So what are you waiting for? If you’re looking to improve productivity in your workspace, try adding some music to your day.
Click here to learn more about Yamaha Hi-Fi products.
I wasn’t sure what to expect the first time I packed my bags for the Bands of America Summer Camp (formerly known as the Music for All Summer Symposium). Music for All educational consultant, Susan Smith, encouraged me to apply for a scholarship that Yamaha was offering to teachers with less than four years of experience. Four days later, my friend Lizzie and I drove from just south of Austin, Texas, to Ball State University in Muncie, Indiana.
Something magical happened that week, something that hooked me. Years later, I still count down the days until I can return to camp, where I now serve as the Coordinator of the Director Academy Assistant team. Here’s why I keep coming back to camp and how it’s changed me in ways I never saw coming.
The Music that Binds Us Together
Before the big concert of the night, each day concludes with a reading session in the director’s band. The excitement of sitting shoulder-to-shoulder with colleagues who I had just met brought me back to my time as a student musician. As I learn from master teachers and discover new literature, I also experience the musical upbringing of others and celebrate their experiences. Camp taught me that a single composition can turn strangers into family, even if it’s only for a week.
Lunchtime Chats
The sessions that I have had the honor of attending and now presiding over are second to none, but learning continues beyond the classrooms of the Teachers College. Every meal during the week opens up the opportunity to learn more from each other about how to navigate our profession. We support one another in times of celebration and times of frustration, offer advice on situations we have experienced, and dream big for the future. During these lunchtime chats, I have learned resilience, teamwork and the kind of confidence that doesn’t come from being the best, but from knowing I could keep going.
The People Who Stay with You
If I’m honest, it’s the people who keep me coming back more than anything else. There’s something about the camp bubble — the long days, the shared exhaustion, the late-night talks in the dorms — where friendships are quickly forged. I met one of my best friends, Jerell Horton, the Band Director at Vestavia Hills High School in Alabama, on the second day of my first year at camp. We’ve been inseparable since, even across state lines.
The magic didn’t stop with the campers. The Music for All staff, clinicians, and Director Academy Assistants poured their hearts into us. I now feel honored to provide those same experiences to others, and I get an indescribable satisfaction seeing them experience the same joy I did when I attended camp as a music teacher. In a world that can be overwhelmingly selfish, camp has taught me that we are only worth what we are willing to give to others.
A Spark that Never Fades
Every year when I leave camp, I am exhausted, my feet are sore, I am sleep deprived and my voice is often hoarse from cheering at the annual Drum Corps International performances. However, I’m also buzzing with energy. It’s like camp flips a switch in me. I go home and work harder, dream bigger, and push myself in ways I wouldn’t have thought to before. Camp hasn’t just changed how I teach, it has changed how I see myself. It’s where I discovered I could be more than I thought, and every return trip reignites that spark.
Why I Keep Coming Back
People ask me why I keep going back to camp and often jokingly ask, “Haven’t you learned enough?” For me, it’s not about mastering every skill or collecting every lesson; it’s about the rush of the final drum corps performance, the ache of saying goodbye, the promise of “I’ll see you next summer,” and helping create the magic for a new generation of first-time camp attendees.
The Bands of America Summer Camp isn’t just a place where I spend the last week of June. It has become a part of me. It’s where I found my passion, my people, and a piece of myself I didn’t know was missing. I’ll see you at camp!
Summer is fast approaching, and before band camps and rehearsals begin, take time to attend a professional development workshop. Not only can you refine or build new skills, but you can network with other music educators.
No matter if you want to learn more about teaching guitar, mariachi, modern band or if you want to become a better music director, there’s a seminar out there for you. Hearing about new ideas, pedagogies, strategies and more will motivate you to tackle the upcoming year of teaching music with renewed vigor. A win-win situation!
Ask for funding from your school or district to cover the cost of the conference.
Don’t be shy. Take the opportunity to talk to seasoned and well-known music educators and performers.
Keep organized notes on new ideas and strategies you want to try.
If there are vendors at the conference, see if there are any products or services that could help your program.
Summer Conferences to Check Out
A few notable conferences to consider:
The Bands of America Summer Camp Director Academy runs from June 23-28 at Ball State University in Muncie, Indiana, and focuses on Music for All’s core teaching principles: reflection, artistry, organization and communication. At the Director Academy, you can connect with the best in the business and learn about trending topics like offering music technology courses. Register today!
Middle school and high school band directors can learn effective rehearsal techniques, enhance ensemble sonority and intonation, and refine communication through conducting at the VanderCook College of Music Band Director Summer Workshop from July 11-14 in Chicago.
To help you improve your marching band, Smith Walbridge offers the Directors Marching Band Clinic from July 8-11 at Eastern Illinois University. In addition to tackling colorguard concerns, drill design techniques and modern body movement, directors will also learn how to run effective and efficient rehearsals, cultivate great leaders and encourage positive attitudes.
Interested in starting a music technology program?
MusicWill offers a Modern Band Summit at Colorado State University from July 9-11. Join other educators to learn about culturally responsive music education and transform your classroom and students with curriculum based around modern music.
The 2025 National Mariachi Education Workshops will be held at The Orleans Hotel & Casino in Las Vegas from June 23-27. Attendees can choose between a beginner or intermediate track with classes on the vihuela/guitar, guitarron, harp, violin, trumpet and voice. Fun, networking and music-making are guaranteed!
If you’re looking to start or enhance your guitar or ukulele program, sign up for a Teaching Guitar Workshop. You can choose from beginner or advanced courses at various one-day events around the country from June through August.
A free online guitar fundamentals course is offered year-round at ShedtheMusic.
Regular readers of my blogs are familiar with my belief that learning to play even a little bit of keyboard — and understanding theory and harmony, which unfold quite naturally at the piano — will improve your bass playing. This sentiment is born from personal experience: When I attended graduate school for film scoring, I took piano lessons for two semesters, and although I had already been exploring chords and harmony on a 6-string Yamaha TRB bass (still available in Europe but since replaced in the U.S. by the newer TRBX line), the time I spent on keyboard put music theory in context and made me so much more aware of chord voicings, orchestration, arrangement, melodies and tonal colors.
Playing guitar can also make theory come alive, but the guitar lessons I took when I was five bored me to tears, and I didn’t take music seriously until I got my first drum as a seven-year-old. As I grew into a drummer/percussionist and then a bass player, I developed a distaste for guitarists who soloed too often and too loudly. I strove to be a supportive and solid team player, and I kept my thoughts to myself whenever guitar players sat in and played “lead bass.”
All those experiences made me uninterested in learning guitar … until now.
THE BASS/GUITAR PARTNERSHIP
Lead guitar may not be my thing, but another style of guitar playing has slowly snuck up on me. Over the years, I’ve come to realize how deeply the legacy of great R&B, soul, funk and African bass is intertwined with rhythm guitar. What would classic James Brown tunes be without rhythm guitarists like Jimmy Nolan and Bootsy’s brother, Phelps “Catfish” Collins?Steve Cropper is as much a part of the Stax rhythm-section sound as Donald “Duck” Dunn. The interplay between groove gods like Chic’s Nile Rodgers and Bernard Edwards, Tony Maiden and Bobby Watson of Rufus, and Meters legends Leo Nocentelli and George Porter Jr. are as crucial as those bass players’ respective connections with drummers Tony Thompson, André Fischer and Joseph “Zigaboo” Modeliste. The tradition continues today with players like bassist Eric “Pikfunk” Smith and guitarist Errol Cooney, who expertly bounce off each other as part of Janet Jackson’s rhythm section.
Perhaps it’s no surprise that I fell in love with the sound of baritone guitar, which is tuned a fourth lower than a standard guitar and strung with slightly thicker guitar strings. Baritones are usually associated with surf music, down-tuned metal and spaghetti Westerns, but their deeper sound feels both familiar and full of possibility. (Videos like this Prince-inspired rhythm guitar part played on a baritone show that it can be funky, too.) When I finally bought an inexpensive used electric baritone, I was immediately entranced. Traditional baritones are strung B-E-A-D-F#-B, which feels familiar to anyone who has spent time on 6-string basses that are tuned B-E-A-D-G-C, in fourths. I considered tuning the baritone just like my 6-string basses, but there are far fewer resources for guitarists who want to learn “fourths tuning,” so I’m sticking with traditional baritone tuning for the moment.
A SHIFT IN PERSPECTIVE
If you’re a bassist who’s planning to learn guitar, get ready for a shift in perspective. Guitar strings are, of course, much thinner and string spacing is tighter, so it’s common for beginners to inadvertently mute adjacent strings, but that doesn’t make it any less frustrating. (On the plus side, bending is a breeze and strings are way cheaper.)
Also, playing with a pick seems to be more of a requirement than it does on bass. Using a whammy bar can be a new thrill. The more time you spend on guitar, the more you’ll notice guitar hooks you might’ve missed the first (or millionth) time while focusing on juicy bass parts. Most significantly, your job description is different, and you’ll now be wrestling with chord shapes, understanding inversions and playing melodies while someone else holds it down on bass.
It can also be prudent to think about your learning style. I’ve chosen to take in-person lessons from a teacher who can help me develop good habits and keep me accountable, but if you learn best from videos, there’s an ocean of information on YouTube, as well as courses from pros like my Yamaha blog colleague Robbie Calvo, whose comprehensive and inspiring The Rhythm Architect lessons can help you along this journey.
Last but not least, find an instrument that you don’t have to fight. The Yamaha FG800J I recently acquired is showing me that there really is nothing like the tone or immediate response of a well-crafted acoustic guitar. The FG800’s string spacing is just a touch wider than my electric baritone, and every chord I struggle to play is rewarded by its rich, balanced sound. I’m grateful for each tiny victory and curious to see where this will go, and how it will affect my bass playing.
Have you ever wondered what kind of music you should play on your electric stringed instrument? There is an assumption that these kinds of instruments are only used for jazz, rock and pop genres, but that’s simply not true! In fact, you can take your classical repertoire to new places with a few interesting tools and tricks.
In the video below, jazz violinist and Yamaha Artist Toshi Nakanishi gets creative by playing and layering all the parts to Pachelbel’s Canon in D by using his Yamaha electric violin (YEV) and a looper effects pedal.
Here’s how he does it:
Step 1 – Set up your rig
You’ll need an electric violin (like the Yamaha YEVor YEV Pro), an effects processor with a looper, and an amplifier.
Step 2 – Study the parts
“Canon in D” is a staple of the classical repertoire and quite possibly the most famous eight-note melody of all time. With this tune in your mind, you’ll be able to structure your approach by separating and then playing the different layers of the canon.
Step 3 – Add each part one at a time
As Toshi demonstrates in this video, add each part on top of the previous one, with effects as needed, starting with the bass line. It’s a great technique that allows you to perform each piece as a one-person chamber ensemble!
More videos featuring Yamaha Artist Toshi Nakanishi:
When my principal observes us, he wants to see an 80/20 split of the cognitive load where students do 80% of the lifting, and the teacher does 20%. This is the goal that I work toward, but I can’t help but wonder if I could get my students to do 100% of the work as I sit back and stress … I mean, watch. After much contemplation, I finally took the risk, and I encourage you to do the same!
During my sophomore year of undergrad at the University of New Hampshire, our professor, Andrew Boysen, Jr., handed us Momentum by Karl Blench and explained the assignment: Study the score and rehearse ourselves like a big chamber ensemble because he was not going to step in. This teaching model was developed and presented by Dr. Scott A. Jones of The Ohio State University. The original concept was created by the Orpheus Chamber Orchestra, a world-class orchestra known for performing some of the most prized and most challenging pieces in the orchestral repertoire, completely rehearsed and performed without a conductor.
This was a unique and fascinating experience for me. Our Wind Symphony was made up almost entirely of music majors, mostly upperclassmen who had already gone through conducting classes and several semesters of theory — of course, we were going to be good!
Now, as a music educator, I wanted to challenge myself to be successful using this same model for my high school students at Brunswick High School in Maine.
Choosing a Piece
Each piece has its own difficulties in a model like this, so you must consider your goal for the group. If you want students to play a piece on their own with little difficulty, consider something straightforward in both score study and performance like a march. (Disclaimer: I love marches. There is a lot to unpack in marches. As you will read, the score study portion of it, especially in terms of form, can be easy for students to grasp. No hate to marches!) Some difficulties they might encounter with a march is tempo and balance.
If your goal is for students to get deep into the musical material and background of a piece, and give an impassioned performance (don’t forget, I love marches! They can have impassioned performances too!), try a lyrical piece. Some difficulties students might have include score study (it’s a bit more involved) and performance issues like intonation and cohesion. Regardless, like any other programming choice you make, select a piece that will stretch your students and give them an appropriate challenge.
Photo by Shutterstock/GNOHZ
Score Study Process
One of the most important parts of rehearsal is the score study process. This informs musical decisions. Students of any age have the capacity to study a score, what varies is the depth of that score study that they are capable of.
To ensure that all students participated in the process, I split them into small groups. Each student received a copy of the score to study and rehearse with (make sure you get permission or use something in the public domain). Each group was responsible for one aspect of the music that they shared with the rest of the ensemble. I assigned the following topics and notes to my students, but you can choose the aspects of the score that you want your students to study.
Background of the piece and composer
Find the composer’s biography
Find the program note for the piece
Melody/Accompaniment
Mark in your score who has the melody
Mark in your score the roles of each instrument, which can be helpful to understand the piece
Form
What is the form of the piece?
Identify recurring melodies and label them with clear labels (e.g. A or Theme 1)
Emotional Arch
What is the emotional arch of the piece?
Where are the climactic moments of the work?
The Rehearsal Process
The process for our student-led rehearsal looks very different from what I experienced at UNH as an undergrad. Just like any other rehearsal, it’s important to have clear expectations and follow them. Giving your students rules for these rehearsals will help keep things on task and help to keep you from stepping in. You can add your own rules (and even change them as you go along), but here are some guidelines and expectations that worked for my students and me.
1. Timekeeper: Before the rehearsal begins, give students a specific duration of time to rehearse — typically, between 10 and 20 minutes works. Short timeframes can help students get to work, and you avoid times of awkwardness (trust me, there are plenty of those). Once you decide the duration of the rehearsal, assign a timekeeper. This is a popular job, and everyone will want to do it. Spread the responsibility. The timekeeper should give a heads-up to the group when there is one minute left in their rehearsal time.
2. Stand when you speak: Having students stand up when they speak is important to make sure students are not speaking over each other. It also makes it easier for students to be heard and to know who is speaking. It’s like the talking stick without the stick!
3. Discuss in your sections: To ensure that all students are participating, having small discussions within sections before giving comments to the whole group is helpful. Your younger students may be more intimidated to speak up in a large group, but they could have some good ideas that they feel more comfortable sharing with their section. It’s important for these small conversations with sections or neighbors to happen so all voices are shared. Sure, there will be a handful of students who are just getting dragged along for the ride, but keeping everyone engaged will ensure that it’s not just a few students doing the work for all.
4. Three comments, then play: I came up with this rule to make sure things keep moving along. Students can get bogged down in saying everything and nothing at the same time. Here’s a conversation I heard after a theater rehearsal. Students were reflecting on how things were going as a group.
Student 1: “We need to make sure that there is no talking in the wings because people can’t hear their cues to go on stage.”
Student 2: “People are missing cues to go on stage. Everyone needs to make sure they aren’t talking in the wings so people can hear their cues to enter the scene.”
Student 3: “The flow of the scene isn’t very good because people aren’t entering. I think they might be missing their cues because they can’t hear over people talking in the wings.”
All these students thought they said something different! I swear, it went on for a while. Keep it short and don’t repeat something that someone else said by saying it a little differently. Having the three-comment rule keeps students playing instead of talking.
5. Create a plan: Students should always use the last few moments of their rehearsal to decide what they will work on in the next rehearsal. This keeps them honest and saves them from wasting half their time by hemming and hawing about where to start today. Just like you make plans for your rehearsal, they should make plans for theirs! You might consider providing them a worksheet to help with this planning. Make sure you write it down to keep them honest!
6. Get them moving! One of the most inspiring performances I have seen was a wind band from Europe. On top of being incredibly proficient technically, their emotion and passion were palpable. One of the things that they did that made their connection so apparent was that they all moved together. The visual component made the musical so much more special. If you have ever played in a chamber ensemble, you know that movement is extremely important. It’s how you communicate. It’s equally as important here but needs to be 10 times more apparent in a larger ensemble. Urge your students to move!
7. Encourage kindness: I cannot emphasize this enough. Tensions will run high. That is just a fact. While students might want to react with snarky and sarcastic remarks, they must be reminded that while working with others kindness will go a long way. Kindness will improve collaboration and efficiency. There is a way to be honest and upfront while also being kind.
What Should You Do?
I’ll be honest — it’s very difficult to turn over the reins and sit idly by, but that’s what is required to make this work! It is important to your students’ development as musicians to do it on their own. It’s similar to watching a baby figure out which shapes fit into the appropriate holes on that classic toy. Just like that baby, your students will run into problems, make mistakes and struggle with doing score study and rehearsing on their own, but the moment you step in, they will see that you are not serious about the process and will always step in when they feel helpless. Resist the temptation to fix things!
I had a student say, “We need a conductor. We have done all we can do without a conductor.”
I told that student that I disagreed. They were just growing frustrated with the process.
As the saying goes, when the going gets tough, the tough get going. But in this case, the tough wanted to go away from the problem! It’s important for students to remain diligent. It’s your job to make them work through it.
Both you and your students will feel a sense of pride when everything begins to click. Some rehearsals will be painful to watch as they work out their problems, but other rehearsals will be inspiring as they do it all on their own and make great music! Students will make the right decisions because they have spent a lot of time learning from you what the right decisions are.
There are a few things that you can do to still be involved and not let your students feel like they are left hanging out to dry. First, during warm up work on skills that will help them in the collaborative rehearsal process. How will they start the piece? In a concert you can’t count “one. two. one, two, three, four.” Get students to make eye contact and start themselves at different tempos — and get them moving!
Second, I gave students notes at the beginning of each rehearsal about the previous rehearsals. These were not notes on the music — that is their job — they were comments about parts of the process. After all, music-making is not new to them, but doing it on their own is. I provided them guidance and reminders about the rules we learned at the beginning. One of my favorite things to tell students is to challenge themselves to do something outside of the box during their rehearsal. By getting them to problem solve in creative, unconventional ways, you might learn a new rehearsal technique.
The Concert
Yes, my students performed in a concert without a conductor! They thought I was joking when I told them they would. There were times when they felt helpless and wanted me to step in, but they persevered and did it! It was one of the most inspiring performances for the students and the audience. Students decided when they would perform their piece — they chose for it to be first, and it was a fantastic way to open their portion of the concert!
Admittedly, it was terrifying to sit in the audience and watch. What if things start to fall apart? When I’m up there with them, I can help, but I felt pretty helpless on the sidelines. But when everything goes right (and it did, phew!), it makes for a very proud director moment!
This process was very rewarding. Students learned a lot about themselves in this process, and they found out that they are capable of making music at a high level on their own. They have the tools and they know how to use them (even if they were holding the hammer upside down during the first rehearsal).
This model may sound daunting, but it will provide many benefits to you and your students. They will tap into the listening skills and musical decisions made during this process when you’re back on the podium. Give your students the chance to demonstrate their knowledge and skills. Take a step back during your rehearsal and let them do 100% of the cognitive lifting.
“I have always used music to communicate and connect with people. My personality is kind of shy so I’ve always struggled to express myself, but when I play music, I feel like I can be 100% me.”
So says Jackie Miclau, keyboardist in indie rock band Mt. Joy. After nearly a decade of touring and recording three critically acclaimed albums (2018’s Mt. Joy, 2020’s Rearrange Us, and 2022’s Orange Blood), Mt. Joy reached new heights in 2024, selling out New York’s Madison Square Garden, The Greek Theater in Los Angeles, Denver’s Red Rocks Amphitheater, and more; their 70-date North American and European headline tour sold more than 180,000 tickets worldwide. “I just love being in that space [when I’m playing]. It’s like this perfect world of music, and when people listen to me play, I hope I can help create that same space for them too.”
Jackie Miclau.
Early Days
Miclau started playing piano at the age of 5, with an emphasis on classical music. She quickly became an accomplished young musician in a household that stressed musical excellence. “My dad was super passionate about the piano, but because he didn’t have the means to take lessons [when he was a kid], he was kind of living out that passion through [his children]. When we were growing up, during the summer he would leave blank cassette tapes for my brother and I before leaving for work. We would have to record hours of our piano practice on them every day before he got home, and he would listen back to make sure — before erasing the tapes so we could do it again the next day!”
“That was traumatizing,” Miclau jokes, “It was the worst! But you know what? Today I can play the piano.”
A Change in Direction
Jackie was such a prodigious talent as a child that she began regularly competing in piano contests, which led to a life-changing event — one that resulted in an abrupt change in direction. “I was fifteen, and I had spent an entire year working with my teacher memorizing this Haydn concerto,” she explains. “I don’t remember how many pages [it was], but it was like a little book. When I went to the competition and sat down to perform, I had a memory slip and I couldn’t remember anything past the first page.”
With the support of her teacher, Miclau handled the embarrassing moment in stride, but it led her to realize that the stress of competing was interfering with her enjoyment of the music. “I just thought, ‘Why am I doing this? These competitions don’t define how good I can play.’”
The decision freed Miclau up to dive deeper into more diverse musical genres — styles like electronic, jazz and pop — and she started gigging with different bands. Yet for all the progress she was making, Miclau realized that she still had a way to go. After one early jam session, she remembers an old blues musician telling her, ‘You can play the blues, but you sound too classical.’ “That was such a punch in the gut!” she recalls with a laugh. “But that’s when I really started to realize that it’s more about feel than being able to play something really fast.”
Calming Chaos
Jackie’s current work with Mt. Joy reflects her eclectic range of influences, from her early days playing piano hymns in church to blues improvisations and modern electronic sounds. But for Miclau, the most important thing is the feeling between the artist and instrument, and the power it has to bring people together — a feeling she hopes to inspire in others through her music.
“Right now, we live in such a chaotic world,” she notes. “With technology having everyone constantly on their phones or doing something on their laptops, it can feel a little crazy sometimes. But I encourage people to just do it [pick up an instrument], because I truly believe music soothes the soul. If people can take a little break and listen to some music or play an instrument to get their minds off things, that’s a really beautiful thing. I know it’s helped me a lot in my own life.”
Elena Bonomo on finding delight in infinite possibilities
The Broadway drummer tells how curiosity and versatility have helped chart her course
Written by Lisa Battles
Elena Bonomo says it’s a meditative moment when she takes command of the beat eight shows weekly as the drummer for Broadway’s Tony-award winning musical, SIX.
The setting wouldn’t give just anyone a sense of ease. The band is part of the onstage cast for the high-energy, pop-rock show. After playing her dream gig for almost four years, Bonomo says the show’s music has become “part of her body,” yet she still fully embraces her role within the show’s dynamic in new and different ways.
In her mindset, there’s always something to learn or discover, and that philosophy brought her to this stage – on Broadway and throughout life.
Early keys to curiosity
As a young child growing up an hour outside of the city, Bonomo spent many hours sitting next to her grandmother, watching her play the piano. She specifically requested it during their time together, loved seeing the joy it brought and benefited from some early lessons.
While time at the piano with her grandmother sparked her love of music, Bonomo also discovered the drums around that time, thanks to a few other relatives who played. With some help from her uncle, she was hooked after a couple of lessons. Her parents heard her pleas for a set of her own, which she got for Christmas at around age 9.
Bonomo began private lessons and played in the middle and high school bands. But it wasn’t until playing in her school musicals that she first felt the pull toward musical theater. “I realized, ‘Yeah, this is what I want to do for a living,’” she says.
Feeding a love for versatility
When considering college, Bonomo sought a program to help her develop her skills across musical styles.
“A lot of schools are very classical-oriented or very jazz-oriented, and I knew at that time that I loved playing all styles of music. I loved rock and funk and Latin music and even the possibility of Broadway, which can sometimes be every single style of music combined into one show,” she says.
She says she chose Berklee College of Music because “they weren’t so focused on just one style.”
She was also ready to experience life in a new place. Beyond that, some of her favorite artists had attended Berklee, like John Mayer and Terri Lyne Carrington, the latter of whom she got to study with at school, along with Neal Smith, Bob Gullotti and Jamey Haddad.
After college, Bonomo joined the Boston-based Americana folk band, The Novel Ideas, for two U.S. tours. That meant five people squeezed into an unreliable van with little money to cover lodging, yet innumerable treasures in seeing new places, making friends and having fun, she says.
“It was an amazing experience because it was my first time touring around the country. Before that, I hadn’t seen too much. With this band in our little van, we got to see the U.S. and play different types of venues,” Bonomo says.
After developing a love for travel with this first post-college gig, Bonomo revisited the idea of working on cruise ships after auditioning back in school. She landed a gig with Holland America Line and set sail on new adventures.
Taking in the world of sights and songs
Bonomo played on cruise ships and saw more places she’d never thought she would, like Australia, New Zealand, Greece and Fiji. Guest entertainers would fly to meet the ship, rehearse with the house band and deliver shows together.
“Every night was different. It trained me to be the working musician I am today in New York because I was sight reading music, playing with different artists every night, playing along with a click track, using in-ear monitors and playing along in a real show with actors. All of that was such a great way to prepare me,” Bonomo says.
Between cruise contracts, she’d return home, play community theater locally and visit the city frequently to work and network. She played with singer-songwriters and wedding bands, did workshops for new shows and picked up some opportunities subbing for other musicians on several shows.
“Somebody once said to me, ‘When you first get out of school, just say yes to everything. You never know where your next opportunity is going to come from.’ So even with the smaller shows, I was like, ‘Yes, absolutely. This sounds fun. It’s more experience,’” she says.
The power of mentorship
Bonomo credits many people and mentors who recognized her passion and facilitated connections along her path. After all, you have to have the question to answer “yes.”
“Sometimes it’s luck; sometimes it’s the stars aligning. But I don’t think the stars are going to align for you unless you put yourself out there and you make yourself open to receive these opportunities. It’s all about putting out your energy into the universe and then you’ll get it back,” Bonomo says.
Being so close to Broadway helped. Her high school choir accompanist had a career on Broadway and introduced her to drummers Larry Lelli and John Redsecker. Bonomo contacted them and asked if she could shadow as they played a couple of shows, and they both agreed.
She and Lelli reconnected when he did a clinic for Berklee’s percussion department, and they stayed in touch. When Lelli needed subs for Cagney, an off-Broadway show he had been working on, he called Bonomo. That gig opened doors, and soon after, she got the call to sub for Waitress, marking her Broadway debut.
“I was ecstatic. It felt like everything I’d worked for was finally paying off,” she recalls.
After that, she was offered the Waitress National Tour, so off she went for a year around the country.
Dynamism and consistency
With SIX, Bonomo says that establishing the comfort with the show over the past several years has allowed her to channel different things into her performances and tune into the nuances of interaction between people on the stage and in the seats. Show after show, she still loves the show’s groove-based, pop-rock drumming and being on stage.
“It’s just so much fun to actually be part of the show and be able to interact with the rest of my band members and the queens and see the audience every night. They laugh at different things all the time,” Bonomo says.
Meanwhile, she keeps her calendar full and skills sharp with other gigs, saying “yes” to all she can manage “just for the variety.”
“Something that I feel like I can always relate to is that I’m a forever student. I’m constantly learning and growing as a musician, and I need that in my life to feel healthy and keep me on my toes,” Bonomo says.
Taking care of the music
An important principle of lifelong learning is giving back by empowering others to learn, too. Bonomo teaches privately and mentors through Maestra Music, an organization that connects mentees age 18 and older pursuing music careers in theatre with professional women and nonbinary mentors working in the industry.
“Every day that I’m playing the drums, I feel so lucky. I feel so grateful to say that I get to do what I love. That’s because I had other people to look up to as a kid … not only just to look up to but people who offered guidance and showed that they cared about helping me – someone brand new to the scene that they didn’t know,” she says. “If I didn’t have that, maybe I wouldn’t have broken into the Broadway world. Maybe I wouldn’t have become a musician. It just takes one person to change somebody’s life.”
I am a high school orchestra teacher in Reno, Nevada. I am a product of public-school music education, and I attended a state school where I barely passed my last semester of music theory. I’m not an expert in this field — I know, I’m really selling myself here.
One thing that I do well is setting goals for myself and reaching those goals with the support of trusted colleagues and subject matter experts who provide necessary mentorship and guidance. Along the way, I have failed and learned a lot.
I’m sharing what I have learned about starting a guitar program in the hopes that your journey will be less bumpy than mine. After all, we all want to connect as many students with music as possible. I certainly do not possess all the answers on this topic. When my knowledge base runs shallow, I find people who can help me and other music educators continue to move forward together.
Below I highlight five reasons why guitar is popular and why you should consider adding it to your class offerings.
1. Guitar is Fun
Many adults wish they could play the piano or guitar, and these same people want to see their kids take advantage of musical opportunities that they may not have had. By playing the guitar, students have the opportunity to choose not only the instrument, but the style of music they like best, and to connect with a new or different group of classmates. The ability to choose is extremely powerful for a student, and guitar teachers get to play a role in it. One day, students in our guitar class will grow into adults who can pass along how to play guitar to their own children. Being a part of this cycle is humbling.
Teaching beginners in guitar is also fun. The school year begins with students who have varying degrees of prior musical knowledge. Some know how to read music and play another instrument, some know how to play a few chords and make it through a song or two, and then there may be a high school junior who hasn’t participated in music since sixth grader choir and never played an instrument. In the span of 18 weeks, all these students will learn to read music, play melodies and chords, and put on a full performance where they are all musicians. There aren’t many places on our campuses where this sort of transformation occurs.
Seeing our students excel in guitar is fun, too! In college before my student teaching experience, I asked my viola professor what I should do if a student performed at a higher level than me. His response has stayed with me to this day: “As a teacher, isn’t that our goal?” Yes, it is. When one of my guitar students learns to play better than me, I am inspired!
Outside of our classroom, some guitar students will take to YouTube and learn techniques we cannot teach. These students choose what they learn, and guitar class was the accelerant. When a student sits down before class and I hear them play something that is technically demanding for their level, I am inspired. A student who discovers Led Zeppelin or Metallica in guitar for the first time allows for deep and meaningful connections.
2. Guitar Kids Rule
The students in guitar class are not band, choir or orchestra students. This means that I am reaching different kids and connecting them to music. The vast majority of guitar students simply want to have fun for at least one class during their school day, and we are providing this opportunity with guitar. Their desire to play the instrument is infectious! They have a desire to continue to play while I’m trying to explain the next task. It drives me crazy, but it’s a special kind of crazy. As a teacher, how can I be upset when my guitar students wants to play guitar during guitar class?
Guitar kids have varied musical personalities. In a single class period, students easily switch between classical literature and technique to working on power chords, then tablature, then end by watching a video of Jimi Hendrix while leading a discussion of free speech as it relates to music. Because every student’s interests differ, the more varied the guitar curriculum, the more engaged they will be with little effort on the teacher’s part. Sharing music can be a way in which a student can safely expose vulnerabilities with their peers in a supportive environment. This creates a fast-paced classroom where a variety of topics are covered on a daily basis.
3. Guitar is Academic
Guitar is standards-based, curricular and assessable. Many schools have “easy” courses that students are placed into and they will get a passing grade. This is not the case with guitar. Guitar students must earn their grade by demonstrating skills and tasks that culminate in a musical product.
Guitar is an academic music subject treated thoughtfully and seriously by the National Association for Music Educators (NAfME). There are multiple publications that specifically cater to classroom guitar education. The first resource is the 2014 Guitar, Keyboard, and Harmonizing Instruments Standards that specifically addresses the guitar classroom. The standards are similar to the ensemble standards most of us are familiar with for band, choir and orchestra. Ensemble teachers can easily navigate the guitar standards and create meaningful experiences for students.
Additionally, the 2020 Opportunity to Learn (OTL) Standards provides guidelines for music educators and school administrators to establish a learning environment best suited for students in the classroom guitar environment. This takes the guesswork out of the usage of space, equipment needs and many other variables in the classroom. The NAfME Council for Guitar Education has provided Guitar Best Practices Year 1-4, a framework of assessable benchmarks for a four-year guitar program to help guide and assist guitar educators. When method books and other resources are partnered with NAfME standards and publications, a truly comprehensive academic guitar course can be offered.
4. Guitar Challenges Teachers
The word “challenge” often make teachers nervous because it’s usually associated with extensive planning, training, assessment creation and a whole host of other time-consuming tasks. For classroom guitar, the primary challenge is students’ varied musical interests. Some are motivated by rock, some by blues, some by classical, and others by everything ` 1else under the sun. These differences vary from year to year, which creates a fun opportunity for me to find relevant materials and music to keep the course fresh and interesting. As an educator, we can be authentically and culturally relevant as the culture of our students changes.
Another challenge guitar teachers face is pedagogical familiarity with the guitar. To combat this, I highly recommend professional-development opportunities like the Guitar and Accessories Marketing Association (GAMA) Teaching Guitar Workshops, which caters to teachers with varying comfort levels with the guitar, including no experience. These workshops also take into consideration all levels of classroom instruction from early elementary through community college. This ensures that all educators, regardless of experience and setting, will walk away with a sense of how to incorporate classroom guitar into their programs.
A third challenge for guitar teachers is the fear that students can actually learn from us. Prior to starting the guitar program at my school, I spoke with several other guitar teachers and they all said the same thing: You only need to be a couple of steps ahead of the students. This was golden advice in the initial stages of teaching guitar. It can be unsettling to begin a new guitar program or to start a job at a new school where you are teaching guitar for the first time in an already established program. As band, choir or orchestra teachers, we have most likely been involved in these ensembles since middle school. They are places of comfort for us. Branching out into guitar can be scary, and admitting the uncertainty is valuable. This challenge becomes less daunting and the fear calms itself as you gain experience.
A fourth challenge in teaching guitar is daily planning. If you possess good daily planning habits within a larger performance goal, your guitar class will be successful. We cannot plan for everything or anticipate every bump in the road. This is where honesty is key. Let students into your thought processes as a teacher and demonstrate what being a lifelong learner who works collaboratively with others looks like to solve unexpected problems. If a student is having difficulty with a certain skill or a question is asked that you don’t know the answer to, work in tandem with the class to find the answers. This demonstrates a level of care, humility and collaboration that students will benefit from.
5. Guitar is Student-Centered
Many music departments are leery of starting a guitar program because they fear that enrollment in band, choir and orchestra might decline. This is partially due to a fear of declining enrollment and also a fear of the unknown. I began my instrumental music path as a violinist, which I enjoyed, until I found the viola and fell in love with the instrument. I started practicing more and improved faster because I found the instrument that I truly connected with. Kids choose instruments because they like them. You might have the occasional student who chooses guitar over trombone — and that’s to be celebrated. A child learning an instrument they want to learn is truly a student-centered focus.
Removing barriers to participation is another student-centered feature of teaching guitar. Guitar offers a musical experience in middle school and high school that does not require a prerequisite. We all know students who participated in music at an earlier age and want to become involved in music again, but they find ability differences on various instruments too difficult to overcome. Guitar allows students like this an opportunity to re-enter performance-based music. This opens up new connections to teachers and other peer groups outside of these students’ every day friend groups.
Guitar will open doors that you and your students did not know existed. The guitar program at my school started with one class of 26 students taught by me. It has since expanded to two years of instruction and adding a second music teacher who teaches a second section of beginning guitar. There’s also the frenzy of trying to offer more guitar instruction, and the reward of watching students step into our jazz orchestra and jazz band as guitar players who can branch out into other areas in our music department. Music educators respond to what our students need. It’s not every day that a student says, “I want to do that thing that’s kind of difficult at an even more difficult level.”
I remember my first Pulse Percussion clinic well. It was 2016 and I was 14 years old. Back then, I didn’t really know what I was getting myself into. I don’t remember what it was about Pulse that caught my attention, but if I had to guess, I would say it was the music composition and performance energy in the front ensemble.
I first joined the drumline at my middle school playing cymbals. I did that for one year, then quads the next. When in a moment of immaturity, I realized how much work it was going to take to play in the high school drumline, so I picked up some mallets and started learning scales and a simple solo on the marimba.
The first drum corps show I remember seeing live was the Blue Devils’ 2014 production of Felliniesque. This prompted a YouTube spree that eventually led to my official discovery of the marching arts and my eventual participation in Winter Guard International (WGI).
Here’s the story of my experience as a member of Pulse Percussion.
What Is a Percussion Ensemble?
As defined by WGI, “Percussion ensembles consist of the marching percussion (also called battery) and front ensemble (also called pit) sections of a marching band or drum corps. Indoor percussion marries elements of music performance, marching, and theater; thus, the activity is often referred to as percussion theater.”
Ensembles in WGI are classified in two ways: organization type, and skill level. Groups who compete on behalf of a school are known as “Scholastic,” while self-organized groups are “Independent.” Their skill level is designated as A Class (beginner), Open Class (intermediate) or World Class (advanced).
The Allure of Indoor Percussion
The exciting thing about participating in a marching percussion ensemble is the way groups create a movie-like environment in a high school gym by playing music unlike anything most people have ever heard.
The Pulse front ensemble offers spots on marimba, vibraphone, xylophone, glockenspiel, timpani, synthesizer and drum set. The vibraphone players usually are given melodic responsibilities and outline chordal textures, employing various types of pedaling, while the marimba players contribute faster-moving passages using a wider variety of playing techniques and stroke types. For this reason, the hierarchy of a traditional mallet percussion ensemble generally has younger members start out on vibraphone, working towards building the strength and endurance necessary to play marimba. This was my experience. I earned a vibraphone spot in 2020, practiced relentlessly to play marimba, and eventually become a section leader.
The author behind his Yamaha marimba.
I have to admit that it can be hard to take on one of those roles. It can get awkward and even tense when you know that the people around have more experience than you do, so it definitely wasn’t all sunshine and rainbows when I first competed in 2020, but as a lot of people can agree, it’s easy to look past those things when you get handed a gold medal. If I had to give the next generation of mallet players a piece of advice, it would be this: Don’t settle, but know when it’s time to move on, and remember that everyone has a life outside of rehearsal.
My Pulse Experience
I encountered a lot of different personalities during my time with Pulse, and many have stuck with me to this day, almost as if a part of that person lives inside me. Unfortunately, in this activity, people come and go. It’s a pretty weird feeling looking around the room for your friend to crack a joke, only to realize that person aged out last season.
As with any music group, most of the work is put in before the competitive season actually starts. Some people view this as the hard part of the season, with competitions and performances as the reward. It’s easy to think this way, and quite honestly, it makes a good amount of sense, but that mindset always made me feel like I was constantly in a state of waiting for the season to actually start.
It’s odd because when I think back, the most memorable moments are those that occurred during the preseason. Whether we were spending our entire break hiding from our instructional staff to see their faces when they realized we were gone, getting threatened by neighbors to stop playing, crawling through the truck on all fours, or screaming in an attempt to match the pitch of an ongoing fire alarm, I have a wealth of shared memories to look back on.
A fun moment during rehearsal.
WGI Competition
During the 2023 season, in Dayton, Ohio, there was a storm on the day of the WGI semifinals competition. When it rains, you have a shortened warmup in a tent. It can get very loud and chaotic in those confined spaces, and while we did have tarps and towels, the wind made it difficult to keep everything dry until we got inside. As you can imagine, there are a lot of moving parts to our setup that really can’t get wet, including our P.A. system, which included a Yamaha TF5 digital mixer, four Yamaha DZR15 speakers and two Yamaha DXS18XLF subwoofers.
Somewhere along the way, part of the stage box that our drum set mics plug into stopped working — likely a result of the rain. Emotions were running high in the tent, but I managed to find a workaround just in time before we pushed our equipment into the arena. Times like this show why thorough planning of your electronics setup is important, and why a dedicated audio engineer is invaluable to every program. Since we spend so much time at rehearsal, observant and curious members also become well-equipped to troubleshoot.
If you were a percussionist in your high school marching band or indoor drumline, some of this might ring a bell. It can get stressful, but it’s also a ton of fun. The priority is hard work, which starts with trusting your instructional and design staff. Memorizing the music is merely step one. From there, we’re tasked with bringing the show to life. There’s a decent amount of work that goes into this, and really, it’s all about presence, confidence and flair. We shine light on every detail, whether it’s when/how we bring our mallets up and down or the vibe we aim to embody. It’s all about expression.
Audition Tips
If you don’t have access to an instrument, ask around. Past and current band directors are usually willing to let you practice on their equipment. If that doesn’t pan out, see if any of your friends or fellow auditionees can share access. If all else fails, and you’re in the financial situation to do so, search online for a local music store that rents instruments. At the end of the day, a piano/keyboard, practice pad — or even a pillow — will work.
I went the rental route at first, but once I was no longer able to afford it, one of my closest friends offered to let me borrow her personal marimba. I always tell her that I’m forever in her debt, and that one day I’m going to buy her a car. She would never let me do that, so I’ll probably just pay for her dinner a few times if she doesn’t beat me to it.
In my experience, success at these types of auditions really comes down to four things.
1. The packet
This should be memorized if you want to be taken seriously. Pay attention to dynamics, sequencing instructions and vibraphone pedaling (even if you want the marimba spot). Every detail matters. Don’t be afraid to experiment with ideas from the packet to challenge yourself and prepare for any on-the-spot variations to exercises. Depending on the caliber of the group you’re auditioning for, there may be an expectation that you’re able to play at a certain high tempo. Start slow and train for endurance.
2. Your solo excerpt
Don’t pick something cliché, and don’t pick something you know you can’t play. Remember, this is an opportunity to showcase your musicianship! A lush chorale played right is oftentimes more impressive than something super-choppy.
For reference, here’s a list of the solos I played during my marching career:
2020: O’Meara, Restless
2022: Lorick, Odessa
2023: Stucky, Isabelle Dances
IV. Stomp
2024: Åstrand, Tribus Modis
III. Arbitrium
Some other popular ones amongst Pulse members include:
Mueller, The Fairview Hymns
Sammut, Libertango
Cangelosi, Etude in E Minor
Marjan, Niflheim
Monkman, Nocturnal Dance
3. Your mindset
Be mentally prepared for a long, often sweaty day. Be ready to play more than you’ve ever played before. Expect the unexpected. Sometimes you’ll be asked to play something you might not have prepared for.
4. Your attitude
Set a realistic expectation for yourself. Do not go into auditions with an ultimatum. Your ultimate goal should really just be to make the group. Talk to the veteran members and get a sense of what it’s like to be in the group. You’ll learn a lot!
In the Thick of It
Here’s what a typical rehearsal weekend for Pulse looks like:
Friday from 7:30 PM — 12 AM
Saturday from 11 AM — 10 PM
Sunday from 10 AM — 5:30 PM
If your jaw dropped while reading that, don’t worry. It’s not actually that bad, and I promise I still had a life outside of “band.”
The ensemble gets a lot better every weekend, but it only works out if everyone takes care of business during the week. My rookie year was probably the busiest time of my life; I was a full-time college student working a part-time job at a restaurant, plus I had two teaching gigs. My schedule was absolutely jam-packed, but I managed to make it work. Yes, I was tired all the time (like my fellow bandmates probably were), but it was a part of my life I wasn’t willing to give up. Some advice I would offer to anyone trying to take on a similar schedule: Don’t sacrifice your sleep.
“Pulsemas” is an exception to the normal schedule. Every year, during the holiday season, we have three or four days of back-to-back 10 AM to 10 PM rehearsals. It’s a big commitment, but it’s almost like going on a little vacation. As much work as we put in, it’s a nice break from daily life, playing awesome music and hanging out with friends. During this time, we learn our entire second movement of music and also partake in festive traditions like ugly sweaters, Secret Santa and White Elephant (this gets pretty intense), plus we put up a “Pulsemas” Tree (an artificial fir with member pictures on ornaments) and decorate our instruments with lights, garlands and ribbons.
The Culmination
As much as it seems like the whole point of Pulse is the music, or the visual aspect, or the production value, it’s really all about the people. Our design team crafts a perfect program, the instructional staff facilitates our learning, and the members define the culture and bring the show to life. The administrative staff and board of directors take care of just about everything else.
It’s really all about the people.
In this activity, you spend so much time with these people that you might end up closer with some of them than you are with your family. In some cases, these people become your family. As one of our staff members likes to say about Pulse, “it’s the only place where everyone around you wants the same thing.”
As much as I idolized past members of Pulse from a young age, I learned just how intimidating it can be to work closely with those who inspire or once inspired you. Impostor Syndrome (where you come to doubt your own abilities despite achieving success) is extremely common in this activity and its effects can be amplified with exposure to certain teaching styles. After idolizing “the greats” for so long, it can be a hard pill to swallow when you realize you’ve become one of them. While I don’t necessarily feel like I always fit within those bounds, I keep pushing because I know I have a responsibility to uphold, inspiring future generations of percussionists and pushing the envelope of achievement.
What do guitar solos from Queen, Muse, Jimi Hendrix, Led Zeppelin, DragonForce, Metallica, Dream Theater, Weezer and 99.9% of other bands have in common? They all incorporate elements of the blues. Guitarists frequently use blues language in their solos. This isn’t something reserved solely for professionals — learning how to play the blues is the best way to start teaching students how to solo on guitar.
This is how I introduce soloing to students. I have them find songs that have guitar solos that they like. Then, we listen to them as a class, and I call out elements of blues style that I hear —bending, sliding, double stops (playing more than one note at a time), hammer-ons and pulls-offs, and vibrato. After we have listened to all the solos, it’s clear to the students that each solo has at least one element of blues style. I tell my students that if they learn how to play the blues, they are learning the building blocks of soloing in every style.
Blues History and Listening
It’s important to discuss the origins of the blues; students must have respect and reverence to the culture. Students are assigned to read the article, “A Brief History of the Blues,” and then the class discusses where the blues came from.
The best way to learn a new language is through immersion, surrounding yourself with people who speak it natively. The same principle applies to learning a new musical language. If you want to learn the sound of Bach, listen to nothing but Bach. If you want to play the blues, listen to the blues! The goal is to fully understand the style and its important players. By immersing yourself in the style of a particular artist and learning some of their licks, you will eventually be able to imitate their playing.
When I teach the blues, we listen all the time. I play the significant voices — B.B. King, Stevie Ray Vaughan, Albert King, Buddy Guy, T-Bone Walker — and more modern players like Joe Bonamassa, Kirk Fletcher and Josh Smith. We compare their tones and playing styles, listening for similarities in their vocabulary. For example, there is a clear lineage from T-Bone Walker, Albert King, Stevie Ray Vaughan to Josh Smith. You can tell that these musicians learned the blues language by listening to the greats of their time and developed their styles by expanding on what they heard.
With enough listening, students can identify who they are listening to based on their tone and playing style. Here are some playlists for early blues, classic artists, jazz blues and modern players.
Learning the Form
The blues is both a song form and a style. Its form has many variations, but most are 12 measures in length, separated into three four-measure phrases, and centered around the I, IV and V chords in a given key. Blues as a style involves interpreting a melody by adding bends, slides and other stylistic ornaments.
To understand the form of the blues, I have students listen to recordings of blues masters or to a blues backing track in A that I created. I ask them to clap when they hear the beginning of a new chorus. They usually intuitively feel the end of the 12-bar phrase and rarely need help counting it out. Once they can identify the beginning of the form, I pause the recording and ask students what measure I’m on. This helps them recognize larger phrases and develop an understanding of where they are in the form.
After that, I show students a lead sheet of the blues form using Roman numerals. They say the numbers of the blues when the chords change in a recording. Then, we play the root notes along with a backing track in A to create a one-note bass line. With enough practice, they can play the bass roots without needing the backing track. If your students are comfortable with power chords, they can play the 1-6-5-6 bass line to the blues form. This is a fun and easy bass line to play, especially because it centers around the power chord shape.
Students can play power chords along with a blues in A to further their mastery of feeling the blues form. They can play these chords in quarter notes or swung eighth notes. Just like the bass lines, students can add the 6th to their power chord shape on beats two and four to play a “Sweet Home Chicago” style blues shuffle.
Once students can hear the form of a blues and play a simple bass line and power chords, they are ready to start learning some language. I begin with call-and-repeat exercises such as one note played rhythmically with style and then I gradually add more notes to create simple phrases. Focus on having students copy not only the notes and rhythms, but also the articulation and dynamics — this is where the soul of the music lies.
Have students learn a lick and then record themselves and listen back to it. The goal is to make their performance sound as close to the original as possible. I also provide a lick library where students can listen to single licks played at two tempos and receive explanations of how the lick works. Let their curiosity guide which licks they want to learn. Some students will stick to easier ones, while others will seek out more advance-sounding licks because they enjoy the sound — which is super cool! Students can continue this study by finding licks in recordings and learn them by ear.
A Note on Using Scales to Solo:Some have tried teaching soloing using the blues scales. I think of scales as letters that can be used to create words. Without context, beginning improvisers often put the letters together to form words that make no sense. Moreover, it’s not just the notes that are played that tell a story through a solo, but how and when they are played. Often, when students solo with the blues scale, their playing lacks intention. Introducing licks through call-and-repeat activities allows students to not only learn notes that sound good over the blues but also allows them to understand how and when to play these notes to create words and phrases that tell their story.
Creating a Narrative
The best solos tell a story. There is a beginning, a middle and an end that takes the listener on a journey. It takes years of practice to improvise a solo like this. Often, professional guitarists have a rough idea of where their solo is going before they start. Some professionals even play the same or very similar solo in the same song.
To slow down the process, have students write a solo narrative outside of musical time. They can start by deciding how many choruses of the blues the solo will last. Then, they can write down the order of the licks that will be played. Beginning students often resist repeating licks in a solo, but that’s exactly what makes a solo memorable. They can write down ways to link licks together and plan how to develop dynamics, contrast and build energy over time. This is analogous to brainstorming and writing a short story instead of creating one on the spot. This exercise removes the fear of soloing and gives students an opportunity to feel confident about what they play.
After students have written and played a few solos, they can start to script improvised sections into their narrative, allowing them to freely create using the language they have assimilated into their playing.
The Jam
Now that students know the blues form, they can play a simple bass line, comp with basic chords and execute a planned-out solo using authentic blues language. This enables them to engage in one of the most transcendent activities musicians can partake in: jamming.
Put students into groups of three and have them take turns playing chords, bass and soloing. The group can come up with a band name, and each member can create a stage name. Allow them time to play the different rhythm section roles together with a drum backing track initially so they become comfortable keeping the form while playing in a group.
The first thing most students lose when jamming is the form, so it’s a good idea to let them know that the best way to get back into the form is to take a moment to listen to the other players. They can even help each other by indicating what measure is coming up. One thing they shouldn’t do is stop playing because this disrupts the flow and is a big no-no in the performing world.
Try It!
Since I started teaching the blues, I no longer worry about students taking solos that lacked intention or believability. The practice they receive from learning the language authentically translates to every other style of single-note playing. I used to force students to solo, and only those who had taken lessons before would volunteer. Now, I have students jamming with each other before school, after school and during resource periods. They are meeting on weekends and playing in each other’s garages and basements — it has really changed the culture of the guitar program at our school!
On my site, ShedtheMusic, I offer a Blues Teacher Guide. I hope this guide will help you as explore the best way to teach the blues to your students.
Let’s face it: Most guitarists don’t give bass the respect it deserves.
“How hard can it be to play?” many of them say (or think). “After all, it’s got fewer strings than guitar, and you mostly just play single notes on it.”
I don’t subscribe to that notion at all. Besides, as a songwriter and composer, I love changing the bass notes in a chord to create interesting harmonic progressions … and those powerful notes sound even better when played on a bass.
In this posting, we’ll take a look at how the average guitarist can easily transfer their guitar-playing skills to bass.
The Bassics of Bass
Let’s start with some of the “bassics,” if you’ll pardon the pun. The open strings on a four-string bass are the same as on guitar (E, A, D, G), only tuned an octave lower. For that reason, all the scales and arpeggios you already know on your guitar can easily be played on the bass, because they have the same exact shapes, although the wider fretboard and fret spacing means you’ll have to spread your fingers a bit more. However, you won’t have to deal with that awkwardly tuned B-string major third interval skip, or the high E string! So in effect, all your shapes become a lot easier to play and memorize. And yes, you can even use your beloved major and minor pentatonic scalesto create basslines. (See below for more about this.) In fact, lots of dedicated bass players love using those kinds of scales.
In addition to the fretboard being wider and the frets further apart, the scale length is longer, and the strings are much thicker. These differences may take a little getting used to, but with repetition and practice, the muscle memory of both your hands will adapt over time.
Yamaha TRBX604FM.
Yamaha PACP12M.
Although you can play double stops and even full chords on a bass, it’s rare: most of the time, you’ll be playing single notes only. That’s because the bass is mainly used to underpin and outline the chords being played on guitar or keyboard instruments.
Bass Amps, Cabinets and Modelers
Basses create frequencies well below that of guitar, so you should avoid playing it through your regular guitar amp, especially at higher volumes. You don’t want to blow the speaker cone! (You can, however, play bass through a P.A. system (using a D.I. (Direct Inject) box) or powered monitor wedges.
Instead, you should opt for a dedicated bass amp. High-quality bass amps, pedals and preamps are all available from Ampeg,a company well-known for bass-oriented products. If you record at home, you can also use your audio interface for direct connection into your DAW. Many guitar modelers, including the Line 6 Helix, HX Stompor Pod Go also allow for direct connection and offer numerous preset bass patches.
The Ampeg SGT-DI bass preamp pedal and DI.
Providing Harmonic and Rhythmic Support
The bass player is expected to support both the rhythmic and harmonic structures of the song. The best way to do the latter is to play chord tones underneath the actual chords. You can opt to play static chord tones (i.e., those that stay on one note) or walking basslines that use scales to create more movement. Quite often, bass players will create riffs that form the basis of the song, or will double guitar or keyboard riffs to add extra depth and power. The approach you take comes down to your own sense of musicality, creativity and skill … much like playing guitar.
If you have a strong understanding of chord/scale relationships and chord-tone arpeggios, you’ll appreciate why using chord tones creates the strongest basslines, the same way that chord-tone melodies and solos sound stronger and more resolute when played on guitar.
In terms of underpinning the rhythmic aspects, the key here is to lock in with the bass (“kick”) drum. Do this, and the groove will feel tight, dynamic and powerful. That doesn’t mean you necessarily have to add a note every time the drummer plays the kick, but you should always be locked into your own pocket on top of those pulses. You may even want to work out those parts with your drummer in advance.
Make a point of listening carefully to the overall rhythmic and harmonic feel that the other instruments are adhering to. I always think the best basslines are the ones that you feel, but don’t necessarily hear as a focal point in the song. Simpler lines are often more effective than complex ones because they better allow the other instruments room to breathe and move above them.
Bass Playing Techniques
The first thing you’ll notice when transitioning from guitar to bass is how much bigger the neck and fretboard are on a bass; the strings are further apart too.
Don’t worry, though. As mentioned earlier in this posting, with a little practice, you’ll start to adapt to the new physicalities. Try to keep your fingertips facing the strings and fretboard, and navigate the wider shapes by pivoting and rocking sideways on your thumb.
Depending on how well your bass is set up, you may also need more hand strength to depress the strings to the fret wires. My advice is to not overdo it at any one practice session. Build up hand strength over time, and never strain your fingers, wrist, arm or shoulders.
As with guitar, you should hold the neck of the bass at a forty-five-degree angle from the body. (You can see this kind of positioning in the video below.) This allows for the wrist to remain straighter. When seated, you’ll want to place the bass on the leg farthest from the headstock.
You can of course play the bass with a pick, same as guitar (in fact, certain types of music, such as hard rock or metal, may even benefit from this), but many bassists prefer to pluck the strings with their fingers and/or thumb. Playing with a pick results in a more defined tone, but using your fingers gives the notes the classic “thump” that most listeners associate with bass. Bassists typically use their index and middle fingers to alternately pluck the strings. Some players rest their thumb on a finger rest or pickup, or on the string below the one they’re playing to stabilize their plucking hand.
I am, of course, primarily a guitarist, but when playing bass, I generally eschew using a pick. Instead, I fingerpick the notes, assigning the thumb to the low E string, index finger to the A string, middle finger to the D string and ring finger to the G string. Traditional and professional bassists would probably be horrified by my technique, but I find that it’s easier for me to articulate scales and arpeggios this way.
I adopted this technique because the tendons on my picking hand couldn’t sustain the repetition on the larger strings. Again, don’t overdo your practice sessions when getting used to this larger, more physically demanding instrument.
Getting Started
I think one of the best ways guitarists should begin adapting to bass is to simply play major and minor pentatonic lines. These will allow you to easily outline the tones in most chords. For example, the minor pentatonic scale is basically a minor 7th arpeggio with an added fourth, so minor chords are covered. The major pentatonic scale can be used to outline major and dominant chords since the five notes in that scale consist of a major triad plus the second and the sixth. The chart below shows how this works:
Of course, if you know major seventh and dominant seventh arpeggios too, you’ll be able to expand your lines further, but start by keeping it simple and try outlining a simple progression such as the one in the video below.
A Word About Slash Chords
You can, of course, also opt to use bass notes that aren’t found in a chord. In tablature or chord charts, these are indicated by chord names that have a slash mark. These are usually referred to as “slash” chords; the letter following the slash is the bass note. For example:
A/B = an A major triad with B (the second) in the bass
A/D = an A major triad with D (the fourth) in the bass
A/F# = an A major triad with F# (the sixth) in the bass
Changing the bass note of a chord can dramatically change how it sounds, and even its chord quality (that is, whether it’s major, minor, dominant, etc.). For example, A/B creates an B11 chord, A/D creates a Dma9 chord, and A/F# creates an F#mi7 chord.
The Video
This video demonstrates my technique for playing bass, and shows various ways you can use major and minor pentatonic scales to outline a chord progression as if they were chord-tone arpeggios. Here’s the chord progression used:
The fingerboard diagrams below show the scales and arpeggios I employed to underpin those chords. Try following along if you have a bass.
The Bass
Yamaha basses have long been used by many of the world’s finest session players and touring musicians. I’ve had a BB434 model in my studio for the past four years, and it plays like a dream, looks really cool on camera and always sits perfectly in the mix.
Yamaha BB434.
The six-bolt miter neck joint holds the neck of this bass closer and tighter to the body, acoustically fusing these two separate components into one. Compared to a conventional bolt-on joint, miter bolting offers a more efficient transfer of string vibration throughout the body. The end result is outstanding sustain and resonance that brings every note to life.
The resonant alder body pairs perfectly with the five-piece maple/mahogany neck and rosewood fingerboard. In addition, the BB434’s custom V5 Alnico magnet pickups are tuned to deliver a brighter sound that cuts through in live performance and requires minimal EQ when being recorded.
The Wrap-Up
It can take many months (or years!) to acquire even the basic skills when learning a new instrument. But because guitar scales, arpeggios and melodic sensibilities all translate well to bass, guitar players have the unique opportunity to transfer their existing knowledge to the bass for near-instant gratification and musical rewards.
With a little patience to make the necessary physical adjustments and acquire a full understanding of the musical applications of the instrument, you can enjoy a lifetime of pairing the low-end frequencies of the bass with your guitar.
Want to learn more about bass? Check out these postings by fellow Yamaha bloggers E. E. Bradman and Michael Gelfand.
PHOTOGRAPHS COURTESY OF THE AUTHOR.
Click here for more information about Yamaha basses.
Music education doesn’t happen in a bubble. No matter how masterful we are as music educators, we can’t do it alone. It takes a team. In 5 Ways to be a Team Player, I highlighted the importance of the music department team. However, fellow music educators aren’t the only players who you need to help make your program a success.
Our music programs are a part of the fabric of our communities. As such, building relationships with key leaders and stakeholders in the school and community is critical to the success of our programs. Over my decade of teaching, I have come to know many amazing individuals and leaders who have helped my students be music-makers. While some connections seem obvious like your building principal, other individuals like a local radio DJ may not be on your radar.
While these people may assist you in very specific ways, like designing a program or securing funding for a new music library, I want you to consider something even more valuable that they can provide: perspective. I consider this network of school and community members as advisors to my program. They are individuals who I will contact if I’m planning a special event, working on a new uniform design, or just looking for guidance in my decision-making. Your network can help you design, refine and implement your program’s vision.
When considering how your network advises you, one option is to have a fixed group that meets at scheduled times throughout the school year. You could have one individual from each of the categories below meet or even just provide bi-yearly feedback. With my schedule though, what I have found most valuable is to have a list of advisors who I contact for help or feedback in the specific areas that they specialize in.
When networking, remember to also play a role in supporting their group mission. These people are a part of your network because they have a mutual interest in the success of students, education and community. In my case, the community is part of the band because the band is part of the community.
Here are some critical school and community members who I encourage you to meet with and build relationships.
School Administrators/Board Members
These are your closest decision-makers who directly impact what happens in your music program. Get to know them, ask them their thoughts about your program and what they would like to see or hear. School board members also offer unique potential as advisors because beyond their role on your board, they likely have a specialty area where they work full time.
Students
As educators, we have already fostered positive relationships with our students but are you seeking input from them? My primary student advisory group is my student leadership team. I seek their input on everything from T-shirt design to rehearsal planning. As the most direct stakeholders and beneficiaries of the program, they are essential in your feedback loop.
Parents
Parents are probably the next most direct stakeholders in education. They have the ability to provide you both perspectives on what their children and the community think and feel about your program. Parents, like board members, also have a wide range of diverse skills and professional experience that can help you achieve your program goals. I frequently consult my booster board parents but also send surveys to all parents or select randomized groups as needed. I most recently did this to see if they felt that the number of band shows we attended this year was too much on student’s schedules.
Local Government Officials
Depending on your municipality, the key players that you should get to know may vary. For me, our Township Manager, Assistant Manager, and Parks and Recreation department have been my primary contacts for helping to coordinate performances “out on the town.”
Civic and Service Organization Leaders
Groups like Rotary International and the Lions Club are common in many towns and usually already have some connection and involvement with the school system. These groups often are made up of many different members of the community and can almost be a focus group for community thought and sentiment. I personally work closely with the Junior Women’s League and Ancient Order of Hibernians who host parades and events in town that include our ensemble.
Veterans Organization Leaders
Bands and marching bands have an important connection to patriotism and our nation’s military history. As such, I have had the privilege of working with members of our American League for various events and parades. While you may see this as band specific, they may be great contacts if you are trying to bring a military ensemble to your school or have a student interested in pursuing a career as a musician in our military.
Secretaries and Custodians
Hopefully this isn’t the first time you have been told to network with these people who make your school run! While you may not see them as advisors, they are people you MUST consult when planning an event. They are the ones who will help you secure facilities and logistics.
Alumni
Alumni are important stakeholders in that they hold a direct connection with the program and often want to see its continued success. One alumnus who I mentioned above is local rock station DJ Brent Porsche who helped us put together a unique marching band show that included song introductions by local DJs from his station, WMMR Philadelphia.
First Responders
While you hope you will never need them, these people are present in our schools and community. If and when you do need emergency help, it is nice to know who will be showing up when you call. Additionally, these individuals can help you consult on safety items or provide services for events and performances you may be hosting.
_______________________________
How do you get started meeting these individuals? Send an email introducing yourself, give them a call, or attend an event or fundraiser they’re hosting.
Have more ideas on who should know or how you have them advise you? Feel free to reach out to me here.
Make life easier for yourself by taking actions for tomorrow. Then you don’t have to decide as much during the day, freeing up precious brainpower! I once heard that anxious people worry about the future and the unknown. I advocate for living in the future just a little bit. I don’t want to cause undue stress or worry, but by living in the future, we can direct our attention more to the present.
Consider two people, both music teachers, who have similar travel times to work and similar family structures.
Person A’s Routine:
Gets up with just enough time to quickly shower.
Spends a few minutes deciding on clothes.
Fixes hair or makeup.
Packs their bag, if applicable.
Stops at Starbucks for coffee and a sandwich.
Rolls into work with just enough time.
Person B’s Routine:
Begins the night before.
Picks out clothes for the next day and puts them at the end of the closet.
Packs breakfast and lunch for the next day.
Packs the school bag with any items needed for the next day.
Preps the coffee machine to just press “start” in the morning.
Wakes up a little earlier to avoid stress.
No one plans on having accidents or emergencies. Person A is by no means out of control. He will get the job done, albeit with a very tight timeline. However, on days with more traffic or spilled coffee or any variation in his routine, he may be off kilter for several days afterward.
Benefits of Person B’s Approach:
Avoids or better manages variations in the morning routine.
Chooses temporary discomfort in prepping the night before.
Reduces stress and wasting mental energy.
By living a little bit in the future — preparing just enough to eliminate making decisions when we should be acting — we remove stress and wasting mental energy resources. Often, the earliest hours of the day are our most productive times. We could be using this energy to prepare for our lessons, think through our actions in class, or even enjoy some music, an audiobook or a podcast on the way to work. Instead, many of us frantically miss this time in the morning because there is just too much to do in a short period of a time.
Here are five areas to start tomorrow tonight!
1. Evening Preparation Tips
Plan your sleep: Many of us stay up too late, bring our phones into our bedrooms or watch TV when our bodies tell us to wind down. Avoiding these things can lead to better sleep.
Prepare clothes and meals: Choose your next day’s clothes and prepare or plan your breakfast ahead of time.
Pack your work bag: Pack your work bag in advance to avoid rushing in the morning.
Prep your coffee machine: Prepare your coffee machine for quick use in the morning.
2. Setting Boundaries
Wake up earlier: Waking up 10 to 15 minutes earlier is less stressful than running 10 to 15 minutes late.
Avoid checking email before work: Don’t check emails before work; your email inbox is simply a to-do list that others add to.
Prioritize core job tasks: If you’re a new teacher, your only job is to get your ensemble to sound good and to get rehired for next year!
Take a defined lunch break: Don’t schedule meetings during lunch or catch up on emails.
Eat well, prepare for the next day, get a good night’s sleep, rinse and repeat — many see this life as boring. After all, we’re adults and free — why should we be so disciplined and live under such a restrictive routine? We fail to realize that discipline is freedom. Instead of seeing a lack of excitement, highlight what we get to do when we have a disciplined routine.
3. Create a Routine
Set morning rules: Don’t check emails at night or before work and prep what you can the night before.
Control your breakfast: Prepare your breakfast for quick use in the morning.
Organize your work bag: Have your bag ready or even leave it in the car.
Separate work and personal time: Take your lunch seriously and don’t take personal calls during work time.
4. Understand that Discipline = Freedom
Time for yourself: If you don’t set a routine, you aren’t taking your time seriously. If you’re not taking your time seriously, everyone else will notice. People are generally good, but they are also resource hogs. If you don’t use your time wisely and for yourself, you might as well give some of your time to others.
Avoid overworking: Busy and overworked mean being out of control. Our profession celebrates those who constantly work and don’t draw lines in the sand. If you don’t take control of your time, someone or something else will.
Let’s look at what discipline gets you. Set some rules for your mornings. Don’t check emails before work. Prep what you can the night before. Your breakfast only needs to be microwaved in the morning. It may not be as tasty as Starbucks, but you control it, it gets the job done, and it’s reliable.
Grab your pre-packed bag as you head out the door or consider putting it in the car the night before. Another option: Don’t bring anything home from school in order to draw the line. Get to work and do your work at work. Don’t take personal calls or waste your time or others. Prioritize your work, not others’ work.
Your main job is getting your ensembles to sound good and working on getting rehired for the next year. Take your lunch break and take it seriously. After lunch, get back to work until your workday ends, either with the end of school or after a rehearsal.
And then go home.
Your work obligations at home may consist of getting your clothes, coffee and food ready for the next morning. But the rest of the time at home until the next morning is your time. And you should consider at this time as sacred just like your work time.
We are music educators; we are not on call all night, and we do not hold nuclear launch codes. We work hard for the children, and by all means, this work is important, but make sure you don’t use this as an excuse for simply not knowing what to do with the free time that you do have.
5. Conduct a Weekly Routine Review
Review and adjust: Conduct a weekly review of your routine to ensure that it’s working for you.
Set goals: Set achievable goals for your work and personal life.
Reflect on progress: Reflect on your progress and make necessary adjustments.
This is definitely not new advice, and there will be some people who will argue against many of my tips. . However, my goal is to help you combat the notion that this job cannot be done unless you work from dawn until late into the evening. Not true!
One of my friends shifted to only working during work hours. She flat out ignored work outside of the workday. Later that year, her ensemble was accepted to perform at the state convention, a first for her and the school. Was the sole reason for this achievement the strict boundaries she set? Of course not. All music educators know that most seemingly overnight successes take 10 to 15 years to accomplish. Yet, this was a year that my friend was able to focus on the time allotted at work. When we buy into the idea that we have all the time in the world (in other words, working late hours and on weekends), we tend to treat our scheduled work time with much less importance and urgency.
I can’t guarantee a ticket for your ensemble to perform at state conventions, but I can suggest that if you realize you only have a finite amount of face-to-face rehearsal time with your students, you’ll probably change the way you structure your time. And, most importantly, there must be some time in there for yourself.
“All these kids want to play bassoon and tuba. And our choir — kids are literally fighting over singing the second alto part! What the heck am I going to do?”
There are those who have a perfectly balanced band, orchestra or choir. Balanced instrumentation or voicing, every part covered. “English horn solo? No problem! Our third oboe player will cover that!”
Then there’s the rest of us.
However, as the saying goes, the show must go on! So, let’s talk about some ways to program literature for your ensemble with limited instrumentation.
Composers don’t write with your band in mind. They write either to an ideal ensemble or the ensemble in their head. Don’t take this personally!
Select music that you can reasonably play with a majority of your group. If musical surgery is required to make the piece work, it may be time to admit that this is not the piece for your group right now. A few alterations here or there are fine, but when you are leaning into “arranging-a-new-piece” territory, it’s time to look elsewhere.
This may seem counterintuitive, but look at a piece before you listen. Many websites allow you to preview a piece. Pay particular attention to ranges. If the piece is written in ranges that are within your group’s capabilities (or stretches them maybe a note or two), then start digging in a little more. If you listen to a piece first, you might quickly fall in love with it because it sounds great, but it may be a bit too much right now (more on that later).
Take special care to look at solos. If a piece features a prominent flute solo and you don’t have a flute player, try another piece.
Be realistic about how many substitutions you may have to make. For example, a piece calls for a horn part and you don’t have any horns, but you have an alto, tenor saxophone or euphonium player to spare, then you can consider it. However, if the piece prominently features four unique horn parts and you only have one musician who can double, this performance may end up lacking. Reminder: Some simple alterations or subbing is expected, not a full-on Frankenstein of the piece.
Here’s another tough-love situation. You can’t play everything you want to play. “I’d love to play Shostakovich’s Festive Overture, but I have no trumpets and my clarinets can’t play over the break.” Maybe try Festive Overture next year?
A lot of us start our careers wanting to play music that we performed in high school or college. Sometimes this works out, but other times — and I certainly experienced this — we realize that our favorite pieces may not be the best fit for our ensemble. If you’re determined to program a piece you love no matter what, chances are you will run into some difficulties. In my case, I handed out one of my favorite pieces and did everything I could to make it work, only to sheepishly asked the kids to return the piece three weeks later and subbing it out with something that fit my ensemble.
Before we get into substitutions, let’s play “Know Your Instruments!” When making substitutions for band instruments, it can help to think about the wind instruments categorized into two groups: cylindrical and conical instruments.
Cylindrical: flutes, all clarinets, trumpets, trombones.
I’ve experimented with the following doublings and substitutions. Some of these are commonly known and even printed as cues in the music; others are suggestions I’ve tried or borrowed from other music teachers with some success.
Ultimately, we want to play the part on the instrument it was actually written for. But we all don’t have that luxury, and there are not flex versions of every piece out there.
So, if you have to double, stay within the same category as much as you can. In other words, sub a conical instrument with another conical instrument, or sub a cylinder with another cylinder.
Oboe — the most common sub for this is muted trumpet. Make sure that your trumpet player’s tuning slide comes out a mute (the mute makes them play sharp), and that the mute is secure in the bell!
Bassoon — euphonium, tuba, bari sax. Make sure to adjust for the range.
Horn — just take any instrument, stick your hand in the bell, and play a bunch of wrong notes … I’m kidding! (Please don’t write me hate mail, horn players!) A common doubling for horn is alto sax, but I actually like using tenor sax.
Baritone sax — euphonium subs quite well. Quite often, however, the euphonium is needed to cover, well, the euphonium part.
For all switches, take care to either transpose the part for the student or help them transpose the part themselves.
Make The Switch
Sometimes, we have more students in one section and no students in a section that we need. If you find yourself in this situation, consider asking students to make a switch. In this article, I go into detail with eight tips on helping students switch instruments.
Study Your Pieces: Take a look at your pieces — how is the melody often voiced? If you’re playing pieces where the trumpet, clarinet and flute are all playing the melody at a certain point, then the composer wants a clear sound because they wrote it for cylinder instruments. If this melody also includes horn and alto sax, then the composer wanted to add a little warmth or depth to the sound. When doubling, try to stay within the intentions of the piece as much as you can. And if the composer provides cross cues and you have the doubled instrument? Keep it simple — no need to use brain power to get creative!
What About Percussion? If you’re limited on percussion, look at your piece and see what is the most crucial part. For a march, we’ll prioritize bass drum, cymbals and snare. Chances are the keyboard parts may be covered somewhere else in the winds if you don’t have the personnel.
For smaller accessories or hand percussion (maracas, etc.), I’ve asked wind players who either rest during a featured percussion section or are a part of a section with plenty of members to cover.
“Must-Be-Nice” Doublings: I have a couple doublings that I put in a category called “must be nice.” These doublings either cost some money if you don’t have the instruments, or require you to have a good friend who will let you borrow them. My program is probably like yours — we’re always looking for as many resources as we can. That being said, if you run across these issues, here are some solutions.
English horn — Occasionally, we’ve programmed some pieces that have an English horn solo. I found it easier to come by 1 a soprano saxophone and 2) a soprano saxophone player. My high school band director taught me this doubling. One clinician listened to a recording of his band once and even commented on the “wonderful English horn sound!”
Tuba — I’m going to break the rule here of subbing (or assisting) with a different family, but besides the typical subbing of bari sax or even euphonium for some higher parts, bass clarinets can be your friend here. Specifically, a contra-alto or contra-bass clarinet — if you have the budget for one or the other. It may not provide the same “warmth” of a tuba, but a low clarinet sound can provide a good foundation for a band.
Resources
There are plenty of resources out there to help with programming, balancing, and instrumentation. I’ll offer two here:
Other people in your shoes: Seriously, find other programs like yours and reach out to the directors to ask how they “work their magic.” Chances are they do something like the above and they have other creative ways of working with what they have. Take as much as you can from every director you meet!
Bravo Winds Training Series: Teaching Smaller Bands DVD: This is one of my go-to resources. This series addresses the challenges of organizing, teaching and performing with a concert band of limited size and instrumentation. If you have a “less-than-traditional” group in terms of size or instrumentation, you won’t regret checking out this method. The program is hosted by clinician Yasutaka Kaneda, with percussion coaching from Michiko Kimura.
___________________________________
I can’t stress enough how important it is to select music that fits your ensemble. However, I have been in situations where it seemed that no one was writing music that was even close to my instrumentation (who knew that tuba players get older and, you know, graduate?). So, I made small adjustments to ensure that my kids could be proud of their performance at a concert.
Ultimately, do what is best for your ensemble while keeping the integrity of the piece intact. If you find that you are practically making a new arrangement, consider a different piece. Or, if you have a really good arrangement, take a chance and submit it for publication (just make sure you don’t perform something without permission/securing the rights).
For the last 40 years, thousands of people have traveled to Bethlehem, Pennsylvania, on the first Friday in August to attend Musikfest, the largest free music festival in the nation. Over 10 days, attendees are treated to hundreds of performances across several stages, featuring local artists of all ages and genres, as well as mainstream artists performing on the premium Steel Stage.
In August 2024, ArtsQuest, the nonprofit organization responsible for Musikfest, launched a new two-day event called the Musikfest Music Industry and Education Conference to bridge the gap between the music industry and music education.
Dr. Marissa Guarriello, the former ArtsQuest Director of Programming for Music, explained in a 2024 interview with local television station WFMZ, “There’s a gap right now in education where teachers and performers aren’t quite aware of how to break into the industry, and what the industry looks like.”
When considering how best to target these groups, Guarriello, who was recognized as a 2025 Yamaha “40 Under 40” educator, continued. “When we decided to do this with Musikfest, we decided that everyone could come and hear about the practice and about the ideas during the day and then walk out the doors and see it all happening in real life.”
The event took place exactly as planned!
Unique Approach
Like other music education events, the conference featured research posters, exhibitors and numerous sessions. What was different about the Musikfest conference was the opportunity to showcase a wide variety of topics, ranging from songwriting for music educators to the current impact of artificial intelligence on the music industry. Additionally, the event featured diverse perspectives and approaches to these topics.
At any given time, it was possible to hear considerations from the viewpoint of high school and college educators, as well as industry professionals who were not aligned to education at all. While this may seem counterintuitive, this free-form approach encouraged dialogues between those inspiring students toward the industry with those already involved in its success.
Each day of the conference started with a keynote presentation. On the first day, Dr. Alain Barker, Senior Lecturer in Music and Director of Music Entrepreneurship and Career Development at Indiana University, emphasized the significant influence the industry has on the future of music education, highlighting an unprecedented opportunity to promote cooperation between industrial and educational perspectives.
The second day’s keynote featured Dr. José Valentino Ruiz, Associate Professor and Founder/Director of Music Business and Entrepreneurship at the University of Florida, who highlighted the ever-growing need for creativity and self-expression in the industry. Ruiz then delivered a resounding performance on the flute, drawing on experiences in both the traditional side of music-making and expanding efforts toward the future.
Connecting the Industry and Education
From there, presenters took an even deeper dive into considerations for partnerships between the industry and education. The conference focused on several key topics regarding the future of music education, such as innovative strategies aimed at attracting a broader range of students to scholastic music programs.
Dr. Shane Colquhoun, Assistant Professor of Music Technology and Contemporary Musical Styles at Alabama State University, suggested that the conference was “an outstanding event that brought together some of the best and brightest minds in education and industry,” and that the individuals coming together during this event “could push curriculum and the field of music education forward.”
Sessions also emphasized the importance of alignment with industry practice by assisting students to release their music into the world and develop professional portfolios. Additionally, presentations promoted how musical experiences should reflect students’ identities, ensuring that their participation resonates both within school music communities and in the larger music landscape.
The author’s presentation at Musikfest was titled “More Kids in the Music Room: Redefining the School Music Community Through the Music Industry.”
My session was titled “More Kids in the Music Room: Redefining the School Music Community Through the Music Industry.” In the presentation, I took a deep dive into how to acclimate and introduce new populations of students into school music programs without disrupting current course offerings or students who are already involved in music. The presentation highlighted programmatic attempts to encourage traditional unaffiliated students (rappers, rock musicians, etc.) as well as students who might not fit into performance-only roles (producers, managers, designers, etc.). I presented a working strategy for incorporating these students and redefining what it means to be a part of a school’s music community. I also included the positive impacts that I have seen to newly evolved school programs like modern music performing ensembles and student-run music productions, as well as more traditional elements of band, chorus, orchestra or jazz.
I felt that my presentation was incredibly well received, and throughout the conference, I had numerous conversations and potential collaborations with other presenters and attendees. I connected with peers, encouraging similar programming at their schools, and I also took away a new perspective to my own considerations with respect to developing opportunities at my schools in the Abington School District in Pennsylvania, that is reflective of the industry.
Student Performances
Paired perfectly against the backdrop of these academic pursuits were opportunities to feature high school and college student performers who study and engage in the professional application of the industry. University of South Florida ensemble The Holly Drive Collective, led by Dr. Clint Randles, Professor of Music Education and Co-Director of Contemporary Commercial Music, was the headline performance for night one. The ensemble featured a multitude of student performers, all showcasing original works spanning pop, rock, hip-hop, soul, funk and EDM genres.
Dr. Randles said, “Musikfest (Education and Industry Conference) was an incredible experience for my students. They were able to perform on a stage next to Greta Van Fleet. They made connections after the performance that they have followed through with. Connections to the music industry were strong and observable throughout the conference. I want my students to do internships in the industry. The connections that I made with people in attendance have proven to be valuable already. I hope that we can do it again next year.”
Though not immediately a part of the conference, other scholastic music industry performers throughout the festival included students from local high schools, New York University and the University of Southern California, proving the impact of the event through its expansive reach.
Expand Horizons
Educational conferences provide great opportunities to expand horizons and consider new approaches that impact immediate teaching. The Musikfest conference did that and so much more, as it promoted not only thought-provoking considerations on the future of music education but also the most influential avenues and partnerships moving forward. This one-of-a-kind conference, both in concept and execution, was further acknowledged by many of the participants, including Sarah Gulish, CEO of F-Flat Books and an active clinician and presenter at music conferences nationwide, who said, “There is no industry-focused conference like this on the East Coast and none that correspond with so much live music! We need more dedicated spaces where music education isn’t separate from the music industry.”
Thanks to ArtsQuest and the Musikfest Education and Industry Conference, it won’t be as difficult to find such an opportunity to expand horizons for music education, the music industry, and to challenge the notions of music programming and creating the best practices for students.
For other music industry opportunities for students and teachers alike, consider attending the Modern Music Invitational, held each spring in Abington, Pennsylvania. For more information, email me, visit the website or read about the event here.
You might think you’ve never heard an oboe before — but chances are, you probably actually have! There are a surprising number of songs in pop culture (not just orchestral music) that feature the unique sound of the oboe.
The oboe is a double-reed woodwind instrument known for its bright, penetrating, slightly nasal tone — almost like a duck — that sets it apart from other woodwinds. It is often described as having a reedy, warm, expressive quality, capable of sounding both melancholic and reflective or playful and lyrical depending on how it’s played. While it may not always be the star of the show, the oboe’s ability to add color, emotion and texture makes it a unique voice in musical storytelling. Next time you watch a movie, play a game or hear a favorite song, listen closely — you just might find the oboe quietly working its magic.
Here’s a list of seven well-known songs that feature the oboe.
1. “The Simpsons” Theme Song
Composed by Danny Elfman, the oboe contributes to the textures of the melodies in this TV theme song, adding depth to the piece. While the oboe doesn’t take center stage, it blends seamlessly with other instruments to enhance the overall sound, adding to the unique character of the theme song. It’s most clearly heard in the whistle-like phrases in the beginning, where it complements the flute’s leading voice. Listen to it here.
2. “Hero” – Mariah Carey
Though its appearances are short and brief, the oboe gets a moment to shine here, gracefully gliding along the track for about four seconds right before Mariah opens the second verse. The same melody can be heard as a subtle, underlying motif throughout the rest of the track. It’s a great example of oboe accomplishing its job of adding magic and good feeling to a track. Listen to it here.
3. “Honey, Honey” – from the play Mamma Mia!
In this ABBA song from the iconic musical, the oboe takes the solo, infusing a whimsical quality to the main melody. Its bright, slightly nasal tone enhances the carefree and almost aloof nature of the song, becoming a defining element of the track’s unique charm. Listen to it here.
4. “Gusty Garden Galaxy” – from the game Super Mario Galaxy
The oboe plays a key role in shaping the adventurous spirit of this beloved video game soundtrack. As part of the main melody, it delivers warmth and excitement, reinforcing the sense of exploration that defines Super Mario Galaxy. The oboe’s soaring tone complements the playful instrumentation, adding a light, airy quality that resonates with many players who grew up with the game. Listen to it here.
5 “Do I Love You” – Lady Gaga and Tony Bennett
This slow tempo classic sung by the two iconic singers opens with an unmistakable 15-second oboe introduction before Gaga’s vocals take over. The oboe appears sparingly throughout the track as a motif, adding to the song’s lush, expressive quality. As part of the orchestral accompaniment, it enriches the emotional depth of the piece, making its fleeting appearances all the more striking. Listen to it here.
6. “Married Life” – from the movie Up
Composed by Michael Giacchino and featured in the animated film Up, “Married Life” uses the oboe to heighten the song’s emotional depth. Its warm, intimate tone shines particularly in the more reflective sections, where it leads the melody with delicate phrasing. The oboe’s voice beautifully conveys nostalgia — with an undercurrent of melancholy — that defines the emotion behind Up and perfectly captures the bittersweet highs and lows of the film’s love story. Listen to it here.
7. “Spin of Ice Crystals” – from the game Genshin Impact
In the expansive world of Genshin Impact, composer Yu-Peng Chen employs the oboe to enhance the frosty, enigmatic atmosphere of the region known as Dragonspine. Its mellow timbre introduces the main melody, weaving effortlessly through the orchestration to add depth and emotion. The oboe’s expressive quality immerses listeners into the cold, majestic landscapes, making it an integral part of the track’s evocative soundscape. Listen to it here.
Did you know that the oboe leads the orchestra in tuning? Find out why here.
Kinetic Joy & Forward Motion Rebekah Ko on music, cycling and their power in dispelling limiting beliefs
Written by Lisa Battles
Much of Seattle percussionist Rebekah Ko’s early career has been about figuring things out—embracing the process, managing expectations, doing the work and discovering her strengths.
Ko’s parents and brother immigrated from Taiwan before she was born in Torrance, California. The first part of her musical journey is similar to many others. Her mother enrolled her in piano lessons, something she always wanted herself. Respectful of her mother’s wishes, Ko did her part with piano for six years but was not passionate about the discipline beyond the performance aspects, she says.
Even so, when it was time to choose high-school extracurriculars, the band felt like the natural fit over sports options.
“I was an indoor kid, wasn’t involved in any sports, and was never really presented with outdoor activities as an option to be pursued,” Ko says. “I didn’t think of myself as an athlete.”
She started with the flute and in eighth grade, she was nudged toward percussion.
Finding New Rhythms
In short, Ko’s band director needed a percussionist who could read music, and she is very frank that she was not the best flutist. Initially reluctant, she soon discovered a deep connection to the kinetic nature of percussion. It was a revelation.
“I fell in love with it. …Something that was really lacking in my life was this kinetic energy connection, this physical connection with doing something and the joy of movement. That’s really what drew me in,” Ko says.
“That was the first time I had an organized activity, and I found a sense of community for the first time through marching band and indoor drumline.”
Despite these benefits, Ko didn’t initially plan to pursue music in college, much less as a career. She wasn’t clear on what that picture would look like for herself.
She halfheartedly applied to business schools while auditioning for something she knew she did want—a spot with the independent percussion ensemble, Pulse. While she wasn’t accepted because the organization did not take high schoolers with programs available to them, she gained a mentor with the group, who encouraged her to apply to music schools. Despite having missed critical deadlines with some, he encouraged her to find others while helping her upskill for auditions.
Around the same time, she earned a spot with the Santa Clara Vanguard Drum & Bugle Corps, where she connected with students from the University of North Texas.
Ultimately, UNT became her school of choice among the four to which she applied. Not only was she accepted to all of them, but she was offered varying scholarships, as well. The same could not be said of her business school applications.
Taking it as a sign, she decided to follow the path music was laying out for her.
Keeping an Open Mind
Ko says her first two years at UNT were rigorous, tackling a highly structured program that laid out four years of lessons and expectations for progress every week.
“I was trying to keep up with this curriculum that assumed you were starting from a certain place because you were there. …I was in a class of almost 40, and my expectation for myself was, ‘Don’t be the worst. Be the second worst.’ …That just allowed for a lot of freedom not to worry about comparing myself to others, which is really easy to do at a school with that many people in a department. I had the freedom to just find my own standards and decide what I wanted out of it and where I wanted to go with the time I was spending,” Ko says.
By her final two years, she had not only improved but developed a competitive edge. And yet she still wasn’t convinced she wanted to pursue an advanced degree. Instead, she leaned into her love for marimba, an instrument that became central to her musical identity.
Entering a New Cycle
After graduating in 2016, Ko’s path took an unexpected turn toward bicycles. A relationship with a bike shop owner introduced her to cycling, and she began helping out around the store. He built her a customized bike, and riding it “was like flying,” she says.
Much like the first time she experienced the physicality of percussion, this was an empowering experience, further breaking down misconceptions she had about her abilities.
While the relationship changed, they remained friends. When Ko moved to Seattle, he backed her up as a reference to land a job as a bike mechanic to make ends meet. Meanwhile, she networked in the local music circles, picking up work with community orchestras and chamber ensembles and playing private events.
Her daily cycling for transportation took the back seat when she bought a car. That temporary bike shop gig turned into a seven-year career in which she became manager.
Tackling New Challenges
In 2020, the pandemic brought a sudden halt to performances while fueling a surge in outdoor recreation. Needless to say, Ko stayed busy.
She also bought herself a mountain bike, a decision that deepened her connection to cycling and herself. Much like her marimba playing, the sport became a form of meditation, requiring her to enter a flow state where hesitation could lead to mistakes.
The process of learning to trust herself on the trails reminded her of the journey she had taken with music in college—overcoming fear, building confidence and pushing through self-doubt.
“If you tense up, things do not go well,” she says.
Mountain biking reinforced an important lesson: moving forward without second-guessing herself. It was a space free of expectations, where she could simply be.
“I think that was something that mountain biking really offered—just something new where I got to be without expectations for myself again and find that freedom,” Ko says. “Remember how that felt, hold that close this time, and apply that to everything else in my life. I think that’s the gift mountain biking has given me over the past four years that I want to move forward with.”
Sharing Her Gifts
Eventually, Rebekah left the bike shop to pursue work in public service. She now works as the director of community resources for Bike Works, a nonprofit focused on building resilient communities through sustainable transportation.
The organization offers educational programming about cycling for youth and adults while working to increase accessibility to underserved communities through repair classes, bike donations and a refurbishing program. Last year, they processed over 5,000 bikes—and that’s not even a record year.
At Bike Works, Ko touches almost every aspect of its mission, including educational programming, determining the viability of donated bikes and assisting with the BikeMobile, a free bicycle repair service. She says her involvement with the organization allows her to combine her passion for cycling with the greater purpose of empowering others with the freedom biking has given her.
Returning to Music with Renewed Intention
As for music, Ko now chooses projects with more intention and excitement. She and three other percussionists are launching a percussion chamber ensemble nonprofit. The idea grew from a longtime collaborator’s school, Seattle Percussion Works, which is dedicated to youth and adult percussion education. That space will serve as the foundation for their ensemble collective, providing access to instruments and practice space.
She is also reviving a trio she formed in 2018 with one of these same percussionists and a keyboardist/guitarist. After pausing in 2024, they are returning under a new name, aptly “AGAIN.” She says this time, they’ve agreed to clearer expectations to focus on experimentation and creativity without strict deadlines.
Another of her projects features an electric guitarist, a drummer, a mini organ player, and herself on marimba. Ko says it was the first group where she got to choose what she wanted to play, and she loves the challenge of adapting marimba to music that sometimes doesn’t strike her as the best suited for it.
“My mechanic, problem-solving brain gets tickled by that experience. It’s fulfilling in that I’ve gone through this process of feeling like I’ve made possible what seemed technically impossible at the beginning. That feels like I’ve conquered something,” Ko says.
Grateful for Perspective & Growth
Ko says the mountain views in Seattle help her keep a healthy perspective about the immediacy of life and her place in the world.
“The clouds will break, and there’s a straight shot of Mount Rainier,” she says. “It’s humbling and grounding, a reminder of how much bigger the world is outside of myself and the city.”
With those perspectives, she’s shifted how she approaches her next steps. While she long stood by embracing the process of elimination, exploring to rule out what she doesn’t want, now she is actively focused on those things she does.
In the same vein, she no longer views music as something that must be a singular pursuit requiring her to choose between it being a career or a hobby. The connection between music and cycling has shown her that both are avenues for growth, spaces where she learns about herself.
“Something I’ve been deconstructing the past couple of years is a mentality of music having to be a career versus a passion or hobby,” Ko says. “It’s a way of living and way of life, my lens of viewing the world and part of my everyday. Both music and cycling are disciplines that have added value to who I am and how I see things.”
In Part 1 of this two-part series, we talked about diatonic chord substitution, which replaces one chord with another chord that shares at least two of the same notes. But there are other substitution methods that are based on shared notes. In this posting, we’ll look at the ways a guitarist or pianist might use dominant chord and secondary dominant substitutions.
TRITONE SUBS
A dominant chord substitution replaces the dominant chord (the fifth degree of the key, the V7) with another dominant chord a tritone (three whole steps) away.
In a I–IV–V (E–Ama7–B7) chord progression in the key of E, for example, the dominant chord is B7, and a tritone away is the F7. Dominant chords set us up to resolve to the tonic, also known as the I chord (in this case, E major). Dominant chord substitution works because the “tritone sub,” sometimes called the “subV,” also pulls us toward the tonic.
Notice that B7 and F7 have two notes in common: A is the seventh of B7 and the third of F7, while F is the fifth of B7 and the root of F7. Both chords contain the same tritone interval: D# – A in B7 and A – D# in F7.
B7: B D# FA
F7: F A C D#
Both chords resolve nicely to E major (E–G– B–D#). B7 already has B and D#; the F# resolves to G, and the A resolves to B. The F7, which already has D#, resolves the F to E, the A to G, and the C to B.
If you’re accustomed to the usual V7–I resolution, the tritone sub may sound “spicy,” but in time, you might develop a taste for this dominant chord that’s a half-step up from the root. For example, have a listen to this vi–ii–V–I in E (C#mi7–F#mi7–B7–Ema7) chord progression …
… and then compare it to the same progression when there’s a tritone sub for the V chord (so that B7 becomes F7), which changes the progression to C#mi7–F#mi7–F7–Ema7.
When you substitute the B7 in E major to an F7, you are playing a chord that’s not in the key, so be mindful that the new chord doesn’t clash with the song’s melody.
SECONDARY DOMINANTS
Now that we’ve heard how interesting it can be to use the tritone of a dominant chord, let’s use the dominant of a dominant chord. In the key of G, for example, we’d replace the dominant chord (D7) with a dominant chord based on the fifth of D7, which would be A7.
Here’s a ii–V–I (Ami7–D7–G) chord progression in G …
… and here’s what it sounds like if we substitute the D7 for an A7, which makes the progression Ami7–A7–G.
Both the dominant chord and the secondary dominant chord pull toward the G major (G–B–D–F#). The D7 (D–F#–A–C) shares G major’s D and F#, the A resolves to G, and the C goes to B. Similarly, in A7 (A–C–E–G), the G stays constant as the A becomes G, the C becomes B, and the E becomes F#.
Instead of substituting the V for its secondary dominant, some jazz musicians add it, placing the sub in front of the V. For example, here’s a ii–V–I chord progression in G major (Ami7–D7–G) …
… and here, adding an A7 — the secondary dominant of the D7 — changes the progression into Ami7–A7–D7–G.
You can use secondary dominants to replace, precede, or resolve to other chords, too. In the key of G, for example:
The secondary dominant of the ii chord (“V of ii”), Ami7, is E7.
The secondary dominant of the iii chord (“V of iii”), Bmi7, is F#7.
The secondary dominant of the IV chord (“V of IV”), Cma7, is G7.
The secondary dominant of the V chord (“V of V”), G7, is D7.
The secondary dominant of the vi chord (“V of vi”), Emi7, is B7.
Songwriters use secondary dominants to add excitement, delay resolution, change key or go to a new section of a song. To add pizzazz to a I–vi–ii–V in G, try adding a secondary dominant that resolves to the vi, which changes the progression from G–Emi–Ami–D7 to G–B7– Emi–Ami–D7. Here’s the original …
… and the same progression with the B7 substitution:
You can take this a step further by swapping the ii chord (Ami) for a tritone sub (E♭7), which leads smoothly into the V (D7). For example, here’s a G–B7–Emi–E♭7–D7 progression:
It can be extremely helpful to know what your keyboardist or guitarist is doing regarding substitutions. If, for example, you see a dominant chord that’s not in the key of the song, consider that it might be a secondary dominant, and if you see a dominant chord a half-step from the root, it’s probably a tritone sub. If you aren’t sure, ask!
Did you ever notice how music sounds better when you turn up the volume? The louder it is, the more bass and treble you hear. But when you turn it down, the midrange becomes more prominent as those low and high frequencies recede.
That phenomenon is a function of how the human ear works. It’s a bit problematic when you want to listen to music quietly, because what you hear tends to sound thinner and less exciting. Fortunately, audio gear manufacturers have come up with various ways to compensate. Yamaha Adaptive Low Volume, incorporated in the company’s new SR-C30A compact sound bar, is the most recent — and most advanced — of such loudness-compensation technologies.
The Yamaha SR-C30A sound bar.
Before getting into how Adaptive Low Volume works, though, a little background is helpful.
The Fletcher-Munson Discovery
Back in the 1930s, a pair of scientists named Harvey Fletcher and Wilden A. Munson were the first to discover that humans perceive frequencies differently at various levels. Their experiments on a group of headphone-wearing test subjects led to the creation of what are known as Fletcher-Munson curves.
Expressed in graph form, these curves map out how we hear frequencies at different volume levels. Fletcher and Munson’s findings, incorporated with subsequent research, are now considered a subset of the Equal Loudness Contours, published by the International Standards Organization (ISO). Although the curves have been updated, Fletcher and Munson’s original concept has held up over time.
The Equal Loudness Contours are shown below. The vertical axis represents volume (specifically, the Sound Pressure Level, in decibels) and the horizontal axis represents frequency (in Hertz). The red and blue lines show how loud each frequency needs to be in order to be heard equally, as compared to other frequencies. (The red lines incorporate modern research, while the blue lines show Fletcher and Munson’s original findings.) The lines are curved because we hear more high and low frequencies at different volumes; they’d be flat if we heard them at equal volumes.
Compare the lowest and highest of the red curves. This shows you that the louder the volume, the less variation there is. In other words, we hear frequencies more evenly at louder levels than at quieter ones.
Manipulating the Mids
Over the years, a control called “Loudness” has been audio gear manufacturers’ primary weapon against those “lost” low and high frequencies. Typically found on stereo receivers, this control boosts low and high frequencies so music sounds full and rich even when the volume is turned down. In some products, it’s a simple on-off switch; in others (like the Yamaha R-N1000A), various degrees of Loudness can be engaged. Sometimes the degree of boost is automatically adjusted, depending on the position of the main volume control: the higher the volume, the less the boost, until the loudness circuit is removed from the signal path altogether.
The Yamaha R-N1000A is equipped with a variable Loudness control.
The concept has been around since before the digital era. However, it’s now usually implemented with DSP (digital signal processing), which can do a more precise job than older analog circuitry.
In the Quiet Night
In recent years, some manufacturers have equipped their wireless speaker systems with a variation on loudness compensation that uses compression (the reduction of levels that exceed a certain threshold) to decrease midrange frequencies at low volumes. Typically referred to as a “night setting,” it’s designed to allow you to listen to music or watch movies with the volume turned down low so as not to bother others in your home.
The problem with such a system is that the compression reduces the dynamic range (the difference between the quietest and loudest signals) of the audio as a whole. This tends to homogenize the sound, making it less pleasing to the listener.
Changing with the Volume
And that brings us to Yamaha Adaptive Low Volume. While Yamaha has integrated loudness compensation systems of various types into its consumer audio products for years, Adaptive Low Volume technology, available in products like the aforementioned SR-C30A sound bar (which includes a wireless subwoofer), represents a new level of quality and accuracy.
The Adaptive Low Volume system is built into the unit’s volume control circuitry. You don’t need to turn it on; it’s always active. It keeps your music sounding full by employing sophisticated equalization, not just of the low and high end, but the midrange frequencies too. It’s called “Adaptive” because it’s constantly monitoring the audio, applying just the right amount of boost and cut to keep a consistent sound regardless of volume. What’s more, because it uses EQ instead of compression, it doesn’t affect dynamic range, so what you hear remains true, even when you’re enjoying music late at night and don’t want to disturb others.
Über-cool … and a great example of how technology can be used to maintain quality sound at all listening levels!
You know it’s spring when baseball season begins. Time to begin enjoying those peanuts, caramel popcorn and the crack of the ball on the bat with these 10 beloved songs about America’s Pastime.
1. GLORY DAYS
This song from Bruce Springsteen’s iconic Born In The USA album focuses on a man who ruefully looks back on his “glory days” playing high school baseball while recalling some of the friends he knew. The first verse is based upon a chance encounter Springsteen had with one of his past Little League® teammates when he himself played baseball in a Babe Ruth league. Listen to it here.
2. THE GREATEST
The lyrics of this 1999 Kenny Rogers song portrays a little boy repeatedly tossing a baseball up in the air, then swinging and missing, though he constantly refers to himself as the greatest player. When his mom calls him in for dinner, we discover that he imagined himself as the pitcher, not the hitter, earning strikeout after strikeout. Listen to it here.
3. NIGHT GAME
This beautiful ode to baseball was written by Paul Simon, based on his memories of attending baseball games in the New York area where he grew up as a kid. The track features the legendary Toots Thielman weaving an evocative harmonica part over Simon’s guitar as the song slowly develops … just the way a great game would. Listen to it here.
4. DID YOU SEE JACKIE ROBINSON HIT THAT BALL?
This feel-good jump blues track was originally recorded by the Count Basie Orchestra in 1949, two years after Jackie Robinson made his major league debut. The song was later covered by Natalie Cole and included in a Ken Burns baseball documentary. Listen to it here.
5. CENTERFIELD
You’re virtually guaranteed to hear this track playing over the PA at most baseball games, both major league and minor. Interestingly, singer/songwriter John Fogerty (the famed front man for the ’60s group Creedence Clearwater Revival) has said that he chose the name of the album before he wrote the song, which was inspired by the ultra-deep centerfield at the original Yankee Stadium. Listen to it here.
6. THE CHEAP SEATS
The Cheap Seats is not only the fifteenth studio album by country music band Alabama, but the name of this feel-good baseball-tinged track, which was used as the theme song by ESPN for their Minor League Baseball games during the 1994 broadcast year, when the single was riding high in the charts. Listen to it here.
7. JOE DIMAGGIO DONE IT AGAIN
This fun track by Billy Bragg and Wilco from the 2000 album Mermaid Avenue Vol II features banjo and guitar, along with lyrics by Woody Guthrie written in 1949, about an old-timer struggling to keep up with the younger kids … proving that some topics are timeless. Listen to it here.
8. ALL THE WAY
Eddie Vedder, lead singer of the rock band Pearl Jam, wrote this one about his favorite baseball team, the Chicago Cubs. Vedder was from Evanston, Illinois and was a lifelong fan. The song is also known as “(Someday We’ll Go) All the Way,” in reflection of the fact that, when it was first released in 2008, the Cubbies hadn’t won a World Series in 100 years — something the team rectified in 2016 … which prompted a video re-release of the track. Listen to it here.
9. SWING
Country artist Trace Adkins recorded this track in 2006. The video uses baseball as a metaphor for a women’s night out at a tavern, depicting the men that play the “game” — including Adkins himself, who ultimately has to step up to the plate. Listen to it here.
10. TAKE ME OUT TO THE BALLGAME
It doesn’t get more baseball than this 1908 Tin Pan Alley song, which has become the unofficial theme to the game, traditionally sung during the seventh inning stretch. Interestingly, neither of the composers had attended a ball game before writing the song! It’s been recorded literally hundreds of times, but the classic version is the one performed by Frank Sinatra and Gene Kelly from the film of the same name. Listen to it here.
Random person on social media: “Schools are failing us — they need to bring back shop, accounting and COMMON SENSE.”
Listen, I appreciate the feedback, but I think we’re doing just fine. Now, don’t get me wrong: Schools can always improve, and educators are always looking for ways to get better. But we must be realistic about the growing list of expectations placed on schools today. It’s not just about teaching the basics anymore.
I love being practical and actionable in my approach. So instead of getting caught up in the noise, let’s focus on what we can do in our classrooms, right now. After all, there are plenty of life lessons being taught every day, whether or not people realize it.
In my music classroom, we’re not just talking about notes and rhythms. This year alone, I’ve dealt with plenty of situations that had little to do with music, and a lot to do with life skills — things that could be considered “common sense.”
Here are five areas where music students are learning valuable life lessons:
Conflict Resolution
Time Management and Organization
Appearance and Hygiene
Leadership & Employment
Family Connections
Let’s dive in and talk about how these life skills are just as important as hitting the right notes.
Area 1: Conflict Resolution
“Let’s not argue about who’s right. Let’s just agree that I am.”
I once read that 10% of conflicts are real disagreements; the other 90% are tone and communication issues. In my class, it’s not just about learning notes but managing high emotions. I make it a point to teach students how to manage disappointment and resolve conflicts constructively, whether they’re upset about seating arrangements or feeling unheard.
Recently, a student came to me because they were frustrated with another teacher’s feedback. We practiced respectful ways to approach the teacher and have that difficult conversation, and just days later, the student felt there was a breakthrough. All it took was a conversation, and it wasn’t nearly as difficult as the student thought (and the student found out that this teacher did not “hate them,” but in fact, cared quite a bit about their progress). These skills will serve students far beyond the classroom. Conflict resolution is something they’ll carry into the workplace and personal relationships.
Area 2: Time Management and Organization
We can care for our students AND we can understand they will try to game the system a little. I’ve always held to the saying, “To be early is to be on time; to be on time is to be late.”
It’s about more than just playing the notes in time — it’s about teaching responsibility and accountability. Students must be in their seats or on the riser, with all their materials and ready to go by the agreed-upon start time. Enter my classroom, one minute before the bell rings, and here comes a student who has been hanging out by the lockers for the past few minutes. They approach me with that familiar request: “Mr. Stinson, can I go to the bathroom?”
I look at them and ask, “Are you asking to go to the bathroom, or are you asking to be late?” There’s a pause before they respond, “Uh…good question.” We have to care for our students and help them manage these moments, but we also need to understand that they’ll try to game the system from time to time. It’s my job to set those boundaries while still supporting their needs. Teaching them the value of punctuality is not just about being in class on time — it’s about respect, preparation and being accountable for their success.
Example: A student regularly started pushing the boundaries with time, arriving to class right before the bell and then asking for a pass to use the restroom. After a few days of this, I pulled them aside and had a candid conversation. We discussed the importance of being prepared and on time, not just for class but for life. I explained that showing up late might seem like a small thing, but in the real world — whether at a job, in college or with commitments — punctuality matters. I encouraged them to take care of personal needs before class and to see showing up early as part of their responsibility. It wasn’t long before this student started arriving with time to spare, ready to go when the bell rang. It was a small win, but one that showed them how taking responsibility for something as simple as being on time can set the tone for bigger successes later on.
Area 3: Appearance and Hygiene
“The aim of art is to represent not the outward appearance of things, but their inward significance.” — Aristotle
Enforce the school dress code. If you’re uncomfortable with this, talk to a trusted colleague to help. Many teachers like to discuss the why of the policies, but that’s usually above our pay grade. I’m an employee, so I’m going to follow these guidelines.
Hygiene: In the event you have to discuss body odor or cleanliness with a student, make sure that they can retain as much dignity as possible. If there are counselors in your school who are good at handling this, don’t hesitate to let them know if a student is suffering from poor hygiene. Additionally, you may find that knowing where some hygiene products (deodorant, etc.) are housed in the school may be helpful. I just let my students know where these items are as a group, in case they forgot to freshen up after a long day.
In a music program, performance days are big events, and first impressions matter even more. We often talk about how an audience will judge their performance not by how well they play, but by how they look and act walking on stage!
I tell my students that showing up to a concert is like walking into a job interview — you’re representing yourself and the entire group. We go over the basics: clean uniforms, polished shoes and a neat appearance. I’ve had to remind a few students that this isn’t just about looking good, but about respecting the hard work everyone has put in.
Area 4: Leadership and Employment
I encourage my students to seek opportunities both inside and outside of school — whether it’s joining clubs, taking on leadership roles or even finding part-time work. These experiences are invaluable for their growth, but with new responsibilities comes the need for preparation. We spend a good amount of time discussing how to navigate this process. For instance, we talk about how to request strong letters of recommendation and what to include in job applications.
Recently, a student wanted a job at a vintage clothing store. We spoke about what possible questions may be asked (for example: when someone asks you what your weakness is, you would benefit from answering how you work through a weakness). The student was able to practice some interview questions with another student, and they got the job! And, of course, now we are working through scheduling conflicts with work and band rehearsals, but that’s a story for another day!
I also help students prepare for interviews — for a job or a class leadership position — and I make sure they present themselves confidently. And while I’m careful not to overstep, I do touch on financial responsibility like budgeting their earnings, understanding the value of saving, and how these skills will serve them beyond high school. Of course, I always make a disclaimer that it is just an opinion, especially if it differs from family advice.
Area 5: Family Connections
I didn’t grow up in a “family first” home, but I remember the way my teachers showed me what family could mean. They’d talk about their kids with pride, reminding me that there was more to life than schoolwork. Now, I share those moments with my students, whether it’s about my daughter’s college visit or a family birthday. These connections remind students that we’re all balancing life together.
This is also a time to help parents out. Sometimes kids like to complain about their parents. They don’t always like when I talk about this, but there are times when I like to let my kids know how I agree with their parents. This helps to reinforce positive behavior.
______________________
Yes, we’re teaching music, but we’re also helping kids grow into responsible, thoughtful, and prepared adults. Whether it’s conflict resolution, showing up on time, or simply looking presentable for a performance, these lessons go far beyond the walls of the classroom. The skills they’re picking up in performance music are the same ones they’ll carry into the rest of their lives — whether they become doctors, engineers or stay involved in music.
While some argue that schools need to teach more real life skills, I’d argue that these lessons are already happening every day in classrooms across the country — often without anyone realizing it. Every single day, students are learning how to show up, work hard and handle life’s challenges. The best part? They might not even realize it’s happening. But one day, they’ll look back and realize those rehearsals were about a lot more than playing the right notes — they were about showing up for life.
Let’s celebrate Saint Patrick’s Day by paying homage to five of the most famous Irish musicians … including one that will probably come as a surprise:
1. U2
They’re inarguably the most well known band to ever come out of the Emerald Isle. Originally a six-piece, the group formed in Dublin in 1976. Within a few short years, singer Bono, guitarist David “The Edge” Evans and their compatriots Adam Clayton and Larry Mullen Jr. were selling records by the millions and setting attendance records in stadiums the world over. They’ve had so many hits over the decades, it’s hard to pick just one or two, but to get a flavor of the group’s powerhouse sound, check out “Pride (In The Name Of Love)” and “I Still Haven’t Found What I’m Looking For.”
2. Van Morrison
Born in Belfast in 1945, Van began playing guitar at the age of 11 and added piano and saxophone to his repertoire while still in his teens. In 1963, he formed the R&B group Them (who had a major hit in 1964 with his song “Gloria”) before launching a successful solo career and giving us two of the most quintessential sing-along tracks ever: “Brown Eyed Girl” and “Moondance.”
3. Enya
Born Eithne Pádraigín Ní Bhraonáin, she’s Ireland’s top-selling solo artist ever, with a distinctively esoteric musical style that includes folk melodies, extensive voice layering and dense reverbs, as exemplified in her hits “Orinoco Flow” and “Only Time.” Her songs have also been featured in the Lord of the Rings trilogy.
4. The Chieftains
Formed in 1963 under the leadership of Paddy Moloney, this group has become synonymous with traditional Irish folk music, with a sound that is almost entirely instrumental and largely built around uilleann pipes. Over the years they have collaborated with numerous artists, including the aforementioned Van Morrison, as well as Luciano Pavarotti, The Rolling Stones and Roger Daltrey.
5. Paul McCartney
Yes, that Paul McCartney. Like many Liverpudlians, Macca is of Irish descent, and, with his post-Beatles band Wings, he released a single entitled “Give Ireland Back to the Irish” in February 1972 as a protest to the events of Bloody Sunday, when British troops in Northern Ireland shot dead thirteen Irish Republican protestors. The record was immediately banned in the UK, and was largely overlooked in the United States too, reaching only number 21 on the Billboard Hot 100 … but it did top the national charts in Ireland.
It’s that time of the year when we make lists and resolutions about all of the things we want to accomplish in the New Year. Don’t forget about your audio/video systems when you put this list together! There are plenty of small projects or additions that can enhance your entertainment experience in a big way.
Here are some of the improvements you might consider making to your home technology systems in 2025.
1. Add Outdoor Speakers
If you spend a lot of time in your backyard, patio or pool, this one’s for you. Don’t mess around using your smartphone to listen to music outdoors! You need a proper set of speakers with some significant amplification to deliver good quality sound and cover a big area … and to battle the ambient noise of traffic, splashing and noisy neighbors.
Difficulty Level: 4 – 8 (Based on a scale of 1 – 10)
First, you’ll have to mount two or more speakers to a sturdy surface. This could be an exterior wall of the home, a trellis, or a post in the landscaping.
Next, you’ll have to get signal to the speakers. If you’re using a wireless system like Yamaha MusicCast, this is an extremely simple process. If you’re using a wired system, it’s a little more complicated as you’ll need to do a wire run, particularly if you want to hide the wire. In the latter case, you may need to take advantage of crawlspaces or attics to get the wire to the outdoors in a clean fashion. Here, hiring a professional installer might be a good option to consider.
Cost: $$ – $$$ (With $ being least expensive and $$$$ being most expensive)
Assuming you already own an amplifier (preferably one with multiple zones, since this allows you to control your music going to your outdoor speakers independently of the music going to your indoor ones), you just need to purchase a pair of all-weather speakers such as Yamaha N-AW194s, along with a sufficient amount of 14-gauge 4-conductor speaker cable. Quality outdoor speakers can be found for well under $200.
Yamaha NS-AW194 all-weather speakers.
Required Tools / Equipment
Cordless drill
Screwdriver
Amplifier (preferably one with multi-zone capability)
Maybe 2025 is the time to add music to your office, dining room or master bath. After all, the more rooms with music, the better! Just popping some speakers on a desktop or tabletop is simplicity itself, but if you want the clean appearance of flush-mounted in-ceiling or in-wall speakers, then you have a little project on your hands. Much like the installation of wired outdoor speakers, unless you’re using a wireless system like a Yamaha MusicCast-compatible receiver and speakers, you’ll need to run wire from point A (your amplifier location) to point B (the ceiling or wall of the room you want music in). On top of that, you need to make sure you install the speakers in alignment with lighting fixtures as well as away from electrical wiring and between beams and joists, so this may be something you might want to put into the hands of a professional installer.
Difficulty Level: 8 – 9
Routing wire through a house can be a challenge, as is lining up speakers in a ceiling.
Cost: $$ – $$$$
Most in-ceiling and in-wall speakers are quite affordable, so if you decide to tackle this project yourself, there won’t be much cost involved. If you opt to hire an installer, the expenditure can be significantly higher … but you’ll get a professional job done.
With movies being immediately released on streaming services, there is no better time to turn your viewing room into a home theater. Don’t be daunted by this task: You can do it! The toughest part will be getting the wires to all the right places, but using a wireless system such as an AV receiver and speakers with Yamaha MusicCast capabilities (such as the Yamaha RX-A8A AV receiver shown below) makes things much easier.
Yamaha RX-A8A AV receiver.
With a simple 5.1 surround setup, you just need to get audio signal to six speakers, but if you are embarking on a trip to cinema nirvana (aka Dolby Atmos, which is supported by the aforementioned Yamaha RX-A8A), then you will need to get as many as a dozen wires to a dozen speakers. A Dolby Atmos system will require three or four speakers in front of you (left, center, right, and most likely a big subwoofer) as well as two additional speakers on the side and two behind you, plus two or four speakers above you, mounted in or on the ceiling.
If you have attic space or a drop ceiling, running and hiding the wires is fairly straightforward. However, if you have to open up walls to get wires around, this can be a bit trickier and may require the services of an installation professional. The good news is that, assuming the video equipment is below your TV, the video wiring should be pretty easy as you’ll only need to get a single HDMI cable from your TV to the AV receiver.
Difficulty Level: 6 – 9
Wire running could be a challenge unless you have an attic, crawlspace or drop ceiling to work with. If you do, the difficulty level could drop to a 6.
Cost: $$ – $$$$
The costs will vary depending on how high-performance you want your hardware to be.
There are a lot of products out there to make your home smarter. Here are a few you might consider adding:
A doorbell system that rings to your smartphone
A doorbell camera that shows visitor’s faces on your smartphone
A smart thermostat that helps you manage your power bill
An intelligent irrigation system that won’t waste water on a rainy day and automatically adjusts to changes in seasons or weather
You also might consider swapping out your dumb lighting dimmers for some intelligent ones so that you can easily set lighting timers, change the color of the light, or simply reduce your utility bill.
Difficulty Level: 2 – 4
Most of these products are made for the consumer, so installation and configuration is pretty painless for most folks. Swapping of lighting dimmers is the most complex of the ideas listed above, and may require an installation pro or electrician unless you are comfortable with basic electrical wiring.
Cost: $ – $$
A lot of these devices are fairly inexpensive and all are widely available online.
Required Tools / Equipment
You can do almost all of these projects with just a screwdriver.
Let’s face it: TV sound stinks. That’s because manufacturers are constantly trying to make the TV cabinets as small as possible, with the screens as large as possible, leaving no room for quality speakers. On top of that, the speakers often face the wall behind the TV instead of the listening area. This makes for some really difficult-to-hear dialogue.
The good news is that there’s a super-easy DIY project that can solve this issue: Just connect a sound bar. Installation is a snap. Connect a cable to your TV, do a fast configuration, and voila: instant way-better sound!
A good choice here would be the Yamaha SR-C20A, which delivers great sound and is compact enough to fit anywhere (on top of or inside an entertainment cabinet, for example). What’s more, handy rear-panel keyholes mean that it can be easily mounted on a wall if you prefer, though this would require running a cable through the wall, which makes the project slightly more complex.
Yamaha SR-C20A sound bar wall-mounted.
The SR-C20A also provides virtual surround sound capabilities and a built-in subwoofer to bring your favorite movies to life without the need to run any other wires. There are also sound bars that come with separate wireless subwoofers. Either way, adding a sound bar/subwoofer combo is the most painless home audio improvement you can make.
Difficulty Level: 1 – 2
Easy to install, easy to configure. If you want to mount the sound bar on a wall, this requires running a cable through the wall, which makes things a little more involved, but it’s still a simple project.
Cost: $ – $$
Sound bars range in cost depending on the performance you want. There are lots of good options under $200.
Required Tools / Equipment
Cordless drill (if you want to mount it to a wall)
Screwdriver (if you want to mount it to a wall)
HDMI cable
Sound bar
Wireless subwoofer (if the sound bar does not have a built-in subwoofer)
With March upon us, it’s time for some basketball fun. Break out the snacks and beverages and fire up your home theater, because it’s not only about the tournaments, it’s also about some great hoop-related movies. Here are 10 of the best of all time.
1. Space Jam
This live action/animated comedy stars none other than the great Michael Jordan playing himself. In addition to supporting roles from Theresa Randle and Wayne Knight, you get to hear the voices of Danny DeVito, Billy West and Kath Soucie. The movie takes a fun look at the period between Jordan’s retirement in 1993 and his return in 1995, but this time around he enlists Looney Tunes characters in a basketball game against visiting aliens! Find out where to stream it here.
2. Hoosiers
With a score by Jerry Goldsmith, this 1986 release stars Gene Hackman as a new basketball coach with a troubled past. Co-star Dennis Hopper received an Oscar® nomination for his role and Barbara Hershey helped round out an exceptionally strong cast. Hoosiers has been recognized by the United States National Film Registry as a “culturally, historically or aesthetically significant” movie. Find out where to stream it here.
3. Love & Basketball
Produced by Spike Lee and Sam Kit, this cult classic from 2000 tells the story of two Los Angeles neighbors who are chasing careers in basketball. The main characters, Quincy McCall (played by Omar Epps) and Monica Wright (Sanaa Lathan) intertwine struggles in life with their love for the game … as well as their love for each other. Find out where to stream it here.
4. He Got Game
Another film from director Spike Lee, this 1998 sports drama stars Denzel Washington and Ray Allen. Washington plays Jake Shuttlesworth, whose son (played by Allen) is the top-ranked basketball prospect in the country. Shuttlesworth is in prison for accidentally killing his wife, but is released on parole in order to convince his son to play for the governor’s alma mater. Interestingly, football legend Jim Brown plays a parole officer. Find out where to stream it here.
5. Hoop Dreams
This compelling documentary follows two African American high school students as they are recruited by a high school with a top-flight basketball program and given the opportunity to pursue their dreams of turning pro. Back in 1994, when the film was first released, critics Gene Siskel and Roger Ebert gave it “Two Thumbs Up” and the New York Times added it to their Best 1000 Movies Ever list. Find out where to stream it here.
6. Glory Road
This sports drama is based on the true story of the events leading to the 1966 NCAA® Division Basketball Championship between the University of Kentucky and Texas Western College. Starring Josh Lucas, Derek Luke and Jon Voight, it explores the race relations of the era. The film won a 2006 ESPY Award for Best Sports Movie and featured a soundtrack from musician Trevor Rabin. Find out where to stream it here.
7. Semi-Pro
Sometimes you just need a good laugh and Semi-Pro delivers just that, with an all-star cast that includes Will Ferrell, Woody Harrelson and Andre Benjamin. The plot revolves around singer Jackie Moon (Ferrell), who buys a basketball team with money from his one hit song. This fun film features lots of cameos, too, from the likes of Patti LaBelle, Kristen Wiig, Jason Sudeikis … and a 700-pound grizzly bear. Find out where to stream it here.
8. Coach Carter
This 2005 film, starring Samuel L. Jackson, is based on the true story of Ken Carter, a Richmond, California high school basketball coach. The real coach Carter made the news in 1999 for suspending his basketball team, which was undefeated at the time, for bad academic scores. His new contract with the team required a C+ average from his players and a requirement that they sit in the front row while attending classes. The movie version is all about team pride and is an inspirational and entertaining view. Find out where to stream it here.
9. Blue Chips
Directed by William Friedkin, this 1994 release stars Nick Nolte as a college coach doing whatever it takes to get new players for his team. Shaquille O’Neal makes an appearance as a blue chip prospect that Nolte is after, along with Anfernee “Penny” Hardaway. Lots of action and drama ensues with a nationally televised game against college basketball legend Bobby Knight’s Indiana team. Find out where to stream it here.
10. BASEketball
This wacky comedy, directed and co-written by David Zucker, stars Trey Parker, Matt Stone, Jenny Parker and Ernest Borgnine, and features guest appearances from great sports figures like Reggie Jackson, Kareem Abdul-Jabbar and Dale Earnhardt. It follows two slackers who, after being shunned at a high school reunion, invent a game that combines baseball and basketball. The adventures begins when a local businessman helps the two create the National BASEketball League (NBL). Find out where to stream it here.
Ready to watch some great basketball-centric TV shows? Check out this blog posting.
As we discussed in Part 1 of this two-part series, chord substitutions are an effective way to spice up your harmonic progressions. As a bonus, they also help improve your songwriting chops and overall guitar-playing skills.
We can expand beyond the seven diatonic chords and the substitutions described in Part 1 by employing three additional techniques: secondary dominants, modal interchange and tritone subs. Let’s explore each of these in detail.
(Note: For the purposes of this posting, we’ll work in the very popular and guitar-friendly key of A major.)
The A Major Scale
Let’s start by mapping out the seventh chords that result from harmonizing the seven tones in the A major scale (A–B–C#–D–E–F#–G#):
I II III IV V VI VII
Ama7 Bmi7 C#mi7 Dma7 E7 F#mi7 G#mi7(♭5)
Now we can begin expanding upon their basic functions.
1. Secondary Dominants
Secondary dominant functions were often employed by a very famous British band from Liverpool called The Beatles. Anyone familiar with this groundbreaking group’s music knows that the harmonic structures employed in their songs were extremely interesting.
Let’s start by understanding what a secondary dominant chord is. Each of the first six chords of any major scale can be preceded by its dominant seventh chord in a chord progression.
For example:
Diatonic Chords
Secondary Dominant Temporary “One”
E7 Ama7
F#7 Bmi7
G#7 C#mi7
A7 Dma7
B7 E7
C#7 F#mi7
Each of the six diatonic chords is now functioning as a temporary “one” chord within the key. The idea here is to strengthen the sound of the pull towards the following chord. In each of these substitutions, you’ll notice that the pull towards the resolution is extremely strong when preceded by its dominant seventh chord. (The reason we don’t precede the VII [mi7♭5] with its dominant seventh is that the mi7(♭5) chord is considered too dissonant to function even temporarily as a “one” chord resolution.)
Secondary dominants are a great way to take your harmonic progressions outside the same scale without leaving the key permanently. Think of them as harmonic enhancements with strong resolutions within the context of a musical progression. Also, consider that the notes that make up the dominant seventh chords can be used in any top-line melody.
Here’s a simple musical example that demonstrates the use of secondary dominant chord subs (shown in bold):
The C#7 chord would normally be a C#mi7 chord in the key of A major, but now we have a major third instead of a minor third within the chord: the note E# (F). The E# can now be used in our melodies over this chord.
Note that you shouldn’t use secondary dominants on every chord or you’ll lose the effect. Choose one or two chords within a progression to add that delicious Beatle-like harmonic approach.
2. Modal Interchange
Modal interchange is the usage of chords from a parallel major and minor key to create a musical progression — for example, mixing chords built from the A major scale with those from the A natural minor scale. (Often composers will use the harmonic and melodic minor scale harmony too, but let’s keep things simple for now.)
Again, the A major scale consists of the notes A–B–C#–D–E–F#–G#–A, so the chords are:
I II III IV V VI VII
Ama7 Bmi7 C#mi7 Dma7 E7 F#mi7 G#mi7(♭5)
The A natural minor scale consists of the notes A–B–C–D–E–F–G–A, so the chords are:
Here’s the verse in the key of A minor, with the modal interchange chord subs shown in bold:
I I/♭7 IVma ♭VI I I/♭7 ♭VI Vma
Ami Ami/G / D/F# Fma6 / Ami Ami/G / Fma6 Esus4 E
I I/♭7 IVma ♭VI I ♭7 ♭III V
Ami Ami/G / D/F# Fma6 / Ami G / C E7sus4 E7
Notice that the bolded D/F#, Esus4 and E are “borrowed” from the harmonized A major scale.
The chorus modulates directly from the key of Ami to the parallel major key of A major in a modal interchange:
I III VI III ♭III II V VI V/VII
A C#mi7 / F#mi7 C#mi7 Cmi7 / Bmi7 / E F#mi7 E/G#
I III VI III ♭III II V VI V/VII
A C#mi7 / F#mi7 C#mi7 Cmi7 / Bmi7 / E F#mi7 E/G#
All the chords in the chorus are taken from the A major scale, with the exception of the passing chromatic Cmi7 chord between C#mi7 and Bmi7.
3. Tritone Substitutions
Tritone substitutions, sometimes known as flat 5 (♭5) or flat II7 (♭7) subs, substitute the diatonic dominant seventh chord with a dominant chord built with a root note a flat fifth interval above the root.
For example, a very typical chord progression in jazz is II – V – I. To give this progression more harmonic variance in the key of A major, simply substitute the E7 chord with a B♭7 chord, as follows:
II V7 I
Bmi7 E7 Ama7
II ♭II7 I
Bmi7 B♭7 Ama7
The E7 chord contains the notes E, G#, B and D, while the B♭7 chord contains the notes B♭, D, F and A♭.
Not only does this wonderful substitution allow for a descending chromatic bassline from the Bmi7 chord down to the Ama7, but each of the tones in the B♭7 chord is a semitone away from each of the tones in the Ama7 chord, making its resolution to the Ama7 chord twice as strong as the original dominant E7 chord, with only two semitone resolutions: D to C#, and G# to A.
As shown below, you can also try using a B♭13 instead of a basic B♭7 chord. I think you’ll like the tritone substitution and progression even more.
You may also want to try using the ♭II when descending to a dominant seventh within the context of a blues chord progression, like this:
Finally, here is a really nice blues intro that could also be used for a turnaround or ending. This approach creates a descending chromatic movement towards the I7 resolution chord (A13).
I/III VII/III II ♭II7 I7
A/C# Cdim7 Bmi7 B♭13 A13
The Video
The chord progression in this video is not purely diatonic in nature. In fact, it’s quite complex, and employs all three of the chord substitution ideas detailed here. I’ve written the progression analysis below the diagrams for both sections of the demo.
Check out the chord diagrams below to see what’s happening … and follow along with the video if you can. You can also download the tabulature and notation here; this shows how I’ve outlined a lot of the chord substitutions with arpeggios instead of scales.
A Section
B Section
Notice that I’m using the instrument’s Gotoh two-point tremolo quite a bit to add shimmers to those complex chords, and the Gotoh locking tuners keep all six strings nicely in tune throughout the performance.
Ending Chords
The Guitar
Yamaha Pacifica Standard Plusguitars like the one I’m playing in the video feature two crystal-clear-sounding Reflectone single-coil pickups and a coil-tappable humbucker, developed in a collaboration between Yamaha and renowned audio manufacturer Rupert Neve Designs. As a result, chordal parts sound detailed, smooth and full of unique character, while single-note lines sing out with defined touch sensitivity. The alder body contours, neck joint and subtle chambering (crafted with proprietary Acoustic Design Technology) also allow for extra sustain and harmonic overtones.
In addition, the comfortable C-shaped satin-finished maple neck and rosewood fingerboard make transitions along the entire fretboard effortless. (A maple fretboard model is also available.)
I also love the Ash Pink color on this model, a very nice addition to the Yamaha color palette.
The Wrap-Up
When you consider the number of possible chord progressions that you could write using the seven diatonic chords, and then add into the mix chord substitutions, inversions and extensions, it’s positively mind-blowing!
If you further expand your chordal universe by interchanging (borrowing) chords from a parallel minor or major key, precede some of those chords with a secondary dominant, and descend to a resolution point using tritone substitutions, you have a galaxy of options with which to write a melody or navigate an improvisation.
I encourage you to explore, create and enjoy these new harmonic ideas, with the knowledge that continued experimentation often rewards us with extremely musical results.
We have all heard the platitude, “knowledge is power.” I vividly remember feeling the impact of this statement during my first semester of college. I was performing in the wind ensemble at my university’s winter commencement. Through each downbeat of “Pomp and Circumstance” on my snare drum, I watched the procession of the directors, professors and new graduates as they entered the arena with different colored hoods and regalia, their three-quarter sleeves and those with chevrons, and the various tam o’shanters and mortarboards. Witnessing hundreds of people ceremoniously being celebrated for their knowledge and wisdom left a lasting impression on me. At that time, I had no idea where my graduate school journey would take me, but I knew one thing for sure: I had to be part of that exclusive club.
Grad School Considerations
Regardless of what piqued your curiosity about the graduate school experience, the fact that you are considering graduate school is a victory worth celebrating. This article will offer some advice, but the overarching takeaway is this: YOU are in charge of YOUR life and YOUR professional career.
Pursuing a graduate degree (or a couple) should not be a means to an end, but rather a vehicle to help you achieve your professional goals more efficiently and effectively. This, of course, begs the question, “What opportunities exist for a music educator with a graduate degree?” If you are a novice teacher, you may not know what possibilities exist for you within your K-12 setting, so let’s unpack this question through three considerations.
Consideration #1: What do your long-term career plans look like?
Are you looking to remain a K-12 music teacher for the rest of your career and want the opportunity to hone your craft?
Are you looking to eventually move into another certification area like educational administration or technology?
Do you love your current teaching environment but fear your music program is in jeopardy and want to position yourself in a way where your job is more secure?
Do you want to eventually teach college?
Or, do you simply want to earn more money?
All of these scenarios are equally respectable and something most of us have considered throughout our careers. Really think about how you want to make the biggest impact in your career and seek graduate programs that will help you align to that trajectory. For example, if you want to be a K-12 music teacher for the rest of your career, pursuing a graduate degree in educational administration is not going to develop you as a music teacher. Conversely, if you want to become a school principal one day, earning something like a master’s degree in music education is not going to equip you with the skills that administrators need in order to support ALL students, like having working knowledge in school law, finance and special education.
Consideration #2: What does your timeframe look like?
Truth be told, there will never be a perfect time to pursue graduate school, but there are better times depending on what is happening in your life. For example, if you recently graduated with your bachelor’s degree and are already in high-octane school mode, it might be to your advantage to start your graduate studies right away since you are accustomed to the rigors of academia. However, if you choose this option, you don’t have much real-world experience that you might want in order to appreciate what you would learn in graduate school. It’s also important to note that depending on what degree program you want to pursue, there may be certain entrance requirements (e.g., minimum number of years of full-time teaching) that you will need before you could even qualify for admission.
On the other hand, if you wait too long to pursue your graduate degree from the time you earned your undergraduate degree, you might have to work much harder to recondition yourself to being a student and the transition to being a student again could be substantially more jarring than you might have anticipated.
The other detail to consider is how your school or district assesses RIF points and tenure. RIF is an acronym for “reduction in force.” In most public schools, licensed staff earn RIF points every year that are usually determined by some combination of years of teaching experience and evaluation rating, which results in a hierarchy of seniority. Generally, teachers who accumulate a greater number of RIF points have better job security.
Tenure, on the other hand, gives teachers the opportunity for due process if they are faced with termination. Tenure is normally granted to public educators once they have demonstrated successful teaching in their school district, as evidenced by their evaluations after four years of service, depending on their state laws. A school or district could theoretically dismiss a teacher for any reason without the need for much justification; that is, until a teacher receives tenure.
Most school districts pay their teachers more based on the number of years of experience (i.e., steps) they have and the number of graduate credits they have earned (i.e., lanes). If you decide to plow through graduate school as a new teacher, understand this risk: you will be earning a higher salary every year you teach BEFORE earning tenure that if you are let go from your job, you will be a far more expensive hire for a school district than someone fresh out of college despite your teaching experience. The same caveat applies to switching school districts. If you are not convinced that your current building will be your long-term home, be careful of earning too much graduate credit too soon before applying for a new position, as you might become significantly more expensive for a new school district to employ.
Consideration #3: Can you absorb the hit when it comes to time and money?
Like any major commitment, graduate study is something that needs to be prioritized. Graduate school will not usurp all your time and money, but your work/life balance will certainly change. The time you used to devote to score study, grading, lesson planning, etc., will soon be spent reading, writing and perhaps even recording or performing. Keep in mind that this does not consider your personal time. Are you in a committed relationship? Do you have young children at home? Are you in the process of moving? Graduate study can be stressful enough despite all of the external pressures life can throw your way.
Pursuing graduate study when you are in a good head space and during a time when you are not overcommitted to other endeavors will only improve your chances of success. Also consider the cost of tuition. How long will it take you to net the income you lose from going back to school after any potential pay increases? Depending on the modality of your program, you may be eligible for scholarships, graduate assistantships, grants or other incentives. You can also check to see if your school or district offers any type of tuition reimbursements for graduate studies. Some state boards of education will also cover some tuition costs for educators who teach in a low-income community. Chances are, graduate tuition will not become any cheaper than what it is at this very moment. While this may be a good motivator, only you can determine if you are personally and professionally ready for this journey.
Master’s Degree Modalities: Traditional and Cohort
In recent years and especially since the pandemic, graduate school has become more accessible. Far removed are the days when going back to school for a master’s degree meant quitting our jobs, moving back into a dorm, and devoting the next two years to schoolwork full-time. While this scenario is still a viable option, it’s important to understand the different modalities that exist so you can determine which option best aligns to your learning style.
Master’s degrees are typically offered in two overarching formats: the traditional model and the cohort model. The traditional model of study is what I just alluded to earlier where teachers pursue full-time study with their primary responsibilities including completing their graduate coursework and immersing themselves in their research (or performance) interests in preparation for a successful defense of their capstone project (e.g., thesis, recital performance). These students may work in tandem with major professors within their department to teach undergraduate students. Depending on the major, most traditional master’s programs last two years and have entrance requirements that could include an audition or interview, a competency exam, a writing sample or a specific GRE score. While it requires full-time, on-campus study, one distinct advantage of pursuing a traditional master’s degree is that you can be fully immersed in your craft from day one. If you idolize a specific professor and want to soak up as much wisdom as possible from them, pursuing a master’s degree full-time and on-campus guarantees the most access to that resource.
Cohort models, on the other hand, provide an alternative to the rigid academic schedule and residency requirements associated with the traditional model. Designed with the working professional’s needs in mind, the cohort model allows teachers to earn a master’s degree without having to give up their jobs. Most colleges and universities that offer master’s cohorts provide flexible pathways to coursework that can include online study, in-person study at satellite locations and/or night and summer classes on-campus.
Online Classes: If you think you might be interested in earning a master’s degree online, understanding how coursework is delivered is essential. Online coursework can be offered synchronously (students log into class at a designated time each week and receive their instruction in real-time) or asynchronously (students access pre-recorded lectures at their convenience and complete assignments at their own pace before each due date). Online study’s convenience gives students access to courses and the professors who teach them. You can learn from content experts in your field from across the world! However, because of the limited access you have to your professors and other students because you are never in the same room together, online coursework requires learners to be self-motivated and independent.
Satellite Study: Students who pursue degrees at satellite locations still learn from professors employed by their college or university and have access to the same benefits as traditional students, but they attend some or all of their classes off-campus at a designated location, such as a community center or local K-12 school after hours. While satellite study allows in-person access to professors and a community of scholars, these courses are often taken in lockstep with everyone in the cohort; that is, there is generally a prescribed plan of study that allows for little to no deviation in course offerings or personnel. This means that for the entire duration of your master’s program, you will likely have the same classmates for every single course and will have to take the coursework, electives included, that you are told to take by the program administrator in order to graduate.
Night Classes and Summer Study: Occasionally, universities will offer night or evening courses on-campus during the academic year to degree-seeking students to offset the number of courses needed to complete a master’s program. While it is uncommon for there to be an entire master’s degree that could be completed exclusively in-person, on-campus, and over evenings, night classes can be an excellent way for students to earn elective coursework in their degree program and feel more connected to their university. More commonly however, colleges and universities will offer on-campus summer residencies for students looking to bridge the gap between the traditional and cohort models of graduate study.
Summer graduate programs often allow for a greater number of degree offerings. Summer music residencies are usually relegated to non-performance-based music degrees (e.g., music education, music technology), which do not require the same type of scheduling needed for rehearsals and performances found outside of regular class meetings. Additionally, summer study allows students to fully immerse themselves in the graduate school experience by enabling them to reside on campus and access places like libraries, practice rooms, or even the student union or quad while still being able to work as full-time teachers during the academic year.
However, there are some caveats of summer study. First, because summer semesters are shorter than a typical fall or spring semester, summer courses tend to be accelerated. This means that the content is delivered quickly and succinctly over longer stretches less frequently. In other words, a semester-long music theory course that traditionally would take place three days a week for 50-minutes each class over a full 16-week semester might instead be delivered in the summer as a one-day-a-week, four-hour class over a truncated 8-week semester. Also, because summers are generally the only time a student would engage with coursework over the calendar year, summer master’s degrees tend to take longer to complete. What might take a traditional master’s student two years of full-time study could take three or four summers to earn the same degree. Prospective graduate students must weigh all possibilities to determine the path that’s best for them.
What Should I Major In?
While this question seems to be the most obvious place to start when considering a graduate school for the first time, it is important to note that occasionally what we decide to major in as graduate students has only a peripheral effect on our jobs. In other words, our graduate majors sometimes do more to enhance our niche than they do to train us on a specific skillset required of our profession. For example, the undergraduate training you received in your music education major enabled you to earn a specific credential that legally allows you to teach music in a public school. Any music degree beyond that will certainly add value to your craft and give you a richer perspective that can enhance how you approach teaching, but it will likely not fulfill a requirement for you to maintain your teaching position. Fortunately, there are several meaningful graduate majors for practicing music educators.
Music Education: Many music teachers who are first-time graduate students tend to major in music education because it aligns to what they know best. When you become a teacher, you quickly become immersed in the minutiae of facilitating instruction and leading a music program. The music education major is naturally constructed around that experience and provides training in specific skills related to many of the duties found within that role. However, it is important to note that a master’s degree in music education can be either academic-based or practitioner-based, so knowing what you want to achieve from this degree path is crucial before enrolling in a program that might not benefit you the way that you had expected.
While any master’s degree in music education will come with its fair share of introductory research courses, some programs intentionally structure their curricula with an abundance of research-based coursework in an attempt to produce independent scholarly researchers. Teachers who pursue this type of music education master’s degree are usually those who go on to pursue a terminal degree in music education and contribute to the growing body of research in music teaching and learning. In this type of program, you will likely encounter more research methods courses as well as courses in music education philosophy, history, psychology and sociology. Capstone requirements for an academic-based degree are usually the writing of a traditional master’s thesis and a successful defense of that manuscript in a student’s research area of interest.
On the other hand, some music education master’s degrees frame their plans of study in ways that are practitioner-based and meant to develop specific skills related to day-to-day classroom instruction. Coursework in these master’s degree programs may include arranging and orchestration, classroom management and student engagement strategies, or even courses in instrumental methods and repair. Capstone requirements for practitioner-based programs are generally flexible and could include projects such as a curriculum analysis or action research in one’s own building. Despite the inherent differences, both academic-based and practitioner-based music education master’s degree programs are extremely valuable to our profession and contribute something of merit to the field. Just be mindful to select a program that aligns to your interests and sets you on a trajectory to be molded into the academic and/or practitioner you want to become.
Other Majors in Music: While pursuing a master’s degree in music education has the most relevancy to what practicing music teachers encounter on a daily basis, some teachers prefer to pursue a graduate music major that strengthens a particular component of their teaching or aligns more to their musical interests outside the classroom. For example, music teachers who primarily serve as ensemble directors may find substantial benefit in a master’s degree in conducting because of how much time they spend actually conducting as part of their job. Or, perhaps a music teacher’s true passion is composing or performing and they are looking to gain more training to bolster their side hustle.
Regardless of the motive to pursue a graduate music degree outside of music education, consider this: when you major in something in graduate school, the expectation is that you are there to get better at that one thing. In other words, if you are pursuing a master’s degree in conducting, expect to graduate as a better conductor. If you are a performance major, expect to graduate with greater skill as a singer or instrumentalist. Your newfound insight will provide you with new ways to consume and curate musical experiences for yourself, but that expertise may not be immediately transferrable to your daily teaching. Fortunately, if you build upon your niche and incorporate it into your teaching practice, your students could receive an inimitable learning experience because of who you are and the unique skillset you bring to the classroom.
One other aspect to consider when deciding on your graduate music major is whether you would ever want to teach college. The minimum educational requirement for nearly all college teaching positions is a master’s degree. However, due in part to academic inflation and saturation in the music field, most college teaching jobs in music are given to candidates with terminal degrees and years of successful college teaching experience. If you are lucky, there could be a local university or community college who might look to you to fill an adjunct position, but the position for which you would be considered is most likely going to be based on your graduate major and less on your K-12 classroom teaching experience. In short, if full-time college teaching is something that interests you, plan on earning a terminal degree like a Ph.D., Ed.D. or D.M.A. after spending a few years in the classroom; if you are interested in the possibility of one day becoming an adjunct professor as a way to earn some supplemental income while you teach in the K-12 setting, know that whatever your master’s degree is in will likely be the only domain in which you would be qualified to teach.
Non-Musical Education Majors: Despite the numerous benefits of a master’s degree in the music field, there are plenty of practicing music educators who have pursued graduate degrees outside of music. While a master’s degree in a non-musical field like educational technology, school leadership, or curriculum and instruction does nothing to develop musical knowledge, it would diversify your resume, which could make you more indispensable to your school and community. Similar to how majoring in a musical field outside of music education provides teachers with a way to carve out a musical niche in their practice, pursuing a graduate major in education outside of music altogether can carve out an educational niche, potentially with greater collateral for success.
Consider this: when we engage in discourse with our musical colleagues about concerns like music education advocacy, student retention or funding, it reinforces a sense of community and contextualizes how we face uphill battles. As therapeutic as some of these gripe sessions can be, these conversations can sometimes lead to deafening echo chambers where we assume we understand what our school and community expects of us without seeing our responsibilities through different stakeholders’ lenses. Pursuing an area of education as a graduate major outside of music could help inform us how other education professionals view music education. Studying educational leadership, for example, could help make us privy to the ways we can best position ourselves alongside – and not against – policymakers to better advocate for our music students.
Music teachers who hold a master’s degree in a specialized area of education could also use this credential to serve their school in broader capacities than could sole music specialists. Many schools, especially those most affected by our current teacher shortage, are often looking for teacher leaders, instructional coaches or department chairs. Music teachers who have training in these domains from their graduate work in education could draw upon these skills to be greater assets to their schools and help further advance their careers.
One Final Thought
My intent with this article was to demystify some of the overarching concerns prospective master’s students have as they consider balancing graduate school and teaching music. And while the pursuit of a master’s degree is not the only way to improve one’s practice, embarking on a journey through graduate school demonstrates a special type of dedication and commitment to one’s craft that has the ability to transform the way you could approach teaching for the rest of your career.
When I was playing “Pomp and Circumstance” as an undergrad, little did I know that I would one day walk across the stage to receive my second doctorate. Being surrounded by content specialists, artist educators and hungry graduate students – figuratively and literally – helped me carve out my niche in my profession better than any other type of professional development and empowered me to become the best version of myself for my students and community. If you, like me, have ever thought that graduate school is something reserved for an exclusive club, please consider this your formal invitation to join us. I am sure you will master it!
Generative artificial intelligence (AI) has the potential to transform the K-12 music classroom by offering new opportunities for personalized learning and creative exploration. The public release of Open AI’s ChatGPT 3.5 in November 2022 proved to be a game changer in AI capability.
Many of us are familiar with AI assistants like Apple’s Siri and Amazon’s Alexa, but the conversational nature and depth of ChatGPT’s responses (when accurate) are different and truly uncanny. ChatGPT, and the many AI chatbots that have come after, continue to blur the lines between human and machine. As such, AI will become more integrated into the field of education in general and music teaching and learning specifically.
AI introduces exciting possibilities for enhancing how students learn music, providing highly personalized educational experiences and fostering innovative ways of creating, performing, responding and connecting through music. However, these advancements come with significant challenges. Music educators must decide how — not if — to integrate AI into their classrooms in safe, thoughtful and interactive ways. To fully harness the potential of AI in music education, educators must carefully consider issues related to equity, bias and the potential overreliance on AI.
A Tutor for Every Student
One of the key benefits of using generative AI in the classroom is its ability to personalize learning. In my general music methods classes at Tennessee State University, we have been experimenting with various AI systems such as Klangio, Poe and Magic School AI to create sheet music, build music theory AI tutors, and develop lessons. Through prompting and feedback, I have shown my students how we can better curate learning experiences to cater to each student’s unique skill level and interests.
This personalized approach directly addresses the varying needs of students, making music education more accessible and engaging. When students receive instruction that is specifically designed to align with their abilities and interests, they are more likely to stay engaged and deepen their musical understanding. A bonus to this approach can also be seen in how students develop at their own pace. This can promote a more inclusive and supportive classroom environment for all students.
A Gateway to Unlocking Creativity
Generative AI also opens up new avenues for creative exploration. In June 2024, my institution’s AI For All Research Center hosted the inaugural AI for All Summit, which aimed to unite K-12 schools and higher education with AI industry leaders to discuss ways of leveraging AI in the most accessible and inclusive way possible. Many leaders across these areas showcased the potential of AI tools in multiple forms, and attendees were even able to receive group and individual trainings on several AI protoypes that were still in development. At this event, I learned about text-to-music AI apps like Udio and MusicLM, and I experimented with generating completely new musicals based solely on a text prompt. My mind was blown!
The capability, accuracy and creative authenticity of these tools helped me reflect on my own creative practice and expand what is musically possible with AI. The ability to instantly generate and manipulate musical ideas can allow our students to explore a wide range of musical styles and genres, pushing the boundaries of what they can achieve in the classroom. I am a strong believer that AI will be a companion to, and not a replacement for, our own creative processes.
Potential Challenges
Despite these benefits, there are considerable challenges to consider, particularly when it comes to equity and access. Not all students have equal access to the technology or the digital literacy skills needed to effectively use generative AI tools. This disparity could worsen existing inequalities in education, as students from under-resourced communities may be left behind. Furthermore, AI systems are trained on existing datasets, which inherently contain human biases. If these biases are not carefully addressed, they can be reflected in content generated by AI, potentially perpetuating stereotypes and limiting the possibilities of creative expression.
Another concern is the risk of overreliance on AI for music teaching and learning. While AI can be a valuable tool for generating ideas, it is essential that students also develop traditional musicianship skills, such as critical thinking, problem-solving and independent learning. It is also critical that educators not lean on AI to think for us in an effort to streamline processes and increase efficiency. The overdependence on AI could have a reverse effect on the profession and lead to more and more “human-centered” academic tasks begin shifted to AI responsibility.
These initiatives are already being piloted on a small scale in places like the Alpha School. If effective, this could jeopardize numerous teachers’ livelihoods and effectively limit the potential growth needed for a thriving and diverse music teacher workforce. Also, a push for more AI interaction may actually stifle the development of students’ communicative and creative skills, as students may become accustomed to relying on technology rather than their own creativity and musical abilities. Striking a balance between leveraging AI as a tool and fostering independent musicianship will be critical for maintaining a well-rounded music education.
As music educators consider integrating generative AI into their classrooms, they must also navigate challenges related to teacher training, data privacy and ethical considerations. I know that no one wants another mandatory training, but teachers at all levels will need specialized training on how to effectively use these tools to enhance their pedagogy while ensuring that confidential student data is collected and used with fidelity. Moreover, questions regarding the ethical implications of using AI in areas such as ownership, creativity, composition, reproduction and distribution will need to be addressed.
We Can Do This
In support of this movement toward integrating generative AI in education, institutions like the Tennessee State University SMART Innovation Center play a critical role. It is our goal to bridge access and equity gaps by providing training and hands-on learning experiences in AI for faculty, staff and students. It is my hope that all our communities will look for ways to collaborate with key stakeholders as we make strides in preparing future generations to navigate the quickly evolving landscape of AI-driven education.
While there are many more considerations we could delve into that go beyond the scope of what can be covered here, if we continue to carefully consider the pros, cons, opportunities and challenges of AI use in the music classroom, we can use AI to create a more inclusive, engaging and empowering music learning experience for all students.
Think of a song as a story in which the sentences (chord progressions) are made of words (chords). Chord substitutions, then, are like synonyms that can replace words without significantly changing the meaning of the sentence. And just as there’s an art to using the right word at the right time, there are several ways to skillfully exchange one chord for another. Let’s start with diatonic chord substitution, where all the chords are in the same key.
THREE-NOTE DNA
Diatonic substitution replaces one four-note chord with another four-note chord that shares three of the same notes. In a major key, the I chord shares three notes with both the iii chord and the vi chord; the IV chord shares three notes with the ii chord and the vi chord; and the V chord shares three notes with the vii chord. (Try using the mnemonic “136-426-57” to remember these relationships.)
In the key of C, for example, the I chord, Cma7 (C – E – G – B), shares triads with the iii chord, Emi7 (E – G – B – D) and the vi chord, Ami7 (A – C – E – G). The IV chord, Fma7 (F – A – C – E), has triads in common with the ii chord, Dmi7 (D – F – A – C) and the vi chord, Ami7 (A – C – E – G). The V chord, G7 (G – B – D – F), shares three notes with the vii chord, Bmi7b5 (B – D – F – A).
Let’s try substituting chords in a I-IV-V progression in E. The chords in the audio clip below are Ema7 for two bars, followed by Ama7 and B7 for one bar each, with the bass outlining each chord.
In this key, the I chord, Ema7 (E – G# – B – D#) shares three notes with the iii chord, G#mi (G# – B – D# – F#) and the vi chord, C#mi7 (C# – E – G# – B). The IV chord, Ama7 (A – C# – E – G#) shares three notes with the ii chord, F#mi7 (F# – A – C# – E) and the vi chord, C#mi7 (C# – E – G# – B). The V chord, B7 (B – D# – F# – A), shares three notes with the vii chord, D#mi7b5 (D# – F# – A – C#).
If we substitute the vi chord (C#mi7) for the I chord (Ema7), the progression becomes C#mi7 – Ama7 – B7, which sounds like this:
If we continue by substituting the ii chord (F#mi7) for the IV chord (Ama7), the progression becomes C#mi7 – F#mi7 – B7 and sounds like this:
And if we substitute the vii chord (D#mi7♭5) for the V chord (B7), we get C#mi7 – F#mi7 – D#mi7♭5:
Although the theory may take a moment to digest, listen to how the substitutions change the chord progressions, and think of them as colors and options at your disposal for soloing and songwriting, or for simply keeping things interesting.
THE ROLE OF THE BASS IN CHORD SUBSTITUTIONS
In most situations, the bassist’s job is to play the root of each chord, but if you’re playing improvisational music, you may have more room to try things out. Let’s take a common progression like a I-vi-ii-V (Cma7 – Ami7 – Dmi7 – G7 in the key of C).
Here’s what it would sound like if the bass substitutes the iii chord (Emi7) for the I chord (Cma7) while the keyboardist plays it straight:
If the bass also outlines the iii chord (Emi7) instead of the keyboardist’s vi chord (Ami7), it sounds like this:
We could take things further by playing the IV chord (Fma7) when the keyboardist plays the ii chord (Dmi7):
We could also play the vii chord (Bmi7♭5) when the keyboardist hits the V chord (G7).
It’s far more common, however, for other instruments to substitute chords while the bass plays the roots of the original progression. As an example, let’s use a minor key, where the chord qualities are different from a major key but the numerical relationships (“136-426-57”) stay the same. In A minor, for example, the I chord, Ami7 (A – C – E – G) shares three notes with both the III chord, Cma7 (C – E – G – B♭) and the VI chord, Emi7 (E – G – B♭ – D). The IV chord, Dmi7 (D – F – A – C) shares three notes with the ii chord, Bmi7♭5 (B – D – F – A) chord and the VI chord, Fma7 (F – A – C – E); and the v chord, Ebmi7 (E – G – B – D) shares three notes with the VII chord, Gma7.
Here’s a I-VI-III-VII groove in A minor (Ami7 – Fma7 – Cma7 – Gma7):
Listen to what happens when the keyboardist substitutes a III chord for the I chord …
… a I chord for the III …
… and a v chord for the VII.
NEW TOOLS
Chord substitutions make more colors available when soloing, give you the ability to switch things around when playing chorus after chorus of the blues (or any other progression) and prepare you for the inevitable moment when your guitarist or keyboardist changes things up. If you decide to use chord subs, though, make sure your choices don’t clash with the melody, which usually flows smoothly from chord to chord. The best way to learn is to experiment and see what works, preferably in the rehearsal room.
In Part 2, we’ll learn how to spice things up by using dominant chord substitutions, secondary dominant substitutions and tritone substitutions. Happy practicing!
Wayfinding to the Spotlight: Emerging artist Tanner Olsen on discovering his voice and what drives his determination
Written by Lisa Battles
Internalizing the power of music, heartbreaking loss and resolute determination all stand as milestones along Tanner Olsen’s path from Chilliwack, BC to Nashville, Tennessee, by way of New York.
The emerging band leader has collected many life lessons from country-music-cranking bonfire parties along rural Canadian backroads to establishing himself in the epicenter of Music City’s live music scene. A decade in, his story has just begun.
Starting Points
While Olsen’s parents introduced him to piano lessons at age 5, and he went on to play in many school bands, his first love was for sports. A shared passion for lacrosse formed a bond with his father as he rose to become a star player.
“He would be at every practice, every late-night training session, whatever it was, he was always there,” Olsen says. “I fell in love with the sport just because I think it connected me with him the most.”
Olsen eventually earned a lacrosse scholarship to attend university in New York. During his two years there, he found his voice and discovered his true calling: music.
He and a teammate entered a talent contest “as a joke,” performing a Jason Mraz cover “to impress the girls.” Instead of laughter, they were met with awe — a reaction that set events in motion Olsen never expected.
“It just went crazy. People came up the stage, ogling over us, saying ‘Wow. That was so cool.’ We were just a couple of lacrosse guys. We didn’t know,” Olsen says. “Once I got a taste of that one little thing, I was like, ‘I think I want to do this as a career.’
“It just hit a spark in my brain that music can make people feel connected to words, feelings, emotions, a certain song … or whatever it is. It was seeing that people connected so hard with that and were genuinely passionate about what we were doing. That’s where I was like, ‘Okay, this is really cool. I love that.’”
Following the Signs
Around that time, another friend back in Canada urged Olsen to relocate to Edmonton, Alberta, and audition for a role as a music teacher. He dropped out of school, studied up on instruments beyond piano, and landed the job. After a while teaching, he moved back home to BC and launched what eventually became the Tanner Olsen Band.
Back home, a casual connection landed the band its first big appearance — a three-day, eight-show booking at the Abbotsford Agrifair in 2017. Once again, Olsen became a quick study and got a little help from his ever-supportive father, who stepped in as a prompter.
“I’m singing country music that I’ve heard on the radio and had just learned to play guitar. I was like, ‘I don’t know how to do this thing, man,’” Olsen says. “So he’s holding up these big poster board cue cards in the back of the stage. I was excessively reading them because I was like, ‘I don’t want to mess these words up.’ After that, we just kept getting booked and booked and booked,” he says.
Support to Change Course
Rock-solid backup came naturally for Olsen’s father, who he says chose intense jobs throughout his life, from serving on SWAT teams to providing personal security for high-profile musicians. That ethos for seizing opportunities and taking risks became a guiding principle.
“He tried things that he loved. When he got bored, he changed it,” Olsen says. “… I kind of always knew I didn’t just want to get a degree and work a job. I knew I wanted to be something bigger and different.”
Meanwhile, Olsen took a truck driving job while building his band’s local following, and talks with his dad often turned to Nashville. He wasn’t keen on giving up his comfortable lifestyle, making good money, driving a nice truck and paying for other toys, as he calls them. Even more, he also wasn’t all that confident in his abilities to make it in Nashville.
“[Dad] was like, ‘You have to do it. You gotta give everything you have and just try.’”
Not long after, Olsen’s father had a series of critical health scares, and in May 2023, passed away following a heart attack.
Eyes on the Road
After several months of working through the initial grief, Olsen carried through on those discussions about Nashville with his dad.
“I talked to that man every day of my life. He wouldn’t let me get off the phone without saying, ‘I love you.’ […] Losing him was the hardest thing ever,” Olsen says. “I got to a point where I just said, ‘You know what? Enough’s enough. Life’s too short.’ He would’ve wanted me to do this Nashville thing because he and I talked about it for so long.”
Olsen called his bandmates, who agreed to make the move despite having nothing lined up once they arrived—the first couple of months required relentless networking just to find the opportunity to secure their work visas. Soon after that, though, the Tanner Olsen Band was booking a dozen or more four-hour shows a week on Broadway.
“We’d play four hours at a bar, pack up our gear, run across the street, set it back up at a different bar, and play for another four hours,” Olsen says. “That’s the way that Broadway works. It’s chaos, amazing, tiring and a struggle most of the time to keep your voice from going.”
Olsen says the band’s living situation could be described in similar terms, which also wasn’t easy.
Staying the Course
Olsen’s father had left his kids some life insurance money, which he leveraged to make the move and support the group, especially in those first several months. They lived in a two-bedroom Airbnb, taking turns for who got stuck on the couch or floor.
“That was the only thing that allowed me to move. But that was like the sacrifice I knew my dad would’ve wanted me to make. I would rather risk literally everything I have to make this happen rather than play it safe. So it was really scary, but we just kept going,” Olsen says. “At the same time, I was grieving like crazy. It kind of felt like I just ran away from my life and my emotions. But it helped to have the guys with me.”
Steadfast in fulfilling his dreams, Olsen keeps his eyes trained on the horizon while his father’s memory lights the path. With each success, his command of the wheel becomes more confident. With any setback, he checks the rearview and tightens his grip.
Sometimes the compass points back to family time amid his hometown’s agricultural fields, massive trees and soaring mountain backdrops. At other times, it directs him back to that small stretch of towering, neon-emblazoned honky tonks in Tennessee or summertime festival crowds.
The next step for the Tanner Olsen Band is developing and recording more original material to make its mark far beyond Broadway. So far, though, Olsen says it’s been satisfying to set an example with all the band has accomplished so far, exemplifying his father’s passion for life and belief in taking chances.
“This stuff is possible, these weird, wild dreams. I am showing everyone back home and anywhere in the world that these things are possible. I think they can happen,” Olsen says. “You just have to try and even if you fail … that’s how you grow, how you learn — and what makes you who you are.”
For many musicians, there is often a need to take your instruments with you wherever you go, so you can practice, perform and enjoy your passion anytime, anywhere. While this can be challenging no matter what instrument you play, it’s especially difficult for drummers.
Finding gear that is both compact and portable, without sacrificing sound quality, can be a real struggle. Technically, any drum kit can be a “travel drum kit” whether it’s large or small. But in most cases, touring with lightweight, compact products is much more convenient.
Here’s a list of essential products for drummers looking to learn more about travel gear.
Travel Drums
Let’s start with a brief history of drums designed for travel.
In the early 1940s, with the rise of jazz and the growing need for portable instruments, drum manufacturers began to create more compact designs. Drum kits became more modular, and the idea of travel drums began taking shape.
Early compact kits, such as the so-called “Cocktail Kit” (sometimes referred to as “Combo,” “Jobber” or “Be-pop” kits) combined both bass drum and snare drum sounds into a single drum. These kits featured a vertical bass drum, a snare drum and a cymbal, along with various other percussion instruments. They offered a compact and lightweight solution, but this convenience came with a trade-off as playing these kits required a drummer to develop different skills, along with a loss of tones that are offered by a full-size drum kit.
Luckily, over the years, compact drum kits have significantly improved, without as many compromises in quality and performance. Yamaha offers several compact options that could be the perfect fit for your needs
Yamaha Compact Kits
The Yamaha Stage Custom Hip drum kit is available in four finishes and is in the same family as the larger Stage Custom Birch, made with the same six-ply birch wood and equipped with the same hardware. It provides a big sound in a compact design, making it an excellent choice for drummers on the go.
When fully assembled, this kit fits comfortably within an area of about 3′ x 5′, making it ideal for gigs with tight stage layouts. The standout features of this kit include a compact yet full of tone 20″ x 8″ bass drum and a versatile 13’’ x 8″ SNOM (snare/tom) drum.
If you’re looking for even more compact drum kit options, be sure to check out the Yamaha Stage Custom Bop and Tour Custom kits. The latter can be configured in a variety of sizes, making it a versatile choice for drummers in need of a portable yet powerful setup for any gig.
Electronic Drums
What if you’re looking for a solution that offers even more versatility and convenience? This is where electronic drums come in.
A Yamaha electronic drum kit.
These kinds of kits have become an increasingly popular choice for drummers who need a portable, flexible option. Unlike acoustic kits, electronic drums can be easily transported and set up without taking up much room, making them ideal for practice or performance on the go. Plus, with the ability to change sounds and adjust volume and tone, they offer a wide range of sonic possibilities.
Finger Drums
As a drummer, have you ever found yourself tapping rhythms on your lap or any nearby surface? We’ve all been there.
Luckily, Yamaha have just the thing you’re looking for: finger drums. The company’s FGDP line includes the FGDP-30 and FGDP-50models, shown below.
FGDP-30.
FGDP-50.
These are not only fun products to play with, they give you the freedom to create and explore music wherever you are!
Accessories
Now that you’ve added a drum kit an electronic drum pad or FGDP pad to your arsenal, you’re probably eager to hit the road. But before you go, be sure to check out these essential accessories to complete your setup.
The Yamaha EAD10 is a highly versatile product designed to streamline the process of miking, recording and sharing drum performances. It eliminates the need for a complex setup involving multiple microphones, cables, mixers and a P.A. system.
A drum kit outfitted with an EAD10.
The EAD10 is made up of two units: a sensor and a module.
The sensor unit is comprised of an XY stereo microphone and a trigger sensor, which allows you to capture a balanced recording of an entire kit when placed at the center of the bass drum.
EAD10 sensor.
The module unit features large, easily adjustable knobs for quick control of volume, preset scenes, reverb and other effects. It includes high-quality Yamaha effects and PCM sound sources, along with trigger sensing technology that can transform acoustic drums into new musical instruments. In addition, its high-performance headphone amplifier ensures exceptional sound quality during practice sessions. It even offers built-in recording without the hassle.
EAD10 module.
Hardware
The final essential item every touring drummer should have is a set of lightweight, reliable hardware. Yamaha offers several compact and portable hardware packs, including the HW-680W and the HW-3.
HW-680W.
HW-680W hardware delivers dependable performance in one complete package. Designed for drummers seeking easy transport options, this pack features lightweight, single-braced hardware with a high-quality design for superior durability.
HW-3.
The HW-3 pack is the result of thorough research and collaboration with artists and designers. It strikes an ideal balance between weight and strength, offering hardware that is extremely light while maintaining the durability and reliability drummers expect from Yamaha.
Good for both practice and performance, these hardware packs combine efficiency and quality to enhance your drumming experience.
Take Your Groove on The Move
With travel drum products, your passion for drumming never has to stop. Whether you’re a touring drummer, a session player or simply someone who loves to practice on the go, Yamaha offers a variety of compact high-performance products that fit your needs.
Click here for more information about these and other Yamaha drum products.
Welcome to part two of my rehearsal instruction series in which I will tackle percussion instruction. Even though they are in the back, we still need to work with them during our rehearsals. Hopefully some of these tips will give you some idea on how to continue to engage your percussionists. If they are not engaged, they often get into trouble.
Include Them
Duh, that is the most obvious statement ever. I believe that we are drawn to the instruments we are most comfortable with. This happens in score study and conducting, too. If we were to get lost in the score (never happens, right?), we often latch onto the most prominent part to our ears: the melody (likely at the top of the score) or our instrument. It’s difficult to latch onto percussion because the parts can often be sparse or complex to get us back on track.
Where am I going with this? In our score study, we must be more deliberate about studying the percussion parts and their subtleties so we can include them in our rehearsals. Because score study usually focuses on structure, melodic and harmonic analysis, etc., it often overlooks what exactly the percussionists are doing. As a result, we leave them out during rehearsals.
In a session about conducting an honor band, Director of Bands at UCLA and Yamaha Master Educator, Dr. Travis J. Cross, said to make sure to address percussionists within the first 30 minutes. Because rehearsal time in middle and high schools is far shorter than that of a multi-day honor band, band directors should do this much sooner than the 30-minute mark.
Inventory
In my article on wind instruction, I talked about the importance of intonation charts for wind students. How can percussionists create an intonation chart? Well, they could try, but it would be really boring.
If you devote a whole rehearsal for your winds students to work on intonation charts, then what could your percussionists do? Have them take inventory of the instruments in your percussion section — what is in good shape, what’s broken, what mallets you have, what hardware you have, etc.
While they do this, have them look up the price of the equipment and what needs to be repaired or replaced. Yes, percussionists hit these instruments, but they are really expensive, so students cannot mishandle them. One benefit percussion students have is that generally the equipment is provided to them, but they should still treat it like they own it.
What a great use of time to educate and give a meaningful housekeeping task to get your percussionists ready for a successful year!
Find the right timbre
One of the best parts of percussion is that there are so many different timbres and colors that can be achieved depending on the way the instrument is struck and what it is struck with. Hard or soft mallet, plastic or rubber, stick density, body of the snare drum — the possibilities are endless. And here’s the thing: Unless you are teaching high-level percussion students, this is pretty much a foreign idea. Sure, students understand that different materials create different timbres, but it is up to you to teach them how to use that knowledge to make the most informed decision on what equipment to use and when.
This is something you can teach during rehearsal and it all comes from your score study. For example, during rehearsal a student on bells has a part that doubles the melody, but it is too loud. Ask the student to find a mallet that makes the instrument less prominent. They might move from a brass mallet to a rubber mallet. Now the sound isn’t as “shimmery” as you’d like. Ask the student to find a mallet that is a bit brighter but doesn’t stick out in the timbre. Finally, the student settles on a plastic mallet.
If your percussion stick and mallet collection is anything like ours, there are many that often go unused because students aren’t thinking about the sound they are creating. Challenge your students to put the various mallets to use by giving them direction on how to find the right stick or mallet for the timbre that will make your performance the most effective it can be.
Utilize your percussionist to help with winds
This is not a novel idea, but one that is worth remembering. When working with winds on something that needs a metronome or some other constant beat, use the snare drummer or temple block player to provide a beat or subdivision. Not only are you keeping them engaged, but you are giving them a chance to flex their muscles on what everyone expects them to do best. Hope they don’t mess up!
While student teaching, I was working with a middle school band on “Loch Lomond” by Frank Ticheli. The students were having a lot of issues with time on their individual parts because of the flowing nature of the music. Something was just not clicking, so my cooperating teacher had an idea to lay down a fat rock beat over the music (don’t worry, it was only during rehearsal) and made “Loch Lomond” into “Rock Lomond.” We didn’t have a student play the rock beat, but we could have. The point is to show that percussionists can serve an extra and creative role in our rehearsal process.
Make your way back there
When was the last time you went back to your percussion section? If it was recently, good for you! Regardless of the last time you made your way back to the percussion section during rehearsal, do it again! If the excitement from the winds thinking the percussionists are in trouble isn’t enough, it breaks up rehearsal and can help you focus the whole group by being at the back of the room.
Similar to my article on wind instruments, just stepping off the podium is an engaging rehearsal tool. While you’re back there, take the opportunity to note some of the workings of your percussion section. Is it set up well? Why are they missing this entrance? Who is having trouble with their part? What is that smell?
Photo by Shutterstock/Elcatso
Part assignments
Oh, the dreadful part assignments, especially when you must keep in mind the strengths of your percussionists so they can be successful and feel challenged with new skills. Easy, right? Don’t get me wrong, I do part assignments for my groups. I swear I know how to do it. However, another way to engage your students is to have them help. I have been lucky to have some exceptional percussionists who love the task of assigning parts, which can be really helpful when sight reading a piece. These students know their section’s strengths and provide parts to other students to challenge them a bit more. Perhaps they will assign a strong battery percussionist a less challenging mallet part instead of the snare part, and vice versa.
Students also can speak up and say, “I would like to work on my skills on marimba. Can I have a marimba part on this piece?”
My percussion leaders have done a great job of making sure parts are balanced and that all students are playing the same number of pieces in a concert. I will admit, sometimes this doesn’t go as planned. There might be that one wind chimes student who sits around for 182 measures before playing for the first time then won’t play for the last 206 measures. Have your students share a document with their part assignments so you can double check their work to avoid this. Even if you have to make these changes, you have saved yourself some time by designating tasks, and you have created leaders in the process!
Bonus: When you go into the sight-reading room at your large group adjudication, these percussion leaders are ready to distribute parts on their own!
Part doubles
If you have a large number of percussionists, you might have to double parts. This can be as simple as doubling a mallet part or adding another snare drum. However, you can be limited by the number of mallet instruments with the right or similar timbre, and you can only stand to listen to a finite number of snare drums. Some might suggest doubling a flute part on bells or similar, which might be effective on something like a march that doesn’t have a mallet part, but might be less effective on other pieces.
How is it possible to keep all your percussionists engaged if they are not playing on every piece? Let me offer a solution. Full disclosure: I learned it from someone else. When assigning parts, double up students on a part, but have them rotate — not a novel idea. However, don’t let the student who’s not playing go sit in the corner; they should be completely engaged, following along with their part and working with the student who is playing their part. What if you change a dynamic, or give an instruction to that part? Now they both know what to do next time! This is also a great way to pair a less experienced player with a more experienced one to create a sort of peer mentorship. They can help each other and remain engaged on every piece during rehearsal. As the concert gets closer, assign one to play the part. Now, if one of those students gets sick before the concert, the other can step in!
__________________________________________
Percussionists play a unique and important role in our bands. One thing that often gets lost on school-aged percussionists is that they are musicians, too! As meaningless as they might think that triangle hit is, or that tambourine or crash cymbal part, they need to play it like it is the most important part in the world because at that moment it just might be. Help your percussionists continue to grow into the artists that they are.
You’ve made up your mind: It’s finally time to build your home theater nirvana — a place where you can spend many happy hours binge-watching your favorite TV shows and movies. You have studied all of your hardware options and subscribed to every major streaming service, and now you are ready to be wowed with immersive sound and stunning 4K image quality.
There is only one problem: How do you actually interconnect all this stuff so that your home theater doesn’t look like a spaghetti factory?
Nobody wants to see their dreams come to a crashing halt because of clutter or objections from a significant other, so let us give you a helping hand.
Tools of the Trade
When it comes to hiding wiring, the main rule of thumb is this: Always look for the path of least resistance. If you have an attic above your home theater room or crawlspace below, take full advantage of these open spaces. If that’s not an option, you will either need to open your walls to run wire or hide wiring under your baseboard and/or carpeting as it travels around the room. There are lots of tools like these to help you fish wire under carpets and through walls. If you are not the handy type, plenty of companies make paintable wire covers to hide unsightly bundles of cables. These are super easy to install.
Here’s a summary of some of the creative techniques for making those pesky wires disappear:
– Take advantage of any gaps that may already be there. Since trim elements like crown molding and baseboards run around a room, take advantage of the small gaps they can provide (i.e., behind the molding or underneath the baseboard). If the room does not have either, you can install a foam crown molding or foam chair rail to create a raceway for wires. This is actually a pretty easy DIY project and adds to your décor to boot.
– Run wiring underneath carpets, throw rugs or runners. There are all sorts of options for flat wire that can be fished underneath a carpet so as to not create an annoying bump in your rug.
– Use wall-mounted flat speaker wire. There are speaker wires on the market that can be installed onto your wall almost like a drywall repair — you simply affix the very thin wire to the wall with adhesive, then apply some joint compound to integrate the tiny bump of wire into your wall for a smooth finish. A little sanding and paint, and voila! Bonus: This type of wire will even work under wallpaper.
– Add some cord concealers. These nifty rigid raceways are a great way to hide a bundle of cables in a neat conduit that can be stuck to a baseboard or wall with dual-sided tape. They are easy to install and paintable. There are also flexible cord concealers that can be used behind your gear as it travels between shelves.
– You can never have enough zip ties! Zip ties are the installer’s best friend — kind of like duct tape to a handyman. They provide a great way to neatly bundle and manage cables. You can also use zip ties creatively to route cables neatly behind cabinets and between shelves.
– Utilize coves and light strips. If your room has a lighting cove or some other kind of design element that houses strip lighting, take advantage of these spaces to hide wire. LED light strips are very low wattage and can be very close to low-voltage wire without fear of causing a fire.
– Break down the barriers. It may sound like a desperate measure, but as a professional installer, I can tell you this is often our only viable option for hiding wires. It doesn’t actually take a lot of effort to open up a wall or ceiling and fish wires around a room — something that becomes even easier if you have an attic above or crawlspace below. All you have to do then is find someone to come and patch the holes you needed to make.
Now let’s take a closer look at the specific kinds of wiring interconnections you’ll need to make in your home theater.
Video Wiring
Hopefully you have selected the perfect size TV and mounted it at the correct height on the wall, so that your line of vision when seated in your favorite chair lands smack dab in the middle of the screen. This is a good start! If you are not lucky enough to have a power outlet behind your TV, there are some great user-installable outlet relocation solutions such as this one.
Most modern-day TVs have built-in apps, but if you want some of the additional features offered by an Apple TV®, Amazon Fire Stick or Roku®, those connections are simple: just plug them into an available HDMI® port on your TV (or use an HDMI extender cable if necessary). Most of these devices are small enough to slide behind a TV so that you don’t have to run wires anywhere, even if an HDMI cable is needed.
If you want the fastest speeds possible, it is best practice to use a hard-wired Ethernet connection from your router or network switch into the back of the streaming device — even if it means running cabling in your basement or ceiling, or going through a wall. (Ethernet cabling can be run for over 300 feet if necessary without signal degradation.) If a hard-wired connection is not possible, the device should work fine wirelessly, as long as it is paired correctly to your Wi-Fi network and you have a strong signal in your home theater. (Click here for some tips on optimizing Wi-Fi.)
For best video quality, DVD and Blu-ray Disc™ players should be connected to your TV with HDMI cables instead of analog ones. Bear in mind that HDMI cabling should be as short as necessary and should never exceed 50 feet in length or you run the risk of signal degradation.
Audio Wiring
As TV manufacturers strive to reduce the bezel around the screen, the biggest casualty is sound quality — you simply cannot fit good speakers into these new designs. So add a sound bar! Even the most basic sound bar will provide audio that’s miles above the speakers built into a TV, but if you’re looking for a great one, consider the Yamaha MusicCast BAR 400. This audio gem even comes with a wireless subwoofer to provide that magical low-end rumble of a rolling tank or the Millenium Falcon. The connections for these devices could not be easier: simply use a short cable to route the TV audio output into the sound bar input (and, from there, to a subwoofer, if you have one) and you’re ready to rock.
Yamaha BAR 400 sound bar.
If you are a home theater aficionado, you’ll definitely want to take advantage of the amazing surround tracks that accompany most modern movies and TV shows. This requires at least a pair of rear speakers for a basic 5.1-channel system (five main speakers and the “.1” subwoofer.) You will hear a lot of opinions on where rear speakers should be placed, but one thing is for sure: They should never be in front of you. Instead, they should be positioned off to the sides of your listening area or behind you, angled in. In a commercial cinema these are typically on the side walls but your particular room may not allow that. If you need to use ceiling speakers for the rears, this can be a pretty acceptable alternative.
Yamaha MusicCast 20 wireless speakers.
Of course, running wires around a room can be a hassle, despite all the great tools described above. An even better solution is to add a pair of wireless surround speakers such as the Yamaha MusicCast 20, which are compatible with all current MusicCast-enabled devices. Simply place a pair in the back of your room to get those amazing fly-over effects you crave. These speakers are available in black or white and are also compatible with music streaming services and your mobile phone so you can use them for music listening too. Bear in mind that even though you do not need speaker wire to connect these speakers, they will still need power, so you will need a power outlet somewhere in proximity. Failing that, you can always use one of the user-installable outlet relocation solutions mentioned earlier in this article.
Adding an AV Receiver
If your budget can stretch a bit further and you desire a higher level of audio performance, you should consider using a full-featured AV receiver like the MusicCast-enabled Yamaha RX-V6A. AV receivers (AVRs for short) act as both the central hub and “brains” of your system, though installing it will require a little planning.
Yamaha RX-V6A AV receiver.
First, determine where you will place the AVR. Even if it has some wireless capability (as the RX-V6A does), there will still be some video and/or audio wiring required … and since all your home theater wires will be connected to the AV receiver, its location needs to be carefully considered. For example, you’ll need to connect it to your TV with an HDMI cable — the shorter the better. In this kind of setup, your streaming devices will also have to move to the receiver location and will connect directly to the HDMI ports on the back of the receiver (instead of your TV).
Second, map out all of your endpoints. Your center channel dialogue speaker will go immediately below your TV. The left and right speakers will go on your TV wall or in your entertainment center, and your goal is to create an equilateral triangle between you (at your seated location) and each speaker. If you failed geometry in school, this just means that the distance between the left and right speakers should be the same as the distance between you and each speaker.
Placing the subwoofer is a lot easier since low frequencies are not very localized, meaning that it’s hard to hear where they come from. Your sub should simply go somewhere along the front (screen) wall of your room, preferably in a corner so you can take advantage of the energy those adjacent walls help create. For a truly chest-pounding audio experience, consider using two subwoofers and place one in each corner.
If you want to ratchet up the immersion factor, you might want to make the move to a 7.2-channel system, which requires two additional speakers mounted in the ceiling or on the rear wall of your room. (The “.2” is just an indication that there are two subwoofers in the system, although you can actually run a 7.1 system with a single subwoofer … but .2 is definitely recommended.)
The ultimate surround set-up is Dolby Atmos® — the holy grail of movie sound. This adds two or four speakers in the ceiling to a 7.2 channel setup to fill the gap between the side and rear surround speakers. If you use two ceiling speakers, these are typically slightly forward of the seating area. If you choose four speakers, then you would mount an additional pair in the ceiling between your seating area and the back wall.
Once you’ve decided on all your speaker locations, you need to choose the wire you’ll be using to connect them. I recommend a minimum of 16-gauge, but 14-gauge or 12-gauge wire will perform better. (Bear in mind that if you intend to run the wire through walls or in the ceiling, you will need wiring that is CL-rated for safety.) In addition, unless you’re using wireless subwoofers, you’ll need to run line-level cables from the AV receiver to each sub.
Now it’s time to start unboxing your AV goodies and get your room wired up for an amazing home theater experience … without any unsightly clutter!
As spring approaches, many of us set new health goals. But for a busy music educator, trying to squeeze in a workout before or after a day of work can be tricky. There are concerts, classes, rehearsals, administrative obligations and performances. Who has time to exercise?
Thankfully, recent research demonstrates that brief bouts of activity, also known as “exercise snacks,” can sharpen focus, improve circulation, boost your mood and deliver many of the same benefits of a longer workout. In other words, if you don’t have time for a symphony, how about an interlude? Exercise snacks are ideal for crazy-busy teachers, as they help preserve and boost your health and energy. Here are a few to try.
Cop a Squat
Few exercises are as beneficial and easy to do —literally anywhere — as the humble squat. Squats improve lower-body strength, stability and bone density. They also help strengthen the core muscles that support your spine, according to Healthline, and they even improve circulation. You don’t need any equipment — just make the most of a short break and do 5 to 10 squats at a time, sprinkled throughout the day.
Restroom Ballet
As you wash your hands or brush your teeth post-coffee, make like a ballet dancer and do some calf raises. This low-impact exercise tones the lower leg muscles and can help with the body’s overall balance and stability.
Monitor Posture
Good posture has been a mainstay of musical performance since … forever. Choirmasters, maestros and prima donna all understand that how you stand influences how you sound. It’s also great exercise. Straighten up, engage that core and attend to your stance. If you’ve been hunched over, do a counter-stretch. If your back has arched (perhaps from holding a heavy instrument), tuck in your tailbone and re-stack your spine. These small adjustments contribute to improved tone and circulation, and they help prevent injury.
Wall-sit
As your students tune-up, do a wall-sit in the back of the room — or the front of the room if you’re looking to acquire a reputation as an eccentric. By the time they find their perfect A, you’ll have fired up your quads, hamstrings and glutes.
One Small Step…
Are you constantly walking from your office to your classroom, practice rooms and performance spaces? Let’s leverage that commute in the name of fitness: Take the stairs instead of elevators and move briskly. If your walk is super short, that is fine, too. Walks as brief as two minutes have been linked to improved cardiovascular health and mental acuity, and are especially important after you eat, helping balance blood sugar, according to research published in the journal Sports Medicine.
Snack Stash
You can probably find room to store a few items that will make your “fitness snacks” more productive: A yoga mat stowed in the corner, fitness bands tucked into a drawer, small hand weights under the desk — none of these take up much room, but they open up possibilities for a midday tune-up. With a yoga mat and 60 seconds of free time, you’ve got the makings of a challenging plank hold. On a call? Sneak in 20 curls with a light weight. Or use resistance bands under your desk to do some hip abductor work while you catch up on email.
Enlist the Troupe
Teaching a group of student musicians can sometimes feel like trying to direct the weather — but remember, you’re in charge, so bring them along on your new fitness regimen. Once or twice per class, instruct them to set down their instruments, stand up and do some shoulder stretches, lunges or neck rotations. Regular breaks to work and loosen muscles will help reinforce the importance of physical health in the life of any well-rounded musician. (Want more in-depth stretches? Check out our story “Ouch! Easy Fixes for 5 Common Teacher Pains.” )
Chair Yoga
If your job keeps you seated for most of the day, make the best of it with chair yoga. Twists, seated forward folds and shoulder stretches can combat stiffness and keep your blood moving. Over time, a little bit of yoga will reduce tension in the neck and shoulders, familiar issues for music educators who conduct for long periods or lean over sheet music. Good posture may have the happy side effects of fewer headaches, less fatigue and a more commanding presence in the classroom. There are tons of free YouTube videos featuring chair yoga, so you can mix up the routine.
Get Rhythm
As a music educator, you have a secret weapon at your disposal: rhythm. Set a metronome at a moderate tempo and do a 60-second set of squats, lunges or even gentle jumping jacks in time with the beat. Consider inviting students to join in a quick “body percussion” break — claps, snaps and stomps — to get everyone moving without missing a beat.
Add It Up
Sneaking in these micro-workouts really can help with your overall fitness goals. Five or 10 minutes here and there can help you get closer to the recommended 150 minutes a week of physical activity. And during for a busy music educator, that’s a total win.
It’s no surprise that some folks wonder if NAMM is still viable. Competition from other trade events, the high cost to exhibit and book hotels, and the fact that some major manufacturers no longer appear at the show have all contributed to concerns that the storied National Association of Music Merchants shindig, now in its 123rd year, is no longer relevant. This year, poor air quality caused by fierce Los Angeles wildfires, which continued to burn during the show, also gave would-be travelers pause.
But those who took the plunge and came to Anaheim, California for the three-day show last month were rewarded with enthusiastic crowds and plenty to experience. While attendance hasn’t fully bounced back to the pre-pandemic high of 115,000, organizers noted that more than 63,000 people attended the show — up 16 percent from 2024 — including 11,000 visitors from 125 countries, 1,850 exhibitors representing 4,400 brands, and 8,700 artists demonstrating and endorsing products. For me personally, it was a thrill to discover that walking into the Anaheim Convention Center and onto the show floor still inspired a familiar tingle of anticipation, even after attending a dozen NAMM shows.
TWO EXHIBIT AREAS
A huge part of that excitement was inspired by Yamaha’s massive space on the third floor of the convention center, which included a giant room with guitars, keyboards, drums and percussion, wind and string instruments, pro audio gear and a large main stage.
Directly across from the big room was a smaller Yamaha Guitar Group room with its own stage, as well as Ampeg, Line 6 products, along with those from the newer members of the Yamaha family, Cordoba and Guild.
PRODUCTS
Yamaha showed off a few new finishes in the BB and TRBX lines, but even with no new bass launches this year, there was still plenty of fun to be had. It was especially awesome to get quality time with the Billy Sheehan Attitude Limited 3, Nathan East BBNE2 and John Patitucci TRBJP2 signature basses!
Across the room, young musicians created a symphony of sound on Yamaha acoustic and electronic drums — including the new DTX6K5-M — while others test-drove Steinberg software products like Cubase and Dorico, checked out the SEQTRAK Mobile Music Ideastation and played YEV Pro Electric Violins. The Clavinova line of digital pianos on display — especially the CSP-295 and the new CLP-845, which were a joy to play. (Fans of Yamaha’s CP88 Stage Piano, take note: The CPOS 2.0 update is now available.)
The hustle and bustle of the main room.
The numerous BB, TRBX and signature-model basses in the main room were all plugged into Ampeg amps, but the smaller Yamaha Guitar Group room was home to gems like the Ampeg SGT-DI, which brings old-school SVT and B-15 tone to a road-ready preamp/DI box with overdrive, EQ, compression and the ability to load virtual cabs with the Ampeg IR Loader app. The main attraction in the Ampeg area was the Venture Series of bass heads and cabinets, comprised of the 1200-watt Venture V12, the 700-watt V7 and 300-watt V3 heads, paired with Venture VB-112, VB-115, VB-210, VB-212 and VB-410 cabs. The largest Venture cab, the VB-88, features eight 8-inch speakers, but it’s only 67 pounds, less than half the weight of an old-school 140 lb. SVT-810E. As someone whose heavy-amp days are behind him, I was intrigued by the Rocket Bass Series — a 500-watt 2×10 with classic looks, a DI and an extension speaker output that only weighs 39 lbs. Yes, please! Oh, and happy 75th birthday, Ampeg!
The stage area in the small room.
The small room was also the place to dig into Line 6’s impressive POD Express Bass effects processor, which boasts seven amps, seven cabs and 17 effects, including a looper. But it was hard to flip through presets while standing near Guild’s gorgeous Starfire 4-string electric basses, their acoustic bass guitar cousins and Cordoba’s cute Mini II Bass MH-E. Although few would consider the hustle and bustle of NAMM an ideal place to audition acoustic instruments, that didn’t stop plenty of would-be soloists from trying!
Make yourself heard! Get inspired with Yamaha at NAMM 2025:
A great song doesn’t need to be complex rhythmically, harmonically, musically or lyrically; it just needs to be relatable to the masses and touch a nerve in the listener.
I’m pretty sure most of us have listened to a hit and said “I could’ve written that.” The fact of the matter is that most Top 40 songs are not especially intricate, but what they all have in common is that certain something that connects with an audience.
I lived in Nashville for 17 years and co-wrote with some of the worlds’ best songwriters. Those amazing people knew their craft inside and out, and trust me, songwriting is a craft that can be learned by almost anyone. Writing a great song, however, is a whole other matter.
Of course there are a million ways to get started. Some people begin with a groove, others a chord progression, many with a melodic hook, and more often than not (at least in Music City), a song title.
Whether you’re new to songwriting and instrumental composition or are simply trying to develop your playing chops, there are harmonic tools and techniques that will help you make more of your chord progressions and add emotional interest. In this posting, we’ll focus on one of the simplest of these tools: diatonic chord substitutions.
Diatonic Chord Substitution
Let’s start by breaking that sentence down. “Diatonic” simply means from the same scale. “Substitution” means you are going to swap certain chords for other chords based on their harmonic composition (i.e., the notes they are made up of).
In this posting, we are going to learn which chords can be swapped for other chords within the same scale. The reason chords can be substituted is that they contain some of the same notes. Within three-note chords (triads), two of the notes will be the same; within four-note chords (seventh chords), three of the notes will be the same. (For more information on triads and seventh chords, read this blog posting.)
The general formulas for diatonic three-note chord substitution are as follows:
The root chord (the I) can be interchanged with the III and VI chords.
In the key of C, that means you can play Emi or Ami instead of the C major chord (CEG). As you can see, both Emi (EGB) and Ami (ACE) contain two of the notes also found in the C major chord: E and G in the case of Emi, and C and E in the case of Ami. So just remember I – III – VI.
The IV chord can be interchanged with the II chord.
In the key of C, that means you can play Dmi (DFA) instead of F (FAC). As you can see, Dmi contains two of the notes found in the Fma chord (F and A). All you have to remember is II – IV.
The V chord can be interchanged with the VII chord.
In the key of C, that means you can play Bdim (BDF) instead of G (GBD). Bdim contains two of the notes found in the G chord (B and D). Just remember V – VII.
Four-Note (Seventh) Chords
The same chord substitution formulas work for four-note seventh chords. In this case, the substituted chords will contain three of the same tones.
In the key of C, Emi7 and Ami7 can substitute for the Cma7 chord:
I III VI
Cma7 Emi7 Ami7
C – E – G – B E – G – B– D A – C – E – G
Dmi7 can substitute for the Fma7 chord:
IV II
Fma7 Dmi7
F – A – C – E D – F – A – C
… and Bmi7(♭5) can substitute for the G7 chord:
V VII
G7 Bmi7(♭5)
G – B – D – F B – D – F – A
Try It for Yourself
Chord substitutions are a powerful harmonic tool that can expand your songwriting and playing skills — even melodic improvisations.
Let’s put it to the test. Start by playing this chord progression:
IV I V I
II: Fma7 / C / G / C :II
Now try swapping Ami (VI) for the first C chord (I):
IV VI V I
II: F / Ami / G / C :II
Then try swapping Dmi (II) for the Fma7 (IV), Bmi7(♭5) (VII) for the G (V), and Ami (VI) for the C (I):
II I VII VI
II: Dmi / C / Bmi7(♭5) / Ami :II
To hear how effective this is, return to the original progression. Note that you could use any or all of these substitutions as separate sections of a song, or as an eight-bar progression.
Melodic Substitutions
If you enjoy playing single-note arpeggios when you improvise, you may want to try using diatonic chord substitution to expand those melodic chops as well. Here’s a simple example to get you thinking about this in more detail:
Over the following Cma7 chord progression, try using an Emi7 or Ami7 arpeggio as your single- note melody:
Cma7 – C – E – G – B
Emi7 arpeggio: Emi7 – E – G – B – D
(The D note will sound as a second or a ninth against the Cma7 chord.)
Ami7 arpeggio: Ami7 – A – C – E – G
(The A note will sound as a sixth or thirteenth against the Cma7 chord.)
The Video
In this video, I’ve recorded an eight-bar chord progression that utilizes the chord substitution ideas described above, over which I add a nice melodic line and slide parts.
Note how the changes in the harmonic structures (i.e., the chord substitutions) affect the way the melodies I play relate to the progression. In other words, your chord choices will give your melodies more variation and musical mileage.
The Rupert Neve and Yamaha-co-designed Reflectone pickups (shown below) allow complex chordal passages to translate cleanly, even when used with a little overdrive. The tremolo bar is super-smooth for chordal shimmers, and the guitar stays perfectly in tune even on those single-note lines. The satin-finished maple neck is a fast and easy-to-navigate slim C-shape, which pairs musically and resonantly with the acoustic design technology-contoured alder body.
The Pacifica Professional is an extremely versatile guitar that can be used for any style and almost any musical application, making it perfect for the studio as well as live performance.
Revstar RSS20 Standard
The chambered mahogany body and neck-through body construction really add sustain to the entire range of Revstar guitars. The two Alnico V humbucking pickups, five-way switching and focus switch found on Professional and Standard models allow for ten musically inspiring pickup configurations.
These well-balanced guitars can provide all the necessary subtlety for jazz chordal passages yet add rock’n’roll grit and soaring blues too. As you can hear in the video, they also sound completely different from the Pacifica Professional on those solo lines.
The Wrap-Up
Chord substitution can be used to expand your songwriting chops, playing and compositional skills, and even improvisations.
When you think about the number of possible chord-progression permutations using just the seven diatonic chords, it’s quite astounding. Add in the ability to interchange some of those chords, and you are opening up your creativity to a whole new universe.
In Part 2, we’ll dive into the vast ocean of tritone substitutions, secondary dominants and modal interchange.
Starting your first “real” job as a music educator is exciting and nerve-wracking. As you embark on establishing your own program and connecting with your students, heed the advice from some top music educators — the Yamaha “40 Under 40” class of 2025.
Dr. Gene Butler, Director of Bands at Smith Station High School in Alabama, is passionate about helping and supporting new music educators. He says:
Tip 1: Relationships are the most important because they form the foundation for a positive and productive music program.
Tip 2: Be the best advocate for your students and program.
Tip 3: Organizational skills are vital because they help ensure that lessons, rehearsals, events, and administrative tasks are executed efficiently and effectively.
Tip 4: Student leadership matters all year because it fosters a sense of responsibility, accountability and teamwork that extends beyond just rehearsal time.
Tip 5: Prioritize your personal time outside of school hours and maintain a healthy work-life balance. Being a music educator is demanding and can be all-consuming, so it’s important to recharge mentally, emotionally and physically to avoid burnout.
Kim Webb, Director of Bands at Greene County Tech School District in Arkansas, offers these tips:
Tip 1: Don’t quit. It’s hard, but it’s hard because the work we do is important. It will get better, but that first year it will feel like you’re drowning.
Tip 2: Your students are people. Treat them like people. Have conversations with them. Laugh with them. Give them grace. You don’t have to be serious all the time.
Tip 3: Reach out to other band directors. If they are good educators, they will want to help you!! Visit their classes. Have them visit yours. Get feedback — and not just from a principal. If you don’t think your band is “ready” to have a clinician out, have them out anyways. That’s the best time to get feedback.
Erin Bara, the Executive Director of We Make Noise and the Assistant Professor and Director of the Popular Music Program at Arizona State University, recommends:
Tip 1: Be as organized as possible!!!
Tip 2: Don’t be afraid to say “I don’t know.” No one knows everything, and it’s good to model to your students that learning is a lifelong adventure.
Tip 3: Hang in there — the first year is the hardest and things get easier, I promise!!
Nicholas Popovich, Music Technology Teacher at Shadow Mountain High School in Arizona, says:
Tip 1: Embrace flexibility and continuous learning. Education and music industries constantly evolve, so stay adaptable, open to new approaches and techniques. Encourage growth mindset and be willing to explore new technologies alongside students. Foster a collaborative, innovative environment.
Tip 2: Focus on project-based learning. Design curriculum around hands-on, collaborative experiences. Students must create original music, experience real-world projects and engage peer-to-peer across disciplines. Build technical skills while enhancing creativity, critical thinking and problem-solving abilities.
Tip 3: Build relationships and connections. Establish a supportive environment by meaningfully connecting with students. Forge partnerships with organizations, professionals and institutions. Provide real-world experiences, networking opportunities and broader perspectives or pathways.
Joshua Race, Director of Bands at Fountain-Fort Carson High School in Colorado, offers these tips:
Tip 1: Don’t put yourself on an island. Ask questions and don’t isolate yourself. You learn more about teaching your first few years of teaching than your time spent in school.
Tip 2: Find a mentor or two or three! Invite them to your room and be open to constructive feedback on how you approach your teaching. Keep doing this forever.
Tip 3: Reflect on your teaching day to day and class by class. Debrief with yourself and ask yourself if you’re reaching every student equally both as musicians and as people.
Dr. Aaron J. Witek, Assistant Professor of Trumpet and Coordinator of Brass and Percussion at Stetson University in Florida, recommends:
Tip 1: The first year is always the toughest, but it’s one you’ll never forget. Embrace the challenges as they lay the foundation for your future as an educator. Make sure to take time for yourself — understand your own needs and prioritize them. It’s easy to get caught up in the pressure and feel like everything is urgent. While pushing yourself may bring outside recognition, it’s not sustainable in the long run. Focus on your trajectory and work on building healthy habits that will support you throughout your career.
Tip 2: Don’t give up — remember your “why.” Stay curious and fascinated by figuring out how to solve each challenge that comes your way. Problem-solving will help you grow.
Tip 3: Remember that you never know what’s going on in someone’s life, and the way you treat them can make a huge difference. Teaching is a people-centered profession, so take care of your students so they can thrive and learn.
Kevin Morrison, Director of Bands at Lambert High School in Georgia, says:
Tip 1: Talk less, play more. I wish I had learned this when I first started out. Learning to play music involves many different skill sets that all need to be developed by doing. Young educators often look for “the golden comment” that will change how everyone thinks about everything, and really all the students needed was to do it again.
Tip 2: Know what you want then seek out people who know how to do that. What kind of program do you want to have? What do you want your band to sound like? Seek out people who have made their bands sound/look/operate the way that you want yours to and ASK FOR HELP!
Tip 3: Let students do things, and let them fail at it. I am still working on this one, but the goal is to show students how to create and grow! Our job as educators is help guide them through that process, not carry them. When they realize that no one is going to do it for them, they have it to do it themselves, they will! And you get to watch in real time as they become more self-assured and proud of all the things they can do.
Lindsay Cummings wears many hats, including Artist Faculty for Musical Theatre Voice at The Chicago College of Performing Arts at Roosevelt University, Professor of Musical Theatre Voice at Loyola University Chicago, Owner of Chicago Music & Acting Academy, and Executive Director and Founder of Downstage Arts. She says:
Tip 1: Remember that you are training professional make believers. You are in the business of fun, of stories and of magic. In doing so, you will create more thoughtful and emotionally intelligent humans.
Tip 2: Do assessments with your students — quarterly, bi-annually or annually. Have them set goals for themselves and use that time to reflect on their progress and their goals.
Tip 3: Give them a safe space to make mistakes. Patience is truly the key to teaching any age but teaching someone to sing who’s never sang before REALLY takes patience. It’s so important to create a learning environment that supports, encourages and lifts up your students. That also means leading by example and owning YOUR mistakes. When I’m playing piano and mess up badly enough that my student doesn’t come in for their entrance, I say, “Whoops, my mistake! I need to practice that part! Let’s try it again.” Seeing their teacher own their mistakes will dismantle the shame students often feel around not getting it right immediately. How boring would it be if we got it right every time?!
Bob Habersat, Commercial Music Teacher at Oak Lawn Community High School in Illinois and Director of Shedthemusic.com, offers these suggestions:
Tip 1: Plan more than you think you need to. I still create daily lesson plans and map out my sequences thoroughly. Having a plan helps me adapt on the fly without losing focus.
Tip 2: Continue developing your own musicianship and creativity. If you’ve never recorded or written a song, do it — and share that process with your students.
Tip 3: Keep open communication with your students. Ask for their feedback and let them see what you’re working on.
Bonus Tip: Never feel like an imposter. Keep learning and trust that you have valuable skills to offer your students.
Shan Kazmi, Director of Bands, Zion-Benton Township High School in Illinois, recommends:
Tip 1: Find the joy in the grind. This job is hard, but all jobs are hard if you want to do them well. A lot of teachers hear “Find your Why” at some point in their careers, but I believe you should find your “Why Not?” instead. Teaching is one of the most influential things you can do for others in this world. It really is the best job. The juice is worth the squeeze.
Tip 2: Don’t make everything about you. I made a lot of foolish mistakes in my early years because I wanted to either stay within my comfort zone or say, “Look what I did.” I didn’t really stop to ask myself if it was best for my students. Remember that we (music educators) are wired a little differently, so things that make perfect sense to us, may not be as widely accepted to our student populations.
Tip 3: Build a network. It’s very easy for music teachers to feel isolated in their roles. Make sure you have a mentor whether it is someone in your building/district or someone from the outside who you trust. Start in your own building by making it into the teachers’ lounge at lunch or join a committee to meet other teachers. Outside of school, try to join a community ensemble. I have made so many connections through the community bands I have performed in and many have helped my program be successful in some way.
Lilly Streich, 5-12 Vocal Music Teacher at Galena Unit School District in Illinois, offers these tips:
Tip 1: Don’t be afraid to roll up your sleeves and put in hard work to make your music program great.
Tip 2: Support all students and meet them where they are at instead of trying to push them to where you think they need to be.
Tip 3: Take a look at your current (or new) program and see where the gaps are to get more students interested and engaged in music in new ways, such as music theory, adaptive music, electronic music, modern band or music appreciation.
Dr. Cordara X. Harper, Assistant Professor of Music Education/Choir Director, Music Education Coordinator and Vocal Music Coordinator at Grambling State University in Louisiana, recommends:
Tip 1: Be a source of inspiration for all you get to encounter.
Tip 2: Foster an environment where everyone feels seen, heard, valued and welcomed.
Tip 3: Never stop learning and seek mentorship at every stage of your journey.
Zane Kaiser, Band and Orchestra Teacher at Justice Page Middle School in Minnesota, offers these suggestions:
Tip 1: Set boundaries for yourself when you can, but also know that it is okay to be not okay.
Tip 2: Don’t quit mid-year. Resiliency is one of the strongest skills you can have in education.
Tip 3: There are so many things you don’t know early on. I am still learning more every day! Finding people to support your learning will help you grow not only as a music educator, but as a whole person, too.
Leah Motl, Orchestra Teacher at IJ Holton Intermediate School in Minnesota, says:
Tip 1: Connect with teachers in your building (not just other specialists). All teachers in your building are on the same team — for the students. Take the time to build trust and community with other teams and departments. Whether you are re-building a program, making changes or simply need to pull students from a class for lessons, positive relationships between teachers can make a huge difference in the implementation and support of your ideas or asks.
Tip 2: Learn to prioritize (your time). The learning curve in years 1 to 5 is intense, and some things will have to take a backseat, but that shouldn’t include your well-being. Focus on tasks that directly deal with students and teaching first. Make it a goal to leave at contract time and leave work at work as often as possible, even if that means one day/week to start.
Tip 3: Learn to negotiate. This is essential to our profession. Whether you are advocating for a student, schedule change or your job, advocacy and negotiation go hand in hand. Behind every ask is a “give-and-take” situation. Approach hard conversations with empathy, data (quantitative and qualitative) and aim for long-term solutions by chipping away at issues through negotiation.
Michael Blanco, the Assistant Director of Mariachi at Las Vegas High School, offers these tips:
Tip 1: Never give up! Push through every day, even the hard ones.
Tip 2: You are good enough — some days it’s hard to believe that you are in your position and it is easy to doubt myself. Watch your students perform — it’ll inspire you.
Tip 3: Meet students where they are at. Be patient and understanding.
Evan Aguilar, the Director of Choral and Piano Activities at Cibola High School and Albuquerque Public Schools in New Mexico, recommends:
Tip 1: Your challenges are portals to making you unique and your artistry interesting. Perfection is boring and unattainable, so embrace ALL the qualities of your life, program and experience as a way to connect, inspire and help others.
Tip 2: This profession is a marathon, not a race. Choose how and where you can be consistent with your students and hunker down and take care of yourself. You have years to develop your mastery.
Tip 3: Find time to do something that fills you with joy to keep you inspired.
Cody Jackson, Band Director at Heights Middle School in New Mexico, says:
Tip 1: Never be afraid to ask for help! Our greatest moments of growth as an educator can just be one question away. Master teachers are lifelong learners.
Tip 2: Never be afraid to experiment! Keep trying things until you find your unique style of teaching in all the concepts you’ll eventually teach.
Tip 3: Never be afraid to model for students! Our students deserve to see what it is to be a musician through us as their teacher. Get down on their level and learn right along with them.
Liam Keller, Director of Orchestras at Chatham High School and Lafayette Avenue School in New Jersey, recommends:
Tip 1: Learn to love failure, it’s the best way to grow.
Tip 2: Never be afraid to try something. No matter how small it may seem, it may be what helps a student develop a lifelong love of music.
Tip 3: Rely on people around you. Surround yourself with people who you look up to, and pick their brain any chance you can.
Tip 1: We are teaching humans, and we are teaching them through teaching music. Every student in your classroom is a whole person with their own story, struggles and dreams. Music is our tool to help them grow, but their well-being always comes first.
Tip 2: Be intentional about access and equity in everything you do. Whether it’s a field trip, a concert opportunity or private instruction, always ask yourself, “Can every student fully participate?” Then work creatively and relentlessly to remove any barriers that might hold students back from these experiences.
Tip 3: You have the power to uplift voices. Choose your repertoire with purpose. You have the power to shape whose voices get heard and what stories get told through music. Your choices send powerful messages about what music matters and whose artistry we value.
Laura Del Rosso, Modern Band Teacher at Lower Manhattan Community Middle School and New York City Public Schools, offers these suggestions:
Tip 1: Let your students lead the way. You create a positive rapport with your students when you ask them what kind of music they want to play and engage with the music they listen to on a daily basis. Student choice is everything!
Tip 2: Eat your lunch and drink water. I’m serious. Self-care is so important. You can’t pour from an empty glass.
Tip 3: Seek out a mentor. Invite them into your classroom and be open to feedback. This is the best way to receive support and improve your practice in the early years of your career.
Alex Hitrick, 7-12 Music Teacher at Broadalbin-Perth Jr./Sr. High School in New York, says:
Tip 1: Be yourself! You’re a human first, musician second. You’ve gotten this far not only because of your musical literacy, but your heart.
Tip 2: Give yourself time to breathe and relax. It’s easy to never sit down for the day and accidentally skip lunch. You can only be the best for your students if you’re taking care of yourself.
Tip 3: Every day will bring new challenges. Expect them and face them to the best of your abilities. Be comfortable improvising and adapting to every situation, because it will not go the way you plan. And that’s okay.
Kate Phillips, PK-5 Music Teacher at Grant Avenue Elementary School in New York, recommends:
Tip 1: In Year 1 you are in SURVIVAL MODE — count every small success as a major accomplishment, and take lesson planning one week at a time. Big picture and long-term planning is a luxury of Year 2 and beyond.
Tip 2: Dedicate blocks of time during your off hours SOLELY to self-care and for personal hobbies (yoga, crafting, making music for yourself!). It’s really easy to spend every free hour lesson planning, but it’s also really easy to burn out this way!
Tip 3: Get into colleague’s classrooms, both in your school and in other schools’ music programs, as often as possible. You will learn SO MUCH about teaching and about kids, and every visit will expand your own instructional toolkit.
Dr. Sarah Fabian, Director of Bands and Assistant Professor of Music at Gardner-Webb University in North Carolina, says that the foundation you lay in the first year as a music educator will shape your teaching philosophy and approach for years to come. Her top three recommendations:
Tip 1: Build relationships first. Music education is as much about fostering connection and trust as it is about teaching musical skills. Students will learn best in an environment where they feel respected, supported and valued. Building relationships with your students should be your priority, not just in terms of their musical growth but in terms of their overall well-being. Spend time getting to know each of your students. Learn their interests, and what motivates them. Don’t just teach the music; teach the students. When students feel connected to you and each other, they are more likely to be engaged and invested in your class.
Tip 2: Be flexible and adaptable. The first year of teaching is full of surprises. Things won’t always go as planned — whether it’s a challenging rehearsal, unexpected changes to schedules or unforeseen difficulties in the classroom. Your ability to adapt will determine how well you manage these challenges and keep your students on track. Always have a backup plan or two. Whether it’s an alternative teaching method or a change in rehearsal format, being flexible will help you remain calm and maintain control of the classroom.
Tip 3: Remember to just be yourself. There’s a tendency to feel like you need to conform to some ideal of what a “perfect” educator is supposed to be — whether that’s being overly strict, overly polished or emulating others’ teaching styles. But the truth is, students respond to authenticity more than anything else. When you’re comfortable being yourself, you not only create a more relaxed, positive classroom environment but you also allow your students to be themselves. Embrace your personality, own your mistakes, be relatable and trust in yourself.
Dr. Marissa Guarriello, Visiting Assistant Professor of String Music Education at the University of North Carolina Greensboro, offers these tips:
Tip 1: Be a sponge — soak up everything you can and analyze how it may or may not fit into your classroom and teaching. There are few times in your life when you are able to go places, do things, and meet people. Make connections, observe classrooms, be messy in your classroom. Over time, these things will shape you and your classroom in ways you never thought possible.
Tip 2: Adjust expectations. I fear that many educators enter their first year of teaching with a romanticized idea of what being a music teacher is, even after student teaching. Teaching, if you’re doing it right, is hard. It takes a lot of time (more than you’re paid for), work (more than what’s on your contract) and patience (more than you’ve ever had before). Big concerts full of pomp and flare are the exceptions not the norm. The everyday of teaching is anything but flare —- there’s paperwork and classroom management and budget restrictions and so much more. The reality of working with people is that it is super messy. Give it your all everyday anyway, especially on the less-than-exciting days. It’s so, so worth it.
Tip 3: Ask questions. Of course, ask the easy questions like “Where is the copier” or “Can you help me with…” But also questions about the people in front of you, the material you teach, how you teach and why you do what you do (in every sense of the question). You’ll learn so much, grow so much and you’ll also remember why you stepped into such an amazing career.
Lee B. Gibson, Assistant Director of Bands at Barberton City Schools in Ohio, says:
Tip 1: Be Passionate about what you are doing. If the kids see that you are passionate about what you do, they will buy in. They might think you are nerdy at first, but just keep being genuine and they will come around.
Tip 2: When things get hard, you will feel like you are failing. That is okay. A Lot of times that is what growth feels like. Just keep going and it will get easier, you will be more successful as you go
Tip 3: Realize that there is way more that you don’t know than what you do know. Always keep learning and growing!
Paul Glader, Band and Choir Director at Bethel-Tate Middle School in Ohio, offers these suggestions:
Tip 1: Go into teaching with wide-open expectations for job placement. Just because you may have an idea of what you may like to do, be open to other doors that may open because it just may surprise you.
Tip 2: Don’t be hard-headed. Ask for help…ask for help…ask for help. Other directors, teachers and administrators have gone through what you are about to experience, and they can help you avoid pitfalls.
Tip 3: Be true to yourself. Don’t try to be like anyone else. The students will respond positively to your authentic self and can see through you if you try to be something/someone you are not.
Christopher McCurdy, Band Director at Ulysses S. Grant High School in Oregon, recommends:
Tip 1: Remember that 99% of teaching is pacing, passion and empathy.
Tip 2: Meet students where they are as your authentic self. Treat them like humans, not cogs in a machine.
Tip 3: Your students will achieve whatever the internal image of their capabilities are. It is your job to support them where they are, have a mental picture of them that’s a few steps ahead, and be their biggest champion as they strive to achieve what they think is out of reach.
Coty Raven Morris, Hinckley Assistant Professor of Choir, Music Education, and Social Justice at Portland State University in Oregon, offers these tips:
Tip 1: If something isn’t going well, start over. Seriously. If it’s a question of teaching particular content, don’t beat yourself up for trying something! Teaching, like all things, is constantly evolving, and we are attempting to cater to so many different types of learners. Our goal is to find more creative ways to repeat our lessons and reach as many students as possible. If something isn’t working out, tell yourself, “Congrats! You now know what won’t work.” Take time to reflect and ask yourself why and what did you learn from the process. And then try something new! If classroom structure isn’t going seamlessly, and your class is disruptive, do not put energy into reprimanding students. That just ruins the rapport built during class. It’s better to have students line up in the hallway as if it’s the first day of school and go through all the first-day procedures. Remind them that your expectations aren’t just academic, but they are also rooted in them being the best versions of themselves. If that wasn’t clearly outlined, give them an opportunity to begin again!
Tip 2: Teaching students about your boundaries can be one of the best ways to create opportunities to establish respectful rapport in and outside of your classroom! I love getting to know my students and investing in them as individual creatives. That used to look like making myself available for every after-school, before-school and lunch activity. I personally enjoy getting work done with lots of people in my office or classroom, but sometimes, I need to have time on my own to knock out paperwork or just enjoy a quiet lunch alone. There’s nothing wrong with telling your students that you’re unavailable. Teach them that it’s not a rejection of who they are, but the desire to fuel your own well-being so that when you see them again, you can give them your all.
Tip 3: Be a thimble that makes thimbles. My high school choir teacher told us, “Everyone thinks that you have to give a well of yourself — an ocean of your energy — to others. But if you do that, what is left for you? All you have to give is a sewing thimble. If we all pour this much into the collective well, then when someone is in need, they can take some. One day when we ourselves are in need, we can do the same.” This lesson has always stuck with me because it reminds me about BALANCE, highlighting your gifts and recognizing opportunities to ask for help. It can be very easy in this profession to lose yourself in pouring out to the young people in front of you. The thing is, there will always be more to worry about and more problems that arise. When we practice the thimble rule, we are reminded that our job is not to fix every single problem, but to provide our students with the tools to address issues on their own or with others. The thimble rule also reminds us that sometimes we’re not meant to have the answer to everything, and this is when reaching out to our community — whether that’s administration, parents or empowering students — to find creative solutions is necessary. We are reminded that none of us have to do any of this alone.
Dr. Cassandra Eisenreich, Associate Professor of Music Education and Flute at Slippery Rock University in Pennsylvania, says:
Tip 1: Build strong relationships with everyone in your school community — students, colleagues, administrators and parents. Establishing a supportive network will help you navigate challenges, gain new insights and create a positive, collaborative atmosphere. Fostering trust and open communication with your students encourages a respectful and engaging learning environment, while connecting with colleagues can provide valuable professional support and ideas. Gratitude can have a powerful impact on your relationships and professional growth. Take time to express appreciation for the help, support and effort of those around you — whether it’s thanking a student for their hard work, a colleague for their collaboration or a parent for their involvement. Sending follow-up notes or messages after meetings, performances or events shows that you value people’s time and contributions. Not only does this foster a positive, encouraging atmosphere, but it also strengthens connections and builds a sense of community and trust. Regularly showing gratitude can enhance morale, motivate others, and create a culture of respect and mutual support.
Tip 2: Embrace flexibility and be ready to adjust your lesson plans on the fly to meet the varying needs, energy levels and interests of your students. Although thorough preparation is essential, things do not always go as planned — students may need additional time to grasp a concept or they may bring new ideas that can actually guide and help to shape the direction of the lesson. By observing and facilitating, adjusting your pacing and allowing for spontaneous bursts of creativity, you can keep students engaged and enthusiastic about the content of the class, fostering an environment where learning can thrive despite the unexpected.
Tip 3: Keep learning and creating. Nurturing your own growth and creativity as an educator is essential because it not only fuels your passion for teaching, but it also sets an example for your students. When you embrace your own creative process, it allows you to better recognize and encourage the creativity in your students. By observing their unique ideas and expressions, you can provide the support and guidance they need to explore new depths in their creativity. This mutual exchange of creativity helps to support a dynamic learning environment where both you and your students continue to evolve, fostering an atmosphere of exploration and growth.
Jacob Abbott, the Performing Arts Director at Dresden High School in Tennessee, offers these tips:
Tip 1: Lean into your strengths and use them to improve your weaknesses.
Tip 2: Treat your students like you would your own children.
Tip 3: You are the expert in the room — act like it.
Nick Blue, Assistant Director of Bands at Franklin High School in Tennessee, says:
Tip 1: Don’t be afraid to roll up your sleeves and work hard! It takes a lot of time and hard work to move the needle and achieve goals.
Tip 2: Find a respected music educator in your community and invite them to your classroom for feedback and advice. Develop a relationship with them and pick their brain on teaching strategies and how to effectively organize a music program. Ask for help!
Tip 3: Take care of yourself. Stay hydrated, eat healthy and make time for exercise. If you don’t take care of yourself, you won’t be at your best for your students.
Dr. Liliana Guerrero, Assistant Professor of Voice at the Butler School of Music, University of Texas – Austin, recommends:
Tip 1: What you model to your students is what they will reflect back to you. If you are compassionate with them, they will be compassionate with you.
Tip 2: You can do it all, but you don’t have to do it all at once. When you’re juggling a lot of things, know which balls are made of glass and which are made of rubber.
Tip 3: The best gift you can give your students is a teacher who takes care of themselves.
Dr. Andrew Stetson, Professor and Director of the School of Music at Texas Tech University School of Music, offers these tips:
Tip 1: First of all, enjoy it. You’ll only be a first-year teacher once, and before you know it, you’ll have been on the job a long time. Learn everything you can and enjoy these pivotal few years that will help shape your entire career.
Tip 2: Trust yourself and don’t be afraid to make mistakes. There are a lot of lessons and experiences that got you to this point, and a lot more lessons and experiences to come.
Tip 3: Don’t forget your mentors. Great mentors will be in your corner your entire career. Reach out to them. Check in often.
Riley Warren, Director of Percussion and Assistant Band Director at Forney High School in Texas, says:
Tip 1: Don’t be afraid to take risks! I had no idea when I started the Forney ISD Middle School Indoor Drumline how beneficial it would end up being for our program as a whole. It was a lot of hard work to get it off the ground, but now I can’t imagine our program without it.
Tip 2: Stick to your guns and see your ideas through. In my first year as Director of Percussion at Forney High School, I implemented an All-Region pass-off system that wasn’t the most popular in its first few years, but is now one of the main reasons for our program’s success, with almost every student participating every year. Some ideas aren’t meant to last, but you’ll never know until you give them an honest go.
Tip 3: Don’t be afraid to change it up every once in a while. For many years, we were stuck in the rut of learning music for the sole purpose of getting a great recording and submitting for festivals. When I realized that this formula was losing its luster, I pivoted to have our annual percussion concert include a guest artist, which has provided a renewed sense of “fun” in the concert preparation process.
Dr. Rachel Woolf, Assistant Professor of Flute at The University of Texas at San Antonio, San Antonio, Texas, suggests:
Tip 1: Allow yourself to continue to grow and learn with your students. You won’t have all the answers nor should you expect to! Use your mentors and friends who are experts in particular areas and ask for help!
Tip 2: Give yourself grace as you develop your teaching style and methodologies. This will take time, which is exciting! Stay open minded to new ideas as you continue to discover what is best for you and your students. Have faith in time to figure things out.
Tip 3: Teaching is a marathon, not a sprint, so pace yourself! Balance giving your best with preserving energy for yourself. Take guilt-free time to rest and unplug; recharging will boost your productivity. Find a grounding activity outside of music that brings you joy and helps sustain your well-being.
Orien Landis, Director of Bands at American Fork High School in Utah, takes a page out of the John Wooden playbook on this one. He says:
Tip 1: Ask questions.
Tip 2: Ask questions.
Tip 3: Ask questions.
Find someone smarter than you and ask them questions. This has made all the difference in my career. Seeking advice on music selection, structuring leadership, teaching various pedagogy concepts and more is essential. Someone has likely already been where you are, made the mistakes and figured out the solutions. Asking questions can save you a lot of heartache. The real trick is finding someone you trust to give thoughtful advice. For me, it’s always been wiser or more experienced directors. It can be intimidating to reach out to an older director, but they’re often the ones who can provide truly valuable and sage advice.
Dr. Catheryn Shaw Foster, Assistant Professor of Practice of Music Education at Virginia Tech, offers these suggestions:
Tip 1: Find a mentor — someone who is older, wiser and has experienced success. Ask them ALL the questions. LISTEN to them. Be receptive to their feedback.
Tip 2: Never stop learning. Your diploma gives you permission to teach. The first five years of your career is where the real education happens. Learn from your colleagues, learn from your students and learn from your mistakes (I promise, we’ve all made a few).
Tip 3: Take care of yourself mentally and physically. Exercise, don’t eat junk (all the time), talk to a therapist, find a hobby. Work shouldn’t be your hobby. Don’t let your job consume you — it will always be there, but time with your family and friends won’t.
Adam Odenwelder, Guitar Teacher at Belmont Ridge Middle School in Virginia, suggests:
Tip 1: Think about why your teachers did things the way they did. Just because we grew up being taught a certain way doesn’t mean it’s the right way. Don’t be afraid to do things differently than everyone else.
Tip 2: Don’t value “cross curricular” stuff over the joy of music-making. We live in an era where music educators have to justify their jobs by supporting literacy through the arts, or teaching math through the arts, etc. However, our job is valuable on its own. I’m not saying reading music isn’t a skill worth having, but don’t become so wrapped up in music literacy that you forget to let the kids play. At the end of the day, the most important thing you can do to make a student a life-long learner of music is to make sure they’re having a good time when interacting with music.
Tip 3: Don’t forget what your job is. At the risk of sounding like I’m saying, “Remember your why,” it is important to remember that you decided to be a music teacher because as a kid, you loved singing or playing your instrument. Remember that your students are there for the same reasons. Guide them in making music, and don’t accidentally gatekeep opportunities for them to make music
Annie Ray, Orchestra Director and Performing Arts Department Chair at Annandale High School in Virginia, recommends:
Tip 1: Go watch your colleagues teach — music and non-music alike!
Tip 2: Be careful of being accidentally with your approach – from unnecessary after-school rehearsals creating real world conflicts for students to not picking repertoire and learning targets that are representative (or the appropriate ability level) of the students in your classroom: “We mistakenly use the arts to divide us. By deeming those that are worth arts education and those that are not.” – Dr. Veronica Morgan-Lee
Tip 3: Comparison is the thief of joy.
Michael Schnell, Middle School Band Teacher at Oostburg School District in Wisconsin, says:
Tip 1: Keep a journal at school and write in it first thing Monday morning and last thing before you leave on Friday. I find that this is a great way to reflect on what your mindset is for the week, what you are thankful for, and what you want to focus on. It helps center myself, appreciate the joy in what we do and also stay in the present in the moment.
Tip 2: Remember that you are a person who teaches, not just a teacher. It is easy to wrap up your identity behind your career or hobbies and define yourself by what you do. However, the small distinction between “I am a musician” and “I am a person who plays music,” can help you realize that there are many parts that go into your identity. It is easy as teachers and musicians to put our all into our careers, but it is important to take a step back and care for yourself as well.
Tip 3: Always be learning and curious. I think back to how much I have learned in my first seven years of teaching about so many different things — instrumental skills, live sound, lighting design, music production, musical theater, technology and more. One of my favorite aspects of my job is that it allows me to explore so many areas that I find interesting or want to learn more about. Don’t be afraid to ask music colleagues or other school staff members for help, advice or guidance.
From serving as a head band director teaching beginning 6th grade instrumentalists to addressing the needs of over 20,000 music educators as president of the Texas Music Educators Association, Dana Pradervand-Sedatole has done it all! Her methodology of keeping fundamentals at the core of her teaching has led her students to become more responsible for finding their own solutions to challenges. She has found that this type of self-assessment has resulted in a deeper understanding of and appreciation for the repertoire being performed and the ensemble as a whole.
Sedatole has a soft spot for new teachers due to her experience supervising her first student teacher. The fact that young educators are often ill-equipped to handle the challenges of the classroom is not lost on Sedatole. Many of these educators were the best musicians in their high school programs and among the best in their collegiate programs. Ironically, they are freshmen all over again, and their level of self-confidence is, understandably, low, as is their level of knowledge in this new realm. Sedatole believes, “It’s O.K. to not know everything, but it’s not O.K. to not know and do nothing about it.”
In addition to providing pedagogical strategies on how to plan and conduct effective rehearsals, Sedatole has much to offer when it comes to the “other stuff,” such as planning a first band trip, purchasing a first set of uniforms, and choosing appropriate literature for the unbalanced ensemble.
With her tenet of investing in the teaching of fundamentals along with her drive to help new educators discover their passion for working with young people, Sedatole is steadfast in her belief that “if you want to be a great high school band director, you’ve got to be a great beginning band director.”
After engaging with Sedatole, educators leave with a renewed sense of purpose and a profound belief in their ability to make a difference. Her impactful thought leadership not only challenges directors to uncover the passion for artistry in music-making from their students, but also instills a spirit of “I can” in teachers of all levels of experience and expertise.
Some of Ms. Sedatole’s session titles are:
Mapping Musicianship
Right from the Start: Putting the “FUN” into Daily Fundamentals
Let’s Talk Band! Building Your Toolbox
To learn more about clinics by Dana Sedatole, please contact Jalissa Gascho at jgascho@yamaha.com.
Dr. Sarah McKoin is a passionate educator dedicated to discovering art at any level of performance. She serves as the Director of Bands and Division Chair of Conducting and Ensembles at Texas Tech where she oversees all facets of the University band program, including four concert bands and two athletic bands as well as mentoring the graduate conducting program.
As early as she can remember, McKoin wanted to be a teacher and has spent her career inspiring students to find their own musical voices. From her days as a beginning clarinetist, she discovered that music touched her emotionally and that those early playing experiences made her “feel different.” Her passion is to inspire the same sensitivities in others.
Educators who work with McKoin quickly embrace her infectious enthusiasm for making a difference in the lives of others. Her instructional approach enables students to self-discover the techniques and nuance required to perform at the highest level. In addition to supporting the musical journey of the individual, this also encourages a collective trust in the ensemble itself, allowing for a more honest, evocative, and impactful connection to the music. Discovering the “why” in a score over the “how” is integral to her pedagogy.
To say that McKoin is intently curious is an understatement. She is interested in what “could” be, so her enthusiasm for discovering new music compositions is not surprising. She lights up at the mention of contemporary classical music, how the medium is evolving, and where wind literature is going.
Working with people and encouraging artistic expression while promoting excellence and deep connections to music make Sarah the ideal professional clinician.
McKoin is a “doer,” and her curiosity extends to her varied activities outside her responsibilities at Texas Tech. A confessed “foodie,” McKoin also finds that painting, tennis, pickleball, and travel provide a balance to her busy conducting career.
McKoin embodies a supportive philosophy: “How would you play if you weren’t worried about being wrong?” She models to students a pursuit of personal and professional growth. As she says, “We all strive to grow for a lifetime — it is what keeps every day fresh and full of possibility!”
Some of Dr. Sarah McKoin’s session title include:
Score Study: Ready, Set, Discover!
Don’t Forget the Music!
We Are What We Program: Ways to reconsider your musical diet• Conducting and Gesture
To learn more about clinics by Dr. Sarah McKoin, please contact Jalissa Gascho at jgascho@yamaha.com.
Vitality! Fervor! Passion! Understanding! Dr. Dennis Llinás doesn’t hide his emotional investment in anything that he does. As an educator, conductor, and composer, Dennis deems music to enrich the lives of everyone involved in the music-making experience … not only the music-makers but the audience members through inventive and engaging programming. He approaches his life’s endeavors by asking, “How can I make the lives of others better?”
Llinás is a proponent of the flipped classroom model and enjoys working with educators to help them discover how they might work with their own instrumentalists to better equip them to discern and solve musical issues independently. He regards each of his students as an extra set of ears in the rehearsal, resulting in his musicians emerging as leaders within the ensemble. As they become more than simply the “receivers” of his direction, they
transition to “decision-makers” of their own artistic direction. Consequently, they become more invested in delivering an enhanced and meaningful performance for everyone.
Llinás pursues the highest sense of musical awareness and development from his students so that they have a profound understanding of the works being studied and the responsibility of each in their own musical contribution to the piece. They are inspired to explore the reasons for the myriad of challenges in a given composition and discover how their individual part contributes to the whole to further advance the composer’s intent. In an innovative instructional approach that seeks to connect directors and students from across the country with the experiences of the young musicians of the University of Oregon Wind Ensemble, Llinás created a video series entitled “The Workshop.” Through a series of private lesson videos, this free hub offers a variety of episodes delivered by the student instrumentalists on the specific works being studied. Llinás wholeheartedly encourages directors and their students to use, share, and grow from this resource that “connects us all through music.”
With his compassion for making music more accessible and meaningful to an increasingly larger audience, Llinás is driven to find the holes in our profession and to fill them appropriately. His literature choices reflect diversity and are one avenue for bringing the audience closer to the art form. He sincerely desires to create a better relationship with music-making for all and will consider any new opportunity to achieve this goal. Llinás holds himself to a strict standard of excellence and lives John Wooden’s mantra to “Discipline yourself before others do it for you.”
Aside from his many music projects, Dennis also has a yen for cooking (especially Cuban fare) and hiking. He even took up day trading to learn something new as a beginner. However, it doesn’t take long to discover that he is passionate about his two rescue dogs, Griffin and Neptune, and his wife Sarah.
Students and directors alike discover that working with Llinás empowers them to view music-making as a more holistic experience, one that creates a profound desire to seek an emotional relationship with the music and those it serves.
Some of Dr. Llinás’ session titles include:
No More Guess What I’m Thinking – Promoting Student Leadership in the Concert & Jazz Ensembles
Getting Past the Right Notes & Rhythms and Into the Music
Programming and Creating an Experience for the Audience and Students
Combining Great Conducting with Great Pedagogy to Maximize Time Management
To learn more about clinics by Dr. Dennis Llinás, please contact Jalissa Gascho at jgascho@yamaha.com.
Director of Orchestras Chatham High School, Lafayette Avenue School Chatham, New Jersey
Liam Keller, Director of Orchestras at Chatham High School in New Jersey, credits his students’ “dedication, thirst for knowledge and constant chase of that next level of playing” as his driving forces. He’s always finding ways to challenge them to become better musicians. For example, Keller advises a senior and a freshman quartet. “These ensembles allow some of our most ambitious string musicians to focus their skills on a style that often is not approached in the typical classroom setting,” he says. “The communication skills that they learn help bring their school ensembles to a higher level.”
Keller also reaches out to feeder schools, parents and the community on a regular basis to keep them abreast of what’s going on with his program. The annual Instrument Sizing Day is “to ensure that students are set up for success from the beginning, and to offer older students the opportunity to upgrade their instruments and try the next level of instrument,” Keller explains. “This event also gives me time to build connections with current students, reconnect with past students and meet incoming beginners.
Keller started Parent Orchestra Night after hearing from parents who wanted to help their children but didn’t know where to start. “These beginner boot camps teach parents to read music, set up an instrument and even learn beginner skills to help reinforce what we do in class at home,” he says.
He started a similar program for the community called Community Open House. “Local residents can come and explore what makes our program so wonderful,” he says. “People can experience being a musician. No experience is required and it is a low-stress exploration of string instruments to give them an appreciation of what the students do every day.”
In 2023, Keller was approached by the New Jersey Symphony about a partnership for symphony musicians to work with Chatham students. “What began as a once-a-month group lesson has grown to include four coaches who work with all orchestra and band students grades 3-12. This program exposes them to the highest levels of playing and musical education,” Keller exclaims.
Keller is grateful that his district celebrates the arts. “Our students can experience professional musical experiences in an educational setting so that they are fully prepared to thrive in the real world,” he says
5-12 Vocal Music Teacher Galena Unit School District Galena, Illinois
Lilly Streich always knew she wanted to pursue music. She basically grew up in her father’s drum store, The Drum Pad, and remembers clinics at the store that featured some of the greatest drummers in the area. “I began taking my first music classes at Kindermusik before I could walk,” she exclaims.
The value of music is embedded in her, and Streich is dedicated to making music accessible to all students at Galena Unit School District. An example of this commitment is when she helped to create adaptive music classes for special education students. “With lower elementary students, we worked on basic steady beat, taking turns playing instruments, moving our bodies to the music, instrument exploration and vocal exploration,” she explains. “With middle school students, we worked on rhythm reading by playing African drums and bucket drums, boomwhackers to learn note names, and one-hand piano songs. These students were able to play Christmas carols at the holiday assembly at the end of the semester, and it was such a joy to see them perform in front of their peers!”
The general music curriculum for grades 5-7 that she developed focuses on fun. “We only have 12 weeks with each homeroom, so I prioritized 1) learning an instrument that students could continue to play outside of the classroom, 2) showing students how music relates to other content areas, and 3) exposing students to new music genres,” Streich says.
Another program she started is the choir mentorship program to make the transition from middle school choir to high school smooth and less intimating. “High school students meet with their middle schooler about once a month, and then we would have larger group gatherings,” Streich explains. “The hope was that when middle school students engage with high school students, they are meeting their future peers and can feel confident in their transition to high school.”
Streich also seeks new opportunities for her students, such as singing in festivals around the Midwest, taking them to music camps, and offering private lessons. Her efforts have paid off! Enrollment in her music ensembles have tripled and her choirs have experienced rapid growth in the last two years. “When students say that music and choir are the best part of their day, I know that music education is where I am meant to be,” she says with a smile.
Assistant Professor of Trumpet, Coordinator of Brass and Percussion Stetson University DeLand, Florida
Since Dr. Aaron J. Witek’s arrival at Stetson University in DeLand, Florida, the trumpet studio has tripled in size and has attracted top-tier talent, including all-state-level musicians. The Assistant Professor of Trumpet and Coordinator of Brass and Percussion started the Stetson Trumpet Ensemble, which has consistently advanced in the National Trumpet Competition, reaching new milestones, including live rounds for the first time in school history.
“The Stetson Trumpet Studio is more than just a class — it’s a community,” Witek says. “We’ve worked hard to build a culture of dedication, but also one where we help, encourage and celebrate one another, creating an environment where everyone feels valued and connected.”
Witek is known for his ability to sense when a concept or musical idea isn’t resonating with students and how to help them. “I believe there are many ways to solve a problem, and I just don’t give up,” he explains. “For example, with air support, if one method doesn’t work with a student, I’ll try another. Maybe an analogy like ‘cooling soup air’ will help, or a simple cue word or sensation like ‘feel the air on the lip.’ Sometimes it’s a combination of visualization and the feeling of blowing forward air while keeping a pinwheel spinning. I might even increase the demand of air by having the student play flutter tongues or with a mute in. Often, it’s a blend of different approaches that leads to success.”
His students have achieved notable successes, such as winning the Stetson in New York Solo Competition, earning International Trumpet Guild scholarships, and advancing in Army Band auditions. “These accomplishments, alongside a supportive and structured learning environment, have elevated the studio’s reputation and performance standards to unprecedented heights,” he says. “I’m also proud of the curiosity they develop, working together and becoming a close-knit community. Seeing them teach others and pass on the love of music and helping others has been a truly fulfilling part of this journey.”
In addition to his role at Stetson University, Witek is an active performer and a sought-after clinician. He is also the Brass Captain Supervisor for the Crossmen Drum and Bugle Corps. “The leadership role I hold in DCI has greatly enhanced my skills, which I apply in academia, particularly as the Brass and Percussion Area Coordinator,” he says. “This experience also supports my involvement in committees and advocacy for students and faculty. On the flip side, my academic expertise in teaching brass mechanics and musicality has influenced my approach in DCI, encouraging a fresh perspective in teaching the activity.”
Witek adds that leading large rehearsals with spectators at DCI has “bolstered my confidence in teaching those who plan to become educators. The expertise I’ve gained in ‘cleaning’ an ensemble and improving clarity in performance at DCI has also proven invaluable in guiding our trumpet ensemble at Stetson.”
Assistant Professor of Flute The University of Texas at San Antonio San Antonio, Texas
Thanks to Dr. Rachel Woolf’s enthusiasm and creative approach to teaching, the flute students at The University of Texas at San Antonio are described as being “on fire.” Woolf fosters student success by building a supportive community rooted in excellence and artistic growth. “I balance lessons with a focus on tone, technique, etudes and repertoire, while cultivating body awareness,” she explains.
In her Flute Studio classes, Woolf and her students sit in a circle to create an equal, collaborative environment. “To cover a wider range of concepts most efficiently, I developed a tone/technique warm-up packet over the last few years, which includes all major and minor scales, raga-inspired melodies and a variety of interval exercises — all designed to be played with a drone,” she explains. “Drawing from my interest and background in North Indian classical music, I introduce students to the tanpura drone, which can easily be found on YouTube. I have observed significant progress in students who practice a different key area each week using the drone, as it helps them focus on tone, pitch, intervals, finger work and theory skills, while encouraging improvisation, deep listening and thinking beyond the measure lines. I am working towards publishing this soon!”
Each year in late summer/early fall, Woolf holds the UTSA Flute Day, a time when Texas Flutists can jump start their all-state etude learning with a day focused on tone, technique and a flute choir reading session to build community.
In the summer of 2024, The National Flute Association’s Convention (NFA) was held in San Antonio, so Woolf founded the San Antonio Youth Flute Choir to perform at the convention. The choir participated in the final performance of the NFA Youth Flute Day. “We welcomed talented middle school and high school flutists from all over the San Antonio metro area and showcased the rich musical heritage of our city,” Woolf says proudly. “I commissioned a piece by UTSA composition alum Dominic Valadez, who also arranged three works by Chicana artists — Selena, Azul Barrientos and Eydie Gormé — and co-directed the ensemble with me. It was truly an unforgettable experience.”
Woolf traveled to South America to perform and teach at the World Flutes Festival in Mendoza, Argentina, as well as at Universidad de Talca and Universidad Alberto Hurtado in Chile. “During this life-changing experience, I had the opportunity to meet, teach and perform alongside many beautiful flutists and musicians from around the world,” she says.
She taught multiple five-hour masterclasses to flutists in Argentina and Chile, both with and without translator. “This experience gave me a profound appreciation for the true universality of music and the flute, as well as the immense positive impact music educators have within their communities worldwide. Music is a universal language,” she exclaims.
Director of Bands Greene County Tech School District Paragould, Arkansas
As Director of Bands at Greene County Tech School District in Paragould, Arkansas, Kim Webb promotes the motto “Belong, Believe, Become” with her students. “Make everyone feel like they belong. Believe in yourself and in each other. Become the best version of yourself. Become the best band we can be. We stick by this motto,” she says proudly.
In order to live by this creed, some tough decisions had to be made. For example, in her first year as director, Webb said that it was clear that the budget allocated to the music program wasn’t sufficient. “We went over several options and decided to cut the 6th-grade program. This allowed us to open up some funds to add high school jazz band as a class period,” she explains.
The jazz class was so popular that the following hear, a junior high jazz class was added. The lesson? “We weren’t able to add money to our budget, so we got really creative about how to maximize the money we did have and add opportunities for our students,” Webb says. “It hurt to lose the 6th grade band, and we worried about how it would affect our program as a whole. We did have lower recruitment numbers for 7th grade, but twice the retention rate, and our high school numbers remained about the same.”
Over the next decade, Webb fought to increase her budget. Armed with data about the program’s statistics, costs, comparisons to other schools and more, Webb was vocal about her program’s needs — not wants — to all the stakeholders, in particular, the superintendent, at numerous meetings. “Advocacy is one of the largest parts of being a music educator because no one recognizes your needs except you and your students,” she exclaims. “You must make your voice be heard!”
Webb improved and expanded the program using the increased budget and fundraising dollars. She added an indoor percussion program as well as winter guard. “We knew our program was ready to add these groups, and they were crucial in the success of our marching band,” she explains. “They helped our students retain skills through spring, and the students who followed the original group were exponentially stronger.”
After years of attending the same competitions, Webb chose a more competitive route that took her band outside of Northeast Arkansas. “We started attending a few prelims/finals competitions and saw how judging at a higher level was different that what we were used to,” Webb says. “This helped us step up our game, and in 2023, we attended our first BOA competition. What a game changer! Exposure to higher level bands gave my kids a higher sense of motivation.”
In 2023, Webb split the high school concert band. Her top musicians tackle challenging repertoire, while the second band focuses on “building fundamentals so they can improve their skills so that when they join the full band, there isn’t a huge learning gap,” she says.
Webb often presents clinics on challenges facing women in music education. “There are a lot of states — mine included — where the majority of band directors are men,” she explains. “It’s important to not let people intimidate women into thinking that their place is in junior high, middle school or elementary school. There is a place for women in every single music education job, including being the head director. If that’s your goal, do it!”
She recalls marching competitions when the males on her staff or band dads were approached because people assumed they were the director. Webb’s advice? “As a woman, you have to teach them how to treat women. Ditch the polos. Wear your pink and your dresses and cute business wear. And, most importantly, be vocal and be adamant! They won’t know how you feel unless you say something.”
Director of Percussion, Assistant Band Director Forney High School Forney, Texas
Several years after joining the Forney High School Band staff as Director of Percussion and Assistant Band Director, Riley Warren started the Forney ISD Middle School Indoor Drumline. “The beauty of this group is that it creates opportunities for our middle school students to perform together and advance their percussive skills, while also providing leadership roles for our high school students, who serve as the primary instructional staff members of the ensemble,” he explains.
“At any given rehearsal, we will have 10 or more high school students instructing the middle schoolers. This helps foster a positive relationship between our high school and middle school programs, and gets our middle schoolers even more excited to join band and percussion in the future,” he says.
Warren’s well-structured teaching approach “starts with the development of the individual musician. Great programs are made up of great individual musicians,” he explains. “We spend a lot of time year-round developing specific skill sets in each student.”
In the fall, his students are given a 12-week pass-off sheet that guides them in learning the Texas All-State Etudes. They receive feedback on the etudes from Warren, their private lesson teachers, or virtually through video submissions. The spring semester focuses on solos, with students preparing a snare drum and mallet solo of their choosing. At the end of the year, they perform their solos for a judge.
Outside of his work at Forney High School, Warren started Rhythmic Wavelengths, a percussion arranging and consulting business. “Working with other percussion directors and their students has become one of the greatest joys of my life,” he exclaims. “Throughout the year, I visit clients for a full day or just a morning or after-school rehearsal. At these consulting sessions, I am able to work one-on-one with students or even run an entire rehearsal. Afterward, I meet with the director to debrief and make a plan to help them accomplish their goals.”
In 2023, Warren started the “Dream Job” podcast with his colleague Shannon Jacobs. “To me, teaching music is a dream job,” he says with a smile. “Despite the many challenges prevalent in the education field, at the end of the day, how lucky are we to be able to help young people become great musicians?”
During the pandemic, Warren noticed that more and more music educators were leaving their teaching positions. “This made me think of how I would feel if I were a high school or college student considering music as my career, which motivated me to start the podcast,” he explains.
Warren and Jacobs have interviewed over a dozen notable high school music educators, college professors, fine arts directors and industry professionals on “Dream Job.” “Our hope is that these conversations will inspire young — and even seasoned — music educators to continue teaching music in a world that seems to value education less and less,” he says.
Director, School of Music Texas Tech University School of Music Lubbock, Texas
Dr. Andrew Stetson, the Director of the School of Music at Texas Tech University, pioneered the Music Humanities program to engage students from diverse academic backgrounds and to highlight the importance of music as an essential tool for fostering critical thinking and creativity. “With the advances in technology, it’s clear that creative thought is going to be a commodity in the future, and music is the best way to access creativity,” Stetson explains. “With that as our foundational thought, we are embarking on a plan that opens our doorways to students from across the university so they can experience music and creative activity firsthand. We think it will change their lives and help build a better future for all of us!”
Change is something that Stetson has embraced. He transformed the reputation of the School of Music into one based on cohesiveness, forward-looking vision and trust. How did he accomplish this? “Two words: Open Door,” he says matter-of-factly. “I make a point of being available to everyone and try to make sure I’m accessible for questions, etc. We also post all information from meetings so everyone can see how decisions are developed. That blend of accessibility and transparency help us build a more cohesive unit.”
Stetson applied this same productive attitude to enrollment practices and growing the school’s donor base. ”Communication is always number one. One of the strengths of our program, and something I try to embody, is that we over communicate with everyone,” he says. “Our potential students hear from us constantly, our donors know what we’re up to every day. In this way, we let people know what’s going on, but we also let them know that we care about them and that we want them to join us and be a part of what we are doing.”
Through outreach, Stetson was able to connect Texas Tech with the surrounding community. “The best part about our community program is that it didn’t need any kind of launch,” he says with a smile. “Lubbock is a thriving arts community, and many of the programs already existed. All I did was reach out to the people in charge and look for ways Texas Tech could help.”
Many of these programs simply needed a home or a space to perform that was affordable, and Texas Tech was in a position to provide that. “After a few years, we moved from an existing community chorale program to now partnering with a local civic orchestra and a community concert band,” Stetson explains. “I love seeing the community come to our building to attend our concerts and engage with music in a more direct way.”
Middle School Band Teacher Oostburg School District Oostburg, Wisconsin
Because Oostburg High School and Oostburg Middle School share the same building, Michael Schnell, the Middle School Band Teacher, proposed starting a Music Production course for high school students. “One of my favorite classes when I was in high school was Music Theory. I also enjoy songwriting and incorporating technology in my classes,” he says. “I wanted a class that included these topics in a relatable way, so with some funds from our music department, we created a small music production lab.”
In the last few years, the class has grown and now the students release class albums on streaming services at the end of the year. “This class has allowed us to explore the creative process and the importance of creativity. It has become a major creative outlet for many students,” Schnell says proudly.
He introduces music production at the middle school level as well — in studio classes that each grade attends for one quarte. Schnell uses this class to teach his students piano, basic beats, music production with GarageBand, and performance skills. “Using popular music that students recognize and enjoy helps connect them with the music-making process,” he explains. “We also discuss how all these different skillsets build off of each other to help us grow as musicians.”
Under his direction, the middle school band program has grown with about 65% of the student population participating in band. Between band and choir, a whopping 90% of middle schoolers are enrolled in a music class. Schnell keeps recruitment numbers high by taking his middle school band to visit Oostburg Elementary, located across the street from the combined middle and high school.
The 8th-grade band plays holiday music during the elementary school lunch on the day before winter break. The 7th-grade band visits 5th-grade classrooms for one week in the spring, each day focusing on a different instrument section. The 6th-grade band performs for incoming 5th-graders when they come to tour the campus on move-up day. “We tell them that in one year they will be playing for the new incoming 5th graders themselves,” Schnell says. “With the size of our community, we are lucky to have the opportunity to really get to know the families of our students.”
The Oostburg School District and the community place a high value on the arts. In 2022, a referendum was passed that included remodeling the theater, doubling its capacity as well as providing state-of-the-art audio and video technology. In 2023, with funding from the Oostburg Community Education Foundation (OCEF), the Bruce Krier Charitable Foundation and community donations, “we purchased a Yamaha Grand Piano for our theater, which has increased the level of musicianship for students during concerts, events and lessons,” Schnell exclaims. “Everyone from our superintendent, building principals, staff and community are advocates for the importance of arts education.”
Orchestra Director and Performing Arts Department Chair Annandale High School, Annandale,Virginia
Orchestra Director and Performing Arts Department Chair Annie Ray launched the Crescendo Orchestra for students with significant and severe disabilities at Annandale High School in Virginia. The seeds of the orchestra started in 2017, when twin brothers with significant disabilities were in her general elementary strings class that met once a week for 30 minutes. She struck up a friendship and collaboration with their mother and began modifying materials.
Ray started her job at Annandale High when COVID hit and was splitting her time between the high school and elementary school. Special education students came back to school first, and she invited them to her classroom to make music. “Alongside their special education teachers, paraprofessionals, occupational therapists and instructional assistants, we spent an entire year breaking down traditional string education until we had a fully written-out curriculum. We’ve been able to run it as a dedicated course since then,” she says proudly.
“Our approach is framed around students with disabilities having the right to truly learn how to play a musical instrument, and not just be socially included,” Ray explains. “The students perform at every concert, just like their general education peers.”
Like Ray, other educators have developed their own programs for working with students with disabilities, while others work with organizations like United Sound and Giving Bach. “I encourage all programs to look into prioritizing inclusion either on their own or with these organizations, which are a fantastic resource,” Ray says.
Outreach to parents is another concept that Ray has embraced. In 2018, she co-founded the Fairfax Arts Coalition for Education Parent Orchestra to provide parents and caregivers with some understanding of what happens in the music classrooms. The idea of a parent orchestra came from Ray’s mentor Brian Coatney, the Director of Orchestras at Wylie High School in Texas. “The Fairfax Parent Orchestra started with about 30 caregivers and have grown to 225 participants with four levels of ensembles — from adults who have never touched a musical instrument to those revisiting a forgotten-about violin in the back of their closet,” Ray says with a smile. “We meet twice a month and have been fortunate to perform at the Midwest Band and Orchestra Clinic!”
Parents can see what is actually happening between the notes and rhythms on the page and the resultant increase in parent involvement in the booster organizations is beneficial. However, Ray explains that there is so much more that comes from educating parents on the process their students go through as a new musician. The Parent Orchestra is an advocacy and educational tool used by parents and administrators. It’s also an experiential professional development opportunity and an mentorship avenue. Most of all, it bridges divides, Rey says.
Connecting is the underlying theme for Ray’s approach to teaching. “I am honored to teach at a school where students come from 66 different countries, speak 59 different languages, and our programs are made up of a vibrant mix of backgrounds, perspectives and strengths,” she exclaims. “For 81% of our students, a language other than English is spoken at home, and over 70% fall below the poverty line. In a world where that diversity can sometimes lead to conflict, investing in the whole student and meeting every student where they are at has been our foundation for understanding, community and progress.”
Ray considers herself lucky to have taught at the elementary, middle and high school levels in this community. “I am fortunate to have had my entire perspective shift on ‘why music education matters’ because of what they taught me,” she says. “To have grown alongside these students and watch them learn to take ownership of this program is one of the greatest gifts of my life.”
Director of Bands Fountain-Fort Carson High School, Fountain, Colorado
In Joshua Race’s classes at Fountain-Fort Carson High School in Colorado, students learn more than music — they become more aware of their own thought processes. The Director of Bands uses metacognitive strategies to help students reflect on their learning and musical performance. By setting individual and group goals, students assess and adjust their approach as both individuals and ensemble members. “I model my thought processes and ask guiding questions to encourage critical thinking and self-reflection,” Race explains. “This helps students become more aware of how they think, problem-solve and improve during rehearsals. As they understand their own learning better, they become more engaged, leading to deeper growth and a stronger connection to both the music and the ensemble.”
His strategy works because enrollment in the Fountain-Fort Carson band program has more than doubled. Race credits teamwork with the feeder schools so students have a smooth, connected experience from middle school through high school. “The band program has become what students call their ‘huge family,’ a place where they feel accepted and appreciated,” he says with a smile. “We’re focused on creating a positive, supportive environment while striving for musical excellence and making sure every student has the best experience they can during their time in the program.”
The program’s growth is impressive, especially when you realize that many students come from military families. “Some are with us for just a year or two, while others stay all four years,” Race explains. “It’s a reminder of how powerful music can be — providing a sense of stability and belonging for students, no matter where they come from. Whether they’re adjusting to a new school or community, music offers a consistent, welcoming place where they can connect, grow and find a sense of home in their education.”
Outside of FFCHS, Race founded the Fountain Valley Community Band to bring together community musicians and to offer music teachers a space to reconnect with their passion for performing. “Joining a community band as a freshman in high school had a lasting impact on me,” he recalls. “Community bands bring together people of all ages and skill levels, from seasoned professionals to students who are just beginning their musical journey. The real value lies in the shared joy of making music together.”
Race also actively connects with directors in the area to offer support. He’s even visited several schools, worked with bands and offered mentorship to younger directors. “We’re all in this together,” he says.
Music Technology Teacher Shadow Mountain High School Phoenix, Arizona
Paradise Valley Unified District in Arizona offers an arts academy, North Valley Arts Academies (NVAA), where K-12 students at Desert Cove Elementary School, Shea Middle School and Shadow Mountain High School can take courses in dance, theater, visual art and music technology. Nicholas Popovich designed NVAA’s music tech program, which is built on a foundation of exploring sound creation and production. He maximized the available tools that provide deep engagement with all aspects of making music using technology, innovative use of hardware, software, equipment and instruments. “This holistic, project-based learning environment allows students to use Digital Audio Workstations (DAW) to compose, edit and produce original music while learning to think creatively,” Popovich explains. “Students collaborate and pool individual strengths and resources, which enhance the learning process through peer-to-peer interaction,” Popovich explains.
The program incorporate the latest hardware and software, which ensures that student experiences meet industry standards. Popovich also broadens learning through innovative interdisciplinary projects where music tech students work alongside their art, dance and theater counterparts. Academy students also visit cultural institutions and meet guest artists from the fine arts community.
“Music Technology graduates are well-prepared for various pathways,” Popovich explains. “Many pursue careers in the industry upon graduation. Moreover, students gain the skills necessary to continue making music as a lifelong endeavor, offering a constant creative outlet for self-expression.”
Through a partnership with the Paradise Valley Community College (PVCC) Music Industries program, Popovich’s students can earn college credits through dual enrollment courses. PVCC faculty provide presentations, workshops and master classes on advanced topics, and students collaborate on live performances and multimedia productions, which gives them a glimpse into the college experience.
Beyond PVCC, the community has been remarkably supportive of Shadow Mountain’s music tech program. “Partnerships thrive with local organizations, providing students with invaluable real-world experiences,” Popovich explains. “These partnerships enrich the program and offer valuable networking opportunities.”
Grants from organizations like Intel, Arizona Educational Foundation, Give A Note and the Grammy Signature Schools Enterprise Awards ensure that students have access to the latest technology and trends. “The focus on developing not only technical skills, but also critical thinking, problem-solving, teamwork and creativity prepares my students for any pathway they choose. Plus, we ensure inclusivity and accessibility for all students, regardless of their background or prior music experience,” Popovich proudly says.
PK-5 Music Teacher Grant Avenue Elementary School Bronx, New York
Before it was popular, Kate Phillips, Grant Avenue Elementary School’s PK-5 Music Teacher, was implementing culturally responsive lessons in her classroom. “As a white teacher originally from a suburban Midwest community, it is essential that my Bronx students engage with their own musical cultures in authentic ways,” she exclaims. “I rely on resources from culture bearers — Carnegie Hall’s Musical Explorers video lessons, for example, are great — and input from students on the artists, knowledge and skills that they want to learn about in a given unit, whether we are studying hip hop, Freedom Songs, bomba and plena, or any other music with which students already have expertise and home experience.”
In addition to emphasizing students’ music cultures, Phillips also teaches her students leadership skills. “Each year, our school dance and music programs engage a select group of 5th-grade students to participate in an Arts Council,” she says.
The members of the council meet throughout the year to help guide concert theme selection and repertoire choices. They also assist with performance logistics like decorations and ushering. “Our school concerts have transformed for the better thanks to their contributions, energy and creative artistic visions,” Phillips says proudly.
She encourages all students to bring her ideas for repertoire, activities, units, anything. “The spark for many concert performances or classroom instrumental pieces have come from students sharing an obsession with a particular viral TikTok dance or YouTube artist, which tends to inspire the whole class to engage enthusiastically in music learning,” Philips says with a smile. “I’m grateful for my students’ constant well of ideas and suggestions.”
Phillips herself has used her creativity in different ways at Grant Avenue Elementary — she wrote an original musical for the 5th-grade production. “The educator and musical theater nerd in me was inspired to reimagine the folktale ‘Stone Soup’ in a Bronx block-party setting,” she explains.
She elicited feedback on plot points, lyrics and other story elements from students and then wrote the songs and libretto with a colleague, drawing on past production successes for structure, songs and staging. “We saw an incredible jump in student buy-in and commitment on this production, and we replicated the success with a second original musical in 2018,” Phillips says. “The process provides a fantastic creative outlet for my artist-self and strengthens my relationships and insights with my students — truly a win-win!”
At this phase of her career, Phillips says that one of her greatest passions is collaborating with colleagues through workshops, mentoring and professional development. As a New York City Public Schools professional development facilitator and team leader, she has hosted two student teachers and acted as a new teacher mentor for two arts educators in her school community. “In each instance, the process of mentoring and sharing expertise has strengthened my own teaching and awareness of my craft,” she explains. “It has built strong bonds between myself and fellow educators. These ongoing relationships continue to nourish me and my practice.”
Guitar Teacher Belmont Ridge Middle School Leesburg, Virginia
There is no status quo for the guitar program at Belmont Ridge Middle School in Leesburg, Virginia, led by Adam Odenwelder. “I’m constantly changing things in order to meet the needs of my students in new and exciting ways,” he says proudly. “Every year that I’ve taught guitar looks wildly different from the previous year, and I hope that I never lose the willingness to mix things up!”
A major part of Odenwelder’s program is student-centered. He doesn’t rely on staid teaching materials that have been around for a long time. His students request most of the songs the guitar ensembles perform, and Odenwelder arranges them. “Because I make myself available as the arranger, my students frequently request songs that may be too difficult for the entire 30+ member ensemble, but a group of three or four students can take the initiative to learn it. I then allow these small chamber groups to be highlighted during our concerts,” he says.
Over the years, students have asked Odenwelder to arrange music from popular TV shows and video games for guitar ensembles, as well as for chamber groups that consist of multiple different instruments. “Last year, one of my students asked me to arrange a song by a popular artist for guitar, violin, flute and vocals,” he recalls. “They performed at a concert and legitimately sounded like a professional cover band! I was so proud that they had the opportunity to showcase their skills.”
Odenwelder’s students have the opportunity to play a variety of electric instruments — from electric guitars and basses to different modelling amps and footswitches that allow them to quickly change from one effect to another. “Using electric instruments in guitar class definitely engages students because they live in a technological world,” he says.
He also encourages students to play written guitar solos in a variety of styles and programs one piece per concert that allows any student the opportunity to improvise a solo on electric guitar.
During COVID, Odenwelder implemented a “flipped” classroom model out of necessity where students watched instructional videos on their own so class time could focus on hands-on practice and personalized guidance. He continues to use this model because it helps build student confidence and achievement.
“When I hand students new music, I make sure to record videos to help guide them through the songs,” he explains. “My students can take directions from videos because they are used to the medium, and because it allows them to take in information at their own pace. They can make the most of their individual practice time, which makes the large ensemble rehearsal much more fruitful.”
Orchestra Teacher IJ Holton Intermediate School Austin, Minnesota
The orchestra program at IJ Holton Intermediate School in Austin, Minnesota, has grown in numbers and, more importantly, in students’ passion for music. That’s because Orchestra Teacher Leah Motl encourages and motivates her students in several ways. “Praise progress often,” she exclaims. “When students make even a smidge of growth, I show them what they did or how they did it and encourage them to push just a little bit further!”
Motl also emphasizes that everyone is a valued member of the ensemble. “Everyone brings their own personal strengths to the group, and we learn to combine those strengths and lean on one another to grow together,” she says.
When learning gets tough, Motl will share her experience as a beginner/middle school musician when she struggled with note reading. “I support students where they are successful, and I know that the hard things will ‘click’ in their own time,” she explains. “My goal at the 5-6 level is for students to enjoy their learning. If they find their instrument/ensemble fun and exciting and a place where they can build on their strengths, they will become motivated to do the hard work.”
Motl has a knack for selecting pieces that her students will enjoy, but that will challenge them at the same time. “I choose music that helps students learn the skills needed to enter the next grade level,” she explains. “Sometimes going outside of the ensemble’s comfort zone can motivate students to rise to the challenge. Choosing the right piece with a new technique, rhythm, note(s) or other advanced musical element can be a game changer.”
When students succeed in playing these more difficult pieces, “I give my students bragging rights that they learned or performed something that wouldn’t be taught until 7th or 8th grade,” she says with a smile.
Motl’s supportive teaching style has led to growth in enrollment. Her 5th grade ensemble has about 120 students, and her 6th grade, about 90 to 100. Her retention rate over the last five years from IJ Holton to the middle school is 75%. Some of Motl’s most successful recruitment and retention strategies include one-on-one check-ins with students and a co-teaching model that was started four years ago between the intermediate and middle schools to help students transition to a new building in 7th grade.
Motl also invites community music educators and musicians to teach sectionals or lessons to her students. She makes sure to have frequent communication with the decisions-makers at IJ Holton and the middle school so she can advocate for the needs of her students and program.
Because IJ Holton is a Title 1 school, Motl works hard to ensure that her students have good-quality instruments. “We are fortunate that the world continues to buy and eat Spam and Hormel lunch meat because the Hormel Foundation, which is based here in Austin, is the primary source of funding each year to purchase instruments for our rapidly growing program,” she says.
Articles in the local paper about the district music programs keep the community informed, and Motl includes information about building and maintaining an equitable music program at IJ Holton in all conversations, grant applications and other asks.
Director of Bands Lambert High School Suwanee, Georgia
Kevin Morrison, the Director of Bands at Lambert High School in Suwanee, Georgia, goes above and beyond to educate the community — especially potential band parents — about the school’s band program. “We use a variety of tools since most of our families did not grow up with the traditional American structure of band programs,” he says.
Morrison and the rest of the director team send out many invitations through various platforms and hold information nights. Most importantly, they let families know the positive impact of making music at a high level has on their children. “We spend a lot of time and energy teaching our students the soft skills that will help them be successful once they leave our band room,” he explains. “We teach them how to manage themselves, care for each other, how and when to lead and when to follow.”
By playing music together, students have the opportunity to learn and practice these life skills, including how to be successful as an individual and as a team. Morrison adds, “Once the parents see the growth in their children, it snowballs from there!”
And snowball it has! Lambert’s band program enrollment has grown by nearly 40% since Morrison came on board. Some of the boost in numbers came from the middle school bands recovering from the COVID shutdown, but Morrison attributes most of the growth to retention. “Students who come into the program stay in the program,” he says proudly. “We prioritize music playing and growth throughout each concert cycle, class period and rep so that students feel successful. The staff spends time developing relationships with students, which allows us to coach them in meaningful ways.”
Morrison has incorporated diversity into the program by linking music selections to his students’ cultural and ethnic backgrounds. He recognizes that his role is to provide guidance as students navigates their musical experience “because ultimately, it is their experience,” he says. That’s why he involves students in selecting repertoire for concerts and performances.
For Lambert’s performance at the 77th Midwest Clinic, Morrison wanted to commission a piece that was authentic and relevant to the student population. He connected with Minoo Dixon, an American-Korean composer who wrote a piece that incorporated traditional Korean folk tunes and percussion! “We try to make sure that while we are exposing students to standard literature, we are also regularly programming underrepresented communities in each concert,” Morrison explains. “Programming like this gives us an avenue to talk about the importance of these communities, their impact on the world and the arts, and to make our students from diverse backgrounds feel like they belong in the world of music-making.”
One of Morrison’s favorite teaching moment was a recording session in May 2024. The only day that the recording engineer and studio were available was the day after graduation. “Every single senior showed up, had a great attitude and gave their best for a lengthy recording session that we planned to submit for festivals that they wouldn’t even get to play at,” he fondly recalls. “They did it because they loved playing together, they loved each other, and they loved the program.”
Hinckley Assistant Professor of Choir, Music Education and Social Justice Portland State University Portland, Oregon
As the Hinckley Assistant Professor of Choir, Music Education and Social Justice at Portland State University in Oregon, Coty Raven Morris says that she “has the privilege of teaching and working with a multitude of ensembles and future music educators to prepare them for the field through the lens of social justice.”
Her position was designed to ensure that concepts of equity in the classroom are interwoven into the pedagogy. Morris wants to practice what music education could look like outside the traditional classroom. “One of the main objectives of my position is designing a houseless choir for our neighbors on the street in the Portland area,” she explains. “Throughout the past three years, we have test piloted a series of connections with different organizations to see what helped the community best, and what allowed our students at PSU to teach and pour back into the city.”
This collaboration between choirs in the area and the university’s community choir concerts will continue. And in 2026, a new partnership with Path Home, a community for houseless families, will begin. “Portland State students under my supervision will serve as teachers and leaders for youth and parent ensembles in a community that helps houseless families with resources and finding permanent homes,” Morris says proudly.
Connecting people is the underlying theme of many of Morris’ endeavors. For example, Being Human Together, started as a community rooted in music educators striving to normalize difficult topics they encounter. Through the practice of conversation, people discuss traditionally taboo subjects like mental health, systemic oppression, diversity and inclusivity. “Everyone wants to talk about heavy stuff, but what if we also practice community and being human with each other?” Morris asks rhetorically. “What if we consider the perspectives of other people and practice sitting with thoughts as our own mindset and theories evolve? Growth in a community does not only come with action, but with patience for evolution in ourselves and others.”
Morris emphasizes this same message of well-being and social-emotional learning (SEL) at clinics she presents. “SEL is something that is interwoven throughout music lessons. When educators prioritize those same elements for themselves, it’s easier to notice the needs of the students in front of us,” she explains. “Whether it’s healing-centered or trauma-informed, these practices ask that educators be flexible with the destination of their plans so that we can care for students along the journey. The key to doing this right involves utilizing the materials and the repertoire as agents of learning and character development.”
Morris started a vlog called “Car Thoughts with Coty” as a fun way to process some of the silly things that happened in her classroom. In her 15- to 60-second clips, she would broadly talk out scenarios that she heard from her students — she never shared student names —such as peer-to-peer conflicts, romantic relationships, academic struggles and successes. “I would have these tiny social media therapy sessions where I shared my thoughts of how to handle different situations,” she said with a smile. “To my surprise, not only would my students grow from watching these videos, but my colleagues at other schools would use them for discussion topics and SEL moments in their own classes!”
She realized that people were in need of talking out problems, so she is evolving her vlog to a new platform called “Coty’s Classroom.” “I’m partnering with Music Workshop to provide teaching videos for free on social media and other platforms that will take the same format as ‘Car Thoughts with Coty’ to make these conversations more accessible,” she says.
Band Director Ulysses S. Grant High School Portland, Oregon
Band Director Christopher McCurdy believes in a group-first mindset, and he vigorously advocates for it at Ulysses S. Grant High School in Portland, Oregon. “Every student deserves an accessible and comprehensive music education no matter where or when they start,” he says. “I do my best to make my non-auditioned classes as accessible as possible to every student, even those with no musical experience.”
Jazz is one area that McCurdy has expanded since his arrival at Grant four years ago. He impressed upon students, parents and administrators that jazz should be on the same tier as a concert band. “In so many schools, jazz is an afterthought or the ‘fun’ class,” he explains. “I believe that it is the best avenue to develop students’ personal musical ownership, and it is our duty as educators to preserve the authenticity and beauty of America’s music through mindful and skilled jazz education.”
Because McCurdy did not require students to be members of a concert band to join the jazz band, enrollment grew quickly. Currently, the number of students in jazz is on par with concert band. “I teach the same fundamentals with my jazz students that I developed in concert band,” he says. “The jazz lab course focuses on jazz history, improvisation and combo work. It’s an ‘all-comers’ course with no audition. We’ve had some of our best kids start in jazz, which is a strong reminder that we sometimes miss reaching many eager students due to audition or scheduling requirements.”
Last year, McCurdy and a group of motivated female students started a female jazz ensemble. It started as a jazz-intensive day camp for middle school girls where they learned jazz from local female jazz professionals, but the attendees also realized that they were in a safe space and could share lived experiences about music and gender. Currently the female jazz program, which encompasses all the girls and gender minorities in the overall jazz program at Grant, has 22 students, but the members are committed to grow this number.
“After the day camp, a small group of five to seven students began gigging around town as the combo JazzChangesPDX,” McCurdy exclaims. “The need was clear, and watching so many freshman girls and gender minorities flock to the program this fall has been the proof of concept. If you carve out a place for everyone, it can fundamentally change the space around you in a beautiful way.”
McCurdy and the parent booster organization work diligently at fundraising to make sure that every student has the ability to go to honor bands, festivals and solo/ensemble free of charge. “Our job is to knock down any walls standing in the way of a motivated and willing student,” McCurdy says proudly. “I am constantly advocating for arts funding in our district and while it’s often difficult, I believe that if your voice isn’t in the room, you can’t expect any real change to land in your lap.”
One of McCurdy’s favorite aspects of his music program is the positive, student-led culture of kindness and accountability. All freshmen are paired with an older student mentor who is their point person as they get started in the music program. “This has led to some really beautiful peer-to-peer moments that help drive us to continue the tradition of excellence that we work so hard to accomplish,” McCurdy says.
Director of Bands American Fork High School American Fork, Utah
Many people describe their programs as student-led, but at American Fork High School in Utah, the marching band is just that. According to Director of Bands Orien Landis, “Our student leadership team essentially runs the band program. During the marching band season, the leadership team organizes and trains students in everything from music to marching fundamentals.”
Landis and his team created several training sessions to help students understand how to run sectionals, rehearse music effectively and communicate well with their peers. He acknowledges that training for leadership requires a lot of time at the start of the season, but “it pays dividends throughout the year. During leadership meetings, students report on progress, which helps hold everyone accountable. When staff and director availability is limited, empowering students is essential to their success,” Landis exclaims.
He took student leadership training even further with the Mountain West Leadership Institute. “During COVID, we needed a way to continue training our student leadership,” Landis explains. “We partnered with Utah Bandmasters and have run the leadership institute for four years now. Last year, we served over 250 students with leadership training from Utah, Idaho, Colorado and Nevada. We see this program continuing for years to come as a way to provide an affordable opportunity for leadership training for students.”
For marching fundamentals, Landis and American Fork’s visual caption head, Peter Bates, developed a seven-week course that all first-year marching students are required to take. This course includes a series of progressively detailed videos, along with questions and video assignments. “Students come to the first rehearsal with a solid understanding of how we want them to move,” he explains. ”This means rehearsals focus more on reviewing the material from the videos rather than teaching it from scratch.”
This approach empowers first-year students and provides a more rewarding experience for older students because the band can progress faster at the start of the season. “We began this process about five years ago and have refined it over time. I believe the results speak for themselves, as the program as a whole has seen significant improvements during this period,” he says proudly.
Surround yourself with good people, and you will learn and grow from the best — Landis takes this principle to heart. He credits the other directors in the program — Director of Percussion Dana Slabaugh, Junior High Director of Bands McKayla Wolf and Administrative Assistant Allison Dean — who work tirelessly to ensure the success of the program and students “I truly believe that we’re in the business of helping students develop attributes that will benefit them throughout life,” Landis says. “Music is simply the medium we use to teach them how to become amazing adults.”
Director of Bands Zion-Benton Township High School Zion, Illinois
Working at a Title I school like Zion-Benton Township High School can be challenging, but Director of Bands Shan Kazmi only sees the positives. “Our students are great. I know people will say that kids are the same everywhere, but the choir director and I believe that our students at Zion-Benton are the best around,” he says with a smile. “Every single guest who has interacted with our band and choir students have commented on how polite and nice they are. Our performing arts students take so much pride in what they do.”
Kazmi goes on to say, “The other reward is just the joy of the grind. I have to work hard here, but it’s not really work when you love what you do. It does challenge me to do things differently than what I learned in college and student teaching, but as a result, I feel like I am a pretty versatile teacher and can adapt on the fly.”
His versatility and adaptability came in handy as he grew the Zion-Benton Township Band program. “We started with two bands, three choirs and a guitar class. Now, we offer four choirs, four bands, AP Music Theory, a music production course and two levels of class piano,” he says proudly. “I wrote the proposals and curriculum for our two additional band classes, our music production course and the AP Music Theory course. We also expanded our faculty to three full-time teachers.”
One of the bands Kazmi started is Beginning Band for high school students with no prior music experience. “When we looked at courses in our building, we realized there was an entry-level class for literally everything except band,” he said. “Post COVID, there were a lot of students who missed the opportunity to join band in middle school, and we weren’t doing them justice by placing them in a freshman-level band with students who had played for 3+ years.”
In Beginning Band, Kazmi starts from scratch with students and teaches them to play and read music. By the end of the course, they are prepared to continue on with Intermediate Band, the school’s entry-level ensemble for students with experience. “Beginning band has gained a lot of traction,” Kazmi exclaims. “Each week, I have at least one student ask me how they can join!”
In addition to extra ensembles and courses, enrollment has skyrocketed from 50 to more than 140 students “It takes a village,” Kazmi says humbly. “The first place I looked was the middle school programs who sent students to us. There was no shortage of students in middle school band — they just weren’t making it to high school. As a high school program, your middle school program is your lifeline.”
Kazmi immediately forged relationships with his middle school colleagues and attended nearly every event they had — 5th-grade recruitment, concerts, booster meetings, summer camps. He brought middle school students to the high school to perform alongside the marching band. “This alleviated some of the ‘scariness’ of high school band,” he explains.
Kazmi also focused on fundraising. “I have always operated with a ‘something-is-better-than-nothing’ philosophy when it comes to fundraising,” he says. “The little things add up over time, whether it’s a car wash here, a restaurant night or even running a concession stand for an event at school. Our most lucrative fundraiser is selling World’s Finest Chocolate Bars. They sell for a dollar and most people have a dollar to spend. Plus, it’s chocolate!”
Fun fact: In 1939, the Zion-Benton band program was the first program to have a commercial product fundraiser. It was with the World’s Finest Chocolate because the plant is located in Zion.
Most of the early fundraising efforts during Kazmi’s tenure went to purchasing instruments and equipment. “When I started teaching at Zion-Benton, most of our instrument inventory was 30+ years old,” he says. “Now, funds go toward student travel and working with guest artists and clinicians.”
Band and Orchestra Teacher Justice Page Middle School, Minneapolis Public Schools Minneapolis, Minnesota
When Zane Kaiser started as the Band and Orchestra Teacher at Justice Page Middle School in Minneapolis, the music program had no budget allocated to it. In the seven years since, Kaiser has built the program and budget slowly and methodically. “Our school community is deeply passionate about music education,” he explains. “Through the continued support from parents and community leaders, I have been able to provide instruments and supplies to any student who wants to be in band and orchestra. I often find ways to share instruments, rehearsal spaces and resources to keep everyone afloat. Grants and donations really make a difference each and every day.”
His efforts have worked — the program has increased from 250 to 450 students. To attract new students and keep current ones in the program, Kaiser says “rehearsals must dance an engaging line between high expectations around musicianship and good old fun. I strive to get students to laugh at least once during class, which pushes them to be more willing to try new and often difficult musical things.”
Kaiser believes that it’s crucial to challenge students at all levels, even beginners, which will lead to high retention numbers. “When you regularly present new goals for students to reach, they will work together and they will stay in the program,” he says. “They also keep their friends and neighbors in, too!”
Lastly, kids are in band and orchestra to perform, so “we get our students out in front of people,” Kaiser exclaims. “From morning ‘informances’ as students arrive to school to local music festivals, we want people to hear our students play!
With larger enrollment in the music program, Kaiser has expanded the ensembles at Justice Page to differentiate the ability levels of the students. The school currently has three levels of band and orchestra, a jazz band course, two levels of choir and two levels of guitar — a full menu of offerings for a middle school. “After school, we work with student rock bands, musicals and songwriting,” Kaiser says. “I am always trying to see who is missing from the music program and how we can get them in the door, even with our large numbers. The more, the better!”
Kaiser also spearheaded a sensory-friendly concert series so special education students could enjoy watching the band perform without being overwhelmed by the sounds and sights of the show. “During my first year of teaching, I saw that many special ed students were excluded from daytime school concerts,” he explains. “So, I worked with my wonderful music therapy and special education colleagues to create a social story around a school concert and prepared student musicians to perform for and alongside their peers. I still have a lot to learn, but it has been a really humbling and rewarding experience.”
Kaiser sees Justice Page as a large neighborhood school. “As a resident of the same community my students come from, I feel extra connected,” he says with a smile. “I want families to know that our music program is more than just growing musical skills, it is about growing a network of peers who can rely on each other beyond their ensembles.”
Outside of his work at Justice Page, Kaiser is also involved in the Greater Twin Cities Youth Symphonies and conducts an orchestra of upper middle and high school musicians. “The GTCYS provides financially responsive opportunities for students to not only join an ensemble but to be supported in private lessons, concert attire, audition preparation, and it also takes care of the complicated costs of being an instrumental musician,” Kaiser says. “Working with the youth orchestra has leveled up my teaching and provided insights that I use in my day-to-day instruction.”
Band Director Heights Middle School Farmington, New Mexico
Band Director Cody Jackson began his tenure at Heights Middle School in Farmington, New Mexico, in the fall of 2020, when the pandemic was at its height and all classes were virtual. He inherited a program of approximately 84 students, all of whom he met via computer screen. Just two years after the pandemic, the band has over 200 students. “To commemorate this remarkable growth, we commissioned a work by Kirk Vogel, a composer from Northern Colorado,” Jackson says.
The song, “Soring to New Heights,” was written specially for his students. “This opportunity provided a unique and unforgettable experience for the students,” he says with pride. “They were part of a world-premiere work written expressly for them, and they were able to engage directly with the composer, who visited in person to collaborate with them. The applause and collective energy on stage following the performance was electrifying!”
To facilitate growth within his ensembles, Jackson reorganized the bands, which were categorized by grade levels — beginning band was for 6th graders, concert band for 7th graders and symphonic band for 8th grade students. Over the next few years, the ensembles became multi-grade and ability-based. Jackson also took this opportunity to connect older and younger students. For each concert, he asked older students to perform alongside younger musicians if they chose to do so. “This initiative led to students collaborating in my after-school program called B.A.S.H. (Band After School Help), where older students have the chance to mentor younger students with musical skills and deepen their understanding of their craft,” he explains.
Jackson and his students also reach out to the elementary feeder schools. Each spring, the middle school band, choir and orchestra have an “informance,” and elementary students for each feeder school can observe and hear firsthand what the music electives at Heights Middle School entail.
To show students that music-making extends beyond the confines of the classroom, Jackson actively seeks opportunities for unique performances where students can engage with the community. Last year, he invited the San Juan College Symphonic Band, a local community ensemble, to collaborate with his students in a side-by-side performance. “My students performed alongside adult musicians, some as old as 84 years, and established meaningful musical connections,” Jackson says.
This year, Heights Middle School’s symphonic band will travel to Albuquerque in May, where they will partner with James Monroe Middle School to perform the national anthem at an Albuquerque Isotopes baseball game.
Fundraising is a part of every music educator’s life, and Jackson has secured about $10,000 in grants and donations. Several local businesses have provided equipment like a sound system and percussion equipment. Others have provided funds to commission music and to expand the band’s music library.
A unique event for the Heights’ band program is the annual mattress fundraiser. An Albuquerque-based company brings several mattresses to the school and sets up a showroom in the gym. “My band students have so much fun each year selling mattresses for the band,” Jackson explains with a smile. “Just ask the students who get to dress up as mattresses and wave signs — it’s a middle school boy’s dream!“
7-12 Music Teacher Broadalbin-Perth Jr./Sr. High School Broadalbin, New York
Alex Hitrick began teaching at Broadalbin-Perth Jr./Sr. High School, during the attempt to return to normalcy post-COVID in September 2020. The enrollment numbers were pretty dismal. “I had about 20 students in middle school chorus and 12 in high school, and my first concert was edited on a computer,” he says.
Today, the middle school chorus has almost tripled to 56 singers, and the high school stands at 70. “I like to believe the numbers rose because I was able to bring a fresh approach to how music can be explored, and the students ran with it,” Hitrick says.
His fresh approach included adding courses like Songwriting & Production, AP Music Theory and a new piano lab. He also started a cover band club called “From the Top,” and students perform with live equipment at real venues.
Hitrick also started an Advanced Choir ensemble for “students who wanted a little more — more whos, whats, whens, wheres and, of course, whys,” he explains. “As we began to increase the difficulty of repertoire performed, their knowledge of music needed to expand, and they wanted to go all in.”
In addition to performing the music, the class analyzes the time the songs were written, why they were written, and students use a variety of theory skills and techniques to better understand how it all works.
Every March, Broadalbin-Perth hosts a PRISM Concert for Music in Our Schools Month that features all the performing ensembles in the district, grades 4 through 12. The concert follows a theme, and every group chooses a song or piece to perform. “At the end, we come together to perform a final song as one giant ensemble,” Hitrick says proudly. “Each year, we raise money for a community member, family or organization in need based on events of that year.”
An exciting and unique performance opportunity was when Hitrick’s students entered a contest for a chance to sing “I Want to Know What Love Is” with the legendary rock band Foreigner at Saratoga Performing Arts Center. “As a class, we arranged the harmonies of the song then submitted a video of us performing the song,” he says. “It was an electric moment seeing them sing their hearts out on stage with Foreigner!”
Hitrick is the first to acknowledge that the success of the Broadalbin-Perth Jr./Sr. High School music program is not a lone effort. The administration supports the arts, and “I am fortunate to have great colleagues,” he says. “We bounce ideas off of each other, inspire each other and are on the same page together. We know that our main goal is to give these students the greatest opportunities in music possible, but we are also there to help our students be the best humans possible.”

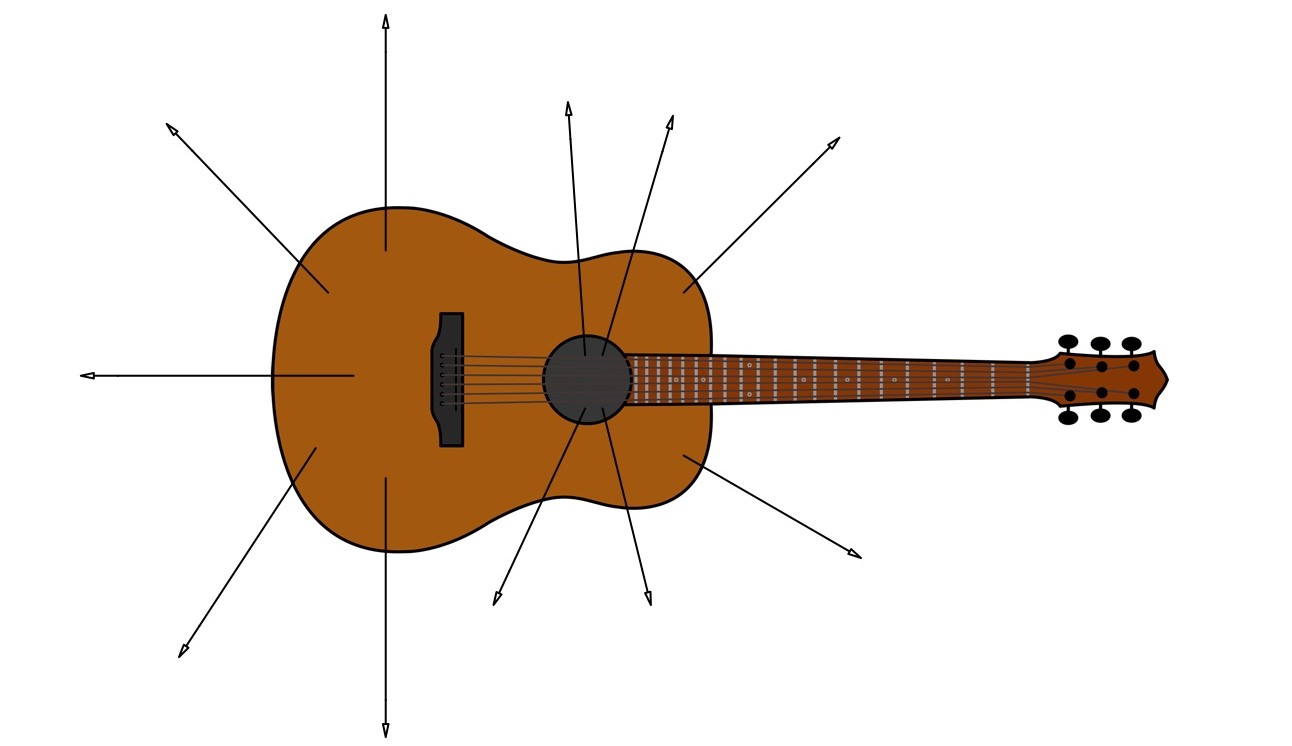

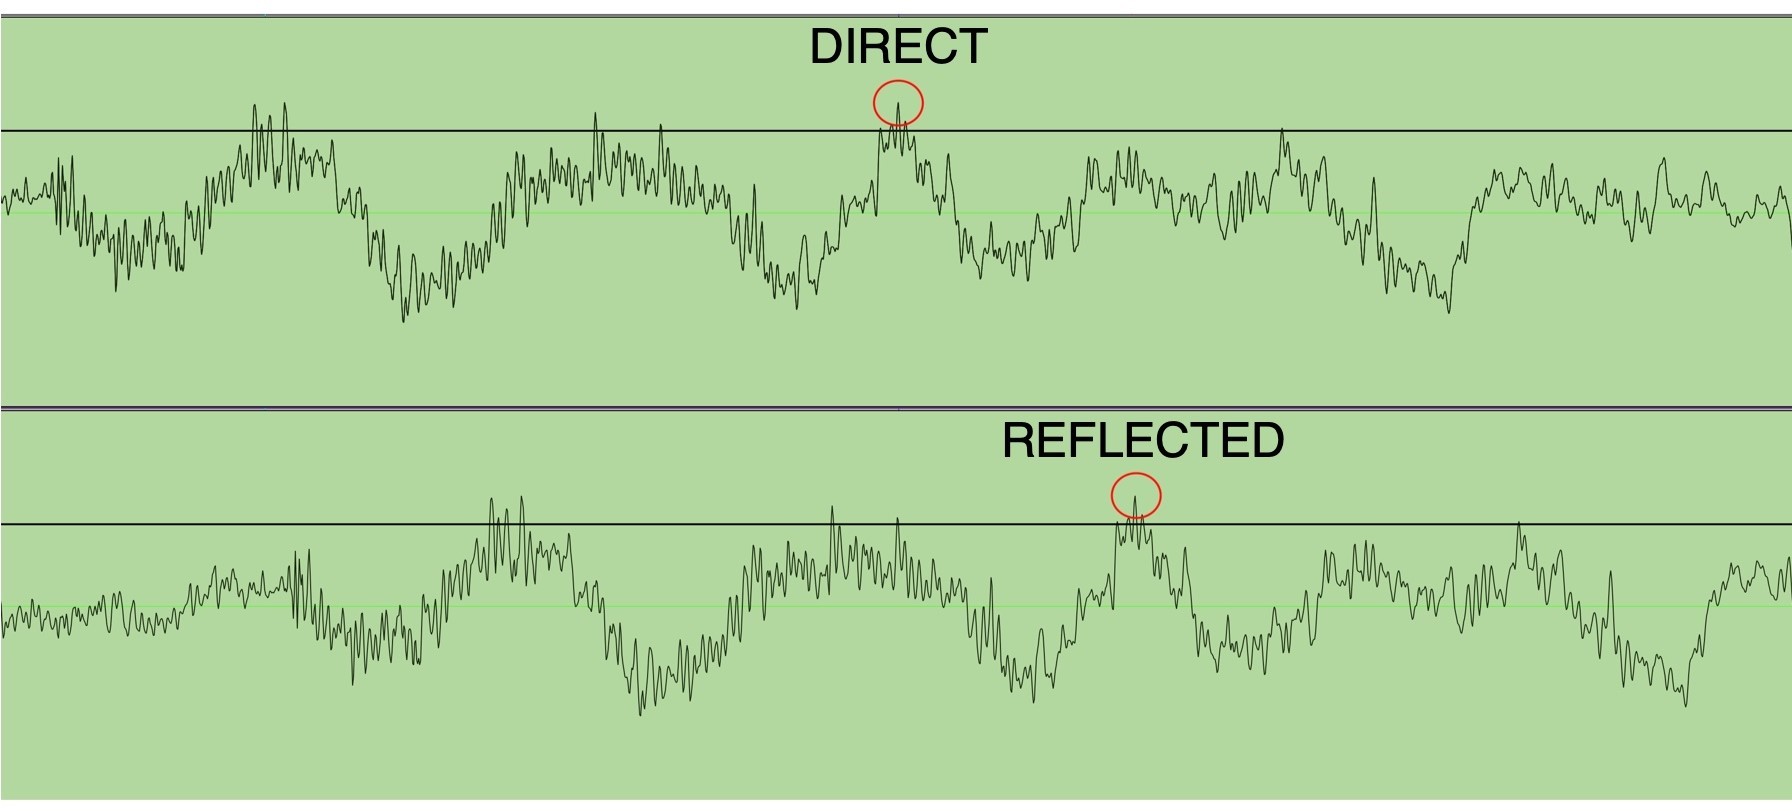


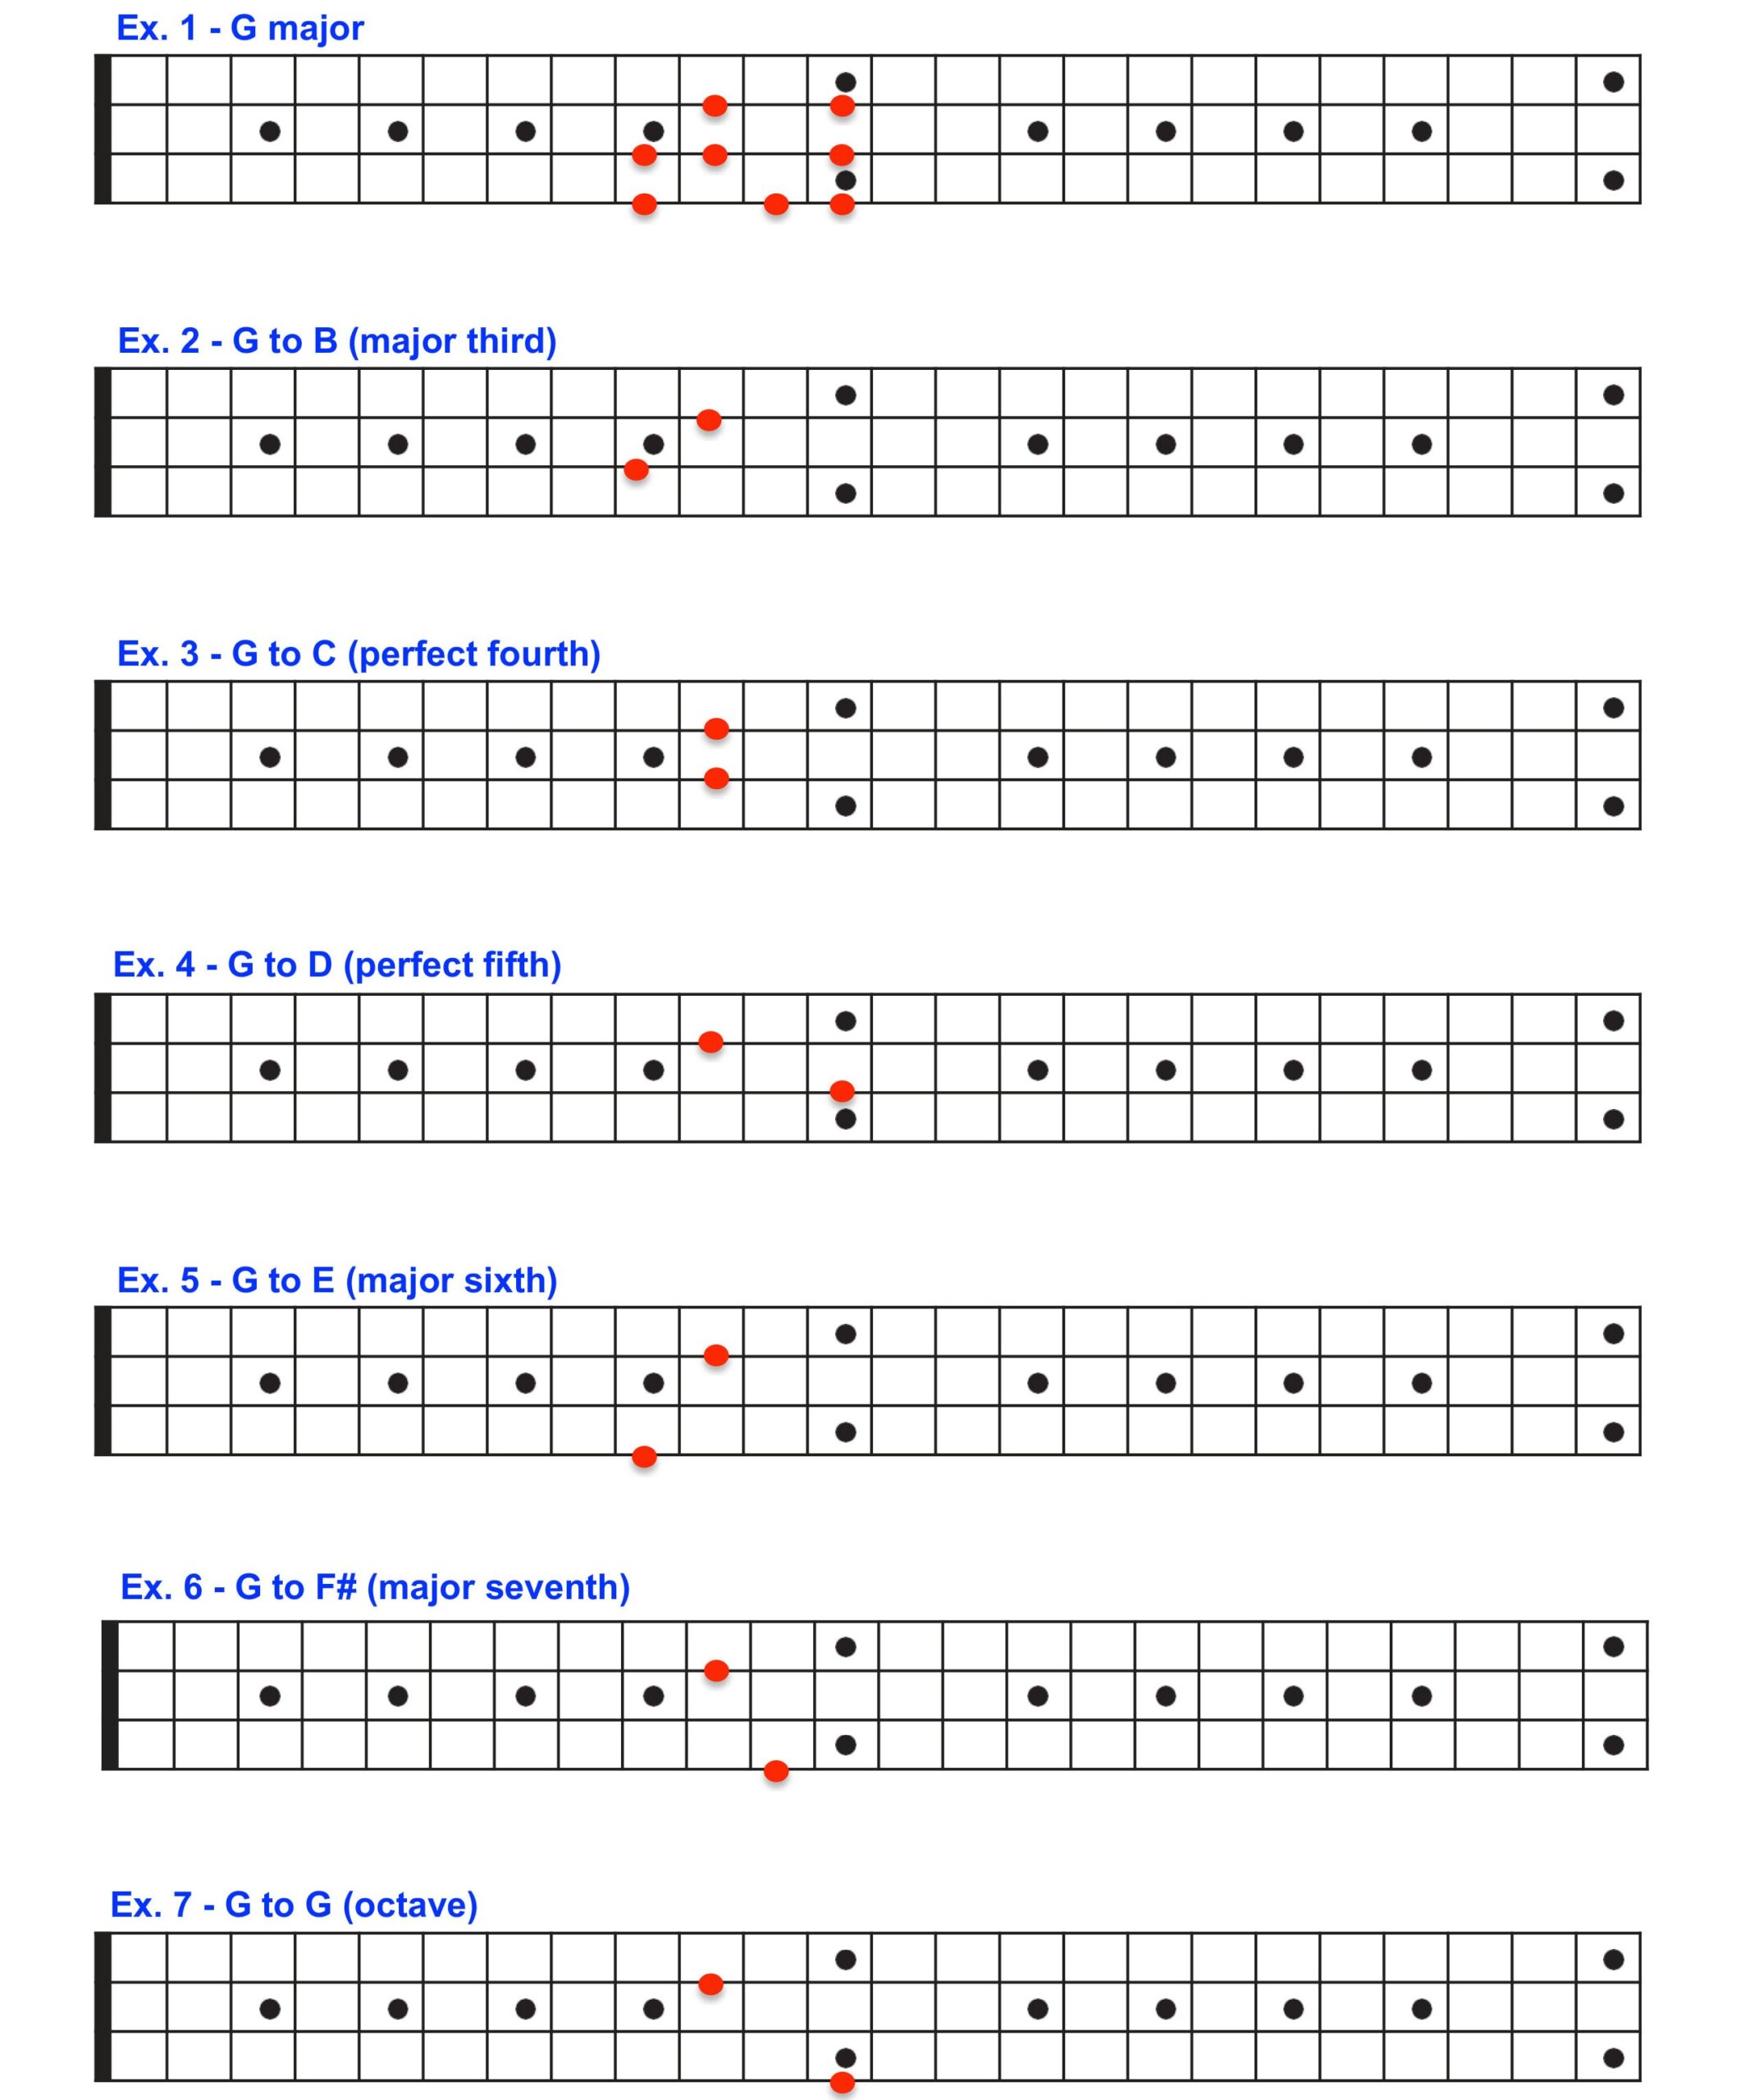
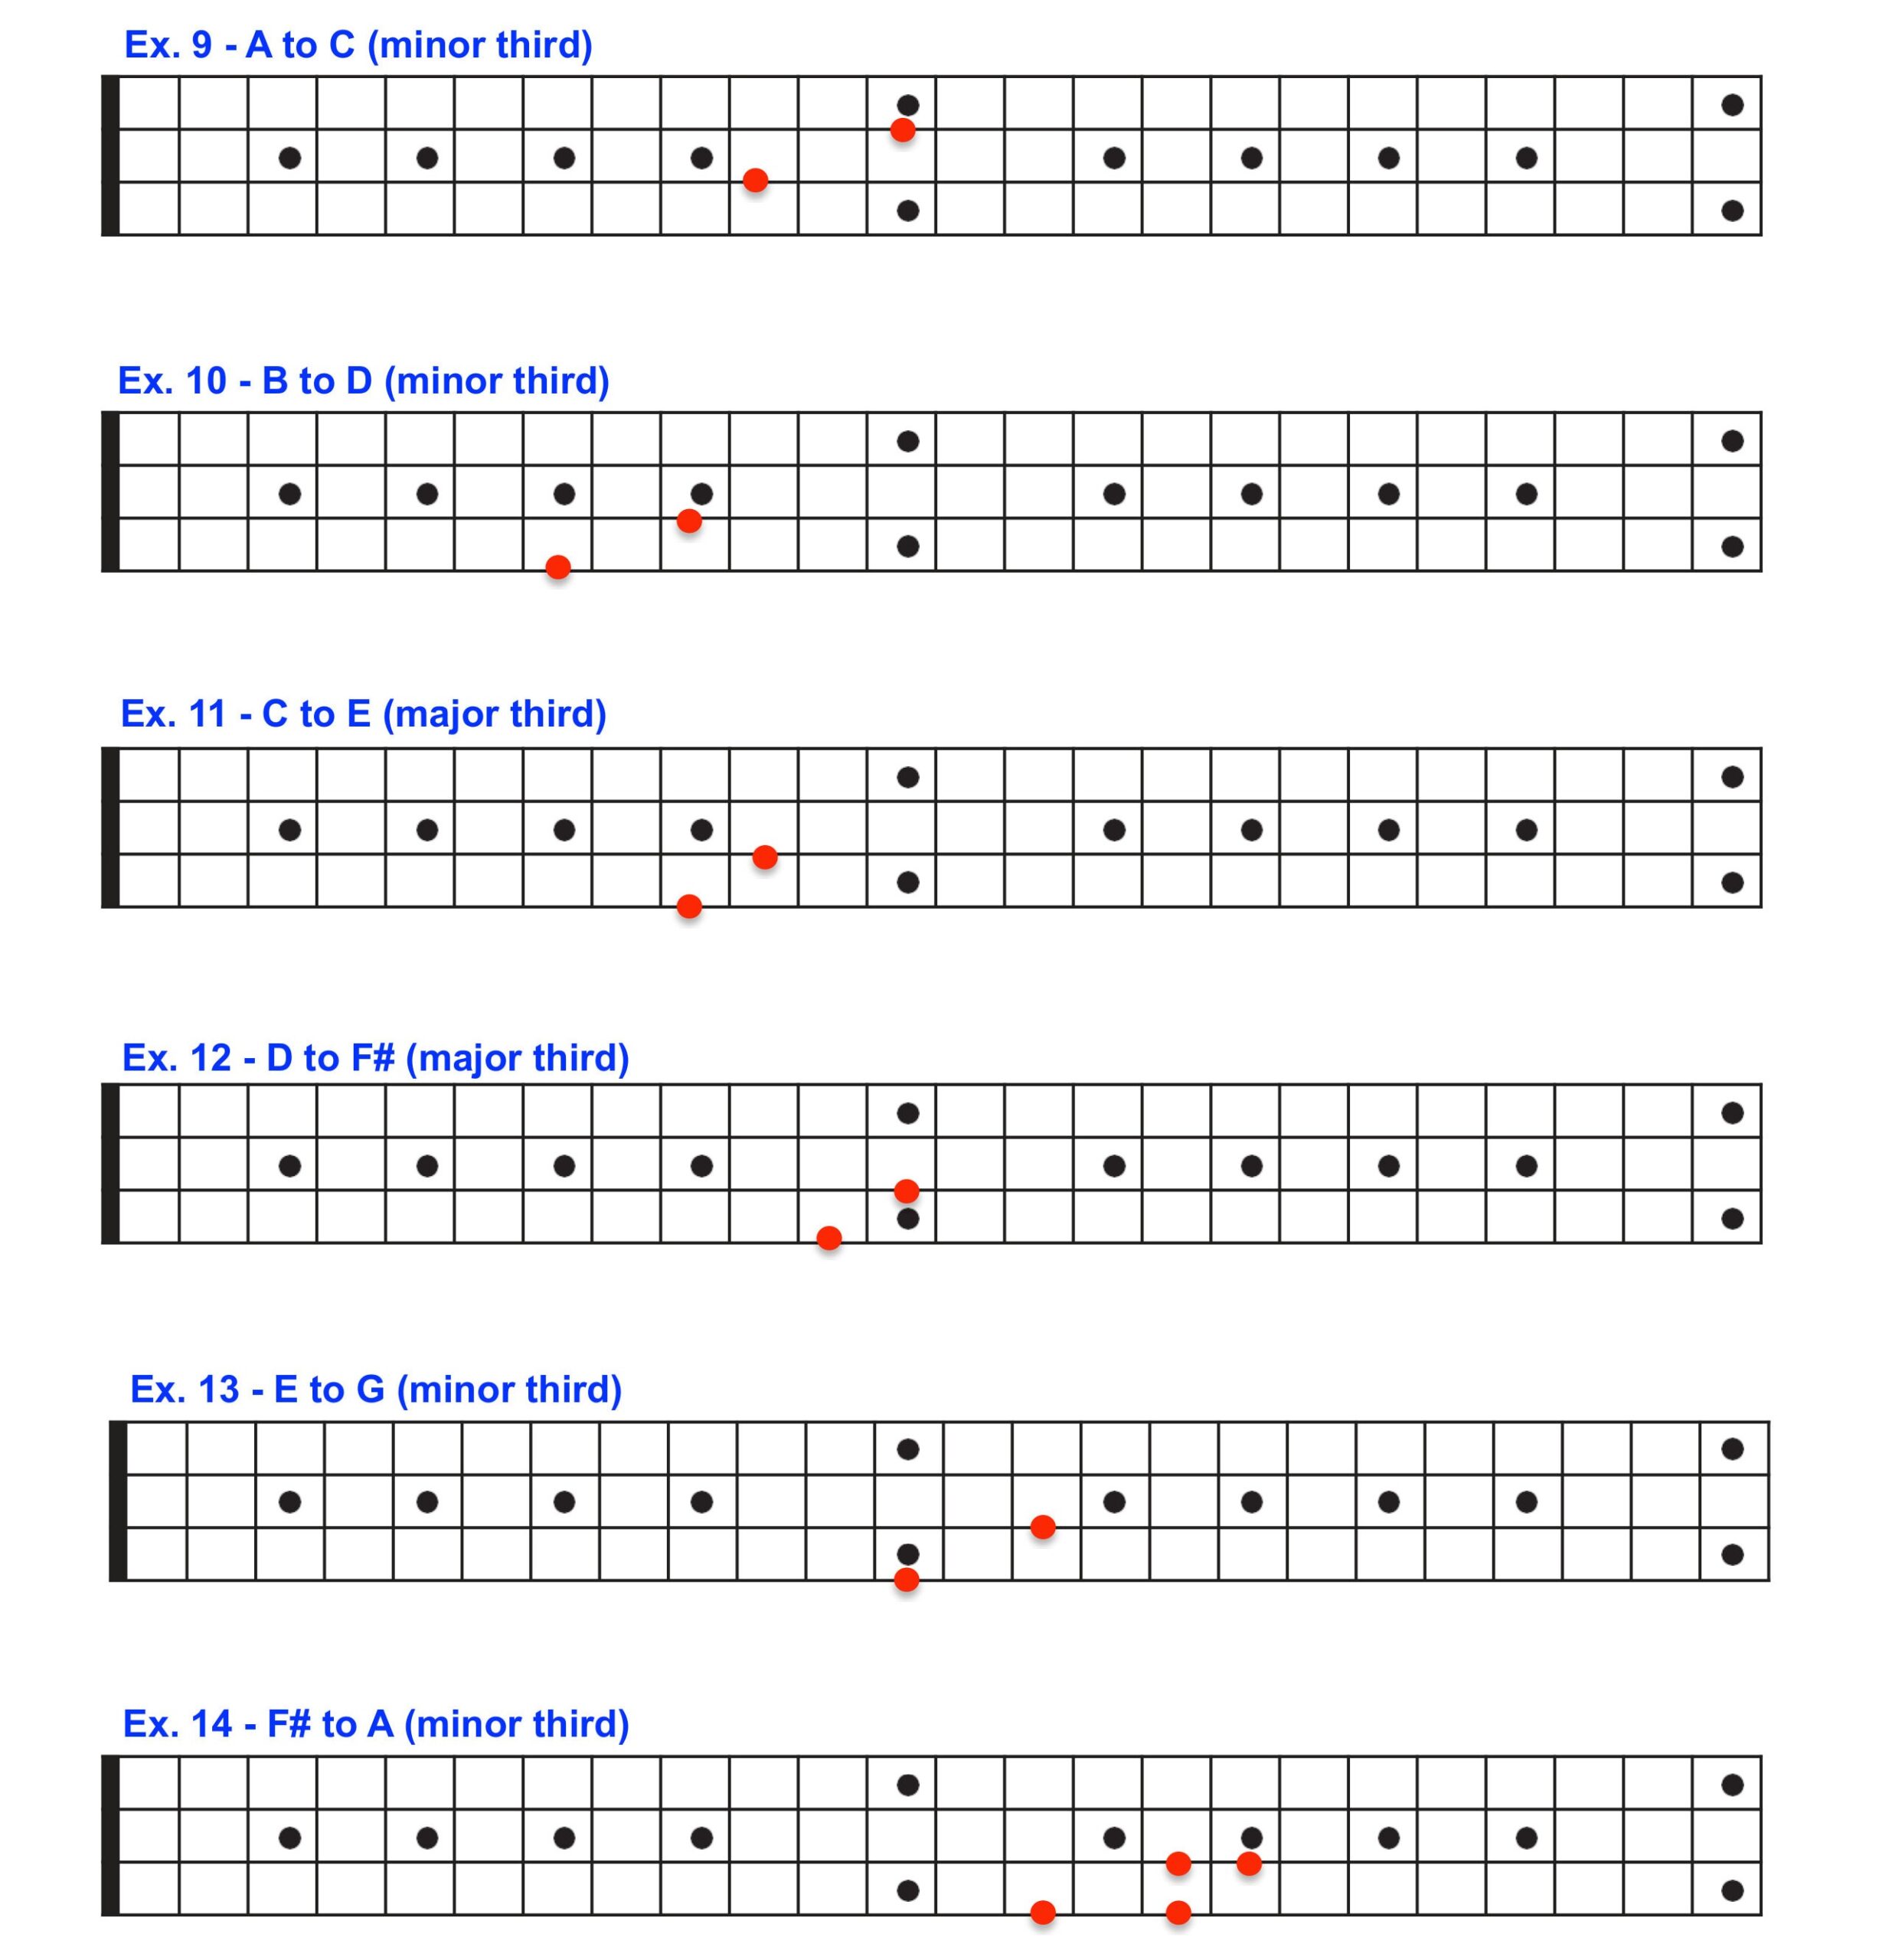
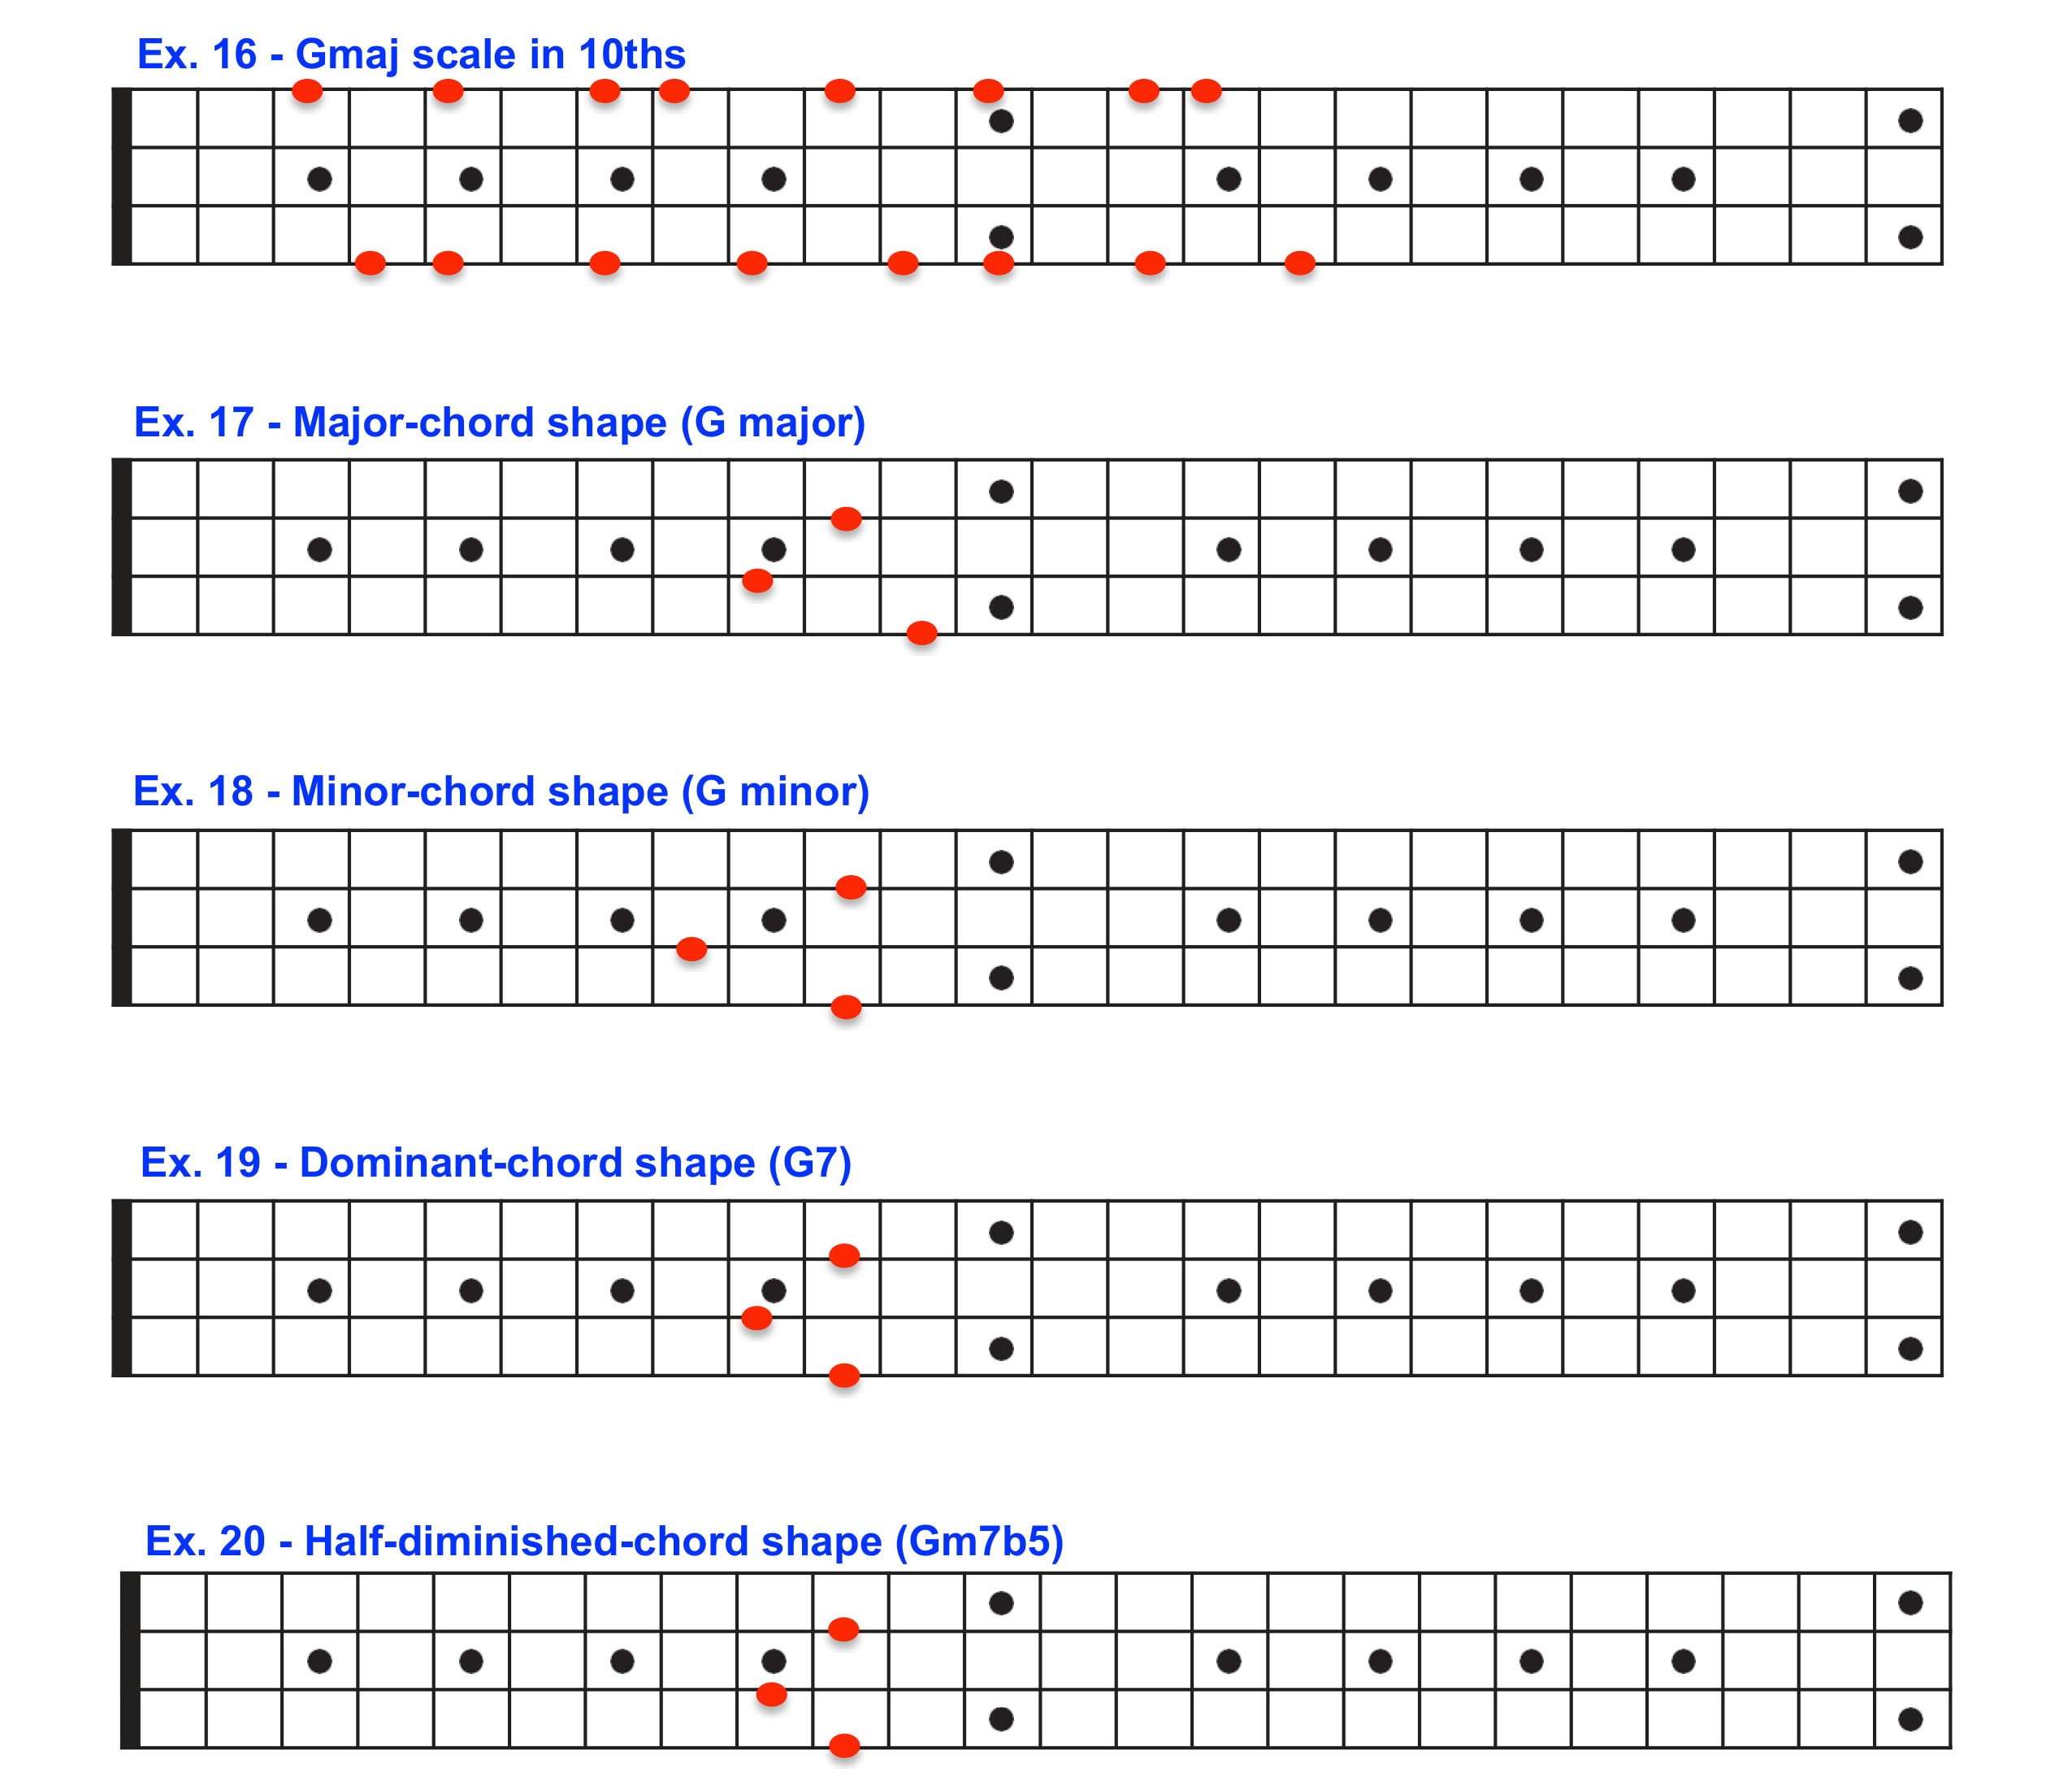


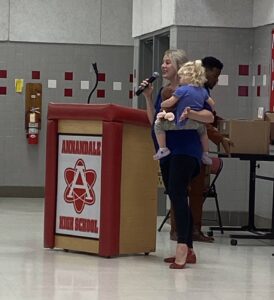


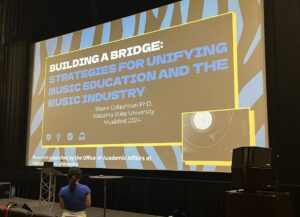
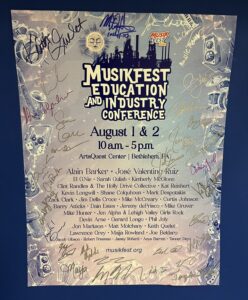


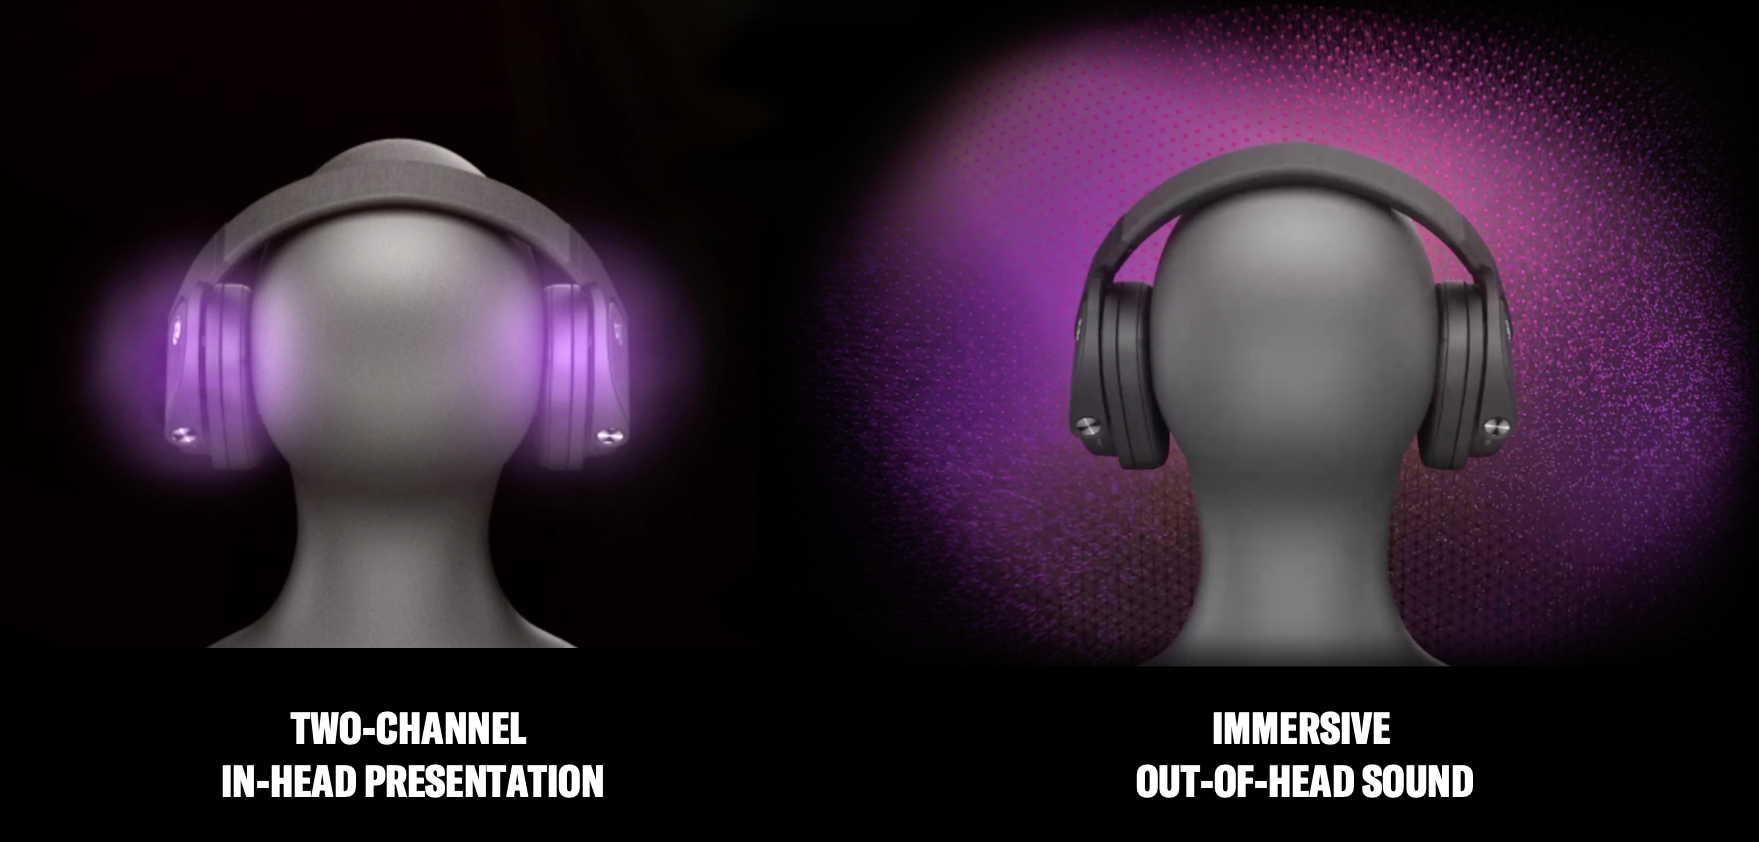


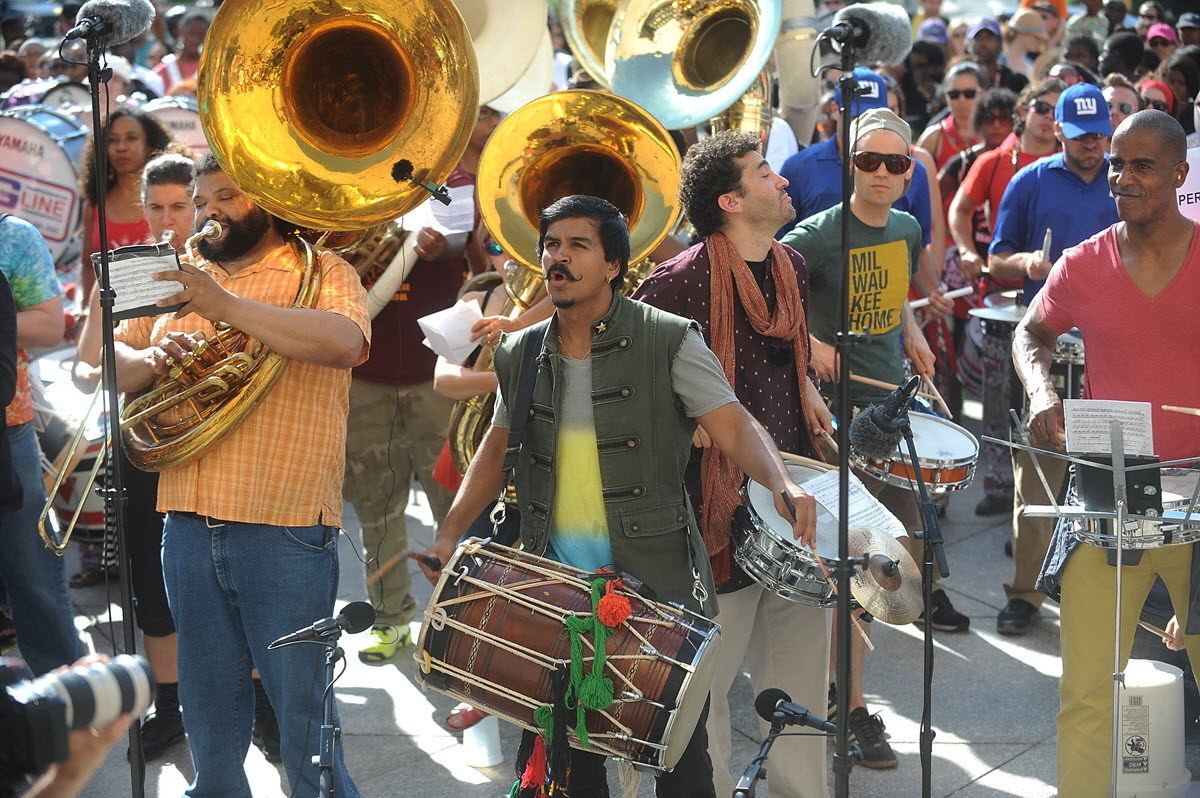


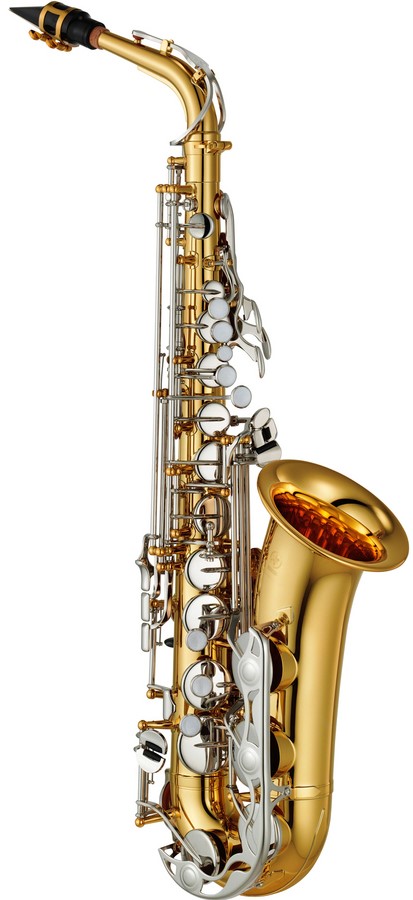


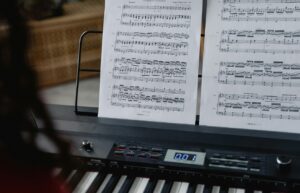


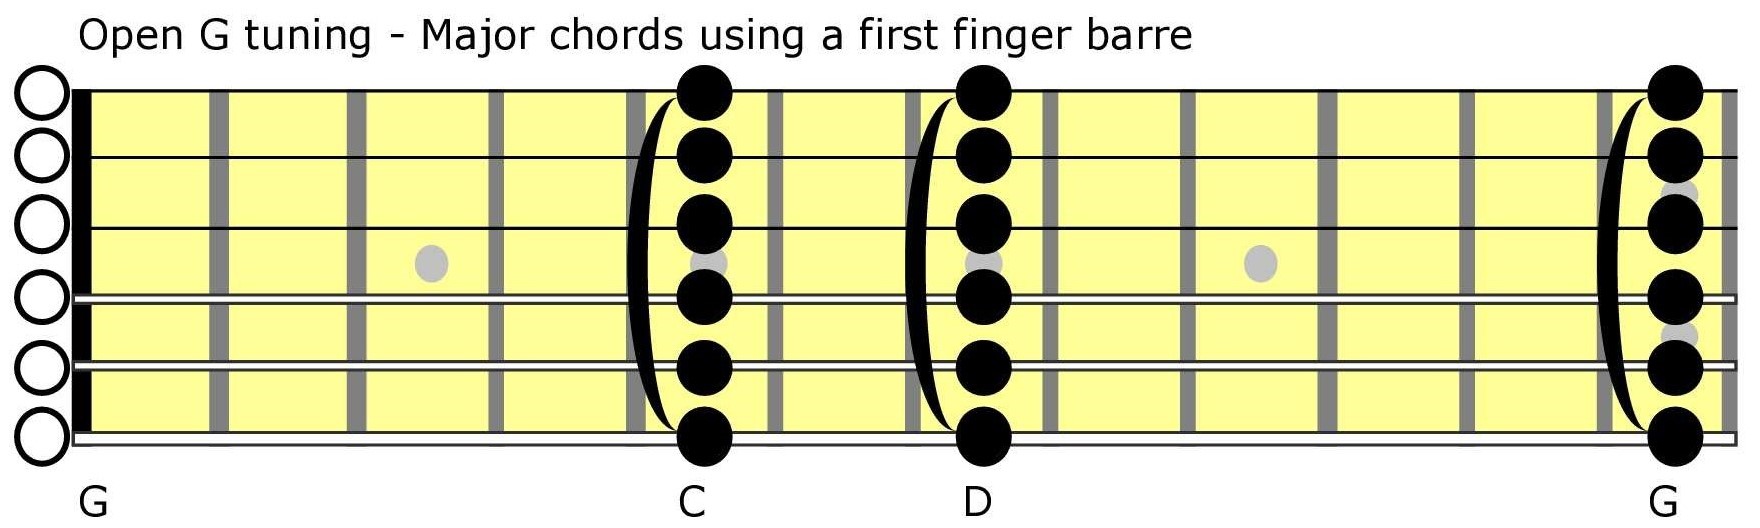
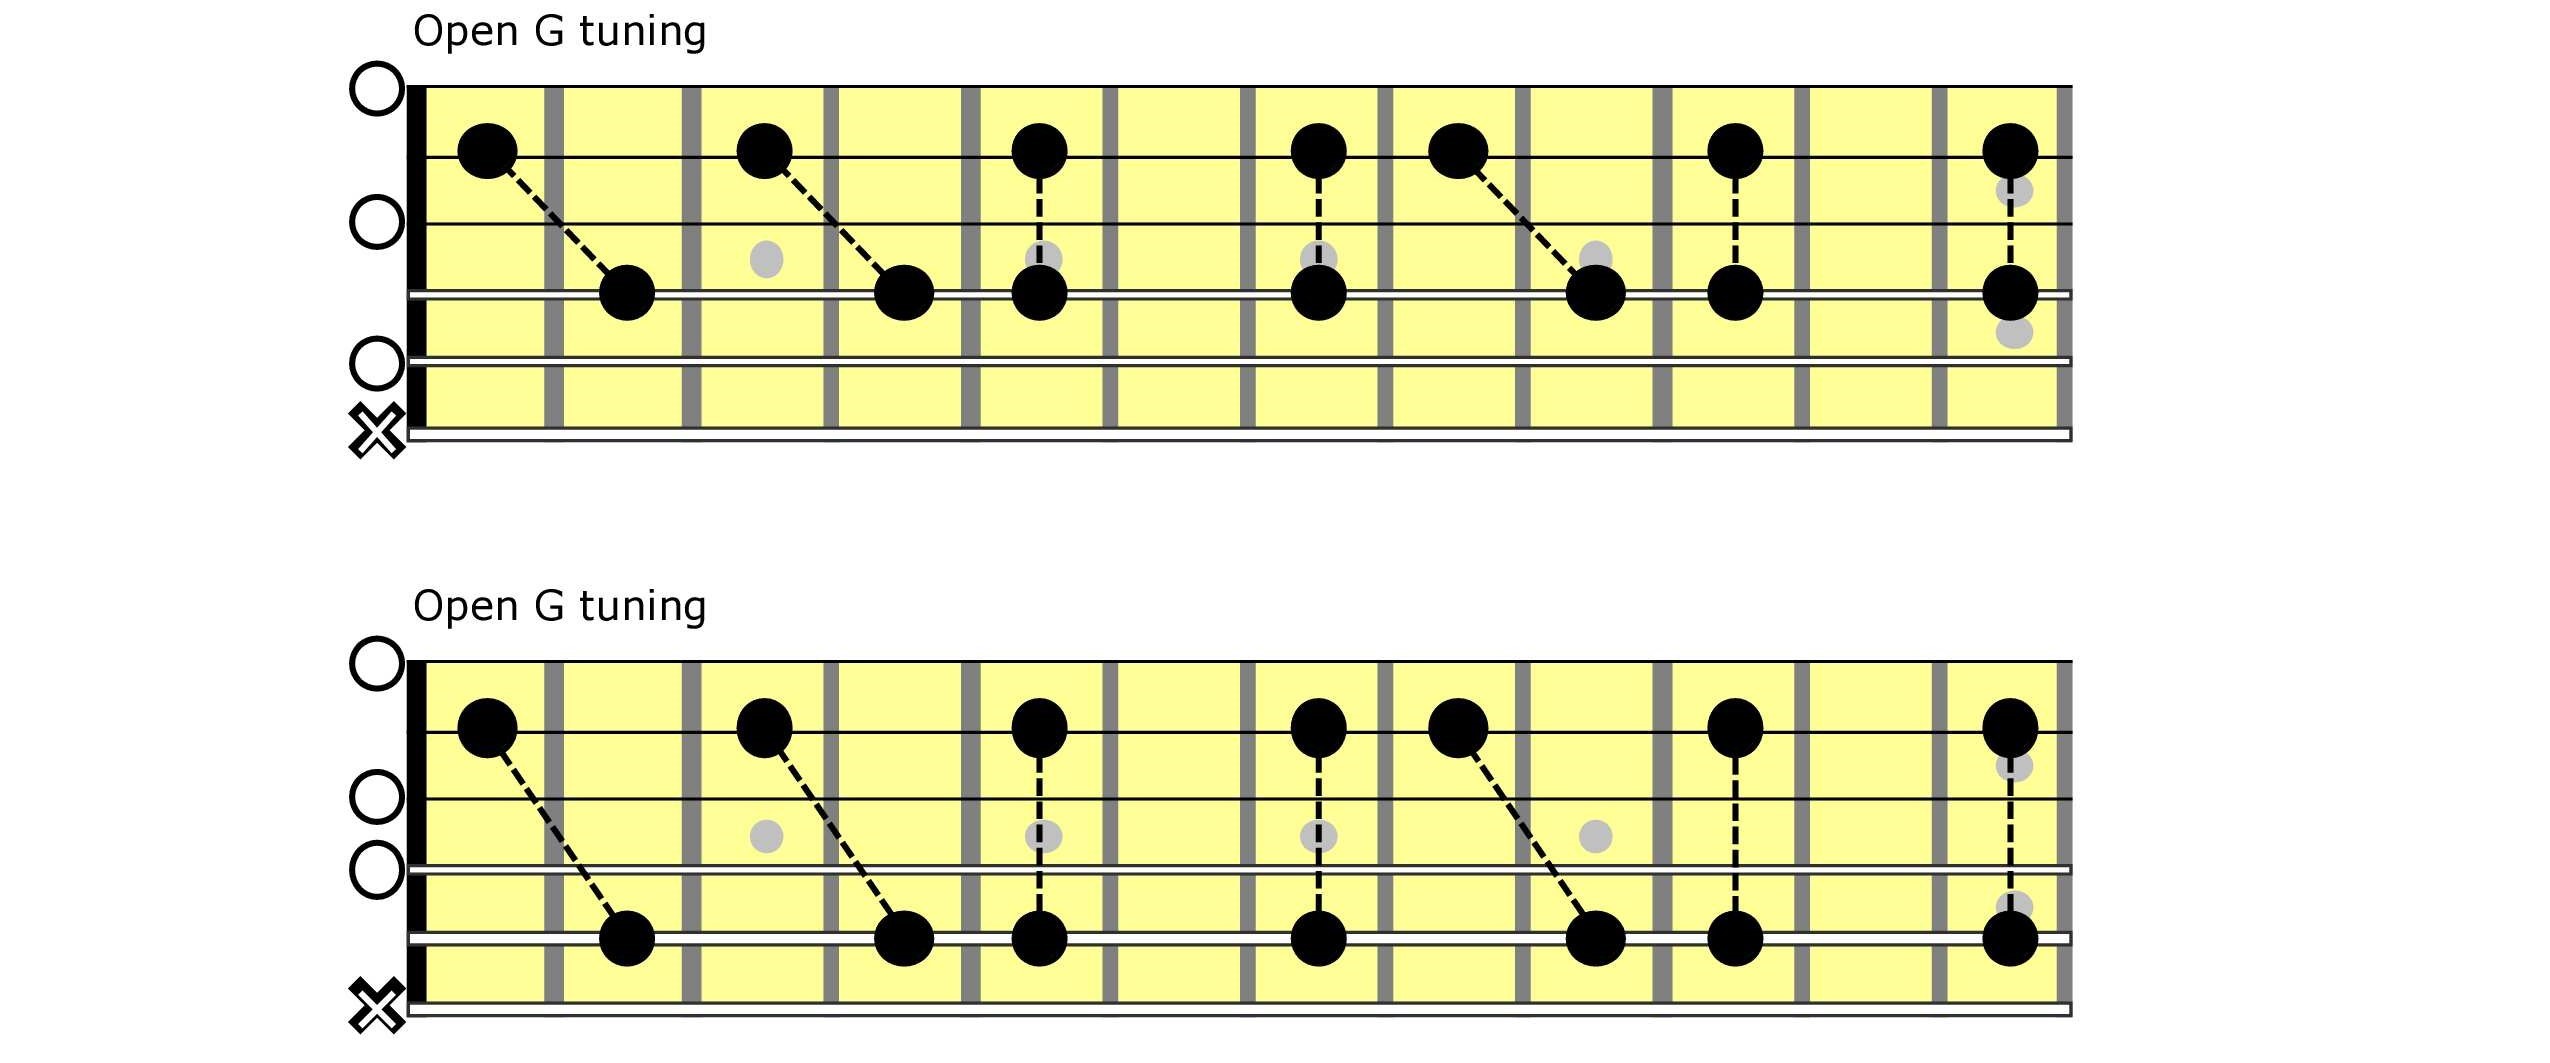
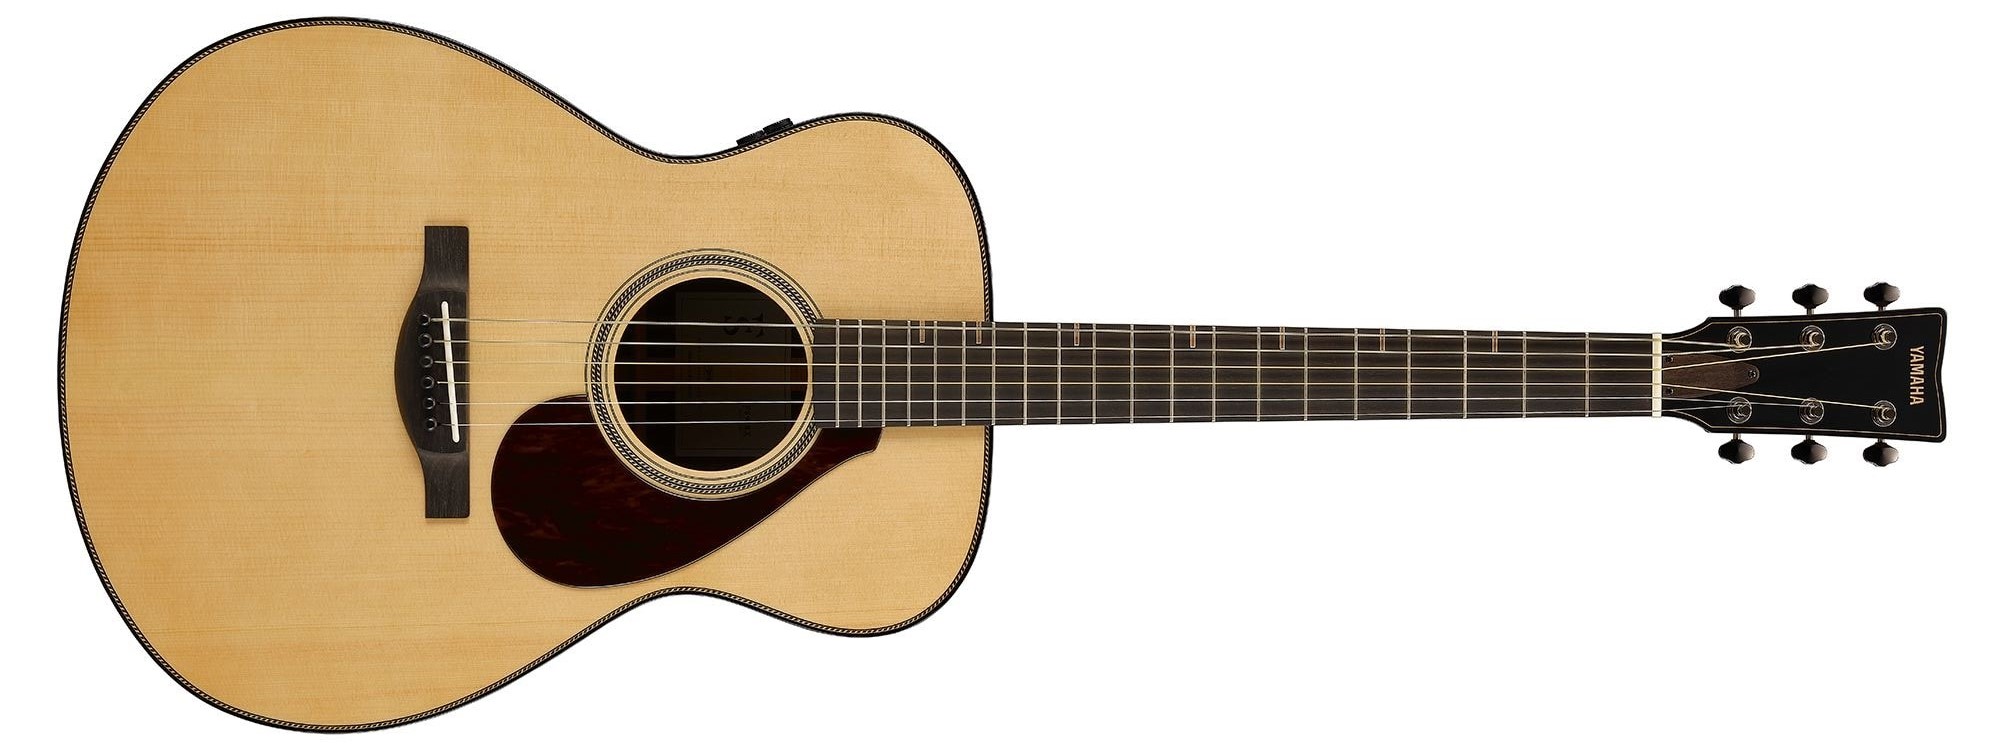
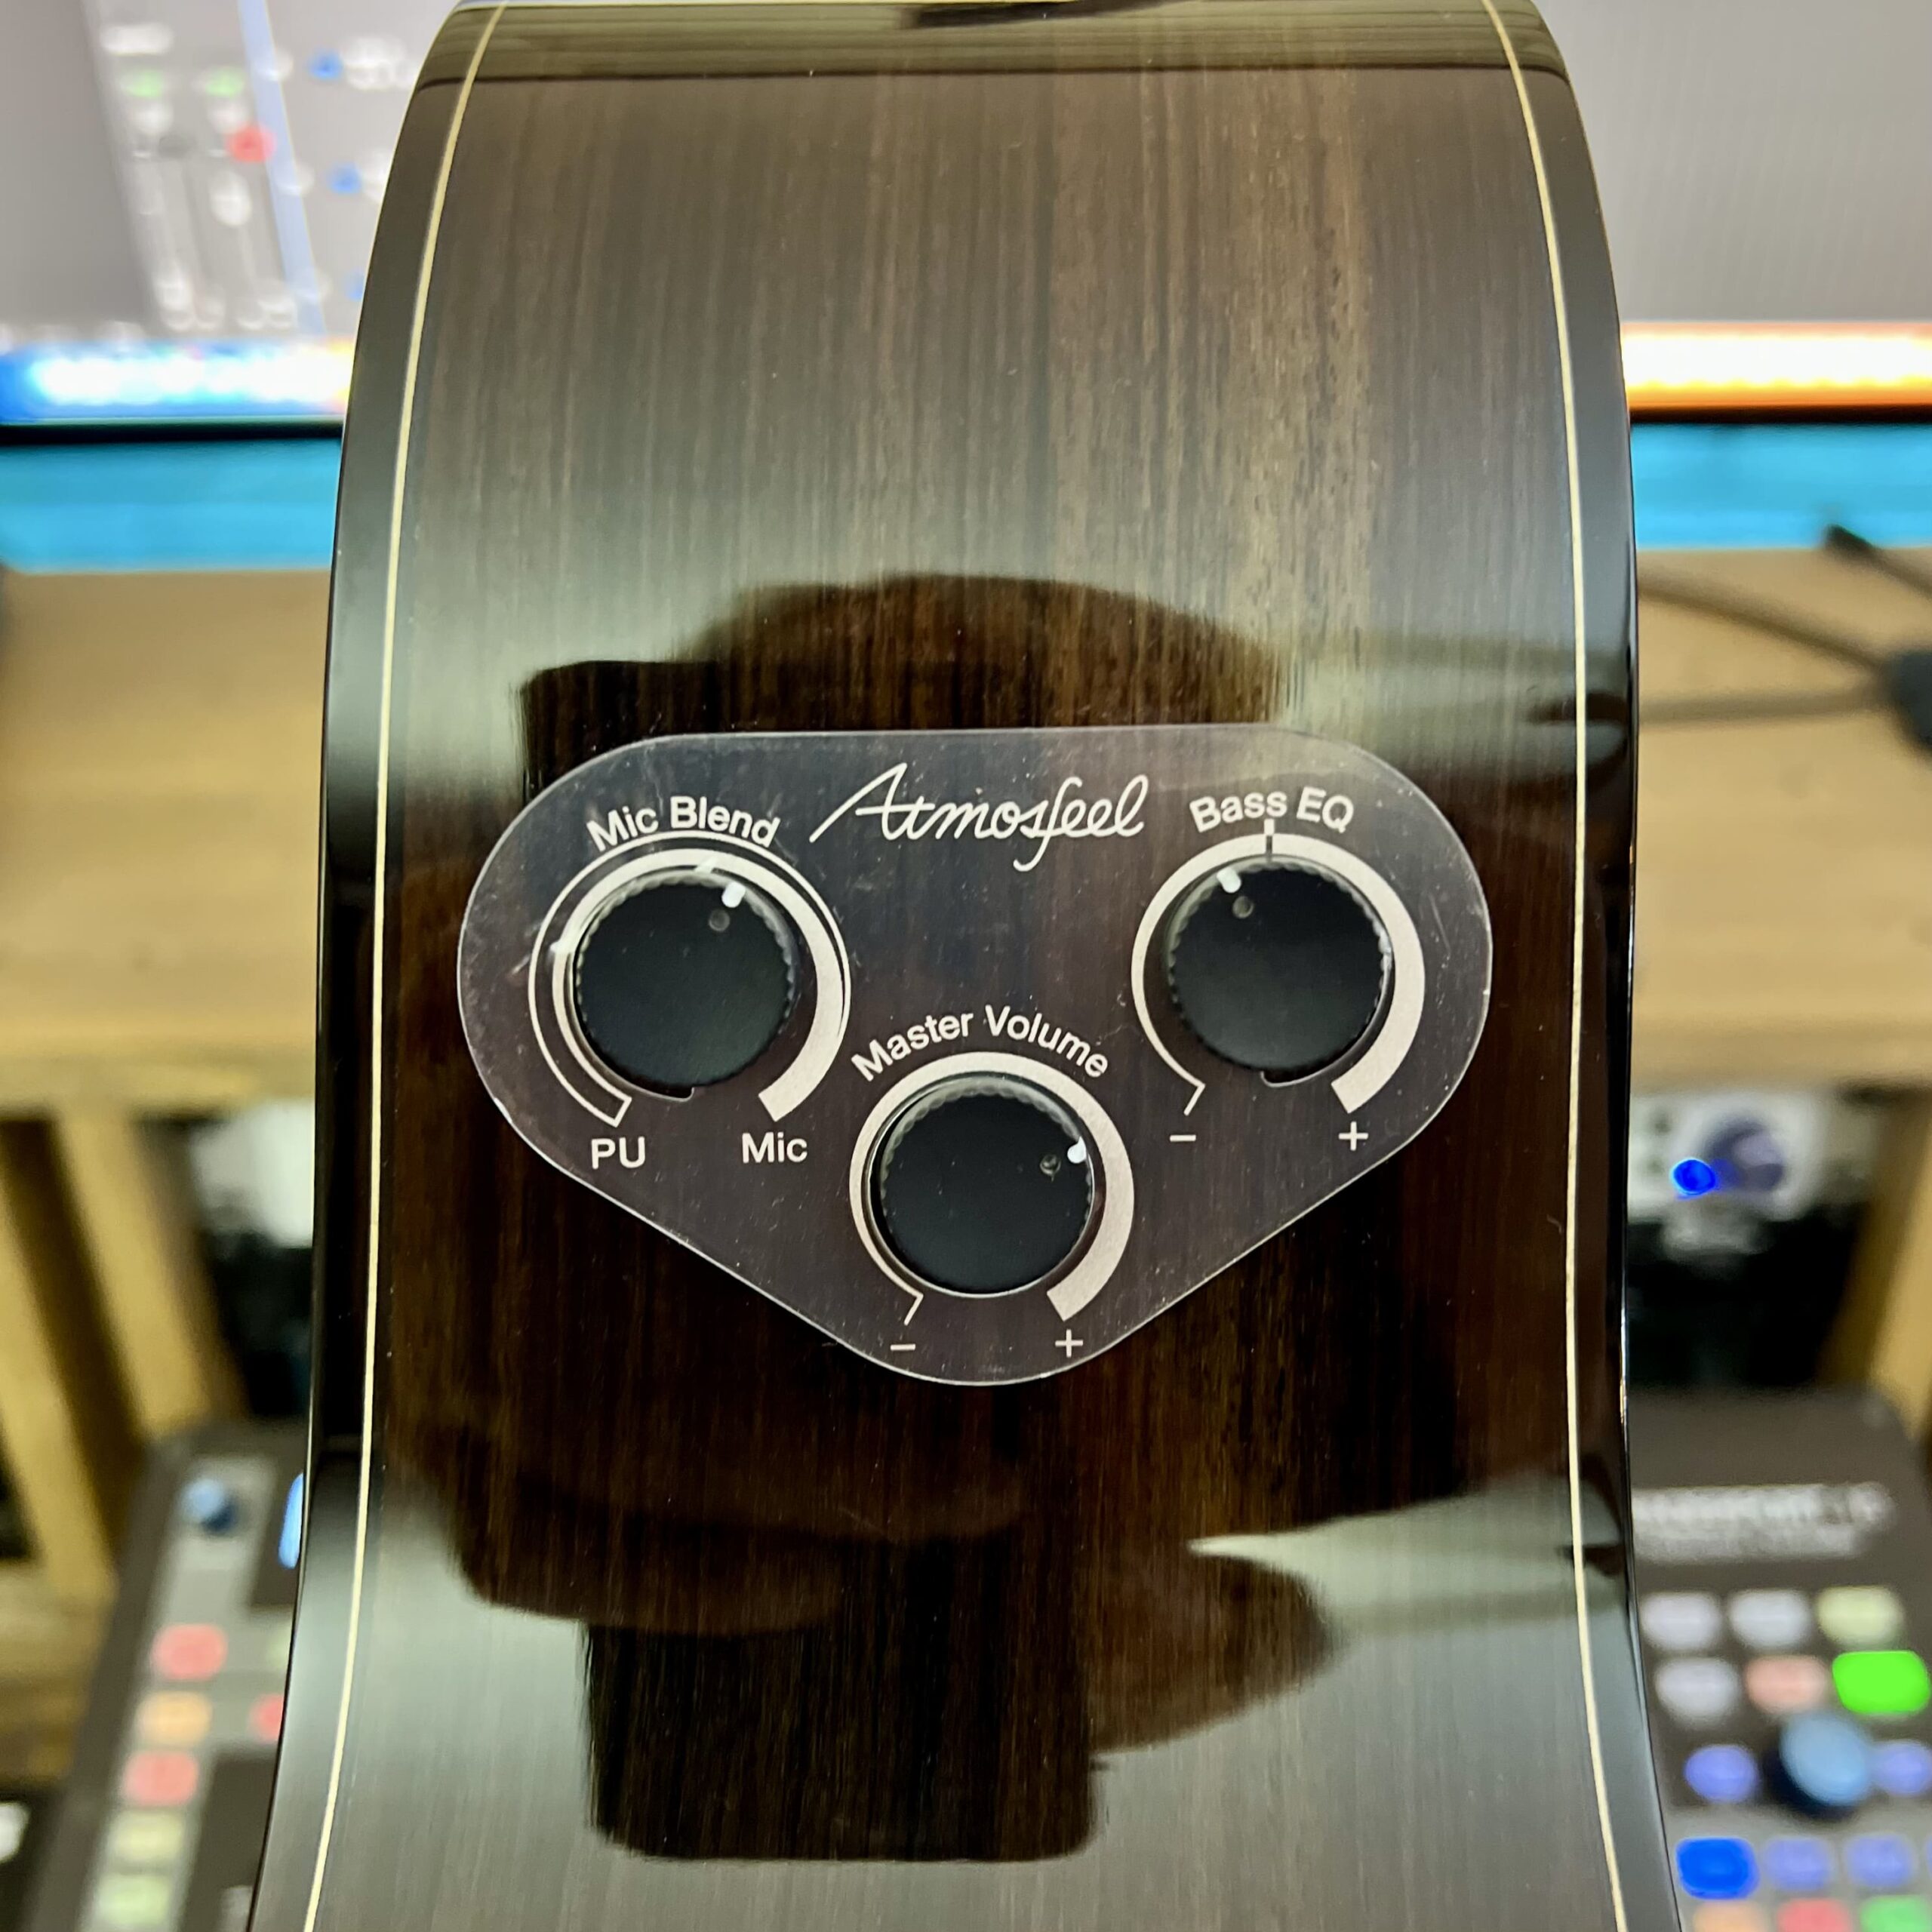
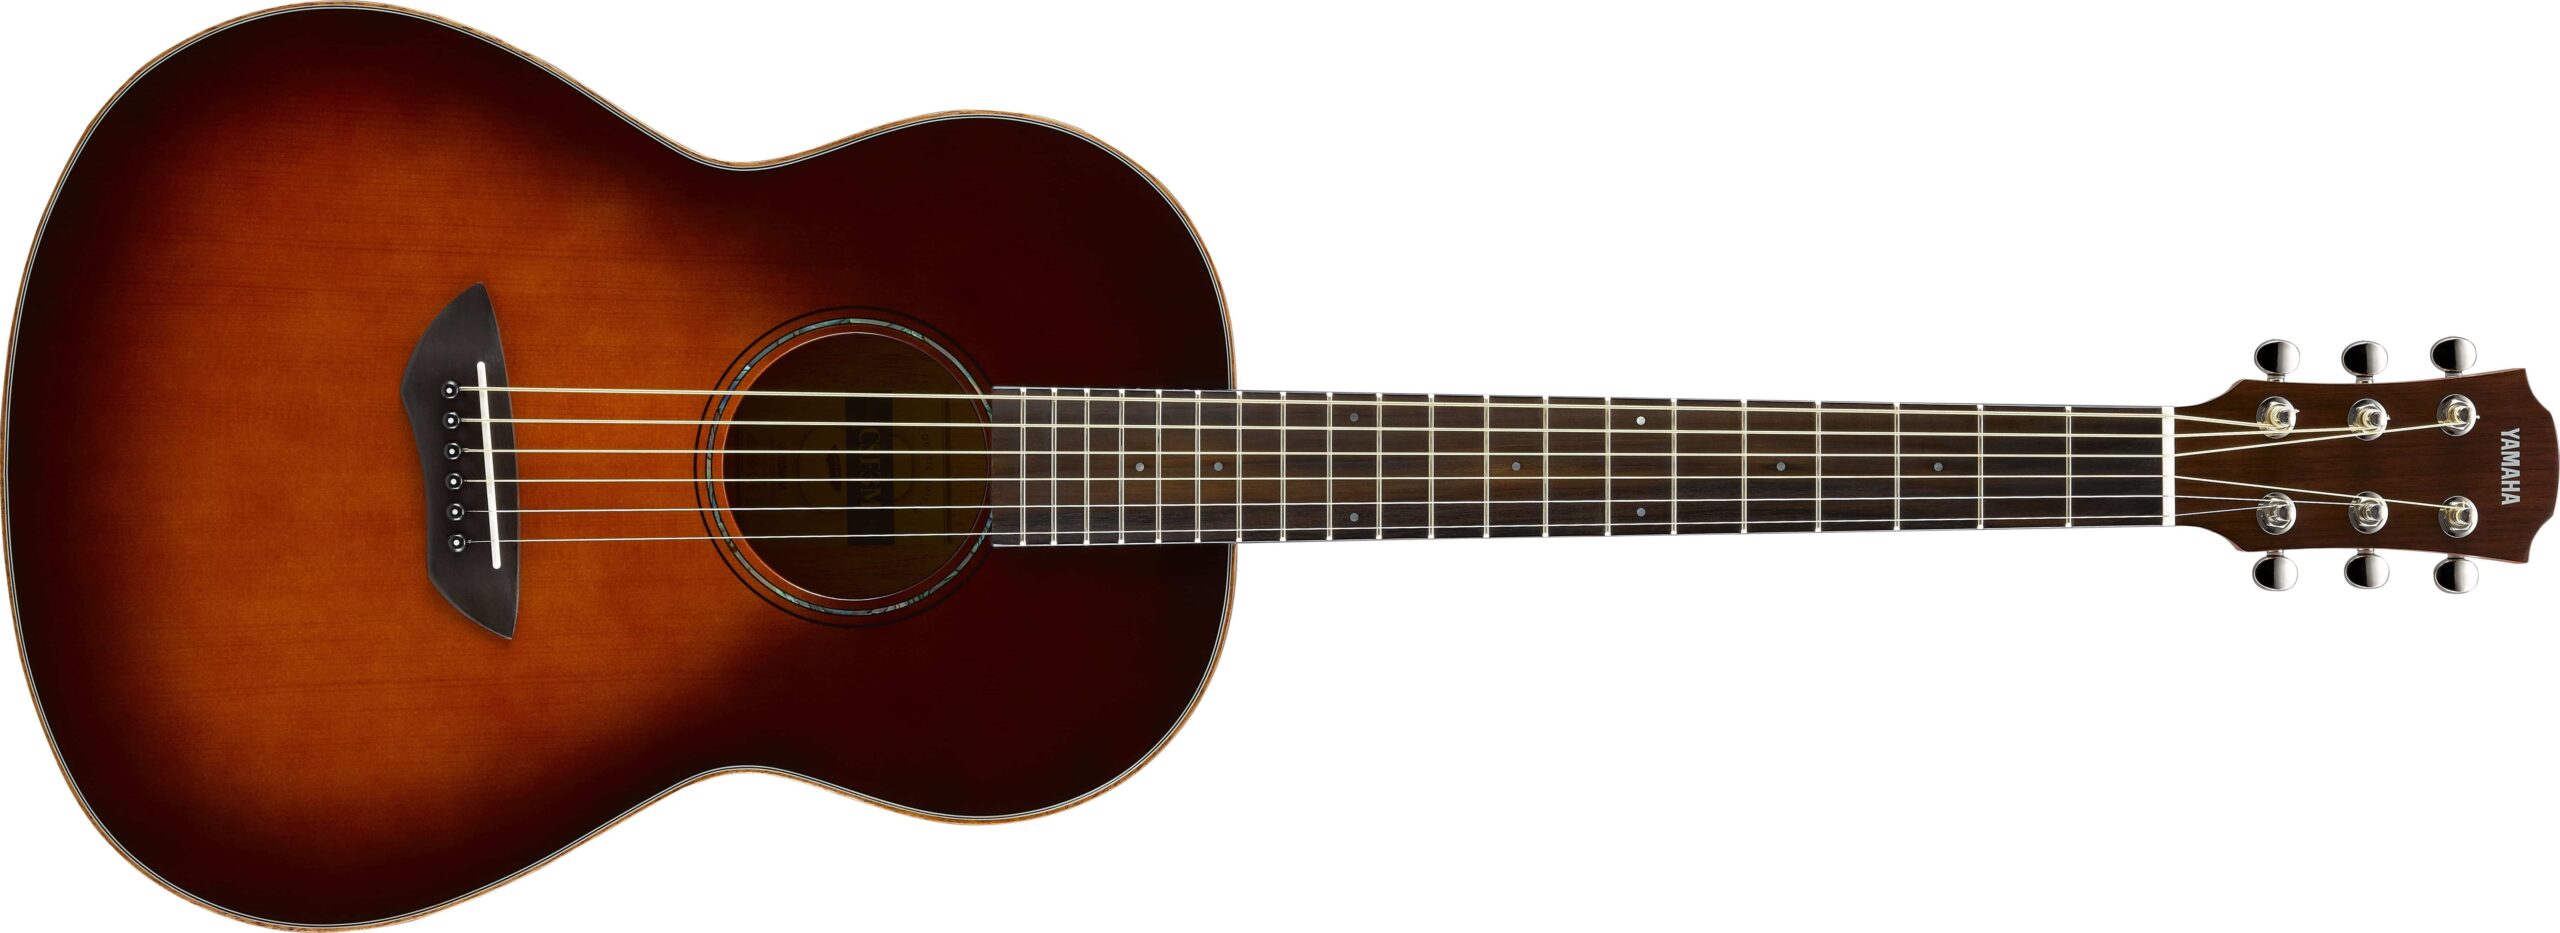


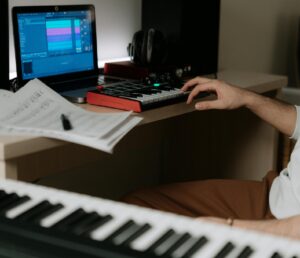


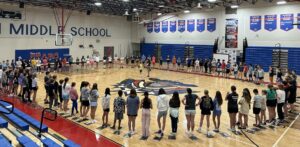


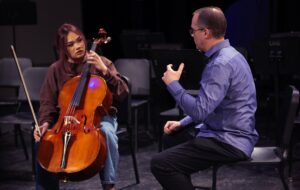


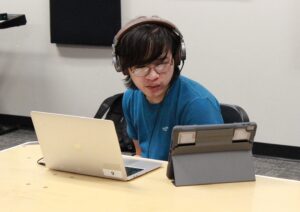

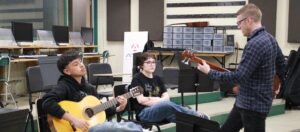


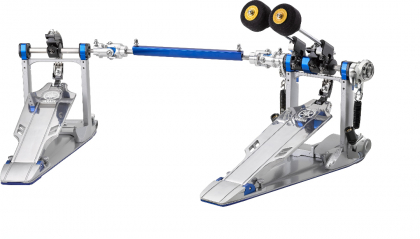


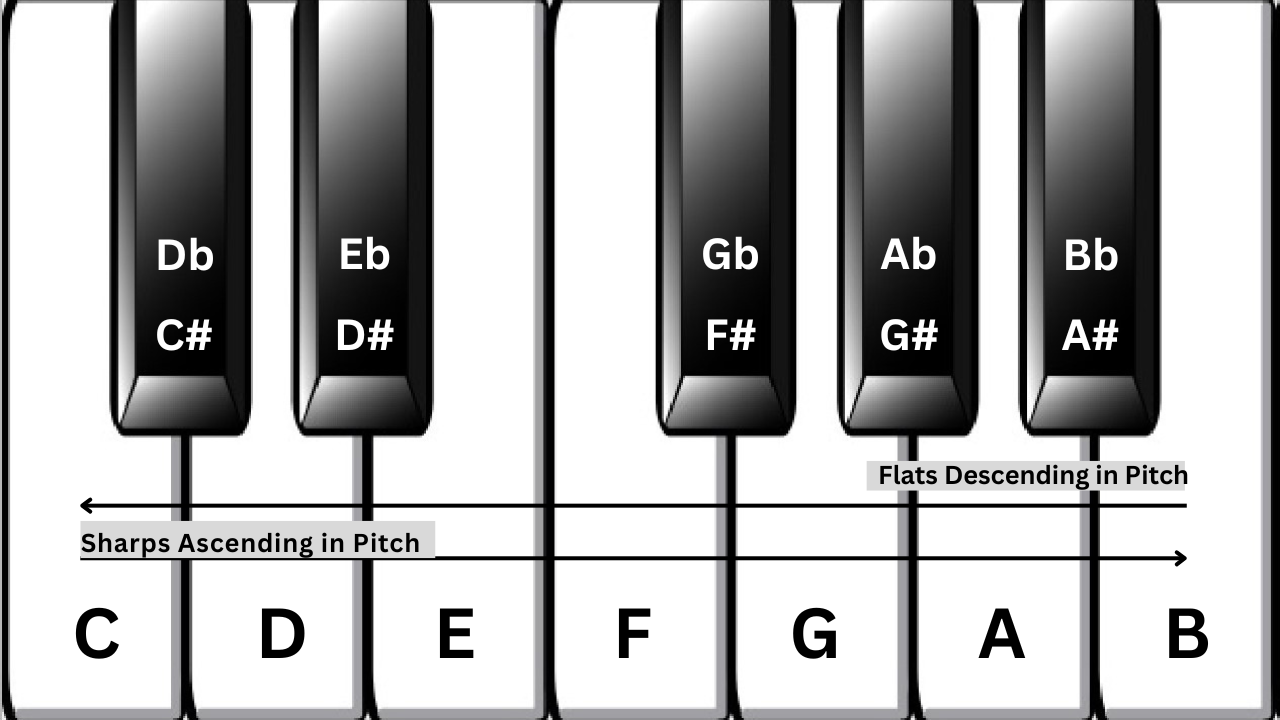
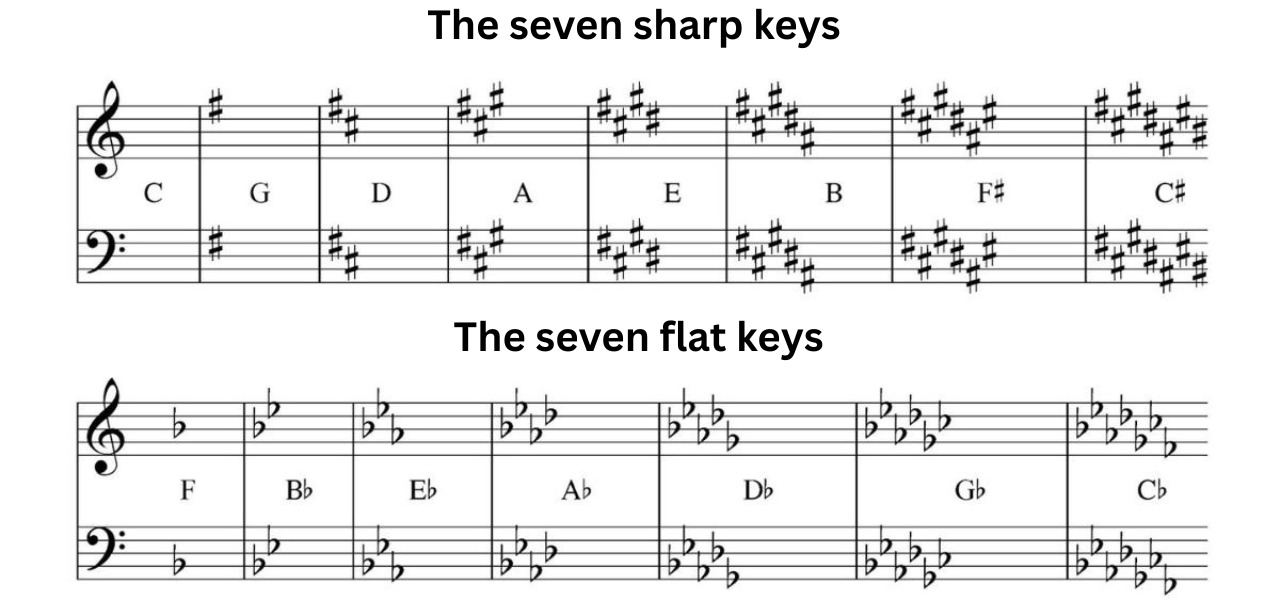
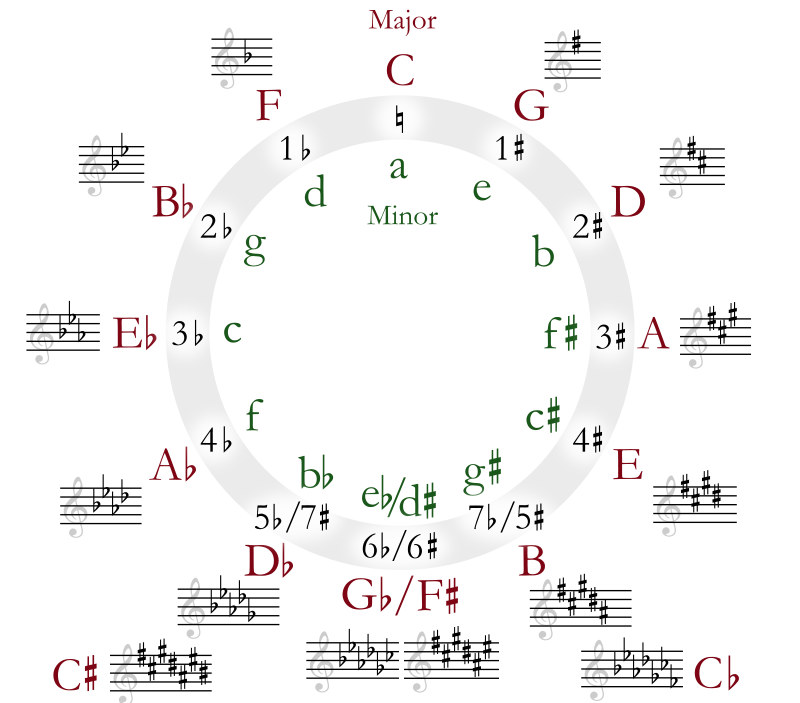


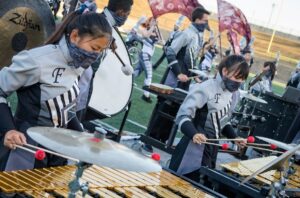
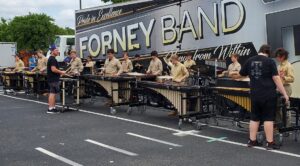
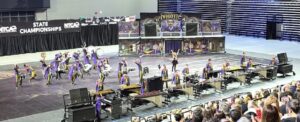
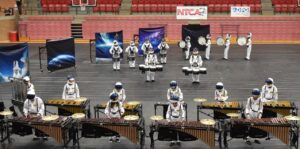
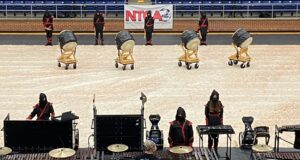

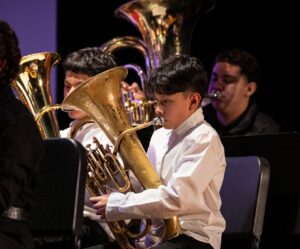
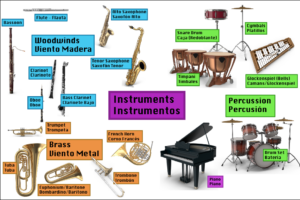
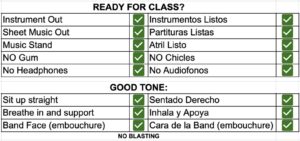
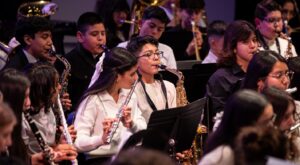
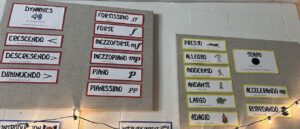


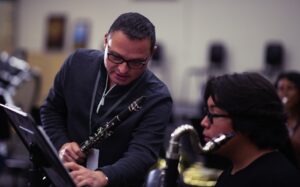


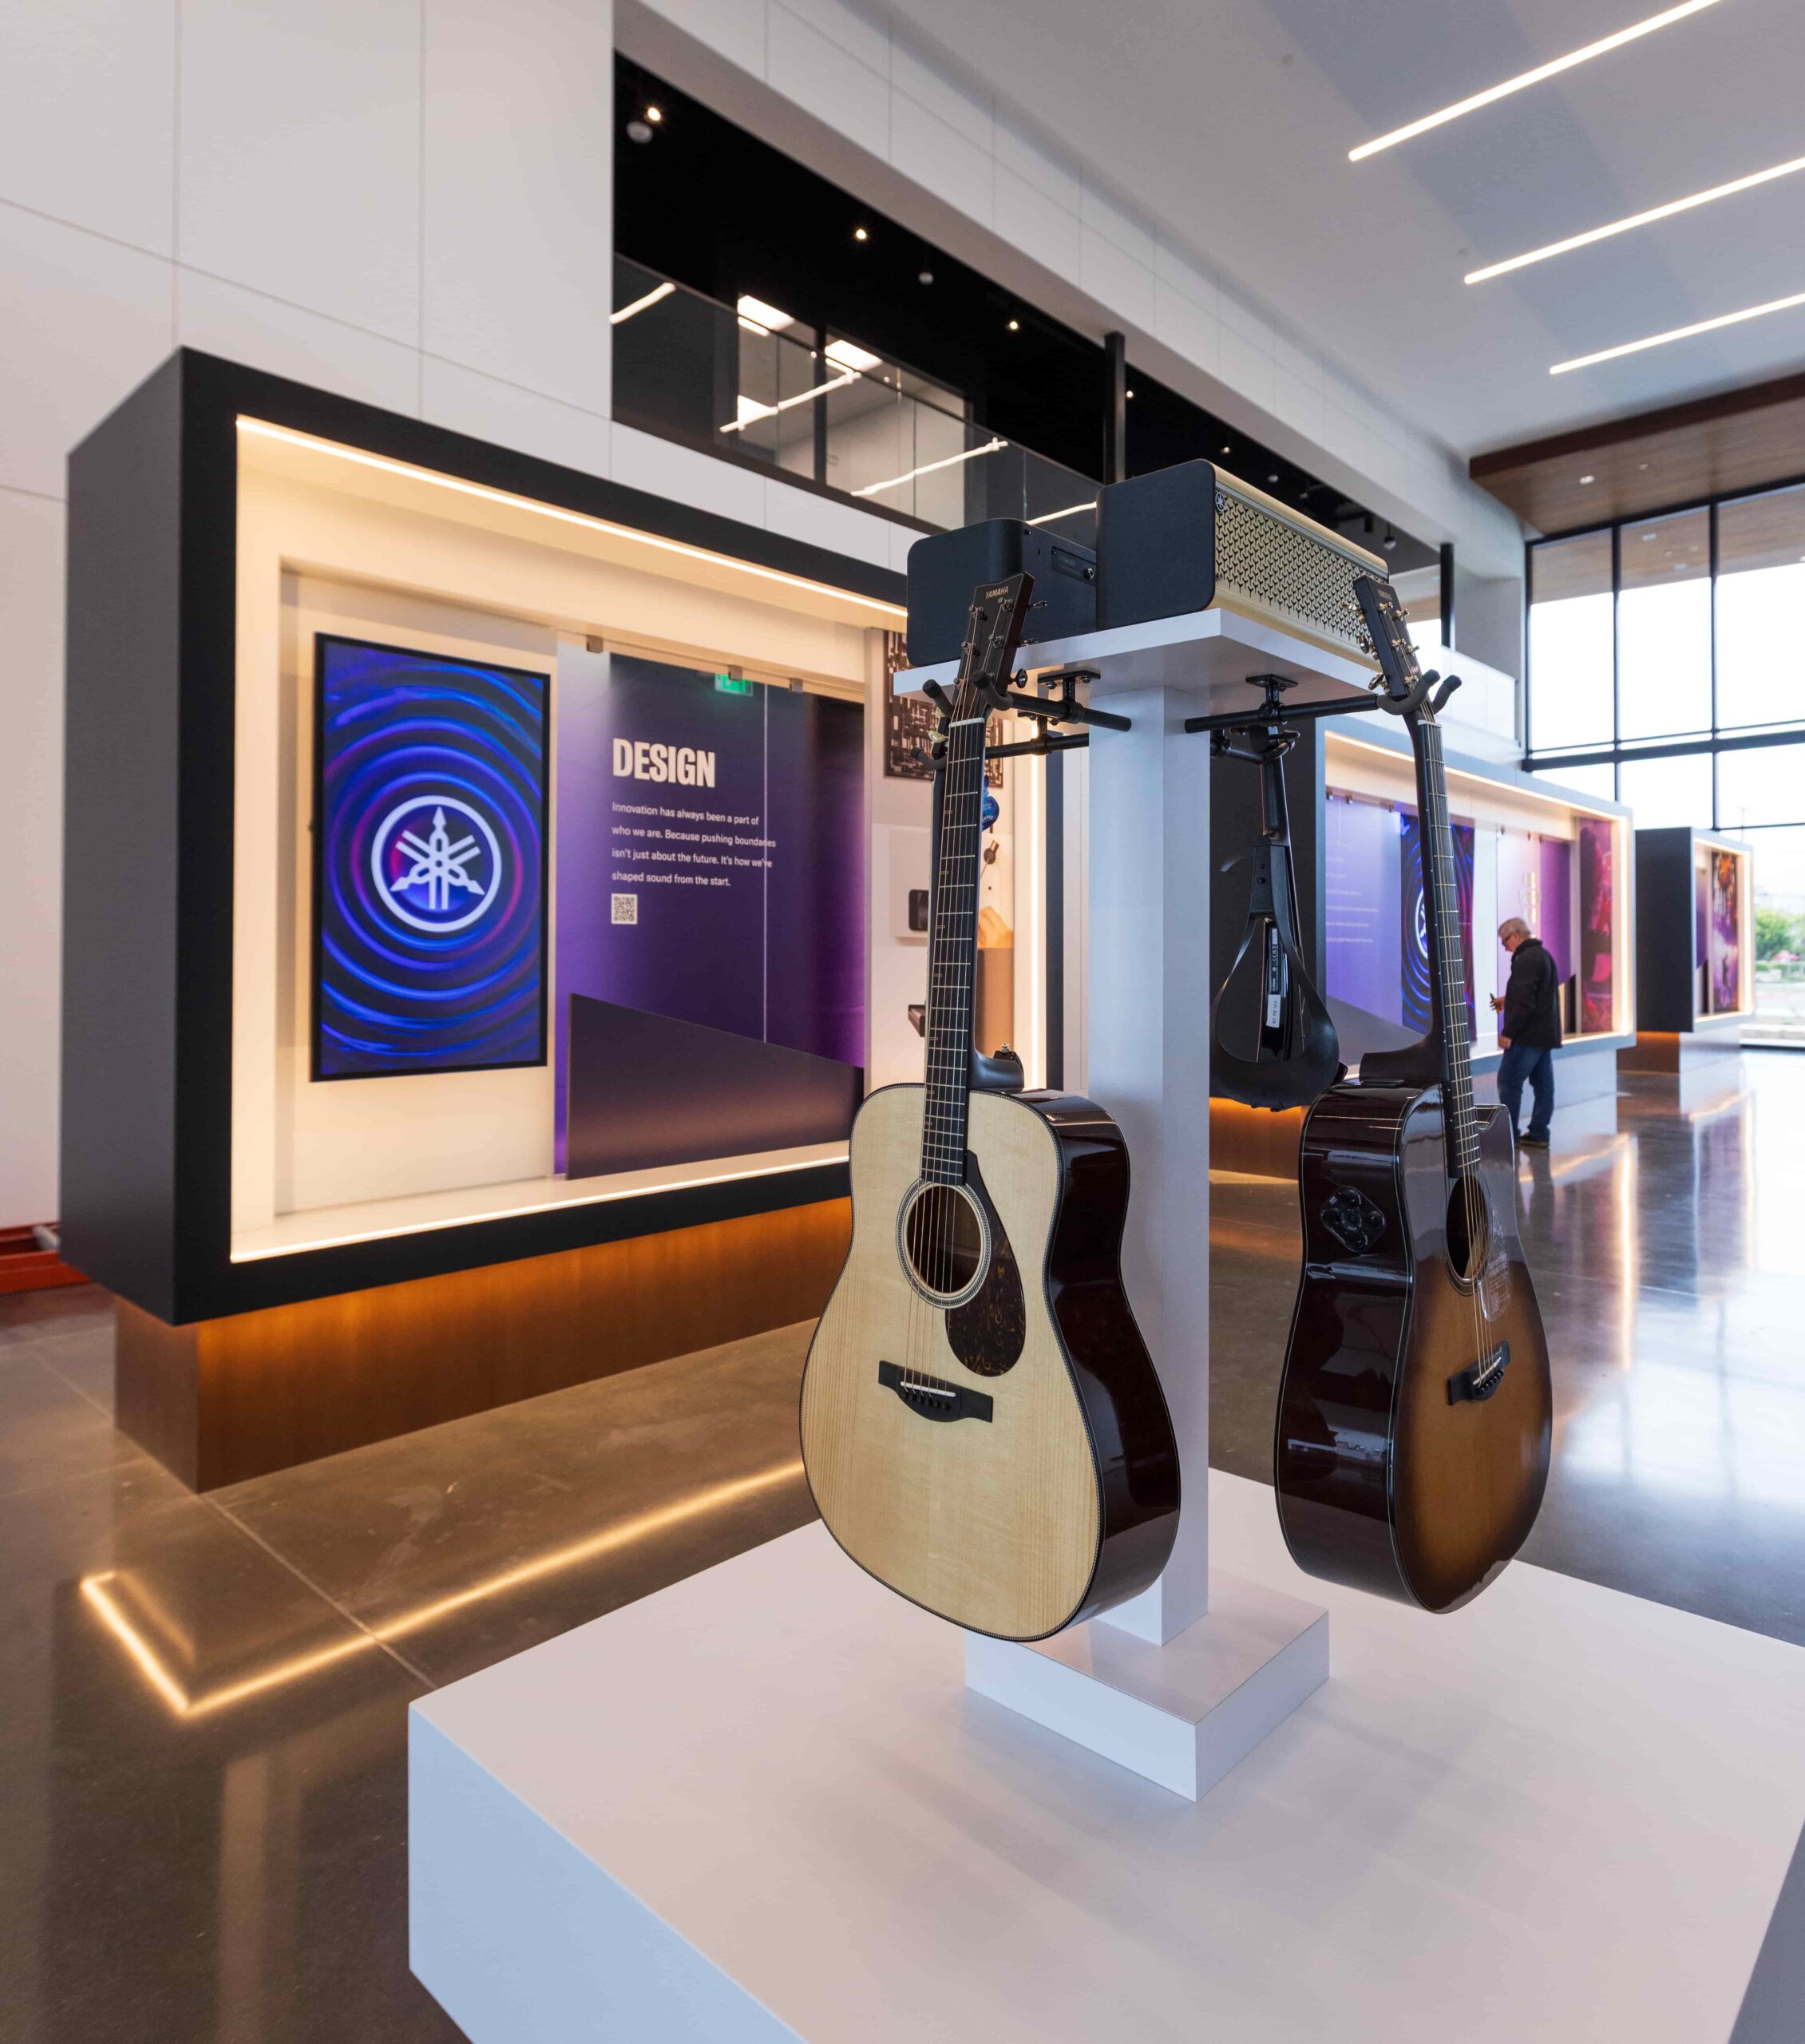

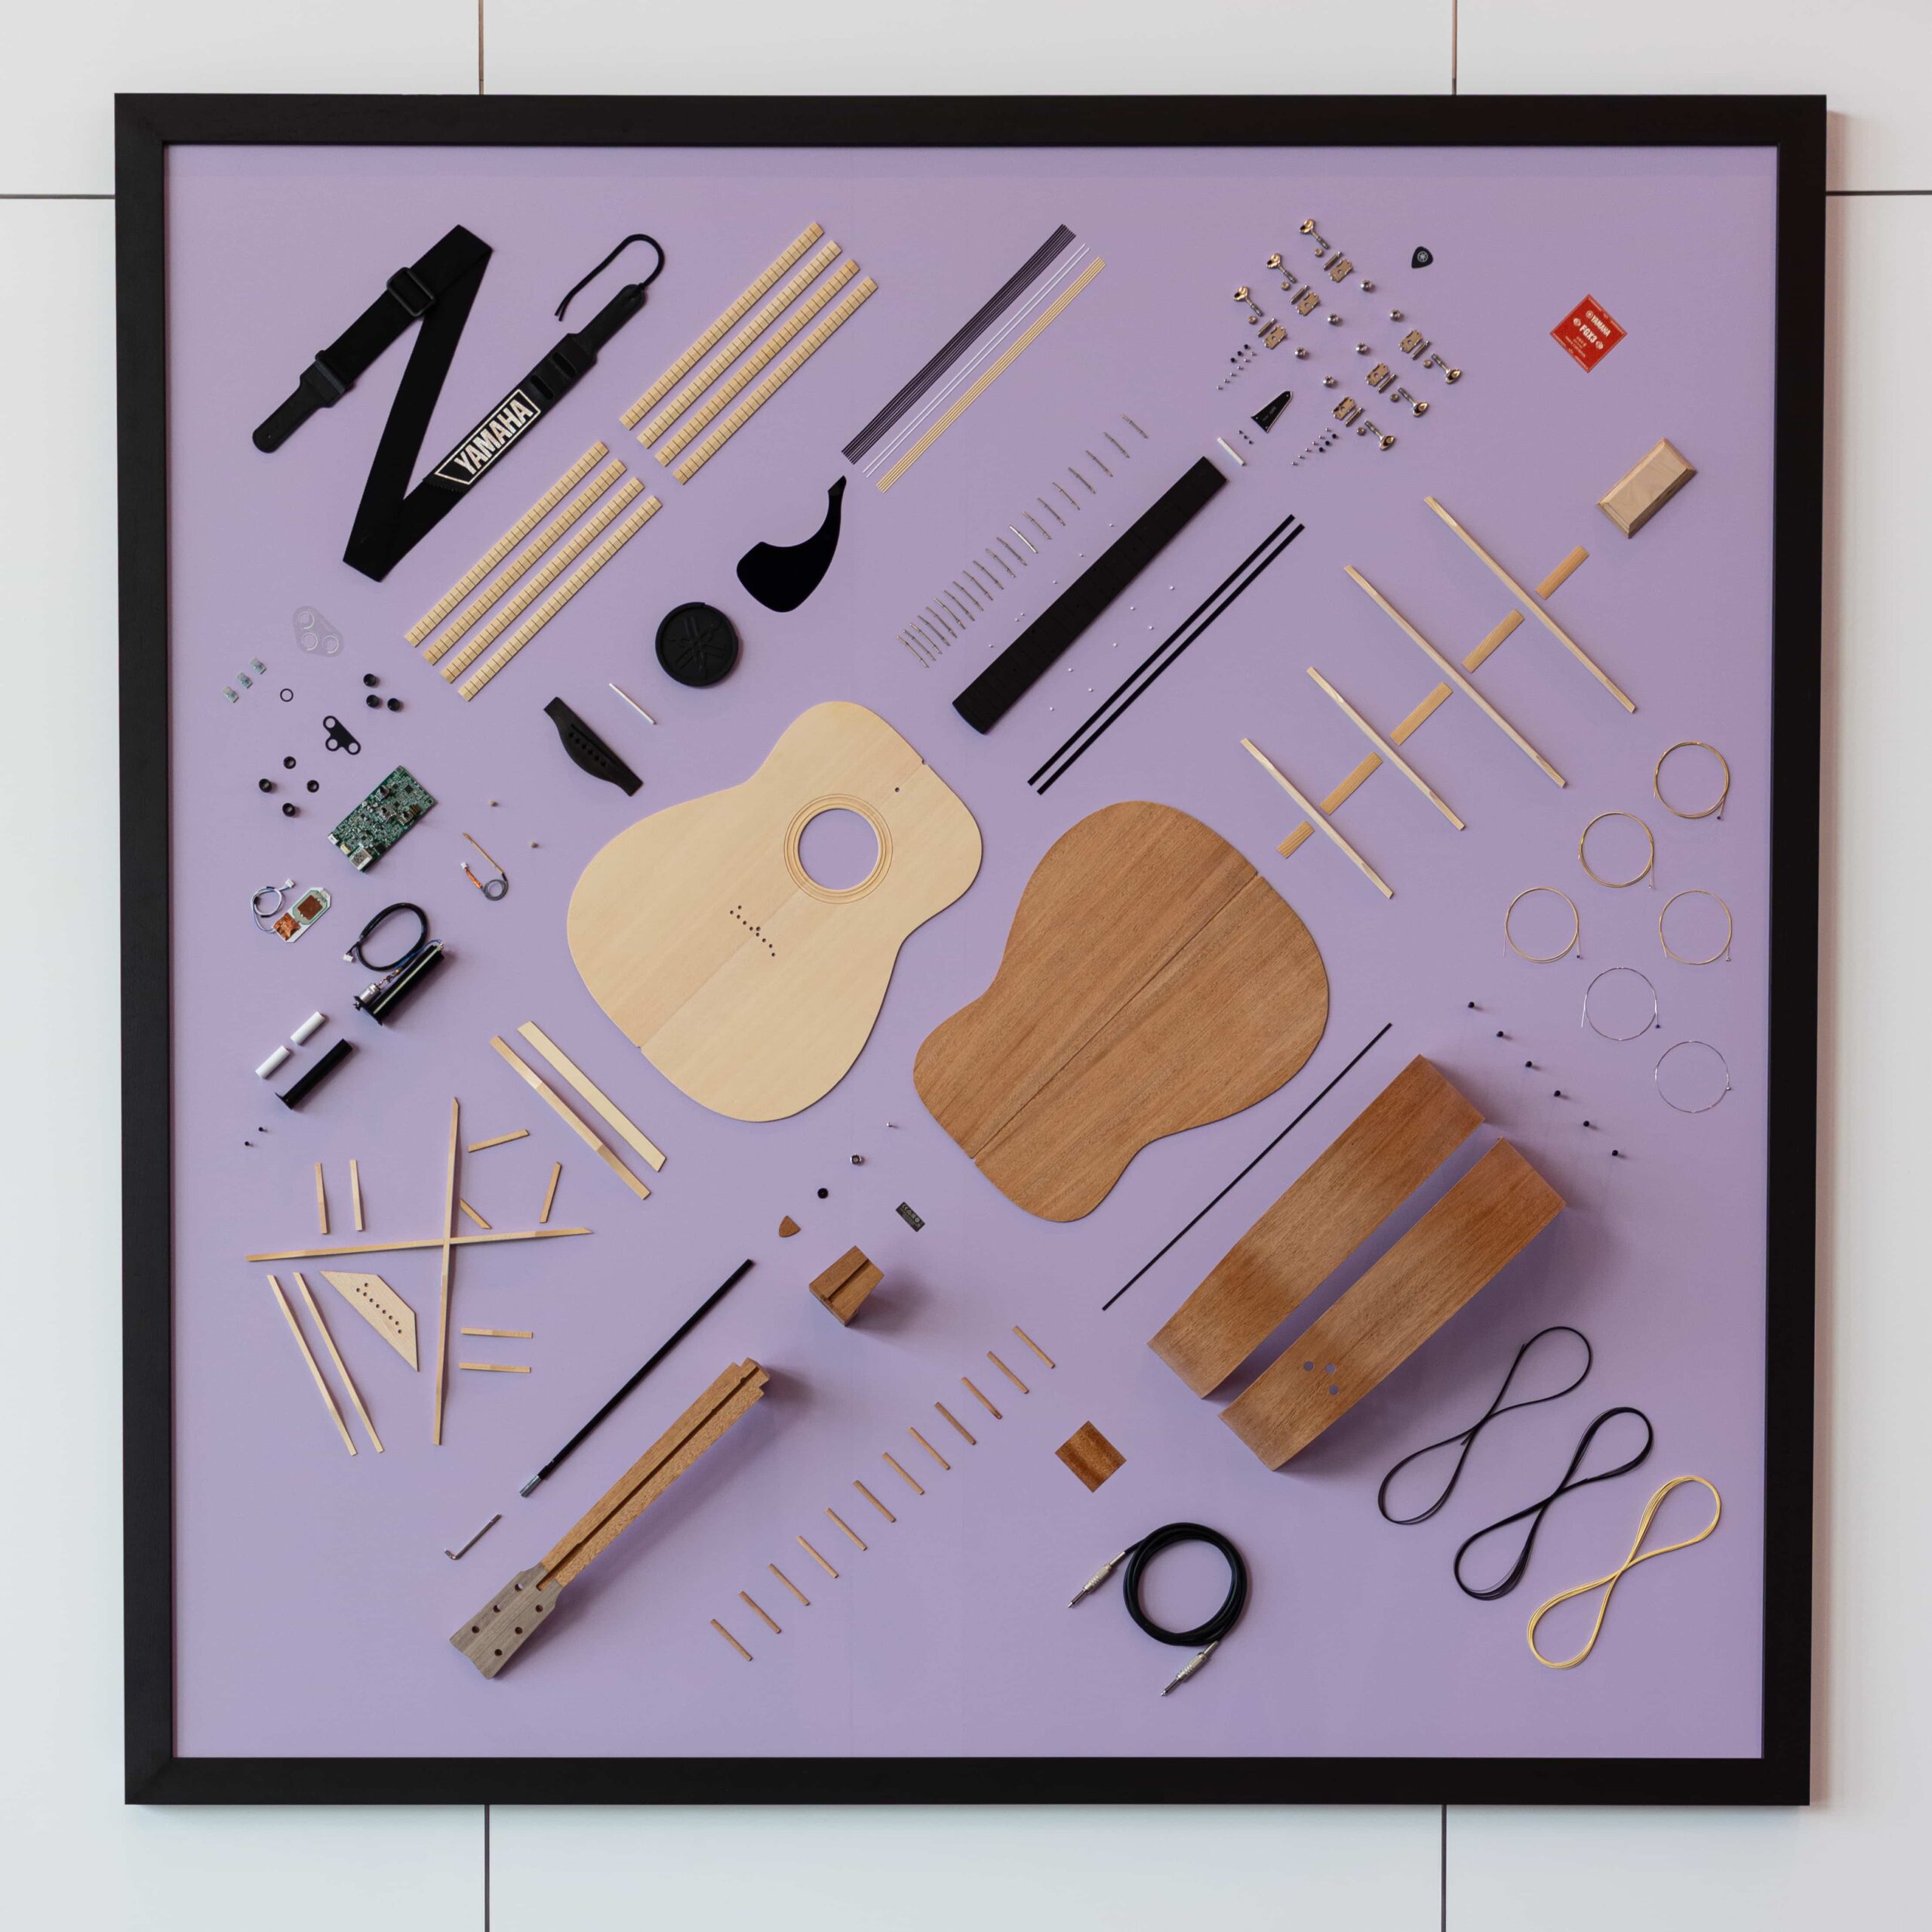


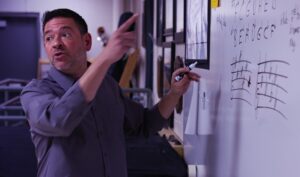
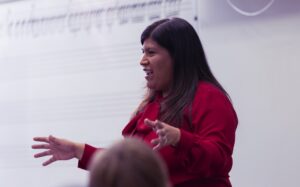


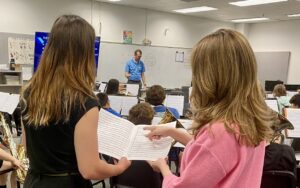


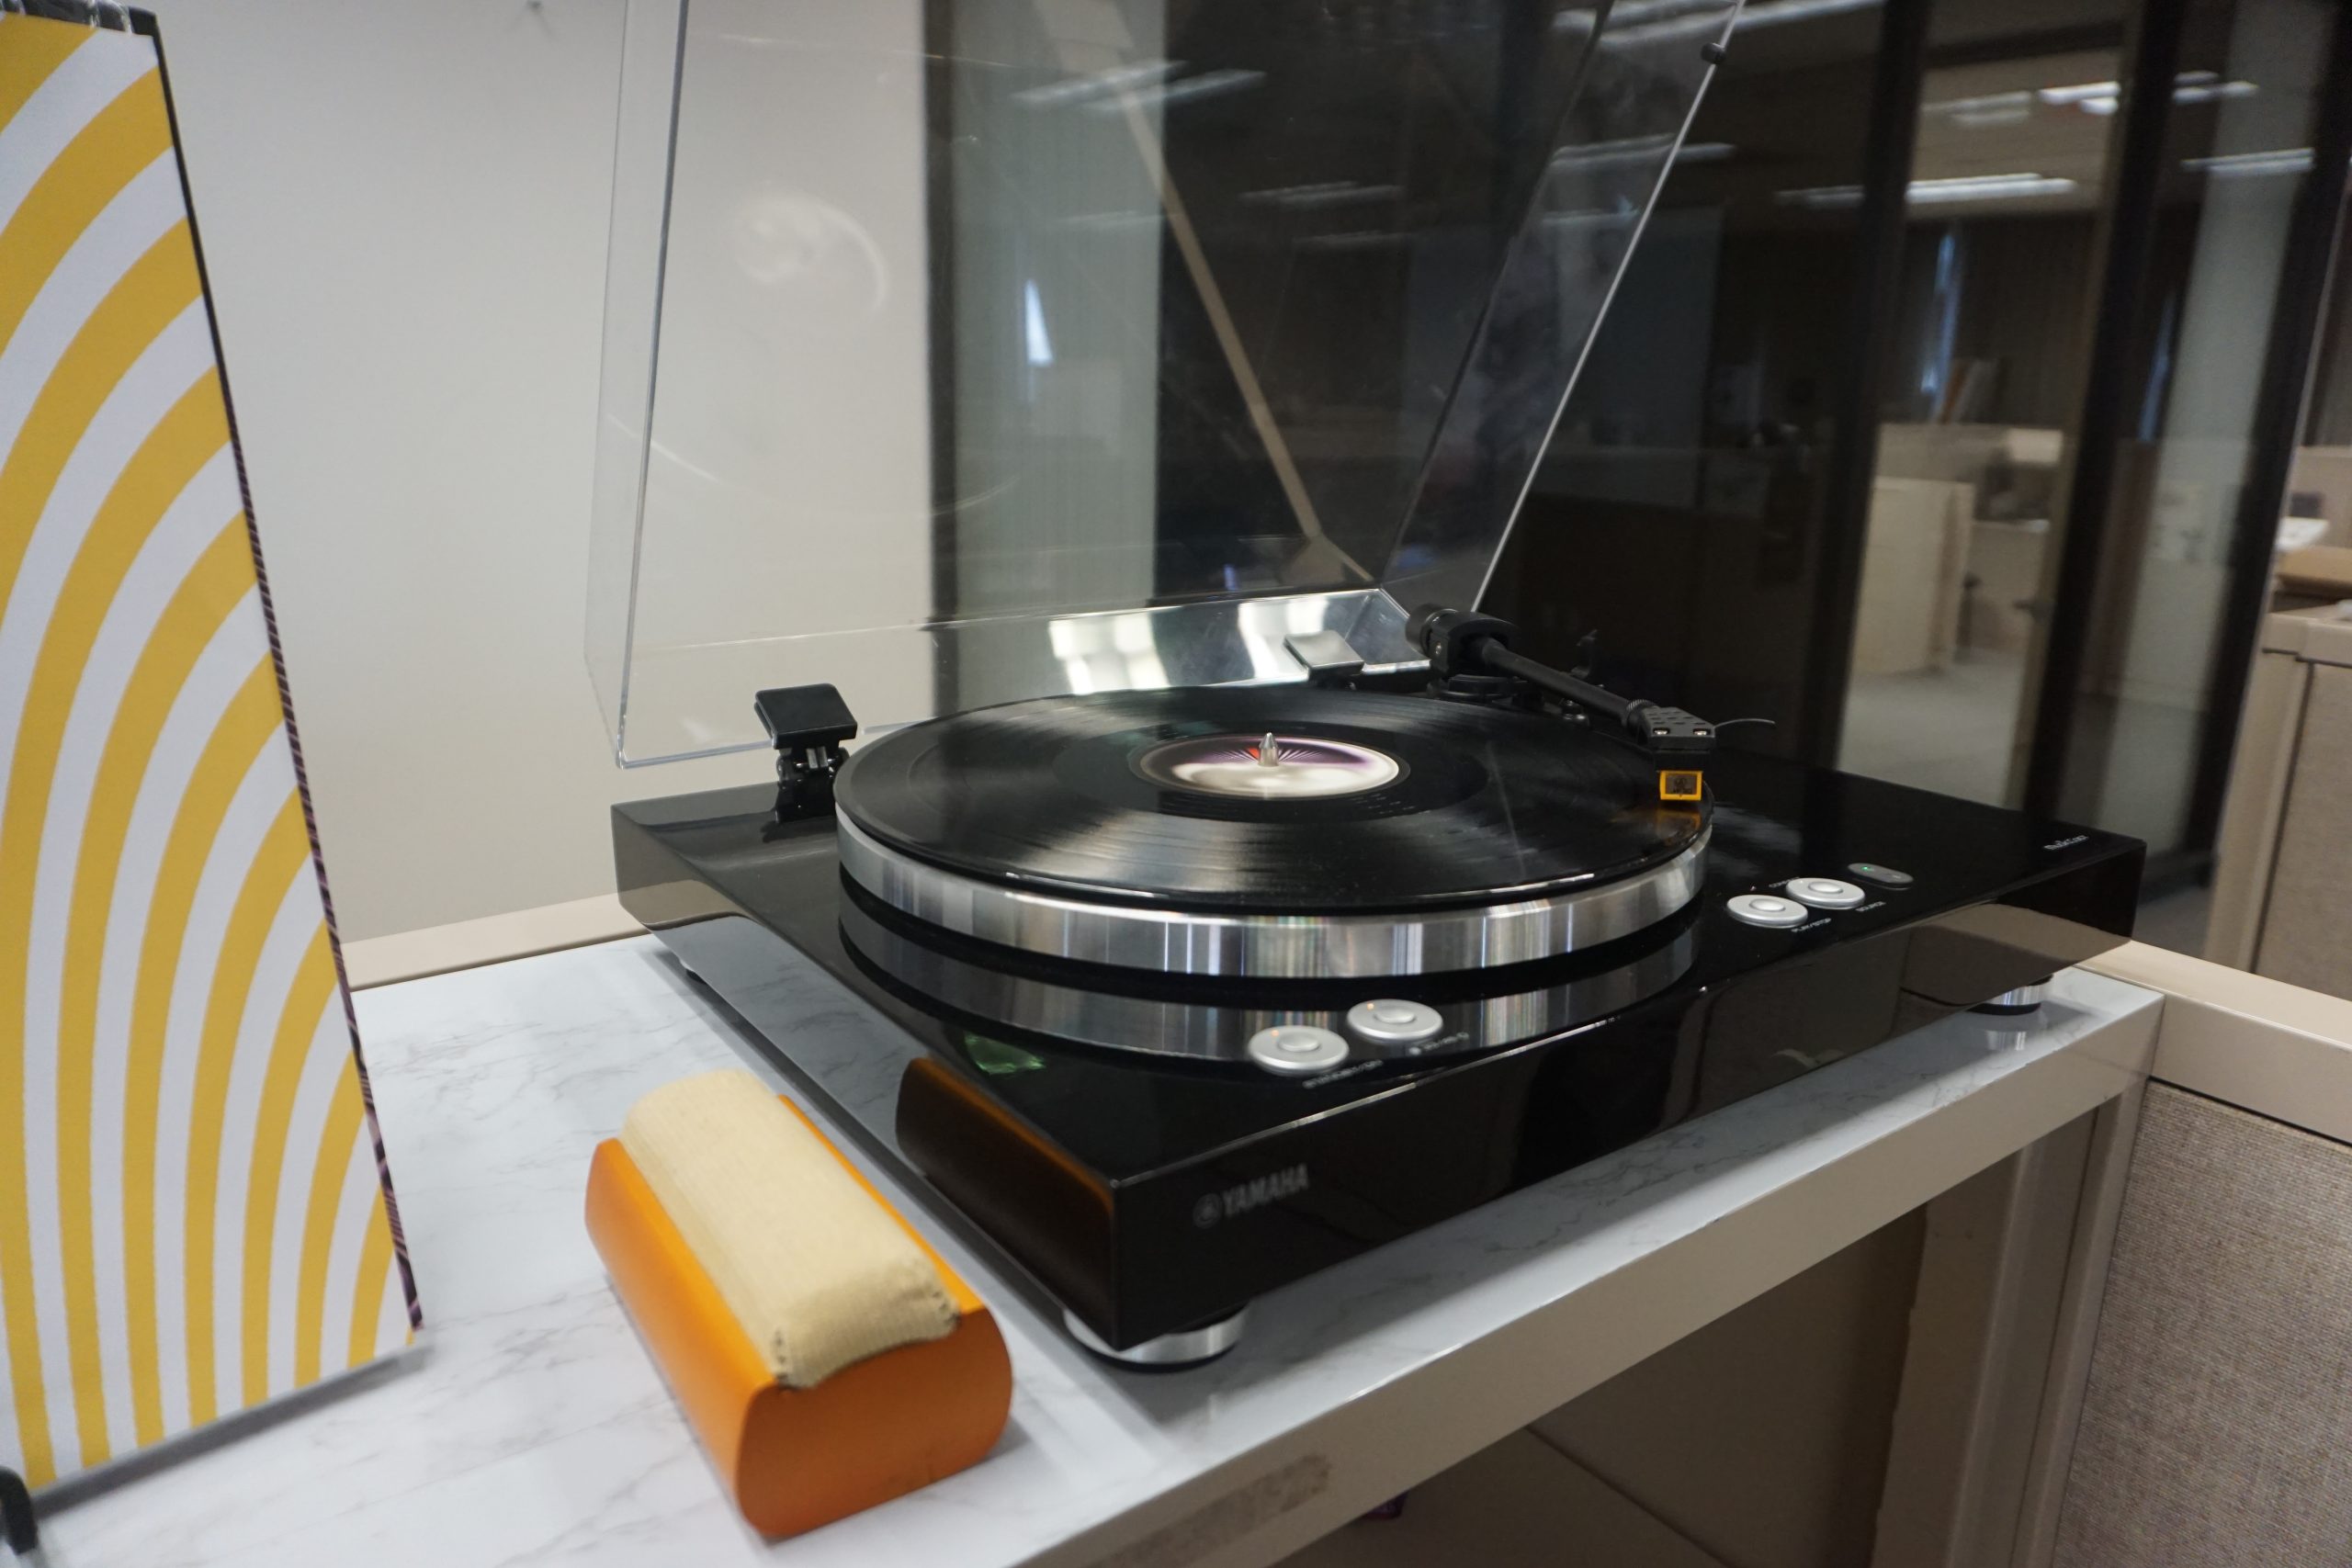


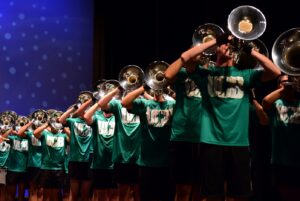

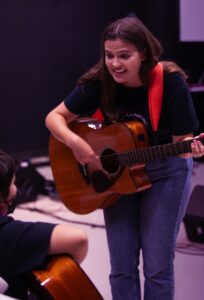


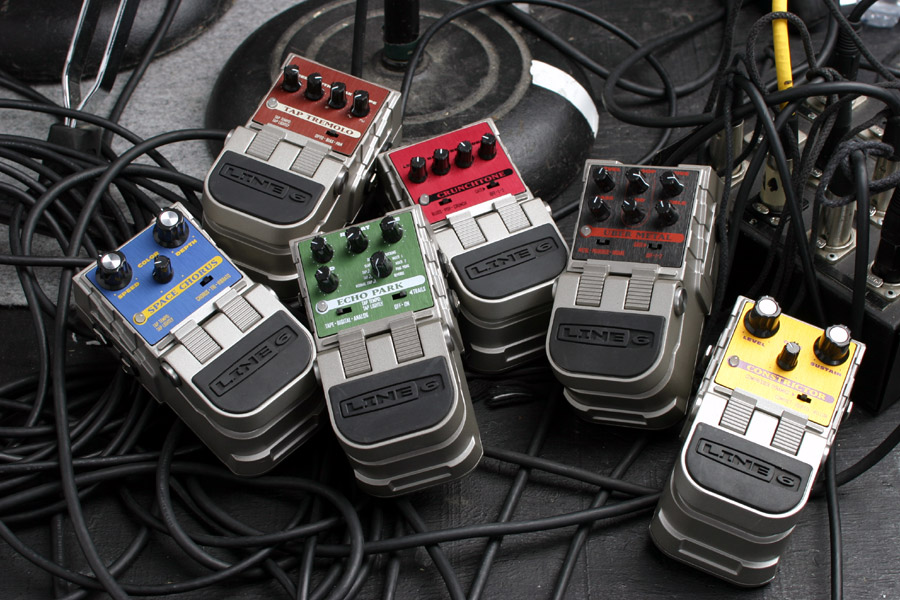


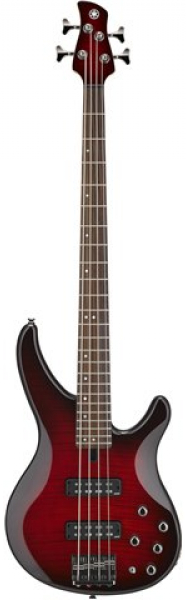
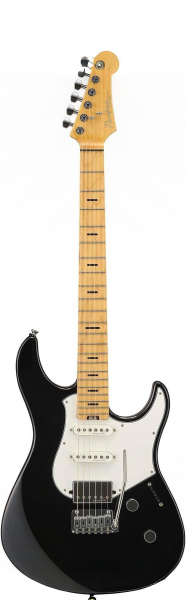
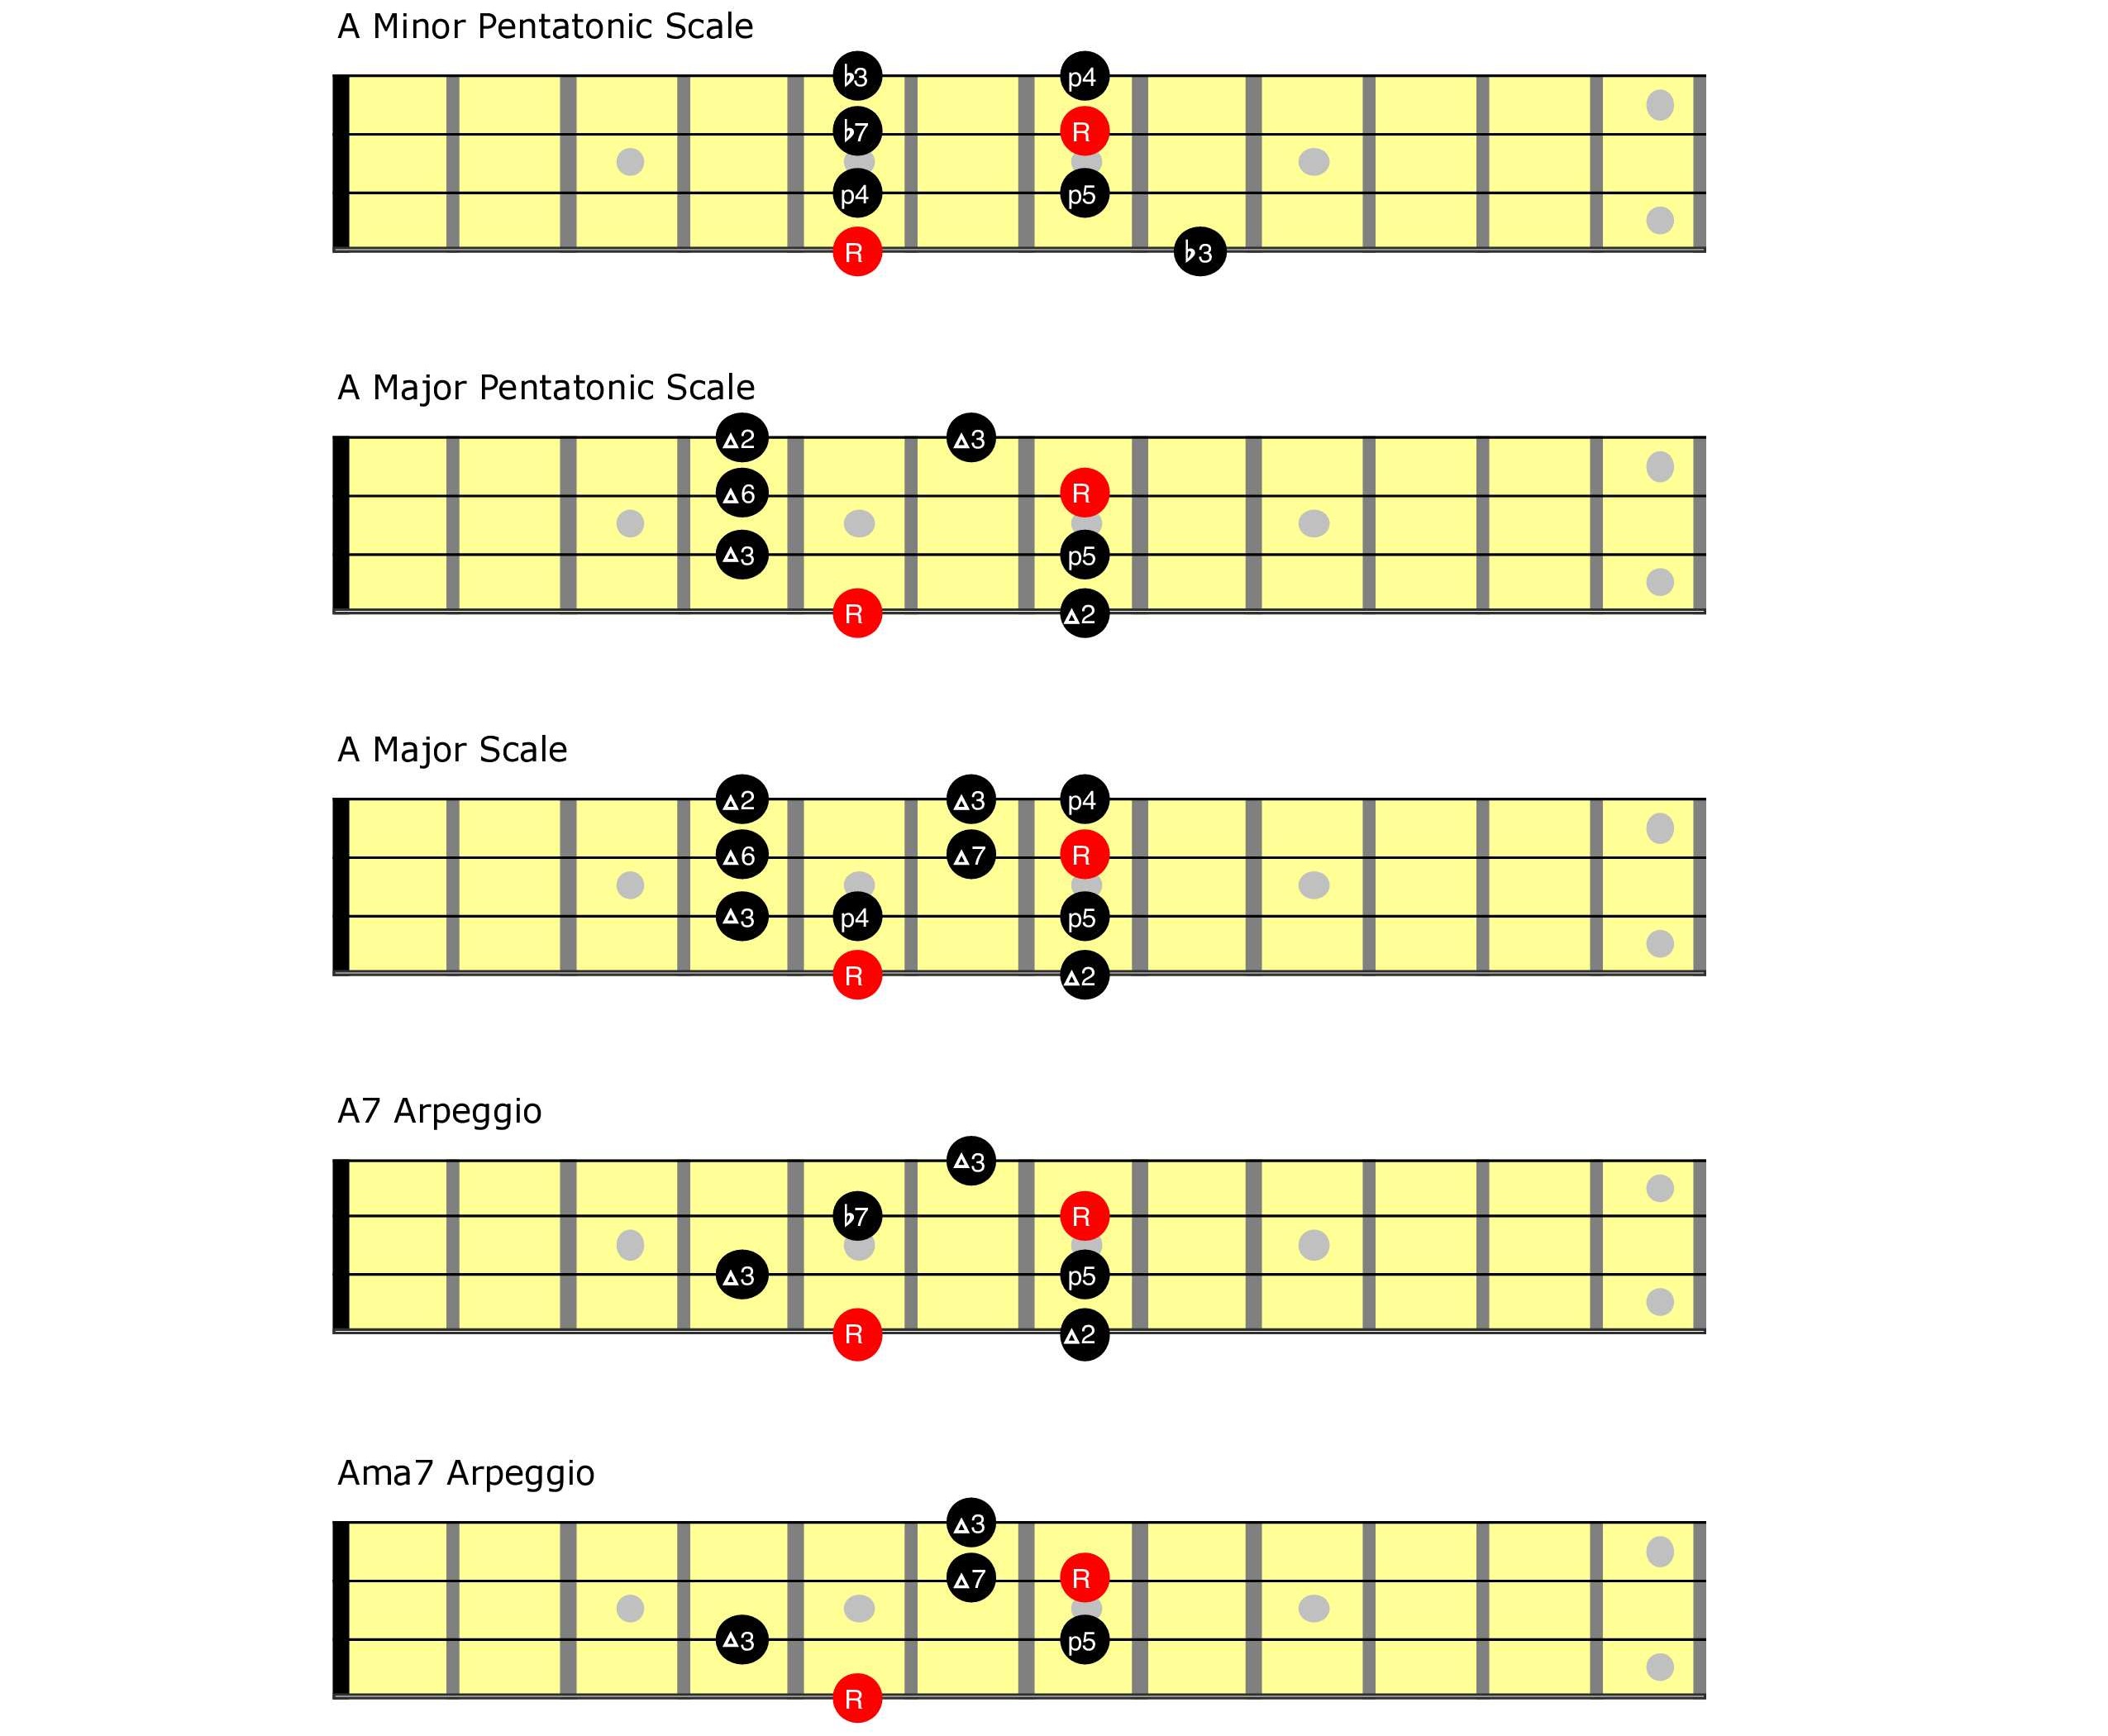
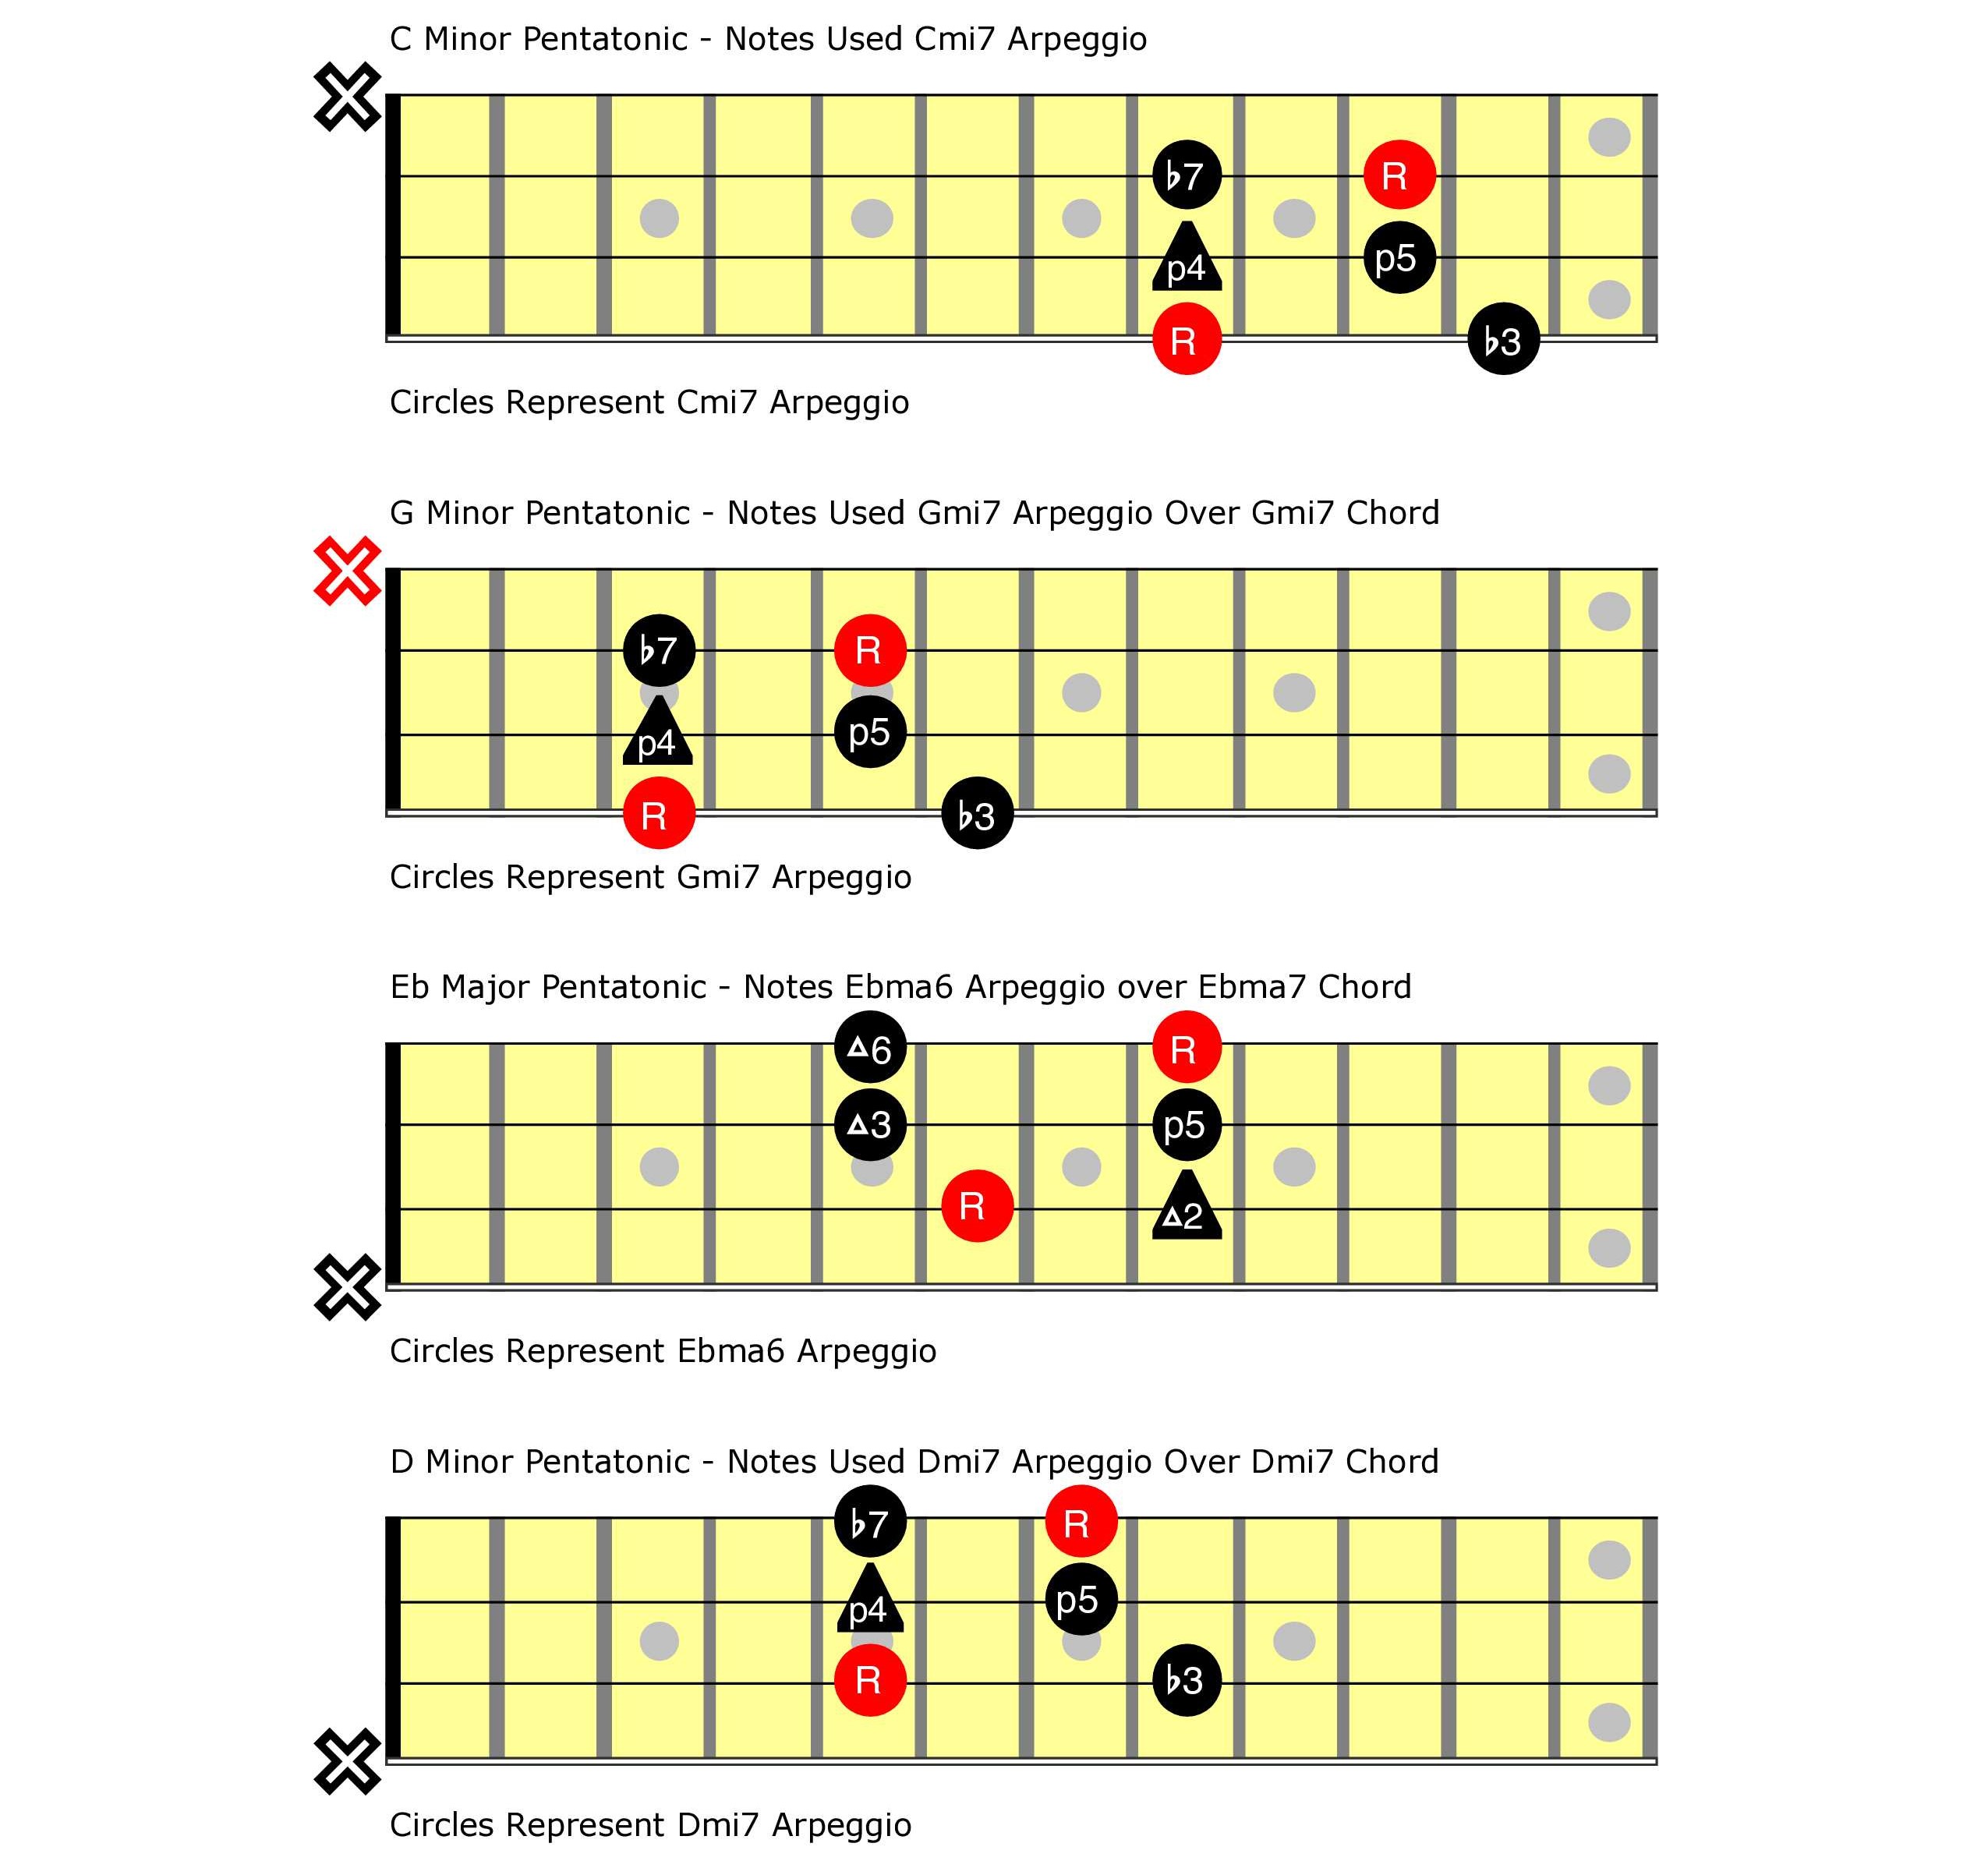
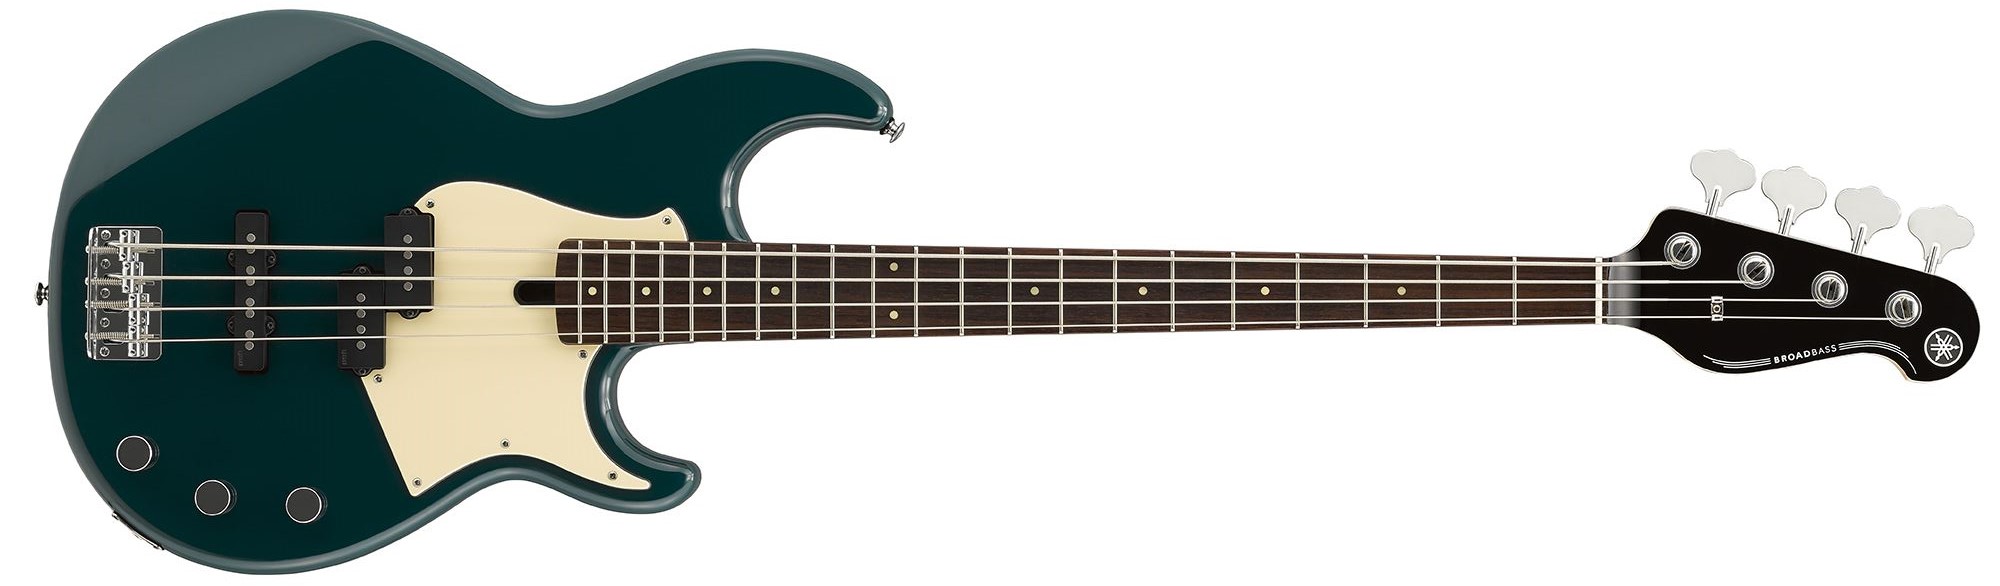


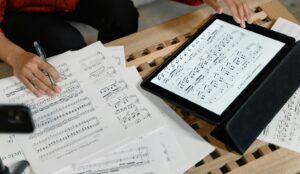

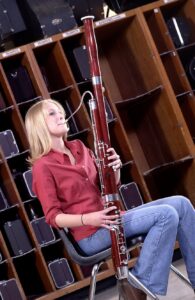

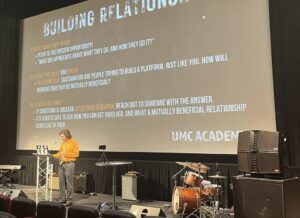
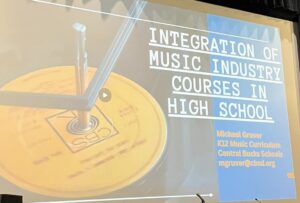

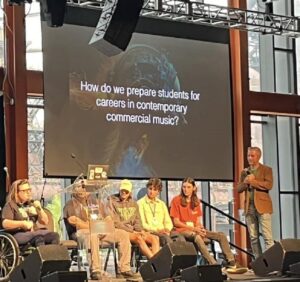
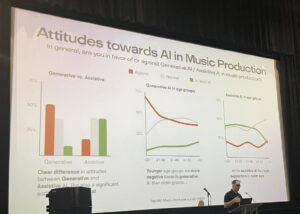


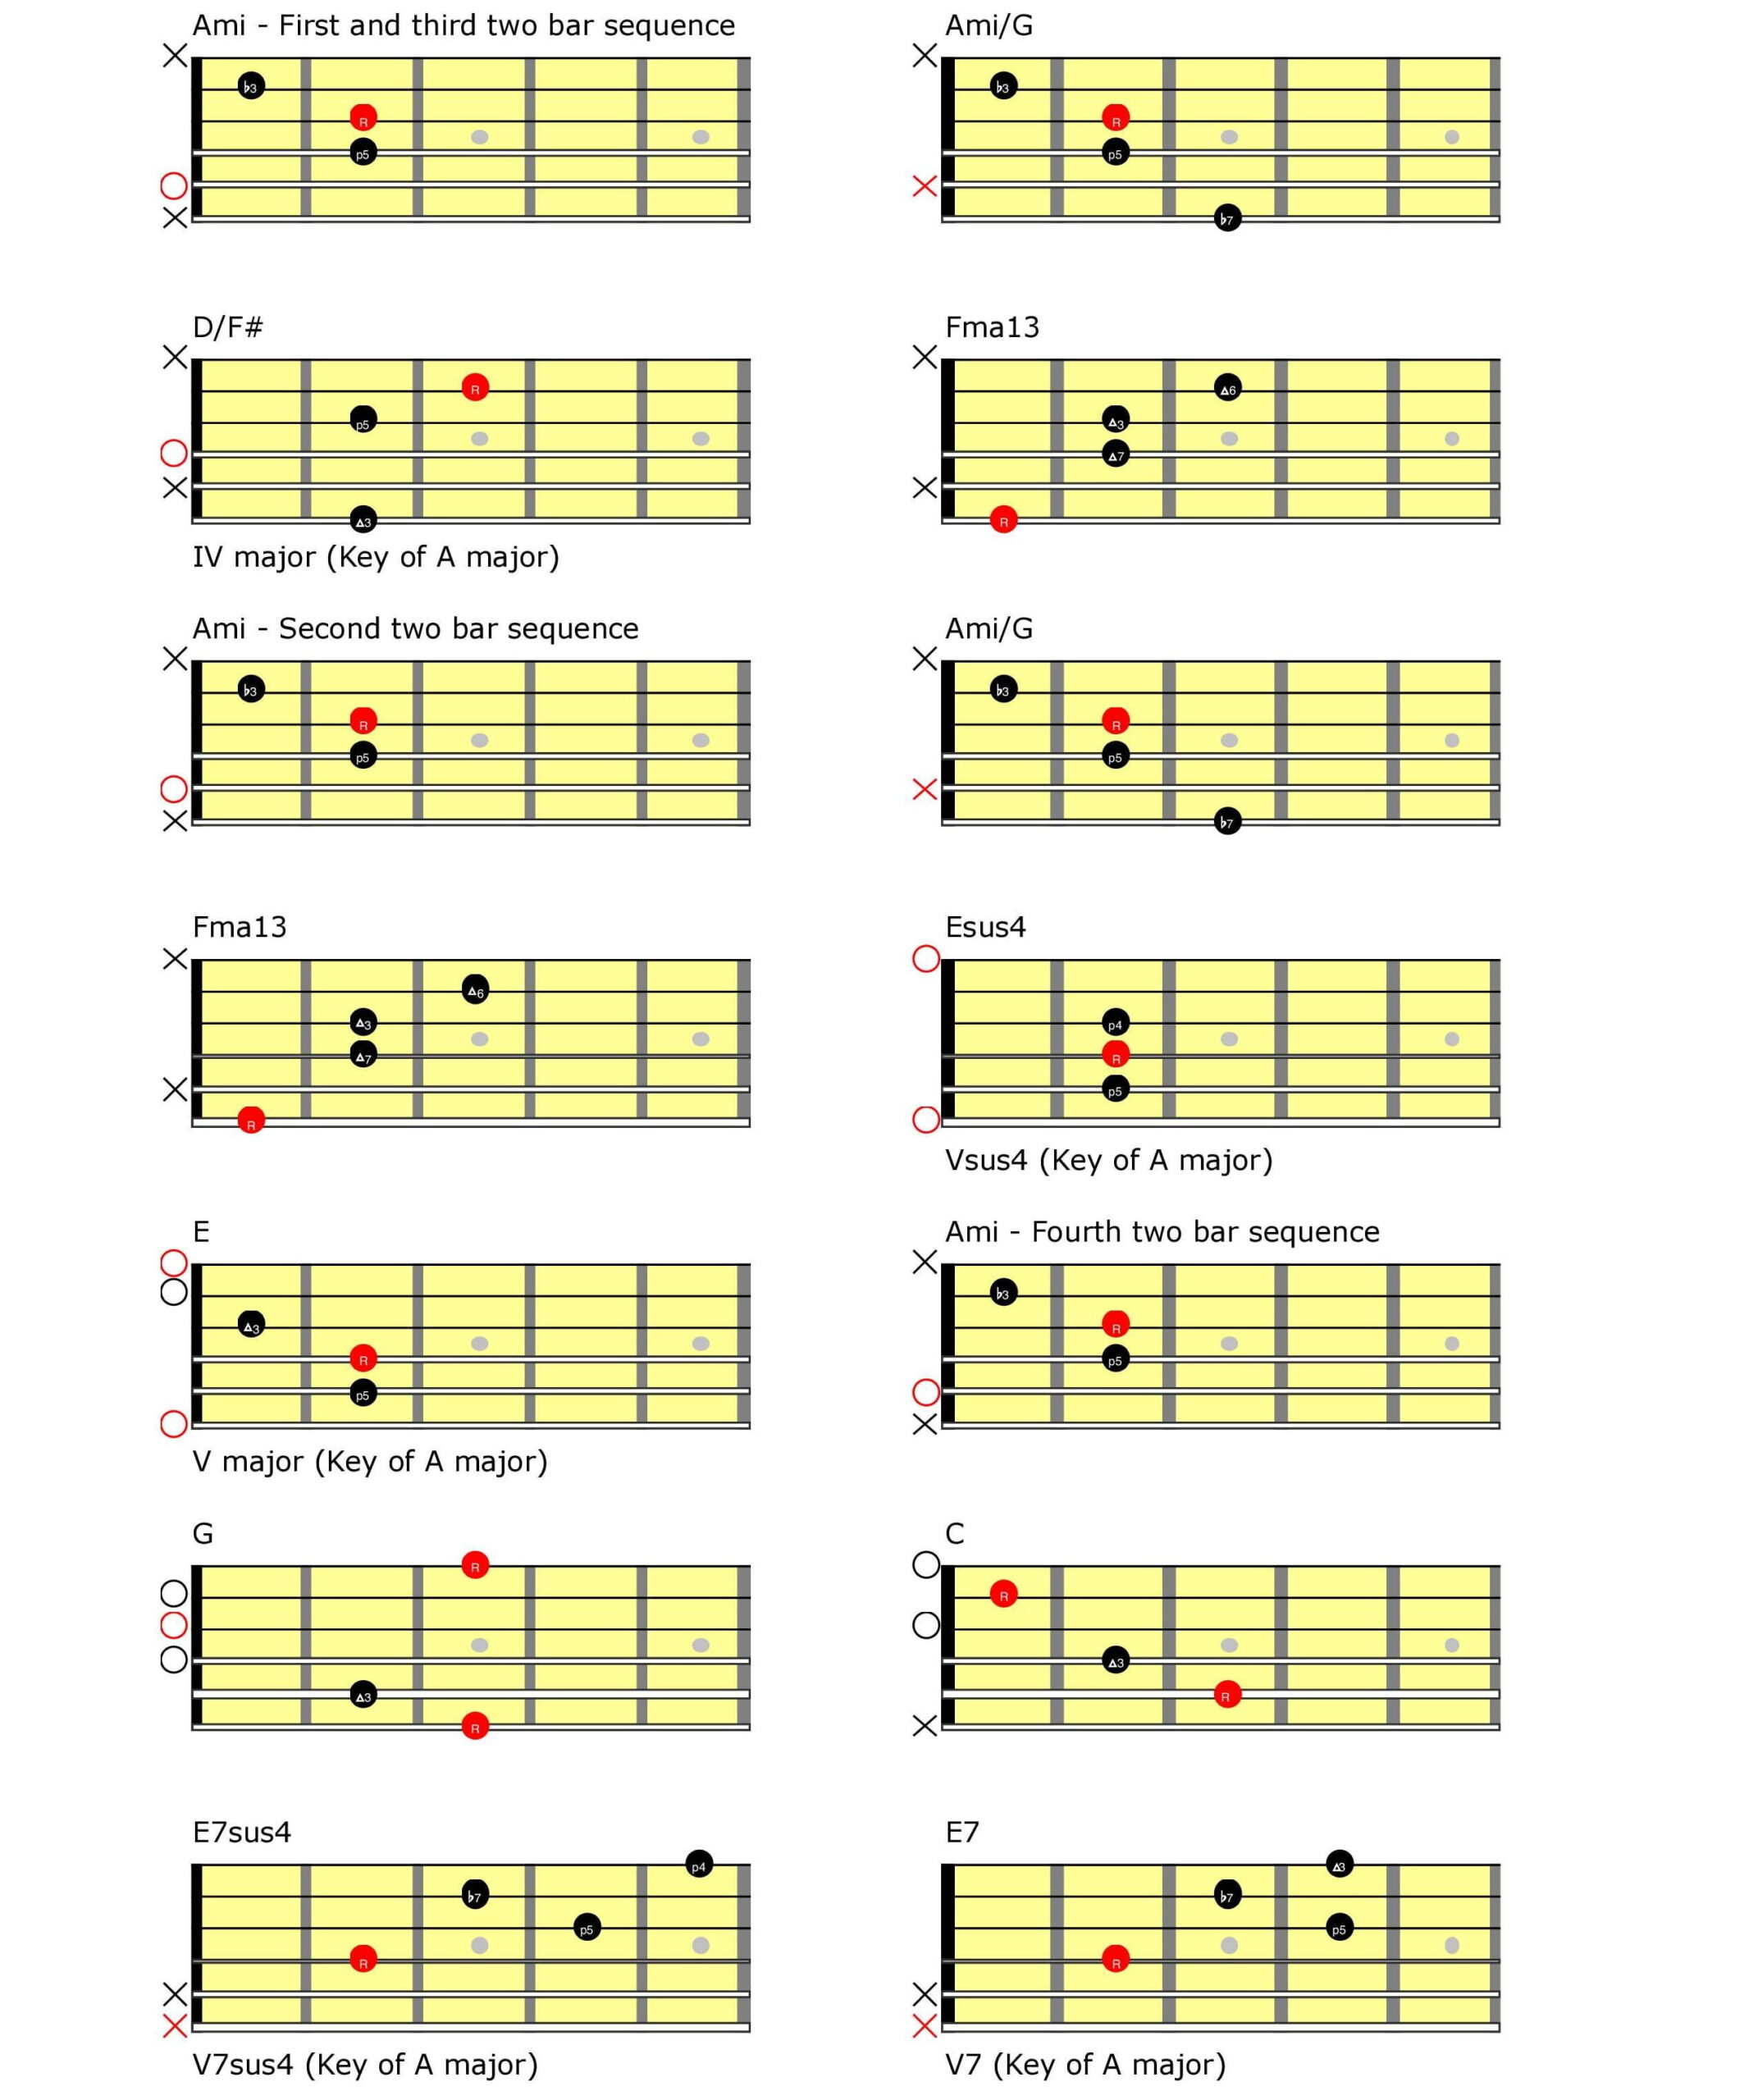
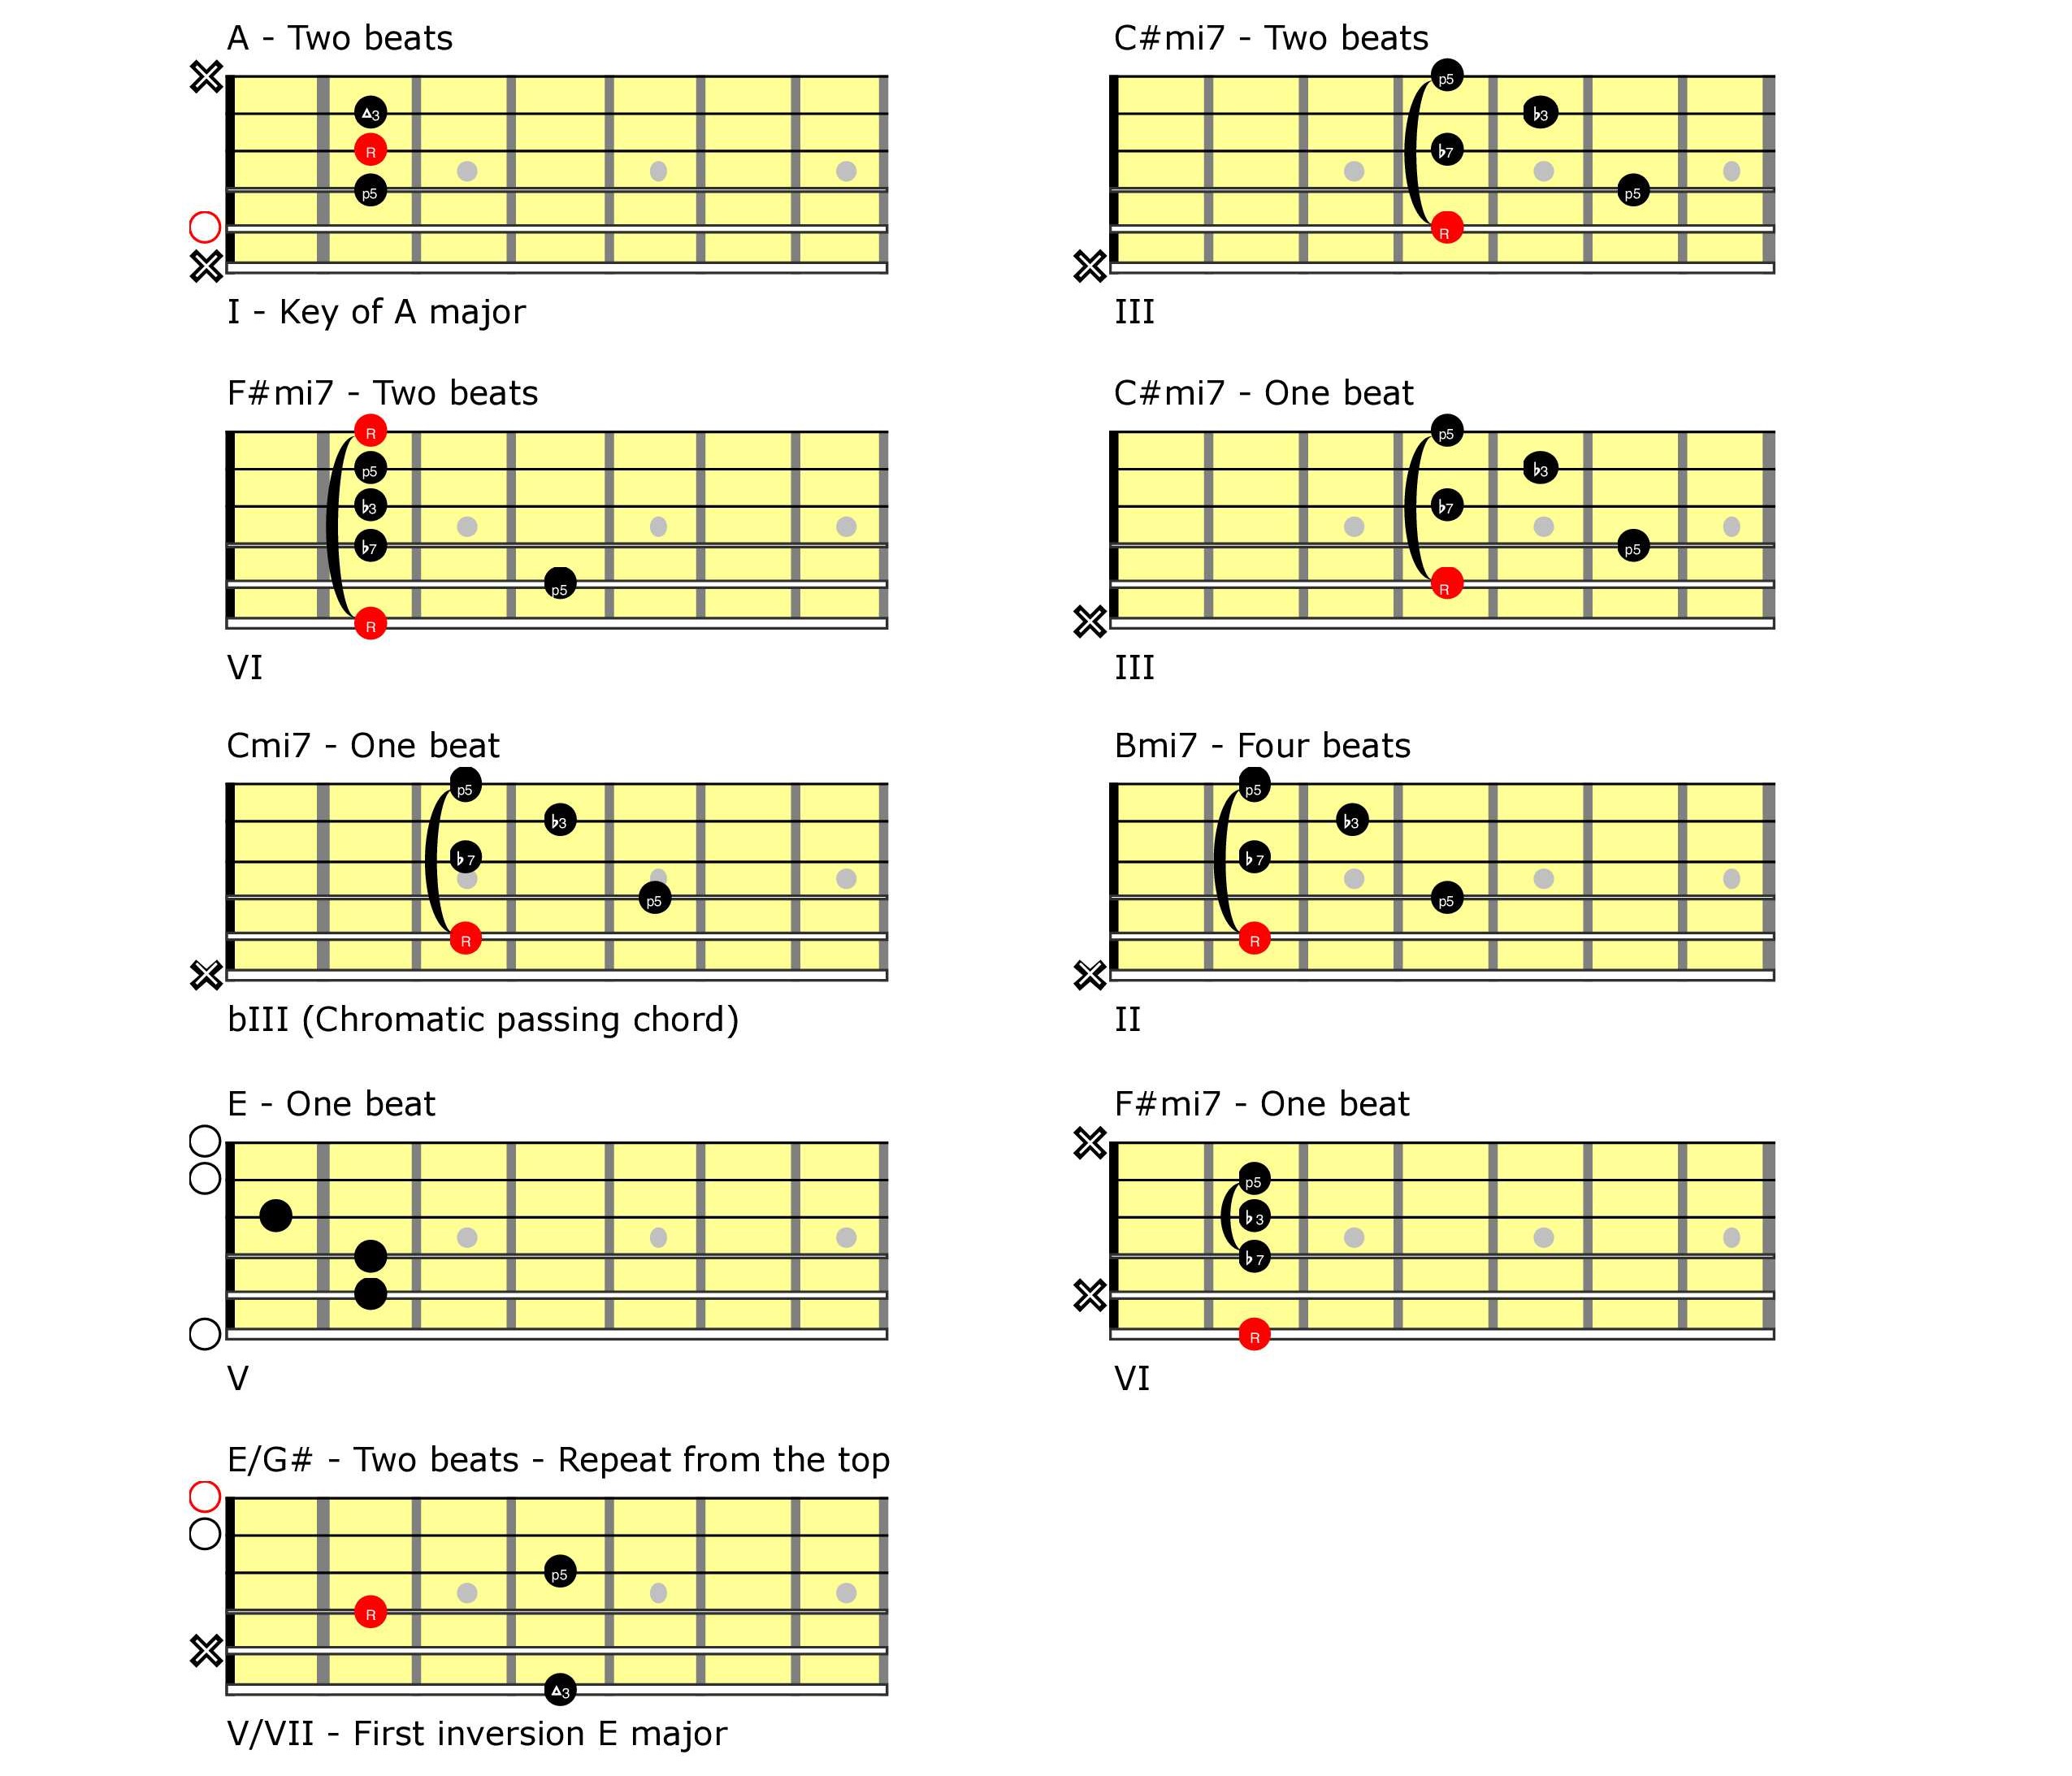


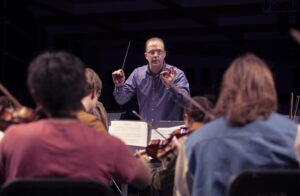
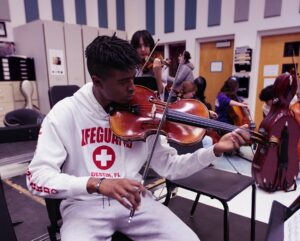
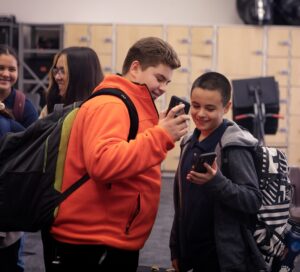


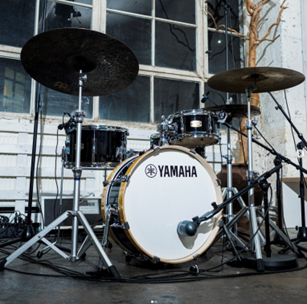

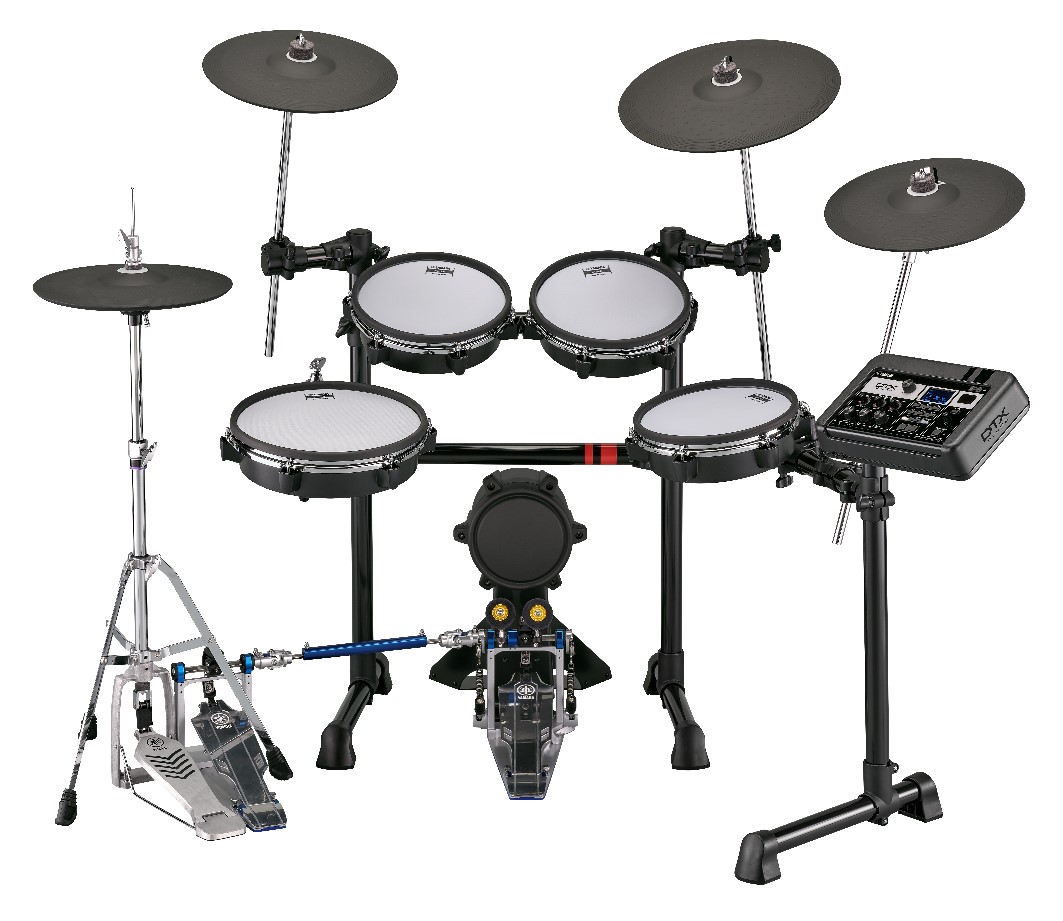

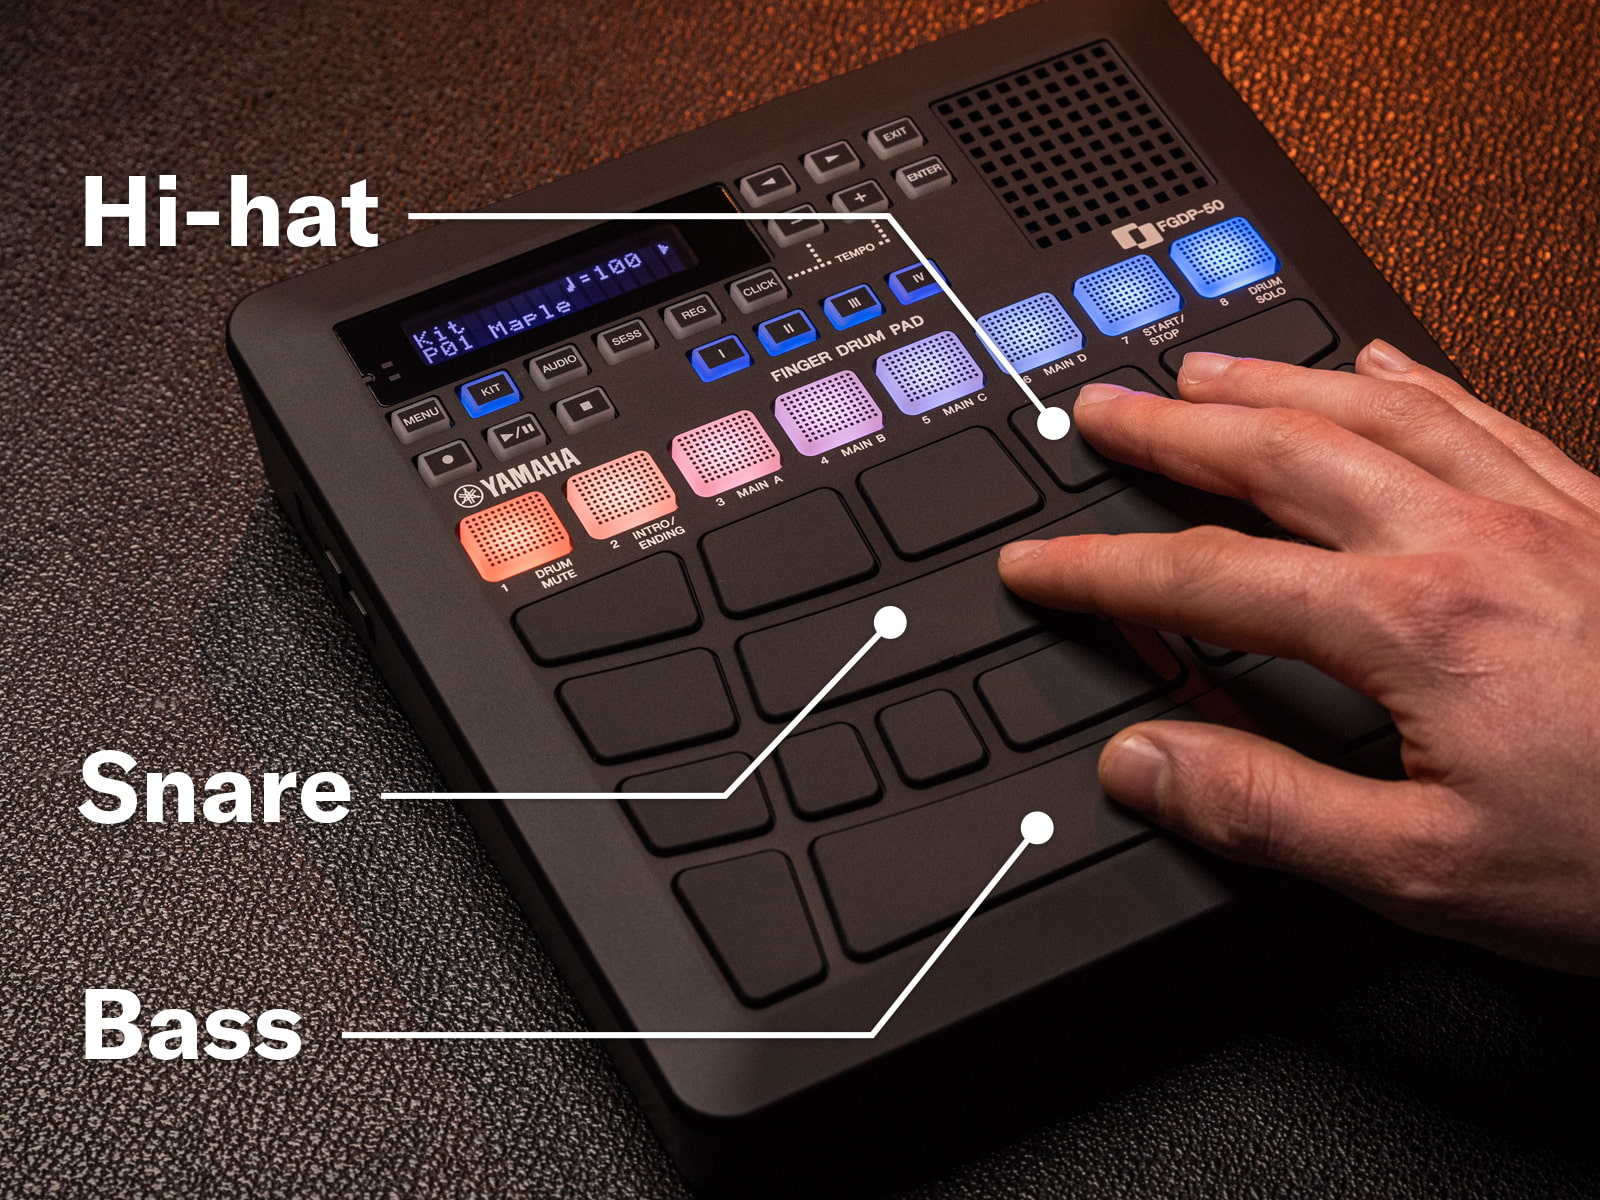
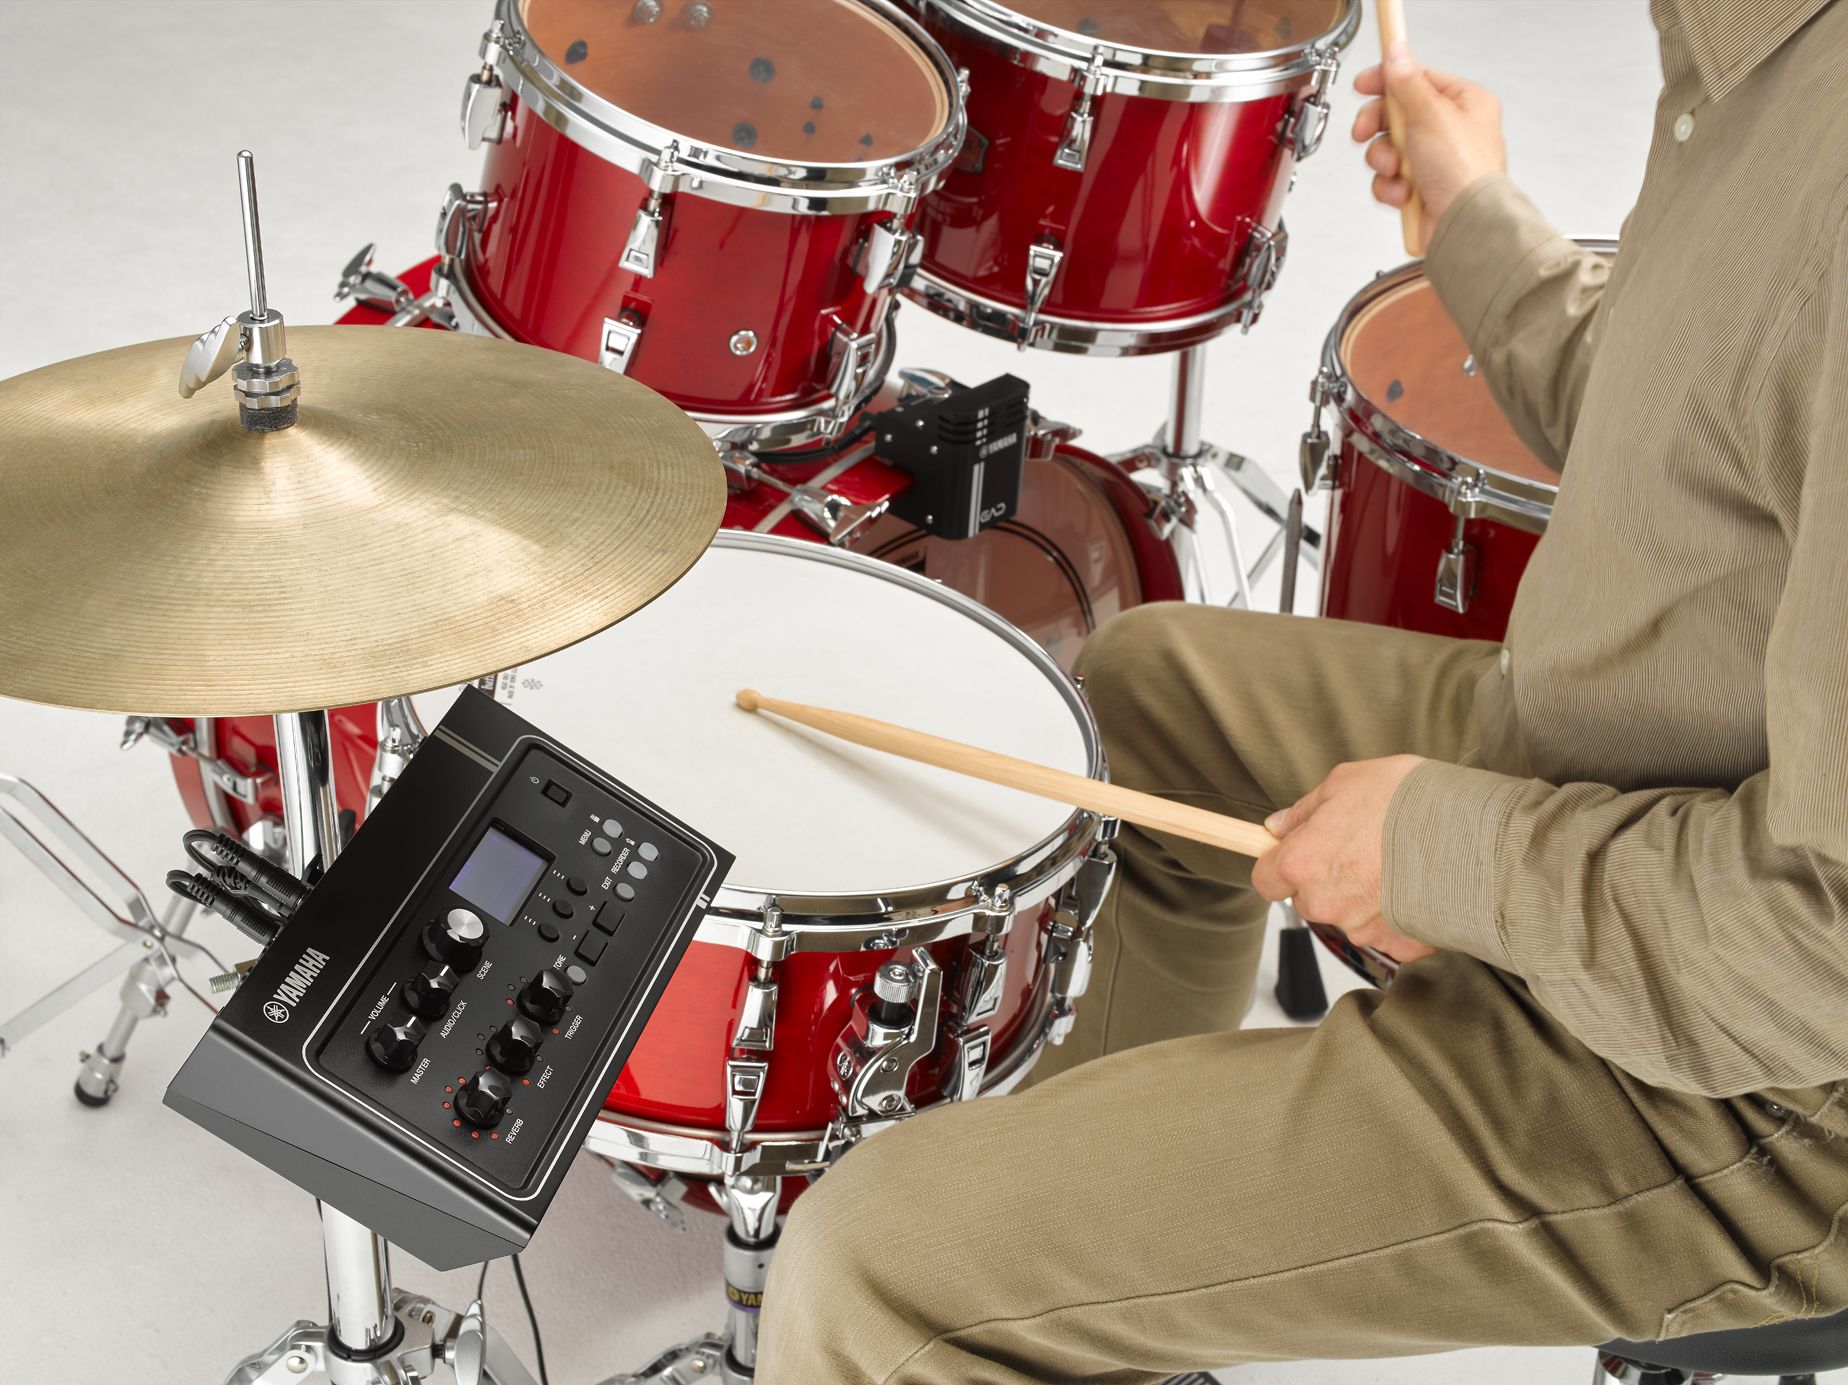
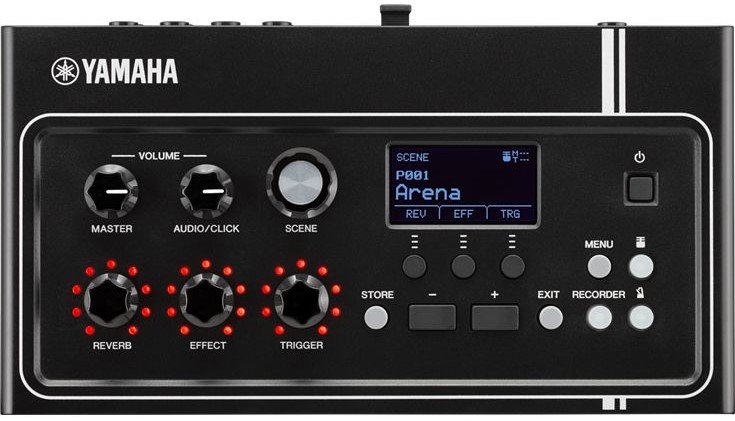
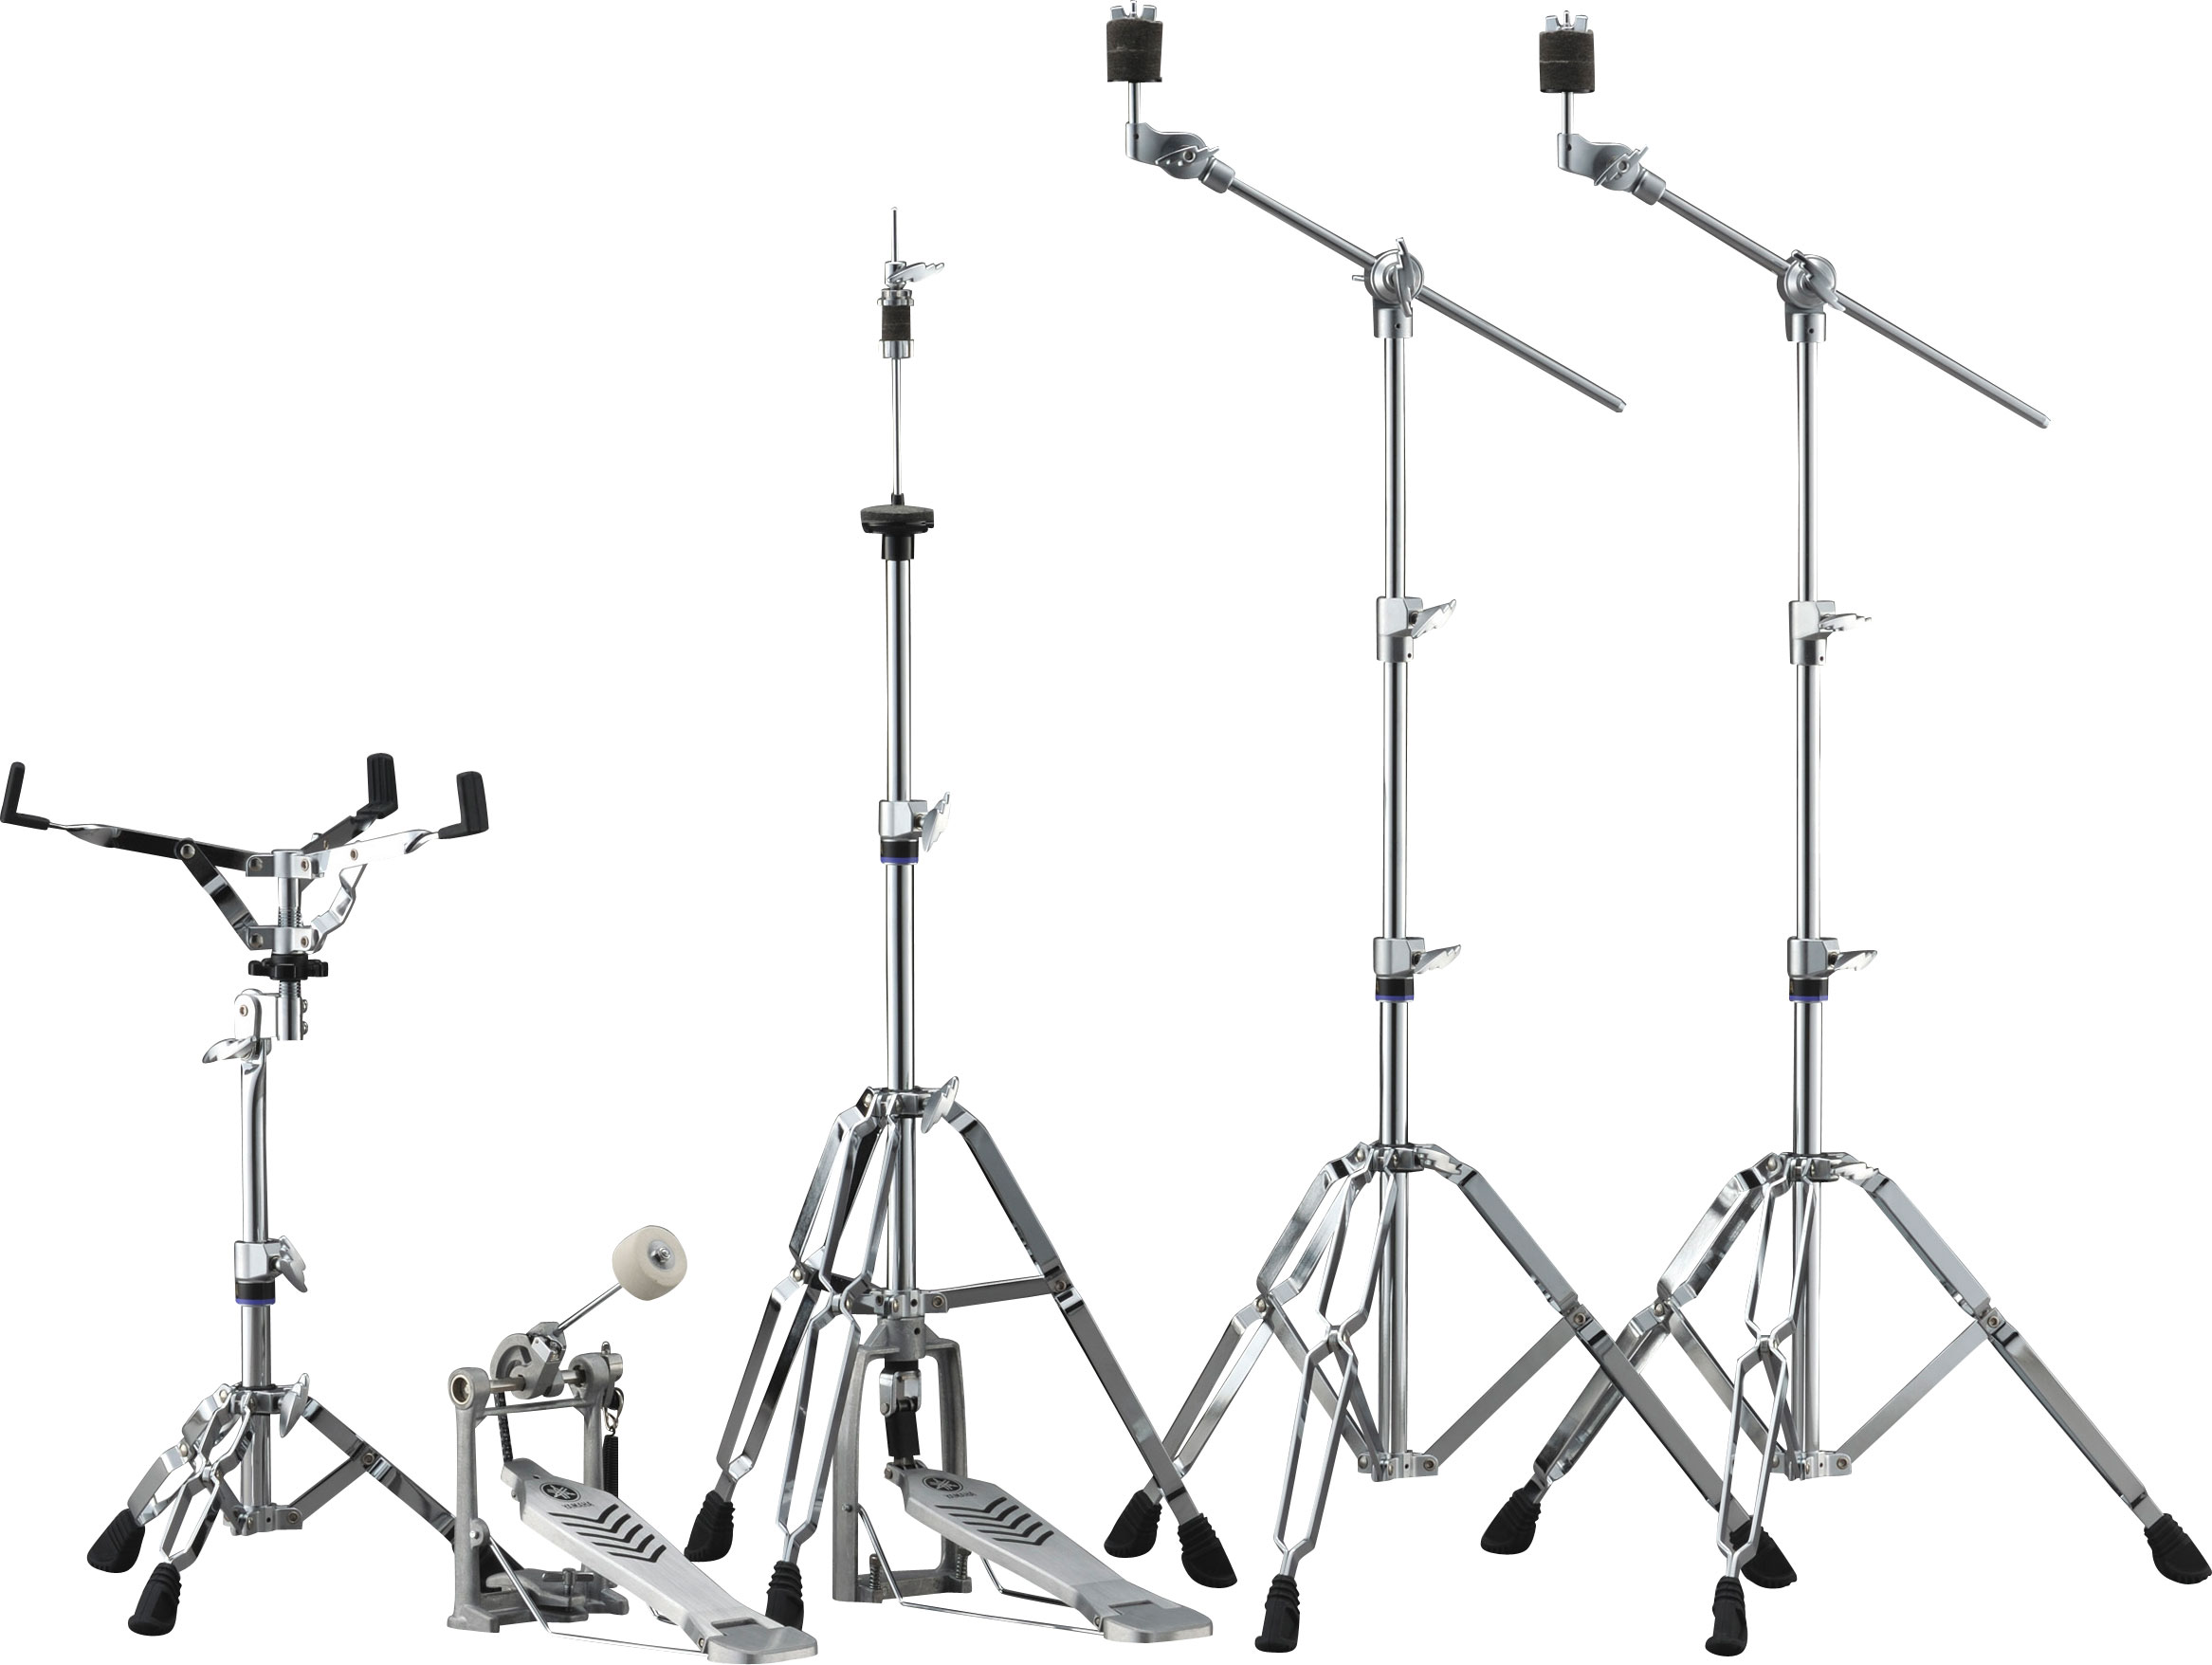
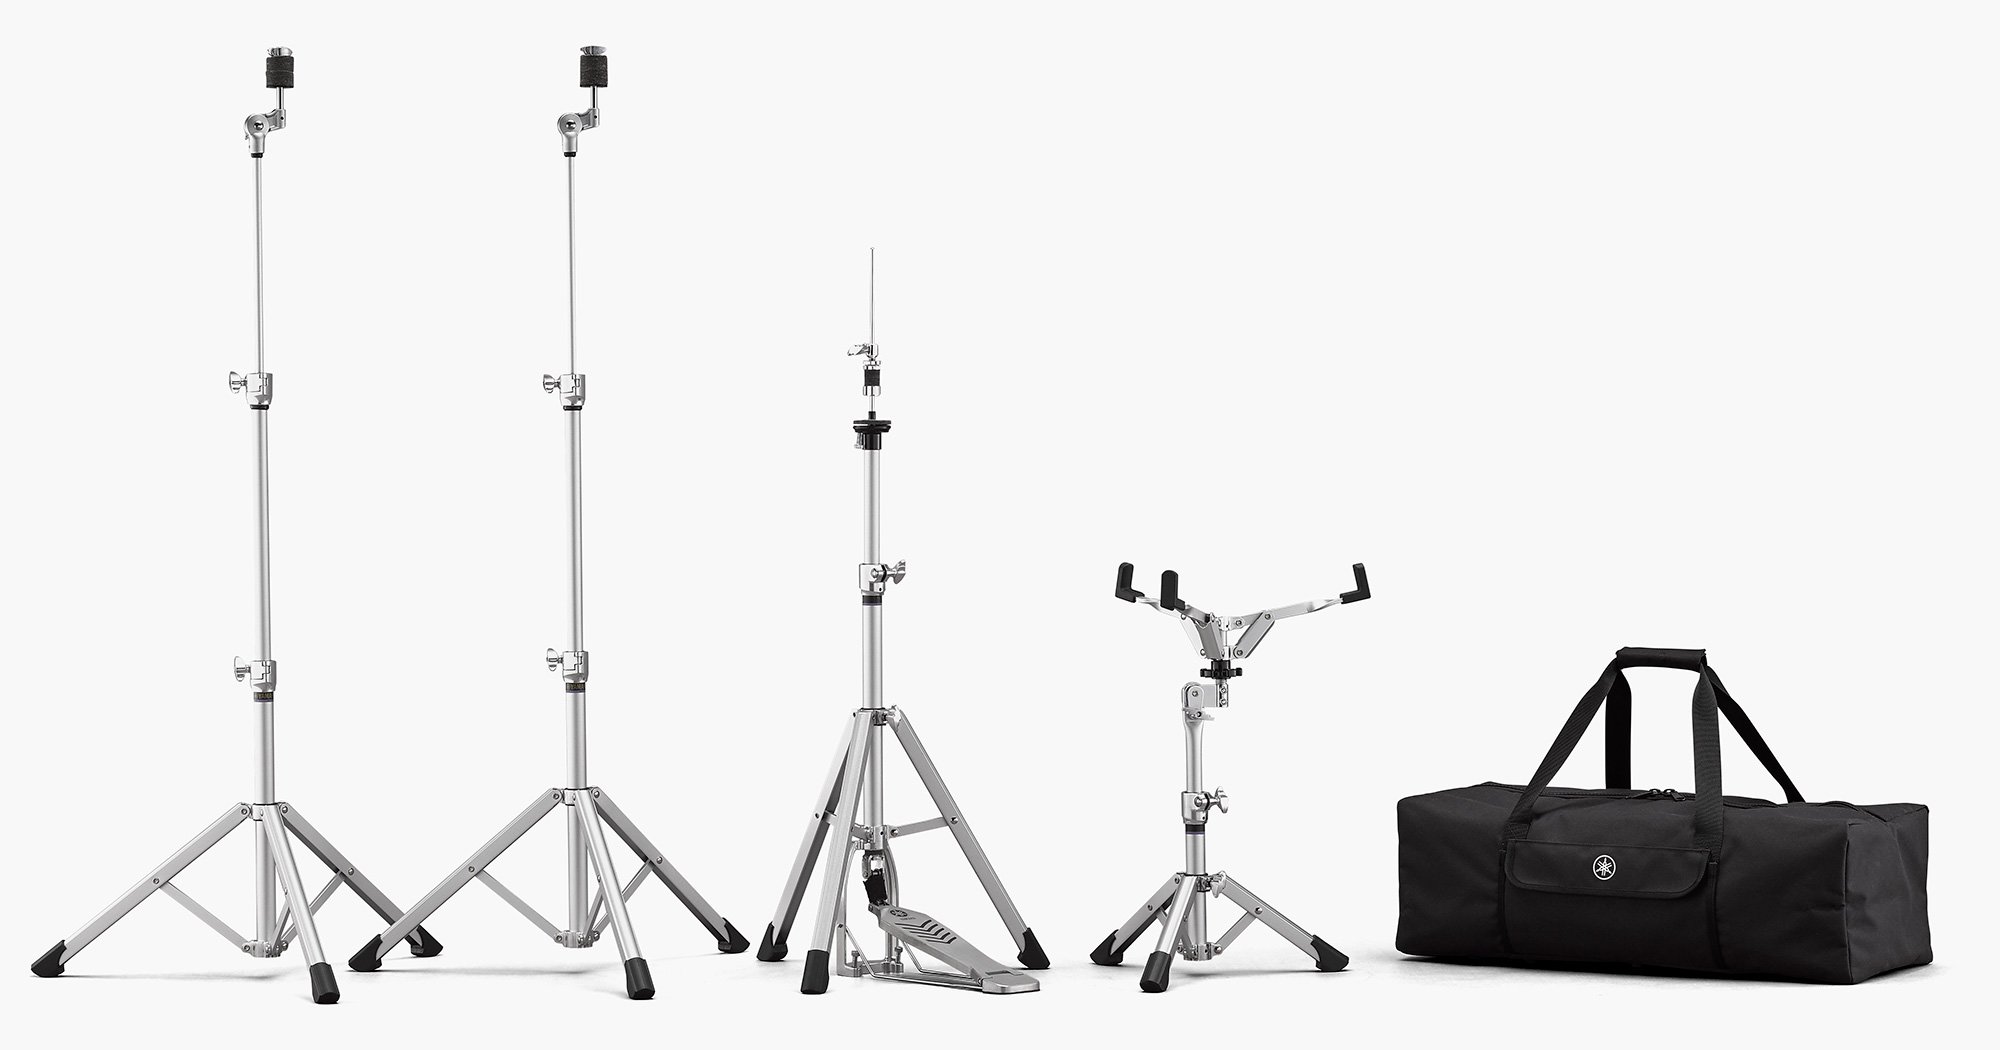


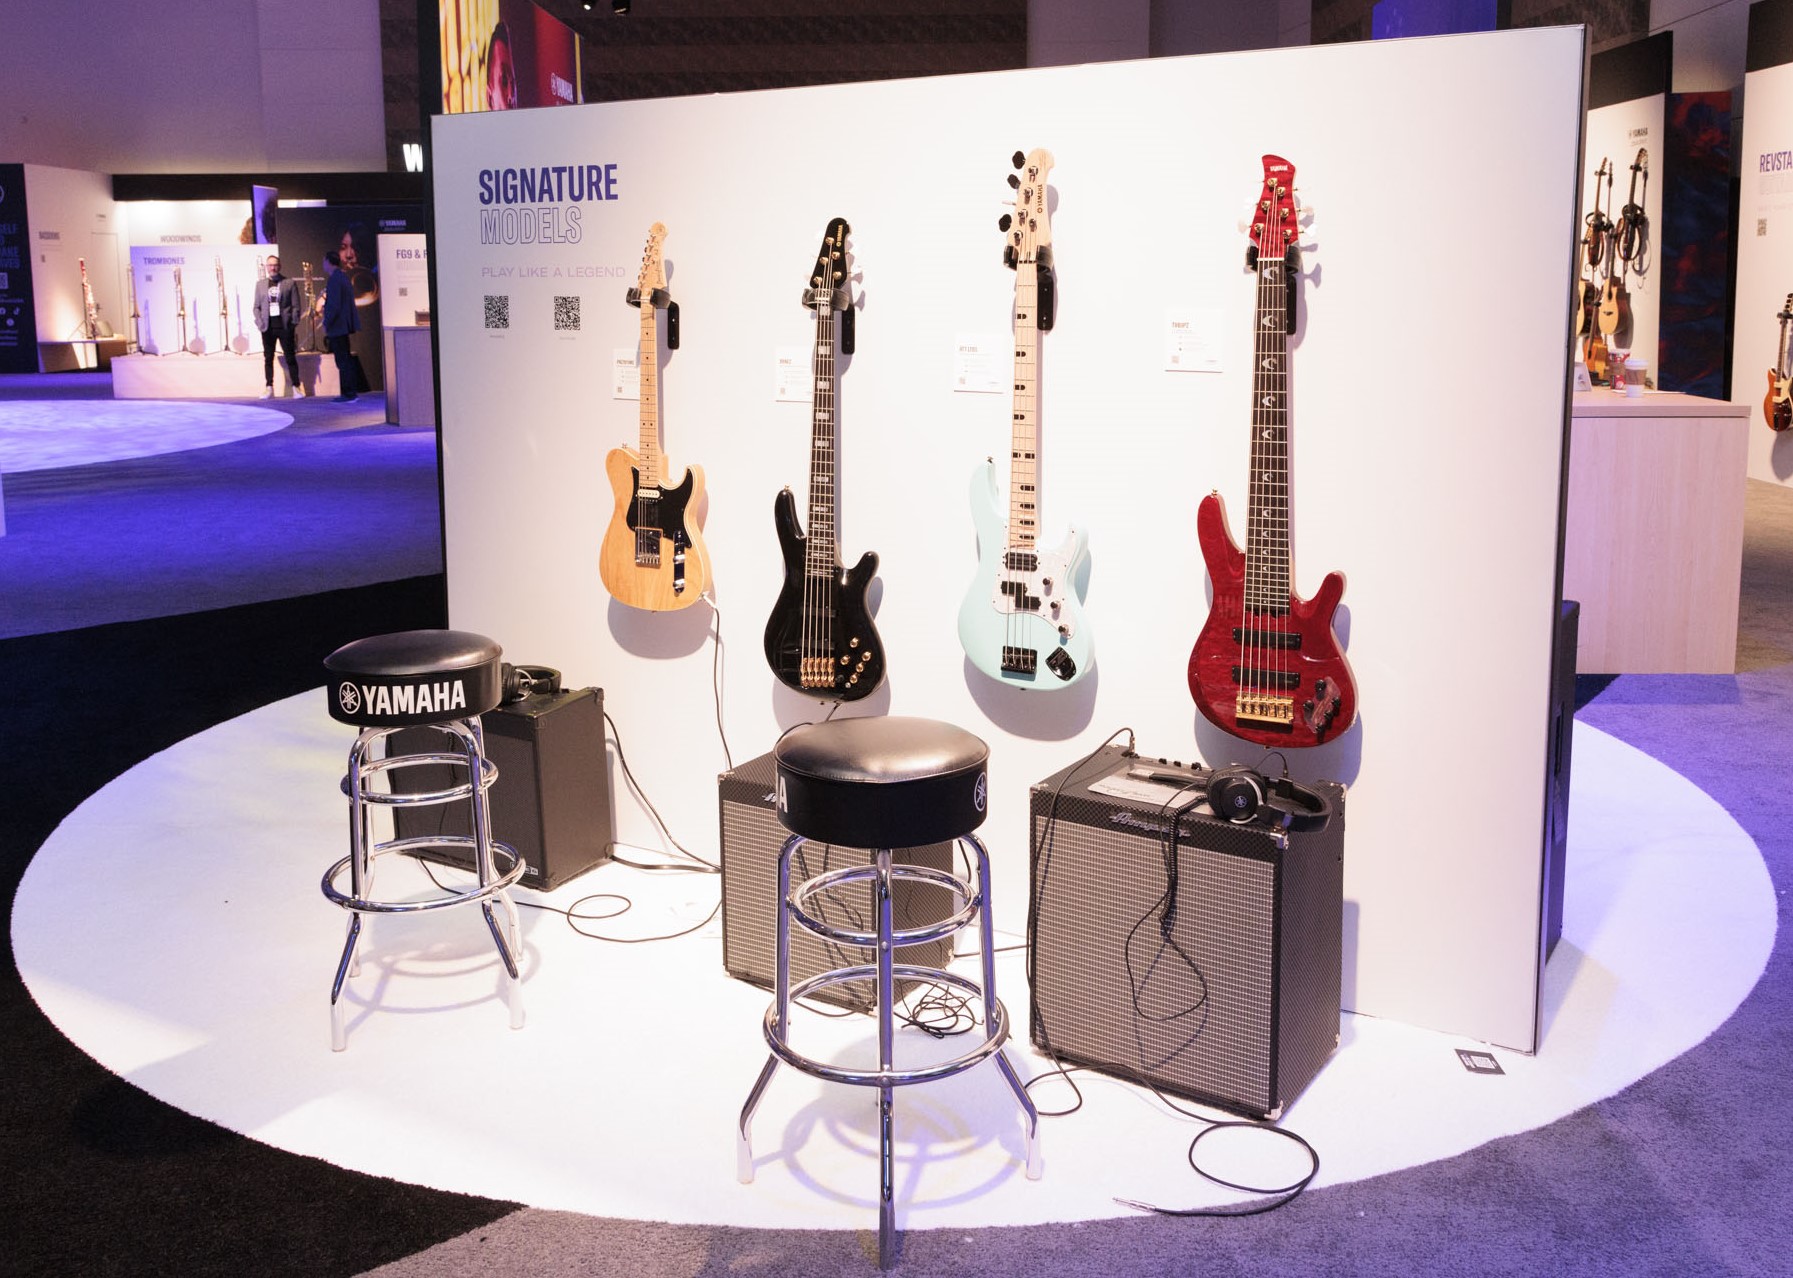
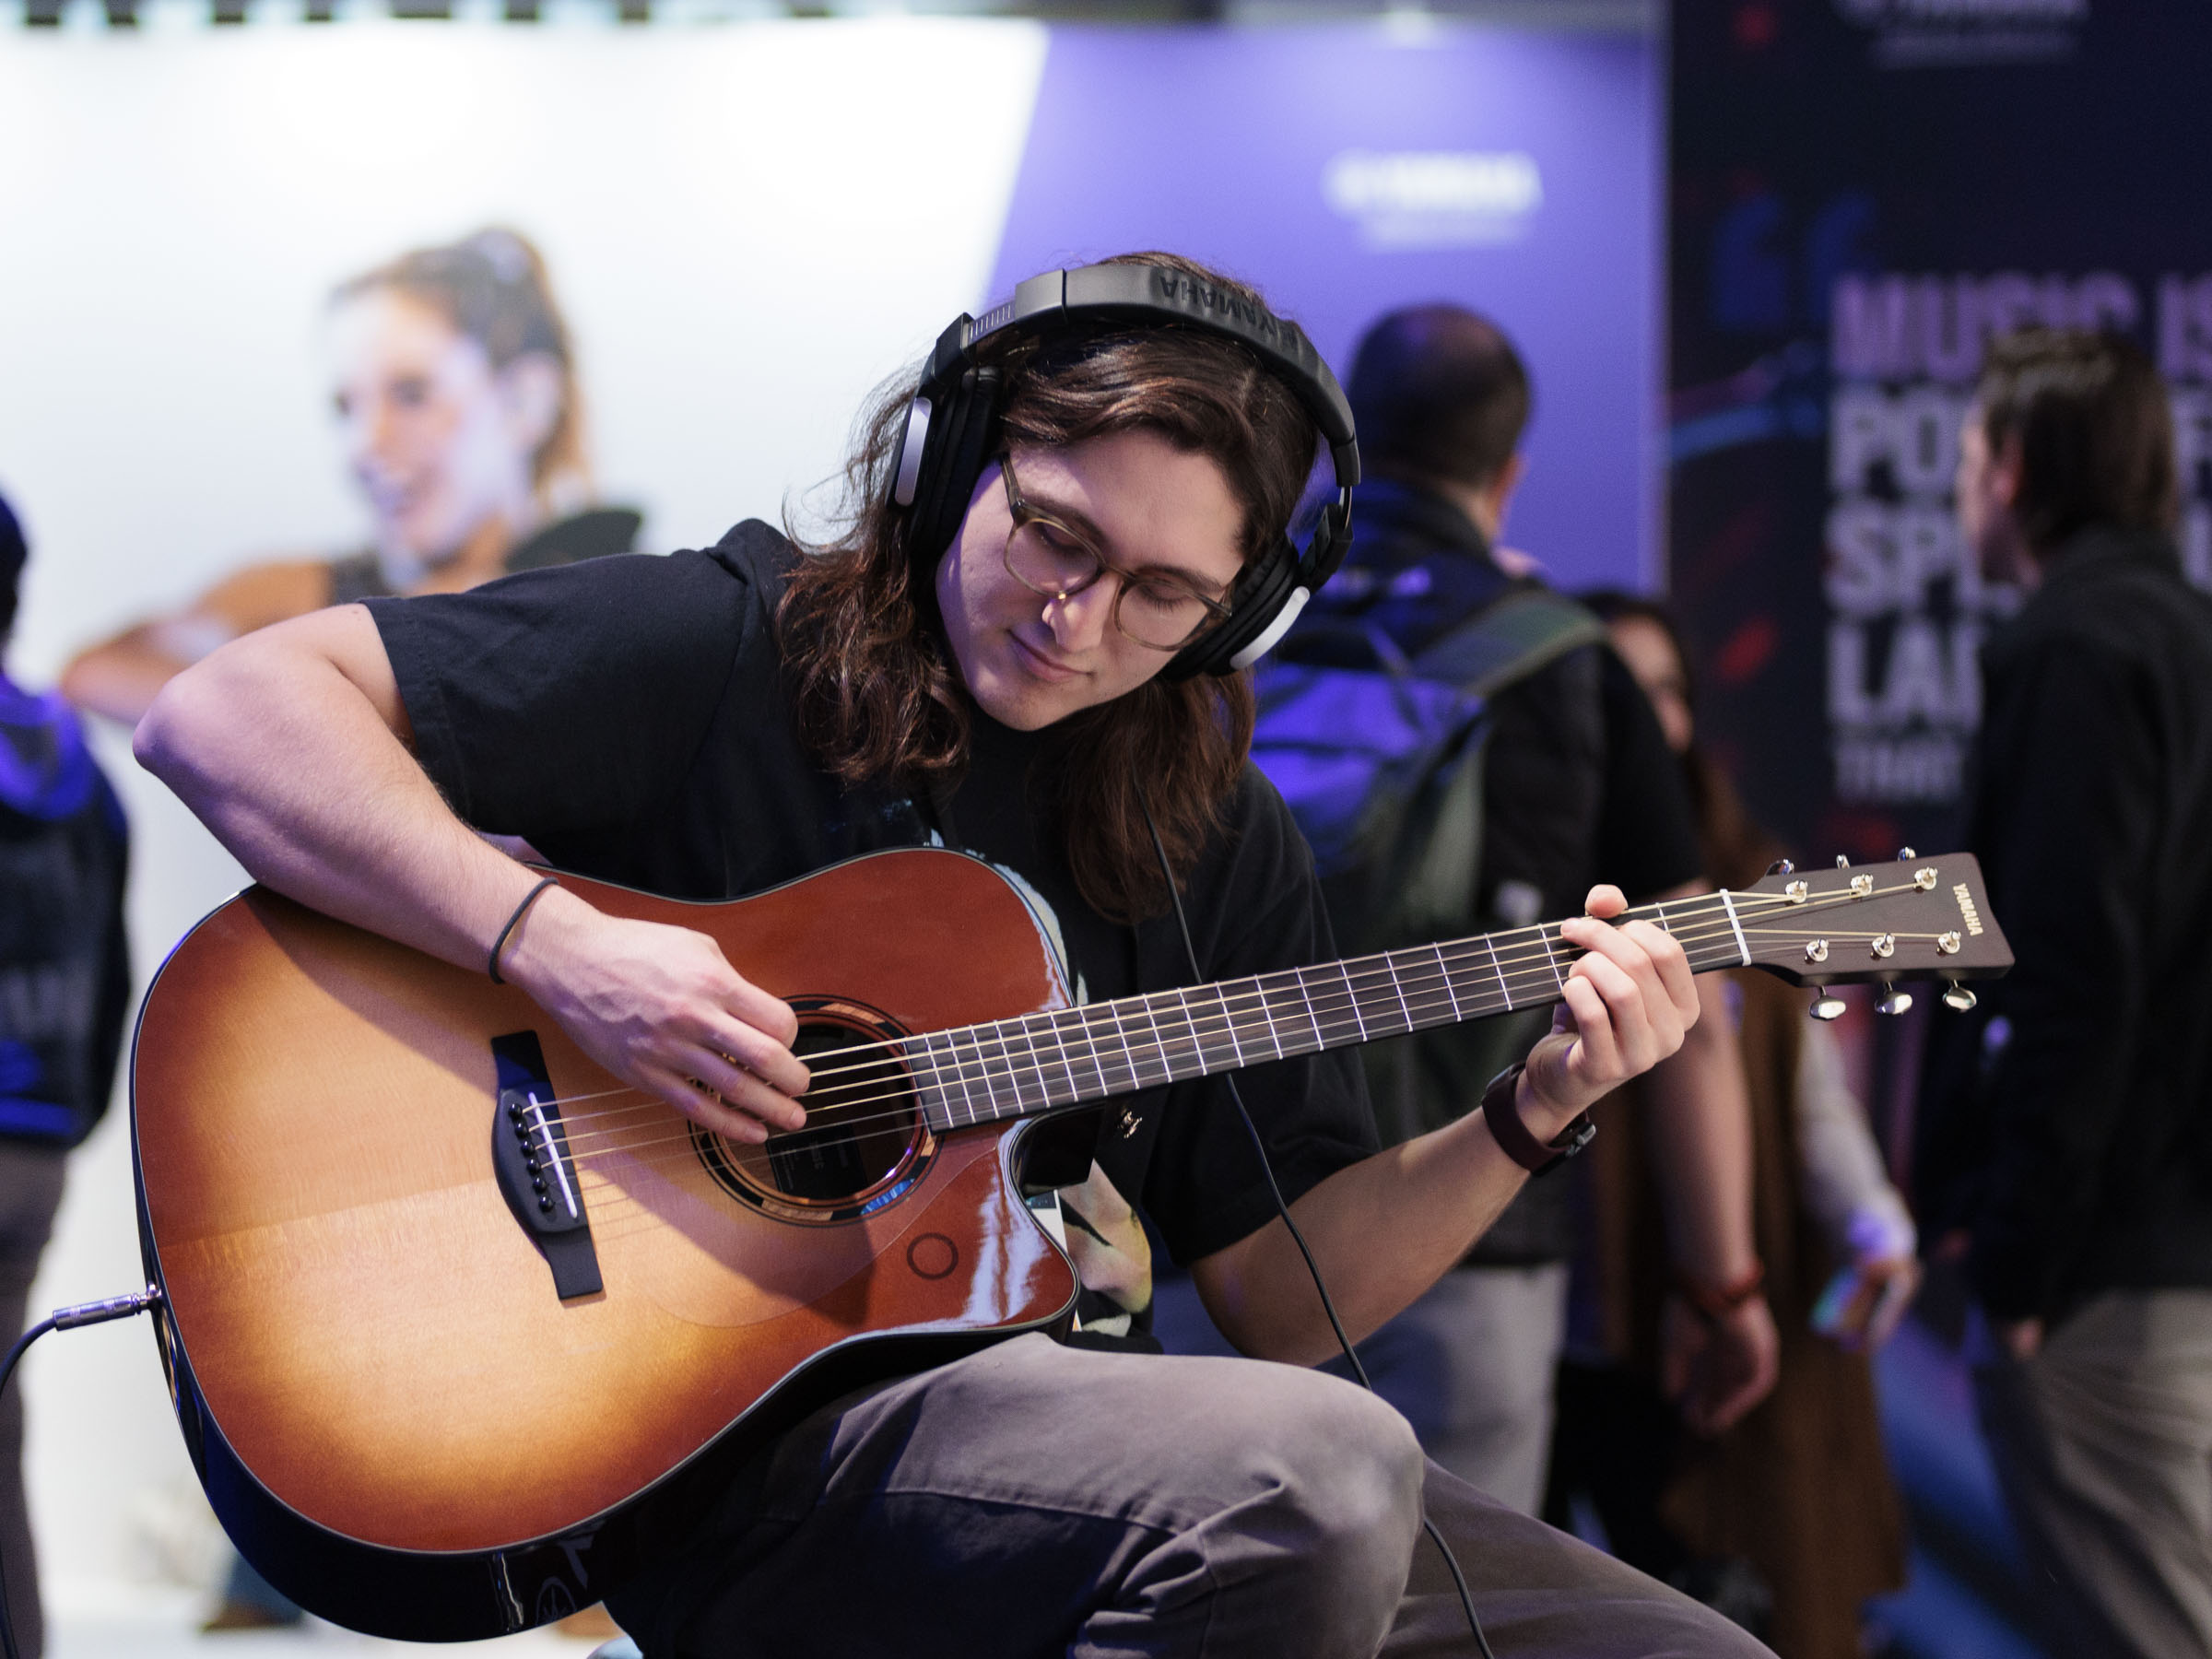
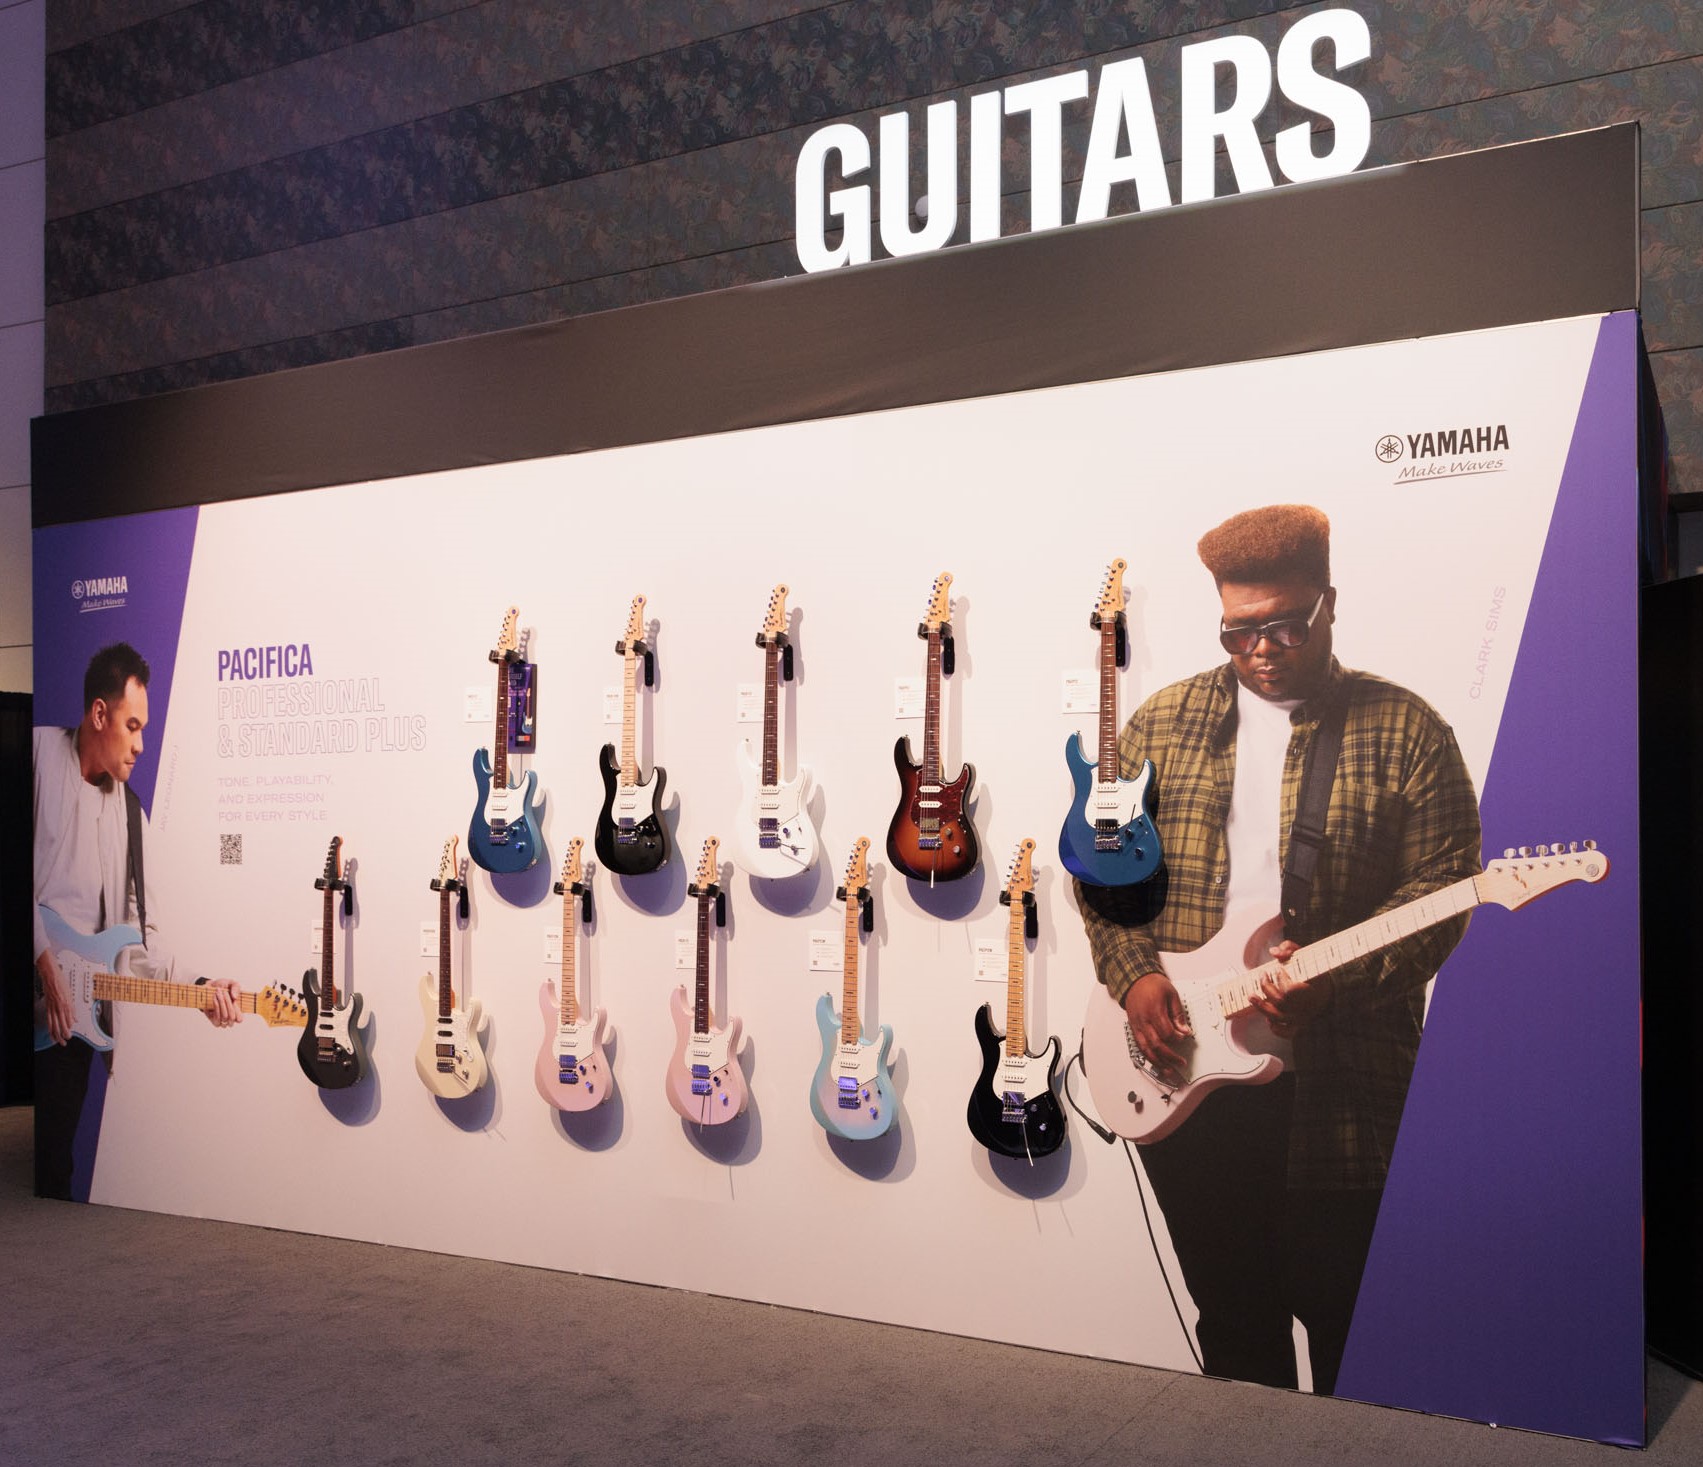

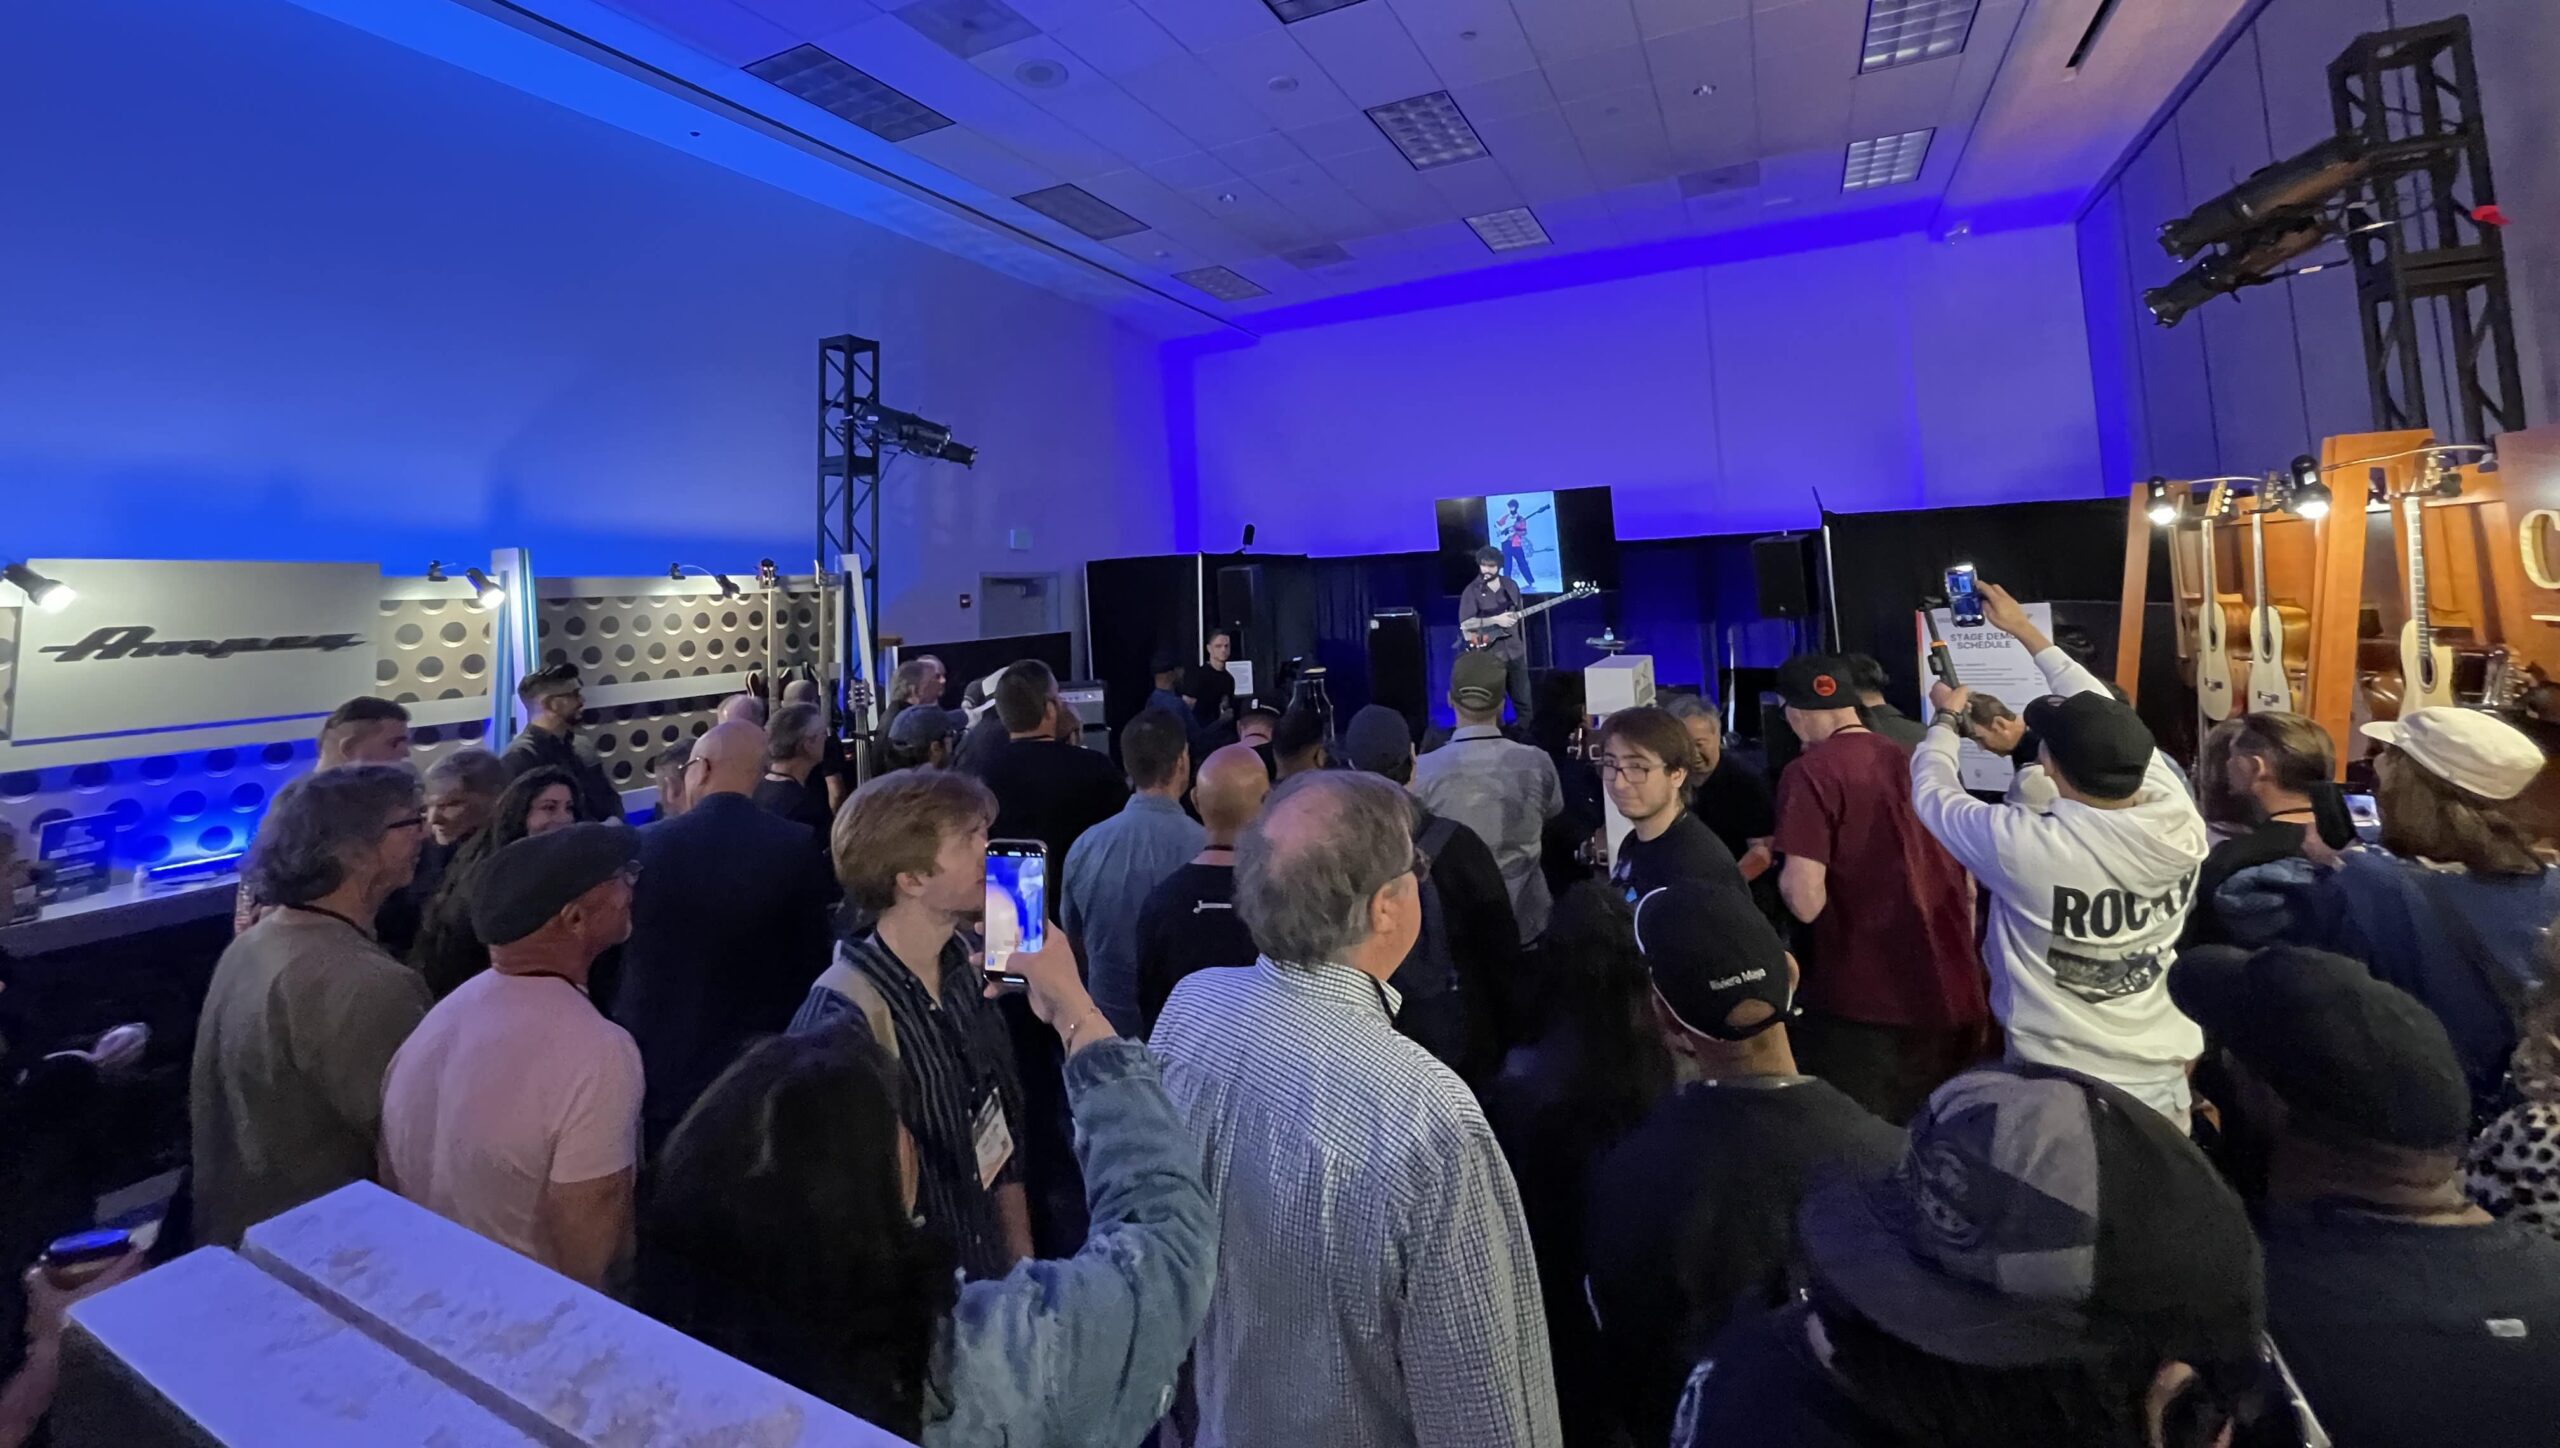

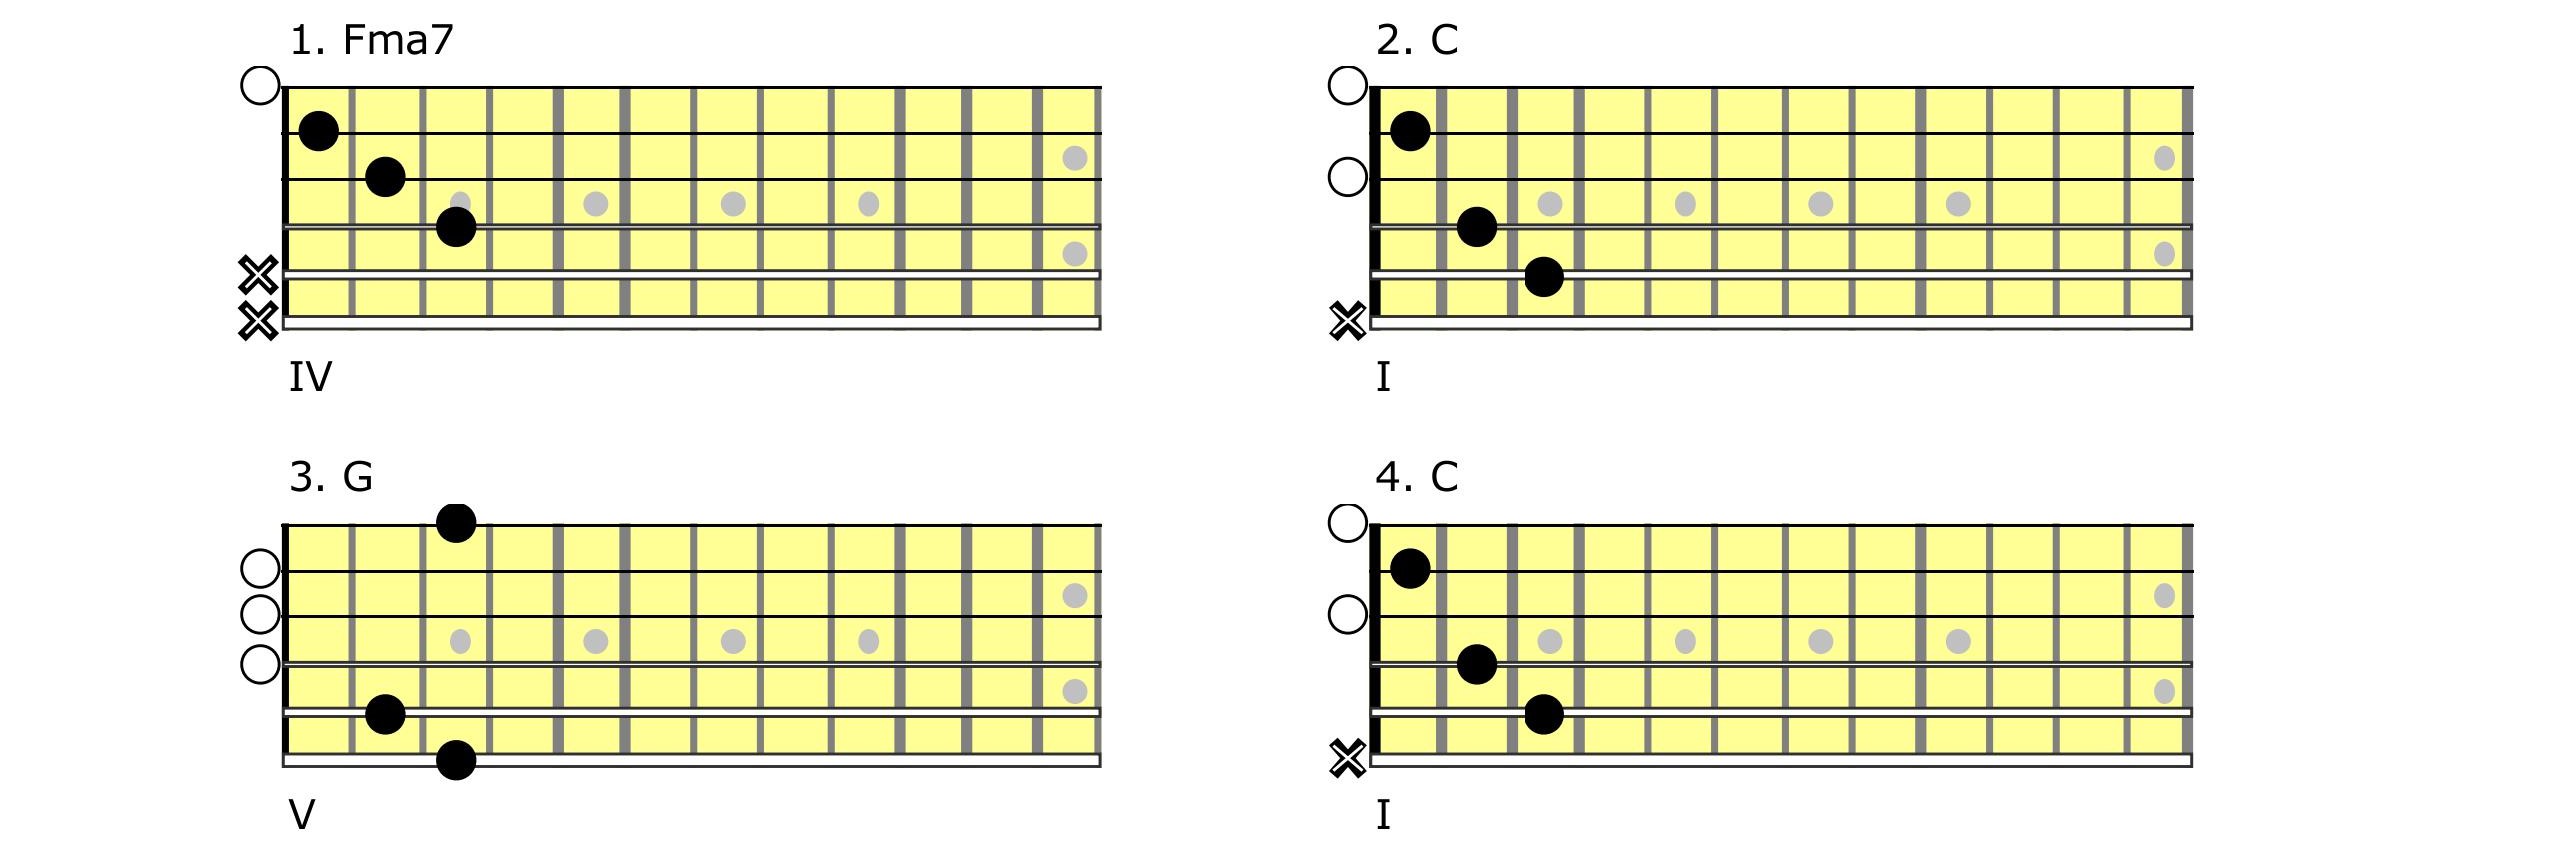
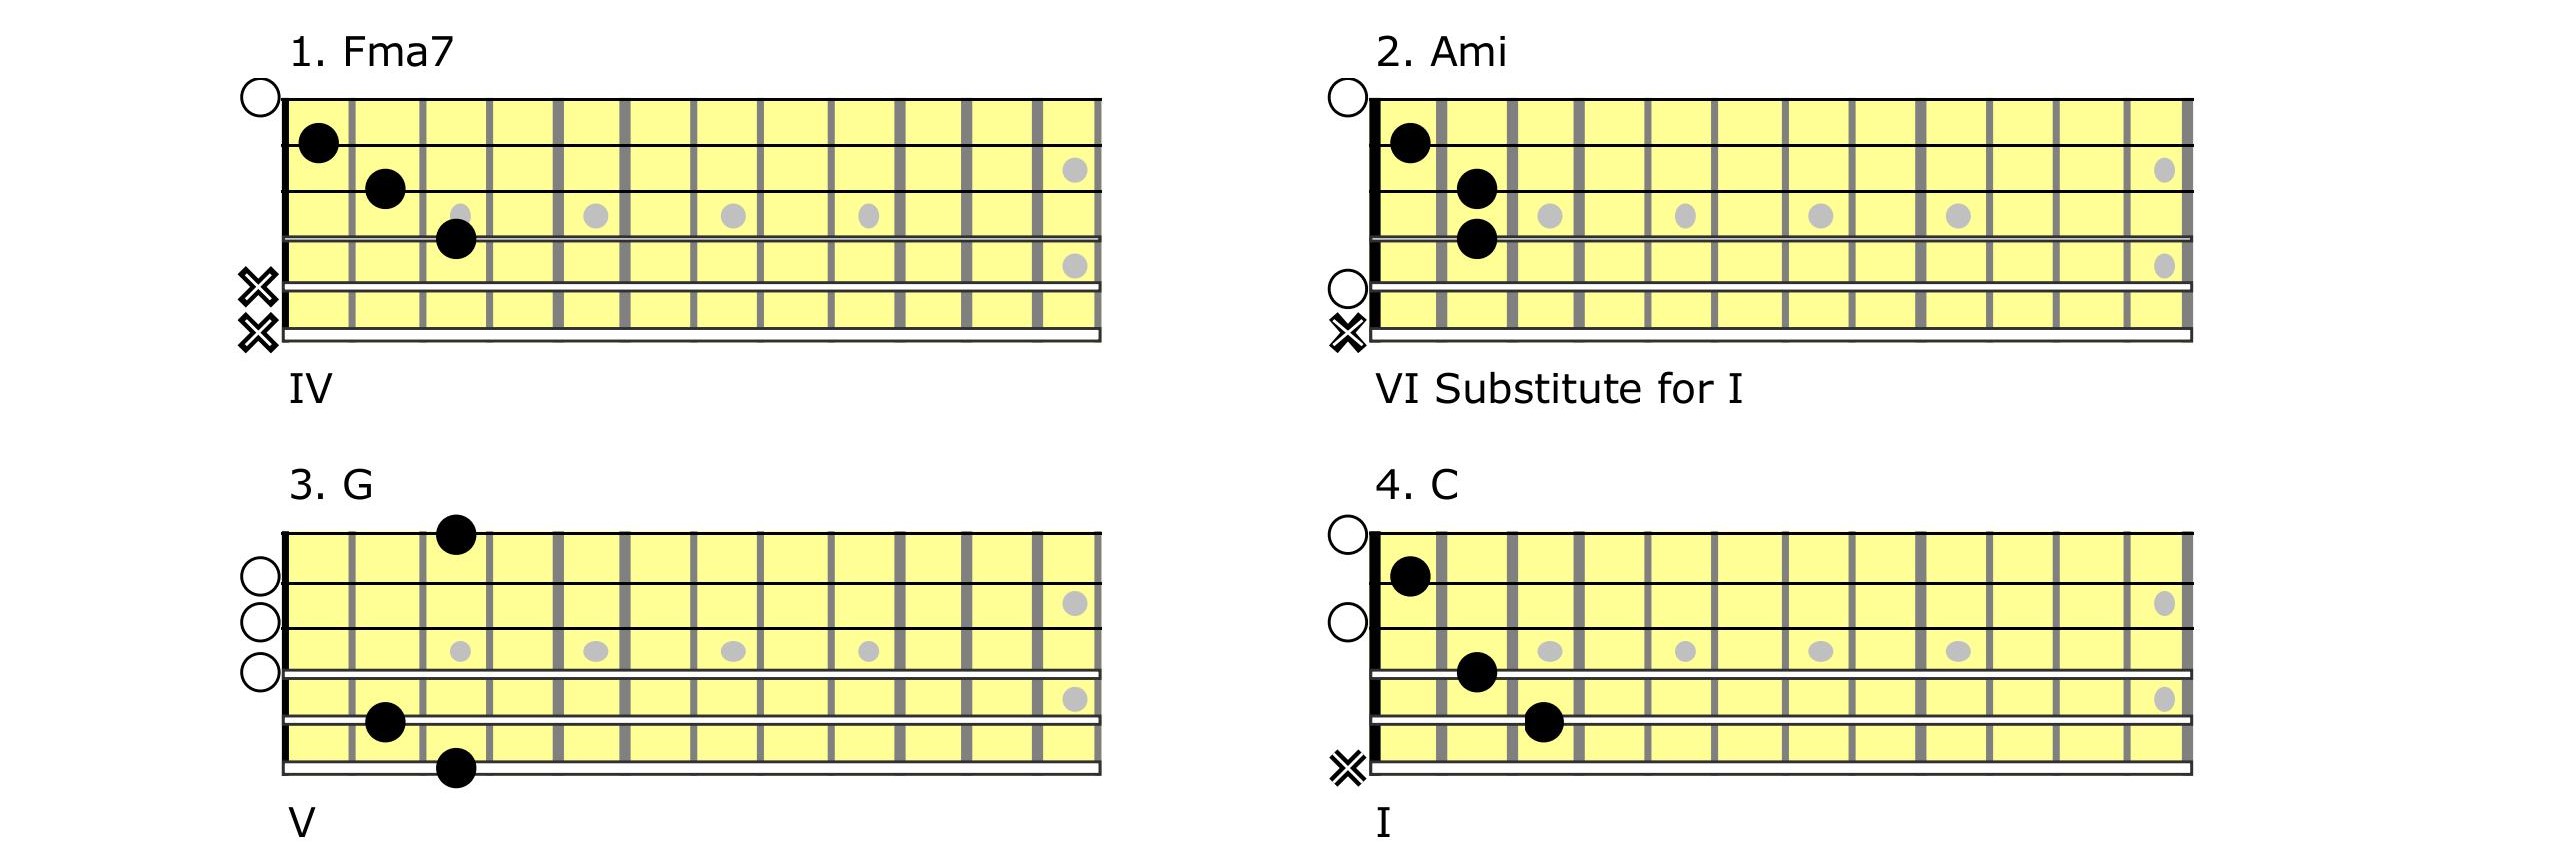
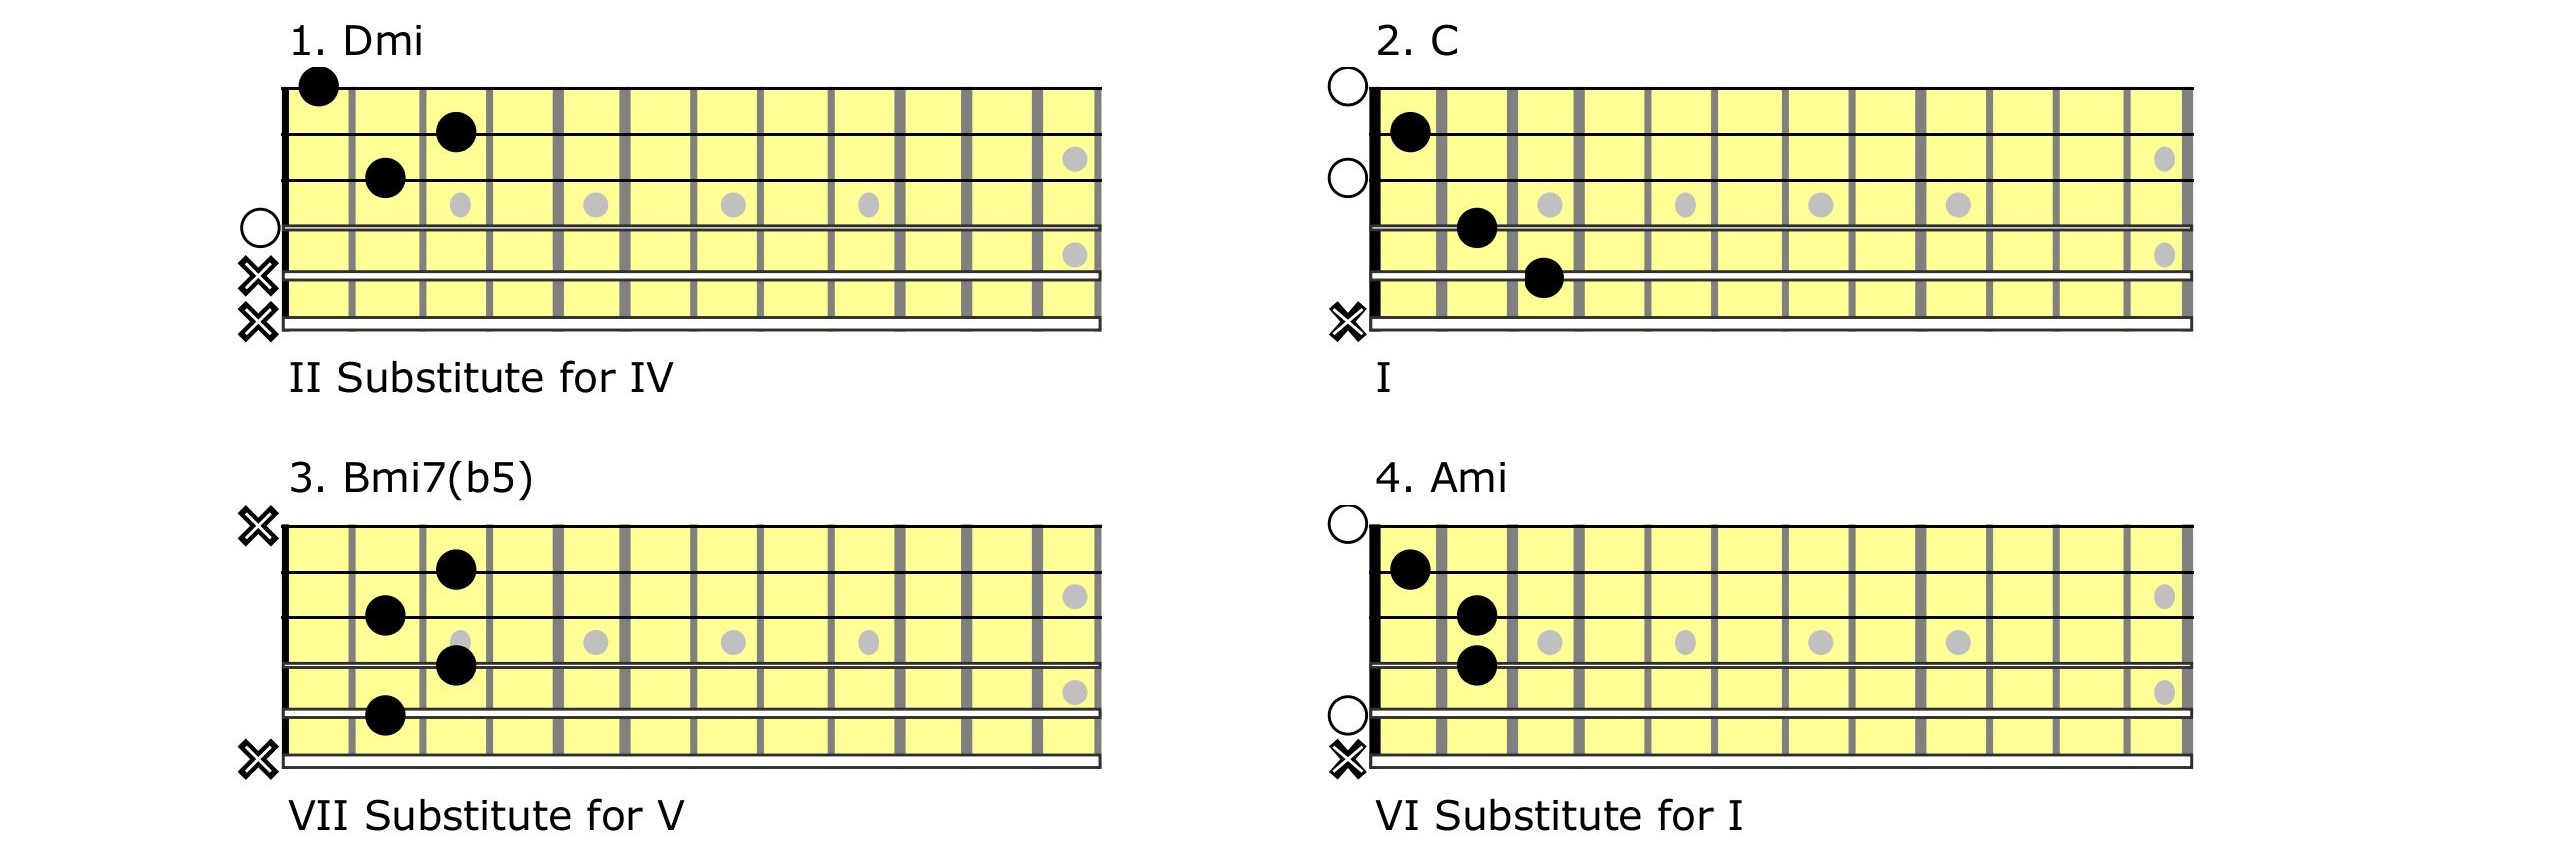


 Kim Webb
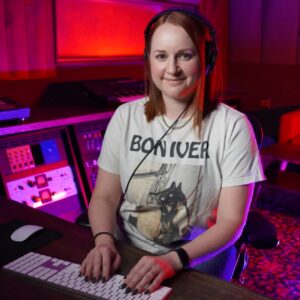 Erin Bara
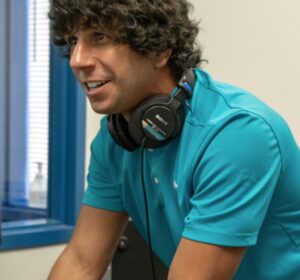 Nicholas Popovich
 Joshua Race
 Dr. Aaron J. Witek
 Kevin Morrison
 Lindsay Cummings
 Bob Habersat
 Shan Kazmi
 Lilly Streich
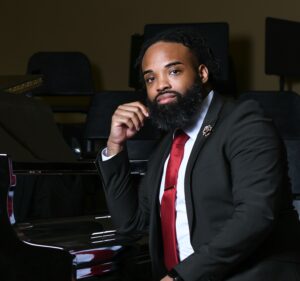 Dr. Cordara X. Harper
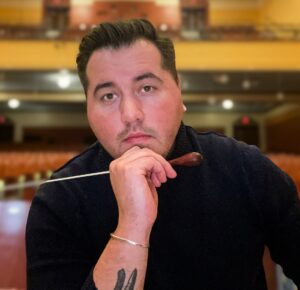 Zane Kaiser
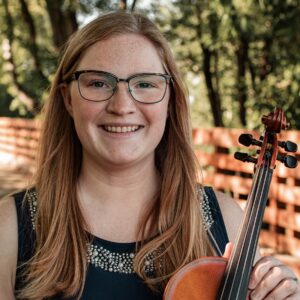 Leah Motl
 Michael Blanco
 Evan Aguilar
 Cody Jackson
 Liam Keller
 Tanatchaya “Tanya” Chanphanitpornkit
 Laura Del Rosso
 Alex Hitrick
 Kate Phillips,
 Dr. Sarah Fabian
 Dr. Marissa Guarriello
 Lee B. Gibson
 Paul Glader
 Coty Raven Morris
 Dr. Cassandra Eisenreich
 Jacob Abbott
 Nick Blue
 Dr. Liliana Guerrero
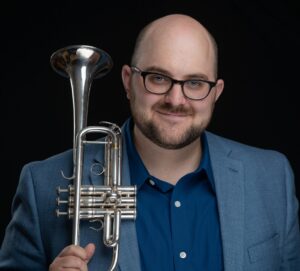 Dr. Andrew Stetson
 Riley Warren
 Dr. Rachel Woolf
 Orien Landis
 Dr. Catheryn Shaw Foster
 Adam Odenwelder
 Annie Ray
 Michael Schnell