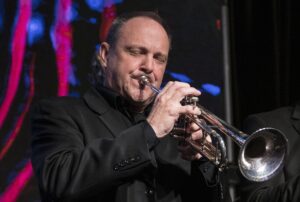
Yamaha Artist Michael Tilson Thomas passed away on April 22, 2026, leaving a legacy that loomed large. Recognized early on as a musical trailblazer and champion of the new, MTT (as he was known) forged an illustrious career as a conductor, pianist, composer, educator and passionate advocate for American composers — a bold public figure who, like Leonard Bernstein before him, reached out to new audiences as he entertained, educated and shared the joy and magic of music-making. In that spirit, one of his most forward-looking projects was his 1987 co-founding and artistic directorship of the New World Symphony — a postgraduate orchestral academy dedicated to preparing young musicians of diverse backgrounds for leadership roles in classical music. In addition to supporting Michael’s composition activities and piano performances for many years, Yamaha has been the exclusive piano for the New World Symphony since its inception in 1987.
After serving for 25 years as the Music Director of the San Francisco Symphony, Tilson Thomas stepped down and became the orchestra’s first Music Director Laureate. In celebration of his storied tenure in San Francisco, and in light of the PBS American Masters documentary “Michael Tilson Thomas: Where Now Is,” this posting takes a look back at his roots and traces his career from its beginnings to today, spotlighting his many accomplishments along the way.
Early Years
Michael Tilson Thomas was born into a family with long ties to the Yiddish Theatre and the film industry. His formal studies at the University of Southern California included piano, conducting and composition.
At the tender age of 19, MTT was named Music Director of the Southern California Young Musicians Foundation Debut Orchestra, where he served as both pianist and conductor for master classes with violinist Jascha Heifetz and cellist Gregor Piatigorsky. During his time with the ensemble he collaborated with Igor Stravinsky, Pierre Boulez, Karlheinz Stockhausen and Aaron Copland on premieres of their compositions at Los Angeles’ Monday Evening Concerts, showing his early penchant for modern music.
Tilson Thomas’ New York conducting debut came when he was just 24 years old. He had recently been appointed Assistant Conductor and pianist of the Boston Symphony Orchestra, and when William Steinberg, the orchestra’s Music Director fell ill during the first half of the program, he said to MTT, “You! Put your suit on! You’re going to conduct!” This brought him to the attention of the world stage, and his career took off.
Musical Influences and Compositional Style
MTT had an ongoing special relationship with the music of Mahler, and his performances and recordings of that composer are renowned the world over. He was noted both as a conductor of the standard repertoire, including the music of Bach, Beethoven, Debussy, and Stravinsky, and as a champion of such composers as Charles Ives, Carl Ruggles, Steve Reich, Lou Harrison, Morton Feldman, and Henry Cowell.
An adventurous composer himself, MTT wrote works ranging from large orchestral pieces to solo piano miniatures. Among his most notable compositions was “From the Diary of Anne Frank,” a commission from UNICEF which was premiered by the New World Symphony in 1990, narrated by the late Audrey Hepburn, as well as “Meditations on Rilke,” featuring mezzo-soprano Sasha Cooke and bass-baritone Ryan McKinny.
Career and Awards
In addition to his quarter-century with the San Francisco Symphony, Tilson Thomas served two stints as a Carnegie Hall Perspectives artist and appeared on over 120 recordings as a conductor. He also made numerous television appearances, including the Keeping Score PBS series as well as a series with the London Symphony Orchestra for BBC Television, broadcasts of the New York Philharmonic Young People’s Concerts from 1971 to 1977, numerous productions on PBS’s Great Performances, and the aforementioned PBS American Masters documentary.
His many awards included 11 Grammys® and the Kennedy Center Honors in 2019, as well as a National Medal of Arts, his naming as an Officier de l’Ordre des Arts et des Lettres of France, the Koussevitzky Prize at Tanglewood, and a Peabody Award for his radio series The MTT Files. He has also been inducted into the California Hall of Fame and the American Academy of Arts and Letters, and previously served as Principal Conductor of the London Symphony Orchestra and Principal Guest Conductor with both the Los Angeles Philharmonic and Boston Symphony Orchestra.
MTT25: An American Icon
The San Francisco Symphony’s 25-day celebration of his history with the orchestra in 2020 culminated in a Virtual Tribute event — MTT25: An American Icon — involving many of the orchestra members and guest soloists who have shared the joy of making music with Tilson Thomas over the years.
During the event, MTT reflected, “I do feel that there have been lots of moments when … as repertoire was premiered, or brought to life again in a completely new way, that we were right there on the cutting edge of what the performing arts are supposed to do — being a living testimony of keeping these great and noble ideas going forward … which music at its best witnesses so profoundly. It’s been a great honor.” And so it has been a great honor for all of us to share in the legacy of Michael Tilson Thomas — a legacy that will endure for all time.
From a musician’s perspective, when a band is described as being “locked in,” it reflects a level of precision and cohesion that comes from intentional rehearsal and strong musical chemistry. This means that musicians are not just individually skilled, but they listen to each other, understand their roles, and know their parts deeply. They play with clarity, respecting the space within the arrangement, ensuring that no one is stepping on anyone else’s part. This results in a unified, cohesive sound that feels polished and connected.
Achieving this doesn’t happen through individual practice; it’s the product of many hours spent rehearsing together as a group, learning how to lock in with one another. While mastering your instrument is essential, playing in a band requires focus on how your part fits into the larger picture — making the group sound great rather than just excelling individually.
In non-musical terms, being locked in can also describe the closeness of our relationships with each other.
You may have heard me mention that the amount of time someone dedicates to practice directly influences their level of expertise. It’s often said that mastering a skill requires around 10,000 hours of dedicated practice. That’s equivalent to working full-time (40 hours a week) for seven years! Before The Beatles recorded their first album, they had already accumulated 10,000 hours of practice as a band, which was a critical factor in their success. Consistent, dedicated time is the key to achieving that level of musical excellence.
If you’re a volunteer musician on a praise team, you probably realize that with the limited rehearsal time you get at church, reaching 10,000 hours of practice could take a lifetime. Expecting to sound like Hillsong United isn’t realistic when you’re only practicing for an hour and a half each week or just squeezing in 20 minutes before the service starts. So, what can you do? My hope is that some of the following ideas will help you get closer to achieving the results you desire.
The natural, optimistic view of aging is that as we grow older, we gain perspective. As percussionists, most of us have gone through some compulsory stages of development, ranging from an inferiority complex to overconfidence, percussion nerd-dom and finally acceptance of being somewhat void of an “instrumental” identity. It’s clear to me that we need to consistently confirm that our own percussion pedagogy is serving our students as developing musicians, not simply percussionists. This, of course, has been the subject of many of my lectures, articles and presentations, but there is always room to find new ways to focus on and serve our students.
At every turn, our instrument family gives us many opportunities to get caught in the details. Percussion encompasses multiple instruments, multiple techniques and serves multiple genres of music, which makes it increasingly difficult to stay grounded in the same foundational skills of music-making that other artists can more easily contextualize. Part of this challenge is simply the hyper-information age that we live in combined with an instrument group that is so ubiquitous and broad. We can easily suffer from option paralysis as we scroll through instructional videos, watch and listen to the world’s best percussionists, and sort through seemingly endless resources. It’s all too easy to spend more time watching, searching and listening rather than playing. How do we train our young percussionists to be musicians as well as cultivating excellence on an instrument that is so broad?
What is a Well-Rounded Percussionist?
Since the 1990s, the term “well-rounded percussionist” has been the focal point of percussion pedagogy. Creating the well-rounded percussionist became the lens through which we based all our percussion pedagogy. Performing specialists pushed back, rightfully so, arguing that a “jack of all trades, master of none” scenario would stifle the quest for excellence, creativity and innovation. Educators would convene at conventions, sharing stories of students who can barely find middle C, or could not decipher the lines and spaces if their lives depended on it.
The good news is that we have benefitted from this debate, and numerous performer-educators have helped us evolve faster than any other instrument family. What followed was two decades of new repertoire, more focus on chamber percussion and an amazing output of contemporary music for our instrument.
What does it really mean to create well-rounded percussionists? For me, as an educator who teaches many non-percussionists, this means creating percussionists who can think, hear, perform, create and experience music on an equal level with their instrumental and vocal peers. If done correctly, music education should be a holistic endeavor, where the instrument is secondary to the internal musicianship of the performer. On many occasions, I have witnessed a student performing on a secondary instrument who has the maturity equal to, or even excelling beyond that of a primary player on the same instrument.
Building the Foundation
I reflected on what it means to know music? Here is a short list:
Music Theory
Pitch
Rhythm
Aural Skills
Physical/Idiomatic
Tone
Expression
Timekeeping
Mechanics/Technique
Performance
Repertoire Study
Sight Reading
Recovery/Confidence
Creativity
Interpretation
Composition
Improvisation
Before trying to include everything on this list for every student, two large-scale questions must be asked of every music educator. Are your students experiencing music to a deep enough degree to:
Come back to your classroom next year?
Continue music when they leave your classroom?
Less than 5% of our students will go on to teach and/or perform music as a career. So, what and how we choose to teach must align with the end in mind. For all music educators (specifically public school teachers), the main goal should be music enrichment.
Music Enrichment
For the percussion section, there are two big challenges in creating a pedagogy that focuses on music enrichment.
UNEQUAL FUNCTION: First, the default vehicle for music education is the large ensemble. Although this has improved tremendously over the last three decades, historically, the function of the percussion section has been one of accompaniment, color, timekeeping and support. These are all noble functions of a section player, which we are still very proud to approach with artistry! However, this paradigm has made it very difficult to create well-rounded percussionists (and musicians) in an academic setting.
JACK OF “NO” TRADES: Second, our instrument family, which has, admittedly, evolved at least in part in such large ensemble environments, does not offer the opportunity to learn music on a single instrument. In sampling the average middle school percussion folder, you might see these parts for any given concert:
Piece 1 – Snare Drum
Piece 2 – Shaker
Piece 3 – Tacet
Piece 4 – Cymbals
In comparing this list to any trumpet/clarinet/violin or choir folder, you will see a drastic difference in how students experience their music ensemble. The obvious remedy for this inequality is chamber music. Unfortunately, most teachers don’t have the staff, space, time or players to design their entire band/orchestra curriculum around chamber music. As far as promoting the creation of a percussion ensemble at your school — the answer is yes. Yes. YES!
Being mindful of how you teach the fundamentals of each percussion instrument can yield results that can achieve one of the most important things in percussion education — transfer value (shout-out to Jeff Moore!). If you find yourself teaching a percussion skill that cannot be transferred somewhere else in our instrument family, adjust and adapt immediately! Aim to create young musicians who happen to have sticks or mallets in their hands!
CONTROVERSIAL OPINION ALERT!
I think young percussionists should exclusively focus on learning pitch, rhythm, ear training and movement. “Wait, how can you leave out the triangle, tambourine, cymbals, concert bass drum, castanets, maracas, etc.?”
We cannot exclude teaching students these instruments. However, because of the limited time we have, it becomes a refined game of prioritization. A student who has a strong foundation in pitch, hand development and ear training will be able to prioritize tone, time and feel when shown the basic techniques of these difficult instruments. How, when and where to implement these techniques is the difficult job of the ensemble director or percussion teacher. However, if we are teaching skills that can be transferred to other parts of our instrument family or even to other instruments, the focus has to be on these foundational skills of musicality.
For example:
Teaching Keyboard Percussion becomes Fundamental of Pitchthrough Keyboard Percussion-Specific Skills
Teaching Snare Drum becomes Fundamentals of Rhythm and Movementthrough Snare-Specific Skills
Teaching Drum Set becomes Fundamentals of Movement and Rhythmthrough Drum Set -Specific Skills
In the next series of blog posts, I will provide techniques in each of these areas that are engaging, idiomatic, creative and most importantly, transferable. The goal is to make everything we teach in percussion foundationally sound while carefully balancing efficient, creative ways of teaching idiomatic techniques. This will serve our students by making connections across our own instrument family, as well as prepare them to be enriched through music with any instrumental vehicle they may choose in the future.
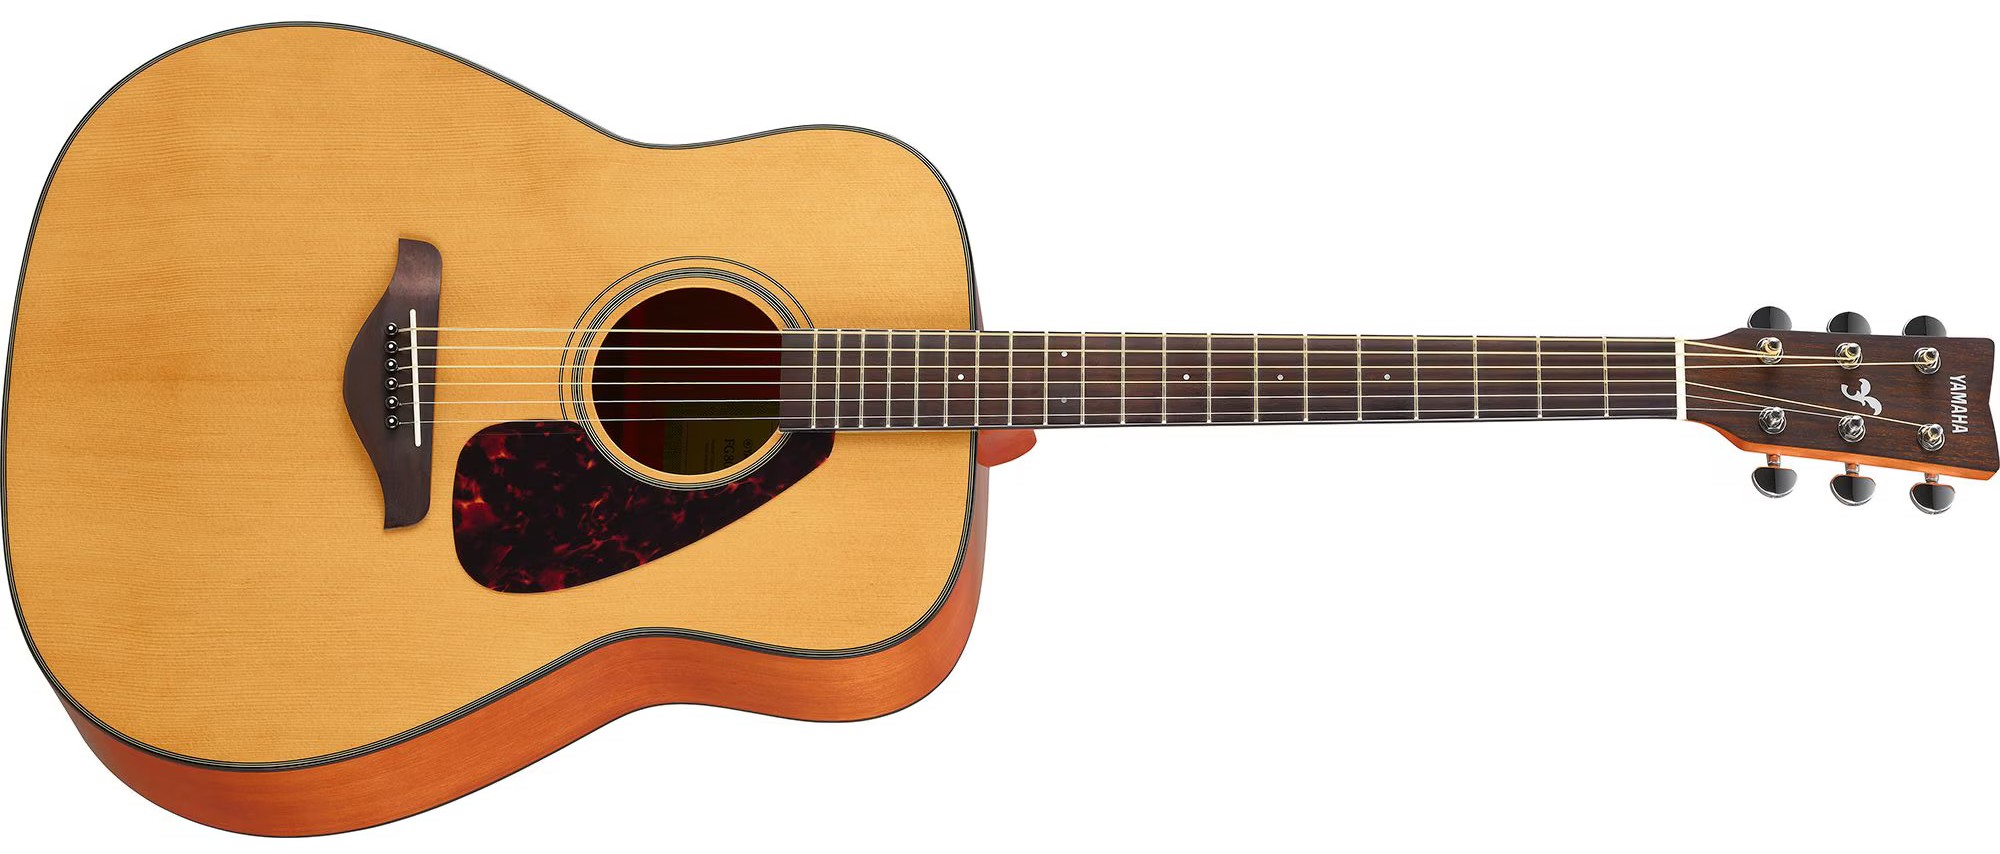
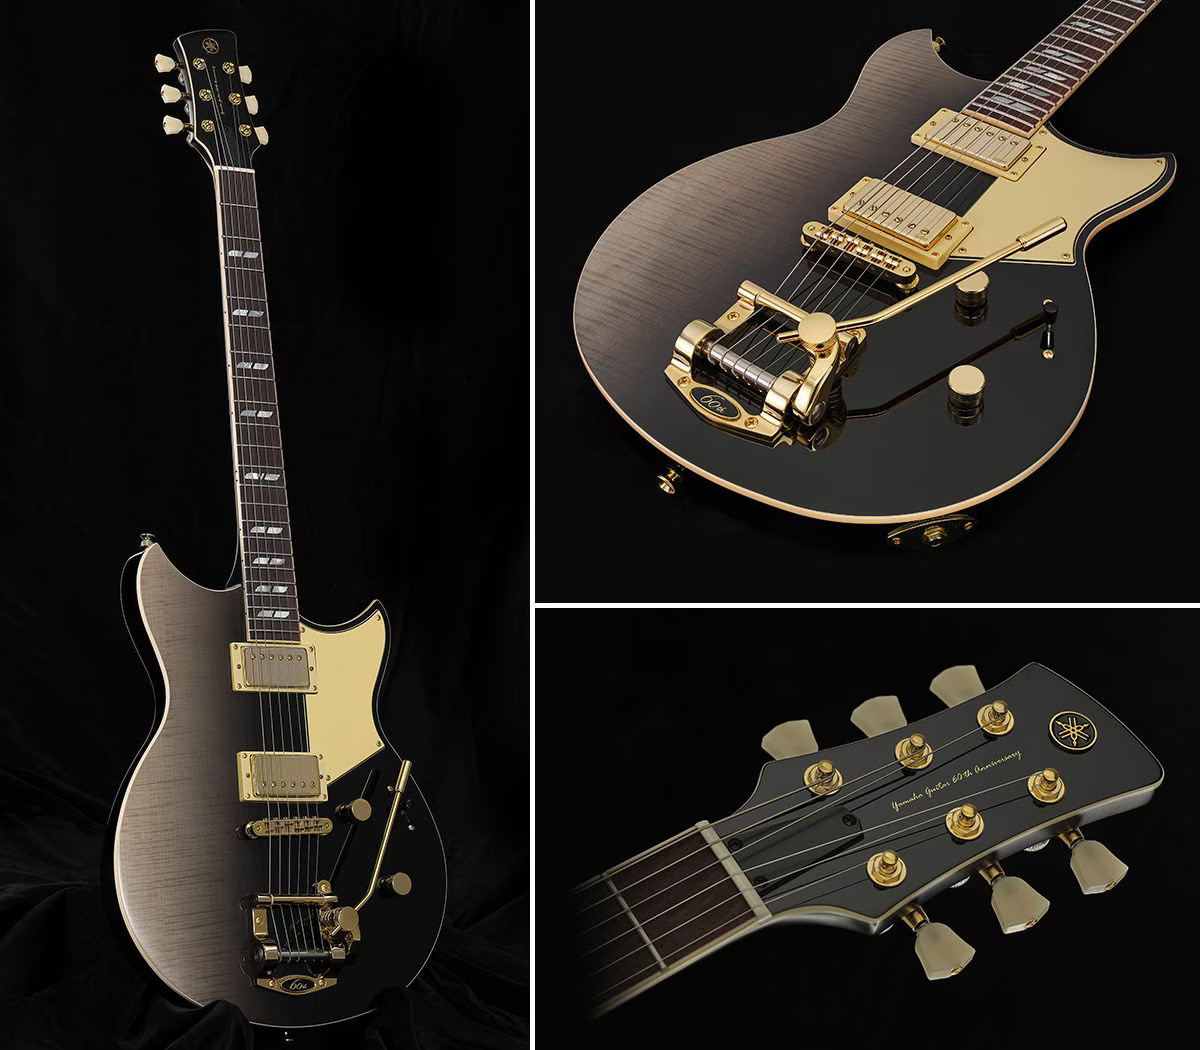
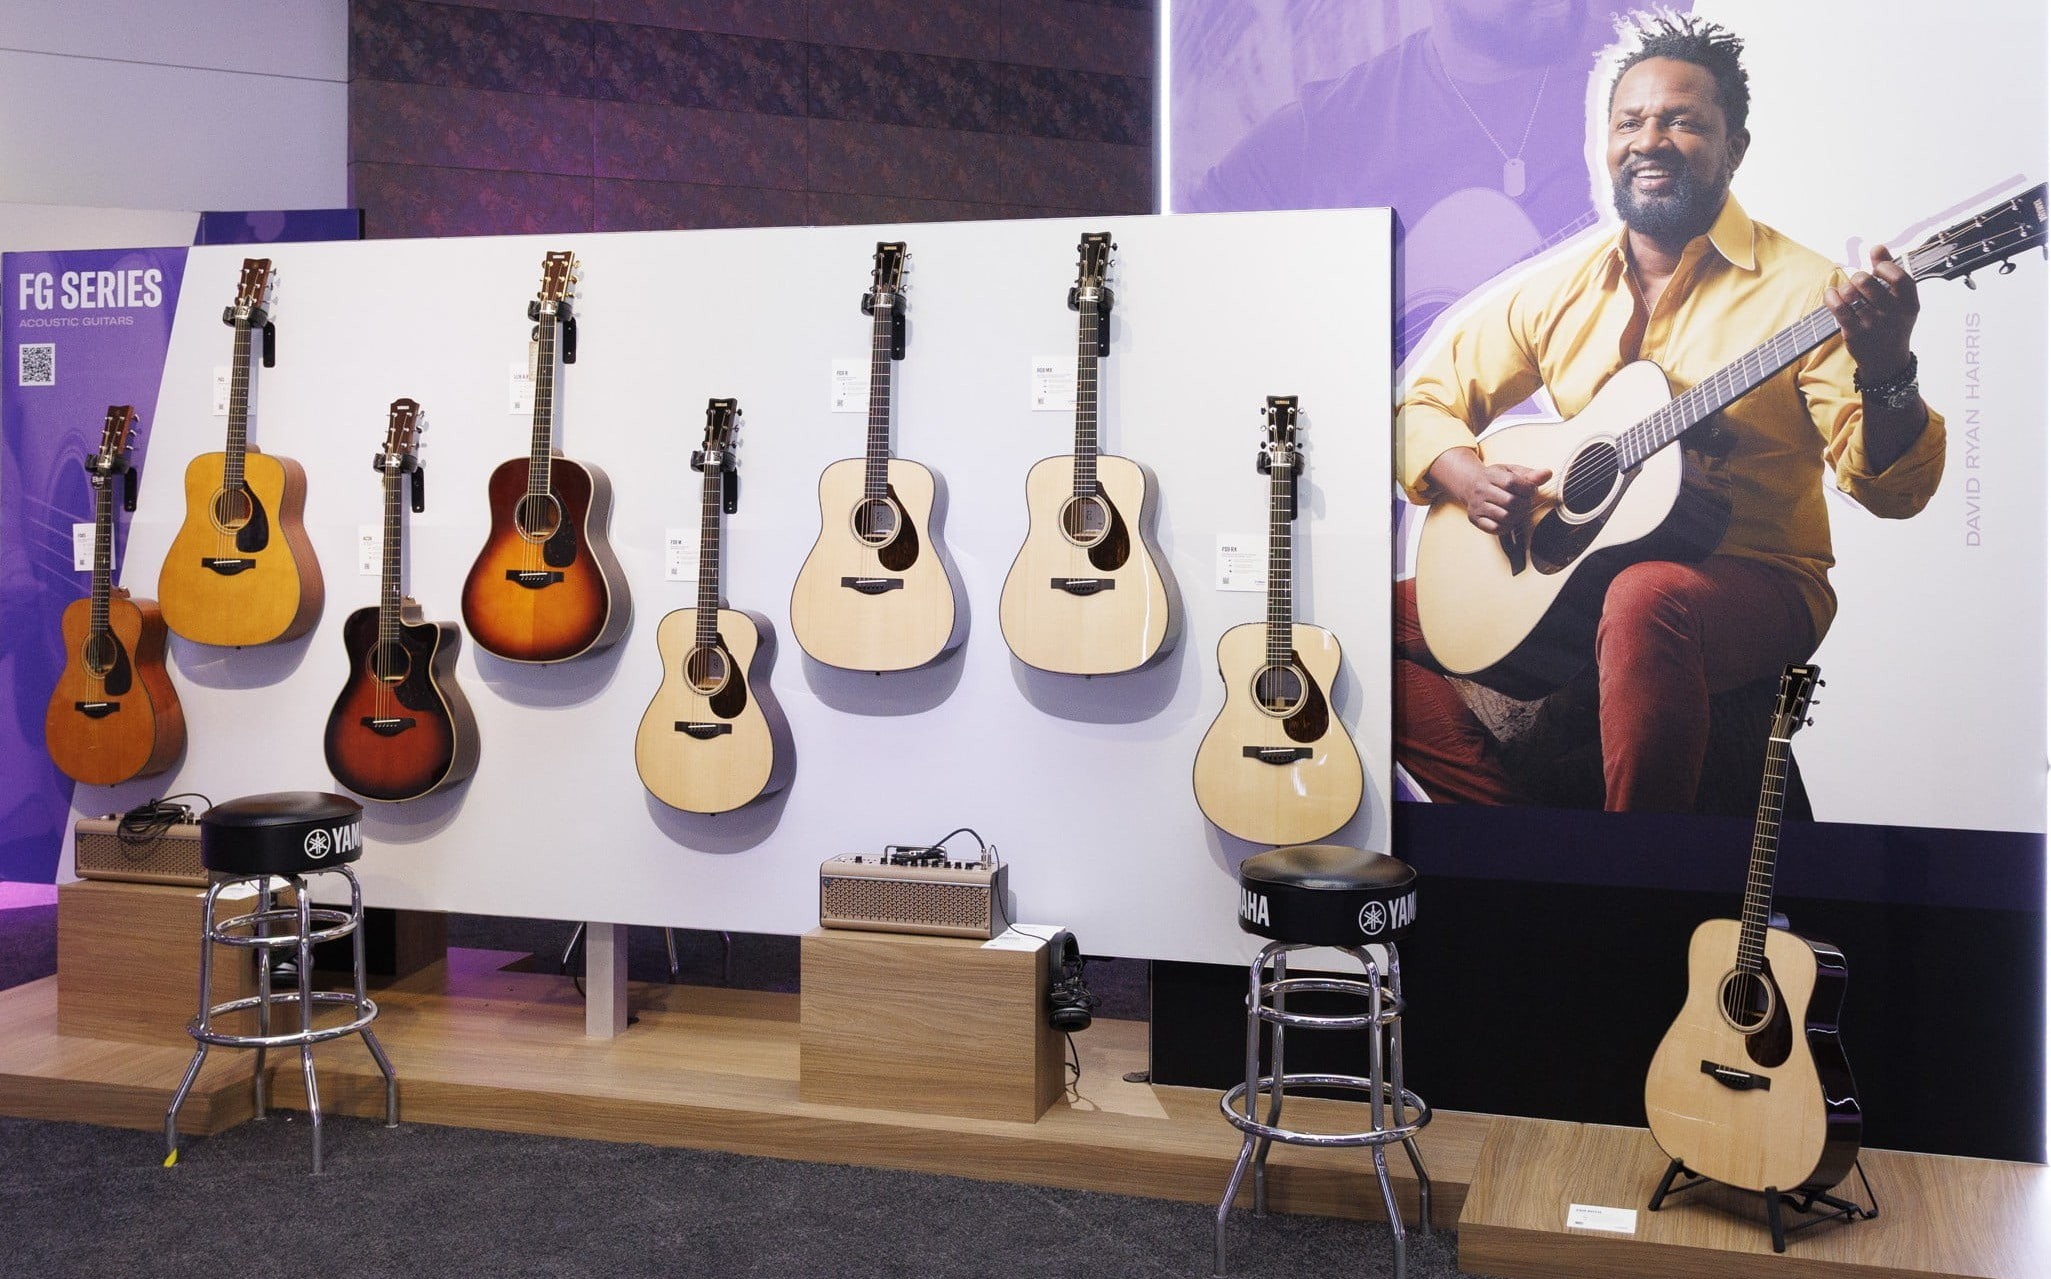
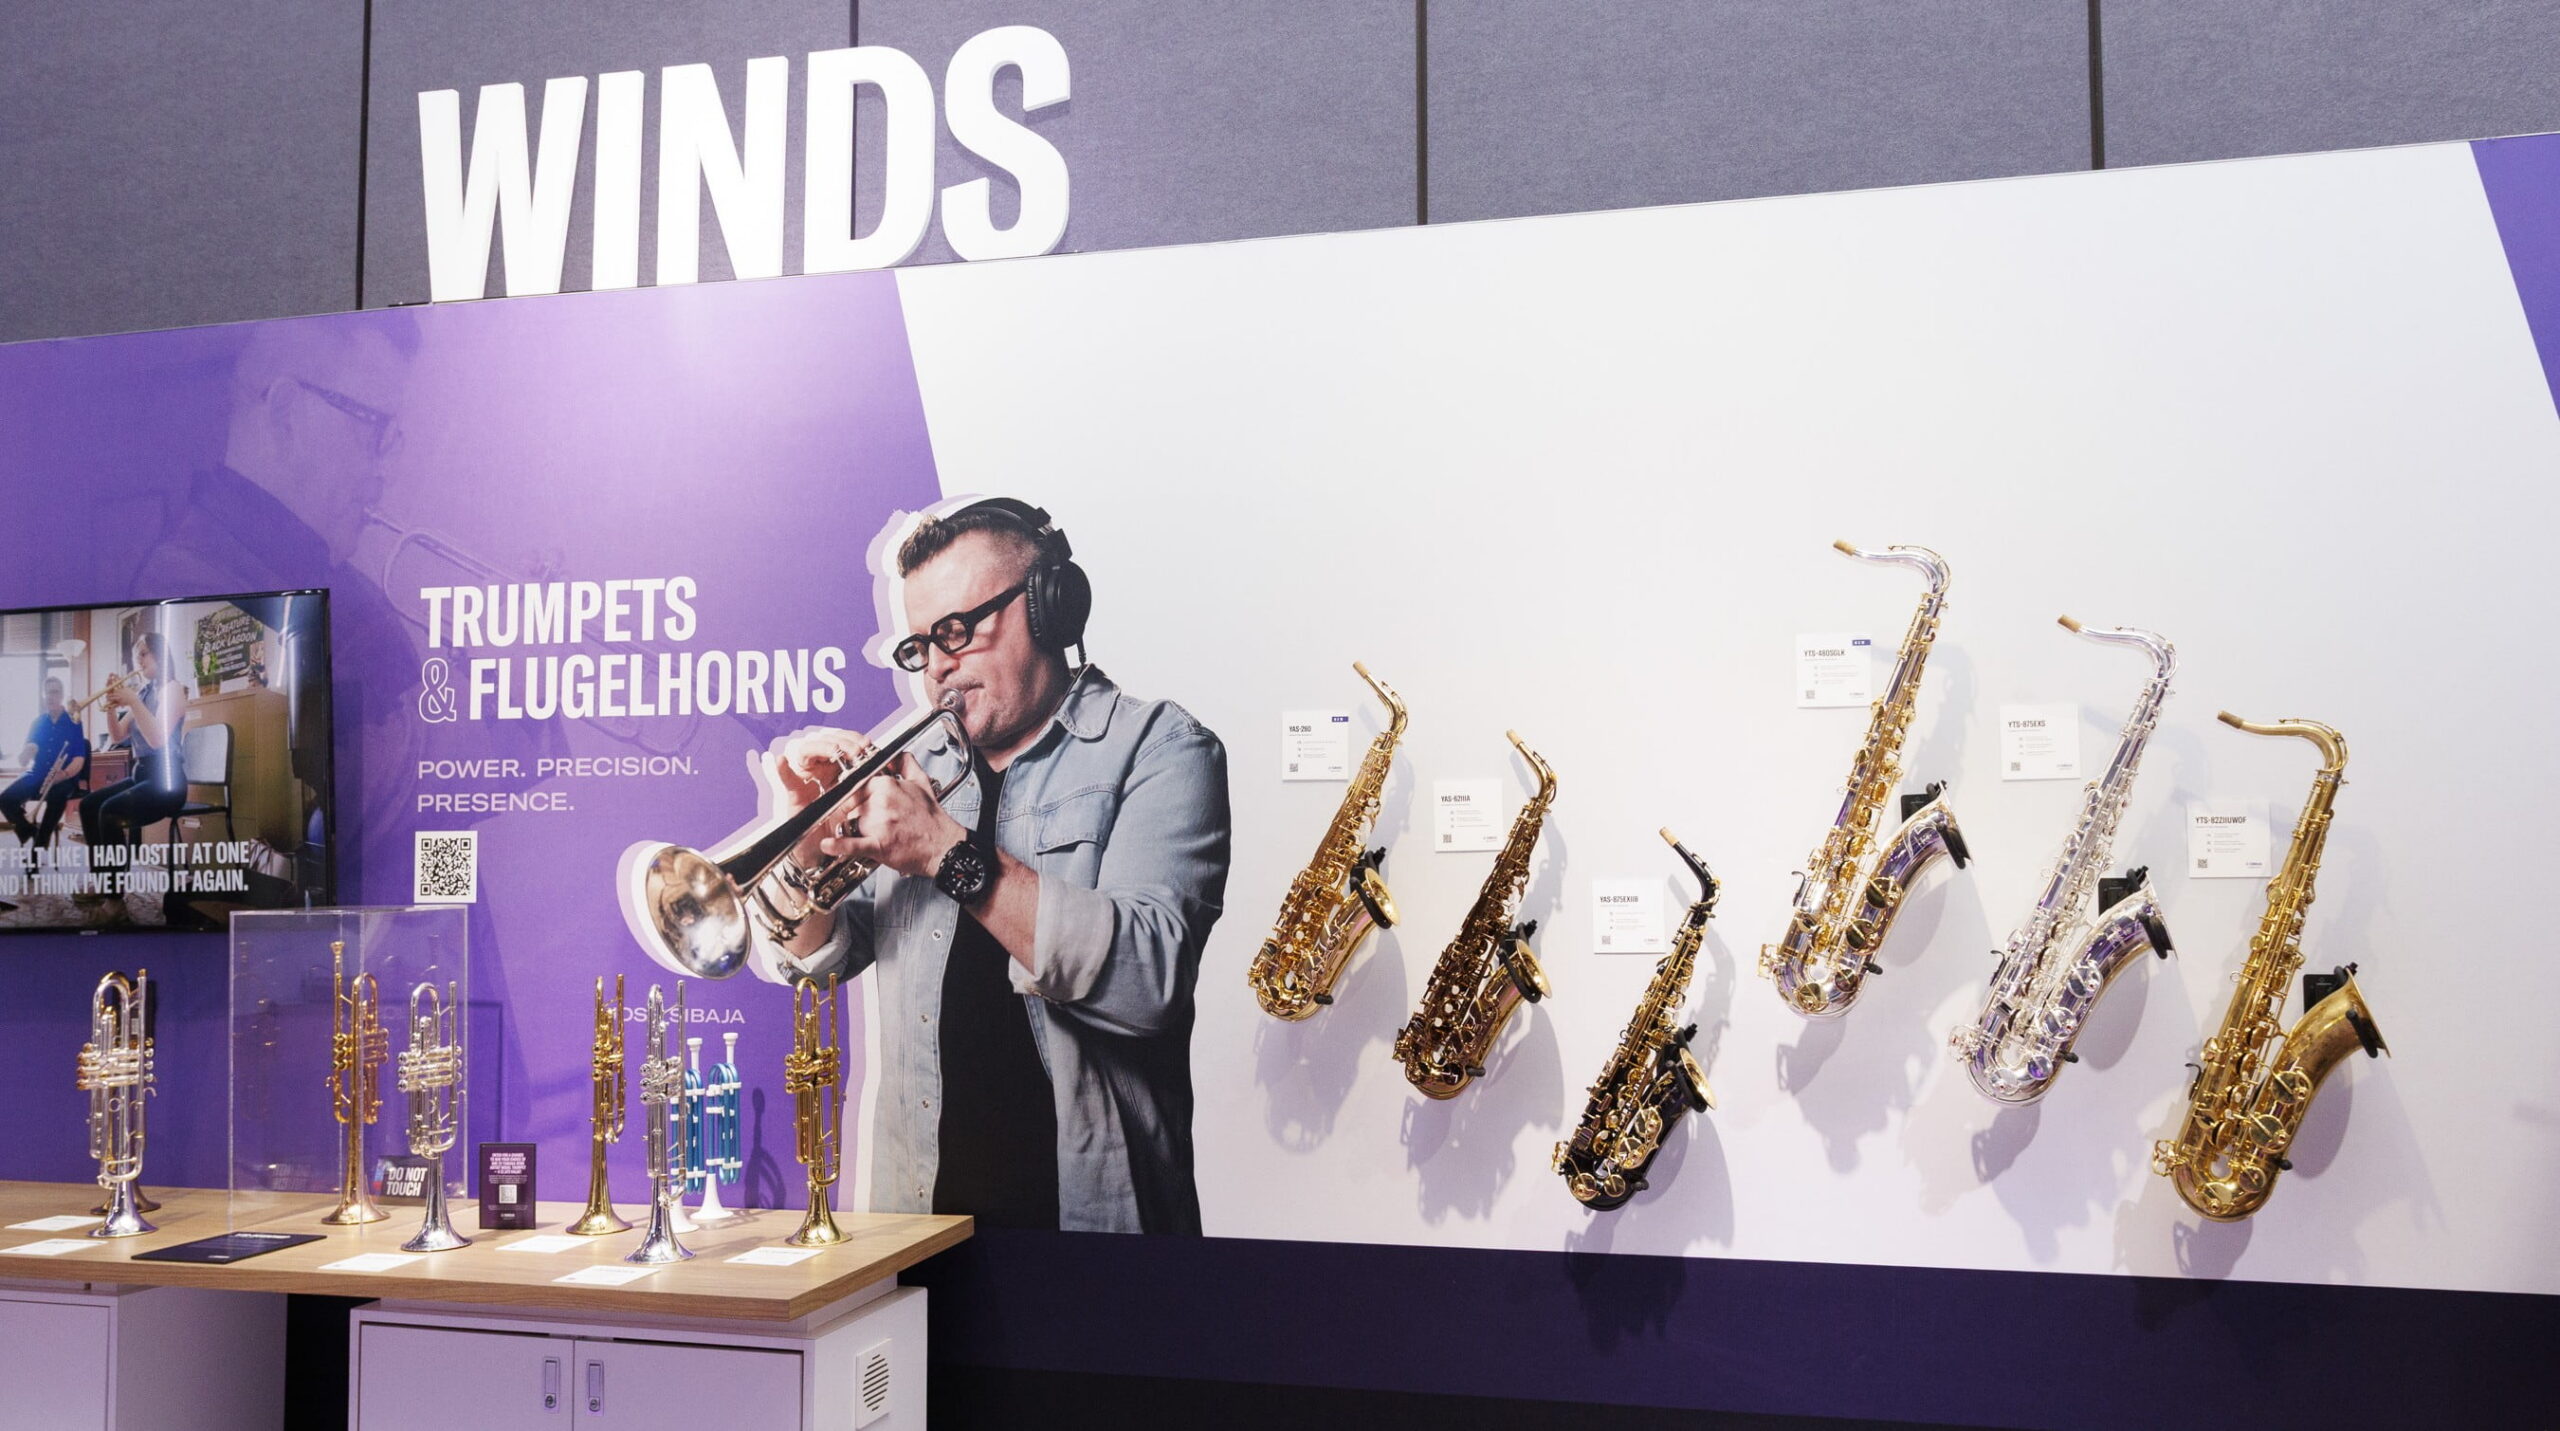
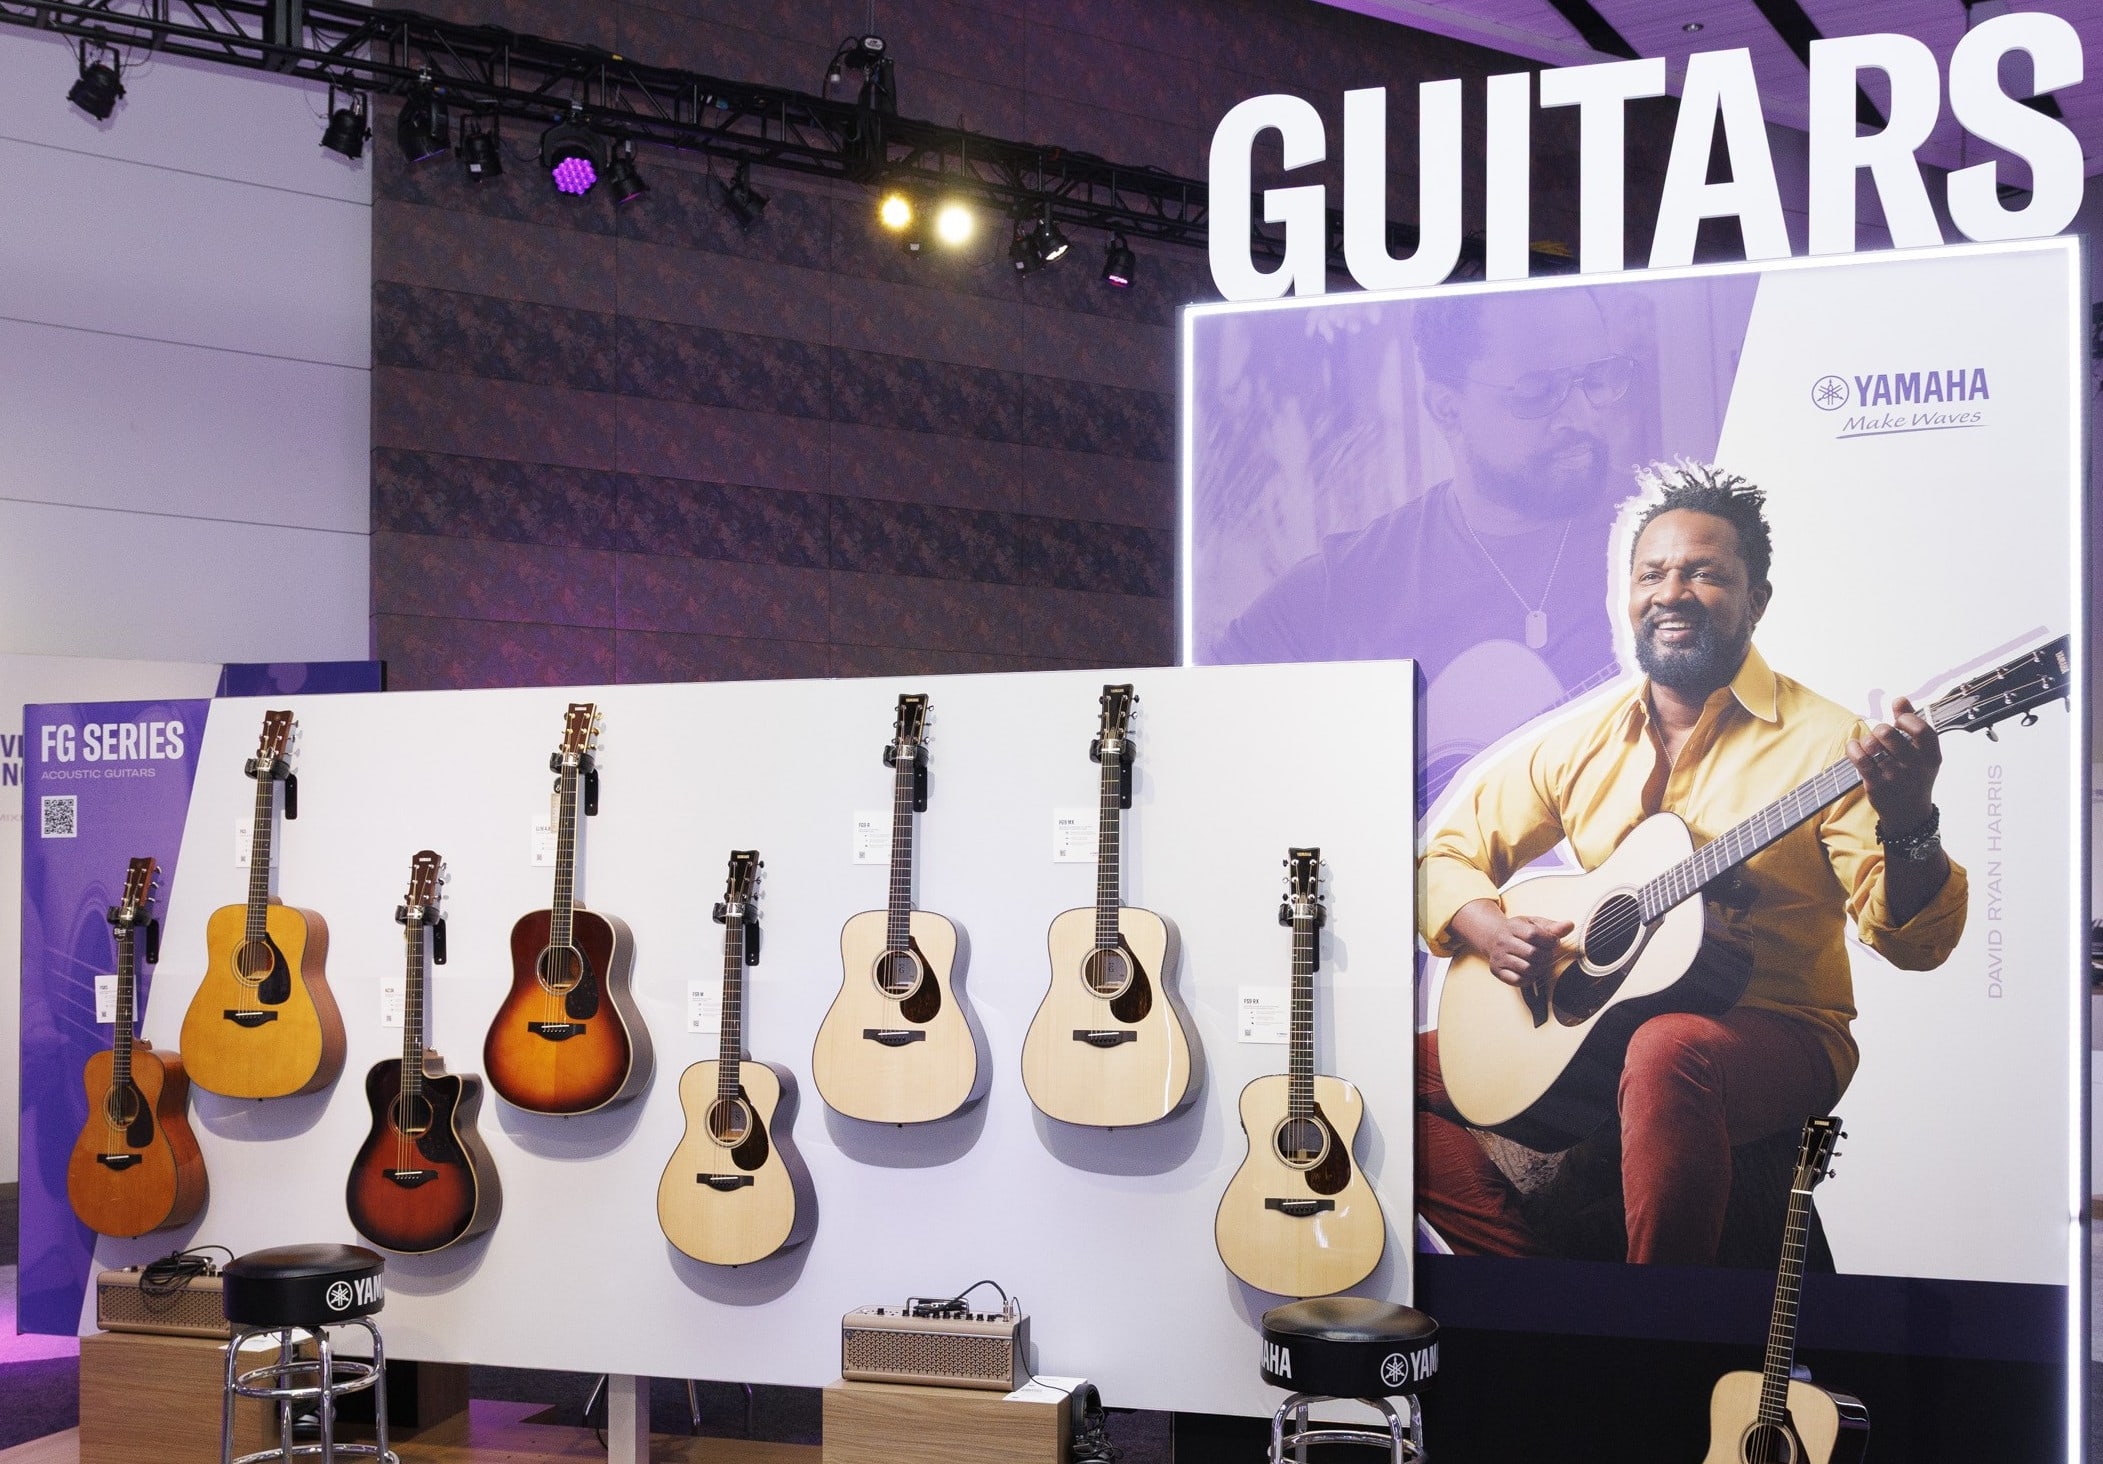
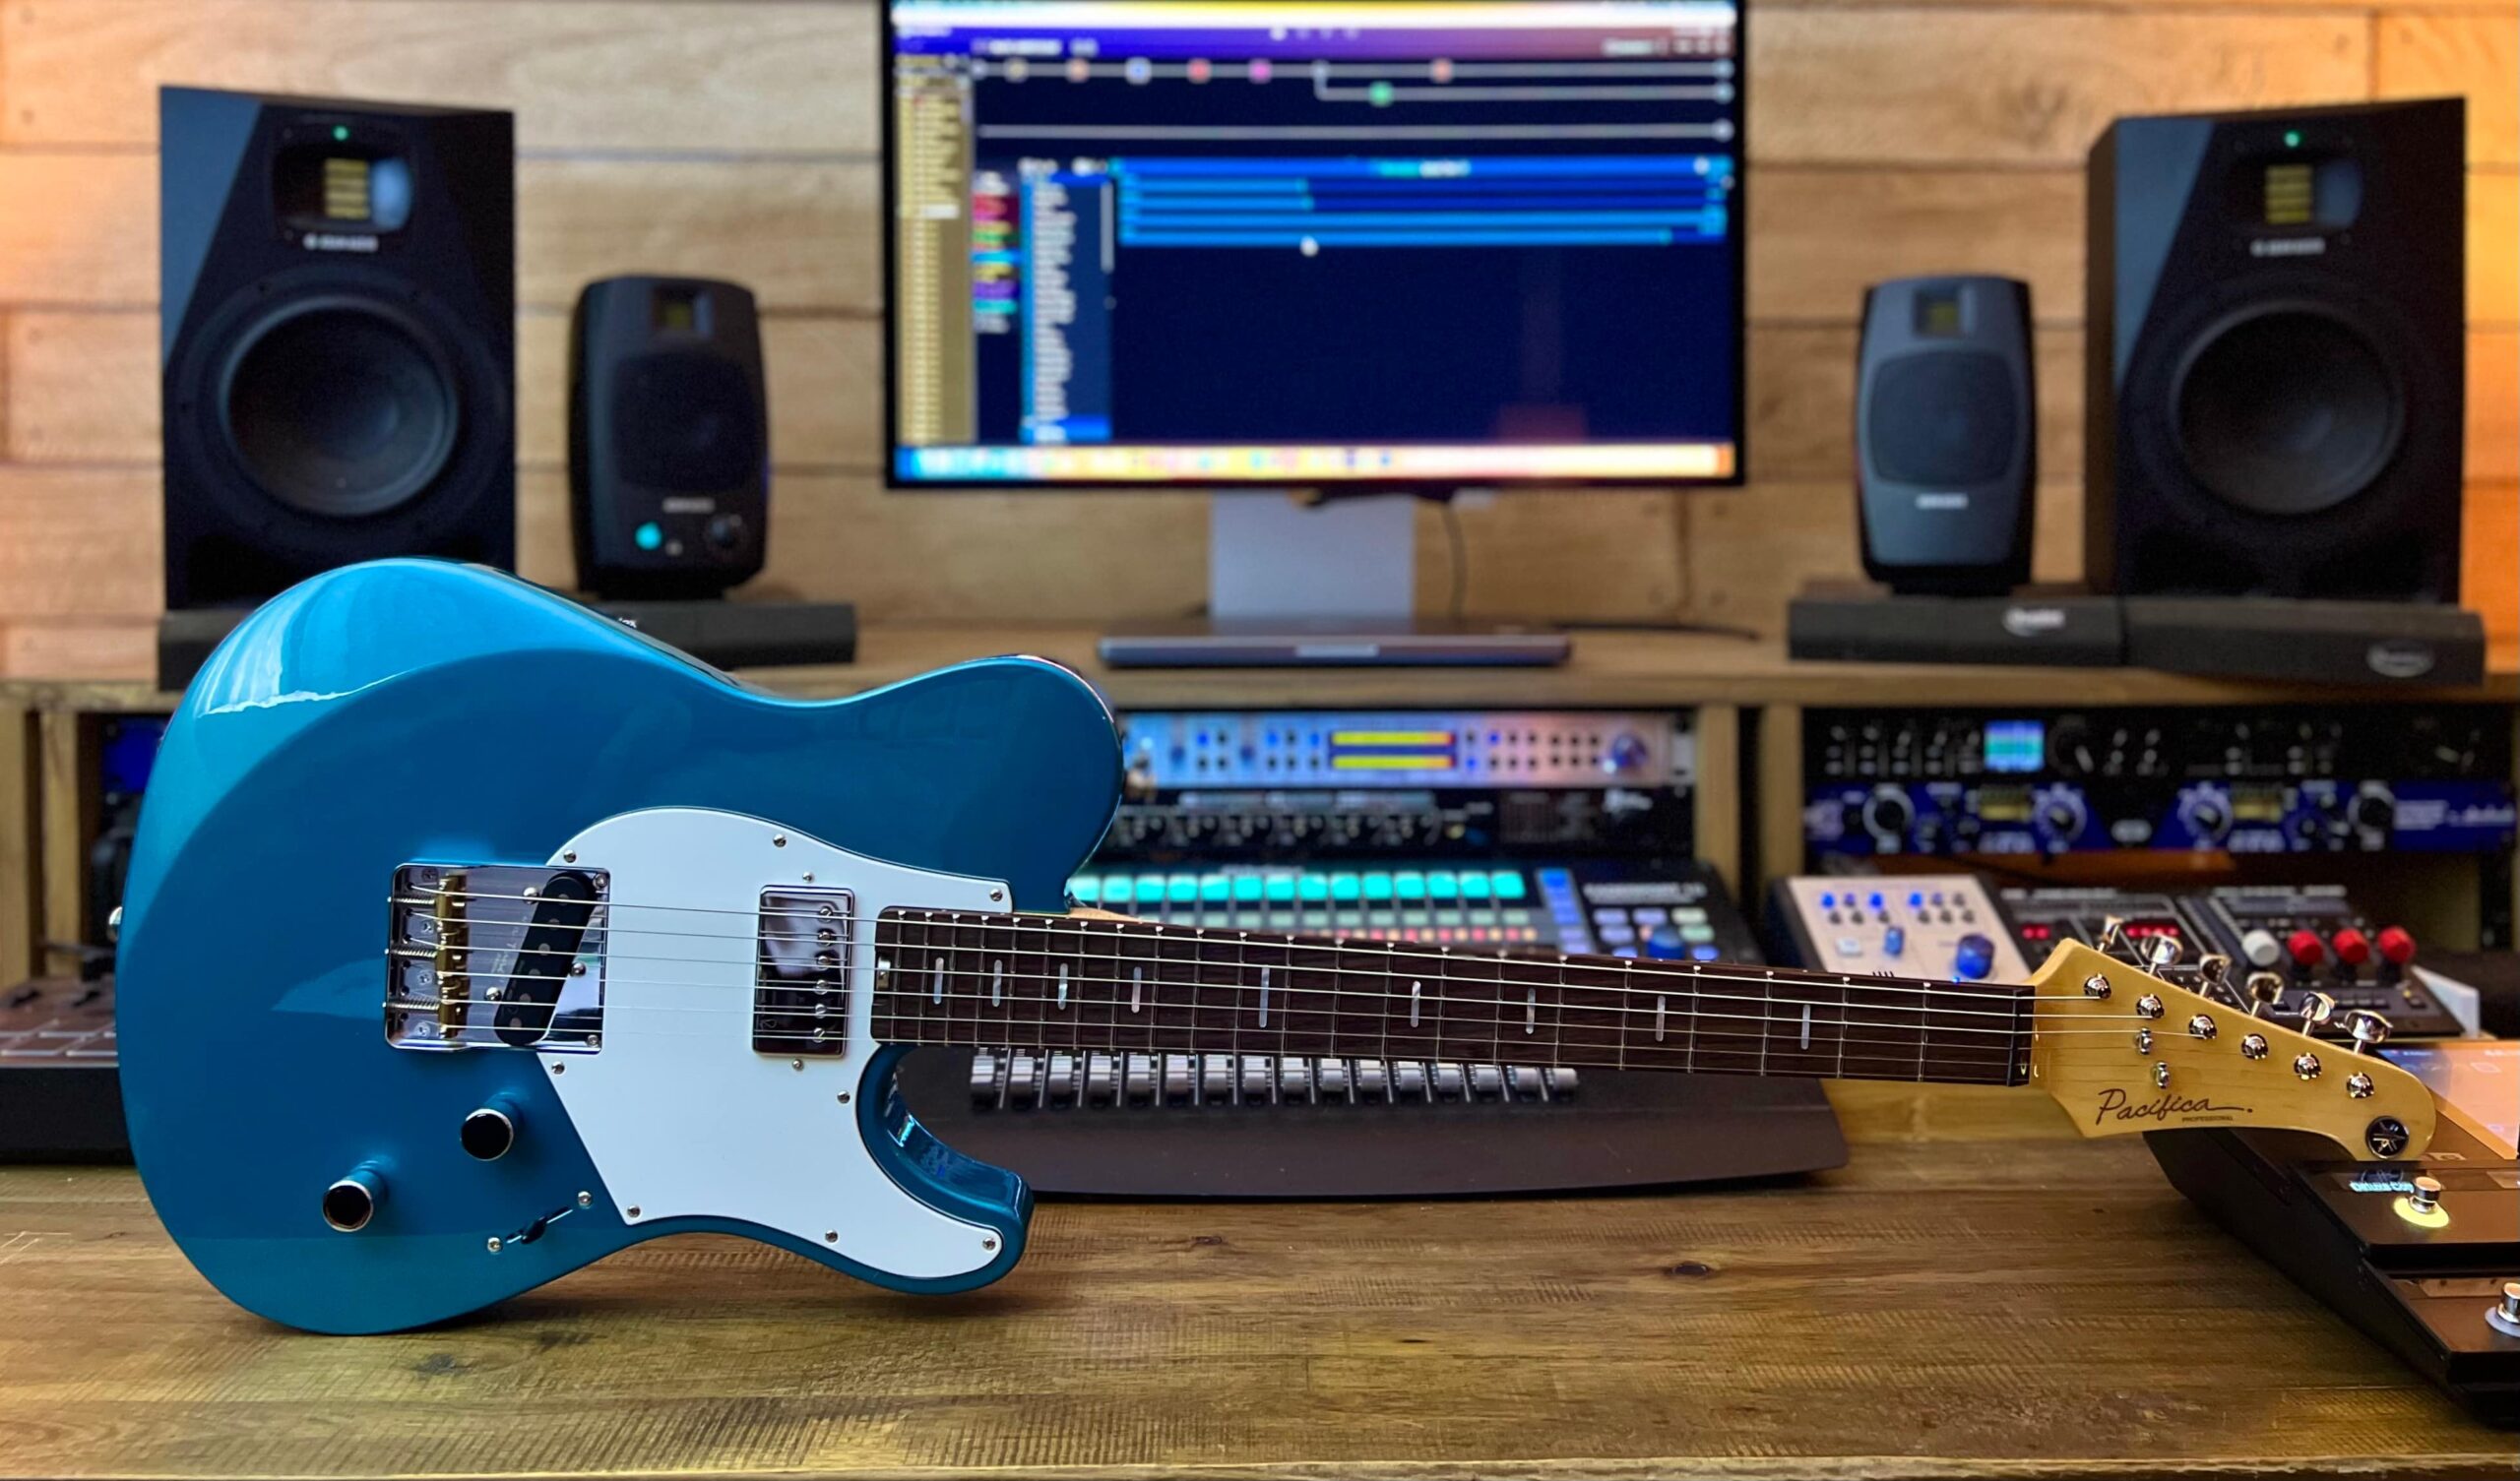
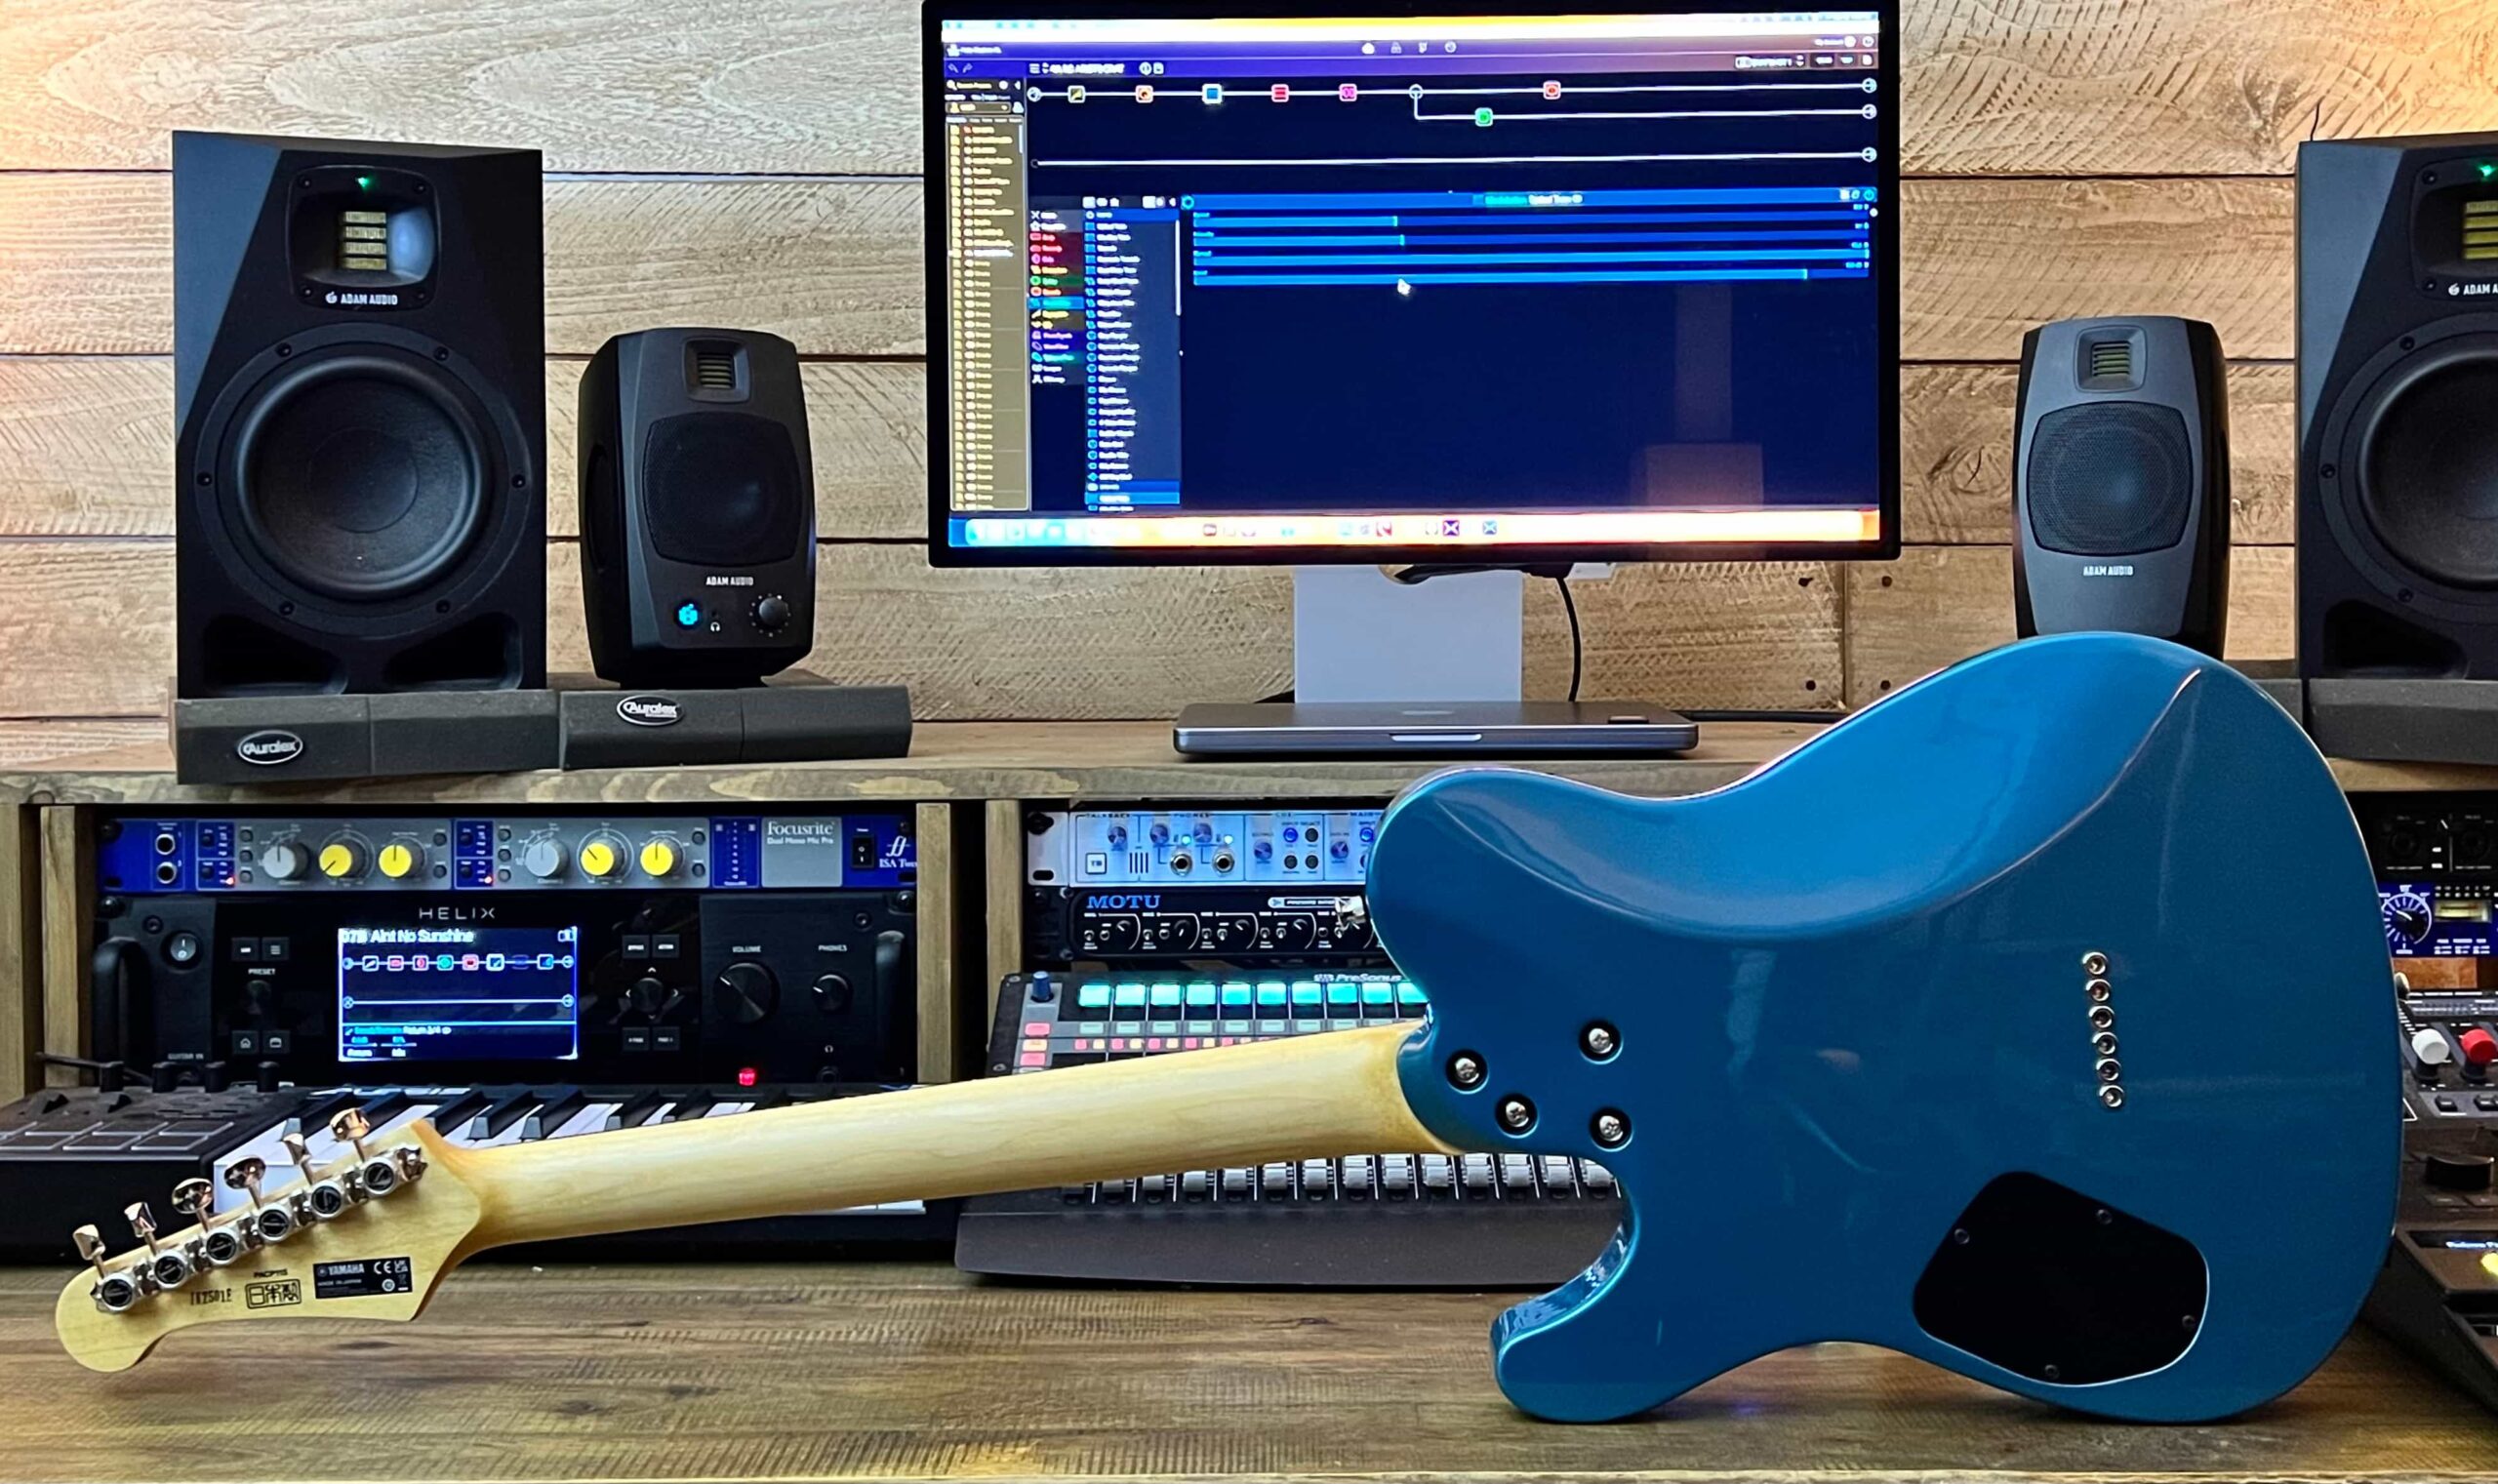
In January 2026, Yamaha Guitars kicked off its 60th anniversary celebrating six decades of crafting quality acoustic and electric guitars.
In six decades of excellence, Yamaha has created incredible products, pioneered ground-breaking technology, and offered a wide range of musical instruments for every style of player … from beginner to professional alike. You can find specific information about the history of Yamaha guitars in this blog posting.
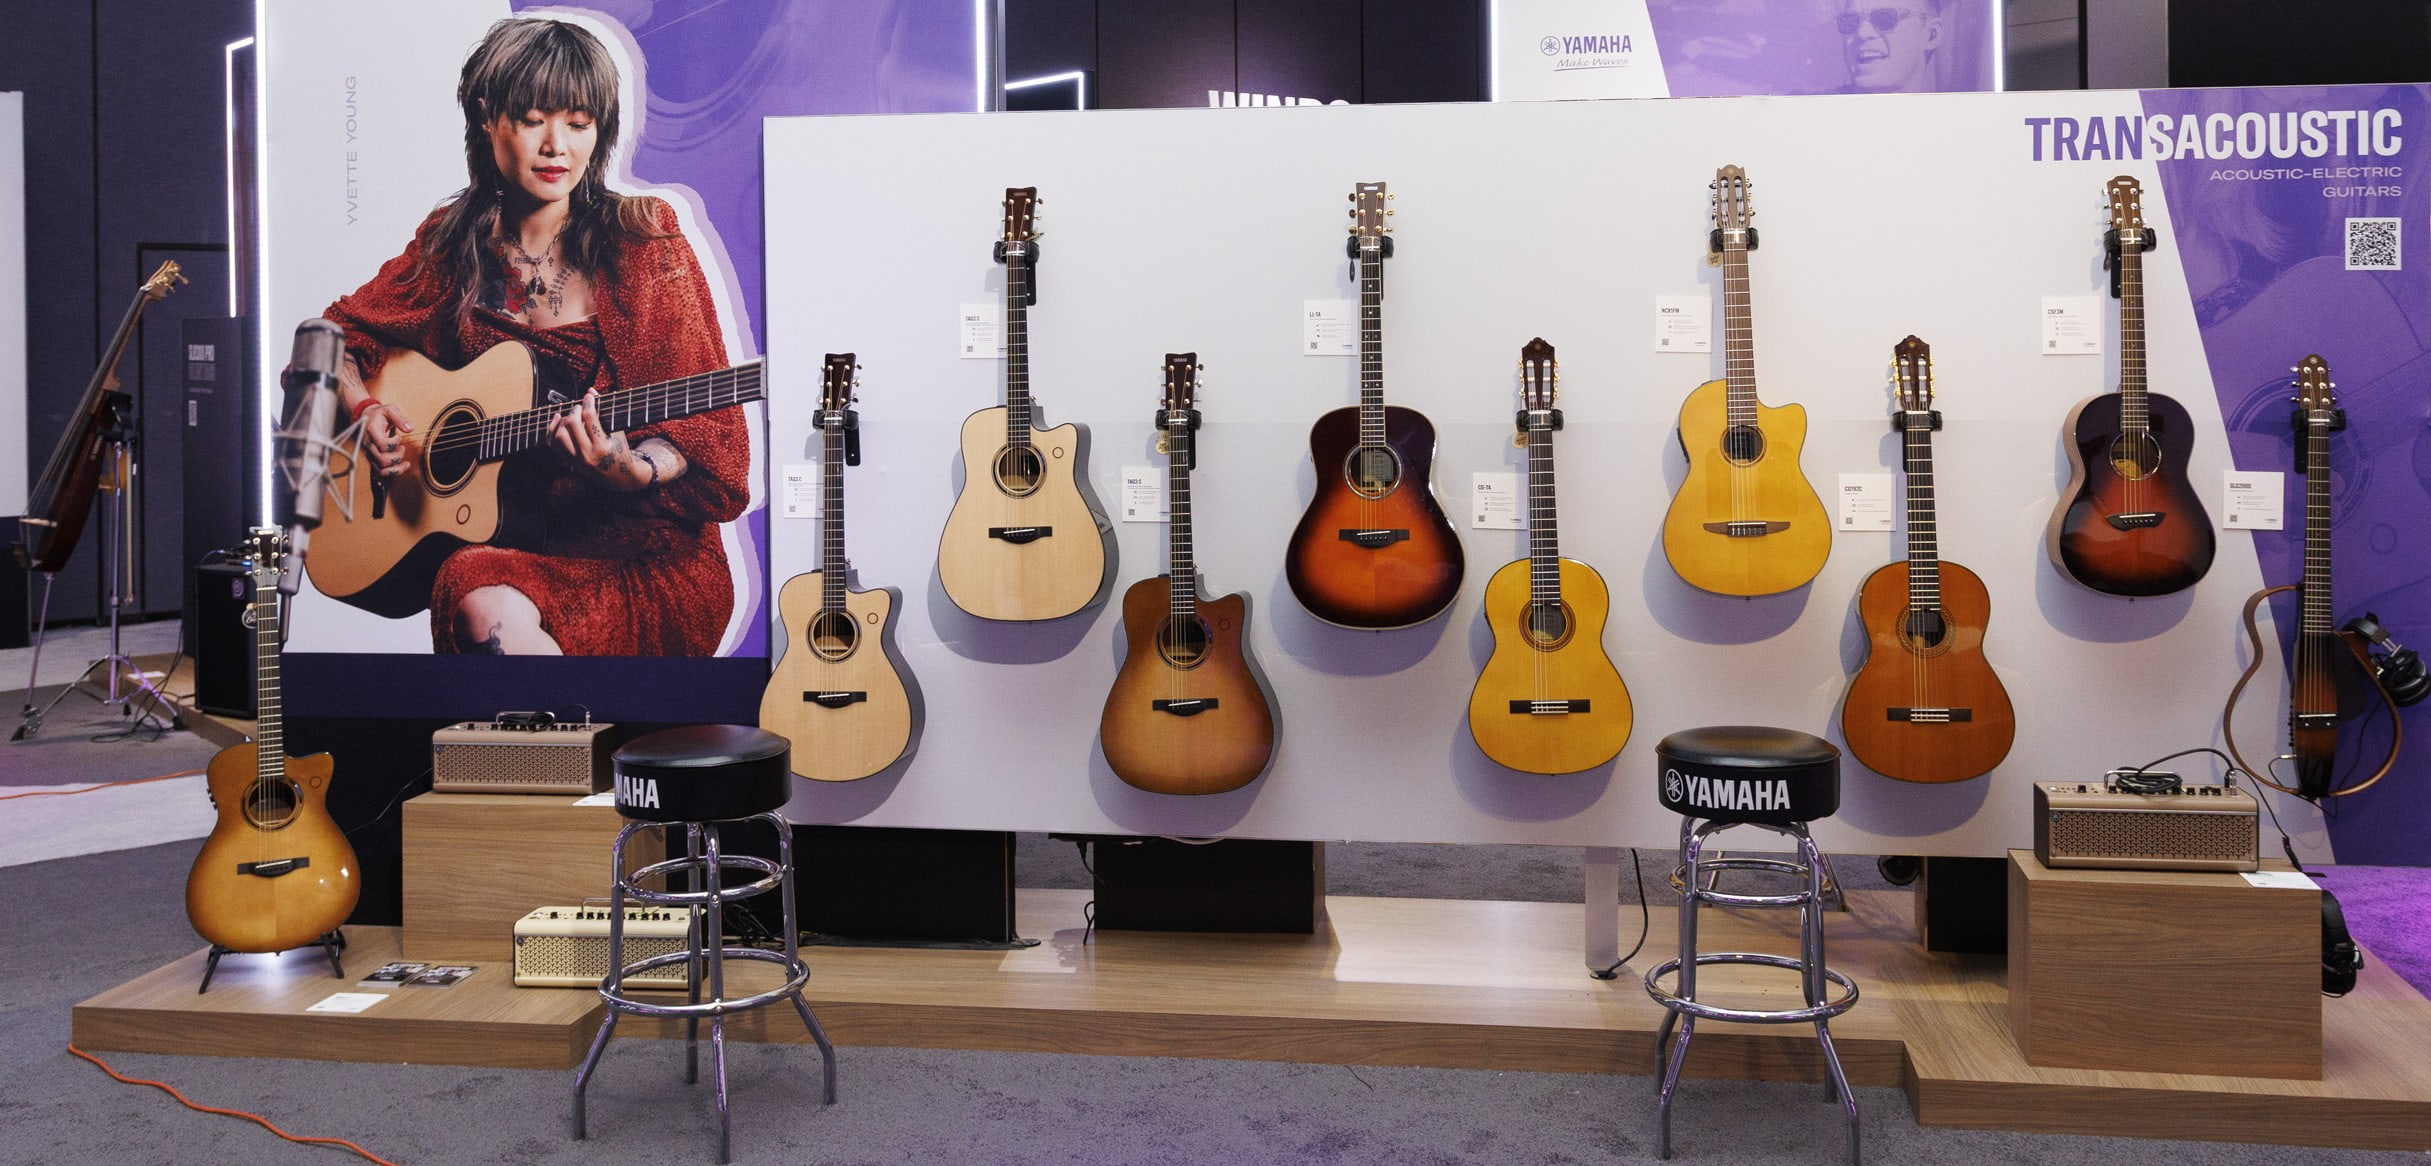
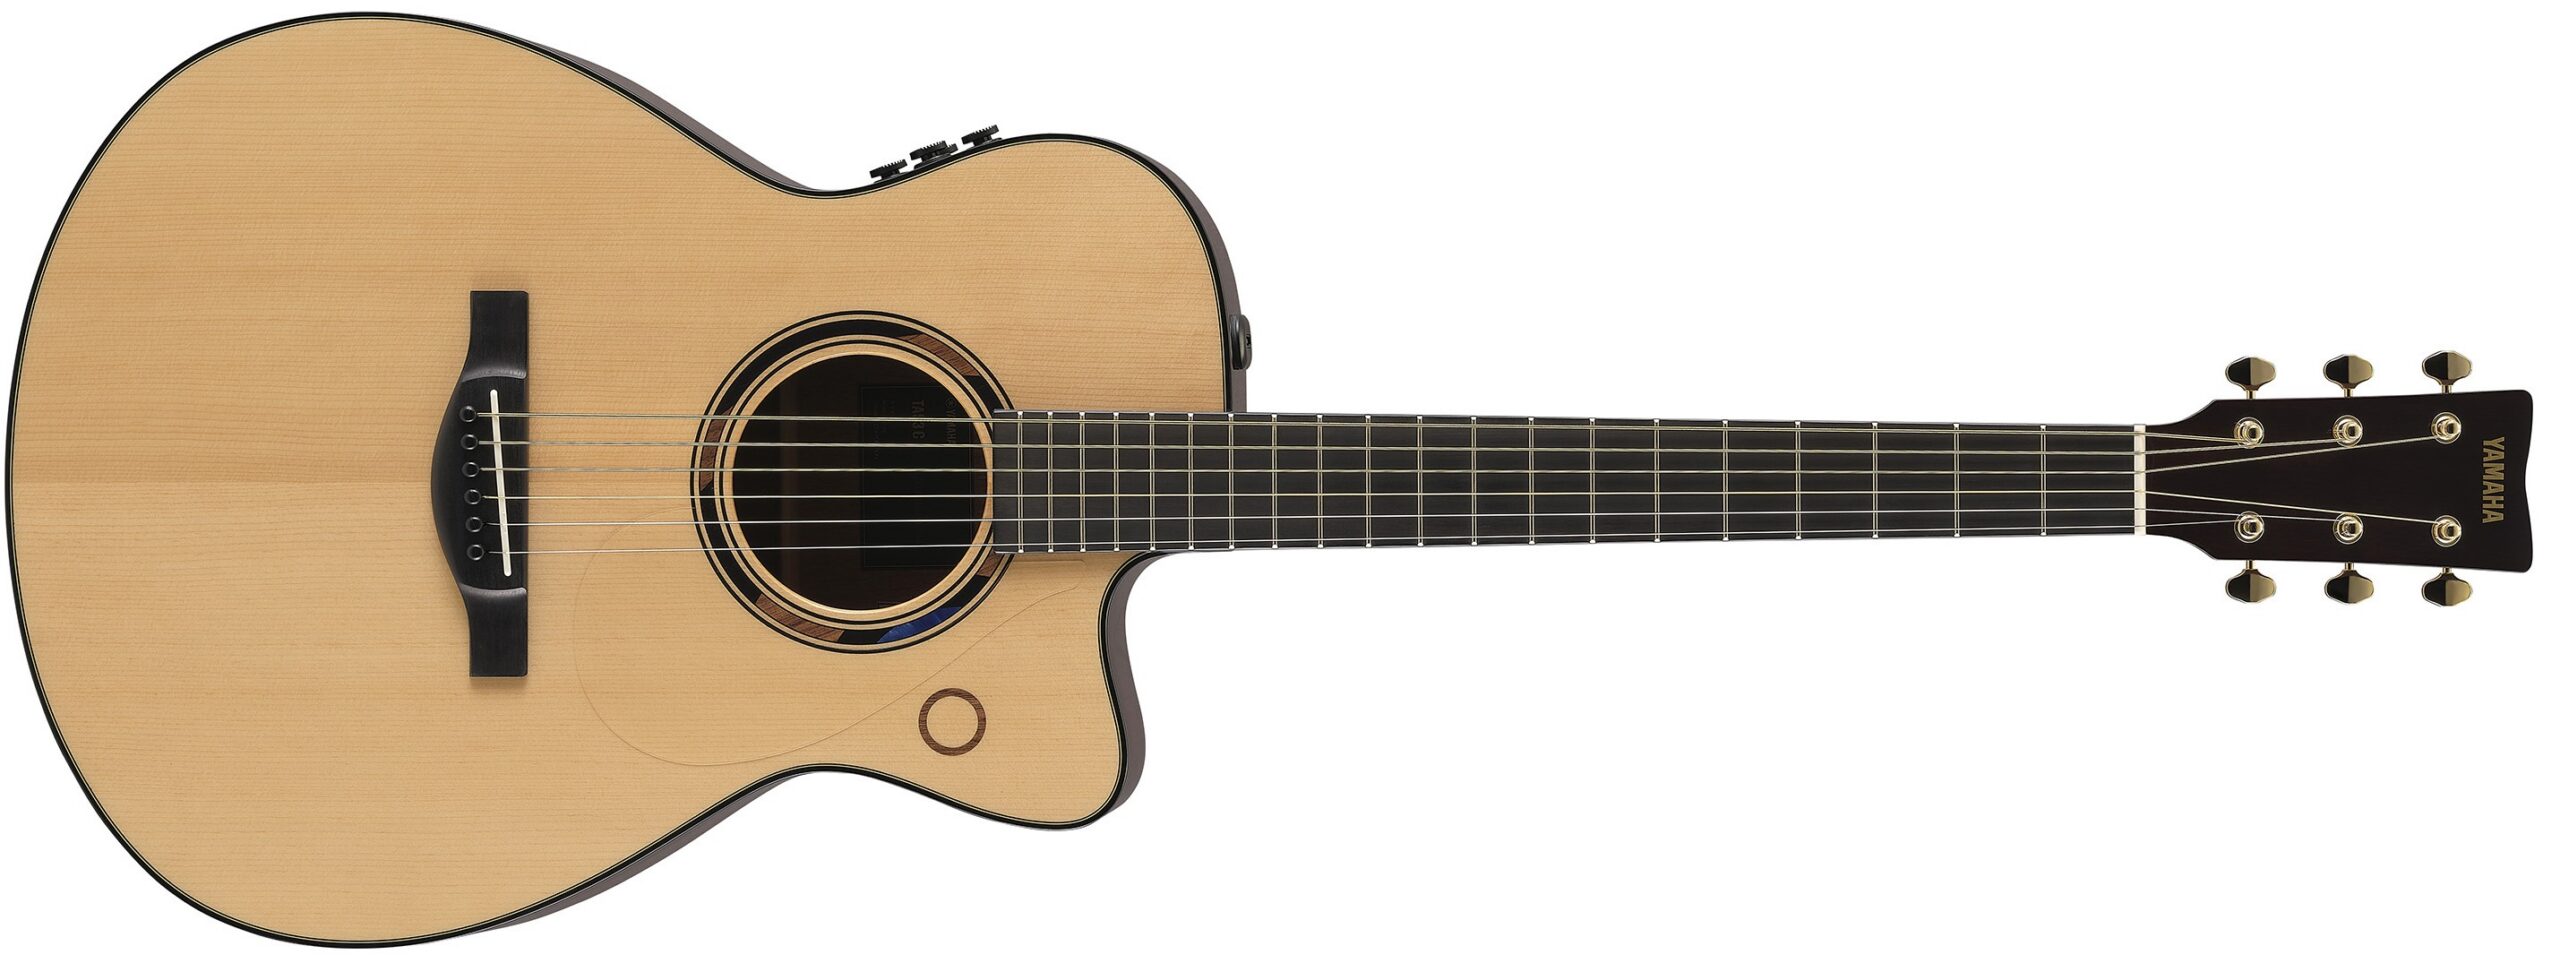
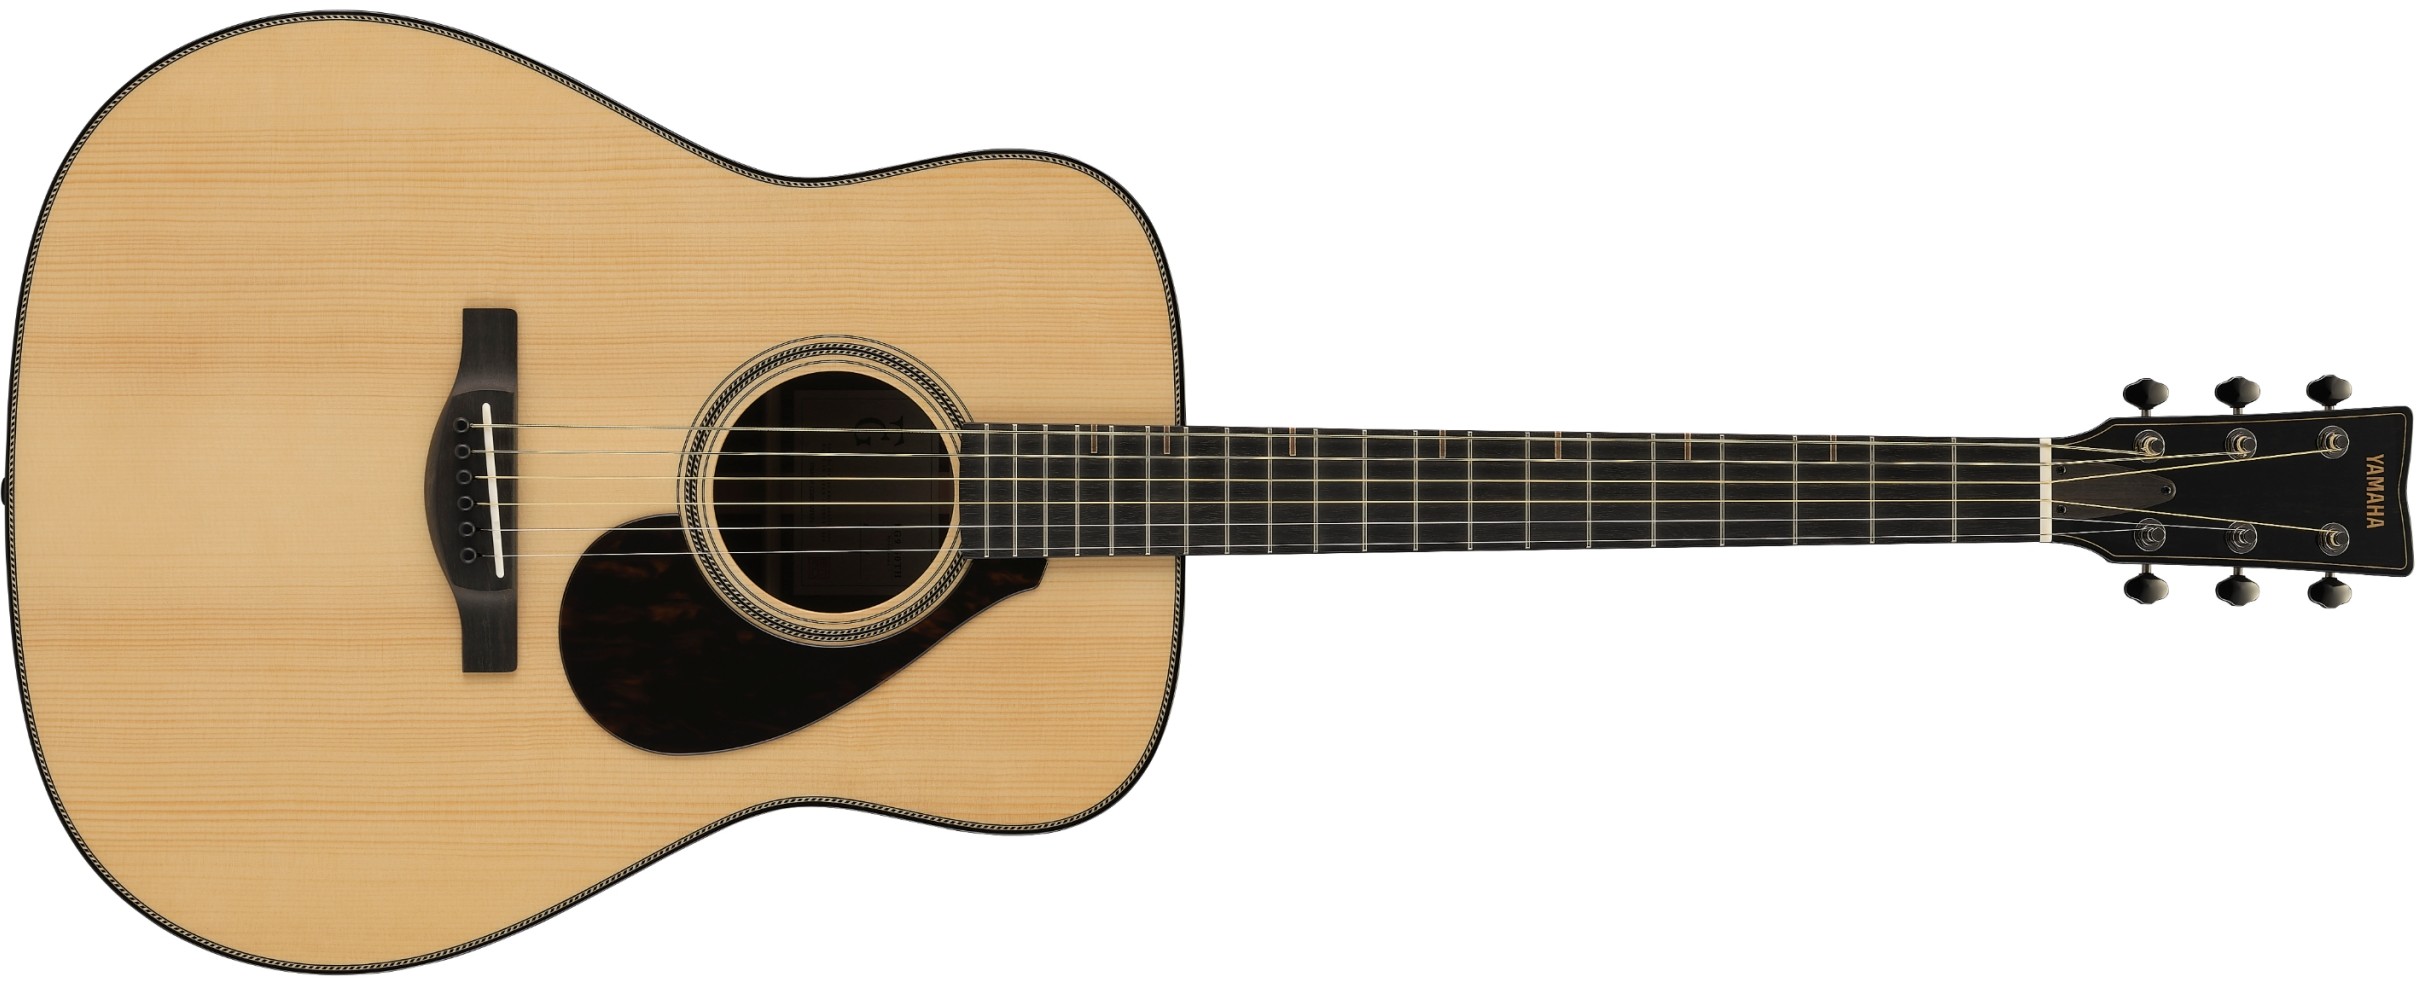
To commemorate this impressive milestone, Yamaha has introduced two limited-edition guitars: the 60th Anniversary FG9 acoustic and 60th Anniversary Revstar Professional electric guitar. I recently had the honor of trying out these incredible instruments in my studio. In this post, I’ll present my thoughts on both guitars, along with videos that let you see and hear them in action.
Yamaha 60th Anniversary FG9 and 60th Anniversary Revstar.
60th Anniversary FG9
Yamaha released their flagship FG9 acoustic guitar in 2023. There were initially two models: the FG9 R and FG9 M, which I described in detail in this blog post. Both feature tapered Adirondack spruce tops, one-piece mahogany bolt-on necks, bone nut and saddle, a classic ebony fingerboard and bridge, nitrocellulose finish, and elegant understated Japanese aesthetics. The FG9 R has a solid Indian rosewood back and sides, while the FG9 Mhas a solid mahogany back and sides. These were later supplemented by the FG9 RX and FG9 MX models, which added Atmosfeel™ pickup systems, as I described in this blog post.
Many of the appointments found on those guitars can also be found on the 60th Anniversary FG9, but Yamaha has outdone themselves with this latest model.
Playability
The 60th Anniversary FG9 is extremely comfortable to play. The fret-ends are smooth, and the tuning stability and intonation are impeccable, as they should be on a hand-crafted Japanese masterpiece like this.
The rounded V-shape satin neck allows for smooth transitions along the entire fretboard. The action was a little on the high side for me, but anyone who digs in hard will appreciate the extra volume and tonality a slightly higher action affords. The bonus to me was that it gave me the perfect playing action for the slide melody and close harmony parts I play in the video below.
Aesthetics
The elegant, understated Japanese aesthetic and distinctive design details of the 60th Anniversary FG9 give it a refined look and a unique character.
The Guatemalan rosewood back and sides provide a beautiful balance of visual elegance, with a naturally varied grain pattern that adds character. Yamaha has kept the all-solid tonewood complements natural, and the clear nitrocellulose finish brings the stunning natural grain forward, in the most pleasing way imaginable.
The one-piece tapered Adirondack spruce top delivers outstanding projection with exceptional clarity and articulate tone, making this instrument the perfect accompanist to vocals.
The satin-finished mahogany neck has a carefully crafted bolt-on neck joint, allowing for enhanced resonance and excellent tonal transfer from the thicker than usual back board of the guitar.
The inner label is made from traditional washi paper (an extremely thin handmade Japanese paper).
The rosette features rope-shaped inlays and purfling inspired by Japanese motifs, and the fingerboard inlays draw from kumiki woodworking, evoking the precision and beauty of Japanese craftsmanship.
The smoky black and gold open-geared tuners are also stunning, and flank the commemorative gold inscription on the back of the headstock. The fretboard and bridge are ebony.
The guitar also comes with a high-quality tweed hardshell case, along with a certificate of authenticity.
Tonality
The 60th Anniversary FG9 delivers outstanding projection with exceptional clarity and articulate tone. When playing fingerstyle, every note has its own voice, while strumming passages are full and distinct, enhancing the harmonic structures with a lovely percussive overtone.
Single-note passages sit perfectly under the fingers, and sing with a sweet, vocal-like tonality. I particularly liked how a glass slide sounded on the strings, as you’ll hear in the video below.
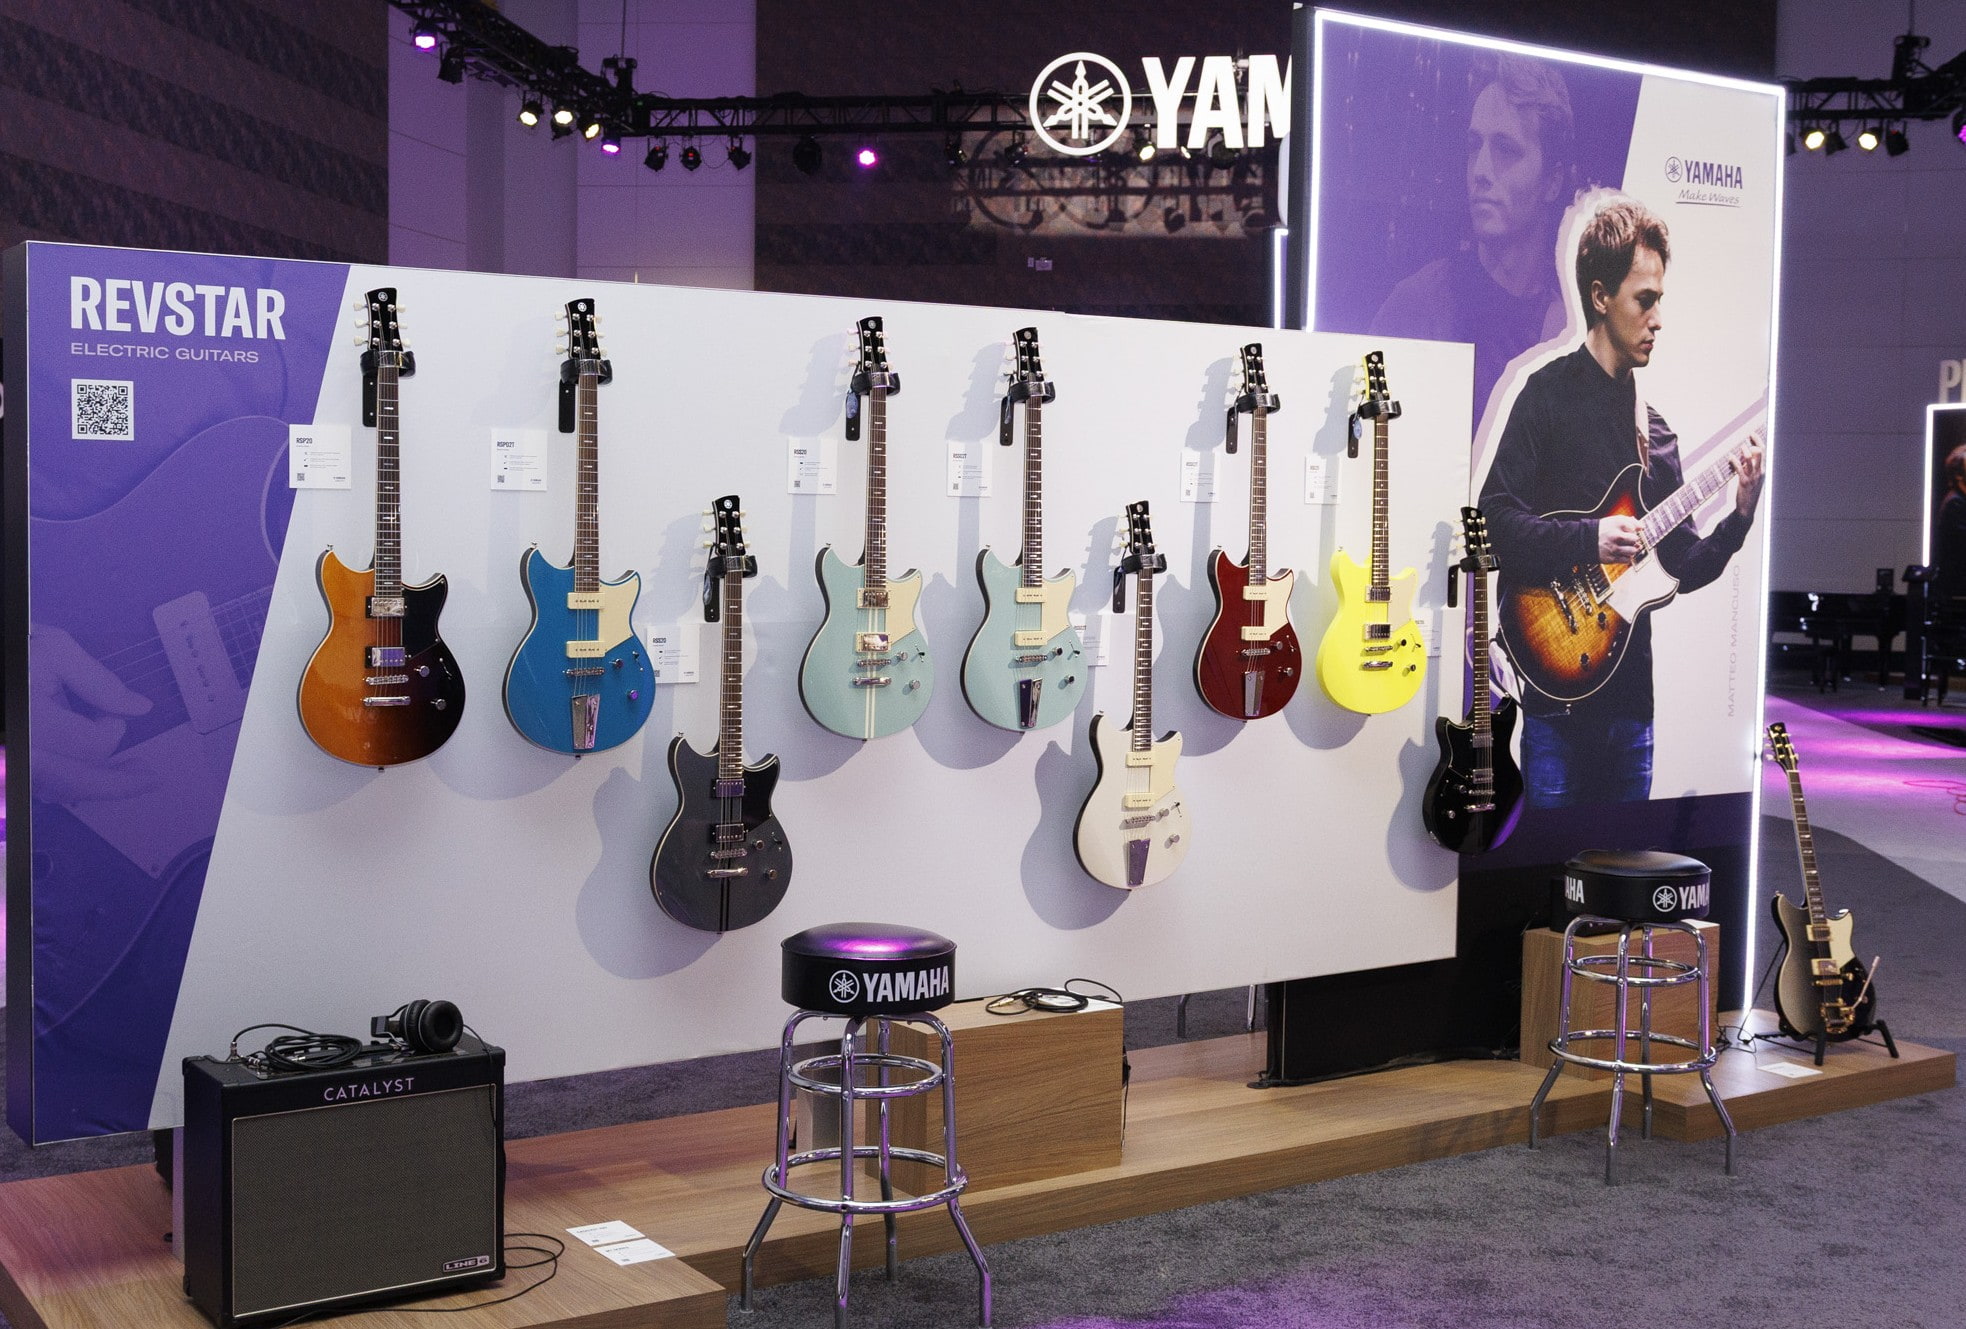
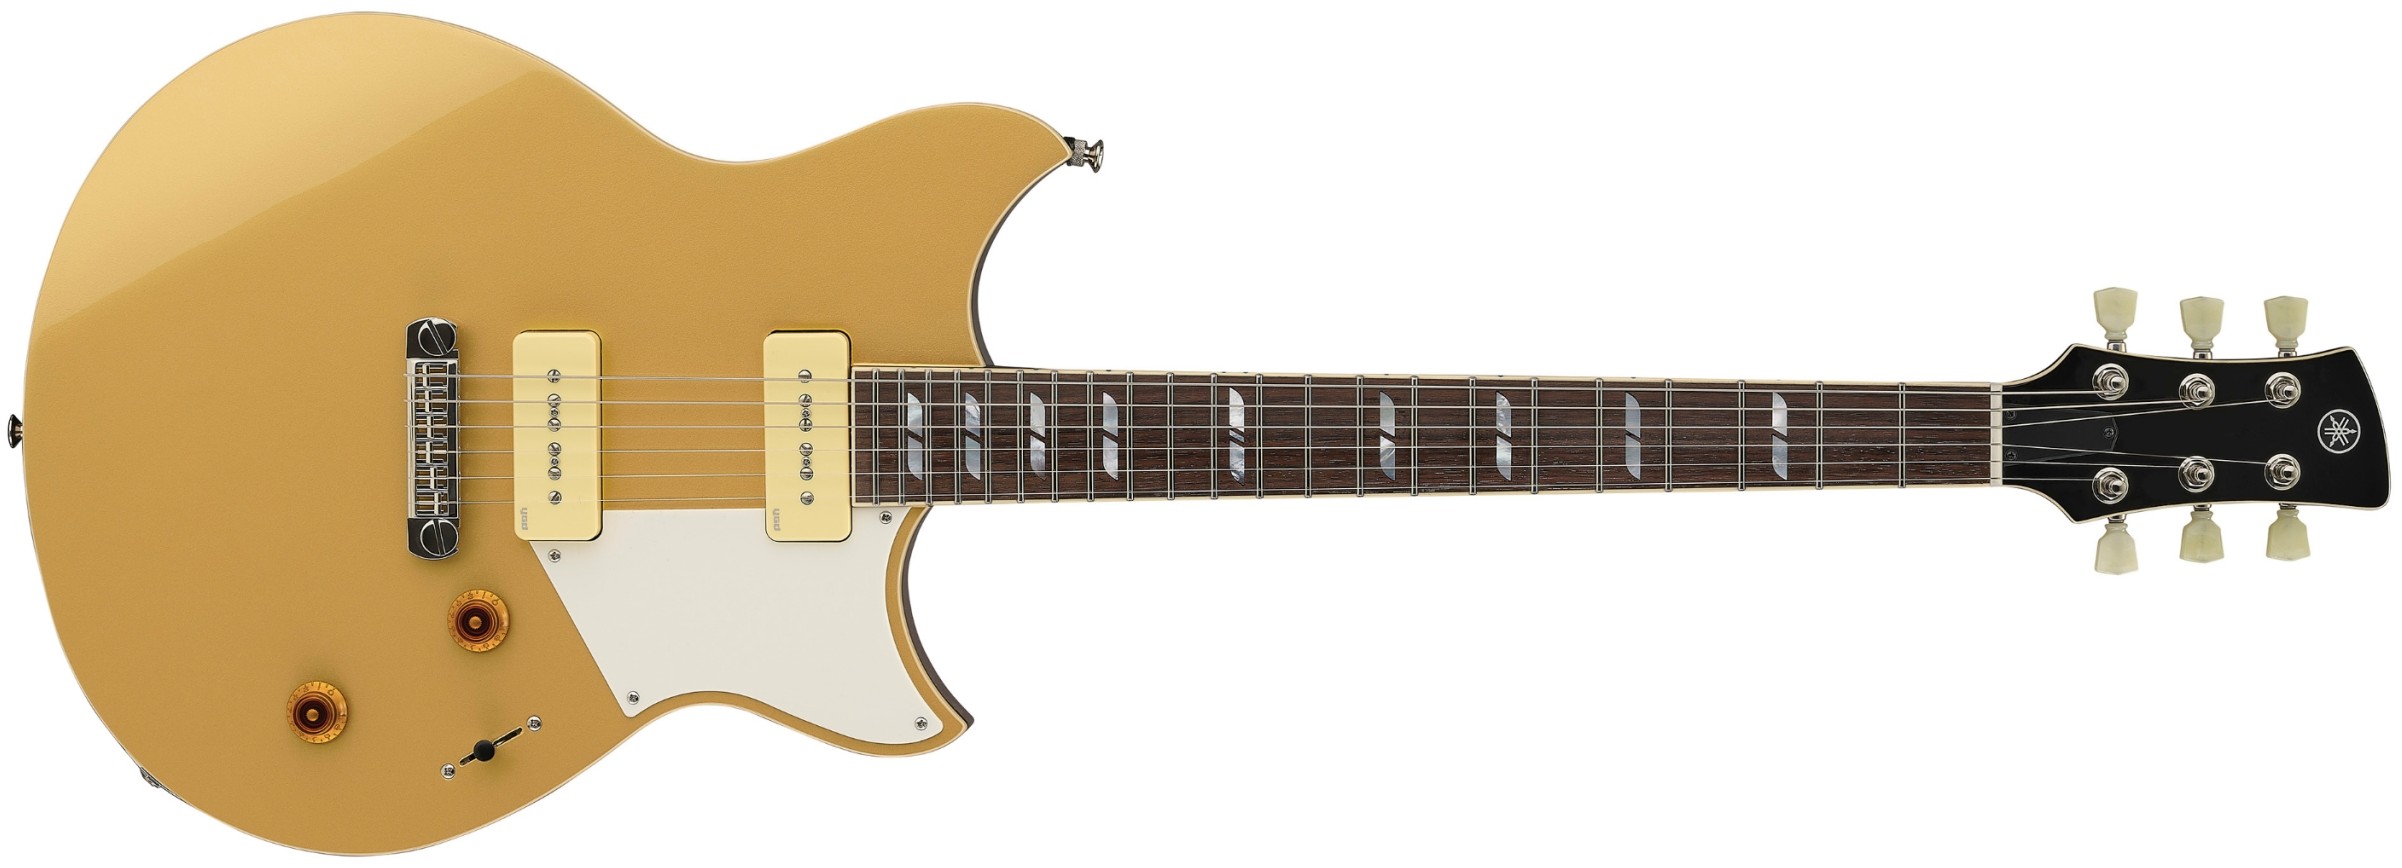
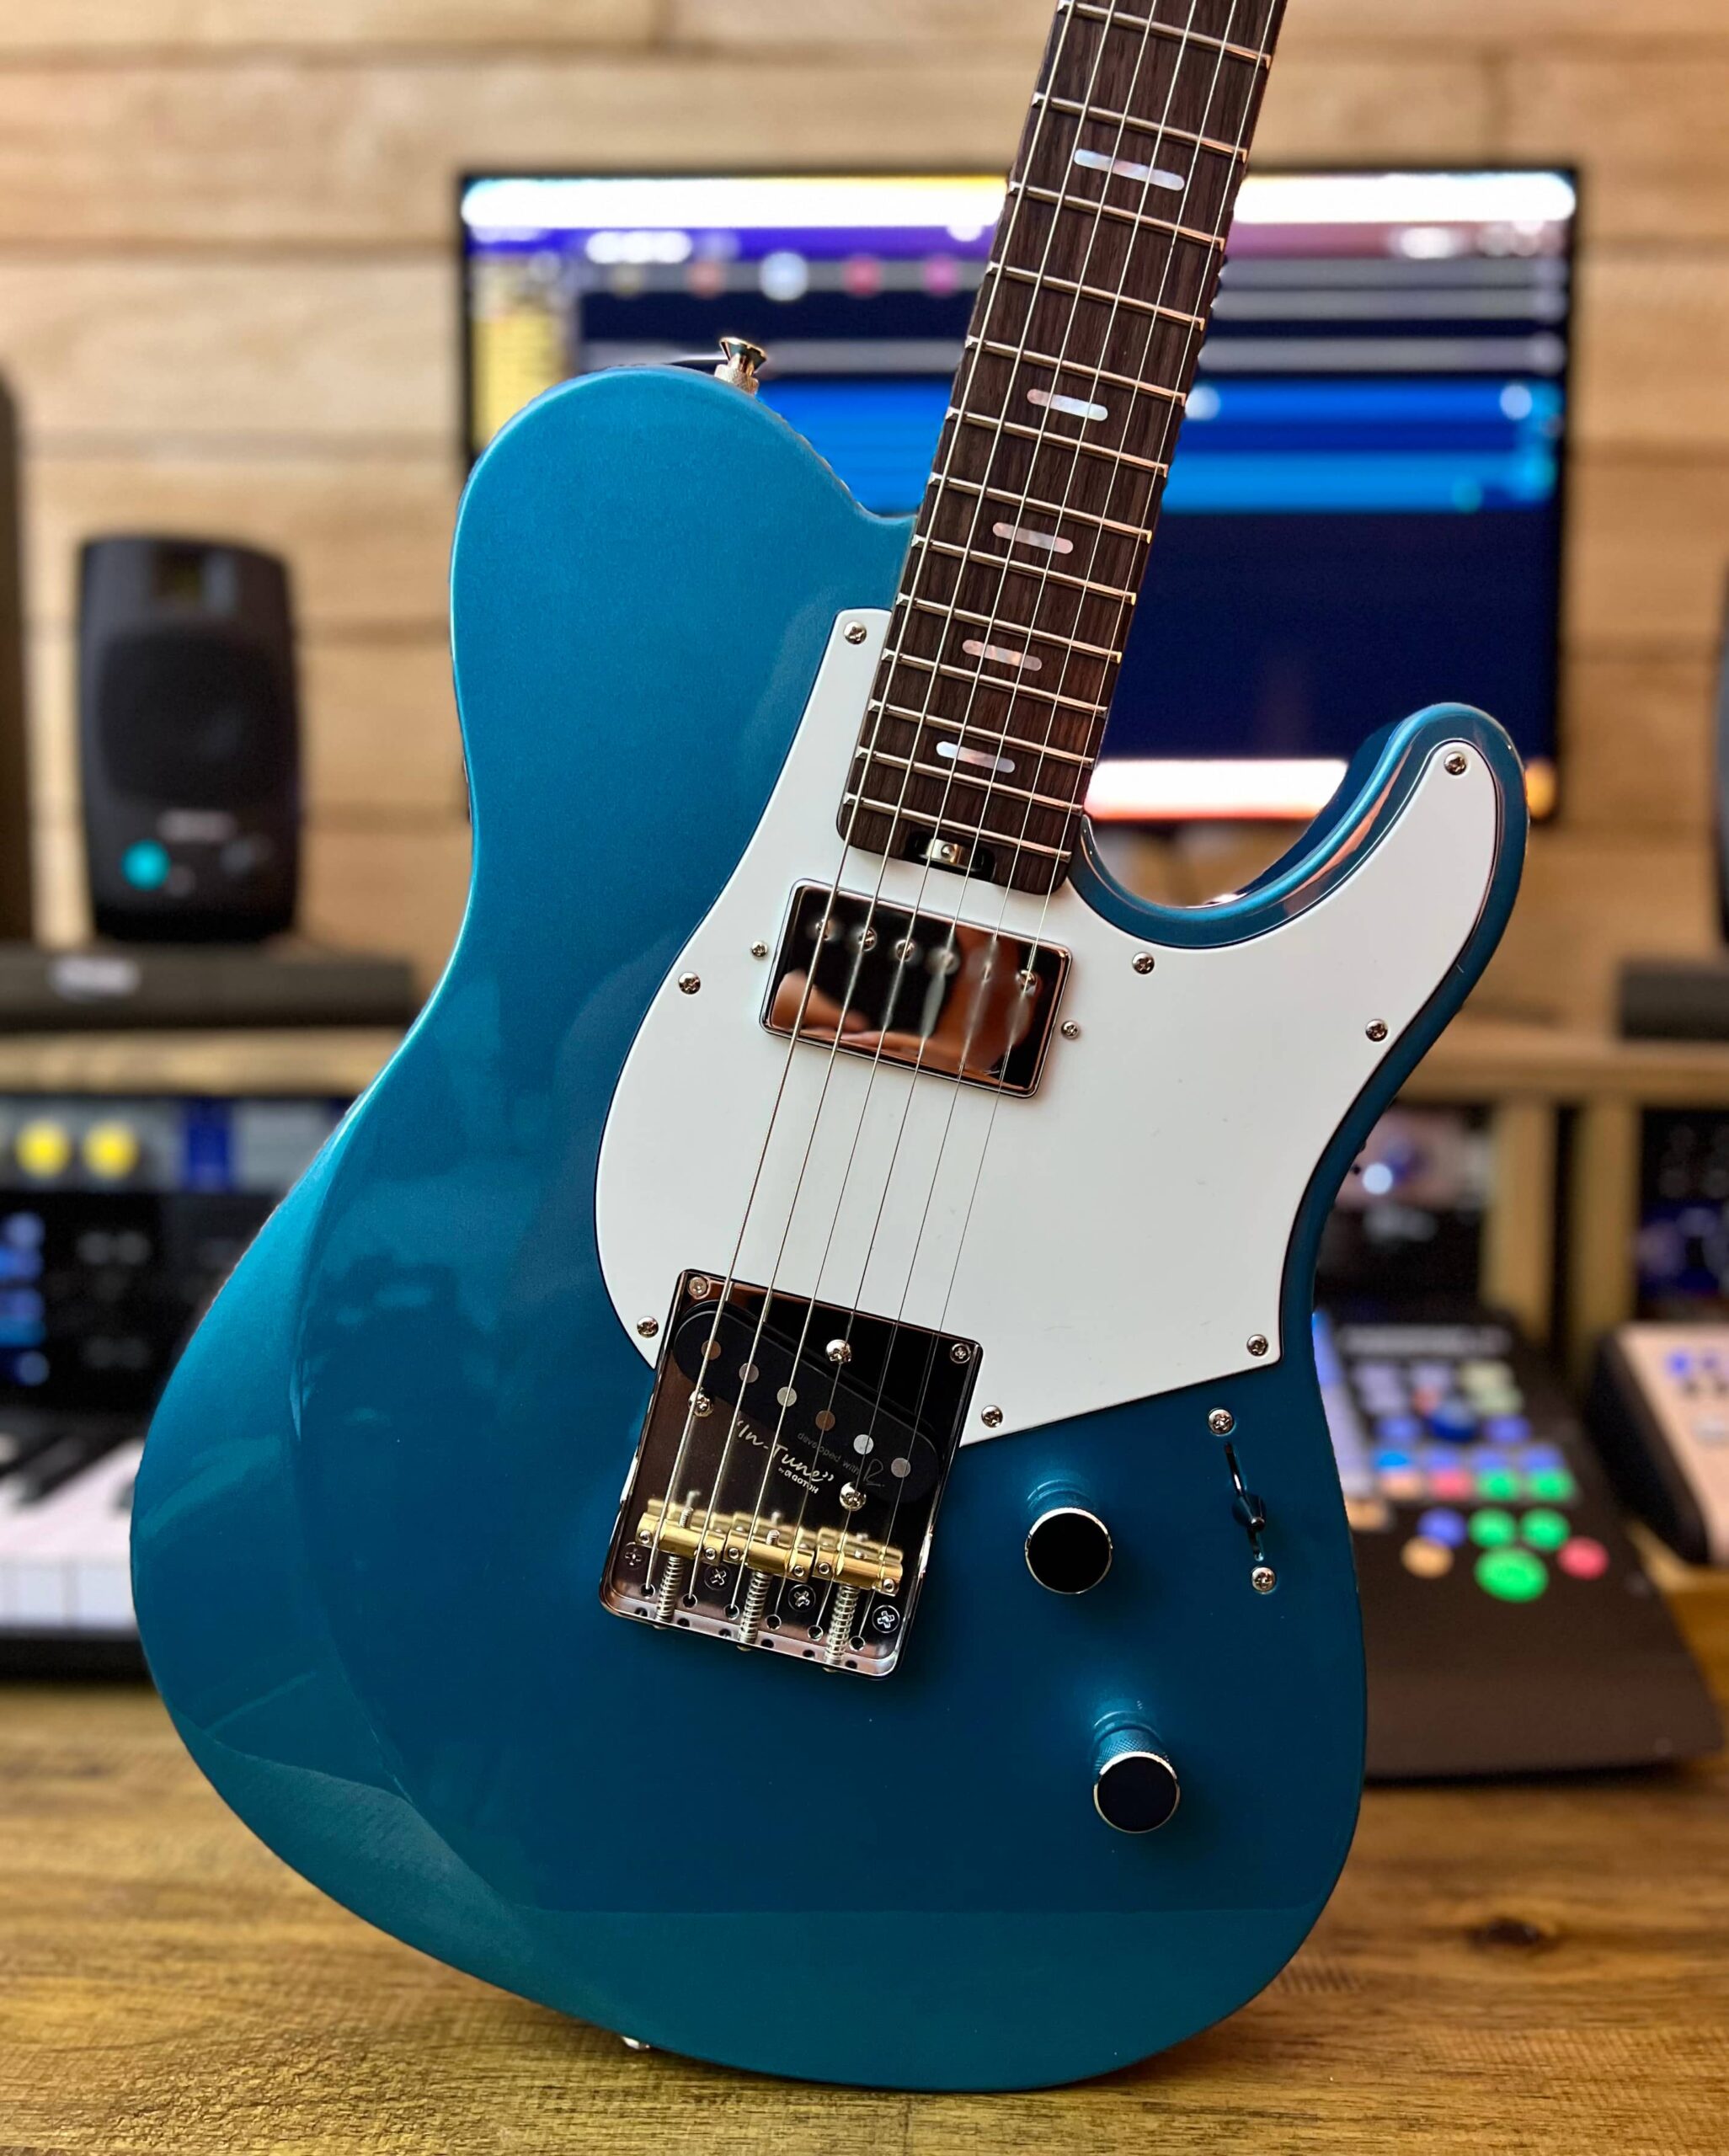
60th Anniversary Revstar
I’ve been a fan of the Yamaha Revstar lineup since its inauguration in December of 2015. Since that time, Revstar has gone through two generations. The second-generation models are slightly larger than the originals, with finely tuned acoustic design chambered bodies and, in the RSS and RSP models, carbon fiber neck reinforcement for extra sustain and tuning stability.
The 60th Anniversary Revstar takes the RSP line to a whole new level of premium finishing and unique details, offering a perfect blend of visual appeal and musical performance.
Playability
The setup, playability, and intonation on this guitar are about as good as it gets — perhaps the best example of a Revstar to date.
The satin finish on the neck allows your fretting hand to simply glide along the fretboard, and the jumbo frets are all impeccably dressed. Simple open position chords are true to pitch, while intricate semi-tone bends and hand vibrato stay perfectly intonated even past the twelfth fret, regardless of how hard you dig in.
In addition, the guitar’s relatively short scale (24 – 3/4″) brings the fretting hand a little closer to the body, especially when seated, and the lower string tension allows for a softer touch and playing longevity without fatigue.
The Gotoh locking tuners deliver excellent tuning stability, and the Göldo tremolo unit is exceptionally smooth and articulate. Soft shimmers are easy to apply, as are dive-bombs if you so desire. The tremolo arm is fully adjustable to playing position and personal taste using the supplied Allen wrench.
Aesthetics
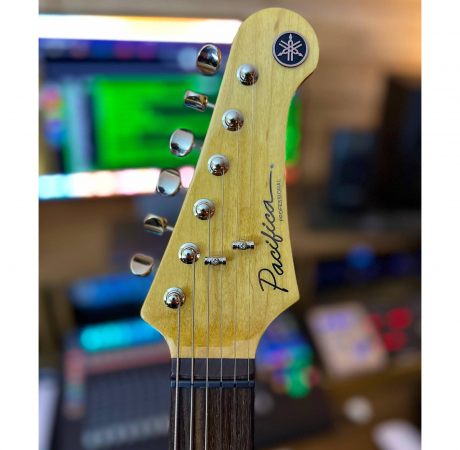
The 60th Anniversary Revstar pairs a lovely, flamed maple top with a mahogany body, a classic tonewood combination utilized in some premium electric guitars. The neck is mahogany, with an ebony fingerboard and a bone nut.
The nitrocellulose lacquer finish on this guitar is literally like glass, and perhaps one of the nicest examples of refined finishing I’ve ever seen. The beautiful noble-black gradient shading allows the flame maple top to show through the tint at the upper bout of the body, while gradually shading downwards to the lower bout to an opaque black finish.
To complement the proprietary noble black finish, Yamaha has chosen to use gold hardware for the tremolo, tuners, and volume and tone knobs. The headstock and Göldo tremolo unit are distinctive and well appointed. They feature a 60th commemorative logo, and the back of the headstock is stamped with ‘Made in Japan’ and a special 60th Anniversary hanko.
The gold and pearl Gotoh locking tuners deliver precise and stable results every time. Another design win for me is the lovely cream pickguard and pickup mounts.
Last but not least, the 60th Anniversary Revstar comes with a beautiful hard-shell case and certificate of authenticity.
Tonality
The 60th Anniversary Revstar’s solid mahogany chambered body with acoustic design helps to sculpt the tone, all while reducing overall weight.
This guitar may look too pretty to rock out, but believe me, it’s down to make waves when it’s time to get nasty, while the humbucking pickups are sensitive and ready to be sweet when it’s time to clean up the act.
In keeping with its luxurious aesthetics, this guitar simply oozes with unique character, rock ’n’roll grit, and authentic blues tones. Both solid jazz and woody blues tones emanate with a minimum of effort, and every one of the tones is further enhanced and shaped by the excellent five-way pickup switch and a “Focus switch” feature. Engaging this switch by pulling upwards on the tone control adds a mid-forward tonality to the output for darker highs and enhanced midrange and lows, much like that of an over-wound pickup.
Essentially there are ten onboard sounds, but in addition, the five-way pickup switching system introduces a subtle phase shift in positions 2 and 4 by slightly delaying the opposite pickup, offering a fresh take on classic “in-between” sounds, often referred to as “out of phase” sounds.
The body and neck feature carbon reinforcement rods to improve vibrational transfer between the two elements, further enhancing the tone and versatility of this exceptional guitar.
The Videos
In the first of these two videos, I play four different guitar parts on the 60th Anniversary FG9: one finger-style, one strumming, and a slide melody, plus a close harmony part a third above the melody.
All the parts were captured using a supercardioid microphone into a dedicated microphone pre-amp, then recorded directly into my DAW. I added a touch of hall reverb and delay to the slide guitar parts to let them sit on top of the mix.
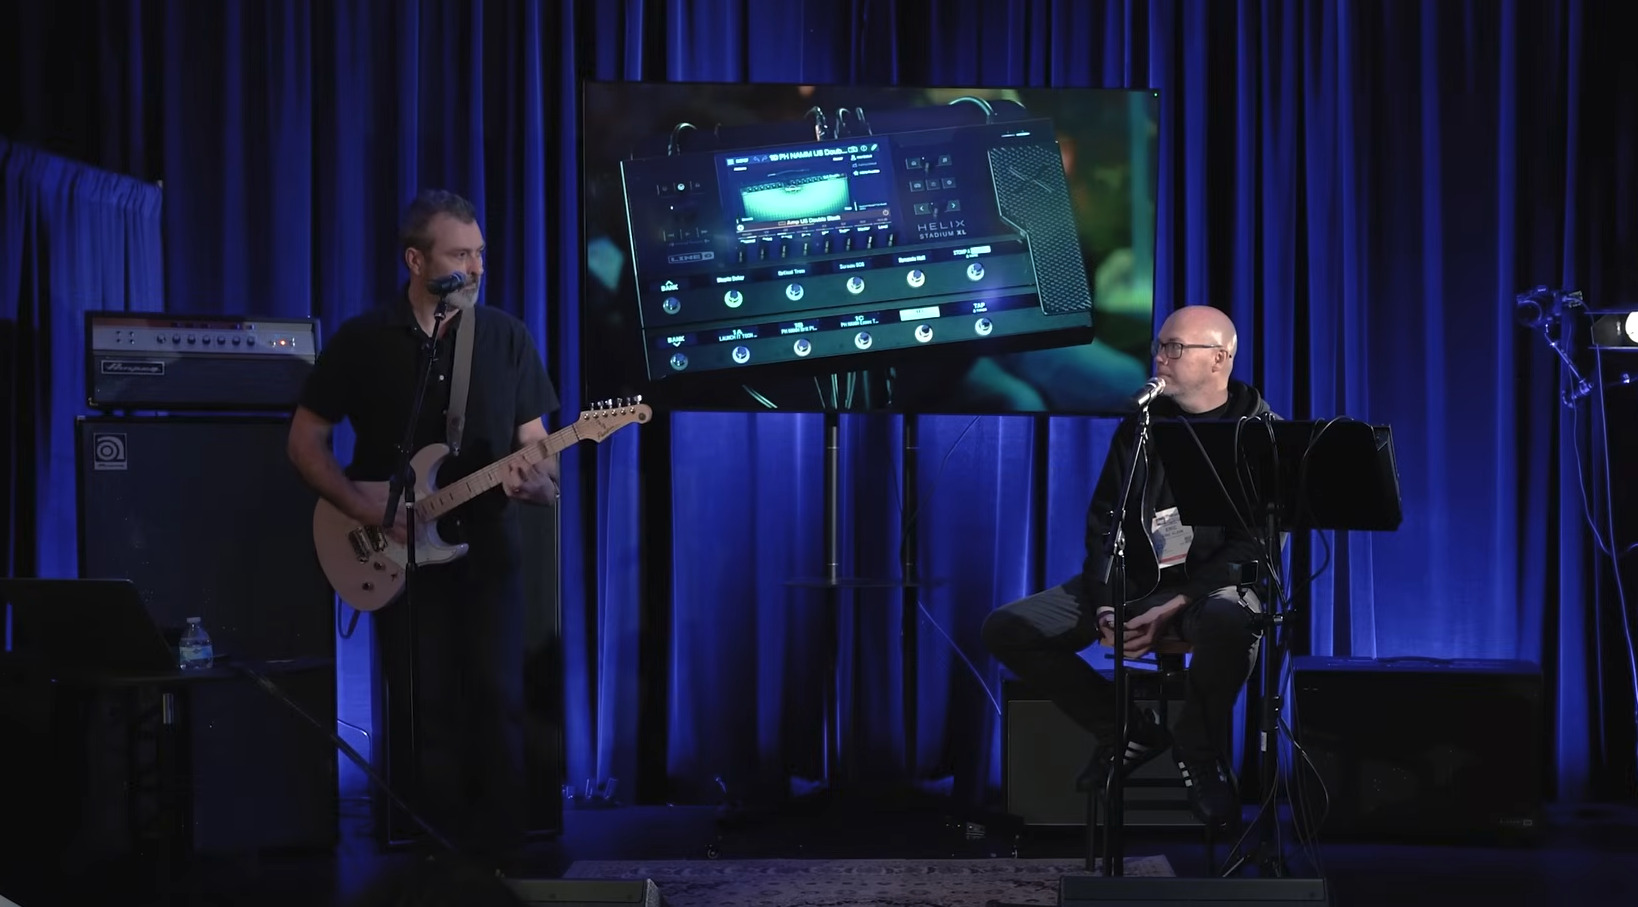
This second video shows how articulate the 60th Anniversary Revstar pickups are within the context of a blues/jazz ensemble of drums, bass and electric piano. (I’m using a Line 6 Helix Stadium for that juicy blues tone.)
I’m starting with the position 4 pickup selection, with the Focus switch engaged. Later in the melody, and during the improvised section, I engage the neck pickup without the switch engaged for an even warmer sound.
You’ll notice that I’m adding a subtle harmony above the melody in the upper regions of the fretboard. As you can hear, these notes are perfectly pitched … a testimony to how good the intonation is on this guitar.
The Wrap-Up
Celebrating six decades of excellence, the 60th Anniversary FG9 and Revstar are a testament to the fine Japanese craftsmanship, innovation, and years of Yamaha’s devotion to delivering the absolute best instruments to musicians around the world.
If you are lucky enough to purchase one of these instruments, I guarantee you will treasure it, revere the workmanship, and own a unique part of musical history.
Rehearsals and performances are most successful when the performers have the right mindset. We’ve all had really great rehearsals and really bad ones. No one has the answer to making every rehearsal great every time. However, I do see an improvement when I incorporate mindfulness in a meaningful way.
I’ve invited a dear friend and colleague, Andrea von Oeyen, to contribute to this article because she is very knowledgeable about this topic and incorporates it into her own rehearsals. In addition to being the Orchestra Director at Oyster River High School in Durham, New Hampshire, Andrea has served as the President of the New Hampshire Music Educators Association.
First, here are ways that I use mindfulness during rehearsals at Brunswick High School in Maine.
Using Mindfulness in Your Warm-up
I incorporate mindfulness into warm-ups for a couple reasons. First, it makes the most sense. You could find moments of zen throughout rehearsal, but once rehearsal starts, you might find it difficult to stop. However, if you find rehearsal veering off course, try using some of the mindfulness tricks detailed below to reel it back in.
Second, mindfulness helps develop a routine. One of the most important steps to a productive rehearsal is a clear and consistent routine. Once mindfulness is added to your routine, it will increase the productivity of your rehearsal.
You will see a clear difference in rehearsals when you take time to incorporate mindfulness — you and your students will feel more focused and productive. My rehearsal is during the last block of the day, so students come from all over the building — from lunch, from PE, from history or other academic classes. They all have very different mindsets when they step into my room. I take the time to bring everyone back to earth and start them (as close as I can) to the same spot mentally.
“Meditation”
During warm-up, I have students “meditate.” I use “meditation” in quotes for a reason. I really don’t know how to meditate. My push for this in rehearsals came after I saw a presentation by Dr. Jason Caslor from Arizona State University. His presentation “Squirrel! Being Present in a World That Doesn’t Want Us to Be,” discusses this very topic and much more. If you have the opportunity of catching Caslor present this session, you will not be disappointed.
During the hour-long presentation, Caslor asked us to close our eyes and meditate, which is very difficult and takes hours of consistent practice. However, during the session, he encouraged us to focus on our breathing. Anytime he saw us losing focus, he told us to consciously bring it back to breathing. How refreshing it was for someone to explain how to meditate instead of just saying, “Do it, and do it now!”
Of course, my mind wandered, but I would then focus on my breath, sometimes thinking in my head “in, out, in, out.” My skills are probably not enough to impress the Dalai Lama, but it’s enough for me.
What I learned from Caslor’s session (and what I described above) is exactly how I introduce and explain it to my students. From then on, our rehearsals often begin with: “Everybody close your eyes.” When eyes close, so do the mouths. It might be the quietest moments in your rehearsal room! Students might have their own way to center themselves and focus, and that’s okay. My hope is that for those who don’t know how to “meditate,” they can try what I’ve learned and always focus on their breath.
During this time, I take a moment to observe them. You can see their energies change. Then I begin to speak to them. I’m not using the time to tell them that there’s a fundraiser starting tomorrow or that we’re playing at the basketball game on Friday or any other announcements. That happens before.
Speaking in a calm and low voice, I give them reminders to focus on their breath. I might ask questions like: “How can you be a positive contributor to rehearsal today?”
I try to have them imagine what a productive rehearsal looks like, and how we can achieve that today. Some days, I don’t say anything at all. The important thing to remember is that by taking a few moments, you can start your rehearsal in a calm and positive spot.
Breathing Exercises
Many of my mindfulness tools revolve around breathing. You can use breathing exercises for mindfulness, as well as for breath-control training. They both help students strengthen their lungs! Breathing exercises are a great tool to kill two birds with one stone.
There are endless options for breathing exercises that you can find online. I’ve used various types of box breathing where you breathe in, hold, breathe out, hold and repeat. I’ve also used techniques to increase the number of counts you inhale and exhale each time.
Music Begins and Ends with Silence
Every piece of music (for the most part) begins and ends with silence. You would never begin a performance while the audience is talking or applauding, so why would we begin rehearsing while students are talking and individually warming up? Getting students into the right mindset for a rehearsal gives you the opportunity to start the music the way it is meant to begin. I often remind students about the importance of silence while they are centering themselves at the beginning of rehearsal.
Try it in Your Class
You can use any of the above techniques to help begin your rehearsals, or you can incorporate them throughout rehearsal to provide more focus for students. For example, when you change pieces is a great time to do more breathing and settle the room from all the chaotic, overstimulating noise.
If you aren’t using mindfulness during warm-ups, I encourage you to begin. Sure, it adds a few minutes to your warm-up time, which takes time away from digging into your repertoire. However, the focus that comes from mindfulness will gain you those minutes back and then some.
When I first started class “meditation,” I noticed a difference right away. One day, I thought we just didn’t have the time because it was an early release day. Afterward, I wondered why that rehearsal wasn’t as good as the long chain of great rehearsals. It didn’t take long to figure out what was missing.
Another Perspective on Mindfulness
Orchestra Teacher Andrea von Oeyen has been using mindfulness in her classroom since she started the orchestra program at Oyster River 12 years ago. Here are her thoughts on why mindfulness is a must for her students.
Mindfulness has so many benefits in the classroom and in life. As a music educator, one of my goals is to bring passion for music to my students. I also firmly believe that a teacher’s main job is to help foster humanity and create lifelong contributing, kind citizens. In order to do this, you must have students’ trust and provide a safe classroom community. The best educators harness these two things and are able to get high-level results as well as help students foster relationships, be kinder to each other and gain empathy. All this can all be done through mindfulness practices.
Andrea von Oeyen and the Oyster River High School orchestra during a performance.
Terminology Doesn’t Matter: I don’t always use the term “mindfulness.” Instead, I often call it “present moment thinking,” “focusing on the present moment” and “meditation.” Because these practices and activities were present from the first day they set foot into the orchestra classroom in middle school, they are very comfortable with the concepts and with each other. Most music educators have an advantage because our ensemble students are together for a number of years, so the opportunity to build trust in one another and from teacher to student is natural. Concepts like closing our eyes and breathing together, mindful and present moment practice activities, and yoga are normal occurrences in my music room, and our students feel comfortable and free from the normal “embarrassment” that might occur.
Use As Needed: In orchestra, some of these activities are planned and purposefully put into the lesson for the day. On other days, they are added due to the energy in the room. There are days when we take 30 of our 80 minutes to get out yoga mats and breath, stretch and meditate. Other days, when I notice that students are having an “off” day and aren’t able to execute musical concepts as they usually do, I will add an activity like breathing together, which takes some time away from music to think mindfully about what is happening within the ensemble. This timeout also helps students focus on individual, purposeful, practice time on passages.
There are many factors why a rehearsal doesn’t go exactly as you expect or why students are unfocused on any particular day. It is usually never personal, but the flexibility of changing the lesson according to what your group needs is extremely important. Many colleagues have asked how I devote this much time to mindfulness when there’s music to be learned and time is always short. Whether it’s a planned mindfulness activity, or a spur-of-the-moment pivot, I find that these practices build trust and end up saving time in the long run.
Feeling Good: Our Oyster River orchestra students agree that these practices are extremely important in making them a more cohesive ensemble that is free to take musical risks. When I asked them why they feel this way, many of them said that the environment is very different from their other classes, that mindfulness has been integrated into their music education experience from the beginning, and that it’s been normalized here. They acknowledge that when we do things like yoga or just closing their eyes for a few moments as a group, it centers them and takes them away from the stress they have in other areas of their lives. They fully recognize that it creates a culture and space where they can be their best selves and mentally reset when their brains become too active for the moment. Overall, the most common comment I hear is that mindfulness exercises simply make them “feel good.”
The late Mihaly Csikszentmihalyi, a Hungarian-American psychologist, discovered a phenomenon he called “flow theory,” which is a state of optimal experience when people are completely immersed in and focused on an activity. Often described as being “in the zone,” flow naturally aligns with music rehearsal and performance, and Amrutha Murthy, Band Director at Park Vista Community High School in Florida, has had great success using this in her classroom.
While at the University of North Texas, Murthy wrote her undergraduate thesis on flow theory. As a music educator, she uses flow theory to design rehearsals that maximize engagement and motivation, and to build a sense of psychological safety and musical accountability with students. She noted that when professional musicians are asked to describe how they felt after a concert, many describe it like this: “I don’t know; I was just in the moment.”
This shows that flow theory rings true in a musical performance, and Murthy’s challenge was to mimic this in every day rehearsal settings with teenagers.
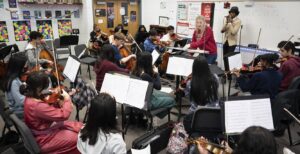
Park Vista Community High School band’s performance at the Music For All National Festival.
Short Bursts of Focus
A key component of her teaching is to direct students to focus intently for short bursts of time, like three to five minutes, followed by a few minutes of more relaxation. Not only does this strategy combat boredom, Murthy says, it creates a situation where “flow” feelings can sprout — and for many kids, that’s what often happens.
“Once they can replicate that feeling, it leaves them wanting more and more,” she says. “That’s the cool thing because flow is rooted in self-discovery. I can’t induce it for you, and you can’t induce it for me … but I can give you parameters and create the conditions to make it possible.”
She explains that when you engineer the conditions you want for your rehearsal room, “you keep students challenged without being burned out at the end of the day.”
Students often tell Murthy that they experienced a flow moment, and describe it as being “so locked in.”
Murthy goes on to explain that with flow theory, “you become fully immersed while maintaining enough awareness to stay focused and purposeful.”
The success of her teaching method shows. Park Vista Community High School concert band was one of only 20 nationwide selected for the Music for All National Festival in the spring.
Murthy acknowledges that while flow is generally a positive experience, sometimes students might still leave a rehearsal unhappy, or wish there was more they could have gleaned from an experience.
“[I ask myself] did you give them the skills and prepare them enough that they want to come back the next day and get better?” Murthy says. She leans on a motto her own band directors taught her: “Be better tomorrow than you were yesterday.”
Band Director Amrutha Murthy and her students at Park Vista Community High School.
Making It Personal
Murthy guides her students toward self-discovery and encourages them to take ownership of their group and the music they make.
“I tell kids that the ensemble they’re a part of is not mine; it’s theirs,” Murthy says. “There are 40 (or in cases like marching band, 120+) of you and there’s one of me. What is bigger?”
She makes the effort to get to know her students as people and as individuals. At the beginning of the year, Murthy gives them a note card and tells them to write down three goals — one for themselves, one for the section they are a part of and one for the whole ensemble. She tells them to be specific, which is an important aspect of effective goal-setting: “I want to get better” is too generic.
At the end of the school year, Murthy returns the students’ written goals and discusses whether they achieved those goals. Meanwhile, every day, Murthy gives students a targeted objective to keep them on track — the “how” is up to them. The targeted objectives give students goal posts. It is similar to approaching a marathon thinking “it is just a five-mile segment … five times and slightly more” instead of being daunted by the 26.2 miles. At the end of the day, the distance is the same, but the mindset shifts.
“It’s all these little specific, measurable things that humanize any task at hand, the task can always be broken up and given some pauses as long as the main objective of the day, concert cycle, and year is at the forefront of your planning,” says Murthy, who often encourages fun between rehearsal segments by asking: “Anybody know any good jokes?” or any other random polls.
Murthy’s office is a comfortable, fun place filled with Squishmallows, and it functions as a safe-space for students to talk to her or her co-director, Mr. Chris Rodriguez. “This building of relationships with students is based on trust. Knowing that they are cared for, and WHO cares for them leads to a better music and school experience for students,” she says.
“They have to know that I’m a human off the podium,” Murthy says. “There’s an opportunity to be humanistic on the podium, but off the podium my job is to get to know you as a person. What makes you interesting and not just flute player number 4?”
Lead and Learn From Trust
“If you’re going to ask people to do something for you, you have to make sure they trust you,” she says. “Flow is not something created by accident; it’s learned by trust. Even if I was the best teacher, if I didn’t have a relationship with these students, they wouldn’t strive to be their best. My students know who I am off the podium. They know I am a distance runner, they know my favorite songs, books, random anecdotes. They won’t trust me as a musician if they do not know who is pushing them to strive for excellence.”
The band’s Instagram hashtag is #onebandonefamily, which describes the atmosphere of Murthy’s music classes, where students learn not just about music but about life in general.
“They’re contributing to something that’s larger than themselves,” Murthy says. “Anything we can do to (nurture) their passions and their hobbies — the things that may not turn into careers but will teach them so many life lessons — is good.”
Murthy’s style aligns with her ultimate teaching goal: “I just want to send beautiful music into the world.”
“That’s been my philosophy since I started teaching,” she says. “More than 90 percent of my students may not touch instruments after high school, but after their time with me, they can look back on this and say, ‘I had a great time and I maximized what I could learn.’ I want to send beautiful humans into the world and beautiful music into the world.”
From left to right: Music Educators Aaron Snipes, Amrutha Murthy and Christopher Rodriguez.
Relatable and Productive
Chris Rodriguez, Park Vista’s Co-Band Director, says using flow theory is a component that’s “her thing,” but that all music students and teachers at the school benefit from it.
“I don’t know if the kids even realize it’s happening; it just ends up being a good class and a good rehearsal, and everyone is just in a better place,” Rodriguez says. “I think it’s just the way that she structures the rehearsals and the pacing of it.”
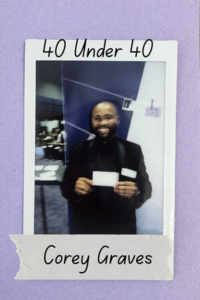
Rodriguez says he is super excited for and proud of Murthy for her Yamaha “40 Under 40” achievement, which is not surprising to him.
“She’s awesome,” Rodriguez says. “The kids clearly see her passion, and they feed off that. She is very relatable with the kids, and students look up to her. … She’s a ball of energy from minute one, and I think the kids all feed into that and respect that.”
Trauma-informed teaching recognizes how a student learns, behaves and builds relationships are affected by their life experiences, including trauma. The work of Maxine Harris and Roger Fallot in the early 2000s helped articulate trauma-informed service principles, which were later expanded and adapted by educators for use in schools and classrooms.
Since then, trauma-informed music education has emerged as a field within this larger context, and now sits at the cross-section of trauma theory, mental health practice, social work, public health and education. Most of us are familiar with the practice of Social Emotional Learning (SEL), which focuses on helping students develop soft skills like self-awareness, social understanding and self-regulation. Trauma-informed teaching creates the classroom conditions for effective SEL practices to take place (Bauman-Field, 2024).
Trauma-informed practice in music education begins with the understanding that students do not enter our classrooms as blank slates. They come as whole people. They bring musical experiences, family histories and vast cultural knowledge. They also bring insecurities, stressors and even wounds that may not be initially evident (Goopy, 2026).
I am a strong advocate for intentionally building rapport with students to gain their trust — a critical first step which allows students to feel comfortable emoting in a safe, expressive and supportive music-making environment. This article explores the importance of each of these concepts under a trauma-informed framework. I hope that, through this exploration, we can see what we can do to better support both our music teacher candidates, as well as the K-12 students whom they will eventually serve.
Safety First
A safe environment matters because students must know that our classrooms are places where they can relax, learn, make mistakes and be respected. In music, we often ask students to do very vulnerable things. We have them sing, play, move, listen, create and perform in front of others — which all requires trust.
When students know that I care about them as people, they are more willing to take risks and be more open to correction. This is also supported in the research literature. Sauerland (2021), provides practical strategies for incorporating trauma-informed practices in the article “Sound Teaching.” Some of these strategies include providing students with choices regarding physical movement, seating arrangements and repertoire selection.
A safe environment, however, does not mean that we avoid high expectations. In contrast, safety allows us to boldly envision the highest of expectations for our students’ learning and for our own teaching. It means that we can construct spaces where students know that they will not be embarrassed, dismissed or judged unfairly throughout the process of learning and continuous development. When we create that kind of space, students are more likely to bring their full selves into the music-making process.
Expression Through Music
Music gives students a powerful way to express emotions in a healthy way. Oftentimes, many of my students carry feelings that they did not have the words to fully convey. Whether they were joyful, angry, tired, anxious, excited or simply overwhelmed by everything happening in their lives, music can give them an outlet to express that emotion (Bailey, 2022). Through singing, playing, composing, listening, moving to or even talking about a piece of music, students could process what they feel without being forced to explain the emotions through spoken language.
As teacher educators, we sit in a unique position to help our music teacher candidates to support their students’ expression through understanding that emotions are not bad or disruptive simply because they are present. Instead, we can guide them toward demonstrating and supporting healthy ways of expressing those emotions through music, while also acknowledging and validating the feelings of their students and the collective ensemble as a whole.
Support Throughout the Journey
Students must feel supported by their peers, teachers and administrators in the building. They may not have that support at home, and we should not assume that support is or is not there. We should meet students where they are and give them the resources and tools to help them along their musical and personal journey.
Students need peers who encourage them, teachers who believe in them, and administrators who understand the value of the work they do. I have seen how much of a difference it makes when students feel like they belong to something larger than themselves, whether that is a band, choir, general music class or the larger school community. Peer support, in particular, goes a long way to help students feel accepted.
As teachers, we serve a critical role in creating the conditions that help our students feel seen and valued. Administrative support helps make sure the structures are in place for this work to continue. When we demonstrate this support to our music teacher candidates, we help them create music classrooms where their students are not only learning the technical aspects of music, they are also learning confidence, connection and resilience (Salvador & Culp, 2022).
Celebrate Our Shared Resilience
We want the next generation of music educators to create classrooms where students feel safe, seen, supported and valued. So, we must model those same commitments in our programs at the higher educational level as well.
Trauma-informed music education and high-level musical achievement are not diametrically opposed — in fact, I would argue that the former must be in place in order to allow the highest levels of musical expression to take place in our programs. Trauma-informed music teaching does, however, require us to redefine what excellence looks like in modern society so that musical achievement is not separate from, but rather supported by, our shared humanity.
The best music classrooms are not only places where students perform well. They are places where students learn that their voices matter, their cultures matter, their growth matters and their presence in the room matters. For music teacher educators, that may be one of the most important lessons we will ever teach.
So, you say yes. Nicely. Without making anyone wait.
Admin catches you between classes. “Can we shift a few things around for an event?” You nod. “Yeah, we can make that work.” You don’t even stop walking. It feels like a harmless exchange that happens 10 times a day.
A parent emails asking for a scheduling adjustment. You reply between classes: “Absolutely — we’ll adjust!” Efficient. Helpful. On top of things.
A colleague vents at lunch. You listen, agree where you can. “I get it. That’s frustrating.” You’re just being a decent coworker.
None of those conversations may feel like a commitment. But here’s what’s happening: The yes isn’t always for them. It’s for you. It ends the discomfort right now. It keeps things smooth. It means nobody’s upset with you today.
The problem is today isn’t when it costs you.
Are You This Person?
Before we go further — a short diagnostic. People pleasers in music education tend to share a few patterns.
You say yes before you’ve thought it through — and spend the next three days making it work.
You’d rather absorb the extra work than have an uncomfortable conversation.
You know what the right answer is. You give the easy one anyway.
When someone pushes back on your no, it usually changes into a yes.
You feel personally responsible for other people’s disappointment.
That last one is what makes the first four happen. The yes isn’t always about being helpful. It’s about not being able to sit with someone else’s discomfort — even briefly, even when their discomfort is reasonable and your boundary is fair.
Two Weeks Later
Here’s what you said yes to:
the extra pep band date
moving a student up a chair
admin using your room for testing
lending percussionists to the choir concert
the booster president’s fundraiser that needs your time to coordinate
Each one felt manageable. Not a big deal at the time. But they all require significant time and energy. Now the concert is three weeks out, you’re down two rehearsals, half your section has conflicts, the booster fundraiser needs a response by Friday, and all those people are operating as if their need is the highest priority.
That’s the house of cards. Not one vague agreement. A stack of them — each reasonable on its own, none of them compatible with the others.
And you know what? You knew. You weren’t a first-year teacher who didn’t understand the tradeoffs. You saw what each yes would cost. You said it anyway because the pause, the pushback, the person’s face when you don’t immediately agree — all of them felt worse than the consequences you’d deal with later.
That’s people-pleasing. Not inexperience. A pattern.
There’s also a social cost to slowing down. Saying “let me think about that and get back to you” to a principal feels like a risk. Telling the booster president you need to check the calendar feels like ingratitude. So, you skip those steps. You keep things moving.
The system rewards it. It just doesn’t protect you from the pile that builds.
What To Do About It
Buy yourself a few minutes before answering anything consequential: Not every ask deserves an immediate response. “Let me check and get back to you today” is not a refusal. It’s due diligence — to yourself, your program and everyone else affected by your answer. It gives you 10 minutes to figure out whether the yes you’re about to give is one you can keep. The hard part isn’t buying time. It’s knowing what to say when you come back. Here’s the structure:
Lead with what you can do.
Name the constraint.
Offer a next step.
Not “I can’t do that.” But rather, “I can do X, the piece that doesn’t work is Y, I’d suggest Z instead.” That works in person and in writing, and it gives the other person somewhere to go rather than just a wall.
Example: Another director asks if your top percussionists can play their choir concert on the same night your pep band has a home basketball game. You say yes on the spot. Now you have no drum set players. Instead, wait a day and respond with: “I can send two of them if they’re back by halftime. I can’t leave the game uncovered. Does that work?” Partial yes. Clear constraint. Their problem to solve, not yours to absorb.
Email is riskier than a face-to-face ask: The after-school conversation is forgotten by Friday. The email you send between classes lives in someone’s inbox — it can be forwarded and it doesn’t fade. If you write “Absolutely, we’ll figure it out” at 1:47 p.m. on a Thursday, that’s a yes.
Name the partial yes before they fill in the blank: If you can accommodate some of what’s being asked, clearly say which part you can do and which part you can’t. Not defensively. Instead of “Yeah, we can probably figure something out,“ try “I can adjust the first part. The second piece runs into something I can’t move — can we talk through that?”
Separate listening from agreeing: You can hear someone out and still not take a position on whether they’re right. If you don’t know enough to have an opinion, say so: “I only have one side of this.” It keeps you out of a conversation you’ll have to untangle later.
What Happens
The first time you pause instead of agreeing, people notice. Someone who’s used to a quick yes from you will feel like something’s off. They may push a little. That discomfort doesn’t mean you’re wrong. It means the pattern is changing — for both of you.
Hold the line: “Let me check on that and get back to you.”
When I started being more specific, most people adjusted quickly. A pause sometimes, a follow-up question occasionally, rarely anything beyond that. What I’d been bracing for almost never happened.
What happened: Fewer days where three things landed at once with no clean answer. Fewer emails starting with “Just checking, but I thought you said …” Less time spent managing expectations I’d accidentally built.
They just couldn’t get it. We were prepping for contest. One piece, Manhattan Beach March by Sousa, has a beautiful melody in the first clarinet part. Meanwhile, the second and third clarinet parts have more notes in eight bars than some kids ever played in an entire concert.
Sectionals, assessments, alternate fingerings and praying to the band gods — no improvement. So, I called my mentor.
“I’ve tried everything and no results. Even worse, the kids are getting frustrated.”
“Have you tried switching the parts?” he said. “Have the first clarinets play the hard part, and give the easier melody to the second and thirds?”
“Is that legal?” I asked.
He laughed and said, “Yes, just because it says clarinet one doesn’t mean someone else can’t play it. In fact, it’s better for everyone if they do.”
It was the simplest solution. It was also the most effective. I just had to let go of the rules.
Most of us don’t question this stuff at first. We inherit it. Some of it is good. Some of it doesn’t fit our kids anymore.
Here are five unwritten rules of music programs worth rethinking.
Rule 1: You Must Do the Same Things Every Year
Same concerts, same festivals, same fundraisers and a trip every two years. This is what I walked into, so I assumed it had to stay. But I had years where this didn’t work. Concerts seemed to sneak up on us, and the fundraisers weren’t bringing in enough money. We passed up a few opportunities because it wasn’t a trip year.
Or am I just doing it because it’s always been there?
The answers usually fall into three categories:
Yes → keep it. If it’s working, leave it alone.
Kind of → adjust it. Change the format. Shorten it. Move it. Fix what’s off.
No → pause it. Not cancel forever. Just stop doing it for now and see what happens.
You don’t have to change everything. Take a little vacation from that jazz dinner with dwindling attendance — and see if it truly needs to come back.
Rule 2: You Have to Program to Others’ Expectations
At some point, most of us pick up some unwritten formulas. You need a march. You need contrast. You need balance so the concert looks “right.”
I remember forcing pieces into programs that didn’t need them. The group wasn’t ready, and I didn’t even want to do it. But it felt wrong not to do this based on what other programs were doing. The pieces never clicked. All they did was frustrate the kids and put a hiccup into the concert flow. That’s the problem with checklists — they don’t know your group.
Sunken cost fallacy: We hang on to pieces way too long just because we already spent time on them. In nearly 20 years of teaching, I can say that I’ve never regretted cutting a piece, no matter how long we rehearsed it.
We think we have to fill out the concert because:
We’ve been rehearsing for months.
It’s our only concert this fall.
We’ve reserved the space.
Administration is present.
Parents are driving out.
Long concerts don’t impress anyone. Well-prepared ones do. If that one piece isn’t working, cut it or shelve it for the next cycle. This isn’t cutting corners — it’s making a decision.
Rule 4: You Have to Eat, Sleep and Breathe This Job
Picture this on social media: a black and white photo of an empty parking lot except for one vehicle, perfectly framed in the shot. Caption: “Tell me you’re a band director without telling me you’re a band director — I’ll start. Last car in the parking lot after school.”
Some colleagues and social media may suggest the recipe for a “winning” music teacher:
Always at school
First in, last to leave
No sleep
Too busy to take a lunch.
Always thinking about the next concert cycle.
I had that view of the job. After years of playing in school and then getting a degree, I could finally lead a group. And that’s what I’m going to do, 24/7.
If your health, sleep and personal life are suffering because of your job — relax. Start small by taking your lunch break. Set working hours and put boundaries on school email. This will help you stay in the job longer.
You also can’t miss something if you’re always there.
Rule 5: You Have to Make Everyone Happy
You want to make everyone in your school happy? Here they are: Students, teachers, counselors, speech therapists, social workers, occupational therapists, physical therapists, library specialists, reading specialists, intervention specialists, coaches, assistant coaches, administrative assistants, financial clerks, teachers’ aides, paraprofessionals, nurses, food service workers, custodians, maintenance crew, technology staff, bus drivers.
But wait, there’s more: Superintendents, assistant superintendents, principals, assistant principals, athletic directors, board members, parents, alumni, local business owners, local politicians, professional development staff, educational consultants, vendors, community members, communication directors, volunteers, school resource officers, security staff, and bookstore clerks.
My apologies if I missed anyone.
There are two ways to look at these lists:
Try to make everyone happy and become more stressed
Understand that a school community involves many people, and that we’re better together.
After all of that, you may be ready to kick the doors open and say, “There’s about to be some changes ‘round here.”
Wait. Let’s go back to our filter:
Does this help the students I have right now?
Or am I just doing it because it’s always been there?
It’s OK to take it slow. Most importantly, run these ideas by your students.
I once thought about cutting a festival. It was a long day, and we always seemed to get beat up in the comments. I mentioned this to the kids. The kids told me that yes, this festival was tough, but that this was the festival where younger members realized they had to start stepping it up.
We kept the festival.
Redefine the Playbook
Not all rules are bad. Some are useful. Some are worth keeping. But not all of them are necessary. Old doesn’t always mean good, but neither does new.
This isn’t about breaking rules or being a rebel. It’s about making the best call for the kids in front of you.
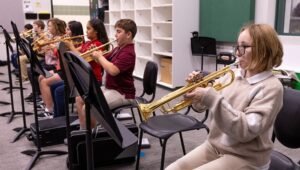
When I started building our drumline at St. Michael’s Catholic Preparatory School a few years ago, I never imagined that it would become mostly female. In fact, I assumed it would look like most drumlines I grew up around: Majority male, built from percussion specialists and shaped by students who already identified as “drummers.” Assumptions have a funny way of falling apart when you give students access, remove the gatekeeping and build a space where anyone can step in and start from zero.
Today, our drumline is one of the most unexpected and inspiring parts of our music program — not because it’s majority female, but because it represents what can happen when you intentionally design a culture where students feel welcomed, included and free to take on roles traditionally not offered to them.
This is the story of how that happened, what I learned and how educators can create similar environments in their own programs.
1. At Small Schools, Culture Is Everything
At our school, extracurricular activities are social networks. Students often choose activities because their friends are there — boys join football, girls join cheer, students follow friend groups into robotics, theater or fine arts.
However, not every student fits neatly into those stereotypes. We didn’t have a marching band, but we still wanted to find a way to build energy, community and student involvement at Friday night football games. A drumline — a fun, groove-based, stand-playing ensemble — felt like the right fit for St. Michael’s.
The challenge? We didn’t have enough percussionists to build a traditional drumline, so we couldn’t afford to think traditionally. We needed to build a drumline that everyone could join. That became the first major shift: Accessibility wasn’t an afterthought — it was the model.
2. Starting Everyone at Zero Changed Everything
Because we had students joining from guitar, bass, keyboards, robotics, theater and athletics, we made a simple but powerful decision: Everyone starts from zero. No prior percussion experience needed.
Instead of building chops-driven, competition-style drumline exercises, we built a program around playable cadences, groove-based parts, teamwork, feel, ensemble unity and fun.
This choice — intentionally lowering the barrier to entry — unlocked participation we never expected. And that’s when things got interesting.
3. The Moment I Realized Girls Were Taking Over (In the Best Way)
Something happened early on that surprised me: Our girls started gravitating toward percussion. Many of our female students in modern band already had backgrounds in dance, drill team, cheer or gymnastics. Students participating in these sports understand rhythm as full-body movement — they have coordination, timing, spatial awareness and muscle memory. So, when they sat down at a drum set or picked up a drumline instrument, the independence between limbs felt familiar. What followed was early success, early confidence, early leadership.
This one simple observation reshaped my entire understanding of gender roles in music: Girls were not only capable of drumming — many were uniquely equipped for it. Our culture had just never made space for them before.
4. The Drumline Became a Home for Students from Everywhere
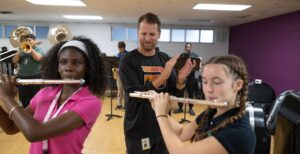
Another surprise: Most of our drumline members are not percussionists at all. They primarily play guitar, bass, keyboards, drums in modern band (a handful) and other instruments across campus. This cross-instrument participation changed the identity of the drumline:
They play differently. Groove matters more than chops. Listening matters more than flash.
They rehearse differently. The culture is collaborative, supportive and team-focused.
They learn differently. We emphasize feeling the music, not memorizing sticking patterns.
And the biggest shift? Students realized that participating in drumline made them better musicians everywhere else. A guitarist who learns snare becomes better at strumming patterns. A keyboardist who learns cymbals becomes better at coordination. A bassist who learns bass drum becomes better at pocket and articulation.
Opening the drumline didn’t dilute the program. It strengthened every part of it.
5. A Culture of Inclusion Led to a Culture of Female Leadership
Once girls saw other girls comfortable and confident in percussion roles, something powerful happened: They stepped into leadership naturally. Not because they were pushed into it or because we designed it that way. But because the space felt safe, encouraging and open. Once leadership took root, it changed the entire culture.
Today, our drumline is tightly knit, supportive, musically mature, grounded in teamwork, driven by groove and, most importantly, led by strong young women from every corner of campus. This is not an “all-girl drumline.” It’s a student-led drumline where girls feel equally capable, valued and empowered — and that has made all the difference.
6. What My Female Drumline Taught Me (Five Big Lessons)
Reflecting on this experience, here are the lessons I didn’t expect to learn:
Lesson 1 — Girls don’t lack confidence in percussion; they lack opportunity. Once the barrier was removed, participation soared.
Lesson 2 — Early success is everything. Students will pursue what they feel capable of quickly — movement-based rhythm gave girls an edge.
Lesson 3 — Cross-instrument musicians make incredible percussionists. Their musicianship, groove, and ensemble instincts changed our sound.
Lesson 4 — Culture shapes participation more than skill. If the vibe is welcoming and the entry point is accessible, students will show up.
Lesson 5 — Inclusion strengthens the whole program. A drumline built on diversity makes every part of Modern Band stronger.
7. Educator Takeaways: What Other Teachers Can Apply Immediately
Remove gatekeeping: Avoid phrases like “real drummers” or “percussion-only.” If you want inclusion, design for it.
Build groove-based cadences: Start simple and make them playable. Let students feel successful quickly.
Invite students from every instrument: Guitarists, pianists, bassists, horn players, singers — groove belongs to everyone.
Allow students to start at zero: Your drumline doesn’t need prerequisites to sound great.
Highlight representation: Show girls what female drumming leadership looks like — in history and on your own campus.
Empower leadership early: Let students count off, lead warmups and manage equipment roles.
Celebrate musicality over technique: What matters most is feel, unity and confidence — not complexity.
Students Redefine the Space, Follow Their Lead
I didn’t set out to create a female-led drumline. I set out to build a place where every student felt welcome. A place where learning groove made you better at whatever instrument you loved, a place where starting from zero wasn’t embarrassing — it was expected.
When that culture took root, something beautiful happened: Girls stepped into a space they weren’t traditionally invited into — and they reshaped it for the better. They taught me that inclusion isn’t something you declare. It’s something you design. It’s something you build into the culture until students feel it for themselves.
And when you get that right? Students don’t just join the program. They lead it. They elevate it. They redefine it.
My job now is simple: Stay out of their way, cheer them on and keep building spaces where every student — especially those who aren’t traditionally seen — can discover what they’re capable of.
“Our goal is for students to make sure the most important musical parts can be clearly heard — they’ll call this ‘balance.’”
“We’re adjusting so students can hear how their part fits into the full group and make real-time changes.”
“Sometimes we’ll run a section multiple times so the kids can focus on clearly speaking their notes.”
You’re not changing what you do. You’re making it understandable.
Make It Easy to Follow — But Hard to Ignore
If your evidence is scattered, you’re asking someone else to piece it together. So, label things clearly, add quick notes and keep it simple. Most online evaluation software has options to make this easier. But don’t just hand over the minimum.
Walk in with evidence of planning, instruction, assessment and reflection. You’re showing a full picture — not just a single class period.
Some of your strongest evidence comes from things that didn’t go well:
Interruptions to Rehearsals: A chance for you to show how quickly you can shift gears and get a group back on track.
A Concept That Doesn’t Land: This allows you to explain the info a few different ways, speaking to a variety of learners.
A Struggling Section: Teaching concepts you didn’t plan for, yet still hitting the goal of the lesson, is evident of a strong teacher who knows what to do in the moment.
When you document this in your evidence or post-observation write up, highlight what happened, what you changed and what improved.
Include positive parent emails, newspaper or online articles featuring your group or you, and if you’ve done work in music ed outside of your school. Evaluators are busy. They’re not ignoring you — they just don’t have access to what they can’t see.
What Happens If You Don’t Show It
An evaluation can only measure what’s visible. And if only 2% of your teaching is observed, the other 98% doesn’t just magically fill itself in.
When you consistently show what students are learning — not just what they’re playing — you’re showing the bigger picture.
Strong music programs are not successful by accident. They’re built through a series of small, repeatable decisions that add up over time and shape what students experience every day. If you’re early in your career, this can feel frustrating because you’re looking for something that suddenly makes your program “work.”
Unfortunately, that’s usually not how it happens. What you’re building is slower and more practical than that. And you can make it happen on purpose.
1. They Know Their Purpose
Stable programs know what they’re trying to do. Not in a mission statement that no one remembers. Instead, the day-to-day decisions that shape every rehearsal.
You can usually tell when a program doesn’t have this. Rehearsals feel scattered. One day is about tone, the next is about notes, the next is about just getting through the piece. Nothing is wrong, but nothing is really sticking either.
When a program has a clear purpose, things tend to line up. You have a lot of directions to choose from:
Are you building individual players?
A strong ensemble?
Trying to keep kids coming back?
Preparing a smaller group at a high level?
Most programs want all of that. The ones that grow, pick a direction — at least to start. When that happens, decisions get easier:
What music gets selected.
How rehearsal time is spent.
What gets corrected — and what is removed.
The lesson: Have a clear plan and work toward it.
2. They Honor Tradition (Without Getting Stuck in It)
It’s cliché for a reason: Nearly everything that could ever be said about what’s important in music has already been said. There’s a reason certain things keep showing up. Tone. Balance. Blend. Intonation. Rhythm. None of that is new, and none of it is optional. Strong programs put fundamentals as part of the routine.
Tradition is not an excuse: There’s a difference between honoring tradition and defaulting to it. “This is how it’s always been done” feels safe. Then you realize that the students in front of you don’t match the system you inherited. The programs that adjust better ask a different question: “What actually helps these students, in this room, right now?” Sometimes the answer still looks traditional. Sometimes it doesn’t. The difference is that it’s a choice — not autopilot.
3. They’re with the times
Programs that hold attention over time leave space for connection. It’s not about being trendy. Instead, they may:
Let students bring in music they like (even briefly).
Program one piece each cycle that feels familiar.
Make quick connections to music they already recognize.
It doesn’t take over the program — but it does provide something for students to connect with.
4. They Look Ahead (Not Just to the Next Concert)
Some programs are living the musical equivalent of paycheck-to-paycheck. Get through this concert. Then the next one. Then the next one.
The ones that build over time think beyond the concerts. Not a perfect curriculum map — just simple questions:
What should a first-year student be able to do by May?
How does the second year feel different than the first?
What habits are we building that still matter in two years?
You’ll still have weeks where you’re just trying to get through rehearsal. That doesn’t go away. But having some direction makes even the tough days feel like they’re going somewhere.
5. They Program for the Students They Actually Have
It’s easy — especially early on — to pick music based on what a “good program” should sound like. You hear other groups. You see state lists. You want to get there.
Stronger programs don’t lower standards. They define success more realistically.
Sometimes the best choice is not the hardest piece. It’s the one that:
Provides opportunities for growth.
Fits your rehearsal time.
Gives more kids something to do.
Has a real shot at sounding good.
When something starts to sound good, kids lean in. When it never quite gets there, they start to distance themselves.
6. They Build a Reliable Rehearsal
If rehearsal only works when you’re controlling every second, that’s a lot of pressure on you. The programs that feel different have structure — not rigid, but predictable. Students know:
A strong program is rarely one person doing everything alone. Even if you’re the only music teacher in the building, there’s usually some connection. Quick conversations. Messaging colleagues. Sitting in the back of someone else’s rehearsal and watching.
Trying to figure everything out alone slows things down. Not because you can’t — but because you don’t have to. Ask for help and feedback — this is one of the quickest ways to improve.
8. They Balance Standards with Reality
There’s a line between pushing and overreaching. Aiming high is not the issue. The issue is when everything feels just out of reach for too long. Or when there are too many commitments. Eventually, kids disengage or burn out.
Programs that hold the balance well make expectations clear — and reachable. These teachers understand that students may have commitments outside of music.
A strong program recognizes this but stays the course with what works. Goals stay intact every year:
Expectations
Routines
Core fundamentals
Programs that are consistently strong don’t reset everything every time things get tough.
10. They Value the People in the Room
Strong programs care about outcomes — but not at the expense of the people in front of them.
These teachers learn names quickly. They keep instructions clear and concise instead of turning everything into a monologue. They don’t embarrass kids who make mistakes.
It’s not all about the repertoire.
11. They Make the Work Visible
Strong programs show off. They don’t gloat. Instead, they make sure their hard work is visible.
They have great concerts, but they’re also a part of the school. They perform at student functions. They share clips of performances with friends and families. Administrators have an open invitation to rehearsals.
People support what they can see and hear.
What This Adds Up To
There isn’t one move that builds a strong program. It’s a collection of smaller things.
School is the place where kids get to try new things and discover what they enjoy doing and are good at … all while having fun at the same time! When students participate in a consistent after-school activity routine, it strengthens their focus and study habits, and helps them develop the skills needed to succeed in life. Creative electives provide essential opportunities for kids to build social confidence, strengthen emotional regulation, and find healthy outlets to express themselves.
Most parents tend to start with sports first, which generally enhances physical health, teamwork, and school spirit, but have you or your child considered trying music? The good news is that you don’t have to choose! In this posting, we’ll share one parent’s story about how his children played sports as well as engaging in school musical activities — a decision that not only brought them great joy but will continue to benefit them in a variety of ways as they grow up.
A REAL-WORLD STORY
Joel Tetzlaff.
Sydney and Seth Tetzlaff.
Joel Tetzlaff is a former percussionist and the Product Marketing Manager for Drums & Percussion at Yamaha Corporation of America. His two children, Seth and Sydney are now high-schoolers, but both started their musical journey when they were in sixth grade. We asked Joel to share his experiences in getting them involved in the world of music at a young age.
Like many parents, Joel’s kids started with sports because, as he explains, “it was easy — you can get in pretty early and at minimal expense.” Being a musician himself, he wanted to get them involved in music too but unfortunately COVID caused a delay in those plans. However, by seventh grade they had joined their school band and, in his words, “that’s when both of them really took a liking to percussion and to learning music.”
“They had a great music educator at their school,” Joel adds. “His attitude was, music is fun, so let’s not overthink this. I think he realized he was competing for their time. You know, it’s not only sports, but Xbox too — all these other things that kids get involved in. But my kids definitely benefited from being in both sports and music. They had different friends in each activity, but in both sports and music, they all have to learn to work together.”
We asked Joel what it was that made him want his kids to explore music, even while they were active in sports. “Well, I didn’t want to push music on them,” he explains, “but I played sports and music in school myself and I just felt that music was something that had more longevity. Music has been important to me throughout my entire life — it’s the one thing that’s been continuously with me, especially throughout COVID. So I came to realize that sports is limited, but music will always be there.”
Musical activities can in fact give your kids something unique that sports cannot. “Music is more cognitive, while sports are more physical,” Joel says, adding with a laugh, “and music is definitely safer than sports!” On a more serious note, he states that music offers a safer place to make a mistake, and can give your kids a sense of accomplishment both as an individual and in a group. But he points out there are also some similarities with sports. “When you look at a football playbook, for example, there are lines showing the places the player has to go, and when you look at a piece of sheet music there are dots showing the notes the musician has to play. But a page with black dots on it doesn’t come to life without our energy, and it’s the same thing with a playbook. Athletes bring the play to life, just as musicians bring music to life.”
THE IMPORTANCE OF TEAMWORK
School sports are renowned for helping build teamwork skills, but the same is true of musical activities: Every player in a school band or orchestra has to respond to and provide support for their fellow musicians in order to play a piece of music correctly. Joel recalls his son Seth having such a moment when he was performing in a concert. “His buddy was off by a measure and Seth helped him find his place. Seth looked over at him and he was like, ‘I got you.’ Then they just came in together. It’s something they still talk about today.”
In both sports and music, it’s about being a part of a community, about children feeling like they fit in — and, as every parent knows, that’s something that’s especially important to schoolkids. In turn, fitting in serves to boost their confidence — a vital skill as they grow up. Joel notes that having his kids involved in both sports and musical activities helped their social life. “They had more friends because they were in both worlds, and they learned to respect people for their different skills: One kid might be a really talented musician, while another might be a gifted athlete.”
BREAKING THE “EITHER/OR” MYTH
Joel Tetzlaff’s experience is that music can fit into your kid’s life without added pressure, even if they participate in sports activities, and he found that it was something that was perfectly manageable. “Scheduling was one of the concerns we had early on,” he says, “but there really weren’t a lot of conflicts. There might be the occasional concert while there was some sort of athletic event, but schools usually balance the event schedule so they don’t have a basketball game and concert at the same time.” A few conflicts did arise — for example, his son was on the football team and also in the school’s marching band, which meant that he wasn’t able to play at halftime shows, but Joel reports that it “didn’t detract from his enjoyment at being part of the band.”
At the end of the day, it comes down to logistics and time management. Asked what a typical week looked like for his family when his kids were juggling sports and music, Joel points out that musical activities tended to happen in a classroom during regular school hours, while athletics happened mostly in the evenings and on weekends. “Games during the week would sometimes take away from music practice, he says, “but our kids would resume practice on off days.”
Joel found it best to set a regular time for practice every day — he suggests an hour after school or before dinner — and to make it fun by allowing his kids to invite their friends over to practice together. The key, he says, is to “allow them time to relax and have time to themselves as well.”
TWO ACTIVITIES ARE BETTER THAN ONE
There are many studies that support Joel’s anecdotal experiences. For example, according to an online posting by the New Song School of the Arts, “Children involved in both fine arts and sports experience a unique combination of benefits. Research from the National Center for Education Statistics reveals that students engaged in both types of activities often outperform their peers academically and socially. They benefit from the creativity and discipline of the arts while also enjoying the teamwork and physical health advantages of sports. These well-rounded experiences prepare children for diverse challenges and opportunities in life.”
Kathy Kucsan, Ph.D., is the Education Director of the Center for Musical Arts in Lafayette, Colorado, and a strong advocate for students getting involved in both activities. She makes the important point that there are many athletes who are also musicians, as well as musicians who are athletes. “Kids have so much to learn and explore, why insist that they make the impossible choice between sports or music?” she asks in this online posting. “Over many years of teaching, I’ve seen students balance soccer or softball and music lessons. They grew up, went to college, and most have careers that don’t involve either. But they play in community orchestras, softball leagues, jazz combos and take Pilates classes, among other things.” (Kathy’s posting includes a chart that shows generalized benefits and a comparison for both music and sports participation in elementary school.)
As an added bonus, there is evidence that doing both activities can even help your child get into the college of their choice. According to this online article by Spark Admissions, “a well-rounded [extracurricular] profile demonstrates versatility, adaptability, and a capacity to balance multiple responsibilities. … Admissions officers often value students who can participate in leadership positions, take on a variety of extracurricular commitments, and enrich the campus culture in multiple domains.”
LET YOUR CHILD FORGE THEIR OWN PATH
We asked Joel what he would say to a parent who’s hesitant to add music because they’re worried about their child being overwhelmed. His answer was quite revealing. “School is the perfect —and sometimes the only— place for kids to experiment and try different hobbies. The opportunity that music brings can be life-changing to your kids. For me, sports was great, but music changed my trajectory in life. The important thing is that you let your children find their passion. Open your mind to the idea that they can do whatever it is they like doing, that they don’t have to become famous or great at it. Let them forge their own path.”
“Music doesn’t take away from sports,” he adds. “In fact, it often can complement it. The time expenditure is minimal, and the cost can be too, since there are options like renting instruments.” There are many fun ways that parents can introduce music to their children in a low pressure, fun way. For example, play them some of your favorite songs. Joel’s daughter — who plays softball year-round — bought a vinyl record player a couple of years ago, prompting him to play her a bunch of his old records. To his great delight, she took a liking to some of the music Joel used to listen to when he was her age. “We listened to Thriller probably eight times from front to back!” he says with a laugh.
Music has continued to play a role in Joel’s kids’ lives as they’ve grown. They still listen to music; in some cases 90’s music, in some cases rap. One of his sons, for example, is interested in making beats, while his daughter leans more towards vintage sounds. “All my kids use music to hype themselves up for games,” he says, “but also as a way to relax themselves. It helps them to both connect and disconnect.”
IF YOU COULD GO BACK AND GIVE YOUR KIDS ONE PIECE OF ADVICE …
We wrapped things up by asking Tetzlaff, “If you could go back and give your kids one piece of advice when they were younger, what would it be?”
“Don’t be afraid to fail,” was Joel’s reply. “Sometimes it’s hard,” he adds, “but music doesn’t have a wrong answer. When you find yourself feeling down about how you sound, that’s how you learn. Whatever doesn’t work, you fix and get better at it. No one is perfect — in fact, being imperfect is what makes a sound unique. There is imperfection in being human. Hitting wrong notes sometimes sounds great.”
Tetzlaff’s advice to other parents is equally straightforward: “Don’t put pressure on your child when they start any school activity, be it sports or music. Let them enjoy the process. Let it be a release for them. And don’t count it out before they get a chance to try it, because you never know what their passion will be.” The bottom line is this: Students shouldn’t have to choose between music and sports. They should do both!
A senior walks in and says, “I think I want to major in music.”
And just like that, everything speeds up. Auditions, applications, scholarships — and the deadline. College auditions aren’t just about playing well. They’re about making decisions, and most students (and families) aren’t sure where to start. Sure, we could send them to the guidance counselor, but music school isn’t exactly like most majors.
Start With the End in Mind (Even If It Changes)
Before you help a student select audition music, ask this: What do they want to do? Because “music major” isn’t an answer. Do they want to teach? Perform? Compose? Just keep music in their life? Those paths don’t just lead to different schools — they lead to different careers and lifestyles.
Some students may say performance but change their mind when they see the amount of practice involved. Others almost rule out music education because some call it a fallback — until they actually work with younger students and learn that they enjoy teaching.
Our job isn’t to gatekeep, but we can provide a reality check. Suggest students watch a college rehearsal or speak to someone else in the field they want to enter. It’s one of the fastest ways for them to see what the job actually looks like.
Build a Smart List (Not Just a Dream)
Dream schools are fine. Considering only one school is the problem. When everything rides on one audition, one acceptance or one scholarship — this creates pressure. Financially and emotionally.
Instead, build a list that includes:
A couple of reach schools
A few solid fits
At least one affordable, likely option
Then revisit this list. Costs and requirements can change.
School reputations matter, too — they aren’t everything, but they must be considered. I’ve seen students thrive at “less impressive” schools because they had opportunities right away. I’ve also seen students get lost at big-name programs.
Other questions to ask:
Is the music and degree program stable?
Are ensembles strong?
Do students graduate within four or five years?
Are alumni employed in a career lining up with their major?
School audition requirements vary. Some programs require two solos of a contrasting style. Others want specific etudes. Some require memorization. Some don’t.
And then there’s everything else:
Scales
Sight-reading
Prescreens
Interviews
Sample compositions
Safest move? Check every requirement straight from the school. Sit down and go through it line by line if needed.
And if they’re still not sure? Email the school of music. The student should tell them what piece they’re thinking about and ask if it fits the program requirements. If not, ask what they might suggest.
Train the Musician, Not Just the Solo
Audition tunnel vision is real.
Pick an audition piece. Clean it up. Repeat. Live this every day. Resent sitting in band when you’d rather be in a practice room.
It’s only your future, right?
But schools don’t just consider the best solo. They also consider complete musicians. The students who stand out can sightread, play in tune and handle all basic techniques on their instrument. Basics begin in rehearsal for all students. Consider regular sight-reading, scales, and some basic theory and ear training exercises.
Prepare the Professional
Most of us know how well a group is going to perform the minute they walk into the performance area. Sloppy looking, all over the place, no plan? They will probably sound exactly how they appear. Poised, proper and professional? You’re more likely to hear a well-prepared performance.
The same applies to potential music majors. The audition starts before they play a note. Help your students with their first impression by preparing them to:
Introduce themselves without sounding scripted.
Look someone in the eye during conversations.
Explain why they’re interested in the school.
Send a professional email to a professor.
Practice answering questions.
Let it be awkward. You’re not turning them into professional speakers. You’re just helping them put their best foot forward. That alone puts them ahead of a lot of kids.
Practice the Audition
Playing in a practice room and playing in the audition are very different experiences. Mock auditions help students get uncomfortable now so they’re not surprised later. I have kids play their audition piece in front of the band, and, if they approve, get feedback from peers.
Have the student record their auditions. If the first take is rough? That’s OK. They may notice rushing, tension or their reactions after they make a mistake. And they’ll learn how to recover.
I tell kids that even if they mess up, keep going like nothing happened. The audition committee may not even notice the mistake.
The Interview Goes Both Ways
Students aren’t just trying to get into a school. They’re trying to figure out where they belong.
So, they should ask questions, too.
What’s the studio like?
Are professors accessible?
What does a normal week look like?
Do scholarships change after year one?
Some students visit their dream school and then change their mind.
Acceptance to a school can feel great but it doesn’t mean it’s the best fit. It’s OK for students to balance the school information with their gut feeling.
Your Role Is Bigger Than the Audition
If this process starts during senior year, the student is already behind. It’s not impossible to catch up, but they do need to be disciplined. They must meet all deadlines.
The application process works a lot better if it starts early.
Build fundamentals early
Encourage lessons and camps
Connect students with college faculty
Even small things help. Guest clinicians. College visits.
You don’t have to know everything. Just get them in front of the right people. Keep parents in the loop every step of the way. College is a big decision for a family.
Talk About Money Early
College is expensive. Music school? More expensive. There’s tuition. Then there are lessons, instruments and camps. Student musicians have limited time outside of class and rehearsals, so it’s tough for them to take on a job to earn money.
How much can I expect to earn in this career path?
Whether or not a student attends a school is up to them and their family. But we’d be doing them a disservice if we just said, “follow your passion” and didn’t bring up the financial reality.
This Is Bigger Than One Day
Audition day feels huge. Students are auditioning for admission, studio placement and scholarships. Your job isn’t just to get them ready for 10 minutes of playing. It’s to guide them to a good decision about where they’ll spend their next four years.
If your students feel prepared, informed and a little more confident — you did your job.
Most job interviews include a question that sounds a little like this: “What do you do when you don’t agree with a colleague’s decision?”
You think about the hypotheticals then say how you can work through anything as long as there’s nothing illegal or immoral going on. You will be able to see their point, get them to see your side, and you both will talk it through together. It’s all going to be OK.
However, when people have to work together, things get complicated.
You’ve probably experienced this. A colleague said something that didn’t sit right. A decision was made without you. A student came to you confused because they were getting different information from two different rooms.
Before you send a text, draft an email or say a word to anyone in the building — assume positive intent.
Rounding up means asking yourself: Is it possible this person was trying to do something reasonable and it just landed wrong? Usually yes. Not always. But usually.
Rounding down sounds like: They’re undermining me, they don’t respect the program, they’re doing this on purpose. That’s the easy story to tell yourself. It’s almost never accurate, and it poisons the conversation before it starts.
How to do it: Write down what happened. Next to it, write one plausible explanation that doesn’t involve bad intent. You don’t have to believe it yet. You just need to consider it long enough to have a real conversation.
Get It Out of Your Head Before You Open Your Mouth
A disagreement with a colleague is not usually an emergency even though it may feel like one. Your brain wants to resolve it immediately, which means replaying the incident on a loop and building a case. That’s not useful — and acting on it too fast usually makes things worse.
How to do it: Write down the facts. Not your interpretation of what happened — the actual sequence of events. Then call a trusted mentor outside the building and tell them just the facts. Just saying it out loud usually defuses the situation. Sometimes you realize the problem is different than you thought. Either way, you’re in a better position to talk than you were an hour ago.
New teacher tip: You haven’t had enough practice with conflict to know what’s a real problem and what’s just disagreement between two people who work differently. Waiting a day costs you nothing. Saying the wrong thing costs you more.
Have the Conversation
Some people will do almost anything to avoid 10 uncomfortable minutes. Stop having lunch in the office. Change jobs. Spend an entire semester planning a war with someone they’ve barely talked to.
That’s a lot of wasted energy. And it usually makes things worse.
A few years ago, things between a colleague and me had been breaking down for about six months. I kept waiting for it to resolve itself. It didn’t. So, I asked him to dinner.
We talked. The issue between us was smaller than I thought. Different teaching philosophies in a couple of areas — that’s to be expected — but nothing that put either program at risk.
What it took was me accepting that people do things differently, and him not reading every difference as a criticism. The working relationship that came out of it was genuinely positive. We started leaning on each other’s strengths. None of that would happen if I kept the silent treatment going.
How to do it: Ask for a low-stakes meeting — coffee, lunch, a discussion after school. Keep the setting neutral and private. Go in with honest questions, not setups. The difference:
A setup: “Did you tell my students they didn’t have to practice?”
An honest question: “I heard something that confused me and I wanted to check in directly. Can I tell you what I heard?”
You don’t want to put someone on trial — you want to open a conversation.
Lead with how you experienced the situation, not what you think they intended. “I felt like this was happening because of that — am I reading it wrong?” is a real question. It gives them room to respond without getting defensive.
When the conversation is over, thank them. Even if you’re still frustrated. They gave you time they didn’t have to give.
Come In With a Solution, Not Just a Problem
It’s you and the person against the problem — not you against the person. That mindset changes the entire tone of what you’re walking into.
How to do it: Before the conversation, know what you’re hoping to walk away with. A defined process for shared band and choir students. An understanding of how decisions get made. An agreement about who gets looped in and when. You don’t need a formal resolution — you need one next step both people can live with.
Here are some working agreements that prevent future problems:
no major decision affecting the whole music program without the department talking first,
students don’t carry messages between teachers,
when something is unclear, ask before assuming.
Agreeing on these habits early avoids a lot of unnecessary damage later.
When It’s Administration
Be careful. Administrators are managing things that you can’t always see. That doesn’t mean their decisions are always right — it means the way you raise concerns requires a little more nuance.
How to do it: Document patterns before you bring them up. “We’ve lost five instructional days to scheduling conflicts this semester” lands differently than “Why don’t you care about the music program?”
Specifics give people something to act on. Complaining puts people on the defensive.
Come with a proposed solution, not just a vent. Bring data if you have it. And consider timing — sometimes a no means not right now, not never. Knowing the difference keeps you from taking it personally.
When the Person Is Just Difficult
Some colleagues are hard to work with. A few people operate in ways that make collaboration genuinely unpleasant, and a single conversation won’t change that.
You don’t have to be friends with everyone you work with.
How to do it: Stay professional. Coexist without making things worse. Avoid always and never in any conversation about them. Don’t recruit allies. Don’t bring students into it. Keep your interactions brief, respectful and task-focused.
A few other habits worth committing to regardless of who the colleague is: Don’t gossip, ask before assuming and don’t make decisions that affect others without telling them first.
If behavior crosses into something abusive or inappropriate, that changes things entirely — document it and go through the right channels.
For everything short of that, operate cleanly, keep some distance and spend your energy where it’s needed.
Remember, most disagreements aren’t about bad intentions. They’re about two people who haven’t talked enough yet.
Teaching “by the book” works really well … until it doesn’t. When I arrived at Mount Vernon High School in 2017, I taught the way I had been trained to teach: Plan meticulously, stay organized, build routines and keep musical outcomes at the center of every decision. Teach the fundamentals well, establish consistency, use backward design, and soon, growth will follow. Right?
Wrong.
My students were unengaged and uninterested in taking the next step. They completed the daily routine, but I didn’t feel the investment, curiosity or shared ownership that strong ensembles need. Each day felt like we were falling short of carefully planned progress.
Eventually, I found myself asking, “Why don’t they care about this?”
The answer was uncomfortable: I had built structures for music-making before I had built structures that helped students feel cared for.
Don’t get me wrong. I cared deeply about what my students could eventually do as musicians, but I was not always demonstrating that I cared about who they were and how we were going to grow together. I focused on notes, rhythms, posture, tone and technique — all things that mattered, but none of which were enough by themselves.
So, I went back to the drawing board and asked a new question: What if I modeled care as intentionally as I modeled my musical outcomes?
The results changed my teaching. The more I focused on creating an environment of care, the more musical progress I saw. Students became more willing to take risks, more invested in one another and more prepared to engage deeply with the music. Care did not replace fundamental skills. It made them better.
Here are five ways I use care-based instruction to build stronger musical outcomes in my classroom.
1. Press Pause on the Playing
I get strange looks when I tell colleagues that my students do not play for the first two weeks of school and even stranger looks when I tell them that we have a concert at the end of October.
In music, we ask students to do something genuinely demanding: Engage with the music on a deeply personal and emotional level in order to create fantastic art. In other words, we ask them to care deeply about their craft and the music they are playing.
But why should they? This is not a rhetorical question. It’s something we must teach.
A student may walk into the music room dealing with any number of difficult challenges that we know nothing about. We then ask them to sit down, tune, focus, listen across the ensemble, respond musically and invest emotionally in the work. That is a huge ask, especially if the classroom culture has not yet given them a reason to trust the people or the process.
Before students can fully engage with the music, they need to understand the environment. They need to know that their teacher cares about who they are inside and outside the classroom. They need to see that their classmates are invested in their shared success. They need to feel that the ensemble is moving toward something together.
When that foundation is in place, the musical work changes.
Warmups are no longer just warmups. Scales are no longer just scales. Technical exercises become tools for expression. Historical context becomes a way to understand people, places and stories. Rehearsal becomes more than correction; it becomes a shared act of growth.
Pausing the playing at the beginning of the year may feel risky, especially when concert deadlines are real. However, in my experience, the time spent building trust, routines and shared purpose will result in better focus, stronger ensemble awareness and deeper musical investment.
2. Learn Some Handshakes
I am originally from Cleveland, Ohio. When I was 12, I had the chance to meet LeBron James, an experience that I’m pretty sure has shaped just about everything I have done ever since. When the Cleveland Cavaliers made their historic 2016 NBA Finals run, overcoming a 3-1 deficit to win the championship, I became fascinated by what helped James and the rest of the team thrive under pressure. One detail stood out to me: the handshakes.
As a child, Al Rodriguez met some professional basketball players including LeBron James.
Players had unique handshakes with one another across the roster. Some had multiple. Win, lose, success or frustration, these handshakes gave players a personal way to connect.
That made me think: What better way to help students learn about one another than by creating their own?
In my classroom, we talk about that Cavaliers team, and we brainstorm the qualities that strong teams possess — trust, connection, resilience, accountability and care. Students then break into small groups, share things about themselves and look for commonalities. Do they like the same food? Do they play the same sports? Do they enjoy the same games, movies or music? Those commonalities become the foundation for their handshake.
A fist bump might turn into someone miming eating a sandwich, using a video game controller and ending with a shared foot tap. After each group creates its handshake, they teach it to other groups and explain the meaning behind it.
Chaos and laughter usually follow. But so does connection.
Months later, I still see students greeting one another with those handshakes. What began as a team-building activity became part of the ensemble’s language. Students have a small but meaningful way to say, “I know you. I see you. We are part of this together.”
That matters musically. Students who feel connected are more willing to listen across the ensemble, support one another through mistakes, and commit to the group’s success.
3. Ask “Dumb” Questions
I tell my students all the time that curiosity is important and that no question is dumb.
Then I make it my personal goal to ask the dumbest, most absurd question I can think of. This became our “DqotD,” or Dumb Question of the Day. The process is simple: Get students talking, laughing, sharing and connecting. The questions might be ridiculous at first, but more often than not, the conversations become more thoughtful than anyone expected.
Once the routine is established, we make it musical. Students might go around the room sharing their answers while working through silent vibrato exercises or bow technique drills. Between each answer, I call out “switch,” and students move to the next repetition or variation. The technical work continues, but the atmosphere shifts. The focus is lighter, more connected and less tense.
That matters.
When students are physically tense, emotionally guarded or afraid of making mistakes, their playing reflects it. However, when they are relaxed, connected and willing to participate, they are more likely to develop the physical freedom required for expressive playing. They feel comfortable enough to try difficult things.
Is it more effective to build vibrato while debating whether a boneless chicken wing is really just a chicken nugget in disguise? Sometimes, it is.
4. Learn the Four Hs
As music educators, we all want to create incredible musical moments. Those moments do not happen by accident. They require hours of practice and an encyclopedia’s worth of knowledge and skills.
The same is true of meaningful classroom relationships. Care does not happen just because we say we care. We must create structures that help students know us and one another more fully and responsibly.
One activity I use is called the Four Hs: History, Heroes, Heartbreaks and Hopes.
Students work in small groups and share what they feel comfortable sharing in each category. They might talk about a part of their history, someone they admire, a difficult experience that shaped them or something they hope for in the future. The most important part is not just the “what” but the “why.”
This activity requires trust, so student agency is essential. Students should never feel pressured to disclose more than they want to. The goal is not forced vulnerability; it is to create a space where students can understand one another with more depth and care on their terms.
These conversations are not inherently musical, but they can do as much for an ensemble as an intonation drill.
Any great ensemble is only as strong as the people within it, and I teach that we have a shared responsibility to uplift one another. Activities like the Four Hs help students practice trust, communication, empathy and accountability.
Those happen to be the same skills required for high-level chamber playing and musicality.
When students understand one another better, they listen and rehearse differently. They respond to mistakes differently. They begin to see ensemble success not as an individual achievement, but as a shared responsibility.
5. Prioritize the Pedestrian
Music teachers have limited time, endless to-do lists and deadlines that never seem to stop. Because of that, we become very efficient.
Come in. Attendance. Unpack. Tune. Warm up. Rehearse. Announce. Dismiss.
That structure is useful. But if we are not careful, efficiency crowds out the small human moments that build the culture we need.
Care-based teaching requires us to prioritize the everyday, ordinary interactions that are easy to overlook.
Spend five minutes at the beginning or end of class talking with two or three students. Ask about their day, but also ask about their lives beyond the music room. Follow up on the game they mentioned, the sibling they were worried about, the college application they submitted or the job interview they had.
These conversations do not need to be long to be meaningful. Over time, they show students that they are known.
Ten minutes in a rehearsal can feel like a lot. But it is a small investment when the return is a classroom where students feel safe, seen and empowered to become the best versions of themselves as people and musicians.
That kind of environment does not lower musical expectations. It strengthens them.
When students know that they matter, they are more willing to work. When they trust the people around them, they are more willing to take musical risks. When they feel connected to the ensemble, they are more willing to pursue excellence together.
Building a Foundation of Care
The word “care” is often treated as a synonym for relationship-building. If students like your class, if they see you as their go-to teacher, or if they say music is their favorite part of the day, then they know you care, right?
Not necessarily.
Relationships are an important first step, but they are not the final destination. A care-based music classroom goes beyond being liked. It asks students to care for themselves, care for one another, care for the ensemble and eventually transfer that care into the music itself.
Educational philosopher Nel Noddings wrote that caring for ideas, such as mathematics or art, has much in common with caring for people. She argued that we can become deeply engrossed in ideas as we do with other people, and schools should make that kind of engrossment possible for students.
That is the heart of care-based music education.
Students need technical skills to succeed in high-level music making. There is no shortcut around that. But students also need trust, belonging, purpose and support. Without those things, we lose the opportunity to turn the technical into the meaningful.
Care is not a checked box or a kind gesture added on top of the “real” work. Care is the foundation that allows the real work to happen.
The call to action is simple: Make care visible in your next rehearsal. Pause before playing. Learn the handshake. Ask the strange question. Follow up on the conversation. Build the conditions that help students feel known, trusted and responsible to and for one another.
When we do that, we do more than produce technically adept musicians. We help students become thoughtful, connected and genuine people who understand that music-making is not just about playing the right notes. It is about learning how to listen, respond, risk, support and care together.
Summer is fast approaching, and before band camps and rehearsals begin, take time to attend a professional development workshop. Not only can you refine or build new skills, but you can also network with other music educators.
No matter if you want to learn more about teaching guitar, mariachi, modern band or if you want to become a better music director, there’s a seminar out there for you. Hearing about new ideas, pedagogies, strategies, and more will motivate you to tackle the upcoming year of teaching music with renewed vigor. A win-win situation!
Ask for funding from your school or district to cover the cost of the conference.
Don’t be shy. Take the opportunity to talk with seasoned, well-known music educators and performers.
Keep organized notes on new ideas and strategies you want to try.
If there are vendors at the conference, see if there are any products or services that could help your program.
Band & Orchestra
Hands-on workshops and events that will help you elevate your band and orchestra program.
Bands of America Summer Symposium Director Academy
As a proud presenting sponsor, Yamaha is excited to share this unique opportunity for educators to receive hands-on coaching on rehearsal efficiency, conducting, lesson planning, finances and more!
Carnegie Hall’s Summer Music Educators Workshop
Explore what great teaching looks like through sessions rooted in artistry, collaborative music-making and connections. Grow your classroom impact today! Travel stipends available.
Dynamic workshops and symposiums designed to elevate conducting technique, artistry, and ensemble leadership.
2026 UCLA Wind Conducting Workshop
Designed for wind band teachers of all levels, this five-day symposium includes full-band and chamber conducting opportunities, as well as open rehearsals and discussion sessions with master teachers, including Yamaha Master Educators Dr. Emily Threinen and Dr. Travis J. Cross.
When: June 21-25, 2026
Where: UCLA, Los Angeles, California
Northeast Wind Conducting Symposium
With guidance from Yamaha Master Educator Dr. Rodney Dorsey, the symposium’s featured clinician, attendees will improve techniques for conducting and rehearsing while exploring other relevant topics.
Where: University of Minnesota, Minneapolis, Minnesota
Commercial Music & Technology
Cutting-edge music technology and commercial music workshops to grow your program and create new pathways for music-making.
Teaching Guitar Workshops’ Nationwide Tour
Teaching Guitar Workshops is hosting nationwide workshops this summer, including one at Yamaha headquarters in Buena Park, California, to teach you how to start and enhance a guitar program at your school! Use code tgw50yam for a $50 discount valid at all tour stops.
When: Tour workshops run June 1-September 2, 2026
Where: Virtual and nationwide stops
The Second Annual Musikfest Music Industry Conference
Dive into interactive sessions, cutting-edge technology demos, inspiring keynotes and real-world insights designed to bridge the world of music education and today’s evolving industry. The keynote speaker is Yamaha Master Educator Dr. David Cutler, and scheduled presenters include Yamaha “40 Under 40” music educator Kevin Longwill and Yamaha Senior Segment Marketing Specialist for Education Natalie Morrison.
When: Four 12-day workshops run throughout June 14-August 14, 2026
Where: Online
The 2026 Modern Band Summit – Free Registration! Music Will offers a professional development conference like no other, where music educators from all over the country come together to learn, teach, play music and experience the modern band curriculum!
When: July 22-24, 2026
Where: Fort Collins, Colorado
The 2026 National Mariachi Education Workshops
At the National Mariachi Education Workshops, experts including Yamaha Master Educator Marica Neel will help music educators deepen their knowledge of mariachi education as they network with peers in a supportive, collaborative atmosphere.
When: June 22-26, 2026
Where: Las Vegas, Nevada
The Leyenda Foundation’s Prof. Development for Guitar
Join Come Together for a four-day professional development institute designed to empower music teachers, performers and community leaders with new tools, resources and collaborations.
“Good afternoon — would you be available to solo with our group? Yes? Great! Also, in the event I suffer a debilitating tree nut allergy and go to the ER, could you also run the entire rehearsal with no prep?”
That’s not how the conversation went, but it is what happened. I was excited to bring in a professional trumpet player to perform with my kids. He was well-known and performed internationally. If you’ve ever heard someone at that level play live, you know what kind of opportunity that was. We were ready!
Before the rehearsal, a student brought in some cupcakes to share. She offered me one. I broke my rule of not accepting food from students and failed to ask about the ingredients. A half-hour later, our guest artist arrived. Through a swollen throat and hives, I introduced myself, let him know I had to go to the ER and asked if he could cover the rehearsal. I told him the principal was on his way to supervise. He said yes — what a good sport. (Also, don’t worry — I lived.)
Guest artists are worth booking. You just have to be thorough.
This Isn’t a Luxury
Bringing in a guest artist can feel like a luxury. Something you do if there’s leftover money or extra time. I think it’s one of the most important things you can do for your group.
Your students listen to you every day. That’s not a bad thing — but it’s one voice. One set of ears. One way of explaining things.
A guest artist changes that immediately. Your students hear a different sound — live, in the room. Not a recording. Not a YouTube clip. A real person making music at a high-level right in front of them. They also hear instructions differently. You can say the same thing for six weeks, and it doesn’t stick. Someone else walks in, says it once, and the kids respond like it’s brand-new information.
“Do you know what forte means?”
“No! Mr. Stinson never taught us that,” the students say in unison.
Avoid calling them “traitors” and just let it be. What’s important is that the kids get the information.
A guest artist adds variety to a routine. There are times of the year when your group needs something different, and this gives you that while supporting your curriculum.
Start Small
Your first guest artist does not need to be a nationally known name. It just needs to be someone solid who works well with students.
Look local:
College professor
Freelance player in your area
Strong teacher from a nearby district
These people are easier to schedule, cost less and still bring a ton of value. More importantly, you get to learn how this guest-artist thing works without a lot of pressure. You figure out timing, communication, pacing — all the stuff that’s not covered in a methods of teaching class.
Don’t guess. Don’t assume. Definitely don’t listen to the tenured teacher on their way out saying, “It’s better to beg for forgiveness than to ask for permission.”
1. Artist fee: Start by contacting a couple potential guest artists, explain what you’re looking for and ask for a ballpark figure. Some may not want to give a price or may ask you what your budget is. It’s OK to push a little and tell them that you have to bring a clear price to the powers that be and that you’re not certain of budget.
2. Travel (this can make cost go up quickly): Travel can be a big cost. Flying someone in versus driving distance is a completely different conversation. If the numbers don’t work, consider 1) splitting the cost with another school, 2) partnering with a school or community college or 3) Look for artists already in your area for a festival or university event.
I’m a little spoiled because my school is an hour from Chicago. It’s not a huge deal for us to book someone already flying in for the Midwest Clinic in December. If you don’t have that luxury, contact some colleagues to see if they know about any festivals or anyone who may be coming into town sometime soon.
If one event wipes out your entire budget for the year, it’s probably not the right move. You still have to run your program the other eight months.
3. Pick the Right Person for Your Group: A big name doesn’t always mean good fit. You want someone who can teach, not just perform. An artist who can’t connect with students and doesn’t understand your ensemble’s level may end up leaving a bad taste in everyone’s mouth.
When you reach out to the guest artist, be clear about your group. Tell them 1) what grade level you teach, 2) what your ensemble actually sounds like (not what you hope it sounds like) and 3) a few pieces your group has performed recently.
“We’re a high school band” doesn’t tell them much. “We’re a non-auditioned 10–12 band that played Grade 3 literature last semester, including ______” does.
This information helps the guest artist prepare — and makes your rehearsals and performance better.
The programming process with a guest artist may be the most important decision you make. Take your time with this, and it’s OK to let the guest artist know if a piece they are suggesting won’t work for your current group. Better to work through this now rather than be stuck with an obligation that stresses everyone out.
Details Matter
Have a special rehearsal scheduled that is non-negotiable. Confirm everything:
Equipment needs
Timeline for the day
Food and dietary restrictions if serving food
Travel logistics
Double check with your admin/building schedule
Also, have a backup plan. If you’re out sick, stuck somewhere or something unexpected happens, who will run the rehearsal? Who has the schedule? Who knows what’s going on?
I didn’t have a real backup plan when I had to race to the ER, but I got lucky.
For the performance, have a structure. One example:
Clinic or masterclass beforehand
Dress rehearsal
Optional Q&A
Performance
When the day comes, you shouldn’t be figuring things out in real time. You should just be running the plan.
If you don’t tell anyone, they won’t know. That’s a missed opportunity.
This helps your program long-term. People appreciate the opportunities you supply for the youth in their community. They’re more willing to get behind your program when they see something great.
Get Your Money’s Worth
If you’re paying for an artist, don’t use them for one hour and send them on their way.
A solo plus a feature with the ensemble works well. For trumpet guest artists, we often program something like Bugler’s Holiday — students stay engaged, and the artist gets room to do what they do. If you have a younger ensemble, simply ask the guest artist if they would be comfortable sitting in on a couple other pieces.
If the guest artist agrees to be out for a long period of time, build out your day even more:
Sectionals
Short clinics
Q&A sessions
Even a 20-minute sectional or a quick talk with beginners can make a difference. If you have permission, record parts of it. You’re not just paying for a performance. You’re paying for access.
After It’s Over, Follow Up
When someone helps, say thank you. This includes the guest artist, performing students, audience members, administration and anyone who helped make it happen. Thank people publicly whenever you can.
Then follow up directly a week or two later with a quick written thank you note to your administration and any donors. Include a picture if you have one. Have kids write the thank-you note for added impact.
This is also how you keep the door open. A simple “we’d love to do this again sometime” goes a long way.
Tip:It can be tough in the moment to remember key people who attended the concert. Consider asking a volunteer parent to make a list of people who should receive thank you notes. And don’t forget to thank the parents!
Keep It Simple
Start with what you can afford. Choose someone who fits your group. Plan it well enough that you’re not scrambling. Have a backup plan … just in case your day goes completely off the rails.
If students hear great playing, learn something new and feel like they were part of something different for a day, that’s an event they’ll remember.
I took my first music history class during the second semester of my junior year. We went in chronological order and got about halfway through the Baroque period. When the end of the semester arrived, it was like turning off a movie when it was just starting to get interesting. Yes, I was that nerdy student who loved music history. There was no way I was going to wait four months for the next lessons.
That summer I worked as a performer at the circus at Great Escape in Queensbury in upstate New York. We had three shows a day with breaks in between. Every day during my first break, I found a quiet, shaded little corner of the amusement park and read my music history text and listened to CDs that I ordered from the Columbia House “12-for-a-penny” deal. It was under these trees with the Adirondacks behind me, the smell of funnel cakes in the air and fresh off a performance with elephants that I fell in love with the music of Mozart, Haydn, Beethoven and Mahler.
Ludwig van Beethoven (Library of Congress)
Launching Composer of the Month
When I began teaching middle school, I wanted to share my love of the classic composers and their music with my students. I created a “Composer of the Month” program where I featured a different composer each month during rehearsals. Each week, I spent 10 to 15 minutes to talk about the composer and play a recording. I created a three-year rotation of nine composers each year, which meant that during my students’ middle school years they would learn about 27 composers.
Taking It To Another Level
After a couple times through the three-year rotation, I tweaked the curriculum. At the beginning of the year, I assigned a composer to each student. When their composer’s month arrived, they prepared and delivered a presentation for the band, such as:
Presentations: Students often gave biographical information or played recordings of their composer’s most well-known pieces. Sometimes, students would get more creative and dress up like the composer and act out scenes from their lives. Or, students might perform one of the composer’s songs on the piano or their band instruments.
Videos and Podcasts: Over the years, students have made videos or podcasts using a digital audio workstation (DAW) like Cubase or BandLab and a video-editing app like WeVideo or iMovie. I especially enjoyed podcast projects where students pretend to interview an expert or the composers themselves. Sometimes, students actually interviewed an expert. (So far, nobody has interviewed the actual composer of the month!)
Posters: Another fun project — and one that works really well when you need plans for a substitute teacher — is to have students create a poster on one of the composers of the month that includes their name, biographical information, famous song titles, compositional techniques, what instrument they played, their inspirations, pictures and artwork. I usually display the posters around the band room.
Concerts: We have featured Composers of the Month in concerts. Students perform their repertoire either as a full group, solos or chamber ensembles. Students introduce the songs and share some information about the composers. Slide decks or videos can be shown while the ensembles are performing.
Composing: A more advanced project that I have only started exploring is having students try to write music in the style of the Composer of the Month. This is pretty advanced for middle school where I am just trying to get the students to learn how to compose in general.
Making it a Cross-Curricular Project
Composer of the Month is not just an activity in my band classroom. I also teach it in my general music classes. In the past, my choir and orchestra colleagues have done it as well. The other two middle schools in my district have also been on board.
Composer of the Month has even been a cross-curricular project with language arts, social studies and art departments participating. We have scrolling announcements on monitors around the school where the Composer of the Month is featured. We have bulletin boards and display cases where you can also find information on the various composers we study. These displays are often put together by students.
Count Basie (Library of Congress)
Diversifying the Project
Fast forward to right before the pandemic. I was working with two amazing music colleagues — Mari Rathke and Maggie Zeidel — who were very involved in the Composer of the Month project and suggested a significant change. Most of the 27 composers we studied were European male composers who lived between 1600-1900. Mari and Maggie did some extensive research to diversify the list of composers.
Mari, who is now teaching orchestra in suburban Chicago, remembers, “We were trying to make it more diverse. We looked for new composers that students could learn from but also composers who students were familiar with like Lady Gaga and Kesha who did more than sing on stage — they had a background in music.”
Maggie, who has since built an amazing program in Eau Claire, Wisconsin, adds, “We knew that we would hit the male African American demographic with jazz artists, and we wanted to make sure we caught more than that when diversifying the program. I recall wanting to include Latinx and LGBTQIA+ composers, as well as female composers and female composers of color. We really dug deep into the underrepresented demographics, not just stopping at the surface level.”
Mari and Maggie’s research was amazing. They created a list of 27 composers from around the world and included amazing musicians who don’t get the attention and credit they deserve. The list also includes a number of genres and eras. Here is the list of composers we are learning about this year:
In April, I really enjoyed talking about Diane Warren, who has written nine No. 1 songs and dozens of Top 40 hits. We listened to several of her songs including Starship’s “Nothing’s Gonna Stop Us Now” and Aerosmith’s “I Don’t Want to Miss a Thing.”
A discussion followed about things like: 1) artists who write their own songs versus those who don’t, 2) how Warren is one of the greatest songwriters of her generation without being “famous” and 3) if Warren had lived during Mozart’s time, she would probably be remembered more because composers from that era are better known than performers (which will lead into our discussion about Mozart in May).
Ethel Smyth (Library of Congress)
Composing A Curriculum
We cover several continents, eras, genres, genders and styles with our Composer of the Month list. After three years of band, choir or orchestra, it’s as if our students have taken a world music history class, too.
The projects, discussions, performances and compositions add so much to the music education my students are receiving. A huge shout out to Mari and Maggie for all the hard work they put into this project as well as contributing to this article.
Yamaha launched the very first TransAcoustic guitars at the 2016 NAMM show. The groundbreaking LL-TA and LS-TA models that were shown there were the first guitars to feature Yamaha proprietary TransAcoustic technology, which allows acoustic instruments to generate reverb and chorus effects in the air (in the case of TransAcoustic guitars, emanating from the sound hole), without the need for external amplification.
Since then, the range of TransAcoustic guitarshas grown to include a wide range of body styles, both with and without cutaways. There are even premium models (such as the TAG3 C and TAS3 C) that add an onboard tuner, delay and full-featured looper.
Every TransAcoustic guitar comes standard with a pre-amp and an under-saddle piezo pickup system that allows the guitar to be used for recording direct to DAW (Digital Audio Workstation) or amplified through a P.A. system for live performance, and the aforementioned onboard effects can also be blended with the pickup output for extra versatility.
Recently, Yamaha debuted two new second-generation TransAcoustic guitars: the dreadnought TAG1 C and the concert body TAS1 C, both of which were detailed in this blog posting. And now these have been joined by two even more budget-friendly models — the TAG1E and TAS1E. The only difference between the two is the body style and size: The TAG1E has a large dreadnought body, while the TAS1E has a smaller, concert body. In this posting, we’ll take a closer look at the main features of each.
TAG1E in Translucent Black finish.
TAS1E in Sand Burst finish.
PHYSICAL ATTRIBUTES
The TAG1E and TAS1E both have a solid spruce top, mahogany back and sides, and a mahogany neck. The fretboard material is walnut, which is a nice departure from the typical rosewood or ebony. The bridge and bridge pins are made of ebony, while the nut is made of urea. The headstock tuners are open gear, with a chrome finish.
The scale length is 25 – 9/16″ (650mm) and the nut width is 1 – 3/4″ (44mm). A gig bag is included.
BUILT-IN EFFECTS
Installed on the inner surface of all TransAcoustic guitars is a device called an actuator.
A TransAcoustic guitar actuator.
This device resonates in response to the vibrations of the strings. In turn, the vibrations generated by the actuator are transmitted to the body of the guitar, and to the air in and around the guitar’s acoustic chamber … resulting in an authentic reverb and chorus sound that radiates from within the body, and outwards through the sound hole. Players experiencing this for the first time often think that there is a speaker system installed in the guitar chamber, but it’s actually this innovative device that produces the effects.
The TAG1E and TAS1E offer three effects: room reverb, hall reverb and a variable chorus. Three rotary dials facing the player on top of the upper bout of the guitar are used to adjust these.
Reverb
The reverb dial allows you to select the amount and depth of room or hall reverb that is produced through the sound hole of the guitar when played acoustically, and through the end-pin jack when amplified.
The dial rotates from fully counterclockwise (completely off) to midway (12:00) when adding incremental amounts of the room reverb, and from midway to fully clockwise when adding hall reverb. It couldn’t be easier to find the perfect type and amount of ambience for your music.
Chorus
The amount of chorus is sweepable from 0 (completely off) to fully clockwise. A really subtle doubling effect similar to that of a twelve-string guitar is produced at the lower settings, while more extreme modulation can be achieved as you move past the center detent of the rotary.
Volume
The volume dial serves two purposes. First, it activates the reverb and chorus effects when pressed and held down for three seconds. (This applies even when playing the guitar acoustically.) To disable the effects, simply press and hold the volume knob down for another three seconds.
This dial also serves as the master output for the under-saddle piezo pickup system and determines the overall output from the end-pin jack. Note that the volume control does not affect the volume or depth of the effects blend, which is a nice feature.
AUTOMATIC POWER-DOWN
The TAG1E and TAS1E power down automatically if the guitar hasn’t been played for about 30 minutes. This saves the battery life of the two AA batteries installed below the end-pin jack. If you are amplifying the sound, remember to unplug the cable from the end-pin jack to preserve the battery life.
PLAYABILITY
Overall, the TAG1E / TAS1E are incredibly well made, and the satin-finished mahogany neck is slim and fast for easy fretboard transitions. The fret-ends are well dressed, with no sharp edges, while the die-cast chrome tuners have a very positive feel and keep everything in perfect pitch, even after hours of jamming.
The setup on these guitars is also exceptional. The nut and bridge have been cut to allow for a low, buzz-free action, and the intonation is spot-on for both complex open chords and voicings further up the fretboard.
AESTHETICS
Both the TAG1E and TAS1E are available in a variety of distinctive finishes. The TAG1E I’m playing in the video below has a Translucent Black finish on its solid spruce top, as well as on its mahogany back and sides. This allows the natural red of the mahogany wood to blend beautifully with the shading of the top for a really classy overall appearance. The satin-finished mahogany neck is solid black, and the body is bound with a black and white binding that adds a subtle definition to the curves.
The walnut fretboard has a naturally soft grey / brown hue that really makes it stand out against the deeper coloring of the body. The fretboard doesn’t have any fret position markers, which keeps the flow of the playing area clean and unobstructed. You can always use the dot position markers on the side of the neck to check note placements.
The sound hole rosette adds a special touch with its cobalt blue and tan marquetry inlays. Quite the centerpiece set inside the solid spruce backdrop!
THE PICKUP SYSTEM
Like all TransAcoustic guitars, the TAG1E and TAS1E are equipped with a pre-amp and an under-saddle piezo pickup system. The control panel is all part of this pre-amp system, allowing effects as well as the main signal to be amplified through the end-pin 1/4″ jack socket.
TONALITY
The solid spruce top of the TAG1E / TAS1E offers a rich midrange and low-frequency response, with the mahogany back and sides yielding a slower transient response, making for a warm and woody tone with strong midrange. Building upon first-generation TransAcoustic guitars, these newer models combine a sleek modern design with fuller body volume and newly optimized effects.
The wide variety of tones you can get from these guitars is demonstrated in the audio clips below, all created with a blend of a condenser microphone and a send from the instrument’s end-pin jack. All the effects come from the guitar itself, with no external amplification or processing used.
1. Finger-style part
I added a touch of the onboard hall reverb and a subtle chorus to this double-tracked guitar part, which serves as the intro to the video below.
2. Spread chords
These double-tracked spread chords also come from the video below. I added more hall reverb and a deeper chorus effect to give them a shimmering sound.
3. Lead tone
The rhythm parts in this next audio clip provide context of how the single notes sound against the other parts in the video. I’m using a nice amount of the hall reverb for the lead guitar melodies.
The Video
This video provides a real-world piece of music that demonstrates the versatility of the TAG1E in an ensemble situation with other instruments.
I recorded the rhythm parts with an external condenser microphone and panned them to the left of the mix, then used the onboard pre-amp and piezo pickup to capture the double-tracks, which are panned hard right. The solo was captured using the pickup system only.
The fingerstyle intro has subtle onboard hall reverb and chorus. I added more onboard effects to overdubbed spread-chord accents as the composition builds, then overdubbed a melody line and solo using the onboard hall reverb.
You can best appreciate the blend of tones if you listen through good quality stereo headphones.
The Wrap-Up
Yamaha has produced two incredible instruments in the TAG1E and TAS1E. The overall aesthetic of these TransAcoustic models is stunning, with features that are totally unique on entry-level guitars.
Both play beautifully and sound amazing with either a pick or fingers … and having the option to add extra musical sheen with versatile onboard effects takes them to a whole new level of expression and inspiration. Whether you’re attracted to the big, big sound that the dreadnought body TAG1E brings or prefer the more controlled tonality of the concert body TAS1E, either instrument will allow you to experience a wide variety of world-class tones without having to break the bank.
We are teaching music during a time where virtually every song ever recorded is accessible on something that lives in our students’ pockets. That reality alone has fundamentally changed what it means to be a music educator. I’ll be honest … I have a love-hate relationship with Spotify and other streaming services.
As an artist, I struggle with Spotify. The economics can feel discouraging and the value of music, something we dedicate our lives to creating, gets flattened into fractions of pennies per stream. Add in the rise of algorithm-driven playlists and AI-generated tracks, it often feels like music is becoming more about quantity and data than artistry and human expression.
As an educator, however, I love Spotify. I’ve never had a more powerful teaching tool sitting right in front of me and my students every single day.
Access and No Limitations
Not long ago, teaching music came with built-in limitations. We relied on CD collections, sheet music libraries, burned mixes or whatever we could piece together from YouTube (if the internet cooperated that day). This barrier to access forced deeper engagement with fewer resources.
Now, that barrier is gone. We have instant access to multiple versions of the same song, live performances versus studio recordings, remixes, covers and entire discographies within seconds. We can jump from The Beatles to Billie Eilish in one click, compare production styles across decades and expose students to a global catalog of music in ways that were unimaginable even 10 years ago. From a teaching standpoint, that’s incredible! We can be more relevant, more responsive and more connected to the musical lives our students are already living outside the classroom.
A Change in Behavior
Today’s students don’t discover music in the way previous generations did, they scroll through it. Music is no longer scarce, it’s now infinite. With this endless resource, attention becomes the currency and something that I can clearly see in my classroom nearly every single day.
Students will play the first 20 or 30 seconds of a song and skip it if it doesn’t grab them immediately. When I give them a list of potential songs for their band set, they often make decisions within seconds, moving on before the song has had a chance to develop. Oftentimes, I know that they would love the song if they just stayed with it long enough to reach the chorus, the bridge or that big moment halfway through. This is especially true with older music, where songs were written with a slower build — sometimes two full verses before the first chorus. Today’s music, shaped by the realities of streaming platforms, tends to get to the hook much faster. Artists understand they are competing for attention, and they write accordingly.
This shift raises an important question for us as educators: What are we really teaching our students about music? When all the music in the world is available for the price of a monthly subscription, what message are we sending about its value? If we’re not intentional, the default lesson becomes that music is disposable, that it’s background noise, that it’s something you skip when it doesn’t immediately serve you.
We know that’s not true. We know the hours, the craft, the collaboration and the vulnerability that go into creating music. We know the power music has to shape identity, build community and tell stories that matter. Part of our job now is to make sure students understand that value, even in a system that often minimizes it.
Pros and Cons
For teachers, the Spotify era brings both incredible advantages and real challenges. On the one hand, we have unlimited access to music. We can pull up virtually any example we need in real time, connect lessons directly to what students are currently listening to, and create meaningful comparisons across genres, eras and production styles. We no longer spend weeks tracking down a recording, and that flexibility has transformed how we teach.
At the same time, we work against shortened attention spans and a tendency toward surface-level listening. Students often experience music passively rather than actively. They hear songs, but they don’t always listen to them. The overwhelming number of choices can also make it harder for students to commit to a piece of music long enough to truly engage with it. Because algorithms often feed them more of what they already like, their musical world can become narrower unless we intentionally broaden it.
Students, of course, experience their own set of pros and cons in this environment. The accessibility is unmatched and nearly any student can explore music at a high level. They can discover new artists, dive into niche genres and find inspiration for their own creative work with ease. This access helps students develop their musical identity more quickly and with greater ownership.
However, the subscription model can unintentionally devalue music in students’ minds. If everything is available all the time, it’s easy to treat it as disposable. Their patience for slow-building songs or complex musical forms can decrease, and listening can become more passive than intentional. There is also the risk of homogenization, where algorithm-driven playlists begin to blur the lines between artists and styles, making music feel more similar than distinct.
Use Spotify as a Classroom Tool
What can we do about it? Don’t fight the technology — teach through it. We must be intentional about how we use these tools in our classrooms and how we shape our students’ relationship with music. One of the simplest but most powerful things we have implemented at St. Michael’s Catholic Preparatory School is “listening days” when we stop everything and just listen to a song all the way through. No phones, no instruments, no distractions. For some students, this is a completely new experience. We sit in it. We let the song unfold. Then, we talk about it. What did you notice? Where did the energy change? What surprised you? What would you have missed if you stopped halfway through? These conversations help students develop a deeper awareness of form, arrangement and emotional arc.
Another strategy is teaching what I call the “long payoff.” When introducing certain songs, especially those with a slower build, I frame it for students ahead of time. I let them know that this song may not grab them immediately, but that it’s worth the wait. We talk about how some of the most powerful moments in music don’t happen in the first 20 seconds. This reframing helps shift their expectations and builds patience in their listening. Over time, students begin to trust the process and become more open to songs that unfold gradually.
We also work on slowing down the scroll when it comes to selecting repertoire. Instead of quickly skimming through songs, we commit to listening more intentionally. We might listen to a full pass of a song, identify its form and discuss why it works. This not only improves their listening skills but also leads to better musical choices for their bands. When students understand how a song is constructed and why it connects, they are more invested in performing it.
Just as importantly, we have open conversations about the music industry itself. Students are already participating in this ecosystem, whether they realize it or not. They deserve to understand how streaming works, how artists are compensated and how algorithms influence what they hear. These discussions don’t have to be cynical, but they should be honest. When students see the full picture, they begin to think differently about the music they consume and create.
Embrace Streaming Services
Looking ahead, the Spotify generation is not a problem to solve … it’s a reality to embrace. These students have unprecedented access to music and are incredibly intuitive when it comes to technology. They are creative, curious and capable of navigating complex digital environments with ease. But they need guidance in developing depth. They need to learn how to listen with intention, how to appreciate the craft behind the music and how to assign value to something that the world often treats as disposable. Our role as educators is shifting. We are no longer just teaching students what to play. We are teaching them how to listen, how to think critically about music, and how to engage with it in a meaningful way.
Spotify and other streaming services didn’t “break” music, but they definitely changed how we experience it. Because of that, educators must adjust, too. If we can take the unlimited access students have today and pair it with the kind of depth and intentional listening that used to be the norm, that’s where things get really powerful. We can give students the freedom to explore anything they want, while also teaching them how to slow down, really listen and understand what’s actually happening in the music. When that balance is there, we’re not just building better musicians, we’re creating better listeners, more thoughtful creators and a generation of students that can carry music forward with a purpose.
No longer a desert backwater dotted with one-arm bandits hiding everywhere that offers shelter from the sun, the Las Vegas metro area is now home to 2.4 million people. The Clark County School District (CCSD) serves more than 300,000 students and is the fifth largest school district in the country. Las Vegas, or any area, can’t support that kind of explosive growth without some collateral damage. One example is the lack of music education and performance opportunities available for Title I schools like Valley High School.
You will find Valley High, home of the Valley Vikings, east of the Las Vegas Strip and the University of Nevada, Las Vegas (UNLV). If you don’t see the high school campus, listen for the music. Follow it, and chances are you’ll meet Dr. Andrew Smouse, the Co-Director of Bands and Orchestras. He helps to lead a loud and proud band program with more than 200 students.
Valley High School hit the jackpot with Smouse. Today, the school boasts a Wind Ensemble, three Concert Bands and two Beginning Bands. In addition to the concert ensembles, Valley High offers a Woodwind Choir, Brass Choir, Percussion Ensemble, Jazz Band, Winter Guard and the competitive marching band, the Valley Vanguard.
A Pennsylvania native, Smouse holds a doctorate degree in wind band conducting from UNLV; he was invited to the DMA program after completing his master’s degree there. His friendly and comforting demeanor mixed with a firm but gentle approach beckons the best his learners are able to give. Case in point: He requires all students to participate in Solo & Ensemble events and advanced band students to audition for the Clark County Honor Band during the school year.
He understands that low income isn’t the only hurdle in the way of Title 1 students. Accompanying obstacles include lack of parental support, having to care for siblings after school, food insecurity or holding down a part-time job to help their families.
Known for his ethos “I teach life but use music to do it,” Smouse doesn’t talk about commitment to students but rather demonstrates it. Which is why he enforces the must participate in two festivals a year rule because he correlates conquering stage fright (even playing something as basic as “Mary Had a Little Lamb” in front of a crowd) to acing a job interview for students. “It’ll be a breeze,” the educator assures his musicians.
Edward Protzman conducting the Southern Nevada Honor Band.
The Southern Nevada Honor Band
Before the Southern Nevada Honor Band (SNHB) was created in 2014, there was only one clinic and audition experience for honor band available for high schoolers in CCSD and Southern Nevada. To give students an added opportunity to have honor band, area band directors created the SNHB — making and keeping its focus on Title 1 students, who didn’t make an honor band audition or who couldn’t make it to an honor band audition. “They get another chance,” notes Smouse. SNHB also gives participants the chance to make music and build friendships with other musicians from different schools.
SNHB mimics similar honor bands protocol. A different out-of-state judge, a professor of music perhaps, is invited each time to offer new and different perspectives. There is no dollar cost to participants, and students use school-owned instruments. (Full transparency and no surprise: Band directors and teachers cover some expenses themselves.) Additionally, generous sponsorships, including from the Yamaha Corporation of America among other corporations and small businesses like local music stores, helped ignite and keep the program humming.
Dani McCracken conducting the Southern Nevada Honor Band.
Band directors meet early in the academic year for the first order of business: recruiting music clinicians. Marching band season ends and is followed by the distribution of selected audition etudes. Next, participants learn the location(s) of the clinic and auditions. According to Music for All’s Advocacy in Action, “The directors and their staff serve as adjudicators in blind auditions at one of the participating schools in early January. After auditions on the same day, the ensemble personnel are announced, and directors receive the music for their students. The two-day clinic then takes place in late January, concluding with a public concert showcasing the students’ work.”
Anecdotal and measurable evidence proves SNHB’s success. It has grown from one honor ensemble to two. Retention is solid and new students participate in clinics and auditions. If an educator has an underserved community with little opportunity for students to participate in an honor band experience, Smouse suggests calling adjacent school band programs and building a system that is objective, impartial and educative for the students.
“A little friendly competition never hurt anyone,” he adds.
Dr. Andrew J. Smouse conducting the University of San Diego Wind Ensemble while presenting a clinic on Holst’s First Suite in E-flat.
The Solo & Ensemble Festival
“There’s nothing that says you can’t have your own festival. It’s your festival, do what you want,” says Smouse, fully determined that all students are afforded the same opportunities. So much so, he tailored a Solo & Ensemble Festival for his students. “We had to get creative to make it free for them and limited funds for us.”
The big project of the quarter for students, this Solo & Ensemble Festival is not the official state- or association-sanctioned event, but it serves the same purposes of the discipline of rehearsal, improving performance, receiving feedback and building confidence. The festival replicates the official version. “I don’t like reinventing the wheel,” Smouse explains.
Students dress up, judging is from the back of the room, the same rubric is used and medals are awarded. (The medals are a lot of steps up from the goofy prizes Smouse is known for awarding in the classroom — paperclips or a candy bar, to name a couple.)
The festival is held on campus and during school time, so there is no need to justify time away from the classroom, no special consideration for travel or collecting permission slips. Smouse asks retired band directors or maybe someone working on their master’s or doctoral degree to judge, paying a small fee out of pocket. Cheaper than transportation costs, he calculates.
It’s great for beginners, students are terrified and they learn to get through it, notes Smouse. “It makes them a better player. It’s not just me yapping at them all the time.”
For both SNHB and the Solo & Ensemble, Smouse has served a variety of roles: administrator, judge, logistics chair, clinician and benefactor. He’s also chief enthusiast with a seemingly unlimited supply of energy to make sure all students have the same access to all opportunities.
“There might not be any funding, but there are always opportunities,” Smouse says proudly.
You take attendance, and there’s a name you don’t recognize. Someone new is sitting in the third row, holding an instrument like they’re not entirely sure it belongs to them. Or they walk in like they own the place and play louder than your entire trumpet section combined. Either way, you have a new student.
If you teach long enough — especially in a high-mobility school — this won’t be a rare occurrence. Students move in. Students move out. Some stay a week. Some stay four years. Some leave right before your concert while holding a part you now need to cover.
This is part of the job. The sooner you treat it that way, the easier this gets.
Don’t Blame the Kid (or Their Last Director)
It’s easy to explain what you’re seeing. You’re thinking, “They didn’t learn this.” “They had no expectations.” “They’re way ahead — what were they doing over there?” None of this helps.
If a new student says, “Sorry, I’m probably behind,” they’re already prepping for comparison. That tells you everything.
Keep it neutral and forward-facing: “Here’s how we do things here.”
Not better. Not worse. Just different. You’ll get trust faster, and you won’t put them in a defensive spot. And you don’t know the full story anyway.
Listen Before You Place
Before you decide where they will sit or what they will play — ask a few questions:
What have you played before?
What did rehearsals look like?
Did you have sectionals?
Sometimes the answers don’t have much info. “I don’t remember. We just played songs.” That’s still useful. It may mean they’re starting from scratch on some basics.
Follow it with: “What part of that do you think will be hardest for you?”
You’ll get real answers like: “I have a job.” “Counting — we didn’t really do that.”
Now you know what to plan for and how to place them. You’re also setting expectations.
Placement Isn’t Just Musical
Now let’s talk about the kid who overnight has become your strongest player. First chair — no question. But should you put them there?
If you do, you just changed the experience of the kid who’s been working for that spot all year. Everyone will notice, and everyone will have an opinion.
Same with leadership. I once had a family ask if their student could be drum major as a senior after moving in. There’s no perfect answer here. One time, I placed the new player at the top of the section — and watched the section get better immediately. But the kids who were long-time members were resentful.
I’ve also kept the returning student in that leadership spot. Most members acted like this made sense. But the new student felt like they’d never have a chance to grow.
Both times, someone was frustrated. Both times, I had to explain it. Neither one felt great in the moment. But you still have to decide.
They’re Either Ahead, Behind or In the Middle
If the student comes in ahead, don’t rebuild the group around them. Challenge them without letting the rest of the ensemble check out. Shared parts, small features or giving them responsibility works better than just handing them every solo opportunity.
If they’re behind, keep it simple: “Here are the two things to fix first.”
Not 10 things. Two. Overloading them doesn’t speed anything up. It just confirms they’re behind — and they already know this.
If they’re in the middle, great. Sit them next to someone solid and keep moving.
Some students are shy and won’t ask for help. They’ll fake it and finger along because no one checked. Do periodic equipment and music checks the first week. Ask a student to help them.
If they can’t participate, nothing else matters.
One thing that’s easy to forget in all of this: This isn’t just a part assignment or a seating chart change. It’s a kid, who just walked into a room with traditions, expectations and social circles. They don’t know your system or where they fit yet. And whether you mean to or not, they can tell if they’re being treated like an inconvenience.
You can be concerned about the ensemble setup and still show up for a new student. Give them some structure. Be clear about expectations. Check in with them early.
They don’t need you to have everything figured out on day one. They do need to know someone’s paying attention and actually wants them there.
“Let’s start with a concert F,” I said. It was my first day at a new school. I was a late hire.
Immediately a student raises his hand. I thought I knew what he was going to ask. “Concert F is your G,” I explained as the resident musical expert.
“Oh, OK,” he said. “I was actually going to ask how to hold this.”
Well, we’re certainly not starting where I thought we were. I had a plan for day one. It involved some warm-up and technique. Sightread our December program. This, of course, would lead to our Midwest Clinic recording session, followed by a guest appearance with all major collegiate and professional wind ensembles.
That plan lasted for about four seconds. Instead, we spent the period figuring out how things fit together. Where to sit. How to sit. How to enter the room.
I walked in expecting a band. What I actually had were the ingredients for a band. They just weren’t combined yet. The kids weren’t behind. I was just the first music teacher most of them had ever had.
Your Program Is Different — That’s the Whole Point
Some programs have a system with a lot of moving parts. Kids start with a specialist in elementary school. They move up to middle school with a larger ensemble. By high school, they know how to “band.” There’s a handoff. Someone else already did the early work.
Then there are the schools where you are the only music teacher for 20 miles in any direction, teaching every grade from K to 12. There is no feeder program, no private lesson studio down the road, and no way for kids to see a live performance without a long drive.
If you try to measure your program against those that inherit years of experience, you will feel like you are constantly behind. That’s not a fair — or useful — comparison.
Your job is different. Not worse. Just different.
The Hidden Curriculum
There’s a whole set of things that some programs don’t have to teach. In other programs, you might have to teach basic instrument care to upperclassmen. Or, you might have to teach beginners how to rehearse in an ensemble — if you don’t have homogeneous instrument classes.
At some point, you will feel pressure to speed up. You’ll hear another program’s recording and think, “We should be further along.”
Slowing down isn’t lowering standards. It’s teaching to the reality you work in.
Fewer rehearsals.
Mixed experience levels.
Limited access to instruments.
Interruptions you can’t control.
I’ve done too much, too soon before. It goes fine for a week, then tone, confidence and musicianship fall apart. I end up reteaching everything I already taught. The slow and methodical way works better.
Your students may need more repetitions, more modeling, more time just to get comfortable making a sound. That’s not a flaw in your teaching. That’s the process. Progress is still happening. It just doesn’t happen on someone else’s timeline.
Someone who barely played last month is now actually trying.
Kids who continue with music.
Some of my most successful concerts weren’t just about the music — they were also about better attendance, kids sitting up with pride and everyone finally wearing black socks.
Once students buy in, our main goal — retention — becomes attainable.
Mixed Ages, One Room — Use It
You might have a 6th grader and a senior sitting 10 feet apart. Ideal? No. Can we work with it? Absolutely!
Older students can model. Tone, posture, how to sit in rehearsal, how to respond when the director stops. Younger students see what’s possible. And sometimes, the older students step up in ways you didn’t plan for, because they realize someone is watching them.
When you plan your band calendar, you may feel like you’re competing with a hierarchy:
Football
Basketball
Track
Testing dates
Prom
In some places I taught, the list was much shorter: just football.
You’ll find out quickly which events matter most to the community. And, fighting it head-on usually doesn’t go well. I’ve scheduled performances opposite big games. It didn’t end in a philosophical win. It ended in low attendance.
Sports aren’t the enemy. They’re part of the ecosystem your program lives in. So, you adjust. You schedule around big conflicts when you can. You look for ways to coexist instead of competing.
What does this look like? The full marching band performing at halftime is wearing a mix of marching band, football and cheerleader uniforms.
Geography
If you’re in a rural or isolated setting, distance isn’t just inconvenient. It changes how everything works. A broken instrument might take weeks to fix. A missing part isn’t a quick trip to the music store — it’s an order, a wait, and sometimes a student who sits out for a month over one small piece. Clinics, festivals and basic supplies all require extra time, money and planning.
Here are what these situations have looked like for my colleagues and me — and what we did about it.
No Nearby Private Lesson Teachers? Connect with university music programs. Many music education students need observation or practicum hours and can do virtual or periodic in-person lessons. It’s not perfect, but it’s something they wouldn’t have otherwise.
No Music Store Nearby? Run a monthly instrument maintenance class. Teach students and parents how to handle minor repairs — stuck slides, leaky pads, broken reeds. Regular checkups mean you’re catching problems early instead of losing a student for two months because of a broken instrument.
No Second Director to Split the Load? Most classrooms have teaching assistants — they just happen to be students. Older or more experienced players can be in charge of setup, filing music and leading section warm-ups. It builds leadership in them and takes real tasks off your plate.
Students Can’t Practice at Home? Operate as if your classroom is the only time they get music. Build repetition into every rehearsal. Front-load the things that matter. Don’t penalize for what happens outside your walls — focus on what you can control inside them.
Sports Dominate the School Calendar? Don’t fight the hierarchy — work inside it. Schedule around the big games when you can. Look for moments where music fits naturally into the community calendar rather than competing with it. The goal isn’t to win a turf war. It’s to keep students involved in something that matters to them.
You Are Building Access, Not Just Teaching Repertoire
It’s easy to look at your program and see what it isn’t yet. What it doesn’t sound like. What it doesn’t have. If you’re the only music teacher these students will ever have, this is the whole experience. There’s no handoff. No next director who will build on what you started.
For a lot of your students, this is it. So, change your goals:
Get them to show up.
Get them to try.
Get them to stay long enough to improve.
Over time, things start to build. A few kids stick. A section starts to sound like a section. The program runs a little smoother than it did before.
At some point, you realize you’re not just filling a gap. You’re the program they had.
A student stays after rehearsal. At first, it’s nothing unusual. “I’m just stressed,” they say, leaning on a chair, not quite making eye contact. You’ve heard that before. You nod, listen, ask a question or two.
Then they open up. Now it’s anxiety. Trouble sleeping. Stuff at home. And you thought you were heading home. Of course you stay. You say what seems right in the moment. Try to help. Be steady. You leave thinking you did a good thing.
Then the next day starts and the kid doesn’t seem much better. You ask yourself what else you can do to fix this. A colleague’s advice pops in your head: “Stay in your lane.”
This frustrates you. It’s a cop-out. But it doesn’t seem like you made things better.
How We Take On Roles We Didn’t Sign Up For
If you teach music, you’re probably a “safe adult” for a lot of kids. That’s a good thing — it means you’ve built a positive environment. But that trust comes with conversations that go beyond “push down button one for Bb.”
It starts with:
Listening
Asking questions
Offering some thoughts
Then, before you realize it, you’re trying to solve something you were never trained to solve. We feel like we’re helping. We may even think, “Well, no one else is here right now, so I guess it’s on me.”
An English teacher who has never played an instrument walks into your room. “Hey, you should play some different music with the kids,” they say. “Also, I went to your concert. How about making those drums louder?”
If this happened, you’d probably think, “You have no clue what you’re talking about.”
We expect people to respect our training. Our experience. The time it took to get good at what we do. And then, sometimes, we turn around and give mental health advice without being qualified. Not because we’re careless, but because we care. But these are situations where we can lean on our colleagues.
You’re Not the Only Line of Support
Schools evolve. Many schools are putting more resources into:
Counselors
Social workers
Mental health specialists
Some schools have entire teams dedicated to student support. These aren’t extras anymore. They’re essential. But they only work if we use them.
Music teachers can feel like the front line, but we’re not always supposed to be the last stop. Some of us think, “What if our student doesn’t want to talk to someone else?” Or, “What if I break their trust?”
Trust comes from doing what’s in the student’s best interest even if that means bringing someone else in. There are people in your building whose entire job is to handle what comes after that first conversation. Let them do it.
If the student trusts you the most, it’s OK if they want you to be present in the conversation. Talk to the social worker or guidance counselor about being involved as support. You’re part of the system — not the whole system.
Helping Doesn’t Always Mean Fixing
Sometimes the best action you can take is not to fix the problem, but to find the necessary support. So, say, “I don’t know, but I’ll help you find someone who does.”
That response is honest and responsible. It can build more trust than pretending you have the answers.
Students don’t need you to be everything. They need you to be real. This doesn’t take much. Sometimes just emailing a counselor and saying, “Hey, can you check in with this student?” Then let them take it from there.
Why Trying to Fix Can Backfire
When we step outside our training, a few things can happen. At best, our actions may be ineffective. At worst, damaging.
You can miss serious warning signs because you don’t know what to look for.
You can oversimplify something that’s complicated.
You can delay a student getting the help they need.
This can look like:
Saying something meant to reassure, and it lands wrong.
Normalizing something that shouldn’t be normalized.
Crossing lines — legal or ethical — that you didn’t realize were there.
None of that comes from a lack of care. It comes from trying to do too much in an environment where “more” isn’t always better. That’s tough to accept when your default is to help.
In Loco Parentis — With Boundaries
In loco parentis is a Latin term meaning “in the place of a parent.” Most schools act in loco parentis by supervising students and making sure they’re safe. But there are lines. Ultimately, most decisions lay with parents or guardians. Not every parent wants you involved in their child’s personal or mental health matters. Even if your intentions are good.
Overstepping can break trust with families. Once that happens, it’s hard to regain trust. Referring a student to trained staff doesn’t just protect the student — it protects you, too.
Time (or Lack Thereof)
You already don’t have enough time. If you do, please write in to the Yamaha educator blog and share how because we could all use your help. Seriously.
Some days, doing your actual job well feels like a pipedream. Add in the emotional weight of trying to support every student through everything, and it becomes unsustainable fast.
No one wakes up and thinks, “Today would be a great day to have some scrambled eggs, stop for coffee on the way to work, and then burnout on my career and personal life.” Instead, it creeps up on you.
“It takes a village to raise a child.” This African proverb stresses that a community is responsible for a child’s well-being. Here’s how this looks in schools.
Your role:
Be a safe, consistent adult.
Notice when something feels off.
Take students seriously when they talk to you.
Connect them to the right people.
Counselor/Social Worker role:
Provide trained, specialized support.
Identify the problem.
Intervene when needed.
Follow through in ways you can’t.
When a system is allowed to work, it takes pressure off you. This helps you become a calmer and more effective teacher.
A “village” helps students get the support they need.
You Have Stuff, Too
You might be dealing with your own stress. Workload. Personal struggles. If you’re not — again, please write and share your secrets with the Yamaha educator blog community.
People often overcome personal struggles. They may think tools and methods are a one-size-fits-all approach. This can be dangerous territory. What works for one person may make things worse for another. Leave the diagnosing and the prescribing for the other professionals.
Listening to and playing music is an enjoyable activity for just about all of us. It turns out that not only is it fun, but it’s good for your health and emotional well-being too.
For decades, scientists, psychologists and other experts have been studying the value of musical activity, and they have reached some surprising conclusions, such as:
It supports concentration, focus and memory
It helps develop and/or maintain motor skills
It sharpens children’s listening skills and aids in language learning and reading
Children who play a musical instrument perform better at testing in math, science and other fields, and generally excel more in school
It helps elevate mood and reduce depression
It lessens stress and aids in physical healing
Learning an instrument fosters a feeling of accomplishment and encourages creative thinking
In this article, we’ll explore these benefits more deeply.
Your Brain and Music
Common wisdom used to be that music was processed only by the right side of the brain — the area that deals with creativity and emotion. In recent years, this has been upended, as explained by neuroscientist and fellow Yamaha blogger Dr. Daniel J. Levitin in his acclaimed book This Is Your Brain on Music. “Contrary to the old, simplistic notion that art and music are processed in the right hemisphere of our brains, with language and mathematics in the left,” he writes, “recent findings … are showing us that music is distributed throughout the brain. Music listening, performance and composition engage nearly every area of the brain that we have so far identified, and involve nearly every neural subsystem.” This online presentation from the Kennedy Center breaks that down clearly.
To better understand this, let’s look at how the brain is occupied and exercised when you play a keyboard instrument like piano. Knowing where to place your hands on the keys and how to jump to notes outside that hand position — often without looking — requires spatial coordination and memory. Motor skills and decision-making are needed to determine how to use your fingers, and how to control rhythm and maintain hand independence. (In fact, no other instrument makes use of all ten fingers as intricately as the keyboard does.) The visual cortex is involved when reading written music and translating that to actions, and memory comes into play when the performer no longer requires the written music. Auditory processes are engaged when learning a piece of music by ear, and in listening to and reacting to the sound produced to help guide decisions about notes, rhythm and dynamics. And the right foot needs to be controlled at the same time as the hands to operate the sustain pedal. Talk about firing on all cylinders!
While all this is happening, the player is getting feedback from what they’re hearing, and if it is deemed as being good, it lights up the brain’s reward system; if not, it triggers a different reaction and emotion. This complex whole-system activity for the brain makes playing a musical instrument one of the most complete and enriching activities you can engage in.
Not only are all these areas of the brain occupied when making music, but prolonged activity strengthens and grows the areas used. This physical change in the brain is called neural plasticity. In other words, you can actually improve your brain by playing an instrument … a benefit that few other activities can deliver.
Early Childhood Learning
The many rewards of starting a child playing a musical instrument at a young age are well-documented. Learning an instrument fosters a feeling of accomplishment for the player, and helps to develop motor skills, concentration and creative thinking — all fairly obvious benefits. But it can also help develop better reading, language and cognition skills. A landmark study conducted in 2018 showed that students who received piano instruction along with their regular reading studies outperformed students who received only extra reading support for the same amount of time. As MIT neuroscientist Dr. John Gabrieli concludes in this blog posting, “These findings bring scientific precision to the question as to whether piano training provides benefits beyond musical experience. It appears that some of the auditory skills learned from piano playing enhance specific aspects of the perception of spoken language, even beyond that gained from additional experience in reading.”
School systems in many parts of the country have observed benefits to kids being involved in music programs. An organization called Save The Music reports that ELA scores (English Language Arts, which includes reading and writing) improved between 2 to 5% for students involved in music programs. The Arts Education Partnership has found that students in ninth grade with music instruction performed significantly higher on algebra assignments than non-musicians, and high school band students consistently test higher in English, math and biology.
Stress Reduction and Mood Improvement
Music is able to convey a wide range of emotions, and so can help to support or even change one’s mood for the better. Our emotional state can affect our physical state, so being able to reduce stress, for example, is a clear health benefit.
Dr. Barry Bittman, Chairman and CEO of the Yamaha Music and Wellness Institute, said in a recent interview that the organization’s research teams have uncovered extensive evidence suggesting that expressing one’s self creatively reduces the impact of stress on many levels. Music triggers chemical responses in the brain that improve mood and reduce anxiety, as well as inducing pleasure, joy and motivation. At the same time, it boosts your immune system and can help relieve pain, including the misery of migraines and chronic headaches. Relaxing music can lower high blood pressure, too; listening to it before bedtime can even alleviate sleeping problems. “Recreational music-making reduces the impact of stress on many levels and allows healing to begin,” adds Dr. Bittman in an article on the benefits of playing piano. “It actually alters gene expression pathways in patients with coronary heart disease.”
Taking the Leap from Listening to Playing
As Daniel Levitin points out in This Is Your Brain on Music, music-making was once a common activity in families and at gatherings like parties. Over time, however, society started to judge player’s abilities more and more, making a distinction between players and listeners. “[But] I would say that most Americans qualify as expert music listeners,” Levitin states. “We have the cognitive capacity to detect wrong notes, to find music we enjoy, to remember hundreds of melodies, and to tap our feet in time with the music.”
Taking the leap from “just” listening to playing a musical instrument for pleasure and shared social experience is actually a small step, and it’s one that should be taken without fear of judgment or criticism. We can use our innate music-making ability to support (or even to change) our emotional state in healthy and healing ways, while at the same time growing our brain. Win/win!
One of my students asked me how much I’d charge to say nice things about them during parent teacher conferences. “Easy,” I said. “$100 if you want me to say you’re ‘special without being special.’ $250 if you want me to say, ‘If I had a whole class like Billy, my job would be sooo easy.’ $1,000 if you want me to pretend the Zoom call froze, and I just disappear.”
It gets a laugh every time.
Then you have your first real parent meeting, and suddenly it’s not funny anymore. It feels like you’re on trial. You start talking fast. You walk out thinking, “Did I do something wrong?”
If you get a system in place for when to email, call and meet — and how to handle those meetings — you’ll help your students even more while avoiding unnecessary stress.
Start Small: What Should Be an Email or Message
Most parent communication can live in email or your school’s messaging system. Positive updates. Quick notes. “Hey, just wanted to let you know your student had a great rehearsal today.”
Parents often respond pleasantly surprised. Not because their kid doesn’t do well — but because they’re used to only hearing from school when something’s wrong.
Once issues start repeating, such as talking in class, missing rehearsals or forgetting materials, it’s probably time to call. I’ve noticed that it may take three to five emails back and forth to get to the bottom of something. When I call, the situation usually gets resolved in minutes.
Phone calls are faster, human and tone doesn’t get misread as easily. You also get information you wouldn’t get over email. I’ve had parents explain things on a call that changed how I approached the student.
When calling, start here: “Hey, I just wanted to give you a quick heads up about what’s been happening and see if we can get ahead of it.”
That usually starts a productive conversation.
When It’s Time to Set Up a Meeting
Patterns of behavior. Bigger academic or behavioral concerns. Situations where you’ve already tried communicating, there’s been a consequence and yet nothing has changed. This is when a meeting is necessary. I usually notice it when I start thinking, “This feels like it’s going in circles.”
“Are you willing to help fix this moving forward?”
“What can we do to help?”
Then land the plane. Everyone should be able to say what the plan is before they leave. Keep it simple and clear: “Let’s agree to keep our hands to our own equipment.” “If something comes up, talk to me before reacting.”
If nobody can clearly state the plan, you don’t have one yet.
Don’t Surprise Parents
It’s March. You bring up an issue that’s been happening all year, and the parent asks, “Why am I just hearing about this now?”
They’re not wrong. When the first contact about a problem is late, it can feel confusing or like it’s not a big deal. I had that exact conversation once, and I didn’t have a good answer. A few reasons popped in my head, but it took so long to speak up because I didn’t handle it and now, I’m frustrated because I don’t know what to do.
Say this: “I understand I should have contacted you earlier about this and will make sure to in the future. I do want to see what we can do to move forward.”
People don’t like surprises — especially not about their kids.
Set the Tone Before the Meeting Even Starts
I hate when I get this email: “Can we meet Friday at 3 p.m.?”
Parents don’t like it either. This message puts people on the defense before they even walk into the room. It leaves too much to the imagination. Instead, give context.
If it’s positive, say it. If a concern, frame it as problem-solving: “I’d like to talk about a few classroom expectations and come up with a plan moving forward.”
Now the parent walks in knowing what this is about — and that you’re not just there to drop bad news on them. A little context lowers the temperature before the meeting even starts.
Keep the Meeting Focused and Structured
I stick to four things in a parent meeting:
What we do in class.
How the student is doing.
What they could improve.
Where they should be going.
If you can, bring examples — work, playing assessments, anything concrete. If you have no data, the meeting can turn into opinions versus opinions.
You can say, “Here’s what I’m hearing in class” or “Here’s what I’m seeing,” but it’s helpful if this was documented.
Having a format also helps you stay on track when the conversation starts to wander — which it will.
Other tips include:
Stick to the Issue:When parents push back or start blaming you, it’s easy to get defensive and start listing everything the student has ever done, regardless of whether it’s related to the issue at hand. If the student is talking too much in class on a Monday in February, it does no good to bring up that the kid forgot their instrument in September. This looks like you’re building a case against the kid. Stay on the issue. You can mention a pattern, but don’t pile on unrelated things just to justify yourself.
You’re on the Same Team: It can feel like it’s you versus the parent. Especially if the meeting starts tense. But it’s not, and you can help control the tone. It’s you, the parent and the student — all trying to solve the same problem. Sometimes it helps if the parent and student hear this. Most parents aren’t looking for a fight. They’re trying to support their kid — even if it doesn’t come across that way at first.
If Things Escalate, Slow It Down: This doesn’t come up often, but it happens. If a parent raises their voice or gets frustrated, fight or flight often kicks in. Resist matching the parent’s tone and energy. Take a breath. Speak slower. Quieter. I had a meeting where things started to get loud, and the only thing I focused on was pausing before speaking. It forced the pace of the conversation to come down with it. And if it crosses a line, don’t sit there and take it. Teachers don’t need to deal with abusive language or threats. Pause the meeting. Bring in another adult. Even saying, “I think it would help to have another set of ears,” can reset the situation.
Handle Pushback Without Arguing: You’ll hear this at some point: “That couldn’t be my child,” or “What about the other student?” My response: “I wouldn’t discuss your child with another parent, and I must do the same here. Right now, we’re focused on this specific situation.” If a parent just cannot believe their child could misbehave, don’t argue. Just state what happened. Let them know you are informing them of the situation and if they understand the consequence. Repeat if needed. It feels awkward, but it keeps things from turning into an argument.
Document and Follow Up So It Doesn’t Repeat
After meetings, jot down a few notes — what was discussed, what the plan is, any agreements. It takes two minutes, and it may help you later with future issues. Keep track of emails, calls and meetings. Many school management platforms have a space for logging parent contacts. If something escalates later, you’ll be glad you covered your bases.
Some issues won’t get solved in one meeting. Send a short follow-up that includes a quick recap of the meeting followed by next steps. “Thanks for meeting today — just wanted to summarize what we discussed and what we’re going to try moving forward.”
I’ve skipped this before and ended up right back in the same situation a few weeks later.
Even when things go well, follow up. It builds trust and keeps everyone on the same page.
Most Parents Are Trying to Help
Your first few parent interactions will probably feel stressful. Over time, you start to realize most parents aren’t coming after you. They’re trying to support their student — just like you are. Once you have a system — when to email, when to call, when to meet, and how to handle each — working with parents becomes easier and more effective.
Cinco de Mayo is not just about margaritas and Mexican food. Here are five iconic songs (what other number could we possibly choose?) that celebrate Mexico’s rich cultural heritage.
1. La Bamba
This Mexican folk song has long been an anthem of cultural pride and resistance — and it’s also the very first song sung in Spanish to hit No. 1 in the United States. The seminal 1958 recording by Richie Havens, a then 17-year-old kid from the San Fernando Valley, was similar to the popular rendition sung by Andrés Huesca in the 1940s, but with a distinctive rock’n’roll beat. Nearly thirty years later, the cover version by East LA band Los Lobos topped the charts … and their music video would win a 1988 MTV Video Music Award too. Listen to the Andrés Huesca version here, the Richie Valens version here, and the Los Lobos version here.
2. Oye Como Va
Written in 1962 by Tito Puente and popularized by the rock group Santana in 1970, this feel-good song will have you doing the cha-cha in no time flat. Carlos Santana’s arrangement dispenses with the brass section in the original version, but adds Hammond B-3 organ and rock drums, with his electric guitar front and center, soloing up a storm and carrying the main melody — a melody that in Puente’s version is played by piccolo. Listen to the Tito Puente version here and the Santana version here.
3. Bidi Bidi Bom Bom
No Cinco de Mayo playlist would be complete without a Selena track. The chorus of this catchy 1994 tune suggests the palpitating heartbeat of the lovestruck. After a shot of tequila, you might even try to bust out your best Selena dance moves. Word to the wise: Don’t. Listen to it here.
4. Amor a la mexicana
Thalía has been dubbed the “Queen of Latin Pop” with good reason: she has sold over 25 million records worldwide. This sultry pop cumbia (a style of music that originated in South America, with sensuous dance movement as an important element) became one of her biggest hits upon its release in 1997. The lyrics celebrate love, Mexican-style, with “horse, boots and sombrero; tequila, tobacco and rum.” Listen to it here
5. Parrandera, Rebelde y Atrevida
This 2005 song, written and sung by the late Jenni Rivera, features lyrics that are at once defiant and liberating. Early in her career, Rivera was criticized for performing traditional banda music — not least because it’s a genre that has long been male-dominated — but she persevered, and by the time of her tragic death in a 2012 plane crash, she had become one of the best-selling, and best-loved Mexican-American artists of all time. Listen to it here.
Although the meaning of “groove” may differ depending on the style of music, the concept itself is important to musicians in every genre. As bass players, our “feel” — the way we co-create and hold down the groove — is our calling card. When there are problems with the groove, paying close attention to our timing, our note choices, and our dynamics are three of the best ways to get things back on track.
1. LOCK IN THE PULSE
“Having good time” means being able to not rush, not drag, and intentionally play ahead, on top of, or behind the beat. If there’s something wrong with the groove, this is one of the first things to fix.
Some factors that may negatively affect a groove include not having good time, not being able to lock in with the drummer, and not listening to what else is happening. Improving any groove starts with making sure we are fulfilling the role of the bass, and that role begins with a consistent pulse.
In the practice room, play along with a drummer (preferable whenever possible), drum machine or metronome to develop your sense of timing and work on grooves. Record yourself often so you can hear whether you’re rushing or dragging. Even the smallest shift, such as laying back slightly or sitting right on top of the beat, can completely change how a groove feels.
2. CHOOSE THE RIGHT NOTES
Note choice is how we outline chord progressions and define harmony. Problems with the groove often come from not knowing the music, not understanding what’s right for the style, or using inappropriate note density (too many notes, or too few).
Listen carefully to how your favorite players approach note choice in terms of when they keep things simple, when they add embellishments, and how they support the harmony without getting in the way. As bass players, we connect the harmonic world (keys, guitar) with the rhythmic world (drums, percussion), and our note choices are central to that role.
SHAPE THE ENERGY
Dynamicsrefers to how we strategically use volume, note density and silence. Each performance is a musical conversation, and just as in any dialogue, we use space, silence, loudness and softness, emphasizing some points more than others as we follow the flow. The conversation begins in the rehearsal room, where leaning into the things that work — and finding solutions to the things that don’t — makes all the difference to what happens onstage.
IN THE STUDIO
Onstage, everything happens in the moment, but recording gives us a chance to try different approaches to gluing it all together. Professional session musicians use all the tools at their disposal to satisfy producers, who often have strong opinions about what the track needs — which is why versatilityand a willingness to pivot are paramount. Let’s look at an example.
Suppose that a producer wants you to add bass to a 48-second demo. The music is laid-back hip-hop that’s anthemic, spacey and evocative, and although there are various signposts — stomps that start the track but disappear after six seconds, a subtle melody line that might be the basis of a future vocal, a riser that goes into a drum fill at 0:29, and a synth figure at the end that outlasts everything else — there isn’t much harmonic development. She’ll probably cut this demo into several smaller segments and add other instruments, and she might get a remix out of it, too. Here’s what the track she presents you with sounds like:
You listen and determine that the main harmony is in G minor. “Just make it groove,” the producer instructs you, adding, “Do your thing, but don’t take up too much space.” You pick up your Yamaha BBP355-string and start playing a slap bass line loosely based in that key:
The G minor tonality works, but the bass line isn’t always in time; notice how it slows down and speeds up. What’s more, at around 19 seconds in, the lick in A takes the listener out of the vibe, and the C you played at 0:25 is downright jarring. And while the producer appreciates that you didn’t take up too much space, she wishes you hadn’t completely ignored the drum fill at the 30-second mark. The last part of the final bass phrase, which begins at 0:34, gradually peters out, and the last 9 seconds of the track are too empty.
After the producer tells you what’s not working, you decide to play fingerstyle instead and use space a bit differently, building a line around a strong G note, like this:
The fingerstyle tone is less obtrusive than slapping, and the producer is pleased to hear you subtly acknowledge the drum fill; she especially likes the phrase you added at the end. In several places, though, the bass line is ahead of the beat. The producer wants it was more integrated into the track, more laid back, more… something. Bolder and deeper, perhaps? She’s not exactly sure what she’s looking for, but she’ll know it when she hears it.
Using compression and EQ, you craft a new tone on your 5-string that accentuates low mids, occupying the space that a keyboard bass might. After a few listens, you decide to zero in on the synth brass, which inspires a behind-the-beat, staccato line in C minor that has a hint of menace. You keep your fills to a minimum, leaving space for whatever else the producer might add, and match the drum moment with a fillof your own, ending the track with a flourish.
The producer is happy. Mission accomplished!
GET GROOVIER
As mentioned earlier in this posting, one of the best ways to improve your groove is to listen closely to your bass heroes. Notice how they use dynamics in different parts of a song, when they choose to be simple or fancy, and how they co-create the pulse of a song with the drummer and the other instrumentalists.
Putting your own playing under the microscope is just as important. After you’ve focused on details, take a moment to appreciate the delicious irony that many of the best grooves convey a feeling of ease: Your favorite bass players probably aren’t obsessed with perfection, and the best feels don’t sound forced. That blend of rigor, big ears, and willingness to go wherever the music wants to take you makes you a true guardian of the groove.
Yamaha launched the feature-laden dreadnought TAG3 C TransAcoustic guitar in the fall of 2024, and its smaller TAS3 C concert body counterpart in January of 2026. Both flagship instruments represent the pinnacle of innovation within the second generation of TransAcoustic guitars.
Not only are both constructed with all-solid tonewoods, they also have a built-in tuner and offer two delays, two reverbs, a chorus, and a full-function looper … all accessible from the top body bout of the guitar. The TAG3 C and TAS3 C can also be connected to a free TAG Remote app via Bluetooth® to access and edit the effects, store ten of your favorite loops, and play your favorite tracks from a paired smart device through the guitar for a jamming experience like no other. And, as with all TransAcoustic guitars, they don’t need to be amplified to enjoy the gorgeous sound of their onboard effects, which are generated in the air, without the need for pedals or processors.
If this all sounds too good to be true, well, it is true, and having had first-hand experience with both instruments, I can say that these guitars are game-changers in the world of electric/acoustic guitars.
ENTER THE TAG1 C AND TAS1 C
The latest additions to the second-generation TransAcoustic family are the TAG1 C and TAS1 C. These stylish instruments are aimed at the creative, budget-minded player who wants to embrace TransAcoustic technology for the first time.
TAG1 C in Sand Burst finish.
TAS1 C in Natural finish.
The only difference between the two is the body style and size. The TAG1 C has a dreadnought body, and the TAS1 C has a smaller, concert body. In this posting, we’ll take a look at the main features of these extraordinary guitars.
PHYSICAL ATTRIBUTES
Both the TAG1 C and TAS1 C have a solid Sitka spruce top, mahogany back and sides, and a mahogany neck. The fretboard material is walnut, which is a nice departure from the typical rosewood or ebony. The bridge is made of walnut, while the nut is made of urea. The headstock tuners are open gear, with a chrome finish.
Both guitars have a single cutaway for ease in reaching high notes and their scale length is 25 – 9/16″ (650 mm), with a nut width of 1 – 3/4″ (44 mm). A hard gig bag for protection and travel is included.
BUILT-IN EFFECTS
Installed on the inner surface of all TransAcoustic guitars is a device called an actuator (shown below). The TAG1 C and TAS1 C actually have two such devices.
A TransAcoustic guitar actuator.
These actuators resonate in response to the vibrations of the strings. In turn, the vibrations they generate are transmitted to the body of the guitar, and then to the air in and around the guitar’s acoustic chamber … resulting in an authentic reverb and chorus sound that radiates from within the body, and outwards through the sound hole. Players experiencing this for the first time often think that there is a speaker system installed in the guitar chamber, but it’s actually these innovative devices that produce the effects.
There are three effects available on the TAG1 C / TAS1 C: room and hall reverb, a sweepable chorus, and two delay types (the latter are accessed via the TAG Remote app — see below). These are controlled from four rotary dials facing the player on top of the upper body bout of the guitar, along with a center push button that turns on the effects and controls.
Note that all onboard effects are generated whether you are playing acoustically or have the guitar plugged into an amplifier via the end-pin output jack.
On/Off button
In the center of the control panel is an on/off button. Press and hold this button down for three seconds, and green lights around the button will illuminate. The lights will then turn white, indicating that the guitar effects are armed and ready to roll.
Reverb dial
The reverb dial allows you to select the amount and depth of room or hall reverb that will be produced through the sound hole of the guitar when played acoustically, and through the end-pin jack when amplified. You can select the type of reverb within the TAG Remote app (see below).
Chorus dial
The amount of chorus is sweepable from 0 (completely off) all the way to fully clockwise. A subtle doubling effect similar to that of a twelve-string guitar is produced at lower settings, while more extreme modulation can be achieved as you move past the center detent of the rotary.
Delay dial
The delay dial allows you to determine the delay volume produced from the guitar’s sound hole and output jack. Tapping the delay knob allows you to set “tap tempo” delay times to sync with a track, or with a Bluetooth song that you’re playing through the guitar (see “TAG Remote App” below).
Volume dial
The volume control has two functions. First, it serves as the master output volume for Bluetooth so you can adjust the volume of the music tracks that are coming from your mobile device. (See the “TAG Remote App” section below for more information.) Note that the volume control doesn’t affect the volume or depth of the onboard effects, nor does it affect the output of the guitar’s pickup system when plugged into an amp or P.A. system: this is adjusted using a separate small dial located in the sound hole.
Secondly, pressing and holding down the volume knob activates Bluetooth connection when syncing to the TAG Remote app on your phone or tablet (see below). Once connected, you can select, edit and change the effects, as well as play music tracks through the guitar’s sound hole.
TAG REMOTE APP
The iOS/Android compatible free TAG Remote app is a dedicated editor for second-generation TransAcoustic guitars such as the TAG1 C and TAS1 C. Various settings such as effect parameter adjustments can be controlled on your smart device for future recall and playback.
The TAG Remote app also adds support for Bluetooth functionality for audio playback. Simply use the app to pair the guitar to your smart device(s) and play your favorite songs through the TAG1 C / TAS1 C body chamber and sound hole.
RECHARGEABLE BATTERY
Both the TAG1 C and TAS1 C utilize a built-in rechargeable lithium-ion battery with magnetic charging connection, giving you up to five and a half hours of playing time. The five-pin connector is found on the top shoulder of the guitar near the neck joint.
The TAG1 C and TAS1 C power down automatically if the guitar hasn’t been played for about 30 minutes. This saves the battery life of the rechargeable lithium-ion battery installed below the end-pin jack. If you are amplifying the sound, remember to unplug the cable from the end-pin jack to preserve the battery life.
PLAYABILITY
The TAG1 C and TAS1 C are beautifully crafted instruments, and their satin-finished mahogany necks allow for easy fretboard transitions. The fret-ends are well dressed, with no sharp edges, and the die-cast chrome tuners keep everything in perfect pitch, even after hours of playing.
The setup on these guitars is also exceptional. The nut and bridge have been cut to allow for a really low buzz-free action, and the intonation is spot-on for open chords and complex voicings further up the fretboard.
AESTHETICS
Both the TAG1 C and TAS1 C are available in Natural and Sand Burst finishes; the TAS1 C in my studio (shown above) has the Natural finish. There’s a lovely figuring to the grain, further enhanced by the black and white body binding to the mahogany back and sides.
The mahogany body and neck have been tinted to a darker red tone, deeper than that of a natural mahogany color, giving the appearance similar to that of rosewood. The slim mahogany neck is satin-finished for smooth and “stick-free” transitions between playing positions, and looks pretty cool in the deeper tint to match the body.
The walnut fretboard has a naturally soft grey / brown hue that really makes it stand out against the crisp, clear tones of the spruce and deeper shading of the body — a nice departure from the usual choice of rosewood or ebony. The fretboard doesn’t have any fret position markers, which keeps the flow of the playing area clean and unobstructed. You can always use the dot position markers on the side of the neck to check your note placements.
The sound hole rosette adds strong visual appeal with its cobalt blue and tan marquetry inlays. Quite the centerpiece set inside the solid spruce backdrop! The clear pickguard is an especially nice touch, allowing the figured Sikta spruce grain and finish to shine through, while at the same time outlining the stunning blue and tan marquetry sound hole rosette.
THE PICKUP SYSTEM
Like all TransAcoustic guitars, both the TAG1 C and TAS1 C are equipped with an under-saddle piezo pickup and a pre-amp — in this case, the advanced second-generation SYSTEM78. The control panel is all part of this pre-amp system, allowing effects as well as the main signal to be amplified through the end-pin 1/4″ jack socket.
TONALITY
The tonewoods used in the construction of the TAG1 C and TAS1 C give these instruments a unique and extremely pleasing sound. The solid Sitka spruce top offers a rich midrange and low-frequency response, while the mahogany back and sides have a slower transient response than many other tonewoods, contributing to a warm and woody tone with strong midrange. If you’re an acoustic purist, you’re going to love the natural acoustic tones coming from this guitar.
Three of the wide variety of tones you can get from these instruments are demonstrated in the audio clips below, created with a blend of a condenser microphone and a send from the direct output of the guitar. All the effects you hear come from my TAS1 C, with no external amplification or processing used.
1. Finger-picking
The first four bars of this first clip serve as the intro to the video below, and demonstrate the pure sound of the TAS1 C, with no added effects. In the next four measures I add double-tracked finger-picked parts (panned hard left and hard right) with a subtle chorus, hall reverb, and a sprinkle of delay. Note that the tones remain sweet, clear and contemporary.
2. Lead tone
In this second clip, also taken from the video below, I’ve included the rhythm parts to give you context of how the single notes sound against the other parts. I’m using a good amount of the onboard hall reverb and simple delay for the lead guitar melodies.
THE VIDEO
Whenever I’m asked to evaluate a new guitar, I generally take a day or so to play it in a variety of musical styles to understand how it responds to both a pick and fingerstyle. As the introduction to this video demonstrates, the TAS1 C sounds superb when fingerpicked. The first four measures have no effects added so you can appreciate the acoustic qualities of the guitar on its own. I then add a subtle chorus, hall reverb and synchronized delay (using the tap tempo feature) to the same fingerstyle part. This gives you a good perspective of the value those incredible effects add.
All the fingerstyle parts were recorded using a condenser microphone, panned hard left in the mix. The double-track overdub was captured using the onboard pre-amp only, and the signal is panned hard right in the mix.
The lead guitar part was captured directly from the end-pin jack and is not double-tracked. I used a moderate amount of the onboard hall reverb, and a tap-tempo’d simple delay, which is set quite high in the mix to let the single notes sit nicely on top of the other instruments.
THE WRAP-UP
Having had the experience of playing most Yamaha TransAcoustic guitars over the years, I can say with confidence that the TAG1 C / TAS1 C are perhaps the best ones in the range so far.
Okay, they don’t have a built-in looper, like their supercharged TAG3 C / TAS3 C siblings, though you can always use a pedal for that. But these guitars look stunning and are easy to play, with a slim satin neck that makes them feel at home right away whether you’re an acoustic or electric guitar player. Most importantly, they have an authentic, captivating tone. Add the onboard effects, and you take an already amazing acoustic guitar to a whole new level of expression.
Yamaha Product Marketing Manager Joel Tetzlaff discusses the new marching hardware and drums for aspiring percussionists — the Power-lite Series — from its inception, the development process and its use in the classroom. Tetzlaff, who has more than 40 years of drumming experience, has worked in in the Yamaha world of percussion for over 20 years and is a Madison Scouts Drum Corps alumni. From speaking with educators and students, to sharing insights with hardware designers, Tetzlaff helped Yamaha introduce the Power-lite Series, which offers the perfect balance between being lightweight and sturdy.
Q. This Power-lite Series was designed with younger percussionists in mind. What are some features that middle/high school educators or parents would appreciate?
A. Overall, this series shines because of its simplicity and pragmatic nature. Because they were designed for younger students, we cautiously crafted equipment that was not overly complex. The carriers and drums don’t require many moving parts, so it’s easy for anyone to pick up and start playing. We want entry-level students to feel empowered in continuing their musical journey, so we ensured our designs would be comfortable, reliable and high-quality
The great thing about creating a series that’s simple is that we were able to maintain it at a competitive price point. We know that educators may be dealing with smaller budgets or unsure if forming a marching band at their school is possible, so this series provides a cost-effective option that will not be financially straining. Our goal in creating entry-level products is to always make them as accessible as possible so anyone can begin their musical journey.
Q. How does the Power-lite series compare to other drumline series?
A. The Power-lite series completes the Yamaha experience. With the addition of an entry-level marching set (snare, tenor and bass drums), we can holistically cater to professional, intermediate and beginner percussionists. From the hardware side of our products, we deliver consistency, and when it comes to our drums, we provide the same. Our phenomenal sound quality rings the same throughout all our instruments. By providing unwavering dependability, we help band directors, educators and musicians alike focus more time on teaching and less on tinkering with equipment. Plus, Yamaha carries decades of specialized knowledge and experience in designing and manufacturing instruments that build upon their preceding models. An increasing number of kids want to participate in musical extracurricular activities, and the Power-lite series is the perfect entry-point for that.
Q. One of the merits of the Power-lite series is the ultra-lightweight construction of the carriers. Could you offer a glimpse of the process behind building equipment that is lightweight but maintains sturdiness?
A. What makes our products so special are the formulas that we have built throughout the years. One of the ways we designed the Power-lite carriers was to assign the heavier elements of the Field Corps carrier to other areas where you won’t feel the weight as much. In this same vein, wherever possible, we utilized lighter material without compromising the sturdy base.
Yamaha shares manufacturing processes with our sister company, Yamaha Motor Corporations. We use their philosophy for most of the construction of our hardware so that they remain robust pieces of equipment.
When designing marching equipment, we take into consideration that this is a piece of equipment that students have direct contact with. Percussionists don’t wear their drums, they wear the carriers that hold their drums. With that in mind, our goal was to prioritize comfort. Additionally, to reduce weight, the T-bar of the carriers was decreased to make the experience more comfortable for young percussionists.
Q. For educators looking to buy new equipment for their school’s music program, how does the Power-lite series fit their needs?
As mentioned previously, we wanted to make gear that felt safe and comfortable, and not be overly complex. We also thought about the needs of educators. If your school only does a few performances a year, then a more feasible option for marching equipment would be the Power-lite series rather than the professional drum corps models that are designed for constant usage. Both educators and students get the benefit of having a set of our best-selling drums at a cost-effective price point. We understand how crucial it is to have a value-oriented line for educators and band directors who have tight budgets, but who want to provide superb quality equipment for their students. Our goal is to keep music accessible to all.
Q. Were there any cross-over in manufacturing techniques between the Power-lite carriers and the Yamaha Field Corps carriers?
The feedback and insights we received from students and educators for the Field Corps were implemented in the Power-lite series. We adjusted the weight ratio of the carriers to make them even lighter for smaller body types. The sizing of the flex points on the shoulders served as an important case study on how to make other areas more flexible, such as in the torso region. We wanted to empower newer students to endure longer performances without feeling uncomfortable or fatigued. The smaller elements in the Power-lite series come from another small carrier that was being distributed in Japan. Having those tools made it easier for us to adapt the carriers to American sizes. What we also learned from the Field Corps carriers was that stainless steel screws and fasteners are less prone to deterioration from corrosive sweat, which is a critical point for music programs that need equipment to withstand years of student use.
Q. The Power-lite instruments are smaller in size. How does this help younger percussionists more rather than regular sized instruments? Does it compromise sound quality?
Our intention was to create something practical for younger students — we didn’t want them to feel discomfort or fatigue when using our products. So, when designing the Power-lite Series, we did our best to focus on the basic function of the carriers and drums while allowing students to develop marching fundamentals. If there is anything our drums will always deliver, it’s consistency, so this series does not compromise sound quality.
At Yamaha, we consider the needs of our customers when developing a new product. There may be educators wanting to get their kids involved with music but don’t want to purchase an entire drumline bundle. The Power-lite series is a perfectly affordable option to purchase individually. Or, if a community wants to start their own youth marching band on a limited budget, this series gives them the opportunity to do so. These are all different-use cases that describe our heartfelt objective for this series. We focused on accessibility because we want to get more people to play music and to bring more people together.
Q. Is there anything else educators or parents should know about the Power-lite series?
A. There are many aspects that make Yamaha a superb choice. We create products with high value, and they’re made to last a long time. We understand the difficulties educators experience when it comes to classroom equipment, and we aim to mitigate these hardships by offering resources that will get them back to teaching quickly. It’s easy to find replacement parts, available resources, and we’re exceptional at keeping things in stock. So, we want music educators to trust that the Power-lite carriers will last for many years of student usage and are easy to maintain. The overall idea with this series was to inspire the joy of starting a child’s musical journey through a practical piece of equipment that will be easy for them to learn.
If you’re a music teacher, you probably didn’t go into education to think about marketing funnels, capacity planning or “the customer experience.” You wanted to teach music, build community and help kids grow.
Most days, that’s still the goal. But somewhere between your third email about the concert uniform and trying to figure out how you’re going to fit in one more rehearsal, it might start to feel like you’re running something bigger than just a class. You’re not trying to build a business, but you are running something with moving parts, expectations and a lot of people depending on it.
The goal isn’t to turn your classroom into a company — it’s to borrow a few habits that make things easier to manage.
You’re Already Doing “Business Stuff”
Small business owners wear a lot of hats: marketing, scheduling, budgeting, communication, problem-solving. Music teachers do the same — we just call it something else
As a music teacher, you already:
Recruit students into ensembles or lesson slots.
Build calendars of concerts, rehearsals and events.
Manage budgets, fundraising and purchases.
Communicate with parents, students and administrators.
Concert week is a good example. You’re answering emails about expectations, sending reminders about call times, double-checking the program, coordinating with the front office — and trying to rehearse at the same time. At some point, you realize you’ve spent more time managing information than teaching.
Private studio teachers are told directly to treat their studios like businesses — rates, policies, onboarding. Classroom teachers don’t always hear that language, but the work is still there.
You’re running a small organization inside a school, whether you want to call it that or not.
Recognizing that doesn’t mean you need to go full “business mode.” It just gives you permission to use ideas that make things run smoother.
Build Simple Systems So Everything Isn’t in Your Head
David Allen, author of “Getting Things Done,” says “your mind is for having ideas, not holding them.” When everything lives in your head, it’s difficult to parse out what gets priority.
Recently, I spent about 30 minutes creating a template in Word and Google Docs — a tedious task that wasn’t fun at all. Later, when things started piling up, it paid me back. The completed template now lives in a folder with other things like:
8th-grade recruitment letter
Donor thank you letter
Concert week email
Field trip info sheet
Now I open a template, change a few details and send it. No blank screen. No guessing what I said last time. It also cleans up communication. Families get consistent information instead of slightly different versions depending on how rushed I was the day I sent separate emails.
A few simple rules:
Keep templates in one place.
Name them clearly.
Write them like you’re helping your future self on a busy day.
If the information does not change, such as program procedures or uniform requirements, consider keeping a copy hosted on your program’s website, LMS or Google Drive. Sending a link (using an email template!) saves even more time.
Small businesses treat time like inventory. Once it’s gone, it’s gone. Teachers are often expected to treat time like it stretches. This works for Doctor Strange or the Scarlet Witch in the Marvel Cinematic Universe, but it doesn’t work for us.
Some changes you should make:
Set a window for communication — Schedule your email time. If something is really important, they’ll come find you.
Be honest about your bandwidth — Not “Can I do this?” but “Can I sustain this for two months without everything else suffering?”
Block time to think — No grading. No email. Just strategizing to fix or adjust something in your program.
Overfilling your schedule doesn’t make the program better. It just makes it harder to maintain.
Communicate Proactively
Another common business philosophy: 99% of all problems are communication issues. The problems often don’t start big. It’s often something small like:
A missing detail.
An assumption that students will pass something along.
A reminder that goes out a little too late.
Then come the emails, the follow-ups and the dreaded “we-didn’t-know” conversations.
I’ve had concerts where I thought everything was clear — and then watched confusion unfold in real time. That’s usually enough to go back and look at what actually got through.
What helped:
A beginning-of-year overview — One document that explains how everything works.
Predictable updates — A short monthly email prevents most questions.
Clear boundaries — Let families know when and how communication happens.
When communication is planned instead of reactive, everything runs smoother.You can also overdo this and run the risk of being seen as background noise. I’ve found that sending updates every week or every two weeks is the most I can do. If something is time-sensitive, it’s OK to send a specific message about this.
Finally, avoid answering email outside of school hours. This just trains people that you are available 24/7. If you must get an answer out to calm your brain, type it out and schedule or delay the send. This often closes the loop just the same as sending the message.
Delegate and Build a Team Around You
These are the things that seem easier to just do yourself:
Fix stands.
Organize music.
Setup the ensemble
Answer every question.
If your program has another director, communicate with them to identify each of your strengths. Then, split up recurring tasks accordingly.
If you’re like me — the only director at my school — you have to rely on students and parents. Students can handle more than we give them credit for when roles are clear:
Students manage folders or equipment
Someone owns setup and teardown
Section leaders can answer common questions
The first few times, it won’t be done your way. It may even fail spectacularly. But much like the Word and Google Doc templates mentioned above, spend some time refining the system. Adjust and give feedback and things will improve.
Parents are the same. Many will help — but they need specific jobs. “Can you organize uniforms for this event?” works better than “Let me know if you can help.” And it definitely works better than “This ship is sinking! I can’t get anything done can you please commit to being the band parent president for the next four years?!”
Not everything from business culture belongs in a classroom.
Growth just for the sake of growth.
“The customer is always right.”
Turning everything into something bigger.
That’s not the goal. The goal is still teaching. Everything else should support that.
Systems, communication and time management don’t replace teaching — they protect it.
Start Small: One Change This Month
You don’t need to overhaul everything. Pick one repeat problem and fix it:
Create one template.
Set a consistent time to answer emails.
Hand off one responsibility to students.
It won’t fix everything overnight, but it will make one part of your day easier. Over time, your program will feel more manageable — not because you’re doing more, but because you’ve stopped doing the same things over and over in different ways.
It’s the last week before the concert. You run the closer, and it falls apart in the same three places it always does. You stop, fix one thing, run it again — somehow, it’s worse. You wonder if that really smart kid in the oboe section could build a time machine to get another week of rehearsal in exchange for a free homework pass. But time machines aren’t real, and that oboist is one of those kids who actually likes doing homework.
That’s when you realize: We’re not ready for our performance. You start mentally rewinding the last three weeks and ask yourself “Why didn’t we catch that earlier?” or “Why didn’t I rehearse that section more?” or “Why did we spend so long on that other piece?”
If you stay in this space, your mind will continue to spiral. If you move on too quickly, nothing gets better. The more useful question: What are we actually going to do?
You start panic-rehearsing. Run everything, fix nothing, talk more, conduct bigger, and hope that it will magically come together on stage. I have a few performances in my past that prove that this doesn’t work. Here’s what helps with the time you have left.
Redefine “Ready”
“Ready” sounds like perfection. It’s not. Late in the process, “ready” really means functional.
Can the group stay together?
Can they start and end together?
Can they recover when something goes wrong?
Remember, audiences are not hearing what you’re hearing. They hear “a song.” Pulse. Confidence. They don’t hear the third clarinet note in measure 62 that you’ve been obsessing over for three days. They don’t know that the horns missed a partial in second movement last Tuesday. They’re not tracking individual errors — they’re reacting to the big picture.
You’ll discover that this is true when you walk off the stage thinking that the performance was rough, and someone in the audience says, “That sounded great.” They’re not being polite — they’re being genuine.
Clean starts and releases matter more than note accuracy at this point. If the group looks and sounds unified, the performance will land. If they’re individually accurate but disconnected, it won’t.
It’s that cliché many of us know: Good groups start together; great groups end together.
We’re not lowering the standard. We’re choosing the most effective goal with the time we have. It’s harder to ignore small errors that you’ve trained yourself to hear. It feels wrong for a day or two. Then you realize that the group actually sounds better.
8 Things to Do in the Last Rehearsals
The week before the concert, we’re tempted to run pieces top to bottom because it feels productive. This feels good because it sounds like a concert. It fills time. Kids feel like they’re “doing it.” You feel like you’re checking a box. But nothing actually gets fixed.
Groups don’t usually fall apart in the typical 8-bar musical phrases — they fall apart between them. When one section hands off the melody to another section. A tempo change that never quite locks in. An entrance after a long rest where kids have their horns up and are looking to others on when to come in.
1. Rehearse Transitions Only: Start 8 measures before the problem spot. Stop 4–8 after. Loop it. Then do it again. Then do it one more time after it feels “OK,” because that’s usually when it actually sticks. You can spend an entire rehearsal just on transitions and get more out of it than three full run-throughs (in fact, I plan one “transition-only” rehearsal one week before each performance). It doesn’t feel as satisfying in the moment, but it makes a big difference in the ensemble’s comfort level.
2. Simplify Unstable Moments: Tempo changes are another common failure point. When things are unstable, simplify. Subdivide out loud — even if it feels elementary. Have them physically “bop” the pulse. You’ll get some eye rolls depending on the age group. Do it anyway. Strip it down to just rhythm — attack points only (playing only the articulation of each note and not sustaining but keeping in rhythm and tempo) — then rebuild. You’re not chasing musicality in that moment. You’re building coordination.
4. Focus on One Thing At a Time: Melody and bass only. First note of each measure. Rhythm-only runs. These are usually the reps where things start to line up, and you can feel the group settle a little. When students feel like they are able to just focus on one musical element, they’ll pay more attention to that concept and become less overwhelmed. Build from there.
5. Choose Functional Conducting: There have been times where I’ve conducted a whole lot of stuff that the ensemble wasn’t actually playing. Functional and clear is the goal. Where are you going to cue more than usual? Where do they actually need you — and where are you just used to conducting everything? Where are you going to let things go? If you try to react to everything in the moment, you can end up helping nothing. “Floor-door-wall-ceiling” conducting patterns are nothing to be ashamed about.
6. Cut It Out: If something truly isn’t going to come together — cut it. Drop a movement. Pull a piece. Shorten something. You may have some parents complain about the concert being shorter. My response? “Thank you! Sounds like we did so well you didn’t want it to end!” Better to end a concert too soon than overstay your welcome.
7. Rehearse Recovery: What happens when it falls apart? Not if — when. Where do they come back in? Who do they watch? You can rehearse this. Bigger cues on rehearsal marks. Conducting smaller. More eyes up in transitions. Also important — your face. When something does go wrong, do your best not to make any faces. On the other hand, if something sounds great, show your face. Both of these can have an effect on an ensemble during a live performance. If you’re like me and you have “Resting Band Director Face,” this can be difficult, but it is necessary.
8. Clean the Non-Musical Stuff: Practice how they walk on and off. Who stands first. How long does it takes to get set? I often know how well a group is going to perform based on the way they walk into the performance space. Rehearse how pieces start so there’s no talking, no extra movement, no guessing. This helps to keep focus and heighten awareness.
Day of the Performance
This is where a lot of over-teaching happens. You’ve spent weeks giving feedback. Now is not the time to add more. Instead, give your students a simple job. Just a handful of things:
“Watch and breathe together.”
“Don’t rush tempo changes.”
“Stay with the pulse.”
That’s it. At this point, more information usually makes the performance worse, not better.
Don’t Apologize
No disclaimers. Don’t say, “Thanks for being here, folks. We had three days off for snow and one day off for locusts. After that, the crocheting team took a field trip during our last rehearsal, so we only had this music for about ten rehearsals. Some of the kids don’t have music because a few trumpet players emptied their water key on some folders and the music just POOF disintegrated. Anyway, enjoy the performance, and I’m sorry for my very existence.”
Don’t Blame: Not the kids. Not the schedule. Not the circumstances. Those things might be real, but they’re not useful if that’s all you focus on.
Say What Went Well: A section held together. Some tones improved. A transition worked. Due to the “fix this, now fix that” nature of rehearsals, it’s important to highlight the positive.
Get Specific About What Didn’t Work: Not “that piece was bad.” Instead: “Tempo change at m. 42 was unstable.” “We rushed releases.” “That transition lacked clarity.” Specificity helps define goals.
Check Your Rehearsal Structure: Did you run too much and isolate too little? Did you avoid hard spots because you were afraid of what you would find out? Or maybe you avoided hard passages because you knew exactly what you would find. Most of the time, it’s a planning issue. An ensemble is a direct reflection of its director. This is both a good thing and a tough thing to admit.
Evaluate Programming: Selecting music is one of the most difficult jobs a music teacher has. Was the piece right for this group, right now, with the time you had? We can’t rely on luck, but it is important that we understand how to make the musical stars align. Changing out a piece is not lowering standards. It’s planning for the kids in your room.
Decide What Carries Forward: Speaking of the piece — consider bringing it back later. Play select movements. Or move on. Not everything needs closure.
We’re Always Learning
We all have situations where we’re not as prepared as we thought. And even if you were, you now have better information than you did a week ago. That’s the job.
Adjust. Simplify. Come back a little more experienced next time. After all, it’s school. We’re all here to learn.
Perhaps a better title for this article would be “How We Ended Up Surprised that Children Have Hands.” Why? Because many elementary music teachers notice something that’s difficult to quantify but impossible to ignore: Students arrive enthusiastic and eager to play, but their hands tire quickly. Fingers collapse on strings, writing stamina fades halfway down the page and coordination that once seemed automatic now requires visible effort. Unless you’re reading a printed version of this article, you’re almost certainly looking at the prime suspect.
Research and public consensus point to the same things — a sedentary lifestyle (World Heath Organization, 2019) and/or an excess of screen time. Tapping on screens does not require quite the same physical force as pushing computer keys, which require less force than pushing typewriter keys, which demand less strain than longhand writing. We can keep going, but at some point, we would be looking at a 9-year-old chiseling symbols into stone and developing forearms like a competitive lumberjack!
Such an observation is not a criticism of students, it’s merely a reflection of the world they are growing up in. Simply put, children move differently than they did a generation ago. Their environment has changed, so their hands respond accordingly.
Emerging research reflects what many teachers have been noticing for years. Longitudinal studies (McArthur, 2022 and Madigan, 2019) and a systematic review (Bakht, et al., 2025) both noted patterns linking increased screen time with lower manual dexterity scores in early learners. None of this proves that screens are villains lurking in the night, but it does suggest that when hands spend fewer hours gripping, twisting, pressing and manipulating physical objects, endurance and coordination may develop differently.
For music educators, this matters because music is unapologetically physical. If we want students to later pursue instruments with confidence, preparation cannot begin the year they first hold a trumpet, flute or violin. In regards to dexterity, we begin much earlier. We begin with rhythm.
The First Circle: Whole Body Rhythm
Gross motor work starts with the body and applies to all grades from kindergarten through 8th grade. In my classroom, students stand in a circle facing inward so we can hear one another better. The circle also gives us something else: a shared pulse. Every year you will have students who did not experience the foundation you laid in earlier grades. Thus, the circle becomes equalizing. Returning students reinforce what they know, and new students absorb it through repetition. No one is singled out, and the rhythm becomes the norm.
No matter the grade level, when the class steps together on the beat while singing, something interesting happens. Students who struggle to match pitch when standing still often begin to regulate themselves once movement enters the picture. Attention is redirected, the ear settles in, and the body organizes the sound.
We might move the circle one step at a time to the left or the right, or we might lift one foot at a time in succession as the beat travels around like the second-hand on a clock. Sometimes I tell a story about a mouse that is trying to stay dry beneath that second-hand during a rainstorm. The class becomes deeply invested in the mouse. I do not question this emotional commitment — I simply allow the rhythm to do its work.
Large movement establishes internal timing, and timing stabilizes coordination. These are not merely engagement strategies, they are neuromotor preparation. At this stage, it can appear deceptively simple, but it is not simple, it is foundational.
The Second Circle: Timing Through Play
Once the body shares a pulse, the hands can begin to take on more responsibility.
One of my favorite exercises involves an invisible ball. I toss it into the air, and students clap when it “lands” in my hand. I test its bounce on the floor and treat it as if it has weight and texture. Incidentally, this exercise offers excellent sense memory training for the teacher as well! Eventually, a student will inform me that I am holding nothing, and I’ll talk about how we follow with our mind. This is usually the moment when their focus sharpens.
This exercise builds anticipation and timing. Students must watch, wait and coordinate movement with an external event. Later, I will bring in a real ball and repeat the exercise, then follow this by bouncing the ball on the floor to set a steady beat as we add words or a song while maintaining the bounce. We may even try to move the circle, tying the hands to the established whole body rhythms.
The point is not the actual ball; it’s layered coordination. Tasks stack and the brain adjusts, thus strengthening coordination. The hands are beginning to act independently within a rhythmic structure. These first two circles work together for all grade levels with a more immediate sense of reward for invested effort.
The third circle is more progressive over the course of many years for students in your stewardship.
The Third Circle: Train the Fingers to Think
In kindergarten we begin with finger taps. Thumb to first finger, thumb to second, thumb to third, thumb to fourth. Slowly at first, then in patterns: forward, backward, in pairs, in sequences of three and finally in sequences of four.
These fine-motor patterns are simple, but they require focus. I introduce one set at a time over a few weeks. In the months that follow, the taps become smoother. We speak while tapping, we sing while tapping and sometimes we use exaggerated articulation. Other times, we whisper while tapping to bring the room into focused quiet before transitioning to the main activity.
The fingers begin to separate in the brain, as well as on the hand — sequencing strengthens and recognition follows. Some students will insist this is boring, and I assure them that I would not waste their time with it if it wasn’t significantly good for them. I understand — sometimes I don’t like to do things that I don’t absolutely have to either.
The tapping exercise is early fretboard training disguised as warm-up. It also has the added benefit of getting their internal pulse aligned with existing time signatures.
By 4th grade, the taps evolve into number combinations because students will begin their strings journey fully in 5th grade at our school. Students work through 24 permutations of one, two, three and four. At first it feels like codebreaking and later becomes a gentle competition to see who can go fastest without messing up. Occasionally, we map those numbers on to scale tones (I tend to favor F, G, A and B) and sing them while tapping. Later on, when we map those numbers onto fretted instruments, the transition feels familiar. Their fingers have already rehearsed independence and recognize the terrain.
None of these exercises are dramatic on their own. Their power is cumulative because music is physical. Before it is expressive, before it is interpretive, music is mechanical. Fingers must press. Hands must coordinate. Breath must regulate. Rhythm must stabilize the body before it can stabilize tone whether you are playing a stringed instrument, a breath-based instrument or exploring the many expressive tones of percussion.
None of this removes challenge. Learning an instrument is demanding. Yet there is a difference between productive challenge and preventable frustration. A student whose hands have been taught to work rhythmically since kindergarten approaches technical difficulty with a different kind of confidence.
There is also the very real possibility that discomfort will show up in instrumental study or there will be pushback from students who find the work difficult. For instance, when beginners first encounter stringed instruments many are surprised by the amount of pressure required to produce a clean tone. That discomfort is not a flaw, it is information — students understand that muscles strengthen through use, and the small calluses that form over time are subtle evidence of growth. Persistence and determination yield results.
Expanding and Returning: The Long View
The circles are not separate lessons. They overlap.
In practice, I often introduce all three circles at the beginning of the year. Sometimes they occupy different segments of a lesson, sometimes they rotate week to week. The sequencing is flexible, but the layering is intentional and elements of them should be present in every lesson.
Life for most modern children involves more sedentary time and more interaction with glass than with textured materials. Music classrooms can help rebalance that equation. Music teachers are uniquely positioned to provide consistent, rhythmic and tactile experiences. We do not need to shame technology — we can simply widen the range of physical experiences students encounter.
Over time those experiences accumulate. The circles close and somehow the hypothetical child chiseling their letters into stone is relieved. The student who looked betrayed by a pencil in September may confidently notate rhythms by March.
If we think developmentally and expand the circles early, our students’ hands will be ready when the music asks more of them.
From the moment human beings started banging on logs and humming along, music has been a part of our daily existence, a constant accompaniment to so much of what we do in our everyday lives.
Music is like a hearth — something people can gather around, listen to and discuss. Artists have built entire careers because they know how to invigorate a crowd. Indeed, music is an incredible source of entertainment, joy and wonder.
But it can also be so much more. Music can actually be used to improve our lives. Here are six ways it can do just that.
1. Getting Fit
Music is an ideal way to grease the proverbial wheels when it comes to getting your body moving. When I played basketball in high school decades ago, the coach would blast songs on the gym’s overhead speakers to pump our team up before tip-off. Today, music is usually in my headphones as I jog, keeping the rhythm and pace. Music’s constant beat can be the maestro that speeds up your own personal tempo.
2. Finding Inner Peace
While some music can get your heartbeat going, other kinds can relax and calm it down. All too often, the human mind finds itself racing through to-do lists, relationship statuses, bank accounts and much more. But there is some music in the world that can begin to unwind that tangled ball of yarn in your brain and help put the brakes on thoughts that are racing out of control. In a moment where meditation might seem impossible, if you put on the right soundtrack, you may be able to pleasantly lose yourself in the vibrations swirling all around you.
3. Facing Your Fears
My wife has long had a fear of spiders. A few years ago, however, she wrote a song about spiders. And now, after performing it hundreds of times onstage, her distress level at the sight of arachnids is honest-to-goodness subsiding. She even picked one up the other day, gently removing it from a picnic blanket. She swears the song helped … and I believe her!
4. Understanding History
Music is a time capsule, a history book. Listening to a song from a certain era can tell you so much about the time period in which it was written. Reports of the state of the world in old blues, jazz or rock’n’roll/classic rock tunes are often more articulate and clear than you’ll find in any encyclopedia. Well-crafted songs frequently tell stories of a generation, the same way that ancient cave drawings or hieroglyphics did thousands of years ago.
5. Gaining Knowledge
Those of us who have benefited from formal lessons and training (regardless of the field) know that growth can only come from dedication, study and sacrifice. For some, that may mean reading the entire works of Charles Dickens, or learning everything there is to know about the ecosystem of dolphins in the Pacific. But music is just as viable an avenue toward knowledge. To understand music is a skill. It’s like learning a language. Having a grasp of time signatures or dynamics, or knowledge of a lineage of songwriters and their body of work — that’s the kind of focus that helps to sharpen a mind.
6. Learning to Collaborate
It can be difficult to know where you fit in. But one of the most amazing things about music is that you can always add something new to it: one more string player in the section, one more voice in the harmony, a tambourine in the background, an ambient layer of chatter to the intro. There’s always room for other musicians — even non-musicians! — if they bring something tasteful to the blend. Collaborating musically not only teaches teamwork, it allows you to build friendships. Those are truly benefits that can last a lifetime.
What is corporate worship, and does it live up to expectations? Some words used to describe it are collective, joint, shared, united, combined, communal and common. So, we could say corporate worship is the church as a united body of believers, collectively with one voice to worship Him and praise the Triune God, the only One worthy of our devotion.
As the song says:
You are the One that we praise.
You are the One we adore.
You give the healing and grace,
Our hearts always hunger for.
Oh, our hearts always hunger for!
Most churches want their congregations to join in and participate in worship, while sadly, there are those churches that do not.
HALLMARKS OF CORPORATE WORSHIP
For this article, we’re focused on corporate worship in the context of congregational singing. First, of course, it should be scriptural. But that doesn’t mean it can’t be creative; creativity is part of the Imago Dei (image of God).
Second, it should be simple. You have highly talented musicians and singers leading the service, but for some reason, that’s just not working for the congregation. This isn’t because they can’t play or sing; they can do both exceptionally well. Rather, in many cases, the congregation simply can’t sing along or follow the often intricate and musically challenging songs. Congregational singing is not the place for a key so high it can break glass. Nor is it a place for rhythms and time signatures that are too difficult to follow. This is especially true when all the congregation has to follow are words on a screen, which often do not communicate any clear pattern to follow.
Third, congregational singing is not the place for music leaders to show off their vocal range. Frankly, some songs, even outstanding ones, are not made for corporate singing. They are fine as solos but not for a congregational sing-together.
Fourth, skilled leadership is essential. A person doesn’t have to have a degree in music to lead your church in congregational singing. However, leadership should be significant enough that it’s thought about before Sunday. What I mean is that we want our instruments to honor the Lord by sounding the correct notes — which also means our voices. That doesn’t mean we can’t let “beginners” lead — we can and should. The point here is to put thought, time, and practice into leading for the inclusion of everyone in the service.
Finally, congregational singing should serve one another. We serve one another by singing others’ preferred songs. We might call this the Philippians 2 principle of singing (see Philippians 2:3-4). This means that we all have favorite songs and styles that we enjoy. As leaders, we can serve our congregations better by thinking of songs and styles they enjoy, singing them with joy, knowing that we are honoring God, and loving our brothers and sisters in Christ as we sing with them.
Unfortunately, song selection has become divisive in many churches, primarily because of style. As it’s important to remember the vertical aspect of our singing, we must also not forget that there is a horizontal aspect: corporate singing. In our worship, we serve one another by singing loudly (I don’t mean obnoxiously). We serve one another by singing truth (Colossians 3:16).
At a training event recently, I was asked: “What is considered too loud for the music portion of the service?” I replied with a non-technical answer: “I observe the congregation and determine if it’s too loud or soft by their posture. If it’s too loud, they will be sitting and watching, not singing, not engaged.”
It’s the “If I can’t hear the person next to me singing, it’s too loud” syndrome. If the band is the only thing you hear in the room, it’s too loud. I certainly don’t need a dB audio level meter to know this. I use my eyes and can see it. It’s obvious. The same thing goes for a worship team that can barely be heard; they should be playing a little louder than the congregation to lead. The congregation may not want to sing out if they don’t have a strong voice to follow.
A beautiful balance happens when the worship team is leading, and the congregation is included as part of the team, just like a choir, singing praises collectively, as if with one voice. In the end, we’re all in the band.
At this same training, a person teaching alongside me voiced a different opinion. He explained to the class that leadership has decided that they DO NOT want to hear the congregation singing in his church. The main PA system sound level is set to mask the congregation’s voice. Did he really say that? I thought I was hearing things. I’m not here to judge, but that’s certainly not biblical.
The Bible contains over 400 references to singing and 50 direct commands to sing. The longest book of the Bible, the Psalms, is, in fact, a book of songs. In the New Testament, we’re commanded not once, but twice, to sing psalms, hymns and spiritual songs to one another when we meet (Ephesians 5:19 and Colossians 3:16).
I don’t know where your church leadership falls on this issue, and I intend not to try and change anyone’s viewpoint. However, if you’re a part of a church that wants to include your congregation in your collective corporate worship, I want to offer some ideas and ways to help.
Tradition is a wonderful thing, but sometimes you need a fresh approach to invigorate the congregation, not to mention the band! Elevate your worship sound with Neo Soul, a genre of music that fuses contemporary R&B and soul with gospel, jazz, and hip-hop elements.
In this lively two-part series, Erick Hailstone dives into the music theory, chord concepts, and stylistic approach to Neo Soul guitar. Plus, he’ll demonstrate Neo Soul’s distinctive techniques, guitar chords, riffs, and licks to elevate your worship favorites.
Part #1: Topics include chord progressions, extensions, slides, and shakes.
Part #2: Explore major and minor triads, diminished and augmented triads, and pentatonic double-stop licks.
When it comes to choosing an electric guitar for your services, there are a great number of options! While styles and models vary, all electric guitars work on the same general principles. A pickup mounted on the guitar’s body functions as a magnetic field. When a metal string is plucked and vibrates, it generates a current. That current is transmitted by the pickup to a preamp circuit with tone controls, then through the guitar cable to the amplifier. The amplifier boosts the signal and changes it with various tone controls and effects, depending on the amp’s design and capabilities. The signal is then output to a speaker, which converts it to sound waves. The type of pickup(s), tone controls, strings, playing techniques and other factors built into the guitar’s design influence the signal that is sent to the amplifier. In short, each part of the guitar affects how the guitar sounds.
Which Guitar Should You Buy?
Buying a new guitar is a personal decision, and your selection should be the result of careful consideration. Things to consider:
Your current and desired levels of musicianship
Think about the style of music you play or aspire to play
Audition more than one or two guitars to check out the neck and body shape; ask yourself which is the most comfortable to hold and play
Perform the same song on different guitars (but use the same amp) to compare tone
Ultimately, you want a guitar that you can grow with; the right companion will make you a better player and happier musician. We’ve created this guide to help you understand the fundamental differences in electric guitars so you can make an informed decision.
Selecting an acoustic guitar to use in your worship band can be a daunting process! There can be a seemingly endless list of features you must consider, but don’t lose sight of the most important factor: YOU. Choose an instrument that feels comfortable to you and fits your needs.
The first step to take is to decide how you really intend to use the instrument. Are you a player or the leader in the worship band? Are you just learning how to play the guitar? The way you plan to use your guitar will help narrow your choices. Yamaha offers an extensive lineup of acoustic and acoustic-electric guitars from which you can choose, and you can use this guide to help you select the best guitar for YOU.
Getting Started Choosing the Guitar
There are four primary areas you need to consider and/or know about before you start shopping for an acoustic guitar:
One of the great things about drums is the variety of sizes, finishes, wood types, setups, and accessories available to you! Few instruments offer the same opportunities to be personalized for the player, so every drum kit is unique. As you continue to develop your abilities, you can always add extra accessories or upgrade your kit. Try different kits and combinations, ask questions of other drummers you admire, and check out online videos of drummers and their kits. Drums don’t have to be expensive — there’s something for every budget and every age.
Before choosing a drum set, you should be familiar with its components. These include a snare drum, a bass drum, one or more mounted toms, and a floor tom. The two other essential components that complete a full drum set are cymbals and hardware. We’ve also included sections on reducing acoustic drum volume, a microphone alternative, and electronic drums.
We hope this guide will help you find the right drum set and hardware that fits your playing style and needs!
There are so many digital keyboards — from synthesizers and digital pianos to a variety of workstations — that it’s crucial to know the differences. This guide will help you decide which features, functions, and specifications best suit your needs, playing style, and budget.
Synthesizers
Synthesizers give you the capability to deeply edit and interact with sounds as well as to expressively play Imitative voices — like pianos, strings, brass and more — using the keyboard and controls. FM synthesis, which was popularized by Yamaha in the 80s, enabled musicians to easily make new, custom sounds. Current Yamaha Montage and MODX synthesizers include over 2,000 preset sounds, and, by using the company’s Soundmondo service, you can add an additional 60,000! If the goal is to plug in and start playing, a synthesizer with a lot of presets is a great choice.
Keyboard Workstations
A keyboard workstation is primarily used for composing, recording and production. Workstations are equipped with recording features, including the ability to record audio on an internal hard drive and perform multitrack recording. Workstations can provide the keyboard professional, experienced songwriter or producer with the tools needed to create, record, edit, and finish songs and intricate patches.
Arranger Keyboards
Arrangers like the Yamaha Genos are portable-style keyboards with professional sound engines and several compositional tools to enhance the songwriting process. Sometimes referred to as a “band-in-a box,” an arranger supplies sounds and sequencing tools necessary to help create a complete song. The strength of an arranger is the ability to arrange music in real-time.
Portable Keyboards
Portable keyboards, like the Yamaha PSR-EW425, are a good choice for beginning players. Their sequencing functions are more basic than those of an arranger, making them easier to learn and master.
Stage Keyboards
Most stage pianos/organs today, like the Yamaha YC series, use modeling, which incorporates drawbars, like a traditional organ, to modify the sound. Stage keyboards also include features like effects, pitch bend and modulation wheels as well as MIDI compatibility.
Join Ed Kerr, a worship arts director, as he shares practical insights for building a strong keyboard toolkit! Ed discusses topics such as the art of tasteful decorating by developing your sense of what fits the mood of the moment, experimenting with new chords and voicings, learning from popular recordings rather than relying solely on theory, and understanding chord numbers and relationships within a key. Together, these tools will enable keyboardists to make confident, musical decisions in real-world worship and performance settings.
We all strive for a perfect worship set each time, but are you prepared for when things go wrong during a live service? Join Ed Kerr, a worship arts director, as he walks you through real-world situations that worship musicians face. From technical issues with gear and in-ear monitoring to staying spiritually grounded while managing the pressure of performance and leading a congregation.
The focus is on balancing musical excellence with authentic worship, addressing unpredictable sound environments, and the importance of preparation and teamwork so that the worship experience stays centered on the congregation’s connection with God rather than just musical execution.
Navigating the transition from a college music education major to a classroom music teacher is daunting. Throughout our formative years, we are trained as musicians to learn the foundational and aesthetic elements of performance, typically in large group, small group and solo settings. As we mature as musicians, we gain more autonomy and increase our creative expression, all the while staying anchored to our fundamentals and best practices.
Even throughout most of a student’s college performing experience, much of what they prepare musically is guided by applied and ensemble faculty. However, when they enter the classroom as a teacher, a seismic shift occurs. Not only are they the authority on all things music in the program (and sometimes the entire school building), but the novice teacher is now responsible for making numerous performance decisions for what is often multiple grades, skill levels, classroom limitations and ensemble sizes. Thrown on top of all this are the administrative responsibilities that new music teachers have to mostly learn on the job, along with building a comprehensive program. It’s easy to see how a music teacher’s first year can be overwhelming.
This exploration of the student-to-teacher transition will offer music education professors some ideas as to how we can help our music education majors navigate the shift and be as prepared as possible for their first teaching job. In order for music teachers to be sufficiently prepared to handle all of the responsibilities of the job on day one, I emphasize three areas in particular: 1) rehearsal planning, sequencing and pacing; 2) building rapport and mastering classroom management; and 3) recruitment and retention. While there are many more important facets of the music teaching profession, I find that these core tenets are foundational to early success, consistent results and building confidence quickly in new music teachers.
Rehearsal Planning, Sequencing and Pacing
When it comes to music teacher preparation, we ensure our candidates have the necessary content knowledge, musicianship skills and performance ability. However, my student teachers frequently tell me that the most challenging part of the job is to successfully take all that knowledge and teach it in a way that students understand and are able to use it themselves to improve as musicians. To help our music education majors, Tennessee State University implemented an education preparation program that utilizes a year-long residency model for our student teachers.
In the fall semester of their senior year, music education majors take the Residency 1 course, where they go into the classroom on a part-time basis — usually two to three days a week — to observe, shadow and build rapport with students and staff, including their mentor teacher. They team teach and gradually work toward becoming comfortable with teaching a full class independently. Residency 1 allows teacher candidates to try different ideas, take risks and get lots of feedback from me and their mentor teacher. They are evaluated with our state-approved TEAM Observation rubric. This process really helps our student teachers with planning and basic teaching foundations needed to be successful.
In Residency 2, taken during the final semester of their senior year, our candidates enter the full-time, all-day-every-day student-teaching phase. They take the skills they acquired in Residency 1, and continue to refine them while focusing on instructional scope, sequencing and pacing. Because the student teacher is in the same school for both the fall and spring semesters, they have sufficient time to build rapport and develop strong professional relationships with students, parents, administrators and staff, which sometimes is not possible under the traditional student-teaching model.
This year-long clinical model has served our music teacher candidates well. I believe that it has built their confidence and preparation immensely once they transition from student teaching to their first teaching job.
Building Rapport and Mastering Classroom Management
While the year-long residency process helps our teacher candidates in their final year of study, TSU’s curricular sequence of pre-clinical experiences helps students make the mental shift that is necessary to be successful managers of their classrooms. For me, building rapport and managing the classroom go hand in hand. It is impossible to emphasize processes, procedures and protocols in the classroom without talking about building relationships with students. As the common axiom in education says, students do not care how much you know until they know how much you care.
In each year of their study, TSU’s music education majors take courses that require in-field K-12 classroom experiences. During their freshman year, students take Introduction to Music Education. It often confuses students when I call them by their last names — “Ms. Johnson” or “Mr. Thompson” — but this is part of the mental side of getting my students to start to seeing themselves as teachers. The course requires them to complete 20 hours of in-classroom field experience, and we make sure that they are active participants in the classrooms they are assigned to, and not just passive observers.
The same goes for their techniques classes, methods courses and conducting lab — all require K-12 classroom contact time with students. So, before they enter student teaching, our music education majors have already accumulated close to 200 contact hours of active teaching in K-12 settings.
By having them experience a variety of school settings, teachers, students and communities, they are adding to their ever-growing teaching toolkit. We all know that a one-size-fits-all approach to teaching does not exist, so we offer as many ideas and perspectives as possible, which has proven to be very helpful for my students, particularly when it comes to finding creative ways to solve student discipline issues.
Recruitment and Retention
Once the teaching foundations are in place and students have a strong understanding of their role as a teacher, we start to discuss program-building. At the heart of this is recruitment and retention. While a few of my students will inherit programs that are more or less established, the majority of them will be tasked with building a program from the bottom up. TSU’s Music Education Seminar course is the perfect setting to bring in voices from around the country to speak on this subject. I also try to have at least one or two alumni panels so our current students can hear pitfalls and challenges new teachers face and how to overcome them. While a good portion of the panel discussion is focused on rehearsal planning, music selection, teaching and classroom management, a majority of the conversation centers on getting students interested (recruitment) and getting them to stay (retention) in the program. The ideas and activities our guests share are so valuable. I even find myself taking notes from time to time when I hear of a particularly innovative recruitment strategy.
Not too long ago, I visited a student teacher at a high school not too far from the TSU campus. This high school is an entertainment magnet school and has a state-of-the-art recording studio. During one of my visits to observe her, she was leading a mini marching ensemble to record some of their tunes in the studio to share on their social media platforms and promote to the 8th-grade band members at their feeder middle schools who might be interested in joining band. The high school band was also preparing for a major city-wide marching competition, which was already being promoted across the city in numerous ways. The group also performed for one of their feeder elementary schools, led an instrument demonstration, and taught some 5th graders how to conduct.
The community impact was evident, and all these activities tied together many important aspects of the recruitment and retention process. By making performance opportunities active recruiting events, we strengthen the reach of the program. By allowing our students to lead these efforts and be the face of the organization, we empower them, instill ownership and reinforce retention.
Supporting the Future of the Profession
The transition from student to teacher is a major milestone for our music teacher candidates that requires strong musicianship, content knowledge and a mental shift in their view of themselves. If we want our music teacher candidates to be successful classroom teachers on day one, we must be intentional about how we prepare them in all aspects of the job.
Focusing on rehearsal planning, sequencing and pacing helps them translate what they know into what their students need. Building rapport with students and learning how to manage a classroom are essential because none of the teaching matters if students do not feel seen, connected and engaged. The K-12 classroom experiences spread throughout the entirety of our curriculum solidify the identity shift from student to teacher. Once those foundations are in place, we offer a bevy of recruitment and retention strategies so that they can build and sustain strong programs. When all of this is done collaboratively, we set up our music education majors for early success. In addition, we solidify the future of the teaching profession by sending forth caring practitioners who will lead programs with confidence and purpose.
Here’s how it starts. “Did you hear about so-and-so not getting renewed next year?” or “Did you hear the band performance last night? Yeesh.”
You’re standing there — in the hallway, copy room, maybe the teacher’s lounge. It sounds casual. Someone’s just talking. Then they turn to you. “What do you think?”
I grew up in the time of “Choose Your Own Adventure” books. You walked through a forest, came to a fork in the road — go to page 22 if you took the left path, page 48 if you went right. If you’re like me, you just closed the book. Safest option was to read something else. But we don’t always get that option.
Whatever you say next has a pretty good chance of being repeated, reshaped or brought up later — usually without you in the room.
Early on, it’s easy to think you can avoid school politics completely. You can’t. Every building has them. The goal isn’t to win or fix them. The goal is to stay out of situations that can follow you for years because once you say something, you don’t control where it goes after that.
Gossip Is a Test (Not a Conversation)
Gossip is sneaky. It sounds like concern or curiosity or someone just trying to “figure things out.” Someone brings up another teacher or an administrator and asks your opinion like it’s no big deal — but it is. If someone is comfortable talking to you about other people, they’ll be comfortable talking about you to other people.
As music teachers, we’re in a weird spot. We hear things from students, staff, parents. People assume we know more than we should — and they’re right. That doesn’t mean you need to share any of it.
When you’re put on the spot, these are perfectly acceptable answers:
Some questions don’t have a good answer. “Be honest … don’t you think Bill really needs some help with woodwind teaching?” (Sorry. if you’re Bill — I’ve only heard great things.)
That “be honest” part is doing a lot of work.
Agree → you’ve picked a side.
Disagree → now you’re the problem.
Split the difference → it still gets used however they want.
Other lose-lose traps may start with these phrases:
“No offense, but …”
“I hate to say this, but …”
Or even “I don’t mean to talk behind their back, but …”
It’s awkward at first, but I find the best way to handle these is to say, “If you think someone needs help, why don’t we include them in the conversation?” The gossiper will most likely retreat on this.
Reputation Is Built Through Actions
Nobody hands you your reputation. It builds in the background, during every class, performance, conversation, interaction and what you get pulled into. Over time, people start to form a picture. You don’t notice it happening — until you hear your name come up in conversations you weren’t part of.
Here’s a simple three-step filter to consider before you choose your words:
Would I be fine with this getting back to admin?
Would I be fine with this getting back to the other person?
Would I be fine with whatever I said going on a billboard in a giant city?
Nothing is as private as people think.
You Don’t Have to Be a Part of Every Room
If you’re hanging out with people and leave feeling more stressed than when you walk in, consider your company. Constant complaining and gossiping will affect your teaching. You may find yourself having shorter patience, less energy and an impatient tone.
You don’t have to make a huge announcement. Just go somewhere else. Take a walk. Close your door. I’ve done this. Nothing happened. Things just got quieter, and I was able to find a group that fit what I needed.
I’ve had this happen at previous schools with admin. They heard about something, usually classroom management or expectations, and asked me to speak with the other teacher. Unless you’re a department chair in charge of supervising staff members, try this answer: “I’m not quite comfortable with that. If it were me, I wouldn’t appreciate a colleague coming to me with this.”
The Grass Isn’t Greener
My mentor once told me, “Sometimes the grass is greener on the other side because they use more fertilizer.”
Teachers often think their school is the only one with problems. But it’s not. Every building has politics. Some are handled well. Some are not. If it seems like it’s too much to handle, remember that you can leave a tough situation. Just be realistic that some version of this will exist in any place where people are involved.
What Helps You Sleep at Night
If you stay out of most of this, you’ll miss some things. You won’t always be “in the know.” Some may say you’re aloof or oblivious. That’s OK.
You’ll also avoid a lot of problems that stick around way longer than the original situation. No replaying conversations. No wondering who heard what. No cleanup.
The easiest way to do this is to keep your nose clean.
Unfortunately, there’s no way around it. Like everything else in your home, audio gear gets dirty over time.
And as the days grow longer and the sun shines brighter, the layer of dust that’s accumulated on your home electronics equipment becomes more noticeable — and smudges and fingerprints on dials, knobs, and faceplates make things even more unsightly. Just like lamps, artwork, upholstery, windowpanes and other interior elements, your audio devices have gone through a long, hard winter and deserve a thorough cleaning. It’s good for their well-being, and yours.
Beyond the aesthetic improvement, clean AV receivers, amplifiers, turntables, speakers and other equipment work optimally and enjoy a longer life. At the same time, the removal of dust and dirt from those devices contributes to a healthier home environment — something that’s especially important these days. After all, you can’t avoid touching the gear or their remotes, so it’s wise to regularly disinfect them to help prevent the spread of germs.
Last but not least, when you take the time to restore the original luster and gleaming front panels of your AV products, the entire room just looks and feels better. It’s like having that fresh, new-car smell after your vehicle has been detailed — you can’t wait to get behind the wheel and take it for a spin. When your audio gear is clean, using it is a more pleasurable experience.
How Dirty is Your Audio Equipment?
Given that the average U.S. home collects 40 pounds of dust each year, odds are that your AV equipment is getting a good coating of it. Worse yet, dust can stay suspended in the air for days, so even doors can’t stop the microscopic particles from floating inside equipment cabinets and depositing in every nook and cranny.
It’s easy to spot this build-up on the exposed portions of gear, but don’t forget about rear panels and cabling — those areas accumulate plenty of dirt and dust that can be easily overlooked. Unfortunately, dust and dirt will attract moisture and form a corrosive layer of material that can eventually degrade the sound and be damaging to exposed connectors, relays and switches — even internal electronic circuitry.
When and What to Clean
A yearly spring cleaning of your audio gear should usually suffice, as long as it’s thorough. Of course, weekly wipe-downs with a microfiber cloth or feather duster are never a bad idea. But for that annual deep clean, you’ll want to disconnect and dismantle everything to get at all the places you can’t ordinarily reach. Disassembling also gives you a chance to reorganize components if necessary, untangle cabling, and refamiliarize yourself with the various parts of your overall system. And who knows: Once you are able to see what’s at the back of the rack, the lack of a particular input or a dent in a side panel might be all the inspiration you need to treat yourself to a new piece of equipment. Your car gets a yearly tune-up, so why not your audio system too?
Don’t forget to include the speakers while you’re cleaning your audio system. Even small, unobtrusive ones like the Yamaha MusicCast 20, MusicCast 50, NS-SW050 subwoofer or SR-C20A sound bar can gather significant dust over time. Be aware that grille material is delicate and can be easily damaged if you press too hard on it while cleaning, so it’s best to remove the grille covers from the speaker housing and clean them separately, laid out on a flat surface.
And while the shelves, cabinets and other storage spots are empty, take advantage by running a vacuum hose and/or a damp cloth over them — you might even want to apply some touch-up paint or stain if necessary. Dust bunnies thrive on solid surfaces and corners, so this may be the messiest part of your cleaning project. But don’t neglect to include those areas, as the last thing you want to do is return nice, clean audio equipment to a dirty environment.
How to Clean
Start by gathering the following supplies:
– Mild liquid cleanser diluted with water in a spray bottle
– Microfiber cloth
– Cotton swabs
– Lint roller or brush
– Vacuum with a soft brush cleaning attachment
– A compressed air canister
– Alcohol-based disinfectant wipes
– Two small sponges
– A soft cotton towel
Avoid using materials that are coarse and abrasive like paper towels and harsh ammonia-based solutions.
Once you’ve got your cleaning supplies in hand, here are some pro tips for how to use them:
– First and foremost, always unplug your gear from AC power when doing any kind of deep cleaning!
– To rid surfaces of dust and fingerprints, apply a light spritz of cleaning solution onto a slightly damp microfiber towel and then use it to wipe the surfaces gently.
Clean your AV receiver with a slightly damp microfiber towel.
– To remove dust from around dials, knobs, terminals and connectors, use a cotton swab.
– To eliminate dust and debris from vents and fans, try a blast of compressed air or a swipe of a soft vacuum brush.
– As a final touch, apply a disinfectant wipe across all remote controls, as these are what get handled the most. Removing the accumulation of oils and dirt will make them feel like new again.
Speakers require some special treatment. After removing their grilles, gently pass a lint roller or a soft vacuum brush over the fabric to remove the dust. Be careful! The goal here is to clean the fabric without stretching it. If the speaker has a removable metal or plastic grille, it can be cleaned with a soapy sponge, rinsed with a second sponge that’s holding clean water and then dried with a soft cotton towel.
Remove your speaker grilles and clean and dry them separately.
An Afternoon Well Spent
Dust and dirt are not just an aesthetic issue. They can actually be real detriments to the performance of your audio and AV system, and while an occasional pass of a duster is helpful, doing a periodic deep clean can do a world of good. If you want to get the most out of your gear, I suggest you add the chore to your annual spring-cleaning routine. Trust me: It will be an afternoon well spent!
Click here for more information about Yamaha AV products.
A teaching interview isn’t just about whether they want you. It’s also about whether the job is something a real person can actually do. In music education, that gap can be wide. A program can sound exciting in a 30-minute conversation and still be nearing collapse.
If you’re in your first few years of teaching, it’s easy to focus on getting a job. However, the wrong job can drain your time, your energy and sometimes your desire to keep teaching at all.
Here are seven red flags to be aware of when interviewing for a job.
For music teachers, this usually shows up later as scheduling issues, last-minute changes or unclear expectations about performances and rehearsals. If they can’t explain how band, choir, orchestra — or whatever you’re walking into — functions on a day-to-day basis, you’ll be the one figuring it out in real time.
No school is perfect. That’s not the point. If the interview committee didn’t take the time to prepare for your interview, proceed with caution.
Are there sectionals? Extracurriculars? After-school commitments?
If you’re asking those questions and getting vague answers, that’s not a great sign.
Teaching music is already a lot. You’re managing students, equipment, performances, communication and logistics all at once. You need to know whether you’re building something from scratch, maintaining something stable or walking into a rebuild.
If the people hiring you can’t explain the job clearly, they may not fully understand it themselves, and that usually means you’ll be doing more guesswork than teaching.
Red Flag #3: The Position is a Revolving Door
I’ve taught in schools that boast that they’ve only had five directors in the 120-year history of the program. I’ve also taught in schools that have had five directors in five years. There was a reason for both.
If multiple teachers have cycled through the position in a short amount of time, ask why — and listen carefully to how they answer. There are always exceptions — people move, retire, change careers. But if the role hasn’t had stability, there’s usually a reason. It could be workload, a lack of support or unrealistic expectations.
Whatever it is, don’t assume you’ll be the one who fixes it just by working harder or caring more. That’s not always how it plays out. Good teaching matters, but the environment matters just as much.
Red Flag #4: The Job Sounds Like Three Jobs
Music teachers are used to doing a lot. That’s part of the deal. But there’s a difference between a full-time job and an unsustainable one.
If you’re expected to teach multiple preps, run several ensembles, manage inventory, handle recruiting, organize concerts, coordinate festivals and take on additional duties — with limited prep time — that adds up fast.
Early in your career, you’re still figuring out pacing, classroom management and how to run a rehearsal — all of which takes a lot of energy. If the job requires you to do everything at once, right away, it’s not just challenging — it’s hard, if not impossible, to sustain.
Red Flag #5: There’s No Support for New Teachers
Ask what support looks like for a new teacher.
Is there a mentor?
Is there another music staff member?
Does admin understand how music programs actually function?
If the basic answer to these questions is, “You’ll figure it out,” that’s a red flag. You can absolutely grow into music teaching, but doing it completely on your own makes everything harder than it needs to be.
Red Flag #6: The Culture Feels Off
This one is harder to define, but you’ll feel it. Pay attention to how people talk during the interview — about students, other teachers, the program itself. If the tone is negative, dismissive or constantly blaming someone else, that usually shows up in the day-to-day experience.
I once interviewed for a position where the head band director and the principal clearly did not see eye-to-eye. The principal spoke as if the school was accented in gold and everything ran perfectly. The band director took every opportunity to disagree with this rosy picture during the interview. When I received the call for a second round, I politely declined. I knew that the job would be hampered by problems with communication, expectation and administration vs. teachers.
Good programs still have issues, but people work together to solve problems. If it already feels tense in the interview, it’s not likely to improve once you’re in the job.
What if they don’t know the answer to your question? You’re looking for a response like: “That’s a great question. We don’t have the answer to that right now, but I’m writing it down and we can get back to you on that.” Honesty is always appreciated.
A school doesn’t need to have everything figured out. But the interviewing panel should be able to acknowledge challenges honestly. If they avoid your questions or redirect them, they may be more focused on filling the position than supporting the person in it.
A Few Music-Specific Things To Check
Some things matter more in music than they do in other subjects.
What’s the condition of the instrument inventory?
How much rehearsal time do ensembles get?
Is there a plan for recruiting and retention?
How is performance space treated and scheduled?
If expectations are high but time, equipment and support are limited, that gap is going to land on you. You’re not looking for perfection — you’re looking for a plan. There’s a difference between being resourceful and being set up to struggle.
You don’t need to ask everything — but a few of these can give you a clearer picture:
Why is this position open?
How long was the previous teacher here?
What does a typical week look like?
What support is available for a new teacher?
What are the biggest challenges in the program right now?
What would success look like after one year?
The answers won’t tell you everything, but they’ll usually tell you enough.
Pay Attention to What You’re Seeing
Most of the time, it’s not one big red flag. It’s a handful of small things:
The answers are a little vague.
Expectations aren’t clear.
The program sounds like it’s been in transition for a while.
None of those automatically mean you should walk away, but they’re worth paying attention to — especially early in your career.
It’s normal to feel pressure to say yes, but this isn’t just about getting hired. It’s about finding a place where you can do the job well. If you’re new and in a position where you need a job, you should at least be clear enough so you know what you’re walking into.
If you leave the interview with more questions than answers, take that seriously.
On his 1967 album Axis: Bold As Love, Jimi Hendrix wondered what would happen “if 6 turned out to be 9.” The mystical implications of those digits (both are multiples of the magic number 3) would not have been lost on Hendrix, but he was also pondering the upside-down quality of that time and envisioning what might happen by the year that would, at least symbolically, end the era that had already become known as “The Sixties.”
By the time 1969 arrived, it was pretty evident that whatever utopian hopes the Sixties generated were unlikely to be realized. Martin Luther King, Jr. and Robert Kennedy had been assassinated within two months of each other in 1968. The Democratic National Convention in August of that year had turned into a pitched battle between the Chicago police and antiwar protesters. Richard Nixon had been elected president in November of 1968 and was inaugurated the following January. He had run on a “law and order” platform that served as the template for many of the culture clashes that still rage today. The conservative Silent Majority were pitted against young counterculture insurgents who viewed themselves, in the words of the Jefferson Airplane, as “outlaws in the eyes of America.”
I was one of those kids. Growing up in Greenwich Village within walking distance of the Bitter End, the Café Au Go Go, the Fillmore East and a dozen great record stores, I was obsessed with rock & roll. I listened to it (and read about it) constantly. By the summer of ’69, I had seen the Rolling Stones, the Who, the Jefferson Airplane, Traffic, Jimi Hendrix, the Doors, B.B. King, Joni Mitchell and too many other artists to count. I was ravenous for it; music gave my life meaning. I was also draft age, unfortunately. I turned 18 less than a month before Apollo 11 blasted off into space, with the Vietnam War going full force. I was about to attend college but sensed that those deferments would soon end. It was a heady time, with more transporting music than I ever could have dreamed of, but there was a tense underpinning to it all.
During his campaign, Nixon promised that he had a “secret plan” to end the hostilities. That plan turned out to be so secret as to be nonexistent. The war dragged on, with more than five hundred thousand American troops facing enemy fire in a country smaller than California, suffering tens of thousands of deaths and casualties. Yet ironically the music our soldiers were listening to were the songs of the very artists — Hendrix, the Doors, Marvin Gaye, Creedence Clearwater Revival, the Temptations — who were creating a soundtrack of rebellion and escape. Whenever anyone mentions the great divisions of our own times, I think back to those days fifty years ago. For better or worse, the parallels are chilling.
Still, a few points of unity stirred back then and the ideal of space travel was one of them. It wasn’t entirely untainted, alas. By 1969, any major project the US government undertook became suspect for its potential military or surveillance applications. Nonetheless, the sheer vastness of space, not to mention our shared status as human beings on a planet floating in a mysterious universe, made it possible for anyone to look up into the skies and see what they wanted to see, dream what they wanted to dream. They are called “the heavens” for good reason. Whatever your politics, whichever side you were on, you had reason to want to go there.
Once President John F. Kennedy declared in 1961 that America would land a man on the moon before the end of the decade, space themes began weaving their way into popular culture — TV in particular. “Star Trek” debuted in 1966 and rested on the premise that space was the “final frontier,” vowing to take viewers “where no man has gone before.” In “I Dream of Jeannie,” space travel joined with romance as an astronaut stranded on a remote island discovered a lovely genie in a bottle. “The Jetsons” imagined a space-age future just as “The Flintstones” captured how the glossy future just around the corner made our lumbering, sub-lunar world seem like the Stone Age.
Apollo 11 astronaut Buzz Aldrin on the moon.
As always, music was at the center of everything. All those shows had theme songs that seemed ubiquitous, and the moon retained the power it has always held as a symbol of romance. Indeed, Frank Sinatra’s exuberant version of Bart Howard’s “Fly Me to the Moon” became the first song played on the moon when astronauts Neil Armstrong and Buzz Aldrin gave it a spin on a portable tape player after the Apollo 11 landing. Yet popular culture, characteristically, found ways to capture some of the fears — and some of the cultural ambivalence — that countered the triumphs of the Apollo missions. Even an elegant pop ballad like Jonathan King’s “Everyone’s Gone to the Moon,” a Top 20 hit in 1965 (and another song listened to by the Apollo 11 crew during their flight), treated the moon as a source of alienation. And David Bowie’s “Space Oddity,” released the week before the Apollo 11 launch, imagined a technological breakdown resulting in Major Tom’s being forever lost in space. That song was inspired by Stanley Kubrick’s 1968 film 2001: A Space Odyssey, which made brilliant use of classical pieces like “The Blue Danube” and Also Sprach Zarathustra, but also envisioned a future in which the very technology that made space travel possible would put human life at risk.
Of course, the actual moonlanding itself couldn’t have been more inspiring. I watched it with my mother in our family’s apartment and even as a teenager the implications of it loomed large for me. It seemed much more than a purely American achievement of “one small step for man”; indeed, it was truly “one giant leap for mankind.” It suggested that there was nothing our shared human vision couldn’t engage and accomplish. The question arises at every moment of social convulsion: “Can’t we all just get along?” In July of 1969, the resounding answer was yes.
But whatever was happening on the moon, the realities of life on Earth could only be held at bay so long. Just weeks after the moonlanding, the Tate-LaBianca murders in Los Angeles chilled the heart of a community that had been one of the hotbeds of Sixties musical and cinematic creativity. In contrast, less than two weeks after that, the Woodstock Festival offered a prospect of peace and love. By the end of the year, however, the mayhem and murder at the Rolling Stones’ concert at the Altamont Speedway in California eviscerated the hippie dream.
Events moved at a strange pace in the Sixties, simultaneously fast and slow. So much happened in such close proximity, but, as George Harrison once described to me about that era, “you could say any year from 1965 up to the Seventies, it was like … those years seemed to be a thousand years long. Time just got elongated. Sometimes I felt like I was a thousand years old.” So that first moonlanding was both a monumental event in human history and just another milestone that got immediately swept up in the head-spinning tumult of the times.
Space travel soon receded as an American priority, but as the psychedelic music that accompanied the dawn of the space age suggested, profound journeys don’t always head outwards. Pink Floyd’s Dark Side of the Moon, for example, charted for more than 2 1/2 years following its initial release in 1973, and continued to chart on a regular basis until 1988. To this day, it remains an essential experience for any young person exploring the wonders of classic rock — and the search for personal identity.
The “Blue Marble” photo.
When I think about space travel myself, I often conjure up the extraordinary “Blue Marble” photograph of the Earth taken by the crew of Apollo 17 (the final Apollo flight) on their way to the moon in 1972. There is our planet, our shared home, so beautiful and exhilarating to see. The true meaning of all we had accomplished came clear to me when I saw that image. From outer space, we could achieve a previously impossible perspective on our own world, an appreciation for the life we know that would lend real meaning to even our farthest flung explorations. “If you know what life is worth / You will look for yours on Earth,” Bob Marley sang in 1973. The heavens, then, might prove a good deal closer than we could have believed.
I did my student teaching in one of the smallest towns in Wisconsin, and I couldn’t have asked for a better spot. My cooperating teacher, Jackie Goplin, had built an amazing music program in Whitehall, Wisconsin. For aspiring music educators at the University of Wisconsin-Eau Claire, it was the location we all wanted to be placed at because of Goplin, who is a wonderful mentor and teacher of future teachers.
One memorable opportunity I was given at Whitehall was to create a rhythm section that was a jazz combo and a rock band. The students wanted to play an Aerosmith song, and I was excited to try it. I was playing in a cover band as a trombone player at the time and wrote all the horn charts, but I wasn’t as familiar with writing charts for a rhythm section. I soon discovered that there were many ways to approach this. One student only knew how to play tablature. Another wanted traditional notation. Another wanted a lead sheet or a chord chart. And yet another told me they would learn it all by ear.
I was quickly introduced to the many ways students learn music. We worked together to create these parts since this was 30 years ago — long before the wealth of available resources we have today. A few weeks after starting the band, we had a short set of jazz, pop and rock songs, and we were impressing the school and community.
SCHOOL OF ROCK – THE MOVIE
A few short years later, I was in my first (and to this day only) teaching position at Chaska Middle School West in Minnesota when I saw the movie “School of Rock.” Jack Black starred as a struggling musician who pretends to be a substitute teacher and turns his pre-teen classroom into a rock band. My wife, Heidi (who is also a music educator), and I left the movie thinking that this was more than a fun little film. It was our nudge to start a popular music program in our district.
What follows is a description of nontraditional ensembles and classes that we offer and how we teach and present them through our district community education at a middle school level. Most meet for a season (one to four months) or two seasons (during the school year and summer).
THE SCHOOL OF ROCK CLASS
We have been teaching our original class, School of Rock, for 23 years. It meets for five or six one-hour weekly sessions and is an introduction to playing and singing in a popular music ensemble. The course was designed for students who are beginners or who know an instrument well but want to learn others.
The first two weeks are spent on the very basics of playing guitar, piano, bass guitar, drum set, and singing. Every student tries each one. Then there are small lessons on rock music history, songwriting and gear setup/cleanup.
We often let students pick a couple songs. Often, these songs are challenging, so we simplify grooves, chord progressions and strumming patterns. The students rotate which instruments they play.
There are no performances by this class. Many students start taking private lessons after this class or attend Bonus Lessons during the school day.
GARAGE BAND
We use the old-school term “Garage Band” for our rock band program, which meets once a week for a couple hours after school during the fall/winter and again in the summer. Students audition on voice, guitar, piano, bass, drum set, horns and strings, and we select enough students to form four bands.
Students and staff collaborate to choose repertoire. We strive to find a variety of songs from different eras and styles that feature different members of the band and challenge students just enough. A good sample of a setlist might include a Motown song from the 1960s, a classic rock or horn-laden song from the 1970s, a metal or synth-laced pop-rock song from the 1980s, a grunge or post-punk song from the 1990s, and something from this century. Music can be found from the same sites listed above in the School of Rock section.
A good way to rehearse a song is to start by listening and identifying the form of the song and focusing on patterns, which could be the lyrics, melodic riffs, chord progressions or rhythmic patterns. Then teach the song by section starting with the intro identifying the number of bars, the tempo, tricky technical passages and balance/tones. Then, make sure each musician understands what they need to practice before the next rehearsal and move on to the next section. Use this same approach for each section.
Go back to the recording often so that students can hear what their goal is. It’s also helpful to note certain tricky sections like a vocal harmony, guitar or piano riff, or drum fill that needs more extensive work. It’s helpful to have a vocal coach or a former student like we do to take a student or group of students into another room to work with them on that part.
Other things that often pop up in Garage Band include discussions on:
similarities and differences between verse 1 and verse 2 or chorus 1 and chorus 2,
tags and key changes,
improvisation,
how to end a song that fades out,
and even a history lesson regarding the significance of the song, artist, songwriter or producer.
Give students a chance to run through the song from the beginning to as far as you have studied the song or even to the end so they know the spots that they need to work on and can enjoy the sections that show progress.
Check out my book, “Starting A Modern Band Program,” which includes more in-depth details on all this plus information on gear, booking shows, stage presence and more.
COUNTRY/BLUEGRASS BAND
Shortly after the debut of our rock band program, a 6th-grader asked to join. He played the banjo and bluegrass music. I asked him if he would join a bluegrass band if I started one. He was ecstatic.
I had very little bluegrass knowledge, but I thought back to my student-teaching experience and how we all learned together. This student taught me more about bluegrass and playing the banjo than I ever taught him. I simply provided the opportunity and helped find bandmates and running a rehearsal.
A couple years into running the bluegrass band, several students asked to learn old-school and contemporary country songs as well. So, we started doing some Johnny Cash, Dolly Parton, Garth Brooks and Carrie Underwood tunes.
We changed the ensemble’s name to our Country/Bluegrass Band. We use similar rehearsal techniques, repertoire decision-making and websites for music that were described above for our Garage Band. And both bands often perform together at the same venues.
I still don’t consider myself a bluegrass expert, but I know many of the standards now, and I can get by as a novice banjo and mandolin player. I have learned that you don’t wait until you become an expert before you start teaching something. Having students teach you is one of the greatest experiences you can have.
MARIACHI BAND
I took a similar approach when it came to starting our Mariachi Band. A small group of students were interested in mariachi, so I taught them some beginning guitar techniques. Then, we found a couple students to play trumpet and violin. I purchased a wonderful book series called “Mariachi Mastery” written by Jeff Nevin that includes arrangements of classics like “La Raspa” and “De Colores” for guitar, guitarron (bass guitar), violin, cello, viola, trumpet and harp. It also teaches technique, history, dance and even has a section on mariachi clothing.
My favorite purchase was a beautiful 6-string acoustic bass guitarron that all the students want to try. Putting together this Mariachi Band has been a highlight of the year. The students learn some basic songs out of the book and perform them at school breakfast or lunch, local Mexican restaurants or summer festivals. The band meets after school in the spring or during our school’s flex time, which are periods during the week when students can choose their activity.
Our after-school Mariachi Band has evolved into a Latin Band that does learns and performs more than mariachi. We will do some Latin jazz like “Blue Bossa” and “A Night in Tunisia,” Latin pop/rock by Santana or Miami Sound Machine or current Latin pop hits by Bad Bunny and Karol G. I find music for these songs out of “The Real Book” or using sites like ultimate-guitar.com or songsterr.com.
HIP HOP CLUB
Our spring after-school Hip Hop Club is run differently than our other ensembles — it’s more of a tour of the four elements of hip hop: DJ, emcee, breakdancing and graffiti.
DJ: I start with DJing but expand this to the creation of beats. Students learn how to beatbox by using this beatboxing tutorial by TylaDubya. The YouTube video invites students to beatbox along.
After beatboxing, students learn how to make beats on learningmusic.ableton.com or using digital audio workstations (DAW) like Cubase or BandLab. Then I introduce the DJ website, Transition DJ, which allows students to learn how to put music on two jog wheels and match beats, fade between two songs, add effects and scratch.
Finally, we’ll take out the real thing — a DJ controller, which you can find for under $200. Make sure to get one that comes with Serato, a pro-level DJ software that is very user-friendly. If you have a controller, two students can come up at a time and spin the hits. For those who really get into the DJ thing, provide opportunities for them to DJ before school, after school, at school assemblies, lunch or after concerts.
Emcee/Rapper: We then move to the second element: the emcee or the rapper. I mentioned some of the fun emcee/rapper activities in my article “Band AND.”
“I Know a Word”: Try this game where one student at a time says, “I know a word, and the word is …” and they say the word. The next student repeats the same phrase and has to rhyme the last word.
Board Book Rap: Another fun activity is to rap board books that students read when they were little. A great one is called “The Story of Rap.”
Both these activities are great while using a beat that students learned to create during the DJing lessons. Or better yet, have them create a beat on a DAW and then record themselves rapping over the top. If you really want to get fancy, use a track-separator like Extrack by Yamaha and find a part of a song to sample. This could be a drum beat, a hook, a guitar or keyboard riff, a vocal line or just about anything and make that a part of their song. Now you’re adding elements of production and songwriting into the club!
Ask if students wants to rap their song in a live performance setting by muting the vocals in the DAW file or they may want to just rap or sing some karaoke to an existing hip hop song. Encourage them to think about cadence, presence and style. You can even have one of your student DJs jump in and add some parts.
If this all sounds overwhelming, look in your area for guest artists to come in and help. In the Minneapolis area, I have asked Dave “AGAPE” Scherer to come teach my kids to rap, Terrell X to teach beatboxing, Kenichi Thomas to teach deejaying, Tish Jones to talk about spoken poetry, and Isaac Rohr to teach music production.
Breakdancing and Graffiti: For the final two elements of hip hop, breakdancing and graffiti, I also bring in guest artists. There are also some great YouTube videos you can show as tutorials. For breakdancing, check out FreeFocusDance and their series of video lessons. For graffiti, check out GraffitiSociety. The videos are interactive so students can practice while watching.
For breakdancing, you’ll need a large space, and students must wear comfortable clothing that they can move in. For graffiti, you’ll need paper, pencils, erasers and markers.
When you put all the elements together, it’s really cool! For example, have a student rapping or singing to a beat someone has created or is beatboxing. Maybe you also have a student playing drums and another student or two playing bass or another live instrument. Meanwhile another student is DJing. While all this is going on, there are students breakdancing, while a student or two are creating graffiti art on a canvas. The possibilities are plentiful. This could be in the classroom or for a performance.
Another exception of the Pop Ensemble is the instruments and technology that we use — for example, a drum sample pad like a Yamaha DTX-MULTI 12, which provides beats that are more authentic to the songs, are run right into a soundboard or amp/speaker. Another great tool is an effects processor like the Roland VT-4 or TC Electronic M100 — just run any standard microphone through it to create effects like autotune, vocoder and pitch bends. Keytars are also a fun instrument to add because they’re not too big for students and they have all the sounds and effects you need.
I have also experimented with students creating backing tracks that run while students play songs. This is a little tricky because I don’t use an in-ear monitor system for middle school. However, the drummer will wear headphones with the track going through. And I’ll also have monitor speakers stationed throughout the band so everyone can hear.
COMMERCIAL MUSIC
Many students are into performing songs from movies, video games and Broadway. For many years, we offered a summer program called Movie Band, which is a concert band that performs all movie themes. We have talked about expanding this to include video game music and Broadway hits. Hal Leonard provides some great books with repertoire for these bands: “Essential Elements Movie Favorites,” “Essential Elements Broadway Favorites.” Also check out JW Pepper for a list of video game arrangements for concert band.
As great as these resources are, music for these multimedia productions often go beyond the instruments in a traditional concert band or symphonic orchestra. I often have students form their own ensembles to play these songs, and I help them arrange music for their instrumentation. In my next article, I’ll focus on these student-led groups.
____________________________________
Popular music ensembles are a great way to give students an opportunity to create music in a different way. It allows them to expand their musical horizons, learn about new kinds of music, perform music they already know and love, discover new aspects of their musicality and personality, and create more joy for them and their audiences. It also brings more students to music who aren’t in your traditional ensembles and keeps some students in your music program who might not normally stay. Honestly, popular music was the gateway to my love of music. We should celebrate it and include it as a part of our music programs.
Spring has sprung and with it comes balls, strikes and baseball season. Here’s a list of 10 of the top baseball movies of all time.
1. A LEAGUE OF THEIR OWN
The title of this classic comedy directed by Penny Marshall refers to a fictionalized version of the World War II-era All-American Girls Professional Baseball League. Tom Hanks stars as a former Chicago Cubs slugger who manages a team called the Rockford Peaches. He’s an abrasive alcoholic who thinks the league is a joke … until the teammates bond and start to win their way to the World Series. Famous for the classic line “There’s no crying in baseball,” the movie also features Geena Davis, Madonna, Rosie O’Donnell, Garry Marshall and Jon Lovitz. Find out where to stream it here.
2. FIELD OF DREAMS
A riveting fantasy based on Canadian novelist W.P. Kinsella’s 1982 novel Shoeless Joe, the film version stars Kevin Costner as a farmer who begins getting mysterious telepathic messages telling him that he should build a baseball field in his Iowa cornfield, which he does, to the delight of his small daughter. To everyone’s surprise, the field attracts the ghosts of baseball legends of the past, including Ray Liotta as Shoeless Joe Jackson. Also making strong appearances in supporting roles are James Earl Jones, Burt Lancaster and Amy Madigan. Field of Dreams was nominated for three Academy Awards® for Best Picture, Best Adapted Screenplay and Best Original Score (by composer James Horner). Find out where to stream it here.
3. 42
This inspirational biopic about baseball player Jackie Robinson explores the pressures and challenges he faced as the first black athlete to play in Major League Baseball™. It stars Chadwick Boseman as Robinson, with Harrison Ford as Branch Rickey, the firey owner of the Brooklyn Dodgers™ in the postwar era. The title refers to Robinson’s jersey number, which was retired across all of baseball in 1997. Find out where to stream it here.
4. THE NATURAL
This compelling drama was directed by Barry Levinson and stars Robert Redford, Glenn Close and Robert Duvall. Based on Bernard Malamud’s debut novel of the same name, it tells the story of Roy Hobbs (Redford) — a baseball prodigy whose career is shut down when he is shot by a mysterious woman. The film received critical accolades and was nominated for four Academy Awards and a Golden Globe® Award in 1984. Find out where to stream it here.
5. THE BAD NEWS BEARS
You’re guaranteed to laugh out loud at this classic 1976 comedy, which stars Walter Matthau as alcoholic ex-baseball pitcher Morris Buttermaker, who becomes the coach of a youth baseball team known as the Bears. The cast includes Tatum O’Neal, Joyce Van Patten and Jackie Earle Haley. Interestingly, the score (by composer Jerry Fielding) adapts the principal themes of Bizet’s opera Carmen. Find out where to stream it here.
6. BULL DURHAM
This 1988 rom-com was partly based on writer/director Ron Shelton’s minor-league baseball experience. It centers around the Durham Bulls, a single-A minor league baseball team, where hotshot rookie pitcher Ebby Calvin “Nuke” LaLoosh, played by Tim Robbins, is guided by ex-major league catcher Lawrence “Crash” Davis, played by Kevin Costner … and also by “baseball groupie” fan Annie Savoy, played by Susan Sarandon. The movie won an Academy Award for Best Original Screenplay and a number of Golden Globe Awards. Find out where to stream it here.
7. MONEYBALL
If you’re interested in high-stakes financial wheeling and dealings, you’ll enjoy this flick about the 2002 Oakland Athletics and the attempt by their general manager Billy Bean (played here by Brad Pitt) to put together a great team despite having a limited budget to work with. Co-starring Jonah Hill and Phillip Seymour Hoffman (as legendary A’s manager Art Howe), Moneyball was nominated for six Academy Awards, including Best Picture, Best Actor and Best Supporting actor. Find out where to stream it here.
8. MAJOR LEAGUE
This comedy features an all-star lineup that includes Tom Behringer, Wesley Snipes, Charlie Sheen, Rene Russo, Margaret Whitton and Bob Uecker. The plot centers around a Las Vegas showgirl who inherits the poorly performing Cleveland Indians baseball team from her deceased husband. Wanting to move the team to Miami — which a legal loophole allows her to do if attendance falls below a certain level — she schemes to make them lose any way she can. Slowly, though, the team gels both personally and professionally and starts to win … to everyone’s surprise. Find out where to stream it here.
9. THE ROOKIE
Here’s a feel-good film, based on the true story of Jim Morris (played by Dennis Quaid), who made his MLB debut at the age of 35, struck out the first batter he ever faced on three straight fastballs and went on to play two seasons before retiring and returning to teaching in Texas. Find out where to stream it here.
10. THE BABE
John Goodman stars as Babe Ruth in this 1992 biopic that begins with the seven-year-old George Herman Ruth being sent to a reformatory school for boys, where Brother Matthias Boutlier first teaches him about the game of baseball. Ruth would sign with the Baltimore Orioles as a teenager and become a star pitcher for the Boston Red Sox before being traded to the New York Yankees, where he would make the switch to outfield and transform into the legendary slugger every baseball fan loves and reveres. Find out where to stream it here.
With March upon us, it’s time for some basketball fun. Break out the snacks and beverages and fire up your home theater, because it’s not only about the tournaments, it’s also about some great hoop-related movies. Here are 10 of the best of all time.
1. Space Jam
This live action/animated comedy stars none other than the great Michael Jordan playing himself. In addition to supporting roles from Theresa Randle and Wayne Knight, you get to hear the voices of Danny DeVito, Billy West and Kath Soucie. The movie takes a fun look at the period between Jordan’s retirement in 1993 and his return in 1995, but this time around he enlists Looney Tunes characters in a basketball game against visiting aliens! Find out where to stream it here.
2. Hoosiers
With a score by Jerry Goldsmith, this 1986 release stars Gene Hackman as a new basketball coach with a troubled past. Co-star Dennis Hopper received an Oscar® nomination for his role and Barbara Hershey helped round out an exceptionally strong cast. Hoosiers has been recognized by the United States National Film Registry as a “culturally, historically or aesthetically significant” movie. Find out where to stream it here.
3. Love & Basketball
Produced by Spike Lee and Sam Kit, this cult classic from 2000 tells the story of two Los Angeles neighbors who are chasing careers in basketball. The main characters, Quincy McCall (played by Omar Epps) and Monica Wright (Sanaa Lathan) intertwine struggles in life with their love for the game … as well as their love for each other. Find out where to stream it here.
4. He Got Game
Another film from director Spike Lee, this 1998 sports drama stars Denzel Washington and Ray Allen. Washington plays Jake Shuttlesworth, whose son (played by Allen) is the top-ranked basketball prospect in the country. Shuttlesworth is in prison for accidentally killing his wife, but is released on parole in order to convince his son to play for the governor’s alma mater. Interestingly, football legend Jim Brown plays a parole officer. Find out where to stream it here.
5. Hoop Dreams
This compelling documentary follows two African American high school students as they are recruited by a high school with a top-flight basketball program and given the opportunity to pursue their dreams of turning pro. Back in 1994, when the film was first released, critics Gene Siskel and Roger Ebert gave it “Two Thumbs Up” and the New York Times added it to their Best 1000 Movies Ever list. Find out where to stream it here.
6. Glory Road
This sports drama is based on the true story of the events leading to the 1966 NCAA® Division Basketball Championship between the University of Kentucky and Texas Western College. Starring Josh Lucas, Derek Luke and Jon Voight, it explores the race relations of the era. The film won a 2006 ESPY Award for Best Sports Movie and featured a soundtrack from musician Trevor Rabin. Find out where to stream it here.
7. Semi-Pro
Sometimes you just need a good laugh and Semi-Pro delivers just that, with an all-star cast that includes Will Ferrell, Woody Harrelson and Andre Benjamin. The plot revolves around singer Jackie Moon (Ferrell), who buys a basketball team with money from his one hit song. This fun film features lots of cameos, too, from the likes of Patti LaBelle, Kristen Wiig, Jason Sudeikis … and a 700-pound grizzly bear. Find out where to stream it here.
8. Coach Carter
This 2005 film, starring Samuel L. Jackson, is based on the true story of Ken Carter, a Richmond, California high school basketball coach. The real coach Carter made the news in 1999 for suspending his basketball team, which was undefeated at the time, for bad academic scores. His new contract with the team required a C+ average from his players and a requirement that they sit in the front row while attending classes. The movie version is all about team pride and is an inspirational and entertaining view. Find out where to stream it here.
9. Blue Chips
Directed by William Friedkin, this 1994 release stars Nick Nolte as a college coach doing whatever it takes to get new players for his team. Shaquille O’Neal makes an appearance as a blue chip prospect that Nolte is after, along with Anfernee “Penny” Hardaway. Lots of action and drama ensues with a nationally televised game against college basketball legend Bobby Knight’s Indiana team. Find out where to stream it here.
10. BASEketball
This wacky comedy, directed and co-written by David Zucker, stars Trey Parker, Matt Stone, Jenny Parker and Ernest Borgnine, and features guest appearances from great sports figures like Reggie Jackson, Kareem Abdul-Jabbar and Dale Earnhardt. It follows two slackers who, after being shunned at a high school reunion, invent a game that combines baseball and basketball. The adventures begins when a local businessman helps the two create the National BASEketball League (NBL). Find out where to stream it here.
Ready to watch some great basketball-centric TV shows? Check out this blog posting.
When we were kids, “Ready, Set, Go!” was a familiar call at Easter egg hunts, three-legged races and track meets. These words signaled us to get ready, find our spot and wait eagerly for the race to begin. Win or lose, the joy was in participating. This phrase can also be a practical reminder to prepare ourselves mentally, physically, spiritually and emotionally as we pursue our goals and expectations.
The “Get Ready, Get Set, Go” framework can be a great way to create a structured routine for your soundcheck and rehearsal process, especially for worship and tech teams. Unlike professional touring bands that have this down to a science, volunteer teams might need some time to get the hang of it since they don’t practice it routinely. But with practice and persistence, you can make this routine second nature for your team. It may take a while but don’t get discouraged. Aim for teamwork and cooperation. You’ll not only enhance your team’s sound but also build stronger, more trusting relationships among its members.
Because you are in ministry and not producing a performance for a fan base, we need to consider the spiritual aspect of why we do what we do and what will glorify the Lord in our service. Check your egos at the door. It’s not about you!
Are you praying? Pray first. Pray individually and pray together. Pray before you plan individually. Pray together as a team
And when you think through your plans, think through this question: How does it bring God glory? “Lord, we ask you to send your Holy Spirit to guide our plan. Open the hearts and minds of each person who participates in this process so that our plan reflects your intentions, and our worship brings you the honor, reverence, power and glory that you deserve.”
GET READY: The Planning and Preparation Phase
Planning is a biblical principle. Proverbs 21:5 (NLT) says, “Good planning and hard work lead to prosperity, but hasty shortcuts lead to poverty.”
before considering what the plan looks like. Proverbs 16:3 says, “Commit your work to the LORD, and your plans will be established.” Proverbs 19:21 says, “Many are the plans in a person’s heart, but it is the Lord’s purpose that prevails.” Cloak whatever you do in prayer, and do not depend on your own understanding
How often have I procrastinated and chosen songs for the service at the last minute? You can guess what the results usually are.
I have experienced what worship looks like when I take shortcuts; I forget to pray (or don’t leave time for prayer), which leads to a plan that will fail to bring God His glory. Choosing songs that I like rather than the ones He would want to hear will not bring us, the body of Christ, into His presence. Once you have devised the plan, it’s time to start the prep.Do you have a regular time for sound checks and rehearsals? If not, set a regular schedule. Determine a consistent day and time for rehearsals and sound checks to ensure all team members can attend. Make sure everybody is committed to the time required. This is a BIGGIE! Nothing sours a team more than members who are consistently late when everyone else is on time.
Choose commitment for new members over talent every time. We will talk later about how you recruit and maintain the team positively. Everyone on the team has a function and a responsibility for that role.
Along with drums, bass guitar rounds out and anchors the overall sound of a band. A good bass player adds flavor and depth to the rhythm. An experienced player can also contribute rich harmonies and low-end solos. Because the instrument is used in virtually all modern musical styles, talented bass players can usually find work with bands quite easily.
The bass is comparatively simple, straightforward and fun to learn. But before you select your first instrument, it’s important to know the basics of bass.
Bass guitars vary widely in quality and price, so before you start looking, figure out your budget and how you intend to use the instrument. Beginners can find a variety of good, affordable starter basses, such as the Yamaha TRBX174 and BB234. They both come from established series — the TRBX and BB Bass, respectively. Yamaha has more than 50 years of experience handcrafting electric basses for players of all levels, and the company’s philosophy is to make a beginner’s experience as positive as possible. So, although these two models feature slightly lower-grade hardware and electronics than top-of-the-line options, their playability helps new bassists excel during the early stages of learning and performing.
Experienced players may want to invest in an instrument with richer tone woods, better electronics and upgraded hardware. A higher-quality bass will sound better, feel better and serve a musician longer. At the top of the TRBX and BB lines, they’ll likely find exactly what they’re looking for. 2 It’s important to have a good understanding of the parts of a bass guitar before you start shopping. Understanding how the instrument is designed and built, as well as knowing its different parts, will help you to ask the right questions and make an informed decision.
In 1961, inventor John Burgeson created the first-ever computerized baseball simulator game. In the decades since, there have been literally hundreds of video games released that, at least in part, are based on his concept. And although every baseball fan can’t play in the majors, anyone can practice their sliders and home-run swings on their gaming consoles.
As spring training approaches, it’s time to continue along the path that Burgeson set out by enjoying these nine classic baseball video games. Batter up!
1. R.B.I. BASEBALL (1987)
This title was the first of its kind to include licensing by the Major League Baseball® Players Association (MLBPA). As a result, it was the first video game to use the names of real players, including superstars of the era like Nolan Ryan and Andre Dawson. Although it did not include actual team names, there were eight squads from cities like Boston, Detroit, New York and others. Making it even more realistic, the virtual players boasted various skillsets (some were speedy on the basepaths, others had a great fastball). For gamers of a certain age, this is the Holy Grail of baseball titles. Preview it here.
2. KEN GRIFFEY JR. PRESENTS MAJOR LEAGUE BASEBALL (1994)
This game from Software Creations® did feature the names and stadiums of real MLB® teams, including the Chicago Cubs and Seattle Mariners, though unlike R.B.I. Baseball, it didn’t offer the names of actual players, with the exception of the title’s namesake. In the 1990s, Ken Griffey Jr. was the star of stars on the diamond and his inclusion in this game made it a must-have. Available for consoles like Super Nintendo®, there was a later release on Game Boy™ that did include real players, but even the original provided the groundbreaking feature of allowing users to save their stats during their season. Preview it here.
3. TRIPLE PLAY 97 (1996)
In the mid-to-late-1990s, video games began to look more realistic. Gone were the cartoonish, rudimentary baseball images of players and in came graphics that looked almost like a real-life matchup. This title from EA Sports® was at the forefront of that movement. Not only was it one of the best baseball video games of its time, it was one of the best video games of any kind, period. Triple Play 97 featured real players, real teams, announcers, crowd noise and more, providing a life-like immersive experience. Preview it here.
4. BACKYARD BASEBALL (1997)
Most sports video titles are known for taking themselves and their subject pretty seriously. More and more, they aim to be as accurate as possible in terms of the look, feel and pace of the actual pro game. But not this one! There is accuracy, to be sure, but it’s of a different kind — that of a child’s imagination. The premise here is: What if you and your school-aged friends got together for a game at the park? From homespun uniforms to cute trash-talking, this one is as fun as a Saturday afternoon with friends. Preview it here.
5. MLB SLUGFEST 2004 (2003)
This offering from Midway Home Entertainment® leaned into the fantastical. Users could play as real-life teams, including the Kansas City Royals or St. Louis Cardinals, or they could play as a band of ninjas, with swinging samurai swords in place of baseball bats. Similar to basketball games like NBA Jam or football games like NFL Blitz, it allowed players to enjoy an extreme version of the sport that was at times part-wrestling match. Preview it here.
6. MVP BASEBALL 2005 (2005)
Though MVP Baseball is nearly two decades old, it might just be the best baseball video game ever. It not only features real players and teams, but it also was granted licensing from Minor League Baseball®, meaning users could play with a franchise’s farm team. Now that’s detail! But it also presents the game within the game, as users could make trades, manage rosters and navigate player injuries as if they were a real-life team’s coach or front-office executive. Compared to everything that came before, this is mind-blowing stuff! Preview it here.
7. MARIO SUPERSTAR BASEBALL (2005)
Love baseball and also love the Super Mario Bros.™ world of characters? Then this game is for you. Here, you don’t have to know contemporary pitchers or hitters; you just have to step up to the plate with folks like Luigi, Wario or Princess Peach. Originally created for the Nintendo GameCube®, it’s actually one of several Mario Bros.-themed sports games, including Mario Power Tennis and this title’s sequel, Mario Superstar Baseball. As colorful and light-hearted as you might expect, this is a game for all age groups. Preview it here.
8. SUPER MEGA BASEBALL 3 (2020)
Somehow realistic and over-the-top at the same time, this title combines the oversized cartoonish nature of some baseball video games with the lifelike gameplay of others. While the first rendition was released in 2014, Super Mega Baseball 3, the third in the series, came out in 2020 and is one of the more popular games to date. Available for consoles like Nintendo Switch™ and PlayStation 4®, it includes a franchise mode where users can control not just a batting lineup but a whole fictional team, like the Sharks or the Heaters. The game can also be played online against opponents all over the world. Preview it here.
9. MLB THE SHOW 20 (2020)
Some may see this game for the first time and confuse it with an actual Major League Baseball contest — it’s that realistic. Created by San Diego Studio® for PlayStation 4, this title features minor league baseball players as well as those in the majors. Users can play online against other opponents or just bask in the realism it offers. It’s hard to imagine video games getting more lifelike than this one. Even the onlooking fans in the stands seem real with their own individual movements and appearances. Add in varying weather conditions, day and night games and real-life ballparks, and you have just about everything you need to completely replicate the actual in-stadium experience. Preview it here.
Enjoying major sporting events at home is the reason you have a 70″ 4K TV and a legit sound system. The Super Bowl™, Kentucky Derby, Daytona 500, the Masters — all are must-see for sports fans.
For these events, all you need to know to watch the action from beginning to end is: what time does it start and what channel is it on? It’s that simple because they happen just once a year, at one specific time, and the broadcasting networks do their best to make sure they don’t conflict with one another. Even NFL, NBA and MLB playoffs and championships (including the World Series) are coordinated so the start times don’t overlap. That way, dedicated fans can see all the action … and the networks can maximize their ratings.
There is, however, one huge exception to this meticulous planning. Around the middle of March, the NCAA® Tournament begins. This culmination of the college basketball season presents a challenge for the fan who wants to enjoy a real home court viewing advantage.
Once the final 64 teams are seeded into four single-elimination brackets, the fun begins. A full schedule of 48 games are played in the first four days, making it impossible for a network to broadcast them all on one channel. With so many games being played at the same time, game conflicts simply can’t be avoided.
The networks have, however, come up with a solution: Spread all the games across four different channels: CBS, TBS, TNT and truTV. Sound good? Not really. Surfing between the four channels with your remote only guarantees you’ll miss a lot of great plays. The best way to watch is to pick up all four broadcasts on four separate TVs.
Sound complicated? Not really. Not if you’re a serious sports fan. In this article, we’ll show you how easy it is to convert your living room into a multi-screen, tournament-ready sports lounge. With a creative combination of cable, satellite, terrestrial broadcast and internet streaming devices, you’ll be able to watch four games simultaneously without interruption. But be sure to start planning early, so you’re not running to the store on game day.
What You Need
1. Four TVs in one room.
You’ll need one for each broadcast channel, so gather the television sets from around the house (bedroom, kitchen, borrow from a friend, etc.) and set them up in your living room alongside your main monitor.
2. Access to streaming apps for each TV.
If all the sets are smart TVs, they should be able to access the most popular streaming apps: YouTube™ TV, Hulu™, Sling™ and others. If they’re a little older and don’t support the latest versions of these apps, don’t worry — there are hardware add-ons available to get the job done, such as Apple® TV, Fire® TV, Roku®, Chromecast® or Xbox™ One. Any of these can upgrade any monitor to a state-of-the-art smart TV.
On the left: streaming services. On the right: streaming devices.
3. Indoor HD antenna for terrestrial broadcast.
You’ll need an antenna to pick up your local CBS channel. HD antennas are available online or from any big-box store. Models vary, but to ensure clear picture quality, get the one that can pick up the farthest digital station.
Indoor HD antenna.
You’ll also need to subscribe and register your smart TVs and/or streaming devices to a streaming services app like YouTube TV, Hulu, Sling or any other that carry the four channels you’ll need to watch the tournament (i.e., CBS, TBS, TNT and truTV).
Note: If you don’t already subscribe to one of these services, do a little research. The services vary in terms of broadcast content and the hardware they support. The number of simultaneous streams each subscription supports is important. Some services limit the number of channels that can be simultaneously streamed into the home. You’re going to need two to three streams to see all the games. The good news is that these are normally month to month services with no penalty for subscribing for a single month.
Set Up Your TVs
There are many ways to make this happen, but the good news is that all are equally effective. Here’s an example that uses a combination of connections from cable TV, terrestrial broadcast and two internet streaming devices. (If you’re tech savvy, get creative with the hardware and streaming services you already have available.)
1. Monitor One (TBS broadcast):
This is the main TV that normally sits in your living room. Use the cable or satellite service already connected to this TV to receive the TBS broadcast.
2. Monitor Two (CBS broadcast):
This monitor will get its signal from local terrestrial broadcast using an indoor HD antenna.
3. Monitors 3 and 4 (TNT and TruTV signals via internet streaming):
These last two monitors are going to get their signals from the internet using the built-in apps or external streaming devices mentioned above.
Switch the Sound
Now that you have different games on all four monitors, it’s just a matter of switching the sound to the one you want to watch. This is simple if you’re using a Yamaha AV receiver that has a SCENE function. (All models made in the past 15 years have it.)
Here’s how:
1. Connect each TV’s audio output to an analog or digital input on the receiver:
2. Set the receiver’s input to the monitor you want, then press and hold a SCENE button for five seconds to set the scene. For example, connect Monitor 1 to the Audio 1 input and set SCENE 1, then connect Monitor 2 to the receiver’s Audio 2 input and set that to SCENE 2, and so on.
3. During the games, simply press one of the four programmed SCENE buttons on your remote to select the sound from the desired monitor. See the action, hear the action!
Now you’re all set to watch the drama of the tournament unfold in the comfort of your home theater. Grab your bracket, your favorite snacks, and enjoy! Will it be March Madness™ or March Sadness for your team?
You’re at a festival, and watch as a band finishes their set, and it’s … not great. Missed entrances. Thin tone. A trumpet solo that clearly felt longer to the kid playing it than to anyone else in the room.
You’re walking back to the buses when you hear the two directors behind you start dissecting everything.
“Tone was rough.”
“Why would they program that?”
“They’re not ready for that level of literature.”
You glance over at your students loading equipment. They heard it too.
I’ve been at that festival. I’ve been that insecure young teacher, trying to prove I knew what was wrong with someone else’s group. It feels good for about 30 seconds.
Criticizing another band doesn’t fix your program. It just tells everyone where your head is. And, most importantly, your students are paying attention.
Your Students Are Watching More Than You Think
When you criticize another program in front of your kids, you’re teaching them how to talk about people who aren’t in the room.
Students watch how you react when things go badly. They’re learning from you what professionalism should look like.
If you roll your eyes at another band, your kids learn that that’s part of being a musician. Make sarcastic comments about repertoire, and they learn that mockery is part of being an adult.
I’ve had students repeat comments back to me that I barely remembered saying. They’re always listening. Always (except when I say to put button one down for Bb).
If we want students to show empathy when a peer misses a note, we have to show it when an entire ensemble struggles. Not the fake, patronizing kind. Just simple respect.
“They worked hard. That took courage.”
That’s enough.
You Rarely Know the Full Story
It’s easy to critique a 12-minute performance. It’s harder to understand the years behind it. You don’t know if that director lost staff. You don’t know if half the band shares instruments. You don’t know if their feeder program disappeared three years ago.
I’m the only band director at my school. Some years I’m just trying to keep everything afloat. There have been semesters where students moved in and out constantly. Years where I’m teaching beginners and seniors in the same rehearsal and hoping both groups grow.
The same is true for the group you’re tempted to critique.
Most Criticism Is About Us, Not Them
When I’ve been tempted to tear down another program, it usually had nothing to do with them.
I was tired and felt behind. I was worried about my own scores, my own programming, my own issues. Pointing out someone else’s problems gave me a temporary boost.
I’d think, “Well, at least we sound better than that.” But that thought doesn’t last.
If things are going well in your program, don’t take shots at someone else’s group. Just watch and think, “They’re working. Good for them.” Or, “I’ve been there.” Because most of us have.
Sometimes Professional Just Means Quiet
When I thought I had something to prove, I gave an opinion about everything. Now I think professionalism looks more like restraint.
If a colleague asks for feedback, that’s different. Be honest. Be specific. Be helpful. And do it privately. But unsolicited analysis isn’t mentorship. It’s ego.
There’s a difference between professional dialogue and commentary within earshot of kids still loading tubas. Sometimes the most professional response after a performance is simple: “That took courage.”
Or, say nothing at all. You don’t lose credibility by holding your tongue. If anything, you gain it.
Your Program Won’t Grow Because Someone Else Struggled
If a group has an off day, you might move up a spot in some competitive festival rankings. But ensembles don’t grow because another band had a rough night.
Better tone comes from teaching tone. Better programming comes from studying scores. Higher standards come from raising them in your own rehearsal room.
Most of us don’t have extra energy to waste. The job is already demanding enough. At some point, your group will be the one that struggles on stage. A rushed tempo. A cracked entrance. A piece that didn’t land.
You’ll walk off knowing exactly what went wrong. And as you’re heading back to the buses, you might hear some voices behind you. You won’t need to turn around.
Your students know that it wasn’t their best performance but praise them for working hard and having the courage to perform in front of others. Have a group discussion about the things to focus on during rehearsals and in preparation for the next festival — all while showing your kids professionalism, resilience and kindness.
You know it’s spring when baseball season begins. Time to begin enjoying those peanuts, caramel popcorn and the crack of the ball on the bat with these 10 beloved songs about America’s Pastime.
1. GLORY DAYS
This song from Bruce Springsteen’s iconic Born In The USA album focuses on a man who ruefully looks back on his “glory days” playing high school baseball while recalling some of the friends he knew. The first verse is based upon a chance encounter Springsteen had with one of his past Little League® teammates when he himself played baseball in a Babe Ruth league. Listen to it here.
2. THE GREATEST
The lyrics of this 1999 Kenny Rogers song portrays a little boy repeatedly tossing a baseball up in the air, then swinging and missing, though he constantly refers to himself as the greatest player. When his mom calls him in for dinner, we discover that he imagined himself as the pitcher, not the hitter, earning strikeout after strikeout. Listen to it here.
3. NIGHT GAME
This beautiful ode to baseball was written by Paul Simon, based on his memories of attending baseball games in the New York area where he grew up as a kid. The track features the legendary Toots Thielman weaving an evocative harmonica part over Simon’s guitar as the song slowly develops … just the way a great game would. Listen to it here.
4. DID YOU SEE JACKIE ROBINSON HIT THAT BALL?
This feel-good jump blues track was originally recorded by the Count Basie Orchestra in 1949, two years after Jackie Robinson made his major league debut. The song was later covered by Natalie Cole and included in a Ken Burns baseball documentary. Listen to it here.
5. CENTERFIELD
You’re virtually guaranteed to hear this track playing over the PA at most baseball games, both major league and minor. Interestingly, singer/songwriter John Fogerty (the famed front man for the ’60s group Creedence Clearwater Revival) has said that he chose the name of the album before he wrote the song, which was inspired by the ultra-deep centerfield at the original Yankee Stadium. Listen to it here.
6. THE CHEAP SEATS
The Cheap Seats is not only the fifteenth studio album by country music band Alabama, but the name of this feel-good baseball-tinged track, which was used as the theme song by ESPN for their Minor League Baseball games during the 1994 broadcast year, when the single was riding high in the charts. Listen to it here.
7. JOE DIMAGGIO DONE IT AGAIN
This fun track by Billy Bragg and Wilco from the 2000 album Mermaid Avenue Vol II features banjo and guitar, along with lyrics by Woody Guthrie written in 1949, about an old-timer struggling to keep up with the younger kids … proving that some topics are timeless. Listen to it here.
8. ALL THE WAY
Eddie Vedder, lead singer of the rock band Pearl Jam, wrote this one about his favorite baseball team, the Chicago Cubs. Vedder was from Evanston, Illinois and was a lifelong fan. The song is also known as “(Someday We’ll Go) All the Way,” in reflection of the fact that, when it was first released in 2008, the Cubbies hadn’t won a World Series in 100 years — something the team rectified in 2016 … which prompted a video re-release of the track. Listen to it here.
9. SWING
Country artist Trace Adkins recorded this track in 2006. The video uses baseball as a metaphor for a women’s night out at a tavern, depicting the men that play the “game” — including Adkins himself, who ultimately has to step up to the plate. Listen to it here.
10. TAKE ME OUT TO THE BALLGAME
It doesn’t get more baseball than this 1908 Tin Pan Alley song, which has become the unofficial theme to the game, traditionally sung during the seventh inning stretch. Interestingly, neither of the composers had attended a ball game before writing the song! It’s been recorded literally hundreds of times, but the classic version is the one performed by Frank Sinatra and Gene Kelly from the film of the same name. Listen to it here.
I’m a band director. I eat, sleep and live band. Ask me any questions about any band composer, literature or conductor, and I’ll answer correctly 80% of the time, every time. #Band4life.
My first job? Four sections of choir. Two sections of band — one of which I co-taught as the assistant. And to make it more interesting, the previous choir director had already applied for a state conference performance, and the group was accepted.
So, a few months into my teaching career — still figuring out attendance, copy machines and why someone kept parking in my assigned spot — I was supposed to help take a choir to perform at the state conference.
I walked into my first class and was met by 60 vocalists waiting to see if I know what I’m doing.
The Moment You Realize You’re in Trouble
One class, I asked the tenors to sing alone for the first time. Silence.
Them: “We don’t know the part.”
Me: “It’s on the page — just read the notes.”
Them: “We can’t.”
OK. New plan. This is not the typical “choir kids can’t read music” complaint. The only advantage band members have is that they have buttons and keys, and they’ll occasionally hit the right notes the first time due to having less notes at their disposal.
I replanned the next several rehearsals to include note-reading, solfège, rhythm exercises and diction. In other words, I couldn’t just wing it like I thought. This would require some real rehearsal architecture and goal setting.
I had the same thoughts every day driving home: “Did they hire the wrong person?*
Sometimes you aren’t hired because you’re the perfect specialist. You were hired because the schedule needed to work. You had just enough skill to be functional in two different disciplines, and someone has to teach those sections. A real gut punch to your ego.
You’re Not Starting From Zero
I used to think: “If I don’t know everything about this discipline, I shouldn’t be teaching it.” This sounds responsible and reasonable, but it’s also not true.
Most of a music teacher’s job isn’t choir-specific or band-specific or orchestra-specific. All include rehearsal structure, pacing, expectations and musicianship.
So, was the goal to get kids to understand and demonstrate proper diction, diphthongs and tone quality? Absolutely. But the goal was also to continue to move our rehearsals forward.
If you’re teaching a discipline that you’re not used to, you’re not starting from zero. You’re starting from about 70%.
Here’s what you can do:
Plan a concert cycle
Diagnose rhythm issues
Know when kids mentally need a reset.
The other 30%? This comes with time, observation and a little humility. Humility just means saying, “I don’t know this yet.”
Some Universal Things
Rehearsal structure transfers everywhere: When I stopped trying to become a choir guy overnight and just ran rehearsals the way I knew how to run rehearsals, things improved.
Warm up with purpose: Not random vocalizing. Targeted. “We’re going to fix vertical alignment today.” Then the warm-up addresses that.
Isolate small sections: I pulled just the tenors and basses for eight minutes while the sopranos marked and listened. That felt normal to me — it’s what I would do with low brass. Then I just worked on fixing two measures instead of running sections or the entire piece.
Reinforce fundamentals every day: Posture check. Breath plan. Unified release. Choir, band, orchestra — a unified system works everywhere. Your job is to work to refine your teaching on those concepts that are specific to the discipline and the grade level that you are teaching.
Leadership is leadership: Clear expectations transfer across all classrooms. Start on time. Stop rehearsal and reset when needed. Have clear behavior expectations. The first few weeks, I overfocused on vocal technique and under-focused on leadership basics. We’d spend five minutes adjusting vowel shape, but entrances were sloppy and kids were talking between reps. Once I tightened rehearsal transitions — “Folders up. Eyes here. We start in three.” — behavior improved.
And when behavior improved, listening improved. And when listening improved, tone improved.
I’ll reiterate: students do not always need a specialist first. They need a steady adult who understands that tone problems can sometimes stem from classroom expectation problems.
Narrow the Focus So You Can Keep Going
The stress of that upcoming state performance almost sent me into over-correcting mode. I wanted to master everything. Every vowel nuance. Every stylistic rule. Every technical detail.
I printed articles. I watched conference videos late at night. I convinced myself that if I just consumed enough information, I’d feel qualified. I was a band guy, but now I have to prove that I belong here. Student-first? Not exactly. But that’s what was going on in my head at the time.
Instead, I just felt tired. I felt like I couldn’t sustain this. So, I narrowed the focus.
The goal was no longer to perform at the state convention and gain the respect of my new peers. Now it was to make sure the students felt comfortable performing with proper posture, diction and tone quality. It was to make sure they felt connected to each other in their classroom and performance.
I stopped chasing every flaw. We worked on the list above — posture, classroom expectations, musical elements.
They improved. Not because I became an expert, but because I simplified.
No Excuses
I apologized a lot and made a lot of excuses at the beginning. “I’m more of a band person …” or “I’m still learning choir …”
I thought I was being transparent. Students hear something else. They hear: This class is secondary; it’s not as important to our director.
You are the choir director this year. Own it. You can be learning and still be in charge. When I stopped qualifying everything and simply led, rehearsal felt different. Confidence isn’t knowing everything. It’s knowing that you can rise to the level the students need.
Borrow Shamelessly
I’ve heard from countless educators that “teachers steal constantly.” See a teaching technique that works? Take it and try it out with your class.
Many new teachers feel like they have to create materials or methods, otherwise it doesn’t count. This is a quick way to burn-out.
Sit in on other directors’ rehearsals and take notes. Find a book like “Building Beautiful Voices” by Weston Noble and use those warm-up methods.
Most great teachers often cobble together what works from other directors. Borrow. Refine. Keep moving.
A Manageable Survival Plan
Here are some additional tips if you find yourself staring at a schedule that doesn’t match your speciality:
Pick conservative literature. Choose music that builds confidence.
Establish a consistent rehearsal routine.
Keep a running list titled “Things I Need to Understand Better.”
Study 10 minutes a day — not two hours in panic mode.
Build one mentor relationship.
This list is doable. Especially when you’re also prepping for a state performance that you didn’t apply for. And still trying to remember to submit attendance correctly.
This Isn’t an Identity Crisis
You’re not a band director stuck teaching choir. You’re a music educator teaching the students in front of you.
Teaching multiple disciplines was a gift. My ear improved. I started listening more carefully. My language became more direct, and I was fortunate enough to interact with even more students who wanted to perform and wanted a place to belong.
I learned how to become a better teacher for whoever was in front of me.
In Part 1 of this two-part series, I wrote about my experience picking up guitar for the first time. I firmly believe that learning even a little bit about other instruments can help you become a better bass player and a better all-around musician. For bassists, learning guitar feels like new territory, both mentally and physically. When I started playing guitar in earnest last year, I was curious to see where it’d take me and the journey held more than a few surprises. If you’re a bass player who’s thinking of learning guitar, here are a few tips that may help you get comfortable as you begin the process.
GETTING STARTED
As I mentioned in Part 1, picking up guitar after playing bass is an adjustment for the hands; the spacing is tighter and the strings are thinner. Putting in the work does have its rewards, though: Even basic chords and double-stops on my Yamaha FG800J acoustic guitar (the instrument I chose for learning) sound great. Trying other acoustics has shown me that the wider string spacing of classical guitars can feel a bit more comfortable, however, especially for those of us accustomed to 5- and 6-string basses.
Yamaha FG800J.
The mental shift is important, too. Generally speaking, bass players are expected to showboat the least; we mostly play single notes, and we choose those notes with intention. On our best days, we are the epitome of usefulness. But when we pick up guitar, we can be supportive without being foundational. We can imply chords without being definitive, and we don’t have to play nearly as much. Guitar players often “sit out” at will, but if the bass goes quiet, the band stops. For a bass player, this freedom takes some getting used to.
FIRST STEPS
I enjoy playing three-note chords (triads) on my 6-string Yamaha TRB bass (still available in Europe but since replaced in the U.S. by the newer TRBX line) and 5-string BBP35, so when I pick up a guitar, my first instincts are to play the same chord shapes I use on bass, as well as single-note lines and melodies on the low strings. Hearing chords that ring out cleanly and clearly on guitar is still a thrill.
Bass is tuned in fourths, which makes it easy to move shapes around the neck and get results without overthinking. A guitar’s four lowest-pitched strings (EADG) are also tuned in fourths — but the fifth string, B, breaks the pattern. (The high E on guitar, which is two octaves higher than the low E, is a fifth from B.) So playing my favorite three-note bass chords on the bottom strings of guitar is easy, but I’ve also learned that playing something as simple as basic intervals (thirds, fourths, fifths, sixths, sevenths and octaves) up and down a scale sounds good, too. And I’m learning to “mind the gap” by adjusting for that B string.
PLAYING RHYTHM
I started out as a drummer, and being inspired by Steve Gadd and Dave Weckl, my kit of choice was a Yamaha Recording Custom. When I switched over to bass as my main instrument, connecting with the drummer was a no-brainer, and rhythm guitar still grabs my attention. When I’m playing guitar, however, my responsibilities are different: My strumming hand still feels the need to keep the pulse, and even though it doesn’t feel as crucial as it is on bass, I like to think of downstrokes as the backbeat and upstrokes as a lift.
FLYING BLIND
After spending so much time analyzing and learning bass parts, I want to know exactly what I’m doing on guitar, but I’m learning to ease into a beginner’s mindset and enjoy simple pleasures without overanalyzing. It’s fun to play a random fret with one finger on the top three strings, for example, while experimenting with basic fingerpicking and strumming. Technically, that’s a first-inversion minor chord (think of it as a minor triad with the root on the top string), but I’m letting myself not overthink it. This “shape” is easy to do, and it sounds good. It’s those little victories that motivate me to keep learning.
NEW GIFTS
As bass players, we mostly think in root position: If the music asks for a G7 chord, we usually play a G and outline the chord with the third (B), the fifth (D), and the seventh (F). In my new role as a guitarist, where the root is not my responsibility, I’ve become more interested in inversions, which can help create smoother, more melodic bass lines and connect chords chromatically, especially when playing walking basslines. Playing inversions on guitar is great for my ears, and it reinforces the importance of the root on bass. It can be helpful to see our job from the outside and understand its importance.
I’ve noticed that when I return to bass after playing guitar, I’m more comfortable leaving space and I’m more selective about the notes I play. This journey is also making me realize how much of the acoustic guitar music I’ve absorbed is from West Africa and the African diaspora, and it’s interesting to hear those flavors come through my neophyte guitar hands.
LETTING GO
In my experience, learning guitar can feel like starting over, but really, it’s more about letting go. Playing guitar is a chance to enjoy new territory. Thinking like a guitarist doesn’t have to mean taking a “me-first” attitude; you just have to be OK not being the anchor. Embrace the change and know that this new adventure can stimulate your fingers, your ears, and your curiosity — and if you do it right, it’ll make you a better bass player too.
The assistant principal asks, “We need your room during fifth hour for testing. Can you relocate band for a few weeks?”
If you’ve taught long enough, you already know what happens next. Little to no percussion access. Half the class time lost to logistics. And a group of kids who feel like they were pushed aside.
I didn’t want to be known as difficult, so I said “yes.”
Three weeks later, rehearsal quality dropped. Kids were frustrated. I was frustrated — but I didn’t let anyone know. I replayed the conversation on the drive home. I told myself pushing back wouldn’t have changed anything. But I knew the truth.
Nobody forced me. I agreed to this.
Being Easy to Work With Isn’t a Plan
Many early-service teachers think being low maintenance makes them professional. Quick agreement can build trust, and cooperation simply means “we’ll figure out the stressful stuff later.”
Your speedy acquiescence makes your program the easiest one to squeeze out. In my case, when something had to move, we moved. When something had to give, we gave. It soon stopped being a discussion. It became an expectation.
Feeling like we were the only group that had to make concessions was frustrating. Moving forward, it wasn’t about becoming difficult or saying “no” just to say “no.” It was about advocating for my program.
Fast Answers Usually Come From Fear
One of the biggest early mistakes I made was answering immediately. Requests came in, and I responded on the spot. Room changes. Schedule shifts. Extra performances. Pull-outs during rehearsal.
I thought my administration would care if I responded promptly. I even thought they’d be upset if I didn’t get back to their email within the same hour (even though some of my emails took a day or two for them to respond to).
Speed did not really matter. All it did was show the anxiety I had about being seen as a team-player.
Silence can feel uncomfortable, but that doesn’t mean you have to fill the space right away. Instead of trying to answer quickly, answer thoughtfully because thoughtful answers protect students and programs.
Frustration Doesn’t Translate
I’m a musician. An artist. Translation: I sometimes get a little emotional and want to say:
“This is frustrating.”
“This keeps happening.”
“This makes rehearsal difficult.”
All true, but sharing these thoughts is not effective.
When advocating for your program, state facts. Impact works better than emotion.
“It’s difficult for us to make that change because we lose percussion access, and 10 kids per class won’t be able to participate for five weeks.”
Or, “We lose instructional time every day we relocate.”
Or, “This affects over 100 students preparing for graded, summative performance.”
That’s a different conversation. You’re no longer venting. You’re informing.
Running a music rehearsal includes many considerations. Most people don’t understand how routine affects beginners, how setup time compounds across weeks, or how physical space shapes ensemble outcomes. If you don’t explain it, people will assume. And we all know what they say about assuming…
Be clear and direct when you speak. It’s not rude or off-putting — it’s simply translating the problem into language that everyone understands.
Patterns Matter More Than Incidents
One disruption is manageable. Again — it’s fine to be a team player and help out your school community. But repeated disruptions? These have a compounding and long-term effect.
Early on, I kept everything in my head. I thought I would remember all the instances we were pushed out or that we had to sacrifice rehearsal time for another activity. But, I didn’t remember everything. Now I log. Not for leverage — for accuracy.
Go back to facts and the impact the disruption will have:
Don’t say, “It feels like we’ve lost a lot of time” — this is vague.
Instead, say, “Since September, we’ve lost nine instructional days” — this is concrete.
Documentation doesn’t make you confrontational. It makes you credible.
Define what you need to protect, and it will be easy to say:
Rehearsal space is non-negotiable.
Beginner instructional time is non-negotiable.
Concert scheduling can be flexible — with ample notice.
When you know your lines, decisions are easier. You also sound more confident.
Not Every Pushback Is Professional
Did I mention I’m a musician, and that sometimes I get a little emotional? There were times that I pushed back because of my ego. I felt overlooked. I wanted to prove a point that we needed respect.
That wasn’t leadership. That was insecurity. And that was on me to pause and go back to my boundaries. Is this affecting instruction, access or long-term expectations? Is the school really in a jam without me adjusting something? These questions helped me set my ego aside and decide rationally.
Preparation Changes Conversations
Musicians are great at practicing. This goes beyond our instrument or voice. Having a few prepared responses can help you and your program.
“I need to think through the impact before I commit.”
“I want to support this, but here’s what it affects.”
“What would need to be in place for this to work?”
Practice these with a friend, in the mirror, on the drive home or even on a Google doc. Planning ahead for some hypothetical situations (that have a high percentage of occurring) cuts down on nerves and helps you make a decision in the best interest of your program.
If You’ve Been Too Flexible
Here’s what you don’t want to do. If you’ve been a pushover, you’ve probably stewed about this in your head and haven’t spoken about it to many people. Then one day, you’ve just had enough and erupt.
“Hey Don, we’re going to have to use the band room again tonight. No problem, right?”
“I’M SICK AND TIRED OF THE BAND ALWAYS GETTING PUSHED OUT!” Followed by a whole lot of other things you will regret saying.
The person asking for this “favor” has no clue what is going on in your head and says, “Whoa — where did that come from?”
Avoid this awkwardness by resetting expectations without frustration and drama. Try this instead: “I’ve been flexible, but I need to clarify something moving forward.”
Most reasonable people adjust quickly once expectations are defined.
With the month of March upon us, it’s hoop time! But there’s no need to go to the arena — here’s a list of ten basketball-centric shows you can watch on your big-screen TV in the comfort of your home.
1. SURVIVOR’S REMORSE
This series ran from 2014 to 2017 and was produced by LeBron James, who also appeared in a few episodes. It explores the life of Cam Colloway (played by Jessie T. Usher) immediately after he signs a pro basketball contract. After moving his family from Boston to Atlanta, he has to deal with a crazy entourage who takes advantage of his kindhearted nature and generosity. Find out where to stream it here.
2. HANGIN’ WITH MR. COOPER
This ’90s sitcom starred Mark Curry and Holly Robinson Peete. Set in Oakland, California, it follows the evolution of a fictional NBA player who gets cut from the team after getting taken down by Charles Barkley, then rises from being a lowly substitute high school teacher to head coach for the boys basketball team. Find out where to stream it here.
3. BIG SHOT
This is one comedy that skips the cliches, portraying some of the obstacles women face in sports. Premiering in April of 2021, it featured John Stamos as a temperamental basketball coach who is fired from an NCAA® Division 1 job after throwing a chair at a referee. He then moves to California to coach at an elite girls school, where he meets a quirky cast of characters, including the no-nonsense dean of the school (Yvette Nicole Brown) and the good-natured assistant coach (Jessalyn Gilsig). Find out where to stream it here.
4. THE WHITE SHADOW
This compelling drama aired in the late 1970s / early ’80s and starred Ken Howard as a white professional basketball player who retires from the Chicago Bulls after a severe knee injury and takes a job as head basketball coach at a mostly Black and Hispanic high school in Los Angeles. While retaining some elements of humor, it addresses many serious topics ranging from physical and mental disabilities to sexual orientation and child abuse. Find out where to stream it here.
5. ONE TREE HILL
Premiering on the WB Network in 2003 and running for nine seasons, this show is set in the fictional North Carolina town of Tree Hill. It followed the lives of two half-brothers who compete for positions on their high school basketball team, starting out as enemies but eventually bonding over the years. Find out where to stream it here.
6. HOOPS
How about some basketball animation? This 2020 Netflix® comedy depicts the frustrations of Coach Ben Hopkins, a bad-tempered high school basketball coach, and his assistant Ron … who just happens to be dating Hopkins’ ex-wife. There are numerous twists and turns as the coach tries to turn around the team’s poor reputation and reconnect with his estranged wife. Guest voices include Guy Fieri as Himself and Damon Wayans Jr as Damian Chapman. Find out where to watch it here.
7. SWAGGER
Inspired by NBA star Kevin Durant’s youth basketball experience on the AAU circuit, “Swagger” premiered in October 2021 on Apple TV®. The 10-episode series garnered critical acclaim for its social commentary, writing and acting. Starring O’Shea Jackson Jr as Ike Edwards and Isaiah Hill as Jace Carson, it explores the multifaceted dramas swirling around ambition, opportunities, corruption and basketball dreams. Find out where to stream it here.
8. LONG SLOW EXHALE
Created by Pam Veasey for BET, this drama premiered in April of 2022, starring Rose Rollins as J.C. Abernathy, head coach of a women’s championship college basketball team in Atlanta. The plot revolves around a sexual abuse scandal wrapped in secrets that threatens all the coach has built. Find out where to stream it here.
9. WINNING TIME: THE RISE OF THE LAKERS DYNASTY
Based on the book Showtime: Magic, Kareem, Riley and the Los Angeles Lakers Dynasty of the 1980s by Jeff Pearlman, this show premiered in March 2022. It presents a dramatization of the personal and professional lives of the ’80s Lakers and features an all-star ensemble cast that includes John C. Reilly as Jerry Buss, Quincy Isaiah as Magic Johnson, Jason Clark as Jerry West, Adrien Brody as Pat Riley, and Solomon Hughes as Kareem Abdul-Jabbar. Find out where to stream it here.
10. BASKETBALL AND OTHER THINGS
This fascinating documentary series features NBA players such as Julius Irving and Allen Iverson discussing the lessons of life they’ve learned throughout their careers, exploring both the dark and bright sides of their personal and professional lives and talking about what playing basketball has taught them. The interviews are interspersed with animated clips, making for some great hoop-watching with the family. Find out where to stream it here.
Ready to watch some great basketball-centric movies? Check out this blog posting.
You know that meeting that you dread? The one where someone across the table asks, “What percentage of the building is in your program?” or “What’s your retention rate from last year?” or worse, “How does your attendance compare to the school average?” You get defensive and start talking about how hard your kids work, how good the last concert was, how committed these seniors are.
If you’re like me, you probably thought that passion would push your program forward. I used to believe that if administrators saw the rehearsals, heard the performances or just felt how much I cared, then it would be enough.
Sadly, it’s not enough.
They want numbers because effort isn’t the same thing as evidence. They weren’t attacking me. They were doing their jobs. I just wasn’t speaking the same language … yet.
Why You Should Care (Especially Early in Your Career)
Here’s how schools work:
Staffing decisions are based on enrollment trends.
Budgets can be based on participation numbers.
Class sections are built off percentages of the building.
Evaluations favor measurable growth.
Equity conversations rely on demographic data.
That’s the game. You don’t have to like it, but you need to understand it.
Knowing your numbers doesn’t mean you love spreadsheets. It just means you’re not walking into a budget meeting blind. It also changes how you feel walking into those rooms. You stop hoping everything will “go well.” You know whether it will because you’ll have these five numbers.
1. Enrollment & Percentage of the Building
Start simple.
How many students are in your program?
What percentage of the total school population is that?
What’s the trend over the last three to five years?
If your school has 1,000 students and 120 are in band, that’s 12%. If it was 9% three years ago, that trend matters. Growth and stability are hard to cut. Declining enrollment isn’t.
I keep a simple running document with year-to-year totals. Enrollment by grade and overall percentage of the building. When someone says, “We need to look at reducing sections,” I don’t panic. I can say, “We’ve grown from 9% to 12% of the building in three years.”
That changes the conversation from opinion to pattern.
2. Retention Rate
Recruiting gets attention. Retention builds strength. What percentage of your students return year to year? Where are the drop-off points? Is it between middle school and ninth grade? Between sophomore and junior year?
If 80% of your freshmen come back as sophomores, that’s powerful. If only 55% do, that’s information you can act on. (Pro tip: Don’t volunteer this information if no one asks!)
One year, I realized we were losing a noticeable amount of students after sophomore year. Not because kids hated band. They were getting jobs. Taking more AP classes. Trying to “make room” for everything else. That forced me to look at scheduling flexibility and how we communicated long-term value. Without that number, I would’ve just said, “Juniors are busy.” The data made me deal with it.
When you can say, “Our retention has increased 15% over two years,” that’s evidence of culture — not just recruitment.
3. Representation & Access Data
Does your ensemble look like your school? We’re talking free and reduced lunch. Race and ethnicity. English learners. IEPs.
You don’t need a perfect match, but you should know where the gaps are. If your school is 60% Hispanic and your band is 25% Hispanic, it’s worth asking why. If your building is 40% low-income and your top ensemble is 10%, that’s a conversation.
I’ve had years where my numbers didn’t line up well. It’s uncomfortable to see it in print, but pretending it’s fine doesn’t help anyone.
Tracking these numbers over time is even more important than the snapshot. It keeps you from looking like you’re running your own island. When equity conversations happen — and they will — you’re not caught off guard. You’re already aware and already working on it.
4. Attendance Data
What’s your class attendance rate? How does it compare to the school average? What about chronic absenteeism?
If the school average attendance rate is 91% and your program runs at 95%, that’s measurable engagement. Data. And data gets attention. High attendance says that students want to be in band. It says your room feels safe, meaningful and worth showing up for.
One year, mine dipped slightly below the building average. I assumed everything was fine. The numbers told me otherwise. When I dug in, I realized we had a cluster of students missing first hour consistently. It wasn’t motivation — it was transportation issues.
Without looking at the data, I would’ve focused on the wrong thing.
5. Growth Data
This is where music teachers often get uncomfortable.
We say, “They sound better.” “Look — they’re engaged. Sitting up in class. Performing with ‘expression.'”
But how can you show it? With pre- and post-assessments using a simple rubric. Festival rating trends over time. The percentage of students who move up at least one performance level during a semester.
You don’t need a complicated system. Even tracking how many students improved tone, rhythm accuracy or sight-reading scores from quarter one to quarter four is enough.
Start with something simple: A four-level rubric. Two checkpoints. Done.
Growth data lets you say, “Eighty-two percent of my students improved at least one level on our performance rubric.”
That lands differently than, “Trust me, they’ve grown.” Chances are you’re already doing this. You just need to write it down.
What This Is Not
This isn’t about turning music into a spreadsheet. It’s about not being surprised in meetings.
I’m also not suggesting you remove artistry from your classroom, or start competing with other programs in your building. It’s understanding the system you work in.
Schools run on numbers. You can still run your classroom on music. Those two things can coexist.
When you know your enrollment, retention, representation, attendance and growth, you don’t feel cornered in conversations.
Saxophonist Jeff Coffin on Music’s Relational Power
The accomplished musician and instructor champions the idea that connection through music is a metaphor for life itself
Written by Lisa Battles
Saxophonist Jeff Coffin is a three-time Grammy Award winner, a member of Dave Matthews Band for almost two decades, a university adjunct professor and record label owner. Even so, and after playing for almost 50 years and teaching over 400 clinics, he “wishes he were better” at combining chords to build harmonies.
Although it usually takes him only one hour to teach high school students chord fundamentals and open up a whole world, the journey into it can go as far as they want. The same goes when covering more advanced material with students in Vanderbilt University’s Blair School of Music, where he shares the same message that fundamentals are the building blocks for everything else: the better we understand them, the better everything else will be, just like with anything in life.
He holds himself to the same standard, always learning, evolving and improving.
True to his heart for teaching, Coffin is all about relatability and a master of metaphors about music, art, life and how they all relate. He aims to stay malleable “like wet clay” when tackling new creative projects. His calendar is overwhelming at times, so he reminds himself that with meaningful commitments, he’s “pouring water into a cup,” not onto a flat table.
Coffin shared with us some of his latest pursuits and philosophies, including where his own fundamentals began.
Building a foundation
Coffin grew up in Dexter, Maine, “a small town in the dead center of the state, along the 45th parallel,” he says. He began playing saxophone in middle school, and the summer before entering eighth grade, his local band director chose him to play in a professional combo that gigged on weekends. By the time his family moved to New Hampshire the next year, he had bought his first horn with the money he made from gigs.
He began his college career part-time at the University of New Hampshire before transferring to the University of North Texas, where he earned a degree in music education in 1990. While he learned to practice at the former, he learned commitment at the latter.
“I was in the practice rooms, you know, every day for over three years, between eight and 12 hours a day, absolutely every day. I felt like I had a lot to catch up on, and it was my time to be very self-disciplined. It was work that I found I really enjoyed doing, which also served me well,” Coffin says.
After graduation, he briefly considered New York and San Francisco before landing in Nashville in 1991. He’d spent about a week there on his way driving back to New Hampshire after school in Texas, liked the vibe and happened to have a friend who needed a roommate.
Finding a fit
Not a fan of country music or even interested in doing studio work long-term, he picked up some work gigging and as a private music instructor and substitute teacher, ultimately finding a home, many friends and collaborators in Music City.
“This is where I met the Flecktones. Béla [Fleck] was living here, all the Wooten brothers were already here, and I thought, ‘Wow, okay, you know, there’s this going on, also.’ And then slowly, people started moving in, I call ‘the misfits,’ and we would all find each other. I had a jam session that cats would come to, and we would meet, play and start groups together. That continued to expand.”
Coffin met Béla Fleck in 1996 and joined the band a year later, staying on for 14 years. It was during that time he met members of Dave Matthews Band, with whom he began playing in 2008. He initially subbed for the band’s original saxophonist, LeRoi Moore, after an accident and complications from it that ended Moore’s life several weeks later. Coffin kept commitments with both groups for a while, also continuing to write and record his own music.
Entering a new energy
When Coffin joined the Dave Matthews Band, he stepped into one of the biggest live acts in American music, one that still draws well over 13,000 fans on average per show, each of which lasts two and a half to three hours.
“It is amazing, and it also has a particular anonymity to it, which is interesting. I get more nervous if I am playing where people are right up on us, and there’s like 75 or 80 people there. With the [Dave Matthews Band] shows, the energy that we get back from the audience is palpable, and what we give is palpable. It’s a very high-energy band, and every show is different; that is why people keep coming back,” Coffin says. “That’s what we dream about as musicians. When you play Little League, you dream that you’re in the World Series, and you win the game . . . [It’s magic] being in a group that feels like every time we play, we win the World Series.”
Coffin describes the band’s 2024 induction into the Rock and Roll Hall of Fame as an overwhelming honor, adding that he’s thankful for recognitions and accolades, like this and his Grammy awards, while keeping it all in perspective.
“I try to have a healthy relationship with those things, and, as I tell my students, ‘Give yourself a little pat on the shoulder and a little kick in the ass, but don’t do either of them too much. If you start to get a big head, well, we’re gonna talk about it,’” Coffin says.
Teaching life through music
When he’s not on the road, Coffin teaches clinics to high school and university students while also working with his students at Vanderbilt, a role he took on in 2015. Acknowledging the range of experience across these groups, he always seeks to present the material through practical applications.
“At the end of the day, we are teaching life, just using music as the metaphor to get to these different things,” Coffin says.
He points to fundamentals and how mastering them serves students, whether or not they pursue music as a career. If they do not, the discipline will set them apart in any field. If they do, it takes more than talent to stand out in an extraordinarily competitive field.
On that note, sometimes plumbing is his metaphor of choice, too.
“I was telling someone the other day, ‘If you want to be a plumber, you damn well better know how to fix a toilet, right?’ So it’s the same thing with a musician. If you wanna be a musician, you’d better be able to play. It’s all the other stuff that gets you called back. That’s the stuff we talk about a lot, the relationships that they have with people,” Coffin says.
Some of the concepts he covers with students at all levels include being an asset and how listening to be considerate of others is as important as listening to music. He underscores that by sharing how the word “listen” can be rearranged to spell “silent.” He asks them to raise their hands if they’ve ever had goosebumps from hearing music. When everyone’s hands are up, he asks them to look around and consider the shared experience of music and its collective power.
“Being at Vanderbilt, these kids are off-the-charts smart and self-disciplined. They learn really fast, and they get it,” Coffin says. “Every lesson is patterned to help facilitate the best possible outcome, not only how they learn but with what’s going on in their lives. There have been times when my student will come in, and we don’t even play. We just talk the entire hour because that’s what they need. Communication is a lesson in itself.”
Serving through music
Coffin says he also teaches music as a service industry, first serving the music, second the musicians he plays with, and third, the audience.
“So I’m at least fourth on the list, but by serving those others, I, in turn, get served. And so I think that this, this philosophy has helped me align my priorities in a way that worked for me,” Coffin says.
To that end, Coffin has built a creative life with many moving parts. He launched Ear Up Records about 14 years ago and has 24 solo records to date. He writes, engineers and occasionally mixes. He’s published books and has a children’s series in the works, co-created with trumpet player and illustrator Augie Haas. The series introduces kids to instruments with a sense of humor and a rhyme scheme he describes as what you’d get “if Dr. Seuss and Thelonious Monk had a child.”
He co-founded AfricaNashville, which brings master drummers from West Africa to the city, and serves as artistic director of the Nashville Jazz Festival, with the second iteration set for October 24-15, 2026. Last year’s inaugural edition employed 71 local musicians. This year, he’s working earlier, building in student workshops and exploring a live radio broadcast partnership.
Exploring art with intentionality
Coffin also makes art, including a longtime passion for photography and a growing collection he wants to exhibit someday, ranging from macro shots of frozen raindrops on fallen leaves to archival images from his years with the Flecktones and Dave Matthews Band. Most recently, he’s been creating other forms of visual art, using an iPad app.
He continues to tour while keeping a list of other musicians he’d love to collaborate with on recordings. Music education and advocacy on a national platform also holds a lot of appeal, Coffin says. It all runs on the same principle of intentionality.
“For me to go after a bone, it has to have some meat on it. I’ve played a lot of gigs and toured a lot, and I love it. But I don’t want to go out and do gigs just to do gigs; I want it to be meaningful,” Coffin says. “When people who are Dave Matthews Band fans talk to us about how they feel the music has literally saved their lives, it doesn’t get any heavier than that, you know? That to me is as deep as it gets. When there is music that affects people like that, it’s a whole different perspective. It makes you realize that there is truly a power in music, there is truly a healing in music, and those are things that I consider every time I play.”
The Three440 Artist Story Series takes you beyond the spotlight and into the real lives of Yamaha Performing Artists. Each story is a window into the creative process, pivotal moments, setbacks and victories that define an artist’s path.
As I was preparing to teach my first guitar class, I spoke to many experienced guitar teachers who all had the same advice: You only need to be one step ahead of your students.
Thankfully, I took this advice to heart because my first couple of years were a train wreck in slow motion, as I learned to play guitar alongside my students. Then, I started to improve. Eventually, instead of reacting to issues, I was anticipating them, but most of it was trial and error.
With any music class, the first month of instruction is critical. During this time, you must set up habits that will be foundational for your students’ success.
I teach classical guitar, and here are some things that worked for me.
Setting the Tone of the Class
The time you spend working on basic techniques will pay off. Reminders and remediation will be required as the year goes on — that’s normal and to be expected. Students physically change throughout the course of a school year, which will require adjustments to technique as well.
I am upfront with students from the beginning. I tell them I am not a formally trained guitarist and that I’m learning just like them — only later in life. I share with them my failures and what that failure has taught me. This demonstrates that learning to play guitar is a lifelong journey, and it takes away the pressure on students to feel that they need to do everything perfectly.
YouTube plays an important role in my guitar classroom. There are unlimited videos of guitar professionals using correct technique. Conversations in class no longer focus on me (“Mr. Baker keeps bothering me about my thumb”), but on the professionals on YouTube (“The guitarist in the video plays with their thumb that way, and Mr. Baker is helping me to play that way”).
I support the usage of various styles of guitars and guitar playing because I want students to discover their own unique preferences. This is a great opportunity for them to determine what works for them and what doesn’t.
For students who have never played guitar, all information in class is new. But for students with some guitar experience, we work together to build upon what they already know, not tear it down. My goal is to acknowledge their experience and make them more receptive to learning how to play classical technique. By showing different styles, students can differentiate — “I play a steel string guitar this way, and I play a classical guitar this other way.”
Learning classical technique makes students more versatile guitar players. We watch videos of various classical guitarists to observe solid technique, which we then compare to other styles. I highlight the physical differences between the guitars and how adjustments can be made. I lead the students to the answer rather than just telling them. This creates student buy-in and fosters a positive classroom experience.
Proper posture with feet shoulder-width apart.
Posture
I rely on videos of professional classical guitarists with impeccable posture to emphasize its importance. I specifically look for videos of guitarists playing on piano benches to illustrate how the back of a chair is not used or needed when playing guitar.
Students’ feet should be about shoulder-width apart and flat on the floor, so they can easily stand without using their hands for support. I have students take note of where their left foot is because this is where the footrest will be placed. I find that boys have a more difficult time sitting tall in chairs. I believe because boys grow so quickly, once they reach high school, they are not used to sitting tall because they are unable to keep up with the pace at which they are growing.
Footrests
The headstock of a classical guitar should be roughly at eye level. To accomplish this, a footrest is essential. Most footrests have adjustable heights, and I encourage students to experiment to find the right height for them. As a student grows, I remind them to adjust their footrest accordingly.
Teach proper guitar placement by hugging the instrument.
Guitar Placement
How a student holds the guitar will be a constant work in progress because the hold changes as they advance, grow and develop preferences. One challenge is that students who have played electric or steel-string guitar tend to rest the waist of the guitar on their right leg. The proper instrument placement is for the waist of the guitar to rest on the left leg and the lower bout of the guitar rests between the student’s legs. The back of the guitar should be held firmly against the player’s body.
To show how close to hold the guitar, I do something silly — I hug my guitar and rock back and forth, side to side, telling the class how much I love my guitar. I instruct them to do the same, and they really get into it. This demonstrates not only how to hold the guitar close, but that there is full range of motion while holding the guitar when seated properly.
This student showcases correct right forearm placement.
Right Hand and Arm
The contact point of the guitar with the right arm is the forearm, not the bicep. An easy check for understanding this is to have students point to their forearm and then their bicep.
Because many students tend to slouch while playing the guitar, both their hands and arms are thrown off. So, I tell students to sit with good posture and hold their guitar. Then, I have students draw an imaginary line from the bridge of the guitar upward toward the lower bout of the instrument. When their finger moves to the area where the face of the guitar meets the lower bout, I tell them to stop. This is where their forearm should be placed.
To demonstrate proper forearm placement, I wave my right hand up and down and have them do the same. This shows that the right arm and hand are free to move at this pivot point created on the guitar. I also demonstrate what not to do by having students place their bicep on the guitar — which causes them to slouch, and their arm is locked in place.
Once students set their forearm in the correct spot with good posture, it’s time to place the right hand on the guitar. At the beginning stages of playing guitar, the easiest place to play with the best sound is the middle of the sound hole.
I have students sit tall, place their forearm correctly on the instrument, make a fist instead of waving to me, and then place their fist in the center of the sound hole by moving the contact point on their forearm as needed. Some students get it immediately, while others will need reminders about forearm placement and good posture (i.e., no slouching).
Proper PIMA.
Rest Stroke
I begin with rest stroke or “alternating I and M.” This gives students a more confident sound to begin with, and it’s much easier to learn than free stroke, which is introduced later in the year. I will tackle free stroke in a future article.
Before teaching rest stroke, make sure students understand PIMA by being able to identify the Spanish words for the fingers: Pulgar (thumb), Indice (index), Medio (middle) and Anular (ring). I have students hold their right hand in the air and wiggle the correct finger as I call out their names. I mirror which finger to begin with and then call out another finger. To keep things fun, I will often show them how using the wrong finger can trip them up. Once students have a working knowledge of the vocabulary for their right-hand fingers, it’s time to place the fingers on the guitar.
At this time, discuss the names of the strings and the corresponding numbers. This is generally an easy step for students to understand, but they will need regular review during the beginning stages.
Incorrect PIMA.
To reinforce PIMA, proper posture and forearm placement, I have students go through the motions of getting into a good seated position, checking the pivot on the contact point with their forearm and placing their fist over the sound hole. Next, I instruct them to keep their fist steady, stick out their pulgar (P) like they’re hitchhiking, and place that finger on the sixth string. Then I have students place their indice (I) and medio (M) on the first string. I demonstrate how to play using both I and M, then encourage them to experiment on their own. We then discuss how they alternate between their I and M, and they discover — with some help from me — that they’re playing “alternating I and M,” which is a core classical guitar skill.
I use the word “pull” rather than “pluck.” This is paired with further instruction on alternating I and M, which is a vertical motion, not a horizontal one. I demonstrate the different sounds made by pulling and plucking the strings. Most students prefer the pulled sound.
This leads to another discussion of what makes the plucked sound unappealing. Students see that when they pluck, they create a hook with their fingers and the string is pulled away from the fretboard, making a slapping sound rather than having the sound resonate freely. I help students understand this concept further by using a set of tongue depressors. I have students hold the depressor in their right hand and make a sound on the guitar. If a student moves the depressor along the top of the string, it creates a resonant sound — which is what pulling on the string sounds like. If a student places the depressor under the string, they have to pluck the string away from the guitar, which creates a slapping sound.
Another way I reinforce pulling is to have students think of pulling through the string adjacent to the string they are playing. For instance, if a student is playing on the second string, they must think of playing the second string by following through to the third string. Students cannot do this if they pluck the string by making a hook with their finger. This is also an easy technique to use by connecting with the athletes in the room. To properly throw a softball or football or shoot a basketball, the athlete has to follow through on the motion.
Incorrect left-hand placement with “hitchhiker” thumb.
Left Hand and Arm
In classical technique, the left thumb is positioned behind the neck, which reduces hand strain. Students who have played steel-string or electric guitars will often have a “hitchhiker” thumb. I regularly tell students that I shouldn’t see their left thumb while they are playing.
Put silly putty on the neck of the guitar to keep students’ thumb from creeping up the neck.
One trick I use is to place silly putty on the top of the guitar neck where a student’s “hitchhiking” thumb usually wanders. The putty sticks to the neck without damaging the instrument. When a student’s thumb creeps up the back of the neck, it will hit the silly putty, resulting in an “icky” feeling.
The left forearm and back of the left hand should be relatively straight. I emphasize that the left hand should touch the guitar in only two places: the pad of thumb and the tip of whichever finger is on the fretboard. Some students collapse their wrist and rest their palm on the guitar neck, which creates tension. To correct this, I place an egg shaker in their palm and hold it in place with a rubber band around their hand to create a rounded hand shape.
To help students achieve the rounded left-hand shape, use an egg shaker.
Keep students’ wrists straight with a ruler.
To help students keep their wrist as straight as possible, I place a ruler on the back of a student’s hand and forearm with a rubber band around their palm and another rubber band on their forearm.
Shoulders must be relaxed. I tell students to stand and shrug their shoulders a few times. Then, I have them shrug as high as their shoulders will go and release the shrug as quickly as possible. Afterwards, they describe how their shoulders feel. If it feels like their arms are heavy, they have done it correctly.
Students do the same shrugging exercise while seated, first without and then with their guitar. The elbow should be low, feeling the weight of the entire arm in the shoulders.
The fingers on the fretboard should always be curved, and the tip of the finger is used to press down on the strings. This is challenging for students who have long fingernails. I show videos of professional female guitarists highlighting that if they had long fingernails, they wouldn’t be able to play the way they do.
The final step in the left hand and arm lesson is teaching students the finger numbers: 1 for the index finger, 2 for the middle finger, 3 for the ring finger and 4 for the pinky. Similar to the right-hand PIMA game, I do the same with the left hand finger numbers. Students who play piano may be thrown off by how fingers are numbered for guitar, however, this generally isn’t an issue with the students.
Picks
I teach students how to use a pick, even though they are learning to play classical guitar. To get a fuller sound with a pick on a classical guitar, students must use the leading edge or the long side of the pick. I point out that on steel-string and electric guitars, you use the pointed part of the pick. To ensure that they use the proper side of the pick, I have students hold the pick between their right thumb and index finger with the point of the pick toward their palm.
When playing chords with a pick, I show how the hand will pivot on the forearm, just like when the right forearm was initially placed on the guitar. This allows the arm and hand to move freely. For melodies, I have students place their right pinky on the face of the guitar, which gives a physical reference point for the pick and increases accuracy.
________________________________
The techniques and tips covered in this article aren’t magic. Students need constant reminders and plent of practice — so be patient. As always, rely on the advice of successful guitar teachers. Find a mentor who can help you. Teaching guitar can be isolating at times, and you can feel like you are the only one having certain technique issues with your students. I promise you, you are not. Keep creating guitarists and have fun doing it!
As the Performing Arts Department Chair and Orchestra Director at Annandale High School in suburban Washington, D.C., Annie Ray has a passion for teaching students. But she doesn’t stop there: She teaches music to the kids’ parents, too!
Back in 2018, Ray drew inspiration from her mentor, Brian Coatney, a fellow music educator from her home state of Texas, who had developed a simple but powerful idea: create a community orchestra specifically for the parents of music students in Fairfax County Public Schools. There would be no kids allowed, and no experience required. This would be an adults-only orchestra, where music student parents — many of whom have never played an instrument before or haven’t picked one up since childhood — can have their own creative outlet.
Annie Ray leading a Parent Orchestra rehearsal.
Over the past half decade, the Parent Orchestra that Ray directs has grown to more than 225 mothers and fathers and 15 teachers who volunteer to teach it twice a month. The Parent Orchestra, which meets to practice two Thursday nights a month, is so popular that Ray has a waiting list of more than 100 adults eager to participate.
“It sprung up into this beautiful thing,” Ray says. “A lot of these caregivers are people who have never touched a musical instrument in their lives.”
Getting the Parent Orchestra off the ground took equal parts creativity, persistence, and community trust. Ray began with a simple Google Form and the support of her co-founder, Dr. Michelle Keenan, sent out to the families in her school pyramid and quickly grew year after year. Because the project aligned with Fairfax County Public Schools’ goals around family engagement and access to the arts, administrators quickly offered their support.
There was no start-up budget and a small participation fee. Every aspect of Parent Orchestra was built through shared resources and volunteer spirit. Instruments were easy – play your students instrument, even if it was tiny! Teachers across the district volunteered their time to coach sections and design lessons. Ray and her co-director, Austin Johnson-Stawarz handled logistics with scheduling rehearsals, organizing music, and ensuring each caregiver had a place to start, whether that meant holding a bow for the first time or relearning fingerings from decades ago.
What began as a grassroots experiment soon grew into a districtwide collaboration. The simplicity of the model inclusive and community-driven has made it sustainable. “We wanted to remove every barrier possible,” Ray says. “If you can show up, we’ll put an instrument in your hands and make sure you feel welcome.”
The Suzuki Triangle
The Parent Orchestra, Ray says, is an expansion of a music education concept known as the Suzuki Triangle, which promotes a collaborative environment involving three parties –— students, teachers and parents — in the learning process for success. Parents often can help their children with math or reading homework, but unless they play an instrument themselves, they can’t help much with music lessons. In the Parent Orchestra, parents get to experience what their kids do as student musicians, and it helps parents understand the hard work involved. It also leads to fun parent-child bonding over a shared activity: playing the violin, viola or cello, Ray says.
“They have said over and over again that they are doing something just for them and connecting with people,” she says about members of the Parent Orchestra. “A lot of them have said the big thing they get out of it is understanding what their child is actually learning. It’s a way for them to connect with their kid.”
Parents learn empathy about the huge learning curve involved with playing musical instruments, Ray says.
“They get to model resilience to their own child,” she says. “You’re not going to be great at this right away. It is a process — a long process. You’re going to sound really, really bad before you sound good.”
The Parent Orchestra runs during the school year, with an end-of-year performance. The most advanced members of the Parent Orchestra performed in a session at the Midwest Band and Orchestra Clinic in 2024.
Connecting Parents
In a YouTube video from Fairfax County Public Schools about the Parent Orchestra, with the title “It’s Never Too Late,” parents describe how participation has enriched their lives and helped them bond with their sons and daughters.
“When I heard about this opportunity, my husband and I were like, ‘We’re signing up,’” Karen Reiley, a mom, said in the video. “For my son, I think, as he watches us struggle, he finds out that struggling through a process is just part of the process. It’s what’s normal and it is what you have to go through to get to the other side, where you can be accomplished.”
Ray says that the Parent Orchestra draws participants from a geographic area with a wide range of income levels, and people who normally wouldn’t meet and befriend each other are connecting as they learn to make music together.
“You have some incredibly affluent parents who are becoming friends with parents who are having a much more difficult situation in terms of finances,” Ray says. “These cultures that would not have crossed are … not just bringing the students together, but their parents across Fairfax County.
“We’re an open door,” Ray says. “We’re a community.”
District-Wide Camaraderie
As for the 15 teacher volunteers who teach Parent Orchestra, they, too, get a chance to get to know each other and learn from their teaching styles, Ray says. Student teachers learn from watching more experienced teachers instruct the Parent Orchestra.
“Normally … we don’t get to see each other,” she says. “Now, we’re watching each other teach.
“It doesn’t just benefit the parents; it benefits us as well,” Ray says. “You’re watching your colleague teach and you’re learning how they approach things.”
Key leaders in the school district — like school board members, principals and even the superintendent — sometimes attend rehearsals. This gives them an appreciation for the performing arts, Ray says.
“It’s an activism piece for community when the parents are right there in front of the superintendent,” she says. This sends the message to decision makers: “This means so much to us, and the arts are important,” Ray says.
What is the first question most musicians ask each other before playing a song, or starting a jam? It’s usually “what key are you playing in?”
Establishing the key of a song is paramount to working together as a band, and there are 15 keys to choose from: One natural key, C (which has no sharps or flats), seven sharp keys, and seven flat keys.
The seven sharp keys are as follows: G, D, A, E, B, F#, C#.
The key center is the overall key that a musical piece is written in, and will contain some, or all of the seven single notes and chords found within that major or minor key. Key centers are sometimes called the parent scale.
In addition to understanding the key of a musical piece, we also need to identify the tonal center of the harmonic progression within the song. This is the resolution point of a chord progression or melody within the overall key of the musical piece. It’s where we hear (and feel) the musical movement naturally coming to rest … and where it finds a resolute conclusion. The tonal center is usually the first chord in the progression, and, as we will see shortly, there are seven possible tonal centers within each key center.
Now that we’ve defined them, let’s dig into each of these terms in greater detail.
Key Centers
The seven-note major scale is represented in formal notation by a key signature that appears after the treble clef and before the time signature in the first measure of music. These key signatures tell us what key the musical piece has been written in. This allows the composer to designate the key without writing sharps or flats as “incidentals” throughout the entire manuscript. We simply apply those sharps or flats to the notes they apply to throughout the musical piece.
Here are the seven sharp and flat key signatures:
Another important aspect of key signatures is that they allow us to retain the major scale formula of intervals when we transpose harmonic structures and melodies into alternative keys. (For more information, check out this blog.)
That interval formula is a set sequence of whole steps (two frets on the guitar) and half-steps (one fret) between the seven notes. The interval formula used to create every major scale in music is:
This shows us a complete set of melodic tones, as well as the chords that are built from the root of each of those tones. Once we have this information, we can determine the key of a chord progression or melody by simply looking at the score or chord chart.
As you can see, there are only two places where a semi-tone interval occurs: between the third and fourth degree, and between the seventh and eighth degrees (the octave). In addition, major triadsoccur on the first, fourth, and fifth degrees of the scale, while minor triad chords occur on the second, third, and sixth degrees of the scale. A diminished chord occupies the seventh degree.
Armed with this information we can easily determine the overall key of a musical piece, and the overall key center. It also helps us visually identify the interval relationships between the melodic tones and the harmonic structures within every key.
Tonal Centers
As previously mentioned, the tonal center of a chord progression is usually the first chord of the sequence. As an example, let’s take a simple chord sequence in the key of A, and assign a modal name to that resolution point. (The modal name is simply another way of telling us what scale position the tonal center occurs on within the scale.)
The first modality of the major scale (Ionian mode)
I 2mi 3mi 4 I
Ama7 Bmi7 C#mi7 Dma7 Ama7 = The A Ionian mode
Ima7 IImi7 IIImi7 IVma7 Ima7
Here we have a chord progression in the key of A major that starts on the first chord of the scale, sequences through the next three diatonic (i.e., from the same scale) chords, and then resolves nicely back to Ama7.
This first mode of the major scale is called Ionian mode. This is a Greek name that we use to identify the first mode, and the tonal center of the major scale.
Next, let’s invert this progression to change the tonal center.
The second modality of the major scale (Dorian mode)
2mi 3mi 4 I 2mi
Bmi7 C#mi7 Dma7 Ama7 Bmi7 = The B Dorian mode
IImi7 IIImi7 IVma7 Ima7 IIm7
This progression has been created using the same four chords in the A major scale, but the first chord in the progression is now the second chord in the scale, Bmi7.
Not only can you identify this tonal center shift visually, when you listen to it, you can also hear that this new sequence resolves nicely to the Bmi7 instead of Ama7.
Now let’s invert the progression again to shift its tonal center.
The third mode of the major scale (Phrygian mode)
3mi 4 I 2mi 3mi
C#mi7 Dma7 Ama7 Bmi7 C#mi7 = The C# Phrygian mode
IImi7 IVma7 Ima7 IImi7 IIImi7
Here, the progression starts on the third chord of the major scale, and likely ends there too. On listening we can confirm this tonal center shift to what’s known as the Phrygian modality within the key of A.
Let’s invert the chord sequence again to further illustrate the point.
The fourth mode of the major scale (Lydian mode)
4 I 2mi 3mi 4
Dma7 Ama7 Bmi7 C#mi7 Dma7 = The D Lydian mode
IVma7 Ima7 IImi7 IIImi7 IVma7
The first chord of the progression is now the fourth chord within the parent scale. On listening we can further confirm the tonal center of the progression to Dma7 … the fourth chord in the key of A. (This is known as the Lydian mode.)
Let’s complete our study of tonal center modalities using the remaining three chords built from the A major scale: E7, F#mi7, and G#mi7(♭5).
The fifth mode of the major scale (Mixolydian mode)
5 6mi 4 5
E7 F#mi7 Dma7 E7 = The E Mixolydian mode
V7 VImi IVma7 V7
The first chord is E7, the fifth chord in the key of A major. This is the tonal center of this progression, known as the Mixolydian mode.
The sixth mode of the major scale (Aeolian mode)
6mi 4 3mi Iimi 6mi
F#mi7 Dma7 C#mi7 Bmi7 F#mi7 = The F# Aeolian mode
VImi IVma7 IIImi IImi VImi
Here, the first chord is F#mi7, the sixth chord in the key of A major. This is the tonal center of this progression, known as the Aeolian mode.
The seventh mode of the major scale (Locrian mode)
7mi7(♭5) 5 6mi 4 7mi7(♭5)
G#mi7(♭5) E7 F#mi7 Dma7 G#mi7(♭5) = The G# Locrian mode
VII V7 VImi IV VII
Finally, the first chord of what is called the Locrian mode is G#mi7(♭5), the seventh chord in the key of A major. This is the tonal center of this progression. However, diminished and half-diminished chords are dissonant in nature, and therefore unlikely to sound resolute or rested … so this tonal center won’t sound and feel like a strong resolution point.
Tonal Center Recap
A Ionian Mode: A chord progression built from the A major scale that resolves to the first chord, A or Ama7.
B Dorian Mode: A chord progression built from the A major scale that resolves to the second chord, Bmi or Bmi7.
C# Phrygian Mode: A chord progression built from the A major scale that resolves to the third chord, C#mi or C#mi7.
D Lydian Mode: A chord progression built from the A major scale that resolves to the fourth chord, Dma or Dma7.
E Mixolydian Mode: A chord progression built from the A major scale that resolves to the fifth chord, Ema or E7.
F# Aeolian Mode: A chord progression built from the A major scale that resolves to the sixth chord, F#mi or F#mi7.
G# Locrian Mode: A chord progression built from the A major scale that resolves to the seventh chord, G#dim or G#mi7(♭5).
Melodic Confirmation
Why is determining the tonal center of a progression so important? Well, when we can determine the key, and the tonal center within that key, we can apply the correct major scale modality to improvise and resolve correctly over the tonal center chord.
To further illustrate this point and prove its value melodically, let’s try an exercise. Start by playing an Ama7 chord, then play the A major scale from A up to A. This is A Ionian Mode and works perfectly because the chord was built from that sequence of notes.
Now play a Bmi7 chord, then play the A major scale from B up to B. This sequence of notes (B Dorian mode) works directly over the chord that’s built from those tones.
Continue with this sequence through the remaining five chords and scale sequences, and you will hear why improvising towards the tonal center is so effective and powerful.
Check out the video below to see and hear the full sequence of chords and scale modalities in the key of A.
The Video
The video above features a cool E Mixolydian chord progression and solo. I’m making sure my scale, arpeggio and double-stop lines all resolve nicely to the tonal center chord and chord tones of E7.
The Guitar
The guitar I’m playing in both of these videos is the exciting new Yamaha 60th Anniversary Revstar RSP20B, crafted to celebrate six decades of excellence. This superb instrument offers a perfect blend of visual appeal and musical performance, featuring a Göldo tremolo unit and Gotoh locking tuners that deliver excellent tuning stability, dynamic range, and expressive playability. The bone nut further enhances the guitar’s natural and balanced resonance.
Like other Revstars, the RSP20B features a chambered body designed to sculpt tone and reduce weight, with carbon reinforcement in the body and neck to improve vibration transfer. The push/pull tone control of this model also functions as a Focus switch, activating a passive boost that emulates overwound pickups for darker highs and enhanced mids and lows for more aggressive tone. In addition, the five-way pickup selector introduces a subtle phase shift in positions 2 and 4 by slightly delaying the opposite pickup, offering a fresh take on classic “in-between” sounds.
The RSP20B has a flame maple top and comes in a gradient Noble Black Burst finish, blending luxurious aesthetics with unique character. The headstock and tremolo unit feature a commemorative logo, while the back of the headstock is stamped with a special 60th Anniversary hanko (a traditional Japanese personal seal stamp).
The Wrap-Up
When we understand that there are seven possible tonal center resolution points within each key center, we can write chord progressions with unique moods and modalities, and then apply the major scale in its correct sequence to resolve perfectly over those resolution points within the key. Understanding key centers and tonal centers really is the key (pardon the pun) to musical mastery over your guitar.
We all have different guitar teaching situations, but we have the same goals — to create an environment where students can learn and to develop processes that set students up for success. These processes are crucial during the first few weeks of class, and once established, teachers can manage them with minimal effort.
The following suggestions are based on what I have learned from other guitar teachers and what has worked — and hasn’t worked — for me.
I teach classical guitar technique. The instruments are easier to manage, versatile and lead to the best sound quality. Students can learn a technique on a classical guitar then easily apply it to a steel-string or electric guitar. The guitar program at McQueen High School has acquired several steel-string guitars over the years, in addition to 12-string guitars, electric guitars and Yamaha SILENT Guitars. Students are encouraged to experiment with different types of guitars, as it builds interest in the full world of guitars and encourages them to be lifelong musicians.
Patience is Key
The following processes require an investment of time and, in some cases, money. Many of the students in beginning guitar have no idea what an instrumental music class is like, so they will experience a paradigm shift that is completely different from their other courses.
Guitar teachers must invest time, patience and understanding especially at the beginning of the school year, so their class will be set up to move faster and more smoothly than if these items and considerations were not addressed.
The Physical Space
Most guitar students are not in band, choir or orchestra. Wherever guitar is taught, make sure this is reflected in what you call the space. It took me a long time to stop saying guitar was taught in the “orchestra room,” which gave the impression that my guitar students were imposters in a space meant for other students. How condescending and demeaning! This unintentional slight may prevent buy-in with students, so I regularly practice being mindful, and I call my room the “strings” room.
Music rooms are complete chaos even before school starts. On any given day, I’ll have a kid on the drum set, another playing piano, others watching TikTok on their phones and everything in-between. With this level of mayhem, we must ensure there are minimal physical distractions in our teaching space. As with all instructional spaces in music, the room should be as tidy as possible. Make sure every piece of equipment, music, folders, instruments and countless other items in the room have specific places to live.
For the instruments themselves, there are multiple ways to store them. I recommend rolling guitar storage racks that have two rows to allow multiple styles of guitars to be stored. Our guitar program has five of these racks — all have held up quite well. Each week, at least one rack is rolled from the strings room to the cafeteria for a performance. These racks also allow for flexibility in the arrangement of all the equipment in the room, so students can use the space as efficiently as possible. I also allow students to store their binders, footrests and books inside their cases, which reduces the need for additional racks and shelves for these items.
Colored dots identify where the different guitar sections should sit.
Student Setup in the Space
As a high school orchestra teacher, I took a lot for granted. Incoming freshmen knew how to put instruments into cubbies, stack chairs and put music stands onto the racks (always a struggle!). Do orchestra students magically know these simple things? No! There are countless elementary and middle school music teachers who, over the course of several years, teach kids how to put their instruments away, stack chairs and get stands properly onto a rack (sort of). Because of this, students in my orchestra classes can get into their places quickly and are ready to play by the time class starts.
On the other hand, guitar students need help on how to properly get themselves ready for class. I have tried a setup of columns and rows. I also had students sit in arcs like a traditional orchestra setup. Both have advantages and disadvantages, which I encourage you to explore.
I took way too much time explaining the setup to students — how many rows and columns there are or the configuration of the arc, etc. I was constantly reteaching and reinforcing setup. One day, I walked into a middle school choir classroom and saw hook-and-loop fastener dots on the floor that showed students where to place their chairs — this changed my whole world.
I immediately ordered a set with different colored dots, and it quickly transformed the layout of my guitar class. The dots help me to quickly see where any setup issues may be and easily remedy them.
Helpful tip: Use different colored dots to identify sections, so students know blue is guitar 1, orange is guitar 2, etc.
Our department is fortunate to have a music stand for every guitar student. This ensures that every student is writing the same information on their own music on their own stand, as needed.
Student with proper equipment: guitar, tuner and footrest.
Individual Student Equipment
I have learned from other teachers and stumbled upon several ways to keep individual student equipment orderly. Having taught for over 20 years, I understand issues may arise when making purchases for my classes. Building instrument inventory and equipment stock takes time. With limited budgets, we must always consider cost, quality, durability, playability and longevity.
Work with your preferred vendor to create bids when making purchases. This builds a relationship with the vendor, allowing them to potentially seek more competitive pricing and buy-in for your guitar program. There’s also a high likelihood the vendor has experience helping other guitar teachers, so they can help recommend products at specific price points, which will be advantageous.
Labels: Everything must have the student’s name on it. Do not be afraid of mail merge — it is your friend. I can crank out name labels, nametags for music stands, and all sorts of handy stuff by using mail merge. If you’re not familiar with mail merge, check YouTube.
Guitars: Every guitar the school owns is assigned a school inventory code that helps with fast identification. The guitars are labeled as “McQGxxx.” This tells me it’s a McQueen Guitar (followed by a three-digit number I create). I engrave this ID using an inexpensive engraver on the guitar tail. If I’m super on top of things, I’ll create individual labels for the guitars with my label maker and put the label on the back of the headstock.
Fasten name tag and pick holder onto guitar cases.
Name Tags: Several years ago, I purchased luggage tags with our school’s logo from an online vendor and attached one on every student’s instrument case handle. I print labels with the student’s name and ID number on a barcode. If the student uses a school instrument, I also have a label with all the instrument’s information including make, model, school inventory code and serial number. The orchestra boosters subscribe to an online music program management system that keeps track of the guitar inventory. I can easily merge the student and guitar information into my school district’s instrument rental contract and then distribute them to students, reducing time and paperwork.
Footrests: Because I teach classical style, each student has an assigned foldable footrest. Some guitar teachers shy away from using collapsible footrests and use blocks of wood instead. While wood blocks may be less expensive and more durable, my students take decent care of the footrests. The main reason I opted for collapsible footrests is that they take up less space in my classroom and are easy for students to take home to practice. A handful of them will wear out during the school year, but I keep replacements on-hand, and the folding footrests are easily stored in guitar bags.
Digital Tuners: It drives me crazy when a student says, “I don’t need a tuner, I can tune by ear.” Tuners are a non-negotiable in my class. If a guitar is out of tune, it sounds bad. I put students’ names on tuners with a silver or gold Sharpie. You can find affordable tuners online, sometimes in multi-packs. If you’re looking at a tuner from an unknown brand, order one to test for accuracy before ordering a class set.
Pick Holders: There are three locations for a pick: in a kid’s hand, inside the kid’s guitar or somewhere in the “Land of Missing Picks.” To help reduce lost picks, I use pick holder key rings that I attach to the luggage tag on the guitar case handle. These are inexpensive and can be purchased through most retailers.
Guitar Picks: You can buy picks in bulk for a reasonable price. I order three thicknesses of picks for students to try, then they can figure out which one they like best. This has created a pick economy in guitar classes, where kids start trading and bartering picks. I also invested in a pick punch that can be used on old gift cards or any other plastic card. Students love using their previous year’s ID to make a pick with their picture on it.
Method Books: There are many high-quality, comprehensive guitar method books on the market. As with all method books, they have strengths and weaknesses. In my guitar program, we primarily use two different method books — one for note reading and chord reading and the other for classical style.
Strap Buttons and Straps: Even though I teach classical technique, I equip all our guitars with strap buttons and guitar straps. Why? Because this teaches students to play both seated and standing. Standing makes large performances, and some rehearsals with a lot of students, more manageable. The buttons can be purchased in multi-packs and can be installed with a power drill and screwdriver. There are many how-to videos online that detail how to install the buttons.
Find Your Solutions
These are just a few organizational strategies that have served me well over the years. If you’re starting a new guitar program, seek advice from as many guitar teachers as you can.
Don’t be afraid to try something. If it fails, try something else.
Let’s celebrate Saint Patrick’s Day by paying homage to five of the most famous Irish musicians … including one that will probably come as a surprise:
1. U2
They’re inarguably the most well known band to ever come out of the Emerald Isle. Originally a six-piece, the group formed in Dublin in 1976. Within a few short years, singer Bono, guitarist David “The Edge” Evans and their compatriots Adam Clayton and Larry Mullen Jr. were selling records by the millions and setting attendance records in stadiums the world over. They’ve had so many hits over the decades, it’s hard to pick just one or two, but to get a flavor of the group’s powerhouse sound, check out “Pride (In The Name Of Love)” and “I Still Haven’t Found What I’m Looking For.”
2. Van Morrison
Born in Belfast in 1945, Van began playing guitar at the age of 11 and added piano and saxophone to his repertoire while still in his teens. In 1963, he formed the R&B group Them (who had a major hit in 1964 with his song “Gloria”) before launching a successful solo career and giving us two of the most quintessential sing-along tracks ever: “Brown Eyed Girl” and “Moondance.”
3. Enya
Born Eithne Pádraigín Ní Bhraonáin, she’s Ireland’s top-selling solo artist ever, with a distinctively esoteric musical style that includes folk melodies, extensive voice layering and dense reverbs, as exemplified in her hits “Orinoco Flow” and “Only Time.” Her songs have also been featured in the Lord of the Rings trilogy.
4. The Chieftains
Formed in 1963 under the leadership of Paddy Moloney, this group has become synonymous with traditional Irish folk music, with a sound that is almost entirely instrumental and largely built around uilleann pipes. Over the years they have collaborated with numerous artists, including the aforementioned Van Morrison, as well as Luciano Pavarotti, The Rolling Stones and Roger Daltrey.
5. Paul McCartney
Yes, that Paul McCartney. Like many Liverpudlians, Macca is of Irish descent, and, with his post-Beatles band Wings, he released a single entitled “Give Ireland Back to the Irish” in February 1972 as a protest to the events of Bloody Sunday, when British troops in Northern Ireland shot dead thirteen Irish Republican protestors. The record was immediately banned in the UK, and was largely overlooked in the United States too, reaching only number 21 on the Billboard Hot 100 … but it did top the national charts in Ireland.
In the world of stringed instruments, it’s a common question. After all, at first glance, a fiddle and a violin look alike. They seem to sound the same, too, when it comes to tone and range. But there must be a clear distinction, right?
Actually, no. In fact, there is no significant physical difference between the instruments. Rather, what demarcates the two is mostly the music being played and the musical approach being taken. When playing folk, country or bluegrass, for example, the instrument is understood to be a fiddle, but when playing classical music, it’s a violin. Want to know more? Keep reading …
THE VIOLIN
The violin is perhaps the most well-known instrument in the string family. The word “violin” comes from the Italian word violino, and the first instruments of the same name appeared around the 16th century. When a bow is pulled against the violin’s four strings (a technique called “bowing”), vibrations are created that are amplified by the instrument’s hourglass-shaped wooden body. The violin’s sound emanates from two f-shaped holes carved in the body, called “f-holes.”
A Yamaha violin.
A violin’s strings are tuned to the notes G, D, A and E. The instrument operates in the soprano range and its neck is fretless. Each string is tuned by one of four tuning pegs at the top end of the neck (the “scroll”).
The parts of a violin.
Players hold the violin with one hand, using that hand’s fingers to press down on different areas of the strings along the neck, bowing the instrument with their other hand. (The strings can also be plucked with the fingers, creating a brighter, more staccato sound.) The chinrest at the bottom end of the violin is placed between a player’s chin and shoulder to steady it.
When performing, a violinist will typically take advantage of the instrument’s entire range of pitches, playing all over the fingerboard, from the notes nearest to the tuning pegs to those all the way up the neck. This, as we will see shortly, differs from common fiddle playing.
THE FIDDLE
The term “fiddle” is a generic, colloquial or even just an affectionate name for a violin. The word is likely derived from the Latin fidula — an ancestor of the bowed stringed instrument known as a lira. Like the violin, the fiddle has four strings tuned to G, D, A and E, and, again, a bow is used to create friction with the instrument’s strings to create the sound, which emanates from a pair of f-holes carved into the body. (As with the violin, the player can also pluck the strings with their fingers, though fiddle is mostly bowed.)
A fiddle often sounds as if it’s being bowed faster than a violin. One reason for this is that a fiddler will generally only play the notes nearest the tuning pegs, keeping his or her hand in what is known as “first position” (see illustration below). In contrast, violinists tend to utilize the entire fingerboard and full range of notes.
First position fingering.
PHYSICAL DIFFERENCES
By and large, fiddle and violin are pretty much the same physically, but there can be some minor structural differences that are worth noting. For example, some fiddles may have a flatter (i.e., less arched) bridge as compared to violins. In effect, this brings the strings closer to the instrument’s neck and fingerboard for an easier “action,” allowing fiddlers to do things like play two or more notes at a time and facilitating faster playing.
Another difference is the type of strings preferred by violinists — gut or synthetic-core — versus the steel-core strings typically chosen by fiddlers, who prize the crisp sound those strings lend to the music.
Finally, some modern fiddles may include a fifth, lower C-string, although this distinction can be more of a grey area when considering contemporary electric violins, which are also often called “electric fiddles,” given that some electric versions of the instrument also offer a lower C-string.
FIDDLE VS. VIOLIN MUSIC
The fiddle is used in country and bluegrass, Cajun and Appalachian string bands, Irish and Celtic folk tunes, and even traditional West African music — genres that often call for solos or other musical embellishments. Fiddle music is usually performed at a fast tempo designed to get listeners up and dancing,
Violin is used mainly to play classical music, as performed by orchestras, symphonies and chamber groups, all musical environments prized for precision over creative interpretation. As such, violin music rarely, if ever, calls for improvisation.
Classical violinists are trained to be very precise in how they play a piece; there must be no deviation from the music as it was written by the composer. Fiddlers, on the other hand, are given the freedom to interpret the music they play in their own unique way, and are also encouraged to create their own signature playing style.
For an example of some great fiddle playing, look no further than country icon Alison Krauss, who both plucks and bows her fiddle in the country tune “Choctaw Hayride,” or check out Michael Cleveland & Flamekeeper’s “Lee Highway Blues.” An example of technical violin music can be found in this performance of a Beethoven Concerto, which involves more musical precision.
PLAYING DIFFERENCES
The biggest differences between fiddlers and violinists lie in the music they tend to play and the approach they take to playing their instruments. Fiddle music is more common during celebratory get-togethers like square dances, while violin music is mostly meant for more cerebral, contemplative musical performances. Fiddlers also often play “by ear,” without sheet music, whereas classical violinists adhere strictly to the written notation.
Playing style can vary subtly amongst violinists and fiddlers, but one common difference is the way a fiddle player holds their instrument. Fiddlers tend to rest their palm against the neck, instead of allowing space between it and their hand, as more technically-minded violinists might do. In addition, when using the bow, fiddle players sometimes place their hand higher up the bow than violinists would, making it easier to play at fast tempos. Finally, fiddlers often employ non-traditional playing techniques, such as string bending or extended double- and triple-stops (where two or three strings are bowed simultaneously).
The Ask Me Anything Wall was designed to give educators and students attending The Midwest Clinic and the Texas Music Educators Association (TMEA) convention a space to ask questions that they might be too afraid to ask. Attendees could write their questions and hang them on the wall.
Yamaha staff would take each question and reach out to key subject-matter experts — Yamaha Performing Artists, Master Educators, “40 Under 40” educators, staff and industry partners who were also at these shows — to answer the questions.
“Attend a teaching guitar workshop!” — Dr. Rob Pethel, musician, educator and researcher based in Atlanta, who started a classroom guitar program in 2008
How do I approach taking the lead without stepping on senior teacher’s toes?
“It’s important to keep the senior teacher ‘valued’, so do your part to continue to move the relationship in a positive direction. From there, use your voice to add your unique approach.” — James Stephens, Director of Advocacy and Educational Resources at Music for All
From left, Joe Lamond, former NAMM president, Marcia Neel and Bob Morrison
How do I reassure parents and students with an unstable high school program to keep going?
Remain NEUTRAL with parents.
NEVER speak ill of others.
ALWAYS make the conversation about the student.
ALWAYS promote continued music-making in high school. Seek additional music pathways like private lessons.
What are easy ways to incorporate music tech in my classroom?
“It depends on the class, grade and what you want to accomplish with tech. Tech for tech sake is never a good idea. That being said, start with whatever tech you have. Take ONE lesson and see how tech can be used by the students to show they understand the concept.” — Dr. Barbara Freedman, Teacher of Electronic Music Composition and Music Production at Greenwich High School in Connecticut and Board Member of Technology in Music Education (TI:ME)
When should you increase your fees?
“Your community will let you know, but you have to ask. Get their input, present your plans and a summary of cost with the ‘why’ and they will follow.” — Christopher Ferrell, Yamaha Performing Artist and the Supervisor of Instrumental Music for the Cobb County School District in Atlanta
Vibraphone
What’s the difference between a vibraphone and a marimba?
“Vibes have metal bars with damper pedal. Marimbas have wood or synthetic bars.” — Joel Tetzlaff, Product Marketing Manager for Percussion and Drums at Yamaha
What resources exist to diversify repertoire easily — composer diversity and musical diversity?
Should I use my Julliard full ride or live my dream and go to school with an education degrees?
“First of all, many congrats on your Julliard acceptance and full ride! Impressive! I would advise you take advantage of that performance degree and then get a master’s with education with your teaching certification!” — Lamar Burkhalter, Yamaha Performing Artist and the Music Director for the NFL Houston Texans
For elementary teachers, how do you remember ALL their names?
My program is small. Our budget is tiny. How can I build a bigger program?
“Find sources of funding BEYOND traditional arts. Look at city grants, CTE, workforce development. Find local partners to sponsor your program.” — Danielle Collins, 2022 “40 Under 40” and Director of Arts, Media and Entertainment for Inspire EDU
How do you balance family, health and life while still having a successful and competitive program?
Don’t worry about being competitive, be your best and it was take care of itself.
Take time to invest in yourself, friends and family.
“Let those recruits see you in action with your students! Show them what’s possible. High energy and fun!” — Jeffrey Grogan, Yamaha Master Educator and Professor of Conducting at Baylor University in Waco, Texas
Have you ever totaled an instrument?
“Unfortunately, yes!! I accidentally destroyed a $10,000 violin at a trade show.” — Doug Steinmetz, Director of Sales at Yamaha
Given the challenges students face today how are you fostering hope and positivity in your classroom?
“Model hope and positivity in all words and actions. Listen to student needs and make all students the center of your program. This will create a community that all will flock too.” — Anne Fennell, Western Division President of the National Association for Music Education, Advocacy in Action Committee Chair for Music for All and a retired educator
How have you broken through walls/cross through invisible red tape?
Don’t let anyone tell you there is something you can’t do — including yourself!
Just be yourself, get recognized for doing things well, do the thing despite any “barriers” (from a female high school band director who was repeatedly told she can’t).
“Music is a universal language. It’s entirely up to your interpretation and will help you build life-long communities. It’s a constant in life, and always there for you!” — Natalie Morrison, Senior Segment Marketing Specialist, Education and Co-Host and Co-Founder of ReVoicing the Future
How do you know when your expectations for your students are too high?
“They’re never too high!” — anonymous music educator
How do I advocate for my music program?
Engage your principal directly. If in middle school, have them help you give out instruments to your “newbies.”
Invite your principal to attend parent night to speak about what students learn in music … even beyond the notes. Provide bullet points.
Consider how you market your program as opposed to advocate for it!
“Absolutely! After a 40+ year career as a band director, clinician and private teacher, I still love what I do! Plus, teacher retirement is a great program!” — Cheryl Floyd, Yamaha Master Educator and retired music educator
Why pursue music?
“You’ll know that music is right for you when you become ‘soul sick’ when you stay away too long.” — Omar Thomas, Yamaha Master Educator and Assistant Professor of Composition at The University of Texas at Austin
“Music makes the world a better place every day. Musicians of any age/love/get to share something wonderful!” — Jeff Conner, a Yamaha Performing Artist and an original member of the Boston Brass
How do you continue to love music having a director that doesn’t make it fun?
“You clearly love music or you wouldn’t have asked this questions! Good for you. Challenge yourself to ‘bring the joy’ to rehearsals and your music-making. Try to ‘infect’ those around you and don’t let others get you down. I admire your determination! Be a leader and example and most of all, have FUN! — Gary Lewis, Yamaha Master Educator, Director of Orchestra Studies at the University of Colorado Boulder
How do we address the voucher situation with our parents?
“Be the reason they stay! Market and brand the positive!” — Joe Clark, Band Director at La Porte High School in Indiana
Do you have a question that you would like to pose to an expert? Please send an email to educators@yamaha.com, and we will send your question to a Yamaha Master Educator, Performing Artist, “40 Under 40” music educator or one of our partners and friends in the music industry.
In modern professional culture, particularly in education and service-oriented fields, “me time” is often viewed as optional or unnecessary. Many feel an unspoken expectation to be constantly available, responsive and productive. Emails arrive after hours, planning extends into evenings and personal commitments are postponed in the name of responsibility. While dedication and passion are admirable, the long-term cost of neglecting personal time is significant.
Research consistently demonstrates that chronic overwork and lack of recovery contribute to burnout, emotional exhaustion and declining job satisfaction (Maslach & Leiter, 2016). However, many professionals continue to push forward, believing they will eventually rest when things slow down. For most, that moment never arrives. Sustainable success is not built on constant output. It is built on intentional balance.
“Me time” is not a rejection of professionalism. It is an essential component of it. When individuals protect time to refuel, they bring greater clarity, patience and creativity to their work. Achieving this balance does not require large lifestyle changes or rigid boundaries. Instead, it happens through small, consistent habits supported by organization, intentional scheduling, and systems that honor both work and personal needs.
Reframing “Me Time” as a Professional Skill
One of the greatest barriers to work-life balance is mindset. Many professionals equate rest with laziness or fear that setting boundaries signals a lack of commitment. Occupational health research suggests the opposite. Individuals who regularly recover from work demands are more engaged, effective and resilient over time (Sonnentag & Fritz, 2007).
Reframing “me time” as a professional skill rather than a personal indulgence changes how it is prioritized. Just as planning, communication and organization are considered essential competencies, the ability to manage energy and recovery is as well. Professionals who master this latter skill are better equipped to sustain long careers without sacrificing health or fulfillment.
Organization plays a foundational role in this reframing. Disorganization often creates a cycle of inefficiency that pushes work into personal time. When tasks are unclear or systems are inconsistent, the workday becomes reactive rather than intentional. Over time, personal hours are consumed by unfinished tasks, not because of workload alone but because of a lack of structure. Thoughtful organization allows work to stay within its intended boundaries, making personal time possible.
The Role of Personal Hobbies in Long-Term Sustainability
Personal hobbies are often the first things to go in a busy schedule. Activities that once brought joy are gradually abandoned under the pressure of professional responsibilities. However, research consistently shows that hobbies play a vital role in stress reduction, emotional regulation and overall life satisfaction (Iwasaki, 2017).
Hobbies serve as more than simple distractions. They provide psychological distance from work-related demands. This distance allows the brain to shift out of problem-solving mode and into recovery. Whether the activity is physical, creative, social or contemplative, the key benefit lies in its ability to engage different cognitive and emotional pathways than those used at work.
Choosing the right hobbies is crucial. Restorative hobbies are those that replenish energy rather than drain it. They do not need to be impressive, monetized or productive. Reading for pleasure, walking, cooking, making music, gardening or creative writing are examples of hobbies that allow individuals to engage fully without pressure. When hobbies become competitive or outcome-driven, they risk replicating the stressors of work.
Scheduling hobbies as intentional activities reinforce their value. When personal interests are left to chance, they are easily displaced by urgent tasks. Treating hobbies as non-negotiable appointments sends a clear message that personal well-being is a priority. Over time, these moments become essential anchors that provide rhythm and balance in an otherwise demanding schedule.
Small Moments with Big Impact
While extended personal time is important, balance is often built through small, intentional moments embedded within the workday. Brief mental breaks significantly reduce fatigue and improve sustained focus, according to research on attention and cognitive performance. (Ariga & Lleras, 2011). These small breaks do not require leaving the workplace or disengaging for long periods. Even a small break that lasts a few minutes can make a meaningful difference.
Small breaks might include stepping outside for fresh air, taking a short walk, listening to music between tasks or sitting quietly before transitioning to the next responsibility. These moments help regulate stress and prevent the accumulation of emotional exhaustion. More importantly, they also model healthy behavior for colleagues and students, reinforcing a culture that values well-being.
Many professionals hesitate to take breaks due to guilt or fear of appearing unproductive. However, research consistently shows that strategic pauses enhance performance rather than diminish it. A professional who is mentally refreshed is far more effective than one who is continuously exhausted. Over time, small breaks become a sustainable habit that supports both efficiency and emotional balance.
Designing a Schedule That Works With Your Energy
Time management alone is not enough to achieve balance. Energy management is equally important to balance. Chronobiology highlights that cognitive performance fluctuates throughout the day based on natural rhythms (Foster & Kreitzman, 2014). Ignoring these rhythms often leads to frustration and unnecessary fatigue.
Designing a personal schedule that aligns with energy levels allows professionals to work more effectively within the same amount of time. High-energy periods are best reserved for tasks that require focus, creativity or problem-solving, while lower-energy times can be used for routine or administrative work. This alignment reduces the overall effort required to complete tasks and preserves energy for personal time.
Protecting the start and end of the workday is another critical component. Clear temporal boundaries reduce work–family conflict and improve overall well-being (Derks et al., 2015). While complete separation is not always possible, even small boundaries, such as consistent end times or protected evenings, can significantly improve balance.
Building margin into the schedule is equally important. Overloaded schedules leave no room for unexpected responsibilities, resulting in personal time being sacrificed to compensate. Margin provides flexibility, reduces stress and allows individuals to respond to challenges without depleting their personal reserves.
Managing Mental Carryover After Hours
One of the most pervasive threats to “me time” is mental carryover. Even when physically away from work, many professionals continue to replay conversations, anticipate problems or plan tasks. This constant mental engagement prevents true rest and undermines recovery.
Mentally disengaging from work during non-work time is essential (Sonnentag & Fritz, 2007). Individuals who achieve this detachment experience lower stress, better sleep and improved emotional well-being. However, detachment does not mean ignoring responsibilities; it requires managing responsibilities effectively.
A simple system for capturing work-related thoughts can dramatically improve mental disengagement. Keeping a notebook or using a phone app to jot down quick reminders allows the brain to release those thoughts without engaging in full problem-solving. This practice of externalizing information reduces mental load and anxiety (Risko & Gilbert, 2016).
The key is restraint. Writing down a reminder should take seconds, not minutes. The goal is not to solve the problem, but to ensure that it is not forgotten. By establishing trust in this system, professionals can enjoy personal time without the constant fear of overlooking something important.
Organization as the Foundation of Balance
Organization is often misunderstood as rigidity or perfectionism. In reality, effective organization is about clarity and control. Clear systems for planning, communication, and task management reduce uncertainty and decision fatigue, allowing individuals to focus on what truly matters.
Perceived control is strongly linked to reduced stress and improved job satisfaction, according to organizational psychology research (Karasek & Theorell, 1990). When professionals know what needs to be done and have a plan to do it, work becomes more contained. This containment prevents work from encroaching on personal time.
Sustainable organizational systems are simple, adaptable and individualized. There is no universal solution that works for everyone. I like David Allen’s Getting Things Done model. The most effective systems are those that fit naturally into existing routines and can be maintained even during busy periods. Organization should serve the individual not become another source of pressure.
Building a Sustainable Approach to “Me Time”
Protecting “me time” is not about achieving perfect balance or eliminating stress. It is about creating systems that support long-term sustainability. Small, intentional choices such as scheduling hobbies, taking small breaks, aligning work with energy, managing mental reminders and maintaining organized systems will collectively create meaningful balance.
Professionals who prioritize recovery are not less committed — they are more resilient. Well-being and effectiveness are deeply interconnected, and individuals who protect personal time remain more creative, patient and engaged over the course of their careers.
“Me time” is not a reward reserved for the end of the day or the end of the week. It is a necessary component of a life and career that can thrive for years. By treating personal renewal as an essential practice, you can build a sustainable approach to work that honors both excellence in the workplace and well-being for your health.
As a third-generation music educator, I grew up witnessing the wide range of emotional swings that this career could yield. At one end of the spectrum, I experienced joy, recognition and a sense of purpose every time my students achieved at the highest levels. At the other end, I felt frustration, anger and overwhelm from constant curricular, administrative and other external pressures.
When I decided to pursue music education as a career, I perceived having a huge advantage because I knew exactly what I was getting myself into. However, even with knowing all that came with the job and having family and colleagues to lean on for commiseration and support, I found myself completely burned out after teaching high school band for five years. I loved what I did, but health issues, recurring hospital visits and missed time on the job had me and my loved ones concerned for my long-term physical and mental well-being.
A Prophetic Meeting and a New Outlook
During this time, I was also completing my Ph.D., and I was so fortunate to have had an impactful meeting with my dissertation advisor that changed my view of my career path. I was researching music teacher burnout and attrition. As I frustratingly explained my health challenges, I admitted that I felt like a fraud for studying a phenomenon that I was falling victim to. My advisor recommended, “Instead of studying why teachers leave the profession, maybe consider what makes them stay.”
Since then, I have been passionate about music teacher career growth and longevity. Higher education music faculty, in particular, occupy one of the most complex professional roles in the academy. Unlike other disciplines in higher education that prioritize research and large-dollar grant funding, music faculty must also excel in classroom instruction, music theory, musicology, applied instruction, ensemble leadership, scholarship, technology innovation, academic advising, recruitment, and service to both the institution and community. All this is considered “just part of our workload!”
Similar to our K-12 colleagues, this intensity creates profound intrinsic fulfillment and significant burnout risk. What I have found in my experience is that career growth and longevity cannot be left to happenstance. Now more than ever, we must curate our own career journey by knowing our why, aligning our purpose to a matching institutional mission and work-life integration.
Understanding Our Passion
Job satisfaction in any career begins with understanding our passion, which drives us on a deep level. But, our career fulfillment over time cannot survive on passion alone. Most music faculty enter higher education because of their love and dedication to their art, but many often leave when they find that there is a lack of balance between the time commitment of the many other facets of the job and what they actually want to be doing: Making music. Add in lack of compensation, mounting administrative tasks and an underappreciation for the value they bring to the institution, and it is easy to see why so many become dismayed so quickly.
One of the main factors behind my “why” stems from a desire to improve systems within institutions so that students can improve their chances at success. We are all familiar with the common cliché “look to your left, look to your right – one of them will not make it to the end of this year.” I was shocked and frustrated to see many of my peers in undergrad not persist in pursuing higher education after the first few semesters. However, unlike the cliché suggests, it was not their lack of academic readiness or inability to better manage their time that led them to drop out. Oftentimes, it was communication breakdowns between financial aid, housing, advising, the registrar’s office, the bursar’s office or some other administrative unit on campus that caused missed deadlines and loss of educational funding.
My desire to improve these systems is what led me to not only teach in higher ed, but also to advise students and serve as a liaison between these different units to advocate for student success. Every career decision I have made since entering higher education, including each job opportunity I have declined, was based on understanding how my passion and purpose are aligned with the mission of the institution.
A Second Aha Moment
Many of my fondest memories — and my most intense frustrations — came out of my undergraduate experience at a Historically Black College and University (HBCU). I am driven by wanting those same powerful learning experiences for my students, while mitigating the frustrations as best I can. This is what led me to want to pursue working at an HBCU.
While this personal alignment to a specific type of institution seems like an obvious decision now, I was initially hesitant to work at an HBCU. I thought that I would not be able to have as significant an impact as I wanted because most systems are slow to change. And, personally, I carried some resentment toward my alma mater earlier in my career over some administrative things that I had endured, which could have been easily avoided.
However, one day, I was having a debate with a colleague, who was also an HBCU alum, about why things had not improved after all these years, and they challenged me to “be the change” that I wanted to see. Another aha moment!
This second change in perspective led me to the possibility of teaching at an institution where I felt my impact could be most significant. At this point, the alignment between the “what,” which for me is music teacher preparation, and the “why” of improving minority student outcomes, came into focus in a profound and meaningful way.
Work-Life Integration
Central to all of this, however, was how my work was integrated into the rest of my life. As musicians, we work non-traditional schedules that stray from the typical 9-to-5 and often include many evening and weekend activities. Evening rehearsals, weekend performances and travel obligations can complicate family dynamics and place a great deal of stress on the family unit (Croysdale, 2025). There is some emerging research that supports what I call work-life integration, though it may also be referred to as work-life balance or work-life sustainability.
Research by Gooding (2018) found that faculty who perceived greater autonomy and clearer expectations reported stronger intentions to remain in the profession. Examples of this include negotiating release time, expectations for service on committees, and flexible class scheduling among other issues. Similarly, Cha and Amrein-Beardsley (2024) found that early career and non-tenure-track music education faculty experienced significantly higher stress. We all know that institutional climate in general and departmental culture specifically can have a major impact on faculty stress. Still, we should consider how we can maximize our benefits (mental health, sabbatical, professional development grants and other forms of faculty development) to improve our well-being and move our career forward.
These findings also align with broader higher education research that indicates how autonomy, collegiality and mission alignment are central to faculty satisfaction (Gee & Konner, 2025). I know that tenure-track positions like mine are few and far between in higher education today, but there are still benefits that come with all faculty jobs that we can leverage to reach our career and life integration goals.
Make Your Higher Education Career Sustainable
We in the music faculty ranks often begin our careers with a wealth of prior experience in other sectors, and we are drawn to this work because of our artistic commitment and pedagogical passion. We truly believe in the power that teaching and performing at the highest level can transform lives and communities. However, longevity in the profession is shaped by how well our professional identity aligns with workload expectations, opportunities for advancement, personal obligations, compensation, administrative support and more. From personal experience, I can attest that the evidence is clear: A sustainable career in higher education is not simply the product of grit, luck or some combination of a number of intangibles. It is the result of being open, intentional, understanding your why and pursuing opportunities that are best aligned to the work-life integration you desire to have.
Whenever I’m asked about the progression of my guitar program at McQueen High School in Reno, Nevada, a line from John Lennon’s “Beautiful Boy” comes to mind: “Life is what happens to you while you’re busy making other plans.”
If I told my undergraduate viola-playing self that in 2025, almost half my students would be guitar players, I wouldn’t have believed it! The motivation for me to teach guitar was initially based on selfishness — I began my career at McQueen and split my time between teaching high school orchestra and elementary general music. I wanted to teach at the high school full time, but my orchestra enrollment alone was not enough to allow this to happen. So, I began making plans to add a guitar program well before it came to fruition. I cannot stress enough how important patience is during this process.
Keep the Conversation Student-Centered
Students are the reason we are educators. Therefore, we must prioritize their educational needs, aspirations and objectives.
If I focused on wanting to start a guitar program at McQueen with the goal of being able to teach at one school, the conversation would have ended before it even started. Instead, I centered the discussion around what the entire student body was missing out on.
It is well-documented and researched that students who are involved in music have better attendance. It is also widely acknowledged that student attendance directly impacts performance. So then, a guitar program would essentially increase student achievement.
When I began teaching at McQueen over two decades ago, the music department consisted of our band, choir and orchestra programs. The music program was for students who had participated in music in their middle school years.
At times, the instrumental programs would have beginners, but this was not the norm. It was difficult for a student to start the cello in their sophomore year without any previous experience. This meant we were not serving the needs of a vast majority of our student body.
I had to ask very difficult, self-reflection questions, which I shared with the administration:
Does our school’s music department allow entry points at any grade?
Is every student able to access instrumental performance ensembles?
Am I interacting with the entire student body or just a specific subset?
Is guitar a class or is it simply a fun class period for students?
Do I have the proper training to teach guitar?
Are there current scheduling issues preventing a guitar class?
Do we have the funding to support a guitar class?
Is our school offering similar opportunities compared to other schools in the district/region/state?
The answer to all these questions was a resounding “no.” I wanted to address each question before talking with the administration and presenting a viable solution.
Solve Small Day-To-Day Problems on Your Own
The dialogue between you and the administration about adding a guitar course is not a one-and-done situation. It will take multiple conversations over a long period of time, and adding a guitar class will not happen immediately. Conversations with my administration started over five years before a guitar program was implemented at McQueen.
Since I started my career, I have made it a point to only show up at my administrator’s door — unannounced or for a scheduled dedicated meeting — for something important. I do not waste admin’s time making my pitch and then walking away for them to solve the problem. The relationship with my principal is based on trust, so when I would show up, they knew it was something that required their immediate and full attention. If I identified a problem, they trusted that there was a legitimate issue that I had already attempted to resolve on my own.
Solve Scheduling Issues
I came up with a timeline of when I would be able to teach guitar during the school day. For my specific situation, I had to build the orchestra program, so one specific orchestra class could be split into two sections. Then, I could teach guitar in another period. This would ensure the overall enrollment necessary to justify additional funding.
Gain Support of Students and Parents
The administrator who eventually oversaw the creation of the guitar program at McQueen used to say, “Treat every student like they’re special … because they are. The parents don’t keep the good ones at home.”
Parents love when their kids want to participate in something positive like athletics, music and other extracurricular activities. To garner the support of students and parents, I included them in the process, and they were also on our problem-solving team. It’s easier for the administration to say “no” to a single teacher than to a group of students and their parents.
Of course, I didn’t want this to turn adversarial, but I had to find students who were passionate about including guitar instruction as part of our curriculum. Some were already in other instrumental music programs, but the majority were not. I held lunchtime meetings where interested students put their names on a list, which I then showed to the administration to prove there was sufficient interest.
I asked students and parents to write notes to the principal explaining why they wanted to take a guitar course. It spoke volumes when, in response, so many students echoed the same sentiment: “We WANT a course where we do a difficult thing.” It is rare for students to advocate for a course or instruction that challenges them, so the need to follow through with the implementation of a guitar program was undeniable.
Photo by CHRUPKA/Shutterstock
Determine How the Guitar Program Will Be Funded
When we began our guitar program, I enlisted the help of my orchestra boosters who were some of the initial supporters of adding guitar. The boosters agreed to pay for my flight to participate in the GAMA Teaching Guitar Workshop if the administration paid for my hotel. I was able to pay the affordable registration from my orchestra budget. This was an easy sell to my administrator — a training workshop in exchange for a $400 hotel bill.
While having a set of classical guitars was not financially feasible for the first year, I received a private donation to purchase 10 guitars for the school. I then worked with a music vendor who offered a discount to students who wished to purchase their own guitars. Other students brought in guitars they already had at home. The first year was a mixture of classical and steel-string guitars, but it was a start.
The other materials — tuners, footrests and picks — were paid out of a small budget the school provided to start the program. This funding restriction did not come as a surprise to my administration because I was transparent throughout the process. I had already informed them that we would need financial assistance to purchase other items to provide a better experience for the students.
Lastly, we purchased method books that the administration paid for using textbook funds. At $10 each, it was easy to secure $250 for the inaugural class to have textbooks (the cost of two math textbooks, at the time). I made sure to write a justification for the books linked to state standards to ensure the administration knew the course was curricular and serious.
A year into teaching the course, I was given the opportunity to apply for a $5,000 grant. Due to my extensive discussions with administration over the years, I already had the justifications and the foundation necessary to complete the application. I was fortunate to earn the grant, which funded more than a full class set of guitars and other essential equipment for the program.
Yamaha SILENT Guitar
This guaranteed that any student who wanted to play guitar would have the opportunity, regardless of their family’s financial situation. Since this grant was awarded, every student could use a school-owned guitar. In fact, students are encouraged to use a school guitar, and during the school year, students are exposed to different types of guitars. Over the years, McQueen has accumulated steel guitars, Yamaha SILENT Guitars, electric guitars and a 12-string guitar. This allows students to be informed consumers, so they can feel confident purchasing a guitar on their own that is suitable for their budget and aspirations.
Looking Toward the Future
In the middle of the second year of the guitar course, several students from the first year of the program expressed interest in taking another guitar course. These students had already completed something challenging, and they wanted to continue to advance. I spoke to the current class … they also wanted a second year of guitar instruction.
This created another “problem” to be solved, but the addition of a second year of instruction was a much easier process. There was already a blueprint for establishing such a program, and administration had already seen the benefit and success of the first program. They were excited to add a second guitar course
The guitar program at McQueen has been around for over a decade now. I have grown as an educator and have thoroughly enjoyed watching students come into the program with no guitar background, and by the end of the first semester, perform in concert, in front of their families and friends.
Being a part of that transformation is special, and I do not take it for granted. I know everyone’s teaching situation is different, so I hope this gives you a framework for starting a guitar course of your won.
The Yamaha guitar displays at the annual National Association of Music Merchants (NAMM) show are always major hubs of activity, filled with new product announcements and appearances from some of the most popular guitarists and bassists in the world … and this year was no different. Here’s a look back at what was happening with Yamaha guitars at NAMM 2026.
THE SHOW BEFORE THE SHOW
Two days before NAMM, Yamaha kicked off its 60th anniversary of building guitars with a special event at the House of Blues in Anaheim, emceed by Nathan East and Billy Sheehan.
Nathan East and Billy Sheehan at the Yamaha Guitars 60th Anniversary Show.
On the show floor, Yamaha showcased many of its classic instruments, as well as a heap of new products. In addition to several new colors of Revstar electrics, Cardinal Black guitarist Chris Buck’s Signature Revstar debuted. This distinctive guitar offers custom-voiced P90-style pickups, a wraparound bridge, a chambered body and a carbon-reinforced neck.
Chris Buck playing his Signature Revstar.
Complemented by exclusive 60th-anniversary specs available only on this commemorative model, the limited-edition 60th Anniversary Revstar is one of the most distinctive Revstars ever released. It boasts a refined Noble Black Burst finish, chambered body, Göldo tremolo, Gotoh locking tuners and custom-designed dual humbuckers.
60th Anniversary Revstar.
The newly debuted line of Pacifica SC Professional and Standard Plus electrics definitely made waves. They combine easy playability with extreme versatility by virtue of their Reflectone™ pickups, Focus switch and Acoustic Design Technology.
The new TAS3 C second-generation TransAcoustic guitar also got a lot of attention. It offers modern technology in a concert-size body, incorporating a built-in looper along with reverb, chorus and delay effects, as well as a rechargeable battery and Bluetooth connectivity.
The gorgeous 60th Anniversary FG9 acoustic guitar — crafted in Japan with an Adirondack spruce top and Guatemalan rosewood back and sides — drew big crowds, and for good reason. This limited‑quantity commemorative model celebrates six decades of craftsmanship with premium tonewoods, refined voicing and exceptional projection. It stands as a rare collector‑grade instrument that blends tradition, power and unmistakable Yamaha character.
YAMAHA GUITAR GROUP
The classic BB, TRBXand SignatureBilly Sheehan, Nathan East and John Patitucci basses in the main display area were all plugged into Ampegamps, but the adjacent Yamaha Guitar Group (YGG) room was home to several additional Ampeg bass rigs, including last year’s breakout star, theVenture VB-88 cabinet.
The room, also featuring Line 6, Guild, and Córdoba brands, was packed with players checking out gems like the Córdoba Stage Artistsolid-body nylon-string electric, which has a neck that’s slightly thinner and narrower than a conventional nylon-string; the 24-fret, 7-string Córdoba Abasi Stage 7, a nylon-string electric guitar engineered for modern electric players; and the eye-catching Córdoba 15C ukuleles.
Guild were showing two jumbo new acoustics: the F-412 12-string and the very limited-series Ventura Reserve VR1 F-40 Au Naturel.
Guild VR1 F-40 Au Naturel.
Line 6 drew enthusiastic crowds to their Helix bar, where they demonstated the new Helix Stadium Floor and Stadium Floor XL amp / effects processors (launched in June 2025, but making their first appearance at this year’s NAMM show).
The Line 6 Helix bar.
Visitors to the YGG room also had the opportunity to check out the new Yamaha ExtrackMusic Practice App (available for iOS and Android), which lets you split the instruments and analyze the chords of your favorite songs so you can practice and play along in “minus one” style (with one selected part muted), as if you’re performing with a real artist.
Checking out the Extrack app.
Besides a bevy of new products, the YGG room was also host to several live performances. Bass aces Vincen Garcia and Pops Magellan, who brought down the house at the Bass Magazine Awardsa few minutes away from the convention center, showed off the Ampeg SVT and Venture bass rigs, as did Tye Trujillo; Adam Simons brought out the best of Guild’s F-412 and D-55 USA Series guitars; Tosin Abasi did a Q&A about his signature Abasi Stage 7; and several demonstrations and performances— with Paul Hindmarsh, Eric Klein, Yamaha Signature Artist Chris Buck, Jemmuel Magtibay, and Scott Uhl — took visitors through the tones and intricacies of the Helix Stadium.
Paul Hindmarsh and Eric Klein demonstrating Helix Stadium.
NAMM continues to flourish as a singularly powerful opportunity for in-person connection between players, manufacturers and retailers. It’s safe to say that the instruments made by Yamaha, a presence at NAMM since 1957 — yep, even before the official 1960 formation of the Yamaha Corporation of America — will always be an important part of the magic.
Guitar can be a tricky instrument for band directors to incorporate into their existing jazz programs. You may have some very talented players in your school who are not part of your bands because they don’t know that they can audition or join. With the success of youth music programs like School of Rock, online and YouTube guitar lessons, and free apps and tab sites, these students might be some of the best budding young jazz musicians on your campus. Here’s how to get them involved.
Auditions
If your school requires auditions for jazz ensemble, encourage your guitar and bass players to audition on anything they can play well, including rock, blues or pop songs. This will give directors a good idea of each guitarist’s overall musicianship and skill level. These students may be new to jazz, but they can usually pick it up quickly based on their experience with rock and blues soloing and improvisation, and they can adapt the chords they know to fit your rhythm section.
Learning Styles: Playing by Ear vs. Note Reading
Many guitar players (including the teachers!) are ear players or are mostly self-taught. This means they learn by hearing the music. They most likely have strong memorization skills and are great improvisers. However, they may not be great note readers.
Allow for some flexibility with note reading. Most guitar and bass players learn by ear or from tab (using fret numbers), so give them time to learn traditional notation. Offer to work with them individually or help them memorize note-reading.
Because of their strong playing-by-ear skills, they will greatly benefit from listening to any recordings you can provide of the specific arrangement you are working on, as well as classic examples of famous musicians playing that tune or composition. Above all, encourage your guitar and bass players to use all available tools — reading, listening and playing with peers — to master the material.
Guitarists who are strong soloists and improvisers will push your other soloists to perform at a higher level and play bigger and bolder. Most can jam over a standard 12-bar blues progression using the minor pentatonic scale. They will already know a handful of Stevie Ray Vaughan– and John Mayer-inspired licks. Ask these players to tear it up on the A minor pentatonic scale and move it up one fret, and they’ll be ready to rip over a Bb jazz blues. Small adaptations like getting familiar with jazz band keys (Bb, Eb and F) and incorporating “jazzy” sounding notes like adding the 2nd and 6th of the scale to their pentatonic runs will make them shine.
The Guitar’s Role in Jazz Band
It’s important that your students understand the role of the guitar in the jazz rhythm section. The guitar doesn’t step on the piano, and it doesn’t play the bass notes especially when the bass is walking. The guitar sits right in the middle — not too high, too low or too much. I call the guitar the “meat in the sandwich.” It’s not the bread or the mayo, but it holds everything together in the middle. A good ear and the ability to listen to the other chord instruments (piano, vibes, organ, synth, etc.) is essential. It’s also perfectly fine for a guitar player to stop playing on solo sections or when the improvised sections become too dense. Horn players spend a lot of time during a tune counting bars of rests and not playing. Often the most musical choice is to play nothing and listen!
Jazz guitarists should stay on the neck pickup for a fatter, warmer jazz tone and use a clean amp sound with a little bit of reverb. They should use a jazz pick (Dunlop makes them) or their thumb for a darker sound. A semi-hollow or hollow body guitar with a humbucker will yield much better results than a solid-body or a heavy metal-style guitar. Save the whammy bar tricks, distortion and pyrotechnics for later — right now, we are looking for a clean, natural guitar sound that’s not too bright or punchy but still cuts through the band.
You will see many big band jazz guitar charts reference Count Basie’s rhythm guitarist, which is often called “Freddie Green style.” Green was known for “chunking” quarter notes through most of the jazz tunes and provide the pulse and swing for the whole band. In big band settings, the guitar and bass players are often driving force of the band and in keeping time. Drums keep time as well, of course, but guitar and bass players are the metronome and need to work hard to develop their sense of time. A quick YouTube search will turn up plenty of videos of this style. Here are a couple of my favorites: 1) Jazz at Lincoln Center’s guitarist, James Chirillo, explaining Freddie Green’s comping style and 2) Nick Rossi’s description of Green rhythm playing.
From Rock to Jazz
One of the major differences between pop/rock/blues and jazz guitar songs lies in the keys in which these styles are played. Guitarists mostly play in sharp keys due to the tuning of their instrument — E, A, D, G, Em, Am, F#m and Bm are great keys for rock and pop songs. They use the easiest chords on the guitar and incorporate the open strings (E, A, D, G, B, E). These are difficult keys for young students improvising on brass instruments. Likewise, horn keys (Bb, Eb, F) are the most challenging for young guitarists. They require stronger knowledge of the guitar neck and use a lot of bar chords, which are difficult and require more strength and stamina. A level 1 jazz chart for your horn players in Bb concert will be a level 3+ for your guitar players based on the key alone! For comparison, try asking a horn player to jam a blues tune in E, A or B. Simply getting your guitarists and bassists used to playing and reading chord changes in flat keys can do wonders for their playing.
Bass notes on strings 5 and 6: For new jazz guitarists, I start them on learning their notes on the neck and blues changes. All guitar chords in the included lesson are built off string 6 (open low E) or string 5 (open A). Having your guitar and bass players memorize the top two strings is crucial for chord reading and comping because that’s where we find the roots of our chord voicings. Learn the two top strings chromatically from the open string (E – F – F# – G, etc.) and memorize which notes correspond to the fret marker dots. For the low E string it’s open E, then G (3rd), A (5th), B (7th), C# (9th) and E again (12th fret, double dots). Do the same for the A string, and your students will be able to find any note quickly by using the dots and adding or subtracting a half-step.
There are apps that can help. I use Tenuto, which has a fretboard quiz. Finding the root of the chord is crucial, but we will see below that it commonly gets left out to provide more room for the bass. In other words, guitarists will build a Bb7 chord on the 6th string Bb and then leave out the Bb root on string 6 when strumming the chord.
Start with the blues: Blues is the common denominator between rock and jazz, and most guitar players are already familiar with the 12-bar form and improvising over it. I start students playing the blues in A, then raising it a half-step to the more common “jazz” key of Bb. Chuck Berry’s masterpiece, “Johnny B. Goode,” is in Bb, and a lot of rock guitar players know how to play this song. YouTube has plenty of great play-along and backing tracks. Search for the key and style you want, such as “Bb jazz blues play-along” or “chameleon backing track” to find some decent options for generic progressions and standards, usually with changes included in the video. Beginners can slow down the playback speed (click the settings gear) to be able to play along. Remind students to watch the original masters perform these tunes as well! Two of my favorites are Miles Davis’ “Freddie Freeloader” and Kenny Burrell’s “Chitlins Con Carne,” which was also covered by Stevie Ray Vaughan.
Jazz blues progressions and 7th chords: Teach students some basic bar chord voicings for Bb7, Eb7 and F7. Later, add Fm7 and C7 to create a couple of ii-V progressions and you’ll have a very simple jazz blues progression (see the sample lesson below). Tell students to memorize these chord grips so they can play other chords using the same shapes. For example, Ab7 is the same as Bb7 — just move down two frets. It’s vital to tell your guitarists to leave out the bass notes — that’s what bass players do, and we want to stay out of their lane, especially when improvising.
Have guitarists ignore strings 5 and 6, the top two strings of the guitar, when comping with the picking hand. Their guitar chord grips can still use the same shape, just avoid picking the bass strings. I also tell students to avoid string 1 on the top of the chord. This note is usually not necessary and gets in the way of the horn parts, vocalists and soloists, and it can conflict with the melody. My rule is to stay on strings 2, 3 and 4. You can still play the same chords in the left (fretting) hand but leave those low notes out when you pick. Eventually it will be possible to simplify these chords down to just the three strings needed in the fretting hand.
Three-note chord voicings: Once a player gets used to “seeing” the root of the chord shape, they can begin to leave it out entirely. Sometimes these are called “rootless voicings” — think Bb7 without the Bb or Cmin9 without the C root. Essentially, the bass player provides the chord root and the ear hears the chord in that context, so if the bass player is playing Bb, the guitar player can leave it and play the other notes in the chord (3rd, 5th, 7th, etc.). Since we only have six strings on the guitar, three-note chord voicings that are missing the root and the fifth will give us the best results and still outline the rest of the chord (3rd, 7th, 9th, etc.) and allow for some very hip extensions and alterations down the line.
Some easy and usable three-note chord voicings and a few hip and common substitutions are included in my Bb jazz blues study, “Blues for Freddie,” a tribute to Freddie Green. I included chord examples in chord grids, standard notation and tablature. The tab is very useful because it shows exactly where to put each finger for each chord voicing. Standard notation can give guitar players too many options. Tab says play this exact string on this exact fret to get this exact Bb, while standard notation just says play a Bb and the guitar has at least three ways to play that same note!
Thirds and Sevenths: A standard 12-bar blues in Bb would usually use Bb7, Eb7 and F7, or the I, IV and V chord in Bb. All of these are dominant chords and use the major 3rd and flat 7th of the chord. The simplest and clearest notes for chord players to outline when comping are the 3rd and 7th of the chord. In my guitar voicings in “Blues for Freddie,” these are the voicings I’ve notated, with the bass note of the chord in parenthesis for reference. This note should not be played by the guitar because the bass and other low instruments should outline the root of the chord. Often on guitar we end up with voicings using the 7th, 3rd and 5th of the chord. For Eb9, I added the 9th of the chord to the 3rd and 7th to give the chord more color and because it’s an easier grip for guitar players to get to than the regular 7th chord. It is very common for chord players to swap out 7th chords for 9th chords and your ear (or your band director) should tell you if it’s usable in context.
Chunk the Quarter Notes: The guitar part is written comping quarter notes on every beat in the traditional Basie big-band style. High school jazz players should have this down because it is the most basic pattern and approach to chord playing. It leaves room for the piano and other rhythm section instruments while the guitar still provides a strong sense of tempo. To make it even more consistent, cut each chord short by lifting the fretting fingers just enough to stop the strings — this will give us the “chunk-chunk” sound that we are looking for.
Accent the Backbeat: Finally, add emphasis by playing harder on beats 2 and 4 while beats 1 and 3 are softer and quieter. This makes the guitar part feel bouncy because the left hand is lifting between each quarter note and soft/loud sounds alternating in the right hand. Every jazz rhythm player should know that emphasizing the backbeat is essential for groove and to make the music swing. Think 1 – 2 – 3 – 4 (say 1 and 3 quietly and 2 and 4 loudly), and you’ll see what the guitar chord accents should be. It’s essential to get your guitar players familiar with these techniques, and once they know how to do it, they will also start to hear it in big band recordings and performances.
This year’s NAMM Show, which coincided with the 125th anniversary of the National Association of Music Merchants, shined a bright spotlight on 1,650 exhibitors and 5,400 brands. While attendance came in around 60,000 this year (63,000 last year), nearly twice as many artists demonstrated and endorsed products, and the Anaheim Convention Center was packed.
As always, Yamaha had a strong presence at the show, unveiling a wide array of new products and participating in numerous learning sessions and panels. Here’s a look at what we had going on at NAMM 2026.
The Yamaha Display
Even before entering the main Yamaha display area, visitors had the opportunity to get an up-close look at the custom C7 Concert Grand piano we created for famed touring artist Benson Boone for his sellout 2025 American Heart Tour. This remarkable instrument, with its distinctive silver-flake finish and special high-traction grip coating, served as the visual and musical centerpiece of the main stage during live performance, as well as the launch surface for many of Boone’s trademark backflips.
Drums
The drum area was, as always, a hub of excitement as experienced and burgeoning drummers alike had the opportunity to sit down behind a Yamaha drum kit (including the DTX6K5-M with mesh pads and the DTX8K-PROX with TCS [Textured Cellular Silicone] pads) and try them out.
The EAD50 demonstration area drew large crowds at NAMM.
Large crowds were drawn to the ongoing demonstrations of the new EAD50Professional-Grade Electronic Acoustic Drum Microphone System and its companion DSU50stereo condenser microphone/trigger pickup, which were both recipients of prestigious “Gotta Stock It” awards from a panel of gear experts and buyers who shopped the show floor. Together, the system combines the capabilities of a DTX-PROX Drum Module, a built-in digital mixer, and processor to deliver expanded drumming flexibility and enhanced audio capture capabilities suitable for home practice, live performance and studio recording environments. The EAD50 offers five XLR mic inputs plus an eight input/10 output audio interface, as well as 2,317 Voices and 252 Digital Effects, plus Looper, Sampler and Playback functions.
EAD50 Electronic Acoustic Drum Module.
Included with the EAD50 and also available as an add-on or stand-alone microphone, the DSU50 is built specifically to capture the natural sound of an acoustic drum kit. In addition to traditional bass drum hoop mounting like its revolutionary Yamaha EAD10 counterpart, it also has a 3/8″ threaded base compatible with microphone stands, allowing it to be used for overhead miking of drums. The DSU50 is also ideal for capturing fresh tones from instruments like acoustic guitar or mallet keyboards, delivering balanced mids and crisp highs.
DSU50 stereo condenser microphone.
Percussion
The Percussion area showcased a wide variety of timpani, mallet percussion, and marching drums and accessories. The new line of Power-Lite Series Marching Drums and Carriers drew special attention and were recognized as one of the top overall products at 2026 NAMM, winning a “Best In Show” award. Designed specifically for young percussionists, these products feature a lightweight construction that helps reduce fatigue while maintaining the superior tone, durability and adjustability that Yamaha is known for, combining comfort, performance and reliability.
Power‑Lite Series marching carrier.
Paired with the carriers are Power-Lite Series snare, tenor and bass drums. Newcomers to the lineup include the QD-6312 Micro Quad (6″, 8″, 10″, 12″ configuration) and QD-6313 Small Quad (8″, 10″, 12″, 13″ configuration) multi-toms. Featuring a pre-assembled mounting rail and REMO drumheads, these are ready to play straight out of the box.
QD-6312 Micro Quad multi-toms.
Winds
On display in the Winds area were a number of new instruments, including the limited edition YTR-8335IIRSKG NAMM26 XENO trumpet (only 100 units produced), the bold style of the YAS-480SGLK alto andYTS-480SGLK tenor intermediate saxophones, and the next evolution of the acclaimed Yamaha Geyer-style Custom horn, the YHR-871II.
The new YAC Flute-Assist attachment, an innovative teaching and performance support tool, also received its debut at NAMM 2026, and was awarded a “Gotta Stock It” designation. Engineered to make learning the flute easier, this small plastic device supports students at various stages of their development by promoting proper technique and enabling more confident play. Its recognition underscores the Yamaha dedication to developing solutions that empower players and educators alike.
YAC Flute-Assist.
Strings
The Strings area featured many acoustic stringed instruments as well as electricand SILENT™ violins, cellos and violas. The revolutionary line of Yamaha SILENT Cellos™ was enhanced with the debut of the SV300Cand SV300Fmodels. The SVC300C offers show-stopping looks and expansive sound capabilities, while the SVC300F brings a more traditional, acoustic-like experience to its sound and feel. Both allow for a combination of different sound types through a blend control, onboard EQ and easy control of multiple reverb settings, and their geared tuning pegs provide quick and easy tuning. In addition, both are lightweight and easy to transport in their included soft cases, with the SVC300C model collapsing into a narrow, travel-friendly footprint.
SVC300C SILENT Cello.
SVC300F SILENT Cello.
Capturing an impromptu performance in the Strings area.
Guitars
In the guitar area, two new Revstar electrics were being debuted: Cardinal Black guitarist Chris Buck’s Signature Revstar, which offers P90-style pickups, a wraparound bridge, a chambered body and a carbon-reinforced neck; and the 60th Anniversary Revstar, which has a distinctive refined Noble Black Burst finish, chambered body, Göldo tremolo, Gotoh locking tuners and custom-designed dual humbuckers.
Chris Buck Signature Revstar.
60th Anniversary Revstar.
A new line of Pacificas was also unveiled at NAMM 2026: Pacifica SC Professional and Standard Plus single-cutaway electrics, which combine easy playability with extreme tonal versatility thanks to their Reflectone™ pickups and Focus switch.
The full line of Pacifica SC electrics.
The new TAS3 C second-generation TransAcoustic guitar got a lot of attention at the show. It offers modern technology in a concert-size body, incorporating a built-in looper along with reverb, chorus and delay effects.
TAS3 C.
The new 60th Anniversary FG9 acoustic drew big crowds too. With its Adirondack spruce top and Guatemalan rosewood back and sides, this stunning guitar looks every bit as good as it sounds.
60th Anniversary FG9.
Keyboards
In the keyboard area, three new synthesizers — the M6, M7 and M8 MODX M, with their expressive control and streamlined workflow, and the lightweight portable 61-key PSR-E483 and PSR-E583 — had lots of pros, aspiring musicians and music enthusiasts lining up for hands-on tryouts.
MODX M8.
PSR-E483.
Pro Audio
There were many new professional audio products making their NAMM debut too, including the line of MGXdigital mixers, which offer built-in microSD card multitrack recording, dual USB-C audio interfaces and HDMI-USB video capture/pass-through (on “V” models).
MGX16V.
These mixers share DNA with the new URX Series audio interfaces, which represent a higher-performance evolution in our audio interface lineup by offering prosumer-level 32-bit/192 kHz audio with advanced onboard DSP.
URX44.
Last but not least was the Elgato Stream Deck-friendly CC1USB controller, which aims to make life easier for producers of streaming audio, podcast and video content.
CC1.
Performances
Even before NAMM kicked off, Yamaha threw a party to celebrate its 60 years of guitar-building with a concert at the House of Blues in Anaheim. Atlanta-based guitarist Ethan Ridings and vocalist Caelyn Carsten opened the night, followed by Welsh band Cardinal Black (featuring guitarist Chris Buck playing his newly unveiled Signature Revstar) and a set from guitar phenom Matteo Mancuso with bassist Vincen Garcia.
Ethan Ridings.
At the Experience Yamaha concerts on the Grand Plaza, Cardinal Black and Mancuso played on successive afternoons; keyboardist Ethan Bortnick also did an exciting set.
Chris Buck of Cardinal Black playing his Signature Revstar.
Matteo Mancuso.
Ethan Bortnick.
The 15th annual Yamaha Night of Worship at NAMM 2026 featured Bernie Herms with special guests Natalie Grant and The Belonging Co.
Bernie Herms.
Natalie Grant.
The Belonging Co.
The Yamaha All-Star Concert on the Grand is always a popular event attended by large and enthusiastic crowds. This year, the All-Star House Band was led by Will Wells and Greg Phillinganes and the show featured show-stopping performances from The War and Treaty, Sheléa, Alana Springsteen, and Ethan Bortnick.
Will Wells and Greg Phillinganes.
Sheléa, Alana Springsteen, and The War and Treaty.
Learning Sessions and Panels
Beyond the thrill of viewing exciting new products and dazzling performances, NAMM offers a wide variety of educational opportunities, and, as always, Yamaha had a strong presence in the various learning sessions and panels. Lisa MacDonald, Director of Vertical Marketing, represented Yamaha at the Music Education Leaders Summit as a panelist, emphasizing what it takes to build education and industry partnerships that are effective, meaningful, and long-term. Along with fellow Yamaha team members Brian Petterson (Director of Marketing, Winds & Strings) and Doug Steinmetz (Director of Sales), Lisa also contributed to a data-driven conversation about education landscape trends at an event sponsored by AIMM(Alliance of Independent Music Merchants).
Senior Segment Marketing Specialist Natalie Morrison led a double session featuring the ReVoicing the Future podcast, elevating women’s voices, and spotlighting how storytelling strengthens trust and connection across the industry’s ecosystem, and Segment Marketing Manager for Education Heather Mansell participated in Building a State Advocacy Coalition, focused on practical steps for creating sustainable state and local advocacy networks. In a second learning event featuring GAMA(Guitar & Accessories Marketing Association), Heather led a conversation about guitar and non-traditional education partnerships, highlighting how programs like Teaching Guitar Workshops (TGW) and Lead Guitar are expanding access and creating new pathways for student participation.
Well, that’s a wrap! Hope to see you at next year’s NAMM, which will be held from Jan 26 – 30, 2027 at the Anaheim Convention Center.
The late fall and winter months are the most dangerous time of year for wooden instruments, particularly if you live in the northern half of the U.S., where temperature and humidity changes are the most extreme. During this period, woodwind instruments are at a higher risk for cracking, and tenon and socket fit issues may arise. Similarly, parts of string instruments may shrink, crack or shift position at this time. Musicians must pay special attention to the effects of weather and take appropriate measures to ensure their instruments make it through the winter months.
Wood, a material that was once alive and full of water, never loses its ability to react to the moisture in its surroundings. When it absorbs water, it expands and when it dries again, it contracts. While temperature has some effect on wood, moisture has a more pronounced effect. Extreme heat causes absorbed water to evaporate and the wood shrinks rapidly. Extreme cold causes absorbed water to expand, which, in turn, causes the wood to expand as well. Wood can crack when it expands or contracts too quickly or unevenly.
How to Care for Woodwinds in Winter
Although no one can guarantee that a woodwind joint will not crack, following these recommendations will reduce the possibility significantly:
– Play the instrument gradually. Many musicians underestimate the need to break in a woodwind instrument and swab it consistently to help control moisture in the bore. When first playing a new instrument (or one that has been that has been fitted with a new replacement joint or allowed to dry out while stored for more than a few weeks), play it gradually. For example, play the instrument for 5 – 10 minutes during the first session, then swab it out, including the tenons and sockets where the end grain can absorb moisture more easily. Then after the instrument sits for at least 4 – 6 hours, play it again, adding 5 or so minutes to each session. After playing it gradually for a week to 10 days, playing for longer periods should not cause a radical change in the wood’s moisture level, and therefore is less likely to cause problems. If this strict schedule is not possible, at least be sure not to play for more than just a few minutes the first day, with a quick swab at the end of the session.
– When playing for long periods of time, swab the instrument out more frequently. A “handkerchief”-style swab will often do a better job than many other types. Having more than one swab on hand is a good way to ensure that you can pull a dry swab through instead of a damp one.
– Never attempt to force a tight swab through a joint. Before the bottom end of the swab disappears into the joint, stop pulling it through so it can still be removed from the instrument if necessary.
– Avoid playing the instrument when it is cold to the touch. It needs to warm up to the temperature of the room or outdoor environment — gradually if possible — before warm air is blown through it. Hold the instrument under a jacket or let it sit in the room for at least 20 – 30 minutes before playing.
– In dry conditions, place a small humidifier in the accessory area of the case. These are available at most music stores.
– Ensure the interior bore is properly oiled. Generally, the treated wood of a new Yamaha woodwind instrument or joint doesn’t need further treating, but if the interior bore gets a very dull, dry look, careful application of bore oil can keep the wood sealed. A properly oiled bore allows only a small amount of condensation from playing to enter the instrument. Bore oiling is best left to a skilled technician, however, as applying too much can create problems. Note: Yamaha Duet+ oboes with lined joints should never have their bores oiled due to the possibility of adverse chemical reactions.
How to Care for String Instruments in Winter
Like woodwinds, members of the acoustic violin family are also subject to the effects of changes in temperature and humidity that accompany winter weather. In northern geographical areas, the wood parts of the instrument can shrink and shift position as environments become drier due to the heating of homes and buildings — something that can even change the weight and the sound of your instrument. The further north in the U.S. you are, the more extreme the changes in temperature and humidity. In some regions, the temperature can fluctuate from 100 degrees plus with high humidity in summer to well below zero and extremely dry in the depths of winter. These huge changes pose danger to the health of your string instrument. In more temperate climates with less drastic temperature and humidity changes, there is less worry.
Here are some tips:
– Avoid quick changes in temperature. Don’t leave your string instrument out in the cold, and let the instrument slowly warm to room temperature in its case before opening the case and handling.
– Invest in a good quality hygrometer to monitor the humidity in your instrument’s environment. The storage area for a violin should ideally be kept at the same humidity year-round. The humidity of the environment in which the instrument is stored should be maintained at around 45% — or at least in the 40% to 60% range, depending on your local conditions.
– Use a furnace-mounted humidifier at your home, or a free-standing humidifier in an orchestra room. These can help keep the environment from getting too dry, which can result in cracks in the wood … unless you get lucky and the water-soluble glue in the instrument gives way to alleviate the stress, in which case the seam can usually be re-glued quite easily. There are also commercially available internal humidifiers made of rubber tubes and other materials, but these must be used with care. Too much water in these products can drip into the instrument and damage the instrument by opening seams held by water-soluble glue.
Keeping a close eye on the temperature and humidity during the winter months and taking a few simple precautions will go a long way towards maintaining the health of your woodwind and string instruments year-round. Let it snow, let it snow, let it snow!
Click here for more information about Yamaha wind instruments.
Click here for more information about Yamaha woodwind swabs and maintenance supplies.
Click here for more information about Yamaha string instruments.
Let’s face it: Wintry weather gives us an excuse to procrastinate — to postpone chores that would entail bundling up and going out into freezing temperatures. Instead, why not stay put, light a fire and crank up some tunes on your home audio system? There’s no better way I know to feel warm and toasty.
Here’s a playlist that complements the frigid season instead of fighting it.
1. Light My Fire
This uber-romantic acoustic version of The Doors’ 1967 classic by Jose Feliciano sets the perfect mood. Hopefully there are enough logs in the hearth to last a few hours. The time to hesitate is through! Listen to it here.
2. California Dreaming
If you’re not quite ready to leave the comfort of your living room to take a walk on a winter’s day, put this Mamas & Papas track on instead and imagine how safe and warm you would feel if you were in a sunnier climate. Bonus: With so many harmonies to embrace, it’s the perfect song to sing along to. Listen to it here.
3. Snow on the Beach
This is my personal favorite from Taylor Swift’s album Midnights. No matter what the temperature is outdoors, close your eyes and listen to this song while imagining yourself on the beach watching a snowflake fall gently on the sand. The dreamy and sonically pleasing production, along with Taylor’s velvety delivery, will warm you up instantly. Listen to it here.
4. Wintertime
Norah Jones’ voice is synonymous with warmth and comfort. Just about all of her material will serve to elevate the thermostat. But this track in particular, about leaning on a special someone to help us make it through the coldest season of the year, is especially cozy and heartening. Listen to it here.
5. Song for a Winter’s Night
With sleigh bells in the background, perhaps left over from yet another Christmas gone by, Gordon Lightfoot brings his trademark yearning — a cry to be near the one he loves when he’s all too aware that the fire has gone out. But your fire is just fine. So throw another log on and enjoy the crooning. Listen to it here.
6. Valley Winter Song
This boppy record from Fountains of Wayne might actually make you want to take a short break from those hypnotic flames and get up and dance! It’s an uplifting song to a friend during a dark winter day, but take heart because the sun won’t be hidden away for long. Listen to it here.
7. Baby, It’s Cold Outside
I love, love, love this Zooey Deschanel and Leon Redbone cover of the classic flirty duet. It’s a playful, more contemporary contrast from the vintage versions of the ’40s and ’50s. If it’s nostalgia you crave on a cold winter’s night, light a candle and make sure this is in your queue. Listen to it here.
8. Sweater Weather
As this song by the American alternative band The Neighbourhood points out, we all instinctively grab for a sweater when there’s a chill in our bones. Whether it’s brand new or laden with holes up the sleeve, whether it’s made of cashmere or cotton, a favorite sweater is like a best friend … a warm security blanket on a frigid day. Listen to it here.
9. Cold
Sure, you can almost feel the frost emanating from the skin of the arctic woman that’s being sung about, but Chris Stapleton’s soulful vocals put a fever in the room. With a fire crackling in front of you and a glass of wine in hand, you’ll almost forget that the couple’s love is on ice. Sit back and get ready to feel cozy. Listen to it here.
10. Here Comes the Sun
This iconic Beatles tune, penned by George Harrison as he took a stroll around his garden one early spring morning (after a long, cold, lonely winter), will have you looking out the window, watching the ice slowly melting before going off to bed with hope of a warmer tomorrow. And I say … it’s alright. Listen to it here.
You’ve been steadily improving as a bassist and spending quality time practicing. Your bass, your amp and your pedals are enabling you to sound like yourself. Now you’ve decided to put yourself out there — and you’re ready to audition.
Auditions can be both exciting and terrifying. Even if you feel pretty good about your playing abilities, it’s still normal to be somewhat nervous about playing prepared music for ears that are listening very closely. In that spirit, here are some tips to help you arrive at your audition confident and ready to showcase your best self.
PICK THE RIGHT SONGS
Most of the time, you’ll get to choose what you want to play at the audition, so begin by creating a setlist that shows off your strengths. (Some schools have their own requirements.) It can be tempting to open with something flashy, but consider starting with the song you feel most confident about. Usually, playing something simple with great toneand dynamics (and playing it correctly) will make a better impression than trying to tackle something tough and not nailing it. Keeping the setlist short will give you more time to get inside every piece so that you can play it well even if you’re nervous, tired, or otherwise distracted.
CHOOSE YOUR APPROACH
If you’re auditioning for an established band, ask how closely they want you to emulate another bass player or whether they’re willing for you to provide your own interpretation. If the goal is to nail someone else’s approach, isolate the bass part and put it under a magnifying glass. Get as close as you can to their tone, note choices, note length, and general vibe. Sheet musicwill help you make sure you’re playing every note correctly. Think carefully about how you will mesh with the rest of the band. Either way, pay close attention to the groove being laid down by the drummer, your closest rhythm-section partner.
FOCUS ON THE DETAILS
Whether you’re copying what’s been done or coming up with your own approach, you should know the songs inside and out. Even if you’ll be reading music at the audition, aim to have everything thoroughly memorized — including the most common keys and tempos for every song, the technique(i.e., fingerstyle, pick, thumb, etc.) that works best, and where you intend to play the noteson your bass) — a couple of weeks before the audition.
During your pre-audition practice sessions, don’t hesitate to slow the bass part down, loop tough sections, and mute bass lines so you’ll be able to nail the part when you’re playing along with the band. During those rehearsals, record yourself and evaluate your playing ruthlessly. Instead of simply making a mental list of weak spots — “there’s a tricky section around bar 49,” for example — work out every wrinkle so that you’re 100 percent confident when you step into the audition. As celebrated Olympic skater Scott Hamilton says, eliminating every “could’ve, would’ve, and should’ve” will allow you to step into the audition room feeling as prepared as you can be.
PREPARE WITH MOCK AUDITIONS AND VIDEOS
Once you’ve tightened up the songs on your own, play them in front of other people. Many classical musicians do “mock auditions,” which give them a chance to play their audition pieces for friends or teachers. Mock auditions are a great opportunity to play through trouble spots and get honest feedback from musicians you respect.
If you don’t have the opportunity to play the audition pieces live in front of others, video can help you see what others see: Where do you hesitate? Do you look tense or relaxed? Are you able to smile and look up from your instrument? Ask yourself also if you plan to sit or stand. How’s your strap height? Is your bass set up and ready to go? Do you have the best strings for the audition, and do you want them to be brand new or broken in? Will you be wearing earplugs or in-ear monitors? How do you manage transitions between songs? As you go down the setlist, stop and fix details, but remember that in performance, you’ll have to keep going even if you make a mistake. Be prepared for the bandleader to call any song on your list in any order.
Pre-audition rehearsals are also a good time to think about the clothes you’ll be wearing. Tight clothes or shoes can affect how you play, but wear what’s right for the band. Wearing your “audition outfit” in the mock audition videos might seem a little excessive but it gives you a chance to see what’s both comfortable and appropriate. Just as putting on a uniform gets you into the mindset of a particular job, practicing while wearing your audition clothes can help you get in the spirit. It also means you won’t have to worry about picking out clothes the day of the audition.
PRACTICE IN YOUR MIND
Some bass players listen to the music on repeat for weeks before the audition, but even if that’s not possible, set aside time each day to practice the songs in your mind. Hear each note, each phrase, each section, and each song all the way through. If your brain practices deeply, it’ll send the messages to your fingers. Visit the audition space beforehand if you can (or at least look at pictures of it online) and visualize yourself playing well in that room. The goal is to be able to play the music in your sleep; knowing each note at a cellular level and seeing yourself succeed is the best way to boost your confidence.
This kind of stringent preparation also gives you a chance to practice putting the stresses and worries of your personal life on hold while you focus on the audition. Think about the effect that your adrenaline will have: Do you clam up or sweat when you’re nervous? Will your hands shake, making it tough to play or hold a pick? The good news is that you can deal with nerves by deeply understanding the musicand building trust in yourself. Consider using breathing techniques favored by public speakers and actors to deal with adrenaline.
ACING THE AUDITION
On the day of the audition, make sure you’re rested. Drink plenty of water, stretch, and listen to your body. If you’ve prepared well, the music itself should be the last thing you’re worried about.
Warm up before you leave home. Build in extra time in case you get lost or encounter traffic so that you arrive early enough to feel grounded and get in tune (this is another reason to visit the audition room before the day of your audition if possible).
If your nerves threaten to overwhelm you, try to be grateful for the talent you have and acknowledge the hard work that got you this far. Trust your training. Be fully present. Think twice before making last-minute changes to the music you’ve practiced so hard to perfect. Do your best, and don’t criticize your performance until you leave the room because the moment you let your confidence and clarity waver is the moment you risk slipping.
When I started teaching nearly 30 years ago, I started a 7th-grade jazz band. Many students were interested in the jazz ensemble for the first couple years, but then I had a hard time finding bass players. I also discovered that students who wanted to play piano, guitar and drum set had a hard time learning jazz because the chords, rhythms and technique were so different from what they already knew.
A few years later, I started other bands — rock, country, bluegrass, hip hop and mariachi — and had si0 milar issues. I also had to introduce instruments like a DJ controller, banjo and guitarron and ended up spending a lot of rehearsal time helping these students. However, what they really needed was some focused time without the rest of the band around.
THE ADVENT OF BONUS LESSONS
Our school district offered pull-out lessons for students to have small-group lessons on their band instrument once a week for short amounts of time. These lesson times were highly beneficial for teaching students technique, embouchure and skills specific to their instrument.
I decided to add another element to these pull-out lessons — on occasion (every other week or once a month), students could receive a lesson on drum set, bass, piano, guitar, guitarron, DJ controller or banjo in what I called “bonus lessons.” Students received lesson time on their band instrument two or three times a month, but they would also receive a lesson on a secondary instrument once or twice a month.
OTHER BENEFITS
I found many other benefits from bonus lessons. Students who were losing interest in band were now engaged in music again, and they were developing new skills and passion.
Students who could not participate in after-school classes like jazz band, rock band and mariachi for whatever reason could now participate in learning these genres and the instruments associated with them.
Bonus lessons expanded beyond instruments. Other topics that we began to offer included improvisation, songwriting, production, theory and history.
These lessons provided opportunities to work with students who were very advanced on their band instrument, struggling on their band instrument, new to their band instrument or had special needs.
LOGISTICS
Our pull-out lesson program has changed over the years, and districts across the country have many different systems from very extravagant to nothing at all. Here are some ideas on how to fit bonus lessons into your schedule.
If you already offer pull-out lessons, make two or three of them meet the needs or interests of your students. For example, have a bass guitar or drum-set lesson once every other week. The week that students have a bonus lesson, they do not go to their regular pull-out class. In this way, the students’ schedules do not change.
Some schools have flex or resource time where students have periods of time each week where they can choose what they need. Our school calls it “WIN (What I Need) Time.” This time can be used for getting extra help in a class, study hall or learning a new skill like a new instrument. Depending on how often students have these flex/resource times, you can offer a guitar session every week. Or, maybe alternate it with a ukulele session. There are schools that form clubs during this time where students have a weekly session for two months. A perk of a schedule like WIN Time is that any student in the school can take bonus lessons, not just students in an ensemble.
Find parents, private lesson teachers or high school/college students to teach these instruments as a pull-out lesson during the students’ band hour. This takes a little more effort because you will need to get administrative approval and possible background checks as well as financial backing of some sort to have visitors coming in to teach, but it’s possible. Along these same lines, you could have peers mentoring same-age peers.
Next, let’s dive into the areas of study that bonus lessons can explore and some ideas on their viability considering that regular attendance may not be possible due to the pull-out and flex/resource time setup.
BASS GUITAR
Let’s begin with the instrument that I started with — bass guitar. At every bonus lesson, I teach or review holding position, hand position, string names and basic technique. Then we learn a song — well, usually it’s just a portion of a song, but it’s the best part. We’ll learn the song with notation and tablature. A couple great rock songs to start with are “Seven Nation Army” by White Stripes or “Don’t Stop Believin’” by Journey. You can find tablature on Songsterr. A great site for both tablature and traditional notation is GuitarInstructor.
When learning jazz songs, I’ll usually skip the tablature portion because jazz charts usually don’t have tabs. I love using “Jazz Ensemble Method” books by Dean Sorenson because it explains technique and has great beginning-level jazz charts.
After a few lessons, we will get into reading chord charts. You can find chord charts for songs on Ultimate-Guitar.com. This gets students to think in terms of harmonic structure and it forces them to use their ears. Because chord charts don’t spell out every single note that is played and don’t show how many beats or bars a chord lasts, it helps the student pick out those notes by ear. This is typically more advanced, but some students take to ear-training more quickly. From a jazz standpoint, this also is a good time to teach walking bass lines. A great book to assist with this is Hal Leonard’s “Jazz Bass Method Book.”
Another way to engage students is through YouTube videos. Students already search for song tutorials on YouTube where a bass player goes measure by measure through a song. These videos are hit or miss, of course, based on the musician’s ability to teach. However, if you preview some suitable YouTube tutorials before the lesson, give the links to your students so they can watch the videos at home to reinforce the lesson.
GUITAR AND UKULELE
Bonus lessons for guitar and ukulele can follow a similar format as the one described above for bass guitar. Start each lesson with a review of the basic holding position, hand position, string names and basic technique. Then teach students a song. My go-to rock songs to start with for guitar are “All the Small Things” by Blink-182 and “Smoke On the Water” by Deep Purple. For ukulele, I like “Riptide” by Vance Joy and “Hey Soul Sister” by Train. Introduce chords, tablature and traditional notation using those same sites listed for bass guitar as well as the Dean Sorenson book for jazz guitar. Introducing a song every one or two lessons will keep students’ interest and show them that they are going to have to practice to be successful.
Two other resources I recommend are Music Will and Bob Habersat’s ShedtheMusic. These sites have so many great ideas and interactive playing and learning opportunities.
PIANO
There are a variety of approaches to take with bonus lessons for piano. It really depends on the students who are interested in learning it and what your intentions are for teaching piano. I usually look to help students who could play piano in our jazz and modern bands. For both of these bands, I put a lot of focus on chord recognition. So, I start with teaching note names and proper hand placement. Then, I move to scales, major and minor chords, and inversions. I’ll then introduce embellished chords like dominant, major and minor sevens, and their inversions. I like using Frank Mantooth’s “Voicings for Jazz Keyboard.”
Next, we jump into teaching songs. For jazz, I use the Dean Sorenson book, and for pop, I use the Ultimate-Guitar and GuitarInstructor sites as well as MuseScore and MusicNotes. This is where I get into reading notation like traditional piano lessons. If a song doesn’t have many or any piano riffs, it’s nice to use a chord sheet. However, if it’s a more elaborate part, I might encourage the student to read a completely notated part.
DRUM SET
My most popular bonus lesson is for drum set. I usually start every lesson by having students play body percussion because I only have one drum set in the room and typically have five to 10 students. Students start by tapping their right foot at a steady tempo representing the kick drum. Then, they will tap their left hand on their right leg on beats 2 and 4, modeling the snare drum. Next, students will tap their right hand on their left leg in a straight 8th-note pattern to model the hi-hat. I rotate students on the drum set during this process and have them start combining two and then finally all three patterns, which result in a basic rock beat.
For a swing beat, students will alternate their feet as quarter notes on bass and hi-hat. Then I’ll have students add their right hand on their right leg playing the swing pattern. Through this entire process, I try to give every student a turn on the drum set where I can teach them proper stick and hand placement and where the stick should strike the drums and cymbals.
Next, I teach them another groove. I use Tommy Igoe’s “Groove Essentials,” which is also great for teaching how to read notation. Lastly, like the other instruments, I put on a song so students can try to figure it out by ear. Start easy with Queen’s “We Will Rock You” and White Stripes’ “Seven Nation Army.”
SONGWRITING
There are many ways to approach songwriting. I start by asking students for a song that has great lyrics. We pull up the lyrics and analyze — we look at the story it tells, the rhyming structure, words/syllables per line, literary devices and overall song form. Then, we compare it to other songs and see what similarities and differences we find. Next, students try writing their own lyrics.
After a few lessons using this approach, we create some melodies and chord progressions and use some of the student lyrics. We discuss common chords used in popular music (I, IV, V, vi) and play around with them in different orders. I like to play Axis of Awesome’s “4 Chords” video, which demonstrates how many songs use the I-V-vi-IV progression.
I also recommend SongWritingForMe by Sarah Gulish and Kat Reinhert, and the book “How To Write One Song” by Jeff Tweedy. You will encounter so many great ideas on how to teach songwriting through these two resources.
I have offered composition from a classical or orchestral angle as a separate bonus lesson, but sometimes I will include it in songwriting lessons.
IMPROVISATION
I start improvisation bonus lessons by playing some examples of great soloists on different instruments in different genres. Some great examples include:
We listen and talk about what we like, and we might even transcribe a riff or two. Then, we discuss coming up with a toolbox of ideas that we can use in our solos. Because many ideas come from listening to a variety of solos, I give students a list of songs and artists they should add to their playlists.
Then I break down some of the basics of improvisation, starting with call and response. Students will use the first three notes from a concert B-flat blues scale and play along with a B-flat blues backtrack on YouTube to make it sound better. We follow up with a Q&A where students can make up their own response, using the same three notes. Then they try a solo all the way through the 12-bar form. The class discusses concepts like creating melodies, using common rhythms like quarter notes and eighth notes, using space, repeating riffs that are cool and building a solo (“tell a story”) — by starting simple and progressively playing faster and higher.
I then incorporate music theory and introduce chord progressions. Students learn that each chord comes from a scale and these notes sound best in each measure. Have students play with a recording and play only the bass note for each chord. Then introduce guide tones (the third and seventh of each chord) and have students play them with the recording. Students can also play patterns like the first three notes of each scale for each chord with the recording.
The next and most important connection is telling students to incorporate the theory (what’s in their head) with what they are feeling (their heart). This is where the magic happens!
PRODUCTION
I wrote about music production in my article about Band AND, a new concept I started in my band class. In bonus lessons, I demonstrate how to use a digital audio workstation (DAW) like Cubase or BandLab. If you need a demonstration yourself, both sites have tutorials or check on YouTube.
A good first lesson is to show students how to use the beatmakers and on-screen piano keyboard to create music as well as recording their voice or live instrument. Then show them how to use the pre-programmed loops — how to loop and split tracks, as well as control volume. Finally, teach them to save and export a file.
During class discussion, point out that songs of virtually any genre have a beat, bass part, harmonic content or hook, and vocals — so they should have at least these four tracks.
If you want to go further with music production, check out ShedtheMusic.
DJ
DJing is a very cool bonus lesson that might be out of your comfort zone, but it’s definitely doable. Purchase a DJ controller with two jog wheels with Serato software. You don’t have to obtain the most expensive model; you can purchase some for under $300. Download songs onto your computer and drag them into Serato. Then, drag one song each into a jog wheel, press “play” on your controller, and use the fader between the jog wheels to transition from song to song. That’s all you need to do to start!
Now it’s time to experiment with tempo controls, effects and, of course, scratching. Your students will love it. It won’t be long before you have students DJing at lunch, school pep fests and assemblies, and dances.
ADAPTIVE MUSIC
One of the highlights of bonus lessons is adaptive music for neurodivergent learners and special needs students. There are many ways you can set this up. I use a system developed by Ruth LeMay where I remove the highest three strings on acoustic guitars, drop D tune the low E string. Then I place colored tape on the frets creating open fifth chords that are taught by color instead of pitch. You can put corresponding colored tape on a piano keyboard or a bass guitar (or better yet, a bass ukulele) with just the E string. Add in a singer and a drummer, and you’re ready to jam! Have your band students help so they can learn leadership skills.
I make slide decks for the songs. Each slide is divided into quadrants with each square representing a measure. I use colored triangles as quarter notes with the words below the triangles. Some songs we have had a lot of success with are “Party in The USA” by Miley Cyrus, “Dancing In the Streets” by Martha and the Vandellas and “Baby Shark” by Pinkfong.
If you are interested in learning more, check out LeMay’s 3Strings.
HISTORY AND THEORY
Two final topics that I offer occasionally through bonus lessons are music history and theory. Usually, I have more success at the middle school level to include history and theory into teaching an instrument, songwriting or improvisation.
__________________________
Bonus lessons are a highlight of our music program. They give students a new area of music to become passionate about, and they increase creativity in your program. Students who can’t get enough music love all the new opportunities. Students who are losing interest, bonus lessons just might be the spark they need. And a possible bonus of bonus lessons? You might just find that bass player for your jazz band.
I dread having to miss a day of school, maybe even more than teaching when I’m sick, because writing sub plans is the worst. However, you will miss a day of school due to an illness, a festival, or just because you can’t handle it one day and you need a day off!
Don’t worry, there are ways to make sure things keep running smoothly and keep students playing their instruments even when you’re not there. I never hear the question “are we playing today?” because we always play, regardless of my attendance. No rest for the wicked! If you have the proper procedures, student leaders, and clear musical plans in place, your students can accomplish a lot.
Procedures
Having clear procedures is important to an effective and efficient rehearsal. These procedures must be efficient and work for you in order for them to work just as well when you’re away.
How do students come into the room? What are they expected to do to get ready for the downbeat? How do you begin your rehearsal?
For example, this is how I handle attendance, something that should be easy and not take away from rehearsal time. Well before high schools implemented cell phone bans, I found that cell phones were a huge issue with rehearsal productivity, so I linked their phones to attendance. Students are required to put their phones in phone caddies, and each slot has a unique QR code that is scanned by a student leader to take attendance. If a student’s phone wasn’t in the caddy, they were absent — either physically or mentally. For my top ensemble, they are responsible for “clocking in” to rehearsal by scanning their own QR code. The responsibility here is now on the students, not on you.
Having responsible student leaders is important to the success of your procedures while you’re away. Check out my articles on choosing student leaders and collaborating with student leaders for more about their roles in the success of your program.
Chamber Groups
One of my favorite units is on chamber ensembles. Playing in a brass quintet was a formative time for me musically. Being able to collaborate respectfully with my peers, make decisions together, and communicate with each other while performing improved my playing and connected me with the members of my ensemble. The greatest part is that chamber ensembles rehearse themselves! Once they have the process and procedures down about who is in their group, what they are playing and where they are rehearsing, this is almost a “set it and forget it” sub plan. You can use this if you expect to be out for several classes, but the ensembles can also rehearse this way when you’re there.
I won’t lie, this does take a fair amount of preparation. Between assigning groups, picking music, and making schedules for their rehearsals, the preparation work is significant, but the reward is invaluable because of the way these skills from small ensembles transfer into your large ensemble. I explain this briefly in my article about preparing for spring concerts.
Sectionals
A tried-and-true student-led musical activity is the coveted sectional. If you are in the middle of a concert cycle, this is an effective way to ensure that students have learned and feel comfortable on their parts. I often send students to sectionals throughout the year while I am absent. With a 75-minute class block, surely they would get a lot done, right? No! The time was too long. Because they knew they had a lot of time, they were actually less focused and intentional in their approach.
So, I decided to give them a little more guidance and hold them more accountable for their time navigating the music on their own. Now their expectation in sectionals is to choose specific parts in their music that are giving them issues and focus their time on those sections (yes, I know that’s how sectionals work). The added component is that they must then record and submit their performance of those sections. Now that they need to submit that performance, they will (hopefully) get those difficult sections to sound really good with a lot of repetition and practice. They might work for the full 75 minutes, but they might not.
The first time I took this approach, I was frustrated. How could students end their sectionals early? Surely, they know they should have worked the whole time! However, I understood after students gave me some feedback. They found that they were far more productive than they usually were because they had a clear goal and directive as opposed to being told to “go and work.”
Student-Led Rehearsals
A student conductor or a drum major who can run rehearsals offers many benefits. Your exceptional student gets podium time, which is valuable if they are planning to go into music education. The rest of your students receive feedback from another set of ears that you trained through your own teaching. Overall, students enjoy and have a lot of fun with a peer on the podium. Students will respect the right leader, but it’s also like letting the inmates take over the prison. It might be chaotic, it might be goofy, but if your expectations are clear, your students will get something done.
Students can also collaborate on the music together like a large chamber ensemble. While I have only done this process with my group under my supervision, there is no reason that they can’t be successful if they have the right tools. Learn more about this in my article about letting students take control during rehearsals.
Individual Practice
Another option is to have your students practice individually. Students will do their work in groups, and then are encouraged to practice individually on their music. If you want to get creative, have students create and try out a practice plan. I believe that many students do not practice because they do not know how to. I don’t know how to do origami, so I usually don’t unless I’m crumpling up some important document.
Make students write down a practice plan for various time lengths (10 minutes, 30 minutes, 60 minutes) that includes a warm-up and specific plans for their repertoire with timespans. Then they should try it!
Students will be surprised that they can’t warm up with all 12 major and minor scales around the circle of fifths and also in 3rds in two minutes. They also find out very quickly that they need more than two minutes to warm up for a one-hour practice session! With this activity, they learn how to practice efficiently and effectively, and you tricked them into practicing during class time!
________________________________________
These are just a few ways that your students can be productive and still play their instruments without you present at rehearsal. Don’t give your students a day off because there is already so little time, and my philosophy is that my students always play in class. Although they may not admit it, that’s what they want to do!
I linked to a number of other articles that I’ve written, not in an effort of self-promotion, but because many of these topics have led to my students being autonomous and my program being a machine that continues to run uninterrupted when I’m away from it. One of the biggest compliments I receive from substitute teachers is that subbing for me is easy because my students know what to do and take care of themselves.
It’s been called America’s greatest block party … and it runs for two solid weeks every year, starting on Fat Tuesday — the English translation of the French words “Mardi Gras.” New Orlean’s unique celebration is marked by costumes, parades, beads, food and sustenance of the liquid variety, all in abundance.
But music plays a big role, too. Let’s take a closer look at the genres that predominate the festivities, along with a list of the top Mardi Gras songs you’ll want to add to your streaming playlist.
Zydeco and Cajun
Louisiana is host to a confluence of cultures, including that of Native Americans, Africans, Canadians, Haitians and the French, among others. This has led to continuous creative strides in jazz and blues, as well as the development of regional music such as zydeco and Cajun, both of which are today considered part of the foundation of American music.
The two genres grew up in the bayou and are closely related, with similar instrumentation: guitar, accordion and/or fiddle, upright bass and some kind of percussion, which can range from a simple triangle or washboard to a full drum kit. Early on, many practitioners became more reliant on the accordion than the fiddle, possibly because the accordion did a better job of overcoming noisy revelers on crowded dance floors.
There are times when inspiration for new music springs from the communities that consume it. Such is the case with the Mardi Gras Indians, who are Black Americans that mask and dress in traditional Native American attire while parading in order to honor American Indians who helped protect enslaved people who fled from bondage — a practice that has existed for more than a century. Their street chants, once used in battle, are found in songs like the Meters’ “Hey Pocky A-Way” (see below). “Street music was the root of all the songs that got to be known as New Orleans rhythm and blues,” says George Porter Jr., bassist for the Meters and leader of the Runnin’ Pardners.
Much of the music associated with Mardi Gras arises from historical events. A good example is “Corey Died on The Battlefield” — a song inspired by a fight in a neighborhood where a Native American was killed. “Being folk music, it changes over time,” says Louisiana State University ethnomusicologist Joyce Marie Jackson. “Sometimes Corey’s a man, sometimes a woman.”
Top Mardi Gras Songs
These are some of the songs you’re likely to hear performed by marching bands (along with brass arrangements of modern R&B favorites) if you’re lucky enough to attend a Mardi Gras parade in person. Who dat!
There’s no song more closely associated with Mardi Gras than this jazz standard popularized by trumpeter and vocalist Louis Armstrong with his 1938 recording. Also known as “The Saints,” the song started as a Christian hymn, with the earliest renditions adopting a slow tempo. While the song’s writer remains unclear, a number of composers have sought copyright, including Luther G. Presley, Virgil Oliver Stamps and R. E. Winsett
New Orleans native Al Johnson, sometimes called Al “Carnival Time” Johnson, is best known for his performances of this song. First recorded in 1960, the tune has become a staple of the Mardi Gras celebration.
Adopted from the street chants of Mardi Gras Indians, “Hey Pocky A-Way” is a carnival favorite. The song was first released in 1974 by the New Orleans funk band The Meters, led by the late singer/songwriter Art Neville. Its title comes from early Native American vernacular, and is sometimes written as “Two Way Pak E Way,” which means “get out of my way.”
This tune drew little traction during its first release in 1953 under the title “Jock-A-Mo” by James “Sugar Boy” Crawford and his Cane Cutters. More than a decade later, the Dixie Cups gave the song new life as “Iko Iko.” Singer Barbara Hawkins has said that the rhythm came together by happenstance. “We were just playing around with it during a session using drumsticks on ashtrays,” she recalls. “We didn’t realize Jerry and Mike had the tapes running.” Legendary songwriters Jerry Leiber and Mike Stoller, who served as producers for the recording, then enhanced the track with bass and percussion.
This R&B favorite, which encourages listeners to visit New Orleans and participate in Mardi Gras, was co-written by Professor Longhair (Henry Roland Byrd) and released by him in 1949. (His 1959 rerecording featured a young Mac Rebennack on guitar, long before he became known as Dr. John.) Byrd is credited with originating a “rhumba boogie” style that fused elements of blues, barrelhouse and Caribbean influences.
This homage to Mardi Gras Indian groups became a local hit in New Orleans when Professor Longhair released his version in 1964 and is today a staple of most brass bands marching in Mardi Gras parades. Longhair’s recording features a whistled first chorus in a rollicking blues piano style, with lyrics written in mock-American-Indian pidgin. (Check out Dr. John’s instrumental version here.)
This catchy tune was first recorded in 1954 by the Hawketts, whose members included Art Neville, later of the Meters, who would release their own version two decades later. According to Hawketts drummer John Boudreaux, the group first tried to play the song in a calypso style before settling on the now-familiar mambo instead.
A positive culture is crucial to the success of your music program. It directly impacts students’ feelings of belonging as well as their participation and engagement. The culture of your program is influenced by your approach to teaching and rehearsing, but students are essential to promoting the positive culture you want to build.
Student leaders have firsthand knowledge about the temperature of your ensemble and how they feel about the environment in which they are working and learning. Collaborating with your student leaders will give you valuable information and help create a positive, open culture with your ensemble. If you are looking for ideas on where to start, check out this article on choosing student leaders.
Have regular meetings
A few years ago, I felt that our culture and community were not as strong as they had been previously. Afraid of what that meant for the health of my program, I met with student leaders — the four elected positions of president, vice president, publicity manager and social chair — to discuss their thoughts and feelings on the current climate in our rehearsals (as someone who constantly worries about what people think of him, I felt proud to have had the courage to ask this question!). As I should have expected, they provided a lot of really good, constructive feedback.
This started a tradition of regular meetings with student leaders to constantly evaluate the band’s culture and come up with ideas on how to improve it. There’s always room for improvement, and these frequent meetings have been a great way for me to meet with my student leaders, give them directives, and for them to bring their own ideas to the table. Each leader serves a unique and important role in improving culture, which they were elected to do. As the year gets busier, we might go longer between meetings, but that hiatus is often met with an inquisitive “when are we meeting next?” by one of the officers.
Give them autonomy
It’s important to give your student leaders autonomy in their ideas to engage students more. It is extremely rare for me to veto an idea from the leadership team. I’m willing to try something at least once. During our regular meetings mentioned above, the leaders wanted more section-building activities that may or may not be musical in nature. We decided that the last rehearsal before a break, we would run through our rep, then play Jeopardy! or Kahoot! The leadership team wanted a full block to play their game, but they knew I would never agree to something like that, so we agreed to the compromise of rep first, then the game.
The student leaders come up with great ideas that I am willing to listen to and try. Some of the ideas might be half-baked, but I just direct the team to figure out how they actually see it working, and once they can articulate that — sure, let’s give it a shot! You can trust that they have the ensemble’s best interest in mind because they were selected to be leaders (by their peers or by you) and they take that responsibility seriously.
Give them directives
Your student leaders want to help make your ensemble a fun and engaging place for everyone. It’s part of the reason why they chose to take on a leadership position. I admit that I’m often of the mindset of “if you want it done right, do it yourself.” But take my advice: Let the students take on some of the responsibility. Give your leadership team directives on what you would like to see and let them problem-solve on how to achieve that.
As mentioned earlier, student leaders have great ideas. If they have direction, they can solve all of life’s problems — OK, maybe not, but they will have ideas on how to achieve goals for your program. This is another reason why frequent meetings are important. Being able to discuss goals and ideas with the students is incredibly valuable for everyone.
Give them face time during rehearsal
Your students see and hear you repeatedly giving them announcements during rehearsals, and you know they aren’t actually listening by how surprised they are when a concert is coming up. Giving students face time during rehearsals can be beneficial to engagement for upcoming events, initiatives, fundraisers, and the list goes on.
The band president speaks frequently to the students at the beginning of rehearsal. As leadership changes, so do their agendas. You will find that different leaders take different initiatives.
For example, a band president from a few years ago asked for bulletin board space. Of course, I was willing to give it a chance. He put up a piece of the week, student of the week, motivational quotes and pictures. He had time at the beginning of class each week to share these with everyone — most band members thought it was a positive addition to our beginning-of-the-week rehearsal.
The initiative he took led to student leaders after him asking for time to engage with their peers on a variety of things, from socials to fundraisers and beyond. I’m happy to give up that time to further engage the students and help my leaders grow and feel that they are making a difference because they are.
Everyone is a leader
Every member of your ensemble can be — and should be — a leader in their own way. There are many ways students can be leaders, and I’m sure you could identify leadership qualities in every single one of your musicians. I am open to input from all my students, regardless of whether they have an official leadership role or not. Sometimes, I get ideas from students just from casual conversations in the hallway before or after rehearsal. Sometimes, students approach me with ideas. They all have skin in the game, so why not give them a chance to be a leader by bringing ideas to you?
Being open and receptive to all students’ ideas has created a positive culture in my program where students feel welcome and heard. This openness is a quality of being a leader yourself.
Regardless of whether you have a leadership structure in place, everything above can still apply with some modification. You could have meetings with students who asked to plan a social or outreach event. You can share your vision for your program with your students and give them autonomy over their ideas to help you achieve that vision. You can allow students to share important events or ideas during rehearsal.
________________________________________
You need students to create a positive culture. Students want to be part of something great; something bigger than themselves. It’s important to utilize student input from your leaders in order to create a culture that they find worth being a part of. By giving students a voice, autonomy, and direction, you are demonstrating to them how to be great leaders.
At Annandale High School, where Annie Ray is the Performing Arts Department Chair and Orchestra Director, more than 96% of students are classified as economically disadvantaged by the state of Virginia. A few years ago, the school had some of the lowest scores in the giant Fairfax County Public Schools district, the ninth largest school district in the country that serves more than 180,000 students.
Now, thanks in part to the “involvement intervention” and individualized student support program that Annandale High School implemented, Principal Shawn DeRose says that Annandale High is the top overperforming school in the district relative to its poverty rate. The key to the program is to incorporate the relationship-based approach that is common in the performing arts, where students in music and drama often have the same teacher for all four years of high school. This relationship keeps students connected to performing arts even when they are struggling academically, Ray says.
“Arts educators are often the first ones to notice that students are missing. We have these deep relationship ties with students, which create this huge sense of belonging in the school,” she explains.
As Ray gets to know her students and who they are over four years, the kids look more forward to coming to school. “Of course, those students are much more likely to open up to me about the struggles in their lives,” she says. “They’re comfortable enough with me to admit that they don’t understand something.”
Hip-hop artist Christylez Bacon teaches Annandale High School orchestra students. (Photo by Joyce N. Boghosian)
Looking at the Stats
Both the strong student-teacher relationship and what is taught between the notes and rhythms on the page of performing arts motivate students to attend these classes, Ray says. In fact, a 2024 study called “Chronic Absenteeism and the Arts in Virginia Public Schools: A Statistical Review” conducted by Robert B. Morrison, Annamarie Bollino, Kelly Bisogno and Patrick McCormick, found that students involved in performing arts showed significantly less chronic absenteeism (defined as missing 10% or more days, excused or unexcused, in a standard 180-day school year), along with higher test scores, better grades and a greater sense of belonging.
The researchers reviewed data from the Virginia Department of Education from 2018 to 2023, and identified students as “no arts” (students who did not take any arts courses) and “any arts” (students who took one or more arts courses). They further organized the data to look at just seniors based on “career arts” (students who have taken four years of arts instruction) and “non-career arts” (students with less than four years or no instruction).
The findings consistently showed that students in the performing arts had lower rates of chronic absenteeism. This report demonstrates a significant correlation between career-arts students and improved chronic absenteeism rates. Career-arts seniors from each year since 2020 show between 32.3% and 50.8% lower chronic absenteeism rates than those who are not.
Additionally, every senior class for each year shows a significant statistical advantage for the career-arts students. These findings held when comparing the data across multiple key variables such as race/ethnicity, gender, free and reduced-price meals, and English language learners. This indicates a strong correlation between career-arts students and lower chronic absenteeism rates.
“Seeing a student as an individual is foundational to Annandale High’s approach to engagement and inclusion,” Ray says. “The goal is to build the infrastructure that allows it to grow and become a sustainable model for other schools as well.”
In addition to DeRose, Ray credits the following for their work: Attendance Dean Cass Haynes, Dean Jacquie Blair, Dean Christina Licciardi, Pyramid Intervention Specialist Dannielle Causley and Assistant Principal Hanna Langstein.
At Annandale High School, the students who are in performing arts are less likely to skip school on the days that they have their performing arts classes. With this fact in mind, the school stopped pulling struggling students from electives to focus on remediation with extra science or math. Instead, students continue attending performing arts classes and music lessons, which motivate them to keep coming to school.
“Any student who is behind in learning and skipping school — all of that improves because they are staying in lessons. We are keeping students plugged into school via what makes them want to be at school,” Ray says.
Annandale High School also includes hosting monthly activity days for all students, who sign up for sessions to do something fun of their choice, ranging from knitting, Black Student Alliance and Future Business Leaders to basketball shooting practice and even playing Dungeons and Dragons.
“In one year with six sessions of the monthly activity days, the school saw a significant increase in students’ reported sense of belonging,” Ray says. “It works!”
The Key: Relationship-Building
The program is all about relationship-building with students as individuals as well as meeting students where they are and encouraging them to find ways to grow. Sometimes, Ray will have struggling students come to her music classroom during math or science class so she can check on them periodically and ask other students to help them.
“Once you have a kid in the habit of coming, and they are seen as an individual and see people invested in them, they want to show up,” Ray says. “Relationship is the essential and fundamental super key to what we do in performing arts.”
One of the benefits of teaching music is that in an age where kids are often glued to a screen, playing music is very hands-on and requires a student’s full focus. “When I’m working with a student, I get to know them without any technology in the way,” Ray says. “If a student is engaging in the arts, they’re not reaching for their phones.”
The Data
The Virginia Department of Education recently released Standards of Learning (SOL) scores from this past year, and the results speak for themselves. In reading, Annandale posted an impressive 83% pass rate, well above Virginia’s average of 74% and the Fairfax County Public Schools (FCPS) average of 79%. In math, the margin is even greater, with Annandale students achieving an 85% pass rate, compared to 72% statewide and 78% across the district.
In addition to strong performances in reading and math, Annandale has made significant gains in science over the past three years. Our pass rate has grown from 56% in 2023, to 67% in 2024 and now 71% in 2025. Biology in particular has been a standout success story. Over the past three years, our pass rate has climbed from 67% in 2023, to 76% in 2024 and now an incredible 86% in 2025, besting both the state and FCPS averages.
Moreover, we continue to expand our advanced course offerings. This year, we are partnering with Northern Virginia Community College to offer dual enrollment in World History and Auto Technology. In addition, for the first time in school history, we are offering Advanced Placement Seminar, an interdisciplinary course for sophomores that develops critical thinking, collaboration and academic research skills. This is in addition to our full array of International Baccalaureate courses.
These results are no accident. They reflect the “hard work of our students, dedication of our staff and support from families and the community,” Ray says. “You can continue that support by staying curious — ask your student about their learning, connect with teachers, attend games and performances, and help us share Annandale’s story.”
From Practice to Policy: Why This Matters Statewide
As this evidence has grown, policymakers have started to ask how Virginia can better recognize and encourage the kinds of student experiences that keep young people connected to school. One response currently under consideration is House Bill 478, known as HB478. The bill would establish a Diploma Seal for Excellence in Fine Arts. Like existing diploma seals in areas such as STEM, civics, career and technical education and biliteracy, the fine arts seal would formally recognize students who demonstrate sustained achievement in music, theater, dance or visual arts.
HB478 acknowledges what schools like Annandale are already showing. When students feel seen, valued and engaged through the arts, they are more likely to attend school consistently, persist through challenges and graduate prepared for college, career and life beyond high school.
By elevating fine arts achievement to the same level of recognition as other diploma distinctions, HB478 aligns state policy with both research findings and real-world outcomes highlighted in this article.
Parents, educators and community members all have a role in supporting policies that strengthen student connection to school. Readers who are interested in advancing the work described here can choose to contact their local delegate or senator to share why arts education matters for attendance, belonging and graduation outcomes. National Association for Music Education members can take 5 minutes to complete this form to show their support. Sharing this article with school leaders or community groups can further elevate data-informed conversations about chronic absenteeism and student engagement.
As Virginia continues to address challenges related to attendance and disengagement, policies that recognize proven, relationship-driven approaches like sustained participation in the arts can help ensure that more students show up, stay connected and succeed.
Drumming is a vital part of any marching ensemble and is especially important for the bands in New Orleans — a city that has been a cultural melting pot throughout its history. Nowhere is that more evident than in its music, which evolved from African, European, Caribbean and Native American influences.
One of the most visible examples of the city’s musical diversity is its marching band tradition. Such bands and “Second Lines” — a type of musical procession unique to New Orleans — are ubiquitous year-round in the Crescent City, but are most visible during the Mardi Gras season.
In case you’re wondering, “Mardi Gras” is French for “Fat Tuesday,” which falls each year on the day before Ash Wednesday, the start of Lent. The term is said to have derived from “Boeuf Gras,” which means “Fat Ox,” and referred to the 17th-century French tradition of eating fattened farm animals on the day before Lent. Fat Tuesday marks the end of two weeks of intense partying, with parades and marching bands abounding. It’s a celebration of the end of Carnival, which begins each year in early January and is celebrated in many countries throughout the world.
Multicultural Roots
Nearly fifty years after its French founding in 1718, New Orleans became a Spanish territory. It remained that way until 1800, when Spain ceded it back to France. Just three years later, the region became the property of the United States as a result of the Louisiana Purchase.
New Orleans was a busy port that was integral to the slave trade until the end of the Civil War. During the Spanish colonial period, slave laws were not as onerous as they would later become. Enslaved people were often given Sundays off and allowed some freedom of movement. Many would gather in Congo Square — a plaza located in the neighborhood that’s now called Tremé — to play and dance to the music from their home countries.
Congo Square played a significant role in developing the musical traditions of New Orleans, particularly drumming. The syncopated rhythms played in those gatherings, such as the “Bamboula,” are considered a foundation of what we think of today as New Orleans-style beats.
On the March
A New Orleans jazz funeral band.
Marching bands have long been a staple of New Orleans music. Their origins go all the way back to the 1830s, when they were primarily military-style ensembles. After the Civil War, emancipated African Americans began forming marching bands, which typically featured brass instruments and usually a pair of drummers: one on bass drum and one on snare.
Such bands became a staple of African American funeral processions, later known as “jazz funerals,” a tradition that continues today. The musicians would play slow dirges as the mourners marched to the cemetery along with the rolling casket. Then they’d play upbeat music on the way back, and the people would dance to celebrate the deceased person’s life. The rhythms they played had a heavy West African influence, as did the dancing of the marchers, which came from West African circle and ring shout dances.
The Second Line
Marching bands performed at many different social events in New Orleans, but the type of procession they formed at funerals became adopted at parades and eventually became known as the Second Line. (The “First Line” is the main section, featuring a full brass band.) The Second Line consists of additional musicians and assorted other marchers who dance and engage with bystanders — a style called “second-lining.” Some have termed this “the quintessential New Orleans art form — a jazz funeral without a body.”
Second Line drumming, particularly for the snare drum, is improvisational, which sets it apart from the highly regimented snare parts in traditional marching bands. At small Second Line parades, the person on bass drum will typically set a steady rhythm, emphasizing the first and third beats of a measure, while the snare player adds syncopated counter-rhythms. At larger parades like those held at Mardi Gras, a second line snare drummer typically follows the brass band, playing off of the marching beat with improvised polyrhythmic figures that can inspire the second line dancers or even the band itself.
Yamaha MS-9414 marching snare drums.
Mardi Gras Celebrations
Up until the late 1800s, the inner-city population of New Orleans was largely shut out of Mardi Gras festivities, which had traditionally been a province of the upper class and consisted of fancy dress balls featuring classical musicians and ballroom dancing.
But at the turn of the 20th century, especially in poorer neighborhoods, people started their own Mardi Gras celebrations. They formed their own Social Aid and Pleasure Club organizations (better known as SAPCs or “krewes”), which began sponsoring parades and other events. Thus began a tradition that’s still a big part of the African American Mardi Gras experience: dressing up in costumes and trying to outdo rival krewes in both music and regalia.
Mardi Gras Music
At around the same time, Dixieland jazz and ragtime were developing as popular musical forms, and both had a major impact on the music played at Mardi Gras. Over the years, additional musical styles have become integrated into the festivities, including jazz, R&B, gospel and funk.
Today, if you’re lucky enough to visit New Orleans during Mardi Gras, you’re sure to see and hear lots of bands of all varieties — everything from small Second Line ensembles to full traditional marching bands with complete brass and marching percussion sections that include multiple snares, bass drums, toms and other marching instruments. High school and HBCU (Historically Black Colleges and Universities) marching bands from as far away as Kentucky, North Carolina and Virginia regularly perform at Mardi Gras parades in The Big Easy, with many incorporating Second Line rhythms into their material.
But Mardi Gras isn’t the only time of year you can enjoy New Orleans’ rich musical offerings. On any given Sunday afternoon, you can visit Congo Square and listen to (or even participate in) drum circles playing traditional West African polyrhythms and Second Line beats on hand drums. Or you can go to famous Bourbon Street in the French Quarter, where many bars offer live music nightly, featuring bands with drummers who interpret infectious New Orleans rhythms on standard kits instead of drumlines.
Whether you play drums or just like to listen to great music, the vibrant New Orleans music scene offers something for everyone!
Photographs by Deborah Gremito and Getty Images / Philip Gould
Yamaha offers a wide range of marching drums. Click here for more information.
When I started what is now We Make Noise, I didn’t plan to build a global organization — I was trying to survive in the music industry. The short version:
I was unhappy as an artist and actively planning a transition.
I was one of the only women working for an array of music-tech companies.
My private students — almost all women — kept telling me the same thing: I explained things in a way they understood and made them feel powerful.
That chorus — and those people — pointed me toward the mission.
Back then, the “fix” was an IndieGoGo campaign to fund an online music-production curriculum — before the internet was overflowing with tutorials. I launched it with one of my artist releases to drive awareness. Within a few months, we were fully funded, and the Lower Eastside Girls Club invited us to incubate the program in their space and community.
It all happened very quickly. Before I fully understood what I was building, I found myself in a major sink-or-swim moment — in front of a classroom of 13-year-old girls, teaching them how to sequence MIDI in Ableton using a Push 1. If you’ve never taught a room full of pre-teen girls, let me tell you: It is exhilarating, hilarious and, still to this day, the most nervous I’ve ever felt while teaching. The questions come fast, the energy is real, and every minute demands clarity, patience and purpose. It was baptism by fire — and it was the moment I knew that I loved teaching and that this work mattered.
Growing Momentum and Opening Doors
After a few years, momentum kicked in — slowly at first, then all at once. So much of my artist career felt like an uphill climb, but when I focused on advocacy, the friction eased and doors started opening. We launched our first chapters in Minneapolis and Los Angeles, and the circle widened. I accepted a full-time role at Berklee College of Music and moved from New York City to Boston. More chapters followed, and with each one, new opportunities kept arriving.
It’s 12 years later, and that circle has a name and a global footprint: We Make Noise (WMN). We’ve grown up alongside our community — maturing our programming for early and emerging creatives, deepening our partnerships and network, and building pathways that go beyond first contact to focus on real professional opportunity. We remain grounded in our core principles — education, community, opportunity — and we’ve evolved to meet our creators’ needs as they grow with us.
My Story and Approach
My entry into music tech wasn’t smooth. I didn’t have anyone to show me the ropes, so in 2006 I taught myself — mostly by Googling terms, equipment and processes. That led to a lot of tutorial videos and plenty of trial and error. I took whatever I learned and applied it to what I was doing, stumbling forward until concepts clicked. It was the opposite of easy, but it unlocked something in me: I could finally name the ideas that had been floating in my head and shape them in sound. I became obsessed. With each new skill, I had another tool to express my musicianship — the process was difficult but empowering.
That DIY learning curve ended up shaping my entire career. I discovered how many people — especially women — quietly shared my experience: feeling powerless over their careers and even over how their own music sounded. With me, they felt safe and powerful. Because I had taught myself with a songwriter’s brain, I could translate concepts and tools into language that made sense. What I didn’t fully recognize at first was that I also had both high-level musicianship and technical chops — skills the industry historically split into separate roles. Being able to flex both sides at once made me distinctive and, ultimately, employable.
Once I figured it out for myself, it felt like a responsibility to teach the next person — and the next — and watch them carry it back to their own communities. A teach-forward chain. Looking back, that version of me was audacious and a little naïve — but relentless effort, an entrepreneurial mindset and good timing turned it into reality.
My teaching has always been intentionally hands-on — leading with the musical tool and not the technical function. I taught signal flow by co-writing songs and recording vocals, automation by shaping emotion, arrangement by moving blocks on a screen until the song felt like it was breathing. I mimicked my own experience and built confidence through completion: one beat, one loop, one verse, one song, one set — repeat. Believe it or not, I’ve taken plenty of flak from the old guard for leading with music first in music-tech education — songs before software manuals. But that approach is exactly what set me apart.
What We’ve Built (So Far): A Snapshot of Impact
As our community has advanced and spread across the world, we’ve evolved alongside it. Early on, our focus was foundational production and engineering literacy; now, our mandate is to get people into the rooms where the work — and the magic — happens. Here are a few of those highlights and programs.
The Hub (Digital Membership Platform): The We Make Noise Hub centralizes workshops, short courses, certifications, office hours and opportunities for our global community. We’ve welcomed 500+ members, delivered six branded online courses and certifications with leading music-tech partners, and we have seen direct industry hires as a result. Members get practical perks — discounts, job postings, feedback sessions with publishers and supervisors — and they join a living network of peers and mentors who they can actually reach.
WMN Sessions (Songwriting & Production Camps): We Make Noise Sessions are multi-day songwriting and production retreats for women and gender-expansive creators to craft material for today’s rising and established artists. They bypass gate-kept opportunities, putting our people directly in rooms they’re rarely invited into. In the past four years, 236 participants have attended; 71 earned writing/production/engineering credits across 22 releases. These camps are powered by long-standing partners including Sweetwater, The Music District, Amazon Music, She Sounds, She Is The Music and more.
Label and Releases: The We Make Noise Label exists to carry the baton across the finish line. A signature moment was “Let Me Be Water” with artist/activist Madame Gandhi — a 10-song album born in our 2023 camp that helped 40+ participants earn professional credits. The project is now under GRAMMY® consideration (New Age), and whether we win or not, it demonstrates how an equitable process can produce competitive outcomes.
Revenue-Sharing and Hiring: We always try to tie opportunity to income. Between being the only non-profit in-house label within Splice, as well as a partnership with BandLab, we have hired 38 creators and raised/made $85,000+ in revenue and shared it with contributors. That matters. It models how learning pipelines can become earning pipelines and shows students, parents and partners what equitable economics looks like at the ground level.
Global Presence and Spanish-Speaking Communities: So much of our progress comes from partnering with local leaders worldwide. Our multi-country chapter network runs programs tailored to each scene — then plugs into a global pipeline of education, community and opportunity. In Spanish-speaking regions, growth has accelerated through our BIME (Bilbao/Bogotá) partnership and includes co-programmed panels, WMN-led sessions and direct connections to decision-makers across Spain and Latin America. In 2025, we hosted our first fully Spanish WMN Sessions in Madrid, uniting artists, writers and producers from Europe and LATAM — and proving that the model travels and thrives.
Where We’re Going Next
It still feels like we’re building the plane while flying it. On paper it looks big. In practice it’s been 12 years of trial, error and writing our own playbook, which is hard, messy and worth it.
Next year, we’re doubling down on opportunity and professional development.
Our focus:
Pipelines: more direct routes from learning to paid work.
Creator program: connect our community’s content makers with industry partners.
Credits: increase writing/production/engineering credits from WMN Sessions and label projects.
Placements: more jobs, internships and commissioned work.
Credentials: additional certifications and skill badges that translate to hireability.
Show floor demos and visibility: more stage time, more hands-on, more proof of talent.
More credits. More checks. More careers in motion.
I didn’t set out to build a global non-profit. I wanted to open a door and then keep it open long enough for a bunch of people to walk through. My hope was for some to hold the door open for the next person. The one thing that I want fellow educators to take from our journey: Design the room you wish you had when you were learning, then fill it with people who will push, support and do the work together. The rest — partners, programs, press, even awards — follows the evidence of what your learners can do.
Ah, Valentine’s Day! Love is in the air, and chocolates and flowers abound. But music can also play a big role when it comes to romance. Here are the stories behind ten love songs sure to set the right mood.
1. Love Me Tender
This 1956 Elvis Presley hit put new words to an adaptation of the Civil War hymn “Aura Lee,” published in 1861. The principal writer was Ken Darby, though the lyric was credited to his wife Vera Matson … and to Presley, whose manager “Colonel” Tom Parker demanded that songwriters concede 50 percent of their credit — and income — if they wanted Elvis to record their work. When later asked why he named his wife as co-writer instead of himself, Darby replied sardonically, “Because she didn’t write it either.” Listen to it here.
2. I Can’t Stop Loving You
Country singer Don Gibson wrote this one hot afternoon in Knoxville, Tennessee in 1958. Four years later, Ray Charles only needed to hear the first two lines before deciding to record it for his album “Modern Sounds in Country and Western Music” … and the rest is history. Listen to it here.
3. And I Love Her
This classic Beatles song, featured in the 1964 movie A Hard Day’s Night, was sung and mostly written by Paul McCartney, though he had some help from John Lennon on the bridge. George Harrison contributed the signature acoustic guitar lick, underpinned by Ringo Starr’s gentle bongo drums. It’s a great example of how the individual strengths of the four members of the group meshed together so well. Listen to it here.
4. Your Song
Composed and performed by Elton John with lyrics by his longtime collaborator Bernie Taupin, this originally appeared on John’s self-titled second album, released in 1970. Interestingly, it was originally just the B-side to “Take Me to the Pilot,” but was preferred by the disc jockeys of the era, and so the two sides were flipped. Listen to it here.
5. Love Will Keep Us Together
First recorded by Neil Sedaka in 1973, this became a worldwide hit two years later when it was covered by The Captain & Tennille (keyboardist Daryl Dragon and his wife, singer Toni Tennille). The duo acknowledged Sedaka’s authorship—as well as his mid-1970s comeback — by working the phrase “Sedaka is back” into the song’s fadeout, accompanied by applause from the studio musicians. Listen to it here.
6. How Deep Is Your Love
This 1977 Bee Gees hit was a big part of the soundtrack to the film Saturday Night Fever … yet the brothers Gibb hadn’t seen the script for the movie when they wrote the song — in fact, they weren’t even certain that there would be a love scene in the film! Listen to it here.
7. I Want To Know What Love Is
The members of Foreigner weren’t sure that this power ballad should even be a single when they recorded it in 1984, with singer Lou Gramm concerned that it might do irreparable damage to their rock image. Songwriter / guitarist Mick Jones later told Billboard the track was released “because it was coming out at Christmas and it had the right kind of mood.” Listen to it here.
8. I Just Called To Say I Love You
Written, produced and performed by Stevie Wonder, this remains his best-selling single to date. Used in the soundtrack to the 1984 Gene Wilder movie The Woman in Red, the song won both a Golden Globe® and an Academy Award® for Best Original Song, as well as three Grammy® nominations. Listen to it here.
9. I Will Always Love You
Whitney Houston’s signature song, released to accompany the 1992 film The Bodyguard, was originally a Number 1 hit for the woman who composed the tune, Dolly Parton … not just once, but twice, in 1974 and again in 1982. Listen to the Dolly Parton version here, and the Whitney Houston version here.
10. Love Story
Taylor Swift wrote this 2008 hit about a real guy she was dating. Her family disapproved, inspiring her to base the song on the most famous love story of all — “Romeo and Juliet” — but this time with a happy ending. Listen to it here.
Balancing all this was central to planning the curriculum for our beginner course. Learning to read and share music through notation provides a more complete music education. Additionally, traditional music reading in guitar and ukulele has fostered an interest in music theory and other elective courses. How do we teach traditional notation reading and melodic playing in our entry-level course?
One-Week Crash Course in Music-Reading
Before starting the method book, the class spends a week on basic music-reading. While many students have some knowledge reading music from previous music courses, this preemptive unit assures that everyone is on the same page. This one-week crash course focuses on pulse, rhythms and note-reading in treble clef. I use a variety of free resources like musictheory.net to provide direct instruction and rely on worksheets and online note-naming and rhythm identification activities to give students ample practice before applying their skills to the guitar or ukulele.
Method Books
For the beginning course, we use the Alfred Method books for guitar and ukulele. The books mirror each other in form and structure and allow for an easy transition when we swap instruments at the quarter. When choosing a method book talk with others who specialize on the instrument. Guitar pedagogue, performer and recording artist David Cullen recently recommended the Hal Leonard series to me. There are dozens of great method books out there and I encourage you to find one that best suits your needs.
The Alfred books are well-structured, beginning with instrument care, playing technique, tuning and general knowledge before introducing a brief tutorial on reading music. Students identify note names on the staff and their rhythmic values in small chunks (usually one measure at a time). The book introduces new notes on one string at a time and gives four to six exercises on those notes before moving to the next string. There are pink highlighted reference boxes at the top of each section that show the note on the staff, a fret diagram and a photo of someone playing the note. Just like for chord teaching, photos are extremely impactful to student learning.
Throughout the book there are pages that introduce new musical concepts, such as different meters, music symbols, repeat signs and more. The book also integrates chords as students’ playing ability progresses. For our course, the chord integration sections are usually the final points we teach in the course.
Teaching from The Book
When introducing a new section, I begin by showing students the note on the fret board. Then, students fret the note, pick it and say the note name aloud. I encourage them to look at the note on the staff in the reference box at the top of the page as they play the note. (Note: it is critical to get students fretting close to the top of the fret with a rounded left hand as they learn to play.)
After playing through and identifying the new notes, I walk students through exercises, or “book songs,” using the following steps:
Note naming: Have students identify the note names on the staff and their rhythmic values in chunks (one measure at a time usually works well).
Chunking: Have students play small sections of the selection together while saying the note names. After students have mastered a small section, they can play another small section and then link those together.
Call and Response: Play small sections of the selection for the students and have them play it back while tracking the notes on the staff.
Finger Names: One thing that really helps some students is saying the finger number/fret number instead of the note name. Just make sure that students track the notes on the staff as they say the finger/fret number so they learn to read the notation.
As I deploy these steps, repetition is the key to success. Students must be given the opportunity to succeed by allowing opportunities to make errors.
Individual Work
Group instruction from the method book is brief compared to the amount of independent melodic practice that students do. Students working independently can work at their own pace and self-reflect on their performance. I walk around the class and provide direct feedback and instruction to students — I think of these as mini one-on-one lessons.
Students are assigned two to three songs a week. The songs in the method book are original educational etudes as well as standard folk songs that you find in many beginning instrumental books. Each day during class, students are allotted time to practice, ask questions, collaborate with a peer and perform their selections. I help students with everything from technique to dynamic contrast depending on the ability of the player. I really enjoy this individual work because it better serves students then a one-size-fits-all group approach for every song.
Learning Management Systems in Guitar and Ukulele Teaching
One of the most unexpectedly valuable tools is the assignment record feature in Canvas, our school’s learning management system (LMS). While I am more than happy to listen to every student play their selections, having students record and submit selections in Canvas has many benefits.
First, it creates a learning artifact. Recorded videos allow me to give specific feedback that students can observe and note in their videos; something not possible in a real time performance. The artifacts can be shared with parents, administrators or used for peer reviews. I have also found that having students record themselves creates a natural cycle of self-reflection because they must review videos for submission. Often students will even leave comments in their recordings, noting things they think they did well or incorrectly.
As a teacher, using the LMS to capture, grade and provide feedback on weekly song performances creates a lot of flexibility in my classroom. I am able to target students who need assistance during class time, and monitor and encourage all students. It also facilitates the different work and learning styles of students.
Learning to read and play from a method book may not seem exciting at first, but student feedback has been overwhelmingly positive. Most students appreciated the opportunity to learn to read traditional notation and some expressed interest in continuing to learn through a music theory class. One student said she was able to use her skills to play out basic melodies for her church worship group.
Do you have a great method book or instructional idea for teaching students to read traditional notation on guitar and ukulele? Feel free to share it with me.
If you’re staying in this year for Valentine’s Day, you might be at a loss for what to watch. We’ve gathered our list of the 10 movies you should check out for date night — some that are funny, some that are thought-provoking, but none that are overly sentimental. (Warning: spoiler alert.)
1. 50 First Dates (2004)
Here’s a movie that offers a different take on romance. Adam Sandler plays the role of a veterinarian who’s living on Oahu, studying marine animals. He’s your typical bachelor, whose standard has become a slew of one-night stands. However, when he falls for a local art teacher named Lucy (Drew Barrymore), she presents a unique challenge: a car accident from the year before has left her with short-term amnesia. Because she forgets him, he has to figure out how to win her over every day. Find out where to stream it here.
2. The Notebook (2004)
No Valentine’s Day is complete without this cult classic. Based on Nicholas Sparks’ 1996 novel of the same name, this romantic drama stars Ryan Gosling and Rachel McAdams, who play a young couple from the 1940s. While McAdams’ character Allie Hamilton comes from a wealthy family, Gosling’s Noah Calhoun decidedly comes from the wrong side of the tracks, which causes the couple to part ways. However, they find their way back to each other years later, as a testament to the undying nature of love. Find out where to stream it here.
3. Pretty Woman (1990)
This film is equal amounts romance and comedy. Julia Roberts’ character Vivian Ward is a sex worker who meets wealthy businessman Edward Lewis (Richard Gere). While Ward is initially hired to accompany Lewis to just a few functions, the two grow close over a week’s time, revealing exactly where their similarities and differences lie. Named after Roy Orbison’s 1964 hit song “Oh, Pretty Woman,” the movie is also the source of the famous line, “Big mistake. Huge.” It’s what Ward says to a high-end retail store worker on wealthy Rodeo Drive after the employee turns Ward away for how she’s dressed. Find out where to stream it here.
4. The Proposal (2009)
This is a tale of a green card marriage gone right. The movie follows an overbearing book editor named Margaret (Sandra Bullock) and her assistant Andrew (Ryan Reynolds), who embark on a sham engagement so that Margaret won’t have to face deportation back to Canada. They initially start out as an unhappy couple, forced to be together for Margaret’s benefit, but things fall in their favor and Margaret’s tough exterior surrenders. Find out where to stream it here.
5. The Big Sick (2017)
The Big Sick is one big, romantic culture shock. The story centers on an unexpected relationship that unfolds between Kumail Nanjiani and Zoe Kazan’s character Emily. After the pressure from Kumail’s family to have an arranged marriage leads to the couple breaking up, Emily becomes hospitalized for an illness. Her parents arrive and they tell Kumail his presence isn’t necessary, but he sticks it out and slowly wins them over while continuing to stand firm against his own family’s wishes. Will the battle he wages to make his own choices prove worthwhile in the end? Find out where to stream it here.
6. The Apartment (1960)
Here’s the perfect throwback film to watch on Valentine’s Day. It’s the story of an insurance clerk named C.C. “Bud” Baxter (Jack Lemmon) who climbs the corporate ladder by allowing his managers to use his New York City apartment for their illicit affairs. Bud ends up falling for Fran Kubelik (Shirley MacLaine), an elevator operator in his office building. There’s just one thing: She’s taken, by his boss no less. Now Bud has to figure out whether she’s worth fighting for. Find out where to stream it here.
7. Eternal Sunshine of the Spotless Mind (2004)
Love isn’t always perfect and this movie is proof of that. Here, we follow the erstwhile couple Clementine Kruczynski (Kate Winslet) and Joel Barish (Jim Carrey), who, in a science-fiction twist, have their memories of each other erased. Yet they somehow find each other again and have an iconic date where they ponder their fates as they lay on their backs on the frozen Charles River in Boston. Is it too late for love to return? Find out where to stream it here.
8. Crazy, Stupid, Love (2011)
This film tells the timeless story of a married couple who find themselves in a rut and eventually divorce. After Cal Weaver (Steve Carell) gets his wife Emily (Julianne Moore) to admit that she is cheating on him, he moves out, only to meet Jacob Palmer (Ryan Gosling), who teaches Cal how to flirt with women at bars and gives Cal the boost of confidence he needs. The movie closes with a glimmer of hope: Will Cal and Emily find their way back to one another? Find out where to stream it here.
9. Just Friends (2005)
Reformed playboys are often at the heart of romantic comedies like this one. It starts with an overweight New Jersey high school student named Chris Brander (Ryan Reynolds) who is in love with his best friend, Jamie Palamino (Amy Smart) even though she ultimately friend-zones him. Years after leaving his hometown with his tail between his legs, Chris returns, having shed the excess pounds and with a cushy job in hand. He reconnects with Jamie and, while he wants to treat her like all the other women before her, he ultimately stops himself when he realizes her friendship is important to him. Find out where to stream it here.
10. The 40-Year-Old Virgin (2005)
While this film isn’t your typical romantic fare, it will have you laughing. It stars Steve Carell as Andy Stitzer, a 40-year-old virgin who works at an electronics store. Once his coworkers — played by Paul Rudd, Seth Rogen and Romany Malco — find out, they’re determined to help him lose his virginity. While he picks up some game from them, he seems like a hopeless case … until he meets Trish (Catherine Keener). Find out where to stream it here.
In this article, I will share how I teach beginner-level high school guitar and ukulele classes using chord-based songs. In a separate article, I focus on learning melodies from traditional notation using method books.
Teaching Chord-Based Songs
Learning to play chords in an accompanying style along with popular music is what draws most students to the guitar and ukulele elective. While there are many method books that help you teach students the chords to their favorite pop or rock hits, I have built my own instructional content when teaching these selections because it allows me to:
Tailor selections to meet our curriculum.
Use songs that directly appeal to each class’s musical interests.
Present the material in a structured manner that emphasizes practice and reinforcement.
Simplify/modify selections to meet the needs of my students.
The songs you chose to study will vary based on your curriculum and your students’ interests, age level, experience and general skill level entering the class. I look for songs that are geared toward teaching students chords in common key signatures like C major, G major, D major, E major, etc. One great thing about teaching chords in common keys is that you can substitute a large number of songs that share the I, IV and V chords in those keys based on student interest.
I start the semester with one-finger chords, which use only the top three strings to ease students into chordal playing. This is great for scaffolding because you can teach a song with the reduced chord fingerings and then introduce the full chord once students have mastered the technique.
As I continue through this article, I will refer to my slide deck for “Eleanor Rigby” by The Beatles, one of the first songs I teach. My slide deck includes materials for guitar and ukulele. Feel free to use it for your classes!
I start with “Eleanor Rigby” for several reasons.
It uses only two chords.
The chords are common and not technically challenging.
It introduces major vs. minor.
It has a simple, steady strum pattern.
Students often know and enjoy the song.
The Beginning of the Teaching Process
Slide 1: Every instructional unit for a song starts with me identifying the song and artist and listening to a recording of the song. I usually pull these from YouTube and sometimes provide multiple examples, especially for selections like “Twist and Shout,” which have several well-known recordings.
Slide 2: The next step is to identify the key signature and the chords within that key signature. Students will learn the I, IV and V chords in common keys and recognize their relationship within the key signature. Because “Eleanor Rigby” only uses two chords and is the first selection I teach, I use this opportunity to teach major vs. minor chords. Most students in my guitar and ukulele classes have limited knowledge of music theory, so I focus on identifying the audible characteristic differences of major vs. minor. This is a great opportunity to plant the seed of interest in music theory!
Introducing Chords
Slide 3 and 4: Next, I introduce students to the chords using chord charts and photos. For this to be effective, students must already have an understanding of how to read and apply chord charts.
I recommend including photos of someone playing the chord along with the chart. I didn’t originally use photos in my lessons, but when I did, I received a lot of positive student feedback. You can take photos yourself or find examples with a simple Google search. There are almost endless resources for chord charts, but I make a lot of my own on chordpic.com, which allows me to customize finger placement and make all my charts consistent.
When teaching students chord charts, I describe where every finger goes but description alone can be confusing — for example, when we move “down” the fretboard, we are moving up in pitch. Demonstration and physical assistance are really the keys to success. If you have a camera, project your hand placement on a smart board. As students are figuring out the finger placement of the chords, you should circulate around the room and provide feedback. Pointing to locations on the fret board as well as guiding their fingers to the right destination, with their permission, is a quick and effective way to help students figure out finger placement.
To reinforce chord finger placement, have students squeeze the shape for 10 seconds, release for 10, then repeat. This will help them develop muscle memory and develop strength with their fingers and fingertips.
Once everyone’s fingers are correctly placed, allow students to free strum a bit so they can hear the chord and get used to avoiding strings if the chord calls to only play certain strings.
Note: There are many “correct” fingerings for a chord, but I choose ones that keep fingers in the same location when transitioning to the next chord, which minimizes motion.
Chord Transitions
Slide 5: Next is one of the most challenging parts of teaching guitar: chord transitions. On this slide I outline a structured progression of exercises that you can use to help students build confidence transitioning between chords, which can be applied to any song. The goal is to create “transition time” between chords early on and then reduce that time as they gain confidence and accuracy.
There are a few big ideas that students must think about as they learn chord transitions:
Think about common finger placement between the transitioning chords.
Think about minimizing the amount of motion necessary.
Think about the overall shape of the hand in that chord and not just individual fingers.
I often spend several days on transitions before putting the song together.
Putting it All Together
Slide 6: Next, I teach the strum patterns through counting, speaking, demonstration and repetition. Students play the strum pattern on every chord as a way to reinforce both the strum and chord shapes. I include simplified strum patterns where I can so students can achieve success quickly.
Slide 7: Next, we put it together and start making music! Early on in the course, I break down the song into sections of the form and focus on teaching how many strums or counts to play on each chord. As we progress, I will move into playing the chords along with the lyrics so students associate the chords with the form and not just a number of counts.
Just like anything else in music, the key to success is SLOW practice and ACCURATE repetition. For ”Eleanor Rigby,” I teach one section at a time and highlight the repetitive nature of most chord progressions. Once students have mastered the sections, I move to adding the lyrics on top of the progression.
Slide 8: The final step is to add lyrics to the progression. Just like the previous slide, students will play the progression and pattern in each section and then add lyrics on top. Initially, I prefer to sing along with the selections. This gives me a lot of flexibility with tempo as we are learning as well as stopping, starting and repeating with ease. When students are ready, I have them play along with a recording.
When playing with a recording, note that you may have taught the song in a different key than the original … no problem! I highly recommend using the free Transpose tool, which is an extension on Google Chrome. This allows you to shift keys and tempos on YouTube selections. I love this tool for my courses and my own individual practice.
________________________________
There are many other great pedagogical strategies that can be used and deployed within this framework. If you would like to share one, please email me and check out my article on teaching students to play melody with traditional notation.
Romantic comedy movies (better known as RomComs) can bring warmth to the spirit even in the depths of winter — and of course are required viewing for Valentine’s Day! Here are the top RomComs of all time.
1. WHEN HARRY MET SALLY (1989)
This classic was directed by Rob Reiner and stars Billy Crystal and Meg Ryan as Harry Burns and Sally Albright. The two first meet in Chicago after college graduation and then share a ride to New York City. Through a series of chance encounters over the years, they eventually start to fall in love. The lunch scene, filmed at the Big Apple’s famed Katz’s Delicatessen, is one for the ages! Find out where to stream it here.
2. MOONSTRUCK (1987)
What would Valentine’s Day be without this flick? It stars Cher as Loretta Castorini, a 37-year-old widow living at home with her parents and grandfather in Brooklyn, who accepts a proposal from her boyfriend but finds herself falling for his younger brother. Plot twists, pasts, futures and romance all perfectly enmesh, thanks to Cher’s stunning performance, along with that of a great supporting cast that includes Nicholas Cage, Danny Aiello and Olympia Dukakis. The film received six nominations at the 60th Academy Awards®, with Cher bringing home the Best Actress Award. Find out where to stream it here.
3. YOU’VE GOT MAIL (1998)
Tom Hanks and Meg Ryan star in this tale of an online romance where the two parties share no information about their personal lives. The twist is that the burgeoning couple are actually business rivals. They eventually meet but don’t discover their real connection until it finally reveals itself through an email exchange. You have to watch it to find out the rest! Find out where to stream it here.
4. SLEEPLESS IN SEATTLE (1993)
Yes, it’s another RomCom with Tom Hanks and Meg Ryan but the resemblance ends there. In this uplifting story, Annie Reed (Ryan) is a journalist who, although engaged, becomes interested in recently widowed architect Sam Baldwin, played by Hanks. Having just moved to Seattle with his son, Baldwin gets on a talk radio show to discuss his feelings, which leads Reed to fall for him. Find out where to stream it here.
5. PRETTY WOMAN (1990)
This big budget film centers on escort Vivian Ward, played by Julia Roberts, as she crosses paths with Edward Lewis, a powerful corporate raider from New York, played by Richard Gere. One night during a business trip, Lewis mistakenly drives into Hollywood’s red-light district, where he meets Ward, who shows him how to operate the manual transmission shift of his sports car. Despite the differences in their lifestyles, the two end up together. Find out where to stream it here.
6. COMING TO AMERICA (1988)
Directed by John Landis, Coming to America showcases the many talents of Eddie Murphy, who created the story and also stars as crown prince Akeem Joffer of the fictional African nation of Zamunda. Seeking an escape from his upper-class life and upcoming arranged marriage, he and his best friend/personal aide Semmi, played by Arsenio Hall, travel to Queens, New York where they take jobs in a fast food restaurant and rent a tenement apartment. In search of an independent woman, Joffer eventually finds love with Lisa McDowell (Shari Headly), with whom sparks begin to ignite. Find out where to stream it here.
7. ROMAN HOLIDAY (1953)
This black and white classic stars Audrey Hepburn and Gregory Peck, and would net Hepburn an Academy Award for Best Actress. She plays Crown Princess Ann, who while touring Rome away from her duties, takes a sedative from her doctor and falls asleep on a bench. American reporter Joe Bradley, played by Peck, finds her and takes her back to his apartment for safety. Needless to say, romance ensues! Find out where to stream it here.
8. IT HAPPENED ONE NIGHT (1934)
Yes, it may have been filmed 90 years ago (!), but this endearing film, directed by Frank Capra (who also gave us the holiday chestnut It’s A Wonderful Life), still delivers romance and laughs aplenty. Here, Clark Gable plays Peter Warne, a rough reporter who runs across spoiled heiress Ellen “Ellie” Andrews on a Greyhound bus to New York City, who is running away from her tycoon father in Florida. Warne recognizes who she is and offers to help reunite her with her new husband in exchange for a story. Snappy patter, adventure and, of course, love follows. Find out where to stream it here.
9. ANNIE HALL (1977)
Woody Allen stars as comedian Alvy Singer as we follow the ups and downs of his romantic relationship with quirky nightclub singer Annie Hall (Diane Keaton). The film brilliantly challenges stereotypes, contrasting the cities of New York and Los Angeles while exploring Jewish identity and other elements of psychology. It won four Academy Awards, including two for Allen as Best Director and Best Original Screenplay, and one for Keaton as Best Actress. Find out where to stream it here.
10. BULL DURHAM (1988)
Mixing sports with romance? It may seem improbable, but Bull Durham manages to pull it off. Based on the real-life minor league baseball experiences of writer/director Ron Shelton, Kevin Costner stars as “Crash” Davis, a seasoned AAA catcher who is tasked with teaching and guiding pitcher Ebby Calvin Laloosh (Tim Robbins). Baseball groupie Annie Savoy, played by Susan Sarandon, eventually finds herself being romantically drawn away from Laloosh to Davis — and the story of that journey is both hilarious and heartwarming. Find out where to stream it here.
When I was in elementary school, I participated in the community youth wind ensemble that served students from all districts in the surrounding area. Each weekend, we met at the local university to rehearse with students from across the county. I made friends in the ensemble that I wouldn’t have otherwise met if I restricted my music-making to my school only. The youth ensemble worked with guest conductors on repertoire that I never would have played in my home district. The experience was incredibly meaningful and is part of what inspired me to become a music educator. Years later, I was able to volunteer for the same ensemble as a student teacher and had my first experience on the podium leading real students through warm-ups and learning a piece of music. I credit this community ensemble with my development as a musician and teacher.
Now as an educator in New York City, I co-direct the Salute to Music All-City Modern Band for students in grades 4 to 8. We serve students from all five boroughs of New York City and help students of all levels (from beginners to shredders) learn how to be in a rock band together. The Salute to Music Program in NYC has provided free musical instruction in chorus, concert band and orchestra to all NYC Public School students for over 60 years. Jazz ensemble joined in over the years, but it wasn’t until 2023 that modern band was added. This ensemble was born out of a need to reach all student musicians in the city, not just the ones who play or sing classically. The need for popular music-making was there, and our students have shown us year after year that this was the outlet they needed to bring out their best inner musician.
Community music-making helped mold me into the educator I am today, which is why I believe it is so important to cultivate community ensembles wherever and whenever possible. Below, I offer some reasons why it is important to specifically include modern band in your community music-making endeavors, as well as some considerations to get started.
3 Reasons Why You Should Start a Community Modern Band
1. Create new pathways for community music-making in your area: In many areas, there are longstanding community-based organizations that provide music education experiences for youth in the form of choirs, orchestras, concert bands, jazz ensembles and wind symphonies. These programs are important, but they sometimes leave out students who do not play classical instruments and those who may not be enrolled in their school music program at all. Opening up the opportunity for students in your area to join a rock band may inspire more students to get involved in music in the first place, and it will create pathways for more students to become lifelong music-makers.
2. Reach a much wider group of students when you include modern band: In a similar thread to reason number one above, there are students who like to rock everywhere! You may never know this fact if your school system doesn’t offer modern band in their courses. Of the students in the Salute to Music Modern Band, 75% do not play their “main” instrument like guitar, bass or keyboard in school. Some take private lessons outside of school, but most simply jam on their own whenever they can. For most of our students, our programming is the only time they get to play in a real band with a real sound system. What an honor to provide that space for them! Creating a way to reach students who fall outside the traditional music canon can only serve to strengthen youth supports and music programming throughout your area and local district schools.
3. Community music-making has the power to bring students and teachers together in ways traditional district-based programs cannot: As a teacher, I personally love collaborating with other educators from different districts and parts of the city as much as possible. When I work with my colleagues from around the city, I learn and gain as much valuable knowledge as our students. Creating a community-based ensemble in your area allows for more connection between music educators across your city, district or county, which can only lead to more shared ideas, more learned techniques and better outcomes for students across your entire area.
Pooling and sharing resources, time and intellectual energy between multiple teachers and schools across a given area can also open the doors for more exciting opportunities for students. You may be able to consider a performance venue for concerts instead of a school auditorium, bring in working musicians for a masterclass with one or more sections of the band, or take students to see live performances. These opportunities become easier to plan and coordinate when you work outside the confines of a traditional school day and in tandem with some of your best colleagues in your area.
4 Steps to Get Started
1. Find the space: This may sound like a no-brainer, but there are specific considerations when selecting a rehearsal site for your new modern band. While a concert hall or auditorium is important for the day of the show, you will likely not want to rehearse with one large group in one large room for the entire season. Modern band lends itself well to sectional rehearsals, where students of similar instruments work on the same song together and can lean on each other for support. This is a great time to leverage age differences within your group. Your older and more experienced students can be support systems and mentors for your newer and younger students. Modern band can also be taught in small groups of students who form their own “mini-bands”.
The Salute to Music program has 30 students enrolled, but we almost never have all 30 playing together at one time. We break them into multiple smaller bands that consist of one drummer, one bassist, a few guitars, a few vocalists and one or two keyboard players. This rehearsal style gives students more choice and autonomy over the music they choose to perform, and it gives them more opportunities to shine on their own. Being the only drummer in a group really encourages that student to work hard at learning their part and encourages newer players to step up to the challenge of being a real rock star.
With these rehearsal models, I personally recommend finding a space that allows you to separate students into these smaller rehearsal groups easily. That could mean using common spaces or different classrooms around the school or finding a rehearsal location that has practice rooms adjacent to your main rehearsal hall. You may also want to consider choosing a school or rehearsal site that is already outfitted with a sound system and the appropriate gear you will need. More on gear below!
2. Gather your gear: Having the appropriate gear for a modern band rehearsal is essential. You want the kids to be able to hear each other while rehearsing and become familiar with the sound engineering components of being in a rock band. Your gear list will change based on the number of students in your group and which rehearsal models you intend to use. For our program of 30 students, we tend to have students form four mini-bands. This means we need a minimum capacity of four rock band setups to be used at once. Yes, that means four drum sets, four bass amps, many guitar amps and multiple keyboards.
Here are my personal recommendations for one band setup:
powered PA system and unpowered mixer (This is my favorite way to mix a band. If you have a set of unpowered speakers and a powered mixer, that’s OK, too!)
2 guitar amps and electric guitars
1 bass amp and electric bass
1 drum set (don’t forget the drumsticks!)
keyboard with 88 weighted keys (don’t forget the pedal)
a good keyboard amp or a DI box that will allow you to connect your keyboard directly to the PA system
2-4 unpowered monitors (for performances)
2 vocal microphones
multiple XLR (microphone) cables
multiple ¼” (instrument) cables
If you have a larger group, you will need to expand the number of keyboards, bass amps, guitar amps and drum sets you need, ideally so that everyone can be rehearsing in their separate spaces at the same time. It should be a priority to source gear for at least one full band setup that can be used for concerts, and then you can get creative with other rehearsal gear needs. Consider using electric drum sets, having students practice on acoustic guitars or using mini keyboards.
3. Recruitment: You never know who has a student in a neighboring district who loves to rock. Consider reaching out to all the music teachers in your district first, then expanding to neighboring ones. If your local area or state has a music educator’s association, reach out to your local representative who may be able to spread the word via social media and email, and can also put you in touch with more local music educators. This is also the time to reach out to administrators at neighboring schools. Remember, not every music program has a modern band program, and some music teachers may not even know that there are guitar-shredding kids in math class. By reaching out to all educators in the district and neighboring ones, you will broaden your reach and tap into ALL students who want to rock!
4. Rock out! Leverage the powers of modern band by allowing students to choose the repertoire they play, pick out a band name, and brainstorm where and when they would like to perform and share their work with family and friends. Student buy-in to the program should be the top priority during the first few weeks of a new venture, and planning ample time for student bonding combined with student choice in their learning will help everyone have the smoothest and most rockin’ time!
In January 2026, Yamaha launched two new electrics that take this classic shape to a whole new level of aesthetic and musical expression. The Pacifica SC Professional and Pacifica SC Standard Plus come in a wide variety of California sun-drenched colors, along with modern features unique to the Yamaha brand of guitars.
Let’s take a closer look at these excellent guitars in more detail.
TONEWOODS
Pacifica SC Professional guitars are hand-crafted in Japan, while Pacifica SC Standard Plus guitars are made in Indonesia. The SC Professional features a two-piece alder body, while SC Standard Plus models have a three- or five-piece alder body. The body has a beautiful arm dress to the upper bout, and a substantial “tummy-cut” on the back for additional playing comfort.
The SC Professional body has also been I.R.A. (Initial Response acceleration) treated, which essentially relieves the tension and stress within a new guitar body to allow the tonewoods to resonate and sound more “played-in.”
The neck is maple: custom-tinted satin on the SC Professional, and a natural smooth satin on the SC Standard Plus. It has a rounded C-shape that is slightly larger than those found on Pacifica Professionaland Standard Plus double cutaway guitars.
FINGERBOARDS AND FRETWORK
Both guitars are available with a maple or rosewood fingerboard, and the frets for both are stainless steel medium jumbo. The SC Professional model features a compound radius fretboard from 9.5″ at the bottom range of the guitar to a 12″ radius at the upper range, while SC Standard Plus models have a 9.5″ radius throughout.)
The fretwork on the SC Professional model I have here in my studio is flawless; the fretboard edges are smooth and the intonation is perfect along the entire fingerboard length, including the upper register. You’ll hear just how good the intonation is in the video below, where I play all the way up at the 22nd fret.
Both the SC Professional and SC Standard Plus have a unique truss-rod spoke wheel at the neck heel/ body joint. This allows you to make precision truss rod adjustments quickly, without having to remove a truss rod cover on the headstock or unscrew the neck. Having the truss rod at the treble end of the neck also allows for more headstock mass, which equates to increased sustain, tuning stability, and a richer sound.
PICKUPS
Both models have two pickups: a single-coil in the bridge position and a humbucker in the neck position. This, as you may well know, is a classic pickup configuration for this style of guitar.
The pickups are both Reflectone, developed in collaboration between famed audio manufacturer Rupert Neve Designs and Yamaha.
The single-coil bridge pickup can be further enhanced by using the “focus switch” feature. Simply pull up on the tone control, and you’ll enjoy a mid-forward passive boost to the tone — more on this shortly.
HARDWARE
There is a three-way pickup selector switch, along with a volume and tone control to blend the pickup tones. In addition, the aforementioned focus switch pull-pot can be used to add extra versatility to the bridge pickup. If you select the neck and bridge pickups (middle position on the selector), you’ll also enjoy the focus switch blended with the humbucker, so in effect you have five onboard pickup variations.
Both guitars offer Gotoh locking tuners, and the nut is black Graphtech Tusq XL. There are two string trees on the headstock, one for the top E and B strings, and one for the G and D strings.
The bridge features a classic stainless steel plate that houses three brass compensated saddles. The SC Professional comes with a hardshell case, and has a lovely chrome inlet logo on the headstock. SC Standard Plus guitars come with a gig bag and a blackscreen printed logo.
COLOR OPTIONS
I love the new Pacifica SC colors. The SC Professional is available in Ash Pink, black Metallic (maple fretboard versions only). Breeze Metallic Blue, Sunny Orange, and Shell White are available on the rosewood fretboard models.
SC Standard Plus guitars are available in Ash Pink and Peppermint Green for both maple and rosewood fretboard models. Desert Burst (sunburst) and Shell White finishes are available for instruments with rosewood fingerboards, and a Metallic Black is available on instruments with a maple fretboard.
All Pacifica SC guitars are extremely appealing aesthetically, which I think goes a long way to wanting to play them. Speaking of which …
PLAYABILITY
I’ve had an SC Professional in my studio now for a few weeks, and I really enjoy playing it.
The body contours allow you to quickly bond with the instrument, as more of your body gets to connect physically with the guitar, and you therefore feel the resonant frequencies it produces.
The neck, although a bit chunkier than other Yamaha electric models (in a good way) feels extremely stable, positive, and resonant with the body. Because it’s super thin and satin-finished, it’s smooth, fast, and easy to navigate. I love the medium jumbo stainless steel frets too. These fret wires won’t need dressing for a long time, which means your intonation will remain crisp and clear for years to come. The fret edges are dressed perfectly, and the compound radius of the Professional model allows for precise chordal passages in the lower register and expressive bends, without choking in the “dusty end” of the fretboard.
The tuning remains stable even after hours of playing, which I appreciate greatly. We want to play our guitars, not spend time tuning after every song.
TONALITY
I usually like to play a new electric guitar acoustically first, to see how it resonates unplugged. You can tell if a guitar will sound good amplified if the body, neck, and headstock feel like they are connected, and vibrating as one element — and the SC Pacifica easily passes that test. It sounds clean, warm and clear, allowing chordal detail and single-note clarity, even without amplification.
I paired my SC Professional with a Helix Stadium XL amp/effects processors to audition the electric tones, and I honestly think this is the best-sounding setup I’ve heard in ages. I’m a big fan of Reflectone pickups anyway as I feel they have the perfect balance of clarity, character, and warmth guitar players crave from their instrument.
All five pickup selections delivered classic pop, blues, and R&B tones, allowing each of the amps, cabinets, and effects in the Stadium XL to “speak” clearly in tandem with the guitar. Overdriven tones retained clarity, even when playing complex chordal passages, and delivered super sweet melodic lines, that sat perfectly in a busy mix, without the need for further equalization (EQ).
THE VIDEO
For this video, I wanted to create a piece of music that would showcase complex chords, arpeggiated overdubs, and a nice melodic solo using the various pickup selections on the SC Professional.
For the main rhythm guitar part, I used the middle position humbucker and single coil pickups, with the focus switch engaged. This gave me a distinct a mid-forward tone that perfectly complemented the chords being played. The amp had a touch of tube breakup to create more Blues than Jazz in the tone.
The overdubbed arpeggiated lines follow the harmonic structure faithfully, except I’m using upper voicings for clarity, and to define the voice leading within the progression. You’ll notice that I added a subtle harmonic tremolo effect to the clean arpeggiated tones. I used the bridge single-coil, combined with the focus switch, to allow for a well-defined second guitar part.
For the solo, I wanted to create a warm, sweet tone that would sit nicely on top of the chords, so I engaged the neck humbucker throughout. I also added a touch of overdrive using the Minotaur overdrive model to a Matchless amp model within Helix Stadium XL. The dual delay adds a really nice stereo spread to the tones, and the hall reverb helped blend everything into one ambient space.
THE WRAP-UP
I believe Yamaha have hit a home run with the Pacifica SC line. The classic body design, paired with contemporary tones, give the discerning player everything they’d desire, within one incredibly versatile workhorse instrument. These guitars are visually stunning, feel like an old friend to play, and sound impeccable through multiple amp setups.
Having a classic sound from a well-designed state-of-the-art instrument blends the best of both worlds: vintage plus modern technology to enhance the stylistic vision of today’s discriminating guitarist. You owe it to yourself to check the new Pacifica SCs out.
Winter is the perfect time to grab a soft blanket, heat up some hot chocolate and fire up the home theater. Here are ten winter-themed movies that will warm you and your loved ones.
1. FARGO
Taking place in and around the wintry tundra of Fargo, North Dakota, this black comedy follows the ever-spiraling misadventures of a financially strapped Minneapolis car salesman (William H. Macy), who hires a pair of thugs (Steve Buscemi and Peter Stormare) to kidnap his own wife (Frances McDormand) in order to extort a huge ransom from her wealthy father. Thanks to its twisted plot and superb acting, Fargo won seven Academy Awards® in 1997 (including Best Picture) and was selected for preservation by the United States National Film Registry in 2006 for being “culturally, historically, or aesthetically significant.” Find out where to stream it here.
2. FROZEN
Inspired by Hans Christian Anderson’s 1844 fairy tale The Snow Queen, this charming film tells the tale of Princess Anna of Arendelle, who teams up with a snowman, an iceman and his reindeer. Together, they search for Anna’s estranged sister Elsa, whose magical powers have mistakenly trapped the kingdom in an eternal frozen winter. The film is visually captivating thanks to its deft use of a combination of CGI (Computer Generated Imagery) and traditional hand-drawn animation — so realistic that at times you’ll almost feel the cold of the deep and heavy snows that swirl all around. Find out where to stream it here.
3. THE ICE ROAD
Set in the far north of Canada, this thriller tells the tale of a convoy of ice road truck drivers (Liam Neeson, Laurence Fishburne and Amber Midthunder) who brave untold wintry conditions to deliver critical supplies to save miners trapped in a collapsed mine. Crank up the speakers to enjoy the edgy multi-genre soundtrack executive-produced by Nikki Sixx of Mötley Crüe fame. Find out where to stream it here.
4. THE REVENANT
This gripping tale of survival is set in the Dakotas in early 1823. It stars Leonardo DiCaprio as Hugh Glass, a fur trader, trapper, hunter and explorer. After being mauled by a grizzly bear and left for dead by his companions, he endures a series of frozen dramatic encounters with nature, American Indians and his own former friends. The cinematography is stunning, as is the score by Japanese musician Ryuichi Sakamoto and German electronic musician Alva Noto, and the film won three Golden Globe® Awards and five BAFTA awards, as well as earning a Best Actor Academy Award for DiCaprio. Find out where to stream it here.
5. COOL RUNNINGS
Bobsledding in Jamaica? Well, sort of. This sports movie is loosely based on the true story of how Jamaican sprinter Derice Bannock (played by Leon Robinson) managed to assemble a national bobsled team for the 1988 Winter Olympics. John Candy provides additional comic relief, and there’s a soundtrack that includes much reggae, mon. This fun flick will get you feeling good about winter! Find out where to stream it here.
6. THE SHINING
“Heeeeeere’s Johnny!” Truly one of the great psychological horror films of all time, this 1980 classic by Stanley Kubrick is based on the Stephen King novel of the same name. Jack Nicholson stars as Jack Torrance, the newly hired winter caretaker of a remote hotel in the Rocky Mountains, who has been told that the previous caretaker killed himself and his family. As Torrance’s mental health deteriorates and his son’s frightening visions worsen, the story takes a series of disturbing twists and turns that will have you on the edge of your seat. Find out where to stream it here.
7. INTO THE WHITE
This exciting adventure film, set during the Second World War, is inspired and based loosely on real-life events that happened in Norway. It presents the trials and tribulations of the crew of a German bomber that has been shot down. In their snowbound trek to get to the coast, where they hope to be rescued, they encounter two British airmen who have also been shot down. The drama and intergroup antagonism builds as weather conditions deteriorate. Find out where to stream it here.
8. TRACK OF THE CAT
This oldie but goodie, released in 1954, stars Robert Mitchum as Curt Bridges, the head of a squabbling family who spend a terrible winter on their ranch in Northern California in the early years of the 20th century. The adventure starts when a hired American Indian hand tells Bridges there is a panther prowling up in the hills. Curt and his brother Harold then embark on a perilous journey into the frozen wilderness to track the panther while the rest of the family, ensnarled in their own drama, await their safe return. Find out where to stream it here.
9. THE DAY AFTER TOMORROW
This 2004 science fiction disaster film, based on the 1999 book The Coming Global Superstorm, depicts how catastrophic climate effects and a series of extreme weather events can bring on a new ice age. You’ll need to stay warm while watching this one, especially when a huge tropical depression splits into three hurricanes above Siberia, Scotland and Canada, flash-freezing everything in its path. Another superstorm then strikes Manhattan, causing NOAA paleoclimatologist Jack Hall (Dennis Quaid) and his son to embark on a series of wild adventures in order to escape the frozen disaster that ensues. Find out where to stream it here.
10. SNOW DOG
Starring Cuba Gooding Jr. as a celebrity dentist based in Miami, Florida, this comedy revolves around his cold weather misadventures when traveling to Alaska to claim an inheritance — which includes blizzards, grizzly bears, thin ice and an old mountain man played brilliantly by James Coburn. The good doctor eventually falls in love in the frozen town and even learns how to drive a dog sled led by a defiant lead dog. Find out where to stream it here.
For much of America’s history, Historically Black Colleges and Universities (HBCUs) have existed in parallel to mainstream institutions of higher education (Wade, 2021). Music has always been at the core of the mission at HBCUs. Since the creation of the first HBCU in 1837 with Cheney University, musical studies have inspired generation after generation of graduates toward social mobility, economic empowerment and community galvanization (Clark, 2019).
While there are many pressing issues within higher education writ large and college music programs specifically, I want to highlight both the remarkable work and the particular challenges currently facing HBCU music departments. I also want to offer opportunities toward the betterment of all music programs within higher education. Whether it is our impressively high-stepping marching bands, exquisite dance teams, phenomenal choirs, swinging jazz bands or cutting-edge and culturally relevant music industry curricula, the music-making and academic experiences that students receive at HBCUs are imbued with historical context, filled with joy, forged through persistence and celebrated in every way possible.
The author teaches at Tennessee State University, an HBCU in Nashville.
Positionality & Perspective
As a proud alumnus of an HBCU — Florida A&M University — who now prepares the next generation of great music teachers at another HBCU — Tennessee State University — I believe my unique lived experience can serve as one of many examples of the power that HBCU music programs have to develop student-musicians who are both exceedingly capable of and astonishingly persistent at transforming the world through the gift of music. The significance of HBCUs is neither abstract nor symbolic to those of us who were trained at one and/or now teach at one. It is thoroughly woven throughout our daily lives.
Because HBCU music programs do not attempt to simply replicate the conservatory model found at most schools of music, we have been at the forefront of student-centered learning and curriculum innovation for generations (Earvin, 204). From the African-American spiritual and gospel to jazz and high-stepping marching bands, HBCUs have greatly contributed to musical offerings at institutions of higher learning.
Some may try to diminish our contributions with claims that our programs do not hold the same high standards for musical quality as our mainstream peers (Hamiel, 2021). However, with more than half of all HBCU music programs actively accredited by the National Association of Schools of Music (NASM), and evidence of HBCU music programs achieving national and international recognition at or above the same level as our mainstream counterparts, the exceptional musicians and ensembles found within our institutions simply cannot be denied.
A Closer Look: What HBCUs Do Well
Music has been central to HBCU institutional identity since the 19th century as core academic and cultural infrastructure (Wade, 2021). Early HBCUs understood music as a means of spiritual grounding, communal unity and social legitimacy within a nation that denied African Americans equal opportunities. From this need emerged several achievements and innovations that highlight all that HBCUs bring to the table.
HBCU music programs have been at the forefront of approaches to musicking (Small, 1998) and community engagement that have only recently become jargon in the modern higher education zeitgeist. Terminology that speaks to cultural responsiveness, diverse perspectives, equitable outcomes and inclusive pedagogy has been integrated into the HBCU experience since its inception.
Black sacred music traditions coupled with the pressing need to raise funds for sustainability anchored many early programs, such as the Fisk Jubilee Singers and Hampton University Choir. HBCU choral programs throughout the United States continue to preserve the African-American spiritual while also integrating Western choral traditions in their repertoire. The international success of these choirs highlights not just Black sacred music, but American music, to the rest of the world. The capabilities of these performing ensembles to achieve musical excellence under the larger context of segregation and discrimination in America, while simultaneously generating institutional credibility, financial support and cultural affirmation, cannot be understated.
The first HBCU marching band was founded in 1890 at Tuskegee University in Alabama.
No discussion of HBCU music programs is complete without acknowledging the significant cultural influence of HBCU marching bands. Since the founding of the first HBCU marching band at Tuskegee University in 1890, these ensembles have transformed the marching band from a strict military-derived unit into a high-energy cultural celebration steeped in contemporary performance traditions (Clark, 2019). With the establishment of the Marching 100 at Florida A&M University in 1946, director William P. Foster developed more than 30 innovative techniques from high knee lift and idiosyncratic musical arrangements of popular music to fast marching, dance routines and more, that all other HBCU bands would later adopt into what is now known as the “HBCU band style” (Thomas, 2016). See a recent performance by the Marching 100 in the video below.
Many non-HBCU bands have now begun began to adopt these popularized innovations. The pinnacle of this movement was witnessed by the release of the movie “Drumline” in 2002, which introduced many to HBCU bands and our unique approach to marching music for the first time.
Current Challenges
Despite their contributions, HBCU music programs continue to face persistent challenges, such as:
historical and chronic underfunding,
aging facilities,
inequitable state support
and heightened accreditation pressures.
As faculty, we are often asked to do more with less — teaching heavier loads, recruiting and sustaining ensembles, mentoring students and maintaining compliance with national standards that were not designed with HBCU contexts in mind. All of this without any additional course release time or pay, of course.
And yet, even within these constraints, HBCU music programs continue to thrive. Many of our institutions have expanded offerings in music technology, sacred music study, music industry studies and even music therapy, responding to shifts in musical interests and needs while remaining rooted in tradition. These adaptations are often framed externally as “catching up,” but in reality, they represent strategic evolution grounded in long-standing institutional resilience.
HBCU Music Programs Matter
In an era of declining funding, demographic shifts and the increasing pressure to justify the arts, HBCU music programs offer a compelling case for the intrinsic and essential value of music (Kelly, 2018). Our institutions consistently demonstrate how music can function as workforce preparation, cultural preservation, community engagement and personal transformation simultaneously. More importantly, HBCUs remind the academy that excellence is contextual. The success of HBCU music programs has never been defined solely by endowments or facilities, but by our successful outcomes: trained musicians, prepared teachers, served communities and sustained traditions.
As higher education continues to interrogate issues of access, equity and relevance, HBCU music programs should not be viewed as historical artifacts or niche institutions. We are living laboratories and active examples of musical excellence from which the broader higher education music community can learn.
As I close, I am reminded of a quote that I share with my students that speaks to our common purpose. In the words of the reverend Dr. Martin Luther King Jr., “We are caught in an inescapable network of mutuality, tied in a single garment of destiny. Whatever affects one directly, affects all indirectly.”
It is my hope that this serves as a reminder of our common purpose as we strive to make memorable musical experiences for us all.
First-year music teachers may often feel overwhelmed. Instead of panicking, take the advice of people who were in your shoes just a few years ago — the 2026 Yamaha “40 Under 40” educators. From finding mentors to being authentic, you’ll find a wealth of helpful advice. Read on!
Ryan Adair, Director of Bands, Salem Hills High School, Salem, Utah
TIP 1: Show up for your students, your program and your community.
TIP 2: Know and magnify your role to the best of your ability without comparing yourself to others in your field.
TIP 3: Have ideas.
Zachary Arenz, Instrumental and General Music Teacher, Flower City School No. 54, Rochester City School District, Rochester, New York
TIP 1: Build relationships — Students learn best when they feel seen, safe and valued. Your colleagues are far more likely to collaborate when you invest in them, too.
TIP 2: Stay flexible — No day, rehearsal or lesson will go exactly as planned, and that’s normal! Adaptability is not a backup plan, it’s one of your greatest teaching strengths.
TIP 3: Protect your curiosity — Keep learning, finding mentors and trying new things. Curiosity fuels creativity, sustains passion and reminds you why you chose this work in the first place.
TIP 1: Create a positive, respectful environment by showing students that you care, while also maintaining clear expectations and consistent boundaries.
TIP 2: Growth happens over time. Set realistic goals, celebrate small wins and remember that every rehearsal is a step forward. Give yourself and your students grace as you learn together.
TIP 3: Stay involved in professional organizations, your school community and feeder schools. These relationships provide support, perspective and encouragement. They also remind you that you’re not alone in this work. Being connected strengthens both you and your program.
Ben Byrom, Music Teacher, Raleigh Oak Charter School, Raleigh, North Carolina
TIP 1: Don’t cry. I’m not being funny or kidding — breathe! Help your students breathe by modeling breath control. You’re doing better than you think. Development is slow, uneven and often invisible before it becomes obvious. Love music, let students know you care and hold expectations consistently.
TIP 2: When it comes to unruly playing in the classroom, know when to persist and when to pivot. Sometimes throwing the lesson out the window (metaphorically) leads to deeper engagement, and play is actually crucial to learning. The founder of Waldorf education, Rudolf Steiner, said, “We are fully human only while playing, and we play only when we are human in the truest sense of the word.” The teacher’s role then shifts from legislator to guide, fostering students’ curiosity toward real understanding.
TIP 3: Don’t be afraid of music theory. It isn’t too advanced if you tier it for age-appropriate accessibility. It should be treated like a second language. I’ve had 3rd graders observe shape notes and instinctively put together tetrachords from shared geometric properties; 4th graders fly through fully named chords by treating piano rolls like board games; and students identifying diminish and augmented chords by their emotional qualities. We jokingly call augmented chords the “no … don’t go in that dark room; the monster is right behind the door!” A major 7th chord is the bittersweet movie ending chord. I’m currently finishing a Yahtzee/Rummy-style dice game for chord building that I could see being used in classrooms across the country. When theory is playful, visual and experiential, students are often capable of far more understanding than we assume.
Dr. Francis Cathlina, Director of Choral Activities, University of Memphis, Memphis, Tennessee
TIP 1: Build a circle of mentors. Seek people who will not only answer your questions but help you ask better ones. That guidance will save you years.
TIP 2: Commit to continued study. Advanced training sharpens your musicianship, deepens your pedagogy and expands how you think. Growth does not stop at the degree — it accelerates through it.
TIP 3: Master the unglamorous work. Clear emails, reliable deadlines and follow-through shape your reputation faster than podium presence. Strong administration makes you a trusted colleague.
Mary Claxton, Director of Teaching & Learning at Music Will and Adjunct Professor at the University of Northern Colorado, Greeley, Colorado
TIP 1: Keep it simple! It’s so easy to want to try every idea you’ve ever had during your first year, but it’s better to do a simple thing well and leave room for flexibility and student choice.
TIP 2: Get to know your community. Go to local concerts and meet the performers and engineers. Go to athletic events and library classes – get to know the people who can become your classroom’s “village.”
TIP 3: Invest in your own creativity. Try new things alongside your students, let them spur your curiosity and remember what it was like to be a beginner discovering the love of music!
Ashley Cobb, Elementary General Music Teacher, Catawba Trail Elementary School, Richland School District 2, Elgin, South Carolina
TIP 1: Do what makes you happy. Balancing everything during your first year can be overwhelming, so make sure to find joy in everything you do. Shift your perspective from “I have to …” to “I get to …” and you will find the positives in even the most overwhelming parts of your first year of teaching. Some things like observations and induction meetings are required and outside of your control. But when it comes to your classroom, your performances, your repertoire and the things you can control, do what makes you and your students feel the happiest and most successful.
TIP 2: Find your ideal balance between quality and quantity. You don’t have to do the most all the time. You do not have to program the hardest pieces or take the most ensembles to performance assessment or have a concert for every event at your school. Find the balance where you can prioritize both work-life and home-life for yourself. Find the balance where your students have challenges but still feel successful.
TIP 3: Become a life-long learner. Do not be afraid to try new approaches and ideas in your classroom to figure out what works best for you and your students.
Brittany Dacy, Director of Bands, Westwood High School, Austin, Texas
TIP 1: Go home — work will still be there the next day. You need to take care of yourself first so you are able to take care of your students.
TIP 2: Ask questions, ask for help. Don’t be shy — even ask the people who you’re nervous to approach. They may become your mentors!
TIP 3: Relationships matter. Be kind to those you meet, be eager to help if you can and invest in your students. If they invite you to a different activity that they participate in, go!
Dr. David Dockan, Assistant Professor of Music Education, Louisiana State University, Baton Rouge, Louisiana
TIP 1: Know that your lived experiences are different from other people’s lived experiences.
TIP 2: Your job is not to create perfect performances, it’s to foster creativity and curiosity in your students.
TIP 3: Remember that it is a blessing to be able to make, teach and explore music as a career.
Joshua Emanuel, Music Teacher, A. MacArthur Barr Middle School, Nanuet Union Free School District, Nanuet, New York
TIP 1: Be open to novel ideas, wherever they may come from. I have learned to say “yes” to my students. If I give a project assignment and a student has an idea for a different way to demonstrate their understanding of the concept, I say go for it. Along those same lines, don’t let yourself be too static. If things are feeling too comfortable, it’s time to change things up.
TIP 2: Find your people. Depending on the size of your school, being a music teacher can be isolating. Find colleagues, either locally or globally, who have similar interests and can spur you to try new things.
TIP 3: Listen to your students and give them some autonomy in their learning. This can take place by developing the class culture, choosing repertoire or suggesting music for you to listen to. If you buy into your students, they will buy into your class. Last year, my 5th grade band students asked if they could perform something for the class that they learned outside of school. This led to a bi-weekly set of student performances in which students performed anything they wanted, which fostered a sense of community and support while building confidence.
Elaina Gallas, Music Teacher and Choral Director, Mill Creek Elementary, Nolensville, Tennessee
TIP 1: Build relationships — with your students, with the other teachers in your building and with a mentor music teacher. You can’t do it alone — and trust me, you don’t want to. Build relationships with your students and let them see you as a real person so they will let you see them and open up to you. The best learning happens when you connect with your students so that they feel safe and seen by you. Build relationships with the classroom teachers and let them know everything that you do. Music teachers are often misunderstood by regular “academic” teachers, but making friendships with them, learning from them and teaching them about the things you do will help in so many ways. Lastly, find a mentor music teacher. The advice and listening ear of someone who understands and can provide insight is priceless!
TIP 2: It’s OK to make mistakes as long as you try. What’s not OK is not even trying. It’s also OK to show your students when you make a mistake. Showing them that you are a real person and that you mess up just like they do will form a bond of trust. They will learn that it’s OK to make mistakes in your classroom and that it is a safe place. Some of the best lessons come through making a mistake, and it just makes the success that much sweeter.
TIP 3: It will be hard, but you can do hard things. There will be so many times when you question yourself or stumble, but just keep going! Your hard work will pay off, and those faces you teach are so worth it.
Matthew Gramata, Band Director, West Milford Township High School, West Milford, New Jersey
TIP 1: Don’t be afraid to challenge the status quo and implement your own vision. Respect program traditions and take inventory of elements that can be enhanced while maintaining the foundation rather than eliminating it.
TIP 2: It’s OK to make mistakes and laugh at yourself. For the amount of critique we provide our students, showing them that you’re not the definition of perfection creates a more harmonious learning environment. They will respect you more for being vulnerable.
TIP 3: Learn what a piano mover is and hire one! Don’t try to lift a baby grand piano from the pit on to the stage with your first-year jazz ensemble for the jazz festival the next day. Piano movers are a real thing … who knew?
Heather Hurley, Director of Bands, Princeton Community Middle School, Princeton City Schools, Cincinnati, Ohio
TIP 1: Focus on classroom management from day 1. Establish clear routines and expectations, use positive reinforcement and consistent consequences, and only allow what you are willing to accept.
TIP 2: Celebrate growth and progress. Focus on effort, improvement and teamwork, not just perfect performances. Small successes build confidence and keep students motivated.
TIP 3: Be direct and consistent to keep parents and administrators informed. This builds trust, prevents misunderstandings and helps the program run smoothly.
Dr. Kyle Hutchins, Assistant Professor of Practice in Saxophone, Virginia Tech, Blacksburg, Virginia
TIP 1: Meet the students where they are at.
TIP 2: Stay curious and embrace creativity.
TIP 3: Encourage risk and embrace failure — they build resilience!
Kasey Julian, Vocal and General Music Teacher, Orchard Hills Elementary School, Novi, Michigan
TIP 1: Follow what inspires you and your students. Don’t do things just because you feel like you have to! Get creative in finding a way that works for your program. Personal and program branding is important so invest time in getting to know yourself, your students and their specific needs. Listen to them.
TIP 2: Protocols, data and organization will save you. You don’t have to reinvent the wheel each time. Prioritize a system of templates for simple things like programs or volunteer sign-ups and copy it each time. It doesn’t have to be the same form as other music educators — there isn’t a “correct” version. Find what works for you.
TIP 3: Your relationship to yourself is so important and sacred. Trust and listen to yourself. Make your own path. Keep learning and don’t stop growing as a person or educator. Never forget to fill your own cup, too.
Aron Kontorovich, Marching Band Director, Director of Piano and Coordinator of Student Activities, James Madison High School, Brooklyn, New York
TIP 1: Building community and relationships within the classroom will yield musical results you never thought possible — don’t skip it.
TIP 2: If you want students to open up and be vulnerable, you must be willing to model that for them first.
TIP 3: Don’t disregard the musical interests and experiences of your students. You could be missing the chance to learn something new and connect with something they care about.
Jake Matheson, Band Teacher at Forest Lake Area Middle School and Band Director for Forest Lake Marching Band, Forest Lake, Minnesota
TIP 1: Build relationships and a family culture. Take the time to know your students as people first. At Forest Lake, our strongest moments come from the trust and camaraderie we’ve built. When students feel supported and valued, they engage more deeply and are willing to challenge themselves musically.
TIP 2: Empower student leadership. Give students ownership of the program early. In our marching band, student leaders mentor younger peers, propose new ideas and shape our culture. Create meaningful leadership roles that strengthen both the ensemble and classroom community.
TIP 3: Be yourself and focus on your students. Your personality and authenticity matter more than trying to be “perfect.” Own your mistakes. Remember that it’s not about you — it’s about the students, their growth and the community you’re building. When you prioritize their experience, your impact will be far greater.
Tiphanie L. McClenton, Elementary Music Specialist and Board-Certified Music Therapist, Bryant Elementary School, Mableton, Georgia
TIP 1: Know your students. Every child learns differently, so take the time to discover what excites, inspires and challenges them. Building strong relationships is the foundation for everything you teach.
TIP 2: Be flexible and creative. Lessons rarely go exactly as planned. Embrace improvisation, adapt to the moment and turn surprises into opportunities for learning and fun.
TIP 3: Celebrate every victory and have fun! Big or small, every improvement, performance or “aha” moment matters. Recognize your students’ growth, and don’t forget to celebrate your own wins — they remind you why you became a music educator and make the journey joyful for everyone!
Chris R. Millett, Assistant Professor of Music Therapy, Practicum Coordinator and Board-Certified Music Therapist, University of Louisville, Louisville, Kentucky
TIP 1: Protect your sleep and protect your health! Nothing good is going to flow out of a tired teacher.
TIP 2: Become comfortable with ambiguity. Being a new teacher often means feeling isolated at times with nowhere to get answers. Learn to trust the process and to find mentors who can offer supervision when you really need it.
TIP 3: Absorb and diffuse the awkwardness. So many situations have the tendency to go one terrible way or the other depending on how we respond. If we take steps to make things comfortable, normal and safe for everyone, it goes a long way to creating a positive environment.
Meghan Mulligan, Music Teacher, The Deron School Inc., Montclair, New Jersey
TIP 1: Conducting is overrated. Play/sing/move with your students, even during the concert. Perform the way you practiced instead of having to practice the way you perform when it comes time for your dress rehearsals.
TIP 2: When it comes to special education, do what works. Get over yourself. Truthfully ask yourself when you program your performances if you’re programming for your students’ benefit or for your own vanity. Do not program pieces that are clearly too difficult just to say that you had your students perform them. Get over your idea of traditional ensembles, performances and audiences.
TIP 3: Along the same lines as my second tip — get over the “traditional route” of learning and performing music. Students who are not reading in their primary language should not be trying to read music. If anything, you should reinforce pre-reading concepts (for music and their primary language). Many students will stay in the “learning-to-read” category and may never move onto “reading-to-learn.” Approach music learning via multiple modalities and don’t be afraid to teach by rote.
Amrutha Murthy, Band Director, Park Vista Community High School, Lake Worth, Florida
TIP 1: Build trust before chasing results because culture drives everything. Consistency breeds confidence
TIP 2: Empower students early; ownership creates motivation, accountability and long-term success.
TIP 3: Mastery requires patience. When you fall in love with the process rather than the product, you don’t have to wait to give yourself permission to be happy.
Kyle Norris, Assistant Director of Bands, Vandegrift High School, Leander, Texas
TIP 1: Find a mentor. Someone who will answer your questions, who you can trust, who you can call at the end of a hard day, who you can celebrate with … this is the best advice I ever received and the best I can pass along.
TIP 2: If you’re anything like me, this is not fun, but record yourself, not just your ensemble (video is better). I wish I was better at doing this when I was younger. You will learn a lot about what you are communicating to your students, either consciously or unconsciously.
TIP 3: Keep it in perspective. Often, what seems like a big deal at the time ends up not being that, especially when you zoom out and think of things in the context of a life-long career.
DeVon Pickett, Director of Arts, Scotland County Schools, Laurinburg, North Carolina
TIP 1: Keep your circle small! Everyone is not worthy of knowing your vision and dreams. Those who know your dreams should earn the right to do so. Not because you are cocky but because negativity can crush dreams faster than anything.
TIP 2: Develop an internal love for education. That internal love will be what carries you through the tough times and allows you to grow.
TIP 3: Keep students first! As long as students are the center of what you are doing, success will find you! Do not base what you do off of social media; base your vision off the needs of your students.
Catherine Plichta, Director of Instrumental Music, The Theater Arts Production Company School, Bronx, New York
TIP 1: Be yourself. You are enough for your students. You don’t have to pretend to be someone else. Doing this allows you to lead with authenticity, integrity and transparency.
TIP 2: Less is more. Do less but do it well. Don’t say “yes” to every single opportunity. It’s easy to spread yourself too thin as a music teacher, especially a first-year music teacher. Saying “no” allows you to say “yes” to the things that really matter.
TIP 3: Ask for help early and often. Teaching is an incredibly challenging profession, and we all need help from time to time. Asking for help early and often helps you avoid pitfalls and can keep you from burning out during your first year.
Rolando Rivera, Mariachi Director, Diamond Hill-Jarvis High School, Fort Worth, Texas
TIP 1: Always be ready to adapt to any teaching environment.
TIP 2: Meet your students at the level they are at and improve alongside them.
TIP 3: Stay consistent with daily routines and expectations.
Al Rodriguez, Orchestra Director & Music Technology Teacher at Mount Vernon High School; Department Chair, Performing Arts Music Director at Washington Metropolitan Youth Orchestra, Alexandria, Virginia
TIP 1: Be flexible. The teachers who are most successful are the ones who don’t try to be perfect but instead lean into making mistakes and trying new things.
TIP 2: Be human. Your students do not want or need a perfect teacher. Show them that you are working hard to improve your craft each and every day, and that’s what you want and expect from them.
TIP 3: Take all the time you need to build caring relationships. When students know that their teacher cares about them and that their classmates care about them and see them, they are willing to take more risks and truly engage with the deeply personal process of making incredible music. The trust you build directly influences the music you will make.
Sean Rosenberry, General Music Teacher and Director of Bands, Horace Mann School Lower Division, Bronx, New York
TIP 1: You’re going to fail — a lot. Lessons are going to bomb, things you thought would work are going to blow up in your face. You’re going to be exhausted and spent and feel like you’re drowning. None of that means you are a bad teacher. Every veteran teacher you work with was once in the same position, and the only reason they have their act together now is because they spent many years making mistakes and learning from them. Good teaching is incredibly intuitive, and that kind of intuition takes time to build. Your first year is always rough, don’t let it discourage you. It only gets better.
TIP 2: Don’t be afraid to find and develop your own style of teaching. I spent many years thinking I was a lousy teacher because I wasn’t good at writing meticulous, detailed lesson plans like I was taught in college. And even when I did, I wasn’t good at following them. Eventually, I realized that I have a very improvisational teaching style, and my brain works better when my lesson plan is more broad strokes, which allows me to figure out the details in the moment. That system doesn’t work for everyone, but it works for me. Play to your strengths and find what works for you.
TIP 3: Find a community of other music teachers to connect with. All of us are in very specialized positions in our schools, and oftentimes we’re by ourselves, or one of maybe two or three teachers in the school or district. It can be very isolating, so it’s important to find other teachers to connect with. Join discussion groups online and go to conferences if you can. There is nothing more valuable or energizing than connecting with other people who share your experiences.
Trevor Rundell, Band Director, Bartlett High School, Bartlett, Tennessee
TIP 1: Don’t try to be anyone but you. It’s OK to emulate your mentors, but remember that you are a collection of your own experiences, instincts and personality. Everyone’s situation is different. Some of what works down the road (or for the best programs in the country) might not work for you, and that’s OK. There is some combination of who you are as a teacher, who your kids are as students, and the materials and methods you choose to use that will yield the results you want — trust yourself and find what that combination is, don’t just search for the “secret elixir”!
TIP 2: Success breeds success, and cumulative success will snowball into greater successes. Be careful of the goals you set for your program — make sure they are appropriate for where you are in that moment. Don’t try to go from 0 to 80 if you haven’t gone from 0 to 60 yet, even if “those guys down the road” are doing that. Do small things exceptionally well, which will build into doing bigger things just as well over time.
TIP 3: Learn to transpose on the fly and use that skill to model for your students on an instrument you sound great on.
Dr. Sonya Schumann, Lecturer of Piano and Community Music School Piano Coordinator, San Diego State University, San Diego, California
TIP 1: Make friends with your colleagues, both in your field and in unrelated fields. Friends in unfamiliar fields help us to learn and grow. Who knows — you might just create or cross-collaborate on something new together!
TIP 2: Continue to expand your own musical palate and remember to refill your “musical cup.” That could be taking private lessons on a secondary instrument or keeping a subscription to the symphony or having a listening party with friends every month.
TIP 3: Not a glamorous piece of advice (and certainly not specific to music education), but one that saves me to this day: Set aside your prep time and keep it sacred! Today’s you will thank the past you.
Matt Siffert, Director of External Affairs, Musical Mentors Collaborative, Boulder, Colorado
TIP 1: Get to know your students. Music education is a wide umbrella and can be administered in infinite ways. The better you know the student you’re teaching, the better you can find a bridge between what you think is valuable as a music educator and what will be salient and suitable to them.
TIP 2: Come up with a plan but be flexible. It’s essential to have a roadmap for how to help your student achieve their goals — exercises, compositions, etc. However, students grow and change. If you can see these changes as they’re happening and adapt, you can find ways to continue providing structure and direction while helping your students grow in ways that neither of you anticipated.
TIP 3: Lead with love. Over two decades in music, I have encountered educators and administrators of many demeanors, and the ones who accomplish the most and have the most positive, enduring impact on their students bring a loving, dedicated energy to their pedagogical practice. When students feel seen, understood and supported, they thrive.
Dr. Andrew J. Smouse, Co-Director of Bands and Orchestras, Valley High School, Clark County School District, Las Vegas, Nevada
TIP 1: Always ask “how does this help the student” with anything you do. If you cannot find a great reason, keep working on the idea. It all comes back to how does it help the student, not you.
TIP 2: Never underestimate the power of a student, regardless of their talent, situation, age, etc. Your words and actions shape each student daily and can change lives, including many whose lives you never knew you changed. Take that power seriously.
TIP 3: Never stop learning. Find a mentor and a group of trusted colleagues as soon as possible. Share your successes but also share and talk through failures or plans that do not go right — this is where the learning takes place, making you a better teacher who can better serve each student. Failure is not failure unless you refuse to learn from it and keep trying.
Eric Stashek, Director of Bands, Lincoln Jr./Sr. High School, Lake City, Minnesota
TIP 1: Prioritize building strong relationships with your students before chasing perfection. Connection and culture always come first. When students feel seen, valued and supported, their growth and learning naturally follow.
TIP 2: Establish a healthy support system of colleagues who you can trust and lean on for guidance. Teaching is a team effort, and it’s important to remember that you are never alone on this journey.
TIP 3: Never lose sight of the spark that inspired you to become a music educator, that first moment when you said, “Yes, this is why I am here!” Some days will feel overwhelming, but your positive impact is lasting. Teach with heart, believe in yourself and let your passion and spirit shine through every lesson.
Shannon Stem, K-8 Music Teacher and 6-8 Musical Theater Director, University Academy and Founder, Beacon Artist Collective, Panama City, Florida
TIP 1: Build relationships first. Invest time to get to know your students, colleagues and community. Trust and connection are the foundation for both learning and artistic risk-taking.
TIP 2: Create a culture of ownership. Give students meaningful leadership and creative opportunities from the start. Empowering them fosters engagement, accountability and growth.
TIP 3: Start simple, plan strategically. Focus on clear, achievable goals and scaffold skills over time. A cohesive plan allows students to experience steady progress while keeping you organized and confident in your teaching.
Erik Stone, Band Director and Vocal Music/Media Arts Teacher, Gordon Parks Academy, STEM Leaders in Applied and Media Arts, Wichita, Kansas
TIP 1: Do not internalize student or family reactions. Behavior is rarely personal and often rooted in care for the student. Lead conversations with empathy and keep student growth and success at the center of every decision.
TIP 2: Change and growth take time, especially when leading a music program. Move slowly and intentionally at first to truly know your students and community. This foundation allows you to build a program that reflects your values and the people who shape it.
TIP 3: Find a work-life balance that fits you. Early enthusiasm can lead to taking on too much. Protect the time it takes for you to rest and recharge in meaningful ways so you can show up fully for your students and sustain your program long term.
Luis “Tito” Talamantes, Interim Assistant Principal at Cesar Chavez High School and Mariachi Director at University of the Pacific, Stockton, California
TIP 1: Build relationships before chasing perfection. Your students won’t remember every wrong note, but they’ll remember how you made them feel. Invest time in trust, belonging and care; strong relationships create conditions for real musical growth
TIP 2: Design for success, then raise the bar. Start will achievable goals that allow students to experience early wins. Confidence fuels commitment. Once students believe they can succeed, they will rise to higher expectations.
TIP 3: Find your people and keep learning. Teaching music can feel isolating early on. Seek mentors, collaborate with colleagues and stay connected to a professional learning community. Growth happens faster and more sustainably when you don’t do it alone.
Enrique Tellez, Director of Bands and Orchestras, Butler Middle School, Cottonwood Heights, Utah
TIP 1: Try and fail, try and succeed — and from it all, learn and adjust. The day you think you’ve figured it all out, is the day you’ve stopped being a life-long learner.
TIP 2: Be careful not to over-program. You can take an easier piece and focus on the fundaments. Holding notes the correct length, teaching how to breathe properly before entering a passage, how to shape, etc. Additionally, you can add to easier pieces. Often, easier pieces don’t have many articulations, crescendos, etc. This is a great opportunity to have students write notation and dive further into musicality.
TIP 3: Take care of yourself. Your mental, physical and emotional health are crucial to the enjoyment of your job. If you haven’t already, consider getting a therapist, going to the gym and spending time on yourself.
Daniel Upton, Jr., Director of Bands, Harrisonburg High School and Adjunct Music Faculty, Bridgewater College, Harrisonburg, Virginia
TIP 1: Teach people through music. Early on, I taught music to people. Once I realized it was all about the people, the entirety of the profession changed for me in the most positive of ways. The connections and relationships were so much stronger.
TIP 2: Have mentors. Steal ideas from everyone you respect and look up to. Put the best of all those people into practice and now you are making it your own. Reach out to those mentors often — don’t go at it alone!
TIP 3: Learn how to develop work-life balance early on. I took way too long to do so, and it’s hard to figure out now.
Alex Whitehead, Director of Bands, Jefferson Middle School, Fort Wayne, Indiana
TIP 1: Everything you do is PR for your program. Take every opportunity to brag and boast about your kids’ successes — perform for your school and wider community as much as possible. You know the value of what music does for students, but everyone else might not. It’s your job to teach the community that what your students do is valuable.
TIP 2: Never be afraid to ask for help because you won’t and don’t know everything. Have a trusted mentor who is there to steer you right, even when you don’t like the answer they give you. You can’t do it alone.
TIP 3: Be yourself. Don’t try to mold yourself to be someone else in front of the kids or teach in a way that is inauthentic to you. You’ll find yourself at your most effective when you can be unapologetically genuine in your teaching.
Sarah Williams, Band Director, West Junior High School, Pocono Mountain School District, Pocono Summit, Pennsylvania
TIP 1: Do not take yourself so seriously. If you make a mistake, own up to it without trying to cover it up. You are human. Tell your students about the mistake and how you plan to learn and grow from it. This gives them the security to learn and grow from their own mistakes.
TIP 2: You may need to remind the class about something many times but that is OK. Sometimes students need many repetitions to process instructions. Sometimes students need the reminder not because they weren’t listening but because they need the reassurance. All our students are different and process information differently. Provide the information in as many different forms as you can. Many will not get the information the first time you explain it.
TIP 3: Go the extra mile and join professional organizations, attend conferences and workshops, and take those classes. The connections you make learning with other music educators are invaluable. The ideas and support from others are necessary to have a long, successful career in music. Plus, you probably do not (or never will) know everything there is to know about music. Learn as much as you can so you can pass it on to your students.
Assistant Professor of Music Therapy, Practicum Coordinator and Board-Certified Music Therapist University of Louisville Louisville, Kentucky
Imagine a high-quality, affordable, community music therapy program that serves people across their lifespans — from mommy-and-me groups for NICU grads to senior adult community choirs. That’s what the Music Therapy Clinic (MTC) at the University of Louisville offers the people in the Louisville-Southern Indiana (Kentuckiana) region.
Assistant Professor of Music Therapy Chris R. Millett is a clinic mentor and former MTC coordinator and explains, “Our mission is to make lives in Louisville richer and healthier through music, and we serve thousands of individuals, families and facilities every year with music-based experiences like songwriting, group musicking, improvising and more to improve health-related outcomes.”
The university just celebrated the 25th anniversary of its music therapy program. “We pride ourselves on our care for students as developing humans, forward-thinking pedagogical practices and an environment that encourages compassion and critical thinking to tackle the concerns of 21st century music therapists,” Millett says.
His teaching approach centers on radical inclusivity of students and musical practices that enable them to better serve an increasingly multicultural world. “This includes preparing students to be their best self musically, stretch themselves clinically and to understand the nature of trauma-informed and anti-oppressive practices to help them adapt to any setting or people group,” he explains.
Millett admits to being relentlessly committed to incremental improvement and is constantly tinkering and improving his lesson plans and workflows. He has integrated modern technologies like digital audio workstations (DAWs) and artificial intelligence in his teaching, as well as redesigned courses to include contemporary popular music and electric guitar.
“I view modern technologies in music practices as both a boon and, at times, a stumbling block,” Millett says matter-of-factly. “I balance the use of digital music tools, artificial intelligence and other technology with an approach that critically evaluates where it is helping and where it impedes or supersedes the creative process. We don’t want to trade our minds for convenience, most especially in creative domains like music!”
The Music Therapy Clinic is the only nonprofit music therapy in the commonwealth of Kentucky and served more than 7,000 individuals in the Louisville area in 2025. Nearly 75% of those who received music therapy services paid low or no costs because of grant and philanthropy funding. Millett himself has helped raise nearly $200,000 since he started in his position at the University of Louisville in 2019 to help offset the costs associated for families and facilities. One organization that Millett and his students serves is Boys & Girls Haven, a private residential group foster home. MTC also hosts the All-Abilities Rock Band, The Grooves, which helps members learn to play instruments, play in a band and foster social connection. The Grooves regularly performs at concerts and local events through a neuro-inclusive, adapted rock band model.
Since the pandemic, the American music therapy community has lacked conference opportunities to build professional communities. In 2022, Millett hosted the first UN-conference, where individuals from around the world participated in the online conference. In 2024, the UN-conference expanded on the theme “Community Music Therapy” and brought hundreds of global music therapists together for a free continuing-education experience.
Millett serves on the board of directors for Certification Board for Music Therapists (CBMT), the music therapy accrediting body that upholds the board-certification credential for music therapists. “It is a humbling experience to be amongst such great leaders in our field, and to hold the responsibility of protecting the public and shaping the next generation of music therapists,” he says with pride.
Elementary Music Specialist Board-Certified Music Therapist Bryant Elementary School Mableton, Georgia
At Bryant Elementary in Mableton, Georgia, every student has the right and ability to learn, and “it’s my job to help them discover it,” says Elementary Music Specialist Tiphanie L. McClenton. “My program is all about curiosity, creativity and bold experimentation.”
In her classes, students explore music, movement and improvisation in ways that let them shine and take risks. Through hands-on experiences, laughter and collaboration, they build confidence, social skills and a lifelong love of the arts. “Even if they never pursue music professionally, I aim for every student to leave my classroom with joy, self-expression and artistic curiosity that lasts a lifetime,” she says.
McClenton provides music instruction and performance opportunities for all 860 students at Bryant, which makes music an inclusive and shared experience across grade levels. “In my classroom, music, movement and improvisation happen every day, and students know it’s time for fun the moment they walk in,” she says with a smile.
Class begins with a movement activity to wake up bodies and brains followed by a quick brain teaser, a hello song and beat and rhythm practice. “Improvisation bursts forth through movement, instruments and acting, letting students explore creativity in the moment. As a certified Orff Schulwerk educator, I pack every lesson with playful, hands-on experiences that spark imagination and keep students eager to return,” she explains.
McClenton also created and directs two performing ensembles: the Sounds of Bryant Orff Ensemble (35 students) and the Bengal Beat Squad (10 students). Both groups perform at school and throughout the greater Atlanta area.
The Sounds of Bryant Orff Ensemble began during the 2021–2022 school year to challenge 4th and 5th graders with more complex repertoire and advanced performance opportunities. In just a few years, the group has earned superior ratings at the Southern Star Music Festival three years in a row, performed at the Georgia Music Educators Association‘s in-service conference, and inspired the creation of an instrumental division in the annual Elementary Music Festival. Looking ahead, the ensemble plans to perform at out-of-state festivals and the Midwest Band and Orchestra Conference. Seeing her students shine on stage “still gives me chills and showcases the exceptional talent and dedication of my young musicians,” McClenton says with pride.
She took the lead in last year’s Fine Arts Night by writing the script, composing and arranging the music, choreographing dances and designing all the props. The performance, “The Mystery Museum,” featured 3rd to 5th graders, including students from Bryant’s special education program. Student actors portrayed news anchors searching Atlanta for a museum of student art. After visiting local museums like the Savannah College of Art and Design, the High Museum of Art, the National Center for Civil and Human Rights, the Children’s Museum of Atlanta and the College Football Hall of Fame, the anchors discovered that the museum was located at Bryant Elementary, where families toured the student-created exhibits afterward. Mystery solved!
As a certified music therapist, McClenton uses her training to approach challenges with empathy, support students with special needs and help every child grow socially, emotionally, physically and academically through music. “Sometimes it’s as simple as switching an overstimulating instrument or keeping a consistent routine for a student who thrives on structure,” she explains. “Other times, it’s using a song, movement or improvisation to spark engagement and connection. Music becomes more than a subject; it’s a tool to help students succeed, express themselves and feel seen.”
McClenton was named Teacher of the Year in two different counties and District Elementary Performing Arts Teacher of the Year. She’s proud to follow in the footsteps of her father, who was a music educator for more than 40 years.
band teacher at Forest Lake Area Middle School Band Director for Forest Lake Marching Band Forest Lake, Minnesota
Band Teacher Jake Matheson leads with heart and creates a culture where every student knows that they belong, feels valued and can contribute regardless of their skill level. “You don’t have to be the best musician — or even a ‘good’ musician — to be an important member of the band,” he says. “I focus on empowering students, building mentorship, nurturing ownership and teaching kids to be good people, so they can grow as musicians, leaders and human beings.”
In addition to teaching at Forest Lake Area Middle School, Matheson is also the Band Director of the Forest Lake Marching Band, which is made up of students in 7th to 12th grades and is run through the Forest Lake Area Schools Community Education. In 2016, he revitalized the marching band, which has grown from 30 members who performed at one parade to 144 students playing at 20 annual events. “In 2025, we reached a major milestone with our first field show in 34 years,” Matheson says proudly. “Along the way, I have been able to hire additional staff and add a flag corps program, which gave another group of students a place to belong.”
The marching band restores a proud community tradition dating back to 1928, while offering students a strong sense of belonging within a supportive “family,” Matheson explains. “In an increasingly self-centered world, our program emphasizes connection, joy, leadership and service.”
The band’s mission — empowering students through ownership and mentorship, so they come to understand that they are part of something bigger than themselves — is deeply personal to Matheson. “I was once a student in this program before returning to lead it,” he says.
As a junior high student in the Forest Lake Marching Band, Matheson was called “Tuba Jake” — a nickname that has stuck with him all these years. His students start off calling him Mr. Matheson, but soon transition to Tuba Jake or simply Matheson. “The nickname serves as a direct link to my own history with the program and because the tuba remains central to my identity as a music educator,” he says with a smile.
Matheson built community support for his program in several ways, including:
Eliminate financial barriers — “Money should never be a barrier to participation. By matching student needs with community generosity, we provide scholarships that ensure every student can join band,” he says.
Strategic partnerships — the Forest Lake Area Schools Community Education provides the logistical foundation and administration stability required to operate. Additionally, we are supported by the generosity of local businesses, organizations and individuals every year.
The value of showing up — “We teach our students the immense value of showing up for their community and proving that the band is a reliable pillar of local pride,” Matheson explains.
In 2019, Matheson created a formal marching band leadership team that participates in targeted training and community-building activities, then serve as positive role models for the group. “We emphasize kindness, compassion and followership to foster a safe and supportive culture,” he says. “This mentoring system builds continuity, excitement and confidence as younger students enter the program, while giving older students meaningful ownership and responsibility.”
Soon after the formation of the leadership team, the Forest Lake Marching Band was the featured “Fund-a-Grant” at a fundraising event sponsored by The Education Foundation of the Forest Lake Area. Matheson led the band from a farm field into a greenhouse where a live auction was underway. “Within five minutes, the auctioneer had raised nearly $30,000 — which was enough to equip the band and fuel its future,” he says excitedly. “Seeing students take ownership of the program and watching it thrive, knowing that our work continues to shape both students and the community is the ultimate realization of a teacher’s dream!”
Marching Band Director, Director of Piano and Coordinator of Student Activities James Madison High School Brooklyn, New York
After the pandemic, the marching band at James Madison High School in Brooklyn, New York, was shut down. Aron Kontorovich wanted to resurrect the band and was “building the ensemble with no existing band members,” he explains. “To get students to join, I made frequent visits to band classes during the day to make my pitch.”
Sharing his excitement with students worked! In the Fall of 2023, the marching band returned and currently consists of the color guard, winds, drum line and majorette squad with a total enrollment of 60 students.
Madison High has always had a strong and large music program. When Kontorovich was hired in 2018, he became the eighth music staff member. “I was bouncing from room to room teaching Concert Band, Modern Band, West African Drumming and wherever I was needed within the existing programs,” he said.
In his second year, he started a piano program and grew it to four sections before COVID. When students returned to in-person learning, Kontorovich had to start over because all his previous piano students had graduated. He drew from his experience running and teaching a private lesson studio to design a curriculum that prioritized student experience and retention to grow the program. “Since returning from the pandemic, the program has grown to a full sequence of beginning, intermediate and advanced classes,” he says proudly. “We hired another educator to teach additional beginner classes and currently serve approximately 160 students.”
Kontorovich has taken on additional roles at Madison. He created a club focused on technical theater in partnership with Roundabout Theater Company. Once-a-month sessions with teaching artists provide hands-on training in lighting, set design and other areas of technical theater. This led to the creation of a stage crew that supports everything from Spring concerts and culture festivals to senior movie nights on the field.
Last year, Kontorovich became the Coordinator of Student Activities, which includes overseeing 70 clubs and serving as the club advisor for student government. “In this new role, I work with students from beyond my classroom to positively influence the culture of the entire school, which consists of 4,300 students,” he says. “As the student government advisor I ensure that students’ voices are heard, that they have an impact on their school community, and I, of course, never miss a chance to highlight and advocate for our music program!”
Kontorovich has been able to connect with all students at Madison High because of his community-building skills. “Building relationships has allowed me to develop a rapport with students that yields a culture of trust, so when I tell a student that I believe in them chasing their dreams, they know that I mean every word,” he explains. “Students know that I will always support them in their growth and at every step of their journey.”
One way Kontorovich brings togetherness and a love of music to his community is to share music in anyway he can. “I play holiday sing-a-long songs in the lobby before winter break, play accompanying piano for concerts or simply walk into a classroom while students are rehearsing to sing along or complement them for their growth and hard work,” he says with smile. “While I am the piano teacher and the after-school marching band director, I feel that every department of our music program is a part of one family with a set of shared values and goals.”
Outside of Madison High School, Kontorovich co-directs the Brooklyn Concert Band for the Salute to Music NYC program on Saturday mornings where he works with serious band students in grades 4 to 8 for a three-hour rehearsal to elevate their skills and have a musical experience they normally wouldn’t have in their school programs.
In the Summer of 2024, he spearheaded the development of a new piano component to the Instrumental Studio for the Middle School Summer Arts Audition Bootcamp, where students spend two weeks at the Lincoln Center and the Juilliard School to elevate their musicianship, develop new skills on their instruments and prepare for their auditions for performing arts high schools.


 Achieving this doesn’t happen through individual practice; it’s the product of many hours spent rehearsing together as a group, learning how to lock in with one another. While mastering your instrument is essential, playing in a band requires focus on how your part fits into the larger picture — making the group sound great rather than just excelling individually.
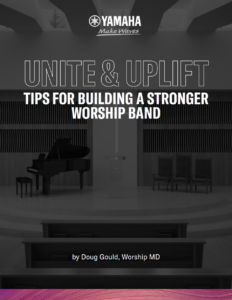

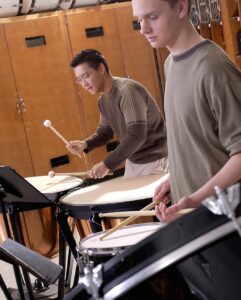
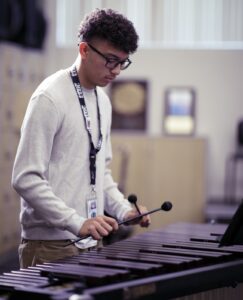
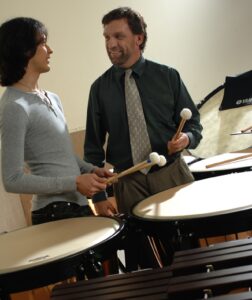
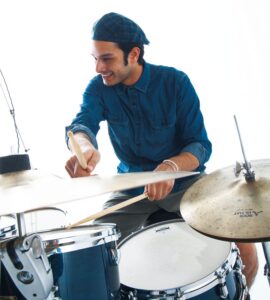

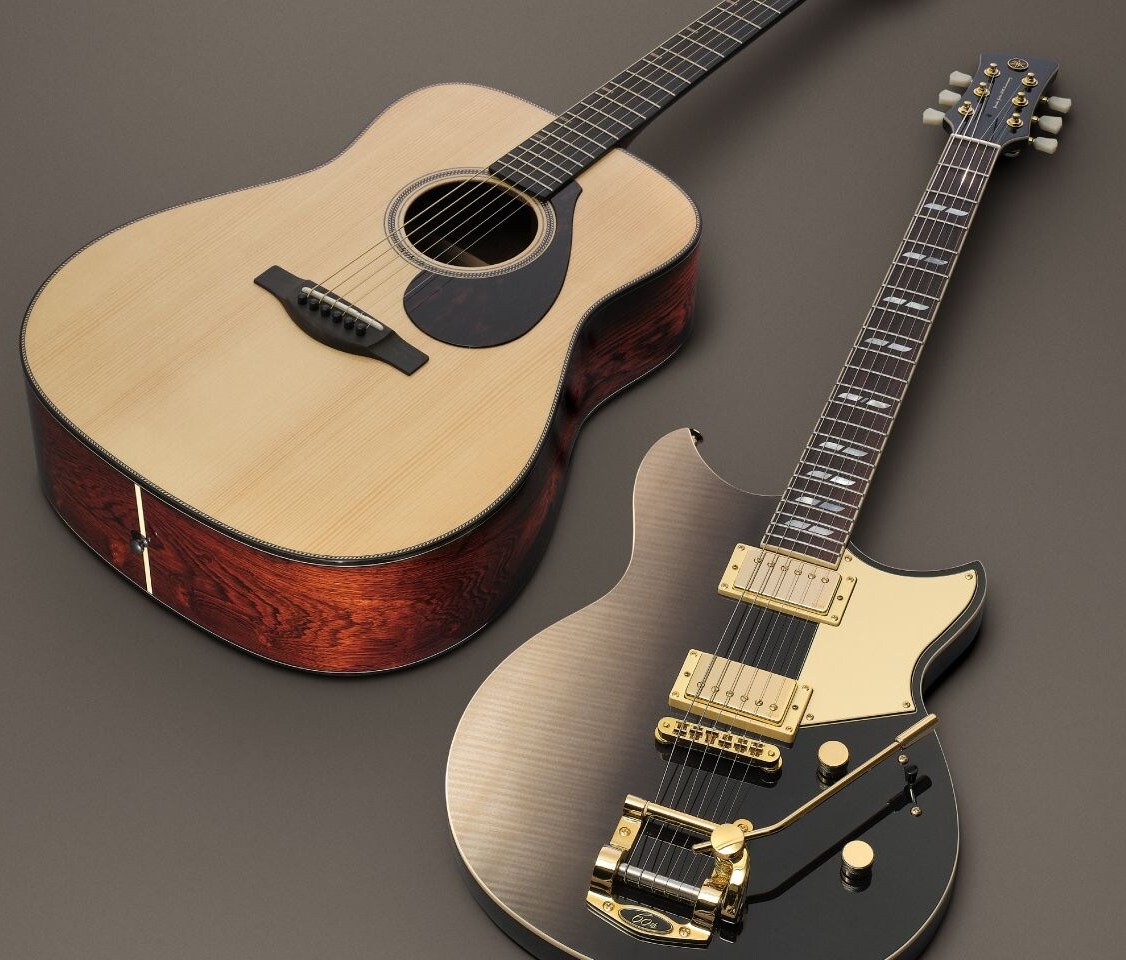
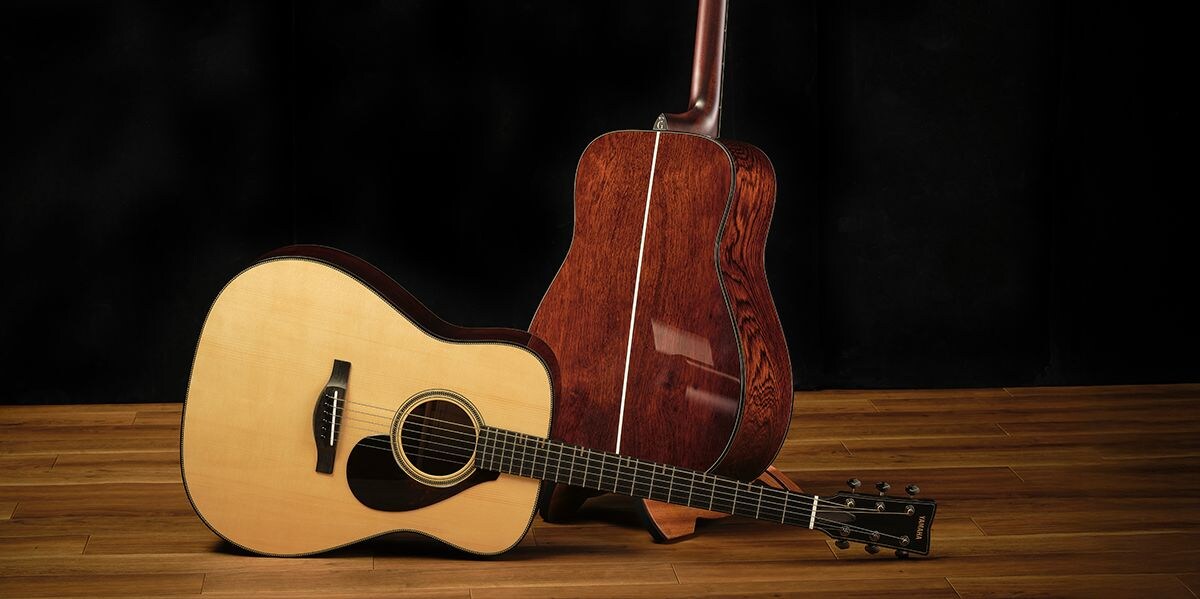


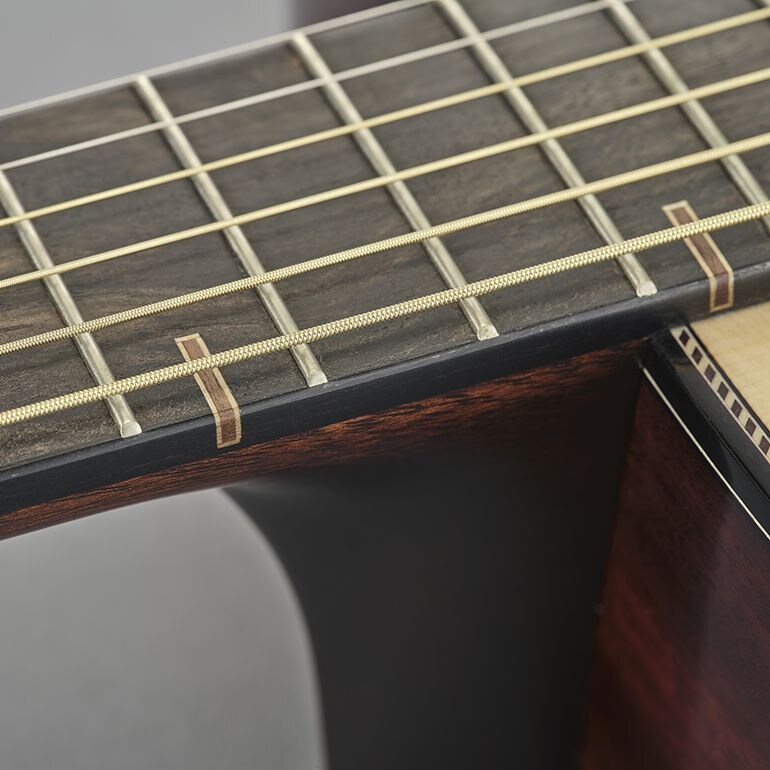
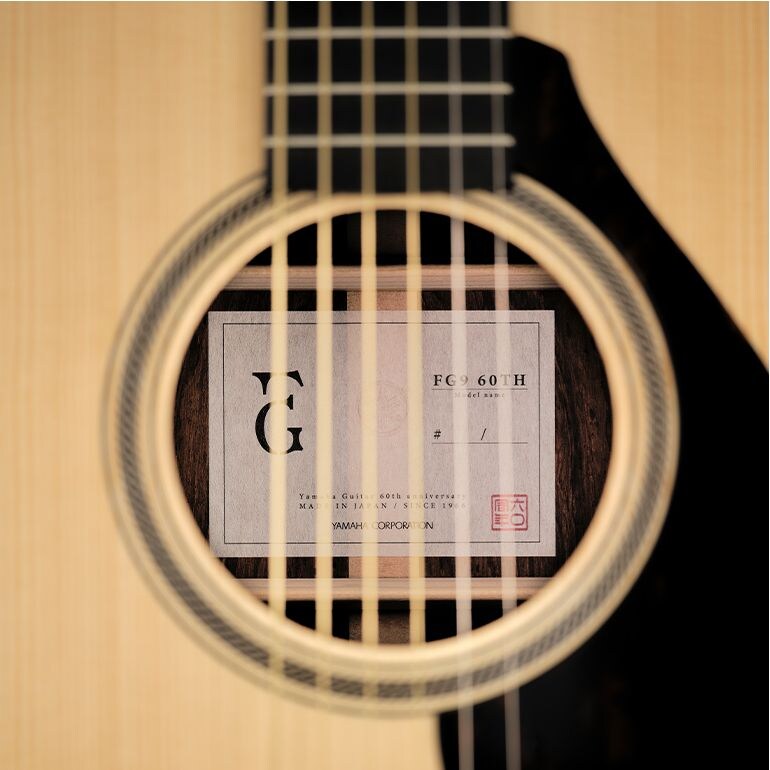


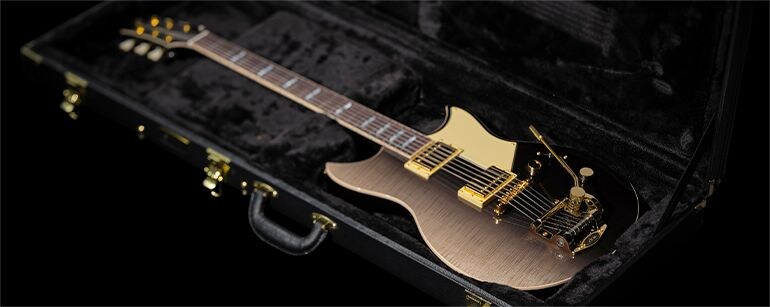

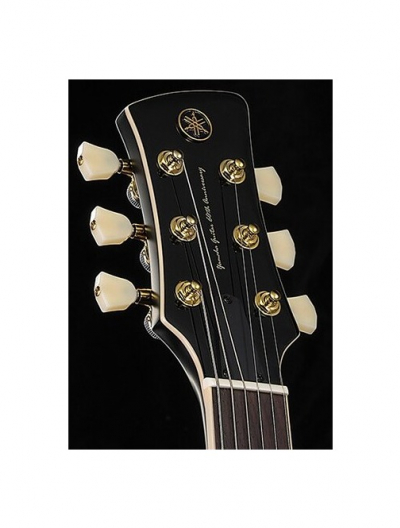
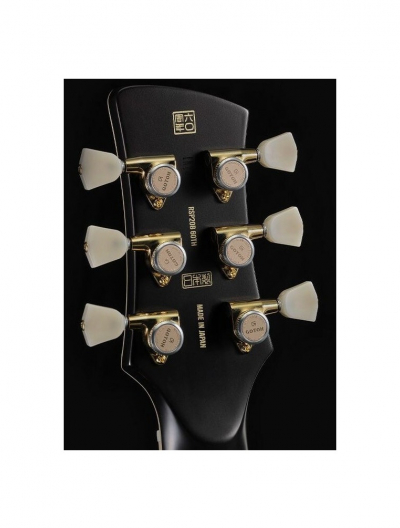
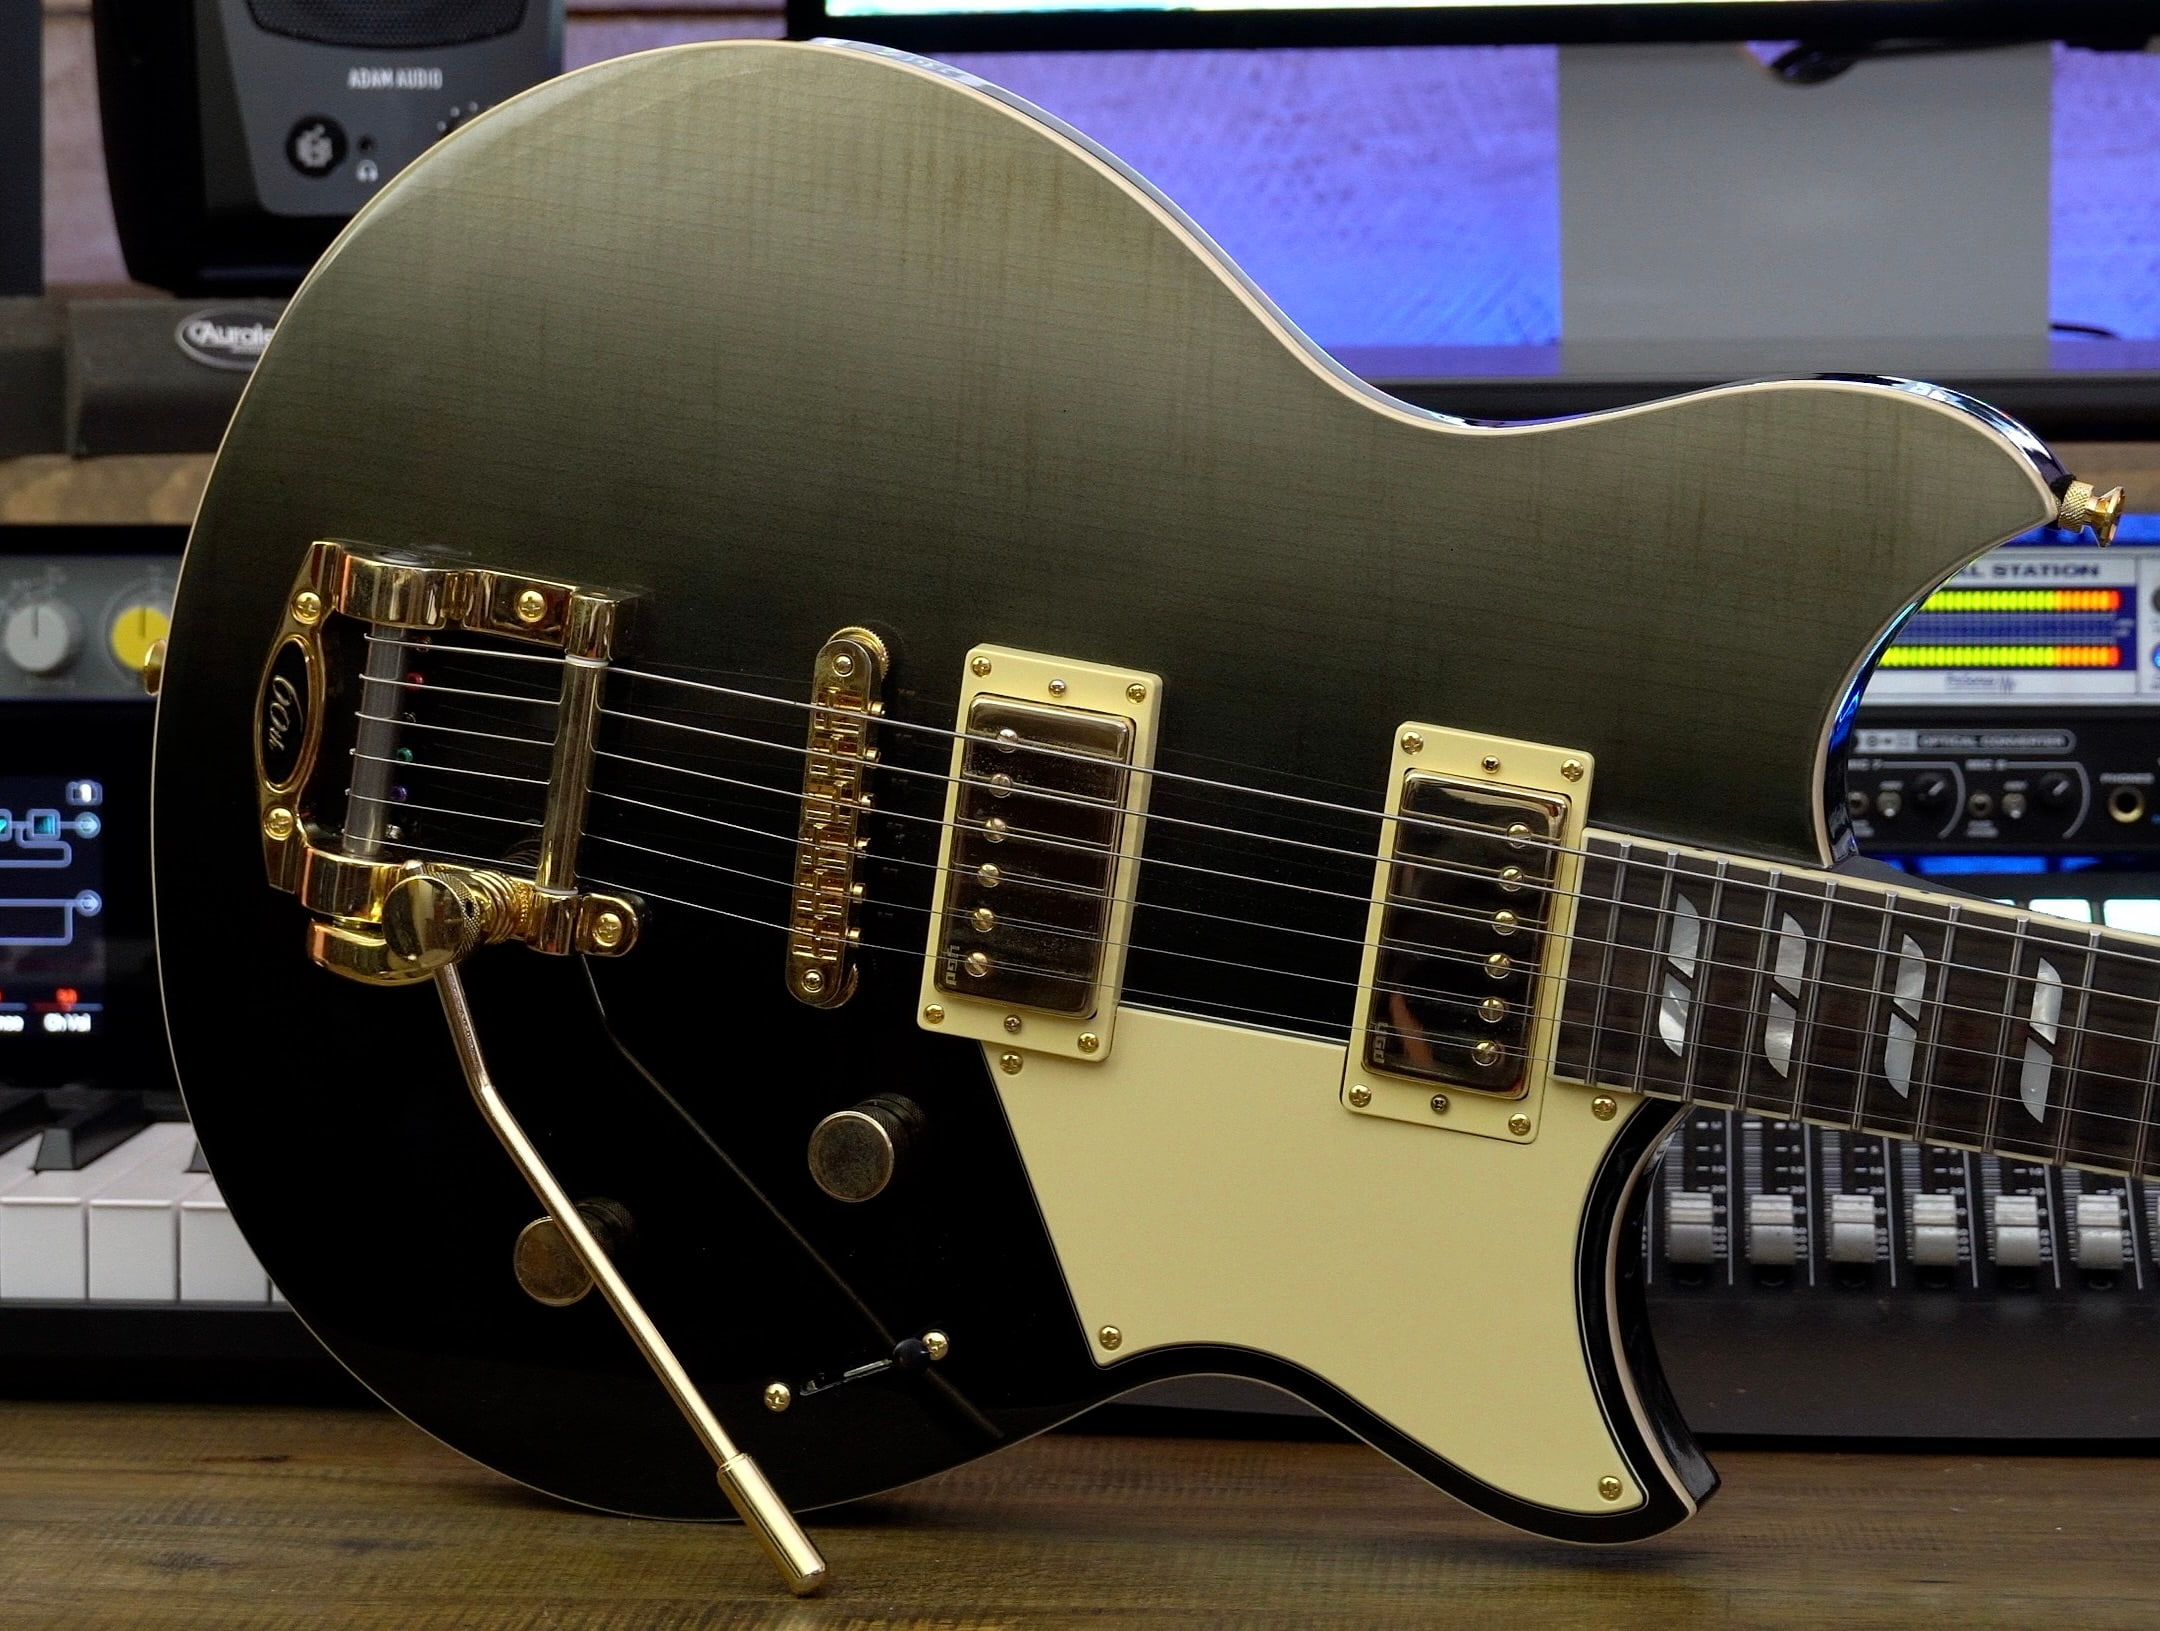


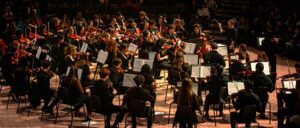


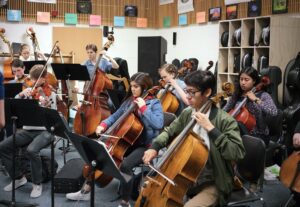


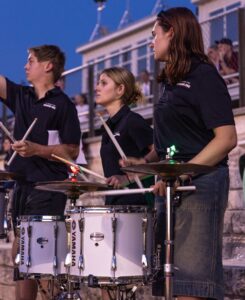

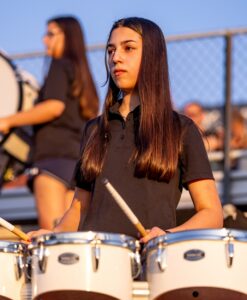

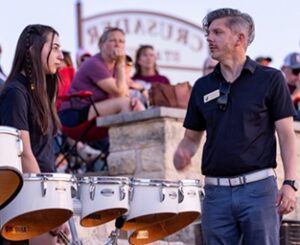
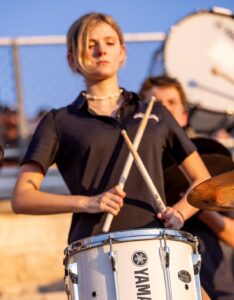

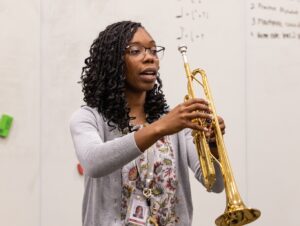
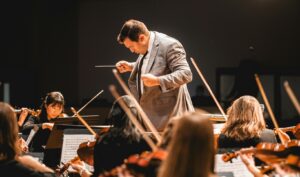


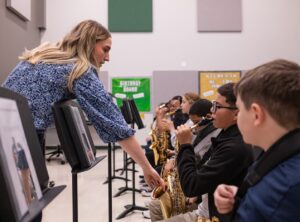
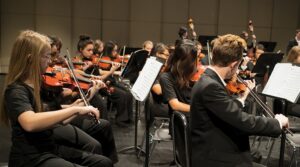


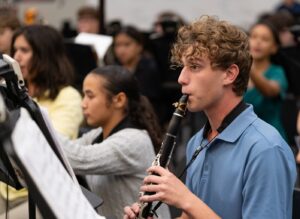


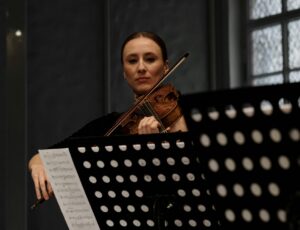


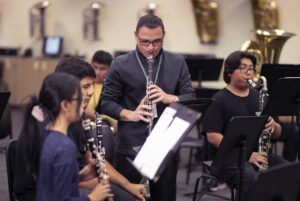


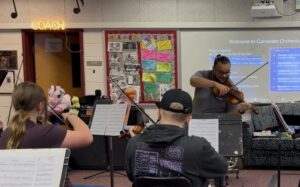
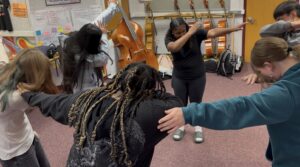

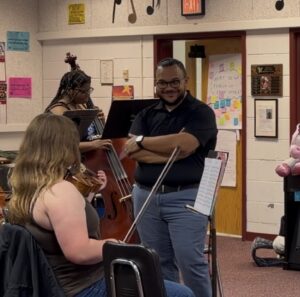

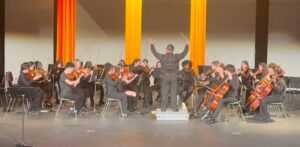

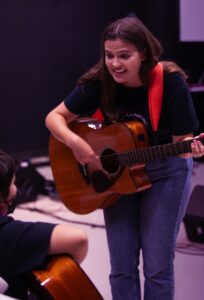
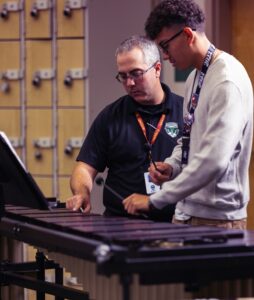


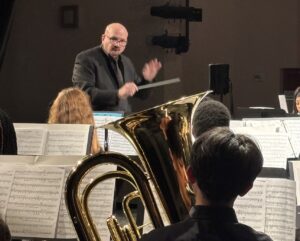
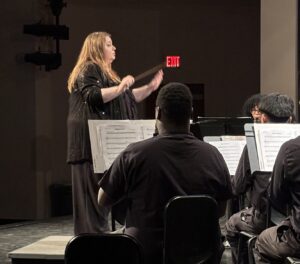
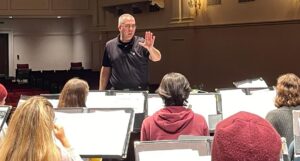
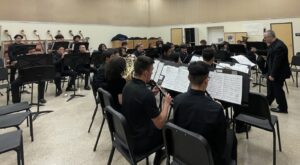


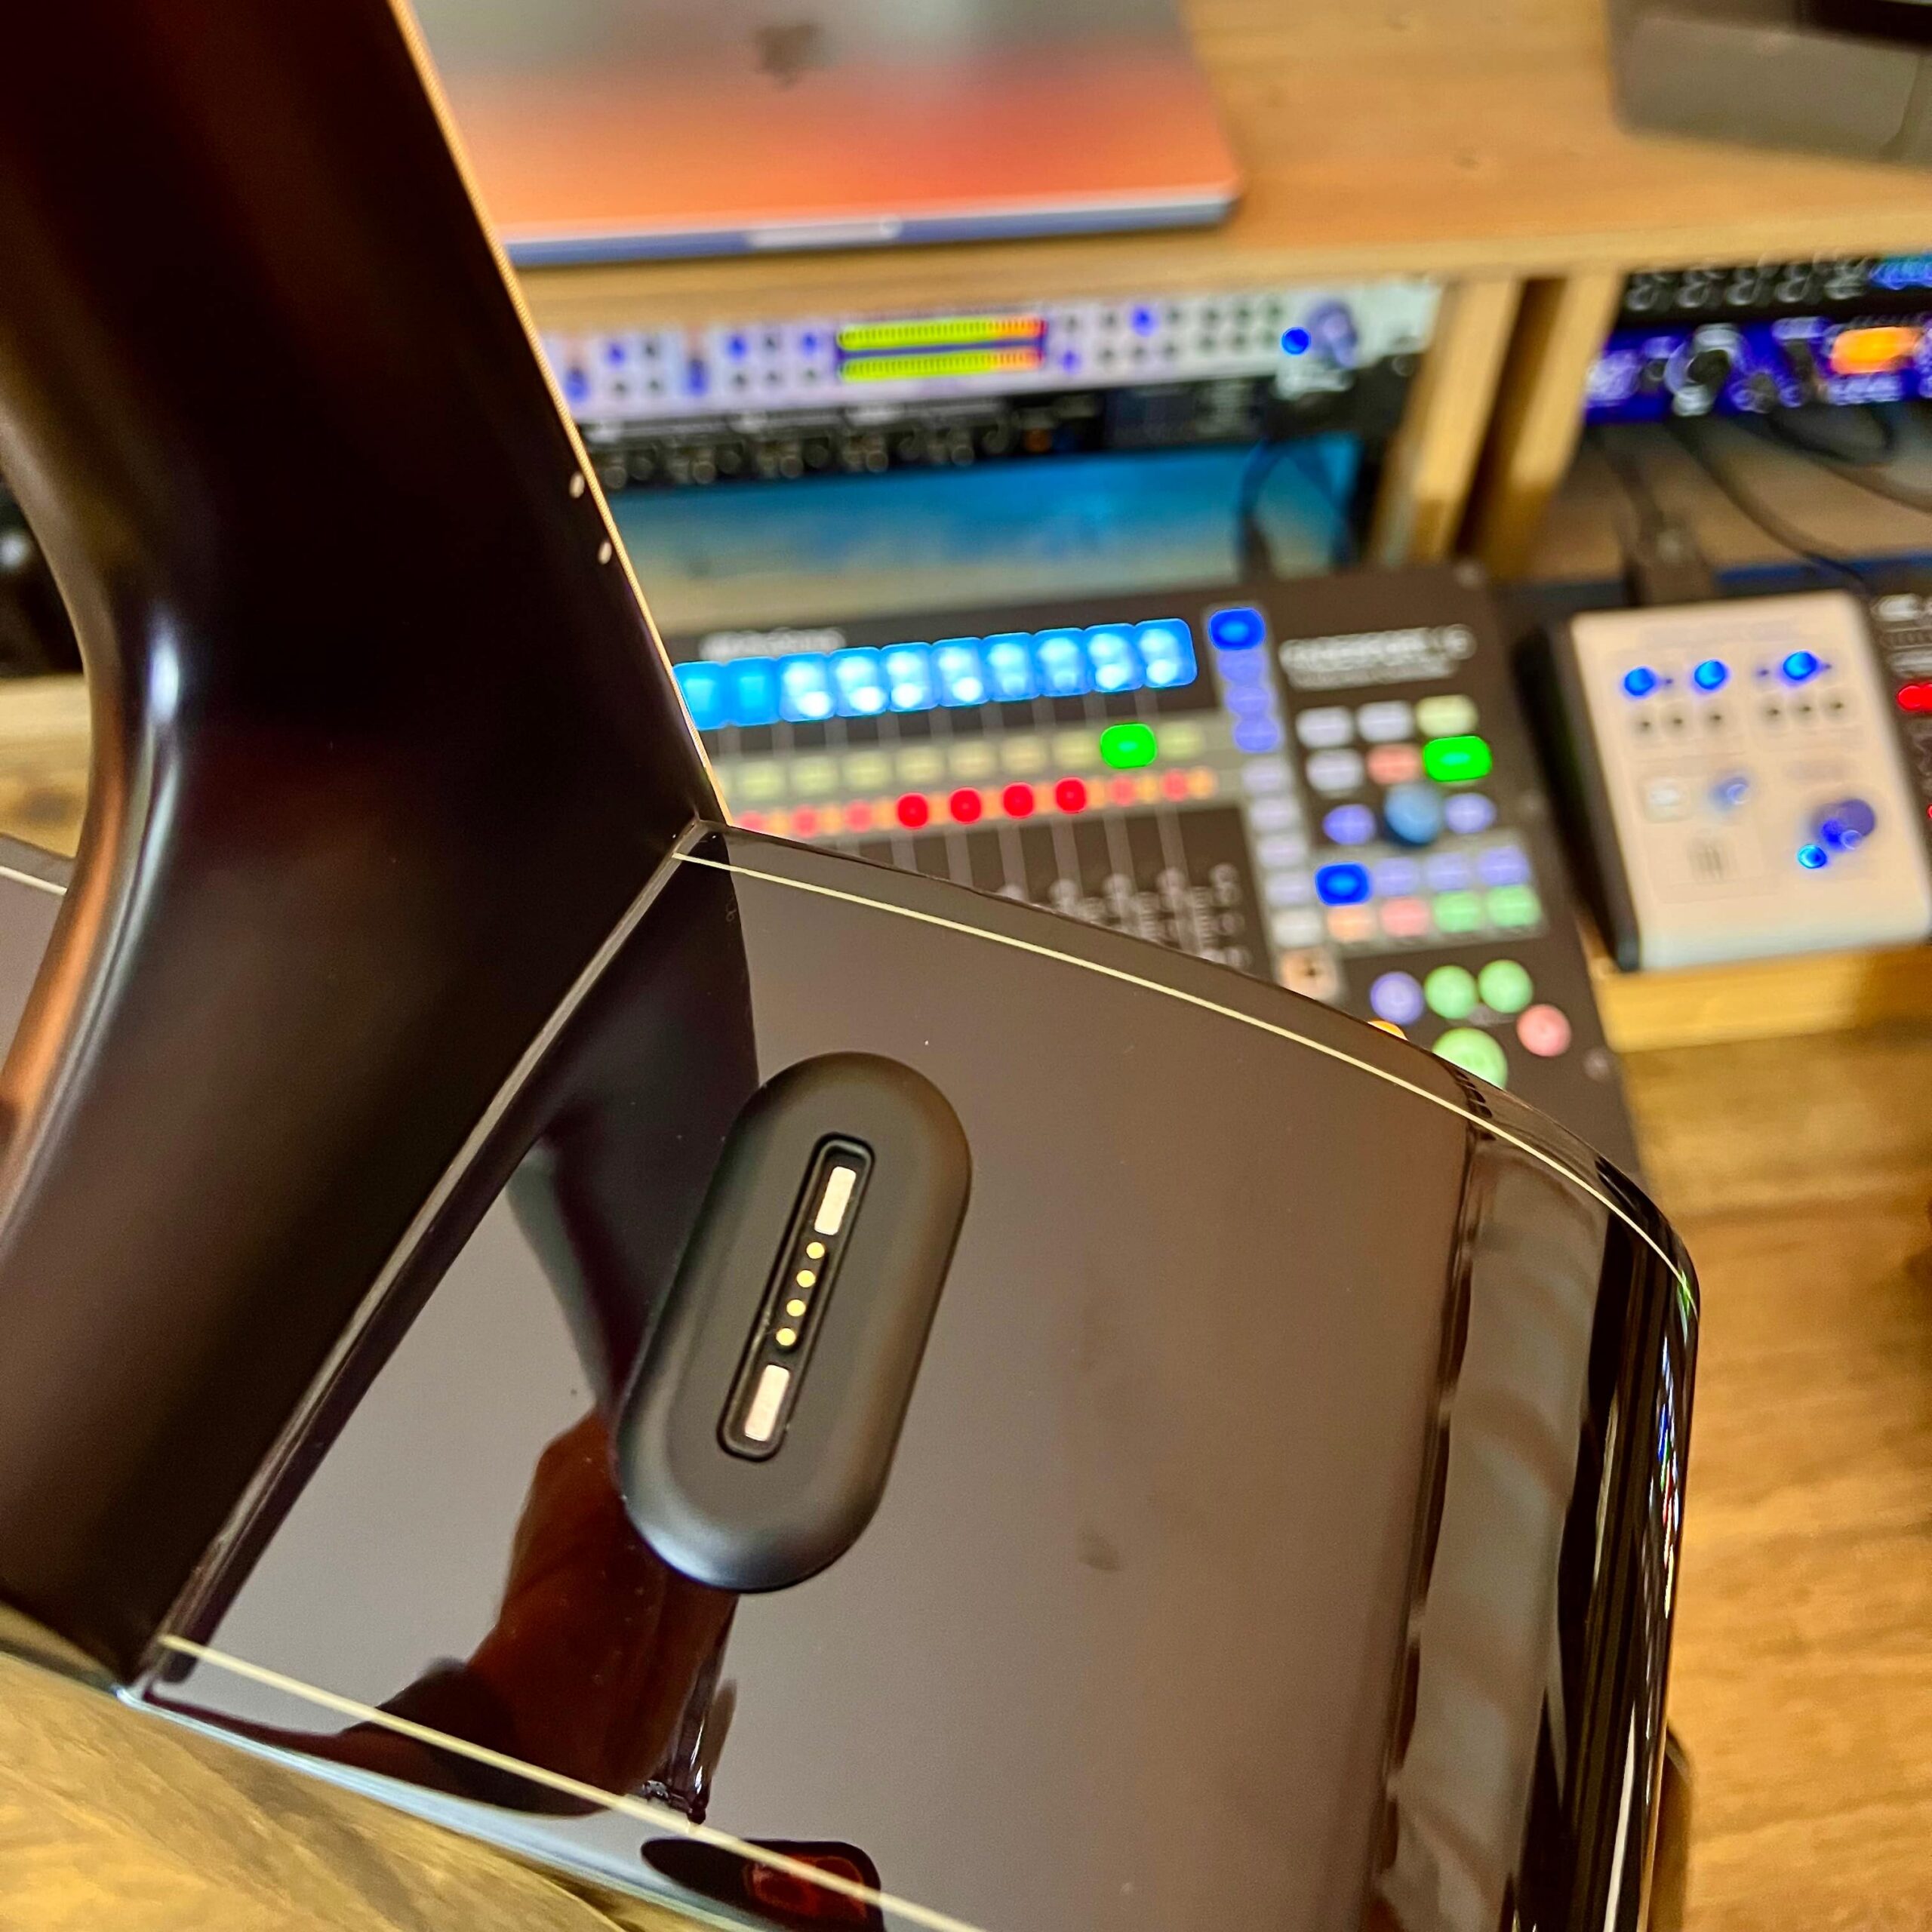
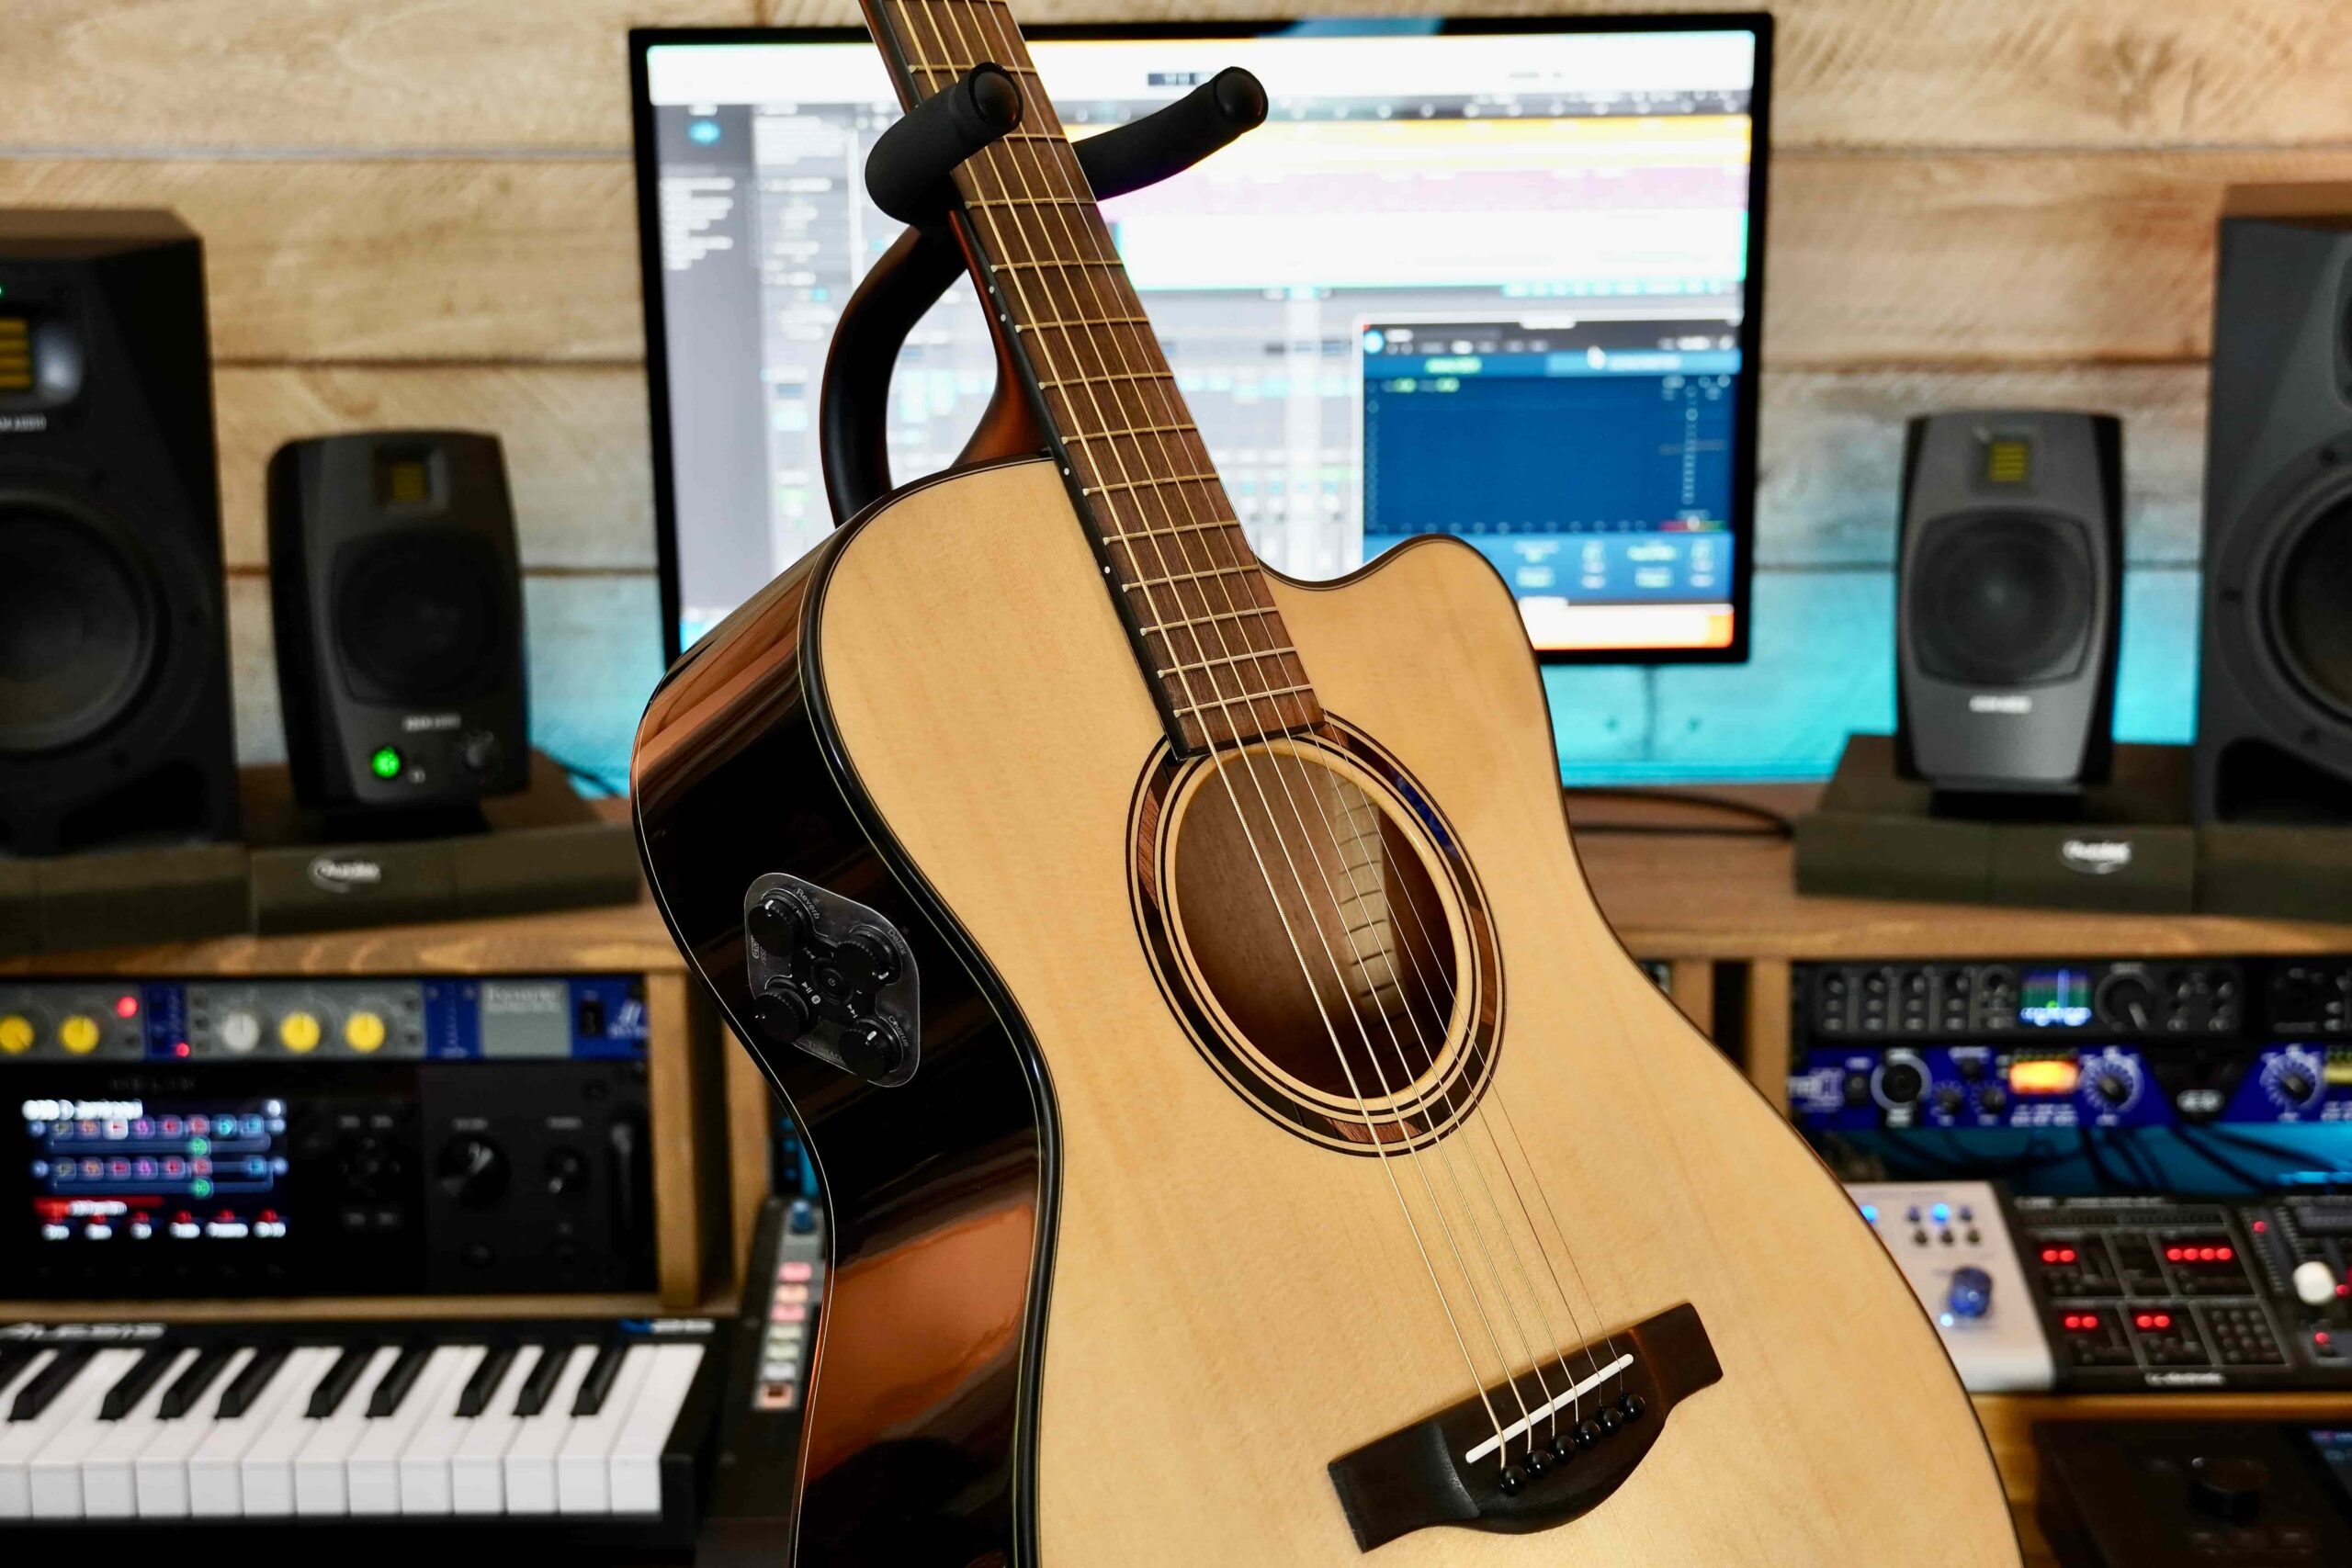
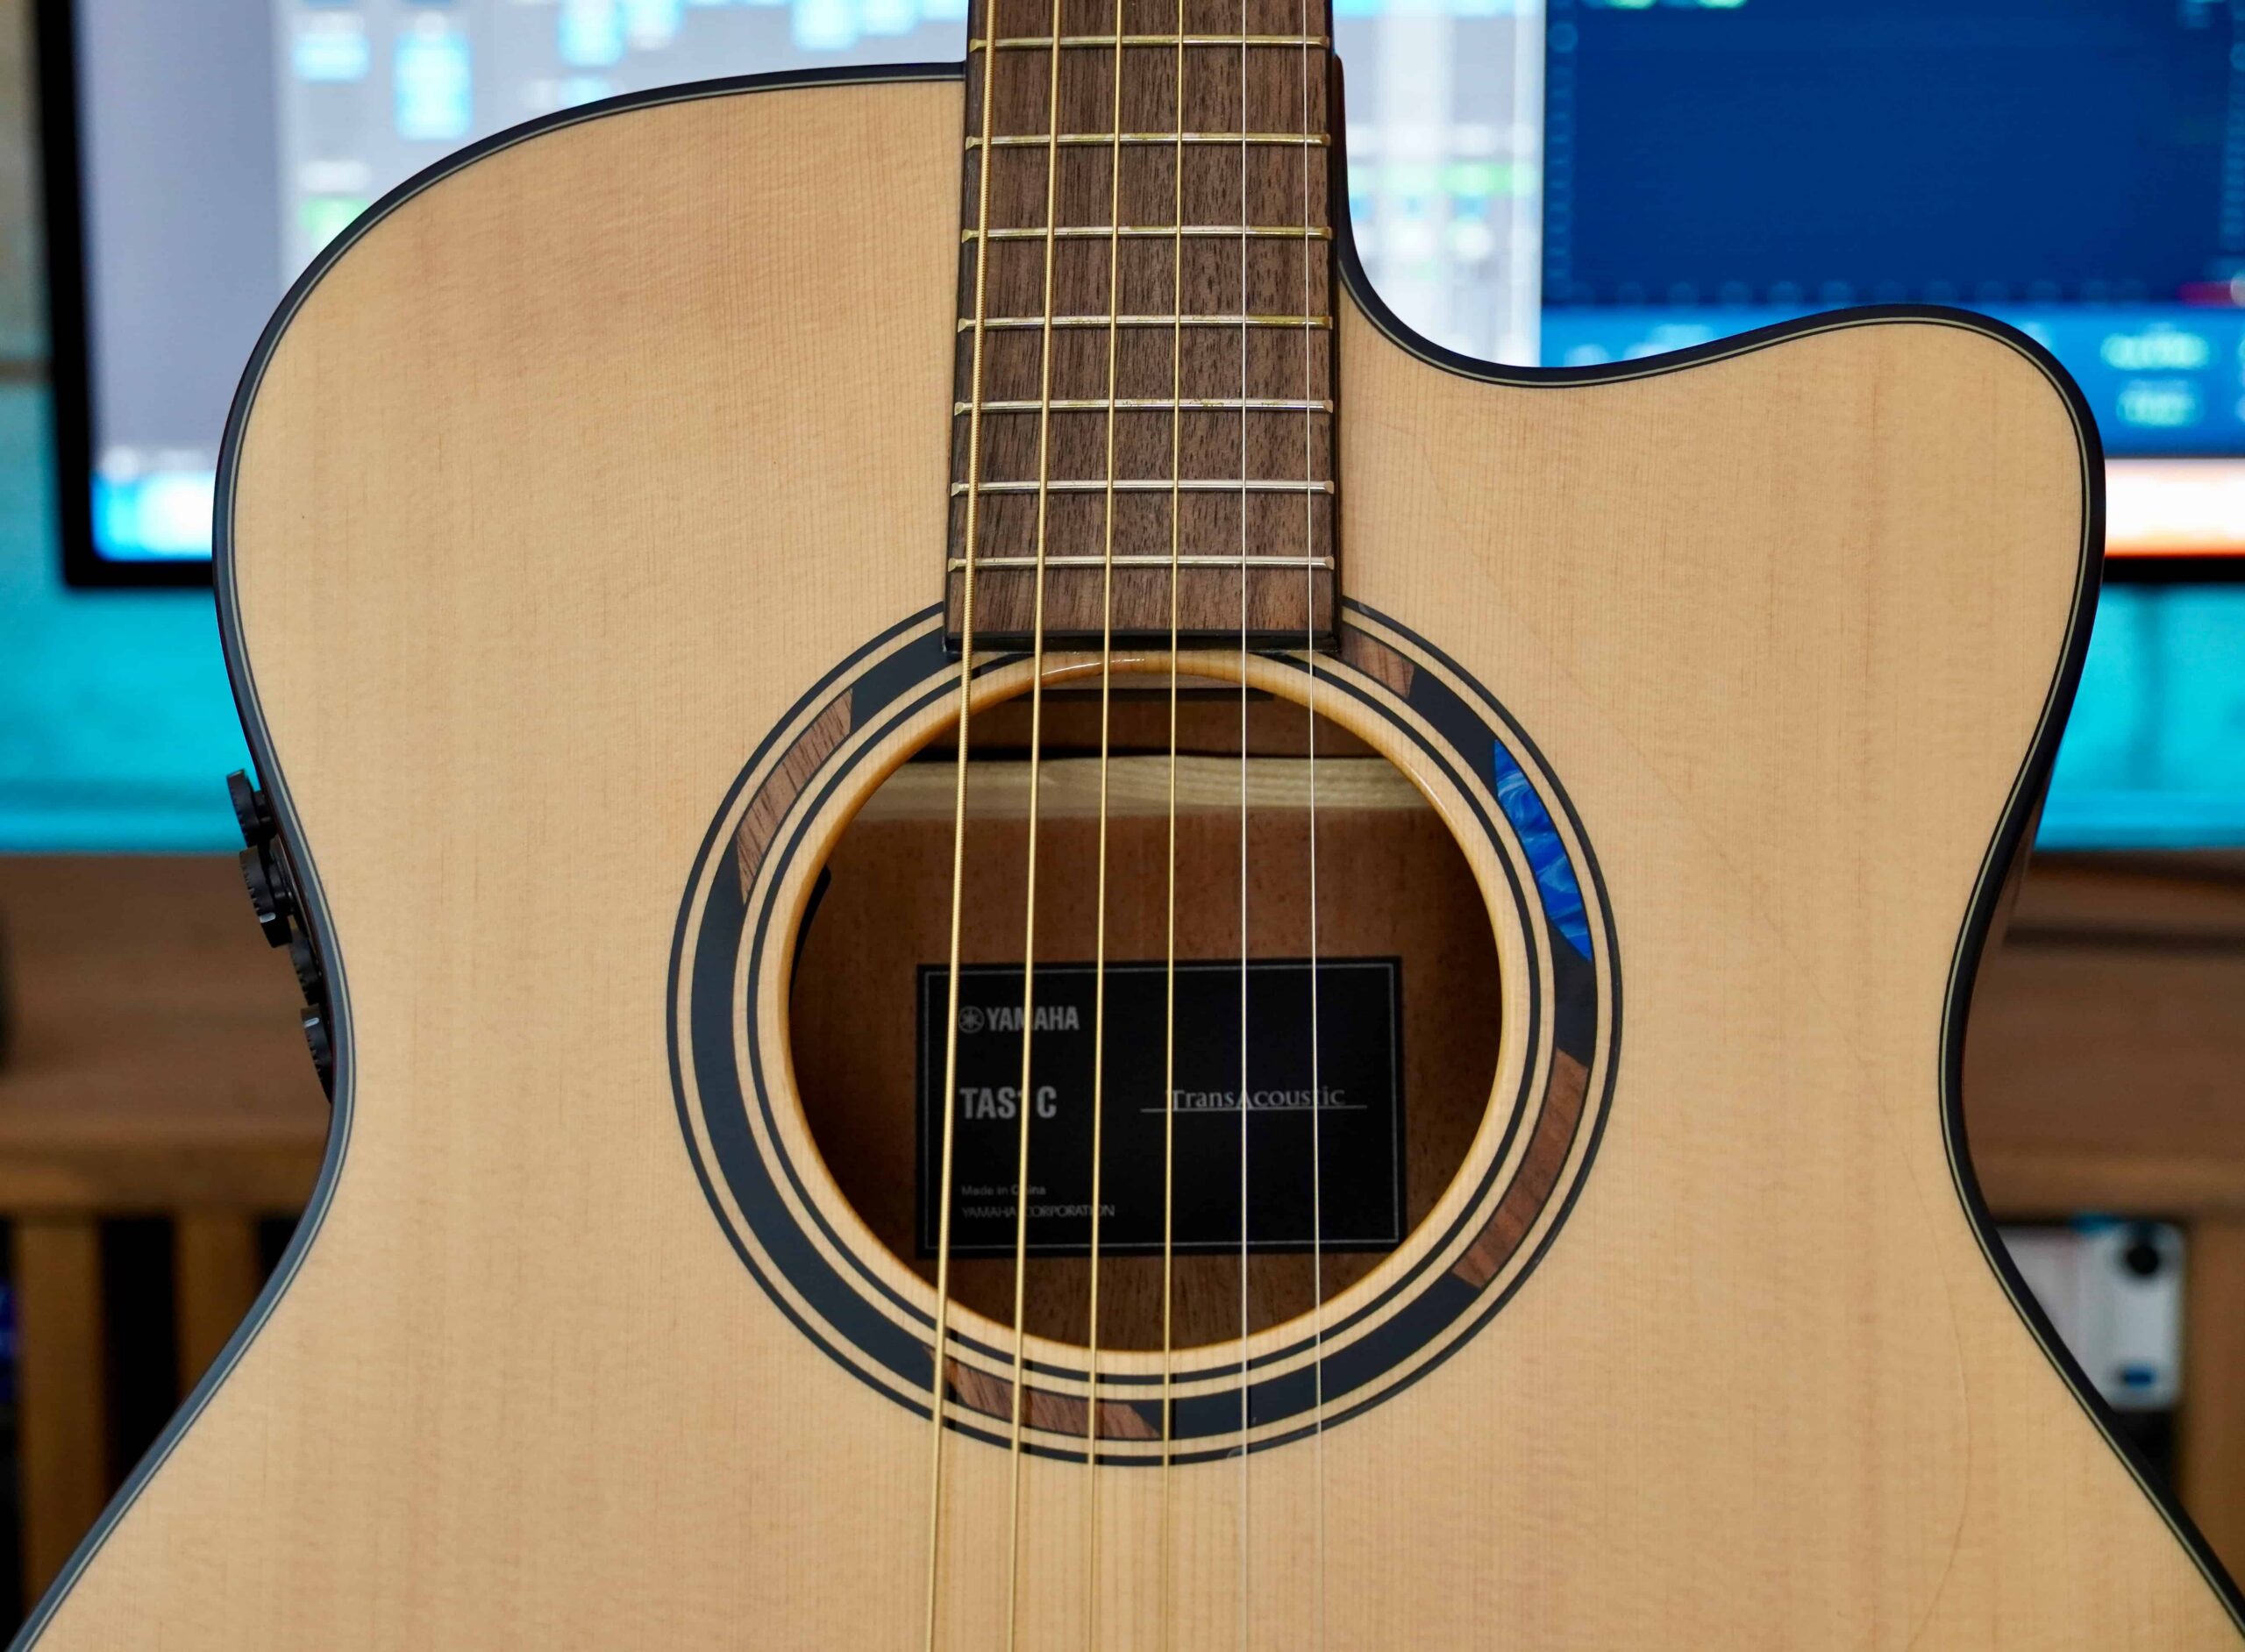


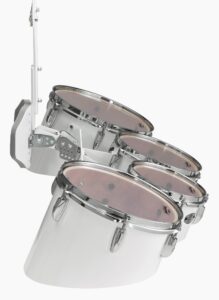
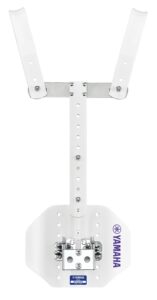
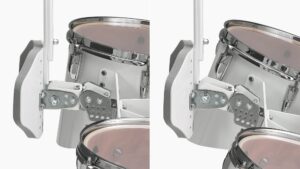

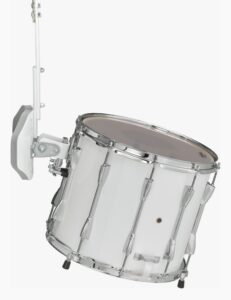


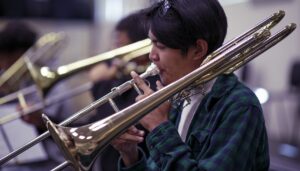
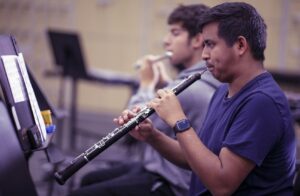
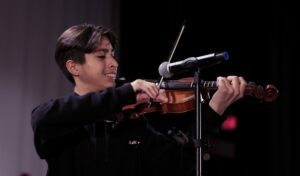
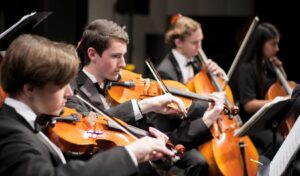

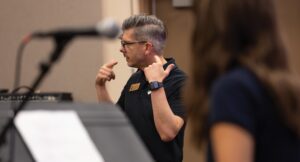


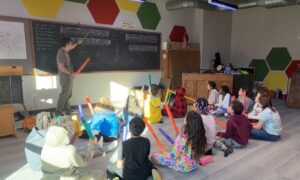
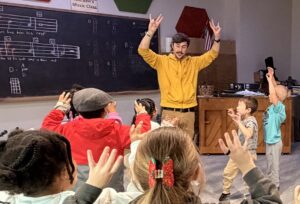


 Second, it should be simple. You have highly talented musicians and singers leading the service, but for some reason, that’s just not working for the congregation. This isn’t because they can’t play or sing; they can do both exceptionally well. Rather, in many cases, the congregation simply can’t sing along or follow the often intricate and musically challenging songs. Congregational singing is not the place for a key so high it can break glass. Nor is it a place for rhythms and time signatures that are too difficult to follow. This is especially true when all the congregation has to follow are words on a screen, which often do not communicate any clear pattern to follow.
 At a training event recently, I was asked: “What is considered too loud for the music portion of the service?” I replied with a non-technical answer: “I observe the congregation and determine if it’s too loud or soft by their posture. If it’s too loud, they will be sitting and watching, not singing, not engaged.”