Director of Bands Foreman College and Career Academy Chicago, Illinois
In Fall 2020, Ben Pedersen was hired as the Director of Bands at Foreman College and Career Academy to restart the band program, which had been dormant for years. He spent the summer before inventorying equipment and watching hours of YouTube tutorials to repair enough instruments to send home for virtual learning.
Once in-person teaching resumed, Pedersen recruited band members by talking to students in the halls, offering lessons after school and practicing with his door open to draw in students curious about what they were hearing. “I’ve emphasized arranging music for my ensembles to ensure students at beginning levels can play music that is historically significant, fun and culturally relevant,” he says. “Now, four years into the program, we offer five sections of band, we have won awards — Outstanding Woodwind Section at the Jazz in the Chi Festival and an ILMEA All-District selection — and about 25% of the school population participates in the program.”
Pedersen uses his school’s location in Chicago to introduce even more musical culture to his students. “When transitioning to public school education from a career as a freelance trombonist, a primary goal of mine was to bring great Chicago artists into my school and bring my students out into Chicago’s vibrant music scene,” he explains. “Foreman has been visited by numerous guest artists, including legendary Chicago artists like saxophonist Eric Schneider and bassist Dennis Carroll, and each visit was paired with a field trip to see them play at a jazz club in the city that night. The experience of getting to meet and work with artists, then seeing them perform in the real world brings the music to life for students.”
“We have also been fortunate to participate in a Jazz Institute program which pairs Chicago jazz artists with schools to provide multiple guest visits to the school as well as tickets and transportation to the University of Chicago’s Logan Center for the Arts to see prominent jazz artists perform live,” Pedersen says.
Foreman serves a diverse student population from a range of cultures within Chicago and from around the world. Most of Pedersen’s students have not had the opportunity to play musical instruments or take a music class before. “I am proud to be able to share my passion for instrumental music and help students achieve success in an area of study that they may have never known they would be interested in. My ultimate goal is to create lifelong appreciators of music,” he says.
Music Teacher Gillespie Technology Magnet Cluster School Chicago, Illinois
In 2011, Cale Patton started teaching at Dawes Elementary School, part of the Chicago Public Schools system. At that point, music consisted of music on a cart with no instruments and certainly no ensembles. She spent over a decade building a robust program that now includes an unconventional band program and an after-school rock band. She also spearheaded hands-on learning through performance opportunities and field trips. “An art-on-a-cart scenario is certainly not ideal,” Patton says. “However, the blank slate at Dawes along with a supportive administration allowed us to explore new ideas and to experiment with different approaches. Of course, there were failures and challenges along the way, but I never gave up hope and worked every day to connect with students and staff.”
After several years, music was finally given its own classroom! In 2020, Dawes was awarded Fine and Performing Arts School status by the district, due in part to the music program. Because of Patton’s commitment to innovation and her track record of pushing the artistic envelope, she was asked to build a music program from scratch at Gillespie Technology Magnet Cluster School in 2024. “Gillespie’s population is even more at-risk than Dawes with a student population that is 95% Black and majority low income. While it was sad to leave Dawes, I have discovered that my calling is to bring the light of music to students who need it the most. I look forward to working with Gillespie’s students and the community to build an innovative, technology-infused and culturally responsive music program.”
Funding her efforts at Dawes required networking and pursuing grants, which Patton says is a full-time job on top of teaching. She searches for grant sources online and pursues every opportunity possible. She has received funding, instruments and more from DonorsChoose, Save the Music (which did “save” her music program in 2017 by providing instruments to start a band program) and Give a Note Foundation (which helped with funds to purchase a sousaphone).
Patton also reached out to local community partners. “One of our greatest partnerships was with Ford City Mall, which donated craft supplies and costume materials, as well as welcomed our ensembles to perform. A highlight for my students and me include Christmas caroling and marching the mall corridors with the Dawes band for Mardi Gras,” she says.
According to Patton, music programs help those who need them the most. “I love to recruit diverse learners and students with behavior challenges because they need positive and encouraging outlets for expression,” she says.
A special tradition for the Dawes marching band is playing to send off Special Olympics athletes and coaches to the games. “The band and drumline would lead the athletes on a march through the halls of the school, outside and onto the bus. The school halls were lined with cheering and supportive students and staff, waving banners and signs of support,” Patton says.
Patton acknowledges that the Dawes band may not exhibit the traditional musical “excellence” of a wind ensemble, but “I am proud that they exhibit excellence in the areas of spirit, fun, community and inclusion. These skills will take the students much farther than a high ranking at contest,” she says.
Associate Professor of Saxophone and Director of Undergraduate Studies The University of Texas at Austin Butler School of Music Austin, Texas
It’s safe to say that if you’re a student of Dr. Stephen Page, Associate Professor of Saxophone at The University of Texas at Austin Butler School of Music, you are almost guaranteed a job upon graduation. His students have nearly 100% job placement at universities and public schools, performance venues, cultural nonprofits and other companies. “One of the best things about being a mentor is witnessing students seek and discover their passion and, more importantly, their purpose,” Page says. “The biggest thing I can do is to let students be open to their own curiosity. From there, I do what I can when I can to foster things forward.”
Page helps students connect with organizations and people who align with their interests in a way that supports turning their own motion into momentum. “In essence, the best thing I can do is to lead students on their way,” he says. “What a gift to do so!”
Page challenges his students with studio projects that involve other subjects like philosophy and neurology. He hopes that these opportunities will create an ongoing sense of curiosity that sets each student on individual paths of discovery. “It’s been great to explore a number of things together as a studio. Whether reading books by artists of other disciplines, watching documentaries about famous chefs or exploring our brain and the ways we can better incorporate our natural selves into our work, we always walk away with something new to think about,” he says.
Another project that Page spearheads is a UT Saxophone Studio YouTube Channel. Many performance videos have been shared on the platform, including one that’s quickly approaching 500,000 views. “New this year is a series of educational videos on all-state audition material. This series put a few of our students in the driver’s seat, performing the etudes and sharing several practice tips for viewers. We’re excited to expand on this into general topics on pedagogy and more to create a valuable resource,” Page says.
Vocal Music Teacher Rocky River High School Rocky River, Ohio
Rocky River High School’s Vocal Music Teacher Allison Paetz enlists the community and engages students when teaching global music. “I love performing music from all over the world, but I am certainly not an expert in every culture,” she says. “I have worked with students to select music that originated in a culture that they have a connection to or special knowledge of. Then, I involve them in helping to teach the language or share information and traditions related to the song.”
Paetz welcomes parents and grandparents to help with language if a student isn’t comfortable, and she says that her class’ understanding and connection to the music is much deeper because of those experiences. “The biggest challenge is finding the right piece for an ensemble in terms of voicing and difficulty level,” Paetz explains. “I have seen so much more music become available since I started teaching, but I would love to see music publishers expand their offerings even more. It would be fantastic to have resources beyond the printed page, especially for music that isn’t traditionally transmitted that way.”
Ten years ago, Paetz started the a cappella group, Chromatix, because she wanted to have an ensemble that could sing challenging arrangements of contemporary popular music. The 14 members of Chromatix — the largest group yet — regularly perform at local events and festivals, and once they helped her during a presentation at a vernacular music conference.
Like all educators, Paetz adapted her teaching approach during the pandemic, and she has retained some of the technology that she used when she taught online. “I still use some lesson plans and projects, especially those that give students the opportunity to transcribe and arrange music. For example, students in our beginning ensemble compose short melodies using a browser-based notation software, which we then use for sight-reading in class,” she says.
Paetz has also embraced the district’s implementation of Canvas to make more resources available to students 24/7 so they can practice independently. “Recently, students recorded themselves singing with their phones while we rehearsed the same piece together in class,” she says. “Students submitted their individual recordings for a quick and easy formative assessment. That would have been a file-management nightmare before Canvas, but I can do things like that more frequently now.”
Paetz is currently working on her Ph.D. dissertation and is conducting a study on perfectionism, stress and burnout in pre K–12 music educators in the United States. “I love what I do, but it is hard work. My hope is that my research can help identify patterns of thought and behavior that increase stress and burnout among music teachers so that we can work on better supporting music teachers and, as a result, students,” she says.
Director of Bands and Orchestras Concord-Carlisle High School Concord, Massachusetts
“No cowards” may be a strange message to share with students, but Director of Bands and Orchestras Christopher Noce uses that phrase for students to know that they can safely and confidently make mistakes during rehearsals. “The biggest difference between a new student at Concord-Carlisle High School and one who has been in our ensembles for a couple of years is in how they handle making mistakes,” Noce says. “Our established members will quickly acknowledge their mistakes in rehearsal — often with a quick glance toward me — and we can continue our rehearsal knowing that we’re all on the same page.”
He goes on to explain that “no cowards” is a tongue-in-cheek way to remind students to own the inevitability of an error. “It’s also important for me that we are always pushing ourselves out of our comfort zones — whether it’s singing in rehearsals, performing challenging repertoire, hollering for soloists in the jazz ensemble or cheering on the football team at home games. We take what we do very seriously, but we try not to take ourselves too seriously,” he says.
Noce brings in conductors who will extend his students’ understanding and perspectives beyond what he can bring to the table. “I keep an eye out at festivals and conferences for folks who may enrich our learning,” he explains. “I’m very cognizant of my limited perspective and inherent bias, and I work to bring in as many varied perspectives as possible.”
Some core values that Noce emphasizes in his class and throughout the program include:
Candor: Students know that he will be honest with them and expects the same from them.
Community and belonging: Everyone is welcome, and Noce means it. Concord-Carlisle sponsors multiple events throughout the year so musicians can just be together and enjoy each other’s company.
Living composers and new repertoire: Noce participates in consortiums and commissions to introduce students and audiences to new composers and repertoire nearly every concert cycle. “We perform a lot of repertoire by living composers, and one of the greatest advantages of this is that we don’t need a Ouija board to communicate with them, and the students love hearing about the work firsthand,” he says.
Musicianship outside our ensembles: Many of Noce’s students perform in outside bands, orchestras, chamber ensembles, hardcore bands and as singer-songwriters. All these pursuits are valued equally for the role they play in enriching the musical community within Concord-Carlisle ensembles.
Prior to joining Concord-Carlisle, Noce co-taught at the elementary and middle school level with Paul Halpainy for nearly a decade. They built a robust program that was more than just a feeder for the high school. “We wanted something that students could be proud of right there and then,” Noce says. “We set high standards, brought in clinicians, participated in concert festivals and even commissioned new works. The biggest investment was in the culture and community within and around our program, and it has paid dividends at the high school level.”
Now, Noce is reconnecting with those students who he remembers teaching how to put together their instruments. “Those 4th graders are now these incredible, passionate, driven, smart, funny and hard-working musicians filling the seats of my high school ensembles,” he says proudly.
director of bands Sam L. Martin Middle School Austin, Texas
The band at Sam L. Martin Middle School has a large Hispanic population with many coming from Central and South America who speak little English. Over 92% of band members are economically disadvantaged and a large portion have at least one accommodation. Director of Bands Alex Mutz says that being a person of color and a multilingual educator from outside the U.S. has helped him form a bond with his students because he understands what his students have gone through as immigrants. “Being able to navigate their language brightens students’ mood because they have someone who they can communicate with,” Mutz says.
He makes sure that his students can overcome obstacles and have the tools and resources they need to succeed, such as playing professional-level instruments. “My view is: Why shouldn’t they have the opportunity to receive the same level of education as any other student regardless of their home situation,” Mutz says.
Mutz adapted many of his lessons to accommodate non-native English speakers. For example, while certain songs are common in the U.S. like “Mary had a Little Lamb,” many of his students do not know it. “So, I try to incorporate songs that they know from their culture,” he explains. “When we are learning notes on the staff, I ask students for input and together we create Spanish versions of ‘every good boy does fine’ to help them remember the notes.”
Mutz has also researched different phonetic approaches and words to help students learn to articulate on wind instruments, which sets them up for success.
It seems fateful that when Mutz attended his college orientation, he decided to change his major from engineering to music. “At registration, it struck me that engineering wasn’t what I wanted. I wanted to keep pursuing music, so I changed my major right there,” he says.
Currently, Mutz is pursuing his masters in music education at Eastman School of Music on top of his work with the middle school and high school bands, and teaching private lessons. “I give the hours that I can without overly stressing myself and still being able to give maximum effort. I have a clear line of communication with my schools. It’s about perspective and loving what you do without burning yourself out,” he says.
As a child, Mutz wanted to join the legendary Blue Devils Bugle and Drum Corps after watching their 1994 show and in particular, the featured euphonium player. When he eventually made the corps, Mutz met the euphonium player and told him that he was his inspiration growing up. “He told me that when he was young, he wanted to be like someone in the corps as well,” Mutz says. “Years after aging out, a euphonium player on one of the marching bands that I was teaching came up and told me that I was his inspiration and that he wanted to be like me. A full circle moment!”
Orchestra Director, Music Department Chair Port Clinton City Schools Port Clinton, Ohio
Small schools don’t mean weak music programs!
That’s the mantra often repeated by Orchestra Director and Music Department Chair Adam Murray, who teaches at Port Clinton City Schools, a small district with about 85 students in the orchestra program. To maintain and grow enrollment, Murray has found a unique way to includes his high school students in the recruitment process, which includes a recruitment concert and an instrument selection event.
Each spring, Murray does a deep dive with his high school symphony into a different facet of the contemporary music industry, such as film, video games, Broadway, television, pop music, etc. In addition to learning the music, students participate in planning and executing a performance event, which includes program designing, advertising and creating related media like videos and posters. The first half of the unit culminates in a midterm project: a multimedia recruitment concert exclusively for 5th graders.
Phase two of the event is an “instrument selection party” where the high schoolers work in groups to plan games, playlists, decorate and help facilitate the instrument petting zoo. The Baroque Violin Shop in Cincinnati brings in dozens of instruments for every 5th grader to play and take home once they have made their decision. “Once you select your instrument and get your picture taken in front of our orchestra backdrop, the red rope unlocks, and you get to head into the VIP orchestra party,” Murray exclaims.
These efforts not only bring in new members to the orchestra, but it also retains the ones Murray already has. “Recruitment numbers are important to me but it’s the retention number that really matters,” he says. “It’s rare that I lose a student before graduation. When Port Clinton students pick orchestra, they are investing in it for the long haul.”
During the summer of 2022, Murray worked with administrative staff at the Firelands Symphony to extend its educational outreach program to Port Clinton. This partnership had not previously existed but has since flourished. “We have sectional coaches, access to private teachers, elementary recruitment tools and many other resources that the symphony is generously providing free of cost,” Murray says. “On the horizon, we are hoping to plan a ‘side-by-side’ with the symphony. Firelands also provides free concert tickets for all students, and our program has taken full advantage of the chance to see a professional symphony in action!”
Murray took over the program from a beloved director. “It might have been hubris, but I never had any pretense about being my predecessor,” he says. “Since day one, I have made this program an unapologetic mirror of who I am as an educator and as a performer. I see these kids five days a week from 6th grade until they graduate. We go through a lot of life together. We are energized, we are effective, and we aren’t afraid to take risks.”
Vice President of Education and Community Engagement Nashville Symphony Nashville, Tennessee
The Nashville Symphony’s education programming is designed to support the city’s students and educators and provide experiences that supplement and enhance the school curriculum. “We are always eager to collaborate and design new programming with our city to better serve the community,” says Kimberly Kraft McLemore, Vice President of Education and Community Engagement.
A popular program is Music In My Neighborhood, an annual week-long residency that is designed to bring the Nashville Symphony’s programming out of the concert hall and into a new neighborhood each year. Musicians, staff and board members visit local schools, community organizations and neighborhood associations to grow existing partnerships, build new relationships and spend time listening and learning from the community about how best to highlight the amazing work already happening in their neighborhood. “We then curate a week-long schedule of programming to showcase our partnerships in that neighborhood,” McLemore says. “We want to collaborate with the community to make music for the community. It is an amazing week full of partnership and music-making!”
Another program, Accelerando, which launched in 2015, is focused on diversifying classical music. Selected students receive full scholarship support to take weekly private lessons with Nashville Symphony musicians, participate in the youth orchestra, take music theory courses, access masterclasses and workshops led by world-renowned guest artists, and attend summer music festivals. “We also help students navigate the collegiate audition process in addition to covering visits and auditions at potential colleges or conservatories. All program activities and curriculum are designed to prepare students to study music in college and eventually go on to pursue a career in orchestral music,” McLemore says.
In February 2024, Nashville Symphony will be partnering with Carnegie Hall to produce the Link Up program with 3,000 students, who will bring their recorders to the concert hall to play and sing with the Nashville Symphony during the performance. “This program is a true collaboration with Metro Nashville Public Schools that provided students with recorders and helped coordinate educator professional-development sessions,” McLemore says. “This program is an opportunity to do more than just expose young students to orchestral music. I hope this program will show them that our concert hall is a space for them to come and make music. That they belong here on our stage.”
Another partnership is with We Are Nashville, a student festival that prioritizes access to high-quality performance opportunities and learning experiences. The festival teaches 300 choir and orchestra students that they have a voice and deserve a space in our music ecosystem. “It was an easy decision to partner with the festival as their host organization. Our city’s students deserve to perform on the Schermerhorn stage, and I’m proud to provide space for them to share their voice,” McLemore says.
Director of Bands and Director of Performing Arts Westfield High School Westfield, Indiana
Westfield High School’s music program was in dire need of revitalization. That’s when Director of Bands and Performing Arts Andrew Muth stepped in. “A successful program isn’t built in a day or a single year. We knew that it was going to take time to build the program,” he explains.
Muth put together five- and 10-year plans that detailed where he wanted to go and how to get there, and he shared the vision with students, parents and the community. “Our goals were big and at times they felt impossible, but we always said that if we do the work, the results will come,” he says.
This inclusive and transparent approach has paid off — there is a real sense of pride around the band program. “I am blown away everyday by the power of relationships. Our kids care about each other. Our parents are the hardest working crew, and the relationship that they have built with the program is incredible,” Muth says.
According to Muth, success has always and will always be the byproduct of excellence. That level of excellence has seeped into their performances. “Our philosophy is that every detail matters,” he says. “This has meant that we always work with designers and vendors who care about our kids. We put shows together that create an identity that is uniquely Westfield. This means we pull from a variety of visual and musical inspirations.”
A particularly memorable experience occurred last year at the WGI Winds finals. “As we were walking onto the floor to perform, a senior leaned over to me and said, ‘I don’t ever want this to be over,’ which made tears fill my eyes. Anytime you watch a student understand the transformative power of music, you couldn’t ask for more,” Muth says.
Muth finds daily inspiration from his own high school band director, Bill Laughlin, who had a sign in the front of the band room that read “good enough is neither.” This phrase affects my leadership style every day. “I would never ask a parent, student or staff member to do something for the program that I wouldn’t personally do myself. I am unapologetically passionate about our kids and our program. I believe in the power of believing in the ability of your students. I go into every season and school year believing that this can be our best year yet,” he says.
Video games sometimes get a bad rap, despite being one of the most popular forms of entertainment on the planet. Seen by some as fodder for a lazy lifestyle, it can be tempting to imagine a couch potato sunken into the sofa with a glazed look over his eyes as he plays the dozenth hour of a war game, moving only his thumbs.
But video games aren’t only meant for the sedentary. Indeed, there are many titles specifically designed to get people out of their seats, to move their bodies and even build up a healthy sweat. Here are 10 games sure to get your blood flowing. Play them and it will be as if you’re in your own personal fitness class!
1. World Class Track Meet (1987)
In the late 1980s, almost everyone had a friend who owned the Nintendo® Power Pad — that mat-like device from Bandai, which laid on the floor and allowed people to play games with their feet instead of their fingertips. Doing so got players out of their chairs and effectively exercising with one title in particular. Released in North America in 1987 (though initially called Stadium Events), World Class Track Meet allowed gamers to compete in four Olympic-like competitions, from sprinting to hurdles to long jump to triple jump, all while enjoying a deep leg workout. Preview it here.
2. Dance Dance Revolution (1999)
This game from Konami was released in North America in 1999 and ever since, it’s gotten players drenched in sweat and their thighs tired as they pump their legs and feet to keep up with a given song’s beat and melody. In much the same way that Guitar Hero set out to instill musicianship in non-musicians, “DDR,” as the title has come to be known, proved to many that they could dance to a rhythm like a pro. Preview it here.
3. Wii Sports (2006)
Released by Nintendo in 2006 along with the then-new Wii video game system, this five-sport collection was a huge success, becoming one of the best-selling games of all time. Though it provided options to play tennis, baseball, bowling, golf or boxing — all of which required gamers to stand and move their limbs — it was the tennis game that proved to be an especially big hit. Not only did the vigorous offering get people active, but many used it for social events like parties or holiday gatherings too. Preview it here.
4. Wii Fit (2007)
Like Wii Sports, this title, which came out a year later, offered players several exercise-oriented games, including options for yoga (with an onscreen personal trainer), aerobics (like hula-hooping), balance (with the Wii Balance Board) and strength training. It became so popular that gyms and health clubs have since incorporated it into their offerings — it’s even been used to provide physical therapy workouts for children and the elderly. Preview it here.
5. Punch-Out!! (2009)
Video game players of a certain age are familiar with the 1987 title Mike Tyson’s Punch-Out!!, but a dozen years later, Nintendo released a new version that used the Wii Fit Balance Board to avoid opponents and the Wii controller to throw punches. This one can get so rigorous that you might forget you’re not actually in a physical boxing ring! With each successful round, the challenge against the skilled digital opposition gets harder and more enjoyable. Preview it here.
6. Zombies, Run! (2012)
This mobile game from the British company Six to Start has players running through a fictional town trying to survive an apocalypse and avoid zombies. The immersive title is also bolstered by guest narrative offerings from the likes of acclaimed Canadian writer Margaret Atwood. Playing as the character “Runner 5,” gamers take on various missions (there are up to 40 of them), dodging the undead and searching for various items in order to figure out how to stay alive. The result? Sweat, discovery and excitement. Preview it here.
7. Pokémon Go (2016)
Not only does this game get players out of their seats, it gets them out of their homes too. A mobile game from Pokémon and Nintendo, downloaded by some 500 million people, this title uses GPS technology and allows players to “capture” digital Pokémon characters out in the world. When the game was first released back in 2016, there were some 150 game characters to find. As a result, there were lots of people walking around holding their phones, looking for the otherwise invisible digital creatures … all while getting in their daily steps. Preview it here.
8. Ring Fit Adventure (2019)
There are some games that try to nudge you into fitness and then there are those that are very clear about their ambitions. Ring Fit Adventure is most assuredly in the latter category. This game for the Nintendo Switch handheld device comes with two adapters: a Pilates-like ring, and a leg strap. With each, gamers are meant to complete fun, goal-oriented physical activities that include running and jumping through courses while accruing points. Preview it here.
9. Beat Saber (2019)
This title from Czech designer Beat Games uses virtual reality to put you in a world where blocks are flying at you as pop music plays. The objective? Use your “sabers” (digital swords created by two VR controllers) to slice the objects, which are synced to the songs. Part-sword fighting game, part-Guitar Hero-like musical offering, Beat Saber will leave your arms feeling as if you’ve just taken part in an action movie, with many fallen enemies at your sides. Preview it here.
10. Just Dance 2020 (2019)
DDR isn’t the only dancing game that gets hearts racing and smiles appearing. This Ubisoft title, which includes songs from big name pop stars, has players mimicking the onscreen choreography, with their movements tracked via motion sensors or smartphone apps. Players accrue points based on the accuracy of their moves. As a bonus, you can enjoy this one on your own or compete with others in multiplayer mode. Just don’t forget to bring a towel! Preview it here.
Band Director, DuPont Hadley Middle School Executive Director, Southeastern Women in Music Symposium Tennessee
Band Director Kacee Sanders is a firm believer in building independent musicians where her only role in the classroom is to act as a facilitator. The goal is for her students at DuPont Hadley Middle School to be thinkers and problem solvers and to be able to operate without her. “I’m not the one making the music; the musicians are. I challenge the traditional band room setting where the band director barks orders from the podium, and the musicians militaristically sit in the chairs and do what’s asked.”
Instead, Sanders wants everyone in the room to be involved in the music-making. She tells her students that every voice and every contribution is needed to create a completely unique and beautiful performance. “I encourage my classrooms to have conversations,” she says.
This independence also results in a supportive, positive and inclusive environment within the band. As a Title I school, most DuPont Hadley students will need music scholarships to go to college. “They work to motivate each other,” Sanders says. “They help each other and have been incredibly encouraging of each other’s successes.”
Sanders employs social and emotional learning practices in the classroom and focuses on creating an engaging learning environment. Every Monday, students complete a “rehearsal reflections” graphic organizer with sections to set their rehearsal intentions for the week, indicate any upcoming performances and track individual, section and ensemble goals.
She also implements several teaching strategies that actively involve students learning with and from their peers. “I believe that all students have something to contribute to the learning environment and should have the opportunity to feel valued and succeed, and I have worked to create a positive classroom culture where this is possible,” she says.
Sanders is proud of her role as Executive Director of the Southeastern Women in Music Symposium and considers it her biggest accomplishment and undertaking. The symposium originated as a Girl Scout Gold Award project by a former student, Mya Foley, who approached Sanders in 2021 to be her sponsor and to brainstorm project ideas. As a percussionist, Mya experienced the male-dominated landscape of the music community and recognized the need for more female representation in both the clinicians she worked with and the composers whose music she performed. The concept of an all-female honor festival began to take shape. The one-time Gold Award project has now evolved into a nonprofit organization and an annual symposium. “Our second symposium took place in December 2023, and we hosted 75 high school and undergraduate participants, who benefited from rehearsals, discussions and mentorship,” Sanders says. “The symposium has never been just an event to Mya and me. It is a testament to our commitment to increase female representation, provide a space for young women to thrive and foster mutual support among women in music.”
Associate Professor of Ethnomusicology California State Polytechnic University, Pomona Pomona, California
How difficult is it to teach music in a STEM-focused school like California State Polytechnic University, Pomona? Associate Professor of Ethnomusicology Dr. Jessie M. Vallejo finds it enjoyable to teach courses that foster creativity, problem-solving, beauty, social justice and a sense of community in this interdisciplinary space.
She revived some courses, such as the mariachi ensemble, which existed in the 1970s and ’80s, and the Music of Mexico course. She also started the mariachi program in 2016. Even though Pomona is a Hispanic-Serving Institution (HIS), “there is still a lot of work to be done to realize our potential in serving students from diverse backgrounds,” she says.
Vallejo developed two new courses: Ethnographic Field Methods and one on musical instruments. “The field methods class encourages students to develop research skills and interact with a community of musicians while connecting with some of their other disciplines and interests, such as history, anthropology, or languages,” Vallejo says.
“The organology class — Theory, History and Design of Musical Instruments — is one of the most enjoyable classes for me to teach. I have always loved the sciences, and this is my way of connecting the department more directly with Cal Poly Pomona’s engineering and science areas,” she says.
Each semester, the students in this course work with the Student Innovation Idea Labs to learn about tools and resources that may be used to build instruments, such as laser cutters or scroll saws. Throughout the class, they discuss instruments’ cultural meanings and roles in different societies, as well as social and scientific issues around instruments like sustainability of materials, endangered plant or animal species and accessibility for people with disabilities, including how to adapt instruments for different needs.
One of her favorite experiences as an educator was the collaboration between the Cal Poly’s premiere mariachi ensemble, Mariachi Los Broncos, and Dr. Julian Saporiti (a.k.a. No-No Boy). “Dr. Saporiti’s music is rich in history lessons, and his song, “The Best God Damn Band in Wyoming,” tied together some of the overlapping experiences of Asian, Mexican and Central Americans in the Pomona area over the last century,” Vallejo explains. “The song is a great vehicle to study local history and contemporary events through performance, and best of all, the collaboration was fun!”
In addition to teaching music, Vallejo works on the school’s transportation committee to address issues about mobility on campus. The committee was able to add a stop on campus for the Foothill Transit Silver Streak bus line, which has helped to shift Cal Poly from being a car-dependent campus. It has also improved transit on the I-10 corridor, reduced greenhouse emissions and made the campus more accessible. Other projects the committee is exploring include continuing to expand bus service, building a mobility hub and extending the protected bike lanes connecting campus to nearby cities.
Vallejo’s research and her own life experiences have taught her the critical importance of representation and culturally relevant programming in K-12 and college settings. “Growing up as one of the few Mexican Americans in Syracuse, New York, I was frustrated that I didn’t have opportunities to learn about my culture, especially in music programs and ensembles,” she says. “I am thankful that I can help ensure that students at Cal Poly Pomona have the opportunities that I had to fight for or seek out through study abroad experiences.”
Assistant Professor of Voice University of Memphis, Rudi E. Scheidt School of Music Memphis, Tennessee Founder and Artistic Director, Cantos para el Mundo
Like most higher education institutions, the song repertoire curriculum at the University of Memphis focused on “standard” Western classical repertoire. When Dr. Paulina Villarreal joined the faculty in 2020 as Assistant Professor of Voice, she was given the opportunity to reimagine the special topics repertoire courses offered at the graduate level.
“I wanted to inspire students through repertoire and expose them to ‘gems’ that they’ve never heard of before, so I dedicated special topic courses to two distinct topics: 1) Entartete Musik (degenerate music)/songs by Jewish composers who were banned by the Third Reich and 2) Iberian and Latin American repertoire,” she says. “I am proud that today, every graduate vocal student has a few selections from underrepresented groups/composers in their performance repertoire!”
Villarreal is passionate about finding songs by Latin American composers who have never been recorded and create high-quality audio and video clips for future performers to explore. She has also presented at national conferences and shared her knowledge of this repertoire with other teachers and musicians. “I am currently in the process of recording a whole album by Mexican composer Maria Grever,” she says. The album’s publication will be preceded by a performer’s guide so that singers all around the world can have access to this composer’s music!”
The Nuevas canciones vocal competition began as a collaboration with Opera Memphis to introduce singers to song and operatic repertoire from Spain and Latin America. Competitors were asked to find and perform at least one selection in Spanish during the final round of the competition.
Another area that Villareal focuses on is trauma-informed pedagogy (TIP), which recognizes that teachers and students have past and present experiences that may negatively affect teaching and learning. “It’s vital to ensure the physical and emotional safety of every student,” she explains. “Some other ways I implement TIP in the studio is being mindful of power dynamics, and always presenting myself as empathetic, open and flexible. I also constantly remind students about on-campus resources, and lead by example by engaging in self-care.”
In 2017, Villarreal founded Cantos para el Mundo (songs for the world) to promote vocal arts of the highest caliber in the North of Mexico. The concert series is in its eighth year, and has represented artists from over 12 nationalities and promoted local talent through scholarships and vocal clinics.
“The University of Memphis Rudi E. Scheidt School of Music is one of the only places in the country that challenges students to become well-rounded musicians, instead of focusing solely on one musical genre,” Villarreal says. “The school of music offers scholarships to any talented and deserving student regardless of major. Our ensembles include finance, law, anthropology and biology majors, among others.”
Orchestra Director Upper Arlington High School Upper Arlington, Ohio
At Upper Arlington High School, Orchestra Director Christopher Lape took the lead in adapting the curriculum from every other day to everyday instruction. “It’s been a collaborative and continuing effort with my colleagues,” he explains. “There’s significantly more room for growth with the consistency of daily instruction. The bulk of the transition has been updating our curriculum map and choosing method/technique books that correlate the best. It’s honestly a reflective process and I want to do what’s best for our students because we place a lot of value on our students and their musical journey.”
In addition to adapting the curriculum, Lape has brought some innovation activities to the orchestra, including the rock band project, an idea that he borrowed from a string teacher in a neighboring district. Students divide into groups to form rock bands and choose a song (a verse and/or chorus), chart the chord structure using keyboard/guitar tablature, and figure out the melody. Once students have the basics mapped out, they choose their roles in the band (melody, root, 3rd, 5th). They have freedom to use different instruments and their voice to experiment with a variety rhythms and movement. “By the end of the project, they’ve created their own arrangements. I love this project because it gives students autonomy in something that is relevant to them,” Lape says.
Another popular project, especially with middle schoolers, is the string sound FX story, which Lape usually schedules around Halloween. “Students step into the role of a Foley artist and experiment with different kinds of sounds that they can make on their instruments. They then incorporate those sound effects into a story that they’ve composed and perform for the class. I put a crackling campfire on the tv, turn out the lights and let their creativity shine,” he says.
Lape co-chairs the Central Ohio String Festival, a large-group adjudicated festival that Upper Arlington High School hosts for middle school and high school orchestras. Each group performs for three adjudicators who provide written/audio-recorded feedback and a rating. Following each performance, a fourth clinician gives the group a clinic where they provide and apply feedback in real time. Last year, 30 orchestras (~1000 students) participated in the event. The goal for the annual festival is to provide growth opportunities for both students and teachers through authentic feedback from a rotating team of highly qualified string educators.
According to parents and students, Lape’s “superpower” is developing rapport with students. He acknowledges and appreciates students for who they are in hopes that they feel seen. “I’m intentional in how I interact with students to help them build confidence in themselves as musicians,” he says. “I value their opinions and give them a voice in musical decisions and repertoire choice. If you take the time to build rapport with your students, you’ll see that they have a lot to offer. We celebrate successes and provide a safe space for struggles and mistakes. That’s how we build resilience and grow!”
Assistant Professor of Trumpet Mississippi State University Starkville Mississippi
Promoting the role of women in music, and in particular trumpet composition and playing, is a huge driving force for Dr. Jacquelyn Lankford, Assistant Professor of Trumpet at Mississippi State University.
She created the Women Composing for Trumpet (WCFT) Competition to add to the list of “standard” trumpet repertoire composed by women. “While there are many incredible compositions by women for solo trumpet, the only one that is considered standard by the trumpet community is the ‘Pakhmutova,’ written in 1955. It was the goal of this competition to bring light to this matter, as well as give modern women composers the opportunity to contribute to this list of standards and be recognized for their accomplishments,” Lankford explains.
The competition announced two winners (Katie Jenkins and Madeline Lee) who were awarded $2,000 each, a recording of their work and a publishing deal with Murphy Music Press.
Another event that Lankford spearheaded was the Powerful Women in Music Concert Series, which was created to continue to initiate ways to change the fact that underrepresentation of women is prominent in the music world. “This is true when it comes to performance opportunities for individual women performers and groups, as well as an audience’s exposure and opportunities to attend events featuring these women,” she says.
To accomplish this, a concert series was created featuring women soloists and groups of women performers from various genres, backgrounds and ethnicities. Performers included Alexa Tarantino (Jazz at Lincoln Center) with the Jazz Band, Caeley Jackson (U.S. Navy Band) and Calypsus Brass (a professional women’s chamber ensemble that Lankford is a member of).
Lankford strives to inspire and motivate those often forgotten or neglected in the trumpet community — so last semester, she started the Trumpet Festival at Mississippi State. Trumpet players at the high school level and beyond were able to come together for this free experience where they could learn, perform and connect. She brought in three guest artists with different genre specializations: Jason Bergman from Indiana University, Pancho Romero from New Mexico State University and Josh Kauffman from U.S. Army Blues. Each provided a masterclass, private lessons and a concert at the end of the festival. “My goal with this event was to provide accessible, high-quality educational and performance opportunities for trumpet players who typically do not get to experience them because of their location or financial situation,” Lankford says.
At Mississippi State University, collaboration is not just something that happens between professors, the students are also inspired to collaborate often. “This includes everything from putting ensembles together for their recitals, dedicating themselves to a trumpet ensemble with a goal to compete at the National Trumpet Competition, meeting outside of any scheduled events to practice together, and even meeting to work on their audition music together,” Lankford says. “This behavior is evident in the trumpet studio, and I have seen it influencing other music students, as well as non-majors who want to be a part of this healthy and inspired culture.”
9-12 Instrumental Music Teacher Franklin Academy High School Malone, New York
Providing meaningful and memorable performance opportunities is vital to Lily Ianaconi’s role as a 9-12 Instrumental Music Instructor at Franklin Academy High School. Last year, the wind ensemble performed the piece “I Am Enough” by Marie Douglas, which was part of the 2023 California Band Directors Association Social Impact Consortium. The piece is a three-movement suite on the topic of mental health. “Our students truly appreciated the opportunity to perform a piece with such relevance and purpose,” Ianaconi says. “We really made a memorable connection with this music throughout our preparation and performance through deep conversation about mental health, underrepresented composers and diversity of wind band literature. The audience sincerely enjoyed the piece and could hear and feel the emotions of anxiety, self-doubt, motivation and fear through the music.”
Ianaconi is always looking to add new experiences for her students, so she added chamber ensemble performances at concerts. Parents, families and audience members enjoyed hearing the different combinations of instruments and styles of music. “As music educators, we’re always searching for ways to highlight the wonderful things that our students are doing. A chamber ensemble is a terrific opportunity for students to work together toward a common goal. The student-led rehearsals give them the artistic space to make musical decisions, communicate their ideas and create lasting memories of making music together,” she says.
A few years ago, Franklin Academy had the opportunity to host a college wind ensemble while the musicians were touring New York. “One of my former students was studying at this university to become a music teacher,” she shares. The college students spent the day with us putting on workshops, masterclasses and performances. That evening, our high school band students performed in a combined concert with the college students. It was a tremendous musical success for everyone involved.”
In 2018, Ianaconi along with other band teachers in the county worked together to add an All-County Festival that had two additional ensembles so that more students could participate in an honor band. “At these amazing and memorable festivals, students become better musicians, make long-lasting friendships and learn more about themselves as performers,” she says.
Each Friday, Ianaconi ends rehearsal by challenging students’ scale playing with a fun game called “The Scallenge.” The full ensemble plays all 12 major scales together. “After the practice round when mistakes and scale sheets are allowed, students must play The Scallenge again without the use of their scale sheets,” Ianaconi explains. “If they make a mistake, they are out! After a student finishes all 12 major scales, their name appears on the wall in the band room. It’s an exciting way for students to support each other as their technique, practice and concentration improve throughout the year.”
Ianaconi’s dedication to her students was clear during the production of “Little Shop of Horrors.” She not only directed the pit but played woodwinds and percussion throughout the show. “I quickly turned pages in my score while giving cues to students on stage with a baton in one hand and a flute in the other. I wetted my Eb clarinet reed in my mouth, tried not to touch the windchimes with my left foot while my right foot rocked a mounted tambourine with a bass drum pedal on 2 and 4 of the tune.”
The audience enjoyed the performance and the students had an incredible time making the show a success. Ianaconi says the experience helped her grow as a director and musician.
Assistant Professor of Choral Music Education and Assistant Director of Choral Activities Boise State University Boise, Idaho
Boise State University embraces innovation in an interdisciplinary way — something they call “Blue Turf Thinking” (named after the famous blue turf at its football field). Dr. Richard Hutton, Assistant Professor of Choral Music Education and Assistant Director of Choral Activities, wholeheartedly believes in “Blue Turf Thinking” and finds creative and compassionate avenues to teach choral music.
“I am inspired by the pure transcendent joy of music, and I’m driven to empower my students to develop their artistic and creative capacities, enable them to be a part of a musical community and provide opportunities where they will experience the power and value of music,” he says.
Hutton has found deep community and enduring friendships through choir, so he provides opportunities that foster those bonds in his ensembles and showcase it to the wider community through activities like Friday night talent shows, neighborhood caroling or Valentine’s Day singing telegrams. He emphasizes that anyone who wants to be a part of the choir program will be welcomed. “The successful choral program gets everyone involved,” Hutton explains. “One of the things I love about choir is that anyone can join and find a sense of belonging. No instrument needs to be purchased and no prerequisite needs to be fulfilled. I have the joy of recruiting even those kids who will say, ‘Oh, you don’t want to hear me sing.’ To which, I tell them, ‘Teaching you to sing is our superpower!’”
Prior to Boise State, Hutton taught at a high school where he offered a choir designed for students who required special education services. Most of the choristers were a part of the comprehensive life skills (CLS) program for students who take one or two elective general education courses where they can integrate with mainstream students. “Rather than having a few CLS students in a variety of choirs, I worked with administration to offer ‘Cougar Choir’ so students from my advanced choir could come alongside a larger number of CLS students in a supportive peer tutor relationship, which fostered an environment where everyone thrived.”
The structured routine of Cougar Choir included greeting and goodbye songs, songs that incorporated American Sign Language, songs with movement and dance, and songs that required Orff instruments, boomwhackers and desk bells. “When I moved on from secondary to higher education, this group of students was the hardest to leave,” Hutton says.
The music department faculty at Boise State demonstrate care for students academically and personally. “Students experience a supportive yet challenging environment and get to enjoy a large university experience in a city with a vibrant arts scene,” Hutton says. “One of our goals is to prepare students for successful careers in an increasingly interconnected global community. I am proud to equip future choral music educators with the tools to make an impact in the lives of students across the Treasure Valley and beyond.”
Music Teacher and Music Director Esperanza Academy Charter School Philadelphia, Pennsylvania
Music Director Miguel Hidalgo takes his role as a Latino teaching at Esperanza Academy Charter School, which primarily serves children of color, seriously. “Being a role model for my students is extremely important to me. This representation fosters a sense of belonging and demonstrates the possibility of breaking down barriers and stereotypes,” he says.
At Esperanza Academy, the music program is part of the curricular majors track. “It goes beyond mere music appreciation to building skills that could set our students on a pathway to pursue a career as professional musicians,” Hidalgo explains. “Despite the challenges of working with orchestral and other instruments that require frequent maintenance, our students’ immense heart, passion and dedication prevail. We are excited to continue growing our small but highly spirited program.”
Hidalgo is dedicated to supporting his students’ academic growth as he strives to instill values, build resilience and empower them to believe in their limitless potential. “I hope these actions create a ripple effect, influencing the next generation to invest in their community and contribute positively to society as a whole,” he says.
Because he teaches students who have varying levels of musical skill and development, Hidalgo must constantly deal with changes in instrumentation. “To meet individual student needs, I simplify parts and rework arrangements to ensure inclusivity and accessibility. This approach fosters a supportive environment, allowing each student to contribute and grow, regardless of their skill level or chosen instrument,” he says.
Many of his students start playing instruments in the 10th grade, and Hidalgo works with them to fast-track their skills with consistent hands-on practice, focusing on foundational skills and gradually building complexity. By fostering a mindset that acknowledges the journey from imperfection to proficiency, he encourages students to navigate challenges and find joy in their musical growth. “I emphasize playing examples regularly, which helps them unlock the power of listening,” he explains. “When trumpets or trombones are struggling, I will play alongside them, even if I am not playing the instrument well. By doing this, I am encouraging them to explore and accept the initial discomfort of sounding ‘bad’ to reinforce the idea that mastery evolves through persistence.”
To foster camaraderie among students, Hidalgo encourages group collaboration and teamwork. “When the bands perform, I do not conduct the ensembles. I believe this pushes students to trust each other and emphasizes the importance of listening. This shared experience creates a cohesive bond, promoting interdependence and teaching them the value of collective harmony on and off the stage,” he says.
Instrumental Music Teacher Peter Johansen High School Modesto, California
Inclusive is the best way to describe the music program at Peter Johansen High School. Instrumental Music Teacher Brad Hart oversees the United Sound chapter at the school, which pairs students with special needs, called “New Musicians” with band members, called “Peer Mentors.”
“During our first Spring as a United Sound chapter, a New Musician was able to travel and perform with the band at Carnegie Hall,” Hart says. “One of our Peer Mentors made the choice to pursue special education as a result of the connection and experience. The new friends and colleagues in music make real connections that is evident around campus. They know each other as musicians and as people, and we get to see the impact of those relationships every week.”
Hart was able to create additional leadership positions for some of the Peer Mentors who can gain experience making lesson plans, reviewing how classes went and writing parts together. “It can be a struggle for sure, but at no time is the struggle not worth it,” he says.
Another way that Hart works with special education students is with a weekly bucket drumming class for three of the school’s severely handicap classes. Students learn rhythms and apply them to performing various styles of music. “They performed ‘Sweet Caroline’ at a rally last year with our band program, and for the last two years, they performed at their field day event with student colleagues from around the county. It’s pure joy to make music with them each week,” Hart says.
Engaging directly with the community is important to Hart, and he established a schedule of performances to do just that. Outside of the traditional school concerts, the band participates in several parades, including the Fourth of July parade with local veterans, winter city of lights parade, a holiday parade and the Airport Neighborhood parade. There are also many jazz combo and jazz band opportunities throughout the year around the community.
Hart also works with new composers and has commissioned several over the years. The school band has also performed works written by students.
“Our program has never been as big as I want it to be because I believe every student should be in music through high school,” Hart says. “But I have always wanted to adapt to reflect who the students are and project to them ways to expand their understanding.”
Music Teacher Southeast Local School District Apple Creek, Ohio
Music Teacher Dennis Giotta at Southeast Local School District established a music technology class to equip students with contemporary skills while nurturing their passion for music. The goal of the class is to prepare students not just for today, but to instill a love for lifelong musical exploration in an ever-changing world “Recognizing the evolving landscape of the music industry, I aimed to empower students with technological proficiency, enabling them to create, produce and innovate within diverse musical realms,” he says. “This class is a bridge between traditional musical education and modern tools, fostering creativity, technical aptitude and a deeper understanding of music’s ever-expanding possibilities.”
Giotta knows that exposure to a broad range of musical styles cultivates not only technical proficiency but also enriches students’ cultural appreciation, empathy and connection to the broader human experience. “That’s why we frequently bring in guest clinicians and guest artists. Learning to play alongside accomplished musicians provides our students with a unique, firsthand insight into professional artistry and the opportunity to witness the pinnacle of musical achievement,” he says. “Guest clinicians help to broaden students’ experiences, and they are a reminder that there is not only one way to teach music.”
Another popular class that Giotta teaches is songwriting, which came out of his interest in finding more opportunities for all students to receive a music education — not just those in band, chorus or orchestra. “This class focused on vernacular music that students would write and perform by themselves on ukulele or piano. The students would also perform their songs at a local coffee shop at the end of the year,” Giotta says.
The songwriting class evolved into rock band after a few years so students could add some more popular instruments and have more collaborative experiences. “Students still write their own music and perform in authentic settings. They also get to perform covers of their favorite songs,” he says.
Giotta strives to create a music curriculum that is dynamic and relevant. He seeks feedback from students, colleagues and the community, as he researches the changing landscape of music throughout the world. “Our music program is a vibrant, collaborative community where passion and creativity thrive. This collaborative approach ensures that our program continually evolves within an environment of constant refinement and adaptation,” he says.
Assistant Band and Choral Director Parkland High School Allentown, Pennsylvania
At Parkland High School, the music department is one of the three pillars that define the philosophy of the district: Arts, Athletics and Academics. “Even with this level of support, advocacy always remains an active part of the job. Being visible in the community is crucial,” says Assistant Band and Choral Director Allison Figueroa.
One area of advocacy — recruitment — is one of Figueroa’s passion projects. She believes that all incoming 8th graders would benefit from a high school band experience because band teaches students a long list of valuable life skills. “I have amplified our 8th-grade outreach with middle school band nights with the high school marching band and jazz band. We also have a meet-and-greet performance with the younger high school concert band. Parkland’s head director and I guest conduct a song with the 8th-grade band during their concerts,” Figueroa says.
She credits the music educators at the district’s nine elementary and two middle schools who lay the musical foundation for students. Once they reach Parkland, students have the opportunity to gain further instruction in performance ensembles as well as select from a catalog of music electives.
In addition to directing the ensembles and teaching courses, Figueroa is the advisor of the Tri-M Music Honor Society. Membership has doubled in the last two years, and students continually look for ways to be more involved in service projects, performances and fundraisers. “I enjoy finding opportunities for our student musicians to be seen and heard by the rest of the school, such as performing in small ensembles throughout the school during the holidays, Music in our Schools month, etc..” says Figueroa. “It has become something the school looks forward to, and it’s incredible how it makes a large school of 3,200 students seem a little smaller even if it’s just for a few moments.”
Figueroa is particularly proud of a collaboration between Tri-M and the PALS (Peer-Assisted Learning Strategies) hand chime choir. ”A committee of Tri-M students runs rehearsals with members of the PALS club to bring the experience of performing in an ensemble to those students who otherwise may not have the opportunity. The students perform side by side at our Festival of the Arts and our Life Skills commencement ceremony,” she explains.
Figueroa is proud to teach at her alma mater. “When I attended Parkland back in the day, I was the eager drum major with dreams of leading my own band. I adored band, chorus and our A-wing (the arts wing) for being a place where I could feel good at something in such a large school,” she says. “Now things have come full circle and nothing makes me prouder than being an A-wing teacher who gets to usher classes of students through the same journey.”
Nicholas Fields, the Band Director at Edgewood City Schools, doesn’t take the responsibility of his job lightly. “A good band/music director gives students a sense of belonging and helps build character, confidence and discipline. These are all traits that build good people later in life,” he says.
When the district faced a budget shortfall this school year, Fields compared the current budget to those from past years to figure out what were the top priorities. “It was my goal to make our band fee as low as possible in order to allow the most participation. It absolutely broke my heart that students couldn’t participate due to cost,” he said.
His compassion was also evident when he stepped in to help the high school band when its director fell ill in 2022. “There was no way that I would let the students not have a quality band education and successful season. I pushed them to be their best and to always keep their goal in mind when things got tough. We made OMEA State finals and earned the top rating of Superior, 1 that year. We finished the year with an overnight trip and contest performance at Cedar Point.”
Fields also spearheaded two fun performance events for his students. The Fine Arts Festival showcases the middle school students in the district. “Choir, band and visual arts all collaborate to make this event a special evening of performances and art displays. The festival brings in a large number of our community members and families,” Fields says.
Because he is a percussionist, Fields is especially excited about the Night of Percussion where the high school percussion ensemble performs a full-length concert of percussion-only literature. “We perform in large group settings, small ensembles and even feature soloists,” he says.
Recently, Fields has seen evidence of the long-term impact of being a music educator. “The process of starting a student in beginning band as a 6th grader and actively being a part of their transformation into a talented graduate is awesome. Lately I’ve been blessed to be included in college graduations, weddings, birth announcements, etc. of former students. The fact that I still come to their minds in these moments is humbling and invokes unspeakable pride. It shows me that the work I do doesn’t just stay in the band room or on the practice field.”
Music Teacher Monroe Elementary School Bartonville, Illinois
“I always say that I can’t do anything more for kids than to just show them the way. They must first be open to it,” says Monroe Elementary School Music Teacher Jeff Driscoll.
However, Driscoll has done much more than just show students the way. In the 15 years that he has worked at the district, the music program’s offerings have grown as has its visibility. Additions include the before-school jazz band, before- and after-school vocal ensembles, the creation of a separate 5th-grade choir (prior to this, there was a 5-8 choir) and a pep band. Outside of the traditional day, there is also a four-week summer band program and a school musical.
He credits the school for supporting the music program and being open to growing it and making it accessible to all students, as well as the parents and community for helping to build up the program and make it possible for their kids to jump in. “Once the kids realize they’re passionate about music, I can show them all the opportunities, activities and different paths that are available,” he says.
The first step Driscoll takes is to look for areas where students don’t have an outlet. For example, starting the jazz band was an opportunity for students to play a different style of music. The pep band also played different types of music, but it also expanded the visibility of the program to a subset of the community that wouldn’t normally hear them. “A before-school advanced vocal group was started for a few years as a chance to sing other styles of music, which slowly morphed into a soprano/alto group. Then we eventually started a tenor/bass group to make sure those kids had outlets as well,” Driscoll says. “We also had a lot of kids who were dramatically minded and loved doing shows, and once the logistics within the school building made sense — which included building a second gym — we added the musical as an extracurricular opportunity.”
Driscoll co-founded Arc Light Productions, a nonprofit community theater with Rachel Roderick, a classmate from high school. Both share a love of theater and wanted to create more artistic and creative-based outlets for kids during the summers. “We have now have two youth productions with 50 to 60 kids each summer in addition to our mainstage adult/community show, Christmastime madrigal dinner that features two children’s choirs, and a full adult choir,” he says proudly.
For Driscoll, it’s all about providing avenues for students to be creative and successful. “Anytime I get to witness kids doing things they didn’t realize they were capable of — that’s a win for me,” he says.
K-12 Music Technology and Engineering Teacher Harmony Learning Center Maplewood, Minnesota
The music program at Harmony Learning Center is among the first in the state to offer music production and engineering for students. “It would be my dream to see more programs like this available, especially for students in underserved communities or for students with disabilities,” says K-12 Music Technology and Engineering Instructor Gillian Desmarais. “I look forward to continuing this important work and building resources for teaching music technology in public schools.”
Desmarais’ class is equipped with sound tech, computers, electronic multi-button controllers and a recording studio. To garner the funds for this equipment, she approached her principal with proof of research, a sample curriculum, long-term goals for students and an outline of expenses. “Providing all this documentation seemed like a lot, but it ultimately gave her enough material to approach other administrators and make a collective decision on the investment,” Desmarais explains. “Within weeks I was approved and could start planning out my dream classroom!”
Because many of her students have moderate to severe disabilities, Desmarais can provide unique accommodations for them by using technology. “For example, with the Launchpad Pro, I can arrange LED colors and patterns of root notes and scales in a variety of combinations. With this advantage, students can improvise, create chord progressions and design melodies without having to work through additional learning barriers,” she explains.
Her students strongly identify with the music and artists they listen to, especially hip hop. Through the lens of production and engineering, Desmarais filters out inappropriate content by creating deconstructed versions of songs. Students learn musical concepts by re-creating parts, remixing, redesigning timbres and so much more.
A popular unit in Desmarais’ class focuses on lyric writing. By the time the unit begins, her students have already deconstructed over 20 popular songs and have been making a lot of new music in the process. “Many students expressed the desire to write lyrics, but they honestly didn’t know how to clearly organize their thoughts. That’s when I decided to build a series of interactive worksheets that students could use to practice rhyming words, develop hooks and find their rhythmic flow,” she says. “Once they mastered the process, they were able to make it their own. After the unit, a lot of students continued to independently write and asked to collaborate with other students. It was a great experience!”
Desmarais considers the bulk of her students to be “non-traditional music students.” This term, as defined by David Brian Williams (2012), describes students who don’t participate in traditional performing ensembles and might not read music notation, but who might sing or play an instrument and aspire to a career in the music industry. By teaching via digital audio workstations (DAW), Desmarais opens a door to a world of instrument sounds for recording and redesigning as well as a workspace to capture and manipulate musical ideas. “By creating relevant original music, students gain confidence in their abilities and find meaning in sharing their art with others. It gives them a voice and I’m grateful to be part of that journey,” she says.
In addition to teaching, Desmarais carves out time to create music. “Four days a week, I try to take a few hours after school to compose, improvise on synths, or play through traditional repertoire. I try to treat it like exercise. By exercising, I can keep those muscles strong for when I really need them. It’s also wonderfully therapeutic,” she says.
Executive Director and Instructor Black Hills Studios of the Arts Rapid City, South Dakota
The nonprofit Black Hills Studios of the Arts (BHSA) was born from a for-profit concept: Bringing excellent music instructors to one place to provide various music instruction. “This one-stop-shop allows parents of multiple children or multi-instrumental children to have a place to receive service for all of their music needs,” says Executive Director Mallory A. Dekker.
BHSA serves the community as an affordable music education facility. Currently, it has 110 private lesson students and reaches an additional 204 through its outreach program to private schools that cannot afford a full-time music educator. “I go to three private schools in the area where I teach general music classes and/or band,” Dekker says. “Sometimes I’m at a school for 4½ hours, other times, just 1 hour. Each school has its own curriculum written for them by me, and it usually incorporates a Christmas and Spring concert, and off we go!”
Dekker and her team are applying for grants for other outreach programs, such as a ukulele group for the Girl Scouts. This would require group lessons, teacher pay and all the ukuleles,” she says.
Because music is so important for emotional and mental health, not to mention physical health, BHSA made it a mission to make music affordable, and to work for students of all ages and for those with ADHD, autistic and Down syndrome. Several years ago, Dekker encountered a student with Down syndrome who wanted to play the clarinet. “Since I love learning about the brain and how it works, I dove into all the case studies and research that I could get my hands on, “ she says. “I spoke with the parents several times, and talked to several doctors and special education instructors. With the plethora of information that I had gathered, I made a system that works for this student — a coding system with some auditory training; using highlighters, numbers and listening exercises.”
After several years of study with Dekker, this student can play particularly well with minimum assistance. “It’s important to note that we develop a new system for each student, and that the student is part of the planning,” she says.
Some of the more common tools Dekker and her team uses to work with special needs students include graphic organizers, highlighters, concept maps, jumping jacks (sounds strange, but she says it works!), directed brain breaks and crayon-coding (a term that Dekker made up, which is essentially “color-coding with extra benefits”).
Another way to reach her students is through online teaching, which was a necessity during the pandemic. “Currently, we have students in rural regions, who are mere hours away, to several out-of-state students, a family in Germany, and one touring the world with her family,” Dekker says. “Most of these families got their start with us in Rapid City, then moved on, and we’re blessed that they chose to stay on with us!”
BHSA continues to grow, but Dekker has faced some limiting factors. Right now, there is more demand than instructors, and it’s difficult to find qualified people. “This demand proves that we are filling an important facet in our community. I just hope to continue to find amazing instructors so we can meet the needs of the area,” Dekker says.
Band Director Plank Junior High School Oswego, Illinois
Plank Junior High has unique and hard-working students, according to Band Director Jessica Corry. “Working at a Title 1 school can sometimes feel like you are constantly dealing with a broken system, but once you have a little bit of success with your students, it makes all the struggles worth it. I’m always amazed at how much adversity students can take on and still prevail,” she says.
Corry increased communication in Spanish to reach Plank’s growing Spanish-speaking population and to grow her program, which currently has 170 members. In the spring, she asks current students if they are willing to call incoming Spanish-speaking families and invite them to instrument fittings. “These calls are always very well received and appreciated,” she says.
She also takes her band members on tours of elementary feeder schools, sends postcards to all incoming families, and holds instrument fitting days to help guide new and potential band members onto instruments that they match with best. These extra efforts to communicate with band families has worked! At the band’s recent state performance, more than 100 family members drove three hours to cheer on their students. Plank parents’ support has been unwavering, according to Corry. “They are so grateful to have teachers who will work hard for their students and are always willing to step up and support when the time comes. Having so many families come out to our performance was a testament of the power and impact of what we do daily and the importance it holds in our students’ lives,” she says.
Corry also makes sure that she is seen throughout the day at Plank outside of the music department. She is currently a breakfast supervisor and sees students who come in early for breakfast to start their day. In past years, she was the main door greeter and was the first face every student saw in the morning. “By the end of the year, pretty much every kid in the building knew who I was and what I did. I would say that I have at least five students each year who join the band just because they wanted to take my class, or had a friend who loved band. That means something,” she says.
Another area where Corry is seen is at in-school suspension (ISI). “I start my day working with ISI students,” she says. “I view these students as my own during this time. We go through all their classes and assignments and make a game plan of how they will work to tackle new or old/missing assignments. We also discuss how they can change their behavior or reaction to situations they find themselves in to avoid coming back to ISI. I always end the ISI period by saying, ‘I’m happy to see you today, but I hope I don’t see you back in here again.’”
Corry recognizes the invaluable influence of mentors. “I entered education due to some fantastic music educators who impacted my life, and I wanted to pass that along to other students,” she explains. Corry is an advocate for making relationships with music educators in the area and having them come out to her classroom consistently, especially at the beginning of the school year. “Feedback from a seasoned educator has a lot more impact during the first month of the school year, opposed to a few weeks prior to a performance,” she says.
She would like to pay it forward and be available to other educators who also teach at Title I schools. “Sometimes, we just need to know that there are other people in our situations who make it work, and all we need to do is connect with them,” she says.
Director of Musical Activities Flora High School Flora, Illinois
During her second year at Flora High School, Director of Musical Activities Jena Combs completely revitalized the music program. She reintroduced choir, drama and music appreciation classes, started a rock and jazz bands, launched a beginner guitar and ukulele class (and added an intermediate class the following year) and made music appreciation dual credit. “Recognizing the need for more general and non-traditional music options, I aimed to cater to diverse student interests,” she explains. “This initiative resulted in a significant increase in enrollment. In just three years, we went from 24 students in one class — which accounts for less than 10% of the school population — to 92 students across eight music classes — over 25% of the school population.”
One of the more popular new offerings is the rock band, which Combs proposed and established as an alternative ensemble in response to student interest in drums and bass guitar. The eight students in the class play various instruments, fostering versatility. Despite some students being new to their instruments, they practice frequently outside of class. “The rock band has enthusiastically performed at multiple events, showcasing their rapid progress by learning and assembling a new song nearly every week,” Combs says. “The rock band has not only expanded musical offerings but also sparked genuine enthusiasm for learning and performing.”
Thanks to Combs’ efforts, Flora provides a dynamic space for each student to discover their potential and contribute to the music program’s reputation as a symbol of hard work and dedication. She credits the collective success of Flora’s music program on the exceptional dedication and hard work of her students. ”Their commitment to going above and beyond has shaped the program’s recognition for excellence and created a platform for students to shine and grow. Their unwavering passion contributes not only to individual achievements but also fosters a culture of collective success,” she says.
Combs presented a clinic on innovative approaches to starting and sustaining non-traditional classes at the Illinois Music Education Conference, where she emphasized the importance of design, teaching methods, and strategies for student recruitment and retention. “Recognizing the need for diversification in my district, I introduced courses addressing this gap, fostering inclusivity, creativity and self-expression. These classes not only enrich cognitive development but also open up diverse career options,” Combs says.
Teaching in a small, rural community, Combs has witnessed firsthand how these opportunities promote cultural awareness, musical diversity and enhance overall engagement and learning. She aims to guide educators in implementing such programs, making a positive impact regardless of school size or location.
Director of Beginning Band Addison School District 4 Addison, Illinois
Growing a small music program with limited resources takes vision and a lot of hard work. Director of Beginning Band Raymond William Cannon credits his fellow performing arts colleagues in Addison School District 4, an elementary district of nine schools, who share his dream for student success and program growth. “Our performing arts team has worked tirelessly to grow our program and ensure student success,” he explains. “We have worked with our district administration to modernize our facilities, provide funding for new instrument purchases and to grow and foster our music parents’ organization.”
The music teachers ask 4th- and 5th-grade teachers to encourage students to participate in 5th grade band and orchestra, they work with their young musicians to foster a mentorship program, and they collaborate with parents to grow a robust music advocacy program. Cannon and his colleagues also reach out to the community. “Local businesses help fundraise and provide opportunities for the program. Our local community members and vendors have also helped with student-specific needs, often donating instruments and items that the school doesn’t possess or adapting instruments to meet students’ physical abilities. This allows us to always have an instrument for our young musicians,” he explains.
Cannon went above and beyond when a young musician injured his arm. Rather than have the student join the band after he healed, Cannon used CAD software and designed a mount that would attach to a cymbal stand. After the model was created, it was printed by the 3D printing club for the student to use. The stand held the instrument, and the student was able to learn and play alongside his peers. Cannon uploaded the model to multiple band director groups for others to use free of charge.
According to Cannon, a key to the success of the Addison music program is giving all stakeholders a voice. “Our ensembles focus on student voice and choice,” he says. “Our students and graduates have a voice in the program, which gives them ownership and encourages them to help the program grow.”
Communication with band families is provided in multiple languages with opportunities for parents to learn with their young musicians. “This allows parents to take an active and involved role in our music program through our Addison Music Parents Organization. This organization plays a vital role in giving parent choice in our program,” he says.
Cannon strives to teach his students that music is a lifelong activity. “Our program may be small, but we are mighty. We are very fortunate to work in a district that believes in our mission of ‘music for all.’ This mindset allows us to overcome adversity and ensure that all students have access to music education regardless of any barriers.”
Band Director Horizon High School Winter Garden, Florida
Changing jobs is always stressful, but moving to a brand-new school is particularly daunting. From day one, Horizon High School Band Director Charlene Cannon focused on building a culture of teamwork and collaboration between all sections to ensure that students would be positive and helpful to one another.
“Our first activity at our first band camp was determining what we would say when the marching band was called to attention because I wanted to make sure all students felt included as part of establishing the look and vibe of our marching band, The Sound of Horizon,” she says. “I have a frame in my office with pictures from day one and day 10 of this first band camp. The difference in camaraderie and connectedness amongst the students is evident. These photos drive me every day to continue my work on student culture and connection to ensure that everyone has a positive experience in my classroom.”
At band camp, there were 36 students. By the second week of school, the number of students almost doubled to 68. Since then, Cannon’s program has experienced a steady growth. “I write my own marching band drill formations each year, and I did a lot of re-writing that first year to make sure that everyone who joined would be included no matter when they signed up for the band program,” she explained.
Cannon was in a unique situation when she started at Horizon High School because a middle school opened on the high school campus at the same time, and she also served as the band director there for a year. She encouraged teamwork and friendship among the middle schoolers, which they carried with them when they entered high school.
For students with no prior musical experience, Cannon started a beginning band class this year to ensure that there was an entry-level option. “This class is taught the same way as the other classes, just at a different pace. By focusing on their individual fundamentals, we’ve made remarkable progress in a short amount of time,” she says.
Cannon encourages her band students to participate in other activities. “I am so proud that my students are also involved in football, cheerleading, golf, cross country, track and field, basketball, volleyball, various clubs and honor societies, tutoring and more,” she says. “I believe that participating in other activities provides high school students the chance to be well-rounded and the mindset to always try new things.”
When Horizon opened, Cannon worked with athletics to determine a policy for resolving conflicts between sports and performing arts. “I’m fortunate to have colleagues who understand the importance of supporting these multi-talented, busy students. The band and color guard students have become excellent advocates of time management and responsibility for their schedules,” she says.
Director of Bands, Jazz Ensembles, Hip Hop and Digital Music Middleton High School Middleton, WIsconsin
Director of Bands Douglas Brown has a deep passion for traditional music forms like band, choir and orchestra, but he knows that these aren’t the preferred mediums for all students at Middleton High School. “To bridge this gap, I introduced a curriculum centered around hip hop and digital music production,” he says. “This curriculum not only resonates with the changing dynamics of the music scene but also caters to a wider array of student interests.”
The success of Brown’s program highlights the significance of evolving music education to align with the varied interests and ambitions of students. “Each year, we see hundreds of students enthusiastically engaging in these classes, which has nurtured a strong community of budding musicians in our school,” he explains. “It’s particularly heartening to witness students from this program advancing to higher education in music production and carving out successful careers in the industry, including roles as hip hop artists, producers and sound engineers.”
Middleton has a state-of-the-art hip hop/music production lab and recording studio. Every student has access to a production cart, which is equipped with a laptop, digital audio workstation, audio interface, power conditioner, microphones, digital/analog turntables, a MIDI keyboard and reference monitors. These stations enable students to perform live DJ sets during lunch breaks and transform any classroom into a production and recording space. Brown emphasizes and appreciates the collaborative effort required to create the lab, recording studio and individual production stations. “All this was made possible through the support of our school district and the generosity of numerous dedicated and enthusiastic donors. Their contributions have been instrumental in bringing this visionary project to life, greatly enriching the music education experience for our students,” he says.
Brown also encourages collaboration among Middleton’s diverse music class offerings. “This collaborative spirit is evident in various projects, such as when our digital music students record and produce albums for the singer-songwriter class, or when our advanced music composition class writes pieces for one of the bands, choirs or orchestras,” Brown says.
A particularly innovative collaboration involved pairing DJs and rappers from the hip hop class with the marching band. A team of creative music writers that included students and professionals composed a marching show that fused elements of acoustic and digital music. The show featured a diverse array of instruments like multiple synthesizers, vocoders, electronic wind instruments and turntables, as well as a rapper who performed verses and spoken word poetry. A highlight was the construction of a central DJ booth on the field, complete with a wall of speakers. “This groundbreaking collaboration not only showcased our students’ diverse talents but also broke new ground in blending traditional and modern musical genres in a live performance setting,” Brown says.
In addition to overseeing the hip hop and digital music courses, Brown also conducts the marching band, four curricular instrumental music ensembles, the percussion ensemble, two extracurricular jazz bands and has over 300 students involved in the band department at Middleton High School. “I often joke that I gave up sleep years ago, but in truth, my passion for what I do fuels me with incredible energy, especially when it comes to serving my students,” he says. “Managing the multifaceted aspects of this role is undeniably challenging, but it’s made achievable thanks to an amazing wife, who is a great musician and educator in her own right, and a team of music educators, private instructors, adjunct faculty and support staff. Each member of this team plays a crucial role, and they deserve equal recognition for the success of our students.”
Director of Bands Kasson-Mantorville High School Kasson, Minnesota
Being part of caring and thoughtful communities is what making music is all about, according to Director of Bands Tony Boldt. “Throughout my career at Kasson-Mantorville High School, one aspect of music making that I have enjoyed the most is having different groups and individuals interact with one another. Music is so much about connection,” he says.
A decade ago, the communities of Kasson and Mantorville in Minnesota passed a referendum that included a new high school commons, a renovated gym, a new 800-seat auditorium and the renovation of the music department. Construction was completed two years later in 2016. “The community has always greatly supported the arts, and the Performing Arts Center serves as a constant reminder of that outstanding support. The space is used almost every day, and we have an amazing technical director who helps bring our concerts and productions to another level,” Boldt says.
He promotes a student aid program, which has fostered leadership skills. “Over the past few years, these students have really become the organization leaders who keep the ship running,” he says. “We have some wonderful senior leaders who are heavily involved in our fall musical and fall band and choir activities. While we pack a lot into the fall, it allows us to create a great leadership team of seniors.”
Performing works by up-and-coming composers has been a focal point for Boldt. His band has performed two works by composer Claire Howard, who Boldt met at the University of Minnesota Conducting Symposium. “We are hoping to expand this into a bigger commissioning project that will take place yearly,” he says.
Boldt’s seemingly endless energy and passion come from having wonderful mentors who modeled how to create groups and spaces where everyone feels welcomed and safe. “I use the same methods for recruiting as I saw my amazing middle school music teachers — Brian Cole and Denise Pesola — used,” Boldt says. “I strive to create community in the same way my college band directors — Dr. Nat Dickey and Dr. Scott Jones — did. My two colleagues at Kasson-Mantorville — Liz Harwood and Sarah Vinzant — are fantastic recruiters and proponents of music who constantly create outstanding connections with students while eliminating barriers to entry. I’ve learned so much from all these incredible music educators.”
Boldt also directs the Rochester Community Band, a group of about 75 musicians that range in age from 14 or 15 to 80! “So much of the recruitment for the Rochester Community Band is word of mouth through members, but I always make sure to invite local students, and we get many during the summer,” Boldt says.
Assistant Professor and Director of Orchestras, Purdue University Artistic Director, Indianapolis Youth Orchestra Indiana
Under Adam Bodony’s tenure as Assistant Professor and Director of Orchestras at Purdue University, the orchestra program has experienced remarkable growth. The number of students enrolled in orchestra has grown by more than a whopping 85% — from 150 during the 2015-2016 academic year to 280 in 2023-2024. The number of orchestras went from two when Bodony arrived at Purdue, to four — a first in the department’s 120-year history.
According to Bodony, enrollment grew for several reasons, including:
Establishing a renewed sense of pride in being an orchestra member at Purdue, having a higher bar of artistic excellence, and creating a culture of support, understanding and kindness.
Establishing a collaborative and supportive relationship with other areas in the department (such as marching band, concert band, jazz band, etc.) and with other colleges in the university (such as the College of Liberal Arts and its component areas related to music).
Seeking out regional, national and international performance opportunities and competition participation to raise the awareness of Purdue’s program while simultaneously instilling a sense of pride in students in representing Purdue University outside of its campus borders.
Reaching out to dozens of professional and collegiate guest artists, guest conductors and guest collaborators. “Our orchestra students have learned from some of the very best talent the United States has to offer,” Bodony says.
Finally, Bodony believes the most important factor is that students “see in me and sense from me my pure love for music, even at a place like Purdue that is overwhelmingly STEM-centered,” he said.
Bodony is also the Artistic Director of the Indianapolis Youth Orchestra (IYO), which he wants to set up as a pre-college conservatory, offering instruction in topics like music theory, music history, conducting and chamber music. After finding out that IYO families were overwhelmingly interested in these pre-college modules, he identified partners to help. “For music theory and music history, we partnered with the Butler University Community Arts School and developed a curriculum together that their staff would then teach,” Bodony says.
For chamber music, IYO partnered with several local professional musicians from area universities as well as the Indianapolis Symphony Orchestra. Bodony developed the curriculum and taught the material for conducting, which culminated with students conducting the IYO Symphony Orchestra.
This pre-college system ran from 2015 to 2020, but everything came to a screeching halt during the pandemic. “This academic year (2023-2024), we restarted our music theory module. Conducting and music history will be next,” Bodony explains.
Having grown up in Indianapolis and now working with youth and college students in the city, creating and promoting local musical opportunities is important to Bodony. When he was young, he craved performance and concert opportunities and was generally supported and found what he was looking for. “It pains me to consider a young person somewhere out there in Indianapolis starving for more art, more music, more high-quality instruction, more depth, more knowledge, more everything, and not being fulfilled. That’s what drives me,” he says.
Assistant Professor of Music Eastern Mennonite University Harrisonburg, Virginia
Knowing the immense power of music, Dr. Benjamin Bergey established an interdisciplinary major called Music and Peacebuilding at Eastern Mennonite University. “While many musicians and ensemble directors know on various levels that music helps to bring people together and make our world better, this is the first undergraduate major in the U.S. that combines the theories and practices of peacebuilding and conflict transformation with musical training,” the Assistant Professor of Music explains.
Students take core music and peacebuilding courses, and through colloquiums, concerts and community events, they experience and practice the applications of music in building peace, which increases their empathy and their ability to engage in dialogue. They must also complete an internship as well as a senior project where they combine the things that they have been learning.
“I also designed a course called Music and Peacebuilding to engage with the growing field and networks of arts-based peacebuilders, and to explore the theories and practices to use music to help transform conflict since making music together can help bridge divides and create common ground,” Bergey says.
As a small liberal arts college, EMU can adapt quickly to meet the varying needs of students, who have the opportunity to be involved in whatever they like. “The university culture is attuned to issues of social justice, inclusion and intercultural competency — values that are so helpful in cultivating a safe and inviting music department, which made developing a major like Music and Peacebuilding possible,” he says.
Bergey is always thinking outside the box to come up with solutions to help his students. He transitioned the music theory curriculum to use open educational resources (OER), which is free to students. “I received a grant from VIVA Open, a Virginia-based library consortium, and adapted and developed resources for our music theory curriculum,” he says. “We had been using expensive textbooks and workbooks for a long time, but that was not necessary. This way, students do not pay for books for their three music theory courses.”
Another solution Bergey spearheaded was during the pandemic. In the summer of 2020, he worked with others in the area to think through creative ways to still sing together in a safe way. Some used microphones and an FM transmitter to sing from their cars, which wasn’t feasible at a college. “I figured we could use PA speakers outside. All I needed were wireless microphones, a mixer, speakers and some cables to make it work,” Bergey explains. “We did that for a full year, giving students the chance to still sing during college, and we put on concerts outside for audiences, who really loved it.”
Bergey chronicled that first summer’s set up, and the choir was featured in a documentary showing the creative ways choirs were able to sing together safely during COVID.
Music Teacher and Children’s Choir Director Greenbriar School, Northbrook District 28 Northbrook, Illinois
Collaboration is valued at Greenbriar School, and music teacher Jeremy Bartunek finds many opportunities to collaborate with his colleagues and students to promote music, creativity and independence. Along with the school’s art teacher, he has developed full and complete artistic experiences for students. Together, they also work with other art and music teachers around the district, as well as with general education teachers to integrate learning across the curriculum, so performing and visual arts are not simply allocated to the music and art classrooms.
“The students play an integral role in the success of our program,” he explains. “I have 5th-grade students running the sound and lights for all our shows, as well as working backstage. My goal is that I can simply sit back and relax during the performances because the kids are running the show.”
Bartunek worked with his general music colleagues in the district to strip down the curriculum to the essentials, which allowed teachers to embellish the curriculum as they needed. For example, one of the markers is that students must successfully perform a melody with three pitches from music notation. “We left the word ‘perform’ rather vague and removed any reference to instruments, solfege, singing, ‘standard notation’ (so graphic notation could be used) or how that would be assessed,” he explains. “Some students used a recorder and standard notation, others sang and used solfege syllables, and others still used music software or created their own physical representation using manipulatives,”
The best part was that each teacher was allowed and encouraged to tailor the teaching and assessment to their kids and specific classes while still maintaining consistency across all three elementary schools in the district.
Bartunek founded the Northbrook 28 Children’s Choir in the Fall of 2019 with about 60 students in 3rd to 5th grade in three different ensembles. “This, of course, turned out to be a terrible time to start a choir because of the COVID pandemic in 2020,” he says. However, the choir continued to meet via Zoom and successfully “performed” virtual concerts. Today, the choir has grown to more than 200 students in 1st to 5th grade spread over four ensembles. The students have performed at community events at Wrigley Field, Northwest Community Hospital, the Northbrook Court mall and more.
Bartunek recognizes that he is just one of many teachers and subjects that students will encounter. “I strive to make the music room a space where students are comfortable expressing themselves musically and where they feel like they can be emotionally open,” he says.
Almost all his students are comfortable singing alone in front of their peers and using their voice as a medium for their personality. “The music room is the best room in the school (except, maybe, the auditorium) and that is because it is the most honest and open place for kids to be,” he says.
2024 Yamaha “40 Under 40” — Music Education Excellence
In 2021, Yamaha launched the “40 Under 40” music education advocacy program to honor educators who are making a difference in growing and strengthening their music programs. Now, we celebrate the 2024 group of remarkable educators who bring innovation and passion into their classrooms.
These 40 educators — all under the age of 40 — showcase the following characteristics: action (anticipate what needs to be done and proactively take the necessary steps that lead to a stronger music program), courage (propose and implement new or bold ideas), creativity (show innovation and imagination in achieving plans and objectives) and growth (establish, grow or improve music education in their schools and communities).
Each year, we receive hundreds of nominations from students, parents, teachers and administrators, local instrument dealers and mentors. The “40 Under 40” educators below have elevated music and music-making in extraordinary ways — like Cale Patton, who started with a music on a cart that blossomed into a robust elementary music program; Miguel Hidalgo, Alex Mutz, Dr. Jessie M. Vallejo and Dr. Paulina Villarreal, who bring the music of their Latin American and Hispanic culture to their classrooms and ensembles; Dr. Jacquelyn Lankford and Kacee Sanders who promote the important role women play in music through festivals, competitions and symposiums; Brad Hart, who hosts a chapter of United Sound at his high school and finds ways to help special needs students play music and feel like they belong; and Douglas Brown, Gillian Desmarais, Dennis Giotta and Kevin Longwill, who all tackled music technology to introduce their students to a completely different side of what’s possible with music.
All the “40 Under 40” educators have remarkable stories behind their teaching philosophies and methods. Come meet them and be inspired by them all.
Join us in applauding the 2024 class of “40 Under 40” educators.
Assistant Professor of Voice University of Memphis, Rudi E. Scheidt School of Music Memphis, Tennessee Founder and Artistic Director, Cantos para el Mundo
Music Director, Tacoma Music Collaborative Executive Director, Music Works Northwest Washington
Providing access to music education is the driving force behind Dr. Tigran Arakelyan’s work at the Tacoma Music Collaborative (previously called the Orchestral Recital Series of Tacoma). As the Music Director, he has developed and continued programs that give students of all ages an opportunity to play chamber music with professionals and perform as soloists with a chamber orchestra. TMC provides an inclusive environment for students to learn and grow alongside more experienced musicians and professionals. TMC’s private lesson initiative offers additional support to young musicians who do not have the financial resources to develop their skills in a private lesson setting. Its public school outreach program helps music educators with sectionals led by guest clinicians.
Arakelyan also started the BIPOC composer commission, which focuses on works for piano and orchestra. “We alternate between commissioning a professional composer and a young composer at the start of their career,” he explains. All these initiatives are in the early stages, and more funding is needed for continued growth.
He is also the Executive Director of Music Works Northwest, a nonprofit community music school that provides accessible music education and experiences. In addition to providing individual music lessons, music classes, music camps and free concerts to King County residents, Music Works offers music therapy, the first organization to do so in the state of Washington. The goal of the program is to address the physical, emotional, cognitive and social needs of people of all ages within the context of a therapeutic relationship.
According to the organization’s website, “We specialize in working with children and teens who identify as neurodivergent or disabled. Treatment goals and interventions are individualized and centered around the strengths, interests and needs of the client. Singing, vocalizing, playing instruments, movement to music are among the long list of ways that our music therapists work with their young clients.”
Arakelyan acknowledges the good work of both the Tacoma Music Collaborative and Music Works Northwest. “These two special organizations provide educational opportunities and bring people together, which provides a platform for many interesting collaborative opportunities for all the people we serve.”
Adjunct Professor of Music Education George Mason University Fairfax, Virginia
Dr. Angela Ammerman believes that teaching music is a calling. “Not only have I had the honor to be called to teach, but I have been called to teach teachers,” she says.
As an Adjunct Professor of Music Education, Ammerman primarily teaches music education majors at George Mason University, and plays a major role in teacher development. “I get to see students go from pre-service teachers to confident, extremely capable and beautifully passionate music educators,” she says.
During her early teaching experience, she created the Future Music Education Camp (FMEC), which helped high schoolers learn about lesson planning, engagement, classroom management, conducting and confidence-building. Students spent one week peer teaching and one week teaching real children. Seeing students get “that spark, that little nudge, to join the ranks of changemakers and bringers of joy” is so special to Ammerman. She is working on bringing the camp to Virginia and has offered virtual training to educators interested in starting their own camps.
In an effort to share her knowledge, Ammerman is writing a series of Music Teacher’s Guide books. The first book in the series focuses on engaging English Language Learners (ELLs) and is geared to not only improve teaching practices, but as a form of encouragement to teachers and advocacy for ELLs. “Music is one of the only subjects in which a student need not speak in order to contribute significantly,” she says. “It is in our music programs that even our newcomer students build social identity, express themselves and participate fully without speaking a word. It is in music where our students find their home away from home.”
The second book in the series looks at recruitment and retention. Two more volumes – on classroom management and general music – are scheduled to be published in 2024.
Ammerman’s influence is far-reaching. In 2018, she started a strings program at Hope House, a children’s home, in Chiang-Mai, Thailand. She secured instruments from her music teacher network as well as through donations (many from Amro Music) and received additional funding to buy more violins from a Chiang-Mai luthier. “I learned that great teaching often means great listening, that the most magical lessons are filled to the brim with the very things our students have taught us, and that we can find joy and love in even the darkest of times,” she says.
The guitar is the second most popular and played instrument in the world. The first? Piano/keyboards, of course! So it’s very likely that you will find yourself in a situation where you are making music with a guitar player, whether accompanying a singer/songwriter, or playing in a band that includes the guitar.
Because both keyboard and guitar are commonly used to play chords and polyphonic parts (i.e., more than one note at a time), some care and planning needs to be taken so the two instruments work well together. Here are five tips for achieving a successful blend betweeen the two instruments.
1. Agree On The Chords
The most obvious issue whenever you are duetting with another instrument/vocalist is to first agree on what key you are going to play in, and what the chords are for the song you want to play. A vocalist might change the key from the original recorded version because it doesn’t fit their comfortable singing range, for example.
In addition, there may be a variety of acceptable chord choices for the tune. Some players like to use the simplest chord progression possible, while others will add more complex chords, and perhaps “jazz up” their arrangement too (see below). Be sure to talk this through ahead of time and come to an agreement on what version you and the guitar player are going to use.
2. Use The Same Chord Color Tones
Once you have defined the notes used in basic triads and seventh chords, more advanced players may start to add what are called color tones to their chord voicings, using ninths, sixths/thirteenths and other fancy additions. You need to find out if the guitarist you are playing with wants to do this, and if so, what choices they will make. A common clash of this sort can occur when you’re both playing dominant seventh chords and you choose to add a regular ninth, while the guitar player chooses the more dissonant, but common, sharp-ninth:
Many songs that just vamp (stay on one chord for long periods of time) will use one of these ninth colors, but playing them together at the same time sounds really bad, as you can hear in this audio clip:
3. Get In Rhythm
As a general policy, it’s best if only one of you supplies the rhythmic movement and momentum in the song, so decide in advance who will be the more dominant player. It is very common for guitar players to strum chords, especially when they are also the singer. If so, you should not play busy rhythms, as you’re likely to clash. Playing long chords and very simple parts is the way to go.
Another approach is to listen to the rhythm the guitar player is using, and try playing a simple pattern that supports any strong accents in their part. But don’t get too busy!
Let’s look at an example of how to do that — here’s another guitar strumming pattern:
Once again, you can use long sustained keyboard chords with a few accents that follow the pattern to support and mesh with the guitar player:
If the guitar player is playing a somewhat busy and melodic picking pattern, the same rules apply. Long sustained chords always work.
Taking a slightly rhythmic approach like this one can also support the guitar part well:
There will be songs that sound better, however, if the keys carry the rhythmic feel. If the guitarist agrees, they should lay back, play less, and let you provide the dominant part on the keyboard.
4. Stay Out Of Each Other’s Way
Another important consideration is where on the keyboard you opt to play your part. It helps if you and the guitarist avoid playing in the same octave. Playing the keyboard chords lower or higher up will allow each part to be heard more clearly, as you can hear in this audio clip:
Also, if the song has a signature guitar riff like the one below, you don’t want to be playing busy chordal parts over it.
Try playing the riff along with the guitar player, but perhaps an octave lower.
Or again, just play longer sustaining chords.
If the riff has strong accents, try playing sustaining chords mixed with a few accents to support the riff.
5. Use Basic Rock Power Chords Where Appropriate
If you are playing heavy rock music in a band with one or more guitars, the guitarists will often be playing what are called power chords. These contain only the root and the fifth, using this type of voicing:
You should play pretty much the same type of voicing, being sure to leave out the third in your chords. I prefer only playing the root, with the fifth below it, leaving out the lower root note.
This smaller chord voicing (only two notes) seems to mesh better against guitar. Try using a wurly electric piano sound, or a distorted rock organ tone.
Following these tips will get you on your way to working well with your six-stringed brethren. Enjoy!
In the late 1980s, the Yamaha Guitar Development (YGD) office in Hollywood, CA included a custom shop that built guitars to order. Sensing a broader opportunity, Yamaha Corporation in Japan decided to create a mass-manufactured guitar based on the features and designs developed by YGD for its custom work.
In 1990, that project came to fruition with the release of the first Pacifica model, the PAC 912. The Pacifica would become known for its versatility, making it a favorite among top L.A. session guitarists like Michael Lee Firkins, Mike Stern, Cornell Dupree and others. Over time, it would become one of the most popular affordable quality guitar models worldwide.
Here’s a look at the eventful history of the Pacifica and how the line has evolved over the years.
The Early Days
The 912 was the first Pacifica guitar to be mass-manufactured.
The design of the Pacifica 912 was based on the work being done at YASH, but the extensive guitar-building experience of Yamaha in Japan was also hugely important. “The Pacifica was a collaboration between the custom shop in Hollywood and Yamaha headquarters in Hamamatsu,” explains Brandon Soriano, Product Marketing Manager of the Pacifica line. “Those guitars were meant to take the custom vibe and feel and feature set and bring it to a more affordable mass market.”
“We gathered information from [local] session players, which helped us create the specifications,” adds Yusuke Ota, Product Owner, Electric Guitars at Yamaha Corporation. According to Ota, the 912 was the first example of what has been a guiding principle in the design philosophy of the Pacifica. “It’s based on the types of wood, pickups and hardware used on the YASH-built custom guitars, but made for mass manufacturing.”
The PAC912 featured a bolt-on neck, an HSS (humbucker/single-coil/single-coil) pickup configuration and a familiar double-cutaway body shape. It also marked the first time Yamaha incorporated third-party components such as Warmoth necks, Wilkinson tremolo systems and DiMarzio pickups into one of its guitars. “In 1990, that was a new way to make guitars for Yamaha,” says Ota. “Previously, we used only original parts, which weren’t replaceable by third-party companies.”
Outfitting Pacifica guitars with popular brand-name parts offered two benefits. First, it made the instruments more immediately appealing. Second, it assured buyers that if they ever decided to customize their Pacifica by swapping out essential parts such as pickups, tuning machines, bridges, etc., they could do so using standard-sized components.
Expanding and Refining the Line
In the 33 years since the PAC912 made its appearance, Yamaha released many new Pacificas in various body, neck and wood types, pickup combinations and price points. The early PAC1412 and PAC1421 models had set necks and carved tops with Yamaha proprietary RM-Pro II locking vibrato bridges, licensed by Floyd Rose. However, these guitars were quite costly to produce, so they were discontinued in 1993.
The PAC1221 model released in 1990 offered a basswood body and a warmoth neck with a compound radius reinforced with carbon graphite rods, along with DiMarzio pickups in an HSH configuration and a Yamaha tremolo bar. Other features included a height adjustable locking nut and a “Total Access” neck joint that consisted of a roomy lower body cutaway, a low profile neck heel and a machined aluminum mating block extending deep into the body. It was available with rosewood and maple fretboards, both of which had distinctive inlays.
1994 saw the debut of the PAC904, which had a body consisting of an ash slab top on an alder back and a highly engineered neck joint, along with locking Sperzel machine heads and a tone control that, when pushed, split the bridge humbucking pickup into one single-coil.
Pacifica PAC904.
The USA1 and USA2 models that were introduced in 1995 had an alder body with a figured maple top (some quilt and some flame), a birdseye maple neck, Sperzel tuners, a Wilkinson tremolo, Duncan Vintage Rails and a Duncan JB humbucker pickup.
Pacifica USA1.
The twelve-string PAC303-12 was released in 1996. It came outfitted with three Yamaha Alnico single-coil pickups, a white pearloid pickguard, gold hardware and a Gotoh 12-string bridge with six ball ends at the end of the baseplate and the other six at the back of the body.
In 2011, Yamaha announced three new Pacificas: the 510, 311 and 611 models (the latter two are still available today — see below), as well as reintroducing the PAC120, which offered a pair of humbucker pickups and a hardtail bridge.
Pacifica 510V.
Pacifica 120H.
There have also been a number of Pacificas with reversed headstocks. These models (which all have the suffix “R”) included the PAC 721R and 821R.
You can actually tell a lot about the features offered by a specific Pacifica model by its suffix. For example, “J” indicates that the guitar has a rosewood fretboard, while “M” indicates that it has a maple fretboard. Other commonly used Pacifica suffixes include:
V = Alnico-V pickups
S = Single-cutaway
W = Wilkinson tremolo
H = Hardtail
D = Alternative body shape
FM = Flame maple
QM = Quilted maple
CX = Fancy pickguard
L = Left-handed
Signature Models
Yamaha also expanded the high end of the line with Pacificas like the PAC311MS and PAC1511MS Mike Stern signature models (developed in 1997) and the updated PAC1611MS available today. This extraordinary instrument features a maple neck, Seymour Duncan pickups and a visually stunning blond single-cutaway ash body.
PAC1611MS Mike Stern signature model.
In 1999, the Pacifica 1512CD Cornell Dupree signature model made its debut (it was discontinued in 2005). It sported a single-cutaway ash body with a sunburst finish and an SSH pickup configuration with a combination of Seymour Duncan and Yamaha pickups.
PAC1512CD Cornell Dupree signature model.
Current Pacifica Lineup
Current Pacifica models include the entry-level PAC012, which is highly affordable yet retains the essential Pacifica sound and features. It has an agathis body, a vibrato bridge and three pickups: a Yamaha humbucker and two single-coils.
Pacifica PAC012.
The PAC112 (part of the PAC100 Series line) has a solid alder body and maple neck, and is available with either a maple or rosewood fretboard. Its design is similar to that of the original PAC912, but with cost-effective materials that allow it to sell for significantly less.
Pacifica PAC112VM.
There are also a number of mid-level “step-up” guitars in the Pacifica line, such as the PAC212 and 311 models.
The PAC212VQM has a distinctive quilted maple veneer top.
Pacifica PAC311H.
Both these instruments are constructed with an alder body and maple neck, and offer a push-pull coil-split switch for additional tonal options. The PAC212 is outfitted with a vintage-style vibrato bar and comes with one humbucker and two single-coil pickups, while the PAC311H has a humbucker and a P-90 type pickup, along with Grover locking tuners.
The high end of the Pacifica line is currently represented by 600 Series guitars. These versatile instruments feature Seymour Duncan pickups in two configurations, pairing a TB-14 “Custom 5” humbucker in the bridge position with an SP90-1 for vintage soapbar tone (PAC611 models) or SSL-1 single-coils in the middle and neck positions for authentic 1950s chime (PAC612 models).
Pacifica 611HFM.
Pacifica 612VIIX.
All 600 Series Pacificas have alder bodies with flame maple veneer tops and a maple neck with a rosewood fingerboard and include a push-pull coil-split switch. Other features include Graph Tech TUSQ nut and string trees, Grover locking tuners and a Wilkinson VS50 vibrato bridge.
Standard Plus and Professional
The two new Pacificas released at the 2024 NAMM Show — the Standard Plus and Professional models — not only expand the line on the top end, but utilize today’s most modern guitar-making technology to provide new levels of playability and sonic versatility.
Although much more sophisticated from a design standpoint, the new guitars harken back in many respects to the early days of the Pacifica line. “These new flagship models bring Pacifica back to its roots as more of a high-end professional-grade instrument,” says Soriano.
All Standard Plus and Professional Pacificas feature alder bodies, maple necks and stainless-steel frets and are available with either rosewood or maple fingerboards.
Pacifica Standard Plus PACS+12M.
Pacifica Professional PACP12.
These guitars feature a new iteration of the Pacifica body that provides impressive tonal balance and is based on technology Yamaha first utilized in the second-generation Revstar line.
“For the past several years,” Soriano explains, “Yamaha has been implementing Acoustic Design technology, which is a form of chambering, but not in the traditional sense. Usually, in the guitar world, if you hear about chambering, you picture someone just taking chunks of wood out. This is different. We had scientists meticulously doing 3D modeling and mapping out how to shape the body and take certain parts out so that the whole thing resonates as freely as possible.”
The Acoustic Design technology used in the Pacifica Professional and Pacifica Standard Plus.
Another critical factor in the extensive tonal range of the new Pacifica guitars is its pickup technology. Perhaps the most surprising development is that these pickups are produced in conjunction with Rupert Neve Designs, a company renowned for its recording consoles, preamps and other pro audio gear.
If you’ve never heard of Rupert Neve Designs pickups, that’s because the ones in the new Pacificas are the first the company has helped create. They never would have made them at all had it not been for a chance discovery. “Yamaha has a deep relationship with their designs in the context of the Pro Audio division regarding mixers, speakers and those kinds of products,” explains Ota. “One of our engineers discovered that one of the Rupert Neve engineers liked to wind pickups as a hobby. Then he found the pickups in the engineer’s garage and asked if he could bring them back to Japan and show them to the guitar development team.”
The pickups had an exceptionally wide tonal response due to the unique way they were wound. Yamaha and Rupert Neve Designs ended up partnering in their development of the Pacifica, naming the new pickup line Reflectone.
The Rupert Neve Designs Reflectone humbucking pickup.
All new Standard Plus and Professional model Pacificas are equipped with Reflectone pickups in an HSS configuration. “Positions two and four on the five-way selector switch are reverse-wound, reverse polarity, so they’re hum-canceling,” Soriano says. “They’re designed to be super clear and have an ultra-wide response, with the thought being that any player can get their sound out of the pickups. It’s like a block of clay that you can sculpt into whatever you want.”
The new Pacificas have a striking look too. Their subtly beautiful finishes are based on those featured on album covers of the City Pop genre, popular in Japan in the 1970s and 1980s, inspired by the California music scene.
City-Pop-influenced finishes.
“Those covers showed West Coast scenery, but were painted by Japanese artists,” Ota explains, “and featured a distinctive Japanese sense of color.” Adds Soriano, “In the spirit of returning to Pacifica’s roots, incorporating the Japanese City Pop aesthetic made perfect sense.”
From L.A. to Japan and back … and now available to the world!
The idea of bolstering one’s fingers to play a musical instrument faster or better is nothing new. Back in 1830, a young German musician, Robert Schumann, invented a device to help him strengthen the index and middle fingers on his right hand. Instead of becoming a better pianist, however, he lost sensation in both fingers, which killed his chances of being a concert pianist. Today, Schumann is renowned as one of classical music’s greatest composers.
Fortunately, there are finger-to-finger exercises that can take your playing to the next level without ruining your hands. Done properly, the four routines described below will wake up your fingers, help you consistently get clean, accurate tone, and give you the finger independence to execute tricky passages on the fly — a crucial skill for any working bass player.
THE TABLETOP
Let’s start with an exercise that doesn’t even require you to play bass. The premise is simple: Curl your hand on a flat surface, palm down, and lift each finger one by one. Sounds simple, right? Notice which fingers are harder to lift than others, and feel the burn when you lift two fingers at a time. Here’s what it looks like.
THE TONY
Like the next two exercises, this set of stretches from prominent New York bassist Tony Conniff requires you to use one finger per fret. Here, you simply play each of the patterns shown below on every string of your bass. (For all patterns, 1 = index finger, 2 = middle finger, 3 = ring finger and 4 = pinky.) If you’re on a 5-string, you might start by playing the first pattern on your G string before working your way down, one string at a time, to the B. Then start the next pattern on the B string and work your way back up to the G.
Pattern 1
Pattern 2
Pattern 3
1 2 3 4 1 2 3 4
1 2 3 2 3 4 3 4
1 3 4 2 3 4 3 2
4 3 2 1 4 3 2 1
1 4 2 4 3 4 2 4
1 4 1 2 2 1 4 1
1 4 3 4 3 4 3 4
1 4 1 3 3 1 4 1
2 4 2 3 3 2 4 2
Here’s what Pattern 1 sounds like, played fingerstyle on a Yamaha BB435 five-string bass:
Here’s what Pattern 2 sounds like, played with my thumb while muting with my right hand:
And here’s what Pattern 3 sounds like, played with a pick:
As you work through these, ensure that each note sounds cleanly and do your best to only lift the finger you’re ready to use; the other fingers should be down and in position, ready to fret. Although this exercise can be played anywhere on the fretboard, it has a special impact in the first position (frets 1 through 4), which is also the biggest stretch. Take your time and stop if you feel any pain.
THE HUMBLER
This drill, a variation on the Tony, is tougher than it looks. Start on your E, A or D strings (or your B string if you’re playing a five-string bass), play four notes in succession, and hold each finger down. Now lift just your first finger and use it to play the note a fourth up (same fret, next highest string) — but hold the other three fingers down. Don’t let go of a finger until you need it to fret the next note. Here’s what it looks like.
THE SPIDER
This stretch has been a practice room and backstage warmup staple ever since Yamaha Artist John Patituccimentioned it in his 1991 instructional video Electric Bass. At the fifth fret, play G with your index finger on the D string, then play the fifth (D, two frets over, one string up) on the G string with your ring finger. Move up a half-step and repeat this reach to the fifth using your middle finger (A♭ on the D string) and pinky (E♭ on the G string).
With your hand still in position, play A on the D string with your middle finger, and use your index finger to play the C on the G string, an interval of a minor third. Finish by using your pinky to play the B♭ and your middle finger to play the D♭ at the sixth fret of the G.
Feel free to try the Spider on any set of adjacent strings; using numbers assigned to your fretting-hand fingers, it would look like this on the D and G strings:
As you play through this, strive for consistency and give each note its full due. Need something more challenging? Start on a lower string and play octaves instead of fifths and minor sixths instead of minor thirds, as this bass player does.
NO PAIN, NO PAIN
As with all warmups and stretches, it’s important to stay relaxed. Start slowly and work your way up with a metronome. Keep your fretting-hand forearm relaxed. A little stress is OK, but if you feel even a hint of pain, stop and rest a minute before continuing.
Consider these exercises a starting point. Customize them for your hands and your bass. Make these workouts your own, and your fingers will love you for it!
It’s NAMM time again! Can’t make this year’s show in person? Here are some of the hottest new products that Yamaha will be displaying on the show floor.
Pacifica Standard Plus and Professional
Pacifica Standard Plus PACS+12M.
Pacifica Professional PACP12.
For over 30 years, Yamaha Pacificas have been one of the most popular affordable yet quality guitar models worldwide. The two new high-end Pacifica models announced at the 2024 NAMM show — the PACS+12 Standard Plus and flagship PACP12 Professional — not only expand the line but utilize today’s most modern guitar-making technology to provide exceptional levels of playability and sonic versatility.
All Standard Plus and Professional Pacificas feature maple necks with rosewood or maple fingerboards, as well as alder bodies with exclusive Acoustic Design technology for enhanced mid frequencies. They also offer an especially extensive tonal range thanks to their unique Reflectone pickups (one humbucker and two single-coils) co-developed with Rupert Neve Designs. The new Pacificas look as good as they sound, too, with subtly beautiful finishes based on those featured on album covers of the City Pop genre, popular in Japan in the 1970s and 1980s and inspired by the California music scene.
SEQTRAK
SEQTRAK.
SEQTRAKis a groundbreaking music creation station that empowers you to unlock your creativity from wherever you happen to be. Capture ideas quickly through its lightning-fast, all-in-one system that includes drums, synths, sampling and sequencing, all packed into a compact, lightweight design. Create original music with two versatile sound engines, then refine with deep editing, custom samples and video creation using the intuitive SEQTRAK app. When you’re ready, share your sounds, collaborate with other artists and connect with fans using its powerful performance features and video creator. SEQTRAK has everything you need. And more.
Montage M with Expanded Softsynth Plugin (E.S.P.)
MONTAGE M8x.
The MONTAGE M next-generation flagship synthesizer ushers in a new era of sound, control and workflow in music creation. It provides three engines that recreate warm vintage analog synths, cutting-edge FM synths and ultra-realistic sampled acoustic instruments, with an advanced Motion Control engine that further enhances these capabilities, adding a unique fourth dimension of control to your music-making.
Expanded Softsynth Plugin (E.S.P.) screenshot.
At NAMM, Yamaha also announced the availability of the Expanded Softsynth Plugin (E.S.P.), which faithfully replicates the MONTAGE M in your Digital Workstation (DAW). Free for all registered MONTAGE M owners, E.S.P. allows you to create, edit and mix MONTAGE M Performances anywhere you go — without the hardware — providing an unprecedented level of stage and studio integration.
Genos2
Genos2.
Genos2 is the new flagship Arranger keyboard from Yamaha. Combining legendary sounds with cutting-edge technology, it can transform solo players into the ultimate cover band and also provides unlimited possibilities for composing and arranging original music. A unique Style Dynamics function allows control over every nuance of accompaniment, and an innovative Real Ambient Drums feature provides players with a virtual drum recording studio. There’s also an AI Chord mode that intuitively guides accompaniments based on what is played, as well as a professional-grade microphone input with studio-quality effects engineered to refine and amplify a musician’s voice. Users can even follow along to their favorite songs with the option to display karaoke lyrics on the built-in color touchscreen or to a TV or computer monitor via HDMI.
FGDP Finger Drum Pads
FGDP-50.
FGDP-30.
Yamaha FGDP Finger Drum Pads allow anyone to drum, anywhere, any time. They provide a distinctive pad layout ergonomically designed for optimal finger drumming and come loaded with hundreds of drum samples, plus there’s an internal tone generator and a built-in speaker, all powered by a rechargeable battery. There are two models to choose from: the FGDP-50 and FGDP-30. The FGDP-50 offers 26 customizable drum pads, 48 Preset Kits and 1,500 Voices (instruments) and includes a USB audio recorder as well as the ability to trigger one-shot samples or short phrases from USB flash memory, while the FGDP-30 has 18 customizable drum pads, 39 Preset Kits and 1,212 Voices. Both models include a Tap Tempo click function as well as an Aux in jack so you can play along with your favorite music, along with a USB to Host terminal that enables seamless transmission and reception of both MIDI and audio data.
DM7 Series Digital Mixing Consoles
DM7.
DM7 Compact.
DM7 Series digital mixing consoles provide unparalleled sound quality, ease of operation and high reliability that make them perfect for a wide range of applications, including live sound, broadcasting and streaming. The DM7 model is configured with 28 touch-sensitive motorized faders (12 + 12 channel plus 4 group) and provides 120 mono channel inputs, along with 32 analog inputs, 16 analog outputs and dual AES digital stereo input/output. The DM7 Compact model has 16 touch-sensitive motorized faders (12 + 4) with 72 mono channel inputs and 16 analog inputs/outputs, along with a stereo AES digital I/O. Both models are Dante-compatible and offer 500 recallable Scenes as well as onboard four-band fully parametric EQ and a variety of dynamics processing options such as compression, limiting, expansion, gate, ducking and de-esser. An optional CTL-DM7 control expansion module adds a variety of physical controls including two faders, 16 user-defined keys, four user-defined knobs and a jog wheel.
62 Series And Custom Z Saxophones In New Finishes
YAS-62IIIA in amber lacquer finish.
YAS-82ZIIA in amber lacquer finish.
Yamaha 62 Series and Custom Z saxophones are designed to be as unique and special as the person playing it, combining a vintage aesthetic with high quality performance. At NAMM it was announced that the YAS-62III alto and YTS-62III tenor models will now be available in unlacquered finishes, along with the gold lacquer and silver-plated finishes already offered. Both, along with the Custom YAS-82ZII alto and YTS-82ZII tenor models (already offered in gold lacquer, black lacquer, silver-plated and unlacquered finishes), will also be available in a stunning amber lacquer finish that adds a touch of vintage charm, with hand engraving that provides a striking contrast against the original brass color. Stand out from the crowd!
See you at next year’s NAMM — and remember, if you can’t make the show in person, you can always catch the highlights here!
For more information about these and other great Yamaha products, click here.
I once herd that the most problems between people are actually communicating problems. As teachers, we no that the majority of what we due involves communication. This communication must be clear. It should not be a bald-headed lie, and for all intensive purposes, it should pacifically attempts to wet our appetites for assimiliating information. (Sorry, I’ll stop taking your patients for granite here.)
The paragraph above is a silly way to emphasize that accurate information (including spelling and grammar) is vital, but so is the frequency of communication. Here is my list of the most effective modes of communication in my program and when to use them.
Communication Methods
The methods of our communication matter. We must put our personal preferences aside and move to what the general population uses the most — and, of course, ensure that they are approved by our schools or districts. However, keep in mind that the most-used methods are also the most crowded. The methods listed below are how I deliver information to a larger group of people at once.
Text Messages: Many schools have moved to text services such as Remind. I suggest text services for one-way communication and announcements from the program.
Social Media: Social media can be an important way to reach people. However, the popular channels can be difficult to keep up with. By the time you have become familiar with a specific app, chances are that your students have moved on to something else. When using social media, it’s important to know your target audience. I have found that administrators prefer shorter form apps like X (formerly known as Twitter) and Threads, parents like Facebook, and students use Instagram, etc.
Email: Email is still effective, but it continues to receive fewer and fewer responses and engagements from us. However, this is my school’s preferred method of communication, so many parents and students migrate over to this when we announce that we will be primarily using email.
Physical Mailings: Do not dismiss the power of a piece of mail! There is, of course, some cost involved with mailings; but that being said, we get more people at a band parent meeting and better responses for concerts when I mail out a letter directly to families. For families who are non-native English speakers, I try to send a letter in their native tongue. I also typically add a line that apologizes for any translation issues. Some of our students move frequently, so make sure that your address book is updated.
Rules for Communication
How many times have you put information in a calendar at the beginning of the year, only to receive phone calls or emails a few months later asking when an event is happening? Or, even worse, a kid misses an event that was listed in the calendar? Your initial reaction is: “It was on the calendar.” However, here are some common observations:
No one wants to do the same work twice; I get it. But some music teachers have this preconceived notion that everyone is as organized and on top of things as we have to be. They aren’t (and maybe some of us aren’t as organized as we think — I’m currently staring at a mess of a desk that I have had every intention of cleaning).
Don’t Become Static Noise: Regular reminders are helpful, but we must approach these with balance. You don’t want to communicate so infrequently that items are missed, but you also do not want to communicate so much that you become background noise. I have found that a weekly posting on Monday works best. It’s simple, regular and reliable. I list the upcoming events for the next two weeks and include reminders about forms or obligations that are due.
Translating Documents: We have a few options for translating documents. If there is a trusted colleague or parent who is bilingual, work with them to translate important documents. Depending on your program, you may benefit from creating a position within a parent club for this specific task. Of course, avoid having parents translate sensitive documents or make calls for private topics.
Online translation services can work as well, and they have been getting a little better each year. Google Translate, ChatGPT or other AI services can translate documents that can be copied and pasted. They are not perfect, but many parents have told me that they appreciate getting the information in a manner that is easier for them to read.
Release all documents at the same time. I put them all in an email, one translation right after the other. For paper documents, make them double-sided, with two languages on each side. This is additional time that ensures that all my students and families are receiving information that they can read.
My Rules
I have some self-imposed rules with my weekly updates.
My updates are distributed on Monday. If Monday is a day off, I distribute the next day we are in session.
Weekly updates cannot be longer than half a page.
If I forget to add something, it must wait until the next posting unless it a) can affect a student’s grade or b) would end up costing someone money or time.
Rule 3 can be broken for celebratory messages, such as students being accepted for major musical events.
Events for the next two weeks are listed.
The next major performance date is included in every weekly correspondence.
Documents must be translated in order to effectively communicate with all of our families.
Regular but non-obsessive communication helps the entire group, but it is also sensitive to the working schedules of my students and parents. Some of us reading this article may have schedules that rarely change. You may be able to say, “No, I can’t stay after school because I have to pick up my kids.”
However, some of our students and parents do not have a regular schedule. Many of our families work hourly wage jobs and receive schedules two to four weeks in advance. One seemingly minor shift in one’s work schedule can create more work in other areas. If a parent normally works from 10 a.m. to 5 p.m. on Thursdays, they wouldn’t have a problem picking up their child from jazz rehearsal that ends at 6 p.m. However, if someone calls off or quits, and their boss says they have to stay an extra hour or two, they have to figure something out. They may be late, dinner will not be ready on time, the car will not be home for their other family member to use it for work, etc.
This parent may have forgotten about jazz rehearsal until they received the weekly update. Once they see the message, however, they can communicate that their child may not be able to make rehearsal due to this change. Ultimately, teachers can help work out a ride or even excuse this student from the rehearsal to alleviate the family situation. The core of this problem and solution? Effective and timely communication.
by lateci / Adobe Stock
Suggested Communication Schedule for Ensemble Programs
As a father of multiple children, pandemic learning definitely altered my communication frequencies. I was getting over 30 messages a day regarding my children, and to be honest, I had to carve out time each day to read through these specific emails.
Listed below is a suggested schedule of communication with the goal being that people are able to read the information in a timely manner.
Once a week: digital correspondence reminding students and parents of upcoming events and due dates.
Quarterly: physical mailings in either a memo or newsletter format.
Identify your four most important events or four groupings of events. Mail home the information on these events approximately 20 days before the event.
Physical mailings with my group get the best response. A letter mailed home with the school’s name on the envelope still holds some importance and priority.
I do not print many newsletters or emails. However if one is mailed directly to me? It goes right on the fridge or magnet board.
It’s redundant, but also email, text and post these mailings as well. Sometimes, people move and will not get the mailing right away. Other times, parents who are divorced may both be signed up for the emails but not the mailings. You can even send a text that says, “Please check your email for important updates regarding the solo and ensemble event.”
Once a semester: calendar reminders and updates. This is simply the calendar updated and printed with any important updates, deletions or additions.
As often as possible: good news, student highlights, music tips
These do not need to be required reading for parents and students, but it always helps to maintain a positive social media presence (if your district allows) with student highlights or snippets of good news in the music world.
Effective communication remains the primary focus, regardless of the evolving channels and needs. Embracing a variety of methods — from digital platforms to traditional mail — ensures that we reach our families effectively. By maintaining a balance between regular updates and avoiding information overload, we can foster a more engaged and informed community.
_____________________________________
Serving the needs of all students by ensuring we implement translation services and sensitivity to the unique schedules and challenges faced by our families further exemplifies our commitment to inclusivity. Ultimately, the goal is to create an environment where information is not just disseminated, but also received and understood. As we continue to refine our communication tactics, let us remember that the heart of our success lies in our ability to connect, inform and inspire those we serve.
“Measures 17 to 24: melody, pay special attention to unifying our articulation. Here we go.”
Group plays.
“Thanks. Everything worked out fine, but let’s listen to clarinets and flutes only. Think about your fingerings: always, alternate, never slide. Here we go.”
Flutes and clarinets play.
“Thanks. Now just third clarinets: let’s take it slower and we’re only taking measures 19 and 20. Why?”
“Because we go over the break there.”
“Yes, correct, thank you. Here we go.”
Thirds play. We rinse and repeat, taking it a bit slower and listening to some individuals. We build it back and have the flutes come back in, and then the rest of the band. We followed this format for a while.
We are on track right now.
We play measures 17 to 24 again. We are now one cosmic entity joined by music-making. The time seemingly stands still. However, several minutes have passed, and the bell is about to ring.
“We’re done already?!” the kids ask.
“Almost,” I say. “Let’s take one more run at this section, this time for balance. Are there any questions?”
A trombone player: “Can I go to the bathroom?”
________________________________________
There are two experiences in the classroom that I strive for. One of these experiences is the first time a group plays in tune and the room sings the pitch back to them. This usually happens around late first semester or early second semester if we’ve put the time into tone, balance and intonation. This is an irregular award for us. The first time is the most effective, and while the next step may not be as exciting, it is much appreciated: The concept of where we want our sound to be becomes the new norm that we strive for.
Photo by Mustafa / Adobe Stock
What is Flow?
The other experience is flow. What is flow? Flow is that state of being where you are extremely focused, and time seemingly stands still or conversely it feels like it rushes by. You may have experienced a state of flow when you get lost in a great book or film or, to another degree, highway hypnosis. A trancelike state overtakes you. A state of flow can be rewarding. In some cases, it seems like we’re finally able to shut off the noise that is constantly rattling around our brains from external and internal sources. We are focused on the task at hand and not distracted by things that don’t matter or things that can’t be controlled at this moment. Flow can be difficult to create. Seemingly, the stars need to align, yet when you realize that you are in a state of flow, you can quickly fall out of this.
There is another level to flow. Beyond the individual experience comes the group experience. Not only do we accomplish a lot when an entire group is in a state of flow, but we feel camaraderie and are connected to the human spirit. We often feel like we have created a space where people belong.
We can find examples of flow in the professional world. Think about world-class athletic teams that just seem to be in tune with each other during a high-stakes game. I grew up watching the Chicago Bulls in the ’90s and was fortunate enough to witness Jordan, Pippen and others in this state of flow during their six championship runs. We, of course, hear, see and experience a state of flow during professional musical experiences. But flow isn’t just reserved for the pros. We can certainly strive to have flow as a regular visitor in our rehearsals.
Photo by annebel146 / Adobe Stock
Identifying Flow with the Students
This is one of the hardest but also one of the most important concepts: We cannot force flow to come out at the beginning, but we can certainly create an environment where flow is welcome and will flourish. However, in a “which came first: the chicken or the egg” situation, once teachers notice flow happening, we must point it out to our students. And yes, sometimes that means sacrificing a little bit of flow at the beginning.
The next time you notice that the group is firing on all cylinders, let them know. This does not have to last for a long period; you can certainly get into a state of flow for just a couple of minutes. But find a way to identify it and point out what happened while also relating to other experiences that students might have with flow. Ask questions: “Students, have you ever had a time where you got lost in what you were doing, whether it was reading, cooking, dancing, listening to music or even playing your instrument? What happened to the time? When deep into a good book or conversation with a friend, did you notice the world around you?”
Now relate this to music. Maybe students have spoken to you before about being nervous about a concert, and then not realizing how quickly the concert was over. This is a state of flow — it may have been induced by nerves and fight-or-flight responses, but hey, we will take the analogies when we can get them.
Photo by Julian / Adobe Stock
Forcing Flow
Now I already said that we cannot force flow to come out at the beginning — but what I should have said that we can’t force it to come out easily. However, there are a few methods that we can use to get our students more focused, which in turn may coax out some flow.
Try this: if there is a passage of music that is not quite there yet but within reach simply through repetition, set the stage for some almost trance-like work. This should be a section of music where everyone performs. If this does not exist in the music you have programmed, then consider using an exercise from a method book. For these exercises, break down a short chunk of music, maybe four to six bars. Go over a few intricacies — maybe the trumpets could use an alternate fingering on a specific note to adjust intonation without sacrificing their embouchure, or maybe explore some trill fingerings for the flutes.
I set a metronome, quietly. I might even use an old pendulum-style metronome that requires students to focus to see or hear it. If I’m using the Yamaha Harmony Director, I turn down the volume as low as it can go while still being audible with no playing going on. And then, we begin about 20 clicks under tempo. If it’s successful the first time, I go up one click. If it’s a trainwreck and I know that it won’t get better with repetition (or that it might even be imprinted incorrectly if we keep going), then we stop and adjust. Then, we go back to the metronome.
We begin again 20 clicks below tempo, and we increase by one click for every single rep. We do not play on — we only play the designated measures. For younger groups, consider having students put Post-Its over the measures preceding and succeeding the bars you want to be played so the distraction is blocked out.
There is little feedback in between reps, if any. Rather, I change the metronome to increase by one click. I signal the group, and we repeat it again. If any issues are moving faster, we simply repeat the measures at the current tempo at least one more time.
When we’re about 10 clicks away from the target tempo, I notice that the group begins to get into a groove. They are not scattered, nor are they trying to distract each other, or, for what it’s worth, even paying attention to each other that much. They are focused on the task at hand. We keep moving — one click, one more click, eight more clicks. We are now at the target tempo, but I don’t tell them. I go at least four more clicks.
When it gets challenging, particularly around four clicks above the target tempo for a quicker piece, I notice that students start to break a little bit. They get nervous because the segment gets more difficult. Some students laugh, others start to clench their instruments a little tighter. This is when I tell them that we are actually above tempo.
“You traitor!” I hear from a trombone player. It’s always a trombone player, but I let it slide. And then we go back to the target tempo, where we can now play the measures with correct notes and rhythms at tempo. We then discuss our state of mind during this time.
Admittedly, a few kids stated that they got a bit bored with it at first, but that pushing forward one click at a time consistently did put them in a state of focus. They forgot about their other classes for a bit, and their problems with friends, parents or home life.
Focus Isn’t Just Avoiding Distractions
True focus in a music classroom goes beyond simply not being distracted or avoiding off-task behaviors. It’s about an active, intentional engagement with the music at hand. In this context, focus means fully immersing oneself in the nuances of the piece being played, understanding the interplay of different parts, and being mentally present in each note and rhythm.
It’s not merely about students refraining from talking or not playing their instruments at inappropriate times; it’s about them actively listening, analyzing and contributing to the collective musical experience. It’s the difference between waiting your turn to play and actively listening to the tone the flutes are performing with, even if you’re a percussionist.
Focus is when our students begin to adjust their volume and intonation to blend and balance with another part. In short, students become focused when they are guided to take more control over their learning and performance.
Routines to Automate
Establishing automated routines as students enter the classroom is essential to create an environment for focused learning and to minimize decision fatigue. Upon entry, students could encounter a clear agenda for the day’s lesson, displayed near the entrance or on a digital screen. This could include the pieces to be rehearsed, specific focus areas for the day (like rhythm or intonation), and any necessary preparation activities (like instrument tuning or warm-up exercises). By outlining these expectations immediately, students can transition from the general school environment to the focused and structured world of music learning.
Additionally, standardized procedures for handling instruments and sheet music, such as designated areas for instrument cases and a consistent method for distributing and collecting music sheets, can streamline the start of class and reduce time spent on logistical details. These are routines we set up early and reinforce until they become automatic.
Protect Classroom Time: Keep Interruptions to a Minimum
I joked in the intro about students being hyper-focused and not even realizing that the bell was about to ring. We were still in a state of flow, and then all the walls came crashing down when a kid asked to use the bathroom.
These situations will happen at times. Use your best judgment, but in my experience, people, including students, counselors, other teachers, phone calls, emails, etc. will interrupt as much of your class as you allow them to interrupt. Some interruptions are unavoidable: if a fire alarm goes off or an intruder drill begins, sorry — these are more important than staying in your state of flow.
When I have a guest clinician out, I let the administration and supervisors know. Magically, we don’t get many interruptions that day. If this is possible with a special guest, then it’s certainly possible during our regular rehearsals (which must be treated just as special as those with out-of-town guests!).
Yes, it’s important to understand that everyone has a job to do. A counselor sending a call slip during your class is just trying to help a student out. A phone call during rehearsal to send a kid to pick up their lunch is important — we all have to eat. Yet, we can also work within our network to adjust or even avoid some of these interruptions. For frequent call slips, I have contacted the counselors and told them exactly what I wrote above: We’re all trying to get a job done. Yet, I politely asked if the call slips, except for emergencies, could wait until after class, or even if they could be distributed equally among classes. We were able to work out an agreement that didn’t just take from the band.
What Do You Do When You Get There?
Enjoy it! A state of flow can be difficult to describe, but it can be one of the most rewarding states that an artist or consumer of art can experience. We are showing students that it is possible in today’s hyper-multitasked world that yes, we can focus on one thing, and we can focus deeply.
Many music educators subscribe to a success checklist. You’re not worthy until you’ve completed the gauntlet.
Swap these milestones with ones that are relevant to your discipline:
State-Level Recognition: Your group must be accepted for the state music organization festival, but only in concert band, concert choir and concert orchestra. You know, the “legitimate” areas.
Auxiliary Ensembles: Once you’ve earned a spot at state, you can then consider your auxiliary ensembles, or “non-legit” ensembles, such as jazz, madrigals, chamber orchestras or vocal jazz. You’ll get a smaller room to perform in, but hey, it’s a plaque that says you got there! (Note: this does not apply to marching band. See the next point).
Competitive Milestones: If you have a marching band or show choir, you then must begin placing at contests. You can start at small shows, but then you must move on to a state show. Not that “state” show; the other state show.
Next-Level Aspirations: You will then go back to your concert ensemble and explore a number of other options that will instantly be recognized as the “next” level. They should have “National” in their name. If a “World” or “Galaxy” exists, or even “Omniverse,” consider skipping straight to this.
Individual Achievements: I hope you haven’t forgotten about your individual musicians! If a state district level exists, this is just the first step. Also, you must get more than two students in — one just doesn’t cut it. Also, at least one or two must go to state. Also, you must do this at the same time as marching band. Also, if you teach choir, triple the number of students you are expected to have at district and state. In fact, only program the district and state pieces with your ensemble.
Organizational Politics: If you teach middle school, you are OK to go to the grade school association contests. But if you teach high school, you may be looked down upon if you attend the state education associations version of a music contest (does not apply to Texas and Indiana). Pull out of these organizations as soon as possible, and if you can’t, begrudgingly participate at the lowest possible level while continuing to try to convince your administration that the “real” organization for music is the other one.
Networking but Not Really: Attend your state and national music festivals. Look people right in the nametag and then determine whether you give them your eyes or keep walking. Note: carefully peel off your “performer” ribbon from previous years and stick on your current badge. They must not forget what you’ve done!
The Commission: If selected for a state or national honor, you must commission a work for one of your events. You may or may not ever play this work again, but it must be commissioned and your name must be on the music.
The Cycle: Completed everything? Rinse and repeat. You’re only as good as your last major success! Oh yeah, and don’t forget about the kids. Let them have a pizza party or something.
Do All This in 10 to 15 Years: If these items don’t occur within your first 15 years of teaching, you will be an utter failure, a late bloomer or the dreaded “you know, they’re a nice person.”
Now imagine going back and doing The Checklist over again, but this time you should be able to do it all at once. Those who don’t or can’t do this? “Well, they’re just collecting a paycheck.” “They used to be good — what happened to them?”
Maybe some music educators did get lazy. And, maybe those who did complete The Checklist aren’t so bad. It’s those who do The Checklist expecting it to offer them some inner peace and sanctum who may come up empty-handed. The Checklist varies according to your location, discipline and expectations.
The Illusion of Prestige
So, you’re not a part of the club who has their ensemble selected for something. Is this really a tragedy? Why do these milestones become our identity? The irony is, often we only realize how trivial these achievements are after we’ve accomplished them.
“It’s not about the trophy, kids! I can say that because we already got the trophy!” As with most major projects and journeys, the “why” matters. On the one hand, some of the more successful programs have teachers who have followed The Checklist journey and as a result have programs that have flourished. The students and teachers utilized The Checklist to reach a set standard and then replaced this competitive model with what they deemed to be more worthwhile performances. In other words, these programs evolved.
But what about those who seemingly can’t escape the competitive grind? First, we must look at what hidden traps occur when we carelessly chase and repeat The Checklist as a cycle.
Chasing Validation Over Substance: The allure of prestigious events and awards can sidetrack educators from the core purpose of teaching: enriching students’ lives through music. But hey, those trophies look really nice in the office!
Limited Perspective: Strict adherence to The Checklist may narrow an educator’s view, overlooking non-traditional or less recognized but equally enriching paths in music education. Some teachers state they attend different contests or festivals regularly, but if the goal and intention remain the same, we are just swapping out a location.
Burnout: Trying to achieve every milestone on The Checklist can be exhausting and may lead to professional burnout, diminishing both your music program and you.
Resource Drain: Focusing solely on achieving checklist milestones often requires significant financial and time investment, which could be used for more individualized, beneficial educational experiences. The resources required to complete The Checklist may not be equally accessible for all schools or communities. There’s just not enough money or time in many cases.
Neglected Innovation: The pressure to conform to established norms can stifle creativity and discourage educators from experimenting with new teaching methods or musical styles. Guidelines can be helpful and encouraging, but pushing to the next level is also rewarding. Music theory one: learn the norms. Music theory two: learn how to break the norms and have a little more fun!
Student Disengagement: An unwavering focus on prestige can make students feel like mere steppingstones for the teacher’s career goals rather than individuals with their own musical journeys.
Overemphasis on Competition: Some may see The Checklist as a strictly competitive mindset. Competition is necessary. Chances are if you are reading this, you had to compete for the position you are in by applying and interviewing for your job. Our students must compete to understand at least a base level of preparing and meeting a standard. Yet, competitive opportunities can be balanced with a collaborative, community-based learning environment.
Exclusivity: Achieving milestones on The Checklist can sometimes rely on gatekeeping and politics, creating an environment where only certain types of programs or students get opportunities.
Lost Joy: The pressure to tick off items from a predefined list can sap the joy and spontaneity of teaching and making music for educators and students alike. That’s right: It’s OK to focus on having some joy. If we are only happy when we are getting applause or recognition, we may have some reflecting to do.
Are you feeling called out? Good. But let’s get one thing straight: If The Checklist pumps you up, go for it! But if it makes you feel less than, or you’re contemplating a career pivot, give yourself the freedom to explore other paths. But most importantly, ask why?
I’m not demonizing these organizations or their checklists. What I am challenging is this almost cult-like mindset that you’re worthless if you don’t accomplish all these things. And why are we all so desperate for external validation? Is that really what all the applause has done to us? If our program is on the chopping block, I get it: save it by any means possible and show the powers that be that the outside experts (anyone who’s out of town) value us. But if we’re trophy hunting and just collecting plaque after plaque and chasing the high, maybe our priorities are out of whack.
Job Descriptions and Blank Slates
Many districts aren’t so regulated when it comes to music program expectations. In the case of music program requirements, think of them this way: your job description is the minimum of what you must uphold. It’s not a restriction. Does your contract say “five home football games and three concerts?” Sounds like an endless amount of possibility, a blank slate if you will.
Make a New Checklist
The Checklist is not inherently bad. It can help improve your program. But it’s not the “be-all and end-all.” There are alternative ways to build up your groups and enrich your students’ experiences. So, if you are feeling like an outsider looking in, let it go. Consider your checklist. Strip away the current expectations. If alternative approaches are necessary, where can you start?
What does success look like for your groups? This is a crucial question. We are not asking “what is easiest for our kids to achieve” or “what contests could my kids go and win?” Rather, this is an important first step in turning intentions around. If the current intentions are for the teacher’s gain, we are looking at intentions being shifted to a new checklist — a checklist that focuses on desirable student outcomes. And what are these desirable student outcomes? Those are for you to find out with your program — after all, you know your kids, school and community best. Below are a few samples of some possible events but be careful of turning this into the “anti-competitive director checklist” (there is always some other trap, isn’t there?).
Host Guest Artists and Clinicians: Invite guest artists to conduct workshops, masterclasses or collaborative performances. This enriches your program and offers students valuable mentorship opportunities. Invite clinicians to work with your group — even if you aren’t heading to a festival! This will hands-down be one of the most effective things you can do to promote musical growth in you and your ensemble. In my time, I’ve had professional trumpet players, clarinet players, local community bands, vocalists and even a frame drummer from Syria perform with my groups.
Invite Groups for Home Concerts: Similar to above, but this time, the guest group is the main event. Bring in groups to perform specialized concerts at your school. This provides a unique and intimate performance experience and can even feature your students as opening acts. You may have seen some groups do this with service bands or well-known vocal groups.
Trips to Professional Performances: Take students to see professional performances, such as the Chicago Symphony Orchestra, to ignite their passion for music and offer them a new point of reference for excellence. We do a yearly trip to the symphony. We stop at a pizza restaurant first and then enjoy the performance. The next few days are always filled with kids in the practice rooms.
Out-of-State Travel with Combined Concerts: Coordinate trips to perform joint concerts with students from other states, providing an enriching and culturally diverse experience.
Push for Chamber Music and Non-Traditional Ensembles: Promote smaller, specialized ensembles like chamber music groups or non-traditional setups. These offer students a focused and intimate setting for musical development. In most cases, nothing is stopping you from turning one of your concerts into a chamber concert; the main groups can play a piece or two, and then the majority of the concert is composed of smaller ensembles showcasing their hard work.
Community Events: I cannot overstate the importance of community events. Early in my career, I often looked at some of these events with contempt, particularly if a local small-town festival conflicted with a marching band rehearsal right before a big show. This time of year was often a divide because I knew what I was doing was best for program growth, but the kids and community wanted more involvement with the town festival besides just playing a few numbers and leaving. So, one year I bit the bullet, and we went hard at our local fest. This 30-minute performance became our priority, and we treated it like a themed concert with guest artists, audience participation, you name it. This turned out to be one of the most enjoyable events we did and drove home to the kids (and director) how much we could serve our community through music.
Revamping Your Marching Band Show: If you don’t compete in marching band, use the freedom to create a unique, multi-faceted show for football games, allowing for creative exploration and community engagement. The rules at a football game for the marching band are pretty much just “start playing at this time and stop playing at this time.” Nothing is stopping you from staging the ensemble anywhere in the stadium, including an up close and personal experience in the bleachers. Our famous move is the “push to the fence.” We start on the field, and by the end of the performance, we’re right in the audience’s faces along with the cheerleaders and poms, and they love it.
State Organization Opportunities and Colleges: Don’t overlook the opportunities provided by your state’s music organization. Whether it’s entering your students in composition contests, sending them to future music educator seminars or attending workshops yourself, these can be valuable ways to broaden both your perspective and that of your students. Additionally, more colleges are beginning their own honor bands or festivals. The smaller festivals have the advantage of students being able to connect more with the conductor and organizers, and other students.
Who’s Judging?
In the end, no one’s truly holding your feet to the fire except, perhaps, you. If you’re chasing after the validation of people who aren’t invested in what you’re doing, is it worth it?
So, if The Checklist is your current life narrative, maybe it’s time for some soul-searching. Reevaluate what really matters in your career and consider giving yourself the liberty to define success in your own way. We aren’t lowering standards. In fact, a hard reality is that this defining success for your students will actually require a little more work, particularly if there isn’t a predetermined model. But ask yourself: Are you and your students worth this reflection, planning, and work? I think so.
The first time I heard of the praise-to-criticism ratio I was in college working on completing a co-op. While my advisors mentioned this concept time and time again, I didn’t fully understand its implications until I began teaching in my own classroom and private studio.
The praise-to-criticism ratio is the amount of positive feedback you give compared to criticism. It’s also called the 3:1 ratio because this is the ideal balance of feedback you give, according to a 2013 Harvard Business Review article on team performance. And what is classroom music if not a team performance?
Photo by lordn / Adobe Stock
Why it Works
Speaking from experience, the 3:1 ratio works because it makes students feel encouraged and safe. Music is an especially vulnerable topic because it’s an art. This is why harnessing the power of the criticism-to-praise ratio is an essential facet to help teach young artists.
The 3:1 ratio reaches the very root of our psychology by helping improve motivation.
Feedback is personal, and this keeps the energy in your classroom positive.
You become a safe person to perform around.
It fills up your bucket or emotional bank account. In a classroom, we often talk about making students bucket-fillers rather than bucket-emptiers. But teachers need to be bucket-fillers, too. In the corporate workplace, they use the term “emotional bank account” rather than buckets. But it all refers to the same thing — no matter the situation, you can’t go wrong with an extra dose of positivity.
How to Enact it
It can be more difficult than it sounds to come up with primarily positive feedback, but here are some tips on how to up your ratio.
Notice the good in whatever they just played. You can notice the good in whatever your student just played, even if they didn’t play anything right at all. You could say, “I love how you kept going even though it got tough.” Make a point to be positive first, and then correct the technique afterward.
View student mistakes with an open mind. Smile, celebrate, and explore first. Some people say a mistake is a mistake, but sometimes, a mistake is a discovery. Did your private string student accidentally hit a harmonic? Then use it as a moment to celebrate and educate. Talking about the difference between whatever they played rather than what you intended doesn’t have to be criticism. Then use the last quarter of your feedback to get the sound you intended them to play.
Here are other ways you can offer positive feedback and make your students more receptive to the feedback we are about to give.
Celebrate improvement.
Support effort.
Notice their personal musical choices (dynamic choices, articulation, dynamics).
If your classroom is having a really rough day, and you can’t find three positive things, discuss neutral things like the history behind the piece. If you completely run out of words, you can even open up the dialogue and ask the classroom as a whole to name three good things about what just happened.
The Power of Recording Yourself
Recording ourselves practicing music is a common way to learn how we really sound on an instrument, but what if we apply the same concept to teaching? When I recorded myself teaching, I realized that I wasn’t using the 3:1 ratio (or 75/25) correctly — my praise-to-criticism ratio was closer to 60/40.
Try it! Recording yourself teaching and tally the types of feedback you give. Even if you just do this exercise once a week, it’ll make a difference. At least, it did for me!
Be Mindfully Critical, Not Negative
If we left out constructive criticism, every performance would be at risk of becoming an amalgamation of disorganized sound. But notice how I said constructive and not negative. Negativity has no part in the praise-to-criticism ratio.
Use a neutral voice and friendly body language. If your students see you holding your breath with your arms crossed, they likely know that what you’re going to say isn’t going to be positive. So, when offering constructive criticism, keep your body language and tone in mind.
Give the student a chance to point out the areas for improvement. Another way to progress through a difficult passage is to ask students to tell you what they could fix. Having students self-reflect is an excellent teaching tool.
Tell it how it is. Mistakes are mistakes, but corrections in technique don’t need to have big emotions tied to them.
What’s Going on at Home?
If you start fixating on a student’s performance instead of celebrating that it’s happening, you are striking the wrong note. Some students come from environments where they get 50/50 positive/negative feedback or worse. Teachers involved in the performing arts must be a beacon of positivity so students can feel comfortable enough to learn and perform, but also so they can be happy. An individualized approach to teaching the arts is a must.
I feel this method is especially important during transitionary years like junior high. As the world continues to change around your students, aim to give them consistency.
Some psychological studies have found better success with 5:1, 6:1, or even 7:1 ratios. Regardless, it’s essential that music teachers give out more positive words and fewer critical ones.
Try It!
Some argue that the 3:1 ratio isn’t backed by science. The problem is that there have been relatively few studies on the 3:1 ratio.
However, if changing the praise-to-criticism ratio has proven to lower divorce rates and increase workplace happiness, why wouldn’t it work in the classroom?
Besides, I’ve found that this concept is best experienced first-person.
Consider adding the 3:1 ratio into your classroom to help foster creativity, resilience, and a sense of safety in your room. Early musical experiences can set the tone for a lifetime. So, fill up your students’ buckets — and yours — with a little extra positivity.
Behind every great drummer is a great drum tech. Simply put, a drum tech’s job is to set up and maintain drum kits. But there’s more to it than that. A tech’s real job is to anticipate an artist’s needs and mitigate any problems — preferably before they arise — that interfere with a musician’s ability to record a track or play a show.
In the case of a drum tech, this can be as simple as making sure there are enough sticks in the stick bag, taping a setlist down or tuning the drums, or as involved in designing and ordering new kits or dealing with vendors and suppliers around the world. But more than anything else, the biggest part of the job comes down to understanding the psychology of the player. A good tech will know what to say (or what not to say) before a performance to help their artist get into the zone. I’ve often said that the technical aspect of what I do (and it can get very technical) is only about 10% of the job and the rest is dealing with the people. No matter how difficult the gig, the former is far easier to learn than the latter.
WHAT IS THE DIFFERENCE BETWEEN A DRUM TECH AND A ROADIE?
Some people in my profession dislike the term “roadie,” but telling a random member of society that I am a “drum tech” will often garner the same reaction as showing a card trick to a dog. However, saying “roadie” will at least spark a small reaction of understanding. I do find that for a lot of us, “roadie” is used internally (among friends and industry folk) while “tech” is a term reserved for the public. In the past, you’d probably differentiate between the two by whether someone was skilled/knowledgeable or just a roadcase-pusher, but as the jobs have gotten more and more complicated (and the shows more expensive) you won’t really find anyone on tour who isn’t a part-time IT specialist. (I’m only kind of joking about that last bit.)
A TYPICAL DAY IN THE LIFE OF A DRUM TECH
A drum tech is the last in and first out at any show. By that I mean that out of 30 to 100 people on a decently sized tour, I am the last one to start my work and will typically be the first one finished. That may sound like an easy gig, but my workday is generally “only” about 14 hours long. I roll out of the tour bus at around 8:00 in the morning and wander my way into the venue to look for a restroom and find coffee and breakfast. The rest of the crew is already hard at work when I shuffle in, and have been for an hour or two.
At 10:00-ish I’ll get a radio call from the stage manager that our truck is ready to be unloaded. Our backline truck (“backline” is the generic term for band gear) also stores the monitor system, which takes up about half of the 53 feet of available space. Along with the other backline techs (the guitar techs, bass techs, etc.), we’ll round up a few local stagehands and get the gear up onto the stage. If we’re lucky, we’ll actually have room to set up but more often than not, the stage will still be covered in lighting truss and video panels. Oh well, back for more coffee. By noon we’ll have access to the stage and I’ll be able to start assembling the drum kit. In the case of Def Leppard, the drums travel already set up, bolted to a plate, and transported in a very large road case. Once the kit is lifted onto the drum riser I’ll patch in the computer racks and power things up. A quick tap check of the drum triggers will tell me if everything is working properly. If so, I can move on to general maintenance — things like changing heads as needed, wrapping drum sticks and making sure things didn’t loosen up on last night’s drive. If anything is broken, I’ll have about an hour to get it fixed.
At 2:30, the sound and backline crew will convene for a line check to make sure everything plays correctly and sounds good, both on stage and out front. I’ll go through and play each drum one at a time until I get the OK from the audio people to move on to the next one. I’ll then check the “playback” system, which in my case is a most definitely overly complicated computer system that plays a click track for the drummer and sync time code for the video department. (If you ever wonder how the video lines up so well with all of the music cues at a show, it’s because the drummer is listening to a click.)
Once the line check is done, I’ll finish cleaning things up (vacuuming the riser, perhaps polishing the cymbals) and wait for Rick Allen to stop by to either look things over or do a sound check. After that, I kill time (more coffee) until about an hour before the show. From then until the final encore, I’m in show mode. I’ll double-check my set lists and notes, as well as all of the hardware and electronics one more time, and then it’s off to the races once the intro song starts.
Since Rick plays a lot of electronics, I run the computers during the show and will handle patch changes as well as monitoring the triggers during each song and making adjustments on the fly. Because I also handle song intros and time code, I have to be as close to perfect as possible. There are few things that suck worse than having 20,000 people (as well as the five onstage) turn around and look at you because you messed up. As soon as the last song is done, I hop up on the riser to grab Rick’s in-ear monitors and tell him he played great (because 99.9% of the time he did).
Then, as the band walks down to the stage edge to take a bow, the chaos of loadout begins.
Actually, by the time the band leaves the stage, all of my gear, minus the kit, is already on its way to the truck. Because time is money and every minute I waste getting my stuff out of the way is one less minute the lighting crew gets to sleep (their day is a lot longer than my mere 14 hours), all our stuff is designed to move out in a hurry. On a normal run-of-the-mill gig, it only takes 30 minutes from the band saying goodnight to the backline/monitor truck rolling out of the dock. (Our best time was 16 minutes!)
Once the truck doors close, I am technically done for the day and will then turn my attention to finding a beverage and having a show post-mortem with the rest of the crew, talking about what worked, what didn’t, and what needs to be fixed or changed before the next show. Sometime between 1 and 2 in the morning, I’ll roll back into my bunk on the bus and fall asleep before waking up to do it all over again.
THE STEPS TO BECOMING A SUCCESSFUL DRUM TECH
If you want to become a drum tech, the best thing you can do is to be prepared for everything. By that, I mean be ready to for things to break and have a solution to fix them. If your drummer hits hard or has a lead foot, have a spare snare tuned up and ready to go, along with a backup kick drum pedal within arms reach. (Actually, even if they hit light, have those ready.) Study your player and their performances. I can often tell when there’s an issue with the hardware based on how Rick is playing. If something that is normally really busy is now super-simple, I’ll scan the kit to see if something is loose or broken. If I’m on my game, I’ll already be on the way up the riser with a replacement before Rick can turn around to get my attention.
Which brings me to suggestion #2: Always be paying attention. I’ve done entire tours where I haven’t seen a frame of the video content … and I’m sitting right in front of the video wall. I do gigs the same way I drive, constantly scanning back and forth (like checking my mirrors).
Last but not least: don’t get an ego about it: You’re there to help the artist create their art, not the other way around.
TIPS FOR THE DRUM TECH
1. Make sure the lugs are tight to the shells
If you can’t get a shell to tune no matter what you do, I’ll bet that the hardware is loose on the inside. The first thing I do with any new (to me) kit is to pull the shells apart and inspect the mounts because this can considerably cut down the amount of time you can spend chasing your tail when time really does matter. If you like a more “open” sound to a kick drum but still want to tighten things up a bit, cut a small 5- or 6-inch square of terrycloth or microfiber cloth and tape it to the center of the inside of the front head. This will slow the head down a bit and yield a lower/punchier tone. Oh, and tune for the mic/audience, not for how it sounds for you. An open/ring-y tone might be great when you’re right in front of the drum but might sound horrible out front and create real problems for the Front of House engineer. Remember, your FOH person is there to make you sound good, so don’t fight them when they tell you something isn’t working.
2. Bring some must-haves to every show
The must-haves for me are probably a little different than most as USB thumb drives aren’t a requirement for everyone, but here’s what every drum tech should bring to every show:
Drum keys. Not one, lots of them. Have one in every pocket.
A good multi tool. I use Gerber but a Leatherman will do just as well; having quick access to a pair of pliers and a knife is super important when you’re in a hurry.
Gaffer’s tape. Get a roll or two of the good stuff: 2-inch black and 2-inch white. You can solve almost any issue (or at least get through a song) with this!
Moongel damper pads. Some folks love them, some don’t. If you find them to be tone killers, cut them in half … or, and this is a total secret weapon, check out a Snareweight M80 drum damper. Instant killer snare and tom tones!
A set of Allen keys(metric and standard). Nothing is worse than that one random piece coming loose on a kick drum pedal and realizing that no one has the proper tool to tighten it back up.
A DrumDial™ drum tuner. I don’t use them much these days but if you’re in a loud environment, one of these can really save a lot of time in getting your drums close to being in tune.
Whenever you listen to streaming music, you are actually hearing a bunch of ones and zeroes.
Sound crazy? Crazy it may be, but it’s true. In this posting, we’ll describe how it all works and explain how an important function called USB DAC delivers optimum sound when enjoying music through a Yamaha R-N800A, R-N1000A or R-N2000A Network Hi-Fi Receiver.
What Is a DAC?
Sound — all sound — begins as a movement of air. (That’s why there’s no sound in space, despite some science fiction movies depicting otherwise.) These vibrations are detected by the human ear and are converted by mechanisms in the inner ear into minute electrical signals that travel up our auditory nerves to our brain, where they are perceived as sound.
In the late 19th century, inventors (including, of course, Thomas Edison — the most famous of them all) developed a means for transforming the movement of air into an electrical signal which could then be etched on a wax cylinder or vinyl disk. Because the resultant signal closely resembled the original, it was termed an “analog.”
But as the delivery medium for recorded sound evolved from the vinyl record to magnetic tape to digital files, the processes required to get that initial vibration from its source to its final destination (our ears) have become increasingly convoluted. And with the advent of digital recording in the 1970s (the delivery medium of choice to this very day), things got even more complicated.
The illustration below shows the entire process. First, the original movement of air is converted by a microphone to an equivalent (analog) electrical signal. That signal is then sent to an electronic component called an analog-to-digital converter (ADC or A/D for short), which looks at (“samples”) the signal many thousands of times per second (the “sampling rate”) and produces a series of equivalent ones and zeroes (digits). During the recording process, these can then be further processed digitally before getting stored to the Cloud or to a hard drive, flash drive or other physical medium.
When it comes time to listen to the audio, the stream of digits is fed to its opposite component: a digital-to-analog converter (DAC or D/A for short), which changes it back to an analog electrical signal, which is then routed to a loudspeaker, headphones or earbuds … which converts it back to the physical vibrations of air that we finally perceive as a sound.
USB DAC
The three Yamaha network Hi-Fi receiver models mentioned above — the R-N800A, R-N1000A and R-N2000A — offer a special USB DAC function via the USB B-type connector on their rear panel, as shown below. This allows you to make a direct digital connection between your computer and the input of the receiver’s DAC when you’re ready to stream audio from your personal music library or favorite streaming service.
These receiver models offer an ultra-precision dedicated crystal clock that supports DSD 11.2 MHz native playback and 384 kHz playback. In the R-N800A and R-N1000A, it’s provided by an ESS SABRE ES9080Q Ultra DAC, while the flagship R-N2000A model has an ESS SABRE ES9026PRO Ultra DAC for the ultimate in high-performance conversion.
These models also provide full support for Yamaha MusicCast wireless whole-house technology, making them compatible with a variety of streaming services such as Amazon Music HD® and Spotify®. You can also use MusicCast to stream Apple Music® with Airplay 2®, and you can easily listen to music anywhere in your home by linking and controlling various MusicCast devices from just one app on your smart device.
The Importance of Master Clock
If you’re just listening to music on the same device it’s originating from — i.e., directly from your computer or from a receiver that’s wirelessly connected to a streaming service — the internal clock in that one device is determining how frequently the digits are fed to the onboard DAC.
But if you’ve got two digital devices connected to one another — for example, a computer and a receiver — it’s critical that both be following the same clock (a “master” clock). If each device is following its own clock — even if the devices are trying to synchronize the clocks to one another — the audio quality of the signal can get degraded and the image blurred (“smeared”) due to a phenomenon called “jitter.” The technicalities of this are beyond the scope of this blog, but if you value good audio, rest assured that jitter is something to be avoided.
The Yamaha Steinberg USB Driver
The Macintosh Operating System (MacOS) built into Apple computers includes a high-performance low-latency driver called CoreAudio that handles clocking issues efficiently thanks to a feature called Aggregate Devices, which treats multiple sound cards and interfaces as a single audio device. However, this is not something that’s built into the native ASIO (Audio Stream Input/Output) driver that’s part of Windows.
But the Yamaha Steinberg USB driver provides an elegant, and free, fix. Simply download it into your Windows laptop or desktop; when you then plug your computer into an R-N800A, R-N1000A or R-N2000A via the USB DAC connector, the PC automatically stops using its internal clock and allows the receiver to take full control of all timing issues.
Moreover, the receiver will be pulling signal off the computer only when it needs to. Instead of two clocks trying to sync up to one another, there’s one highly accurate clock (the one based in the receiver), and it only takes control while you’re playing back audio.
And that’s how USB DAC works in the R-N800A, R-N1000A and R-N2000A: Jitter issues and image smearing gone. In their place? Pristine audio.
With the start of another new year, we often make resolutions to lose weight, start a workout regime, learn a new language, or take on an exciting hobby that we’ve always wanted to try.
While learning to play the guitar won’t help you shed the extra holiday pounds, it will immerse you in the resonant frequencies of a beautiful art form that enhances overall health and the joyous pursuit of musical self-expression. Music is also an incredible language with global appeal, understanding and appreciation.
Is it easy to learn the guitar? Well, it can be, depending on your dedication to the process and utilization of the right educational tools. But probably the biggest factor is choosing the guitar that’s best suited to your personal needs. There are three main types of six-string guitar: electric, acoustic steel-string, and acoustic nylon-string. Of course, certain musical styles lend themselves to certain guitar types. (Trying to play heavy metal on a nylon-string acoustic guitar, for example, may not be the best way to go.) That said, pretty much everything you learn as a guitar player can be articulated on any of the three.
In this posting, we’ll concentrate on the two acoustic guitar types and explore the physical and musical differences between them. A good understanding of this will allow you to make a better-informed decision when you’re ready to buy your first — or your next — guitar.
Physical Attributes
Steel-string guitars
Acoustic steel-string guitars come in a variety of body sizes, neck widths and scale lengths. The shorter the scale length (that is, the shorter the distance between the nut and the bridge), the less tension there will be on the strings, which is definitely a good thing for beginners.
Steel-string guitars range in size from parlor size (the smallest) to orchestra, concert, grand auditorium, dreadnought and Jumbo (the largest). Choosing the right body size for your physical frame is very important for a beginner. If the guitar overpowers you in volume and size, consider choosing a smaller body style like a parlor or concert body guitar. Conversely, if the guitar feels too small for you and the strings seem too close together for your fingers and hands, consider a larger guitar body size and neck width.
Acoustic steel-strings have two plain (unwrapped) strings: the high E and the B. The remaining four strings are wound with a bronze or phosphor bronze winding. Wound (wrapped) strings have a light ridge and texture to them, as opposed to unwrapped strings, which have no ridge and a smooth texture.
Steel-string guitars have a higher string tension than their nylon-string counterparts, and this may initially make them harder to play, especially if you’re using thick string gauges and the instrument is not set up correctly. Ideally, you’ll want to find a guitar that has low action, meaning that the strings are close to the fretboard, allowing your fingers to easily press them down onto the frets, so the notes sound clean without your having to exert too much pressure or effort. Players with small hands may opt to choose a steel-string with a slimmer neck profile, such as Yamaha CSF Series guitars.
Steel-string guitars are usually played with a plectrum (guitar pick), which adds a nice percussive sound to the rhythmic delivery of chordal passages and lead lines. As you progress as a player, you’ll also want to learn how to use your fingers to pick individual strings — a technique appropriately enough known as fingerpicking.
Nylon-string guitars
Beginners often find nylon-string guitars (also known as classical or Spanish guitars) easier to play and physically more manageable than steel-string guitars. Unlike steel-string guitars, nylon-string guitars are predominantly the same size and generally have the same scale length. If set up correctly, a shorter scale length (and lower string tension — see below) will definitely help the beginner in playing single notes as well as chord shapes.
On these instruments, the top three strings (high E, B and G) are made of nylon and have a low tension, so they require a softer touch than their steel-string counterparts. The lower three strings (D, A, low E) are lightly wound, so they offer a lower tension and have a lighter ridge and smoother texture than wound steel-string versions.
The overall volume of nylon-string instruments will almost always be softer than that of a steel-string, and players often adopt a fingerstyle approach on these guitars. You can strum a nylon guitar, but generally this is done with the nails on the picking hand, not a pick. The overall sound will be percussive in nature, but it will be gentler and less defined than that of a steel-string acoustic.
Traditional classical nylon-string guitars also have a wider fretboard, with a flat fingerboard radius. Having more room between the strings may help players with larger hands. Smaller students may opt for a nylon-string guitar with a non-traditional neck width such as Yamaha NTX Series instruments.
Sonic Differences
As mentioned previously, all musical genres can be performed on either steel-string or nylon-string guitars. However, each will lend itself toward specific types of music due to the tone and feel those guitars elicit.
Typical genres played on nylon-string acoustic guitars would be:
Pop
Jazz
Latin
Classical
Flamenco
Typical genres played on steel-string acoustics include:
Pop
Rock
Blues
Country
Bluegrass
Folk
My advice is that you take into account the sound, playability and overall musical approaches you lean towards before making a final decision on the guitar that might work best for you.
I also suggest finding a nylon- and steel-string guitar of the same body size to try side-by-side. Hold each instrument and see which one feels more comfortable in your hands. If you’re not able to play guitar yet, have the store staff audition the instruments for you, and ask them to demonstrate the differences we’ve discussed here before making a purchase.
The Videos
Here are two videos that demonstrate the tonal differences and breadth of styles these instruments can achieve.
Nylon-String Demo
Nylon-string guitar is perfect for the classical Spanish flavor of the music in this video. Playing this on a steel-string could work, but would sound less authentic and be slightly harder to play.
Steel-String Demo
A blues tune always sounds so good on a steel-string acoustic! There’s just something pure, raw and unapologetic about the emotional content in this genre. Playing slide on a nylon-string guitar just wouldn’t work. The extra string tension and crisp tone of the steel strings allow the slide to really sing out in a musically satisfying way.
The Guitars
The Yamaha CG-TA TransAcoustic nylon-string and the CSF3M steel-string guitars featured in these videos are roughly the same size, so I thought that would make for a fair comparison, while displaying the vast difference in tone and musical style of each instrument.
Yamaha CG-TA nylon-string guitar.
The CG-TA features ovangkol (similar to African rosewood) back and sides, a solid spruce top and wonderful onboard reverbs and chorus. This classical guitar has a traditional-width rosewood fretboard.
Yamaha CSF3M steel-string guitar.
The CSF3M features a solid mahogany back and sides, solid Sitka spruce top and a slim rosewood fingerboard.
Both guitars have a passive undersaddle piezo pickup for recording or live performance.
The Wrap-Up
In my opinion, choosing a guitar that suits you best may be the most important decision you make when you’re first starting out. Fortunately, there are many excellent choices for the beginner. If you can, spend a little more on the right instrument, as the guitar you select may well stay with you throughout your entire lifetime of musical progression.
If the guitar you are trying to learn on is too hard to play, it will seriously impair your ability to learn, create frustration and ultimately cause you to give up before you even begin. But if you choose a playable, inspiring and musically resonant instrument from the get-go, you’ll want to play more, and the resultant practice time will lead to logical progression and personal growth as a musician.
In early 2016, a call came in to Yamaha Entertainment Group in Nashville with an extraordinary request: “Prince wants you to make him a purple piano.” So began a whirlwind journey that ended up with Yamaha delivering a one-of-a-kind grand piano to Paisley Park in Minnesota.
In celebration of the artist known as Prince, this is the story of that project and how a piano transcended its role as a musical instrument.
Prince (born Prince Rogers Nelson) was well known throughout his lifetime for his singing, songwriting, guitar playing, recordings and live performances, but he was also a phenomenal keyboardist; in fact, piano was his first instrument. Prince’s father was a professional jazz pianist, and a great musical influence on Prince early in life.
Early in his career, Prince was not often seen playing a piano or keyboard in concert, but he often played them on his demo recordings. In 1983, he recorded a free-form performance at the piano, likely just a rehearsal capture of song ideas to be worked on more fully later on. This was eventually released in 2018, entitled Piano & A Microphone 1983. The title came from a limited series of concert performancesPrince undertook in early 2016 to flesh out a concept he had for a solo tour that would feature him performing alone at the piano. These performances would also include him reminiscing about his life, his music, and his thoughts on a wide range of subjects.
It was during the early prep for what was planned to be a much larger-scale tour that Prince and his friend/confidante/sometime-drummer Kirk Johnson discussed the idea of using a custom-colored purple piano, and Johnson reached out to Yamaha to make it a reality. “We wanted a combination of a great acoustic piano that had an awesome look and had great sounds that could be manipulated,” recalls Johnson.
In previous live shows, Prince had often used one of the onboard faders of his Yamaha Motif synthesizer to fade up strings behind the grand piano sound he was playing. “He was doing that for sustain,” explains Scottie Baldwin, who served as Prince’s Front of House engineer during tour dates. “He was using it as a means of sustaining a chord so he could change keys and things like that. Sometimes he would do it during a song, but often he would use it at the end of a song, knowing that a grand piano only sustains for so long, but a string patch would carry on until he made his next move and decided what song he was going to play next.”
The Project Is Defined
Once Yamaha vetted that the inquiry was genuine, Chris Gero, one of the company’s directors and Chief Artist Relations Executive, got involved. As he relates, “Our relationship with Prince goes back to the mid-’90s — he often contacted us to try out and buy products, ranging from digital mixers to synths, and he had bought six grand pianos for his studio. But he didn’t believe in endorsements, and so we helped him out but never did any type of promotion with him. I had met him a few times at Grammy® and other industry events, and I would say our relationship was friendly, but not close.”
But now that was changing, and Prince wanted Yamaha to make a custom-colored purple version of the C7X SH SILENT Piano™, which he had been using for the tour dates and at his studio.
Yamaha C7X SH SILENT grand piano.
Prince was very specific about the shade of purple he wanted. “He and I walked around the Paisley Park building and picked the couch color he liked best,” says Johnson, “and that’s the swatch he sent to Yamaha.”
The swatch Prince sent to Yamaha.
Prince had seen some documentary films that Gero had created over the years and wanted him to produce the concert opener film sequence to play before his live shows. In essence, Prince was asking Yamaha to partner with him both technically and creatively to realize his vision for the planned full tour. This massive collaborative effort led to Prince greenlighting the first endorsement deal of his career. Per Prince’s request, papers were drawn up and sent over for sign-off on this historical partnership with Yamaha.
Yamaha Goes Into Action
Gero realized that exactly matching a custom color and painting the piano in a way that would hold up under the rigors of touring was a tall order, but he had the perfect partner for the job: Justin Elliott. In addition to being a master piano technician, Elliott and his wife have forged a unique career cosmetically modifying pianos to match décor, special needs and events. Needing to find a type of paint that would stand up to the wear and tear of touring and look good under stage lights, Elliott decided to use enamel car paint. After many experiments and communication back and forth with Prince directly, they finally got the color to his satisfaction. (“He loved it!” says Johnson.) The final color ended up being adopted by Pantone as a new addition to their portfolio, entitled Love Symbol #2.
With the color selected and the piano painted, it was shipped from Elliott’s studio in Florida up to Nashville so Gero and his team could shoot the first part of the film. Chris recalls: “Prince and I came up with the concept of showing the piano being prepared and painted, and he wanted it to be sexy, and to ‘represent me.’ So we put together the concept, and had only a day and a half to shoot it. But I think the filmcame out well, and Prince was very happy with it. The second part of the concept was to be filmed with him when the piano was delivered to his studio.”
Another aspect of the project had to do with the sound engine that was built into the piano. Each Yamaha SILENT Piano has a mechanism built in to stop the hammers from hitting the strings and instead trigger an internal sound engine via MIDI technology, for private practice or an expanded tone palette. As he had done with his Motif synthesizer, Prince wanted to be able to play piano layered with strings to provide a fuller, more sustaining sound for certain songs, but he had a very specific string sound he wanted. In a very short period of time, Yamaha sound designers in Japan were able to create this custom sound to load into the piano before it was shipped. “In order to get the effect of fading strings in, he’d manually switch between the Grand Piano sound and the Grand Piano / Strings patch,” explains Baldwin.
The last request was to put the symbol that Prince had taken to using to represent himself on the piano. After some discussion, everyone agreed to place the graphic on the fallboard of the piano, right above the keys, as shown in the tweet below.
Done and Delivered
When the piano arrived at Paisley Park, Prince took to it right away, often playing it for hours on end. Here was his tweet:
BOOM (FROM LOTUSFLOWER) ON THIS NEWLY ARRIVED PURPLE PRESENT FROM YAMAHA…. “RESOUNDING!” pic.twitter.com/cXwRPi1wzG
After about a week with the piano, Prince decided to hold an event to showcase the new instrument. Chris Gero remembers it well. “On April 16, 2016, Prince invited a small crowd to a music party at Paisley Park,” he says. “The piano was covered with a purple cloth. Then he dramatically pulled the cloth off the purple piano. He played chopsticks first, then a few minutes of classical music without singing. He finished with the piano and did not play again publicly.”
The Prince Piano Today
Since that time, the piano has remained in Studio B at the Paisley Park complex in Chanhassen, Minnesota, near Minneapolis. This massive facility served as Prince’s creative playground for over 30 years, and now, as per Prince’s original vision, it has been opened to the public as a museum, a recording facility and an event venue. Makayla Elder, Museum Collection Manager, explains: “Studio B is a spot on the tour that is only for ticketed VIP and Ultimate Experience guests, so it’s an upper level part of the tour. While it’s blocked off by purple ropes, it’s the only area where visitors get that close-up and personal with an instrument. It’s also the only place they get their picture taken, and the piano is right behind them, with the now-iconic logo that Prince used clearly visible in the shot.”
The Prince piano at Paisley Park.
And now, for the first time since it was delivered to Prince, this one-of-a-kind instrument will be moved from Paisley Park and brought to Winter NAMM 2024 to be displayed in the Yamaha booth. “2024 is the 40th anniversary of Purple Rain,” states Charles F. Spicer Jr., a managing member of Prince Legacy LLC and longtime friend of Prince’s. “This event will be the stepping stone to a year’s worth of celebration of Prince’s life, and the phenomena we know as Purple Rain, both the album and the film. It is only fitting that we recognize the partnership between Yamaha and Prince that created this instrument, so starting at NAMM we plan to turn the world purple again.”
When Rachel Roberts, Associate Professor of Music Leadership at the University of Rochester’s Eastman School of Music, was a student at Eastman herself more than two decades ago, she visualized her future much differently. She recalls, “I came to Eastman as a flute performance major thinking, ‘I’m going to be the piccoloist of the Boston Symphony Orchestra!’”
Early on in her performance career, Roberts faced a struggle that hits many young musicians: the constant stress and financial strain of living life one audition to the next. While walking the halls of Eastman, Roberts saw a flyer promoting the school’s then-new Arts Leadership Program and realized that working behind-the-scenes in the music industry might be her true calling. “I’ve been doing this type of work for years. I helped run community bands since junior high and later with high school bands,” Roberts says. “I love that back side and connection with people.”
After she became involved with the Arts Leadership Program (ALP), a whole new world opened up to her. Roberts took multiple jobs and internships, including working for Eastman’s public relations department, interning in orchestra management for the Rochester Philharmonic Orchestra, and planning the grand opening for an outdoor amphitheater in Atlanta.
Past and present Institute for Music Leadership directors and assistant directors: (from left to right) Dr. Blaire Koerner, Leslie Scatterday, Jim Doser and Rachel Roberts.
According to Roberts, the skills she learned as a performance major went hand in hand with the skills she needed on the administrative side. “As a musician, you look at a piece of music and break it down. You work in sections, you understand the whole scope of the score that’s underneath,” she says. “That’s what planning the grand opening was like. We started at the end with the grand opening, then broke down the steps to get there. ‘Who are the community partners?’ ‘What is the budget?’ It’s the same abilities applied in a different medium, behind the stage.”
This journey ultimately led Roberts back to where she started: Eastman School of Music, where she is now Director of the Institute for Music Leadership (IML), which has been a staple of music education at Eastman since the founding of the Arts Leadership Program back in 1996. The program focuses on career development within the music industry, and it encourages students to develop a productive mindset and look at the bigger picture behind every music performance. “You can learn as many skills as possible,” says Roberts. “But the bigger piece is the mindset of how you approach opportunities, how you approach your career.”
Joyce Tseng supported the Rochester Philharmonic Orchestra’s education department in bringing in over 9,000 students from local schools for an interactive experience.
50 Years in the Making
The Arts Leadership Certificate Program is currently in its 27th year, and the IML itself was officially founded in 2001. However, according to Roberts, the foundational ideas behind this leadership program have been in the works for nearly 50 years.
In Roberts’ office sits a binder from the 1970s, filled with papers from Eastman’s first Business of Music class, which was taught by jazz trombonist Rayburn Wright. “These conversations about entrepreneurship have been going on for a long time at the school,” Roberts says.
Even the school’s name itself honors a famous entrepreneur, George Eastman, founder of Eastman Kodak Company, who also funded the creation of the Rochester Philharmonic Orchestra. “It fits that Eastman has this lens, given George Eastman’s history,” Roberts says. “These conversations were happening through the ’60s, ’70s and ’80s.”
In the 1990s, Dean James Undercofler decided to officially launch the Arts Leadership Program. “Since the IML began, it’s continued to develop [and] provide professional opportunities to musicians both on and off the stage,” Roberts says.
Noah Sesling used the special opportunity grant (offered to ALP students and alumni two years after graduation) to intern with the Metropolitan Opera in Fall of 2022.
A Practical Performance Mindset
“On and off the stage” is a key phrase in the IML’s philosophy, which aims to develop not only students’ performance abilities but also their knowledge of the entrepreneurial side of music. “Do you see where you can fill a niche? How can you innovate and be creative there? It’s the mindset of self-efficacy,” Roberts says. “It’s thinking like an entrepreneur, having that creative and innovative lens through which you see musical possibilities.”
As a result of this mission statement, the IML features a variety of practical classes beyond performance, which include grant writing, music health and wellness, auditioning strategies and career preparation. Currently, the IML has two levels of music marketing classes: an introductory course and an advanced class that breaks down specialized marketing concepts.
Auditioning classes regularly welcome guests. “We bring in faculty members to help explain how to separate from the music side,” Roberts says. “They delve into the mindset of preparation you need to be successful in any type of audition.”
The certificate in Arts Leadership requires students to complete four credits of Arts Leadership courses, two semesters of internships, and participate in one special event like a performance or a guest visit.
What makes this certificate unique is its accessibility. “The Arts Leadership courses are free for anyone to attend at Eastman,” Roberts says. “The certificate is available for any student at Eastman — undergrad, master’s, Ph.D., anyone.”
Student Isabella Lau attended the International Women’s Brass Conference at the University of North Texas in 2022.
Benefits of a Balanced Education
Because Roberts herself was among the first classes of students to participate in the IML during her undergraduate years, she can attest to the benefits of the balanced education it offers. “I love that the IML provides a menu of offerings to choose from,” she says. “You can dip your toe in, or you can dive in, such as with the Arts Leadership certificate.”
According to Roberts, one of the advantages of completing the entire Arts Leadership certificate, rather than just taking a few IML courses on the side, is the depth of commitment the program encourages. “In earning this certificate, it shows a true focus to understanding a different side of the music industry,” Roberts says. “Individuals often come to Eastman solely to study performance. This work, through the certificate, immerses students in what it means to be in the music business today, working alongside mentors, colleagues, leaders and supervisors at an internship.”
This past summer, Eastman’s website launched a page called Alumni Journeys, which details the success stories of the school’s alumni, both in the Arts Leadership Program Certificate and in the master’s program in Music Leadership. “We have close to 500 alumni now,” Roberts says.
At its core, the IML pushes students to question and refine their career goals and definitions of personal and professional success. “It asks the individual to think, ‘What skills do I want to develop? What are the directions I can go?’ It asks the students to think critically about leadership — their own leadership, leadership in the industry and how they fit in,” Roberts says. “It goes back to that mindset of creativity, of being an entrepreneur, of developing that resilience [and not being] afraid to create your own path.”
Sammy DeAngelis (second from left) used the special opportunity grant in Summer 2023 to create professional materials and recordings for his percussion ensemble in preparation of a tour.
What’s Next?
As the IML continues to evolve, Eastman is adding more programs for students interested in the intersection of music and business. In addition to the IML and the Arts Leadership certificate, Eastman also hosts a leadership conference, a three-day intensive program in June that will enhance a person’s leadership effectiveness.
In September 2023, Eastman launched a program targeted at a new demographic: high school students. The Eastman Leadership Development Retreat was open to high school students throughout the Rochester area. “It’s been this natural evolution of ways to continue providing leadership development opportunities for musicians, in ways that are relevant to the industry right now,” Roberts says.
Overall, Roberts is proud of how the IML has evolved during the past two decades and the variety of programs it continues to develop. “The IML is really a gem here at Eastman,” she says. “It’s a joy to look back at all the amazing work that’s happened with the leaders of our school.”
Eastman School of Music is one of 10 distinguished colleges and universities selected to be part of the inaugural Yamaha Institution of Excellence program, which recognizes extraordinary commitment to innovation in the study of music. The Yamaha Institutions of Excellence were chosen for their dedication to providing unique and challenging experiences to music students through diversity of thought and curriculum. They are also recognized for exposing students to a wider variety of voices and opportunities and preparing them for the modern world of music.
Opening the door to Emily Meyerson’s music classrooms in the North Baltimore Local Schools in Ohio reveals what looks to the naked eye like a scene of chaos: Students may be playing electric guitars, creating electronic music on iPads, building their own drum kits out of coffee cans, or singing while their friends accompany them on ukuleles. A closer look reveals one student working on a year-long graphic novel project about music, while another conducts research on the euphonium, and another collaborates with a group of friends to form a miniature band of their own.
This type of student-led creative exploration comes from a pedagogy called “Teaching for Artistic Behavior” (TAB). Meyerson, who teaches general music for kindergarten through 6th grade, began implementing TAB concepts into her classroom nearly a decade ago, and the process has only evolved and improved.
According to the TAB pedagogy website, the guiding principles include statements like “The child is the artist” and “The classroom is the child’s studio.”
The original intention of TAB pedagogy was for use in visual arts classrooms; however, Meyerson and other music teachers are now finding ways to implement the same principles in elementary music education. “So much of school has become [about] straight lines, no talking … kids have to have an outlet to be kids,” Meyerson says.
The Artistry of Music
Because TAB originated in the world of visual arts, Meyerson first learned of the pedagogy through a friend who teaches art classes. “My best friend was hired as our visual art teacher at the elementary school. Because we were already friends, and we have similar outlooks on education, we wanted students to be able to collaborate between our classrooms. We’re both into exploring through play,” she says.
A core concept of TAB pedagogy is the “open studio,” or a space where students can freely explore with various artistic media, setting their own goals along the way. “It’s made for visual art, so the ‘open studios’ [might include] a painting studio, a drawing studio, a sculpture studio,” Meyerson says. “I wasn’t sure what that would look like for me, so I tested out a lot of things.”
After getting involved in TAB Facebook groups and gaining advice from other teachers, Meyerson started equating different instruments with different artistic media. The open studio became a place for musical media experimentation. “Instead of painting, it’s drumsets. Instead of drawing, it’s keyboards,” Meyerson says.
An obvious difference between the visual and musical arts is the noise involved. While many students can work on visual projects individually, balancing the conflicting noises of students simultaneously playing different instruments is more of a challenge. “Every class brings headphones with them. Most of the instruments I have are electric: electric drumsets, keyboards, electric guitars [that students] can plug headphones into,” Meyerson says.
Meyerson also keeps a container of headphone splitters in her classroom so two students can collaborate on a project, listening to the same source, while using headphones.
Students also have modifications available to keep the classroom as calm as possible. “I have a 6th grader who’s working on a project about the euphonium,” Meyerson says. “We’ve talked about, ‘You can buzz on your mouthpiece, or you can work on your fingerings without playing.’”
Meyerson’s classroom also includes a sound-dampening studio area that the school’s custodial staff helped her build. When Meyerson’s students, like the student working on the euphonium piece, are ready to record something for their final project, they can go into the sound-dampening studio area and play their instrument at full volume.
Though Meyerson, who was recognized as a 2023 Yamaha “40 Under 40” educator, takes some precautions against the noise, she also acknowledges that her classroom is allowed to get a little crazy. “The reality is, it’s loud,” she says. “But the kids have found a way to work through that. They’re so focused on what they’re working on.”
Sometimes, the noise can even benefit students. When a student becomes distracted by someone else’s project, it often leads to a conversation about the different elements of music both students are exploring.
A Typical Day for TAB
While the open studio is a key component of TAB, Meyerson uses this concept alongside more traditional teaching methods to make sure that her students are meeting music education standards.
A typical day for a 3rd-, 4th-, 5th- or 6th-grade student in Meyerson’s classroom begins with a seven-minute lesson. Meyerson sets a timer at the start of class, then uses this time to have the class work together. “I do a demo, or I might teach skills, or we might do little task parties where they demonstrate a certain skill,” Meyerson says. “For example, I tell students, ‘You have to show me you can do XYZ on the keyboards before you can use them.”
Once the seven minutes are up, the rest of class time is devoted to the open studio. However, amidst the free experimentation is a quarter-long project that students can work on at their own pace. At the start of each quarter, students have a check-in with Meyerson where they present their project idea. Then, throughout the rest of the quarter, they can budget their open studio time to make progress on their project, ask Meyerson or other students for help, or experiment with different musical modalities.
Once students have committed to their projects, Meyerson serves as a guide and facilitator, helping those students bring their ideas to life. “The fundamentals of TAB means the music studio is their studio. They’re musicians. I’m the facilitator,” she says. “Either kids are working and I’m checking in on [and] helping them, or sometimes [I’m sitting at my desk] with a line of kids who are like, ‘I have a question!’”
Project Parameters
Students have three main parameters they must follow for their projects: a) it must be related to music, b) it must be something the student is excited about learning, and c) it must be a project that shows at least three to four class periods’ worth of work.
With those guidelines in mind, students have presented a variety of creative ideas that reflect their diverse interests. “I have a kid who’s composing a keyboard song, and his friend built a drumset out of coffee cans and tinfoil. They’re composing a song together,” Meyerson says. “I have kids who do singing projects [and] collaborate with a friend playing the ukulele. Last year, I had a group who made a band with two kids playing electric guitar, one kid playing drumset, and a singer. It was super cool to watch them as the year went on.”
Often, students will create interdisciplinary projects that include other interests of theirs, like visual art. “I’ve had kids create children’s books before,” Meyerson says. “They can take those projects back and forth between the art studio and music studio.”
Some students may even choose to take on a year-long project with quarterly progress check-ins. One of Meyerson’s current students is writing a graphic novel including a villain that removes all the music from the world. “That’s not a project that he can finish in six weeks,” Meyerson says. Instead, this student checks in with Meyerson every quarter to show his progress, with the goal to complete the graphic novel by the end of the school year.
When students take on bigger projects, Meyerson emphasizes her classroom’s tenet “engage and persist.” While students may make changes to their project during the course of a quarter or school year, students must find a way to see their projects through to completion.
Building Skills, Building Scaffolds
The “open studio” model core to TAB requires that students have some basic knowledge of music with which to explore; as a result, implementing TAB looks different in a kindergarten class than it does in a 6th-grade class.
For her K-2 classes, Meyerson begins the school year with more structured instruction while slowly introducing TAB concepts. “In kindergarten, we don’t start any TAB stuff until the end of the year,” Meyerson says. “In a 30-minute class, we might have 20 minutes of structured activity and 10 minutes at the end where [students can choose].”
In her 1st- and 2nd-grade classes, Meyerson gives her students what she calls “choice time,” or time where they get to explore in the open studio. Instead of choosing their own projects, students have quarterly song challenges, in which they create their own songs to present.
By the time students reach 3rd grade, most have been slowly introduced to TAB, so they’re ready to start brainstorming project ideas of their own, managing their time to complete their projects, and experimenting with more instruments and technology.
The Beauty of Organized Chaos
In using TAB pedagogy, one of the biggest obstacles Meyerson has faced is parents who don’t understand the concept. “What the kids are producing is kid-level music and kid-level art,” Meyerson says. “Parents are looking at that and saying, ‘I’m used to my child learning the same song for the Christmas program.’”
One way Meyerson has helped parents understand the benefits of TAB is through a yearly “make-it, take-it” night that the school hosts in the spring. On this night, parents, families and community members are invited to see their students’ work. “We take what we do in our classrooms and set it up across the entire school,” Meyerson says. “The kids can be facilitators and walk their parents through what they do in art [or] music class. That helps a lot.”
Thankfully, Meyerson has had the complete support of the school’s administration. “Our principal loves what we’re doing,” she says. “She’s been on board since the beginning.”
Meyerson has also begun spreading the word about TAB to other music educators throughout the country. “I’ve presented at the Ohio Music Educators Association and at the National Association for Music Educators,” Meyerson says. “Other music teachers are starting to reach out to me.”
Meyerson has noticed that other teachers are afraid to implement TAB pedagogy into their classrooms because of its non-traditional nature. “There was a day when the kids were all in here working, and I was sitting at my desk watching them work,” she says. “I was feeling so guilty! But they were really engaged and excited about what they were doing.”
At the end of each quarter, Meyerson examines each student’s final project and asks the students to reflect on their process, often using questions like, “What is a specific thing that makes it really special?” and “What is something that was challenging, and how did you solve it?”
TAB is not just about getting students to learn the material; it’s about getting them to think like a creative artist. “The end goal is that they’re leaving here learning how to be a musician,” Meyerson says.
So many people are jumping into vinyl these days! Whether you’re starting from scratch or are a longtime collector, here are 10 albums that every music lover should have in their record crate, chosen not just for their music but for the sound quality they offer. They represent a wide variety of genres, but they have one thing in common: They all deliver a level of magic that you just can’t get from CDs or streaming.
1. Buena Vista Social Club – The Buena Vista Social Club
If you can only have one record to fully engage chill mode, BVSC is it. Guitarist Ry Cooder took a trip to Havana, found some great studio musicians and produced this two-LP set of smooth, delicate, guitar-based tunes that beg for the lights to be turned down low. You’ll feel like you’re in a Wes Anderson movie … and the recording quality is out-of-this-world good. Seek out a copy of the 1998 Classic Records remaster for the absolute best sound.
2. Post – Bjork
Bjork has such a diverse catalog, it’s tough to decide which of her albums to go with, but Post contains such a variety of styles and textures, if you have to have only one, this is it. The combination of digital and acoustic sounds is always fluid, with layer upon layer of Bjork’s voice all blending in a spectacular fashion. Despite there being such a high density of information, you’ll get pulled in almost immediately.
3. Abbey Road – The Beatles
By the time the Beatles recorded this, their final album, EMI studios (now called Abbey Road) had upgraded their gear considerably, so despite being all-analog, this record has the most “modern” feel of all Fab Four releases in terms of the sophistication of the overdubs, the dynamics and the overall spaciousness of the sound. Hard-core fans may scream heresy, but check out the 2019 remixes with half-speed mastering produced at Abbey Road. Traditionalists will harken back to the earliest, first stamper British pressings of these records, which are great-sounding too, but now fetch four-figure prices.
4. Ella Fitzgerald Sings the Cole Porter Song Book – Ella Fitzgerald
You should have this six-LP box set because no one on earth can (or could) sing like Ella. From the smoothness of her delivery to her six-octave range and creamy soft tone, it’s simply the best there is. However, these tracks somehow always flatten out when streaming, so definitely go for the vinyl version! There are so many fun songs from Cole Porter to choose from here, from the suggestive “Let’s Do It” to the apologetic but ultimately dark “Miss Otis Regrets (She’s Unable to Lunch Today).” Slap them on your turntable, sit back and enjoy: If you aren’t already an Ella fan, you’ll quickly become one.
5. King of Rock – RUN DMC
By the time of their second release, King of Rock, the Hollis, Queens trio of rappers were a solidly locked unit. Back in the early ’80s, record companies were simply pumping out hip-hop discs and not paying careful attention to the pressing quality, but Mobile Fidelity Sound Labs has just given the same audiophile treatment to this record as they did to last year’s reissue of Raising Hell and the result is brilliant. The beats hit harder, and the individual vocals now battle back and forth for attention on your speakers like you’re right there in the club.
6. The Chronic – Dr. Dre
You can’t have East Coast Rap/Hip-Hop in the record crate without the West Coast being represented too. I never get tired of Dre’s breakout solo record, The Chronic, which strikes the perfect balance of intelligence, sophistication and hard-hitting beats. The current 30th Anniversary vinyl reissue (now pressed as a two-record set) is the one to get.
7. Sea Change – Beck
Like Bjork, Beck has delivered such a wide range of records, it’s tough to pick just one, but Sea Change has such an atmospheric, cohesive groove from start to finish, this is the droid you want. Striking a perfect balance between his earlier, sillier work and later, more disjointed releases, this record is intriguing to listen to on multiple levels. Whether you’d rather just swim around in this massive pool of sound or get introspective with the clever lyrics, there’s so much here to enjoy and absorb. Find a copy of the Mobile Fidelity remaster as a double LP set. The pink one looks cooler, but the black one sounds better.
8. Eat a Peach – The Allman Brothers Band
If you’re not quite ready to delve all the way into the roots of the blues, here’s a timeless classic that will get you in the mood, with some solid jam band crossover to boot. Released in 1972, Eat a Peach is the final ABB album to feature bandleader Duane Allman, who fell victim to a fatal motorcycle crash at the end of ’71. The hits on this record (“Blue Sky,” “Melissa”) still get heavy airplay even today, and the sonics are incredibly lush.
9. Tosca – Puccini
Think you’re not an opera fan? Pick up the vinyl version of Tosca performed by Maria Callas with the LaScala Orchestra and Chorus on EMI and be prepared to think again. This rendition delivers a warmth and a presence that is simply stunning — something you just can’t get when streaming or listening to it on CD.
10. That! Feels Good! – Jessie Ware
OK, this may be a bit of a dark horse, but Jessie Ware’s fifth album is a high energy R&B romp that channels a bit of Donna Summer along with a dash of Diana Ross and a touch of Grace Jones, yet always feels completely original. The vinyl release sounds amazing, the songs are fun, and the wall of sound production is sure to get you shaking … in a good way.
I remember picking my classes for my senior year of high school. I knew I wanted to go into music, so I packed my schedule with every music class and extracurricular I could take: band, jazz band, AP music theory, jazz literature and improvisation, and guitar. More than half my schedule was music classes! To make room for these classes, I dropped science because I had already fulfilled my science requirement for graduation. Many of my friends took physics during our senior year, but I didn’t. Fast forward to today: I am a music teacher teaching a physics class!
“Why on earth would they let a music teacher teach a science course?” Well, it all started when I was a new teacher thinking of how to expand the course offerings at Brunswick High School in Maine. After collaborating with one of my colleagues, Kait Ostrov, who was part of my new-teacher mentorship program, we decided to present a new course to the school board: The Physics of Music. The idea came from a brainstorming session to increase course offerings at our school. I knew that a lot of my students had an interest in science, so this seemed like a no-brainer. This would be the first class that could fulfill either a science or performing arts credit, and it would be the first class taught interdisciplinarily by two teachers.
The process for presenting the course had to begin early enough so it fit into the budget season and course selections. Kait and I worked together to give a justification for the course as well as a class overview and needs. We presented that to our curriculum coordinator for the school district, who took it over from there and presented it to the school board and came back to us with any questions. The school board approved the class, and it went into the course book. The Physics of Music has been in the course book for three years; we never had enough students to justify running the course — until now.
You’ve probably heard the phrase, “STEAM not STEM,” which is how many schools attempt to promote art as an integral part of education that has increasingly become more focused on science, technology, engineering and math as future career fields for students. Here I am doing it, folks!
Music teachers often get defensive trying to prove our worth in comparison to core subject educators, and we have argued that “none of your favorite things would exist without music and art.” Luckily for me, my school looks at electives (in our case, music) as being of equal or similar value to core classes. So, at this rare moment of unity, this interdisciplinary course seemed perfect. Besides, what student wouldn’t want to take a class taught by two of their favorite teachers at the same time?!
While I believe that my students are learning a lot from this class, here are some things I have learned.
First-Day-of-School Jitters
I wrote this on the first day of our interdisciplinary class:
Everyone gets those first-day-of-school jitters that comes with the nervousness and excitement of the unknown. I certainly did as I entered a classroom filled with test tubes and beakers to teach music. All those nerves went away when class started. With a great group of six students (this is a small number, especially after I said we couldn’t run the class before because we didn’t have enough students sign up for it; but we have more next semester!) in front of us, it was my turn to explain parts of the lab that they would be doing.
The idea of assigning labs to students is so foreign to me. Frankly, it sounds like the plot of a bad sitcom about a music teacher who lost his job due to budget cuts but is lucky to be offered the open science teacher position. (Mr. DeMille, I’m ready for my close-up!) What I realized in that moment is that although it’s a different environment, teaching in music classrooms happens the same way as other classrooms. It was so fun to walk around to different workstations answering questions and guiding the students in their first day of learning in a completely new course. Maybe I was just excited to show off my knowledge of science, but in hindsight, I was really just showing off my impeccable technique playing the whirly tube and wine glasses!
What made this experience so natural and comforting was knowing that there was another teacher there to answer the questions that I couldn’t and vice versa. Yes, we are helping share our knowledge in our respective fields, but at a deeper level, the students recognize that they might not always have the answers, and it’s okay to ask for help.
Learning the Basics
As I mentioned earlier, I never took physics in high school or college. I was completely out of my element (haha, get it — elements?). I had a lot of catching up to do, but I was excited to do it. Cracking open a book about physical properties of acoustics is not something most people look forward to, but once I started, I was excited to keep going. Maybe that’s just my lifelong-learner side talking. I read, reread and took notes to grasp all the stuff I missed out on, and boy, did I feel like I should have taken physics back in high school!
My purpose in the class (and that of my co-teacher’s) became clear. My role was to understand the scientific properties we are teaching and how to relate those to the physical things that happen when you play an instrument. For example, why does a clarinet play lower than a flute? How do sound waves get amplified from a vibrating string? What physical features of an instrument affect the frequency? How and why do we quantify frequency into pitch?
Kait’s role was to understand the science at a deeper level to be able to explain those properties and the calculations behind them. Our specific roles helped us work together.
Early on in developing this course, we struggled to find the best path to present it to the school board. Would it be a science class or a music class? How would we convince them to let two teachers teach one class? We knew that we truly could not do this without each other. Maybe we could each learn everything we needed to know about music and science to teach the course alone, but we were lucky to be given the opportunity to co-teach the class. I get to learn every day from Kait, not only things about science, but about classroom management, differentiated instruction, varied teaching methods, etc. These are skills and techniques that I can bring back to my music classes. They say two heads are better than one — and this is a perfect example.
Teamwork Makes the Dream Work
Co-teaching is something that may feel a little unnatural at first, but it gets easier. Sometimes it feels like I have no clue what is going on and can’t be of any help explaining a topic, but I’m sure (I hope) that Kait feels the same way at times. It is fun and feels organic (another science pun) to riff (music pun) off each other. And I believe that helps deliver the material to the students in an effective way — we have a lot of chemistry (okay, I’m sorry, I’m done). Some questions come to me, and others go to her. The students know each of our strengths, and they also know that there are two teachers there to help them.
The Value
As I mentioned at the beginning of this article, my co-teacher and I recognized early on how much value our respective subjects have, and how much value we have as science and music educators. That is why we knew that we could be successful offering this interdisciplinary course. It has also been nice to hear from others how awesome they think this course is. And they’re not wrong, it is pretty cool. My colleagues see the value in music classes — and I’m one of the lucky ones, I know — but it means a lot to hear from others how much they see the impact of your work.
You Can Do This, Too!
Come up with your own ideas for interdisciplinary courses or steal ours! I’m sure there are plenty of other ideas that you could come up with that may best serve your student population. Our students excel in both science and music (no surprise that music kids are excelling, right?), which led us to the course we developed. So far, we feel like it has been successful and hope to continue running it so long as students continue to sign up for it.
Getting it started was the hard part but keeping it going should be easy with students sharing how much they enjoy the class! We may have more ideas in the future and hope we can inspire others to offer true interdisciplinary courses. Every school is different, and the process of adding a new course is different, so talk with your principal or department chair about what that looks like for you. And be patient!
I realize that staffing at other schools might not allow for two teachers to teach one course, but I would encourage you to collaborate with another teacher on a unit or even a lesson in some of your classes. Invite a teacher to work with you on something you’re teaching or offer your expertise to help enhance another teacher’s class. Music’s place in other disciplines is endless. I guarantee that you’ll learn a lot from those other teachers — I’m lucky to get that experience every day. Additionally, you’ll get a chance to collaborate and maybe even see the sun beyond your concrete rehearsal room walls.
___________________________________________
Not to sing my own praises (and trust me you don’t want me to sing), but if this course was taught when I was in high school, I definitely would have taken it because it was relatable to the world I was about to dive into. Co-teaching an interdisciplinary course like this has been extremely valuable for me. It pushed me to grow as a teacher and as a learner. It forced me to leave the windowless rooms of the music wing and go see other people and watch how they teach. It encouraged me to collaborate more — something I preach in my rehearsal room frequently. And it made me put my money where my mouth was and make STEM into STEAM.
For musicians, “time” isn’t just something that happens on a clock, and “feel” is more than an emotion. A player with “good time” has a solid grasp on the pulse of whatever music they play; understanding a song’s “feel” includes a deep understanding of its style. Having good time and having a good feel are two separate skill sets, and both are crucial.
TEMPO & GROOVE
When we talk about time, we’re referring to tempo, usually expressed in bpm, short for “beats per minute.” Having good time means not speeding up (“pushing time”) or slowing down (“dropping time”) in relation to the rest of the band, especially the drummer. For a bass player, being “in the pocket” is one of the highest achievements, as demonstrated by iconic bassist Nathan East in this video.
The word “groove” encompasses many ideas, but in this context, it describes the feel of the music, which is related to the style (punk, funk, classical, reggae, metal, etc.) and the meter (3/4, 4/4, 5/8, 12/8, etc.). Practicing with a metronome and studying recordings are surefire ways to refine your relationship to feel, groove, tempo and click tracks. No matter what style you’re playing, it’s important to stay in time — and to adjust when necessary.
FLEXIBLE TIME
The great Abraham Laboriel Sr., who has used Yamaha basses on many of his 4,000-plus studio recordings, recommends that musicians learn how to place time in relationship to the click. Most of us learn to play right on the click, which is also known as “center time.” Being able to play so consistently that you “bury the click” is a skill that comes in handy while recording or playing onstage to a click in your in-ear monitor. But Laboriel also urges students to practice playing behind the beat (not unusual in pop music, especially in R&B and soul, and sometimes exaggerated in reggae), as well as ahead of the beat, which is common in rock and metal. In instances where he’s had to play to a pre-recorded track with subtle tempo shifts, Laboriel shows how it’s possible to smoothly shift between the three approaches.
Here are some examples of playing on the beat, behind the beat and ahead of the beat, all demonstrated on a Yamaha BB435.
To start, here’s a bass line that’s played right on the beat, in center time:
In contrast, here it is played behind the click:
And here’s the same part, this time pulling ahead of the click:
As Laboriel notes in an instructional video for MyMusicMasterclass, a drummer can make your part feel different just by the way they play. “[Many] human beings feel music naturally on the click, behind the click, or ahead of the click,” he says. “When you’re playing with different musicians, you have to know where they’re placing things, and how to adapt and join them so that your sound is in agreement.”
Here’s an example of how the same bass line sounds with two different drummers, hard-hitting Sheila and laid-back Sean. If I play ahead of the beat with Sean, the bass part sounds rushed:
But when I take the same approach with Sheila, the results are much better; in fact, the bass line sits right in the pocket:
Similarly, if I play behind the beat with Sheila, things get a bit uncomfortable — the bass line can’t keep up with her:
But when I lay back with Sean, things are much groovier. (The rhythm section that chills together, stays together!)
Developing the ability to play in center time (i.e., right on the beat) will carry you through most gigs. Here’s the bass line right on the beat with Sheila …
… and here it is with Sean:
THAT ORGANIC FEELING
Before digital recording became popular in the 1990s, it was quite normal for a song to change tempos organically. Put a metronome on while playing a classic like the Police’s “So Lonely,” and you’ll notice that it starts at 78 bpm and ends closer to 83 bpm. (Check out this fascinating set of graphs that show tempo changes in a number of well-known songs.)
On stage, the drummer is the main timekeeper, and generally, the band moves with the drummer’s time, which could vary from song to song and show to show. But the emergence of drum machines in the ’80s and ’90s contributed to expectations for a stricter sense of time, and engineers found that a very steady drum part anchors a performance and makes it easier to move other parts around. Genres such as hip-hop, which introduced drum machines to wider audiences, influenced drummers’ approaches and made it desirable to play with only the slightest tempo variation.
Today, many drummers play to a click track, which keeps everything — including playback tracks and MIDI events — strictly in time. Strive to be on the same page as your drummer, but keep your ears open to the juicy friction that can result from having slightly different relationships to time. And whether your band is bound together by a click track or not, being limber about time is a skill worth cultivating. As Abraham Laboriel says, “Knowing how to adapt will make you a happier and more flexible musician.”
The word “expert” gets bandied about a lot. Expert witnesses testify at trials. Financial experts tell us the savviest ways to save for retirement. Eight-year-old social media experts save our bacon when we can’t figure out which little button we need to tap.
Don’t be intimidated by the concept of an expert because experts are made — not born. In fact, “the development of genuine expertise requires struggle, sacrifice and honest, often painful self-assessment,” reports Harvard Business Review. “There are no shortcuts.”
So, what does expertise look like when it comes to teaching?
An Expert Teacher Prototype
According to published research from the University of Warwick, there are certain characteristics and traits that help define teacher expertise. Published in Educational Research Review, the study was called “Building the expert teacher prototype: A metasummary of teacher expertise studies in primary and secondary education.” As a metasummary, it pulled in data from 106 studies; three of the studies were specifically on music educators. The study includes findings from research on 1,124 teachers from around the world.
With teaching, there are so many factors, explains the study’s lead author, Jason Anderson, Ph.D., assistant professor of applied linguistics at Warwick. How long has the teacher been teaching? What subject are they teaching? How big is the class? What are the teacher’s beliefs and personal characteristics? And as music educators know, there are probably a thousand more variables.
Recurring Traits
So, the researchers tried to put their finger on what characteristics kept bubbling to the top. “Think of it as a Venn diagram, where we are looking for things that overlap,” says Anderson. As a teacher educator, materials writer and educational researcher and consultant, Anderson has supported teachers and developed materials for use in over 30 countries. The study found that expert teachers:
Are driven by moral duty toward their learners, which motivates them to work hard, reflect critically and exhibit unconditional care for learners.
Have a passion for teaching, a positive self-image and a desire to succeed in their profession, which helps them cope with challenges.
Have three qualities central to expert teacher professional development: reflection, lifelong learning and collaboration with peers.
Assess progress, spot misunderstandings and offer ongoing feedback.
Offer individualized support and feedback throughout the lesson.
Rather than seeing this as a checklist of “must-haves,” Anderson suggests this information can be viewed as more of a prototype. “If a teacher notices there are things they aren’t engaging in, then these might be potential areas they could try out. Not that they should do or must do, but what they can experiment with.”
He continues, “For example, there’s good evidence that teacher reflection is a key part of teacher expertise. Expert musicians do this, too. Do high performance teachers reflect more? Our study has uncovered a reasonable amount of evidence that they do, and it’s also linked to a sense of moral duty. This won’t surprise teachers. Or the parents who know their children’s teachers well. But it’s interesting to think about in terms of the science.”
The study’s results will be useful to current teachers, Anderson notes, as well as for preparing future teachers, recruiting teachers, ensuring teacher quality and developing curriculum.
Teaching Specialties: Does Subject Matter?
Anderson says he was surprised that the study revealed there wasn’t that much difference between elementary and middle/high school educators as expected. “Because many elementary teachers are generalists, as opposed to subject specialists, we expected there to be differences. But we found that it’s a lot of the same characteristics that are important.”
Still, he acknowledges, “Any subject specialist will tell you, often with a lot of passion, that every subject is different. What constitutes a good music teacher isn’t what makes a good math teacher, and vice versa. Our study looks at what overlaps between them. With subject experts, we often get so immersed in our own areas, we forget about the universals, the things that cut across all subjects. I’ll give you an example: what we call the interpersonal dimension. All expert teachers need to be able to build, hold and maintain rapport, respect and understanding with their learners. This is key — especially once you look at secondary education — that students believe in their teacher, trust them and are willing to take risks. They need to know their teacher will be there supporting them and guiding them if they run into difficulty.”
Another area that came up in the study is adaptive expertise, or the ability to adapt to an unfamiliar situation. Anderson notes that teaching is both an art and a science. “The art is the more intuitive side of teaching. We’re trying to get as close to it as we can, without ruining it or pinning it all down, but realizing we can at least identify it.”
As anyone who’s ever tickled the ivories knows, playing piano is fun! But did you know that it’s also good for you?
Here are five reasons why.
1. It Provides Stress Relief
There are numerous studies that demonstrate that people who play the piano tend to experience less anxiety and loneliness. In fact, a 2013 article published in Frontiers In Psychology found that piano practice can actually help treat depression in elderly adults. But playing the piano does more than just remove negative emotions; it replaces them with positive ones by releasing serotonin and dopamine in the brain as you play — the same “feel-good” chemical neurotransmitters responsible for giving you the “chills” when listening to music that stirs you. Even just playing for a few minutes a day can lower your blood pressure. It’s so beneficial, in fact, that it’s a widely used form of therapy for Attention Deficit Disorder (ADD).
Listening to repetitive sounds engages the neocortex area in your brain, thus reducing cortisol levels, which serve to calm you and reduce impulsive behaviors. In one study published in the International Journal of Music Education, college students were sorted into groups where they either played piano, created a sculpture, wrote calligraphy or simply sat in silence. Remarkably, the piano-playing group experienced far larger drops in cortisol levels than the sculpture and calligraphy groups.
Playing the piano requires full focus, leaving no room for other thoughts, making it an excellent non-pharmaceutical alternative if you are experiencing anxiety issues or having trouble sleeping due to overthinking. It’s also an activity that provides ample opportunities to bolster self-esteem: mastering a tricky passage of music makes you feel good about yourself and helps generate a positive outlook on life while providing a healthy outlet for creative expression.
2. It Improves Concentration and Dexterity
As we just said, playing the piano requires concentration; you need to coordinate your fingers, eyes and mind — even your body posture — and at the same time focus on rhythm, pitch, note duration and tempo. Every detail matters!
Interestingly, playing a musical instrument is one of few activities that engages all areas of your brain simultaneously, so you are actually multitasking when you play the piano. Some call this ability “split concentration,” while others term it “divided attention.” Either way, it’s an integral part of playing the piano, which requires that you use both hands, listen to the notes you’re playing and work the pedals … all at the same time. Multitasking skills like these extend to real-life situations. They enable you to pay better attention at school and work without requiring you to drop everything else you’re doing. (To learn more, check out this TedEd presentation.)
At the same time, piano playing sharpens your fine motor skills and improves dexterity. In some ways, playing the piano is like taking your fingers to the gym. As you practice, your fingers will strengthen and finger speed will increase. Good motor skills like these can not only make you more agile, but also result in increased energy overall.
A study published in the Journal of Anatomy even suggests that the cortical mapping in the brains of pianists actually changes over time to increase finger speeds. That’s why learning to play the piano can improve motor movement and overall coordination even in children and adults with reduced motor skills.
Reading music with your eyes and responding with your hands also serves to build excellent hand-eye coordination; this applies to learning any musical instrument. However, when playing piano specifically, you develop independent coordination skills. At times, your left and your right hand need to execute totally different movements. Your brain has to tell each hand separately what to do and how to move. And as you improve, you go from playing one note at a time to playing several in each hand. Developing independent coordination skills can positively impact other areas of your life, such as playing sports or video games, doing computer work, doing home or car repairs, even cooking.
3. It Helps You Develop a Musical Ear
If you play piano (or are interested in learning how to play), you’re probably someone who already appreciates music. But learning an instrument like piano can allow you to appreciate music even more by enabling you to hear details in music you may have never noticed before and better appreciate the skillset of your favorite artists.
Having a keen understanding of sounds is called aural awareness; people with this skill are said to have a “musical ear” (the opposite of being “tone deaf”). Interestingly, although having a musical ear helps you play the piano, the opposite is also true: Playing piano helps you develop a musical ear by training you to recognize tones, intervals and chords as well as helping you to develop a sense of pitch. After all, you need to listen carefully in order to play any piece of music, and only if you are able to remember how it should sound will you be able to correct yourself. In fact, it helps to hum the song that you are about to learn before you actually start to play it on your piano.
Aural awareness is important in aspects of life outside of music too. Good aural awareness makes it easier to identify and understand sound patterns of foreign languages, can help fight dyslexia while it is still developing, and can even help you if you have trouble hearing when there is a lot of background noise (a physiological phenomenon known as the Cocktail Party Effect).
4. It Fosters a Sense of Community
Music is a universal language that crosses all barriers and is capable of eliciting strong emotions in both the listener and player. The piano was designed to reflect human emotion and feeling, and for hundreds of years, it has been bringing the power of music to millions of people.
Playing piano is a wonderful way of bringing together the larger community, as well as smaller groups of family and friends. And even though it’s often seen as a solo instrument, it can open up your social life! Consider joining an ensemble, playing voluntarily for a senior center or church, or starting an online or in-person pianist group in your area. Music is always a great conversation-starter, especially when you’re with others that play the same instrument.
5. It’s Easy to Learn
Compared to most other musical instruments, the piano is easy to play, and you can start at any age. No need to build up calluses on the fingers as with learning guitar; no having to develop embouchure and breathing techniques as with a wind instrument — endeavors that are sometimes painful and can dissuade otherwise enthusiastic students from continuing to learn. To play the piano, all you have to do is sit and press down a key. (Of course, that’s an oversimplification, but it’s certainly easier to start on piano than on most other instruments.)
There are lots of options for piano students at every level, from beginner to professional. Most schools offer piano classes and there are plenty of private teachers everywhere; you can also get a lot from blog postings like our Well-Rounded Keyboardist series or watching piano tutorial videos online.
So what are you waiting for? Time to start playing!
Now that we have laid the foundation for how school music programs can positively influence high-need schools and the students they serve, it is time to explore methods that have been proven to work in these settings. When many teachers reference high-need or Title I schools, they often include factors such as low socioeconomic status, higher crime rates, greater student absenteeism, and an increased risk of involvement in gang activity and drug use among other negative consequences. Some may even assume that an overwhelming majority of their students are from single parent households and are being raised by teen mothers, or “kids raising kids” as the cliché goes.
While some of these conditions may be the reality for some students who attend these schools, we should not generalize these factors to all students. Eric Jimenez and Justin McLean pointed out may untruths about teaching in high-need schools in their article, “Dispelling the Myths of Teaching in a Title I School.” They stated that many of the things that teachers may believe about teaching in this setting are based on deficit thinking and lowered expectations for musical excellence. If you have not listened to Jimenez and McLean’s music education podcast, The Score, consider adding it to your playlist. It has become required listening for my music education majors here at Tennessee State University!
As an undergraduate and graduate student, I was lucky to have mentors who taught me that all students can learn and reach the highest levels of academic and musical excellence, regardless of their life circumstances. One of those mentors, Dr. Shelby Chipman, Director of Bands at Florida A&M University, emphasized the importance of believing that our students can achieve anything in “Perceptions of At-Risk Students by Florida Secondary School Band Directors,” an article based on his doctoral dissertation. By creating a safe and nurturing environment, developing an effective daily routine and empowering each student within the program, we can give our students the knowledge and skills they will need to be successful not just in music, but in every facet of their lives.
photo by Adobe Stock/PressMaster
Create a Supportive Environment
Throughout my years of teaching in high-need schools, the one factor I found to be most critical was the classroom environment. Not only did I want students to enter a clean and organized classroom every day, I also wanted them to know that our room had a unique “micro-climate” and that it was up to all of us to maintain it. I wanted students to feel safe, know that they could be open and take risks, and that I was there to support them. Dr. Gabriel Arnold’s article, “Effective Band Director Techniques for Teaching in Title I Schools,” emphasizes the importance of creating such an environment.
I would start each year doing several group activities with the students that included establishing rules for the music room and setting goals for both individual student achievement and for the group as a whole. I scheduled a town hall at the beginning of the year and invited students, parents, staff and administrators. There, we opened up the floor to allow all stakeholders to state any ideas that they had and what they would like to see the program accomplish that year.
When it came to the music we studied and performed, I made sure to get input and take suggestions from students so that our repertoire was made up of an inclusive and diverse selection of pieces that represented my students. Representation, identity and cultural competency can go a long way toward developing more engaging experiences for students and can be another way we let our students know that they are seen and valued.
Photo by Adobe Stock/Yury Zap
Develop a Consistent Routine
I find that predictability can be an asset to music organizations, especially when a student’s home life or school day outside of our class may not be as routine. When I taught high school and middle school band, I dedicated the first several weeks of school just establishing and practicing procedures. Whether it was how to enter class, take out equipment, assemble instruments, knowing when to talk and when to be silent, warming up or tuning, my students could depend on the class flowing in a certain way. Though there were times when we had to deviate from our structure for other reasons — usually outside of our control — students built up enough “muscle memory” through practicing the procedures that they could easily adjust. This helped them feel very confident and comfortable in my class. It also led to students trusting that I cared for them, that I knew what I was doing as a teacher, and that I wanted them to have the best music-making experience possible.
In her article entitled “The Role of Band Programs in Title I Schools: A Middle School Principal’s Perspective,” Dr. Lisa Williams discussed how music programs in high-need schools can positively impact student outcomes and increase the morale of the entire school. I would constantly challenge my students to take the things they were learning in my class and apply them to all their classes. I wanted our organization to serve as an example of what was possible, and by doing so, I hoped to inspire other teachers and students in our school to replicate our success. I would often invite other teachers to bring their students to my classroom for an in-school field trip and let them participate in our class and ask as many questions as possible. When students saw how my colleagues and I worked together for the good of all, it was easier to reinforce high expectations throughout the school. The band students also saw how influential they had become in the school, and I tried to empower them as much as possible through leadership opportunities.
Make Every Student a Leader
Early in my career, I realized that the band staff and the parents could only do such much. There was only so much time and bandwidth we all had for certain tasks. One summer, while planning for pre-season camp, I started to think about how we could get our students more involved with the operations and logistics of running the program. We decided to have a free leadership workshop (open to anyone currently in band) to see how many students might be interested in doing more. On the first day of the program, nearly the whole band showed up; way more than we expected! After we finished covering leadership basics, such as communication, teamwork and conflict resolution, I asked for suggestions on how we could allow our student leaders to be more involved.
From this conversation, our show planning, dance routine and arranging teams were formed. These groups helped students with an interest in wanting to learn more about these areas an opportunity to contribute to our halftime shows and concerts in significant ways. Other students wanted to be involved in different ways, so we created student committees that mirrored our parent booster committees with groups that handled volunteering, equipment management, fundraising, administrative support and more. These committees with both students and parents helped us operate both during the school day and after school, and they provided more leadership opportunities for students.
At the first high school where I worked, Miller Grove High School in Lithonia, Georgia, we had a simple motto: “You Must Do Something.” This referred to both our ethos and school requirement that every student had to be involved in at least one extracurricular activity. For the band, we took this statement to another level by requiring that every band student must be a leader and serve on at least one of our student teams or committees. I know that by distributing leadership this widely it can feel as if we are over-delegating. But, at the end of the day, our staff was clear to let everyone know that the director had the final word. We did this to ensure that everyone took ownership of the program while knowing that our band staff would ensure that everything ran smoothly and met our collective expectations for success.
Stay the Course
As we all strive to build programs that will support and nurture student musicians, we must remember that everything we are trying to achieve is an iterative process. By creating a supportive environment, developing a consistent routine in our classrooms and empowering each student through leadership development, we will see our students achieve as musicians and grow as people. If we continue to show up for our students and give it our all each and every day, they will see our example and show up for us as well.
A violin and a viola look somewhat alike, but in fact there are numerous differences between the two — not just size, but also variations in tone and overall construction — even the bows that are used to play them.
Let’s take a deep dive into how the two instruments differ from one another.
SIZE
Yamaha AV20 violin.
Yamaha AVA5 viola.
In general, a viola is slightly larger than a violin, but each of these instruments actually have variable sizing depending on age, arm length and finger length.
Stringed instruments are measured from the bottom of the lower bout (the edge of the instrument) to the top of the upper bout; the neck and scroll aren’t used in “size” measurements. Violins are measured in fractions, beginning at 1/32 (or 7″) up to 4/4 (or 14″), also known as “full size.” Because violins can be made so small, kids as young as two years old can begin playing them.
Violas, on the other hand, are sized in inches, not fractions. They range from 12″ all the way up to 18″ in body length. A full size (4/4) violin is exactly the same length as a 14″ viola, but the construction of the instrument is a bit different to accommodate the lower strings and deeper tone. (See below for more information.) A “full size” viola usually references any violas from 15″ to 16.5″. These are the most common sizes for adults.
Playing an instrument of the correct size is extremely important. An orchestral string instrument that is too small for you won’t allow you to properly navigate through all the notes on the fingerboard, while if you play an instrument that’s too large, you may not have the reach to hit all the notes comfortably. Sizing for stringed instruments is best done by an instructor or a professional at your local music store so they can ensure you’ll have the best fit possible.
CONSTRUCTION
Violins and violas are constructed somewhat differently from one another. As shown in the illustration below, a viola’s body has wider and thicker sides (also known as the ribs of the instrument). A viola will also sometimes incorporate thicker front and back plates (the tops and bottoms) to further enrich its deep, warm tone.
TONE
Speaking of tone, have you ever had the opportunity to hear an orchestra perform? If you listen closely to the strings, you’ll often hear a sweet, clear melody, and then a darker, richer tone gliding gently behind it. The collaboration of these two beautiful voices highlights some of the main tonal differences between violin and viola.
Orchestral stringed instruments such as violin and viola are tuned in fifths. The violin is the soprano voice of an orchestra, and is tuned E5, A4, D4, G3 from the highest (or thinnest) string to the lowest (or thickest). This, along with its construction, gives the violin a sweet, crisp tone that provides an orchestra with a clear melody and leading voice. The viola is considered the alto voice, and is tuned a perfect fifth below a violin (A4, D4, G3, C3). The first string on a viola begins on the second string of a violin, as shown below. This allows the viola to not only provide beautiful harmonies with the violin, but warmer undertones as well.
Some contemporary electric violins such as the Yamaha YEV-105 have five strings instead of four; the extra string adds the low C found on the viola. These kinds of instruments are widely used in electric orchestras as well as jazz, rock and pop bands — even for solo performances.
BOW
Violin bows and viola bows are also different. Viola bows are a bit longer in length, and have a thicker tip, but the most obvious way to spot the difference is in the frog — the square-ish part at the bottom of the bow near the tightening screw into which the horsehair feeds. On violin bows, the frog has a sharp back (usually at a 90-degree angle), while on a viola bow the frog has a more rounded, smooth back. Why is this part called a frog? There are many theories but no conclusive answer! Theories include everything from horse hooves to the vice used in its construction to its overall appearance.
Even with all these differences, violins and violas have worked seamlessly together for hundreds of years to create beautiful, nuanced music. The next time you’re at an orchestra concert or are listening to the soundtrack of your favorite superhero movie, see if you can hear the differences between the rich, earthy tones of the viola and the sweet melodic voice of the violin. If you’re looking to learn to play, choose the instrument that speaks to you the most, make sure you get the right size, and remember, practice makes progress!
When the Yamaha Harmony Director HD-300 was released, music educators were very excited because it was touted as a powerful tool to more effectively teach intonation and rhythmic training. With that excitement came many questions about how to incorporate the Harmony Director in daily rehearsals, such as:
“Isn’t it just another keyboard?”
“Do I have to be a theory geek to figure this out?”
“How much time outside of rehearsal will I have to study to utilize it effectively?”
“Isn’t it just a fancy F concert machine with a metronome?”
Any instrumental director can incorporate the HD-300 into their everyday rehearsals. The great thing about the Harmony Director is that you become more comfortable and proficient with the technology as you and your students learn together.
If you want to develop great sound, balance and tuning in your ensemble rehearsals, there is no device better than the HD-300 to help you achieve this. Tuning in a wind or string ensemble must include aspects of equal and pure (just) temperament. Using one or the other exclusively will not create the cohesive ensemble sound you desire. With a few simple exercises, you can begin to understand which temperament is appropriate at any given time.
Throughout music history, different tuning systems, or temperaments, were developed and improved as composers became more creative. Later compositions required musicians to be able to move freely from key center to key center, an impossible task in early temperaments.
For wind groups, the two most commonly used temperaments are equal temperament and pure (just) temperament. In order for wind groups to perform “in tune,” a combination of both equal and pure temperaments must be used.
Equal temperament is the standard tuning system used today. The idea of an octave split equally into 12 half steps is a common and obvious system to use. In the course of music history, however, it is a fairly modern concept.
Pure temperament involves the use of “pure 5ths” and “pure 3rds.” Pure intervals can be traced back to Pythagoras who used “perfect” mathematical ratios to create his tuning system. The use of these pure intervals gives major and minor triads a rich sonority that equal tempered 5ths and 3rds do not exhibit. The downside, however, is pure tempered chromatic pitches do not always sound sonorous with their neighbors. Essentially, tempering involves the slight adjustment of scale degrees to fix unpleasant sounding intervals within a scale.
The HD-300 has the ability to change its tuning from equal to either pure major or pure minor temperament. This allows the subtle differences in sound and tuning within those temperaments to be easily heard and demonstrated.
Which Temperament Should I Use?
In general, equal temperament should be used when working on scales, scale patterns or simple interval exercises like this “Remington” exercise. When you are tuning a melodic phrase or harmonic progression, it is best to use pure temperament.
Where Do I Start?
Start with the exercises that are a part of your daily basics routine.
The exercise above is one of the most basic sound exercises because it helps create the reflex of a pure start, consistent middle and organized end to a sound. With the Harmony Director set to pure temperament, you can also accurately depict what the most prominent overtone sounds like. Set the HD-300 to pure F major, and it automatically adjusts the C concert +2 cents. This slight tempering of pitch places the C concert where it occurs naturally in the overtone series. This exercise can be quickly transferred to any key center just by the touch of a few keys on the Harmony Director.
The Next Step
When students become comfortable with hearing an adjusted perfect 5th, you may wish to move on to discussing tempering in a melodic phrase.
Begin by concentrating on the 3rd and 5th scale degree in a major key. This develops the basic concept and reinforces your initial discussion of temperament. In the exercise above, there are arrows above the flute part point up and down. In pure F major, the 3rd scale degree is adjusted -13.7 cents down from equal and the 5th scale degree is adjusted +2 cents up from equal.
Singing the exercise along with the HD-300 is an effective way to allow students to become accustomed to the adjustments. Do not get caught up in the math with the students. Use phrases such as “slight adjustment” (1 arrow) and “significant adjustment” (2 arrows). Try to avoid phrases like “play it slightly sharp” or “very flat”. Do not confuse tuning with a tuner and tempering with your ears. Encourage students to “let their ears guide them.”
Putting it Together!
Tempering is both a horizontal and vertical concept. By using a triad in any key, you can help students understand their role and how to adjust their pitch within a specific chord. The same concept applies here as it did in the melodic exercise. In pure F major students who play the 3rd would adjust down toward the root (-13.7 cents) and students who play the 5th would adjust slightly up away from the root. (+2 cents). Because the Harmony Director can switch quickly between equal and pure temperaments you can allow students to hear the “beats” of an unadjusted triad versus the clarity of an adjusted triad.
In all exercises involving the HD-300 and tempering, the most important tool students can use is their ears. Singing every exercise you play and every excerpt of music you perform is the quickest way to develop this skill in your students.
Going Further
As you become comfortable with simple exercises involving the Harmony Director and tempering, you will begin to see how it correlates with your concert literature. Find those places where you need to isolate specific chords or melodic content in a phrase and unlock the incredible power of the HD-300 and your student’s ears!
When video games first rose to popularity in the 1980s, arcades were all the rage. Millions would visit the digital fun houses and pop quarters into big cabinet-sized machines to play titles like Pac-Man and Space Invaders, trying to outdo bad guys and get to the next stage.
Eventually technology advanced, allowing players to enjoy gaming at home, mostly with the groundbreaking and extremely popular Nintendo® Entertainment System (NES®). But when smaller handheld consoles made their appearance, a whole new market opened up.
Here’s the history of those gems.
VIDEO GAME WATCHES (late 1970s)
One of the first handheld games to garner attention was the basic 1977 Mattel title Football I. A few years later, though, companies began making even smaller gaming devices, with the first video game watches debuting in the early 1980s. A company called Nelsonic Industries kicked things off with a rudimentary gaming watch called Space Attacker, which was similar to the popular Space Invaders arcade game. Casio also offered a similar gaming watch. Soon these devices became even more varied, with options ranging from The Legend of Zelda™ to Super Mario Brothers™ to Tetris and even Star Fox. While not especially advanced by today’s standards, they were innovative due to their compact size.
GAME BOY™ (1989)
Although the first handheld game console with interchangeable cartridges — a feature that single-game watches didn’t allow — was Milton Bradley’s Microvision (released in 1979), the Nintendo®Game Boy™, which hit the market ten years later, was really the handheld device that started it all. It offered more intricate gameplay than anything that came before it and gave users the chance to play games similar to the larger (and beloved) NES console but in a portable, battery-operated manner. The Game Boy was so popular that the device sold over a million units in just a few weeks and the many iterations released since have sold some 120 million units. After its inception, other versions have been released, including Game Boy Color™, Game Boy Advance™, Game Boy Pocket™ and, later, the Nintendo DS Lite®.
ATARI LYNX (1989)
The Atari Lynx handheld controller launched just two months after Game Boy. Atari had previously created a successful home console in the 1970s (known for titles like Pitfall), but this handheld system offered color gameplay right off the bat, and in a more advanced 16-bit format, as opposed to the 8-bit Game Boy. In 1991, the follow-up Lynx Model 2 was released. While Atari did have an established name in the gaming world, the Lynx system never took off like its Nintendo counterpart, with 71 games released for the Lynx compared to nearly 1,100 for Game Boy.
GAME GEAR (1990)
Game Gear was the biggest contemporary rival to Game Boy, more so than the Lynx or others on this list. It offered titles from its parent console, the Sega Genesis, which had achieved popularity thanks to its mascot, Sonic the Hedgehog. Unlike the original Game Boy, the Game Gear also offered games in color, not just black-and-white. One issue the handheld console had, however, was that it ran on 6 AA batteries, which lasted only a handful of hours, whereas the Game Boy ran on 4 AA batteries for much longer. Later, Sega released the Genesis Nomad, though that’s considered a commercial flop today.
TURBOEXPRESS (1990)
Also released in 1990, TurboExpress was a portable version of TurboGrafx-16, a 16-bit home console system that rivaled Sega Genesis and was known for its signature character, the cave boy Bonk. What set this handheld device apart, however, was that gamers could use to the same slim cartridge in their TurboGrafx-16 home consoles as they could in their handheld ones, enabling them to freely swap between handheld and home devices. But because TurboGrafx-16 simply wasn’t as popular as the NES or Sega Genesis, this offering failed to sell any more than 1.5 million units, even though it was in some ways more advanced.
NEO GEO POCKET COLOR (1999)
This handheld from the Japanese company SNK is remembered for its innovations as well as its failure to compete with Game Boy. Today, the Neo Geo Pocket Color is noted for its clear color screen and extremely sensitive controls — perfect for combat games. Unfortunately, it was also one of about a dozen handheld devices released between the early 1990s and the 2000s (such as WonderSwan, Watara SuperVision and Mega Duck) that were commercial failures.
PLAYSTATION® PORTABLE (2004)
This handheld system from Sony proved to be the next major innovation in the market thanks to its advanced graphics and extensive library of PlayStation® games. Over the course of 10 years, the device sold more than 80 million units. The PSP, as it was nicknamed, could also connect to a player’s home PlayStation 2® or PlayStation 3® consoles and even play real movies. In this way, it was more like a portable entertainment system, not just a gaming one. Since its inception, Sony has released numerous sequels, including the PlayStation Vita® in 2011.
NINTENDO SWITCH (2017)
The Nintendo Switch™ is one of the most recent innovations in handheld systems, and it’s as versatile and enjoyable as any device ever made. It can be used as on its own or connected to a home television, sound bar or AV receiver like a console, and can be played by one or two gamers simply by removing the small controllers on the sides of the device. Notably, just like a modern cell phone, the Switch also allows players the option of online gaming thanks to its internet connectivity. Since its 2017 release, the Switch has sold more than 125 million units. What else would you expect from the company that essentially started it all with Game Boy?
YPAO™ (short for Yamaha Parametric room Acoustic Optimizer) is an exclusive Yamaha technology that analyzes the acoustics of your listening and viewing space so that the sound you hear is the absolute best it can be. All current multi-channel Yamaha AV receivers incorporate some form of YPAO (there are several different levels), as does the latest line of RN Series stereo Yamaha network Hi-Fi receivers, but the implementation is slightly different.
In multi-channel (i.e., 5.1, 7.2, 9.2 or 11.2) AV receivers, the user first selects a target curve — flat, natural or front. The YPAO system then works to timbre-match your speakers to the selected curve.
However, when you are using a Hi-Fi receiver and have only two speakers in the room, the goal is to achieve optimum imaging and frequency response, so YPAO instead matches the two speakers to each other.
Here’s a detailed explanation of how YPAO works in two-channel Hi-Fi receivers.
MINIMAL EQ
With the judicious application of acoustic treatment, some listening spaces can have a flatter response (and therefore sound better) than others, but since no room is perfect, a certain amount of equalization usually needs to be applied to get things sounding as good as possible. However, Hi-Fi YPAO uses as little EQ as possible, cutting rather than boosting any problematic frequency areas.
As highlighted in the illustration below, the left channel is significantly boosted at approximately 40 Hz as compared to the right channel. This could happen if the left speaker is close to a wall (which would cause low frequencies to increase due to room reflections) and the right speaker is positioned further away from any reflective surfaces.
Such a situation will result in different frequency responses between the two speakers. When a low piano note is played, for example, the left channel will be louder than the right channel, and so the fundamental frequency of that note will be shifted to the left — just as if you had turned your balance control on the front panel counterclockwise from center.
But a piano note has a whole spectrum of frequency harmonics, not just the fundamental. And the right channel might actually be louder (relative to the left) at the second harmonic (as shown below), which will cause that part of the sound to be shifted to the right.
This kind of disparity can continue throughout the entire frequency spectrum, and even if it’s just a matter of a decibel or half a decibel, the imaging will be greatly compromised. A piano or a guitar that’s mixed to dead center should sound like a single instrument coming from a very focused point, but when you have a situation like this, depending on which harmonic you’re listening to, the sound is going to be shifting back and forth between left and right — even within a single note. The end result is that sonics will blur and the instrument will appear as if it’s a foot wide in-between the speakers, instead of coming from one particular spot.
CUTTING INSTEAD OF BOOSTING FOR FOCUSED SOUND
The solution comes from selectively cutting certain frequencies instead of boosting them. In this particular instance, if you try to boost the right channel to match the left channel, the result will be less than optimum because the left channel already has an artificial boost due to imperfect placement of the left speaker in an imperfect room. Boosting a frequency will also raise the noise floor in that area of the spectrum, reducing the signal-to-noise ratio and resulting in lesser dynamic range.
In this particular example, we know the left channel is too loud at approximately 40 Hz, so we can cut that frequency range. At this frequency, the right channel looks like it’s flat, but we could be making an error there. So YPAO will also drop the right channel down to match the left channel at the second and higher harmonics:
This will not result in a perfectly flat frequency response, but at least now the channels are matched, which will result in a tightly focused sound.
Yamaha R-N Series network Hi-Fi receivers offer two sets of speaker terminals, allowing you to, for example, connect a set of bookshelf speakers and a set of floor-standing speakers. The R-N800A, R-N1000A and R-N2000A models allow you to store individual YPAO settings for each set of connected speakers, so the correction for your bookshelf speakers would be different than for your floor-standing speakers. And if you ever choose to run them both at the same time, an “A+B” YPAO memory slot calibrates the system for that circumstance as well.
YPAO VOLUME
The human ear has less sensitivity to high and low frequencies at lower volumes. At those levels, we tend to hear mid-range tones much more clearly, which is right where most singers’ voices fall. That’s why, when the volume goes down, the instrumental accompaniment — the extra layers of sound that give a song so much more depth — tends to disappear.
The Yamaha solution comes in the form of a technology called YPAO Volume, which is essentially a loudness control that’s tied to the volume control:
YPAO Volume is incorporated in current Yamaha AV and network Hi-Fi receivers, further ensuring that all musical components are precisely balanced at every volume level. The end result is a richly fulfilling experience whether you’re listening softly or at full tilt.
And that’s how Hi-Fi YPAO works … and why it makes everything sound so good!
Let’s be honest: We’ve all purchased a new guitar in hopes that it will serve to magically transform our playing to new heights of expression.
No doubt the exciting colors and sensual curves we love so much about our instruments can inspire new approaches, songs, and even an elevated sense of performance. And indeed, improvements in your technique may occur through sonic nirvana, extended hours of practice on the new axe, or simply because your latest guitar plays better than your old one.
But what happens when the initial rush of euphoria wears off? Do we find ourselves wandering aimlessly around a plateau of fretboard possibilities that lead us nowhere, endlessly searching for the Stairway to guitar-playing Heaven?
It’s my job as an educator to ascertain blockages, stagnation and/or lack of progress in my students. After all, it usually takes an outside perspective to reveal the quicksand.
The good news is that there are steps you can take to shift a low-gear malaise into high-octane territory. Here are three tips that will expand your guitar technique, musicality and chops within 30 days. This does mean you’ll have to do some work, though, so strap in and commit to upward, forward motion.
1. Improve Your Left/Right Hand Coordination
One of the main reasons guitar players don’t improve is that their picking hand isn’t in sync with their fretting hand.
This often occurs with single-note passages because downstrokes are naturally stronger than upstrokes, just as ascending fretting hand movements tend to be stronger and more fluid than those going from the pinky to the first finger. This can cause timing discrepancies between the picking hand and the finger placements on the fretboard.
A great way to address this imbalance is to employ an exercise using only upstrokes. Here’s how: Take the following chromatic passage of four notes on the low E-string: A-A#-B-C. Using only upstrokes, play the four notes, using each of your four fretting-hand fingers (one finger per fret). Repeat the sequence for about a minute, playing consistent eighth notes. Take a break, and then repeat the exercise, this time playing the notes from high to low: C-B-A#-A.
Repeat this sequence several times, then move on to the next string. You’ll notice that the string gauges will affect your precision; that’s why you’ll need to work across all six strings. Do this for 30 days and you’ll see massive improvement.
Note: Don’t employ this technique when performing; just use your regular alternate picking as usual.
2. Learn to Visualize
Visualizing chord shapes, scales and even song lyrics can help you achieve and retain muscle-memory proficiency without even touching your guitar.
When we visualize motor skills, we are actually creating the associated neural impulses and sending those mind messages to the fingers … even if we’re simply playing “air guitar.”
For example, play the A minor pentatonic scale at the fifth fret. As you do so, say each of the notes from low to high out loud (A-C-D-E-G-A-C-D-E-G-A-C), then play the scale back from high to low, once again saying each note out loud as you do so.
Now visualize fingering each of those notes, and name each note as you see them in your mind’s eye. Seeing your fingers play the scale shape and making the note name associations will solidify the scale architecture, the pitch intervals and the building blocks that create melodic sounds.
Repeat this exercise for 30 days, and each day, move the scale shape to a new fret location until you’ve done it in all 12 keys.
3. Supercharge Your Phrasing
Believe it or not, you can transform your lead guitar playing chops dramatically by simply shifting the start point of your licks across the beats in a bar.
Most guitar players have a tendency to start each phrase on the first downbeat of each bar (the “one”). But when you move the phrase to the second downbeat of the bar (the “two”), a whole new melodic and rhythmic world opens up.
Try it for yourself: Find your favorite jam track and count the beats. Take one note from an appropriate scale shape and play it on the downbeat of one. Now play the same note on the downbeat of two. Repeat until you’re comfortable playing that one note on each of the four beats in the bar, then take your favorite phrase and practice starting that lick on the downbeat of each beat in the measure.
After practicing this for 15 days, it’s time to turn up the heat. Take one note and play it on the upbeat of one (the “and”). Do this until you are comfortable, then move on to the upbeat of two, and so on.
Don’t try playing full phrases on the different upbeats until you can identify and perform this exercise using a single note on all four upbeats. The hardest part of this application for most players is identifying the beat and its subdivisions. Once you can do that, you’ll be able to place your licks at any point within the bar.
Trust me, this is the cool factor you’ve been looking for. However, you’ll need to stay focused and work on it for a while before it begins to become part of your natural playing.
The Video
In this video, I demonstrate a couple of ways to elevate your melodic chops and phrasing prowess, with plenty of room at the end for you to jam over my chordal structure.
In the first eight measures, I use an E minor pentatonic scale, and I’m starting each of the four two-bar phrases on the downbeat of three. The space this leaves at the beginning of each two-bar section allows me to take a relaxed approach to the melodic lines. In addition, I’m starting each new lick on the last note of the previous phrase in order to add melodic motion.
To increase the challenge, the key modulates up a minor third to G (G minor pentatonic scale) for the next eight measures, though I stay in the same fretboard position. This helps to reinforce scale shape recognition, so try to do the same thing when it’s your turn to jam.
The Guitar
The guitar I’m playing in the video is a Yamaha Revstar Element RSE20 with a Neon Yellow finish. (I’ve named it “Neon Leon.”) Like all second-generation Revstar guitars, it has an acoustically-tuned chambered mahogany body for enhanced resonance, sustain and musicality. In addition, the jumbo frets on its 13″ radius rosewood fretboard keep the notes flowing and the intonation spot-on from the lowest to the highest notes.
The two Alnico V humbucking pickups on the RSE20 capture every nuance and translate them faithfully to your amplifier. The tones available from the three-way selector switch on the guitar can be further expanded by pulling up on the tone control. This “dry switch” feature effectively reduces the bass response of the pickups for a brighter sound.
The Wrap-Up
I know we’ve all hit the wall at times and found ourselves stuck in a wasteland of the same musical information. It’s a loop that leads nowhere.
And then there’s the maze of development options that may or may not lead to our next level of proficiency. The question is, which path of study do we choose to find our way out?
I always think the best approach is to determine what you are trying to achieve. Focus on the big picture and then take small steps towards that mountain. If you’re not sure what that big picture is yet, work on solid techniques, positive reinforcement of the skills you have, and above all, be proactive and prepared to put in some hard work. With that in mind, you can get where you want to go … and possibly a lot faster than you might think. In fact, you might be amazed at what you can achieve in just 30 days.
Many articles and resources are tailored toward guiding head directors of school music programs, but what about the unsung heroes? Assistant directors and co-directors play a vital role in the success of a program. Starting in one of these positions is both rewarding and demanding. Let’s delve into some practical advice to help assistants or co-directors make the most of their time and navigate the school year successfully.
The Foundation is Communication
Many problems or neglect experienced by assistants and co-directors happen due to a lack of communication or a translation issues. Establish a relationship with your colleagues where you are comfortable speaking openly to them. This must be done by you — you cannot wait for this to happen to you, much like you cannot wait for students to learn their parts on their own.
An essential aspect of your role as an assistant or co-director is effective communication. Keep open channels with your head director, students and parents, which can make the difference between a chaotic environment and a harmonious one. Clear, concise communication can preempt misunderstandings and set the stage for a successful year.
Don’t Wait for Opportunities
If you sit around waiting for a cue, you might miss the entire performance. I still regret not counting my measures for a performance of “Into the Woods” when I was in high school and had to play the trumpet solo. I looked at the conductor, he looked at me, and then I did what any self-respecting trumpet player does — pretended my first valve wasn’t working!
Be proactive. From the obvious tasks like fixing equipment and ensuring that the music is ready, to the larger ones like proposing new initiatives, step up. Remember, it’s not always about whose job it is but rather getting the job done. Offer your ideas and you will not only earn respect but you will also get a chance to make a meaningful impact.
Consider this famous saying: “You don’t know what you don’t know.” This couldn’t be more true. If you need information, seek it out. Don’t wait for it to come to you because it might never show up.
Check Your Ego at the Door
Music education is all about the students, right? Yes, it is, but it’s also important to gain experience in the administrative aspects of the job, particularly if you want to grow and get better or move on to a different position at some point. My suggestion is to focus primarily on the students and enjoy anything else that comes up as a side benefit.
Remember, this is not a solo performance. Both assistant and head directors set the tone for the group. A clash of egos can easily throw everything off key.
Choose Annoyance Over Ambiguity
I once had a student who was making quite a few mistakes. I asked them to mark their music. They didn’t. I asked them again and then moved toward the stand. The stand was empty.
Me: “You don’t have any music!”
Student: “The music is in my heart, Mr. Stinson.”
Me: “Nice try — why didn’t you tell me?”
Student: “Because I thought you would be upset.”
I explained that yes, I would have been a bit annoyed that we’d have to get him another part, but now I was actually more irritated. However, I can relate to this student because when I was a student, I had my fair share of items that I would categorize under “not wanting to annoy” the head director.
Ask questions, clarify doubts and ensure everyone’s on the same page. If you have questions that don’t need to be dealt with right away, write them down and then schedule a weekly meeting to discuss these items. Often, you will find solutions to some of these problems before the meeting even occurs.
I give the same advice for speaking to administrators: bring solutions, not problems. If you are new to a program and a student asks you about a procedure for pep assemblies, for example, tell the student you’re not sure and that you will get back to them. Then, talk to your head director and tell them that you think this is the process but you wanted to check in so everyone is consistent.
Your Growth Doesn’t Stop
Professional development isn’t a luxury — it’s a necessity. Whether you attend workshops, webinars or simply read up on new methodologies, always look for ways to enhance your skills. If your school can only afford to send one director to a professional development opportunity, seek out other options. State and national conferences are helpful, but more and more organizations are offering professional development catered to needs and schedules.
Don’t forget more immediate resources. Your professional relationships can extend beyond your immediate work environment. Networking can provide a safety net, a sounding board and even future opportunities. Expand your relationships to other departments and you might find unexpected benefits. Interdisciplinary initiatives can enrich your program and diversify the learning experience for your students. Don’t be the music teacher who never leaves the music wing!
Document Your Achievements
Whenever you bring something notable to the program, document it. Whether you initiated a successful fundraiser or introduced a new teaching method, a record of your achievements can be crucial during evaluations or when advocating for another position. Check out my article on Changing Jobs: Improve Your Resume.
Feedback: A Two-Way Street
A successful program thrives on continuous improvement. Regularly seek feedback from your colleagues and don’t shy away from providing your own constructive critiques as well. If you have less experience, be genuine in how you speak.
“I really liked how you taught hemiolas today. It made me think of it in a different way. I’m going to steal that!”
Many of us have heard that the best teachers steal ideas from each other all the time.
Time Is of the Essence
With so many responsibilities, time management becomes essential. It’s not just about getting through the day but about maximizing each moment for you and your students. Prioritize your tasks and again, be proactive.
A common co-teaching or assistant relationship is the teacher-administrator. Running a music program is a big, busy job, and it often turns into one person who teaches while the other one takes care of the necessary administrative tasks. This situation may flip flop. If this works for your program, great.
Some educators find that co-teaching results in a lot of interruptions and disrupts a good flow in classroom management. However, a great synergistic relationship can elevate a classroom. If this doesn’t exist for you right now, and it’s something you and your colleague are interested in, be patient. It can develop over time.
There Will Be Conflict … And That’s Ok!
When disagreements arise, and they inevitably will, have a predetermined conflict resolution mechanism, which will save you a lot of heartache and tension in your working relationships. I once heard that most signed agreements are actually documents on disagreement. We don’t usually have agreements unless we are in conflict over something. Imagine how much easier your life would be if you had some of the tough decisions figured out ahead of time? No stress, no wasting your mental energy!
At the same point, you may find that something you had agreed to before no longer feels right (for example, your role in the program, the number of pieces for a concert, etc.). While I do think it’s important to honor commitments, I encourage you to have a discussion to see if there’s room for renegotiation. In situations like these, being proactive can help. Work with your colleague and revisit important items every year, every six months or in some cases, every concert cycle.
Consider this: If two people were exactly the same and agreed on absolutely everything, one of them would be unnecessary.
Navigating Preferences with Tact
Preferences are natural — students or parents may favor one director over another. Handle with care! Respond with tact, emphasizing that the program is a team effort. If they persist, simply reiterate your team-oriented philosophy.
Your Voice Has Value
Although you might be working alongside more experienced colleagues, remember that your perspectives and insights are valid. Stand your ground when necessary, but always with respect and an open mind.
Compromise Out Loud
This is an important one for everyone — not just assistant directors — to remember. Compromises can be viewed in a couple of different ways: We can agree and everyone is happy, or we can agree and everyone is settling for less than what they wanted.
You’ll have to work through successes and failures to figure out what is best for each situation. However, if there is something you want from the start, I urge you to speak up immediately. If you are open to compromising, do so after you have spoken your wants or needs.
Too many times, I thought about something that I wanted, but compromised in my head and spoke this compromise out loud. In some instances, the receiver wanted further compromises, which put me in a position of giving up even more of what I wanted.
One time, I thought, “I’d love to conduct two more pieces at the concert, but I’d settle for even just one. I’ll offer up one.”
The response: “Yes, let’s do one piece, but just at the next concert. We’ll evaluate after that.”
I’m not trying to paint head directors as control freaks — this is just a recollection of a past experience.
Adaptability: Your Secret Weapon
The world of music education isn’t static. New techniques, technologies and methods are always on the horizon. Being open to them not only benefits the program but also enriches your professional journey. It could make you indispensable to your program. So, be open and be on the lookout for tools that’ll make your job easier!
________________________________________
Being an assistant or co-director in a school music program presents unique challenges but it also offers fulfilling opportunities for growth and impact. Embrace the multifaceted role you play, and don’t forget that your contributions are invaluable for the program’s success. Use these tips to navigate the complexities and joys of your position, and you’ll not only survive the school year but thrive in it.
Sure, there are reviews and word-of-mouth endorsements, but how can you know if a person is really qualified to tune and care for your piano? To ensure you’re entrusting your instrument to a capable craftsman, you’ll want to know about the Piano Technicians Guild — an organization that has a long history with Yamaha.
The Piano Technicians Guild
The Piano Technicians Guild (PTG) is the acknowledged leader and resource for training, registering and sharing information amongst piano tuners, rebuilders and craftsman. Formed in 1957 from the merger of two piano technician organizations (American Society of Piano Technicians and the National Association of Piano Tuners), the PTG has become the #1 resource for technical information, for networking and referrals, and for training in the art of piano care. The Guild runs training classes at their headquarters in Kansas City, Kansas, which also houses a museum of historical instruments. While primarily a U.S. organization, it boasts a membership of around 3,300 people from around the world and holds regional conferences and an annual convention attended by manufacturers and members alike.
Yamaha has a long history with the Guild in recognition of the benefits of having a known network of accomplished professionals to draw upon for their dealer’s needs. Yamaha formed their U.S. company, Yamaha Corporation of America (YCA) in 1960, and immediately started supporting and working with the PTG. They draw on the Guild to find technicians to work on their pianos in the field, to help dealers find competent service people, and to learn about trends in the marketplace. Ryan Ellison, the YCA Supervisor of Piano Services is a long-time member who joined when he first decided to go into the practice of piano service and tuning. He states that he is in contact with the organization almost every working day, and recommends them to all his dealers.
Training and Certification
The training program offered by the PTG is comprehensive, and considered one of the best in the world. Interestingly, it is based on training materials and methods that Yamaha developed in the U.S. for the care of their instruments, and was run for 40 years under the name “The Little Red Schoolhouse.” Now called Grand Action Regulation in 37 Steps, the program was created by LaRoy Edwards, former head of service for Yamaha, before being turned over to the PTG in 2012. A practical guide to the workings of a grand piano, the course teaches technicians all they need to know to adjust and regulate the instrument, as well as tuning skills and best practices. While it was developed as a Yamaha-centric training, Ellison explains that “these are common, baseline things that all pianos need and benefit from. The basic design and technology of the grand piano hasn’t changed that much over the last decades, and the attendees learn skills that translate to most every instrument out there.”
To be certified by the PTG, a technician must pass three tests. The first is a written exam establishing basic knowledge of piano design, tuning concepts and various repair techniques. This is followed by two hands-on evaluations covering practical application of those studies. One is a tuning exam that challenges the technician to match a “master tuning” that was devised by a panel of experts as an optimal target. The judges use extremely sensitive audio equipment to measure the deviation from the desired target. Even though it is common to use electronic tuning devices these days, a technician aspiring to receive PTG certification must show the ability to reach the target goals by ear as well.
The final practical exam covers the technician’s knowledge of assembling both grand and vertical piano actions, and adjusting the myriad of settings of the mechanism, called regulation. This also includes demonstrating skills in the common repairs needed, including working with the wood elements, cloth and felt components, piano string wire and the other materials found in a piano action.
These exams must be performed within a prescribed period of time (four hours each), so the final judging is based both on skills and desired proficiency. Passing these exams confers upon the student the title of Registered Piano Technician. You should look for this qualification (RPT) when hiring a tuner/technician to work on your instrument:
The PTG Convention
Yamaha is also involved in the Piano Technicians Guild’s annual convention. Along with providing pianos for the event and exhibiting their instruments, Yamaha often holds seminars to educate the attendees. In 2022, Yamaha displayed their CFX Concert Grand, their Enspire Pro Disklavier reproducing piano, and the Bösendorfer 280VC Concert Grand piano. The company also held multiple workshops on piano maintenance, including four sessions led by a senior product designer from Bösendorfer. Finally, they sponsored a unique concert where Yamaha Artist Frederic Chiu performed a two-piano concert featuring him playing the CFX in duet with a CFX Disklavier, showing off the latter’s self-playing and synchronized-to-a-Disklavier-TV-performance capabilities. The 2025 PTG convention will be held from July 16 – 19 at the Iowa Events Center and Hilton Des Moines Downtown in Des Moines.
With the onset of fall, change is in the air. School has started again, the leaves are falling, and of course, it’s the beginning of another season for the National Basketball Association.
But the popular sports league, which is known for stars, scoring and athleticism, is also on display in many favorite video games, from the rudimentary offerings of the 1980s to those pixel-perfect ones today. Yes, basketball gaming is nearly as illustrious as the sport itself!
Here are eight of the best basketball video games ever made.
1. ONE ON ONE: DR. J VS. LARRY BIRD (1983)
The first-ever video game to feature a licensing partnership with the NBA, this 1983 title from Electronic Arts highlighted two of the NBA’s best players. Julius Erving, better known as Dr. J, would go onto win the NBA championship in 1983 and Larry Bird would win it the following year. But in this game, made for PC and Atari, along with several other systems of the era, the two stars are pitted against each other in a one-on-one half-court battle. Beware big dunks, because they can shatter your backboard, forcing a digital janitor to clean it up. This title was so popular that it led to the 1988 sequel Jordan vs. Bird. Preview it here.
2. TECMO NBA BASKETBALL (1992)
Gamers know the name Tecmo thanks to the popular 1991 release Tecmo Super Bowl™. But just a year later, the company released its basketball version for the Nintendo® Entertainment System (NES). Featuring rosters from the star-studded 1991-92 season, this is one of the last titles to feature the trio of Michael Jordan, Magic Johnson (who had retired the year prior) and Larry Bird (who retired at the end of the season). It was also the first game to be officially licensed by the NBA and the league’s player’s association. As far as the game itself, it marks an advance from the 1980s One on One series to include full-court gameplay, complete team rosters and improved graphics. Preview it here.
3. NBA JAM T.E. (1994)
The original NBA Jam came out in 1993, but the updated version, NBA Jam Tournament Edition, dropped a year later. This series was so popular that it’s still part of the lexicon now, thanks to phrases from the game’s announcer like “He’s heating up!” and “He’s on fire!” Popular both in arcades and on home consoles like Sega Genesis® and Super Nintendo®, NBA Jam T.E. offered users the chance to pick from three players on every NBA team’s roster to play in fast-paced two-on-two contests. Not only could gamers play as stars like Scottie Pippen, Shawn Kemp or Muggsy Bogues, there were secret characters to unlock too, like the musician George Clinton. This release was famous for big dunks, pushy defense and fun characters. Preview it here.
4. NBA LIVE 95 (1994)
This offering marks the first of the NBA Live series. As such, it features many crucial innovations, including precise in-game free-throw shooting and a turbo button for player speed bursts. Made for consoles like Sega Genesis and Super Nintendo, this was also the first NBA title to include the option for users to create fictional players, which gave gamers the chance to even create themselves as players. Today, NBA basketball video games are big, big business. But this was the first example of a more lifelike one, which would pave the way for others on this list like NBA 2K11 and NBA 2K24 (see below). Preview it here.
5. NBA STREET VOL. 2 (2003)
As stylish and bombastic as any sports video game created in the early 2000s, this sequel to the original NBA Street (which was released in 2001) includes skyscraping dunks, iconic legends of the game (like Larry Bird and Dr. J) and full-court three-on-three gameplay that mimics playground pickup games, but on steroids. This EA Sports™ title for Sony PlayStation 2®, Microsoft Xbox™ and Nintendo GameCube® is lavish and eye-popping, with a stellar soundtrack that includes songs from many popular artists of the era. Preview it here.
6. NBA BALLERS (2004)
Another game that depicts a hyped-up playground atmosphere, this 2004 title from Midway Sports was available for PlayStation 2 and Xbox. It offers one-on-one contests that pit players against each other for a timed best-of-three series. Inspired by the flashy styles displayed in the AND 1 Mixtape street ball leagues and videos — which were all the rage in the 2000s — NBA Ballers embraced the more flamboyant side of the sport with acrobatic moves and full-throated trash-talking announcers. Preview it here.
7. NBA 2K11 (2010)
NBA 2K11 is remarkable for several reasons, most notably because it features the NBA’s greatest player of all time, Michael Jordan. The Chicago Bulls star even graced the cover of this title, which offered both single-game matchups and a special season-long Association mode, where players could control an entire franchise from preseason all the way through the playoffs. Longtime gamers know how rare it is to have MJ in a video game, so including him in this one makes it feel that much more special and, well, necessary. Preview it here.
8. NBA 2K24 (2023)
The most popular run of NBA video games today, the 2K series’ most recent offering is the hyper-realistic NBA 2K24, which has already become a fan favorite. Its cover features the late NBA superstar Kobe Bryant, who wore No. 24 on his jersey during the final years of his NBA career. Available for multiple modern consoles, including PlayStation 5®, Xbox One™, Nintendo Switch™ and others, this full-featured game offers players traditional five-on-five gameplay or immersive options like being able to manage rosters, play entire seasons, engage in online competition against opponents and more. It also offers a PROPlay mode, which incorporates real, up-to-date NBA footage into the gameplay. Preview it here.
Strumming a guitar or playing piano is such a standard way to invite and capture musical ideas that even great bass players like Paul McCartney and Sting put down their four-strings when it’s time to write songs. But is it possible to write songs by making magic with your bass riffs? The answer is an unequivocal yes, and in this posting I’ll show you how.
STORY TIME
For our purposes, a “song” is a story we tell with rhythm, melody and harmony — in other words, a pulse you can feel, a line you can hum and a chord progression with a narrative arc, usually organized in terms of intros, verses, choruses, bridges and outros.
Many bassists think of music in terms of single-note bass lines instead of chord progressions. Because we spend most of our time playing the root of each chord, the other notes can be an afterthought. But if you want to add songwriting to your skill set, it’s helpful to learn about chord progressions.
COMMON CHORDS
The order in which chords appear is one of the great foundations of Western harmony. Our ears have become accustomed to certain chord sequences which have been used over and over again, so being familiar with these chord progressions makes it easier to learn tunes and write songs that satisfy (or subvert) listeners’ expectations.
SING IT AND FEEL IT
Chords are important, but even if you’re clueless about a song’s harmony and/or lyrics, the melody can still embed itself in your brain. Bass players are usually supporting vocals and melodic instruments, but we can play melodically too. Besides being fun, playing melodies on bass can aid in learning the fretboard, inspire your soloing, and help you write melodies of your own.
The rhythm of a song is just as crucial — so crucial, in fact, that the same chord progression over a different rhythm can sound like a different tune altogether. As you prepare to write, decide how you want listeners to experience your song’s groove (style and feel), tempo (usually expressed as beats per minute, or bpm for short) and harmonic rhythm (how fast the chords go by).
LET’S JAM
There are several ways to write songs on bass. Try singing a melody to yourself, playing it on bass, and then figuring out chords on bass that work underneath it. You could also take a stock chord progression and make it your own, substituting chords at will. Learning new songs, as well as practicing scales and arpeggios, may also fire up your inner songwriter. Of course, playing with guitarists and pianists is an excellent way to bring your songs to life, but working with samples can be rewarding too. Instead of click tracks, I practice with apps like Drumgenius and frequently find myself coming up with new parts as a result of those jams.
USING RIFFS TO CREATE A SONG
Here’s an example of how you can craft a complete song from a collection of bass riffs. It starts with an idea that came to me one day while I was practicing octaves between the D on the B string and the D on the A string of a Yamaha BB435 five-string bass:
When I played along with a beat, it sounded like an intro to me:
I first tried outlining a D major chord, but it just didn’t feel right, so I made a verse part by playing the root, third, fifth, and flat 7th of D minor instead:
After that first verse, it felt natural to go to the E string and repeat the pattern in G minor (a fourth up from D minor) before returning to D minor. If you’ve ever played a blues pattern, this progression — “going to the four” — will sound familiar:
Continuing the minor bluesy flavor, I played B♭ major for two bars, threw in a fill in G minor, and briefly touched on Fmaj7. After restating the original D minor groove, I played the B♭major-Gm-Fmaj7 progression again:
I then felt like going to a major tonality with a more “open” feel, so I created a new section (Fmaj7-Am7-B♭maj7-Fmaj7-Fmaj7-Am7-B♭maj7-Gm7), most likely inspired by a classic vocal melody:
After the expansive energy of the chorus, it felt right to bring the energy back to D minor:
Now I had a basic structure: intro, verse one (Dm7), verse two (Gm7), back to verse one, then verse three (B♭major-Gm-Fmaj7), verse one again, verse three, chorus (Fmaj7-Am7-B♭maj7-Fmaj7-Fmaj7-Am7-B♭maj7-Gm7), and back to verse one before a fadeout:
Developing this rough idea meant figuring out which chords worked for the bass part, adding a couple layers of keyboards, replacing the drums and carefully finding guitar samples that fit. A sax solo helped complete the vintage feel:
Meticulously arranging vocal samples from a series of loops made this really feel like a complete song, which I titled “It Ain’t Love.” Here’s what the final mix sounds like:
GETTING INSPIRED
As the saying goes, “Genius is one percent inspiration and 99 percent perspiration.” If you stay open to inspiration and are ready to catch it when it happens, you might find that good ideas show up more often. But no matter how (or how often) inspiration strikes, writing songs on bass can definitely be lots of fun!
Music students and music teachers alike suffer from writer’s block every now and then. Some days, it’s harder to keep that creative spark alive in the classroom.
Many of the things that foster my own creativity have helped my students as well. Kids are artists, too, and not as different from us as you might think! Here are a handful of tips to help un-stick writer’s block — no matter the student’s grade level or age.
1. Lower the Stakes
Some people say that the hardest part of composing is getting started. It’s daunting to open a blank document or DAW hub and penning or punching in the first few notes. While I partially agree with this, I think that high stakes are the biggest reason that dampens creativity.
High stakes can mean several things. When I compose or arrange, the project takes longer or never gets done if I have too many parameters. Starting with a 20+ instrument orchestral score or an overly flowery description of a piece as “inspiration” is a recipe for disaster. On the other hand, basic string quartets can be embellished and expanded into a symphonic piece with ease.
How can you lower the stakes? I reduce everything down to a lead sheet and chord symbols. I have found that when there’s a lack of rules, real magic happens. This works for our students, too.
The next time you give a composing assignment, stick to one or two parameters. “Come up with a song for a spooky movie” or “Use sol and do in a passage.”
Or, have students improvise over a basic drone and later sit down to write on the staff paper — this will have the same effect. Playing an instrument over just one note lowers the stakes.
2. Try a Different Instrument
Writing on or for the same instrument over and over again can feel redundant. So, if your class is always playing on hand percussion and xylophones, break out your classroom set of ukuleles.
Writing on different instruments feels different and will inspire different musical pieces. For example, when I play the cello, my writing often results in a legato, melancholy piece. But when I compose for guitar, the music tends to be more poppy. Students have a different relationship with each instrument they come across, just like you do.
Try bringing in and demonstrating an exotic instrument and have your students write a melodic line for you to play on it. You’ll be surprised with what they come up with. Some instruments that I have brought into the classroom include piccolo, djembe (a West African drum) and hammer dulcimers.
3. New Listening Exercises and Prompts
If your students aren’t relating to Vivaldi, supplement your listening exercises with something more modern. For example, have students listen to modern songs, and then prompt them to write a melody for that artist to sing. “Write a melody for Post Malone or Taylor Swift.” Make sure you select a clean and appropriate playlist for reference, of course.
Listening to music of all eras is important, but realize that if your classroom is in a creative rut, a pop-rap composition lesson might garner more excitement than saying, “Write an alternate motif for ‘Winter.’”
I remember teaching in the middle of February and struggling to keep the attention of a 1st-grade class. I decided to try an out-of-the-box idea — a Valentine’s Day-themed lesson where students would write poems on paper hearts, and then rap them to one another. I chose a basic copyright-free instrumental backtrack with a groovy feel. This was one of the students’ favorite lessons all year. For the rest of the school year, they asked to do the Valentine’s rap game. Little did they know that the lesson was a composition in disguise.
4. Move!
With an administrator’s permission, take your students outside for a walk before a composing lesson. A walk may sound like the opposite of doing music, but we all need to clear our minds before focusing. Students don’t get the chance to get up and about as often as they should. In middle school and high school, they have stricter schedules with even less opportunity to get out and move.
A Stanford study showed that people were 60% more creative while moving and that creativity remained for a while even when the exercise had concluded. For me, composing is best done after a stroll or getting that cup of coffee.
Before anything creative can happen, you must meet your own and your student’s basic needs (see Maslow’s hierarchy of needs theory). Your students won’t be as creative if they have unmet basic needs. If they are thirsty, hungry, anxious, or need to move, address these issues first. Keep emergency snacks and drinks on hand, and maintain a safe and comfortable spot in your classroom — these are essential for students of all ages.
5. Try a New Experience First
A new experience can be a lot of things — a trip to the symphony or art museum, a group drum circle, or a slam poetry/music collaboration project. Mixing up your routine — anything you wouldn’t normally do in your classroom — is creative fuel for young minds.
One other thing that fosters creativity at many age levels is improvisation. If you teach a group of older musicians, have students comp (improvise) over a tune as the rest of the band vamps (plays a basic section). Record this exercise and have students transcribe what they wrote on the fly.
Things I will never get back: the hours I wasted trying to get 200 names copied from an Excel spreadsheet as First Name, Last Name instead of COMMA, First Name, Last Name. Also, those hours wasted trying to do a mail merge from Word for three labels when I could have just printed them at some point.
Here are some tools and tricks I’ve accumulated over the years that have eliminated some of teaching’s little annoyances. The good news is that they save time every day. The bad news is that if I am missing any of these items or visiting somewhere, I must become “flexible.”
I picked up these tools gradually. If your funds allow it, go ahead and splurge. Otherwise, gather these items one at a time and make some small, but much appreciated, improvements.
Stamps
Ink stamps have saved me time for small items such as return address envelopes to hall passes. I always wanted the automatic time and date stampers that our front office uses for passes, but these can run several hundred dollars. For about $10 to $20, you can get a self-inking stamp and customize it with your name, school, etc. It doesn’t fill the entire pass requirements, but it has cut down on filling out passes dramatically. You can also use these for music scores, stamping original parts, etc.
Time saved per use: 20 seconds, which was used to scroll forums for last year’s marching band placements.
Extra Scores
Every time I purchase a piece of music, I get an additional score. This has come in handy more than I realized. I’m able to have a desk set and a podium set, or even bring one home to mark up during some free time. Additionally, whenever we have a clinician come in, or even an interested student, I can simply hand over the score.
Uses: your own score study, handing scores to other ensemble members or clinicians, mark up scores for comparison; home set for score studying and putting kids or spouses to sleep quickly by reading program notes.
Label Printer
This one is a bit of a luxury item. An individual label printer, such as a Dymo 550, can be an invaluable tool. I have a collection of Avery label pages that have 10, five or even just one label used on them. When I try to reuse them, they either get jammed or I don’t put them in the printer properly.
Uses: individual labels for envelopes, instrument case, return address envelopes (if you don’t have your fancy ink stamp), you name it. I also use these to indicate on purchase orders what my account is and where it is coming from, and the date I submitted the purchase order. Cheaper options exist — just make sure your tech department supports additional devices being connected to your computer.
Time saved: depending on my patience and mail-merge skills, at least 10 minutes. I used this saved time to unnecessarily label items, including office supplies, and yes, even the label maker.
Key Organizer
Maybe you enjoy getting holes in your nice dress pants, right next to the valve oil stains that won’t come out. Maybe you prefer jangle over joy. I don’t. I upgraded to a fold-out key organizer, and I’ll never go back. Most people have heard of KeySmart key organizers, but I use a brand called CarboCage, and I’m going on at least six years with it. I have a clip attached to it that allows me to securely attach it to my lanyard or car keys, and my keys are always conveniently at my disposal.
Time saved: it’s convenient until I have to spend precious minutes listening to drummers say, “You know what would be awesome on that? A drum key!”
Barcode or QR Scanners
Some districts are moving to scanned attendance. If you hold after-school rehearsals, there are some options for scanning IDs to take attendance quickly. However, using your handy dandy labels, you can also create barcodes or QR codes for student attendance logs or even for instrument inventory. This certainly takes some time up front, but combined with a cheap barcode scanner on Amazon, you can quickly scan kids in for attendance, fundraiser turn-ins, etc. I use a USB-connected barcode scanner and just search online to convert serial numbers or IDs to barcodes.
Time saved: about five minutes per rehearsal. Use this time to entertain yourself by scanning an ID and announcing, “Price check on aisle five!” to 100 silent, judgmental teenagers. At least you entertained yourself.
Flash Fill
This is not a purchase, but I must share this tip with those who don’t know about it. I love spreadsheets, but I easily get frustrated when they don’t work the way I want them to work.
Then, I stumbled upon something that changed my whole day: Flash Fill. Export some data in a table, such as ensemble members names or instruments. Next to these columns, write a few lines as you want to see them. You can use this to change the title case, reorganize words, and even adjust names in alphabetical order. Ctrl-E on Windows and Command-E on Macs. For Google docs, it’s called “Smart Fill” and activated by Ctrl-Y or Command-Y.
Time saved: at least 30 minutes. You’ll save 20 minutes trying to organize the sheet, and 10 minutes wondering if a pivot table is actually a gymnastics routine.
An Extra Set of Clothes
To deal with spills, surprise superintendent meetings or just for a change of pace, an extra set of clothes, preferably nice and presentable, can be helpful. Add some deodorant and a toothbrush in an office drawer as well.
Time saved: the time it takes to drive to a store or drive home is well-worth saving. Just make sure that if you change sizes over the course of your teaching career that your back-up clothes reflect this. Trust me on this one…
Pencil Dispensers
I purchased a pencil dispenser similar to a diner’s straw dispenser for my classroom. It’s refilled weekly, and I don’t have to worry about access to pencils. I place it in the front of the classroom, and we are always able to mark our music accordingly.
Time saved: once I got over the initial joy of dispensing pencils just to put them back in, this has easily saved us several minutes each rehearsal.
Extra Legal Copies of Music in a Drawer
Consider placing extra purchased copies of music in a drawer or file that students or a designated trusted student can access. If a student misplaces or forgets their music, the trusted student can help them out, which saves you the time of having to be at the beck and call of every request.
Time saved: about five to 10 minutes a week of copying. Unless that guy — the guy who loves to talk (a “time burglar“) — is at the copier, and you know that you’re not getting out of the copy room for at least an hour if he sees me.
Multiple Classes? Multiple Folders
If you teach two or more classes, keep a separate folder for each class. Even if some materials are redundant, keeping multiple copies in each folder will save time because you won’t have to shift even a single sheet or two back and forth. Grabbing the folder and going is a lot easier than making adjustments in between each period.
Time saved: depends on how far your office is. However, if you’re stressed from a rough class, you’ll have to create another excuse to leave the room for a bit.
Give Up Some Control!
I heard an interview with an author and entrepreneur who said that once he gave his employees some control, his workload went down considerably, the employees were happier, and the company thrived. I’m not comparing students to employees, but they certainly have requests and they do want to get the job done. Consider the most frequent student requests that start with “Can I” or “May I?” These are things that the kids can do themselves but feel they need to get permission.
Time saved: honestly, not much. You’ll probably hear the question, “What about this one?” over 100 times if you assign some kids to sort music. But they will get the job done, and future requests will go more quickly. It also creates more buy-in for your organization.
________________________________________
And there you have it — a small toolkit that makes a teaching day at least a little less chaotic. Use these tips to reclaim time for what truly matters, like wondering what you’ll do with all the time saved.
You’re visiting a friend (or relative) and are blown away — almost literally — by the sound coming from their audio system or home theater. The low end is making a special impression, to the point where the walls are almost starting to shake.
One glance around the room and you can see where the sound appears to be coming from: two or more speakers, connected, no doubt, to a powerful amp or receiver. But then there’s that mysterious-looking black box sitting on the floor, perhaps directly under the TV, perhaps tucked off to the side.
What the heck is it?
Well, actually, it’s the source of much of the magic you’re hearing. It’s a subwoofer — a special kind of speaker whose only job is to add extra sonic impact. Ready to learn more? Read on …
Anatomy of a Subwoofer
To better understand how a subwoofer works, let’s break the word down into its two parts: “sub” and “woofer.”
A woofer is the big cone at the bottom of a loudspeaker, the section designed to produce low frequency sounds. (The other, smaller cone or metallic component — called a tweeter — produces high frequency sounds. In some cases, there may also be a mid driver to produce midrange sounds.)
The sub prefix is short for “sub bass” — the lowest of the low end. So a subwoofer is a speaker in an self-contained enclosure that reproduces only the very bottom of the audio spectrum — those rumbling sounds that we actually feel more than we hear.
A rich, full sound ideally consists of a good blend of not only highs, mids and lows, but sub-bass too. So when that HUGE bass pad makes your chest vibrate during the breakdown of your favorite dance song, or that epic explosion practically lifts you out of your seat while you’re watching your favorite action film, that mysterious black box on the floor — the subwoofer— is largely responsible.
Subwoofer History
The first subwoofers were designed in the 1960s to help add bass to Hi-Fi stereo systems. As technology progressed, they found their way into movie theaters and then into home theater systems, where they reproduce the LFE (Low Frequency Effects) channel in surround sound mixes. The often-used term “5.1” refers to five full-range speakers and a single subwoofer (the “.1”) to play back the lowest frequencies. Advanced AV receivers like the 11.2-channel Yamaha RX-8A can route signal to two subwoofers (the “.2”), along with 11 main speakers.
Yamaha RX-A8A AV receiver.
Construction Considerations
The enclosure plays an especially important role in the performance of a subwoofer. Usually made from wood, fiberglass or other sturdy materials, it holds the sub driver in place and may also include any associated electronics such as crossover (the frequency at which the subwoofer begins working) and volume controls. While designs vary, some subwoofers have a port or hole to help project the sound, while others are sealed. The Yamaha NS-SW100 features a Twisted Flair Port design, which helps create a smooth flow of air for additional clarity and accuracy.
Yamaha NS-SW100 subwoofer.
Subwoofers also come in various sizes and shapes. Most are designed to sit on the floor, while some compact models have a down-firing driver and front-facing port, enabling them to be rack-mounted or positioned vertically.
Active subwoofers include a dedicated amplifier, whereas passive subwoofers do not — instead, the power is provided by the amplifier or receiver. Power ratings, expressed in watts, represent the amount of power a subwoofer can handle on a short-term (“transient”) and/or continuous basis. Higher power ratings generally translate to a louder, cleaner sound.
Advanced Subwoofer Technologies
Subwoofer technology continues to improve. For example, there are now subwoofers (such as the Yamaha MusicCast SUB 100) that can connect with a MusicCast-capable system wirelessly. In addition, Yamaha NS-SW Series subwoofers such as the aforementioned NS-SW100 incorporate a proprietary system called Advanced YST (short for “Yamaha Active Stereo Technology”). This helps improve the motion of the subwoofer driver for especially strong and accurate low end.
Subwoofers can also work with sound bars, helping to extend their frequency range. With a product such as the Yamaha TRUE X BAR 50A, a wireless subwoofer is included, allowing you to place it anywhere in the room. (Low frequencies are not easily localized — that is, it’s hard for the human ear to perceive where they come from — so a subwoofer can be positioned pretty much anyplace it sounds good.)
Yamaha TRUE X BAR 50A sound bar and wireless subwoofer.
So if you’re looking to improve the richness and fullness of your audio system or home theater, consider adding a subwoofer. It will help lighten the load on your other speakers or sound bar, and fill out the all-important bottom end. More importantly, your favorite action films, video games and music tracks are sure to sound better for it.
It’s important when learning a new piece of music to plan out your keyboard fingering ahead of time — to decide which fingers you will use to play each note, and how you will move your hand position to cover passages that don’t fit underneath a single location. If you don’t take this important step, you may find yourself unconsciously changing your fingering decisions each time you play a piece of music, which in turn won’t allow the repetition of practice to help you develop proficiency in performance.
Here are some tips for making good choices.
The Basics
Piano keyboard fingering is commonly numbered as follows:
The thumb is numbered as 1
The index, or pointer finger, as 2
The middle finger as 3
The ring finger as 4
The pinky as 5
Some players feel that rules are made to be broken, but there are four best practices for piano keyboard fingering that you should follow:
1. In general, don’t use your thumb on black keys. Doing so moves your hand forward (away from you and closer to the back of the keyboard), which makes it harder to control the white keys. The exception is if you are learning a piece of music that starts on a black key and/or is predominately played on the black keys, in which case you will almost certainly have to use your thumb.
2. Try to use as many of your fingers as possible when executing passages. It’s tempting to only use the first two or three fingers, which tend to be the strongest, but the more fingers you utilize, the smoother your playing.
3. Similarly, try to keep your hand in a position that covers as many of the notes in the passage as possible. Think of it as economy of motion: no need to move around more than necessary just because you couldn’t cover one note at the end of a phrase.
4. If you have never studied how to play scales in basic piano lessons/pedagogy, it would be good to work on this keyboard fundamental. The fingerings and technique you learn will be very helpful in figuring out how to execute new music.
Most musical passages you will encounter can be broken down into one of three scenarios. Let’s explore each in turn.
Scenario One: Everything Fits Under Your Fingers
In this scenario, the notes of the phrase all fit easily underneath your five fingers. The fingering for this is easy: just place your hand over the range of notes and play accordingly. For example, if you were to play this passage …
… your hand should be placed over the keys as follows:
This works even when all the notes aren’t white keys. Here is the same example played in the key of E major:
Here, your hand should be placed over the keyboard as follows:
Finally, here’s the same phrase played in the key of E-flat major. This is an instance where it’s fine to place your thumb on a black key:
Here, you should place your hand over the keyboard as follows:
Scenario Two: The Need To Stretch
Usually, only small sections of a piece of music will fall so cleanly under the hand as in the above examples. More common are phrases that can be best played by stretching your fingers so you can reach more notes without having to completely move your hand position. For example:
To play the notes in the first measure, you’ll need to stretch your hand slightly so your 5 (pinky) finger reaches up to the A, as shown below. (No finger needs to be positioned to play the D, since it’s not part of this phrase.)
In the second bar, you’ll need to stretch slightly further so the pinky can now play the B-flat while the rest of your hand remains in position:
Scenario Three: A Change In Hand Position Is Necessary
The most advanced situations are phrases that require you to reach notes further away than any single hand position can cover. This encompasses the widest range of possibilities, and the first that we’ll discuss is a phrase that requires you to make two easy shifts in your hand position along with stretching your fingers during the section, as in this example:
The first two beats in measure 1 require you to stretch your hand so your thumb plays the middle C and your 4 (ring) finger plays the B-flat, like this:
Alternatively, you could have chosen to use the 5 (pinky) finger for the B-flat, fingered as follows:
There is almost always more than one way to approach these kinds of decisions; do what feels best for you.
In the rest of measure 1, the line climbs higher, so you’ll have to move your hand position to be able to reach the remaining notes. As suggested earlier, it’s best to find a way that moves your hand into a position that covers as many of the notes as possible. Accordingly, as you get to the B-flat, you should start to bring your thumb under to the right to bring it closer to the F. That way, after playing the G with the 3 (middle) finger, your thumb will be ready to play the F. You can then stretch your hand upward to get into position for the upcoming B-flat and C, using the 2 (index) and 3 (middle) fingers respectively:
Next, stretch the hand again so you can reach the upper G with your 5 (pinky) finger. As you reach for the G, bring the rest of your fingers back together to cover the last two notes, like this:
Scenario Four: Long Ascending Lines
The longer a phrase is, the more you will have to keep shifting your hand position. As a general rule of thumb (pun intended), you should try to use groupings of three to four notes before shifting your hand position. Let’s figure out what to do for this example:
Trying to use as many note groupings as possible. Here’s one possibility:
The beginning of the phrase through to the middle of the second measure works well as four-note groups, and then you need to bring the thumb under to jump up to the C on beat 3. From there, you can choose a three-note group and bring your thumb under again to help stretch up to the high A. Then you can let your hand relax into a normal position, which allows you to cover the rest of the notes.
The only difficult part of the above example is the jump from the G (played with the 4 finger) to bringing the thumb under to the following C note on beat 3. Here’s an alternate approach that might be smoother for you:
Starting off with two three-note groupings sets you up to play the E, G and high C in the second measure, all within the same hand position (using your thumb, 2 and 4 fingers), after which you can bring your thumb up and into the following notes in closer proximity, which may feel better to you. You can then play the rest of the phrase within the same hand position by just stretching up slightly to reach the A.
By applying these basic principles, you will learn to work out the best fingerings for your hands — an essential step towards smooth and fluid playing.
Traditionalists love two-channel Hi-Fi. Forward-thinkers love networking and music streaming. With Yamaha Network Hi-Fi receivers, you get both.
Here’s a guide to the current lineup, along with a description of their salient features.
Streaming Plus
There are four Yamaha Network Hi-Fi receivers to choose from: the R-N600A, R-N800A, R-N1000A and R-N2000A. All four models offer superb stereo sound, Bluetooth® wireless connectivity and support for Apple® AirPlay 2® so you can share music with multiple connected devices and exercise voice control of those devices via Siri.
All are MusicCast-enabled too. MusicCast is the Yamaha proprietary whole-house solution that uses your existing Wi-Fi network to share music to other MusicCast-enabled audio components under the control of your smart device. This groundbreaking technology allows you to listen to downloads from your computer or other devices and to stream music from the most popular music services such as Amazon Music HD and Spotify®, letting you fully enjoy exceptionally high-quality audio anywhere in your home with complete fidelity.
All four models are available in your choice of a black or silver finish, and all offer a rear panel subwoofer output as well as a front panel headphone output. They also provide dual stereo speaker outputs so you can connect two pairs of speakers, along with a comprehensive set of input connectors, including special phono terminals so you can easily connect a turntable and enjoy music from your vinyl record collection. There’s even a Pure Direct button that bypasses all tone control and loudness circuitry, allowing you to instantly hear the purest sound through the shortest signal path.
Let’s take a closer look at each model.
Good: R-N600A
Yamaha R-N600A.
R-N600A rear panel.
The Yamaha R-N600A is a traditional stereo Hi-Fi receiver with all the modern features described above. It offers 80 watts of output power per channel with a frequency range of 20 Hz to 20 kHz, and provides five analog audio inputs and four digital audio inputs, including an optical connection so you can hear TV sound with Hi-Fi quality. A front panel USB port allows connection to a thumb drive, and its advanced construction design mounts all circuit boards to a composite resin base that is anti-resonant and isolated from the chassis to effectively remove any external mechanical vibration.
Better: R-N800A
R-N800A.
R-N800A rear panel.
The R-N800A ups the ante with 100 watts of output power per channel and advanced features such as a front panel OLED digital display that shows the content being played, a rear panel preamplifier (PRE) output, specially designed anti-resonance feet that absorb and reduce mechanical vibration, and a detachable power cord. It incorporates the renowned SABRE ES9080Q 384 kHz / 32-bit Ultra DAC (from ESS Technology) to deliver superior sonic performance and accurately reproduce even the finest musical nuances and the subtle ambience of concert halls.
In addition, the R-N800 offers YPAO™ (Yamaha Parametric room Acoustic Optimizer) sound field correction. The goal of YPAO is to create an ideal listening environment right in your living room. This is accomplished by analyzing your room and automatically applying small amounts of precision EQ to match the two speakers to one another. The end result is tightly focused sound, with each sonic element occupying its own space in the sound field. You can even store individual YPAO settings for each set of connected speakers (A, B and A+B).
Best: R-N1000A
R-N1000A.
R-N1000A rear panel.
The R-N1000A incorporates all the features of the R-N800A, along with gold-plated speaker and input terminals, ensuring a high-quality connection that prevents signal loss. In addition, it utilizes extra-thick wires for the internal ground connections — a critical feature that establishes the componentry as being truly premium Hi-Fi, with increased signal-to-noise performance.
The R-N1000A also provides an HDMI ARC (Audio Return Channel) port, allowing connection to a TV with just a single cable, and with excellent hi-res sound quality. Like the R-N800A, there’s a rear panel USB connector with built-in DAC (digital-to-analog conversion) functionality. The internal ultra-precision dedicated crystal clock ensures signal accuracy, with support for DSD 11.2 MHz native playback and PCM 384 kHz playback, letting you take full advantage of the sonic precision unique to today’s high-resolution and lossless sound sources.
Audiophile Quality: R-N2000A
R-N2000A.
R-N2000A rear panel.
For the ultimate network Hi-Fi receiver, look to the flagship Yamaha R-N2000A, which incorporates all the features of the R-N1000A but utilizes the same patented floating and balanced amplifier design as our acclaimed A-S Series integrated and M5000 all-analog power amplifiers. It offers 90 watts of power per channel with an extraordinary frequency response of 5 Hz to 100 kHz and incorporates a toroidal transformer that delivers an overwhelmingly spacious sound filled with realism.
The mechanical ground concept utilized by the R-N2000A maximizes rigidity for expressive and rhythmic bass, and its ESS SABRE ES9026PRO Ultra DAC ensures ultimate high-performance conversion. The front panel features elegant level meters with softly illuminated LEDs that evoke the nostalgic era of Hi-Fi, and the rear panel offers speaker terminals that are cut from pure brass for highly secure connection, along with an Ethernet connection for high-speed data transfers. Listen to your favorite music through the R-N2000A and you may even discover a few details you never noticed before!
Whatever your budget, whatever your audio needs, there’s a Yamaha Network Hi-Fi receiver that’s right for you.
Drummer Sonny Emory and bassist Nathan East comprise one of the most solid rhythm sections in music. The reason is that they are tight — not just in the musical sense, but in terms of a steadfast friendship that has lasted for over 30 years.
Their credentials are impeccable. The Atlanta-born Emory started drumming at the age of 4 and moved to Los Angeles twenty years later, where he began playing with Joe Sample and the Crusaders. From 1987 to 1999 he held down the drum chair with the legendary R&B group Earth, Wind & Fire, and served as a member of Bruce Hornsby’s Noisemakers band from 2002 to 2018. In the course of his career, he has recorded and/or performed with a virtual who’s who in pop and jazz music, including Eric Clapton, Stanley Clarke, David Sanborn, Bette Midler, Al Jarreau, Paula Abdul, Jean-Luc Ponty and Boz Scaggs. A graduate of Georgia State University with a B.A. in Jazz Performance, Emory has long had an ongoing commitment to academia and currently serves as part-time professor of applied percussion at Georgia State University. His rock/funk group The 7eventh Time (formed with his sons sons Nic Gibran and Ni Emory) recently released their debut single, “Lost in the Sunshine.”
Sonny Emory.
Nathan East is well-known as one of the top session and touring bassists in the world. A founding member of the chart-topping contemporary jazz group Fourplay, he was 16 years old when he got his first break and found himself on the road with Barry White. For the last forty years, he has been churning out hit songs with legendary artists like Eric Clapton, George Harrison, Michael Jackson, Phil Collins, Whitney Houston, Beyoncé, Barbra Streisand and Stevie Wonder. His genre-crossing groove has earned him recognition — including a Congressional Record for his contributions to the worldwide music community — and the respect of his peers, as illustrated by his appearances on hit records as diverse as Andrea Bocelli’s Passione and Daft Punk’s Random Access Memories.
Nathan East.
Another commonality shared by the two is that they are both Yamaha Artists. We recently caught up with Emory and East as they discussed what it takes to build a foundation on which great music can be made.
FINDING THE GROOVE
Sonny Emory: We’re a team and we’re hired to create something together that supports the artist. Every night is special for us because we approach it with love and passion, and we’re trying to get better every night.
Nathan East: You dig a groove, and you just keep getting deeper. And pretty soon you can’t get out of it.
Sonny: Into a hole you can’t get out of, known as the pocket.
Nathan: Exactly.
Sonny: It is very, very important for the bass and drums to become basically one instrument, and then you build the musical house on that one foundation. But it takes two willing parties to be able to find out where the other party is living and meet in the middle so that you can create something together.
Nathan: Listening is such a big part [of it], listening and trusting, because whenever I put a note down, it [should be] with the bass drum simultaneously, and [with Sonny] I don’t have to worry that it’s going to be in front or behind. You just trust this one location where that downbeat is going to be. And for me, every bar is the new downbeat, a new opportunity to get it right.
Sonny: When you do that as a duo consistently, that is what creates that groove. Any bass/drum duo that you’ve heard in the past has been really successful as far as the groove.
Nathan: Especially with our instruments, drum and bass, the most important thing is consistency. We have to be a constant, and I try to maintain that constant energy and attitude.
Firm friends.
THE IMPORTANCE OF FOCUS
Nathan: You know, it’s easy to start off with focus. You start the tune and you’re concentrating, but then as it goes on, a lot of people will [begin to] drift. Pretty soon it’s not as focused toward the end. But up until the last note, it has to be focused. That’s one of the things that Joe Sample always tried to drill into us: Don’t just start and then let it go.
Sonny: There’s a mental kind of telepathy thing that we have to do. Nate is standing in front of me and downstage, but I’m always out of the corner of my eye looking at his body language, checking out how he’s feeling, what we need to feel. We’re navigating the hole, and we have a lot of fun [doing it]. The fun is the challenge of being able to lock that groove in and make it feel the way it’s supposed to feel every night.
Nathan: For me, the drums are the DNA, the ground zero for the beat, the groove, the song, the dynamics.
Sonny: The bass to me plays a similar role. I would go even as far as to say that the bass is the glue. I’m trying to lay the concrete, here comes the glue for the other parts. And of course, Nathan plays so beautifully, so melodically as well as [laying down] the foundation of the groove and has mastered how to do both, basically simultaneously without getting in the way of or detracting from either one. I know I can depend on him. That’s what you need. You want to have your best guy with you to make sure that you win.
”You want to have your best guy with you.”
Nathan: Sometimes I look at it as, say, a basketball team. Did we win the game tonight? When we go out there, we have to not be individuals, we have to pass the ball to each other. We have to think in terms of, ‘What’s going on around me and how am I going to be able to help the conversation and be here to serve?’
Sonny: And to assist. There are nights where sometimes there may be a little quirky something, but we all have to have each other’s back in order for us to stay the course and win the game together, not [just] the quarters. You want to win the whole game. It’s not enough to just play two or three songs great. That set overall needs to be a good set.
Nathan: A great set. But we’re not talking about perfection. If there’s a clam or a mistake, you get to see what you’re made of. Steve Ferrone used to say, never make the same mistake once. But the times that I feel it just tickle are when you simply put that groove down there. It’s infectious and it’s a lovely thing.
Sonny: And the audience, they feel that right away. If you do that from beat one and you try to make that your goal, every bar of every song, they feel it. It’s an emotional thing. Especially when it starts on the bottom, everything on the top is just icing. The challenge is concentrating for a complete hour and a half. Not 30 minutes, not 42 minutes, not 60 minutes. 90 minutes from the first beat to that last downbeat.
Nathan: Your intensity [has to be] as strong on the last song as it is on the first song. In order to win, you’ve got to push it.
Sonny: You can’t drop the ball an hour and 15 minutes into the game; you don’t want to fumble with two minutes left in the fourth quarter if you’re about to score.
ADVICE TO YOUNG MUSICIANS
Sonny: Well, good luck! [laughs] You’ll need a little bit of that, too. Nathan has always been a musician that I’ve admired, not simply because of his mastery of the instrument and his musicality, but because of the person that he is. He’s a very, very genuine person. He’s grounded. I tried to model myself after guys like Nate who live life with integrity and play music with integrity, always a gentleman, well-rounded. That’s what I want to impress upon the younger guys now. But if you’re getting into music, be ready for some disappointments. You’re not going to always win, or the situations aren’t going to always turn out the way that you would hope for. Just continue to try and move forward. Stay true to the craft.
Nathan: Music is what we do, but we do it with so much love and passion, it almost becomes who the person is. But I think you make a good point when you stress the human element and the humanity that comes with your playing as well. And this is one of those things that shouldn’t have anything to do with how much you’re making. You still should bring the same love, whether the gig is for 20 people or 20,000 people. You’re not going to play less, and you’re not going to be less of a person. And you can’t do it for followers, for likes, for money. No. It has to be something that you love.
Sonny: The ups and the downs are going to come. But if you have the love for [music], the love will get you through those down periods. That’s what keeps motivating you to continue to move forward.
THE NEW MUSICAL PARADIGM
Nathan: We’re in a completely different music environment [today] than when we started playing.
Sonny: The paradigm has definitely shifted. This is a totally different industry.
Nathan: Young musicians have to figure out how to navigate this paradigm, just like we had to figure it out when we started out. It’s a people business, and every time you get on stage, there are eight other people over there, each with their own story, each with their own life. I’m not as concerned with telling my story as I am about finding out what everybody else’s story is. That keeps you curious. It keeps you passionate, and you learn, and you listen as much as you can.
Sonny: When you stop learning, it’s over. It really is. You stop growing the minute you stop learning.
Nathan: And if you’re up there, be careful [because] it can change in an instant.
Sonny: Which is why staying grateful is very important. So stay grateful, stay humble, and stay hungry. Stay learning. Continue to just become a better version of yourself.
To encourage students to engage with melodies beyond the confines of sheet music and go off the page, consider having them decipher melodies by ear. This approach can be scaffolded to gradually build upon student success. Begin with a “fill-in-the-blank” melody exercise, where a portion of the melody is notated in standard notation, leaving a measure blank. Challenge students to use their ears and musical memory to fill in the missing measure. For this exercise, you can choose a familiar folk melody or a children’s song that everyone knows.
The next step in this process is to have students play a melody they hear from a recording. Select a popular melody that students are familiar with and loop a section at the start of the class. Display it on the board for students to work on while they assemble their instruments as part of their warm-up routine. Play the melody together as a class using the loop, then turn the loop off and have students play the melody independently. Encourage students to infuse style into the melody by experimenting with articulation and dynamics when they play it. Finally, have students share their stylized melodies with the class. This approach encourages students to be more expressive with their single-note playing and helps them better understand melodies when reading them from sheet music.
Melody Tab
When playing melodies from memory, it’s helpful to consider where the melody aligns with the underlying chords. Most often, melodies start on chord tones like the third or fifth. To introduce this concept to students, use melody tab notation. In melody tab, chord tones are represented by numbers in place of note heads, and the rhythms are indicated using beams and flags.
Display chord spellings on the board for various instruments in different keys and have students practice these melodies while paying attention to chord tones. To delve deeper into this, encourage students to memorize chord spellings and play melodies using their memorized chord knowledge. This approach not only teaches them about melody theory but also serves as a foundation for improvisation.
Transcription is a challenging yet rewarding skill for composers, improvisers and musicians who play off the page. Beginning with a blank page can be daunting, so guided transcription provides students with a structured approach to learning melodies. Divide students into small groups and provide them with melodies, along with supplied rhythms and starting pitches to assist them in transcribing. Students can use notation software like Dorico or traditional paper and pencil for this exercise. Start with simpler songs, such as Blink-182‘s “All the Small Things” and gradually progress to more complex jazz solos.
Harmonize a Melody
Teach harmonization in two ways: by ear and through theory. When teaching harmonization by ear, consider it like lanes of traffic. Identify a lane, which represents a chord tone either above or below the melody, and follow the direction of the melody while staying within the harmonic lane. Play a simple melody for students to learn by ear, play chords underneath with a piano or guitar, and have students experiment with chord tones above or below the melody. Let them discover the notes that fit harmonically while following the melody’s contour. Remind them to stay in their lane and find notes that sound good.
For a more theory-based approach, introduce students to harmonization through chord tone analysis. This sample score brings students through an approach of writing harmonies in a more traditional manner. Combine both strategies to create a solid foundation for writing harmonies.
Once students can write their own chordal parts, learn melodies by ear and harmonize melodies off the page, they can create their own complete arrangements. Encourage students to listen to horn arrangements by different artists to understand how timbre changes through instrumental texture and how harmony can be added or removed to create varying textures. Have students select a tune and arrange it together as a call.
Start by collectively storyboarding and narratively planning the melody, harmony and instrumental parts of a song. Then, experiment with different combinations of timbres, ranges and instrument families for the chords, melodies and harmony parts. Perform the song at a concert and explain the creative process to the audience. With practice, students will be able to craft their own arrangements of songs, fostering creativity and expression in a student-centered, project-based environment.
I’ve always been an advocate of creating a job, rather than finding one. This gives you control over both the employment details and the job description, along with the ability to adjust each parameter to personal taste.
I know this entrepreneurial approach isn’t for everyone — especially those who aren’t self-starters — but it’s served me well for many decades.
Of course, there are multiple ways to earn a living within the music industry: anything from executive positions within major corporations to retail store sales positions, content creation, teaching, and of course, live performance. In this posting, however, I’d like to cover one specific area of the music industry and share five surprising ways to find (or create) a gig as a guitar player.
I’ll assume you are at a reasonably proficient level of ability, have good gear and a list of songs that you can perform at a moment’s notice. Repertoire will be essential if you are a solo performer, jazz musician or cover band musician: You’ll need a shortlist of standout tunes you can use for auditions, as well as a more extended list for when you land the job. Most live performance engagements last for three hours, typically broken up into three 45-minute sets, though sometimes the first set needs to be an hour long to get the audience “hooked” and excited.
Here are five tips for landing a gig as a guitar player:
1. Subbing
The first thing I did when I moved to Nashville (and later to Kona, Hawaii) was to go out and meet the local players who already had established gigs. Making friends with these musicians will allow you to tell them who you are, what you do, and offer your services should they ever need a last-minute stand-in (a “sub”) for their regular gig.
I’ve literally been called or texted an hour before a gig to fill in for a booked artist. These positions can turn into a regular engagement if the artist moves on to a better time slot or venue, or leaves town altogether. For me, many of these initial substitute gigs turned into lucrative long-term resort residencies.
Think about it this way: Helping a fellow musician out of a tight spot builds good faith, shows willing professionalism, and allows you to showcase your talents to the venue management. Win-win!
2. Become a Sideman
In the major music hubs like New York, London, Los Angeles and Nashville, there are long lists of musicians that are available to play one gig, a weekend run of dates, or a world tour. These players aren’t necessarily looking to join a band, but are instead sidemen that work for hire to back up an artist. These gigs can become regular engagements, and even sometimes turn into band positions, though management, artists and labels often prefer to offer a short-term contracts to session players instead.
Sideman opportunities may arise through friends, your listing in a session agency or the Musicians Union, or simply because you’re well known in the industry as a reliable asset to any performance situation.
If you’re extremely professional, proficient in multiple styles of music, have a cool vibe, learn fast, get on well with people and are available for travel on short notice, this might be the ideal gig for you. Just remember that when these kinds of jobs come to a close, so do the revenue streams that are associated with them. Generally speaking, sidemen get paid for the performance day, not the travel days. This may mean being on the road for five days but only getting paid for three — something you might want to consider (or negotiate) before accepting the gig.
3. Worship Gigs
If you attend a church that features weekly live music, you’ll notice just how amazing some of those players are. That’s because many of them are professional musicians during the week, and support their faith through performance in church on Sunday.
Many musicians take these kinds of jobs just to network with the talent on those stages. The worship industry is huge, and that simple “church gig” could well turn into a major placement as a session player, bandmember or as an artist in your own right.
You’ll often find multiple guitar players onstage at worship gigs. If you hope to join them, make sure both your electric and acoustic skills are up to par. As a bonus, if you sing or play bass, keyboards or percussion, you’ll become known as a multi-instrumentalist, and your financial value will increase dramatically.
4. Jam Nights
Many clubs host a weekly jam session, and playing at them is a great way to showcase your skills. Quite often, these venues will have a house band that you’ll jam with. These players are likely to be working with many other musicians on the local music scene. Impress those guys, and your name will be whispered through the ranks of other well-respected players in town. Never underestimate the power of impressing people at a low-key event!
Performance jam sessions are also a great way to work out new material and/or conquer any stage fright issues that may be holding you back. You may also meet other participants or attendees that simply need a back-up guitar player for a gig or recording session.
5. Songwriter Rounds and Open Mic Nights
Songwriter rounds and open-mic nights are another great way to showcase your skills (and your songs, if you write). More often than not, other writers or attendees will jam with you, or you with them, by playing fills, singing harmony or taking solos. I did this a lot when I lived in Nashville, and I can’t tell you how many times I was asked to play a gig, record a session or collaborate on a project after a show.
If you’re in a music hub like Nashville, you’ll get to hear the newbies working out the kinks in their performances, but you’ll also witness the master musicians that turn heads with every note they play or sing. But even in off-the-beaten-path places like Hawaii, these kinds of events can provide great networking opportunities. One evening I was playing at the “First Fridays” art walk in Holualoa. I was there to support a local art gallery, playing for tips, and I met a couple of very influential people that were very impressed by my performance. That “free” gig led to some of the most lucrative resident gigs and private events I’ve ever played.
The Video
One of my favorite gigs is representing Yamaha guitars at trade show events. In this video, I’m playing to a group of NAMM attendees that are enjoying the tones of a Yamaha SA2200 semi-hollow body electric guitar played through a Line 6 Helix processor and a Yamaha STAGEPAS 1K (now replaced by the STAGEPAS 1K MkII) PA system.
After this performance, the guitar player and keyboardist for a mega-star artist asked me if I’d be interested in playing guitar in the band for the next tour. It’s these kinds of opportunities that arise when you are active within your industry.
The Guitar
The handmade Japanese-crafted sunburst SA2200 semi-hollow guitar is my favorite instrument in the Yamaha guitar range. The tone, playability and cool vibe it offers resonate perfectly with my stylistic approach — and I hear the same positive comments from every musician who has ever played one. It’s just one of those guitars that works well in so many genres of music.
The Wrap-Up
I’m a huge believer that we, as humans, are transmitting thoughts, desires and all sorts of communications into the ether.
But it’s a two-way street: You also need to have your antenna “open” and tuned in to receiving messages of guidance. We can wait for divine inspiration, a sign, or the muse to appear, or we can choose to be proactive and manifest the reality we want, and the jobs we desire most.
Activity breeds activity, and we have the ability to create the realm we live in: that’s what consciousness is, after all. So go out and manifest that amazing gig you’ve always dreamed of!
22 year-old Matthew Whitaker is the very definition of a one-time child musical prodigy. His grandfather gave him a Yamaha keyboard when he was just three years old — and soon, he was off and running. “I taught myself nursery rhymes,” Whitaker, who was born blind, says. “I was just copying whatever I heard on the radio.”
His family quickly realized this wasn’t just a toddler making noise — this was an extraordinarily talented musician. Whitaker first attended New York City’s Filomen M. D’Agostino Greenberg (FMDG) Music School, an institution committed to helping people pursue their study of music while addressing the challenges posed by vision loss, where he learned to play piano, later becoming adept at both drums and the organ. At 10, he performed at the Apollo Theater, opening a show that celebrated Stevie Wonder’s induction into the legendary venue’s Hall of Fame. At 15, he was named a Yamaha Artist — the youngest musician ever to join that storied group. In 2020, the long-running CBS television show 60 Minutes devoted an entire segment to him.
Musical Director Matthew Whitaker playing a Yamaha grand piano during the opening run of “Billy Strayhorn: Something to Live For” at Pittsburgh Public Theater.
Despite all the accolades, humility seems to be second nature for Whitaker. “I always tell people that God blessed me with a gift,” he says. “And I’m always blessed and honored to share that gift with other people.”
Two Musicians from Two Different Eras
Some 85 years before Whitaker arrived on the scene, another child prodigy named Billy Strayhorn was born. By the time Strayhorn reached his teens, he was already composing sophisticated songs, writing for musicals and leading jazz combos. Most impressively, he began composing what many consider to be his masterpiece, “Lush Life,” when he was just 16 years old. That song, a preternaturally world-weary lament set to an almost mystical D-flat melody, has since become one of the American Songbook’s immortal standards, covered by countless musicians over the decades, including Nat King Cole, John Coltrane and Ella Fitzgerald. Even pop megastar Lady Gaga tackled “Lush Life” with Tony Bennett on their Cheek To Cheek duet album in 2014.
Strayhorn’s closest collaborator for more than 30 years was Duke Ellington, who called him “my right arm, my left arm, all the eyes in the back of my head, my brainwaves in his head, and his in mine.” Indeed, Strayhorn composed Ellington’s signature song, “Take The ‘A’ Train,” along with countless other Ducal favorites.
The Musical Comes Together
In the fall of 2023, the separate paths of Matthew Whitaker and Billy Strayhorn crossed when Whitaker became musical director for Billy Strayhorn: Something to Live For, a new musical that debuted at Pittsburgh Public Theater. Written by Rob Zellers with Kent Gash, the play tells the Strayhorn life story, from his impoverished youth in Pittsburgh to his behind-the-scenes wizardry with Ellington, to his work with such singers as Lena Horne and Billie Holiday.
The musical features lively dance numbers, intricate choreography and vibrant wardrobe, but it also delves into the composer’s trials and triumphs as an openly gay Black man during an era when both the civil rights and gay rights movements were in their infancies. Tragically, Strayhorn didn’t live to see the dawning of a more tolerant age; he passed away at the age of 51 in 1967.
Whitaker got involved with Something To Live For via Steven Tabakin, one of the musical’s producers, who had made About Tomorrow, a PBS documentary about the pianist that aired in 2022. “During the filming process, [Steven] was like, ‘Oh, you remind me so much of Strayhorn,’” Whitaker recalls. “He said, ‘I’m working on this musical with Kent Gash, and I would love for you to be a part of it.’ I said, ‘Wow, I would love to.’ I think [Strayhorn] and I are really similar. The fact that he was able to do this despite how he was treated — it’s really inspiring.”
The musical features lively dance numbers and vibrant wardrobe.
Matt’s Musical Direction
Featuring a score filled with Strayhorn’s best-known works (plus plenty of hidden gems), Billy Strayhorn: Something To Live For gave Whitaker the chance to take a deep dive into the composer’s musical universe — though he didn’t feel the need to improve on perfection. “Billy is one of the greatest composers,” he says. “I’ve been digging into his music and when it came to arranging, everything was pretty much there. [He] had such a great ear for everything. All I did was put in a few of my things in here and there, and that was pretty much it.”
According to Whitaker, it’s significant that Something To Live For debuted in Strayhorn’s Pittsburgh hometown. “The fact that we’re so close to some of the landmarks that have been mentioned [in the show] is fascinating,” he notes. “For example, one of the scenes [takes place] at the Stanley Theater — and that theater is really close to the theater that we’re in.”
Playing a grand piano provided by Yamaha Dealer of the Year Solich Piano, Whitaker led a live jazz group each night during its initial run, expertly accompanying the onstage action. Despite the fact that he’s a seasoned performer, having taken the stage at such hallowed venues as Carnegie Hall and Lincoln Center, taking part in this kind of production is new to Whitaker. “Honestly, it’s really fun working with everyone,” he says. “Everyone is super unique [and] is just really gelling with one another.”
Matthew performing live with lead actor Darius de Haas.
Critics have been impressed so far. “The Billy Strayhorn story may be known to jazz heads, but it’s a fiercely human narrative that deserves to be heard after years in Ellington’s shadows,”wrote Broadway World’s Greg Kerestan. “Hopefully, this show will put Billy Strayhorn back in the narrative … and double hopefully this cast and orchestra will record a cast album so I can hear these performances again!”
“Audiences have been loving it, and everyone is wondering what’s going to be happening next with the show,” Whitaker says. “So hopefully — fingers crossed — we’re going to be going somewhere with it after this run is over. I can’t wait to see what happens next.”
Looking to the Future
In the meantime, Whitaker has his own career to tend to. The musician already has three albums under his belt — Outta the Box (2017), Now Hear This (2019) and Connections (2021). Featuring some of the jazz scene’s biggest names, including Christian McBride and Jon Batiste, each one is a showcase for his burgeoning skills on piano and organ. Whether covering favorites by such jazz piano giants as Thelonious Monk and Ahmad Jamal or offering up a host of terrific originals, Whitaker is clearly a force to be reckoned with. And he’s just getting started.
“I have a project coming up next year called On their Shoulders that’s going to be a tribute to some of my favorite organ heroes,” Whitaker reveals, naming Jimmy Smith, Dr. Lonnie Smith, Charles Earland and Joey DeFrancesco as a few of the master musicians who will be highlighted on the album. “The plan is to hopefully do a series to feature other instruments, like piano and then drums and then other stuff.”
Whitaker’s relationship with Yamaha remains strong. “Yamaha is what I’ve known all my life,” he says. “Back in the day I had a PSR-262— one of those small 61-note keyboards with all the sounds and accompaniment styles. It was so much fun! It was actually my sister’s, but I obviously took that from her because that’s what brothers do,” he says with a laugh. “Over the years, I’ve gotten more into other instruments, [but] the fact that Yamaha makes every instrument under the sun — seriously, it’s amazing.”
Whitaker is looking towards the application of technology for the next generation of blind and visually impaired musicians. “[Yamaha] makes it so that [their keyboards are] accessible for blind users to navigate and that’s something I would love to get more involved in,” he enthuses. “Just chatting and figuring out programming, making sure it’s all accessible. I want to help with that more.”
Billy Strayhorn once said, “I believe in the power of music to heal, to uplift, and to inspire change.” It’s a sentiment Whitaker is fully onboard with. “Music is something that can be healing,” he says. “I’m always grateful whenever I get a chance to share my gift with others. Everyone deserves to be happy and positive.”
Photographs by Michael Henninger for Pittsburgh Public Theater, courtesy of Pittsburgh Public Theater.
Yamaha Artist Cory Hills began his professional percussion career the traditional way, never imagining that one day, his primary audience would be elementary schoolchildren.
Cory Hills.
After discovering his love for percussion at a young age, Hills kept on drumming throughout high school and into college, finding success and checking off the goals of an aspiring professional musician: obtaining multiple degrees, holding prestigious fellowships and performing with orchestras all over the country, even winning a Grammy® award.
Hills teaching students Percussive Storytelling.
But when a graduate program took him to Europe to study art, he had an epiphany. Instead of following a path that would lead to either a professorship or joining a major symphony, Hills decided to turn his focus to where he felt he could make the greatest impact, creating Percussive Storytelling, a children’s program that fuses original classical music with storytelling.
While Cory still dabbles in traditional musical pursuits, performing regularly with the Los Angeles Percussion Quartet and numerous other chamber groups, his mission has become to make music accessible and empowering for youth. We recently sat down with Hills to discuss how he unexpectedly found his purpose.
Hills with his Grammy Award Certification.
VEERING OFF THE TRADITIONAL PATH
The a-ha moment happened while in Italy, Hills remembers. “I was studying contemporary arts exploration; European art, avante garde, high art and high fashion,” he says. “It was art for art’s sake, and I felt a disconnect with the audience and what my voice was trying to say.”
He channeled his struggle by writing a simple story called “The Lost Bicycle” and putting percussion to it. It was 2005, and without realizing it, the interdisciplinary Percussive Storytelling concept was born. Yet Hills set the idea aside and powered on with a typical percussion career.
Years later, Hills was asked to perform “Lost Bicycle” at a Kansas elementary school, and the students loved it. It led to more gigs, then an unusual offer from a local donor who wanted to personally fund Cory to present the show at multiple schools in Kansas. Hills took the opportunity to bring music to more kids, and for the next six months performed throughout the district nearly every school day.
“Playing drums while telling stories is not a new concept,” Cory says, noting that this has been an important part of the Senegalese griot tradition for thousands of years. But his particular approach to merging original stories and music was a winning recipe for Hills’ audiences — and for his sense of purpose.
UNDERSTANDING THE WHY
Hills spent the following years performing nonstop, but it wasn’t until he had kids of his own that a new perspective was added.
Becoming a stay-at-home dad gave him the time needed to reflect and start connecting with researchers and experts that explored different educational approaches. “I hadn’t really had a chance to dissect what I was doing before and understand why people liked it, what worked and what didn’t,” he recalls. Everything changed for Hills after spending time with his own children. “That’s when I realized I was able to attach some of what I was doing to child psychology and learning development,” he says.
As an example, Cory cites Howard Gardner’s theory of multiple intelligences, which states that kids learn in different ways, from verbal to visual to tactile. Hills remembered this from his undergraduate studies but realized he could put it into practice by “making these stories come alive in three-dimensional ways to give children the maximum number of opportunities to successfully interpret the information.”
Hills also reflected on his original mission of bringing music to low-income communities. He often found himself performing at the same middle-class schools, and decided to shift his focus to working with schools in lower socioeconomic areas. He also won a grant through the National Endowment for the Arts in the small town of Alamosa, Colorado, where he not only brought his workshops to schools but also to settings like after school programs.
For the first time, Hills worked hands-on and with the same kids regularly, whether daily for a week, or once weekly for several weeks. “Instead of me performing, we’d sit down together, write stories, play percussion, and compose music together, all in a short span of time,” he says.
It was an approach he found to be far more impactful, partly because percussion instruments are so accessible and easy to pick up and learn without much instruction. “It’s not like learning tuba,” he points out. “For percussion you just hit a woodblock or triangle with a stick, and essentially have a 100% success rate. That’s what makes it really fun, because we don’t lose time on the learning curve — the kids can just jump right in. They quickly realize, ‘I can do this!’ and gain confidence.”
SEEING HOW MUSIC BENEFITS KIDS
Once Hills shifted to workshops, bookings skyrocketed, and soon thereafter he was offered a fellowship with the Fred Rogers Institute in Latrobe, Pennsylvania, from 2021-2022.
Cory raves about his time studying the legacy of Mr. Rogers. While the organization’s emphasis is primarily on creating original productions, Hills was a fellow on the research side — their first to focus on children’s music.
Hills at the Fred Rogers Institute during his fellowship.
He analyzed Rogers’ extreme attention to detail and deliberate use of music and props, then created his own show, “Frankie the Otter.” It features a non-gendered otter who’s new to an animal sanctuary, meeting other animals who tell their stories. “It focuses on social emotional learning and growth, so it’s a show about friendship, kindness, and the power of community,” Cory explains. With emphasis on access, Hills also created a free accompanying PDF guide for the show that any parent or teacher can easily use. It contains activities and QR codes linking to videos.
“It’s transformative, like music therapy for some students,” Hills says of “Frankie.” Many participants start off writing light, silly stories, then eventually feel empowered to share deeply from the heart. Cory has watched bullied, silent children open up after several days and process a range of emotions, and has observed nonverbal autistic kids discover how to engage and newly express themselves.
Hills’ “Frankie the Otter.”
Hills notes the influence of Mr. Rogers, who noticed that some kids shut down if you try to engage directly. “[But] if you put something as a buffer between you and allow them to talk through something — for him it was a puppet —they will actually open up,” he says.
EXPANDING ACCESS TO ARTS
Cory Hills presented “Frankie the Otter” at the Percussive Arts Society International Convention (PASIC) in 2023. Given the impact of his workshops, Hills hopes to cultivate partnerships so he can create additional interactive guides and visit more schools. He’s also leveraging technology to expand access, using virtual shows to reach schools that might not have as much access to the arts.
Student teaching can be a transformative time — it’s literally the last stop after at least 16 years of schooling before you’re trusted with the reins (or in some cases, where the reins are removed!) to begin teaching.
However, as the old adage goes, you don’t know what you don’t know. Listed below are some tips for student teachers (and those who host them) to get the most out of their experience.
Don’t Be Afraid to Test Things Out
Some of the best cooperating teachers I know have often told their student teachers the same thing: Try things out with the group in front of you. If you screw something up, you get to leave in a few weeks, and they clean up any messes!
Student teaching is truly the time to dig in, get out of your comfort zone and expand your teaching toolbox. Try one new thing every rehearsal, whether it’s an icebreaker, rehearsal technique or even something with your conducting. Keep what works and decide whether the things that don’t work either need refinement or just need to go.
Frame Your Questions Tactfully
You won’t always agree with your cooperating teacher, and that’s perfectly fine. However, it’s essential to handle disagreements diplomatically. Instead of outright dismissing their ideas, ask open-ended questions to better understand their methods. This approach not only shows your willingness to learn but also keeps the lines of communication open.\
Often, our sense of self becomes so important that we must stand our ground on every single thought. Keep in mind that the statements and actions from your cooperating teacher may be but a single sentence, but they come with years of experience.
Consider the following dialogue options:
Prompt A
Co-op Teacher: “I think kids need to learn and master their scales before we even consider putting a piece in front of them.”
Student Teacher: “I don’t agree. Let’s get a piece in front of them soon so they are more encouraged to learn these scales.”
Prompt B
Co-op Teacher: “I think kids need to learn and master their scales before we even consider putting a piece in front of them.”
Student Teacher: “That’s interesting. I never thought about building up those skills; I often just dove right in. Could you walk me through the process of what the timeline for this might be?”
Both student teachers probably think the same thing, but prompt B puts the ego in check a little bit. Student Teacher B is interested in this process and wants to learn more. Student Teacher A immediately dismisses the concept. Who would you rather work with?
Maintain Professionalism and Manage Relationships
Maintaining professionalism goes beyond your interactions with your cooperating teacher; it also encompasses your relationships with students and parents. Communities are closely knit, and word travels fast. Whether it’s your behavior, communication style or attitude, any misstep can damage your reputation — sometimes irreversibly. Therefore, always act respectfully and professionally to safeguard your standing within the community.
Sometimes, especially if you’re younger than your cooperating teacher, students and parents might feel more comfortable confiding in you. They may even go as far as to express a preference for your leadership, citing a better rapport with someone closer to their own age. While flattering, such comments can be a slippery slope.
To manage this situation effectively, it’s important to align yourself with your cooperating teacher rather than compete for popularity. If a parent or student praises your approach over that of your cooperating teacher, it’s wise to have a pre-planned response to defuse the situation while preserving the team dynamic. For instance, you could say, “I appreciate the compliment. Mr. Stinson and I work hard as a team to ensure that the students have a great experience.”
If the parent persists, simply reiterate your original statement. This keeps the focus on teamwork and the collective goals of the educational experience, rather than individual egos.
Build Your Own Rapport — Don’t Copy Others
Building rapport takes time. While it’s tempting to imitate your cooperating teacher’s style, it’s crucial to forge your own relationship with the students. Authenticity is key; let your unique teaching style shine through. And if you don’t have a unique style, this is the time to build it!
When you observe your cooperating teacher, you are observing years of skill, experience and refinement. You are also seeing established rapport amongst the teacher and students. Sometimes this may look like friendly banter or jokes. Although you may know that you have the skills to lead a rehearsal, the students need time to warm up to someone new. You are a visitor, but you are also able to develop your own appropriate rapport with the ensemble.
Copying speech patterns, phrases or even jokes from your cooperating teacher may seem inauthentic to the students, and in worst case scenarios, may even insult them! Let the rapport unfold itself, and don’t force it.
Ask a Lot of Questions
Time questions appropriately. Keep a journal and write down any questions you have. Then, consider speaking to your cooperating teacher about setting aside a weekly time to go over some items. Remember, keep your ego in check.
Many of us are just itching to get out and teach, and after 16+ years of school, we’re ready. But we still must be prepared to be schooled. Ask your questions, write down the responses, and take the answers to heart.
If You Want to Experience Something, You May Have to Ask
We don’t know what we don’t know — I go back to this again and again because it’s so true. If there are items that you think you would benefit from during your student teaching experience, don’t hesitate to speak up. I believe that a student teacher should be able to conduct at least one piece at a concert, but there are other directors who either disagree or don’t put this out there until the student teacher asks.
Advocate for yourself but curb your expectations. Most student teachers would probably not be entrusted with taking on half the program for a major festival, but being involved with a home concert is a reasonable ask.
Embrace the System
For nearly my entire educational life, people have complained about the “new” way to do math, and how kids can get the right answer but they don’t get full credit if they don’t use the correct process. This is true not only for “new” math, but for every classroom, household, workplace and business. There is always some sort of structure or system in place.
We teach kids how to get the correct answer, but we are also teaching them about systems. If a student wants to get into coding, they will have to understand the ins and outs of HTML, CSS and other coding languages. Schools thrive on systems, too, from the school board and district office all the way to the classrooms. Yes, systems can be frustrating and even restrictive at some points, but as a student teacher, you must learn about this system. Even if the process is not the same at every school, you will gain experience in procedures, chains of command and administrative tasks that are common at most schools.
By the end of your student teaching experience, consider this short checklist:
Understand safety procedures, including but not limited to fire drills, lockdowns and other emergency drills.
Complete a bus request.
Complete a facility request.
Initiate at least one parent contact, positive or constructive.
Assist with planning for a field trip.
Be introduced/introduce yourself to key school personnel, including but not limited to building administration, administrative assistants, deans, custodians and other teachers.
Write a thank you note to most of the people above.
Attend one music parent meeting, if applicable.
This is not a comprehensive list, but it should get you started with the non-classroom teaching items.
There Is Always Work to Do
Hard reality: Your future employer may not care how good your groups sound. They will care if you are late in answering emails, not submitting your bus requests, and unaware of typical school procedures. Sit down with your cooperating teacher and hammer out one or two of these a week at the beginning of your assignment. Use the list above to start.
Once you’re ready, see what you can take off their plate. Your first job’s procedures may differ, but you’ll at least be aware of how a field trip request works, what procedures are in place to background check chaperones for a trip, and request space for a concert.
Are you done with attendance, copying, rehearsal planning and score study? Take a look at some other pieces. Clean up an area of the rehearsal room, tighten music stands, practice your secondary instruments, work on your choral accompanying skills or practice your interviewing skills. There is always something to do, and now is the best time to do it.
Ultimately, you’re looking for abundant experiences and a letter of recommendation by the end of your student-teaching assignment. Get the work done so your cooperating teacher has plenty of examples to draw from when writing about you.
Leave on a Good Note
The great student teachers I have had formed a rapport with the students that was their own, and were not afraid to make mistakes in front of the ensemble. They also thanked everyone and left on a great note. They showed up on time every day, did not ask for special treatment, and got the job done. We’re big on writing notes in my program — every kid gets a note of encouragement or recognition on their program before every concert. Many of my student teachers took this to the next level by writing an individual thank you note to every kid in the program. A lot of work? Absolutely. But a great lesson in appreciation and going the extra mile.
Student teaching is like a testing ground — a place where you can stretch your wings, make mistakes and figure out what kind of educator you want to be. It may be a short chapter in your life, but it’s one that can shape your career in big ways. The advice and to-do list laid out in this article won’t cover everything, but they give you a solid starting point. Keep in mind that being an educator means you’re always learning. Your time as a student teacher is just the beginning of a long and rewarding journey.
Music streaming services are, by their nature, technologically sophisticated. And thanks to recent advancements, they’re now even better able to discern your musical tastes and serve up the songs you want to hear. Here are the latest developments in that field.
AI
Services such as Spotify®, Apple Music®, Amazon Music, Qobuz, TIDAL and Deezer offer catalogs in the neighborhood of 100 million songs. With so much music, it can often be challenging for users to decide what to listen to, which is why customized suggestions are so helpful. That’s where artificial intelligence (AI) comes in.
TIDAL and other streaming services present users with customized suggestions.
Some streaming services provide playlists curated by humans, but those are not personalized for each user. More commonly, they employ AI algorithms that rely heavily on the user’s listening histories to create suggestions. Recent improvements in AI, particularly Machine Learning (ML) — a subset of AI — have substantially increased the accuracy of such recommendations.
Machine Learning
Machine Learning involves training computers to analyze vast amounts of data, look for patterns, and make human-like inferences and predictions. A machine-learning algorithm continually improves its abilities as it learns more data, without requiring additional programming from a human.
Streaming services use several different ML techniques to create user recommendations. One is called collaborative filtering. This involves analyzing users’ listening patterns for commonalities, then making song and album suggestions based on them. A simplified example of the logic used in collaborative filtering would be: “Because most listeners of band A also listen to band B, recommend songs by band B to anyone who listens to band A.”
Another Machine Learning technique that Spotify and other streaming services use to categorize music before making recommendations is Natural Language Processing (NLP). This takes the metadata associated with each song (such as artist, genre, songwriter, lyrics, release date, production credits, etc.) and then searches the web for keyword matches in articles, blog posts and other text. NLP sorts through what it finds to identify connections between songs or artists that help inform its recommendations.
Yet another way streaming services implement AI is by analyzing a song’s audio for specific characteristics, a technique known as feature extraction. Tempo, genre, key, mood and instrumentation are some of the characteristics it considers. This analysis helps the streaming service accurately categorize songs, and its data adds to the precision of its recommendations.
Feature extraction analyzes the song’s audio for relevant characteristics.
Your streaming service also learns more about you whenever you listen to a song. It remembers your activities, such as searching for an artist, following an artist, rating a song, adding a song to a playlist, or choosing to listen to a recommended song or album. Not only does the streaming service use that data to refine its recommendations to you but also to inform its collaborative filtering algorithms.
MIIR: Finding the “Chill Phrase”
If all that sounds pretty sophisticated, just wait. An AI-based technology on the horizon will soon be making recommendations even more accurate and impactful.
This development was recently announced by a new enterprise called MIIR Audio Technologies (MIIR is an acronym for Music Intelligence Impact Retrieval), formed by a group of scientists, producers, musical artists and others. The company claims to have discovered how to find the moments in a song that affect listeners the most. They call these “Chill Phrases” — the lines or musical phrases in a song that gives the listener the greatest emotional response. “Most people can think of a phrase in a song that gives them the chills,” explains Roger Dumas, PhD, Chief Science Officer and co-inventor of the technology. MIIR finds that Chill Phrase, along with a secondary one, and then rates both according to a Chill Index.
This data will help streaming services recommend the most impactful music to their listeners, increasing customer satisfaction, but MIIR also has plenty of other potential applications. For example, the company touts its possibilities for maximizing the effectiveness of music in TV commercials and even for helping patients with dementia.
Generative AI
Other than the “big brother” ramifications of having your music-listening activity uploaded to a database, the AI techniques and applications described here are relatively benign and help the services present you with music that more accurately fits your taste.
However, there is one area in which AI and streaming music services intersect that may negatively impact artists who legitimately make royalties (small as they are) from their music getting streamed. It involves another form of artificial intelligence called Generative AI.
That technology, available to the public on websites such as Boomy, allows users to create AI-generated songs based on a few descriptive choices such as genre and mood. Such compositions are controversial for a couple of reasons.
First, these songs are created using all preexisting music as their reference. The songwriting, lyrics, arrangements and mixes of everything that’s come before become the raw materials for the generative engines. Both artists and the record industry argue that such activity is tantamount to copyright infringement.
Secondly, unscrupulous people have used AI-generated songs and bots posing as listeners to generate royalties, an activity called “artificial streaming” — something that Spotify terms a “longstanding, industry-wide issue that [we are] working to stamp out across our service.” The company recently purged many AI-generated songs from its collection, suspecting they were being used in such schemes. (Read more about the controversy.)
AI’s impact on music streaming will only increase as technology evolves. As with AI in general, we have to hope its benefits outweigh the problems it creates. One sure bet is that personalized recommendations from streaming music services will continue to get more sophisticated and accurate in the months and years ahead.
Defining what success looks like for our students and our program can be a contentious topic. Regardless of the uniqueness of the setting in which we teach, we were trained in college music programs that gave us the necessary knowledge, skills and attitudes to build a program based upon the traditional licensure pathways of general, vocal and instrumental music. Throughout the country, however, we see that more music teachers are offering a diverse array of music-making experiences. Depending on our knowledge of and exposure to a variety of musical styles, we may have doubts about our preparedness to create these experiences.
Most of what we initially conceptualize as success is informed by our own experiences in K-12 and collegiate music organizations. Concerts, tours, field trips, large and small ensemble assessments, competitions, community events and the awards we receive from these performances usually influence our perception of a program’s success. Large enrollments, the percentage of students with high GPAs and academic honors, and the number of students who make all-state, regional and district-level ensembles can also build a narrative that allows parents, administrators and the community to define success by these indicators.
This article, however, shares how we can look at different ways to more authentically measure success. By knowing our students and the assets they bring to the classroom, understanding our own strengths and weaknesses, and creating unique music-making opportunities for our students that are relevant and content-rich, we can reconceptualize what success can be.
Know Students’ Assets
Students bring a wealth of knowledge and skills into our classrooms that we are sometimes unaware of. All too often, I go to classrooms where the teacher’s expectations and current circumstances do not align, and the teacher has fallen into a deficit thinking mindset. Instead of seeing what students can offer to help build the program, the teacher only sees what is lacking. This mode of thinking can often mislabel students from underserved communities and assume that the reason why students are struggling is because of factors that inherently prevent their own progress — i.e., lack of motivation, inadequate family support or cultural differences. This thinking, however, can be easily remedied by first developing a rapport with our students, and then by learning more about their life experiences and musical interests.
Knowing what my students were already bringing into the classroom helped me to incorporate different musical genres and a variety of ensembles into the classroom. My first job was as a high school band director in 2006. The school was relatively new and the administration was very supportive. This allowed us to dream big and offer a variety of ensembles beyond traditional band, choir and orchestra. Though the term did not exist at the time, we were at the forefront of the modern band movement that helped get more students involved in music-making at the secondary school level. We also decided to turn one of our storage closets into a music production studio, had it retrofitted with all the necessary equipment and acoustic treatments, and partnered with the Dallas Austin Foundation to provide in-school and after-school music production, audio engineering and beat-making classes. By understanding our students’ interests, we were able to provide them with deeply impactful experiences that shaped their development as both musicians and people.
Understand Our Strengths and Weaknesses
Though I am now an advocate and practicing clinician for popular music education and technology, I did not have the necessary skill sets to teach music production, notation software or live sound reinforcement when I began my teaching career. Even though these areas are tested on music teacher licensure examinations, I did not have any classes or formal training in college. Some of the knowledge I gained came from being involved in jazz combos and big bands while I was in high school and college, and some other skills came from my own curiosity and wanting to know more about the music industry and how it functions. I used my own experiences and strengths to improve myself in areas where I believed I was underprepared.
To feel more confident about creating and facilitating more modern music classes for my students, I invested in myself through professional development and MOOCs (Massive Open Online Courses). I joined the Association for Popular Music Education and attended workshops through Technology in Music Education. MOOCs are also an excellent way to acquire new skills at an affordable price — and sometimes even for free! After I completed the music production specialization MOOC by Berklee College of Music through Coursera, I realized that all the time I invested in my development had turned what was once a weakness into one of my strengths.
Make Unique Music-Making Opportunities
One of the advantages we have as music teachers is the ability to take the ideas we learn about from our students and make them into reality. When I was in high school, which was a Title I school in an urban school district in the southeastern United States, our band director gave us ownership of the program in many ways. He knew the skills we had, understood what motivated us and leveraged that to help our jazz band class tour throughout the region each spring. Though our director would help us with some logistics and sign paperwork, we students were responsible for scheduling the performances, contacting organizers for the events, setting compensation fees, requisitioning bus transportation, finding restaurants that would cater or provide meals for us, rehearsing pieces, and even selecting or composing the literature to be performed.
From those experiences, I gained immense confidence and clarity about the career path I would pursue after high school and realized that music education would be a great fit for me. We can all do the same for our students. Whether it is performance-based, recruitment-focused or fundraising-minded (my high school experiences ended up being all three), we can create opportunities for our students to transform into leaders for the program. Because this approach is student-driven, it can also lead to a sustainable program that is more resilient to a change in music teacher.
It’s All About Student Success!
Music educators can strongly influence what success can look like for our program. In a profession that traditionally uses ensemble size, competition trophies and assessment ratings as the standard benchmarks for program success, it is up to us in the profession to offer more authentic and inclusive value-added metrics that truly speak to the personal and academic growth of our students.
In the spring of 2022, 75 female classical guitarists took the stage — the virtual stage. Aiming to highlight women’s accomplishments in the field of classical guitar, Doris Cosic, then a senior at the University of Southern CaliforniaThornton School of Music, had organized an all-women virtual guitar orchestra featuring musicians from all around the world. After commissioning a piece from Grammy-nominated Brazilian-American composer Clarice Assad, Cosic organized, compiled and edited a video performance piecing together all 75 musicians in perfect harmony.
Associate Dean Brian Head
According to Brian Head, Associate Dean and Director of Classical Guitar at USC Thornton, Cosic is still using the same skills in her professional life post-graduation. “Doris now works for a classical production company that produces videos,” Head says. “She learned a lot of digital audio and video editing that she’ll probably continue to use going forward.”
Cosic’s virtual orchestra is one of about 40 interdisciplinary performances that classical music majors at USC Thornton put on every year as part of a new initiative called the Young Artist Project, which requires classical music majors to combine their music performance acumen with another area of study, culminating their senior year in a presentation that shows how they can combine classical music with other skills to create something new.
“Even the greatest classical musicians in the world are doing other significant things that aren’t about playing the cello or piano,” Head says. “At a music school, that can almost feel sacrilegious. Every hour you take away from practicing scales [or] getting ready for that big concerto is an hour wasted; that’s the mindset.”
Head, along with the faculty of USC Thornton’s Classical Performance & Composition Division, aims to change this mindset by inspiring students to draw connections between their work as classical performers and other skills they’ll use in their future jobs. “We’re trying to show the relevance — the active, in-the-present relevance — of the work they’re doing in school with professional life,” Head says.
The Young Artist Project first launched at USC Thornton in 2019. After a brief hiatus due to the COVID-19 lockdowns in 2020 and 2021, the program has now completed two full iterations and will enter its third rotation during the 2023-2024 school year. The project has gained momentum among students during the past few years, and Head sees big plans for the future.
The interior of USC Thornton’s performance space, Newman Recital Hall. (Photo courtesy of the USC Thornton School of Music)
Beyond the Practice Room
The Young Artist Project began as part of an overall curriculum change in the Thornton School a few years ago. Called the “classical redesign,” the new academic trajectory emphasizes interdisciplinary connections over mastering a given instrument.
This method presents various areas of study as inherently interconnected. “It’s some kind of psychological trick in our minds that, when you sign up for a class, it’s in its own little box and has nothing to do with the rest of your life,” Head says. “Young Artist Project is an attempt to break down those barriers and show this as a real trajectory by linking this up with other courses.”
Undergraduate majors in the Classical Performance & Composition Division begin their Young Artist Projects during the second semester of their junior years, when they take a class to conceptualize and plan their projects under the mentorship of both faculty and peers. However, before that class begins, students have already started to think about the ways music connects to other areas of their life.
For example, one class that many students take before beginning their projects is called “Music and Ideas.” Instead of focusing on a specific genre or historical era of music, the class organizes music by other themes that connect music of many styles and periods to each other and to larger aspects of the human condition.
The Gateway Facility rehearsal rooms for the USC Thornton popular music program. (Photo by Jason Dontje)
“We organize it around concepts instead of composers, time periods or places,” Head says. “We might talk about money, and how musicians made money in different eras. We might talk about religion or politics. We talk about jazz in the 1920s, what the political realities were during the Harlem Renaissance, and how that relates to composers in the late 1700s who were trying to assert themselves as artists. And, in turn, how that informs choices faced by musicians today.”
Classes like this help students to start drawing connections between musicianship and professionalism. “The overarching goal is to elegantly incorporate all of this into what a student is planning to do outside of school,” Head says. “The mission is [for students to get] equipped with practical skills, but also the philosophical and cultural apparatus to talk about it, to raise money for it, to collaborate and become more of a citizen of the world.”
Majors, Minors and More
When the time comes to choose a topic for the Young Artist Project, USC Thornton encourages students to look to their career goals and non-musical interests, including any double majors or minors they may have. “Some of our students are double majors, or they minor in the neurosciences or East Asian Languages,” Head says. “We want them to recognize that everything they do as artists is tied to what they do as humans, in their academic endeavors and in life.”
Students’ projects span a variety of disciplines — from sustainability to social justice to technology and more — and examines the way those topics can intersect with classical music. “It could be scholarship, it could be coding, it could be work that they’re doing at a retirement community nearby,” Head says. “The goal is to tie that to their musical practice and create an event, a deep work of scholarship, a tour, an app, a podcast.”
Each year, the classical music major at USC has about 40 students in the junior class. Because the Young Artist Project is a requirement for a classical music degree, that means Head and the other faculty see about 40 new projects each year.
Composer Quenton Blache (‘23), a graduate certificate student in USC Thornton’s Screen Scoring program. (Photo by Ben Gibbs)
Unique, Individualized, Bespoke
Because students’ project formats rely on their specific interests and career goals, there is no one template for a successful final project. “If you have 40 students, you have 40 different ways those presentations work,” Head says.
As Head explains, projects like Doris Cosic’s virtual guitar orchestra exist as a finished product that can be accessed anytime online. However, other projects might require a one-time presentation or performance.
For example, Classical Guitar major Robert Wang, who is an accomplished fragrance designer as a side hobby, curated a concert that paired musical pieces with different smells. Wang studied the multi-sensory performance approach of Russian composer Alexander Scriabin and then created his own performance, arranging and choosing music that he tied to specific scents. He held his recital at the Los Angeles Olfactory Institute, where a series of fragrances were distributed to audience members to inhale while the student performed each piece of music.
For his Young Artist Project, Blache partnered with a fellow USC Thornton student to create a live-to-picture concert with the Thornton Student Symphony Orchestra.
Though each project has one thing in common — classical music — every other element of the project, presentation and final assignment is tailored to the individual. “Some projects are scheduled throughout the semester. Others exist on the web. Some do a tour experience and they video tape it and present it,” Head says. “We try to make it bespoke.”
Because each project has its own requirements, some projects may require a budget while others don’t. Head says that while most students can accomplish their projects without a big financial budget, others may need funding. These students use this opportunity to practice finding outside grants, crowdfunding and putting together a budget.
However, because funding is often small, Head says that part of the learning experience involves keeping the scope of your project realistic. “Part of the exercise is to manage the expectations of this kind of first effort,” Head says.
Doheny Library at USC. (Photo courtesy of USC Thornton School of Music)
A Bright Future
Increasing funding for the program and grant opportunities for students is one of Head’s goals for the future of the Young Artist Project. “We have identified a donor who’s helping to underwrite this in a meaningful way, starting this fall,” Head says.
But beyond the financial, Head hopes to expand the program in other ways as well. Mainly, he wants students to become motivated by seeing successful alumni projects. “I love when former students come back and say things like, ‘Now I’m the production coordinator for the Santa Fe Opera doing multimedia, just like the Young Artist Project I did five years ago,’” Head says.
While alumni regularly return to USC Thornton to inspire current students, Head is looking forward to seeing alumni taking advantage of all the skills they used in their projects — beyond music performance — in their professional lives. “We hope that we create a feedback loop … focusing on this thing that isn’t just their playing,” he says. “That’s my next step.”
The Young Artist Project is intentionally open-ended, but Head says that doesn’t mean students need to pressure themselves to make their projects something groundbreaking or career-defining. Rather, the projects should serve as a debut creation, with the idea that many more creations are yet to come.
“This is an example of something you might be doing in a major way, and this might become part of your professional identity,” Head says. “You’ll do many projects. You need to make your mark, identify what you’re doing and get a great start.”
The University of Southern California is one of 10 distinguished colleges and universities selected to be part of the inaugural Yamaha Institution of Excellence program, which recognizes extraordinary commitment to innovation in the study of music. The Yamaha Institutions of Excellence were chosen for their dedication to providing unique and challenging experiences to music students through diversity of thought and curriculum. They are also recognized for exposing students to a wider variety of voices and opportunities and preparing them for the modern world of music.
Feeling overwhelmed by endless to-do lists and the demanding role you play in your students’ lives? I once thought technology would solve everything and that using more apps would make my life easier. However, as I strived for focus, I found that only extremely useful tech tools make the cut. In fact, minimizing screen time and notifications has been remarkably beneficial. This guide introduces tools, both tech-based and ones that are refreshingly simple, that have proven invaluable in managing the complexities of teaching.
1. Paper and a To-Do App
My to-do list used to be comprised of emailing myself, Post-Its, lists, whiteboard lists, to-do apps and my memory. I was spending four times as much time managing these lists as I was doing actual work. I’ve written about prioritizing tasks using the “Getting Things Done” system, as well as developing Atomic Habits. By moving to two inputs — a notebook and one to-do app, Todoist — I removed a significant amount of stress from my life.
My notebook goes with me to the podium, and I can write down any notes, such as “order more reeds” or “John has a conflict with the football game.” I then take time in the afternoon to either complete or insert these tasks into my app. Rinse and repeat.
Your method may vary. If Post-Its work for you, stick with them, but consider that too many lists create more work. There is also the chance for more items to slip through the cracks.
Replaces: Post-Its, multiple apps, a full email inbox and precious mental bandwidth.
I was a little late to the game with the Harmony Director, but this is my go-to tool in the classroom. It saves time, is somewhat portable and very easy to use. I used separate apps and devices for metronomes and tuners, and I spent a long time attempting to teach pitch matching and justified intonation. This tool cuts that time down significantly. There is a bit of a learning curve, but by now, so many people are using the HD-300 that resources are plentiful. I saw a younger director post online about ways to teach intonation with the Harmony Director. An older director made this snide remark: “How about good old-fashioned listening?”
I believe the Harmony Director is something that speaks to both the newer generation of educators as well as the more experienced one. There are no fancy screens or wires to hook up. The teacher gets the job done by using this tool to demonstrate, and the kids have to listen to adjust. Truly an invaluable teaching tool in the right hands.
Replaces: Multiple apps, metronomes, tuners and simple recording devices.
3. AI Textbots
While AI has been recently grabbing headlines, the first successful AI program was actually written in 1951! It may be controversial, but AI generators, when used for the right reasons, can be helpful. I have yet to be convinced that the current generation of AI can replace everything a human can do, but ChatGPT and Google Bard are invaluable for spelling and grammar and even for checking tone.
If I have a particularly tough email to send, I will write it out and then ask an AI to see if my email looks aggressive or has any conflicting statements. About half the time, I accept the suggested changes and send the email. With the other half, I realize that if I have to revise as much as the AI suggests, then it’s better to pick up the phone and speak to the other party directly.
AI works well for simple coding. I often have Excel lists of students that I need organized in various ways. Asking an AI bot to provide a formula to sort all junior woodwind players by last name but listed in first and last name format, so I can easily copy to a concert program, has been a huge time-saver.
Replaces: Time spent on YouTube trying to figure out pivot tables and the organization of data in Excel sheets, and annoying your colleagues with “Does this email sound OK?” requests.
4. Transparent Sub Plans
I hated taking time off because I knew a non-musical sub would oversee my class. They were responsible, but I knew that we would not get as much done on that day. So, I took matters into my own hands and decided to let everyone in on the sub plans. All students have email accounts, so I sent the sub plans as either a PDF or a non-editable Google Doc link to my supervisor, the sub and all my section leaders. This worked great! Kids felt accountable and responsible for their class, and I returned to a glowing report from the sub.
Moving forward, I provided even more transparency. I simply emailed the plans to everyone in the band and let them know which students would be in charge. This has become a typical pattern, and our substitutes feel a lot more at ease subbing in a music class.
Replaces: The opportunity for music kids to inadvertently stage their own production of “The Lord of the Flies.”
5. Non-Musical Section Leaders
OK, this isn’t a tech or archaic tool, but more of a human resource. Note: “Non-musical” doesn’t mean that this section leader doesn’t have musical ability; rather, it means that their specific job isn’t helping other students with musical performance. Think about the things that take up a lot of your time that aren’t sensitive materials. For example, I had issues organizing the reed and supplies cabinet. A student complained twice about this, and I said, “Congrats! You’re now the reed cabinet supervisor!” The student laughed, and I explained that it was certainly something I could do, but that there were many other areas of the program where I might be better suited. The student volunteered to organize the reed cabinet every Friday and even went above and beyond by emailing me a weekly list of items that needed to be ordered to replenish our stock.
Replaces: Time and effort spent on the endless organization of supplies. Bonus: Provides student opportunity and leadership.
Find What Works for You
Effective teaching doesn’t have to be a lone journey filled with stress and clutter. The right set of tools, both digital and non-digital, can significantly streamline your processes and make teaching not just manageable but truly rewarding.
From using Todoist to organize your tasks to the Yamaha Harmony Director for pitch training, and even AI textbots for spelling and grammar checks, technology can be your ally. But let’s not forget the value of human resources like non-musical section leaders who can take some of the load off your shoulders.
The most important lesson is to tailor these tools and strategies to your unique teaching style and needs. When you find what works best for you, you’ll see that the road to teaching excellence becomes far less complicated. After all, teaching is less about managing stress and more about inspiring the next generation. May these tips help you focus on what truly matters — creating a transformative learning experience for your students.
In modern music, the drums are the foundation — the rhythmic backbone of the group.
The drum kit has provided the beat and tempo for almost all forms of popular music since the dawn of jazz in the early 20th century. That makes it one of the most important instruments on the stage or in the studio, as well as one of the most involved. But drums have many moving parts and pieces — in addition to taking up sheer space — and setting up and maintaining a drum kit requires a specific knowledge and awareness of the gear itself.
Here are some pointers and expert tips from Yamaha product training specialist Jim Haler on how to keep your drums visually attractive, eminently playable and sonically pleasing.
Proper Placement and Storage
Say you just acquired a brand new drum kit and it’s going into your house or studio for the first time. In the excitement of the moment, you may have the impulse to set up and start playing right away, but it’s important to consider where and how your kit will “live” in its new environment.
Do not set up your kit where it is exposed to direct sunlight. While the finishes for some kits (including some Yamaha models) are treated with UV protection, that’s not always the case. “If your drums sit in direct sunlight for long periods of time, they’re going to fade,” says Haler. “And if they have a “wrapped” [smooth glossy white or silver] finish, you also risk having the finish getting hot and bubbling on you.”
Be sure to put your kit on a rug. Dedicated “drum rugs” do exist, though any floor rug with rubber on the bottom will work. Without a rug, your drums will slide and shift as you play them. Not only does this make it hard to perform, the pointy kick drum spurs could damage hardwood floors. A rug will also catch and confine any splinters and sheddings from your drumsticks.
When not playing your drums, cover them with a drum cover — like you would an expensive car — to prevent accumulation of dust and debris.
Even with a cover, some dust will inevitably find its way to your kit. “Dust can act like small pieces of sand and put minor scratches in the finish,” cautions Haler, who recommends applying Yamaha Piano Unicon Polish with a soft microfiber cloth to prevent cosmetic damage and keep your drums shiny and clean. “Yamaha also have an exclusive non-glossy finish called Vintage Natural,” Haler adds. “For this particular finish I recommend using an orange oil furniture cleaner for periodic maintenance.”
Getting the Most Out of Your Drum Heads
The heads are the part of the drums that take the most abuse. They’re meant to be replaced over time to maintain proper tone, but there are ways to maximize their longevity.
Playing with correct technique is vital. “Make sure you’re playing the drums properly and not burying the stick into the head, but playing off the head,” says Haler. “It makes less of an impact and is going to help your drums not only sound better, but last longer.”
Position and angle your drums correctly relative to your height on the drum throne — something that can help with proper striking technique. “If your toms are at too much of an angle and you’re not sitting at the right height, when you go to strike your toms, you’ll be digging the tip of the stick in,” says Haler, who warns that this can also reduce overall playability.
Choose drum heads that suit your style of playing. “If you’re playing metal and really hard, aggressive stuff,” says Haler, “you shouldn’t be using single-ply heads; you should be using double-ply heads.”
Snare Care
Snare tone is one of the more tangible artistic choices at a drummer’s disposal, especially in the context of rock and pop music. This part of the kit deserves special treatment.
Make a habit of turning over the snare drum and examining the snare wires themselves from time to time, especially if you begin to notice a lack of snare response. If any of the wires are bent or are starting to get detached, they will tend to rattle after you hit the drum, compromising the snappiness and pop of the resultant sound, so consider installing a new set. If you’re in a pinch (i.e., right before a performance) and can’t replace the snare wires, take a wire cutter and snip off any misshapen strands all the way down to where the wire is soldered on, as small tips of exposed wire can cut into the head.
Snare wires.
Whenever you swap out a snare head, it’s a good time to lubricate some of the moving parts of the drum itself — especially the “throw-off” strainer mechanism that is moved up and down to raise and lower the snares. Haler recommends putting a small drop of 3-IN-ONE® oil in those contact points so the lever moves smoothly and doesn’t make any noise. You should also add a small drop of oil around the adjustment screw for the snare wires (on the bottom) and the threads for the tension mechanisms, as well as the turning screws and the ends of the tension rods.
Snare “throw-off” strainer.
Proper Treatment of Cymbals and Hardware
Some drummers like their kit to be shiny and polished, while others prefer the road-worn look. Either way, here are some basic fundamentals for caring for the metallic portions of your kit.
Avoiding rust is key. If you need to transport your kit, make sure to wipe off any condensation if the drums have been moved inside from the cold. This is particularly important when it comes to hardware like stands and tom mounts, which have many fine points of adjustment.
Some drummers perspire more than others. Be aware of your body chemistry, as stray sweat and hand oils can also lead to spot rust.
Position your cymbals at a slight angle to encourage proper striking technique and prevent breakage. “When you’re striking right into the edge of the cymbal, that’s the most fragile part, and that’s where you’re going to get a lot of cymbal breakage,” Haler points out. “It’s best to play your cymbals at least at a slight angle.”
Be wary of what solutions and polishes you apply to your cymbals. More abrasive products can discolor or tarnish them — some can even remove your cymbal’s logos altogether!
Tips for Safe Travel and Transportation
Whether you’re transporting a kit to band practice, gigging locally or touring the world, there are some universal do’s-and-don’ts for moving your drums.
Invest in road cases. If you’re playing nightly as part of a tour, hard cases are a must — if only for the peace of mind that comes from knowing that your shells, cymbals and hardware are always protected — not to mention that they’re more compact and efficient for loading/unloading. If you only occasionally move your kit for local gigging, soft cases will prevent scratches and random damage.
Be wary of kit loaning and sharing. It’s common practice, especially in local circuits, for a band to backline its kit. This act of generosity will help keep things moving smoothly when there are multiple performers on the bill, but it also opens up the inherent risk of other drummers — with perhaps more aggressive playing styles — damaging part of your kit, breaking a cymbal or drum head, etc. If you’re on a tight budget or concerned about damage, it’s best to not share.
Always carry a tool kit and spare breakables such as drum heads, as well as extras of small, easily misplaced components such as cymbal felts/wingnuts and hi-hat clutches. You never want to be caught in a pinch mid-gig, so come prepared to make minor on-the-fly repairs if needed.
Whether you’re playing an entry-level kit like Yamaha Rydeen models, or higher-end options, such as PHX and Recording Custom Series kits, these guidelines will protect your investment and keep you firmly in the pocket. Happy drumming!
“Mr. Stinson, I’d like to play the oboe, but don’t seat me in the front row. Even though I’m the only oboist, I don’t want the oboe solos. Could you also make sure no one looks at me or hears me? And if I make mistakes, don’t mention them. If I sound good, don’t mention that either. In fact, please act as if I don’t exist. Oh, and can you order better reeds?”
As educators, it’s our job to guide today’s kids beyond their comfort zones. While I still encounter students brimming with confidence — those who can’t wait to play a solo or relish being the center of attention — I’m increasingly meeting students reluctant to play, sing or even speak in class. Often, these students resort to having others ask questions for them.
Our aim is not to transform introverts into extroverts. We want to equip all students with the skills to advocate for themselves and actively participate. Some of our students might prefer solitude, while others sit silently, yearning to share their passions but feel hindered by nerves or by the complexities of being a young person. I know I was that person, and I’m thankful to my teachers for helping me work toward advocating for myself.
Build Resilience
Recently, I’ve dealt with some students who have trouble with basic face-to-face interactions, such as ordering at a fast-food restaurant during band trips. How can we nudge them into positive discomfort, and more importantly, inspire them to persevere toward goals, especially after experiencing setbacks?
Our aim isn’t to make professional musicians. We want to help students grow to understand themselves and handle the world around them. To do this, we combine knowledge of how people think with real-world teaching methods. We want to get students ready for the different challenges they’ll definitely encounter in life.
Cultivate Confidence in Small Groups
Utilizing small sectionals is an effective way to make students feel more at ease with both speaking up and playing alone. It’s fascinating to witness kids who were initially hesitant open up and exhibit a newfound comfort when they’re in smaller groups (as opposed to standing in front of the whole band). This smaller setting serves as a launching pad for future confidence. Don’t stop there! If you ask a student to take the big leap of performing solo, set them up for success, especially if it’s their first time stepping into the spotlight. Make the environment as fail-safe as possible because the objective is to encourage a repeat performance — or at the very least, instill the belief that solo performances are beneficial experiences worth pursuing.
The rehearsal atmosphere must be more than just a place to practice music; it must be a sanctuary of sorts. If you find that the music itself isn’t resonating with a student, then explore alternative routes to connect with them. I was once told that there are worse things than selecting music that the kids like. Casual conversations about day-to-day topics — “What did you do over the weekend?” or “What are your favorite foods?” — can go a long way in building that crucial student-teacher rapport.
Be a little daring — gradually put more difficult pieces in front of the ensemble. The intention here is to coax and nurture a slow but steady development of skills, a resilience of sorts, in students. Remember: These selections don’t even have to be part of your concert repertoire. The point is to remove the element of a high-stakes performance, and allow them to just play.
Customize the Journey
Honor Individual Strengths and Interests: Not every student aspires to shine in the same way. While some may shy away from solo performances, they may excel at speaking in public. Rather than strictly funneling them toward musical solos, I encourage them to use their verbal talents for tasks like program notes or concert introductions. I’ve even seen such role diversification inspire other students to consider alternative ways to contribute to the musical community.
Understand Fight or Flight: I’ve told my students of my own paralyzing nervousness in 5th grade when faced with performing at church. My solution? I faked an illness to get out of it. Ironically, I didn’t have to go that far because I worked myself up to actually being sick. These anecdotes serve to remind students that even those of us who appear comfortable had to confront and overcome our fears.
Adaptation in Feedback: Feedback is not a one-size-fits-all mechanism. While some students can absorb an ongoing stream of constructive criticism, others may find their emotional bandwidth taxed at just three comments. In such cases, I’ve learned to cap my feedback at two points initially, regardless of how urgently more feedback might seem needed. I then gradually introduce additional positive comments over time, observing their receptiveness and adjusting accordingly.
Group Strategies for Comfort: Another tactic to make students more comfortable with solo performances is to initially divide them into sub-groups. Whether sorted by age, choice of instrument, or even shared experiences like having broken a bone, these smaller groups can serve as a softer introduction to performing alone. It’s a tactic that has dual benefits — it enhances performance comfort while also building a sense of community among students by highlighting shared experiences or interests.
The Dual Nature of Our Class: Our class is a blend of the personal and the professional. While the personal connection comes naturally through our shared love for music, the business part entails the constructive feedback required for improvement. I’ve even incorporated role-playing exercises where a student volunteers to play a passage, receives feedback and then applies it. We then discuss the interaction to clarify that constructive, even direct, feedback is not unkind or mean, but rather, it is essential for growth. When students experience this later “in real life,” they tend to understand that this is the process.
The Art of Making Mistakes: Mistakes should be normalized, not stigmatized. They are, after all, the clearest indicators of areas ripe for improvement. One idea that is effective is to feature a “common mistakes” segment in class, transforming what might be perceived as faults into constructive discussions for learning and growth. By doing this, we shift the focus from faults to improvement and resilience. Whenever possible, I try to have my kids listen to rehearsals or view behind-the-scenes footage of great works of art. We often are presented with finished products, falsely creating a sense that things come easier to others and that mistakes are not made.
Foster Holistic Development through Communication and Collaboration
Build Communication Skills and Setting Boundaries: More and more, I find students hesitant to directly communicate with their instructors, often resorting to emails or enlisting friends to speak on their behalf. While I understand the apprehensions, it’s crucial to develop good communication habits. So, if Marcie sends a friend to ask me if she could try a different instrument, I’ll directly address Marcie and gently but firmly emphasize that she should be the one making her own requests. My tone is always measured, so I don’t heighten any existing fears about direct communication that a student may already harbor.
Collective Learning and Performance Opportunities: To build confidence in students, I look for ways to make the learning experience collective and collaborative. Once, a colleague from outside the music department stopped by our rehearsal. Seizing the opportunity, I asked my students if they’d like to sight-read a piece for him. Half were eager, half were hesitant, but we went ahead anyway. After a typical sight-read session with all its hitches, Mr. Smith applauded the effort, leaving many students encouraged. What began as a tentative exercise turned into various sections of the band performing short excerpts for him. Sure, there were nerves, particularly among the younger players and those who I know have performance anxiety, but the collective atmosphere made individual participation less daunting. As a side note, Mr. Smith ended up spending half an hour instead of the two minutes he’d initially planned.
Reflection and Ongoing Improvement: After such activities, it’s essential to make time for reflection. Students should have the opportunity to identify their strengths and areas that require improvement. This not only validates their hard work but also reinforces the culture of continual growth that we want to cultivate.
Strategies for Resilience: Finally, it’s crucial to provide students with stress-management tools, ranging from simple breathing exercises to sharing personal stories and resilience strategies. Although skill development is vital, emotional resilience also plays a key role in creating a well-rounded learning environment. Don’t hesitate to share your own setbacks and the lessons you’ve learned from them. Doing so can often foster open dialogues, encouraging older students to share their own experiences and insights.
Final Tips
Balance Individual Needs with Collective Growth: Extreme cases are bound to arise in any educational setting — for example, students who are exceptionally sensitive to face-to-face interactions. It’s crucial to maintain a balanced approach in such situations. While it’s not your personal mission to “change” the student, you do have a responsibility to foster their educational development as a whole person. For instance, after calling a parent to inquire about their child’s reluctance to interact in class, I received an unexpected tip: my deep voice intimidated the student. I didn’t try to impersonate Mickey Mouse the next day, but I was more mindful about my tone and volume with that particular student.
The Fine Line of Personalization and Universal Learning Goals: The knee-jerk reaction to modern education problems might be to personalize learning to the extreme, catering to every student’s unique needs. However, that’s neither practical nor beneficial for the community at large. I’ve written on how essential it is to strike a balance. We aim to build positive relationships with our students while guiding them toward a realistic understanding of the world they’ll eventually navigate as adults. The goal isn’t to carve out special rules or conditions for every individual. Instead, we need to empower all students to maintain their unique identity while also acquiring the skills to adapt and advocate for themselves in various situations.
By integrating elements of communication, collective experiences, reflection and resilience into the teaching framework, we can create a more supportive and enriching experience for all students.
Takayasu Ebihara, head of product planning for SILENT Brass™ at Yamaha Corporation of Japan, began playing the French horn in his first year of junior high school. He has a vivid memory that informed his career choice. “Over the summer break, I brought home my instrument so that I could clean it,” he recalls. “My mother wanted to hear me play, so I thought I’d give it a go — but after only a minute of me playing, a neighbor called to complain.”
From time immemorial, all over the world, brass players have faced the same dilemma: How to practice without disturbing the neighbors?
With the introduction of the first SILENT Brass system in 1995, Yamaha provided the perfect solution. And with the recent introduction of the third-generation SILENT Brass system, things have gotten even better.
Ready to learn more? Read on …
FROM MUTED TO UNMUTED
Before the introduction of SILENT Brass, the only practical option a player had for quiet (though not silent) practice was to use a mute. These devices are designed to be placed directly inside the bell of the instrument and are commonly made of cardboard, aluminum or wood, with cork or spring clips employed to hold them in place.
A variety of brass mutes.
The benefit of using a practice mute is that it greatly reduces the sound of the instrument, but there are two major drawbacks. First, it drastically changes the tonality of the instrument, giving it a tinny sound. Even more significantly, using a mute makes it harder to play the instrument and control pitch, so many players find it tiring and difficult to use. “They’re generally considered a necessary evil,” says Jonathan Goldman, Senior Product Marketing Specialist, Winds and Strings at Yamaha Corporation of America. “The problem is that you have no way to really hear yourself. You’re kind of playing on feel, so you tend to overblow and push too hard so that you can hear something resembling pitch and articulation. After a short amount of time — 20-30 minutes tops — you’ve got to put the mute away. You have to stop playing because it can really mess with how you perceive pitch and how you perceive your sound.”
Enter Yamaha SILENT Brass
The Yamaha SILENT Brass system not only turns the sound of a muted instrument into that of an unmuted instrument, it restores playability. Here’s how it works.
The system consists of a special practice mute fitted with a pickup microphone (appropriately enough termed a Pickup Mute™), which is connected to a small electronic Personal Studio™ unit that clips onto the player’s belt. That little box incorporates Yamaha-exclusive Brass Resonance Modeling technology that works in much the same way as noise-cancelling headphones, removing the tinny muted tonality and replacing it with the natural acoustic tone you hear when playing without a mute, making it sound as though you are playing mute-free. (More about this below.) The Personal Studio unit can also be connected to a computer or smart device via a supplied USB cable, making it easy to record performances or take part in online lessons at home. Just plug in the included headphones and anyone can practice to their heart’s content whenever they want.
The SILENT Brass system.
SILENT Brass systems are available for trumpet, cornet, Flugelhorn, trombone, French horn, euphonium and tuba. Each comes with a mute specially designed to recreate the feel and response of that particular instrument. The euphonium and tuba mutes, for example, have an adjustable plunger rod that allows use with a wide range of bell and instrument sizes. When a mute is connected to the Personal Studio box, the system automatically senses which one is being used and triggers the appropriate sound when the pickup mic detects that the instrument is being played.
SILENT Brass trumpet/cornet mute.
SILENT Brass Flugelhorn mute.
SILENT Brass trombone mute.
SILENT Brass French horn mute.
SILENT Brass euphonium mute.
SILENT Brass tuba mute.
DESIGN IMPROVEMENTS
Today’s third-generation SILENT Brass system offers numerous improvements in terms of both playability and sonics.
In addition to being much more comfortable to blow through, the latest generation SILENT Brass Pickup Mutes are also significantly smaller and lighter than the original ones. “The heavier the mute is, the harder it is for the player to keep the bell up,” says Ebihara. “This is why we did our best to make the mute as lightweight as we could. It is also more compact than previous ones, so players can store their instruments in their cases with the mute still attached.” These new mutes are also designed to attach and remove smoothly and easily, and they can be used independently of the Personal Studio.
“Throughout the development stage, we emphasized that the system needed to have a very lightweight, very portable, extremely free-blowing and quiet practice mute,” says Goldman. “We thought that if we started at the root with a really good-playing practice mute that felt like there wasn’t something in the bell all the time, that would give us the best chance of success. The new mutes are super lightweight — a small fraction of the weight of the original version, which you couldn’t leave in the bell while you were traveling or while it was in the case. They also fit perfectly, almost perfectly flush with the outside of the bell.”
The size of the Personal Studio has been reduced as well, enhancing portability, but the biggest change came in the form of the Brass Resonance Modeling technology incorporated within. “We have always placed value on reproducing the natural sound of instruments,” says Ebihara, “but our digital processing technology has made significant progress since our first model. Our new Brass Resonance Modeling technology effectively cancels out the acoustic characteristics of the mute, allowing the instrument’s natural sound quality to shine through.”
The updated electronics in the new Personal Studio box also help combat the need to overblow in order to hear and feel what you sound like. “The faithfulness of the articulation and your sound is so good that you can spend more time practicing,” explains Goldman. “Your musculature can do what it’s supposed to do in a much more natural way.”
In addition to onboard reverb and individual mic and output gain controls, the new Personal Studio box also provides an aux input so you can play along with songs from your music library. Another new addition is a USB output that allows you to participate in online lessons and directly record your playing as an audio track in a DAW (digital audio workstation) such as Steinberg Cubase. The USB output also enables the SILENT Brass system to integrate with the free Yamaha Rec’n’Share app, allowing you to record your performances — complete with video — on your iOS or Android™ device for sharing with family and friends via social media.
Also new to the Personal Studio are two sound modes: “Player” and “Audience.” Player mode is optimized for practice. When selected, the following processes occur:
Sound picked up by the microphone at the end of the pickup mute is processed digitally to cancel out the characteristic “closed” sound of the mute.
The natural sound that emanates from the bell when the instrument is played without a mute is reproduced and added.
The timing, volume and tone of the sound reaching the player’s left and right ears are individually adjusted, and reverb is added as needed to accurately simulate the feel of performing in a room or hall from the player’s perspective.
In Audience mode, the listener hears the sound of the instrument as if it was being played in front of them, making this mode ideal for recording or online lessons. Here, the following processes occur:
Sound detected by the microphone at the end of the pickup mute is digitally processed to cancel out the sound of the muted instrument.
The natural sound that is produced by the unmuted bell is recreated for the player to hear, emulating the sound an audience hears when an instrument is played on stage.
The sound reaching the listener’s left and right ears are adjusted for timing, volume and tone, with reverb added as needed to accurately simulate the sound of the audience experience.
“The designers were so thoughtful in the way they sampled acoustic instruments,” enthuses Goldman. “They did recordings of the player playing their instrument both with and without the mute, with microphones placed both directly behind the player’s head and in a 360-degree pattern from all different directions. They had microphones hearing what the player is hearing as well as microphones hearing what the audience was hearing.” When used to replace the muted sound, the end result is a drastic reduction of the harshness that comes from the pickup microphone that is sitting inside a plastic environment.
To Goldman, the recording process was one of the keys to Brass Resonance Modeling technology. “I’m a trombone player,” he explains, “so I am used to hearing the instrument on the left side of my head; I hear much more of my sound on the left than I do on the right because there’s nothing there. But if I play French horn, the sound is coming from a lower position on my right, down near my hip. When I plug a SILENT Brass mute into the Personal Studio box, it senses which one is plugged in. In Player mode, the system balances the sound in the stereo field appropriately — to the left and a bit forward if I’m using a trombone mute, lower and to the right if I’m using a French horn mute, just like it is from the player’s perspective. It’s important when you’re practicing to be able to hear the instrument where you naturally hear it. But when you change to Audience mode, the system creates a balanced left-right stereo sound field and adds the sound coming from the front of the bell, recreating what the audience hears. In either mode, when you attack a note, the representation you hear in the headphones is very real.”
THE GENESIS OF YAMAHA SILENT PRODUCTS
Japan is one of the most densely populated nations in the world, dotted with tiny, closely-adjacent apartments and thin separating walls that are sometimes literally made out of paper. It was logical, therefore, that Yamaha — the world’s largest music manufacturer — would be the birthplace of repeated innovations in practice technology, going back many decades.
“In very congested Japan, where they love the arts and they love piano, the number of children practicing piano in densely packed neighborhoods during the day was getting to be problematic; people were complaining a lot,” explains Goldman. Accordingly, the first SILENT product from Yamaha was the SILENT Piano™, introduced in 1993. This groundbreaking instrument, which is still in production today, utilizes a mechanism that lowers a bar inside the piano which prevents the hammers from hitting the strings. Even when employed, the action feels exactly the same — the only difference is that there is no sound of hammers hitting the strings. Instead, when you put headphones on, you hear the digitized sound of a real concert grand piano — a sound that matches the expectations of your ears and enables quiet, private enjoyment of your instrument … complete with something that an acoustic piano cannot offer: a volume control.
Other SILENT products followed, including the first-generation SILENT Brass system that debuted just two years later, along with SILENT Session Drums™ (1996), SILENT Violin™ (1996), SILENT Cello™ (1998), SILENT Bass™ (2000), SILENT Guitar™ (2001) and SILENT Viola™ (2002). With a user experience that makes players forget that their instrument is muted, Yamaha SILENT Brass technology provides musicians with the capability of playing comfortably anytime, anywhere, without bothering the people around them. It is an extraordinary solution that was borne of the company’s goal of placing equal weight on the musician’s own enjoyment and consideration for others.
Marching bands and drum corps are known for their ability to create immersive musical experiences with a vast array of nuanced sounds. One of the key tools that empowers this sonic versatility is the field frame used to house mallet percussion instruments. In this article, we’ll explore how Yamaha’s redesigned field frame system offers a wealth of opportunities for educators and their percussion ensembles.
Versatile Mounting Solutions
The Multi-Frame™ II offers a robust, reinforced frame that unlocks a realm of creative possibilities for percussion ensembles. Whether you’re in need of a mark tree for a delicate transition or an electronic percussion pad to trigger samples, this frame is the answer. Educators, who are looking to add unique textures to their ensemble’s repertoire, rely on the Multi-Frame II and the versatile RDC-10 Percussion Clamp to mount virtually anything to marimbas, vibraphones, xylophones or glockenspiels.
Cymbals: The Multi-Frame II is most commonly used in conjunction with a short-boom or medium-boom arm cymbal holders. Most percussionists mount a suspended cymbal on the frame, but some opt for various effect cymbals, such as a splash cymbal (which can be used for splits among players), or a a pair of closed hi-hat cymbals. Regardless, the versatility from the Multi-Frame II and the cymbal holders enables you to create dynamic and impactful transitions and accents within your ensemble. Helpful Hint: To mount a crotale mounting bar, use the base tube of a cymbal holder.
Microphones: When it comes to enriching your percussion section’s sound and seamlessly integrating it with the rest of the ensemble, you may need to amplify your instruments. Programs operating on a strict budget often use bungee cords to attach a microphone to the keyboard’s rail assembly. While this method is effective, it may not be the most secure solution, and it lacks visual appeal.
An alternative approach is to utilize the instrument’s stay that runs beneath and across its length or one of the supports on either side. Here, you can securely clamp a microphone boom arm equipped with a shock mount. This setup allows for precise microphone positioning beneath the instrument, while also minimizing the risk of picking up frame noise that could otherwise be transmitted through the microphone.
In regions where external noise interference is a concern, a windscreen can further enhance sound quality by mitigating unwanted signal. This comprehensive approach ensures that your mallet percussion instruments are amplified with precision and without compromising the ensemble’s overall sound quality.
Electronic Percussion Pad: When you need a member to trigger samples in your ensemble, but your keyboardists are already covering another part of the composition, Yamaha has a solution. Import your desired sample and assign it to a pad on the DTX-MULTI12 Electronic Percussion Pad. This way, a mallet percussionist can play the sample, adding a unique layer to your performance. See figures 1 and 2 above on how to mount the DTX. Be sure to plan for cable routing to amplify the sample through your PA System.
This innovative approach allows you to achieve a range of sounds, including drum set (kit 009), timpani (kit 040), chimes/tubular bells (kit 041), and more. With the MAT1 Module Attachment and CL-945(L)B Tom Ball Clamp, you can securely mount your electronic percussion pad and avoid equipment damage.
Concert Drums: Educators can maximize the acoustic potential of their front ensemble with a range of concert drums. Mounting concert snare drums or concert toms has never been easier, and it can be done within seconds. This versatility allows for a powerful, horizontally and vertically aligned wall of sound, ideal for various musical expressions, from aggressive to delicate.
Pair the CL-945(L)B with the Yamaha 8000 series or 9000 Series Concert Toms for exceptional attack, brilliant tone and a wide tuning range. If you need additional low-end impact, consider impact drums, which may be challenging to mount on a field frame, but they can be transported separately. For a mountable solution, search for a standalone kick drum fitted with a tom mounting bracket and use the outer pipe assembly of a cymbal holder.
For a concert snare drum, all you need is your drum of choice and a snare drum stand. Remove the leg base from the stand, place the pipe assembly into your clamp, mount the drum and you’re ready to show off your well-rounded percussionists. For storage and transport of these drums, a hard case is an essential to avoid cosmetic or structural damage.
Multi-Application Xylophone/Bells: Achieving the perfect balance of articulation and resonance is essential in modern front ensemble orchestration. Educators can mount a marching xylophone or bells with two clamps and an adapter. This approach is ideal for ensembles with limited resources or space, allowing you to create a well-rounded ensemble sound even with a smaller group.
Tips:
Adjust the adapter’s placement to find the optimal playing position.
Exercise caution when mounting and transporting these instruments.
Store them in their respective cases during transit. Mounting them while the Multi-Frame II instrument is in transit is not recommended.
Trap Table: For percussion instruments without mounts or when you need a convenient way to store mallets for quick changes, a trap table might come in handy. If the trap table includes a standard pipe mount, it should fit right into your RDC-10 Clamp. This addition has the potential to streamline your performances and enhance the efficiency of your percussion ensemble.
Auxiliary Percussion: To make use of any extra cymbal holders or percussion mounts, consider mounting a range of auxiliary percussion instruments with standard 3/8″ mounts. Diversity in your percussion ensemble’s soundscape is crucial because different musical styles call for different instruments. Whether it’s cowbells for Latin beats, woodblocks for contemporary compositions, castanets for a Spanish flair or tambourines for folk music, this system adapts to the demands of various genres.
To safeguard your percussive arsenal during transport, consider investing in hard cases or soft bags designed for auxiliary percussion instruments. These protective solutions ensure that your instruments arrive unscathed and ready to contribute their unique voices to your ensemble’s performances.
Get Creative
Don’t hesitate to think outside the box and experiment with unconventional additions. Drum corps are known for using metal objects like anvils, brake drums or cylinder tanks as instruments. Sometimes, the most distinctive sounds come from the most unexpected sources.
If a particular item creates the precise sound your composition needs, it deserves a place in your ensemble. If traditional mounts don’t work, consider a custom solution by involving a skilled parent volunteer. Embracing innovation in this regard can lead to remarkable musical results. By exploring the myriad of mounting options and possibilities that the Multi-Frame II offers, you can take your percussion ensemble to new heights of creativity and musical expression.
In September 2023, I posted the article “20 Ways to Set the Tempo for a Great School Year” that quickly resonated with many of you. The response was overwhelming, to say the least. Colleagues and strangers alike reached out to thank me for writing that article. I’m grateful for every single message, but as the notes of appreciation poured in, I had a lingering question: “What happens when the going gets tough? How long will a list of tips actually last?”
Full disclosure: I wrote that initial list as much for myself as for other educators. It’s easy to make a list of ideals when you’re feeling … ideal! However, what do you do when even the best-laid plans hit a sour note? I thought to myself, it’s time for some reminders and recharging.
So, on those days when the morning coffee tastes like someone added some valve oil, or when the once-eager faces in the classroom seem like an audience awaiting a show you’re not prepared for, here’s a follow-up.
1. The Power of Appreciation
Never underestimate the impact of a simple “thank you.” Be it a word of appreciation from a student, a gesture from a colleague or a nod from an administrator — it’s a validation of your efforts. And don’t forget to thank yourself. Self-gratitude is a replenishing reservoir.
Try this: Send one handwritten thank-you note to someone who has helped you out after you read this article. Keep it short and simple. Mail it out or put it on your colleague’s desk. Don’t expect anything back — you’re just saying thank you because you believe in showing appreciation.
2. The Joy of Small Wins
Rome wasn’t built in a day, and your favorite concert piece was written one note at a time. Sometimes all it takes is one student to finally master that complicated rhythm or nail that elusive high note to remind us why we love our jobs. Small victories accumulate into big triumphs. There will be highs and lows, but a trumpet player who finally presses finger one down for Bb the first time is just as big a deal as a pristine performance. One win leads to others. Consider keeping a small journal or even a section of the whiteboard where kids can write their small victories. In one week, you’ll see a considerable amount of progress that you may have missed or trivialized.
Sometimes it feels like there are no wins, and that’s OK because one day does not define us. On our worst days, we need to focus on at least one thing that has gone right, or we can try to find the humor in the absurdity of the situation.
Recently, I had a day where nothing went right. The students were challenging, some surprises came up with the schedule, the car started making noise, dinner was burned, etc. I went to the grocery store that night. The cart system requires a quarter to release the cart, and when you place the cart back in the corral, you get your quarter back. I was thinking about how the day couldn’t get any worse as I put the cart back … and there was no quarter. I found the situation to be a little funny. Then a guy went up to get a cart and said, “Hey — free quarter!” I absolutely lost it and just laughed all the way to my car. I shared this with my students, and all of them were able to relate with their own quarter-eating story.
3. Less Is More
In our zeal to cover every piece, technique and theory, we often forget that sometimes less is more. It’s better to have students deeply understand fewer things than superficially cover many concepts. This type of understanding often leads to a greater appreciation and application of knowledge.
Step back — do you really need to run every piece today and make the same progress as yesterday? Sometimes narrowing our focus on one specific item can make a world of difference in our progress and stress level. It is OK to spend 10 or 20 minutes or even an entire class period on a measure or two, to tune a note or get the perfect diction down for one word. I’m lucky enough to have the Chicago Symphony Orchestra an hour away from my school. I tell my kids that what sets those musicians apart from everyone else is that a lot of us would pay money to hear one of them play even one note. Taking time to master one small item can help our kids understand what it is to push yourself and strive for the next level.
4. Don’t Fear the Reset Button
If something’s not working, don’t be afraid to hit reset. Whether it’s a teaching method, a lesson plan or even a classroom layout — it’s never too late to change up things. A fresh start is often the quickest way to regain your momentum. And it doesn’t have to be permanent. “Strings, everyone sit by someone else today. We’re going to focus on listening to parts we aren’t normally seated near.” Then go back to your regular seating the next day.
This can apply to your personal life as well. Recently, I started reading a book. I was about three hours into a book that would require five more hours of reading. It was a slog; I wasn’t getting much from it and started to dread my reading time, which is something I normally enjoy. So, I stopped and picked up another book and devoured it in two sittings.
5. Your Well-Being Matters, Too
We often pour so much into our students that we forget about ourselves. Remember, you can’t pour from an empty cup. Exercise, meditate, read or simply take a break when you need to recharge. I got busy and started going down the fast-food route again. A simple course correction of adding in some meal planning on Sunday saved me quite a bit of stress. If you don’t take your lunch break at school, consider starting small: Once a week during your lunch time, take a walk, visit another area of the school or even try something extravagant like eating your lunch in peace. We often think we need hours and hours of rest to recharge, but oftentimes, a five- to 10-minute break can be time enough to recharge.
6. Keep the Big Picture in Mind
Drown out the minor irritants and daily drudgeries by focusing on the larger mission. You are a mentor, a guide and a cornerstone in the development of the next generation. That’s no small feat! This can be easier said than done, so here are a few tips:
You can still check email but try to tackle one of your big projects first, such as score study, lesson planning or even something fun for your program. Then, in the remaining moments before your next commitment, complete other people’s requests like emails. Apply Parkinson’s law, which states that work will expand to fill the allotted time. If you spend 30 minutes on email, see what happens when you restrict your email response time to just 10 minutes. You may be surprised by your work output and energy level.
7. The Classroom Is a Stage, But It’s OK to Drop the Act
By this point, you have been “on” for quite some time. Sometimes, Super Teacher’s civilian clothes show under their superhero costume and mask. Authenticity goes a long way. While it’s necessary to maintain professionalism, it’s also OK to be human. Show your vulnerabilities and share your stories — they allow students to connect with you on a deeper level.
8. Every Question Is a Good Question
This classic piece of advice is easy to forget. Encourage questions — they can be about course material or life in general. A curious student is a sign of an engaged mind, and that’s what we want, right?
The only exception is: “Are we playing today?” The answer is and always will be: “Yes, we play every day, have played every day and will continue to play every day.”
9. Network and Share
Isolation can be a teacher’s worst enemy. For those of us who teach fine arts or other electives, we may even be secluded to another part of the building, away from the majority of teachers. Go talk to someone — anyone — in your building. Say hi and catch up. Go be a time burglar for a bit! Share your experiences and challenges with colleagues and listen to theirs. You’ll be amazed at how many new perspectives and solutions you’ll find when you open up. (Note to self: When you actually see another adult who stumbles into your wing, don’t open with, “Look! Another adult! PLEASE TALK TO ME!” (This comes across as slightly desperate.)
10. Find the Humor
Laughter is an underused tool in education. A classroom where laughter is frequent is one where learning is a joy, not a chore. Humor can be a fantastic icebreaker and a great way to make material more accessible. Plus, we all want to be a part of something that is fun and joyful. When a section in my group starts laughing, the rest of us wonder what we’re missing out on.
It’s fine to bring up a goofy thought, but don’t let it derail your class. We started a food fundraiser recently, and all the items looked absolutely delicious. My favorites were any products that had sugar in them. I thought, “What if a company tried to sell flavor combos that just didn’t work?” So, I said it out loud. My band is now looking at starting an LLC to sell cookies in five exciting flavors, including “Toothpaste and Orange Juice,” “Sedimentary Coffee Grounds at the Bottom of Your Cup Because You Made It at Home to Save Money” and “Middle School Gymatorium” (essence of ketchup, sweat and regret). It was silly and had nothing to do with music, but we had a great rehearsal after that.
Teaching is a long road, and like any journey, it has its ups and downs. Never forget that you have the best co-pilots a person could ask for: your students. Keep these gentle reminders in your back pocket, adapt them to your style and keep forging ahead. Even during tough times, remember that you make a difference. Continue to lead with purpose and integrity.
If you are responsible for one or more large ensembles, conducting is one of the most important parts of your job. Your performance as a conductor is a window into your skills as a teacher. That’s why it is vital to be a good conductor for your students. By “good,” I don’t mean you passed Conducting 101 in your undergrad music education program. “Good” means that you can show the intent of the sound in your head through your gestures (explaining it in words doesn’t count!).
I have seen many conductors who are blessed with incredible rehearsal techniques and a musical ear, but their conducting was basically the pattern with an occasional dynamic. This isn’t good enough.
Here are the five reasons why you must be a good conductor for your students.
1. At Least You Did Something
You may have heard that the role of the conductor is to look like the music. The greatest conductors who you probably love to watch all look like the music personified. There is some truth in that statement, but that idea should be approached cautiously.
If you are of the mindset that you need to look like the music, that may get in the way of what your ensemble needs. If you have choreographed every move of each piece you conduct, you may look like the music you listened to, but do you look like the sound that your ensemble is creating? You need to look like the music in a way that will help your group sound the way you want them to.
I was lucky to participate in a conducting masterclass in Sicily where I conducted the first movement of Holst’s Second Suite in F. I had come up with a vision of what I thought the movement should sound like and was ready to take my shot at conducting. I started, listened, and showed the group articulation, the shape of the line, dynamics, etc.
When I was done, the maestro said, “I don’t know what you were trying to do, but at least you did something.” Ouch — I’ll try to take that as a compliment!
I encourage you to try something that can help your ensemble. Maybe it works, maybe it doesn’t, but at least you did something. And you can do something else next time.
2. Made for All Ages
No matter what grade level you teach, from elementary to college, being a good conductor is important for your students. As students get older they understand and respond more to nuances in your conducting, but don’t count out the younger students. Elementary students listen and engage in music in various ways such as drawing and dancing to music the way they hear it. By the time students start playing instruments, they can understand the gestures you show because they can connect the idea of motion to music.
You might think, “But my group can’t play in time unless I’m mirroring with both my hands the whole time.” I feel like that sometimes, too (this is where not conducting can be extremely effective, but that’s a topic for another time). Sure, depending on the age and ability level of the students, you may feel like you need to focus on some things more than others — in this case, time. However, there are other aspects of the music that students can respond to as well. Who knows, maybe if they start to include other musical aspects into their playing, it may fix other issues.
When I work with middle schoolers, I do not change my conducting but rather my focus because their needs are different. Like I said before, students are capable of understanding. They get bored seeing the same thing the whole time. Just think of how many TikToks they watch in five minutes. Their attention spans can be very short.
If you are conducting big all the time, that is all they will see and all you will hear. When they see it all the time, they will stop paying attention, which might be shocking because kids pay attention all the time, right? However, if you do something different, they will notice and will watch, analyze and respond. They can do it. And you can let go of all the control.
3. Engaging Rehearsals
Being a good and effective conductor will keep your rehearsals fast-paced and engaging. How many times have you played in a group where the conductor started telling you what to fix even before the third trumpets realized everyone had stopped? I’m guilty of doing this when I’m in a rush.
Imagine how much time you could save if you showed your students something instead of telling them. If you are so focused on sounding like the music that you have to stop and explain to your group what you are doing — “When I do this, you should sound like that” — that defeats the purpose of being a conductor, it eats up rehearsal time, and you run the risk of fixating on your choreography instead of the music. I, for one, think I am a better musician than dancer!
4. Inspire
Part of being a good conductor includes score study. Through score study, you begin to understand the ins and outs of the composer’s intent and develop an image of the piece and the gestures that will help you communicate the music. If you simply conduct a four pattern and do nothing else, you are doing a disservice to the music and all the work that you put in to understand the piece.
One time, my band was working on a piece, and the students seemed disengaged; they were phoning it in. They weren’t playing the piece — which should have been very easy for them — at the level that I expected from them. As a result, I changed my conducting. Not to be more musical but to be less, and they sounded even worse (how was that possible?).
I then said to them, “If you don’t care about the music and how you sound, why should I care about the music and how I look?” This could very easily have gone the other way.
If you don’t care about the music and showing it, why should they care about playing it musically? If you are simply conducting the beat pattern of the music, they will play the musical equivalent of that, and you will be disappointed.
What your ensemble needs may vary from week to week, day to day or even moment to moment, and you must meet those needs. In my article about unconventional rehearsal techniques, you can — and should — focus on the music immediately. Do not wait for students to play perfectly in time before you begin working on and showing the musical nuances.
5. Make Them Want to Play for You
How many times have you yelled “Watch!!!” in the middle of a piece? Hopefully, they weren’t during a concert. And how many times did that fix anything? If it was more than zero, I’m impressed.
In general, students want to do well for their teachers. I truly believe that. Do they always follow through on that? Of course not — they’re just kids!
Although their desire to do well is natural, don’t give them a reason not to try. Remember, you are also performing with them, and every time your group plays, it is a performance. One of the greatest compliments I received from a dear friend of mine was: “You always give so much energy and emotion into your conducting in rehearsals, and just when I don’t think you can give any more, you somehow give more during the performance.”
Your students deserve your all. When you do this, many things will happen — students will respond, you will create a stronger connection, and they will give it their all. All this needs to happen just once for students to want to play for you forever.
How You Can Get Better at Conducting
There are many ways to improve your conducting. It all depends on what you want to improve. The cheapest way is to record your rehearsals and performances and watch them afterward. It is uncomfortable and awkward, but necessary. Unrelated to conducting, I once viewed security footage at the school and had the speed at 2x. The assistant principal said, “Here you come down the hallway.” I was mortified! I looked as if I had never walked in my life. Why did I move like that? After all, I’ve been walking for at least a few years by now. Regardless of how you look, it is the truth. Watch the videos of yourself and then send them to trusted colleagues for feedback.
Another option is to attend conducting symposiums with some of the best conductors. It is extremely rewarding and humbling to work with people much better than you and watch them work with other conductors.
And finally, practice. Practicing conducting may feel awkward at first but it gets better— trust me. People you live with will get used to it, too. It is weird to conduct without an ensemble, but as a result you will be leading, and not following, in your rehearsal.
Thanks to technology, recording bass at home is easier than it has ever been. Here are a few tips to help you get started.
MAKE SURE YOUR BASS IS READY TO GO
Before you even start recording, make sure your bass is ready to go:
If necessary, get your bass set up and intonated. This will ensure that the string height is just right and that the instrument is in tune all the way up the neck.
Put on a fresh set of strings and break them in so that they’ll stay in tune as you record.
Dial in the right bass tone for the song, with the understanding that getting the bass to sit nicely in a mix might mean having to remove some of the low end.
Plug in and make sure your input level isn’t too high.
The Yamaha BB435 is capable of many different tones.
Recording puts a magnifying glass on your technique, so warming up before a session by practicing with a metronome is also always a good idea.
GATHER THE NECESSARY HARDWARE
Most of today’s computers have enough processing power to run DAW (Digital Audio Workstation) software such as Steinberg Cubase, but make sure you have enough disk space to save your recordings, whether on your internal hard drive or any connected external hard drives. To connect your bass to your computer, however, you’ll need an audio interface; these come in all shapes and sizes. Some amplifiers, like the Yamaha THR10II desktop amp, have a built-in audio interface. The THR10II is designed primarily for use with guitar, but does a superb job with bass too.
The Yamaha THR10II makes it easy to record bass.
In addition, in order to ensure you’re hearing your bass accurately while recording it, you’ll want to be sure you’re listening through high-quality headphones like the Yamaha HPH-MT7 and/or monitor speakers like the Yamaha HS Series.
In both professional recording studios and onstage, the engineer will likely plug your bass into a DI (“direct injection”) box, so you should have one in your home studio too. One of the advantages of recording through a DI is avoiding audio gremlins like ground hum.
In addition to taking this direct signal from the bass, many engineers also place a microphone in front of the bass player’s amp. A well-recorded DI will capture solid tone with excellent definition, but miking your amp will give you the sound of that amp (which can be used to bolster low end, especially if it’s connected to large speakers), plus some of the “air” in the room. Both sounds are useful, and many engineers blend the two together.
Here are three audio clips (all played on a Yamaha BB435) that demonstrate this. First, a DI signal on its own:
Next, the same bassline recorded by putting a mic in front of an amp:
And finally, the sound of the two combined:
USING EQ, COMPRESSION AND EFFECTS
Equalization (“EQ”) and compression can be applied to your bass during recording, during mixdown, or both. The advantage of doing it during recording is that future overdubs are made to a more-or-less finished bass sound; the disadvantage is that you’re pretty much stuck with that sound if you later decide that it doesn’t fit in with the other instruments. On the other hand, if you leave EQ and compression solely to the mixdown stage, overdubs are being done to a bass sound that may not be quite polished. The decision is yours to make; experiment until you come up with the technique that works best for you.
To record an effect, you can plug into a pedal before your interface or use a software plug-in, again. As with EQ and compression, this can be done during recording, during mixdown, or both. A plug-in will be cleaner and introduce less noise than a pedal. In addition, it might have cool presets, and you can always change how much of the effect you hear. Consider recording both a clean track and an effected one so you can blend the two as desired during mixdown.
PLAN AHEAD
Decide whether you want to record all the way through the song or go section by section. It may be easier to record one section at a time, but playing all the way through can impart a better overall feel. When it’s time to record, back up a couple of measures so you have time to come in. Some people like to record in a “cycle” mode (your DAW may call it something different), which repeats a section over and over, allowing you to record multiple takes without stopping.
RECORDING FOR OTHERS
If you’re adding bass to someone else’s track, send them a few choices. Be sure to include both the complete track with your bass part and just your bass part on its own. This “soloed” bass track should be the same length as the complete song, even if your part is shorter or you only play on certain sections. Doing this makes it easy for the recipient to place the track in their DAW, hear it in context and mix it. If you export MP3 files, they may be small enough to attach to an email, but if not, use a file transfer application like Dropbox, WeTransfer or whatever service works best for the recipient.
OVERCOMING RED-LIGHT JITTERS
Many players experience pre-performance anxiety when they see the red “record” light. If you’re nervous before a session, take a deep breath, acknowledge it, and remember that, unlike highly paid professional studio bassists, you’ll most likely have plenty of chances to get it right — as well as the tools to fix most mistakes in your DAW. So play with confidence!
Music education has always been about the long game and less about the quick wins. While instant gratification can be enticing, I’ll always choose the joy of long-term accomplishments. Here’s how you can set up your class for lifelong success.
Always Address Tone
We’re always swamped during rehearsal, but if we wrap up early, it’s back to tone. Think of it as building musical athleticism. Forming an embouchure, holding a bow or singing with proper breath support is physical. The mechanics of good tone involve real muscle and airflow. No shortcuts allowed.
Treat your musicians like athletes and understand that if you want great tone at the spring concert, then you must start your physical conditioning now. Rushing this process isn’t just ineffective, it’s potentially damaging to the musicians’ physical wellbeing. So, plan accordingly, and commit to the long game of developing tone.
Try These Practical Tips
Play or sing for your students regularly; let them hear it straight from you.
Work breathing exercises into your daily routine. Tone starts with air.
Insist on Intonation
We focus on intonation from the first day of class, and in many instances, we begin during the summer through extra rehearsals. Without this early commitment, my ensemble will not be able to perform in tune effectively. The process is layered — first, we work on achieving a characteristic tone, followed by addressing balance among the instruments. Only then do we dive into the specifics of tuning unison pitches.
There’s a camp of people who argue against using electronic tuners, advocating instead for “listening.” While I’m a big proponent of developing listening skills, I see the value in attaching tuners to each student’s instrument, especially during the early phases of rehearsal. My ears may not be perfect, but they’re still more trained than those of the students. Consequently, they often don’t know what good intonation sounds like until we collectively produce it and internalize that sound. It becomes a lightbulb moment when I can get just two students to play in tune, which gives them a benchmark, a goal.
By the time December rolls around, the majority of students have a tangible understanding of what “in tune” really means. Why the push to start so early? We’re back to our musical athletes. Certain muscular techniques — like tightening or relaxing the embouchure to alter pitch — require time to develop. These are not skills that can be rushed without risking poor habits or even physical strain. Therefore, an early start on intonation is crucial.
Try These Practical Tips
Utilize the resources at your disposal: employ tuners, drones and other tools to refine pitch.
Conduct a pitch inventory in pairs for targeted improvement. Designate a space like a practice room where two students can bring their instruments, a tuner and a note sheet. One student plays while the other observes the tuner and records the pitch accuracy — sharp, flat or in tune. This exercise makes students aware of their individual pitch tendencies.
Incorporate specialized tools like tonal harmony software or the Yamaha Harmony Director to teach intonation. Pairing these resources with instructional materials like the Bravo Music’s Winds Training Series DVDs can enhance learning.
Start by tuning a single pitch each day and then progress to tuning an entire chord daily. This gradual approach helps students better understand what being “out of tune” really means.
Use the “two tuners trick” to improve pitch perception: Set up two tuners to produce a tone simultaneously, one at 430 hz and the other at 440 hz. Gradually increase the frequency on one tuner by one hertz at a time. Have students raise their hands when they no longer hear the wavy sound produced by the conflicting pitches. This exercise is effective in teaching students to recognize out-of-tune waves.
Start Sightreading Every Day
Encourage your students to sightread a new piece of music every day. I know that time is a constraint. However, the dividends of consistent, daily sightreading are invaluable.
Investing in sightreading during the fall months — October, November, December — eases the fears and anxieties your musicians might have about new music come January and February. The task becomes less daunting, and your students will eagerly take on new pieces. Plus, incorporating regular sightreading into your routine can serve as a refreshing change of pace, breaking up the potential monotony of lengthy concert preparation cycles.
Try These Practical Tips
Start small: Dedicate one day a week as sightreading day or focus on one new piece a week over multiple days. Aim to increase the frequency over time.
Utilize resources: Tap into sightreading books or methods, whether from print or digital retailers. Most books, such as Tradition of Excellence or Essential Elements, provide some sightreading or rhythm reading examples in the back. If you use MakeMusic (formerly SmartMusic) or Musicfirst, the sightreading examples they supply will work well.
Switch it up: Have musicians swap parts. For example, part 1 can play part 2, part 2 can play part 3 and so on. Trumpets might tackle clarinet parts (adjusting for range) and vice versa. Get creative — there’s no one-size-fits-all approach to help students improve.
Maintenance Matters
I drive a 2003 Toyota that has its share of minor issues, but it’s a reliable vehicle overall. While I’m no car expert, I address mechanical problems as they arise and prioritize preventive maintenance. Given that I’m driving an older model, I understand the importance of frequent oil checks and having a professional inspect various components like tires and spark plugs every so often.
In the same vein, maintaining our musical instruments — and yes, that includes voices — instills discipline and responsibility in our students. It also minimizes unpleasant surprises, like a clarinet spring breaking just moments before a performance. Take time during class to remind students to oil and grease their instruments regularly. For vocalists, emphasize the importance of vocal rest, staying hydrated and avoiding straining activities like screaming, whispering or even speaking loudly.
Try These Practical Tips
Keep a visible chart with a maintenance schedule for instruments so everyone knows when it’s time for a tune-up.
Reach out to parents or, even better, partner with an instrument repair company to send technicians for periodic check-ups, akin to doctor’s visits.
Incorporate a quick “health check” at the beginning of each week’s practice. Have students do a basic rundown of their instruments or vocal cords, noting any issues like sticking valves or vocal strain, so they can be addressed before they become larger problems.
Facing Fears
I don’t mean to get psychological here, but I know from conversations with colleagues that a lot of us have things that we’re either afraid of or that we simply avoid. Maybe you’re hesitant to focus on a difficult music section, reluctant to rehearse an unpopular piece or nervous about asking for more funding. Do your due diligence — know your facts and prepare accordingly. Then, get real with yourself: Make a list of what you’re avoiding. Depending on your comfort level and the stakes involved, you can either approach these issues cautiously or jump in with both feet.
I had my own set of fears — inviting clinicians (too soon, we’re not ready), isolating sections or individuals during practice (I don’t want to single anyone out, we’re too busy), and petitioning for additional funding (it’s a tight budget, they’ll likely refuse). Recognizing these fears was a game changer; ignoring them was no longer an option. Facing them head-on has improved me and my ensemble.
Try These Practical Tips
Carve out some time to reflect on what you tend to avoid during rehearsals. Write down your reasons for avoiding these things. Next, ask yourself if others are doing these things and succeeding. If so, question why you think you can’t. Keep in mind that we often see what we expect to see when looking at others’ situations — not the whole truth.
Depending on your personality, try a different approach to confronting these issues. If you’re usually hesitant, try diving right into a smaller task. If you’re the type to act quickly, maybe slow down and think it through before taking action.
Regularly reassess your list of fears or avoidances. Once you’ve tackled one, it’s easy to replace it with another one without even noticing. A periodic review ensures that you’re constantly evolving, both as an educator and as a musician.
Sustained Success
The beauty of long-term strategies lies in their subtle transformational power. When you incorporate these habits into your routine, they become second nature to both you and your ensemble. Using a recording device serves as a potent tool to track this evolution. When you play back recordings from October in May, your students will likely be in disbelief at how far they have come. It’s crucial to celebrate this progress by acknowledging it and reflecting on the strategic steps taken. Instant gratification might keep the engine running, but it’s the long-term investments that really fuel the journey.
For more than 45 years, Yamaha has been manufacturing headphones, bringing quality sound and the latest technology to personal listening.
Here are some of the most memorable product releases through the decades.
HP-1 ORTHODYNAMIC® HEADPHONES
HP-1 Orthodynamic headphones.
First introduced in 1976, the HP-1 represented our first entry into the headphone market. It was a product that had many unique features. Yamaha engineers had developed a manufacturing method to sandwich a very thin polyester “orthodynamic” diaphragm embedded with a thin copper conductor in-between two specially designed magnet structures. Similar in concept to the electrostatic speakers being experimented with at the time, the sound was open, full range and very musical. In addition, the skills of renowned Italian industrial designer Mario Bellini were tapped to create the look and feel of these headphones. Their open headband and fabric head strap made them extremely light and comfortable, good for hours of non-stop listening. Versions of the HP-1 (including the YH-1000, YH-100 and HP-1A) were released all the way into the mid-1980s.
EPH-20, EPH-30 AND EPH-50 WIRED EARBUDS
EPH-50 wired earbuds.
The EPH Series wired earbuds released in 2010 were designed to be used with the MP3 players and iPods of the era, as well as with home stereos. There were three models: the EPH-20, EPH-30 and EPH-50, all of which featured a dynamic driver and delivered an impressive frequency range of 20 Hz to 21 kHz. Driver size and maximum Sound Pressure Level (SPL) differed from model to model, with the EPH-50 having the largest driver (.53″) and the EPH-30 delivering the highest SPL (110 dB). The EPH-30 and EPH-50 came in both black and white, while the EPH-20 was available in five different colors, including “Hot Pants” Pink.
PRO SERIES
PRO500 wired headphones.
The wired PRO Series consumer headphones introduced in 2012 delivered high quality sound in a low-profile style. All three models — the on-ear PRO300 and over-ear PRO400 and PRO500 — incorporated a newly-developed Yamaha-proprietary driver design with neodymium magnets for maximum efficiency when used with mobile devices. In addition, they had an adjustable reinforced headband with textured padding, allowing for long listening sessions, and their detachable tangle-resistant cable was made from a material that was designed to reduce “touch noise” transfer effects. The cable included an in-line microphone optimized for use with iPod, iPhone and iPad devices, and provided a “+/-“ volume control as well as a dedicated button that allowed the user to play/pause music, skip to the next/previous song, or answer/end phone calls. All control buttons had a tactile click-response for intuitive operation without need for visual reference.
WIRELESS EARBUDS AND HEADPHONES
TW-E5B True Wireless earbuds.
YH-E700B wireless noise-cancelling headphones.
In 2020, Yamaha headphones and earbuds transitioned from wired to wireless technology with the release of a wide range of products that currently includes these models:
YH-E700A wireless noise-cancelling Bluetooth headphones
YH-E500A wireless noise-cancelling Bluetooth headphones
All incorporate the very latest innovations in personal listening, such as Qualcomm® cVc (Clear Voice Capture) technology and Qualcomm TrueWireless Mirroring for stable wireless connectivity, and all deliver Yamaha True Sound that vividly depicts the texture and tonal balance of the sound of each musical instrument. Various models also provide an array of Yamaha-exclusive features, including Advanced ANC (Active Noise-Cancelling) technology that leaves your music pure and untouched; a Listening Optimizer that corrects the sound in real time, adapting to you and your environment; Ambient Sound that lets you choose when you need to be aware of your surroundings; Listening Care intelligent equalization for full-range sound at low listening volumes; and 3D Sound Field, which enables you to enjoy an immersive theater-like listening experience wherever you go.
YH-5000SE AUDIOPHILE-GRADE HEADPHONES
YH-5000SE audiophile-grade headphones.
In a great example of things coming full circle, the recently released audiophile-grade YH-5000SE headphone rekindles the Orthodynamic legacy of the HP-1 with 21st century advancements in materials and technologies. Central to the YH-5000SE is a Yamaha Orthodynamic driver with an ultra-lightweight thin-film diaphragm that faithfully recreates every nuance of musical dynamics for sonic accuracy and extremely responsive performance. Other features include a Japanese-made, rolled plain Dutch weave stainless steel filter and an arch-shaped protrusion, housed within a large yet lightweight magnesium body that has outstanding rigidity. The two-layer headband and smooth stepless slider provide maximum comfort, and two types of earpads are included (leather and suede), as well as two types of silver-coated cables and a dedicated aluminum headphone stand.
Yes, it may be difficult to predict the future of headphone design, but the legacy of these great Yamaha products has clearly made a lasting impact, with the YH-5000SE truly representing the state of the art in personal listening today.
Congratulations, you’re a professional! Armed with a degree, student teaching experience and a broad range of skills, you’re well-equipped for your role as a music teacher. However, when you stand before your class or speak with parents, that nagging feeling of being an imposter creeps in.
“What if people discover that I’m a fraud? I can’t even talk to parents without feeling nervous.”
You’re not alone — welcome to the self-doubt club. There’s a seat waiting for you next to my colleagues and me.
Imposter syndrome affects people in many professions, but the spotlight can be especially harsh for music teachers. You’re responsible not only for educating students but also for inspiring a love of music in them, which amplifies the pressure you might feel. Take comfort in knowing that many educators grapple with these same anxieties, even years into their career. Below, you’ll find strategies to help overcome imposter syndrome.
1. Recognize the Syndrome for What it Is
Imposter syndrome is common. You fear being exposed as a “fraud” despite evidence of your competence. Remember, these feelings are an internal struggle about perception, not reality.
If you have self-doubt as you lead your students in their first concert, know that many skilled musicians and teachers have felt the same way. You belong here.
2. Reality Check Your Experience
When doubt creeps in about your qualifications, take a moment to reflect on the foundation of your career. Consider your credentials, hands-on experience and positive feedback you’ve received. Tangible reminders like your degree on the wall or thank-you notes from students and parents can reinforce your competence. As you set up music stands before class, remind yourself of your achievements — your music education degree, years mastering your instrument and successful student-teaching experiences. You’ve earned your position through hard work.
3. Team Up on High-Stakes Projects
If the mere thought of leading a big project like a concert or overnight trip fills you with dread, team up with a more experienced colleague. This collaboration not only eases the workload, but it also assures you that you’re on the right path.
Imagine you’re tasked with organizing the annual spring music festival, and it feels like an impossible task. Don’t be shy about tapping into the wisdom of a seasoned colleague or even a music teacher from another school. Working together provides the opportunity to learn valuable insight from someone with more experience. If you want to earn trust and enhance your reputation, volunteer for high-stakes projects beyond your usual role, like prom planning or travel coordination. And if any mistakes happen, well, that colleague should have known better than to entrust this to an imposter, right? Jokes aside, the real benefit lies in shared responsibility and personal growth.
4. Develop a Character
“I’m not a music teacher, but I play one on T.V.”
When self-doubt arises, employ a performance strategy. In other words, play a character to navigate through tough situations. Visualize the most confident version of yourself and channel that persona when imposter syndrome strikes. If you’re anxious about talking to parents about their student’s progress, imagine how a seasoned educator would handle the situation and emulate that character. This act of “playing the part” can boost your confidence.
For example, when I faced a challenging phone call to a parent, I initially felt like Don, the relatively inexperienced music teacher. However, in that moment, I chose to act as a different version of me — the one who is composed, confident and focused on what’s best for the student.
If assuming a different persona feels disingenuous, remember that we all adapt our behavior in the various roles of our life — work, personal life, parenting and more. And, you’re a musician. Chances are you had to play some sad music when you were happy and vice versa, but ultimately you got the job done.
5. Pep Talks
“I’m good enough, I’m smart enough and doggone it, people like me!” — Stuart Smalley
Boosting your confidence through self-talk or support from others is invaluable. When facing a daunting moment like your first solo performance at a teacher’s conference, take a breather backstage or in a quiet spot. Whisper affirmations: “You’re well-prepared, and you’ve got this.” These words act as your shield against self-doubt.
Additionally, seek support from someone you trust. A quick text or call for a pep talk can make a world of difference. Hearing reassurance from someone else validates your own affirmations.
Verbalizing positive thoughts can transform your mental state, drowning out doubts. Whether it’s that solo performance, a challenging meeting or any situation that triggers imposter syndrome, a timely pep talk can be the boost you need to succeed.
6. Take the Plunge
The best teacher is experience, so don’t overthink and take calculated risks. If you want to tackle a more challenging musical piece, do your research, weigh the pros and cons, then take that leap and put it in the folders for sightreading.
Regardless of the outcome, every risk enriches your professional journey. Lessons from challenges are as valuable as successes. Each challenge builds your experience, chips away at imposter syndrome and informs future decisions. So, when the opportunity arises, seize it, take that calculated risk and grow from whatever comes next.
7. Honesty is the Best Policy
Honesty builds trust, so don’t exaggerate your qualifications. If you’re unsure about something, admit it and promise to follow up with the needed information. This straightforward approach increases trust.
If a student asks about a bassoon fingering that you’re not familiar with, don’t bluff and say, “Mumble, mumble, pancake key.” Be honest and say that you don’t know but commit to researching it. Such forthrightness maintains and often enhances trust.
I once faced an unexpected question during trip planning about medication. I didn’t have an answer, but I assured the parents that I would consult the school nurse and policies, promising a response by the week’s end. It’s OK to not know everything. What matters is your commitment to finding out.
8. Seek Feedback from Trusted Colleagues or Mentors
Before important events or meetings, rehearse your presentation or discuss your plans with an experienced colleague. Seek constructive feedback and, to make the practice more authentic, ask them to pose challenging questions that you might actually face. Offer to return the favor by doing the same for them in the future. This preparation sharpens your material and boosts your confidence for when it really counts.
9. Engage Parents and Students as Partners
Seek input from parents and long-standing community members — their insights are invaluable. A collaborative atmosphere creates opportunities for diverse perspectives and fosters shared responsibility.
Imagine you’re introducing a challenging piece of music with complex rhythms or unfamiliar cultural elements to your percussion class. Instead of avoiding it, say to your class, “This is intricate, and it’s new to me, too. Let’s explore it together.”
Invite students to share how they learn tough rhythms. Transparency about not knowing everything creates a learning environment, turning vulnerabilities into opportunities for communal growth.
What about parents? Many are more than willing to offer help for odd jobs like stuffing envelopes to helping to organize travel. Yes, we’re the musical experts, but don’t shy away from asking parents what they think your program needs. You’ll be surprised at some of their insights.
10. Celebrate Your Achievements No Matter How Small
Remember that complicated rhythm you were initially hesitant to introduce to your percussion section? The one you asked students to help you master? After weeks of collective effort and learning, your students finally nailed it during rehearsal. Don’t gloss over this achievement — celebrate it! Give your students kudos, maybe even bring in a small treat the next day. (I use imaginary points based on our school mascot and tell the kids they are redeemable for nothing, and they still fight over who gets more points!) Don’t forget to give yourself a pat on the back, too.
Acknowledging and celebrating these milestones, however small they may seem, not only boosts your students’ morale, it also helps you construct a more realistic and positive self-image over time. It’s a way to counteract the imposter syndrome by recognizing that, yes, you do have the skills and the right to be in your role.
11. Document Your Successes
After a challenging semester with a new curriculum or innovative teaching method, receiving applause and accolades at the final concert is rewarding. Capture these moments. Take photos, save emails and jot down compliments. Create a digital or physical “feel-good file” and add items to it regularly, including your updated resume, not for job hunting but as a self-affirmation tool.
When imposter syndrome strikes, open that folder. Revisit your accomplishments and positive feedback to ground yourself in your competencies. Acknowledging your capabilities is a powerful antidote to self-doubt. I often look at my feel-good folder; I still have thank you notes from over 15 years ago to remind me of how far I’ve come.
12. Set Realistic Expectations and Goals
Setting achievable goals is crucial, especially for music teachers stepping into successful programs. The weight of expectations, internal and external, can fuel imposter syndrome.
Imagine teaching beginners, dreaming of them mastering a complex piece by year-end. You can achieve this goal by breaking it down. Set attainable milestones like basic scales and rhythms first, then simple ensemble pieces and progress gradually. Celebrate victories at each step because they build confidence.
Reality Check: It’s natural to want to emulate successful programs or directors. Keep in mind that they didn’t achieve their status overnight. It’s easy to set our sights on the cosmos — making it to district festivals, then state, national and maybe even international competitions. But such a fast track to the stars can set you up for failure, or at the very least, unnecessary stress. Start with engaging and enjoyable concerts as a foundation. Set challenging yet realistic objectives. Don’t reinforce imposter syndrome with unrealistic expectations. Build your legacy — not someone else’s — step by step.
13. Establish a Support Network
Feeling isolated intensifies self-doubt. Build a network of colleagues, mentors and online teacher forums for support and growth. Chances are, some go-getter has already created a Facebook group for your discipline and grade. They offer advice, fresh perspectives and a safe space for questions and insecurities.
If you know about a veteran music teacher in your district, reach out. Invite them for a coffee or virtual chat. Be open about your triumphs and challenges. Seasoned teachers often faced similar uncertainties and fears, offering both practical advice and emotional reassurance. You’re not alone.
14. Mindfulness and Self-Compassion
Mindfulness combats imposter syndrome, so be aware of negative thoughts and emotions. Show self-compassion as you would to a friend.
If you’re preparing for a high-stakes event, pause, practice deep breathing or mindfulness exercises. Catch negative self-doubt in its early stages. Ask yourself, “What advice would you give a colleague or student?” It’s likely not harsh, but it is reassuring. Extend that same courtesy to yourself.
15. Share Your Experience
Once you’ve had a successful semester or school year in dealing with imposter syndrome, offer guidance to others facing similar challenges. Whether they are student teachers, recent graduates, or new department members, share your wisdom through regular meetings. This not only benefits them but also boosts your self-confidence and skills as you share your journey and effective strategies.
You Can Do It!
Battling imposter syndrome is a long-term endeavor, not a one-time fix. Whether you’re a seasoned music teacher or new to the field, it’s natural to feel self-doubt at times. The key is to break down your journey into manageable goals and celebrate your victories along the way. Keeping a “feel-good folder” can serve as a powerful antidote during moments of doubt, as can the practice of mindfulness.
So next time you find yourself questioning your right to stand in front of your music class or nervously preparing for a parent-teacher meeting, pause and remind yourself that you’ve earned your place. In those moments of doubt, remember to be both your toughest critic and your biggest supporter. You are more capable than you think, and each day offers a new opportunity to prove that — not just to others, but to yourself.
Building rapport with students, parents, the school and the local community is one of the most important, yet often overlooked, aspects of a successful music program. If you teach at a Title I school that has a majority of students whose families live at or below the poverty line, establishing these relationships is even more critical.
Understanding Student and Community Needs
Many of us are familiar with Maslow’s Hierarchy of Needs as outlined by Saul Mcleod, and we understand why it is essential for us to know what we may need to provide to students so they can be successful in school and in our program. If our students’ physiological (food, water, clothes, etc.), safety, social and esteem needs are not adequately met each day, we must be ready to address these issues to mitigate any barriers to the learning process. As highlighted by Jessica Minahan’s article, “Trauma-Informed Teaching Strategies,” it can be difficult for a student to maximize their learning potential when they are hungry, feel they are in danger or do not have the support needed to fully express themselves.
As a teacher in Title I schools throughout my K-12 career, I can reflect back to times when I saw my students struggling to have these needs met. At first, I leaned on my educational training, which taught me that teachers have a specific role, and if we have students who need support in other ways, we must be aware of the people and available services to share with them and their families. We should not, however, wear the many hats of counselor, surrogate, life coach, etc. This kind of thinking, however, unintentionally built barriers that prevented my students from opening up to me.
Next, I tried to assess what I thought the needs of my students were and provide the resources they needed in the classroom. Students, however, would feel embarrassed or ashamed and not take advantage out of fear of judgment by me or their peers. Then, as I was taking notes at a conference session on building rapport with students, I realized I was missing a key component to my intentions. I was not connecting with my students as people — I was still viewing them as a type of “stakeholder,” and they were viewing me as just a music teacher. When I started to connect with my students on a human level, share more about myself and my background, and learn more about them and their interests, it made it so much easier to build a strong rapport with them. Alice Pendlebury’s dissertation, “Building Positive Relationships in Title I Schools,” highlights the importance of developing strong bonds with your students as a gateway to trust and success. The following passages will share in greater detail how to establish meaningful connections with students, parents, colleagues and community partners.
Build Trust with Students
Students seem to have a radar for when adults are being authentic. Whether it is smiling and greeting students at the door as they enter class or chatting with a few students on their way out of class, it is vital that we are genuine in expressing ourselves. If we come across as contrived, forced or obligatory with our actions, these practices can be perceived by our students as being “fake” or inauthentic.
Knowing how to pronounce their full name correctly.
Constant encouragement and an open-door policy.
Talking to students during downtime (before school, between classes, etc.) and sharing more about yourself in a casual, but still professional, way.
I made it a priority to have at least one informal conversation with each of my students before the end of the first two weeks of the school year. This helped me get to know my students, start building trust, and help them understand that I see them not just as student musicians, but as people too.
Finally, learn not only about your students’ musical interests, learn more about their lives outside of music. There are many wonderful things our students have going on in their lives that, because we only see them within the context of our class, we do not get to see fully expressed. If you ever have the chance, attend an event or a sport that some of your students may be involved in at school. It will build lots of goodwill with your students, and their parents will appreciate it as well.
Getting to know parents is also very important to build a strong and sustainable music program in any setting, but it is particularly critical for success in a high-need school. Because of the economic stressors that families can face, it may be difficult for a parent or guardian to balance their family responsibilities, work schedule and involvement with the program. Before I would ask parents to fundraise, chaperone or serve on a committee, I would carve out time early in the school year to introduce myself to as many parents as possible, get to know them and share the volunteer opportunities with our program.
Next, I would invite parents to come sit in on either a class or an after-school rehearsal whenever they had any free time so they could see what it is we do in music class. I had a completely open-door policy and let parents know that they could come as often as they liked. Once parents saw how much their child was learning in music class, it was easy to reach out to them for support and assistance. Using a method of giving first and asking second made it simple for me to ask parents to step up when we needed them for fundraising, chaperoning or supervising students.
Collaborate with Colleagues, Administrators and Community Partners
The colleagues and administrators at my schools were always supportive of our programs, not because it was the norm at the school, but because I was intentional and authentic in garnering their support. One example of this can be found in how I approached them. We’re all very busy, so I would find the parts of the day when a colleague or the principal may have less on their plate and schedule a brief meeting. For some, the best time was before school, for a few it was during morning or afternoon duty, and for others it was after school. I would make it a point to learn more about what they have going on professionally and how the music program could support them. Investing in this way helped me to have a very open and approachable relationship with my colleagues, which helped us greatly when we needed extra teachers for field trips or managing crowds at concerts and other events.
Community partners were such a joy to work with. We built strong partnerships with local small businesses, as well as many restaurants and big box stores in town. Schools and districts usually have a list of their official partners in education, and I would use it to start my outreach. I would also ask parents if they were small business owners or worked for a company that would be interested in partnering with us. Once I introduced myself and gave them a little information about the program, I would offer my program’s support of their business. I would ask them to share any events or activities they have upcoming and how either I, our students or our parent volunteers could help support them. Companies are accustomed to having organizations ask for monetary gifts or free goods, but I wanted them to see that a partnership with our program would be mutually beneficial. This always led to a massive outpouring of support from our community partners. Whether it was sending our jazz band to perform at a local board meeting or bringing student and parent volunteers to our community partners’ events, our ability to show how we could support them in reaching their goals was a great benefit to the music program as well.
Strong Rapport Leads to Success
Photo by Adobe Stock/Mustafa
Building rapport with students offers a multitude of benefits. It fosters a positive and supportive learning environment where students feel valued, seen and understood. This connection can really boost a student’s sense of self, motivation and overall engagement in our program. Also, by establishing trust and rapport, we can gain insights into students’ unique backgrounds and needs. This allows us to tailor our instruction and provide more targeted and personalized academic support.
Strong professional relationships with parents, colleagues, administrators and community partners can provide the resources and funds necessary to help our programs thrive. When the community coalesces around a music program in this way, it often results in improved attendance rates, reduced disciplinary issues and better academic outcomes.
This series attempts to show ways that we can mitigate disparities in access and opportunity by providing a high-quality educational experience for our students who may face socio-economic challenges. Building rapport with our students, their families, the school, and the local community can go far toward developing a thriving music program.
Staging your first major concert or festival is a landmark event in an early music educator’s career. It is a journey full of excitement, learning and certainly a few nerves. Being well-prepared is a must for this adventure. To aid you on this pathway, we present some tips and insights grounded in real experiences to help you keep your cool on performance day, even if the brass section left half their equipment back home, 20 miles away!
Meticulous Preparation is Required
Performance Selection: The mantra “under program and overperform” should be your guiding principle. Choose pieces that resonate well with your group’s competency rather than gravitating toward the most challenging compositions. Strive to excel in your chosen pieces, creating a performance that stands tall in its own right. If anyone who isn’t a clinician criticizes you for your program selections, either don’t engage or ask them what they would have programmed instead. Remember, we’re always learning. If a clinician suggests something, it’s worth considering … heavily.
Clinician’s Assistance: Engaging a clinician early on in your preparation is a wise strategy. Their experience can be a guiding light and will help shape a performance that resonates with professionalism and excellence. Many experienced directors who were apprehensive to have a clinician visit their school often confess that they wish they had done this sooner.
Dress Rehearsal: This is exactly what it sounds like — a rehearsal of the big day, which will help identify kinks and iron them out. It also ensures that the performance is as seamless as possible. Some groups do a dress rehearsal without uniforms, but we recommend replicating the festival experience as closely as possible. Fixing a concert uniform issue the night before is significantly less stressful than dealing with it the day of (and hours before) the performance.
Parent Volunteers: The assistance of parent volunteers can be a cornerstone in efficiently handling various logistics. From supervising uniformity to chaperoning buses and helping with folders, their aid can be indispensable. We have no qualms about leaning on our chaperones. There are too many things for us to remember during the day, and parent help is much appreciated.
Essential Repair Kit: An emergency repair kit complete with reeds, valve oil and small screwdrivers can be a true savior in addressing instrument mishaps promptly. We typically pack at least three reeds per instrument.
Health and Safety: Advocating for student welfare, especially during marching band events on hot days, is imperative. Guide them to prioritize their wellbeing above all.
Multiple Directors: Some schools only have one director, who handles everything. If you work with another director, don’t be afraid to cover details and ask questions. In our time as a co-director or assistant, we would rather annoy our colleagues with too many questions than frustrate them with emergencies on the day of the event.
Remember, it’s just music! If there is an option to register for comments only, or exhibition performance in marching band, consider taking it. This will alleviate quite a bit of stress for you, and the educational process will still hold firm.
Transportation Rules
Bus Delays: This is completely out of your control, so just roll with it. This may be your first time at a major event, but trust in the experience of the festival organizers to manage such issues with care. We have never had festival organizers say, “Sorry, you can’t perform because your buses were late.”
Also, don’t blame the drivers. We are experiencing bus driver shortages everywhere and added stress does not help anyone.
Permission slips: Have copies of these with you. If they have parent contact information, make sure they are in alphabetical order, and don’t forget to shred them at the school afterward.
Same Seats Both Ways: Some directors like to be nice and let kids change buses or sit anywhere they want. We have found that this just makes things more difficult for attendance. We stand firm on the same-seats, same-bus method for getting to and from the event. Our flexibility is that once attendance is taken for the return trip, the kids can change seats on the same bus, but only before the bus starts moving.
D-Day Strategies
Eat and Drink: We’re talking to you, directors. We often hit the ground running as soon as we arrive at school and don’t take a break until we get home 12 hours later. You can’t do this on festival day. Pack some healthy food options and set an alarm to eat and drink (just make sure that your alarm doesn’t go off during the performance!).
Sheet Music: The first order of business is to ensure the availability and organization of sheet music. Rely on original, numbered scores, and steer clear of photocopies. Always have a spare set to circumvent unforeseen circumstances. Many of us have attended performances and have forgotten the sheet music. It was stressful at the time, but we’re still here! In some cases, we borrowed a set from the school, and in other extreme cases, we simply had to skip the pieces that we did not have on hand.
Communication: Make sure to have the phone number of at least one administrator in your phone. We have had to use these contacts quite a bit, especially during trips right after we returned from remote learning.
Stage Setup: Give time for kids to adjust to being on stage. Some directors feel like they have to rush, which results in kids playing with music stands that are at an incorrect height, or they are seated incorrectly. It may feel like an eternity but take a few seconds to ensure that everyone is comfortable and seated in positions where they are normally seated.
Weather: If the event is an outdoor performance, monitor the weather and use your best judgment. If your group has to wait to enter the parade because your kids look like they need water, then your priority goes to the students’ wellbeing.
Footwear: You are going to be walking a lot. We learned the hard way that our concert shoes, whether they are winged-tip dress shoes or heels, are not good choices for schlepping equipment back and forth and running between warm-up and performance areas. Pack a set of comfortable shoes to ensure ease of movement and comfort during the hustle and bustle of the day.
Stress + Stress = More Stress
Kids will forget things or mishaps will occur. These things are unavoidable. Do not react with frustration and stress. Look at these situations as opportunities to solve a problem together. If you are stressed, it’s OK to tell a student, “I need a minute.” This can save face and allow you to return to the student calmly, so you can both find a replacement trombone slide.
Concert Etiquette: Prep your students on being a good audience — they should be excited to listen to other groups! However, we suggest that if your group is new to major performances or festivals, avoid listening to other groups before their own performance. Other groups can certainly be inspiring, but your students can become intimidated by other ensembles, which will affect their performance. Try to schedule time to listen afterward, if possible.
Percussion Specifics
Percussion has its own set of rules and intricacies. Ensure that you have all percussion items accounted for and that specific students are responsible for these items. On the day of the event, particularly with younger bands, have students open their cases and show you the instruments they are responsible for.
The Ready Sign: Before we begin a piece, every percussionist must acknowledge us before we start. The easiest way is a thumbs up.
Pedal to the Metal: Check the timpani ahead of time. More than a few times, our kids have had to adjust to a pedal system that they weren’t used to.
Bringing it Home
Being Present: Make sure to at least enjoy a few moments on stage with your students. I often tell my kids that many people in this world never get the chance to share their hard work with others and receive applause. Your first festival will be over in a flash, but if you can be in the moment for at least a minute or two, you will reap the benefits.
Acknowledgments: Say thank you to everyone involved: parents, bus drivers, colleagues and especially the students. This can help create a nurturing and appreciative atmosphere that everyone will want to continue participating in. We have had many parents experience some crazy festival days, but they continue to come back because they feel appreciated.
The Perfect Bow: We also must remember to say thank you to our audience. Remember to bow and acknowledge those who came out to listen to your group. How long should you bow? Here’s what we tell our students: As long as it takes to say “peanut butter and jelly sandwiches” in your head.
Pre- and Post-Performance Analyses: Encourage students to reflect on their performance, which fosters a culture of continuous learning and growth. Sharing constructive feedback and celebrating the success can be a great learning experience. Some kids will state how much they enjoyed the performances, while other kids will complain that the pizza wasn’t good. It’s all part of the process.
Other Believe-it-Not Tips for Success
Here are a few other tips to ensure success. Or, at the very least, avoid some embarrassment. If this advice sounds oddly specific, it’s because we’ve been there. Trust us!
Have good relationships with other directors. Help whenever asked. You never know when you might need to borrow a concert snare 10 minutes before your performance. (Thanks, Mark!)
Let chaperones know that the buses should not leave without the director! If you go inside to get “one more thing,” make sure you have the head chaperone’s number so you can get the buses to turn back around to get you! Or, you may give up after 20 minutes and drive yourself to the event, which steals invaluable bonding time with your students or time for last-minute planning with your fellow directors.
Author Don Stinson is the Band Director at Joliet Central High School in Illinois.
Check your concert programs, then check them again. Have the kids sign off on their names, and then check them again. Don’t be surprised when you have to apologize to the parents for leaving the baritones off the program.
When bowing from the podium, be mindful of the safety rail. If you happen to hit your head on said safety rail, ignore it. The kids will think that your watering eyes are because of their stellar performance, not your excruciating pain.
“Bobby, do you have your folder?” “Yeah, Jeff says he’s taking it.” Jeff didn’t even show up that morning, and he’s definitely not bringing Bobby’s folder. Make students be responsible for their own items. The most common reason we have left items behind was because kids relied on someone else.
Tell kids ahead of time that when they’re in the audience they should not hum along with pieces they know.
If you lose grip of your baton and it flies out of your hand and onto the floor, or worse yet, into the hair of the flute player in front of you, just let it go. It’s gone.
Author Jessica Corry is the Band Director at Plank Jr. High School in Oswego, Illinois.
Avoid scheduling a time-sensitive event, such as a dinner, movie or show, after your performance. An event that runs late coupled with students who still need to be picked up may deter any plans you have.
If your background is band and you end up taking a job that has a choir element, be prepared for a choral performance where the surprise guest speaker just happens to be Julie Andrews. Yes, that Julie Andrews. No pressure.
Remember, the road to a successful performance is paved with detailed planning paired with a spirit of adaptability to embrace the spontaneity of the live performances.
We are cheering you on as you take this significant step in your musical career, wishing you a journey filled with success, learning and sharing in musical experiences!
The flute is one of the most common instruments in the world, and it has been found in nearly every culture in existence. The flute has made quite a name for itself since ancient times. But did you know these five flute facts?
1. The First Flute Was Probably Made by Neanderthals
The oldest flute historians have found dates back to approximately 60,000 years ago. The ancient flute I’m referring to was found by archaeologists in Slovenia. Name after the cave in which it was found, the Divje Babe flute was discovered in 1995 and is the only Neanderthal flute to be uncovered so far. It is currently housed in the National Museum of Slovenia.
This find was monumental to historians because it proved that Neanderthals created music. Not only is it the oldest flute, it is also the oldest instrument in the world.
Aurignacian flute made from bone. (Photo by Jose-Manuel Benito Alvarez via Creative Commons Attribution/Share Alike 2.5 Generic license)
Other very old flutes include the Hohle Fels flute (from over 30,000 years ago) and the Geißenklösterle cave flutes (over 40,000 years ago). But the Divje Babe flute still takes the cake for being the oldest as the carbon dating estimates it to be an astonishing 60,000 years old.
2. Flutes Were Made of Surprising Materials
You might be shocked about the variety of materials used to make flutes. The Divje Babe flute was made from the femur of a cave bear. Other animal bones used to make flutes include swans and woolly mammoths! The Hohle Fels flute (also called the Aurignacian flute) was carved from a griffon vulture.
Some ancient flutes that are still played today have interesting materials and accessories. The Chinese dizi, for example, requires a thin paper membrane that is attached to the instrument with the juice of a garlic clove. The result is a one-of-a-kind woodwind with a unique buzzing timbre.
3. It has Versatile Historical Uses
Flutes have been used for:
Spiritual purposes
War
Artistic performances
Celebrations
To profess love
Artwork in Kyoto shows woman playing the flute.
I once played the solo to a German piece where the flute represented death, which I thought was pretty unique, but using the flute to represent death has been done since ancient times. The Aztec death whistle might be the spookiest of all of the flutes used for spiritual reasons. This orb-shaped ocarina-like flute creates a haunting screaming/whistling sound. It was traditionally used to aid the sacrificed dead in their travel to the afterlife.
By the time the fife was created around the 1300s, flutes were often used for war. During the Crusades, transverse flutes were commonly used in the military. But flutes were used for artistic expression, too. In Indonesia, an end-blown flute called the suling was used alongside a bronze percussion ensemble (collectively called gamelan) in order to accompany shadow-puppetry (Wayang kulit).
In some Native American tribes, flutes were traditionally played by young men to confess their love for a woman. According to the Smithsonian, Native American flutes were common in Southwestern tribes and were most often made of red cedar. In India, flutes are associated with Krishna, the god of love. If you think about it, using the flute as a romantic instrument at weddings is in some ways, historically accurate!
4. The Instrument Can Create a Near-Perfect Sine Wave
Waveforms are the basis of all sound, and there are four main types: sine, square, triangle and sawtooth. A sawtooth wave gives the violin that buzzy undertone. The triangle wave gives flute-like woodwinds their crystalline clarity in the lower register. A square wave gives a clarinet its richness, and a sine wave is what makes pure sounds with fewer partials.
You can hear them all isolated on the Perfect Circuit website. Interestingly enough, when a Western flute is played in its upper register, it creates a waveform that is close to that of a pure sine wave.
5. They’re Woven into Mythology
There are books that focus on the mythical stories of the flute. It seems that the instrument has been associated with many cultures’ gods. As mentioned earlier, the Indian god of love and compassion, Krishna, was associated with flute, which also represents nature, and all that is divine.
The Greeks had multiple flute myths. The flute was created by Athena, the goddess of war, wisdom and reason. A nymph named Syrinx was transformed into a flute after she drowned, and she was then played by the god Pan.
There are many variations of the creation of the flute woven into Native American lore. For example, the Comanche believe that the flute was created to help a man express his sorrows (according to Flutopedia), and the Sioux tell a tale of how a man played the flageolet (a small end-blown 5-holed flute) in order to find a woman to marry.
Statue of Pan holding a panpipe.
But the significance of the flute in the context of mythology is not lost to time. For example, the Debussy piece “Syrinx,” which references the pursuit of the Greek nymph by Pan, is still one of the most popular musical works for solo flute today. Similarly, Mouquet’s “Pan et Les Berges” (Pan and his shepherds) is another piece flutists play around the world.
It seems that the flute is constantly associated with myths. This, by extension, has led composers such as Reineke to base one of his most well-known pieces, “Undine,” on the idea of a Greek water nymph.
Latin music is very popular in the United States, and mariachi is especially prevalent among Mexican families. Mariachi musicians across the U.S. perform at events honoring the rich culture of Mexico, as well as other Latin American countries. Because of the music’s popularity, mariachi education is a sweeping movement that started in the Southwest but is now offered at many schools in the U.S. Incorporating mariachi into a formal music education program has made all the difference to many students of Hispanic descent who may not have otherwise become involved in music.
Mariachi by Accident
Daniel is a graduate of Las Vegas High School and its mariachi group, Mariachi Joya, and current member of Mariachi Plata at The College of Southern Nevada. Before he joined mariachi, he was not involved in any music courses although he always wanted to be a musician. He joined mariachi on violin during his freshman year and loved being in music class with his friends. Toward the end of the year, COVID-19 sent everyone to virtual learning.
Daniel took advantage of online music theory courses offered at LVHS and used his time at home to learn even more about mariachi. He decided that he wanted to switch to the guitarron, which is a bass-guitar-like instrument that carries the bassline in the mariachi ensemble. He took the initiative to practice every day, and when we returned to school the following year, he was named the guitarron player of Mariachi Joya!, which has been recognized as the “Nation’s Premier Mariachi Ensemble” by SBO magazine. Daniel’s grades improved and he even had straight As during some semesters of his junior and senior years.
“For me, mariachi was an accident,” he says. “I was going down one path, and my love for mariachi took me to even new heights. I just thought I was going to play the violin, but through the last few years I have gotten to share the stage with famous musicians, meet my heroes, and even bring music back into my parents’ lives.”
His mother, Flor, echoes his passion and says, “I am very proud of my son. I am happy that out of all my kids that one of them has the same love for mariachi music as I do. My relationship with my son is closer because he started to play mariachi music and it fills my soul to see him doing what he loves”.
Now, Daniel is slated to become one of the first-ever mariachi students in a new university program and is excited to bring this beautiful music to new generations as a mariachi teacher after he graduates.
A Family of Musicians
Jennilee is another example of how mariachi changed a student’s life. Jenni was not involved in after-school activities before mariachi came along. She was a very shy young woman who followed in her older brother’s footsteps when she joined mariachi. She is now a senior at Las Vegas High and regularly auditions at vocal competitions across the country.
“Mariachi has made me believe in myself more than ever,” she says. “We really love this music and this community we have created. I do not know where I would be without my school’s mariachi program”.
Her younger sister is now in mariachi, and their mother is proud to have three musicians in the family who make people smile with every performance.
Brothers in Mariachi
Axel is the current student director of Mariachi Joya. He started playing the violin in beginning mariachi two years ago and practiced for hours every day to get into the school’s top ensemble. His younger brother, Irvin, is a mariachi student at Keller Middle School, which has a thriving program under Ms. Miriam Vazquez, who does a great job at preparing her students to become “Joyas.”
U.S. Sen. Catherine Cortez Masto of Nevada with Axel, a member of Mariachi Joya.
Irvin really loves playing beautiful music with his friends, and he says, “I am really proud of my big brother Axel. He is a role model for me and has inspired me to work hard in school. Mariachi has bonded us. Now we have something special to talk about every day. I hope I can be in Joya one day, too.”
Axel has a 4.0 GPA and says that mariachi greatly contributes to his academic success. “Mariachi has motivated me to do well in school,” he says. “It taught me that I can get results with hard work, so if I put hard work into other classes, I can do well in those just like mariachi.”
Being a part of Mariachi Joya has changed his outlook on what he wants to do in life. Axel says that he wants to teach mariachi so he can help students “bring their communities together just like we did here on the east side.”
Axel and Irvin are just one of many examples of how mariachi education has brought families together. It also prepares students for life outside of music.
The cultural power of mariachi is strong. It rings families together, creates opportunities for students that they wouldn’t otherwise have, and it creates strong community engagement.
I can’t tell you how many times I’ve heard people say that learning music theory will ruin your “feel.”
Not true! In fact, learning music theory will only enhance it. That’s because it expands your knowledge, provides more options for composition, and improves your ability to translate ideas to other musicians.
I know phenomenal musicians who have zero formal training and play strictly by ear. I also know some players who have a master’s degree in music but struggle to improvise, or even get through the simplest song without sheet music. I think the best approach is to have a well-rounded ability in every aspect of your craft.
But how do you go about it? Sure, there are some amazing guitar tutorials online. Great players break down the parts to your favorite songs, and some even give you the theory and analysis behind the notes. Unfortunately, this method of learning is a one-way street. You can’t ask the teacher questions or receive feedback on posture, fingering or technique.
That’s why I suggest you instead consider taking real, in-person guitar lessons from a qualified instructor (your local music retailer can suggest someone in your area), as opposed to just learning nuggets of wisdom from a friend or a few riffs from some songs on YouTube.
Here are five reasons why.
1. Fresh Fingers
Learning anything from a book or video may give you the necessary tools to accomplish a certain task, but an instructor can guide you and add the elements of finesse that a one-way platform just can’t do.
As much as I love using Google search or YouTube for musical resources, the fact of the matter is that not everything on the internet is accurate. (Shock, horror!) Without the discerning eye and ear of a professional to give you instant feedback, you may end up learning techniques that will ultimately impair your abilities down the line. Sadly, I’ve seen this all too many times … and breaking muscle memory is way harder than learning something with fresh fingers.
2. Logical Progression
I’d say that most of us learn how to play the guitar “somewhere in the middle.” We can play a few chord progressions and a handful of riffs and Pentatonic licks … but without knowing the “how and why” it all works together.
As an educator, I’ve always been an advocate of logical progression. Start with the basics. Learn the correct fingerings for chords and scales, a few simple rhythmic values and the theory behind the notes, then gradually add techniques and musical expression to play songs with musicality. I also believe that you can develop musical sensibilities and feel by practicing stylistic grooves and developing your phrasing chops with melodic and rhythmic displacement techniques.
So look for a guitar teacher that builds you up from the beginning, or fills in the gaps to what you already know. With a solid foundation in all aspects of music, you can build a house in which creativity can flourish. A good instructor will push you to build a mansion, or help you renovate your existing structures into a beautiful new home.
3. The Inquisitive Mind
When I learn something, I want to know both the “how” and the “why.” If you don’t have a naturally inquisitive mind, you need to develop one in order to expedite your musical journey. For that reason, be sure to ask lots of questions of your instructor, so you can gather a full understanding of any topic.
Sometimes the answers require further questioning … and that’s just how it should be. Sometimes the information needs to be delivered in multiple ways in order for the concept to “stick.” Again, this is perfectly normal.
A good teacher will recognize whether or not the student fully comprehends the information being conveyed. I always confirm this with my students by asking them questions until I am sure they understand every aspect of the material we’re working on.
4. Setting Sail
Embarking on a journey of discovery often requires a road map. Structured courses that are curated by a professional educator often keep you on track.
If you know what your big picture goals are, you can take small steps towards that destination. For example, learning how the seven major scale modes work, one mode at a time. Adding a deadline is often a good idea too. Nothing motivates me better than a deadline. It’s the procrastinators’ kryptonite.
5. The Jam Factor
When you learn from a real-life instructor, you have the opportunity to hear how they play, and how they integrate the same information you’re working on.
So many professional guitar players cite their instructor as the driving force behind the musical storm they finally became, and there’s a good reason why. Jamming with your mentor will give you a growth perspective. You’ll be able to actually hear how well you’re doing through comparison, then make small corrections and implement their suggestions in real time.
Virtual Learning
If you can’t find a good local instructor, you may be able to work with a qualified guitar teacher via video chat online. However, I suggest you take some time to determine what you’re trying to achieve in advance of taking those kinds of lessons. Audio quality is improving radically on online platforms such as Zoom, but latency and bandwidth compression often negate the ability to jam online.
So make a list, and work through the list by asking lots of questions. You can always record your video lessons, enabling you to watch them again for reference. Maximize your time and get your instructor to demonstrate ideas, concepts and examples while you’re online with them.
As you are probably aware, guitar courses are also available for subscription, streaming or download. This is where my personal legacy as an instructor primarily resides.
These courses are a great way to work with your favorite players and discover specifically what they have to offer you. Just make sure you find someone who fills in any gaps in your knowledge and nurtures your creativity through real-world musical examples.
The Video
The harmonic structure of the progression I’m playing in this video takes you through three different keys within the context of a four-bar phrase. Having the knowledge to analyze, play and improvise over this kind of progression generally comes from having some kind of formal training, so I thought this would provide a good example of what it might take to handle this kind of musical challenge without the guidance of an instructor.
I’m using a Yamaha CSF-TA TransAcoustic guitar and layering its tones into the mix with a subtle strumming part. I’ve double-tracked this guitar part, adding small amounts of the onboard reverb and chorus, panning the two hard-left and hard-right for extra width. The arpeggiated overdub defines the harmonic structure of this progression by following the upper voices in the strummed guitar part.
The melodic phrases are being played on a Yamaha SA2200 semi-hollow body electric through a Line 6 Helix processor. I’m targeting chord tones of the five chords to establish their tonality within the framework, but I’m also making sure you can hear the characteristic tones you’ll find in some of those tasty chord voicings too!
The Guitars
The CSF-TA is the parlor-sized powerhouse in the TransAcoustic range. Like all TA guitars, it features two onboard reverb types (Room/Hall) as well as chorus, all without the need for external amplification. All effects can be dialed in to taste with a sweepable mix control.
Yamaha CSF-TA.
TransAcoustics also feature an excellent undersaddle piezo pickup and a preamp that works beautifully for recording directly to DAWs or for plugging into the mixing console at a live gig. These versatile acoustic-electric guitars are excellent for young beginners due to their short scale length and small body size, and the solid Sitka spruce top will only get better with age.
Yamaha SA2200.
The SA2200 semi-acoustic guitar may be one of the best sounding electrics on the market. These amazing guitars resonate like a piano, play like a dream, sit beautifully in the mix, and look like a million bucks on camera.
The Wrap-Up
When we take intentional steps towards our goals, we get closer to them.
Working with a professional guitar teacher can guide your steps around the pitfalls, keep you moving towards your destination, and perhaps most importantly, inspire you to reach the same high level of proficiency. Lofty goals indeed, but the right instructor can help you achieve them!
The 12-inch single (or “maxi” single, as it was called back in the ’70s and ’80s) tends to be synonymous with DJs, conjuring up visions of dual turntables. Yet there is so much more to this form of media! When vinyl records ruled the radio waves as well as the dance floors, the 12-inch was a great way for record companies to get a new release out to the public immediately, and there were sonic benefits as well. Putting an entire song or two on one side of a large slab of vinyl like this means big grooves, along with the potential for tons of bass and incredible dynamic range.
Today, 12-inch singles still exist, but they tend to be more biased towards electronica, house and the occasional Record Store Day release. Here are a dozen — some new and some old — that I think you’ll enjoy.
1. All of a Sudden – The Chemical Brothers
“All of a Sudden” is the latest single drop from the Chemical Brothers, which is actually the B-side of their song “No Reason.” Their signature heavy driving beats (on both sides) deliver a solid bottom end that you might not be used to, even with vinyl. Hang up that disco ball and turn up the volume!
2. 1999 – Prince
Prince may just be the undisputed king of the 12-inch, in part because so much of his music was being played in clubs, but also because he had such a prodigious output. All his singles deliver the maximum level of dynamics the medium is capable of, but if this one happens to be your first purchase, you’ll be hooked for life.
3. Paranoimia – The Art of Noise
Released in 1986, the three versions of the title track and a bonus edit of “Dragnet 89” have Max Headroom nodding in approval. All are full of fun electronic sounds that fly all over the room, weaving in and out of the signature synth backing track that anchors it all. Though many 12-inch singles are 45 rpm. with one track on each side, this one is meant to be spun at 33, so you can dance for about 10 minutes before you have to flip it over.
4. It’s Tricky – RUN-D.M.C
Nothing says hip-hop to me like RUN-D.M.C. This 33 rpm 12-inch features five versions of “It’s Tricky”: Club Mix, Uptempo version, the album version, “scratchapella” version, and the “Tricky Reprise.” “Proud to be Black” is a bonus track at the very end.
5. Cruel Summer – Bananarama
Considering it’s been a warmer than normal summer and big hair is starting to make a comeback, this one seems totally appropriate to make the list. The title track delivers a more solid beat than the LP version (which is very compressed), and the three vocalists come through with much more presence.
6. High and Dry – Radiohead
This eclectic group has released a wide range of 12-inch singles for nearly 15 years now. “High and Dry,” from their second album, The Bends, accentuates the atmospheric aspect of their music perfectly, creating a massive sonic landscape in your listening room (or in your headphones). Most 12-inchers deliver more overall level, but this one does a particularly good job of revealing the intimate vocals and the separation of the three guitars that are the foundation of the Radiohead sound.
7. Prime Time – The Tubes
The ’70s art band The Tubes were well known for attracting top studio engineers to assemble their albums, and this track from Remote Control was produced by Todd Rundgren. As with most 12-inch singles, the wide grooves produce additional sonic nuggets that even the well-crafted LP hides — like backup singer Re Styles, who sounds much more present in this release.
8. Become – Beach House
Here’s a 12-inch that blurs the line between maxi single and EP. There are five new Beach House tracks here, and the group’s dreamy sound really comes to life on vinyl, with a Twin Peaks-like feel. In addition to the ethereal vocals, there are some heavy synth bass grooves to rattle your walls.
9. Peek-a-Boo! – DEVO
The alternative DEVO anthem “Peek-a-Boo!” is another great example of taking a fairly dense track and achieving greatness by spreading it all out on one album side. The jumble of grungy, distorted guitars and synthesizers all have their own voice here. Keep this one at the front of your record crate on party night.
10. The Look of Love – Dusty Springfield
This is one of the few 12-inch single releases pressed by an audiophile label, the now defunct Classic Records. Good as the standard album sounds, this version really shows off just how great your Hi-Fi system can sound. The only thing that did a better job at capturing Dusty’s slinky voice is the master tape!
11. I Scare Myself – Thomas Dolby
Here’s another track that sounds absolutely brilliant with all the extra groove space, and again, it’s not just about slamming bass, but about inner detail. “I Scare Myself” was recorded with such a huge feel, you’ll swear there are surround sound speakers hidden somewhere in your room.
12. Fight The Power – Public Enemy
The theme song from Spike Lee’s film Do The Right Thing demands the forcefulness that only a 12-inch single can provide. There are a few options out there, but I suggest the extended version, with the full unedited 6:45 rendition from the theatrical release, and the sanitized radio version on the flip side.
Children have an innate desire to improvise and create. Without any expectations, they begin life moving, singing and playing music in imaginative and newfound ways. As students begin learning formal music in elementary school, the urgency for mastering literacy and vocabulary skills can sometimes take the place of learning improvisatory or creative music skills. As a way to counter this, the National Coalition for Arts Standards (NCAS) reorganized music learning goals into the universal domains of creating, performing, responding and connecting. The hope was that by re-emphasizing these domains, the focus could shift to foster students’ convergent and divergent thinking. Exercising these enabling skills helps prepare students for the multiple roles found in the music industry as well as promoting student autonomy. The national standards are very extensive, so for brevity, here are the four major disciplines with summarized anchor standards.
Anchor Standard 1: Generate and conceptualize artistic ideas and work.
Anchor Standard 2: Organize and develop artistic ideas and work.
Anchor Standard 3: Refine and complete artistic work.
Performing/Presenting/Producing:
Anchor Standard 4: Analyze, interpret, and select artistic work for presentation.
Anchor Standard 5: Develop and refine artistic work for presentation.
Anchor Standard 6: Convey meaning through the presentation of artistic work.
Responding:
Anchor Standard 7: Percieve and analyze artistic work.
Anchor Standard 8: Interpret intent and meaning in artistic work.
Connecting:
Anchor Standard 10: Synthesize and relate knowledge and personal experiences to make art.
Anchor Standard 11: Relate artistic ideas and works with societal, cultural and historical context to deepen understanding.
David Brian Williams, author of “Reaching the Other 80%,” defined 80% of students who do not currently participate in music education ensembles as “non-traditional musicians” (NTM). NTMs are determined to be between 6th and 12th grade and may have a music life independent of school. They may also not read music notation but aspire to a career in the music recording or the music industry. A later article written alongside Peter R. Webster titled “NTM Skills as a Future College Music Student” defines specific music technology skills as “essential for the undergraduate music major.” The following skills are outlined below:
Understand MIDI and applications with instruments.
Set up/problem solve a computer music workstation.
Understand basics of acoustics.
Create/edit a music video.
Manage social media music-sharing tools.
It’s important that we refer to these competencies as overarching goals for our growing students and find ways to cleverly integrate them into our lessons. Giving students the opportunity to compose music, whether it be in notation software or in a digital audio workstation (DAW) is a great way to accomplish the national standards, while also allowing students time to practice these music technology competencies. Using web applications that bridge music with other interdisciplinary topics like science or math can be a fun and new way for students to make connections to music. MIDI instruments are very customizable and can be a great addition to the classroom for students with disabilities. As a music stand is to sheet music, technology is to music education. Let it be a tool for supporting students in their music learning experiences.
Elementary Music Curriculum with Technologies and Web Apps
Assuming that Chromebooks, iPads or desktop computers are available to you in your classroom, the next step would be to invest in decent quality headphones like the Yamaha HPH-50B. A little more expensive than the average headphones, these have much better sound quality and will be more durable for classroom use. Headphone splitters are also a great investment for collaborative projects that require more than one student listening from the same device. These are relatively inexpensive and can include a range of two to five headphone ports for sharing audio.
Optionally, having a few MIDI controllers can be great for small group projects or classroom stations. MIDI keyboards are the most common choice for DAW composition and can come in a variety of sizes. For classroom use, 25-key MIDI keyboards are more suitable for portable independent use, whereas 49-key keyboards are great for two-player fixed stations. Other controllers like the ARTinoise re.corder (based on the recorder) or the Joué J-Play Keys (based on the xylophone) can be fantastic for students who struggle performing on their traditional counterparts due to a disability. STEAM-based kits are also great for connecting music to other disciplines. Useful for classroom activity stations, these kits are often self-guided and include apps that introduce skills like coding or instrument making. Lastly, microphones can be a worthwhile investment for older and more advanced music technology students. Microphones requiring a separate interface and XLR cable are more professional (like the Focusrite Scarlett Studio 3 bundle), though there are many USB microphones that require less set-up (like the FIFINE USB Microphone).
A few general music curriculums that specifically integrate music technology include “Teaching Music Through Composition” by Barbara Freedman, “Using Technology with Elementary Music Approaches” by Amy M. Burns, “Integrating STEM with Music” by Shawna Longo and Zachary Gates. These resources are great for introducing digital composition or for STEAM-based/interdisciplinary learning. Web applications (web apps) are also be a great way to engage students. Below are a few of my top recommendations, as well as a few others that are fun for kids to explore music with.
Creating lessons that give students time to explore is key. This semi-structured “play” time allows them to make stronger connections to each new concept by utilizing it within their own art. Here are some of my favorite elementary music lessons that apply students’ new musical knowledge in an engaging and creative way. Enjoy!
Lesson 1: Soundwaves and The Science of Sound (STEAM)
NCAS:
Anchor Standard 1: Generate and conceptualize artistic ideas and work.
Anchor Standard 6: Convey meaning through the presentation of artistic work.
Anchor Standard 10: Synthesize and relate knowledge and personal experiences to make art.
Anchor Standard 11: Relate artistic ideas and works with societal, cultural and historical context to deepen understanding.
Technology Competency Goals:
9. Understand basics of acoustics
5. Create music with production software (web-app version)
Objective: Students will understand sound waves and how humans hear sound. Using Chrome Music Lab, students will use the visualizer to experience how pitch affects soundwaves and the movement of air particles. Students will also learn a song and participate in a movement activity reinforcing these learned concepts on soundwaves.
Level: Grade 3 (can be modified for other grade levels)
1) Begin with the question, “what is sound?” As students guess, slowly navigate them toward the answer: “vibrations in the air.” Next ask, “What is actually vibrating when we hear sound?” The answer should be “air molecules.” Feel free to use the following explanations below alongside diagrams or photos in a slideshow presentation.
“All sound is made up of vibrations. Vibrations through the air.”
“What is actually vibrating? Air molecules! Molecules are tiny particles that make up everything around us. Even you are made of molecules! Molecules are also invisible, meaning we can’t see them. Air molecules help us to hear sounds.
“When a bell rings, the air particles around it start grouping together and spreading out. This movement looks like a wave. We call these sound waves!”
2) Demonstrate the movement of soundwaves using Chrome Music Lab. Navigate to the Soundwaves window and ask students, “What do the blue dots represent? What instrument is at the bottom of the screen?” Tell students to observe how air particles move differently based on each note’s pitch. Define pitch and clarify that “the higher the pitch, the faster the movement of the air particles; the lower the pitch, the slower the movement of the air particles.” Have student volunteers play a note from the demo computer. Use the magnify glass on-screen to zoom in on the horizontal waveform. (*This demo will prepare students for a follow-up lesson on soundwave shapes)
3) Give students 10-15 minutes to explore Chrome Music Lab’s Soundwaves window as well as the other music windows.
4) Transition students to begin learning the accompanying “Johnny Was a Molecule” song and movement activity. Have students listen and echo each line one line at a time. Introduce the Sally verse in a follow-up lesson or as an extension.
When the bass would play, she’d move slower than a bear
Crawl, crawl, crawl, and wobble to and fro
And now you’re like a molecule, ready, set go!
Movement Game:
On the Johnny verse, have students jump to the beat.
On the Sally verse, have students crawl to the beat.
After the verse is sung, the teacher alternates playing a high-pitched and low-pitched sound. Students respond by either moving slowly (low pitch) or fast (high pitch). Specific locomotor movements may also be picked in advance (e.g., fast: running, skipping, jumping or slow: crawling, tip toeing, walking). Teacher may give individual students a turn to play instrument(s) as well.
Lesson 2: Four Basic Sound Waves (STEAM)
NCAS:
A group of 5th-grade students learn about sound waves.
Anchor Standard 1: Generate and conceptualize artistic ideas and work.
Anchor Standard 6: Convey meaning through the presentation of artistic work.
Anchor Standard 10: Synthesize and relate knowledge and personal experiences to make art.
Anchor Standard 11: Relate artistic ideas and works with societal, cultural, and historical context to deepen understanding.
Technology Competency Goals:
9. Understand basics of acoustics
5. Create music with production software (web-app version)
Objective: Students will learn about the four primary wave shapes and recreate them using manipulative (popsicle sticks). Using Soundbreaking, students will use the visualizer and sound generator to identify the differences in timbre between soundwaves and the movement of air particles. Students will play a competitive popsicle stick game by listening and identifying the different soundwaves.
Level: Grade 3 (can be modified for other grade levels)
1) Start by reviewing what sound is (e.g., vibrations through the air). Show a visual of a transverse wave and explain that the reason it is horizontal is that it’s simpler to see. Ask students, “What shapes do these soundwaves look like?” Have them guess the triangle and square shapes. Introduce all four basic sound waves (sine, square, triangle and sawtooth) along with their visuals.
2) Use the Soundbreaking app to play back each soundwave’s unique timbre. Have two students volunteer to play a guessing game. One student plays a soundwave while the other guesses. See if they can listen for the differences in sound.
3) Allow students 5 to 10 minutes to explore the Soundbreaking app on their devices.
4) Transition students and provide a group demonstration of how to create each soundwave with popsicle sticks.
5) Distribute eight popsicle sticks to each student and have them re-create each soundwave shape.
To begin the competition, have students hold onto their own popsicle sticks and split the room into two groups. Next, play a tone, display the name and/or show the visual of either of the four sound waves (sine, square, triangle or sawtooth). Students must work together to make a giant soundwave from one side of the room to the other. The first team to use all their popsicle sticks wins!
A group of 4th and 5th graders work together to create the four basic wave shapes.
Lesson 3: Introduction to Audio in Songwriting (STEAM)
NCAS:
Anchor Standard 1: Generate and conceptualize artistic ideas and work.
Anchor Standard 2: Organize and develop artistic ideas and work.
Anchor Standard 5: Develop and refine artistic work for presentation.
Anchor Standard 6: Convey meaning through the presentation of artistic work.
Anchor Standard 10: Synthesize and relate knowledge and personal experiences to make art.
Anchor Standard 11: Relate artistic ideas and works with societal, cultural, and historical context to deepen understanding.
Technology Competency Goals:
A 3rd-grade student uses an online DAW to create their first song.
2. Understand and edit digital audio
8. Set-up/problem-solve a computer music workstation
5. Create music with production software (web-app version)
Objective: Students will learn about digital audio and the transfer for sound from a microphone to a digital audio workstation (DAW). Students will also write their first song using an online DAW and apply their knowledge of audio in the creating process. Students will share their projects with peers and discuss aspects to refine for the next song.
Level: Grade 3 (can be modified for other grade levels)
Digital Audio Workstation (e.g., Cubase, Soundtrap, Garageband)
Procedure:
1) Begin by asking, “When you talk on the phone with someone, how are you able to hear them and how are they able to hear you?” Begin the conversation by guiding students toward the term “microphone.” Use the visuals to display a picture of a stage microphone, a studio microphone and a computer microphone. Next, explain the process of how sound is recorded onto a computer.
“When sound vibrations reach the microphone they are made into an electric signal. That signal then becomes a series of numbers known as binary code (the language of the computer). In the computer, this data represents a digital sound or “audio.”
2) Have a project open in your DAW and encourage students to view the sample browser/loop browser. From here, differentiate audio loops by their “audio icon” (see below) and drag and drop one into the timeline. See some examples below for reference.
3) Have students begin a project in which they drag and drop four audio loops into their blank project. Give students 10 to 15 minutes to complete this task.
4) Once most students are done, have them transition to “Musical Museum,” an activity where students will simultaneously stand up, walk around the room and listen to two random student songs. Allot about 4 to 5 minutes for this activity. Afterward, have students return to their seats and begin a discussion on what they heard. Some appropriate questions to ask include:
“What did you like about the songs you heard?”
“What would you want to hear more of?”
“What instrument sounds did you recognize/like in songs?”
“What’s one thing you heard that you might add to your own song?”
In the next few articles, we’ll discover why beginning with these technology goals and interdisciplinary lessons provides a strong foundation for middle school and high school music learning. We’ll also look at showcase opportunities, trademark stages of learning with the DAW, audio engineering fundamentals, and project-based learning activities. In the meantime, enjoy and lookout for more coming soon!
Read the first article in this series, “Music Tech Series, Part 1: Getting Started Teaching the DAW.”
** Nominations for the 2026 Yamaha “40 Under 40” are closed. Please return to this page in October 2026 when the nomination period for the 2027 class will begin.
Do you know a young music educator who inspires students, colleagues and the community? Someone who oversees a program that is continually growing and improving?
Nominate them now to be recognized and celebrated as one of the top 40 music educators under the age of 40!
Yamaha is an active advocate for music education, and we want to empower music educators and help them strengthen their programs in any way we can.
“40 Under 40” is the latest part of this advocacy. This program will recognize and celebrate innovative and impactful music teachers under the age of 40 who are doing extraordinary things in their classrooms or programs. These music education leaders will be the ones to watch in 2023 and beyond.
Eligibility Requirements
Music educators — any grade level, public or private schools, private music instructors — can be nominated by students, parents, other teachers or administrators, and mentors. No self-nominations are allowed.
Nominations will be accepted from October 1 to November 1, 2025.
Nominated educators should have the following characteristics:
Action — How does the nominee take proactive actions to build a stronger music program?
Courage — How has the nominee implemented bold, new ideas in their program?
Creativity — In what ways did the nominee realize plans and ideas with originality and resilience?
Growth — How has the nominee established, grown or improved music education in their community?
Must be under 40 years old on March 31, 2026.
Please click here for the nomination form. In addition to providing information about the nominee, you must tell us in 500 words how the nominee embodies the characteristics above.
Benefits to 40 Under 40 Educators
Music educators who are selected for the “40 Under 40” program will receive national recognition for the positive impact their work has on their schools and communities.
Key Dates and Deadlines
October 1: nominating period opens
November 1: nominating period closes
December: selected educators will be notified
February 2026: The 2026 “40 Under 40” educators will be announced
Contact
For information or questions about the Yamaha “40 Under 40” program, please email educators@yamaha.com.
Sign up for the Yamaha Educator Newsletter to stay informed about the “40 Under 40” program and other music education advocacy news and information from Yamaha.
* If fewer than 40 nominees are selected, or if any selected nominees decline such nomination, fewer than 40 individuals may be featured in our annual “40 Under 40” article. Yamaha Corporation of America reserves the right to select alternate nominees if a selected nominee is unable, unwilling or otherwise ineligible to participate in this program. Nominees must be willing to be featured in this program, provide image(s) to Yamaha, and sign a release agreement. All decisions by Yamaha are final.
Nominations are used solely for the purpose of identifying suitable teachers to be profiled in the “40 Under 40” program. Your information will not be shared, sold or added to any marketing database. Nominations are good for only the current nomination period and will be not retained for any future “40 Under 40” program. Please see our Privacy Policy for additional details.
There are cases where third parties submit inquiries to Yamaha with the intention of making suggestions regarding inventions or ideas they have. We ask that you refrain from making any suggestions concerning inventions or ideas with the purpose of receiving rights or compensation for said suggestions. For more information, please see Unsolicited Ideas under our Termsof Use.
@ 2025 Yamaha Corporation of America. All rights reserved.
Imagine that you’ve just seen a great movie with your friends. Everyone’s taking turns remembering the highlights, and when it’s your turn, you quote your favorite lines, compare it to other movies you’ve seen, and maybe even share a detail or two your friends might’ve missed. When you’re done, someone else pipes up and shares their experience of the film.
This, in essence, is what a bass solo is: your contribution to a conversation between you and the rest of the band. You and your bandmates are having a shared sonic experience, and each solo is a remark on the song that’s currently the topic of conversation. Just as your thoughts on a movie are informed by how well you know the genre, actors and director, your solo will reveal how comfortable you are with the song, your instrument and the type of music you’re playing.
Here are a few tips and techniques for crafting effective and compelling bass solos.
LISTEN, LISTEN AND DO MORE LISTENING
It’s much easier to develop a concept of soloing if you enjoy listening to good bass solos. There are many ways to approach a solo and a wide variety of styles, from Paul Denman’s cool feature on Sade’s “Smooth Operator” to Jaco Pastorius’ impeccable turn on Ian Hunter’s “All American Alien Boy” to Billy Sheehan’s insane chops on Mr. Big’s “Addicted to That Rush.” (played on his Yamaha Attitude Limited 3 signature bass). If you’re new to this adventure, enjoy learning what kind of solo you like, and ask yourself what each occasion calls for.
DO YOUR HOMEWORK
If you’re nervous about soloing on a particular song, get familiar with its harmony and melody. Knowing the scales and chords you’ll be soloing over is like reading a book before writing a book report — it’s not just helpful, it’s necessary. Get inside the song by playing arpeggios of each chord, which will help you develop phrases to have under your fingers. Think about tempo too: a sweet ballad, a head-nodding hip-hop groove and a techno track all require different approaches. Some musicians learn to hear spontaneous melodies and play them in real time; others use arpeggios or chord tones; others base their solos on transcriptions of other people’s solos. Most solos combine several techniques that have been honed in the practice room so they’re ready to be used on the bandstand. No matter what, build a roadmap.
MAKE A PLAN
Once you know how long your solo will be (in most contexts, four, eight or 16 bars), pick an approach. The song or style may ask you to be as fluid as a saxophone, chordal or driving like a guitar, or thumpy and percussive like an upright bass or drum. An easy way to start is to take a short phrase, state it clearly, repeat it and develop it. When it comes time to solo, many bass players go up the neck for articulation and a change of tone, but you don’t have to. Willie Weeks’ solo on “Voices Inside/Everything is Everything” is a great example of a bass solo that grooves, starts low, tells a story, and has a satisfying arc.
THINK ABOUT SPACE
It might seem natural to play fewer notes on slower songs, but this melodic Tal Wilkenfeld solo on Jeff Beck’s “Cause We’ve Ended As Lovers” proves that that’s not always the case. Some solos are spacious, while others are busy. Listen to David Hood’s relaxed eight-bar solo on the Staple Singers’ “I’ll Take You There,” then check out Rancid’s “Maxwell Murder” to hear Matt Freeman go wild. Both solos fit their respective songs like a glove.
BE WILLING TO EVOLVE
If you solo on a particular song often, consider developing something you can refine over time. In the ’70s, an epic Suzi Quatro bass solo helped make her famous, and four decades later, she’s doing it again. “It’s physically demanding and requires immense concentration, but I’m playing it better than ever, which is a real surprise at 73,” she said in a recent Bass Magazine interview. “I have been practicing my bass solo, and I can’t practice it enough!”
WORK WITH YOUR BANDMATES
It seems obvious yet contradictory: Your solo is only as good as your bandmates’ support. When we stop playing, the bottom (quite literally) drops out, and how the rest of the band reacts in that moment makes all the difference. Chic’s “Good Times” keeps the dance floor packed during the bass solo because Bernard Edwards never loses the groove. Sometimes the bass solo is a call and response with the rest of the band, like John Entwistle’s big moment on The Who’s “My Generation.” Others are duets, like this one between Red Hot Chili Peppers bassist Flea and guitarist John Frusciante. Your bandmates are part of your solo, and so is the audience. Listen to how the audience cheers on a Joe Dart bass solo straight into a tight arrangement of the Eagles’ “One of These Nights.”
RELAX INTO IT
Whether you’re playing a solo that’s meticulously planned or simply winging it, stay open to unexpected moments and the thrill of improvising, an art taught by many teachers, including Victor Wooten. Watching him not get thrown off when he breaks a string during a marathon solo is simply inspiring.
At the end of the day, the best way to learn is to listen to great solos, figure out what makes them work and spend lots of time with your bass so that when the time comes, you can step into the spotlight with confidence and let the magic flow.


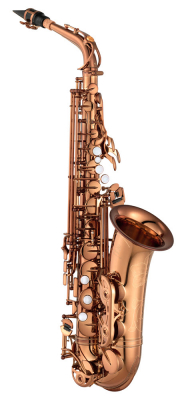
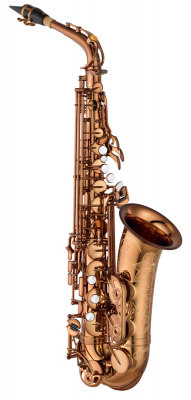


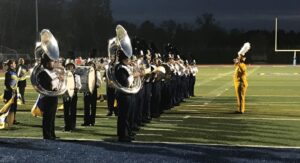


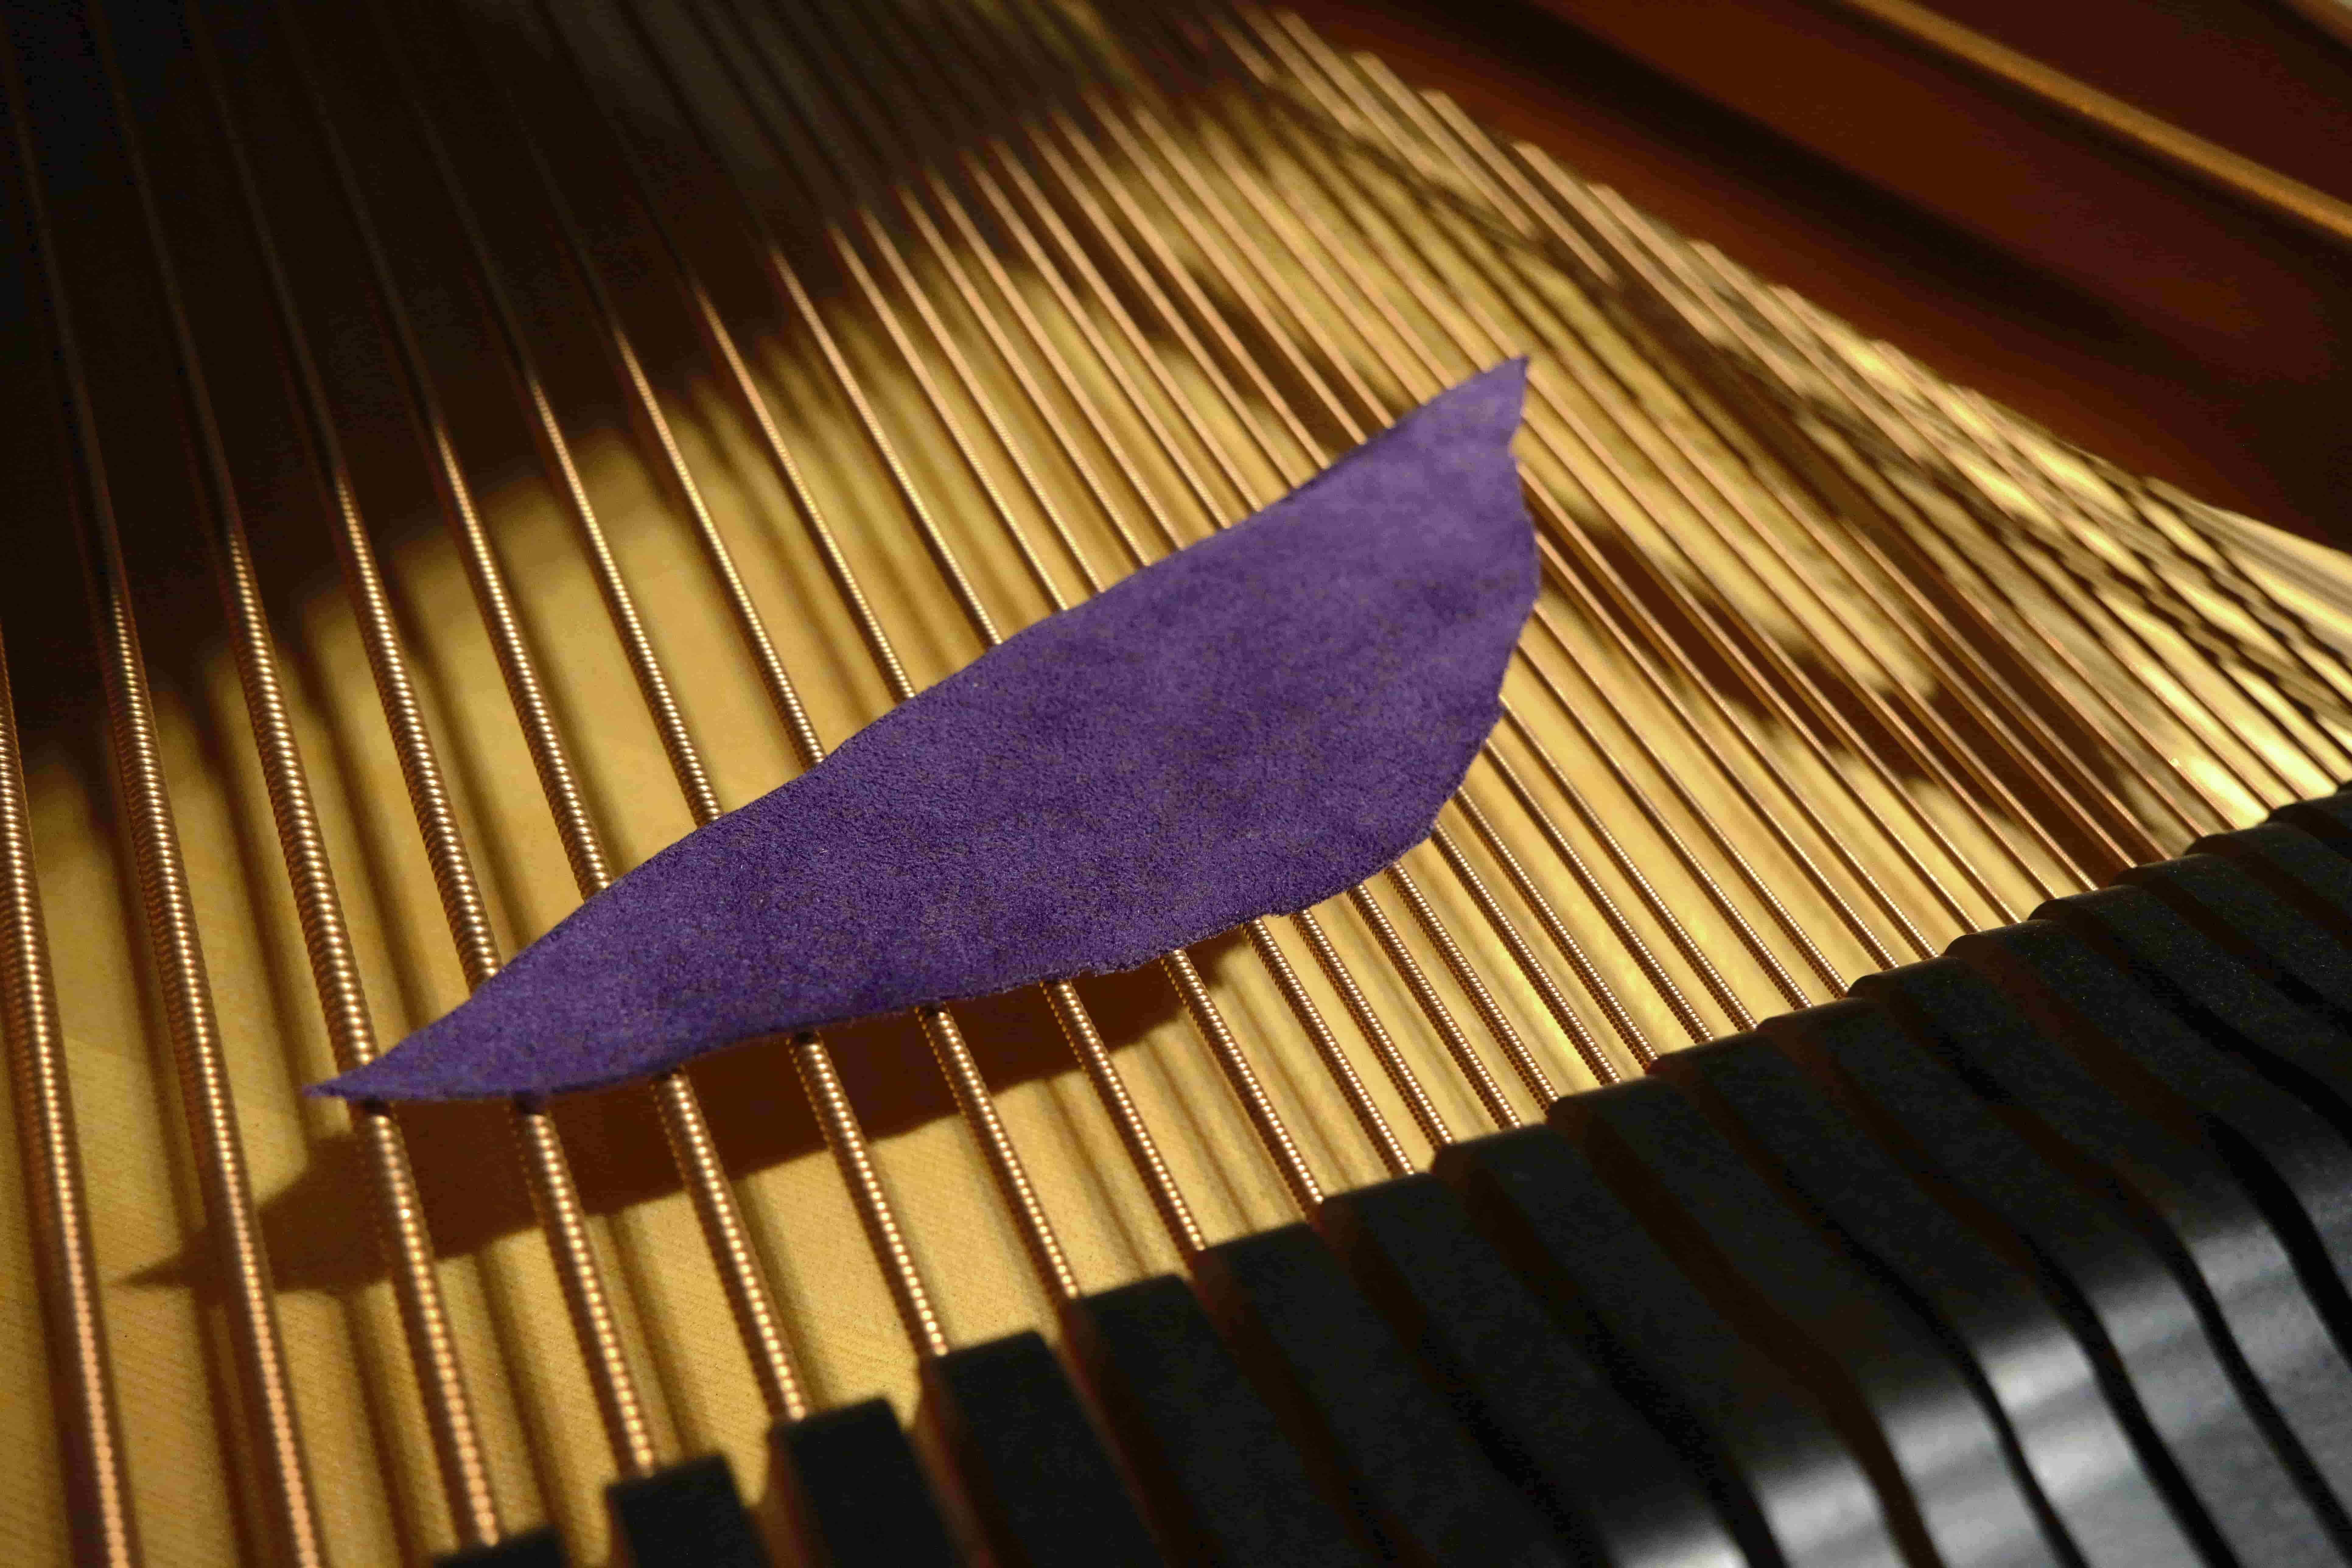


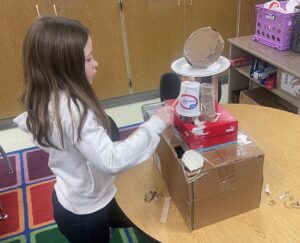
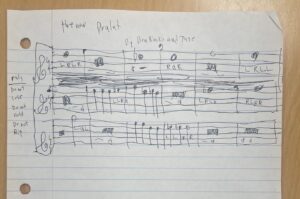
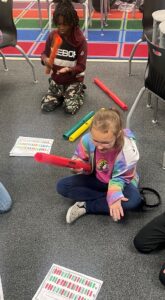
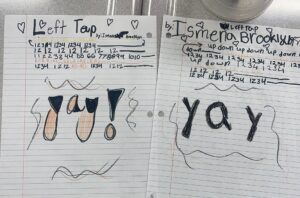


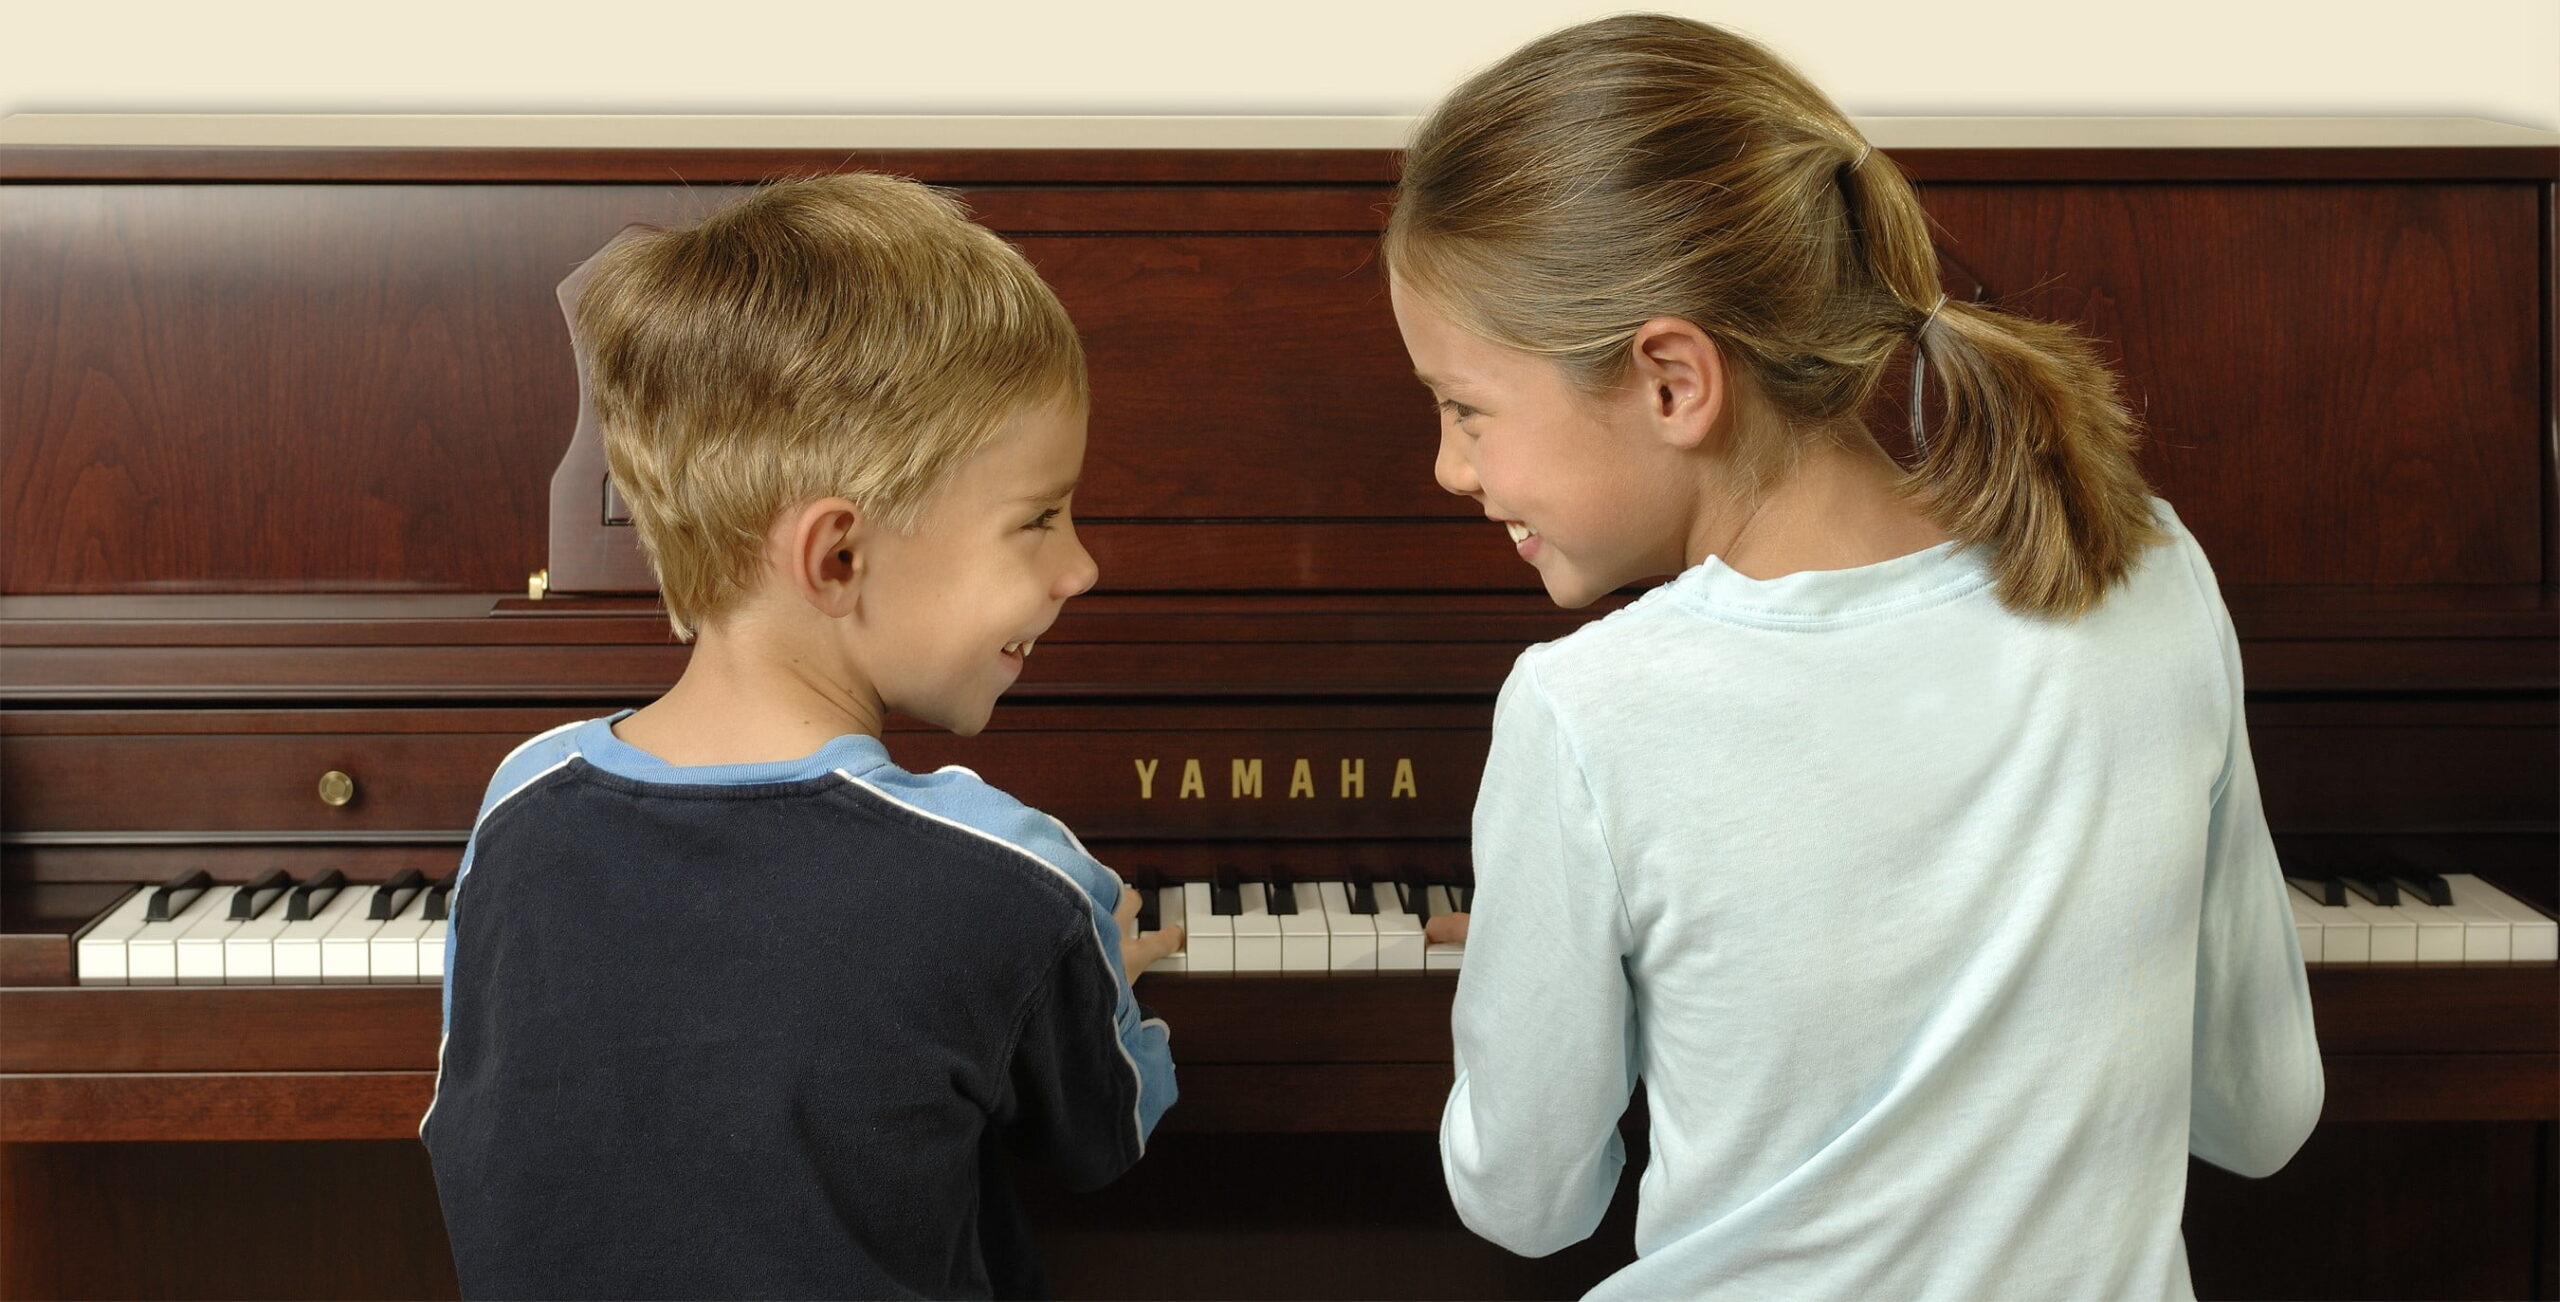


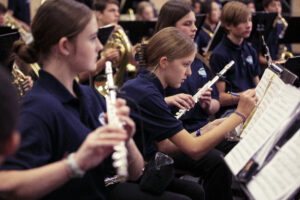


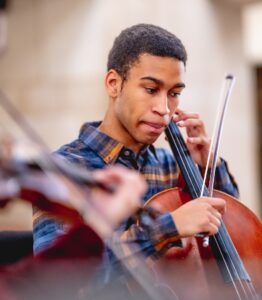
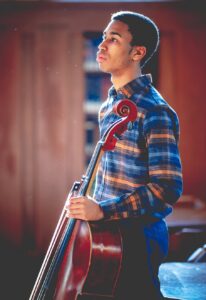


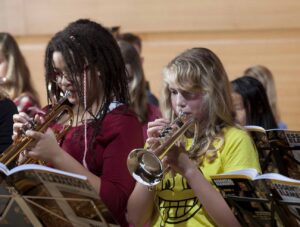


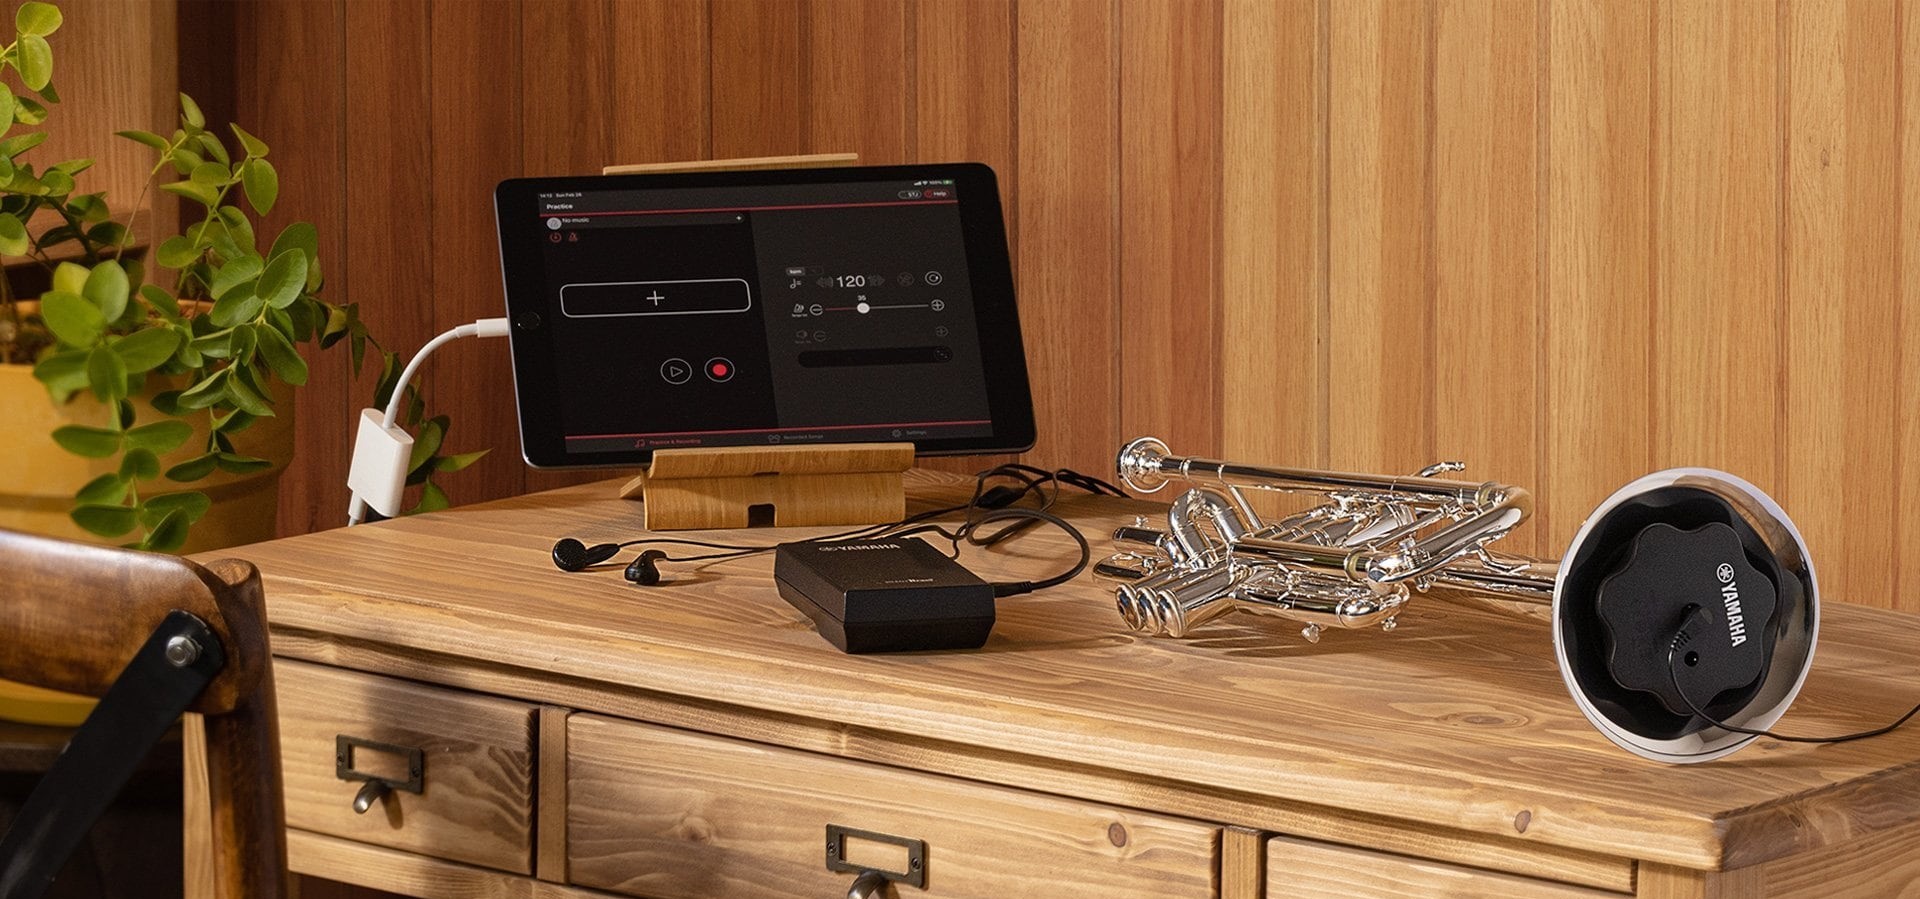


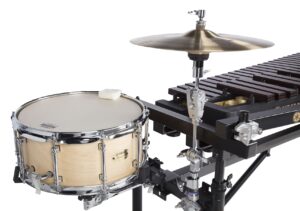

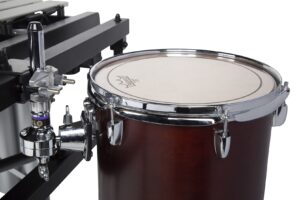
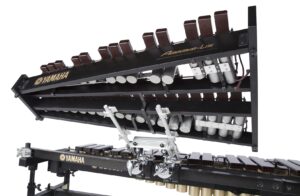


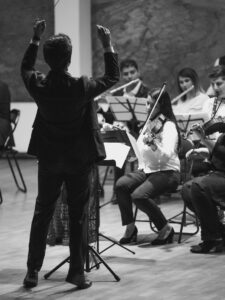
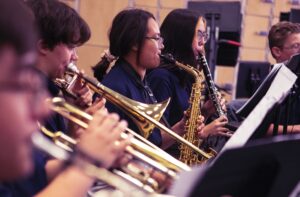
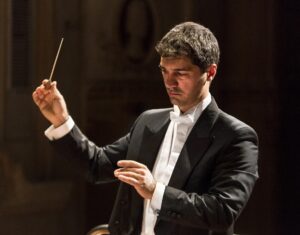
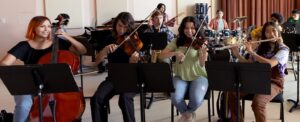


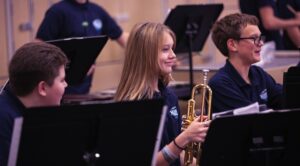
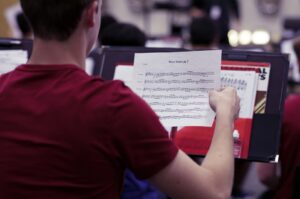
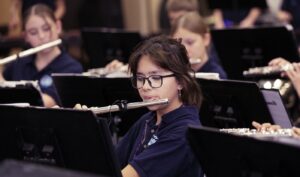


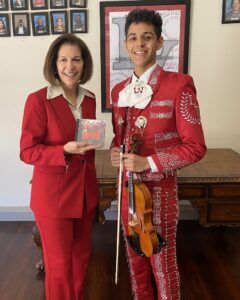


 Creating:
 Edit in notation software (like
 1) Begin with the question, “what is sound?” As students guess, slowly navigate them toward the answer: “vibrations in the air.” Next ask, “What is actually vibrating when we hear sound?” The answer should be “air molecules.” Feel free to use the following explanations below alongside diagrams or photos in a slideshow presentation.
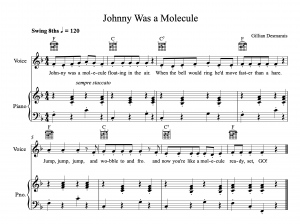


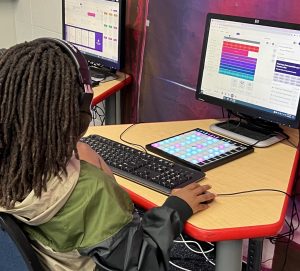
 2) Have a project open in your DAW and encourage students to view the sample browser/loop browser. From here, differentiate audio loops by their “audio icon” (see below) and drag and drop one into the timeline. See some examples below for reference.