
Davis David

Back to 40 Under 40

2023

David Davis

Music Teacher
Park Spanish Immersion Elementary School
St. Louis Park, Minnesota

David Davis, the music teacher at Park Spanish Immersion Elementary School in St. Louis Park, Minnesota, sees his students as co-learners and co-teachers, and he happily shares the teaching podium with them.

“Most of the unique aspects of my music program are student-created through highly intentional classroom facilitation and instructional design that centers student voice, choice and creativity,” he says. “By prioritizing students’ ideas, identities and cultures, I’m able to make learning intrinsically motivating and relevant. By taking this approach, the music I utilize is inevitably more culturally diverse, and students can more easily see themselves reflected in the curriculum.”

Davis believes that all students are innately musical and deserve to have a music education that is welcoming, inclusive and relevant to their lives. ”Whereas most music curricula are generally static and look the same regardless of what community they are serving, I choose to customize my music curriculum to be more organic, linked to student curiosity, and relatable to student experiences and backgrounds to better fit the ever-evolving communities I serve,” he says.

Citing constant self-learning and reflection coupled with a drive to take action toward systemic change, Davis has grown his band and orchestra program to 85% of enrollable students. Changes that supported this growth include:

  • Frequently acknowledging every student for their cultural and musical brilliance regardless of their technical skills.
  • Prioritizing student voice and choice, rather than a teacher-directed approach that just asks for compliance.
  • Decentering the Western classical aesthetic priority by emphasizing learning by ear, improvisation, dance and other music genres equally to Western technique and notation reading.
  • Reducing gatekeeping by including all instruments and genres in my curricular classes and ensembles (yes, guitars in orchestra and accordions in band!)
  • Implementing student self-assessment within a co-created rubric instead of typical grading practices, so students are invested in self-evaluation and setting growth goals.
  • An “opt-out” rather than “opt-in” registration model for my first-year instrumental program that ensures every student has a place, as well as an instrument they can use, in band or orchestra if they wish.

Running a program that pushes boundaries has paid off. “Through projects incorporating improvisation/composition, a diversity of music genres and contemporary electronic instruments, not only are my students excited to participate in class, but they are getting a much more well-rounded, holistically musically literate, creative, culturally aware music education than what I had,” he says.

During the pandemic remote learning environment, Davis experienced one of his proudest moments when his 3rd-grade class created an entirely original musical. “All I did was coach them, and this incredible bunch of 9-year-olds created original songs, characters, background music, art and storylines, sharing ideas and videos through virtual contexts,” he says. “The resulting Zoom musical brought so much joy to all of us during a challenging year.”

Continue reading

Claiborne Leah N. Dr.

Back to 40 Under 40

2023

Dr. Leah N. Claiborne

Associate Professor of Piano
University of the District of Columbia
Washington, D.C.

Teaching at an HBCU (Historically Black Colleges and Universities) comes with a lot of responsibilities — something Dr. Leah N. Claiborne, Associate Professor at the University of the District of Columbia, understands and embraces. “It’s an incredible honor to teach at an HBCU that was initially founded for the purpose of educating young Black women,” she says. “Black American contributions are woven into the fabric of this country, and HBCUs honor and acknowledge the whole American story in all disciplines. While I had no idea that after graduating from the University of Michigan that I would be teaching at an HBCU, it was an obvious choice because I knew that my research would not only be welcomed, but it would be celebrated with an already long history of great scholarship on Black American music.”

While many predominately white institutions across the country have struggled in recent years to incorporate underrepresented voices in their curriculum, “it is expected that our students’ recitals, their history classes and their literature courses includes the voices of Black Americans,” Claiborne explains. “It is expected because there is an understanding that the HBCU community honors the full story of American music — a story that cannot be told fully unless it honors the contributions of Black Americans.”

Claiborne also spreads the message of diversity, equity and inclusion (DEI) as the Director of DEI for the Francis Clark Center and the co-chair of the DEI track of the National Conference of Keyboard Pedagogy (NCKP). She joined the editorial committee of “American Music Teacher,” the journal of the Music Teachers National Association (MTNA) and proposed a column dedicated to sharing best practices of DEI efforts across the country, and having a dedicated area for teachers to share their transformative work within their communities. “The best part of writing is the feedback from colleagues across the country. After I write an article, I wonder if anyone will read this or think that this work is important,” Claiborne says. “Then once it is published, my heart swells with feedback from teachers.”

While she was still studying at the University of Michigan, Claiborne conceptualized Ebony Music, an organization that shines a spotlight on Black classical pianists and Black composers of piano music. “Representation is so vitally important in all stages of musical development, and in the area of piano, there has historically been very little representation of Black classical pianists and music by Black composers on the great performance stages in the country and across the world,” she said. “I often wonder what it would have been like if I not only had the opportunity to learn music by Black composers, but also see Black pianists on the concert stage.”

Claiborne says her greatest joy is when she hears her community speak about Black composers in the same way they speak about Bach, Beethoven or Brahms. “We need to move past the performance and education of underrepresented composers simply because they are underrepresented,” she says. “When we discuss, perform and write about this music because of its impact in our field, we honor the voices who created it. It’s a gift for me to be part of this historic journey of honoring voices and sharing them with my communities.”

Continue reading

Rader Noelle

Back to 40 Under 40

2023

Noelle Rader

Orchestra Teacher
Mendive Middle School
Sparks, Nevada

Noelle Rader was an aspiring professional violist, but after a performance-related injury became so severe that she could no longer play, she underwent surgery to save the long-term use of her hand. As she worked with doctors and surgeons, she became a substitute teacher to have some flexibility around necessary appointments. “I soon found the classroom to be an invigorating place, and I became extremely passionate about music education,” Rader explains. “Even though my former career ended sadly, being a teacher felt like coming home. I love teaching orchestra, and middle school is my absolute jam!”

As the orchestra teacher at Mendive Middle School in Sparks, Nevada, Rader says that student choice is a big part of her teaching philosophy. “It can be seen in our daily rehearsals where students decide what learning strategy they need for a particular song, to our concerts where students vote on each piece we perform,” she says. “I’m also very proud that the demographics of the orchestra program reflect our school. I’m happy that every kind of student sees themself in orchestra.”

Rader says that the more than 200 musicians in her orchestra aren’t just students, they are people. “I want them to feel seen and heard when they are in my classroom. We celebrate, we cheer each other on, and we share our thoughts and feelings,” she says.

Because Rader experienced pain, discomfort and eventually injury from playing an instrument, she became particularly interested in how to prevent that for her students. Body Mapping is a somatic education method that helps musicians learn about movement in music by learning about their bodies and senses. “I incorporate these principles directly into my teaching as we learn concepts in class, such as understanding where our arms actually connect to our body and how to use the arm joints freely when bowing. I believe all musicians have the right to make music free from pain and discomfort,” she says.

Rader is often asked to present her Body Mapping teaching methodology at conferences, especially because the rates of playing-related pain and discomfort among musicians is staggering, and researchers have found that this includes young musicians in elementary and secondary school. “I believe music education can no longer ignore the physical aspects of learning to play an instrument,” she explains. “Incorporating ways of supporting the physical wellbeing of our students is critical. Body Mapping can give educators the knowledge and vocabulary to support our students’ music learning. If students feel good when they play, they will be happier in our classes and have the freedom to express themselves.”

Continue reading

Vazquez Miriam L.

Back to 40 Under 40

2023

Miriam L. Vazquez

Music Teacher
Duane D. Keller Middle School
Las Vegas, Nevada

Mariachi is so much more than a musical genre to Miriam L. Vazquez, a music teacher at Duane D. Keller Middle School in Las Vegas. It’s an inclusive movement! “Everyone can be a part of it regardless of language, age, religion or ethnic heritage,” she says. “All voices are important and valid in the promotion of mariachi education — not just Latinx educators. I say that music itself is a language, and more than ever, mariachi needs advocacy.”

Her mariachi program started with 80 students last fall, and one year later, it boasts 300 students! “Upon returning from the pandemic, many students faced great pain and fear as they lost a part of their lives that they thought could never be recovered,” Vazquez explains. “I decided to design a unique mariachi program where not only my students would feel at home, but also their families and other members of the community, who eagerly seek the warmth of being part of something great, new and with a purpose.”

Vazquez says that her program experienced an influx of non-Hispanic students who are developing a love and passion for mariachi music and “feel right at home in my classroom.” The program also provides opportunities for students to travel and gain valuable life skills that often lead to increased educational achievement, career prospects and other life aspirations.

Vazquez is described as understanding students’ social and emotional needs as well as their musical needs. She explains that gratitude is a fundamental part of the mariachi culture. “Aside from playing music together, I also encourage my students to be effective communicators,” she says. “We have developed a beautiful tradition of expressing aloud why we are grateful to have each other in our lives, which has greatly affected our culture at a school level. Not only have we seen a larger presence of music/performing arts on campus, but there has been a drastic increase in family involvement at the school — things our program has driven!”

Another way Vazquez shows gratitude is by promoting other programs at Keller during her concerts, which are some of the most well-attended shows in the district, with some drawing audiences of more than 1,000 people.

“We connect on a multi-generational level while building strong relationships among families, school and community,” she says. “In fact, we are launching our Familias Fuertes (Strong Families) sessions this semester to strengthen our family relationships through workshops that cover most of our students’ topics of need.”

Vazquez hosted the Keller Mariachi Face Off, affectionately referred to as “noche,” which brought together over 1,500 students, families and community members to celebrate the success of her growing program. “Within seven months of starting the program, we had more than 20 schools come together to make the event a success. In our specific location in the city, there aren’t a lot of community resources or community gathering places, so being able to provide this sense of community for everyone is a huge step in the right direction for us as a program and for our school.”

Continue reading

Hatfield Lisa

Back to 40 Under 40

2023

Lisa Hatfield

5th-grade band and orchestra teacher
Batavia Elementary Schools
Batavia, Illinois

Teaching a concept like syncopation and rhythm to elementary school students can be challenging, but Lisa Hatfield, the 5th-grade band and orchestra teacher at Batavia Elementary Schools in Illinois, uses creative elements in her teaching approach. “I love to teach using fun and creative methods — and that’s how I learn, too,” she says. “For a concept like counting syncopation, I use unique aids, such as basketballs and Legos. With basketballs, kids can see, hear and even feel the down (bounce) and up (catch) beats. When we build rhythms on top of each other, I use Legos to show students how they ‘fit’ together.”

Hatfield also arranges current songs and trends to incorporate more advanced skills like accidentals and higher ranges, so students work on them over and over without realizing the repetition. “My class just learned how to play an octave from a TikTok song,” she exclaims.

Her main goal is for her students to love playing their instruments, but “for my sanity, everything I teach must also be personally entertaining, so I like to keep things new and fresh,” she says with a laugh.

Hatfield’s program boasts a retention rate well over 90%. She says that involving other music teachers and older student musicians as often as possible helps create a stronger musical community and promotes how fun and exciting the music experience can be if students stick with it! Some events that celebrate the musical progression throughout all levels include:

  • 8th grade ensembles performing and demonstrating instruments at a recruitment concert for 4th graders,
  • the marching band’s special meet-and-greet (while autographing posters) with beginning musicians,
  • the annual All-City concert that brings together hundreds of grades 5-12 musicians to perform together.

Hatfield has shared her knowledge by teaching courses on integrating technology into school music programs through the VanderCook College of Music continuing education program. Some of her top tips? Create beautiful and environmentally friendly digital programs that the audience can scan with a smartphone, which “allows you to expand the purpose and reach of your program by including pics and gifs of your students,” she says. Hatfield also says to promote fundraisers and events with direct links, so people can dive deeper into your program notes and the history or inspiration behind your song selections. Finally, transitioning to cloud-based content and visual aids for both students and parents “enable you to effortlessly update them from year to year, share with ease and edit them quickly to accommodate different student needs from anywhere,” she says.

Continue reading

Meyerson Emily

Back to 40 Under 40

2023

Emily Meyerson

K-12 Music and Drama Educator
North Baltimore Local Schools
North Baltimore, Ohio

Emily Meyerson, the K-12 Music and Drama Educator for North Baltimore Local Schools, isn’t afraid to try anything to improve her program. “I came into an established program in 2010, where things had been done a certain way for so long, and I was too green to immediately shake things up,” she says. “After I had a couple of years under my belt and gained a little confidence, I knew that major change was necessary in order for this program to thrive.”

Meyerson started with a huge revamp of the middle school program. “I went from 50 kids in the middle school choir to seven, which was terrifying,” she says. “I leaned on my administration for support, and the elementary principal at the time suggested the creation of an elementary show choir as a feeder program.”

Over the next several years, her numbers grew and she started to see the fruits of her labor. Meyerson now has a strong middle and high school choir program, and she continues to use the elementary show choir as a great feeder program to get strong singers involved early.

Another change she made was switching her pedagogy to Teaching for Artistic Behavior (TAB), a concept the art teacher introduced her to that focuses on:

  • What do artists do?
  • The child is the artist.
  • The classroom is the child’s studio.

Meyerson and the art teacher took the plunge together and incorporated this new methodology. “Switching to a TAB pedagogy completely revitalized my classroom, the way I teach and my students,” she says.

When students come into her music class, they begin with a mini-lesson or demo that usually lasts about five to seven minutes, then they are free to explore and create in whatever ways they want, within certain guidelines. “In the visual art world, TAB studios are offered by medium so you might have drawing, painting and sculpture studios,” she explains. “In music, I wanted to do the same thing, offering the same type of choices. Some of my favorite studios are boomwhackers, keyboards, ukuleles, electric guitars, electric drums, note knacks, electronic music (on iPads) and the recording studio that my custodians built for me in the back of my classroom.”

Meyerson acts as facilitator, helping students work through whatever problems that may arise as they work toward project completion of their choice. “Sometimes, it’s absolutely chaotic, and at any given time, instead of creating one lesson plan for a whole class, I could be working on 25 different things with 25 students,” she laughs. “We’ve got things in place to help with that though, including a check-in system with specific points they need to touch base with me, and a list of questions to keep them thinking, reflecting and acting like musicians.”

Meyerson also created a swing choir to push and stretch students who were ready for a bigger challenge, as well as a high school guitar program to reach students who weren’t in choir or band or those who wanted additional musical outlets. She started with a two-level class, Guitar I in the fall and Guitar II in the spring. It was a huge success and soon Guitar III was added, followed by Guitar IV this year. “I am super excited about this new course! It features more advanced guitar techniques, electric bass and culminates with a final project that will be writing, recording and producing an original song,” she says.

Continue reading

Kitchell Johanna M.

Back to 40 Under 40

2023

Johanna M. Kitchell

Orchestra Director
Riverside Junior High School,
Riverside Intermediate School
Fishers, Indiana

Johanna M. Kitchell, the Orchestra Director at Riverside Junior High School and Riverside Intermediate School in Fishers, Indiana, is not only a problem-solver in her own right, but she is instilling this skill in her students.

Her classroom is described as an active place of learning and Kitchell knows that she is helping to “raise” not just the next generation of performers, but the next generation of music consumers. “I strive to incorporate their opinions,” she explains. “We discuss phrasing, bowing and articulation choices; then we listen and provide feedback. Students write their own program notes for concerts. We perform in the community, we attend local concerts. I try to give my students agency within our learning, and by doing so, find ways for them to feel connected to music that will last past their junior high orchestra days.”

Kitchell also gives students a voice in interpretive and musical decisions. “We all have moments where the music doesn’t have all the information, and we have to ask: Should there be a crescendo? What’s that articulation? Where in the bow? There are also times where the edits we have made still doesn’t feel right, so I ask students for their ideas, and we try them all,” Kitchell says. “We find what works best for the music, together. It takes longer than if I just told them, but that doesn’t engage their musicianship or ask them to think critically.”

Kitchell took problem-solving to a whole new level when she found that she wasn’t consistently using any method book with her second- and third-year players. She was trying to connect skills and techniques to repertoire, but most books layered so many different skills that it was hard to find exercises her students could play accurately. So, she created her own method book, “Golden Techniques for Intermediate Strings” “Each unit is built in isolation, allowing students to focus on a single skill or technique,” she explains. “The exercises introduce each concept simply, then use it in ways most commonly seen in junior high orchestra repertoire. I have found this to be a more effective way to help my students develop their playing skills.”

Kitchell, who is also the Concert Orchestra Conductor for the Indianapolis Youth Orchestra, has grown her program from 70 students to as many as 285 during her 15 years at Riverside. “That wouldn’t be possible without administrative support,” she says.

Continue reading

Tran Trevor

Back to 40 Under 40

2023

Trevor Tran

Head of Performing Arts,
Director of Vocal Arts
Fort Myers High School
Fort Myers, Florida

A growth mindset isn’t a trendy buzzword. It means to push students to thrive on challenge and to look at setbacks as opportunities for growth and developing skills. Trevor Tran, Director of Vocal Arts and Head of Performing Arts at Fort Myers High School in Florida, integrates this philosophy into his classroom. “Every year during the first week of school, I give a short presentation about growth mindset,” he says. “We discuss our biology and the natural learning processes of our brain in order to show how humans learn. This helps students understand how our abilities and intelligence can improve and grow.”

Tran takes this lesson beyond the first week of school “Throughout the year, students have individual goals that they work toward and track, and we strive as a class and as individuals to improve,” he explains. “The main message I want to share with other music educators is how growth mindset boosts intrinsic motivation. Students exposed to the idea are more likely to overcome adversity and have more confidence in themselves.”

And adversity has not been a stranger to Tran’s students and his music program. On top of the disruption and change from the pandemic, the Fort Myers area was hit hard by Hurricane Ian in September 2022, which devastated the community. “Despite all the challenges, my students have continued to make great strides toward becoming better musicians, and I know that they will be ready for the real world because of all the obstacles they have overcome,” Trans says proudly.

Outside of his work at Fort Myers High, Tran is expanding the musical offerings in his area. He started the Southwest Florida Choral Festival to provide the public schools and the Lee County community an opportunity to engage with high-quality choral educators. Tran’s plan includes pooling together resources and hosting a well-known choral educator in Southwest Florida to present sessions, clinic choral groups in the area and put on a showcase concert with students from the public schools. “During the past two years, we have set the foundation and started to build. The goal is to engage and collaborate with more groups to expand the event,” Tran explains. 

Another project that Tran is involved in is the Composition Colloquium, a composition education initiative sponsored by the Florida Vocal Association, which was started because there was a lack of educational resources for students interested in composition. “Since its inception, I have led workshops and private composition lessons with students across the state of Florida. These students have ranged from beginning composers to advanced writers who have composed multiple works. We hope to continue providing this resource to Florida students to help usher in the next generation of composers,” Tran says.

Continue reading

Wakabayashi Nicole

Back to 40 Under 40

2023

Nicole Wakabayashi

Director of Music and Drama
Notre Dame School of Manhattan
New York, New York

Notre Dame School of Manhattan is a small Catholic, all-girls, college preparatory high school with a mission to provide education to any student regardless of demographic or socioeconomic standing. The program that Nicole Wakabayashi, the school’s Director of Music and Drama and the Arts Department Chair, runs formally started six years ago when she began working at the school.

“This was the first time, in the recent past, that the school has had a choral music program that was integrated into the curriculum,” Wakabayashi says. “I re-built the extracurricular glee club, put on three shows each year with all of the choral ensembles, and music directed the spring musical. While I may not have some of the resources of more developed programs, such as a formal music room or a plethora of instruments, I do have the continued support from the faculty at Notre Dame and, most importantly, the incredible talents and energy my students bring every day. They make my experience as an educator extremely rich.”

Wakabayashi has found innovative ways to bring more inclusion and diversity to her program. In 2019, she started an arts showcase — this first production revolved around the immense contributions of Black artists and musicians to American culture. “The impetus of this project, titled ‘What is Black? Celebrating Black American History Through Music, Art and Poetry,’ was to provide a platform for Black students to tell their own stories through art in a way they might not have been able to in other academic settings while highlighting the importance of antiracism throughout our school community,” she says.

While Wakabayashi produced and music directed the show, she had a group of her senior students curate the entire program. “The main curator of our first showcase, a Cameroonian-American student, told me she wanted to show that Blackness was more transcendent than the binary ways we often look at race. By using the humanizing nature of art, we were able to better celebrate a sense of self through a Black lens,” she says. “The first performance, pre-COVID, had an overwhelmingly positive impact, which propelled us into a virtual edition in 2020 and finally an in-person show in November 2022.”

The 2022 production included a heavy amount of dance, led by professional choreographer Angel Kaba, as well as a six-piece band (with Alphonso Horne on trumpet, Norman Edwards Jr. on drums, Patrick Sargent on saxophone, Mariel Bildsten on trombone, Raul Reyes Bueno on bass and Wakabayashi on piano) to accompany the vocal ensembles. “The rehearsal process and letting the kids create something together really formed a deep sense of community. I am excited to continue this tradition every year going forward,” Wakabayashi says.

Another way she has incorporated diversity is through the Introduction to Music Theory elective she started. “In this course, we cover all the basics of Western music theory and delve into music history during the later parts of the year,” Wakabayashi explains. “I make sure to stress that this type of music analysis is only how a certain part of the world understands music. In order to open their eyes and ears to different types of music, I try to cover a little bit of everything from Hindustani Ragas, the influence of the Indonesian gamelan ensembles on French Impressionistic music, Eastern European folk music traditions, West African Gyil music or anything that might be a little ‘different’ from what we’re used to. I want my students to learn how to listen empathetically and honor the performance practices and styles of different traditions.”

As a music educator, Wakabayashi says that she lives by this quote:

Why We Teach The Arts

Not because we want you to major in the arts,

Not because we expect you to sing, paint, act or dance all your life,

Not so you can just relax or have fun,

But so you will be human.

So you will recognize beauty,

So you will be sensitive and be closer to an infinite beyond this world,

So you will be closer to others,

So you will continue to grow in love, compassion, gentleness and peace.

The arts are not something you do, but something you are.

Of what value will it be to make a prosperous living unless you know how to live?

Continue reading

Burch Emily Williams Dr.

Back to 40 Under 40

2023

Dr. Emily Williams Burch

Coordinator of Music Education,
Professor of Music
University of South Carolina, Aiken
Aiken, South Carolina

Dr. Emily Williams Burch has been described as a choral entrepreneur. “To me being a choral entrepreneur is embracing new technology as a way to deliver services, develop new content, create new formats and ultimately break the glass ceiling that is the definition of what a music educator can do,” she says. “As French educator Nadia Boulanger said, ‘To study music, we must learn the rules. To create music, we must break them.’ That’s the out-of-the-box thinking that I embrace as a choral entrepreneur.”

In addition to her position as Coordinator of Music Educator and Professor of Music at University of South Carolina Aiken, Burch is the Executive and Artistic Director of RISE Chorales, a community-based women’s choir, and RISE Outreach, the group’s nonprofit arm. The choral group, which was formed in 2016, shows the community that through singing, women can learn crucial work-readiness skills and other soft skills that will help them succeed throughout life. “It’s the flexibility and ability to innovate and create quickly that most excites me about the RISE Chorales,” Burch says.

The outreach arm started in 2021 and offers college scholarships for RISE singers, sponsors singers to explore RISE and other music opportunities, and provide programming throughout the city to communities that do not have musical opportunities. “We also have two active programs/collaborations,” Burch explains. “We bring music to a school with students who have learning difficulties as well as to a respite care center for adults with Parkinson’s or memory loss. The most rewarding moments are seeing students who struggle with reading or sequencing grasp concepts such as literacy, composing, arranging and performing on a variety of instruments including boomwhackers, recorders and ukuleles.”

Burch also reports seeing incredible progress at the care center when participants suddenly can move to the music, access a memory or story that was previously lost, or simply interact in new ways through music in order to provide stimulation and conversation.

Another hat that Burch proudly wears is podcast host. “Music (ed) Matters” started in April 2020, and each week, Burch meets up virtually with colleagues — known and unknown — and captures their stories and expertise. Every Tuesday morning, a new episode is released featuring educators, musicians, innovators, businesspeople — “basically anyone doing incredible things that can empower and enhance our world as music educators and lovers of music,” she says. 

As if all this isn’t enough, Burch co-authored the book, “The Business of Choir,” with Alex Gartner, and says the idea for the book “stemmed from a few podcast recordings and involved working  in collaboration — which is one of my extroverted self’s favorite things to do!”

The best advice from the book, according to Burch, is that every choir (or band, orchestra, music classroom or space) has a story worth sharing — a legacy of tradition, time, love and incredible music. “But a legacy is not built on these idyllic terms alone,” Burch says. “Some important, yet occasionally overlooked, concepts are missing, such as recruitment, volunteerism, evaluation, strategic planning, accounting and fundraising, to name a few. The book enables you to connect the minutia to the music and ultimately help you quantify your choir’s story and impact on your singers and within your community. The more people who know, the more lives we can impact through the power of music!”

Continue reading

González Andrés

Back to 40 Under 40

2023

Andrés González

Music Director
Play on Philly
Philadelphia, Pennsylvania

Play On Philly (POP) provides underserved children in Philadelphia a transformative music education experience that develops and inspires the behaviors needed for a successful life. It was modeled after Venezuela’s hugely successful El Sistema program founded by Maestro José Antonio Abreu. It seems fortuitous that when Andrés González, who was trained in Venezuela’s El Sistema program for more than 20 years, moved to the United States, POP was looking for a new Music Director. “POP’s mission mirrored El Sistema’s advocacy for social justice, and when I became part of POP’s community, it felt like an extension of my work in Venezuela,” González says. “I always say that this is a life mission for me.”

POP’s program team and teaching artists are committed to cultivating musical excellence, lifelong skills and confidence. Partnering with Philadelphia schools, POP creates on-site music centers where students receive eight hours of intensive music education and ensemble practice every week after school. Now in its 12th year, POP serves more than 350 students through its pre-K-12 programs at five music centers, as well as through the POP summer program at Temple University. POP also supports young musicians in their musical studies through the Marian Anderson Young Artist Program.

After the pandemic, González saw an opportunity to change POP’s program structure. “I wanted to provide younger students with similar experiences that I had when I was their age: To play music in a large children’s orchestra and feel empowered and supported by your community of peers,” he says. “Before, K-12 students at different music centers didn’t interact too often. With the POP Children’s Orchestra, our students come together as a community and play together.”

Older students in the orchestra serve as section leaders and mentor younger students, and each instrumental part is leveled, allowing students of all ages and experience levels to play together while being challenged in meaningful ways.

In addition to finding opportunities for area children to play music, González strongly advocates for students to work with composers and performers, and through POP’s collaboration with local and national arts organizations, he’s able to create relationships with composers and musicians. “We partner with artists and organizations that hold similar values to us and are committed to giving our students high-quality instruction and experiences,” González says. “We’re in constant communication with partner organizations, composers and renowned soloists to find different kinds of collaborative projects and performances to bring together our curricular goals, recognition of our students in Philadelphia and beyond, and high expectations of artistry and musicianship.”

González shares his world view with his students. “I come from a family and a country with nearly no orchestral and classical music traditions. I know that community-based programs are such an important piece of our societies because every time we include and give access to new young musicians, we are also giving access to their families to new opportunities and make them feel part of the world,” he says.

He regularly shares videos of performances by the Berlin Philharmonic or other important ensembles in the world to show his students what an orchestra should sound and look like on the stage and to create connections to the orchestral training field in the world. “We can’t limit our communities to only what they are used to living and seeing, educators are also a window to the world,” González says. 

Continue reading

Ganong Derek Dr.

Back to 40 Under 40

2023

Dr. Derek Ganong

Assistant Professor of Trumpet,
Director of Jazz
Boise State University
Boise, Idaho

Rethinking music degrees in higher education and bringing them into the 21st century is a pretty tall order, but Dr. Derek Ganong is up for the challenge. As the Director of Jazz and Assistant Professor of Trumpet at Boise State University in Idaho, Ganong acknowledges that “it’s always hard to innovate within music education due to the tradition-bound nature of the discipline. However, because Boise State University is a truly innovative place, this thinking is bleeding into our music department. We are in the midst of an experiment to see how music in higher education will tolerate innovation on a grand scheme.”

Part of this experiment is Ganong’s development of a music production certificate that is slated to begin in the fall of 2023. “It took three years to get a majority vote on this certificate program in my department,” he explains. “After that, it was swiftly approved by the higher administrative layers and is currently in the implementation stage — the place where the majority of plans that fail will fail. It’s my task to, in addition to my normal workload, create these courses, find spaces, create schedules, get funding for technology, and market the certificate. I have a few partners within the college, but the onus is on me to make this actually happen in fall 2023.”

Ganong says that despite the robust and thriving nature of the music industry, music education as a whole has yet to universally adopt the agility necessary to truly prepare students for sustainable careers post-graduation. He addresses this by still focusing on the performing aspect, but he also incorporates career education and open discussion/mentoring of students in music industry skills.

This means a lot of independent study courses, outside workshops, bringing in guest speakers and artists, personal investment in equipment, constant contact with industry folks, and time spent on personal development. All this work has paid off. Some of Ganong’s students’ successes include:

  • Producing a full analog synthesis album after working with Ganong,
  • Creating an original music soundtrack for a student’s video game final project who had no prior music skills.
  • Becoming the first-ever intern with Ableton Live after an independent study course with Ganong.
  • Running the Boise State Jazz orchestra 100% remotely during the pandemic and producing three full-length albums of the ensemble by teaching recording techniques. 

“My students thrive on this ala-carte system,” Ganong says proudly.

Continue reading

Weir Sara

Back to 40 Under 40

2023

Sara Weir

Music Teacher
Park View Middle School
Cranston, Rhode Island

Sara Weir’s influence on the Cranston community in Rhode Island is far-reaching. In addition to her position as a music teacher at Park View Middle School where she incorporates technology and innovative manipulatives to help her students learn, she has developed a community choir and a district-wide symphony orchestra!

Weir’s general music students in 7th and 8th grade learn about technology as well as music. They use supplemental instructional apps like Youcisian or YouTube tutorials in between direct or one-on-one instruction on ukulele, guitar and piano. Additionally, Weir’s classes do a Foley Art lesson where students record everyday sounds using CapCut and Vocaroo and layer them over a short film. “I love this lesson because students get to see the history of sound effects from when it was mostly physical objects and the progression to using digital sounds and keyboard sound effects,” she says.

Weir’s music program is built on relationships between students. “We work together in class as a team to learn, and then eventually perform,” she explains. “Students teach each other, and students get to have choices in what pieces we perform. We try to have hands-on activities and instruments for all our classes. If we don’t have the physical instrument, we utilize as much technology as we can.”

In addition to the use of cutting-edge tech, Weir also goes “old school” by using several different manipulatives to help her strings students with bow holds. “Our school can’t afford the silicone bow-hold aids for all my students, so I went online and found a YouTube video on how to make ‘pinky houses,’” she explains. “The kids love the name, and the flexibility of the tape allows students to build the muscles with help. In time, the tape comes off, and they are ready to play. I see an improvement each year, as students begin to master the fine motor skills.”

Manipulatives are also used in Weir’s band class, where flute, clarinet and saxophone players create pencil instruments and use a Sharpie to mark dashes for the keys. “It’s very compact (travel sized!) but allows students to practice fingerings on a smaller scale before transferring the skill to their larger instrument. It also makes for a handy replacement when they forget their instrument,” she says.

While working on her master’s degree in education leadership and policy from Boston University, Weir decided to create a community choir to fulfill the community engagement part of her practicum requirements. “I felt that a community choir would be a great way to bring all ages and levels together to sing and heal, post COVID,” she says. “I had a few goals: 1) sing as much as possible, no matter what; and 2) to use movement and mindfulness to  connect with our bodies and voices.”

Weir plans to facilitate and aid the community choir in whatever way she can, both as a member of the community and as a Cranston Public Schools representative and educator. “We would like to expand our programming and do more than one performance this spring,” she says.

In addition to the community choir, Weir also started a district-wide symphony orchestra. “When I attended Cranston schools as a child, we didn’t have orchestra or strings past 8th grade,” she says. “When a graduating high school senior (who was headed to the University of Rhode Island) reached out to me over the summer and asked me to help him continue the symphonic orchestra he was running at his school, I said yes! We could combine our dreams — his of conducting original symphonic works and mine of creating a community space.”

The Cranston Symphonic Orchestra features students in grades 7-12 from the four middle and two high schools. In addition to performing original and arrangements of master symphonic works, Weir encourages and provides support on auditions and music from other community groups. Students rehearse for two hours every week and will perform several concerts this year, as well as guest perform at several others to help with recruitment. “It’s an excellent chance for students to build a social network across the city,” Weir says.

Continue reading

Schepart Caleb

Back to 40 Under 40

2023

Caleb Schepart

Music Teacher
Dr. Kenneth B. Clark Academy
Dobbs Ferry, New York

The Dr. Kenneth B. Clark Academy (KCA) in Dobbs Ferry, New York is part of the Greenburgh-Northcastle School District, a special act district that teaches students with significant learning and developmental diagnoses that require specially designed instructional approaches to support their individualized education program (IEP) objectives. 

Caleb Schepart, the music teacher at the KCA, is familiar with special act schools. As a child, his parents both worked at a school similar to KCA, which was designed to meet the unique learning needs of the residential students living on campus in the care of a residential agency. Schepart joined the school’s staff in 2004, helped develop its burgeoning music program and worked there for 10 years while completing his education to become a certified music educator. “After teaching for several other school districts, I was delighted to return to my roots at another special act school,” he says.   

Because his students at KCA are typically “nontraditional learners who have not found success in their home school districts, I developed a nontraditional music program to better meet their unique learning needs,” Schepart explains. “I want my students to be intrinsically motivated to participate, ask questions, sing, play and otherwise learn about music.”

KCA doesn’t have a formally defined band, but rather it supports a variety of small groups that form and regroup depending on the songs, projects and performance opportunities that the students are interested in. “I manage and oversee these groups, placing as much responsibility as possible with the students. There are different kinds of performance and recording opportunities throughout the year,” Schepart says.

To facilitate his nontraditional program, Schepart created a nontraditional learning environment by transforming his class so that it has the look and feel of a café/coffee house. “I wanted to create a ‘real-world’ music space that had to function as a classroom. The café/coffee house vibe feels like a place where people can relax and also get things done. There is a performance/stage area, chessboard café tables that also function as desks and a PA system,” he says.

The nontraditional classroom décor is an important part of creating a low-pressure music-oriented environment where “students who otherwise showed little willingness to play or sing started singing unconsciously and without fanfare, or made requests to play a karaoke track for them, or showed me what they knew how to play on the piano but had kept to themselves for the past three years,” he says.

KCA’s administration have supported Schepart’s vision, including the flexibility to create courses for unique groups of students. “I am able to offer empowering learning experiences through a skillful blend of technical instruction and inquiry-based learning,” he explains.

For example, Schepart developed an instrument-making course and a course on music in video games, film and TV. “These courses supported brain-based learning and offered opportunities for students to leverage their multiple intelligences,” he says. “Part of my research for the creation of these courses involved interviewing and surveying prospective students, so I was able to plan the courses with student interests in mind.”

During the instrument-making course, students constructed kalimbas (thumb pianos). “We listened to music and talked while our hands were busy with the often repetitive tasks of cutting, smoothing, bending, drilling, wire wrapping and assembling,” Schepart says. “A conversation about the ethics and legality of harvesting and using hard woods led to discussions on economics, climate change, physics, poaching and rights for indigenous people.”

Continue reading

Burdette Gabriella

Back to 40 Under 40

2023

Gabriella Burdette

Orchestra Director
Grace M. James Academy of Excellence
Louisville, Kentucky

Inclusivity and empowerment are the focal points at Grace M. James Academy of Excellence, a magnet middle school in Louisville, Kentucky, with an Afrocentric STEAM (science, technology, engineering, the arts and mathematics) perspective for Girls Excelling in Math and Science (GEMS). The school’s innovative and student-centered vision are what attracted Orchestra Director Gabriella Burdette. “The encouragement from administrators to give students limitless possibilities and new experiences was an important factor to me when I joined the team at Grace James,” she says.

Her goal for the orchestra program is to empower each student to achieve excellence in playing an instrument in the orchestra, while incorporating the specialized curriculum of the school. “Each unit of study is created and developed to represent the Afrocentric themes of Identity, Humanity, Justice and Oppression, African Diaspora, Intersectionality and Black Joy,” Burdette says. “The Afrocentric and gender-specific curriculum provides students with opportunities to share their personal opinions and perspectives, collaborate with others, draw connections between the content and their personal lives, and provide relatable instruction about women’s roles in music.”

For example, for the Identity unit, students collaborated to create a battle composition, where they played their instruments and “battled” with another section in the orchestra. Students then discussed how they were able to apply their own personalities and music choices into the collaborative activity.

For the Justice and Oppression unit, students went on a field trip to watch a youth orchestra perform Western-style music. They then identified, described and compared the music from the concert to African-American composers like Florence Price, Joseph Bologne, William Grant Still and more.

Burdette says that the concerts her orchestra puts on are intentionally prepared with the Afrocentric curriculum in mind. “We have studied history and performed pieces such as ‘Kumbaya,’ ‘Were You There,’ ‘Lift Every Voice,’ rap music, ‘Adoration’ from Florence Price and more,” Burdette says.

She also brings in professional ensembles and musicians from the Louisville Orchestra to her classroom, which opens the door to many collaborative opportunities and perspectives that enriches students’ lives. “I constantly tell my students that I love showing their talent and skills off as much as I can,” Burdette says. “With the support from the administration, they notice how much we invest and believe in their potential. It is truly all about the students and giving them limitless possibilities.”

Grace James students are excited to learn new skills and repertoire, and more importantly, “they are able to see and perform musical selections from artists who look like them, and they, in turn, learn how to be bold, driven and themselves,” says Burdette.

Continue reading

Burnside Logan

Back to 40 Under 40

2023

Logan Burnside

Band Director
Jordan High School
Jordan, Minnesota

As a young music educator in Minnesota, Logan Burnside found a unique way to glean wisdom and knowledge from seasoned directors who have developed great instrumental music programs. He created a podcast called The Band Director’s Lounge and interviews band directors from around the country. Some of Burnside’s favorite pieces of advice from recent episodes of the podcast include:

  • “A great band program helps students get better. It doesn’t matter if they are the best band in the district or the country — it matters that they improve and find joy in music. That can happen anywhere.” — Elizabeth Jackson Kirchhoff (episode #28), Eden Prairie (Minnesota) High School
  • “A great band program is a program that makes a difference in your community, and that can look different wherever you teach.” — Robert Baca (episode #35), University of Wisconsin Eau Claire
  • “You can’t teach excellence without having achieved excellence.” —Scott Guidry (episode #34), Bemidji (Minnesota) State University

These podcast interviews have resulted in Burnside growing his own music program at Jordan High School with some innovative programs, such as the Jordan Band Academy, a peer-to-peer music lesson and mentorship program where high school students volunteer to teach lessons to middle school students. Burnside and his middle school colleague, Tracy Cederstrom, pair up high school and middle school students based on their combined knowledge of students’ skills, abilities and personalities. “Then we just get out of the way and let the high school students work their magic! We have found that the student volunteers are very benevolent and truly want to give back and help make the program grow. Likewise, the middle school students want to learn and improve. Our three district buildings (elementary, middle and high schools) are across the street from each other, so students are able to easily walk back and forth,” Burnside says.

Another special program at Jordan High created by Burnside and Kathryn McKnight, who teaches choir at the school, is “Music Theory Lunch.” Because the school does not offer a music theory class, the two teachers co-teach a brief lesson during a weekly informal lunchtime meeting for students interested in music-theory-related topics, such as composition, sight-singing and rhythm-reading. According to Burnside, the students who attended and brought their lunch down to one of the music rooms, loved it.

Burnside also expanded student leadership roles in the band room. “Shortly after I began teaching, I invited students to nominate peers to be their student leaders,” he says. “This leadership group met once a week before or after school to learn how to be effective leaders in the music room, in their academics and life at large. I prepared brief topics for discussion at each meeting, drawing from musicians and non-musicians alike, including Dr. Tim Lautzenheiser, Simon Sinek, Steven R. Covey, Jocko Willink, Jon Gordon and more.”

Students responded well to this, and Burnside believes that they are the main reason for the positive, inclusive and encouraging band culture that exists in Jordan High’s program. “More importantly, it gave students ownership over what was happening, providing opportunities to voice concerns and learn how to co-lead the bands,” he says. “As a result, it only made the band environment better and drew more students to want to be a part of the ensembles.”

Burnside continues, “Band is the place that it should be — safe, supportive, challenging, rewarding and fun. I am incredibly proud of my students, who they are and who they go off into the world to be outside our high school. However, I am filled with joy by how many students cite feeling supported and cared for in band. They openly talk about feeling like they belong to a team and family and they have fun as part of their band experience.”

Continue reading

Wines Susan

Back to 40 Under 40

2023

Susan Wines

Orchestra Director
Wade Hampton High School
Greenville, South Carolina

Imagine taking your district’s strings program from an exploratory course to a seven-year investment (from 6th through 12th grade)? That’s exactly what Susan Wines did at Greenville County School District.

“For the first half of my career, I taught band and orchestra at a middle school that was severely affected by the economic crash of 2008,” Wines says. “For two consecutive years, the principal had to cut employee positions to maintain the budget, and despite recommendations to cut my position, she preserved not only my position, but both programs because she saw the positive effect music had on our community.”

Wines moved to Wade Hampton High School, where the program was half the size of her middle school one, and she immediately saw how a middle school music educator can positively influence the high school program. “I have long held a  vision for fostering lifelong musicianship, but this new position shed light on the ramifications of our decisions as directors as well as the need to create a team, from the first year students enter the music program through graduation,” she notes.

As the lead teacher for the orchestra division for the district, which has 15 high schools, 30 middle schools and more than 50 elementary schools, Wines revisits the topic regularly. “There is no direct feeder system for orchestra programs, which has exacerbated the retention conundrum for all music programs,” she explains. “I have restructured our directors to be part of specific ‘orchestra teams’ that promote unity and provide support for one another while championing students to stay in the program for all seven years. I encourage my colleagues to not only dream but to make definitive plans that moves all of our programs forward through joint events that showcases the seven-year investment.”

Wines knows that investing in each student takes efforts, “but it yields long-term, I would even argue lifelong, results.”

On top of her work at Hampton High and the district, Wines is also the Education Director and Conductor of the Greenville County Youth Orchestra (GCYO). The GCYO welcomes any student, and Wines helped to expand the structure to be a five-tiered orchestra program plus a new wind symphony program.  

Lauded for her work at the district and county-wide level, Wines is also innovative in the classroom. She often merges multiple disciplines — such as music and history or orchestra and writing — to engage her students to make connections and forge relationships. “Last year, one of my orchestras worked on ‘Agincourt’ by Doug Spata,” she says. “Instead of focusing only on time signature, finger patterns and bowing techniques, I knew that this piece afforded my students with an opportunity to learn so much more.”

Not only did her students form small groups to discuss the history of the Battle of Agincourt, they also speculated which melodic theme was the English versus the French, and why the composer chose 7/8 as the time signature as they mapped the battle through the repertoire.

“When the students came back together, a full group discussion ensued, and history buffs emerged as they shared their thoughts and opinions,” Wines shares. “Moments like these not only allowed students to shine and share their knowledge with their peers, but they infused students with more confidence while they saw their value within the orchestra program as well as life.”

Continue reading

Fripp Jasmine M.T.

Back to 40 Under 40

2023

Jasmine M.T. Fripp

Director of Choral Activities and General Music
KIPP Nashville Collegiate High School
Nashville, Tennessee

“Passion and excellence are contagious, transparency breeds trust, and structure brings stability,” says Jasmine M.T. Fripp, the Director of Choral Activities and General Music at KIPP Nashville Collegiate High School.

Fripp walks into every rehearsal with excitement and a genuine love for the art of music-making. Not only does she hold her students to a very high level of excellence, she finds ways through music to showcase the beauty in Black and Brown cultures. “Because I create structure through planned rehearsals, retreats, performances, choir outings and trips, kids take the music program as seriously as I do,” she explains. “They understand what we do as an ensemble has purpose and goals to achieve.”

She finds ways to weave history, culture and issues of social justice into her general music program. “Within my general music classes, we study Black and Latinx cultures through music,” she says. “We talk about how Black and Latinx cultures either laid the foundation for or had a large impact on various music genres. We also discuss heavier topics like cultural appropriation, protest songs, racism and colorism in the music industry. Lastly, I teach students how to fight for social justice through music and other talents.”

Her mission to have more diversity and inclusion in the world of music education led Fripp to create The Passionate Black Educator, which “aims to advocate for students of the global majority by providing opportunities to learn and advance through music, fine arts and education,” she says. The organization empowers music educators of all cultural backgrounds to create student-centered classroom environments that promote anti-racism, culturally responsive pedagogy and healing-centered teaching.

Not surprisingly, Fripp is a sought-after clinician for her work in music education and anti-racist pedagogy. Some of the main messages she teaches through her presentations include:

  • Music from Black, Brown, Indigenous and Asian cultures hold just as much educational value as Euro-centric music. If you don’t know about cultural music, don’t be afraid to seek out experts and resources.
  • Becoming an anti-racist music educator is a continuous process that cannot be done by simply checking off a list of “anti-racist deeds.”
  • Racism and white supremacy culture in music education negatively impacts students and teachers.
  • There is beauty in solidarity. Make it mandatory in your music classroom.

Fripp came to the attention of many music educators in 2020 when she posted “With Love, Letters to my Fellow White Music Colleagues” on Facebook. She explains that during her reflection time following the murder of George Floyd, she thought of “all the inequities that I witnessed within music education and how it impacted my Black and Brown students, and me. For years, I suppressed my feelings and kept my observations to myself, but through this letter, I finally dared to say, ‘enough is enough.’”

Continue reading

Griffin Kylie

Back to 40 Under 40

2023

Kylie Griffin

Elementary Music Teacher
Dozier Elementary
Erath, Louisiana

Kylie Griffin brings her love of southern Louisiana music, culture and language into her classroom at Dozier Elementary School in Erath, Louisiana. She wants her students to appreciate the cultural identity of their community at a time when Cajun and Créole French culture are rapidly declining. “In 1921, French was banned in Louisiana schools in an effort to Americanize the state’s population,” Griffin explains. “Our grandparents were humiliated and abused for speaking French. That’s why I teach Cajun and Créole French songs to my students as well as use French in my classroom.”

Griffin says that the music she teaches has inspired the community as a whole. “Family members tell me how much it means to them to hear their children sing French songs, especially to their grandparents who speak the language fluently,” she says. 

Outside her music classroom, Griffin finds time to promote the area’s music through groups like the Bayou Tigre Steppers, the state’s first school-sponsored, student-led zydeco ensemble, which she started in 2021. This Bayou Tigre Steppers consist of older students who want to continue playing the music of their families. “My goal with this ensemble is to create lifelong musicians who can preserve and continue our beautiful culture,” she says.

Griffin’s love of zydeco started during her graduate studies at the University of Louisiana at Lafayette, where she played in the Ragin’ Steppers band. After graduating, Griffin and her husband, Gregg, started their own group called Poisson Rouge, which just released “Là -Bas,” its first full album that is available on all streaming platforms.

Griffin also started Petits Cajuns, a Cajun French music camp, with her husband and Jason Harrington — both music teachers in the district. Camp attendees choose to learn accordion, fiddle or acoustic guitar. “Our goal as music educators is to create lifelong musicians who want to continue to play in some capacity after they leave our music program, even if that means singing or playing songs for their children later down the road,” she says. “I hope that students in my classes, the Bayou Tigre Steppers and campers at Pettis Cajuns will continue to play and sing Cajun, Créole French and zydeco music!”

Continue reading

Chilton Rob

Back to 40 Under 40

2023

Rob Chilton

Creator
Readymade Music Literacy
Frisco, Texas

The pandemic provided an unforeseen opportunity for Rob Chilton. “When school shut down in March 2020, I decided to make videos lessons to continue teaching my beginning band students,” he explains. “I decided that the option that provided the most value would be investing my time in strengthening my students’ literacy from home. Teaching the nuts and bolts of rhythm, staff notation and piano keyboard seemed to be easier to do remotely than monitoring their embouchure, hand position and other elements of performing.”

Starting with a basic camera, white board and colored dry-erase markers, Chilton soon began experimenting with graphic design and more professional software. He then added special effects and different characters into his lessons. Videos became a viable virtual tool to teach his students at Killian Middle School in Lewisville, Texas, throughout the 2020-2021 school year.

In May 2021, Chilton made the tough decision to leave the classroom to develop his video series that he named Readymade Music Literacy, which is geared for beginning band, orchestra and choir classrooms. During its first year, Readymade Music Literacy was used in 12 schools in two states. Currently, it is being taught in 85 schools across 10 states. “I’ve had the opportunity to visit multiple schools that use Readymade Music Literacy, and the reception has been incredible,” Chilton says. “Students tell me that they love the videos and often ask for autographs and want me to do impressions of myself from the videos!”

Music educators say that Readymade Music Literacy introduces concepts quickly and efficiently and makes reading music fun. They also tell Chilton that the series of 36 weekly videos lessons gives them a little breathing room in their busy schedules.

Chilton started Readymade Music Literacy as a way to connect with today’s generation of learners, who are living in a drastically different world than the one he grew up in the 1990s. “They play video games, watch YouTube and scroll social media,” he says. “My videos are professionally made but with a YouTube feel. Colorful graphics, special effects and quick dialogue make learning to read music feel more relevant to today’s generation.”

Chilton’s immediate goal is to reach more music educators to introduce them to Readymade Music Literacy and how it can help streamline their musical literacy instruction. His long-term goal is to develop more content that positively impacts the experiences of both teachers and students. “The job of a teacher isn’t getting easier, and I want to bring relief to the table to empower educators to do their job with efficiency and longevity.” Chilton says. “For students, I want to make learning to read music fun and desirable!”

Continue reading

Spakes Taylor

Back to 40 Under 40

2023

Taylor Spakes

Director of Performing Arts
West Rowan Middle School
Salisbury, North Carolina

When the band program at West Rowan Middle School was in danger of being cut, Taylor Spakes, the choir director, stepped in. “Knowing that both band and chorus is so important to the community, I could not allow for one of the programs to be cut from the school,” she says. “The high school program was in a state of regrowth after COVID, and eliminating its main feeder band program was not an accessible option.”

To prepare herself for her new position as Director of Performing Arts, Spakes met (and continues to meet) with other band directors to receive what she calls “band director lessons. They have been a huge help in getting me up to speed on correct technique with playing instruments and learning the keys to a successful band program, as well as how to fix an instrument, how to teach a beginning instrumentalist, and how to put an instrument together for the first time,” she says.

Luckily for Spakes, her choir experience provided the foundation for how to run a music program. “When in comes to performing, music is music, no matter the vessel,” she says. “Specifically, teaching choir has given me a leg up on how to teach ear training, aural skills and audiation. I infuse singing into the band program to help train ears, which has proven to be helpful in sight reading.”

One of Spakes’ proudest moment as a music educator happened in the spring of 2022 at a combined concert with the high school choir. “Each year, my choir students sing ‘Seasons of Love’ from ‘Rent,’” she explains. “We also learn the song in sign language to show how music can be experienced by those in the deaf and hard-of-hearing community. At this concert, all choir students from 6th to 12th grade had learned that song with me. The stage was flooded with my current and past students to create a massive choir. Seeing all my students from the beginning of my teaching career to the current year was the most fulfilling and beautiful way to end the school year.”

Continue reading

Aguilar John

Back to 40 Under 40

2023

John Aguilar

Director of Bands
Robert Eagle Staff Middle School
Seattle, Washington

Which of these is plausible for a middle school band?

a) Traveling across the country to perform at two battle of the bands.

b) Performing at a Seattle Storm halftime show, which has garnered more than 2 million views across social media platforms.

c) Recording a song with rapper Bruce Wayne (Marlon Wood).

d) All of the above.

If you know John Aguilar, the Director of Bands at Robert Eagle Staff Middle School in Seattle, then you would immediately pick d) all of the above — and you would be right.

Aguilar explains that Curtis Akeem, a social media comedian, personality and marching band advocate from Atlanta, reached out to him after seeing his middle school band on Instagram. Akeem wanted to support the band, so Aguilar asked him to come to Seattle to work with his students on a song that they planned to perform at a Seattle Storm halftime show. Akeem MC’d the show, which featured artists Bruce Wayne (Marlon Wood) and Alexandra Fresquez. Not only was the show a success — it was shared on social media and to date has more than 2 million views! This led to the Robert Eagle Staff band being invited to participate in two HBCU-inspired battle of the bands in Atlanta in the spring of 2023.

Aguilar and Bruce Wayne (Marlon Wood) both attended the University of Washington (UW), where Wood was a football player in the 2000s before becoming a rapper and educator, and Aguilar was the drum major in the 2010s. “Although we were a few years apart, we crossed paths when the UW Husky Band asked me to arrange one of Marlon’s songs for them to play,” Aguilar says.

Both men wanted to inspire the youth and the community through an original song. “SOAR” was created to uplift listeners through themes of hope, motivation, pride and perseverance. “After the struggles and educational effects of the pandemic years, it was just inspiring to see students not only return to their original musical form, but also evolve and try new things that were firsts for our program,” Aguilar says. “We became the first middle school marching band in our district to release an original song on streaming platforms, and during that journey, the song was nominated for a Hollywood Music in Media Award, and the “SOAR” music video has amassed over 1 million views on YouTube. What was more inspiring was to see and hear students singing the song whenever it came on the radio or played over the school speakers. It truly became THEIR song!”

By bringing in Black artists/educators like Akeem and Wood, students “learn Black music in a culturally authentic way,” Aguilar says. “It also gives them a chance to meet the artists/educators and hear their stories and journeys, making the education more than just about music, but holistically about life.”

Continue reading

The Importance of Roots, Fifths and Octaves in Bass Playing

As bass players, our number one job is to play roots. Anything else we do is extra, but playing the root of each chord is what we’re most often expected to do. Unfortunately, basslines that consist of only roots can be boring for both the listener and the player. Here’s a guide to augmenting roots with other notes — specifically fifths and octaves — when playing bass. Believe it or not, with just those three choices, you can craft basslines that are interesting to the ear and fun to play.

Ready to learn more? Read on …

Chord Changes

You can think of a song as a series of chords — in other words, a chord “progression.” One popular chord progression might begin with an A minor 7 (Ami7) chord, go to a C7 and then an F7 before ending on an E7. This is an a “iii-V-I-VII7” series because in the key of F, A minor 7 is the third (the “iii”), C7 is the fifth (the “V”), F7 is the root (the “I”) and E7 is a major variation on the seventh chord (the “VII7”), which would usually be E minor 7 flat 5.

In this case, the rest of the band will assume that whatever else the bass player does, he or she will play an A for the Ami7, a C for the C7, an F for the F7 and an E for the E7. This assumption is so strong that guitarists and keyboardists often play “rootless” voicings, chord inversions and substitutions because they know the bassist will take care of the root. If you’re struggling to learn a new song, nailing the roots with authority is a great start.

SPICING IT UP

However, as stated earlier, sticking to the roots alone usually isn’t enough. But even before adding in other notes, try varying your feel. Sustain the root (sometimes a moment in the song is calling for just a “football” — a whole note) or keep it short; push and pull or repeat it for the length of each chord. As always, staying locked into your drummer is crucial; working with (and sometimes against) the kick drum is one of the foundations of playing bass.

Another way to get the most from the root is to play it in octaves or at different places on your fretboard. On a standard four-string bass, for that Am7, play the A at the fifth fret on the E string and then zoom up the fretboard to the A at the 17th fret. Bounce between the open E string and the one at the seventh fret of the A string. Alternate between octaves of an F. If you have a five-string model like the Yamaha BB435, explore the possibilities of the C at the third fret of the A string, the low C at the first fret of the B string, and the C at the fifth fret of the G string.

Electric bass guitar.
There are at least seven places to play every note on a five-string bass like the Yamaha BB435.

THE FIFTH

No matter how creative you get, roots and octaves may not be enough. The next option? The fifth. You’ll find the fifth above the root one string higher (toward the floor) and two frets up (toward the bass’ body); the fifth below the root will be found on the same fret, one string lower. To play the root and fifth of a C chord, for example, play a C on the third fret of the A string, followed by a G on the fifth fret of the D string or at the third fret of the E string.

The root-fifth-octave shape is familiar to most bassists because it works so well and in so many different musical genres, most prominently country music:

This same pattern plays a major role in Tejano, polka and tuba basslines — it’s even used quite often to nail down the low end in reggae music:

To show how you can incorporate fifths into your playing, let’s revisit our iii-V-I-VII7 chord progression. Try adding the fifth of each chord to your A, C, F and E roots and octaves — an E to the Ami7, a G to the C7, a C to the F7, and a B to the E7, then try out variations like these:

  • Play the root, followed by the fifth above
  • Play the root an octave up, followed by the fifth below
  • Start with a low-octave root, go up to the fifth, and then hit the root an octave higher
  • Bounce back and forth between the fifth above and below before landing on the root in-between

Listen to how the bassline in this audio clip (played on a Yamaha BB435, with the pickup and tone controls wide open) connects to the drums as soon as they enter, playing mostly roots at first before adding octaves, fifths and slides.

As you can hear in the next clip, combining these choices with different playing techniques (such as adding very high octaves) and rhythmic variety gives you endless options.

If you’re jamming to music that’s new to you and aren’t sure whether the chords are major or minor, playing the root and fifth will work in most cases … with one common exception: the minor 7 flat 5 chord.

Here’s why: In any major key, the root-fifth-octave shape is great for the first, third and fifth chords. It also works well on the second, fourth and sixth chords. In F major, those would be Gmi7 (the second chord), B7 (the fourth chord) and Dmi7 (the sixth chord). Usually, if we build a chord on the seventh — in the key of F major, it would be an E half-diminished — we’d have to lower the fifth, which is why a half-diminished chord is also called a minor 7 flat 5; the notes of an E minor 7 flat 5 chord are E (the root), G (the minor third), B-flat (instead of a B, the usual fifth) and D (the minor 7). In this case, however, we’re playing a seventh chord built on the E, so we have a G-sharp (a major third), a B (the fifth) and a D (the minor 7).

That said, depending on the music you’re playing, you can learn dozens of songs without ever coming across a minor 7 flat 5 chord. When you do, enjoy its tangy flavor and be sure to flat the five. Eventually, you may learn to use all the chord tones in your basslines and experiment with your own inversions and substitutions. In the meantime, knowing your roots, fifths and octaves will take you a long, long way.


Check out E.E.’s other postings.

Simple Stereo Miking Techniques

In multitrack recording projects, instruments are usually miked in mono — that is, with a single microphone. However, in certain situations, you’ll get better-sounding results if you use two mics to capture the sound in stereo. These scenarios include:

  • Recording acoustic piano
  • Recording an acoustic guitar that’s the main instrument in an arrangement
  • A live recording of an entire ensemble or an instrument section like strings or horns
  • Drum kit overheads
  • Room mics

But recording a source in stereo takes more than just setting up two mics and hitting record. Here’s what you need to know, including some simple stereo miking techniques that are easy to set up yet yield excellent results.

First, Choose the Right Microphones

The main gear requirement here is a a pair of microphones, or a dedicated stereo mic, which will make setup easier. The downside to the latter is that many stereo microphones only feature a single miking configuration, whereas using two separate mics gives you more options.

If you go with a pair of mics, make sure they’re the same make and model. Otherwise, you won’t get a frequency-balanced signal on the left and right. That said, there’s no rule that you can’t use different mics; it’s possible you might like the results.

You’ll get the best results for many instruments with a pair of small-diaphragm condenser microphones (sometimes called ( “pencil” mics) set in a cardioid polar pattern, though omni also works in some situations. Use a factory-matched pair if you want the same exact response from each mic. Don’t get too hung up on that, however, as you can also get good results with an unmatched pair of the same microphone.

Another useful, though not strictly essential piece of gear is a stereo bar. It’s a small holder that screws onto a microphone stand. One type, shown in the photo below, contains two posts, each on a swiveling arm. This allows you to connect a pair of mics and adjust their distance from each other and their angle to the source, making positioning easy. Another type contains a single, non-swiveling bar with adjustable posts to configure the side-to-side position of the microphones.

Diagram.
A stereo bar lets you precisely position two mics for stereo configurations.

If you don’t have a stereo bar, you can simply use two mic stands, one for each mic.

Next, Consider the Source

When deciding whether or not to record an instrument in stereo, think about the source. Does its sound emanate mainly from a single point, such as a voice or a trumpet? If so, you’ll probably be fine miking it in mono. But if it’s spread out, like a piano, vibraphone, or even an acoustic guitar, it can sound much better in stereo.

The context is also crucial. If it’s a solo or heavily featured instrument such as an acoustic guitar on a singer/songwriter ballad or a piano on a piano/vocal demo, you’d be more likely to record it in stereo so that it can fill up the stereo spectrum in the mix. But if it’s, say, an acoustic rhythm guitar in a dense arrangement — a situation where you don’t want it to be overly wide — mono miking is a better choice.

Phase becomes a consideration whenever two or more mics record the same source. That’s because the sound waves from the source will arrive at each mic at a slightly different time. If your mix gets summed to mono, those differences in arrival times cause a phenomenon called comb filtering, which can cause some of the frequencies to cancel each other out, resulting in thin or dull-sounding audio.

Diagram.
The sound waves reach the closer mic (Microphone 1) first.

XY

Stereo recording has been around for a long time (it was first invented in the 1930s), so audio engineers have had many years to perfect miking methods that allow you to record in stereo without creating phase problems. Each method has its strengths and weaknesses, so it’s good to know several techniques — that way, you can choose the one that’s right for your project.

The simplest stereo-miking technique is called XY. It requires two cardioid mics with their capsules at a 90-degree angle to each other, stacked one over the other, like this:

Pair of microphones.
XY mic positioning.

Point the closed part of the “v” at the source. How far back you position the mics depends on the instrument, the room and what you’re trying to accomplish. The further the mics are from the source, the more it will start evening out tonally, but you’ll also get a lot of room sound (reflected sound coming from the walls, floor and ceiling, as opposed to direct sound coming from the source).

XY provides a tight stereo image free of phase issues when summed to mono. You can gain a more expansive sound by moving the mics outward beyond 90 degrees (but still with the capsules stacked on top of one another), though you might sacrifice a little tonality when their signals are summed to mono.

Here are two audio clips of an acoustic guitar recorded with an XY pair. First, here it is in stereo.

… and here’s the same recording summed to mono. As you can hear, the frequency response holds up pretty well.

ORTF

Another relatively easy-to-use stereo configuration is ORTF (which stands for Office de Radiodiffusion Télévision Française) — a technique that was developed by French broadcast engineers. Instead of the capsules being together like with XY, they’re spaced apart by 17 cm (approximately 6.7 inches), with the microphones at a 110-degree angle to each other:

Two microphones.
ORTF mic positioning.

ORTF works particularly well when you’re miking an ensemble or vocal group. It gives you a wider image than XY, with more emphasis on the sides and less on the center.

Here’s an audio clip of an acoustic guitar recorded with ORTF. Because this technique requires that the mics point in the opposite direction, the body side of the guitar recorded a little louder than the neck side, so when mixing I panned its channel slightly left in order to balance out the energy in the stereo image.

Spaced Pair

Another basic stereo miking technique is called spaced pair (sometimes known as “AB”). It yields a pretty extensive stereo image, although it’s a little harder to avoid phase issues when summed to mono.

The photograph below shows the mic positioning for a spaced pair recording: simply place two mics roughly three to 12 feet apart to capture the source, which should be in the center:

Two microphones on stands.
Spaced pair mic positioning.

When deciding where to place the mics, use what’s called the 3:1 rule to minimize phase issues. It states that the distance between the two microphones must be at least three times greater than the distance of the mics to the source. Unless you’re miking an ensemble, you probably don’t want the mics to be too far from the source, anyway. That’s because, in addition to any phase issues, you’ll get a lot of room sound and fewer transients (the loud initial part of sounds, like the crack of a snare drum or the attack of a guitar pick), resulting in mushier overall sonics.

Here’s another acoustic guitar audio clip, this time recorded with a spaced pair. As with the ORTF example, there was some imbalance between levels on the left and right, so I did a little judicious panning during mixing to compensate.

Comparing Stereo Miking Techniques

Here are three examples of conga recordings captured with XY, ORTF and spaced pair so you can compare and contrast the results of each technique. All three were recorded with the mics about 2 to 2.5 feet from the congas.

XY:

ORTF:

Spaced pair:

Don’t be shy about using a tape measure to accurately judge the distance between mics and from the mics to the source when employing any stereo miking technique. Whichever technique you choose, be sure to listen to how it sounds as the player plays (use headphones for best results) and adjust positioning until you get the sound you want. It’s easier to experiment with the distance between the source and mics when using XY or ORTF because you don’t have to worry about the 3:1 rule.

Make sure to check your recording in mono too. It won’t sound as wide, but hopefully, you won’t lose too much tone from comb filtering. If it sounds significantly worse in mono, reconsider your mic positioning or miking strategy.

All images courtesy of the author.


Check out our other Recording Basics postings.

Music To Keep You Warm When It’s Cold Outside

Let’s face it: Wintry weather gives us an excuse to procrastinate — to postpone chores that would entail bundling up and going out into freezing temperatures. Instead, why not stay put, light a fire and crank up some tunes on your home audio system? There’s no better way I know to feel warm and toasty.

Here’s a playlist that complements the frigid season instead of fighting it.

1. Light My Fire

This uber-romantic acoustic version of The Doors’ 1967 classic by Jose Feliciano sets the perfect mood. Hopefully there are enough logs in the hearth to last a few hours. The time to hesitate is through! Listen to it here.

2. California Dreaming

If you’re not quite ready to leave the comfort of your living room to take a walk on a winter’s day, put this Mamas & Papas track on instead and imagine how safe and warm you would feel if you were in a sunnier climate. Bonus: With so many harmonies to embrace, it’s the perfect song to sing along to. Listen to it here.

3. Snow on the Beach

This is my personal favorite from Taylor Swift’s album Midnights. No matter what the temperature is outdoors, close your eyes and listen to this song while imagining yourself on the beach watching a snowflake fall gently on the sand. The dreamy and sonically pleasing production, along with Taylor’s velvety delivery, will warm you up instantly. Listen to it here.

4. Wintertime

Nora Jones’ voice is synonymous with warmth and comfort. Just about all of her material will serve to elevate the thermostat. But this track in particular, about leaning on a special someone to help us make it through the coldest season of the year, is especially cozy and heartening. Listen to it here.

5. Song for a Winter’s Night

With sleigh bells in the background, perhaps left over from yet another Christmas gone by, Gordon Lightfoot brings his trademark yearning — a cry to be near the one he loves when he’s all too aware that the fire has gone out. But your fire is just fine. So throw another log on and enjoy the crooning. Listen to it here.

6. Valley Winter Song

This boppy record from Fountains of Wayne might actually make you want to take a short break from those hypnotic flames and get up and dance! It’s an uplifting song to a friend during a dark winter day, but take heart because the sun won’t be hidden away for long. Listen to it here.

7. Baby, It’s Cold Outside

I love, love, love this Zooey Deschanel and Leon Redbone cover of the classic flirty duet. It’s a playful, more contemporary contrast from the vintage versions of the ’40s and ’50s. If it’s nostalgia you crave on a cold winter’s night, light a candle and make sure this is in your queue. Listen to it here.

8. Sweater Weather

As this song by the American alternative band The Neighbourhood points out, we all instinctively grab for a sweater when there’s a chill in our bones. Whether it’s brand new or laden with holes up the sleeve, whether it’s made of cashmere or cotton, a favorite sweater is like a best friend … a warm security blanket on a frigid day. Listen to it here.

9. Cold

Sure, you can almost feel the frost emanating from the skin of the arctic woman that’s being sung about, but Chris Stapleton’s soulful vocals put a fever in the room. With a fire crackling in front of you and a glass of wine in hand, you’ll almost forget that the couple’s love is on ice. Sit back and get ready to feel cozy. Listen to it here.

10. Here Comes the Sun

This iconic Beatles tune, penned by George Harrison as he took a stroll around his garden one early spring morning (after a long, cold, lonely winter), will have you looking out the window, watching the ice slowly melting before going off to bed with hope of a warmer tomorrow. And I say … it’s alright. Listen to it here.

The Performance Mind Game

On a warm and humid Friday night in Texas, 250 students come off the field following a halftime performance. The crowd cheered throughout the performance of these wonderful musicians, and high fives and hugs ensued. The props are rolled away, and the electronics unplugged as an army of parent volunteers spring into action to clear the field to allow the football game to resume.

What You Can Do Before the Performance
What You Can Do During the Performance
What You Can Do After the Performance

Now what? What is the right thing for me to say to them? What if they performed well? What if they didn’t? What should your students be thinking as they prepare for the performance, during the performance and then afterward (possibly the MOST important moment for student growth)?

These questions must be answered whether it’s at a football game, on the concert stage, an individual performance or a major competition. Why? Because students will make decisions about their performance on their own — and oftentimes, it’s NOT the decisions we want as music educators —we must take control of the situation and shape the message toward student growth and engagement.

THE YAMAHA EDUCATOR NEWSLETTER: Sign up to receive real-world advice, tips and instrument guides!

 Before the Performance

We are all familiar with this scenario: During the anxious time before a performance, our minds just run wild as we can’t help but focus on all the “what-ifs” instead of the hours of training and dedicated practice that went into this moment. It’s completely natural, yet totally destructive!

With my students, we try to identify the things that happen in our minds before a show, isolate those negative thoughts and fill our minds with positive outcomes and focus on training. Having trust in the training that has been invested into the performance is KEY!

Do they trust it? What anxieties do they have? Have you asked them? It’s amazing what students will tell you, especially your older leaders. Candid responses about their fears and anxieties can help you craft a message that will empower your students to do their best going into a performance.

positive Post-Its on computer screenTry this: We have a challenge that we throw out to our groups leading into big show weeks. How long can you go saying, writing (social media/text) and thinking positive outcomes? The more you say, write and think something, the higher the probability that it will come true! Challenge your group and acknowledge that if/when you fall off the positive wagon, you will get right back on. It’s a tough assignment but reminders and encouragement from student leaders in the group will work wonders. And talk about a shift in the culture of the group from this simple exercise — just wait and watch!

During the Performance

Forney High School Band performing on fieldTake time to lay out for your students the physical and mental realities of performance. Physically, their bodies may exhibit some of the responses we have all experienced as performers: rapid heart rate, butterflies in their stomach, sweating, dry mouth, etc. These physical responses are natural, but they can be overcome or even used to your advantage when students are taught how to deal with them.

Now for the mental side of the performance. We have all heard the old saying “give it 110%.” I have said it myself many times before I realized that it is complete sabotage for a performer. How? Ideally, in performance, your students strive to execute their assignment exactly as they have been trained — nothing more, nothing less!

I try to overemphasize that on show day, we do NOT want something “special” because it already is special! We have trained, designed and rehearsed it to be special, exciting, musical and expressive. Trying to do more than you have trained to do in performance is a guaranteed way to lower the quality of your execution and overall performance quality! Instead, help your students realize that they have already done all the hard work in rehearsal, now it’s time to let it happen in performance. Trusting each other and the training they have invested will pay so many dividends in performance excellence!

 After the Performance

closeup of arrow props for Forney High School performanceThe post-performance aspect of the mental game may be the most important as it is directly in our control if we choose to accept the challenge! Check out my article, “The Power of Words: The Enduring Effects of Arrows and Songs,” which dives into the importance of choosing the right words to build each other up instead of tearing each other down.

Now, we’re all familiar with this scenario: Your students just finished their performance — and no matter the type of performance or venue — they will begin to assess how they did. If you are not aware and cognizant of this fact, you are missing out on a huge opportunity.

When things go well, it’s generally easy. Everyone is feeling good about the performance and themselves. No problems, right? Almost. When things go well, lead your students back to what allowed them to be successful. Was it extra-focused rehearsals during the week? Was it their flexibility during trying circumstances? Find the behaviors that you want to encourage in the future and link those with the current good feelings students are having from performing well together.

What do you do when things do not go well? I used to fall into the trap of anger and guilt-tripping as my weapons of choice. At times, this negative reinforcement was relatively effective, but at what cost? Instead, shape your students’ mindsets and focus on:

  1. What went well (which is generally much more than initially will be acknowledged)?
  2. What did you learn?
  3. What are you going to do about it?

Following this line of questioning will help students realize the positives from within the performance and refocus them on the actionable steps to improve. It’s all part of the journey as they grow as performers, musicians and people!

Try this: After your post-performance talk, have your students rate their performance into one of two categories: “good” or “needs work.” Tell students in the “good” category to think about their performance and celebrate it. Ask the “needs work” group to stay behind and have a quick chat with you. Do not allow those kids to walk away thinking they have failed you or the group — this is detrimental to their growth and the group’s success. Instead, spend a few minutes counseling each of them, providing an actionable plan to address the aspects of their performance that they felt was subpar.

Prepare for the Moment

Do something crazy and ask your students this simple question: “What percentage of successful performance is mental?”

Ask yourself that question, too! I bet that you will get some high percentages as responses. With that in mind, how much of the performers’ time is spent focusing on building and refining their mental game? If you are anything like me, the answer is not a lot! I always counted on our rehearsal time being there when we really needed it, yet all too often, our performances lacked the cohesion and consistency we had been delivering consistently during rehearsal. What gives?

male teacher talking to male music student

How many students have said, “I just played this perfectly in the practice room,” but they cannot consistently deliver under pressure. This must be one of the most common complaints and frustrations for music educators as well as their students. The answer lies in understanding the importance of proper and prescriptive mental preparation for the moment.

Here is the biggest piece of advice I could give any competitor in any activity: Focus on the process of performing, NOT the results.

We as teachers and performers have control over the process but very little control over the actual results (i.e. rank, placement, medals, trophies, etc.). That’s why you must design your rehearsals and practice sessions around incentivizing student behaviors that result in the desired performance outcomes — without referencing things that are out of our control.

If you talk about things that are out of your control, you take the power away from you, their teacher, and delegate it to someone else. You would be crazy to do this! You are the one who has your students’ educational development at the top of mind as they walk in the door each day — keep that great tool in your toolbox!

In the band hall, students hear me say, “The most important note is the NEXT NOTE!” In fact, I say it so often that my students will actually finish the sentence. This simple saying helps students remember that no matter what happens in performance, that moment has now become the past and all that can be controlled is the present or the next note!

One of my goals each year is to have my students care so much about the process of performing their assignment — so much so that they care about that individual achievement more than the actual results or the competition. It’s a huge challenge to get everyone on board with this because there is no leaderboard showing who is in first place in the “process of performing” championships, but the more students who buy into this mindset, the better educational environment you will have in your classroom and an amazing byproduct is consistently better performances!

Subbing Success

After I received my degree in instrumental music education, I found myself in the exact field of my studies — but only for a short period of time. I had been hired as a general music teacher at a primary school, and my first year flew by. When June rolled around, my long-term substitute contract ended. By September, I still hadn’t found a full-time music position in my area, so I decided to start substitute teaching for two nearby districts.

Music educators find themselves subbing more often than you might think. Even the music educators I know who have full-time music ed positions often end up substituting for classes such as art, AP history or English during their planning period due to the national substitute shortage that we’re still experiencing.

So, whether you are a music education student about to graduate or a seasoned music teacher, it’s a good idea to familiarize yourself with subbing in core classrooms.

Myth: It’s An “Easy” Gig

Some say that subbing is an easy job, but it’s not — it’s hard to do subbing well. My childhood friends and I still recall an elementary school substitute teacher who we could distract by getting her to tell stories. In fact, we even tallied how many class periods were spent doing nothing because we asked the sub the right questions. Although this teacher was well-meaning, this is not the type of substitute teacher you want to be.

A stellar sub combines discipline with gentleness, fun with focus, and friendliness with professionalism.

alarm clock showing 7 a.m.Arrive Early

Substitute teaching is almost always full of unexpected surprises, such as a group of kindergartners playing with baby carrots instead of listening to the lesson or high schoolers tying each other to poles with sweatshirts.

Plan to arrive early to avoid the chaotic early morning school traffic — make sure to check where the school is and the best route to get there. By getting to school early, you’ll have time to look over the large stack of notes from the teacher and prepare yourself for the day to come.

Familiarize Yourself with End-Of-The-Day Release

If you are subbing at an elementary school, one of the first things you should look for is the end-of-the-day release plan. If you don’t find one, call the office immediately.

One of my most stressful substitute experiences was when the list of car-line students was underneath a stack of ungraded papers where I couldn’t find it. I didn’t realize that the list was missing until it was time for dismissal. By then, it was too late, and one student ended up in the wrong place after school.

Attention-Grabbers

Have a handful of attention-grabbers ready to keep your pupils engaged and ready to learn. For elementary school, many teachers use “1,2,3, eyes on me” or other call-and-response phrases.

Similarly, playing a relevant, clean pop song often grabs the attention of junior high and high school students. Soft music can also be used to help students focus while they are completing tasks like scantron quizzes or post-movie Q&As.

Be Compassionate

If you still can’t seem to get the students’ attention, there may be an underlying reason why. One day in a rowdy high-school foods class, I tried all my normal attention-getters, but nothing worked. It turned out that many students were upset because a coach had suddenly quit with no warning. After I took the time to listen, the group settled down, and the class moved on to do the assigned tasks.

Also, make sure to use a student’s preferred pronouns and correct name pronunciation — even if that means asking twice. I once subbed for a teacher who apparently wouldn’t use a student’s pronouns or nickname. The student actually cried when I called them by their preferred name with their preferred pronouns. Sometimes it can be that easy to make a student’s day.

Get Connected

One easy way to stay connected is to make sure to have the office numbers for each school you regularly sub at. Getting locked out is a matter of when not if, especially if you take students out for recess, so having these numbers in your phone is essential. Additionally, get to know the janitorial staff and aides because they go a long way in making your substitute assignments run smoothly.

Be an Open Book

Be sure to tell students a little bit about yourself because you never know when you might be back!

Being an open book also means owning up to your mistakes. If you misspeak or calculate something incorrectly on the board, be honest about it — it’s OK to show them that you’re human. Students don’t like cover-ups.

On one particularly sleepy morning when I was subbing at a high school, I accidentally grabbed a regular marker and started to write on the Smart Board (oh, no!). Before I knew it, 30 high schoolers were whispering and giggling, and they couldn’t have cared less about algebra. So, I did two things.

  • First, I acknowledge my silly error by saying, “Clearly, Miss Fitzwater has not had enough coffee this morning!”
  • Then I cleaned the Smart Board with a cloth and rubbing alcohol.

Always Have an Emergency Backpack

female teacher in front of classroom with one student raising his handOne of the best things I carry with me is my emergency substitute bag, which includes:

  • A well-loved, safe candy like Hi-Chews. Look for something that is allergen-free (think: no nuts, no gluten, no red dye 40).
  • A coloring sheet for each lower school grade.
  • Adult meditative coloring sheets for junior high students and up.
  • An educational movie DVD or two.
  • A Bluetooth speaker.

Remember that music can be used to teach just about anything. Ever heard of “Fifty Nifty United States”? If the main classroom teacher didn’t leave you a plan, pull out what you know and teach in the context of music.

Benefits of Subbing

While the idea of substitute teaching may sound overwhelming to those who have only taught in the same classroom every day, it is still a rewarding career. I was able to connect to students, and I still use the skills I learned as a sub in my job as a one-on-one flute and piano teacher.

11 Vinyl Tracks to Demo Your Home Audio Gear

Assessing Hi-Fi gear is a lot like test-driving a car: You need to investigate the basic parameters before signing on the dotted line. I’ve listened to literally thousands of audio components during my time as a reviewer, so I’ve learned which songs best reveal what’s going on under the hood and in the room. And nothing puts audio gear — especially a turntable — through its paces better than a well-recorded track on vinyl.

While many will suggest overly produced audiophile recordings for this purpose, I suggest you instead use music you know intimately, so you can easily discern subtleties. Here’s a list of some of the tracks that will best show off your system to its full advantage.

(Note: A few of these songs are available as 12-inch vinyl singles, but for the most part, you will have to play them from the albums cited.)

1. “High on Sunday 51” – Aimee Mann

This is the second track on Aimee Mann’s Lost In Space album, and it’s the tune I always play first when trying out any new piece of audio gear. It immediately tells me if a component can deliver the sense of space necessary to making music feel real. Are you hearing a big soundstage, with every instrument and vocal in its own distinct spot? If so, your system may well be up to the task. During the chorus, when Mann sings “Let me be your heroine,” listen carefully for the backing vocal, which should sound like it’s coming from right behind her as she stands at the mic.

2. “Speak to Me” and “Time” – Pink Floyd

Pink Floyd’s classic Dark Side of the Moon album has been around forever, but it’s still a great way to show off your system. The deep heartbeat at the beginning of “Speak to Me” gives you a real insight into how deep your woofers/subwoofers can go (and if you’re having turntable feedback issues), while “Time” is a real torture test. The louder you can play it while still distinctly hearing all the different clocks and alarms, the more resolution you have.

3. “Peg” – Steely Dan

Though the vibes at the beginning of “Rikki Don’t Lose That Number” will instantly show if your cartridge is mistracking, “Peg” (from the Dan’s Aja album) is arguably the best track to judge turntable performance overall, thanks to its incredible dynamic range, pinpoint imaging and multiple layers of backing vocals. 45 years later, it’s still an invaluable tool for evaluating audio gear.

4. “Jocko Homo” – Devo

This track from the group’s incredibly well-recorded debut album Q: Are We Not Men? A: We Are Devo! (produced by Brian Eno) is probably the most un-audiophile recording on my list, but it has so many synthesizers and processed vocals, a poor-quality Hi-Fi will make it sound like it’s being played on an AM radio. However, if your system delivers superior detail, you’ll hear sonic treats bouncing all over the room … which might just get you up off the couch to bounce along as well.

5. “Allegro Ma Non Troppo” – The Jung Trio

Okay, now it’s audiophile time. Violin is one of the most challenging instruments to get right on a Hi-Fi system, with piano a close second. This exquisitely recorded track has both. The two violins and the piano should fill your room, each in its own very distinct space, and the piano notes should gently fade into nothingness. The violins should appear full and rich; if they sound metallic and screechy instead, your system is failing the test. Best to listen to this track off the full vinyl release, Dvorak – Trio in F Minor, Op.65.

6. “Helplessly Hoping” – Crosby, Stills & Nash

When listening to this track from CSN’s self-titled debut album, pay close attention to the distinctiveness of the three legendary vocalists. As with most of the group’s recordings, they all tend to sing at a similar volume, and the blend that makes their sound so unique can also make it sound like one big voice on a mediocre system. The better your audio gear, the more you can hear the subtle differences in timbre between Messrs. C, S and N, and the better you can pick out each element within the intricate harmonies they are weaving.

7. “Rolling in the Deep” – Adele

By now, you’ve probably heard this song to death, but that’s what makes it great for demoing your system. Adele is one of the few contemporary artists with the necessary clout and budget to produce such outstanding-sounding records. The challenge here is to have a system capable of delivering lifelike dynamics and the tremendous range of her voice … and the better your system, the easier it is to discern the changes in her voice from her debut to now. Texture is everything here. Who knows? You may even rekindle your love for 21.

8. “Bug Powder Dust” – Kruder & Dorfmeister

Fans of techno and electronic music usually agree that The K&D Sessions is part of where it all began, and this track contains so much musical information, your system will definitely be put to the test. The production here is huge and airy, with layers of rock-solid bass grooves and tinkly bits everywhere. You should feel like you’re swimming in this track; it’s that big.

9. “Lay Your Hands on Me” – Peter Gabriel

Every record from this iconic singer is full of sparkling sonics, and while all of Peter Gabriel 4 (or Security, as it is sometimes called) is a joy to listen to, “Lay Your Hands on Me” is the jewel. When listened to on a great system, the percussion at the beginning of the track will spin around your speakers, with a texture that almost sounds like fingers on a chalkboard, burrowing into your soul as a steam radiator-like sound swells up from behind Gabriel’s haunting vocal. At about 2:30, the song increases in level, with dramatic drums all the way to the end, where they conclude with a massive crescendo. Watch the volume control on this one; it’s a speaker destroyer. Are yours up to the task?

10. “Just a Little Lovin” – Shelby Lynne

The title track from Shelby Lynne’s masterful Dusty Springfield tribute album Just a Little Lovin’ was recorded on analog tape and is filled with ear candy. It’s a song that’s become an audiophile classic — one that you can go back to repeatedly, even when you’re not listening critically. Things start happening immediately, with a snare sidestick hit floating in the air. As the cymbals fade out at 1:23 (they should dissolve ever so gently to black), listen for the print-through on the master tape just before Shelby’s voice comes back in.

11. “For Pete’s Sake” (closing theme) – The Monkees

Why is a track from such a poorly recorded album (Headquarters) on this list? Crazy as it may sound, a bad recording can serve to separate a good system from a fantastic one. The more overall musicality your system has, the better it will do playing the worst records in your collection. Perfectly recorded vocals are low-hanging fruit; nearly any audio system will do a passable to great job with them. But put a compressed Monkees record on the turntable and see what happens. You might be surprised.

Step Up to a Better Electric Guitar

Playing guitar — or any musical instrument, for that matter — is an evolutionary process. If you actively learn and practice, your skills will continuously improve. And the better you get, the more you’ll care about guitar quality.

Whether you’re contemplating going from a beginner guitar to an intermediate one, or an intermediate one to a premium model, buying a guitar with improved tone, playability and features will allow you to express your newfound playing skills fully.

Here’s a guide to the factors you should consider when stepping up to a better electric guitar.

BETTER TONE

On acoustic guitars, tonal quality almost entirely depends on the woods used and the design and construction of the body and neck. With electric guitars, it’s a little different. The overall tone is instead mostly influenced by the pickups and the guitar’s electronics — not to mention the amp and effects used by the player.

That said, the woods used in electric guitars also play a significant role. Solid-body guitars like those in the Yamaha Pacifica line tend to have more sustain because the vibrations from the strings resonate significantly through the solid block of wood that makes up most of the body.

Guitar.
Yamaha PAC612VIIFMX Pacifica.

Conversely, hollow-body and semi-hollow-body guitars such as the Yamaha SA2200 use an arch-top design that incorporates acoustic cavities for a rounder, thicker tone. However, because they don’t have as much mass in their bodies, they don’t sustain as much, and they can feed back (squeal) when brought too close to an amplifier.

Guitar.
Yamaha SA2200 semi-hollow-body guitar.

Despite their name, solid-body guitars aren’t completely solid on the inside. All of them have spaces cut in the body to allow for the insertion of the pickups and the electronics. Sometimes guitar makers purposely add additional body cavities, referred to as chambers, to change the resonant properties of the wood and alter the tone in a specific way. For example, the newest line of Yamaha Revstar guitars, introduced in 2022, feature chambered bodies. As you can see from the image below, these chambers are strategically placed on the outer edges of the body, away from the bridge, so they have less impact on sustain while still significantly reducing the weight of the instrument.

View of unfinished body of a guitar.
The chambered body of a Yamaha Revstar guitar.
Finished guitar.
Yamaha Revstar RSS20.

BETTER TECHNOLOGY

Electric guitars are generally equipped with either two or three pickups (the small electronic devices that convert the vibrations of guitar strings into electrical signals), and they play a huge role in the sound of the instrument.

In general, the closer a pickup is to the bridge, the brighter its tone and vice versa. But pickup design is even more important. Pickups fall into two basic categories: single-coil and humbucker. Single-coils have a thinner, brighter tone; humbuckers have two coils and produce a thicker, rounder and louder tone. “P90-style” pickups are a bit of a hybrid. Although they have only one coil, they’re beefier-sounding and louder than a traditional single-coil.

Side by side images of guitar bodies.
Humbucking pickups (left) and P90-style pickups (right).

The dual-coil design of humbuckers serves another critical function: noise reduction. If you’ve ever used a high-gain amp or a compressor or distortion pedal with your guitar rig, you know how much buzz and hum can result. Humbuckers were initially developed to minimize such noise. Their two coils have reversed polarities, which helps cancel those sonic gremlins.

Yamaha makes not only humbuckers, but traditional single-coil and “P90-style” pickups too. An electric guitar will often feature one style of pickup, but there are plenty of exceptions. For example, the Yamaha Pacifica 311H sports a humbucker in the neck position and a P90-style pickup in the bridge position. Pacifica 212VQM and Pacifica 212VFM models offer three pickups in an H/S/S configuration, with a humbucker by the bridge and single-coil pickups in the middle and neck positions. In addition, both models are equipped with a coil-split switch, which turns the humbucker into a single-coil pickup.

Electric guitar.
The Yamaha Pacifica PAC212VFM features an H/S/S pickup configuration.

BETTER FEEL

The construction of an electric guitar neck, including the installation of the frets, is crucial to its sound and durability. This tends to be better on “step-up” guitars than on starter instruments. There are two main factors to be aware of here.

The action on a guitar is the distance from the string to the frets. The lower the action, the easier it will be to play. The higher it is, the more difficult it is to press down on the strings. Except for slide guitarists, who need high action to get the best tone, most guitarists like the action of their instrument to be set as low as possible. However, there’s one caveat: If the strings are too low, they can “fret out” — that is, lose all their sustain and sound buzzy and/or muted when played at certain frets. On guitars where the frets are uneven or worn down, the problem gets exacerbated — a good reason to consider purchasing a new instrument instead of a used one.

Another aspect of feel is the fingerboard radius. If you look closely at a guitar neck, sighting it down toward the headstock as shown below, you’ll see a slight curvature of the fingerboard, going up in the center and down on the sides. That curvature, which varies depending on the guitar model, is the fingerboard radius. The higher the radius, the flatter the neck, and vice versa.

Closeup.
Fingerboard radius.

Necks with a low radius are generally more comfortable for playing open-position chords and low notes. Those with a higher radius allow the guitarist to play all over the fretboard with the feel — and the action — staying consistent.

Yamaha Revstar guitars all feature a 12-inch radius, which is a “best of both worlds” design. The Pacifica 200 models have a 13-3/4″ radius, making them particularly suited for musical styles that incorporate lots of fast, high notes.

BETTER LOOKS

Better sound and feel are the most important reasons for upgrading to a new guitar, but the look is also important to many guitarists. Especially if you perform live, the shape and color of your guitar contribute a good deal to your visual image and your “brand.”

The Yamaha Revstar RSS20T, which features a retro “café racer” motorcycle-inspired chrome tailpiece, is an example of a guitar with a distinctive style. The RSS20T also features P90-style pickups, sometimes called “soapbox” pickups, which add to the old-school vibe.

Guitar.
Yamaha Revstar RSS20T.

It’s always good to have lots of options to choose from, and Yamaha Revstar guitars are available in a particularly wide range of colors, as shown in the illustration below. As an example, the RSS20T model mentioned above is available in your choice of four different finishes.

An array of guitars.
Yamaha Revstar guitars offer an especially wide range of colors and configurations.

Yamaha Pacifica 300 Series guitars also give you plenty of color and finish options, as shown below.

Four different colors of a guitar.
Yamaha Pacifica PAC311H colors.

These guitars also feature a hybrid pickup configuration, with a P90-style neck pickup and a humbucker in the bridge position. Having two different pickups not only provides sonic variety, but also adds to the guitar’s visual appeal.

BETTER CRAFTSMANSHIP

As compared to starter instruments, intermediate- and professional-level guitars tend to offer improved craftsmanship overall. They are generally constructed from higher quality tonewoods and usually incorporate more advanced electronics and better-sounding pickups, along with sturdier tuners and other hardware — plus they often come in eye-catching finishes.

So if you’re looking for an electric guitar that sounds, plays and looks better than the one you’re playing now, do yourself a favor and consider stepping up. You’re bound to find an instrument that inspires you to new heights … and that’s always a good thing!

Fingerboard radius photograph courtesy of the author.


Click here for more information about the full line of Yamaha electric guitars.

40 Under 40 – 2023

2023 Yamaha “40 Under 40” — Excellence in Music Education

Yamaha launched the “40 Under 40” music education advocacy program in 2021 to celebrate and recognize outstanding music educators who are making a difference by growing and strengthening their music programs. Now, we celebrate the 2023 group of remarkable educators who triumphed before, during and after the pandemic to keep their programs thriving.  

These 40 educators — all under the age of 40 — showcase the following characteristics: action (offer innovation and imagination solutions in achieving plans and objectives), courage (propose and implement new or bold ideas), creativity (show innovation and imagination in achieving plans and objectives) and growth (establish, grow or improve music education in their schools and communities). 

THE YAMAHA EDUCATOR NEWSLETTER: Join to receive a round-up of our latest articles and programs!

We received hundreds of nominations from students, parents, other teachers and administrators, local instrument dealers and mentors. The selected “40 Under 40” educators have gone above and beyond to elevate music and music-making in their students’ lives — like Gabriella Burdette, who embraces the Afrocentric and gender-specific curriculum at Grace James Academy of Excellence; Rob Chilton, who created a music theory video series that makes reading music fun;  Jasmine M.T. Fripp, who weaves history, culture and issues of social justice into her general music program; Kylie Griffin, who is keeping the music, culture and language of south Louisiana alive in her classroom; and James Sepulvado, who has helped to create a premier summer camp that attracts top music students and musicians/clinicians, as well as a new professional development workshop for music educators.

All the “40 Under 40” educators have remarkable stories behind their teaching philosophies and methods. You’ll be inspired by all of them. 

Join us in applauding the 2023 class of “40 Under 40” educators.

Meet the 2024 “40 Under 40” Educators

Meet the 2022 “40 Under 40” Educators

Meet the 2021 “40 Under 40” Educators

2023

John Aguilar

Director of Bands
Robert Eagle Staff Middle School
Seattle, Washington

Read more

2023

Dr. Emily Williams Burch

Coordinator of Music Education,
Professor of Music
University of South Carolina Aiken
Aiken, South Carolina

Read more

2023

Gabriella Burdette

Orchestra Director
Grace M. James Academy of Excellence
Louisville, Kentucky

Read more

2023

Logan Burnside

Band Director
Jordan High School
Jordan, Minnesota

Read more

2023

Rob Chilton

Creator
Readymade Music Literacy
Frisco, Texas

Read more

2023

Dr. Leah N. Claiborne

Associate Professor of Piano
University of the District of Columbia
Washington, D.C.

Read more

2023

David Davis

Music Teacher
Park Spanish Immersion Elementary School
St. Louis Park, Minnesota

Read more

2023

Brandon J. Duras

Director of Instrumental Music
Brunswick High School
Brunswick, Maine

Read more

2023

Jasmine M. T. Fripp

Director of Choral Activities and General Music
KIPP Nashville Collegiate High School
Nashville, Tennessee

Read more

2023

Dr. Derek Ganong

Assistant Professor of Trumpet,
Director of Jazz
Boise State University
Boise, Idaho

Read more

2023

Andrés González

Music Director
Play on Philly
Philadelphia, Pennsylvania

Read more

2023

Corey L. Graves

Director of Bands
Tony A. Jackson Middle School
Forney, Texas

Read more

2023

Kylie Griffin

Elementary Music Teacher
Dozier Elementary School
Erath, Louisiana

Read more

2023

Matt Gullickson

Band Director
Eastview High School
Apple Valley, Minnesota

Read more

2023

Lisa Hatfield

5th-grade band and orchestra teacher
Batavia Elementary Schools
Batavia, Illinois

Read more

2023

Dr. Joseph L. Jefferson

Director of Jazz Studies,
Associate Professor of Trombone and Euphonium
Southeast Missouri State University
Cape Girardeau, Missouri

Read more

2023

Professor Larry Jenkins

Professor, Assistant Director of Bands
Tennessee State University
Nashville, Tennessee

Read more

2023

Johanna M. Kitchell

Orchestra Director
Riverside Junior High School,
Riverside Intermediate School
Fishers, Indiana

Read more

2023

Paul Lowry

Director of Bands, Percussion and Jazz Studies
Department Chair, Performing Arts
Del Sol Academy of the Performing Arts
Las Vegas, Nevada

Read more

2023

Nerissa Manela

PhD Student, Teaching Assistant
University of Miami
Coral Gables, Florida

Read more

2023

Emily Meyerson

K-12 Music and Drama Educator
North Baltimore Local Schools
North Baltimore, Ohio

Read more

2023

Dr. William Oliver

Director of University Bands, Assistant Professor of Music Education
Huston-Tillotson University
Austin, Texas

Read more

2023

Noelle Rader

Orchestra Teacher
Mendive Middle School
Sparks, Nevada

Read more

2023

Caleb Schepart

Music Teacher
Dr. Kenneth B. Clark Academy
Dobbs Ferry, New York

Read more

2023

James Sepulvado

Performing Arts Department Chair,
Associate Professor of Music
Cuyamaca College
Rancho San Diego, California

Read more

2023

Dr. Timothy S. Sexton

Associate Director of Bands
Tarpon Springs Leadership Conservatory for the Arts
Tarpon Springs, Florida

Read more

2023

Dylan Sims

Associate Director of Bands
Gold Hill Middle School
Fort Mill, South Carolina

Read more

2023

Marcus D. Smith

Choral Director, Music Educator
Baltimore City College
Baltimore, Maryland

Read more

2023

Taylor Spakes

Director of Performing Arts
West Rowan Middle School
Salisbury, North Carolina

Read more

2023

Theodore Thorpe III

Director of Choral Activities
Alexandria City High School
Alexandria, Virginia

Read more

2023

Jabari Tovar

Instrumental Music Teacher,
Percussion Specialist
Salem Public Schools
Salem, Massachusetts

Read more

2023

Trevor Tran

Head of Performing Arts,
Director of Vocal Arts
Fort Myers High School
Fort Myers, Florida

Read more

2023

Miriam L. Vazquez

Music Teacher
Duane D. Keller Middle School
Las Vegas, Nevada

Read more

2023

Nicole Wakabayashi

Director of Music and Drama
Notre Dame School of Manhattan
New York, New York

Read more

2023

Sara Weir

Music Teacher
Park View Middle School
Cranston, Rhode Island

Read more

2023

Greg White

Director of Bands
Ronald Reagan High School
San Antonio, Texas

Read more

2023

Tyler Wigglesworth

Choir Director, Performing Arts Academy Coordinator, Vocal Music Director
West Covina High School
West Covina, California

Read more

2023

Jeremy Williams

Band Director
L.H. Marrero Middle School
Marrero, Louisiana

Read more

2023

Franklin J. Willis

Adjunct Professor of Music Education
Vanderbilt University, Blair School of Music,
Community Impact Director
CMA Foundation
Nashville, Tennessee

Read more

2023

Susan Wines

Orchestra Director
Wade Hampton High School
Greenville, South Carolina

Read more

Continue reading

Benefits of Using a Gaming Headset

Hearing the sounds of your favorite video game can often be just as important as seeing the visuals. But audio quality can be a tricky matter. Without the right equipment, an attacking army soldier may miss an instruction from a captain, or Mario might not hear the turtle shell shot from Luigi’s go-kart before it’s far too late.

There are other reasons why audio matters when it comes to gaming. What if the other people in the room are making distracting noises, or don’t want to hear you playing? What if your fellow gamers are talking to you on the phone but it sounds more like shouting? Gaming headsets provide the perfect solution.

Here’s a guide to the benefits of using a gaming headset like the Yamaha YH-G01, and the reasons why this simple add-on can help fine-tune and improve your gaming experience.

Gaming headset.
Yamaha YH-G01 gaming headset.

IMMERSIVE AUDIO

There’s no question that using good quality speakers when gaming is a plus. However, one inescapable fact is that speakers have to be placed some distance away from you, which means you’ll be hearing some of the sound of your room (known as “reflected sound”) along with the game audio. But with a gaming headset, the audio is direct and up-close in your eardrums without any of the sound of your room added in, making for a much more immersive experience. A gaming headset will allow you to hear every potential adversary, every chant from the stadium, every fireball from Mario’s hot hand with full fidelity and clarity, just as it was intended by the game designers.

In addition, when using a headset with a dedicated gaming mixer like the Yamaha ZG01 or ZG02, players can adjust the sounds of the game as they wish. Want more bass in your car chase? The mixer can do that. Want more treble in the roar of the soccer fans cheering? No problem. A gaming mixer can even provide a significant advantage during gameplay by allowing you to boost the sounds of footsteps in first-person shooters, for example, or the low rumble of approaching tanks or fighter jets. If you’re into multiplayer games, a gaming mixer will also give you precise control of voice chat — both your voice and that of your fellow players — allowing you to create a customized mix that works best for each title.

Small electronic unit.
Yamaha ZG01 gaming mixer.

IMPROVED SOUND SEPARATION

Gaming headsets are also gatekeepers, in a sense. They not only keep the sound of the room out of your ears, they also keep the sounds of your game out of the room. For those playing in a household with people who might not want to hear your latest victory on the digital field of battle, this is a major benefit. Your friends and family can go about their business without hearing grenades going off as they do the dishes.

What’s more, any noise that may come from them vacuuming or watching the latest viral video on their phone won’t intrude on your gameplay. As every seasoned gamer knows, just when you’re about to make that big jump, someone always comes along and asks you where the orange juice is, and you lose your character’s final life. But with a gaming headset, you can enjoy the bliss that is separating what you hear in the game from what the rest of the household hears. It’s a win-win.

BETTER COMMUNICATION WITH YOUR FELLOW GAMERS

Gaming headsets are multifaceted. They pair a set of headphones with a microphone that stretches conveniently near your mouth so you can easily communicate with other gamers over the internet. Whether you’re on the same team trying to claim territory in the greatest war ever played, or are battling against an opponent on the digital gridiron in a tightly contested football matchup, a gaming headset provides not only a way to hear what’s going on but a means with which to interact and speak to other players, allowing you talk a little trash from the comfort of your sofa or gaming chair.

AFFORDABLE AND PORTABLE

Another major benefit of a gaming headset is affordability. Sure, it can be great to have a big, sprawling sound system in your home. To have giant surround sound speakers in every corner of your living room, man-cave or she-shed might be your idea of nirvana. But for many, it’s simply not a viable option. A gaming headset, on the other hand, won’t break the bank, plus setup is a breeze: Simply plug it into your game console or laptop — no troubleshooting or DIY agitation required. And, unlike home audio systems, gaming headsets are extremely portable. They can be taken on planes, packed in suitcases or stored away easily for later use. If you’re gaming without a headset, what are you waiting for?

Which Electric Guitar Body Type is Best for Your Music?

Let’s face it, guitar players love their gear! We collect instruments, drool over mystical hand-wired overdrive pedals, and create forums to discuss the latest modelers, vintage tube amps and guitar brands.

In reality, do we actually need multiple versions and variations on the same theme? After all, it’s basically a plank of wood with a set of six tuned strings stretched across it, right?

Well, not exactly.

Whether you’re painting with oils, pastels or tonal colors, you need a set of brushes and a varied palette of colors in order to capture the styles, sounds and flavors you want, be it on canvas or onstage.

As I discussed in a previous posting, the construction, tonewoods, pickups and hardware in any electric guitar all have a significant effect on the resulting tone. Other aspects, such as neck size, dimensions and whether the instrument offers a single or double cutaway, affect playability … and let’s not forget the aesthetic: the visual appeal and how it affects the fashion sensibilities of the artist and the genre of music they represent.

But perhaps the most profound impact on the tonality of an electric guitar comes from its body type — solid, hollow/semi-hollow or chambered. All three can actually be used for most styles of music, but some work better for particular genres than others. Here’s a guide to choosing the best electric body type for your musical needs.

Solid-Body

As its name implies, a solid-body guitar utilizes a single block of wood for its body. The greater mass and minimal acoustic resonance of this type of body emphasizes fewer frequencies, which means that the sound delivered to the guitar’s pickups is essentially uncolored. As a result, the pickup design and internal electronics play a somewhat greater role in tonality than in other body types.

One big advantage here is that solid-body electrics rarely feed back, even when placed right up against an amplifier. These types of guitars also tend to have better sustain than other body types. Just how much sustain you get depends mostly on the kinds of woods used and the types of pickups in the guitar.

Weight can sometimes be an issue with solid-body guitars, but Yamaha Pacifica electrics are cut for comfort, while still providing all the benefits of a solid body. The Pacifica 612VIIFM model I play in the video below is actually one of the most versatile guitars in my arsenal. Sporting a coil-tappable humbucker in the bridge position (when “tapped,” the signal is taken from somewhere within the coil of wire in the pickup rather than from the end of it) and two single-coil pickups in the neck and middle positions, the 612VIIFM provides a total of seven onboard pickup configurations for a huge amount of sonic variety.

Author playing guitar.
Playing the Yamaha Pacifica 612VIIFM.

All the tones that come from this guitar are light and bright, especially in the mid-range, and the neck has a slim, satin, super-fast profile that’s perfect for pop, rock and metal. If you prefer a medium fret profile and a longer 25-3/4″ scale length, this guitar could be the perfect fit for you.

The 612VIIFM also features a Wilkinson tremolo bar. Having the ability to add subtle chordal shimmers or crazy dive-bombs will definitely be appealing to many players. This electric covers a lot of musical ground, looks the part both on-camera and onstage, and could very well be the one axe you take into any recording or live performance situation.

Hollow/Semi-Hollow Body

Hollow-body electrics are somewhat similar to acoustic guitars (which are all, by definition, hollow-body instruments). Semi-hollow body instruments differ slightly in that they have shallower bodies and a solid block of wood in the center to reduce feedback.

Both types usually weigh considerably less than solid-body guitars — something to consider if you do a lot of live performance. In addition, because they have a resonating chamber similar to that of an acoustic guitar, you can hear them better when playing unplugged, which might be a factor if you have family, roommates or neighbors who aren’t all that happy when you practice at stage volume. However, because their bodies don’t interact with pickups the way a solid-body does, these types of guitars usually don’t summon up a whole lot of sustain, so if you’re partial to long drawn-out notes, they may not be the ideal choice for you.

That said, the resonance of the body emphasizes low-mid and bass frequencies, so hollow- and semi-hollow body electrics tend to deliver a naturally rich tonality. That’s absolutely true of the highly revered Yamaha SA2200 semi-hollow body, which is one of my favorite guitars to play at trade show events and in-store clinics. This gorgeous instrument has the recognizable contours of an archtop guitar, complete with double f-holes for better acoustic projection. It imparts a warm, “woody” tone, thanks to its design, large body dimensions and acoustic chambers, along with its soft maple center-block construction and Alnico V (coil-splittable) humbucking pickups.

Author playing guitar.
Playing the Yamaha SA2200.

The coil-tap feature allows you to achieve a distinctively bright, clear tone, perfect for delineating arpeggiated chords in a dense mix or with a full band ensemble onstage. R&B, blues, rock, jazz and jazz-fusion players may all favor this guitar for its distinct rhythm tones and silky- smooth single-note passages.

The SA2200 also has that traditional sunburst “cool factor” on the bandstand. It’s not what I would consider a guitar for the metal or hard-rock player visually, though it could definitely take on the gig sonically if need be.

Chambered Body

Electric guitars with chambered bodies essentially combine the best of both worlds. Carved within their solid bodies are a series of finely tuned chambers to change the resonant properties of the wood and alter the tonality in a specific way. Second generation Yamaha Revstar guitars and the recently released Pacifica Standard Plus and Professional models fall into this category; all utilize the signature Yamaha Acoustic Design process to precisely shape tone and increase resonance while at the same time reducing weight and optimizing balance.

View of unfinished guitar body.
Yamaha Revstar body chambers.

The dual humbucker Alnico V pickup configuration on the RSE20 (one of two Revstar “Element” models), along with its three-way pickup selector and “dry” switch, allows for six onboard pickup variations. (There are ten on Revstar Standard and Professional models.) The dry switch effectively cuts (reduces) the bass frequencies for a cleaner, crisp tonal variation. It’s not a coil-tap, but it will definitely help your guitar achieve extra clarity in a complex mix.

Author playing guitar.
Playing the Yamaha Revstar RSE20.

The shorter (24-3/4″) scale length, jumbo frets, 12″ radius and chunky neck profile enables you to easily make slinky note bends, with less string tension than electrics that have a tremolo bar, which require somewhat more effort to bend strings.

Revstar guitars have definitely been styled and designed to rock. Their broad and bold color palette, cafe-racer styling, angled headstock and double-cutaway design pair beautifully with the powerful tones these guitars deliver. That said, Revstars also deliver solid blues and jazz tones, even though the look of the instrument may not fit the band aesthetic for those genres.

The Video

For this video, I recorded an R&B track that demonstrates a rhythm guitar part, an arpeggiated chordal overdub and a solo using all three guitars, each played through the same amp model and effects. Any variation you hear in terms of volume, clarity and presence are a result of the instrument’s innate tonal and design attributes.

The rhythm parts have been layered to support the solo line, and I’ve chosen the pickup selection for each guitar based on musical suitability. I did my best to play each of the three guitars the same way, though I probably unconsciously approached each somewhat differently due to physical variations, tone and psychological perception … which is actually a great way to expand your artistry and explore new musical possibilities.

The Wrap-Up

Can you play every gig, session and presentation using just one guitar? Of course you can … but that would be like wearing a Halloween costume to work every day, or a pair of shorts to a wedding. Possible, but not ideal (or appropriate) for the situation.

We all have one or more “go-to” guitars that we favor … the one(s) that best represent our musical style and stage persona. But we should also consider that axes with different physical attributes can inject creative inspiration, versatility and opportunity into our musical world.


Check out Robbie’s other postings.


Click here for a video of Robbie demonstrating the Yamaha Pacifica 612VIIFM.

Click here for a video of Robbie demonstrating the Yamaha SA2200.

Click here for a video of Robbie demonstrating the Yamaha Revstar RSE20.


History Of The Organ

There are few musical instruments that have had as long a path of continual development as the organ. In fact, no other keyboard has had such a major impact on music across the ages — and it remains as popular as ever.

Here’s a look at the history of this remarkable instrument.

Pipe Organs

Incredibly, the organ dates all the way back to the 3rd century, credited to the Greek inventor Ctesibius of Alexandria, who first came up with the concept of moving air through a tuned pipe to produce a note. The earliest pipe organs could only play one note at a time and used water (either naturally falling from a waterfall, or manually pumped) to blow air into the tube.

In the 6th century, the Romans invented the bellows, a manual pump mechanism for forcing air — an innovation that had a huge impact on the development of the organ since it enabled air to be selectively sent to multiple pipes under the control of a keyboard, allowing several notes at a time to be played. The instrument was first brought to Western Europe sometime in the 7th century, where it was used for public performance and other secular purposes.

At around this time, the organ began developing in mechanical complexity, with pitch determined by the length and diameter of the pipe (one for each key on the keyboard), and tonal quality becoming a function of the material used to craft the pipe and other design characteristics.

View of pipe organ with keyboard and full wall of pipes.
A pipe organ.

The use of the pipe organ in churches soon became commonplace. By the 10th century there was a report of a large organ installed in a cathedral in Windsor, England had 400 pipes, 26 bellows and two keyboards of 40 keys each — and required 70 men to operate!

The introduction of stops (groups of pipes, each of which produces a different timbre) in the mid-15th century was a major innovation. It allowed the player to selectively choose sounds and sound combinations and also provided the ability to play softer and louder, making the pipe organ much more versatile.

Close up view of a church pipe organ.
Pipe organ stops on either side of and below multiple keyboards.

The invention of bass pedals — low notes that could be played by the feet — first appeared during the 16th century.

Male organist stepping on pipe organ pedals.
Organ pedals.

At around the turn of the 20th century, massive pipe organs called theatre organs began appearing. Designed to accompany silent films and live shows, they offered a wide range of timbres, many going far beyond what one would expect from an organ, including celeste, sleigh bells, wood blocks and manual percussion like cymbals.

Enjoy this collection of pipe organ music to get a sense of the majesty and beauty of the instrument, and click here for more information about its construction.

Smaller Organs

At the same time that organs were becoming massive installations that could only fit in large cathedrals, another trend began: smaller instruments that enabled organ music to be brought into social settings. The portative organ, for example, could be slung over the shoulder, or held in the lap and played with one hand, while the other hand operated bellows that drove air through small pipes. The positive organ was somewhat larger, but still manageable enough to be wheeled into various locations for performances. These types of instruments tended to only have a few stops and a smaller number of keys.

During the Renaissance and Baroque periods, the tonal palette of organs grew extensively, with more differentiation based on the country of development. In addition, new features were developed, further extending the musicality of the pipe organ. One example was the Swell Pedal (also called the Swell Box), first introduced in 1712. It operated by opening and closing louvers on a box or room that contained a rank of pipes, changing the sound from muffled to fully open. This was followed by the Crescendo Pedal, which enabled the gradual addition of more ranks and stops, allowing for real-time dynamic expression.

Reed Organs

Another variant of the smaller organ design was the reed organ (also called the “pump” organ), which became popular in the late 1800s. Unlike pipe organs, the reed organ was quite dynamic, with changes in the air pressure blown across a vibrating reed serving to increase and decrease the instrument’s volume. Interestingly, this was the first type of instrument that Yamaha founder Torakusu Yamaha worked on; he would later develop his own model, which introduced various improvements that made tuning more reliable. In 1897 he founded Nippon Gakki Company (Japan Musical Instrument Company) and started producing portable reed organs.

An early Yamaha reed organ.

In 1935, Yamaha introduced the Magna Organ, which was an electrically blown reed organ with pickups to help amplify the sound.

Drawing of organ and bench.
Yamaha Magna organ.

Tonewheel Organs

The next big breakthrough in organ design came with the “tonewheel” organ, first developed by Hammond in 1935, then refined until the release of the company’s iconic and best-selling B-3 model in 1955. Based on a series of spinning magnetic wheels that excite transducers, each wheel produces signals of varying frequency to create a simple sine wave-based tone for each key. A total of 96 tonewheels are used to create nine harmonics, with the level of each controlled by sliders above the keys called drawbars.

Closeup of Hammond B3 organ drawbars.
Hammond organ drawbars.

Tonewheel organs (sometimes called “drawbar organs”) are electrically powered, and their volume is controlled by a foot pedal. Other aspects of the design include a chorus/vibrato circuit to produce timbral and pitch animation, percussion to add a transient attack to each note, and the common use of an external rotating speaker system called a Leslie to further animate the sound.

This hugely influential keyboard set the standard for non-pipe organs, and remains popular in gospel, jazz, rock and other genres of music. This playlist showcases some of the many artists who play the instrument.

It’s worth noting that the advance of technology in the 1980s allowed companies to begin emulating the classic tonewheel sound of the Hammond B-3 with the use of analog, and later digital chips, followed by modern sampling and DSP (Digital Signal Processing) methods. These instruments are sometimes called “clonewheels,” a punny title that refers to their copycat nature. The original Korg CX3 released in 1980 was an analog design, as were the Crumar Organizer and T Series. The Roland VK-7 (1997) was the first clonewheel to utilize modeling to recreate the tonewheel sound. Nord (a brand of the Swedish company Clavia) took the same approach in their Electro Series, first introduced in 2001, as did Italian companies Crumar and Viscount. Not to be left out, Hammond (now Hammond-Suzuki) released their own range of clonewheel organs like the XB Series, as well as the current XK and SK Series.

Electronic Organs

Allen Organ released the first fully electronic organ in 1939, using vacuum tubes. This design concept would soon be adopted by other manufacturers, who offered it in large-format console, small spinet and other configurations. Many of these offered features like bass pedals and auto-chord accompaniment features, including drum rhythms. The first Yamaha electronic organ was a spinet model called the D-1, released under the company’s Electone brand in 1959.

View of organ.
Yamaha D-1 Electone organ.

Electronic organs were followed by simpler types of home organs called chord organs. These used buttons on the left side to sound full chords, making them easier to be played by novices and children. The first was made by Hammond in 1959, but the most popular and prolific range was the Magnus Chord Organ.

So-called “hybrid” organs combined transistor circuits for sound production, coupled with tube-based amplification systems. Gulbransen was the first company to release such a design in 1957, using it for their line of theatre organs. Rodgers followed in 1958, with their first fully transistorized pipe organ unveiled in 1962.

Combo Organs

With the rise of rock and roll in the 1960s, the need for smaller portable organs that could be played onstage became apparent. Into that void came some classic instruments that are still being emulated today. The two most popular brands were Vox, from the UK, and Farfisa from Italy. The Vox Continental appeared first (in 1962), and was adopted by many of the top artists of the day. These classic songs all featured the Vox organ.

Farfisa responded with the Combo Compact in 1964, followed by subsequent models, also used by many iconic bands of the era. These ’60s and ’70s hits all featured the Farfisa combo organ.

Other companies soon entered this burgeoning market, including Gibson (actually just rebranded Lowrey combo organs), Ace Tone (built by Roland founder Ikuhiro Kakehashi) and Yamaha, with models such as the YC-10 (1969), YC-30 (1969), YC-20 (1970) and YC-45D (1971).

Three different organs.
Yamaha YC-10, YC-20 and YC-30.

Digital Pipe Organs

By the mid-20th century, electronics began replacing wind-driven pipes. In 1969, Allen Organ started development on the first all-digital pipe organ, which utilized sampling (digitized recordings of an instrument) for the first time to reproduce the sound. The Allen Computer Organ was released in 1971. The Dutch company Johannus started making sample-based digital organs in 1987, followed by Rodgers in 1990. These kinds of instruments continue to be produced today for church and home.

The Role of the Organ in Current Yamaha Keyboards

In recognition of the continued importance organ plays in music, all current Yamaha electronic keyboards offer dozens (or, in some cases, even hundreds) of organ sounds. For example …

YC Series Stage Keyboards

Yamaha YC Series Stage Keyboards utilize the company’s proprietary Virtual Circuit Modeling to recreate the sound and behavior of vintage organs with incredible detail, offering three variations: a pristine clean tone, a sonically rich classic, and a road-worn example. They also offer FM technology for a unique take on the organ sound.

Electronic keyboard.
Yamaha YC61.

YC Series keyboards are designed specifically for live performance, with physical drawbars and dedicated switches for percussion, chorus-vibrato and rotating speaker speed, thus providing the kinds of realtime hands-on control organists are used to.

Screenshot.

The YC61 model even has a “waterfall” keyboard, with keys that have flat fronts and a slightly radiused edge for extremely organ-like feel and performance.

Closeup.
The YC61 “waterfall” keyboard.

reface YC

The Yamaha reface YC is an ultra-portable keyboard that offers sampled renditions of five of the most-used organ types:

  • Classic vintage drawbar
  • British transistor combo
  • Italian combo
  • Japanese transistor combo
  • Yamaha YC-45D combo
Small keyboard.
Yamaha reface YC.

Each has authentic drawbar tones, percussion and other characteristics for period-accurate performance. Enjoy these demos of the YC in action.

MONTAGE and MODX+ Synthesizers

Ever since the days of the GX-1 (the progenitor to all modern Yamaha synthesizers), Yamaha synths have included organ sounds. The same is true of today’s Yamaha MODX+ and flagship MONTAGE synthesizers, both of which utilize sampled (AWM2) and advanced FM (frequency modulation) technologies to deliver dozens of incredibly rich vintage organ recreations, enhanced by realistic modeled chorus/vibrato and rotating speaker simulations. Listen to the MODX’s drawbar organs and pipe organs, which are the same as are found in MONTAGE.

Large synthesizer keyboard.
Yamaha MONTAGE6.

Genos

Yamaha Arranger keyboards offer an expanded range of sampled organ sounds, with many pipe and drawbar variations, along with classic theatre organ and combo organ sounds. The Yamaha Genos, for example, offers over 80 sampled and modeled organ tones, including tonewheel organs with accurate rotating speaker effects, as well as pipe organs, theatre organs and combo organs. Listen to the Genos pipe organ sounds in action.

Electronic keyboard.
Yamaha Genos.

Though it’s been around for more than 18 centuries, the sound of the mighty organ still continues to play a big role in the music being made today — a true classic if ever there was one.

10 Ways to Jump-Start Your Songwriting

Whether you’re a beginner or a well-seasoned pro, when it comes to songwriting, we all face occasional creative resistance — better known as writer’s block — when our muse goes on holiday. Often this comes at the top of a year when we’re just recovering from our own holiday festivities: shopping, airports, meals, parties. Perhaps our muse gets jealous and wants some time off too.

I’ve been writing songs for many years and there are still times when, as Natalie Cole sang in her playful 1987 hit “Jump Start My Heart,” I need to jump-start my creativity. If you feel that way too, I’d like to share some suggestions that have helped me reignite my muse once I’ve disassembled my Christmas tree.

All these recommendations embrace a new element of some kind. That’s because when we keep doing things the same old way, our muse gets bored. And so do we. Let’s do all we can to lure it back into the room!

1. ENLIST A NEW CO-WRITER

A new partner may bring out a style in your writing that no one ever tapped into before, just like red next to blue has a different tone than red next to orange. Colors change each other. People do too. But making that call can be scary. What if the person you’ve reached out to doesn’t respond? So what. Move on. There are many songwriters in the sea.

2. IMPLEMENT A RANDOM CHORD PROGRESSION

Come up with a random four-chord cycle you’ve never used before and see how it affects your orientation. Unfamiliarity can have you conjuring up a melody that might not have ever married to that safe chord progression you default to all too often.

3. USE AN ALTERNATIVE SONG STRUCTURE

Instead of employing the typical verse/chorus/bridge/then rinse-and-repeat formula, experiment with an alternative format like verse/verse/bridge/verse and see if you can work the title into the first or last line of every verse (like “Over The Rainbow” or Bob Dylan’s “Make You Feel My Love.”) It may be a challenge to find your footing with a new template, but I promise you it’s worth it. This structure has yielded many an evergreen copyright.

4. EMBRACE A METAPHOR

Pick an object. List its attributes and try to incorporate how they relate to a relationship you’re in, a situation, a feeling, your life — much like Rihanna did when she sang about how she’d protect a loved one with an “Umbrella,” or the way Demi Lovato compared a “Skyscraper” to how tall and powerful she felt.

5. CHANGE YOUR SCENERY

Get out of your head by taking a drive to a place you’ve never been to before — a hiking trail, a beach, a vista. Look out onto an unexpected landscape, a mountain range, a body of water. Breathe in the unusual smell of the air, foreign vegetation, rain!

6. REVISIT THE PAST

Hunker down with an old diary or journal. Let yourself remember that old flame. How have your feelings changed since you last saw each other? Did you find closure? Is your heart still aching? Let vulnerability be your catnip.

7. REACH OUT TO A FORMER BESTIE

Getting back in touch with an old friend can trigger emotional memories. Does it get you fuming about unfinished business or joyfully wanting to reunite because it feels so good? There should be considerable material here!

8. PICK A COLOR

… then partner it with something in the sky that is not actually that color. A fuchsia moon. A cobalt sun. Purple stars. Play with the combination. See what celestial rhymes emerge. Take license. After all, this is art.

9. GO IN A DIFFERENT DIRECTION

Listen to your favorite album by your favorite band and allow yourself to be guided by its unique atmosphere. For me, it might be The Beatles’ Sgt. Pepper’s Lonely Hearts Club Band, in which case I’d challenge myself to write a song that captures the trippy, the psychedelic, the fantastical, the diamonds in the sky.

10. EXERCISE YOUR MIND

In his book How To Write One Song, Jeff Tweedy of Wilco describes a lyric-play exercise in which he pairs 10 objects within his line of vision with random verbs and then creates a poem from the pairings. He’s always surprised at the odd beauty this yields and professes that some of the unlikely snippets have made their way into his favorite songs. Definitely worth trying!


Think of these suggestions as tools in a toolbox. They’re here to help. Maybe one of them will jump-start your craft as another year commences. Maybe you’ll find all of them useful all year round. Most importantly, don’t fret. Your muse will be back before you know it. Can you think of a time it didn’t return?

Here’s to a super-creative 2023!


Check out Shelly’s other postings

Top 10 Winter Movies

Winter is the perfect time to grab a soft blanket, heat up some hot chocolate and fire up the home theater. Here are ten winter-themed movies that will warm you and your loved ones.

1. FARGO

Taking place in and around the wintry tundra of Fargo, North Dakota, this black comedy follows the ever-spiraling misadventures of a financially strapped Minneapolis car salesman (William H. Macy), who hires a pair of thugs (Steve Buscemi and Peter Stormare) to kidnap his own wife (Frances McDormand) in order to extort a huge ransom from her wealthy father. Thanks to its twisted plot and superb acting, Fargo won seven Academy Awards® in 1997 (including Best Picture) and was selected for preservation by the United States National Film Registry in 2006 for being “culturally, historically, or aesthetically significant.” Find out where to stream it here.

2. FROZEN

Inspired by Hans Christian Anderson’s 1844 fairy tale The Snow Queen, this charming film tells the tale of Princess Anna of Arendelle, who teams up with a snowman, an iceman and his reindeer. Together, they search for Anna’s estranged sister Elsa, whose magical powers have mistakenly trapped the kingdom in an eternal frozen winter. The film is visually captivating thanks to its deft use of a combination of CGI (Computer Generated Imagery) and traditional hand-drawn animation — so realistic that at times you’ll almost feel the cold of the deep and heavy snows that swirl all around. Find out where to stream it here.

3. THE ICE ROAD

Set in the far north of Canada, this thriller tells the tale of a convoy of ice road truck drivers (Liam Neeson, Laurence Fishburne and Amber Midthunder) who brave untold wintry conditions to deliver critical supplies to save miners trapped in a collapsed mine. Crank up the speakers to enjoy the edgy multi-genre soundtrack executive-produced by Nikki Sixx of Mötley Crüe fame. Find out where to stream it here.

4. THE REVENANT

This gripping tale of survival is set in the Dakotas in early 1823. It stars Leonardo DiCaprio as Hugh Glass, a fur trader, trapper, hunter and explorer. After being mauled by a grizzly bear and left for dead by his companions, he endures a series of frozen dramatic encounters with nature, American Indians and his own former friends. The cinematography is stunning, as is the score by Japanese musician Ryuichi Sakamoto and German electronic musician Alva Noto, and the film won three Golden Globe® Awards and five BAFTA awards, as well as earning a Best Actor Academy Award for DiCaprio. Find out where to stream it here.

5. COOL RUNNINGS

Bobsledding in Jamaica? Well, sort of. This sports movie is loosely based on the true story of how Jamaican sprinter Derice Bannock (played by Leon Robinson) managed to assemble a national bobsled team for the 1988 Winter Olympics. John Candy provides additional comic relief, and there’s a soundtrack that includes much reggae, mon. This fun flick will get you feeling good about winter! Find out where to stream it here.

6. THE SHINING

“Heeeeeere’s Johnny!” Truly one of the great psychological horror films of all time, this 1980 classic by Stanley Kubrick is based on the Stephen King novel of the same name. Jack Nicholson stars as Jack Torrance, the newly hired winter caretaker of a remote hotel in the Rocky Mountains, who has been told that the previous caretaker killed himself and his family. As Torrance’s mental health deteriorates and his son’s frightening visions worsen, the story takes a series of disturbing twists and turns that will have you on the edge of your seat. Find out where to stream it here.

7. INTO THE WHITE

This exciting adventure film, set during the Second World War, is inspired and based loosely on real-life events that happened in Norway. It presents the trials and tribulations of the crew of a German bomber that has been shot down. In their snowbound trek to get to the coast, where they hope to be rescued, they encounter two British airmen who have also been shot down. The drama and intergroup antagonism builds as weather conditions deteriorate. Find out where to stream it here.

8. TRACK OF THE CAT

This oldie but goodie, released in 1954, stars Robert Mitchum as Curt Bridges, the head of a squabbling family who spend a terrible winter on their ranch in Northern California in the early years of the 20th century. The adventure starts when a hired American Indian hand tells Bridges there is a panther prowling up in the hills. Curt and his brother Harold then embark on a perilous journey into the frozen wilderness to track the panther while the rest of the family, ensnarled in their own drama, await their safe return. Find out where to stream it here.

9. THE DAY AFTER TOMORROW

This 2004 science fiction disaster film, based on the 1999 book The Coming Global Superstorm, depicts how catastrophic climate effects and a series of extreme weather events can bring on a new ice age. You’ll need to stay warm while watching this one, especially when a huge tropical depression splits into three hurricanes above Siberia, Scotland and Canada, flash-freezing everything in its path. Another superstorm then strikes Manhattan, causing NOAA paleoclimatologist Jack Hall (Dennis Quaid) and his son to embark on a series of wild adventures in order to escape the frozen disaster that ensues. Find out where to stream it here.

10. SNOW DOG

Starring Cuba Gooding Jr. as a celebrity dentist based in Miami, Florida, this comedy revolves around his cold weather misadventures when traveling to Alaska to claim an inheritance — which includes blizzards, grizzly bears, thin ice and an old mountain man played brilliantly by James Coburn. The good doctor eventually falls in love in the frozen town and even learns how to drive a dog sled led by a defiant lead dog. Find out where to stream it here.

What Is Loudness?

If, like most of us, you listen to music from streaming services, you’ll notice that each song seems balanced, volume-wise, with the ones that are played before and after. That’s because all major streaming services employ proprietary loudness normalization algorithms that automatically adjust the level of a song before it’s streamed.

Why is this important to home recordists? Well, if you’re hoping to share your music with the world, streaming is pretty much the only way to go these days, so knowing how those algorithms work is critical to getting your music played. Here’s a guide to the measurements that make up what we call “loudness,” along with step-by-step instructions for getting your music prepped so that it will sound its best when streamed.

LUFS

The term “LUFS” (pronounced “luffs”) is one that you may have come across when reading articles or watching videos about music production. It’s an acronym for Loudness Units Relative to Full Scale, and is a relatively new type of loudness measurement for music and other audio — a measurement that’s more accurate than those used previously, such as peak and RMS.

A Loudness Unit (LU) is roughly equal to 1 dB, though measured somewhat differently. Full Scale refers to 0 dBFS (Decibels Full Scale), which is as high as you can go in a digital audio system without clipping. (Another, less commonly used but functionally identical term of measurement is LKFS, which stands for Loudness, K-weighted, Relative to Full Scale.)

All major streaming services, including Spotify®, TIDAL, Apple Music® and Amazon Music, along with radio, television, and movies, have switched to using LUFS because it’s currently the best measure of loudness over time. In addition to virtually eliminating the need for listeners to adjust their volume control from song to song, the adoption of LUFS has pretty much ended the so-called “loudness wars,” where artists or producers tried to master their music at high levels so that their songs would stand out from those of competitors when played back to back. Nowadays, with all songs set to a specific LUFS target, the need to radically increase the volume when mastering has been eliminated. The result has been better-sounding music.

What’s in a LUF?

LUFS get measured in three different ways: Momentary, Short-Term and Integrated. If you look at a LUFS meter, such as the primary meter in Steinberg Cubase Pro (when set to LUFS), or the SuperVision plug-in in Cubase Pro or Artist, you’ll see those categories and more.

Screenshot.
The Steinberg SuperVision plug-in.

It’s not as complicated as it appears at first glance. Momentary LUFS get measured every 400 milliseconds, which is a little less than half a second. Because they capture such short periods, they function more like the readings from a dB peak meter, showing you loud transients (spikes) in a song.

Short-Term LUFS get measured every three seconds — a considerably longer period of time. They’re good for seeing the level changes between song sections.

The most important are Integrated LUFS, which the streaming services use for their loudness targets. Integrated LUFS provide an average level over time. Measuring them over an entire song is the best way to get accurate results.

True Peak

Another standard term of measurement is called True Peak. It’s particularly important because it’s the value that gets regulated by the streaming services’ loudness normalization algorithms.

True Peak is measured using a standard called dBTP (decibels true peak). Unlike LUFS, True Peak not used for assessing overall loudness. Instead, it measures the peaks in your song, making it a vital tool in preventing distortion.

If the True Peak reading for a song is too high, it can cause inter-sample peaks. These occur because of a phenomenon that can happen when a digital signal gets converted back to analog. The peaks get slightly higher after conversion back to the analog domain. If they start out too close to 0 dB, the peaks in the analog audio can exceed 0 dB, which can cause distortion. Often, such distortion is not audible until your WAV or AIFF files are converted to MP3, AAC or some other compressed (aka “lossy”) codec for streaming.

The possibility of distortion from inter-sample peaks is the reason the steaming services are so careful about True Peak. If a song has a True Peak value that exceeds -1 dBTP, the loudness normalization algorithm will turn down the overall volume of the song, which you don’t want to happen.

Screenshot.
If the True Peak level is above -1 dBTP, you need to reduce it.

Dynamic Range

A song’s dynamic range is defined as the difference between the quietest and loudest moments. Loudness meters don’t all use the same scale for it, but they all measure it in some way.

The Steinberg SuperVision plug-in uses the Loudness Range (LRA) scale, which computes a ratio between the loudest and softest points using Loudness Units (LU). The lower the LRA (or other dynamics measurement), the more constant the level because there’s less variation between the loudest and softest points. The higher the reading, the more variation.

That being said, if your song’s arrangement has some extremely quiet and loud parts, you will want to reduce the dynamic range with a compressor or limiter so that listeners don’t have to adjust their volume controls when the song gets too soft or too loud. In the days of the Loudness Wars, songs would get limited to the extreme. Music that’s squashed like that can sound fatiguing. Conversely, leaving more dynamics provides a more open and airy sound.

In the graphic below, you’ll see the same song’s waveforms stacked one over the other. As you can see, the lower one (in red) was limited too heavily.

Screenshot of wave forms.
The red waveform was limited too heavily.

Dynamic range varies from one style of music to the next. Classical has the widest, generally, followed by jazz. Pop and rock have smaller dynamic ranges, usually between +5 to +7 LU on the LRA scale. EDM is more heavily compressed and can have readings closer to +4 LRA.

How to Adjust Loudness

Adjusting loudness is a controversial issue. Some experts say that you shouldn’t get hung up on the loudness level; you should just make your song sound good, and the streaming services will adjust it to their standards anyway. That said, it’s desirable to at least be in the ballpark so that the algorithms won’t have to use extreme processing to get your music into compliance. That’s because such processing could potentially affect your song’s dynamic range.

There’s a relative consensus that shooting for about -14 LUFS (the Spotify target) and a True Peak reading no louder than -1 dBTP will get you close. It’s probably easier to mix your songs a little quieter (many say aim for about -23 LUFS) and do the mastering as a separate step afterward.

Mastering level adjustments are generally made using a limiter such as the Steinberg Maximizer plug-in provided by Cubase. You typically increase the LUFS level by turning up the input gain, which in the case of Maximizer is done with the Optimize parameter. True Peak is reduced by turning down the Output control.

Screenshot.
Lowering the Output reduces the TruePeak level.

Here’s a basic step-by-step for getting your song’s loudness up to about -14 LUFS and at or below -1 dBTP. For the purposes of this exercise, we’ll describe using Cubase for this purpose, but the same basic procedures will apply to any DAW.

1. Import your song into a stereo track.

2. Insert a limiter on one of the insert slots on either that stereo track or the main Stereo Out.

3. Insert SuperVision or another LUFS- and True Peak-capable meter as the last plug-in on your Stereo Out.

4. Set the meter to measure loudness. In SuperVision, this is done via a dropdown menu:

Screenshot.
Setting SuperVision to measure loudness.

5. Play your song all the way through and observe the results for Integrated LUFS and True Peak.

6. Hit reset on the meter (the button with circular arrows) and start playing the song again. If you need to increase the Integrated LUFS (which you probably will, depending on how loud you mixed it), turn up the Optimize knob until the LUFS reading gets to approximately -14. Anywhere between -13 and -15 LUFS is close enough. If you don’t see any changes, try resetting the meter again and letting the song play for a while so that SuperVision sees both the quietest and loudest parts of the song.

7. If the True Peak is above -1 dBTP (-0.99 or higher), reduce the output knob by a small amount, hit reset again and let it play past the loudest point in the song. You should see the True Peak reading drop.

8. Because you lowered the output, the LUFS reading may now drop below the -13 to -15 LUFS range that you’d set. If that happens, push up the Optimize knob a little more. Remember to reset the meter each time. Finesse the Optimize and Output parameters until you get the Integrated LUFS and True Peak to approximately -14 LUFS and -1 dBTP, respectively.

9. If the dynamics on your song (the Range measurement on Super Vision) are below about +4 LU, you may want to revisit your mix and take off any master bus compression or limiting you used. Then try the whole process again. Once you’ve got the various loudness measurements to where you want, bounce the song out of your DAW as a 24-bit WAV file.

It might seem tricky, but after you adjust a couple of songs, you’ll get the hang of it. Trust me, it’s worth it. The result will be better-sounding music and a greater chance of getting your songs streamed out to the world.


Check out our other Recording Basics postings.

New Year’s Resolutions for Musicians

We’ve completed another revolution around the sun, and it’s time to celebrate — but it’s also time to take stock and think about how we can make the coming year even better.

Things like losing a few pounds, developing new work skills, taking that long overdue vacation — those are all pretty standard. For musicians, though, New Year’s resolutions might need to be somewhat more specialized. Here are seven suggestions that can help you improve your chops and expand your musical horizons in the months ahead.

1. Feed Your Creativity

Set a goal of writing some new music every week. This doesn’t have to be a full song — even a simple melody, riff, phrase or beat will do. The idea here is to stimulate the creative area of your brain (until recently, thought to be the right hemisphere, though some recent studies show that the left hemisphere can play a role too), and, honestly, the results don’t matter all that much: for the purposes of this exercise, a bad piece of original music is better than no piece of original music.

Like so many other things in life, this is a case where practice makes perfect. The more music you write, the easier it will become over time. Eventually you’ll find yourself stringing together those basic melodies, riffs, phrases and beats into complete musical compositions. If you’ve got a flair for lyrics (or can partner with someone who does), they can even turn into pop or rock songs that might eventually become hits! (Interested in pursuing your songwriting muse? Check out our blog postings from Grammy-nominated singer/songwriter Shelly Peiken.)

2. Expand Your Repertoire

Learn one new song or composition every ten days. If you’re good at learning by ear (a skill that also gets better with practice), all that’s involved here is finding a song you like and listening to it repeatedly until you can play the chords and melody. If not, instructional YouTube videos, sheet music and/or “fake” books can provide you with the chords and notation to just about every song and composition out there. (Yamaha offer hundreds of sheet music titles, all available for immediate download.)

3. Master Your Instrument

Make a point of tackling a new playing technique every month. This can be as simple as learning new scales or chords, or as complex as developing drumming polyrhythms or learning circular breathing techniques. Instructors can be very helpful in achieving this goal, but there are plenty of online resources to help in that endeavor too, including articles here on the Yamaha blog such as our Well-Rounded Keyboardist series and the many guitar tutorials presented by renowned educator/clinician Robbie Calvo.

4. Record Your Muse

Learn a new recording skill every other month. After all, if you want to put your music out there for the world to hear, you need to be able to record it, and the better it sounds, the more likely you are to find an audience. This can encompass a wide variety of aspects, including:

  • A basic understanding of sound, acoustics and microphone design
  • Knowing how to set levels correctly and avoid distortion
  • Learning the importance of room treatments and proper monitoring
  • Trying out different mic placements to see how they affect the sound
  • Experimenting with new plug-ins and advanced features offered by your DAW software
  • Creating mixes that sound good in all different environments and on different systems
  • Understanding the basic principles (and importance) of mastering

You can find lots of great tips about all of the above — and more — in our ongoing series of Recording Basics blog postings.

5. Open Your Ears

Expose yourself to a new genre of music for an extended period of time every few months. This one’s super-easy: all you have to do is listen. But you need to make a conscious decision about what you want to listen to, and you need to listen intently, to try to get “inside” the music, to understand what makes it tick.

You might want to start slowly by sticking to genres similar to the ones you already like — for example, classic rock fans will probably enjoy blues music too. After awhile you can begin to stretch things by experimenting with genres that are significantly different from your personal tastes: If you’re a classical music aficionado, try some hip-hop; if you’re a rap fan, go for some gentle folk or country music. You may not like what you’re hearing, but there’s also the possibility that you will. Either way, you’ll be expanding your musical horizons, which can only help you develop as a musician.

6. Step Outside Your Comfort Zone

Try to learn a new instrument in the coming year. Notice we said “learn,” not “master,” because it’s impossible to master any musical instrument in that short a space of time. (When asked why he still practiced at the age of 90, the legendary cellist Pablo Casals replied, “Because I think I am making progress.”)

So we’re talking about the basics here, but even getting that far will help stimulate your brain and improve your chops on your chosen instrument (as learning sitar did for Beatle lead guitarist George Harrison) … though it’s also entirely possible that you’ll gravitate to the new instrument instead. For example, Tower of Power saxophonist Stephen “Doc” Kupka started on oboe but switched over to baritone sax in his college years because he wanted to play rhythm and blues; similarly, the group’s drummer David Garibaldi initially wanted to play trumpet, but found himself practicing violin instead before discovering the joy of drumming. The alternative instrument you pick should ideally be somewhat similar to what you already know — for example, if you’re a guitarist, try taking up bass, or vice versa — as this will help you make progress more quickly. But if you’re up for a challenge, by all means go for something completely different!

7. Get Critical

Over the course of the year, develop critical listening skills so you can better evaluate your own recordings and those of other musicians. You want to be able to listen like a producer, like an arranger, and like an audio engineer. Some people are born with those skills, but they can be learned, though there are no shortcuts here — you have to put in the time.

Being a critical listener allows you to delve beyond the gut-level reaction you have when you first hear a song and appreciate it intellectually, which can only aid you in your development as a musician and as a composer or songwriter. There’s a reason, after all, why your favorite music is your favorite music … and once you develop these kinds of listening skills you’ll be able to know what that reason is and apply it to your own music-making.

Here’s to a great year ahead!

So You Just Got Your First Bass – Now What?

You’ve done the research and finally pulled the trigger, or perhaps you totally lucked out and nailed a sweet deal on a used bass. No matter how you arrived at this moment, the first time you hold a bass that’s yours and yours alone is unforgettable. You’re on a new journey and the sky is the limit. Congratulations!

Here’s a guide to the next steps you need to take.

FOUR ESSENTIALS

If your bass didn’t come with a strap and an instrument cable, those should be your first priorities. It’s easy to fall in love with an eye-catching bass strap, but keep in mind that a padded and/or wider strap can help keep your shoulder from hurting if you’re playing for long stretches or if your bass is heavy. If you like to move around a lot, consider getting a pair of strap locks, which help secure your strap to your bass. Instrument cables come in many lengths and colors and at several price points; some players prefer right-angle cables, which are great for basses with an input jack that’s flush with the body, and others swear by particular brands. A basic six-footer does the job for most folks, but my advice is to go for the best cable you can afford, as it will almost certainly last longer than the cheaper ones.

Electric bass guitar.
The Yamaha BB234 is a great entry-level bass with professional features.

The third item no bassist should be without is a tuner. There are plenty of tuning apps, but I’d recommend plugging into a tuner pedal or using a tuner that clips on to your headstock, like the Yamaha GCT1. Most tuners these days work for both guitar and bass; if your first bass is a 5-string, make sure any tuner you’re considering can handle a low B. (The GCT1 checks that box.)

Small electronic device with screen and clip.
Yamaha GCT1 clip-on tuner.

Finally, just as humans need clothes and shoes, every bass needs a case. Whether or not your bass came with a hard case (which is the best option), a good soft case (usually called a “gig bag”) will help protect your instrument almost everywhere except the underbelly of an airplane.

PLUG IT IN

Once you’ve covered the basics, it’s time to think about amplifying your bass, and there’s a universe of options for every budget and requirement.

Of course, nothing comes close to the thrill of playing through a big amp along with a drummer and the rest of the band, and when that time comes, you’ll want to go the extra mile to get the best amp in terms of price, portability, power, tone and durability. (Definitely check out some of the models offered by Ampeg — a brand long favored by many bassists.)

But to start — especially if you have roommates or neighbors — you’ll want to invest in a small practice amp. Bear in mind that bass notes travel easily through walls and ceilings, so turning the volume up to even moderate listening levels might prompt complaints — which is exactly why many practice amps, including Yamaha THR-II Series desktop models, have headphone jacks in addition to speakers.

An array of small guitar amps.
Yamaha THR-II desktop amps.

But an amp isn’t the only way to experience your bass. If you make music on a computer, plug your bass into an audio interface using its instrument input (assuming it has one; if not, you’ll need a DI box) and have fun playing and recording into your DAW.

Bass-specific headphone preamps are another way to keep your practice sessions private and immersive. Old-school headphone preamps have volume and basic tone controls, but today’s models also feature EQ, effects and realistic speaker cabinet modeling — sometimes even rhythm tracks you can practice to. Many also offer Bluetooth®, making it especially easy to play along with streaming music or apps like iReal Pro running on your laptop, Android® or iOS device.

When you’re ready to join a band and begin gigging, you’ll need a bass amp suitable for rehearsals and small venues like clubs. Again, it’s well worth checking out those in the Ampeg line, such as their compact Portaflex models.

Amplification equipment.
Ampeg Portaflex bass amp and cabinet.

NEXT LEVEL

Once you’ve had your bass for a while, you may notice a few things you’d like to tweak. In addition to an overall inspection, most professional setups include making sure the instrument is in tune all the way across the neck, adjusting the truss rod if necessary, dialing in string height and checking pickup height. This process is best done with new strings, so a setup is a great opportunity to try a different set of strings. If there are other issues — tuners that are too tight or too loose, static when you twist the control knobs, or problems with the preamp, pickups or input jack — talk to your luthier or repair person before they get started. Getting your bass back after a good setup can make such a dramatic difference that it may inspire you to learn how to set up your own instrument.

Last but certainly not least, consider taking lessons. One of the great things about being a bass student today is that there’s tons of information online, and a lot of it is free. But so much of it is also contradictory, and piecing together the many strands of advice while making steady progress — not just learning a lick or single technique at a time — can be challenging. A good teacher will help you set specific goals and encourage you to practice regularly to reach them; if you’re lucky, you’ll find someone whose life and musical experience enriches your journey and offers valuable shortcuts to bass mastery.

Getting your first bass can be a life-changing moment. Revel in it! Get to know your instrument. Connect with others who play the same make and model. Take good care of it, and your bass will take you places you might never have imagined.


Yamaha offers a wide variety of entry-level, intermediate and professional basses. Click here for more information.


Check out E.E.’s other postings.

Turning Your “Won’ts” into “Cans”

By winter break, music educators have had time to watch their students learn new things and progress, but they also start to notice those students who seem to be falling through the cracks. Usually, they are the ones who don’t volunteer to answer questions and often appear lost. The exchange between teacher and these students often sounds something like this:

Teacher (seeing a student who appears to not be following the music): “Walter, what note are you playing there?”

Student: “I don’t know.”

This is often followed by the teacher either providing the answer or asking another student to answer the question. The first student’s dilemma hasn’t been solved, and similar conversations continue to take place throughout the year.

Identifying the “Won’ts”

disengaged male studentIn over 36 years of teaching, I have yet to come across a student who could not participate and learn, but I continue to meet those who will not participate in the learning process.

I describe this type of student as a “won’t”— one who possesses the ability to answer a question or perform a task but isn’t motivated to do so. They are reluctant to respond or participate. In many programs, this type of student will continue to fail quietly.

Before exploring how to address these “won’ts,” it’s helpful to understand why they’re behaving the way they are. Often, they have missed one or several steps in the learning process usually due to absence or inattentiveness. Or perhaps this knowledge gap has gone unnoticed or unattended to by prior teachers. Sometimes these students haven’t been made to answer but have usually been provided the answers or allowed not to answer. (It is important to note here that I am not talking about students with a specific learning disability or special educational need, which requires another level of awareness and sensitivity that must be considered before any of this.)

Be Relentless in Asking Questions

How do you convert this inactive student to be a participating, contributing member of your class? Something that has worked for me with my middle school students is to be relentless in the process of asking questions and not accepting a non-response. Often this requires digging a little deeper with your questioning process. As an example, an exchange with that initial student might go like this:

Teacher: “Walter, what note is that?”

Student: “I don’t know.”

Teacher: “Let’s help you find it. Is it on a line or space?”

Student (looks for a moment): “A line.”

Teacher: “Okay, that’s correct. Let’s go from there — what’s the name of that line?”

Student: (appears unsure) “C? E?”

sax on top of sheet musicTeacher: “How many lines up is it?”

Student (looks at note for a moment): “Three.”

Teacher: “Okay, great. Now, what is the letter name of that line on our staff on the wall?”

Student (stares at wall for a moment): “Um, B?”

Teacher: “Well, that would be correct if you played a treble clef instrument, but Walter, your instrument plays in the bass clef. What would the letter name of that note be in bass clef?”

Student: (Looks again): “Uh, D?”

Teacher: “Great! Now we’re getting somewhere. What position do you use for D?”

Student: “I don’t know.”

Teacher: “Okay, that note is on your fingering chart, take a look and find a note that matches it.”

Student (slowly flips to chart then looks for a moment): “Fourth?”

Teacher: “Great! That note is in fourth position. What was its name again?”

Student: “D.”

Teacher: “And what position is D in?”

Student: “Fourth.”

At this point, you’re finally ready to move on. Now, many of you probably found that minute-and-a-half conversation painful (and perhaps familiar), but that investment in time should pay off over time. In the process, the student produced four correct answers that were acknowledged by the teacher — something that likely doesn’t happen daily for that student. That’s progress already, but it would be foolish to assume that’s the last time the conversation would be held. Let’s imagine the next time…

Teacher: “So Walter, how do you play that note?”

Student: “I don’t know.”

Teacher: “Is it on a line or a space?”

Student: “A line.”

Teacher: “Great. How many lines up?”

Student: “Three.”

Teacher: “Okay, great. What’s the name of that line?”

Student: “It’s D.”

Teacher: “Excellent. What’s the position for D?”

Student (looks back through the book for a few seconds): “It’s fourth.”

Teacher: “You’re getting faster! So how do you play the note D?”

Student: “Fourth position.”

male music teacher conducting middle school bandNotice how much shorter this conversation was, and once again, the student has experienced success in and appropriate recognition for providing answers in class.

At this point, I’ll continue to prod this student with similar questions at every opportunity, making him my “go-to” person for note name or position questions. The responses will tend to come faster. Usually what also will happen is that the student will get annoyed at always being asked questions, so they start to prepare the answer before you ask:

Teacher: “So Walter…“

Student: “It’s D, fourth position!”

Teacher: “Thank you.”

Now the real magic begins when a different student makes a similar error.

Teacher: “Ashika, what note are you playing?”

Ashika: “I don’t know.”

Teacher: “Walter, tell her what note it is.”

Walter: “It’s D, fourth position!”

And bingo! Walter has just experienced the power of owning knowledge that someone else does not have. Perhaps for the first time. For some students, this is a powerful moment — you’ll see it in their reaction. Others may not even realize what they’ve just done, so you’ll need to point it out:

Teacher: “Walter that’s pretty cool to have an answer someone else needs, isn’t it?!”

Walter (smiles)

A Simple and Powerful Process

Empowering students with knowledge and the process to gain new knowledge can be an educational turning point for some, and even life changing if they can transfer it to other classes.

male music teacher talking to three studentsThis process sounds simple because it is. Some important things to consider are the following:

  • Remember that it is an ongoing process. Just doing this once won’t alter a student’s behavior. Your consistency will lead to more consistent student behavior.
  • Your tone in leading the student through the questions is key. Be calm and encouraging and offer authentic praise (do not overdo it).
  • It’s helpful to follow your questioning of one student by asking one or two other more reliable students similar questions. This produces a model for reluctant students and keeps the rest of the class on their toes knowing that they might be asked a question as well.
  • If you find you’re not receiving the right type of answers, consider how you’re asking the questions. Avoid questions that can be answered with just “yes” or “no.” Instead, ask those that require more specific answers. Often, we need to simplify the wording of our questions to be more direct.
  • Do not show your frustration with students’ reluctance to respond. Understand that there may be one or more contributing factors other than their lack of attention or knowledge.
  • Always encourage students who provide an appropriate answer (which may not always be the correct one). In doing so, you are encouraging participation and providing positive reinforcement that will encourage further participation.

As you work your way through your classes and identify your “won’ts” and focus on turning them into “cans,” you are developing a classroom culture that values knowledge. Make a big deal when students learn the process of finding the information they need, and celebrate when they use that information appropriately. This will create that “can-do” attitude in your classes, and you’ll find yourself facing less “won’ts” each week! Use the opportunity of a new year, new semester, quarter or even the start of a new week to reset these students and point them toward success.

Shine the Spotlight on Community Engagement

College music programs sit in a unique position within the world of music education. As degree-granting institutions, we oversee a significant portion of workforce preparation for those entering the K-12 teaching profession. As incubators for fostering the musical growth and development of music majors transitioning from amateur to professional levels of musicianship, we collaborate with a host of community partners to facilitate activities, internships and performance opportunities. As liaisons between the academy, music industry and nonprofit entities, college music departments throughout our country have the capacity to bring numerous stakeholders together in efforts to make a positive impact in the communities we serve.

This article shines a light on the work that the music department at Tennessee State University does to engage with our community in various ways.

The Music Department and Community Academy

happy Black elementary student standing in front of school gatesLocated in Nashville, Tennessee State University, a Historically Black College & University (HBCU), sits in the heart of the place affectionately known as “Music City.” Being in one of the country’s most vibrant cities for live music has certainly helped us in terms of involvement with the greater Nashville community, and we do our best to be proactive in pursuing potential partnerships with organizations within our local area. One of the ways we do this — in addition to the work we do through our memoranda of understanding (MOUs) with outside entities — is through our community music program.

Our Community Academy of Music and Arts (CAMA) is a community-based, nonprofit program housed within our department that provides year-round arts education for underserved students in Nashville and surrounding areas. In addition to one-on-one lessons on a range of instruments with our esteemed faculty at low to no cost to students ages 3 to 18, we also host several summer day camps that include visual art, music performance, math and science applications of music-making, and fun activities and field trips to historic locations in town where students can learn more about the arts in Nashville. The combination of our efforts both within our department and through CAMA have helped us to “level-up” our community engagement in many ways, including expanded collaborations with several leaders in music education and the recording industry.

Community Engagement

happy students at Nashville Opera
photo from Nashville Opera

Our department offers degrees in music business, technology, performance and education. Each of our programs provide internship, performance and in-field clinical experiences for our music majors. Our music industry and performance majors benefit greatly from the long-standing partnerships we have with the Recording Academy, Windish Music and Nashville Opera. Our music education majors have had the opportunity to observe, intern and team-teach with teaching artists from our partners at W.O. Smith Music School, QuaverEd, Metro Nashville Public Schools and the Tennessee Music Education Association.

All our majors and minors, and even some of our graduate students, can take advantage of our partnerships with the Nashville Symphony Orchestra, Sweetwater Music, Country Music Association Foundation and the National Museum of African American Music. These include scholarships/grants, paid internships and performance opportunities.

In addition to our efforts within the department and through CAMA, we also offer the TSU Summer Band Camp each June. This week-long residential camp is offered to student musicians in middle school and high school and serves as one of our most successful strategies in recruitment and is attended by more than 200 participants annually. We also invite many of our alumni who are band directors to come and lead sectional rehearsals, reading band sessions, and share their experience and knowledge with other directors in attendance through several professional learning sessions. One of our esteemed alumni, Mr. Jimmy Day, was recently selected as the state of Colorado Teacher of the Year! The camp is subsidized by many of our local partners mentioned above, which helps to reduce costs significantly for student participants.

These efforts have aided our department greatly in recruiting a critical mass of student musicians of color and successfully preparing them for careers in music. The significant impact of these partnerships has helped our department expand immeasurably to meet the needs of our students.

Lights, Camera, Action!

TSU The Urban Hymnal CD coverMany of my colleagues at other institutions often ask how we are able to forge these connections within our community and maintain them for so long. For us, it starts with active engagement and proactive pursuits. Our faculty are constantly forming professional relationships by attending and presenting at conferences, participating in college recruitment fairs, visiting local K-12 schools regularly, serving on the boards of local nonprofits, and constantly publicizing the work we are doing through local news outlets and social media. And with our upcoming historic performances this academic year with our jazz band at the prestigious Midwest Clinic: An International Band and Orchestra Conference, Carnegie Hall performance for our top choir, and recent GRAMMY nomination for our marching band’s debut album entitled “Urban Hymnal,” I believe that it is through our outreach efforts and involvement in our community that we continue to accomplish all that we have.

I hope that some of what I have shared will spark some ideas as you continue your community engagement efforts!

Best Family Video Games

Getting together with family for the holidays is about catching up and reconnecting. But sometimes that requires a little something extra — a hearth, of sorts, to gather around. Generations ago that meant a literal fireplace, but today we have even more dazzling options … like video games.

Here are eight of the most family-friendly offerings, all of which are sure to delight and engage players of every skill level. Gather around the game console and enjoy the holidays!

1. FIFA 23 (2022)

With all the recent excitement about the World Cup, your family is sure to appreciate the subtleties and detail of this, the latest in the FIFA soccer series, which is not only fun to play, but a joy to watch. The sweeping green grass, the lifelike teams, the sounds of chanting crowds and observant announcers — this is as close to participating in an actual soccer match as there is in the world of gaming. Various modes allow players to face off against soccer power teams like Chelsea and Arsenal or nations like Brazil, France or Germany, matching up against the computer or playing against an opponent live or online. FIFA 23 even features Women’s Club Football, the first in the series to do so. Preview it here.

2. SONIC MANIA (2017)

Designed to resemble the popular Sonic games of the 1990s, Sonic Mania is bright, fast-paced, nostalgic and fun for all ages. Along with his compatriots Tails and Knuckles, Sonic maneuvers through 13 side-scrolling levels, picking up rings, bouncing off springboards and earning gifts by smashing televisions — all in a day’s work. But the main objective remains the same: defeat the elusive Doctor Eggman (aka Doctor Robotnik). Preview it here.

3. LEGO BATMAN: THE VIDEOGAME (2008)

Batman is one of the most beloved fictional characters and Lego is one of the most adored toys, so why not combine them in a video game? The mystery of Batman and the familiarity of Lego provide a gaming experience that is both involving and a bit silly (in the best of ways). Every family member will want a turn. Play as Batman, with your trusty sidekick Robin, as you seek to thwart your classic enemies, from the Riddler to the Penguin to the Joker and more. Lego has put out similar games based in popular movies like Star Wars, Jurassic World and Harry Potter, but the Batman game is the first with an original plot. Preview it here.

4. OVERCOOKED! (2016)

This title provides all the fun and chaos of trying to put together a feast … but without the stress of having to feed your actual family and clean up afterwards. Playing as chefs rushing around a kitchen (the layout of which changes for each level), you cut up ingredients to prepare a meal in a short window of time. You may get a warning that your dirty plates are piling up and someone must stop what they’re doing and wash dishes, but just like in a real restaurant, you’ve got to keep up! This multi-player game requires lots of teamwork. Just what families are best at, right? Preview it here.

5. MARIO KART 8 (2014)

The most recognizable character in video game history may be best known these days for his go-kart racing games, and with good reason. The Mario Kart series doesn’t disappoint. Each multiplayer title is brightly colored and features some of the most familiar faces in gaming, including Princess Peach. But while some Mario titles offer traditional levels and puzzles, Mario Kart 8 is simpler, plus it was also the first in the series to offer anti-gravity racing. Players race around a track, playing solo or against other family members, all while having to dodge spinning turtle shells and fireballs shot out by their opponents. Preview it here.

6. SUPER MARIO PARTY (2018)

Sticking with our favorite digital Italian plumber, this title is a perfect example of a “party” video game that’s meant for groups of people. Super Mario Party was both a reboot of the series and a return to the turn-based gameplay of prior titles. Several secondary multiplayer games are included here, but in the main one, each player navigates the board, rolling dice and moving the corresponding number of spaces, with each space impacting the players differently, such as taking away or giving coins. After each turn, players play a “minigame,” which involves the others, too. Preview it here.

7. LUIGI’S MANSION 3 (2019)

But enough about his older brother — it’s time to dive into Luigi’s world now. This is the third in the Luigi series, which resembles the Ghostbuster movie franchise. Here, players walk around a haunted hotel as the green-clad Luigi, climbing floor to floor via the hotel’s spooky elevator. The goal? To rescue friends who were tricked into visiting by the ghosts that inhabit the place, vacuuming the apparitions up as you go. Preview it here.

8. ANIMAL CROSSING: NEW HORIZONS (2020)

In this, the fifth in the Animal Crossing series of “life simulation” games, players travel to a deserted island to develop the area as best they see fit — gathering items, harvesting berries, chopping wood and constructing dwellings — with the goal of building a happy community of human-like animals. The world is yours in this video game, but be sure to work in unison with the natural resources, changing seasons and animals on your team. Players can also earn the chance to visit neighboring islands and invite those villagers to their homes, if they so choose. Preview it here.


Get even more family fun from these titles by playing them through dedicated gaming mixer or using a gaming headset.

How to Use Inserts

Ever wonder what those connections on your mixer called “inserts” do? Here’s a guide to what they are and how they are used.

Inserts In The Analog World

Many analog mixers, such as the Yamaha MGP Series, offer inserts on the input channels. They’re often found on the rear panel, like this:

View of panel inputs.
Channel inserts on the Yamaha MGP16X.

An insert provides both an output (or “send”) and an input (or “return”) on a single 1/4-inch TRS (Tip/Ring/Sleeve) jack that’s internally wired as a pair of connections. Using an insert requires a special cable (appropriately enough called an “insert cable”), which has a TRS plug at one end and two TS (Tip/Sleeve) plugs at the other end.

When the TRS connector is plugged into an insert jack, the signal from the mixer channel is sent out through the tip of the TRS connector to an external (“outboard”) processor such as a compressor or noise gate. The ring of the TRS is used to return the signal from the processor back into the same mixer channel. The TS ends of an insert cable are usually labeled to indicate which one is an input (the bottom jack in the illustration below) and which one is an output (the top jack in the illustration below).

Diagram.
Signal routings of an insert cable.

A switch inside the insert jack senses if there’s a TRS connector plugged in. If a connector is not plugged in, the insert is bypassed. But when a connector is plugged into the jack, the signal is rerouted from the mixer to the external processor. The insert usually comes in the signal path after the mic preamp, trim and equalization (EQ) circuitry, but that can vary from one manufacturer to another.

Two Plus Two Equals Three?

One unbalanced cable requires two conductors: a tip that carries the “hot” signal, and a sleeve that carries the ground. So how can a TRS insert — which has three conductors — carry two separate signals? The answer lies in the fact that the sleeves of the two TS connectors are both wired to the sleeve of the TRS so that they share a common ground.

Diagram.
The two TS connectors of an insert cable share a common ground.

Most manufacturers use the tip of the TRS as the send and the ring as the return but some do it vice-versa, so be sure to check the manual for your particular mixer.

When To Use An Insert

Inserts are most useful when you want to process individual channels, and when you want to hear only the processed signal. Inserting a compressor on a vocal channel, for example, ensures that you hear only the compressed signal and dedicates the compressor to the vocal only. This enables you to optimize the compressor settings for the vocal before it is sent to any other buses (e.g. the stereo L/R mix or any of the aux sends), but it also means that you need more hardware if you want to process a lot of channels. Compressors (typically used on vocals, kick, snare and bass), gates (for drums) and outboard EQ processors are generally accessed via inserts and are therefore commonly called insert effects.

Reverbs and delays are not generally accessed via inserts because they often receive signals from multiple channels. These types of effects are typically accessed via an aux send, with the processed signal coming back into the mixer via an aux return, where it is blended in with the unprocessed “dry” signal.

In live sound, graphic equalizers and compressors are also often used to process the full mix being sent to the stereo L/R bus. That’s why some mixers, like the Yamaha MGP24X and MGP32X, provide inserts for the stereo L/R outputs:

Diagram.
The stereo inserts on the MGP24/32X.

Inserts In The Digital World

Digital mixers usually don’t have insert jacks because the processing is done internally. Yamaha TF Series digital mixers, for example, provide a four-band parametric EQ, gate and compressor on every input channel.

View of panel.
Channel view on the TF Series mixers.

More advanced users may want additional processing and that’s why Yamaha Rivage PM, CL Series and QL Series mixers feature a virtual rack with a wide variety of effects, including graphic EQ, vintage compressor, analog tape simulator, pitch shift, distortion, flange, filter and more.

Screenshot.
The CL/QL virtual rack.

These processors can be inserted on any input channel, which opens up a world of possibilities. For example, you could insert a digital model of a vintage tube compressor on the lead vocal channel to get a different type of compression from the standard compressor offered by the mixer. Input channels on CL and QL mixers have two inserts, each of which can be set to pre-EQ, pre-fader or post-fader (post-on switch).

Screenshot with area highlighted.
QL1 input channel processing.

Effects in the virtual rack can also be inserted on any output, such as an aux send or the stereo L/R mix bus. A graphic EQ inserted on an aux output that’s being used for a monitor send can help control feedback, while a virtual tape simulator inserted on the stereo L/R bus can add analog warmth to your mixes.

Screenshot.
The Yamaha Series 85 virtual analog tape simulator.

Pre- Versus Post-Fader

As mentioned earlier, Yamaha CL, QL and Rivage PM mixing consoles offer the option of using an insert pre- or post-fader, and it’s important to understand the difference between these patch points, especially when using a compressor or noise gate. If you insert a compressor or gate pre-fader, then the action of the processor remains consistent regardless of fader position. This is generally good for input channels.

Inserting a compressor or gate on an output channel is a different story, and whether to insert it pre- or post-fader depends upon what you are trying to achieve. If you insert a compressor post-fader, then raising the fader increases the compression. This is great if you want to use the compressor on an aux send feeding a monitor (or, in some mixers, a dedicated “monitor send”) or the stereo L/R bus as a way of keeping the volume level from getting too loud. But if you want the “flavor” of the compressor to remain consistent regardless of the volume, then insert the compressor pre-fader. Inserting a gate post-fader is probably a bad idea because the gate may close as you lower the fader, thus cutting off soft sounds.

As you can see, inserts are an important component in live sound. They can help improve your mixes and open up creative possibilities. If you haven’t used them before, what are you waiting for?


Check out our other Tools of the Trade postings.

How to Transform a Lead Sheet Into a Performance

Lead sheets are a very basic form of sheet music that only show the melody of a song and the accompanying chords, with no indication of the keyboard part that should be played underneath. They’re often available in collections called “fake books” and are primarily intended for professional players as a quick way to access a song (or a lot of songs) at a live gig — instant repertoire expansion!

The challenge for a beginning keyboardist is to learn to develop a complete and convincing two-handed performance from these bare-bones guides. In this posting, we’ll show you how.

Note: You’ll need to have a good knowledge of chords, inversions and harmony to use lead sheets effectively. If your skills are a bit lacking in any of those areas, we suggest brushing up before moving on to the concepts below.

A Typical Lead Sheet

Here’s a typical example of a lead sheet for the Christmas classic “Deck The Halls”:

Musical annotation.

As you can see, only the melody is provided, along with chord symbols placed above the notes (lyrics are optional and may or may not be included). When first learning a song from a lead sheet, start by just playing the melody with your right hand and the root (the name of the chord, or the note presented after the slash mark) with your left hand, like this:

Musical annotation.

Now you can decide how you want to fill things in to create a more interesting accompaniment. The main goal here is to include more notes to fully represent the chords. This can be done with either your right hand or your left.

Creating a Chord Melody

Doing this with your right hand (while still playing the melody) results in what is known as a chord melody. Before you start that process, however, I suggest you learn how to block out the chords without playing all the moving parts of the melody, using well-chosen inversions that follow the melody nicely. For example:

Musical annotation.

Once you’re comfortable with that, you can fill in the rest of the melody, say like this:

Musical annotation.

Left Hand Chord Support

There are a few ways to approach playing the chords with your left hand. Again, start by just blocking out the chords in a similar fashion to the way we did it with the right hand:

Musical annotation.

When that feels comfortable, you’ll want to choose some better voicings (groupings of notes) and inversions so you don’t jump around so much. Here’s an example:

Musical annotation.

What’s different here?

  • Some of the left-hand chords are spread apart wider to sound fuller — for example, bars 1 and 3
  • Not all the left-hand voicings use all the notes of the chord (this is true of many of the C7 chords), since the missing note is being played by the right hand
  • There’s a fancier left-hand alternating pattern playing on the middle C7 and F/C
  • For the sus4 resolutions, only the 4-3 in each chord are moved so it doesn’t sound so clunky

Another approach would be to employ a simple stride pattern, where you alternate a bass note and a chord to add a nice rhythm to your playing:

Musical annotation.

To create a more flowing feeling, try arpeggiating the chords (i.e., playing them as separate notes) instead:

Musical annotation.

Spreading the Chords Between Both Hands

Spreading the notes equally between both hands is another good way to interpret a lead sheet. To do this, you’ll use the top fingers of your right hand (the ring finger and pinky) to play the melody, while the lower fingers of your left hand (again, the ring finger and pinky) play the bass notes. The remaining fingers in both hands can be used to play other notes to fill out the chord. This style of playing is common in church hymns (for example, the Bach 4-part Chorales), and is the basis that many jazz pianists use for playing solo piano.

To get started with this technique, go back to just playing the melody and the bass note slowly, as we did earlier (and as shown/demonstrated below). This will allow you to see and hear what the outer edges of the voicings will be.

Musical annotation.

Now just fill in some of the missing notes, trying to play at least one additional note with each hand. Some pianists like to be strict and not double any notes between the hands, but there’s really no hard and fast rule here: simply spread the notes nicely across both hands so it sounds good to your ears. Here’s an example of how this can work, with added pedaling (indicated by the sustain/damper pedal markings in the notation) to demonstrate how everything can be made to sound connected:

Musical annotation.

These are all good, solid approaches to transforming even the most basic of lead sheets into a complete performance you can be proud of. With practice, you’ll undoubtedly come up with more of your own. Happy faking it!

All audio played on a Yamaha P-515

Check out our other Well-Rounded Keyboardist postings.


Click here for more information about Yamaha keyboard instruments.

Exploring Curated Playlists

Covering virtually every genre from country to rock to jazz and hip-hop, curated playlists on streaming services are a hot new trend. Not only do they satisfy musical cravings, they can expose listeners to new and exciting music that they may not otherwise have found on their own — and can also help emerging artists get discovered.

Simply put, a curated playlist is one put together by a person, as opposed to a computer algorithm. (On Spotify®, the latter are called “personalized” playlists.) Curated playlists are created and maintained by individual users or editorial teams, driven by their personal tastes and preferences. They allow you to take your listening experience to a whole new level, and best of all, anyone can create one!

In this article, we’ll take a closer look at how curated playlists work and spotlight some of the best ones out there.

Playlists that are Style-Driven

Many of the most popular curated playlists are genre-specific — think Spotify’s “RapCaviar” (which has over 14 million users and is credited with launching the careers of several new artists), “Todays Country Hits” or “Canal Off – Surf.” Others are more context-driven, such as “Bollywood Curated,” “Sad songs for the boys” or “Study Beats.”

Personally, I love curated playlists and use them almost every day. Instead of taking time to hunt around for particular tracks, I can just identify a style that I’m interested in hearing at that very moment. For example, when I want to listen to some jammin’ reggae on Pandora®, I simply type in “Bob Marley” and then navigate over to “Playlists.” I then get results such as “Bob Marley A-Z,” a 20-song playlist of Marley’s best tracks, along with “Deep Cuts: Bob Marley” (similar, but with 29 songs). On Spotify, a search for “Bob Marley” returns curated playlists like “Bob Marley Radio,” which includes a diverse selection of artists from Damian Marley to Musical Youth, Anton Ellis, UB40, Toots & The Maytals and more. That way, I can stay either on the artist that I specifically want to hear, or expand my musical tastes with other artists working in the same genre.

Playlists That Reflect Personal Taste

Don’t think that curated playlists just stick to a certain style, however. Often they are designed to reflect the diverse personal tastes of the individual or individuals who created them. For example, check out the Spotify “Music For … Inspiration” list put together by Robin Pecknold, frontman for the indie band Fleet Foxes; it will give you an interesting insight into the music that influences him and his fellow bandmembers. In a similar vein, “Wilco Recommends” (also on Spotify) includes tracks recorded by the band themselves as well as favorites by other artists such as Tweedy, Billie Eilish, Beyoncé, Lizzo and others.

Summer Day, Summer Night,” a playlist on Amazon Music curated by Tae-EM, harkens the sounds of summer, which might just be the thing you need to get through a cold winter night. Then there’s  “Uninterrupted Radio” playlist on Pandora, which provides stations curated by sports stars like Lebron James, Trae Young and others. Perhaps the most intriguing of all is Apple Music’s “A Playlist Curated By Deaf People,” which features songs by artists like Rupert Holmes, Etta James, Eminem and Keith Sweat, demonstrating that music does not have to be heard to be felt.

Build Your Own

As mentioned previously, you can easily create your own curated playlist and share it with friends and family. If you’re looking to pitch your playlist to one of the major streaming services so that the general public can access it too, here are some useful hints:

  • Be on the lookout for new music
  • Select a variety of tracks that you love
  • Give the playlist a theme and a purpose
  • Aim for a total of 30-50 songs
  • Include just one song per artist
  • Update your playlist regularly

Curated playlists also provide a great way to hear emerging artists who may have never gotten exposure, not because of any lack of talent but simply due to the overwhelming amount of music we all now have access to. It can be hard to discover some of these unknown musicians unless we are pointed to them … and these playlists do the pointing.

If you create your own original music, consider putting together a curated playlist for use as a promotional tool. Spotify accepts direct submissions from musicians; simply sign on through the Spotify For Artists website. And Amazon offers a new feature that allows artists to pitch their music to the company’s playlist curators. If they like what they hear, the editorial team places your song on a playlist in that genre of music. With these and other initiatives, it’s becoming increasingly easier to share your music with the world!


For some great tips on how to get playlists of your music posted on a major streaming service, be sure to check out this blog article.

Top 10 Mixing Tips

Mixing is like playing an instrument. It’s a skill you develop over time with lots of practice and repetition. Although there are no shortcuts to becoming a professional-level mix engineer, here are ten tips to help you improve your mixing chops.

1. Get Organized

Spend a few minutes organizing your tracks before you start mixing. Doing so will make your mixing workflow more efficient.

First, arrange the tracks in the mixer by type. For example, put the drum tracks next to each other, followed by the guitars, the keyboards, the vocals, etc.

Next, color code the tracks by category. Decide on specific colors to apply to various types of tracks and commit to using the same ones on future projects. The more you use them, the more your eye will become accustomed to seeing blue drums, red guitars, pink vocals, green keyboards and purple basses. After a while, the color coding will become second nature and save you time searching for tracks.

Screenshot.
Tracks arranged by type and color-coded.

You’ll probably want to start with at least one reverb and one delay set up on auxiliary tracks (called FX Tracks in Steinberg Cubase); you may also use other types of effects frequently. As part of your setup, create the necessary tracks, insert the effects and confirm the routing. Consider creating a template file that saves your configuration so you don’t have to set it up for each song you’re working on.

2. Check Each Track for Glitches

Another essential task is to solo each track to listen for glitches and noises you might not have noticed with all the tracks playing — for example, a singer’s throat clearing or loud breath, a pick noise before a guitar line, or a forgotten crossfade after an edit that resulted a click.

Screenshot.
Find and edit out any glitches on your tracks.

Yes, it can be a little tedious to go through the entire song track by track, but by using your DAW’s editing tools to fix any problems you discover, you’ll never have to worry about stray sounds ending up in the final mix.

3. Create a Preliminary Rough Mix

You’ll find many different opinions on how to start a mix, but here’s one that’s easy and effective: Pan all the tracks to the center, set all the volume faders at unity gain (0 dB) and turn off all EQ and effects, then adjust the track faders to create a rough balance.

Screenshot.
Start with all tracks panned to center and set at unity gain.

One way to create that rough mix is to start with the lead instruments and vocals muted, so all you’re hearing are the rhythm section instruments: drums, bass, rhythm guitars and chordal keyboard parts. Think of those tracks as the bedrock of your song. Get them balanced first, then add the vocals and any lead or melody instruments. Using the faders alone, make everything sound as good as you can before you start EQing or adding effects.

4. A Place for Everything

Once your rough mix is created, start thinking about the soundstage. In a stereo mix, selectively placing tracks from left to right is the easiest way to give each part its own space. Instruments like kick drum, snare drum and bass are almost always panned to the center, as are lead vocals. If you’re using a drum loop or drum machine, the kick and snare will already be in the center.

Where you pan the rest of the tracks is a creative decision, though symmetry is important: You want the left and right sides to be, on average, pretty close to equal in volume. For example, try to place stereo backing vocals at three and nine o’clock, or eight and four o’clock.

When you’ve got an instrument such as a dense synthesizer sound on a stereo track, it can occupy a lot of left-to-right real estate and mask other instruments. Many DAWs offer an optional panner (in Cubase, it’s called the Stereo Combined Panner) that you can deploy on a track-by-track basis to pan the left and right independently. This can be used to shrink the width of a stereo track while keeping it balanced between left and right, or to push it toward one side without collapsing it into mono.

Screenshot.
The Cubase Stereo Combined Panner.

Panning is designed to give you control over the side-to-side aspect of the stereo soundstage, but unfortunately, there are no single controls for the front-to-back aspect. However, you can move a sound forward by making it louder, brighter or less reverb-y (or any combination of the three); conversely, you can move a sound back by making it softer, less bright or awash in more reverb.

5. Filter Out Mud

One of the most common mix problems is muddiness. Cutting unnecessary lows and low-midrange frequencies can help eliminate the mud. Vocals and guitars typically have lots of unneeded low-frequency information that you can reduce with a high-pass filter (also known as a “low-cut filter”).

You’ll typically find such filters in EQ plug-ins such as Cubase studioeq, shown below. The process is simple: Set the lowest band to act as a low-cut filter and slowly move the frequency for that band higher as the track is playing. When you hear the instrument or voice start to thin out, back off the frequency knob slightly until the thinning just starts to go away.

Screenshot.
A low-cut filter in Band 1 rolls off unneeded low end.

6. Go Easy with Reverb

A good-sounding reverb can work wonders as an effect, but too much can turn your mix into a muddy mess.

It’s not just how much reverb you apply, however. The reverb’s decay time (sometimes called “room size” or “reverb time”) also plays a major role. That’s because the longer a reverb decays, the more it will wash over itself from one beat, word or phrase to the next, adding clutter to the mix. The faster the tempo, the more acute this phenomenon becomes because the beats are coming faster.

If you hear reverb wash, tighten it up by backing off the amount of reverb or reducing the decay time. If that doesn’t give you the result you’re after, try rolling off some of the reverb’s bass by using its EQ to reduce everything below about 400Hz.

Screenshot.
The length of time that a reverb decays is critical.

7. Save Often and Incrementally

Once you’re deep into a mix session, retaining your objectivity can be tricky. As a result, it’s often hard to know when to stop and, in the quest for perfection, take your mix into the weeds. Moreover, once you’ve pushed your mix into questionable territory and saved it, you may not be able to easily get it back to its most recent good-sounding point … if you can even remember where that was.

Fortunately, if you make a habit of using the “Save As…” command instead of “Save” (a technique known as incremental saving), you can mostly mitigate this problem. Here’s how it works: Any time you make a relatively significant change to your mix — say, putting a heavy compressor on the drums — employ Save As and give the file an incrementing number (or letter, it’s up to you) and add a brief description of the change to the file name. For example, “Song Name_1.7_bass up 2dB.” That way, if you go too far, you have a selection of previous versions with labeled changes that you can revert to.

Screenshot.
Incremental saving protects you from losing a good version of a mix.

8. Compare Your Mix

By comparing your mix to a professionally mixed song of a similar genre, tempo and instrumentation, you can get good clues to what yours lacks, if anything, and you can compensate. The process of comparing to a reference track is called “A/B-ing.”

The easiest way to set this up is with a dedicated A/B plug-in, but you can also A/B inside your DAW by creating a stereo channel, importing your reference track, and using that channel’s mute and solo buttons to switch between your reference and your mix. (See below.) It’s important to adjust the level of the reference track so that it’s the same as your mix. Otherwise, the comparison won’t be accurate.

Screenshot.
With the reference track muted, you hear your mix only.
Screenshot.
With the reference track soloed, you hear it only.

If you’re going to reference this way, it’s also better to create a dedicated mix bus track and route all of your tracks into it. (In Cubase, select all your tracks, including FX channels, then Control+Click on one of them in the MixConsole and use the “Add Group Channel to Selected Channels” command.) Route the mix bus’s output to the Main Out. When you export your mix, change the output source to the Mix Bus from the Main Out.

9. Let it Sit

I strongly suggest that you always let your mix sit overnight (or at least for a few hours) before calling it finished. As mentioned previously, it’s easy to lose objectivity over a long mix session, and you may be not-so-pleasantly surprised by some of what you hear when you listen the next day or after an extended break.

As you listen, make notes of the issues you hear, and correct them one by one. Then your mix should be in good shape.

10. Make Sure Your Mix Translates

As a final check, listen to your mix in as many places as possible outside your studio to ensure that it retains its balance on various speaker systems and in different acoustic spaces. Listen on your living room stereo, over a boombox, in your car, at a friend’s house, etc. Also be sure to check your mix on headphones and earbuds.

If it sounds good everywhere, you’re home free. But if you notice a consistent problem that you didn’t hear when you did the mix — such as too much or too little bass — your studio’s room acoustics or monitors (or both) are causing you to hear frequencies inaccurately. As a result, it will be impossible to balance levels correctly.

In the short term, the best way to mitigate that is to revise the mix and compensate for the discrepancies. For example, if it sounded too bright, make it a little less so and see how that sounds elsewhere. In the long term, consider adding acoustic treatment to your studio and/or upgrading to more accurate monitors — taking either or both of these steps should serve to improve the quality of your mixes substantially.


Check out our other Recording Basics postings.

Develop Atomic Habits for Your Program

Look into any successful music program, and you’re bound to find some sort of system. Teachers may use different method books, classes may look different, and students may be playing different music, but successful groups often have a system of routines and habits that teachers and students rely on.

There are many great publications on habits, such as “The Power of Habit” by Charles Duhigg and “The Seven Habits of Highly Effective People” by Stephen R. Covey. Every book and system have their pros and cons, and you can spend countless hours vetting the ideal system for your group. However, it’s more important to get something in place, so you can get to work. For our purposes, I’m going to use James Clear’s book, “Atomic Habits,” which was published in 2018.

The quick summary of “Atomic Habits” is that there are four elements to creating a habit:


Make it Obvious

black and white close-up image of teenager's hands holding cell phoneMaking habits obvious in a music class begins by simply being aware of habits that you want to break and habits that you want to build.

Let’s start with a very obvious one: phone use during rehearsal. I used to be OK with students having their phones on their stands because I naively thought that “they could use them for tuning!” And yes, they did use their phones for tuning, but guess what? Phones are made to be convenient (and attractive, easy and satisfying…), so students also took the extra few seconds to check any notifications that came in, which then led to more and more phone use during what they perceived to be downtime in rehearsals.

The class as a whole had to address the phone being so obvious, attractive, easy and satisfying to use. I knew that I could not compete with the limitless informational and connectivity opportunities that a phone has. So, the decision was made: Phones could not be used at all during rehearsal.

Student: “How will I tune now?”
Me: “I have tuners you can borrow.”
Student: “What if my mom texts me during class?”
Me: “Then I can just make two copies of the handbook outlining the rules on phones.”

For habits you’d like to build, make them obvious by thinking about locations. For example, I told my ensemble that I wanted to begin each day with a new tuning exercise. We did the exercise a few times, but we quickly forgot about it because it was, well, new. We solved this with a very quick and easy solution: At the end of class, students were instructed to put the tuning exercise in the front of their folder before they left. The next day, I went back to my old routine of starting with our previous exercise and was immediately met with 60 students holding up the new exercise.

Make it Attractive

Start with a habit that we like the most, and you and your class will be more inclined to continue with the habit. Is there a certain musical exercise or piece that your group likes? For some groups working on simple theory in musical ensembles or using the ensemble’s favorite piece can be a good start to identify keys and phrases. If you have access to music teaching software, such as the MusicFirst suite, these can be great habit-forming games. My son wasn’t crazy about math at first, but he’ll play the Prodigy math game that his school promotes every day.

Once students get used to working on some habits and routines consistently, they can move toward other areas. If you can help students make it a little fun, this can go a long way.

THE YAMAHA EDUCATOR NEWSLETTER: Sign up to receive real-word advice, tips and classroom guides!

Make it Easy

winds instruments and music standsOur exercises are selected ahead of time. For my group, I use exercises from the following books:

How do I make this easy? My program purchases a copy of these books for every student, and they are in their folders from the beginning of the school year. I also make this easy for students by printing out a list of the most common exercises we will use from each book. You can go a step further and have students put multi-colored sticky notes on common pages.

Our system is also made attractive for members of our program due to the variety. If students get tired of one specific exercise, we can choose an articulation exercise from another book.

Try making a simple goal that can be achieved. Let’s say you want to do more sight-reading. Doesn’t sight-reading a piece a day sound good? But an entire piece can be difficult to deal with. What if your initial goal was to simply sight-read one measure per day? It might sound a little goofy, but it’s achievable.

You’ll find that on some days, you sight-read the one measure, and that’s enough — check and done! — because you need to focus on the upcoming concert or other big event. But on most days, you’ll find that sight-reading one measure is the little bit you and your students need to motivate yourselves to continue. The students will then say, “If this music is out already, why not just sight-read the rest of it?”

I find myself doing the same in my personal life. If I want to make a goal of reading, my goal is one paragraph. Most days this turns into at least 20 minutes of reading. But a few days a month, I meet the minimum requirement and move on.

Make it Satisfying

pizzaNo one will continue with a habit if there is no payoff, which can be intrinsic or extrinsic. Unfortunately, with music, it’s difficult to pinpoint short-term payoffs. I suggest starting with an external reward but don’t announce this to the kids. Rather, commit to an extended time working through your habit or routine, and then surprise your students with the reward. For some groups, the timeline might be a week, and for others, it might be six months.

I’m not a big fan of using candy, pizza parties, etc. as rewards, but you know your group best. In my case, the goal — or habit — was to sight-read more. We sight-read musical examples everyday for over a month. The students had also been asked to read some popular film music like “Star Wars” or “The Incredibles,” which became a sort of interim reward.

The big reward was a piece that had quite a few elements in it that we had already sight-read. In one class, the students did their typical routine. I then announced that we had been consistent with our sight-reading goal for over 30 days and that when you work hard on something, you get the opportunity to work harder but you also feel more accomplished. I then handed out the piece, which was “Dance of the Jesters” by Tchaikosvky, and we sight-read it. The students instantly noticed that they could sight-read this full piece much better than they normally could, and they were happy to have a working break from our typical concert music. Plus, sight-reading this piece also continued our habit!

Keep it Consistent

Consistency is the easiest — and hardest — part. It’s easy because all we have to do is follow our plan every single day.

It’s hard for a multitude of reasons. Many people get bored with the same routine. Combine that with unrealistic expectations of progress (hard reality: It takes a long time to get better at things in the intermediate to advanced stages), and it’s a surefire way to become discouraged quickly. On top of that, sometimes we have issues come up at school, such as fire alarm drills or classroom interruptions that throw off your routine.

Keeping things consistent has a lot to do with accountability. As mentioned above, moving the specific exercise to the front of the folder created an opportunity for students to hold me accountable. It also helped the class to make sure that the routine and habit that we were trying to form became a priority. This action resulted in doing and completing the habit earlier in the rehearsal or class time as opposed to the end when time can run out or other time burglars can wedge themselves in.

calendar with days marked off According to a blog post by Clear, comedian Jerry Seinfeld has a strategy called “don’t break the chain” to combat procrastination. On a large wall calendar, mark each day that you complete the habit you want to instill with a large X. Seeing consecutive days and weeks with Xs will motivate you to not “break the chain.” This strategy has worked wonders for my group and me. The visual representation of our habits has encouraged us to push through the tough times.

However, we’re not perfect, and we may miss a day. While we should avoid this at all costs, it’s not the end of the world. Clear states that we get into big trouble with habits when we miss two days in a row. If you miss a day, don’t beat yourself up over it, but do make it a priority to jump right back in as soon as possible on day two. Looking back, I’ve had many habits that I tracked for over a year and then I missed two days. It took me a good two or three months to get back into that habit.

If you find yourself having difficulty keeping things consistent, consider stepping back and looking at what you are doing. You may find that you have simply enacted too many new habits or the habits you have are too big. Consider breaking down these habits into smaller, more manageable chunks. Five-note scales instead of eight, sight-read one line of music instead of a piece, two minutes of articulation drills instead of five, etc.

Avoid the Pitfalls

When it comes to making habits stick, pitfalls exist. If I’m sick and taking antibiotics, I might be less inclined to finish the medicine if I start to feel better. Of course, this could result in me not fully treating the illness and becoming sick again. I think habits are similar in that just when things get better in my band, we tend to want to stray from the hard work we had implemented. Don’t do this! This is the time when it gets good, so push yourself and your students to continue and show that consistency pays off.

Things can also get, well, boring. Doing the same thing every single day can begin to feel like a chore — it’s still obvious and easy, but it is no longer attractive and it no longer feels satisfying. During these lulls, I recommend alternate approaches that meet the same goal. Have a few different articulation exercises or chorales to cycle through to ensure that there’s enough interest to continue.

Another pitfall is doing too much too soon. When I’m in the mood to be productive and change something, I end up wanting to change as many things as possible. This quickly becomes overwhelming, and my focus is going in too many directions at once. Many music educators are high achievers who can balance many things at once, but it’s important to be realistic with your limits when changing something significant. Once you’ve successfully implemented a new habit, you will have an easier time stacking additional habits.

A final pitfall can be expecting perfection. In “Atomic Habits” Clear writes, “An imperfect start can always be improved, but obsessing over a perfect plan will never take you anywhere on its own.”

Analyzing and vetting systems is important, but at the end of the day, taking actions, especially small actions, can lead to significant and positive changes in a program. So, figure out which habits you want to make atomic and find ways to make them obvious, attractive, easy and satisfying!

Work With Your Strengths

Superman’s résumé is pretty impressive. He’s got superhuman strength, X-ray vision and enough stamina to fly around the globe, sans plane. His weakness, famously, is Kryptonite. But here’s a crazy idea: What if everything about you contained strengths, and there is no Kryptonite?

That’s the perspective taken by the VIA Institute on Character. Based in Cincinnati, the nonprofit is dedicated to understanding and improving human experience, via studying character traits. Its work is based in the positive psychology movement, which seeks to identify and boost mental assets, instead of focusing solely on problems. Positive psychology is used by a variety of professionals — therapists, teachers, coaches, counselors and other practitioners — with the goal of helping people thrive. Instead of asking, “What’s wrong with me,” positive psychology flips the script and asks, “What’s right with me, and how can I foster that?”

CHECK IT OUT: The CB-9000 Series Concert Bass Drum

Twenty-Four Strengths

woman sitting in front of wall full of drawn doodles and holding up card with a drawing of a lightbulb

Back in the 1990s, two pioneers in the field of positive psychology, Christopher Peterson and Martin Seligman, spent three years on a project. They worked with 55 social scientists, seeking to identify and classify the positive strengths in people. You know, the virtuous good stuff we aspire to, such as bravery, fairness, teamwork, and the ability to love and be loved.

That project culminated in a 2004 book, “Character Strengths and Virtues: A Handbook,” and a classification of 24 qualities that are considered universal, that is, they span across different cultures, belief systems and countries. The 24 strengths are broken down into categories of virtues, like this:

  • Courage: This group of character traits includes Bravery, Honesty, Perseverance and Zest.
  • Humanity: This category spotlights Kindness, Love and Social Intelligence.
  • Justice: Fairness, Leadership and Teamwork are all part of this.
  • Temperance: Traits such as Forgiveness, Humility, Prudence and Self-Regulation are categorized here.
  • Transcendence: Appreciation of Beauty & Excellence, Gratitude, Hope, Humor and Spirituality get classified under this.
  • Wisdom: Under this umbrella, character traits include Creativity, Curiosity, Judgment, Love of Learning and Perspective.

Everyone possesses these 24 qualities, but in combinations that are unique to them. For example, some people have bravery as one of their top strengths, while others might have that as “a lesser strength” and rank higher in other qualities like Leadership or Kindness. Supposedly, knowing one’s top strengths and learning how to work with them can help people feel more confident, handle stress better and reach their professional and personal goals.

VIA Survey

The project also created two free tools for understanding these character strengths, called the VIA Inventory of Strengths (or VIA Survey), which is for adults, and the VIA Youth Survey, which is designed for those aged 8 to 17.

By now, more than 25 million people have taken the VIA Survey. It’s a 240-item questionnaire, which takes about 20 minutes to complete. For example, there will be a statement, such as “I always admit when I am wrong,” and then you click on “very much like me,” “like me,” “neutral,” “unlike me” or “very much unlike me.”

group pf students with hands stacked on top of each otherWant to take the survey? Here are two sites; both are free but you will have to take a few minutes to set up an account and password. Try VIA’s Website or the Authentic Happiness website from the University of Pennsylvania, where Seligman is a professor. (Dr. Peterson, who taught at the University of Michigan, passed away in 2012.)

I had taken the survey in November 2021 and took it again in December 2022, and my results were strikingly similar. My top traits were almost identical, as were the ones that came in at the bottom of my list of 24 traits. That’s where I’m thinking, man, I have some stuff to work on. But good news: “Your top five are the ones to pay attention to and find ways to use more often,” the survey advises. Ah, okay. Remember, this is positive psychology. It does not say challenges don’t exist, but rather it focuses attention and resources on how to create meaningful and fulfilling lives — regardless of what’s happening around us.

When you think about the best qualities a music educator could have, you might think about things like creativity, a love of music and organizational skills. All true, of course, but what’s so interesting is that within the 24 strengths, there are all sorts of combinations where a music educator can succeed. One teacher might discover their top strengths are Love of Learning, Appreciation of Beauty & Excellence, and Hope — and they are an amazing music educator. Another might discover Bravery, Spirituality and Teamwork as their top strengths — and be an equally amazing, yet totally different music educator (and human).

Using the Strengths in Your Classroom

  1. Think about your music students in terms of their strengths, rather than honing in on their weaknesses. For example, you might have a lesson plan that builds on the strength of Curiosity. What happens if you and your students come up with some song lyrics, then come up with a musical tune to go with it. What about if you try it the other way around— play some music and ask students to write lyrics to it? Discuss with them, which one came more easily for them, and why do they think that is? Did some students find one easier than the other, or did the group have similar experiences? Another example: For young learners, ask them to listen to music with their eyes open, then closed, and talk about their perceptions.
  2. music teacher with three winds students

    When you give feedback to students, highlight what strength you see them expressing, and in this way, you can be very specific when giving praise. For example, “You showed a lot of Bravery by volunteering to sing the solo today,” or “that Teamwork was fantastic; I saw how well you were working with the rest of the percussionists.”

  3. For parent-teacher conferences or for assessment periods, ask students to think about their strengths and share a few areas where they feel they are performing well and why.

Figuring out your top five strengths and how you can use them more often with your students and colleagues is worth the time and can be both inspiring and enlightening.

The Unlikeliest Places

Most songwriting ideas are triggered by the obvious: unrequited love, an awe-inspiring sunset, a beautiful painting. Personally, I love to pull song titles and lyrics from everyday conversations. My friends have no idea how muse-worthy they are!

But there are a lot more things that can inspire creativity, often in the unlikeliest places. For instance, the elements.

GETTING INSPIRATION FROM THE ELEMENTS

Earth, wind, fire (the band too) — they all elicit energy. And energy is contagious. For example, at the first clap of thunder, you might run outside and wait for the rain. Songs have been written about walking in it, singing in it; Rihanna even had a massive hit with a song about umbrellas.

The air, of course, keeps us alive, which was the foundation for the Hollies’ 1970s classic (and endlessly catchy) “The Air That I Breathe,” co-written by my dear friend Albert Hammond. Whether it’s beneath our wings or we’re blowing in it, the wind is a no-brainer inspiration that lends itself to emotional content.

I wonder if Jim Morrison was addressing an uncooperative matchbook when he came up with the lyrics to The Doors’ mega-hit “Light My Fire.” Or if Bruce Springsteen actually felt his temperature rise when he sang of his pent-up desire in “I’m On Fire.” And then there’s James Taylor, who managed to cover two birds with one stone when he wrote “Fire and Rain.”

There’s another element: water. I would posit that simply being submerged in H2O, whether diving into the ocean or floating in a swimming pool, can fire up all kinds of possibilities. Floating relieves the physical body of the need to support itself, freeing the mind to wander. And if we happen to be face-up we may ponder “The Warmth of the Sun.” Or clouds! Or a jet airliner! There’s so much to be sung about what’s in the sky above us.

And let us not forget about mother earth below. Carole King hit the nail on the head when she equated her lustful feelings with the earth moving under her feet. Joni Mitchell sang about the tearing down of nature to put up parking lots in “Big Yellow Taxi.” We owe the earth so much. Why not dedicate a song to her? After all, “Heaven is a Place On Earth!

FINDING INSPIRATION IN FILM AND EVERYDAY LIFE

Okay, enough about nature. Let’s look at some other unlikely sources of inspiration. According to Aerosmith’s Steve Perry, the band’s 1975 smash “Walk This Way” was triggered by a scene in Mel Brook’s film Young Frankenstein. Or how about George Harrison’s “Taxman” (a song I put on repeat just about every year in April), the guitarist’s clever response to that yearly call from his accountant with news of how much he owed the government.

From personal experience I can report that the spark of my Grammy-nominated song “Bitch” (co-written with Meredith Brooks) revealed itself at a red light on a drive home. I was in a horrible mood and knew I was about to make my boyfriend the target. Fortunately, it occurred to me to write instead about how grateful I was that he accepted me with all my ups and downs.

And then there was the night I was experiencing relentless insomnia and used it to my advantage by turning the experience into the words to a song called “Up All Night,”which eventually was recorded by 1980s pop star Taylor Dayne. “Somewhere there’s a man who needs me,” I wrote, “not someone who runs and leaves me up all night.”

In fact, I once titled a song with words I found on a plaque in the dressing room of a local boutique: “I’m not gonna cry cuz it’s over; I’m gonna to smile cuz happened.” Yes! Perfect! True, the song was about unrequited love, but the lyric didn’t come directly from my diary. Instead, it was a random object that reminded me of how I felt about a past relationship (or two).

I’ve even thought about how many moves we make in the kitchen that can be equated with the steps in the process of falling in and out of love: simmering, stirring, waiting, patience, heating up, burning. Inspiration from the stovetop!

The bottom line is that we can find ideas, concepts, titles everywhere — not just in yearning, sunsets and paintings. They’re all around us … if we’re willing to keep our eyes and ears open, and connect the dots.

“Connect The Dots”! Now there’s a catchy concept and title right there. 🙂


Check out Shelly’s other postings.

Secrets to a Successful Jam Session

There’s a sense of freedom and autonomy that I really enjoy as a solo performer, but I also really enjoy the camaraderie and energy of working with a band.

I often get to jam with friends in social situations, so I do get to enjoy ensemble interactions outside of my professional engagements. Let’s face it: Jamming is fun. There’s no pressure to be perfect, and it’s a great environment in which to explore creative ideas.

Yet despite the relaxed atmosphere of a jam, I do feel there is an etiquette to those musical interactions — a protocol that, when observed, can lead to an even better experience for all involved. Here’s a guide to holding a successful jam session, along with some backing tracks you can practice to when friends aren’t available.

FOLLOW THE LEADER

Like most social or business gatherings, jam sessions usually have an obvious leader. If you feel that the group needs some guidance, and you have the experience to lead a musical adventure, by all means step up and make some suggestions on how to proceed. (Or you can just start playing — often everyone else will follow along.)

One of the main jobs of the leader is to call out the solos, either verbally or with a nod of the head. This will help everything stay on track, and allow everyone to take a shot at playing lead. If the designated soloist is unsure of the scale they should use, the leader should mouth that to them or take a short solo themselves to demonstrate how it might work. The goal is to make sure no one feels left out: after all, it’s a jam, not a gig.

Once the tempo, feel and groove of the jam is established, I like to add an alternate rhythm guitar part to enhance the music. However, I always stay locked into the chord structure without complicating the changes.

COMMON COURTESIES

It’s important to stick with the plan, at least in the initial stages of a jam. When someone decides to suddenly change the chord progression or rhythm part, things can start to quickly fall apart. That’s why it’s important for everyone to learn the chord structure and stick to it when someone else is soloing. It’s a big part of jamming etiquette.

Make sure your volume and tones are appropriate for the situation too. All this takes is a little awareness and time to listen to the general dynamic within the group. Being too loud or using inappropriate tones can turn people off.

I’ve asked players to turn down many times. I’m sure it makes some people wonder, “Who the heck does he think he is?” … but I’m doing it for the greater good of all. Sometimes you have to be brave and tell it like it is!

START WITH A SIMPLE CHORD PROGRESSION

I suggest starting with a simple chord progression, one that all the participants can play easily. That way, everyone can relax and not feel any anxiety or pressure to perform. Making sure everyone can be involved is essential too. If someone isn’t clear on a guitar part or the chords, take a moment to show them what the underlying structure is.

Simple chord progressions can evolve into epic compositions in the hands of creative players, and beginners will also learn a great deal by hearing the possibilities created by the more experienced players in the room.

Here’s a basic chord progression that’s ideal for kicking off a jam session:

II:  Emi  I  Emi  I  C  I  D  :II

The tablature for these chords in the open position (i.e., with open strings ringing out, as indicated by the Os on the left) is as follows:

Chord charts.

If you analyze this in the key of G, you can see that it’s a Vi mi / IV ma / V ma (minor sixth, major fourth, major fifth) chord progression. You can, of course, further enhance this progression to create harmonic variation if you like, but this is an excellent place to start.

In the video below, my enhancements to the basic chord progression are as follows:

II:  Emi9  I  Emi9  I  C5/2(#11)  I  Dadd4  :II

None of these extensions change the progression; they simply add flavors to the overall vibe of the jam. You can then add a nice arpeggiated part like this to enhance the overall pop/rock sensibilities of the jam:

II:  Gma7  I  Gma7  I  Cma7  I  D5/2  :II

Hang on a minute (I hear you say)! Where did the Gma7 chord come from? Well, Gma7 contains the same tones as Emi9 and can therefore be used as a chord substitution. In this way, we can take a simple structure and bring it to life with harmonic enhancements, along with rhythmic variation.

An ideal scale to use for improvisations over this progression would be the E minor pentatonic scale … which is exactly what I chose to use in the video.

TIME TO GET JAMMING

Now, it’s time to get jamming! First, here’s the basic backing track from the video below with just bass, drums and keyboards:

I then added an underlying arpeggiated acoustic guitar (“Guitar 1”) part, which you can hear in the audio clip below:

Chord chart.

Finally, I added a second arpeggiated part, this time played on electric guitar (“Guitar 2”):

Chord charts.

Try jamming over all three of these audio clips and see what kinds of leads and improvisations you can come up with.

THE VIDEO

This video demonstrates all the chord changes and techniques described here; watching it will help you to articulate the Guitar 1 and Guitar 2 parts described above. It also showcases a nice solo and phrasing applications of the E minor pentatonic scale.

THE AMP

All the tones for both the audio clips and the video come from one amplifier: the compact yet powerful Yamaha THR30IIA desktop amp. Even though it’s designed for use with acoustic guitars, the electric guitar solo was played through it too, along with my favorite overdrive/ compressor foot pedals.

Small guitar amp in foreground with fireplace and lit candles in background.
Yamaha THR30IIA desktop amplifier.

I love all the THR-II wireless desktop guitar amplifiers for so many reasons. They combine state-of-the-art modeling technology and outstanding effects with a tuner, a tap tempo feature, an auxiliary input (so you can listen to music from smartphones, tablets, laptops and MP3 players) and stereo speaker imaging — and they can also be used as a stand-alone audio interface for recording directly to your computer. These portable tone machines provide enough horsepower to take to a jam session too — even if you’re jamming outdoors. That’s because they’re battery-powered and will last well into the night.

The THR30IIA also comes equipped with a microphone input and dedicated volume/reverb controls so you can sing through it without the use of a PA system (which would be overkill for most jam sessions). In addition, there are multiple mic models and three-way stereo imaging to further enhance the audio experience. It’s an amazing little package for any living room jam … or even for a cafe gig.

THE GUITARS

The Yamaha AC5R A Series acoustic guitar used in the video also comes with its own onboard microphone modeling (your choice of large diaphragm tube or ribbon mic), so getting great tones with the THR30IIA was a breeze. It comes standard with a solid Sitka spruce top and rosewood back and sides, making the acoustic tones just as impressive as the amplified ones.

Closeup of author playing acoustic guitar in his studio.
Yamaha AC5R.

The Pacifica 612 is quite possibly the most versatile electric guitar Yamaha makes, suitable for everything from clean pop to screaming rock ’n’ roll. Its five-way pickup selector switch allows you to dial in any number of tones, making it a great guitar to take to any jam.

Author playing electric guitar in his home studio.
Yamaha Pacifica 612.

THE WRAP-UP

One of the best ways to improve as a musician is to work with other players, especially if they are more advanced than you are. Jamming allows you to interact with your peers and players of all levels.

Take a great guitar, amp, effects and attitude with you to the jam. Do all you can to guide and support your contemporaries, and then tap into your inner rockstar when it’s your time to shine. The key to a successful jam session is listening first, responding and playing second. Consider yourself a musical conversationalist and you’ll do just fine.

Photographs courtesy of the author.

Check out Robbie’s other postings.

How Sheet Music Can Improve Your Playing Skills

Playing a musical instrument brings us pleasure, relieves the stress of the day and lets us express emotions in a healthy and nurturing way. Most of us enjoy playing the music we love, and enhancing those joys by learning to read music will help improve your musical skills as well.

In this article, we’ll explore the many benefits of incorporating printed music (called sheet music) into your learning and playing experience. First, though, let’s explore the different kinds of sheet music that are available.

Different Sheet Music Formats

Here’s an example of what the sheet music for the theme song of the popular TV show “Stranger Things” looks like:

Sheet music.

Of course, that particular example is an instrumental. Sheet music for music with vocals (such as Carole King’s “You’ve Got A Friend,” shown below) generally comes in what is called “piano/vocal” format, which looks like this:

Sheet music for "You've got a Friend" by Carole King.

As you can see, the main melody of the song is presented on its own stave of music, with lyrics beneath it. Below that is a dual stave piano part, which often is a reduction of the song (with melody) to support the vocal line, as in the above example. The chords to the song are presented above the “top line” melody, and are often shown as guitar chord symbols (a representation of where to put your fingers on the guitar fretboard), making sheet music an important part of learning guitar as well as keyboards.

There’s also sheet music optimized for beginners; these are generally labeled as “easy piano,” such as this version of “Let It Go” from the movie Frozen:

Copy of simplified sheet music for "Let It Go" from the movie FROZEN

In addition, there are specialized versions of sheet music, such as this example of “Let It Go” arranged as a piano duet:

Sheet music for "Let It Go" as a piano duet.

Download this and play along with your child — you can both learn piano together!

The Fastest Way to Learn Your Favorite Songs

The most obvious benefit to using sheet music is that it’s the quickest way to learn your favorite songs. It’s not easy to learn a song by ear (many players can’t do it, and that’s alright), and there are sheet music versions of songs designed for various levels of player — often available for instant download. No visit to a brick-and-mortar store necessary; no waiting for the delivery person either! The online Yamaha Downloadables store, for example, offers a myriad of sheet music titles, from pop and rock hits to movie and show tunes to gospel, liturgical and other genres.

Learn By Playing

Obviously you need to be able to read music to use sheet music, but you don’t need to be an expert sight-reader to do so. As with any practice tool, the rule of thumb is to start slow — very slow at first! But it’s worth it, because learning via sheet music allows you to spend more time making actual music, rather than playing rote exercises that you would never perform in public. It’s a form of “learn by doing” that is much more enjoyable than working through exercise or instructional “method” books.

Improve Your Skills

Here are some of the specific keyboard skills that can improve when you play your favorite songs from sheet music:

Learning to play in various keys. The various songs you choose are likely to be in different keys, requiring you to pay attention to the key signature at the beginning of each line, which shows you what notes need to be played as sharps or flats. Playing music in different keys is a better way to learn the various key signatures than simply practicing scales.

– Fingering. It’s important to work out how to place your hands in the best position to cover the notes needed, as well as knowing when your hand position needs to move. You’ll need to figure this out slowly, out of tempo, and you might even need to write down the fingerings for the trickiest parts, but doing so from sheet music is an excellent way to learn this.

– Executing unfamiliar rhythmic figures. Rhythm is an important component of music, and it’s great to be able to translate what you see on the page to playing with the right “feel.” Most players tend to use the same rhythms over and over because they are familiar and already feel good. What is on the sheet music may be different than your usual way, and this will expand your rhythmic vocabulary.

– Increasing your reach. Playing arpeggiations and chords that don’t necessarily fit easily under your natural hand position is essential to coaxing a fuller sound from your keyboard. Reading from sheet music is a great way to learn to play wider arpeggiated figures and bigger-sounding chords.

– Gaining hand independence. One of the hardest things for keyboardists to master is tricky syncopations between your two hands. This is a skill best learned visually, at least at first. Being able to view those syncopations in print allows you to better see where the notes line up between your hands.

Widen Your Musical Horizons

There are lots of types of music in the world, and these various subsets of musical style and taste are called genres. If you want to learn a new musical genre, you should listen to as much of that kind of music as possible, and then try to play it. Sheet music can be your guide into these uncharted waters. Whether it’s gospel music, Latin styles such as cumbia, or modern urban music such as neo-soul, you can find sheet music of the most popular songs in every genre, and through playing them you will learn what makes that style what it is.

Improve Your Sight-Reading … and Your Bank Account

Like anything else in life, if you want to get better at doing something, you need to do it a lot. Regularly playing from sheet music will help improve your reading skills, to the point where you will eventually find that you can actually sight-read most simple scores. And a musician who reads well is more likely to be called on (and hired!) for different jobs and recording/performance opportunities.

Shared Experiences

When you want to get together with a few friends to play some music, bringing a pile of sheet music can help to quickly get everyone up and running learning the song(s) you want to play. The music provides the singer with the lyrics as well as melody, the guitar player can follow the chord symbols above the melody line, and the keyboard player can reference the piano staves provided. Everyone is covered!

Special Features of the Yamaha Sheet Music Previewer

The online Yamaha sheet music store allows you to preview the first page of each selection so you can try it before you buy it, with a number of helpful “widgets” that make the experience interactive.

Here’s the overview you’ll see if you’re using a desktop or laptop computer and you scroll down the page. As an example, we’ll use Carole King’s “You’ve Got A Friend,” mentioned above:

Screenshot.

Along the top are a row of tool icons:

Screenshot.

These provide the following helpful functions:

– The Play button (far left) plays the song automatically for you so you can hear the music on the page as well as see it.

– The Metronome icon (second from left) adjusts the playback speed slower or faster as desired.

– The Flat/Sharp icon (third from left) can be used to transpose the song to another key. This affects both the onscreen score and playback, as well as the optional PDF you create (see below) and is especially helpful if you are going to want to sing along with your playing.

– The Trumpet icon (fourth from left) is useful if you’re planning on playing the lead melody “top” line on a wind or string instrument instead of singing it. As a bonus, if you select a wind instrument, the top line melody is automatically transposed to the appropriate key.

– The Note Size icon (in the middle of the toolbar) is used to scale the size of the notes. Increasing the note sizes will make them easier to see, but will also reduce the number of bars shown in the preview, as well as how many will print per page if you download it as a PDF using the Print icon (see below). Here’s a cool tip: decrease the note size while you’re previewing a song and you’ll get more bars of the tune in your preview before purchasing!

– The Reset icon (fourth from right) undoes any tempo, key, or note size changes you’ve made and restores them to the default settings.

– The View icon (third from right) changes the look from normal printed music requiring page turns to a scrolling view.

– The Print icon (second from right) allows you to save the first page as a PDF file; from there, you can print it out so you have a hard copy. This is especially helpful if you don’t have your device near your keyboard and you want to try out the sheet music later.

– The Full-Screen icon (far right) expands the page to fill the entire screen, hiding the toolbar in the process. This sometimes only works when you click on the Preview button at the very bottom of the screen, beneath the song title.

If you’re accessing the online store from a mobile device, the display looks slightly different:

Screenshot.

Here, the Play button on the left of the toolbar works the same as in desktop/laptop computers — it starts the music playing back. All other functions can be accessed by touching the Settings button on the right; a menu drops down showing the icons described above.


Yamaha offers hundreds of sheet music titles available for immediate downloading. Click here to view the available titles.

12 Holiday Movies to Stream This Season

The holidays are a time for family and friends, and what better way to liven up the season than with your favorite festive movie? Whether it’s classics, comedies, love stories or kid-friendly, we have you covered with this list of 12 movies you should check out for the holidays.

1. A Christmas Story

Set in December 1940, this charming movie is told from the perspective of 9-year-old Ralphie Parker, who desperately wants a Red Ryder air rifle for Christmas. He gets his wish, courtesy of his father (the “Old Man,” played brilliantly by Darren McGavin) despite his mother’s objections … and true to his mother’s prediction, he accidentally shoots himself in the face on Christmas morning and breaks his glasses. There are several unforgettable moments here, including the scene where Ralphie’s friend Flick freezes his tongue to a flagpole — not to mention the battle of wills between Ralphie’s mother and father over a “major award” the Old Man won in a contest: a table lamp in the shape of a woman’s leg. Find out where to stream it here.

2. Home Alone

How can it truly be the holidays without Home Alone? Starring Macaulay Culkin, Joe Pesci, Daniel Stern, Catherine O’Hara and John Heard, this timeless flick follows the adventures of Kevin McCallister (Culkin) after his family accidentally leaves him at home and goes on an international trip. Antics ensue, with Kevin ultimately saving his house from being robbed by a pair of hapless burglars. Find out where to stream it here.

3. Miracle on 34th Street

Miracle on 34th Street is one of those perfectly wholesome family flicks. The original 1947 version stars Edmund Gwenn as Kris Kringle, who substitutes for the Macy’s Thanksgiving Day parade Santa when the original Saint Nick is too drunk. Soon, Kringle becomes so popular that he begins appearing at the Macy’s store in midtown Manhattan, where he tells everyone (including a very young Natalie Wood) that he’s the real Santa Claus. Those claims lead him to a lawsuit, where the court is trying to decide whether he is mentally fit. Find out where to stream it here.

4. The Polar Express

This animated adaptation of Chris Van Allsburg adored children’s book is a fantastical adventure story for all ages. It tells the tale of an extraordinary train ride a young boy takes to the North Pole on Christmas Eve, and how, in the course of the journey, he discovers much about himself and the curiosity of life. Find out where to stream it here.

5. The Santa Clause

In this 1994 comedy, divorced dad Scott (Tim Allen) finds his life turned upside down when he accidentally kills a man wearing a Santa suit. He suddenly finds himself in the North Pole where he becomes the interim Saint Nicholas until the next one arrives. Scott doesn’t think much of the role, but he does end up gaining weight and growing a white beard. Find out where to stream it here.

6. How the Grinch Stole Christmas

This live action remake of the beloved Dr. Seuss story was directed by Ron Howard and stars Jim Carrey as the nasty Grinch, who is determined to wreck Christmas for the good-natured people of Whoville by pilfering all the festive items from the town. Still, one Whoville citizen named Cindy Lou Who (Taylor Momsen) manages to win the Grinch over. Find out where to stream it here.

7. Elf

If you need a good laugh this holiday season, look no further than Will Ferrell’s Elf. This 2003 comedy follows Buddy (Ferrell) who was brought up in the North Pole from childhood. Feeling like he doesn’t belong with the elves, he visits New York where he attempts to find his real father, played by James Caan. After taking a DNA test, the pair attempt to form a bond. Find out where to stream it here.

8. Jingle Jangle: A Christmas Journey

This feel-good film tells the tale of Jeronicus (Forest Whitaker), a once-famous toy maker whose joy is snuffed out by an apprentice who steals his most treasured invention. His happiness is restored when his granddaughter, Journey (Madalen Mills) returns for a visit and he discovers they share the same passion for toy making. The cast is rounded out by Phylicia Rashad as Grandmother Journey and Keegan-Michael Key as Gustafson, Jeronicus’ apprentice. Find out where to stream it here.

9. Christmas With the Kranks

Luther (Tim Allen) and Nora Krank (Jamie Lee Curtis) are looking forward to finally spending one holiday alone. Rather than indulge in typical Christmas festivities, the couple decide to take a Caribbean cruise. However, their plans don’t align with that of their neighbors, who are hell bent on winning the yearly “best decorated street” competition — and the Kranks soon feel like castaways since they aren’t awash in Christmas cheer. Find out where to stream it here.

10. Love Actually

This 2003 RomCom presents nine intertwining stories that explore love in the weeks leading up to and after Christmas, with the storylines unfurling as the days go on. The movie boasts an A-list cast, with appearances from Hugh Grant, Colin Firth, Emma Thompson, Liam Neeson and Keira Knightley. Find out where to stream it here.

11. Almost Christmas

Proving that family can overcome almost anything, this flick stars Danny Glover as a mechanic whose wife recently died. Facing the first holiday season without the love of his life, he tries to get his four bickering children to come to his house to celebrate, in hopes that they will move past the trivialities and commemorate the day instead. Find out where to stream it here.

12. The Christmas Chronicles

This is a newer offering from Netflix, but it certainly has the potential to become a classic. The film follows Kate (Darby Camp) and Teddy (Judah Lewis), two kids who, upon discovering Santa Claus (Kurt Russell) in their home, decide to hop in his sleigh for a ride. However, their intrusion causes the sleigh to crash and all the presents in it to go missing. With Christmas right around the corner, the kids and Santa have to come up with a plan to get things back on track and ultimately save the holiday. Find out where to stream it here.

Five Ways a Mixer Can Improve Your Multiplayer Gaming

Multiplayer online video gaming can be super fun, but not if you’re having issues balancing the various audio feeds involved: the sound from the game, your voice from your headset (or other) mic and the voices of your fellow gamers coming through the chat facilities of a social media platform like Discord. To try to get them all in balance, you may have to switch between the volume controls in different software applications, which can be tedious.

But if you have a dedicated gaming mixer like the Yamaha ZG01, problem solved! This simple add-on to your gaming station allows you to easily mix the audio sources with real knobs and faders, all in one affordable and easy-to-use device. Here are five ways that a dedicated mixer will improve your multiplayer gaming experience.

1: It Gives You the Right Connections

Whether you’re playing from your PC or a game console, a mixer like the ZG01 provides you with all the appropriate connections and controls needed for multiplayer gaming.

View of controls on unit.
The Yamaha ZG01 is made specifically for gaming.

For voice chat, the ZG01 offers a professional XLR/TRS mic input and a standard 3.5mm jack, allowing you to connect different mic types, including one built into a gaming headset or a separate standalone microphone.

View of controls.
ZG01 signal flow.

If you’re hosting the game from your PC, you’ll want to connect to your gaming mixer via USB-C, which gives you a bi-directional audio flow between the two devices. Game sound and the voice chat from the other players will be routed from your PC into the mixer. Your voice will go into the mixer and then be sent “downstream” to your computer through the USB cable.

Diagram.
Connecting the ZG01 to a PC is simple and straightforward.

If you’re playing a game from a console, it’s best to use a mixer with an HDMI port to send the audio and video into the console. (Note: A gaming mixer won’t process the video but will “pass it through,” which allows you to send it to a video capture device should you decide to stream the game from your computer.) The ZG01 offers not just one, but two HDMI inputs, allowing you to connect up to two game consoles (such as a PlayStation® and Xbox™, or an Xbox and Nintendo Switch™) and also provides an HDMI output for a TV or monitor.

2. It Gives Complete Tactile Control of Audio Levels

The whole idea of using a mixer is to be able to centrally control a variety of sources to create the best mix. On a unit like the ZG01, each of the feeds you connect to it — the game audio, your fellow gamers’ voices and your voice — are governed by separate volume controls, allowing you to quickly adjust the correct one when necessary.

The ZG01 offers individual knobs that control voice chat and game-sound levels and a volume fader for your microphone level. In addition, the largest knob on the unit controls the overall mix volume so that you can set it to a comfortable level for your headset or speakers.

View of front control panel.
The ZG01 volume controls are conveniently situated.

3. It’s Compact

When you think of an audio mixer, your mind probably conjures up an image of a large mixing console with lots of knobs and faders. But chances are you wouldn’t want such a big, clunky device taking up precious space in your gaming station. Dedicated gaming mixers are typically smaller and easier to manage than conventional audio mixers.

That’s certainly the case with the ZG01, which is only eight inches wide by a little over four inches deep. You won’t find rows and rows of extra channels on the ZG01. It has only the tactile controls you need to conveniently control the various audio feeds involved in your multiplayer gaming experience. Less frequently used settings are accessed via the free ZG Controller companion software for PC and Mac.

4. It Lets You Fine Tune and Change Your Voice

Imagine being able to apply fun effects to your voice that your chat partners will hear. The ZG01 offers a selection of onboard mic settings to improve the quality of your voice as well as mic effects that let you quickly and easily morph your voice into something different, funny or scary. These include gate, compressor, EQ, limiter, reverb, pitch, radio voice, and press-and-hold buttons for echo and censor beep sounds.

View of controls.
The ZG01 Mic Settings.
Control panels.
The ZG01 Mic Effects.

You choose the effects in the ZG Controller software, but you can turn the effects on and off from the three Mic Effect buttons on the face of the mixer.

View of controls.
The ZG01 front-panel Mic Effects buttons.

5. It Improves the Game Audio

One of the benefits you get with gaming mixers like the ZG01 is the ability to enhance the game audio itself. For example, the ZG01’s Focus Mode increases the ambient sound and reduces the player’s sound to give the player a competitive advantage.

If you choose the 3D Chat Space option, you can place the voices of your fellow gamers in a virtual space that’s differentiated from the game sound. That can help avoid confusion when you’re playing a game with a lot of dialog in it and chatting with your buddies as you play.

View of controls.
The ZG01’s modes offer powerful ways to alter the game sound.

Another ZG01 option is called ZG Surround. It takes the multichannel surround mix coming over HDMI or USB and virtualizes it to create a 3D soundscape you can hear in conventional stereo headphones.

Check out our companion article “Five Ways That a Gaming Mixer Can Improve Your Game Streaming.”

Learn more about Yamaha gaming mixers and headsets.

A Conversation With Bobby Shew and Wayne Bergeron

When you talk to famed trumpeters Bobby Shew and Wayne Bergeron about their lives, you quickly realize that making music is central to who they are. The quest for them is more than just being able to play difficult music and make it sound easy; it’s about expressing their voice and looking to deepen their connection to music. And while their iconic careers stem largely from playing the trumpet, their Yamaha flugelhorns hold very special places in their hearts.

Bobby Shew

Man playing a flugelhorn.

Bobby Shew’s professional career started when he was just 13, playing local dances and events in his hometown of Albuquerque, New Mexico. By the time he turned 15 he was leading his own band at a local dinner club. These early years paved the way to a long recording and performing career, including work with Tommy Dorsey, Woody Herman, Della Reese, Buddy Rich and many other major artists. At the same time, he continued to lead his own band and today is in constant demand as an educator and clinician, helping musicians of all ages and levels improve their skills and grow their love of music.

Shew’s connection to Yamaha started in 1974 during a tour in Japan. Bobby was approached by instrument designers Kenzo Kawasaki and Hiroo Okabe, who invited him to visit the local Yamaha Atelier to try some trumpets they had been working on. “There were 18 trumpets lined up on a couple of tables,” Shew remembers. “They were all different from each other, and different from what I was used [to] playing at the time. That first time, we didn’t find anything that worked for me, but I was in and out of Japan a couple of times a year and each time I went over there, they approached me to come to the Atelier, and I did. It was a great honor for me because of all the trumpet players on the planet that they could have come to, they came to me.”

After four years of testing new designs, Shew made the decision to switch to Yamaha trumpets exclusively. But his move to Yamaha was about more than just looking for something new. “All of a sudden, I was playing with half the effort and making better music, and this was a bit of a revelation [about] how to play a horn,” he says. “I started learning new ways to approach the trumpet and this only made me want to experiment and play more.”

Bobby has also been a development partner with Yamaha for all of the Custom Z trumpets and Custom Z flugelhorns, including the most recent YFH-8310ZII model. And while most people think of Shew as a trumpeter, for him the flugelhorn hits closer to the heart. “My favorite instrument for playing deep into my heart and soul is the flugelhorn because it feels a little more emotional to me,” he says.

Golden horn.
Yamaha YFH-8310ZII Custom Z Flugelhorn.

He isn’t shy about what this latest instrument has to offer, either. “I can control it,” he says, simply. “I don’t have to wrap my legs around the chair I’m sitting on to get upper notes on the horn. And I’m able to play it in tune! But it all comes back to the sound and the new Z flugel has what I’m looking for. If it’s easy for me to get my sound, then it’s easier for me to make the music come to life … and if I can do that, then I think it’ll be easier for whoever is listening to feel the music.”

Wayne Bergeron

Man playing a silver flugelhorn.

Wayne Bergeron has had an equally stellar career. He originally started on French horn but switched to trumpet in seventh grade where he found a natural upper register ability. Wayne first came to national prominence when he landed the lead trumpet chair with Maynard Ferguson’s band in 1986. As a sideman, Bergeron’s list of recording credits reads like a “who’s who” in contemporary jazz and pop, running the stylistic gamut from Ray Charles to Green Day.

But of all of his accomplishments, recording music for film and television stands out and puts Bergeron’s playing in front of millions of people every day … whether they know it or not. This type of work requires not only extreme accuracy and versatility but the ability to use sheer musicianship to support the story being told on the screen. The music varies and the pace in the studio is fast, requiring Wayne to be present, laser focused, and quickly connected to the music. On top of that there’s all the nuance that goes into playing an instrument, including blending with the other musicians and, of course, playing in tune!

All these things, Bergeron says, are made easier on his new Yamaha YFH-8315IIGS Custom Flugelhorn. “I have a couple of regular TV shows I do: American Dad, which is a lot of flugelhorn, and Family Guy, which is almost all flugelhorn. We have to be fast and there are a lot of cues and no time for a lot of takes, so you have to get it right and nothing can be out of tune. The new 8315II in particular has this nimbleness to how it plays. I feel like the horn just goes with me even on the hardest stuff. If I need to come in very soft and hold that note for 12 beats, I can do it. If I want to put some edge on the sound to say something specific or complement something else that’s happening, I can do it. I can make it sound exactly the way I hear the music in my head, and I love it. There’s no better way to get an audience connected with the music than to have that. It gives me access to all the musical tools in my toolbelt.”

Silver flugelhorn.
Yamaha YFH-8315IIGS Custom Flugelhorn.

Bergeron looks back on his first connection with Yamaha as an exciting and humbling honor. “Back in 2001, when I first met with them, I never thought I’d be designing a trumpet, especially for a successful, huge company like Yamaha,” he says. “I mean, the horns are already great! But it’s amazing how they keep working to improve the instruments, and when we try something new it’s exciting and creates kind of a spark to go play. I’m like a kid again and can’t wait to get to the gig with the new horn or just grab some piece of music from my file cabinet that I think, ‘Oh man, that would sound amazing on this horn.’”

A Spark That’s Still Burning

Beyond their skills as horn players, Bobby Shew and Wayne Bergeron have a lot in common. For one thing, they have enjoyed long, sustainable careers … which can make it hard to remember that they were both beginners at some point. Like all musicians, they had influential teachers and a vision for the kind of life in music they wanted to create. But for both it started with a “spark” — that first connection to making music. And, for both, the fires lit by that spark are still burning. For them, it’s not just about trumpets and flugelhorns; it’s about staying connected, playing music, teaching music, collaborating with other musicians and finding ways to express themselves through their instruments. “Sometimes I pinch myself that I have the best job in the world,” Wayne says.


Learn more about the new Yamaha Custom Z Flugelhorns and Custom Flugelhorns.

12 Best Holiday Albums to Own on Vinyl

Can you believe it’s that time of year again? If your idea of seasonal cheer includes listening to holiday music in front of a fire with some friends, here are some must-haves for your vinyl collection.

1. Louis Wishes You A Cool Yule – Louis Armstrong

This one is new in a sense because it contains all of Louis Armstrong’s holiday tunes in a single place, along with a bonus track — a previously unreleased reading of Samuel Clement Moores’ “A Visit From St. Nicholas” (better known as “The Night Before Christmas”). Ella Fitzgerald and Velma Middleton also team up with Satchmo on one tune each. Verve/UMe claims this is Armstrong’s first official Christmas album … and they might just have a point.

2. Ella Wishes You A Swinging Christmas – Ella Fitzgerald

Ms. Fitzgerald’s slinky voice draws you into her holiday world like no other. She swings from the get-go with souped-up versions of “Jingle Bells” and “Santa Claus is Coming to Town,” then moves the tempo around as the songs dictate. This collection of tunes is so finely polished and will fly by so quickly, you might find yourself playing it again and again.

3. The Beach Boys’ Christmas Album – The Beach Boys

This has to be the perkiest Christmas record ever. Beach Boys fan or not, if five minutes of this one doesn’t put a smile on your face, you must be a Grinch with a small heart. The mixture of traditional tunes with stellar production and killer harmonies are impressive enough, but the Brian Wilson original, “The Man With All The Toys” steals the show. So get out there with all the Whos in Whoville and sing along. The only question is, will you get the stereo or mono version? Tell your holiday gift-giver to buy you both — you’ve been good, right?

4. A Charlie Brown Christmas – Vince Guaraldi Trio

For many, the songs on this record and TV special may very well have been their first introduction to jazz, without even knowing it. But the light, sparse arrangements and the tasteful playing of Vince Guaraldi and his trio are so good, this is a record to play all year long. There are multiple audiophile remasters to choose from, too — even pressings in red or green vinyl to spruce things up.

5. A Holly Dolly Christmas – Dolly Parton

Dolly pulls in a number of buddies for a Christmas album peppered with great duets. Miley Cyrus and father Billy Ray join in on the festivities — even Jimmy Fallon contributes some great banter. If the Beach Boys serve up the sprightliest Christmas album, Dolly and friends give you the biggest, sweetest holiday dessert tray. And maybe that’s what we all need a slice of right now.

6. Christmas Album – The Jackson 5

You might be tempted to pick the group’s 2009 compilation Ultimate Christmas Collection instead, but dig deeper because the real gold was pressed to wax in October of 1970, when the Jackson 5 were at the top of their game, with three consecutive Top Five albums that year alone. With the Christmas Album, the brothers take 11 well-worn holiday tunes and make them their own. High point: a 12-year-old Michael Jackson singing “I Saw Mommy Kissing Santa Claus.”

7. A Very Special Christmas 2 – Various Artists

As part of a continuing effort to help the Special Olympics, VSC 2 is perhaps not as consistently good as the first album, but it has higher highs and a wider variation on the theme. But then how many sequels exceed the original? Tom Petty’s “Christmas All Over Again” and Aretha Franklin’s “O Christmas Tree” alone are worth the ticket price, and Run-D.M.C.’s variation on “Christmas Is” adds a bit of levity that always comes in handy at holiday time. Give up the dough, yo!

8. Christmas Christmas – Cheap Trick

Imagine The Beatles doing a Christmas record that was part early material, part Sgt. Pepper. This album delivers hard-hitting, up-tempo pop holiday tunes with densely layered vocals and powerful guitars, all performed at a “Roll Over Beethoven” pace. Much as the darlings from Rockford, Illinois have been compared to the Fab Four, perhaps this is their most Beatlesque effort. Straightforward rock and roll with a holiday groove that’s good enough to enjoy all year long. “Run Rudolph Run” has to be one of the best Christmas songs ever!

9. Holidaydream: Sounds of the Holidays, Vol. One – The Polyphonic Spree

This record starts with the band whistling “A Working Elf’s Theme,” and only gets more avant-garde as it goes on. “Happy Xmas (War is Over)” almost sounds like one of John Lennon’s alternate takes, yet “Silver Bells” is so kaleidoscopic, it feels more like a Flaming Lips tune. The sonic landscape the Spree presents is as wide as a fresh snow at the North Pole. They could have easily called this record Have Yourself a Trippy Little Christmas.

10. The Ventures Christmas Album – The Ventures

If you’ve ever spent a balmy Christmas in Los Angeles or Scottsdale, where the lights are hung from palm trees, this record will take you right back there in a minute. Ironically, the Ventures hail from the Pacific Northwest where the sun rarely shines, and the surf isn’t. But they turn in a great performance here, giving a broad cross-section of Christmas standards the full surf treatment, jangly guitars and all.

11. Silent Night – Sinead O’Connor

This is only an EP, and “Silent Night” is really the only Christmas song on it, but this is one of the most gentle yet haunting versions ever recorded — almost David Lynch movie ethereal. This piece of vinyl is tough to find, but well worth including in your holiday music collection. After all, an open, airy presentation like this is what analog is all about!

12. Christmas Party – She & Him

We end our holiday collection with something eclectic and quirky … and what could be quirkier than a dozen tunes featuring Zooey Deschanel? With this collection, she and her partner M. Ward have stirred up creamy holiday goodness and mixed in some top supporting talent. The Chapin Sisters (who’ve accompanied them on tour) join in for a few tracks, and Sonic Youth’s Steve Shelly plays drums on most of the record. Consider this one a charming Christmas sleeper.


Check out these turntables from Yamaha.

Help Students Learn from Failure

How can we help our students embrace and bounce back from failures? How can we use failure to grow and continuously improve? Lifting our students from difficult moments is one of our many jobs as educators. Often, our personal encounters with setbacks and how we were able to bounce back can benefit our students as they deal with disappointment.

Failure is painful. It’s humbling. And the more emotionally invested you are in something, the more it beats you down if things don’t turn out the way you hoped.

Many younger teachers are leaving the profession today, and while I know that burnout is real, I also wonder how much this exodus is connected to feeling like they’ve failed at the job in one way or another — not necessarily failure related to competitive results but failure in general.

As an educator, it’s easy to feel like a failure. Regularly. The same could be said for anyone, but teachers are constantly taking care of the well-being of our students and co-workers. A drum corps mom once asked me, “You take care of everyone. Who takes care of you?”

That’s a hard question to answer. Teaching and leading can be lonely. Even though we lean on friends and family, we know that everyone has pressures and worries, so we hesitate to burden others working through their own issues.

A Look Back at My Big Failure

In January 2006, I had just completed a magical fall semester playing euphonium in the Rutgers University Wind Ensemble, which I considered the Rolls Royce of university bands on the East Coast. Since high school, I had dreamed of earning a position and performing with the group, and it was one of the highlights of my time at Rutgers. The mix of masters and doctoral musicians mixed with a few high-achieving undergrads made for a pretty incredible-sounding band, which was under the direction of Dr. William Berz, a brilliant musician, educator and conductor. He programmed outstanding literature that exposed his musicians to everything from transcriptions to classic wind band warhorses to contemporary pieces, many not yet published.

My heart sank when the audition results were posted for spring semester ensembles. I had been moved down from the Wind Ensemble to the Symphony Band, and my chair had been given to a first-year undergraduate. I was crushed. I remember feeling so many emotions — sadness over losing something I had worked so hard for, anger because I had invested in the process only to move backward, betrayal that my investment in the program wasn’t good enough for our conductor, and embarrassment that I no longer would be able to perform with the top musicians on campus. I was full of shame and self-doubt. And then came the tears.

Jarrett Lipman leading his band in the standsI called my dad, who was a professor and director of continuing education at Rutgers, in near hysterics and asked if I could come by his office to talk. When I got there, he gave me a big hug to let me know that everything was going to be OK, and then he allowed me to talk and spill all my emotions before even attempting to weigh in to help. After I calmed down, we talked through my disappointment, and my dad encouraged me to reflect on what might have led to the chain of events and challenged me to be proactive in my response to the situation. His suggestions included seeking feedback and staying focused on continuous improvement. And, most importantly, he reminded me of one of my grandfather’s favorite sayings, “As stressful as this seems, six months from now, you’re going to be worrying about something else.”

I left his office still licking my wounds and not entirely convinced I wanted to continue as a music major. That said, I did my best to reflect on my dad’s advice as I contemplated changing my major to music business, political science or communications.

When I look back on that experience now, I realize that I lost my spot to someone who was better than me. I either needed to get better at euphonium if I wanted to move back up, or I needed to feel good about performing in a great ensemble that wasn’t the Wind Ensemble. I never overcame my frustration over being dropped down during my last year at Rutgers. So rather than work harder to improve and move back up, I stopped auditioning for Wind Ensemble and spent my final year working toward my senior euphonium recital instead.

I regret this decision. While my playing did improve, it wasn’t at the level it would have been if I had confronted my fear and aggressively sought feedback to get better. I let my discouragement cause me to make a decision that wasn’t in my best interest. I had a great senior recital and enjoyed my time in the Symphony Band, but I would be remiss if I did not admit that I made the wrong decision here. I wish I could go back and do it differently. But this experience and the lesson I learned motivate me when I’m debating whether or not to walk away from something for the wrong reasons.

A Different Perspective

Since moving to Texas 15 years ago, I have been lucky to work with and learn from a variety of our private lesson faculty and masterclass instructors at Claudia Taylor Johnson High School. I now have a different viewpoint about the value of failure, especially how to build from it, and how to move forward from it.

Mr. Joe Dixon, our trombone teacher and one of my mentors, has a guiding principle when it comes to results. He tells students and staff, “Whether you succeed or fail, you get 24 hours to celebrate or sulk, and then it’s time to move forward.”

This lesson continues to resonate with me and has helped our students during their highest and lowest moments.

Jarrett Lipman and the Chambers family at Midwest
Jarrett Lipman (second from right) and the Chambers family at Midwest in 2019.
Jarrett Lipman and Mark Chambers during his Crossmen days
Jarrett Lipman (left) and Mark Chambers in 2007.

My career-long mentor and friend Mark Chambers believes failure is as valuable as success. He has witnessed his students experience pain over the years when they didn’t achieve the desired result, but he has also seen the personal growth and perseverance they gained. After setbacks, students learn to bounce back, analyze, reflect and keep moving forward.

There have been many times through the years at Johnson when the group or I did not achieve a desired competitive result, or we were denied admission to something we worked hard for. We have tried ideas that didn’t pan out, and we ran some events that flopped. Mark has coached me through many of these failures by sharing his wisdom, which always focused on how to “keep going.”

Sometimes failure isn’t connected to results — sometimes, we fail as role models, friends, co-workers and humans. These are some of the most challenging moments. We lose our tempers with our students. We say something that makes a student cry or feel small. We slight a co-worker. We succumb to jealousy or speak ill of someone we care about.

We must learn how to remediate these types of failures, whether it’s through a sincere apology, an open conversation and admission of error, or a plan to move forward. Accepting failure as a part of our growth will result in better outcomes in the future.

A Successful Example of Dealing with Failure

I remember one of the finest musicians and leaders in our band program earned a chair in the Texas All-State band during his freshman, sophomore and junior years. However, during his senior year, he was extraordinarily busy with college auditions (11 of them!) and placed first in the region and area rounds, only to have a problematic audition in the final contest. He did not advance to all-state that year.

Johnson High School's band performing on the fieldThe most remarkable part was watching this student process the results and then stick around to celebrate his peers who did earn chairs, including many who asked him, “How could you not have made it?”

This student took photos with other students and pumped them up about the significance of their accomplishment, even though I know he probably wanted to go into a corner and cry. He was fighting many emotions that day, and when I spoke to him later, he was very calm and logical about things, even though I knew inside he was hurting.

The week after the auditions, the student admitted that the day was a “gut punch.” The days that followed weren’t the easiest for him as he watched celebrations around the other all-staters ensue. Still, he kept a fantastic attitude in our rehearsals and worked hard to move forward. Soon enough, this student was admitted to eight top music conservatories around the country. He also earned a chair in the National Youth Orchestra (NYO of Carnegie Hall). He spent the summer with this group and traveled to Berlin and Europe to perform.

I realize things do not always work out this well, but I was inspired by this student’s maturity and resilience, and I often think about how I wish I had that kind of persistence and positivity at his age.

How We Can Help

Think about when students often fail: performing in front of others, audition results/chair placements, contest results, college rejections, job rejections, losing out on leadership positions, romantic pursuits.

It’s important to be aware of your students’ feeling during these situations. Some students can’t hide their feelings, while others try to put on a brave face. We all remember being teenagers and dealing with the emotional angst that came our way. Students who participate in a music program learn much more than musical ability and music appreciation. They gain the confidence and tools to confront whatever challenges they face in life, including failure — but sometimes they need our help, whether it’s a nudge in the right direction or a supportive hand at their back.

Here are some tips to help students refocus after a disappointment.

  • How can we use this failure to improve? Continuous improvement is powerful. Students must learn from their mistakes, reassess where they can improve, and work smarter the next time they try something.
  • How can we help turn failure into an opportunity for growth, so students overcome the fear of failing? Resilience is best learned through experience. Help students confront that fear and turn it into a positive motivator.
  • Johnson High School band in show costumes in auditoriumFailure is like any skill — the more we practice and experience it, the better we can master our ability to learn from it and move forward.
  • Winston Churchill said we learn that “success isn’t final, and failure isn’t fatal.” Our ability to move forward from present failures determines our ability to achieve future successes.
  • Students learn that they are stronger than they think they are. Failure hurts, but like all injuries, it will heal with care and time.
  • Students may be on a “hot streak” and learning to cope with failure early can help them prepare to bounce back from difficulties later in life.
  • Students may “want for nothing” and the band can provide experiences that challenge and force them to dig deep.
  • Students can learn to take risks and experience that it is better to try and fail than never trying at all. The pain of regret hurts worse than the pain of defeat.
  • Help students avoid self-loathing and focus on what they have achieved and what they can improve.

How to Get Started Producing Music at Home

It’s never been easier to record and produce music at home. Digital technology allows anyone with a computer, audio interface, digital audio workstation (DAW) software and one or more microphones to create a studio that, in some respects, is more powerful than commercial studios of the analog age.

In this article, we’ll explain what you need to start recording and producing music at home. It helps if you have recording experience, but you can learn that as you go. (One great way is to read the Recording Basics articles here on the Yamaha blog.)

What’s Your Goal?

Before putting together your home studio, think about what you want to accomplish with it. Having a good understanding of your goals will help your gear-buying decisions and influence where you set up your recording equipment.

Do you intend to record bands or other ensembles? If so, you will need enough space to accommodate a drum kit (preferably in a separate room), and you’ll be much better off in a house rather than an apartment because of the noise levels your sessions will create.

An apartment-based studio is fine for vocals, MIDI instruments, and relatively quiet instruments like acoustic guitar, violin, flute, mandolin, etc. You can also record electric guitar and bass direct (also known as DI, short for Direct Inject). That means plugging them straight into your audio interface so you can record them without an amp. You can later bring those tracks to life with amp-and-effects modeling software such as VST Amp Rack (a plug-in included with Steinberg Cubase) and add amp and cabinet sounds, as well as effects, when it comes time to mix.

View of front panel.
Use an amp modeler like Steinberg VST Amp Rack on DI guitar recordings.

Workspace

Another consideration is the desk or table that you put your gear on. You’ll need enough room for your audio interface, your computer (along with its keyboard and mouse) and possibly your studio monitors too. If your table is too small for all of those components, you can opt to deploy your monitors on speaker stands placed behind the table.

You’ll be much happier if you’ve got some open space on your worktable because you’ll likely need to plug in cables and connect additional hardware, at least occasionally. If you’re squeezed for space from the beginning, it will only worsen over time as you add to your setup.

Power is also an issue. Depending on the electrical wiring in your house or apartment, you might pick up radio-frequency (RF) interference and/or hums and buzzes from the wiring, which could find their way onto your recordings. Consider investing in a power conditioner with multiple outlets. A good one will help remove RF and other noises from your AC and also protect your gear from voltage spikes, which have the potential to fry your equipment. Keep your use of daisy-chained power strips to a minimum because they can create a fire hazard.

CPU

A computer running DAW software is the linchpin of any contemporary home studio. To run the latest version of the DAW of your choice, you’ll need a relatively modern computer. A model from ten years ago may have trouble running current software and could even be incompatible.

Screenshot.
Steinberg Cubase 12 in action.

You can run your DAW on either a desktop or laptop computer, and it can be a Mac or a PC. (Many top DAWs, including Cubase, are compatible with both platforms.) You’ll also want your computer to have at least eight gigabytes (8 GB) of Random Access Memory (RAM), preferably more. RAM is the dynamic memory that your computer uses for running applications and its operating system. How much your computer has will determine how many applications it can open simultaneously and how much it can allocate for the recording process. If it has less than 8 GB of RAM, your computer will likely get bogged down frequently as you’re recording, plus you’ll be limited in your ability to add effects and tracks. With many computers, it’s possible to upgrade to more RAM.

DAW

DAW software combines the functions of a multitrack recorder, a mixer and an effects processor, all in one application. There are many DAWs on the market, all of which allow for recording, mixing and editing both audio and MIDI.

The differences are in the user interfaces and advanced features. Steinberg offers Cubase in a variety of tiered versions (“editions”), at different price points; these include Cubase Pro, Cubase Artist and Cubase Elements. If you purchase a Steinberg audio interface (more on that below), it will include a free version of Cubase — either Cubase AI or Cubase LE, depending on the product.

Sample of the table.
A partial comparison of Cubase version features.

Unless you own Cubase Pro, which is the flagship, you can always upgrade to a higher version to add more capabilities.

Audio Interface

Another essential piece of gear is an audio interface, which acts as the bridge between your recording gear and your computer. It’s also where you connect your mics, instruments and line input sources, as well as where you plug in your headphones and monitor speakers.

View of rear panel.
Your audio interface is where you connect mics and more.

A wide variety of interfaces are available, offering two, four, eight, 16 or even more inputs. Which model you purchase will largely depend on what you need now or think you’ll need in the future. For many home recording musicians, two inputs and two stereo output channels are sufficient. You’ll probably only need more if you’re planning to record a band or ensemble.

These days, most audio interfaces connect to computers via USB 2.0 or USB 3.0, although some use Thunderbolt. It’s best to buy an interface with the same connectivity format as your computer.

However, USB is backward compatible; in other words, assuming you have the correct adapter, you can connect a USB 3.0 device to a USB2.0 computer … but not vice versa. Whenever you connect a newer version of a format to an older one, the data will get processed at the speed of the slower format. Even if you don’t yet have a USB 3.0 computer, it still might make sense to get a USB 3.0 interface and use an adapter. That way, you’ll gain in connectivity speed and bandwidth when you do buy a new computer.

Two of the most important components in an audio interface are its microphone preamps and its converters. A preamp is necessary for raising the microphone signal to line level so that it has sufficient gain for recording and connecting to other gear. The converters transform your incoming audio signal from analog to digital on the way into the computer and from digital to analog on the way back to the interface. Better converters equate to better quality audio.

Generally, the more you spend on an audio interface, the higher the quality of both mic preamps and converters, but some models, such as the Steinberg UR-C Series (all USB 3.0 devices), offer excellent quality preamps and converters at an affordable price.

View of controls.
The Steinberg UR24C offers USB 3.0 connectivity.

Monitors

Unless you plan to mix solely on headphones (which is possible but not advisable), you will need a pair of studio monitors. Studio monitors are designed to accurately reproduce the frequencies of the audio you’ve recorded. That’s crucial for creating mixes that translate to other audio systems outside your studio.

Monitors come in a variety of sizes, defined by their woofer size. Most contemporary monitors are self-powered, so you don’t need a separate amplifier.

The size of the woofer largely determines how much bass you’ll hear; for example, eight-inch woofers deliver more low-end than monitors with six-and five-inch woofers. If your budget allows and you can comfortably fit them in your studio, consider getting eight-inch monitors like the Yamaha HS8.

View of speaker with filter cover removed.
Yamaha HS8.

Another option for adding bass to your monitoring setup is to augment your system with a subwoofer. Adding a sub like the Yamaha HS8S to monitors with 5-inch woofers (like the Yamaha HS5) will give you enough bass response to mix even low-end-heavy hip-hop or EDM music. A configuration with two monitors and a subwoofer is called 2.1-channel.

One of the significant differences between home and commercial studios is that the latter are purpose-built for recording and mixing, with rooms that are acoustically treated. Home studios are almost always set up in existing spaces like bedrooms and dens, which are almost never constructed with acoustics in mind.

As a result, many home studios have problematic acoustics that can make it hard to monitor accurately. For example, you might hear more bass or less high-end than what’s in your mix because the room acoustics exaggerate those frequencies.

Proper monitor placement can help but won’t eliminate acoustical issues. If you have the budget, consider getting acoustic treatment for your studio. (Do an online search for “acoustic treatment.”)

Mics and Accessories

Another critical ingredient in your studio is your microphone (or microphones). Mic type and quality can considerably affect the sound of your recordings.

If you can only afford one microphone, get the best large-diaphragm condenser model your budget allows. Such mics generally offer good sonics and are versatile enough to be used on both vocals and instruments.

Closeup of mic on stand.
A large-diaphragm condenser microphone.

You’ll also need cables and a stand for each mic. In the studio, boom stands offer much more flexibility of placement than straight stands. It’s worthwhile to invest in a heavy, good quality boom stand because it will be easier to manipulate and more durable than a cheap one.

If you’re planning to do any MIDI recording, you’ll also need a controller keyboard and/or a pad controller. (Most MIDI keyboards offer some pads, but they are rudimentary in what they can do compared to a dedicated pad controller.) You’ll likely want to tap in drum parts to give them a more realistic feel.

Fade Out

Once you get your gear and setup squared away, you can focus on learning how to record. Like any skill, you can’t become proficient overnight. Although you want to learn as much as possible from friends with studios and online learning resources, there’s no substitute for experience. Record some projects, even if just for practice. The more you do, the better you’ll get.


Check out our other Recording Basics postings.

Click here for more information about Steinberg Cubase.

Holiday Lessons and Activities for Elementary School

Having a hard time keeping your pupils engaged before the holiday break?

The weeks between Thanksgiving and winter break can be one of the most challenging times of the year. And with all the fun and family time coming up, who can blame students for getting excited?

To help get you through the next few weeks, try mixing things up with the following holiday-themed lessons.

Handmade Sheet Music Ornaments

round ornament sitting on top of sheet musicOlder elementary schoolers have had enough time to familiarize themselves with some classical pieces. Plus, this is a holiday project that doesn’t break the bank. All you need are cardboard or paper mache ball ornaments and glue or Mod Podge, which can be found at most Hobby Lobby, Dollar Tree or Dollar General stores. The paper ornaments are typically lesson than $1 each, especially if you buy them in a pack.

If you are really on a budget or want to reduce, reuse and recycle, you can opt to have your student choose from scrap paper from last winter.

To make the ornaments, have students dip strips of sheet music — 1- to 1½-inch long strips work well — in glue or Mod Podge and paste them onto the round ornament. This holiday project comes from Take Time for Style.

You can also add extras like jingle bells and confetti, which I used as an activity for students who finished before music class was up.

Interactive Listening: Snowy Edition

Interactive listening can be made to fit any holiday, but winter-themed interactive listening is my favorite because there is so much classical music to choose from. For example, everyone knows “Sleigh Ride” by Leroy Anderson. Two of the quintessential parts of the song is the “pop” noise created by a slapstick and the horse’s “clip-clopping” done by temple blocks. Split your class into two groups and assign clappers/claves or other similar-sounding wood percussion instruments. When students must wait to play their part, I find that they listen more deeply.

Another great song for interactive listening is Vivaldi’s “Four Seasons” — I focus on the movement “Winter” after Thanksgiving break. Keep students on their toes by playing Synthesia music videos for them, where the notes are shown in circles or blocks on the screen, like in the video here.

Alternatively, you can play classical winter pieces (here is one of my favorite holiday playlist) while students do other activities, such as the sheet music ornament activity above or completing snowmen coloring pages. The latter makes an excellent emergency sub plan.

“Reindeer (Hokey) Pokey”

Keep the kids up and moving around to get some of that pre-holiday energy out! One of my favorites is the “Reindeer Pokey,” a spin-off of the “Hokey Pokey.” I find that one dance at the beginning of class and one in the middle of class helps stave away the fidgets during lesson plans, especially ones that focus on solfege practice and music history.

The “Reindeer Pokey” is ideal for pre-K and lower elementary students and is one of those songs that you can play for students over and over. They got so excited about it in my classroom that they keep asking for it in the spring!

For other holiday song-and-motion ideas, check out Fantastic Fun and Learning.

Holiday-Themed Dance Cards

elementary school girl holding bellsMake listening to winter-themed music more interesting by creating holiday dance-move cards for your mid-elementary classroom. I like to mix it up by having the students lead the dances once they are familiar with the different activities — such as take tiny elf steps, do some reindeer kicks, march like a nutcracker, etc. If your schedules allow it, you can team up with the P.E. teacher for this one.

I prefer to make the dance cards myself, or come up with the different movements with the students, but check out Toddler Approved for dance card ideas.

Bring Out the Orff Arrangements (Or Make Your Own!)

When I was in elementary school, my teacher used to bring out the xylophones and Orff arrangements as the holiday break approached. I do the same with my classes. Teachers Pay Teachers is a great reference for Powerpoint presentations that have creative Orff arrangements that include three or more instruments.

Caroling the Halls

Caroling around the school is an excellent activity that the administration is usually very excited about. Upper elementary students can carol with recorders or ukuleles with straps. Caroling can quickly become a school-wide tradition and serve as a rite of passage for the oldest grade in the school.

Steer away from religious songs (unless your school is private) and go with tunes like “Let It Snow” or “Do You Want To Build A Snowman?”

Caroling around the school provides students with valuable performance experience.

“The Nutcracker” / Tchaikovsky Lesson

If your district has the funding for a field trip, I highly recommend a live listening experience, such as a trip to see “The Nutcracker.” Many times, this isn’t within reach, so bring the ballet to your class with these lesson ideas.

Share a Holiday Song

You may be surprised at how many winter or holiday songs from around the world your students know if you prompt them to share a song from their culture or family. This project is great for mid- to upper elementary students and will make all students feel welcome in the classroom.

Try this fun homework project: Ask students to write a one-page paper or PowerPoint on a holiday song that their family always sings or plays, and then have them present it to the class along with the song.

The holiday season will keep you on your toes whether you are a seasoned music educator or just getting starting. Plan ahead, but most importantly, plan to have fun. No matter what you and your students celebrate, make this season the best it can be. Stay festive and happy music-making!

Essential Gear for Your Home Studio

Recording studios have come a long way since the days of multi-million dollar complexes with 30-foot long consoles and flying faders. It’s now possible to make professional-quality recordings at home, with gear that costs a fraction of what those old commercial studios paid. With that in mind, let’s break down the essential equipment you’ll need to get your own home recording studio up and running.

Computer

The computer is the heart of the modern-day recording environment, whether it’s a six-figure studio or simple bedroom rig. Our recommendation is to get the most processing power and memory your budget allows for — trust us, you’ll need it. Your DAW (Digital Audio Workstation) software and plugins (more on these below) have the capabilities to eat up CPU power and memory at an alarming rate.

It’s also a good idea to invest in an external hard drive for backup — in addition to a cloud-based storage system — for redundancy purposes (in other words: you’ve worked hard, so safeguard yourself from lost data!). Another element that many home users neglect, at least to start, is a powerful GPU (graphics processing unit), which may allow you to extend your desktop to a pretty elaborate multiple-monitor configuration if your computer’s built-in hardware does not already allow for this. More monitors mean more screen real estate, and if you plan on tracking and mixing a lot of channels in your projects, spreading them out can make the process a whole lot easier to see at once.

DAW and Software Plugins

Great, you’ve got a tricked-out computer system all ready to go. Of course, the next step is to get a DAW — the software you’ll be using to record, mix and edit your tracks. At the same time, you should also research what audio plugins and software effects you may wish to use for your projects. Plugins extend the capabilities of your recording software, and some mimic external hardware devices you may already be familiar with, such as modulation effects, guitar amp and/or cabinet simulators and reverb units.

Screenshot.
Steinberg Cubase AI.
Screenshot.
Steinberg AmpSimulator plugin.

Your DAW is going to be where you spend the majority of your time during your sessions, so research a few different options to see what’s available. Steinberg Cubase AI is a popular and easy-to-use piece of software that’s an excellent choice for anyone looking to get into home recording. (It also comes bundled with the company’s UR24C audio interface mentioned below.) Arming tracks to record, editing tracks and mixing them together is fairly straightforward, and adding plugins or using some of the add-ons included in the package is a breeze.

Cubase also works seamlessly with the entire range of Steinberg audio interfaces (see below), making for a tightly-integrated recording ecosystem sure to take the hassle out of setting up a studio rig for the first time.

Microphones and Cables

Depending on your needs, there are a wide variety of mics to consider for your home studio (dynamic, large diaphragm condenser, small diaphragm condenser, USB mics, etc.) — each of which will require (typically) XLR cables. Increasingly, we are seeing more high-quality digital mics with USB and even Thunderbolt connectors, which makes direct hookup to your Mac or PC (and now mobile devices) a snap. Without quality mics to capture the sound of the instruments and vocalists you wish to record, your mix is doomed from the start. What’s the old adage? Garbage in, garbage out …

Audio Interface

Even the best mic in the world is useless if you can’t get the sound it picks up into your system. In order to route audio (and MIDI) signals into your computer, your guitar cables, DI lines, MIDI controllers and microphone cables all need to be connected somewhere. That’s where an audio interface comes into play. This unit connects your audio and MIDI sources to your computer, typically featuring a combination of mic preamplifiers with analog-to-digital convertors, DI inputs, monitor controls, headphone ports and gain controls, as well as output jacks that enable signal to be sent to speakers and/or headphones.

Steinberg UR24C.

For example, the Steinberg UR24C is a two-input, four-output interface with 32-bit/192 kHz audio resolution, Class-A D-PRE mic preamps for stellar recording quality, and a USB 3.1 SuperSpeed port for fast, reliable and seamless connectivity. It even has built-in effects like reverb and digital models of guitar amplifiers.

A setup like this provides everything a home recordist needs to get started, and as you require more inputs, you can graduate to more advanced systems. But pretty much any audio interface will get you ready to begin recording, right out of the box. Just plug it in via USB, configure your DAW to recognize the device, plug in your mics or instruments and hit Record.

Control Surface

Sure, you can sit there with your mouse and keyboard and try to control your mix “in the box,” so to speak, but it’s easier (and more fun) to feel tactile controls under your fingers. Control surfaces, which typically work with most major DAWs and operating systems, take the pleasure of mixing with physical faders and knobs and turn that into a practical solution for home studios. These units don’t transmit any audio signals; instead, they operate by sending data to your computer that, in turn, tells the on-screen controls what to do. Most units will also enable you to map certain features to some or all of the physical controls, for greater customization of your workflow.

A control surface may actually become the most indispensable tool in your home studio arsenal, especially if you want to be able to run your sessions in a traditional manner. Many first-time home recordists overlook including this bit of hardware when first getting set up. Our advice is to not make that mistake.

MIDI Controllers

If you’ll be using virtual (software-based) instruments as part of your setup, investing in a good MIDI controller is going to be essential. The good news is that most audio interfaces and DAWs are already set up to handle MIDI in/out and editing. And if they don’t have MIDI I/O, most modern-day MIDI controllers — and even some synthesizers — allow for MIDI-over-USB, meaning you can bypass an audio interface completely and connect directly to a computer.

Four small electronic keyboards in 2 rows of 2.
Yamaha reface series.

The reason we mention synths is that while you can certainly buy a MIDI controller on its own (say, a MIDI keyboard with a few octaves of range), those devices only do one thing: transmit computer data to your DAW. That’s great and all, and you can obviously command entire symphonic performances from such devices, but if your budget allows, it might make more sense to purchase a synthesizer that also can act as a MIDI controller. That way, you get the great sounds of the synth, plus the ability to use it to transmit and (in many cases) receive MIDI data to and from your DAW. For example, the reface series from Yamaha includes four different synthesizers — reface CS, CP, DX and YC — each doubling as a handy, portable USB MIDI controller.

Studio Monitors

What good is mixing a song if you’re not hearing it properly? Unlike consumer Hi-Fi speakers, which often color the sound to make for a more pleasant listening experience, studio monitors offer more of a flat frequency response (i.e., one where no particular frequency area is emphasized or de-emphasized) to ensure that your mix will sound good on virtually any system.

Speaker without filter cover.
Yamaha HS8.
Closeup of control panel.
Yamaha HS8 rear controls.

For years, the go-to for many home recording studios and commercial studios alike have been Yamaha models — you’ve probably seen the classic white speaker drivers in countless photos and videos. For example, the HS Series powered monitors (which include five models, ranging from the compact HS3 and HS4 to the fuller size HS8) deliver the legendary sound Yamaha is known for, loud and clear. They also offer controls for high trim and for compensating for your room environment — features that can make the difference when it comes to producing your project the right way.

Our recommendation is to not skimp in this area — hearing your mix through pro-level monitors will be crucial when it comes to crafting the right sound for your project.

Headphones

Closeup of headset with Yamaha logo on earpiece.
Yamaha HPH-MT7 headphones

Of course, to really hear all the nuances you’ve created, you’ll also want to test your mix on headphones. A pair of good closed-back studio monitor headphones like the affordable Yamaha HPH-MT7 — or their big sibling, the HPH-MT8 — will let you test your tracks without room bleed and ambient noise leaking through (problems you’d encounter with open-back headphones meant more for hi-fi listening).

These are the basics you’ll need to get started. For a more serious rig, you can also add a dedicated uninterrupted power supply (UPS), power conditioners, outboard effects, soundproofing / acoustic treatments such as panels and diffusers, and lots more goodies. Click here to find the Yamaha products that will best fit your home studio needs.

Yes, There Is Such a Thing As Silent Practice

You love music. You love your kids, too. But do budding musicians really have to practice so much?

Whether you are that budding musician, or are the parent of one, we’ve got a newsflash: The people within earshot could use a break once in a while. Hearing that same étude five times in a row is fine, but hearing it 20 times is starting to get irritating, and around the 30th replay everyone within listening distance may start to feel a definite headache coming on.

Okay, the logical side of you knows that musicians really do have to practice that much. But couldn’t they maybe just take it down a notch in volume?

As a matter of fact, they can. Thanks to modern technology, the volume of most major instrument types — keyboards, guitars, strings, brass, woodwinds, even drums — can be drastically reduced without diminishing players’ ability to hear themselves. And leading the way is the extensive line of Yamaha SILENT™ products. Here’s an overview of these potential sanity-savers.

Piano and Keyboards

Of course, electronic keyboards of all stripes (and from all manufacturers, including Yamaha) come with headphone jacks, making silent practice an intrinsic and important feature. But what about acoustic pianos?

Young girl playing piano while wearing headphones.
SILENT piano.

At first glance, a Yamaha SILENT Piano looks just like a normal acoustic piano with weighted keys, pedals, strings, and hammers. But these instruments lead a double life. They can be played just like any other piano, or they can be switched into Silent mode, in which case the hammers stop hitting the strings, and the sound can be heard only via headphones. The way this works is nothing short of magic: A series of optical sensors beneath the keyboard and pedals measures the nuances of the playing and then uses them to trigger the digital sound of a piano, which can be turned up or down as desired — without disturbing anyone in proximity. SILENT Pianos are available in a variety of upright and baby grand models; some even include sounds sampled from the famed line of Yamaha CFX and CFIIIs full-size concert grands.

Drums

Full electronic drum kit.
DTX6K3-X electronic drum kit.

Like digital keyboards, electronic drums always offer a headphone jack for private practice. These instruments are built around pads (similar to practice pads) that produce little noise but can still be remarkably sensitive. In fact, some Yamaha electronic drum kits offer pads that are divided into three separate zones, allowing for a greater variety of expression than even acoustic drums. They also include built-in practice tools such as a programmable metronome, onboard recording and training songs that allow the player to master various genres. With an electronic drum kit, the drummer in your house can thwack away to their heart’s content, producing a staggering range of sounds that only they will hear in their headphones.

Acoustic Guitar

How do you lower the volume of an acoustic guitar? By taking away its most resonant component: its body. This explains the strikingly minimal outline of the Yamaha SILENT Guitar. Instead of having an actual front, back and sides, these instruments resonate virtually through a special pickup that uses digital modeling to replicate the sound of a typical acoustic guitar as captured by a high-quality studio microphone. The result is an instrument that produces next to no sound on its own, yet still has a realistic tone, the loudness of which is completely controllable. A number of different SILENT Guitars are available, including one based on a folk-style guitar and others styled after classical guitars. All are collapsible, making them easy to travel with.

Two acoustic guitars with only outlines of the body.
SILENT guitars.

Guitar Amplifiers

Think that a guitar plugged into an amplifier means an inescapable blast of sound? Think again. Many of today’s practice amps, such as the Yamaha THR-II desktop series, have headphone jacks, allowing silent practice … without disturbing anyone else nearby. These amps also have the benefit of built-in digital effects such as distortion, reverb, etc. — meaning that you won’t have to spend extra on pedals or other signal processing hardware.

Yamaha THR desktop amps.
THR desktop amplifiers.

Strings

Four open bodied stringed instruments: two violins, a viola and a cello.
SILENT strings.

The first SILENT Violin™ was designed over 20 years ago to offer players the ability to practice in an environment where they wouldn’t disturb family or neighbors around them. Today’s lineup of Yamaha SILENT and Electric strings includes three models of violin, a SILENT Viola, three SILENT Cellos and three SILENT Basses. This gives budding musicians the opportunity to form complete Electric Ensembles where SILENT and Electric string players can practice and perform together, create meaningful music and express themselves, all while plugged into headphones.

Brass

Brass instruments can be very loud when you get up and close and personal, but there’s already a long-established way of making these instruments quieter: It’s called using a mute. The problem is that mutes dramatically alter tone as well as volume. Yamaha has addressed that issue with its revolutionary SILENT Brass system, which consists of a mute fitted with a pickup that connects to a small electronic “personal studio” unit. That little box contains exclusive circuitry that simulates a standard acoustic tone, making the instrument sound as though there’s no mute being used. There are versions for trumpet, flugelhorn, trombone and French horn, as well as for tuba and euphonium, and the SILENT Brass mutes for the latter two actually have extra adaptability in that the position of the mute head can be adjusted to match different bell sizes and personal preferences — which also means that the same mute can be used on B♭, C, E♭ and F tubas. The tuba and euphonium models can also be disassembled into parts that are stackable, making storage easier.

Yamaha SILENT trumpet mute
SILENT trumpet mute.

Woodwinds

Electronic saxophone shaped similarly to a clarinet.
YDS-150 Digital Saxophone.

The Yamaha YDS-150 Digital Saxophone plays and feels like an acoustic saxophone, but its wealth of digital technologies offer a number of enhancements, including 73 onboard sounds and a headphone jack that enables saxophonists to practice in privacy. The mouthpiece has a design just like that of an acoustic sax and the standard key layout ensures natural playability and smooth operation, plus there’s a breath sensor that detects the intensity of the player’s breath for precise control of both volume and tone. Bluetooth connectivity and a wired aux input even allow the player to jam along with music being played on an external source such as a smartphone or laptop, all in complete silence and without disturbing others in the vicinity.


When you think about it, every one of these instruments and devices is remarkable in that they achieve something that wasn’t possible until relatively recently: They give both musicians and listeners an unprecedented degree of control over what they hear. All of which means that you or your child can practice to their heart’s content at a drastically reduced volume with no corresponding loss of tone, while your long-suffering neighbors (or long-suffering you) enjoy only peace and quiet.

Top Five Synthesizer Features

There was a great deal of excitement when the modern synthesizer was invented in the mid-20th century. Not only was it able to produce a far wider range of sounds than any other instrument, many of those sounds were unlike anything that had ever been heard before.

Today’s synthesizers are much more capable than they were 50 years ago, and their potential to create unique tonalities has expanded further still. However, the sheer number of options these instruments offer can make it difficult to make a purchasing decision.

Difficult — but not impossible! Whether you’re buying your first synthesizer or are planning on giving one as a gift, here are five important features to look for.

Sound Quality

Everyone wants an instrument that sounds good. But the meaning of “good” varies, depending on a musician’s taste, playing style, and the genre of music they gravitate towards.

Your best bet is to look for a synth capable of producing the broadest spectrum of sounds and tone colors. The affordable line of Yamaha MX series synthesizers, for instance, utilize AWM2 (Advanced Wave Memory 2nd Generation) waveforms for their preset sounds. These waveforms are based on high-resolution audio samples, which means that wherever the sound being sampled hails from, it’s been captured cleanly and accurately. MX owners can add further color to these sounds with five-band equalization and VCM (Virtual Circuitry Modeling) effects like flanging, phasing and wah-wah.

Yamaha MX49 electronic synthesizer keyboard.
Yamaha MX49.

Full Control

One thing you shouldn’t get overly fixated on is the number of sounds in a synth. There are two reasons why. First, as we said, synthesizers by their very nature are able to create a large (though not necessarily unlimited) number of sounds. Second, even entry-level synths typically come with hundreds of factory-created “preset” sounds.

For most synth owners, presets are just starting points. What’s important is how the synth allows the user to control the sound. You should definitely look for one that comes with lots of knobs, dials, wheels, pedals and faders, since these are the controls that are used to alter and interact with sounds.

You might not expect to encounter a wide range of controls in a mini-keyboard, but the Yamaha reface series demonstrates just how many can fit into a small 37-key package. Each reface model adopts a different stylistic and sonic approach:

– The reface CS is a virtual “old-school” synth that allows the user to choose between five unique oscillator types.

– The reface DX provides the freedom to edit FM (Frequency Modulation) sounds.

– The reface YC offers a wide range of organ sounds, along with tone wheel and drawbar controls.

– The reface CP provides electric piano and keyboard tones with “retro” analog-type knob controls.

Four small electronic keyboards.
Yamaha reface series.

Any one of these could work well for players who want specialized sounds and a portable means of endless sound-tweaking.

Magic Touch

Playing just about any instrument is a highly tactile affair, and so the way a synth’s keyboard feels is of great importance. Light, non-weighted plastic keys have obvious virtues (for one thing, they make a synth easier to carry), but many players — particularly those used to playing acoustic or electric pianos with a heavy “action” — will want a weighted keyboard; that is, one that feels more solid under their fingers.

Similarly, the way the controls feel can be nearly as important as what they do. Again, this is largely a matter of personal taste; some players prefer turning knobs to pushing buttons or vice versa. Although ease of use is crucial, you may not want anything to be too easy. Yes, having to really press down on a button to store data can be frustrating, but it might in the end be better than needing only a light touch to mistakenly erase a sound you’ve spent hours creating.

In the Flow

What if the person you’re buying for is a performing musician? The likelihood is that they will want a synth that makes it easy and efficient to get from point A to point B while onstage. Be on the lookout for models that give players the ability to customize functions and streamline overall workflow.

For example, Yamaha MODX synthesizers are packed with helpful features such as a Live Set function for quickly organizing sounds for live performance and SSS (Seamless Sound Switching), which allows players to change from one sound to another without an obvious cut-off between the two.

Yamaha MODX electronic keyboard.
Yamaha MODX8.

Making Connections

In today’s high-tech world, easy integration with software apps — via computers, mobile devices or both — is a must. Before you make a final decision on any synth model, confirm hardware connectivity and DAW compatibility. (“DAW” is short for Digital Audio Workstation — the software used for recording music.)

All Yamaha MONTAGE synthesizers, for example, come with both MIDI and USB connections, as well as analog inputs and outputs. Any of the three models — the 88-key MONTAGE8, the 76-key MONTAGE7 and the 61-key MONTAGE6 — can easily be used as controllers for most popular DAWs, including Steinberg Cubase, thus providing enormous extra flexibility for recording, processing and editing audio.

Yamaha MONTAGE8 electronic keyboard.
Yamaha MONTAGE8.

Don’t get us wrong. Sound quality, control options, feel, workflow enhancement and compatibility are by no means the only things to consider when buying a synth. But if you’re satisfied with how your choice stacks up in these five areas, you’re probably well on your way to finding an instrument that will bring plenty of joy to the sonic alchemist in your life.

For more information about Yamaha synthesizers, click here or visit www.yamahasynth.com.

Buying Your First Drum Set

You’ve always wanted to play drums. Or perhaps your child or grandchild has expressed an interest in (and perhaps shown an aptitude for) playing drums and you want to encourage them. Either way, you’re a bit conflicted about it.

On the one hand, you feel ready to indulge yourself (and of course you’re always ready to indulge your kids and grandkids!), but on the other you think it’s going to be a noisy and costly activity. In addition, there’s the intimidation factor: Some folks find the prospect of buying a drum set both time-consuming and confusing, especially if they’re not familiar with the jargon and don’t know what to ask for.

The good news is that none of these things are necessarily true. Drums today can be almost completely silent, and they can be affordable, too. What’s more, thanks to online resources (like this blog!), navigating the maze of options is easier than ever before. Here’s what you need to know before you start shopping for that first drum set:

What is a Drum Set, Anyway?

A drum set (sometimes called a drum “kit”) is simply a collection of drums, cymbals and mounting hardware, similar to those you’ve seen played onstage by your favorite band. There are two kinds of drum sets: acoustic and electronic.

An acoustic drum set is made up of the following five basic components:

1. Drums: There are typically at least four or five drums in a set. Each consists of a shell (typically made of wood, but also sometimes metal), across which is stretched a drum skin or “head” (usually made of clear plastic Mylar® or calfskin) — the surface you hit with a stick. The drums that are used most of the time are the bass (“kick”) drum and snare drum, though most drum sets also include one or more tom-toms.

Steel snare drum
Yamaha Stage Custom steel snare drum.

2. Cymbals: Circular plates made of metal, used for a crashing sound. The most important of these are a hi-hat (two small cymbals mounted vertically, one inverted, that come in contact with one another when a pedal is pressed) and a “ride” cymbal. A starter drum set may also include one or more “crash” cymbals.

3. Hardware: Metal stands to hold the cymbals and drums, plus a throne (seat), a foot pedal (for the bass drum) and a hi-hat stand that includes a pedal for crashing the two cymbals together.

4. Sticks: Long wooden dowels used to strike the drums and cymbals.

5. Drum key: A small metal device used to tune the drums by stretching their skins.

In electronic drum kits, the sounds are produced via electronic, not acoustic means, so pads made of rubber, Textured Cellular Silicone (TCS) or mesh material are struck instead of physical drums and cymbals. Electronic drum kits also include a module (a “brain”) in which hundreds of different sounds are stored digitally.

Acoustic Drums or Electronic Drums?

When deciding which kind of drums to buy, one of the most important factors is the space required. In addition, you will want to consider the time of day you or your child will be practicing — will this disrupt your other family members or the neighbors?

Acoustic drum sets are much louder than electronic drums, have a much larger footprint and will require some sort of isolated room for practice.

Electronic drum set.
Yamaha DTX402.

Electronic kits are smaller, quieter and easier to use since you don’t have to worry about tuning or changing drum heads. An electronic drum kit like the Yamaha DTX6 Series or DTX402 Series is often the best choice for beginners since you won’t need to soundproof the room where they are located — you or your child can use headphones to practice. Another big advantage to electronic drums are the built-in training functions they often provide. These allow an aspiring musician to improve the critical skills of timing and feel. This can include built-in songs the student can play along to, making training and practice more fun — and therefore ultimately more successful.

The Advantages and Disadvantages of Each

Acoustic drums:

  • The standard for both lessons and live performance.
  • Loud!
  • Take them anywhere: not tethered to a power outlet.
  • Instant gratification: nothing to plug in or set up. Just start hitting ’em!
  • Good for larger bedrooms, basements or garage … especially if the spaces can be soundproofed.
  • Produce one sound with various tunings.
  • Drums and cymbals come in various sizes.
  • Larger footprint: requires an average 5′ x 5′ space.
  • Requires lots of new sticks and drum heads as they wear.

Electronic drums:

  • Easily used at home but requires amplification for performance.
  • Quiet practice with headphones.
  • Good for apartments or small bedrooms.
  • Capable of producing various sounds and styles of drum kits.
  • Requires some setup and an electrical outlet.
  • Pads for drums and cymbals are typically smaller than their acoustic counterparts.
  • Smaller footprint: requires only an average 4′ x 4′ space.
  • Built-in training functions and metronome.
  • Less stick wear.
  • Heads don’t wear down and need replacement unless the kit uses mesh heads. (Yamaha offers replacements for these.)

Things to Look for in an Acoustic Drum Set

1. Mass: A good drum has some weight and feels sturdy. If the drum feels light, the metal and shell is of lower quality. While such drums are not necessarily bad, they are typically harder to tune and tend to need to be replaced sooner.

2. Expandability: If your skills and/or enthusiasm (or that of your young drummer) grows in future, make sure you can add extra components and order individual drums in the same color as your current set. Ask what sizes might be available.

3. Substantial features for your investment: Good drums, heads and hardware can cost a bit more, but they will also retain their value and make it easier to trade up when you or your child are ready.

Things to Avoid in an Acoustic Drum Set

1. Metal corrosion and poor workmanship: Examine the drum shell inside and out. Pay attention to the appearance of the seams. Are they well-crafted and without flaws? Is the finish smooth, with no “bubbling”? If the work is sloppy, chances are you’ll spend more time repairing or replacing things than actually playing the drums.

2. A manufacturer that doesn’t stand behind their instruments: Research drum brands ahead of time. Look for those that have gotten good reviews from users and/or impartial journalists. Lofty features and marketing claims are hard to substantiate without reviews! Things can break and get worn, but quality endures and is reflected in the way the manufacturer is perceived in the marketplace.

Things to Look for in an Electronic Drum Kit

1. Sounds: There’s usually a direct relationship between the price of a module (the central “brain” of an electronic drum kit) and the quality and variety of sounds it offers. Top-notch modules include all the standard drum sounds you would expect, but also offer many other sounds such as bells, wood blocks and non-percussion instruments, as well as special effects. High-end modules also provide the ability to edit and create your own sounds, and in some cases, allow you to download your own samples. Modules with editing and download capabilities can cultivate creativity!

2. Preset patterns: Every module has a selection of preset patterns — typically, short two-bar phrases or drum parts related to specific drum kits or musical styles. As mentioned earlier, these can be valuable learning tools, as well as a source of inspiration in creating your own unique drum parts. Many modules include full play-along tracks for both fun and practice.

3. Connectivity and expansion: If you plan to expand your electronic kit with more pads and triggers in the future, be sure the module has enough connectors to allow this. A USB port lets you send MIDI data to external PCs, digital audio interfaces and workstations, giving you access to a wide range of music software. Inputs for connecting multiple types of audio players (such as smartphones, tablets and CD players) let you practice and play along with your favorite music. Multiple outputs that can send your performance simultaneously to a mixer and recorder can be useful in both live and studio settings. In addition, be sure that the outputs will support the type of amplification system you plan to use.

4. Apps, apps and more apps: Speaking of connectivity, ancillary mobile apps can make any electronic drum kit easier to use, which makes learning faster and playing more fun. That’s why it’s important to choose an electronic kit that’s compatible with as many apps as possible. Yamaha has developed a full line of free apps for DTX-MULTI 12, DTX400 and DTX402 series electronic drums (click here for more information). In addition, specialty apps like Yamaha Rec’n’Share can be used to capture the audio from a Yamaha DTX6 Series or DTX402 Series electronic drum kit or EAD10 electronic acoustic drum module and combine it with video taken with a smart device. The user can then download their performance and share it on social media, or send it to friends in a text or email. Want to learn more? Read our blog article “Three Ways That Apps Can Help Your Electronic Drumming.”

5. A module “head” that is simple to use and sounds good: It should also allow you to download new kits and customize existing kits with fresh sounds and capabilities. There’s no better way to stay engaged!

6. Pads that are sturdy and have a good feel when played: There are several types of drum and cymbal pads available. When choosing, look for a good feel that pairs well with the sounds of the module. You can have a very good pad and an average module — or vice versa. Rubber pads are generally used in less expensive starter electronic drum kits, although some may offer mesh or foam. The pads you choose should have some give, but not too much rebound or bounce.

7. A rack that has sufficient weight to keep things in place yet is easy to adjust: The mounting hardware of your electronic drum kit should make it easy to keep components in place, using a standard drum key or knobs that stay tight.

8. Durability: Anything you hit with a stick should have some mass — and should feel sturdy.

Things to Avoid in an Electronic Drum Kit

1. A module with significant limitations: If it doesn’t allow you to personalize the feel of the kit or limits the number of pads you can add (due to only a few or single-zone inputs), keep looking.

2. A module that has poor sounds: Unlike acoustic drums, you can’t fix the sounds of an electronic drum kit with well-placed tape or muffling.

3. Pads that feel too hard: This can cause fatigue.

4. Pads that feel flimsy: Typically, these will not hold up under normal playing conditions — especially at the hands of a child.

5. Pads that are too bouncy: These can make transitioning to an acoustic drum set difficult.

Cost Versus Quality

Whether you’re shopping for acoustic or electronic drums, you’ll find that the market is full of affordable options. But remember, you or your child will be physically hitting the drums and many cheaper kits will fail over time due to heavy use, so make sure you look for a drum set that is robust, even if it costs a little extra. In addition, more expensive electronic drum kits feel more realistic and offer larger playing surfaces similar in size to those found in an acoustic drum set. Whichever way you go, starting with good quality instruments will make the experience more enjoyable — and can save you money down the road.

For more information, check out our three-part blog series, “So Your Child Wants to Learn to Play Drums”:

Click here for Part 1

Click here for Part 2

Click here for Part 3


Click here for more information about Yamaha drums.

Top Fantasy TV Shows and Movies

Your home theater offers a chance at escape. While the mundane world drones on around us, there are exciting fictional avenues that give the imagination new places to go, new adventures to experience — a whole universe of the mystical and magical. Whether that’s a faun meeting you at a lamp post to introduce you to witches and a talking lion, or a young boy with a wand that can change the world, diving into these dreamscapes can enliven and recharge our minds.

Here are eight of the top fantasy television shows and movies — escapes into new lands of enchantment and wonder.

1. GAME OF THRONES (2011-2019)

Based on the best-selling novels by writer George R. R. Martin, the eight seasons of this TV series present a panorama of political conflicts and power grabs in the time of knights and kings. The show earned record viewership and garnered 59 Emmy Awards, which is the most for any dramatic series to date. Shot in the U.K., Croatia, Iceland, Spain and other foreign locales, Game of Thrones famously even involves characters raising fire-breathing dragons as pets for their own use in brutal warfare. This epic adventure is as immersive as any you’ll ever hope to find. Find out where to stream it here.

2. HOUSE OF THE DRAGON (2022)

The prequel to Game of Thrones, this 2022 drama is set some 200 years before its predecessor. So far, just 10 episodes have been produced, but only five days after its launch this summer, House of the Dragon was renewed for a second season. Like the original, this is a tale of knights, dragons and political infighting, but it also traces the roots of some of the most important GoT family lineages. Dragon is also not for the faint of heart, as it incorporates quite a bit of dark cinematography, not to mention murders and bloodshed. Find out where to stream it here.

3. THE LORD OF THE RINGS TRILOGY (2001-2003)

What if there was one object that could destroy all life as we know it? That’s the question that begins the story of Frodo Baggins in The Lord of the Rings. These three films, all directed by Peter Jackson, offer some of the most eyebrow-raising special effects ever created — everything from giant tusked elephants to the trickster Gollum, who is addicted to the power that comes from the titular ring. Rich with wizards, orcs, goblins, archers and warriors, these movies set the standard for fantasy in the 21st century. Find out where to stream them here.

4. THE HARRY POTTER FILMS (2001-2011)

The eight films in this series (to date) are based on the celebrated novels of writer J. K. Rowling. Like the books, the movies track Harry’s life and his journey as he navigates maturity and his preordained relationship to magic. Colorful friends Hermione Granger and Ron Weasley stand by Potter’s side through the burgeoning wizard’s trials and tribulations as he battles the likes of the evil Voldemort. There are also prequel films, which began with the 2016 movie Fantastic Beasts and Where to Find Them. Find out where to stream them here.

5. THE CHRONICLES OF NARNIA: THE LION, THE WITCH AND THE WARDROBE (2005)

In this, the first of a series of adaptations of C. S. Lewis’s series of novels entitled The Chronicles of Narnia, a group of four children leave London for the country. There, bored, searching their new home for adventure, they find a large wardrobe, which itself is a portal to a new land filled with mythical creatures, dark magic and mystery. Met by a curious, conflicted faun, seduced by an ice queen, and saved by a loving, talking lion, the children learn what matters most in the world: goodness. Find out where to stream it here.

6. THE NEVERENDING STORY (1984)

Ever wonder what it would be like to have your very own luck dragon? This movie answers that question, as a young boy named Bastian Bux skips class and takes a book to an attic where he reads about “the nothing” taking over the world of Fantasia. What is the solution? It’s unclear. Until … a-ha! The way to end the nothing is to engage the imagination of a young child through Falkor, the luck dragon, along with vivid characters like racing snails and potion makers. Find out where to stream it here.

7. LABYRINTH (1986)

Directed by Jim Henson, executive produced by George Lucas and starring David Bowie, this film follows Sarah (played by a 16-year-old Jennifer Connelly) who is in search of her baby brother, taken by The Goblin King (Bowie). Sarah must traverse a mysterious land and a giant maze with the help of friends like the diminutive Hoggle and giant furry Ludo, who can summon rocks with a growl. Like Alice going into Wonderland, the journey is both jarring and beautiful, filled with memorable, strange characters. Find out where to stream it here.

8. THE WIZARD OF OZ (1939)

This movie is an all-time classic and the theatrical gold standard when it comes to fantasy. There’s no place like home, there’s no place like home. That’s the lesson young Dorothy learns after a tornado takes her from her residence in Kansas to the magical, fearsome world of Oz. There, she meets the Scarecrow (in need of a brain), Tin Man (who needs a heart) and the Cowardly Lion (who needs courage), all of whom help her to locate the Wizard in the Emerald City. Together, the foursome battle the Wicked Witch of the West to prove they have what it takes to earn the Wizard’s assistance. Will he be able to get Dorothy back home to her family? Only time (and a little chanting) will tell. Find out where to stream it here.

Here’s What to Look for When Shopping for an Acoustic Piano

There is nothing quite like the joy of playing a real piano. The feel of the keys and the beauty of the tone — produced by felt hammers striking metal strings resonating through a massive wood soundboard — is an experience that is difficult to replicate with a purely digital keyboard.

When shopping for an acoustic piano, you should of course pay close attention to the touch and tone of each instrument that you audition. Naturally, you’ll also consider the instrument’s size, durability and style and finish of the cabinet, as well as the cost.

But there are other important issues to consider when it comes to today’s pianos, where technology can play a major role in your enjoyment of the instrument you purchase. In this article, we’ll take a look at some of them.

Practice in Privacy

A smiling little girl playing a SILENT piano while wearing headphones.

Wouldn’t it be great to be able to play your piano whenever you feel like it — and not bother neighbors or members of your household?

Imagine that you could put on headphones and play the very same grand or upright piano you’ve fallen in love with – and not be heard by anyone!

This is a feature you can find on some modern acoustic pianos, including numerous Yamaha models such as the Disklavier™, SILENT Piano and TransAcoustic™. In fact, nearly every size of a grand and upright piano that Yamaha makes is available in at least one of these series of technology-equipped instruments. There are even two Bösendorfer models available as Disklaviers.

Here’s how it works: When you engage silent mode, a bar inside the piano that prevents the hammers from hitting the strings is automatically moved into place. Remarkably, the action feels exactly the same — the only difference is that there is no sound of hammers hitting the strings. Instead, when you put headphones on you’ll hear the digitized sound of a real concert grand piano — a sound that matches the expectations of your ears and enables quiet, private enjoyment of your instrument.

Add a Volume Control

Or suppose you’d like to play without headphones but somehow turn down the volume. Of course, you could lower the lid of the piano, but that only gets you so far. How about having a volume knob that can do the job?

The Yamaha TransAcoustic piano does just that. By injecting the sound of a digitized 9-foot concert grand piano directly into its own soundboard, you can alter the blend of the two to your liking, giving you a variety of options:

Play an upright or small grand piano and sound like you’re playing a large concert grand. Simply adjust the relative volume of the concert grand piano with the volume knob.

Get your piano in tune… even if it’s actually out of tune. Turn on the Silent feature (so the hammers don’t hit the strings) and send the digitized sound of the concert grand into the soundboard. Instant perfectly tuned piano!

Ready for quiet practice? Just put on headphones and enjoy the concert grand experience all to yourself.

Go back to the totally “pure” sound of the piano itself. Easily accomplished: Just turn off the digitized sound.

Upright Yamaha piano with graphic effect to show interior mechanism on right half.

Live Performance Enhancement

The Silent feature can also be used in the exact opposite way: to amplify your piano. This allows you to easily perform in a large public space, such as a church or performance venue where the acoustics require amplification. As an alternative to using microphones, you can connect your instrument directly to the venue’s sound system.

Interact With Your Apps

Woman playing Yamaha piano with iPad on music stand.

If you’ve been to a concert or two in the last couple of years, you may have noticed that sheet music is going digital. It’s not uncommon to see musicians reading music off a tablet instead — the same kind of tablet, in fact, that you may already own.

A tablet can replace hundreds or even thousands of printed pieces of sheet music, plus it fits nicely on the music desk of any acoustic piano. Add a wireless connection between the piano and the tablet — another feature you’ll find in several Yamaha models — and your playing can interact with the music on the screen. You can then use an app that helps you learn a piece, or one that provides a musical accompaniment that actually follows your playing.

Not only does Yamaha provide a way of connecting acoustic pianos directly to these interactive apps, we’ve pioneered a method of doing so wirelessly, using a Bluetooth® MIDI adapter called the MD-BT01.

Record Yourself

Creating a beautiful audio recording normally requires a combination of expensive microphones, careful mic placement and audio expertise. Yet some of today’s pianos allow you to make an audio recording without external microphones.

Man behind mixing desk recording a pianist in a sound booth.

Most Yamaha technology-equipped pianos offer this feature. The basic idea is that the piano uses its internal digital sample of a 9-foot concert grand to turn your playing into an audio recording. The recording is free of room noise and hiss and will always be in perfect tune — even if the piano itself is actually out of tune.

Enjoy Performances from Artists the World Over

Let’s take things a step further. How about the idea of inviting fine artists from around the world into your home — virtually — to play your piano, at any hour of the day, any day of the week? That’s something you can do if the acoustic piano you purchase includes a record-and-playback system.

The full-featured Disklavier models offered by Yamaha have such a system. This means that you can record yourself and the piano will actually reproduce your performance by moving the keys and pedals the same way you did when you played!

Couple on a couch in a living room watching a self-playing grand piano play.

This also gives you the opportunity to play back recordings that were made by other people on other pianos. For example, you can enjoy a piece of music being performed by a master artist or the original composer, or you can practice a piano duet by playing along with an absent partner.

The controls offered by the Disklavier are quite extensive. You can adjust the speed of playback or transpose the performance. You can even use a mobile device to record yourself with synchronized video or to enjoy a live concert that is streamed to your piano from a distant location.

Just a few years ago, these would be the makings of science fiction. Today they are reality. So when you’re ready to purchase an acoustic piano, be prepared to enter a brave new world. These aren’t your grandmother’s pianos!


Click here for more information about the Yamaha Disklavier.

Click here for more information about Yamaha SILENT Pianos.

Click here for more information about the Yamaha TransAcoustic Pianos.

Authentic Bass Playing

What is it that makes a bassline rock, funk, country?

As a bass player, your relationship to harmony (usually outlined by guitar or keyboard), along with rhythm and time (dictated by the drummer), is always paramount. However, every genre has its own set of basic guidelines that help you step into its particular musical universe. Knowing these core values will make you a more versatile bass player.

Let’s take a look at — and a listen to — a few of them.

ROCK CITY

When it comes to rock music, if you can play with a pick and lay down the root of the chord in time with the drummer, you’re off to a great start. Playing right on the beat (or slightly ahead of it) is desirable, and doubling guitar riffs an octave below is a big part of the gig. If there’s movement between chords, it’s less likely to be scalar and more likely to be about approaching notes from one or two frets below the tonic of the next chord.

Clarity is more important here than low end; a thinner, more aggressive sound allows you to be heard over and underneath masses of guitars and layered keyboards. Billy Sheehan and Peter Hook are two good examples of trailblazing rock bassists, each taking unique and instantly recognizable approaches to the genre. Their signature Yamaha basses are specifically designed to give you quick access to the tones Sheehan and Hook are so famous for.

Black and white electric bass guitar.
Yamaha Billy Sheehan Attitude Limited 3 Signature bass.


Red electric bass guitar.
Yamaha BBPH Peter Hook Signature bass.

The audio clip below is played on a Yamaha TRBX174EW with both pickups on. Notice how the broken eighth-notes on the root in the verse are contrasted with the steady eighths played in the chorus.

BLUESVILLE

Blues bass patterns are easily identifiable (and thus, easier to understand) in terms of their typical 1-4-5 chord progression. A solid grasp of the major and minor pentatonic shapes — the so-called “blues box” — will get you far. Get comfortable with playing the same pattern over and over, finding small details to change on each chorus, then switch to a new bassline when the solos begin; it’s all about chord tones, walk-ups and walk-downs. One of the hallmarks of a blues bass pro is a mastery of “turnarounds” — the many ways the chords go back to the top of the pattern. You will also need to be firmly wedded to the kick drum at all times.

In this next example, played on a Yamaha BB435 with both pickups wide open and the treble rolled off, listen to how the bass is playing a 12-bar chorus by outlining 1-3-5-6 or root-octave-flatted 7-5 changes.

FUNKYTOWN

The phrase “funkin’ on the one” is a reminder of just how important that first downbeat is in funk and soul — even though the inherently syncopated nature of the music means that the bass often doesn’t land on the other downbeats. And while a rock gig will expect you to be on top of (or ahead of) the beat, funk expects you to lay back “in the pocket.” You can get lots of mileage out of the root, 3rd, 5th, flatted 7 and octave, but harmonically astute lines use the 4th, 6th and 9th, as well.

Fat, round fingerstyle tone is king here, although slapping and thumb/palm mute techniques are just as crucial. One of the most important tools of a funky bass player is note duration: Using muted ghost notes and other short duration notes adds a particularly funky spice. Yamaha BB Series basses (especially the 5-string Yamaha BBNE2 Nathan East signature model, if your budget can stretch to it) are all excellent choices for slapping and other essential funk playing techniques.

White electric bass guitar.
Yamaha BBNE2 Nathan East Signature bass.

This next audio clip, played on a Yamaha BB435 with both pickups and tone wide open, presents an old-school funk in the key of A minor. Check out the use of space, call and response with the other instruments, slapping and double-stops on the flatted 7th and 6th intervals.

ISLAND TIME

An effective reggae groove is all about space, chord tones and offbeats, but learning to lay back is the number one priority here. Think of the “skank” (the offbeat usually played on keys or guitar) as the “one.” Once you’re in the zone, you’ll feel the downbeat with conviction, although you may not necessarily want to be playing it. Many of the great reggae basslines are incredibly simple, too, consisting of chord tones (1-3-5, 1-5-octave and others) played in a melodic fashion that you can almost sing or hum.

For the fullest, fattest tone, cut your treble, boost the bass, and try playing on the lowest strings almost exclusively, where the boom factor is highest. If your instrument has dual pickups, use the neck one only. Here, a five-string bass such as the Yamaha BB435 is ideal since it allows you to go super-low.

Brown electric bass guitar.
Yamaha BB435 bass.

That’s the bass I’m playing in this next audio clip, using just the neck pickup with the tone knob turned completely clockwise to roll off all the high end.

GOIN’ UP THE COUNTRY

To instantly conjure up a country flavor, play a root-fifth bassline, stay in the first four frets of the neck, keep it simple, and lock in with the kick drum. Many country bass parts consist of basic chord tones only (1-5 or 1-4-5, with perhaps an added 6 in the bridge). Verses and choruses often use the same chords, but you can make them feel different by moving between staccato for verses and legato for choruses (or vice versa).

Your tone should be big and full, a subliminal reminder of the upright bass. This next audio clip was played on a Yamaha BB435 with both pickups employed, but with the tone rolled off. Here, the bass plays a two-note-to-the-bar pattern, sticking to the root and fifth, almost always going down to the fifth and back up to the root (unless the figure is root-fifth-octave or vice versa). That root-fifth motion is contrasted by scalar walk-ups or walk-downs, most commonly found on the V chord back to the tonic chord.

In many ways, these examples are from a time when genres seemed more easily definable. Today, styles of music blend together smoothly (and sometimes not so smoothly), and there are dozens of subgenres that mix and match. Most rock bass players, for example, have a passing familiarity with funk and blues, just as modern country includes plenty of rock and hip-hop flavor. The truth is that most musicians listen to more than one genre, and their influences bleed into each other.

Regardless of your personal taste, it’s important to study these standard approaches, and others as well (i.e., gospel, salsa, metal, etc.). Understanding the stylistic hallmarks of different genres will help you grasp and develop the essentials of each musical landscape … and will help you grow as a bassist.


Check out E.E.’s other postings.

How Yamaha TransAcoustic Guitar Technology Works

When people play a Yamaha TransAcoustic (TA) guitar for the first time, their initial response is typically surprise and delight. Then they wonder how Yamaha managed to get chorus and reverb effects out of an unplugged acoustic guitar.

In this article, I’ll tell you how they did it.

A Technology That Began Inside a Piano

Yamaha engineers originally developed TransAcoustic technology for pianos more than 20 years ago, though the first of these instruments didn’t debut until 2014. “The idea for the technology had been at Yamaha since about 2000,” says Shingo Ekuni, who was on the original design team for the TA guitar and is now a product manager for acoustic guitars at Yamaha. Today, the product is in its second generation, with Transacoustic™ TA2 models available both in grand and upright versions. These are genuine pianos that have been modified with TransAcoustic components that use its soundboard to naturally amplify digital sounds — in effect, turning the instrument into an acoustic speaker.

Diagram showing inside a hybrid upright piano and the internal electronics.
The inside of a TransAcoustic TA2 upright piano.

Here’s how it works: First, touchless optical sensors mounted under the keys convert every keystroke and pedal motion into high-resolution digital data. That data is then routed to a sound module that offers various user-selectable keyboard and instrument sounds, including harpsichord, organ, electric piano, strings and more.

Closeup of sensors under the piano keys.
TransAcoustic Piano optical sensors.

The data is also converted back to an analog signal that goes through an amplification stage before being sent to two transducers attached to the piano’s soundboard. (A transducer is a device that changes energy from one form to another.) These transducers convert the electrical signal to sound waves, which cause the soundboard to vibrate like a speaker.

Diagram showing inner workings of hybrid upright piano.
TransAcoustic Piano transducers (bottom left and right).

When the piano is placed in TransAcoustic mode, the hammers get blocked from hitting the strings, so all you hear (via connected speakers or headphones) is the digital instrument sound you selected. If you want to blend in the piano sound on top of it, you can switch the piano to Layer mode. You can also play the piano on its own acoustically.

Bringing the Concept to Guitar

The Yamaha engineers knew that if the TransAcoustic technology could work on a piano, it could work on an acoustic guitar, which also has a wood body and vibrating strings. However, because the surface area of a guitar’s body is much smaller than a piano soundboard, and because, unlike the piano, there’s no way to mute the guitar’s acoustic sound effectively, they decided on a different implementation: instead of trying to use it to substitute the sound of a different instrument, TA technology would be used to add effects to the natural sound of the guitar.

The first TransAcoustic guitars were the high-end LL-TA and LS-TA models, released in 2016. Their success led to TA versions of many of the company’s acoustic guitars, including the long-running FG and FS Series instruments — even the nylon-string CG.

A hybrid acoustic guitar.
The FG-TA is one of many TransAcoustic guitars.

A TransAcoustic guitar is, first and foremost, a guitar. Even if you never turned on the TA system, you’d still find it to be a quality instrument. In fact, if you see someone holding a TA guitar but not playing it, you’d probably never know it has this groundbreaking technology inside. If you noticed the three low-profile control knobs on the top side of the body, you’d likely think they were all part of a pickup system for onstage use.

A closeup of someone pointing out the knobs on side of hybrid acoustic guitar.
TransAcoustic guitar control knobs.

But you’d change your mind once you heard that person play the guitar, with reverb and/or chorus effects swirling in the air all around them as if by magic. (Those same effects, by the way, are routed to the instrument’s output jack via the built-in piezo pickup, so you’d hear them coming from the amp too, if the guitar was plugged in.)

How a TA Guitar Works

Here’s how a TransAcoustic guitar creates those effects: When the electronics are turned on, the string vibrations are captured by a piezo pickup in the bridge. From the pickup, the signal goes into a circuit board mounted inside the guitar. There, it’s converted to digital data and sent to a digital effects processor, then it gets converted back to analog before passing through an amplification stage.

Finally, the amplified signal gets sent into something that Yamaha calls an actuator — a small metal device attached to the inside surface of the back of the guitar.

Closeup of small metal piece.
A TransAcoustic actuator.
Image of hybrid acoustic guitar with overlaid diagram and inset image of actuator placement.
Actuator placement inside a TA guitar.

The actuator functions similarly to the transducers on the TA piano, turning the electrical signal into sound waves and transferring those vibrations to the entire guitar body, and from there, into the air. In essence, it causes the body of the guitar to function as a giant speaker. And because the guitar’s acoustic sound is also resonating through the body, the effects blend in with it in a natural-sounding way, creating an immersive experience for the guitarist.

By the way, plugging a guitar cable into the quarter-inch jack on the end-pin transforms a TA guitar into an acoustic-electric that you can connect to an amp, a PA system or a direct box — any device that accepts an instrument-level signal. The output features a mix of the guitar sound captured by the pickup and the TransAcoustic effects.

Dialing it In

To turn on a TA guitar’s effects, all you have to do is press and hold the center control knob for about a second. You won’t see any change on the outside of the instrument, but if you look in the sound hole, you’ll see a lit power indicator on top of the circuit board.

Once it’s on, you can choose between two types of reverb — Hall or Room — and you can vary the amount by the position of its control knob. A second control knob lets you dial in the desired amount of a chorus effect. You can have one or both effects on and balance their intensity to your taste, plus there’s a dedicated overall volume knob if you’re using the piezo pickup output. The entire TA system is powered by a pair of AA batteries. A handy energy-saver feature shuts off the power after 30 minutes of inactivity.

TransAcoustic guitars are quite possibly the most versatile guitars ever made. You can play it like a regular acoustic guitar without effects, or with the effects blending with the acoustic sound, or as an acoustic/electric with effects. Whichever way you use it, you’ll know you’re playing a unique and innovative instrument.


Check out these related blog articles:

Discover Yamaha TransAcoustic Guitars

Which TransAcoustic Guitar is Right for Me?

MJ Ultra and the FG-TA TransAcoustic Guitar

Her Name Is Ruby

“Breaking Amish” with My Yamaha FG-TA

Nylon TA on TV

How to Record TransAcoustic Guitar Effects


Click here for more information about Yamaha TransAcoustic guitars.

Giving the Gift of Guitar

Around the holidays — well, actually all year long — I get phone calls, emails and texts (thank goodness carrier pigeons have gone out of fashion) from friends who want to buy a guitar, but don’t know much about them. Their questions sound something like this:

“Hey Tom, my (son or daughter) wants to play guitar. What’s the best one?”

“Hey. I’m at (pick a store) and they have a guitar here — would this be a good one for (me/my son/daughter/niece/nephew)?”

As much as I’d love to post my cell number and be everyone’s personal guitar shopper, this article is meant to start you in the right direction and arm you with the information you need to find the right guitar to gift a loved one (or yourself).

Here are the four things you need to know to give a holiday gift that can bring a lifetime of enjoyment.

One: Get ‘em what they want to play

If you are buying a guitar for someone who knows what they want — great! Much of your work is done. The single most important decision is selecting an instrument that will make the person want to play. So if they want an electric guitar (don’t freak out — we’ll address the different types of guitars in just a minute), buy them an electric. If they want a classical guitar, buy them a nylon string model.

But what if they don’t know what they want? In that case, you’ll need to do a bit of detective work. It’s easy: Simply find out what kind of music they love and want to play. Determine what musicians or music genres they listen to, and then see what type of instrument those artists usually play. If your gift recipient is a fan of contemporary pop or country music, an acoustic steel-string guitar will fit the bill. If they are enamored with classic rock bands, an electric guitar is probably in order. If they’re into folk or classical music, a nylon string guitar is your best bet.

Two: Types of guitars to consider

The second thing you need to know is just a bit about the different types of guitars you can choose. The good news is, there are really just three of them:

Acoustic steel-string guitar. This is the most popular style for a new player. As the name suggests, this guitar makes sound without an amplifier, so all you need is the guitar itself to make music. It also has steel strings, which have a distinctive sound. You may have heard that steel strings are hard on the fingertips, and this is true to a point, but most people adapt quickly.

Acoustic guitar with natural wood finish.
Yamaha FG800 regular body acoustic guitar.

If you are considering a steel-string guitar, I have two important tips. First, choose a size that’s right for the player-to-be. Folks with smaller hands and bodies will find a smaller body guitar easier and more enjoyable to play. Young teenagers, children and some adults find this to be the best choice.

Acoustic guitar with light wood finish.

Yamaha FS800 small body acoustic guitar.

Secondly, if the person to whom you are gifting the guitar has aspirations of performing or recording, an acoustic-electric guitar is a good way to go, since this type of guitar allows them to play acoustically and also plug in and play amplified.

Acoustic guitarl
Yamaha FGX800C acoustic-electric guitar.

Classical (nylon string) guitar. As the name implies, the strings of these instruments are made of nylon. This type of guitar has a distinctive sound that is associated with classical music, and also some folk music. You may hear that it’s best to start with a nylon string guitar because it’s easier on the fingers, but as I mentioned earlier, most people adapt quickly to whatever kind of guitar they are given. Also, nylon string guitars often have wider necks, which can make it more difficult to play for some folks with smaller hands.

Acoustic guitar with wood finish and nylon strings.
Yamaha C40II nylon string guitar.

Electric guitar. For this type of guitar, you’ll also need an amplifier, since the guitar itself doesn’t make much sound. That adds somewhat to the initial expense and takes a bit more effort to plug in and play — but not much. On the other hand, beginners sometimes find electric guitars a little easier to play than acoustic guitars, since the strings may be closer to the neck (in the jargon, their “action” is lower), so less finger strength is required.

Pacifica 900 Sq
Yamaha Pacifica electric guitar.
THR Amp Family
Yamaha THR desktop amps.

Three: It pays to accessorize

Home stretch. All the hard parts are done. Adding a few items to your gift can help your player start off strong.

The most frustrating part of learning to play guitar used to be tuning it! But no more. You can download a number of tuning apps for your smartphone that work great. There are also clip-on tuners that sell for well under $20. The important thing to know is that a tuner is a critical tool for any guitarist.

Clip-on tuner with digital screen.
Yamaha GCT1 clip-on tuner.

For most styles of music, a guitar strap is a great investment. The important function of a strap is that it lets a new player get their guitar in the right position right away.

And, if you’re buying for a burgeoning musician who will be taking their guitar to school, friends’ house or lessons, a case is really important too. For most purposes, a lightweight, soft case known as a “gig bag” works well and is not very expensive.

Four: Put a bow on it (with a teacher)

If you REALLY want to get your new guitar player off on the right foot, gift them a month of lessons with a qualified guitar teacher. A teacher will start them off right in terms of holding, tuning and playing the guitar. You can learn to play songs watching YouTube, but a real, live teacher makes a difference. Hit up your local music store — most offer lessons — or Google it.

Finally, a brief visit from the Ghost of Christmas Past. What if you have a guitar hanging around in a closet someplace. Is that OK to gift? I’d give that a definite maybe. It could be totally fine with a new set of strings and a slight adjustment or two, or it could be a one-way ticket to frustrationville for your player-to-be. My advice? Take it to a local music store and have them check it out for you.

Have fun finding that gift that can bring a lifetime of music! It lasts way longer than chocolate.


Click here to find out more about Yamaha guitars.

Desktop Amp Buying Guide

So you’ve just gotten an electric guitar. Maybe it was a holiday gift from someone special or a special gift you bought for yourself. Perhaps you purchased it as a present for another family member. No matter what the situation, you’ll need an amplifier to plug into. The good news is, if you’re mainly going to use it for practice, choosing a suitable amp isn’t all that hard. That’s because of something called “digital modeling technology,” which convincingly imitates the tonal properties of a wide variety of amp types. Because of modeling, pretty much any guitar amp can sound like pretty much any other guitar amp these days.

This being the case, the main questions you need to ask yourself concern size and power output (the latter is measured in wattage). Your principal choice will be between smaller “desktop” amps and larger “traditional” models. In this article, we’ll focus on the option that takes up the least space and offers the most portability and versatility: the desktop amp — a concept originated by Yamaha some years ago and exemplified in the company’s current THR-II Series.

Just to be clear, this kind of amp has nothing to do with the virtual desktop on your computer; it’s not a piece of software and in fact there’s nothing virtual about it. These are actual amplifiers that are small enough to fit on an actual desktop, and there are four models to choose from. Let’s take a closer look at each.

THR10II

The smallest amp in the lineup is the THR10II, which is just over 7 inches high, 14½ inches wide and 5½ inches deep. There are two different varieties of the THR10II (the THR10II WL model has a built-in wireless receiver and rechargeable battery), but both come with dual 3″ speakers and put out 20 watts of power — more than enough for learning purposes. Perhaps even more importantly, both have auxiliary inputs and Bluetooth® capability so you can jam along with the favorite tunes on your smartphone, tablet or music player. Both also feature headphone outputs, so you can practice in complete privacy … and without disturbing other family members or neighbors.

THR10II desktop amp.

THR30II WL

Obviously, desktop amps are perfect for practicing at home, but with the THR10II WL and slightly larger 30-watt THR30II WL wireless models in particular, you can practice pretty much anywhere, since they can run on either AC power or an internal rechargeable battery. What’s more, their use of VCM (Virtual Circuitry Modeling) means that they can produce a range of sounds much bigger than they are. There are multiple amp tones to choose from, each offering a different amount and/or type of distortion, plus settings for bass, acoustic guitar and other instruments.

Add two distinct effects circuits — one for modulation effects (chorus, flanging, etc.) and one for delays and reverbs — and you’ve got an amp that sounds great right out of the box: no effects pedals needed. The modulation effects have all the watery shimmer any fan of classic ’80s new wave could want, while the delays and reverbs successfully combine digital clarity with analog warmth. And if you’re not satisfied with the presets for any reason, you can download a free THR Remote editor app (available for both iOS and Android® devices), which allows you to customize those effects — and amp tones — to your heart’s content. Last but not least, like the THR10II models, the THR30II WL provides an auxiliary input, Bluetooth support and a headphone output, allowing you to jam to your favorite tunes and practice in private.

Yamaha THR30II wireless amps in three different colors.
THR30II WL desktop amps are available in three different colors.

THR30IIA WL

Okay, but what if your guitar isn’t a standard electric, but an acoustic-electric (meaning that it’s clearly audible either plugged or unplugged)? In that case, you don’t need an amplifier for home practice, but you may still want one for live performance, as well as for the extra tonal possibilities it offers. The Yamaha THR30IIA WL is specifically designed to be used with acoustic guitars, and whereas the other desktop amps in the THR-II Series feature digital models of various amplifier types, this version instead lets you select from three different microphone models — Tube, Dynamic and Condenser — that simulate what your guitar would sound like if you put one of those mic types in front of it.

When I’m recording acoustic guitar at home, I often use a dynamic mic for convenience, and in my experimentation with the THR30IIA WL, I found that its Dynamic setting was true to that basic, no-frills tone. The Tube and Condenser settings, however, were the opposite of what I expected: Condenser was more resonant overall, making it well-suited for playing on your own, while Tube gave individual notes — even low ones — more definition, making it ideal for those times when you’re playing with others and need to have your parts cut through. Besides the three mic models, there are two other modes: Flat (which, as the name suggests, leaves the signal coming from the guitar as is, with no sonic enhancements) and Nylon-String (a midrangey sound designed specifically for classical acoustic-electric guitars).

Like the other THR-II amps, the THR30IIA WL features some cool onboard effects. You can pick a short or long reverb as well as chorus, delay or both together. (The delay is actually more of a slapback echo, designed to be atmospheric and not overwhelm what you’re playing.) To kick things up a notch or two, you can also deploy a stereo imager, which impressively widens the sound field produced by the amp’s two 3.5″ speakers and adds a pleasing hint of an early-reflection tone (another name for ultra-short reverb — think tile bathroom) as well.

If you like to sing as well as play guitar, the THR30IIA WL has you covered, since it has two inputs, one specifically designed for a microphone. Bluetooth, wireless and battery-power capabilities are all standard too.

THR30IIA desktop amp.
THR30IIA WL desktop amp.

Perhaps most impressively, every desktop amplifier in the Yamaha THR-II Series weighs less than ten pounds. Not long ago, getting so much sonic variety in such a compact package would have been considered absurd. With these amps, not only do you get all those options, you can take them with you everywhere you go. What’s more, every model has a USB port and comes with a copy of Steinberg Cubase AI software, which makes it easy to take the sound coming out of your amp and turn it into digital audio — going from an actual desktop to a virtual one. The power of technology!


Click here for more information about Yamaha THR-II Series desktop amps.

Click here for more information about the Yamaha THR30IIA desktop amp.

This Holiday Season, Give the Gift of Great Sound

It’s that special time of year again! Here are some great audio gift ideas from Yamaha for the music lover or movie aficionado in your life.

Earbuds

TW-E7B True Wireless Earbuds

Closeup of an earbud in a person's ear.

Our flagship TW-E7B True Wireless earbuds deliver astonishing sonic realism, detail and clarity that makes you feel closer to the artist. There are a full complement of Yamaha-exclusive features too, including Advanced ANC (Active Noise-Cancelling) technology that leaves your music pure and untouched; a Listening Optimizer that corrects the sound in real time, adapting to you and your environment; Ambient Sound that lets you choose when you need to be aware of your surroundings; and Listening Care intelligent equalization for full-range sound at low listening volumes.

TW-E7B earbuds also deliver crystal-clear phone calls thanks to their advanced mic design and Qualcomm® cVc (Clear Voice Capture) technology, as well as stable wireless connectivity with Qualcomm TrueWireless Mirroring. They offer up to 22 hours of total battery life, and are water and sweat resistant so they can be worn outdoors as well as indoors.

TW-E5B True Wireless Earbuds

Guy with ball cap and hoodie wearing an earbud in his left ear.

High-performance yet cost-effective TW-E5B earbuds provide next-level sound and style, with extraordinary realism, detail and clarity, along with crystal-clear calls thanks to advanced mic design and Qualcomm cVc (Clear Voice Capture). They offer up to 30 hours of total battery life, and are water and sweat resistant so they can be worn outdoors as well as indoors.

Features include Ambient Sound that lets you choose when you need to be aware of your surroundings and Listening Care intelligent equalization for full-range sound at low listening volumes.

TW-ES5A True Wireless Bluetooth Sports Earbuds

View of someone working out with an earbud in right ear.

TW-ES5A sport earbuds are specially designed for use in all activities and weather conditions, delivering dynamic sound that drives you to your best performance. Their unique shape with silicone fins ensures a secure and comfortable fit, plus they’re waterproof and sweat resistant, making them the ideal companion on the playing field, between the hoops or in the gym.

Features include Ambient Sound that lets you choose when you need to be aware of your surroundings and Listening Care intelligent equalization for full-range sound at low listening volumes. They’re also especially long-lasting, with up to 34 hours of total battery life, along with stable wireless connectivity and crystal-clear calls thanks to their advanced mic design.

AV Receivers

RX-V4A

View of receiver on a shelf.

The RX-V4A 5.2-channel surround sound audio-video receiver brings the theater experience to your living room, with the latest in HDMI video compatibility and advanced audio technology, including Dolby Digital Plus and DTS-HD Master Audio decoding.

A whopping 80 watts per channel provides plenty of power, and there are numerous onboard wireless streaming options, including Wi-Fi®, AirPlay 2® and Spotify Connect, allowing you to easily listen to your favorite music on services such as Pandora®, Spotify®, Amazon Music, SiriusXM, TIDAL, Deezer and Napster. There’s support for voice control, enhanced media and gaming, as well as Yamaha MusicCast multi-room technology, which allows you to control all functions remotely from a free app, as well as giving you the ability to connect optional wireless surround sound speakers. What’s more, built-in YPAO automatic room calibration can be used to analyze the acoustics of your listening and viewing space so that the sound you hear is the absolute best it can be.

Speakers

Freestanding speaker.NS-777 Floor Standing Speaker

Every fan of great sound will be thrilled to receive this gift. The NS-777 is a floor-standing three-way bass reflex speaker that can handle up to a whopping 250 watts of music power. It incorporates a pair of 8″ cone woofers, a 5″ midrange cone driver and a 1″ aluminum dome tweeter for full-range sound from 30 Hz all the way up to 35 kHz. For improved imaging, the midrange and tweeter utilize Yamaha-exclusive waveguide horns that reduce reflected sound and increase the proportion of directly generated sound waves reaching your ears.

The NS-777 cabinet has a high gloss black piano finish that provides solid construction with minimal sound diffraction, and the included speaker stand provides the solid footing necessary for full floor contact, enhanced stability and minimal vibration resonance.

NS-C444 Center Channel Speaker

Horizontal audio speaker.

The NS-C444 two-way acoustic suspension speaker is specially designed to carry critical center channel information (which is usually dialog) in home theaters. It incorporates dual 5″ cone woofers and a 1″ aluminum dome tweeter that utilizes an exclusive Yamaha waveguide horn for a clear and precise sense of sound direction and placement.

The NS-C444 can handle up to 250 watts of music power with a frequency response of 65 Hz to 35 kHz. The cabinet has a high gloss black piano finish, which provides solid construction with minimal sound diffraction, and the grill cloth provides an attractive and acoustically transparent protective cover for the drivers.

NS-333 Bookshelf Speakers

Two small audio speakers, one with the filter cover removed.

The NS-333 two-way bookshelf speaker system is ideal for both music listening and home theater applications. It incorporates a 5″ cone woofer and a 1″ aluminum dome tweeter, and thanks to its bass-reflex design, can be used for main or surround channels. For improved imaging, the tweeter utilizes a Yamaha-exclusive waveguide horn.

The NS-333 can handle up to 150 watts of music power with a frequency response of 65 Hz to 35 kHz. The cabinet has a high gloss black piano finish, with an attractive and acoustically transparent grill cloth to protect the speaker drivers.

Home Theater in a Box (HTIB)

YHT-5960U

Modern living room with TV and surround sound units.

While there’s something to be said for assembling a home theater with hand-selected individual components, there’s no question that a complete turnkey “Home Theater in a Box” system like the YHT-5960U is a lot easier and more convenient — the ideal gift for movie and TV enthusiasts everywhere.

The YHT-5960U includes a full-featured 5.2-channel Yamaha RX-V4A AV receiver, along with a powerful subwoofer and complete set of surround speakers. The RX-V4A offers the latest in HDMI video capability and a whopping 80 watts of power per channel, along with advanced audio technologies like Dolby TrueHD and DTS-HD Master Audio. It also supports enhanced media and gaming, YPAO automatic room calibration, and wireless streaming via Wi-Fi, Bluetooth, AirPlay 2, Spotify Connect and Yamaha MusicCast. There’s even voice control with Amazon Alexa, Siri® and Google Assistant. The included front, rear and center speakers place easily in your room, and there’s a dedicated subwoofer for powerful bass, plus speaker wire perfectly matched for each speaker.


Ready to learn more about these great products? Check out our online store.

“Lean into Change” is the Driving Force Behind the SEMO Jazz Program

In February 2023, the annual Clark Terry Jazz Festival at Southeast Missouri State University (SEMO) will present something new at its Friday night gala concert: A repertoire of works exclusively by women.

Each year, the festival features something different. Past years have included performances by Andre Hayward (trombone), Mike Tomaro (composer, arranger and saxophonist), Craig Fraedrich (composer, trumpeter), the U.S. Army Blues, Dr. Alton Merrell (jazz pianist) and more. One constant for the Clark Terry Festival is that no two years are alike.

Dr. Joseph Jefferson

In the midst of COVID lockdowns, the festival embraced one of its biggest changes yet: Going virtual for a year. But under the leadership of Dr. Joseph Jefferson, who is now an Associate Professor of Music and Director of Jazz Ensembles at St. Olaf College, SEMO was up for the challenge.

Jefferson arranged five virtual clinics centering on topics like transcription, improvisation and jazz drumming. Guest performers couldn’t travel to Missouri for an in-person show, so Jefferson arranged for a group of guest musicians from New Orleans to perform while students hosted a watch party to view the performance. Attendees from schools in the area could access all these virtual resources. Kevin Hampton, SEMO’s music chair, called Jefferson’s solutions to the pandemic “incredibly creative.”

During his five years teaching at SEMO, Jefferson’s innovative approach has led to explosive growth in the jazz program. Embracing change is such an integral part of his teaching experience that it has become core to his educational philosophy. “I implore that students are open to new things in their world. They need to understand that the only thing that remains the same is change,” he says. “Change is always happening. We should want to lean into change as much as we possibly can so we can be the best educators and the best humans.”

THE YAMAHA EDUCATOR NEWSLETTER: Join to receive a round-up of our latest articles and programs!

SEMO jazz ensemble performing with singers

Energy and Excitement

When Jefferson began teaching at SEMO in the fall of 2017, he inherited a small jazz program, with just six students in the non-audition Jazz Lab group and 11 in the audition-based Jazz Studio ensemble. He has since expanded those groups, which now boasts 26 students in the Jazz Lab and 20 in the Jazz Studio. “To see the growth of students has been pretty remarkable,” Jefferson says.

The secret to attracting new students? Jefferson’s energy, enthusiasm and unbridled passion for the art of jazz. “You have to have a certain energy about you to get students engaged,” Jefferson says. “My students can see that I’m very active with them. I leave school worn out every day. I put so much into my teaching.”

With the growth of the program came an increase in performance opportunities. SEMO’s jazz students were used to three yearly performances — a fall concert, their gala concert performance at the Clark Terry Festival, and a spring concert. Since Jefferson began leading the jazz program, students now have additional performances, including a big band holiday jukebox show and Celebrate the Arts, which is in collaboration with the music department and the Jeanine Larson Dobbins Conservatory of Theater and Dance.

“These shows give students a different opportunity to work and collaborate with their peers across campus,” Jefferson says. “Additionally, it gives me an opportunity to collaborate with the wonderful music faculty and colleagues from other disciplines.”

SEMO jazz trumpet section

Give ‘Em Stuff, Not Fluff

When describing his energy as an educator, Jefferson says, “I think it’s important to ‘give ’em the stuff.’ They need the real-deal stuff. They don’t need me to give them fluff.”

According to Jefferson, the “real-deal stuff” means a well-rounded approach to a jazz education and intentional programming. It’s not just learning about the music itself, it’s important to understand the context surrounding that music. “Students need to understand the historical context, what was happening in the world when this music was written and why it was written,” he explains.

Part of this well-rounded education includes organizing performances that feature different genres and composer demographics. This coming spring, Jefferson is hosting a blues concert “to showcase the importance of the blues, gospel and the spiritual aspect that are essential to this artform.”

Jefferson also employs this approach when organizing the Clark Terry Festival. “Each year, I try to strategically bring in an artist from a different instrument type,” he says. He adds, “I don’t want the audience leaving only knowing one aspect of this rich artform.”

Dr. Joseph Jefferson conducting SEMO jazz band

The Festival’s Humble Beginnings and Growth

As part of his endeavor to teach a diverse range of perspectives in music, Jefferson has put together a gala concert featuring compositions and arrangements by women for the 2023 Clark Terry Festival. The show will also feature saxophonist Sharel Cassity as a performer. But this year’s women-focused gala concert is just one aspect of what makes SEMO’s annual jazz festival special.

The Clark Terry Festival was started in 1998 by music fraternity Phi Mu Alpha Sinfonia, of which Jefferson is a member. Clark Terry, the legendary jazz trumpeter, was the guest artist at that first concert. Over the years and throughout various guest artists, the name stuck.

Much like the jazz programs at SEMO, Jefferson has worked hard to grow the size and scope of the festival during the past five years. “During my first year, we might have had 16 or 17 bands [participating],” Jefferson says. “With a new person coming in, you have to test the waters and get adjusted.”

Since Jefferson’s first year, the festival has nearly doubled in size; the largest festival was in 2020 with 32 participating bands. “That’s remarkable for this area,” Jefferson says. “We’re pulling from schools not only in Missouri, but Illinois and Kentucky.”

The Clark Terry Festival serves as a personal development opportunity for local high school band directors through clinics and workshops. Additionally, the festival is a recruitment tool for SEMO to introduce prospective students to the jazz program and the music department. “We believe if we get students on our campus, they’ll fall in love with it. It’s absolutely gorgeous,” Jefferson says. “Students get here and fall in love with the opportunity to create and perform. They’re surrounded by amazing music faculty who are excited about wanting to help them improve and grow.”

Dr. Joseph Jefferson conducting SEMO jazz band

COVID, Changes and Clinics

According to Jefferson, even though the Clark Terry Festival began 25 years ago, due to various roadblocks, the festival has taken place 23 times so far. One recent obstacle was the COVID-19 pandemic, which shut down schools around the country. While the festival was virtual in 2021 and cancelled in 2022 because of COVID, Jefferson found innovative ways to provide participating schools, as well as his own students, with enriching jazz resources.

For example, Jefferson organized a live virtual performance from New Orleans featuring musicians like Ashlin Parker, TJ Norris, Amina Scott, Gerald Watkins and John Michael Bradford. While the musicians performed in the studio, students watched online. “It was great,” Jefferson says. “We did a watch party in our big space. We also shared access to that performance free of charge with high school band directors and community members so people could see that we were still trying to stay connected.”

While adapting music education during COVID was difficult, Jefferson felt ready for the task because he had already been using virtual programs like Skype and FaceTime. When the pandemic began, he learned Zoom as well.

Keeping a group of music students engaged online was a challenge, but Jefferson utilized one of his favorite resources: his connections with other musicians to put on clinics. “I reached out to a lot of my friends,” Jefferson says. “Vincent Gardner, a fraternity brother of mine and lead trombonist for Jazz at Lincoln Center, gave a masterclass on improvisation, listening, style, performing in a big band setting and other general jazz topics.”

In addition to putting on a variety of masterclasses, such as “Understanding the Blues,” “How to Play a Jazz Ballad” and “Finding Players You Like Who Play Your Instrument,” Jefferson gave his students assignments that translated well to the online learning format, including transcription and listening exercises. He hosted weekly check-ins with his students, and throughout the process, kept a “this-too-shall-pass” attitude.

SEMO jazz sax section

Open to Opportunities

Jefferson’s adaptability during the COVID lockdown was indicative of his overall philosophy of staying open to change and new opportunities. Even under normal circumstances, Jefferson still tries to think outside the box to enrich students. “I try to provide numerous opportunities where they are getting information from people outside of this area. We have a lot of students who come from smaller areas of Missouri and around the country,” he says. “I’ve been around so many different people in so many different places. It’s important for my students to have diverse learning experiences as well.”

One such opportunity came last spring, when Jefferson and the Jazz Studio was invited to participate in a Jazz Educational Residency at Jazz St. Louis. Students attended a concert and also performed for drummer extraordinaire Bryan Carter, who gave them critiques as well as a masterclass. “It was a really great experience,” Jefferson says.

Jefferson saw his efforts rewarded this past January when he received the Jazz Education Network’s 2022 Ellis Marsalis Jr. Jazz Educator of the Year Award. The award, named for jazz pianist and educator Ellis Marsalis Jr., is presented to a collegiate jazz educator annually at the Jazz Education Network Conference. “When I found out I won, I was absolutely blown away,” Jefferson says. “I remember the first day I walked on campus [at Southeast Missouri State] and the first band I had. Transitions are often difficult. To gain supporters who understand the purpose I’m trying to put behind [my program] was … a monumental thing.”

In the months since receiving this award, Jefferson has stayed motivated to continue improving as an educator and performer. “It encourages me to continue to grow,” he says. “I tell my students, ‘We must be lifelong learners.’ We must be adaptable. If we don’t, we’re doing a disservice to the art and to ourselves.”


Southeast Missouri State University’s Holland College of Arts and Media is one of 10 distinguished colleges and universities selected to be part of the inaugural Yamaha Institution of Excellence program, which recognizes extraordinary commitment to innovation in the study of music. The Yamaha Institutions of Excellence were chosen for their dedication to providing unique and challenging experiences to music students through diversity of thought and curriculum. They are also recognized for exposing students to a wider variety of voices and opportunities and preparing them for the modern world of music.

How to Choose Your First Guitar

Congratulations on deciding to buy your first guitar! Whether you’re looking for an acoustic or an electric model, a guitar can make your life more fulfilling and fun. One of the advantages of taking up guitar, as opposed to other instruments, is that you can learn enough chords to play some songs relatively quickly. The feeling of accomplishment you’ll get is likely to inspire you to put in plenty of practice time, and like so many worthwhile endeavors, the more you put into it, the more you will get out of it.

If you’re buying a first guitar for your child, that’s great news too! Studies have shown that music education and a musical household can benefit childhood development. It can also help with spatial skills and improve test scores and IQ. Those are the measurable benefits, but the intangible “vibe” or “mojo” of being a musician is the most fulfilling part. And that feeling is easy to access any time by just picking up the guitar.

So what do you need to know to find the ideal instrument? Let’s start with some basic terminology and definitions.

Acoustic vs. Electric

There are two types of guitars: acoustic and electric. An acoustic guitar is an instrument that creates its sound without needing an amplifier. An electric guitar requires an amplifier to be heard in all its glory. Acoustic guitars always have hollow bodies made of wood; electric guitars can have either hollow or solid bodies (again, usually made of wood), though some electric models are termed “semi-hollow” because they have a solid block of wood running through the center of their otherwise hollow body.

All electric guitars use steel strings, as do many acoustic guitars. Those kinds of strings tend to be bright-sounding and vibrant. Some acoustic guitars, typically termed classical guitars, use nylon or composite strings instead, which have a gentler, more mellow tone.

There are also acoustic guitars that come with built-in electronics so you can plug them in and amplify their natural sound. Such instruments are sometimes called “acoustic-electric” guitars.

How Guitars are Built

Knowing a few things about the construction of a guitar will help you in your search for the right instrument. Here’s an illustration that shows the various parts of an acoustic guitar:

An acoustic guitar with its various elements indicated.
The various parts of an acoustic guitar.

In both acoustic guitars and electric guitars, the density and weight of the woods used help determine the tone and resonance that the guitar produces.

Most of the tone of an acoustic guitar gets generated from the wood in its top, which is the face of the instrument. Spruce is commonly used for steel-string acoustic guitar tops, although sometimes you’ll see mahogany. In the case of classical nylon-string guitars, you’ll occasionally encounter models with cedar and cypress wood tops. A guitar with a solid top will produce a richer tone than one with a laminate or plywood top. The wood used for the back and sides of an acoustic guitar is equally critical for tone creation. Typically, guitar manufacturers use mahogany, nato, rosewood or maple for fuller tone. Make sure to find out the composition of the wood in a guitar before buying it.

The woods used in the construction of electric guitars are usually alder, basswood, ash, pine, maple or mahogany. Some models will even use one kind of wood for the back of the body and a different one for the top. For example, you can find electrics with a maple top on a mahogany body. The type and combination of woods used has a major impact on the tone of an electric guitar.

Find Your Fit

You’ll want your guitar to be comfortable to hold and easy to play. After all, if it doesn’t meet both of those criteria, you might get discouraged from practicing! One critical factor in selecting a guitar is finding one that’s size-appropriate for you. An instrument that’s too big or too small will make learning difficult and not as enjoyable.

To determine if a guitar’s size is right for you, try sitting down and holding it in your lap. See if you can reach the far end of the fretboard (the part closest to the tuning machines) with your left hand. If you can’t do that, choose a guitar with a neck that has a shorter scale length. The scale length refers to the distance between the nut and the bridge. (Refer to the illustration above to see where those components are.) Another advantage of a short-scale neck is that it reduces string tension, making fretting (pressing down the strings) easier. The URBAN Guitar by Yamaha, which was created in collaboration with superstar Keith Urban, is designed for easy playability, has a short scale length, and even comes with an interactive lesson app.

Two toned acoustic guitar.
The URBAN Guitar by Yamaha is designed for beginners.

The shape of a guitar’s body also affects comfort. For example, a concert-style shape (such as the one used by the URBAN Guitar) is narrower across the waist and has a shallower depth than the larger Traditional Western or Dreadnought guitar, making it easier to hold. The URBAN Guitar also features a cutaway (an indentation of the body where it meets the neck), which lets you more easily reach the upper frets on the high strings.

The Yamaha STORIA line of acoustic guitars are also a great choice for beginners, as they all have short-scale necks, small bodies and low action. (See the “Tweaked for Comfort” section below.) Although designed for first-time players, they offer quality and features you can grow into, including built-in electronics.

Beautifully wood-grained acoustic guitar.
Yamaha Storia guitars combine first-time-player features with a stylish look.

If you’re especially petite or are buying a guitar for a child, you might want to consider a compact acoustic guitar such as the Yamaha JR1 or the three-quarter size Yamaha JR2. Both models are mini-versions of the famed Yamaha FG Series of acoustic guitars, delivering big tone despite their small size. They’re also ideal for practicing in the park, on the beach, or anywhere your muse takes you.

Young man sitting under a tree playing an acoustic guitar.
Compact Yamaha JR guitars make it easy to practice anywhere.

It’s best to try out guitars of different shapes and sizes at your local music store and see which one feels most comfortable. There’s a model out there that’s perfect for everyone!

Tuning In

Another important issue is the quality of the tuning machines (often called “tuning keys” or “tuning pegs”). They should turn smoothly and easily and shouldn’t bind or jump when you turn them.

But even when playing an instrument with the best tuning machines, beginners sometimes have trouble getting their guitars in tune. The solution is simple: make a small investment in an electronic tuner. Today’s tuners are simple to operate and can help you save time and frustration. There’s no shame in using one, either: Virtually all guitarists — even the top professionals — use them.

Clip-on tuners are the easiest to use. They attach to the headstock and sense the pitch of a string through vibrations in the wood. A good choice here is the Yamaha GTC1, which can be used not only for guitar, but other stringed instruments such as bass and ukulele too.

Close-up of small electronic screen on a clip.
A clip-on tuner like the Yamaha GTC1 makes tuning easy.

Tweaked for Comfort

As stated earlier, when you buy a guitar, it should be comfortable to play. Of course, you can’t change its body size, type or scale length, but there are many aspects that can be adjusted. Most can be done on your own, but if you’re a beginner, you’re best to have them done by a qualified luthier (a craftsperson who builds and repairs guitars and other stringed instruments). Most music stores can refer you to such a person, or may even have one on the premises.

The most common problem you might encounter is that its action — the height of the strings over the fretboard — is too high. Low action, like what you’ll find on the URBAN Guitar by Yamaha, improves playability, but if it’s too low, there can be string buzz or some notes may not ring out properly (a phenomenon known as “fretting out”), so some compromise may be in order.

Side view of a guitar.
The lower the action, the easier the guitar is to play.

Another common problem is a guitar being unable to play all its notes in tune, which requires adjusting its intonation. In the hands of a skilled luthier, this is usually fixable if the basic construction of the guitar is sound.

If you find a repair person you like, try to build a long-term working relationship with them, similar to what you do with a good auto mechanic. You want to find someone you can trust. Someday, you may end up doing the maintenance work yourself, but in the meantime, leave it to the professionals.

Add a Case

To protect your new instrument, a case is necessary. Many beginner guitars come with one; if not, it can be bought separately. Alternatively, you can opt for a gig bag like the Yamaha AG-SC, which can have either soft or semi-rigid sides and is typically made from a heavy-duty fabric or leather, with padding for protection. Gig bags are generally lighter than cases and most offer shoulder straps. Those with a single strap allow you to sling your guitar over your shoulder; a double strap lets you carry your guitar like a backpack, keeping your hands completely free.

A hardshell case like the Yamaha AG3-HC provides the most protection from bumps or the occasional drop — although there are no guarantees your guitar won’t get damaged if you drop it while it’s in the case. However, hardshell cases are heavier and typically more expensive than gig bags, and they don’t have straps, so you can’t carry them as easily.

Views of open and closed guitar cases.
A Yamaha AG3-HC hardshell case (left) and AG-SC gig bag (right).

Consider a Guitar Bundle

You can simplify the process of finding and purchasing all the gear you’ll need with a bundle such as the Yamaha GigMaker. These comprehensive and affordable packages include the guitar itself, as well as a tuner, strap, cable, gig bag and even picks. There are versions available for steel-string acoustic, classical nylon-string acoustic and electric guitars; the latter also includes a practice amp.

Collection of guitar accessories.
The Yamaha GigMaker Electric package.


Click here for more information about Yamaha guitars.

How to Choose Your First Bass

Congratulations on deciding to buy your first bass! There’s never been a better time to jump into the low end. No matter what style of music you want to play, there are tons of resources to help you get started — and plenty of solid, versatile instruments for every budget.

If you’re reading this, you’ve already begun the first step toward getting a new instrument: research. The internet contains an ocean of opinions about every facet of bass, some more trustworthy than others, but the facts — dimensions, colors, options, weight, prices — are easy to find, too. Besides visiting retailers, reading bass magazines, and checking out online forums, be sure to talk to your bass-playing friends, who most likely have thoughts about what’s hot and what’s not. YouTube, of course, is always useful when it comes to seeing and hearing an instrument you’re interested in.

IN YOUR HANDS

That said, the truth is that you won’t know if a bass is right for you until it’s in your hands. Visiting your local music stores to play the basses they have on display can be an important first step toward owning a great first instrument.

Man looking at bass guitars on a wall.

Here are some important questions to ask yourself as you consider whether the bass you’re trying out is the right one for you:

  • Is the neck the right size and shape for your hand?
  • Does the instrument feel too heavy or too light when you stand?
  • Does it balance well on your knee when you sit?
  • Does the bass’s control layout work for you?
  • Is the bass correctly intonated? (That is, do some notes sound slightly sharp or flat of what they should be?) This is something that can be easily checked with a tuner, and will be more apparent as you play higher up the neck. Poor intonation can sometimes be fixed with a correct setup, but not always, so it’s a potential red flag.

Keep in mind that basses that have been hanging in a music store and played day in and day out may sometimes need a setup to return to the optimum playing condition in which they left the factory. If the gap between the strings and the frets is uncomfortably high, for example, it could indicate that spending days, weeks, or months in the store’s fluctuating temperature has affected the neck — another potential red flag. It’s also not uncommon for a bass that’s been on display for awhile and played by many hands to have dead strings, finger grime, and dust. If you’re excited about an instrument but concerned about wear and tear, talk to a salesperson. You can also ask if the store can include a setup and/or fresh set of strings when you buy the bass.

MAKING THE TRANSITION FROM GUITAR TO BASS

Guitarists who pick up a bass for the first time will immediately notice that the necks are longer and the strings are fatter. The scale length of an electric guitar — the distance between the bridge and the nut — is usually between 24″ and 26″, but with electric bass, 34″ – 35″ is standard.

Electric guitars are strung with much thinner strings than bass, with the thickest typically being a .042 E string, while a standard EADG set for bass consists of a .100 or .105 E, an .085 A, a .065 D and a .045 G. Guitarists might therefore want to opt to substitute light- or even extra-light gauge strings on their bass, at least at first until sufficient finger strength is achieved, but just know that this comes at a sacrifice in terms of beefiness and low-end thud. And if you feel attached to using a pick, just know that some bassists use them and some don’t, but most agree that learning to play with your fingers is crucial.

FOCUS ON SONICS, NOT JUST LOOKS

The look and feel of a particular bass may be what immediately attracts you, but it shouldn’t be the end of your decision-making process. Sound is extremely important too — maybe even more so! Once you find a bass that captures your interest, try playing it through different amps so you can hear its unique voice. See if the knobs and tuners turn easily. Do you hear crackling or static when you twist the knobs or plug in a cable? This would suggest a problem with the electronics, and could be cause for concern.

Another thing to listen for is consistency in tone and volume. Do some notes buzz or sound significantly louder or softer than others, even when played with equal intensity? This could indicate a potential issue with the basic construction of the instrument, or it could be a simple fix that can be easily rectified with a setup. Either way, it’s worth having a discussion with the salesperson.

FINDING THE PERFECT STARTER BASS

Price, of course, is always a major consideration when it comes to choosing your first bass — or when making any purchase, for that matter. It used to be that, when it came to musical instruments, you got what you paid for, but the good news is that advances in technology mean that you can find high-quality starter basses today, such as the very affordable Yamaha RBX and TRBX lines.

Electric bass guitar.
Yamaha TRBX174EW.

As an example, the TRBX174EW 4-string model is light in weight (just around 7 lbs.) yet solidly built, and it sounds great too. The three knobs — a volume control for each of the two pickups, plus a master tone control — are straightforward and make it easy to dial in the meat-and-potato tones every bass player is expected to have. The neck is slim — a bonus for guitarists looking to make the transition to bass — with access all the way up to the 24th fret, so it’s easy to reach those high notes. Adjustments you’ll have to occasionally make (such as tweaking the truss rod) are simple, and it comes strung with standard-gauge D’Addario nickel strings, which are ubiquitous precisely because they work for most styles. The TRBX174EW is also handsome, small-bodied and travel-friendly, as well as genre-agnostic: It doesn’t feel designed to cater to a particular era, style or trend.

Many of the greatest bass players began on instruments that were less than ideal by today’s standards, but your first bass will likely be far better built and more versatile than any starter bass they used. As recently as just a few years ago, many experts would have suggested that a first-time bassist should consider buying a used instrument to save money, but that’s no longer the case. In terms of price-to-performance ratio, we live in a golden age of musical instrument possibilities … and that’s good news for aspiring bassists everywhere!


Check out E.E.’s other postings.

The Difference Between Swing Time and Straight Time

Have you ever noticed that different styles of music have different feels to them? Rock ’n’ roll feels nothing like reggae, and jazz feels very different from classical and pop music. The most critical difference is how the main beat is subdivided: rock and pop divide the beat equally, so you have eighth notes that cut the beat into equal halves, and sixteenth notes that divide the beat in four equal parts. This is commonly called straight time, or a “duple” feel. Jazz and reggae commonly cut the beat into three equal parts, called swing time, or a “triplet” feel. In this article, we’ll explore the difference between the two.

Straight and Swing Eighths

Straight eighth notes are easy. You simply take the main beats in the measure — that is, the quarter notes — and divide them in half. These eighth notes are commonly verbalized by saying the word “and” between each of the numeric counts in the measure, as shown below:

Musical annotation.

Swing notes, however, are based on a triplet feel, which divides the main beat into three equal parts. These are commonly verbalized by saying the syllables “trip” and “let” between each of the numeric counts in the measure, as shown below:

Musical annotation.

If you compare both of these subdivisions, you can see that only the main beats line up, with the “in-between” notes falling in different places:

Musical annotation.

To play with a swing feel, you tie the first two triplets together into a single note, followed by the last triplet for the second note of the grouping, as shown below:

Musical annotation.

Doing this makes the first note longer and causes the second note to occur a bit later than would an even subdivision of the beat into eighth notes, as shown in the bottom stave in the illustration below:

Musical annotation.

Playing in Swing Time

Let’s apply this concept to some actual notes on the keyboard. Here’s the C Major scale played in straight time, followed by it played in swing time:

Musical annotation.

Getting comfortable with the feel of swing time is important — so important, in fact, that it’s a good idea to add this rhythm to your normal scale practice routine, alternating between these two rhythmic approaches.

Too add to a good swing feel, you should also slightly accent the off-beat notes — the ones that line up with the “let” syllable (that is, the second, shorter note of the group). If it’s easier for you, just make sure to not to accent the downbeat notes (the first/longer note of the grouping). Here’s the way it should look and sound:

Musical annotation.

Instructing the Player to Add a Swing Feel

If you’re looking at that last example, you may be thinking that, with all those triplet markings, fingerings and accents, the notation is very complicated to read … and you’d be right. In fact, no one ever writes out swing eighth notes like that. It’s much simpler to leave them looking like normal straight eighth notes, with an instruction to the player to change the feel of the rhythm.

This is done with either of two methods. The simplest is to just write “Play with a swing feel” at the top of the music. But the most common (and accurate) way to deliver this message is to add this marking to the top of the first measure of the music:

Musical annotation.

This tells the player that a swing feel should be imparted to the music that follows. Our previous scale exercise would now look like this:

Musical annotation.

Let’s try another example, this time using a typical bebop jazz melodic figure instead of a simple scale.

No one would want to have to read a melody notated like this:

Musical annotation.

It’s much easier to read (and play) this version:

Musical annotation.

Refining Swing Feel

Now that you understand the theory, here’s the reality: Few jazz musicians actually play swing eighth notes as true triplets. In fact, if players only went as far as described above, they’d likely be accused of having a swing feel that’s “corny.” To improve your swing feel, you need to refine your placement of the second note of the triplet grouping. At very slow tempos, a true triplet works fine, and sounds like you are really digging into the groove of the tune. But as the tempo increases, the second note of the grouping will start to feel like it’s lagging a bit too much, making the rhythm somewhat jerky. So players will move it a little earlier, while still retaining the loping feel of the triplets. The faster the tempo, the more even the notes will get.

Listen to this audio clip of the previous bebop line, played at a faster tempo and in a variety of swing feels:

Each time through the melody I change my placement of the second note of the grouping. First, I play it as straight eighth notes; then as true triplets; then with the second note moved slightly earlier; and then with the second note moved a bit further back. I finish with straight eight notes once again so you can hear that even the subtlest swing treatment still sounds different than straight time.

This more refined way of playing swing time is best learned by listening to jazz recordings and trying to play along. As the great Duke Ellington (along with lyricist Irving Mills) said, “It don’t mean a thing if it ain’t got that swing.”

All piano examples played on a Yamaha P-515

Check out our other Well-Rounded Keyboardist postings.


Click here for more information about Yamaha keyboard instruments.

Top Gifts to Encourage Your Child’s Love of Music

When my daughter was in preschool, she took piano lessons, which she appeared to enjoy — until she figured out where all the notes were on the keyboard and came to the conclusion that she didn’t need to learn anything else. A little later on, we bought her a half-size guitar. She liked to plink around on it occasionally but wasn’t motivated to go any further than that. Violin was a total non-starter. And despite having a beautiful voice and a good sense of pitch, she was reluctant to sing in front of people.

Then, in fourth grade, something clicked, and she discovered that she loved being in a chorus. Two years later, her shyness about singing has gone away, even when she’s doing it solo, and her confidence as a performer has grown by leaps and bounds.

All of this is just to say that there’s no sure way for parents or grandparents to predict what’s going to engage a child musically. For every kid who’s pulled like a magnet toward every instrument he or she encounters, there are many others (like my daughter) who aren’t certain what excites them most. But the fact that they are excited about music is something to support, and often that support requires trying out several options, until one clicks. When it does, a lifetime of pleasure awaits. With that in mind, here are some gift suggestions that could help spur your child on to new musical heights.

A Starter Keyboard

You can’t go wrong with an entry-level digital keyboard, especially if it’s designed to make playing simple and fun. The Yamaha PSR-E473 falls squarely into this category, with 820 sounds — enough to fuel countless hours of experimentation — plus touch-responsive keys, onboard lessons, a downloadable songbook and 290 styles of auto accompaniment. It also offers a personal favorite feature: a central display screen that shows the staff position of every note being played, along with the location of middle C — a lifeline that can really help beginners when they get lost on the keyboard.

Medium size electronic keyboard.
Yamaha PSR-E473.

A Bigger Keyboard

The PSR-E473 has a lot going for it, but it only has 61 keys and they’re not full-size. If you feel your child is ready to move up to something that’s closer to a standard piano but still has the flexibility and portability of an electronic keyboard, consider a model like the Yamaha PSR-EW300. It’s got a great feature set and it offers 76 keys, making it possible for budding virtuosi to play more demanding and far-ranging pieces.

Large electronic keyboard.
Yamaha PSR-EW300.

A Starter Acoustic Guitar

Keyboards are nice, but what if the child on your gift list seems more like the pickin’-and-grinnin’ type? Based on my past experience as both a guitar student and guitar teacher, I strongly recommend that beginners start off using nylon-string acoustic models. Electric guitars require amplification, which adds an extra layer of hassle that beginners shouldn’t have to deal with, and nylon strings are much easier on the fingers than steel ones, leading to a kinder, gentler callus buildup. Your child should also play a guitar that matches his or her size. I once tried to teach basic chords to a seven-year-old boy on a full-size electric guitar, only to realize that his arms were too short to reach the frets. (It wasn’t a fun experience for either of us.)

Luckily, finding half-size or 3/4-size models shouldn’t be much of a challenge. The Yamaha CGS line of nylon-string acoustic guitars offers both, as well as a full-size model. Or you might consider a Yamaha APXT2, which is a 3/4-size version of the company’s APX500II — the world’s best-selling acoustic-electric guitar. It’s available in a variety of finishes and has a built-in pickup so its sound can be amplified; it also comes with a tuner and a soft “gig bag” carrying case. In general, half-size guitars are best for ages 5 to 8, while 3/4-size is ideal for 9- to 12-year-olds, but you may want to see how the different sizes actually fit your child before making a commitment.

Acoustic Guitar Range
Yamaha CGS guitars.
APXT2580x452
Yamaha APXT2 guitars.

Essential Beatkeepers

Four metronomes in use.
Yamaha MP-90 metronomes.

Compared to a keyboard or guitar, a metronome may not seem like such an exciting gift. But if your child has been struggling to play a piece of music without speeding up or slowing down, a metronome can help him or her reach that goal. Old-school pendulum metronomes like the Yamaha MP-90 continue to be a fine choice: they’re simple and durable and are available in a variety of colors, plus they have the added advantage of never needing a battery or a wall socket.

Clip on watch type metronome.
Yamaha ME-55BK metronome.

Or, for those who prefer something less bulky and more portable, consider a clip-on model such as the Yamaha ME-55BK. Alternatively, you can go higher-tech and pick from a number of excellent apps for smartphones and tablets.

The Joy of Being (and Staying) in Tune

Electronic tuner with clip.
Yamaha GCT1 tuner.

Although being able to keep their instruments in tune may or may not contribute to your child’s love of music, it will definitely contribute to others’ appreciation of the music he or she makes. Clip-on digital tuners like the Yamaha GCT1 tuner make the tuning process easy and convenient. What’s more, although it has specific settings for guitar, bass, viola, cello, and ukulele, the GCT1 can be used with any instrument.

Starting on Winds

It’s just as customary for aspiring wind players to start on the recorder as it is for guitarists to start out on nylon string instruments … and in the right hands, recorders can actually sound pretty terrific. They’re also a lot easier to get a grip on — both literally and figuratively — than any other wind instrument, and for sheer portability, they’re hard to beat. The Yamaha YRS-24B recorder, made of ABS resin, is a school standard. My daughter owns one, and playing it in elementary school definitely helped her develop a better sense of pitch and overall musicality.

Recorder made of resin.
Yamaha YRS-24B recorder.

Another great beginner instrument for kids is the Pianica. This small, portable keyboard is super-easy to play — all that’s required is to simply blow air into it while pressing down on the keys. While the resultant sound is similar to an accordion or a harmonica, it uses the same notes and familiar black-and-white keys as a piano. This makes it easy to get started right away, since your child can choose from thousands of easily available piano book and sheet music titles to learn the notes to their favorite songs. Yamaha offers a variety of Pianica models, from the small P-25F, with its two-octave range, to the slightly larger P-32D, to the three-octave P-37D. Each comes with an extension pipe that allows it to be played on a tabletop, as well as a durable lightweight plastic case that can double as a music stand. The top-of-the-line P-37E also has a three-octave range but a somewhat richer tone due to its being made from environmentally-friendly EcoDear® plastic.

Woman playing Yamaha Pianica flat on a table.
Yamaha P-37E Pianica.

Drums with a Volume Control

Kids love banging on things, and eventually some become very good at it. But a lot of parents can have a hard time with the concept of supporting a family percussionist’s development, for fairly obvious reasons like noise, noise and noise. That’s where a set of compact digital drums like the Yamaha DD75AD comes in. It’s got eight touch-sensitive pads and two assignable foot pedals that can be used to play 75 pre-programmed kits and 10 custom ones your child can create from scratch. And there’s a headphone jack! Will wonders never cease?

Electronic drum pad with 9 heads and controls.
Yamaha DD75AD compact digital drums.
Electronic drum kit.
Yamaha DTX402 electronic drum kit.

If your child shows a real propensity for drumming, you can take things a step further by buying him or her a full electronic drum kit like the Yamaha DTX402. Not only does this provide everything they need to play along with their favorite tunes and jam with their friends, it comes with 10 built-in training exercises that make learning fun, which is always a good thing. And when you purchase a DTX402 Series kit from an authorized Yamaha dealer, your child receives three free months of Melodics — a fun and easy-to-use training app that does a great job of  encouraging kids to play and helps build their skills and confidence. Plus, like the aforementioned DD75AD, the 402 has a headphone jack, so you can enjoy peace and quiet while your young drummer unleashes their creativity.

Better Ways to Listen

Black studio headphones.
Yamaha HPH-MT5 headphones.

If your child is like most kids, they probably do most of their listening on ear buds or computer speakers. Unfortunately, the audio quality of those kinds of products leaves a lot to be desired. You can help your kids appreciate the rich sound tapestry of music — and perhaps even encourage a budding composer, producer or audio engineer — by buying them good-quality headphones or speakers. Yamaha HPH-MT5 headphones deliver a balanced sound that is faithful to the source, plus they’re lightweight and comfortable, with an extended frequency range that will allow your child to hear the entire sound, from the lowest lows to the highest highs. These headphones also include a carrying bag and a 1/4″ stereo adapter.

Small vertical oval shaped audio speaker. The touchscreen controls on top are displayed.
Yamaha MusicCast 20 wireless speaker.

The Yamaha MusicCast 20 is a wireless speaker that’s great on its own or as a part of a stereo setup. Its compact size means that it can fit in even the smallest bedroom (it’s wall-mountable too), plus it offers a variety of connection choices, including Wi-Fi, Bluetooth®, AirPlay 2® and Spotify® Connect. It provides excellent sound quality, and because it can be voice-controlled from Alexa and Google Assistant devices, or with Siri® via AirPlay 2, it’s definitely got the cool factor too.

Songs to Play

Okay, so your gift recipient’s got an instrument — maybe one of those mentioned above. Now what’s he or she going to do with it? Hint: Make sure there’s some sheet music handy. This is good advice whether the player in question is a beginner, intermediate or advanced; everybody enjoys learning a new tune or figuring out how to play an old favorite. It just so happens that Yamaha offers a wide selection of sheet music for immediate downloading. There are well over 30,000 items available, covering just about every genre imaginable, so you’re sure to find something for even the most finicky performer.

The App Zone

If your young musician is into tech, there’s certainly no shortage of apps and software out there. Sequencers, synthesizers, notation programs, digital audio workstations, you name it — these products just continue to become more powerful and easier to use. And they’re not just for the pros, either. In fact, there are a wide range of apps specifically designed for beginners. For example, Playground Sessions is a piano learning program developed in association with legendary producer Quincy Jones. The free Yamaha Chord Tracker app (available for iOS® 15.2 or higher and Android™ smart devices) helps players figure songs out by analyzing the chord progressions of recordings, and Kittar (also from Yamaha, and also free) breaks music down into phrases based on a given song’s structure. All three are remarkable in the way they approach the various pieces of the music-making puzzle.

Learning with Lenny

Watching my daughter progress through school has been further confirmation of a venerable truism: Great teachers make all the difference in a child’s life. The teachers she likes best are thrilled to do what they do, and they pass that feeling on to their students. So if your child is interested in learning more about music, its history, and all its many wonders, you should consider exploring DVD options that present that kind of information in a simple, easy-to-digest fashion …and you couldn’t find a better teacher than Leonard Bernstein.

From 1958 to 1972, the famous conductor conveyed his immense knowledge of and passion for music to millions of television viewers through his series of Young People’s Concerts with the New York Philharmonic. The inspirational spirit of these programs shows no signs of diminishing over time. You can find 25 of them on a nine-DVD set titled simply Leonard Bernstein: Young People’s Concerts with the New York Philharmonic. There are few better ways to pass an abiding love of music on to the next generation.

Buying Your First Digital Keyboard

When purchasing your first digital keyboard, there are several factors to consider: size, budget, sound quality, the number of onboard sounds, touch, built-in learning features, recording capability, and connectivity to devices and computers — to name a few. In this article, we’ll try to simplify your shopping decisions by exploring each of these.

Short On Space? Go Portable.

Small digital keyboards are sometimes called portable keyboards. They are exactly that — portable. These instruments take up very little space, and can be set up or stored anywhere. Most have 61-note non-weighted keys, although some models feature 76 keys, sometimes with slightly weighted actions. Many people prefer a keyboard that is touch sensitive, which allows better musical expression, similar to a piano. On those instruments, the harder you play the key, the louder the sound.

Just about every digital keyboard provides a headphone jack. This is a great feature that allows you to make music in privacy at any time of the day or night. And even entry-level instruments offer a large variety of onboard sounds — dozens or even hundreds of them. Quality can vary, though, so be sure to listen carefully as you audition them. In addition, many digital keyboards support Styles that automatically provide elaborate accompaniments. Again, quality can differ from instrument to instrument, so take a little time to try them out.

Any of the Yamaha PSR-E Series portable keyboards would be good choice for the beginner. They all have a built-in feature called “Keys to Success,” which is based on teaching techniques shared with Yamaha over many years. You can select just the key phrases (“steps”) of a song — the ones you like most or need to work on — and practice them one by one. Each time you play all the way through the current step, your performance is evaluated.

A Yamaha PSR-E273 portable keyboard.
Yamaha PSR-E273 portable keyboard.

Connectivity to computers and portable devices such as smartphones is another important feature to look for. Several digital keyboards provide a USB TO HOST port for this purpose, allowing you to record high-quality audio or MIDI without the need for a separate interface. A wide variety of creative and educational apps are available online from Yamaha and other developers.

Looking for More? Consider a Digital Piano.

Portable keyboards are great for the hobbyist and beginner. However, you may prefer to purchase a more advanced digital piano. These instruments offer many of the qualities of an acoustic piano, including a full 88-note weighted keyboard — but at a significant savings in cost — and without the need for regular (and sometimes expensive) upkeep. In addition, they often provide functionality you won’t find on the typical acoustic piano, such as recording capability, connectivity with devices and computers, learning tools and more.

Yamaha offers a wide range of digital pianos, including these:

P-Series compact digital pianos like the P-515 are a great option if space is an issue and are suitable for both practice and live performance.

A Yamaha P-515 compact digital piano.
Yamaha P-515 compact digital piano.

Our Portable Grand digital pianos combine portability with weighted keyboards. Some of them also offer wireless connectivity for iOS smartphones and tablets using optional wireless adapters.

Portable grand digital piano.
Yamaha DGX-670 portable grand digital piano.

Yamaha ARIUS instruments include a number of digital pianos with built-in consoles, ranging from basic models to those with advanced features.

Yamaha console digital piano.
Yamaha ARIUS YDP-103.

Clavinova is the premium Yamaha digital piano product line, combining authentic touch, tone and look with cutting-edge technology. There are three different series of Clavinovas available: the CLP, the CVP, and the CSP.

Digital piano in polished ebony finish.
Yamaha Clavinova CSP-150.

Choosing your first digital keyboard may seem overwhelming at first, but with a little research and a visit to a local music dealer or two, you’re sure to come up with the ideal solution. And remember: Always buy not just the instrument that fits your budget, but the one that best fits your needs.


For more information about Yamaha portable keyboards, click here.

To find out more about our digital keyboards, digital pianos and Arranger instruments (including Genos), click here.

How to Shop for Wireless Headphones

When it comes to wireless headphones, it’s easy to get overwhelmed by the ocean of options, but a little knowledge and planning will narrow down the field considerably. Whether you’re buying them for yourself or as a holiday gift, let’s take a look at what you need to know to make an informed purchase.

Headphones, Earphones or Earbuds?

For the purposes of this article, we’ll use the generic term “headphone” to include earphones and earbuds as well. However, there are two types of headphones: over-ear and on-ear. The difference between the two is as follows:

Over-ear models like the Yamaha YH-E700A provide the maximum sound isolation. As the name implies, these kinds of headphones fully enclose the ear with soft cushions. One caveat, though: If they are too heavy, tight or restricting, it can be uncomfortable to wear these kinds of headphones for long periods of time. The Yamaha YH-L700A feature plush memory foam for an excellent seal and soft fabric on the adjustable headband for long-lasting comfort and listening sessions.

Yh E700resize X 478
Yamaha YH-E700A over-ear headphones.
Yh L700 Crop X 478
Yamaha YH-L700A over-ear headphones.

On-ear models like the Yamaha YH-E500A have cushions that sit on the outer ear, as opposed to enclosing the entire ear. Many people find these models — particularly those with adjustable headbands — to be the most comfortable when listening for extended periods.

Headphones.
Yamaha YH-E500A on-ear headphones.

Then there are earphones such as the Yamaha EP-E70A, which are worn in the ear with a wired connection to some form of band worn on the neck or body. One advantage they provide is that if you’re out of juice or want to connect to an airplane entertainment system, they can be connected the traditional wired way.

Earbuds with shoulder supporter.
Yamaha EP-E70A earphones.

Earbuds like the Yamaha TW-E3B are worn in the ear with no wired connection to anything (“true wireless”). These are the lightest weight and most unobtrusive of all kinds of personal listening devices.

TW E3B Crop X 566
Yamaha TW-E3B true wireless earbuds.
Model Wearing TW E3B X 566

How Will You Be Using Your Headphones?

This is the first consideration that will help narrow down your choices, so start by asking yourself this question: Will you be using your headphones for …

Listening to music on your home audio system? As mentioned above, quality over-ear headphones can offer the maximum in sound quality.

Listening on the go? Earbuds are great for creating a personal space when you’re on the go, while on-ear headphones allow you to enjoy your music without disturbing those around you in the workplace.

Commuting or at your desk? Earphones have some advantages over earbuds if you’re not moving around much. They usually have a longer battery life than earbuds, and possibly better sound because they have more space for batteries and drivers. On the downside, the band may flap around when you’re walking or exercising.

Exercising, jogging or working out? Here, earbuds are more suitable due to their unobtrusive size. Just make sure they’re water- and sweat-resistant.

If you can’t decide how you’re likely to be using your headphones most of the time, it may be that you need more than one. But there are many other factors to weigh as well, such as:

Fit

Good fit is a must! No matter what other features your headphones have, the way they sit on your head or in your ears defines how comfortable they are and how long you can wear them. In addition, how well the headphones fit over your ears or seal your ear canal affects the quality of the sound reaching your ears. Look for headphones that offer a customizable fit, whether it’s swiveling earcups for over-ear models, or several sizes of eartips for earbuds and earphones. Here’s how to get the best fit from earbuds and headphones.

Active Noise-Cancelling (ANC)

The problem with listening on the go — that is, away from a controlled environment like your home — is that your music is subject to all kinds of noise from loud conversations, traffic and other intrusions from the outside world. Headphones with a feature called ANC (short for “Active Noise-Cancelling”) address that problem by removing unwanted noise from the music you hear. But be aware that there are various methods for noise-cancelling and some headphones, and some are more successful at it than others. Yamaha Advanced ANC technology uses sophisticated processing and internal microphones to carefully separate and remove the noise, leaving your music pure. Yamaha YH-L700A and YH-E700A headphones, as well as EP-E70A earphones, feature Advanced ANC.

Ambient Sound

Think of ambient sound as the opposite of ANC. Some headphones allow you to choose when to let in sounds from your environment, like traffic sounds or public transit announcements, for safety reasons. A simple button push might keep you from missing your train stop!

Sound Quality

For those who are all about getting lost in their music, the best choice is over-ear or on-ear headphones, since the isolation they provide is optimal for delivering high-quality audio and an immersive experience. That said, when headphones are worn as a fashion accessory, sound quality may seem like a secondary consideration. But you can still enjoy high-quality audio while making a statement about who you are.

Before you consider sound quality, however, understand how subjective it is: What sounds good to one person may sound just “meh” to someone else. If you can’t pay a visit to a store, read reviews or try to get suggestions from friends and family as to what kind of headphones they use, and why they like those particular models.

Look for insight on the overall balance. Do reviews talk about the headphones coloring things, or bringing out certain aspects they may have never heard before? That can be a good thing or a bad thing, depending on the content and personal taste. Things to look for in reviews and try to avoid: obvious distortion, or a sound that’s too boomy or overly bright. Any of those sonic symptoms will quickly lead to listener fatigue. The goal is to purchase headphones that will be used often, not ones that will end up on a shelf.

When it comes to making any kind of purchase, recommendations can often be helpful, though bear in mind the source; if the person offering suggestions doesn’t use their headphones the way you will, you might consider following your own path.

Battery Life

Freedom ain’t free. The cost of being wireless and free to roam about untethered is charging time. If you can’t be without your music, consider how long the battery lasts in your wireless headphones and how long it takes to fully charge. Ideally, you’ll want to choose a model that won’t have you searching for a charging station everywhere you go, such as Yamaha EP-E70A wireless noise-cancelling earphones, which provide ultra-long battery life of up to 18 hours per charge.

Bluetooth®

Many wireless headphones connect to music sources using Bluetooth. The latest version, Bluetooth 5, addresses problems with earlier versions such as dropouts and limited sound fidelity. If you listen to music streaming services, Bluetooth headphones that feature aptX HD or aptX Adaptive technology offer high-quality, glitch-free audio, which makes them great for gaming too.

Water Resistance

If you’re planning on using your earbuds for working out, make sure they’re water- and sweat-resistant. A water resistance rating of IPX4 or higher should allow you to work up a sweat without damaging your earbuds. The Yamaha TW-E3B model offers the highest IPX rating of the company’s earbuds. Learn more about IPX ratings here.

Bonus Features

Aside from these main features, look for extra benefits in your headphones that might separate one model from the pack. For example, all Yamaha wireless headphones incorporate Listening Care, which allows you to hear the details in your music without turning the volume up to potentially harmful levels. Some models also feature Listening Optimizer, an adaptive technology that analyzes the fit of your headphones and the wearing conditions in real time to optimize the sound for the best listening experience possible.

The top-of-the-line model, the Yamaha YH-L700A, features 3D Sound Field with head tracking. This technology transforms traditional two-channel listening into a 360-degree sound field with the push of a button, allowing listeners to experience movies and videos on their mobile devices with cinema-like realism — immersing them in the action onscreen.

Dummy head wearing headphones.

Another factor that might be important to you (or the person you’re buying headphones for) is voice assistance. Digital assistants like Alexa, Google Assistant and Siri have become an integral part of our lives because of their ubiquitous presence on our phones and smart home devices — and they’re even found on some earphones and headphones. If you’d rather ask than push buttons, these voice assistants can perform basic functions like controlling volume and taking phone calls.

Last but not least, don’t forget about carrying cases and accessories that might tip the scale toward your final decision. With so many headphones to choose from, every little feature matters!

Photograph courtesy @officialjackel.


Click here to learn more about Yamaha wireless headphones.

What’s the Best Piano for Your Room?

You’ve made the decision to buy a piano, and you’re eagerly anticipating the many hours of musical pleasure it will bring you and your family. But pianos come in so many different sizes and shapes, it can be difficult to know which is the best one to purchase.

Of course, you want your new instrument to sound great and look great. But first and foremost is the size consideration: after all, the piano has to physically fit in the allocated space. What’s more, the size of the room — along with the placement of the piano in it and other factors — will have an impact on sound quality.

Fortunately, there are some easy guidelines to follow that will help you determine the best piano for your space, whether you live in a cozy apartment or an opulent home. Let’s dig in!

Piano Types

As described in a previous blog posting, there are two basic types of pianos: grands and uprights. The most obvious difference is size (grand pianos are larger), but they also have different characteristic shapes due to the positioning of their soundboards, across which are stretched the strings. Because the soundboards of grand pianos are mounted horizontally, those instruments have a bigger “footprint” and a sleeker profile than uprights, which can look a little boxy by comparison.

Grand Piano
Grand piano.

Upright Piano
Upright piano.

Grand pianos are usually the choice of professional musicians in that they offer a richer, more dynamic sound than uprights, though there are exceptions, such as Yamaha YUS Series uprights, which offer a broad range of sonic tonalities more reminiscent of a grand piano. But uprights take up much less space and tend to be considerably less expensive than grand pianos, making them a favorite of music students and a staple of schools and conservatories all over the world.

Piano Sizes

Grand pianos vary in size from “Baby grand” models that can be as little as 4 1/2 feet in length, all the way up to “Concert grand” models, which can be 9 feet in length or more. (Note that grand piano length is measured from the key slip — the piece of wood in front of the keys on the keyboard — to the very end of the lid.)

Upright sizes range from small “Spinet” models (popular decades ago but rarely made today) to larger “Console” and “Studio” models that vary in height, up to 52″ or so. Interestingly, almost all pianos — both grands and uprights — are approximately 5 feet wide. This is due to the fact that they all provide a standard 88-note keyboard.

Yamaha offers a wide variety of grand pianos, from GB1K and GC Series baby grands (with 5′, 5′ 3″ and 5′ 8″ models) to the CX Series and SX Series (with lengths from 5′ 3″ to 7′ 6″) to the internationally renowned CF Series of concert grands (which range in length from 6′ 3″ all the way up to a full 9′).

Someone playing a grand piano in a living room as seen from above.
The Yamaha C3X is 6′ 1″ long.

Yamaha upright pianos range from compact, entry-level P22 and b Series instruments to the U Series — the world’s most popular upright — to the aforementioned flagship YUS Series. The height of these pianos varies from 45″ to 52″, and their depth varies from a mere 21″ to 26″. This last dimension is particularly important since, as we’ll see, upright pianos are designed to be placed up against walls.

Upright piano in a modern home.
The Yamaha U1 is 4′ high.

Which Piano Size Is Right for Me?

Needless to say, room size is a major determinant in deciding which piano is right for you: The larger the room, the larger the piano it can accommodate — and, in general, you should purchase the largest piano that your room will comfortably allow. Seems simple enough, but it turns out there’s a lot more to it.

For one thing, the increased surface area of the soundboard and the greater length of the strings in larger pianos translates to more vibrational energy, which increases projection — in other words, larger grand pianos can sound a lot louder than smaller ones. That said, most non-professional pianists don’t play with the velocity required to make larger pianos project to their highest potential, so it’s unlikely you’ll be filling a large room with sound when playing leisurely. (Interestingly, larger grand pianos can also be played more softly than smaller ones. This is due to the longer key length, which supports better physical control over hammer velocity. That’s why a concert grand piano is easier to play at lower volumes than a baby grand.)

You’ll also need to factor in whether or not other people in the room (or in adjoining rooms) will be disturbed when you’re playing. This leads to the issue of room treatments: If there’s lots of soft furniture in the room (such as sofas or easy chairs), carpeting on the floor and/or drapes or curtains on the walls or windows, the piano will be a lot quieter (and the sound will travel a much shorter distance) than if the room has a hardwood floor with little furniture, drapes or curtains to absorb the sound. A grand piano might be overbearing in a room like that, whereas an upright would probably sound fine.

That said, there’s no ignoring the fact that grand pianos often have a more pleasing aesthetic than uprights. If you’re set on buying a grand rather than an upright, and your room has the space to accommodate it, that’s fine, but you’ll probably be better off with a baby grand, or one of the smaller full-size grands, as opposed to a larger model.

Here’s why: The physics of sound propagation leads to the rule of thumb that, for optimum sonics, the total length of the walls of the room should be at least ten times bigger than the length of the piano. A 9-foot concert grand piano, for example, should ideally be placed in a room that has 90 feet or more of total wall length … and few living spaces meet that criteria!

A very large grand piano is therefore usually not a good choice for a typical living room. That’s one reason why these instruments are called “concert” grands — they’re really designed for the concert hall. Their sound doesn’t fully propagate for many feet, so someone standing nearby (or someone seated at the piano, playing) will not hear the instrument at its best, whereas an audience member in the tenth row of a large venue would. This is true regardless of how well made the instrument is, and even if the room is equipped with all the necessary materials to absorb sound.

Tip: It can be helpful to get a large piece of drawing paper and trace an outline on it of the dimensions of the piano you’re considering purchasing. (Dimensions like the ones shown below are readily available from the manufacturer or dealer.) Be sure to add an extra 2 feet to the depth of the outline to allow for when the bench is pulled out while you’re playing.

Yamaha GB1K baby grand piano dimensions.
Yamaha P22 upright piano dimensions.

Piano Placement

As mentioned previously, upright pianos are designed to be placed against a wall. This positioning not only yields optimum sound, it also gives you the best use of available space, particularly in small rooms. (There’s an aesthetic consideration too, in that the backs of upright pianos are rarely finished.)

Woman playing an upright piano in a home.
Upright pianos are designed to be placed against a wall.

Grand pianos, on the other hand, sound best when they’re out in the middle of a room, or placed at a 45-degree angle in a corner of the room. However you position it, you’ll want to ensure that the pianist — especially if it’s you! — will be able to see the rest of the room (or perhaps even out a window) instead of having to face the wall.

A little girl playing a baby grand piano in a living room.
Grand pianos are designed to be placed out in a room.

It’s also important to protect your piano from any sudden climate changes that can harm the instrument. For example, you should never place a piano under direct sunlight. While having it near a window may look aesthetically pleasing, the heat of the sun could easily damage it. Similarly, it should not be placed near air vents, as any temperature changes will affect the instrument.

Piano AR

Yamaha offers an amazing online augmented reality tool called Piano AR that can help you decide where to place your piano … even before you buy it!

Screenshots of smartphone and tablet.
Piano AR superimposes a virtual image of the Yamaha piano model of your choice in your room.

Simply go to the Piano AR website on your mobile device’s browser and select the Yamaha upright or grand piano model you want to view, then tap the “View In Your Room” button and scan the area where you would like to place the selected piano. You’ll be shown a virtual image of the piano as it would appear in your room — you can even rotate the piano or change the finish color so you can see how it will blend in with your décor, then take a picture of how it would look as you explore different options. With Piano AR, it’s never been easier to envision the piano of your dreams in your home.

The Digital Option

If you have your heart set on owning a grand piano but your available space only allows for an upright (or if you already own a grand but are downsizing to a smaller space), there’s an easy solution: Consider purchasing a digital piano instead. Not only do many digital pianos offer the sound of a grand (in addition to many other kinds of instrument sounds — a feat of technological wizardry that not even the finest acoustic piano can provide), they also take up much less space than even an upright. They also allow you to practice silently by simply plugging in a set of headphones, and are much easier to maintain than acoustic pianos — for one thing, you never have to tune them!

Yamaha offers many different digital pianos, from portable models to beautifully crafted ARIUS YDP Series instruments to the full-featured Clavinova line, available in both upright and grand piano cabinets. Many include digital samples of the revered Yamaha CFX and Bösendorfer Imperial concert grand pianos found on the finest concert stages the world over.

Piano in a living room.
Yamaha Clavinova.

And then there are hybrid instruments like Yamaha SILENT Pianos™ and the TransAcoustic Pianos™. These have the genuine sound and feel of an acoustic piano … but they also allow you to decrease volume or even mute the sound altogether, making them capable of fitting into anyone’s lifestyle.

Whichever type of piano you end up purchasing — grand, upright or digital — you’re sure to enjoy many happy hours of making music. Time to start measuring!


Check out these related blog articles:

Here’s What to Look for When Shopping for an Acoustic Piano

What’s the Difference Between a Grand Piano and an Upright Piano?

Why Aren’t There More Than 88 Keys on a Piano?

What’s the Difference Between a Digital Keyboard and a Digital Piano?

Which Digital Piano Is Right for Me?


Click here for more information about Yamaha pianos.

Click here for more information about Yamaha digital pianos.

Click here to locate your local authorized Yamaha piano dealer.

10 Best Rock Albums to Own on Vinyl

Perhaps no musical genre is more synonymous with the concept of a vinyl “album” than rock. FM radio was built around such albums — collections of songs meant to be listened to in a particular order — even down to the idea of a “Side One” and a “Side Two,” complete with a few seconds of silence as you turn the record over and place it back on your turntable.

For some, this will be new territory; for others, well-traveled ground. And even if the latter, perhaps your favorite vinyl albums are so well-worn, you need a fresh copy. These are the 10 rock albums you shouldn’t be without.

1. Led Zeppelin – Led Zeppelin

Although rock music has many sub-genres and classifications, this record has it all. Everything is present in enormous proportion, too: big drums, big guitars, and of course Robert Plant’s massive lead vocals. It’s even mixed big, with ping-pong stereo effects that make this even more exciting when listened to on the biggest speakers you can muster, or on a pair of good-quality headphones or earbuds. Granted, Zep borrowed a lot from the Blues, but they made it all their own and while their sound became more complex throughout their discography, their debut album is the essence. And it hasn’t aged a day since 1969 — the definition of a classic.

2. Revolver – The Beatles

There’s lots of buzz about the new Revolver Special Edition box sets, and with good reason. Anyone who loves The Beatles has a particular favorite album, and though Sgt. Pepper often steals the limelight, Revolver is perhaps the best example of the Fab Four pushing all the creative boundaries, both musically and technically. A regular vinyl copy is still an essential part of your collection (preferably the mono version, which was the mix that the four Beatles oversaw and approved), but the new Super Deluxe Vinyl set features complete remixes of the album in both mono and stereo, along with tons of outtakes and demos — all packed onto four half-speed-mastered 180g LPs, plus a seven-inch vinyl EP that contains the “Paperback Writer”/”Rain” single recorded during the Revolver sessions.

3. The Doors – The Doors

What a way to start 1967! Though The Beatles were well known for embracing psychedelia, The Doors gave no quarter with their eponymous debut album, which was released on January 4 of that auspicious year and would go on to sell nearly 20 million copies. Combining the group’s imaginative playing, multiple musical styles and of course, Jim Morrison’s growling vocals, this incredibly well-recorded and produced record might just become one of your favorite albums to show off what your Hi-Fi system can do. Be sure to dim the lights and listen to the last track — the aptly titled “The End” — carefully for an emotional roller-coaster ride that may leave you gasping for breath.

4. Who’s Next – The Who

The Who’s fifth album shows them transitioning from the straightforward heavy rock sound that launched their careers to the more experimental bent of Tommy (the first “rock opera”) and Quadrophenia. Who’s Next not only contains three of rock’s greatest anthems in “Won’t Get Fooled Again,” “Baba O’Riley” and “Behind Blue Eyes,” it has some of the best-recorded guitars and most powerful vocals in rock history, courtesy of composer/guitarist Pete Townshend and lead singer Roger Daltrey. Legendary lunatic drummer Keith Moon is no slouch here, either, attacking his kit with wild abandon as nimble-fingered bassist John Entwistle holds it all together. Solid listening and a tour de force performance from start to finish!

5. Some Girls – The Rolling Stones

With such a long history and discography, it’s not easy to call out just one Rolling Stones record. But cool and innovative as their early works are, Some Girls is a seminal album for so many reasons. For one thing, it’s the first recording on which Ronnie Wood is a permanent fixture, cementing the lineup that would remain intact from the mid-’70s until bassist Bill Wyman’s 1993 retirement and drummer Charlie Watts’ recent passing. For another, it shows off the group’s creativity, adaptability and sense of humor. For those whose Stones journey began with “Start Me Up,” shift back to Some Girls and bask in the gamut of style presented here.

6. Bridge of Sighs – Robin Trower

You might think it crazy not to include a Jimi Hendrix record in a list like this, and no disrespect to the trail-blazing virtuoso, but I would argue that his albums were somewhat uneven, and that his real legacy came from the way he inspired a lot of other guitarists, including, for sure, Robin Trower. Following his departure from the group Procol Harum (of “Whiter Shade of Pale” fame), Trower adopted the same power trio format, though he never took the lead vocals as Hendrix did, instead handing that task to bass player James Dewar. The playing of all three musicians on this record is staggeringly tight from start to finish, and though the pace of the songs waxes and wanes a bit, it starts and finishes heavy, heavy and heavier still. And thanks to Beatles’ engineer Geoff Emerick — the man behind the board for this album — the sound is as impeccable as rock records get. A must-listen on vinyl!

7. Greetings from Asbury Park, N.J. – Bruce Springsteen

When Bruce Springsteen’s debut album hit the shelves back in 1973, he was being heralded in the press as the next Bob Dylan, but he’s always rocked out a lot more than Dylan ever did. Though Greetings from Asbury Park, N.J. received major critical acclaim, it came out of the gate slowly, not reaching multi-platinum status until the spring of 1992, nearly 20 years after its release. If you forget everything else Springsteen has done and go back to Greetings, you can hear the blueprint for so much of the rest of his music and his stunning concert performances.

8. Nevermind – Nirvana

Contrary to popular belief, Nirvana didn’t invent grunge. Seattle had a strong grunge scene going by the mid ’80s. But the group’s second album, Nevermind, hit the airwaves in 1992 to a receptive audience, leading to a chain reaction once it hit MTV — which was at its peak at the time. It’s a thrill from the first track to the last, and in the day, was a welcome change from disco (already on the decline) and hair metal, which had become a caricature of itself. Sit down and listen to both sides of Nevermind from start to finish, and you’ll see why this became one of the best-selling vinyl records of all time, with over 30 million copies in the collections of rock enthusiasts everywhere.

9. Love at First Sting – Scorpions

When this was first released in 1984, the Scorps were at the top of their game — on the airwaves, in heavy rotation on MTV and out on the road supporting the album. Filled with hard-driving tracks, First Sting would eventually go triple platinum and yield no less than four major singles. Nearly 40 years later, this is still one of rock’s ultimate guilty pleasures.

10. The Battle at Gardens Gate – Greta Van Fleet

While some dismissed Greta Van Fleet’s first record as a fluke, their 2021 sophomore effort is every bit as strong, if not better. Where the group’s vocals on their debut album were essentially a copy of Robert Plant’s, they’ve broadened their scope and are delivering their own sound here. If you love your rock heavy and Zeppelin-esque, but want a band you can actually go see, GVF is pretty much the only game in town. Turn this one up as loud as it will go!


Check out these turntables from Yamaha.

The Pianica: A Great Way To Start a Musical Journey

Do you know someone who has a secret desire to play songs and make their own music, but doesn’t know where to begin? Is there a child in your life who would thrive with the benefits a musical education brings to a growing brain? If so, a Yamaha Pianica might be the perfect holiday gift!

The Pianica is a small, portable keyboard that’s breath-powered; all that’s required is to simply blow air into it while pressing down the keys. While the sound it makes is similar to an accordion or a harmonica, it uses the same notes and familiar black-and-white keys as a piano. This makes it easy for anyone to get started playing the instrument, since they can choose from thousands of easily available piano book and sheet music titles to learn the notes to their favorite songs.

Close-up of the Yamaha Pianica's thin metal reeds.
In a Pianica, air blows across thin metal reeds to make each note.

Yamaha first introduced the Pianica way back in 1973. It’s the company’s version of what is known more broadly as a melodica or a keyboard harmonica. Actually, “keyboard harmonica” is a great way to describe these instruments, since that’s essentially how they work. Like a harmonica, sound is produced when air blows across a thin strip of metal called a reed in order to make it vibrate. But while a harmonica requires you to carefully blow into small holes to play a specific note, the keys on a Pianica redirect the air to blow across the individual reed that’s tuned to that note.

So how difficult is it to play a Pianica? Not difficult at all! In fact, just about every elementary school student in Japan learns to play music on a Pianica. The standard piano-like keyboard makes it intuitive to learn scales, chords, and the relationships between natural notes and accidentals (sharps and flats). And because these instruments are made from lightweight and durable plastic, they’re easy to carry around. Several Yamaha Pianica models even include color-matched durable plastic carrying cases that are tough enough to last in a child’s hands.

Pianicas can be played in two different ways. For those who prefer a traditional two-handed piano approach, the instrument can be laid flat on a table, with both hands used to work the keys. In this configuration, air is blown into a long flexible tube to get the sound started. Alternatively, if the player prefers to be mobile, the Pianica can also be held and played vertically, with the air blown into a fixed mouthpiece. This is a great choice for playing on stage or while walking around — it even allows the player to act as traveling troubadour at a party!

Woman playing Yamaha Pianica flat on a table.
The Pianica played flat on a table.

For more experienced players, the Yamaha P-37E models come with a soft zippered carrying case that makes it easy to take the instrument anywhere. These instruments were built to appeal to a more mature player, with internal design changes that produce a softer and more mellow sound quality than the brighter models often used in schools. In addition, the body of the P-37E is constructed using an environmentally-friendly plastic called Ecodear®, which uses a resin from plants to replace some of the petroleum found in regular plastics. All of this combines with a sleek and stylish look to make an instrument that fits in with the décor of anyone’s home as well as onstage.

Whether you’re buying a gift for a friend or relative hoping to discover or rediscover the joy of making music, or you’re a parent who wants to introduce your child to music for the very first time, Pianicas are an easy and fun way to get started.

Check out the video:


Click here for more information about Yamaha Pianicas.

Write Like Nobody’s Listening

You’re probably familiar with the expression “dance like nobody’s watching.” It suggests that we’re less inhibited and self-conscious if nobody actually sees us dancing … which makes us more inclined to dance.

The idea (attributed to Mark Twain or Satchel Paige or William Purkey or Susanna Clark or Richard Leigh, depending on who you ask or what Google turns up), has been worked into many a contemporary pop song (even serving as the title of a 2020 single from rapper Iggy Azalea and singer-songwriter Tinashe), and has been used as the name of both EPs and television episodes, so it must have hit a universal nerve.

I recognize this in myself. I enjoy dancing, but my moves are limited and if I felt I had to impress someone with any semblance of sophistication, grace or agility, I might decline. I have, however, been known to try some fancy choreography alone in a room.

I’m of the opinion that this theory applies to composing music as well: Writing a song is a lot easier if nobody is witnessing you in the process.

But not as many of us are asked to conjure up some original music as we are asked to dance. So, as an experiment, I thought I’d do just that. After all, if we can successfully inspire someone to embrace a new creative outlet, it would make both parties happy. And thankful. With turkey-season almost upon us, November seems like a good month to celebrate gratitude.

In my quest I approached a few friends who’ve never written a musical note or lyric and asked them if they’d be willing to try writing a song. And if they were, would they attempt to do so when no one was around? When no one was home. When the door was closed.

I promised they wouldn’t have to play their creation for me. In fact, we would make that a condition: Even if they wanted to play me their song, I would not listen to it. I felt that the notion that someone might form an opinion about their efforts could (or would) alter their experience, their comfort level, their motivation. I told them that I would, however, check in on them from time to time to see how it was going.

Not surprisingly, three different friends yielded three different results. A spectrum of connection.

Sara, who plays a bit of piano — just enough to accompany her singing voice — was a bust. Although she adores music (we’ve always enjoyed going to concerts together), she was not drawn to making music herself. She reported sitting in front of a piano and … nothing. No pull, no humor, no curiosity, no desire. She swears she didn’t feel self-conscious. She’d simply rather play a beloved classical piece she learned in middle school than write something herself. I accept that. Hey, songwriting is not for everyone. (I’m actually grateful for that because if it were, there’d be way too much competition. As if there wasn’t enough already!)

Aaron, who plays guitar but doesn’t write, agreed to give it a shot although he was sure that nothing impressive would transpire. He was wrong. Not ten minutes after picking up his guitar with the goal of coming up with a song, he reported stumbling on a hook, then some verses. In no time he found himself rocking out to what he called a “smash” that he planned on taking to his band so that they could learn and perform it. Unlike Sara, he was beside himself. Exuberant. Like a kid who just discovered candy. Understandably, this made my day. It was almost too easy.

But it was Paula’s experience that gave me the most gratification. Paula was hesitant at first to pick up her husband’s guitar, but she’s always had a creative spirit. She’s been dabbling in poetry for years and considered my challenge an opportunity to find a musical home for her prose, to get her words off the page.

She reported being slow to start, but the basic chord changes her husband showed her gave her hope and inspiration. Once she was able to flow through D – Em – A with some muscle memory, she noticed her energy shifting to her emotions — to the places where that strumming led her. Ideas began to flow. She opened her journal and implemented phrases and stanzas from her poetry. She found that she was able to articulate feelings she had about a falling out with a friend — feelings she hadn’t been able to sort out previously. In making the time to invite them in, and with just enough accompaniment to draw them out, she found answers and creative catharsis. Everything, in fact, that songwriting is supposed to do.

What’s more, Paula discovered that every time she took a break, the time it took to return to her guitar got shorter and shorter. She was eager to continue. And eventually she wrote what she considered her very first song. She told me she knew it wasn’t ready for prime time, that it wasn’t competitive or commercial. But nobody had to know that. Besides, that wasn’t the goal.

A few weeks later, Paula and I met for lunch and discussed the new love of her life: songwriting-in-private. She said that, in retrospect, the key to giving herself permission to try something new was the comfort of knowing no one was listening. No one was judging. No one was watching her dance.

You don’t have to be a professional musician to be a songwriter. After all, a songwriter is simply someone who writes songs. Not everyone who makes music needs do so for fame, notoriety, or to sustain a livelihood. In the best of all worlds, music is a means by which to explore your innermost feelings … without caring what anyone else thinks. Succeed in that, and you’ve truly experienced success.


Check out Shelly’s other postings

A Guide to Home Studio Monitors

When you set up a monitoring system for your home studio, your goal is not to make it sound as good as possible. Instead, you want it to provide a realistic sonic picture of the audio and MIDI tracks you’re working on. That way, the music you record and mix won’t sound significantly different when played on other speaker systems.

Conversely, if what you’re hearing doesn’t accurately reproduce the frequency content in your tracks, your music is less likely to “translate” to other systems and will sound amateurish.

In this article, we’ll look at what you need to know to get the best monitoring in your home studio. We’ll focus on 2.0-channel (left-right) systems, which you can use for stereo or mono mixing, but will also touch on 2.1 systems, which include a subwoofer. (Multichannel audio formats such as Dolby Atmos or 5.1 surround require much more complex speaker systems and are beyond the scope of this article.)

Near and Far

First and foremost, it’s important to understand the distinction between consumer speakers and studio monitors. Consumer speakers are meant for casual listening and so they tend to hype lows and highs in order to create a more pleasing sound. In contrast, studio monitors are designed specifically to provide accurate sound with a “flat” frequency response (that is, one with no frequency areas artificially boosted).

The Yamaha HS Series is a good example of monitors built for the studio. Every HS speaker cabinet incorporates two drivers: a woofer and a tweeter. Each driver gets amplified separately — in other words, they are bi-amplified. The incoming signal is split between low and high frequencies at a specific crossover point, with the lows and lower-midrange frequencies going to the woofer and the upper-midrange and high frequencies routed to the tweeter.

Closeup of speaker with filter screen removed.
Yamaha HS8.

HS monitors come in five different sizes, categorized by the size of the woofers; the larger the woofer, the lower the bass frequencies the monitor can reproduce. The compact 3.5-inch HS3 produces bass down to 70 Hz; the slightly larger 4.5-inch HS4 down to 60 Hz; the 5-inch HS5 down to 54 Hz; the 6.5-inch HS7 down to 43 Hz; and the 8-inch HS8 all the way down to 38 Hz.

To give you some perspective, the fundamental (basic) frequency of the low E on a 4-string bass guitar (its lowest note) is 40 Hz. So if your monitor only reproduces down to 54 Hz, you’ll still hear that bass note because it’s got overtones that are much higher than 40 Hz (see the illustration below), but you won’t be able to judge how it sounds between 40 Hz and 53 Hz.

Screenshot.
The frequencies in a bass low E.

So why wouldn’t everyone get a monitor that can go as low as possible? One factor is cost. Larger monitors are typically more expensive. Another issue is space. Monitors with 8-inch woofers tend to be relatively large. If you don’t have a lot of space in your studio, you might find them too big to fit comfortably. Some monitors with 8- to 10-inch woofers are classified as “mid-field,” and are designed to be placed farther back from the listener. For most home studios, it’s best to stick to monitors designed for near-field use, such as the Yamaha HS Series models.

Unless you’re planning to produce a lot of EDM or hip hop — both genres where the bass is paramount and the music is often listened to on systems with subwoofers — you can probably get by without hearing below 50 Hz or so from your monitors.

Studio headphones (as opposed to consumer-grade headphones) sometimes let you hear lower frequencies than monitors; if so, you can use them to check the lowest parts of the audio. As an example, Yamaha HPH-MT7 and HPH-MT8 studio headphones go down to 15 Hz, which is theoretically below the lowest level of human hearing (approximately 20 Hz).

Over the head headphones.
Yamaha HPH-MT7 studio headphones.

By the way, it’s generally a good idea to check your mixes on headphones, given that many people now consume music exclusively on headphones or earbuds instead of speakers. In addition, when listening to monitors, room reflections can cause you to hear some of the right channel signal in the left speaker and vice versa, whereas on headphones you hear the left and right channels entirely separately.

Another way to get more bass with smaller monitors is to supplement them with a subwoofer like the Yamaha HS8S, thus creating a 2.1 system. A correctly configured subwoofer will provide you with more than enough bass response, even if your main monitors are somewhat lacking. And because our ears don’t perceive much directionality in bass frequencies — that is, we can’t tell readily where they come from — you can put a subwoofer on the floor under your work surface (or pretty much anywhere in the room) and not use up precious table space.

Small speaker.
Yamaha HS8S subwoofer.

In the Field

Professional studios are designed by acousticians and are often custom-built and outfitted with extensive (and often very expensive) acoustic treatments to ensure they’re neutral for mixing and suitable for recording.

Home studios, however, are generally situated in existing rooms in houses or apartments. Even if you have the budget for acoustic treatments, you may not want to attach absorbers and diffusers to your walls — especially if you’re renting. Luckily, there are strategies you can follow to help reduce the impact of unfavorable room acoustics that would otherwise make accurate monitoring problematic.

Most importantly, you want to place your monitors in a near-field configuration. This entails two monitors forming an equilateral triangle with your listening position. The distance of each of the three sides should be roughly the same and between about two and four feet. It helps to angle (“toe-in”) the monitors in by about 30 degrees, so the drivers are pointing directly at your ears. There are apps that can help you do this.

Diagram.
A near-field monitoring configuration.

Even in a near-field setup, the room’s dimensions will still impact what you hear. One of the most common problems is low frequencies that build up in corners and close to walls, which can overly hype bass frequencies. When that happens, you’re likely to undermix elements like the kick drum and bass guitar, which will sound too soft when played back on more accurate systems.

Reducing Reflections

Another problem common to rooms without acoustic treatment is phase cancellation caused by room reflections. Because reflected sound reaches your ears later than direct sound, phase shifts can occur that cause particular frequencies to be attenuated (diminished), further skewing the accuracy of the reproduction.

Where you place your monitors in the room can help reduce problematic reflections. You want them as close to the center of the room and as far away from walls and corners as possible.

Diagrams.
Different approaches to speaker positioning will affect the sound.

You can also mitigate some room issues if the monitor you’re using has adjustable built-in EQ. Yamaha HS Series monitors provide dual rear-panel EQ controls labeled ROOM CONTROL and HIGH TRIM. ROOM CONTROL adjusts the speaker’s low-frequency response (below 500 Hz) and is used to compensate for excessive reflections in some listening environments. The HIGH TRIM switch allows you to slightly cut or boost the speaker’s high-frequency response (above 2 kHz). In rooms that are overly bright, you would use it to cut the high-frequencies; in rooms that are too “dead,” you would boost it.

View of rear panel.
HS Series monitor rear-panel EQ controls (circled in red).

If your monitors won’t fit on the desk or table you’re using as your workspace, you may need to set them on stands. If those stands are adjustable, they’ll also help get your monitors high enough: The tweeters should be at about the same height as your ears when you’re sitting in your mix position. Regardless of whether you use stands or set the monitors on a tabletop, it’s best to decouple the vibrations coming from the cabinets so that they don’t get transferred into the supporting surface. Such vibrations can cause resonances that can further skew what you’re hearing. This is best accomplished by placing monitor isolation pads between the monitor and the surface they’re sitting on. These are generally an inch or two thick and are made of heavily absorbent material. You may be very pleasantly surprised at how much this simple addition aids in the accuracy of your monitoring system!

Additional Tips

No matter how carefully you configure your monitoring system, it’s always helpful to listen to your mixes on other speakers (those in your car, in your living room speakers, on a boombox, etc.) to make sure that your mixes are translating. Doing A/B comparisons with professionally mixed songs is another way to help ensure that.

It’s also good practice to check your mix at different levels as you’re working on it. Because the human ear perceives frequencies differently at various volumes, you don’t want to always listen at one level.

Be careful not to mix loud for too long, however. Louder volumes will hasten how quickly your ears get fatigued. When that happens, you’ll be less able to make accurate judgments. Instead, get in the habit of taking a break for at least 10 minutes — if not an hour or two — during every mix session to give your ears a chance to rest.

Monitoring at levels of 85 dB or more for extended periods of time can also damage your ears. A device (or app) called an SPL meter (short for Sound Pressure Level meter) will enable you to be aware of your monitoring levels and allow you to avoid unhealthy exposure. The app versions aren’t usually quite as accurate as hardware devices, but are often very inexpensive, or even free. Either way, it’s a great addition to your home studio.


Check out our other Recording Basics postings.

Ear Candy

Great music sounds amazing when you listen to it over great speakers, but earbuds and headphones can deliver an extra degree of detail. Here are some audio tricks and treats that you can easily miss on speakers, but might surprise you when experienced on earbuds or headphones.

RIDERS ON THE STORM

This Doors single features singer Jim Morrison whispering the lyrics underneath his lead vocal, mixed low and doused in reverb. It’s something that can barely be heard on speakers but reveals itself well when listening on headphones — almost as if Morrison himself is standing behind you whispering in your ear. Spookier still, it was the last song ever recorded by the group and the last singing that Morrison ever did in the studio. Said Doors keyboardist Ray Manzarek in a 2014 interview with Uncut magazine: “How prophetic is that? A whisper fading away into eternity, where he is now.” In addition, there’s an epic fade to silence — over 20 seconds long, with the sound of a thunderstorm raging in your ears. Check it out here.

RECKONER

Here’s a moody groove from Radiohead’s In Rainbows album that features über-stereo panning best appreciated over earbuds or headphones. It begins with the drums on the right and a number of percussion elements on the left. As the song develops, voices can be heard in the left and right channels independently, followed by strings, keyboards, bass and, eventually, a full chorus spread across the entire soundscape, complete with ambient reverb effects. For the recording of the album, producer Nigel Godrich moved the band to a stately Georgian home almost 50 miles outside their hometown of Oxford. “On ‘Reckoner,’” Godrich recalled in a Rolling Stone interview, “people were all over the house, shaking things and getting this groove going, then chopping it up into little pieces and putting it back together. It was a lot of fun.” Check it out here.

WHOLE LOTTA LOVE

This classic Led Zeppelin track always got me as a kid. Not only is it one of the group’s most iconic songs, it features one of the most memorable guitar riffs of all time, accompanied by an electronic instrument called a theremin, which soars in the middle of the song. In addition, there’s something really interesting going on during the middle “way down inside” Robert Plant vocal break — a studio accident that stemmed from the fact that he originally recorded it on two different tracks. When the mix team of guitarist/producer Jimmy Page and engineer Eddie Kramer realized that the headphone bleed from the first track couldn’t be removed, they instead doused it in reverb and used it as an effect. Kramer also made extensive use of panning to “fling” Page’s guitar solo from one side to the other, which can clearly be heard in earbuds. Check it out here.

HEY JUDE

An F-bomb on a Beatles record? Better believe it, and it comes on one of the group’s biggest hits, too: “Hey Jude.” Listen closely on earbuds or headphones at the start of the third verse (underneath the “then you begin” lyric at around the three minute mark), and you’ll hear Paul McCartney swearing softly as he hits a clunker on the piano … and you’ll probably never unhear it. In his 2006 memoir Here, There and Everywhere (co-authored by Yamaha blog editor Howard Massey), legendary Beatles engineer Geoff Emerick recalls John Lennon insisting the two curse words be left in, albeit buried just low enough so that they are barely audible. “Most people won’t ever spot it … but we’ll know it’s there,” Lennon explained gleefully. Check it out here.

BEAUTIFUL

This song from Christine Aguilera’s fourth studio album Stripped is especially fun when experienced on headphones. If you listen closely, you’ll hear faint nuggets of subtle rhythm underneath the track whenever she sings — it’s especially clear at around 3:47, just before the ending. The sound actually came from an old backing track playing in the headphones as Aguilera was doing her vocal overdub. Mix engineer Dave Pensado later explained that he left it in because it added to the honesty of the song. Check it out here.

STEVEN’S LAST NIGHT IN TOWN

Instead of going into a traditional studio, the group Ben Folds Five decided to record their 1997 album Whatever and Ever Amen in the front room of a rented house in Chapel Hill, North Carolina. As often happens when tracks are laid down outside of a professional facility, noises can creep in. As the band was recording the song “Steven’s Last Night in Town,” someone’s cell phone rang. Instead of taking it out, they left it in and it can clearly be heard at the 2:56 mark, along with the laugh of bass player Robert Sledge. They liked the timing of it, so they just made it part of the song! Check it out here.

MOVING IN STEREO

The aptly titled track “Moving in Stereo,” from The Cars’ eponymous debut album, will keep your ears entertained with sounds that are constantly shifting from one side to the other. In the intro, the single guitar begins in the right channel only, with a synthesizer swimming in both ears. Vocals from singer Benjamin Orr start out hard left, then move to the center, then over to the right before moving back to the middle for the rest of the song. Bonus ear candy: Put on headphones and from time to time, you’ll hear what sounds like Christmas bells being shaken faintly in your left ear. Check it out here.


Enjoy these great songs on quality earbuds or headphones such as those offered by Yamaha.

How To Play Guitar Double-Stops

As a guitar teacher, I’m always taking inventory of the techniques and approaches I’d like to share with my roster of students. Those ideas need to have artistic value, cover a variety of musical genres, and sound amazing … with minimal effort. One of my favorite techniques developed into a full-blown online guitar tutorial called “Double-Stop Chops,” and double-stops are what I’ll be talking about in this article.

WHAT ARE DOUBLE-STOPS?

Double-stops are simply two notes of different pitches played at the same time. Technically, they’re known as dyads: two-note chord fragments. (A chord, by definition, must contain at least three notes.) When we view these powerful little nuggets as partial chords, we can better see how they relate to the larger full chordal shapes and use them to outline the parent chord in a progression.

I’ve long experienced the sonic power of double-stops at my live performances, where I often use them to create memorable hooks, motifs and solos. I also discovered that they help to reduce the hand fatigue I’d often feel at the end of a three-hour show. Essentially, double-stops provide twice the melodic impact without the dexterity needed for single-note lines.

There are several specific double-stops that are commonly used to create consonant, melodic phrases on guitar, namely:

  • Major and minor thirds
  • Fourths
  • Major and minor sixths
  • Octaves (the root note of a chord, combined with the same tone an octave higher)

All these intervals reside within the major scale and relate directly to the chordal harmony derived from that seven-note scale. For example, in the key of C:

The chart above shows the kinds of double-stops that exist within the listed chords. However, you don’t have to adhere to outlining each chord; with double-stops, you can create melodies that glide across the harmony as if using single notes.

Interestingly, every other double-stop will also be a chord tone from the original chord. For example, if you play a major third double-stop over a Cma7 chord, the tones are C and E (root and major third). If you then play an Emi7 chord minor third double-stop, the tones are E and G (root and minor third.) Both of those tones (the major third and perfect fifth) are also in the Cma7 chord.

Taking things one step further, if you play a major third double-stop from the G7 chord (root and major third), the notes it contains (G and B) are also in the Cma7 chord (where they serve as the perfect fifth and major seventh). When playing double-stop sequences, every other double-stop will often be a chord-tone resolution, and will therefore sound extremely strong over the original chord.

DOUBLE-STOP SHAPES

Each double-stop has a unique shape. Major and minor thirds adhere to the same shapes across the string pairs on the fretboard except on the G and B string. This is because the interval between the open G and B strings is a major third, as opposed to every other string pairing’s interval of a fourth.

Fourths adhere to the same shape except on the G and B strings, and also when the fourth interval is related to the IV chord. Fourths on a IV chord are augmented (sharpened by a semitone).

Sixths adhere to the same two shapes (major and minor), and because these shapes are divided by a string, you don’t have to worry about the discrepancy between the G and B string.

Octave intervals are also created by skipping a string. Creating octaves from a D- and G-string root note will give you its octave pitch four frets higher on the B and E strings, respectively. Octaves can be found three frets higher when the root note is located on the E and A strings.

The chart below shows the double-stop shapes for major and minor thirds, fourths, and major and minor sixths, as well as octaves, laid out across the fretboard in the key of C major/A minor. You’ll want to learn these as linear sequences in order to create musical ideas and melodies. When played in a linear fashion, you’ll also be able to hear the complete major scale within each sequence and will start to relate each shape and location with its “parent” major scale chord.

Chords chart.

Diatonic Harmony/Triads

In this next chart, I’ve laid out the harmonized major scale of C as triads, indicating the major and minor thirds within those shapes. Take a moment to play through the sequence of chords, then play the two-note double-stops. You’ll still be able to hear the scale position of the chord even without the full body of each chord.

Chord charts.

Devote a few practice sessions to going through all seven chords and playing the double-stop shapes within them. If you spend enough time on this, you’ll be able to outline chord progressions with ease and create amazing double-stop sequences when improvising.

Shapes Within Shapes

There are additional double-stop shapes within each of those simple triad chord shapes. Here’s a diagram of the C chord showing other double-stops within its four-note framework:

Chord charts.

Interesting to see that there are minor third and minor sixth intervals within a major chord, isn’t it?

ARTICULATION

I find that I can best vary the dynamic and volume of each of the two tones if I use my fingers. I prefer to play double-stop licks and phrases with my thumb and first finger, although sometimes I use my third finger as well. You could choose to use a pick instead, but achieving wider intervals like sixths and octaves that way is considerably more challenging.

You’ll notice in the video below that I often slide between double-stop shapes, and also sometimes play each of the two tones separately for an intervallic effect (a series of notes separated by space or time). It’s an art form I really enjoy and something I consider a huge part of my playing style.

THE VIDEO

In this video, I play each of the four double-stop types in sequence, starting with major and minor thirds. Note how I use my fingers to articulate them, and how I’m actually creating melodies — not just linear runs — from those shapes. The solo crescendos employ ascending octave runs. At the end, I add a touch of a wah effect to expand the sonic palette.

You’ll also see me mixing double-stops with single-note lines. Don’t be afraid to mix and match the different shapes, double-stops and scale runs within your solos.

THE GUITAR

I played all of the rhythm and lead guitar parts in the above video using the versatile Yamaha Pacifica PAC612VIIFM. I used the Seymour Duncan middle and neck pickup combination for most of the tones, along with some lovely Wilkinson tremolo (“whammy bar”) shimmers on some of the rhythm parts.

Author playing his guitar.

This guitar not only sounds and plays beautifully, its looks are striking as well, thanks to its gorgeous Indigo Blue flame maple top.

THE WRAP-UP

Deep within the framework of regular three- and four-note chords lies the backbone of rock ’n’ roll and soundtrack to its history. Double-stop chord fragments of all shapes and sizes have long been woven together to create classic rock, pop, and rhythm and blues intros, melodies and motifs. As a bonus, if you play these intricate self-harmonized lines on a steel-string acoustic or nylon-string classical guitar, you’ll also evoke the twang of country music and the romantic flair of Latin, jazz and classical composition. Amazing what two notes can do!

Photographs courtesy of the author.


Check out Robbie’s other postings.

How to Deal with Common Stressors

When a 1-year-old falls and bumps her knee for the first time, she starts wailing like it’s the worst thing that has ever happened to her. That’s because it is the worst thing that has happened to her.

We all experience something for the first time throughout our lives. We don’t come into this world experienced and full of wisdom. And yes, some of these issues are commonplace, but it’s still stressful, especially the first time we deal with them.

“Stomach churners” is the term I use to describe those situations that form a knot in your stomach and ruin the rest of the day. Things like:

  • The angry parent email (I left the baritones off the program once).
  • That one class. You know … the one that just isn’t working, no matter what strategies and interventions you use.
  • The first time a kid tells you “no” or doesn’t listen.

There have been a few times in my career where something stressful or upsetting derailed my day. Then, a veteran educator helped me, and sometimes let me know that this situation was not a big deal.

In no particular order, here are some common stressors that music educators go through. This is an “includes-not-but-limited-to” list, so if you have a situation that you think should have made the list, email us at educators@yamaha.com.

frustrated woman with head down on her laptopKids Quitting

This is a hard one, and even veteran educators can’t help but take this personally. It never feels like the student is quitting music; rather, it feels like the kid is quitting us or quitting themselves.

The reality is that sometimes students quit. The other reality is that while music is for everyone, the medium that we are able to provide music for kids might not be the best setting for that particular student. We can take it personally, we can care, but we can also respect their choice and welcome them back if they return.

How do we get over it? Well, sometimes we don’t . But we respect others’ choices, even if they don’t align with what we would have done in their situation.

Kids Forced to Quit

This, on the other hand, is a much bigger pain to me. I understand that students have to work within the structure and confines of the school schedule, graduation requirements, the amount of time they have, etc. Many schools have that one class that causes conflicts. But consider this: Perhaps it is our class that is the source of conflict for other electives (it doesn’t always feel good to consider these things!).

The reality is that sometimes kids have to choose. Was it all really a waste if they spent three years in music instead of four?

Other situations can be dire. For example, if a specific class or program is potentially cannibalizing your program (we’re talking enrollment drops of 5% to 10% or more), advocacy, informing and even arguing must come into play. I hesitate to use the words “saving your program,” but sometimes this is the case. Even though I know my program might still be the source of conflict at this point, I understand that there is still a certain fragility to the existence of fine arts programs that are dependent on enrollment. Remember that sometimes, being in tune with our school’s goals with the resources we have can help us to combat potential issues.

Administrators or Parents Not Understanding Us

Many of us just want to be understood, respected and left alone. But consider this: Are we trying to play opposing sides?

Stephen Covey’s “7 Habits of Highly Effective People” states: “Seek first to understand, then to be understood,” a quote that has deep meaning for me. There was a point in my career where I made some scheduling or rehearsal mistakes, and I wasn’t playing nice with some other colleagues.

The principal called me into his office, and I’ll never forget what he said. “We disagree on something right now,” he said. “I think I need to start thinking about things more like a band director, and you need to start thinking about things more like an administrator.”

This was just the advice I needed. The principal wasn’t telling me to back down or change my stance, but rather to consider other viewpoints.

We work in schools. If someone doesn’t understand something, maybe we need to inform (teach) them as best as we can.

But sometimes, others may never understand us. I called a mentor of mine once complaining that all the community cared about was the pep band and that they weren’t taking our concert literature seriously. My mentor’s response: “There are worse things than making people happy with music.”

Message received.

Although the community didn’t seem to understand our artistic concert approach, they didn’t stand in the way of it. I decided at that point that it wasn’t really important for everyone to understand that we are artists!

happy girl standing by school busLunch or Bus Duty

I’m still convinced that teachers love the actual teaching part of teaching. And then there are the duties. Not many teachers look forward to organizing mass transport of hormonal adolescents (bus duty) or supervising the collective midday feeding (lunch duty). Organizing these duties is never the same as your classroom, and there is often a lack of control and order.

Turn it around into something positive. A friend of mine took lunch duty as an opportunity to meet every kid in the lunchroom and form positive relationships. After a couple of years, some of these kids joined the band. Was my friend crazy about doing lunch duty? No. But her personality was such that she supported the entire school, not just the music program. As a result, more kids signed up for music.

When Things Don’t Go Perfectly

Winston Churchill said, “Perfection is the enemy of progress.”

Your perfectionism stresses kids out. There, I said it.

Let’s think about concerts. If you’re leading a group of 20 to 100 students between the ages of 4 to 18 at a specific time of day in a specific location with several parents, administrators, etc., watching … it isn’t going to go perfectly. So, stop hoping for things to go off without a hitch. As long as no one’s safety is at risk, some of these hitches can actually lead to memorable events.

Once my band was doing a recording session, and we had to use glass Coke bottles for a specific sound. After a few runs, the percussionist hit the bottle a little hard. We have the most pristine recording of glass shattering, the ensemble stopping and then everyone laughing. We took a few more months to improve this piece to play at a state festival. You know what the kids request to hear years later? The bottle break!

Another example was when I saw one of the most respected directors in the state show up to a festival, get ready to play and then realize that the percussionists left nearly all of their equipment back at the school, which was over two hours away. The director did what any of us would do. He stressed out for a bit, held his head in his hands and then asked for help. The band going on afterward offered to let the first band use its equipment. The performance was fabulous.

When all else fails, think about how an imperfect event will lead to absurd and entertaining conversations in the future. People don’t sit around the dinner table talking about the perfect events that happen. The worse the event goes, the better the story you have to connect with other imperfect human beings later!

However, this does not mean we do not have high standards.

students throwing graduation caps in the airThat One Class

We’ve all had that class, and some years, it’s harder to deal with than others. It either meets at the beginning of the day, causing stress and anxiety to your morning, or at the end of the day, serving as a final challenge to an otherwise productive day. The further into my career I go, the fewer instances I have of this, but it still comes up. I know that different classes require different approaches. The more I tried to make that one class fit the mold of my other classes that were going fine, the worse it got.

Remember: It’s not personal! Do you drive to work thinking, “I can’t wait to dump my entire life out on these kids and just take it out on the first 6th grader who crosses my path!”

Hopefully not! The same is true for our students. Yes, they can push our buttons, and yes, they can sometimes purposefully act out.

Each situation is different, but in many cases, the tried and true still works. Don’t be afraid to call home, refer the student to someone else or change seats (who says all the sopranos must sit together in every rehearsal?).

When I work with younger teachers on classroom management, I ask them how we can be proactive about behavior as opposed to reactive. For example, in one classroom, kids misbehaved most when music was being handed out. We made a proactive plan by simply eliminating this downtime. Music was prepared ahead of time, names were penciled into parts, and a few students came in ahead of time to place music on the chairs. There were two benefits from this plan: The teacher no longer had to deal with behavior issues, and she saved a good 10 minutes that could now be used for playing.

At times reacting is necessary but be careful because there comes a point when management can quickly be lost. When we must react, I strongly recommend taking a pause and thinking about the intention of the behavior, which can help you come to a helpful response. Sometimes there isn’t a clear reason why a student did something, but other times, you may find answers that lead to correcting the behavior as well as empathy.

Ever-Changing Rules and Guidelines

This is a tough one. The school unveils the new improvement plan for the year, and the new educators nod their heads because they’re all in. The veteran educators sit silently and wonder how long this new plan will last. It’s a difficult balancing act. On one hand, no one likes their time wasted. On the other hand, the less support something has, the less likely it is to flourish.

School improvement plans aren’t going away. Furthermore, if you’re an elective teacher, you have to pick a side. You know what I’m talking about. Have you voiced these thoughts out loud or at least in your mind?

  • Elective teacher: “None of this applies to us! This is a complete waste of our time, and I could be doing something better. Why do I have to be here?”
  • Same elective teacher, different meeting: “They didn’t include us in any of this! I feel like we’re on our own island and no one understands us.”

We’re either in, or we’re in the way. Many school improvement plans are battles that may not be worth fighting. Remember: We are employees with supervisors, and we answer to people. Nothing says you have to go all out. If there is a school improvement plan that you can totally get behind, go for it. Otherwise, complete the minimum requirements, don’t complain and use your remaining energy in other parts of your job.

The Angry Parent Email

To: musicteacher@awesomeschool.org
From: angryparent@youllneverbegoodenough.com
Subject: no subject (alternate subject: the entire email just placed in the subject line).
Sent high priority.
No greeting, and a hard-to-read tone. Are they angry or IS THEIR CAPS LOCK KEY BROKEN?

frustrated woman looking at laptop with hands on her head

The angry parent email. Oof. It always comes after a mistake or miscommunication. You’ll probably make less mistakes as you continue your career, but you’ll still make mistakes. Just own it. That being said, parents shouldn’t get a free pass to abuse you. Your school may vary, but if a parent becomes verbally abusive on the phone, they get one warning, and then the phone call ends. Here’s what I say and do:

  • “Mr./Ms. Parent, I understand you’re upset, but I can’t continue this phone call if you continue yelling or swearing.” Yelling and swearing continues. “I’m sorry Mr./Ms. Parent, but I will contact you over email and make my administration aware of this so we can resolve the situation. Thank you.” Then, IMMEDIATELY notify your supervisor

Angry parent emails still make my stomach churn. There are typically two responses to these: 1) wait for a bit, and then respond or 2) just tackle it right away. I prefer the latter tactic. In most cases, I respond asking the parent when they are available for a phone call, and then I speak to them.

Nine times out of 10, they are not as angry over the phone as I perceived them to be in their email. Rather, they are frustrated or just want to be heard. We come to a solution. If I’m wrong, I admit my mistake and let them know the action I’m taking. If I don’t know the action I’m going to take, I tell them this, but that I will get back to them within a day or two to let them know. If we determine that there isn’t any fault, but rather some communication issues, I’m still sorry for the situation and the stress that it caused.

When It’s Not What You Thought It Was

I love my job, but I’ve also come to realize that it is what it is — a job. Some of us may have been sold a bill of goods to think that what we do is fun (music is enjoyable after all, and we get to work with kids, right?). It can be fun…sometimes. But, it’s still a job.

Expecting our jobs to be fun just because they involve music and kids can put unrealistic expectations on everyone involved. It is still work. It can be fulfilling, but our jobs cannot be expected to provide all the joy in our lives, and we can’t blame our work when it requires…well, work.

You may have heard some teachers say, “I’ve never felt like I worked a day in my life because I did something I loved!” I’m happy for those people, but I can’t relate to that every day. I’m certainly grateful, but everything I’ve loved, including my job, people close to me, hobbies, etc., have required work at some point. The love you have for your craft is what keeps you coming back during the stressful times.

female teacher raises handSome Final Tips

Just because you find yourself in stressful situations doesn’t mean that you are doing a bad job. However, if you find that everywhere you go and everyone you correspond with has conflict, you may need to take a hard look in the mirror. I was once bluntly told, “If it smells everywhere you go, check your shoes.”

Quadrants: Consider breaking your day into quadrants. There are certainly things out there that can ruin your day, but what if you were able to have a situation ruin only part of your day?

Communication: Many of the issues that come up stem from communication issues. When you’re in a stressful situation, consider stepping back and looking at the communication that led up to the event. Could you have communicated something clearer, or did you read something with an intention different than what the other party meant?

Stressful situations will always happen. We can wish them away and become frustrated when our life doesn’t become easier, or we can become experienced and stronger in our handling of our professional relationships.

We can’t eliminate all the stress in our lives, but we can work to actively manage the stressful situations that may occur. I share this quote with anyone feeling overwhelmed: “I ask not for a lighter burden, but for broader shoulders,” which has been attributed to both a Jewish proverb and to Atlas in Greek mythology. This doesn’t mean you are constantly looking for tough situations to be in; rather, you are working to gain experience for those times when the going gets tough.

Funding Your Music Program: Crowdfunding, Grants and Partnerships

Throughout my career in both K-12 and higher education, one of the questions I was frequently asked was, “How do you raise so much money for your program”?

In my early years as a high school director, I was in awe of programs that managed annual budgets of $100,000 or more. They could rely heavily on student band fees to raise the funds. As a teacher in a Title-1 school (Title 1 refers to the federal educational aid program that supports students from low-income families), it was difficult for me to ask students and their families to contribute similar amounts year after year.

Even now, as a program coordinator at a public Historically Black College/University (HBCU), I often find that under-resourcing and tightening fiscal constraints leave us with little in terms of state funding appropriations. But, instead of these realities hindering me from moving my program forward, I have used them as opportunities to secure funding to ensure that my students have access to a high-quality music education.

THE MS-9414 MARCHING SNARE: Reimagined and redesigned for your classroom.

Crowdfunding

Before the age of the internet, many of my fundraising initiatives included the tried-and-true approach of selling things to people. Whether it was concessions, car washes, candy, cookie dough, coupon books or candles, the majority of our funds came from selling tangible goods and services.

man monitoring budget on laptopWhen I first heard of sites like DonorsChoose, GoFundMe and AdoptAClassroom, I must admit that I was a bit hesitant. However, seeing others reap the benefits of crowdfunding helped me to take the plunge and use this very effective fundraising tool. From receiving instruments and equipment to collecting close to $250,000 to cover travel expenses to the Tournament of Roses Parade, crowdfunding has been and continues to be one of my first approaches when I need to raise funds.

Grants

My history with grant funding goes all the way back to when I first started teaching. While working at Miller Grove High School in Lithonia, Georgia, we were the recipients of a Dallas Austin Foundation Grant, which provided music production gear and after-school studio instruction to selected students in our program. As a middle school director, again at a Title-1 school, our program secured support from the Mr. Holland’s Opus Foundation. With this grant, we repaired many of our older school instruments and purchased newer instruments so that more of our students could participate in band. We also received funding from the Atlanta Symphony Orchestra and Clayton State University’s Spivey Hall for music-related field trips and experiential learning.

As a college professor, I was part of a team to receive an Affordable Learning Georgia Grant, which helped us to provide open educational resources (OER) to students enrolled in our general education elective music appreciation course. In my current role, we are in the second year of our Grow Your Own Grant; a multi-year, multi-million dollar grant we received from the State Department of Education in Tennessee aimed at supporting our teacher candidates as we meet the challenges of the current teacher shortage and diversifying the teacher pipeline. While some of these programs have a national profile, many of them take place at the state and local levels. I encourage us all, whether in K-12 or higher ed, to seek out grant funding from all levels of government, as well as local and regional foundations, in order to maximize our efforts.

THE YAMAHA EDUCATOR NEWSLETTER: Join to receive a round-up of our latest articles and programs!

Partnerships

marching band brass section

Having reliable and consistent partners backing you financially can go a long way to support your program each year. One of the methods I used to set my yearly budgets for my program activities included reaching out to our business partners, sponsors and private donors who were reliable contributors.

We would sell ad pages in our annual banquet program, receive free or heavily reduced catering for trips, games and other events, and receive donations for various campaigns, such as our annual Rehearse-A-Thon and Band Day fundraisers. These contributions would help us greatly reduce students’ financial burdens. We would also receive free or heavily reduced music equipment and accessories from local music stores as we would start our new band students.

Having reliable and consistent community partners can go a long way toward defraying costs and generating major revenue for your program!

Show Me the Money!

man on phone while sifting through papers on table

At the end of the day, we all want to provide the best possible music education for our students. I believe that having multiple revenue streams is essential to funding those efforts. In music education curricula at the college level, there is little room for training future teachers on how to fundraise and manage large amounts of money. Thankfully, there are many of us who are more than willing to share our ideas and help those who are simply looking for ways to grow and support the vision they have for their ensembles. Good luck to you in your fundraising efforts!

Neurodivergence and Music: My Experience

As a neurodivergent person, I experience sound differently than other people. I was born with hyperacusis. Sounds that are at a normal volume to most people sometimes seem extremely loud and distorted to me. As a child, I used to hide under the table when my parents took me to restaurants where live musicians performed.

Neurodivergent people often experience sounds, including music, differently. While this can pose a certain advantage in the creative sense, it can also result in feeling inundated and overwhelmed.

THE YAMAHA EDUCATOR NEWSLETTER: Join to receive a round-up of our latest articles and programs!

What is Neurodivergence?

People whose brain works differently are often called neurodivergent. Types of recognized neurodivergence include attention-deficit/hyperactivity disorder (ADHD), autism spectrum disorder (ASD), obsessive-compulsive disorder (OCD) and more. People can be neurodivergent without having a specific diagnosis or disorder.

To me, neurodivergence is like running on a different operating system. Some of us are Macs, and others are PCs. Unfortunately for Mac users (neurodivergents), most of the world is set up under the PC operating system. It’s not something that needs to be fixed, it’s just different.

woman wearing headphones with face paintd with blue, orange and red paintNeurodivergent individuals often need accommodations — such as noise-reducing headphones or fidget spinners for stimulation — to make their experience in public settings like schools more positive.

Synesthesia

Another example of neurodivergence is synesthesia, when one of your senses is combined with another. Less than .5% of all people have synesthesia, and not all synesthetes have experiences that are related to sound. However, many synesthetes have a unique relationship to music. For example, some can see the different colors in music (tone-color synesthesia), taste sounds (Lexical-gustatory synesthesia) or see shapes and washes of color from music (chromesthesia).

8D Audio

You may have heard of 8D audio — which tricks your brain into thinking it’s in a larger space — from TikTok videos. These recordings aren’t an accurate test for neurodivergence, but neurodivergent individuals may experience them differently. Some say that the music is “bouncing around” inside of their heads. Others say 8D audio makes them feel as if they are surrounded by sound as if they’re inside a music venue.

People with ADHD, ASD, and others with neurodivergence find 8D audio to be particularly riveting, myself included. Some recent research has also suggested that listening to 8D audio helps those with anxiety focus and relax. Here is an example of 8D audio (be sure to listen with headphones so you can get the full breadth of experience).

Tips for Accommodating Neurodivergence in the Classroom

child wearing headphonesJust because a sound isn’t loud to you, doesn’t mean it isn’t perceived as loud to others. Sometimes neurodivergent students need more stimulation in order to focus in music class. Here are some simple ways to accommodate your neurodiverse classroom:

  • Have earplugs and noise-canceling headphones available to your students.
  • Leave a safe space for students to distance themselves from noise.
  • Allow frequent, short breaks for those who appear overwhelmed (drinks at the water fountain, short walks with an aide).
  • Have small fidgets in a basket for those who need a different kind of stimulation (squishy toys, pop-its, etc.).

If your school has access to weighted items, such as vests or blankets, keep one in your classroom. Many educational experts also recommend incorporating something called universal design for learning (UDL) into your lessons. This framework is based on neuroscience and aids students with different learning styles and preferences. Some examples of UDL include multi-sensory lessons, student-led learning, flexible assessments and providing multiple ways for a student to interact with a lesson’s material. While this takes a little more planning, UDL can be very helpful for your students and you.

Tips for Neurodivergent Music Teachers

It can be easy to become overwhelmed with the sounds of a music classroom. I love teaching music, but sometimes, it can feel overstimulating. Unfortunately, teachers can’t crawl under a weighted blanket when the music gets too loud! However, there are some subtle things can do to keep ourselves more present and to prevent overstimulation.

Invest in musician-grade earplugs: If you find yourself feeling frequently overwhelmed with sound, try noise-reduction earbuds. They will reduce the level of sound evenly throughout the spectrum of highs, mids and lows without sacrificing clarity. Many of these earbuds are discreet and clear — my co-workers never noticed me wearing them — and they took away a lot of my noise-induced stress.

close up of fidget spinnerNormalize fidgets and sensory tools, starting with yourself: About halfway through my first year of teaching K-2 music, I had an epiphany. I, too, could use the stress balls that I had on my desk for my students! To be honest, I was afraid that my elementary schoolers would laugh at me. But I explained, “Sometimes Miss F gets overwhelmed, too” while I squeezed a stress ball or used sensory items. This simple statement normalized the tools on my desk, encouraged conversations about sensory tools, and helped my students take them more seriously. While it might be embarrassing at first, it helps everyone get what they need in the long run.

Don’t linger on activities: Moving from sit-down activities such as music sculptures or solfege exercises to up-and-moving lessons like line dances will help you and your students stay regulated. I’ve found that if I linger on one activity for too long, students get fidgety and I feel drained. Too much of one type of lesson plan can make the energy in your classroom go wonky.

Be Aware of Differences

All neurodivergent folks don’t experience sounds in the same way, but I hope these facts and tips from a neurodivergent music teacher will help you better understand your students and make informed decisions in the classroom. Just remember, some of us are operating PCs, while others of are operating MACs. Happy inclusive music-making!

Seven Ways to Ensure a Smooth Sound Check

There’s a reason why experienced musicians — even seasoned pros — make the effort to do a sound check before every show. Sound check is the best time to test your gear, dial in levels, settle into new surroundings, and maybe even rehearse a new song.

Here are seven things every live sound engineer can do to make sure that sound check goes smoothly. Trust me, it’s worth it: The result will almost always be a better gig.

1. Create an Input List

One of the easiest and most effective things you can do to prep for a sound check is to create an input list — something that’s easily done with any spreadsheet application. This is a list of all sources on the stage that need to be connected to the PA system, showing the name of the instrument, the mixer channel number, and whether the source is a microphone or a DI (Direct Inject) box. You can also add a column that indicates the general location of the source and a section that shows onstage monitor requirements. In situations where there’s a house engineer who isn’t familiar with your band, an input list will help them understand your PA requirements.

Table of data.
An input list can easily be created using a spreadsheet.

2. Design a Stage Plot

A stage plot is a drawing that shows the physical layout of the instruments on stage — invaluable in helping an engineer understand where everything is located. In addition to the instruments, you should identify the microphones and DIs using numbers that match the input list, as well as locations for the monitors. It’s also helpful to label each position with the band member’s name because this will help anyone consulting the stage plot to become familiar with your group. There are software apps that can be used to create slick professional-looking stage plots, but even a hand-drawn sketch can work just fine.

Diagram.
A stage plot shows the location of everything on stage.

By the way, you may hear the terms “downstage” and “upstage” used when talking about instrument, mic and monitor locations. These are holdovers from years ago, when theater stages were raked (sloped) toward the audience — something that’s less common today. The downstage edge is closest to the audience, while the upstage edge is at the back of the stage, typically where the drummer sits.

3. Use a Talkback Microphone

Communication between an engineer and the performers is vital, and a talkback microphone enables an engineer at front of house (FOH) to easily speak to the musicians on stage.

Many mixing consoles, including all models in the Yamaha MGP Series, offer a dedicated talkback mic input that can be routed into the aux sends, allowing musicians to hear the engineer through their in-ear or stage monitors.

View of rear panel.
The talkback input (top left) on the Yamaha MGP16X.

Having the talkback mic ready to go before the performers even start to test their instruments will enable you to ask each musician to play their instrument while you set input levels. Be sure to set input gain properly and leave a little bit of headroom in case some of the musicians play louder during the show than they played at sound check (that never happens!).

4. Create Scenes

Some digital mixers, including Yamaha Rivage PM, CL, QL and TF Series models, feature a built-in library that can store and recall scenes containing every mixer setting. Creating a scene at a rehearsal saves time at sound check because you won’t have to start from scratch. Tip: Store each scene into a memory location, lock it, then save it again into a new location so that the original can’t accidentally be changed.

Screenshot.
The Yamaha TF1 scene library.

Some digital mixers (including all Yamaha models) can interface with offline editors that can be used to create, store and recall scenes using a computer or smart device, so even if you don’t have access to the console before sound check you can still build a scene. Creating a basic scene that includes channel names, rough aux send levels, DCA (Digitally Controlled Amplifier) assignments and onboard effects processor settings saves time, even if you can’t set the input gain for each channel. For example, if you know that you’ll need a compressor and a gate on the kick and snare channels, you can do the “grunt work” of naming the channels and turning on the gates and compressors in the offline editor. The file from the offline editor can be saved to a thumb drive, and loaded from the thumb drive into the mixer on-site.

Screenshot.
Yamaha QL Editor.

5. Arrive Early

No matter what the circumstance or venue, always plan to arrive at the sound check early. This will give you time to test mics, change batteries in wireless mics, make sure the PA is set up correctly, and ensure that all cables and connections are working. It’s easier to do this before the musicians arrive.

Sound checks can be tough to manage when a lot of people are present because not everyone has good sound check “etiquette.” One way of alleviating the amount of confusion onstage is to stagger the arrival time of the musicians. For example, have the drummer and bassist show up before the rest of the group so you can place mics on the drum kit, patch them and test the lines without everyone else standing around waiting, and possibly making a lot of distracting noise. While it’s tempting to place mics on the drums before the drummer arrives, it can be counterproductive because the drummer may want to move drums or cymbal stands and the mic stands might be in the way, so give the drummer time to settle in before you start putting up mics.

Once you have the input levels set, you can make adjustments to the monitor mixes and house mix. Many live sound engineers build their house mix starting with the drums and bass, but constructing a mix around the vocals is equally effective. Slowly add instruments into the mix one at a time so you can get a feel for how the PA system interacts with the room. If you’re using a digital mixer, don’t forget to save the scene after soundcheck has finished — and back it up to a thumb drive for safety!

6. Be Smart

If you’re using a digital mixer, be aware that there are apps for smart devices that allow wireless remote control over your mix so you can walk around the room and make adjustments to the sound while listening in various locations — even stand onstage in front of a monitor while making adjustments to the monitor mix or ringing it out. There are several free StageMix apps designed to control various Yamaha digital mixers. Some can even be set up with “permissions,” allowing each musician to control their own monitor mix.

Screenshot.
The CL StageMix app provides smart device control over Yamaha CL Series mixers.

7. Make A List

No matter how many gigs you have under your belt, it never hurts to make a list of what you’ll need for the show and tape it to the inside of your work box. It’s easy to forget things like AC power strips, extension cords or extra cables, and you don’t want to be scrambling to find those items at the last minute. A little planning goes a long way in making sure you have a smooth sound check … and a great gig!


Check out our other Tools of the Trade postings.

Scary Video Games

People often enjoy feeling frightened around Halloween. Each year, many of us dive into movies and media that make the hair on the backs of our necks stand up. Whether it’s revisiting a favorite horror flick or immersing yourself in a scary video game, being shocked and surprised by ghouls and ghosts has become a favorite pastime, especially around the end of October.

In this article, we’ll investigate eight of the most blood-curdling video games, all of which are made even more impactful when played through a dedicated gaming mixer like the latest Yamaha ZG Series mixers.

1. BLOODBORNE (2015)

Nothing is quite as scary as the dark, and this game is intentionally dimly lit. Here, the main character, known as the Hunter, traverses a Gothic, Victorian-era-inspired town where those still living are afflicted with a blood-borne disease. The Hunter must discover the source of the illness by deciphering the region’s quandaries and beating back the sickened beasts. To do so, he utilizes weapons like a massive axe, swords, guns and more. And all the sounds you hear as you play are the heavy breathing of your enemy, random rattling chains and the steps you take in darkened staircases. Preview it here.

2. SLENDER: THE EIGHT PAGES (2012)

Do you know the Slender Man? He’s a fictional tall, lanky villain with a white visage, black clothes and no facial features, and he’s on your trail in this title. So watch out! Set in a dense forest at midnight, players must search to find eight pages of notes from various spots in the woods. The problem is, you’re being chased, and visibility is low. In fact, you can hardly see a thing — just a limited circle of light from a flashlight keeps you from total darkness … and your batteries may run out! If you manage to collect all the pages, daylight will come. But if not, you’ll just be another victim of the Slender Man. Preview it here.

3. RESIDENT EVIL 7: BIOHAZARD (2017)

Supremely life-like, this title may have you thinking you’re actually in the game. Your mission, as protagonist Ethan Winters, is to find your long-missing wife as you wander a plantation otherwise left for dead. Literally. What’s more, you’re being hunted by a diseased family trying to take you down. A telephone rings and you get your cryptic directions for your next move. Everything is a mystery as you try and figure out where you are, what you’re doing and ultimately how to escape. Survival is the name of the game — in other words, it’s classic Resident Evil. Preview it here.

4. SILENT HILL 2 (2001)

This title is both creepy and eerie. Protagonist James Sunderland ventures into the town of Silent Hill, Maine, after receiving a letter from his deceased wife who tells him she’s waiting for him there (despite having died from illness three years prior). There’s only the sounds of your footsteps to keep you company and monsters around every corner … and on the rare occasions you’re alone, the fear of an attacker looms large. Along the way, you’ll encounter other humans: A teenage runaway, a precocious eight-year-old and a woman who strangely looks just like James’ wife. Prepare yourself for cold shivers and lots of adrenaline rush. Preview it here.

5. AMNESIA: THE DARK DESCENT (2010)

Your name is Daniel. You’re in a darkened castle with no memory of how you got there. And all you care about now is maintaining your wits and sanity. But this is no easy task, as you must traverse the castle and figure out puzzles to aid in your escape. Stay in the shadows too long and your mind goes mad, with hallucinations that decrease your chances at fending off attacking monsters. Find the light, restore your mind. The catch? Daniel cannot fight against foes. He can only flee. Scary side note: This title features an actual “afraid of darkness” meter, which says a lot. Preview it here.

6. OUTLAST (2013)

The sky is fire; the air, ash. And you, Miles Upshur, are investigating an old, decrepit psychiatric hospital located in rural Colorado. Miles is a freelance journalist and he’s on the job, digging into a tip he got about experiments being done on people in the asylum. But perhaps he wouldn’t have taken the gig had he known the hospital was populated by homicidal patients! Corpses line the hallways; danger lurks around every corner. He even has to outwit a crazy priest along the way — is nothing sacred? But Miles has weapons he can fight back with, right? Nope! He can only hide or try to sneak past them, staying in the shadows. Preview it here.

7. INSIDE (2016)

Guard dogs bark. A boy slides down a bumpy hill. Masked guards wave their flashlights. The surroundings are dark, grey, hopeless. The only way through is to solve scary puzzles. For example, parasitic worms cause farm pigs to run wild. The protagonist, called the “intelligent boy,” can use them to help in his escape. But where the boy finds himself next is a zombie-filled city. Gulp. His trump card? The boy can use a convenient mind control helmet to get the greying bodies to assist in the escape. But watch out for “the Huddle,” which is a blob made of human limbs that may be controlling your brain! Preview it here.

8. ALIEN: ISOLATION (2014)

Based on the Alien film series (so you know it’s going to be unnerving!), this title casts you as Amanda Ripley, daughter of the movie’s heroine Ellen Ripley, as she searches for the reasons behind her mother’s mysterious disappearance aboard a shiver-inducing space station. An alien creature is running rampant, causing carnage, and Amanda must find a way out. She also must find a flamethrower to thwart various enemies, from hostile humans to robots, along the way. And the whole time Amanda is chased by the alien, she cannot defeat it, only circumvent or evade the creature. You can use tools to track the alien, but that might mean — ugh! — giving away your location. Preview it here.

The Power of Words: The Enduring Effects of Arrows and Songs

“The Arrow and the Song” is a powerful poem that explores how we communicate with each other and the long-lasting effects these moments have on our lives. Longfellow’s poem resonates with me because it shows how some words stick with you and hurt you like the arrow, while other words build you up and are carried in your heart like a song. This message is so important and helpful to the daily operations of our program. Read further to see how much this simple poem impacted a group of students at Forney High School in Texas.

I shot an arrow into the air,
It fell to earth, I knew not where;
For, so swiftly it flew, the sight
Could not follow it in its flight.

I breathed a song into the air,
It fell to earth, I knew not where;
For who has sight so keen and strong,
That it can follow the flight of song?

Long, long afterward, in an oak
I found the arrow, still unbroke;
And the song, from beginning to end,
I found again in the heart of a friend.

— The Arrow and The Song (1845) by Henry Wadsworth Longfellow

Be Aware of Your Words

color guard member after performanceHow do our words truly affect others? Each day, we take part in dozens of conversions with our students, coworkers, family members and others. As music educators, we are tasked with communicating with our students throughout the day, and for many of us, we have the opportunity to have a continuing conversation for years before our students graduate from our programs and head out into the world.

Now let us look more closely at the words themselves. Are our words, our daily instruction, truly building our students into the people we want them to be? It is vitally important to realize that each one of our students has a self-image that is being molded and shaped by the interactions they have each day, and most notably, the interactions they are having with you!

My great friend, author and Olympian, Lanny Bassham, describes the self-image of a person as the sum total of their habits, attitudes and beliefs. It’s why they are the way they are and oftentimes, why they do what they do. This self-image is shaped daily by the experiences and words of people around them.

As music educators, we are great at developing relationships with our students. Just attend a high school reunion and you will see all the music people on one side of the room reminiscing about the great times they had with their directors and friends. It’s an impactful profession we have!

Now let’s own the weight of our words and take ownership of the incredible power we have to shape the self-image of our students for the better. Here are some practical tools that you can employ TODAY to check your language that shapes your students’ self-image.

Arrows to Avoid

color guard performingAvoid words like “don’t” and “but.”

For anyone who has played golf, consider this analogy: You are standing at the tee on the first hole looking down a beautiful green fairway, and down the right side of the fairway is a giant, glistening blue lake just calling to your golf ball. The last thing you think before you hit the shot is, of course, “DON’T hit it in the water!”

Don’t means DO. Every time you try to think about not doing something, you are increasing the chance of actually doing that thing. Your students are the same way. Paint an image in their head of what you do want to happen instead of what you do not want to happen.

For example, you are working with a young clarinet player whose chin is moving while playing. Instead of saying, “Don’t move your chin,” tell the student, “Can you focus on keeping your chin very still?” Paint the image in the mind of the listener of the desired outcome instead of the result not desired!

Have you ever had anyone give you a compliment followed by the word “but” and then a criticism? If you are anything like me or my students, once the word “but” enters the equation, all the complimentary material before the “but” is erased and all you can think about is the criticism.

Erase that word from your vocabulary! Instead, replace it with action words like “now can you,” “will you,” “try this,” etc. These words paint a totally different picture in your students’ minds and creates a feeling of “I have been successful so far, now I can try this next step to be more successful!”

Promote Songs

Forney High School band member in uniformHave you ever had a great performance? Of course — it feels wonderful to perform at your best!

Have you or your students had a poor performance? Of course — it’s part of being human.

You must always remember that your students desperately want to please you, their peers and the organization. After a subpar performance, it’s easy for them to immediately begin beating themselves up. We’ve all been there. In fact, it’s unfortunately a habit for many of us — as soon as things don’t go right, we beat ourselves up! This causes so much damage, and long-term negative effects will ensue.

Try this helpful strategy to help shape the self-image of your students immediately following a performance: Have a post-performance talk, emphasizing the things that went well, the things that we all learned together, and what we’re going to do about it as an organization. This conversation in and of itself is very helpful and will give you an opportunity as their educator to shape the direction of their minds going forward.

The next important step is to ask students to rate their individual execution/performance into a few categories:

    1. Good
    2. Okay
    3. Needs work

Those who find themselves in the first two categories should focus on how much fun they had while performing and live in that moment with their friends.

Those who are in the “needs work” category are the focus in this whole exercise. Many of these students would have, had you not intervened, held that hurt inside and began beating themselves up focusing on their mistakes instead of the solutions. This internal battering often turns into more mistakes and further damage to their self-image.

Take an opportunity to meet with each of these students and coach them through their perceived shortcomings and provide them with a customized plan for improvement. Now the student is focused on the solution instead of the problem. They are focused on their own ability to improve instead of internally telling themselves they have failed. What a powerful tool this is! Employ this technique after your next performance.

It may take a few tries before the “needs-work” students have the courage to come to you, so I always tell the whole group that I am most proud of these students for their honesty and selflessness. After they do well in the next performance, I make sure to praise them in front of the group to continue building that self-image.

Forney High School band performing Arrow and Song show
The Forney High School band performing The Arrow and The Song show at the UIL State Championships.

When Longfellow wrote “The Arrow and the Song,” I doubt he would have ever dreamed of the impact his poem would have on a marching band in Texas. In fact, it has impacted us so much, we created a marching show about it! Truly what better material to surround our students with than a realization that the words they say to each other can be either “arrows” that hurt people for years to come, or they can be “songs,” powerful words that build up the self-image of each other.

Longfellow put it most eloquently in the final lines of his poem: “And the song, from beginning to end / I found again in the heart of a friend.”

Use your words wisely — be the song!

Zen, Qi Gong and Music

I would like to thank Reverend Rinsen and Reverend Do’on (pictured above with me) as well as Reverend Shokai for helping me through my jukai journey. I also want to give a big shout out to talented photographer Luna (Shōsō) Kasior Bitner for doing a last-minute photoshoot. I could not have written this article without all of you!

Last spring, in the midst of the pandemic, we began the process of jukai, an initiation into the Zen Buddhist community. “Ju” translates to granting, and “kai” means precepts. Jukai is the process of undergoing an empowerment ceremony in which one takes the three refuges, three pure precepts and the 10 grave precepts. Zen practitioners spend weeks writing their own personal interpretations of these precepts, such as vowing not to kill — whether it be animals or the energy of a room. Then we sew a miniature Buddha robe; the material representation of the vows we take, in each handmade stitch.

So what does this have to do with music and teaching music?

For me, the answer is … everything.

The process of undertaking jukai changed the way I relate to my instrument, the flute, as well as how I teach it to others. Before, my flute playing felt academic and distanced. Now, my experience is more emotive and natural. The flute isn’t something to be studied and polished, but rather, a paint brush for musical expression.

Meditating Altered my Teaching Style

Reverend Shokai pulling energy like a bow and arrow
Reverend Shokai pulling in energy like a bow and arrow.

Science has made a lot of headway in mindfulness research since the early 2000s. A 2003 study by Joanne C. Chang, Elizabeth Midlarsky and Peter Lin found that mediation reduced performance anxiety in musicians. According to the study, 66% of musicians and college music students experience anxiety. It’s likely that music teachers experience similar levels of anxiety, so any tools we can use to combat tension will help us grow as educators and creatives.

Shortly after I received Jukai, I noticed that my teaching style changed for the better. Just one week of sewing and sitting zazen (meditating), as well as participating in mindful cleaning, walking and cooking caused a major shift in my perspective. I wasn’t in a rush for my students to get things right on the first try, and I no longer tried to explain lessons to them correctly as fast as possible. It seemed like the world was full of time: There was a universe in every breath. I had the chance to really think about what I was about to say.

One of the workshops that impacted how I relate to music and music performance was qi gong.

Qi Gong: A Body Practice

Qi gong (pronounced chi gong) is a body practice and martial art that developed in China roughly 5,000 years ago. According to Piedmont.org, the difference between qi gong and tai chi is that qi gong’s body positions are used for specific situations, whereas tai chi aims to create a seamless flow between movements.

During the retreat, I experienced qi gong in sessions led by Rev. Shokai. While barefoot, we had body practice outside on the grass in front of the temple, which was a grounding break for all of us after a long day of sesshin (a period of intensive mediation practice from dawn until dusk).

“In both Zen and qi gong, we are practicing embodiment.
We work with the mind, energy and body, realizing that they are not separate
and this has a profound impact on the way we live our lives.” — Rev. Shokai

When practicing qi gong, I could clearly feel the energies in my body. Similar to sitting meditation, I was aware of every tiny muscle and pang of pain, especially from my asthma. I couldn’t avoid the tensions in my body or the intrusive thoughts that didn’t serve me. Body practice and meditation make you confront your problems head on, instead of being distracted.

Despite being painfully aware of everything happening inside my body and mind, I felt uplifted and refreshed after each afternoon session. All discomfort seemed to dissolve into the cool earth.

Teaching and Playing Music After the Retreat

I didn’t notice how profoundly my week-long retreat affected my career as a music teacher and performer until I returned home.

I greeted my distance flute students on Zoom and noticed how seamlessly our conversations flowed. After spending days in silence, I was better able to connect with my students. Since my own anxiety was lessened, I was better able to think about my private students, and what they wanted to achieve creatively. My students laughed more and learned more.

My descriptions of playing the flute and achieving certain embouchures were no longer broad strokes but became extremely specific descriptions of how I found each timbre and tone color.

Before, I gave specific and dry examples of how to play the instrument, such as “Tighten your corners” or “Shoot for a direct tone and bring up the volume.” This type of teaching is necessary in private lessons, but now my instructions are infused with more creativity and emotions. I now ask, “How would you make this section sound more pointed?” or “What can you do to make the piece sound more oceanic and flowing?”

I now offer guidance with more questions, which makes students feel more involved in the learning process. I allow myself to think outside the box, and even encourage students to imagine their own character arcs for each piece or movement.

Religion or Metaphor?

Reverend Shokai bringing energy down from the heavens
Reverend Shokai bringing energy down from the heavens.

If all of this sounds a little woo-woo, you’re not alone. You don’t even have to take my word for it.  Many members of our jukai class of 2021 do not believe in the heavens or any of the religious concepts. Some practitioners think of these ideas as metaphors or concepts that further aid our practice and help us delve into deeper relaxation and awareness.

Meditation and Mindfulness in the Classroom

Formal Zen training isn’t for everyone, but I believe there is a lot to take away from this.

I’m not saying that you should ask your students to meditate in class. Depending on your circumstances, this could actually be the opposite of Zen. I remember back in high school when we studied ancient religions, and our history teacher had our class meditate for five minutes each day for one week. Unfortunately, the result was out-of-control classroom.

Not every student wants to participate in or is interested in meditation. But in the process of receiving jukai, I learned that as music teachers, we can meditate for our students.

By raising up your own energy and feeling calm and centered within your own body will affect the people around you — especially young people — in a very palpable way. Meditation requires a certain level of maturity, so gauge where your students are at before imposing a mandatory five-minute sit before every class period

Zen is Music

While Zen practitioners are known for taking vows of silence, we aren’t quiet all the time. Being quiet is a practice … but so is making noise! You will hear many instruments, such as chimes, bells and even rumbling drums, in the zendo, or meditation hall.

I think of Zen as silence with music in between the cracks.

Show your students examples of Zen practice, particularly Zen music, which may help cultivate some gravity with your students about how much every seemingly small noise matters. Consider showing your students this video, which features some of the musical instruments of Zen liturgy.

That being said, it’s difficult to convey the depth of feeling that rises as one merges with the practice, the people and the full experience of the zendo in mere words and videography.

The more you and your students are aware of your emotions and body will help you become one with your musical process. So, go forth! Or rather, find a buckwheat cushion!

More About the Buddhist Temple of Toledo

This article was inspired by my experiences at the Buddhist Temple of Toledo, which is a Soto Zen temple, and with Professor and Rev. Jay Rinsen Weik, as well as all the helping hands and members of the jukai class of 2021.

Photos by Luna (Shōsō) Kasior Bitner

10 Best Jazz Albums to Own on Vinyl

Because jazz often has more space in the music than a lot of rock, hip hop or electronica, it’s easier to get closer to the real thing in your home audio system, especially in terms of sonic scale.

Here are 10 of the very best jazz albums you need to hear (and own) on vinyl. Double-check the alignment on your cartridge to maximize your enjoyment.

1. Kind of Blue – Miles Davis

This is essentially the Sgt. Pepper of jazz. Many have called Kind of Blue “one of the best albums of all time,” and because it has a more modal, melodic style than other records by the legendary trumpeter — in fact, most jazz records, period — it’s more approachable, making it one of the best ways to get into jazz. But the longer you listen, the more complexity you can absorb. There are a number of great vinyl pressings available, so you can’t go wrong with any of them. Besides, by the time you’re done, you’ll probably own several different copies!

2. Saxophone Colossus – Sonny Rollins

Huge as Kind of Blue is, it might be argued that this is a close second in terms of both playing and accessibility. The opening bars of “St. Thomas” are just as inviting as the beginning of KoB to be sure, and if nothing else, this is a record that you should have as a bookend. Rollins’ sax sound is huge here, and when the incomparable Hal Roach takes front and center for a drum solo, you’ll feel as if you’ve been pushed back in your seat. A true joy on vinyl, this is 39 minutes of non-stop excitement with an infectious groove that will have you dancing around the house.

3. A Love Supreme – John Coltrane

Another masterpiece on a par with Kind of Blue, this offering by legendary saxophonist John Coltrane is a four-part suite full of highs, lows and innovation. It was Coltrane’s biggest selling record, and is considered by many to be one of the best jazz albums of all time, yet remains incredibly accessible. Fun fact: Coltrane recorded this entire album in a single day at producer Rudy Van Gelder’s home studio. Wow. Just wow.

4. Ah Um – Charles Mingus

This album completes what could be considered the basic building blocks of jazz. Within a genre so full of innovation and diversity, these first four records alone will expose you to a wide range of musical thinking. Because Mingus is primarily a bass player, Ah Um is full of textural complexity, and includes the classic “Goodbye Pork Pie Hat,” which has become a jazz standard that’s been covered by everyone from Rahsaan Roland Kirk to Joni Mitchell to Jeff Beck. With so many subtleties and rapid mood changes, this is one piece of vinyl that will give your system a workout in a way that is sure to surprise and delight.

5. Offramp – Pat Metheny Group

Like so many other jazz greats, guitarist Pat Metheny’s first two records with the Pat Metheny Group followed a more traditional groove before branching out with Offramp, establishing him as a more abstract and experimental composer. Whether you pick this up as an original ECM pressing, or the current remastered version, this record begs to be played from start to finish on vinyl. Metheny’s playing is simple, sparse and deliberate here … and he still includes the track “Are You Going With Me?” in nearly every live performance. If you only have one PMG record in your collection, this is the one to have.

6. The Köln Concert – Keith Jarrett

Volumes have been written about how The Köln Concert almost didn’t happen, yet it turned out to be one of jazz’s more happy accidents. This masterpiece of textural improvisation is a joy to listen to, recorded with so much ambience that it’ll really show off your Hi-Fi system to its fullest. The sound that Jarrett achieves from the tattered Bosendorfer piano that he was forced to play here only underscores his genius. And the opening of “Part 1” might have you wondering if a young George Winston wasn’t in the audience taking notes.

7. Barefoot Ballet – John Klemmer

Some may be quick to write John Klemmer off as “smooth jazz,” yet growing up in Chicago’s jazz scene, Klemmer had the chops to make serious music. While not as commercially successful as some of his other albums, Barefoot Ballet features Klemmer’s groundbreaking work using echo effects on his sax, creating a texture that would often be imitated but never duplicated. The space, melody and complexity presented on this album makes for a true classic.

8. The Three – The Three

This piece of vinyl is a bit obscure, but worth tracking down if you can find a copy. Originally produced in 1976 by East Wind Records, it’s a direct-to-disk recording of Joe Sample (on keyboards), Ray Brown (on bass) and Shelly Manne (on drums) performing a handful of jazz standards. Because of the D2D process, they went straight from recording session to the cutting lathe, having to get each side of the album right on the first take. The clarity and dynamics of this record are stunning, and will really show off what your system can do.

9. Land of the Midnight Sun – Al DiMeola

After playing with Chick Corea’s Return to Forever for a few years, this was the 22-year old guitarist’s first solo album. Al DiMeola would go on to release a prodigious catalog of work, but this deeply complex record showcases his early genius, both as a player and a composer — and, as a bonus, he’s backed up by Stanley Clarke and Jaco Pastorius on bass, along with a very young Lenny White on drums. The early CBS/Sony pressings are somewhat lackluster, so seek out a Japanese import if you can find one.

10. Bitches’ Brew – Miles Davis

I can’t think of a better way to end this list than with Bitches’ Brew — probably the most controversial and influential work of Davis’ long career. In stark contrast to the easy groove of Kind of Blue, Brew is difficult listening hour, and a cornerstone of jazz fusion. The musicians on this record don’t just play, they attack their instruments in a way that’s never been done before, or since. It’s an incredibly spacious sonic exercise, and one that will put your system to the test, whether listening on speakers or headphones. (If you choose the latter, keep the volume down on the first pass, as this album is really dynamic!) As with all Miles Davis’ records, there are a wide range of pressings to choose from.


Check out these turntables from Yamaha.

How to Play Octaves on Piano and Keyboard

Looking to get your piano and keyboard melodies and figures to stand out more? Doubling the notes in octaves is a great way of achieving that. In most cases this will make the part sound more powerful, but if played incorrectly, it’s a technique that can tire out your hand and arm. In this article, we’ll show you how to play octaves properly … without fatigue.

Arm, Wrist or Fingers?

Too often, players will tighten up their arm, wrist and even shoulders when playing octaves, moving their arm up and down like a piston. While this can work when playing only a few notes or repetitions, it produces a lot of tension in the body, and is therefore something to be avoided. Let’s try playing some repeated C octaves, with the thumb on Middle C:

Musical annotation.

As shown in the video below, rather than tightening up the arm, you should pivot your wrist up and down slightly, leaving your arm relatively still. When first practicing this wrist movement you should exaggerate the motion to exercise your wrist and learn what it feels like; in performance you won’t need to move the wrist so much.

As another reference, watch this video of famed virtuoso pianist Vladimir Horowitz playing a very difficult Chopin Polonaise, with an incredibly fast left hand octave figure. His left arm and his wrist are barely moving up and down, and he certainly doesn’t look as if he is straining to play the part.

Try the following example, where each time you move to the next measure, you double the speed of your repetitions. This is best practiced with a metronome.

Musical annotation.

The next step is to learn how to move to different notes in order to play a melody with octaves. Start with the first five notes of the C Major scale, slowly increasing your tempo as you feel comfortable:

Musical annotation.

When that feels comfortable, try playing the complete C Major scale, again slowly increasing your tempo:

Musical annotation.

Mixing White and Black Notes

While it is possible to always use the thumb and the fifth finger (the pinky) when playing octaves, it is common practice to use the fourth finger for black notes, and the fifth finger for white notes. This will help you eventually when playing legato, but it’s good to start doing this for all octave playing.

This next example has you playing an ascending chromatic scale, which is simply every key on the keyboard in successive order. Pay attention to the fingering so you use your fourth finger on the top of each black note octave. Many piano teachers and concert pianists suggest raising your wrist just slightly when playing moving passages of octaves, as shown in the video below.

Musical annotation.


Now let’s try playing the same chromatic scale, with a more legato touch. Using the fourth finger for the upper black notes helps you to play those octaves in a more connected way. Of course the thumb cannot play perfectly connected for the lower notes, but the upper note will help to fool the ear into thinking the entire passage is well-connected.

Musical annotation.

Riffs in Octaves

It’s very common to play right-hand octave riffs when playing rock and roll and boogie-woogie style piano. Here are some examples played at slow and faster tempos — don’t forget to use your fourth finger on the black notes!

Musical annotation.
Musical annotation.
Musical annotation.

More Delicate Octaves

Octaves don’t only have to be used to add power. As shown in the example below, doubling a melody in octaves can also be done softly, in ballads and more down-tempo pop tunes. When played gently and in conjunction with the sustain pedal, it can be a very beautiful sound.

Musical annotation.


All audio played on a Yamaha P-515

Check out our other Well-Rounded Keyboardist postings.


Click here for more information about Yamaha keyboard instruments.

10 Spooky Guitar Sounds

It’s that time of the year again, when ghosts, vampires and witches abound. If you want to get into the spirit of Halloween, here are 10 ways you can make your electric guitar sound scary.

My tools for creating these spooky sounds were a Yamaha THR30II Wireless desktop amplifier, a Line 6 Helix LT effects pedal, the Line 6 Helix Native plug-in, the Steinberg roomworksSE plug-in, and/or some combination thereof. All the audio clips were recorded into Steinberg Cubase, with all the guitar parts tracked direct. (The line outputs of the THR30II and the Helix LT were connected to the inputs on my audio interface.)

Note that you can freely transfer any sounds you create in the Helix Native plug-in to and from Helix LT or other Helix pedals. They all offer the same effects and architecture, so you can consider them interchangeable.

1. Monstrous Chords

This sound utilizes a high-gain setting from the THR30II for distortion, along with the amp’s built-in Chorus and Echo/Rev effects. Reverb is almost always helpful in creating a spooky sound, but because I wanted one with an even longer decay than what was available on the amp, I inserted Cubase’s roomworksSE plug-in. If you’re just using the amp alone, you can still get a close approximation with the settings shown below.

With this sound, it helps to play a part with some dissonant notes if you want it to sound really spooky. The audio clip below has me playing some power chords (root and fifth only, with no third) under which I’m adding pulsing bass notes on the (mostly open) low E string. There are also a couple of half-step chord changes, which add to the scary vibe. Near the end, I hit a harmonic and let it ring out. As it did, I moved the whammy bar on my guitar slightly to make the pitch warble.

View of front panel.
Monstrous Chords THR30II amp setting.
View of front panel.
Monstrous Chords roomworksSE setting.

2. Shakey Ghosts

Like the previous example, this sound features the THR30II with a similar high-gain setting, only this time using the amp’s built-in tremolo to provide pulsing modulation. Ambience comes from the amp’s Hall reverb and roomworksSE. The decay on roomworksSE is over 11 seconds, which is much longer than you’d use for conventional music production but works here to create the cavernous space needed.

View of front panel.
Shaky Ghosts THR30II amp setting.
View of controls.
Shaky Ghosts roomworksSE setting.

3. Mutant Spaceship Landing

All the effects and the amp sound for this one came from the Helix LT pedal. The setting combines a slightly crunchy amp sound with a bit of added distortion. The pulsating sound comes from a unique Line 6 delay called Bubble Echo, which creates a sample-and-hold effect similar to what you’d get on a synth. I also included some Harmonic Tremolo. The playing technique consists of slowly scraping a pick down the low E string from the top of the neck all the way to the nut. It’s fun and easy … plus you don’t need to have any guitar chops to play this one.

Screenshot.
The Helix LT signal chain and the Bubble Echo settings for Mutant Spaceship Landing.

4. Alien Flux

I used the Helix Native plug-in to create this outer-worldly effect. Settings include US Double Nrm amp and 2×12 cab, along with Adriatic Swell, a swelling delay. The most critical effect in the signal chain is the Helix Mutant Filter, which provides the moving filter sound that’s key to the ethereal vibe.

The audio clip demonstrating this sound has me playing simple two-note chords in fourths that slide up the neck. At the end, notice how each beat’s volume goes up and down. That was done by putting the Cubase track into automation write mode and manually moving the channel fader up and down.

Screenshots.
The Helix Native setting and the volume automation used for Alien Flux.

5. Haunted Rings

A ring modulator is always a good choice for creating strange sounds. This particular example was created inside Cubase with four Steinberg effects plug-ins.

The effects chain starts with the Amp Simulator plug-in on a clean setting. Next is the Ring Modulator, which adds a buzzy resonance. Then roomworksSE provides a large reverb ambience with a decay time of close to 11 seconds. Finally, the Mono Delay plug-in adds motion to the sound: I set it to a short 50 ms delay time with the Feedback and Mix knobs at or near 50 percent. In the audio clip, I’m playing a three-note arpeggiated pattern with an augmented fifth interval to create dissonance.

View of control panels with corresponding soundwaves on screenshots.
The four Cubase plug-ins used to create Haunted Rings.

6. In the Depths

This sound was also created exclusively with Cubase plug-ins. The sustain is created with copious gain in VST Amp Rack’s Plexi model, exaggerated with a Fuzz box from the plug-in’s Post Effects. In the Pre-Effects, an Octaver adds a lower octave to the sound. Finally, there’s some reverb from the REVerence convolution reverb plug-in with the English Chapel preset.

The audio clip below consists of a power chord that sustains throughout the entire duration. The pitch variations resulted from my lightly moving the guitar’s whammy bar.

View of settings.
The sustain for In the Depths was created in the VST Amp Rack using gain and fuzz.

7. Demented Bells

This sound uses the THR30II exclusively. The amp is set to Hi-Gain/Classic, and has both the Flanger effect and Echo/Rev at their highest settings.

This example incorporates harmonics played on the guitar to create a bell-like sound. Because the intervals between the harmonics available in standard tuning at the fifth, seventh and twelfth frets are major, I tuned several strings down a half step, including the high E, D and low E. The idea was to create more dissonant-sounding intervals.

View of control panel.
Demented Bells THR30II amp setting.

8. Vampire Waking

For this example, the note choice — mainly from the diminished scale — was even more important than the sound for creating an ominous vibe. Sonically, I used the Helix Native plug-in with the Brit Plexi Jump amp and cabinet with Fuzz Pi, adding to the distortion.

The most critical effect in achieving the sound is the Glitch Delay in Helix Native, which divides each delay repeat into slices (in this case, four) and changes their order. The result is a short delay with many repeating taps that are rhythmically random.

Screenshot.
The complete set of Glitch Delay parameters for Vampire Walking.

9. Ghostly Slide

The Theremin is an electronic instrument often used to create ghostly sounds in horror movies. Here, I’m using a guitar slide to help create a pseudo-Theremin effect.

The amp sound comes from the VST Amp Rack plug-in with the Plexi model selected. I used Overdrive in the Pre-Effects section, and Fuzz and Compressor in the Post-Effects section, with the idea being to get as much gain as possible. To add more stereo width, I inserted Steinberg’s Ping Pong Delay plug-in at the end of the effects chain, set to a very short delay time.

The part you’ll hear in the audio clip below was played on the G, B and high E strings up high, with very heavy finger vibrato.

View of amp controls.
Fuzz and compression was used to add lots of gain to Ghostly Slide.

10. Diminished Returns

Here’s another example that only uses THR30II effects. It features a high-gain setting with the Tremolo and Hall reverb effects maxed out. In the audio clip, I’m playing fast arpeggiated notes from a diminished chord, slid up four frets after each three-note phrase. Then at the end, it just sustains and lets the THR tremolo effect provide the motion.

Amp controls.
Diminished Returns THR30II amp settings.

Modern Music and Tech in Beginning Strings

While learning viola as a student, Tanner Otto enjoyed both improvisation and figuring out how to play tunes that he heard on the radio. Fast forward several years, and Otto has incorporated both aspects into the 5th- and 6th-grade beginning strings program at Edwin H. Greene Intermediate School, part of Sycamore Community Schools in Cincinnati, Ohio.

Otto also throws in a composing unit and a marching orchestra opportunity during the district Homecoming Parade.

Edwin H. Greene Intermediate School orchestra students holding up their bowsThe result of these off-the-beaten-path lesson plans has been more student engagement, higher retention and overall program growth. “By adding in pop and recognizable music and adding technology, students have a positive experience in class and feel confident on their instruments,” Otto says.

Since Otto started his career at Sycamore in the fall of 2019, the retention rate in orchestra — even accounting for the loss of students moving out of the district — between 5th and 6th grade has increased from about 70% to 90%. Similarly, retention between 6th grade and the start of junior high in 7th grade is currently about 85% to 90%. Due to more students continuing with orchestra up the grades, a second orchestra section for 7th grade was added in 2021-2022, and the high school will add a third orchestra during the 2022-2023 school year.

THE YAMAHA EDUCATOR NEWSLETTER: Energize your creativity as you build your music program!

Using Popular Songs to Reinforce Skills

Otto began compiling a pop tunes packet when he was a college senior studying music education at The Ohio State University. At the time, Otto’s teacher wanted the pieces to play with his own 5th-grade class. So, Otto began notating eight-measure snippets of the most identifiable melodies from popular songs.

By his first year at Sycamore, the packet had three pages of content, including a few pop songs, some television and movie themes like “Star Wars” and “Jurassic Park” as well as other recognizable bits like “William Tell Overture.”

Tanner introduces the songs to 5th graders in their second semester and gives out a packet of the songs at the start of 6th grade. Instead of using the pieces just for fun, Otto incorporates the songs into the curriculum by reinforcing skills or fingerings. Otto would even transpose melodies into a different key signature if needed.

Music educator Tanner Otto playing bass with students‘I Love You’ from Barney is in a really easy D major, and we do it early on in 5th grade,” Otto says. “‘Say So’ by Doja Cat has really helped 5th graders with string crossings. It’s better than anything in the method book because it happens faster, and they know how it goes, so they’re willing to play it and learn it and go faster and faster.”

In 6th grade, Otto’s class plays the “Star Wars” theme in C major to reinforce that finger pattern. “‘Happy Birthday’ is great to teach the dotted rhythm, so students can see it on the page even though they know it by ear,” he says. “And ‘Havana’ by Camila Cabello is really good for teaching 8th-note rhythms. ‘The Star-Spangled Banner’ has a thousand things that can be taught from changing finger patterns to varying rhythms.”

When students could no longer attend school in March 2020 due to the COVID-19 pandemic, Otto focused even more on popular tunes. “As long as students were playing their instruments, they were keeping their skills up at home,” Otto says. “I was teaching through video and using these little songs each week,” he says.

Otto asks his students for ideas for additional tunes, so now the full packet is eight or nine pages long and growing each year. “I take suggestions from students in August when we start school, and I will fill the whiteboard with any suggestions that they have,” he says. “Then I’ll go through and narrow the list down to ones that are able to be added or worthwhile. … I try to hand out the packet by the third week of school.”

Typically, pop music cycles through faster, while movie themes tend to stick around longer. “You need to search out what pop songs would work well in a classroom and then see from there if you can fit them into what you’re teaching,” Otto says. “This past year, there have been good pop songs but not a ton of good popular music that would work well in orchestra class.”

In general, for 6th graders, Otto spends about 15% of class time on the tunes packet, 35% using the method book, and 50% focused on concert music.

Occasionally, students might play “Happy Birthday” for other teachers around the building. And at a concert, they might play a snippet of a pop tune to show parents the variety of what they’re learning.

Edwin H. Greene Intermediate School orchestra performing with school mascot

Improving Through Improv

Improvising and composing also help students use their own imaginations to incorporate modern or rock music genres into the coursework. Otto builds up improvisation skills through a simple progression. At first, he asks students to play any rhythm they want on the D string on top of a pre-created backing track or groove. Then, Otto gives them a specific rhythm, and they can use any note. Then students can play any note and rhythm they want.

“In class, I like to do it as a warmup,” Otto says. “It’s a way of targeting the skills we’re working on and disguising it a little bit for the students. Now they’re working on that creative part of playing and figuring out what music they’re writing in their head as they’re playing their instrument.”

Students also work together with a partner and reflect on their playing. “In improv, there’s no wrong note, but certain notes can sound better than others,” Otto says.

Music educator Tanner Otto showing students how to hold a bowThey also incorporate improv into concerts. “Sometimes there’s a solo section in a piece, or we can make one,” Otto says.

For example, the song “Pepperoni Pizza Rock” by Brian Balmages “is a famous beginning strings song that has a solo section in the middle,” Otto says. “I had 10 students do a four-measure improv solo in the concert.”

Doing improv allows diverse students to shine. “Different students take to improv while others take to playing songs out of a packet or playing sheet music,” he says. “It’s really cool to see.”

Otto also adds technology into the mix. Using BandLab online or Soundtrap for Chromebook, he starts by creating a track and then asking students to improvise over it. Students then create their own grooves and play their string instrument on top of it. “It’s improv and technology all at once,” Otto says.

Creative Composition

Doing improv is a great lead-in to learning composition. Otto teaches composition using notation software. However, he doesn’t give students full reign. Instead, he guides them to write four-measure pieces that the class could play. Each finished piece gets projected onto a screen, and the class will sight-read through it. Otto might pick a key signature and tell them to use certain types of rhythms. He also asks them to start and end on a certain note.

“Giving them a lot of parameters helps,” he says. “Otherwise, things can get a little too crazy or they are too hard to play.”

Otto focuses on having students edit the work as well. “We pass our Chromebooks around, and students go through and check someone else’s work for errors. Then they have a conference with their friend. So, we do editing before the final submitted product.”

The composition unit is scheduled after a major concert or as part of Otto’s planned days out of the classroom. Before he left as a chaperone for the high school orchestra trip in the spring of 2022, he taught his students about composition and the software, so they could work on their projects when they had a substitute teacher.

Edwin H. Greene Intermediate School marching orchestra
Edwin H. Greene Intermediate School’s marching orchestra.

Otto says that he would like to see technology incorporated into all 5th through 12th grade instrumental programs but that teachers should be familiar with the programs themselves. “I would play around in the software and figure it out and see what it’s capable of before I would introduce it to students,” Otto says. “Having knowledge of how it works and what’s there will help you when you get in front of your students. If you don’t quite know how the software works, it’s going to be hard to explain to students how to use it or help fix a problem when they run into an issue.”

Though he hasn’t incorporated students’ compositions into concerts, he does send them through email to share with parents.

Overall, thinking beyond the method book and concert music has helped students increase their enjoyment of orchestra. Otto has even presented his insights at the Ohio Music Education Association Conference and The Ohio State University String Teacher Workshop.

“The students look back on having fun and really appreciating their final product,” Otto says. “The technology part, as we head further into the 21st century, should play a bigger role in music education. Students are learning new skills or the same skills in a different way.”

Case Study: A Festival that Celebrates Soloists and Small Ensembles

The idea of the Solo and Ensemble Festival started long before San Elijo Middle School was even built.

It was the brainchild of Mr. Charlie McGhee, who at the time was the band director at San Marcos Middle School. He wanted to highlight students and give them a chance to perform outside of the full band experience. In 2002, he worked with some solo and ensemble groups during the year and had them perform at the end-of-the year concert in between the large bands.

When San Elijo Middle School was built in 2004, McGhee became the director there and brought this idea with him. He started a small festival for the students at San Elijo, which included judges and ratings. This event has now become a strong tradition for our music program, incorporating both vocal and instrumental musicians.

solo bass player performing at the San Elijo Middle School Solo and Ensemble FestivalFinding Repertoire for Ensembles and “Oddsembles”

Starting as early as October, students ask for solo and ensemble music with excitement. Solos, duets, trios, quartets and larger ensembles are all welcome at the festival. We encourage most students to only participate in a maximum of two ensembles as we have found that “less is more” with younger musicians.

Regarding solo repertoire, we have many middle-school-level solos in our music library. If a student has a solo piece in mind, it needs to be approved by my co-director, Shannon McInnis, and me to ensure maximum educational value and success for the musician.

For a majority of the ensembles, students create the groups and then we adapt the music to their ensembles. Sometimes it is a clarinet trio or brass quintet, which is easy to find music for. Sometimes a group is what we fondly call an “oddsemble,” which can be anything from a bass trombone and flute duet to a vocal, French horn and piano trio. This year, we had a quartet made up of two mallet players, an oboe and an alto sax.

For these “oddsembles,” we take a trio or quartet written for like instruments and rearrange the orchestration, sometimes changing octaves or key signatures to make it more accessible for the students. It is time-consuming but when you see it all come together and how much fun the students have performing with their friends, it is worth it.

We often have students with high-level piano skills accompany our soloists so that they can showcase their musical skills in ways they usually cannot in band or choir class.  Some of our students also play different instruments that may not be offered through our music program, such as violin or ukulele. We encourage these students to play their instruments at the festival as a way to, again, showcase their skills but also broaden their musical education and awareness.

"Oddsemble" performing at the San Elijo Middle School Solo and Ensemble Festival

Festival Venues

Now, 20 years later, the Solo and Ensemble Festival at San Elijo Middle School is bigger than ever with three schools participating and sometimes over 100 different solos or ensembles performing. Creating the performance schedule is a giant puzzle, making sure students in multiple groups do not overlap and have enough time in between performances to regroup before their next performance.

Our school’s PAC, gym and library are transformed into three performance venues for the festival. The baby grand piano is tuned set up along with our orchestral sound shells on the PAC stage. The PAC is where most solos and percussion groups perform because soloists are often accompanied by a pianist, and because the stage is located near the band room for access to percussion instruments.

The library is smaller and more intimate, which is perfect for small ensembles. The gym is used mostly for vocal performers because the acoustics are great for vocal sound projection.

Finding the right venue for each group is important and can help young students perform better with more confidence.

Solo flute player performing at the San Elijo Middle School Solo and Ensemble FestivalDay of the Festival

Our music community is vital to the success of the festival, and we rely on the help of our music families to keep things running smoothly. The festival is a great way for parents to see a little bit of the music world and support the music program without having to give up an entire day to volunteer.

As students arrive at the festival, our parent and student volunteers welcome them at check-in and share any information they might need. Once performers are checked in, they make their way to the band room to warm-up or to gather with their groups and prepare for their performance.

We hire judges, usually other band and choir directors we know from middle school to college level, to adjudicate the performances and give ratings. Each student receives a 5- to 10-minute clinic after their performance from a judge to pinpoint elements they can continue working on.   Students also receive written feedback from a judge with a rubric and rating. Each performer is awarded a ribbon based on their rating as a token of their hard work. After their performance, students can collect their feedback and ribbons at the awards table.

There is also a small concession table with drinks and snacks for students staying for multiple performances, helping run the festival or staying in support of fellow performers.

Honoring Traditions, Building Community

Students from San Elijo Middle School who participate in the festival and receive a rating of superior then perform in our honor recital. At the recital, Mrs. McInnis and I select certain groups to perform at the Spring Concert as a tradition from the first years of the festival started by Mr. McGhee. Students are delighted to be chosen and take pride in their performance.

The Solo and Ensemble Festival gives so much to participating students not only educationally but also in the way of their self-confidence. When students are preparing for the festival, we encourage them to learn their parts individually, and if they are part of an ensemble, to meet once a week at lunch or after school to start piecing it together. Almost all rehearsals are student-driven, which develops strong musical skills and leadership qualities. Music coaches and directors will step in and provide guidance when needed or to help refine elements. For students working on solos, they are putting themselves out there, learning to push through performance nerves.

three bassoon players performing at the San Elijo Middle School Solo and Ensemble FestivalOur Solo and Ensemble Festival strengthens both our musicians’ skills and music community. Students involved often become leaders in their classes and are the most confident players in our ensembles. Rehearsing without a teacher helps them develop their critical thinking and analytical skills in music because they must break down why something isn’t working, lining up or doesn’t sound right.

As for our music community, our administrators, teachers and parents become involved in something together that celebrates individual musicians. With large concerts and events, the audience sees large groups of students working together to create a final product. However, in the case of the Solo and Ensemble Festival, our music community sees the individual work ethic and skill that goes into a performance. This can be eye opening because they witness the details and courage of a solo and/or small ensemble performance.

Big things can come from small moments and that is what our Solo and Ensemble Festival does for our music program every year.

Mentoring in Action — From the Mentee’s Perspective

Music education students face a unique challenge: We spend nearly a decade mastering our instruments, then choose to make the art of music-making a career. Then we spend four years in the safe halls of our colleges and universities, studying instrumental pedagogy and child psychology (occasionally wandering out for practicums), as we prepare for a profession that many agree is unable to be prepared for! Like bracing for the impact of a cannonball into a lake that we know is freezing, music education students are told that we will not know what teaching music is like until we are actually “in it.”

That adage was a cloud that grew darker as I neared graduation and joined the job hunt. As a chronic worrier and vigilant planner, I did what I could — such as reading books, teaching lessons and marching bands where I could and listening to hours of podcasts during my drives to and from school. One that I particularly enjoyed was “The Bandmasters Podcast,” hosted by Don Stinson, a recipient of two citations of excellence from the National Band Association, a two-time GRAMMY® Music Educator quarterfinalist and current Director of Bands at Joliet Central High School.

A few weeks after a chance encounter at the Music for All Summer Symposium with Dr. Dave Gerhart, the assistant marketing manager of educator for Yamaha, I received the unbelievable opportunity to meet Don and have a chat about my worries — a literal dream come true!

Our Meet Up

Dan Schmitt head shot
Dan Schmitt

The discussion between Don and me had a general topic: The typical worries, questions and fears of a soon-to-be first-year teacher, and the answers that a veteran teacher could provide.

Before the Summer Symposium, I was offered a position as Director of Bands at John F. Kennedy Middle School in Plainfield, Illinois. In this position, I would teach over 150 6th-, 7th- and 8th-grade band students, as well as an additional 80 6th-grade general music students. As my future career path became clearer, I was excited — and terrified! When I called my mother to deliver the good news, she was naturally happy and impressed, but she verbalized the thought that had been heading to the forefront of my mind: “Are you qualified for this?”

When Don and I sat down at a coffee house, I was (in typical fashion) nervous while he was (in even more typical fashion, I came to learn) as calm as could be. He congratulated me on “the new gig,” and we proceeded to discuss some of our shared connections and experiences. I pulled up the list of questions that I had drafted — remember, I’m a vigilant planner! — and I dove into my biggest worry. I had heard from dozens of teachers that the first year of teaching is, in a word, terrible.

Own Your Mistakes

Don smiled and told me how it wasn’t awful, how it did not need to be awful, but he added that I would make mistakes.

Don recalled that at one of his first concerts as a real band director he forgot to list a student’s name on the program. Not an uncommon band director error, and certainly not the worst one someone can make in their first few years of teaching (much better than the stories I’ve heard of accidentally leaving a student behind on the spring break trip), but it was an error that the student’s parent did not take kindly to. Don knew this because he received a scathing email, complete with bold text, capital letters, underlines and numerous exclamation marks. His knee-jerk reaction was understandably defensive: How dare this parent talk to me like this? Don’t they realize how busy I am? It isn’t even that big of a deal!

classroom setup from podium
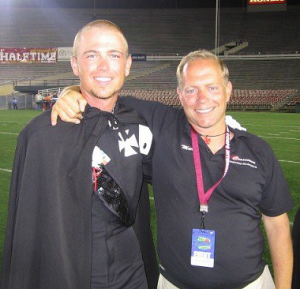
However, Don did the smart thing that many of us may have heard during our student-teaching: He waited. After taking some deep breaths and calming down, Don came to some realizations. Yes, he was busy, but the reality is that everyone’s busy! And this student was left off the program at a concert that he had worked hard for. The parent and child were upset, and nothing could change that. Don’s response was indicative of what I observed was at the core of his overall demeanor — honesty — and is one of the qualities that makes him a master educator.

A few hours later, a calmer Don wrote back to the parent. He didn’t bold or underline text, he didn’t use capital letters or a single exclamation mark. He was honest and communicative. He said that he felt terrible and that he would print another program that included the student’s name.

Don let the experience guide him — since that inadvertent omission, he always checks his programs with students — and became a better educator because of it.

Work-Life Balance

As our conversation continued to flow naturally (no question sheet needed!), Don recounted more stories from his years of teaching that benefited from being honest with those around him. When he started a new job, he asked the students which traditions were meaningful to them. No drastic changes, just meeting the students where they were at and knowing what was important to them.

Or when he started feeling overwhelmed, he reached out to booster parents and asked for help. (Another Stinson lesson — if it doesn’t require a music degree, delegate!) Sure enough, they arrived in numbers, and he could focus on teaching music.

“But it’s not just the beginning of my career that I’m worried about.” I admitted to Don. “What if I end up burning out down the line? I’m seeing it everywhere!”

Don knew exactly what I was talking about — he had been there. While the “it’s okay to not be the last car in the parking lot” advice has become more common, it had more weight coming from Don. At the point when Don started feeling burnout, he had a family. Like most people, Don acknowledged that he needed to do more things outside of work, but he would never follow up.

His next two words caught me off guard: “Rock climbing.”

I wasn’t sure how to respond, so I just repeated those two words: “…rock climbing?”

Don explained that he would schedule an event in advance — whether it was rock climbing, going to the zoo with his children or taking a road trip — and would force himself to do it. He said that once you force yourself to simply do an activity instead of binge-watching a show, you end up enjoying it. He wanted to make a change to his work-life balance, so he added more “life” and stuck to it. He (and his family) have been happier because of it.

Too Blessed to be Stressed

As we reached the end of our time together, I asked Don the question that had been creeping into my mind based on what I had seen both in real life and on band director forums (he chuckled at that one): “Does your job stress you out?”

Without hesitation, Don said, “No.”

Admittedly, I was a bit surprised at his instant response, but he broke it down. Don had worked out what needed to be done at his job, how to prioritize it (he wrote this great article about) and when to go home. He recognized that he was teaching students he loved at the alma mater he cherished, and that he was glad to have the life he does. At that moment, I told him how much our talk had calmed me down. Throughout the numerous situations that Don recounted, he always remained honest, talked to people, asked for help and taken things one day at a time. We are all (or will be) music teachers, building meaningful connections through a medium we love.

Lasting Lessons

shaking handsIt’s easy to get caught up in the details, but Don Stinson’s practical advice and honesty made me feel better. Sure, right now I don’t know exactly how to do every aspect of my job, but there isn’t any podcast that can prepare me for that. I could only be sure that I would bring the openness and positive attitude that my students needed. At the Summer Symposium earlier that month, master teacher Alfred Watkins advised me that no matter what, students will come with joy in their hearts — it’s simply up to us to unleash it.

The last few weeks, I have attended countless induction and institute days. I’ve spent many hours in meetings preparing for things that don’t directly involve holding a baton and directing sound. As I learn about different assessment methods and new school rules, Don’s words — as well as words from the multitude of mentors that every young teacher needs — return to me when I begin to feel overwhelmed. I am able to remain calmer, even as the first day of school is days away.

From Don, I learned that there will eventually be a point where all of us young educators will feel confident and prepared. And while we may not be there yet, we can simply enjoy the moments we have, get to know our new students, and be ready to make mistakes and learn from them. In the meantime, while we’re still learning, we can focus on the things that matter — our students, the music, and, of course, double-checking our programs.

Read this article’s companion piece, Mentoring in Action — From the Mentor’s Perspective, by Don Stinson.

Mentoring in Action — From the Mentor’s Perspective

I was scheduled to write an article toward the end of the year about the importance of being a mentor, but I received an email in midsummer from my editor at Yamaha, asking if I would be interested in a real-world mentoring opportunity that I could then write about.

A recent music education graduate, Dan Schmitt, had attended the Music for All Summer Symposium and talked to some Yamaha staff members about starting a new job in the Chicagoland area. He admitted that he was a little nervous but very excited about the position.
Why not have Dan reach out to me — I am also based near Chicago — with some “burning” questions before stepping into the classroom? I immediately said, “Yes!”

Our Meet Up

We agreed to meet at a coffee shop and prior to our meeting, Dan emailed me several questions. I reviewed them but chose not to dig into them too much because I wanted Dan to have some authentic, filter-free responses.

Don Stinson during his early years of teaching
Don Stinson during his early years of teaching.

We hit it off immediately. I could tell Dan was worried. He first asked, “A common consensus I hear is that your first year of teaching is always going to be rough and you shouldn’t expect much. Is this actually the case? Does it have to be? How can we best ‘brace for impact’?”

I was disheartened to hear that this was what he was hearing from multiple angles. Someone might as well have said, “Welcome, Dan. This year will be terrible, and you won’t get it back.” Yet, here was someone in front of me who clearly wanted to resist this way of thinking, and I’m grateful for that.
I could go into a lot of detail about Dan’s questions and our conversation, and I’m sure Dan covers some of that in his side of the story. The short version is that I thought back to when I was a young teacher. What I wanted to hear didn’t matter. What was more important was to find out what I needed to hear. Most of these must-know items fell in the categories of confidence, vulnerability and balance.

Confidence and Vulnerability

In terms of confidence, I reminded Dan that he was hired for this job and that a school board signed off on him. The people who sign his paychecks have confidence that he can do the job, and therefore, there is no reason for him to have any doubt that he is the person for this position. Confidence doesn’t mean that you have the answers to everything; rather, it’s about someone being able to trust and rely on you. Reliable and trustworthy people make mistakes and continue learning. Perfection is not the goal.

  • It’s important that new educators understand the realities of teaching. There’s an unwritten expectation of music teachers.
  • You must always say yes.
  • You must get to school early and leave late.
  • You must check the boxes of bringing your kids to certain festivals and contests.

The list goes on and on. By all means, if you’d like to follow this path, go for it. I did and learned a lot about myself and what was best for my kids along the way.

Balance

rehearsal at Joliet Central High SchoolHowever, new educators should understand that they can and should have the option of enjoying a life outside of their career. I shared my ups and downs with Dan. Small things, like missing out on some after-school social events. Other small things, such as not being at some of my own children’s events because of work-related items or eating poorly during busy seasons. But these small things add up to larger issues and can sneak up on you. No one plans on their health taking a negative turn, or their friend circle shrinking, or a divorce. They just “seem to happen” and can often be a result of us putting our careers ahead of our own health and wellness.

Here are some suggestions I shared with Dan on how to balance a career and a personal life.

Not-To-Do List: I spoke to Dan about the concept of a “not-to-do” list. Try new things as much as you can, but as you progress in your career, write down the things that you really don’t like that you can actually opt out of. Those items go on a “not-to-do” list, which is basically a reminder that you have some choice in how you spend your and your program’s time.

Schedule “Me” Time: Make sure to schedule what you want to do for fun for the year (hiking, seeing a movie, time with friends) and put these dates in your calendar. These events become non-negotiable, regardless of what pops up or how tired you are!

Age Differences: Dan told me that some of his music parents might be old enough to be his parents. How can you talk to someone like a professional if they have 20 years on you? I went back to being vulnerable and open and suggested approaching parents by saying something like: “I know I have a lot to learn and manage in this program, and I’m confident that I can give your child a positive musical experience. Yet, I’m not too proud to ask for help. Can you help me with some of the management and planning part of this program?”

Own Your Mistakes

Don’t fake it until you make it — just be honest. I told Dan that he’ll undoubtedly make mistakes — we all do — and to simply own them. I shared a couple of examples of early errors I made.

  • “You didn’t turn your bus request in on time!”
    Internal monologue: Lots of excuses about being busy, systems being cumbersome, having no help, etc.
    External (honest) response: “You’re right. I didn’t manage this procedure well. I’ll write this down and make sure to turn all of my future bus requests in on time.”
  • Me: “OK, class — this rhythm is counted as ‘one-e-and-a.’”
    Student: “Actually, Mr. Stinson, that’s counted as ‘one-and-a.’”
    Me: “Whoops — I made a mistake. You’re correct. Thank you for correcting me and thank you for supporting me on my rhythmic journey.”

Lasting Lessons

Don Stinson conductingThis meeting was exciting for me. Selfishly, I got a lot out of meeting with Dan. Sometimes as a teacher in the mid-stage of your career, you reflect on the things that you do, but also on the things that you used to do. As I shared my thoughts and tips with Dan — such as being vulnerable with students to encourage musical expression, writing encouraging handwritten notes on every student’s program before a concert, and creating a not-to-do list — I started to realize that I had strayed away from some of these items in my own teaching.

A lot of teaching is coming to the realization that relationship building is key to helping today’s students and effective teaching in today’s group education settings. In the past, I had used some of those items that I suggested to Dan to get to the “next level,” while enjoying what I thought was a side-effect of relationship building. But early on, I inadvertently switched my priorities. I started thinking that I had to prove myself to others to get to that next level. In hindsight, maybe that next level wasn’t important (or maybe, there wasn’t even a next level…).

I enjoy my time teaching, but I’ll admit, I get a little nostalgic for those early years of curiosity, trial and error, and new experiences. So, I took my own advice, and walked into the first day of school as fresh as I could be, with an open mind to deliver what I can this year. It was one of the best opening days with students that I’ve ever had. We focused on ourselves and our little corner of the world in our band room.

To the mid-stage and veteran teachers, I ask: Are we welcoming our new colleagues, or are we serving as gatekeepers to the profession we love and live? Yes, they’re new, but do our new colleagues really have to feel like they are going through yet another audition/job interview until they prove themselves? I’ve witnessed some mid-stage to veteran teachers wanting to make new teachers “pay their dues” or even suffer to make sure that they are truly in it. Yet, I’ve also witnessed experienced teachers provide guidance, support and encouragement.

We can — and must — help guide and mentor our own. There will always be kids to teach, and we have to help in any way we can to ensure that there are teachers for our kids. I’m glad to have people like Dan as a new colleague in the music education world. A new teacher who is going into teaching knowing that he won’t be perfect, but that he has the skills to do the job; a teacher who is able to check his ego at the door and ask for help when needed, and a teacher, like many of us, who just simply want the best for our world.

I followed up with Dan after this meeting over text. I was happy to hear that his first rehearsal went better than expected. I’m looking forward to meeting with him again soon. I have a recurring task in my to-do list to check in with some student teachers or teachers who I have mentored in the past. Time always seems to get away from us but it’s important to make the time and prioritize connecting with those who are working to find their way.

To all teachers out there — good luck this year, and take it all in. This year shouldn’t just exist to pass and make you “check off” a year of experience.

Read this article’s companion piece, Mentoring in Action — From the Mentee’s Perspective, by Dan Schmitt.

Case Study: The Value of Voice-Based Choirs

When Benjamin Rogers arrived at Liberty Middle School in Spanaway, Washington, to start their new role as choir director during the fall of 2019, the program had only 80 students, who were divided into ensembles based on grade level.

Rogers set his sights on expanding the program, but a few months into the school year, a new hurdle came their way: the COVID-19 pandemic, which moved all instruction online.

Regardless of these obstacles, Rogers has managed to double the size of the choir program during the past three years. The 2021-2022 school year boasted a choir of 165 students, with numbers projected to reach 180 during the 2022-2023 school year.

Rogers grew the program with a clever restructuring of the ensembles. Instead of breaking choir groups into 6th, 7th and 8th grade ensembles, Liberty Middle School divides students into groups based on their voices. Liberty Middle School now includes four choir ensembles: beginning treble choir, intermediate treble choir, advanced treble choir and bass choir.

choir class at Liberty Middle SchoolSince restructuring the choir program, Rogers has noted many benefits not only in increased membership numbers, but also in the educational and emotional benefits to the students. “Choir can be female-dominated in some areas, and it’s really tough for middle school boys in choir,” Rogers says. “I wanted them to be able to have comfort and a sense of camaraderie and ownership in what they’re singing. I’ve always thought that if I have a group of students with similar voices, I can devote more time to training their technique.”

Be a Squeaky Wheel

To undertake this restructuring process, Rogers describes himself as a “squeaky wheel,” constantly bringing their ideas to the school administration’s attention. “I talked to the principal every single day. I put the bug in the counselors’ ears. I talked about how good it would be for recruitment and retention and how good it would be for [students’] education,” he says.

Rogers also says that being a “squeaky wheel” is their best piece of advice to other educators looking to restructure their choirs in a similar way. “Keep hounding about it as often as you can without getting reprimanded,” he says. “Give them the facts. Voice-based choirs build up the members of the program. They are pedagogically sound because you’re able to focus on one technique versus another, and they create a greater sense of community when students have those types of affinity groups for their voices.”

Once Rogers got the go-ahead from school administrators and cooperation from the counselors to make his vision a reality, he faced another hurdle: finding appropriate music.

boys choir at Liberty Middle School

Repertoire is Key

When Liberty Middle School first opened about a decade ago, it served 7th through 9th grade students before later shifting to a 6th-8th grade school. As a result, much of the music repertoire in the school’s library was for vocal ranges inaccessible to younger students. “The majority was soprano, alto, tenor and bass (SATB) music, and that is … not suitable for middle school level in general,” Rogers says. “My first year, I spent my entire budget on music because the difficulty level was not accessible.”

Switching to voice-based choirs instead of grade-based choirs also helped solve the repertoire problem by allowing Rogers to choose music that focused on each ensemble’s vocal capabilities.

When switching to voice-based choirs, Rogers originally planned to continue with the SATB music, letting the treble choir learn soprano and alto parts and the bass choir learn tenor and bass. However, scheduling conflicts made it difficult for the choirs to rehearse together, so Rogers realized that they would need to choose individual music for each ensemble.

By tailoring the music choices to each ensemble’s vocal capabilities, students were able to focus more on their individual parts. “The sopranos and altos were learning music that was balanced and intended for just sopranos and altos. Working on balance is a really big part of being in an ensemble,” he says. “I started purchasing a lot of bass choir and a lot of treble choir music. That helped their musicianship accelerate immensely.”

Liberty holds three choir concerts every year – winter, spring and a final concert toward the end of the school year. During each concert, all choir groups perform one song together as a group but perform the rest of their music separately. “Advanced and intermediate treble choirs are usually doing soprano and alto music,” Rogers says. “The bass choir learns tenor and bass music.”

Just as Rogers intended, the numbers of male students in choir have greatly increased with the advent of the bass choir group. After having 30 students in bass choir this past year, Rogers says that next year, it’ll be above 40, “which sounds terrifying — there will be a lot of testosterone in a smelly classroom!”

Liberty Middle School choir performance

COVID Considerations

During Rogers’ first year at Liberty, COVID-19 caused school to go virtual for a few months, which made choir difficult. However, this experience also helped Rogers hone in on their ensembles’ strengths.

When school was remote in 2020, Rogers tried to hold choir over Zoom, which he says, “doesn’t work, but we made do like everyone else did.” One of the ways they “made do” was by recording students’ parts for their yearly Veteran’s Day performance and editing them together.

Despite the difficulties, Rogers stepped up to the challenge of building a choral community even when students were separated. “What I really gained from the experience was how much of a community we need to be,” he says.

Choir and Community

Liberty Middle School choir with piano playerEven over Zoom, Rogers had students participate in a community circle, where ensemble members all greeted each other and shared their thoughts aloud with the group.

This community circle practice has continued as school resumed in-person and has become a staple at Monday rehearsals. “We all get to learn about each other,” Rogers says. “Everyone’s validated in [community circles]. Lots of students go with different names than what they were given at birth, and so anytime someone introduces themselves, I say, ‘Hi, I’m Rogers,’ and they say, ‘Hi, Rogers.’ In some classes, it’s cheesier than others.”

Still, this simple practice helps build cohesion. “I look for those opportunities to have students feel welcome, safe and part of something great.”

Rogers says that the bonds and friendships students form in his choir groups are often their favorite part. “A lot of students have a friend because of choir,” he says. “We do a lot to try to lift each other’s voices and energies.”

One highlight is the choir shout-out wall. Students can use Google Forms to leave compliments to their fellow choirmates. A teaching assistant will then write the nice comments on note cards and post them to the shout-out wall.

From the bonds formed among students to the growth in choir membership, the voice-based choir program has been a success in the school district’s eyes. Similar programs have been implemented in other schools. “It’s becoming more of a standard practice with the choirs throughout our district now,” Rogers says. “Voice-based choir is what they have at the high school already. It’s catering to that, and it’s gone well so far.”

Elementary Music Crafts: Handmade Instruments

Handmade instruments are one of my favorite activities to do with elementary students. You can find an instrument craft for every age group. Try planning one of these projects in your lessons for this upcoming fall!

The Benefits of Manipulatives

Manipulatives are any hands-on educational tool that supports learning. Manipulatives and crafts are a great way to incorporate deeper learning through dual coding — an educational theory that students process information best when they learn sensory visual and verbal content together.

The crafts in this article are instruments that students can use to self-direct their exploration of music, which has a positive impact on young musicians, and is often incorporated in state music standards. Lastly, hands-on experiences get students’ attention in a way that paper and pencil work doesn’t.

Types of Instrument Crafts

These are the most common instrument craft categories:

  • Straw instruments
  • Popsicle stick instruments
  • Cardboard instruments
  • Homemade hand percussion

Most of these crafts are economical because they use resources that most teachers already have.

Straw Instruments

Straw instruments are more difficult to play, so I would recommend the following activities for upper elementary classes.

cup of strawsStraw panpipe: Straw panpipes are a great way to teach about how length affects pitch and how scales work. To make a straw panpipe, you will need wide straws and materials to connect them, such as string, popsicle sticks and rubber bands, or simply tape. While you can use thin, they are much harder to get a sound on than bubble tea/boba straws.

MakerState, a nonprofit that focuses on hands-on STEAM education for schools and students in need, does a great job showing how to make a sturdy panpipe tuned to a pentatonic scale using straws, rubber bands and large popsicle sticks. Straw pan pipes are great prep for future flutists.

You can also make smaller pan pipes (from Tea Time Monkeys) with smaller straws, tape and paper.

Straw Reed: If you want to make sure that there are enough oboists or bassoonists in the high school band, get them started early with straw reeds. This craft also teaches how back pressure on instruments like the trumpet feels and helps young woodwind players produce a steady stream of air. Straw reeds work when you press your lips together, and the two pieces of the straw meet and vibrate.

A straw reed can be used at any age. It was one of my college flute professor’s go-to methods to revitalize a flutist’s air pressure.

To make a straw reed, cut a straw to a point and then snip off the peak. Be careful because the tops can be sharp, depending on the angle at which you cut them.

To get started, check out this instructional straw reed guide from SPS National.

Popsicle-Stick Instruments

You’ve probably heard of photo frames made from popsicle sticks, but how about harmonicas or even kalimbas?

popsicle sticksPopsicle-Stick Harmonica: This is one of the faster projects on our list. Popsicle-stick harmonicas require rubber bands, larger popsicle sticks, and straws or toothpicks. These “harmonicas” sound a lot like kazoos. They are super fun and buzzy, so be sure to do a lot of prep on when and where your students are allowed to play their instruments!

See instructions and photos of popsicle-stick harmonicas from Camp Little Victors, part of C.S. Mott Children’s Hospital.

Popsicle-Stick Kalimba: Kalimbas are a modern version of the ancient instrument of the Shona people of Zimbabwe called the mbira. Both mbiras and kalimbas are lamellophones, a tuned percussion instrument with metal tines.

This percussion project is more involved — you make the pitched tines out of popsicle sticks — so I recommend it for smaller classes or in stations.

For an easy version of a popsicle-stick kalimba (from BingoBongo Learning), you will need popsicle sticks, paper bowls, glue and small wood blocks.

For a harder version (from Carved Culture), you will need a hot glue gun, and both thick and thin popsicle sticks. I suggest the hard version for 6th grade to junior high music classes.

Cardboard Instruments

Do you have a source of free cardboard? Then try out these two crafts.

two small cardboard boxesCardboard Trumpets: This craft is suitable for lower elementary students and teaches about sound waves and buzzing.

Students will make a “bell” out of construction paper that fits tightly around a paper towel roll. Other materials you will need include tape, scissors and glue. Check out instructions and photos of cardboard trumpets from Tea Time Monkeys.

Cardboard Box Guitars: I couldn’t leave out this classic craft! I made cardboard box guitars with my grandma in the early 2000s — it’s something a kid must try at least once!

Cardboard box guitars can be made from any kind of box, including tissue boxes and cereal boxes. If you tell students to bring in a box without giving them any dimensions, they will learn that different sized instruments have different pitches (i.e., the larger the box, the lower the sound). You will also need long rubber bands, tape and a cardboard tube for the neck.

To make a cardboard box guitar, tape the box closed and cut a square sound hole in the middle of the front of the box. Then, cut a hole in the top that is the same size as your cardboard tube. Attach the cardboard tube with duct tape. Cut some notches in the top of the tube and stretch the strings across the neck and guitar.

Watch this great cardboard box guitar tutorial from PBS Kids.

Percussion

Rhythm is the heart of all music, so percussion crafts are great to help little ones understand music.

Egg Shakers: All you need to make these hand percussion instruments are plastic Easter eggs and rice. While this craft is a bit messy, it gets students hands-on experience with shakers. Try pairing it with a lesson about Native American gourd shakers and how they are made.

If you want to get fancy, you can even attach the eggs to spoons and make maracas like in this how-to from Harmony Garden Music Therapy.

stack of paper platesPaper Plate Tambourine: Here’s another simpler project for lower elementary students. You will need paper plates, jingle bells, a hole punch and some string. Because the tambourine is made of paper, students can color or paint their instruments before they put them together, allowing for more creative freedom than some of the other projects! Check out instructions and photos of paper plate tambourines from First Palette.

Tips for Using Music Crafts in the Classroom

Using manipulatives in the classroom can be a difficult task. Here are some tips to make sure your music projects run smoothly:

  • Give instructions before you pass out materials.
  • Hand out supplies one at a time.
  • Make them all the same!

Students will jump the gun on your lesson plan if you pass out materials too soon. It’s better to hand out materials one at a time for each step. You can also set up stations around your classroom to aid during transitions.

For younger elementary students, use the same color constructor paper for all the paper trumpets — trust me, this will save you a lot of headaches. If you struggle with classroom management, limit the choices, but offer ways to decorate the instruments (different colored crayons, items that can be glued on, etc.). For more mature classes, you can give students more creative reign. However, if this is your first time doing musical crafts, go slow and keep it simple!

I remember the days when I dreaded teaching my own craft lessons that I had so painstakingly concocted. But with a little bit more planning (and a lot more experience), I eventually got the hang of it!

Which instrument craft are you most excited to try?

Louder Isn’t Always Better

Did you ever notice how music sounds better when you turn up the volume? The louder it is, the more bass and treble you hear. But when you turn it down, the midrange becomes more prominent as those low and high frequencies recede.

That phenomenon is a function of how the human ear works. It’s a bit problematic when you want to listen to music quietly, because what you hear tends to sound thinner and less exciting. Fortunately, audio gear manufacturers have come up with various ways to compensate. Yamaha Adaptive Low Volume, incorporated in the company’s new SR-C30A compact sound bar, is the most recent — and most advanced — of such loudness-compensation technologies.

Long thin speaker on counter directly in front of flat screen's legs.
The Yamaha SR-C30A sound bar.

Before getting into how Adaptive Low Volume works, though, a little background is helpful.

The Fletcher-Munson Discovery

Back in the 1930s, a pair of scientists named Harvey Fletcher and Wilden A. Munson were the first to discover that humans perceive frequencies differently at various levels. Their experiments on a group of headphone-wearing test subjects led to the creation of what are known as Fletcher-Munson curves.

Expressed in graph form, these curves map out how we hear frequencies at different volume levels. Fletcher and Munson’s findings, incorporated with subsequent research, are now considered a subset of the Equal Loudness Contours, published by the International Standards Organization (ISO). Although the curves have been updated, Fletcher and Munson’s original concept has held up over time.

The Equal Loudness Contours are shown below. The vertical axis represents volume (specifically, the Sound Pressure Level, in decibels) and the horizontal axis represents frequency (in Hertz). The red and blue lines show how loud each frequency needs to be in order to be heard equally, as compared to other frequencies. (The red lines incorporate modern research, while the blue lines show Fletcher and Munson’s original findings.) The lines are curved because we hear more high and low frequencies at different volumes; they’d be flat if we heard them at equal volumes.

Graph.

Compare the lowest and highest of the red curves. This shows you that the louder the volume, the less variation there is. In other words, we hear frequencies more evenly at louder levels than at quieter ones.

Manipulating the Mids

Over the years, a control called “Loudness” has been audio gear manufacturers’ primary weapon against those “lost” low and high frequencies. Typically found on stereo receivers, this control boosts low and high frequencies so music sounds full and rich even when the volume is turned down. In some products, it’s a simple on-off switch; in others (like the Yamaha R-N803), various degrees of Loudness can be engaged. Sometimes the degree of boost is automatically adjusted, depending on the position of the main volume control: the higher the volume, the less the boost, until the loudness circuit is removed from the signal path altogether.

Front panel of a stereo receiver with certain controls circled.
The Yamaha R-N803 is equipped with a variable Loudness control.

The concept has been around since before the digital era. However, it’s now usually implemented with DSP (digital signal processing), which can do a more precise job than older analog circuitry.

In the Quiet Night

In recent years, some manufacturers have equipped their wireless speaker systems with a variation on loudness compensation that uses compression (the reduction of levels that exceed a certain threshold) to decrease midrange frequencies at low volumes. Typically referred to as a “night setting,” it’s designed to allow you to listen to music or watch movies with the volume turned down low so as not to bother others in your home.

The problem with such a system is that the compression reduces the dynamic range (the difference between the quietest and loudest signals) of the audio as a whole. This tends to homogenize the sound, making it less pleasing to the listener.

Changing with the Volume

And that brings us to Yamaha Adaptive Low Volume. While Yamaha has integrated loudness compensation systems of various types into its consumer audio products for years, Adaptive Low Volume technology, available in products like the aforementioned SR-C30A sound bar (which includes a wireless subwoofer), represents a new level of quality and accuracy.

Product information.

The Adaptive Low Volume system is built into the unit’s volume control circuitry. You don’t need to turn it on; it’s always active. It keeps your music sounding full by employing sophisticated equalization, not just of the low and high end, but the midrange frequencies too. It’s called “Adaptive” because it’s constantly monitoring the audio, applying just the right amount of boost and cut to keep a consistent sound regardless of volume. What’s more, because it uses EQ instead of compression, it doesn’t affect dynamic range, so what you hear remains true, even when you’re enjoying music late at night and don’t want to disturb others.

Über-cool … and a great example of how technology can be used to maintain quality sound at all listening levels!

Bethany Robinson: Education As Foundation

Woman in black dress with an upright electronic bass instrument posed for formal photo.
Bethany Robinson with her Yamaha SLB300PRO SILENT Bass.

“I think confidence is a skill that you can teach along with notes and rhythms,” says Yamaha Artist and educator Bethany Robinson. “When we ask students to stand up and improvise, that can be a very, very scary moment for them. Helping to equip them with something that they’re going to be instantly successful with — or breaking it down into such a small thing [so] that every student, no matter their experience level, will sound good when they get up and do this — [that’s when] their confidence and their competence grows.”

Robinson herself approaches her two callings — as an educator and as a professional jazz bassist — with a confidence and an enthusiasm that is palpable. A 2022 Grammy Music Educator Award Finalist, she was named one of the 2022 Jazz Heroes by the Jazz Journalists Association, which honors advocates who have had a significant impact in their local communities. It’s easy to see how she has become an inspiration for both her students and her fellow musicians.

COMPETITIVE EVEN AS A SIXTH GRADER

Growing up in a musical family with a mother who was a piano teacher and a father who was a bass player gave Bethany an early start as a musician. Having enjoyed the public school band experience, she intended to join her middle school jazz band as a pianist but when it was time to audition, found numerous piano players already lined up. Spotting a kid in the corner with a bass, she went up to him and asked how long he had been playing the instrument. His answer? “One day.”

Robinson — who admits that she was competitive even as a sixth-grader — recalls running home and excitedly telling her father, “Dad, this kid has a one-day head start on me!” No doubt delighted that his daughter wanted to follow in his footsteps, her father handed over his bass and a career was born.

“I sat at the piano and I made my own fingering chart and figured out what note was what,” she recalls, “and really fell in love with the bass. Out of all the instruments I learned over the years, that was the one that spoke to me the most. I love the foundational aspect of being the low end for the band and keeping things moving.”

Woman playing an electric guitar while seated adjacent to a grand piano.
Bethany with a Yamaha BBNE2 bass guitar.

ON TEACHING

Robinson received her first Lilly Teacher Creativity Grant in 2011, which allowed her to travel to New Orleans and New York City in order to explore current trends in jazz. In the course of that journey, she attended the Band Director Academy at Jazz at Lincoln Center and developed a whole new concept of jazz pedagogy at the secondary level.

She was teaching sixth grade music when she was given the opportunity to come to Noblesville High School in Indiana (where she still serves as Jazz Band Program Director and Assistant Band Director) soon after the head band director had retired. “It was perfect timing in my career,” she says, “[though] there was just one jazz band here and it was made up of students who were just perhaps not interested in doing marching band. So they were resistant at first [to things like auditions, traditional jazz literature, dancing in class, etc.] but then it became the culture and all the older students [told] the freshmen, this is what we do, we dance and we sing. Then we added a second band and then a third one and now we have six of them.”

Under Robinson’s direction, Noblesville bands have made four appearances at the Indiana State School Music Association (ISSMA) Jazz State Finals, took second-place at the 2021 & 2022 National Jazz Fest Large School Jazz Ensemble Category and were two-time finalists in the prestigious Jazz at Lincoln Center Essentially Ellington Festival and Competition.

“Just this past year, we had the chance to win the State Finals for the very first time in my career,” she reports. “We didn’t. [But it was] one of my favorite moments of my teaching career because we were able to watch most of the bands and our kids were genuinely cheering on every [competitor]. On the way home, more than one student came up to me and said, ‘I wouldn’t have traded first place for any experience we had today because it was so great.’ That’s a moment as a teacher. You think, ‘They get it!’ It’s not about winning, it’s not about first place. It’s about the experiences that we have when we come together and everyone fulfills their role and brings their spirit into the music.”

THE IMPORTANCE OF SCHOOL MUSIC PROGRAMS

Given her own personal experience, it comes as no surprise that Robinson is a fierce advocate of school music programs. “[They] were so important for me,” she states. “First of all, [they] gave me a place to belong and take whatever excitement or skills or intelligence I have and channel them into something that was social. With private lessons, you’re by yourself and you’re making music, but the motivation to practice when it’s just you and an instrument [is not always there]. Some kids have that, but as soon as you start making music with other people, there’s the idea that we all can bring something unique, we all bring this sound together and we’re all kind of counting on each other. There’s something really special about playing your instrument with other people and having that interaction. It’s like a conversation: You don’t know where it’s going to go, but the more you have them, the more comfortable you are with them. For me, the idea of playing with other people was so transformative and so motivating that I wanted to devote my life to giving those opportunities and those same experiences to the students too.”

“I find that, for students, having a place to belong in middle school or high school changes their experience and their personal growth, and maybe [even] the path that they find themselves on. For a freshman coming from a middle school to a huge high school, they have so many options [as to] who to eat lunch with or who they’re going to see in the hall. What school music programs give students is connection. And if students have connection, then they’re going to be showing up to their math class and to their reading class and to their social studies class.”

Robinson has the following message for parents who are allowing their kids to be a part of school music programs: “The first thing I would say is thank you. And I also would say that this music program will change [your child’s] life. They will be connected in a way that they wouldn’t be otherwise. So keep them in music because it will help them for the rest of their lives, no matter what they decide to do.”

“Students have unlimited potential in music,” she adds. “The main thing [for them] is to find artists that they love to listen to, friends that they love hanging out with and can jam with, to come up with arrangements of songs, to get together with others and try to transcribe a jazz solo. The more fellow students they can get together with [to] hang and play music and sing, that’s going to be how they continue to fall in love with music and get better and better at their instrument.”

PURSUING GOALS

“10 years ago, I didn’t even know what the Essentially Ellington program was,” Robinson says. “But I went there and I was like, wow, hopefully I could do this. It was just a dream; you say these things out loud and then you kind of laugh because there’s no way that would really ever happen, but it never stopped me from pursuing [that goal]. Goals may seem completely impossible and completely unattainable, but the process of pursuing them is actually so formative. [In this case], you’re learning about this really deep music and how difficult it is. But no matter how bad it is when you start, it just gets better and better, so it changes you in the process. Even if you don’t reach that ultimate goal you’re after, the steps you take to try to get there are just as important.”

MUSIC COMES ALIVE

“Music really comes alive when students are moving beyond just the notes and rhythms that are on the page,” Bethany explains, “and when it does, it becomes expressive. When you listen to original recordings, [you realize that] there’s so much inflection that could never be written out on a piece of paper. It’s when students start connecting to those moments of expression that they realize how nuanced music is … and how nuanced life can be. They have to pay attention on such a deep level to understand the music and then emulate it in order to come up with their own expression, and that then helps them to be more expressive in other areas of their life as well, [even in] their relationships with other people.”

“I get really emotional when I think about how the students benefit from what we do,” she continues. “Building this kind of culture creates an ecosystem for students to succeed, no matter what the subject is. That is the most important thing to me. We just happen to be making great music along the way.”


View this post on Instagram


A post shared by Bethany Robinson (@bassbethany)

Bethany with her students at the Essentially Ellington Jazz Band Competition at Lincoln Center.


For more information, visit www.bethanyrobinsonjazz.com