
The Recorder: It’s an Instrument, Not a Toy

For most of us, a plastic recorder was the first musical instrument we encountered back in elementary school, and for that reason it’s something we tend to think of as a childhood toy. However, the recorder is actually a serious instrument, with a rich history that goes back to ancient times. Intrigued? Read on …

History

One of the very first recorders was the Quena — a Latin-American instrument that dates back to the ancient Incan Empire. The modern recorder was developed in Europe during the Middle Ages. From the second half of the 15th century to the 17th century it was frequently used in live performance, but in the late 18th century it began to be overshadowed by the flute, a related instrument, though one that differs significantly in terms of volume and timbre. In fact, the recorder was originally known by the name “flute.” Eventually, the modern flute began being referred to as a transverse flute in order to differentiate it from the recorder.

Recorders of the 17th century had a cylindrical bore, and a timbre that was broader and less piercing than that of today’s instruments. Initially, they played a substantial role in ensembles that included vocals, as well as in all-recorder ensembles (called “whole consorts”) as well as “broken consort” ensembles that included stringed instruments such as violin.

With the advent of the Baroque period (1600 – 1750), the recorder came to be used almost exclusively as a solo instrument. Because a more piercing sound was deemed desirable, the bore of the recorder was made conical. As a result, higher pitched harmonics became more prominent, yielding the distinctive timbre we hear today.

During this period, a great many “sonata” and “concerto” works were produced for the instrument — in fact, it could be said that this was the golden age of the recorder. In addition to G. F. Handel’s “Seven Sonatas” and “Two Trio Sonatas,” a number of operas and oratorios featured recorders. They were also used for solos in J.S. Bach’s “Brandenburg Concerto” No. 2 and No. 4, and as an instrument for performing obbligato in many cantatas. In addition, Italian composers such as Scarlatti and A. Vivaldi wrote numerous sonatas, triosonatas, and concertos for recorder — “Concerto in C-Major for Sopranino Recorder and String Orchestra” is one that is particularly well known.

From the time of the classical period, when works by Mozart and Beethoven became popular, orchestras began to develop, but due to its limited volume, the recorder was unable to hold its own. And since the flute was more expressive, the recorder gradually became less popular, although it still continues to be used widely in performances of Baroque music. Today, the recorder is the most popular instrument in early music education, with widespread usage in elementary schools the world over.

Varieties of Recorder

Long wood instrument with brass mouthpiece, keys and accents.
Yamaha YRGB-61 great bass recorder.

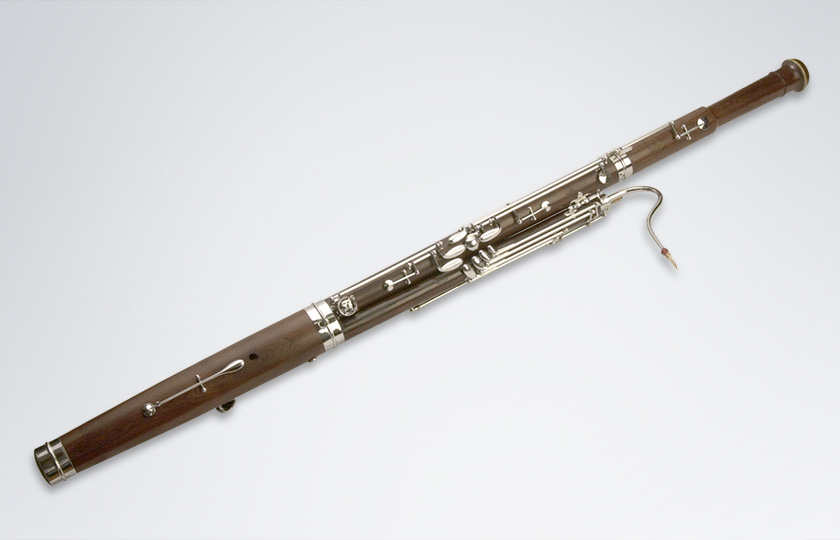
Recorders come in many varieties, from the sopranino recorder, which is about the size of a Sharpie™, to the great bass recorder, which is as big as a piece of furniture. The type most frequently used for solos is the alto recorder. There are also quartet ensembles that perform with four types of recorders; soprano, alto, tenor and bass.

Because they are so big, some bass recorders and great bass recorders cannot be blown directly with the mouth as with smaller-sized instruments. For that reason, a long pipe (called a blowpipe) extends from the sound-generating part of the instrument to the lips. Furthermore, as the gap between tone holes is wider, keys are added for the locations where they cannot be covered directly with the fingers. However, since the blowpipe is just a simple structure to channel the breath, anyone can quickly produce sound, and the fingering is almost entirely the same from recorder to recorder, although the timbre produced varies.

As the size of the recorder increases, its pitch range gets lower. Great bass recorders are twice the length of tenor recorders, and there are also contrabass (sub-bass) recorders, which are twice the size of bass recorders. In addition, there are many types within the soprano and alto recorder families, each about half an octave higher in pitch than the next larger-sized one, as shown in the chart below:

Graphic showing the dynamic ranges of different size/types of recorders.
The pitch range of different types of recorders.

Plastic vs. Wood

Recorders were originally made of wood, but today there are of course also plastic recorders, which are moderately priced and robust yet produce a solid sound. Plastic recorders also have the advantage of relatively straightforward maintenance, although water droplets can sometimes clog the windway (airway) since these instruments do not absorb moisture. (This can be easily remedied by lightly tapping just above the windway, or by blowing or sucking to force out the droplets of water.)

The ABS material used in Yamaha plastic recorders gives these instruments exceptional impact resistance, making them extremely durable. They offer a clear timbre and exceptional intonation, and their overall pitch can be adjusted by simply changing the extension of the head joint, allowing the recorder to be tuned to participate in an ensemble with other musical instruments.

Wooden recorders have a distinctive, rich tone that is not generally matched by plastic recorders. However, wooden recorders are more expensive than plastic models, and require more maintenance. They can be made of rosewood, ebony, maple, Kingswood or Castelo wood. In general, the softer woods produce a softer sound, while the harder woods produce a more pronounced sound, though there is a broad expressive and timbral range within each variety.

Two Different Fingerings

In the 1920s, instrument designers in Germany felt that the standard Baroque recorder was too difficult for beginners to learn, since some notes put the player’s fingers in positions that can feel uncomfortable or unnatural. Because of this, they made a small change to make those notes easier for a beginner to play. As a result, there are two varieties of recorder in common use today: “Baroque style” and “German style.”

In “Baroque style” recorders:

– Soprano F (Alto B♭) tone fingering is not in sequence with the rest of the scale.

– Fingering for sharp (♯) and flat (♭) notes is simple.

– The same fingering can be applied when playing recorders that differ in size.

In “German style” recorders:

– Soprano F (Alto B♭) tone fingering is in sequence with the rest of the scale.

– Fingering for sharp (♯) and flat (♭) notes is difficult.

– The same fingering cannot be applied when playing recorders that differ in size.

On a soprano recorder, playing a simple melody with a narrow range in a pitch range such as C major or F major presents no particular issue with a German style recorder, but performing a piece with a wider range or accidentals (sharps and flats) is more difficult.  Also, since models other than the soprano are mostly made in the Baroque style, if fingering is learned on a German-style soprano model, it cannot be applied on a Baroque-style instrument. For more information, see our blog article “Recorders: Baroque vs. German


As you can see, a recorder is much more than just a toy! And now that you’re long out of elementary school, it might just be time for you to reacquaint yourself with this wonderfully expressive yet easy-to-play instrument.

This posting is excerpted from the Yamaha Musical Instrument Guide. For more information about Yamaha recorders, click here.

Playing with Intention

I love the excitement, optimism and hope that comes with the start of a brand new year. Resolutions are shared, goals are set and plans are made to fulfill lifelong dreams.

The word “resolute” means that we are steadfast and courageous in achieving what we set out to accomplish. Spending more time at the gym, giving up smoking, working less in 2019 or booking the trip of a lifetime to French Polynesia could all be seen as worthwhile pursuits.

Whatever your personal desires may be, they can all be realized with a focused mind and tenacious energy for the task at hand.

Set Your Intention

Before I set my intention, I make sure that I am very clear on what my motives are. Then I plan, aim and shoot at the target. If my preparation is impeccable and the work I do is consistent I will have done everything within my power to land a bull’s-eye.

To this end, I use a series of tools to keep me on track and in forward motion. The first step (and, for me, the most important one) is to be very specific about the target I want to hit. Am I being realistic, sincere and honoring my authentic self in this pursuit? If anything about my goal is disingenuous, I won’t have achieved anything except to serve my ego. Intentions that are honest and true are also worth claiming when they come to fruition!

The next step is to visualize the “big picture” end result, see it clearly in my mind and take a mental snapshot of the finished canvas. Having a clear picture of your ideal horizon is going to help you forge a pathway towards it. Dreaming big is great, but envisioning those dreams is even better.

Do we always achieve what we set out to accomplish? No, and that’s because there are variables beyond our control. Objects hit the fan when least expected, other people convolute and shake our resolve … and sometimes life just happens. The key is to keep going, never give up — and, even in the face of adversity, adversaries and sheer misfortune, somehow find the strength within to keep going.

I have found that a great way to stay focused on a specific project is to create something called a mind map — a diagram that use shapes and colors to connect ideas or topics to a central theme. Using words, colors and shapes in this manner stimulates my visual nature and helps me to organize my creative thoughts. Some of my maps are ideas for guitar courses, while others are project lists with deadlines; in the case of the latter, as each deadline is met, I change the color to green and move the shape to a new location.

As an example, here’s a mind map for a guitar course I created a few years ago:

Screenshot of a graphic showing themes and words connected to each other with lines.

As you can see, sub-topics revolve around a central theme and related topics are joined as a thread. To me, these visual planners are less intimidating than a written list, plus they appeal to the eye and serve as constant reminders of work that needs to be done. So if you tend to procrastinate, try mapping out a project and self-impose a creative deadline. You’ll start to enjoy much greater productivity and personal sense of achievement.

Add Intention to Your Guitar Playing

When you pick up your guitar, do you have a specific goal in mind? Is it purely to have fun and unwind, or are you practicing scales, chord progressions and songs for a band rehearsal or upcoming performance? I’m a firm believer that five minutes of focused playing is far more productive than two hours of “noodling.” When you focus on a topic, you are dedicating time to improve. When you noodle you are mostly just reinforcing muscle memory. Sometimes that’s good, sometimes not. If you noodle and continue to make mistakes, you are programming those mistakes to be repeated perfectly every time. Thats right — you’re perfecting your mistakes!

Instead, the next time you sit down to practice, set your intention for that session before playing a single note. Decide what you are going to do before you even unlatch the case. Want to learn how to use an E9 arpeggio over a blues? Set your intention to learn one E dominant 9th arpeggio shape and a few licks within a single 20-minute practice session. Even if you have only five minutes a day to hone your chops, apply that time wisely and after a week of mindful practice you will have improved exponentially … trust me!

Create a mind map of the practice goals you want to implement and work through them methodically. Set realistic goals that are easy to accomplish. Small chunks are easier to digest than larger ones and eventually add up to a broader achievement.

The Video

In this video I wanted to demonstrate a finger-style blues and slide guitar solo. Notice how clean and precise the chordal and single note rhythm playing is and how the bass guitar follows the single note riffs. This was not pure chance; it was completely intentional.

Similarly, as you listen to and watch the slide playing, check out the right-hand technique and pay attention to the way the muting and picking deliberately coordinates with the left-hand slide. Again, every note was played intentionally. I wasn’t just hoping for the best; I chose the tones very carefully and decided what to play … and as you may know, playing slide guitar requires a lot more accuracy for correct intonation.

The cool guitar I use here is a Yamaha CSF3M parlor guitar with a passive pickup — the perfect choice for the style of music I’m playing in the video. The mahogany back and sides impart smooth warm tones and the Sitka spruce top provides the clarity for those single-note lines.

Acoustic guitar.
Yamaha CSF3M parlor guitar.

I plugged the guitar directly into a Line 6 HX Stomp pedal running a super low-gain patch I’d created (shown below) and recorded everything direct to my DAW:

Screenshot of digital audio workstation screen.

The Wrap-Up

We have the power to pre-select what we want to say in our compositions and improvisations. If we target specific chord tones, phrase those ideas to be conversational and leave space between the lines for the breaths of air, it aids musical digestion and gives our audience time to relax and savor the notes.

So don’t be frivolous with what you play. Set your intention, articulate your sentences and make every note count!

Photographs courtesy of the author.

Check out Robbie’s other postings.

Schedule Yourself

Ever wake up with very little on your calendar and find yourself savoring the idea that you’ll finally get to finish something you started the week before?

Then midnight comes around and you realize you didn’t get anything done.

How can all those hours have slipped by?

Maybe there’s a danger in having too much time on our hands. After all, the more time there is, the more opportunity we have to waste it.

As a creative creature, I revel in a structure-free day, tending to tasks at my whim. I’d rather make art when inspiration strikes than force my muse to dance. But I’ve come to realize that even if I’m working on something solo, I might have to block out the time to do it — make an appointment with myself, just as I would if I were scheduling a co-write or a session with a collaborator. Even though making music is my joy, it’s also something I often resist. There’s that voice in my head: What if I sit at the piano for an hour and nothing comes out? And so the procrastination begins. The dawdling.

There are other thoughts that curb my enthusiasm, too, though they are really ones of pure arrogance. For instance: I don’t need to practice, I’ll be fine. Ridiculous. How can I expect to be on my game at my next performance if I let two weeks go by without picking up my guitar? How will my voice reach the high notes if I don’t do daily vocal warm-ups?

So I’ve been trying this new thing. It’s called scheduling myself.

Duh.

First things first. Wake up. Have coffee. (That’s non-negotiable.) Next, I ask myself: What are my commitments today, and what else do I (realistically) want to accomplish in the next 16 hours? And then I write it all down. With a pen on paper. (Why? Because we are more invested in that which we have written by hand. But that’s another blog for another day.)

Then I make a timeline blocking out my day down to the hour. No, to the minute. And I stick to it! It’s my personal AA meeting — the sponsor I must account to.

There’s little margin for error. Even folding two loads of laundry can make me late, so I account for that too. I know exactly how long it takes to do the stuff I’ve been doing for years. Work out: one hour. Drive to yoga class: 15 minutes. Social media: one hour. (OK, two.) 🙂 Calls, emails, that long overdue task of getting those extraneous papers off my desk. Ugh. They always come back too soon.

If my GPS says it will take 26 minutes to get to my meeting across town, I leave the house 26 minutes prior to that meeting and pray for no traffic and good parking karma.

This system has been working out so well that I’ve made a New Year’s resolution to keep it up. As regimented as it sounds, the alternative is having the most unproductive day ever.

You see, regardless of my resistance, when I’m finally sitting at the piano (or writing this column, for that matter) I’m back in my zone. In familiar territory. My happy place. Even if I felt empty when I first sat down, it doesn’t take long before I’m smiling and tapping away (at the laptop or keyboard) because I’ve found something interesting to say. Or sing. Or play.

Female songwriter, Shelly Peiken, resting her elbow on the piano keyboard while smiling into camera.

I may not finish the lyric but I’ve most likely loosened the lid. After all, you never know when that magic song is going to fall from the sky, completely by accident. So we have to make time for the accidents and trust that they will happen. I want to be available for my muse to find me. Because if I’m not there, she may go somewhere else.

Have a happy and productive New Year, everyone. If you have a resolution of your own, you might want to put it in your calendar and make it happen instead of hoping it will.

Photo courtesy of the author.


Check out Shelly’s other postings.

Soundmondo and the MODX

Have you checked out Soundmondo yet? This way cool social website allows you to discover new synth sounds, as well as organize and share your own sounds. Originally designed for the Yamaha reface line of mobile mini keyboards, support has since been added for MONTAGEMODX and MODX+ synthesizers.

You can access Soundmondo via any desktop computer running a current version of Google Chrome, or, with our free downloadable app, from any iPhone®, iPad®or iPod touch® running iOS 9 or later.

The number of free Performances available for MODX grows every day. They’re searchable by tag …

Screenshot of application.

… or, if you know the name of a Performance (or its author), you can use an onscreen Search box. You can also “Browse by Instrument” to show only MONTAGE/MODX/MODX+ Performances. Once you find a Performance you’d like to try, simply click on the SYNC button to transfer it to your synth; from there, it can easily be saved to memory.

If you’d like to share a sound you created, Soundmondo allows you to include a short audio example or video (in the form of a SoundCloud, YouTube or Vine URL) to accompany your Performance:

Screenshot of application.

Organizing your MONTAGE, MODX or MODX+ Performances is a snap with Soundmondo. You can view a list of all the sounds you have uploaded, or the sounds (uploaded by other users) you have selected as a favorite. You can even rate Performances and organize your sounds into set lists.

Soundmondo also provides a User Leaderboard that shows the most prolific users and the top downloaded Performances:

Screenshot of application.

So what are you waiting for? Check out Soundmondo today and start climbing up the ranks of the Leaderboard!


Click here to visit yamahasynth.com.

Nine Things to Know Before Buying a Drumline

Congratulations! You landed your first job as a high school band director, a position that you’ve been preparing for ever since you were in your high school band. The principal wants you to revitalize the marching band program, and you look forward to a few big parades this fall, along with the half time show at the home football games. You have 100 kids in the program, a small booster group and a budget to get a new drumline.

The bad news is that you don’t know much about drumlines. You were the first chair clarinet in your college wind ensemble, and you only did one year of collegiate marching band because it was a requirement for your general music degree. You have watched a few drum corps shows over the years and have some friends who marched in The Bluecoats and the Madison Scouts so you know there are more than a few drumline brands out there … but you really can’t tell one brand from another.

How can you make a smart choice for your students, spend the school’s money wisely and purchase quality instruments that will be delivered in time for band camp? The purchasing process can be a bit complicated, but with a little research, you can make an informed decision. Here are nine tips to keep in mind:

1. Talk to Your Local School Music Dealer

Local dealers are great resources, especially if they’ve been in business for a long time. Ask them lots of questions, such as: Which musical instrument brands hold up over time? Which brands can get parts without delay? How long does it take to get delivery?

2. Don’t Be Fooled

There are some brands that sell different drums to drum corps or a college than they do to high schools. With other brands, the products used by a college or drum corps is exactly the same as those you’ll be buying for your high school. Make sure this is the case, so you are not sold something that is different than what is advertised.

3. Understand Your Programmatic Needs

This comes down to the amount of marching your program will be undertaking. Will there be two parades or ten each year? Is your program producing one halftime show or four shows each fall? Are you also developing an indoor percussion program? Is your program participating in larger regional events such as USBands or Bands of America marching festivals? The answers to these questions will narrow the choices relating to drum finish, installed drumheads, size options and purchase quantity.

4. Compare Options and Prices

All drum brands are not created equal. Established brands have a long history of doing it right. Their instruments have a well-documented construction process and have been tested with the top drum and bugle corps for years. If one drumline price quote is much less expensive than the others, there may be a reason why. More often than not, cheap drums sound cheap, don’t hold up well and will likely end up costing you more in the long run.

5. Colors Options are Abundant

Do you want a stain or a wrap? Do you want your drums to blend in or contrast with your uniform? Do you need a custom color? Will you change the color each year to blend in with your halftime show? Keep in mind that a custom drum finish will probably take extra time to deliver, and there will probably be an upcharge. Standard finishes are great options to supplement your traditional school colors. Be sure to ask if drum finishes for the brand of choice are UV treated to prevent color fading. Having your white drums turn yellow after the first year will be a real disappointment.

6. Ask Around for Advice

Ask collegiate marching band directors and percussion friends for recommendations to the brands they prefer. Was the company sales representative available when needed? Were the drums easy to carry? Where the carriers flexible enough to fit students of all sizes?

7. Drumheads are Important

Be sure you know the type and brand of head preinstalled on each drum, and get it in writing. This is important because low-cost, non-branded drumheads may not be very usable, and so can lead to an expensive and unbudgeted purchase to get the correct drumheads. For snare drums, choose a Kevlar-type top batter drumhead and a clear ambassador on the bottom or snare side. For multi-toms, select a pinstripe head; and for bass drums, get a white ambassador head.

8. Protect Your Investment

To keep your drumline in tip-top shape all year, purchase a few accessories like covers to protect the drums from the damage of heat and moisture, as well as hard cases to protect the drums during travel. Other accessories to consider include rim savers to keep bass drum hoops free from the damage of rim clicks, stick bags for snare drums and multi-toms, and tom guards to protect the bottom edges of multi-toms. An ounce of prevention goes a long way to keep a drumline in good working order.

9. Drum Sizes and Quantity

Drums differ in sizes. If you have a program with 75 brass players, you need drums that will project to the top of the stands over the brass section. If you are using a PA or sound reinforcement, it’s even more important to have drums that project. Several factors allow a drum to produce volume, but the most important ones to consider are the shell material and shell depth. When a wood shell is made properly, there are no gaps in the construction. (Some brands fill in the plies with wood putty.) The wood shell must vibrate freely to produce a full sound. A shorter shell depth, while lighter, produces less volume.

A standard wood shelled snare drum is 14″ in diameter and 12″ deep. Multi-toms come in various depths and sizes. A small band program should look at small quad or quint options, where the largest drum is 13″ in diameter. Large quint or sextet sixes are not needed for programs where the musical ability of the student is not advanced. Bass drums are important to keep the band’s beat but keep the sizes close together for optimal tonal response.

Alternative shell depths are good options for students of smaller stature or when the amount of marching is limited. If your program is not marching a lot, don’t get the biggest drum sizes available. Keep it simple.

As with any major purchase, the key is to research your options and ask a lot of questions. That’s the best way to ensure that your students are equipped with quality instruments that will last.


Click here for more information about Yamaha marching drums.

What’s a Receiver? Part 1: Hi-Fi

If the only music you ever listen to is digital content from your mobile device or computer, sure, you can build a home audio system based purely around Bluetooth®. But if you want to connect your turntable, play over-the-air radio, or even listen to physical digital media like CDs, you’ll want a component stereo (“Hi-Fi”) system, like the kind that was popular with your parent’s generation.

The heart of every audio system is its receiver, and in this two-part series, we’ll look at why it’s such a critical component in any audio setup. In this article we’ll talk about Hi-Fi receivers, and in Part 2 we’ll talk about AV receivers, which add video to the equation.

Why Hi-Fi?

The best receivers are simple to use yet complex and powerful under the hood. Contemporary models are equipped to handle virtually any type of music source, from analog to digital. They’re definitely not just for your Dad’s generation, as they can be used as the central hub for all the music and audio that you play throughout your house.

Hi-Fi systems give you the ability to mix and match components to put together a system that’s right for your space and your finances. What’s more, if you build around a quality receiver, you can always add or swap other components (such as speakers) as your needs and budget grow.

Connection Central

A receiver functions as the central “brain” of the operation, routing inputs (such as those coming from turntables, CD players, etc.) to outputs (such as speakers and headphones). All of the input sources — except, as we’ll see shortly, those coming from streamed audio such as Wi-Fi and Bluetooth — physically connect to the jacks on the rear panel:

As described.
Yamaha R-N303 receiver rear panel.

These include a number of line-input stereo pairs for connecting CD players and other types of audio sources that have analog line-level outputs. However, turntables (such as the Yamaha TT-S303), must be plugged into designated “Phono” inputs. These inputs connect to an internal preamplifier that boosts the level of the signal coming from the turntable’s cartridge and processes it with a special EQ curve called RIAA equalization. Many receivers also provide a post next to the phono inputs for connecting a ground wire from the turntable — something that can really help keep hum under control.

Turntable with phono outputs magnified to show detail.
The Yamaha TT-S303 turntable phono outputs.

Contemporary receivers such as the Yamaha R-N803, R-N303 and R-N602 supplement their analog inputs with circuitry for receiving digital Bluetooth and Wi-Fi signals. These “Network” receivers even have Ethernet ports for wired connection to a home network, as well as USB inputs for connecting mass storage devices such as hard drives and memory sticks, enabling the playback of MP3 music files and other digital formats via USB.

There are also rear panel output jacks for connection to speakers and other components. In a stereo system, there are two speakers, one for right and one for left. Many receivers, such as the Yamaha R-S202, offer a second set of speaker jacks and facilities for switching between two speaker pairs.

Closeup view connectors.
Yamaha R-S202 speaker connectors.

In addition, some receivers offer outputs for an optional subwoofer, which supplements the left and right speakers and adds significantly more bass response, and there will always be a headphone jack (typically be located on the front panel for convenience) so you can listen without speakers when desired.

In addition, the Yamaha R-N803, R-N303 and R-N602 support the MusicCast system, which allows you to send music to compatible sound bars and wireless speakers throughout your house.

Master Control

In addition to a control that allows you to easily switch between various input sources, receivers offer a master volume control as well as separate knobs for bass and treble — sometimes midrange or other frequency bands too — so you can shape your sound using a process called equalization.

There will also usually be a “loudness” on/off switch in recognition of one of the primary characteristics of human hearing: we perceive frequencies differently at different volumes.  At loud levels, we hear more bass and treble and less midrange, while at quieter levels, the bass and treble are much less prominent and the midrange louder. Activating the loudness control boosts the bass and treble, so that you can listen at a soft volume with a similar frequency response to when you listen at loud levels.

Photo of front of receiver.
The Yamaha R-N803 offers controls for volume, tone, loudness and input source selection.

Most receivers today (including all Yamaha models) come with remotes so that all these functions can be adjusted from the comfort of your sofa or recliner.

Power to the Music

The function of the amplifier stage of a receiver is to raise the level of incoming signal high enough to drive passive (that is, unpowered) speakers. The specific amount of power, which varies from model to model, is reflected in the receiver’s wattage. Needless to say, the more power, the louder the sound will be.

Less obvious, perhaps, is that more power also makes for a cleaner sound. That’s because the extra wattage gives your system extra headroom — that is, the gap between the highest level of an incoming sound source and the point where distortion begins. This allows you to listen at loud volumes without coming close to straining the amplifier’s capacity.

Tuning In

In a nod to your father’s generation, receivers today still almost always include a radio tuner for both the AM and FM bands. Although listenership to terrestrial radio has dropped in recent years as online music sources have become ubiquitous, the medium is still popular.

There are typically controls for switching between AM and FM and for tuning in radio stations. Many allow you to save stations as presets, so you can switch between them with a touch of a button. Most Yamaha Hi-Fi receivers allow you to save up to 40 different stations for later recall.

Receivers also generally provide special jacks on the rear panel for the connection of an antenna to help boost the incoming radio signal. A small indoor antenna is often provided, but if reception is exceptionally weak, you can always connect a more powerful outdoor one.

The bottom line is this: Hi-Fi isn’t just for your dad. Especially given the recent rise in popularity of vinyl, these kinds of receivers have become more relevant than ever. If you love music but a home theater isn’t in your budget (or immediate future), they’re well worth checking out.

Check out Part 2 of this article: AV Receivers


Click here for more information about Yamaha Hi-Fi components.

The Piano Guys Come to a Disklavier Near You

Having amassed billions of views and millions of followers, The Piano Guys (www.ThePianoGuys.com) have become one of the most successful instrumental music groups ever to grace the internet, while capturing the hearts of music fans as they tour worldwide.

The meteoric success of the “Guys” — pianist Jon Schmidt, cellist Steven Sharp Nelson, video producer Paul Anderson and music producer Al van der Beek — can be ascribed to their more than 60 breathtaking videos. In these videos, they perform their unique brand of classical, contemporary and rock and roll music in locales where a piano has never gone before, from atop the Great Wall of China to the edge of a 1,000-foot cliff in the Utah desert.

Recently, a dozen of The Piano Guys’ most popular viral videos moved into a new format: Now they can be experienced as simultaneous television and “live” piano performances in the homes of Disklavier owners around the globe.

These DisklavierTV performances put a bright spotlight on both the amazing talent of The Piano Guys and the Yamaha Disklavier — a high-tech reproducing piano that can transmit nuanced performance data (not only the actual keystrokes but also the subtle gradations of pedal movement) between similarly equipped instruments over the internet. In other words, as an artist performs, their precise note-for-note performance data is captured and then can be streamed to similarly equipped instruments anywhere in the world, where it is recreated exactly as the artist originally intended.

DisklavierTV adds yet another layer of technology, allowing a piano and ensemble performance to be streamed to and enjoyed on a television screen. So as fans of the Guys watch and hear Schmidt and Sharp Nelson trade piano and cello jabs on the big screen television, Schmidt’s actual performance is faithfully recreated, note-for-note and in perfect sync, on a connected Disklavier in the viewer’s home.

“This data is not a recording of the sound of the piano,” Anderson points out, “but rather it’s a precise digital map of Jon’s performance — what notes he played, how fast and hard the key was pressed, how he used the sustain pedal, etc. We recorded each and every one of Jon’s keystrokes and pedal movements to create this new DisklavierTV experience. It provides us an opportunity to let our fans experience our videos in a way they cannot on YouTube or Vimeo. Think of it as an “enhanced reality” experience: Jon’s fingers are essentially reaching out from the video and playing the piano sitting in front of you.”

To make the experience even more authentic, Van Der Beek meticulously removed Schmidt’s acoustic piano part from the original audio recordings, which was then replaced with Schmidt’s performance data to enable playback on other Disklavier pianos. Technical consultant Craig Knudsen also programmed several unique Disklavier “keyboard animations” — silent keyboard patterns that dance up and down the keyboard when Schmidt is not playing — to give the performances a visual impact never before experienced on a piano.


For more information about The Piano Guys, visit www.ThePianoGuys.com.

For more information about DisklavierTV, visit www.DisklavierTV.com.

Standing on the Shoulders of Giants

Sir Isaac Newton (who, as the commercial says, clearly knew a thing or two about seeing a thing or two), once modestly said of himself, “If I have seen further [than other men], it is by standing on the shoulders of giants.”

Geoff Emerick and Howard Massey talking and smiling.
Geoff and I sharing a laugh.

We lost one such giant a couple of months ago: legendary audio engineer Geoff Emerick, who I’ve written about here before — and for me it was personal, as Geoff and I were close friends for nearly two decades. Beyond the numerous innovations he brought to the art of recording (as exemplified in many of the great Beatles records he, along with producer George Martin, helped bring to the world), Geoff was a humble man who devoted much of his last years to reaching out to students. I have many happy memories of wandering around trade shows with him; it seemed we could never move more than 50 feet without being stopped by an aspiring musician or home recordist who wanted to chat or take a selfie, and Geoff was always generous with his time and ready to offer advice and an encouraging word.

He and I often did presentations to audiences that included young men and women who weren’t even born when Beatles records were dominating the airwaves, and I could see a little skepticism in some of their eyes as we were being introduced. Both Geoff and I understood how they might feel that the recording techniques we would be discussing — mostly developed in the 1960s — were not especially relevant to them, or the modern genres of music they were interested in. It was at those moments that I would toss out the Isaac Newton quote, and it was with some degree of satisfaction that I would see an “Oh, now I get it” look on many of those young faces.

The point is this: Nobody begins their career in a vacuum. Geoff’s knowledge base began with the underlying work done by Thomas Edison and Emil Berliner (inventors of, respectively, audio recording and the phonograph record), Jack Mullin (developer of the tape recorder), Alan Blumlein and Georg Neumann (pioneers in microphone design), Les Paul and Tom Dowd (who created and defined the art of multitrack recording), as well as his own personal mentor at Abbey Road Studios, Norman Smith, who engineered all the early Beatles records.

Every aspect of music creation and music-making has their giants. Composers build upon the epic works of Bach, Haydn, Mozart, Beethoven, Chopin and Tchaikovsky; songwriters on the tunes of Stephen Foster, Irving Berlin, Lieber/Stoller, Holland-Dozier-Holland and Lennon/McCartney. Classical pianists develop their performance skills by closely studying Rachmaninov, Gould, Horowitz and Rubinstein. Saxophonists learning to improvise take inspiration from Charlie Parker and Coltrane; trumpeters from Louis Armstrong, Dizzie Gillespie and Miles; bassists from Mingus, James Jamerson and Jaco. Jazz guitarists search for new fingerings and chord inversions based upon those of Charlie Christian, Wes Montgomery, Django Reinhart and Barney Kessel, just as classical players aim to further refine the technique of Segovia, Julian Bream and John Williams. Even modern rock guitarists refer back to past masters like Chet Atkins, Scotty Moore, Chuck Berry, Jimi Hendrix and Duane Allman.

So as we start a new year, this might be a good time to reflect on some of the musical giants upon whose shoulders you stand. Who are they, and what have you learned from them? You might be surprised at how much relevance the old can have to the new.

Photo by Mark Von Holden/WireImage.


Check out Howard’s other postings.

Paul McCartney Streamed Live … via Nuendo

Man with glasses smiling at camera with computer screens and electronics in background.

Producer/engineer/composer/arranger David Kahne has a career to envy. The impressive résumé of artists he has worked with is topped off by none other than Sir Paul McCartney, who last September gave an exclusive concert for a lucky audience of fans at Grand Central Station in New York City.

Featuring a set list of Beatles and Wings classics, combined with songs from Sir Paul’s studio album Egypt Station, Kahne’s job was to ensure that the vocal mix for the YouTube stream was picture perfect, and with only half an hour between the live performance and the streamcast, do-overs were a luxury he did not have.

Kahne explains why Steinberg Nuendo 8 DAW software was the software he trusted with a mission this critical. “I was in one of two broadcast trucks,” he says. “The first was taking a split from the front-of-house mixer, and that truck sent me about 20 stems: drums, bass, the rest of the instruments, then individual tracks for all the vocals. I was taking feeds into two redundant MacBook Pro laptops, so I could stop one to tweak and sweeten tracks while the other kept recording. I would do that, render the audio, copy it all to a USB stick, then physically run that up to the guys in the video editing suite, again and again, sneaker-net style.”

What aspects of Nuendo helped Kahne rise to this challenge? “The main thing I like about it is that it always works,” he laughs. “With a running half-hour window in which to do everything, it all had to go down without a hitch. I’ve run much larger projects on just a laptop — such as a recent project for National Geographic where I had over 100 tracks — and Nuendo is always extremely stable.”

Another factor of the slim time frame in which Kahne had to work is that any audio processing and sweetening had to be done with the most ready-to-hand tools. “For doubling or tripling vocals, the Automatic Audio Alignment tool in Nuendo is simply amazing,” he says. “You select one track as your timing guide, then you can select a bunch of other tracks and — boink — they all sync up with the timing of the master. We had to do plenty of this in real time, and it’s normally a tedious process that requires busing to and from a third-party plug-in. In Nuendo … you can make it happen in, like, two seconds.”

Nuendo’s time accuracy also proved invaluable. “I’ll mention time code only to say I didn’t really need to think about it,” says Kahne. “Everything came in time-stamped, and when I finished working, I gave the rendered files to the video guys, and all of it synced up with their workflow perfectly.”

His three favorite Nuendo features? “Stability, stability, and stability. It never gives me any glitches, freezes, or dropouts, even with tons of tracks, even on just a laptop. For my composition and more MIDI-centric work I love Cubase, but for anything to do with film or video, or live streaming, it’s Nuendo all the way.”

Check out the YouTube video of the Paul McCartney concert here.

Photos by Jen Maler and © Paul McCartney/YouTube


Click here for more information about Steinberg Nuendo.

Open Your Mouth … Even If You’re Not Playing a Wind Instrument

“Music to me is like breathing. I don’t get tired of breathing; I don’t get tired of music.” — Ray Charles

Have you ever sat in an audience during a recital and started to feel uncomfortable about the performance onstage? I’m talking about something other than the occasional memory slip or stick drop — it’s something far more profound, a moment of disquiet. I think we have all experienced this (some more than others).

Obviously, tension is a bad thing. It is bad for our bodies and makes any performance less musical. There are lots of factors that go into a stiff performance (poor preparation, lack of rehearsal time, new room, etc.). But as I watch these tense moments begin to happen, I always notice one thing: The performer’s mouth is closed.

I remember the first time I observed this as one of my students was playing through a piece for their lesson. “Just open your mouth and play through that phrase again,” I told him.

It worked! In fact, it was almost as if a different person had walked into the room and played the same passage. That got me thinking: Do we tend to close our mouth when we play and does this lead to tension? Time for some research!

My first stop: YouTube. Sure enough, there was plenty of visual proof. Of course, YouTube presents a collection of videos from all kinds of players at all different levels of ability, so I realized that it might not be the best place to test out my theory. So I tried it with more of my students. About 85 – 90% of them sounded like a different player when they opened their mouth (just slightly — not like yelling!) and put a little space between their lips.

As I thought about this more, I began hypothesizing that when you open your mouth, you release the tension from your body.

Don’t believe me? Try this little experiment:

1)    Clench your face with your mouth closed.

2)    Clench your face with your mouth open.

When your mouth is closed, you can feel the tension in your upper body and arms. When your mouth is open, it feels odd and it is difficult to clench your face.

This is not a new concept. While taking a Lamaze class with my wife before our son was born, we learned that when it is time to push during labor, a woman should keep her mouth open in order to relax. Breathing is fundamentally an involuntary action. Wind players and singers tend to be more conscious of their breathing than other musicians and even work out ahead of time when to breathe depending on the musical line or pace of the music. Non-wind players don’t usually “plan” their breathing and as a result, generally play with their mouth closed … though they’d probably get better results if they opened it once in awhile.

Try it out during your next practice session and see if it works for you. If you’re like most people, I think you’ll discover that your performance will improve if you just open your mouth.

Photo by Vidar Nordli-Mathisen on Unsplash.

Setup and Teardown Tips for Portable Worship Sound Systems

Many times, sound problems in a House of Worship can be solved just by moving some of the key components around. In this video, Yamaha product manager John Schauer describes how to efficiently set up a sound system in your worship venue while at the same time preparing the system for easy teardown. He provides tips to help you avoid accidents and potential safety issues, as well as how best to create logical cable runs and channel layouts in your mixer. For example, in order to ensure that the stage has the cleanest look possible, running cable should only be done after all equipment is physically in place and all mic and speaker stands are set to the correct heights.

Click here to find out more about Yamaha professional audio products.

Top 10 Musical Scenes to Watch with a Home Theater

Part of the joy of owning a home theater is being able to sit back and take in the visual and aural spectacle of great films. From timeless classics like “Casablanca” and “The Wizard Of Oz” to comedies such as “Wayne’s World” and modern action adventures like “Mad Max Fury Road,” each of the movies listed here offer powerful musical moments that will keep you coming back time and again. So get that bowl of popcorn, fire up your system, and prepare to be entertained.

1. Casablanca – La Marseillaise

Yes, music can make a political statement. In this 1942 romantic drama starring Humphrey Bogart, a clash happens when Nazi officers begin singing “Die Wacht am Rhein” at the piano. Not to be outdone by the unwelcome guests, Victor Laszlo orders the orchestra to begin playing “La Marseillaise.” Unable to overtake the fervor and volume of the patrons, the Nazis back down, ending with the patrons clapping and patting each other on the back yelling “Viva La France!” Check it out here.

2. Wayne’s World – Bohemian Rhapsody

Who would ever have thought that a classic film scene could take place in an AMC Pacer? This scene from the 1992 side-splitter has Dana Carvey (Garth Algar) and Mike Myers (Wayne Campbell), along with their rocker friends, banging their heads to a cassette tape of the Queen tour de force “Bohemian Rhapsody” blasting inside the cramped car. It was a brilliant and comical use of the song and the scene became an instant pop culture meme. Side note: Apparently Freddie Mercury got to see the scene shortly before he passed and loved it; in fact, Queen won an MTV Video Music Award for the scene and also saw the song propelled to number two on the Billboard singles chart years after its original release. Check it out here.

3. The Wizard of Oz – If I Only Had a Brain

“What would you do with a brain if you had one?” asks Dorothy (Judy Garland) in this 1939 landmark film. The answer from scarecrow Ray Bolger evolves into a fully orchestrated musical piece, beautifully performed by the MGM Studio Orchestra. Check it out here.

4. Top Gun – To the Danger Zone

Training the best fighter pilots in the world, the Top Gun school made a perfect platform for this 1986 blockbuster featuring Tom Cruise and Val Kilmer. As an F-14 Tomcat launches off the deck of an aircraft carrier, the song “Danger Zone” (performed by Kenny Loggins) slowly builds up to the high-flying adventure that’s about to place. When it comes to action in the skies, it’s hard to “top” this movie! Check it out here.

5. Mad Max Fury Road – Guitar Guy

This wild scene from 2015 Australian post-apocalyptic action film features a hard-rocking guy on the back of a rolling truck with a wall of amplifiers. As the rolling caravan comes under attack, the music issuing forth from the flame-spitting guitar plays a central role in the fire and fury of the scene. Check it out here.

6. Platoon – Opening

Sometimes it’s the unusual choice of music that makes a powerful impact on the overall feel of a film. Such is the case with this 1986 movie, which explores a soldier’s journey in the Vietnam War, where the use of Adagio for Strings by Samuel Barber for the opening music on the dusty windblown airstrip grabs you immediately. As Charlie Sheen and the others walk off the plane and get their first taste of a foreign country, the sweeping strings help to foreshadow what’s about to come. Check it out here.

7. The Good, the Bad and the Ugly – Duel Scene

This is one of the great Clint Eastwood scenes of all time, although not a single word is spoken. With the heroic Ennio Morricone score pulsing and flowing underneath, the camera pans in on the characters’ shifting eyes and movements, and the music continues to build as they do a slow, gradual dance on the stones in the center of a graveyard to gain position. We can all guess what happens in the end … or can we? Check it out here.

8. Caddyshack – Opening

As a gopher chews up the golf course, Danny Noonan (Michael O’Keefe) rides his bike to work, accompanied by the song “I’m Alright” (written by Kenny Loggins — there he is again!), immediately delivering the feel-good nature of this wacky and star-studded 1980 comedy. Check it out here.

9. Batman The Dark Knight – Bank Robbery Scene

Opening with a solitary and rather uncomfortable string note, the score (by Hans Zimmer) underpinning this scene unfolds into a pulsating synth movement as clown-masked bandits perform a bank heist. Loading up a bus full of cash, the musical crescendo eventually reveals that the Joker is behind it all. This is just one of the many moving moments in this 2008 superhero film based on the DC Comics character Batman. Check it out here.

10. Dr. No – Casino Scene

Just as Sean Connery famously introduces himself at the card table as “Bond … James Bond,” one of the most memorable guitar riffs in movie history starts playing underneath in this pioneering 1962 British spy film that launched a thousand imitators. The recurring themes from composer Monty Norman would go on to populate many of the films in the decades-long Bond series that shows no sign of letting up today. Check it out here.


Learn more about how to create the perfect home theater.

For more information about Yamaha home theater systems click here.

A First-Year Map to Success for New Orchestra Directors

In Case Study: A Las Vegas Middle School Orchestra’s Remarkable SuccessKathryn Greene outlined how she took her program to unprecedented heights, despite having no prior strings experience.

She offers new orchestra instructors, a plan to help them succeed in their first year. Like Greene did at Cashman Middle School, you, too, can expand your program and take your students to perform at prestigious music conferences.

1. Consider the School’s Needs: Find out the goals of the administration and partner to achieve them.

2. Crunch the Numbers: “You’ve got to stabilize the budget and figure out where your money comes from,” Greene says. “And figure out your inventory. If you need more instruments, figure out how to get them.”

3. Tailor Your Fundraisers: “A lot of schools [sell] coupon books for $25 to $30,” Greene says. “My families are not going to buy a single coupon book. What I can do is sell a bunch of $6 to $9 items. We also sell candy. Candy sells well, and it’s cheap. We also do a donation drive because some families would rather give money and call it a day.”

4. Look for Opportunities: If your program is cash-strapped, find unique ways to get the resources that you need. Greene acquired and repaired an instrument that another school was planning to throw out. And the music program received a grant from VH1 Save the Music Foundation and Toyota.

5. Cut Yourself Some Slack: “Roll with the punches and forgive yourself for mistakes because you’re going to make them,” Greene says. “Early on while I was making mistakes, I reminded myself that I was going to get better at it. I had an aptitude for music. I was good at working with kids. I was trained. I just needed to not put too much pressure on myself to be perfect.”

Photo Courtesy of James Cashman Middle School

This article originally appeared in the 2018 V4 issue of Yamaha SupportED. To see more back issues, find out about Yamaha resources for music educators, or sign up to be notified when the next issue is available, click here.

Conducting 101 for High School Students

Imagine a director asking, “Can you make your sound move the same way you moved your arms?”

Dr. Thomas McCauley

Earlier in the rehearsal, the director showed students how to indicate the dynamics of forte with wide, sweeping motions and piano with smaller, more nuanced wrist flicks.

Most students never get to experience the musical and personal development that results from conducting an ensemble. Conducting is a skill often reserved for student leaders, particularly drum majors, or postponed until college. However, teaching conducting techniques within high school and even middle school music ensembles can improve students’ general musicality.

“[Conducting] can give an opportunity for them to see outside themselves a bit more,” says Montclair (New Jersey) State University Director of Bands Dr. Thomas McCauley. “That’s the goal of every teacher of every large ensemble — [doing] an activity that would help [students] realize that there are things going on beyond them playing notes.”

Giving students the opportunity to conduct the ensemble helps them develop confidence and leadership abilities that can be applied to everyday life. “This kind of exposure to what it takes to be a leader, the passionate commitment and the ability to communicate, not just word to brain but heart to heart, is truly effective,” McCauley says.

Stick to the Basics

Start students with the basic movements of conducting: large arm movements, posture and dynamic indications. “The basics of conducting are not complicated,” says McCauley, who taught high school for nine years prior to taking on several university positions. “There are a few simple patterns that one must memorize.”

Although conducting styles go further than marching band, simple two-handed drum major conducting in familiar time signatures such as 4/4 can help students understand the foundation. Do not delve too deeply into the details of conducting technique, McCauley advises; instead, the lessons should be more introductory. “The teaching of actual conducting to high schoolers is more like giving them a taste of what it’s like,” he says. “You’re exposing them to what a conductor does and what it’s like to do it.”

Move with the Music

In addition to conducting, teaching students to move with the music can help them develop musicality. “What we’re really trying to do is take the intricacies out of playing for a moment and have [students] engage with the music using large muscle groups,” says McCauley, who founded the University of Indianapolis Orchestra Festival and Festival of Winds for high school students.

Because both instrumental and vocal music require finely tuned, small muscle movements, using a broader spectrum of body movement — such as shoulder swaying and head nodding — helps students better understand the “shape” of the music and communicate nonverbally with the musicians around them. For example, chamber musicians use body motions to play together, even without a conductor.

Tie It In

Conducting lessons can be made relevant to the general ensemble rehearsal by integrating them into the curriculum. “It’s another tool, another avenue, another pathway to help students understand not just intellectually but also physically, emotionally [and] spiritually what it is we’re trying to accomplish with a phrase or a dynamic marking,” McCauley says.

He recommends using conducting lessons to break up rehearsals. “When the students might need a break anyway, and you’re trying to make a point, it’s time to truly engage them and have them try to replicate what you’re doing on the podium,” he says. “It’s something physical you can refer to for the rest of rehearsal [and] use as a way to develop the music.”

Think of the Future

Learning conducting techniques will help students not only in their high school music careers but also in their college educations and career pursuits, regardless of whether conducting is an active aspect of their journeys.

“Obviously, if they’re going to be teachers, it’s a good way to introduce them to the idea of listening and being aware and movement,” McCauley says. “It’ll certainly give them a bit of a leg up before they show up to the first day of basic conducting. Even if they’re going into music therapy or composition or jazz or performance, these kinds of tools can only help them, even if they don’t use them every day.”

Photo of Dr. McCauley courtesy of Daniel J. Schmidt

This article originally appeared in the 2018 V4 issue of Yamaha SupportED. To see more back issues, find out about Yamaha resources for music educators, or sign up to be notified when the next issue is available, click here.

High School Student Leaders Can Help Recruit Younger Music Students

The best recruiters for music programs are our current students. When re­taining music students from middle and elementary schools, your current students serve as the best public relations for your program.

These student leaders are role models and can make an immediate and impactful impression on younger students.

The goal of recruitment is for both students and their parents to see the long view of music-making as one sequential program that starts in elementary school, continues through middle school, and concludes with high school graduation and hopefully beyond.

In addition to traditional events like the annual marching band night to bring together middle and high school students, there are other activities and opportunities that directors might consider implementing to help bridge the gaps from elementary to middle to high school programs.

Organize an Annual Elementary School Assembly

female student playing the bassHave the high school band in full regalia march through the elementary school to an energetic cadence that will bring all the students into the performance venue. At some point during the student-led performance, the drum major/conductor should ask, “Who would like to conduct the band?” It’s likely that every hand will immediately be raised.

Give the chosen youngster a baton and help him or her conduct a march or even the high school fight song. At this young age, students are the most impressionable, and every student in the school will wish they had been chosen to be the student conductor!

This activity could predispose elementary students to want to be members of the high school band and, thus, join the middle school music program.

Encourage Summer Internships

New instrumentalists will quickly understand what a music education program can offer in a more individualized, casual setting, such as a half-day summer lesson program. High school students would benefit immeasurably from serving as intern instructors at these summer camps. They will gain peer coaching experience while being guided and supervised by directors, and beginners will view these high school students as leaders to emulate. Everyone wins!

Maintain Ties to Elementary and Middle Schools

High school students can remain engaged with their elementary and middle school programs to clearly demonstrate that instrumental music reaches beyond the elementary and middle school years. They can speak to younger students and parents from their former schools about the short- and long-term advantages of active participation in instrumental music.

High schoolers can also serve as emcees for the elementary or middle school concerts or other appropriate events. Working with a prior music director shows the connection from one program to the next.

High school students can offer to teach group lessons during the year or even assist with tutoring in a supervised setting. They can sit in on rehearsals at the elementary or middle schools to provide musical leadership in the various sections.

Provide Testimonials

High school music students can talk about the balance that can be achieved with participation in multiple activities, such as sports, cheerleading, drama or debate, in addition to band.

A photo of a football player in uniform holding his trombone sends a great message that students can participate in music along with other activities. Student leaders can speak with middle school students who may be thinking of leaving the program and counsel them in how participation in multiple activities can be accomplished — especially in regard to scheduling.

A short speech or presentation from a high school student leader at the beginning of a rehearsal at the middle school can help greatly. The high schooler can address any objections or questions regarding the music program from the middle school group. This tactic provides a better chance of keeping a student in the program by allaying his or her concerns beforehand rather than trying to reverse a decision to drop the program.

Host a Big Brother/Big Sister Instrument Night

High school leaders can offer to help beginning students select their instruments for the first time. At these events, parents can meet the high school director and see the continuum within the program. Beginners will love working with the high school students.

Send Notes of Encouragement

A nice touch that can go a long way are short notes of encouragement to elementary and middle school students. High school students can write these notes to younger students playing a like instrument, praising their exemplary talents as demonstrated in a recent concert or at solo and ensemble or large group festivals.

For more ideas, read “Bridging the Gap Between Middle School and High School” from the Music Achievement Council.

This article originally appeared in the 2018 V4 issue of Yamaha SupportED. To see more back issues, find out about Yamaha resources for music educators, or sign up to be notified when the next issue is available, click here.

Sean Jones’ Advice to Educators: Encourage Professionalism with Students

In How Trumpeter Sean Jones Gets Respect, Jones recounts how he started performing as a child through church.

Today, he teaches his students more than just the fundamentals of performance; he also stresses that professionalism will help students secure gigs and succeed in their musical careers. Here are some ways that educators can encourage professionalism with their students.

Help Find Gigs: Jones learned about many of his gigs from his teachers. With the advent of the internet, Jones says that no one should be left uninformed about potential gigs. Educators can inform their students of new gigs they find online. “Google ‘local jam sessions,'” he says.

Teach Practical Skills: While it may seem self-evident, Jones finds it important to impart a few life lessons on how to exude a professional image. Teachers should tell their students: “Show up on time.Make sure you’re a good person on the bandstand and that you’re dressing for the gig,” Jones says.

Reminder to Follow Up: Educators should let students know the importance of following up after a performance. Staying in touch with other performers can help students keep a gig long-term.

Seize Opportunities: Educators should frame gig acquisition as an active process. They should tell students about searching for gigs, networking with other musicians and seeking out work wherever they can find it. “You can’t sit at home and wait for the phone to ring,” Jones says. “You have to introduce yourself, be in people’s faces, go out there and get it. Every day go after it!”

Photo by Rob Shanahan for Yamaha Corporation of America

This article originally appeared in the 2018 V4 issue of Yamaha SupportED. To see more back issues, find out about Yamaha resources for music educators, or sign up to be notified when the next issue is available, click here.

Collaboration is Key for K-12 Alignment

When leaders consider the ideal infrastructure for a school district’s music program, they need to agree on several things.

They must look at how to set up K-12 feeder programs, create K-12 aligned curriculum, define a K-12 music education philosophy, and ensure equitable and sustainable resources.

Knowing that the “magic” happens in the classroom between students and teachers, many feel that the music teacher should be empowered to control all of these factors. In a previous position as a middle school band teacher, I made decisions without considering factors beyond my classroom. Looking back, I now realize that I should have been more collaborative with the other middle schools as well as with the elementary and high schools in the district.

Now as part of an arts administration team for Shelby County Schools, a district in Memphis with nearly 100,000 students, I know that there is greater strength through collaboration. Any situation that ends with a leader saying, “It’s my way or the highway,” is not good.

Rarely are there only two choices. The best option is usually a compromise that factors in many voices. Here are the top considerations when working to build this collaborative approach.

Trends in Education Leadership

close up shaking hands

Some school districts have an established vision of aligned teaching and learning among all of the schools in the district. Others empower principals to be leaders of curriculum and pedagogy in their schools. A teacher who wants to increase the amount of autonomy in the classroom or increase the amount of K-12 program alignment should first gain an understanding of the school’s or district’s philosophy.

Transient Students and Staff Turnover

Students who live in concentrated poverty tend to change schools more often than students in affluent communities. As students move from one school to another, some stakeholders will desire a pedagogical approach that is more aligned, so that students experience greater consistency even though it may impede music teachers’ ability to implement their own vision.

It can be difficult to collaborate with other music teachers when staff turnover rates are high. Relationship fatigue can hinder collaboration as it takes a significant investment of time to build trust among collaborators.

Fundraising Philosophies

Some schools empower music teachers to be the sole person in charge of raising funds to support their students. Other school districts effectively use the National Association for Music Education (NAfME) Opportunity-to-Learn Standards and invest in a district infrastructure to support music programs with equipment, facilities and resources in a way that creates equity among schools and programs.

Feeder Patterns

What works in small districts that have clearly defined feeder patterns may not work in large districts that have competition among schools.

Or a community may wish to align feeder patterns between preschool, elementary, middle, high school and even college experiences, often referred to as the Pre-K-16 continuum.

Teacher Support

In Memphis, there is a strong Orff Music program led by Wincle Sterling that serves all K-5 students across the district. Teachers have a strong collaborative support system that includes new teacher mentoring, pro­fessional learning communities, curriculum workshops and sharing sessions.

There are a number of formal and informal ways to build collaboration throughout the music program with curriculum committees, peer evaluations, all-district ensembles and professional development workshops.

Another strategy for collaboration is the cultivation of our district leadership team, comprised of experienced teachers, that provide support to new teachers, give recommendations on policy matters and make sure that teacher voice is represented when district decisions are being made.

Time Management

group of teachers meeting over coffee in a restaurant b ooth

Because collaboration requires time, leaders need to be intentional about when and how to engage stakeholders. In-person meetings might work for some groups, but most music teachers are overwhelmed with teaching all day and spending time before and after school with additional rehearsals. That leaves the weekend — except for competitions, festivals, community events and the Saturday honor ensemble auditions!

In Memphis, we have utilized strategies to support in-school collaboration through creative scheduling and early student release days or by using online meeting tools such as Zoom or Google Hangouts.

Most importantly, however, Memphis music teachers have developed a strong network of collaboration by developing friendships and spending time “off the clock” to support one another.

Investment in Students

People will not care about your vision for the program until they are convinced that you care about your students and the community you serve.

Once you demonstrate a sincere passion for developing the students and communities, you can reach out to other teachers in the area, at all grade levels, and strive to value every voice at the table. Invest time to build relationships, set curricular goals, advocate for greater financial and staffing support, and leverage a collective vision. Normalize the support systems, so that the infrastructure remains during times of change.

This article originally appeared in the 2018 V4 issue of Yamaha SupportED. To see more back issues, find out about Yamaha resources for music educators, or sign up to be notified when the next issue is available, click here.

Case Study: A Las Vegas Middle School Orchestra’s Remarkable Success

When Kathryn Greene began teaching orchestra at James Cashman Middle School in Las Vegas in 2006, she may have been in over her head.

Not only was Greene yet another teacher in a revolving door of instructors who had tried to succeed in the position, but she had a secret that she didn’t tell her students during her first year: She had no actual experience teaching orchestra or performing on string instruments.

“I don’t play at all — I took violin for a few weeks when I was 4, and that was it,” Greene says. “My experience was with band.”

Yet despite these initial setbacks, Greene was passionate about her job. While working to become a better instructor, she quietly grew Cashman’s orchestra into a nationally recognized program. The orchestra program had 160 students out of about 1,100 in grades 6 to 8 when Greene began; now it has more than 240. She’s expanded the program to include two beginning orchestras, an advanced beginning orchestra, two intermediate orchestras, an advanced orchestra and a chamber orchestra.

In 2016, the chamber orchestra performed at the prestigious Midwest Clinic International Band and Orchestra Conference in Chicago. And in March 2019, the ensemble will perform at the American String Teachers Association (ASTA) National Conference in Albuquerque, New Mexico.

“Her work ethic, expectations, work with colleagues and ability to reach students — many of whom are in challenging situations — is second to none,” says Dr. Richard McEnaney, coordinator of secondary music, dance and theater for Nevada’s Clark County School District. “Her program is a reflection of her dedication, love and plain old hard work, both from her and her students.”

Money Matters

Kathryn Greene teaching her orchestra students

When she took the position, two of Greene’s earliest priorities were stabilizing her budget and increasing her inventory. Most Cashman families couldn’t afford instrument rentals, so students relied on the orchestra department’s inventory of violins, violas, cellos and basses. Today, most students get their own instruments, but that wasn’t always the case.

“When I came, we were using the same violin five periods a day,” Greene says. “You can’t expect kids to practice if you don’t have an inventory. And you can’t build an inventory without money.”

All funds for Cashman’s orchestra come from a $25-per-student annual course fee plus fundraisers.

“We squeeze the pennies out of every­thing,” Greene says. “I got a bass that another school was going to throw out. I asked the repair guy how much it would cost to make this playable, and he repaired it for $150.”

In 2017, Cashman Middle School received grants toward the purchase of wind and string instruments as well as pianos and keyboards from the VH1 Save the Music Foundation and Toyota as part of a charitable campaign.

Internal and External Support

At previous band jobs, Greene had observed orchestra classes, but those experiences didn’t fully prepare her to teach her students at Cashman. She took some private lessons to familiarize herself with string instruments and relied upon other skills she’d used as a band instructor.

“Rhythm and setup … that’s the same no matter what instrument you’re playing,” Greene says.

Having her administration’s support has been crucial for Greene’s success. “You can’t have a great program without support,” Greene says. “I needed my schedule built in a certain way, so I could have the right kids at the right level. If it’s between my class or a math class, the priority will be given to math. To keep from losing students to scheduling conflicts, I needed my master schedule changed, which required administrative support.”

A Certain Caliber

five cello students holding their instruments and awards

Greene constantly recruits students with a strong work ethic. “You can be the best teacher in the world, but you have to get the right students,” she says. “That’s why I look for students who have the right skills to succeed — skills like listening and being organized. I need students who are built for the work, and they’re not necessarily the straight-A kids.”

Each year, Greene handpicks her most promising beginning students and asks them to join the advanced beginning orchestra during the second semester, which meets after school. This orchestra has performed at the ASTA Nevada chapter’s annual music festival for the past five years.

“Every time I’ve taken the advanced beginners, I score a first place because the kids know how to really work,” Greene says.

By the time they make chamber orchestra, Greene’s students are accustomed to practicing consistently and staying after school.

Music students do better when they receive private lessons, but most families at Cashman can’t afford them on their own. Thankfully, the Cashman Family Foundation stepped in to provide $10,000 in scholarship funds for students who take lessons through the Nevada School of the Arts.

“The vast majority of our kids who went to Midwest had private lessons,” Greene says. “My parents can’t drive my kids, so we have the private teachers come to the school.”

Prestigious Heights

During the 2016-2017 school year, Cash­man’s chamber orchestra was one of only three middle schools nationwide that performed at the Midwest Clinic. “Performing at Midwest is like the pinnacle of every music teacher’s career,” Greene says. “It took me 10 years to get the program to that level.”

The students were committed to the performance and devoted months of their time to get everything right. “They gave up their summer vacation,” Greene says. “They played four hours every day. We had just graduated a large 8th grade class, so we had to get the younger kids up to the level.”

The 2016 trip to Chicago was a once-in-a-lifetime experience for the students and parent chaperones. “I had kids who had never flown before, kids who had never been out of Las Vegas before,” Greene says. “It definitely was something that they will never forget.”

In March 2019, Cashman’s chamber orchestra will be one of seven middle schools performing at ASTA. Until then, chamber orchestra students will play at school twice a day to prepare for the event. And the students and parents couldn’t be happier.

“I know nothing about music, but I know when I see people doing their job right,” says Ivan Bachvarov, whose daughter, Anna, plays violin in the chamber orchestra. “Ms. Greene is definitely one of those. She loves her job. She puts a lot of energy in it. The best part is: She is able to get the kids to put a lot of energy in it, too. And when they put a lot of energy in it, the results follow.”

Photos courtesy of James Cashman Middle School and Ivan Bachvarov

This article originally appeared in the 2018 V4 issue of Yamaha SupportED. To see more back issues, find out about Yamaha resources for music educators, or sign up to be notified when the next issue is available, click here.

How Trumpeter Sean Jones Gets Respect

Some educators command attention with a booming voice and a larger-than-life presence. Sean Jones employs a completely different tactic that is equally — and probably more — effective.

He teaches with a soft voice and an unassuming demeanor. But the acclaimed jazz trumpeter and music educator instantly gains his students’ respect. How? “[I] lead by example,” he says.

Leading by example involves spending a lot of time playing for his students, rather than just discussing concepts with them. “My students learn from me by me showing them: This is how you play a scale. This is how you articulate,” he says. “I believe the apprenticeship approach is crucial in artistic development.”

According to Jones, leading by example is more important than titles or formalities. “I’m not one of those professors who needs to be called ‘Professor Jones.’ Call me Sean!” he says. “But understand that my work speaks for itself. That’s what garners respect, not a title.”

Foretelling the Future

Sean Jones sitting in a chair holding his trumpet

When Sean Jones was 16 years old, he wrote his mother a letter declaring that he would be a college professor. The letter, which focused on what he planned to be doing in 10 years, was an assignment for an English class at Warren G. Harding High School in Warren, Ohio. The teenage Jones wrote about the connection he hoped to make with his future students, how he didn’t want to work a 9-to-5 job and that he planned to record his own album.

“And lo and behold, all those things happened,” Jones says. “[My mom] still has the letter, which is cool.”

Jones started playing the trumpet when he was 10 years old. “Everybody wanted to play the clarinet, flute, drums or saxophone; I wanted to be different, so I picked up the trumpet,” Jones says. “I fell in love with the challenge of playing [the trumpet]. … The harder it got, the more I wanted to practice.”

That love for taking on new challenges and opportunities eventually led Jones to serve as chair of the brass department at the Berklee College of Music in Boston, record eight albums, start Carnegie Hall’s National Youth Orchestra (NYO) Jazz program and take on his current role as chair in jazz studies at the Peabody Institute of the Johns Hopkins University in Baltimore.

“Musicians have the ability to make or break a person’s day with a sonic vibration,” he says. “I take the job of educating and performing very seriously. I know the sounds created can heal or destroy a person.”

Sound, Spirit and Soul

As a child, Jones was introduced to the world of music through church. He recalls that his childhood church services were composed almost entirely of music, helping him develop musical skills early in life. “I was playing and singing by ear at a very early age and at a high level,” he says.

Jones joined a church horn ensemble called the Sound of Victory, which per­formed on Friday nights. When he was 14, the Sound of Victory went on the road and started performing in other churches.

Jones believes that music has a spiritual component. “Music — and sound — is the most powerful sense we have,” he says. “There is something magical about it. It resonates with your soul. It vibrates throughout your whole spirit and consciousness.”

In addition to performing with his church ensembles, Jones also performed with his high school’s music programs. Jones really wanted a jazz combo class, so he asked one of his teachers about starting one. “I actually founded the jazz combo at Warren G. Harding High School,” he says.

Pillars of Support

Sean Jones with a male student, who is playing the trumpet

Jones went on to Youngstown (Ohio) State University, earning his bachelor’s degree in classical trumpet performance, then to Rutgers University in New Brunswick, New Jersey, for his master’s degree.

He recalls two Youngstown State professors — Tony Leonardi and Stephen Gage — who influenced his teaching style in different ways. While Leonardi had a tough-love approach, Gage was uplifting and spiritual.

As an educator, Jones combines aspects of both approaches. “[Students] want to feel fulfilled. … However, the art requires us as educators to let students know [when] their output is subpar,” he explains.

While he never wants to stifle a student’s creativity and confidence, Jones also emphasizes that some music fundamentals are non-negotiable. “You have to understand phrasing. Technique is important,” Jones says. “It’s my job to nurture young minds while curating excellence.”

Jones recognizes his own teachers as some of the most important pillars of support he had growing up. When Jones wanted more time to practice, one of his teachers gave him the key to his rehearsal space. Jones would then spend all night practicing. “I’ve always had great teachers, and I think subconsciously, that made me want to be a teacher myself.”

Keep Playing!

Sean Jones holding his trumpet and leaning against a stage

Jones says that his teachers also helped him find paying gigs. “My mom didn’t have a lot of money, so I had to play gigs to [help] make ends meet,” he says. “I’d be in school all day, and at night I’d travel to Pittsburgh or Cleveland to do gigs.”

Jones navigated different types of gigs, and he encourages his students to be prepared for a variety of musical situations. “The hardest gig I ever played was a circus; you’re just repeating the marches forever,” he says. “That gig taught me pacing, it taught me endurance, and it taught me that I didn’t want to play in the circus ever again.”

Regardless of the type of gig, Jones says that performers need to understand the music to be successful. “I played in wedding bands. I played bar mitzvahs. Name the scenario, I played it,” he says. “I attribute my success in every one of those situations to my ability to be pedagogically sound and to know the genre sensibilities enough to be authentic.”

Performance continues to be a key component of his career. “Just because you’re an educator doesn’t mean you can put down your ax and just teach,” he says. “Keep playing! I find educators all the time who gave up playing. I think that’s a bad thing because you become disconnected from the music itself.”

Educators need to stay connected to the music they are teaching as well as with the students themselves, Jones adds. Jones recommends that educators attend their students’ performances outside of school, if possible.

“Music is constantly evolving,” he says. “The older I get, the more I realize, I have to [keep] studying what’s current. It’s important to stay relevant.”

Berklee, Peabody and Beyond

In 2018, Jones finished his fourth year of teaching at Berklee, where he spent his time developing a curriculum that would give all students a solid pedagogical foundation.

“The big thing I added was the require­ment to do various etudes, no matter what style of playing you focused on,” he says. “You had to do Clarke studies. It’s important to study those etudes, … so that you can get a strong foundation. That’s part of the lineage of playing a brass instrument.”

Jones is also a proponent of a diverse education, meaning that students are educated in a variety of styles. “They want to be prepared for more than the symphony orchestra that [accepts] five people every few years,” he says.

He is now bringing this concept of a diverse education to the Peabody Institute. Jones plans to integrate jazz studies into the school’s broader music curriculum.

While he enjoyed his time working at Berklee, he knows he can bring a lot of growth to Peabody’s jazz department. “I wouldn’t be able to live with myself if I didn’t go after the opportunity,” he says. “It’s time to rise to the challenge.”

Photos by Rob Shanahan for Yamaha Corporation of America 


This article originally appeared in the 2018 V4 issue of Yamaha SupportED. To see more back issues, find out about Yamaha resources for music educators, or sign up to be notified when the next issue is available, click here.

Make a Plan: 8 Ways to Maximize Rehearsal Time

Try to fit these eight recommendations into every rehearsal. If you keep things moving, it’s amazing how much you can accomplish during a 45-minute class.

We spend a lot of time with our students. In a given school year, a 45-minute class taught for 180 school days amounts to 8,100 minutes spent with the same set of students. Those minutes are a valuable commodity. It’s imperative to display the agenda or plan for the day so students know that you have a plan, and it helps lower student anxiety levels when they can count on things happening in a particular order. Having a plan usually saves time over the course of multiple classes.

1. Individual Warmup Time

I am a big believer in allowing students to warm up individually before the rehearsal begins. I realize that there may be reasons why you might not want them all playing before class starts, but in most cases, it’s essential to know how proper individual warmups can drastically improve success for the entire ensemble. I can’t tell you how many times students find out that their instrument isn’t working, or students are able to help each other with musical and non-musical items during warmup time. Give them a set time limit of two to three minutes for the warmup. If you have younger students, you might want to post several warmup “choices” on the board, such as long tones, major scale, chromatic scale, a melody from a piece of music, lip slurs, rudiments, etc.

To keep students accountable during this time, have them journal periodically in their folder so that they have an opportunity to describe the warmups they are using. Making them write about it usually helps keep them on track for several days afterward. Watch several videos of professional musicians warming up so that students can see and hear it done correctly. I also recommend that students see you warm up on your instrument from time to time so that you can show them what you are trying to accomplish in that time period.

2. Play In Unison

open music book

It is so important to play in unison. It’s a wonderful way for students to learn to come to a “musical consensus” and is often the only time in a rehearsal where you can teach the exact same thing to every student. It’s an opportunity to focus in and out from your own sound, instead of jumping right into playing in harmony. The payoff for playing in unison is that students learn how to start, sustain and release together. They learn how to play with dynamics and how to manipulate pitch so that the intonation sounds correct.

At Metea Valley High School, we start almost every band rehearsal with a Concert F Remington exercise (sometimes called an F Pivot), which allows us to work on light articulation in a legato style, shifting from note to note cleanly and playing in tune and in time. Next, we typically have students play a scale in unison or perhaps a unison melodic phrase. Try this to get students super focused for the next part of rehearsal!

3. Play Intervals

Many times, we mistakenly jump from playing in unison directly into a chordal piece. Students need more time to develop their understanding of playing 2nds, 3rds, 4ths, 5ths, 6th, 7ths and octaves. This practice allows you to teach pitch manipulation, but honestly they do it naturally. Perhaps the best way to experience intervals is playing along with a drone pitch. Try playing a drone on the tonic, or pick a specific pitch in a melody that needs work and play that pitch as the drone. My students really enjoy this!

The easiest way to work on interval training is to split your ensemble in half from left to right. Tell the students on your right to focus on your right hand when you conduct, and then tell the students on your left to focus on your left hand. Start everyone playing a Unison Bb (or any key), then only move your right hand to direct them up the scale one pitch at a time. The players on the left are sustaining and providing the drone for the other students. At any point, you can move up and down the one-octave scale creating intervals as you go. Students naturally correct the 4ths and 5ths easier than they correct 3rds and 6ths. After you have brought each group up and down the octave, both end on the Unison Bb.

4. Play Chorales

After we finish playing in unison and intervals, we move onto chords by playing chorales. First and foremost, it is so important to get wind, string and percussion students playing in a legato style so that the idea of uninterrupted breath, stroke, bow, etc. is achieved. This is where beauty of tone takes place. Chorales offer this experience whether playing slowly or quickly. My favorite way to get students thinking about playing chorales in SATB (soprano, alto, tenor and bass) parts is by allowing them to see the score I use as the chorales in the Tradition of Excellence Technique & Musicianship by Bruce Pearson and Ryan Nowlin with the 9th graders. I use 36 Chorales For Band by Aaron Cole with my upperclassmen (which is available online as a free resource with a suggested donation). Many books today have sections where students read from a SATB score, and this helps students learn other parts in a chorale.

5. Sight Read as Much as Possible

Students learn so much when they sight read, but most of us have no time to sight read regularly. To force the issue in our 9th grade band several years ago, I created folders for each student called the “Sight Reading Anthology.” I collected pieces of music in a beginner through intermediate range that progress students through several keys, time signatures, styles, etc. In total, there are almost 30 pieces. Students read one piece per day (generally speaking) until we finish the project. By late November, students should finish the folder. The benefits of this activity are that students regularly practice analyzing, reading, entering, resting, matching, creating, and best of all, make connections between success and failure from day to day, which is what learning is all about!

6. Practice Rhythm: Count, Clap, Play

hands clapping

Students need several methods for counting, subdividing and practicing rhythm so that they can process it on their own one day. It’s our responsibility to give them strategies for counting and executing rhythm, and one of the most crucial items is exposure to multiple time signatures, note and rest values, and learning how to process rhythm quickly.

Most method books have pages of rhythm in the back of the book, or you can create your own “rhythm sets” so that students have opportunities to see and master lots of rhythms in many different contexts. Another variable to adjust is tempo.

One of my favorite games in ensemble rehearsal is when I play a measure of rhythm, and then students have to guess which rhythm I played from a page that has 20 rhythms on it. Hands go up to provide the answer, and then once the correct answer is revealed, the entire ensemble gets to play the rhythm. The student who answered correctly is rewarded by getting to play the next rhythm for the class to guess. Students would play this game for hours if you let them!

Check out another idea for a different counting system: David Newell’s “Teaching Rhythm: New Strategies and Techniques for Success.” I think you’ll enjoy his ideas on subdividing and counting rhythm from a whole new perspective.

7. To-Do List

notebook open to a to-do list

One part of each of my rehearsals includes a rapid fire “to-do” list of micro details. For example, for song 1, you would write on the board:

Flutes – pitch @ end of meas. 17

clarinet – sixteenth notes meas. 17-18

trombones Eb & Ab chords meas. 35

percussion – sd tamb groove @ meas.107

I typically do a list like this for every piece of repertoire being played that day. The students know that after we accomplish fixing all of the items on the “to-do” list, they get to move onto playing bigger chunks or entire pieces. The nice thing about using an approach like this is that you don’t get bogged down during a piece of music trying to fix random details that coincidentally just occurred — something I call “whack-a-mole” rehearsing where you just stop every time you hear an error. Music educators want to be in an instructional mindset where we already know what we want to accomplish.

8. Individual Playing

When playing warm-ups and chorales, detailing music or sight reading, there are opportunities for individual playing, which I consider to be the breeding ground for students inspiring other students. They also serve as learning models as you work on fundamentals or details in their playing.

I love teaching individuals during ensemble class time because it allows all students to see the process of improvement. Students who struggle the most can benefit from your help, and even your best players can always play something more musical or with more professional attention to details like articulation or intonation.

I don’t use individual time for grading their playing; I use it as “example” time. Use questioning like: “Who wants to play the first note at measure 12?” Then move on to: “Would you mind playing the whole measure now?” or “Who can play a beautiful concert F for us today?” Then I follow that up with: “Everyone try to play that note exactly like you just heard Joe play. Didn’t you love the way he started that note?”

Use positive and specific language when listening and helping individuals in front of the ensemble and ensure that other students are paying attention to the lesson you are teaching so that they can benefit from the information as well. The idea here is that you are making each and every link in the chain stronger.

It’s Your Turn: Try It

It is possible to fit all of this into a rehearsal. If you have trouble managing your time in a class and feel like you usually do not accomplish everything you were hoping to, consider having a co-worker observe your class with a stopwatch and have them keep track of the minutes you allot for announcements, talk rather than play, etc.

Of course. we need rehearsals where we develop some depth of understanding, but for the most part, students like it when you have a plan for many activities that vary instruction and learning. By ensuring that you are fitting these essentials into most rehearsals, you are showing an enthusiasm for learning music. I’ve found over the years that students feed on our enthusiasm, so I continue to keep things fast paced, focused on musical and personal growth, and encouraging improvement every day. I hope these ideas will keep your rehearsals fresh and productive.

This article was originally published in the December 2018 issue of SBO Magazine.

Meet Yamaha Master Educator Marguerite Wilder

The ultimate goal for beginning band students is the devel­op­ment of skills and under­standing that enable the student to experience musical artistry. Marguerite Wilder‘s innovative, game-filled approach to teaching fundamentals help set students on a strong path toward success.

This technique helps teachers monitor individual progress while providing the students with a comprehensive, rigorous and creative learning experience that includes strong aural skills and improvisation techniques.

Wilder’s long tenure as a middle school band director has helped her work with educa­tors on effective strategies to transfer young musicians from short method book songs and arrangements to full band arrangement experiences. She explores how daily routines start with warm-up and fundamental exercises that address the components of music that will be used in their music literature. Young instrumentalists also need an understanding of how melody, rhythm, harmony and bass lines combine to produce music.

Band directors looking for ideas to incorporate into their beginning band classes have found great suc­cess implementing Wilder’s unique ideas and have discovered that her comprehensive approach has led to enhanced musical independence for students at an accelerated pace.

Some of Marguerite Wilder’s session titles are:
  • Meaningful Middle School Band Rehearsals
  • An Aural Approach with Instrumental Music Using Conversational Solfege
  • Habits of a Successful Middle School Band
  • Teaching and Rehearsing the Middle School Band
  • Do It! Teaching through Rain, Sleet, Snow and a 7th Grade Fire Drill
  • You Too Can Be a Winner with Beginners
  • Creating Habits of Success for the Young Band

To learn more about clinics by Marguerite Wilder, please contact Jalissa Gascho at jgascho@yamaha.com.

Meet Yamaha Master Educator Dr. Emily Threinen

Dr. Emily Threinen is director of bands and associate professor of music at University of Minnesota. She consistently works with composers, arrangers and performing artists of varied disciplines.  Residencies and projects with composers and new compositions are integral to her creative work. She is an active and in-demand guest conductor, clinician, conference presenter and performer.

Passion with excellence motivates Threinen’s teaching. She aims to create an environment, whether it’s during a rehearsal, in the classroom, in private lessons, in public work­shops, etc., where students and educators can achieve something beyond what they previously thought possible. When working with students, she shares her ideas and processes in a way that inspires thought, feeling and creativity. When working with educators and conductors, she brings solid pedagogy, research, analysis and respect for tradition as well as incredibly high standards, inspiring the goal of being true to oneself.

Threinen is a true artist when it comes to programming and careful study of score, which she highlights in presentations titled “Connecting the Dots: Linking Score Study to Authentic Gestural Communication” and “You are What You Program: Developing a Programming Philosophy.”

Threinen is keenly aware of time when interacting with students and educators, recognizing every minute spent with a student or educator is a gift to be carefully considered. Success and develop­ment take time, investment and practice. Focused work and diligent awareness of oneself can spur educators and students toward success in both career and personal ambition. Inspiring directors to take time and make the long-term investment in their students’ development drives Threinen, and makes her a highly sought-after educator.

A few of Dr. Emily Threinen’s session titles are:
  • Passion from the Podium: Rehearsals Aiming to Inspire
  • Score Discovery: Finding Your Interpretation
  • We are What We Play: Developing a Programming Philosophy
  • V.I.P. Revisiting the Art, Craft, Responsibility, and Joy in our Work

To learn more about clinics by Dr. Emily Threinen, please contact Jalissa Gascho at jgascho@yamaha.com.

photo by Ann Marie Grocholski

Meet Yamaha Master Educator Dr. Kevin Sedatole

Dr. Kevin Sedatole is Director of Bands and Professor of Music at Michigan State University.  He serves as administrator of the entire band program at Michigan State University, totaling over 700 students, which includes the wind symphony, symphony band, concert band, chamber winds, campus bands, Spartan Marching Band and Spartan Brass.

Having conducted and taught all over the world, Sedatole’s commitment to music-making and conducting is to the music itself, through the study of the score, the understanding of the intent of the composer and knowing what is best for the musicians. This provides a setting for increased musicianship on the part of the performers as individuals as well as the proficiency of the ensemble.

“When the ensemble knows that the director’s top priority is to serve the music,” Sedatole says, “the bar is raised.”

Sedatole continues to serve high school and collegiate level band and orchestral teachers as a clinician, guest conductor and adjudicator. As a young educator, one of the first things he learned from his mentors was to treat everyone equally. In their positions as leaders, ensemble directors walk a fine line of being perceived as an authority figure.

Directors who work with Sedatole soon discover that his conducting and teaching style provides more of an atmosphere of equivalence, as he presents different ways of doing and looking at things, giving musicians things to think about on their own. Whether working with students in an honor band setting or with educators in a workshop setting, his approachable style provides a genuine atmosphere that truly connects the director and the ensemble members.

A few of Dr. Kevin Sedatole’s session titles are:
  • Expressive Conducting Gestures Based on the Laban Method
  • Quality Repertoire — The What, Why and How
  • Building Musical Depth Through Quality Experience

To learn more about clinics by Dr. Kevin Sedatole, please contact Jalissa Gascho at jgascho@yamaha.com.

Meet Yamaha Master Educator Marcia Neel

Dynamic, energetic, exciting — these are the words used to describe Marcia Neel, one of the most knowledgeable professionals in the field of music education today.  This began years ago when she was a secondary music educator whose ensembles were known for consistent quality and attention to artistic detail.

She has carried that philosophy and constant search for perfection into everything she does — particularly when it comes to the complex art of school- and district-wide program building, where all of the pieces relating to standards-based curriculum, including instruction, scheduling, recruitment and retention, professional development and student achievement, come together to form the ideal, sequential program.

Neel cares about serving schools and school districts by providing just this type of guidance. From building or refining course syllabi to organizing a K-12 Master Music Education Plan that results in increasing the numbers of students served through an enhanced, relevant curriculum, Neel has done it all as the Secondary Fine and Performing Arts Coordinator for the Clark County School District (CCSD), headquartered in Las Vegas, Nevada. Over the course of her 14-year tenure, she led the Secondary Arts Education program to an astounding level of growth and enrollment. The standards-based Mariachi Program, implemented in 2002 in the CCSD, has grown from 250 students to almost 7,000 today. Neel is currently President of Music Education Consultants and Senior Director of Education for Yamaha Corporation of America.

Neel’s enthusiasm for engaging more children in music-making is contagious, and providing these opportunities through an organized, well thought-out vision and unified approach is her passion.

Some of Marcia Neel’s session titles include:
  • Combatting the Teacher Shortage: Sharing Short- and Long-Term Innovative Strategies
  • 5 S.M.A.R.T. Ideas to Retain THIS YEAR’S Beginners
  • From Zero to Mariachi
  • Defying Gravity: Gaining Leadership Momentum
  • KEYNOTE: Back to the Future: A Return to the Why
  • KEYNOTE: One is Too Small a Number to Achieve Something GREAT!
  • 5 S.M.A.R.T. No-Fail Ideas for Retaining Your Beginners
  • Bridging the Gap Between Middle School and High School: Tips for Ensuring a Seamless Instrumental Music Education Experience
  • Broadening Your Base: From Zero to Mariachi
  • Building Your Music Program: A Practical Guide for Recruitment and Retention
  • Crossing Over to the Other Side of the Podium: Lessons in Body Language
  • Creating a Unified Message: Creating the District-Wide Music Education Plan
  • Inclusivity and Diversity in Music Education: Programs that Engage Underserved Populations and Embrace Social-Emotional Learning
  • Interviewing Skills: The Rules of the Road
  • Making an Advocate out of Your Principal: Ten Things You Can Do On Monday
  • Show Me (How to Get) the Money: Accessing Federal Funds for Music Education
  • Tips for Success: A Guide FOR Instrumental Music Educators BY Directors FOR Directors

To learn more about clinics by Marcia Neel, please contact Jalissa Gascho at jgascho@yamaha.com.

Meet Yamaha Master Educator Anthony Maiello

With a broad and diverse arsenal of experiences spanning over five decades, Anthony Maiello‘s enthusiasm for teaching music is nothing short of contagious.  Having taught instrumental music education from the grade-school level through the university doctoral level, both in the United States and aboard, his experiences give him a unique view and approach to teaching and making music.

Not only is Maiello one of the most inspiring conductors of our time, he approaches every teaching situation with the same verve — whether teaching a private lesson, having a one-on-one conversation or conducting the premiere of a new work. He views each moment as an opportunity to inspire and nurture a love of sharing music with others.

Currently, a Distinguished University Professor at George Mason University in Fairfax, Virginia, Maiello’s mantra is that music is a powerful art form, with the power to touch humanity, souls and a person’s complete being. His presentations are centered around teaching with enthusiasm and energy, “like your hair is on fire!” He believes that directors should continuously strive to motivate each other on a daily basis, so that they might do the same for their students. This is displayed in his session entitled “Student Motivation Techniques.”

Maiello is an extremely effective clinician for bands, wind ensembles and orchestras. He is a highly sought-after lecturer for college-level conducting students.

Working collaboratively with Maiello is a game-changing, inspirational experience in the life of any conductor, whether in a professional development session, such as “How’s Your Podium I.Q.(‘I’ Stands for Inspirational)?” or as an observer in an ensemble rehearsal with musicians of any age or ability level.

Some of Anthony Maiello’s session titles:
  • Conducting — A Hands-On Approach
  • Conducting Nuances — Little Things Mean a Lot
  • Serious Score Study
  • How’s Your Podium IQ? (“I” Stands for Inspirational)
  • Student Motivation Techniques

To learn more about clinics by Anthony Maiello, please contact Jalissa Gascho at jgascho@yamaha.com.

Meet Yamaha Master Educator Gary Lewis

A multi-faceted artist, Gary Lewis has done it all — from jazz performance and marching band, to musical theater and opera, to arranging for a variety of genres.  He has also been involved in entrepreneurial efforts such as establishing a contemporary music festival.

With such diverse experiences, Lewis lives his belief that music serves as “the thread that connects us all.”

Lewis is currently the Director of Orchestral Studies and the Bob and Judy Charles Professor of Conducting at the University of Colorado Boulder. He conducts the University Symphony Orchestra and is also Music Director of the West Texas Symphony Orchestra. He is a fervent believer that music is the great equalizer and that educators can change lives through the indispensable gift of teaching young people how to make music — what he calls the single most important thing.

Core to Lewis’ teaching and workshops is a focus on developing and enhancing the unique relationships that are found within the exemplary ensemble. He inspires directors to discover how they can empower their own students by teaching them how to interact and collaborate with each other in the music-making process. This art of close and connected collaboration is critical to the success of a chamber ensemble, and he applies the same types of principles to larger ensembles. Fostering an environment where all musicians discover the inherent intimacy and awareness of music-making not only leads students to become more independent musicians, but also provides heightened and more fulfilling experiences with others.

As conductor of the University Symphony Orchestra at the University of Colorado Boulder, Lewis also oversees the entire orchestra program and leads the graduate program in orchestral conducting. His graduate conducting students have enjoyed great success as conductors of university orchestra programs, youth orchestras and professional orchestras alike.

A few of Gary Lewis’ session titles include:
  • Conducting: Giving Up Control to Gain Control
  • Rehearsal Techniques (The Long Game: Giving Our Students the Skills and Responsibility to be Independent)
  • Making Our Large Ensembles More Like Chamber Music
  • 4/4 is 4/4: Empowering Ourselves to Work with Strings, Winds and Percussion
  • Building Leadership In Your Ensemble
  • Score Study and Preparation: How Analysis Meets Performance
  • Bach and Beyond: Baroque-Style Performance Practice Applications for String Orchestra
  • Art vs. Craft: How to Get to the Technique Through the Music

To learn more about clinics by Gary Lewis, please contact Jalissa Gascho at jgascho@yamaha.com.

Meet Yamaha Master Educator Craig Kirchhoff

Having appeared as a guest conductor throughout the world, Craig Kirchhoff brings a deep understanding of both traditional and contemporary literature to his sessions, including one titled “Score Study: A Different Perspective.” With a celebrated teaching career spanning decades, Kirchhoff is professor emeritus of conducting at the University of Minnesota and remains true to his mission of changing lives through the experience of making music.

Kirchhoff works extensively with undergraduate and graduate music students, helping them amass a collection of tools which they, in turn, may use to provide life-changing experiences for their future students. Kirchhoff also thoroughly enjoys working with and guest conducting high school and collegiate ensembles.

Inspired by his high school band director, Kirchhoff challenges and motivates educators to rediscover the “magical moment” when their lives were changed through music. Through this sense of purpose, directors find a more philosophical framework for teaching, and realize their most significant contribution as an educator is to pass this inspiration on to their students. He truly believes that all decision-making stems from a director’s desire to provide an atmosphere that enhances the students’ curiosity, so that they are able to unlock their own discoveries about and passion for meaningful music-making.

Kirchhoff believes that enthusiasm is external, and alone will not motivate an educator or a student. Passion, however, is internal, lasts a lifetime and moves us all forward while inspiring others.

A few of Craig Kirchhoff’s session titles are:
  • Some Things I Believe
  • Score Study: A Different Perspective
  • The Rehearsal Technique: It’s Not What You Say, But How You Say It
  • Teaching the Art of Listening in Rehearsal
  • Is Your Conducting Helping or Hurting Your Ensemble?

To learn more about clinics by Craig Kirchhoff, please contact Jalissa Gascho at jgascho@yamaha.com.

Meet Yamaha Master Educator Jerry Junkin

Whether conducting a group of professionals or students, Jerry Junkin is committed to ensuring that musicians under his baton make an emotional connection to the music. This comes, in part, as a result of choosing the exact, right piece of repertoire for the ensemble, as well as delving into the intent of the composer to discover the inspiration for the work.

As Director of Bands and Professor of Wind Conducting at Butler School of Music at The University of Texas at Austin, Junkin thrives when approaching an ensemble with a solid base, so he can enhance the great work being done and really move it to a deeper, more inspired level.

Educators attending Junkin’s workshops soon discover that the technical aspects of ensemble music-making simply scratch the surface. Although the development of musicianship is always at the forefront, Junkin believes that it is only through a comprehensive understanding of the music — it’s purpose, musical elements, emotion — that directors can assist and lead students to develop natural instincts, and eventually arrive at a place where they can inspire themselves.

Junkin is a respected authority on conducting and is an in-demand speaker, adjudicator and conductor. He is an ideal guest as a conductor for honor ensembles or as a lecturer at staff development days and MEA events.

Some of Jerry Junkin’s session titles include:
  • Leave No Tone Unstirred
  • Does Expressive Conducting Make a Difference?
  • Score Study

To learn more about clinics by Jerry Junkin, please contact Jalissa Gascho at jgascho@yamaha.com.

Meet Yamaha Master Educator Barry Houser

Students, leadership, excellence and passion — the core of Barry Houser‘s teaching, as well as his working with directors, is based on the intermingling of these four components. At the University of Illinois at Urbana-Champaign where he is the Associate Director of Bands, Director of the Marching Illini and the Chair of the Conducting Area, Houser brings a unique energy and enthusiasm to all that his varied positions require. His teaching background encompasses both extensive high school and university experiences, which have been met with incredible success.

He ignites a passion in others for life-long music-making, regardless of their chosen career path. He is in constant pursuit of artistry and believes in continuing to pursue success and excellence every day.

Keeping students at the core and heart of what music educators teach is a pillar Houser stands by, both in teaching and in practice. His own experience as a collaborative director has led him to discover that directors must do more than “copy and paste” what other programs have done. Rather, there must be a comprehensive understanding of the process that leads to success. Meeting the ensemble where it is then taking it to the next level is his mantra to band directors. By focusing on the students and their ability to grasp musical concepts, Houser believes that musical excellence will follow and will ultimately drive the ensemble forward.

Providing opportunities for success for each student is at the heart of all that Houser does. He believes that the sky is the limit as long as he holds students to a communicated level of excellence, whether in the classroom, on the gridiron, or in life outside of the music-making realm.

Some of Barry Houser’s session titles are:
  • From the Football Field to the Concert Stage
  • Technology on the Gridiron
  • System + Spirit = Success
  • Inspiring Leadership

To learn more about clinics by Barry Houser, please contact Jalissa Gascho at jgascho@yamaha.com.

Meet Yamaha Master Educator Jeffrey Grogan

Jeffrey Grogan is an internationally known conductor and teacher who is dedicated to pursuing his craft and sharing the joy of musical excellence with young musicians.  His early teaching experience taught him the importance of “getting to work,” teaching grades 6-12 in a very small town.

He quickly learned how to manage it all — from teaching and ordering buses to setting up stands, working with parents and much more. Grogan engaged fellow teachers, parents, custodians and others to “get the job done.” He continues to do this as Professor of Music and Director of Orchestral Activities at Oklahoma City University and as the Artistic Director and Conductor of the Oklahoma Youth Orchestras.

Grogan’s collegial approach helped mold his fundamental belief that gaining the trust of one’s peers, while providing an inspirational angle to understanding the spirit of the music by the players, is fundamentally important. Core to his approach is ensuring that those under his baton know and understand their responsibility to the music and are able to trust and support the ensemble. This is what inspires successful performance experiences. Whether conducting a small chamber ensemble or large all-state orchestra, Grogan’s focus on each individual’s emotional engagement is key, ensuring every ensemble member is fully engaged in every moment of a rehearsal.

Grogan pours an exorbitant amount of emotion, energy and passion into every moment, and he also makes the time to celebrate the successes of the music-makers. He creates inspirational moments and fosters a unique vocabulary that serve to provide connections within the music and among the players. He believes that what’s most important is what’s happening in the “here and now” and looks for each opportunity to create a little bit of magic in every rehearsal.

A few of Jeffrey Grogan’s session titles are:
  • Lead Rehearsals that Inspire
  • Conducting Artistry through Gesture

To learn more about clinics by Jeffrey Grogan, please contact Jalissa Gascho at jgascho@yamaha.com.

Meet Yamaha Master Educator Larry Gookin

Inspired by his own high school band director, Larry Gookin‘s primary focus when conducting wind bands of any level is for the performers to “say something.”  Mere perfection of the technical aspects of performance is simply not enough — the musicians must make a personal connection to the music, which results in an expressive, musical presentation. Only then will the ensemble members truly experience the performance as opposed to presenting the performance. Audience members are greatly impacted by this experience, as well.

Gookin has more than four decades of educational experience and is a Distinguished Professor and Emeritus Professor of Music at Central Washington University. His open and inviting podium style puts his players at ease from the very first note. His teaching philosophy is based on the premise that educators teach people, not just music. He works to help players discover the emotional content within the music, then uses that discovery as the impetus for them to interject their own emotions into the performance. This instills empowered, expression-filled musical decision-making.

Whether conducting an honor band or working in residence with a school band program, Gookin’s teaching style promotes honest exchanges with both students and educators alike. He also enjoys working in-depth with young music educators as they strive to discover who they are as directors and what their ultimate purpose is in teaching.

Some of Larry Gookin’s session titles are:
  • The Art of Musical Conducting
  • Performance Anxiety and Stage Fright
  • Music Advocacy
  • Wind Band Intonation – Yamaha Harmony Director
  • Emotion and Meaning in Music
  • Podium Personality and Communication
  • Band Director Burnout

To learn more about clinics by Larry Gookin, please contact Jalissa Gascho at jgascho@yamaha.com.

Meet Yamaha Master Educator Kevin Ford

Kevin Ford has two strong tenants that guide his work as the Director of the Leadership Conservatory for the Arts at Tarpon Springs High School in Florida.

First, he assists his students, and their families in understanding the connection between the artistic and music-making processes, and growing as individuals to become service-minded and compassionate people.

Second, he encourages the art of collaboration, both through leadership and by example. By allowing and prompting his students to find answers and solutions, he encourages a process that allows for flexibility and empowerment in the music-making process. This enhances the students’ experiences because they are a part of a collaborative environment, which fosters empowerment and creativity.

With empowerment comes responsibility. Ford sets high expectations for himself and his students at the Leadership Conservatory of the Arts to come to rehearsal prepared and leave with new goals, which the students set for themselves. This is a shared commitment to achieve more and be better every day. This is echoed in the way Ford utilizes mentorship in his program — experienced musicians are partnered with less experienced musicians in small ensembles, which provides student leaders the opportunity to inspire, lead and help their growing colleagues.

Ford has a great deal to offer any instrumental educator when it comes to the topic of bringing out the best in student musicians. His leadership program at Tarpon Springs High School is nationally recognized. Any program looking to extend its traditional curriculum to include a creative approach to learning, which focuses on leadership development and artistry should consider learning more about this conceptual approach through a session with Ford.

A few of Kevin Ford’s session titles are:
  • 7 Habits for Highly Effective Directors and Students
  • TEACHING: Building a Culture of Artistic Excellence
  • Artistry: Unlimited Possibilities
  • Leadership
  • Show Design Process
  • The Importance of an Outstanding Educator
  • New Teachers: The First 100 Days

To learn more about clinics by Kevin Ford, please contact Jalissa Gascho at jgascho@yamaha.com.

Meet Yamaha Master Educator Richard Floyd

Richard Floyd is the State Director of Music Emeritus at The University of Texas at Austin. He is a recognized authority on the art and craft of teaching and making music.  He is an ideal director for honor ensembles or lecturer at staff development days and MEA events. Floyd specializes in challenging student ensembles and music educators alike to reach their highest level of craft and artistry.

When directors have the opportunity to work with the incomparable Richard Floyd, it doesn’t take long to discover that it is his commitment to artistry and passion for the art of making music that are what define him as a conductor. He believes making music is core to our human experience. Floyd is unique in that he continually creates artistic, musical connections for every level of music-maker, whether they are in a middle school, high school, collegiate or an adult ensemble.

Sharing his passion for the art of making music with students and fellow educators is one of Floyd’s greatest joys. Directors who have the opportunity to see him work with an ensemble observe an uplifting, artistic rehearsal. He desires to lead educators to view what they do as their calling — passion-filled, with art, beauty and inspiration — instead of merely a job.

One of the key distinctions to Floyd’s conducting and teaching is that he leads musicians to uncover the art that is inherent in each piece of quality literature by encouraging them to think and make discoveries on their own. In doing so, Floyd provides an enlightening experience where music makers create their own artful decisions and subsequently enjoy the rewarding feeling that comes with a sense of ownership of those choices in performing with others.

A few of Richard Floyd’s session titles are:
  • To Be a Better Teacher, Be a Better Conductor
  • Pathways to a Happy Workshop
  • What They See is What You Get
  • The Seven Deadly Sins of Music-Making
  • Getting to the Art of the Matter
  • Hear It, Feel It, Fix It
  • Fail Safe Fixes for Frequently Frustrating Flaws
  • The Music You Play Matters
  • Do You Hear What I Hear?
  • The “Three Es” of a Productive Rehearsal: Efficient, Effective and Engaging
  • Getting It Correct Don’t Make It Right

To learn more about clinics by Richard Floyd, please contact Jalissa Gascho at jgascho@yamaha.com.

Meet Yamaha Master Educator Cheryl Floyd

Cheryl Floyd is at home presenting on any instrumental music topic. But as the retired Director of Bands at Hill Country Middle School in Austin, Texas, she shines especially bright in the realm of “all things middle school.”

At this incredibly challenging, yet significantly crucial, time in the lives of young music students, she consistently brings a fine-tuned balance of high expectation, passion and an extra helping of heart to each of her rehearsals.

What young students always seem to take away from Floyd’s teaching is her passion for developing their musicianship and skills by scouring repertoire to find the perfect piece to accomplish this superior goal. She is highly dedicated to discovering and commissioning exceptional repertoire, which she speaks to in her session titled “Commissioning Music for Young Band.”

As an educator and presenter, Floyd shares her lifetime of music making and teaching with fellow educators by challenging them to introduce their students to excellent music and to teach with lots of energy and passion — something she does as a dynamic, in-demand guest clinician and conductor through her session “Rehearsal Strategies for the Young and the Restless.” Floyd is also a champion of unique teaching methods and learning pathways, such as the Suzuki Method. Understanding that students, especially middle school students, learn fastest when they are happy, Floyd provides a learning environment for students that is fun, high energy, musically focused and inspirational; wisdom she imparts upon other educators so they can inspire the students in their programs.

Viewed and respected as a highly-effective conductor, directors across the United States repeatedly call upon Floyd to work with their students and fine-tune their ensembles.

Some of Cheryl Floyd’s session titles are:
  • Tuneful Teaching from the Start
  • The Magic of Having a Mentor
  • Picking Pieces for Picky People
  • Rehearsal Strategies for the Young and the Restless
  • Best Beginnings for Beginners
  • Commissioning Music for Young Band

To learn more about clinics by Cheryl Floyd, please contact Jalissa Gascho at jgascho@yamaha.com.

Meet Yamaha Master Educator Douglas Droste

With a dynamic and engaging teaching style, Douglas Droste brings a level of enthusiasm to orchestral rehearsals, which stems from his determination to achieve musical success for every student, at every level, in every ensemble.  He is passionate about this approach and takes full responsibility for ensuring that students are motivated to perform at the highest level.

A former full-time public school music educator and currently the Director of Orchestral Studies at Baldwin Wallace University Conservatory of Music in Berea, Ohio, Droste has firsthand experience with the challenges that are inherent to music educators. He regularly works with school-aged musicians through all-state and honor orchestras, music festivals and school visits, as well as with their directors. Because he holds himself to the highest standard, young musicians under his leadership are nurtured to a rewarding level of achievement. Directors champion Droste’s ability to translate music-making skills to life-enhancing skills through his in-depth interpretations, keen sense of community and personal ability to empower and inspire.

Droste’s presentations and workshops range in scope, much like his teaching experience, from the practical and technical aspects of bowing, to high-level and inspiring conducting workshops about making informed decisions on the podium.

A few of Douglas Droste’s session titles are:
  • Conduct Like You Mean It!
  • Bowing Misuses and Conducting Fixes
  • Conducting Decisions, Decisions, Decisions!
  • Orchestral Leadership Principles

To learn more about clinics by Douglas Droste, please contact Jalissa Gascho at jgascho@yamaha.com.

Meet Yamaha Master Educator Dr. Rodney Dorsey

Dr. Rodney Dorsey‘s expertise in music education stems from a diverse background of experiences, which include teaching at multiple distinct public high schools as well as directing college ensembles for decades.

As an African American band director, Dorsey knows what it means and how it feels to be a minority — a unique and motivating perspective he brings to students and teaching moments.

He is currently a Professor of Music and Conductor of Wind Orchestra as well as the Director of Graduate Wind Conducting Studies at Florida State University College of Music and is active guest conductor, clinician and adjudicator in the United States and has welcomed engagements in Bulgaria, Hungary and Canada.

Making connections with students as individuals is one of Dorsey’s strengths and passions. He understands that directors can have a powerful, positive impact on young musicians and their goals, and accepts this as part of his professional responsibility.

Serving the roles of both director and mentor, Dorsey’s student-centered approach to teaching focuses on providing valuable and useful input, which can be immediately implemented. Through the process of setting goals and making connections with fellow students within the ensemble, Dorsey works with students individually to help them develop a plan to achieve their objectives.

Some of Dr. Rodney Dorsey’s session titles are:
  • Strategies for Long-Term Success
  • Get Inside the Music
  • We are What We Teach: Quality Literature and the Instrumental Ensemble

To learn more about clinics by Dr. Rodney Dorsey, please contact Jalissa Gascho at jgascho@yamaha.com.

Meet Yamaha Master Educator Dr. Travis J. Cross

Dr. Travis J. Cross is a Professor of Music and Director of Bands at UCLA, where he conducts the wind ensemble and symphonic band and directs the graduate wind conducting program. His diverse areas of expertise make Cross an ideal presenter for any session designed to enhance the skills of the earnest band director.

For example, his session on the role of the conductor explores the profound relationship between conductor, score and ensemble, as well as common barriers to success, progress and growth. Another session provides directors with strategies to increase the level of students’ individual musicianship skills by empowering them to think, listen and use movement to enhance the performance experience.

As an engaging and active conducting clinician, Cross often utilizes real-time participation, where audience members form small ensembles that Cross conducts. This “real-time” problem-solving approach assists directors in understanding how they may use these techniques in their own classrooms.

Cross is an ideal director for honor ensembles, as he has a profound understanding of music-makers at any age. His dynamic personality engages students quickly, which inspires them to perform at the highest level. His ability to choose the right concert material provides a solid base for enhanced student learning.

Core to his own teaching approach are the tenets of listening, problem-solving and active engagement within the ensemble. On the podium, Cross seeks to conduct not just the music, but also the players — the people who bring the music to life. This subtle shift focuses his words and gestures on how to motivate, educate and instigate the players to make effective and musical sounds. He is passionate about assisting and mentoring educators of all levels, specifically early-career band directors, building connections between university and high school programs.

A few of Dr. Travis Cross’ session titles are:
  • Better than Before: Questions and Ideas for Successful and Sustainable Teaching After the Pandemic
  • The Interactive Rehearsal: Empowering Students to Think, Listen and Move
  • We are What We Play: Developing a Programming Philosophy
  • The Conductor’s Role
  • The State of Our Art
  • Zero to Concert in 48 Hours: Strategies for Success with Honor Bands

To learn more about clinics by Dr. Travis J. Cross, please contact Jalissa Gascho at jgascho@yamaha.com.

Meet Yamaha Master Educator Daniel Berard

In his inspirational and practical presentations, Daniel Berard, the Director of Bands at Chatfield Senior High School in Littleton, Colorado, shares his experience of starting with nothing but a blank piece of paper and a vision.  He helped build support systems comprised of community members and parents to create a thriving program.

He brings knowledge and experience of what must be done at various stages of development to place a program on a trajectory of sustained success.

Berard’s passion for developing musical literacy and high levels of performance excellence in students is infectious. He offers valuable advice on how to create and sustain a nurturing environment for student success, creativity, leadership and independence, as well as advancing one’s pedagogical foundation, rehearsal environment, and effective and expressive conducting techniques.

He hears and understands what teachers experience and what they might need to do in order to clear obstacles and build support systems. Berard is an expert at diagnosing and prescribing what may be the best steps for teachers seeking to advance their pedagogy, positively impact their students and sustain successful music programs.

Berard assisted with the process of opening Fossil Ridge High School and Kinard Middle School, in Fort Collins, Colorado, and created thriving music programs at both schools. He has led the music department through a path of explosive growth, innovation and excellence, and provides practical suggestions for teachers to connect to the larger scope of the school community by positively engaging colleagues across disciplines.

He is often asked to speak about integrating technology into pedagogy, assessment and rehearsals. These sessions focus on everything from establishing a music technology lab to production classes that include live audio reinforcement, digital creation, recording and film scoring.

Some of Daniel Berard’s session titles include:
  • Collaborative Rehearsal Strategies
  • Empowering a Student-Centered Ensemble Experience
  • Developing Independent Musicians Through Collaborative Rehearsals
  • Fueling Your Fire, Sustaining Your Passion— A Discussion on Career Longevity, Finding Joy and Balance, and Avoiding Burnout
  • From Nothing to Nationals — A Blueprint for Building and Sustaining a Thriving Band Program
  • The Business of the Band — the Band Director as CEO
  • The Unintended Consequences of “Don’t” — Rehearsal Strategies that Foster Student Engagement and Build Musical Independence
  • Creative Show Design Solutions for Marching Bands Large and Small
  • Engaging the “Screen-Ager” and Leveraging Social Media Within Your Ensemble
  • Streamlining Your Assessment Systems Through Integrating Technology — Helping You “Inspect What You Expect”

To learn more about clinics by Daniel Berard, please contact Jalissa Gascho at jgascho@yamaha.com.

Chasing Away The Holiday Blues

The holidays are supposed to be filled with joy, right? Well, the truth of the matter is that they can also be a source of stress and tension. In fact, part of that twisted knot in your stomach may be due to those holiday songs that you keep hearing over and over and over again.

The good news is that there are ways to undo those feelings and bring both musical and emotional contentment back into your life.

A recent article entitled “Does That Early Holiday Music Make You Happy — Or Bring Out the Bah Humbugs?” cites a poll reporting that 25 percent of Americans say the most stressful thing about the holidays is listening to the music.

Let that sink in for a moment. Music is supposed to bring us joy and happiness, not induce stress in our bodies and minds. All year long, most of us play music in our homes, cars and offices to feel good. Why should it be different this time of year?

The answer lies in the fact that, during the holidays, we’re assaulted by an endless onslaught of themed songs that play relentlessly, from every loudspeaker hidden in the ceilings, nestled in our car doors, lurking behind every innocent-looking potted plant. Yet holiday music is not for everyone. The reason you hear holiday music earlier and earlier each year, especially in places of business, is to stir up a sense of nostalgia … which in turn makes you want to spend more on gifts. However, at some point this technique can start to have an adverse effect. And for those who have had unpleasant associations with the holidays, this kind of musical overload can actually create feelings of contempt or sadness.

But just because you can’t stand to hear “Silent Night” or “Frosty The Snowman” anymore doesn’t mean you can’t take matters into your own hands and try to change the narrative. I’ve found, for example, that putting up holiday lights is an effective way to combat the holiday blues. This year, I decorated a fern plant before the Thanksgiving holiday with both white and multicolor lights. It immediately made me smile, and I found myself turning the lights on not only every night, but as soon as I got up in the morning.

Then I ran across an article that helped confirm my theory about lights: people who decorate earlier are simply tapping into the holidays before others, which makes them happier. In the article, psychologist Deborah Serani also notes that “decorating can definitely lift your mood.”

I also find that playing my all-time favorite holiday CDs — A Charlie Brown Christmas by the Vince Guaraldi Trio and the soundtrack to Dr. Seuss’ How The Grinch Stole Christmas — help lift my mood. I also enjoy creating my own custom playlist of holiday songs that elicit good memories or make me feel festive. This also has the bonus of letting me take control, at least to some extent, of which holiday songs I am listening to.

My final piece of advice is to embrace the spirit of giving. Years ago, I got together with a friend — the talented keyboard player Peter Vitalone — to record a holiday record called In the No L, where we did unique cover versions of some of our favorite seasonal songs. Along with special guests ranging from Shawn Pelton to Grammy-nominated opera singer Angela Blasi, we created a project that we’ve never sold. Instead, we’ve simply given this music away to help spread the cheer. So in that spirit, here’s a gift for you, dear reader: “Carol of the Bells,” featuring David Sancious on piano and Jerry Marotta on drums/percussion:

So if the holiday blues have got you down, try to take some positive steps to turn things around. Maybe it’s time to put on that holiday station, make some hot chocolate, put up a string of lights and try to create some new memories. And don’t forget to give if you can!


Check out Rich’s other postings.

Creativity at Christmastime

As I sit down to write this, the holiday season almost upon us, what I want to say — or at least what I think I should say — is that I always feel a festive creative spirit calling this time of year.

But the truth is, the last thing I want do at the moment is write a song. And that’s odd because usually I can’t wait to get my hands on an instrument and start making music. It’s strange to not feel an impulse tugging at my sleeve. I should be inspired.

There’s a Christmas playlist resounding in every mall I enter, every restaurant in which I dine, every gas station, supermarket, nail salon. They’re inescapable. A guilty little voice in my head whispers: “Every songwriter on earth must be writing a holiday song today. Why aren’t you?” Yet I’d much rather shop. Or bake cookies. Or sit by a fire and read while Nat King Cole serenades me.

What’s wrong with me? Making music has never been work.

Still, for some reason, my creative brain needs to shut down at the end of the year. It simply runs out of gas.

To be sure, there are other holiday-related activities I do enjoy: wrapping gifts, decorating gingerbread houses, ornamenting trees, finding the quintessential balance of rum and nog, taste-testing my friend Fran’s Chanukah Latkes. But picking up my guitar? My journal? Sitting at the piano? Not so much.

For me, December is about reflection, taking stock, disengaging, rejuvenating, alphabetizing my spice rack (I actually just did that), cleaning out closets and giving away things I purchased in haste. You know, making room for the new.

Maybe taking time off is the best thing I can do for my creativity. After all, a recharge is an investment for the future.

After the holidays are over, when I take down my tree and put the box of ornaments back on the shelf where they’ll rest for the next 12 months (wasn’t it just yesterday that I put them away?), I’ll be more than ready to get to “work.”

Come January, I’ll be rested, my mind and heart ready for a fresh look at the world, at time flying by, at love and laughter. I’ll be ready to make peace with my demons, reacquaint myself with my better angel. The seasons they go round and round and so another year will begin.

But songs about cider on the stove, carolers at my door, reindeers, sleigh bells and mistletoe? I’ll leave that to my colleagues who can’t slow down.

Don’t get me wrong. I’m no humbug. I adore dressing up and going to holiday parties. I love giving and receiving. I live for romantic holiday Rom-Coms set in New York City. (In fact, I wish I was at Rockefeller Center right now watching the ice skaters glide under the big Christmas tree.) I yearn for a long walk through Central Park in the snow, a hot chocolate nestled in fuzzy gloves. I miss the cold. I miss the stuff New Yorkers are sick of. Christmas isn’t the same in Los Angeles. 🙁

Songwriter Shelly Peiken on her patio in sunglasses playing her guitar.
Click on this picture to hear a song I wrote about Christmas in LA.

Uh oh — what’s this? I feel something shifting inside me — a flutter in my heart. Maybe it’s all the New York talk making me feel nostalgic. Where’s my capo? Where’s my pick? I think I’m tuning to an open D.

What is happening?

A song. A song is what’s happening. After all, no matter what we say, no matter how we may try to give it a rest, let’s face it: When lightning strikes, a writer writes.

Happy holidays, everyone. Whoever you are, wherever you are, whatever you’re doing. Whether you’re working or playing, revving up or cooling down, may next year bring you all the hope, the love, the laughter — whatever it is you need — to start again.

Photo courtesy of the author.


Check out Shelly’s other postings.

Get Ready for the First Performance National Day of Celebration

Give beginning band and orchestra students a boost in confidence by providing an opportunity for them to showcase their newly acquired music skills in front of family and friends in a public setting. That’s the mission of the First Performance National Day of Celebration (FPNDoC).

Developed by the Music Achievement Council (MAC), FPNDoC is a turnkey demonstration concert that takes place early in the school year and recognizes the achievements of beginning instrumental music students.

The Goals

MAC has identified the third Thursday in November as the official FPNDoC, however, music educators can pick any day within first six to eight weeks of the school year.

In addition to applauding the musical accomplishments of beginners, the primary goals of the program are to reduce dropout rates among beginning music students, create short-range incentives for students, encourage communication with parents, and strengthen administrative support of the music program.

The Toolkit

To help music educators plan and implement a First Performance concert, MAC has created a free FPNDoC toolkit that includes:

    • Template letter/invitation to parents. It’s recommended that the music director announce the date and time for the First Performance at the first parent meeting.
    • Template letter/invitation to principal/administration
    • Customizable and printable PDF certificate of advancement. Make sure to have certificates printed for each student to celebrate this major advancement from beginning instrumental music student to member of the band/orchestra.
    • Script template. You will need to find an emcee for the First Performance. Consider asking a representative from the school administration, a member of the parent organization or the high school band director to serve in this role.
    • Press release template. You will need to publicize the event across the school and community. So in addition to a press release, you will need posters and school-wide announcements.

Download the materials here.

What’s Left?

You need to select what to perform.Select pieces from a beginning band method book or check out MAC’s “First Performance – A Demonstration Concert,” which is available through Hal Leonard.

Make sure light refreshments are provided following the performance.

You may want to consider involving high school music students to pass out programs, answer questions, serve refreshments or assist in tuning students before the performance. The beginners will look up to their older peers and parents will see the long view of participating in a music program.

Share Your FPNDoC Videos

The National Association of Music Merchants (NAMM) Foundation is encouraging music educators to share short, informal FPNDoC videos. Instructions on creating a video can be found here.

Tape highlights of your rehearsals as you prepare for your First Performance concert. Interview students and their parents about the First Performance. Or tape yourself giving an overview of the FPNDoC experience. And, of course, don’t forget to capture clips of the performance.

Videos will be posted on The NAMM Foundation website and shared via its social media channels.

FPNDoC Test Run

At the 2017 Midwest Clinic in Chicago, attendees were treated to the First Performance of two local schools’ beginning music students. (Read about the FPNDoC performances at Midwest here.) Parents were asked two questions after the concert:

    • Now that you have seen your child perform, are you more likely to encourage your child to stick with band?The response was unanimous – 100%.
    • What one word would you use to describe your reaction to today’s performance? Here are the responses.

The sound of applause early in a musician’s life is infectious and can encourage continued growth leading to a lifetime of music-making. The resulting memories will last for a lifetime. With beginners, there will never be a more enthusiastic group of performers and audience members than these young musicians and their families and friends. FPNDoC is designed to provide a singular opportunity for students, parents, administrators, student peers and the community to recognize and celebrate the accomplishments of beginning instrumental students. It will also help to ensure a strong program overall.

What Puts The “Holiday” In Holiday Music?

‘Tis the season when the bells are a-jingling, the herald angels a-singing and the drummer boys a-drumming.

Some of us have more tolerance for holiday music than others (personally, I tend to start getting a little weary of it somewhere between Black Friday and Cyber Monday) but there’s no question that the songs that dominate the airwaves, shopping malls and elevators this time of year carry a certain spirit all their own — a spirit that evokes feelings of love, peace and goodwill towards our fellow man.

What is it that puts the “holiday” in holiday music, anyway? It turns out that there are several factors — some that are glaringly obvious and others that are quite thought-provoking.

First, the obvious:

1. Holiday music makes us feel good. Like other sensory experiences, music has a powerful effect on our subconscious, to the extent that it can actually change our mood. When we hear music we like, we feel good. The same is true if we hear music that triggers warm memories such as past holidays with family and loved ones. (Psychologists call this the “reminiscence bump.”)

2. They’re just plain great songs. The mainstays of holiday music all have one important thing in common: They’re well-crafted songs. Usually written in a feel-good major key with clever lyrics that deliver positive, uplifting messages and/or paint pictures of an idealized time gone by, they tend to consist of simple melodies and chords that lend a sense of familiarity before throwing you a surprise once in awhile — the ideal recipe for a song that sticks in your head year after year.

And now for the perhaps not-so-obvious:

1. Their instrumentation. Holiday songs unashamedly incorporate elements like church bells, trumpet fanfares and dramatic orchestral strings to remind you of hymns and religious settings. In addition, they often feature high-pitched instruments like sleigh bells and glockenspiel that conjure up images of falling snow and children’s toys. Subtle? No. Effective? Definitely.

2. Their versatility. Most popular holiday songs lend themselves to a wide variety of arrangements and can easily be played by anything from a full orchestra to a marching band to a small jazz ensemble to a group of carolers. As David Ludwig, dean of artistic programs at the Philadelphia-based Curtis Institute of Music points out, “a lot of these songs have existed for hundreds and hundreds of years and have survived the test of time precisely because they’re so singable, they’re so accessible, they’re so flexible.”

3. The weather outside is frightful. “When it’s most cold out and the bleakest, is sometimes the time when people want to celebrate the most,” Ludwig adds. “[That’s when they] want the most warmth and sense of community with each other.” In other words, when it’s time to cuddle and huddle, that’s when we’re most receptive to songs that emphasize affection and human connection — the very definition of holiday music.

Cover displays a drawing of a winter scene including a church, bare trees and snowflakes, as well as the title of the song and that it is by Irving Berlin.
“White Christmas,” written in 1942, is the best-selling song of all time.

By the way, in case you think that all “traditional” holiday songs are centuries old, think again: With some notable exceptions (such as “Silent Night” and “Jingle Bells”), many of the secular ones were actually written in the first half of the 20th century. That’s why their musical characteristics (i.e., solo vocals sung over lush orchestral instrumentation) reflect those of the American popular music of that era. The rise of rock’n’roll in the 1950s ushered in a new generation of holiday songs such as “Jingle Bell Rock” and Elvis’s perennial “Blue Christmas,” but there have been relatively few memorable holiday songs written since then, apart from Bing Crosby’s improbable 1963 hit “Do You Hear What I Hear?” (actually written as a protest song in the midst of the Cuban missile crisis) and José Feliciano’s heartfelt “Feliz Navidad,” written and released in 1970.

Why is that the case? Hard to say, but perhaps it’s a simple as the fact that it takes a generation or more for a song to become so imbued in our subconscious that we consider it a “classic.” Or — and I hate to say it — maybe it’s because the holiday spirit has eroded in recent years due to factors like over-commercialization and “Christmas creep,” where the sound of sleigh bells begins wafting from the speakers in overzealous stores eager to rake in the gift dollars even as the summer sun is blazing outside.

All food for thought — like gingerbread cookies and candy canes. Me, I’m off to deck my halls with boughs of holly. Happy holidays, everyone!


Check out Howard’s other postings.

Don’t Play With the Metronome

Metronome with arm swinging.

You know that annoying device that beeps incessantly, often completely out of time with your playing? You may have one the size of a book that has more knobs and switches than a soundboard. You may be “old school,” with one that swings like a pendulum from side to side. Or you may be the “less is more” type with a free app on your smartphone or tablet — something that’s always handy anyway. Regardless, this device often seems to serve no better purpose (at least when you bother to turn it on) than to irritate you with its refusal to stay in sync with your brilliant sense of time.

Well, that’s because you’re doing it wrong. My advice: Don’t play with the metronome.

You may say to me that your music teacher, band director, percussion instructor, parent, etc. have all told you to use your metronome every time you practice. Well, yes, of course, you should certainly use it while you practice. Just don’t play with it.

Confused? Allow me to elaborate.

Rather than play with your metronome, count with your metronome. Turn it on, then count along with it. Count quarter notes. Count eighth notes. Count sixteenth notes, triplets, quintuplets, septuplets … any rhythmic unit that you think you might encounter in the music you’re playing. After you’ve established a rhythmic context, count anything that has rhythm (yes, I know, that means everything) along with the metronome: your études, your band music, your solo and ensemble music, your audition piece …. every piece of music you play or are learning.

It may seem like a matter of semantics, but hear me out. It is practically intuitive to count out loud as you play — just as intuitive as it is to play along with your counting. Your hands and feet easily sync up with the syllables coming out of your lips because all of that information is originating from the same brain. So if you allow verbalization (i.e., counting out loud) to function as an interpreter of sorts between the metronome and your playing, you’ll likely find that the metronome will no longer be a source of frustration, but a true asset in time-keeping.

Spotlight on Vinyl Subscription Services

We live in a world of modern conveniences. So what’s to stop us from modernizing the most vintage way to enjoy music?

The recent resurgence of vinyl reflects a combining of the old with the new, and there are a number of exciting products that allow you to take advantage of this convergence. The problem is that collectors often find themselves spending inordinate amounts of time combing through the racks at stores and flea markets. Wouldn’t it be cool to instead be able to explore this world without ever having to leave the comfort of your home? Vinyl subscription services provide the perfect solution, and they offer a variety of options to suit almost any need.

Here are six of the top vinyl subscription services available today:

Vinyl Me, Please

Started in 2013, this is one of the largest services. They provide music with a focus on discovery and education.

Options and Features: VMP offers a mixture of new releases from both up-and-coming artists and established legacy artists. They offer a variety of genre-specific subscriptions, including classical, jazz, rap and Hip Hop. All albums are pressed on heavyweight colored vinyl and any remastering is done “hand-in-hand with the artist.”

Vinyl Moon

Founder Brandon Bogajewicz has a recording industry background and is publisher of the music blog The Burning Ear. After getting into vinyl, he saw a need for a record club that would share compilations of new artists’ music, rather than single-artist albums.

Options and Features: Bands and labels submit their work and each month’s release provides music from different artists that Bogajewicz chooses himself. In addition, each volume’s record jacket and vinyl are designed by a different visual artist who is given free reign to create a unique experience. Members also have access to purchase exclusive albums from previously featured bands, and VIP members also get special perks like unique vinyl colors and collectible items.

Magnolia Record Club

Started by Nashville musician Drew Holcomb, this service is geared to those who love indie, folk, and country music. Each album is hand-selected by Drew or other artists.

Options and Features: Each record is a new release in an exclusive pressing — complete with listening notes and a unique art card — designed with the intent of becoming a collector item. Subscribers can also choose to add on an Artist Discovery Album: an up-and-coming act’s vinyl, usually signed or personalized by the band. There is also a Facebook group where club members can share their love of music and all things vinyl.

Vinylmnky

Founders Travis and Nick Jourdan started this subscription service in 2015 with the mission of helping to share new artists with others.

Options and Features: Artists are found through relationships with record labels and by scouring Soundcloud and taking artist submissions. Subscribers to the popular Breakthrough Record of the Month option get a different artist’s debut record sent to them each month, along with add-ons such as signed album covers, photos and posters.

Turntable Kitchen

Founded in 2008 by Matthew Hickey and his wife Kasey Fleisher as an online publication dedicated to music criticism, cooking, and food photography, the company launched its first vinyl subscription service in 2012.

Options and Features: The Pairings Box option provides an exclusive, limited edition seven-inch vinyl record by an up-and-coming artist each month, along with three original recipes, an ingredient to go with the recipes, and a digital mixtape of new music. Other subscription types include Coffee & Vinyl Pairing, which includes fresh-roasted artisan coffee, and SOUNDS DELICIOUS, which offers full-length cover versions of the albums that influenced each featured artist.

Feedbands

Entrepreneur Graham Langdon started this company in 2012 in an attempt to help talented but unknown artists find wider audiences — and get paid in the process. It began as a streaming service that gave artists 99 percent of any earnings from their music; a vinyl subscription service was added in 2013.

Options and Features: Top vote-getting new artists on the company’s streaming service — many of whom go on to land major label deals — get a free, first-time pressing of their debut album each month, and subscribers can opt to receive that album or can choose from one of 70 records previously released. All records are hand-pressed in color variants.


The starting prices for each of these services are roughly the same, so you’ll likely want to make the selection of vinyl being offered as your focal point when deciding which one is right for you. Whichever you choose, your mailman will soon start serving as your conduit for enjoying new music!

NOTE: While we do our best to provide useful information and resources for our customers, Yamaha does not endorse or affiliate with any of these services.

Assignable Controllers

This article is all about something called assignment. The standard definition of the word in most dictionaries goes something like this: “To allocate (as in a job or duty).”

When most people think of assigning something, they think of delegating a task, as in assigning your child a chore to complete, or assigning an employee to do a particular job. When it comes to the Yamaha Genos flagship workstation, the concept isn’t all that different: you assign functions to controllers such as a button, a knob or a slider. In other words, you’re telling Genos, “When I press or move this button/knob/slider, I’d like it to execute this task.”

All in all there are 22 different controllers on Genos, each with a factory default assignment (i.e., job to do). But you can tell any of them to do something different. Here’s how:

How to Change Button Assignments

Let’s start by assigning a function to one of Genos’ six ASSIGNABLE buttons (A-F):

Close-up of controls.

You begin the process by holding down the DIRECT ACCESS button and pressing the button you want to reassign:

Close-up of direct access button on controls.

This will take you to the Assignable menu screen, which shows all current assignments for not only the buttons but the Foot Pedals and Home button shortcuts as well. By default, Yamaha has already assigned the six Genos buttons to commonly used functions. As you can see in the photo below, ASSIGNABLE button A is assigned to Mixer, while B is assigned to Channel On/Off, etc.:

Screenshot.

But let’s say that instead of calling up the mixer, you would prefer to have quick access to editing your Voices (“Instruments,” in Yamaha lingo). Simply highlight the Assignable Button A field (which should already be highlighted by default), then touch that field.

You’ll see the list expand with 13 glorious pages of functions which can be assigned to the highlighted button. Touch the onscreen down arrow below the page ratio, and go to page 3 of 13 (3/13), then select Voice Edit:

Screenshot.

Now touch Close to execute the action. Voila! Now whenever you press ASSIGNABLE button A you’ll be taken directly to the Voice Edit menu. Follow the same steps to change the assignments for the other ASSIGNABLE buttons.

Having a dedicated button really is a time saver. Before this re-assignment of ASSIGNABLE button A, if I wanted to access the Voice Edit menu, I’d need three button presses, (Menu, onscreen Menu 2, then Voice Edit). With this change, accessing that menu only requires one button press!

How to Change Knob Assignments

Let’s move on now to changing the assignment of a knob. You’ll notice there is already a dedicated physical button labeled KNOB ASSIGN:

Close-up of buttons.

You might well think that this is used to assign a particular function to one of the six knobs, and you wouldn’t be far off. But what this button actually does is cycle through the three pages of current knob assignments. These can be seen in all their glory in the OLED Sub Display — the dedicated thin strip above the knobs. If you keep pressing the KNOB ASSIGN button you’ll see that the display goes from page 1 to 2 to 3 and than back around to 1 again. That means in essence you can have 18 different knob functions at your fingertips at any given time.

Assigning one or all of the knobs is as simple as holding down the (you guessed it) DIRECT ACCESS button and pressing the KNOB ASSIGN button. You will now be taken to the Live Control screen where you get a comprehensive look at all the Knob and Slider Assignments:

Screenshot.

Let’s start by re-assigning Knob 1. As you can see, Knob 1 (shown onscreen in page 1, row 1) is currently set to Cutoff. Maybe you’d rather have quick access to changing the Portamento Time instead. To do so, simply highlight the Cutoff field onscreen (it should already be highlighted by default). Touch it and you’ll see the “Knob 1 – Type 1” menu appear. Touch the onscreen down arrow directly below the page ratio and go to page 3 of 5 (3/5), then select Portamento Time:

Screenshot.

When you touch Close, instead of the Sub Display showing Cutoff for Knob 1 Page 1, it shows PortaTime:

Close-up of screen readout.

Again, you can use the same procedure to change the assignments for all six ASSIGNABLE knobs.

How to Change Slider Assignments

Now let’s change the assignment of a slider. One of the coolest things about Genos custom assignments is being able to assign a function normally reserved for one kind of controller to a different kind of controller. So with that in mind, let’s assign one of the sliders to panning — something usually accomplished with a knob.

Start by holding down the DIRECT ACCESS button and (yes, you guessed it again!) press the SLIDER ASSIGN button:

Close-up of buttons.

You’ll find yourself in the Live Control screen once again. Highlight Slider 1 (in row 1 — it should already be highlighted) and touch it:

Screenshot.

The “Slider 1 – Type 1” menu will then appear:

Screenshot.

Volume will be selected, which makes perfect sense since that’s what sliders are usually used for. Select Pan instead and touch Close. Now the OLED Sub display strip shows Pan instead of Rhythm1 Volume:

Close-up of screen output.

Grab that slider and experience a whole new way of panning! Yes, some might argue that a knob is a more intuitive controller for panning, since when you turn it to the left it moves the signal to the left and when you turn it right it moves the signal to the right. That said, there are engineers that prefer using sliders for functions other than volume. In the end it’s all about what feels right to you.

As before, the same process is used to change the assignments for all six ASSIGNABLE sliders.

How to Rename Assignments

If you’d like to personalize your Genos experience even further, you also have the option of renaming your assignments. (These personalized names will be displayed in the OLED Sub Display strip.)

To do so, simply highlight the name of the assignment you’d like to change (I’m using PortaTime for this example),and touch the onscreen Rename field:

Screenshot.

The onscreen keyboard will appear:

Screenshot of onscreen keyboard.

You can rename assignments any way you’d like, as long as there are no more than nine characters. (For this example, I’m going to rename the assignment “PortaCool.”) When you’re finished, touch OK in the lower right hand corner, and bask in the glory of your newly personalized name assignment:

Close-up of screen output.

So go forth and assign to your heart’s content. It’s one of Genos’ most useful shortcuts, and with some practice I think you’ll find it will greatly streamline your musical workflow. And — with the possible exception of Daylight Savings — who doesn’t like to save a little time?

All photographs courtesy of the author.


Check out these related postings about using Genos:

Mastering AI Fingered Mode

MIDI Recording, Part 1

MIDI Recording, Part 2


Click here for more information about Yamaha Genos.

Grouping In Live Sound

Every mixing console provides a number of faders that allow you to change the level of incoming signals on the fly. They’re usually colored white or yellow so they contrast with the darker color of the board itself, making them easy to see in the low-light conditions of clubs, churches and other venues.

In addition to these individual channel faders, there’s also always a master fader (typically located to the right of the channel faders) that enables you to alter the overall mix volume at a touch. But many times there are also two, four or more faders near the master fader, sometimes colored differently. These are called group faders. What do they do? In this article, we’ll provide you the answer and explore this important tool for mixing live sound.

What It Is and How it Works

Groups (sometimes called “subgroups”) are a great way to organize your mixes and make them easier to manage. They also provide the ability to route signals to additional devices so that you can record or send audio to multiple locations.

As an example of the way grouping is implemented, Yamaha mixers such as the MGP12X have a feature called “Bus Assign.” This consists of three small buttons labeled “ST,” “1-2” and “3-4” located next to each channel fader, as shown below:

Close-up of the controls.
MGP12X Bus Assign section.

As described in our Tools of the Trade blog posting about aux sends and returns, a bus is an audio path that takes a signal from point A to point B. When you want to travel to a specific place, you need to get on the right bus — like going to work. And like public transportation, you get on a bus with other people and everyone rides as a group to the same destination. On a mixing board, a bus takes a group of audio signals to the same place.

The simplest mixers have only a left/right stereo bus which eventually makes its way to the speakers. See that red button labeled “ST”? When pressed, it assigns (connects) the input channel to the L/R stereo bus and master fader. You can then use the pan control to position the sound from left to right. But here’s the important thing: If you don’t assign the channel to a bus, you’ll never hear it.

The other buses are groups. The MGP12X buttons labeled “1-2” and “3-4” assign the input channel to stereo group faders, not to the master fader. They serve as a sort of “local” bus that groups a bunch of channel faders together. The group fader can then assign the signals anywhere you like, including to the main stereo bus.

Why would you want to do that? One reason would be to make mixing a lot of channels more manageable.

How to Use Groups

Let’s suppose that you have three people singing, each into their own microphone. Each microphone is connected to its own input on the mixing board, so now you have three vocal channels that you can balance for a good blend. Obviously, once you’ve got the balance set you won’t want to disturb it, but let’s suppose that over the course of the performance the band gets louder and the vocals become difficult to hear. The problem is that, if you raise each vocal fader separately — no matter how carefully — you will inevitably alter the blend you created between the three microphones. Sure, you can try to raise each fader equally to maintain the balance but that’s not likely to happen because faders are not linear — they don’t behave in a manner like, “if you push up each fader a half-inch, they all get louder by the same amount.”

This is when you need a group. Instead of assigning the vocal channels directly to the stereo bus, assign them to groups 1 and 2. This way, the vocal channels take a detour in the signal path — they go to group fader 1-2 on their way to the stereo mix. If you want to make the vocals louder or softer, all you have to do is raise or lower that one group fader. The balance between the vocal mics stays the same and you can alter the level of all three channels with one finger.

But you’re not done yet! The vocals are now on the group 1-2 buses, but those buses haven’t left the depot. Here’s what the group faders on the MGP12X look like:

Close-up of controls.
MGP12X group faders.

As you can see, next to each group fader is a red ST assignment button, just like the ST button found on the input channels. This is what connects the groups to the stereo bus. If you push that button, the groups are sent to the stereo fader and you will be able to hear them. (The odd-numbered groups — 1 and 3 — are automatically connected to the left side of the stereo bus, and the even-numbered groups — 2 and 4 — are automatically connected to the right.) When you use the pan control on the input channel, you are actually deciding whether to route the signal to group 1 (left) or group 2 (right) or both (center).

The group faders on the Yamaha MGP24X are a little more sophisticated:

Close-up of controls.
MGP24X group faders.

For one thing, the groups on the MGP24X are mono, not stereo. You still have to assign the group fader to ST in order to hear it, but here you can actually pan it from left to right. A mono group panned to the center would work fine for the vocal channels in our example above because you’d probably pan the vocals to the center anyway (you don’t want the audience on one side of the room not hearing the vocals because they’re panned to the opposite side). You could then use group 2 for bass, maybe blending a bass DI channel with a microphone on the bass amplifier.

That would leave groups 3 and 4 for a bunch of drum mics. By panning group 3 to the left and group 4 to the right you would create a stereo pair. The pan controls on the individual drum mic channels would then move a signal between groups 3 and 4, while the pan controls on the group faders would determine where (left to right) the sounds will be heard. If the group faders are panned center and you pan a signal between groups 3 and 4, you’ll still hear the sound in the center.

The groups on the MGP24X also have on/off switches. You could use these to turn off those drum channels on a song where the drummer doesn’t play (in order to reduce mic leakage or rumble) — but don’t forget to turn them back on!

Once you’ve assigned a channel to a bus, whether it be to a group or the master stereo fader, the signal is on its way out of the mixing console.

Group Output Jacks

Mixers that provide grouping often also have dedicated group output jacks on the rear panel. Here’s what they look like on the Yamaha MGP12X:

Close-up of jack outlets.
MGP12X group output jacks.

Why in the world would you want the group signal to go to a separate jack? One example would be for making a live recording of your band. For example, you could put the drums on group 1, the bass on group 2, guitars on group 3 and vocals on group 4. Then you could connect the group output jacks to a recording interface such as a Steinberg UR242 and record the instruments to separate tracks. At the same time, you could also assign the channels to the ST bus so that the audience can hear those sounds in the PA system. After the show, you’d have the ability to mix the recording of your band, with separate control over levels and EQ for drums, bass, guitar and vocals.

Another use for group output jacks would be if you needed to route your mix to a second set of speakers placed in a different room at your gig. You could assign the input channels to groups 1-2 and ST at the same time, use the stereo outs to feed your main speakers, and then use group outs 1-2 to feed a second set of speakers.

When you think about it, grouping — especially when combined with aux sends and returns —  provides a slew of new options and a great deal of additional flexibility when it comes to mixing live sound.

Photographs courtesy of the author.


Check out our other Tools of the Trade postings.

Click here for more information about Yamaha mixing consoles.

Bassoon Basics

The bassoon is one of the more unusual woodwinds, with a distinctive shape consisting of a long tube that looks as if it has been folded in two. Here are some interesting things you may not know about this intriguing instrument.

A bassoon.
Bassoon.

Birth of the Bassoon

The modern bassoon was designed in Germany but its musical ancestors were developed in the 16th century in France and other European countries. All were low-pitched double-reed instruments.

The name “bassoon” derives from the French basson, an instrument that became widely used in orchestras in the latter half of the 17th century. However, the basson had only a few keys and produced a low volume. In addition, it was difficult to tune. Nonetheless, composers such as Ravel, Debussy, Saint-Saëns and Berlioz produced exquisite works in which the basson features prominently.

A bassoon.
A four-key bassoon.

Up until the end of the 18th century, bassoons commonly had just three or four keys. Then bassoons equipped with six or eight keys began to appear. However, the fingering varied depending on the manufacturer, and a standard design had yet to be established. In the first half of the 19th century, German military bandmaster Carl Almenräder began efforts to improve the instrument. He increased the number of keys and made other innovations such as improving the part of the instrument where the tube bends back on itself, known as the “U-tube.” This made the instrument’s pitch easier to control, and at the same time increased its volume. The fruits of these efforts — passed down via musical instrument maker Johann Adam Heckel, who worked with Almenräder — have now come to be known as the German-style (or Heckel-style) bassoon. The overwhelming majority of instruments in use today use that design.

The decline in popularity of the basson and rise of the modern-day bassoon is largely attributed to influential orchestral conductors. During his tenure as conductor of the NBC Symphony Orchestra in the 1930s, Arturo Toscanini promoted the German-style bassoon for its superiority in providing more accurate pitch. When Herbert von Karajan became conductor of the Orchestre de Paris in 1969, he was said to have sometimes made disparaging comments to musicians such as, “Are you still playing the basson?”

Physical Structure

The bassoon is an unusually long instrument, nearly four and a half feet in length. Since the tube of the instrument has a folded shape, it would reach almost twice that if extended to its full length!

At the tip of the instrument is attached a fine metal tube known as a bocal. The bassoonist blows air into the double reed attached to the very end of the bocal. The bore of the bassoon extends from the joint to which the bocal is attached, continues downward before performing a U-turn within the metal part at the instrument’s lowest point, and then leads all the way up to its highest point. At the very top there is an opening called the bell.

The interior of a bassoon, from the bocal to the bell, is a conical tube, the diameter of which steadily widens. The diameter at the very tip of the bocal is around 4 millimeters, while the diameter at the bell is 40 millimeters. Between those two points, the interior of the bore gradually becomes wider.

A bassoon.
Inside a bassoon is a conical tube that gradually widens.

Note that there is also a type of bassoon with a range one octave lower, known as the contrabassoon.

A contrabassoon.
Contrabassoon.

The Differences In Double Reeds

A bassoon is somewhat similar to an oboe in that sound waves are produced as the two parts of a double reed quickly vibrate. However, an oboe reed is attached to a short piece of metal, while a bassoon reed consists solely of the reed itself, and is inserted into the long metal tube of the bocal before being used to produce sound.

Compared to that of the bassoon, the tube, or “bore,” of the basson is smaller, so producing a strong sound is difficult. To counteract this, the reed (which is the part that produces the sound), is made larger.

Three bassoon reeds, lined up largest to smallest, left to right.
L to R: The reeds of a contrabassoon, a basson, and a bassoon.

Why Is It Difficult to Hear the Lowest Bassoon Note?

It is often thought that the sound of the bassoon is difficult for bassoonists themselves to hear, since the bell is high up at the top of the instrument. That’s actually not the case. For brass instruments that have no openings through the rest of their structure, the bell is the only place where sound can emerge. However, a woodwind instrument like a bassoon has many tone holes, so sound can escape through any holes that are not being covered at any given time. That said, the very lowest note of a bassoon can be somewhat difficult to hear. That’s because when this note is played, all the tone holes are covered, so the sound does not emerge from the instrument anywhere other than the bell at its top.

Does the Sound of the Bassoon Move?

Since the bassoon is a tall, slender instrument, the positions of the tone holes are comfortably spaced some distance apart over its full length. For this reason, with the very lowest tone coming from the bell alone and the note one tone higher coming from tone holes below the bell, sound emerges from farther down the instrument as the pitch becomes higher. However, after the lowest hole is reached around the tenor joint (the point at which the instrument folds back on itself), the pattern reverses and the pitch instead rises as the tone hole positions climb higher. For those performers who sit in front of the bassoon in an orchestra or small ensemble, this can create the eerie sensation of the sound seeming to move around behind them.

Compare the Sounds

Curious to hear what the bassoon, basson and contrabassoon sound like? Check out these audio clips. The first features a modern bassoon playing the Ode to Joy from Beethoven’s Symphony No. 9, repeated three times, first at a high pitch, then at a middle pitch and finally at a low pitch:

In this second clip, you’ll hear a basson playing an extract from La fille aux cheveux de lin by Debussy:

Lastly, here’s a contrabassoon playing part of Die Forelle by Schubert:

There’s a distinct tonal similarity, but you still should be able to hear a significant difference between the three instruments!


This posting is excerpted from the Yamaha Musical Instrument Guide.

Click here for more information about Yamaha bassoons.

Breathing Between the Notes

I’m often asked by my fellow guitar players what kind of music I listen to when I’m relaxing at home. Honestly, I mostly like to just listen to the peace and quiet around me. I spend most of my working moments writing, recording and performing music, so when I’m not working, I prefer the ambience of nature around me.

I have the good fortune to live in Hawaii, and most mornings you’ll find me in the ocean, swimming and gazing at the wonders beneath the surface. Vibrant marine life and the natural colors of coral hue, enhanced by sunlight and aqua blue water fill my visual senses with wonder, while the underwater silence cleanses my spirit of the stress of daily life.

Photo of a postcard of a tropical beach.

It’s very important for me to find space for creative thought, so I consciously make an effort every day to create an open environment around me. I may spend a couple of hours watching the palm trees sway back and forth like Hula dancers on the breeze while I sip freshly roasted coffee. To the observer, it may appear that nothing of any value is occurring, but it’s during these moments of serenity that I formulate my best ideas. When there is “air” around my thoughts, it allows me to think clearly and visualize my next body of work.

I find that visualization is one of the most powerful tools for manifesting the reality you want to see in your life. It’s the quantum physics approach of “Thought Is Matter” — that whatever you think is the seed to grow the reality. If you nurture the seed and water the ideas with further optical input, the plan becomes more clear and the dream can often become a reality.

I’ve always been a bit of a dreamer, but I also pair those mental blueprints with additional active ingredients such as hard work and tenacity. Without a strong work ethic, dreams often stay in an ethereal world and never manifest in real life. Even with a strong plan for the future, work needs to be done and action taken before tangible results can be seen.

Our minds are the most powerful aspect of our human being. Musicians spend hours practicing scales, arpeggios and chord voicings with our physical body, but do we spend any time at all training our minds to achieve better physical results? Our fingers don’t move without the brain engaging the motor functions first, so surely we can visualize the movements and send those neural impulses to our fingers, even when we are away from the instruments we play. In a similar fashion, we can also use visualization techniques to overcome stage fright, prepare for live performances or even gracefully execute a challenging musical passage.

Horn players use both hands to articulate the lines they play, but they also have to breathe between each phrase. This physical limitation in technique is also a natural way to leave “air and space” between melody lines and solo improvisations. I recently found myself wondering if guitar players could find a similar way to bypass our muscle memory and force ourselves to “breathe” between our phrases. After giving it some serious thought, I devised an idea that you might try the next time you pick up your guitar.

The Concept

The concept is really simple: Just jam along to one of your favorite backing tracks, but lift your fretting hand off of the fingerboard between each phrase. While your hand is off the fretboard, finger-snap in time with the track for two or three beats, then place your hand back on the fretboard to play your next line. This will yield an approximately breath-long pause between each phrase — or more, if you decide to wait for another beat or two.

The fact that you are unable to play any notes during that brief period of time forces you to phrase with a little more air. Check out the video below to see and hear exactly what I mean.

The Video

The progression I’m improvising over consists of chords derived from the key of A major. This is an A Ionian progression with a tonal center of the I major chord, A:

I:   A   I  C#mi7(b13)   I   F#mi7(b13)   I   Dma7   E7sus   :I

My lead guitar phrases combine notes from the A major pentatonic scale and the A major scale, along with a judicious amount of chromatic passing tones.

Revstar inner workings.

I chose to use a Yamaha Revstar 720B with FilterTron-style pickups for this demo, as the open tonality they impart to the sound further illustrates “air and space” within the tone, as well as around it. These Alnico V magnetic pickups are humbucking in nature, but often remind me of a super quiet, single-coil pickup.

I created an amp and effects signal path in my Line 6 Helix® using only six effects blocks, as shown below. Keeping the signal path simple further allowed my guitar and the notes I chose to play “breathe” within the music.

Screenshot.

The Wrap-Up

Any time you feel restricted by your creativity or musical chops (or by life itself, for that matter), take a moment to find some inner peace or a new vista. Then make space in your mind and visualize your dreams and goals. Let your mind wander freely, allow those new thoughts to wash the old regimes and ideas away.

When you play music, let the conversation evolve naturally. Listen first before responding with your musical point of view. Let the listener digest each of your sentences … and give them time to enjoy your story!

Photographs courtesy of the author.

Check out Robbie’s other postings.

For more insight into the role of silence in music, see our blog article “The Sounds of Silence.”

How to Connect a Turntable to an AV Receiver

Adding a turntable is a great way to expand your home entertainment system and embrace the growth of vinyl records. It’s also a simple process. Here are step-by-step instructions that will ensure that everything gets connected correctly:

Step 1
1. Place your turntable directly next to your receiver. Consider an entertainment cabinet or shelving system that can dampen the vibration of both units with minimal shaking.

Step 2
2. Connect the supplied RCA-type stereo cable to the output of your turntable. (If your turntable didn’t come with them, you’ll need to purchase a quality RCA-type stereo cable, readily available from retailers everywhere.)
Step 3
3. Look at the back of your receiver and examine the audio input options. Receivers with a built-in phono preamp will have inputs labeled “Phono.” (If the receiver does not have an input labeled that way, jump to step 4 below). If your receiver has such an input, simply connect the output cable coming from your turntable there and you’re pretty much done! (If your turntable is equipped with a GND (ground) wire, you’ll need to connect it to the GND terminal screw on the receiver.)
Note
Note: If you are using a turntable that gives you the option of selecting between “Phono EQ” and “Thru” (such as the Yamaha TT-S303, shown above), make sure the switch is set to “Thru” so both preamps are not running at once. In most instances, the receiver’s EQ will be better than the turntable’s.
Step 4
4. If your receiver does not have a phono input, don’t worry – many turntables have their own built-in preamp. (You can verify this in the owner’s manual.) As long as this is the case, you can use any receiver input, such as the ones labeled “Line,” “Audio,” “CD” or “Auxiliary.”
Step 5
5. In order to hear vinyl playing back from your turntable, be sure to check the input setting on the front display so that its name matches the rear panel input you used for connection.

To summarize, the output/input connections should look something like this:

Turntable Output: AV Receiver Input:
Phono* Phono
Line Out** Line, Audio, CD or Auxiliary

* If your turntable has a Thru/Phono EQ switch, switch it to Thru to turn off its preamp.

** If your turntable has a Thru/Phono EQ switch, switch it to Phono EQ to turn on its preamp.

You might also consider sidestepping cables altogether and going wireless instead. Yamaha provides this capability with the MusicCast wireless multiroom audio system, which utilizes your home’s Wi-Fi connection and allows you to stream music through MusicCast-enabled devices and wireless speakers throughout your entire home. The Yamaha MusicCast VINYL 500 Wi-Fi turntable even lets you stream the sounds of your vinyl!

Songwriting Without a Safety Net

“What was that melody I just sang?” I ask myself in a panic. You know, that hooky little bit I can not repeat. Well, I can sort of repeat it … but not quite. And we all know it’s the “quite” that matters.

Like it says in the title of a song I once wrote (“Almost Doesn’t Count”), similar is not the same. It was something about that particular, peculiar bit — that je ne sais quoi — that shall never come again.

I have to face it. It’s — GONE! Headed for the great abyss to join all the other magical melodies, chord progressions and guitar licks that have escaped because:

The mic wasn’t on.

I’ve made this mistake before. When will I learn?

Interior of a piano bench showing a portable cassette player and cassettes.

No getting around it: I’ll have to start from scratch. And that’s a shame because it didn’t have to be this way. I’d have a killer hook If Only: If only the mic was open, or the voice memo was activated or — for those of us with analog hearts — that portable cassette player was in Record. (Mine is hidden in my piano bench because I don’t want my younger collaborators to see it.) It’s a regrettable faux pas that might be the difference between an unmemorable writing session and a creative experience that could change my life … not to mention the size of my bank account.

So what’s my excuse for resisting this simple prerequisite to a productive writing session? I actually have three:

1. There’s a superstitious voice in my head that believes once I make a conscious decision to press Record, I’m signaling to the Universe that there’s an expectation that something remarkable could happen. The problem is, the Universe doesn’t like when I presume anything. It wants to surprise me — to be in control. It wants to give me a gift I don’t expect to receive. Apparently, that’s what brings the Universe joy. And power. So if it witnesses me taking steps to catch the magic, it won’t bestow me with any. 🙁

2. Knowing I’m being documented makes me self-conscious. I feel a pressure to be brilliant. To perform. To be on my game. I do not want to disappoint anyone in the room. So I play it safe, coloring within the lines. And we all know it’s stream-of-consciousness — that un-calculated, disorganized madness — from which magic descends.

3. Once I acknowledge there was something pretty special a ways back, then I have to locate it. But did it happen before I ordered lunch? After I Googled Lady Gaga? I could be rewinding and fast forwarding for days. And then I’m already down the rabbit hole — committed to retrieval and analysis. Sometimes I find the bit. Sometimes I don’t. Sometimes it wasn’t as good as I thought it was and now I’ve wasted a whole lot of time and taken myself out of the moment. And I might not be able to get back in. Ugh.

Creativity is complicated.

But the fact is that none of the above are good enough excuses, because there’s too much at stake. So I’ve been trying to embrace the idea that documentation is a responsibility — an automatic precursor to any creative endeavor. Just like seatbelts before driving, a napkin on a lap. It’s insurance — protection against loss or damage of something valuable. A necessary inconvenience. And once I make a habit of it, I’ll start forgetting that the computer or smartphone or cassette recorder is running, which is a good thing.

You might say, “But what about all those untitled new recordings cluttering up my voice memo queue?” Well, that’s what air travel is for. Get yourself a cocktail, pop in the ear buds and get busy. Delete. Delete. Delete. Or maybe you’ll hear something you forgot about completely — that cool little ditty you dictated at a red light. It’s a “start” you can bring to your session tomorrow. Awesome!

There’s a curious balance in life between the things we lose (lightning in a bottle, sunglasses, car keys) and the things we find (those earrings, a letter from my father, that long-forgotten voice memo). I’m trying to be more forgiving with myself when things disappear. After all, there’s a lot on our multi-tasking minds. That said, with a little more care, there are losses we can prevent. If we’re more mindful we will surely lose less.

Now go to it. And don’t forget to press Record!

Photo courtesy of the author.


Check out Shelly’s other postings.

Elton John’s Million Dollar Piano

In September 2011, world-renowned artist Elton John debuted his “Million Dollar Piano” show at The Colosseum at Caesars Palace. The concert extravaganza took Las Vegas by storm, receiving widespread acclaim from critics and fans over the course of its seven-year run.

The centerpiece of the show was, of course, Elton’s one-of-a-kind piano, which was the result of a four-year collaborative partnership with Yamaha to design and build one of the world’s most advanced musical instruments.

Man assembling pieces of an acrylic piano.

At its core, the Million Dollar Piano is a highly modified, hand-assembled Yamaha CFX, a top-of-the-line nine-foot concert grand, with harp and hardware made from nickel rather than brass, all hidden within an acrylic panel and supported by clear acrylic legs.

But it’s also much, much more. After all, Elton John had requested a piano that could materialize out of nowhere on stage during his performances and provide an unparalleled playing experience, so something truly magical had to be created.

Marrying artistic inspiration with technical expertise, Yamaha designers outfitted the instrument with state-of-the-art video and lighting features, including 68 LED video screens to display imagery that synchronizes with the imagery on stage, allowing the piano to blend chameleon-like into its surroundings before transforming its appearance to complement each of Elton’s iconic songs. They also added sophisticated MIDI controls that allowed Elton to trigger and manipulate light, sound and video all in real time.

A black bodied custom piano with acrylic base.

The process began with the construction of a full-size mockup of the instrument. Computer graphics were then used to assess the effect that lights would have on its appearance, which led to the polygonal shape of the finished product. “We … [wanted] to gauge how stage lighting from different directions would reflect off the piano and to predict the kind of outlines it would create,” report designers Akie Hinokio and Yukinori Mikage. “This effort shows in the way the clear acrylic scatters light with a prism-like effect from the triangular legs.” The design also takes into account the thermal expansion of the acrylic caused by heat from the LED monitors.

Someone playing the Million Dollar Piano.

The team also came up with an ingenious solution to another request from Elton John. “[He asked] that this piano be a truly inimitable, almost like a high-end sports car,” Hinokio and Mikage explain. “In response, we utilized the same genuine leather from his sports car to wrap around the keyboard.”

With all these cutting-edge technologies, the Million Dollar Piano actually ended up costing more than a million dollars to build: 1.3 million, to be exact. And there are actually two Million Dollar Pianos; in addition to the primary piano, an “understudy” was built as a backup instrument.

The Elton John: The Million Dollar Piano concert film featuring the namesake piano made its international cinematic debut in 2014 and was shown in 1,200 movie theaters in more than 40 countries before being released on home media, making the Million Dollar Piano one of the world’s most recognizable instruments.


Click here for more information about Yamaha grand pianos.

Timpani Maintenance

The percussion family consists of vast number of instruments. In a standard music room, there will be timpani, marimbas, xylophones, bells, snare drum, bass drum, cymbals, tambourine, triangles and much more. All require regular care and maintenance. In this article, we’ll talk about one of the most difficult percussion instruments to maintain: Timpani.

Problem #1: The pedals are slipping.

This is the most common issue regarding timpani. Before you adjust the spring tension, you must check the range of the timpani. Plastic heads stretch and if the timpani are not tuned to the correct range (something that should be checked every month), the pedal will slip or will not stay in place.

Here’s a chart showing standard tonal ranges for Yamaha and most modern-day timpani:

Musical annotation.

If your timpani are not in the proper range, make the necessary adjustment. Once you are certain that each timpano is tuned properly, check its pedal. If it is still not holding the pitch, then it is time to adjust the balance action spring. This component regulates the tension between the pedal and the head. Be very careful when adjusting the spring — if you loosen it too much, it can come off.

If the pedal will not stay on the top note, you need to tighten the spring. If the pedal will not stay on the bottom note, you need to loosen the spring. Remember: “Righty tighty, lefty loosey.” Bear in mind also that when you change a timpano head, you need to loosen the spring to “reset” it back to the middle tension. A lot of people forget to do this and then you will have pedal problems because the spring is too tight and can’t be tightened any further.

Problem #2: The pedal is “sticky” or doesn’t move smoothly when tuning the pitch.

This is usually an issue of lubrication (or lack of lubrication). Locate the part known as the spider mechanism (on Yamaha timpani, it is located under the base), then identify the rod that goes through the base and pulls the mechanism when the pedal is engaged. (See the circled part [4-8] in the illustration below). This is the rod that needs lubrication:

Engineering drawing of components.

Here are the steps to do so:

1. Push the pedal up to the highest note.

2. Carefully set the drum on its side on a carpeted surface.

3. Clean the rod with a rag and remove any debris or old grease.

4. Using a Q-tip, apply some white lithium grease to the rod. (White lithium grease holds up better than spray lubricant.)

5.  While the drum is on its side, move the pedal to spread out the grease. If it is extremely dry, you may need to apply more grease.

6.  Put the drum back in the normal playing position and play.

Problem #3: The gauge doesn’t work.

This is a common problem in a school setting. Check that the cable (similar to a brake cable on a bicycle or motorcycle) is attached to the strut and is not bent. You can use zip ties to loosely secure it to the strut so that it doesn’t get pulled out during transportation.

If this does not fix the problem, it’s time to get a new cable. This is usually a simple matter of contacting the manufacturer or an authorized dealer. Be sure to have the model number of the timpani to help them locate the correct part.

Bonus Question: Where should the pedals be set when the drums are not being played or stored?

If your timpani are being used every day during the school year, pedals should be kept in the middle of the range after every rehearsal. Whenever the timpani are moved, push the pedals to the top note in the range. This will help keep the heads centered in case the drums are hit going through a door. Over the summer and during breaks, set the pedal to the lowest note. This will help keep tension off the head for long periods of time and give the drum heads more life.


Click here for more information about Yamaha timpani.

Why Sound System Safety Is So Important

In this video, Yamaha product manager John Schauer focuses on sound system safety issues, explaining the difference between what can be done by volunteers in your House of Worship and what needs to be done by professionals. As an example, electrical wiring and the hanging (or “rigging”) of speakers from the ceiling should only be done by a licensed contractor — not only because it is an absolute requirement for insurance purposes but for the safety of your staff and parishioners. Also included are a number of tips for easily implemented safety measures, such as taping down onstage cables and using proper instrument stands:

Click here to find out more about Yamaha professional audio products.

Piano Lessons Can Improve Your Child’s Language Skills

For parents and educators alike, there is a great deal of interest in how learning to play an instrument such as piano benefits a child. One benefit can simply be feeling the joy of making music and developing an appreciation of music. Another could be fostering a habit of practice and mastery that might transfer to other aspects of life. In some cases, playing an instrument can lead to other experiences, such as playing in an orchestra or even a career in music.

And then there’s the possibility that musical experience enhances the mind and brain of a child in ways that extend beyond music. This interest promoted a widely known misunderstanding called the “Mozart effect.” In 1993, three researchers reported in the prominent journal Nature that listening to a piece from Mozart — as opposed to relaxation or mere silence — temporarily enhanced the performance of one of several spatial reasoning tasks. Such was the public eagerness for musical experience to have benefits beyond music that popular accounts suggested that listening to classical music made people smarter, but the original finding was highly limited, and most researchers have been unable to replicate even those limited findings.

More careful science has asked whether adults with many years of experience in playing an instrument have enjoyed psychological benefits beyond music. At Stanford University, Dr. Nadine Gaab and I compared the ability of people with at least nine years of experience in playing an instrument (musicians) to people with little or no instrumental experience (non-musicians). Of course, the musicians knew a lot more about music, but we wanted to determine whether they also had superior abilities in hearing the sounds of spoken language by asking them to make challenging judgements about speech sounds like “ba” or “wa.” What we found was that musicians performed better than non-musicians only for speech sounds that demanded precise timing or temporal judgments. (Further, the more years that musicians had practiced their instruments, the greater the advantage relative to non-musicians.) But the musicians had no advantage in making other kinds of judgments about language sounds. We interpreted these findings as indicating that musical training may enhance precision in auditory temporal acuity that spontaneously generalizes from music to spoken language.

These and other similar findings indicate that playing an instrument may enhance specific abilities beyond music. But there was a catch related to the usual issue that correlation does not mean causation: Maybe it was not the experience of playing an instrument that made musicians more accurate at certain aspects of language, but instead it was something about the nature of people who played musical instruments that also made them better at certain aspects of language.

Consider a sports analogy. Being taller is helpful in being a good basketball player, but playing a lot of basketball does not make you taller. Maybe children with a better sense of timing are more likely to enjoy playing an instrument and therefore have additional motivation to continue to play an instrument. Maybe children with a better sense of timing play their instruments better, and therefore receive more positive encouragement from teachers and parents. Maybe parents who encourage their children to play instruments also tend to talk more with their children, or are more supportive in other ways, and thus foster timing skills in both music and language for entirely separate reasons.

Young girl and her father play piano together.

The only way to scientifically prove causality — to prove that it is the experience of playing an instrument that makes children better at certain aspects of hearing language — is a training study in which children without prior instrumental experience are randomly chosen to either be trained or not trained on playing an instrument. Any difference after the training must be caused by the experience of playing the instrument (a design known as a randomized controlled trial or RCT) because this design has eliminated any differences in initial talents or parenting.

But educators could ask another question. In the limited hours of the school day, they must choose carefully what curriculum most benefits a child. Perhaps playing an instrument does enhance the perception of spoken language, but could the same amount of time devoted to a more standard part of the school curriculum, such as reading, do even more to enhance spoken language? After all, reading is built on language — print makes spoken language visible and children use their knowledge of spoken language to learn to read. The correlation between reading and language is clear-cut. So what happens if one group of children receives reading instruction instead of music instruction? Would the children receiving music instruction show a benefit for spoken language compared to the children receiving reading instruction? Comparing music and reading instruction also rules out other explanations of any benefit from music, such as simply the extra time receiving attention and instruction from an adult (because that extra time and attention would occur also with reading).

Yun Nan, Robert Desimone, Chen Chen Gong, Eveline Geiser, and I (from the McGovern Institutes at MIT and Beijing Normal University) designed such a study, of 74 four-to-five year-old Mandarin-speaking children in China. The children in the musical group received six months of piano training, in a curriculum developed by Chen Chen Gong. The children in the reading group received an equal amount of reading instruction. For both groups, two experienced teachers taught 45-minute sessions, three times a week, delivered to small groups of four to six children. There was no extra practice outside of class. A third group received neither kind of instruction and served as a baseline group to demonstrate what happens without either extra piano or reading instruction. At the outset, the groups had similar scores on many measures of cognitive abilities (such as IQ scores) and came from similar socioeconomic backgrounds. Therefore, any differences after training were unlikely to reflect initial differences in talents or parenting.

Extra education — both piano and reading — improved accuracy in both hearing words and hearing vowels, relative to children who received neither instruction. This is already interesting, because the benefits from music (which has no direct relation to language) were similar to those from reading (which relates directly to language). But music provided an additional boost in language beyond reading. Children who practiced the piano outperformed the other groups of children on judgements about words when those judgements had to be made on the basis of consonants.

What was special about consonants (versus vowels)?  Probably it was all about timing (and thus similar to the findings from Stanford). Speech sounds (the small sounds within words) fly by rapidly as we hear spoken language. With every sound, we have to quickly judge what sound we heard, and whether we heard one sound versus another sound; the correct recognition of sounds empowers us to correctly know what word we have just heard. In this high-speed world, vowels have relatively longer durations, and this gives us a bit more time to judge whether we just heard an “a” or an “e” or “i”, etc. But consonants are merciless and give us almost no time at all. The difference between a “b” and a “d”, for example, depends on tiny fractions of a second of auditory information. As a result, consonants demand remarkable temporal precision to be heard correctly. And practice with the piano enhanced the discriminating of one word from another specifically on the basis of consonants.

Chart showing training effect on brain responses to pitch

The perceptual advantage from piano training was mirrored by a brain difference. Brain functions were indexed by “event related potentials” (or ERPs), which are electrical signals from the brain measured by electrodes placed on the skull. ERPs can measure brain responses to sounds (and other things) in milliseconds. After piano training, children who showed the greatest improvement on consonant-based word discrimination also showed the greatest enhancement of the brain ERP to musical pitches, thus linking expected brain gains from musical experience to gains in consonant perception in words:

These findings bring scientific precision to the question as to whether piano training provides benefits beyond musical experience. It appears that some of the auditory skills learned from piano playing enhance specific aspects of the perception of spoken language, even beyond that gained from additional experience in reading. At the same time, these benefits from piano instruction are quite specific, at least for the six months of training, since all three groups of children showed similar developmental growth on tests of IQ, working memory, and attention.

References

Nan, Y., Liu, L., Geiser, E., Shu, H., Gong, C.C., Dong, Q., Gabrieli, J.D.E., and Desimone, R. (2018) Piano training enhances the neural processing of pitch and improves speech perception in Mandarin-speaking children. Proceedings of the National Academy of Sciences of the United States of America, in press.

Zuk, J., Ozernov-Palchik, O., Kim, H., Lakshminarayanan, K., Gabrieli, J.D.E., Tallal, P., and Gaab, N. (2013) Enhanced syllable discrimination threshold in musicians. PLoS One, 8, e80546.

Rauscher, F.H., Shaw, G.L., and Ky, N. (1993) Music and spatial task performance. Nature, 365, 611.

The Sounds of Silence

In a recent posting I touched on the wit and wisdom of jazz pianist Thelonious Monk, citing his profound and poetic definition of the word genius (“the one most like himself”).

Musical annotation.
Even non-musicians can play this!

This time around I’d like to take a closer look at another all-too-true Monk aphorism: “What you don’t play can be more important than what you do play.” A decade after Monk uttered these immortal words, Steely Dan’s Donald Fagen restated the theme when he reportedly instructed the group’s backing musicians to pay more attention to the space between the notes than the notes themselves.

Of course, for centuries beforehand, classical composers were, to great effect, employing the stark contrast between lots of notes and few (or none) of them. Some scholars say that it was Ludwig Von Beethoven who pioneered the method. His Eighth Symphony, for example, has been described as “compression and containment … the art of interruption and sudden spillover. Cadences stop, start and stop again; they play games with our sense of order.” From LVB’s masterpieces to the finale of Sibelius’ Symphony No. 5, with its huge closing chords and even huger gaps of silence, to Barber’s Adagio for Strings, with its long gasp of nothingness that presages the orchestra’s timid re-entry, the message is clear: Less can be more. (A concept taken to its absolute extreme with John Cage’s 4’33”, which consists of four minutes and 33 seconds of … absolutely nothing.)

Kind of Blue album cover.

Probably the musician who best characterized this approach was the enigmatic jazz trumpeter Miles Davis, who early in his career developed an improvisational style that was based on the way Picasso used a canvas, where the focus was not on the objects themselves, but the space between them. As best-selling author (and fellow Yamaha blogger) Dr. Daniel J. Levitin has written, “Miles … described the most important part of his solos as the empty space between notes, the “air” that he placed between one note and the next. Knowing precisely when to hit the next note, and allowing the listener time to anticipate it, is a hallmark of Davis’ genius.” Nowhere is this more apparent than in Miles’ breakthrough 1959 album Kind of Blue, where his methodically disciplined phrasings are interspersed with long silences that are sometimes as long as the phrases themselves. Yet his solos on that album are nothing short of riveting, particularly in the way they contrast with the busier passages played by John Coltrane and Julian “Cannonball” Adderly — fellow jazz legends who acted as sidemen on this seminal recording, along with pianist/composer Bill Evans. Even if you don’t consider yourself a fan of jazz, you owe it to yourself to give this gorgeous, deeply meditative album a listen.

Photo of Slowhand album cover by Eric Clapton.

In the rock world, most soloists are, of course, guitar players, and they generally pride themselves on their ability to cram as many notes as possible into each moment. (As the old joke goes, “What’s the difference between a shredding guitarist and an Uzi? An Uzi can only repeat itself 10,000 times a second.”) One exception to that rule is Eric Clapton, who in his younger days was nicknamed “Slowhand” for the way he eschewed rapid-fire solos in favor of a more languid — but no less effective — approach. (Yes, he may have temporarily abandoned this tactic during his stint with ’60s supergroup Cream, but one could argue that his lead lines were often less dense than the bass underpinnings being woven by Jack Bruce.) For examples of how restraint can work better than bombast, check out Clapton’s lead work on his hit single “Wonderful Tonight” or his (uncredited) solo on The Beatles’ “While My Guitar Gently Weeps.”

But it isn’t just in terms of soloing that silence is key. It can be a powerful tool in musical arrangement, too. As an example, check out “All Right Now,” a 1970 hit for the English rock group Free. The way the verses jump out at you is not only due to the stripped-down instrumentation accompanying Paul Rodger’s vocal (just drums and one solitary guitar — not even bass) but because of the long gaps between the guitar chords, populated with just a hint of percussion. When the choruses and solos kick in with fuller instrumentation (including bass), the contrast is an attention-grabber.

Speaking of bass, the best four- and five-string players know the importance of leaving space for the vocals and melodic instruments. Session bassist Chuck Rainey is perhaps the perfect example, renowned for a spare approach that supports but never detracts from the central melodic content. No coincidence, then, that Rainey appeared frequently on Steely Dan recordings, having clearly won the approval of the aforesaid Donald Fagen.

Mozart was once asked what the greatest effect in music was, and his reply was, “No music.” Pithy, yes, but something worth keeping in mind the next time you begin crafting a song or musical arrangement … or the moment you step into the spotlight to take a solo.


Check out Howard’s other postings.

Five Reasons Why You Should Practice On Electronic Drums

I’m a drummer who has played acoustic drums on gigs for as long as I can remember, but there’s no escaping the fact that practicing on acoustic drums can sometimes be a challenge. Let’s take a look at the top five reasons why you should consider practicing on electronic drums instead.

1. They Allow You to Practice Quietly.

Young man playing electronic drums with headphones.

Acoustic drums and cymbals were designed to be hit with a piece of wood. Unfortunately, the great sounds they make as a result of being struck aren’t as controllable as our family members and neighbors might like … and, sadly, there are no volume knobs on acoustic drums.

Electronic drums — also referred to as E-drums — solve this problem by actually providing such a knob and allowing you to use headphones or earphones to play as loud as you want without anyone else hearing you do your best imitation of Tommy Aldridge, John Bonham or [insert name of favorite drummer here].

The only audible sound is of the stick hitting the drum and cymbal pads and the kick pedal beater hitting the kick pad (unless you are using a beater-less kick pedal, which reduces the volume to a whisper). This comes in handy with late-night practicing or apartment living.

Having total control of your overall volume with the push of a button or twist of a knob also helps to protect your ears from damage — something that is harder to manage when playing loud cymbals on an acoustic set.

In addition, playing E-drums with headphones or earphones encourages kids to be more creative and try things they wouldn’t normally try on acoustic drums (such as playing different styles of music) since they are the only ones hearing it.

2. You Can Record Yourself Easily.

Laptop with edrum control panel connected.

When playing drums, it’s sometimes hard to tell if you’re actually playing “in time.” Recording yourself playing along to a pre-recorded song or a metronome and listening back is a great way to tell if you are speeding up, slowing down or playing right on the money.

Some E-drum modules (the “brain” of the kit) have built-in recording options that make it quite easy. You can also connect a module such as the Yamaha DTX-PRO to your computer via a USB, or just use the analog outputs of the module to record into your favorite DAW (Digital Audio Workstation) software.

Youth using app on phone.

My favorite way to record is with an app such as Rec’n’Share, which is compatible with a number of Yamaha electronic drum kits, including the DTX6 Series. Simply install this free app onto your iPhone® or iPad® and connect the device to your module. This allows you to use the pro sound of your drum module along with your phone’s camera to record a top-notch video.

Electronic drum kit as seen from above.
Yamaha DTX6K3-X electronic drum kit.

3. Built-In Timing and Training Exercises.

Some drum modules have built-in training and learning exercises. These valuable practice tools enable you to improve your playing skills in a fun and challenging way and makes practicing more enjoyable, thus allowing you to immerse yourself in the limitless excitement of drumming. The module’s features can include:

  • Metronome – This is the most common and most-utilized tool offered by a module. You can play along with the metronome by hearing the “click” and/or by seeing it. Either way, this allows you to determine if you are ahead of or behind the beat.
  • Play-Along Songs – You can play along to recorded songs in the module’s memory or hook up your own music player. Pop, rock, funk, metal, hip hop, EDM, jazz and latin are some of the styles of songs commonly offered by most modules.
  • Training Modes – These exercises are designed to make you a better player, faster. They’re a fun way to learn to read drum music notation, play with dynamics and develop your sense of timing.

4. Compact Size.

The footprint of most electronic drum sets is smaller than that of an acoustic set. This means that you can set up your E-drums in rooms with limited space and store them in a closet or under the bed when not in use.

E-drum pads are also smaller in size compared to acoustic drums, so they can be easily adjusted to fit your own height and unique setup. For example, tom pads can be closer together and lower to the ground. On acoustic sets, the toms typically have to sit on top of the bass drum and cannot go any lower than the top of the bass drum.

Since E-drums are so compact, they are lighter and more portable than an acoustic drum set. This comes in handy if you do a lot of traveling and want to take your drums with you.

Young man carrying a folded-up electronic drum set.

5. Sounds, Sounds and MORE Sounds!

Practicing on an acoustic drum set gives you one particular overall sound that, aside from tuning your drums, is not going to change much. But with an electronic drum kit, you get top-notch, studio-quality sounds recorded with expensive microphones and effects like reverb and delay that you would have to spend a fortune to reproduce on an acoustic set.

Think it’s complicated? It’s not. Actually, finding your way around an electronic drum module is quite easy. Just by pushing a few buttons you can tune every drum and cymbal higher or lower in pitch, edit or alter sounds and effects and put custom kits together.

Most modules have hundreds of internal sounds and the ability to load in your own custom samples. Having that many different drum and percussion sounds and effects available at the push of a button — and also being able to play hand percussion on your pads — allows you to explore styles and genres of music you normally might not play.

Choose the E-drum kit that is right for you and that has the features that best suit your needs. Your neighbors will thank you!

Click here for more information about Yamaha electronic drums.

Click here for more information about Yamaha DTX6 Series electronic drums.


Snare Drum Warm-Up, Part 5

The fifth and final installment in our series about creating the ideal warm-up routine.

The previous four blog articles in this series got your hands moving and introduced accent patterns, wrist lifts, and flams. Let’s move on now to rolls.

Element #5: Rolls

Rolls are arguably one of the most difficult elements of playing percussion. I like to incorporate double and triple/multiple bounce rolls into my warm-ups so I can work on my fine motor skills. I generally do these exercises for 30 seconds and then switch hands. Make sure that once you start you don’t change the tempo:

Musical annotation.

Once your hands are warmed up, it’s time for the long roll. The key to long rolls is to relax. Start with a minute for each long roll and build up to 4 – 5 minutes. This is also a great exercise when you are watching TV or YouTube:

Musical annotation.

Use a metronome on the first set of exercises to maintain a steady tempo. The rolls are the final exercise in a well-rounded warm-up.

For more roll exercises, check out my previous blog post “How Do You Roll.”

Creating a warm-up routine is an individual process and what works for me will not necessarily work for everyone. Feel free to create your own routine! 


Check out the previous postings in our Snare Drum Warm-Up series:

Part 1: Warming up the big muscles

Part 2: Transitioning to the small muscles

Part 3: Accent patterns and wrist lifts

Part 4: Adding flams to the equation


Five Ways SURROUND:AI™ Enhances Horror Films

It’s been over 40 years and I still get chills when I hear “Tubular Bells,” the theme song from the 1973 horror classic The Exorcist.

Sound evokes powerful emotions, and horror movies in particular make the most of this phenomenon. Beyond terrifying visual imagery, sound is the nail in the coffin that destroys your last shred of composure and gives you the willies long after the movie is over.

For those of you who like a little fright on Halloween night — or any night, for that matter — watching horror movies at home is a great escape.

A 5.1- or 7.1-channel surround sound system is a must for movie lovers, and Surround:AI™, a breakthrough technology in the latest line of Yamaha AV receivers, brings artificial intelligence to home theater sound. Surround:AI automatically adjusts audio parameters for each scene in a movie, giving you the best entertainment experience possible.

In real time, Surround:AI analyzes and optimizes scenes to isolate and focus your attention on the faintest footstep and whispered dialogue in your center channel speaker, then expands the sound field to your surround speakers to produce the maximum effect of the whine of the chain saw and the panicked scream in the jump scare that follows. Surround:AI perfectly accentuates the switch from normalcy to terror that is the hallmark of horror movies.

So go grab a blanket to hide behind, then watch and listen to how Surround:AI enhances these bone-chilling movie moments:

1.  Shower Scene — Psycho (1960)

This iconic scene from director Alfred Hitchcock’s black and white classic features the horrifying screech of violins in time with deadly knife stabs — all against the mundane backdrop of water spraying from a shower head. A good reason to choose shower doors over shower curtains every time! Check it out here.

2.  Shark Eats Boy — Jaws (1975)

John Williams’ Oscar-winning score portends the approach of the great white shark in Steven Spielberg’s thriller so artfully it might not need anything else to set the mood. But with the innocent sounds of swimmers splashing in the water and Olivia Newton-John honestly declaring her love on the radio in the background, the contrasting blend of elements makes it seem like just another day at the beach … till it’s not. Check it out here.

3.  Chest Burster Scene — Alien (1979)

An ordinary meal among crewmates on a spaceship turns into a landmark scene in horror filmdom. Cheerful banter and the clinking of dinnerware gives way to terrified screams, then stunned silence. You’ll never think of doing the Heimlich maneuver on anyone again. Check it out here.

4.  Hypnosis Scene — Get Out (2017)

Here’s another entry in the “Making Ordinary Sounds Terrifying” category. The simple sound of the spoon stirring the tea in Jordan Peele’s Oscar-nominated directorial debut becomes nails on a chalkboard in this scene. Can you get off your couch or are you in the Sunken Place? Check it out here.

5.   A Father Does His Duty – A Quiet Place (2018)

Spoiler alert: Grab a tissue before clicking this link. There is a lot of silence in John Krasinski’s breakout directing turn, and this scene shows just how much impact a single sound can have. Check it out here.


Now that you’re in the mood, cue up your favorite horror movie on your surround sound system and get the most out of every scary moment … from the safety of your own couch.

Using Registration Memory

One of the features of my CVP Clavinova that I use on a daily basis is called “Registration Memory.” This allows me to save (“register”) all of my favorite sound combinations and panel settings for later recall by simply pressing a single button. In this article, we’ll take a detailed look at how this works.

In much the same way you can save your favorite radio stations as presets on your car’s radio (rather than manually dialing them in every time), you can create your favorite sound combinations and assign them to eight dedicated buttons right on Clavinova’s front panel. All you have to do is press the MEMORY button just to the left of those eight buttons, then press the desired button (1-8) you want to save it to:

Graphic.

This is not actually a new concept for keyboards — it’s actually a throwback to an idea implemented on pipe organs. On the organ, “registration” is the act of choosing and combining stops (a set of pipes producing a similar tone) in order to produce a particular sound. It was a system designed to store specific organ sounds so that they could be recalled instantaneously by the player during live performance. It usually consisted of several numbered buttons situated in the space between the manuals (the keyboards), allowing the organist to change registrations on the fly. On a Clavinova, these buttons are conveniently located right above where the right hand normally plays, allowing for easy access during performance.

Yamaha further expanded upon this concept by allowing you to specify which parameters are saved to each button. The factory default setting includes sounds, volumes, effects and more. However, you can also add things like Songs and Vocal Harmony settings for instant recall of your favorite songs or harmonies.

Alternatively, you can reduce the number of parameters saved to these buttons. This allows for some unique possibilities and more flexibility. The list of parameters that can be registered is automatically displayed when you press the MEMORY button, before you select buttons 1 – 8.  Simply enter or remove checkmarks by touching the desired items. Items having checkmarks will be registered:

Graphic.

This can be a great “performance saving” feature. For example, let’s say you want to transpose the instrument up four half-steps in the middle of a song. Normally, this would require four separate taps on the Transpose (+) button on the Clavinova panel. Instead, why not uncheck all of the parameters except Transpose, and create one Registration Memory button that leaves Transpose at 0 and a second one that saves Transpose at +4? Much easier!

The settings for up to eight Registration Memory buttons is saved within a Bank, and you can create as many Banks as you want:

Graphic.

To make the feature even more useful, it’s a good idea to assign helpful names to both the Banks and the individual Registration memories. Often I name entire banks with the name of the song I am performing. The Clavinova automatically alphabetizes the titles of the banks, so they’re easy to locate.

Another tip: Try creating a single bank for each song you will be performing. This will allow you to use the memories to take you through the song structure. For example, you can use button #1 for the first verse, button #2 for the chorus, button #3 for the second verse, button # 4 for the bridge, etc.

There are many benefits to Registration Memory, no matter how the instrument is used. It allows performers to eliminate those awkward silences between songs, allowing them to be ready for the next one in the set with the touch of a button. Songwriters will appreciate the ability to instantly recall the Voice combinations and setups you had in that moment of inspiration, enabling them to pick up exactly where you left off without spending time searching. No wonder it’s one of my favorite Clavinova features!

(Note that, in addition to the CVP Clavinova, Registration Memory is found on the CSP Clavinova and CLP Clavinova, as well as on Yamaha Arranger keyboards — even on some portables and digital pianos through the use of the Smart Pianist app.)


Check out these related blog articles:

Learn to Play Your Favorite Songs

How to Add New Songs to Your CSP

Kooky Karaoke

Getting the Most Out of Audio to Score

Yamaha Smart Pianist App Version 2.0

Which Digital Piano Is Right for Me?

“Breaking Amish” with My Yamaha FG-TA

I own a lot of guitars. As a guitar-centric TV composer, I need to have many different sounds at my fingertips and I rely on my instruments to provide a wide palette of sonic options for whatever show I’m working on.

The Yamaha FG-TA TransAcoustic guitar, with its unique built-in reverb and chorus, can literally do what no other guitar in my collection can do, making it an invaluable tool in my creative arsenal. Simply pressing a button on top of the FG-TA causes a small metal disk inside the body called an “actuator” to vibrate in response to the strings. Those vibrations are then conveyed to the guitar body and come out of the sound hole along with the natural sound of the instrument. To control the amount and depth of the resulting reverb and chorus, all you have to do is turn up the associated control knobs atop the guitar. In just seconds, you’ve got something special going: a vibe, something that is very important to my compositions.

I was recently asked to compose several cues for the TLC Network reality show “Breaking Amish.” Some of the scenes in the show are moody and unsettling, and so I reached for my FG-TA to elicit those feelings.

Acoustic guitar on desk next to laptop.

Since the guitar has a built-in pickup, I can output the signal to outboard effects as well, taking things a step further. For this cue, I started by plugging the FG-TA into my trusty Line 6 Helix® guitar processor, and connected the left and right outputs to my DAW. I then placed an omnidirectional microphone directly in front of the guitar to capture the natural sound of the instrument, for a total of three channels.

For the first pass, I engaged both the reverb and chorus effects on the FG-TA. These effects were not only picked up by the microphone (since they come out of the sound hole), but were also sent into the Helix via the guitar’s direct output. Using a patch that I modified with the unit’s onscreen editor (shown below), I added a bit of dynamic compression, as well as some delay (set to 69 beats per second, which was the tempo of the cue) and a little additional reverb. Using the Helix panner, I split the stereo signal hard left and right, giving me independent control over the effects coming from each side:

Screenshot.

The combination of the Helix output and the microphone picking up the built-in FG-TA effects gave me the vibe I was looking for. Here’s what that first pass sounded like:

One of the techniques that I like to use to thicken guitar tracks is to double-track the first pass. Sure, I could just copy and paste the sound, but that’s just artificial stereo. I much prefer the natural sonics resulting from the inevitable imperfections of the second pass. In this case, I disabled the TA effect, keeping just the Helix effects enabled, to create a slightly different sound than the first pass:

It’s easy to hear the difference between the two takes. The guitar in the first pass, with the TA reverb and chorus enabled as well as the Helix effects, is deeper and wetter. To complement that, the guitar in the second pass (with only the Helix effects) is drier and more upfront. Together, they create a nice emotional soundscape for the cue.

To create even more of a mood, I did a third pass using an EBow, which is a hand-held, battery-powered electronic device you hold up against the strings to cause them to vibrate. For this pass, I played the FG-TA with a slide and used only the output of the Helix, adding a touch of modulation to the sound for some extra movement. This created a pad-like sound which added to the overall unsettling feel of the music:

For planning and layout in the mix, I had the first pass (the guitar with the TA effects) panned primarily to the right, with the microphone just right of center, one Helix channel far right, and the other at about 11 o’clock. For the second pass, I did the opposite, panning it primarily to the left. I then panned the third pass (the guitar/Helix effect with the EBow) at around 11 and 2 o’clock:

Screenshot.

Here’s the full mix, including all three passes of the guitar, as well as some added bass and percussion:

Along with the percussive groove, they gave the cue just what was needed for the show: an emotional, slightly uncomfortable but cool-sounding vibe — all thanks to the built-in effects and overall great sound of the FG-TA.

Photographs courtesy of the author.


Click here for more information about the Yamaha FG-TA TransAcoustic Guitar.

Fix Winds Instruments in a Pinch

As a school band director, you take on many roles, including instrument doctor. For students renting an instrument, the dealer most likely offers maintenance and repair insurance.

Though insurance is a great investment in the long term, in reality, problems almost always occur at the wrong time or at the last minute.

Here are some pointers for short-term fixes to help you get a wind instrument playing well enough for a concert or competition without making the actual final repair more expensive.

THE YAMAHA EDUCATOR NEWSLETTER: Join to receive a round-up of our latest articles and programs!

Get Educated

Most educators have experience with the basics of either brass instruments or woodwinds but usually not both. You can find many videos on YouTube and elsewhere that show repair and maintenance for instruments. Be careful because while some have good advice, others are questionable in content. The Band Instrument Repair program at Minnesota State College Southeast in Red Wing, Minnesota, has a series of videos on YouTube with solid information.

You can also learn band instrument repair and maintenance by taking college courses that can be applied toward continuing education requirements. Or consider a part-time job at a music store during the summer to immerse yourself in a shop situation.

Seek Expert Resources

Develop a relationship with your local school service sales representative and repair shop. They can help you stretch your repair budget and provide parts for last-minute needs. They can also help you purchase some needed supplies to stock in your band room.

Assemble a Kit

items to stock in a winds repair kit -- screwdrivers, spring hook, blue painter's tape, cable tie, non-latex bandage, lubricant.

Here are some specific tools that you should have in your school repair arsenal.

• A few screwdrivers appropriate for woodwind instruments to tighten loose pivot screws and hinge rods. However, be careful that you know which screws should be turned and which should not be.

• A spring hook to hook needle springs back into their cradle.

• Blue painter’s tape to wrap up torn woodwind tenon corks.

• Plastic twist ties or twisted pipe cleaners to connect brace feet on a saxophone when the guard screw has fallen out. This way the threads are not damaged by an incorrect screw.

• Cable ties can temporarily connect a brace on a brass instrument and avoid a more expensive repair caused by soldering or gluing the connections.

• Non-latex bandages to keep a water key closed when the spring has broken. Latex can damage the lacquer or silver finish.

• Rotor string or braided fishing line to restring a rotor.

Stock Extra Supplies

Keep a small variety of cleaning and lubrication supplies in your office for students to use or purchase. Items like valve oils, slide grease, swabs and reeds can save the day.

Consider the Weather

It’s essential to know your year-round local weather, both inside and outside, so you can consider the best storage solutions to prevent repair problems in the short and long term.

Seasonal changes in temperature and humidity are much more dangerous for wood instruments, so humidifying and maintaining temperature in the music room is very beneficial.

Know Your Limits

Once you have the tools that you feel com­fortable using and have your room set up, all you need is experience.

Know your limits because there is a very fine line between making a student’s instrument play well for the concert and adding to the final repair cost or actually damaging a part. If you are unsure, leave the repair to the professionals.

This article originally appeared in the 2018 V3 issue of Yamaha SupportED. To see more back issues, find out about Yamaha resources for music educators, or sign up to be notified when the next issue is available, click here.

Streamline Rehearsals by Establishing a Routine

How many times has the thought, “If I only had one more week,” passed through your mind when preparing your ensemble for an upcoming performance?

You can actually get back some of that time by establishing a routine and structure that streamlines rehearsals and increases efficiency. To ensure consistency, consider establishing the following sequence.

Entrance and Preparation

Students enter quickly and quietly. Music may be playing in the background. Students retrieve their instruments and folders and take their seats.

Students put their music in rehearsal order as indicated by the detailed lesson plan, which should be clearly visible on the board in the same place each day. The plan should not only indicate the order of the selections to be rehearsed but also which sections and what specifically will be practiced, e.g., articulation or dynamic contrast. This lesson plan sets up the short-term goals to be realized during this rehearsal.

When Does Class Really Begin?

Students must know exactly when class begins. Is it when the bell rings? Is it when the director takes the podium? Getting class started is one of the major difficulties for beginning directors.

One middle school director in Henderson, Nevada, starts his beginning band class by playing a recording of a march (which changes weekly) as soon as the bell rings. This provides a given amount of time for students to be in their seats and ready to play. Students are not considered tardy as long as they are in their seats with instruments and folders by the end of the march.

This works well because the march encourages a prescriptive expectation as well as a weekly listening lesson. Whatever the policy, class must begin in the same fashion each day or a good bit of rehearsal time will be lost in just getting started.

Warmups

Warmups, scales, sight-reading and assorted exercises should be chosen purposefully to enhance tone quality and promote good technique. Try to provide warmups that are related to the literature being worked on that day.

Rehearsal Goals

Try to make strides in at least three pieces of music in each rehearsal. The higher the expectation, the better. Expectations should be set not necessarily in terms of level of difficulty but based on the level of achievement of the various musical aspects being rehearsed.

End of Rehearsal

At the end of the rehearsal, do three things.

1. Review the musical accomplishments by asking students a question like, “What improvements did we make in the Holst today?” Rehearsal review forms are one way for students to record their daily achievements. Authentic assessment activities like these forms also provide an opportunity for students to reflect upon their musical experiences. Always expect good writing, spelling, punctuation, etc.

2. Articulate what needs be worked on tomorrow as a result of what was achieved today.

3. Make relevant announcements during the last couple minutes of class, never at the beginning.

The benefit of following a routine is that more time will be allotted to music-making. It might even add up to that extra week that you wished for!

This article originally appeared in the 2018 V3 issue of Yamaha SupportED. To see more back issues, find out about Yamaha resources for music educators, or sign up to be notified when the next issue is available, click here.

Build Teamwork with Drum Circles

On the first day of school, students may come to band class and sit timidly, not making eye contact. If the teacher facilitates a drum circle, then by the end of class, everyone will be smiling and bubbling with excitement. “A drum circle is a great way to connect people together in a way that’s musical but not necessarily academic,” says Matt Savage, percussion specialist at Cary (North Carolina) High School, founder and director of Rhythm Alive drum circle events and a Yamaha Artist. “[They’re ideal] at the beginning of a new school year as a team-building event; before a concert to sharpen listening skills, rhythmic accuracy and ensemble playing; and after a concert or big event as a fun stress reliever and way to celebrate together.”

If you’d like to incorporate drum circles into your repertoire, here’s how to get started.

Create a Circle

Don’t leave the classroom chairs in their usual positions. Students should sit in a circle, so everyone can see each other, and each person is viewed as an equal participant.

You can set up chairs before students arrive or ask for help. One circle is fine for 50 students. Larger groups should sit in concentric circles.

Include Everyone

Drum circles are great for the entire band, not just percussionists. You can include color guard members and wind and string players.

“With the whole band, it puts the [students] in a different, unique, risky situation,” Savage says. “They have to play and feel rhythm in a different modality.”

Distribute Instruments

Try world percussion instruments like bongos, djembes, congas, shakers and tambourines. You can use empty soda bottles, wood blocks or five-gallon buckets. Or ask students to clap, snap or use body percussion.

If you’re handing out sticks or mallets, give each student one, not two. Using one mallet levels the playing field because “a lot of the wind [and string] players don’t have drum techniques,” Savage says.

Start with the Heart

group of music students in a large drum circle

Begin with a steady beat that is relatable to everyone. “I always start every one of my drum circles with the first rhythm you ever hear — the heartbeat, your mother’s heart,” Savage says. “The facilitator plays a steady ‘lub-dub’ rhythm on the drum. The counts in 4/4 time would be on 1 and 3. Ask the others to join in after 10 to 15 seconds of listening and feeling the heartbeat groove.”

Once everyone is playing, visually cue half of the circle to stop while the other half continues. Then, cue the half that isn’t playing to play the heartbeat between beats. One side will play on 1 and 3, and the other side will play on 2 and 4. Once the new rhythm is established, give cues to start and stop as you see fit.

Try Different Rhythms

Echoes are popular and effective: Play a simple rhythm and ask everyone to play it back. Then, tell a student to play a rhythm and have everyone echo it back. Move to the next student until everyone in the circle has a turn.

Or ask each person to play two notes in turn, striving for a steady 1-2, 1-2, 1-2 rhythm. Explain how to recover if the rhythm becomes unsteady.

Once the rhythm travels the circle a few times, increase the tempo slightly each time the beat reaches the starting point.

“The outcome should be an incredibly fast wave of notes around the circle,” Savage says.

Encourage Student Leaders

Drum circles can help participants develop rhythm, listening skills and coordination. They also give students the opportunity to lead a large group, sometimes for the first time.

“A few students really open up and bloom right in front of your eyes,” Savage says. “Sometimes the quiet [students] come out of their shells.”

Savage once asked a shy student to lead a drum circle and was pleased with the results.

“Instead of doing it the typical way — instead of pointing — he would use his legs, his head, his eye contact,” Savage says. “At one point, he started dancing. It erupted into this great strong group, and soon everyone was in the center and dancing. High school kids are self-conscious, but they were comfortable enough to come together and dance. It’s literally feeling the power of the drum.”

Measure Your Success

Students should think about music differently after a drum circle.

“The students have listened to each other and played rhythm in a different way,” Savage says. “Their rhythmic accuracy, their listening skills [and] their timing should improve. There should be a higher sense of camaraderie. There should be a buzz in the room.”

This article originally appeared in the 2018 V3 issue of Yamaha SupportED. To see more back issues, find out about Yamaha resources for music educators, or sign up to be notified when the next issue is available, click here.

Instruments at an Inner-City Music Program

In the blog post, Case Study: A Music Program Succeeds in the Inner City, read how the band program at Rancho High School in Las Vegas was transformed by band director Clint Williams. Even with all its successes, Rancho’s band program operates on a tight budget — owning no semi-trucks, using inexpensive stock uniforms and reusing equipment from season to season as much as possible. However, one area where the band does not skimp is in its instrument inventory.

Williams guarantees that each student in his program receives a school-issued classroom instrument. Those who play brass or woodwinds have one instrument in the classroom and one they can leave at home.

The school owns all of the student instruments and, most importantly, they’re all the same brand. “When you’re talking about at-risk students or low socioeconomic students, they don’t want to feel inferior,” Williams says. “I think it’s important to put everyone on the same playing field.”

How did he afford to provide the band with two instruments for each student? In his first two years at Rancho, Williams was “given a shot in the arm of money to acquire instruments” from the school’s principal, he says.

On top of that, for the first three years, his band did not travel. “All the fundraising we did went into purchasing quality instruments to put in the kids’ hands,” Williams says. “Not a piece of junk but something that was going to last. That’s why I ended up with a lot of Yamaha [instruments] because they’ll last.”

This article originally appeared in the 2018 V3 issue of Yamaha SupportED. To see more back issues, find out about Yamaha resources for music educators, or sign up to be notified when the next issue is available, click here.

Case Study: A Music Program Succeeds in the Inner City

Nestled between the city’s homeless corridor and a cemetery near the historic Fremont District of Las Vegas, Rancho High School might not seem like the ideal home for a successful performing arts program.

Clint WIlliams

But thanks to Clint Williams, Rancho’s director of bands, the program is thriving.

In the last five years, Williams put his personal mantra of “L’audace, l’audace, toujours l’audace!” (Audacity, audacity, always audacity!) to work. He transformed Rancho’s sputtering band program into one of the most successful in the state. Overall, the school has amassed 25 superior ratings at various concert festivals and five Sweepstakes Awards through the Southern Nevada Band Association.

The largest public high school in Nevada, Rancho has one of the highest homeless student populations in the county, and 73 percent of Rancho students qualify for free or reduced lunch.

On the flip side, the school offers five year-round bands: wind ensemble, wind symphony, concert band, freshman band and beginning band. The Rancho Regiment marching band is one of only two in the state that was a finalist at a Bands of America regional marching competition in 2017.

The Vision

In some ways Williams’ success can be attributed to the vision of the school’s principal, Dr. James Kuzma, who came to Rancho in 2008. At that time, Rancho was graduating around 50 percent of its students. Kuzma predicted that a quality performing arts program would lead students toward improved academic standings. Out of this priority, Kuzma brought in Williams in 2013 to lead the band program.

The program Williams inherited was bereft of hope and numbers. Just 87 of Rancho’s 3,300 students participated in the band program with only 49 in marching band. Rancho’s beleaguered program had not earned a superior rating in a generation.

On day one, the new band director laid down the law and abolished traditions that were inconsistent or that did not advance camaraderie or musical achievement. Williams warns directors that “getting rid of traditions can work, but it can also be risky.”

The key is to replace them with new traditions. “In our case that became the love of performance and good fundamental music skills,” Williams says.

Williams also encouraged students to gather for pregame dinners and honored graduating seniors with cords and trophies. In addition, he created a new logo for the band to signify a new beginning.

Directors should always start with the committed kids, Williams advises. His strategy freed the band of students whose interest in music was half-hearted or nonexistent. “I knew the students who remained did so because they loved making music, loved band and were committed to excellence,” Williams says.

Dexter Hidalgo, a clarinet player who spent four years in Williams’ program, knew immediately that the new director meant business. Before introducing himself, Williams was ousting disruptive students. “That set the foundation that this was much more serious than we’d thought,” Hidalgo says. “A lot of kids left that semester.”

Bold and Aggressive

Percussionists for the Rancho High School band practicing

The plan worked. In Williams’ first year, the Rancho Regiment placed first in its class at the Showdown at Silverado competition through the Marching Band Open Series circuit. Although Rancho had only 10 brass players, one of the top judges that day called his brass players “fearless,” Williams says.

“The best advice I can give is to be bold and aggressive — aggressive air, aggressive sound, aggressive performance … own it,” he says

Word of the band’s success spread. Soon students were arranging their class schedules to include concert band. “Human beings are attracted to achievement and excellence,” Williams says.

Students who participate in band must be disciplined, team players and accountable to one another, says Andrew Smouse, Rancho’s coordinator of percussion. “All of these are evident without question at Rancho,” Smouse says. “A huge portion of that is what Clint Williams brought to the table.”

Quality and Quantity

To increase his numbers, Williams raised his standards rather than lowering them. Focusing on the individual player rather than the ensemble was the means to this end. “I never want a child to feel neglected; I don’t want a [student] to feel inferior in any way,” Williams says. Assessing the individual is “where it all starts.”

Hidalgo says, “There was no moment when [Mr. Williams] was too busy for [any] of us.”

Demanding quality is vital to increase numbers. “The best advice I can give for growth is to always provide excellence in the performances of the high school ensemble,” Williams says. “This, partnered with communication to the middle school directors, will attract students to your program. People are attracted to high standards. … Quality breeds quantity.”

With higher standards and increased quality, Williams’ numbers spiked. By 2018, more than one-third of Rancho’s students were enrolled in the performing arts while the school’s graduation rate nearly doubled to 97 percent.

Band directors, Williams says, must always consider optics. Marching bands are often the public face of a high school. Therefore, they must exude quality when they play — from the national anthem to the school’s fight song.

All In

Parents buy into band programs if their children are playing to the highest standard. Before Williams arrived at Rancho, few parents were involved. Deanna McHenry, a parent of two Rancho band students, witnessed the immediate positive effects Williams had on the program.

“He raised the bar and expected them to be excellent,” McHenry says. “Mr. Williams started to include the parents more. The band boosters was started. More parents were buying into supporting the band and supporting their kids. He opened the doors, so parents got more involved.”

Parents started building props and equipment and doing the band’s laundry.

Getting students and their parents involved and committed to the band program is just one of Williams’ many achievements. “Clint Williams is one of the most dedicated professional band educators I’ve had the privilege of knowing or working with,” Smouse says.

This article originally appeared in the 2018 V3 issue of Yamaha SupportED. To see more back issues, find out about Yamaha resources for music educators, or sign up to be notified when the next issue is available, click here.

Pablo Rieppi and the Art of Practicing

In the blog post, Pablo Rieppi’s Passion for Percussion, we learned of Rieppi’s nearly nonstop practicing regimen through his college days. To keep daily practice from becoming tedious, Rieppi recommends the following:

Emphasize Creativity

For Rieppi, the joy of practicing comes with finding the creativity in your part. To bring out that creativity, Rieppi has written solo snare drum accompaniments for students to use during practice. Although snare drums have no pitch, “you still have to pretend you’re playing with someone who’s playing melodies and harmonies, so that comes out in your phrasing or tone color, articulation or dynamics,” he says. “I wrote these accompaniments for solo snare drum [to help] students practice creatively with pieces that can get mundane.”

Here are books Rieppi has written to help snare drummers:

Keep a Practice Journal

When students become frustrated with practicing, a good educator helps them break down the aspects of practicing that are giving them trouble. Rieppi tells his students to reflect on the process of practicing by writing down their thoughts, feelings and ideas in a practice journal. “If they’re having trouble with a piece, I want them to think about the areas causing them difficulty,” he says. “How does it feel in your fingertips? Your gut? Your back? Is it uncomfortable? Why? Find ways to make it comfortable. You have to help them unravel the way they think.”

This article originally appeared in the 2018 V3 issue of Yamaha SupportED. To see more back issues, find out about Yamaha resources for music educators, or sign up to be notified when the next issue is available, click here.

Pablo Rieppi’s Passion for Percussion

World-renowned percussionist Pablo Rieppi decided to teach himself to play drums as a junior in high school.

Little did he know that a year later, he would decide to pursue music professionally when the rock band he formed with his friends won a local battle-of-the-bands competition. Starting on a chosen instrument at a later age than typical musicians, Rieppi faced many hurdles in the pursuit of his passion. But he eventually succeeded due to his resilience and dedication.

“The greatest strength is … grit,” Rieppi says.

Throughout his career, Rieppi’s grit helped him push past obstacles that arose instead of stalling in his tracks. The first challenge came during his college audition for George Mason University in Fairfax, Virginia, when a panel of college professors asked Rieppi to play the marimba. “I asked, ‘Which one’s the marimba?’ They looked at me like, ‘Who … is this guy?'” Rieppi recalls. “I said, ‘I can just jam on the snare drum.’ So I did that.”

Yamaha Master Educator Anthony Maiello was one of the professors on the panel. He told Rieppi to take some lessons, then come back and audition again. Rather than taking this feedback as a rejection, Rieppi accepted the constructive criticism.

“I said, ‘Sure! I’ll take lessons!'” Rieppi says. “Being naïve was my anesthesia. It prevented me from feeling a lot of bumps and bruises because I figured everything would be fine.”

He took private lessons with Ken Harbison of the National Symphony Orchestra and was later accepted at George Mason.

Now the percussion department coordinator and faculty member with the Pre-College Division at The Juilliard School in New York, a member of the New York City Ballet Orchestra and a regular guest with the New York Philharmonic, Rieppi emphasizes the values of ambition and commitment.

Feeding the Mind and Body

Pablo Rieppi

With a bottomless hunger for musical knowledge, Rieppi began devouring the wisdom of his professors during his undergraduate years and while working on his master’s at Juilliard.

Maiello grew to be one of his greatest mentors. “He is responsible for forming my standards when I was a student,” Rieppi says. “He’s the kind of person who teaches and leads by example. If he says that you should work hard every day to develop your ears, it’s because he places a score on the treadmill and sight sings while he works out every morning.”

When Rieppi holds his own students to a high standard of excellence, he thinks of Maiello’s influence. “I realize I am transmitting many of the standards I learned from Mr. Maiello,” he says.

Rieppi also recalls the tutelage he received under Elden “Buster” Bailey, the retired percussionist of the New York Philharmonic, who passed away in 2004. Because it was Bailey’s final year of teaching at Juilliard, Rieppi was committed to squeezing as much knowledge out of him as he could.

Rieppi’s lesson with Bailey followed his lunch, so Rieppi would start warming up during the lunch hour; that way, he was able to get more advice from Bailey outside of the scheduled lesson. “I really had a two-hour lesson instead of one,” Rieppi says. “It was just an amazing year.”

Around the same time in his life, Rieppi attended a class about the Alexander Technique, which taught him to develop strong posture and body techniques that he incorporated into his percussion playing. “Both Buster and the Alexander Technique showed me how to use my body, my back, my fingers, everything — how to play better using rebound,” he says.

As an educator, Rieppi tells his students to use posture and movement in their percussion performance. “A lot of times, I’ll look at their fingers or their hands or the way they’re holding their sticks, and they’re like, ‘Why is this a big deal?'” he says. “I’ll go into an explanation [of] my days with Buster and how the body and physics help us be better musicians.”

Teaching the Individual

When teaching, Rieppi makes sure students have a complete understanding of why they should do something, not just what they should do.

“I give them a long-winded explanation, and they understand,” he says. “It’s not just something they’re going to forget after a lesson. They’re going to think about using [their] back, using different muscles, how gravity helps the stick come down easily by itself, how you can recycle your strokes to play more efficiently.”

Rieppi’s thorough explanations help him gain trust with his students. “I tell [them], ‘If I ask you to do something, you don’t have to do it unless I have a really good reason.'”

Not only do Rieppi’s clear explanations help students retain and internalize new skills, but they also help him tailor his teaching, taking into account each student’s back­ground and experiences. “My job as a teacher is to understand where the student is coming from, [to] find an individual way to address what they need, so it doesn’t become a formula,” he says. “If you took two actors and gave them the same script, it’s going to sound totally different. Music is the same.”

Rieppi recommends taking students’ differences into account rather than ignoring them. “You can take what they’ve learned [in the past] and adjust it, so that going forward, you can have a much broader base,” Rieppi says. “I’ve written books. I have all these worksheets. But at the end of the day, each worksheet has to be individualistic.”

Figuring Out Priorities

Pablo Rieppi with percussion instruments

Regardless of a student’s level of expertise, practice always needs to be the number one priority. Early in his college education, Rieppi developed an incredibly strong work ethic and a passion for the art of practicing itself. “I just practiced, ate and went to the bathroom,” he says. “Every free hour, I practiced.”

While at George Mason, Rieppi would become frustrated when the music building closed its doors around 10 p.m. “I wanted to practice even later,” he says.

He asked the director of the music department to keep the building open later; his request was denied. He then asked multiple teachers if they could find a solution for him. Rieppi was ultimately given 24-hour access to the building.

While Rieppi exemplifies the importance of making school and practicing a priority, he warns students that school shouldn’t be their top priority forever. “School is just the beginning,” he says. “A lot of students see [their] master’s degree as the final step into the professional world. It’s really the first steppingstone.”

Throughout the journey, Rieppi also made family a priority. “My parents bought my first Yamaha marimba and were very supportive of my dream to be a musician,” Rieppi says. “My wife and kids are the most important things in my life. I love them, and I need them. I’m blessed to have both [music and family].”

His son, a rising percussionist, has allowed him to bring the worlds of music and family together. “I play with him, but I’m not his actual teacher,” Rieppi says. “I’m his dad first. I got him his own percussion teacher. I’m not going to sit down with my son every week and say, ‘You [need to] practice more!’ We jam together. We just have fun with music.”

For Rieppi, having fun with music was what inspired him to pursue percussion in the first place. “To me, music is like a vital organ; it has taught me almost everything, and I have to have it,” he says.

That passion for music is essential to the often-tumultuous journey to securing a paying job in music. “There are some guys who take 36 auditions before they get the job,” he says. “It’s a huge investment from your soul, your time and your wallet. To keep up that investment, [so] that someday it might pay off, that’s grit. … It takes a while …[but] being able to make a living and being happy with what you’re doing [is] my definition of success.”

This article originally appeared in the 2018 V3 issue of Yamaha SupportED. To see more back issues, find out about Yamaha resources for music educators, or sign up to be notified when the next issue is available, click here.

Snare Drum Warm-Up, Part 4

The fourth in a five-part series about creating the ideal warm-up routine.

The previous three blog articles in this series got your hands moving and introduced accent patterns and wrist lifts. Now we’ll add a new rudiment: the flam.

Element #4: Flams

The flam is one of the original 13 National Association of Rudimental Drummers (N.A.R.D.) snare drum rudiments. It consists of a stroke preceded by a grace note. At this point in the warm-up routine, I like to take a step back and give my hands a chance to relax. The first version goes back to the “8 on a hand” preceded by a flam.  This also introduces the down stroke on the last eighth note of each measure:

Musical annotation.

The next exercise incorporates four flam rudiments that are very common in the Charley Wilcoxin Rudimental books. It also helps you practice Flamacues beginning on the left hand — something I personally didn’t do as much as I should have as a young percussionist:

Musical annotation.

Be careful of the stickings at the end of this exercise, where a double is used to ensure that you begin on the opposite hand when you repeat the exercise.

Remember to start at a slow tempo and use a big range of motion to get your muscles loose. Use a metronome and track your progress. As before, try increasing the speed of the metronome by two beats per measure every time you repeat the exercise. (This can be done manually, or with the use of an app.)

Creating a warm-up routine is an individual process and what works for me will not necessarily work for everyone. Feel free to create your own routine! 


Check out the previous postings in our Snare Drum Warm-Up series:

Part 1: Warming up the big muscles

Part 2: Transitioning to the small muscles

Part 3: Accent patterns and wrist lifts

Part 5: Wrap it up with rolls

Five Reasons Why Home Theater Is Better Than Going to the Movies

There you sit, happily at home. Your favorite flick is on your 4K screen and cinematic sound from your home theater setup is filling every corner of the room. A decade ago, this might not have been possible. For others, it might be the next possibility.

Since the dawn of time (or early 1900s, take your pick), moving pictures and the cinema were the perfect duo. Like Bonnie and Clyde, Batman and Robin, Garth and Wayne. They were synonymous with dinner and a show. The perfect date night: easy to plan, predict and budget for. But a lot has changed since a Charlie Chaplin premiere. Especially technology.

Not only have digital streaming services, movies on demand and popular cable shows come to rival Hollywood’s biggest blockbusters, the ability to enjoy your favorite movies at home has also become increasingly affordable and gratifying. In fact, the experience at home might be even better than a night out at the movies.

Here are five reasons why:

1. Cost. This one’s a no-brainer. According to the National Association of Theater Owners, the average cost of a ticket at movie theaters in the U.S. rose to $9.38 in the second quarter of 2018. Then there’s the popcorn conundrum to consider. A large bucket (even without butter) and two drinks can easily run $20 or more, making that night out at the movies lighten your wallet by nearly fifty bucks! Compare that to staying at home, preparing special snacks, enjoying your favorite drinks and using zero gas to drive to the theater — and you’ve saved yourself a bundle of cash to use on other things. Perhaps an enhancement to your sound system, or purchasing the movie itself?

2. More Choice. Sure, binge-watching more than one movie at a theater is possible (though costly), but you’re limited to only those films being shown at the venue and the need to coordinate show times carefully. But if you stay at home, you have nearly endless content at your disposal — content that you can watch at your convenience, with the pause button assuring plenty of time for restroom breaks and the like. There’s Blu-ray, DVDs and purchased streaming content, as well as cable packages that offer a wide array of television shows you can’t find in any theater. When it comes to the sheer amount of choice available to every home, there’s really no comparison.

3. Cleanliness. Hands up: Who likes sticky floors and dirty seats? Sure, many establishments have upgraded to recliners, but that’s just another way to sweep things into the cracks. Far better to stay at home where you have total control over hygiene.

4. Convenience/Comfort/Control. Ah yes, the three Cs. Let’s weigh the facts. At home, you can get out of bed, walk into the living room and you’re ready to watch a movie. Or you could shower, dress and drive to the theater. I don’t know about you, but lounging in PJs or a robe strikes me as a much more appealing option. You can also control the movies and TV shows you watch at home, as opposed to the theater, where you’re at the mercy of show times and traffic. Nothing quite compares to the convenience of watching what you want when you want.

5. Noise/Sound Quality. Save yourself a headache and high blood pressure by controlling not just what you watch but also the environment you watch it in. Staying at home allows you to avoid rude theater-goers who never learned about public etiquette. (It seems as if, no matter how many creative ways theaters try to explain the shortcomings of humankind when it comes to cell phones and talking during movies, humankind simply will not abide.) What’s more, you can get better sound at home, especially if you calibrate your system so it performs optimally. Compare that to a theater that may or may not have quality speakers or the capability to run the kind of setup the film demands, with presence and enough bass to rumble your seat. A standard 5.1-channel surround sound system in your home can easily rival (or even surpass) that of many theaters.

You may want to remember these points before you decide to go see the latest blockbuster in the movie theater. Chances are it’ll be available to watch at home in a couple of months anyway!


Click here for more information about Yamaha AV products.

Why Does the Oboe Lead the Orchestra in Tuning?

Man playing oboe in an orchestra.

Every orchestral performance starts the same way: First, you hear the oboe play an A (the standard tuning note, usually 440 Hz, though some orchestras prefer a higher 442 Hz), followed by each instrument playing an A and the entire orchestra tuning with one another. This is the moment that announces the start of the concert.

It also raises the question of why the oboe is in charge.

Beyond the fact that its bright, penetrating sound is easy to hear, there are two explanations: The first is that it is because the oboe has a relatively stable pitch, and the second is that it is because the pitch of the oboe is unstable. The two explanations are the complete opposites of one another.

So what’s going on here?

Nearly all instruments can be unstable in pitch due to changes in heat, humidity and the like. Typically, however, they come with mechanisms (such as tuning pegs on a string instrument) that allow performers to tune them. However, because of its physical structure, you can only change the pitch of an oboe by removing and inserting reeds of different breadth or length — unlike the way you can alter the tension of a violin’s strings, for example, or adjust the position of a clarinet’s barrel. What’s more, it is nearly impossible to make any sudden changes to an oboe on the day of a performance.

The bottom line is that it’s difficult to adjust the pitch of an oboe. Therefore, the other instruments must match it, not the other way around. And that’s why the oboe serves as the orchestra’s standard for tuning!


For more information about Yamaha oboes, click here.

This posting is excerpted from the Yamaha Musical Instrument Guide.


This Is How Music Moves Us

Many of us talk about the way our favorite music “moves” us, but most musicians I know don’t like dancing, and are not particularly good at it, either. Yet all musicians use their bodies to make music. Whether it’s blowing in a tube (trumpets, clarinets), bowing a string (violin, cello), using a mallet or stick (timpani, xylophone, drums) or pressing keys (piano, organ), there is no musical sound without some body movement initiating it, and most commonly, many successive body movements. Even singing, which requires that we force a column of air through our larynx and modulate our vocal folds in very precise ways, requires movement — it’s just that most of those movements are invisible to observers.

Clearly, professional dancers must have a strong musical sense in order to do what they do, just as musicians must have a strong sense of rhythm in their bodies. I’ve become interested lately in why and how non-professionals move to music — regular people dancing at parties, at concerts, raves or in their own living rooms with the shades drawn.

Kids dance fitness class.

To put this in context, infants begin to move their bodies rhythmically in response to music in their first two years of life, even before they have full control over their motor systems. These early movements are not usually synchronized with the music — that skill typically emerges at around age three or four, though many children are not especially good at it until they are older. Some animals can also keep a beat, although generally not much better than two-year-olds. Quasi-synchronization has been claimed for California Sea Lions, Rhesus Macaque Monkeys, and Eleonora Cockatoos.

What is it in the brain that causes us to move to music? As infants, we all go through a period of exploring the world we’re in and trying to manipulate it — this is part of an exploratory instinct (or “program,” if you prefer) in the brain. We learn about the world by actively exploring it, by interacting with it. When a baby reaches for a spinning mobile above its bed, it is acting this out. What it learns is how to move its arms toward a specific object, and, later, how to predict where a moving object will be and reach out to grab it. Reaching and grasping are two of the basic ways that babies learn how to make movements that have desired consequences. When we’re older, we learn to catch a ball thrown at us, to hit a baseball, get on and off a moving escalator, and so on. Neuroscientifically speaking, babies and young children are coordinating the input-output link between their visual systems and their motor systems. That is, they see something with their eyes, and due to complex circuitry in the brain, they can learn to create an appropriate motor response. This visual-motor coupling is fundamental.

Similarly, we have auditory-motor coupling circuits that allow us to take in information from our ears and respond appropriately with our hands, feet and other body parts. Toddlers love their little noise-making games because it reinforces this training: they push on a button, lever or key and a sound comes out. Magical! (The same word I’d use to describe watching Chick Corea play the piano.) One of the things that effectuates such coupling is that entire populations of neurons — millions at a time — synchronize their firings to the beat of the music. This makes it easy for us to move our bodies in time to the music. And, in a recent experiment I published with my colleagues Dan Abrams and Vinod Menon, we found that when people listen to music together, their brain waves synchronize too. This has huge implications for diplomacy and the prospects for peace, as well as for reducing interpersonal and intergroup tensions.

So why is it that so many professional musicians don’t dance? We don’t have any research on this, but I suspect it’s because, compared to dancing, playing a musical instrument and singing require both different muscles and a very different use of those muscles. For a musician, a tenth of a gram of pressure from the fingers or a 1/1000th of a second difference in timing can make all the difference between a great-sounding note and a bad-sounding one, and the musician needs to make hundreds of these kinds of microdecisions a minute. Casual dancers also need to exert muscle control, but the movements are very different, and typically require less precision. It’s also a different approach and mindset: You can dance and have a good time (more so if you’re uninhibited) at any skill level. But playing a musical instrument in a satisfying way requires a minimum level of skill. Musicians may not enjoy dancing because they are accustomed to their rhythmic movements to be very highly refined (and to come as a result of arduous training), and they can’t let go of that mindset long enough to cut loose and cut some rug.

Speaking of the precise movements required to play a musical instrument, an interesting thing happens when musicians practice: They expand the regions of their brain used for performing on their instruments. Violin players, for example, have an increased area of the part of their brain that controls their left hand, the hand that is required to make the most precise movements. Musicians in general tend to have a larger than normal corpus callosum, the bundle of fibers that connect the two cerebral hemispheres — the left brain and the right brain. As musicians get better, their movements become routine, which is just another way of saying that new pathways get wired up in the brain that allow them to play with their memory, and with their subconscious, without having to consciously direct their fingers (or vocal cords). This allows musicians to concentrate on the emotional aspects of their performance, and on communicating those emotions to their audience.

And, perhaps, to dance a little on stage too.

Live Sound Interconnections 101

Audio signals always start somewhere and end somewhere else (usually at a speaker). In the course of their journey, they typically travel through a variety of different connectors and cabling. Using the right cable and connector for the job is as important as using the right size socket wrench to tighten a nut. Here’s everything you need to know about the kinds of interconnections you’ll encounter in both live sound and recording.

Three Different Signal Level Types

There are three types (though technically, these are actually ranges) of signal level: mic, line and instrument. Let’s look at each in turn.

Mic Level

Microphones produce very low signals that must be amplified before they can be sent through a mixer and then on to a power amplifier and speakers. That’s why every mic input on a mixer has a preamp that raises the weak output from a microphone up to a much stronger line level. Mic cables typically have an XLR male connector at one end and an XLR female connector at the other end:

Side by side pictures of an XLR male connector and an XLR female connector.
Line Level

Line level signals are much stronger (“hotter”) than mic signals and therefore don’t require as much amplification or gain as mic level signals. They can come from a variety of sources, including the outputs of a mixer or an outboard effects device such as digital delay or reverb. There are other devices that produce line level signal too, such as computer audio interfaces, CD/DVD players, samplers and some keyboard workstations. The output of wireless microphone receivers can often be switched to either line or mic level, so make sure you know what the setting is before you connect it to your mixer. Any line level output can be plugged directly into a power amplifier or powered speaker and will produce plenty of volume.

Cabling carrying line level signals can terminate in any combination of XLR, TS (Tip-Sleeve), TRS (Tip-Ring-Sleeve) or even RCA connectors:

Side by side images of a TS male connector and and TRS male connector.
RCA male connector.
TS/TRS female (left) and RCA female (right) connectors.
Instrument Level

What about the signal from an electric bass or guitar? These kind of fall into the Island of Misfit Toys. Instrument signals are too strong for a mic input and too weak for a line input. Instrument connections almost always use the TS connectors shown above. Yamaha STAGEPAS 400BT and 600BT mixers have special “combo” jack inputs that can accept XLR, TRS or TS connectors (but only one at a time!). There’s also a switch for Mic, Line or “Hi-Z”; the latter turns the combo jack into an instrument input with just the right amount of gain to bring the signal from an electric bass or guitar up to line level without adding noise or distortion:

STAGEPAS combo jack with Instrument input.

This “Hi-Z” (impedance) switch also ensures that the input has the correct electrical characteristics so that the pickups on your electric guitar or bass sound the way they are supposed to.

Other Types of Audio Signal

On occasion you may find some unconventional audio connections on a mixer. For example, the Yamaha MG16XU has a USB input that you can use to connect a phone or laptop for music recording and playback. The Yamaha STAGEPAS 400 BT and 600BT powered mixers feature Bluetooth capability, allowing you to stream audio from your phone wirelessly for music in-between sets.

Here’s What Not to Do

Live sound newbies sometimes make the mistake of thinking that, as long as you have the correct connectors on a cable, you can plug anything into anything. Not true. For example, you could in theory make a special cable that would allow you to physically connect an electric guitar to a mic input, but the signal from the instrument would almost certainly overload the mic input, causing distortion. A similar thing happens if you try plugging a CD player’s line level output into a microphone input.

Conversely, if you connect a microphone to a line input you’ll find that the signal from the mic is not loud enough to use — even when you turn the gain control up all the way. There will also be lots of background noise and/or hiss in the signal. That’s another reason to make sure you always match output levels to input levels.

Unbalanced vs. Balanced

Unbalanced

Any audio connection requires at least two wires or conductors: a positive (“+”) signal (sometimes called ‘hot’), and a ground. Inside the cable, the ground is typically wrapped or braided around the + wire:

Unbalanced cable.

The ground wire is often called the “shield” because it not only carries audio but also helps to protect the + wire from interference produced by cell phones, lighting dimmers, and radio and TV stations (this is known as “RFI” or Radio Frequency Interference).

This basic two-conductor arrangement is called unbalanced, and is generally used by electric guitars and basses, as well as some electronic keyboards. In addition, connections from most DJ mixers and analog turntables are unbalanced, as are most speaker and headphone cables — even some inexpensive patch cables. (A “patch” cable is a short length of cabling used to connect the output of one device to the input of another via a series of jacks arranged closely together in a patch bay.) Unbalanced cables are OK (but not great) at rejecting RFI because the shield itself works as an antenna. For that reason, unbalanced cable runs should be no longer than about 15 or 20 feet.

Unbalanced cables used for electric guitars and basses terminate in TS connectors, while those used for DJ mixers and CD/DVD players usually terminate in RCA connectors. The 1/8-inch mini or 3.5 mm TRS connectors you’ll find on phones and MP3 players are also unbalanced.

1/8-inch (3.5 mm) mini TRS connector.

Unbalanced cables are generally not used for microphones because the noise picked up by the cable would be relatively loud, and so, when amplified along with the mic signal, would be very noticeable. The goal is to get rid of the noise while retaining the original signal. And that’s exactly the purpose of a balanced line.

Balanced

A balanced cable uses three conductors instead of two. One carries the original signal (the “+”). A second carries an inverted (phase reverse) duplicate of the original and is called the  “–“ (negative or cold). The third shields the + and – from interference. Sometimes there is also a piece of foil wrapped around the + and – to increase the amount of shielding. Balanced lines can easily be run upwards of 150 feet without significant loss of signal or added noise. However, because of the additional circuitry required, balanced gear tends to be more expensive than unbalanced equipment.

Balanced cable.

The most common connectors used by balanced cables are XLR and TRS. Note that one, and only one balanced signal can be carried by a single XLR or TRS cable. Don’t be fooled into thinking that a TRS connector is always used as a “stereo” connector. It’s better to view a TRS connector as a tool that can be used for many purposes, like a hammer. For example, it can be used for unbalanced stereo headphones, for a mono balanced connection or for a special connection called an “insert” (a send/return at unity gain). TRS connectors are rarely, if ever, used by professional microphones.

Note that using a TRS cable for an electric guitar or bass will not make the signal balanced, and may actually add more noise than if you use the proper TS cable. Conversely, using a TS connector for a balanced signal instead of a TRS one will work — sort of — but you may hear additional noise and/or lose some signal level, so it’s not a great idea.

This may all seem a lot of information to take in, but the bottom line is that using the right cables and connectors will keep your audio clean and quiet — the ultimate goal in both live sound and recording.

All photographs courtesy of the author.


Check out our other Tools of the Trade postings.

Click here for more information about Yamaha mixers.

Snare Drum Warm-Up, Part 3

The third in a five-part series about creating the ideal warm-up routine.

The two previous blog articles in this series got your hands moving. They started with eighth notes and progressed to sixteenth notes. The exercises in this posting will begin to introduce accent patterns and wrist lifts.

Element #3: Accents

Start with the theme and progress to the variations once you feel comfortable.

Theme:

Musical annotation.

Variation 1:

Musical annotation.

Variation 2:

Musical annotation.

Be careful of the stickings in Variations 1 and 2. These have been written with triplets and doubles to ensure that you begin on the opposite hand when you repeat the exercise.

Remember to start at a slow tempo and use a big range of motion to get your muscles loose. Use a metronome and track your progress. As before, try increasing the speed of the metronome by two beats per measure every time you repeat the exercise. (This can be done manually, or with the use of an app.)

Creating a warm-up routine is an individual process and what works for me will not necessarily work for everyone. Feel free to create your own routine! 


Check out the other postings in our Snare Drum Warm-Up series:

Part 1: Warming up the big muscles

Part 2: Transitioning to the small muscles

Part 4: Adding flams to the equation

Part 5: Wrap it up with rolls

The Sounds of Halloween

The ghosts and goblins will soon be coming out to play, delighting and frightening young and old alike. Whether you’re planning a big Halloween bash or just want to set the mood for the trick-or-treaters at your door, the right kind of music can always add some extra scream potential.

At YamahaMusicSoft.com, you’ll find all the ingredients for creating a scary soundtrack, including Halloween-themed MIDI songs, PianoSoft software and sheet music — everything you need to turn your keyboard into a haunted piano. And if you’re a Yamaha Disklavier user, there’s definitely no better time of year to enjoy the chilling “ghost player” effect of your instrument’s moving keys!

Here are some of the hobgoblin-y highlights:

  • More than a dozen spooky MIDI songs, including Frankenstein (the Edgar Winter hit, not the creation of the mad scientist), Bad Moon Rising, and, for the exorcist in you, Tubular Bells.
  • Boo – Halloween Favorites and A Haunted Halloween are two PianoSoft albums that can turn even the most unassuming domicile into a foreboding haunted house.
  • Custom Audio Backing Tracks for songs such as Ghost Riders in the Sky and Don’t Fear the Reaper. Load these in and prepare for the hair on the back of your neck to stand up as you play along!
  • A great selection of Halloween sheet music. Sure, it may still be a week away, but if you’re going to learn how to play the Tocatta and Fugue in D Minor by the 31st, you probably need to get started now.
  • With Piano Radio, you can stream Halloween music directly to your Disklavier — no need to change CDs or fiddle with your music player. And, as a bonus, the instrument will appear to be playing itself!
  • CVP and CSP Clavinova owners can enjoy an extra dose of ghoulish fun by downloading Kooky Karoake MIDI files such as Monster Mash, which, as demonstrated in the video below, automatically adds Boris Karloff-like effects to your accompanying vocals.

So stock up on the treats (a must if you want to avoid tricks), set out that jack-o-lantern and have yourself a super-spooky time!


For more information, visit YamahaMusicSoft.com.

Four Benefits of Having a Professional Do Your Home Theater Installation

We’ve all been there. You think the do-it-yourself (DIY) route will not only save you money but also help you avoid the hassle of finding the right person — and someone who might be coming into your home at a time that’s inconvenient for you. Some projects are less daunting than others, such as installing a sound bar with a couple of wireless speakers. But as the number of components in your home theater system continues to grow, so does the complexity and your ability (and spirit) to take on their installation.

Before you get past the point of no return, here are four reasons why you should consider hiring a pro to install your home theater:

1.  Much less research is required

You can easily find the right person for the job through a quick internet search or by asking a friend or two, and then you won’t need to spend hours on end watching online instructional videos or scouring the hardware store for some random tool you may never use again. Hiring a professional installer will save you tons of time by letting you rely on the expertise of someone who does this type of work daily.

2.  You can get the job done well regardless of the level of expertise required

You might consider yourself a jack of all trades but there’s always somebody who can do it better. A pro will also usually know ways to do things that can save you money as well as time, like whether or not to drill holes or use a different product. They can also troubleshoot a difficult situation that you might make worse with an uninformed decision. Plus, most professional installers offer service and support should additional questions arise or further work be required.

3.  Stress reduction

We all have more than enough stress in our lives without having to add more. It’s all too easy to work up a sweat and suffer through a migraine when running speaker cables through your walls that might accidentally put holes in your pipes. Instead, why not avoid the hassle and allow a pro to take on the full scope of the project? Sure, it may cost some money out of pocket, but it’ll save you from freaking out over how expensive it would be to replace whatever it is you might have damaged while attending the school of hard knocks. Plus, it’ll help free up your time to focus on other projects for which you’re better suited.

4.  There’s probably a lot that an installer knows that you don’t

If you consider yourself the next Bob Vila, then this part’s not for you — but let’s face it, most of us are not on that level. Few people are experts at both carpentry and installing electrical components in their homes. Professional installers not only have the knowledge to be more efficient, but they can provide you with options you might not be aware of. Not only might an installer help keep you from spending thousands on unneeded repairs and home updates, they may open up possibilities for integrating other components of your home into a system as smart as your theater, including lighting and security.

Taking on a home theater installation project by yourself, with the potential savings in money that goes along with it, is certainly doable, especially if you’re handy around the house. But some things — like expertise and peace of mind — are often well worth a little extra coin. Leave it to a professional instead and you’ll likely end up spending more time enjoying your home theater than fixing it.


To find a Yamaha dealer, use our dealer locator here. If you’re looking for a custom installer for a specific brand like Yamaha, we recommend you search locally (with a search engine or social community website) using the terms “home theater custom installers.” Availability of custom installers may vary based on region.

A Story of Healing

I talk a lot here about the power of music. But the power of hard work and perseverance is equally potent, and the two combined can make for an almost unstoppable force.

Take my friend Ray Levier. After being severely burned in an unfortunate childhood accident, he faced the loss of several of his fingers and some of his motor skills. But he was determined to not let that affect his future and what he loved doing most: drumming, creating and making music.

Young man with burn scars on face and wearing a ball cap sitting at a drumkit.

His is a story of not just surviving but thriving. Beyond Ray’s musical prowess, he rides motorcycles, jumps out of airplanes and climbs mountains. He has a relentless zen-like focus and determination to constantly get better at his craft.

“To me, the power of music means healing,” Ray explains. “Music goes beyond where words go. In my travels, when you go to other countries, people may not know politics, but they know music and how it makes them feel good. I think music is a powerful expression of a human being that truly touches people in a deep way. It is what makes me, and those around me, feel good.”

When the accident happened, Ray had just started getting into the drums. “At first I was like, oh no,” he says, “but I also thought, there is no way I’m going to just let this slip away. [After the operation], I looked down and I said “I have hands, that’s all I care about.” If I can hold the sticks, I can do this.”

Levier has always credited his mom, who is an accredited energy healer, with helping him through the challenging times. “When I was lying there in the hospital, she told me to think healing thoughts,” he says. “She said think about what makes me feel good and I knew right away that drums were it. Drumming was something that I just couldn’t get out of my thoughts.”

And drum he did. But he also had to approach the instrument from a new angle. “I thought I could learn everything that a human can that has normal facility of their hands,” he recalls. “In my mind, there was no handicap; I just had to use different muscles and strategies. Most of the common drum techniques did not apply to me, because it was about finger touch and just letting the stick kind of bounce within the fingers. So that didn’t gravitate to me when I was learning. What I did was use hard work and perseverance instead.”

It’s that no-holds-barred attitude of having to succeed that has pushed many people to new levels, including Ray. Very simply, the more people told him what he couldn’t do, the more focused he got. And once he was on that path, there was no looking back.

During this single-minded pursuit, Levier found that even twelve hours of practice a day wasn’t enough, because he started to see the larger scope of what was possible, deciding to use the great drummers of all time as motivation to succeed. “I looked at guys like Buddy Rich and felt I could aspire to his chops and ability,” he explains. “I thought of it as shooting for the stars and if I hit the mountain, that would be completely acceptable.”

None of this was easy. “It was about showing up and getting your hands dirty,” he says. “You have to push through that feeling inside of you that says this sucks here. So you punch through the touch practice sessions and you massage it and polish it and then you sometimes break through and discover, whoa, there is a diamond underneath all this crap. Then you start to see the benefits of what you’ve been pouring your blood, sweat and tears into. Overall, the more frustrated I get at something, the more laser focused I get to overcome it.”

Young man riding a camel in front of a pyramid.

These concentrated efforts and endless practice sessions paid off. Ray today travels the world playing drums for a variety of artists, including KJ Denhert, who he’s worked with for over 20 years. “I’ve been to Egypt [with KJ] and got to go up to King Kofah’s chamber in the top of the pyramids,” he says with wonder. “Words can’t describe that. The epiphany hit me that I was getting paid to be in this amazing place to play for people that don’t speak our language and most of them don’t even know the style we play. But it didn’t matter, because they know it moves them.”

A similar thing happened when the band traveled to Nepal and played the Kathmandu Jazz Festival. “We were having lunch on the top of this building and the waiter points and says, “That’s the tip of Mount Everest. You rarely get to see this.” It was an amazing experience.” Music has also allowed Ray to perform for audiences from Alaska to Italy, as well as St. Barths and St. John in the US Virgin Islands.

My friend Ray Levier has played on countless TV tracks, released several of his own records, and is currently working on another project that includes the likes of guitarist Mike Stern and bassist Will Lee. A deeply introspective soul, he has a unique outlook that likens life to a pinball game. “If you can keep that ball up and don’t let it fall down the gutter you’re going to hit things,” he explains. “You’re going to score and you’ll gain points in your life. It’s not always easy. It’s hard to keep things juggling and always moving. But whatever your big dreams and lofty goals are, you have to go for them, because we only have a limited amount of time here.”

“I feel super blessed to do what I do as a musician, to see the world, play music and bring joy and happiness to others,” Ray says. And we in turn are blessed to have people like Ray Levier show us the way.

Photos courtesy of the author and Mike Dwyer. Video courtesy of Scott E Moore and Eric Feldman.


Check out Rich’s other postings.

Jeff Coffin Video Series, Part 2: Caring for Vinyl

Being passionate about something means both being knowledgeable and nurturing that passion. Vinyl is no different. Aside from playing the records, it’s also important to maintain them.

In the first video in this series, Dave Matthews Band saxophonist Jeff Coffin took us to his favorite local record store and showed us how he shops for vinyl. In this installment, Jeff welcomes us into his home and talks about some of his favorite records, along with providing tips for the care and maintenance of vinyl.

Click here for more information about the Yamaha MusicCast VINYL 500 Wi-Fi turntable.

Snare Drum Warm-Up, Part 2

The second in a five-part series about creating the ideal warm-up routine.

Part 1 of this series explored ways of warming up the big muscles. In this article, I want to talk about transitioning to the small muscles.

Element #2: Moving from Big Muscles to Small Muscles

Musical annotation.

This exercise is a combination of singles, doubles and paradiddles:

Note that this is written in 3/4 time. Too often exercises are written in 4/4 and we mindlessly play them. Doing an exercise in 3/4 time will help warm up your mind as well as your body.

Remember to start at a slow tempo and use a big range of motion to the get your muscles loose. Use a metronome and track your progress. Try increasing the speed of the metronome by two beats per measure every time you repeat the exercise. (This can be done manually, or with the use of an app.)

Creating a warm-up routine is an individual process and what works for me will not necessarily work for everyone. Feel free to create your own routine! 


Check out the other postings in our Snare Drum Warm-Up series:

Part 1: Warming up the big muscles

Part 3: Accent patterns and wrist lifts

Part 4: Adding flams to the equation

Part 5: Wrap it up with rolls


The Principles of Musical Architecture

When I write songs, produce an artist or mix a project, I think in terms of architecture: musical architecture. I try to build a strong foundation on which to add multiple layers, weaving instrumentation into composition, with air and space providing the mortar that binds it all together.

Consider the tempo as being like the grading of land — the initial preparation for the blueprint (your song canvas) to be executed. Using that analogy, the kick drum pulse serves as the first pour of concrete slab; the snare, hi-hat, tom and percussion grooves define where the dividing walls will stand.

The bass guitar underpins and supports the foundation of the song with root and chordal/tone frameworks from which each tonal “floor” will ascend. Open-position triad chords strummed on an acoustic guitar ring out as the first floor of harmonic progression, while sweet 7th chords and piano inversions add color and additional floors of harmonic variation. The placement, phrasing and “pocket” that each instrument finds in the groove serve as the load-bearing and dividing walls, defining space and flow within the overall song construction.

Then come the melodies that adorn the musical structures we design. I often think of these as the intricate millwork, fabric, furnishings and brush strokes that take the limelight — the top-line notes that reside within the walls of chordal harmony.

Acoustic guitar leaning against a buffet table in a formal dining room.

Lyrics provide the roof and complete the edifice; personal, relatable words, delivered by the human voice in emotional performances of rhythm, rhyme and melody.

It’s only when we have a roadmap, a pre-production floor plan and a great team of musicians that we can forge our song into a residence that will stand for a very long time.

I’m expressing music to you in these terms because I often use visuals as a reminder of how I’d like my audio palette to sound. I mix tracks from left to right and from low to high, and I like to support each instrument with the one below it. Live performances can adhere to the same principles of musical architecture: a pyramid of lows to highs. And even the solo performer can select an instrument that fully supports the tone and volume of their voice.

As a singer/songwriter/performer, I am finely attuned to the frequency ranges and volume that many acoustic guitars offer. A full sized guitar like theFG-TA TransAcoustic, for example, may offer more bass and mid-range response than the compact, short-scale CSF3M parlor guitar, but which instrument is the best option to support my voice, complement my vocal range and not overpower me in an acoustic environment? These are the questions I ask myself when selecting an acoustic guitar.

The Challenge

I thought it would be interesting to record three different acoustic guitar shapes and sizes to compare their tones and find the best fit to support my voice. I know the guitar tone-woods will also have an effect on the sound but the purpose of this experiment was to get a general idea of how each instrument’s frequencies work with my vocal tone, and the song being played.

I decided to keep the vocal and guitar tracks totally separate so that none of the guitars would have an influence on how I sang the song, so I recorded my vocal over a piano and percussion track and then replaced those backing tracks with acoustic guitars once the vocal was finished.

The guitars I chose for the recording (and the video below) were as follows:

  • Yamaha FG-TA – A full-size western-style guitar with mahogany back and sides and a solid spruce top.
  • Yamaha A Series AC5R – A concert-size body with a cutaway, a solid rosewood back and sides, and a solid Sitka spruce top.
  • Yamaha CSF3M – A parlor guitar with a short-scale neck, a solid mahogany back and sides, and a solid Sitka spruce top.
Three acoustic guitars lined up from left to right largest to smallest.
Left to right: FG-TA, AC5R, CSF3M

My voice tends to occupy the lower frequency ranges, so I was really curious to hear how each guitar would support my vocal tone. While recording, I tried to keep the dynamics of my performance consistent, letting the instruments provide the tone and volume naturally. I used a tube microphone running into a tube preamp (with the EQ set flat) to capture both the guitar and vocals.

When recording the guitar parts, the mic was placed approximately 12 inches from the neck at a 45-degree angle to the 14th fret of each instrument. I then double-tracked each and panned the first take hard left and the second take hard right in the mix. I added a little Hall Reverb for ambience, but no compression was used on the guitars.

The Video

As you watch the video, try to focus not just on the tonal differences between the three guitars, but, more importantly, the way each blends with my voice. I felt that the two mahogany body guitars (the FG-TA and the CSF3M) sounded brighter to my ears and let my vocals sit out front of the performance better; I also think that either would sit nicely in a dense mix of multiple instruments. The rosewood AC5R sounds nice and warm to me — perfect for solo acoustic gigs — but I found myself listening to the guitar instead of the vocals in the recording.

The Wrap-Up

The vocal melody is the most important aspect of any song, and the instrument choices we make can either enhance or detract from the end result. Using the instrument that best supports the vocal is therefore key to getting optimum results.

Of course, there are many other factors that go into deciding which guitar to buy, such as comfort and playability — how it feels to your hands and body. And sure, we also want our instruments to look cool on stage … but not to the detriment of our music. So the next time you’re considering a new guitar, listen carefully to the tone, volume and sound it produces when accompanying your voice and ask yourself this important question: Does this instrument support, complement and allow your vocals to shine as the focal point in the performance? If it does, your choice just became a lot easier.

Photographs courtesy of the author.

Check out Robbie’s other postings.

Want to know more about how different woods affect the sound of guitars? Check out our blog article “A Brief Guide to Acoustic Guitar Tonewoods.

Click here for more information about Yamaha acoustic guitars.

Blocking Writer’s Block

You’re stuck. There is no word in the world that, as John Lennon put it, tells the truth and rhymes. You’re sure your song needs a bridge but what else is there to say? Or worse yet, you haven’t been inspired for weeks. Maybe you should have gone into accounting.

So you get angry with yourself. And scared. And insecure! If you were a real writer, material would be coming out of your ears, you say to yourself. If you were a real writer you’d be bursting with inspiration. But you’re empty. Will you ever get it back?

Smiling woman leaning on her elbow on the keys of a piano.
Me, waiting for “it” to come.

Listen, it happens to everyone. Trust me. Maybe some people won’t cop to it but it does. And it’s OK.

It’s just writer’s block — a temporary affliction. It’s hard to remember that, though, when you’re right smack in the middle of it. This isn’t the first time you’ve had it, right? Why is it so easy to forget that you survived it before?

It might cheer you to know that there are things you can do to relieve the frustration. But before you do any of them, stick with it … and write as much as you can. Journal (used here as a verb) or strum past the emptiness. Why? Because sometimes the magic line, melody or chord progression reveals itself five pages (or five measures) past the pain. And if that happens, don’t question it. Receive it as you would a gift. Open your arms to the heavens and just say “thank you.”

That said, if you’ve been at it for hours and you’re ready to pull your hair out …

Take a walk. Go for a drive. Do what you have to do to get away from your screen, your journal, your keyboard or your guitar. Go to the mall or the movies … but stay away from the fridge; no amount of emotional eating will free you up faster. Get a beer or a mani-pedi. My activity of choice is making soup. (Green pea and mint is my favorite.)

Stand up! Better yet, pace. The movement alone can stimulate thought and keep you from freezing up mentally. Go to the gym. Get your blood flowing. Hang upside down so it gets to your head! I do this for one minute after every work-out. It’s also therapeutic for back issues.

Or do the exact opposite: Take a nap. I’m serious. If we’re really-really-really-lucky, after hours of obsessing it’s possible to dream the answer. Then the trick is to wake up and document it ASAP. I’ve heard that we lose 90% of our dream recall within 10 minutes of waking up, and I believe it.

OK, so what if you’re in a writing session with collaborators and can’t head out or grab that nap? Either would be kind of rude, right? Well, then …

Excuse yourself for a toilet break, whether you need one or not. Get in there and shut the door. Sometimes when you’re alone and not feeling self-conscious about being on your game (which can happen, especially when you’re with other writers — people you understandably want to dazzle), a line or melody will come more naturally. At which point you can walk back into the room with the money.

If all these exercises fail, don’t panic. Take solace in the knowledge that creative shut-downs are actually quite constructive. They’re telling you that your unconscious needs to work on its own for a while without your help. The nerve! Yet isn’t it reassuring to know your brain is churning away even when you’re not actively in the driver’s seat? So why not let it?

In other words, Surrender!

Then don’t be surprised if, when you return to your work-in-progress, it all comes together without a hitch — a delayed result with no effort on your part. You already did the work.

So ignore writer’s block like the pesky fly on the wall that it is. Don’t give the debilitating power of writer’s block the dignity it wants to rob you of. Think of it as a staring contest and try not to be the first to laugh. Just keep staring. Eventually, you will win.

Photo courtesy of the author.


Check out Shelly’s other postings.

Jeff Coffin Video Series, Part 1: Shopping for Vinyl

Man in record store looking at a vinyl record.

Everyone needs a hobby. For Jeff Coffin, music lover and saxophonist with the Dave Matthews Band, it’s collecting records. He’s been doing it for years. Now that vinyl is making a comeback (and now that Yamaha has introduced a new wireless turntable to spin and stream your tunes to enjoy in any room of your home), we could all use a few pointers on how to shop for vinyl.

We recently met up with Jeff in Nashville and joined him on a visit to his local record store as he explained how to select vinyl for a personal collection. Take a look … and you might want to take some notes too!

Check out Part 2: Caring for Vinyl

Click here for more information about the Yamaha MusicCast VINYL 500 Wi-Fi turntable.

Snare Drum Warm-Up, Part 1

The first in a five-part series about developing the ideal snare drum warm-up routine.

As an educator and professional performer, I have noticed that over the years, my practice time has decreased for one reason or another. I have also found that the older I get, the harder it is for me to start playing without first warming up.

Creating a warm-up routine is an individual process and what works for me will not necessarily work for everyone. That said, a good warm-up:

1)  Is a reasonable length. If it is too short, it won’t be effective; if it is too long there won’t be enough time to do it every day. The routine I’ll be presenting in these articles takes just 10 – 15 minutes from start to finish.

2)  Starts with big muscles and moves to smaller muscles.

3)  Evolves over time. As you learn new repertoire, you need to adapt the warm-up to help with the technical demands.

Element #1: Warming Up the Big Muscles

The goal of this exercise is to get your big muscles moving. It’s also a time to forget about everything else that is going on in your life and listen to the sound you are creating on your instrument.

Musical annotation.

Start with a classic “8 on a hand”:

Then move on to a “clone” of the exercise:

Musical annotation.

(This term comes from Teaching Percussion by Gary Cook. He uses “cloning” to mean having both hands playing at the same time.)

Advanced players can add this exercise, which incorporates different stroke types:

Musical annotation.

F = Full Stroke, D = Down Stroke, U = Up Stroke

Remember to start at a slow tempo and use a big range of motion to get your muscles loose. Use a metronome and track your progress.

Check out the other postings in our Snare Drum Warm-Up series:

Part 2: Transitioning to the small muscles

Part 3: Accent patterns and wrist lifts

Part 4: Adding flams to the equation

Part 5: Wrap it up with rolls

Selecting a PA System for Your Worship Venue

Welcome to a new feature on the Yamaha blog in which we present a series of videos about doing live sound in aHouse of Worship.

Ready to install a sound system in your House of Worship? You won’t want to miss this video, with Yamaha product manager John Schauer presenting tips for determining the amount of amplifier wattage needed for your sanctuary as well as the number of required mixer inputs and outputs. He also discusses the advantage of using powered speaker systems with integrated mixers and amps.

Click here to find out more about Yamaha professional audio products.

Teaching Mallet Percussion with the YX-230 Tabletop Xylophone

In the realm of percussion, the goal for every music educator is to create a percussionist who is also a well-rounded musician. As teachers, we dream of a highly disciplined group of students in the back of the band hall who are every bit as accomplished as their brass, woodwind or string counterparts.

Yet all too often we are roused from this wonderful dream by the eardrum-shattering sounds of the dreaded bell kit. Many of us experience the sound of a dozen or more first year percussionists playing on these tiny hearing-loss creating devices and say, “There has to be a better way.”

Now there is. The tabletop xylophone has taken the place of the bell kit and has become a useful tool to help create young percussionist-musicians. Here’s why:

Sound Quality

A tabletop xylophone with stand and case.
Yamaha XY-230 with optional stand and soft-sided case.

Because bell kits have such a high-pitched and displeasing sound, some students (and their parents!) have been so turned off that they have been discouraged from practicing altogether. And even if they do persevere, students often strike the bars in a very timid fashion — a stroke that doesn’t create the correct technique or muscle memory. Designed specifically for easy playability and handling, the Yamaha YX-230 tabletop xylophone offers full-size bars made of real Padauk wood for a true characteristic tone. As a result, students using the proper stroke with this instrument (and its included Yamaha ME-103 mallet) will create the desired sound from day one. Proper strokes are analogous to tone production in wind instruments. If students are practicing on a beginning instrument that does not promote this, they will be creating poor performance habits. The YX-230 can be played with a full stroke since it produces a superior sound to other alternatives.

A Boon to Technique

Mallet percussion reading and technique is vital to the development of every young percussionist-musician. For beginning players, the ability to keep their eyes on the music and be able to hit the bars accurately is enhanced by full-sized bars. Bell kits, with their tiny bars and mounting screws, are very difficult to hit with any consistency or exactness. The larger bars of a tabletop xylophone such as the Yamaha YX-230 more closely imitate the peripheral vision playing situation of a full-sized instrument and create the proper muscle memory, vital for accuracy. Students who practice playing scale patterns on a tabletop xylophone will have little or no trouble transferring to a performance instrument. This cannot be said of a student who practices on a bell kit.

Because most tabletop xylophones are three-octave instruments, students in their second or third year of instruction can perform virtually all of the études found in band method books, concert band literature and District Honor Band audition music. Students can practice all of their major scales in two-octave patterns, as is often required of auditions. Even beginning four mallet technique can be started on a tabletop xylophone.

Home Use

The ability to give students an instrument that enables them to do focused, deliberate and accurate practice at home is an immeasurable advantage to any alternative currently available.

Any beginning student with a tabletop xylophone under his or her bed or stored in the closet has a fully functioning tool for high-quality practice in just seconds. The YX-230 and optional stand fold up simply and can be stored or set up just about anywhere. The advantage of this favorable at-home scenario over the bell kit option — or attempting to find practice time on a school owned instrument before or after school — is profound. Students will become self-reliant with their practice habits and excuses for not practicing will be eliminated.

Use in the Classroom and Practice Room

In addition to being a useful tool for beginning students, the tabletop xylophone is also a huge asset in the classroom. A few additional sets of instruments such as the YX-230 in the classroom can allow entire classes of percussionists to perform at the same time — a cost-effective way to have enough mallet resources for every student. In addition, small practice rooms that may not be able to fit a full-sized instrument can certainly fit a three-octave xylophone. A school outfitted with these instruments creates even more opportunities for their young percussionists to hone their skills.


Click here for more information about the Yamaha YX-230 tabletop xylophone.

Click here to read about and download the Yamaha Mallet Resource Guide, which provides information about music fundamentals, along with exercises, scales and études for students.

Genius Is As Genius Does

We all have our musical heroes. If you’re like me, you probably think of one or more of them as “geniuses.”

But are they really worthy of the term?

In a recent posting I talked about the art of arranging, citing the genius of Brian Wilson as an example. It’s an appellation often given to the famed leader of the Beach Boys, and in his case I think it’s justified, but as I was writing the piece it got me thinking about what the word actually means.

Handwritten notes.
Steve Lacy’s notebook, with tips from Monk.

The Oxford Dictionary tells us that it signifies “exceptional intellectual or creative power or other natural ability.” But I feel that a far better definition was provided by Thelonious Monk. The legendary jazz pianist was almost as well known for his dispensations of wisdom as he was for his distinctive composing and playing skills. As scribbled down by one of his sidemen (soprano sax player Steve Lacy) in a spiral-bound notebook way back in 1960, Monk’s primer of do’s and don’ts have become a kind of bible for musicians everywhere.

There’s lots of timeless advice here (“What you don’t play can be more important than what you do play”; “A note can be small as a pin or as big as the world, it depends on your imagination”), but the observation that’s made the most impact on me is this one:

“Whatever you think can’t be done, somebody will come along and do it. A genius is the one most like himself.”

There have been many inspiring examples of people coming along and doing the “impossible” throughout history. From the light bulb to recorded sound (incredibly, both inventions from the mind of one man — Thomas Edison), from the automobile to the airplane, from the telephone to the smartphone, from the computer to the internet, these are all parts of our everyday life that would have seemed unthinkable not all that long ago.

But more importantly, I think, is the second part of Monk’s assertion. What he’s saying (much more poetically than I ever could) is that a genius has to be an individual and have the courage of their convictions … no matter what.

Brian Wilson faced ridicule in the early stages of his career. His soaring falsetto was viewed by many at the time as “sissy” music, and many of his initial songs — driven by record company pressure to cash in on fads such as surfing and hotrods — were characterized by puerile lyrics and simplistic melody lines. But even as a teenager, Brian knew that the music deep inside him had worth, and he kept at it. Eventually he matured into one of the twentieth century’s most inventive and influential songwriters, giving the world masterpieces like “God Only Knows” and “Good Vibrations.”

Man at sound board.
Humberto Gatica.

It’s fine to be influenced by your heroes, at least early in your musical career. But the ultimate path to genius lies in being yourself. Some years ago, I had the opportunity to interview veteran engineer Humberto Gatica (who’s worked with a star-studded list of artists that includes Celine Dion, Barbra Streisand and Josh Groban), and the advice he offered to aspiring young record producers and musicians came down to just that. Here’s what he had to say:

“Be open to trying things, and you will find your sound. At the end of the day, it’s what you think sounds good and what feels good to you. It might be in line with other people who will want to work with you because they love the way you hear things. Or it might work against you because they don’t like what you do.” In other words, irregardless of opinion, you need to follow your own path.

So be unafraid. Do the undoable. Be yourself. Have the courage of your convictions and the strength to stand by them even in the face of adversity. Achieve these goals and someday you just might find yourself on someone’s list of musical heroes (not just your mom’s! LOL) … and they might even think of you as a genius.

Photo of Humberto Gatica courtesy of Uno Productions.


Check out Howard’s other postings.

Six Things You Never Knew About Trombone

Uniquely among brass instruments, trombones have a slide, used to alter the pitch as it is extended and shortened. Though originally created in the mid-15th century, trombones have continued to evolve through the years.

Here are six things even experienced trombone players may not know about their instrument:

1. The Name Came from Drawing Swords

Band with trombone and clarinet like instruments being played.
16th century Flemish painting depicting the trombone.

Until the 18th century the trombone was called a “saqueboute” (in French) or a “sackbut” (in English). Although opinions vary on the etymology, some sources (such as The New Grove Dictionary of Musical Instruments) suggest that the word comes from the French word “sacquer,” which means to draw out (a sword or the like). The instrument may have gotten its name due to the act of sliding a tube out to lengthen it resembling that of a swordsman drawing a sword from a scabbard.

The current name of the instrument means “large trumpet.” In German this instrument is called a “posaune,” which originally meant “trumpet.” This is because the trombone and trumpet are like relatives sharing the same ancestor, although trombones have a somewhat wider pitch range than trumpets.

2. The Trombone Was Once a Sacred Instrument

Trombones have been used in a variety of situations, including the courts of aristocrats, churches, and in military bands. However, beginning in the 18th century the instrument was seldom used in secular music. Instead, it was used much more often in religious settings such as in church services. Trombones have a range similar to that of the human voice and are capable of producing awe-inspiring harmonies during concerts, so they began to be treated as “divine instruments.” Composers of the era therefore generally refrained from using trombones in music outside of masses, oratorios, or other religious music.

3. “Fate” Changed the Fate of the Trombone

Beethoven was the first to use trombones — until that point seen as religious instruments — in a secular symphony. “Symphony No. 5 in C minor, Op. 67” (“Fate”), first played in 1808, was the first symphony in which a trombone was used. Beethoven would go on to use trombones again in “Symphony No. 6 in F major, Op. 68” (“Pastoral Symphony”) and “Symphony No. 9 in D minor, Op. 125” (“The Choral”), building a foundation for the trombone to stand as a fixture in orchestras in the 19th century.

4. There Are a Variety of Trombones, In a Variety of Pitch Ranges

Trombones are made in a variety of ranges approximating the range of the human voice, including soprano, alto, tenor, and bass trombones:

Graphic of four trombones from largest to smallest.
Various different trombones.


Graphic showing different trombones and related ranges.
Trombone pitch ranges.

Trombones are generally played by extending and shortening the slide, which changes the length of the tubing and thus the pitch of the sound. Because the slide needs to be extended farther and farther from the body to reach positions far from the body, some unique technology is required to play the instrument smoothly.

The standard trombone is the tenor trombone. It is used in a wide variety of musical genres, including classical, jazz and pop music.

Photo of trombone.
Yamaha YSL-881 tenor trombone.

Tenor bass trombones are designed with an extra attachment of tubing called an “F attachment” for an expanded bass range. This also allows the same pitch to be played without the player having to extend his or her arm so far. However, large bore tenor bass trombones require the player to be able to blow a lot of air into the instrument. They are therefore better suited for advanced players. Medium bore instruments are recommended for beginners.

Photo of trombone.
Yamaha YSL-882 tenor bass trombone.

Bass trombones feature an even wider bore size than tenor bass trombones, and are equipped with one or two pieces of tubing to supplement its bass range. Other than the bore size being wider, these instruments are generally identical to tenor bass trombones. However, a bass trombone usually features a second extra attachment of tubing for an even lower range and easier slide technique when playing low. They also use a mouthpiece with a larger diameter to make it easier to produce lower sounds with a good tone quality.

Photo of trombone.
Yamaha YBL-830 bass trombone.

5. Jazz Trombones and Symphony Trombones Are Quite Different

There are two very different ends of the spectrum when considering the types of trombones in common use today: jazz trombones on one end and symphony trombones (for playing in an orchestra) on the other. Some of the parts on these two kinds of instruments vary. Especially noticeable is the size of the bell:

Photo of small and large trombone bells.
Left: Jazz trombone; Right: Symphony trombone.


Photo.
Left: Jazz trombone; Right: Symphony trombone.

A jazz trombone has a smaller bell, thinner walls, and a smaller bore size. The gap in the slide is also narrower. Jazz models are designed this way to make the instrument smaller and increase slide mobility. This allows the player to move quickly from note to note.

In contrast, symphony models tend to be larger overall (with a larger bell too) and are therefore able to produce a more robust sound. A trombone needs to produce sound that is loud enough to reach members of the audience in the back row — all the way from the rear of an orchestra that may have more than 80 members. A symphony trombone can actually be one of the loudest instruments in the orchestra.

6. It’s Possible to Raise The Pitch Even As You Extend the Slide

In general, the longer the tube, the lower the note. However, trombone players can play higher notes as they extend the slide, simply by adjusting their embouchure to play a note in a higher acoustic partial — a technique that’s helpful when playing anything from a quick jazz solo to a Beethoven symphony.

Don’t believe it can be done? Check out this video:

This posting is adapted from the Yamaha Musical Instrument Guide.

For more information about Yamaha trombones click here.


How Do You Roll?

There are many techniques a percussionist must learn in order to become a well-rounded musician. Fortunately, many of them are applicable on a variety of percussion instruments. The roll is the perfect example.

Maintaining a smooth, clear and clean roll is difficult. This article will provide you with a number of exercises that can be added to your warm-up routine to help improve your roll. Each begins with the foundation (the pattern with which your hands move), followed by a roll. The exercises can be practiced utilizing double, triple or multiple bounce rolls. Also included are exercises that start and end on different hands to improve the technique of the non-dominant hand.

Many educators are of the opinion that the roll is best produced using an arm stroke, where the tips of the sticks stay closer to the drumhead, since this aids in controlling the distance between the bounces of the roll.

Exercise A – Continuous Motion Exercise

Muscial annotation.

We recommend that you use an arm stroke for both the foundation (measures 1 and 3) and the roll exercises (measures 2 and 4). This will help stress the importance of using the arm.

Exercise B – Additive Process Exercise

Musical annotation.

Click here for more exercises.

Tips

As with any new technique, be sure to practice slowly. Here are some tips to help you succeed:

1)   Set aside 10-15 minutes every day to work on your roll technique.

2)   Record yourself to make sure you are not learning any bad habits. Compare these recordings weekly to track your progress.

3)   Practice in front of a mirror so you can see your hand position.

4)   Use a metronome. Start with a slow tempo and increase it gradually.

With regular practice and repetition, you’ll soon see an improvement in your overall sound and technique.

Resources

Looking for additional resources to improve your roll? Check out these books:

1)   The Modern Concert Snare Drum Roll by William James

2)   The Roll by Emil Shollee

3)   Developing Dexterity by Mitchell Peters

Utilizing Modeling Technology

Keyboard samples and drum machines have been used to emulate real instruments in popular music for decades now. In the guitar world, the current trend is to “model” key components in the effects/amp signal chain in order to replicate the sound of a processed, amplified instrument.

Gray microphone with Line 6 Helix device as background.

The Line 6 Helix®is a great example of how modeling technology has progressed. This device makes it possible for anyone to access the sound of a range of boutique amplifiers and custom effects in one feature-laden guitar rig, weighing in at only 14 pounds.

Black guitar and pedalboard cases.

I use my Helix to process my vocals and guitar playing for warm-ups, recording, video and film gigs, trade show presentations, and stage performances all over the world. Helix gives me all of my sounds in a studio quality stereo rig, and all of my song sets are stored and ready to go without any further setup — plus I can listen to everything, via headphones, in the comfort of my hotel room. It’s like traveling with two 4 x 12 cabinets, an amp head, and a pedalboard … and, as a bonus, I can put them all in a backpack that fits nicely in the overhead compartment of any commercial aircraft!

In recent years, manufacturers have also begun modeling the sound of high quality microphones, which can be used in conjunction with Digital Audio Workstation (DAW) and plug-in software. This technology is also available in the onboard acoustic guitar preamps of many Yamaha guitars. For example, the SRT2 (Studio Response Technology) system in the A Series A5 and A3 guitars offers tube and ribbon microphone models that can be blended with a traditional under-saddle piezo pickup to produce a wide range of studio quality, live performance tones.

The Video

Photo of an AC5R Yamaha guitar bend control.

The AC5R that I’m playing in this video features two microphone options at the push of a blend control knob. Mic Type 1 is a model of the legendary Neumann U67 large diaphragm condenser microphone, while Mic Type 2 is a model of an equally iconic Royer R122 active ribbon microphone.

Running a cable from the output jack of the guitar into my audio interface allowed me to directly record all the sounds that you hear in the video. No expensive microphones or outboard preamps were needed, so setup time was minimal, allowing me to focus on the creative aspects of my performance.

I used an equal blend of piezo and Neumann U67 mic model for the two strummed rhythm parts, and an even blend of the Royer R122 mic model and piezo pickup for the double-stop and single note lines. I kept the onboard EQ controls on the AC5R flat but added a touch of compression and reverb in the mix.

The Parts

Rhythm Guitar 1

The first rhythm guitar track features chords that are all derived from the E major scale. I’m letting the top two strings ring out on all of the open chords.

This part consists of an eight-bar progression with a tonal center of the E chord (I) Ionian:

1                  1                   5               6m            6m

I: Eadd2  I      Eadd2          Badd4  I     C#m7  I   C#m7 I

4                2m                   5              5              4/5

I  Aadd2  I   F#m7(add4) I  Badd4  I   Badd4        A/B :I

Rhythm Guitar 2

I used a capo at the fourth fret and played the same harmonic progression using the following chord shapes (again, the key is E; the shapes are in relation to the capo):

1             1         5           6m         6m

I:     C     I     C      G/B    I   Am7  I   Am7  I

4            2m        5           5          4/5

I      F     I   Dm7   I    G     I    G         F/G :I

If you understand the CAGED guitar system, transposing with a capo will be easy for you. Take a moment to analyze the first guitar part and place the scale position number above each of the chords. (I’ve done that for you on both charts.)

Now use those scale position numbers in the key of C to give you the chord shapes for your second guitar part:

Guy playing a guitar chord.
Double-Stop Chops

Double-stops are two notes of a different pitch, played at the same time. You can also think of them as chord fragments.

In this video, I’m using diatonic 6ths from the key of E to produce those melodic lines. Think in terms of outlining the chord progression first by locating double-stop shapes from within the rhythm guitar part chords. You can add connecting flourishes (as I do here) by connecting those shapes with other diatonic 6ths.

Single Note Lines

The single note lines are all coming from the E major scale. I end the double-stop phrased solo with a nice descending crescendo line on the last two measures. I’m muting the initial lines of the second half of the solo to add definition, energy, and variation … not easy to do on an acoustic guitar with no effects! You’ll also notice that I end the solo with an unmuted crescendo line for two bars.

The Wrap-Up

It’s all about phrasing — the rhythmic delivery of your melodic message. I’m always thinking about the phrasing aspect of each and every line. When I improvise, I listen to the groove and the harmony to find the “pocket” for the melody lines to sit in. And the latest technology makes the process of capturing the magic easier than ever before.

Photographs courtesy of the author.

Check out Robbie’s other postings.


Click here for more information about the Line 6 Helix.

Click here for more information about Yamaha A Series guitars.

Violinist Christian Howes’ Three Pillars of Pedagogy

In the blog post, Christian Howes: Versatile Violin Virtuoso, renowned strings performer and educator Christian Howes explains why he started Creative Strings Academy.

His pedagogy is comprised of what he calls “a trifecta of pillars” in order to expand students’ understanding of music.

Pillar 1: Break Down the Music

Howes advises that students learn not only their own parts but also examine how those parts fit into the whole. “What’s happening in the melodies?” he asks. “What’s happening in the countermelodies?”

Pillar 2: Nurture Creative Abilities

When Howes does a school residency, he teaches students about composition, arranging and improvisation. “[Teach] them how to nurture their natural creative abilities in a musical context,” he says.

Pillar 3: Expose Students to Different Styles

Instructors should expose students to a variety of musical traditions. Connecting different cultures was one of Howes’ main goals when he started Creative Strings Academy. “The purpose is to help people feel more connected, to change the music education community at large, to make it more integrated,” he says.

This article originally appeared in the 2018 V2 issue of Yamaha SupportED. To see more back issues, find out about Yamaha resources for music educators, or sign up to be notified when the next issue is available, click here.

Christian Howes: Versatile Violin Virtuoso

At 15 years old, violin virtuoso Christian Howes found himself envious of his school’s last-chair second violinist. Howes recalls how that classmate was composing and recording his own original songs.

“He couldn’t play his way out of a paper bag, [but] … he was writing his own songs,” Howes recalls. “I remember feeling a pang of jealousy because I thought, ‘He’s creating something of his own.’ … The thing about creativity is [that] it’s the ultimate equalizer.”

Howes had been classically trained throughout his childhood, beginning in the Suzuki program at age 5, and he had spent the past few summers in conservatory programs. But the admiration that Howes felt for his classmate inspired him to step out of his comfort zone and try something new — forming a rock band with his friends. “I started to discover things about music that I hadn’t discovered as a classical violinist,” he says.

Now Howes is a world-renowned performer and educator, and he is recognized for his willingness to step outside of traditional string genres. After serving as an associate professor at Berklee College of Music in Boston for three years, Howes founded Creative Strings Academy in 2011, a not-for-profit focused on encouraging creativity and originality within strings education.

Through Creative Strings Academy, Howes provides a variety of educational services — online lessons, instructional YouTube videos and podcasts, and hands-on experiences such as school visits. He also runs workshops that have been held in Ohio, Texas and North Carolina as well as in Toronto, London and Lausanne, Switzerland. Howes’ online academy has reached at least 50,000 string players; his YouTube videos have exceeded a million views; and approximately 150 adult and youth musicians participate in the Creative Strings Academy workshop and festival in Columbus, Ohio — in its 16th year — each summer.

Unique Approach: “Opening the Hood of Music”

violinist Christian Howes

In music just as with any other creative arts, a basic understanding of the art form’s construction is needed in order to be creative, Howes says. “We can’t be creative with information we don’t have already,” he states.

For musicians to bring their own perspectives to a piece, they must first study its inner workings. “This is opening the hood of music,” Howes says. “Imagine a racecar driver who goes fast, but they open up the hood and don’t know what’s there.”

In Creative Strings Academy’s school residency program, Howes encourages students of all ages — from elementary school to high school and college, as well as private studios — to use this “opening-the-hood” approach. How? By taking apart a constructed piece of music, examining its individual parts and understanding how those parts fit into the song as a whole.

“If you think about a classical string player, [he or she is] focused on playing a melodic line as crisply and beautifully as possible, not paying attention to the broader view of all these parts,” he says. “It’s [about] presenting that [information] in a way that can be useful for classical string players. That can relate to the internalization of harmonic information, rhythmic information, the groove, the different parts of each song.”

Once students have knowledge of music theory and an understanding of how different songs are arranged, they can start to formulate their own ideas about music. “If you tried to write a piece in Spanish, that might be difficult if you don’t know Spanish,” Howes says. “We [give students] clear choices that conform to the knowledge they’re already comfortable with. You’re going to be creative within the parameters given to you — which is sort of an irony to creativity. There’s so much freedom; it’s paralyzing.”

Composing Creativity

violin case with one acoustic violin and one electric violin

One of Howes’ goals with Creative Strings Academy is to empower students by giving them an outlet to develop their own musical style. He believes that composition, arranging and improvisation should be part of every musician’s education.

“When you teach kids to compose, you show them they are creative,” Howes says. “A lot of classical musicians have this belief [that] ‘I’m not creative; I can’t do that.’ To give kids [the opportunity to say], ‘I made that,’ is really empowering.”

Music educators value Howes’ focus on com­position and improvisation. Students from Blue Valley Unified School District in Overland Park, Kansas, participated in Howes’ workshop during one of his school residencies. “[Improvisation is] part of the ‘whole person’ in learning music,” said Kathleen McCullough, retired Blue Valley orchestra director. “If you teach music, you should be teaching all music, not just one corner of it.”

Having the ability to showcase creativity also removes the hierarchy that often comes with a competitive musical ensemble. “In the world of first [chair], second, third, fourth, last, we want to show [students] that even if [they are] not first chair, they can make just as big a splash by having the courage to create and follow whatever their voice is,” Howes says.

As an innovator in his field, Howes believes in sharing his knowledge with a range of people. Consequently, his extensive online platform covers topics from instructional videos about how to play blues scales on a violin to advice on how to run your musical career like a business. “The willingness to share [my] creativity was a big motivation for me,” Howes says. “As a teacher, I’m trying to model that for other people as well.”

By putting his art out there for millions of people to see, Howes is hoping to debunk the myth that musicians — and artists at large — should be private about their work. “Classical musicians [tend to] hide it in a practice room, like it’s private,” Howes says. “No! Share music in the world. It’s about community. Play music with your family; play on street corners; [play] at church.”

Transcending Genre

Since his high school rock band days, Howes has embodied the importance of breaking free from the confines of musical genre. “There were guys in the rock band who’d had one or two lessons,” Howes says. “I’d had a thousand, but they seemed to know things about music that I was totally unfamiliar with. Thinking about the chord progression, learning a different rhythmic vocabulary … I started thinking about improvising.”

When he started college at The Ohio State University, he began to play bass in a jazz band and soon joined a blues band as well. He spent much of his early 20s playing gospel music in church services, which led to his appreciation for the influence of many different cultures on music as a whole. “Whether you’re talking about Appalachian music, Latin music, jazz, punk, gospel, blues, a lot of it had to do with the African-American influence on Americana music,” Howes says. “It was playing in gospel church services every Sunday [that] had an impact on me.”

Howes believes that for musicians to develop their own voice, they should first listen to as many genres and musical traditions as they can. “It’s [about] having a more multicultural perspective,” he says. “There are all these beautiful traditions out there, and we should go deeper to understand them.”

In his high school and college days, Howes would experience a musical awakening whenever he saw live performances of different genres. “I was hungry to grow,” he says. “When I’d have that encounter, it would make me realize [that] there’s so much more I want to learn about this aspect of music or this vehicle of expression.”

Howes feels that his experiences playing in a variety of styles and genres has made him the successful musician he is today. “I collected these different toolkits and perspectives,” he says. “Earlier on, [I] was trying to fit into these traditions, from rock ‘n’ roll to Latin or jazz. But as I matured, I realized that the real goal is to find my own sound.”

This article originally appeared in the 2018 V2 issue of Yamaha SupportED. To see more back issues, find out about Yamaha resources for music educators, or sign up to be notified when the next issue is available, click here.

Tips to Manage Workload and Find Work-Life Balance

The job of a music teacher can be overwhelming with so many activities to juggle. As we begin a new school year, it’s the ideal time to reevaluate your responsibilities and make a plan for workload management.

Then, you can be at the top of your game professionally while maintaining your personal life.

I teach winds and percussion full-time at Metea Valley (Illinois) High School, including directing the bands and symphony orchestra. I also teach graduate-level professional development classes at VanderCook College of Music in Chicago. I perform professionally as a percussionist, and I play music at my church. I’ve been married for 15 years and have five children, ages 2 to 11. I also finished my first marathon this year!

I volunteer as much as I can, having served on the board of two not-for-profit music organizations. I am an educational consultant for the Music Achievement Council and a representative-elect for the Illinois Music Education Association.

People constantly ask me, “Glen, how do you do it all? With five kids, high school band, part-time college, how do you find time for all of that?”

I usually reply, “I’m sure you are just as busy as me!”

In the 18 years that I’ve been teaching, I have figured out that the secret to work-life balance is planning. Plan your tasks, workload and personal time, and stick to it. Here are some processes I use, so I don’t feel overwhelmed.

1. Sort Paperwork

Paperwork drove me crazy because I tried to get through it all the same day. I would get frustrated because I couldn’t get it all done. Now I use a desk pile system called the “7-7-7.”
Gather all of your assignments, bills and receipts, printed out emails and lesson-planning documents. Then separate them into three piles.

The first pile is work that must be done in the next 7 minutes. Realistically, I get through this pile during my 45-minute planning period. The items in the second pile must be addressed in 7 hours. The third pile are the things that must be done in 7 days. Rebalance these piles daily, so that you always know what must be done and when.

I never take home paperwork — ever. If you leave things at school, you will become more efficient while you are at work.

2. Sort Email

Another way to simplify your life is to use an email management system called “zero inbox.” Once you open a message from your inbox, you reply immediately, or you put it in the trash or an action folder. Realistically, my inbox will look great for a few weeks, and then I need to spend 20 minutes cleaning it up again.

3. Enjoy and Share

I used to think that once I mastered all of my work-related stuff, then I could solely focus on the other things in my life. Wrong!

By planning time for personal activities, I found that sharing those experiences helps me explain ideas from different perspectives, enriching class discussions and student relationships. For example, I told my students about my marathon training, and they were a huge motivation throughout the process.

4. Evaluate Priorities

I realistically can’t do everything, so I have had to give things up from time to time. When I was serving as a board member for two not-for-profits, I realized that I only had time for one. I decided to give up the position of website designer for ARTSpeaks because it was not as purposeful as the position I had with the Alyssa Alvin Foundation for Hope, where I serve as an educational consultant.

5. Plan Ahead with Co-Workers

The music department staff at Metea Valley doesn’t have planning time built into our daily schedule. So we decided to meet every week for 30 minutes at 6:45 a.m., which has saved us many hours of chaos. We actually solve a lot of problems during these weekly meetings because we know who is doing what and who is leading particular events or projects.

6. Develop Yourself

The more classes, seminars and conventions I attend or books that I read, the more motivated I am. Consider starting a master’s degree or taking a professional development class at a nearby college or online. Online classes are convenient because there is no travel time, and you can connect with teachers and classmates across your state and the entire country.

In my continuing education, I have met others with whom I share ideas, successes and failures in the classroom and in my life. This networking is so important!

This article originally appeared in the 2018 V2 issue of Yamaha SupportED. To see more back issues, find out about Yamaha resources for music educators, or sign up to be notified when the next issue is available, click here.

Scheduling Advice from a High School Band Director

In Case Study: A Successful Band Program in a Border Town, we met Dena Laurel, head director of the Roma High School band, who built a successful program despite being located in a remote and impoverished area.

Laurel employs a very precise scheduling and pacing strategy to maximize instructional time with her students. Here is a glimpse of her planning technique.

1. Start at the End: Figure out where you want the program to be at the end of the season and work backward, using a calendar and lesson plans. “Work smarter, not harder,” Laurel says.

2. Plan for Setbacks: To allow for weather, emergencies or other challenges, choose a date to have your show (or concert pieces) completed at least one to two weeks earlier than the end of your season. “You can always cancel practice, but you can’t add more,” Laurel says.

3. Set Realistic Expectations: When scheduling, think about the realities, capabilities and history of your band. “Figure out how to pace it,” Laurel says. “How much time does it take your band to take in that amount of information?”

4. Make Every Second Count: Laurel likes to plan every second of rehearsal, so that there’s not a down moment. “Right now, I could tell you exactly what part we’re going to learn on a particular weekend in August,” she says. “I can tell you exactly when I’m going to have my show finished. I can tell you which weeks we’re going to work on which parts of the show.”

5. Communicate: A plan won’t work unless everyone knows what’s expected of them. Laurel shares the schedule with students and parents electronically. Each student knows exactly what they need to learn and by when.

6. Stay on Target: Deviate from your plan as little as possible and don’t second-guess the pacing you set. “Have faith that the plan that you make will get you exactly where you want to be,” Laurel says. “Trust your relationship with the kids and their playing as well.”

This article originally appeared in the 2018 V2 issue of Yamaha SupportED. To see more back issues, find out about Yamaha resources for music educators, or sign up to be notified when the next issue is available, click here.

Case Study: A Successful Band Program in a Texas Border Town

In a sprawling state like Texas, it might be easy to overlook the small town of Roma that sits along the Rio Grande on the U.S.-Mexico border.  But that would be a mistake because the Roma Independent School District has cultivated a unique and successful music program thanks in large part to Dena Laurel, who came to Roma High School as an assistant band director in 1997 and then moved up to become director of bands in 2008.

Although the majority of Roma High School families struggle financially, the 220 students in the band thrive on hard work, organizational ingenuity and community support.

Under Laurel’s leadership and tutelage, Roma High School has performed at several prestigious competitions. In 2017, the band played at Texas’ University Interscholastic League (UIL) State Marching Band Contest at San Antonio’s Alamodome, where it placed 11th in 5A competition. At the Bands of America (BOA) Super Regional, Roma High School took home the Class AA championship in 2016.

In concert band, Roma has had even greater success. At the Texas Music Educators Association Honor Band competition, the high school band placed seventh in 2018, and Roma Middle School placed second in 2016.

Daily Instruction, Lifelong Mentorship

Dena Laurel

A focus on instrumental technique with more personalized instruction helps the Roma band program defy expectation. With the next closest city and colleges about an hour or more away, private lessons are simply not an option, even if the students could afford it. That’s why Roma’s band department turns its extremely rural location into its biggest asset.

Between the high school and two middle schools, Roma has a team of 12 band instructors, each specializing in one instrument. Though they each have a primary campus, they drive to all three schools every day to teach their specific students.

“When I was teaching French horn, it was almost [like] a college setting, like I was running a studio,” Laurel says.

In middle school, students focus almost completely on working with their teachers by section, with the band as a whole coming together only when preparing for a competition or performance.

“I think it’s one of the best programs in Texas because it provides a teacher for each instrument, which is not very common,” says Orlando Medrano, a Roma alumnus who returned to the program as a tech and is now a professional musician. “The students gain more knowledge and become more competent in playing.”

Beyond the technical advantages, having the same teacher for six years results in lifelong mentorship. “We have a really special bond with the students, and we get to watch them grow,” says Corey Graves, Roma Middle School head director and district euphonium teacher.

Currently, nearly 50 percent of the incoming sixth graders join the band program each year. Laurel and her team focus on recruitment with high-energy classroom visits and band performances for fifth graders. “We have all the teachers leave some time in the schedule for recruitment,” Laurel says. “There are so many music programs here that if we didn’t, [all the students would] gravitate to the mariachi or Mexican Banda programs just because they’ve grown up in that culture. They don’t really know what a concert band is or [what it] does.”

Motivated, Not Deflated

Roma High School band director Dena Laurel walks with the drum major and other band members.

The lack of funds can sometimes be discouraging, but Laurel and her team constantly reinforce a “never-give-up” outlook that brings the community together. Whether with chocolate bars, catalogs or football game concessions, the students and parents constantly fundraise because band fees would be impossible to collect.

“I have parents and band moms who come in after school and make tons of spaghetti because they know that after practice, there’s not going to be any food at home for the kids,” Laurel says. “Though all the families are poor, those that have a little more money give as much as they can.”

When competing in UIL or BOA, Roma comes into contact with bands of very different sizes and situations, some with electronics, props or new instruments. “The amount of money on the field [at these competitions] is extremely intimidating, but I always tell everyone it doesn’t matter — it’s about playing better and marching cleaner,” Laurel says.

As a student, Medrano says that he and his bandmates viewed the exposure to other programs as motivation. “It’s something that we looked forward to seeing every time we went to a competition because although we couldn’t afford all those things, we worked just as hard as them,” Medrano says. “We matched their level of musicianship and did the best we could on the marching field even though we didn’t have what they could provide. A lot of times those bands would have higher scores than us, but it never phased us, and we just worked even harder.”

Engaging Experts

According to Medrano and Graves, Laurel’s willingness to delegate and ask for help is one of her greatest strengths. “She is an outstanding leader; she has a big program that requires a high level of commitment and organization,” Graves says. “She delegates responsibilities to those who are really great at what they do, and that’s what helps the program.”

Laurel’s dedication is noted and ap­preciated by more than those associated with the band program. In 2018, she was recognized as the district’s Secondary Teacher of the Year.

Roma often brings in clinicians or outside help to work with the band. “[Laurel] brought a lot of people who were experts in the field of marching band or music-making and was never afraid to let other people teach her band,” Medrano says. “She … understands when something needs to be done that she can’t do. That’s something that I learned from her.”

Because Laurel studied music per­formance and not education in college, she says that asking for help and guidance was a saving grace in her early years as a band director, and she continues to consult others. “Don’t be afraid to reach out,” she says. “The worst thing that can happen is that they say, ‘no.’ [But] they’re usually excited to help and excited for your program to do well because that’s another great program that they’re affiliated with.”

This article originally appeared in the 2018 V2 issue of Yamaha SupportED. To see more back issues, find out about Yamaha resources for music educators, or sign up to be notified when the next issue is available, click here.

Add Sound Reinforcement

In its 2017 show titled “Resurgence,” the Arcadia (California) High School Apache Marching Band used electronic sound design including amplification of soloists to create a unique aesthetic for its program.

Like Arcadia, many ensembles now incorporate sound reinforcement — microphones, amplifiers, signal processors and other electronic elements — to enhance the band’s volume, to project soloists or sections, or to add voiceovers and synthesizers to the music.

Arcadia percussion instructors Kevin Shah and Tony Nuñez emphasize the importance of making sound design part of the show rather than as its own separate element.

“Have the sound element be integrated and part of the soundtrack rather than just sitting on top of it,” says Shah, who is also the creative director and percussion composer and arranger for the Blue Knights Drum and Bugle Corps, based in Denver, Colorado. “When it’s done really well, it’s part of the fabric of the production. It’s not overbearing but not underproduced.”

Nuñez, a sound design specialist as well as art director for the Riverside (California) City College Indoor Percussion, suggests focusing on the show theme and musical development rather than putting too much emphasis on technology. “People get stuck on the tools instead of focusing on the musical message or student experience,” he says. “Use limited tools to create maximum effect.”

Seek Expert Help

Kevin Shah

To get started, music educators should use resources offered through marching organizations to learn more about sound design. For example, The Arcadia Music and Arts Symposium offers master classes, workshops, roundtable discussions, performances and other activities for both students and directors. In addition, WGI Sport of the Arts has a series of educational downloads that provide information about sampling, synthesizers and amplification for indoor drumlines.

“When you start to invest in equipment, it can get overwhelming,” Shah says. “There are a ton of resources out there. Try to connect with people who already have experience and soak in the information.”

Invest for Now and the Future

With a large variety of equipment and technology available, Nuñez says sound design equipment should be specific to the program’s needs rather than generic. “It’s about what the music needs to do, the budget, and what the show needs to accomplish,” he says.

Shah advises educators to invest in equipment that will help carry their programs forward. For example, buy a mixer with the ability to purchase expanders when the need for more channels arises.

“Always [keep] learning, updating gear [and] maximizing what you have,” he says. “When you get to a point where the band needs to grow, have the ability to do so.”

Consider Balance and Blend

Tony Nuñez

Once an ensemble has the appropriate equipment, let designers experiment with the technology, Nuñez suggests. “Empower the designers to think about it as a design tool,” he says. “Experiment for a time, then say, ‘What can we do?’ If you’re all on the same page, you can start with an idea, experiment, then find your way.”

Using sound reinforcement to bring out certain elements of a marching show requires careful blending of timbre and volume. For example, Shah suggests focusing sound reinforcement on front ensemble musicians as the instruments are intended for an indoor setting. With amplification, musicians can play the instruments correctly without making adjustments for volume.

In addition, many ensembles use sound design and reinforcement to enhance individual elements, including soloists and voiceovers. In Arcadia’s “Resurgence” show, amplified synthesizer effects in the beginning of the program allowed the ensemble to build up to its first impact. Shah says that using electronics effectively helps the entire ensemble rather than just a select few.

“It gives more character to the sound, and depending on the type of show, it’s going to give it more of a rich texture,” Shah says. “It’s an opportunity to enhance the sound of your group.”

Teach Technology to Students

Both Shah and Nuñez emphasize that while directors need to understand the equipment themselves, they must pass along that wisdom to their students. “Take the time to work it out, ask questions, do trial and error, and really help them fully understand,” Nuñez says.

Shah says that students should fully understand how to operate the technology. “I try to make sure every student [involved] is taught how everything works and what to do when something goes wrong,” he says. “With any sort of equipment, there will be failures, and being able to troubleshoot effectively is another huge component to training your students.”

In the end, sound design gives directors an opportunity to make their shows stand out, especially in competitive settings where ensembles have similar instrumentation. “For modern ensembles, [sound design] is a way to enhance the acoustic ensemble and use it as a storytelling device,” Shah says.

This article originally appeared in the 2018 V2 issue of Yamaha SupportED. To see more back issues, find out about Yamaha resources for music educators, or sign up to be notified when the next issue is available, click here.

Bring a Sense of Joy into Elementary Music Classes

Many successful people’s careers were shaped in part by their experiences as young music-makers.

That’s what these following people have in common: Condoleeza Rice, former U.S. Secretary of State; Jerry Gay, an engineer who helped build the Hubble telescope; Alan Greenspan, former Federal Reserve Chairman; Richard Carranza, chancellor of the New York City Public Schools; and Steven Spielberg, renowned American filmmaker.

In an article titled “Seeing the World through the Eyes of a Child,” Lisa Rosas, an entrepreneur and inventor, asks, “Have you ever noticed at a certain age we stop playing and become more attuned to responsibilities and to things that need to get done?”

Rosas then reflects upon how, when watching children in their natural settings, we observe “authenticity, vulnerability, laughter, tears and pure joy.”

As music educators, we need to bring that authenticity and sense of pure joy into our music classrooms starting in elementary school.

A Nurturing Environment

When new students venture into music classrooms for the first time, they are filled with excitement and fear — they are excited to try something new and fearful of not being successful. How do we capture their youthful enthusiasm and allay their fears? By creating an environment that nurtures curiosity and creativity.

For example, when a “wrong” note is played, you need to figure out why it was played incorrectly and how you can help the student play the note as it was written. Do not put the student on the defensive by asking, “Why did or didn’t you do …?”

Instead, be positive and nurturing and say, “Let’s try X to see if we can improve Y.”

For the most part, young children exist in the present, and their lives are about movement and play. Movement is a part of everyday life, and those of us who have children know that static activity does not lend itself to play. Music programs live in the present, and music-making is definitely not a static activity.

Don’t Forget About Yourself

Whether you’ve been teaching for less than one year or more than 20 years, be sure to nurture yourself as well. Life coach and best-selling author Lauren Mackler defines seven ways to be nurturing to yourself.

  1. Send loving messages to yourself, which include giving yourself a pat on the back when deserved and being supportive of yourself as needed.
  2. Take good care of yourself.
  3. Do nice things for yourself.
  4. Set healthy boundaries with others.
  5. Become your own advocate.
  6. Believe in yourself.
  7. Be compassionate with yourself.

Music teachers know how influential and life-changing music can be. It helps us live more from the heart. We smile. We enjoy relationships. We are passionate and enlightened. We let go. We don’t suppress our emotions, and we express ourselves freely. In short, we view the world through the eyes of a child. And when we do that, we are already on the road to success.

This article originally appeared in the 2018 V2 issue of Yamaha SupportED. To see more back issues, find out about Yamaha resources for music educators, or sign up to be notified when the next issue is available, click here.

Genos MIDI Recording, Part 2

In Part 1 of this two-part series on MIDI recording in Genos, we focused on using Quick Recording mode, which is great for capturing ideas since Genos arms or activates every channel. This is especially useful when recording a Style, which can have up to eight tracks of instrumentation playing back at once.

This time we’ll dive deep into Multi Recording, which allows you to start from scratch and build a complete song track by track. For this demonstration, we’re going to be recording single part instrument voices (no layers or splits) and lay down a simple three-track song, one track at a time.

The first step is to select an instrument voice for your first track. Let’s choose one of my favorite voices in Genos: the Yamaha C7 Studio Grand, and assign it to the Right 1 Part. To do this, you can either touch the Right 1 graphic on the screen and select the C7 Studio Grand from page two of the Piano category, or press the Voice button (a white backlit button located to the right of the jog wheel, next to the Style button):

Screen views.
Someone pressing a touch screen.

Pressing the Voice button will take you to the Voice Part Setup screen. Tap anywhere within the Right 1 blue name field and you will be taken to the same category and voice selection screen as if you’d used the touch screen. This is cool because there’s more than one way to navigate the instrument voices:

Next, make sure that only the Right 1 Part is ON (unless of course you want to record layered or split voices, but for now let’s just stick with piano):

View of voice buttons.

Then double-check that the ACMP button is off (not lit):

View of buttons.

When the ACMP button is lit, generally you won’t hear a single instrument across the full range of the keyboard unless your fingering mode is set to one of the “FULL” keyboard modes. (See my blog article “Mastering AI Fingered mode” for more on this)

Now that you’re set up with your single C7 Studio Grand, let’s do some recording! It’s as simple as pressing the RECORDING button, located just to the right of the SONG B area on the left side of the panel:

Finger pressing recording button.

Once pressed, you will see the Song Recording menu pop up on the screen. Go ahead and touch Multi Recording. Next, press the red record icon in the lower left hand corner of the screen. You’ll now see all 16 tracks become “Armed” (in recording vernacular) — in other words, ready to record. It’s important to note that even in MIDI Multi Recording Mode, Genos still defaults to arming all 16 tracks, just to cover its bases. Also, be aware that the song name is always titled “New Song” (which makes sense, since we are going to do just that — record a new song):

Screen view.

Now let’s un-arm (more properly called “disarm”) the 15 tracks we don’t want to record. Simply deactivate tracks 2 through 16 by touching the red “Rec” icon beneath each track. You’ll notice that as you do this, each disarmed track number will turn green.

At this point you should have track 1 armed (indicated with a red Rec icon), and tracks 2 through 16 disarmed:

Screen view.

Genos is now in Record Standby mode, meaning that, when you strike a key, recording will begin.

NOTE: I highly recommend using a metronome when doing Multi Recording, as it can help you stay in time when laying down additional tracks. To turn on Genos’ built-in metronome, simply touch the Metronome icon in the upper right-hand portion of the screen. Changing the tempo or even tapping in a tempo in is achieved by the TEMPO + & – buttons as well as the TAP TEMPO button:

View of buttons.

Go ahead and start up the metronome and you’ll hear it begin clicking at the current tempo. (Turning the metronome on will not start the recording.) Once you’re comfortable with your chosen tempo, just start playing and Genos will begin recording. When you’re finished, touch Stop (the square icon at the bottom of the screen).

To play back what you’ve recorded, touch the Play/Pause icon at the bottom of the screen. If you’re not happy with your recording, simply touch the Record icon in the lower left-hand corner of the screen and try again. If you are happy with what you recorded, this is a good time to save your song.

To do so, simply touch the Save icon at the top of the screen:

Screen view.

Now you get to choose where you want to save your song — to the internal User memory, or to a USB Thumb Drive. (Note: A compatible USB thumb drive must be inserted into one of Genos’ “To Device” ports in order to save to a thumb drive.) Accordingly, select either the User icon or the USB1 icon and a name selection screen will appear, allowing you to name your song:

Screen shots.

Type the name of your new masterpiece into the character field, then press OK. At this point, you can confidently power down the Genos with the knowledge that your song has been saved.

Now it’s time to select another instrument voice for recording on Track 2. Go to the Home screen and touch the C7 Studio Grand icon, which is currently assigned to the Right 1 part. You will now see the Instrument categories. We’re going to be recording drums on Track 2, so touch the Drum Kit icon in the lower left-hand corner of the screen. Five pages of drum kits will appear. Select the first one, named Rock Drum Kit:

Screen shot.
Screen shot.

Press the Recording button and once again select Multi Recording mode, then touch the New Song field and select your song (I’ve named mine “Gabe’s Newest Hit”):

Next, touch the EXIT icon to return to the recording screen. Under Track 2 (Channel 2), there should be an icon of a Grand Piano. Touch that icon. The “Song Ch2” pop-up menu will appear:

Screen shot.

Select “Right 1” from the list (if it’s not already selected), then touch OK. You’ll now see that the Grand Piano icon for Track 2 has changed to a Drum Kit icon and is already in record stand-by mode, just waiting for you to lay down your second track:

Screen shot.

Turn the metronome back on, and when you’re ready to start recording, either start playing, or touch the Play/Pause icon at the bottom of the screen. When you’re finished laying down your drum track, touch the Stop icon at the bottom of the screen. Now touch the Play/Pause icon again and you’ll hear Tracks 1 and 2 playing back simultaneously.

Manually playing drums in time can be challenging, so Genos gives you the ability to quantize note data. Quantizing essentially moves notes you’ve recorded so they line up timing-wise with the beat.

Let’s go ahead and quantize the drums. You’ll notice an icon labeled “Quantize” at the bottom of the screen:

Screen shot.

Touch this and various Quantize options will appear to the right of the screen. For now, let’s stick with the default sixteenth note size with the strength at 100%. To apply this, select the Track/Channel you’d like to quantize (in this case, Track 2, Drums) and touch Execute. When you now play back your song, you should notice that the drum beat sounds tighter and more in time.

If you’re happy with what you’ve recorded on Track 2, go ahead and save again: Touch the Save icon at the top of the screen, select the current song you’re working on and touch the “Save Here” icon in the upper right-hand corner of the screen. You’ll be given an opportunity to rename the song or just leave it as is, then touch OK in the lower right hand corner of the screen. Genos will ask you if you’d like to overwrite your current song. Select “Yes” and you’ll be taken back to the recording screen.

Now it’s time to select our next instrument voice to record. If you scroll back up a little, you can simply follow the steps above. The process is exactly the same, although this time you will be recording to Track 3. Let’s select a Bass as the instrument voice for that track:

Screen shot.

After you’ve recorded your third track and saved it, now you can start mixing. Press the Slider Assign button just to the left of the faders until the OLED Sub Display appears (it’s the skinny window above the six knobs and eight faders), showing Ch1 through Ch10:

Front panel.

Faders 1, 2 and 3 now control the volume for Tracks 1, 2 and 3. Start your song playing back while moving the faders up and down. You’ll notice the volume levels of your three recorded tracks will get softer or louder. When you get the mix just the way you like it, simply save it again.

By repeating the steps above, you can record 16 individual MIDI tracks and mix them all independently, without ever cracking open a laptop. How cool is that!

All photographs courtesy of the author.


Click here for more information about Yamaha Genos.

Home Theater in Small Spaces

If you’ve ever wanted to have a great-sounding home theater or music streaming system in a small apartment or rented space but thought that it wasn’t possible, prepare to be surprised.

Sound bar on a cabinet below a flat screen tv.
Yamaha MusicCast BAR 400.

With a sound bar that includes a wireless subwoofer (such as the Yamaha MusicCast BAR 400) as your foundation, you can easily create and install a quality surround sound setup for movies, TV, gaming and streaming audio in even the smallest space, and without the need for a dedicated receiver or the hassle of running cables everywhere. (No need for drilling holes in walls or floors, either!)

Let’s take a closer look at the components of such a system:

Sound Bar

The key to creating a home theater in a small space is the sound bar, which reproduces the all-important center channel (where most dialog lives) as well as the left and right stereo channels, critical to music playback. As its name implies, the MusicCast BAR 400 utilizes MusicCast, the wireless multi-room audio system developed by Yamaha for easy connection through your home Wi-Fi® network. In addition, you can remotely control MusicCast devices from your smartphone or tablet using a simple app.

Photo of rear panel.
MusicCast BAR 400 rear panel connectors.

All you need is a single cable to connect the BAR 400 directly to your TV’s HDMI, optical or analog outputs. (For music-only content, you don’t need any cable at all since wireless connection can be made via Bluetooth®, AirPlay® or Spotify Connect.) You can even have hands-free operation of your system via Alexa voice control using any Amazon Echo device. And by adding a pair of optional Yamaha wireless MusicCast Surround-enabled speakers (see below), you can turn your system into a full 5.1 wall-shaking surround setup.

The BAR 400 provides great sound, with four 1-3/4″ woofers and dual 1″ tweeters for maximum sound coverage. It’s versatile too, with the ability to create simulated surround from DTS® Virtual:X™ soundtracks and decode Dolby® Digital and DTS® audio for full 5.1 surround sound (with the use of optional rear speakers). It can also play back virtually every audio file format from MP3 and MPEG-4 to AIFF up to 192 kHz/ 24-bit.

 Subwoofer

Photo of small rectangular subwoofer.
MusicCast BAR 400 subwoofer.

If you’re looking for realism, you need the bone-shaking low-end audio that can only come from a subwoofer. The subwoofer included with the MusicCast BAR 400 features a 6-1/2″ cone woofer that delivers bass frequencies with clarity and punch. And because it connects wirelessly via Bluetooth, you can place it anywhere in the room that’s convenient … without having to run a long cable.

Rear Surround Speakers

Every great home theater needs a great pair of rear surround speakers to hear those flyovers, effects and explosions. By adding a pair of Yamaha MusicCast 20 or MusicCast 50 wireless speakers, you can complete your 5.1 home theater (or create a multi-room audio setup) without having to run any wires around your couch, comfy chair or through the walls.

Two pairs of speakers.

Like the rest of the system, these small, unobtrusive speakers allow voice control via Alexa. They also feature a wide variety of connection choices including Bluetooth, Wi-Fi, AirPlay and Spotify Connect. Add a pair to the BAR 400 and you’ll have a full-blown 5.1 home theater system with left, center, right, left surround and right surround speakers, as well as a subwoofer.

Accessories

One of the huge advantages of building a home theater system around a MusicCast BAR 400 is that you don’t need a receiver or speaker wire — in fact, you don’t need any cabling at all, other than a single HDMI, optical or analog cable for connection to your TV. It’s a great way to turn any small space into the perfect binge-worthy home theater, powerful music system or booming game sound center.


Click here for more information about the Yamaha MusicCast BAR 400.

Snare Drum Rudiments

Rudiments are the “vocabulary” of percussionists and drummers. They teach stick control and help students develop their technique across all of the percussion instruments. In that sense, they are similar to scales on a keyboard instrument.

It is generally assumed that by the time a percussionist gets to college, they already know their rudiments. Unfortunately, many students don’t know them as well as they should. This is especially true if the student starts on a mallet percussion instrument or comes to percussion from another instrument.

A Brief History

Over the years, percussionists have tried to come up with a standardized list of rudiments. The original rudiments were developed in Europe hundreds of years ago and were introduced into the United States during the American Revolution. In 1933, the National Association of Rudimental Drummers (NARD) created the “Thirteen Essential Rudiments” from the 26 Standard American Drum Rudiments.

These thirteen rudiments were adopted and used as a test for membership in the so-called “Thirteen Club.” They included the long roll, the 5-stroke and 7-stroke roll, the flam, the flam accent, the flam paradiddle, the flamacue, the ruff, the single and double drag, the double paradiddle, and the single and triple ratamacue. In the early 1980s, the Percussive Arts Society added fourteen rudiments, reordered them and published the 40 Standard American Drum Rudiments, broken down into the following four categories:

1) Roll Rudiments

2) Diddle Rudiments

3) Flam Rudiments

4) Drag Rudiments

More recently, a number of hybrid rudiments (combinations of two or more of the original 40 rudiments) have been informally added, and are common in drumlines and drum corps.

Favorites

Here are my two favorite rudimental warm-up exercises:

Musical annotation.

1) Flam Accents and Flam Taps:

Musical Annotation.

2) “Paradiddle-Paradiddle”:

Resources

Click here to download the Yamaha Rudiments Poster.

There are also numerous websites where you can explore snare drum rudiments, including:

Percussive Arts Society Rudiments

Vic Firth 40 Essential Rudiments

Drumeo Rudiment Drumming Game


Four Reasons I Travel With My Yamaha SILENT Guitar™

As a touring musician, I always look for a guitar that can work for me in all different situations — anything from playing live on a big stage to jamming in a small club to doing studio sessions. The SILENT Guitar™  from Yamaha, with its revolutionary design, more than fits the bill. Here are four reasons I take it with me wherever I go.

1. Portability: The SILENT Guitar has been with me all over the world, from Asia to the Middle East and Europe, and it’s never failed me. But it’s also extremely easy to travel with. That’s because you can actually unscrew the guitar’s body to make it even more portable! Since there’s also an option to plug your headphones straight into the guitar, it makes a great guitar to practice on, whether you’re travelling or when you simply need to dig down by yourself.

Several views of a Yamaha SILENT Guitar.

2. Sound: The built-in preamp on this guitar delivers great sound. I have played several gigs where people ask me where my pedals are and I tell them I don’t have any; it’s just me and the SILENT Guitar straight into the mixer! Plus, with its built-in effects, I know that no matter what PA system I encounter at a venue, I can always have my own settings to get the sound I need. Just plug and play!

3. Look: Audiences are always amazed at the look of the SILENT Guitar; its elegant and artistic design always draws eyes wherever I play. People can’t believe that, even though there is no body, they’re still hearing that full, beautiful warm sound coming through the speakers.

4. Quality/Reliability: A good quality instrument should allow you to focus on the main goal: to perform and express your inner feelings and thoughts out through the strings to the audience. I’ve played my Yamaha SILENT Guitar on tons of stages over an eight-year period and I’ve never had any serious problems with the electronics or structure of the instrument. I’ve been able to count on it throughout my career, and that’s why it will continue to be one of my main guitars for life!

Check out this video of Alex playing his SILENT Guitar:

Animated GIF courtesy of the author.


Click here for more information about the Yamaha SILENT Guitar.

Seven Fun Places to Put Your Wireless Turntable

The recent resurgence in popularity of vinyl records should really come as no surprise. Why? Because, as anyone who’s had the pleasure knows, playing records is fun: a visual, aural, and tactile experience like no other; an endearing ritual that can quickly become a habit; a way of listening to recorded music that feels direct, personal, and real. In today’s constantly connected iWorld, it’s refreshing to be able to hear songs in a manner that doesn’t involve disembodied icons and images floating on a screen.

And yet the new vinyl boom has also re-exposed one of the format’s key downsides: its lack of convenience, which is a tough hurdle to clear given that people are now used to accessing music wherever they go. The main problem is the turntable. Where do you put the darn thing? It’s big. It’s bulky. And it needs to be connected to both an amplifier and a preamp to be heard. So your placement options are sorely limited, right?

Wrong. Or, to be more specific, wrong if you have a wireless turntable such as the recently introduced Yamaha MusicCast VINYL 500, which has a built-in preamp and uses Wi-Fi® to send signals directly to powered MusicCast speakers and other wireless devices — no cables and no receiver necessary. The MusicCast VINYL 500 also allows you to tune into Internet radio and streaming services, and can even work with Alexa via your smartphone or Amazon Echo device.

All this means that you can now savor the joy of playing records anywhere in your home — and come that much closer to making your feng shui dreams a reality. Bearing in mind that a wireless turntable can be easily moved anywhere at any time, here are five places you might consider trying out:

1. Reading Nook

Imagine you’re relaxing at home on a weekend. You’re about to sit down with your favorite book in the reading area that you established for just such an occasion. But before you settle in, you realize there’s one thing that would help make this leisure activity even better: music. You grab a vinyl record from your nearby collection and drop it onto your wireless turntable. If you have multiple wireless speakers in your house, you can even control which ones your music is streamed to, so others in the house who may not share your eclectic taste can enjoy themselves in peace and quiet.

2. Home Office

Since it already has a computer and speakers (perhaps even wireless ones), your home office can be the perfect place to house a turntable. You might also consider storing your vinyl there — something that can help create a personal space for yourself, close to the rest of the family but still separate.

3. Enclosed Patio

Do you like to entertain? Putting a wireless turntable on your patio adds an instant soundtrack. And thanks to the turntable’s connecting capabilities, you can link it to multiple other speakers in your home (or even out in your yard), which gives your guests an enjoyable listening experience no matter where they happen to be.

4. Bedroom

It’s been a rough day and you need to get your soul back in order by listening to one of your favorite albums before retiring for the night. Why not add to the relaxation by bringing the turntable right into your bedroom? You may find that making the transition from wakefulness to slumber is easier than ever. There are of course other, more romantic possibilities in this part of the house that might involve the playing of Barry White records … but you can probably figure those out for yourself.

5. Kitchen/Dining Room

Great music adds to the experience of both cooking and eating. So set your wireless turntable on a nearby sideboard, counter, or shelf — anywhere handy, as long as it’s not too close to the preparation or consumption of food and drink. (Messy accidents and turntables don’t mix!) For extra fun, match the music you’re listening to with the style of cuisine being served. Tex-Mex and Willie Nelson, anyone?

6. Game Room

Playing video or board games is fun but sometimes you need to play something else — like a record — to create some atmosphere. Consider placing the turntable and a wireless speaker in your game room to boost the ambience while you’re rolling the dice or shooting bad guys on your big screen TV.

7. Next to the Bar

Enjoy mixing drinks like a pro? Enhance the experience with music while you create the next great cocktail. The next time you make a Manhattan, put on some Frank Sinatra to help get you and your guests in the mood.

These are just a few options — and we haven’t even discussed the tantalizing concept of playing your records outdoors! But you get the idea: One of vinyl’s biggest historical limitations, the turntable’s lack of easy portability, is now definitely a thing of the past.


Click here for more information about the Yamaha MusicCast VINYL 500 turntable.