I once heard a music professor say, “if everything is accented, nothing is accented.” We’ve all seen a 16-bar phrase of music with every note accented. When we play the ink precisely as it is written, the music sounds like the teacher from Charlie Brown — monotonous, boring and predictable.
I’ve often translated this lesson to other parts of my life, specifically my career and personal workload. Accent means an emphasis on a pitch. Emphasis means to put stress on something. Stress is not always bad, but we risk becoming overloaded and burned out if everything is stressed.
Enter teaching in 2021. School, state and federal mandates must be adhered to, on top of the typical teacher requirements like planning, grading and other tasks that are not student contact hours.
Every year, the fight to keep teaching as one of the top priorities becomes more difficult. Just because something is noisy doesn’t mean it’s the most important.
Furthermore, when you ask anyone for advice on prioritizing tasks, you may get some helpful advice, but usually, you hear people’s opinions on what is important to them. I’ve had many colleagues and supervisors tell me that it’s OK to say “no” or “no big rush on this” — and sometimes, they mean it.
Bottom line, there are specific non-negotiable tasks and projects you must do. As an employee of a business, you signed a contract agreeing to fulfill these tasks. Some of these tasks are directly laid out in your job description, but many fall under a catchall statement that says something like “all other tasks as required by the supervisor.”
Even so, I believe that teachers have some agency in what we can prioritize. We can be productive in a healthier sense by setting some boundaries, properly managing our workload and determining what is essential.
Boundaries: Protect Classroom Time
 Our jobs must remain focused on the following two items: 1) ensure the safety of our students and 2) educating our students.
We already know how vital safety is, and it’s a good bet that your school has many systems in place to ensure this. So, on to our classroom time.
As a teacher, the direct contact we have with our students in our planned classroom and rehearsal time is of the utmost importance. This time should be treated as precious and non-negotiable. Even if you have little control over your classroom time, this is the most direct impact you will have on students. There is no substitute for human interaction and direct teaching, guidance and learning.
Teachers should make every effort to avoid the insidious nature of administrative tasks infecting classroom time. This is easier said than done. I’ve been teaching for 15 years, and I occasionally break this rule but quickly recognize when I do and get back on the tasks that actually matter. I regret the early years in my career when I put students into sectionals simply to catch up on administrative work.
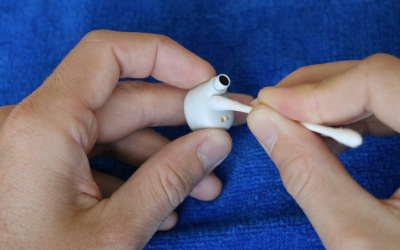
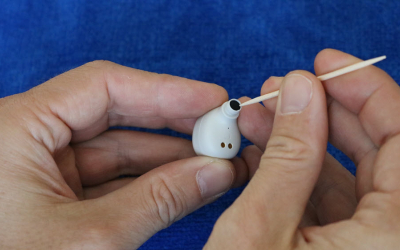
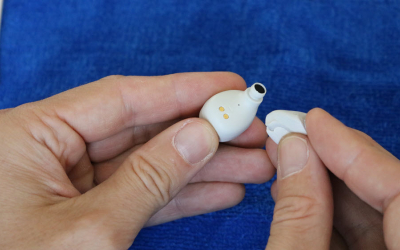
Some teaching moments can organically come out of administrative tasks. For example, some instruments may have common faults. Depending on the age of your students, you can show them during class how to do some minor repairs to instruments. Take five minutes to adjust a loose screw with an eyeglass screwdriver, and you’ve potentially saved yourself time in the future. Furthermore, you’re providing an opportunity for student autonomy.
Other administrative tasks can wait. When we say “yes” to checking email, we are saying “no” to interacting with our students. You may also be in a situation where other teachers want to pull kids out of your class to finish a test or project. We have field trips and events that occasionally pull students out of a day, but I never ask students to complete work for me during another teacher’s class. The more this is entertained, the more other teachers will ask for your kids to leave your class. And then you have more work, later on, to catch them up.
Besides administrative tasks, there are other “time burglars” that can rob you of your precious time without you even knowing it. Read my article on some common time burglars and how to address them.
Manage Your Workload

Work Within a System: I love lists and organization systems and have tried almost every system under the sun. After years of vetting, combining and tweaking systems, I’ve come up with a practical, reliable and boring system that works for me. It’s primarily based on David Allen’s Getting Things Done (GTD) system combined with the Todoist app and a notebook.
I put all my tasks in Todoist. If I’m ever without a digital device and think of a few to-dos, I write them down in a notebook and transfer it over to Todoist later. Within the app, I list my projects, and the tasks within projects are managed by what is actionable, when I can do it, where I can do it and how long it’s going to take. Tasks are worded in a clear, direct and actionable way. For example, “Call performance venue to get price for three-hour concert rental on November 21.”
The GTD system says to engage with all your projects consistently. This did not work for me because I like to dig in and complete at least one project every week or two. So, I rank my projects and focus on getting to completion as best as I can. If I have to wait for someone to complete a task to move forward on a project, that project is demoted to “waiting.” I then make a note to follow up with that person.
 One list I particularly like is my two-minute task list. According to the GTD system, if a task takes two minutes or less, you should just do it and not have it take up valuable real estate in your schedule or brain. I agree with this but learned that these small tasks can get out of control if not approached correctly. First and foremost, planned-out tasks come first. Emergencies can wedge their way into my planned time, but nothing else. I reserve two-minute tasks for either a specific time of day or transition time. Sitting at a meeting and the presenter is 10 minutes late? Use that time to complete five tasks. Teaching a private lesson, and the student is pulled out for an early release by the office? Knock a couple of two-minute tasks off the list.
A word of caution: don’t get addicted to completing two-minute tasks to feel a sense of accomplishment. Focus on these tasks during breaks or short specific times of the day; otherwise, you might get caught up trying to complete as many as possible instead of focusing on more profound work.
Bring Solutions, Not Problems: One of my cooperating teachers shared an insightful piece of wisdom: “When you complain, people have two reactions — 1) they don’t care or 2) they’re just glad whatever you’re going through isn’t happening to them.”
Most people are sympathetic and even empathetic to our issues, but they aren’t likely to actively work to find a solution that will further us. If you need help from an administrator, by all means ask them for help, but bring them at least a few examples of what you have done to help your situation or some thoughts on possible solutions. For example, say, “I have a situation I need help with. I have tried these three things, but I haven’t been able to gain any ground on this issue. Do you have any other ideas?”
Use Your Teaching Assistants: I have 120 teaching assistants — they just happen to be my students. Every week, set aside some time for planning. Go through your list of what needs to happen and who can do it. At my school, students cannot submit attendance due to privacy issues, but they can set up chairs and stands, file music and monitor the supplies cabinet.
We’re a Title I school, and we provide all items for students, and most items are stored in a cabinet. I designate a student to be our supplies cabinet manager, and he or she monitors the stock and distribution of reeds, valve oil, grease, sticks and related articles. When we are running low, the student emails me a list of what needs to be reordered. I show the student how to format the email so I can forward it directly to our music store rep (budget permitting).
We regularly have parents who help out as well, especially with smaller-scale projects. One year, I needed 200 letters stuffed into envelopes. I called a parent and asked if she could help with this. This parent had expressed in the past that she wished she could help more but couldn’t commit a significant time to help because of work. She said she could help, and I sent the envelopes and letters home with the student. They came back stuffed the next day, ready for labeling. The parent was proud she could help out with her child’s music program, no matter the size of the job. I used my free time to fix yet another broken instrument.
Outsourcing Is OK: If you have the money or resources, outsource what you can. This section includes some harsh realities and things I have said to myself.
 Harsh Reality #1: Only I can make the perfect concert program. I spent hours selecting all fonts, finding the ideal graphics and template, and triple-checking all names.
- People don’t care who designs the program, as long as you don’t use Comic Sans or Papyrus fonts (sorry, not sorry). They just care that it’s done. Spend $50 at the local print shop to create the program or ask a music parent volunteer to take on this task. Just triple-check the names yourself, so you don’t leave off the euphoniums again.
- Harsh Reality #2: I listened to every single student play their chair placement assessment because I am a devoted music educator. At 120 kids submitting three-minute assessments, this was 360 minutes of recordings. Assuming I did at least three minutes of writing and feedback for each student, this was now 720 minutes on this task. I spent close to 12 hours on this one task, but it was worth it because I listened to every kid and gave feedback!
- Yes, it’s important to hear each student individually, but you may be able to do this during class and provide real-time feedback in a quicker, more organic way. This took two or three hours out of your day for at least a week. Based on your energy levels, did the kid that had their assessment listened to at hour three get the same quality of feedback as the kid in hour one of your listenings? Or did you maybe get a little tired and rushed to get through these? Save time. Although you are good at giving feedback to students, so are others. If you digitally record assessments, send them to trusted colleagues who are experts in the specific instrument or voice parts. Use an ID number instead of student names to protect privacy, email the recording and Google Doc, and set a deadline.
- Harsh Reality #3: I feel guilty about outsourcing certain items that aren’t necessarily in my job description because I feel that I should be doing them myself.
- Who said you should be doing these items yourself? Besides, if you have the money in your budget to ease your workload while benefiting the students, there’s nothing to feel guilty about! If you don’t have money in your budget, you have two options: do it yourself or find volunteers. Think of it this way — you are already participating in outsourcing because you are the one being outsourced to teach music as an employee in your district. You may also be hiring someone else to teach voice lessons, write drill or fix instruments.
You will soon realize that no one cares who did a specific job; they just want the job done correctly and on time. Just give credit where credit is due.
Determine Importance
 What is actually important? As a professional, you know there are certain non-negotiables in your job. Teachers must complete IEP/504 reports, attendance, grades, mandated reporter tasks and promptly return parent emails and phone calls. If you ask yourself, “What are they going to do, fire me?” and the answer is “yes,” then those tasks are important and must be completed accurately and on time.
Now, let’s move on to some other tasks. Here’s an activity: Rank these tasks in order of importance:
-
- Complete an IEP report that is due in one week
- Complete an IEP report that is due tomorrow
- Respond to an administrator email about contract tracing in your class
- Replace the cork on a saxophone neck
- Select music for the next concert cycle
- Book a piano tuner and request payment
- File music from the previous concert
- Clear your email inbox
- Lesson planning
- Respond to a superintendent’s request for a group to play at a local event.
- Reply to a parent email marked “high priority” about a fundraiser that is due in three weeks.
Now ask yourself a few questions:
-
- Who is the best and most appropriate person for each of these jobs?
- What happens if I just don’t do the task?
- Do I have to do this today?
- Will it make things worse if I put this off?
- Can someone else do this?
- Will it take me longer right now to teach someone else to do this?
- If this is not a legally/contractually required task, will my group learn/sound better if this task is completed?
- When is the best time to complete a specific task?
- Who is this task actually crucial to?
- Is this a task that must be done, should be done or that I want to be done?
You can quickly figure out what will and won’t put students’ safety and education at risk or your job in the above list. Some of the tasks genuinely are important, but are they important right now? Sure, the superintendent is contacting you, but saxophone kid can’t play until that neck-cork is fixed. The word “superintendent” holds a lot of mental weight, but I know that my superintendent would completely understand if I didn’t get back to her immediately because I was making sure a kid was able to play his instrument.
Other tasks could be done by someone else. Most of these tasks must be done by you, but there’s no reason you couldn’t show and then ask student helpers to file music. Another option is to simply not do specific tasks. In the case of filing music, you could actually just leave it in a pile. You may be a person that’s OK with the mess, or you may be a person who gets mentally drained seeing unorganized things, but not doing some of these lower-level tasks is an option.
Depending on the time of year, energy level, etc., I would separate this list into the following three groupings.
 Today / High Priority / Must Be Done
- Respond to an administrator email about contract tracing in your class — high priority, safety issue.
- Complete an IEP report that is due tomorrow — this is a hard deadline and a document that has legal ramifications.
- Lesson planning — this will require a significant part of my mental energy, so I would complete this before moving on to the next set of tasks
- Today / Would Be Nice to Get Done
- Replace the cork on a saxophone neck — if I have a stock of saxophones necks that I can clean and loan out, this is pushed to a later date
- Book a piano tuner and request payment — do this within the next two days because district finances take a long time to process
- Respond to a superintendent’s request for a group to play at a local event — our superintendent is busy and knows how busy everyone else is; she will understand if I have other pressing tasks to get to first
- Clear your email inbox — this would be helpful, but if I can’t get to it, I will at least check email to make sure there are no new action items.
- Not Today — if on the slim chance, I finish everything above, I may engage with this list a little
- Complete an IEP report that is due in one week — this can be done up to the due date; it’s on my radar, but other items take priority.
- Select music for the next concert cycle — this is important, so I want to carve out a chunk of time to dig into it. I would rewrite this task as “schedule two one-hour time blocks to begin selecting music for next concert” and put it on my tasks for tomorrow.
- File music from the previous concert — take this off my plate and delegate to some students
- Reply to a parent email marked “high priority” about a fundraiser that is due in three weeks — respond during my next email engagment time OR delegate to the parent running the fundraiser
You Decide What Is High Priority: Just because someone says a task is important doesn’t mean that it actually is. You will receive emails that are marked high priority, and in some cases, this is true. But in most cases, you are the one to determine whether a task is a high priority to you. The email sender feels that this is an important task, but he or she does not know your schedule or priorities.
You may also find yourself in a situation where the superintendent, principal and your department chair each sends you something that is a high priority. This can be a real dilemma, especially for newer teachers. In these cases, use your best judgment. You have a few options. If two tasks will be five minutes apiece and one will take at least half an hour, knock out the quick tasks first and then focus your energy on the more extended task. If they are all equal in energy and time, you can complete them by paygrade/ranking. That’s right — the higher position in the district gets his or her task completed first.
Don’t Be Surprised by Things You Know Are Going to Happen: Every year, I have colleagues who get upset that they have to complete tasks for their teaching evaluation. They don’t want to do it, don’t think it helps and complain about it. This is wasted energy. This is a requirement of your school, district and state — you have to do it. Accept it. Complaining about it may be therapeutic, but it does absolutely no good for you.
If you are incredibly passionate about things like this, consider lobbying or directing your efforts toward places or organizations that may impact these things. I’m not saying to be a mindless zombie and accept everything at face value, but certain aspects of teaching are never going away. People who have jobs must be evaluated regularly. You know it’s coming. Accepting things like this doesn’t change the fact that they’re frustrating, but it can free up some mental energy.
This acceptance strategy can be applied to your daily schedule as well. If you know that every day will have interruptions, including administrative requests, broken instruments or surprise reports, plan on this. In my position, I can count on about 50% of my planning time as my own and 50% allotted for surprises, emergencies or wherever else I would like to give my time to. Days that don’t have emergencies or surprises are counted as a bonus.
 Just Say “No”: Many of us already say “no” frequently. When you say “yes” to something, you will end up saying “no” to something else. This isn’t a bad thing; the reality is that everything just takes time, and time is finite.
I’m naturally a people pleaser, so I’ve had to work hard on this one. If you are overwhelmed, and something is presented to you where you have a choice, say “no.” And unless it’s a part of your contract, do not explain why! When you explain why you are saying “no,” other people will automatically go into problem-solving mode to convince you to take on this oh-so-important task. All you need to say is, “Thanks for thinking of us, but we’re unable to help.”
Being direct is OK. If you want to be polite, say, “No, I can’t do this right now, but check with me in a few weeks,” but you have to be OK with someone checking back with you in a few weeks. I’ve found that people are tougher than I give them credit for; they can handle a direct “no.”
Saying “yes” to someone else for something you really don’t want or need to do is potentially saying “no” to yourself. And you should treat yourself well. People look out for their own best interests, and you should do this as well.
Sometimes the medium can distort the message. If you are concerned with getting misconstrued over email or text due to someone misreading your tone, pick up the phone or visit the person to deliver the “no.” It’s also good practice if you’re not used to standing up for yourself. If you follow a script, you will be surprised at how assertive you can be.
A music teacher’s job continually presents more challenges, opportunities and work. Remember, you are responsible for getting your work done and taking charge of your personal and professional growth. Others may try to make their priorities your priorities. We are employees, and we do have to adhere to whatever system we are in, but with some adjustments, a push toward personal agency and putting your kids and yourself first, you can reduce the noise of urgency put upon you. You are in charge of what is important to you!


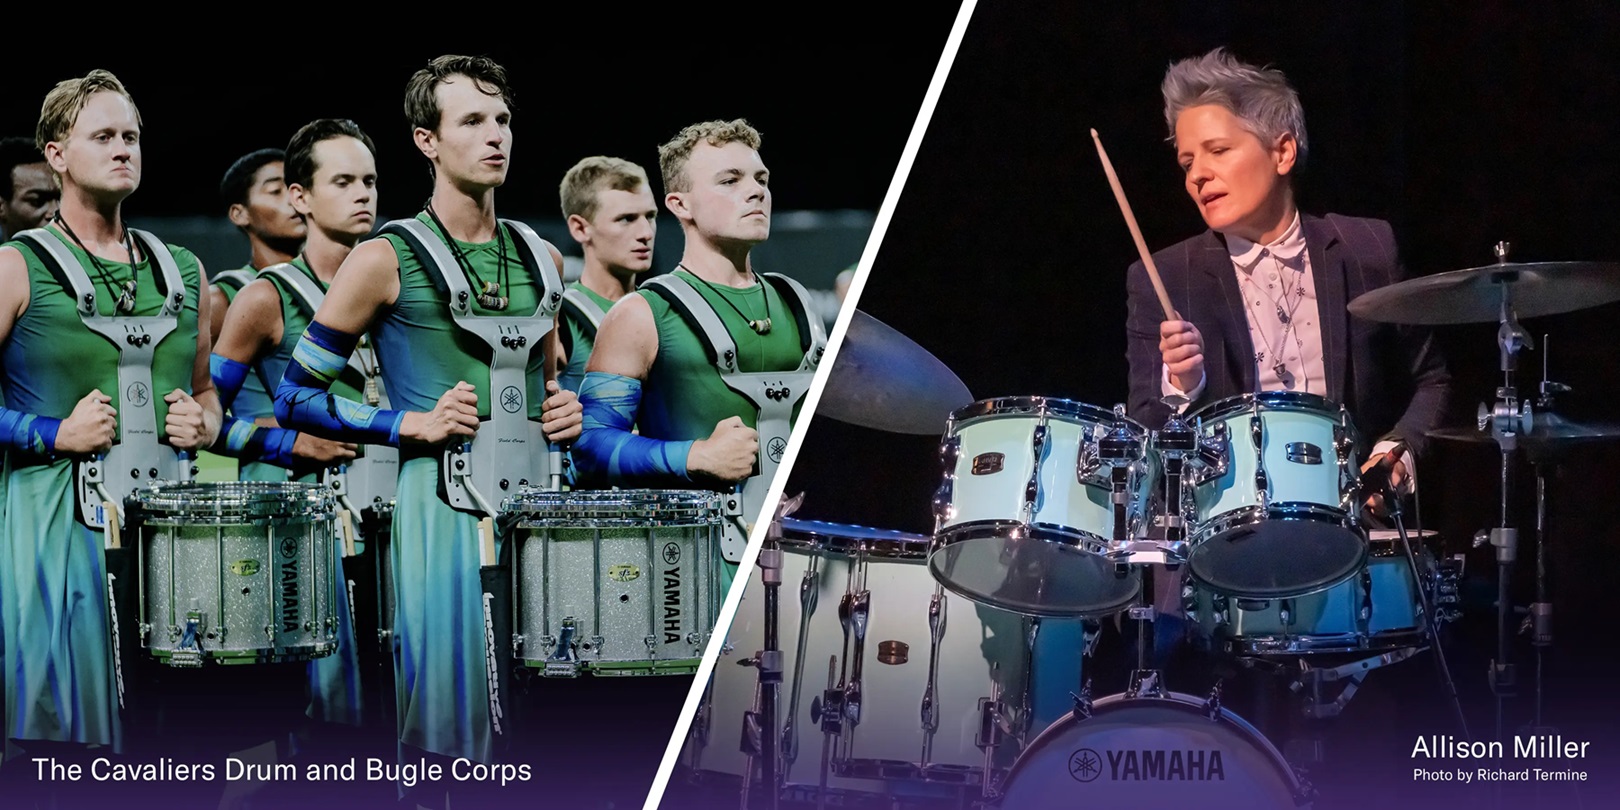
 The Pennsylvania Music Education Association conference gives us an opportunity to connect with all of you and to remind you that Yamaha is your partner in music education, not just through our great instruments and professional audio products but also with resources, support and professional development. We know how difficult these past two years have been as we have navigated through these uncertain times, and we want to express our appreciation and gratitude for everyone involved in making this conference possible. We want to continue to hear about your programs and learn about you and your specific needs to see how Yamaha can partner with you to help.
 Stop by and say hi to us in the exhibit hall. We’ll be showing some new instruments in the booth, including the Harmony Director, the YBS-480 Baritone Saxophone and the MS-9414 Marching Snare Drum.
 The Kansas Music Educators Association conference gives us an opportunity to connect with all of you and to remind you that Yamaha is your partner in music education, not just through our great instruments and professional audio products but also with resources, support and professional development. We know how difficult these past two years have been as we have navigated through these uncertain times, and I want to express my appreciation and gratitude for everyone involved in making this conference possible. We want to continue to hear about your programs and learn about you and your specific needs to see how Yamaha can partner with you to help.
 The California All-State Music Educator Conference gives us an opportunity to connect with all of you and to remind you that Yamaha is your partner in music education, not just through our great instruments and professional audio products but also with resources, support and professional development. We know how difficult these past two years have been as we have navigated through these uncertain times, and we want to express our appreciation and gratitude for everyone involved in making this conference possible. We want to continue to hear about your programs and learn about you and your specific needs to see how Yamaha can partner with you to help.


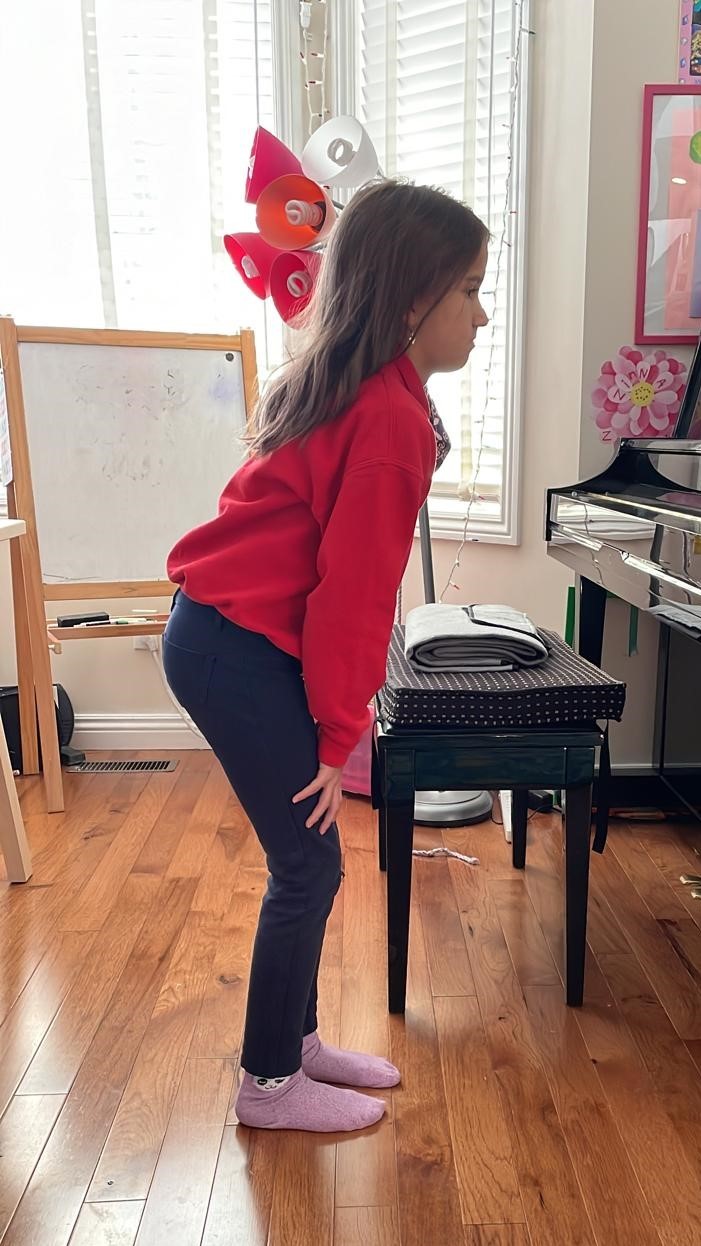 Solution — To address
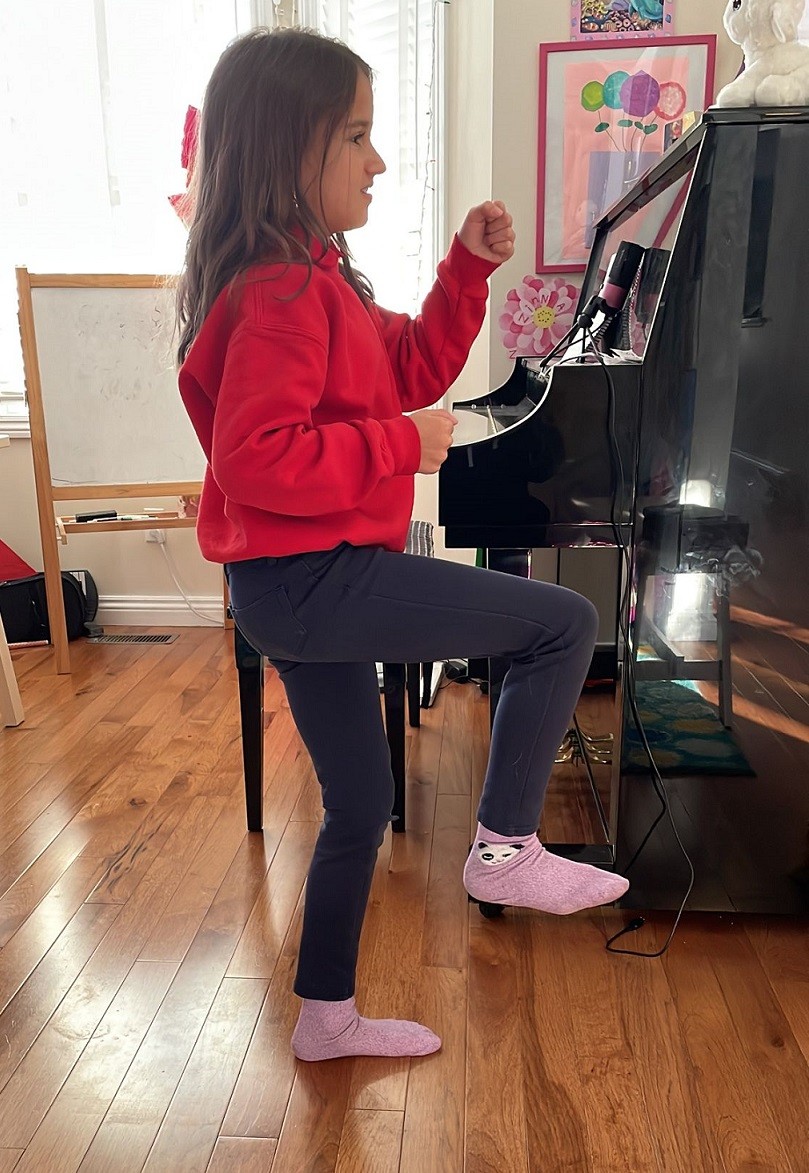 pulse and rhythm problems, I like to use movement activities that can be accomplished away from the piano. I find this approach to be more effective. It also creates a small break in the lesson when the student can stand up and refocus with a different activity. Some movement ideas include marching or patsching (tapping on thighs) while singing the melody of the piece.
 The musical flow of 4/4 versus 6/8 meter is very different. Often, students may not read rhythms correctly because they do not have a full understanding of the meter.

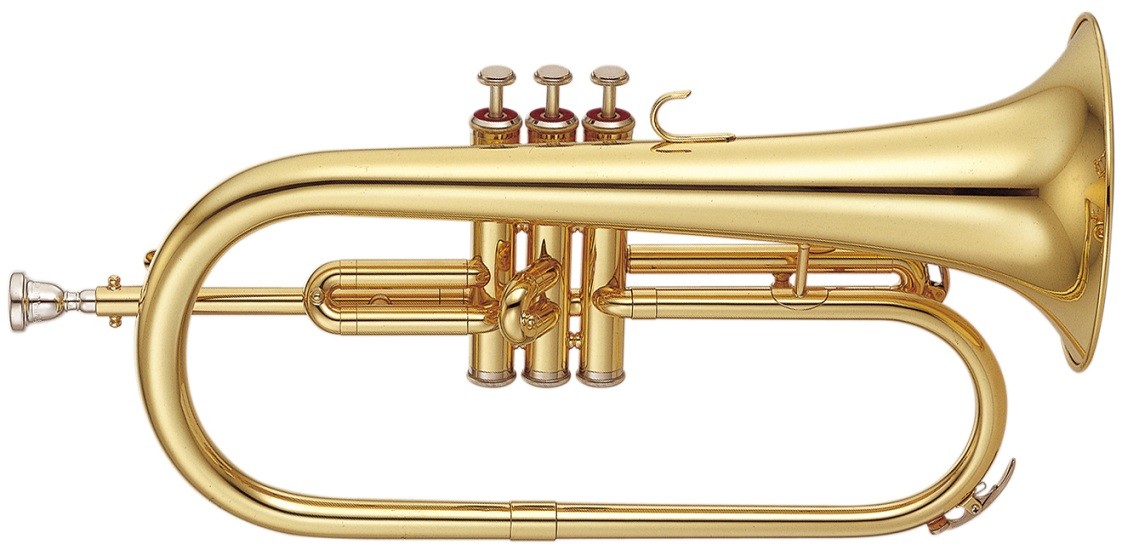 Auxiliary Brass
 The must-have auxiliary woodwind for a concert band is a


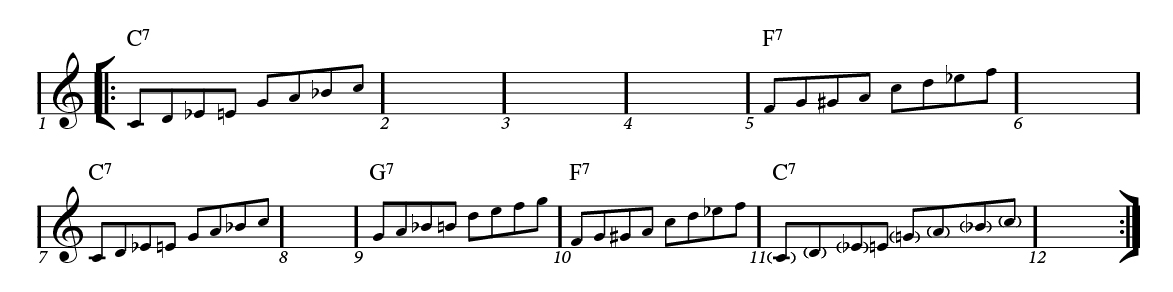
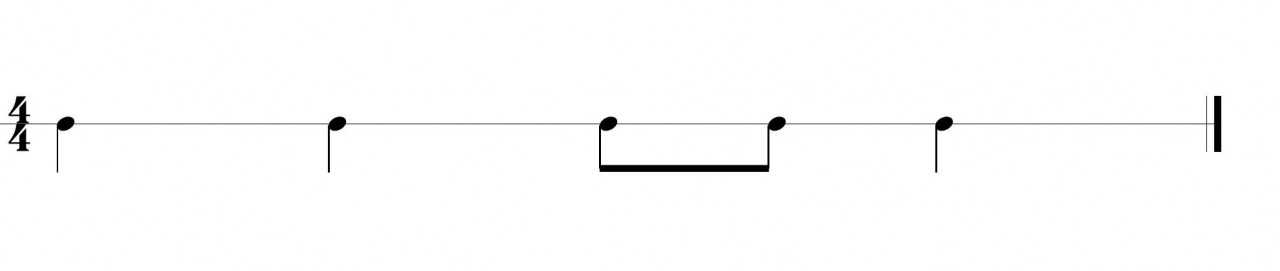 In his theory, there are specific rules for creating the patterns, but for now, let’s just use a simple pattern of quarter, quarter, eighth, eighth, quarter in 4/4 time (see pattern to the right). As the teacher, I would start by using a neutral syllable like “bah, bah, bah-bah, bah.”
 One of the most common rhythmic problems I encounter is playing steadily in 3/4 time. Unfortunately, most of the music on the radio and most of the music in early method books is in 2/4 or 4/4 time, so switching to triple meter can create problems. (While not directly movement-related, improvising in the “troublesome” meter can be a great help.)
 I have also seen Dalcroze teachers use tennis balls to work on this concept. The teacher plays a piece with changing tempi while the student bounces the ball on the macrobeat. The microbeat actions might be passing the ball to another hand, tossing it. (Using the tennis ball also makes the student pay attention to how much force or accent is needed on each downbeat.)
 With older children, body percussion is a fun way to work on complex rhythms or polyrhythms. One of my favorite body percussion activities is a rhythm canon, demonstrated


 But then the story loses me. The boy wants more, and the tree gives it. But the tree starts giving away so much that it becomes less and less valuable. Branches are removed, and eventually, the entire trunk is cut down. The tree is reduced to a stump, but it continues to tell itself that its happy to give.
 Some Small Changes to Put Yourself First
 Make a list of the things that you want to do for yourself — things for your health, personal growth, recreation and relationships. This can be anything from studying a piece you enjoy, exploring a new exercise routine or getting a band together to play a set at a bar. I have a list of projects and priorities that I can do now, and a list that I’d like to do someday (called my “Someday/Maybe” list).
 Because your time is valuable and you have so many options, any request of your time must earn a “yes” from you. Think about some requests or opportunities in the past that you have regretted saying yes to. Chances are, they provided little benefit to you or your students. Your time would have been better spent doing something else. I don’t think there’s a specific formula for a “yes” from me, but I have noticed some patterns.
 I love lists. My favorite is my “not-to-do” list, which includes things, ideas or events that I have tried at least once and determined that I do not want to do them again if given the choice.
 So, you’ve got your not-to-do list, your negotiables and non-negotiables, but you’re still having trouble saying “no.”
 Practice, Practice, Practice


 Over the past 20 years, researchers have been increasingly interested in awe, as they have found that it helps people feel more satisfied, more connected, more generous and less anxious.
 In the classroom, ask students to find a piece of music that makes them feel the sensation of awe — or come up with a list together as a class. (Here are some examples of lists:

 You might face some resistance and difficulties if you start to charge $5 to $10 for admission to concerts, but here are some reasons to consider it with an audition-only ensemble:
 Here are some tips for providing incentives:
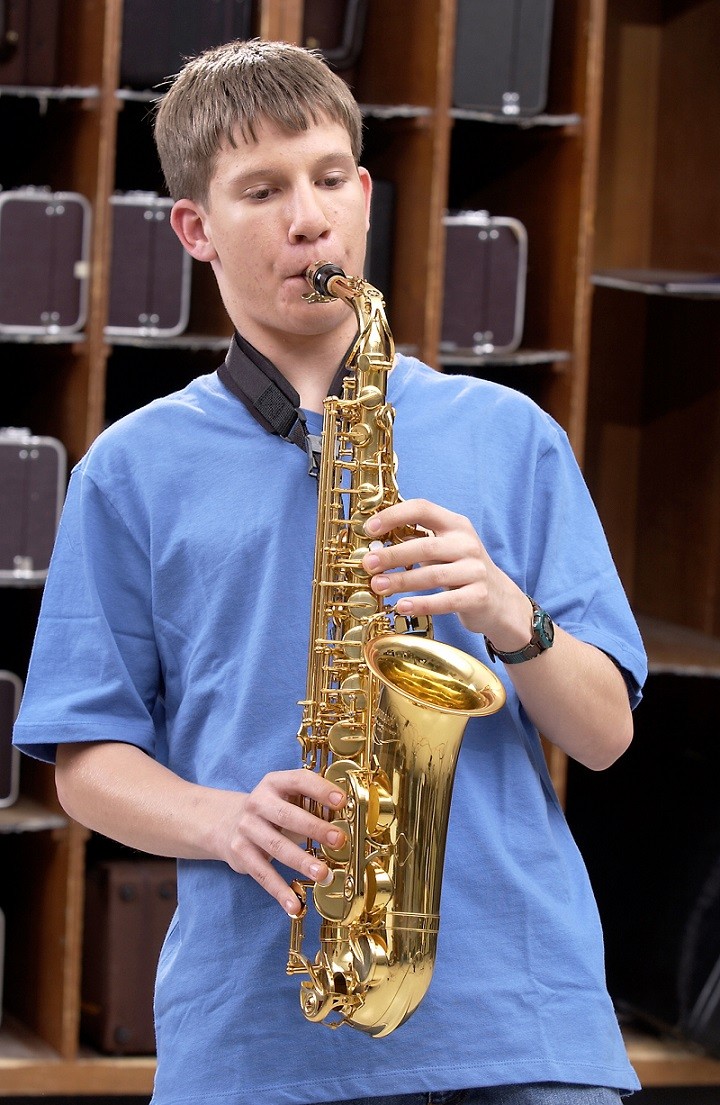 Audition-only ensembles are a great way to provide services to your community. Students who sign up for audition-only bands are more likely to want to perform at events outside of school.
 Vicchiariello and the school district solved its storage problems in a variety of ways. Most importantly, the board of education purchased an enclosed trailer exclusively for the band’s use in March 2018. Previously, the district had transported the band’s equipment to competitions, games, and other events in several multi-use box trucks. As the board looked at buying a new box truck, it incorporated the purchase of the trailer. Vicchiariello coordinated with the director of grounds to research the size and internal features as well as bid out the project. A student’s uncle paid for the custom exterior paint.
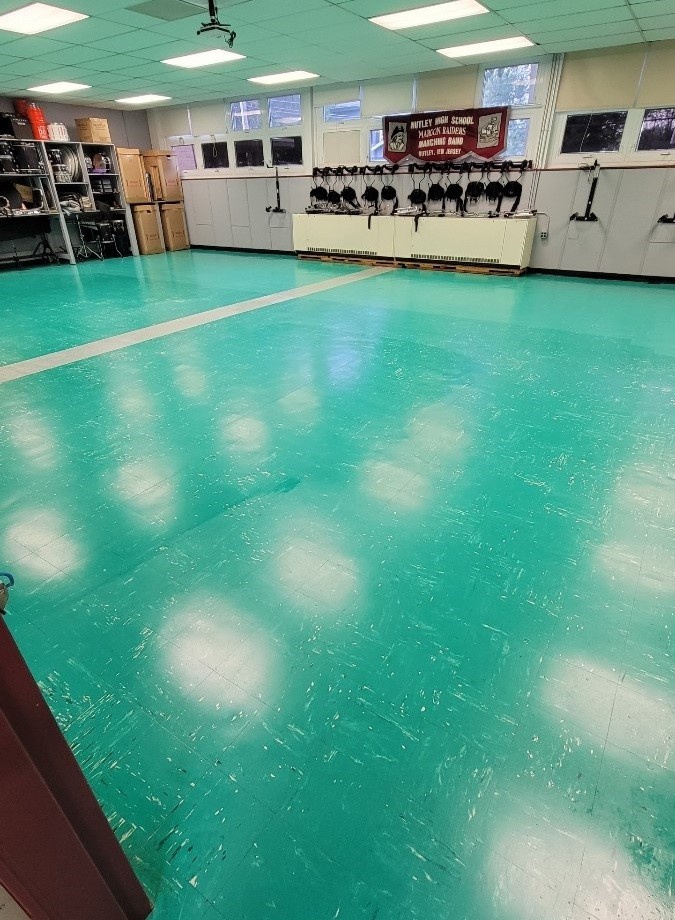 In addition, Vicchiariello built shelves and a rack in the back of the band room to house battery equipment and harnesses, respectively. Unfortunately or fortunately, the band received new marching band uniforms in 2018 as well, so the shelves now hold boxes of extra uniforms instead. “It’s like the ever-turning carousel that doesn’t want to stop,” Vicchiariello says.
 In the same vein, Vicchiariello solved challenges that the marching band faced with rehearsal space. With only one multipurpose field used for football, baseball, soccer, lacrosse and marching band at the high school, the band’s rehearsal schedules conflicted with sports practices and games. Therefore, the band members often walked to


 For students, band can be:
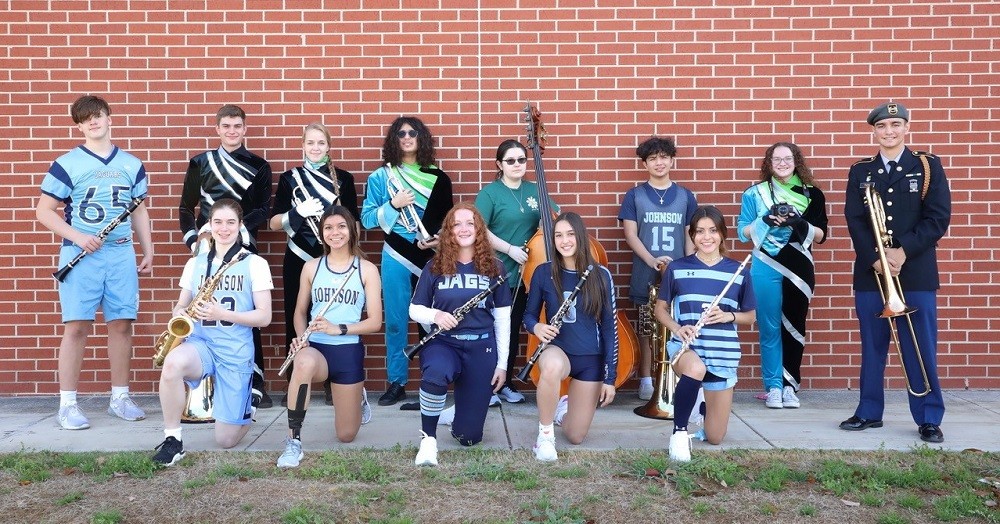 There are examples across the country of football players marching in the half-time show, band students singing in the musical or choir, and fine-arts students excelling in athletics. And at Johnson, we are proud to have students in all grades and band levels who participate in multiple other activities, and some do it for all four years.
 with Ginny and Mark Kraft, his high school choir and band directors.") At
At 


 The Florida Music Education Association conference gives us an opportunity to connect with all of you and to remind you that Yamaha is your partner in music education, not just through our great instruments and professional audio products but also with resources, support and professional development. We know how difficult this past year has been as we have navigated through these uncertain times, and I want to express my appreciation and gratitude for everyone involved in making this conference possible. We want to continue to hear about your programs and learn about you and your specific needs to see how Yamaha can partner with you to help.


 Resist the Phone: Smartphones emit blue light, which can disrupt your circadian rhythm and mess up your sleep cycle. It’s tempting to reach for your phone every five minutes to check on work-related emails — but don’t do it! The best thing is to turn off your mobile phone when it’s bedtime. Also, keep the phone brightness on “reading mode.”


 A majority of the plans for the new school’s buildings have likely been in place for a while, but it’s important to find out what decisions you can still impact. If the music room building is still in the planning stages, inquire about wide doors for moving instruments, extra storage space, stage access, dropped ceiling tiles for sound dampening or exposed ceiling for a livelier sound. If the building is already under construction, ask if your room will be painted to match the school’s color scheme or if you can choose a custom color that you won’t mind looking at every day. Even if all decisions are made, you can still be a part of the purchasing process.


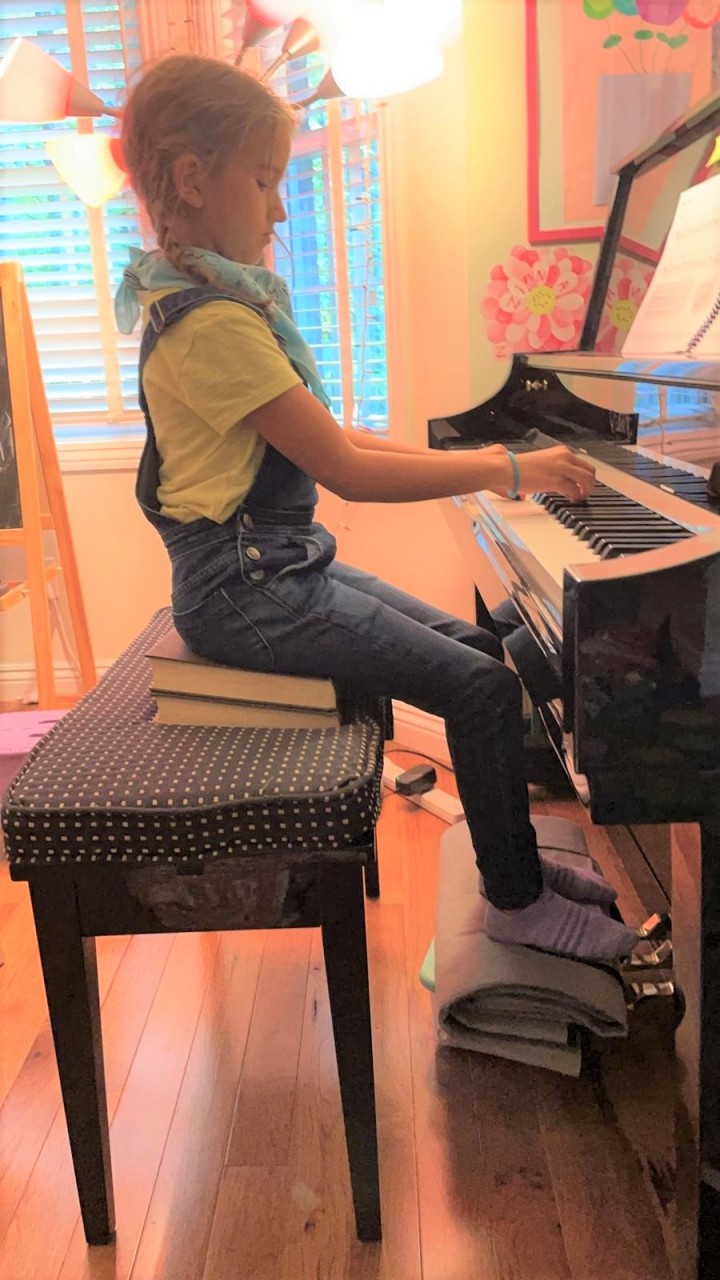 Height of the Bench
 Students often will play with overly flat fingers, collapsed joints and collapsed knuckles. Playing with a compromised hand position will lead to injury and prevent students from reaching their potential. It is important to understand the key aspects of good hand position when playing the piano.
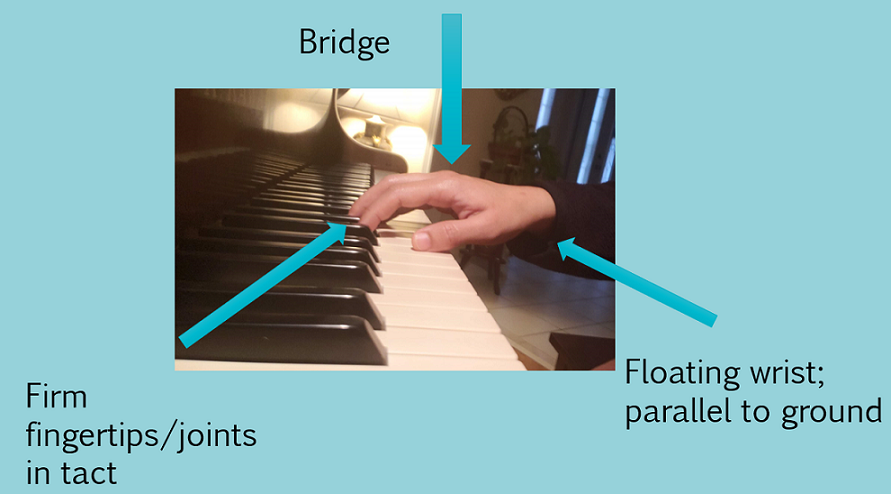 The
The 

 In 2007, I remember thinking, “Wow, this is so cool! I can get my email on my phone!” That was before I knew better.
 If I use my computer, I stay focused thanks to a few timers that block certain time-wasting websites. Furthermore, recognizing locations where you work best will help you avoid burgling time from yourself. When I have some extended writing or computer work to do, my go-to productive environment is a coffee shop where I sit with my laptop and headphones, listening to idle chatter and the ambient sounds of a café from a website called
  Oh, the countless times I’ve had an excellent plan for my free period, only to be presented with a pile of plastic, rods, screws and unidentified objects. (It’s always bass clarinets, right?)


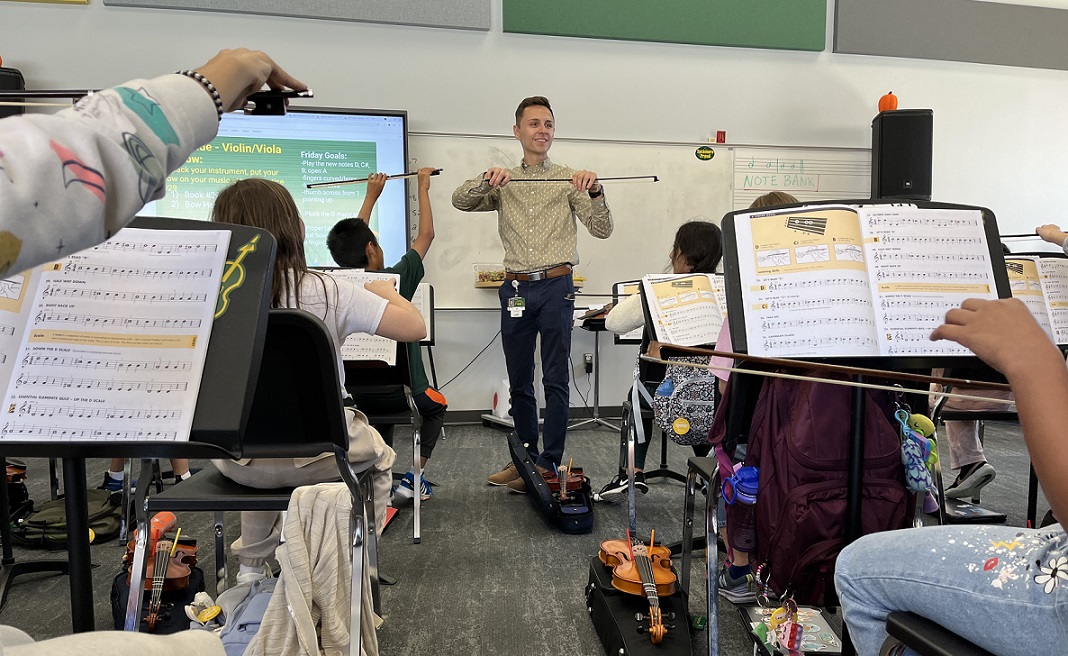
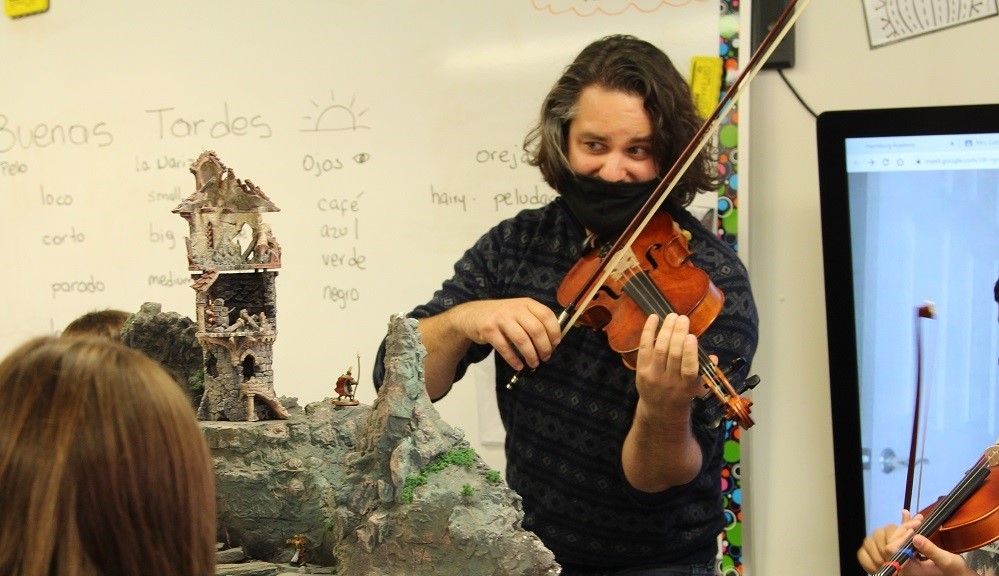
 As a result, Gamon created an innovative role-playing game (RPG) that uses goals in the violin curriculum and overall grade units to unlock puzzles that advance the story. Called “Novice to Ninja” (read
 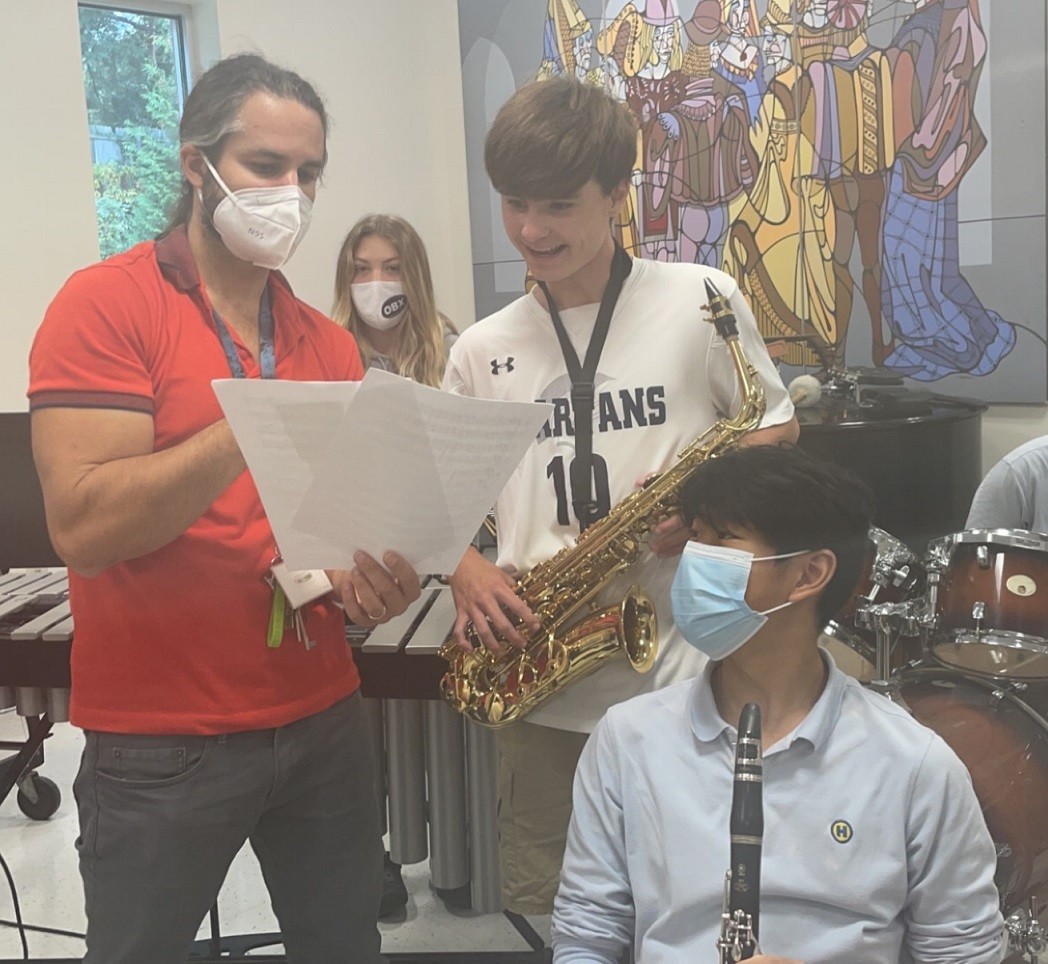 Starting in 5th grade, Harrisburg students can choose a new instrument in strings, winds or brass. At the middle school, Gamon conducts the symphonic orchestra.
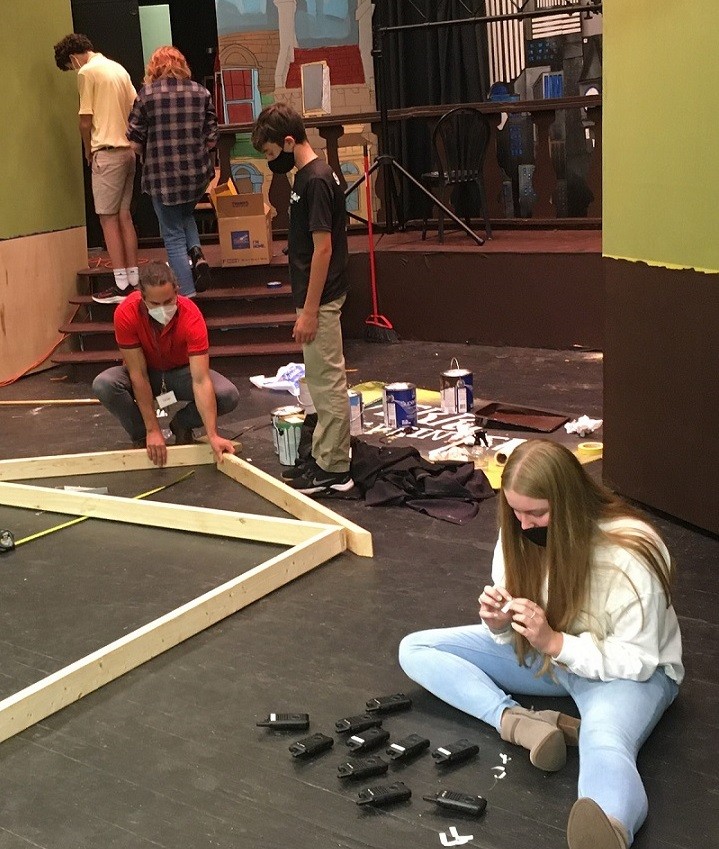 Furthermore, Gamon teaches Stagecraft and directs the school’s spring musical, which rehearses from September to March. In Stagecraft, students learn about lighting, sounds, props, costumes, construction building, design and marketing.

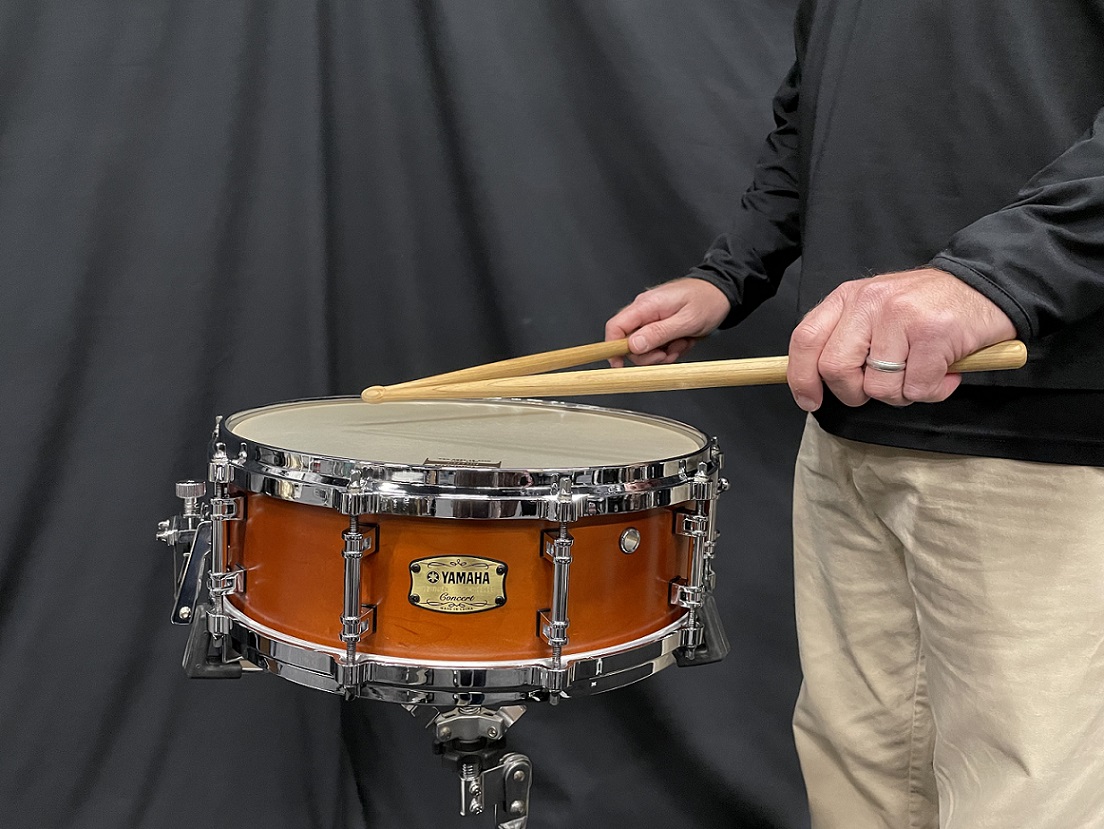 I have witnessed students just walk up to a snare drum and start playing. However, it is important to adjust the drum to the proper height so that the bead of the stick hits the drumhead at the optimal point. If the drum is not at the proper height, students will have tension in the shoulder.
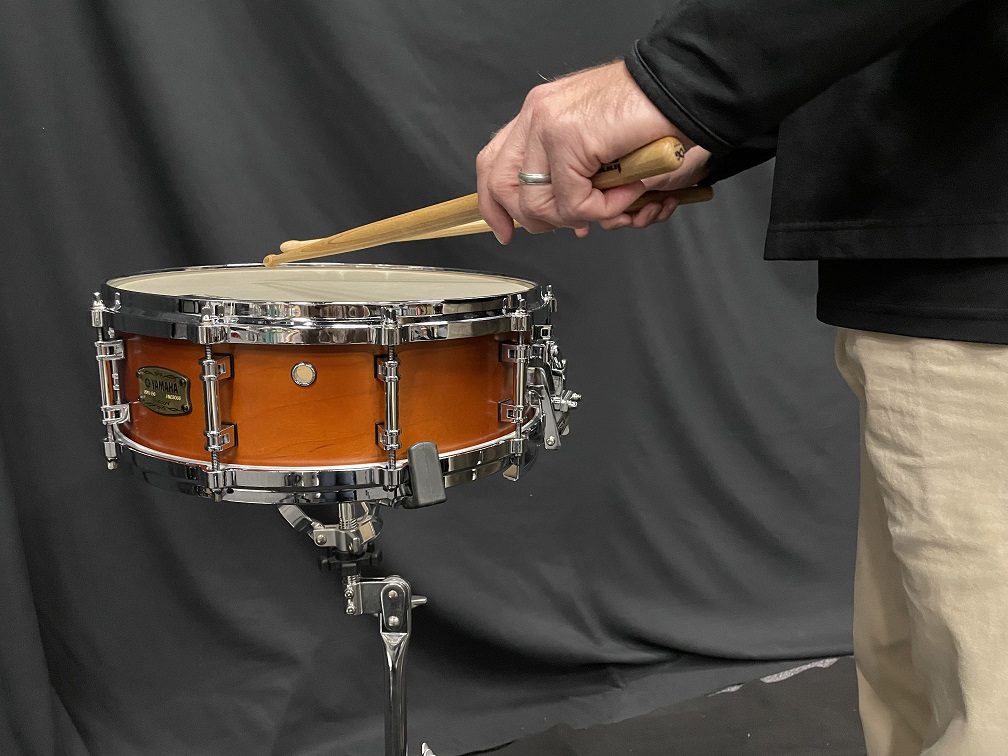 Fix it: Drum Set Up (
 Tell students to use their dominant hand and put the drumstick inside the first knuckle of their pointer finger. They should position the drumstick so that approximately two-thirds of the stick is coming out the front of their hand. Let the drumstick drop and count how many bounces are created. Tell students to reposition the drumstick and try a different fulcrum. Again, have them count the number of bounces. If there are less bounces, students should move the drumstick the opposite way and see how many bounces are achieved.
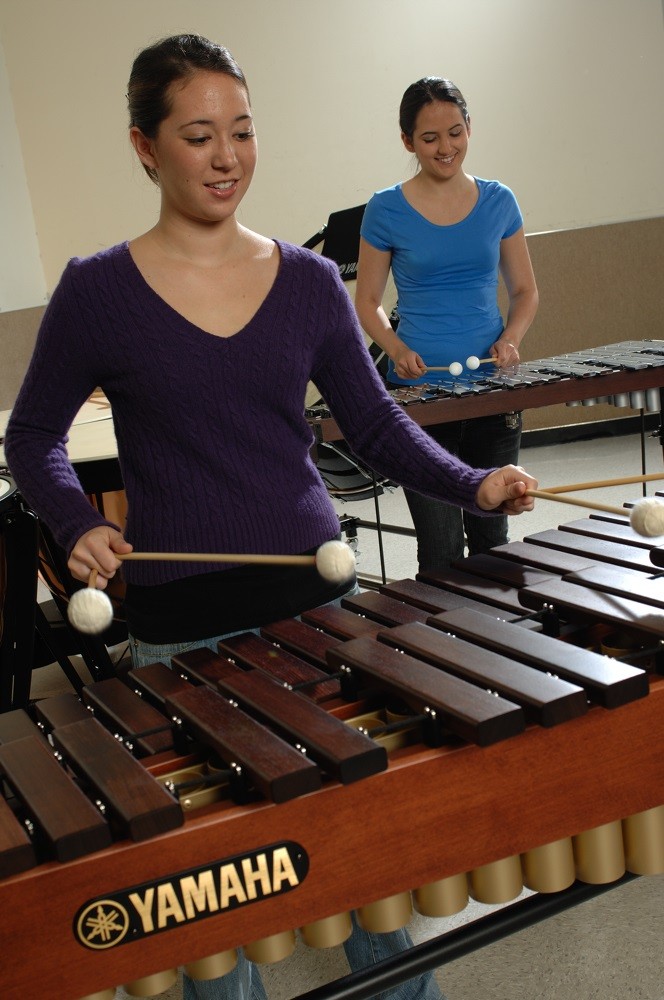
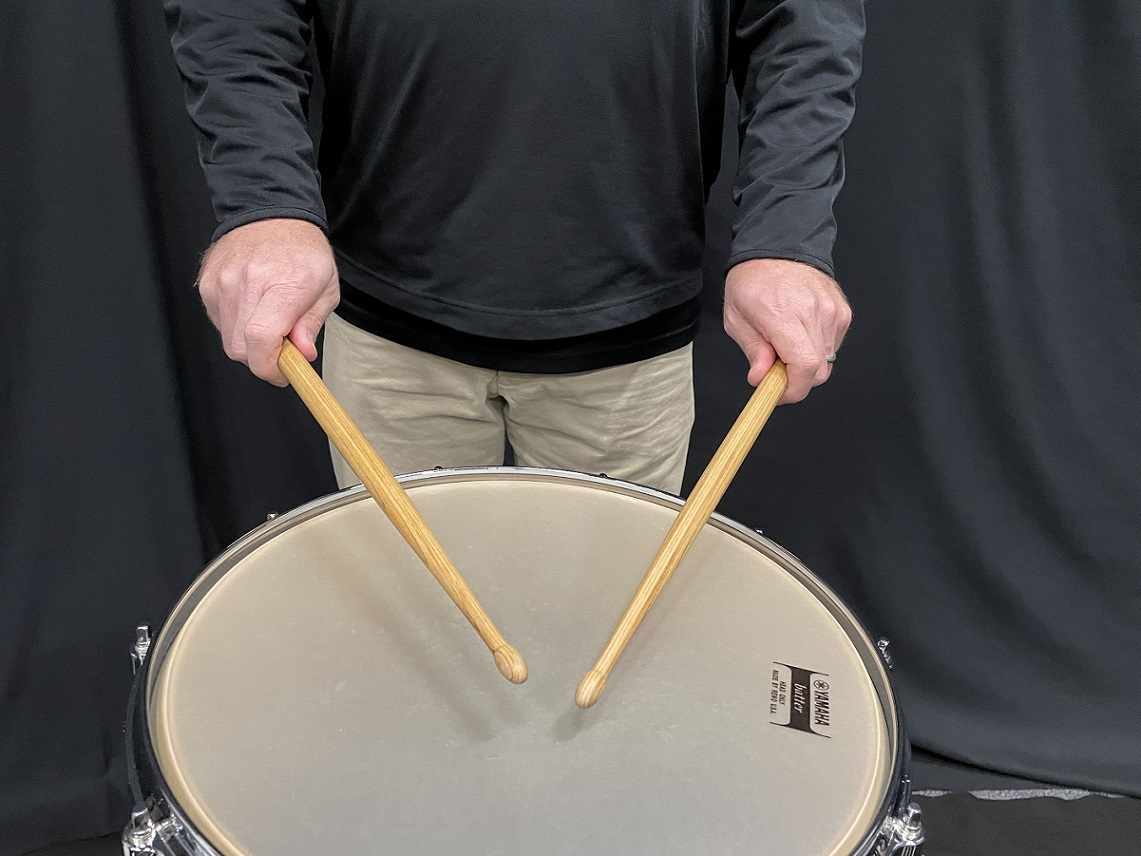 There are two grips that can be used on snare drum: matched grip or traditional grip. Because matched grip is used on snare drum, marimba, xylophone, timpani, bells and most percussion instruments in a concert ensemble, I have found that it’s best to start a student on matched grip.


 Students often play with flat fingers — with their nails visible on the keys — so they can see that they are playing the desired keys. However, a curved hand position where the tips of the fingers are used allows for more dexterous scale playing because the fingers are able to move with greater ease and speed. The fingers simply cannot move as quickly in a flattened position. When playing with flat fingers, there is also more friction between the fingers and the keys, which makes it difficult to play scales fast. Think of flat-fingered scale playing as akin to sprinting flat footed.
 On the other end of the spectrum, students may overdo curved hand positions and end up curling their fingers. As such, they grip the keys and play with what some teachers call “the claw.” Playing scales in this way necessitates a lot of physical effort as one muscle or set of muscles is needed to keep the fingers in this curled position, while another muscle or set is needed to lift and move the fingers.
 SOLUTION: The solution to correcting flat or curled fingers is similar. First, help your students understand that neither flat nor curled fingers are the most comfortable or ideal finger position for fast scale playing. In a neutral position, the fingers of the hand curve naturally, and this position is best for achieving superior scale and arpeggio playing. Here’s a simple exercise to help students find the natural curve of the fingers: Have them lift their arms to shoulder height at their sides and then drop their arms freely. Looking down, they will notice that their fingers are now in a naturally curved position.
 Many students misunderstand the correct position of the thumb on the keys and try to play using too much of the thumb, or even attempt to play on the very tip of the distal phalanx rather than on the corner of it (the spot on each thumb where the nail meets flesh). As such, students sometimes incorrectly play with a straight rather than a slightly bent thumb.
 In addition, when passing the thumb in ascending right-hand and descending left-hand scales or arpeggios, many students begin moving the thumb under the hand too late, or keep the thumb straight rather than slightly bent at the proximal interphalangeal joint when moving it.
 SOLUTION: The best way to help a student understand where to play on the thumb is to simply point it out to them — touch the part of thumb that should make contact with the key. If a student has been playing with the wrong part of their thumb, or without bending it from the proximal interphalangeal joint, or at the wrong angle in relation to the key, the correct procedure will feel strange and unfamiliar to them. It will take time for them to change their habit and learn to use the thumb properly and effectively.
 To facilitate improved thumb motion under the hand in scale and arpeggio playing, break down this small, but surprisingly challenging, movement into several steps. I recommend working on this motion first in scale playing versus arpeggios and start with a scale with many black keys. According to the book, “Chopin: Pianist and Teacher as Seen by His Pupils,” Chopin advocated for having students start with B major (right hand) and then D flat major (left hand) scales with the position of the thumb in mind. These are also some of the easiest scales to coordinate in hands-together playing as the thumbs of each hand come together on the white keys. Together with G flat major, these are the first octave scales I teach a student to play hands together. These scales are also excellent for achieving good passing of the thumbs as fingers 2, 3 and 4 play black keys, which are raised, allowing for a natural space to emerge on the keyboard in which the thumb can move freely and easily.
 Some students try to play scales with a hand(s) that is not kept in line with the arm at the wrist, such that the position of the wrist joint is overly high or overly low.
 As such, ease of movement is lost, tension can develop and injury can ensue when utilizing awkward wrist positions while playing.
 Some teachers prefer to use the image of a “floating wrist” to help students achieve an improved mid-range position. When I inherit a student who has been taught to make a dropping motion of the wrist on every finger action to achieve a weighty sounding scale, I encourage them to strive for “beautifully gliding” scales. As such, the arm guides the fingers so that the hands and arms move laterally (or horizontally) over the keys like a figure skater glides effortlessly over a glassy lake, rather than creating the visual and sonic effect of choppy waves. Gliding scales can be further enhanced with a gradual and even crescendo ascending and diminuendo descending. In this way, they are rhythmically even and musically shaped.
 Some students are able to implement the natural curve of the hand in their scale playing, but then they allow the final knuckle or distal interphalangeal joint of fingers 1, 2, 3 and/or 4 to collapse as one or more fingers depress the keys (this happens most often with finger 4, in my experience). According to Carolyn and Jamie Shaak in “
 Collapsing joints can result in two-handed scale playing in which the hands are unaligned or unsynchronized because the final finger joint in one or both hands is not firm and, therefore, not moving with control, resulting in differing speeds in the dissent of the keys played by each hand.
 SOLUTION: Collapsing knuckle joints are a bad habit and teachers must be vigilant and tireless in their efforts to correct this bad habit among their students. First, students must be aware of how it feels to use the fingertips correctly versus incorrectly.
 Ulna deviation is all too common in piano playing. According to
  SOLUTION: To help curb this harmful habit, make students aware of their ulna deviation and show them how to correctly align the arm behind the palm instead of aligning it with the thumb, so that the arm guides the fingers. It is also helpful to have students think about the position of their elbows in relation to each hand. Tell your students to keep each of their elbows farther away from the trunk of their body to help facilitate better coordination in scale, and even more so when playing arpeggios. It is sometimes helpful to have students imagine a bunch of flowers growing from their armpits and not squish them, or an armpit balloon and not pop it.
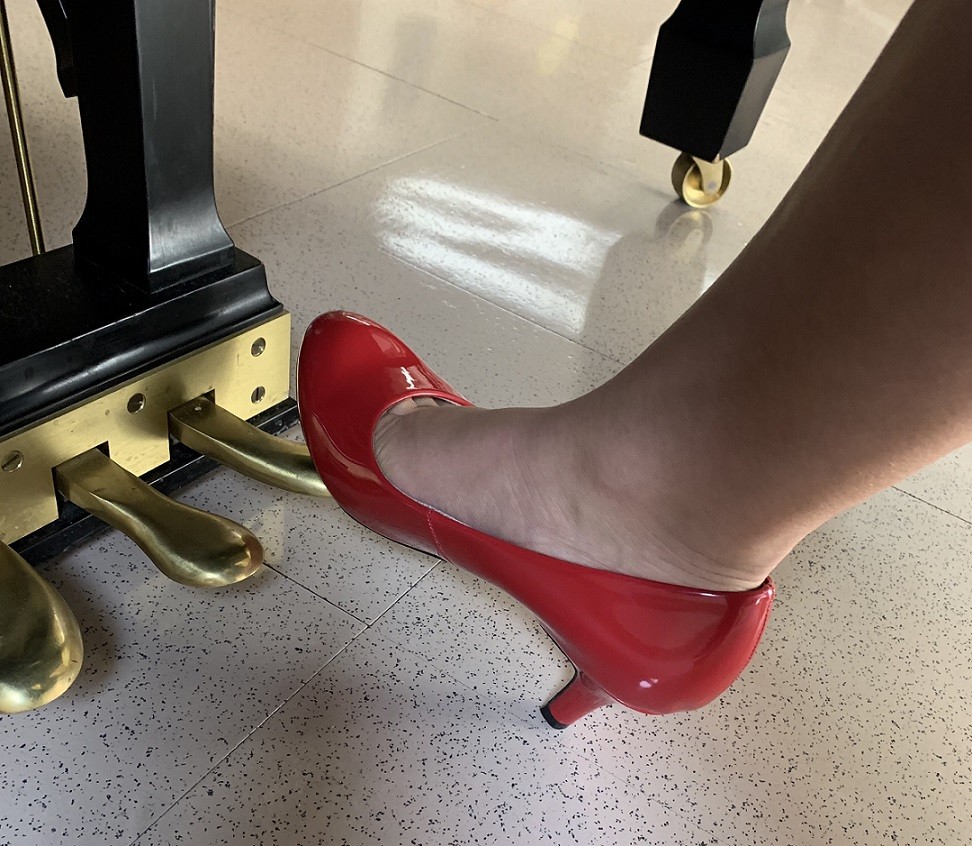 One of the most common pedaling problems I see is when students lift their entire foot and leg to change the pedal. (I informally call this “horse pedal” because it reminds me of a horse pawing the ground.) This motion not only takes away all control of pedal depth and timing, but it also causes an interruption in the phrase. Horse pedal usually occurs when a student is not aware of the musical and physical implications of pedaling incorrectly. Luckily, it can be fixed with a bit of focus and attention to the problem.
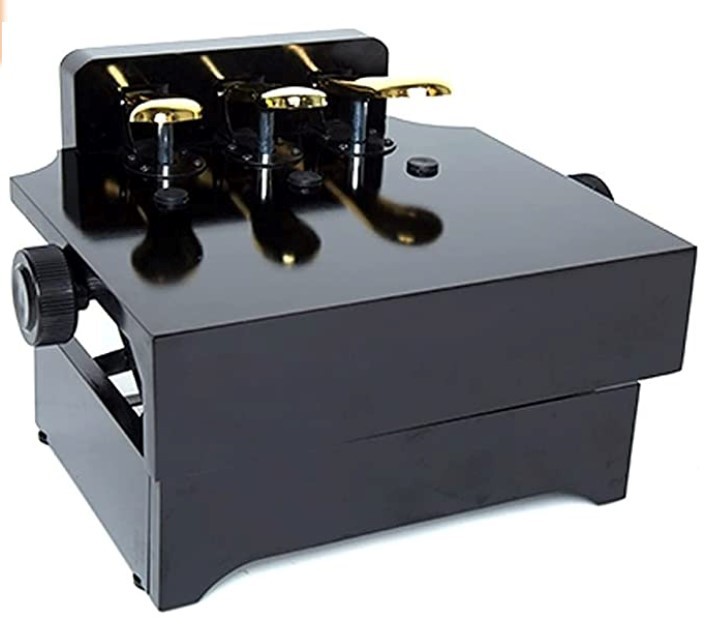 In order to use and change the pedal efficiently and effectively, your student’s heel should remain on the ground, and the pedal should be played with the ball of the foot, right below the first and second toes. If a student is too short to reach the pedal comfortably, use a pedal extender (see picture to the left), which can be purchased for a relatively low cost.
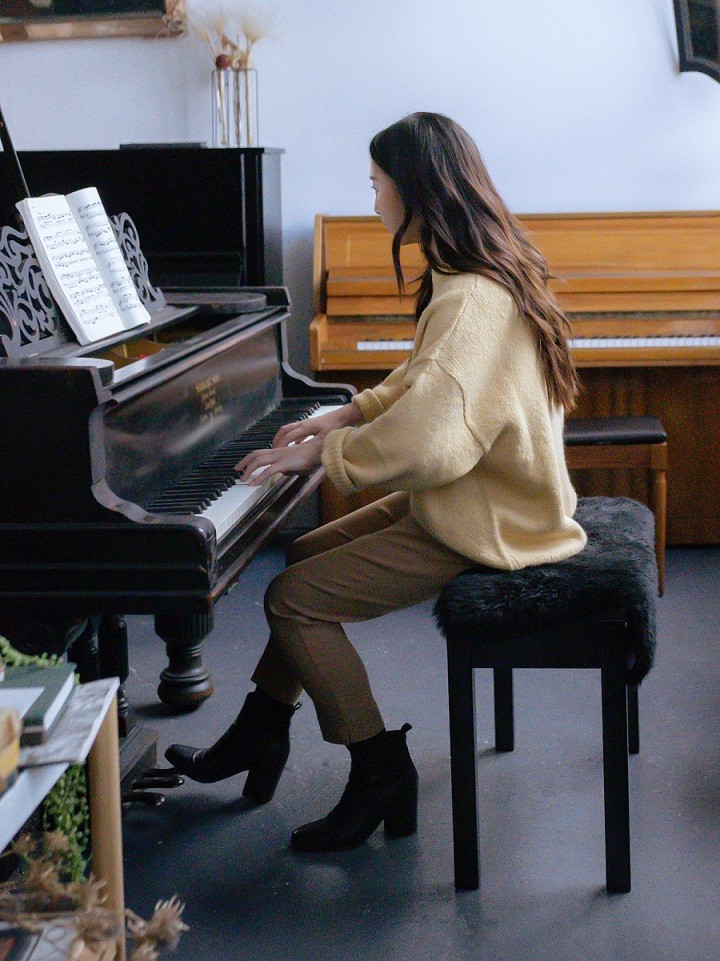 It is very common for pianists to jam down the pedal when they feel nervous or uncomfortable with a passage. (Raise your hand if you’ve ever done that!) When teachers and students are nervous or not as well prepared as they would like, their focus becomes much more limited.
 Communication
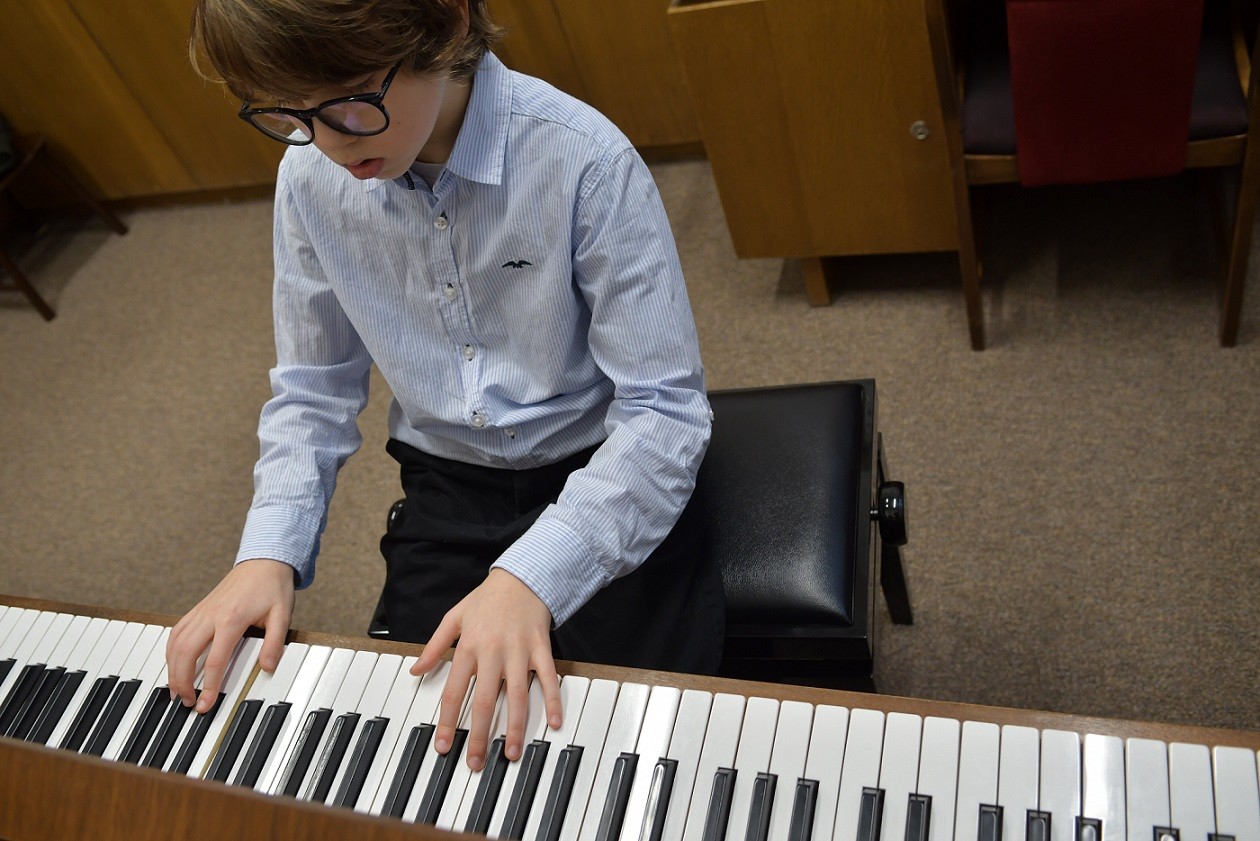 Say “a child with autism” rather than “an autistic child.” This might seem like a small and unimportant distinction, but to the child and his or her parents, this is a big deal.
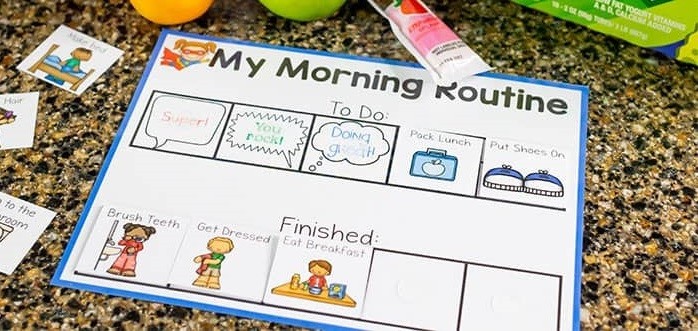 Some children with autism are used to using picture schedules (see photo to the right) at home or school, and I often incorporate that into lessons. (You can easily make one with Velcro and poster board.) Others like to begin and end with the same song but are able to have more flexibility during the lesson. An example of a sample lesson would include: 5-Finger Patterns, Improvisation, Repertoire Piece, Notes Names, Student’s Choice, “Hokey-Pokey.”
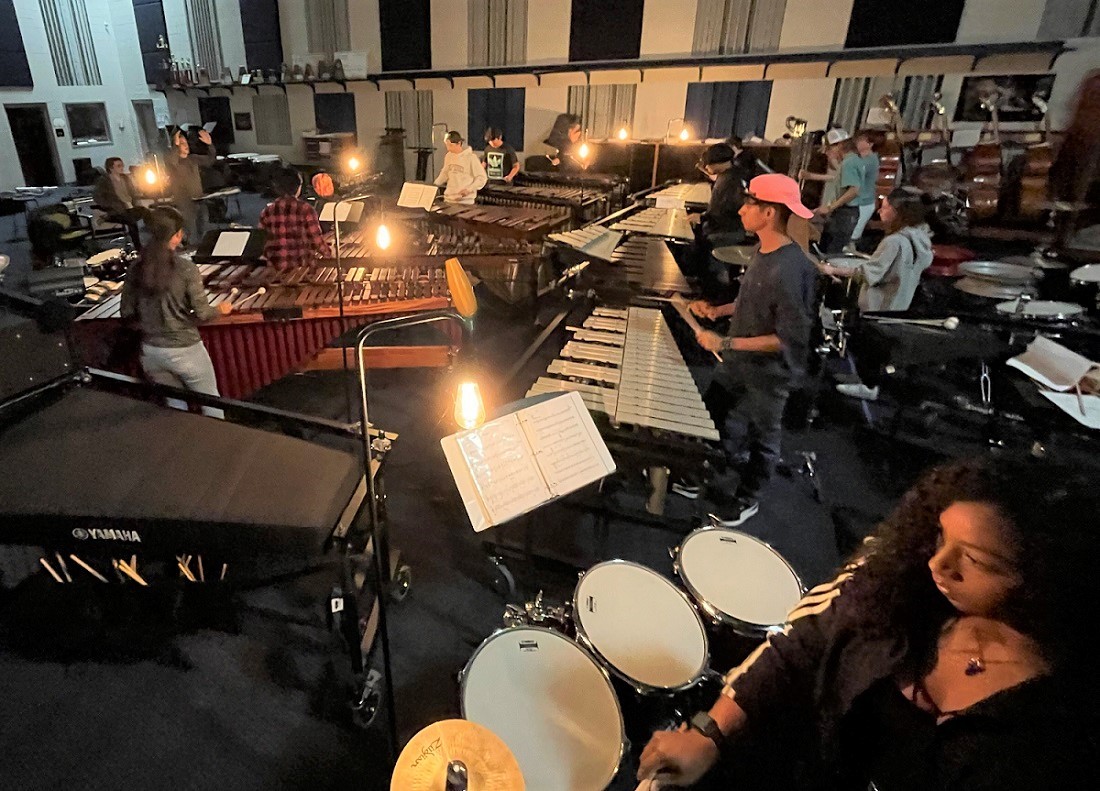
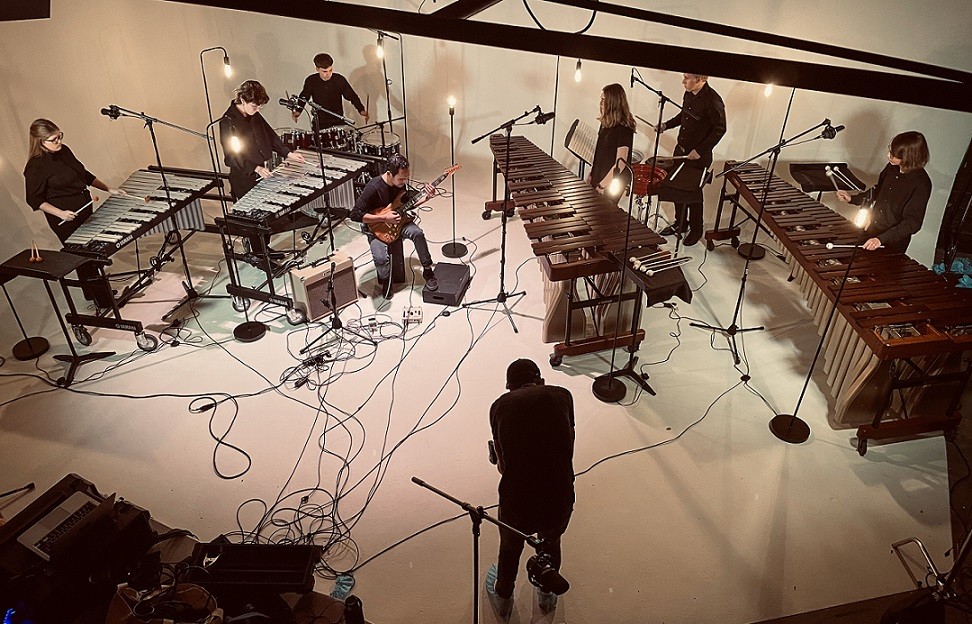 Moore feels passionate about percussion ensemble as a relatively new genre. “We’re in the golden age of concert percussion composition right now,” Moore says. “A lot of the best music written for the art form is coming out every year.”
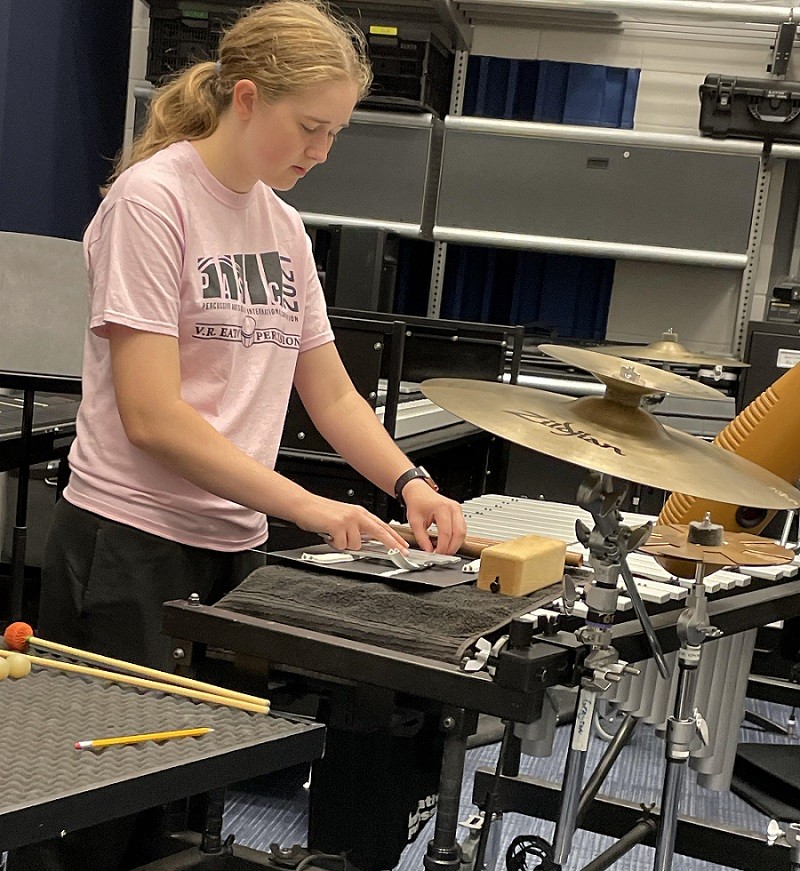 Moore grew Eaton’s percussion ensemble, which meets between the end of November to mid-March, partly from the organic expansion of the school. As the third high school in the
 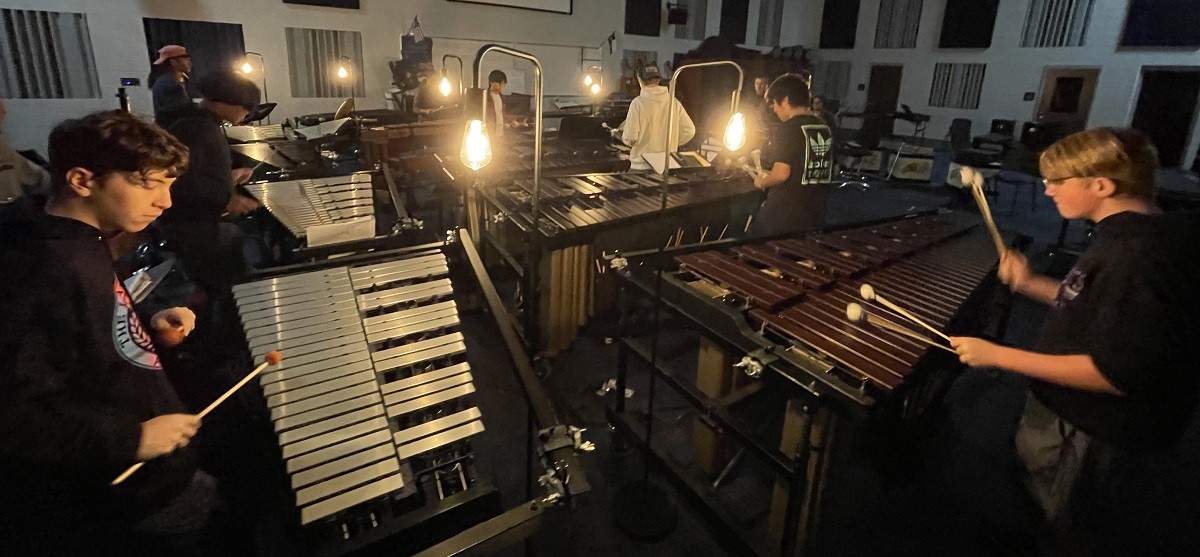 In 2020, Eaton won the North Texas Percussion Festival for high school large group on the weekend that started spring break in early March. “This festival was the very last in-person thing that anybody did [before COVID shutdowns],” Moore says.
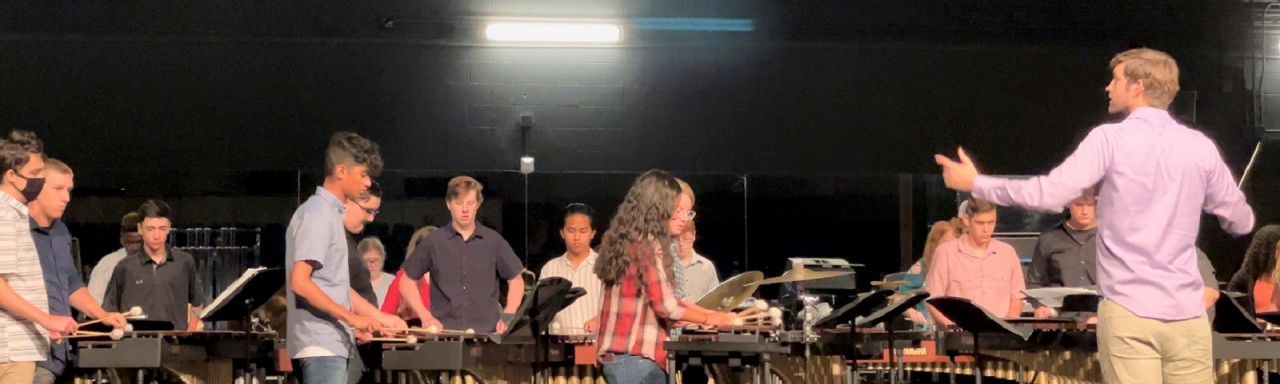 As a composer himself, Moore had written a marimba choir piece, titled “Together,” to help musicians get through the early days of the pandemic. Moore had posted the composition on social media and requested video submissions. With 111 submissions from middle school to adult performers, including some Eaton High School students, the song was produced into a compiled video by Cameron Sather and aired on
 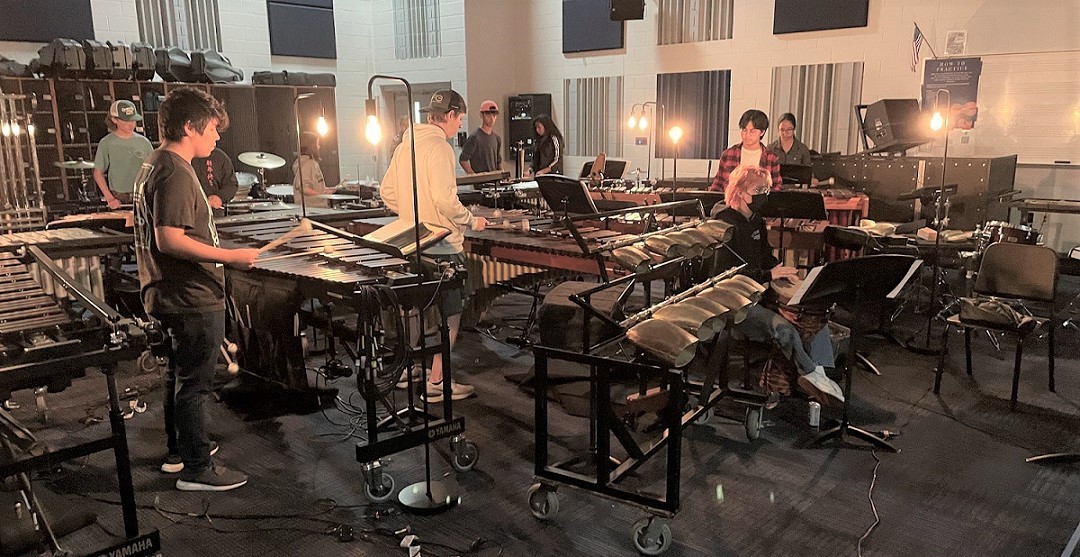 By April 2021, Moore accepted the invitation to perform at PASIC in November. Since groups typically don’t find out about PASIC performances until the summertime, he now felt ahead of the game. But Moore made a pact with himself and the other directors to maintain a work/life balance while preparing for the high-profile show in the percussion ensemble’s off-season.
 Moore and Vogt have crafted a 45-minute PASIC 2021 concert that he describes as “collaborative, flowing and fresh.” With a mix of smaller groupings to larger percussion orchestra, the program brings together all of Eaton’s 33 percussion ensemble members plus seven string players and five dance (color guard) students performing seven songs, each with a distinct sound and purpose.
 V.R. Eaton’s 45-minute performance at the November 2021 Percussive Arts Society International Convention will comprise the following mix of pieces.
 First, purchase a set of 25 to 30 mini play doughs. Next, borrow a set of vinyl spot markers from the gym. Make sure you have one per student. Space out the spot markers across the classroom before your students arrive.
 Clapping games are another way to give your students a fun break but still practice music. Try clapping games as a stationary break, especially when your classroom is too excitable to do line dances.
 Use Orff stories to incorporate both reading and creativity. These stories are perfect for events like reading week, when your school may ask you to read instead of play instruments: Why not do both?
 Tool 2: Nibble on Some Chocolate
 Tool 4: Use Choice Architecture
 Accents and Accessories
 DO have your students purchase their own shoes
 Concert Ticket Sales
 Ensemble and Instrument Fees
 Large food chains and local restaurants are happy to profit share in exchange for increased drive-thru business and in-restaurant patrons on less busy nights. Restaurants, such as
  The “Everything” Deal
 Before we start talking about social marketing, you must understand the difference between branding and personal branding. Branding is the process for creating a name, logo or symbol that identifies and differentiates your product and services from your competitor’s (
 Ready to build your online presence? You want to control your message and how people perceive you on the internet. So, build a personal website and set up your email address and social media accounts.
 If you want to start a private lesson studio, find a location and set up the room where you can teach. But how do you find students? I recommend volunteering at your local public school’s music program. Ask the director if you can teach a masterclass in exchange for passing out your business card (aka, your information). As you build your reputation, parents will hire you to teach private lessons to their children.
 How Do I Start?


 The North Carolina Music Education Association conference gives us an opportunity to connect with all of you and to remind you that Yamaha is your partner in music education, not just through our great instruments and professional audio products but also with resources, support and professional development. We know how difficult this past year has been as we have navigated through these uncertain times, and we want to express our appreciation and gratitude for everyone involved in making this conference possible. We want to continue to hear about your programs and learn about you and your specific needs to see how Yamaha can partner with you to help.