Starting a new job is always stressful.
As a first-year music educator, you must familiarize yourself with your new school, administrators, staff and fellow faculty members, not to mention your students and parents. Then there’s concerts, competitions, lesson plans, assessments — the list is long.
We asked our 2021 “40 Under 40” educators what three tips they would offer to first-year music educators. Heed their advice as you start your career, and remember that as demanding as the work may be, the rewards are limitless, especially when you consider the lifelong impact you will have on a generation of music students.
 Matthew Martindale, the Director of Bands at Shelby County High School and Columbiana Middle School in Columbiana, Alabama, says to:
1. Don’t rush the process. Very early in my teaching career, I was always focused on the next thing, the next concert, the next year — and the list goes on. Take each day for what it is. If the students are learning how to play concert D, don’t worry about concert E flat.
2. Collaborate with colleagues. Early on you will probably be in a situation where you are the only musical option in town, or even in your entire system. Talk with other directors close by. Call your high school band director. I still talk to my high school band directors. You will be amazed at the knowledge you can gain from them.
3. Take time to get to know your students. If they have your trust, you can do amazing things musically.
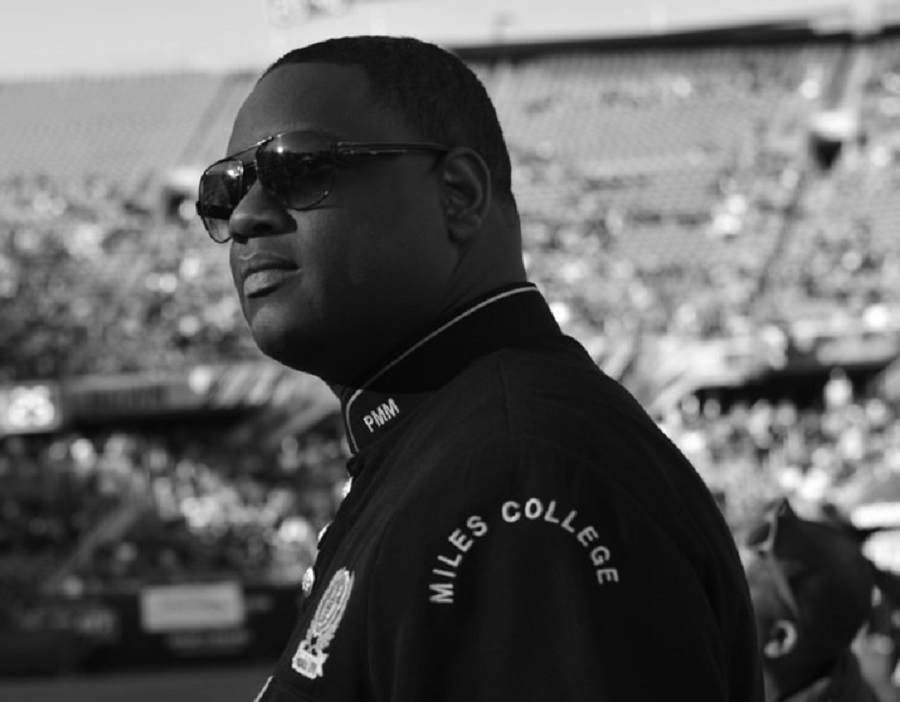
 Willie Snipes Jr., Director of College Bands at Miles College in Fairfield, Alabama, offers these three tips:
1. Never make a decision without seeking God.
2. Hang around successful music educators.
3. Never sacrifice music education for personal gain.
 Jenn Bock, Assistant Band Director and Marching Band Director at Highland High School in Gilbert, Arizona, advises new teachers to:
1. Find a mentor. It may be from your student teaching, a current colleague or someone else in the field you admire.
2. Ask questions. If you don’t know the answer to something, find someone who does. Reach out to others in the field who are experts in the areas that you need to grow.
3. Learn your secondary instruments. Early in my career, I chose a new secondary instrument to focus on each year. I would warm-up with the kids in class on it, practice it and at least be able to play it at their level, so I could model good tone production on every instrument for them.
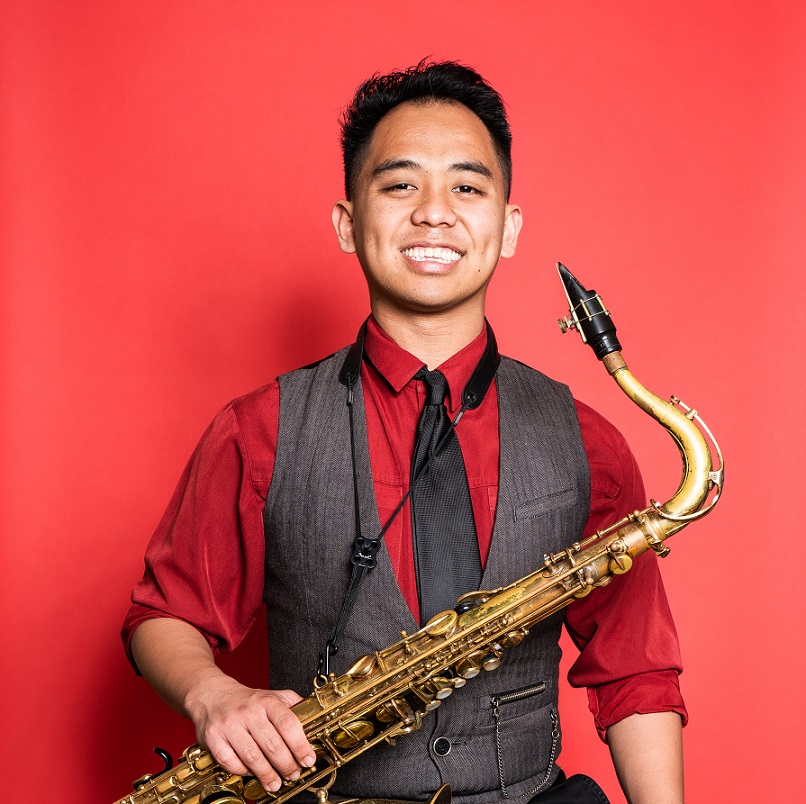
 EJ Villanueva, General and Instrumental Music Teacher at Orange Grove Elementary School in Anaheim, California, says to:
1. Find a mentor/support system that understands what you do (for example, a veteran music teacher).
2. Connect with your students and care for their interests.
3. It is okay to make mistakes — be honest about them and learn from them. Your students and fellow staff will respect you for it.
 Javier Alcantara-Rojas, Director of Instrumental Music at Granite Hills High School and Director of the GREAT Academy in Apple Valley, California, says, “My three tips for first-year music educators is to learn, learn, learn.”
1. Learn from your students and community. Find out about their interest and weaknesses.
2. Learn from your colleagues. Talk to other amazing directors and ask for advice.
3. Learn from yourself. Do what you can, it is enough.
 Aaron Zeilinger, Director of Instrumental Music at Orange Lutheran High School in Orange, California, offers these three tips:
1. Listen to fantastic ensembles as often as you can. I find that if I can attune my ears to spectacular musicians, I keep my aural image focused on something I can strive for.
2. Connect with colleagues often. This does not always have to be other music directors; engage with other teachers and discuss teaching. I find that good teaching is universal, and I am constantly inspired by excellent teachers in other departments.
3. Remember that your students are just that — students. They are dealing with many items in their life that drastically shape their future. A superior festival rating or a 1st-place trophy will not be as impactful as a supportive and safe environment. Focus on the students and everything else will fall in line.
 Becky Paschke, Instrumental Music Director at D’Evelyn Junior/Senior High School in Denver, Colorado, says:
1. Always remember to be kind.
2. Everyone has their own teaching style. It is ok to emulate master teachers, but you need to develop your own style and be authentic.
3. This past year, we have all learned not to take anything for granted. Approach every single day with passion and enthusiasm.
 Tiffany Cox, Director of Bands at Lake Worth Community High School in Lake Worth Beach, Florida, advises new teachers to:
1. Stay true to yourself. In education, it can feel as if you have to create a personality that aligns with being the “perfect educator.” While it is important to be professional, you will be a far more effective teacher if you use your natural personality in your teaching. Be quirky, be nerdy, be funny — but be yourself!
2. Invest in your students, not the program. People talk all the time about successful programs and the ratings they get at festivals or the legacy of the band director. But that’s not the important stuff. You’re creating the leaders of tomorrow in your band room. Make sure that they are encouraged and supported in their passions (musical and non-musical).
3. Find a mentor. Through my research, I’ve found an incredible amount of evidence that a mentor can make or break the first few years of teaching. No one can do this job on their own — you’re going to need help. Don’t be afraid to reach out to other directors and if you feel awkward doing that, send me an email or find me on social media and I’ll be happy to help you out!
 Megan Sahely, Director of Orchestras at Leon High School and Raa Middle School in Tallahassee, Florida, recommends that first-year educators:
1. Recognize that music means something different for each of your students. Not every kid wants to be a professional musician or teacher, and your class may not be the central identity factor for many of your students. That’s ok. You can strive to create a culture of musical excellence that still welcomes students who have a more casual relationship with their instrument. This is one of the keys to creating lifelong music lovers. Students who graduate from this program may not pursue music professionally, but they will always look back fondly on the memories, relationships and music that they made as a part of your program.
2. Find allies amongst your colleagues and treat everyone that you encounter with respect. With the support of your school secretary, custodial staff, hall monitors, accountant and administrators, your program can grow and thrive.
3. Your to-do list will never be completed, so learn when to be done for the day. Setting boundaries that protect your personal time and personal life will create long-term mental health benefits by protecting you from overwork and burnout.
 Andrew Gibb-Clark, Director of Choral Activities and Fine Arts Department Chair at Highland High School in Highland, Illinois, points to these three keys:
1. Be flexible, adapt and improvise.
2. Always focus all your efforts on the students, fight for and do what is best for them, always!
3. Don’t take things personally and be willing to be there for your students for more that just what they are doing in your classroom. Building strong caring student relationships is the most important!
 Christine Adelmann, Band Director at Gompers Junior High School in Joliet, Illinois, recommends that first-year teachers:
1. Make the effort to familiarize yourself with your students’ cultures, home lives, interests and overall value as individuals — not just as music students. Making genuine connections is how we as educators provide safe learning environments where students can make mistakes, learn and grow.
2. Remember that all kids are good kids. Approach your students with empathy by trying to understand their perspectives. Provide them with opportunities to show good character.
3. Don’t be afraid to admit when you are wrong. Respect your students enough to own your mistakes.
 Don Stinson, Director of Bands at Joliet Central High School in Joliet, Illinois, says:
1. Don’t be afraid to have your mentors/teachers watch you teach. I waited too long because I was intimidated.
2. Every rehearsal/class session should include insistence, consistency and persistence from the classroom leaders.
3. We can’t do this alone. Seek help when needed but offer as much help as you seek.
 Chris Kaflik, Director of Bands at Brownsburg High School in Brownsburg, Indiana, offers these three tips to new teachers:
1. Go out and observe other teachers. It does not have to be someone “famous.” Almost every teacher has a new trick that you can add to your toolbox. Even after you’ve been teaching for years, observe others. Then, take what you learned and apply it to your teaching style. Don’t try to be somebody else as a teacher, be you. But you can use elements of the approach you have observed in others.
2. In terms of being a band director, don’t think of it as a job. It is a lifestyle. That does not mean you have to live and breathe your program in any unhealthy way, but it’s not a “9-to-5” job. The more you invest in your students, staff and program, the more you will get out of them.
3. Don’t be afraid to get out of your comfort zone — I mean that in a number of ways. Learn and play instruments that you are not great at, try different/new teaching techniques/strategies, be willing to have a personality in front of students that is not your “default” everyday “self” if they need that.
 Megan Cooney, Director of Athletic Bands and Associate Director of Bands at St. Ambrose University, Davenport, Iowa, says to:
1. Make sure you thoroughly develop your own teaching, artistic and musical values before you lead a group of people. You cannot lead others before you spend time with yourself.
2. Always advocate for what is best for your students, the program and yourself even if it is not widely accepted.
3. Know how to hustle and be a good hang. So much of our job, whether it be playing gigs, recruiting for our ensembles, fostering great relationships with parents and/or administration is dependent upon our ability to relate and talk with people. People can decipher whether you are genuine and really know your stuff very quickly.
 David Bechard, Director of Instrumental Music at Wahlert Catholic High School, Dubuque, Iowa, says the keys to success are:
1. Music selection: Do less, better. Select quality literature that your students will be able to play well. Success is good for recruitment and retention.
2. Make friends with the custodial crew. When you need things on concert day (or any day), they will be saviors.
3. It’s not about YOU — it’s about the kids.
 Jennifer Antonetti, Instrumental Music Teacher at Topeka High School, Robinson Middle School, Meadows Elementary School in Topeka, Kansas, tells first-year music educators to:
1. Ask questions! Mentor teachers, your co-teachers and administrators are here to help you, but we don’t know what you don’t know or what you need help with.
2. Keep good records of your inventories like instruments, uniforms, equipment, lockers, finances, music library, etc. You need to know what you have and what you need for budget purposes, and you don’t want to use your budget to pay for something again that was lost when you didn’t have a record of it.
3. Keep a “smile file” of all of the sweet notes that people write to you and all of the cute pictures that students draw for you. The smile file is a great resource for you to be able to look at and read when you have a “down” day.
Bonus: Keep a small bag on hand with things that you might need for a personal emergency in your classroom.
 Lydia Cox, Chorus and Digital Music Teacher at Crosby Middle School in Louisville, Kentucky, says to:
1. Prioritize building relationships.
2. Give your students a voice.
3. Remember that every educator has been a first-year teacher! We have all experienced the tremendous learning curve that comes with being a new teacher but investing in your students and showing them that you care is vital in creating a successful and lasting classroom culture!
 Cory Zilisch, Director of Orchestras at Westport Middle School in Louisville, Kentucky, offers these tips to new educators:
1. Be creative. Don’t be afraid to try new things and venture off the beaten path.
2. Don’t forget why you were drawn to music. Try to create that opportunity for your students.
3. Ask for help! The best educators are the ones who constantly ask for help, or learn new things to perfect their teaching.
 David Matchim, Director of Bands at Centennial High School in Ellicott City, Maryland, recommends that first-year music educators:
1. Work as hard as you can, be the person you want your students to be and celebrate the small things.
2. Keep your focus on making your students the best people and musicians they can be, and the rest will fall into place.
3. Don’t make it about you.
 Doug Schaffer, Director of Bands at Mark Twain Junior/Senior High School in Center, Missouri, offers these three tips:
1. Be a part of your community. Go to the games. Chaperone the dances. There’s no better feeling than knowing that your community knows a) you’re the band guy and b) you care.
2. Find a mentor. There’s always something you don’t know. Find someone who knows it. There’s always someone who is willing to help, be it literature suggestions, clinics or to just have general conversations.
3. Put in the time to build something. It takes time.
 Tyler Swick, Elementary Music Educator at Robert and Sandy Ellis Elementary School in Henderson, Nevada, says:
1. I would tell a first-year educator to understand that they are completely unprepared for the job that they are about to take on. You may be a fantastic musician and have a heart of gold, but no one can teach you how to be ready to teach, relate to and nurture the next generation of students. Their successes and failures are constantly shifting, and as soon as we understand how to teach them, they grow up and the next generation shows up.
2. The second tip is that aural theory is as important as your college professors told you it is, and we should all be sorry we blew that class off.
3. Lastly, the landscape of education will only become more digitized, and your skills as a beginning educator will be enhanced by your vast experience with technology. Lean into your comfort with computers, videos, audio and all things digital because the students need that from you going forward.
 David Irish, Director of Orchestras and Associate Director of Concert Bands at Palo Verde High School in Las Vegas, Nevada, recommends that first-year teachers:
1. Get master educators in front of your group and learn from them.
2. Prioritize your physical and mental health.
3. Each year gets easier with experience. It’s a marathon, not a sprint.
 Vincent Vicchiariello, Director of Bands at Nutley High School in Nutley, New Jersey, says essential things to keep in mind are:
1. Be dedicated — the hours are long and it is one of the hardest jobs, bust it is also the MOST rewarding.
2. Don’t be afraid to ask for help. Everyone in the music world wants to help one another.
3. Be yourself. Students want you to be human and see who you are.
 Phil Nagy, Music Teacher at McVey Innovative Learning Center (part of Hilliard City Schools) in Hilliard, Ohio, offers this advice:
1. Give yourself grace! You won’t have time to do everything you want to do.
2. Take care of yourself. Like the airplane safety routine, secure your own oxygen mask before helping others. You can’t give of yourself to your students if you are not well.
3. Become really good friends with the custodians and secretaries, they can singlehandedly make your job easier!
 Jason Sleppy, Band Director at Mason Middle School and Marching Band Director at Mason High School in Mason, Ohio, says:
1. You cannot do it alone. You will have many demands for your time during your first year, but don’t underestimate the energy you need to invest in forming relationships and teams. Seek out mentors to bounce ideas off of and develop great relationships with the individuals you work with. Essentially, team up with your parent booster group. They will be absolutely essential in creating rewarding experiences for students.
2. Gratitude: It is easy to get caught up in things you think aren’t going right. A school day is a constant onslaught of challenges from parents, students and faculty. Don’t forget about everything that is going well and let that fuel your motivation to continue.
3. Patience: The first year will be bumpy, and if we are being honest, most educators don’t feel like they “know what they are doing” for 10 years (or ever!). Use every situation to learn what works and what doesn’t. Look in the mirror often, as that is where the problems and solutions lie. The second year will be immensely easier.
 Carmen Fields, Choir and General Music Teachers at Edgewood Middle School in Trenton, Ohio, offers these encouraging words:
1. Teach what you love. When you teach from your heart students can tell. So, if you’re passionate about opera or the oboe, find a way to tie it into your curriculum. Don’t be afraid to have fun.
2. Show where you came from. I love showing old videos, some good, some not so good, of me performing, as well as doing non-musical things like riding ATVs or driving Corvettes. I have seen huge payoffs and connections with students.
3. It will get better. The first year is overwhelming for everyone. You can do this!
 Tim Walck, Director of Music at Austin Area School District in Austin, Pennsylvania, recommends that first-year teachers:
1. Be authentic and genuine.
2. Set goals, and then processes to achieve those goals for yourself, and your students.
3. Budget time for yourself to recharge and refresh. In order to care for others, you must first care for yourself.
 Erin Busch, Executive Director of Young Women Composers in Philadelphia, Pennsylvania, says:
1. First, don’t be too hard on yourself! Constructive criticism is a good thing and helps to strengthen your work over time, so don’t take it personally when things don’t go perfectly.
2. Next, create a game plan but don’t be afraid to deviate from it. Improvising isn’t just something that happens on stage; it happens in the classroom, too, and can be often better than what was planned.
3. Finally, disrupt the canon! Mozart, Beethoven and Brahms are all important composers, but there is so much more out there that students need to hear.
 Celina Velez, Music Director at Cayuga Elementary School in Philadelphia, Pennsylvania, offers these tips:
1. Be ready and then be ready to improvise. Be prepared and decide ahead of time to enjoy creatively solving the problems that will pop up.
2. Celebrate everything. Celebrate all your students’ musical and academic achievements and celebrate every possible holiday/feast/community event. These occasions give students more performance opportunities and introduce them to a diversity of musical styles.
3. No one can compare. Do not compare yourself to the previous music teacher or even your own musical upbringing. Look at your students, get to know them and decide to bring them two steps farther down this musical road than what they think they can do.
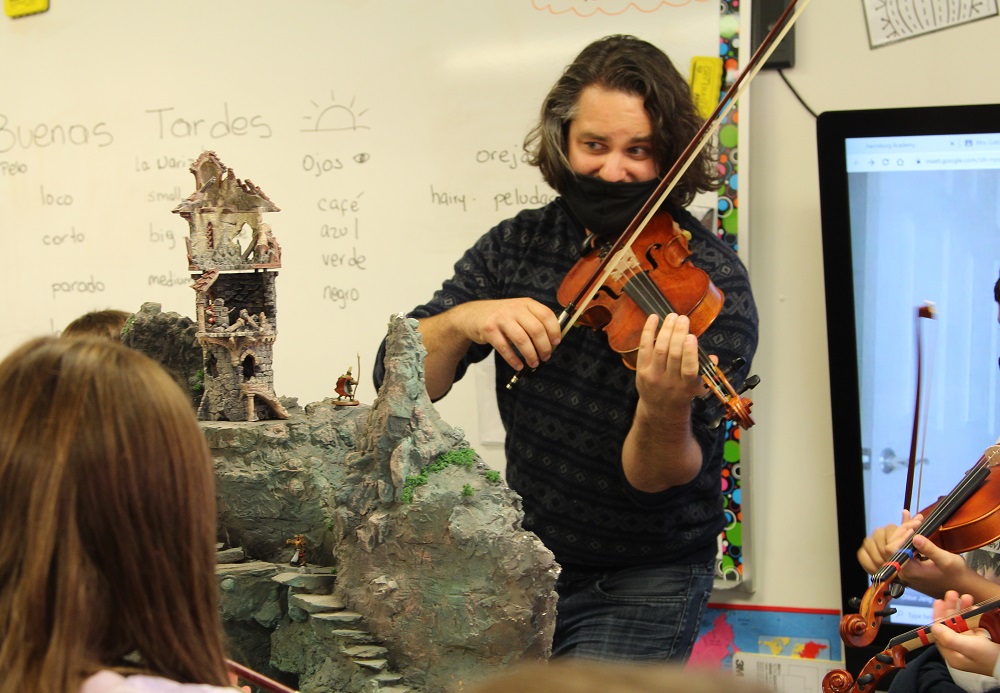
 Michael Gamon, Fine and Performing Arts Chair and Center for Creative Arts Director at Harrisburg Academy in Wormleysburg, Pennsylvania, offers these three tips:
1. If you want to instill a love of learning in your students, be ecstatic about how much you love to learn.
2. What makes a great musician makes a great teacher. Be flexible, detail-oriented and positive under pressure.
3. Performance, music and art are more powerful as acts of giving than as acts of self-expression.
 Jacob Campos, Director of Bands at Franklin High School in Franklin, Tennessee, recommends that first-year educators:
1. Put your ego aside and keep it there forever. Ask questions without any shame. Find the best teachers in your area, state and nationally, and email or call them with questions. Every good teacher likes to help the next generation because they remember what it was like to get started as a music educator.
2. Find your weaknesses, accept them and study. Read articles and books, and ask about pedagogy and strategies in all the areas you feel uncomfortable.
3. Remind yourself why you teach daily. Start with: “What good shall I do today?” And remember it’s about the students not the subject. You can perform way more elite works when you are attentive to your students; interested in their lives, hopes and dreams; and actively working to build those relationships.
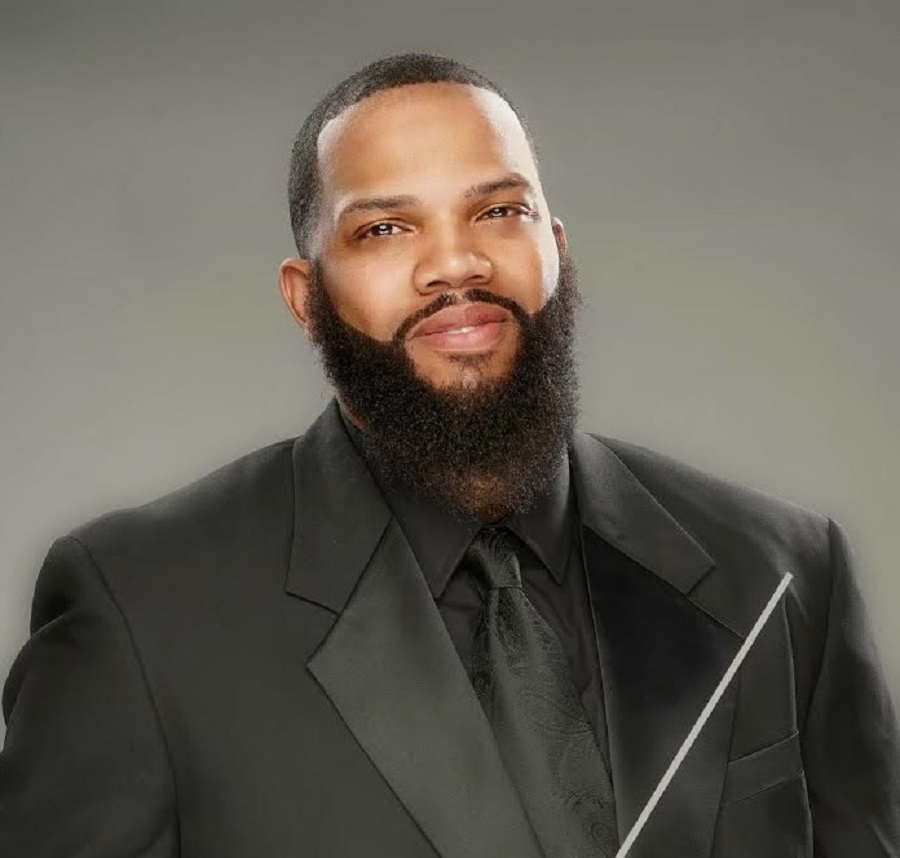
 Willie Garfield, CEO of Garfield Institute of Music in Memphis, Tennessee, says to:
1. Perfect your skills and knowledge in music education as much as you can.
2. Learn the business side of music education — grants, state licensing and local funding.
3. Remember that you’re not only a music educator but a role model, and you will change lives.
 Steve Moreland, Director of Fine Arts at St. Michael’s Catholic Academy in Austin, Texas, says the keys to a successful first year is:
1. Creativity is the prerequisite for innovation. Think outside the box and don’t be afraid to take risks.
2. Sometimes it’s best to just learn the hard way about what works and what doesn’t because those lessons seem to stick with you longer.
3. Take care of your behind-the-scenes teams such as the facilities, cafeteria and office workers. These people are just as important to the success of your program as anything else, and they are often the most overlooked.
 Brian Teed, Director of Percussion and Associate Director of Bands at Wakeland High School in Frisco, Texas, offers the following advice:
1. Take a breath. First-year music educators are often so eager to make an impact on a program that they often focus their energy toward tasks or situations that they do not need to focus on just yet. You do not need to transform the entire program in your first year.Show up every day with a consistent welcoming personality toward your students and your co-workers and everything else will fall into place. Don’t try to change too much your first year, give it time and see why things are the way they are before you implement change.
2. Constantly learn.Open your perspective as to what the music classroom can be. Make the realization and be okay with the fact that there are many different ways to approach teaching and conveying our passion to our students. The best in our field will present a tailored combination of everyone else’s style and approach but with their own personal ambitions.
3. Find your community.We have all been where you are. We have all had the same thoughts you have. We all want you to be successful and for your students to have an enjoyable experience with music. The world is getting smaller and smaller, so it is easier to find people to talk with, don’t be afraid to post your questions to a group page or walk into your co-worker’s office down the hall. Build your community and grow your support system. You are not alone.
 Matthew Moore, Associate Band Director and Director of Percussion at V.R. Eaton High School in Haslet, Texas, recommends that first-year educators:
1. Be transparent. Making mistakes is the gateway to growth in life and music. When you acknowledge your mistakes, your kids are more likely to grow through theirs.
2. Every group of kids is different. Your teaching style, curriculum and approach might land perfectly with some classes of students but not others. Young teachers may have self-doubt when everything doesn’t go according to plan. Make adjustments as necessary, but don’t lose your confidence.
3. Take time for yourself and your family. Our jobs can sometimes feel like everything else must be sacrificed, but you can still be an amazing educator while striving to live with balance. This will help you feel fresh and ready for more for years of music education.
 Eric Jimenez, Assistant Director of Bands at Prairie View A&M University in Prairie View, Texas, says:
1. In this profession, you need someone to help guide you. My first recommendation would be to find a mentor with experience in the areas you need the most assistance. Areas of need could be specific to who you are as a person or the population you are serving.
2. Secondly, structure your daily tasks and responsibilities to have time for yourself, family and friends. This organization will help create longevity in this career.
3, Lastly, relationship building with your students should be a primary teaching strategy. Your students will enjoy making music with someone they trust, respect and enjoy.
 Jarrett Lipman, Director of Bands at Claudia Taylor “Lady Bird” Johnson High School in San Antonio, Texas, offers these wise words:
1. On your hardest days, and you will have hard days, always remember why you got into teaching. Think about what and who inspired you and try to instill that same passion into your students.
2. Remember, band is your life, it is not necessarily your students’ life. Push them hard on the clock, but respect their time and consider what they have going on both on and off campus outside of band.
3. Magical musical moments last a lifetime. Make a point to soak up every moment and encourage your students to do the same. Time flies and you don’t want to look back and wish you had enjoyed moments that you allowed yourself to stress over.
 Giselle Vento Banda, Music Specialist at Parkdale Elementary School in Waco, Texas, offers these recommendations:
1. When I was teaching in Italy, I learned that emotions generate learning. My first tip is to develop a humanistic relationship with your students, or scholars as I like to call them.
2. My second tip is to remember to honor your mental and physical health. It is not necessary to give everything you have, leaving nothing for yourself.
3. Finally, it is imperative that we educate others about the value of our profession.
 Christopher DiMassimo, Assistant Director of Bands at Rachel Carson Middle School in Herndon, Virginia, says to:
1. Develop a routine to make your life manageable — get up early, set up a budget, meal prep and plan, plan, plan!
2. Build relationships! Get to know the office staff, custodial staff and non-arts teachers. Go to school sporting events and after-school activities, so you can cheer your students on and show your face outside of class.
3. Observe other music teachers and ask questions! Get into the mind of other music teachers and figure out HOW they think.
 Kevin Cooley, High School Band, AP Music Theory and Digital Audio Production Instructor at Platteville High School in Platteville, Wisconsin, tells first-year teachers:
1. You do not need to reinvent the wheel! Most teachers are happy to share their content with you if you ask.
2. Work hard for your students but also carve out time for your personal life by setting boundaries between your work and home life.
3. Every teacher has moments of doubt and it’s okay to feel frustrated from time to time, but don’t let those moments trick you into thinking that you aren’t making a difference in the lives of your students.
Check out tips for first-year music teachers from the 2026 “40 Under 40,” 2025 “40 Under 40,” 2024 “40 Under 40,” 2023 “40 Under 40” and 2022 “40 Under 40” educators for more invaluable advice!


 Let’s start with the little details — the most basic ways to build a positive relationship with your music students.
 Provide ways for students to touch base outside of the classroom. This might be holding regular office hours and encouraging drop-ins, or you could have a classroom “Talk to Me” box, where students can drop in their thoughts.


 Why Are Video Calls so Exhausting?
 Simply looking at our own faces on the screen can be distracting and even anxiety-provoking. We start to notice our facial expressions, a new laugh line, our eye bags — everything and anything starts to feel a little awkward when stared at for too long.
 We have, Corbin posits, become a bit disembodied, lacking in relationships with people in our near proximity, such as our neighbors, fellow parents at our kid’s troop meeting or that dude who comes in every week to the same spinning class. Random, local relationships are a bit awkward — and that is the point. We are forced to mingle, and while it’s sometimes uncomfortable, that sense of friction is good, says Corbin. This is how we learn to trust the people surrounding us, and that sense of trust is necessary for a well-adjusted society.


 As music educators, we understood that advocating was an essential part of our job even before a worldwide pandemic where aerosol dispersion was unsafe. And because music educators are resilient in our pursuit to share music with children, we have spent over a year finding flexible and ingenious ways to keep music education moving forward. Through these challenges we have all learned new ways to reach students outside of our classrooms and have continued to be strong advocates for music education in childrens’ lives.
 Last March, the world stopped. “Two weeks to flatten the curve” was all we talked about (and Carol Baskins — what does this mean? Sorry, I must have missed it.). “Two weeks” became “this fall.” Then fall came and went. Here we are, a year later, just beginning to see a light at the end of the tunnel.
 When COVID-19 restrictions ease, students and educators must adapt and prepare for a return to schools. All school staff will need to support students in their transition back to the classroom, and at the same time, manage their own transition and anxiety. Below are several resources to help as educators prepare to support this transition, particularly for anxious students.
 It has been gratifying and a pleasure to be a part of providing tools and compass direction as we all come out of the tunnel of COVID. I know that many of you can only see the dim light at the tunnel’s end, but I assure you that it is near, and we have survived. A new and brighter day is in our immediate future.
 The world became smaller when COVID-19 closed our schools. Not because we were trapped in our homes but because teachers rallied online to share their best practices from across the globe. I received advice from Italy, Australia and Alabama all in one thread. Video content, games and songs have been made readily available for educators by the educators who created them.
 No matter which cliche you prefer, they all ring true: You can’t pour from an empty pitcher and you do have to put your oxygen mask on before you can help others. After a long, hard adrenalized sprint to “make it happen,” you have to give yourself some grace, so I just want to leave you with a few words on recharging your own batteries.
 Recruiting New Students
 Two large stimulus bills were passed called the
 Phone Calls — While an “old-school” approach, phone calls remain one of the most effective means of recruiting students. Calling parents individually allows you to speak one-on-one with parents to share your excitement about the program and uncover any concerns. Oftentimes, parents want their child to be in the band or orchestra but may have a misunderstanding about the conflicts or other commitments that might prevent them from enrolling their child. Here is a list of


 This article originally appeared in the 2020N3 issue of Yamaha SupportED. To see more back issues, find out about Yamaha resources for music educators, or sign up to be notified when the next issue is available,
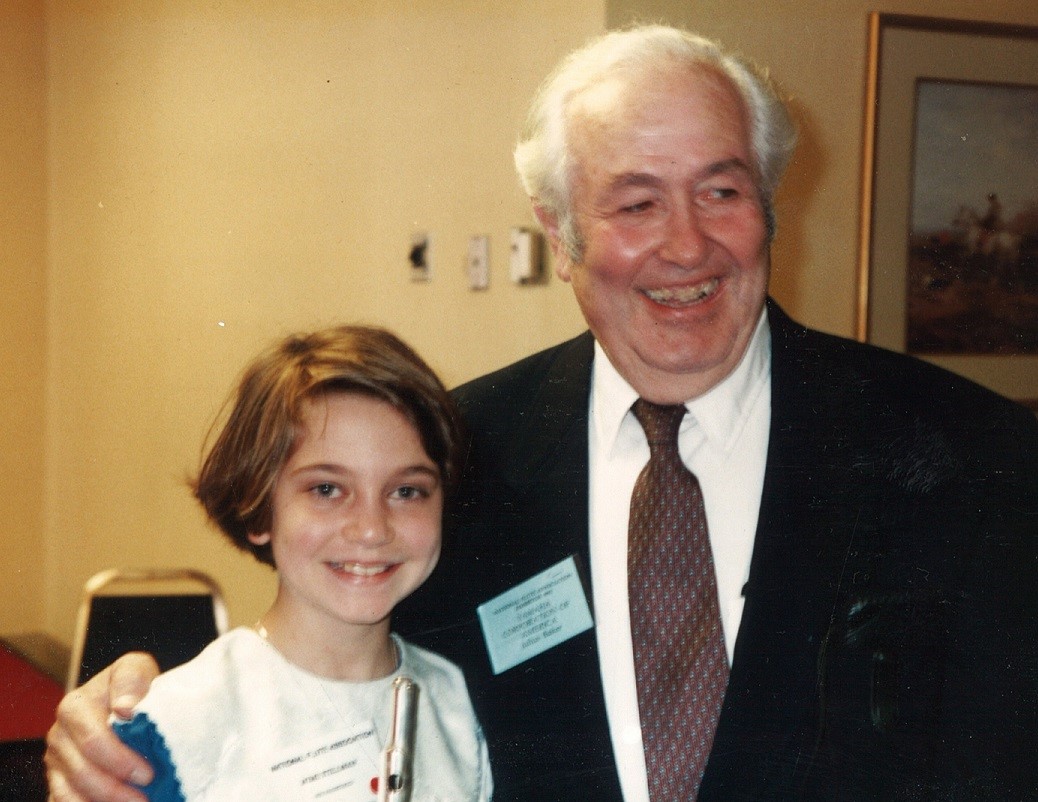 Her lead teacher at Curtis was the legendary
  Connecting with Students
 This article originally appeared in the 2020N3 issue of Yamaha SupportED. To see more back issues, find out about Yamaha resources for music educators, or sign up to be notified when the next issue is available,

 Step 1: Sound the pitch [e.g., piano, marimba, tuning fork, tuner app. I am not a fan of a pitch pipe].


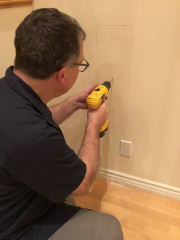
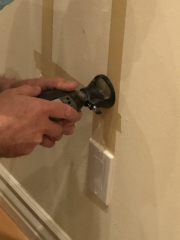
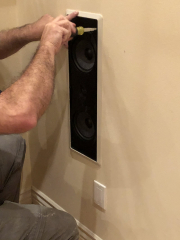
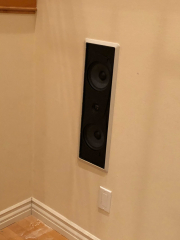
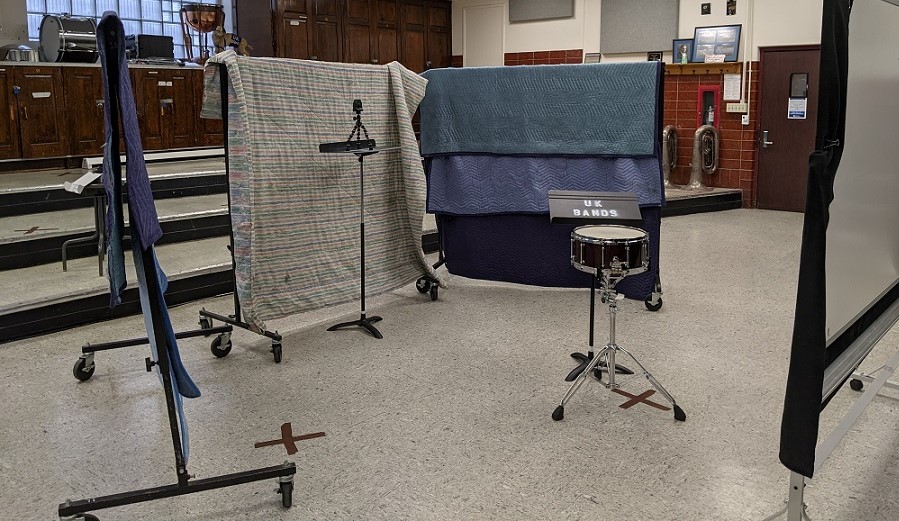 You can negate some of the effects of the hard surfaces in your recording space by placing soft surfaces in front of them (see photo to the right). This is called “treating the room.” These soft surfaces absorb some of the sound waves instead of reflecting them. Where you place the soft surfaces can increase their effect. You can purchase a
  With recording devices becoming more and more automated, obtaining good video is increasingly easy. Nearly all current smart phones are capable of producing semi-professional-level videos and are becoming the camera of choice for those on a budget. However, the recording device can only do so much. You can help make your recording better by giving it good, quality light and good placement compared to its subject matter.
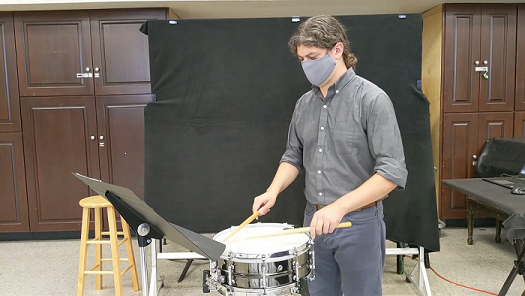 Also, consider what needs to be in the frame. Think of all the elements of your students’ performance that you observe when you teach them in person. Ask your students to do their best to include those elements in the recording — and you must do the same. For example, you will need to see their hands, arms and upper body for just about any instrument. Wind players will need to include their face as well. Asking them to film themselves in front of a solid color that contrasts with their skin tone can lead to clearer images and make up for poor lighting situations. I frequently record myself in front of a black sheet of fleece that acts both as a sound dampener as well as color contrast (see photo to the left).


