Throughout my career in both K-12 and higher education, one of the questions I was frequently asked was, “How do you raise so much money for your program”?
In my early years as a high school director, I was in awe of programs that managed annual budgets of $100,000 or more. They could rely heavily on student band fees to raise the funds. As a teacher in a Title-1 school (Title 1 refers to the federal educational aid program that supports students from low-income families), it was difficult for me to ask students and their families to contribute similar amounts year after year.
Even now, as a program coordinator at a public Historically Black College/University (HBCU), I often find that under-resourcing and tightening fiscal constraints leave us with little in terms of state funding appropriations. But, instead of these realities hindering me from moving my program forward, I have used them as opportunities to secure funding to ensure that my students have access to a high-quality music education.
Before the age of the internet, many of my fundraising initiatives included the tried-and-true approach of selling things to people. Whether it was concessions, car washes, candy, cookie dough, coupon books or candles, the majority of our funds came from selling tangible goods and services.
When I first heard of sites like DonorsChoose, GoFundMe and AdoptAClassroom, I must admit that I was a bit hesitant. However, seeing others reap the benefits of crowdfunding helped me to take the plunge and use this very effective fundraising tool. From receiving instruments and equipment to collecting close to $250,000 to cover travel expenses to the Tournament of Roses Parade, crowdfunding has been and continues to be one of my first approaches when I need to raise funds.
Grants
My history with grant funding goes all the way back to when I first started teaching. While working at Miller Grove High School in Lithonia, Georgia, we were the recipients of a Dallas Austin Foundation Grant, which provided music production gear and after-school studio instruction to selected students in our program. As a middle school director, again at a Title-1 school, our program secured support from the Mr. Holland’s Opus Foundation. With this grant, we repaired many of our older school instruments and purchased newer instruments so that more of our students could participate in band. We also received funding from the Atlanta Symphony Orchestra and Clayton State University’s Spivey Hall for music-related field trips and experiential learning.
As a college professor, I was part of a team to receive an Affordable Learning Georgia Grant, which helped us to provide open educational resources (OER) to students enrolled in our general education elective music appreciation course. In my current role, we are in the second year of our Grow Your Own Grant; a multi-year, multi-million dollar grant we received from the State Department of Education in Tennessee aimed at supporting our teacher candidates as we meet the challenges of the current teacher shortage and diversifying the teacher pipeline. While some of these programs have a national profile, many of them take place at the state and local levels. I encourage us all, whether in K-12 or higher ed, to seek out grant funding from all levels of government, as well as local and regional foundations, in order to maximize our efforts.
Having reliable and consistent partners backing you financially can go a long way to support your program each year. One of the methods I used to set my yearly budgets for my program activities included reaching out to our business partners, sponsors and private donors who were reliable contributors.
We would sell ad pages in our annual banquet program, receive free or heavily reduced catering for trips, games and other events, and receive donations for various campaigns, such as our annual Rehearse-A-Thon and Band Day fundraisers. These contributions would help us greatly reduce students’ financial burdens. We would also receive free or heavily reduced music equipment and accessories from local music stores as we would start our new band students.
Having reliable and consistent community partners can go a long way toward defraying costs and generating major revenue for your program!
Show Me the Money!
At the end of the day, we all want to provide the best possible music education for our students. I believe that having multiple revenue streams is essential to funding those efforts. In music education curricula at the college level, there is little room for training future teachers on how to fundraise and manage large amounts of money. Thankfully, there are many of us who are more than willing to share our ideas and help those who are simply looking for ways to grow and support the vision they have for their ensembles. Good luck to you in your fundraising efforts!
As a neurodivergent person, I experience sound differently than other people. I was born with hyperacusis. Sounds that are at a normal volume to most people sometimes seem extremely loud and distorted to me. As a child, I used to hide under the table when my parents took me to restaurants where live musicians performed.
Neurodivergent people often experience sounds, including music, differently. While this can pose a certain advantage in the creative sense, it can also result in feeling inundated and overwhelmed.
To me, neurodivergence is like running on a different operating system. Some of us are Macs, and others are PCs. Unfortunately for Mac users (neurodivergents), most of the world is set up under the PC operating system. It’s not something that needs to be fixed, it’s just different.
Neurodivergent individuals often need accommodations — such as noise-reducing headphones or fidget spinners for stimulation — to make their experience in public settings like schools more positive.
Synesthesia
Another example of neurodivergence is synesthesia, when one of your senses is combined with another. Less than .5% of all people have synesthesia, and not all synesthetes have experiences that are related to sound. However, many synesthetes have a unique relationship to music. For example, some can see the different colors in music (tone-color synesthesia), taste sounds (Lexical-gustatory synesthesia) or see shapes and washes of color from music (chromesthesia).
8D Audio
You may have heard of 8D audio — which tricks your brain into thinking it’s in a larger space — from TikTok videos. These recordings aren’t an accurate test for neurodivergence, but neurodivergent individuals may experience them differently. Some say that the music is “bouncing around” inside of their heads. Others say 8D audio makes them feel as if they are surrounded by sound as if they’re inside a music venue.
People with ADHD, ASD, and others with neurodivergence find 8D audio to be particularly riveting, myself included. Some recent research has also suggested that listening to 8D audio helps those with anxiety focus and relax. Here is an example of 8D audio (be sure to listen with headphones so you can get the full breadth of experience).
Tips for Accommodating Neurodivergence in the Classroom
Just because a sound isn’t loud to you, doesn’t mean it isn’t perceived as loud to others. Sometimes neurodivergent students need more stimulation in order to focus in music class. Here are some simple ways to accommodate your neurodiverse classroom:
Have earplugs and noise-canceling headphones available to your students.
Leave a safe space for students to distance themselves from noise.
Allow frequent, short breaks for those who appear overwhelmed (drinks at the water fountain, short walks with an aide).
Have small fidgets in a basket for those who need a different kind of stimulation (squishy toys, pop-its, etc.).
If your school has access to weighted items, such as vests or blankets, keep one in your classroom. Many educational experts also recommend incorporating something called universal design for learning (UDL) into your lessons. This framework is based on neuroscience and aids students with different learning styles and preferences. Some examples of UDL include multi-sensory lessons, student-led learning, flexible assessments and providing multiple ways for a student to interact with a lesson’s material. While this takes a little more planning, UDL can be very helpful for your students and you.
Tips for Neurodivergent Music Teachers
It can be easy to become overwhelmed with the sounds of a music classroom. I love teaching music, but sometimes, it can feel overstimulating. Unfortunately, teachers can’t crawl under a weighted blanket when the music gets too loud! However, there are some subtle things can do to keep ourselves more present and to prevent overstimulation.
Invest in musician-grade earplugs: If you find yourself feeling frequently overwhelmed with sound, try noise-reduction earbuds. They will reduce the level of sound evenly throughout the spectrum of highs, mids and lows without sacrificing clarity. Many of these earbuds are discreet and clear — my co-workers never noticed me wearing them — and they took away a lot of my noise-induced stress.
Normalize fidgets and sensory tools, starting with yourself: About halfway through my first year of teaching K-2 music, I had an epiphany. I, too, could use the stress balls that I had on my desk for my students! To be honest, I was afraid that my elementary schoolers would laugh at me. But I explained, “Sometimes Miss F gets overwhelmed, too” while I squeezed a stress ball or used sensory items. This simple statement normalized the tools on my desk, encouraged conversations about sensory tools, and helped my students take them more seriously. While it might be embarrassing at first, it helps everyone get what they need in the long run.
Don’t linger on activities: Moving from sit-down activities such as music sculptures or solfege exercises to up-and-moving lessons like line dances will help you and your students stay regulated. I’ve found that if I linger on one activity for too long, students get fidgety and I feel drained. Too much of one type of lesson plan can make the energy in your classroom go wonky.
Be Aware of Differences
All neurodivergent folks don’t experience sounds in the same way, but I hope these facts and tips from a neurodivergent music teacher will help you better understand your students and make informed decisions in the classroom. Just remember, some of us are operating PCs, while others of are operating MACs. Happy inclusive music-making!
There’s a reason why experienced musicians — even seasoned pros — make the effort to do a sound check before every show. Sound check is the best time to test your gear, dial in levels, settle into new surroundings, and maybe even rehearse a new song.
Here are seven things every live sound engineer can do to make sure that sound check goes smoothly. Trust me, it’s worth it: The result will almost always be a better gig.
1. Create an Input List
One of the easiest and most effective things you can do to prep for a sound check is to create an input list — something that’s easily done with any spreadsheet application. This is a list of all sources on the stage that need to be connected to the PA system, showing the name of the instrument, the mixer channel number, and whether the source is a microphone or a DI (Direct Inject) box. You can also add a column that indicates the general location of the source and a section that shows onstage monitor requirements. In situations where there’s a house engineer who isn’t familiar with your band, an input list will help them understand your PA requirements.
An input list can easily be created using a spreadsheet.
2. Design a Stage Plot
A stage plot is a drawing that shows the physical layout of the instruments on stage — invaluable in helping an engineer understand where everything is located. In addition to the instruments, you should identify the microphones and DIs using numbers that match the input list, as well as locations for the monitors. It’s also helpful to label each position with the band member’s name because this will help anyone consulting the stage plot to become familiar with your group. There are software apps that can be used to create slick professional-looking stage plots, but even a hand-drawn sketch can work just fine.
A stage plot shows the location of everything on stage.
By the way, you may hear the terms “downstage” and “upstage” used when talking about instrument, mic and monitor locations. These are holdovers from years ago, when theater stages were raked (sloped) toward the audience — something that’s less common today. The downstage edge is closest to the audience, while the upstage edge is at the back of the stage, typically where the drummer sits.
3. Use a Talkback Microphone
Communication between an engineer and the performers is vital, and a talkback microphone enables an engineer at front of house (FOH) to easily speak to the musicians on stage.
Many mixing consoles, including all models in the Yamaha MGP Series, offer a dedicated talkback mic input that can be routed into the aux sends, allowing musicians to hear the engineer through their in-ear or stage monitors.
The talkback input (top left) on the Yamaha MGP16X.
Having the talkback mic ready to go before the performers even start to test their instruments will enable you to ask each musician to play their instrument while you set input levels. Be sure to set input gain properly and leave a little bit of headroom in case some of the musicians play louder during the show than they played at sound check (that never happens!).
4. Create Scenes
Some digital mixers, including Yamaha Rivage PM and TF Series models, feature a built-in library that can store and recall scenes containing every mixer setting. Creating a scene at a rehearsal saves time at sound check because you won’t have to start from scratch. Tip: Store each scene into a memory location, lock it, then save it again into a new location so that the original can’t accidentally be changed.
The Yamaha TF1 scene library.
Some digital mixers (including all Yamaha models) can interface with offline editors that can be used to create, store and recall scenes using a computer or smart device, so even if you don’t have access to the console before sound check you can still build a scene. Creating a basic scene that includes channel names, rough aux send levels, DCA (Digitally Controlled Amplifier) assignments and onboard effects processor settings saves time, even if you can’t set the input gain for each channel. For example, if you know that you’ll need a compressor and a gate on the kick and snare channels, you can do the “grunt work” of naming the channels and turning on the gates and compressors in the offline editor. The file from the offline editor can be saved to a thumb drive, and loaded from the thumb drive into the mixer on-site.
Yamaha TF Editor.
5. Arrive Early
No matter what the circumstance or venue, always plan to arrive at the sound check early. This will give you time to test mics, change batteries in wireless mics, make sure the PA is set up correctly, and ensure that all cables and connections are working. It’s easier to do this before the musicians arrive.
Sound checks can be tough to manage when a lot of people are present because not everyone has good sound check “etiquette.” One way of alleviating the amount of confusion onstage is to stagger the arrival time of the musicians. For example, have the drummer and bassist show up before the rest of the group so you can place mics on the drum kit, patch them and test the lines without everyone else standing around waiting, and possibly making a lot of distracting noise. While it’s tempting to place mics on the drums before the drummer arrives, it can be counterproductive because the drummer may want to move drums or cymbal stands and the mic stands might be in the way, so give the drummer time to settle in before you start putting up mics.
Once you have the input levels set, you can make adjustments to the monitor mixes and house mix. Many live sound engineers build their house mix starting with the drums and bass, but constructing a mix around the vocals is equally effective. Slowly add instruments into the mix one at a time so you can get a feel for how the PA system interacts with the room. If you’re using a digital mixer, don’t forget to save the scene after soundcheck has finished — and back it up to a thumb drive for safety!
6. Be Smart
If you’re using a digital mixer, be aware that there are apps for smart devices that allow wireless remote control over your mix so you can walk around the room and make adjustments to the sound while listening in various locations — even stand onstage in front of a monitor while making adjustments to the monitor mix or ringing it out. There are several free StageMix apps designed to control various Yamaha digital mixers. Some can even be set up with “permissions,” allowing each musician to control their own monitor mix.
The TF StageMix app provides smart device control over Yamaha TF Series mixers.
7. Make A List
No matter how many gigs you have under your belt, it never hurts to make a list of what you’ll need for the show and tape it to the inside of your work box. It’s easy to forget things like AC power strips, extension cords or extra cables, and you don’t want to be scrambling to find those items at the last minute. A little planning goes a long way in making sure you have a smooth sound check … and a great gig!
“The Arrow and the Song” is a powerful poem that explores how we communicate with each other and the long-lasting effects these moments have on our lives. Longfellow’s poem resonates with me because it shows how some words stick with you and hurt you like the arrow, while other words build you up and are carried in your heart like a song. This message is so important and helpful to the daily operations of our program. Read further to see how much this simple poem impacted a group of students at Forney High School in Texas.
I shot an arrow into the air, It fell to earth, I knew not where; For, so swiftly it flew, the sight Could not follow it in its flight.
I breathed a song into the air, It fell to earth, I knew not where; For who has sight so keen and strong, That it can follow the flight of song?
Long, long afterward, in an oak I found the arrow, still unbroke; And the song, from beginning to end, I found again in the heart of a friend.
— The Arrow and The Song (1845) by Henry Wadsworth Longfellow
Be Aware of Your Words
How do our words truly affect others? Each day, we take part in dozens of conversions with our students, coworkers, family members and others. As music educators, we are tasked with communicating with our students throughout the day, and for many of us, we have the opportunity to have a continuing conversation for years before our students graduate from our programs and head out into the world.
Now let us look more closely at the words themselves. Are our words, our daily instruction, truly building our students into the people we want them to be? It is vitally important to realize that each one of our students has a self-image that is being molded and shaped by the interactions they have each day, and most notably, the interactions they are having with you!
My great friend, author and Olympian, Lanny Bassham, describes the self-image of a person as the sum total of their habits, attitudes and beliefs. It’s why they are the way they are and oftentimes, why they do what they do. This self-image is shaped daily by the experiences and words of people around them.
As music educators, we are great at developing relationships with our students. Just attend a high school reunion and you will see all the music people on one side of the room reminiscing about the great times they had with their directors and friends. It’s an impactful profession we have!
Now let’s own the weight of our words and take ownership of the incredible power we have to shape the self-image of our students for the better. Here are some practical tools that you can employ TODAY to check your language that shapes your students’ self-image.
Arrows to Avoid
Avoid words like “don’t” and “but.”
For anyone who has played golf, consider this analogy: You are standing at the tee on the first hole looking down a beautiful green fairway, and down the right side of the fairway is a giant, glistening blue lake just calling to your golf ball. The last thing you think before you hit the shot is, of course, “DON’T hit it in the water!”
Don’t means DO. Every time you try to think about not doing something, you are increasing the chance of actually doing that thing. Your students are the same way. Paint an image in their head of what you do want to happen instead of what you do not want to happen.
For example, you are working with a young clarinet player whose chin is moving while playing. Instead of saying, “Don’t move your chin,” tell the student, “Can you focus on keeping your chin very still?” Paint the image in the mind of the listener of the desired outcome instead of the result not desired!
Have you ever had anyone give you a compliment followed by the word “but” and then a criticism? If you are anything like me or my students, once the word “but” enters the equation, all the complimentary material before the “but” is erased and all you can think about is the criticism.
Erase that word from your vocabulary! Instead, replace it with action words like “now can you,” “will you,” “try this,” etc. These words paint a totally different picture in your students’ minds and creates a feeling of “I have been successful so far, now I can try this next step to be more successful!”
Promote Songs
Have you ever had a great performance? Of course — it feels wonderful to perform at your best!
Have you or your students had a poor performance? Of course — it’s part of being human.
You must always remember that your students desperately want to please you, their peers and the organization. After a subpar performance, it’s easy for them to immediately begin beating themselves up. We’ve all been there. In fact, it’s unfortunately a habit for many of us — as soon as things don’t go right, we beat ourselves up! This causes so much damage, and long-term negative effects will ensue.
Try this helpful strategy to help shape the self-image of your students immediately following a performance: Have a post-performance talk, emphasizing the things that went well, the things that we all learned together, and what we’re going to do about it as an organization. This conversation in and of itself is very helpful and will give you an opportunity as their educator to shape the direction of their minds going forward.
The next important step is to ask students to rate their individual execution/performance into a few categories:
Good
Okay
Needs work
Those who find themselves in the first two categories should focus on how much fun they had while performing and live in that moment with their friends.
Those who are in the “needs work” category are the focus in this whole exercise. Many of these students would have, had you not intervened, held that hurt inside and began beating themselves up focusing on their mistakes instead of the solutions. This internal battering often turns into more mistakes and further damage to their self-image.
Take an opportunity to meet with each of these students and coach them through their perceived shortcomings and provide them with a customized plan for improvement. Now the student is focused on the solution instead of the problem. They are focused on their own ability to improve instead of internally telling themselves they have failed. What a powerful tool this is! Employ this technique after your next performance.
It may take a few tries before the “needs-work” students have the courage to come to you, so I always tell the whole group that I am most proud of these students for their honesty and selflessness. After they do well in the next performance, I make sure to praise them in front of the group to continue building that self-image.
The Forney High School band performing The Arrow and The Song show at the UIL State Championships.
When Longfellow wrote “The Arrow and the Song,” I doubt he would have ever dreamed of the impact his poem would have on a marching band in Texas. In fact, it has impacted us so much, we created a marching show about it! Truly what better material to surround our students with than a realization that the words they say to each other can be either “arrows” that hurt people for years to come, or they can be “songs,” powerful words that build up the self-image of each other.
Longfellow put it most eloquently in the final lines of his poem: “And the song, from beginning to end / I found again in the heart of a friend.”
I would like to thank Reverend Rinsen and Reverend Do’on (pictured above with me) as well as Reverend Shokai for helping me through my jukai journey. I also want to give a big shout out to talented photographer Luna (Shōsō) Kasior Bitner for doing a last-minute photoshoot. I could not have written this article without all of you!
Last spring, in the midst of the pandemic, we began the process of jukai, an initiation into the Zen Buddhist community. “Ju” translates to granting, and “kai” means precepts. Jukai is the process of undergoing an empowerment ceremony in which one takes the three refuges, three pure precepts and the 10 grave precepts. Zen practitioners spend weeks writing their own personal interpretations of these precepts, such as vowing not to kill — whether it be animals or the energy of a room. Then we sew a miniature Buddha robe; the material representation of the vows we take, in each handmade stitch.
So what does this have to do with music and teaching music?
For me, the answer is … everything.
The process of undertaking jukai changed the way I relate to my instrument, the flute, as well as how I teach it to others. Before, my flute playing felt academic and distanced. Now, my experience is more emotive and natural. The flute isn’t something to be studied and polished, but rather, a paint brush for musical expression.
Meditating Altered my Teaching Style
Reverend Shokai pulling in energy like a bow and arrow.
Science has made a lot of headway in mindfulness research since the early 2000s. A 2003 study by Joanne C. Chang, Elizabeth Midlarsky and Peter Lin found that mediation reduced performance anxiety in musicians. According to the study, 66% of musicians and college music students experience anxiety. It’s likely that music teachers experience similar levels of anxiety, so any tools we can use to combat tension will help us grow as educators and creatives.
Shortly after I received Jukai, I noticed that my teaching style changed for the better. Just one week of sewing and sitting zazen (meditating), as well as participating in mindful cleaning, walking and cooking caused a major shift in my perspective. I wasn’t in a rush for my students to get things right on the first try, and I no longer tried to explain lessons to them correctly as fast as possible. It seemed like the world was full of time: There was a universe in every breath. I had the chance to really think about what I was about to say.
One of the workshops that impacted how I relate to music and music performance was qi gong.
Qi Gong: A Body Practice
Qi gong (pronounced chi gong) is a body practice and martial art that developed in China roughly 5,000 years ago. According to Piedmont.org, the difference between qi gong and tai chi is that qi gong’s body positions are used for specific situations, whereas tai chi aims to create a seamless flow between movements.
During the retreat, I experienced qi gong in sessions led by Rev. Shokai. While barefoot, we had body practice outside on the grass in front of the temple, which was a grounding break for all of us after a long day of sesshin (a period of intensive mediation practice from dawn until dusk).
“In both Zen and qi gong, we are practicing embodiment.
We work with the mind, energy and body, realizing that they are not separate
and this has a profound impact on the way we live our lives.” — Rev. Shokai
When practicing qi gong, I could clearly feel the energies in my body. Similar to sitting meditation, I was aware of every tiny muscle and pang of pain, especially from my asthma. I couldn’t avoid the tensions in my body or the intrusive thoughts that didn’t serve me. Body practice and meditation make you confront your problems head on, instead of being distracted.
Despite being painfully aware of everything happening inside my body and mind, I felt uplifted and refreshed after each afternoon session. All discomfort seemed to dissolve into the cool earth.
Teaching and Playing Music After the Retreat
I didn’t notice how profoundly my week-long retreat affected my career as a music teacher and performer until I returned home.
I greeted my distance flute students on Zoom and noticed how seamlessly our conversations flowed. After spending days in silence, I was better able to connect with my students. Since my own anxiety was lessened, I was better able to think about my private students, and what they wanted to achieve creatively. My students laughed more and learned more.
My descriptions of playing the flute and achieving certain embouchures were no longer broad strokes but became extremely specific descriptions of how I found each timbre and tone color.
Before, I gave specific and dry examples of how to play the instrument, such as “Tighten your corners” or “Shoot for a direct tone and bring up the volume.” This type of teaching is necessary in private lessons, but now my instructions are infused with more creativity and emotions. I now ask, “How would you make this section sound more pointed?” or “What can you do to make the piece sound more oceanic and flowing?”
I now offer guidance with more questions, which makes students feel more involved in the learning process. I allow myself to think outside the box, and even encourage students to imagine their own character arcs for each piece or movement.
Religion or Metaphor?
Reverend Shokai bringing energy down from the heavens.
If all of this sounds a little woo-woo, you’re not alone. You don’t even have to take my word for it. Many members of our jukai class of 2021 do not believe in the heavens or any of the religious concepts. Some practitioners think of these ideas as metaphors or concepts that further aid our practice and help us delve into deeper relaxation and awareness.
Meditation and Mindfulness in the Classroom
Formal Zen training isn’t for everyone, but I believe there is a lot to take away from this.
I’m not saying that you should ask your students to meditate in class. Depending on your circumstances, this could actually be the opposite of Zen. I remember back in high school when we studied ancient religions, and our history teacher had our class meditate for five minutes each day for one week. Unfortunately, the result was out-of-control classroom.
Not every student wants to participate in or is interested in meditation. But in the process of receiving jukai, I learned that as music teachers, we can meditate for our students.
By raising up your own energy and feeling calm and centered within your own body will affect the people around you — especially young people — in a very palpable way. Meditation requires a certain level of maturity, so gauge where your students are at before imposing a mandatory five-minute sit before every class period
Zen is Music
While Zen practitioners are known for taking vows of silence, we aren’t quiet all the time. Being quiet is a practice … but so is making noise! You will hear many instruments, such as chimes, bells and even rumbling drums, in the zendo, or meditation hall.
I think of Zen as silence with music in between the cracks.
Show your students examples of Zen practice, particularly Zen music, which may help cultivate some gravity with your students about how much every seemingly small noise matters. Consider showing your students this video, which features some of the musical instruments of Zen liturgy.
That being said, it’s difficult to convey the depth of feeling that rises as one merges with the practice, the people and the full experience of the zendo in mere words and videography.
The more you and your students are aware of your emotions and body will help you become one with your musical process. So, go forth! Or rather, find a buckwheat cushion!
More About the Buddhist Temple of Toledo
This article was inspired by my experiences at the Buddhist Temple of Toledo, which is a Soto Zen temple, and with Professor and Rev. Jay Rinsen Weik, as well as all the helping hands and members of the jukai class of 2021.
Because jazz often has more space in the music than a lot of rock, hip hop or electronica, it’s easier to get closer to the real thing in your home audio system, especially in terms of sonic scale.
Here are 10 of the very best jazz albums you need to hear (and own) on vinyl. Double-check the alignment on your cartridge to maximize your enjoyment.
1. Kind of Blue – Miles Davis
This is essentially the Sgt. Pepper of jazz. Many have called Kind of Blue “one of the best albums of all time,” and because it has a more modal, melodic style than other records by the legendary trumpeter — in fact, most jazz records, period — it’s more approachable, making it one of the best ways to get into jazz. But the longer you listen, the more complexity you can absorb. There are a number of great vinyl pressings available, so you can’t go wrong with any of them. Besides, by the time you’re done, you’ll probably own several different copies!
2. Saxophone Colossus – Sonny Rollins
Huge as Kind of Blue is, it might be argued that this is a close second in terms of both playing and accessibility. The opening bars of “St. Thomas” are just as inviting as the beginning of KoB to be sure, and if nothing else, this is a record that you should have as a bookend. Rollins’ sax sound is huge here, and when the incomparable Hal Roach takes front and center for a drum solo, you’ll feel as if you’ve been pushed back in your seat. A true joy on vinyl, this is 39 minutes of non-stop excitement with an infectious groove that will have you dancing around the house.
3. A Love Supreme – John Coltrane
Another masterpiece on a par with Kind of Blue, this offering by legendary saxophonist John Coltrane is a four-part suite full of highs, lows and innovation. It was Coltrane’s biggest selling record, and is considered by many to be one of the best jazz albums of all time, yet remains incredibly accessible. Fun fact: Coltrane recorded this entire album in a single day at producer Rudy Van Gelder’s home studio. Wow. Just wow.
4. Ah Um – Charles Mingus
This album completes what could be considered the basic building blocks of jazz. Within a genre so full of innovation and diversity, these first four records alone will expose you to a wide range of musical thinking. Because Mingus is primarily a bass player, Ah Um is full of textural complexity, and includes the classic “Goodbye Pork Pie Hat,” which has become a jazz standard that’s been covered by everyone from Rahsaan Roland Kirk to Joni Mitchell to Jeff Beck. With so many subtleties and rapid mood changes, this is one piece of vinyl that will give your system a workout in a way that is sure to surprise and delight.
5. Offramp – Pat Metheny Group
Like so many other jazz greats, guitarist Pat Metheny’s first two records with the Pat Metheny Group followed a more traditional groove before branching out with Offramp, establishing him as a more abstract and experimental composer. Whether you pick this up as an original ECM pressing, or the current remastered version, this record begs to be played from start to finish on vinyl. Metheny’s playing is simple, sparse and deliberate here … and he still includes the track “Are You Going With Me?” in nearly every live performance. If you only have one PMG record in your collection, this is the one to have.
6. The Köln Concert – Keith Jarrett
Volumes have been written about how The Köln Concertalmost didn’t happen, yet it turned out to be one of jazz’s more happy accidents. This masterpiece of textural improvisation is a joy to listen to, recorded with so much ambience that it’ll really show off your Hi-Fi system to its fullest. The sound that Jarrett achieves from the tattered Bosendorfer piano that he was forced to play here only underscores his genius. And the opening of “Part 1” might have you wondering if a young George Winston wasn’t in the audience taking notes.
7. Barefoot Ballet – John Klemmer
Some may be quick to write John Klemmer off as “smooth jazz,” yet growing up in Chicago’s jazz scene, Klemmer had the chops to make serious music. While not as commercially successful as some of his other albums, Barefoot Ballet features Klemmer’s groundbreaking work using echo effects on his sax, creating a texture that would often be imitated but never duplicated. The space, melody and complexity presented on this album makes for a true classic.
8. The Three – The Three
This piece of vinyl is a bit obscure, but worth tracking down if you can find a copy. Originally produced in 1976 by East Wind Records, it’s a direct-to-disk recording of Joe Sample (on keyboards), Ray Brown (on bass) and Shelly Manne (on drums) performing a handful of jazz standards. Because of the D2D process, they went straight from recording session to the cutting lathe, having to get each side of the album right on the first take. The clarity and dynamics of this record are stunning, and will really show off what your system can do.
9. Land of the Midnight Sun – Al DiMeola
After playing with Chick Corea’s Return to Forever for a few years, this was the 22-year old guitarist’s first solo album. Al DiMeola would go on to release a prodigious catalog of work, but this deeply complex record showcases his early genius, both as a player and a composer — and, as a bonus, he’s backed up by Stanley Clarke and Jaco Pastorius on bass, along with a very young Lenny White on drums. The early CBS/Sony pressings are somewhat lackluster, so seek out a Japanese import if you can find one.
10. Bitches’ Brew – Miles Davis
I can’t think of a better way to end this list than with Bitches’ Brew — probably the most controversial and influential work of Davis’ long career. In stark contrast to the easy groove of Kind of Blue, Brew is difficult listening hour, and a cornerstone of jazz fusion. The musicians on this record don’t just play, they attack their instruments in a way that’s never been done before, or since. It’s an incredibly spacious sonic exercise, and one that will put your system to the test, whether listening on speakers or headphones. (If you choose the latter, keep the volume down on the first pass, as this album is really dynamic!) As with all Miles Davis’ records, there are a wide range of pressings to choose from.
Looking to get your piano and keyboard melodies and figures to stand out more? Doubling the notes in octaves is a great way of achieving that. In most cases this will make the part sound more powerful, but if played incorrectly, it’s a technique that can tire out your hand and arm. In this article, we’ll show you how to play octaves properly … without fatigue.
Arm, Wrist or Fingers?
Too often, players will tighten up their arm, wrist and even shoulders when playing octaves, moving their arm up and down like a piston. While this can work when playing only a few notes or repetitions, it produces a lot of tension in the body, and is therefore something to be avoided. Let’s try playing some repeated C octaves, with the thumb on Middle C:
As shown in the video below, rather than tightening up the arm, you should pivot your wrist up and down slightly, leaving your arm relatively still. When first practicing this wrist movement you should exaggerate the motion to exercise your wrist and learn what it feels like; in performance you won’t need to move the wrist so much.
As another reference, watch this video of famed virtuoso pianist Vladimir Horowitz playing a very difficult Chopin Polonaise, with an incredibly fast left hand octave figure. His left arm and his wrist are barely moving up and down, and he certainly doesn’t look as if he is straining to play the part.
Try the following example, where each time you move to the next measure, you double the speed of your repetitions. This is best practiced with a metronome.
The next step is to learn how to move to different notes in order to play a melody with octaves. Start with the first five notes of the C Major scale, slowly increasing your tempo as you feel comfortable:
When that feels comfortable, try playing the complete C Major scale, again slowly increasing your tempo:
Mixing White and Black Notes
While it is possible to always use the thumb and the fifth finger (the pinky) when playing octaves, it is common practice to use the fourth finger for black notes, and the fifth finger for white notes. This will help you eventually when playing legato, but it’s good to start doing this for all octave playing.
This next example has you playing an ascending chromatic scale, which is simply every key on the keyboard in successive order. Pay attention to the fingering so you use your fourth finger on the top of each black note octave. Many piano teachers and concert pianists suggest raising your wrist just slightly when playing moving passages of octaves, as shown in the video below.
Now let’s try playing the same chromatic scale, with a more legato touch. Using the fourth finger for the upper black notes helps you to play those octaves in a more connected way. Of course the thumb cannot play perfectly connected for the lower notes, but the upper note will help to fool the ear into thinking the entire passage is well-connected.
Riffs in Octaves
It’s very common to play right-hand octave riffs when playing rock and roll and boogie-woogie style piano. Here are some examples played at slow and faster tempos — don’t forget to use your fourth finger on the black notes!
More Delicate Octaves
Octaves don’t only have to be used to add power. As shown in the example below, doubling a melody in octaves can also be done softly, in ballads and more down-tempo pop tunes. When played gently and in conjunction with the sustain pedal, it can be a very beautiful sound.
While learning viola as a student, Tanner Otto enjoyed both improvisation and figuring out how to play tunes that he heard on the radio. Fast forward several years, and Otto has incorporated both aspects into the 5th- and 6th-grade beginning strings program at Edwin H. Greene Intermediate School, part of Sycamore Community Schools in Cincinnati, Ohio.
Otto also throws in a composing unit and a marching orchestra opportunity during the district Homecoming Parade.
The result of these off-the-beaten-path lesson plans has been more student engagement, higher retention and overall program growth. “By adding in pop and recognizable music and adding technology, students have a positive experience in class and feel confident on their instruments,” Otto says.
Since Otto started his career at Sycamore in the fall of 2019, the retention rate in orchestra — even accounting for the loss of students moving out of the district — between 5th and 6th grade has increased from about 70% to 90%. Similarly, retention between 6th grade and the start of junior high in 7th grade is currently about 85% to 90%. Due to more students continuing with orchestra up the grades, a second orchestra section for 7th grade was added in 2021-2022, and the high school will add a third orchestra during the 2022-2023 school year.
Otto began compiling a pop tunes packet when he was a college senior studying music education at The Ohio State University. At the time, Otto’s teacher wanted the pieces to play with his own 5th-grade class. So, Otto began notating eight-measure snippets of the most identifiable melodies from popular songs.
By his first year at Sycamore, the packet had three pages of content, including a few pop songs, some television and movie themes like “Star Wars” and “Jurassic Park” as well as other recognizable bits like “William Tell Overture.”
Tanner introduces the songs to 5th graders in their second semester and gives out a packet of the songs at the start of 6th grade. Instead of using the pieces just for fun, Otto incorporates the songs into the curriculum by reinforcing skills or fingerings. Otto would even transpose melodies into a different key signature if needed.
“‘I Love You’ from Barney is in a really easy D major, and we do it early on in 5th grade,” Otto says. “‘Say So’ by Doja Cat has really helped 5th graders with string crossings. It’s better than anything in the method book because it happens faster, and they know how it goes, so they’re willing to play it and learn it and go faster and faster.”
In 6th grade, Otto’s class plays the “Star Wars” theme in C major to reinforce that finger pattern. “‘Happy Birthday’ is great to teach the dotted rhythm, so students can see it on the page even though they know it by ear,” he says. “And ‘Havana’ by Camila Cabello is really good for teaching 8th-note rhythms. ‘The Star-Spangled Banner’ has a thousand things that can be taught from changing finger patterns to varying rhythms.”
When students could no longer attend school in March 2020 due to the COVID-19 pandemic, Otto focused even more on popular tunes. “As long as students were playing their instruments, they were keeping their skills up at home,” Otto says. “I was teaching through video and using these little songs each week,” he says.
Otto asks his students for ideas for additional tunes, so now the full packet is eight or nine pages long and growing each year. “I take suggestions from students in August when we start school, and I will fill the whiteboard with any suggestions that they have,” he says. “Then I’ll go through and narrow the list down to ones that are able to be added or worthwhile. … I try to hand out the packet by the third week of school.”
Typically, pop music cycles through faster, while movie themes tend to stick around longer. “You need to search out what pop songs would work well in a classroom and then see from there if you can fit them into what you’re teaching,” Otto says. “This past year, there have been good pop songs but not a ton of good popular music that would work well in orchestra class.”
In general, for 6th graders, Otto spends about 15% of class time on the tunes packet, 35% using the method book, and 50% focused on concert music.
Occasionally, students might play “Happy Birthday” for other teachers around the building. And at a concert, they might play a snippet of a pop tune to show parents the variety of what they’re learning.
Improving Through Improv
Improvising and composing also help students use their own imaginations to incorporate modern or rock music genres into the coursework. Otto, who was recognized as a 2022 Yamaha “40 Under 40” music educator, builds up improvisation skills through a simple progression. At first, he asks students to play any rhythm they want on the D string on top of a pre-created backing track or groove. Then, Otto gives them a specific rhythm, and they can use any note. Then students can play any note and rhythm they want.
“In class, I like to do it as a warmup,” Otto says. “It’s a way of targeting the skills we’re working on and disguising it a little bit for the students. Now they’re working on that creative part of playing and figuring out what music they’re writing in their head as they’re playing their instrument.”
Students also work together with a partner and reflect on their playing. “In improv, there’s no wrong note, but certain notes can sound better than others,” Otto says.
They also incorporate improv into concerts. “Sometimes there’s a solo section in a piece, or we can make one,” Otto says.
For example, the song “Pepperoni Pizza Rock” by Brian Balmages “is a famous beginning strings song that has a solo section in the middle,” Otto says. “I had 10 students do a four-measure improv solo in the concert.”
Doing improv allows diverse students to shine. “Different students take to improv while others take to playing songs out of a packet or playing sheet music,” he says. “It’s really cool to see.”
Otto also adds technology into the mix. Using BandLab online or Soundtrap for Chromebook, he starts by creating a track and then asking students to improvise over it. Students then create their own grooves and play their string instrument on top of it. “It’s improv and technology all at once,” Otto says.
Creative Composition
Doing improv is a great lead-in to learning composition. Otto teaches composition using notation software. However, he doesn’t give students full reign. Instead, he guides them to write four-measure pieces that the class could play. Each finished piece gets projected onto a screen, and the class will sight-read through it. Otto might pick a key signature and tell them to use certain types of rhythms. He also asks them to start and end on a certain note.
“Giving them a lot of parameters helps,” he says. “Otherwise, things can get a little too crazy or they are too hard to play.”
Otto focuses on having students edit the work as well. “We pass our Chromebooks around, and students go through and check someone else’s work for errors. Then they have a conference with their friend. So, we do editing before the final submitted product.”
The composition unit is scheduled after a major concert or as part of Otto’s planned days out of the classroom. Before he left as a chaperone for the high school orchestra trip in the spring of 2022, he taught his students about composition and the software, so they could work on their projects when they had a substitute teacher.
Edwin H. Greene Intermediate School’s marching orchestra.
Otto says that he would like to see technology incorporated into all 5th through 12th grade instrumental programs but that teachers should be familiar with the programs themselves. “I would play around in the software and figure it out and see what it’s capable of before I would introduce it to students,” Otto says. “Having knowledge of how it works and what’s there will help you when you get in front of your students. If you don’t quite know how the software works, it’s going to be hard to explain to students how to use it or help fix a problem when they run into an issue.”
Though he hasn’t incorporated students’ compositions into concerts, he does send them through email to share with parents.
“The students look back on having fun and really appreciating their final product,” Otto says. “The technology part, as we head further into the 21st century, should play a bigger role in music education. Students are learning new skills or the same skills in a different way.”
The idea of the Solo and Ensemble Festival started long before San Elijo Middle School was even built.
It was the brainchild of Mr. Charlie McGhee, who at the time was the band director at San Marcos Middle School. He wanted to highlight students and give them a chance to perform outside of the full band experience. In 2002, he worked with some solo and ensemble groups during the year and had them perform at the end-of-the year concert in between the large bands.
When San Elijo Middle School was built in 2004, McGhee became the director there and brought this idea with him. He started a small festival for the students at San Elijo, which included judges and ratings. This event has now become a strong tradition for our music program, incorporating both vocal and instrumental musicians.
Finding Repertoire for Ensembles and “Oddsembles”
Starting as early as October, students ask for solo and ensemble music with excitement. Solos, duets, trios, quartets and larger ensembles are all welcome at the festival. We encourage most students to only participate in a maximum of two ensembles as we have found that “less is more” with younger musicians.
Regarding solo repertoire, we have many middle-school-level solos in our music library. If a student has a solo piece in mind, it needs to be approved by my co-director, Shannon McInnis, and me to ensure maximum educational value and success for the musician.
For a majority of the ensembles, students create the groups and then we adapt the music to their ensembles. Sometimes it is a clarinet trio or brass quintet, which is easy to find music for. Sometimes a group is what we fondly call an “oddsemble,” which can be anything from a bass trombone and flute duet to a vocal, French horn and piano trio. This year, we had a quartet made up of two mallet players, an oboe and an alto sax.
For these “oddsembles,” we take a trio or quartet written for like instruments and rearrange the orchestration, sometimes changing octaves or key signatures to make it more accessible for the students. It is time-consuming but when you see it all come together and how much fun the students have performing with their friends, it is worth it.
We often have students with high-level piano skills accompany our soloists so that they can showcase their musical skills in ways they usually cannot in band or choir class. Some of our students also play different instruments that may not be offered through our music program, such as violin or ukulele. We encourage these students to play their instruments at the festival as a way to, again, showcase their skills but also broaden their musical education and awareness.
Festival Venues
Now, 20 years later, the Solo and Ensemble Festival at San Elijo Middle School is bigger than ever with three schools participating and sometimes over 100 different solos or ensembles performing. Creating the performance schedule is a giant puzzle, making sure students in multiple groups do not overlap and have enough time in between performances to regroup before their next performance.
Our school’s PAC, gym and library are transformed into three performance venues for the festival. The baby grand piano is tuned set up along with our orchestral sound shells on the PAC stage. The PAC is where most solos and percussion groups perform because soloists are often accompanied by a pianist, and because the stage is located near the band room for access to percussion instruments.
The library is smaller and more intimate, which is perfect for small ensembles. The gym is used mostly for vocal performers because the acoustics are great for vocal sound projection.
Finding the right venue for each group is important and can help young students perform better with more confidence.
Day of the Festival
Our music community is vital to the success of the festival, and we rely on the help of our music families to keep things running smoothly. The festival is a great way for parents to see a little bit of the music world and support the music program without having to give up an entire day to volunteer.
As students arrive at the festival, our parent and student volunteers welcome them at check-in and share any information they might need. Once performers are checked in, they make their way to the band room to warm-up or to gather with their groups and prepare for their performance.
We hire judges, usually other band and choir directors we know from middle school to college level, to adjudicate the performances and give ratings. Each student receives a 5- to 10-minute clinic after their performance from a judge to pinpoint elements they can continue working on. Students also receive written feedback from a judge with a rubric and rating. Each performer is awarded a ribbon based on their rating as a token of their hard work. After their performance, students can collect their feedback and ribbons at the awards table.
There is also a small concession table with drinks and snacks for students staying for multiple performances, helping run the festival or staying in support of fellow performers.
Honoring Traditions, Building Community
Students from San Elijo Middle School who participate in the festival and receive a rating of superior then perform in our honor recital. At the recital, Mrs. McInnis and I select certain groups to perform at the Spring Concert as a tradition from the first years of the festival started by Mr. McGhee. Students are delighted to be chosen and take pride in their performance.
The Solo and Ensemble Festival gives so much to participating students not only educationally but also in the way of their self-confidence. When students are preparing for the festival, we encourage them to learn their parts individually, and if they are part of an ensemble, to meet once a week at lunch or after school to start piecing it together. Almost all rehearsals are student-driven, which develops strong musical skills and leadership qualities. Music coaches and directors will step in and provide guidance when needed or to help refine elements. For students working on solos, they are putting themselves out there, learning to push through performance nerves.
Our Solo and Ensemble Festival strengthens both our musicians’ skills and music community. Students involved often become leaders in their classes and are the most confident players in our ensembles. Rehearsing without a teacher helps them develop their critical thinking and analytical skills in music because they must break down why something isn’t working, lining up or doesn’t sound right.
As for our music community, our administrators, teachers and parents become involved in something together that celebrates individual musicians. With large concerts and events, the audience sees large groups of students working together to create a final product. However, in the case of the Solo and Ensemble Festival, our music community sees the individual work ethic and skill that goes into a performance. This can be eye opening because they witness the details and courage of a solo and/or small ensemble performance.
Big things can come from small moments and that is what our Solo and Ensemble Festival does for our music program every year.
Music education students face a unique challenge: We spend nearly a decade mastering our instruments, then choose to make the art of music-making a career. Then we spend four years in the safe halls of our colleges and universities, studying instrumental pedagogy and child psychology (occasionally wandering out for practicums), as we prepare for a profession that many agree is unable to be prepared for! Like bracing for the impact of a cannonball into a lake that we know is freezing, music education students are told that we will not know what teaching music is like until we are actually “in it.”
That adage was a cloud that grew darker as I neared graduation and joined the job hunt. As a chronic worrier and vigilant planner, I did what I could — such as reading books, teaching lessons and marching bands where I could and listening to hours of podcasts during my drives to and from school. One that I particularly enjoyed was “The Bandmasters Podcast,” hosted by Don Stinson, a recipient of two citations of excellence from the National Band Association, a two-time GRAMMY® Music Educator quarterfinalist and current Director of Bands at Joliet Central High School.
A few weeks after a chance encounter at the Music for All Summer Symposium with Dr. Dave Gerhart, the assistant marketing manager of educator for Yamaha, I received the unbelievable opportunity to meet Don and have a chat about my worries — a literal dream come true!
Our Meet Up
Dan Schmitt
The discussion between Don and me had a general topic: The typical worries, questions and fears of a soon-to-be first-year teacher, and the answers that a veteran teacher could provide.
Before the Summer Symposium, I was offered a position as Director of Bands at John F. Kennedy Middle School in Plainfield, Illinois. In this position, I would teach over 150 6th-, 7th- and 8th-grade band students, as well as an additional 80 6th-grade general music students. As my future career path became clearer, I was excited — and terrified! When I called my mother to deliver the good news, she was naturally happy and impressed, but she verbalized the thought that had been heading to the forefront of my mind: “Are you qualified for this?”
When Don and I sat down at a coffee house, I was (in typical fashion) nervous while he was (in even more typical fashion, I came to learn) as calm as could be. He congratulated me on “the new gig,” and we proceeded to discuss some of our shared connections and experiences. I pulled up the list of questions that I had drafted — remember, I’m a vigilant planner! — and I dove into my biggest worry. I had heard from dozens of teachers that the first year of teaching is, in a word, terrible.
Own Your Mistakes
Don smiled and told me how it wasn’t awful, how it did not need to be awful, but he added that I would make mistakes.
Don recalled that at one of his first concerts as a real band director he forgot to list a student’s name on the program. Not an uncommon band director error, and certainly not the worst one someone can make in their first few years of teaching (much better than the stories I’ve heard of accidentally leaving a student behind on the spring break trip), but it was an error that the student’s parent did not take kindly to. Don knew this because he received a scathing email, complete with bold text, capital letters, underlines and numerous exclamation marks. His knee-jerk reaction was understandably defensive: How dare this parent talk to me like this? Don’t they realize how busy I am? It isn’t even that big of a deal!
However, Don did the smart thing that many of us may have heard during our student-teaching: He waited. After taking some deep breaths and calming down, Don came to some realizations. Yes, he was busy, but the reality is that everyone’s busy! And this student was left off the program at a concert that he had worked hard for. The parent and child were upset, and nothing could change that. Don’s response was indicative of what I observed was at the core of his overall demeanor — honesty — and is one of the qualities that makes him a master educator.
A few hours later, a calmer Don wrote back to the parent. He didn’t bold or underline text, he didn’t use capital letters or a single exclamation mark. He was honest and communicative. He said that he felt terrible and that he would print another program that included the student’s name.
Don let the experience guide him — since that inadvertent omission, he always checks his programs with students — and became a better educator because of it.
Work-Life Balance
As our conversation continued to flow naturally (no question sheet needed!), Don recounted more stories from his years of teaching that benefited from being honest with those around him. When he started a new job, he asked the students which traditions were meaningful to them. No drastic changes, just meeting the students where they were at and knowing what was important to them.
Or when he started feeling overwhelmed, he reached out to booster parents and asked for help. (Another Stinson lesson — if it doesn’t require a music degree, delegate!) Sure enough, they arrived in numbers, and he could focus on teaching music.
“But it’s not just the beginning of my career that I’m worried about.” I admitted to Don. “What if I end up burning out down the line? I’m seeing it everywhere!”
Don knew exactly what I was talking about — he had been there. While the “it’s okay to not be the last car in the parking lot” advice has become more common, it had more weight coming from Don. At the point when Don started feeling burnout, he had a family. Like most people, Don acknowledged that he needed to do more things outside of work, but he would never follow up.
His next two words caught me off guard: “Rock climbing.”
I wasn’t sure how to respond, so I just repeated those two words: “…rock climbing?”
Don explained that he would schedule an event in advance — whether it was rock climbing, going to the zoo with his children or taking a road trip — and would force himself to do it. He said that once you force yourself to simply do an activity instead of binge-watching a show, you end up enjoying it. He wanted to make a change to his work-life balance, so he added more “life” and stuck to it. He (and his family) have been happier because of it.
Too Blessed to be Stressed
As we reached the end of our time together, I asked Don the question that had been creeping into my mind based on what I had seen both in real life and on band director forums (he chuckled at that one): “Does your job stress you out?”
Without hesitation, Don said, “No.”
Admittedly, I was a bit surprised at his instant response, but he broke it down. Don had worked out what needed to be done at his job, how to prioritize it (he wrote this great article about) and when to go home. He recognized that he was teaching students he loved at the alma mater he cherished, and that he was glad to have the life he does. At that moment, I told him how much our talk had calmed me down. Throughout the numerous situations that Don recounted, he always remained honest, talked to people, asked for help and taken things one day at a time. We are all (or will be) music teachers, building meaningful connections through a medium we love.
Lasting Lessons
It’s easy to get caught up in the details, but Don Stinson’s practical advice and honesty made me feel better. Sure, right now I don’t know exactly how to do every aspect of my job, but there isn’t any podcast that can prepare me for that. I could only be sure that I would bring the openness and positive attitude that my students needed. At the Summer Symposium earlier that month, master teacher Alfred Watkins advised me that no matter what, students will come with joy in their hearts — it’s simply up to us to unleash it.
The last few weeks, I have attended countless induction and institute days. I’ve spent many hours in meetings preparing for things that don’t directly involve holding a baton and directing sound. As I learn about different assessment methods and new school rules, Don’s words — as well as words from the multitude of mentors that every young teacher needs — return to me when I begin to feel overwhelmed. I am able to remain calmer, even as the first day of school is days away.
From Don, I learned that there will eventually be a point where all of us young educators will feel confident and prepared. And while we may not be there yet, we can simply enjoy the moments we have, get to know our new students, and be ready to make mistakes and learn from them. In the meantime, while we’re still learning, we can focus on the things that matter — our students, the music, and, of course, double-checking our programs.
I was scheduled to write an article toward the end of the year about the importance of being a mentor, but I received an email in midsummer from my editor at Yamaha, asking if I would be interested in a real-world mentoring opportunity that I could then write about.
A recent music education graduate, Dan Schmitt, had attended the Music for All Summer Symposium and talked to some Yamaha staff members about starting a new job in the Chicagoland area. He admitted that he was a little nervous but very excited about the position.
Why not have Dan reach out to me — I am also based near Chicago — with some “burning” questions before stepping into the classroom? I immediately said, “Yes!”
Our Meet Up
We agreed to meet at a coffee shop and prior to our meeting, Dan emailed me several questions. I reviewed them but chose not to dig into them too much because I wanted Dan to have some authentic, filter-free responses.
Don Stinson during his early years of teaching.
We hit it off immediately. I could tell Dan was worried. He first asked, “A common consensus I hear is that your first year of teaching is always going to be rough and you shouldn’t expect much. Is this actually the case? Does it have to be? How can we best ‘brace for impact’?”
I was disheartened to hear that this was what he was hearing from multiple angles. Someone might as well have said, “Welcome, Dan. This year will be terrible, and you won’t get it back.” Yet, here was someone in front of me who clearly wanted to resist this way of thinking, and I’m grateful for that.
I could go into a lot of detail about Dan’s questions and our conversation, and I’m sure Dan covers some of that in his side of the story. The short version is that I thought back to when I was a young teacher. What I wanted to hear didn’t matter. What was more important was to find out what I needed to hear. Most of these must-know items fell in the categories of confidence, vulnerability and balance.
Confidence and Vulnerability
In terms of confidence, I reminded Dan that he was hired for this job and that a school board signed off on him. The people who sign his paychecks have confidence that he can do the job, and therefore, there is no reason for him to have any doubt that he is the person for this position. Confidence doesn’t mean that you have the answers to everything; rather, it’s about someone being able to trust and rely on you. Reliable and trustworthy people make mistakes and continue learning. Perfection is not the goal.
It’s important that new educators understand the realities of teaching. There’s an unwritten expectation of music teachers.
You must always say yes.
You must get to school early and leave late.
You must check the boxes of bringing your kids to certain festivals and contests.
The list goes on and on. By all means, if you’d like to follow this path, go for it. I did and learned a lot about myself and what was best for my kids along the way.
Balance
However, new educators should understand that they can and should have the option of enjoying a life outside of their career. I shared my ups and downs with Dan. Small things, like missing out on some after-school social events. Other small things, such as not being at some of my own children’s events because of work-related items or eating poorly during busy seasons. But these small things add up to larger issues and can sneak up on you. No one plans on their health taking a negative turn, or their friend circle shrinking, or a divorce. They just “seem to happen” and can often be a result of us putting our careers ahead of our own health and wellness.
Here are some suggestions I shared with Dan on how to balance a career and a personal life.
Not-To-Do List: I spoke to Dan about the concept of a “not-to-do” list. Try new things as much as you can, but as you progress in your career, write down the things that you really don’t like that you can actually opt out of. Those items go on a “not-to-do” list, which is basically a reminder that you have some choice in how you spend your and your program’s time.
Schedule “Me” Time: Make sure to schedule what you want to do for fun for the year (hiking, seeing a movie, time with friends) and put these dates in your calendar. These events become non-negotiable, regardless of what pops up or how tired you are!
Age Differences: Dan told me that some of his music parents might be old enough to be his parents. How can you talk to someone like a professional if they have 20 years on you? I went back to being vulnerable and open and suggested approaching parents by saying something like: “I know I have a lot to learn and manage in this program, and I’m confident that I can give your child a positive musical experience. Yet, I’m not too proud to ask for help. Can you help me with some of the management and planning part of this program?”
Own Your Mistakes
Don’t fake it until you make it — just be honest. I told Dan that he’ll undoubtedly make mistakes — we all do — and to simply own them. I shared a couple of examples of early errors I made.
“You didn’t turn your bus request in on time!”
Internal monologue: Lots of excuses about being busy, systems being cumbersome, having no help, etc.
External (honest) response: “You’re right. I didn’t manage this procedure well. I’ll write this down and make sure to turn all of my future bus requests in on time.”
Me: “OK, class — this rhythm is counted as ‘one-e-and-a.’”
Student: “Actually, Mr. Stinson, that’s counted as ‘one-and-a.’”
Me: “Whoops — I made a mistake. You’re correct. Thank you for correcting me and thank you for supporting me on my rhythmic journey.”
Lasting Lessons
This meeting was exciting for me. Selfishly, I got a lot out of meeting with Dan. Sometimes as a teacher in the mid-stage of your career, you reflect on the things that you do, but also on the things that you used to do. As I shared my thoughts and tips with Dan — such as being vulnerable with students to encourage musical expression, writing encouraging handwritten notes on every student’s program before a concert, and creating a not-to-do list — I started to realize that I had strayed away from some of these items in my own teaching.
A lot of teaching is coming to the realization that relationship building is key to helping today’s students and effective teaching in today’s group education settings. In the past, I had used some of those items that I suggested to Dan to get to the “next level,” while enjoying what I thought was a side-effect of relationship building. But early on, I inadvertently switched my priorities. I started thinking that I had to prove myself to others to get to that next level. In hindsight, maybe that next level wasn’t important (or maybe, there wasn’t even a next level…).
I enjoy my time teaching, but I’ll admit, I get a little nostalgic for those early years of curiosity, trial and error, and new experiences. So, I took my own advice, and walked into the first day of school as fresh as I could be, with an open mind to deliver what I can this year. It was one of the best opening days with students that I’ve ever had. We focused on ourselves and our little corner of the world in our band room.
To the mid-stage and veteran teachers, I ask: Are we welcoming our new colleagues, or are we serving as gatekeepers to the profession we love and live? Yes, they’re new, but do our new colleagues really have to feel like they are going through yet another audition/job interview until they prove themselves? I’ve witnessed some mid-stage to veteran teachers wanting to make new teachers “pay their dues” or even suffer to make sure that they are truly in it. Yet, I’ve also witnessed experienced teachers provide guidance, support and encouragement.
We can — and must — help guide and mentor our own. There will always be kids to teach, and we have to help in any way we can to ensure that there are teachers for our kids. I’m glad to have people like Dan as a new colleague in the music education world. A new teacher who is going into teaching knowing that he won’t be perfect, but that he has the skills to do the job; a teacher who is able to check his ego at the door and ask for help when needed, and a teacher, like many of us, who just simply want the best for our world.
I followed up with Dan after this meeting over text. I was happy to hear that his first rehearsal went better than expected. I’m looking forward to meeting with him again soon. I have a recurring task in my to-do list to check in with some student teachers or teachers who I have mentored in the past. Time always seems to get away from us but it’s important to make the time and prioritize connecting with those who are working to find their way.
To all teachers out there — good luck this year, and take it all in. This year shouldn’t just exist to pass and make you “check off” a year of experience.
When Benjamin Rogers arrived at Liberty Middle School in Spanaway, Washington, to start their new role as choir director during the fall of 2019, the program had only 80 students, who were divided into ensembles based on grade level.
Rogers set his sights on expanding the program, but a few months into the school year, a new hurdle came their way: the COVID-19 pandemic, which moved all instruction online.
Regardless of these obstacles, Rogers has managed to double the size of the choir program during the past three years. The 2021-2022 school year boasted a choir of 165 students, with numbers projected to reach 180 during the 2022-2023 school year.
Rogers grew the program with a clever restructuring of the ensembles. Instead of breaking choir groups into 6th, 7th and 8th grade ensembles, Liberty Middle School divides students into groups based on their voices. Liberty Middle School now includes four choir ensembles: beginning treble choir, intermediate treble choir, advanced treble choir and bass choir.
Since restructuring the choir program, Rogers has noted many benefits not only in increased membership numbers, but also in the educational and emotional benefits to the students. “Choir can be female-dominated in some areas, and it’s really tough for middle school boys in choir,” Rogers says. “I wanted them to be able to have comfort and a sense of camaraderie and ownership in what they’re singing. I’ve always thought that if I have a group of students with similar voices, I can devote more time to training their technique.”
Be a Squeaky Wheel
To undertake this restructuring process, Rogers describes himself as a “squeaky wheel,” constantly bringing their ideas to the school administration’s attention. “I talked to the principal every single day. I put the bug in the counselors’ ears. I talked about how good it would be for recruitment and retention and how good it would be for [students’] education,” he says.
Rogers also says that being a “squeaky wheel” is their best piece of advice to other educators looking to restructure their choirs in a similar way. “Keep hounding about it as often as you can without getting reprimanded,” he says. “Give them the facts. Voice-based choirs build up the members of the program. They are pedagogically sound because you’re able to focus on one technique versus another, and they create a greater sense of community when students have those types of affinity groups for their voices.”
Once Rogers got the go-ahead from school administrators and cooperation from the counselors to make his vision a reality, he faced another hurdle: finding appropriate music.
Repertoire is Key
When Liberty Middle School first opened about a decade ago, it served 7th through 9th grade students before later shifting to a 6th-8th grade school. As a result, much of the music repertoire in the school’s library was for vocal ranges inaccessible to younger students. “The majority was soprano, alto, tenor and bass (SATB) music, and that is … not suitable for middle school level in general,” Rogers says. “My first year, I spent my entire budget on music because the difficulty level was not accessible.”
Switching to voice-based choirs instead of grade-based choirs also helped solve the repertoire problem by allowing Rogers to choose music that focused on each ensemble’s vocal capabilities.
When switching to voice-based choirs, Rogers originally planned to continue with the SATB music, letting the treble choir learn soprano and alto parts and the bass choir learn tenor and bass. However, scheduling conflicts made it difficult for the choirs to rehearse together, so Rogers realized that they would need to choose individual music for each ensemble.
By tailoring the music choices to each ensemble’s vocal capabilities, students were able to focus more on their individual parts. “The sopranos and altos were learning music that was balanced and intended for just sopranos and altos. Working on balance is a really big part of being in an ensemble,” he says. “I started purchasing a lot of bass choir and a lot of treble choir music. That helped their musicianship accelerate immensely.”
Liberty holds three choir concerts every year – winter, spring and a final concert toward the end of the school year. During each concert, all choir groups perform one song together as a group but perform the rest of their music separately. “Advanced and intermediate treble choirs are usually doing soprano and alto music,” Rogers says. “The bass choir learns tenor and bass music.”
Just as Rogers intended, the numbers of male students in choir have greatly increased with the advent of the bass choir group. After having 30 students in bass choir this past year, Rogers says that next year, it’ll be above 40, “which sounds terrifying — there will be a lot of testosterone in a smelly classroom!”
COVID Considerations
During Rogers’ first year at Liberty, COVID-19 caused school to go virtual for a few months, which made choir difficult. However, this experience also helped Rogers hone in on their ensembles’ strengths.
When school was remote in 2020, Rogers tried to hold choir over Zoom, which he says, “doesn’t work, but we made do like everyone else did.” One of the ways they “made do” was by recording students’ parts for their yearly Veteran’s Day performance and editing them together.
Despite the difficulties, Rogers stepped up to the challenge of building a choral community even when students were separated. “What I really gained from the experience was how much of a community we need to be,” he says.
Choir and Community
Even over Zoom, Rogers had students participate in a community circle, where ensemble members all greeted each other and shared their thoughts aloud with the group.
This community circle practice has continued as school resumed in-person and has become a staple at Monday rehearsals. “We all get to learn about each other,” Rogers says. “Everyone’s validated in [community circles]. Lots of students go with different names than what they were given at birth, and so anytime someone introduces themselves, I say, ‘Hi, I’m Rogers,’ and they say, ‘Hi, Rogers.’ In some classes, it’s cheesier than others.”
Still, this simple practice helps build cohesion. “I look for those opportunities to have students feel welcome, safe and part of something great.”
Rogers says that the bonds and friendships students form in his choir groups are often their favorite part. “A lot of students have a friend because of choir,” he says. “We do a lot to try to lift each other’s voices and energies.”
One highlight is the choir shout-out wall. Students can use Google Forms to leave compliments to their fellow choirmates. A teaching assistant will then write the nice comments on note cards and post them to the shout-out wall.
From the bonds formed among students to the growth in choir membership, the voice-based choir program has been a success in the school district’s eyes. Similar programs have been implemented in other schools. “It’s becoming more of a standard practice with the choirs throughout our district now,” Rogers says. “Voice-based choir is what they have at the high school already. It’s catering to that, and it’s gone well so far.”
Handmade instruments are one of my favorite activities to do with elementary students. You can find an instrument craft for every age group. Try planning one of these projects in your lessons for this upcoming fall!
The Benefits of Manipulatives
Manipulatives are any hands-on educational tool that supports learning. Manipulatives and crafts are a great way to incorporate deeper learning through dual coding — an educational theory that students process information best when they learn sensory visual and verbal content together.
The crafts in this article are instruments that students can use to self-direct their exploration of music, which has a positive impact on young musicians, and is often incorporated in state music standards. Lastly, hands-on experiences get students’ attention in a way that paper and pencil work doesn’t.
Types of Instrument Crafts
These are the most common instrument craft categories:
Straw instruments
Popsicle stick instruments
Cardboard instruments
Homemade hand percussion
Most of these crafts are economical because they use resources that most teachers already have.
Straw Instruments
Straw instruments are more difficult to play, so I would recommend the following activities for upper elementary classes.
Straw panpipe: Straw panpipes are a great way to teach about how length affects pitch and how scales work. To make a straw panpipe, you will need wide straws and materials to connect them, such as string, popsicle sticks and rubber bands, or simply tape. While you can use thin, they are much harder to get a sound on than bubble tea/boba straws.
MakerState, a nonprofit that focuses on hands-on STEAM education for schools and students in need, does a great job showing how to make a sturdy panpipe tuned to a pentatonic scale using straws, rubber bands and large popsicle sticks. Straw pan pipes are great prep for future flutists.
You can also make smaller pan pipes (from Tea Time Monkeys) with smaller straws, tape and paper.
Straw Reed: If you want to make sure that there are enough oboists or bassoonists in the high school band, get them started early with straw reeds. This craft also teaches how back pressure on instruments like the trumpet feels and helps young woodwind players produce a steady stream of air. Straw reeds work when you press your lips together, and the two pieces of the straw meet and vibrate.
A straw reed can be used at any age. It was one of my college flute professor’s go-to methods to revitalize a flutist’s air pressure.
To make a straw reed, cut a straw to a point and then snip off the peak. Be careful because the tops can be sharp, depending on the angle at which you cut them.
You’ve probably heard of photo frames made from popsicle sticks, but how about harmonicas or even kalimbas?
Popsicle-Stick Harmonica: This is one of the faster projects on our list. Popsicle-stick harmonicas require rubber bands, larger popsicle sticks, and straws or toothpicks. These “harmonicas” sound a lot like kazoos. They are super fun and buzzy, so be sure to do a lot of prep on when and where your students are allowed to play their instruments!
Popsicle-Stick Kalimba: Kalimbas are a modern version of the ancient instrument of the Shona people of Zimbabwe called the mbira. Both mbiras and kalimbas are lamellophones, a tuned percussion instrument with metal tines.
This percussion project is more involved — you make the pitched tines out of popsicle sticks — so I recommend it for smaller classes or in stations.
For an easy version of a popsicle-stick kalimba (from BingoBongo Learning), you will need popsicle sticks, paper bowls, glue and small wood blocks.
For a harder version (from Carved Culture), you will need a hot glue gun, and both thick and thin popsicle sticks. I suggest the hard version for 6th grade to junior high music classes.
Cardboard Instruments
Do you have a source of free cardboard? Then try out these two crafts.
Cardboard Trumpets: This craft is suitable for lower elementary students and teaches about sound waves and buzzing.
Students will make a “bell” out of construction paper that fits tightly around a paper towel roll. Other materials you will need include tape, scissors and glue. Check out instructions and photos of cardboard trumpets from Tea Time Monkeys.
Cardboard Box Guitars: I couldn’t leave out this classic craft! I made cardboard box guitars with my grandma in the early 2000s — it’s something a kid must try at least once!
Cardboard box guitars can be made from any kind of box, including tissue boxes and cereal boxes. If you tell students to bring in a box without giving them any dimensions, they will learn that different sized instruments have different pitches (i.e., the larger the box, the lower the sound). You will also need long rubber bands, tape and a cardboard tube for the neck.
To make a cardboard box guitar, tape the box closed and cut a square sound hole in the middle of the front of the box. Then, cut a hole in the top that is the same size as your cardboard tube. Attach the cardboard tube with duct tape. Cut some notches in the top of the tube and stretch the strings across the neck and guitar.
Rhythm is the heart of all music, so percussion crafts are great to help little ones understand music.
Egg Shakers: All you need to make these hand percussion instruments are plastic Easter eggs and rice. While this craft is a bit messy, it gets students hands-on experience with shakers. Try pairing it with a lesson about Native American gourd shakers and how they are made.
Paper Plate Tambourine: Here’s another simpler project for lower elementary students. You will need paper plates, jingle bells, a hole punch and some string. Because the tambourine is made of paper, students can color or paint their instruments before they put them together, allowing for more creative freedom than some of the other projects! Check out instructions and photos of paper plate tambourines from First Palette.
Tips for Using Music Crafts in the Classroom
Using manipulatives in the classroom can be a difficult task. Here are some tips to make sure your music projects run smoothly:
Give instructions before you pass out materials.
Hand out supplies one at a time.
Make them all the same!
Students will jump the gun on your lesson plan if you pass out materials too soon. It’s better to hand out materials one at a time for each step. You can also set up stations around your classroom to aid during transitions.
For younger elementary students, use the same color constructor paper for all the paper trumpets — trust me, this will save you a lot of headaches. If you struggle with classroom management, limit the choices, but offer ways to decorate the instruments (different colored crayons, items that can be glued on, etc.). For more mature classes, you can give students more creative reign. However, if this is your first time doing musical crafts, go slow and keep it simple!
I remember the days when I dreaded teaching my own craft lessons that I had so painstakingly concocted. But with a little bit more planning (and a lot more experience), I eventually got the hang of it!
Which instrument craft are you most excited to try?
Bethany Robinson with her Yamaha SLB300PRO SILENT Bass.
“I think confidence is a skill that you can teach along with notes and rhythms,” says Yamaha Artist and educator Bethany Robinson. “When we ask students to stand up and improvise, that can be a very, very scary moment for them. Helping to equip them with something that they’re going to be instantly successful with — or breaking it down into such a small thing [so] that every student, no matter their experience level, will sound good when they get up and do this — [that’s when] their confidence and their competence grows.”
Robinson herself approaches her two callings — as an educator and as a professional jazz bassist — with a confidence and an enthusiasm that is palpable. A 2022 Grammy Music Educator Award Finalist, she was named one of the 2022 Jazz Heroes by the Jazz Journalists Association, which honors advocates who have had a significant impact in their local communities. It’s easy to see how she has become an inspiration for both her students and her fellow musicians.
COMPETITIVE EVEN AS A SIXTH GRADER
Growing up in a musical family with a mother who was a piano teacher and a father who was a bass player gave Bethany an early start as a musician. Having enjoyed the public school band experience, she intended to join her middle school jazz band as a pianist but when it was time to audition, found numerous piano players already lined up. Spotting a kid in the corner with a bass, she went up to him and asked how long he had been playing the instrument. His answer? “One day.”
Robinson — who admits that she was competitive even as a sixth-grader — recalls running home and excitedly telling her father, “Dad, this kid has a one-day head start on me!” No doubt delighted that his daughter wanted to follow in his footsteps, her father handed over his bass and a career was born.
“I sat at the piano and I made my own fingering chart and figured out what note was what,” she recalls, “and really fell in love with the bass. Out of all the instruments I learned over the years, that was the one that spoke to me the most. I love the foundational aspect of being the low end for the band and keeping things moving.”
Bethany with a Yamaha BBNE2 bass guitar.
ON TEACHING
Robinson received her first Lilly Teacher Creativity Grant in 2011, which allowed her to travel to New Orleans and New York City in order to explore current trends in jazz. In the course of that journey, she attended the Band Director Academy at Jazz at Lincoln Center and developed a whole new concept of jazz pedagogy at the secondary level.
She was teaching sixth grade music when she was given the opportunity to come to Noblesville High School in Indiana (where she still serves as Jazz Band Program Director and Assistant Band Director) soon after the head band director had retired. “It was perfect timing in my career,” she says, “[though] there was just one jazz band here and it was made up of students who were just perhaps not interested in doing marching band. So they were resistant at first [to things like auditions, traditional jazz literature, dancing in class, etc.] but then it became the culture and all the older students [told] the freshmen, this is what we do, we dance and we sing. Then we added a second band and then a third one and now we have six of them.”
Under Robinson’s direction, Noblesville bands have made four appearances at the Indiana State School Music Association (ISSMA) Jazz State Finals, took second-place at the 2021 & 2022 National Jazz Fest Large School Jazz Ensemble Category and were two-time finalists in the prestigious Jazz at Lincoln Center Essentially Ellington Festival and Competition.
“Just this past year, we had the chance to win the State Finals for the very first time in my career,” she reports. “We didn’t. [But it was] one of my favorite moments of my teaching career because we were able to watch most of the bands and our kids were genuinely cheering on every [competitor]. On the way home, more than one student came up to me and said, ‘I wouldn’t have traded first place for any experience we had today because it was so great.’ That’s a moment as a teacher. You think, ‘They get it!’ It’s not about winning, it’s not about first place. It’s about the experiences that we have when we come together and everyone fulfills their role and brings their spirit into the music.”
THE IMPORTANCE OF SCHOOL MUSIC PROGRAMS
Given her own personal experience, it comes as no surprise that Robinson is a fierce advocate of school music programs. “[They] were so important for me,” she states. “First of all, [they] gave me a place to belong and take whatever excitement or skills or intelligence I have and channel them into something that was social. With private lessons, you’re by yourself and you’re making music, but the motivation to practice when it’s just you and an instrument [is not always there]. Some kids have that, but as soon as you start making music with other people, there’s the idea that we all can bring something unique, we all bring this sound together and we’re all kind of counting on each other. There’s something really special about playing your instrument with other people and having that interaction. It’s like a conversation: You don’t know where it’s going to go, but the more you have them, the more comfortable you are with them. For me, the idea of playing with other people was so transformative and so motivating that I wanted to devote my life to giving those opportunities and those same experiences to the students too.”
“I find that, for students, having a place to belong in middle school or high school changes their experience and their personal growth, and maybe [even] the path that they find themselves on. For a freshman coming from a middle school to a huge high school, they have so many options [as to] who to eat lunch with or who they’re going to see in the hall. What school music programs give students is connection. And if students have connection, then they’re going to be showing up to their math class and to their reading class and to their social studies class.”
Robinson has the following message for parents who are allowing their kids to be a part of school music programs: “The first thing I would say is thank you. And I also would say that this music program will change [your child’s] life. They will be connected in a way that they wouldn’t be otherwise. So keep them in music because it will help them for the rest of their lives, no matter what they decide to do.”
“Students have unlimited potential in music,” she adds. “The main thing [for them] is to find artists that they love to listen to, friends that they love hanging out with and can jam with, to come up with arrangements of songs, to get together with others and try to transcribe a jazz solo. The more fellow students they can get together with [to] hang and play music and sing, that’s going to be how they continue to fall in love with music and get better and better at their instrument.”
PURSUING GOALS
“10 years ago, I didn’t even know what the Essentially Ellington program was,” Robinson says. “But I went there and I was like, wow, hopefully I could do this. It was just a dream; you say these things out loud and then you kind of laugh because there’s no way that would really ever happen, but it never stopped me from pursuing [that goal]. Goals may seem completely impossible and completely unattainable, but the process of pursuing them is actually so formative. [In this case], you’re learning about this really deep music and how difficult it is. But no matter how bad it is when you start, it just gets better and better, so it changes you in the process. Even if you don’t reach that ultimate goal you’re after, the steps you take to try to get there are just as important.”
MUSIC COMES ALIVE
“Music really comes alive when students are moving beyond just the notes and rhythms that are on the page,” Bethany explains, “and when it does, it becomes expressive. When you listen to original recordings, [you realize that] there’s so much inflection that could never be written out on a piece of paper. It’s when students start connecting to those moments of expression that they realize how nuanced music is … and how nuanced life can be. They have to pay attention on such a deep level to understand the music and then emulate it in order to come up with their own expression, and that then helps them to be more expressive in other areas of their life as well, [even in] their relationships with other people.”
“I get really emotional when I think about how the students benefit from what we do,” she continues. “Building this kind of culture creates an ecosystem for students to succeed, no matter what the subject is. That is the most important thing to me. We just happen to be making great music along the way.”
Bethany with her students at the Essentially Ellington Jazz Band Competition at Lincoln Center.
In Part 1 of this two-part series, we showed you how to build the four main triad chord types and add the seventh degree to create major, minor and dominant seventh chords.
We can further enhance the harmonic flavor of these chords by adding what are known as chord extensions. The three chord extensions are as follows:
Second or ninth (A ninth is a second up an octave)
Fourth or eleventh (An eleventh is a fourth up an octave)
Sixth or thirteenth (A thirteenth is a sixth up an octave)
Technically, ninths, elevenths and thirteenths should only be denoted when the seventh is present in the chord. However, musicians often use those terms regardless of the seventh.
It’s important to understand that adding an extension doesn’t change the harmonic structure (that is the “quality”) of a chord in terms of whether it’s major, minor or dominant. That’s why adding an extension to any of those chords doesn’t change their function within a chord progression — it merely adds more complexity to the flavor.
Major and Minor Extensions
Seconds
A G major triad with a second added (in this case, the note A) is called G(add2), although musicians often refer to it as G(add9). Adding the major second to a major triad creates a sweeter, more contemporary sound.
You can change this to a G minor triad by lowering the third and adding the second. This is called Gmi(add2), though, again, musicians often refer to it as Gmi9. Using the correct names will raise your grades when taking written theory exams … but more importantly, it’s good practice for sharing information with other musicians.
Fourths
Generally speaking, adding an extension of a fourth to a triad will create a suspended fourth chord, called a sus4. The name comes from the fact that the fourth is preventing the third from resolving — in other words, “suspending” its resolution. Suspended chords often resolve back to the third, creating a consonant tension before resolution.
The G major triad with the fourth suspending the major third is called G(sus4). The G minor triad with the fourth suspending the minor third is called Gmi(sus4). It is also possible to add a fourth to a full major triad without it suspending or replacing the third. This is called an add4 chord. These chords can be hard to construct on the fretboard, but the illustration above shows a Dadd4 voicing that’s pretty easy. Try it, so you can hear how cool it sounds.
Sixths
Adding the sixth (E) to Gma will result in a major sixth chord, called G6.
Adding the sixth (E) to Gmi will result in a minor sixth chord, called Gmi6
As a matter of interest, the G6 chord is enharmonic as Emi7 (in other words, it contains the same tones as Emi7). However, how the chord is perceived will depend on the context and which of the two notes is in the bass.
Seventh Chord Extensions
Once you have the seventh present in chords, you can designate second, fourth and sixth extensions as ninths, elevenths and thirteenths:
Ninths
The Gma7 chord with the ninth (A) added is called Gma9.
The Gmi7 chord with the ninth (A) added is called Gmi9.
The G7 chord with the ninth (A) added is called G9.
The diagrams above depict all three of these chords with the ninth above the seventh in pitch. Theoretically, the ninth should always be voiced this way; however, this is not always practical, so other voicings can be substituted.
Sevenths and Suspended Fourths
If you add the fourth to major, minor or dominant seventh chords, these are still referred to as suspended fourths, regardless of the seventh being present in the chord. (Hey, I don’t make up the rules, I just explain them.) Adding the fourth to a seventh chord can still create a suspension if you place it in front of the third. So Gma7(sus4), Gmi7(sus4) and G7(sus4) are all typical chords in modern harmony.
Elevenths
An eleventh added to a major seventh chord will either be a perfect eleventh (if added to the I major chord) or a naturally occurring sharp eleventh (if added to the IV major seventh chord). The perfect eleventh will sound extremely dissonant and is generally raised a half-step to a sharp fourth in jazz compositions.
The Gma7 chord with the eleventh (C) added is called Gma11.
The Gma7 chord with the sharp eleventh (C#) added is called Gma7(#11).
The Gmi7 chord with the eleventh (C) added is called Gmi11.
An Fma triad with the G in the bass is called G11(dominant 11th). Because of its major third interval, a dominant 11th chord generally adheres to raising the eleventh to a sharp eleventh in order to reduce the dissonant tonality. Again, you’ll see this in jazz, but not so much in pop or rock music. The fusion and contemporary version of this is called a “slash” chord — that is, a chord with a note other than the root in the bass. In this case, it’s F/G: an F major triad with the G in the bass. If you analyze the chord from the G bass note, you get the root (G), flat seventh (F), ninth (A) and perfect fourth/eleventh (C). This is a much sweeter-sounding chord, albeit one that’s still considered a dominant chord in modern compositions.
Thirteenths
Finally, let’s add the thirteenth above the seventh on the Gma7, Gmi7 and G7 chords.
A naturally occurring thirteenth will occur on a IImi7 chord, but will be a minor thirteenth on IIImi7 and VImi7 chords in diatonic major scale harmony. Just be aware of this if you are trying to retain tones within one specific key.
The Gma7 chord with the thirteenth (D) added is called Gma13.
The Gmi7 chord with the thirteenth (D) added is called Gmi13.
The Gmi7 chord with the minor thirteenth (D) added is called Gmi7(♭13). This occurs on the IIImi7 and VImi7 chords.
The G13 chord is a dominant seventh chord with a major sixth added. The sixth is referred to as a 13th because the flat seventh (minor seventh) is present in the chord.
The Harmonized Major Scale
It’s perfectly fine to build all these chords from one specific root note. However, once you move these chords into alternate scale positions, the extension may be flattened or sharpened to accommodate the major scale formula. You’ll therefore want to be aware of the scale position a chord occupies in a given key when adding extensions.
For example, the III minor chord in the key of G major is Bmi7. The next note up in the scale is C, which is a semitone above B, so adding a ninth to Bmi7 in this key would result in a ♭2 or ♭9 extension. The chord would be referred to as Bmi7(♭9).
The Chord Progression
The chord progression I’m using in the video below retains the drum and bass parts from the Part 1 video, but enhances the harmony with extensions. The mere fact that I can change the voicings over the same bass part goes further into demonstrating that the harmonic integrity remains, regardless of the additional extensions.
Here’s the original chord progression:
II: G7 I G#dim7 Bdim7 I Ami7 I D+ F#+ :II
… and here’s the revised progression using extensions:
II: G13 I G#dim7 Bdim7 I Ami9 Ami11 I D13 D9 :II
As you can see, I’ve added the thirteenth to the G7 chord, the eleventh and ninth to the Ami7 chord, and exchanged the D+ for a sweeter-sounding D13 and D9.
The Video
Here, I’m fingerpicking the first guitar part. This was done to establish the 12/8 time signature of this blues-based progression.
The second guitar part utilizes upper chord voicings to accentuate the harmony on the top four strings, as shown below.
As I did in the Part 1 video, I’ve chosen to once again play double-stop chord fragments to outline the chord changes and to create a subtle melody on the top string. The specific double-stops are shown below.
Last but not least, my lead guitar melody follows the chords with their specific arpeggios (chord tones) and some judicious use of the G and A blues scales.
The Guitar
As in Part 1, I’m playing a Yamaha FSC-TA TransAcoustic guitar in this video. This instrument really does shine when it comes to recording multiple guitar parts. The neck and fingerboard are so well-balanced between acoustic and electric guitar dimensions that any style of music and technique can be articulated with absolute ease.
I used the FSC-TA’s built-in pickup to capture all the guitar parts in the video, and varied the amount of onboard hall reverb for each guitar part to retain clarity on the overdubs. I also added some extra ambience on the double-stops and single-note lines to help them stand out sonically.
The Wrap-Up
Simple chord progressions can evolve into extremely complex harmonic structures when you delve into the realm of extensions and alternate voicings. I’ve found that with careful orchestration and a clear knowledge of the possibilities, I can take even the most modest three-chord song and easily turn it into a complex and harmonically rich guitar arrangement.
And when you consider that a chord extension automatically becomes a chord tone, you’re also expanding your melodic resolution points and tasty choices when soloing and improvising. It’s like opening a doorway to a world of new musical options!
I’ve been a collaborative songwriter even since I got the bug to be a professional over two decades ago. I’ve always loved the challenge of merging my creative DNA with someone else’s and seeing what happens.
I remember the instructor in my first composing workshop asking the class, “Who would like to write with Shelly?” And I remember the sinking feeling I had inside — the same one I felt in middle school when the coach asked the PE class who wanted to be on my team. Would anybody raise their hand?
Well, someone did — Alex, another aspiring songwriter. We were off and running. In fact, we couldn’t stop. Why had we waited so long? After years of composing music all by my lonesome, I now had a partner. A conspirator. Someone who pushed when I pulled. Someone who had strengths where I was lacking, and vice versa.
Instead of dining alone all the time, I could now share a meal with someone and compare her reaction when the flavor hit our tongues. Songwriting was suddenly a bigger world. It would never be the same.
That first partner is still my dear friend and we absolutely cringe when we listen to the songs we wrote back then — songs we thought were amazing at the time. But it doesn’t matter. What matters is that we held hands and fearlessly jumped in. We learned from each other. We felt the feels together. Co-writing was something we did side by side. Face to face. And we wouldn’t have wanted it any other way. There was beauty in the coexisting, the discovering and co-creating in the same room. There was this kind of vibration when we got it right. A widening of the eyes. We both felt it. At the same time!
But so much has changed in music composing culture. Technology has made it more convenient and easier in many ways to marry music with words. It’s given us the freedom and independence to collaborate with someone on the other side of the world. We can add more texture to productions without musicians, cut and paste at lightning speed, tune vocals, you name it. To be honest, I don’t know how I’d get as much accomplished without a DAW either. But now, instead of somebody sitting across from me and strumming a chord progression in real time, they might program that progression in the privacy of their own space and send a file to be decorated with a melody and a lyric — a combination that has become widely known as a “topline.”
In a songwriting class I teach I’ve noticed that many students co-write transactionally. Perhaps they couldn’t find time to get together, so Joe wrote the verses and Jane wrote the chorus. No wonder compositions sound disconnected. Disjointed. I wonder if the two writers were excited to listen to their creation first thing the next morning … or if they were simply relieved to get the assignment finished.
I’ve even started hearing the process called “making songs” instead of songwriting. Until recently I didn’t understand this modern renaming of the craft I hold so dear. But it makes sense. It’s the combining of ingredients.
Listen, I enjoy writing to pre-fab instrumental productions occasionally. I’ll press play on a tasty track that a trusted and seasoned pro has sent me and marinate with it for days. On my own. While I cook. During a run. When I drive. Words fall out and feel right, and nobody interferes with my flow. It’s a change of pace. I get it. But it’s a different sport.
I try to convey this to my students, because it would break my heart if they never got to experience that magical good vibration. I urge them to give face-to-face collaboration a try, because when all is said and done, there’s really nothing like the feeling of a song coming together symbiotically — two people simultaneously recognizing that vibration when they get it right.
Looking to push the sonic boundaries of your home theater? Watch one or more of these epic battle scenes. When the explosions and impacts pound your subwoofer, flyovers and bullets begin to zoom everywhere and the armies start clashing in front of you, it might be time to duck under the covers. But first, turn the volume up!
LORD OF THE RINGS: RETURN OF THE KING – THE BATTLE OF PELENNOR FIELDS
Swords, shields, armor, elephant charges and stirring music make this scene from the final installment in the famed trilogy unforgettable. Here, Gandalf the White, played by Ian McKellan, takes control of a battle after Denathor (John Noble) tells the men to flee rather than fight. But fight they do and the incredible visual effects and sound design — underpinned by a powerhouse score by Howard Shore performed by the London Philharmonic Orchestra — will mesmerize you. Check it out here.
INDEPENDENCE DAY – VICTORY
This science fiction action flick starring Will Smith and Randy Quaid took home the 1996 Academy Award for Best Visual Effects, but there’s plenty of sonic excitement here too. The story begins when an extraterrestrial mothership enters earth’s orbit and deploys huge saucers over numerous major cities. The climactic battle scene has the earthlings finally taking on the aliens. It’s filled with high energy sound design, including flyovers coming from all around you. When his missiles jam, fighter pilot Russel Casse, played by Quaid, flies his jet into the enemy ship, causing a massive catastrophic explosion that will light up your screen and get your subwoofer shaking. Check it out here.
AVATAR – THE FINAL BATTLE
This groundbreaking film from director James Cameron takes place in the mid-22nd century, as humans begin colonizing a lush moon called Pandora. The ensuing mining activities threaten a humanoid native species called the Na’vi, who, in this amazing scene, fight for their home against a mechanized army bent on their destruction. A number of cutting-edge visual effects were invented for this film, which, combined with powerful sound design and music from James Horner, makes for a spectacular viewing experience. Check it out here.
STAR WARS EPISODE 2: ATTACK OF THE CLONES – BATTLE OF GEONOSIS
The entire Star Wars franchise is marked by epic battle scenes, but this is arguably the most memorable one of them all. This episode is set in time 10 years after the Phantom Menace film. It features all the digital effects we have come to love in the series, but the climactic battle was created directly in animatics and is instigated by none other than the most famous Jedi Grand Master Yoda. With plenty of flyovers, laser shots, explosions and high-energy action, it’s sure to keep you on the edge of your seat. Check it out here.
TRANSFORMERS – SCORPONOK DESERT BATTLE
This battle from the 2007 award-winning movie Transformers combines computer animation with live action. In a war between robots who can disguise and transform themselves, the heroic Autobots fight the evil Decepticons, who try to build an army using the machines of the Earth. Taking place deep in the desert, this clash between a group of soldiers and a robotic scorpion-like creature called a Scorponock is filled with loud, heavy action and lots of sub-rattling explosions and gunfire. Heavily armed attack jets finally roar overhead to finish off the job, giving your surround sound system a further workout. Check it out here.
GODZILLA VS. KING KONG – HONG KONG BATTLE
Not every battle scene involves armies. This one involves two legendary foot-stomping, earth-shaking monsters: Godzilla and King Kong. The excitement takes place at night in the streets of Hong Kong, adding to the visual impact onscreen. This 2021 American-made film is actually the 36th in the Godzilla franchise, and it used three different visual effects studios to create the battle between the giants. Check it out here.
THE HOBBIT: BATTLE OF THE FIVE ARMIES
Between the menacing music from composer Howard Shore and the relentless stomping of thousands of soldiers marching into war, this classic scene from The Hobbit builds and builds to an incredible climax. Elves, men and dwarfs take on the evil fanged Orcs in a wild onscreen clash that will rock your sound system. Check it out here.
MARS ATTACKS! – JIM BROWN VS. THE MARTIANS
This 1996 science fiction comedy (yes, there is such a genre!) directed by Tim Burton features an all-star cast that includes Jack Nicholson, Glenn Close, Danny DeVito and Michael J. Fox. The premise? Flying saucers land on Earth and when the President of the United States mistakenly welcomes the invading Martians as foreign dignitaries, mayhem ensues. George Lucas’ company Industrial Light and Magic (ILM) created the Martians and in this scene, heavyweight champion boxer Byron Williams (Jim Brown) takes a bunch of them on, smashing their glass helmets with his punches as they jump all over him. Adding to the comedic chaos are the dramatic stabs of brass from the Danny Elfman score coming from all around you. Check it out here.
For the first time since the Every Student Succeeds Act (ESSA) — which spelled out that music and the arts were part of a well-rounded education — became federal law in December 2015, a comprehensive study of the status and condition of music and arts education in public schools has been conducted. The Arts Education Data Project (AEDP) looked at data reported by school districts in 2019 and found that while 92% of public school students do have access to music education, more than 3.6 million students do not, and that over 2 million students do not have access to any arts education (dance, music, theater or visual arts).
The study also noted that a disproportionate number of these students without access to arts education are concentrated in major urban or very rural areas where the majority of students are Black, Hispanic or Native American, and at schools with the highest percentage of students eligible for free/reduced-price meals.
Findings about music education in public schools from the report include:
92% of all students have access to music education during the school day.
49% of all students participate in music education during the school day.
8% of all students have no access to music education during the school day.
Music education is available from elementary through high school with the highest participation in elementary schools because many states require participation at this level.
Arts Education in Public Schools
When looking at access to arts education, the report found:
96% of all students have access to arts education during the school day.
67% of all students participate in arts education during the school day.
4% of all students have no access to arts education during the school day.
Spreading the Word
The report was released just prior to the National Association of Music Merchant (NAMM) Music Education Advocacy Hill Day in mid-September 2022, so members and advocates of arts education as well as industry representatives could share this data as they traveled to Washington, D.C., to talk to members of Congress and their aides about the need to support music and arts education. Read Yamaha Education Marketing Manager, Heather Mansell’s five takeaways from her trip to D.C.
Music and arts educators are encouraged to participate in the Arts Education Data Project, and to work with their administration and district leaders to ensure that they apply for available Title I and Title IV Part A funds to support and expand music and arts programs.
For well over a decade, the NAMM Foundation has brought together music education advocates from across the country, tapping into one of their greatest resources, its membership. For those not familiar, NAMM is the acronym for the National Association of Music Merchants, which encompasses hundreds of music-centric businesses including musical instrument manufacturers (like Yamaha), retailers (your local musical instrument store) and not-for-profit music-service organizations (like United Sound). As one the largest companies in the membership, Yamaha Corporation of America, invests in sending representatives to advocate for funding and strengthening music education in the United States.
I was fortunate to travel to Washington, D.C., on September 14, 2022, to participate in NAMM’s “Hill Day” advocacy push. This event was put together to drive awareness and highlight the outcomes of student participation, and most importantly, where and how money is being spent on music education. Funding educational programs takes place at all levels of government, but NAMM specifically funds and uses current research data to track what happens to that money once it is applied to various bills and the provisions in its laws. As an advocacy coalition, we take this data to legislators and have conversations about the importance of funding key programs that will impact students, teachers and communities.
Here are my five takeaways from this year’s Hill Day.
1. New Study Results
The Arts Education Data Project, led by longtime music education advocate Bob Morrison, released the results of its 2019 Study with new insights on how music education is being distributed and applied. The report revealed that over 3.5 million students in U.S. public schools do NOT have access to music education, and that more than 2 million students have no access to ANY arts education at all. While 92% of students do have access to music education, the new data also revealed that a disproportionate number of students without access to music and arts education are concentrated in public schools in major urban or very rural communities; in public schools that have the highest percentage of students eligible for free/reduced-price meals; and in public schools with a student population that is majority Black, Hispanic or Native American.
2. Access and Participation
It’s important to highlight the nuances and details from the study. Music education is available to students in elementary through high school, with the highest participation in elementary schools, in part, because many states require participation at this level. When looking at all public schools, both traditional and charter, the study found that 34% of students without access to music were at charter schools, compared to 6% without music in traditional public schools. The study includes many other details about which students do and do not have access to music education. A summary of the report prepared by NAMM can be downloaded and reviewed here.
3. Take Action
We focused our legislative ask on the most direct and consistent form of funding for music programs: Title IV-A, a provision in the Every Student Succeeds Act (ESSA). These funds are available to every school district and are specifically directed to expanding music and arts learning opportunities. Many music and arts teachers don’t know about this funding source, and many districts can do much more to ask for funds through this provision. Title IV-A is currently authorized at $6 billion and we asked legislators to fully fund this at $2 billion, and work to keep increasing this amount. You can learn more about Title IV-A here.
4. Be Heard!
Legislators want to hear from constituents! I was fortunate to work within a coalition of advocates in Washington, D.C., that had materials on hand and a clear ask prepared. However, I realized that the rubber meets the road at the local level, which has motivated me to show up at my local school board meeting at the district level and participate in the conversation around arts and specifically, MUSIC program funding.
5. Advocacy is who you ARE
Yamaha Marketing Manager Heather Mansell with Yamaha Master Educator Donny Gruendler at the 2022 NAMM Hill Day.
Advocacy isn’t a one-time action, it’s a mindset and revolves around what you can do in your daily interactions. I look for every opportunity to have a conversation about the benefits of music education. I can work with individual teachers about improving their program by talking to them about funding and goals for program expansion. I also keep tabs on who can influence program expansions from a legislative standpoint (it’s generally done at the district level). Have a simple conversation with other parents, with teachers at your child’s school, talk about arts education with elected representatives at the municipal, state and federal levels. It’s a pretty easy conversation to have — over 82% of adults WISHED that they played a musical instrument (Gallup/NAMM).
This year’s Hill Day was an exciting return to a post-pandemic world, reminding representatives about what we want for our children, which is an education that includes MUSIC.
Further reading on the benefits of music education, and many other topics for music program leaders, can be found on the Yamaha music educator blog.
Sometimes, being a music teacher is a pain in the neck. Literally.
As much as music educators love their jobs, teaching can be brutal on their bodies. According to the Society for Music Teacher Education, “Music teachers are known to be at high risk for many occupational health issues.” It cites common musculoskeletal disorders linked to music educators’ roles, such as a choral conductor with shoulder pain or a band director experiencing back problems from lugging equipment around.
Is Music Hazardous to Your Health?
The act of playing an instrument, while joyous, places the body into unnatural positions. That’s why, according to a MedPage Today research study that was conducted by Witten/Herdecke University in Cologne, Germany, two-thirds of professional musicians live with chronic pain. That study found that the top areas of pain were the back, shoulder, neck and wrist/hand. This discomfort was linked to the area of the body most stressed by the instrument played by a musician. For example, brass players were more likely to have back pain from holding a heavy instrument like a tuba or French horn, while string players and flutists tend to suffer more from arm and shoulder pain.
Let’s start with some overall habits that can help music educators avoid pain, regardless of which instrument or vocal classes are being taught:
Take frequent breaks — about every half hour if possible — to stretch or rest.
Practice proper posture and share those best-posture practices with your students.
Because stress can cause muscular tension, according to an article on the American Psychological Association website, try to reduce stress overall. That’s easier said than done for a busy music educator, but adequate sleep, regular physical exercise, social support and meditation can all help tamp down stress levels.
If you do experience pain, promptly make an appointment to see your healthcare provider because it’s easier to treat pain when it starts, rather than after it’s become a chronic, months-long problem.
Here are some tips for using flexibility and strength exercises, as well as adapting repetitive movements — from head to toe.
Tight Neck and Shoulders
Spent all week with a violin or viola (and, um, middle schoolers)? Well, it’s no wonder you’ve got a pain in your neck. Yoga Journal notes that the anatomy of the neck and shoulders is both complex and extremely mobile, making it particularly prone to injury from overuse. According to a metastudy of the research on yoga and neck pain, yoga has been found to have a significant effect on pain intensity, improves range of motion, and may help with overall anxiety. To soothe tight necks and strengthen shoulders, try these yoga asanas: Cobra Pose, Bow Pose and Eagle Pose (how-tos from Yoga Journal are shown here).
Wrist/Hand Pain
The repetitive motions of piano playing can result in achy joints, stiff fingers and sore forearms. Professional pianists know how to properly align themselves and how to get the bench height right, but don’t forget this simple fix, too: raise your hands above your head occasionally throughout the day. This may help reduce the risk of carpal tunnel syndrome, by reducing fluid that accumulates and avoiding pressure on the median nerve in the wrist.
To warm up with your students before a keyboard lesson, try some of the fun, kid-friendly exercises from New Zealand-based piano teacher Ruth Power. Her brief video shows how to strengthen wrists and increase the range of motion in hands, with moves like “The Mermaid” and my personal favorite, “The Zombie.”
Low-Back Pain
Some chronic, low-back pain comes from sitting at a desk or computer, while other music educators find they develop back pain from holding an instrument, such as a trumpet, aloft. The Alexander Technique has been found to be a cost-effective, useful way to treat persistent back pain, according to the British Medical Journal. Popular with performers, the Alexander Technique teaches posture habits, and the mind-body connection of balance and alignment, with the goal being more freedom of movement.
Tight Hips
Sitting for hours at a time, such as when teaching or sitting on a band bus, may cause tight muscles and pain in the hips. Try to stand up and move around a bit when possible. And when you get home, meet your new best friend: A foam roller. Foam rolling, or “self-myofascial release” if you want to be fancy, has been found to relieve hip pain, according to research published on the National Library of Medicine. Here are three stretches using a foam roller that you can easily do in your living room.
Sore Feet
Many music educators are on their feet, often in dress shoes, for multiple class periods. Try placing an anti-fatigue mat — those dense foam/gel pads professional chefs use — in the spot where you spend the bulk of your day standing. When you get home, make like a ballet dancer and soak feet in a bucket of warm water and Epsom salts for 20 minutes. According to the Cleveland Clinic, Epsom salts may reduce inflammation and help relax muscles. Or if you’re feeling brave, plunge those tootsies into a bucket of ice water for 10 minutes, which can alleviate pain. (Or at least make you forget you were having pain, because — yowza! — that’s cold!)
Hopefully, by being mindful of posture and movement throughout your teaching day, you can avoid some of the physical strain that comes with being a music educator. And come the weekend? Massages, long baths or yoga classes are all wonderful, healing rewards for all your hard work.
Many professionals in the business world would agree that a company’s logo is one of the most important facets of its brand. Not only is a logo the first opportunity for a company to make a statement about its product or services, but an effective logo can make a terrific first impression on potential clients, future employees and other stakeholders. It can even strike fear in competitors.
Although music teachers are not trained marketing strategists, we are content experts who spend countless hours developing our musical skills and refining our pedagogy so that our students can benefit from the best version of ourselves. However, if we do not effectively market our product — in our cases, our students’ achievements and the authentic learning opportunities we create in our classrooms — we may alienate ourselves from the very people whose support we need to stay afloat and flourish in a post-pandemic educational landscape.
Why should our students be the only ones privy to the culture and prestige we associate with our music programs? Having a brand that transcends the walls of your music classroom is an excellent way to let the greater community and other outsiders in on the magic you and your students create on a daily basis.
A brand for your school music program or a select ensemble should not just be about designing a cool logo and throwing it on a T-shirt. Rather, it should be about creating and sustaining a unified vision and mission for your program. To be clear, a vision should center around what you want your program to be, while a mission should focus on how you intend to get there.
When the Dwight D. Eisenhower High School band was in the process of rebranding our ensembles, I met with current and former students and their families to determine the aspects of our program that meant the most to us and which areas could be improved. I wanted all stakeholders to have a shared vision so our program would be reflective of our students and their community. We looked at music programs from other schools that we admired and considered how we could provide similar opportunities for our program. The sense of pride you want your students to experience as a member of your music program starts with a meaningful vision and mission. Otherwise, your logo would just be a design without any substance.
Once your vision and mission are created, consider when the best time would be to brand or rebrand your program. I would caution new directors on rebranding an already established music program in a completely different direction if their school community is not ready to embrace significant change. On the same token, a rebrand may be long overdue for experienced directors who have been steering the ship on the same course for quite some time. A rebrand may be accompanied with some resistance, but if you keep your focus student-centered, you will encounter much less adversity.
No branding is complete without an effective logo. When selecting a logo for your program, it’s important to consider the following questions:
Will I incorporate the school’s existing logo into my new design? If so, am I able to obtain permission from the copyright holder to do so?
Many school logos come from the same source material with varying degrees of copyright permission. Perhaps you have even encountered identical mascots from two different schools. In my hometown of Chicago, it seems as though every “Home of the Mustangs” school has the exact same horse graphic! That said, my school’s Cardinal logo is strikingly similar to our namesake from the National Football League. Because of this, I am limited by copyright as to what I can design using that particular logo.
What colors do I want for my new design? Am I obligated to use a particular color scheme based on the school’s colors?
Most school music programs that don a program-specific logo tend to use their school’s colors. If you are looking to design something exclusive to your program but do not want to create a logo completely against the grain, consider adding accents in a neutral color such as white, black, silver or gold.
Will my logo contain an icon, text or both? If it contains text, do I need to acquire a particular font?
Most logos contain both an icon and text, though some multi-national companies are now ubiquitous enough for their icon to stand alone from their text (e.g., Starbucks, Pepsi, McDonald’s). If you are using a popular font, you can try changing its typeface, character spacing or color to add more exclusivity to your logo.
Who will design my logo?
Perhaps you have a talented student who is an experienced artist. Maybe you dabble in graphic design between lesson planning and preparing for concerts. Or, maybe logo design is way beyond your purview and you outsource the job outright. In any case, use the tools and resources at your disposal to generate the best possible product based on your preferences. I happen to be a huge fan of simple designs. Many of the most popular logos in our society are simple and bold, so I wanted to mimic that idea with my own band’s logo.
Will my logo appear electronically, in print or both? Can my logo be produced in the correct file type, size and resolution to meet my needs?
If you want to print your logo on a banner for your marching band or other large-scale media, you must ensure the digital file is rendered in high-resolution. One of the ways resolution is measured is DPI, or dots per inch. When using a graphic meant for electronic distribution (e.g., Twitter profile, website image), 72 DPI should suffice. However, most graphics that will be printed should be at least 300 DPI. The higher the DPI, the sharper the image. Rendering high-resolution artwork will result in larger file sizes, but it will look crisper and less pixilated or grainy when displayed on larger surfaces.
What are the inspirations for my design?
In my experiences, drawing inspiration from the school and its surrounding community is a great way to establish a sense of pride about an organization and generate local support from outside your program. Creating a new iteration of an existing logo adds a breath of fresh air to an ensemble steeped in tradition; designing something totally different breaks from the norm and portrays a willingness to embrace change. Both ideas convey something different, so it is best to consider the potential impact your branding will have on your program, school and community.
Our Rebranding Story
I had a prime opportunity to rebrand our marching band in 2013 when our school board approved the purchase of new uniforms. At the time, we did not have a band logo or any real identity. Our uniforms were almost 25 years old, and they were mostly black with very few design elements. About a third of the uniforms were missing buttons, most did not fit properly, and some were torn from years of use. Suffice to say, no one was particularly enthusiastic about suiting up for a football game or festival.
My administration gave me carte blanche to design whatever I needed to take our image from the early ’90s to the 21st century. With our school colors being red and white, I wanted a bright uniform that would stand out on a football field and make a statement of authority. I worked with a local artist and graphic designer and ultimately opted for the design shown here.
Over the course of that year, our band formed an identity steeped in our new vision and mission of empowering one another. We decided that helping other members of our organization become the best version of themselves was just as important as achieving individual success. Our students began sharing responsibility for their own learning and holding each other accountable. We intentionally and collaboratively designed rehearsal plans to keep our organization advancing toward our goals. We sought to be the band that tried together, failed together and triumphed together.
Equipped with a bold new uniform that gave us a new found sense of confidence and pride, we drew inspiration from its design to create our logo. From that point, we flooded our neighborhood with this brand and made our band program’s success — even the smallest of victories — synonymous with our community.
Every elected official in our community has a band T-shirt with our logo on it. Our band parents have yard signs, window clings and face masks, among other merchandise proudly displayed throughout our community. Every 8th grader from each of our feeder schools receives a brochure with our course offerings on letterhead with our logo proudly displayed. Now that we are several years into our rebrand, we have successfully used our logo in different iterations separate from our original design to showcase specific productions from year to year.
Think about when you were first hired as an ensemble director. Reflect on the level of enthusiasm you possessed when you were FINALLY empowered to build or shape a music program the way YOU wanted. If that fervor has begun to wane, especially since navigating through the pandemic, a rebrand could help reignite your passion and set you and your students on a trajectory to achieve greater personal fulfillment through your collaborative music-making.
Sometimes students don’t like band. Sometimes parents don’t like band. And, as odd as it can seem, I know there are times when I struggle to find joy in the day-to-day business of being a band director.
As educators, we go through many highs and lows, and it can feel very lonely trying to navigate teaching a subject where the expectation is “it’s fun.” I have often had teachers in other core subjects remark, “Well, you must never struggle with students because the kids actually like being in your class every day.”
Rationally, this thought process seems somewhat logical as students “elect” to take band because they enjoy it. Of course, we know this is not the case and face many of the same challenges that core subjects encounter and our own set of issues that are unique to music teaching.
Sometimes, we face an expectation from parents or administrators as well that a student will always enjoy band because it is supposed to be a break from the hard work and pressure of the other “academic” subjects they take. Many see band as a hobby, an extracurricular, a class that students sign up for because it doesn’t offer additional challenges or hard work.
The rewards of band can also prove somewhat elusive for students because they often don’t see the full benefit of membership until several weeks or months into participating in the season. In a time when students have so many means of instant gratification at their fingertips — from TikTok to PlayStation to binging an entire season of a Netflix show in one sitting — the thought of investing days or weeks into a craft to receive gratification can be daunting for young musicians.
And even more, we are competing with an ever-evolving number of electives and choices designed to prepare students for their future. All these factors have contributed to some of my struggles as a teacher and how to balance keeping students engaged at the highest level while respecting their need to enjoy and excel in other aspects of life.
Delayed Gratification
Delayed gratification means students won’t always see instant results. At this time of year, we struggle with students coming back from summer with varying enthusiasm about band camp. Sometimes students will quit before the first day of camp, and others shortly into our rehearsals.
Many younger band members are overwhelmed by the pace and intensity of rehearsals in the hot sun, and they have yet to experience the joy of the first football game or competition to keep them motivated. So much of incoming 9th graders’ commitment to band relies on faith in their peers and directors and a love for their day-to-day experiences. Sometimes those reasons aren’t enough. Our senior members may not feel the same enthusiasm with older peers and friends graduating. They often say that things “aren’t the same” as they were in the “good old days.”
In any scenario, we continue to talk to students and parents that the challenges they face and the highs and lows they experience in the music program are no different than those they’ll encounter in the real world beyond high school. I have joked for years that during band camp, parents see their kids at their worst moments of the day — when they have to wake up for rehearsal and when they come home from camp. At these times, students are usually tired, irritated, hungry and not particularly motivated to do anything. Meanwhile, the directors and staff have seen these same students running around with their friends all day, enjoying making music and living their best lives. Parents’ and directors’ experiences with students sometimes may be at odds, which can make it even harder to keep families committed.
5 Reasons to Look at the Bigger Picture
When asked what we want our students at Claudia Taylor Johnson High School to take from their experience in band and why delayed gratification is worth it, here is what we share.
We want our band members to practice behaviors that will result in achieving goals they set for themselves. Behaviors, not just goal-setting, lead to success.
We want our band members to learn to work smart and hard, understanding that hard work for the sake of hard work doesn’t in itself yield results. But, without a strong work ethic, nothing great is possible.
We want our band members to learn how to pursue excellence at the highest level and develop patience to perform detail-oriented tasks.
We want our band members to learn problem-solving skills that will allow them to work through challenges they face later in life.
Most importantly, we want our band members to learn that when they get tired, they should rest rather than quit.
Each of these philosophies requires that students participate in band long enough to see the benefits of membership, and it can be hard to keep them (and their parents) excited about the commitment. Band is a long-term investment. If students remain patient, they’re sure to find the pot of gold at the end of the rainbow.
Peaks and Valleys
Throughout the year, I experience high moments, or peaks, with students, usually during great rehearsals and times when I feel that we are connecting and making terrific music together. However, most days are “ordinary time,” or valleys, when it seems like you are going through the motions. The kids aren’t necessarily high or low, and you’re in the weeds working through music or drills.
When I reflect on the year, these ordinary days are the ones I wish I could go back and re-do because even though they may not seem remarkable at the moment, they are critical on that pathway to excellence. Make every day count, even the ones that don’t feel particularly special.
The low points usually come around the same time — after major holiday breaks, during the six-week grade check in the fall, the middle of October in marching season, and in February between December and spring break when time seems to pass so slowly. Students aren’t always excited to see me, to work on fundamentals or even to play their instruments. Sometimes it gets mundane — and that’s ok! We all can learn to work through boredom without feeling the pressure to make our rehearsals “Disneyland” every day.
When my students were shutting down or tired or grumpy during rehearsal, I used to take it very personally and sometimes would grow resentful about it. Now, I realize that it is just a normal part of ordinary time. Learn to embrace it and keep going. Your students will follow you as long as you keep the environment healthy.
You Won’t Always Be Their Favorite
I know many of us went into teaching to inspire our students to love music and help them be better humans. My band directors profoundly influenced my life, and I love being able to lift up my students and make a difference for them.
This makes it challenging when I am not their favorite teacher all the time. On the one hand, I want them to love the art form and enjoy my class. But on the other hand, I understand the role that delayed gratification plays. And as the years have passed, I have learned to trust my students more. Even if they aren’t enjoying every moment, in the bigger picture of what we are doing, they are smart enough to come out the other side knowing that “it wasn’t easy, but it was worth it.”
Bucket drumming is a popular trend among busking musicians performing for tips on crowded streets. In my hometown of Las Vegas, bucket drumming can be heard every few blocks down the Las Vegas Strip and Fremont Street.
The artform was created out of necessity because it was a combination of cheap and mobile instruments that can mimic the highs and lows of a drum set. Some of these “found sounds” are hard to distinguish from the real samples used in today’s popular music.
Music teachers have the same demand for inexpensive, storable and relatable instruments in our classroom.
Classic Bucket Drumming
Your buckets and sticks have arrived! What now?
I lead my elementary students in a call and response where they are expected to play the top of the bucket. Once the process feels like it has run its course, introduce playing the side of the bucket. For some students, this will feel like breaking the rules while others may be knocking theirs over with grandiose swings. Playing the top of any percussion instrument has been normalized with hand drums, xylophones and just about everything else in your room. The bucket presents the opportunity to truly find sounds.
A great second activity would be to challenge students to find as many sounds as possible. Top, side and rim will become popular answers, but cheer for the student who lifts the bucket and explores the interior or starts using their hands instead of sticks. After students have had a chance to show-and-tell their discoveries, incorporate the popular sounds into your call and response. Inevitably, a student will introduce a hint of choreography into their playing. Whether it is a large motion or swaying their body, challenge the students to explore what motions feel natural when playing the bucket. Because of height differences, students who can stand and play may jump around or circle the bucket while taller students show off drumming from far away.
The grand finale of your first bucket lesson should combine all the elements that students discovered in your class. Using their playing zones and choreography, craft a short routine that can be memorized in a short amount of time. Repetition is your friend! If students love a pattern, instead of moving on to a new pattern, repeat the same pattern while standing on one foot or facing a different direction.
If the class is proud of their creation, perform for anyone who will listen! Classroom teachers pick up from the music room at my school, which makes a perfect opportunity for a performance assessment and maybe even a photo for the yearbook or monthly newsletter.
Polyphony
Once your students are comfortable with their rhythms and playing zones, add complexity to the lesson by creating two-part patterns. A fun place to start would be singing “Row, Row, Row Your Boat” or any round out loud with the class. Next, have students drum the syllables on the carpet or a soft material. This allows you to monitor any outliers and give direct support to those who need it. Similar to students who are afraid to sing, young musicians might find drumming loudly as a chance for others to judge them. Use precision when judging if a student is choosing to not participate or is cautious about being heard.
Utilize a neutral position like “Sticks down!” or “Shoulder position!” to alert students that it’s time to stop playing. Attempt to sing your round with two groups. This lesson would benefit from a previous understanding of rounds but take the time to make a multi-week lesson plan if you are starting from scratch. Once your preferred level of proficiency is met with singing the round, bring the drum sticks back so students can drum their syllables. Create an arrangement that allows each group a chance to sing and play its part. Group A might be singing while Group B is drumming and vice versa. Add some minimal choreography and you have a stage-ready performance. For teachers who love choreography, create a Group C so that one group is singing, one group is drumming and the third group is moving.
Remo Rhythm Lids
Bucket drumming could stop at polyphony and life would be good, but the Remo Rhythms Lids take the entire activity somewhere special. There are a few different models of the Rhythm Lid, including bright and dark tone, a snare and a sound-sensitive model. If you do any work with students who have sound sensitivity, I implore you to look at the Rhythm Lid Comfort Sound Drumhead. It allows students to strike at high velocity and only create a low, inviting tone. This has been wonderful for my students who have varying muscle control as well.
General music hand drums are priced to last a lifetime. While I am thrilled that they last a lifetime, the entry is sometimes too steep for a music program. Consider how many bucket drums you could create for the cost of one lifetime-quality hand drum. I am a firm believer in a 1:1 ratio of instruments to students, which has led me to fill my room with the snare and dark-tone Rhythm Lids on buckets. Besides being portable and durable, students love that they get their own instrument. The first time that I asked a kindergartener to move a drum was also the last time, but even my smallest student can move a bucket.
The snare Rhythm Lid is impossibly accurate to the snap of a real snare drum at a fraction of the cost and weight, which led me to think about the possibilities of marching.
Marching
I created marching buckets by removing the metal handles and drilling large holes in the same spots. This allowed me to string a cord of the same diameter through the holes as a neck strap. I found that smaller diameter cord and string were too uncomfortable for students to wear around their neck. I even used shredded T-shirt fabric as a buffer between the neck and cord. Because elementary students are forever at different heights, I measured cord for the tallest and shortest students I could find and then made random lengths between those two extremes.
Once students stand with their buckets on, all lessons can be repeated with the intention of walking or marching while playing. As soon as the weather dips below 100 degrees Fahrenheit in Las Vegas, music class goes to the field and performs our rhythm games while walking in a circle or following the leader.
The students’ favorite activity is call and response in a tiny circle. Once we reach a small goal, the students take a step backward, put their drums down and run one rotation around the circle. Eventually, the circle is the size of the field and we can barely hear each other, but we still cheer when it’s time to run the lap. This was also a great activity for testing season because students are eager to get out of the building and stretch their legs.
A more formal marching experience is to memorize an eight-measure pattern and see if students can walk as a group while performing. This is a great time to talk about vamping and watching for a cut-off signal. My after-school instrument club prepared for a parade by learning some three-part patterns that could be played as many times as necessary in a row. We named them fun code words that the students coined like “Boomcha,” which allowed me to cue an ending to the current pattern, yell “Boomcha! 1, 2, ready, go!” and we were set for another block or so.
Alternative Seating and Storage
Besides all their wonderful musical benefits, buckets have alternate uses that have become standard in my classroom. I phase out damaged performance buckets as storage for boomwhackers, guitar strings, instrument cables and everything else that needs a separate container. My music room has no chairs but with a soft pad, buckets become a tolerable sitting surface for a short amount of time. If you’ve seen the cardio drumming trend then you can imagine how fun it would be to throw a yoga ball into your bucket and drum away!
Even if you aren’t excited by the idea of bringing buckets into your classroom, I hope you can see the intention of finding music in unlikely places. I hope there are many more musical solutions that check as many boxes as the inexpensive, durable, portable and useful bucket.
There is a lot of misunderstanding when it comes to exactly how electronic drums work. In reality, they’re not nearly as complicated as most people think — in fact, the technology is actually quite simple. In this article, we’ll take a deep dive into the inner workings of electronic drums and explain how they deliver their sonic magic.
The Magic Of Quartz Crystal
As you can see from the illustration below, an electronic drum kit consists of several pads and a couple of pedals, plus a module, which is actually a specialized computer that acts as the central “brain.”
We’ll talk more about the module later in this article, but for now let’s focus on the pads. Interestingly, one of the most important parts of just about every drum pad comes from the Earth itself. This is a small brass disc (usually around 1″ or 27 mm in diameter) with what looks like a circular piece of paper on one side. Together, this is called a piezo sensor (or piezo pickup).
A piezo sensor.
The white material is actually an extremely thin slice (or wafer) of quartz crystal. By themselves, neither part does anything special, but put them together and attach a couple of wires, and they start to behave like a very basic microphone.
If you attach one of these piezo sensors to something else (such as a block of wood or lump of plastic) and hit it, the sensor will send out a little spike of electricity. The amount of electricity (that is, the amount of voltage) generated depends upon how hard you hit the object: Hit it lightly, and the spike will be quite small; hit it harder, and the spike will be much larger.
Because they are really flexible, piezo sensors make very good loudspeakers, and so they are excellent for giving us information and receiving information. That’s why you’ll find them in pretty much every electronic device you own, from your phone to your computer — even your refrigerator and microwave have them. When you leave your refrigerator door open or your microwaved popcorn is ready, the appliance tells you by making a pinging or beeping sound … and that sound is coming from a piezo sensor. When your phone beeps to tell you that you have a message, that’s also probably a piezo sensor embedded in your phone. And when you hit an electronic drum pad, it is a piezo sensor that’s responsible for making that little voltage spike go all the way down the cable to the module.
Piezo Sensors in Pads
Depending on the pad, there might be one or more piezo sensors, or even one piezo sensor and a special switch called a pressure switch. As an example, the mesh pads that come with Yamaha DTX8 Series and DTX10 Series electronic drum kits have either one (toms) or three (snare) piezo sensors under the head and another on the shell. The ones under the head detect when you hit the drumhead with your drumsticks, and the one on the shell is there to detect when you hit the rim of the pad. The signals go from both sensors down the cable from the pad to the module, allowing the module to “know” which part of the pad was hit.
Cymbal Pads and Pressure Switches
Most cymbal pads (such as the Yamaha PCY175 or PCY155 you’ll find incorporated in DTX Series electronic drum kits) have three areas (“zones”) you can hit, which give you three sounds. These are called 3-zone pads.
A 3-zone pad.
The middle zone (the “bow”) has a piezo sensor under it, just like in drum pads, but the zones at the top (“bell”) and edge have pressure switches instead, and this allows cymbal pads to do something that drum pads can’t do.
Here’s how it works: When you hit the cymbal pad anywhere, the piezo sensor in the bow sends a little voltage spike down the cable to the module, and the module plays the sound you’ve programmed it to play when the cymbal pad is hit. But when you hit the bell or the edge, the associated pressure switch diverts the spike down a different part of the cable, so the module knows that a different part of the cymbal has been hit.
It’s worth noting that, although many electronic drum manufacturers require the use of two cables to connect their 3-zone pads to their modules, Yamaha cymbal pads connect to the module with just a single cable, making setup faster and easier.
Cables Are More Important Than You Realize
Most people don’t give a second thought to the cables they use to connect their drum pads to the module, but they are actually very important.
If you unplug and look at the end of the cables you plug into your drum pads, you’ll see that they terminate in a jack with a number of shiny sections and black rings. The exact number of each determines how many different channels of information the cable can send to the module at any one time. The most common of these jacks are the TRS (“Tip/Ring/Sleeve”), which contains three shiny sections and two black rings, and the TS (“Tip/Sleeve”), which contains two shiny sections and one black ring.
The longest shiny part (the “sleeve”) is the electrical “ground.” It doesn’t carry any information — it simply ties things together so that all the components interact nicely without hum. Each of the other shiny sections, however, can carry different information. A TS cable/jack can only carry information from one piezo, but a TRS cable/jack can carry voltage spikes from both the head piezo and the rim piezo. So if you ever suddenly have a problem with a pad just after you’ve set up your electronic drum kit, check the jack and make sure you haven’t accidentally used a TS cable by mistake, as that could seriously limit the ability of your drum pads.
It’s also worth remembering that not all cables are created equal. The cables that come provided with Yamaha DTX kits all comply with international standards, whereas some cheaper cables that can be easily bought online may not, meaning that they can fail to provide a good connection or work loose easily, which you don’t want to happen on stage!
The Module
So what happens when the little spike of electricity from the piezo pickup or pressure switch gets to the module?
Firstly, the module looks at the size of the voltage, and works out from that how hard the drummer hit the pad. (Because each pad is connected with its own cable, the module knows which one was hit.) Next, it looks up what sounds are assigned to that pad and decides which sound it should play, and how loudly.
When you hit an acoustic snare drum quietly, the sound is very different than it is when you hit it very hard. Electronic drum kits do much the same thing: If you hit a drum pad lightly, the module will play the sound softly; if you hit it hard, it will play the sound loudly.
Yamaha DTX-PROX module.
The modules in most modern electronic drum kits, including all Yamaha models, store and play back samples (digital recordings) of real drums and cymbals. These recordings will be made at many different volume levels, from very quiet to very loud, so there might be over a hundred samples of the same snare drum, for example, each played at a slightly different volume. This allows the module to play back exactly the right sort of hit at the correct volume for your playing, depending on where you hit the pad and how hard you hit it.
That’s how it works. There is no magic, but there is some clever electronics … and, believe me, it makes all the difference. So the next time you play your electronic drum kit, thank quartz crystal for its innate properties, and know that inside each of your drum pads is an essential piece of the Earth.
For the past decade-plus, a new style of music and music production has been growing in popularity, particularly amongst younger music fans. The rise of DAW (Digital Audio Workstation) software like Steinberg Cubase, along with compact, affordable recording equipment, has given aspiring artists increased opportunities to create full-blown musical productions in their homes (as opposed to being forced to go into professional recording studios) and to release them to a worldwide audience through social media and popular file sharing websites. The result? A brand-new genre of self-produced songs and artists that are calling the shots and cranking out hits from their bedrooms.
So what is Bedroom Pop, anyway? In this article, we’ll take a deep dive into the sound and history of this burgeoning genre, and identify some of the top practitioners of the style.
THE SOUND OF BEDROOM POP
Actually, the term “Bedroom Pop” applies more to how the music is made than what it sounds like. Bedroom Pop songs might comprise rock, Americana, hip-hop or any number of musical styles. What they will almost always have in common, though, are the following three things:
1.A sense of vulnerability. Since the production occurs not in a big, splendid studio but in a small, personal bedroom, the songs tend to resemble the intimate place in which they were made, with a markedly personal sensibility in terms of both the songwriting and the performance.
2.Lo-Fi production and sparse instrumentation. Building on the initial Lo-Firevolution of the 90s but now fully digital, Bedroom Pop records tend to have a bare-bones production that often emulate the tape-saturated tones of the earlier era, complete with warbly Beatle-esque keyboards and guitars, as well as chill drums and, often, the sound of analog synths.
3.A visual aesthetic. Today’s technology has progressed to where artists now have the ability to shoot and edit their own videos on their laptops. This allows Bedroom Pop artists to market their music the way they want and freely bring their visions to life via outlets such as YouTube, Instagram and TikTok, where, with the helpful aid of algorithms, thay are able to find a global audience.
THE HISTORY OF BEDROOM POP
The roots of Bedroom Pop go back to the reinvention of the home recording industry in the 1980s and 1990s, when the ability to write and record songs at home started to become more prevalent. DAW software — along with easy-to-use plug-ins that provided lifelike samples of acoustic instruments, synth emulators, professional effects and the like — allowed recordings to be made on laptops with the click of a mouse.
What resulted was a slew of home-recorded artists who became known for their subdued vocals and DIY techniques, and a seductive indie sound that focused on the intimacy of the artist rather than a full-scale studio production.
Pioneering Bedroom Pop artists include Elliot Smith, who recorded his album Roman Candle completely in a home basement studio way back in 1993; Beck, whose early albums featured numerous home recordings; and Alanis Morrisette, who recorded all the vocals to her 1995 mega-hit album Jagged Little Pill in producer Glen Ballard’s home studio.
In 2018, Spotify certified Bedroom Pop as a bona fide genre with a dedicated playlist that has amassed over a hundred standout songs and nearly one million “likes” to date. Today, most streaming platforms include popular “Bedroom Pop” playlists among their offerings.
CONTEMPORARY BEDROOM POP ARTISTS
Billie Eilish
For all the successes of early Bedroom Pop artists, perhaps no one exemplifies the genre more than multiple Grammy® Award-winner Billie Eilish, who wrote and recorded now-legendary songs like “bad guy” in her Los Angeles home. Eilish would sing layer after layer of vocal tracks sitting on her bed with a handheld mic while her brother Finneas would record her and produce homemade beats that featured lit matches as snare samples and stomped feet as kick drums.
mxmtoon
Another major Bedroom Pop artist of note is 21-year-old ukulele-playing mxmtoon (also known as Maia), whose self-released 2018 EP, Plum Blossom, was recorded in her parents’ guest bedroom and has since been streamed over 100 million times. Since that time, her singles, EPs and albums range from the lyrically insightful to the sonically delightful, with her jazzy song “falling for u” (performed in collaboration with peachy) earning over 5.5 million YouTube streams.
beabadoobee
Filipino-British singer-songwriter beabadoobee rose to fame in 2018 after getting her first guitar just the year before. Over the next three years, she released five EPs, including Loveworm (Bedroom Sessions) and a debut LP, Fake It Flowers. While her sound began in rock or pop-punk styles, she’s tended more towards traditional pop recently. Her intimate tune, “Coffee,” has earned some 5 million views on YouTube to date.
Soccer Mommy
The Nashville-based artist known as Soccer Mommy released her first album, Clean, in 2018. Prior to that, she released a series of EPs, including the 2015 Songs from My Bedroom, followed a year later by Songs from My Bedroom (pt. 2). Her subdued rock hit, “Shotgun” — the video for which is shot in a literal bedroom — has since earned some 300,000 YouTube views since its release in the spring of 2022.
As more and more artists continue to follow in the footsteps of Eilish, mxmtoon and others, the genre will likely continue to increase in popularity and footprint. Who knows? As technology advances and increases in availability, we all may be Bedroom Pop artists one day!
The violin, for all its sonic and visual beauty, can be difficult to learn. It’s a precise instrument that requires manual dexterity, a good ear and a great deal of practice. But knowing your instrument and developing good playing habits can open the door to lifelong enjoyment and a long-lasting musical relationship that will yield many rewards.
Here are eight tips that will help you on the road to mastering the violin.
1. STAY IN TUNE
Standard violins have four strings. When left “open” (i.e., without your fingers pressing down on any of them), these strings are tuned to G-D-A-E, with the G-string being the lowest-pitched and the E-string being the highest. Before playing anything on your violin, it’s important to be sure each of these four strings are tuned properly — no string should be “sharp,” meaning pitched higher, or “flat,” meaning pitched lower. To play a song properly, and especially when playing in an ensemble with other musicians, your instrument must be perfectly in tune. That’s the first step for any violin player, seasoned or beginner.
2. USE THE CORRECT SIZE VIOLIN
It may not be obvious at first, but it’s important to remember that violins come in several sizes. Since the invention of the instrument, violin makers have debated the best size for sound quality. But size also matters when it comes to playability. The smaller the instrument, the more accommodating it can be for children and younger players (for example, Yamaha YVN Model 3 violins are available in three fractional sizes). For those curious on how to choose the right size, here is a good rule of thumb: The player should place the instrument under their chin and reach out over the scroll (the S-shaped decorative end) of the instrument. If their hand can comfortably wrap around the scroll without overstretching, then it is the correct size. For more information, visit the online Yamaha Student Violin Finder.
3. ADOPT THE PROPER POSTURE
Balance and relaxation are paramount when it comes to playing violin. It’s easy to hold the instrument too tight or to put too much pressure on your chin, neck or back, all of which hold the violin in position even more than your hands. Correct playing posture involves keeping your spine aligned. To do so in a seated position, sit toward the front end of a sturdy chair, aligning your left foot slightly ahead of your right; when standing, keep your feet shoulder-width apart. Use the chin rest, keeping the violin parallel to the floor, and curve your left hand in a C-shape around the neck so that it supports the instrument. Another important step is to center your left elbow beneath the midpoint of the violin. Try practicing in front of a mirror to ensure your body is in the correct position.
4. ROSIN YOUR BOW
A bow made of horsehair is drawn across a violin’s strings to get them vibrating, which in turn results in a sound we can hear. But adding rosin to the bow creates a subtle sticky quality that aids in producing a quality sound. It’s a bit of a balancing act, however: Add too much rosin and the sound will be shrill and decidedly unpleasant. It can help to seek out an experienced player for advice on achieving this balance, and it’s a process that takes some getting used to, but it’s also something every new player will have to eventually get used to doing on their own. Bear in mind that the rosin cube must be replaced at least once a year before it dries out and becomes dusty rather than sticky.
5. LEARN YOUR SCALES
If there is one “cheat code” to mastering any musical instrument, it’s learning scales. Scales are the building blocks of music; they inform a musician what notes fit into a given composition. Scales are relatively easy to play on instruments with fixed notes, such as piano or a fretted instrument like guitar, but much harder to play correctly on a fretless string instrument like the violin, where the exact position of your fingertips on the fingerboard is crucial to the notes sounding in tune. So, every time you practice your violin, be sure to play scales repeatedly. It’s not glamorous work but it aids in the foundational effort that will pay off later ten-fold. Moreover, playing scales on violin strengthens your fingers and trains your ears, both of which are invaluable musical skills.
6. REGULAR MAINTENANCE IS IMPORTANT
A violin produces sound through tension and friction. The horsehair bow is taut, and it pulls against the instrument’s four strings. So, it’s important to give the bow a break. Just as a person cannot be tense all the time, your bow needs a respite. Feel free to loosen it when it’s not in use by screwing open the bottom of the bow. This will extend its life. Similarly, since the strings are tight, you need to replace them every few months. This will improve the sound quality and decrease the chances that a string will break during a live performance. When replacing violin strings, remember to do so one at a time. This will prevent pieces of the violin, like the bridge or sound post, from coming loose and possibly falling off altogether. (This isn’t irreparable … but it would require a visit — and a potentially expensive one — to a luthier.) In addition, a well set-up violin — one that has been checked and adjusted by an expert, with a properly cut bridge and parts that turn and function well — is more enjoyable to play and makes it easier for you to learn.
7. USE A QUALITY INSTRUMENT
One important aspect of playing an instrument is forging a bond with it over the years. But any musical instrument that is poorly made will sound substandard and won’t stand up to the rigors of practice and performance … and that’s especially true of an instrument as delicate as the violin. In addition, a poorly constructed violin will go out of tune often (see Tip 1 above). On the other hand, violins that are made well will sound better, last longer, stay in tune with ease and be easier to repair. Quality begets quality, so don’t skimp, or your learning may suffer.
8. PRACTICE, PRACTICE, PRACTICE
In the end, there is no shortcut to success: The more time you put in, the better the results will be. Whatever their instrument, aspiring musicians must hone the basics and create the right foundation. Muscle memory is always a crucial factor, and when it comes to violin, your hands and fingers must become used to playing. They need to know, without thought, where a note is, how a scale unfolds, how to draw the bow to get the desired sound. The same is true when it comes to repertoire: There are countless compositions to learn and refine. Yes, some players are “naturals,” but even they need to spend thousands of hours refining their craft … and even violinists with decades of experience practice daily to maintain their skills. So be prepared to practice, practice, practice. The labors will soon turn to labors of love, and the satisfaction you’ll get from playing violin — and playing it well — will be priceless.
Everyone wants great sound, but not everyone has a lot of space for a great sound system.
Until now, that is. The new Yamaha SR-C30A compact sound bar allows anyone to enjoy clear, enveloping, full-range TV and gaming sound — with deep, rich bass — in even the smallest of spaces.
Ready to learn more? Read on …
COMPACT DESIGN
At only 23.6″ wide and 2″ tall, the SR-C30A is designed to fit just about anywhere — not just living rooms but bedrooms, dens, home offices and home gyms too. It’s perfect for use on desks, in gaming stations and with smaller screen-size TVs and computer monitors, or it can easily be wall-mounted, thanks to convenient keyholes on the rear panel.
The included wireless subwoofer is equally compact, with a width of just 6.3″ and a height of 13.3″. It can be positioned either vertically (on the floor, for example) or horizontally (say, on the shelf of an entertainment center), providing loads of placement options. And the provided adhesive feet mean that it won’t slip and slide, no matter how loud you crank up the bass!
SUPERIOR SOUND
The SR-C30A goes beyond conventional speaker directivity to create a breathtaking sound field that seems to come from the center of the TV screen itself. It packs a powerful punch, too, with dual 1.8″ full-range drivers and 20 watts of power per channel. There’s support for Dolby® Digital and virtual 3D Surround Sound for cinema-like sonic immersion, as well as Yamaha Clear Voice technology for enhanced dialogue and narration clarity, plus a unique Adaptive Low Volume feature that automatically equalizes select high, mid, and low frequencies for optimal sound at low volumes — great for watching your favorite movies and TV shows late at night without disturbing others in the house.
In addition, built-in Compressed Music Enhancer technology utilizes advanced digital signal processing algorithms to enhance Bluetooth® audio listening, making the SR-C30A a great choice for music enjoyment. Last but not least, a Bass Extension function allows you to instantly add rich bass tonality without disturbing the balance of the overall sound.
Speaking of which, what’s an action movie or lifelike video game without powerful bass? The SR-C30A’s 50-watt wireless subwoofer has a 5.1″ driver that adds low-frequency rumble you can not just hear but feel, bringing every explosion and spaceship flyover to life.
LOADS OF CONNECTIVITY
The more devices you can connect to, the more useful the sound bar. The SR-C30A is loaded with multiple connectivity options, including an HDMI port with ARC (Audio Return Channel) — technology that allows audio to be sent through the same HDMI cable that carries the video signal. In addition, there are also not just one but two optical digital inputs, as well as an analog input, plus support for Bluetooth streaming so you can wirelessly listen to tunes from your device of choice, including Bluetooth-equipped TVs. Flexibility personified!
EASY SETUP AND OPERATION
Thanks to handy top panel controls and an included remote control, setup and operation is incredibly easy. Power your TV/monitor on and off, choose your input, turn on Clear Voice or Bass Extension, select your listening mode (see below), dim the LEDs and/or mute the sound, all at the touch of a button. In addition, you can independently set the volume of the main speakers and subwoofer without ever getting up from the comfort of your chair.
Prefer control from your smartphone or tablet? No problem. The free downloadable Yamaha Sound Bar Remote app, available for iOS and Android™ devices, allows you to do all this via Bluetooth.
FOUR SOUND MODES
Four sound modes are provided by the SR-C30A, allowing you to optimize the audio for your particular application. Two-channel STEREO mode is designed for music playback, while STANDARD mode is best suited for TV programs such as sports broadcasts, since it emphasizes human voices and creates a wide sound field. The proprietary 3D MOVIE mode (created especially for the SR-C30A) provides enveloping three-dimensional surround sound for the enjoyment of movies. There’s even a GAME mode designed for video games; it accurately reproduces the localization of individual sound effects for a highly immersive gaming experience.
The term “Latin music” actually encompasses a variety of genres, the most popular of which are bossa nova, samba and salsa. All feature percussion instruments such as congas, timbales, shakers and tambourine. There are a number of common rhythm patterns they play, and both keyboardists and guitarists draw from them to create their accompaniment parts. (Note: If you’re using a digital keyboard, you’ll probably want to set it to an acoustic piano sound since most Latin music incorporates actual piano, as opposed to electric piano, organ or synth sounds.)
Here are five of the most universal patterns utilized in Latin music. The first one, called a 2-3 son clave, has two strikes in the first bar and three in the second. (Note that each example is played twice in the accompanying audio clip.)
Here’s a slight variation that makes the first bar more syncopated by offsetting the second strike to the and of 3:
This next pattern flips the groupings into a 3-2 son clave:
Or we can choose to make the second bar more syncopated, like this:
This last pattern is taken from a common guitar comping figure heard in many bossa nova performances. Notice how it is syncopated after the first two claps:
Armed with this knowledge, let’s explore some cool comping patterns.
Bossa Nova (Right-Hand Chords)
The Bossa Nova style first became popular in the 1960s with tunes like “The Girl From Ipanema.” A soft, jazzy style of music based on the samba, a Bossa Nova harmony uses many jazz color tones, along with sophisticated voicings (groupings of notes to form chords).
The following examples play a C 6/9 chord, using two possible right-hand voicings. They will all work well when you are playing with a bass player. This first one uses the 2-3 son clave rhythm described above:
Here is the same chord progression, this time played as a 3-2 son clave:
Finally, here it is played with the bossa nova guitar comping pattern described above:
Be sure to try these patterns with other chord qualities and voicings.
Bossa Nova (Two-Hand Chords)
You’ll get a fuller sound if you play voicings using both hands. Here is the same selection of patterns spread across both hands:
Try practicing the same rhythms with these other chord quality voicings:
Bossa Nova with Bass and Chords
Often you will need to play the bass line yourself, whether you are playing solo, or accompanying a singer or other instrumentalist. Here are two common bossa bass figures, using only the root and the fifth of the chord:
When you combine this bass line with the right-hand chord progression and play it in the rhythms described above, this is what you get:
Montunos (Chord Outlining)
Salsa music requires a very different approach. In this highly rhythmic dance genre, the piano most often outlines the chords using arpeggiated patterns (playing through the chord tones one note at a time). These patterns are commonly called montunos.
Here is a simple chord progression, followed by how we’ll think of the chords rhythmically:
Syncopation (emphasizing the off beats) is an important element of a piano montuno, and montuno patterns are often played by both hands, as in this next example, played at both slow and fast tempos. Note how, in Bars 3 and 4, the right part is moved up to another chord tone in order to create a nice harmonized figure.
Another cool approach is to vary the right hand part more, perhaps adding some contrary motion, as in the first two bars of the following example, again played at two different tempos:
In the second half of the example, some select notes are doubled as octaves, which adds strong accents to the rhythm. Montunos using octaves in the right hand are very commonplace.
Montunos (Vamps)
Many Latin tunes will have long sections that stay on a single chord — something that’s called a vamp. Vamps allow you to create some interesting patterns that imply additional chords like this classic one, which moves downward from the root through the major-seventh, to the natural seventh, and into the sixth:
The first two bars has the hands playing together; the second two use an octave-based figure in the right hand to complement the basic pattern.
This next pattern moves upward from the fifth to the flat sixth and into the natural sixth, and then back down, using strong octave accents:
Notice that the left hand does not play exactly the same notes as the right hand. That’s perfectly acceptable, but it’s important to play them in the same exact rhythm so your part is rhythmically tight — a staple of salsa.
All piano and bass played on a Yamaha P-515; percussion from Steinberg Cubase drum loops.
When we invest our time in learning new chord shapes on the guitar, we broaden our musical vocabulary. Understanding that these shapes can further expand into new chords by simply moving one finger empowers us to conquer new territory until we’ve unlocked the entire fretboard.
I often think of this expansion as “shapes within shapes.” Triads can be found within seventh chord structures, double-stop fragments within the triads, and single-note melodies and bass lines can simply be the chords broken into each of their individual tones.
We’ll explore all these concepts in this article, the first of a two-part series. In Part 2, we’ll talk about adding chord extensions for additional harmonic spice.
STANDARD MAJOR TRIAD SHAPE
Once you learn a standard major triad shape, you can then move one note at a time within that shape to create minor, diminished and augmented triads. To demonstrate how this works, let’s start with a G major chord shape that uses the F open-position shape moved up to the fifth position, as shown below. (The fifth position is where you can locate the root note, G.)
From here, you can easily create the following triad chords:
G Major (Gma): Root – Major Third – Perfect Fifth
The G major triad chord contains the notes G (root), B (major third) and D (perfect fifth), in that order (i.e. in that voicing), which means it’s a root position triad.
G Augmented (G+): Root – Major Third – Augmented Fifth
To create a G augmented triad chord, simply raise the fifth (the top note D) up one fret (to D#). I suggest using your first finger to barre the third and second strings at the fourth fret, and your second finger to play the root note (G).
G Minor (Gmi): Root – Minor Third – Perfect Fifth
If you lower the second note in the major chord by one fret, it becomes a minor third. This creates a G minor chord. Use your first finger to barre the third and second strings at the third fret. Your third finger remains on the root note (G).
G Diminished (G0): Root – Minor Third – Diminished Fifth
To create a G diminished triad chord, lower the top note (D) by one fret (to D♭). Continue to use your third finger for the root note, your second finger for the minor third (B♭) and your first finger for the D♭.
Note that the major and minor chords are consonant (resolute), while the augmented and diminished chords are dissonant (unresolved). Once you know the shapes for these four main triad types, you can easily change keys by simply locating the appropriate root note and moving the shapes into those fretboard locations.
By the way, it’s highly unlikely that you’ll use all four of these triads with the same root note within a progression, although I’m going to show you a cool blues jam using just these four chord types later in this article. First, however, let’s create the four main seventh chords using the same approach.
Seventh Chords
Seventh chords are built by adding a seventh on top of triad chords. Let’s use the same root note, G, to build four different seventh chords, as shown in the illustration below.
Once again, from here, you can easily create the following chords:
G Major Seventh (Gma7): G (Root) – B (Major Third) – D (Perfect Fifth) – F# (Major Seventh)
Major seventh chords have a sweeter, more complex sound than triads. The G major seventh chord utilizes the basic triad shape and adds the note F# on top of the chord. Note that we’ve retained the original voicing within this shape.
G Minor Seventh (Gmi7): G (Root) – B♭ (Minor Third) – D (Perfect Fifth) – F (Minor Seventh)
Minor seventh chords contain both minor thirds and minor sevenths, so you’ll need to lower the top note within the G7 chord (from B to B♭) to get the flat third degree needed, as well as lowering the major seventh from F# to F.
G Dominant Seventh (G7): G (Root) – B (Major Third) – D (Perfect Fifth) – F (Minor Seventh)
This a major triad chord with an added flattened seventh (that is, a minor seventh) above the fifth. To create this from the major seventh shape, simply locate the major seventh (7th fret, second string) and flatten (lower) it by a semitone, from F# to F. Again, the voicing hasn’t changed: we’re simply changing the shape. (Knowing the voicing helps you locate the tones that need to change within a chord shape.)
G Minor Seventh Flat Five (Gmi7(♭5): G (Root) – B♭ (Minor Third) – D♭ (Diminished Fifth) – F (Minor Seventh)
Minor seventh flat five chords contain both minor thirds and minor sevenths, so you’ll need to lower the top note within the G7 chord (from B to B♭) to get the flat third degree needed, as well as lowering the perfect fifth from D to D♭.
Chord Progression
Now that we have a selection of chord qualities (major, minor, diminished, augmented), let’s use them to create a nice blues progression consisting of the following chords: G7 / G#dim7 / Ami7 / D+.
We’ll further enhance this progression by inverting the G#dim7 and D+ chords. Diminished chords will invert their own notes every three frets, so you can literally move them three frets and the same notes occur … just in a different order. The same thing happens with augmented chords, except you’ll need to move them four frets to naturally invert. This creates a wonderful movement within pretty much any chord progression.
Here’s our newly expanded blues chord progression:
The Video
I thought it would be cool to create a video that shows the full arrangement, starting with the drums and bass guitar lines.
As shown in the illustration below, the bass line consists of arpeggios that outline the four main chords in the progression. There’s no need to invert a bass line when the diminished and augmented chords invert, but you could if you wanted to.
I also overdubbed a simple triad chord arpeggio on the top three strings to outline the chord changes. Note that I left a lot of space for this guitar part.
I’m playing a fingerpicked 12/8 rhythm for the main rhythm guitar part since I felt that those subdivisions helped to move the track along.
For the solo, I thought it would be nice to follow the chord changes with double-stop sixths, as shown below. These are found within the triad chord shapes.
The single-note lines are played with a slide. I’m paying close attention to the changes and outlining the characteristic notes from within each chord — in particular, the G# and D in the G#dim7 chord, and the augmented fifth (A#) within the D+ chord. For the outro part of the solo, I’m using double-stop minor thirds, arpeggios and a nice mix of the G blues scale on bars one and two, and the A blues scale on bars three and four.
The Guitar
The Yamaha FSC-TA TransAcoustic guitar I’m playing in this video features incredible onboard reverb and chorus effects. I used a touch of its hall reverb on all the guitar parts in the video, as well as a sprinkle of delay from my DAW for the slide and single-note lines.
Rather than mic the guitar for this session, I decided to use its built-in piezo undersaddle pickup and record the signal direct. I think it authentically represents the sonic qualities of this concert body acoustic, which is A.R.E. (Acoustic Resonance Enhancement)–treated for a vintage tone.
In the video, you’ll notice that the cutaway on the FSC-TA allows me to easily reach the higher notes I’m looking for in the slide part — something that would certainly be a lot harder on a guitar that didn’t have a cutaway.
The Wrap-Up
With a little knowledge of music theory and a good memory for shapes, you can easily create all four triad types. By adding one more chord-tone, you can further extend those triads to create the main seventh chords. You can also move these shapes to other fretboard locations to create standard chord progressions, like the blues progression described above.
In Part 2, we’ll be enhancing the harmony further with chord extensions.
Guitar may be a stringed instrument, but in the hands of a skilled player, it can sound like a percussion instrument too. These videos, created by flamenco guitarist Hernan Romero, will show you how to play several Latin rhythmic and percussive ideas on your guitar.
In all these videos, Romero is playing a Yamaha CG-TA TransAcoustic classical nylon-string guitar. The effects you hear are all coming from the guitar itself.
ABANICO RHYTHM
In this example, the right hand is mimicking a cajón, which is a Peruvian drum. The rhythm is in straight 4/4 time, but most of the movement is made by the fingers, not by the wrist. Use as little (or even no) wrist and arm action as possible, and keep your thumb anchored on top of the low E string, with the index finger doing the basic strum. This is essentially a fanning motion, and the fingers open that way to create the rhythm.
ABANICO RHYTHM WITH ADDED COMPONENTS
Here, we’re taking the Abanico rhythm and adding a “kick drum” sound with the ring finger just below the sound hole. As before, remember not to use the arm and wrist. This keeps the rhythm tight and provides more control and articulation.
ABANICO RHYTHM WITH MORE COMPLEX COMPONENTS
This next video shows the same technique as above, but with a more complex pattern and variation of “kick drum” hits and fills. As you can see, different patterns can be added with the ring finger to create a more complex rhythm.
RASGUEADO RHYTHM
Rasgueado is a 4/4 pattern that uses all the fingers in both an open and closed hand technique. In addition, a “kick drum” sound is created with the ring finger just below the sound hole.
RHYTHMIC SNARE CONCEPT
Here, we are using the lower strings of the guitar, E and A in standard tuning, to create a “snare drum” sound. In addition, the side and top of the guitar are being used for additional percussion, almost like a conga drum.
BULERIAS RHYTHM
This traditional 12/4 flamenco rhythm is called Bulerias. It uses the same techniques as described above, with a slightly different rhythm pattern.
ADDING ARPEGGIOS AND TREMOLO
This is a combination of all of the above, this time adding arpeggios with the fingers, along with tremolo, where the thumb plays a bass line independent of the fingers.
COMBINATION OF LATIN PERCUSSIVE TECHNIQUES
Here’s an improvisation incorporating all the previous examples in an Alegrias 6/8 rhythm. It blends together all the previously discussed techniques, including Abanico, tremolo, arpeggios and percussive elements.
Guitar players have long thought that “tone” is subjective, which it certainly can be. When it comes to acoustic guitars, there are a variety of factors involved, including the type of wood used to make the instrument and its physical construction, as well as the kinds of strings you put on it, the use of a pick or fingers, and of course the style, approach and feel of the player themselves.
Let’s take a closer look at the most important factors in getting great acoustic guitar tone.
Tonewoods
Like electric guitars and basses, most acoustic guitars are crafted from wood, and every type of wood has its own tonal properties, hence the term tonewood. That’s largely because each type of wood has different weight and density characteristics, both of which play a major role in the overall tone of the guitar.
The top of an acoustic guitar is what resonates the most sound into and out of the instrument. Spruce, which is a lightweight, highly resonant wood, is commonly used for acoustic guitar tops, as it delivers a bright and clear tonality. Most Yamaha FG800 and FS800 Series acoustic guitars feature solid spruce tops, except for the FG850 and FS850 models, which have solid mahogany tops for a slightly warmer and darker tone. Other tonewoods used in acoustic guitar tops include rosewood, maple and koa.
The Yamaha FG840 has a solid spruce top.
The Yamaha FS850 has a solid mahogany top.
Rosewood and mahogany are commonly used for the backs of acoustic guitars. The backs and sides of a guitar combine with the top to create the resonance and projection of the instrument, thus adding to the overall tonality. Acoustic guitar fretboards (sometimes called “fingerboards”) are usually made of either rosewood or ebony; the latter delivers a somewhat brighter sound.
Technology can also play a part in tone. Yamaha L Series steel-string and NCX2000R/NCX2000FM nylon-string acoustic guitars, for example, feature Acoustic Resonance Enhancement (A.R.E) treatment, which is a technology developed by Yamaha that adds an “aged” sound to the wood of the guitar. This is achieved by maintaining tight control over the humidity, temperature and atmospheric pressure of the wood, altering its molecular properties to deliver a resonant, pleasing tonal quality similar to that of a vintage guitar that is many years old.
Yamaha NCX2000R.
There is no right or wrong when it comes to the choice of woods used in an acoustic guitar since each combination will have its own sonic character and tonality. It comes down to personal preference.
Bracing
Bracing is another significant factor in acoustic guitar tone. This refers to the strips of wood that are attached to the inside of the top, helping to give the instrument strength and sturdiness. Heavier braces deliver a different tone than lighter ones, and some braces are carved or scalloped for additional lightness. Different types of designs include X-bracing, Fan bracing, V-Class bracing and Ladder bracing. As an example, Yamaha APX Series acoustics feature non-scalloped X-Type bracing to maximize resonance for a full, natural tone.
Shape, Size and Style
The design and style of the instrument also has an impact on tonality. My first acoustic guitar, purchased right off the rack at the local record store, was a Yamaha FG-45. It was a 3/4-sized “parlor” guitar with a spruce top and a rosewood fretboard. It was small, but it projected a lot of sound!
Typical steel-string acoustic guitar sizes include (from largest to smallest) jumbo, traditional western, dreadnought, concert and parlor, with classical nylon-string guitars ranging in size from roughly concert to parlor. Jumbo guitars tend to output more sound and have more natural reverberation simply because they are bigger and therefore have more wood. However, medium- and smaller-sized acoustic guitars, if properly made, do not lack in projection or tone. In fact, many players would choose these guitars because the sound can be tighter and more focused.
The Yamaha LL16 ARE has a jumbo body.
The Yamaha LS16 ARE has a smaller body.
Some acoustic guitars, like the URBAN Guitar by Yamaha (designed in collaboration with none other than Keith Urban), feature a cutaway on the body, which gives the player easier access to the upper frets. In some cases, cutaway guitars may have a slightly different tone than non-cutaways, with a touch less bass due to the fact that there is literally less guitar body.
The URBAN Guitar by Yamaha.
Pick or Fingerstyle
One of the top factors involved in acoustic guitar tonality is whether you choose to play with a pick or with your fingers — and this is the case regardless of the general quality of the instrument itself.
Using a pick will provide extra clarity and attack to each note or chord strummed. In fact, even the type of pick you use will change the tone or character of the sound. I own a variety of pick types made from synthetic materials like plastic, as well as those made from bone and metal, with metal delivering the brightest tone. There are also picks with different thicknesses. Thinner picks will add a touch more “air” (treble) to the notes, whereas thicker picks will deliver a sound with more mids and lows.
Playing with your fingers softens the sound since there is no attack coming from a pick, although long (but well-manicured) fingernails can act as surrogate picks, allowing you to play with a hybrid finger/fingernail approach.
A related factor is where your strumming hand is positioned. Play closer to the bridge and you’ll get a brighter sound; play closer to the neck and the sound will be more mellow.
Strings
The type of strings you put on your guitar makes a big difference in the overall tone too. Play the exact same chord on a steel-string and on a nylon-string and they will sound very different!
A steel-string guitar will have a brighter, crisper sound, even if played with your fingers; nylon-string guitars (either classical or folk) will have a much softer, rounder sound, even if played with a pick. It’s purely the nature of the strings. Steel strings are traditionally made from a steel core wire with some kind of outer wrap, which could be bronze or a phosphor-bronze composite. Classical guitar strings are made of nylon filament or a nylon core with a bronze or silver wire wrap.
In addition, the thicker the strings, the thicker the tone. String thickness is called gauge; heavier-gauge strings can be tough on the fingers, but they deliver a fuller sound compared to thin-gauge strings. Depending upon your hand strength, you may need to compromise; again, this is a matter of personal preference.
The TransAcoustic Experience
Because by their very nature acoustic guitars don’t require amplification in order to be heard (unlike electric guitars), the sound of an amplifier doesn’t normally play a role in acoustic guitar tonality. (That said, there are acoustic-electric guitars like Yamaha A Series and LL16 models, that have built-in pickups and so can be optionally amplified without the need for a microphone.)
Yamaha A1M.
For the same reason, effects aren’t usually a major factor in acoustic guitar tonality — that is, unless you’re lucky enough to be playing a Yamaha TransAcoustic guitar, which utilizes amazing Yamaha technology that actually creates reverb and chorus effects in the air … no amp needed.
Yamaha FG-TA.
Yamaha CG-TA.
I own both Yamaha FG-TA steel-string and Yamaha CG-TA nylon-string TransAcoustic guitars. As you can hear in the audio clips below, they sound very different from one another, even when playing the same chords or notes. Here’s the FG-TA:
And here’s the CG-TA, playing the exact same chords and notes:
The audio clips below demonstrate how the addition of their onboard effects can have an impact on their tone. First, the FG-TA with a touch of the onboard reverb and chorus added:
Finally, here’s the sound of the CG-TA with the same onboard effects:
As you can see (and hear), acoustic guitar tone is a combination of the physical construction of the instrument and personal playing style — the better the instrument and the more accomplished you are as a guitarist, the easier it is to get great tonality.
Interested in learning how to use a synthesizer? Do it — it’s fun, and endlessly creative. To help you get started, here are some of the most important technical terms you’ll encounter on your journey.
Additive
A synthesis method that produces complex sounds by combining many basic ones (called sine waves), each tuned to a different pitch (frequency) and balanced at various levels. (See “Synthesis”)
Aftertouch
A form of modulation that varies the sound by pressing further down on a key after it has been depressed. (See “Modulation”)
Amplifier
The part of a synthesizer that controls the volume or gain of the sound, i.e., how loud the sound is. This is often varied over time using an EG (Envelope Generator). In an analog synthesizer, the amplifier will often be called a VCA (short for Voltage-Controlled Amplifier). (See “Analog” and “EG”)
Amplitude
Another word for volume or level.
Analog
In synthesis, a means of producing sound through the use of electrical voltages. Most analog synthesizers create sound via subtractive synthesis. (See “Subtractive” and “Synthesis”)
Arpeggiator
A function that takes the notes you are holding on the keyboard and automatically plays them in some repeating order. For example, if you hold down a C Major triad (which contains the notes C, E and G), an “up” pattern will keep playing C-E-G-C-E-G-C-E-G over and over, while a “down” pattern will play G-E-C-G-E-C-G-E-C. These arpeggiated patterns can span more than one octave, and can play more complex note groupings as well. Yamaha MONTAGE M synths incorporate an exceptionally comprehensive arpeggiator that can even generate controller data. (See “Controllers”)
AWM (Advanced Wave Modulation)
A form of PCM data encoding used in many Yamaha synths that utilizes high-resolution audio samples as the waveform for a sound. (See “PCM”, “Sample” and “Waveform”)
Controllers
These are hardware devices such as wheels, knobs, sliders, pads, joysticks, foot switches and pedals, that are used to affect the sound in real time (that is, as you are playing). Yamaha MODX, MODX+ and MONTAGE M synths offer a controller called the Super Knob that can be used to control many parameters simultaneously. (See “Parameter”)
Cutoff
The point at which a synthesizer’s filter begins to cut or reduce frequencies. In a low-pass filter, either no frequencies higher than the cutoff will be allowed to pass, or they will be faded out from that point. In a high-pass filter, either no frequencies below the cutoff will be allowed to pass, or they will be faded out. In a band-pass filter, frequencies around the cutoff (both above and below) will be cut or faded out. (See “Filter”)
Digital
In synthesizers, refers to sound production via some form of digital signal processing (DSP), which manipulates a stream of numbers (“digits”) to emulate a waveform. Many forms of synthesis are possible using this type of technology. (See “Waveform”)
EG (Envelope Generator)
A synthesizer component (either hardware- or software-based) that is used to shape the amplitude, frequency or timbre of a sound over time. The modulating signal it produces is often described in terms of Level and Rate values. Higher levels result in more change to the sound; lower rates cause the change to occur more slowly, while higher rates cause the change to occur more quickly. (See “Amplitude,” “Frequency” and “Timbre”)
Filter
A synthesizer component (either hardware- or software-based) that shapes the timbre of a sound by reducing or removing certain user-determined frequencies. There are several different types of filters employed in synths, the most common of which are a low-pass filter (which reduces or removes frequencies above a user-designated cutoff point), a high-pass filter (which reduces or removes frequencies below a user-designated cutoff point) and a band-pass filter (which reduces or removes frequencies around a user-designated cutoff point). In an analog synthesizer, the filter will often be called a VCF (short for Voltage-Controlled Filter). (See “Analog,” “Cutoff,” “Frequency,” “Resonance” and “Timbre”)
FM (Frequency Modulation)
A method of synthesis whereby one waveform is used to affect (“modulate”) the timbre of another. Yamaha first brought this technology to commercial success with their DX7 synthesizer, first introduced in 1983. (See “Modulation,” “Synthesis,” “Timbre” and “Waveform”)
Frequency
The technical term for pitch, usually given in Hz (short for “Hertz”), a unit of measurement that describes the number of vibrations per second. The more vibrations per second, the higher the frequency and the higher the pitch. The human ear can discern frequencies as low as approximately 20 Hz (20 vibrations per second) up to 20kHz (20 thousand Hertz, or 20,000 vibrations per second).
Glide
Sometimes called “portamento,” this parameter causes notes to slide smoothly in pitch from one to another. The more you increase the glide, the more pronounced the effect will be, and the further away the second note is from the first, the more you will hear the effect. (See “Parameter”)
Granular
A synthesis method that uses small looping slices of audio to produce ethereal and highly imaginative sounds. (See “Synthesis”)
LFO (Low Frequency Oscillator)
An LFO is an oscillator with a frequency lower than 20 Hz, which means it cannot be heard as an audible pitch but is instead used for modulation purposes. When routed to a synth’s oscillator (in which case it affects frequency), the result is vibrato, which is a repeating raising and lowering of the pitch of a note. When routed to a synth’s amplifier (in which case it affects amplitude), the result is tremolo, which is a repetitive change in volume. When routed to a synth’s filter (in which case it affects timbre), the result is usually a repeated automatic wah-wah effect. (See “Amplitude,” “Frequency,” “Modulation,” “Oscillator” and “Timbre”)
Modeling
A form of digital synthesis that uses mathematical algorithms to simulate the sound of known instruments and objects. A more advanced form, called physical modeling, involves analyzing each physical aspect of known instruments, and recreating the sound they make when struck, plucked, blown or otherwise excited. Instruments such as strings, brass, woodwinds, guitar, bass, drums, tine and reed pianos, drawbar organ and even the acoustic piano have been modeled in both software and hardware synths. Many classic analog synthesizers have been modeled too, in a subset commonly known as Virtual Analog Modeling, or VA for short. (See “Digital” and “Synthesis”)
Modulation
This occurs when one synthesizer component is routed so as to affect (“modulate”) another component, thus changing one or more aspects of the sound. The component being used for modulation purposes is usually called the “modulation source” (or “mod source” for short) and the component being affected is usually called the “modulation destination” (“mod destination” for short). EGs (Envelope Generators) and LFOs (Low Frequency Oscillators) are typically used as modulation sources, as are the frequency and/or velocity of the note being played, the amount of aftertouch, and real-time controllers like pedals, sliders, switches, joysticks and the pitch bend and modulation wheels typically found on hardware synths. (See “Aftertouch,” “Controllers,” “EG,” “Frequency,” “LFO” and “Velocity”)
Oscillator
The sound-producing component(s) in a synthesizer, which generates the waveform that the sound is built upon. In a subtractive synthesizer, this waveform will typically be a sine, triangle, square/pulse or sawtooth wave, each of which has a typical timbre. Most synths offer multiple oscillators. In an analog synthesizer, the oscillator will often be called a VCO (short for Voltage-Controlled Oscillator). (See “Analog,” “Subtractive,” “Timbre” and “Waveform”)
Parameter
A term for a single variable element of a synthesizer’s architecture. Most sections of a synthesizer will have multiple parameters that can be manipulated to create and modify a sound.
PCM (Pulse Code Modulation)
In many digital synthesizers, each oscillator will be playing back a sample — data that represents a recording of a sound. Pulse Code Modulation (PCM for short) describes the most common way in which that data is encoded. Usually many samples are spread across the keyboard so they sound accurate at various playback pitches. (See “AWM,” “Digital,” “Oscillator” and “Sample”)
Polyphony
This term refers to how many notes a synth can play simultaneously. A monophonic synth can only play one note at a time; a duophonic one can play two notes at a time. Polyphonic synths (like most that are currently available today) have the ability to play three or more notes at a time.
Resonance
Sometimes called “emphasis,” this is a filter parameter that boosts the frequencies closest to the cutoff in order to create an accentuated harmonic “bump.” It’s often used to create a distinctive chirping, or “quacking” type of synth sound. (See “Cutoff,” “Filter” and “Frequency”)
Sample
A digital recording of a sound stored in memory, used as an oscillator’s waveform. (See “AWM” and “PCM”)
Subtractive
The most common form of synthesis, used in most analog synths and many digital ones as well, whereby the timbre is shaped by a filter that removes (“subtracts”) unwanted sonic components. (See “Analog,” “Digital” and “Filter”)
Synthesis
The act of creating sound using electronic hardware or computer software. Most forms of synthesis offer many parameters for detailed shaping of the sound. (See “Parameter”)
Timbre
The unique, identifiable tonal quality that enables us to tell the difference between different instruments and sounds even when they are playing the same pitch.
Velocity
The term for how quickly a key is depressed. It is associated with how loud we play a sound, since harder playing presses the key down faster than softer playing.
Waveform
The signal that an oscillator produces, which is the basic sound we hear. (See “Oscillator”)
Wavetable
A method of synthesis that uses a group of waveforms of short duration that can be swept through in real time (via an EG, LFO or real-time controller) to create unique, evolving and changing timbres. (See “Controller,” “EG” and “LFO”)
Click here for more information about Yamaha synthesizers.
The history of sports video games started some 50 years ago with the release of the mock-table tennis title Pong in 1972. About a decade later, things got more interesting, with then-advanced games like One on One: Dr. J vs. Larry Bird in 1983 and Tecmo Bowl in 1987. Since then, the sports video game landscape has grown exponentially. Today, there are tennis games with which you can work up a sweat through the use of wireless controllers, golf games featuring legendary athletes like Tiger Woods, and football, soccer, baseball and basketball games that feel like real life.
Here, we will dive into the best of the past two-plus decades, highlighting the top titles and what makes them special, from growth in graphics to the enjoyment of playing … and winning. All these gaming choices offer engaging sporting experiences with the ebb and flow of competition, and the details in their soundtracks can be equally important for generating emotion, from the crowd noises to the acoustics of the arena itself, particularly if you add the immersive envelopment of surround sound.
1. MADDEN NFL 2003
Generally considered to be the gold standard in video sports games, the Madden series (named after the late football coach and broadcaster John Madden) is a perennial best-seller. The most recent edition is Madden NFL 23. But the best reviewed version, by a hair anyway, is Madden NFL 2003 — the 14th installment of the series and the first to have Mini Camp mode and Al Michaels serving as the play-by-play announcer. Originally released for Game Boy Advance, GameCube, Microsoft Windows, PlayStation® and Xbox™, this was an early entry to life-like digital gameplay. No live game on TV? Put this on and immerse yourself. Preview it here.
2. NBA 2K11
Two words: Michael Jordan. The GOAT (aka Greatest Of All Time) basketball player graced the cover of this release because this is likely the best incarnation of the popular NBA 2k series, with options to play single games or via Association mode, during which a player can control an entire (digital) NBA organization. New modes with Michael Jordan were also introduced (longtime gamers know how rare it is to have His Airness appear in games), and classic NBA teams were brought in here, as well. For contemporary rosters, including cover star Luka Doncic, check out NBA 2k22. Preview it here.
3. MLB 10: THE SHOW
People who have played Little League baseball often wonder what it would be like to face a professional curveball. For the 99% of us who never will, check out MLB 10: The Show. Though released back in 2010, many feel that this title is still the best in the series. It was the first in the line to introduce Catcher Mode, in which you can see the game from behind the plate, and Home Run Derby, where players can hit baseballs out of the park in competition. Watching real baseball on TV can feel slow, but this video game provides a completely different experience since it allows you to control all aspects, from base runners to hitters to fielders and even management decisions — all with realistic graphics and lifelike ballparks. Preview it here.
4. FIFA 13
There’s something majestic about the large, rolling green fields. The roar of the (digital) spectators. The rivalry of country versus country, the stakes of it all. While there have been dozens of FIFA soccer games throughout the years, this title, which launched in September 2012, notably offered “First Touch Control” for the first time, which affects how a player controls the ball upon receiving a tough pass. Play as legends in their prime, from Lionel Messi to Cristiano Ronaldo — but watch out, this game has been known to cause tension in even the closest of friendships (just like the real sport)! Preview it here.
5. WII SPORTS: TENNIS
In 2006, Nintendo released the multi-game package Wii Sports. It included baseball, bowling, boxing and golf, but it was tennis that was the focal point, and it remains one of the best even today, more than 15 years later. While the graphics are a bit more cartoonish and rudimentary compared to titles like Top Spin 4 (2011), the game play is fluid, fun and frenzied, thanks in large part to wireless Wii Remotes, which allow players to stand and swing at the oncoming ball like Venus or Serena Williams might. Preview it here.
6. TIGER WOODS PGA TOUR 2004
Not only does this title have the most beloved intro, featuring rapper DMX, but this early incarnation of the universally beloved golf video game series also features 20 courses based on real life options, plus six fantasy courses. It’s a particular favorite on PlayStation because of the analog stick, which allows you to calibrate shots with unusual precision. PGA Tour 2004 was the first in the series to allow players to create their “Game Face,” meaning you could create the likeness of your golfer from scratch. And while graphics may have improved over the years, the gameplay of this series didn’t need to. Preview it here.
7. SPIKE VOLLEYBALL
Released in 2019, this title is a fairly recent addition to the sports game landscape. While volleyball doesn’t have the e-sports legacy of, say, basketball and football, there are dozens of titles that date back to the 1990s and earlier (Venice Beach Volleyball is a fun NES offering from 1991). With full commentary and 50 teams from all over the world, players can dive realistically into the contest for indoor matches that offer booming serves, masterful teammate setups and, of course, plenty of spiking! (Replays are lifelike, too.) Spike Volleyball does, however, require a fair amount of coordination between players so there may be a slight learning curve. Preview it here.
8. NHL 14
Debuting in 2013, this popular game is faster than previous titles in the series and showcases more realistic hits amongst the on-ice digital combatants. The game also offers more violent fighting between foes, if you’re into that — some have even described it as “brutal.” But such is the life of a hockey player. In addition, NHL 14 offers a “Be A Pro” career mode where players can improve the status of their legacies even off the ice. Gameplay and broadcast commentary is so real here that casual onlookers might think an actual game is onscreen! Preview it here.
9. WWE 2K14
Professional wrestling video games have a long, illustrious history, dating back to the Nintendo 64 days pre-millennium. But improvements have been made in the past two decades. Case in point: WWE 2K14, first released in 2013. Not only can you battle big names in the ring, but it offers different modes like “The 30 Years of WrestleMania,” which recreates three decades of wrestling lore and includes classic WWE footage. Players can take on opponents like The Undertaker, The Rock, Andre the Giant and Hulk Hogan. Indeed, this game doubles as a history lesson and looks the part too, with stunning graphics. Preview it here.
10. UFC 4
Ready for some bloody combat between muscular foes? This modern Mixed Martial Arts title, released in 2020, is not for the faint of heart. UFC 4 offers 229 unique fighters and various modes, including Career mode in which players fight to become the Greatest. As you progress, you can choose to take on or dismiss certain fight offers or you can play online battling opponents in the intimidating Octagon. There are also backyard battles and literal underground forums. It’s like you’re an actual member of the Ultimate Fighting Championship! Preview it here.
Take your gaming experience to the next level by integrating a Yamaha AV receiver or sound bar into your gaming setup.
A little more than 20 years ago, our nation suffered one of the most brutal tragedies ever witnessed. I will never forget being woken by a phone call from a friend early that morning who said, “Turn on the TV, you’re never going to believe this.” And he was right. Part of me still doesn’t.
Just days after the 9/11 attacks, songs about air travel were banned from the radio and music sales plummeted but recording artists came out of their studios in droves to help us deal with the trauma. Sheryl Crow and several other artists appeared on America: A Tribute to Heroes, a televised benefit concert to raise money for the victims and their families. Although Ms. Crow’s contribution, “Safe And Sound” wasn’t written specifically about the event, it’s obvious how evocative it was of the day. The melancholy. The devastation. The heartache.
The following month Paul McCartney, David Bowie and The Who headlined The Concert For New York City to honor the first responders who put their lives on the line. Jon Bon Jovi, Neil Young and Alan Jackson penned inspirational songs about the unforgettable day. Bruce Springsteen compiled The Rising — an entire album based on the aftermath of 9/11.
Musicians raised over $170 million in the weeks after the terrorist attacks. Their generosity and empathy helped us, individually and as a nation, fathom and process the enormity of our loss. The universal language of music brought comfort to those who lost loved ones and communicated to them that they were not alone. Through music, the depth of their grief was not only understood but shared.
Such is the healing power of music.
Then, just a few years ago, the entire world was plunged into chaos by the arrival of a novel virus. Like some horror movie, everyone felt isolated and scared. City after city, country after country went into lockdown. Nobody knew how long it would last, or how bad the devastation would be. That’s when music-makers all over the globe stepped out onto their balconies and fire escapes to sing, strum, shred, pluck and harmonize in an effort to try and take peoples’ minds off of their loneliness and this mysterious illness. And you know what? It worked. It brought us together in spirit if not proximity. Jule Styne and Bob Merrill knew what they were talking about when they wrote the words, “People who need people are the luckiest people.”
Even my hubby and I jammed in our Laurel Canyon driveway. We aren’t first-rate musicians (which is why we call ourselves The Clams), but a neighborhood hungry for connection pulled up lawn chairs nonetheless and allowed itself to be lifted up by the sound of live instruments and human voices. It wasn’t only for them that I strapped on Ruby, my Yamaha TransAcoustic guitar. I went to bed that night with a smile on my face. I had sung away my own blues.
Nothing can change a mood quite like a song. Just as “You’ve Got A Friend” can fill an empty room when we’re lonely, “Dust In The Wind” can send us spiraling when we’re feeling just fine, thank you!
Researcher Elizabeth Krasnoff has done extensive study on the healing power of music in her paper “The Effects of Auditory Binaural Beats on Consciousness and the Human Nervous System.” As she explains, “Neuroscience research is just beginning to uncover the impact of sound on our nervous system. Shamanic traditions to this day still consider song the primary tool for healing the ills of the body and soul.” That may be one reason why surgeons have long played their favorite music to relieve stress in the operating room, and extending music to patients has been linked to improved surgical outcomes.
Come to think of it, my orthopedist recently used Shockwave Therapy — acoustic waves that lead to faster regeneration of the tissue — on my recently repaired rotator cuff. Though I couldn’t hear a thing, I believe my shoulder did! It’s feeling a lot better.
The positive impact music can have on Alzheimer’s patients has long been well-documented, and fellow blogger Rich Tozzoli has written here about his first-hand experience in seeing how just holding a guitar made a huge difference to a friend’s mother who was suffering from that horrific illness. So did my friend, hit songwriter Franne Golde, when she set out to find a way to keep her husband, record producer Paul Fox, connected to his music after he was diagnosed with early-onset Alzheimer’s disease. The solution came via an organization called Music Mends Minds, a nonprofit that creates musical support groups for people with neurocognitive disorders.
Explains Franne, “Founder Carol Rosenstein noticed that her husband, a successful attorney and pianist who’d been diagnosed with Parkinson’s disease, came to life when he sat at the piano. Even though he was declining overall, he played perfectly. So she decided to start a band for him — they called themselves The Fifth Dementia. Soon others with Parkinson’s, Alzheimer’s, dementia and traumatic brain injuries joined up, adding their voices and instruments.”
Franne made a date with Carol to bring Paul to their next band rehearsal. “He was not thrilled at first,” she recalls, “but I convinced him that he could help, that this was a perfect opportunity to be a producer of sorts. Slowly he warmed up to the idea and began attending regularly, singing and playing keyboards and percussion. It brought live music back into Paul’s life. He made wonderful friends and it gave him a purpose, a sense of belonging and something to look forward to.”
One of the most vital elements of a film is its score — the soundtrack that guides the viewer through each scene. Depending on the genre, the use of music can vary from minimal, such as a slice-of-life art film where the lack of music mimics the ambience of reality, to maximal, with epic orchestral arrangements adding to the grandeur of a big-budget adventure or sci-fi flick.
In the beginning, there were silent films, where actual live musicians and orchestras would perform music to accompany the action onscreen. (In those bygone days, the score was arguably even more important, as it was the only audible facet.) In the decades since, movie scores have become more dynamic and nuanced — and more rooted to what’s happening in any given scene. Sometimes it serves merely as subtle background music, embedded beneath the dialogue and intentionally undistracting. Other times it booms out of your home theater system or sound bar, lending an emotional tug to a climactic scene or turning point in the plot.
Here are some examples of how the score can enhance the viewing experience and help tell a film’s story.
The Theme Song
There’s no better way to ensnare the viewer than opening a film with a memorable theme song. It can set the tone and mood from the get-go, instantly capturing the audience’s imagination before a single character has even stepped onscreen.
Such was the case when moviegoers attended the first Star Wars in 1977. The opening orchestral blast of composer John Williams’ iconic theme immediately transported you to a galaxy far, far away. With its soaring melody and triumphant energy, it’s widely considered the greatest theme of all time. Other examples of notable theme songs include those in The Pink Panther series and the many James Bond films as well as The Godfather, The Terminator and Rocky.
The Atmosphere
The core function of a movie score is to provide atmosphere and ambience, accenting scenes and transitions with music of an appropriate mood. The late Vangelis’ soundtrack to Blade Runner is a perfect example. The implementation of synthesizers and electronic instrumentation brings the viewer right into director Ridley Scott’s futuristic dystopian rendering of Los Angeles.
On a more rustic note, Radiohead guitarist Jonny Greenwood’s original score for There Will Be Blood projects the gothic Americana vibe of the movie with music equally as harrowing as actor Daniel Day Lewis’ star performance. The same could be said for Ry Cooder’s score for Paris, Texas, which also has a dark Americana tinge. Stripped down to sparse acoustic instrumentation and lonesome, lingering notes, Cooder’s soundtrack captures all the bleakness and depression that fills the screen.
Conversely, the absence of a score is sometimes the best way to reflect a film’s atmosphere. As an example, the road movie Radio On prefers the use of natural sound, and the only accompanying music is what the protagonist himself hears as he makes a lonely drive across Britain.
The Action and Suspense
It’s hard to imagine some movie sequences — especially in the action, thriller and horror genres — without music befitting of the onscreen energy. These scenes would feel pretty empty otherwise. In Alien, for example, the unsettling dark ambience of Jerry Goldsmith’s score actively promotes the terrifying uncertainty felt by the characters themselves, projecting the sense of looming fear onto the viewer. Howard Shore’s soundtrack to The Lord of the Rings trilogy is chock full of high-energy orchestral arrangements, providing epic musical accompaniment for The Battle for Middle Earth and its many sword duels and clashes.
Chase sequences can also benefit from a musical accompaniment that drives forward with equal intensity, thus amplifying the rush of action taking place. Post-apocalyptic action flick Mad Max features many such scenes, with screeching horns and brass underpinning the violent car chases and roadside skirmishes.
The Character Fanfare
Some films incorporate a fanfare to remind the audience of a particular character throughout a film. These pieces are musically synonymous with their respective character, with some obvious examples being Michael Myers in Halloween (sinister piano and string pads), Darth Vader and “The Imperial March” from Star Wars (martial orchestral), and of course, James Bond (spy surf rock).
Even if you hear these themes out of the context of the movies, the characters still come to mind. This is particularly effective in films with many characters, such as The Lord of the Rings trilogy, providing viewers an aural cue to help identify everyone. Here, Shore primarily uses folk instrumentation and whimsical flutes for the hobbits, haunting harmonious choirs for the elves, pounding orchestral percussion for the orcs, etc. Each group of characters has its own sonic palette.
The Soundtrack as a Storytelling Device
Some films even use the score as a tool to tell the story or advance the plot. Take John Williams’ Jaws theme: The repetitious one-two string sweep is central to the shark attack scenes, gradually raising the level of suspense until disaster strikes. A more modern example can be found in the film Uncut Gems, with its soundtrack of shrieking noises and high-pitched frequencies actively disturbing the audience on a visceral and physical level, mirroring the anxiety experienced by the characters themselves.
The 1982 experimental art film Koyaanisqatsi took the concept even further. A commentary on the relationship between humanity and nature, it has no tangible plot or dialogue. Instead, a series of beautifully shot images are presented, accompanied by music from modern minimalist composer Philip Glass. The score and visuals run parallel, taking on an equal importance.
The Climax
Lastly, a film’s climax is a key moment for any score composer. At the emotional high point of the plot, the music must match it in intensity and grandeur. The 1939 epic Gone with the Wind is considered one of the greatest films of all time, and Max Steiner’s score receives equal praise. When tragedy strikes in the climactic scene, the sweeping melancholy of the orchestral arrangement is enough to bring a tear to the eye. Another example of more recent vintage is Prince’s “Purple Rain” — a tear-jerkingly beautiful use of music that makes its appearance during the peak moment of the film of the same name.
A piano is much more than the notes it plays. By some combination of its beauty, resonance, weight and presence in a room, a real piano can deliver a sensory experience that a recording just cannot match.
Sarah Meyohas, a conceptual artist based in New York City, explores this concept and more in her latest art piece “Dawn Chorus,” where she uses a self-playing Yamaha Disklavier piano as the centerpiece, in combination with interactive augmented-reality (AR) visuals set to music. Viewers wearing an AR headset see a three-dimensional display of iridescent birds trailing watercolor streaks of light as they swoop and flutter about the piano. When the birds alight on the strings, they trigger phrases of a complex melody that was composed especially for the exhibit. It appears as if the birds themselves are actually playing the music.
In 2022, “Dawn Chorus” was displayed at Top of the Rock, the observation deck at New York’s Rockefeller Center. Meyohas spoke with us about the piece and how the blend of inspiration and technology made it all possible.
Sarah Meyohas.
Q: What were your overall goals and mindset as an artist? Is there something you hope to show people through your art?
A: With art, I think there’s always some resistance to being exactly “one thing.” If it were just about saying one thing, we could write an essay about it. But I think a common thread in the work I’ve made is engagement with new technologies and how, maybe, they alter what it’s like to be human today. Some of my projects have taken technological trends and accelerated them to an extreme to reveal something.
In the case of “Dawn Chorus,” I’m using a technology — augmented reality — that’s more typically used in military or enterprise applications, where it’s not particularly meant to be a beautiful visual experience. In a sense it’s diverting this technology to something it wasn’t designed to do, which I think shows you something very beautiful and poetic.
Q: What do you hope people will get out of this piece?
A: It’s different from how you typically engage with either visual art or music. The piece we composed for this is three-and-a-half minutes long — and normally you never spend that long with an artwork. It’s [also] different from being at a concert, where you’re seated and not asked to engage with the music actively, as you do here. I want people to use that time to feel inspired and be taken out of their daily life. I want them to experience that moment of magic.
A video example of “Dawn Chorus” in action.
Q: How and when did you first have the idea for “Dawn Chorus”?
A: In 2018 I tried an augmented-reality headset and saw its potential as something really exciting for art, and I wanted to push its capabilities. After the initial inspiration, I knew I wanted to make it a musical piece and that a piano would be part of it. A piano is such a beautiful object and has such a presence in a space.
I first noodled around with some animation concepts that didn’t quite work technically. It took me a while to land on the idea of birds, but I knew right away it was perfect. Birds are linked to music, of course, and are small enough to see in the frame of an AR headset. It makes you feel like you’re wearing binoculars.
Then it was off to the races. We did our first demo of the piece in early 2020, and it was up for two weekends at the New Museum [in New York City] before everything was shut down.
The Disklavier at the Top of the Rock observation deck.
Q: Why did you choose a Yamaha Disklavier as the piano to be used in this piece?
A: It’s an amazing piece of equipment. There was really no other option — there’s nothing like it on the market. Technologically, we needed an instrument that could be triggered via MIDI. But also, we needed an instrument that sounds beautiful musically, a true acoustic piano sound. This piece would not be the same with an electronic keyboard. We wanted that illusion that the music is being played by birds landing on the strings. That was only possible through the combination of an AR headset and the reproducing ability of the Disklavier.
The audience walks around as the augmented-reality birds appear to play live music.
Q: What can you tell me about the music composed for this piece? I understand it was composed in part algorithmically, but with contributions from a talented human composer.
A: There were a few cooks in the kitchen. I wanted the music to evoke water, as if the piano is a fountain that the birds are playing in — light and fluttery, with the sound of birdcalls. We took fragments from composers like Liszt and Debussy and did a statistical analysis to generate phrases that were similar to phrases in those compositions. I’m not a composer myself, so this was kind of a “hack” to be able to generate phrases, and then play them back and listen and adjust. Sometimes we’d have to change keys and figure things out as we went along. We also brought in a composer, David Francois Moreau, who composes for dance quite a bit — which makes sense because this was kind of like choreography for these birds.
The soundscape is a mix of birdcalls and flute, with a hint of some electronic sounds as well. The inspiration for that was a phenomenon called the “electromagnetic dawn chorus,” which basically occurs when people misinterpret ambient electronic noise as birdcalls.
There’s a sense in the piece that this is music humans couldn’t play, because there are just so many notes. The idea was that this is a composition only birds can play.
Q: What were your musical influences growing up?
A: I started playing piano when I was four years old and eventually took classes at the Manhattan School of Music. I like to play Liszt and Chopin and Debussy — a little Rachmaninoff too. As a kid I liked playing Béla Bartók. I remember playing a piece called “Diary of a Fly” that was completely dissonant and so hard to memorize. Maybe that’s what primed me to want to use music in this way. The piece we composed for “Dawn Chorus” contains some dissonant elements, in combination with some more melodic elements.
Q: What about visual art? What are your influences there, and how do they come into play in “Dawn Chorus”?
A: I love the Rococo period of art, and there is something kind of “Rococo” about pianos in interiors. In a sense, this piece is like a contemporary Rococo, where I’m using natural forms and taking them to this exuberant extreme.
Q: What kind of feedback have you received on “Dawn Chorus”? Are there any observations that stand out to you?
A: One comment that I thought was spot-on came from a friend who said it was very “Fantasia.” It’s that use of music — amazing, iconic music — in combination with the visual animation. So that made perfect sense to me: It’s like Fantasia come to life!
Photos: Top of the Rock
For more information about Sara Meyohas and her latest works, click here.
For over 40 years, Yamaha synthesizers have inspired sound and expressive control. From the DX7 that helped define the sound of the 1980s to the MOTIF series used by top stage and studio artists around the world, Yamaha has long been a name associated with cutting-edge synthesizer technology. In 2016, we announced MONTAGE, a synthesizer that expanded the realistic instrument sound of MOTIF and modernized the expressive capabilities of the DX7, along with sophisticated dynamic control, followed two years later with MODX. (MONTAGE has since been supplanted by the even more advanced MONTAGE M.)
Enter MODX+: a new synthesizer with the DNA of MONTAGE and MODX in a compact, mobile and lightweight package, with three models to choose from. The 61-note MODX+6 is perfect for sound designers wanting the distinctive sonic stamp of modern Frequency Modulation (FM-X) synthesis. Performing and recording keyboardists requiring realistic piano, electric piano, strings, brass and other imitative sounds will appreciate the versatility and expanded range of the 76-key MODX+7. Pianists needing a realistic piano touch and sound will be inspired by the MODX+8 with its 88 graded and weighted keys.
There are three reasons why MODX+ deserves your attention: sound, control, and mobility.
SOUND
Like the flagship MONTAGE, MODX+ offers two synthesizer engines. Advanced Wave Memory 2 (AWM2) is a sample-based subtractive synthesizer engine combined with proprietary cutting-edge audio technology, allowing playback of extraordinarily detailed samples of instruments such as the Yamaha CFX 9′ and Bösendorfer Imperial 290 concert grand pianos, Seattle orchestral strings, and more. MODX+ offers 1.75 GB of internal user waveform memory, same as MONTAGE, and an upgrade over the 1 GB offered by MODX.
The second engine is based on Frequency Modulation synthesis, updated for the needs of today’s sound designer. Yamaha brought FM technology to the world in 1983 with the DX7. MODX+ features FM-X, with enhanced expressivity and dynamic capabilities as well as the versatility to create a nearly infinite variety of tones, from clear and bell-like to percussive and cutting or even distorted and chaotic. One of the major improvements offered by MODX+ is 128-note FM-X polyphony, as opposed to the 64-note FM-X polyphony in the original MODX.
CONTROL
MODX+ allows everyone to sound unique through Motion Control — a sophisticated dynamic control matrix. Its Super Knob plays a big role in this, allowing deep simultaneous control of multiple parts in multiple ways. For example, you can turn up a string sound while turning down a piano sound. Or turn a symphonic string section into a string quartet in a perfectly seamless manner. Applied to the FM-X synthesizer engine, the Super Knob can introduce tremendous amounts of sonic change where a simple pad becomes a bell which becomes something words can’t even describe!
Another part of Motion Control is the Motion Sequencer. It has a similar capability to the Super Knob but creates change rhythmically as opposed to manually — great for automating your modulation while synced to other parts. There’s also an Envelope Follower so you can use audio to control virtually any parameter or effect, along with ABS (Audio Beat Sync) that detects and synchronizes to the beat of an external device like acoustic or electronic drums, a drum machine, or any audio source. In addition, the pitch bend and mod wheels on MODX+ which, like those on MONTAGE, are rubberized, giving them a better feel and making them easier to control.
MOBILITY
Did we mention MODX+ is compact, lightweight and ready to go anywhere? The MODX+6 weighs in at just 15.9 pounds; the MODX+7 at 17.6 pounds; and the 88-note MODX+8 at 31.7 lbs. We’ve even got cool bags to go with them!
Check out the video:
For more information, check out Blake’s Take on yamahasynth.com.
Imagine you’re in a music store. You see a bass that gets your heart racing, but it’s hanging high on a wall. When you ask an employee for help, he says, “Sure!” and runs off to get a step stool.
When he’s not back a couple minutes later, you ask another employee. He’s on the phone, though, so he whispers a noncommittal “sure” and continues his conversation.
A third employee wanders in, but when you tell her that this just might be the bass of your dreams, she says, “suuuuuure” and backs away from you like you’re crazy.
Just then, the first employee returns with a step stool. He grins and asks, “You sure you want this bass?”
Each “sure” had a slightly different meaning. What set them apart? Tone.
The tone of your voice is just as important as what you say. In fact, the way you say something often conveys more meaning than the words themselves. It can be helpful to think of bass tone the same way: It’s the first thing we hear when someone plugs in, and a player’s tonal choices for each musical moment says a lot about them.
DEVELOPING GOOD TONE
Just as everyone has a distinctive fingerprint, skilled musicians develop a particular way of expressing themselves — a kind of “toneprint.” With practice, we first learn to imitate other players’ voices and then eventually develop our own. Part of the fun of becoming a proficient musician is learning to balance one’s natural tendencies with the needs of each situation, which is why the definition of “good tone” depends on the gig: What works for a death metal show won’t cut it at a roots reggae festival, and neither of those tones is quite right for a church gig, a salsa dance floor or a bluegrass session.
As bassists, our tonal decisions can make us or break us. In fact, we buy basses not just for feel, but for specific tones too — but where exactly does tone come from?
Equally impactful are the electronics inside the bass, starting with the type, number and selection of pickups. In addition, a bass with active electronics can sound quite different from one with passive electronics, and of course the settings of the tone controls themselves will also, unsurprisingly, have a major effect on tonality.
The Yamaha BB435 has an alder body, dual split single-coil pickups and passive electronics.
The Yamaha TRBX505 has a mahogany body, dual double-coil pickups and both active and passive electronics.
Last but not least, your choice of strings (roundwound vs. flatwound, new vs. old, gauge thickness, etc.) can make a bass sound like a completely new instrument, as can a good setup.
As a bass geek with wide-ranging musical tastes, I’m fascinated by instruments that have come to be associated with certain genres and tones. Beginning in the 1970s, when both music industry advertising and bass-building took a quantum leap forward, the instrument of choice used by critically and/or commercially successful bassists could cement an instrument’s reputation for excelling in a particular genre. The rise of custom “signature” basses like those offered by Yamaha, along with the wide variety of tonally flexible mass-market instruments available today, have begun to change the way we think, but some basses are still closely linked with styles, eras and sounds.
IT’S IN THE HANDS
When people say “tone is in the hands,” it means that your way of expressing yourself will come through whatever instrument you play. In other words, a lot of bass tonality comes from you. The more you’ve trained your hands, the more sonic options you’ll have.
For example, having the ability to use a pick or play fingerstyle gives you a great deal of versatility, as do playing techniques like tapping, strumming or playing harmonics, all of which give you access to a universe of tone. Combining these with other choices, such as fretting-hand grip and picking-hand placement, increases your ability to reproduce a wide range of modern bass tones and conjure flavors that invoke guitar, synth or upright bass. If you regularly play several different basses, you’re most likely learning to modify your technique to bring out the best in each instrument, whether it’s using a different touch on passive and active basses or muting effectively on 5- and 6-string basses.
AMP, SPEAKER AND EFFECTS CHOICES
Your tone begins with your instrument and your hands, but if you use an amplifier, it will play a large role too. (An amp isn’t always required, since bass is often recorded direct, and in live performance, sometimes it’s fed into a PA system that way as well).
The characteristics of your chosen rig — the tonal signature and power-handling capabilities of your preamp (if you’re using one), amp and speaker(s), as well as speaker size — are all crucial factors in the search for a sound that’s uniquely yours. Especially if your bass has passive electronics (or is in passive mode), the preamp inside your amp is responsible for a crucial stage in your tone. If your bass has active electronics, consider how its circuitry jibes with your amp’s preamp. In fact, adding, removing, engaging or bypassing a preamp is one of the most popular ways to achieve a desired tone.
Last but not least, effects devices and pedals offer dozens of ways to subtly (or radically) shape your bass tone, although it’s worth mentioning that some poor-quality pedals may degrade your signal at the same time (a phenomenon known as “tone suck”). The addition of compression, for example, can make a huge difference in terms of sustain, as well as warming up your sound and giving it extra “thump.” Other effects, such as delay, flanging, phasing, chorusing, harmonizing, ring modulation and envelope filters can add a distinctive stamp to your bass parts — some players even like adding a touch of distortion at times, though it’s usually something to be avoided.
Studio musicians collaborate with engineers to deliver a bass tone that sits well in a mix, while performing musicians work with sound techs like FOH (Front Of House) and monitor mixing engineers to maintain consistent tone from venue to venue. Some players collect multiple basses that allow quick access to specific sounds, while others become adept at pulling dozens of distinct tones from a single instrument. But for most of us, the idea of “perfect tone” is a moving target, so have fun experimenting while staying open to what the song and situation needs. And the next time a bass line stops you in your tracks, take a second to think about all the components that came together to deliver that big, beautiful gift to your ears, and smile!
POSTSCRIPT: SOME COOL BASS TONES
Here are some examples of tonal settings you might want to try. These audio clips were all created with a Yamaha BB435 recorded direct — no amp, no effects. With its dual pickups (bridge and neck — each with its own volume control) and a Master Tone knob, this is a bass that offers a world of sonic options.
Turning both pickups and the tone knob all the way on is a great starting place for a bold tone that can cut through a mix:
Both pickups wide open and tone halfway up is a quick recipe for old-school slap tone like this:
Try turning both pickups all the way on, rolling the treble off, muting with your picking-hand palm and playing with your thumb for tone like this:
For a different flavor, use just the bridge pickup, add just a touch of treble, and mute with both hands:
Or, using just the neck pickup, roll off your treble and use your picking hand on the neck — far away from the pickups — for a tone reminiscent of fretless or synth bass:
The mixing console is the most important component of your PA system, acting as a central hub for all audio inputs and outputs. If you’ve been thinking about upgrading, here are some signs that you’re ready to make the move.
You Need More Inputs
Running out of inputs is a big indication that you’re outgrowing your current console. Maybe your band is playing larger venues and you’re ready to mic the drum set, or you’ve added playback tracks to your show. Or maybe you need extra microphones for a special worship service. No matter the reason, you’ll need inputs to accommodate those sources.
The Yamaha MGP32X offers 24 microphone inputs.
The mixer is typically the most expensive component of a PA system, so plan for the future with one that has more inputs than you need right now (it’s amazing how fast those extra channels fill up!). For example, the Yamaha MGP32X analog console offers 24 microphone inputs, plus four stereo line inputs, which should be sufficient for most venues. Although most analog mixers cannot be expanded, many digital ones (including all Yamaha TF and Rivage PM Series mixers) offer optional expansion racks and cards that can increase the input and output channel counts.
You Need More Outputs
As your band starts playing bigger venues, you might want separate monitor mixes for each musician. For example, the drummer may need to hear a click for playing along with pre-recorded tracks, but the rest of the musicians may not want to hear the click. Pro-level mixers generally offer more aux send outputs than beginner mixers. Both the Yamaha MGP32X and MGP24X models provide six aux sends with individual XLR outputs that can be used for creating monitor mixes, plus they have two internal effects sends.
The Yamaha MGP24X provides six aux sends.
Additional outputs found on pro-level mixers like the MGP24X include a mono output (useful for feeding a subwoofer), extra stereo outputs for connecting auxiliary speakers, group outputs for patching into a recording device, and matrix outputs that allow you to combine different mix buses for specialized applications like streaming to the web.
Digital mixers often have assignable “Omni” outputs — a feature that you won’t find on an analog mixer. Yamaha TF Series mixers provide 16 XLR Omni outputs that can be user-assigned to the L/R mix, aux sends, or matrix outputs.
This screen from the Yamaha TF1 shows that Aux Send 1 is assigned to Omni out 1.
Inserts
An insert is a special connection on a mixer that allows an external processor such as a compressor, noise gate or equalizer to be patched into a specific channel. Inserts are usually found on input channels, but many pro-level mixers also provide inserts on the main L/R output and the group outputs. Inserting a processor on an input or output channel allows you to optimize the settings of the processor for that specific channel — though the processor cannot be “shared” with other channels.
The inserts on an analog mixer often use a single 1/4-inch TRS jack as both an input (send) and an output (return) at the same time, and connect to the processor using a special insert cable, wired as shown below.
An insert cable.
Yamaha TF and Rivage PM Series mixers provide onboard digital effects (see below) that can be inserted on a channel, without the need for external patching.
Here, a UA76 limiter plug-in is digitally inserted on a channel of a Yamaha mixer.
A Wider Range of Effects
Entry-level mixers usually provide just one or two onboard effects processors with a limited selection of effect types. Pro-level mixers — particularly digital models — feature comprehensive virtual effects racks that can greatly expand your sonic palette by allowing you to create unique effects for different instruments. For example, you could have one type of reverb for the drums, another reverb for the lead vocal and a third for the horns, each optimized for their respective instrument. Virtual effects racks also allow individual effects to be digitally inserted as described above. Many digital mixers offer a wide range of effects, including pitch shift, chorus, flange, phaser, stereo delays, and a variety of different reverb types such as plate, hall, room, chamber and reverse reverb.
Advanced Routing Capabilities
Pro-level mixers, particularly digital consoles, also provide routing flexibility you won’t find on entry-level mixers, such as audio groups, pre/post switching on the aux sends, and the ability to route effects into monitor mixes.
Audio groups (also called “subgroups”) make it easy to manage a large number of channels. As an example, let’s suppose you have ten channels of drums and want to make the entire drum set louder. Trying to move each fader by the same amount will prove frustrating and inaccurate. Grouping those channels together, however, enables you to control their level with just one fader (or two if you want a stereo group).
Digital mixers often provide a special type of group called a DCA or “Digitally Controlled Amplifier.” Unlike an audio group, a DCA is not an audio path — it adjusts the level of each channel individually, as opposed to summing all the channels into one.
Most digital mixers and some high-end analog mixers (for example, the Yamaha MGP24X/32X) also offer aux sends that can be switched between pre-fader and post-fader, making them equally useful as either effects sends or monitor sends.
Another type of advanced routing that you won’t find on an entry-level mixer is the ability to send effects to the aux sends. This enables you to add reverb or other effects to the monitor mixes, which can help inspire a musicians’ performance.
Yamaha TF mixers allow you to send effects into the aux sends.
Talkback
Talkback is a special channel designed to help an engineer communicate with musicians on stage. Much more effective than yelling from the front-of-house mix position to the stage, a talkback microphone is routed into the aux sends so that it can be heard through the musicians’ monitor mixes. Most pro-level mixers offer this feature, providing an XLR input for the talkback mic, assignment buttons for routing the microphone into the aux sends, a level knob for controlling the volume of the talkback mic, and an on/off switch. A stereo assign switch for the talkback mic (again, found on many pro-level mixers) can be handy if you need to make an announcement over the PA system from front-of-house.
Improved Memory Capacity
One of the big advantages of using a digital mixer is recallability. Digital models can usually store and recall every setting on the mixer as a “scene” or “snapshot,” and many allow you to create libraries of channel settings, effects or EQs. Scenes can be created for each song and then sequenced to build a show. You can create different scenes for different venues, or for different performers in the same venue — which is particularly helpful in House of Worship applications where services may have different musicians and/or ministers. Scene data can usually be stored to and recalled from a thumb drive, allowing you to carry the data with you and load it into another console.
Scene library for the TF Series.
Remote Control
A feature that you won’t find on entry-level mixers or any analog mixer is remote control via network. Many digital mixers can be controlled using a smart device, which opens up a world of possibilities. You can walk the room while controlling a Yamaha TF mixer from an iPad, and adjust your mix based on different listening positions. In addition, musicians can control their own monitor mixes from a smart device using apps like Yamaha MonitorMix, which supports the use of up to 10 smart devices simultaneously. MonitorMix provides each musician with personal control of their mix, reducing the workload on the front-of-house engineer.
Yamaha MonitorMix.
As you can see, stepping up to a better mixer not only provides a greater range of sonic possibilities, it can also mean more options for taking control of your performances as you step up to bigger and better gigs.
If you’re a game streamer on a platform like Twitch or YouTube Gaming, or are considering becoming one, a dedicated gaming mixer like the Yamaha ZG01 will help improve the experience for you and your audience. In this article, we’ll explain why.
1. It Provides Just the Right Amount of Audio and Video Inputs
The Yamaha ZG01 provides HDMI, USB and XLR/TRS mic connections.
A gaming mixer provides inputs for all the audio and video sources required for gaming — no more, no less. You don’t need a separate mixer and audio interface; the gaming mixer handles the functionality of both.
Typically, a gaming mixer offers the following connection types:
USB ports
The ZG01 features two USB ports. One port is used if you’re hosting the game from a computer that has USB-C. In that case, it not only provides power to the ZG01 but also carries game audio and voice chat from your PC into the ZG01 and sends your mix of game audio, voice and chat back to your PC for streaming.
The second USB port is used to power the ZG01 if you’re hosting the game from a console or from a PC without USB C.
HDMI® ports
These allow you to connect a game console’s audio and video signals to the mixer via HDMI. (Note: A gaming mixer won’t process the video but will “pass it through,” allowing you to send it to a video capture device for streaming on your computer.) The ZG01 offers two HDMI inputs, which make it possible to connect up to two game consoles (such as a PlayStation® and Xbox™, or an Xbox and Nintendo Switch™) and an HDMI output for a TV or monitor.
Here are the kind of connections you’d make in such a setup:
A game streaming setup incorporating a console and a video capture device.
Mic inputs
These enable you to plug in a microphone for chatting with your audience. The ZG01 offers both professional XLR/TRS and standard 3.5 mm microphone inputs so that you can use either a standalone microphone or the mic built into a gaming headset.
2. It Offers Comprehensive Control
Your stream includes both the game audio and your spoken commentary about the game action, as well any comments coming from your chat group. If you want to keep your audience interested, it’s essential that your viewers be able to clearly hear both the game audio and your voice, as well as their own chat. A gaming mixer like the ZG01 is purpose-built for doing just that. It allows you to easily adjust the balance between the game audio, your microphone and group voice chat. A good audio mix is crucial even if most of your audience is listening on mobile phones, poor-quality stereo headsets or laptop speakers with limited fidelity.
The ZG01’s intuitive front panel controls let you easily balance the audio elements of your game stream.
3. It Has a Small Footprint
Many audio mixers take up a lot of space and offer dozens of knobs and switches, many of which are unnecessary for game streaming. Dedicated gaming mixers provide a smaller and easier way to manage your gaming audio experience. The compact footprint of the ZG01, for example, fits neatly into any gaming command center, offering just the right selection of tactile controls needed for real-time mixing and effects, with deeper, less frequently accessed settings available in free companion ZG Controller software.
4. It Lets You Fine-Tune and Personalize Your Voice
One way to make your stream more compelling and at the same time help differentiate your commentary from voices in the game is to add effects to your voice. The ZG01 provides a wealth of onboard effects, including compression, limiter, reverb, pitch, radio voice and more, plus press-and-hold buttons for echo and censor beep sounds. It gives you the power to substantially change the character of your voice, quickly and easily.
Some of the voice-changing options offered by ZG Controller.
5. It Allows You to Enhance the Game Audio
A gaming mixer will sometimes let you enhance the game audio in different ways to add to the excitement for your audience. For example, the ZG01’s Focus Mode feature enables you to increase the ambient sound and reduce the player’s sound in the game audio to add to the dramatic effect in battle and other action scenes — there’s even a 3D Chat Space, where game chat voices get placed where you want them in a virtual space that avoids overlap with the game sound.
In addition, the ZG01 allows you to virtualize the game’s surround soundtrack, thus significantly enhancing the immersive aspects for your audience and making them feel like they’re part of the action even if they’re listening on stereo headphones. Check out the entire family of Yamaha gaming accessories.
Using Other Mixer Types
It’s worth noting that, although a dedicated gaming mixer like the Yamaha ZG01 or its smaller cousin, the ZG02, offers the most flexibility and connectivity options, you can get some of its functionality from a compact audio mixer with a USB output, such as the 6-input Yamaha AG06MK2 or 3-input AG03MK2. (The AG03MK2 is also part of the Yamaha AG03MK2 LSPK bundle, which includes a high-quality microphone and connecting cable, along with studio-quality headphones.)
The Yamaha AG06MK2 compact audio mixer.
Alternatively, you can use an all-analog audio mixer connected to an audio interface, which will route the audio signal directly into your computer. Audio mixers put many handy features at your fingertips. Their multiple input channels allow you to connect simultaneous sources (for example, multiple microphones if you have guests or more than one host). They also typically offer multiband EQ for adjusting the tone of your microphone as well as dynamics processing such as compression/limiting, along with panning and built-in effects for enhancing voices. However, they won’t provide the HDMI ports you’ll find on a dedicated game streaming mixer, which makes getting the game audio into it from a console much less convenient. (For example, if your gaming console has an optical out, you might need to convert that optical out to analog first.) You’d likely have to control the game audio level from the console or your streaming software instead of the mixer.
The lack of HDMI connections on a compact audio mixer won’t be an issue, however, if you’re playing the game on your PC rather than on a console. That’s because you can feed the output of the mixer into your computer via USB and then balance it with the game audio using software running on your computer, such as OBS Studio or Streamlabs.
I am interviewing prominent people, some in the music industry, others not. For this Q&A, I talked to Congressman Mark Amodei.
I chose to interview Rep. Amodei from Nevada because it’s important to emphasize that arts education is a nonpartisan issue. Amodei, a Republican member of the House of Representatives since 2011, speaks joyously about his former music teacher as well as his memorable music-making experiences as a public school student in northern Nevada. Each year, he makes time to meet with me in his Washington, D.C., office, and he remains one of music education’s ardent supporters.
Q. Why is it important to protect access to a musical education?
A: I’m a product of my experiences — we all are. My experience in public schools in Nevada was well-rounded because all of us had music starting in elementary school. My grandmother had a violin, so in 4th grade, that was the instrument I learned to play. I was certainly not what one would consider a cultural icon, but a group of cellists and I would often get to go to a separate room and practice together. In fact, I once got to play a solo on the family “Stradivarius.” I was so proud to have actually learned a song that I could play on that particular instrument.
When the music teacher, Nonie Gardner, came into class, we always had fun, but she commanded our respect. Nonie was a lady of culture, and she was passionate about music. You not only respected her but also her subject.
Music is part of the fiber of growing up and going to school. In high school, you always knew the name of the football coach and the band director. It’s just part of having a well-rounded education.
Q. Which person from history, dead or alive, would you want to have lunch with and what would you discuss?
A. Any of the Comstock key figures — for example, John Mackay or Abe Curry (a.k.a. the founding father of Carson City) — to talk about what happened in those days and why, especially the establishment and eventual closing of the mint in Carson City. Turns out that much of Nevada’s silver was shipped to San Francisco to be minted because of an issue with the mint in Carson City. I would have loved to have been a fly on the wall to learn more about what was really going on during the Comstock Lode days.
Q. What is your most embarrassing moment that you can share?
A. As an up-and-coming 5th-grade basketball player, I got the ball and promptly dribbled to the other team’s basket and scored. Oops!
Q. Other than music, what brings you inspiration?
A. When I was 40, the answer would have been different than what it is now. Now that I’m 60, I’m more introspective. I’m inspired by people who have not had an easy way in life because of major challenges (physical, environmental, etc.) and yet have persevered and achieved success. These people set a higher standard in life for all of us because of what they have accomplished in spite of their personal situations.
Q. What is your biggest pet peeve?
A. The older I get, the less tolerance I have for arrogance. There’s just no place for it.
Q. Why is music important to humanity?
A. In my experience, regardless of what kind of day you’re having — good, bad or indifferent — music will enhance your mood. It can be relaxing and soothing or energetic and motivational. It helps us with perspective because it can do so much for our attitude.
Q. What is your favorite guilty pleasure food?
A. When I’m in the right mood, I want a juicy hamburger with all the goodies. One of the best burgers around is at a place called Scoopers in the city of Sparks. I’m also a breakfast guy – more of a sausage links guy than a bacon guy.
Q. What piece of music do you wish you had written and why?
A. Most of my music affection is for the actual music itself — not necessarily the lyrics. Some of the Doobie Brothers music really fires me up. Specifically, I love “Listen to the Music.” I also enjoy the Free Willy song, “Will You Be There” — it’s the beat that drives the song. In terms of sound, I enjoy the “highs” with not so much emphasis on the “lows.” My favorite styles are pop, country and jazz. My jazz epiphany came as a result of hearing the Peanuts theme song! I’m also a huge fan of Mindi Abair (a Yamaha Performing Artist).
Q. What’s something about you that most people don’t know?
A. I’m a frustrated yard worker and truck guy. During my free time, I love to putter around the house doing handyman jobs. It also allows me to focus on something aside from the duties of my normal, daily routine.
This article originally appeared in the 2019 V2 issue of Yamaha SupportED. To see more back issues, find out about Yamaha resources for music educators, or sign up to be notified when the next issue is available, click here.
Douglas Droste is Director of Orchestral Studies at Baldwin Wallace University Conservatory of Music in Ohio. As a dedicated advocate of music education, Droste regularly conducts youth and all-state orchestras and serves as a clinician and adjudicator for school orchestras and festivals.
A. Two things: my children and athletes. My kids inspire me daily — to be a better father and person, and to hopefully give them the tools to be successful. Athletes are very similar to musicians in having to produce at a high level for a consistent period of time.
Q. When did you know that you were going to make music the focus of your professional life?
A. I knew very early that music would be a major part of my life. My parents, sister and aunt are retired or current music educators. Almost all of my relatives at least played an instrument or sang in choir.
Q. What is your biggest pet peeve?
A. Musically speaking (besides the basic fundamentals like intonation, tone, etc.), string players playing in the wrong part of the bow.
Q. What is your favorite guilty pleasure food?
A. Burgers and pizza, with a side of extra exercise the next day.
Q. Which person from history, dead or alive, would you want to have lunch with and what would you discuss?
A. Leonard Bernstein, a brilliant man and musician with an intense passion for everything he did. We would discuss music, politics, sports and him helping me get a guest conducting gig with the New York Philharmonic.
Q. What is the most embarrassing moment of your life that you can share?
A. My first job was as band director in Baltimore, Ohio. At my very first concert while speaking from the stage, I somehow managed to call the townspeople “Baltimorons.” It wasn’t in a negative way, so I think most people didn’t notice — or at least I hope so!
Q. What piece of music do you wish you had written and why?
A. Several books and magazines that won’t get read until after the last concert of the semester! My family has given me “How Dogs Love Us” by Gregory Berns and “The Alchemist” by Paulo Coelho. I’ll get to them eventually …
Q. Why is music important to humanity?
A. Music is in everything we do. It is an incredibly powerful tool for personal emotions, social change, rehabilitation, self-awareness, education, relationships … you name it.
Q. Why is it important to protect access to music education?
A. We must continue to advocate for music in our schools. Like I said above: Music is in everything we do. We must also use music to teach young people how to be good people. Unfortunately, not all decision makers are musicians or even artists. Once something is cut financially, it is that much harder to get it back. Keep your programs strong, perform often in your community, play at school functions regularly — stay visible!
The dictionary describes “tone” as the quality or character of sound. Of course, the quality of a sound is in the ear of the beholder.
Some of my friends revere certain guitar players, and often describe them as having great tone. Some I would agree with, some not. I’d argue that style, technique, chops and gear are separate attributes that contribute to the tone, but are not the foundation or source of the tonality itself. I’ve heard accomplished players make cheap electric guitars and amplifiers sound amazing, and players of lesser skill make expensive custom gear sound awful.
So where does great electric guitar tone come from? In this article, I’ll try to answer that question, looking at all aspects, from the physical to the metaphysical.
It Starts With Soul
It may sound clichéd, but I believe that first and foremost, great electric guitar tone comes from the soul of the player.
If this strikes you as vague, consider this: An extremely attuned and sensitive musician will respond in real time to the sounds they are coaxing from their instrument, making constant (and sometimes minute) adjustments in note choices, finger pressure, dynamics and phrasing until they achieve the tones they hear in their head (and feel in their soul).
When I’m presented with a new guitar, amp or pedals, I first listen to the sounds they produce and honor what they give me. I then combine that information with my personal touch to create my sound. I think you’ll find most skilled musicians do the same thing.
Does that mean we don’t care about what gear we use? Absolutely not. The sonic chain may start with the spirit, but the physical tools we use can be considered a conduit for the resulting tones.
Before we take a closer look at those factors, though, let’s discuss how playing technique helps shape guitar tonality.
The Importance of Technique
One of the fundamentals of playing guitar is that the fretting hand chooses the pitches, while the picking/strumming hand delivers the rhythm. If the fretted notes are played cleanly and are in perfect coordination with the rhythms, a positive and solid connection is made between the two hands, and the result is good tone. If the hands are not in sync with one another, the connection will be poor, and the resulting sound will be inconsistent and weak.
In my experience, these kind of synchronicity problems are usually due to strong downstrokes from the picking hand, with upstrokes that are weaker by comparison. These issues can be remedied by practicing scales purely with upstrokes until the dynamic, speed and attack are equal in both picking directions. Pay attention to how close the pick is to the strings; reducing distance in this area will improve tone, articulation and speed.
Don’t ignore the chords either. Practice clean chord changes slowly, with minimal space in-between each change, and gradually bring those transitions up in tempo.
It’s also important to have a handle on appropriate tones for specific styles of music.
If you play in a band (as opposed to playing solo), your main job is to create tones that support the feel, audio aesthetic and textures within that ensemble — challenges that will be crucial to keeping the gig. For example, the kind of overdriven tones you’d use for rock, blues and metal aren’t appropriate for jazz and funk music … in which case, you need to keep those tones warm and fat, clean and funky!
Now let’s move on to the physical aspects, starting with …
The Guitar Itself
Every guitar — both electric and acoustic — has its own intrinsic tonality. Plug a Yamaha Revstar into an amp and I guarantee you it will not only sound significantly different from electric guitars made by other manufacturers, but it will also be distinct from a Yamaha Pacifica or a Yamaha SA2200 semi-hollow electric plugged into that same amp. In fact, it will sound somewhat different from other Revstar models, and even (to a lesser extent) other guitars of the same exact make and model.
What’s the reason for this? A lot has to do with the physical construction of the instrument and the tonewoods utilized. Professional and Standard second-generation Yamaha Revstar electric guitar models, for example, employ mahogany for the body and neck, combined with a maple top and a rosewood fingerboard — a tried and true combination that harkens back to the ’40s and ’50s and the pioneering instruments made during the infancy of electric guitar.
Then there’s the issue of body type: hollow-body vs. solid-body, each of which imparts a distinctive tonality. Some newer designs, like that of second-generation Yamaha Revstar guitars, employ chambered bodies, which essentially combine the best of both worlds.
Neck design and how it is joined to the body is also a major contributor to electric guitar tonality. Does a guitar with a one-piece neck-through design and a truss-rod stripe sound different than one with a bolt-on maple neck and ebony fingerboard? Highly likely, as the wood, width and stiffness of the neck — even the width of the fret wires — all contribute to the transfer of tone.
Even the headstock plays a role. Anyone who has used a clip-on tuner will attest to the fact that resonance travels all the way from the player through the guitar and ends up at the headstock to produce the vibrations that the tuner uses to measure the pitch of the strings.
Needless to say, the electronic components of an electric guitar have a huge impact on the instrument’s sound. For example, single-coil pickups deliver a very different tonality than that of humbuckers or Filtertrons; that’s why many guitars offer combinations of various pickups. The magnets used in each, along with their windings, output levels and wiring configurations all have a profound effect on tone, as does the distance between the pickup and the strings, bridge and neck. Electric guitars with multiple pickups are outfitted with pickup selection switches; choose the pickup closest to the neck for a warmer tonality or the one closest to the bridge for a more “biting” tone, or opt for a blend of the two. (Some guitars, like Yamaha Revstar Professional and Standard models, offer comprehensive pickup selector switches that provide out-of-phase settings for even more tonal variety.)
Then there are the tone controls you’ll find on pretty much every electric guitar, as well as special features like the “focus” switch found on Revstar Professional and Standard models, which smoothes out the treble frequencies while boosting the lows and mids for a more defined sound. There’s also the dry switch (a bass filter) found on Revstar Element models, such as the RSE20 I’m playing in the video below.
Strings
Strings also make a considerable contribution to the tone. Lighter gauge strings generally lend themselves to articulations like bending, vibrato, tapping and legato-style playing, though at some sonic expense in terms of lack of “beefiness.” Heavier gauges work better for slide playing and add that extra bottom, but they are tougher on the fingers. In fact, you may need to compromise when it comes to strings. For example, when I’m performing live, I often need to play for extended periods of time, and that’s not physically possible for me on heavier-gauged strings; as a result, I have to find a balance between tone, gauge and a manageable string tension.
Picks
Yes, even your choice of pick (or your decision not to use one) affects electric guitar tonality. That’s because guitar picks are made from various materials (such as plastic, nylon or even metal) and come in different sizes and thicknesses.
Thin picks are great for strumming because they create a nice percussive sound, and work well in live performance. However, I often prefer medium picks (generally nylon) when I’m recording because they allow me to control the low frequencies and maintain clarity in the mids and upper-mid frequencies — something that’s extremely important when layering multiple guitar parts. I use extremely heavy picks for single-note lines because I like the solid connection the pick makes with each string. I can vary that dynamic using my inner sensibilities, coordination and tactility.
I’m also an advocate of using your nails for finger-styles, percussive rhythm playing, slide and double-stop parts. Acrylic nails impart their own unique tone, and allow you to articulate the notes the way you want for each individual technique.
Amplification
Electric guitars are rarely if ever played direct (i.e., plugged in but without amplification), so the amplifier being used will play a major role in tonality. It can be helpful to consider the musician and guitar as a painter and a brush, and the amplifier as the blank canvas on which the paint will be laid, layered and blended.
Most of the electric guitar tone will have already been created before the signal coming out of the jack reaches the amplifier and speaker. A quality amplifier and speaker combination like a Line 6 Catalyst® guitar amp will stay true to the delivery of the original tone. The amplifier’s tone controls (bass, mid, treble, presence) can then serve to accentuate (boost) or attenuate (decrease) different aspects of the sound for additional sonic shaping. A lesser-quality amp will alter the signal being delivered, usually deteriorating it to some degree. But even the best amp can’t do much with a poorly developed signal, in which case the result will almost inevitably be a substandard guitar tonality. The lesson is simple: Get your tone right before it reaches the amplifier.
Line 6 Catalyst 60 guitar amp.
Effects
Just as electric guitars are rarely if ever played unamplified, so too are they rarely played without effects such as reverb, delay, phasing, flanging, chorusing, distortion, etc. Your choice of effect type(s) can have a profound effect on the tonality of your electric guitar — in fact, even where you place them in the signal chain (i.e., reverb before chorusing vs. chorusing before reverb) can have an impact on your sound.
Logically speaking, by choosing to add an effect, you’re looking to alter the tone. (That’s why they’re called “effects”!) The mere fact that an effect has been added will have an impact on the sound of your electric guitar. Some effects devices offer a “true bypass” feature, which means they won’t affect the purity of the signal path when the effect is not engaged.
The Video
The video below presents a good example of what I consider to be excellent electric guitar tone. In it, I’m playing a second-generation Yamaha Revstar RSE20 Element electric guitar, running through a Line 6 Helix effects processor. I used the neck pickup exclusively, with the dry switch engaged throughout. As I was experimenting with the melody, I found that the combination of resonant tones in the key of C# minor coupled beautifully with the humbucking neck pickup and my custom Helix preset. You may even notice a hint of flute-like tones emanating from the double-stop phrases.
The Guitar
Yamaha Revstar RSE20 in Neon Yellow finish.
I really like how the Yamaha Revstar RSE20 faithfully reproduces my tone and adds that fat, warm sustain I look for in an electric guitar. It has a beautiful resonance thanks to its finely tuned chambered mahogany body, Alnico 5 humbucking pickups and neck-through body design. The RSE20’s tone control also features a “dry” switch that filters out some of the low-end frequencies for additional tone shaping.
The Wrap-Up
Without the musician, the guitars, effects and amplifiers all lay silent, absent of tone. So take time to evaluate your signal chain … starting with you.
When your soul and spirit connect with your physical being, they transmit and coordinate creative ideas through your fingers to the strings, tonewoods, pickups, amp and effects. When that happens, an electric guitar’s true tone makes its appearance as a unified sound and a unique form of musical expression. It’s not just magic, it’s sonic alchemy!
While it can be tough to create the realism of a symphony hall in your home with a Hi-Fi system, if your amplifier has enough power and you’ve got big enough woofers in your speakers, you can at least transform your living room into your favorite club.
Here are 10 of the very best EDM albums you need to own on vinyl. Make sure your turntable is isolated from the floor so you can crank up the bass!
1. The K&D Sessions™ – Kruder and Dorfmeister
For many EDM fans, this two-disc CD collection of remixed tracks is considered ground zero in terms of the feel and seamlessness it achieves. Now that you can buy it as a four-album set on vinyl, things are taken up a notch. The tracks from Bomb the Bass, Sofa Surfers, Roni Size and more (along with two original tunes) will either keep you glued to your chair taking a major trip inside your mind or bouncing around the room with a glow stick. These beats hit hard.
2. Dehli 9 – Tosca
In this musical alternate universe to Kruder & Dorfmeister, Richard Dorfmeister partners up with pal Rupert Huber as the duo Tosca. Bass is in abundance — as it should be — but this record is very downtempo and ambient, almost symphonic at times. When I think of EDM, I usually think of a room full of people in close proximity. But this record always makes me want to take a road trip.
3. 4×4=12 – Deadmau5
When you first set the stylus down, 4×4=12 starts off slow and trancelike, but about a minute and a half in, the bass starts pumping and doesn’t stop till the end of the album. If you listen closely, you’ll swear some of your favorite disco tunes are sampled, yet ever so slightly in the way that has made Deadmau5 a living legend and an incredible curator of sound. But just when you think Mr. Mau5 has gone back to the ’70s, he slows things down with “Raise Your Weapon” and then backs you up against the wall with “One Trick Pony,” which feels a lot like a Rage Against the Machine track. This album offers some of the deepest bass you’ll ever feel, so get those subwoofers hooked up and ready to rumble!
4. Scary Monsters and Nice Sprites – Skrillex
It’s nearly impossible to talk about Deadmau5 without making Skrillex part of the conversation. Stalwarts of each may claim their guy is the best, but Skrillex brings his metalhead past to the forefront with faster beats and heavier hooks; as a result, Scary Monsters and Nice Sprites has a very different feel than 4×14=12. (Students of irony will enjoy learning that Scary was released a day after 4×4.) This is a bigger, more densely packed record that will have you looking for that last can of Red Bull in the fridge when you’re done listening. If you can take the whole thing in at once.
5. Pet Shop Boys – Electric
If you thought you knew the Pet Shop Boys as a synth/dance pop band, this album will get you rethinking. Electric kicks up PSB’s sound with harder-driving rhythms, the bpm meter cranked up, and so many layers of synthesizers, you might mistake this for a collection of Daft Punk outtakes. They even do a Springsteen song on this record (“The Last to Die”) and it succeeds brilliantly! Warning: This album may get you wanting to install a disco ball on your ceiling.
6. Homework – Daft Punk
Speaking of Daft Punk, if your appreciation for the helmet-clad French duo began with Random Access Memories — and that’s not a bad place to start — spin the clock back. Way back to the duo’s debut. This one’s as sparse as EDM gets; there’s barely more than a bass line on some of the tracks. Pure genius, or an uncut gem? You be the judge.
7. Ray of Light – Madonna
With the help of well-known techno producer William Orbit, Madonna puts together a record that’s equal parts pop, dance and techno. The sonic textures created here feel like they could almost be part of a David Lynch soundtrack, albeit not quite as dreamy. If you have a high resolution audio system, you’ll be hearing ear candy everywhere. Madonna keeps her smoky voice much more subdued here, building a sonic landscape that makes you want to get off the dance floor, sit at the table, take it in and chill.
8. 20 – Orbital
20 has a more coherent sound, and is somewhat more lyrical than some of the other choices here, yet there’s no skimping on the bottom end: these tracks thump. The killer mix of samples and ambient effects give 20 a Fashion Week catwalk kind of groove at times, and when they aren’t doing that, they feel like something you might hear as the backdrop of a ’90s video game. As a bonus, thanks to a high level of ambience, the tracks on this album will show off your audio system to great effect.
9. Moon Safari – Air
Where some subsets of electronica rely more heavily on beats and samples, Air’s debut album was much more of a textural exercise (as are their subsequent releases), and an incredibly intriguing one at that. Where Skrillex sometimes feels Andy Warhol, think of Air more as the Ansel Adams of techno, painting audible images in broad, sweeping forms. There’s a delicacy here that coddles you, where some of the others pummel you into compliance. Gentle drums and synth bits blend in with the solid bass lines; even a vocoder makes an appearance on “New Star in the Sky.” It’s far and away the dreamiest record on this list.
10. Play – Moby
Claimed to be the most successful electronica album of all time — and not only in terms of total record sales — every one of the tracks on this record have been licensed to the max. But the bluesy, backbeat texture of this record still stands up 20 years later. It starts out fairly raw but becomes diffuse at the end, as the beats and textures dissolve into your room. Even if you were there back in the day when it was released, revisit this one.
Characterized by the metal wires or “snares” stretched across the bottom head, the snare drum plays a large role in just about all genres of music, including pop, rock, metal, funk, hip hop, R&B, progressive, marching band, drumlines, orchestral and jazz. When used in popular styles of music, it’s the snare that provides the backbeat on the 2 and 4; in orchestral and jazz pieces, the snare is used for color, accents and embellishments of musical phrases. Because it’s the centerpiece of the modern drum kit, the snare drum is the starting point for beginning drummers, and it often serves as a showcase for advanced players demonstrating their technical skills.
As you might imagine, there are a huge variety of snare drums available. In this article, we’ll look at the most common types and their applications.
Metal
Snare drums can be constructed from a variety of metals, the most popular being steel or stainless steel, aluminum and brass, followed closely by copper and bronze. Metal snare drum shells are constructed either by bending a flat metal sheet into a cylinder and welding the seam (so-called “welded” shells), or by spinning and heating a metal disk while pulling it over a cylindrical form (“spun” shells). The metal can also be melted and cast into a cylindrical mold, which is a very expensive process.
The Yamaha RLS-1455 snare drum features a stainless-steel shell.
Each of these materials has a unique sound, but in general, metal snare drums produce a sharp “crack,” a quick response, and a lot of overtones. Steel can produce bright, ringing overtones that require damping, while brass tends produce a rich tone with dark overtones. Metal snares in general have good projection, produce great rim shots (where you use a stick to simultaneously strike both the rim of the drum and the top head), and can easily cut through on loud stages, which is why they’re a favorite for hard rock.
Metal snares, like all acoustic snare drums, can be tuned across a wide range, depending upon the player’s preferences. Medium and high tunings generally project better while offering greater sensitivity and dynamic range. Low tunings are great for slow-paced songs like ballads, but can limit the dynamic range — meaning that you really have to smack the drum hard to make it speak.
Metal snare drum shell depths range from five to eight inches, with 14 inches being the most popular diameter, though there are models with 13- and 15-inch diameters.
Snare drums have been made from wood going as far back as the 1300s(!), when a drum called a tabor was used for communication purposes. Wood shells can be constructed by gluing together thin plies (layers) of wood, by steam-bending a solid board, or by gluing together wood blocks.
The Yamaha TMS-1455 Tour Custom snare drum features a six-ply maple shell.
A wide variety of tonewoods are used to make snare drum shells, including maple, birch, oak, poplar and mahogany, as well as more exotic woods such as wenge, jatoba and kapur. Each of these woods has distinct sonic properties. For example, oak produces a low fundamental tone with bright highs, while maple has excellent balance between mids and highs, with a warm low end.
Multi-ply shells are most common because the direction of the grain can be alternated, producing a shell that is resonant, strong and stable. Multi-ply construction also enables a manufacturer to use layers of different types of wood to create a unique shell “recipe.” For example, Yamaha Absolute Hybrid Maple snare drum shells have a center ply of wenge, surrounded by layers of maple. This yields a shell that has a wide dynamic range, great response and excellent projection.
Yamaha Absolute Hybrid Maple snare.
Wood snare drums sound warm and fat, and tend to be a bit less ringy than metal snare drums. Sizes range from five to eight inches deep with diameters of 12 to 15 inches, with 14 inches being the most popular. Wood snares provide a wide range of tuning from a low “thwack” to a high crack and everything in-between, making them useful in a variety of musical situations. As with metal snare drums, the tuning of a wood snare will have an effect on not just its tone but also its dynamic range. (See the “Metal” section above.) Ringo Starr played a wood snare almost exclusively throughout his career with The Beatles. For a good example of his signature snare sound, check out the song “Get Back.”
Marching
You’ve probably heard the distinct sound of marching snare drums in a drumline or as part of the marching band in a parade. The most common marching snare has a 14-inch diameter and is 12 inches deep, but diameters vary from 13 to 15 inches and depths range from 9 to 12 inches. Though quite large, marching snares are usually tuned very high, enabling drummers to play extremely precise complex rhythms and rudiments in an ensemble format.
The Yamaha MS-9414 marching snare is 12 inches deep.
The majority of marching snares employ wood shells, but unlike the snare drums used in drum kits, a marching snare may have retractable legs or suspension hardware that allows it to be held in place or attached to a carrier harness worn by the drummer.
Since they are often played outdoors or in large indoor spaces, marching snares are designed for precise articulation, maximum projection and durability. Marching snare wires are made from nylon or synthetic gut, which produces a dark, dry sound with less sustain than metal wires, and the snares may be independently adjustable. The shells may also have additional air vents for improved articulation and snare response.
Marching snares aren’t often heard in popular music, but there are some notable exceptions including on the songs “Tusk” by Fleetwood Mac and “Lose My Breath” by Destiny’s Child. Here’s what a marching snare sounds like:
Piccolo
As the name implies, piccolo snare drums are characterized by their small size: 3 to 4 1/2 inches deep with diameters of 13 or 14 inches (though there are some models with a 12-inch diameter). Piccolo snares provide a high-pitched, sharp “pop” that easily cuts through a mix, and rim shots that have a nice “bark.” They’re often used as secondary or effects snares in a large kit (as used by Rush’s late drummer Neil Peart, for example), but can also be used as the main snare in funk, pop, reggae or hip hop (as used by Yamaha artist David Garibaldi, best known for his work with Tower of Power). Piccolo snares can be made of metal or wood, but wood is generally the more popular choice.
Due to the reduced distance between the top and bottom heads, piccolo snares provide a fast response to quick stick patterns and ghost notes. They may ring quite a bit, but when properly tuned the ring can be musical, and the top head can always be damped to reduce the amount of ring. Here’s what a piccolo snare sounds like:
Click here to listen to David Garibaldi playing his Yamaha Piccolo Signature snare with Tower of Power on the song “What Is Hip?”
Electronic
Whether used as part of a hybrid acoustic/electronic or all-electronic drum kit, an electronic snare drum is one of the most versatile instruments you’ll ever encounter. A snare drum trigger pad such as the Yamaha XP80, combined with a Yamaha DTX-PRO electronic drum module, can provide a palette with hundreds of different real and electronic snares, as well as other instrument and non-instrument sounds.
The Yamaha DTX-PRO electronic drum module.
An electronic snare gives you the ability to instantly recall different sounds, change tuning, or add effects such as reverb and delay. Some drum modules (like the DTX-PRO) can be used to sample (that is, record) your own snare drums, and the XP80 features multiple zones for playing rim shot and side stick sounds, which makes for realistic playing.
Electronic snare drums can be heard in all types of popular music. Two classic examples are the songs “Running Up That Hill” by Kate Bush, and “In The Air Tonight” by Phil Collins, which combines electronic drums with acoustic drums.
Check out this video of Yamaha Artist Larnell Lewis playing a Yamaha DTX10K-X electronic drum kit:
Here’s a video that compares the individual sound characteristics of various Yamaha snare drums:
Artists have been releasing live albums for years, but a concert film can bring you even closer to the performance. In recent years, live performance clips have become even more relevant, with some artists relying on them entirely to promote their music in lieu of touring. Thankfully, with the power of a proper home theater system or sound bar, a good concert film can often be as gratifying as seeing a band in person.
Here are 10 of the very best that you can enjoy in the comfort of your living room.
1. The Last Waltz
Legendary director Martin Scorsese staged this masterwork documenting The Band’s final concert, in the process revealing the tangible camaraderie that permeated the Winterland Ballroom that memorable November night in 1976. Many consider The Last Waltz as being the best of the genre, and for good reason: Not only does it provide an intimate, up-close portrait of the group’s denouement, it manages to capture the zeitgeist of ’70s rock music in the process. In an unprecedented parade of talent, bonafide stars such as Neil Young, Joni Mitchell, Eric Clapton, Bob Dylan, Van Morrison and others take the stage to play their own original material, as well as jamming with Robbie Robertson, Levon Helm and company. Stream it here.
2. Homecoming: A Film by Beyoncé
Homecoming cemented Beyoncé’s status as one of the greatest pop stars of our time, documenting her now-legendary performance at the 2018 Coachella Valley Music and Arts Festival. What’s especially fascinating about this film is the combination of vivid performance clips showcasing the entire set, along with behind-the-scenes footage documenting the creative direction of the concert and the events surrounding it. Stream it here.
3. Alice In Chains: MTV Unplugged
Of all the grunge bands, Alice in Chains were perhaps the most suited for the acoustic format of the MTV Unplugged concert series. They had already proven as much with 1994’s stripped-down Jar of Flies EP. Applying the tone of that collection to an entire live set, AIC put on a heart-wrenching performance, with sparse and minimal arrangements that added emphasis to the songs’ emotional weight and placed the pain-drenched vocals of frontman Layne Staley center stage. It may be a time capsule of halcyon days gone by, but it’s a requisite artifact of the era nonetheless. Stream it here.
4. Nirvana: Live at Reading
Notwithstanding their own breathtaking performance on Unplugged in 1994, Nirvana’s appearance at the 1992 Reading Festival in England — finally released officially in 2009 to widespread acclaim — was arguably just as important to the band’s development. It was an infamous event, perhaps best known for Kurt Cobain’s intro stunt. Playing off the then-rampant headlines surrounding his drug abuse and personal life, a smock-wearing Cobain is pushed on stage in a wheelchair. The morbid bit ends with him falling over after taking the mic and laying splayed across the stage. The jokes stop there, however, as Nirvana proceed to blast through an airtight, ferocious set. Stream it here.
5. Dave Chappelle’s Block Party
Comedian Dave Chappelle’s biggest contribution to the music world was 2005’s Block Party. With cult director Michel Gondry at the helm, Chappelle curates a who’s-who dream lineup of mid-2000s hip-hop talent that includes Kanye West, Mos Def, The Roots, Common and Erykah Badu. Watching this film is like hanging out at an actual party MC’d by Chappelle. It’s a true cross-sectional document of rap and R&B during that memorable era just over 15 years ago. Stream it here.
6. Prince: Sign o’ the Times
Prince was a potent live performer, as many of us got to witness during the Super Bowl™ XLI Halftime Show. At the peak of his popularity, he was downright godly, as evidenced by this visual supplement to his 1987 album Sign o’ the Times. Despite being a box office bust, critics and fans have praised it for being a palpable document of Prince in his prime. He even gets to flex some of his acting talents during the between-song narrative clips. Stream it here.
7. Pink Floyd: Pulse
Pink Floyd were always known for their immaculate light shows and visuals; you could listen to their records over and over again, but you really had to see the band live to fully experience them. Thankfully, the 1995 concert film Pulse would fill that void. The spherical light fixture used during this show is now iconic among Floyd fans, as it somehow lends itself to each song featured here, from “Learning to Fly” to “Comfortably Numb.” One expects nothing less from the group, who play a gargantuan 145-minute set that includes a full performance of The Dark Side of the Moon. Stream it here.
8. Fleetwood Mac: The Dance
This 1997 concert film and live album of the same name signaled the reunion of Fleetwood Mac’s most successful lineup: Lindsey Buckingham, Stevie Nicks, Mick Fleetwood, John McVie and Christine McVie. Whatever the history between the band members, it was put aside for a career-spanning set of greatest hits and even a few new originals from the three primary songwriters. Unlike 1980’s Live film — compiled across 60 shows — The Dance was shot in one night at Warner Bros. Studios in Burbank, California. The controlled recording/filming environment gives this a rare sheen that’s irresistible to the attentive home viewer. Stream it here.
9. The Cure: Anniversary 1978-2018 Live in Hyde Park
In July 2018, goth rock pioneers The Cure performed this 29-song set to over 65,000 fans at London’s Hyde Park. The show celebrated the group’s four-decade career and was released as a full-blown concert film in 2019. One might expect that they wouldn’t quite sound the same after all the years apart, but they put on a timeless performance that could have been lifted from their peak in the late ’80s. From the opening cinematic splash of “Plainsong” onward, the band casts an irresistible spell over those in attendance and anyone who decides to watch this riveting film. Stream it here.
10. Metallica: S&M2
In 2019, Metallica reunited with the San Francisco Symphony to reprise 1999’s S&M concert. Across two September evenings, the band played career-spanning sets backed by symphonic flourishes, re-imagining songs such as “Master of Puppets” and “Nothing Else Matters” in an orchestral metal style. Original S&M director Wayne Isham was there to capture the proceedings, and the resulting 150-minute concert film is a love letter from Metallica to its fans. The many shots of the band members’ interacting with the ecstatic audience are as entertaining as the powerhouse performances. Stream it here.
2022 has seen the release of a number of new Yamaha brass and woodwind instruments. Here’s a look at just a few of them.
BRASS
YTR-8335IIRKG-LN Xeno Trumpet
Designed for musicians at any level, the YTR-8335IIRKG-LN limited edition B-flat trumpet is based on the acclaimed second-generation Xeno trumpet line. It offers several distinctive features, such as a proprietary cryogenic acoustic treatment that enhances the instrument’s ability to resonate, a durable clear lacquer finish, a medium-large 0.459″ bore and a reversed main tuning slide. In addition, thinner valve casing and pistons, along with the modified angle of the branch tube (the “knuckle”) result in improved response and provide the performer with an ideal blowing resistance.
The new bell design of the YTR-8335IIRKG-LN contributes to optimum resistance for a powerful tonal core and accurate slotting, as well as enhancing playability in the upper register. The unique “Kangakki” (“wind instrument” in Japanese) engraving is a historical reference that reflects the balance between tradition and the instrument’s modern design and construction.
WOODWINDS
YOB-441IIT Series Intermediate Oboes
Designed for intermediate players, 441IIT Series oboes build upon the popular Yamaha 441 Series with additional keys and features designed to enhance performance, including a unique third octave key (the “T” in the name), which serves to stabilize both the articulation and the intonation in the third octave. In addition, the bell bore has been redesigned to improve the intonation of the middle range, with a low B-flat resonance key that improves the intonation of that low note and a low B-C# trill key. All models utilize all-cork pads for reduced pad noise and include a thumb rest with an included neck strap ring for improved playability and less stress on the player’s shoulder and neck.
The YOB-441IIT model utilizes Grenadilla wood for the body and bell for an exceptionally warm and pure sound, while the YOB-441IIAT has a body constructed from ABS plastic resin for enhanced portability and durability in all weather conditions, even in geographic regions with very low humidity. The YOB-441IIMT model features a Duet+ body — a proprietary Yamaha technology where the wooden inner bore and tone holes are coated with ABS resin to prevent moisture from soaking into the body even during changes in temperature and humidity, thus preserving the oboe’s sound and resonance. In addition, the 441IIT and 441IIMT models are constructed with metal tenon joints, making it easier to assemble the instrument.
YOB-441IIT.
YOB-441IIAT.
YOB-441IIMT.
Allegro Intermediate Oboe
The YOB-541MTAL oboe is the latest addition to the Yamaha line of Allegro band instruments and is the perfect partner for both aspiring and professional players. Whether you’re a chamber musician, wind ensemble member or multifacted doubler, this instrument was designed with all your needs in mind. It features an attractive and durable Duet+ body that ensures consistent sound and resonance even during swings in temperature and humidity.
The injection-molded inner bore of the Allegro oboe is designed to resist cracking and provide stability and tonal consistency. In addition, the upper joint body is drilled out slightly larger around the bore and tone holes. Other features include attractive gold-plated key posts, all-cork pads and a thin valve casing and pistons for improved response and ideal blowing resistance. There’s also a ring key, a banana key and a G#-A trill key, as well as a vertically adjustable thumb rest for ultimate comfort with or without a neck strap.
YCL-650II Clarinet
Like the original Yamaha YCL-650, the new YCL-650II B-flat clarinet is designed for those who are serious about their clarinet performance but need to watch their budget. The body is expertly crafted from responsive, high-quality Grenadilla wood for a hearty sound and impressive pitch accuracy, and the keys, ligature and mouthpiece cap are silver-plated for stunning visual appeal. A 17-key, 6-ring Boehm key system is utilized, with longer E/B levers and C#/G# keys that prevent your fingers from slipping, reducing the chances of fingering mistakes.
The YCL-650II 65mm barrel design produces a focused tone and quick response by optimizing airflow, with a resonance chamber that aids in projection and improves intonation in lower notes. An adjustable thumb rest with needle springs allow for faster key action and makes playing comfortable for hands of all sizes. Leather pads provide improved pad life, seal and overall tonal performance, while at the same time eliminating unwanted clicking noises. Because the surfaces of the pads don’t vibrate when the instrument is played, no spurious pad noise occurs and breath flows directly toward the bell for outstanding projection.
YCL-631II Professional Alto Clarinet
Yamaha clarinets can be found in many of the world’s top orchestras. They feature accurate intonation and a rich resonant sound. The new YCL-631II is a handcrafted alto clarinet characterized by superb playability and a tone that is warm and full with powerful projection.
The two-piece body of the YCL-631II is made of select Grenadilla wood and the inner tenon sleeves are metal, which improves the seal and tonal resonance. It utilizes standard Boehm system fingering and offers 19 keys and 7 covered tone holes that are undercut by hand for precision, leading to consistent, uniform response throughout the instrument’s full range. The ligature, cap, mechanism and bell ring are all silver-plated, and the ball joint key connectors allow you to easily assemble the clarinet and reduces the chance of damage when doing so.
I’m sitting here with a song title and a melody but it’s not going anywhere. In other words, I got nothing.
It was so good when it came to me last week. I should have written it down immediately, when the idea was fresh and hot. When a pebble had rippled the water.
A feeling is never as clear as in the moment you first have it. But, no. I waited. And so much has happened since then!
You might think if it’s important it will come back, but unfortunately that’s not always the case. Perhaps I can come up with something else — maybe even a song that’s just as good.
But what if I can’t?
This is not just writers’ block. It’s more like a creative stasis, the dictionary definition of which is: “a slowing or stoppage of the normal flow.”
That’s exactly what it feels like. And trust me, it’s my least favorite state.
When creative stasis happens, I consider kinetic energy to be the best solution. After all, if we want to accelerate an object, then we must apply a force, and applying a force requires us to do work. After that work has been done, energy will have been transferred to the object, and the object will start moving again.
I’ve been through this before, so I no longer panic when it happens. I know from experience there are things that can be done to awaken a sedentary muse. Here are a few of them:
1. Upgrade your personal aesthetics
Silly, I know, but consider your attire. It may sound superficial; after all, no matter what we wear, we’re still the same person underneath our clothes. Yet I feel differently when I go to the supermarket in sweats and a scrungy ponytail, as opposed to shopping in a pressed pair of jeans and clean hair. Your “shell” influences the way you feel, how open you are to the world around you and how people regard you … all of which affect your energy.
2. Relax your personal aesthetics
Sometimes you need to go in the opposite direction. There are times when I’ll “put myself together” before a session but when I show up, I realize I’m overdressed. Stiff. I feel it as soon as I walk in the door. When that happens, off come the shoes, up goes the hair. Hey, you’ve got to read the room.
3. Alter your space
I’ve worked in my writing room for decades. Recently I replaced a drab futon with a turquoise ultra-suede cover and a taupe carpet with a black and white rug which spoke a new language (physically and musically) with the keys on my piano. Call me crazy, but words and melody-movement have started popping more freely. (My theory: The room was bored. Now it’s happy!)
4. Put your eyes on something else
My nephew recently texted me a photo of his newborn baby. The look on the infant’s face is priceless: He is exhausted, thrilled, in love and absolutely terrified, all at the same time. I studied that photo for ages, took it in, absorbed it. And now I am verklempt … and anything but stuck creatively.
5. Listen to music that makes you emotional
Speaking of newborns, I imagine a new birth is how Carly Simon’s song “Julie Through the Glass” came to be. It’s the song I took to the hospital 24 years ago to share with my daughter the moment she was born. I suggest you give it a listen … and dare you to be unstirred. A rush of emotion is often all you need to get the creative juices flowing again.
Of course, I can add lots of other suggestions: Light a candle. Go for a run. Call a friend (preferably one with whom you can engage in a deep, provocative conversation). Make soup. You get the idea.
Creative stasis won’t last if you throw it kinetic pebbles. So change something. Anything. Your clothes. Your hair. The air. The lighting. The scenery. Your company. Your hunger level. And keep tossing those pebbles into your still waters until the ripples won’t stop!
Music is energy. We look to it to calm us down, to help us soak up the sun, or to get us through a rough patch. And sometimes we count on it as a means of motivation — to help us break out of lethargy and … move!
I’m talking about fodder for the workout. The gym. The 5-mile run. That said, it’s not always easy to lace up our running shoes. It’s hard to keep from thinking about your to-do list and the emails you need to return — any mundane task that will aid and abet procrastination.
What helps me get started is knowing that when I arrive on the scene, I’ve already curated my playlist so there’ll be no decisions to make or fumbling with my device when I step onto the treadmill. I can just press play and go.
Here are 10 songs to consider adding to your playlist. All will help start you up, keep you going and cool yourself down.
1. When You’re Around
This tune from the group Water From Your Eyes tops my list because getting started is the hardest part, and if I begin with a song that delights me as opposed to a full-on jam, I’m more likely to stay on the machine! Besides, going from 0 – 60 too quickly will tire anyone out. This whimsical, delightful track will help ease you into your routine and put a smile on your face simply because your ears are happy. Listen to it here.
2. Slow Song
This sexy, playful, Madonna-esque track from The Knocks (with Dragonette) is actually anything but slow: it’s rhythmic, boppy and uplifting. Let’s go! Listen to it here.
3. Fade
The mantra-like lyric “I feel it” and the trance-inducing rhythm of this Kanye West track is sure to get your pulse pumping. Even better, it will put you in the zone where you’re no longer making excuses or thinking about what else you have to do today. Time to start sweating! Listen to it here.
4. No Mutuals
What are Fake Fruit saying in this ultra-catchy song? I can’t tell. What does “No Mutuals” even mean? I don’t care. Hey, when it comes to workouts, it’s all about the vibe, and this track’s got plenty of it. Listen to it here.
5. Alpha Zulu
Phoenix frontman Thomas Mars was inspired to write this song when he heard a pilot repeating the phrase over the radio during a turbulent flight in stormy conditions … which is probably how many of us feel about life at times. All the more reason to keep running until you get to the other side! The rhythmic driving production will keep you focused on the prize: not quitting till you get there. Listen to it here.
6. As It Was
There’s a real emotional essence to this Harry Styles song, which, along with its infectious hook and brisk tempo, will keep you moving from start to finish. Turn this one way up! Listen to it here.
7. Cold Heart
I’ve always loved Elton John’s “Sacrifice” and “Rocket Man,” and in this PNAU remix (featuring Dua Lipa), the two are mashed-up together in an irresistible hypnotic tonic. This track will put you about as deep into the head zone as it gets. Listen to it here.
8. About Damn Time
Leave it to Lizzo to deliver this body-positive self-empowering affirmation that will encourage you to keep going even when you feel you’re ready to throw in the towel and climb off the elliptical. Listen to it here.
9. Colors
The relaxed tempo of this Black Pumas track will serve to slow your pace and heartbeat when you’re at the end of your workout. You may be sweaty but you’ll be ready to go out into the world (after a shower, of course!) and notice its beautiful dynamic colors … just like the song says. Listen to it here.
10. Stay High
This uplifting Brittany Howard song is all about feeling good and staying that way — a message you’ll want keep revisiting long after your pulse rate drops back down and those endorphins wear off. Listen to it here.
Enhance your workout with a quality pair of earbuds like the Yamaha TW-E3B, which are water/sweat resistant and offer a secure fitting, along with great sound.
If you’re new to music production, you may wonder what differentiates recording, mixing and mastering, which are the three steps in the music production process. In this blog, we’ll clarify the distinctions between them.
The order in which they occur is almost always as stated in the title of this article. That’s because you can’t mix until you’ve recorded, and you can’t master until you’ve mixed. Let’s take a deep dive into each step.
Recording
In music production, recording encompasses getting all of your instrument and vocal parts — whether they’re audio or MIDI — onto separate tracks in computer-based DAW software (short for “digital audio workstation”) such as Steinberg Cubase. DAWs are powerful applications that you can use not only for recording, but for mixing as well — even, to some degree, mastering too.
Steinberg Cubase DAW software.
You can divide the recording process into several sub-categories. Tracking (sometimes referred to as “recording basic tracks”) is a term that refers to capturing the foundational building blocks of a song, such as drums, bass and rhythm guitar or keyboard. Typically, the elements that are laid down in a tracking session are the first things recorded for the song.
Genres like hip-hop and EDM are exceptions. They don’t usually require tracking sessions because the foundational tracks are typically programmed using loops or MIDI rather than being recorded by live players. Sessions in those genres generally skip right to overdubbing, another sub-category of recording, where you add new parts over existing tracks. More often than not, an overdub session involves a solitary musician or vocalist. However, it could also be a group of players like background vocalists or string or horn players. The idea is that you’re adding parts onto an existing recording rather than laying down the initial tracks for a song.
Although it’s a matter of semantics, one could argue that pre-production also belongs in the recording category. It entails rehearsing, arranging and sometimes recording rough demos before starting tracking. Some would even consider songwriting to be a part of pre-production.
Another term to consider is live recording. In the studio context (as opposed to the recording of a live show), this refers to a band or ensemble tracking all their instruments — and possibly their vocals too — together. Some bands prefer this approach because they’re more comfortable playing together as if they were onstage.
Live recording in a studio works best when the facility allows for enough isolation between the mics set up so that there isn’t much bleed (“leakage”) between the tracks. Otherwise, that can create problems with the next major music production category: mixing.
Mixing
Mixing (doing a “mix-down”) is the process of combining all the tracks in a multitrack recording down to a stereo or mono file. (Some DAWs also allow you to mix down to various surround sound formats like 5.1-channel or 7.1-channel, but that’s outside the scope of this article.)
Your DAW will offer a dedicated window that functions as a virtual mixing console (sometimes also known as a “mixing board,” “mixer” or “mixing desk”), which emulates the kind of large-scale hardware-based mixers you’ll find in professional recording studios. In this window, you are able to move onscreen faders to adjust individual levels for each track, as well as pan (place) them left to right in the stereo spectrum and insert plug-in effects like reverb and delay.
A DAW mixer is extremely powerful.
DAW mixers (and most modern hardware-based mixers) also allow you to automate aspects of your mix in order to make volume changes, as well as to adjust pan and effects send/return levels in specific parts of the song.
In a typical DAW workflow, the final step in the mix process is called bouncing to disk. When you initiate a bounce, your DAW sums (combines) the various tracks in your session into one mono or stereo audio file. Once you’re satisfied with your mix, you’re ready to move to the mastering phase.
Mastering
Without question, the least understood stage of the music production process is mastering. Think of it as the final polishing of the music, where you apply any necessary frequency or level adjustments to make it sound as good as possible.
Engineers who record and mix albums generally don’t master them, although that’s changing somewhat. Professional mastering engineers typically work in highly specialized facilities with finely tuned acoustics and the best monitors and amplifiers to ensure they hear the music as accurately as possible.
The mastering engineer will improve the sound of a mix using equalization and dynamics processing (compression and limiting), usually quite subtly.
Although the mixed audio files are in digital format, mastering engineers sometimes temporarily convert them to analog to apply tube or tape qualities to the material and make the audio sound “warmer” (i.e., less harsh), before converting it back to digital.
Besides polishing the sound, mastering engineers must ensure the music is at the correct level for the delivery medium (or media), such as streaming, vinyl or CD. They’ll often raise the volume using a mastering limiter, which squashes down the peaks and brings up the overall level, assuring that it’s as loud as the competition.
Some mastering software even incorporates artificial intelligence to analyze your music and apply the necessary frequency and level adjustments. It’s probably not going to sound as good as if you sent it to a human mastering engineer, but it’s faster and less expensive. However, there are other aspects of mastering jobs that are better done by a human. For example, if the mastering engineer is working on a multi-song project like an album or EP, they also must balance the levels between songs so that the listener doesn’t feel the need to turn the volume up or down to compensate for volume fluctuations.
For vinyl or CD, the mastering engineer puts the songs in the correct order and creates the spacing between songs. Although a lot of what a mastering engineer does is esoteric and highly technical, the artist and/or producer will sometimes attend a mastering session to weigh in on any artistic decisions, such as spacing.
There are specific frequency and time limitations that engineers need to consider when creating a vinyl master (aka a “lacquer”), a disc that gets physically cut on a lathe at the end of the mastering session and is required for the vinyl pressing process.
If you’re just getting started with recording, it’s best to focus on the tracking and mixing stages; your mastering skills (if you choose to learn them) can always come later — as we’ve seen, that stage is often carried out by dedicated mastering engineers anyway. And don’t worry about not having sufficient experience: Even the best engineers and producers started at the same point you’re at now. The best way to become proficient at music production is to dive right in and start recording!
The Las Vegas High School (LVHS) Mariachi Program was founded for a community that embodies what it means to “shine bright” and “be a joya,” which is Spanish for jewel.
As the founding director, I was able to create a five-year implementation plan that allowed for maximum student success. The plan included annual goals as well as action items. Systems were meticulously designed to ensure the school’s first new music program in more than 50 years would impact as many students as it could reach.
Mission Statement and Vision
First, we wrote a mission statement and vision that were adopted by staff and students. Every decision made for the group goes back to these philosophies, which helped us during the early stages of creating our massive mariachi program.
Here’s our mission statement: The Las Vegas High School Mariachi Program is dedicated to the advancement and preservation of mariachi music. It is the mission of the Las Vegas High School Mariachi Program to allow students to explore, engage, and perform music from the mariachi genre while designing curriculum to assist students in meeting their future goals.
Here is our vision: The Las Vegas High School Mariachi Program seeks to be a performance-oriented program that is engaged in both local and national concerts, invitationals, and competitions.
Once we had our mission statement and vision, the work began. Our first task was naming our performing group. Our name comes from our century-old alma mater:
Nestling near the golden foothills, ‘neath the western sky. Rests the Jewel of the Desert, dear Las Vegas High Sing her praises ever louder, echoing back and back Hail to thee dear Alma Mater, Valiant Red and Black
“Jewel of the desert” resonated with us, so after input from students, staff and our community, Mariachi Joya was born.
Year One
Our first year was mostly about introducing mariachi music to students and giving them performance opportunities, even as beginners. Instruments were ordered an
d arrived in October 2018, and our first performance was at a local middle school hosting a big Halloween event. At this time, we didn’t even have T-shirts to serve as uniforms, so we dressed in school spirit wear to go along with the Halloween theme. Beginners performing in their first month learning new instruments was not a popular idea. I had some pushback from a few stakeholders, but I knew it was the right thing to do. Our fledgling program needed to get some excitement and buy-in from students, parents and community members. Although t
here were about 100 students enrolled in the program, we selected the top 25 to perform for the first performance of Mariachi Joya. The performance was a huge success, and the students were so happy with their work.
The rest of the year was
mainly spent on developing the basics on our instruments and preparing for the end-of-the-year concerts. The students were in a fairly good place by second semester, so we decided to attend our District’s Advanced Mariachi Festival for a rating. Mariachi Joya worked so hard in the months leading up to the festival performance and received a rating of “Excellent” from the judges! It was an overwhelming success for us as the district’s newest music program.
Year Two
By our second year, we had a true mariachi group formed within the program. Joya became an audition-only ensemble with weekly after-school rehearsals. We had some strategic marketing goals set and wanted to get out into the community as much as possible. An original theme song called “Tema Mariachi Joya” was written for us by Michael Sital, a renowned mariachi arranger from Victoria, Texas.
We started the year off with a bang, premiering this new Tema at the Las Vegas Flamingo Library Mariachi Spectacular. It was an amazing experience to open the show.
Throughout Year Two, we continued to grow and rehearse. We planned to attend a national competition in May, so it was time to really dig into some musical details and aim for excellence. (Of course, this competition was canceled due to the pandemic.)
During our preparation, we were asked to perform for then-candidate Joe Biden at one of his campaign stops in Las Vegas. Even though we were only given a week’s notice, we jumped at this opportunity. President Biden spent a lot of time after the event to speak with the students and really get some insight on what their public education was like. This performance was one of our last ones before COVID-19 shut us down for over a year.
Year Three
Our plans for Year Three drastically changed because for a full 18 months, we were not able to rehearse or build on our momentum. Students were upset, attendance was at an all-time low and music-making came to a halt. Something had to be done, so we decided to produce a record. Microphones were dropped off at students’ homes and recording began in September 2020. We released our original song, “Tema Mariachi Joya,” the following month in October, and we pushed the record out to everyone who missed playing and hearing music.
News traveled fast, and a few months after the announcement of the record we were asked by the Biden Inaugural Committee to represent Nevada at the 2021 inauguration of Joe Biden and Kamala Harris. We had a mere 10 days to put together this performance for the most historical event of our lifetime. It was a true honor and having met President Biden the prior year made it that much more special.
We ended the year with the highly anticipated release of our debut album, “JOYA.” We had a sold-out album release party and consequently released three music videos of our favorite songs. Things continued to look up for our mariachi program, and we started in-person rehearsals again in preparation for something huge.
We announced “JOYA — The Tour,” and our first stop was Las Vegas City Hall and later that week we performed for Vice President Harris at the White House’s “America’s Back Together” tour. Joya began performing at some of our nation’s most iconic venues, including San Antonio’s City Hall, The Mexican Cultural Institute in Washington, D.C., Las Vegas’s esteemed Smith Center for the Performing Arts, and Placita Olvera (the birthplace of Los Angeles). Mariachi Joya joined many other professional mariachi groups on their national tours and performed with or opened for ELLAS, Mariachi Sol de Mexico, Mariachi Nuevo Tecalitlan, Aida Cuevas, Mariachi Divas, Mariachi Los Camperos and Mariachi Vargas de Tecalitlan.
Through its first few years, the LVHS Mariachi Program has made a great impact on its students and the local community. The program’s graduation rate is 100%, and mariachi students have regular grade checks to ensure academic success. The program grew to over 240 students who are also involved in the other performing arts at LVHS like band, choir, orchestra, dance and theater.
As the high school mariachi director, I helped establish feeder programs at both of our neighboring middle schools. There are more than 600 combined middle school students taking mariachi at those schools now.
Although most of the students won’t become full-time mariachis after graduation, we also have a 100% career and college placement rate for the 2022 graduating class. With a few students taking over family businesses, the rest went off to colleges and vocational schools. It is my hope that they take with them the lessons they learned through our shared experience with Mariachi Joya.
LVHS now has six auditioned mariachi groups: Grupo Vegas focuses on other kinds of trio Latin music, Mariachi Joya and Mariachi Cristal are audition-only competition groups that perform across the state and country, Mariachi Brillante and Mariachi Resplandor are larger performing ensembles that perform at multiple LVHS concerts, and Trio Vegas is made up of the top three mariachi students in the program.
Mariachi students continue to bring pride and excitement to our school that bears our city’s name. We used to say “be a joya” as a sign off, but now with so many amazing groups, we say “shine bright.”
In the spring of 2021, 12 student pop bands at Huntington Beach High School in California faced a dilemma: They wanted to perform as they always have at the spring concert, but COVID restrictions only allowed no more than 50 students to be on stage at once, including performers and tech and media students.
A normal concert would have six bands on stage per night, performing three to four songs each. Program Director Danielle Collins suggested that students film their songs to play on-screen in the auditorium. However, the students wanted to perform live, and they proposed another idea. They would perform for four nights, with a maximum of 23 students on stage per night, which meant that each band would have to learn and perform nearly 20 songs.
Collins recalls telling them, “You’re crazy! You guys learn three songs per show, and now you want to learn 20?”
But student leadership insisted.
“They did it … and they killed it! Everybody got way better, and they took more ownership because of it,” she says.
Because the additional work was the students’ idea rather than a teacher-issued assignment, they were motivated to put in the work. Trying to reach a goal, which even their own teacher said was crazy, incentivized students to step outside their comfort zones. “If I would’ve asked them to do that, they probably wouldn’t have taken the responsibility,” Collins says.
This philosophy of student initiative is pervasive throughout the Huntington Beach High pop music program, which emphasizes a teen’s ability to forge their own musical path. “The students have their choice when they come here to find their niche,” Collins says. “If songwriting is their jam, they go in that direction, and we help develop that. If they solely want to be a performer, they go that way. If they want to run rehearsals, we start walking them down that leadership road.”
Pop music is one division in the school’s overarching Music, Media and Entertainment Technology (MMET) program. Collins oversees the program as well as the pop department, which offers real-world professional experiences through concerts, community gigs and more.
Teamwork Makes the Music Work
In the MMET pop music program, students join forces to form multiple bands, but the collaboration doesn’t stop there. Because of the amount of collaboration required to put on a pop music show, students get a full education not just in music performance, but also in teamwork.
Students can audition for the pop music program on their choice of voice, guitar, bass, keyboard or drums. However, a lot of pop music, rock ‘n’ roll and other genres require a blend of other instruments, including brass and woodwinds. That’s where collaboration comes in. “We have a full-time instrumental music director on campus,” Collins says. “If I need strings and horns for a show, we work with those guys.”
The MMET department also makes sure that students within each specialty work together. Currently there are about 130 pop music students who work together with the 35 media and tech students to put on, direct and film the three student-run concerts each academic year.
The second concert in February is called Playlist and consists of half original songs and half top-40 pop music. For this show, media students create music videos while pop music students work on original songs. “The students make the set list, vote on it and pick the order,” Collins says.
Finding Structure in Chaos
Because students have so much agency in the MMET department, instructors must be more flexible with their approach to pedagogy. “With a student-led program, there’s going to be a little more chaos,” Collins says. “Because of that, the scaffolding is different. It’s not going to be Bloom’s taxonomy, where students understand, then apply, then analyze and create. Creating happens immediately.”
Collins models this self-starting behavior by keeping an open line of communication with her students and encouraging them to share their ideas. “You have to be open to not having the answer,” she says. “I don’t have all the solutions. A majority of the really cool things I’ve participated in with my program are things my students thought of.”
While the program allows for a lot of creative freedom, a consistent structure keeps students on the right track. Broken down by grade, students see Collins either every Monday and Wednesday or every Tuesday and Thursday, but always at 3:00 p.m. sharp. Each class period begins with a 15-minute meeting to go over logistics, and then students break into rehearsals in separate music studios. Each student group has a 45-minute block scheduled in the studio to rehearse, and rehearsals last until 6:15 p.m.
Bringing a Song to Life
From the moment they receive a new song until the moment they step on stage at a concert, students have about six weeks to learn and perfect their music — for the first three weeks they focus on learning the songs, and the rest of the time is for rehearsing.
Learning a song is all about breaking it down. “They’ll start out on instruments and will chart all the songs,” Collins says.
To make chord and lyric charts, students can research their music at home, work out the notes on their pianos or guitars, or even find chord charts online that they then verify. “We’ll check the lyrics to make sure they’re school-appropriate, and we have the students change anything that isn’t,” Collins says.
Once the song is mapped out, it’s time to break out the technology. Students record their individual parts and then turn in their isolated recordings — called “stems” — to Collins as part of their assignment. Collins, along with the rest of the pop music staff, drops the student recordings into LogicPro to put all the parts together. The staff and students then listen to the consolidated recordings to find any errors.
Students then receive rehearsal tracks for each of their songs, which have a metronome click added to the audio. While practicing, students gradually wean themselves away from the rehearsal track, but if they run into any issues, they can always refer back to the track to get back in the right groove.
Throughout the learning process, students work on setting their own goals, which include due dates for memorizing chords and lyrics. “I have them calendar out when they want their checkpoints, and we build the checkpoints together,” Collins says.
During the rehearsal stage, students use in-ear monitors in place of the metronome tracks. Because many shows start off on a dark stage before a dramatic lighting shift, students practice their songs in the dark to get used to performing without being able to see. Tech rehearsals and dress rehearsals follow as students prepare to become rock stars onstage.
Finding Success Through Failure
A program based on student initiative requires a strong foundation of trust between teacher and student. Students must feel comfortable enough to try and fail. That’s why Collins emphasizes the importance of failure as a learning tool.
To build that trust with her students, Collins is honest about her own strengths and weaknesses. “I admit what I do and don’t know about teaching pop music,” she says. “I was trained as a classical percussionist and marching drummer. I’ve never been in a pop music band, and my kids know that.”
By acknowledging some of her shortcomings, Collins has helped her students become comfortable with identifying their own places for growth. “We’ve tried really hard to build trust with the kids so they can be honest about failure,” she says.
She recalls a rehearsal with a sophomore vocalist. Collins asked the student how she felt about her performance, and she replied that she wasn’t really happy with it. Collins then asked if she knew what needed to be fixed. When the student confirmed that she knew, Collins simply said, “Take the time, and you’ll be fine.”
By making failure part of a routine conversation rather than a high-stakes evaluation, students can work on identifying their own weaknesses without pressure. “I try not to pass judgment … instead, I help guide them so they feel good about what they’re doing,” Collins says. “If they feel like they’re letting me down, they’re going to fail. They’re much harder on themselves than I could ever be.”
Professional Pop Stars in Training
By fostering student self-sufficiency, the MMET pop program helps prepare students for music industry jobs. Whether a student is interested in performance or in the business side of music, MMET has resources to help them reach their post-graduation goals.
Classes are sequenced so that, on average, most upperclassmen have opportunities to perform gigs throughout the community. While freshmen and sophomores take songwriting and recording classes, juniors and seniors take classes like Advanced Professional Music, which teaches about performance, producing and management. Underclassmen record a holiday album every year, while upperclassmen spend the season performing holiday songs around the community.
Students learn multiple facets of putting on a show, not just performance. “I have students who are more interested in the business end, so I have them help me with the admin side of my job,” Collins says. “[Students] learn how to set up and tear down for a gig. They learn audio basics and how to troubleshoot their gear, and they learn advanced microphone techniques.”
Additionally, the MMET program has an offsite performance coordinator, who has arranged for multiple standing gigs for students, including a weekly paying restaurant gig. “The kids are performing, programming the set list, casting it, managing the pay, the gear, the schedule,” Collins says.
Resources for Growth
For schools that are interested in starting a pop music program, Collins recommends a few resources. She mainly emphasizes the importance of learning tracks, or tracks with the students’ individual parts isolated. For example, the pop music department’s vocal director will often take a new song and sing over the original record at a higher volume to isolate an individual’s part. These learning tracks are then deposited into a Google Drive folder that the entire department has access to.
Even if a school doesn’t have the number of staff that the MMET program has, Collins says creating these resources is still manageable. “Our vocal director did it [when she was] a student,” she says.
She recommends finding some strong students who can build tracks with isolated parts and click tracks. “Give them some learning resources like recordings,” she says. “Preparing the resources for the kids to learn these songs is the biggest steppingstone for other directors trying to do pop music.”
Arpeggios (broken chords—that is, chords played one note at a time) are great devices to use as an accompaniment for a singer, or as runs between the main melodic phrases of a tune. Everyone who takes piano lessons learns how to play them, but usually in a pretty basic fashion that’s kind of predictable and lacking color.
In this article, we’ll explore ten ways of making arpeggios more interesting.
1. Use Both Hands
You can add excitement (and a nice touch of showmanship) by using both of your hands to play arpeggios, alternating from the left hand to the right hand as you go up (and back down) the keyboard. This is pretty easy for even beginners to execute, and looks cool as well.
As an example, here’s a basic C Major arpeggio, played up and down the keyboard across four octaves:
The notes are played as eight-notes (two notes to the beat), but I have notated the stems/beams in groups that show which hand plays which notes. Stems that go down are played by your left hand, and stems that go up are played by the right hand.
After you play the first three notes and move into the notes to be played by your right hand, start to move your left hand over your right to get into position for the notes starting on beat 4 of the first measure. Continue to alternate your hands in these three note groupings. Notice that when you get to the top C on beat 3 of the second measure I indicate that you should use the 2nd finger of your left hand, but for that note only: you return to using the right hand for the following three notes.
Here’s another way to execute this top of the phrase:
With this technique, you change your fingering slightly in bar 2 so you can play the whole phrase with your right hand, avoiding the extra crossover.
You should practice this until you get all the notes sounding smooth and are able to alternate your hands with ease. Try it with different rhythmic groupings as well — for example, triplets (three notes to the beat):
Then take it up a notch by arpeggiating sixteenth notes (four notes to the beat):
Be sure to explore this in all 12 keys, and to try other chord qualities too, such as a minor triad:
We’ll be applying this two-handed method to the other nine arpeggios in this article as well.
2. Repeat Ranges
It sounds really nice to repeat part of the range you play, rather than just going straight up and down the keyboard. The next example illustrates how this works. Here, the left hand goes back over the same notes the right hand just played when ascending, and the right hand repeats what the left hand played on the descent. Note: In this, and all the following audio examples, I’ll first play the arpeggio slowly (with a metronome click for reference), then repeated at a much faster tempo, without the metronome.
Here’s the same approach using a minor triad:
3. Add Color Tones
Arpeggios become much more interesting when you add some notes that go beyond the basic root, third and fifth of a triad. Here’s an example where the right hand swaps out the root for the second (a D) — a simple change that sounds very pleasing to the ear.
This also works well when applied to a minor chord:
4. Add A Sixth
In a similar vein, try adding a sixth to your arpeggios, like this one, applied to a major chord:
Here it is on the equivalent minor chord:
5. Combine Both The Second And The Sixth
Commonly called a 6/9 chord (we call the second a ninth if there are tones from the sixth or higher present in the chord), this lends itself especially well to arpeggiation. Here it is applied to a major chord:
And here’s the minor 6/9:
6. Extend the Range Of Your Notes
Extending the intervals between your notes beyond the stacked thirds of a triad gives your arpeggios a more expansive sound. Likewise, not always playing the triads as root position chords can enrichen your playing. Here’s a great way to approach the added second arpeggio we explored earlier:
The left hand shape goes from the root up to the fifth, skipping the third (for now), and then goes on to the added second note. This open sound is more modern than the typical root position triad. Next, the right hand plays a C triad, but in its first inversion, where the notes have been rearranged to be third, fifth, and then root. This will take some practice to get comfortable, since both hands have to stretch a bit further.
This approach also works well using a minor chord quality:
7. Move Away From Typical Triad Shapes
We’ve kind of been saying this all along, but it bears repeating: try to steer clear of playing typical triad shapes wherever possible, as in this example. As you can hear, especially when played fast, the results can be pretty spectacular.
8. Combine Different Triads
As you start to explore 6th and 7th chords you can create good voicings and arpeggio patterns by stacking two different triads together. For example, if you combine both a C and G triad you get a C Major 9th chord, which also includes the major 7th. In this next example, these are the triad shapes we’ll be using:
Now we’ll incorporate both triads into a two-handed arpeggio pattern, like this:
Here’s a variation, using the 2nd inversion of the G Major triad:
9. Combine a Minor Triad With a Major Triad
Stacking a major triad on top of a minor triad — especially if you add the 7th, 9th and 11th — delivers a really rich sound. For example, here’s a B-flat Major triad on top of a C minor triad, with those extra notes added:
Here are both triads arpeggiated in their root positions to sound the minor 11th chord:
This time we’re only playing it up as a sweep and then letting it ring: you don’t have to play your arpeggios up and down all the time. In fact, when using them as runs it’s often better to simply play them either up or down; that way, it doesn’t sound so much like an exercise.
10. Combine Complex Chords
Lastly, you can combine complex chords to create very effective arpeggios. This example stacks a C dominant 7th chord in the left hand and an A Major triad in the right to create a very jazzy sound.
When we arpeggiate it, we’ll leave out the G (the 5th) in the left hand so there’s a better balance of notes per hand:
And here’s that same arpeggio as just a simple run going up:
Notice that I left some notes out of the left hand after the first beat, reducing it to a single B-flat each time. This makes the arpeggio not only simpler, but faster to climb up — perfect for a flashy run after playing a chord voicing.
Most bassists don’t dream of becoming a solo artist — instead, they dream of playing with other talented musicians in a band. Whether you aspire to be in a duo, a power trio, a fab foursome, a jazz quintet or a big band, there are a number of fundamental steps you can take to pass an audition, meet your fellow musicians’ expectations and become an indispensable, full-fledged band member. Here’s a starter checklist to get you ready for the big time.
1. Have Reliable Gear
The instruments, amps and other gear that musical groups use are typically a reflection of what the band members like — or can afford. But other times the gear connotes a specific vibe they want to give off. (You probably won’t find an acoustic bass in a thrash-metal band, for example.) Which brings us to Rule #1: No matter what bass and amp you use, make sure it works as it should. In terms of your bass, that means it’s a quality instrument (Yamaha offers lots of different models to choose from, from entry-level to professional grade) that has been set up properly and isn’t suffering from performance issues like buzz and hum, poor intonation or an inability to stay in tune.
The Yamaha TRBX174 is an excellent entry-level bass.
Similarly, be sure your amp is suitable for the type of music you’ll be playing, that it sounds good, has adequate power and no blown speakers. The well-known company Ampeg make a line of Rocket Bass amps that are all eminently suitable for bassists in first-time bands. While we’re at it, make sure your instrument cable works perfectly, your strap is in your case, you have a fresh battery if you own a bass equipped with active electronics, and an extra set of strings in case you break one. In other words, be prepared.
Any of these Ampeg Rocket Bass amps will serve you well in your first band.
The bottom line is this: You can be the best player in the world, but if your gear doesn’t function properly, that’s what people will remember about you. As the saying goes, you only get to make a first impression once.
2. Show Up on Time
Whether you’re going to an audition, a rehearsal or a gig, show up on time. Better yet, be early. No excuses. Being late is bad form, and starts you off on the wrong foot. It’s always good form to be punctual; and if you can’t be early, at least don’t turn up late. Of course, it’s inevitable that someone will be delayed every once in a while for a valid reason, and at some point it’ll happen to you. But it can’t happen over and over again, or you’ll find yourself outside looking in. Every minute of rented rehearsal space costs money, and even if money isn’t an issue, you shouldn’t keep other people waiting for you, especially if you’re the new person in the band. The issue is magnified when you’re gigging: Do not under any circumstances show up late and miss sound check or show time. Most bands have at least one time-challenged member, but don’t let that person be you.
3. Do Your Homework
Don’t show up to an audition or rehearsal without knowing the material you’ll be playing. If you know most of the songs and have questions about a specific change or part you don’t understand, that’s fine. But if you think you’re going to waltz into the room without having run through the material beforehand, think again: Your lack of preparedness is probably going to be obvious, and it’s going to tick off your bandmates. Showing up unprepared says you don’t care enough about the people you’re playing with, and/or that you think too highly of your own chops. Believe me, it’s not the precedent you want to set.
I suggest you make it a habit to run through the songs on your own at least once or twice before each rehearsal — enough to ensure that nothing comes as a surprise when you’re practicing with your bandmates. Sometimes it’s enough to stick to root notes in the early stages of working through a song if you don’t have the specifics of a bassline down yet, but at the very least, you have to know the chord changes; otherwise, you’ll be lost, and everyone will hear you flailing around. It’s the surest way to flub an audition or ruin a rehearsal. So don’t be lazy. Learn the material.
4. Learn at Least a Little Music Theory
Great players aren’t born, they’re forged in the fires of practice, studying, listening and performing. For me, studying theory has always been the weakest aspect of my playing, but I’ve always known enough to understand what’s going on. In other words, I know what I don’t know — and it’s a lot.
That said, I can hear a drum groove and figure out the time signature, select the right notes to play in a given progression or arrangement, and I am conversant with other musicians when we’re using actual words rather than notes to communicate what we’re doing or want to do. Degrees in music theory aren’t required, but they won’t hurt, and having basic knowledge is always an advantage over ignorance. The more you know, the more you can contribute to the whole.
5. Bring a Tuner
In this day and age, a tuner is a no-brainer for home, stage or studio use, whether it’s a clip-on unit that attaches to your headstock like the Yamaha GCT1, a stompbox, a multi-effect device with a built-in tuner or a dedicated rack-mounted tuner. For the purposes of auditions and rehearsals, any of these options will do. You don’t necessarily need to mute your volume when you’re tuning up, although doing so is always appreciated, and is a pro move.
But unless you have perfect pitch (and you most likely don’t), you need to have a tuner in your signal chain or within easy reach, and you need to use it religiously.
Yamaha GCT1 clip-on tuner.
If you don’t own a tuner, go buy one. If you own one and don’t use it, stop undermining yourself and make using it a habit. Playing in tune won’t necessarily make you better, but it eliminates a problem that could otherwise doom your tenure in any band.
6. Less is More
Auditions are your first opportunity to show off your talent and versatility, but don’t overdo it. Play with energy, and in the pocket, but only play what’s necessary. Experienced bassists know that the space in-between the notes is just as important as what you play. A good bass line is a combination of the right note pattern, the right syncopation, and lots of air for it to breathe. Resist the urge to show off and play too much.
7. Lock in with the Drummer
The essence of groove is when the bass and drums lock together. It’s that magical “mojo” that melds the two, making each instrument sound better and more powerful than they do on their own. You need to learn how to read the drummer’s mind simply by looking into their eyes. That doesn’t mean staring at their foot to copy their kick drum pattern (although that can work wonders when all else fails). It means knowing your part, knowing their part, actively listening, and complementing each other with your rhythmic and note choices.
When your bassline slots in with a kick drum pattern, everyone in the room will hear it and respond to it — the audience and your fellow bandmembers alike. One thing most great pop, rock, soul and R&B records have in common is that the drums and bass are working hand-in-hand from start to finish. Believe me, when you learn how to pull this off, it feels so good, it almost becomes an obsession — the more you do it, the more you want to do it. The best rhythm sections do it with authority.
The best way to teach yourself how to find a groove is to practice scales and patterns with a metronome — the slower the better — so that you can nail beats at any reasonable tempo. Then raise your game by playing along with drum loops, a drum machine, isolated drum tracks, or your favorite songs. As you move on to playing with your band’s drummer, make this a focus and eventually it will start to happen all by itself.
So, to summarize: Get your gear together. Show up on time. Do your homework. Learn some music theory. Bring a tuner. Adopt a “less is more” approach. Work hard with your drummer to craft a groove. If you do these things, you’ll be off to a great start. So what are you waiting for? Grab that bass and start rocking!
Band directors are always looking for new ways to get students excited. One sure-fire way to do this is to have students observe other students perform, which usually happens during competitions, where they watch groups in different categories than themselves.
This is a great educational opportunity because students learn to identify what entails a great performance.
Before the pandemic, I never thought of creating special concert events with our band program. However, during the past three academic years, I have worked with a great group of people to figure out the ins and outs of planning a collaborative concert. If this is something you’re interested in developing, I hope that you can learn from my hits and misses.
First Collaborative Concert: Christmas Celebration
Our first collaboration was within our own school during the 2019-2020 school year. Ashlyn Kuyrkendall, the choral director, and I wanted to put together a big event to open The Grande Hall, part of the new performing and visual arts center in town. Our idea was a Christmas Celebration, showcasing all aspects of the music departments at Shelby County High School (SCHS) and Columbiana Middle School, for all of Columbiana to enjoy. We began planning in August with the Shelby County Arts Council and city officials. The process of getting this concert off the ground was much more work than we anticipated.
First, we received the go-ahead from the school administration and the arts council for our December concert date. We were told that the venue would be ready even though it was in the final stages of construction. The Grande Hall was ready — barely. We had dress rehearsals with the painters in the hall, and students had to unpack hundreds of chairs for the floor.
Second, we learned that having a concert off campus can be tricky. You must make sure that you have everything covered, such as equipment, sound, risers, as well as a plan A, B and C — in case anything goes awry.
Together, Mrs. Kuyrkendall and I crafted an event that is still talked about today! The concert itself was a great success, but the required planning prepared me for future collaborative endeavors.
Second Collaborative Concert: Arts on Main
At the end of the 2020-2021 school year, the fine arts teachers at SCHS were approached by our district’s fine arts supervisor about starting an annual end-of-the-school-year arts event in our town. We are not the largest high school in our school system, but we are home to the central office, and Columbiana has a thriving main street, which is part of every quintessential southern town. At first, we were caught off guard because this would be our first big event since the pandemic, but as we started planning, we saw how this event would be great for our community and our school system.
With the help of other district teachers, we hashed out a plan to have groups representing each of the seven school zones in our system. We partnered with our city’s Main Street Columbiana and the Shelby County Arts Council, and with only a few weeks of planning, we arranged to have two stages for performances, art installations, food trucks and store fronts opened for the big event.
Challenges we faced included timing, weather (because it was an outdoor event), coverage and ensuring that all the local businesses were happy. Just when we thought everything was taken care of, we learned that a separate event would be taking place in one of the venues in the arts center. We could not use that section of the center, but everything else was open to us. We had chosen that venue as our rain backup plan, but luckily, we were blessed with a great day of weather, and everything went off without a hitch.
The second year of the event in 2021-2022 brought more challenges. This time, the arts center was completely booked, so we were only able to use our main street area. We revamped our event with some changes that really made the event shine. First, we moved the two performance stages to each end of Main Street. This created a corridor and centralized the focus of the event. The previous year, one stage was on the street and the other was around the block at the arts center. Although this allowed for a bigger footprint, the spread-out nature of the event seemed to create less of a buzz.
With the lack of space at the arts council, we were unable to have our county-wide high school senior visual arts display that we did the first year. Instead, we featured the artwork of the seniors in each storefront. We felt this brought more traffic into the shops and created a buzz about it more than in previous years.
We are in the process of planning year three of Arts on Main, and we believe that some of our new ideas will highlight the arts even more in our great small town. We want to continue the same buzz from the second year with a more centralized location, but we also want to incorporate our multimillion-dollar arts center in town. We want a similar set-up as year one with one stage near the arts center and park. To encourage foot traffic in that area, we plan to have vendors in the park. We also want a final celebration performance at night, featuring all performing arts students from the seven school zones along with a fireworks display.
Third Collaborative Concert: Joint Jazz Concert with the University of Montevallo
The final collaboration that I worked on over the past few years, was a concert with the University of Montevallo, which is about 25 minutes away from SCHS. We have several teachers who are alumni of the school, and many Shelby County students attend college there.
Montevallo has a very successful band program, and the director, Joe Ardavino, is one of the nicest people you will ever meet. At the start of the 2021-2022 school year, our program at SCHS expanded its course offerings to include Jazz Band for the first time. I knew it would take a while to get the jazz group up and running. We spent the first semester learning the language and theory behind jazz. We performed at some community events during the holidays to get the group used to playing in public.
Olivia Snyder, a SCHS special education teacher, who helps with the band, is a Montevallo alum, and I mentioned to her in passing that I thought it would be cool if we did a collaborative concert with Montevallo’s jazz ensemble at the end of the year. The next morning, I was cc’d on an email between her and Joe.
Before I knew it, we were planning a concert for April in correlation with Jazz Appreciation Month. We just needed a venue, so I called the Shelby County Arts Council and asked if the Black Box Theater, which seats a couple hundred guests and has great acoustics, would be available. It was!
We had numerous discussions about what we wanted the concert to be and settled on each jazz group playing a 20-minute set to highlight the jazz programs at SCHS and Montevallo. Then the concert would end with a jam session between both groups. My jazz students were so excited about the joint concert, and even students who were not in jazz band were excited to be audience members.
The planning for this event was beyond easy, and it was due to all the previous collaborative events I had worked on. This is another event I always get on the calendar early to give our jazz program something to work toward. I would love to expand the collaborative jazz concert to include the jazz programs at other district schools as well as other local jazz groups to create a jazz festival in Columbiana.
Lessons Learned
After three years of collaborative efforts, these are the five key elements to pull off a successful event:
Don’t be afraid to ask others if they want to do a concert together. All music educators want to highlight their students’ achievements and doing it together can really be a great thing for your students.
Make sure your venue is secure in all aspects. Think of everything imaginable and have back-up plans. A contract is good — just make sure it specifically outlines exactly what each party expects and what is required.
Overcommunicate. The more conversations you have with your colleagues, the more likely you will uncover things that may have been missed.
Publicize your event more than you think you need to because you want as many people as possible to show up to see your students perform. If you notice some important people at your event, make sure to talk to them or at the very least recognize them.
The more you plan, the greater the event will be. Make sure you delegate work to volunteers or other teachers, so that on the day of the event, you can enjoy your students’ performance and not have to worry about whether the bathrooms are open.
Remember, the more you highlight your students in creative and new ways, the more your program will grow. I am seeing that more and more, especially in our middle school band program, which has doubled in the past three years! Many middle schoolers say they joined band because they have seen the high school band preforming in many different locations and settings.
Another way we have showcased the artistic talents of our students is through three murals around town. My favorite is the one Ruthie Johns and Lauren Campbell, two band students who graduated in 2022, painted outside the band room door. They approached me about it in the spring of 2020 before the pandemic, and they finished it in the summer of 2022.
The idea for the mural came last summer, when the band went to the back of the practice field where a giant oak tree was located. I noticed that the tree had sustained some damage, probably when a tornado came through the town in 2021 and destroyed several homes. I told the students that the tree represented our band program. We might take shots to the exterior, but our roots and interior are strong.
The quote on the mural by author Tom Robbins — “Our similarities bring us to a common ground, but our differences allow us to be fascinated by each other” — mirrors the inclusive nature inside the band room. We accept everyone regardless of their background.
Ruthie and Lauren thought the idea for the mural was perfect for what the SCHS band program is: A family that welcomes everyone and stands strong regardless of any shots to our outside. Principal Kyle Dudley loved the idea and gave them the go-ahead.
Our city is becoming increasingly more of an art sanctuary with multiple murals, the arts council and thriving fine arts departments at all five local schools. I hope that as the fine arts grow in Columbiana, so will our community in support as evidenced by our collaborative efforts these past three years.
While most of your students have heard of Mozart or Beethoven, I bet they haven’t heard of these five composers: Saygun, Lehmann, Mehul, Ben-Haim and Janáček.
If we just stick to the names of household classical composers, our young listeners will not have the opportunity to broaden their musical tastes. So, without further ado, let’s take a peek into some of the greatest little-known composers, from “Turkey’s Sibelius” to the first woman to ever be commissioned to write the score for a musical comedy.
Ahmet Adnan Saygun
Turkish composer and musicologist, Ahmet Saygun (1907-1991), is known for blending Turkish folk songs with the sounds of the West. Perhaps you’ve heard of “The Mightly Five,” a group of famous composers who created a unique version of Russian classical music. Saygun was a member of a similar group called “The Turkish Five” that introduced Western-style music to Turkey. In his obituary in The New York Times, Saygun was called “The Sibelius of Turkey,” referring to Jean Sibelius, who is regarded as Finland’s greatest composer.
I discovered Saygun when I bought a hammer dulcimer. While these two topics seem unrelated, they have a connection to me! I bought a vintage hammer dulcimer at a garage sale and decided to tune it up. While waiting for my tuning key to arrive in the mail, I researched the history of the instrument and learned about a type of dulcimer-like instrument called the cimbalom, which is typically played in Romani music. Then I read about Aksak rhythms and then about Eastern European/Balkan music theory. One rabbit hole led to another, and pretty soon, I was listening to Saygun!
Liza Lehmann
Liza Lehmann (1862-1918), a soprano vocalist and composer, was born in London to a German painter father and music teacher and composer mother. She is believed to be the first woman to have been commissioned to write a musical comedy. Her performing career lasted well over a decade, then she began songwriting and composing.
Lehmann composed many lighthearted, comical pieces, such as “Nonsense Songs” and “Four Cautionary Tales and a Moral.” She is best known for her vocal compositions, and especially her song cycles, a set of songs that are tied together by one theme, such as love.
“In a Persian Garden” is her most well-known cycle. This collection stands out because it includes part of the Rubáiyát that has been translated into English. The Rubáiyát is a text that focuses on the mysteries of life as written by the Persian poet Omar Khayyám (1048–1131).
Lehman’s musical talent must have been passed down through the generations — three of her grandsons have musical careers: Steuart Bedford is a well-known opera conductor and concert pianist, David Bedford is a composer, and Peter Lehmann Bedford is a singer. Steuart created professional recordings of his grandmother’s pieces, including this Spotify playlist of three of her songs.
Étienne Nicolas Mehul (1763-1817) was dubbed “the most important opera composer in France during the Revolution.” He was a member of the French Symphonic School of music, and according to ClassicFM, he may have even been the first composer to ever be called “Romantic.”
Unfortunately, Mehul’s librettist (the person who writes the text of an opera) was not quite up to par with the composer. According to Parker Symphony Orchestra’s website, one of Mehul’s operas was such a huge failure because of the librettist that a music critic commented, “It would be impossible to imagine anything worse.” Perhaps this is why the composer felt compelled to write two symphonies, as symphonies don’t need lyrics!
Speaking of symphonic works, the fourth movement of Mehul’s First Symphony in G Minor sounds extremely similar to Beethoven’s Fifth. Both pieces were written in 1808, which has led musicologists to pose the question “Who copied whom?!”
My first experience listening to Mehul was comparing the two pieces in music history. Listen to Mehul’s First Symphonyand see what you think.
Despite the issues with his librettist, it is remarkable that Mehul is so infrequently mentioned today.
Paul Ben-Haim
Although Paul Ben-Haim (1897-1984) is a composer known for his Israeli/fusion classical pieces, he was born in Munich, Germany. He studied with Fredrich Klose, a German composer best known for writing a piece in response to Franz Liszt’s death.
Ben-Haim had a unique musical flavor that is described as being somewhere in the middle of traditional Middle Eastern music and French Romanticism. According to Bach-Cantatas, he was the leader of the Middle Eastern school of music.
Known for his two symphonies, cello concerto, clarinet quintets and patriotic pieces, Ben-Haim’s work has often been compared to that of Swiss composer, Ernest Bloch. Ben-Haim’s pieces feel as monumental and exotic as Nikolai Rimsky-Korsakov’s “Scheherezade.” In his lifetime, he won an Israel Prize in music, and guided many pupils, including Tzvi Avni.
I have long been a fan of Bloch, but I didn’t discover Ben-Haim until after college. He redefined what classical/romantic music meant, and he certainly didn’t hesitate to use dissonance! My personal favorite is his Second Symphony, which is blossoming and flute-heavy.
Leos Janácek
While Czech composer Leoš Janáček (1854-1828) is considered a household name amongst classical musicians, most non-musicians haven’t heard of him. He was devoted to studying folklore and folk music, which he collected extensively.
Janáček is believed to be the most frequently performed Czech opera composer throughout the world. According to statistics by OperaBase, he is the 15th most played composer. Though he wrote many operas, they are all in Czech, which likely explains why they are not as frequently performed throughout the West.
His most well-known work, the orchestral “Sinfonietta,” was dedicated to the Czech army and was a contribution to Sokol, a Slavic gymnastics movement/ organization.
I remember in college when our wind ensemble performed the Janáček piece, “Capriccio,” with a guest pianist, who was a long-time friend of our conductor. Unfortunately, as college kids, we simply couldn’t wrap our minds around the complex piece that was written by someone we had never heard of. This frustrated our conductor to no end because he had a deep appreciation for the composer. Since college, however, I’ve learned to enjoy Janáček a lot more myself!
Sadly, Janáček isn’t well known in western countries, especially in the States, but he should be.
Photo Credits from top — Saygun: Moornebel, CC BY-SA 4.0, via Wikimedia Commons; Lehmann: W. and D. Downey, Public domain, via Wikimedia Commons; Mehul: Antoine-Jean Gros, Public domain, via Wikimedia Commons; Ben-Haim: National Library of Israel, CC BY-SA 3.0, via Wikimedia Commons; Janáček: Public Domain, via Wikimedia Commons
In Bob Malone’s shop, there’s no such thing as a generic instrument. In almost 40 years of designing and modifying Yamaha horns — 21 of those years working directly for the company — Malone has become known for his design collaborations with such artists as Bobby Shew and Wayne Bergeron, among many others. But beyond the artist credits to his name, Malone has helped change how Yamaha develops instruments. Instead of designing a prototype and seeking artist input later, Malone helped pioneer a process of consulting first with the artist — often one specific, elite artist — and tailoring the instrument around that artist’s needs. His approach yields instruments linked indelibly to one musician’s personality and playing style, but with elements that enrich whole product lines and inspire musicians at all levels, like a star athlete’s signature shoe that becomes a favorite with aspiring players across the sport.
A Craftsman’s Career Begins
A trumpet player since grade school, Malone initially pursued a performance career with a sideline in instrument repairs and modifications. That sideline would become a lifelong calling. After starting out under renowned brass technician Larry Minick, Malone started his own business, Bob Malone’s Brass Technology, in 1983 — quickly earning a sterling reputation for his craftsmanship. Originally working out of a space in Minick’s shop, he opened his own facility in Southern California in 1987.
Bob Malone (second from right) in his California shop in the late ’80s, with Swedish trumpeter Hakan Hardenberger holding one of his latest designs.
Soon afterward, he formed a relationship with Yamaha: first becoming a Yamaha dealer, then performing authorized Yamaha repairs, and eventually landing the career-changing assignment to develop the famed Z Trumpet alongside Shew and legendary Yamaha designer Kenzo Kawasaki.
Bob Malone, Bobby Shew and Kenzo Kawasaki
In 2001, Malone was brought into the company and was sent to Grand Rapids, Michigan, where he helped form the Yamaha Custom Shop. In 2003, he was part of the group that selected and designed Yamaha’s showpiece New York City atelier offices. He was essential to the creation of the Xeno Artist Model line of B-flat and C trumpets developed with orchestral greats John Hagstrom, David Bilger, Thomas Rolfs, Robert Sullivan, Håkan Hardenberger, Tom Hooten and Chris Martin. He also provided wind instrument technical support to Tower of Power, Snarky Puppy and Big Bad Voodoo Daddy, working with the bands’ entire horn sections to facilitate instrument selection and modifications. While trumpets will always be nearest to Malone’s heart, he’s also brought his signature approach to the development of key Yamaha trombone, flugelhorn, French horn and tuba products, as well as creating a patented clarinet barrel.
A Conversation About Collaborations
Now once again based in Southern California as the Yamaha Corporation Director of Winds Atelier and Artist Relations, Malone is looking toward a new phase in his career. Not yet ready to retire, he’s carved out a role where he can focus solely on the creative side of his work. With new projects in his sights, Malone talked with us about some of his favorite collaborations and what they’ve meant for a generation of horn players.
Q: In general, what’s your approach to developing a horn for an elite artist?
A: At that level, they know what their sound is. They have an identity. So you’re trying to give them an instrument that allows them to be them, but in a way that’s easier to play and offers them more possibilities.
You’re trying to give the artist the freedom to create. They have a musical idea. You want the instrument to be almost transparent, and not get in the way of that idea — so they’re not having to think about mechanics or intonation or needing to manipulate anything as they play.
Q: What was it like working with Bobby Shew? What did he need in an ideal trumpet?
A: Bobby is such a unique player. He’s obviously a great jazz player, but he’s also known for being an incredible lead player who plays effortlessly in the upper register. So we had the challenge of creating an instrument that would work really well in both areas. He had developed this concept of playing that was really based on efficiency, so he needed an instrument that matched what he was trying to do. The Z Trumpet was the result.
Bob Malone with legendary trumpet artist Bobby Shew.
Q: How did the process behind the Z Trumpet change how Yamaha develops instruments?
A: Yamaha had earned a great reputation for quality manufacturing. But their process for developing new instruments was mostly internal: putting together a prototype and then taking it out and having players try it, taking notes on their reactions, and making changes based on that feedback. The criticism was that even though the instruments really played in tune, were easy to play, and had high-quality manufacturing, they didn’t have any personality.
The Z project may have been the first time Yamaha didn’t do that. They identified a player, and the idea was to make an instrument that he would be 100% happy with. Since it wasn’t designed by a committee but was based on a particular person — a really well known, well respected artist — we ended up with a trumpet that had personality: Bobby’s personality. From that point on, virtually all of the development projects that we’ve done involving pro or custom instruments have had a development artist associated with them.
Bob Malone holding the Chicago Artist Model C trumpet he helped create.
Q: What about the L.A. Trumpet, the model you developed with Wayne Bergeron? How was that different?
A: Wayne and I have known each other for a long time. We met while playing out at Disneyland, and we’ve been friends ever since, so we had a really good base from which to work together.
The Z Trumpet was a great trumpet that satisfied a lot of players, but it didn’t satisfy a certain kind player, and Wayne really represented that type of player. He’s a very physical player. At the end of the night, after the second or third set, when he was really tired, he wanted a trumpet that wouldn’t force him to be “efficient.” As he put it: “I want to be able to fight myself off the ropes. I want to be physical with it and not have the trumpet hold me back.” He needed a trumpet to match his style of playing, so we went back to the drawing board and ended up with a trumpet that was him.
Mark Gould, Jim Thompson and Robert Sullivan, with Bob Malone (front). All three have led as principal chairs in major orchestras around the U.S.
A: I had known John Hagstrom of the Chicago Symphony Orchestra since he was out in California playing with the Disney All-American College Band, and I’d modified virtually every instrument that he was playing. I asked John if he’d be interested in helping Yamaha develop a new C trumpet. He said yes, and we started on a path of discovery to build an instrument that would be a preferable choice for players in a symphony orchestra. That ended up being the Chicago C Trumpet.
That was the first Artist Model trumpet, and there were lots of twists and turns in developing it. At one point the orchestra was on tour in Switzerland, and Daniel Barenboim was the conductor. In front of the orchestra, they did a playing test between our Yamaha prototype and another well-known trumpet brand, playing them both back and forth … and Barenboim chose the Yamaha. That was a really important moment in our development of that horn. It went into production, and I think for a period of time it was used to win more trumpet auditions than any other model.
We went from almost no presence in the major orchestras to a dominating presence. The entire Boston Symphony and Philadelphia Orchestra play Yamaha trumpets now — not to mention players in the New York Philharmonic, the L.A. Philharmonic, and the list goes on.
Q: What’s unique about doing this kind of work with Yamaha?
A: It goes back to the core values that made me join Yamaha in the first place. It’s the way Yamaha values the development process and strives to create the best instruments, at every level. For a student, it’s giving them something that isn’t going to get in the way of their progress. The idea of creating more music makers is huge. With a professional player, it’s giving them an instrument that will allow them to fully develop their musical ideas without getting in the way, giving them new possibilities.
One of the big differences between Yamaha and other companies is on the R&D side. They have designers assigned to every instrument, and those designers go to work every day thinking about how to make these instruments better. And it’s supported from the top on down — from the executives all the way down into the trenches where these development sessions take place.
Bob Malone (left) with fellow Yamaha technicians Katsuhiko Furumi, Norihisa Fukuda and Wayne Tanabe (left to right).
Q: You’re now moving into a different kind of role with Yamaha. What will that entail?
A: I’m pretty excited about it. I’m stepping into a consultant role where I’m giving up my administrative responsibilities and I’ll be able to focus on development projects: working with artists, mentoring staff. The agreement makes me available both here in the U.S. and globally. It’s allowing me to transition into retirement a little more gradually, and we’ve got some exciting projects that I’d love to still be involved with. I’m looking forward to it.
Bob Malone during the early days in his shop.
Insights from a Master: Great Instrument Qualities
How do you build a great musical instrument? For Malone, the X factor is creating the instrument that becomes “transparent” in the player’s hands: “You want that instrument to let them project their voice without thinking about it,” he says. “The creative process doesn’t get filtered out through the instrument. Their focus stays on the creative side, and not on how to overcome this or that deficiency.”
If that’s the “secret sauce,” what’s the basic recipe? You can start with these four essentials, according to Malone:
Intonation: “When the horn has a problem with intonation,” he says, “compensating for that problem can become subconscious for the player — pushing a certain note up because it’s flat, let’s say. But with an instrument that plays in tune, the player doesn’t have to do that. It puts less stress on them, and they don’t tire as quickly because they’re not having to manipulate so much. At the same time, you want to create an instrument that’s flexible, because in the real world, you’re playing with ensembles where the pitch may vary, and you need flexibility to push the pitch one way or the other.”
Quick response: “You want the instrument to be agile — to react in the musical moment. If you watch a great jazz quartet, there’s so much communication going on between the players. They’re reacting against what the others are doing. You need an instrument that responds quickly so you can have that musical conversation.”
A “blow” that feels good to the player: “You want the instrument to meet the player where they’re at. You want the balance of resistance to match what that player needs. If that isn’t right, there are lots of problems that can develop. One is fatigue. Another is that the instrument won’t resonate properly. It may not have the same uniform color or sound as you go from the bottom register to the top register.”
A signature sound: “The signature sound is relative to the player, not the instrument. There are a lot of instruments out there that may play in tune, may be easy to play — but there’s no flexibility, no opportunity for the player to project who they are. You want flexibility. You want transparency. You want the artist’s sound to come through.”
Steinberg Cubase is powerful DAW software with a deep feature set that grows with each new release. With so much functionality in one application, it’s not unusual for a user to have questions about how to use or access specific features. To that end, Steinberg offers an array of online support resources, none more impressive than Club Cubase, a twice-weekly live-streamed Q&A session on YouTube with product specialist Greg Ondo.
Greg Ondo.
During each session, viewers around the globe ask Ondo questions in real time, primarily via chat, and he provides live answers. The visuals consist solely of a screen share of Ondo’s computer running Cubase, so you get to see the program in action the whole time.
We recently had a chance to talk with Ondo to get a behind-the-scenes look at the show.
ML: How did Club Cubase get started?
Greg Ondo: I used to do a lot of in-person Steinberg events — I was traveling constantly. People would ask, “Can you come to Sacramento? Can you come to Boise?” It was hard to justify all that travel, so a few years ago we decided to try to do something that could reach people regardless of where they lived.
ML: I understand your viewership is from all over the world.
GO: We haven’t had anyone from Antarctica yet, but we’ll have people from Asia, Australia, Europe and all over Africa, as well as, of course, North and South America. Usually, we have about 5,000 views for each session. We do two four-hour sessions a week.
ML: Do you get any of the questions in advance?
GO: We have an email address — clubcubase@steinberg.de — that people can send questions to, but probably 95 percent of the questions come from live chat.
ML: Do you also use Club Cubase for new product introductions and demos?
GO: When we have a new Cubase version release, I’ll do a special walkthrough, and instead of just hitting bullet points, I try to take the time to explain the concept and the features and tie different features together. There are usually about a hundred features that get added with each new revision. If you look at most marketing materials, they may cover five or six of them.
ML: What’s the typical postproduction process?
GO: After every livestream, I’ll take a break for dinner for an hour or two, then, I rewatch it and type up the questions to create an index of all the topics discussed. We also have a viewer named Jan Karlqvist in Stockholm, who just created a site called cubaseindex.com. He takes my indexes for each episode and puts them into a searchable database. It turns out that, over the past couple of years, we’ve answered about 19,000 questions.
The Club Cubase setup, from Greg’s perspective.
ML: What’s the most common question you get asked?
GO: Probably, “When is the next version of Cubase coming out?” Even though I’m really careful not to share any inside information, the question still gets asked a lot.
ML: Besides Cubase-specific questions, do you get into generic production topics too?
GO: Sometimes people will ask things like, “How can I get a vocal better?” So, we’ll get into stuff like that, and I’ll present a solution using Cubase.
ML: You have all these projects that you constantly have open while demoing features. Did you create those specifically for Club Cubase, or are they your music?
GO: I often create projects to show specific features, and sometimes, when we have a new version coming, I’ll call in a favor. For example, I think it was in Cubase 6 that we added multi-track drum editing. I got in touch with a friend of mine who’s a drummer, and asked, “Do you have any drum tracks that were played really badly that I could use?” (laughs) People will also volunteer songs and projects for me to use. I can’t use anything that’s copywritten, obviously.
ML: It sounds like your viewers are pretty interactive.
GO: Yes. Club Cubase has built a great community, and even though I’m the only one talking, I want people to introduce themselves in the chat and say where they’re from. Some of our viewers have formed good friendships and have ended up doing projects together. One of the guys sent me some files with drum tracks, and he asked me to play bass over them. Next week, we’re releasing our second album! I’ve only met one of the guitar players — a guy who lives outside the Dallas area — a couple of times at seminars I’ve done, but the other two guys live in Spain. It’s turned into an interesting musical project, even though we’ve never actually played together at the same time.
Another thing we do to build community is, for the last two hours of the last livestream of each month, we have a little Zoom meetup so that everyone can talk to each other. We also sometimes have a guest artist. We had Clay Ostwald last month, who has done work for Gloria Estefan for 35 years and also served as musical director for the Broadway play On Your Feet. He answered questions, provided insights, and shared industry perspectives. It’s just a wonderful community. And everyone is so nice and respectful of each other.
ML: What are your top tips for new users of DAW software?
GO: Learning the keyboard shortcuts can really speed up your workflow. Whenever you find yourself going to the same menu often, memorize the keyboard shortcut. Also, you don’t have to know everything in your DAW. It’s better to learn one thing at a time, like, “Okay, today, I want to figure out how to make beats,” or, “I’m going to teach myself two new tricks on programming drums,” or, “I want to learn how to do better vocal tuning.” DAWs can do so much, but you don’t have to use all their functions. You can just use those that you need.
And always hit “Record”! So many great moments are never captured. Cubase has a terrific feature called Retrospective Record. If you happen to play the most beautiful theme when you weren’t in record, you can just hit a button, and the MIDI data will appear.
You know, in the old days, if you walked into a recording studio as a musician — a facility with a large format console and racks of hardware effects processors and tape machines — you wouldn’t be expected to understand any of it. So it’s okay not to know everything that’s going on in your software. Don’t feel bad about it. I often compare learning a DAW to learning a musical instrument. You don’t sit down at a piano the very first day and play Chopin — you have to get the mechanics of it, which takes time. Take the same approach when learning your DAW.
Since its launch in 2011, the live streaming service Twitch has become an indispensable online platform for gamers, serving as a hub of entertainment for viewers who want to watch others navigate popular games. By October 2013, the service boasted some 45 million unique users who were watching gameplay both live and on-demand, with a multitude of fun games, from “e-sports” like football, baseball and basketball titles to first-person role-playing games like Grand Theft Auto and multiplayer games like Fortnite.
Of course, success breeds competition, and today, Twitch is not the only platform that gamers can dive into. YouTube, for example, offers everything from gaming tutorials to live gameplay of popular titles like Call of Duty. The social platform Discord, which debuted in 2015, gives players the ability to communicate via instant messages, voice calls, video calls and text massaging in private or public chats, trading tips (and even a little trash talk) as they play.
Nonetheless, Twitch still serves as the primary forum for introducing new titles, showcasing how specific games can be played and elucidating strategy as well as providing gaming tips, tricks and secrets. There’s even a biannual convention known as TwitchCon where fans can play and compete with one another. Here are seven of the best games to enjoy on Twitch.
1. Grand Theft Auto 5
Known for its nefarious protagonists and seedy missions, GTA5 allows players to control one of three characters as they contend with corrupt government agencies while attempting to complete various heists on foot, in a car or even while flying a plane. This is an open-world multiplayer game that offers myriad options and places to interact with and venture, and it’s a popular title to not just play but to observe, both to learn the ins and outs of the strategy and for those who may not want to partake in the often-brutal missions. Do you want to be an actor or a viewer? Both are fun, but one may just require a stronger stomach. Check it out here.
2. Fortnite
This popular title offers three modes: an everyone-for-themselves “battle royale,” a cooperative “save the world” and a build it yourself “Fortnite creative.” As with many modern games, there are countless intricacies to each that require a level of comfort before one can attempt to be successful, and especially since players can enjoy Fortnite online against opponents all around the globe, it’s smart strategy to watch some gameplay style before diving into the deep end. Check it out here.
3. Minecraft
This is what’s known in the industry as a “sandbox” game, meaning that creativity is at the core and just about anything goes in terms of options and strategy. Players explore “blocky” infinite terrain to build structures, invent machines, fight computer-controlled enemies or even cooperate with players against other human-controlled adversaries. Minecraft is as big as it gets when it comes to the vastness of gaming possibilities, so watching others play it can be informative for later gaming, or it can be viewed simply as the longest animated movie ever, with action around every digital corner. Check it out here.
4. Call of Duty: Warzone
This latest addition to the Call of Duty franchise offers something that previous iterations didn’t: a focus on the accumulation of in-game currency. It also supports up to 150 players, up from the previous 100. The game’s “battle royale” mode pits players against one another in an ever-shrinking map with the objective of being the last player standing. Players want to avoid the yellow gas, which in turn forces them into tighter and tighter spaces. Needless to say, there is a big learning curve and a lot of strategy necessary to compete and win. It’s also action-packed and rich with refined graphics, making it a compelling war story even if you choose to just observe instead of playing. Check it out here.
5. Counter-Strike: Global Offensive
This multi-player first-person shooter pits two teams — the Terrorists and the Counter-Terrorists — head-to-head in order to complete various objectives. The Terrorists can plant bombs while their opponents work in unison to stop them. Or, in another plot, the Counter-Terrorists attempt various hostage rescues that their opponents have captured. Officially, there are nine game modes in this title, all involving distinct details and plots. It’s a fast-paced game, with bullets flying and potential enemies around every corner, so for those who may not want to wield a digital gun or involve themselves in the game’s espionage, watching it unfold can be a better (or at lest less heart-pounding) approach. Check it out here.
6. Sid Meier’s Civilization VI
This title requires a sense of the big picture. Players work to develop a civilization from a smaller settlement over the course of thousands of years to become a world power. Goals include military dominance, technological prowess and cultural superiority. Players compete against the computer or other human opponents by exploring vast worlds, developing new cities and civilizations, building infrastructure, developing the military culture and strengthening defense systems. All these can, however, be difficult tasks without a strong sense of how the game works, which is why you may want to view it on Twitch first and then develop your own order of operations based on the experience of others. Check it out here.
7. Animal Crossing
A bit of a lighter offering compared to the (mainly) war-themed titles listed above, this game involves a human character living among anthropomorphized animals in a village. Players collect items, plant plants, catch bugs, fish and socialize with the local furry residents. Created by Nintendo, this open-world game is played in real time and involves various holidays and slower events like the growth of trees. It’s highly customizable too: a player’s house can be furnished, decorated or expanded; clothes can be made, accessories and hair styles changed. You may not need to observe Animal Crossing online for strategy or tips, but it’s fun just to enjoy its entertaining details. Check it out here.
One of the most exciting attractions at NAMM each year are the Yamaha Main Stage concerts. Since 2013, the Main Stage has hosted legendary artists such as Stevie Wonder, Tony Bennett, Elton John, Earth, Wind & Fire, John Legend and U2 drummer Larry Mullen Jr. In 2018, the venue was moved from the indoor Anaheim Marriott Ballroom to the outdoor Convention Center Grand Plaza, allowing larger numbers of people to enjoy the concerts.
The Yamaha Main Stage.
The 2022 NAMM show (the first in-person gathering held in two years) featured two Main Stage events: A Night of Worship with Fred Hammond and Saddleback Worship, and a Saturday concert that included performances from Kandace Springs, Preservation Hall Jazz Band, and Tank and The Bangas.
Ryan Nelson.
Overseeing production was Ryan Nelson, the Yamaha Director of Recording & Concert Production, whose resume includes work with Kenny Chesney, Matchbox Twenty, The Monkees, Alabama, Gretchen Wilson and ZZ Top, among others. Ryan recently provided us with a behind-the-scenes look at what it takes to get NAMM Main Stage events from planning to reality.
SL: You’ve been running the Main Stage since 2013. How was this year different?
Ryan Nelson: In the past we’ve had a “house band” with core musicians like Nathan East, Greg Phillinganes and Teddy Campbell, and Yamaha Artists would make guest appearances with them, performing one or two songs. This year we treated it more like a music festival, where each band played a full set, so we had the opportunity to work with their engineers, stage managers and backline techs. It’s a unique opportunity for musicians and their crews to feel the magnitude of what Yamaha brings to the music industry. Some of the front-of-house (FOH) or monitor engineers weren’t familiar with the consoles, so we had teams in place to work with them in pre-production, helping them create and edit show files and making sure they were comfortable using the desks. We also had product specialists on-site to help with instrument setup if, for example, a guitar player wanted the action adjusted on a guitar.
FOH mixing position.
Monitors mixing position.
SL: How many days did it take to set up?
RN: We started dropping gear off and staging trucks on the Sunday evening, which gave us four days to load in and set up. Normally, we’d like to have one more day for load-in, but this year we were up against a Star Wars™ convention.
A truck delivering gear to the Grand Plaza.
SL: What are some of the challenges that you face each year?
RN: One challenge is that there isn’t a real load-in area, so we have to be very cognizant of scheduling when things can load in or out. When we show up at the Grand Plaza, it is just a concrete pad in front of the convention center in between two hotels and a bunch of palm trees. We’re responsible for bringing everything required to make the shows happen: power generators stage decking, roof, motors, rigging, the ballasts that it takes to hold all of that up — even the dressing room trailers fall underneath our purview. The amount of trucks and gear that have to come into that small area is phenomenal. We make sure that trucks can get in, unload their gear, and get out to make room for the next group. We’re basically turning the Grand Plaza into a festival-type venue for NAMM.
The Main Stage under construction.
The Main stage from above with elevated Yamaha VIP section.
Another big challenge is that there isn’t a proper backstage area at the Grand Plaza because things are happening all around you. This year we flipped the direction of the stage so that Yamaha could provide a VIP experience from their booth on the third floor of the convention center looking down towards the stage. But the Grand Plaza is also the main entrance for NAMM, so now people entering from the hotels were looking at the back of the stage. We set up LED screens and a PA on the backside of the stage to create a welcoming environment — as opposed to just a backstage area where nothing is happening. If there is overflow of people behind the stage or if they’re eating at the food trucks, they can see and hear what’s happening on stage.
Backstage area.
SL: What equipment was used for the main PA system?
RN: All of the consoles were Yamaha Rivage. We used a Rivage CS-R5 Control Surface for FOH (front-of-house), a CS-R10 for monitors and a CS-R3 for the broadcast/live stream mix. We had a 58-channel isolated analog split between FOH and monitors, and we used all of those channels — though not necessarily all at the same time. Each of the systems also used Yamaha HY256, HY144D, and HY144D-SRC expansion cards that enabled us to connect to other devices via Dante® if needed, or provide feeds for virtual recording and playback. The PA speakers and amps were all NEXO, and were provided by Reach Communications (Minneapolis, MN) and Mastermind Production Group (Fullerton, CA).
Main Stage NEXO speaker array.
SL How did the new generation of Rivage consoles facilitate operations that were difficult in the past?
RN: The way that Rivage consoles network makes it possible to quickly patch, repatch or pull channels that we didn’t think we’d need at FOH, monitors or on the streaming side. For example, the Disneyland marching band played at the front entrance of the Anaheim Convention Center to kick off NAMM, and at the very last minute they asked if their performance could go livestream. It was easy to flip a camera around for the visual, but we also needed microphones for the audio. We were able to utilize some of the inputs to the FOH console and patch them to the other consoles via the TWINLANe network. This would have been much more difficult to deal with if we were using copper snakes.
Backstage livestreaming area.
SL: What sort of response did you get from the artists and the engineers?
RN: We had a really positive response from both artists and engineers. The engineers were able to get first-hand experience using Rivage consoles in a real-world situation. They could hear the EQ and processing for themselves in a familiar context, and they were able to walk away with a show file they could use as a starting point for their monitor or front-of-house mixes.
On the artist side we had a lot of positive reactions too. There were keyboard players who may have had a preference for a particular instrument, but when they heard, for example, a Yamaha YC88, they wanted to make it their go-to stage keyboard from then on. And it seems like every time we put a Yamaha guitar in a guitar player’s hand, their reaction was, “I’m taking this with me! This is my new axe!” It’s great to see that kind of excitement.
SL: Is seeing that sort of reaction your favorite part of doing this?
RN: Yes, and also I love being behind the scenes and watching everything from this side. I’ve been mixing front-of-house for years and have mixed for some great artists. I wish the bands could experience what it’s like at front-of-house. I’ve always seen that position as an extension of what’s happening on stage, and it translates to the audience. It’s amazing to be in the middle of that energy!
And I’d just like to add that these shows would not be possible without the behind-the-scenes work of an entire Yamaha team that includes Chris Gero, John Wittmann, Ben James, Jalissa Gascho, Rachel Mills, Jeff Woods, Helen Pursell, Greg Crane, Preston Gray and Tres Cozad.
Photographs courtesy of Ryan Nelson and Steve Leiken.
Jazz was one of the keys to growing the music program at The King’s Academy (TKA), a K-12 private school in West Palm Beach, Florida.
In his six years at the school, Director of Instrumental Arts Wes Lowe, has almost doubled the enrollment in the music program, which offers students many different fine arts specialties, such as band, choir, dance, and musical theater.
He attributes this growth in part to the fact that students can start learning an instrument in 4th grade instead of waiting until 5th or 6th grade. “In order to have a successful program, you need a healthy system in place where you can have the younger students filter in,” Lowe says. “We’ve spent a lot of time investing in our elementary students, and we are reaping the benefits.”
Lowe is very familiar with TKA’s musical legacy since he attended the school himself and his mother was the drum major there. “My heritage and ties to the band program inspire and motivate me to lead the program in a way that continues to have life-changing impact on my students,” he says.
The area that has been the biggest catalyst for growth at TKA has been the jazz program. “Our school really caught onto jazz music and our community enjoys it as well,” Lowe says.
He focuses on these four pillars to continue to strengthen the jazz offerings at TKA.
1. Select Appropriate Music
“The most important thing is choosing the appropriate music for your group,” Lowe says.
When selecting jazz music, find the best type of music that will challenge students but is also attainable for them to execute with practice. “You don’t want to choose something so far out of their skill level that they’re never going to reach it,” he says. “So, this does take time on the director’s end — listening and sifting through everything that’s out there to choose high-quality music that’s standard and enriching for jazz bands.”
The music you choose for your program is completely dependent on the setup and abilities of the students involved. “Some programs can perform more difficult music than others, and that’s OK,” Lowe says. “At TKA, we started with more fundamental jazz music that the kids and audience liked before we started increasing the difficulty and technical level of the music.”
Lowe’s biggest tip: Go to the J.W. Pepper website to see all the jazz options that are available. Listen to different sample recordings and sort by grade level to find appropriate music.
2. Ask Local Directors and Musicians to Work with Your Band
Reaching out to other band directors who have a thriving jazz program or local jazz musicians “can be very valuable, especially for high school jazz bands,” Lowe says.
Band directors are members of many Facebook groups and readily share success stories as well as music resources, Lowe says. For example, if you’re focused on jazz but aren’t a jazz player (Lowe was a tuba player), advice from other music educators is a great way to add enrichment to your program. Two Facebook groups Lowe recommends are Band Directors and Middle School Band Directors.
“When I took over, I asked a lot of local directors what I should be doing,” Lowe says.
He picked their brains about music selections and ways to teach the many different genres of jazz. Lowe also asked local professionals to work with his entire band or to take a sectional out and focus on a small group of students. This was a great way for him to get plugged into the local band community, and it allowed his students at TKA to hear from a variety of instructors.
“The end goal is to make students better, so the more people you bring in, the more they’ll grow,” Lowe says. “I find this helps inspire students to be more receptive to feedback during rehearsals and more reflective on their own playing ability. This practice will ultimately increase their level of musicianship.”
The piece of advice Lowe heard the most on how to improve as a jazz instructor from area experts? Listen to as much jazz as possible. Lowe learned that jazz is a language, and in order to learn and teach it, you have to immerse yourself in it. So, he added jazz to his playlist, and surrounded himself with jazz.
“It’s important to highlight your students’ work. There needs to be some type of goal or product you’re working toward,” Lowe says.
Jazz is the most accessible type of music to a wide audience, so hosting a jazz-and-coffee night or jazz concert will resonate with your community. “It’s important to create these events and hype them up within your school community,” Lowe says. “Then, your students will have the opportunity to showcase their talents and passion to an appreciative audience.”
Lowe has found success producing an annual Night of Jazz that features guest artists, such as the late drummer Duffy Jackson and Yamaha Performing Artist Wayne Bergeron. “Having these world-class artists working alongside my students inspires them to work harder and push the level of our group even higher,” Lowe says. “And, working with a professional artist at a concert helps take some of the performance pressure off of the students and allows them to shine.”
Concerts and performances require a lot of practice and rehearsals, so be sure to give students ample time to gain confidence to be performance ready. Find a timeline that challenges them as well. For TKA’s Night of Jazz concert in April, Lowe and his students started working on the music in January.
“In four months, they learned 14 charts, which pushes them for sure,” he says. “In the past, it took my students maybe the entire year — from August to April — to learn those charts, but as the program has taken off, so have the strengths of the students.”
4. Seek Outreach Opportunities to Perform in Your Community
“The more you can take jazz to your community, the more people will rally behind your program,” Lowe says. “Jazz is so accessible, especially for the older generation, and it’s the perfect opportunity to take your band and perform at downtown marketplaces, retirement communities and 55+ communities that are looking for entertainment.”
Lowe, who was recognized as a 2022 Yamaha “40 Under 40” music educator, has also found that the more he takes his students to perform in the community, the more people they have attending their concerts.
“It allows you to get the pulse of your community, and it’s a way for students to give back,” Lowe says.
In 2021, TKA’s jazz program expanded to different groups, including The King’s Academy Jazz Ensemble and a quintet called The Annie Matot Jazz Quintet. This jazz quintet was formed around a senior vocalist and Young Artist of the Year award winner, Annie Matot. Her fellow schoolmates — Ethan Rapp (trumpet), Alex Theodore (piano), Hadiya Stewart (bass) and Ashton Horne (drums) — comprised the rest of this student-run ensemble.
“This is a great example of being flexible and finding different avenues for students to showcase their hard work, especially if the students are super talented,” Lowe says.
The quintet started playing in downtown marketplaces in the summer of 2021 as a way to bring music back into the community after COVID-19 shut down everything. By booking their own gigs, the musicians in the quintet have been able to get real-word performing experience — especially at events and venues that could only accommodate smaller groups — while still being in a controlled environment. The Annie Matot Jazz Quintet now has its own Instagram and Facebook pages.
“Before you know it, we had people reaching out for the quintet to play at weddings and fundraisers,” Lowe says. “Now, we’ve gone all over the state, and this all started by simply going out in the community.”
“Early in life I had to choose between honest arrogance and hypocritical humility.
I chose the former and have seen no reason to change.” — Frank Lloyd Wright
You do the work, get your observation hours, complete student teaching, get your degree and land your first job. You have the training, credentials, experience and potential to be a great teacher. Yet, when it comes to your abilities, you don’t want to appear too confident.
Why not?
People want to follow confident leaders! Parents and communities are trusting us with their most prized possessions — their children. We have to be able to look parents, administrators and other stakeholders in the eye and say, “I am the right person for the job. I may not be perfect, but I have the skillset that will ensure your students’ safety and education. I work hard, and I’m more than capable of taking on this role.”
Simple and straightforward, right?
Apparently not, because I have noticed a shift in confidence in both younger and experienced educators. These educators are hard-working, well-qualified and talented. However, their confidence in their abilities has taken a hit for various reasons. We cannot control the expectations or criticism that society may have on teaching. Yet, we can take some steps to make sure that we are not standing in our own way. In other words, we must take measures to maintain our confidence, build a little more belief in ourselves and even be arrogant when the job calls for it.
Avoid Self-Deprecation
I learned these lessons the hard way.
People will believe what we tell them about ourselves.
We accept most of what we think.
Let’s start with a pet peeve of mine: self-deprecation. To me, this is the opposite of confidence. I despise when people make fun of themselves and cloak it in humor. I am generally an optimistic person, but I know that there are enough people and situations in the world that will knock you down. And when you start making fun of yourself, you have joined those ranks.
Negative self-talk can be insidious. There’s a time and place for poking a little bit of fun at yourself, but I’m talking about those who do this multiple times each day. Most of the time, they’re trying to be funny, but they could also want to appear agreeable or may use self-deprecation as a defense mechanism.
But remember my second lesson above — we believe most of what we think. When we start thinking or talking a specific way about ourselves, we’ll risk believing it.
It’s a very short distance from “I can’t believe I was so dumb to do this” to “Maybe I can’t handle this career.”
Try this exercise. The next time you have a negative thought about yourself, pretend that you’ve said it out loud in front of someone who wholeheartedly agrees with your unnecessarily negative thought. Think about how offended you might be.
“I can be really stupid sometimes.”
“You sure can be!”
“I’m a failure at this.”
“Absolutely — you ARE a failure at this!”
“This is the dumbest thing I’ve ever done.”
“Sure is!”
“Hey! Why do you keep agreeing with me?”
“Because I’m taking what you say at face value.”
What’s the lesson here? If you tell people how many mistakes you make and how you have no business leading a classroom, they will believe you.
On the flip side, if you show that you have confidence in your abilities to lead a group of students but that you need help with some organization, people will believe you.
I’m not suggesting being overconfident. After all, we all have things that we need to work on. But why make things harder? Convincing yourself or others that you are not good at something creates unnecessary barriers and challenges.
Have you ever thought, “I’m the worst at this.” Are you really? Probably not.
And if you are, that’s awesome because you’ll feel great every time you show some improvement. Embrace opportunities for progress — sometimes you’ll master something quickly and other times, your learning curve will be steep. It’s important to recognize your strengths and weaknesses and make adjustments to routines accordingly. For example, if you aren’t great at tracking student paperwork for competitions, put weekly reminders in your calendar or delegate this task to a parent or student leader.
How can you expect others to support you if you don’t support yourself?
Appreciate the Appreciation
“Thank you” is a complete sentence.
Why are we so quick to disregard positive feedback for something we worked hard for and put so much time and resources into?
How often have you been told “Job well done” or “Great work” after a concert or event, and you immediately give the credit to everyone else (or the ever-popular, “The kids worked so hard!”)?
Yes, the kids did work hard, as did the district that supports the programs financially and morally. Newsflash – so did you! Your time and work came at the cost of degrees, professional development, time and money — just like everyone else.
“Mr. Stinson, the band sounded great today! What a wonderful concert!”
“Thank you! I really appreciate that!” (Is this so hard to say?)
Obviously, give credit where credit is due, but don’t deny someone the desire to show appreciation for you and your work.
You Don’t Have to Be the Best
When we think we are “the worst” at something, many of us aren’t satisfied until we’re “the best” at that particular task. I’m going to say something that might surprise you (and me): Work to be the best at some things, but it’s OK to simply be good enough in other areas.
You also don’t have to get better at everything. If you’re a competitive person, this will be extremely challenging. Raise your hand if you’ve worked hard at a skill just to prove a point to someone and later realized that you didn’t even want to personally build that skill. Admittedly, I’ve done this a few times before I realized that I was being driven by rivalry rather than self-improvement. Make sure that your priorities are your priorities, and not just something to prove to someone else who isn’t paying your bills.
How Do I Become More Confident?
I wish I could tell you that it’s easy to just stop thinking negative thoughts! It’s like telling someone who’s angry to calm down. Has someone red in the face ever said, “You’re right. I’ll calm down”? No!
Here’s another exercise. Take an inventory of your strengths, weaknesses and personal characteristics. Rank or categorize them in whatever system you prefer: pros and cons, from 1 to 5, green-yellow-red lights, etc.
In my case, I label my strengths as “green lights.” These are the things that I am naturally good at or worked incredibly hard at. Traits and characteristics in the green category would include connecting with students, writing, playing my instrument, project management and consistency.
My “yellow lights” category contains items that I’m good at but that require work and can fall by the wayside if I don’t pay consistent attention to them, such as fitness, eating well and personal organization. I may fail at these things once or twice a year, requiring me to reset or adjust.
I need to work on “red lights” things, which can be perceived as weaknesses. My current red lights are avoiding conflict, not focusing during conversations, too much screen time and not getting enough sleep.
It’s important to note that a red light item can be promoted to be a yellow light, but a yellow light item can also be quickly demoted to be a red light if I’m not careful. That being said, this list will change over time. The more you deal with something, the more confidence you will have to handle future occurrences.
For example, let’s say you need to tackle a large project. A beginner teacher’s initial thought might be “I can do this.” The mid- to later-stage educator might think “this project needs to be done.”
I had a colleague who sponsored the school prom. She did this job for nearly 10 years, and at two different schools! Every year, the prom went off without a hitch. Venues were secured, tickets were sold, transportation was booked, volunteers were scheduled, food was catered, the DJ was booked, etc. When something went wrong, she would say, “OK, time to adjust.” She called in favors or just did the job herself. The kids had a great experience and didn’t have to worry about how much work went into this.
Why was my prom-planning colleague so confident? Because she had done the job many times before, and there were very few surprises left. At one point, she was a new teacher sponsoring the prom, and she had to deal with last-minute cancelations, including a venue change one week before the dance. She had no guidance, no project binder to refer to and barely any budget. It took her about a week to recover from her first prom. But she stuck with it and was able to come in with a more detailed action plan every year.
Yes, she still gets upset and frustrated, but this does not stop her from finding a solution to the problems that come up. Furthermore, she goes into these events expecting some issues to happen. She is mentally prepared to address surprises and solve problems. If nothing happens, that’s a bonus! Nothing is perfect, and when we expect perfection, we can easily go into a downward spiral that isn’t good for anyone. Things happen, and we can choose to either react or leave it alone.
You might be thinking, “I’ll never chaperone prom!” But if you’re a music teacher, make sure to translate the above statement to every concert, marching band festival and field trip. Some of us are doing the equivalent of three or four proms a year! The up side of this is that there is so much experience packed into one year that you’ll have no choice but to be confident!
Direct Your Doubts to the Right People
Sometimes we need a pick-me-up. This is important, but make sure you go to the correct people. For small issues, it’s fine to vent to a couple of friends. You may have a great relationship with your supervisor, who may be open to listening to you, but I would not make this a habit. As previously stated, you don’t want to persuade someone — especially one who can affect your job — that you’re dealing with some self-doubt about your job.
We all go through rough patches, so treat them as speed bumps or detours, but avoid convincing someone else that this is a roadblock for you.
Strategic Arrogance
Arrogance is exaggerating your own worth or abilities. To me, arrogance is the complete opposite of self-deprecation. If negative self-talk can convince you that you aren’t as good as you really are, then perhaps you can use arrogance as a tool to become better than you currently are. Some of my best growth has been from being strategically arrogant.
I don’t practice the type of arrogance that comes from talking down to others. Instead, I hype myself up. In fact, the more absurd and irrational I can make my thoughts going into a stressful situation, the more I lighten up and actually perform better.
True story: I started teaching at a school that had a very high-performance reputation. I spent hours lesson planning, and the students ate everything up and asked for more. They’d even email me outside of school hours with content-related questions or thoughts on the music we were playing. A teacher’s dream, right? Of course, I enjoyed this situation, but the stress and self-doubt were starting to take over. Thoughts like “Am I really the person for this specific job?” and “I can barely stay one step ahead of these kids — what happens if they find out how hard I have to work for this?” crept into my mind.
I was spiraling fast as our first concert approached. Not only did I have to prove to the kids that I knew what I was talking about, but their parents as well. I never stopped working hard to prepare myself and the kids, but my stomach was in knots over my self-doubt.
Here’s a window into my mind and thoughts as I watched the video. Hmmm, I bet Gustavo Dudamel worked pretty hard for this performance. You know who else has worked hard for a performance? Me! What if someone records this school performance with me conducting, and puts it on YouTube, and then that video gets shared a bunch of times, and in another part of the world, Gustavo Dudamel is nervously getting ready for a performance and goes backstage to decompress and watches a YouTube video, and he sees me! He thinks, “Wow, this guy looks like he works hard! I’m going to take a few conducting tips from him tonight!”*
So, that’s how I got through my first concert. Yes, I worked really hard, but I combined this with my duty to make sure that Gustavo was not nervous for his performance. I was Maestro Dudamel’s only hope (just like Obi-Wan Kenobi, but let’s not go down that rabbit hole!).
*This is not the craziest thought I’ve had. (I realize that this footnote is self-deprecating in an article about avoiding negative self-talk. We’re all works in progress.)
You are a Leader Whether You Like it or Not
I grew up an hour outside of Chicago in the ‘90s, during the Chicago Bulls’ six championships. A lot of my childhood was spent adoring the starting lineup of the Bulls and despising any team that wasn’t them. A famous opponent of the Bulls was Charles Barkley of the Phoenix Suns. In a controversial Nike ad from 1993, Barkley famously stated that he was not a role model. People can debate whether professional athletes are role models, but everyone agrees that teachers are.
People look to role models and leaders for guidance. Some may look for leaders to take on what they cannot or will not take on themselves. Others are capable of what we do, but simply do not have the time. We don’t always expect perfection from our leaders, but we do expect confidence and capability.
As educators, we sometimes have doubts about our abilities. We fear risk and the unknown just as much as everyone else. We make mistakes and may even fail … hard. But we must manage our fears, embrace the challenges thrown our way and come out stronger on the other side. And even when we mess up, people still follow us because we are confident leaders and have their best interests at heart.
Biopics are one of the best ways to familiarize yourself with a musician’s life story and creative output. Not only are these films visually compelling, they often emphasize sound design, giving viewers a treat for the eyes and ears.
Here are 10 of the best music biopics available for streaming. Settle in front of your big screen and crank up your surround sound system or sound bar for a great viewing — and listening — experience.
1. Ray
This 2004 release stars Jamie Foxx as R&B legend Ray Charles in a transcendent performance that would earn Foxx an Oscar® for Best Actor. Charles led a tough but triumphant life, and it’s as if Foxx put that weight on his own shoulders to deliver the most convincing characterization possible. Find out where to stream it here.
2. Walk the Line
For many people, when they think of music biopics, this is one of the first to come to mind — it was a sensation when it hit theaters in 2005, notching $186.8 million versus a mere $28 million budget. Joaquin Phoenix and Reese Witherspoon star as husband-and-wife country superstars Johnny Cash and June Carter, and the chemistry between them is undeniable. Director James Mangold presents everything in a realistic, measured style — just how The Man In Black would have wanted it — and the screenplay is based on Cash’s own autobiography, so he essentially wrote the film himself. Find out where to stream it here.
3. Straight Outta Compton
Dr. Dre and Ice Cube are among the producers of this 2015 movie about the rap group N.W.A., and what they created is arguably the greatest hip-hop film of all time. The individual stories of the members of N.W.A. (which, of course, includes both Dre and Cube) are vivid in their own right, but the biggest takeaway from the movie is the music industry snapshot it provides. From contract disputes to studio sessions, we’re given an inside look at how the industry worked — for better or worse — in the early 1990s. Find out where to stream it here.
4. La Vie en rose
Marion Cotillard stars as legendary French singer Édith Piaf in the 2007 release La Vie en rose, named after one of Piaf’s most famous songs. The film is structured non-linearly, exploring different parts of the singer’s life and career, ranging from her greatest heights — enrapturing audiences from the stage — to her tumultuous personal life and addictions. Find out where to stream it here.
5. Bird
Jazz lover Clint Eastwood sat in the director’s chair for this 1988 biopic, which transports the viewer to the smoky nightclubs of the ’40s and ’50s as it follows the life of Charlie “Bird” Parker (Forest Whittaker) — one of the most influential jazz saxophonists of all time, and the main founder of the bebop style. Eastwood does an admirable job of maintaining historical accuracy as he traces Parker’s career from playing small venues in his native Kansas City to his glory days in New York City performing alongside the likes of Dizzy Gillespie, Max Roach and other legends. If you’re a jazz fan, this one is a no-brainer. Find out where to stream it here.
6. The Doors
If you want to see how Jim Morrison became The Lizard King, you’ll want to check out this stylish and memorable trip back to the late 1960s, directed by Oliver Stone. Although there were four members in The Doors, the film focuses mainly on Morrison (played brilliantly by Val Kilmer), whose erratic behavior and heavy drinking led to his tragic death at the age of 27. Find out where to stream it here.
7. Lords of Chaos
Lords of Chaos falls into both the music biopic and true crime categories, following the vitriolic and often violent rise of Norwegian black metal in the early 1990s — specifically the band Mayhem and one-man project Burzum. Mayhem mastermind Euronymous (Rory Culkin) is the de-facto leader of Oslo’s nihilistic black metal scene, holding court at his record store Helvete. From there, the story descends into, well … chaos. This was Hollywood’s first foray into the realms of extreme metal, and it doesn’t disappoint. Find out where to stream it here.
8. Bohemian Rhapsody
This powerful and moving Freddie Mercury biopic essentially introduced a new generation to the music of Queen. Within weeks of its release, the group’s records couldn’t be found in record stores, and play counts on streaming services went through the roof. It’s a testament to the strength of the film itself and Rami Malek’s jaw-dropping performance as Mercury, which earned him a Best Actor Oscar at the 91st Academy Awards®. It’s as if Queen had time-traveled from the past to perform in glorious 4K. Find out where to stream it here.
9. The Dirt
Anyone who has read Mötley Crüe’s tell-all biography The Dirt can tell you that the band’s story begged for a film adaptation. Netflix finally filled that void in 2019, presenting a vivid glimpse into the sleazy and excessive ’80s hair metal scene as we follow the band through its wild and hedonistic lifestyle on the Sunset Strip. Of all the biopics on this list, The Dirt is the one best suited for a watch party. You’ll feel like you’re hanging out with the members of Mötley Crüe! Find out where to stream it here.
10. Ma Rainey’s Black Bottom
Produced by Denzel Washington and adapted from the 1982 play of the same name, this film is set in the 1920s and gives the viewer a birds-eye view of a turbulent recording session by diva blues singer Ma Rainey (Viola Davis). Chadwick Boseman plays the ambitious trumpeter Levee Green in what would be his final role, as he tragically died during post-production. The film is dedicated to his memory, and he would receive a posthumous Best Actor nod at the 93rd Academy Awards. Find out where to stream it here.
As I write this (in late June), I’m noting much pomp and circumstance around me. Groups of young adults with corsages on lapels and wrists, gathering at a local park. White limos rolling down the streets, shuttling celebrating students to prom night festivities. Facebook feeds filled with proud parents of graduates.
It brings back memories of my own school days, and of those teachers who influenced my path in life. Not surprisingly, because I chose a career in music, it was my high school choir director Mr. Chris who gave me the courage to go forth and … be musical. If I had been equally energized by a history teacher, would I have chosen a different path? Hard to say.
On second thought, maybe it’s not so hard. After all, an influential teacher is someone who is excited about what they teach. Full-stop. Their enthusiasm and purpose are contagious.
I strived to be a good singer in Mr. Chris’ class. Though I was an alto miscast as a soprano (in my opinion), he thought I belonged on the right side of the bleachers singing melody, not harmony. So there I stood. I trusted him. I stretched to hit those high notes … because he thought I could.
Here I am in a high-school production of Fiddler on the Roof.
He cast me as Sarah Brown in the musical Guys and Dolls —a leading role. I was definitely not the strongest singer in my class, which had me wondering why he chose me instead of Laura, who clearly had a stronger voice, with a masterful vibrato and a good command of pitch. I, on the other hand, found vibrato elusive, eventually convincing myself that some people seem to be simply born with it while others are fated to be eternally searching for it. And pitch? At that point in my life, pitch was a concept I had never even heard of, much less an asset I possessed.
Maybe my audition was simply more convincing than Laura’s. All I know is, as soon as I saw my name on the casting sheet, I felt believed in. It affected me. It spurred me on. Mr. Chris saw something in me that I didn’t see myself. I’ll always be grateful to him for that.
He also chose me for a one-night All-County choir performance for which I rehearsed so fervently that on the night of the show I completely lost my voice. There he was in the audience. Little did he know I was mouthing the words.
An inspiring teacher is a student whisperer. An enabler. An empowerer. They don’t have to come out and tell you in so many words what they think your path is. They may let you know in subtler ways. And if you’re listening, you’ll take their cues.
It was obvious that Mr. Chris loved what he did, and he wanted to pass that love onto his students. He was full of lightness of heart as well. I remember him turning back to us after bowing to the audience at one concert he conducted and wiping a tear from his eye with the tip of his tie — a signal that we had done him proud.
Years after I graduated, I wanted to come back and thank Mr. Chris for that love and belief. Sadly, he passed before we could reconnect. I was too young and perhaps too self-absorbed in high school to realize that there are words worth saying before graduation.
A couple of years ago I became a part-time college professor, teaching songwriting. When I accepted the position, I asked myself two questions: How could I inspire my students to believe in themselves? How could I signal to them they have something unique to offer the world?
I found the answers by trying to follow in Mr. Chris’ footsteps. I make sure to let my students know when their songs move me, and I point out the parts I think are really special. I let them know when I think they’re better than they think they are. They may not see it yet. But hopefully one day they will.
And occasionally I receive an email at the end of a semester from a student telling me how much they appreciated my guidance … that it was the best class they ever took! I’m grateful they thought to tell me before they graduated.
If they have a hit song one day and remember me, that will mean I did my job.
The Yamaha MusicCast system is wireless multi-room audio technology that works with a variety of home audio components, including AV receivers, wireless speakers and even a Wi-Fi turntable. The free Yamaha MusicCast Controller app allows you to use your smart device to control MusicCast-enabled products via Wi-Fi.
The latest release of the MusicCast Controller App offers many exciting features that help enhance the user experience and make enjoying music easier than ever. Here are some of the best new MusicCast App features you’ll want to try.
A New Look for the Main Screen
The app looks a little different now, but it’s more than just a cosmetic facelift, with numerous controls and access to commonly used functions repositioned for easier access. For instance, the Main screen is now essentially four screens in one, with dedicated panels for Device Control, Source Selection, Now Playing and Navigation Tabs. Putting the most used activities up front simplifies the enjoyment of your MusicCast system.
The Main screen is divided into four panels for fast access to commonly used functions.
Main Screen – Device Control Panel
The Device Control panel provides direct access buttons to handy features like switching rooms, timers, sound settings and linking options. These controls are commonly used every time you play music over your system.
Device Control panel details.
Main Screen – Source Selection Panel
The Source Selection panel not only lets you select the source you want to hear, but lists the recent sources that were accessed, as well as up to 40 of your most recent content selections. Your personalized playlists and favorites are all right there as well.
Source Selection panel details.
Main Screen – Now Playing Panel
The Now Playing panel is normally minimized on the Main screen. Tapping the panel will expand the Now Playing panel to full screen. This displays more details about the music you are listening to, as well as providing quick access to other commonly used screens for further customization.
Now Playing panel details.
Main Screen – Navigation Tabs Panel
One of the major improvements to the new MusicCast app layout are the three Navigation Tabs located at the bottom of the screen. With a single button press, you are instantly routed to one of three important sections of the app: the Main, Routines and Settings pages.
Navigation Tabs allow you to instantly go to the app’s main three pages.
Routines Page
When using the MusicCast app, you’ll likely find yourself developing habits based on what sources you listen to and what rooms you like to link together, as well as a favorite volume level. You can think of Routines as being whole-home presets — a quick way to reset your entire system with the press of a single button. There are factory Routines, such as “leaving home,” which provides a quick way to shut down all MusicCast devices in your system. In addition, once you have your system set the way you like, you can also save it to a Routine. For example, you can build a Routine for parties, with all zones linked together, or one for morning listening, with just the bedroom and bath playing the news while you are preparing for your day. Take advantage of Routines to make your listening more enjoyable.
Here’s how to access and create Routines.
Settings Page
Though somewhat tucked out of the way, the Settings Page connects to an area of the app that contains some very important controls. Most of these controls are not necessarily used every day; however, they can be critical to enjoying the optimum MusicCast experience. The How-to-Use button, for example, can be a real goldmine of information while learning the nuances of your system. Use these “mini tutorials” to graphically guide you through step-by-step procedures to get the most out of your MusicCast system.
Settings page details.
Now that you’re up to speed on the latest changes to the MusicCast app, it’s time to give it a spin. Enjoy!
In Part 1 of this three-part series about recording acoustic instruments, we described the various microphone types and presented general tips for mic placement; in Part 2, we showed you how to best capture the sound of guitar and bass. Here, we’ll conclude by looking at how to mic an acoustic piano, as well as some common brass, woodwind and hand percussion instruments.
Before getting into the specifics, though, here are a couple of general points about instrument miking: First, in most situations, if you’ve got one mic that’s by far the best one in your collection, you should consider using it, even if it’s not the “type” suggested for a specific source. And secondly, patience is critical. Spend time moving the mic (or mics’) around — even if it’s only by small increments — until you find the placement where the instrument sounds best.
The Ivories
How you go about miking a piano varies greatly depending on the type and quality of the instrument, the room acoustics, and whether the pianist is featured in the arrangement or is just playing a background part.
You can get pretty elaborate with setups that include combinations of close and room mics, but we’ll keep it simple here and talk about practical two-mic configurations, which can yield an excellent sound if executed correctly.
The typical method for capturing the sound of a grand piano involves a spaced pair of microphones, one for the lower range and one for the upper. (If possible, use condenser mics because pianos have a vast frequency range.) If you have mics that offer omni polar patterns (which pick up sound equally from all around), you’ll get a more representative sound and more accurate bass response (with no proximity effect) than with a unidirectional mic … but you’ll also pick up more reflections and less direct sound.
Start by aiming your mics as shown.
Use boom stands to position the two mics 8 to 12 inches above the strings, near the hammers, and start by spacing them roughly 15 inches apart, as indicated by the “bullseyes” in the illustration on the right. You can experiment with the distance between the mics; however, be sure to follow the 3-to-1 rule. If you want a more focused stereo sound, try a configuration like X-Y or ORTF, with the mics aimed at about the center point of the hammers.
If you’re trying to get more attack in the sound, try lowering the mics a few inches. The closer they are to the hammers, the more direct sound and transient energy they’ll pick up. The higher they are, the more reflected sound coming off the lid and from the room will get picked up, creating more ambience.
Although you’ll probably end up recording your piano in stereo (with the final mix usually made from the player’s perspective — that is, with the lows on the left and highs on the right), you should always check the signal in mono. If you hear significant phase cancellation, try reversing the polarity on one of the mics.
Because of its physical differences from a grand, an upright piano requires a modified approach. Some people like to take off the entire bottom panel under the keyboard and place the mics there, spaced a foot or more apart. You can also get good results by opening the top lid and using boom stands to place the mics inside. Use a similar concept as with the grand piano: one mic for lows and one for highs in a spaced pair. Move the mics lower inside the lid for a more direct sound, or higher up for more room sound.
Horns of Plenty
The two brass instruments you’re most likely to encounter are trumpet and trombone. Both are relatively uncomplicated to record because virtually all of their sound comes out of the bell at the end. They’re also quite loud.
Considering those two factors, a cardioid dynamic mic is a good choice because it has a directional polar pattern and can handle high sound pressure levels without distortion. A large-diaphragm condenser can work well too, although you’ll probably have to engage its built-in pad switch. (A pad cuts the input level by a specified amount, making microphones more suited for loud sources.) You could also use the pad switch on your console or interface, but if the mic is getting overloaded, the sound will be distorted by the time it gets to the preamp in those devices. Alternatively, many engineers like to use ribbon mics on brass, so if you’ve got one (or the budget to rent one), you might want to experiment with it.
If you’re overdubbing a single trumpet, start with the mic pointed directly at the center of the opening in the bell, about 10 inches away. For trombone (which is even louder than trumpet), start at about 14 inches away.
Aim the mic directly at the trumpet or trombone bell.
You don’t want to get too close for a couple of reasons. First, you don’t want to pick up a lot of wind noise. Second, you want to capture some of the reflected waves in the room, which loud instruments like trumpet or trombone are sure to create. Ideally, you want to record trumpet in a relatively “live” room; that is, one with a number of hard surfaces.
Experiment with the distance and angle (and mic, if you can) until you get a good, full sound without distortion. Pointing the mic straight into the center of the bell will give you the brightest results. You’ll capture less high-end if you angle the mic to one side or the other (i.e., off-axis).
As with other instruments, your miking strategy will depend on several factors. Particularly with trumpet, pay attention to the frequency range of the part. If the player is hitting many high notes, the trumpet may sound shrill, and so you may need to angle the mic off-axis. You also might opt for a dynamic or ribbon mic in such a situation, because condenser mics tend to capture more high-end and could accentuate the shrillness.
If you’re recording a brass or horn section, you’ll get the best results if you record all the instruments at the same time (as opposed to overdubbing each part individually). After all, a well-arranged horn section should meld the various instruments into what sounds like a single entity. Horn players are also used to playing together, and so you might get a superior performance that way. A single good-quality omni mic can be used to capture the sound of a horn section in mono, or you can try a pair of mics in a stereo configuration such as X-Y or ORTF; individual microphones for each instrument are rarely needed. Either way, have the players stand at least three feet back from the mic (or mics) as a starting point.
Also experiment with the placement of the musicians in order to get the optimum blend. Bear in mind that you won’t have any way to change the individual instrument levels when you’re mixing, so make sure you’re happy with the balance you’re getting. If you’re capturing the sound of the horn section in mono, consider recording two passes of the part, panning one left and the other right during the mix to add width. Even if you’re recording in stereo, doubling will make the section sound bigger.
A Mighty Woodwind
Unlike trumpet and trombone, where the sound comes mainly from the bell, woodwinds such as saxophone and clarinet create sound throughout their bodies. As a result, you don’t want to aim the mic directly at the bell; instead, start by placing the mic about 18 inches away from the instrument and aim it over the bell so that it’s pointed at the approximate center point of the keys.
Aim the mic at the middle of the sax or clarinet.
The best mic to use will depend on the instrument, the sound you’re going for, and what you have available. Both condenser and ribbon mics do a good job of capturing the sound of all varieties of sax, as well as clarinet and flute.
Shake It
Hand percussion instruments such as shaker, maracas and tambourine create sounds consisting primarily of upper midrange and high-frequency energy. Because they’re percussive, they also tend to have very loud transients. Those transients are also of such brief duration that many standard VU meters are too slow to display them — a leading cause of distortion, and a good reason to use Peak Program (PPM) meters instead.
There’s a divergence of opinion about which mic type is best for recording hand percussion, but you should do fine with either a small- or large-diaphragm condenser, both of which excel at capturing transients. If the sound you’re getting is too cutting or piercing, you could try a ribbon or dynamic mic instead, since they capture fewer high frequencies. As with other instruments, the closer the player is to the mic, the more present and “in your face” the sound will be; the further away, the more ambient.
A good starting point is to have the player stand about eight inches from the mic. Because hand percussion instruments have to be physically shaken to create sound, the direction of the movement relative to the mic will impact the results. If the player moves it forward and back from the mic, the forward sounds (typically the accents) will be louder. If you’d prefer to minimize accents to get a more even-sounding part, have the player move the instrument from side to side relative to the mic capsule.
The direction a hand percussion instrument moves relative to the mic affects the captured sound.
Tambourine is not only capable of jangly sounds but may have a drumhead on it too, in which case it will generate low and midrange frequencies as well as high ones. With or without a drumhead, tambourines have a very wide dynamic range and so can easily overload the input. Therefore, you should make sure to set its level relatively low so that you have some headroom. Otherwise, you could end up with clipping that makes the track unusable.
Most of the time, you can get a good result recording hand percussion in mono. It’s usually better to have the percussion instrument coming from a single point in space rather than being too spread out across the stereo soundstage. In addition, when you’re mixing a shaker, maraca or tambourine in a song with a drum kit, you typically want to pan it away from the hi-hat, or their parts (which are in similar frequency ranges) may mask each other.
Stop. Take a moment for yourself. Create a short list of those special educators who propelled you forward to where you are today. Think carefully about what each of them had in common. If your list is anything like mine, you may have just reached a riveting realization.
An exceptional educator is one whose work continues far beyond the walls of the teaching studio; one whose impact is sustained well past the conclusion of any final exam, recital or capstone experience. I have spent my academic teaching career navigating an expansive landscape of collegiate music programs from public to private, liberal arts to top research universities. While each has offered its fair share of unique opportunities, the common denominator is that students consistently desire something beyond the curriculum itself — mentorship.
mentorship /ˈmen-ˌtȯr-ˌship/ noun. (1) the guidance provided by a mentor, especially an experienced person in a company or educational institution; (2) a period of time during which a person receives guidance from a mentor.
Admittedly, many of us choose to enter the field of education because of an impactful relationship we had with a mentor. I recall some of my own experiences with my undergraduate opera director, Dr. Carleen Graham. What was it that made her so impactful? Of course, her knowledge knew no bounds. But, it wasn’t Dr. Graham’s expertise in the field of opera (or her newly minted doctorate from Columbia) that had the greatest influence on her students. It was her natural ability to cultivate a connection. It was her desire to show up and be present. And it was her undeniable passion for pedagogic practice — a passion so fiery that I can still feel the heat some 14 years later.
As I have ventured to live up to the legacy of Dr. Graham, I have found great success in the mentorship of many of my own students. While there is no one formulaic solution to providing great mentorship, the four steps below offer a systematic procedure by which to explore new pathways to success.
1. Seek to understand each of your students.
Human connection is fostered by mutual understanding and shared experience. It is important to spend time getting to know your students, both in and outside of the classroom. Learn a bit about their unique journeys, struggles, hobbies and interests. In addition, offer them the space to begin to share who they perceive themselves to be.
Once we have a clear understanding of each of our students, we are more capable of helping them discover what they wish to say as artists. One’s personality simply cannot be removed from the equation. When we are having conversations surrounding identity, brand, and an individual’s artistic footprint, these details are paramount. Without such information, artistic expression often lacks definition, passion and purpose.
2. Encourage calculated risk-taking.
A great mentor equips their mentees with the tools by which to seek success. As per the high stakes nature and competitiveness of the performance world, it is imperative to remember that each risk carries the potential for yet another disappointment. When trying to empower young artists to develop the confidence and self-worth to move forward (despite the continuous stream of rejections), a calculated approach to seeking performance opportunities is especially important.
I often encourage my students to conduct a bit of market research on the companies and programs for which they are hoping to audition prior to the allocation of any resource — be it time, money, mental energy or otherwise. If a particular young artist program has a track record of hiring singers with two or three previous seasons of professional experience, only those artists with parallel profiles need apply. Equipping mentees with the skills necessary to evaluate such opportunities is especially critical for early career success. It is through this process of calculated risk-taking that we build more thoughtful, sustainable and resilient artists.
3. Support your students outside of the classroom.
It probably goes without saying, but visibility is essential. The work of a great mentor goes well beyond the meeting hours of any course. It is important to make time to show up for students, whether it be by attending performances, meeting them during office hours or even sending a quick check-in email at various points throughout the semester.
The relationship between mentor and mentee is strengthened by clear and consistent communication among both parties. I have also found student engagement to be more considerable during class when these additional steps are taken outside of the classroom. It’s a win-win situation for both mentor and mentee and a significant step toward exceptional mentorship by way of increased accessibility.
4. Inspire by sharing your journey.
It is no accident that you are in the position you are in. You have undoubtedly taken many calculated risks and successfully navigated the tumultuous terrain of being a musician and an educator in the 21st century. Congratulations!
While there is no one path to success in our ever-changing industry, sharing accounts of one’s own trials and tribulations can be particularly insightful and encouraging. Perhaps you were covering the role of Cassio in Verdi’s “Otello” at Utah Festival Opera and had to go on during the company’s closing performance with less than 10 minutes notice. Or maybe your work was criticized by somebody who claimed you weren’t “doctoral quality,” and you persevered. Then again, it might have been a job where you later won over an individual who spoke poorly of your artistic abilities. Whatever it may be, these anecdotes are invaluable pieces of the puzzle. They enable mentees to see the reality of the profession and offer great insight into the process, however difficult.
The universe has an unusually clever way of bringing life full circle. For instance, a handful of my current students are singing with companies that I have performed with some years ago. Like Christina Swanson, for instance, who is currently spending her summer working as a Festival Artist with Utah Festival Opera. Will she go on for any of her cover assignments? I’m not sure. But, what I do know is that she is equipped with the tools by which to find success should she be called upon to do so.
While I’m unsure if I’ll ever live up to the legacy of Dr. Graham (who, by the way, now serves as Dean of the Vocal Division at Manhattan School of Music), I will continue to reflect on the mentorship offered to me by so many of my most admired teachers. Mentors like Dr. Jill Pearon, Dr. Dean Southern, Dr. Evan Jones, Mrs. Margaret Murphy, Dr. Justin Comito and many more.
So, If you’re still reading and remain unsure as to where to begin, stop. Take a moment. Carefully refer back to that list of educators who helped get you to where you are today. And when in doubt, give your “Dr. Graham” a call. You’ll be glad you did.
In June, 207 teachers were named quarterfinalists for the 2023 Music Educator Award presented by the Recording Academy and GRAMMY® Museum. An additional 125 “legacy” applicants from 2022 are also eligible to win the award.
Among the quarterfinalists and legacy finalists are nine Yamaha “40 Under 40” music educators from 2021 and 2022.
“It is always an inspiration to hear these worthy educators’ stories, but we’re thrilled to see so many ‘40 Under 40’ educators being recognized for their innovative teaching methodologies and commitment to transforming their programs,” Lisa MacDonald, the Director of Vertical Marketing for Yamaha Corporation of America. “We are particularly heartened to reflect on the generation of students who are being inspired by these extraordinary teachers to be lifelong music makers.”
Yamaha “40 Under 40” Educators and GRAMMY Quarterfinalists
David Amos, a 2022 Yamaha “40 Under 40” music educator, is the Director of Bands at Heritage Middle School in Painesville, Ohio. He finds creative ways to introduce his students to the many facets of music, such as a nine-week Careers in Music class that looks at non-performing careers in the music industry and including diverse repertoire as part of his curriculum. One of his students said that Amos always finds ways to push students to be a better version of themselves as an individual and in music. “Remember, music is worth it. … While music is the content we teach, our first goal must be to teach students the skills they need to be successful in this changing world,” Amos said.
Dr. Justin Antos, another 2022 “40 Under 40” educator, is the Director of Bands and Orchestras at Dwight D. Eisenhower High School in Blue Island, Illinois. He has grown his music program by first building morale and establishing a culture of respect and encouragement. He celebrates little victories to enhance his students’ sense of pride. “I believe that being a music educator is less about the ornate spires and more about the individual bricks that build the castle,” he said. In 2021, Antos was a top 10 finalist for the GRAMMY Music Educator Award and used the honorarium he received to purchase hand drums, Gato boxes, wood blocks and pitched handheld instruments for the music therapy department at Advocate Children’s Hospital of Oak Lawn.
Amir Jones, who was named as a Yamaha “40 Under 40” music educator in 2022, is the Director of Bands at Thomas W. Harvey High School in Painesville, Ohio. Some of his students come from challenging socioeconomic situations, but when they enter his program, “they are given the best opportunity we can offer despite what other obstacles they may experience outside of our program,” Jones said. His unique approach — using a large-band mentality for his smaller band — has paid off. “We started to travel yearly, we play music that pushed our limits, we purchased quality equipment, we performed on our local news and participated in as many performances as possible,” Jones said.
Tyler Swick, who was part of the first Yamaha “40 Under 40” group in 2021, is an elementary music educator at Robert and Sandy Ellis Elementary School in Henderson, Nevada. Parents have described him as a “musical musician” whose “work ethic knows no bounds when it comes to ensuring he gets a smile out of a few extra kiddos.” Fun is a big part of Swick’s Orff-based music classes and his YouTube channel, Swick’s Classroom, which has videos of catchy songs that feature Swick’s “cutting-edge creativity and self-taught knack for audio and video production to create educational material,” according to another parent. In 2020, Swick received the “Heart of Education” award from The Smith Center and used his $1,000 prize to purchase each Ellis Elementary student a pair of drumsticks, a scarf and a shaker — items that he called for them to use in remote classes during the pandemic.
Alex Wilga, a 2022 “40 Under 40” educator, is the Director of Bands at Davenport Central High School in Iowa, which has a rich 136-year history. “My job is to make sure the program is in better shape when I am done than when I started,” he said. Wilga was part of the district team that coordinated a proposal to secure $2.5 million in funding for music and other special activities when “pay-to-play” participation fees were “I am always pushing for my students to have every experience that is possible through band. I don’t want them to worry about quality instruments, quality facilities, adequate funding or the other administrative things that come with a large program. I don’t want students to have a single roadblock so that they are free to become the best versions of themselves that they can possibly be,” he said.
Yamaha “40 Under 40” Educators and Legacy Applicants
Andrew Gibb-Clark, who was recognized as a Yamaha “40 Under 40” teacher in 2021, is the Director of Choral Activities at Highland High School in Illinois. When the pandemic hit in 2020, Gibb-Clark was determined to still present the spring musical production of “The Little Mermaid.” He brainstormed with the production team and came up with the idea of a drive-in “… with students performing live inside, and the audience in their cars across the street, enjoying the drive-in- movie style musical,” he said. The video feed of the performance was projected on a 11×22-foot screen and sound was transmitted through each car’s radio. A colleague said that Gibb-Clark’s “the-show-must-go-on attitude shows his unselfish caring toward his students.” In the fall of 2022, he is moving to Kirkwood High School in Missouri.
Wes Lowe, a 2022 “40 Under 40” educator, is the Director of Instrumental Arts at The King’s Academy (TKA) in West Palm Beach, Florida. Lowe knows the legacy of the TKA instrumental arts program because he attended the school as a child. “My heritage and ties to the band program here inspire and motivate me to lead the program in a way that continues to have life-changing impact on my students,” he said. He started band instruction with proper fundamentals and training for 4th graders, building on the foundation of having a strong beginning band program. Thanks to Lowe, the jazz program has grown and students perform for the community regularly, and the halftime shows have been compared to Super Bowl™ halftime shows!
Matthew Martindale, another 2021 Yamaha “40 Under 40” music educator, is the Director of Bands at Shelby County High School in Columbiana, Alabama. The “Pride of Shelby County” is the oldest band in the county, but it was the smallest and in need of many upgrades when Martindale first arrived at the school. Through a capital campaign and grants, he purchased band uniforms and instruments. His students soon started calling him “Martindad,” showcasing the bond he has with his students. The band won Best in Class during Martindale’s second year, but trophies aren’t important to him. “If you can get your students to realize that competition is only one aspect of growth and that improvement is more important, then you can be happy as a director,” he said.
EJ Villanueva, a 2021 “40 Under 40” educator, is an instrumental music teacher at Orange Grove Elementary School in Anaheim, California. With the expectation of teaching the same students for seven or eight years from transitional kindergarten (pre-K) to 6th grade, Villanueva knows that he must provide unique experiences that go beyond traditional elementary music. “I … explore different facets of music that can range from learning how to sing, dance and respond to music, [to] learning how to compose, beatbox, rap, play in a rock or pop band, … everything,” Villanueva said. The depth and breadth of Orange Grove’s music program seems even more phenomenal since Villanueva only started teaching there in 2018, and the entire Anaheim Elementary School District had been silent — with no music classes — for approximately 20 years, shortly before Villanueva’s arrival.
Winner Will be Announced in March 2023
The GRAMMY quarterfinalist and legacy applicant list will be narrowed to 15 semifinalists, then 10 finalists and finally one winner in March 2023, who will attend the 2023 GRAMMY Awards and participate in several GRAMMY-related events. The winning music educator will receive a $10,000 honorarium.
According to the GRAMMY in the Schools website, the GRAMMY Music Educator Award recognizes current kindergarten through college educators in public and private schools who meet the following criteria:
Have made a measurable difference in the lives of students
Have a made a significant and lasting contribution to the field of music education
are exemplars of the best in the field
Have shown a commitment to the broader cause of maintaining music education in the schools
Have made a significant impact on their school and community
Great basses aren’t created by accident — they’re conceived, designed and built with intent. To varying degrees, each design decision affects a bass’ character. For example, its neck construction (bolt-on or neck-through) impacts brightness and sustain. The tonewoods selected for the body, neck and fretboard impart particular sonic characteristics, while also affecting the instrument’s overall weight and balance. In addition, the pickup types and configurations (along with their locations on the body) play a big role in determining tonality and harmonic content, as does playing technique (picking versus fingerstyle) and the choice of string (flatwound versus roundwound). The list of contributing factors goes on and on …
But perhaps the most important factor that determines the tonality of a bass is its equalization (EQ) circuitry and settings. The “tone” knobs and switches on your bass are all connected to an out-of-view host of electronic components that make an outsized contribution to the sound even before the signal exits your bass and hits your amp, preamp and/or DI box.
Manufacturers take a variety of different approaches to bass equalization. These are the most common ones:
1. Master Knob
2. Two-band EQ
3. Three-band EQ
In this article, we’ll explain how each works, along with a description of the pros and cons of the three approaches. We’ll also provide audio clips so you can hear for yourself how tweaking your bass’ EQ controls can alter the sound. First, though, we need to tackle the concept of …
ACTIVE VS. PASSIVE EQ
Some EQ circuits are active, meaning they require power from an onboard battery to function. Others are passive, requiring no power. In the case of passive EQ circuits, the tone controls only cut frequencies, whereas active EQ controls allow you to cut or boost frequencies. Cutting frequencies isn’t necessarily better or worse than being able to boost frequencies; it’s simply a different approach to carving out the signature sound you’re after.
As you might guess, active and passive EQ circuits have different sonic characteristics. Active EQs are commonly considered more “hi-fi,” while passive EQs are often referred to as “vintage” and “warm.” If you like both, you should consider a bass equipped with active/passive EQ switching, such as Yamaha BB700 Series and TRBX600 Series instruments. Here’s what a BB735A sounds like with active EQ:
And here’s what it sounds like when switched to passive EQ:
Yamaha BB735A.
The BB735A, along with its four-string cousin, the BB734A, also offers an interesting twist on active/passive switching: When in active mode, the three-band EQ knobs work as expected (see the “Three-Band EQ” section below), but when in passive mode, the treble knob becomes a Master Tone control, which we’ll describe next.
MASTER TONE KNOB
Many vintage basses, as well as some new ones, are equipped with a single passive “Master Tone” knob that cuts highs when you turn it counterclockwise. All Yamaha BB Series basses except the BB734A and BB735A models offer this kind of EQ control, as does the Yamaha RBX170 and TRBX174/TRBX174EW.
Yamaha TRBX174.
The following three audio clips (recorded using my vintage Yamaha BB1200 bass, strung with flatwound strings) demonstrate how the sound changes when you turn the Master Tone knob. Here, it is wide open (completely clockwise):
Next, the half-way position:
And finally, with the highs fully rolled off (completely counterclockwise):
TWO-BAND EQ
Many of today’s basses feature either a two- or a three-band EQ circuit — a “band” in this case meaning a specific frequency range. A bass with two-band EQ offers separate knobs for treble and bass. If the EQ circuit is passive, filtering occurs over that frequency range when you turn the knobs. When both knobs are wide open (i.e., turned fully clockwise), you’ll hear the uncolored sound of your bass. From there, you have two ways to alter the sound: Roll off the highs to cut string noise and accentuate the low end, and/or roll off the lows to bolster the snap and sizzle of your attack.
In basses with active two-band EQ (such as the Yamaha TRBX204 and TRBX304 /TRBX305, you can opt to boost the highs and lows, as well as cut them. Here’s the sound of a TRBX304 (strung with roundwound strings, and with both pickup volume controls equal) with both the high and low EQ knobs set to their center detent position for no cut or boost:
Compare that to the sound of the same bass with both the bass and treble boosted to the max:
And here’s the TRBX with the bass still boosted to max, but with the treble completely rolled off, for a richer, less aggressive sound:
Yamaha TRBX304.
Bassists who prefer instruments with three-band equalization (see below) claim that two-band EQ doesn’t deliver enough control over midrange frequencies. My take is that most two-band EQ circuits are more than up to the task of tone shaping, and that you should use your amp’s or mixer’s EQ section to create the general sound you want, then use the bass’ onboard EQ to tweak things to perfection, not the other way around. That said, there are certain specific advantages offered by three-band EQ, which we’ll explore next.
THREE-BAND EQ
A three-band EQ circuit features separate knobs for treble, bass and mids, and the circuitry is almost always active. Three-band EQs inherently offer greater flexibility to players who want to create a very specific sound. Perhaps you are an aggressive slap-and-pop player who lusts after a particular mid-scooped sound, or maybe you’re in a band with two guitarists and a keyboard player and need your bass to carve out a specific midrange frequency slot within the overall band mix to be heard above the din. In these and other situations, an active three-band EQ offers the comprehensive versatility to craft the specific tone you need without any compromises.
Many Yamaha basses offer three-band EQ, including the BB734A / BB735A models; the TRBX504 / TRBX505 and TRBX604FM / TRBX605FM; the BBPH Peter Hook Signature BB Bass; the BBNE2 Nathan East Signature Model (which adds a unique Mid Cut control and switch); and the TRBJP2 John Patitucci Signature Model.
Here are four audio clips demonstrating the effect of EQ on a Yamaha BB735A, strung with roundwound strings and in active EQ mode. First, here’s the 735A with the bass and mid knobs set to the center detent for no boost or cut, but with the treble full up:
Next, here it is with the bass and treble knobs 3/4 of the way up, but with the mids fully boosted:
Finally, here it is with the same bass and treble knob settings, but with the mids fully cut for a “scooped” ’70s funk sound:
While it’s true that having an extra mid band (which will usually be cut, not boosted) can help give your instrument a richer sound, set-it-and-forget-it players who typically don’t fiddle around with the knobs on their bass may not want or need so much tonal control. Inexperienced players may also find themselves intimidated and confused by the presence of so many knobs (in addition to volume and possibly blend knobs). To address that concern, some basses, such as the Yamaha TRBX304 and TRBX305, come equipped with EQ presets, enabling you to immediately select the precise sound you want rather than tweak knobs in hopes of arriving there manually. The following audio clips demonstrate two of the five EQ presets offered by the TRBX304. First, the “Pick” preset, played with a pick:
Compare this to the “Finger” preset, where I play the same bassline, this time fingerstyle:
NO WINNERS, NO LOSERS
Before you decide which approach to equalization you prefer, keep in mind that no amount of EQ (or EQ system ever designed) can make you sound better than you actually are. Great tone starts with the player, both in terms of how you play your instrument and where on the bass you actually play it. For example, plucking or picking closer to the bridge will yield a crisp, ‘70s funk sound, while playing further up the neck where the fretboard meets the body will result in a richer, warmer tone. Any and all of these approaches will dramatically affect the sound of your bass before you ever touch a tone knob, and will make your use of EQ that much more powerful when you start tweaking away.
Click here for more information about Yamaha basses.
When music educators assume a position at a new school, they routinely follow in the footsteps of their predecessors. They will inevitably be told “this is how we do things here…” or may even receive pushback if they attempt to break the status quo. This was often my experience at the beginning of my career.
Some educators may find comfort in walking into a school with an already established music program, knowing that all they have to do is meet a set of expectations. But what happens when the program and the expectations don’t exist? Where do you turn when you take on the task of building a new music program in a school where music education was absent for quite some time?
This was the challenge I faced during the height of the pandemic, when I moved back to the United States from teaching abroad to begin a new high school music program at Central Falls High School in Rhode Island.
Outlined below are the four essential keys you must consider when launching a new high school music program. Starting a program from the ground up takes a lot more work, but the benefits and rewards are worth it!
1. Begin with a Strategic Plan
Prior to the start of the academic year, draft a strategic plan for the new music program that includes a mission. Why are you there to begin a music program? What purpose does it serve? Make it concise but keep the bigger picture in mind.
Here’s our mission: “The mission of the Central Falls High School music program is to educate and inspire students through collaborative music making while providing positive life-changing musical experiences for the entire high school as well as the greater Central Falls community.”
Next, draft a vision for the program. What will you specialize in? What will you provide for your students?
Here’s how our vision begins: “Every student at Central Falls High School will have opportunities to participate in collaborative music making and develop musical skills for lifetime application.”
Finally, detail the core values in your strategic plan that will serve as the anchors for your new program. It’s helpful to align these core values with the National Core Arts Standards if your school district uses them. Be specific and connect these core values to part of the music process.
For example:
Inclusive — Music making is provided to all students as they are able to participate at their own level.
Comprehensive — Students develop an awareness and knowledge of multiple musical styles as they engage with repertoire that is varied in genre, language and culture.
Share the strategic plan with your administration and ask for feedback. They will be delighted to have the opportunity to be included in this exciting process. Discuss how the core values of your music program connect with your school’s larger mission statement or academic program of studies.
One of our school’s goals is to develop more practices of culturally responsive teaching, so it was important to my principal that our music program met these same standards. It was also essential for him to hear how we planned to create connections within the community of Central Falls. Sharing your vision as the new music director is a necessary step to confirm your administration’s full support of the new music program.
Return to your mission statement and program vision when you are reflecting on the progress of the program mid-year and make revisions as needed. Let this be a living document that continues to inspire both music teachers and music students.
2. Minimize Course Offerings
All music directors wear many hats, and they are often some of the busiest people in the school building! Developing new curriculum, units and lesson plans for multiple courses at the same time is extremely time consuming and can lead to burn-out.
For the first year, plan to offer only one or two different courses. Even if you previously taught this course at another school, there will inevitably be changes that you will need to make. For example, you may need to re-write your unit plans in a specific way or on specific forms that are unique to your new school. Or, you may need to have fully realized lesson plans for every unit depending on your administration. By having just one or two different courses, you can focus on your students instead of worrying about all of the administrative paperwork required of teachers.
Also keep in mind that as a new staff member, you will need to be evaluated. Teaching one or two courses to multiple sections will provide ample time to become a master teacher who is able to focus specifically on the needs of your students at your new school. Each group of students will have nuances, so you must adapt your curriculum and mode of instruction accordingly. Once you are comfortable with these courses, consider adding a third course the next semester. Don’t forget to reflect on how the first semester went and continue to develop your original curriculum to meet the demands of the 21st century learner.
As the years progress, your music program will grow, and you will be able to identify and retain those students who live, eat and breathe music. When this happens, you will discover the joy of creating both fun music electives as well as new performing ensembles. Just remember to start small and take it measure by measure before attempting to offer the gamut of musical experiences.
3. Get Buy-In from Your School Community
As music educators, we are often “othered” and may not be seen as “core” teachers. Some districts refer to the music, art and drama teachers with a condescending label like “itinerants,” and guidance counselors might think that music is “just an elective.” Other teachers or building administrators may complain about the amount of noise coming from your room. If you are a seasoned educator, you have experienced all the above and then some. However, if you are entering a new school that is not used to having music as a course offering, all these challenges will be heightened. The best way to overcome these hurdles is with community buy-in.
First, identify staff members who have a musical background. Maybe a science teacher plays the trumpet in a band, or perhaps a Spanish teacher is the organist at her church. Once you identify these individuals, make them your support system and advocates! Use them to help acclimate the community to understand what having a musical experience is like.
Next, identify the type of ensemble that is best suited for your school. Will it be a marching band, an orchestra or a choral program? Before you begin a new ensemble, find out what your administration would like and expects. You also must be realistic and identify the particular strengths of your own musicianship.
Make sure to involve your current students next. What are they interested in? Do you have a lot of students who like to sing? Or maybe you have enough interested students to begin a modern band program. Once students are excited about the opportunities that come with performing in a new ensemble, you can begin to include the other staff members you’ve previously identified and see how they can help and support your students in this new venture.
4. Open Your Doors
Open your classroom doors — figuratively and literally! Make the music room “the place to be.” Welcome students you don’t know into your room or invite them in for lunch. Get to know them. Provide a safe and welcoming environment for anyone walking into the room, whether or not they are music students.
Fill the hallway with music. Music is such a unifying, humanizing and healing force. Any passersby who hear the music will be filled with joy, and they might peek into your room. Invite them in. Play for them. Sing for them. Invite them to play or sing with you. The more you consistently involve other community members into the daily work of music making, the more respect your program will receive and the bigger the impact will be on your students.
When your students are comfortable, find opportunities to share their work with the school community. Perform at lunchtime. Invite other classes to the music room. Run a school-wide talent show where music students serve as hosts and perform together. Identify your rising stars and have them sing the national anthem at school sporting events. Start new traditions like hosting an international night and welcoming community members to share their musical backgrounds and cultures. Find opportunities to fill as many hearts and minds as possible in your school with music.
Then, open your doors to the greater community. Connect with a local college music program or arts organization. Find ways to collaborate and invite guest artists to work with your students. Reach out to professional artists who will be visiting your town and inquire about holding a master class for your students. You may be surprised to find that a five-time Grammy-winning group is more than happy to pay a visit to your school. Once you provide these transformative musical experiences for your students, you may notice that new students will find the courage to walk through your door every single day wanting to join and asking how they can be a part of “it.”
Use the relationship between your athletic and spirit organizations to strengthen your campus community. Look at football games as a chance to showcase your music program while supporting and enriching the school’s culture. Pep rallies, playoffs and athletic events are a fantastic time to show the band’s versatility.
Here are some of my strategies, suggestions and thoughts about creating a strong relationship between football and band, such as what music to play, how to build relationships with coaches, how to balance this with other events, the importance of being visible at community events, and how all of this can create a support structure for your program goals.
Strengthen Community
Texas is known for great football. And where there is great football, there is often a great band. Players, coaches and spectators appreciate the energy and presence of the marching band in the stands and on the field during halftime. The band brings more fans to games, increasing the crowd’s size and spirit.
Bringing together football, band and the spirit teams — the school’s largest organizations — can positively impact all aspects of campus life. The relationship between football and band fosters goodwill and mutual respect. Directors should create an environment where the band serves as the “connective tissue” between sports and the spirit groups. This takes effort and compromise.
I admit that I struggled with this for a long time. Only recently have I come to appreciate how these relationships can boost overall school spirit as well as morale within the spirit groups and each sport team.
You Get Out What You Put In
This best sums up my relationship with our athletic department since Claudia Taylor Johnson High School (CTJ) opened in 2008 in San Antonio. As a young teacher, I was driven toward a single mission: To build the best band possible. Anything that fell outside the spectrum of improving our marching and playing skills was deemed a distraction from that goal.
I resented the constant “drumbeat” from spirit and athletic organizations that always seemed to want a piece of our time. “Send us a drumline for this,” “Can we get a pep band for that,” “The band can’t miss that game for the biggest contest of the year.” There always seemed to be someone requesting the band at an event that took time away from rehearsals.
I wanted to practice, and I wanted my students to focus on what we were there to do — be great at marching band. I resented that football, basketball and dance were able to focus on their activities without being called to serve as a “jukebox” for every event on the calendar where someone thought that the band could add a little “ambiance.”
At games, we rotated between 12 or 13 stand tunes, plus the fight song and the school song. These tunes took a while for my young students to learn in the early years because of the complicated rhythms and syncopations. We received regular critiques from football parents that we didn’t play loud enough or didn’t play the “right kind of music.” It was, to say the least, a bit disheartening. It seemed that everything we did was under fire. At this time, our band was starting to do really well in competition, so I felt frustrated that the community seemed to focus on what we were not doing instead of what we were actually achieving.
Around my fifth or sixth year, I began to reflect on why the band’s relationship with spirit and athletics was not as strong as it should be. I remember talking to then-Principal John Mehlbrech, who encouraged me to take a step back and try to see the bigger picture. He was at every band event and worked so hard to support us. Even though I heard what he said, I don’t think I was really listening.
The band worked harder to be more energetic at pep rallies and play better music, but I still wasn’t “feeling the love” from or for my colleagues or the athletic community. Finally, in 2020, when the pandemic hit, things clicked for me — during my 13th year of teaching.
Unity through Adversity: Preparing for the “Pandemic Season”
In June 2020, we started discussing the upcoming season and whether the football season and marching competitions would occur. I spoke weekly with Principal Gary Comalander, head football coach Mark Soto and dance team director Stephanie Trevino. My goal was to gain insight into the community outside of band to gauge the desire to participate in a season of some kind.
I learned that Coach Soto and Director Trevino were already working on plans of their own to move forward with a season. We hit a setback when the start of school and our season was delayed until after Labor Day, but thanks to the open communication among the four of us, we were able to navigate the challenges and eventually proceed with practices. The bond that we developed during the summer preparation only grew stronger as the season progressed, and our students and parent organizations began to emulate the relationship they saw among the campus leadership.
Our parent organizations helped each other with safety preparations, including hand-washing and bottle-filling stations. Our students encouraged one another to participate and stay healthy so that we could continue moving forward.
Through the weeks of preparing our groups for our initial performances, we were communicating so regularly that any time an issue came up, we leaned on one another for emotional support and guidance. Mr. Comalander’s steady guidance and leadership gave us the courage and strength to tackle the day’s challenges. The camaraderie that had evolved among spirit, athletics and band made it feel much less lonely.
A Successful Season and a Glimpse of the Future
Though socially distanced and in masks, the first pep rally with band and dance was an emotionally charged event. The spirit groups and band were pumping each other up in a way I had not experienced before. When it was time for the first football game, we were all a little nervous about how it would play out.
I watched the football team race to the band and spirit squads after defeating a rival team and start jumping and cheering. The band members were screaming and returning the energy back to the team. As the season evolved, this connection only grew stronger. The football team continued to win games, the band and spirit teams got closer, and we all looked forward to the end of the game when the football team would run over with joy to celebrate. We all worked harder to play louder and better and added some new stand tunes to our repertoire that would pump up the team and help them win.
Our season in 2020 extended nearly to Christmas because of the schedule change, which allowed the spirit groups the opportunity to perform “Holly Jolly Holiday Parade” together at halftime in our “Holiday Extravaganza” show. This performance showcased the unity of our various teams and represented an entire season of working to support each other, overcome obstacles and keep our students safe. It was the culmination of sharing ideas and pursuing a common goal. This special energy and synergy provided a glimpse of what it could be going forward.
In 2021, I wondered if the energy of 2020 would repeat itself, and I was delighted to see that it did! With the return of the packed student section in the stands (called “the jungle”), the drumline and band members made it a tradition to energize the section during the third quarter by playing “Blinding Lights,” “Welcome to the Jungle” and “Bula!” (See photo to the right.)
The students in “the jungle” were gracious in a way I had not seen before. Their energy inspired the band members to give even more passion to the game and the players.
The shift in my attitude and the collaboration with the administration, football coach and dance director during the pandemic opened new doors for the team and our entire school community.
17 Ways to “Reach Across the Aisle”
This positive energy that is shared among the football, band and spirit teams is part of the culture at many other programs in San Antonio. Some great ones that have inspired us at CTJ include James Madison High School with Philip Flynn and Evan Berry, Brandeis High School with Richard Herrera, and Winston Churchill High School when our own Alan Sharps was leading the charge. These programs built strong relationships with their athletic departments and went out of their way to support their teams while maintaining incredibly competitive marching bands.
Things I have learned from watching these programs as well as my own experiences at CTJ include:
Remind students that the number one priority at football games is to support the team. All energy from the stands should be positive and professional.
Keep students involved in the games and pep rallies, and train them about how to respond to first downs, touchdowns and player injuries on the field.
As directors and staff, model enthusiasm for your students at the games. Be engaged and supportive of the team regardless of the score or the time of year.
Learn stand tunes that pump up kids and coaches. Ask your coach if there are any songs that they would like you to play. And see what the players think about your choices.
Consider what your dance team and cheerleaders want to do. Can you coordinate selections, drum line cadences and other events to create more unity in the spirit section?
Coordinate events with your spirit organizations for maximum impact. Think about doing a halftime show together at least once or twice a year to signify unity between the organizations.
Highlight student athletes who also participate in band. Look for ways to showcase their accomplishments and cheer on those athlete-musicians at the games. (See photo to the right.)
Coaches and administrators do not always understand everything about band, especially if they weren’t involved in it. Many administrators were former coaches. Do not take it personally if they question things. Be receptive to questions and receive criticism and suggestions openly. Be considerate in your responses and avoid seeming defensive.
Avoid missing football games for contests. Yes, we still need to compete, but consider selecting regionals based on your football schedule to avoid Saturday conflicts. When the band doesn’t attend a game, it affects athletics revenue because band parents aren’t there and the game doesn’t have the same energy. Or, see if your middle school band can fill in for you if missing a game is unavoidable.
Go to away football games. That’s right, I said it. Go to away games. Remind your community how valuable your band is and how much it contributes to the team spirit. Show your investment in the community at large.
The band must be at pep rallies, but does the entire band need to go? Consider rotating the responsibilities so not all the kids go all the time. This could reduce stress on the students and directors while still showing support.
Can you send a pep band to basketball, track, soccer and other sports? Check with your administrators.
Consider attendance at send-offs. They may fall during your rehearsal. Can the drumline go? What about a section or pep band?
Bring the drumline or a pep band to play for the student section during one of the quarters of the game to get them energized. At CTJ, the student section is called “the jungle,” and we play “Welcome to the Jungle” and a few other tunes and cadences during games to get them pumped. It gets pretty rowdy, and the band members love it.
Coaches and band directors should make it a point to spend time together outside of school. Find common ground and enjoy fellowship once or twice a semester with a happy hour, dinner or other get together.
Recognize athletic and spirit groups’ accomplishments on your social media.
Invite your athletic teams to one of your competitions. Our football team has attended one of our competitions the last two years, and it was a huge hit with our students. Spirit and athletics also hosted a send-off pep rally for our band heading to state. The band members felt so supported.
As an artist, I’m always fascinated by the design layouts and floor plans developed for trade show events. Display areas have to be visually appealing as well as functional, plus they have to be easy to navigate by a large group of people.
The new Yamaha location at the 2022 NAMM show, on the third floor of the Anaheim Convention Center, allowed the company to condense several product areas into one large square presentation space. This allowed for full line of sight to all of the display areas within the booth — a great idea that I think was appreciated by Yamaha staffers and attendees alike.
The focal point, in the middle of the space, was the revolving stage, overhead Yamaha logo and the company’s spectacular new CFX grand piano. Theatrical lighting set the mood, along with huge wall monitors projecting performance videos and NEXO speakers suspended from the ceiling emanating immersive surround sound. No matter where you were standing in the booth, the effect was dramatic!
But my personal focus, of course (and the reason I was representing Yamaha at NAMM), was on Yamaha guitars, and there were plenty of them at the show, including …
I’d been dying to try out the Professional line for a while, and got the chance to demonstrate an RSP20 in Swift Blue and an RSP02T in Sunset Burst (shown below) at the show. Both guitars had been set up perfectly, and played just the way I (and, I think, most people) like them. To my eyes, the combination of cream pickups and scratch plate really do complement the Sunset Burst finish very well.
RSP20 in Swift Blue and RSP02T in Sunset Burst.
All RSP models are identical in construction, with chambered mahogany bodies, maple tops, rosewood fingerboards, carbon fiber rods in the body and neck, and 12-inch radius fretboards with stainless-steel jumbo frets. They also feature an extremely versatile five-way selector switch and a unique Focus Switch for an instantaneous boost in the low and mid frequencies. The RSP20 has two humbucking pickups, while the RSP02T sports two P90s instead, for those tasty single-coil sounds we all love. The tones they provide for rock ’n’ roll are excellent, and blues slide, legato melodies and double-stops all shine on both instruments. They were my favorite electric guitars at the show, without a doubt.
New TransAcoustic Guitars
Here I am, demoing the FSC-TA at NAMM.
Yamaha acoustic guitars were also represented extremely well at 2022 NAMM, with a full complement of amazing TransAcoustic instruments. The FGC-TA and FSC-TA are the latest cutaway models in the line and really do take center stage for the solo performer who needs an acoustic guitar that provides easy access to the upper register.
I used an FSC-TA in tobacco sunburst finish throughout the show for my demo performances, and I really loved the plugged-in tone as much as the acoustic sound and ambient effects. (Check out the video below for my full performance on this guitar.) It came as no surprise to me, then, that the FSC-TA followed in the footsteps of previous TA models by winning the NAMM “Best in Show” award again this year! What will they think of next for this range?
New Amplifiers
The big news on the amplifier front is that Yamaha THR-II wireless desktop amps have received a refresh in the aesthetic department and are now available in black or white, in addition to the original tan finish. This makes total sense when you consider that most players will have these amps on their desk at work or coffee table at home. Your choice of desktop amplifier can now complement your interior design palette as well as your musical taste!
Posing with a THR30II in white and a Pacifica 612VIIFM.
Also on display at NAMM were Line 6 Catalyst combo amplifiers, along with the company’s flagship Helix processor and HX Stomp effects pedal, all of which were put to good use in the stage backline. The new DL4 MkII, which takes delays to the next level of digital expression, was also a mainstay of the main stage at the Yamaha booth.
The Videos
I always feel that products are best demonstrated in the capacity in which they’ll ideally be used, paired with other products and in a real-world live music situation.
The FSC-TA, vocals and percussion loops in the video below, shot at NAMM, are all running through a Helix effects processor and a Yamaha Stagepas 1K (since supplanted by the second-generation Stagepas 1KMk II) portable line array PA system — the exact same setup that I use for all my live performances. You’ll notice that the parts all retain their clarity even when I’m overdubbing in the looped outro section. I think it sounds pretty good, considering this video was captured using my smartphone. Trust me: the sound is infinitely better in person.
I shot this second video the day before the show opened because I couldn’t resist capturing my two favorite guitars before they were covered in fingerprints by adoring fans — the Revstar RSP20 in Swift Blue with humbucking pickups, and the RSP02T in Sunset Burst, with those lovely cream P90s. I hope you enjoy admiring these beauties as much as I did, as well as listening to the musical underpinning I composed to celebrate their release.
The Wrap-Up
While attendance at the 2022 NAMM show may have been lighter than in past years, it was clear from the enthusiasm of the attendees that the passion for the music manufacturing industry is alive and well.
We all love what we do, and that always shows at the Yamaha booth. The live performances there were all world-class, interactions with dealers, competitors and artists were always cordial and fun, and the entire Yamaha team worked together in every way to support the vision of the company, its products and the end user.
It wasn’t all that long ago that like-minded gamers would have to physically travel to each other’s homes to enjoy rudimentary multiplayer titles like Street Fighter II or NBA Live. Modern video games, of course, have increased greatly in both complexity and visual appeal; what’s more, with the rise of technology and widespread broadband access, gamers can compete with one another from pretty much any location in the world, as long as there’s a Wi-Fi signal or LAN connection. In addition, with the availability of community chat apps like the messaging platform Discord and the video live-streaming service Twitch, gamers can interact with friends and competitors, sharing texts or videos as they play.
Here are 10 of the most iconic multiplayer games of all time.
1. FORTNITE
Arguably the most popular multiplayer game ever, this title first hit the shelves in 2017. Today, there are three ways to play: Battle Royale, in which up to 100 players fight to be the last one standing; Save the World, which is a cooperative survival game; and Creative, in which you can build your own worlds and arenas. The game is something of a cross between a first-person shooter and Second Life, meaning it’s got drama and feels like you practically live inside it. Preview it here.
2. SUPER SMASH BROS. ULTIMATE
This title, the fifth installment of the Super Smash Bros. series, was released in 2018 and offers a melee of battle action between a wide-ranging cast of Nintendo protagonists. Gamers like to play this at parties because many can join in and there’s a wide array of characters. The game is bright, fast-paced and cartoonish in the best of ways, making it family-friendly too. Preview it here.
3. RED DEAD REDEMPTION 2
Also released in 2018, this is the third in the Red Dead series. Set in 1899, players act as outlaws in the Wild West, and the multiplayer mode, known as Red Dead Online, allows up to 32 people to get together in both cooperative and competitive missions. Players can customize a character and explore the world either alone or in a posse, galloping on horseback or running through an old saloon town. The game is on just about every “best of” list for its realism and immaculate graphics. Preview it here.
4. WORLD OF WARCRAFT
Released in 2004 (with some 12 million subscribers by 2010), this title is often thought of as one of the originals for the modern multiplayer. Gamers love the options of being able to create detailed characters, engage in myriad missions, combat their foes and explore vast worlds in a group or solo. The screen can get a little crowded in battle mode, so gamers will want to be able to hear each bow-and-arrow shot and sword chop in order not to be caught off guard … making it a real plus if you can listen on a good sound system while playing. Preview it here.
5. OVERWATCH
Though this first-person shooter was first released in 2016, the game’s creator, Blizzard Entertainment, adds new worlds, characters and maps with each subsequent version. The title is very much group-focused, assigning players into two teams of six. Gamers then choose which “hero” to control from a large and diverse roster, each with special abilities, and teams must compete in specific tasks during a limited period of time, creating a heart-racing experience. It’s also an easy-to-play game with comic book-like graphics that is today included in “E-Sport” professional leagues. You won’t want to miss the dialogue between competitors in-between forcefield deployments and flame-throwing, so listen with the volume up! Preview it here.
6. CALL OF DUTY 4: MODERN WARFARE
While this title is over a decade-and-a-half old — it debuted in 2007 — it’s also, to many, the gold standard when it comes to multiplayer first-person shooters. Customize your player, complete team-oriented tasks and enjoy the seemingly never-ending battle modes. Unlike its three predecessors, Call of Duty 4 ditches the World War II backdrop and takes place in modern times (well, 2011). A Middle Eastern president has been executed and there’s a civil war in Russia, but Western forces have been sent in to end the fray. Unlock weapons and camouflage as you advance to the sound of loud, whirring helicopters and crackling radio calls. Preview it here.
7. GRAND THEFT AUTO 5
Just about every gamer knows of and has played a GTA title, and the fifth installment, which was released in 2013, is one of the most popular to date. Set in the fictional locale of San Andreas, players navigate the underbelly of the city as one of three lowlife characters. Hop in cars, planes and other vehicles as you work to complete tasks, or just take down those in your way. Grand Theft Auto Online allows up to 30 players to perform in a variety of different modes, accompanied by the beloved soundtrack and non-stop action. Preview it here.
8. GOLDENEYE 007
Based on the 1995 James Bond movie GoldenEye, this became an instant hit upon its release in 1997, with split-screen action that seemed ahead of its time. The original version could only be played as a single protagonist completing tasks or in a head-to-head “deathmatch” mode, but in 2010, an updated version allowed up to eight players to compete remotely. This is one game where stealth matters, so you’ll want to listen closely in order to be able to hear every footstep and weapon reload. Preview it here.
9. MINECRAFT
Originally invented to help kids with problem-solving skills, Minecraft is known as a “sandbox” game, which means it allows a great deal of freedom for players to engage however they like. Since its debut in 2011, it’s evolved into one of the most popular games in the world, despite having simple block-like graphics. Depending on the chosen mode, players can fight the computer or cooperate with (or even compete against) each other online. Preview it here.
10. SUPER MARIO KART
One word comes to mind when describing this title: addictive. The cartoonish gameplay, combined with familiar characters that include Mario, Luigi, the Princess and Donkey Kong, makes this pure fun: no military-style battling here. Instead, challenge friends by racing go-karts and bikes over the many tracks as you fire banana peels or turtle shells at each other — even fly or dive underwater. Originally launched in 1992, updates released in the 2000s and 2010s allow gamers to play online in competition. Preview it here.
Video games are best enjoyed when you’re listening through a quality audio system or a sound bar like the Yamaha YAS-109.
Playing keyboards involves more than just your hands and fingers. There are also one or more foot pedals involved, and while using them is not mandatory, employing them will enhance your performance. In this article, we’ll show you how.
The Sustain Pedal
No matter what kind of keyboard you’re using — acoustic grand piano, acoustic upright piano, digital piano or even a simple digital keyboard — there will be a Sustain pedal. On acoustic pianos this is called the Damper pedal, because when you press it down, it lifts up all the dampers (small pieces of felt-backed wood that are used to stop the strings from vibrating, as shown in the photo below), but regardless of terminology, they all have the same function: to allow notes to sustain after you lift your fingers from the keys. This helps you to connect notes that are too far away for you to reach without moving your hand position.
On acoustic pianos and digital pianos with a case design that looks like an acoustic, this will be the pedal on the right. Smaller, slab-style digital pianos and digital keyboards will come with a separate pedal that gets plugged into a jack in the back, usually labeled Sustain:
The basic technique for using the sustain pedal is as follows:
1. Make sure that your right foot heel is on the ground, and that the front of your foot is resting lightly on the pedal.
2. Play a note, and then immediately depress the pedal fully. When you lift your finger off the key, the note will keep ringing. If you lift your toes up from the pedal, the note will stop ringing.
To demonstrate how to use the Sustain pedal to connect notes together instead of using your fingers, we’ll use a C Major scale. Start by playing Middle C with your second finger, then press down the sustain pedal. When you’re ready, play the D note (again, with your second finger), and lift the pedal up as you press down on the key. If you lift it up too early, the notes won’t be connected. If you’re a little late, the C note will ring into the D slightly. Right after you play the D, press the pedal down again. Repeat this process each time you play the next scale tone: Using your second finger only, play a new note while simultaneously lifting the pedal, and then depress the pedal again.
Here’s the exercise represented in musical notation, along with an audio clip so you can hear what it sounds like. Note the line below the music staff, which shows the intended pedal actions (the solid line indicates when the pedal should be held down; the up arrows indicate when it should be lifted up):
This technique is commonly referred to as legato pedaling (legato is a musical term that means “to play connected”). Now let’s apply this kind of pedaling to some basic musical examples. The notation below shows a common way to play a chord with the left-hand only by first striking the root down low, and then bringing the hand up to play the triad. Using legato pedaling, you can connect the low note to the chord cleanly, with no overlap, as you can hear in this audio clip.
Extending the concept, here’s a good exercise for the left hand that trains you to move across longer distances, again using the Sustain pedal to connect the notes.
Next is an exercise for the right hand. The first two notes fit under the hand nicely, so no pedaling is required; however, to jump up to the higher E you’ll need to do a legato pedal move. The following G also fits well under the hand, so no pedaling is needed, but then you’ll need to shift your hand position, so you’ll want to use the pedal to connect that smoothly.
Other Ways to Use the Sustain/Damper Pedal
Connecting notes is only one way to use the Sustain pedal; it’s also often employed to create a warm swirl of sound with notes all overlapping together. Go back to the first left-hand example we presented, but this time keep the pedal down so the chord gets added on top of the low C note, like this:
As you can hear, this sounds fuller than the way the figure was played earlier.
Next, move on to the second example, this time keeping the pedal down. As you can hear, this builds a nice, rich voicing.
Finally, go back to the right-hand exercise and keep the pedal down to build up a full sound like this:
This will work well until the harmony changes, or until other notes are introduced that clash with the sustaining ones. When that happens, you’ll want to refresh the sound by briefly lifting up and then depressing the pedal again. Exactly when you do this is a matter of taste — use your ears to judge when the sound is getting too cluttered. To demonstrate how to do this tastefully, here’s a famous piece of music by J.S. Bach, with the pedaling indicated in the line under the staff:
Here’s the same piece of music played at a slightly faster tempo, with the first run-through using pedaling and the second run-through with no pedaling.
All the notes in this piece fit easily under your hands, so you don’t need to use the pedal. But after listening to how rich and sonorous everything becomes when the notes ring together sympathetically, playing with no pedaling sounds so much drier, and, well … ordinary.
The Left Pedal
If you have an acoustic piano, or a digital piano with a full complement of three pedals (either built-in or available as an optional accessory), you can explore the left-most one, traditionally called the Una Corda pedal, or the Soft pedal. Both names are a bit confusing, for reasons that we’ll explain shortly.
When you depress this pedal on an acoustic grand piano, the entire keyboard mechanism is shifted slightly to the right, causing the hammer to only strike two of the strings, rather than all three, as shown in this video. This will produce a slightly thinner sound, though it’s a very subtle change. It does produce a markedly different tone, however, due to the fact that fewer strings are being struck, and also because the area of the hammer closer to the edge is employed, which is likely to be less compressed and worn from general playing. So why call this pedal Una Corda (“one string” in Italian)? It’s because, when the piano was invented in the early 1700s, the majority of the note range used groups of two strings, not the three that became common design around the middle of the nineteenth century. Using this pedal thus reduced the struck area to one string.
In an upright piano, the mechanism is different. Here, depressing the Soft pedal moves the hammer action closer to the strings, so it has less distance to travel, as shown in this video. This results in less momentum during the hammer motion and a truly softer sound, but with no tonal difference. Obviously digital pianos cannot physically achieve either of these mechanical effects, so they just reproduce the aural effects, making the sound both quieter and tonally gentler. You can hear this in the audio clip below, where the second run-through is played with the Soft pedal engaged.
In general, if you want to simply play softer you should achieve that effect with touch alone. The Una Corda/Soft pedal should be used only when you want a more delicate, or more muted sound as a tonal variation. This pedal is also commonly engaged when accompanying a vocalist or other instrument soloist so you don’t overpower them with your playing.
The Middle Pedal
On acoustic grand pianos and most digital pianos, the function of the middle pedal (called the Sostenuto pedal) is to selectively sustain only those notes whose keys are currently depressed; you can then play freely around those notes with a short articulation and/or apply the damper pedal as needed, as this video demonstrates. However, on some pianos, depressing the Sustenuto pedal will only sustain notes in the lower range of the instrument (a function called Bass Sustain), since you’ll often want to sustain one or more bass notes while being able to play higher notes more freely.
On most upright pianos, the middle pedal serves a different function, instead moving a long piece of felt between the hammers and the strings, as shown below. This serves to mute the sound, thus allowing players to practice quietly, as demonstrated in this video.
In those pianos, the middle pedal may be called a Practice pedal, or a Mute pedal. However, there are a few upright piano models, such as the Yamaha YUS5, where the middle pedal provides a true Sostenuto function.
Tammy Miller, a member of the Omaha Conservatory of Music’s artist-faculty and the Keyboard Explorers Liaison, who coordinates piano group lessons, is working to change the way students engage in piano lessons. In doing so, she hopes to create more students for life.
Miller herself was a late beginner — she started taking piano lessons at 14. She says her father decided she might have some talent in music, so he bought her a digital keyboard and signed her up for lessons with the lady down the street.
“I was hooked and decided to make it my lifelong passion and career,” Miller says.
She went to Idaho State University for piano and vocal performance, and through the school’s Preparatory Piano Program, she started teaching at a pretty young age. Then, Miller began to take some educational psychology courses and realized she loved learning about how people learn, which inspired her to go to the University of Oklahoma to get a master’s in piano and pedagogy, where she also taught group piano lessons.
When she landed at the Omaha Conservatory of Music, there wasn’t an established group piano program, so Miller worked to implement one called Keyboard Explorers. “A group piano program is beneficial for the students and the community,” she says.
Building a Program’s Success
A group piano program is a unique and fun way for students to progress quicker than if they were taking individual lessons, Miller says. With a group of students who are at the same level, you can pre-determine the pacing and you can make lessons more curriculum based rather than individualized. The pacing can move faster as students’ skills develop because they are following the same curriculum with the same teacher.
And, a successful group program builds community. Students form friendships in a group setting, which encourages them to practice and commit to their piano playing.
“It’s like if you’re trying to stick to a new workout routine and you go to the gym with a friend,” Miller says. “Having a buddy helps encourage students to continue lessons.”
Miller believes that another way to ensure a program’s success is to have an event for students to work toward. She plans to implement a recital and a graduation after her eight-week courses.
Her students usually progress through two levels of Keyboard Explorer lessons before moving to individual lessons. “It’s up to the teacher and student/parent — with the help of the liaison — to determine whether the student is ready for individual lessons, should advance to level 2 or even retake level 1,” Miller says.
“In some ways, group lessons act as a feeder program. It’s a way to see which students would be a good fit for your studio if you don’t do any auditions, and it’s a good way for students to find a teacher they connect with,” she adds.
Group classes also have a shorter timeframe and are less of a financial commitment so parents can decide if studying piano is right for their child.
Overcoming Challenges
It can be a challenge to build a Keyboard Explorer program, but it is also a labor of love — as long as you are patient, Miller says.
Some issues that she has run into include convincing an administration and parents about the value of the program. It took five years to grow the Keyboard Explorers, which started with Miller as the sole teacher. Now the program offers eight sections of keyboard classes for children and adults. “The model has worked and grown in popularity! In fact, since the success of the Keyboard Explorers, the conservatory administration has now created Explorer-type classes for every instrument,” Miller says.
Another potential problem is that students are required to practice at home or outside of their lessons. To facilitate practicing, the Omaha Conservatory of Music has practice rooms that students can use.
While Miller’s group piano lesson are eight weeks, she says that a course can range from eight to 16 weeks long per level. Miller finds that her eight-week model works best for student retention because the time commitment is less daunting, and it allows students to get their feet wet to see if they eventually want to move on to individual lessons.
Connecting Through Community
A group program makes teaching piano adaptable and approachable. Teachers can adjust to student needs and connect with more students at once.
“One of the issues that the conservatory faced was a long student waitlist, and a lot of students on that list were beginners,” Miller says.
In the past, the solution to having more than 100 students on a waitlist was to hire more teachers, which proved to be easier said than done. “There were students who had to be turned away because there just wasn’t enough room or individual teachers,” Miller says. “The Keyboard Explorers program is a great way to give more students the opportunity to take lessons at the conservatory!”
A group piano program allows for many students of different age groups and abilities to take lessons. For example, beginner courses can be split by age, such as 6 to 8 and 9 to 12, with multiple levels.
This gives students (and parents) a chance to try out piano lessons in a cost-effective setting.
At the Omaha Conservatory of Music, the Keyboard Explorers program uses a keyboard lab, which can host 12 students at a time.
For younger kids ages 8 and under, parents are required to take the class alongside their child. “Parents are learning with their students! It can be a fun bonding experience for parent and child,” Miller says.
Having a teacher who knows how to teach both parents and students in a class geared toward students is really important, she says. Not all parents have a background in music, much less piano, so by participating in the class, parents can help their child at home, which helps students progress faster and tackle music of increasing difficulty.
Overall, Miller has seen a successful retention rate since implementing the Keyboard Explorers program and has had at least one student per session continue on with lessons.
“The students who come through the program are awesome,” Miller says. “We’ve seen the community come together, and friendships have formed because of the group lessons.”
AURO-3D® is a multichannel sound format that expands on standard 5.1 and 7.1 surround sound by adding additional height layers that fill in above the left, right, center and surround channels, allowing for more detailed sound localization. With so many movies featuring speeding cars, airplanes, rocket ships and other flying objects these days, the extra layers of height provided by AURO-3D can make the user experience feel even more immersive, and the same is true of complex music with dense instrumentation.
Watching or listening to content in this format requires an AV receiver that is able to decode the AURO-3D signal and distribute it to the appropriate speakers, such as the Yamaha AVENTAGE RX-A8A or RX-A6A. You’ll also need the requisite speaker configuration, including those in a standard 5.1 or 7.1 surround setup, plus a speaker pair above the screen and another high one that points down at an angle (these can be in-ceiling mounted speakers).
The Yamaha AVENTAGE RX-A8A offers AURO-3D decoding.
And, of course, you also need AURO-3D content. Here are some recommendations for movie scenes and songs that best demonstrate the capabilities of this exciting technology.
AURO-3D Movie Scenes
Because of its ability to project sound above the listener, an AURO-3D movie soundtrack can be even more immersive than one mixed in 7.1 or 5.1 surround sound. Check out these scenes!
HOW TO TRAIN YOUR DRAGON 2 – THE WING SUIT
The plot of this animated adventure film centers around protagonist Hiccup and his dragon Toothless, who united the Vikings and Dragons in the first movie.
As you might expect with a movie like this, there’s a whole lot of flying going on, so there are plenty of scenes where the extended height perception you get with AURO-3D accentuates the animated thrills. This scene is particularly thrilling, as Hiccup (the protagonist) dons a suit that allows him to fly and then begins riding on the back of his dragon Toothless. They start out low over the water and then zoom up to higher altitudes, with Toothless spinning faster and faster as they break through the clouds. Watch the scene here.
BLACK PANTHER – THE CAR CHASE
This popular superhero movie tells the story of T’Challa, who goes back home to the African country of Wakanda to become king after the death of his father and finds that ruling a nation is a bit more challenging than he expected. Also crucial to the plot is a substance called vibranium, which gives superpowers to those who eat it. T’Challa partakes and becomes the Black Panther.
The car chase scene in this film is epic, enveloping the viewer for almost five minutes of nonstop action. You’ll see spinning and flipping galore, with the Black Panther jumping off a speeding car onto a nearby building. Needless to say, AURO-3D makes the action significantly more intense. Watch the scene here.
SPIDER-MAN: HOMECOMING – THE WASHINGTON MONUMENT RESCUE
This film from the ever-growing Marvel franchise shows a teenage Peter Parker, aka Spider-Man, performing humdrum typical teen activities like walking on the ceiling, holding broken ferry boats together with his webbing and fighting against a criminal in a flying vulture suit. There are many scenes where AURO-3D’s immersive height implementation comes into play, but the most compelling is the Washington Monument rescue scene.
It starts with Spider-Man standing on a tiny ledge near the top of the monument. Next, police officers in helicopters arrive to arrest him. He jumps off the structure using his web to keep him in the air before crashing through a window, where he again uses his web, this time to rescue his friends from a falling elevator. Finally, he saves his would-be girlfriend from tumbling down the elevator shaft. If you have a fear of heights, you might need to hold on to your seat while viewing! Watch the scene here.
BLADE RUNNER 2049 – THE SEA WALL CHASE
This film is a sequel to the original Blade Runner movie from 1982. Like the first movie, it takes place in a dystopic future version of Los Angeles, only this time, it’s 30 years later.
Our hero, Officer K, is a blade runner for LAPD, and that means he hunts down replicants (enslaved bioengineered humans) that break the law or rebel. Many of the scenes have a distinctly vertical aspect, but none more so than in the Sea Wall Chase, with flying cars dive-bombing each other, spinning out in flames and landing in the water. Particularly during those moments, the soundtrack’s implementation of AURO-3D height-localization prowess is compelling. Watch it here.
AURO-3D Music
Some music available in AURO-3D is mixed directly for it, while other pieces get “upmixed” from stereo. (Upmixing uses software algorithms that intelligently transform stereo mixes into immersive AURO-3D.) To handle the data required for AURO-3D, albums supporting it are typically released as Blu-Ray™ discs. Here are a few notable AURO-3D-encoded songs.
“REQUIEM: VIII. SANCTUS”– NIDAROSDOMENS JENTEKOR, TRONDHEIMSOLISTENE (LUX)
This song comes from the album Lux, with AURO-3D-savvy producer Morten Lindberg at the helm. It won a Grammy® for Best Immersive Audio Album in 2020 and features Nidarosdomens Jentekor (the Nidaros Cathedral Girls’ Choir) and Trondheimsolistene (Trondheim Soloists string orchestra) performing together. On “Requiem: VIII. Sanctus,” the high notes from the choir soar even higher (in height, not pitch) than they would in stereo or even in 7.1 surround sound. You feel totally enveloped by the music and can easily imagine you’re listening from inside an old European cathedral. Check out the stereo mix here.
“LUNACY” – DAVID MILES HUBER (PARALLAX EDEN)
Grammy-nominated producer David Miles Huber’s Parallax Eden has been released in various multichannel formats over the years, including an AURO-3D version. If you want to feel surrounded by pulsing beats and brilliant electronic textures, any of the compositions will get you there, but the most compelling is “Lunacy,” which starts with a solo clavinet and builds to complex interweaving synths, keyboards and drums. Listening to it in AURO-3D lets you hear each instrument with more clarity than in stereo because the soundscape is so much bigger.
“I immediately fell in love with the powerful emotion [AURO-3D] brings to the listeners,” says Huber on the AURO-3D website. “Creatively, more possibilities come to mind when you have such an extensive canvas available.” Check out the stereo mix here.
“CAROLS OF DEATH: NO. 3. TO ALL, TO EACH” – SKYLARK VOCAL ENSEMBLE (CROSSING OVER)
This song comes from a concept album by the acclaimed American choir. According to the group’s website, each composition “depicts the dream state at the end of life.” Hearing it in AURO-3D places you in the middle of these mystical choral arrangements, with the soprano, alto, tenor and bass parts panned three-dimensionally. “Carols of Death: No. 3. To All, To Each” by American composer William Shuman is an awe-inspiring example. Check out the stereo mix here.
Looking for an AURO-3D compatible AV receiver? Check out the Yamaha AVENTAGE RX-A8A and RX-A6A.
While most music educators plan for one or two big annual performances, Brandon Felder, the music director of SHABACH! Christian Academyin Landover, Maryland, tries something different.
“I’ve always been of the mindset that we should not work for just one culminating activity but rather a continuum of different experiences,” he says.
Felder achieves this continuum of experiences through what he calls “intentional music programming.”
“I cannot emphasize enough the importance of students performing in public, so I regularly organize small classes for my students to play through their pieces to gain confidence in front of an audience,” Felder says. “I also try to arrange informal performances for them to gain further experience before their formal concerts.”
By performing often, not only do students develop their musicianship, but they also develop life skills like teamwork and the ability to manage projects, time and stress. “The wider experiential base allows for the brain to understand complex information and meaning,” Felder says. “Performance experience provides more anchors for the brain to process and function … and it helps students develop into responsible citizens with a sense of purpose, accomplishment and a deep appreciation for the arts. This is the most satisfying achievement for me as a teacher.”
Branching Out of the Classroom
For Felder, music education should be more about the journey than the destination. That means creating what he calls “many mini-opportunities” for students to practice and perform outside of the classroom. He says it’s important for students to perform for different crowds and to “allow their music to be heard more than just once.”
According to Felder, the journey his students go on should not stop in the classroom. So, he sets up experiences and opportunities for his students to interact with and perform for members of the community. He starts within a 3- to 5-mile radius from SHABACH. That way, students don’t have to travel far, and spectators are members of their local community.
To find new opportunities, Felder first goes to places that fit into what he calls the HEAR Perspectives: Humanitarian, Educational, Artistic and Religious institutions. One week, Felder might take his students to a bookstore and have them perform a recital or go to a local college and take a tour of the music department. Another week, they might play for patients at a nursing home, sing for people at a soup kitchen or perform for a church fashion show.
Finding Balance
Intentional music programming is not a new idea for Felder. “It’s a full circle thing for me,” he says.
During his high school years, he experienced a more traditional approach to music programming. However, Felder was also afforded wonderful on-the-fly opportunities, like a last-minute phone call to back up country superstar Shania Twain when he was a freshman in high school. “We’ve all felt those goosebump moments, so the more often that students have those opportunities, the more chances they have for their skills to transfer from the four walls of the traditional classroom mindset and beyond the traditional music class curriculum,” he says.
Felder says that he now tries to offer those big showstopping moments for his students, as well as more local, community-based opportunities. So, whether he is recruiting artists on Cameo to make virtual appearances at SHABACH recitals or working with a local piano store to host a recital where his students could play on top-of-the-line instruments, Felder says he tries to stay flexible and think outside the box.
The Five Cs of Intentional Music Programming
Mini-opportunities serve multiple purposes, Felder explains. First, they allow his students to give back to their communities. They also introduce his students’ art and music to members of the community who may not otherwise be exposed to it. Felder says that at their spring shows, he’ll often see people who first experienced the SHABACH music program during one of their mini-opportunities.
Felder wants these mini-opportunities to provide both students and spectators with “two shots and a booster: Two shots of curiosity and empathy and a booster of optimism in every musical presentation.” He says that whatever they decide to do musically, those three elements must to be accounted for because “music has the power to transform mind and spirit, in addition to allowing souls to communicate.”
Felder also looks for ways to emphasize what he calls his five Cs of intentional music programming: Creativity, Collaboration, Community, Connection and Citizenship. In any opportunity that he finds, Felder asks himself if those fundamentals are met. “I’m always looking for opportunities that allow students to experience the five Cs,” he says.
The elements of the five Cs became especially important during the COVID-19 pandemic, when Felder hosted his music classes virtually. He found creative ways to continue following his intentional music programming method, by having students record voice memos of them singing or playing instruments, having socially distanced performances when they could, and even creating and filming an hourlong adaptation of “The Wiz,” featuring a red-carpet premiere, a mix of gospel and modern-day music, and, of course, dancing scarecrows.
Staying Energized
Felder says finding these curated opportunities can be challenging, so it’s important for him to stay personally energized about music. He sees himself as a “teaching artist,” meaning that he values the level of his own musical experience, while also trying to share that knowledge and love of music with his students.
He “continually looks to fuel [his] own creative experiences through personal performances, examination and objective opportunities” before he can then feed his students’ passions. Whether that’s at SHABACH, his work as the music director of the Georgetown University Gospel Choir, performing his own music, or serving the D.C. chapter of the GRAMMYS® as Governor and Music Education Chair, Felder learns from and becomes energized by these experiences. He says it’s his responsibility as a music educator to take those experiences and the innovation and fresh ideas that come along with them and transform them into a meaningful curriculum for his students.
Felder says that if he’s excited about something, his students have an easier time buying into it, so staying energized is vital for him.
Staying Honest
It’s also important to be transparent with your students. “Life is still happening to us,” Felder says.
Because he shares how he’s feeling with his students, they can learn empathy and compassion. When they see that Felder has had a tough day, but he’s still there, ready to teach, he says they learn resilience and how to push forward. And finally, when they see him turn to music to deal with his emotions, they learn that they can do the same thing in their own lives.
The more honest he is with his students, the more that honesty is reciprocated. “I want my classroom to be a safe space where students can share and where there is comfort,” he says.
Sometimes, that means making on-the-fly adjustments to the curriculum when big events happen. “I sometimes allow the energy and the feelings of the students dictate where the programming may go,” he says.
By pivoting, he can reinforce collaboration, as well as show students that they can use music to express their emotions.
Felder is also transparent with the curriculum he teaches. He analyzes the history behind famous songs with his students. They debate whether certain lyrics are still applicable today and hold discussions on which parts of songs to stress during live performances. This collaborative way of music programming helps students feel that their voices are being heard and that they have input in their performances.
Finding Success
Felder insists that there is no cookie-cutter way to attempt intentional music programming and that each group of students should have curated programs for their own needs and situations. To be successful with this type of curriculum, Felder says you must find balance and learn what works best for each group of students. And, perhaps most importantly, it’s about staying flexible and being able to change direction when a situation arises that can’t be ignored.
It’s also important to reexamine how most music educators measure success. Felder says intentional music programming has deepened his music program in a qualitative way. While he acknowledges that numbers matter, he prefers to measure growth differently.
If a program grows too fast and has too many participants, Felder is not able to fully reach all of his students, which he sees as problematic. “Sometimes, we look at how we scored on a certain assessment instead of noting that ‘this student’s range of knowledge has grown’ or ‘this student’s vocal range has grown’ or ‘their experiential range has grown,’” he says.
This type of data is more important for Felder’s own goal of helping his students flourish. “My goal is not to make the next Beethoven or Justin Bieber or Beyoncé, but just to make well-rounded citizens,” he says.
Felder hopes that the lessons his students learn in his music programs set them up for success, regardless of what they do. He especially loves when former students come back to remind him of moments or performances that he’s forgotten. Felder says that’s ideal for him — that some performance or show he’s curated, big or small, has stuck with his students for years. This proves the core message of his intentional music programming: Give students as many opportunities to perform as possible and allow them to appreciate their journeys just as much as their final destinations.
What does it take to build the ultimate drums? That’s the question Yamaha designers asked in the early 2000s. Tapping into more than 40 years of drum building experience and input from world-renowned Yamaha artists, the quest to create the finest drums available led to the development of the Yamaha PHX (pronounced “Phoenix”) Series. Introduced in 2008, PHX are the company’s flagship drums, incorporating numerous innovations and combining the best of new technology with traditional craftsmanship to create the ultimate high-end drum kit.
Ready to learn more? Read on …
The Hybrid Shell
The heart and soul of every PHX drum is the shell, which features a unique 11- or 12-ply hybrid design combining several different species of tonewood.
PHX hybrid shell construction.
The center ply is Jatoba, an extremely hard and dense wood. This “core” ply is surrounded by layers of Kapur, which is in turn surrounded by layers of North American maple used for the interior and exterior plies. North American maple has traditionally been a popular choice for the construction of drum shells due to its hardness, but is actually the softest of the woods used in PHX shells. Constructing the shells with the hardest and most dense material at the core provides increased volume, a strong fundamental tone and a wide tuning and dynamic range. In following the company’s philosophy of “vertical integration” (where developments in flagship products are incorporated into other products down the line, wherever feasible), hybrid shell construction is also used in Yamaha Absolute Hybrid Maple and Live Custom Hybrid Oak Series drums.
As is the case with all Yamaha drum shells, PHX Series shells are hand-crafted using an “air seal” system whereby an air bag is dropped into the center of the shell mold and inflated, pushing outward against the interior ply and joining the plies together with uniform pressure throughout the shell. Diagonal, staggered seams and cross-laminated wood plies increase the strength of the shell and ensure that the shell holds its shape.
PHX drums are available in a variety of finishes (see the “A Wide Range of Choices” section below), with an exterior ply of either North American maple or textured Tamo ash. The ash veneer is less than half the thickness of a traditional coating so it doesn’t interfere with the resonance of the shell.
PHX Textured Black Sunburst Ash finish.
Bearing Edges
The bearing edge of a drum shell (the portion of the shell that contacts the drum head) has a huge impact on both tone and articulation. All PHX bearing edges are cut at 30 degrees and finished perfectly smooth by master craftsmen to guarantee easy tuning and a wide tuning range.
PHX bearing edges have a specific shape depending upon the type of drum.
Y.E.S.S. (Yamaha Enhanced Sustain System) II Mounting System
PHX Series rack toms employ the Y.E.S.S. II shock mounting system, which permits the shell to vibrate freely while preventing unwanted movement. Incorporating a wood mounting plate (made from the same North American maple as the outer ply) and specially designed rubber inserts, the Y.E.S.S. mounts are located at nodal points on the shell — places where there is minimal vibration — to ensure that the mount does not interfere with the shell’s ability to resonate. The mounting points on larger toms are located where less desirable overtones are present, allowing optimum control over the decay and overtones produced by the shell. For drummers who prefer to mount their toms using stands, PHX bass drums are also available in an R-Version without the tom mount.
Details of the Y.E.S.S. II mounting system.
In another example of the aforementioned “vertical integration” approach, the Y.E.S.S. II mounting system is also used in Yamaha Live Custom Hybrid Oak and Absolute Hybrid Maple drums.
Hooked On You
The hook lug on PHX drums (as well as on Absolute Hybrid Maple drums) evolved from the Yamaha Nouveau lug, which was an innovation in lug technology. Designed to make head changes quick and easy, the hook lug has a small footprint and is located at a position on the shell where it mutes unwanted overtones and enhances the fundamental note. Its rectangular shape prevents rotation of the casing while tuning, guaranteeing that the tension rod is perfectly aligned, as well as providing firm support even when under high tension.
This kind of lug makes head changes much faster than with traditional lugs because the hoops can be removed simply by loosening the tension rods. Studio players will love the fact that they can convert their kit to concert toms in minutes without worry about rattling hardware, losing tension rods or washers, or the chance of cross-threading tension rods.
The Yamaha hook lug.
Attention To Detail
Every component used in the construction of a drum has an influence on the sound, including the hoops and the air vents. During the PHX R&D process, the Yamaha team discovered that die-cast hoops made from zinc can choke the sound of a drum — particularly smaller sizes such as 8-, 10-, and 12-inch toms. Die-cast hoops made from aluminum, however, provide rigidity, and deliver powerful rim shots and clarity of tone without choking the drum. That’s why PHX and Absolute Hybrid Maple drums utilize 3.0 mm die-cast aluminum hoops.
Vent holes allow air to escape from inside the shell, which improves the playing feel of the drum. They also affect the pitch, projection and decay of the drum. Depending upon the dimensions of the shell, PHX drums have between one and ten air vent holes. As the size of the drum increases, so does the number of air vents. A large PHX floor tom can have six vents while a bass drum may have eight or ten, depending upon the size.
Air vents affect the pitch, decay and playing feel.
Increasing the number of air vents lowers the fundamental pitch and shortens the decay. All of these variables have been fine-tuned in PHX drums to create the optimum tonal balance and playing experience.
A Wide Range of Options
PHX Series drums are meticulously hand-finished in a variety of eye-catching colors and high-quality finishes, accentuated with gold or chrome hardware. Maple PHX drums are available in either matte or gloss finishes, while the Ash models are available in gloss or textured finishes (the latter has a slight shine to it).
PHX gloss, matte and textured finishes.
These finishes have been rigorously tested for resistance against changes in humidity or fading from exposure to UV light, guaranteeing that they will sound and look beautiful for a lifetime.
Here are some videos that show how PHX Series drums are constructed:
Check out this video of Yamaha Artist Larnell Lewis playing the PHX:
In the face of societal shifts and the COVID-19 pandemic, music teachers have realized the need to address issues surrounding access, equity and inclusion more intentionally in music education.
Much of the conversation, however, focuses on recruitment, retention and diversifying repertoire. While these are essential elements in our efforts toward a more inclusive music education for all, I believe that assessment is one of the most critical areas to improve. How we assess our students is critical in determining whether they decide to continue in our programs and reap the benefits of active music-making in a school setting. If we diversify the avenues in which we allow students to demonstrate what they know and what they can do, we can give them a more equitable chance at success.
In recent years I have become a major advocate for portfolio assessment, which I believe is one of the most authentic and relevant methods of assessment we have at our disposal. The music department at Tennessee State University developed an electronic portfolio, or e-portfolio, as a cornerstone assessment for our program. Through this process, we learned how to prepare our students for future careers and continuing education by giving them a product that is personalized and responsive to the competitive job market and post-baccalaureate landscape of today.
What is an E-Portfolio?
An e-portfolio is a collection of student work that demonstrates progress and achievement over a given time period. The e-portfolio captures contextually rich evidence of student performance through audio, video and other digital artifacts that are easily accessible and editable for the student and easily viewable and gradable for teachers.
In addition to providing evidence of cumulative student growth and achievement over time, e-portfolios can provide detailed information regarding how students learn through self-assessment and reflection. Numerous music education researchers (Burrack, 2002; Dennis, 2018; Dunbar-Hall et al., 2015; Hepburn, 2017; Taylor et al., 2012) discuss the importance of incorporating e-portfolios to increase student achievement.
Why Portfolio Assessment Matters
Early in my career, my approach to assessment was primarily based on two types of performance: pass-offs for individual students and performance assessment ratings for ensembles. Pass offs are a type of performance task, e.g., scales, rhythm sheets and excerpts from music, that students perform to demonstrate their level of proficiency. Performance assessments can include any contest, festival or competition in which students are evaluated and given a formal rating as a group. Many music educators are familiar with and utilize these systems because we experienced and excelled at these types of assessments when we were students.
Over the years, however, I have found that these approaches are not the be-all and end-all for assessment in music education. During my first year of teaching music in higher education, I was able to judge a prospective music student for admission into our program. The student, who uses the pronoun they, had achieved many accolades, including numerous awards and all-state ensemble participation. But, when it came time to audition, nerves got the best of them, and they left feeling dejected. However, as a supplement to their application package, the student provided a link to their e-portfolio. It contained numerous solo performances at solo and ensemble festivals. Their ratings were the highest marks achievable. The student also provided evidence of their versatility on multiple instruments and their ability to collaborate with other students through various chamber music performances.
As the audition team assessed the videos and other evidence in the e-portfolio, the perception we had of the student changed. No longer did we believe that the student was not adequately prepared or lacked the requisite skillset. Instead, we saw that they were an ideal fit for our program — who just happened to have a bad day and got nervous in a high-stakes setting. This student would go on to major in music education, receive a substantial music scholarship, earn numerous honors and awards, graduate near the top of their class, and is now an accomplished teacher and currently working on a graduate degree in music.
My reflection on this experience clarified the power of portfolio assessment in promoting equity in learning outcomes and access to opportunities within the field.
The Purpose of E-Portfolios
One of the new buzz terms in the assessment community is “sustainable” assessment, or “renewable” assessment, which comprises non-disposable assignments (Seraphin et al., 2019). This type of assessment puts students at the center and prioritizes the production of knowledge, skills and performances. E-portfolios are one of the best tools we can use to move toward more sustainable assessments. They provide an authentic way of assessing student learning while allowing students adequate time and space to produce and highlight their best work. E-portfolios also offer multiple opportunities for teacher observation and assessment. Many of our current assessment practices, while performance-based, are only an isolated snapshot of what a student is truly capable of. It simply shows us what happened at a specific time and place. On the other hand, portfolio assessment is holistic and allows for a comprehensive view of a student’s skillset.
E-portfolios can encourage students to develop the abilities needed to become independent, self-directed learners. The goal of all music educators is to give their students the tools and strategies needed to be independent and confident musicians. When my students reach this ability level, I know that I have done my best. I believe that portfolio assessment not only lets students reflect and be honest with themselves, but it also develops and monitors their progress over time. This factor alone has inspired me to reassess and revise not just my assessment approach, but also our planning and instructional practices.
Implementing E-Portfolios
You’re probably thinking: This all sounds great, but where do I find the time to construct, implement and grade all this!? This is a valid question. It took me almost four years to see my department’s e-portfolio come to fruition. It is not a quick, set-it and forget-it sort of task.
Our first year was mostly planning. We researched other schools doing this kind of work, assessed what we were already doing well, and discussed how we could create a meaningful and relevant assessment for our students that would set them up for success in their future endeavors. Once we agreed on the purpose of the assessment and chose the software (an already in-use learning management system), we began to hash out the details.
Below is a list of the components we wanted in the e-portfolio. We also asked our students for feedback throughout the process. As you develop your e-portfolio system, you and your students may also want to consider things that you think would serve students best. Our e-portfolio categories include:
I know that there are many things to consider when implementing e-portfolios. What software to choose, the scope and timeline, selecting required components and deadlines for student submissions, rubric development, and grading best practices are just a few things that come to mind. When we began the process, none of us considered ourselves experts on this. But after spending time planning, piloting, revising and developing both the process and product over several years, we are now in a space where both faculty and students feel that the e-portfolio is something that graduates can use going forward as they move into the next phase of their academic and professional lives.
Relevance is Key!
E-portfolios are not the easiest type of assessment to implement, but they are deeply meaningful and can be one of the most relevant products that students can produce to demonstrate what they know and what they can do. I always recommend that you start small and keep it simple. Once you understand how you want to structure the e-portfolio and where it will exist, the next step is to pilot it with just one class or one small group of students. It is also essential to explain to both students and parents how the e-portfolio can be used beyond the classroom.
I hope we will continue to innovate as educators in all areas of our programs and create systems that give our students the best opportunities for success.
I think of extroverts and introverts in terms of batteries. True extroverts recharge their energy reserve — their batteries — by interacting with other people. They thrive in the spotlight, on meeting new people, on social engagement.
Extroverts are the ones who must be dragged from a party and who feel no anxiety when they get an invite to a “mix and mingle” networking event. (Whereas I get tense even typing the words “networking event.”)
Introverts like me recharge their batteries with either time spent alone or with one-on-one time with loved ones. This doesn’t mean introverts are shy or unenergetic, but they will come home from an event and think, “Phew!” For introverts, interacting with other people takes exertion, and having periods of time with less stimulation is restorative.
How to Tell If You’re an Introvert
Introversion/extroversion is one of the five main personality traits often called the “Big Five” used in psychology to describe aspects of human personality and to predict behavior. (The rest of the Big Five are openness to experience, conscientiousness, agreeableness and neuroticism.)
According to the U.S. Chamber of Commerce, introverts in the workplace tend to prefer solo projects instead of group projects, enjoy written communication over verbal, and feel tired after being in social settings. Extroverts, in contrast, don’t need much alone time, enjoy group projects and love to be in social situations. Those students you see belting out show tunes by their lockers? Definitely extroverts.
In the past, introverts got a bad rap as being antisocial, but introverts are increasingly understood and valued for their strengths, which include creativity, excellent listening skills and careful decision making — traits that help them in leadership positions. So, you don’t need to fake being an extrovert to succeed. Instead, learn to work with who you really are. As Anne Lamott wrote, “Lighthouses don’t go running all over an island looking for boats to save; they just stand there shining.”
You prefer to focus on the outer world (E=extraversion) or your own inner world (I=introversion)
You tend to focus on the basic information you take in (S=sensing) or interpret and add meaning (N=intuition)
Your initial decision-making is based on logic and consistency (T=thinking) or on people and special circumstances (F=feeling)
You prefer to get things decided (J=judging) or stay open to new information and options (P=perceiving)
There are 16 possible personality types, each expressed as a four-letter code.
Snyder found an “extraordinarily high concentration of ENFJs, a personality type that is extroverted.” However, he writes, “there is a wide range of personalities represented within music teaching and within the teaching professional as whole,” and notes that there are successful educators of all types. If you are an introverted music educator and feel surrounded by extroverted colleagues, it’s not surprising.
Schedule in Quiet Time
By the very nature of their jobs, music educators are called on to expend social energy. Think about work such as teaching one-on-one instrument lessons, standing in front of a classroom or directing a choir. Then there are the staff meetings, open houses and district trainings. That’s a lot of output for an introvert.
It’s important to schedule in some downtime during your day with activities like taking a walk or reading alone in a quiet spot. These restful moments will help you feel recharged and ready for the next social interaction. Some introverts even find that teaching at smaller schools is a better fit for them, with fewer students per class and less crowded classrooms.
Make Mindful Choices
Another key for introverts: Don’t overcommit. When opportunities arise to chaperone the senior-class trip to a ropes course, make sure it aligns with your needs. Introverts may do better with more behind-the-scenes roles, such as designing flyers for that class trip or helping with trip registrations. And because introverts need time to process information, try to avoid knee-jerk “yes” or “no” responses — try “let me check and get back to you.”
Resources for Introverted Music Educators
Here are some ideas for developing your music education career, while nurturing your inner introvert:
Take the quiz, “Are You an Introvert Teacher?,” which provides actionable tips for introverted teachers, such as having plenty of student-led lessons, planning school activities through communication platforms like Google Meets instead of in-person committee meetings, and eating lunch once a week alone to give yourself a break from other humans.
Introvert, Dear is an online community devoted to introverts’ needs, with resources on how to handle relationships, careers, parenting and even concert-going as an introvert.
Do you have introverted students who need support? Check out the scholarly paper “Introversion and Social Engagement,” published in “Frontiers in Psychology,” 2020, for deeper understanding of how to help them thrive.
Got my flip flops on. Margarita in hand. Sunglasses — check. Straw hat — check. Beach chair — check. Smart device — check. All I have to do now is put on a quality pair of earbuds and I am ready for some leisure time!
Now, some people head to the ocean simply to cool off. For me it’s more of a spiritual event. But if it’s 98 degrees in the shade, proximity to H20 is an oasis for the body and the soul. Here on the baking sand, I prefer a soundtrack that reinforces the chill vibe I want to retain. And if I had to pick 10 songs to give me that vibe, these would be the ones I’d choose.
1. Here Comes The Sun
This prayer-like mantra from The Beatles’ Abbey Road album never fails to help me honor and appreciate the renewed 24-hour cycle we so often take for granted. As I listen, I picture the sun sneaking up from the horizon and I remember how grateful I am I get to see another day. (Thank you, George, for showing Paul and John you could write a great song too!) Listen to it here.
2. Soak Up the Sun
If this Sheryl Crow song doesn’t get you in the beach mood, I don’t know what will. Turn up the volume as you settle in and let the rays do their thing — it’ll make you feel like you’re absorbing that vitamin D right into your blood. (Don’t forget the sunscreen!) Listen to it here.
3. Ocean Man
This kooky ditty by Ween gets me out of my hot head. In fact, by the second hook I’m swimming with Jacques Cousteau or meeting future fried calamari with my octopus teacher. Pass the snorkel gear! Listen to it here.
4. Stuck in The Middle With You
The lyrics have absolutely nothing whatsoever to do with surf or sand, but I love this Steelers Wheel song nonetheless because it transports me back to summers gone by. I’m with my girlfriends. Someone’s mom dropped us off at the beach. There we basked, tin foil-lined double album covers turned into sun reflectors strategically angled under our chins, boombox blasting this track. Life doesn’t get much better than that. Listen to it here.
5. Sailing
Occasionally, I’m lucky enough to be invited out on a friend’s boat. Looking back at the shore, I consider the opposite perspective, how small it all seems. I take in the breeze, the smell of the salt in the water, the random dolphin chirping a greeting. Like a fine wine, Christopher Cross’s “Sailing” is the perfect pairing for the moment. Listen to it here.
6. Space Song
If someone broke your heart last night, the sea can have a mystical healing effect. Go to la mer and confide in her. Have faith in the process. And in the ocean. Then touch your toes to her waves and queue up this cathartic Beach House tune. Listen to it here.
7. Leave the Door Open
Bruno Mars and Anderson Paak are the fun-lovingest duo ever. This feel-good flirtatious number will put a smile on your face, even if there’s one already there. Trust me, it’ll just get wider. Open the door and let them in! Listen to it here.
8. Jamming
I shouldn’t have to even explain this choice. Come on, it’s Bob Marley. He’s jammin’. Put on this track and you can be jammin’ with him too. Listen to it here.
9. Island in The Sun
This utterly infectious summer throw-back from Weezer reminds me of my favorite vacation — the one in which I drank too many piña coladas and read that trashy novel. If you don’t have the time to get away for a week right now, this track will make you feel like you’re already in Aruba. And the bonus is you’ll save a bundle in airfare! Listen to it here.
10. Good Vibrations
What would a beach playlist be without a Beach Boys track? Most lists would probably include the obvious: “Surfing Safari” or “Surfing’ USA.” But “Good Vibrations” is my choice because even if you can’t surf to save your life, the positive energy you’ll get from this “pocket symphony” (as composer Brian Wilson characterized it) is all you’ll need. Listen to it here.
If you’re heading for the beach, Yamaha TW-E3B wireless earbuds are a great choice thanks to their IPX5 rating, which provides sweat-resistance, protecting them from water activities short of swimming or diving.
When I used to take my young daughter to the beach, she’d splash around in the water for hours. Me? I’d sit in a chair and watch the waves. Still do. Maybe my passivity has something to do with a fear of sharks that developed shortly after seeing the film Jaws.
But I never felt like I was missing out. On the contrary. Watching water move has always made me feel calm and creative. There’s nothing like an ocean to clear my head or cleanse my palate.
Fortunately, I live 20 miles from the Pacific. I grew up five miles from the Atlantic. So no wonder I have this connection!
Today, as I sit on the sand watching the waves come in and go out, nothing’s changed. And since I muse here regularly, I decided to take a little dive into my laptop to see if there was any basis to my theory that water is an elixir for the soul.
Turns out there was plenty. Psychology Today, for example, features a blog in which innovation strategist Kathryn Haydon writes, “Water and creativity are alike in so many ways. Not only does describing water force us to think creatively, the nature of water is similar to the nature of creativity: it’s ubiquitous, keeps us alive, comes in many forms, has an infinite variety of expression, and its strength can alter the very landscape.”
Thank you. I couldn’t agree more.
Maybe it comes down to the fact that nobody can live without water. Water = life. We’re made of water (mostly, anyway). I’ve noticed that when I make an effort to stay hydrated, I’m cognitively more focused, less tired.
However, I believe that it’s more spiritual than that. Oceans are deep. Perhaps they subliminally send an invitation to our brain that says we too have depth that invites exploration.
Many people claim to get their best ideas in the shower. You may be one of them. While it’s true that showers are not especially deep, it makes me wonder if our minds mimic the flow of the water. After all, movement inspires movement. This speaks to how the back-and-forth motion of ocean waves provokes the mind to do the same, instilling rhythms in our soul — rhythm being one of the intrinsic components of music, of course.
A Harvard study suggests that when a person gets distracted, his or her mind gets a break and the dopamine released during that time helps the brain to conceive some new creative ideas. That may or may not be true for everybody, but water in motion certainly always distracts me. Gets me out of my head. Puts some space between me and my worries, calms my over-excitement, loosens my writers block.
I realize that not all of us live near an oasis. But a lake or a pond will do. A swimming pool. Even a bathtub! I notice that when I’m at the gym, looking out the window as I tread away on the treadmill, my eyes inevitably veer toward (and stay focused on) the swimmer in the lap pool and the water she is causing to ripple. Not surprising.
I’m grateful that I live near the ocean’s powerful muse. Every time I put on my favorite cable-knit, fall into my frayed yet faithful beach chair and look out onto that vast body of H2O, I hear her creative calling.
In his book Blue Mind, marine biologist Wallace. J. Nichols argues that when we’re physically immersed in water, our body doesn’t have to work so hard to support itself, which liberates the part of our brain which would ordinarily take part in that support.
Isn’t that exactly the freedom we strive for, wait for, work toward, welcome, covet, yearn to hold on to?
Maybe I should get out of my chair and get into the water more often.
Hundreds of elementary, middle and high school musicians eagerly look out over the crowd of the Schermerhorn Symphony Center, home of the Nashville Symphony. These students have spent months preparing for this day and their hard work is about to pay off.
Choral performers climb to the loft, while instrumental musicians find their places onstage. The crowd murmurs excitedly; it’s packed with proud families and members of the community.
This is the We Are Nashville Festival, and the person behind the curtain, making sure everything goes as smoothly as possible, is Bryson Finney — artistic director of the festival.
A Growing Dream
The We Are Nashville Festival just celebrated its fifth year, and while today, it’s made up of hundreds of students, as well as partnering artists and arts organizations from around the city, the festival looked very different just five years ago.
The festival began as an idea between Finney and other local music teachers. Finney’s school administration at Cole Elementary where he served as the music educator, had connected him with Dr. Kevin Stacy, the current director of the English language learners department, and Dr. Nola Jones, the director of the visual and performing arts department, for Metro Nashville Public Schools. These educators were interested in finding a way to highlight diversity through music within the district. At the time, Finney was working with a widely diverse student population and had just put out a CD showcasing his elementary choir, and they were interested in his thoughts.
Finney left the meeting excited to find a way to make it happen. It took months of brainstorming between Finney and five of his fellow music educators — Christopher Blackmon, Franklin Willis, Ann Marie Morris, Kathryn Affainie and Nita Smith — before the idea of the festival took form.
The first We Are Nashville Festival took place in 2018 at Christ Church Nashville and consisted of students from three elementary schools and one middle school. The group sang “We Are Nashville,” a song Finney had written two months earlier. “That song caught the ear of the community and that’s the reason it grew,” Finney says. “I just knew we had to do the festival again.”
The following year, the number of interested schools jumped to nine, and Finney needed a larger performance area. Finney went on a hunt to find a venue that could house the event, but he was having trouble finding a space. After searching all around Nashville, he approached organizers at Blair School of Music located on the campus of Vanderbilt University, who loved the idea of the festival. They gave him full use of the building, and through a budding partnership with the Country Music Hall of Fame a plan was developed to support by bringing over artists to teach and perform at the festival. This festival structure — a large performance venue and local artists leading workshops — solidified the future of what the festival would look like.
Changes During the Pandemic
In 2020, the festival became a program of Choral Arts Link, an arts and community focused non-profit in the Nashville area. This move and partnership with non-profit director Margaret Campbelle-Holmon was vital for the festival as it continued to grow. During this same year, the festival was planned for March 3, but Nashville was faced with a major tornado, so Finney moved the date to March 28, but he then had to cancel the event due to COVID-19.
After the cancellation, Titus Underwood, the principal oboist for the Nashville Symphony, reached out to Finney with an idea to make a video of “We Are Nashville,” the song Finney had written for the 2018 festival. The song was previously performed in 2019 and 2020 by the Nashville Symphony during the annual Let Freedom Sing Concert. Finney asked the music teachers who were scheduled to go to the festival to provide as many videos of their students performing the song as possible. Other community-based groups were excited about the idea and wanted to join in as well. The resulting video was a collaboration between the Metro Nashville Public Schools, Nashville Symphony, the Nashville Symphony’s Accelerando students, Nashville Ballet and the Voices of Vision Community Choir. The video would go on to win the 2021 Midsouth Regional Emmy® award and further propel the We Are Nashville Festival into the community’s consciousness.
With the pandemic still raging in 2021, Finney knew that the festival would need to be all digital, which he was excited to explore. Finney works as a Learning Technology Specialist for Metro Nashville Public Schools and assists educators with successfully integrating technology into their instruction. So, he interviewed local artists and music directors and provided digital resources for students and teachers.
In 2022, the festival was back to being in-person and accomplished its biggest show yet. Finney had built strong relationships with members of the Nashville Symphony and thanks to the valued partnership with Kimbery McLemore, vice president of education and community engagment, the show took place at the symphony’s home, the Schermerhorn Symphony Center. Students from 11 schools participated, along with Vanderbilt University’s Philharmonia Youth Orchestra and Nashville Symphony’s Accelerando Program. In total, there were more than 300 orchestral and choral musicians participating in the festival. “I think we definitely met our goal, building community through music,” Finney says.
A Long Journey
The We Are Nashville Festival may take place over the course of a single day in March, but the preparation and planning begins much earlier. Finney spends months organizing and preparing for the day, with some festival planning beginning just a few weeks after the previous festival has ended.
Finney wants “everything to be concrete by August” because educators can apply to be part of the festival beginning in September. For the next few months, Finney meets with interested educators to go over the meaning behind the festival and what will be expected of them. Finney and his team finalize the roster of schools in December and distribute the music that will be played at the festival. The next three months are nonstop for Finney, with logistical operations being finalized, including sending in the stage layout. The morning of the festival in March is the culmination of a year’s worth of time, dedication and planning. And the day is just getting started.
The Day of the Festival
Student arrivals at the festival are staggered with elementary school students arriving first. “Their day begins with rehearsals, and then they’re immersed into a general music experience,” Finney says, with students being introduced to different types of music, dance and even exploring music through visual arts and crafts. Finney recruits local Nashville artists to lead these workshops, further driving home his message of community and togetherness. Finney thinks that it’s crucial to introduce elementary school students to different paths that they can take in music.
While elementary school students are in their general music experience, middle school and high school students arrive to practice and take workshops of their own. Then, they break apart and begin practicing their music in sectionals and tier-based rehearsals before coming back together for dinner. During dinner, the We Are Nashville student orchestra made-up of high school students from all over the Nashville area, begin their final run-through of music before the final dress rehearsal and show.
Finney is quick to acknowledge that the success of the festival is due, in large part, to the hard work of the teachers. “The music educators run this show,” he says. “They’re conducting. They’re even writing the songs, and 40% of the music was original this year.” Finney says his goal is to have that growth continue. “I want as much original music as possible, highlighting the talent of music educator in this city” he says.
The Heart of the Festival
Finney, a 2022 Yamaha “40 Under 40” music educator, is passionate about making sure that even as the festival grows, the core of the festival remains the same — through community showing students what’s possible with music and what they can do.
“The festival is definitely centered around exposure,” Finney says. “Children need to be exposed before they can dream of what they can become.”
In the spirit of that goal, Finney believes that there are three elements that the festival offers to help students envision their futures in music — see, identify and participate.
First, Finney wants students to be able to see where music can take them. He says it’s important for students to meet local Nashville artists and the Nashville Symphony musicians and know that there are paths open to them in music.
Next, Finney wants that exposure to turn into identification. “I want students to be able to build some type of relationship with what they’ve seen,” he says.
He hopes that the elementary school students can look at the middle and high school students and envision themselves in their positions. Finney says that he receives feedback from teachers who say that their students want to join the middle school or high school orchestra or choir because they saw them perform at the festival. For Finney, that is what the festival is all about. He says it’s important for students to realize that “they’re just like me, or they look just like me, and they’re doing something I would love to do,” he says.
Lastly, Finney wants students to feel like they are participating in something unique, which they might not have a chance to do otherwise. Being able to perform at the festival in “this big, beautiful performance hall with local Nashville artists, as well as your peers, is key to the success of the festival,” he says.
This exposure and participation make up the heart of the festival. “After those three elements — I’ve seen it, I can identify with it and I’ve participated —kids can dream and have the ingredients to know that this is what they really want to do,” Finney says.
Looking to the Future
Finney is thrilled with the success the festival has had since its inception, but he still sees room for growth.
“I would love for it to become a week-long event where the festival is the launch, but resources are available all week,” Finney says. He envisions the week including local musicians visiting schools for workshops and performing for students and their families as a way of encouraging the community to come together through music.
Regardless of how big the festival grows, Finney says that it’s important to keep community and exposure at the festival’s core. He says one of the most impactful parts of the festival is when teachers see their former students performing with the middle or high school groups. That desire to reconnect solidifies the community-based nature of the festival. Or, in the words of Finney’s award-winning song: “Hand in hand, together we will stand, we are Nashville.”
The Yamaha Disklavier is a truly revolutionary instrument — a world-class acoustic piano that can faithfully reproduce every nuance of a performance and stream it, wirelessly, anywhere in the world … including your living room.
More than 30 years of continuous innovation has resulted in the latest iteration: the Disklavier ENSPIRE™. If you were lucky enough to purchase one of these remarkable pianos recently, you should have received an “Essentials Kit” from your dealer. (If you haven’t, contact them to get one.) This box of goodies includes accessories and information about setting up streaming services for your instrument, as well as access codes for free downloadables and online content.
Ready to learn more? Read on …
Contents of the Essentials Kit
Here’s what’s included in the Essentials Kit:
3-month trial of Piano Radio
Disklavier Radio (formerly Piano Radio) is a truly unique listening experience. With 60 live channels of streaming music, it’s like having a professional pianist in the room playing your favorite songs by your favorite artists. With moving keys and real acoustic sound, Piano Radio brings your Disklavier ENSPIRE to life and creates the perfect atmosphere. As a bonus, your Piano Radio subscription also includes access to DisklavierTV™ programs featuring streaming video content. (Available in the U.S.and Canada only.) There’s no need to change disks or set up a playlist — just sit back, relax, and enjoy!
Free PianoSoft album download
With the promo code provided in the Essentials Kit, you can choose any one of these six PianoSoft albums as a free download. (Available in the U.S. only.) PianoSoft albums allow you to listen to original recordings of your favorite piano performances on your Disklavier ENSPIRE. When these songs are played back, PianoSoft physically plays the piano, moving the keys and pedals to reproduce the original performance. It’s like having a professional pianist in your home!
Tutorial videos from Link-to-Learn
Learn how to operate your Disklavier ENSPIRE with these online Link-to-Learn QuickStart videos and product guides that take you step-by-step through the features and functions of your instrument, including numerous musical demonstrations. They offer you an exciting, interactive learning experience and cover a variety of musical topics such as “How To Play Chords,” “How To Play Keyboard” and more — everything you need to find your true music-making potential.
32 GB USB flash drive
You can never have enough storage! Included is a USB flash drive with a whopping 32 gigabytes of space to store your favorite downloaded songs or recordings.
Bluetooth® adapter with audio cable
This small, unobtrusive adapter allows you to quickly and easily connect your smart device via Bluetooth for wireless DisklavierTV viewing.
Magnetic cord cover
This stylish magnetic cover with self-adhesive backing enables you to hide all connected cables on the inside of one of the piano legs.
Getting Started
To get started, simply go to yamaha.io.gifts. There, you’ll find clickable links to redeem your free 3-month subscription to Piano Radio and DisklavierTV, choose and download your free PianoSoft album, and watch the Link-to-Learn ENSPIRE video guides. Also available on this page are handy FAQs (Frequently Asked Questions) and a “Contact Us” form if you have any further questions or need additional help.
Even if you can’t get out to a concert, a great live album by your favorite artist can bring a lot of excitement to your living room, especially when you listen to it on vinyl, and over a quality audio system. Just make sure your turntable is on a stable rack or shelf, so you can really crank it up!
Here are 10 of the very best live albums of all time. For that extra bit of realism when listening, fire up a “lighter” app on your smartphone and wave your hands high in the air.
1. Alive! – Kiss
After three relatively tame studio LPs, with their career in a tailspin, Kiss took the bold leap of releasing a double live album, consisting of performances from their Dressed to Kill tour in the summer of 1975. After years of controversy, the group came clean in the early 2000s and admitted that the recording was heavily massaged in the studio. Regardless of whether this is a pure live record or not (many other bands would follow this model in years to come), there’s no question that Alive! captures the Kiss vibe better than any other recording out there. Far from an audiophile pressing, the vinyl version is slightly compressed … but, on the other hand, that means you can turn it up that much louder.
2. Miles of Aisles – Joni Mitchell
Where Kiss’ Alive! couldn’t be more raw, Joni Mitchell’s first live recording feels like a cross between a studio session and an intimate coffeehouse performance, though most of these tracks are taken from shows at the Universal Amphitheater in Los Angeles in 1974. Part of the allure of this album comes from her backing band, the LA Express, who consisted of some of the best studio jazz cats at the time. The vinyl version is open, airy and delicate, and the sparse bits of audience applause are so well blended, on a great system, you’ll feel as if you’re really there. As a bonus, Mitchell’s voice never sounded better.
3. At Budokan – Cheap Trick
This record is one of the most densely packed 42 minutes and 27 seconds in power pop history. And, reminiscent of ’60s-era Beatlemania, the band’s hyper-energetic performances are delivered over a wall of screaming Japanese fans. Much like Kiss, Cheap Trick muddled around the Midwest for years, building a strong live following, yet having modest record sales. That all changed at the close of 1978 when At Budokan was released in Japan. It wouldn’t make it to America until February of 1979, but by then rabid Trick fans had already found a way to get their hands on the album. Decades before the internet, this record went viral from one record collector sharing it with another. Ah, the joys of vinyl.
4. Frampton Comes Alive – Peter Frampton
This seminal recording captures Peter Frampton at the peak of his popularity and musical prowess, and shortly after its release in 1976, it became the best-selling live album of all time. Regardless of your age, you probably know most of the songs, which are still in heavy rotation on classic rock stations today. The recording quality is stellar, and the performances spot on — so good, in fact, that Frampton would never equal this level of sales and radio play again. It’s a truly timeless rock classic.
5. Stop Making Sense – Talking Heads
Punk, power pop and new wave would steamroll over the heavy rock that dominated live venues at the end of the ’70s, and so the ’80s brought a more stripped-down approach to live performance. There’s no better example than Stop Making Sense. This 1984 live set is both theatrical and intimate at the same time. Featuring a big band riffing behind lead singer David Byrne’s memorable oversized suit, the Heads romp through 19 songs, but on vinyl, you’ll only get to hear nine of them (all that would fit on a single disc). All the tracks are high-energy from beginning to end and capture a sense of abandon that Talking Heads studio records do not. Check out the concert film of the same title (available on several streaming services) to add an additional dimension to your understanding of this influential band.
6. Home of the Brave – Laurie Anderson
A true pioneer of electronic music and perhaps the woman that defined the term “performance artist,” Laurie Anderson’s Home of the Brave is a hybrid, with five of the eight tracks captured live. Keeping the groove the same, and the recording quality high throughout, they blend right in with the three studio tracks. She’s accompanied on this album by an all-star lineup of backing musicians, all in service of Anderson, her clear violin and voice synthesizers. It’s art school music at its best.
7. Performing This Week – Live at Ronnie Scotts – Jeff Beck
Jeff Beck has been tearing up arenas for decades, with a number of live albums to his credit, but this one, recorded at Ronnie Scotts club in London in November of 2007 is the most enticing snapshot of this guitar hero yet. It features a number of classic tracks spanning a large cross-section of his discography, and the performance is tight and dynamic. There isn’t a note out of place, and the recording beautifully captures the acoustic environment of this nightclub setting.
8. Unplugged – Nirvana
Nirvana’s Unplugged is probably the record most associated with the long-running MTV series of the same name. It’s been reported that Cobain was having a tough time with the producers of the show, yet managed to do the entire Unplugged performance in one take. Sadly, it ended up being the band’s final recording before the world lost lead singer Kurt Cobain. In addition to being an incredibly rich recording, the way Nirvana’s normally hard-driving songs translate to a slower, acoustic pace reveals another facet of this band’s talent. Who knows where Nirvana might have gone after this?
9. Unplugged – Jay-Z
Jay-Z’s collaboration with the Roots took the Unplugged concept to another level. The extraordinary skills of all parties involved makes for a record that nearly defies genre, and the combination of beats, jazz riffs, and Jay-Z’s ability to shift gears smoother than a Bentley makes for a hip-hop masterpiece. To everyone that ever uttered the words “hip-hop isn’t really music,” consider yourself schooled. This is as good as it gets.
10. Homecoming: The Live Album – Beyoncé
Capturing Beyoncé’s 2018 Coachella performance, Homecoming is the biggest-sounding record on our list. The sheer amount of musical power cut into these grooves almost demands to be turned up loud. Really loud. This record is so dynamic it will push your music system to its limit … and if you have subwoofers, Homecoming will put them to the test. The range of style presented here is mind-bending and, of course, Beyoncé’s range takes no prisoners. It’s almost as if she’s channeling Ella Fitzgerald, Diana Ross and Aretha Franklin simultaneously, while putting her own spin on it in real time.
It’s NAMM time again! Can’t make this year’s show in person? Here are some of the hottest new products that Yamaha will be displaying on the show floor.
CFX Grand Piano
Yamaha has been making pianos for over a century, and striving to continually improve the artistic experience through feedback from the world’s most acclaimed pianists. The new Yamaha CFX is the culmination of that quest — a handcrafted concert grand piano that melds tradition and innovation, built by master craftsmen who understand the delicate balance between absolute precision and the human touch.
The carefully hand-selected materials that go into every CFX work together to create richness in every note, with astonishing projection. Only the finest beech and mahogany woods are chosen to give the rim a warm, deep sound quality. State-of-the-art A.R.E. technology (Acoustic Resonance Enhancement) reduces moisture content to impart an aged character that suppresses damping for clean vibrations, and an innovative joint method brings expertly seasoned woods together for smooth, resonant tone. Each CFX soundboard is fashioned from the top one percent of European spruce, chosen for its ability to transform string vibrations into beautiful sound. The shape of the crown has been refined to add a deeper mid-bass tonality, and the width, height and position of the sound ribs has been modified to increase dynamic range. The bass strings are hand-wound; the highest-quality felt is used for the hammers; even the frame is hand-molded and sand casted. From gentle pianissimo to powerful fortissimo, the CFX provides an extraordinarily responsive touch, furthering the connection between player and piano.
Second-Generation Revstar
Initially launched in 2015, Revstar® was the first new electric guitar series from Yamaha in more than a decade, drawing on the company’s heritage in both electric guitar and motorcycle design. The second-generation Revstar guitars being shown at NAMM fine-tune that concept with enhanced playability, versatility and tone.
All feature chambered bodies developed with the signature Yamaha Acoustic Design process to precisely shape tone and increase resonance while lowering weight and optimizing balance. They also boast a new neck profile and are available in a number of ultra-cool racing-inspired finishes — there are even left-handed models to choose from. Revstar Standard and Professional models come with either humbuckers or P90-style single-coil pickups and have unique five-way pickup selector circuitry that offers a new twist on classic “in-between” sounds, along with a Focus Switch — a passive boost function that evokes the sound of overwound pickups. If you’re a player interested in classic style with modern upgrades, you’ll definitely want to check out these great new guitars.
DTX8 / DTX10 Series Electronic Drum Kits
The new DTX8 Series and flagship DTX10 Series electronic drum kits offer a perfect blend of functionality and playability, giving drummers the ideal instrument for rehearsal, recording and live performance. DTX8 Series kits are ideal for drummers looking for a combination of high-quality sounds and versatility. DTX10 Series kits are designed for drummers who demand the very best in performance capability and durability.
DTX8 and DTX10 Series kits are available in two stunning finishes — Real Wood and Black Forest — and offer two playing surface options: two-ply mesh heads from Remo that boast outstanding resilience and can be tuned to fit the drummer’s desired tension, or Textured Cellular Silicone (TCS) heads that offer a surface that will never loosen, along with a more natural response and rebound similar to an acoustic drum. The DTX8 Series utilizes the DTX-PRO module, while the DTX10 Series is powered by the new DTX-PROX module. Both modules offer the same tone generator and feature high-resolution samples professionally recorded in world-renowned studios, along with unique features such as a real-time Kit Modifier that allows major tonal change and inspires creativity with the twist of a knob. In addition, the DTX-PROX has a “Live Set” function that allows drummers to freely arrange and set various kits, tempos and audio files for backing tracks, as well as seven LED rotary faders that can be used to instantly change instrument parameters such as altering the tuning of the snare or muffling the kick. Both the DTX8 and DTX10 are compatible with the free iOS/Android™ Rec’n’Share app that allows drummers to practice along to songs in their library, record video, and easily share their performances without leaving the drum throne.
Cubase 12
Whatever you need, Cubase helps you to reach your full creative potential. From Hollywood blockbuster composers and Billboard Hot 100 producers to keen beginners, the world of music production has long trusted the comprehensive feature set, straightforward tools and unrivaled sound of this acclaimed DAW music production software.
NAMM attendees will have an opportunity to explore the many new features and workflow enhancements offered by the latest release: Cubase 12. These include everything from new effects and advanced editing tools to improved audio-to-MIDI and expanded MIDI Remote integration, making it easy to add MIDI controllers to your music production setup, with auto-detection of your device and mapping of all available controls. The Scale Assistant in VariAudio makes pitch editing a breeze, while the Audio to MIDI Chords feature allows Cubase to instantly analyze any recorded audo and derive the chord progression for you automatically, blurring the borders between audio and MIDI so you can focus on the music instead of the technology. With Cubase 12, you’ll find composing, recording, and mixing even more rewarding than ever before.
YTR-8335IIRKG-LN Xeno Trumpet
NAMM will also see the debut of the YTR-8335IIRKG-LN Xeno B-flat trumpet — an instrument that speaks to players looking to create new musical moments. Trumpeters aspiring to stand out from the crowd will find it to be just as unique as they are.
The YTR-8335IIRKG-LN continues what has become a tradition of limited-edition wind instrument models created by Yamaha to celebrate and inspire music-makers. This particular model offers several distinctive features, including a proprietary cryogenic acoustic treatment, a durable clear lacquer finish, a medium-large 0.459″ bore and a reversed main tuning slide. The unique “Kangakki” engraving on the bell means “wind instrument” in Japanese — a historical reference that balances with the instrument’s modern design and construction.
See you at next year’s NAMM — and remember, if you can’t make the show in person, you can always catch the highlights here!
For more information about these and other great Yamaha music products, click here.
In Part 1 of this three-part series, we addressed some fundamental issues regarding mic selection and placement. Here in Part 2, we’ll expand on that theme and offer specific tips for recording plucked stringed instruments such as guitar and acoustic bass, as well as bowed strings. (In Part 3, we’ll cover piano, percussion and wind instruments.)
Ensemble Recording vs. Solo Instruments
As discussed in Part 1, a critical factor in determining how to approach capturing the sound of any acoustic instrument is whether you’re recording one musician at a time, or several in the same room. If the former, you can concentrate on getting the full sound of the instrument, which can be difficult when you have to worry about bleed from other sound sources.
Omnidirectional (“omni”) microphones, which pick up sound from all around, are a good choice when recording one instrument at a time since they often deliver a more accurate sonic picture than you’ll attain by simply pointing a directional mic at one spot. They’re also not subject to the proximity effect (as described in Part 1), so you can position them closer to the instrument without getting an artificial boost in the bottom end.
But if you’re recording an ensemble of several musicians playing together, you’ll probably need to limit yourself to directional mics like cardioids and position the players as far apart as possible. The good news is that, because cardioid mics pick up sound mostly from in front and reject sound coming from behind, facing the mics directly opposite one another (as shown below) can significantly reduce leakage.
Face cardioid mics opposite to reduce leakage.
Recording Acoustic Guitar
In most cases, you’ll be able to capture the sound of acoustic guitar with a single condenser mic. If you have several available, experiment to see which one sounds best. A small-diaphragm condenser will tend to pick up transients a bit better and thus yield a brighter sound with more attack, while a large-diaphragm model will deliver a fuller sound with more low end, so your choice of which to use is largely down to the musical content.
Start by aiming the mic where the neck meets the body, and place it roughly 9 to 15 inches away from the instrument:
To record acoustic guitar, start by aiming the mic here.
If the guitar is the featured instrument, or the only instrument in the song — for example, if you’re recording a simple guitar / vocal demo — you may want to experiment with stereo miking to give it a more expansive sound. In Part 1, we mentioned the XY miking technique, which provides a stereo image without phase issues and is pretty easy to set up, although it works best when you have a pair of matching mics:
The XY configuration.
You might also consider trying an ORTF configuration; this is another two-mic technique that yields an even wider image, though, again, it works best when using a matched pair of mics. Space the mic capsules about 6-3/4 inches apart and angle them at about 110 degrees:
The ORTF configuration.
With both XY and ORTF, start by placing the mics about a foot back, then experiment by moving them closer in or slightly further away.
If you have two mics that are not matched (i.e., different makes or models), try a “spaced pair” method instead: aim one mic at the guitar body a few inches past and slightly below the bridge and another where the body and neck meet.
A starting point for aiming the mics in a spaced pair configuration.
This will give you a more expansive stereo image, but be sure to follow the 3:1 rule (as described in Part 1) to avoid phase problems.
You can take a similar approach with other plucked stringed instruments such as mandolin. Again, use your best condenser mic, preferably one with a small diaphragm. Start by aiming it where the body and neck meet, angling the mic slightly toward the higher strings. Try different distances from about three to 12 inches and see which sounds best. The closer you place the mic, the more present it will sound; the further back, the more ambient.
When recording banjo, you’ll need to aim the mic somewhere on the head because that’s what creates the tone. If the player uses fingerpicks (as any bluegrass banjoist will), make sure not to aim it too close to the player’s hand because you’ll capture too many pick noises.
Recording Upright Bass
It can be challenging to successfully record a plucked upright bass, such as for jazz or bluegrass. That’s because it’s such a large instrument, the sound comes from more than one place. The trick is to get a good blend between the very low frequencies coming from the body of the instrument and the sounds coming from the strings as the bass is being plucked, which are in a much higher frequency range. Without a good amount of the latter, you’re likely to get results that are overly bassy and lack definition.
On upright bass, the goal is to capture the right blend of lows and highs.
Start by placing a large-diaphragm condenser about a foot or so back from the bridge, then begin moving it around as the bassist plays while you monitor the sound carefully on headphones. If you can’t get a good enough blend by moving the mic around, consider using a second mic (a large or small-diaphragm condenser) closer to where the neck and body meet. Here, you’re not going for stereo; instead, you want to blend in those higher frequencies with the primary mic signal so that the bass will have some transient energy to cut through. Again, make sure to observe the 3:1 rule to avoid phase problems.
Bowed Strings
When you’re dealing with a bowed instrument like a violin, viola, cello or bowed upright bass, the goal is to capture a blend of the resonant tone from the body with just a little bit of the scraping of the bow on the strings. You need to go easy on the latter or the sound will be too scratchy, but you also need some of those higher frequency components for articulation purposes.
With bowed strings, the goal is to blend the resonance of the instrument’s body with a little of the bowing sound.
Try using a condenser with a cardioid pattern. For instruments that have a lot of low-frequency information (such as cello and upright bass), choose a large-diaphragm condenser because those kinds of mics are better at reproducing rich bottom end.
Place the mic three feet above and in front of the instrument, and aim it where the bow meets the strings, then experiment with different distances. If you’re having trouble getting a good sound, the problem could partially be due to room acoustics, so try putting the player in a different part of the room and see if that helps. When bleed is a concern in ensemble situations, you’ll have to move the mic closer or consider using a quality clip-on condenser mic that attaches behind the bridge.
Remember: These descriptions are simply guidelines. They can work well as starting points, but you should always feel free to experiment. As always, a lot depends on the quality of the instrument and the microphones, as well as the musicianship of the player and the acoustics of the room.
Click here for Part 3, in which we discuss how best to record piano, percussion and wind instruments.
Curricular guitar and ukulele courses have gained traction in both elementary and secondary education, and for good reason! Traditional ensembles (band, orchestra and choir) still play a vital role in music education, but guitar and ukulele instruction help us engage a wider range of students in the joys and benefits of making music.
Additionally, the instruments are fairly affordable and can be used to easily connect our students to music that is more relevant to them.
I hope the story about our guitar and ukulele elective at Springfield High Schoolcan help you develop a similar program at your school.
Developing the Course
Although I developed the curriculum and premiered this course at Springfield High, I cannot take credit for introducing the idea or getting it approved. My predecessor, Kevin Cooper, and my colleague, Mike Zubert, were inspired by the success of guitar courses at a local district, and they worked together to develop the concept of a guitar and ukulele class.
A proposal of the course was given to the building principal at the time, Dr. Joseph Hepp, a multi-instrumentalist in his own right, and reviewed by our district curriculum coordinators. After they approved it, the elective was added to the course offerings during course selection.
I realize that not everyone who presents such an idea to their administration will receive the type of initial interest and support that we were lucky enough to get. I encourage you to talk with your building administration about the formal process for introducing a new course. In some districts it may be as simple as getting building approval, where others may require it to be heard by the school board or a school board curriculum committee. Be patient! Sometimes these processes can take months or years.
When presenting the idea for the course, I recommend having answers to the following questions (I have provided some sample answers to help):
Why is guitar and ukulele instruction important to your curriculum, students and school?
Guitar and Ukulele instruction will help us engage a wider range of students in music learning and performance beyond our traditional ensembles. With so much relevant content and easily accessible instruments, a guitar and ukulele course can help us create a more inclusive music learning environment. Students will leave the class with a musical skillset that enables them to continue to play and perform beyond high school, leading to a more fulfilling life.
How will the class fit into the current schedule? Does it replace another elective? Will you need additional staffing to cover the elective?
This class will replace our music appreciation class, which has seen declining enrollment over the past four years. It can fit into the same period slots as that elective and will not need additional staffing as the same teachers are certified to teach this new course.
What type of supplies (instruments) will you need? How much will they cost? How will they be paid for?
Depending on how we structure the class, we can buy about 30 high-quality student level guitars for $6,600 or ukuleles for $3,300. We would also need to purchase some textbooks, which will cost approximately $350 total. We were hoping to split the cost between our department budget, building budget and curriculum budget.
It was predetermined that this course would be a one-semester (half-credit) elective for beginning guitar/ukulele players, available to any student in grades 9-12. Like all classes in the building, the class runs for approximately 50 minutes every day. The course is restricted to 24 seats per section. Our first year we ran 2 sections and we are now running 4 sections yearly.
Curriculum and Instruction
Once the course was approved, I began to write and design the curriculum as well as a scope and sequence for the course. I decided that students would spend half of the semester on ukulele and then transition to guitar. I wanted all my students to walk away with a skillset where they could continue learning, playing and enjoying music on guitar and ukulele beyond the class. Thanks to discussions and input from my colleagues, I determined that I wanted students to be able to meet two primary goals:
Read and play simple melodies using “traditional” notation.
Perform common harmonies and harmonic progressions from various types of notation (such as chord charts, tab, etc.) and by rote.
Teaching students to read traditional notation is greatly valued within our music department. Additionally, I knew that providing students with basic music literacy and theory skills would allow them to engage in a wider range of music enjoyment beyond high school. My goal in designing this specific element of the curriculum was for students to use these skills in music reading or singing at civic events, at places of worship and socially, as well as in career settings like early childhood education.
In order to develop students’ technique and musical literacy skills, I investigated various method books. After talking with several music educators who teach individual or group guitar/ukulele instruction, I settled on the “Alfred’s Basic Guitar Method” book series. The text effectively sequences the technique and music literacy through original, classical and folk melodies. Additionally, I liked that the book has a nearly equivalent version for ukulele that would allow for a smooth transition between quarters.
Daily class time is allotted for students to practice these exercises and receive direct feedback from me as I float around the classroom. Students then either perform the selection individually in class or record it into our learning management system for assessment. The class is designed so students complete about three to five melodies a week.
When it came to teaching common harmonies and progressions on the instrument, it was more difficult to find text and resources that met the needs of the class. While there are several popular methods for teaching harmony, few would effectively work for guitar and ukulele. For this reason, I ended up creating most of my own original resources (slideshows and handouts) to teach harmonies and chords with the aid of online resources such as UltimateGuitar.com, Fender Play and the many channels on youtube.com, including Marty Music, Swift Lessons, Guitar Lessons 365,The Ukulele Teacher and Ukulele Cheats.
I designed this portion of the course so students could learn common progressions, such as the blues, and chords (I, IV, V, ii, vi) in common keys (C, G, D, A, E). I picked an appropriately challenging selection in each key that could act as a vehicle for learning these chords and progressions. When students switch instruments after the first quarter, they relearn the previous selection in that key and also learn a new, slightly more challenging one. The blues progression is particularly enjoyable as students get to learn about the history of the blues and even write and harmonize along with an original blues composition!
As I developed this curriculum, I consistently referred back to my state learning standards as well as the NAFME standards for harmonizing instruments to make sure my curriculum aligned.
Along with the curricular support for the class, our district supported the purchase of a set of guitars and ukuleles through building and curriculum budgets. As the program expanded, we were able to use a combination of our department budget and curriculum budget to expand our inventory. Every student is assigned a guitar and ukulele during the course that they can use in class and take home as needed. If you are unable to secure a district budget funding source, I highly encourage looking into other options. It’s possible that districts may be able to use Title 1 or Title IV-A federal funds to secure instruments if the program meets the requirements. Right now, districts may also be able to use ESSER funds to expand music programing, depending on how they wrote their ESSER funding plan.
I know several educators who have been able to secure ukuleles and guitars using federal funds over the past several years. Plenty of resources about the funds and music education are available online, especially through the National Association for Music Education (NAfME). Along with these federal funding sources you can also investigate local grants or crowdfunding. In our district, we have an education foundation, The Springfield Area Education Foundation, that can issue grants to make purchases for classroom sets of instruments.
Reception
This guitar and ukulele elective has become extremely popular in our building! Last year, we ran six sections of the course taught by one other teacher and me and engaged approximately students in meaningful music making! One of the most surprising and rewarding pieces of feedback I received from students is how much they value being able to learn traditional music notation in high school!
Many students purchased their own guitar or ukulele at the end of the course and came back to show me what they have been learning or working on! I have even had several staff members and administrators talk with me about purchasing a guitar and ukulele for themselves. Several have even joined us in class!
If you have questions about starting your own guitar and ukulele program or would like to learn more about Springfield’s elective, please reach out to me at mark.stanford@ssdcougars.org.
A musician’s daily diet or daily drill provides all the necessary basics for performing on an instrument successfully. While it’s not a perfect formula, at Claudia Taylor Johnson High School, we stick to our daily drill in the same way that we brush our teeth or get dressed for school each day — we make it a part of our routine.
Like a balanced nutritional diet, we work on fundamental exercises each day that strengthen the skills our students need to achieve a high level of performance. In the earlier parts of contest preparation, we invest more time on fundamentals and less on practicing contest literature. The time focused on fundamentals allows students to develop skills that will make learning the music easier and address weaknesses in our ensemble.
Fundamentals include all elements of the daily diet for the contest literature, including rhythm training, ear training, breathing exercises, buzzing for brass, long tones, lip flexibilities, harmonic slurs, articulation exercises, range builders, dynamic control exercises, scales, chorales, tuning sequences and more.
If a contest is in March or April, you will likely begin preparing in January. Here is a suggested structure:
In January, spend 60% of rehearsal time on fundamentals, 40% on music.
In February, spend 40% of rehearsal time on fundamentals, 60% on music.
In March and April, spend 20% of rehearsal time on fundamentals, 80% on music.
The table below shows how to split time during a 40-, 60-, and 80-minute class period on fundamentals vs. music and how that time should shift over the course of content preparation.
Class Length
January (60% — 40%)
February (40% — 60%)
March-April (20%— 80%)
40 minutes
24 fundamentals, 16 music
16 fundamentals, 24 music
8 fundamentals, 32 music
60 minutes
36 fundamentals, 24 music
24 fundamentals, 36 music
12 fundamentals, 48 music
80 minutes
48 fundamentals, 32 music
32 fundamentals, 48 music
16 fundamentals, 64 music
At the end of the day, “right notes and rhythms” go a long way toward a magical musical performance. If students do not have enough time to practice the music during class, they certainly will not be successful during the performance. In general, students practice more efficiently when a teacher structures it, so class rehearsal time becomes critical.
Investing in fundamental skills early on during contest preparation will make working on the music more accessible. Additionally, if you spend time warming-up each day, consider that time as fundamental skill development more than just a warm-up for the day. Long tones can help develop listening skills side-to-side and learning to play with a beautiful sound. Scales help develop students’ sensitivity to matching style and articulation side-to-side and section-to-section, rather than just learning individual notes. The directors who use fundamental warm-ups to develop ensemble skills and not only individual skills will find that their groups begin to take on a resonance and uniformity of sound that enhances all of the music your students perform together.
Daily Drill Essentials
With so many possible uses of fundamentals time, it is easy to get overwhelmed and wonder what to cover in a day. To avoid randomness in our warm-ups or skipping over an essential part of a musician’s diet, we insist on a few things in our fundamentals each day:
Breathing
Singing
Long tone
Lip slur brass/Harmonic slur woodwinds (or woodwinds can do a technique accompaniment)
Articulation exercise
If we only have time for a very short warm-up, it must include a sustained long-tone exercise: a Remington/interval study or major/minor scales. It also must include a lip slur exercise for brass (either a soft, slow slur or something quick) and a harmonic slur for woodwinds. Sometimes we will have our woodwinds play a fast finger/technical exercise while the brass plays slurs for efficiency. And finally, the daily drill must include something to work tonguing and style. This could be multiple tonguing, fast tonguing or even learning to control accents, tenutos, staccatos or other styles students will need to succeed.
You might consider a breathing sequence that students perform every day — like in four out four, in four out eight, in two out eight, in one out eight at different tempos — rather than just creating something different each day. Additionally, singing can be as basic as a single note or five notes of a scale. Ultimately, we use breathing and singing to develop those skills in a vacuum and raise a student’s awareness about how they feel when they take a proper breath and how something sounds when it is in tune. If students can learn to think about how they feel or how they want something in the room to sound, it increases the chances that they will do this more when they start to perform music.
With additional time, you might explore advanced exercises, including dynamic control exercises, pitch bends for brass, range builders, or other rhythm and ear training exercises. A more extended fundamentals period provides more options. When you need the basics, prioritize the daily drill that works best. And remember, students become easily distracted outside the band class, so it is better to organize their daily drill/warm-up than leaving it in their own hands. If you do it as part of your class routine, you’ll know it is getting done properly.
Long tones or slurs first?I have had great brass teachers weigh in on this debate. Many believe that flow studies and slurs should be done first to move around on the instrument early in the warm-up. Others say that long tones done before slurs will enable fluidity for the day. Ultimately, you can try both or consider mixing it up. At Claudia Taylor Johnson, we have flipped back and forth over the years. Currently, we are in a “flexibility and fluidity first phase,” and we are choosing to do moving slurs early in the warm-up before our sustained exercises.
Daily Drill Must Support Your Contest Program
While we don’t try to “teach to the test” at Claudia Taylor Johnson, we structure our fundamentals/daily drill to address the skills needed for our performers to play our contest program at a high level. If we know that we are working on Borodin’s “Polovtsian Dances” and a lot of the piece is in the key of concert A major, then we will structure our daily drill with a lot of exercises and chorales in that tonal/key center. Band students spend a lot of time in the keys of concert Bb, Eb, F or Ab major, so playing in A major takes them out of their comfort zones. Working long tone patterns and articulation exercises in A makes the uncomfortable more normal for students. They learn tuning tendencies on their instruments and how to control “bad notes” during fundamentals, making it easier when they work through challenges in their music.
Another example, if you are working on Sousa’s “The Black Horse Troop,” you would be wise to practice daily drill rhythmic patterns in 6/8. You could do long tones or scales using rhythmic patterns from the march to help develop both counting and articulation skills. Anytime you can transfer complex rhythms from your contest literature into your fundamentals, you double the time your students develop those skills to achieve success.
Using time in class each day to address fundamental skill concerns will improve your ensemble’s performance. Like a sports car that requires daily maintenance and fine-tuning or the human body that needs a balanced diet to live a healthy life, your band will thrive with the proper daily drill that addresses your performers’ needs. A basic structure can still look different each day to avoid your fundamentals from becoming monotonous and tedious. Your students will improve over time by working on skills and not just their contest literature.
Adam Tendler has always made it a point to challenge himself, beginning with his first attempts at learning classical piano as an adolescent, and continuing in his current ambitious goals as an adult. He has become nationally renowned for his willingness to give performances in thought-provoking locations such as cemeteries, chapels and public parks — as well as for his drive to bring the genre of contemporary classical music to the masses and further its acceptance in the mainstream. Launching his career by embarking on a courageous mission to perform in all 50 states (a personal and professional adventure he details in his book 88 by 50), Tendler now collaborates with the top names in modern classical, as well as with artists outside the genre, to introduce new first-time listeners to this complex form of music.
Adam recently spoke with Yamaha about how he continues to challenge himself to this day — both professionally as well as personally — to express his emotions through music.
Unusual and Unique Spaces
“I think I’ve always been drawn to presenting programs in unusual or unique spaces,” Adam says. “Sometimes it has been because of necessity, just because that’s what I had to work with at that time, and we could get a piano there.
“Playing Liszt in the Green-Wood cemetery catacombs (in Brooklyn, New York) was a huge risk and a huge experiment because it was a very long program, a very intense program, and we truly were in catacombs surrounded by souls — we were amongst the dead, and it was a very spiritual program,” he recalls.
“And to the very last second, it was unknown how this was going to work – if this was going work. But I really wanted to see how that music would activate in that space. I had this faith that it was going to be really cool and really powerful, and that combination of really cool and really powerful has guided me into playing different programs in unusual spaces, whether it’s in the catacombs or in nightclubs, or in galleries. When you take music out of the standard concert hall and put it in new spaces, that music can spark and activate in a different way, and it can reach a broader spectrum of listeners, which is always a goal of mine too.”
88 by 50 Tour
The 88 by 50 Tour was an ambitious project that Adam embarked on right after graduating from college. The goal: Play a professional piano concert in all 50 states. It took Adam almost a year to complete.
“In essence, [it was a way] to try to teach myself how to perform,” he says, reflecting back on the origins of the undertaking. “I really felt like the stage was the classroom I needed. If I wanted to be a performer, I needed to be on stage a lot more because by the time I left music school, I had become kind of a nervous wreck as a performer.
“I wanted as much time on stage as possible,” Tendler continues. “I wanted to put myself in unusual places. I wanted to play modern music, and finally, there was this element of, I am not comfortable with who I am. Maybe by the end of this gauntlet of 50 states, I’ll have enough courage to come out.
“Everyone I knew was preparing me to be okay with it not working. Everyone said, ‘You know, if you just do 10, even that’s okay,’” he remembers. “I was like, I really want to do this, but I had no planning. I earned all my own money, and worked construction and taught piano lessons, and saved it all. It was very much a grassroots situation. As I was on the road, I would book more and more shows, finding places through search engines and calling them and seeing who would say yes.
“But there was a trajectory of coming out [too]. From the beginning, [when] a presenter said to me, ‘You don’t have a closet, you have a vault,’ to midway through the tour, falling in love with somebody, and having this relationship.”
By the time he got to state 50, it had been a year, and to Tendler’s way of thinking, he still didn’t really have a career. “I didn’t know if I had a national presence and I still was in the closet,” he remembers. “It was this interesting thing: I felt profoundly different, and yet I realized at the end of this project, all I really had was myself.
“It was like, well, I need to start to be honest about who I am. I found myself as a performer, and in a way, had come out as a performer. … I felt like I [could finally] say to people, now I am a pianist. That was the last thing I needed to do: to learn to be comfortable with my sexual identity. Even to this day, I struggle with that notion. Is it such a big deal, who I love? Is it anyone’s business? But at the same time, it was such a point of agony to have to hide such a powerful and deep part of myself, a part that fuels my music-making.”
A Fortress and a Vessel
Coming from a musical family of two generations of pianists, Adam received instruction at an early age, but it wasn’t until his high school years that he started to devote more time to the craft — often as an escape from the pain of being bullied by classmates.
“I was six and a half when I first started playing piano,” Tendler says. “In my hometown in Vermont there were two piano teachers. One was my grandfather and the other was his competitor. My mother, in the boldest move I could ever imagine, put me with his competitor, and I don’t know if he ever forgave her!”
“[It was when] I started to discover music by Chopin and Rachmaninoff [in high school], that something sort of clicked with me, and this does actually have to do with being gay. I was bullied a lot, growing up, for my voice and just how I acted. I was ‘accused,’ for lack of a better word, of being gay before I even really knew what that meant. I had no clue what everyone was talking about,” he recalls with a laugh, “but I knew they were making fun of me and teasing me about it.”
Fortunately, Tendler began to find that he could express himself at the piano in a way that was safe. “Somehow playing the piano created a fortress around me,” he says. “It was a fortress that could protect me, but it was also a vessel in which I could escape from being bullied.”
Musical Influences
The background of modern American classical music comprises a range of people from different backgrounds, including composers such as Aaron Copland and John Cage, who hid their sexual identities as it was not an accepted norm of their era. The dissonant music of these composers reflected how Adam felt during his adolescent years. He includes their work in many of his performances today
“With a composer like Copeland or Cage, or Robert Palmers,” Tendler explains, “I can resonate with them on a personal level, because of their sexual identity, even if they didn’t make that part of their identity the forefront of their music at all. The truth of the matter is that, [for] most of my career, neither did I. When I did the 50-state tour, I was still in the closet. I thought the tour was going to solve that for me and somehow make me so courageous and brave that I was going to come out, but I was battling that stuff all the time.
“I love the raw dissonant energy of modern music,” he says. “The decision to write dissonance — to commit that to the page and to commit it to a performer to have to play notes that grind against each other — was something I admired. I felt like I was dissonant to my environment; I felt like I wasn’t belonging in my environment. I think that became a big part of why I started to gravitate toward that music, because it felt like the only way in which I could actually resist and rebel.
Adam Tendler collaborating with artist Dev Hynes (@devhynes), also known as Blood Orange, for a series of performances including one for the Brooklyn Music Academy (BAM).
Advice for Young LGBTQ+
“I think I would tell that young person to not wait,” says Tendler. “They don’t have to wait until they’re in their mid- to late twenties, like I did, to embrace and be honest about who they are. The personal risks I thought I was facing, I had built them up in my head. The truth is that, on the other side of that honesty is a community and a family of other queer people who are so happy for you, for any young person who’s coming out.
“There is a whole culture, world and community rich with amazing people who are there to support them, [so they should] avoid underestimating the people around them. I really underestimated the people around me. [I felt] that I was going to be rejected and cast off, and it was just not the case. I was completely embraced.
“It might not be true for everybody, but the honesty, integrity, bravery and courage to come out and be honest about who they are will be admired by the people around them.”
The clarinet is one of the more versatile woodwind instruments. It’s found in symphony orchestras and small ensembles, and used in a wide range of musical genres, from symphonies to jazz, not to mention klezmer music, where it serves as the featured instrument.
But what is it that makes a clarinet sound like a clarinet? Well, while the instrument’s inner shape has a great impact on its tone, so too does its mouthpiece. That’s because the mouthpiece, which houses the clarinet’s reed, is integral to producing sound. To make music, the mouthpiece is placed into the player’s mouth and blown into, which vibrates the reed and creates notes via the instrument’s keys. The mouthpiece’s size and shape can dramatically affect that process.
You may think that you should just stick with the mouthpiece that came with your clarinet, but that’s not always the best option. Certain mouthpieces can be more difficult to play than others, and, depending on the materials they’re made from, can create a darker or brighter sound. And of course, quality counts: It’s important to choose a mouthpiece made by a reputable manufacturer. Saving a few dollars may cost more in headaches down the line.
In this article, we’ll tell you what you need to know so you can buy the right clarinet mouthpiece for you.
FIRST THINGS FIRST
As a first step, you want to make sure there are no chips or scratches on the mouthpiece you’re considering purchasing — something that’s especially important when buying used mouthpieces.
You also need to be aware of reed placement, which can have an impact on the sound your instrument makes. The clarinet uses a single reed, and these come in varying degrees of “hardness,” which is generally indicated on a scale from one (softest) through five (hardest), although the numbering system can vary between brands.
The exact placement of the reed is set by adjusting the ligature, which is a piece of metal, rubber or other material that holds the reed to the mouthpiece. Generally, the reed performs best when its tip is lined up flush with the tip of the clarinet mouthpiece. If the reed is placed too far below the mouthpiece’s tip, it may “cave in” on itself, causing a brittle sound … or there may be no sound at all! If the reed is placed too far above the tip of the mouthpiece, it can feel stiffer or harder, making the instrument more difficult to play. The sound will also be diminished in terms of volume or can seem fuzzier.
MOUTHPIECE MATERIALS
Clarinet mouthpieces are made of a variety of materials, including rubber, plastic, crystal, glass, wood, ivory or even metal. In general, the softer the material, the darker the sound; the harder the material, the brighter the sound.
There are two varieties of Yamaha clarinet mouthpieces. They have a similar design but utilize different materials. The company’s Standard Series mouthpieces are made of sturdy phenol resin (plastic), while their Custom Series models are sculpted out of a high-quality hard rubber called ebonite, which offers a deep resonance and tonal qualities similar to those of natural wood. Standard Series mouthpieces are designed to be easier for beginners to play; Custom Series mouthpieces provide more experienced players with an extra degree of control. For more information, click here.
SIZE AND SHAPE
There are a number of aspects to the way a mouthpiece plays and sounds. Two crucial ones are the inner chamber shape — literally the shape inside the mouthpiece — and the facing length and the size of the rails. Bear in mind that these elements aren’t always reflected in the model number and are instead determined more by the brand or series of mouthpieces.
External size, however, is not a big factor. According to Matt Kerns, Yamaha Marketing Manager, Winds & Strings Accessories, “You may find minor differences in the size and shape from brand to brand, but it’s usually just cosmetic. It’s what’s inside that counts!”
Kerns adds, “This assumes, of course, that the mouthpiece is for the correct instrument — there are different sizes of clarinet instruments, like alto clarinet, bass clarinet and so on, and each of these will have a different specific size mouthpiece.”
Yamaha 4C alto clarinet mouthpiece.
Yamaha 4C bass clarinet mouthpiece.
OPEN VERSUS CLOSED
Another major factor is whether the tip — that is, where the reed meets the end of the mouthpiece — is classified as being open or closed. “The size of the opening at the tip affects the ease and quality of tone production,” says Kerns. “The narrower the tip is, the harder the reed has to be.”
It’s for this reason that beginners should choose a mouthpiece with a medium-sized tip opening, which, according to Kerns, will work well with a medium-hard reed. And experimenting with reed firmness is important each time a player gets a new mouthpiece. Yamaha clarinet mouthpieces range from 3C to 6C, with the 3C having the smallest (that is, most closed) tip opening and the 6C having the largest or widest opening.
Yamaha 3C.
Yamaha 6C.
“A more open tip can use a softer reed and produce a more powerful sound,” Kerns explains, “while a more closed tip may need a stiffer reed and will produce a more controlled sound.”
BEGINNERS VS. ADVANCED
For beginning clarinet players, it’s generally best to get a middle-of-the-road mouthpiece. For example, the Yamaha 4C is designed specifically to make it easier for a beginner to get started and sound good right away. “More advanced mouthpieces may need more physical strength in the embouchure — that is, the muscles around the mouth,” says Kerns.
Yamaha Standard Series 4C.
As a reference, the 4C has a medium-small tip opening and works well with reeds in the 2 – 3 strength range, while the 5C has a moderately open tip that allows a player with a stronger embouchure to produce a bigger and fuller sound. These can be paired with stiffer reeds. The Custom Series 4CM has a tight tip opening that pairs well with stiff reeds to provide maximum control.
Yamaha Custom Series 4CM.
CORK
A final note for discerning customers, says Kerns, is to take notice of the cork at the bottom of the mouthpiece. “It can and likely will wear out over time just from regular use,” he explains. “However, a good repair shop can replace the cork so that the mouthpiece can continue to be used.” So, whether determining the right mouthpiece or the right cork replacement for the right mouthpiece, choose wisely!
With the heat just around the corner, it’s time to reach for those lighter summer films to enjoy with family and friends. Here’s a list of the 10 movies you should check out for those relaxing summer nights.
1. National Lampoon’s Vacation
Road trips are a summer theme — and in 1983’s National Lampoon’s Vacation, the Griswold family makes their way from Illinois to the California amusement park Walley World. However, mishaps follow Clark (Chevy Chase), Ellen (Beverly D’Angelo) and their two children along the way, especially after Clark meets a stunning woman in a sports car. Things begin to unravel when the Griswolds’ car experiences issues and someone in the family passes away. Find out where to stream it here.
2. Summer Rental
This laugh-a-minute flick follows Jack Chester (John Candy), a burnt-out air traffic controller who takes his family on a month-long beach vacation that turns out to be anything but relaxing. For starters, they discover that their “luxurious beach home” is actually a run-down lodging — and things rapidly go downhill from there. Find out where to stream it here.
3. Captain Ron
In this 1982 comedy, Martin Harvey (Martin Short) and his wife, daughter and son travel to a Caribbean island after Harvey learns that he inherited a yacht — though the vessel is in by no means shipshape condition. With plans to take the vessel back to Miami, they have to hire someone to sail the boat, which is where Captain Ron (Kurt Russell) comes in … and his playful ways prove to be endless trouble for the Harveys. Find out where to stream it here.
4. A Goofy Movie
If you’re looking for heart-warming nostalgia during your summer vacation, then A Goofy Movie will fill the bill. This 1995 Disney animated film stars the beloved pup Goofy, who plans on taking his son Max on a trip after some trouble at school. Though Max is endlessly embarrassed by his father and doesn’t want to go on the cross-country fishing trip, he eventually caves and the two embark on a trek that brings them closer together. Find out where to stream it here.
5. Dirty Dancing
“Nobody puts Baby in a corner.” That’s the Patrick Swayze line that most people associate with this 1987 romantic drama, but there’s a lot more to this sweet movie as we watch Swayze’s character, Johnny, fall in love with Frances ‘Baby’ Houseman’ (Jennifer Grey) one summer at a Catskill resort. They meet when Johnny — the resort’s dance instructor — recruits Baby as his new dance partner, and he teaches her how to be a professional hoofer. Find out where to stream it here.
5. RV
In an effort to keep his family together, the seriously dysfunctional Bob Munro (Robin Williams) takes his wife and two kids on a road trip to the Colorado Rockies in a motor home, in hopes that they will bond rather than grow apart. However, the cross-country jaunt takes unexpected twists and turns, with the entire family cramped in the same small space for two weeks. Find out where to stream it here.
7. Blue Crush
Surfing is the life for Anne Marie (Kate Bosworth) in this 2002 film, and the same goes for her two friends and younger sister — with whom Anne Marie shares a beach shack. Each day, the girls wake up early so they can catch some morning waves to train for a surf competition … that is, until Anne Marie gets distracted when she falls for a new guy in town, a pro football player on vacation. He soon wins her heart, and she has to find a balance between surfing and love. Find out where to stream it here.
8. Dazed and Confused
Set in 1976, this coming-of-age comedy film is rife with high school stereotypes — the geeks, the stoners and the jocks. But what all those groups have in common is that it’s the last day of school and summer vacation has arrived. That means incessant shenanigans, including house parties and summer flings, with star athlete Randall ‘Pink’ Floyd (Jason London) just trying to figure it out. Find out where to stream it here.
9. Mamma Mia!
This star-studded 2008 musical, based on the music of ABBA, features Amanda Seyfried, Meryl Streep, Pierce Brosnan and Colin Firth, to name just a few. It follows Sophie (Seyfried) and Donna Sheridan (Streep), as they plan the perfect wedding for Sophie on a Greek island. It’s a dream of Sophie’s to be married off by her father at her wedding, but Donna was a single mother who never told Sophie who her biological father was. Hilarity ensues when she invites a few of her mother’s exes to see if anyone fits the bill. Find out where to stream it here.
10. Girls Trip
This 2017 release just may be the ultimate BFF film. It stars Regina Hall, Queen Latifah, Jada Pinkett Smith and Tiffany Haddish as four best friends who have started to grow apart. Then everyone is invited to New Orleans for a girl’s trip — and as they eat, drink, and dance through the city, they remember why they bonded in the first place. Find out where to stream it here.
Want to hear these films at their best? Try listening to them with a sound bar like the easy-to-use Yamaha YAS-109, which has built-in-subwoofers for deep bass, Clear Voice technology for enhanced dialogue clarity and DTS Virtual:X 3D surround sound.
A talented bassist can work magic on just a single string, but even if you haven’t actually tried it, you can probably visualize some of the challenges it would present. For one thing, you’d have to adapt your technique to play it well. How would it be different from playing a conventional 4-string bass?
What I want to focus on here is not how to get the most out of one string, but how adding an extra string is conducive to new approaches and invites you to rethink how you play your bass. So, without further ado, here are 5 tips for playing 5-string bass effectively.
1. TAKE ADVANTAGE OF THE EXTENDED LOW RANGE
I was initially attracted to the 5-string bass by the low B string and how it allowed me to plumb the lower depths of bassdom with notes that weren’t available to me on my 4-string in standard tuning. Sure, a sub-octave effect via a stompbox or a multi-effect processor like the Line 6 HX Stomp XL can synthetically create notes below low E, and a drop-D tuning can enable you to manually detune your E string to an open D — albeit a rather floppy D. But with a 5-string bass, you don’t need an effect or mechanical device to play that low, and your bottom string won’t be sagging either. When I strap on my Yamaha BB735A, I don’t have to worry about plugging into an effect pedal or any add-ons to go low … I just play.
Yamaha BB735A.
And having all that extra bottom range is only half of the equation: What you do with it is what really matters. When applied tastefully, that newfound low end can be a game-changer in a song. Playing a groove — or even a whole note — a full octave below where I might play it on a 4-string provides a powerful boost to the energy of a chorus or bridge, as demonstrated in the video below. It also creates additional separation for the bass, helping every other instrument find its appropriate slot in the mix.
2. EXPLORE MORE EFFICIENT HAND POSITIONING
Many 5-string players who start out on a 4-string bass are initially thrown off by what seems at the time to be an extra string. But as they acclimate to the new configuration and get comfortable using that low B, they start to consolidate their hand movements on the neck rather than going on long, awkward runs. It’s an economical approach that saves you energy, and also allows you to play the same pattern faster and in more locations on the fretboard, meaning you can opt between wholly different tonal shapes, depending on whether you’re playing in the middle of the fretboard or down toward the nut.
Here’s a video that demonstrates how a 5-string bass makes it easier to play fast runs:
3. MASTER PALM-MUTING AND USING THE B-STRING AS AN ANCHOR
When you use the low B-string with discipline and intent, it has lots to offer … but be forewarned: If your playing gets sloppy, the B-string can become a source of aggravation for you, your bandmates and the sound man or recording engineer. That’s because it’s thick and floppy, so if the meaty part of your thumb accidentally rubs up against it, it can cause a huge distraction via string and fret noise.
The good news is that you can prevent this from happening with either a palm-mute of the B-string while you’re playing other strings, or by using the B-string as a thumb rest (like the one mounted near the neck or middle position pickups on many basses). Either way, be careful not to mute the B-string so fiercely that it gets mashed down against the pickups, which will create an annoying thump that will please neither your bandmates nor your audience.
Here’s a video demonstrating palm muting:
… and here’s one showing you how to use the B-string as a thumb rest (sometimes called thumb anchoring):
4. EXPERIMENT WITH ALTERED TUNINGS
Altered tuning is more synonymous with guitar than bass, but the same rationale applies when it comes to 5-string. By tuning some of your strings outside the typical B-E-A-D-G scheme, you may find it easier to play certain types of chords or patterns (see below), or to find voicings that would be difficult if not impossible to reach in standard tuning. It can also spark some ideas that you might not otherwise have conceived or been able to play.
As an example, check out this video, where I have my BB735A tuned to B-E-G#-B-E:
Some bassists in metal or deathcore bands use altered tunings to create more sludgy menace to their sound, even though the frequencies below low B are difficult for amps and cabinets to reproduce coherently. That said, it’s absolutely worth experimenting with ideas to find new inspiration. That might mean dropping tuning across the board by a half-step, or tuning the B-string up to C. There are no rules, so do what makes you happy (until you start snapping strings, that is).
5. PLAY DOUBLE-STOPS AND CHORDS
Why should guitarists and keyboard have all the fun? I love playing double-stops or triads with pull-offs on 4-string bass, but a 5-string bass lets you play barre chords like a guitarist (keep this in mind when you mess around with altered tunings). It also allows you to be even more creative by using the low-B string to drop the root down a full octave to help put a rock-solid foundation beneath the intervals that you’re playing. It might take some getting used to, but chords can really add an extra dimension to your bass playing, as shown in the video below.
Check out this posting for more information about the benefits of playing a 5-string bass.
Learning to play piano — or any keyboard instrument, for that matter — may seem like a daunting task at first, but thankfully, the amenities of the modern age can make it much easier than you might think, and at the same time deliver an experience that’s both intuitive and personal.
Yes, there’s an app for that! In fact, there are a wide range of learning apps out there that can take a beginning keyboardist to an intermediate or even advanced level in the comfort of their home. Many of these can complement — or, in some cases, even replace — classroom instruction or a private teacher. These apps are designed to guide newbies through the basics at the player’s own pace, and can also serve as the ultimate practice tool.
In this article, we’ll look at one such app, called flowkey, and show you how it can get you on the road to making music right away.
Getting Started
Before beginning, place your phone, tablet, or laptop near your keyboard or piano so that you can view it easily; this will also allow the app to follow along as you play.
flowkey provides an interactive learning experience by listening to your instrument. Using the built-in microphone on your device (no cables needed), the app can, with great accuracy, detect whether you play the correct notes and chords, then give you feedback. If you are using a digital instrument, you have the option of connecting to flowkey via MIDI or Bluetooth® to enhance the accuracy even more.
After launching flowkey, the “Introduction to the Piano” course is where beginners will want to start:
Here, you can learn the core basics of posture, hand position and reading sheet music, accompanied with numerous practice exercises. To ease you in, flowkey starts you off playing with just one hand, then the other, before eventually leading to the next beginner-level course: “Playing With Both Hands.” A circle showing your percentage of progress will fill up as you run through the various lessons and tutorial videos.
Digging In
You can jump around to various courses of different skill levels at any time, so once you’ve mastered the concepts presented in the beginner level courses, you can move onto other lessons and exercises. True to its name, the app presents a gradual flow of concepts so as to not overwhelm those new to keyboards. For example, the “Intermediate Piano Playing” course starts with fingering techniques that allow you to physically reach various notes — integral to performing more complex pieces. From there, you’re given a crash course in sharps and flats, as well as changes of key and time signature. More advanced courses include additional sheet music and scale practice exercises, as well as lessons specific to mastering and improvising chords.
There’s a lot of content to unpack in flowkey’s “Courses” tab, so it’s important for newer players to approach the tutorials at a measured and gradual pace. Spend time with each lesson until you have grasped the insight at hand and feel comfortable enough to move on. The flowkey course curriculum was designed to support step-by-step progress, so you’ll get the most out of the app if you soak up each lesson sequentially. For example, you’re not going to understand much about time signatures if you can’t read sheet music. As with any autonomous endeavor, you get out what you put in.
Learn to Play Your Favorite Songs
One of the most impressive things about flowkey is its intuitive play-along feature, which allows you to easily learn some of your favorite songs. The app offers a large library of musical pieces, from classical to jazz to film and TV favorites to contemporary pop.
What’s more, there are multiple tiers of skill for each song and lesson, as denoted by a colored ring: green (Beginner), yellow (Intermediate), red (Advanced) and, in some cases, purple (Pro):
Say you want to try your hand(s) at Beethoven’s eternal piece “Für Elise.” Simply pick which level of skill you’d prefer by selecting the corresponding color; the app will then launch the interactive song player, where you can play it to your heart’s content. You’ll find that practice does indeed make perfect!
When you launch a song, flowkey presents a top-down view of the keyboard and a scrolling section of sheet music where you can select various passages to loop if you don’t want to play the song front to back right away. This allows you to master specific portions of songs, such as a difficult solo or chord. From there, you can choose whether to practice right hand notes, left hand notes, or play with both hands. You can also switch to a “Slow Motion” learning mode, which slows down the song’s tempo for easier playing accuracy. A convenient “Wait” mode will pause the song until you’ve hit the correct note, allowing even newbies to keep up, regardless of tempo.
Whether you’re just embarking on your keyboard journey or looking to hone your skills with daily song exercises, flowkey provides hours of learning experiences with lessons, insights and intuitive play-along features. The app’s universal accessibility and large song library make it a worthy option for those looking to learn keyboards or piano from the comfort of their own home … and for a fraction of the price of physical lessons. Settle in at your keyboard, fire up flowkey, and you’ll be dancing your fingers across those ivories in no time!
Click here to read the flowkey Complete Beginner’s Guide.
From now through March 31, 2025, customers purchasing a qualifying Yamaha digital piano or keyboard get three months of flowkey Premium access. Click here for more information.
Knock on wood — COVID protocols are being rolled back even more as we prepare for the 2023-2024 school year. Although masks are becoming optional, there are some COVID safety rules that I plan to maintain in my music classroom at Robert and Sandy Ellis Elementary School because they create a stronger learning environment where students are conscious of their germs and surroundings.
Hand Washing and Sanitizer
Students have been taught to wash their hands after using the bathroom their entire lives, but hand-washing has felt like a new concept recently. The task of taking an entire class of students to wash their hands before music class is too clunky to do every hour. Instead, I have elected to allow students to self-regulate when they need to wash their hands or quickly use hand sanitizer.
Depending on the age of your students, you might prompt with different questions, but I ask my class before they walk in the room if they’ve touched anything so far today that they wouldn’t want to put in their mouths? The question is designed to get a sweeping response that encourages students to wash their hands. I ask the question to open the door for students to choose if they should wash their hands rather than mandating that everyone do so. Giant tubs of hand sanitizer are stationed near tissues, boomwhackers and the door to give students ample opportunity to use it when desired.
Band, orchestra and choir may not have such a high demand for clean hands, but the elementary music classroom sees enough students putting mallets, boomwhackers and shakers in their mouth to encourage the continued practice of cleanliness.
Less Sharing, More Concentrated Time
Before March 2020, my classroom was a space where students could sample dozens of instruments before promoting up to band, orchestra and choir in 6th grade. When we returned from quarantine, sharing was banned in all classrooms, even if it meant changing your entire curriculum. Most general music classrooms depend on sharing because class sizes are larger than the number of available instruments in a given family.
For example, my 15 ukuleles were each shared by three students who rotated with each ding of the timer. Now that rotating was off the table, I had to commit 15 students to a ukulele at the beginning of class and find other instruments for the remaining students to play. Instead of teaching only ukuleles for an entire lesson, I had to expand my limits to teach ukuleles to 15 students, xylophones to 15 students and hand drums to 10 more at the same time. There were definitely growing pains, but the upside was that students received longer practice times on their instruments and reached proficiency quicker than they did before. This model also allowed me to repeat a lesson with students on different instruments the next week.
Music Lessons Available Online
When my district, Clark County School District, was implementing distance education, music teachers were required to post a new lesson every rotation for students to follow either in class or independently. Though it was quite the chore, creating scores of video lessons and the benefits of keeping them on standby have been wonderful.
My school requires emergency sub plans to be submitted in a red folder so that a substitute has a fighting chance if you’re absent unexpectedly. Having video lessons has allowed me to simply email a link to the substitute with the lovely direction, “Press play.” Students still receive instruction from their qualified music teacher, and the substitute only has to monitor a few students because most of the class will be engaged by your video presence.
Similarly, if you are not assigned a substitute, you can send your video lesson links to the classroom teacher to experience in their classroom or the music room.
Distanced Sit Spots
Many music classrooms are blessed with chairs, but I find them to be a space waster especially when you consider how many instruments could take their place. Pre-COVID, I subscribed to a very loose sitting arrangement on the floor that allowed students to choose their own space. Although it created some problems, the success that I enjoyed was reading students’ engagement based on where they sat. Students who chose the far back corner were telegraphing that they didn’t plan to enjoy or participate in class. I could then gauge the efficacy of my lessons based on how my back-row friends were doing. Sometimes they played with their shoes but other times they scooted a little closer and gave it their best effort.
Despite every teacher in the building telling me I’d be happier with arranged seating, I kept my model. Post-COVID, everyone was required to turn in seating charts for their classes, complete with diagrams for contact tracing purposes. Copying the PE teacher, I purchased Velcro sit spots and spaced them out to the district’s liking.
I’m still using the sit spots eight months later. In fact, I’m content to keep this layout for the remainder of my career! The spacing has drastically reduced behaviors that were tied to close proximity. Students are still close enough to communicate but just out of arm’s reach. I now have the option to call small groups by sit-spot color, and I have made red dots an undesired location for repeated behaviors. “Friend, please move to a red dot until you can make better choices,” is a new deterrent.
Computer Lab Time
One of the futuristic solutions during quarantine was to take music classes to websites like Soundtrap, BandLab,Chrome Music Lab and many others that teach music production. Combined, these websites allow students to create melodies, accompaniments, beats and podcasts all from the school’s computer lab or personal Chromebook. Sound production in music education deserves its own article, but here I’ll simply say, “We need it.”
Distance education created an online resource boom that has given the world the highest quality resources we have ever had in the history of music education. I was fortunate enough to attend an elementary school that had a MIDI keyboard lab meant for student music production, but decades later, that school is still one of the only schools to have a keyboard lab in the entire state. Websites like Soundtrap and BandLab allow any school on the planet to forego purchasing hundreds of thousands of dollars’ worth of physical equipment because their software is compatible with mouse clicks and keyboard strokes. Playing a C major chord is as simple as pressing QET on your QWERTY keyboard.
Exit Procedures
For the last 12 months, the goal at the end of every music period was to prevent cross contamination from one class to the next. Students knew to collect mallets and sticks they used and place them in a red bucket that would be sprayed down at lunch time. Other items like ukuleles, shakers and drums were wiped down in the final three minutes of class.
These tasks, though tedious, created student ownership that I had not previously witnessed. Before the pandemic, many of the rules in my music classroom were meant to protect the equipment from the students. Now, and for the first time in my career, students were tasked with maintaining the instruments, and they demonstrated a shared commitment to make each instrument last as long as possible. I plan to roll back wiping down every hour, but I want to maintain an “instrument check” before lining up so that students have an opportunity to care for the instruments. “Check the wheel locks, the screws, the strings, the bars, the mallets and put it back where you found it. Sanitizer is by the door on your way out!”
What About You?
Every state has handled the return to the classroom differently. What procedures do you plan to keep? Is there something you unconsciously kept and just realized it? Share your thoughts with me on Instagram @Swicksclassroom or email educators@yamaha.com.
NAMM is back! Here’s a look at some of the many drum, percussion and marching instrument products that Yamaha will be showing at the annual event, which will be held in Anaheim this year from June 3 through June 5.
DTX10 Electronic Drums
The DTX10 Series is the flagship of the Yamaha DTX lineup, combining the functionality of electronic drums with the aesthetic of their acoustic counterparts. Two kits are available: the DTX10K-X, which comes outfitted with TCS (Textured Cellular Silicone) pads, and the DTX10K-M, outfitted with REMO® two-ply mesh heads. Both feature newly designed shells that offer the presence and beauty of authentic acoustic drums, constructed from high-quality birch ply and available in Black Forest or Real Wood finishes. In addition, both utilize a hex rack mounting constructed from a strong, lightweight aluminum alloy, providing tremendous flexibility for positioning while keeping toms and cymbals locked in place throughout a performance or recording session.
DTX10K-X in Real Wood finish.
All DTX10 Series kits are powered by the new DTX-PROX module, which provides 14 trigger inputs, 256-note polyphony and the ability to layer up to four sounds per pad. It offers a full gigabyte of WAV ROM, with more than 700 voices and 70 preset kits, plus you can build up to 200 of your own custom user kits. Features include a unique Kit Modifier that allows you to instantly create your desired sound by simply turning Ambience, Compression and Effects knobs, along with a Fader Select knob and seven LED rotary faders for even more extensive editing capability. Plus, with the use of the free Yamaha Rec’n’Share app, you can take videos of your performance and share them without leaving the drum throne.
DTX8 Electronic Drums
DTX8 Series electronic drums provide the same aesthetics as the DTX10 Series, but at a more affordable price point. Two kit options are available: the DTX8K-X, which comes with TCS (Textured Cellular Silicone) pads, and the DTX8K-M, with REMO® two-ply mesh heads.
DTX8K-M in Black Forest finish.
The heart of the DTX8 is the DTX-PRO drum module, which comes loaded with hundreds of professionally-sampled sounds and effects, as well as 512 megabytes of WAV ROM. It provides 256-note polyphony and the ability to layer up to four sounds per pad, as well as 14 trigger inputs, a three-knob Kit Modifier for instant sonic tweaking, and a series of built-in training tools designed to allow players of every level to develop their drumming skills.
DTX6 Electronic Drums
DTX6 Series electronic drum kits provide an easy and fun way to practice and learn to play drums. There are three models to choose from — the DTX6K-X, DTX6K2-X and DTX6K3-X (shown below) — all equipped with a DTX-PRO module, as well as kick drum, snare drum, tom and cymbal pads.
The EAD10 instantly transforms any acoustic drum set into a hybrid kit. Simply mount its sensor unit (which contains a pair of high-quality condenser microphones and a kick drum trigger) on the bass drum hoop. The microphones capture the entire kit, and the kick trigger can play any of the hundreds of drum or percussion sounds built into the EAD10 module. In addition, multi-zone snare and tom trigger inputs on the module can accept the output from a clip-on drum trigger such as the Yamaha DT50S, or from Yamaha XP Series and TP Series drum pads, making it possible to layer electronic sounds with the acoustic sound of the drums, or to expand your acoustic kit with electronic percussion, cymbals or effects.
PHX Series Drums
Also on display at NAMM will be top-of-the-line PHX Series drum sets — the ultimate musical instrument for drummers, handcrafted by our expert technicians.
PHX double bass drum set in Classic Maple finish.
PHX (short for “Phoenix”) drums are highly customizable and available in a wide variety of sizes. They all have hybrid shells made of Brazilian jatoba, North American maple and kapur for maximized attack and sustain while providing plenty of projection and warmth, along with a unique shell mounting and a specially designed hook lug system for a rich fundamental tone. And they look as beautiful as they sound, with your choice of Classic Maple or exotic Burled Ash finishes — even the hook lugs and aluminum die-cast hoops are available in either gold or chrome.
MS-9414 Series Marching Drums
Yamaha will also be showing the new and updated MS-9414 marching snare drum and MS-9414S piccolo marching snare drum.
MS-9414 marching snare drum.
MS-9414S piccolo marching snare drum.
Continuing the legacy of the famed line of SFZ marching snare drums, the redesigned MS-9414 Series was built to satisfy director and player requirements through extensive field testing and evaluations with top DCI and WGI performing groups and artists. The augmented maple shell ensures a warm tone with excellent presence and projection, and additional air holes help produce precise snare articulation without reducing volume. A unique top hoop shape enhances the rimshot sound and reduces drumstick damage, and a new strainer design and knob shape allows quick fine-tuning and consistent snare tension while adjusting. In addition, redesigned hardware reduces weight without compromising tone or durability.
CFM-1414 Concert Field Snare Drum
Also on display will be the new CFM-1414 14-inch deep-body field drum, specially designed for concert performance.
CFM-1414 concert field snare drum.
The CFM-1414 utilizes the same type of eight-ply maple shell as the famed CSM Series, popular for its rich resonance and warm tone. Its deep body ensures ample volume and a fat sound, with vent holes and a snare bed that have been modified to enhance “snap” and response.
YPS200 and YMS100 Percussion / Percussion Mallet Stands
Another highlight will be the debut of the YPS200 percussion stand and YMS100 percussion mallet stand.
YPS200 percussion stand.
YMS100 percussion mallet stand.
These versatile and handy accessories have a variety of applications. The YPS200 rolling trap table can be used to hold tuning keys, spare sticks/mallets or small percussion instruments such as triangles, castanets or tambourines — even glockenspiels! The YMS100 is a noiseless mallet stand with a wide height-adjustment range, making it easily accessible to players of all heights.
Remember, if you can’t make the show in person, you can always catch the highlights here!
You may not ever have the chance to actually sit in the cockpit of a high-performance airplane, but you can approximate the exhilaration by playing flight simulator games — an experience that gets even more realistic and compelling when you connect your gaming console to a surround sound system with a high-quality AV receiver and speakers or sound bar.
Here are some of the best flight simulator games to enjoy in surround sound.
1. GRAND THEFT AUTO 5 (PlayStation®, Xbox™, Windows)
One of the most popular game series in modern history, GTA offers players the chance to drive lots of different cars in lots of different situations … and, in this fifth installment, fly commercial airline planes too. It’s your choice, however, as to whether you want to fly them safely or into mountains; whether you want to land them gently on airport tarmacs or crash land on city streets. With a surround sound system and a good subwoofer, you’ll actually feel what it’s like to graze a bridge before having to eject and land in the harbor below. (Keep your ears out for sirens going off in the distance in all directions — or the next plane following closely behind!) Preview it here.
2. WAR THUNDER (PlayStation, Xbox, Windows)
This realistic war game relies largely on flying, giving you a sense of what it’s like to go into battle as a nation in global warfare. Meaning: bold explosions, deathly vehicle crashes and fiery jet engines whizzing past your ears! You can opt to represent the United States, Germany or the U.S.S.R. as you maneuver your choice of bomber jets or propeller planes … but you need to remain alert at all times, as shooting accuracy and vehicle maneuverability are paramount. In other words, don’t let yourself get surprised by an enemy hot on your tail because the audio is too low! Preview it here.
Sound is as important as your flying ability when it comes to this game; in fact, within moments of launching Ace Combat 7, you’ll wonder if you’ve been teleported to an alternate reality. From the left, directions are barked at you regarding your next mission; from the right, radars are beeping frantically. Missiles fly overhead as black clouds of crashing explosions appear from every direction — you can almost hear the heat coming from the engine of your virtual airplane. Preview it here.
4. X-PLANE 11 (Windows, Mac®)
Less a game and more a training program, this title is as realistic as it gets. It features crystal-clear graphics, incredibly detailed cockpit layouts and vivid scenery that accurately depicts the real world. Click each switch to get the engine revving while on the tarmac, or make the necessary adjustments as you cruise at altitude. You also learn the ins and outs of real-life bustling airports; for example, you can fly a commercial airliner out of a virtual LAX and deal with the airport’s “traffic.” With a surround sound system, you can immerse yourself in everything from the roar of wind by your window to the delicate cockpit click-clacks. There are a ton of settings, too, including the option to fly bigger, louder military planes. Preview it here.
A first-person simulation game set 50 years after human extinction in a post-apocalyptic Paris, France, this inventive title allows you to feel what it’s like to be an eagle (not a plane!), flying through the sky, over buildings, adjusting to the shifting winds and dodging errant leaves. You have to defeat rival squawking animals in order to find the perfect place for your nest and keep your species alive … but to do so, you must stay vigilant and listen for every rustle of a feather in the breeze. Eagle Flight sounds great in standard stereo, but if you plug in a virtual reality headset like the Oculus Rift, Oculus Quest or PlayStation VR, you can experience every moment in stunning surround sound. Preview it here.
6. MICROSOFT FLIGHT SIMULATOR (Xbox, Windows)
This globe-trotting title allows players to test their piloting skills against challenges of night flying, real-time atmospheric changes and thunderous weather conditions. Enjoy flying anywhere in the world as you maneuver different types of planes and flight models while soaring over vivid landscapes, and do your best to navigate every tree, skyscraper and mountain in your path. The detailed visuals and powerful surround sound elements give you a level of accuracy and realism that makes you want to pack your bags and take a trip. Preview it here.
Musicians know that having the right tools can make all the difference when learning a new concept or practicing your instrument. Whether you’re just starting out or you’re a seasoned pro, there’s no denying that great music software can help take your skills to the next level.
For beginners, there are dozens of apps and websites that can help you learn the basics of music theory and composition. You can find instructions on everything from how to tune your instrument to how to create complex chord progressions. And if you get stuck, there are often video lessons or forums where you can get help from more experienced musicians.
For musicians who are already proficient, technology can still be of great assistance. Software programs can help with things like recording and mixing your music, writing notation for compositions, ear training and so much more.
Not to mention the software programs and music apps that help music educators teach their students with a greater level of engagement and success.
In this blog post, we’ll introduce you to five great music apps and software programs you may not have heard of but should definitely look into. So, if you’re looking for a new way to create music or just want to make sure you’re using the best tools available, read on!
EarMasteris an app for improving your ear training and sight-singing skills. Ear training is oftentimes a small part of a singing lesson curriculum. However, EarMaster helps train your ear and hone your pitch at a much higher level, no matter which instrument you play.
The app features a variety of exercises that gradually increase in difficulty, ensuring that you can always find a challenge to keep you engaged.
In addition, the rhythm training and sight-singing features will help take your musical skills to a new level.
BandLab is an online music studio that brings together musicians from around the world. It provides everything you need to record, mix and share your music.
With a simple and intuitive interface, this cloud-based platform puts powerful tools and effects right at your fingertips. And because it is completely accessible in the cloud, you can work together with up to 50 collaborators per project, regardless of where they are located.
BandLab also has “BandLab for Education” to help music educators enhance the learning experience for students. It offers teacher features such as assignment creation capabilities, a grades system and real-time collaboration.
Whether you are working on a new demo, adding a final polish to your latest masterpiece or teaching a classroom of students, BandLab makes it easy to create and share your music with the world.
Most music educators have had students push back on musical genres that are typically taught in the classroom. Solfeg aims to bring trendy pop music education to the classroom with its intuitive platform.
With Solfeg, educators can do everything from creating music theory and history quizzes to assessing student recordings and seeing overall activity indicators.
All of Solfeg’s 150+ songs are simplified for school usage, include genres like pop, jazz and rock, and can be filtered by levels, chords and rhythm.
The interactive play-along feature makes it easy for students to visualize the percussion section chords, and a piano/vocal melody for each song on the Solfeg platform.
Currently, Solfeg offers content for the ukulele, piano, guitar and singing, however, if that’s something you think your students might be interested in, give Solfeg a try.
Noteflight Learn provides music educators with a tool that students can use to compose music and get automatic performance assessments.
Thanks to its easy-to-use interface and sharing capabilities, students can access the website from anywhere with an internet connection and get feedback on their pieces.
Noteflight Learn also integrates with Google Classroom and other learning management systems so that you can easily keep track of assignments and performances.
SmartMusicis a web-based suite of music education tools that allows users to create, practice and perform music with professional accompaniments. It also provides access to sheet music, lessons and resources for music teachers and students.
SmartMusic holds the largest library in the industry with just under 15,000 printable titles so you won’t run out of sheet music any time soon.
It also offers an array of tools for practicing pitch, sight-reading, composing and more.
Congratulations on your new job! Whether you are entering your first year of teaching or first year in a new position, it is an exciting time in your life. Just as athletes train and prepare for big events, teachers also need to prepare for our big event known as the first year.
You have sat through courses, observed teachers and taught lessons of your own. You are ready to put theory into practice, but where do you start?
This article is set up chronologically, beginning with the summer before your first day on the job and ending with the last day of school. I believe in five-year benchmarks throughout a person’s career similar to how several school districts and universities acknowledge their employees. With that in mind, I approach the first year of teaching as training for the next four years. Click on the links below to see how I set up my first year:
If you have ever trained for an athletic event, you know the importance of built-in rest days in the schedule. I emphasize rest throughout this first-year training plan because it is imperative to your overall well-being. Take your rest days as seriously as your workdays.
Create sustainable daily routines that maximize your time
Winter Break: Rest
self-care
Reflect and recharge
Second Semester: Full Marathon
music-making
minimize organizational disruptions to focus on music-making
First Week of Summer Break: Rest
reflect
How can you effectively change one or two items to make your next year run smoother?
Summer: Strength Training
When training for a large event like a marathon, there are many checkpoints along the way. Many athletes will focus on strength training for several weeks prior to beginning their official marathon training as preventive maintenance. This period strengthens their muscles and reduces the risk of injury further down the line.
Similarly, after accepting a job offer, use the lead time to the start of the school year as preventive maintenance. During this period, you can get a handle on the organizational structure that is currently in place. The ability to physically spend time in your new facilities is important. Take the necessary time to familiarize yourself with inventory items, such as instruments, music, folders, lockers/locks and uniforms.
When you begin to look through your inventory ask yourself these questions:
How are these currently organized?
Where are they stored?
What is the school policy for instrument rental?
Locate all school forms for inventory items.
Are there currently parent or student volunteers who help with uniforms?
Once you have answered those questions, proceed with making the current system work for you. If you find that an organizational overhaul is needed, I strongly encourage you to envision or create the new structure in a manner that is teachable. Delegate the larger tasks to student leaders or parent volunteers in order to spend your time and efforts on students and music-making.
The calendar for the upcoming school year has likely already been set. Make sure to map out your year, start by adding the following events to your work calendar:
Concert Band concerts/events
Jazz Band concerts/events
Pep Band events
Marching Band events
Travel (is it one trip per year?)
Annual fundraisers
Annual recruitment tours
Parent Organization meetings
Highlight all events that require travel, such as festivals, and check with the school administrative assistant about the procedure for bus requests. How many weeks prior to the event do you need to submit bus requests? Add those deadlines to your calendar! Once you have the calendar organized, send an email to parents and students introducing yourself and the important dates for the upcoming school year.
Once you have your calendar mapped out, you will have a better idea of when your first public performance will be and with which ensemble(s). You can begin to think about programming music. To keep it simple, try to find programs from the past three years of concerts to give you an idea of what music the ensemble(s) have performed. This gained insight can guide you toward a difficulty level. Rosters of your classes will also help you estimate expected instrumentation. From there begin pulling music from your library that is comparable to the previous year’s concert programs. I also encourage teachers to pull music that is on the easier side for sight reading at the beginning of the year. This helps to build confidence for the ensemble and for you to focus on musicianship versus notes and rhythms from day one.
While most of this prep work can be done in solitary, keep in mind that athletes rarely train alone, they have coaches and peers who they can go to for advice. Similarly, seek advice and mentorship early. One of the first connections that I encourage you to make is with the administrative assistants and custodial staff. These people are the lifelines at every school. They know who you need to contact for any given scenario, where you can find information and how to approach specific people. Keep in mind that these people are also extremely busy, so go to them with a well-formulated question or set up a meeting with them and bring several questions. They will appreciate that you are respectful of their time and have gathered your questions together.
Also, take time to meet the counselors at your school. Ask them questions about how the registration process of classes works and where music classes fit in the process. What classes are offered concurrently with your courses? Gather all the information that you can before the school year begins.
Now that you have spent time getting to know your inventory, calendar and creating your important support system within the school, make sure to reach out to your mentor and colleagues outside of your school. The true secret to success is having a support system that might include friends you graduated college with or past teachers who you now call your friends. Connect regularly with the people who will listen and offer advice when asked.
The final step of this summer period is to reflect and dream. Take time to write down your why. Why do you want to work at this specific school? What goals do you have? Dream big! Write down your five-year goals first. What do you hope to accomplish by year five on the job? Do you want the program to have experienced a certain amount of growth or performed at a specific venue? Write them down as well as benchmarks to hit along the path to success.
Forbes released an article in 2017 titled “11 Powerful Traits of Successful Leaders” and the fifth trait mentioned is “Setting Clear Goals and Persisting in Achieving Them.” Students want to be part of something bigger than themselves. Having big dreams and goals to chase creates a culture of excellence for your program. Do not skip this all-important step of your summer prep.
The First Week: 5K
The first week of the school year is fast and furious. This is when you will appreciate your summer prep work. Each year your first week of school will become more efficient.
Here is what I have learned over the years. The first day of school sets the tone. Have as much as possible ready to hand out on day one. Line up instruments with rental contracts along the walls and put student folders in assigned slots. Inside their folder, students can find their assigned locker number and lock combination if it is school provided.
On day one, this can be a simple process. When you are ready to share the information, simply project on the screen folder slot assignments and have students pick up their labeled instrument in exchange for the signed paperwork. This all takes a good amount of prep work, but the result is a clean handling of inventory. Once you have distributed the inventory, the rest of the week can be spent making music and building community. Spend time with appropriate warm-up/technique books and sheet music. Make music as much as possible and keep the room filled with positive energy, so students know that it is going to be a great year!
The First Semester: Half Marathon
Remember the calendar that you created during the summer? Make sure to consistently use it, and you won’t miss important deadlines, such as bus requests! This semester will fly by, so create daily and weekly habits that will enhance your work/life balance.
Set boundaries with your work email. After a certain time at night, you are no longer on the job and all incoming emails can be read and responded to the next workday. The earlier you set these boundaries the better — parents and students will learn your communication habits. Stay strong when someone becomes upset that you did not immediately respond to an email that they composed at 11:00 p.m. Politely respond during your regular work hours and thank them for their patience.
Create routines for yourself and your program. Have a consistent routine for lesson planning, class structure, daily email correspondence, weekly/biweekly email newsletters for parents, and planned time for yourself. During the first year, it’s not a bad idea to hang a chore chart by your desk and physically check off each daily task. You can find hundreds of templates for these online. A chore chart can help you stay focused each day on the task at hand, maximizing your down time. The more organized and focused you are at work, the easier it is to “leave work at work” and strike a greater work-life balance.
While you figure out your routines and how to balance work with your personal life, make sure to give yourself space to reflect often. How are your ensembles progressing musically? Are you establishing a good rapport with your students? Check in with the goals you set prior to school starting — does anything need to be revised now that you are living in the job? Touch base with your support system. Send texts to your friends and laugh regularly.
Winter Break: Rest Days
Take your rest seriously, unplug from the job over winter break. Go into your email settings and set up the automatic out-of-office reply that lets people know that you value their correspondence and will respond after school resumes. The last step is to delete your email app from your phone, if you have it installed. Enjoy, you earned this break!
Second Semester: Full Marathon
During the first semester, you created a foundation to build on. You have routines in place that work for you. Throughout the second semester consistently reflect and evaluate what specific parts of your job are creating friction. Continue to smooth out any administrative tasks that are distracting you from the most important part of the job: your students.
This is an ongoing process in the job, so give yourself time and grace. Accept that you will make mistakes and own them when they happen.
Begin planning for the next academic year while finishing out this one. What events were great and should continue? Is there anything that could be left out next year?
Check in with your goals and create a trajectory for your program that is both positive and sustainable. Remember that you are not alone, continue to lean on your support system.
Summer Break: Reflect and Rest
During the first week of summer break, go someplace off campus and reflect on your year. Choose a place that will allow you the space to think clearly and write down your thoughts. Bring a journal or laptop and write down everything that went well.
What are some areas of opportunity for improvement? Write down a few actionable steps to aid in improvement. Is there anything you can remove from the job? Or is there an area where you can continue to hone your daily routine in order to maximize your downtime?
After you have reflected, give yourself time to rest. Set the automated email reply and unplug for a good chunk of time.
Congratulations, you have completed your first year of teaching!
Stride piano is a highly rhythmic style of playing that originated during the ragtime era of the early 20th century and eventually developed into an entirely new way of performing. Some of the principle innovators included James P. Johnson, Willie “The Lion” Smith and Fats Waller. Later practitioners included Art Tatum, Oscar Peterson and Dick Wellstood. You can find many dazzling examples of their playing on YouTube (just search for the term “stride piano”).
Often played at very fast tempos, it’s a great way for pianists to show off their skills (especially their left-hand technique), but mastering stride piano can take years. You can, however, incorporate the basics into your playing fairly easily. In this article we’ll show you how.
A Simplified Approach
The key aspect of stride piano playing is its use of a bass note followed by a chord voicing above it, like this:
In this basic example, for each chord, you play the root, followed by a simple triad voicing. Then you play the fifth of the chord, followed again by the triad. It will take some practice to do this cleanly: as always, take it slow and get used to the distances your hand has to go between the bass notes and the chords.
Here’s a variation that does less alternating between bass note and chord; instead, it uses passing tones (notes in-between chord tones) on the fourth beat of each measure to lead into the root of the next chord:
This approach will lend a bit of an old-time feel to your playing. It also works nicely when used with bluesy and rock and roll licks, or for adding a country boogie feel, as in these examples:
A Modified Approach for Playing Ballads
A simplified version of this concept can be used to create a full, but very easy to play left-hand accompaniment that’s perfect for many slower-tempo situations, like ballads. As you can hear in this next audio clip, you should use the sustain pedal, pressing it down after the root note so it keeps on ringing while you play the chord voicing; then release the pedal just before playing the next measure, again using it to connect the bass note to the chord that follows.
To make things a little more interesting, try adding some passing tones on beat four to lead into the next chord, like this:
This next example varies the rhythm of the passing tones for a more flowing feel:
Alternatively, you can play the root, followed by the fifth of each chord, before playing the chord voicing:
Taking that idea one step further, try this approach, where the left hand plays the root, fifth and then the tenth (that is, the third played an octave higher) in a gentle arpeggio. As you can hear, this produces a very full sound:
Putting The Hands Together
The next step is to add a melody line with the right hand. The basic root-only left-hand accompaniment looks and sounds like this:
Here’s that same melody line with a little more movement in the left-hand accompaniment:
Here’s a different melody line, played over a more complex left-hand accompaniment for a very flowing feel:
And here it is with a root-followed-by-fifth left-hand accompaniment:
Finally, here’s the root, fifth, then tenth idea underpinning that same melody:
Try Another Time Signature
This style of accompaniment also works nicely in 3/4 time (waltz feel). Let’s wrap things up with some examples of how you can adapt stride accompaniments to that time signature.

 When I first heard of sites like DonorsChoose, GoFundMe and AdoptAClassroom, I must admit that I was a bit hesitant. However, seeing others reap the benefits of crowdfunding helped me to take the plunge and use this very effective fundraising tool. From receiving instruments and equipment to collecting close to $250,000 to cover travel expenses to the Tournament of Roses Parade, crowdfunding has been and continues to be one of my first approaches when I need to raise funds.


 Neurodivergent individuals often need accommodations — such as noise-reducing headphones or fidget spinners for stimulation — to make their experience in public settings like schools more positive.
 Just because a sound isn’t loud to you, doesn’t mean it isn’t perceived as loud to others. Sometimes neurodivergent students need more stimulation in order to focus in music class. Here are some simple ways to accommodate your neurodiverse classroom:
 Normalize fidgets and sensory tools, starting with yourself: About halfway through my first year of teaching K-2 music, I had an epiphany. I, too, could use the stress balls that I had on my desk for my students! To be honest, I was afraid that my elementary schoolers would laugh at me. But I explained, “Sometimes Miss F gets overwhelmed, too” while I squeezed a stress ball or used sensory items. This simple statement normalized the tools on my desk, encouraged conversations about sensory tools, and helped my students take them more seriously. While it might be embarrassing at first, it helps everyone get what they need in the long run.


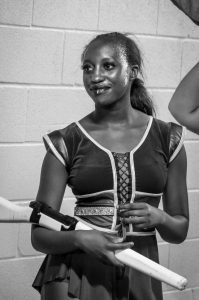 How do our words truly affect others? Each day, we take part in dozens of conversions with our students, coworkers, family members and others. As music educators, we are tasked with communicating with our students throughout the day, and for many of us, we have the opportunity to have a continuing conversation for years before our students graduate from our programs and head out into the world.
 Avoid words like “don’t” and “but.”
 Have you ever had a great performance? Of course — it feels wonderful to perform at your best!
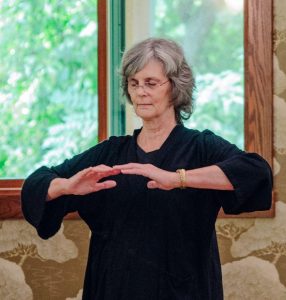


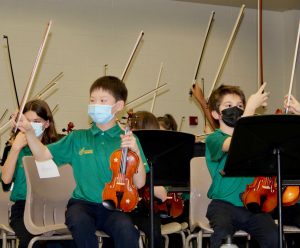 The result of these off-the-beaten-path lesson plans has been more student engagement, higher retention and overall program growth. “By adding in pop and recognizable music and adding technology, students have a positive experience in class and feel confident on their instruments,” Otto says.
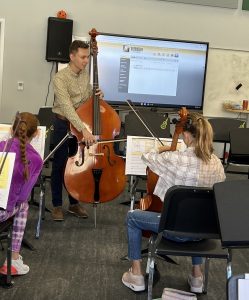 “
“
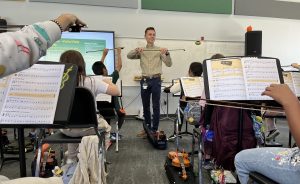 They also incorporate improv into concerts. “Sometimes there’s a solo section in a piece, or we can make one,” Otto says.
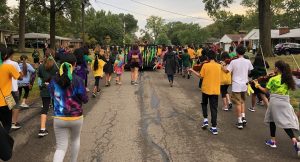

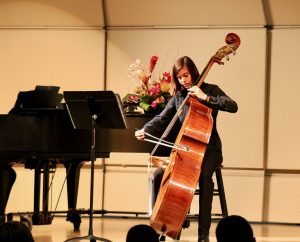 Finding Repertoire for Ensembles and “Oddsembles”
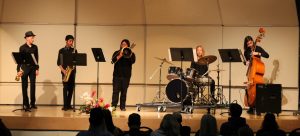
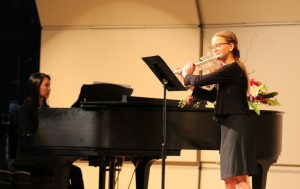 Day of the Festival
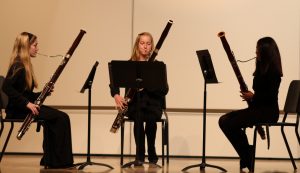 Our Solo and Ensemble Festival strengthens both our musicians’ skills and music community. Students involved often become leaders in their classes and are the most confident players in our ensembles. Rehearsing without a teacher helps them develop their critical thinking and analytical skills in music because they must break down why something isn’t working, lining up or doesn’t sound right.

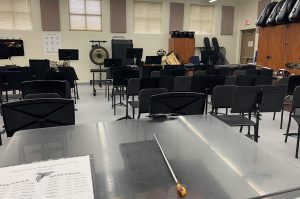 However, Don did the smart thing that many of us may have heard during our student-teaching: He waited. After taking some deep breaths and calming down, Don came to some realizations. Yes, he was busy, but the reality is that everyone’s busy! And this student was left off the program at a concert that he had worked hard for. The parent and child were upset, and nothing could change that. Don’s response was indicative of what I observed was at the core of his overall demeanor — honesty — and is one of the qualities that makes him a master educator.
 It’s easy to get caught up in the details, but Don Stinson’s practical advice and honesty made me feel better. Sure, right now I don’t know exactly how to do every aspect of my job, but there isn’t any podcast that can prepare me for that. I could only be sure that I would bring the openness and positive attitude that my students needed. At the Summer Symposium earlier that month, master teacher

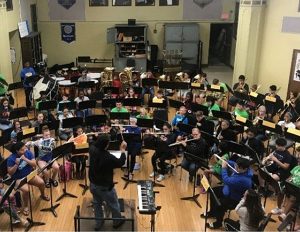 However, new educators should understand that they can and should have the option of enjoying a life outside of their career. I shared my ups and downs with Dan. Small things, like missing out on some after-school social events. Other small things, such as not being at some of my own children’s events because of work-related items or eating poorly during busy seasons. But these small things add up to larger issues and can sneak up on you. No one plans on their health taking a negative turn, or their friend circle shrinking, or a divorce. They just “seem to happen” and can often be a result of us putting our careers ahead of our own health and wellness.
 This meeting was exciting for me. Selfishly, I got a lot out of meeting with Dan. Sometimes as a teacher in the mid-stage of your career, you reflect on the things that you do, but also on the things that you used to do. As I shared my thoughts and tips with Dan — such as being vulnerable with students to encourage musical expression, writing encouraging handwritten notes on every student’s program before a concert, and creating a not-to-do list — I started to realize that I had strayed away from some of these items in my own teaching.
 Since restructuring the choir program, Rogers has noted many benefits not only in increased membership numbers, but also in the educational and emotional benefits to the students. “Choir can be female-dominated in some areas, and it’s really tough for middle school boys in choir,” Rogers says. “I wanted them to be able to have comfort and a sense of camaraderie and ownership in what they’re singing. I’ve always thought that if I have a group of students with similar voices, I can devote more time to training their technique.”

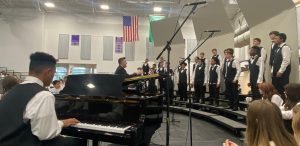 Even over Zoom, Rogers had students participate in a community circle, where ensemble members all greeted each other and shared their thoughts aloud with the group.
 Straw panpipe: Straw panpipes are a great way to teach about how length affects pitch and how scales work. To make a straw panpipe, you will need wide straws and materials to connect them, such as string, popsicle sticks and rubber bands, or simply tape. While you can use thin, they are much harder to get a sound on than bubble tea/boba straws.
 Popsicle-Stick Harmonica: This is one of the faster projects on our list. Popsicle-stick harmonicas require rubber bands, larger popsicle sticks, and straws or toothpicks. These “harmonicas” sound a lot like kazoos. They are super fun and buzzy, so be sure to do a lot of prep on when and where your students are allowed to play their instruments!
 Cardboard Trumpets: This craft is suitable for lower elementary students and teaches about sound waves and buzzing.
 Paper Plate Tambourine: Here’s another simpler project for lower elementary students. You will need paper plates, jingle bells, a hole punch and some string. Because the tambourine is made of paper, students can color or paint their instruments before they put them together, allowing for more creative freedom than some of the other projects! Check out
  Give instructions before you pass out materials.


 The report was released just prior to the
 I was fortunate to travel to Washington, D.C., on September 14, 2022, to participate in NAMM’s “Hill Day” advocacy push. This event was put together to drive awareness and highlight the outcomes of student participation, and most importantly, where and how money is being spent on music education. Funding educational programs takes place at all levels of government, but NAMM specifically funds and uses current research data to track what happens to that money once it is applied to various bills and the provisions in its laws. As an advocacy coalition, we take this data to legislators and have conversations about the importance of funding key programs that will impact students, teachers and communities.

 Is Music Hazardous to Your Health?
 Tight Neck and Shoulders
 Tight Hips

 When asked what we want our students at
  Throughout the year, I experience high moments, or peaks, with students, usually during great rehearsals and times when I feel that we are connecting and making terrific music together. However, most days are “ordinary time,” or valleys, when it seems like you are going through the motions. The kids aren’t necessarily high or low, and you’re in the weeds working through music or drills.
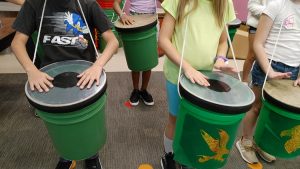
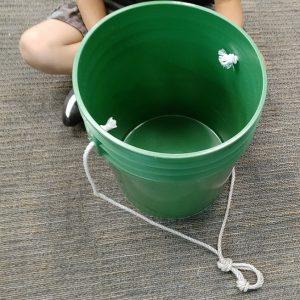
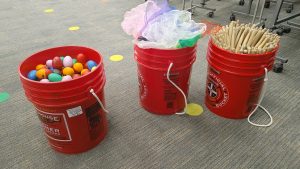 Besides all their wonderful musical benefits, buckets have alternate uses that have become standard in my classroom. I phase out damaged performance buckets as storage for boomwhackers, guitar strings, instrument cables and everything else that needs a separate container. My music room has no chairs but with a soft pad, buckets become a tolerable sitting surface for a short amount of time. If you’ve seen the
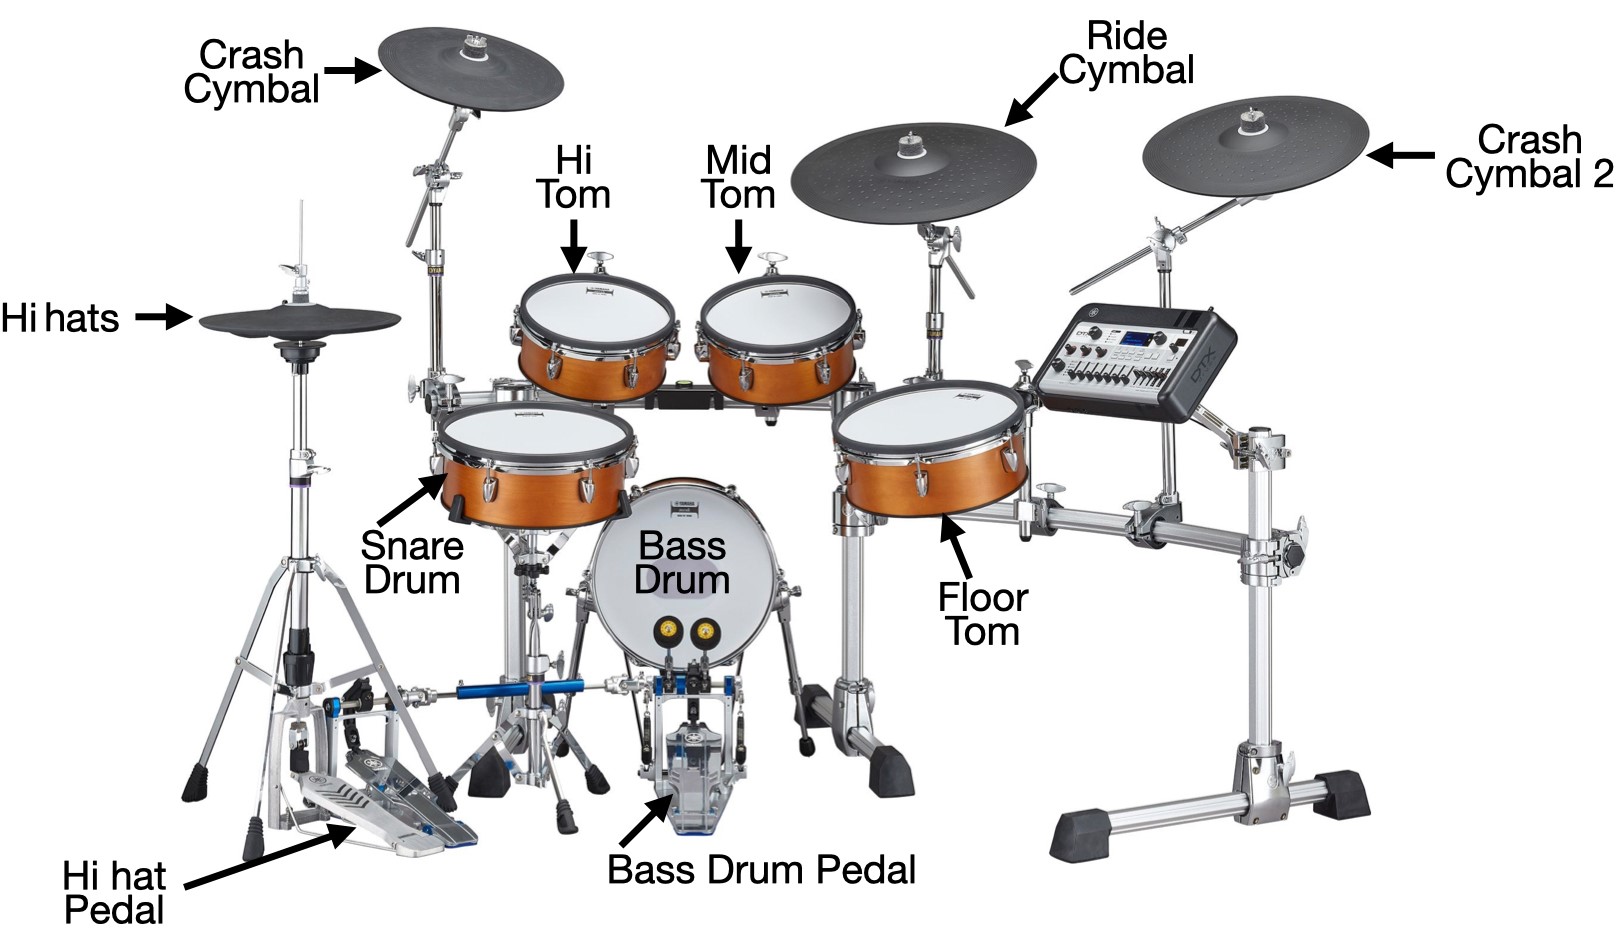


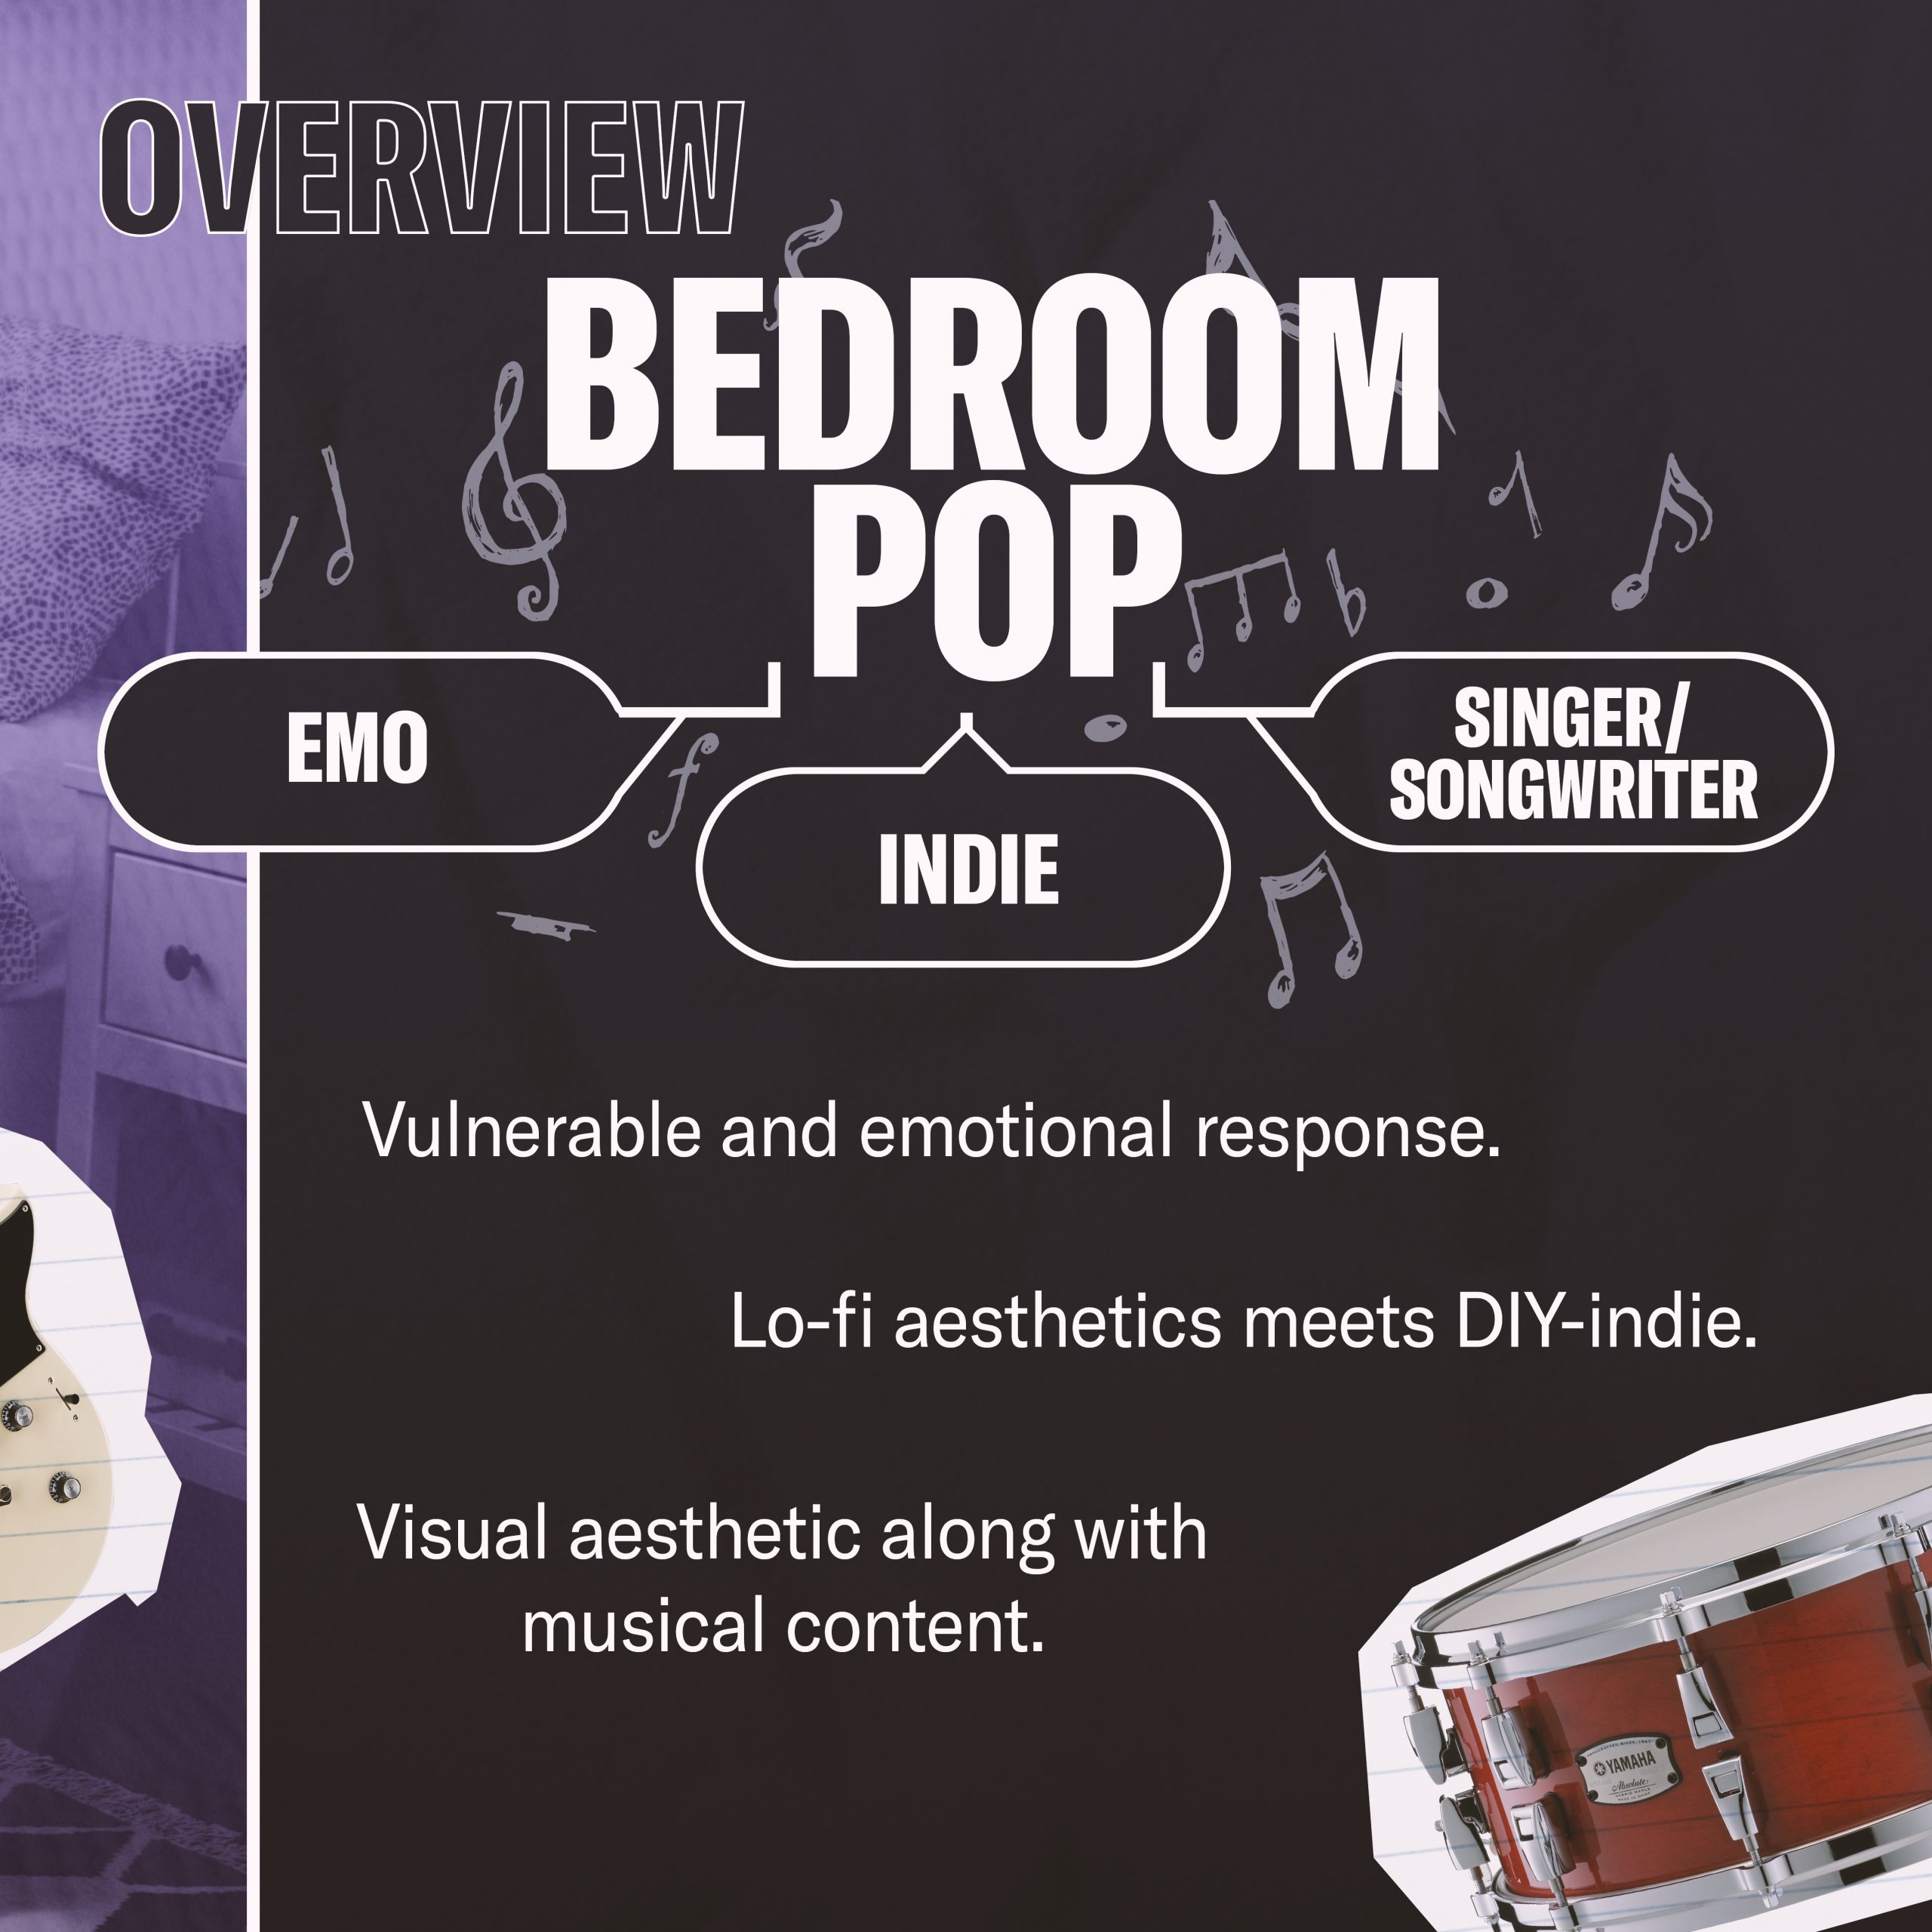
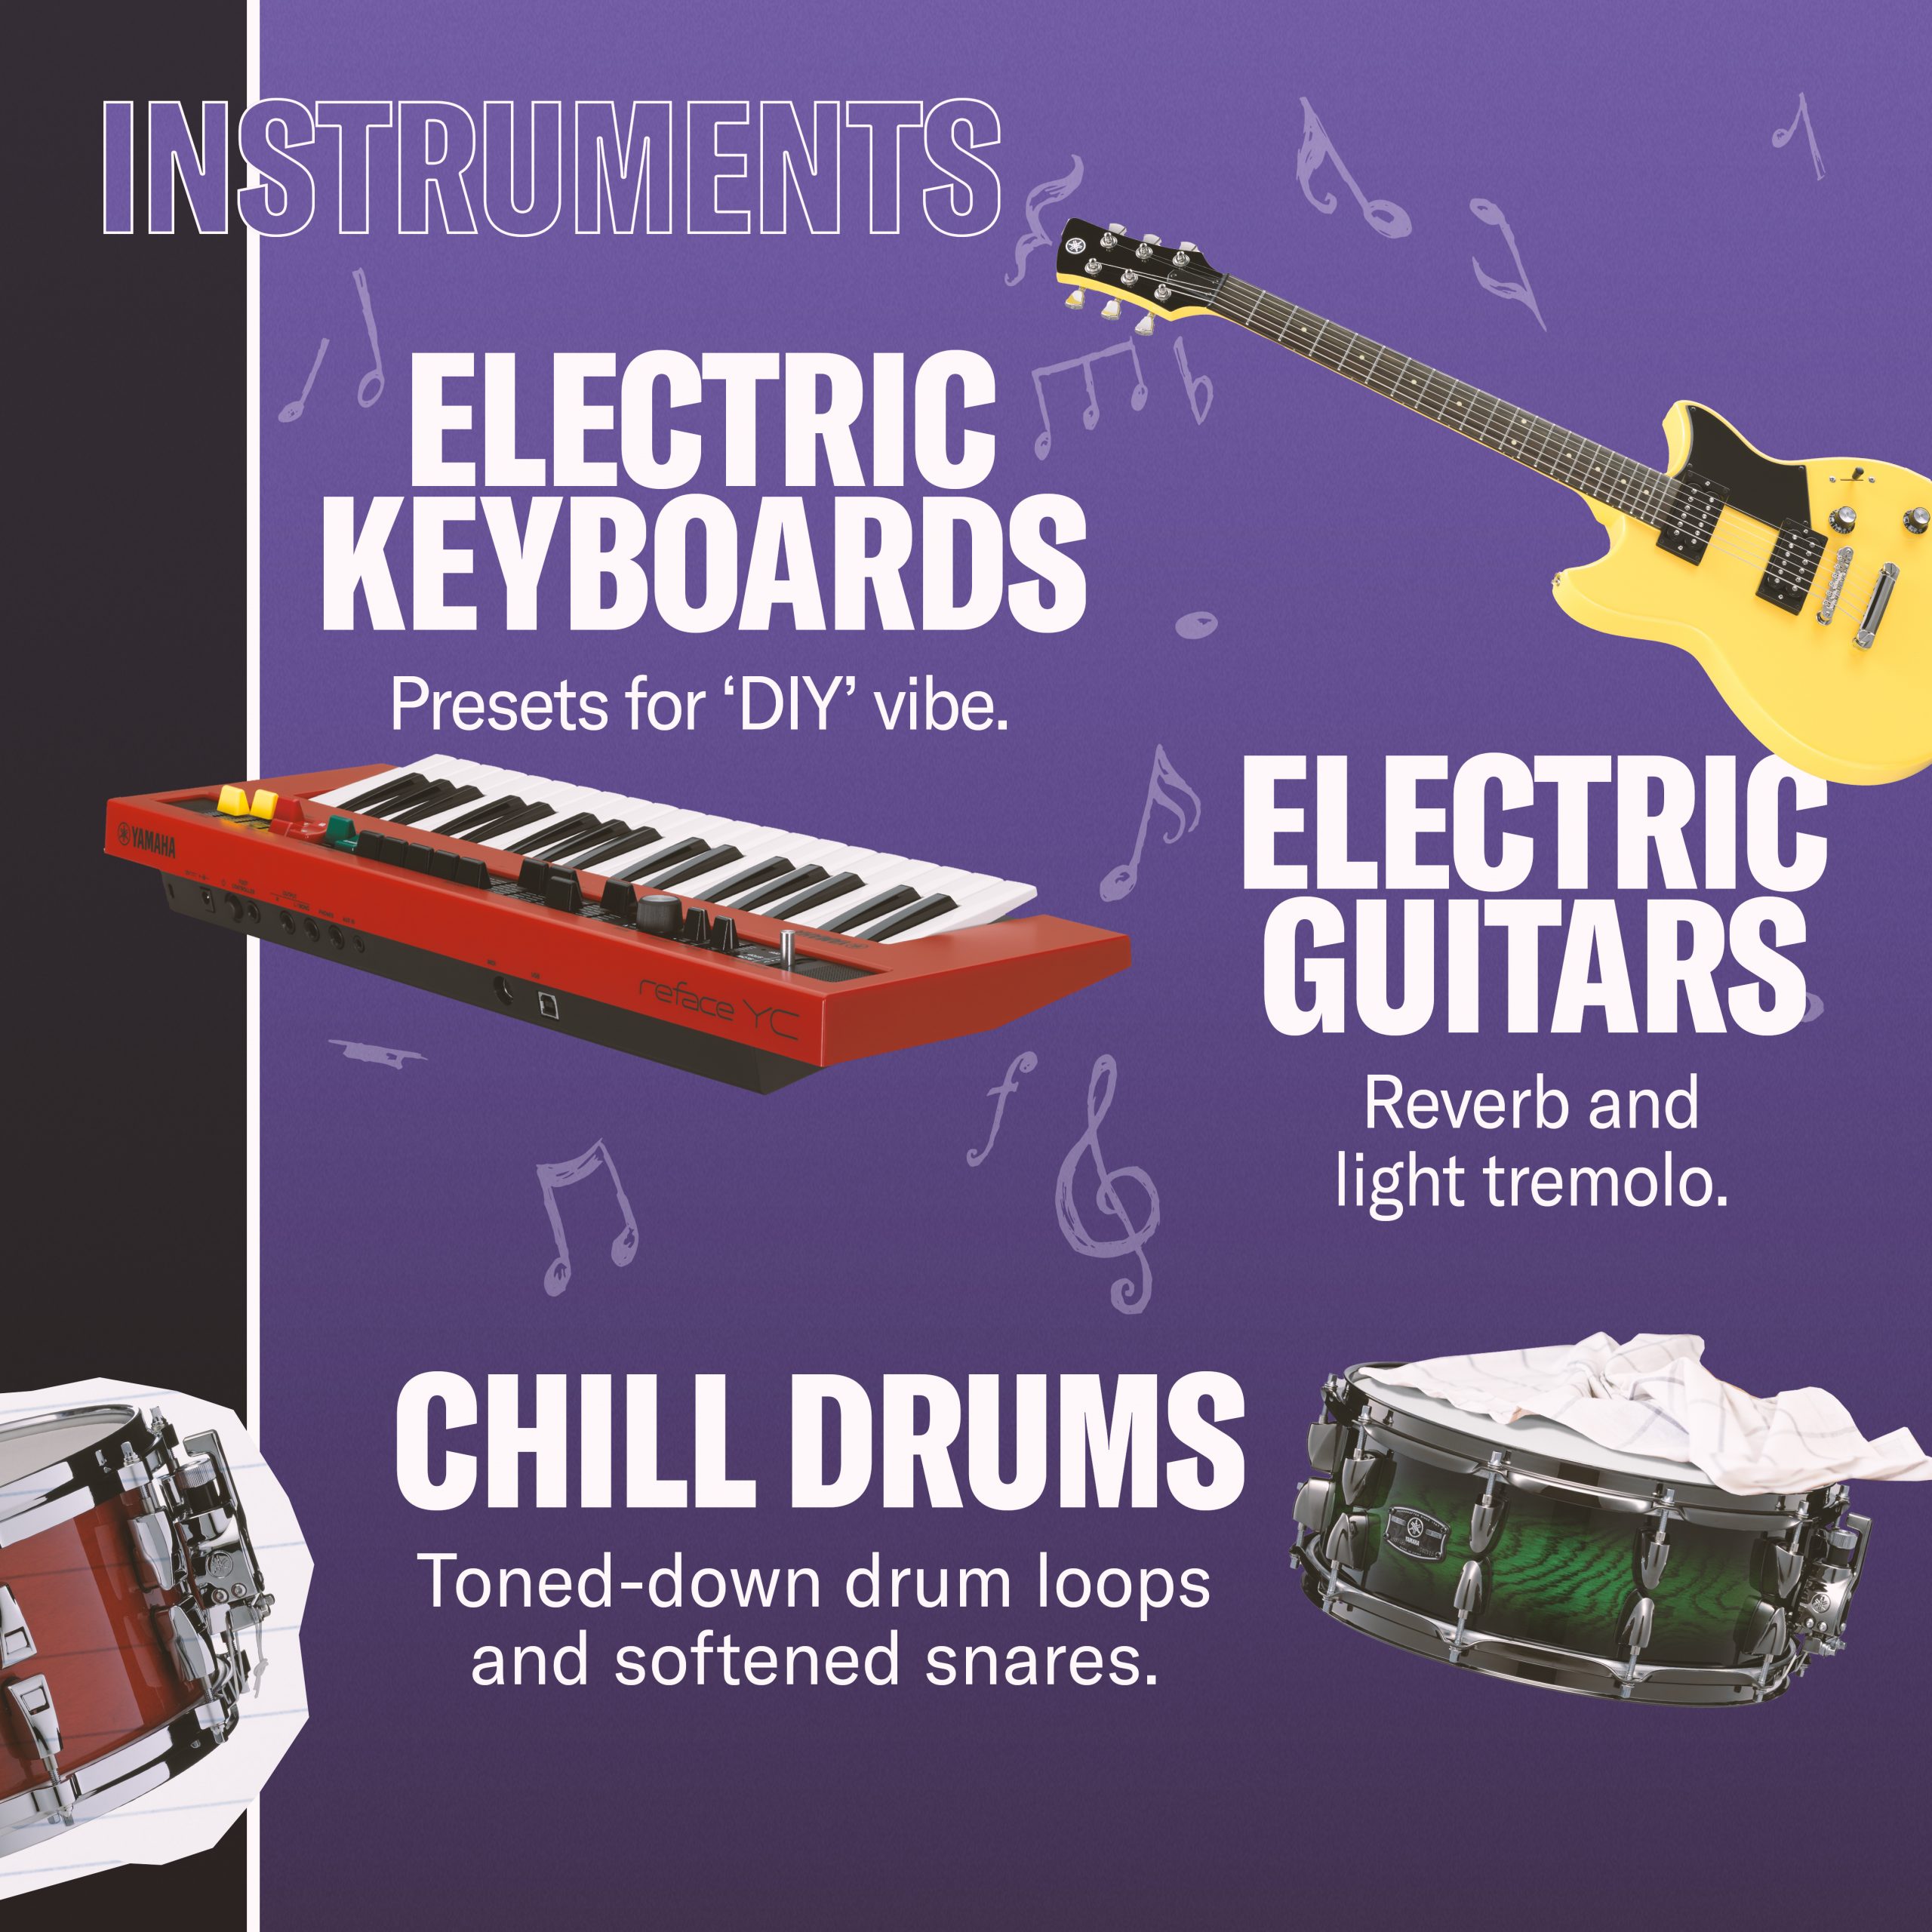


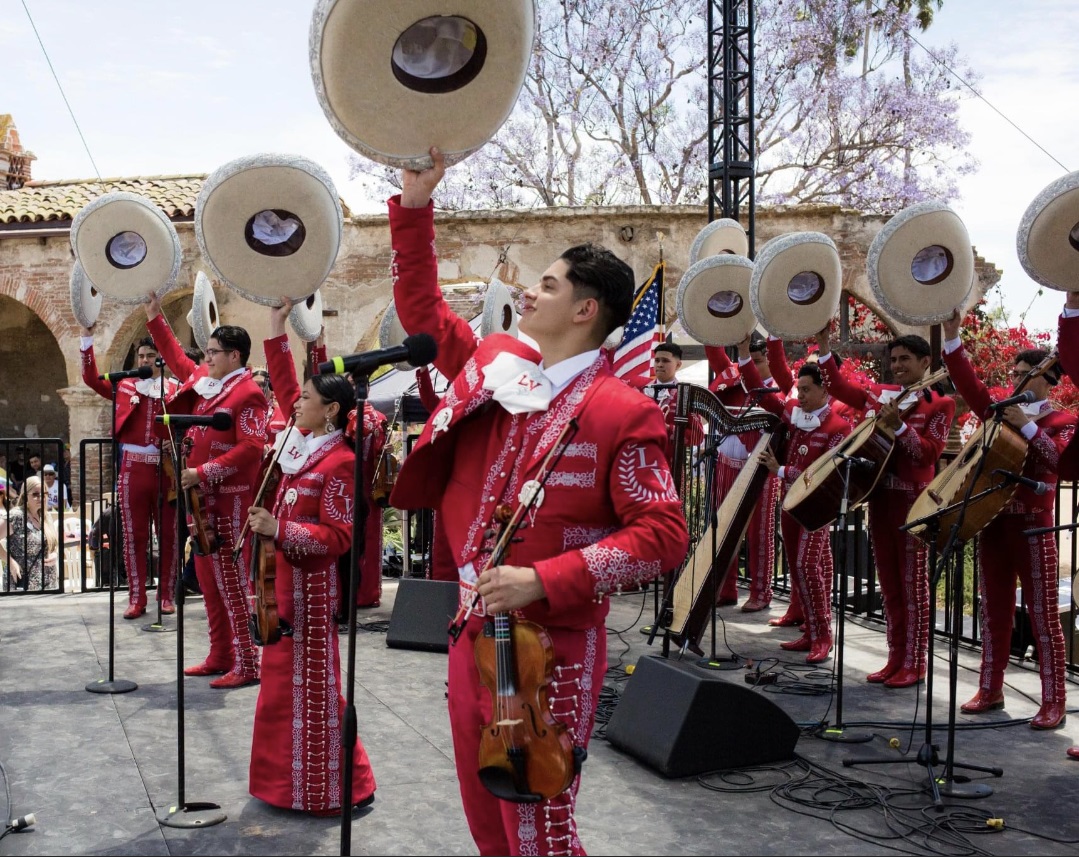 First, we wrote a mission statement and vision that were adopted by staff and students. Every decision made for the group goes back to these philosophies, which helped us during the early stages of creating our massive mariachi program.
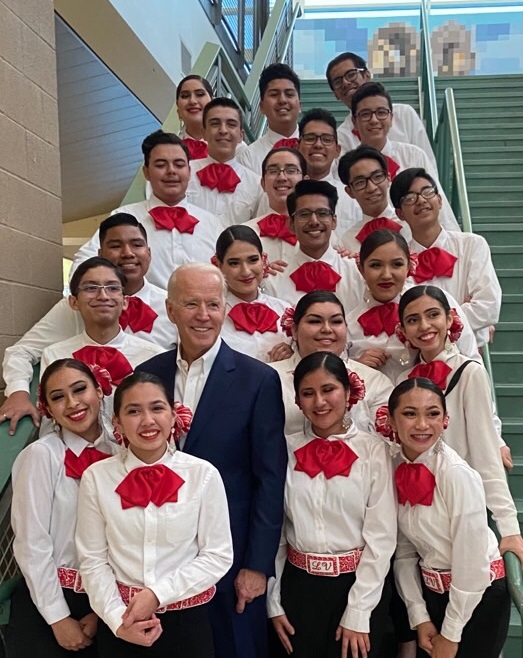 By our second year, we had a true mariachi group formed within the program. Joya became an audition-only ensemble with weekly after-school rehearsals. We had some strategic marketing goals set and wanted to get out into the community as much as possible. An original theme song called “
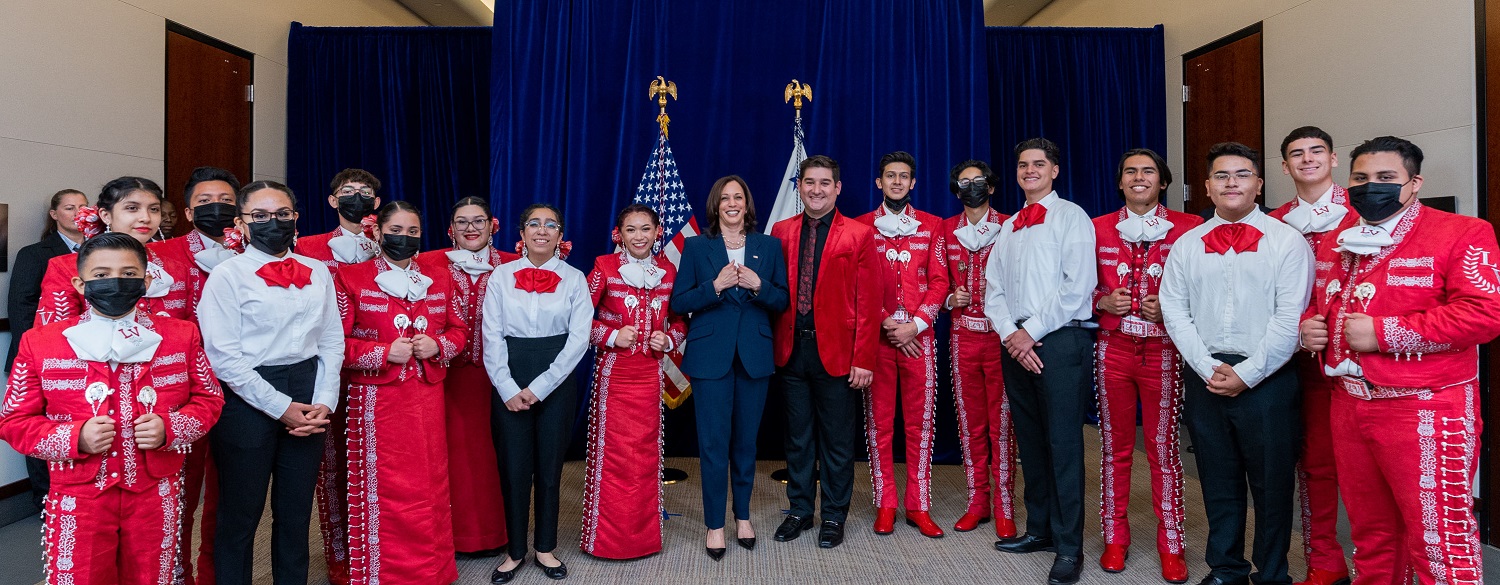 Our plans for Year Three drastically changed because for a full 18 months, we were not able to rehearse or build on our momentum. Students were upset, attendance was at an all-time low and music-making came to a halt. Something had to be done, so we decided to produce a record. Microphones were dropped off at students’ homes and recording began in September 2020. We released our original song, “
 We ended the year with the highly anticipated release of our debut album, “JOYA.” We had a sold-out album release party and consequently released three
  Although most of the students won’t become full-time mariachis after graduation, we also have a 100% career and college placement rate for the 2022 graduating class. With a few students taking over family businesses, the rest went off to colleges and vocational schools. It is my hope that they take with them the lessons they learned through our shared experience with Mariachi Joya.
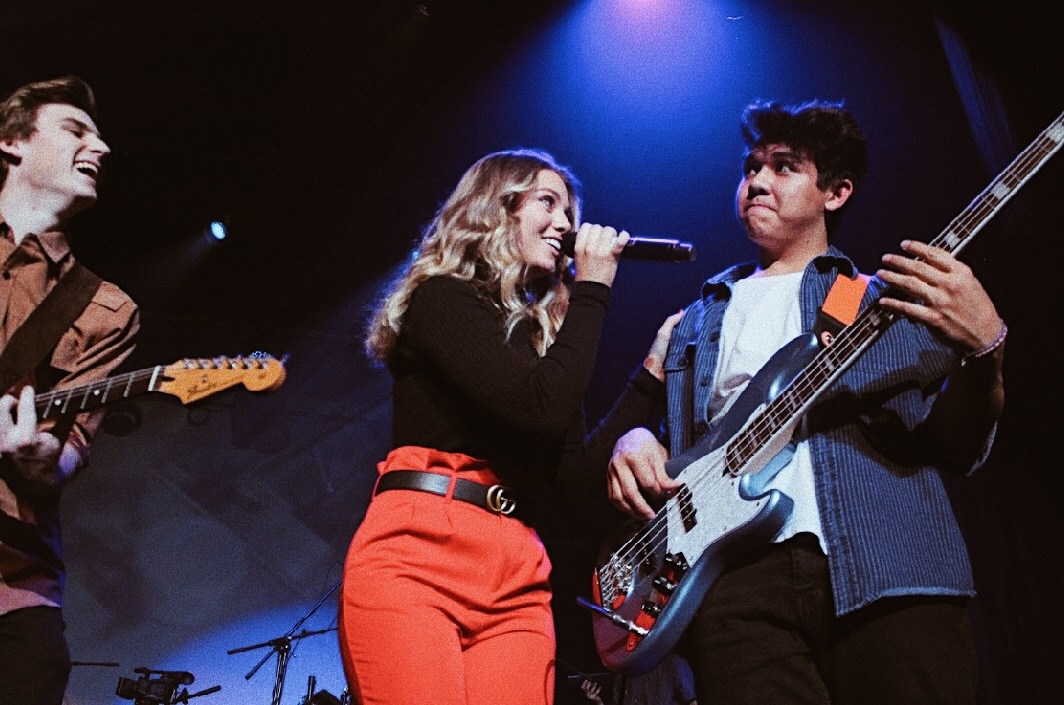 In the MMET pop music program, students join forces to form multiple bands, but the collaboration doesn’t stop there. Because of the amount of collaboration required to put on a pop music show, students get a full education not just in music performance, but also in teamwork.
 From the moment they receive a new song until the moment they step on stage at a concert, students have about six weeks to learn and perfect their music — for the first three weeks they focus on learning the songs, and the rest of the time is for rehearsing.
 By fostering student self-sufficiency, the MMET pop program helps prepare students for music industry jobs. Whether a student is interested in performance or in the business side of music, MMET has resources to help them reach their post-graduation goals.


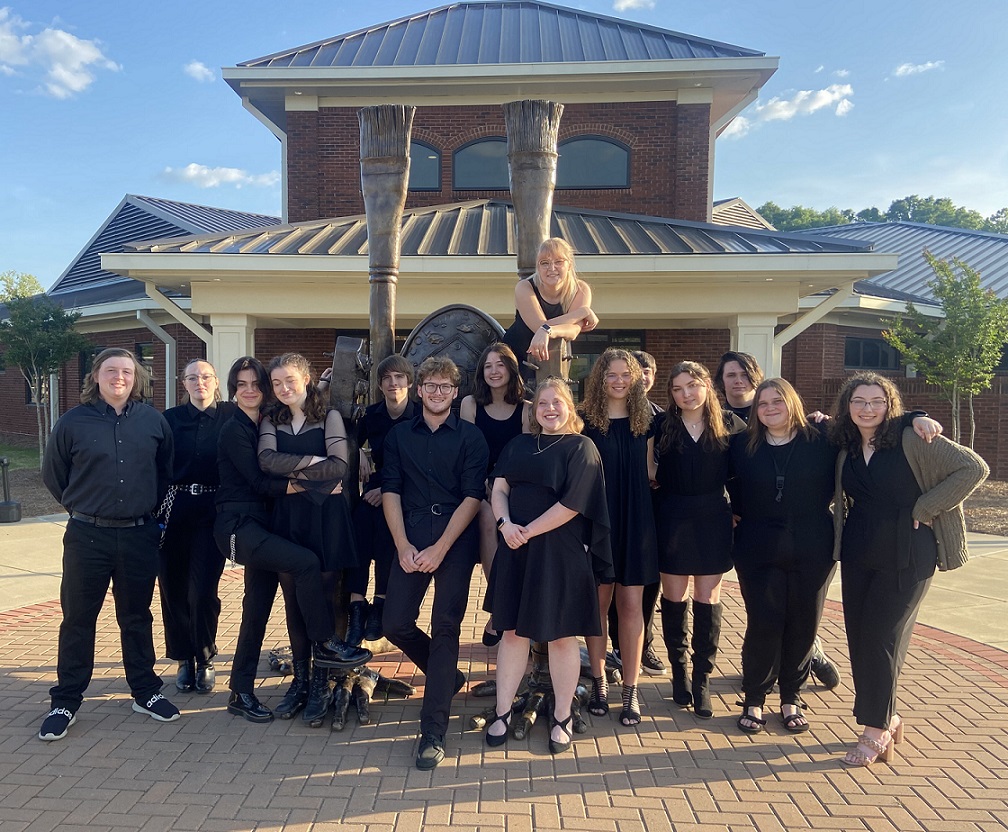 Our first collaboration was within our own school during the 2019-2020 school year. Ashlyn Kuyrkendall, the choral director, and I wanted to put together a big event to open
  At the end of the 2020-2021 school year, the fine arts teachers at SCHS were approached by our district’s fine arts supervisor about starting an annual end-of-the-school-year arts event in our town. We are not the largest high school in our school system, but we are home to the central office, and Columbiana has a thriving main street, which is part of every quintessential southern town. At first, we were caught off guard because this would be our first big event since the pandemic, but as we started planning, we saw how this event would be great for our community and our school system.
 The second year of the event in 2021-2022 brought more challenges. This time, the arts center was completely booked, so we were only able to use our main street area. We revamped our event with some changes that really made the event shine. First, we moved the two performance stages to each end of Main Street. This created a corridor and centralized the focus of the event. The previous year, one stage was on the street and the other was around the block at the arts center. Although this allowed for a bigger footprint, the spread-out nature of the event seemed to create less of a buzz.
 Montevallo has a very successful band program, and the director,
 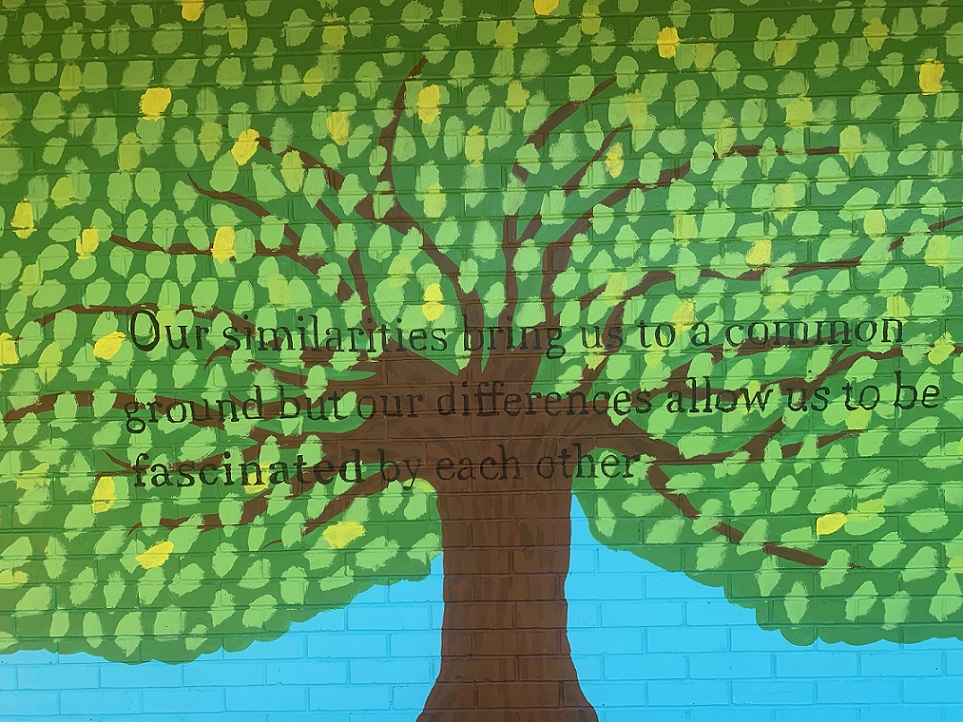 The idea for the mural came last summer, when the band went to the back of the practice field where a giant oak tree was located. I noticed that the tree had sustained some damage, probably when a tornado came through the town in 2021 and destroyed several homes. I told the students that the tree represented our band program. We might take shots to the exterior, but our roots and interior are strong.
 Turkish composer and musicologist, Ahmet Saygun (1907-1991), is known for blending Turkish folk songs with the sounds of the West. Perhaps you’ve heard of “
 Liza Lehmann (1862-1918), a soprano vocalist and composer, was born in London to a German painter father and music teacher and composer mother. She is believed to be the first woman to have been commissioned to write a musical comedy. Her performing career lasted well over a decade, then she began songwriting and composing.
 Étienne Nicolas Mehul (1763-1817) was dubbed “the most important opera composer in France during the Revolution.” He was a member of the French Symphonic School of music, and according to
  Although Paul Ben-Haim (1897-1984) is a composer known for his Israeli/fusion classical pieces, he was born in Munich, Germany. He studied with
  While Czech composer Leoš Janáček (1854-1828) is considered a household name amongst classical musicians, most non-musicians haven’t heard of him. He was devoted to studying folklore and folk music, which he collected extensively.


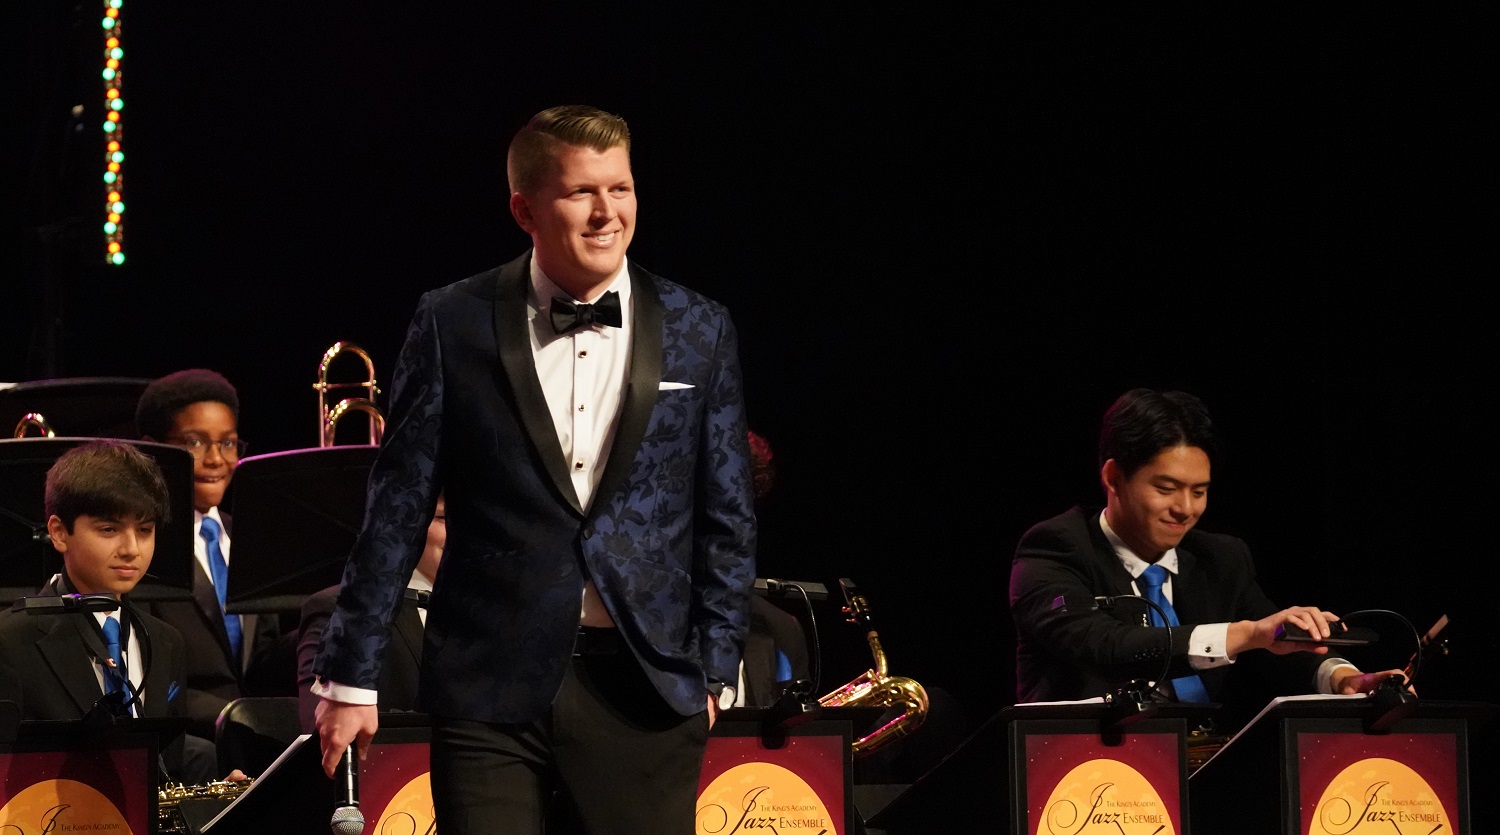 “The most important thing is choosing the appropriate music for your group,” Lowe says.
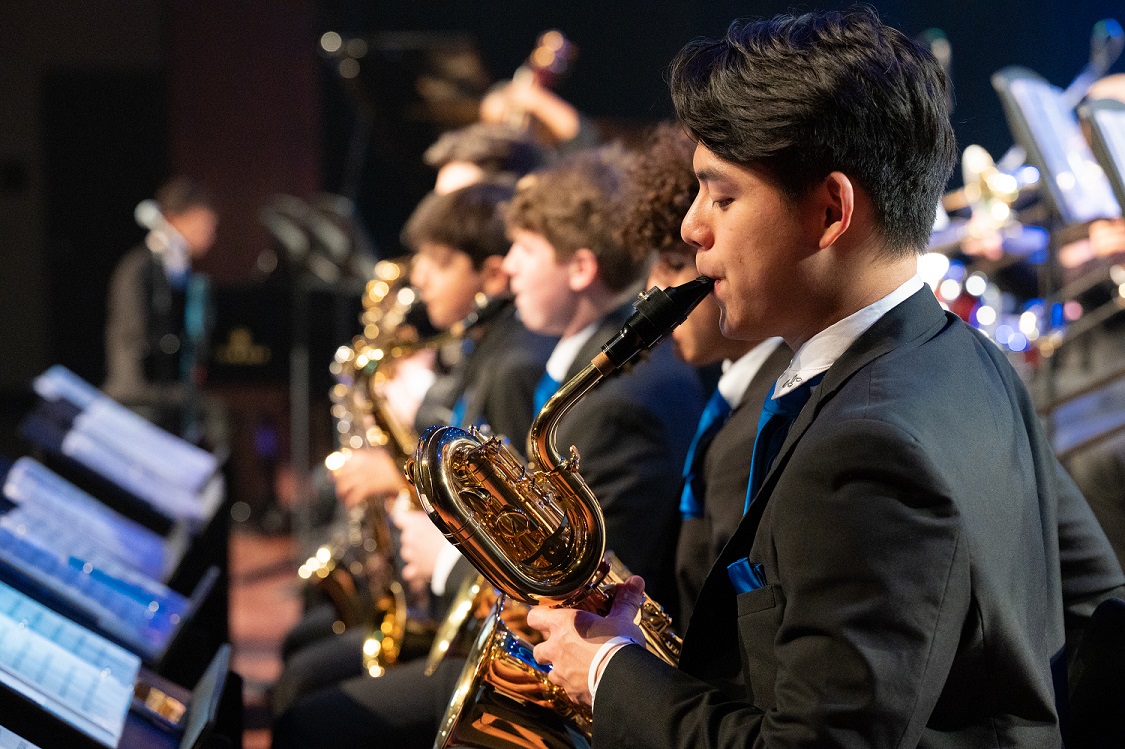 Reaching out to other band directors who have a thriving jazz program or local jazz musicians “can be very valuable, especially for high school jazz bands,” Lowe says.
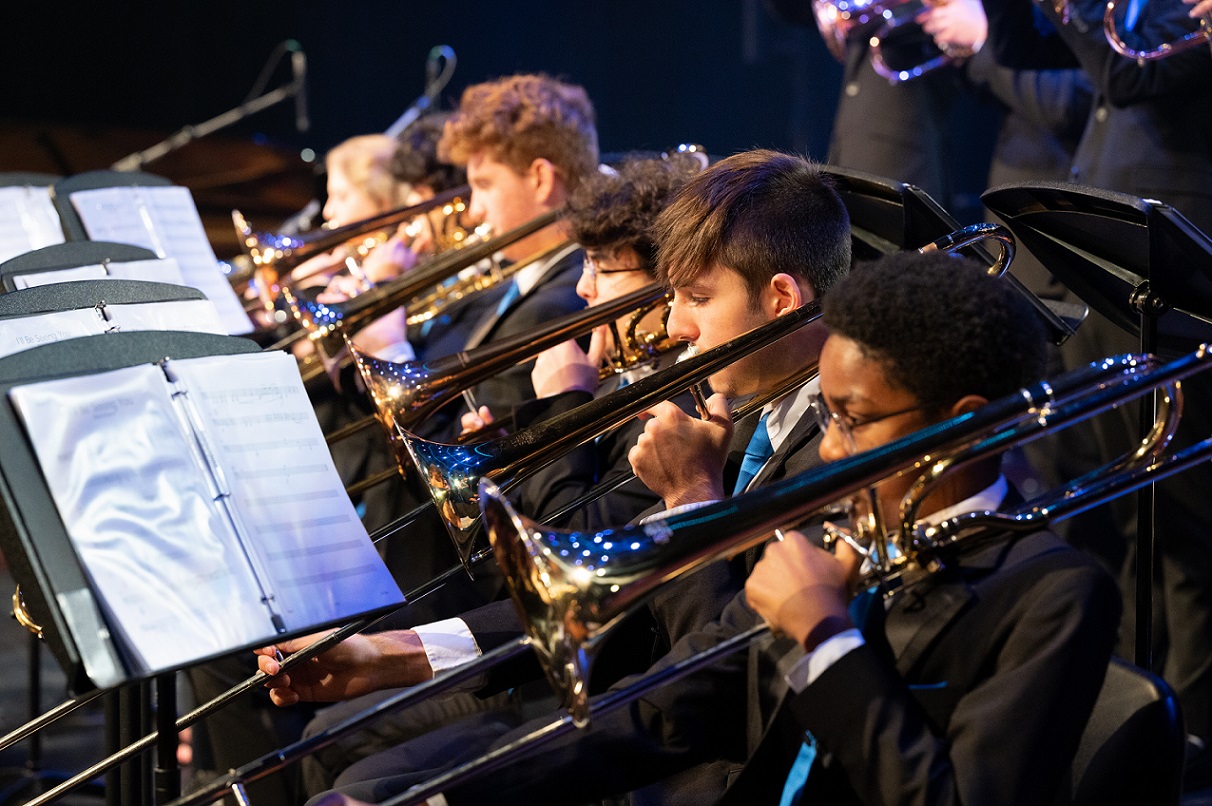 He picked their brains about music selections and ways to teach the many different genres of jazz. Lowe also asked local professionals to work with his entire band or to take a sectional out and focus on a small group of students. This was a great way for him to get plugged into the local band community, and it allowed his students at TKA to hear from a variety of instructors.
 Lowe has found success producing an annual Night of Jazz that features guest artists, such as the late drummer
  “The more you can take jazz to your community, the more people will rally behind your program,” Lowe says. “Jazz is so accessible, especially for the older generation, and it’s the perfect opportunity to take your band and perform at downtown marketplaces, retirement communities and 55+ communities that are looking for entertainment.”
 “This is a great example of being flexible and finding different avenues for students to showcase their hard work, especially if the students are super talented,” Lowe says.
 I learned these lessons the hard way.
 How often have you been told “Job well done” or “Great work” after a concert or event, and you immediately give the credit to everyone else (or the ever-popular, “The kids worked so hard!”)?
 In my case, I label my strengths as “green lights.” These are the things that I am naturally good at or worked incredibly hard at. Traits and characteristics in the green category would include connecting with students, writing, playing my instrument, project management and consistency.
 Yes, she still gets upset and frustrated, but this does not stop her from finding a solution to the problems that come up. Furthermore, she goes into these events expecting some issues to happen. She is mentally prepared to address surprises and solve problems. If nothing happens, that’s a bonus! Nothing is perfect, and when we expect perfection, we can easily go into a downward spiral that isn’t good for anyone. Things happen, and we can choose to either react or leave it alone.
 I grew up an hour outside of Chicago in the ‘90s, during the Chicago Bulls’ six championships. A lot of my childhood was spent adoring the starting lineup of the Bulls and despising any team that wasn’t them. A famous opponent of the Bulls was Charles Barkley of the Phoenix Suns. In a controversial


 A great mentor equips their mentees with the tools by which to seek success. As per the high stakes nature and competitiveness of the performance world, it is imperative to remember that each risk carries the potential for yet another disappointment. When trying to empower young artists to develop the confidence and self-worth to move forward (despite the continuous stream of rejections), a calculated approach to seeking performance opportunities is especially important.
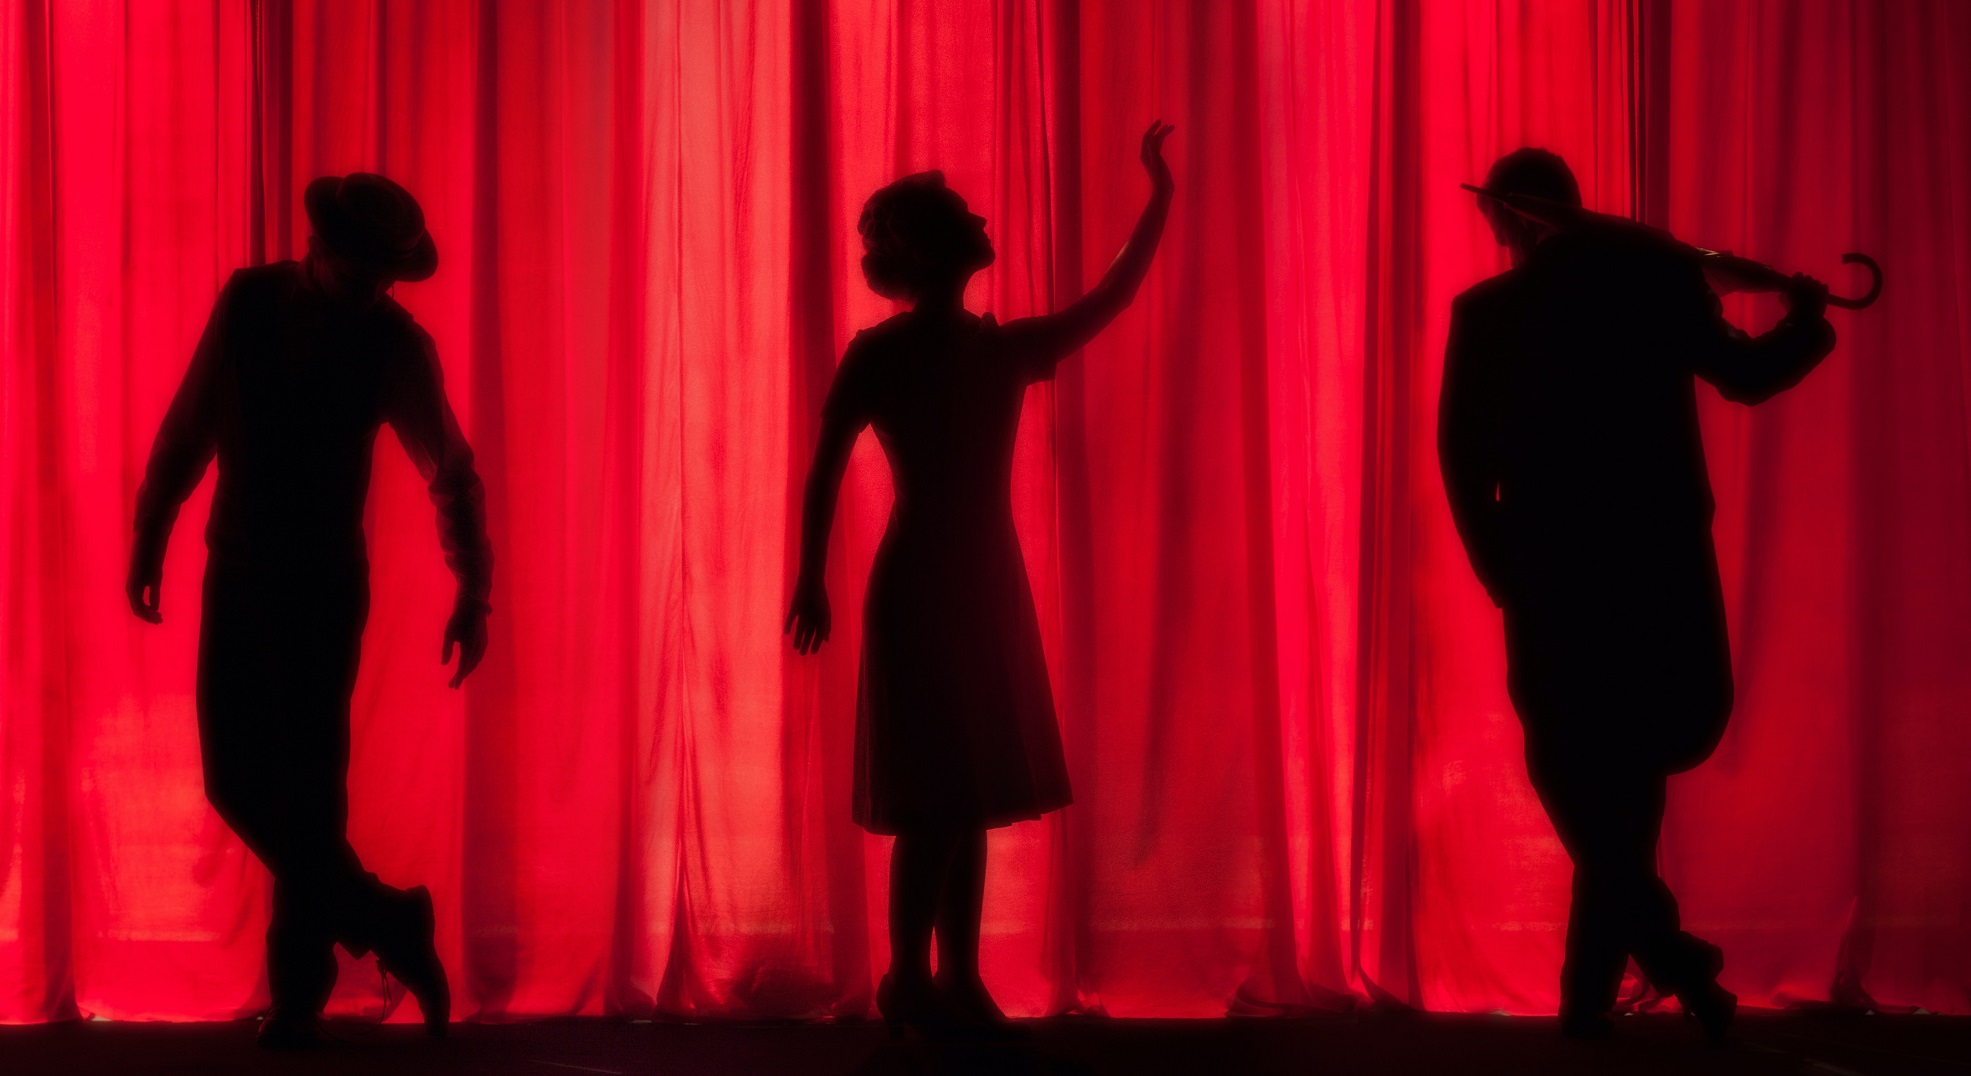
 The universe has an unusually clever way of bringing life full circle. For instance, a handful of my current students are singing with companies that I have performed with some years ago. Like Christina Swanson, for instance, who is currently spending her summer working as a Festival Artist with Utah Festival Opera. Will she go on for any of her cover assignments? I’m not sure. But, what I do know is that she is equipped with the tools by which to find success should she be called upon to do so.
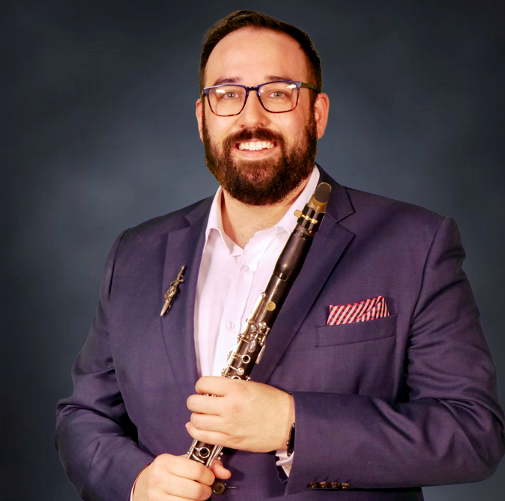 David Amos


 Andrew Gibb-Clark

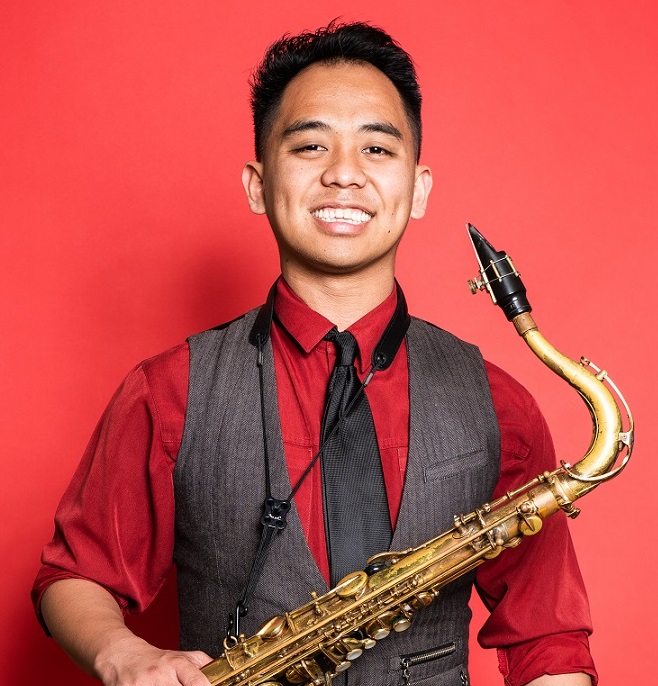


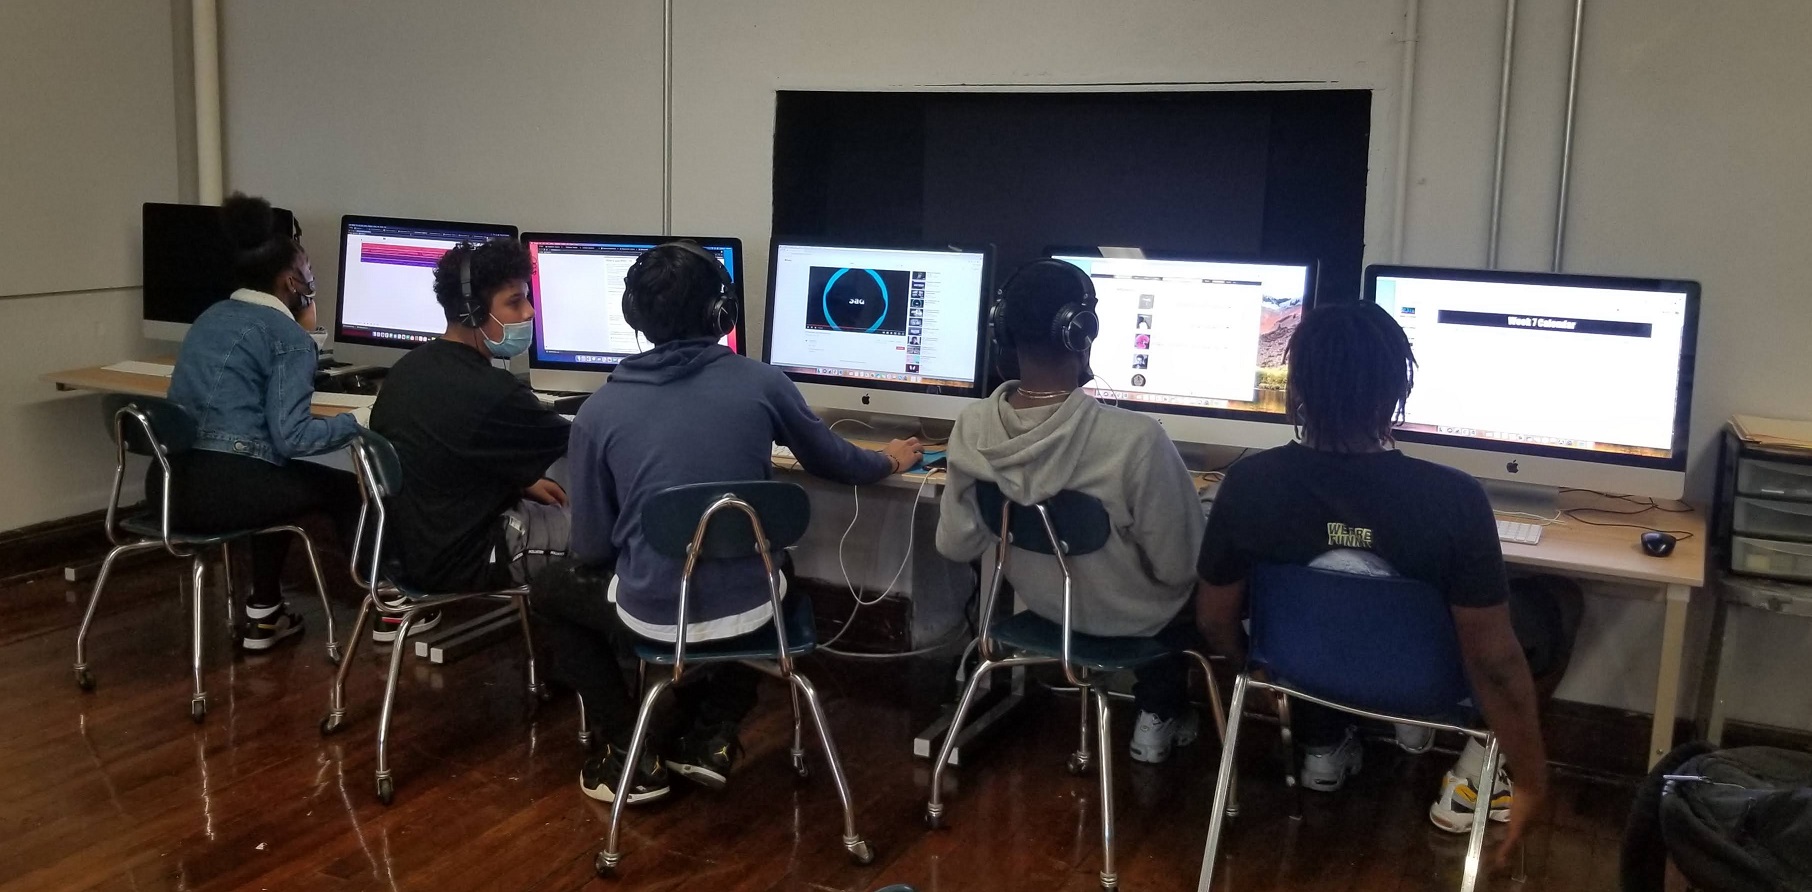 Prior to the start of the academic year, draft a strategic plan for the new music program that includes a mission. Why are you there to begin a music program? What purpose does it serve? Make it concise but keep the bigger picture in mind.
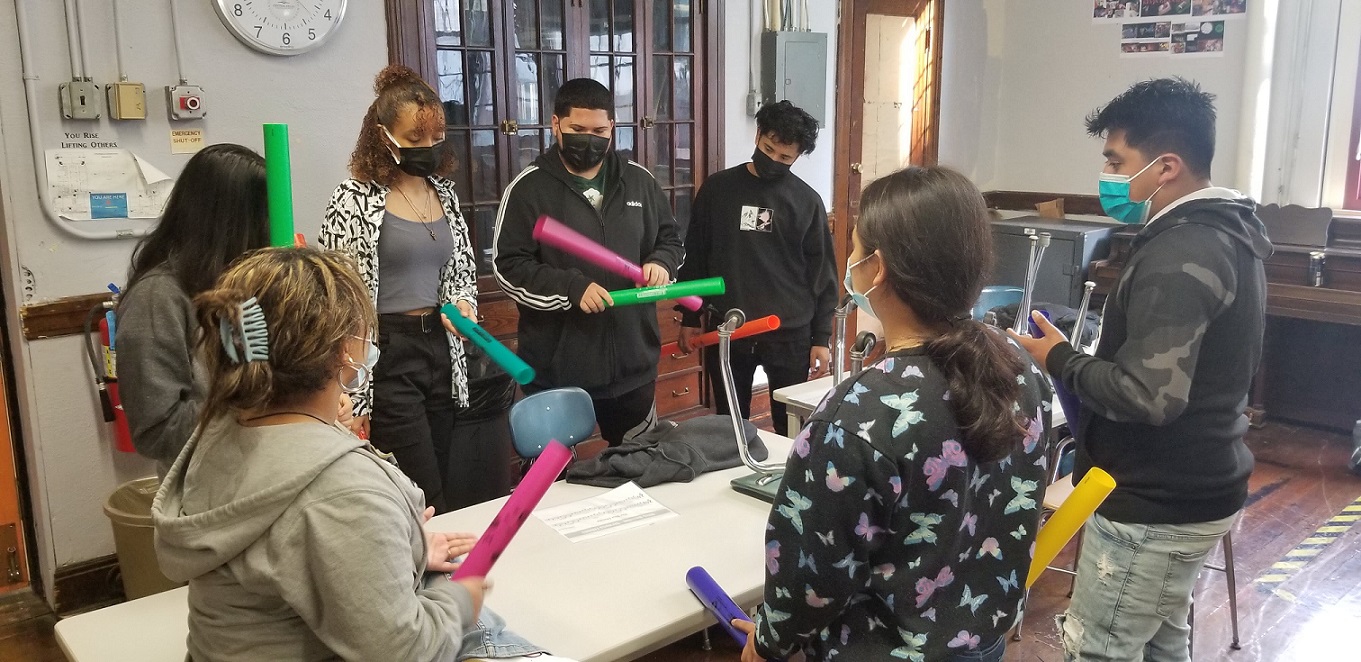 All music directors wear many hats, and they are often some of the busiest people in the school building! Developing new curriculum, units and lesson plans for multiple courses at the same time is extremely time consuming and can lead to burn-out.
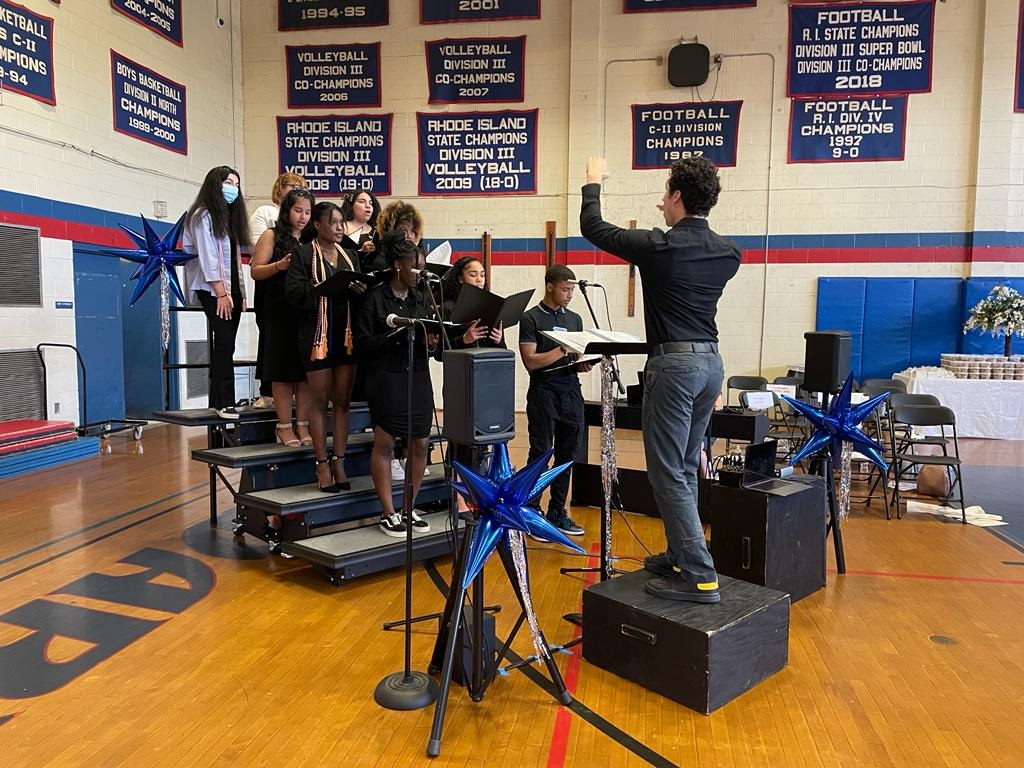 As music educators, we are often “othered” and may not be seen as “core” teachers. Some districts refer to the music, art and drama teachers with a condescending label like “itinerants,” and guidance counselors might think that music is “just an elective.” Other teachers or building administrators may complain about the amount of noise coming from your room. If you are a seasoned educator, you have experienced all the above and then some. However, if you are entering a new school that is not used to having music as a course offering, all these challenges will be heightened. The best way to overcome these hurdles is with community buy-in.
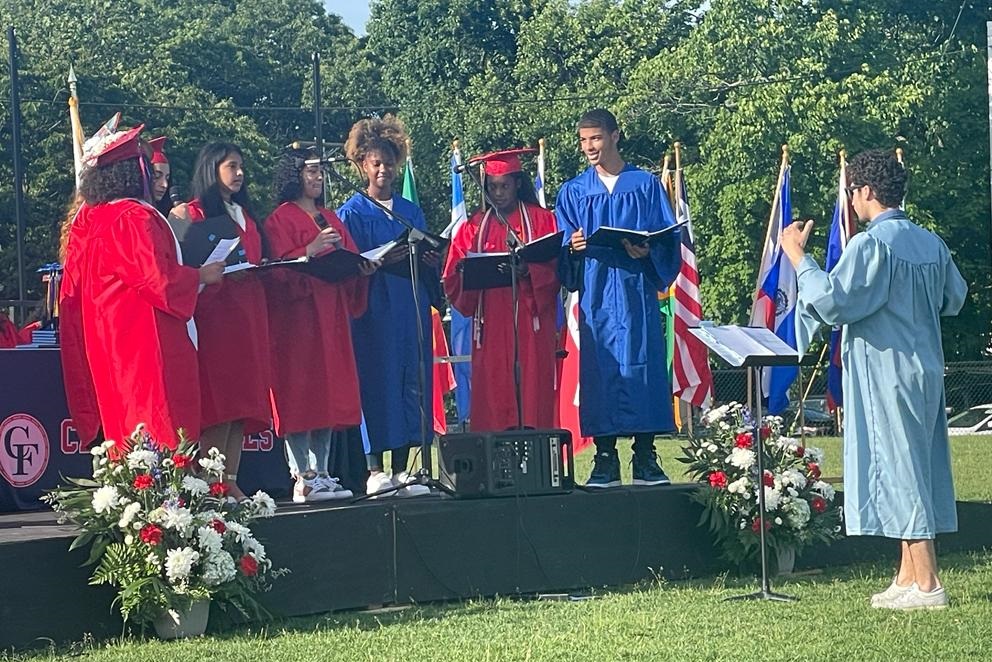 Open your classroom doors — figuratively and literally! Make the music room “the place to be.” Welcome students you don’t know into your room or invite them in for lunch. Get to know them. Provide a safe and welcoming environment for anyone walking into the room, whether or not they are music students.
 Texas is known for great football. And where there is great football, there is often a great band. Players, coaches and spectators appreciate the energy and presence of the marching band in the stands and on the field during halftime. The band brings more fans to games, increasing the crowd’s size and spirit.
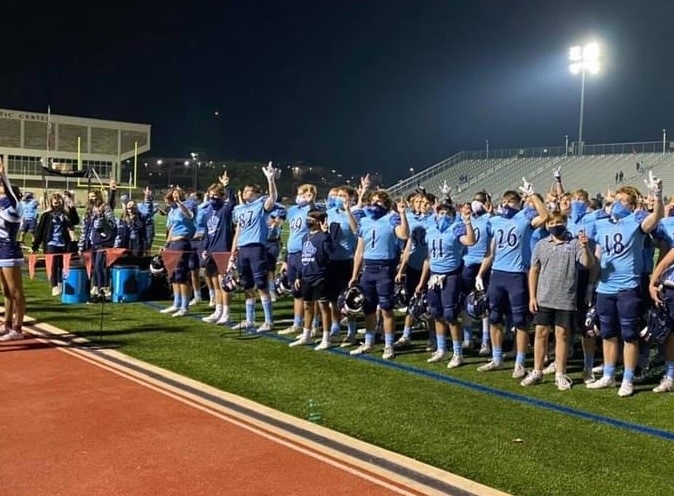 I resented the constant “drumbeat” from spirit and athletic organizations that always seemed to want a piece of our time. “Send us a drumline for this,” “Can we get a pep band for that,” “The band can’t miss that game for the biggest contest of the year.” There always seemed to be someone requesting the band at an event that took time away from rehearsals.
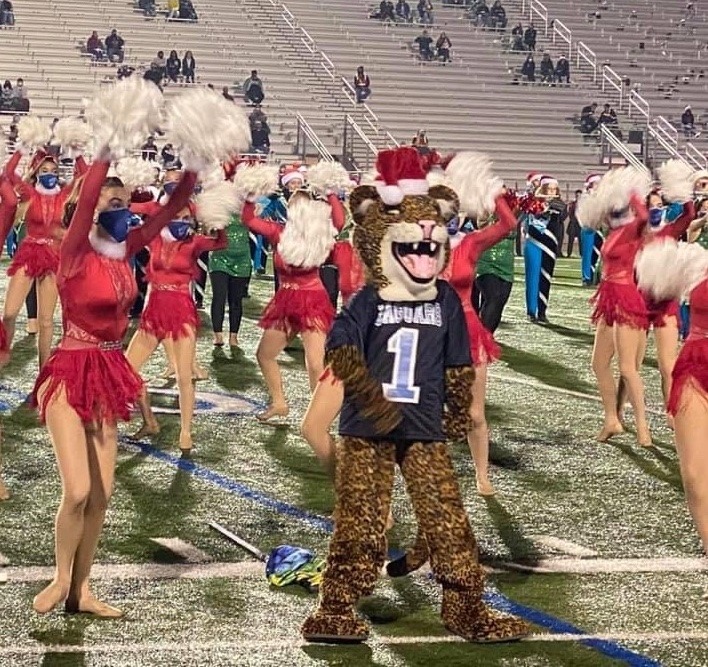 In June 2020, we started discussing the upcoming season and whether the football season and marching competitions would occur. I spoke weekly with Principal Gary Comalander, head football coach Mark Soto and dance team director Stephanie Trevino. My goal was to gain insight into the community outside of band to gauge the desire to participate in a season of some kind.
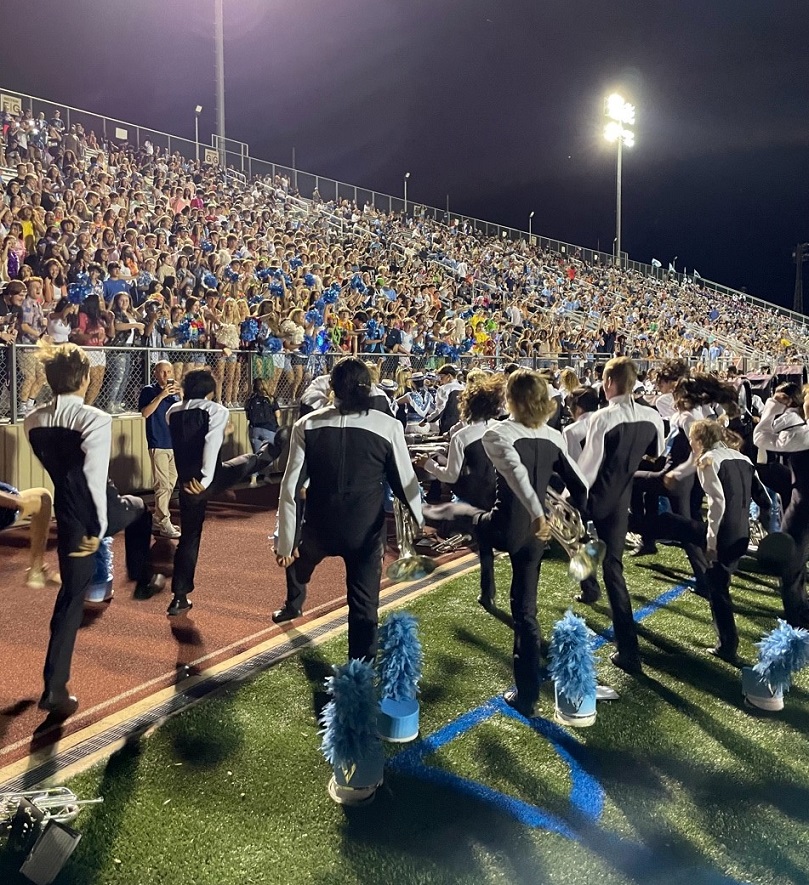 Our season in 2020 extended nearly to Christmas because of the schedule change, which allowed the spirit groups the opportunity to perform “Holly Jolly Holiday Parade” together at halftime in our “Holiday Extravaganza” show. This performance showcased the unity of our various teams and represented an entire season of working to support each other, overcome obstacles and keep our students safe. It was the culmination of sharing ideas and pursuing a common goal. This special energy and synergy provided a glimpse of what it could be going forward.
 Highlight student athletes who also participate in band. Look for ways to showcase their accomplishments and cheer on those athlete-musicians at the games. (See photo to the right.)


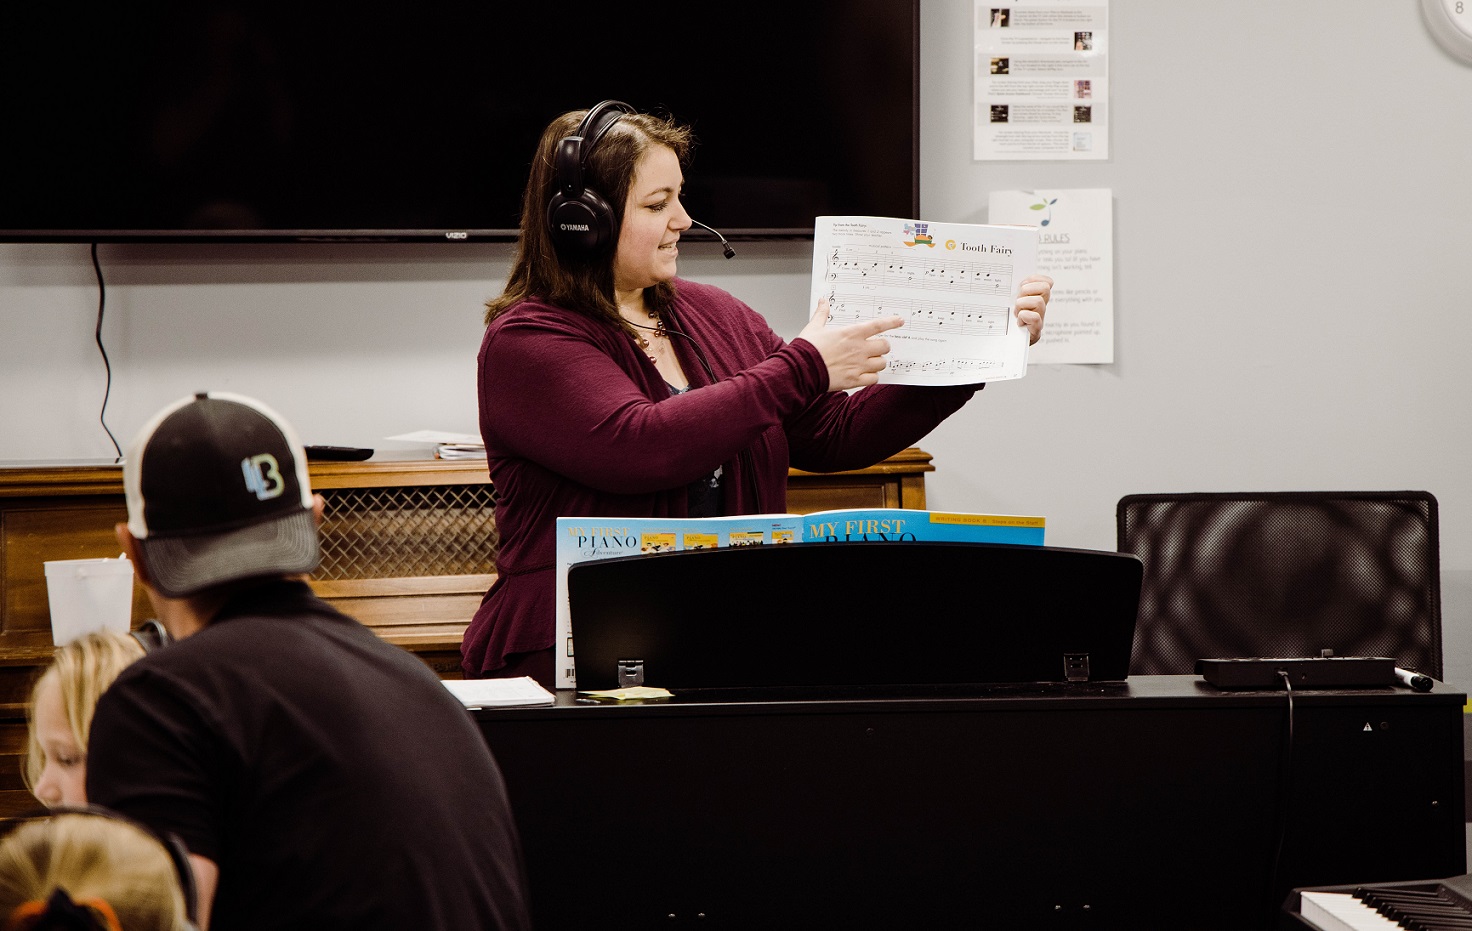 A group piano program is a unique and fun way for students to progress quicker than if they were taking individual lessons, Miller says. With a group of students who are at the same level, you can pre-determine the pacing and you can make lessons more curriculum based rather than individualized. The pacing can move faster as students’ skills develop because they are following the same curriculum with the same teacher.
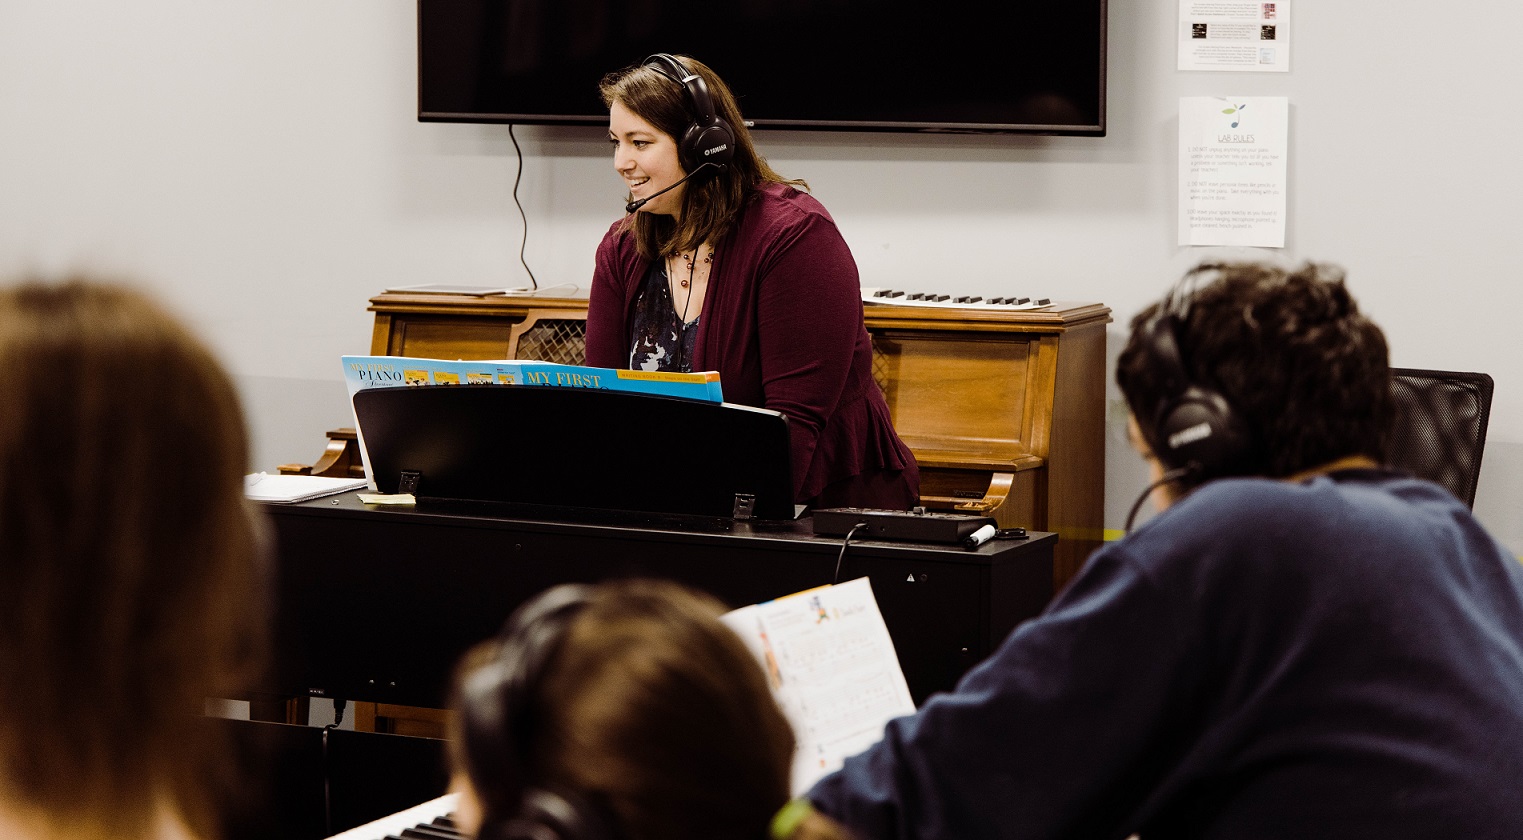 It can be a challenge to build a Keyboard Explorer program, but it is also a labor of love — as long as you are patient, Miller says.
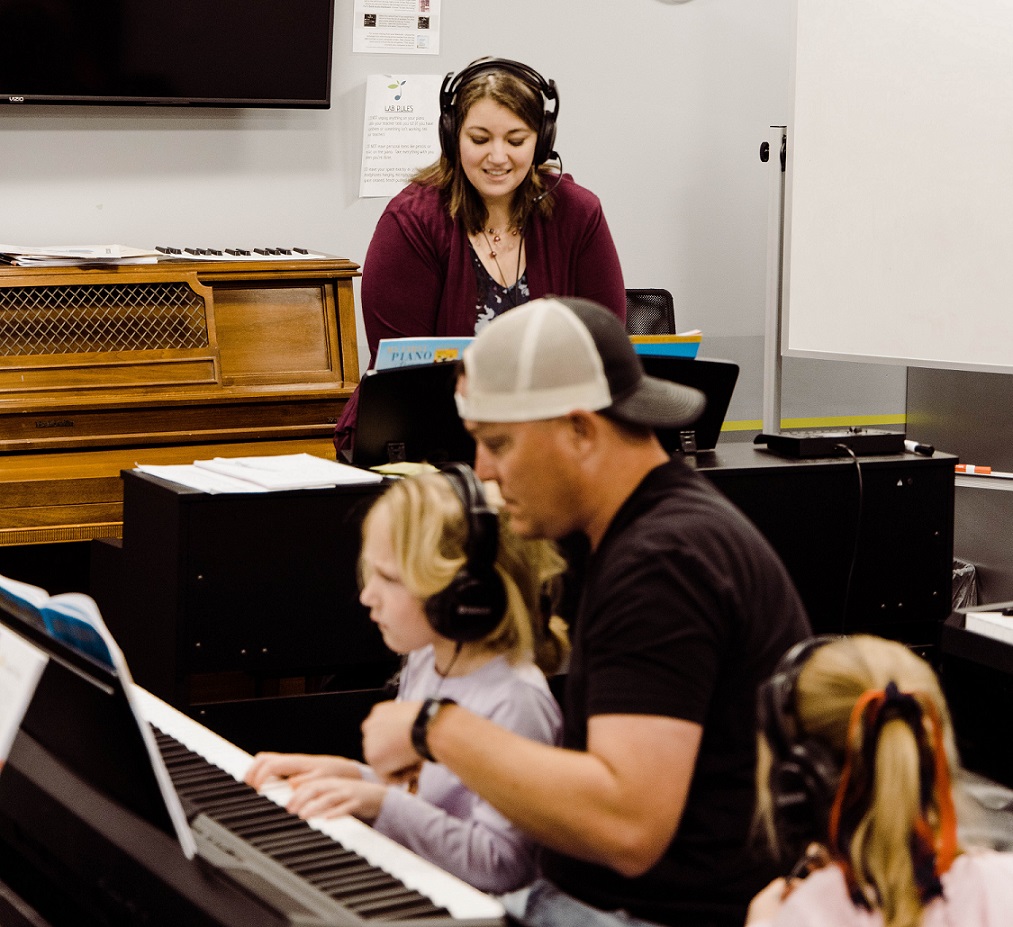 In the past, the solution to having more than 100 students on a waitlist was to hire more teachers, which proved to be easier said than done. “There were students who had to be turned away because there just wasn’t enough room or individual teachers,” Miller says. “The Keyboard Explorers program is a great way to give more students the opportunity to take lessons at the conservatory!”


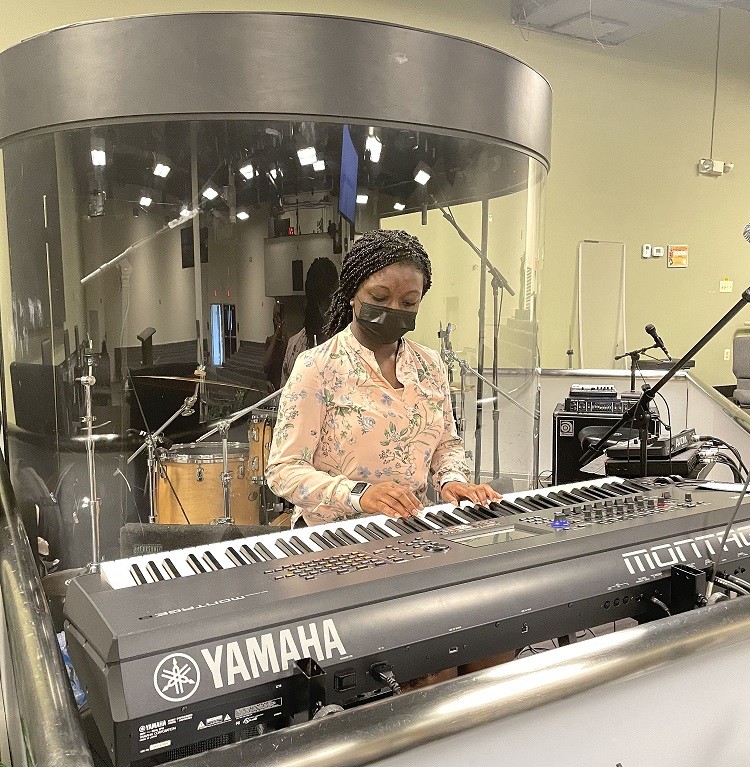
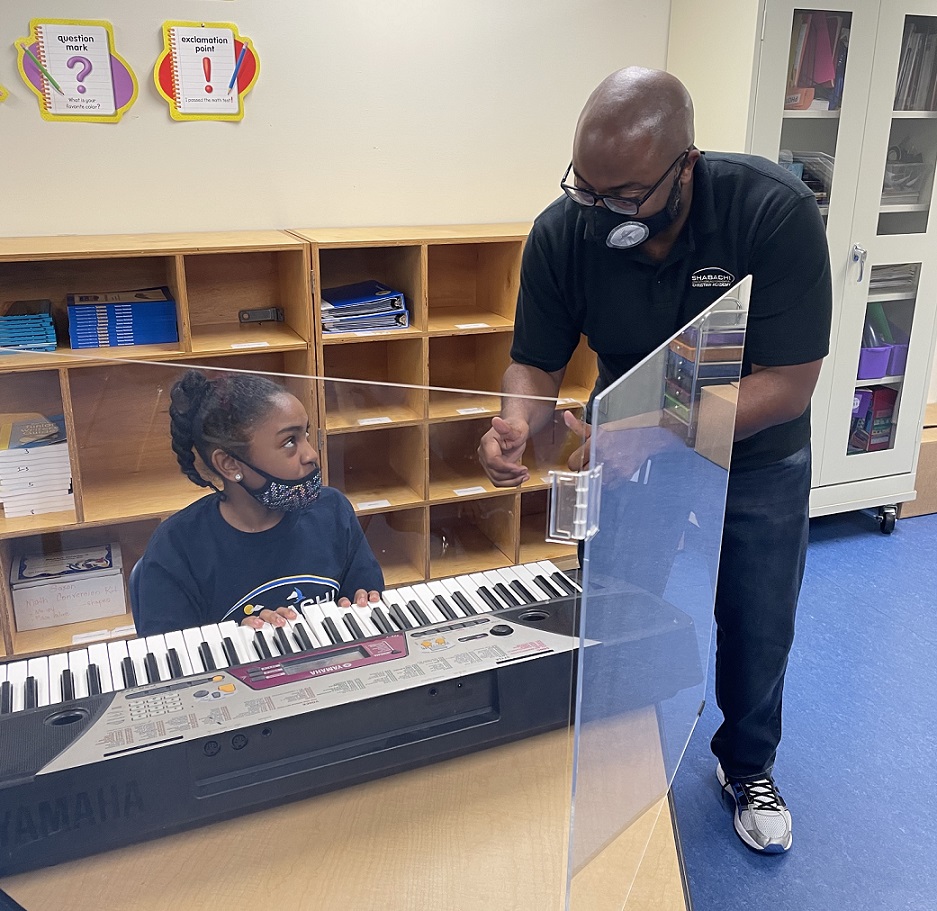 For Felder, music education should be more about the journey than the destination. That means creating what he calls “many mini-opportunities” for students to practice and perform outside of the classroom. He says it’s important for students to perform for different crowds and to “allow their music to be heard more than just once.”
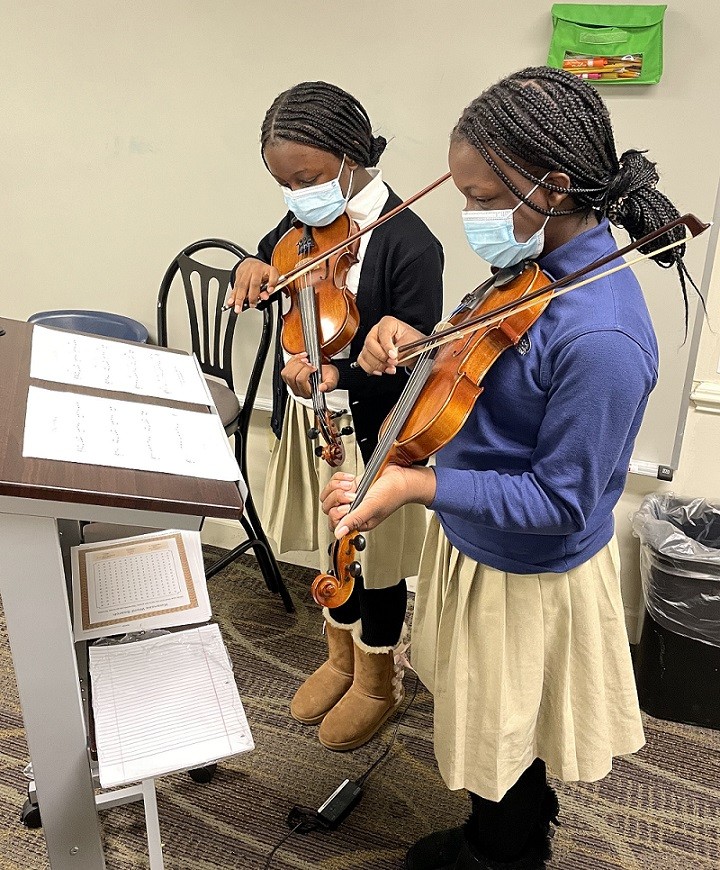 Mini-opportunities serve multiple purposes, Felder explains. First, they allow his students to give back to their communities. They also introduce his students’ art and music to members of the community who may not otherwise be exposed to it. Felder says that at their spring shows, he’ll often see people who first experienced the SHABACH music program during one of their mini-opportunities.
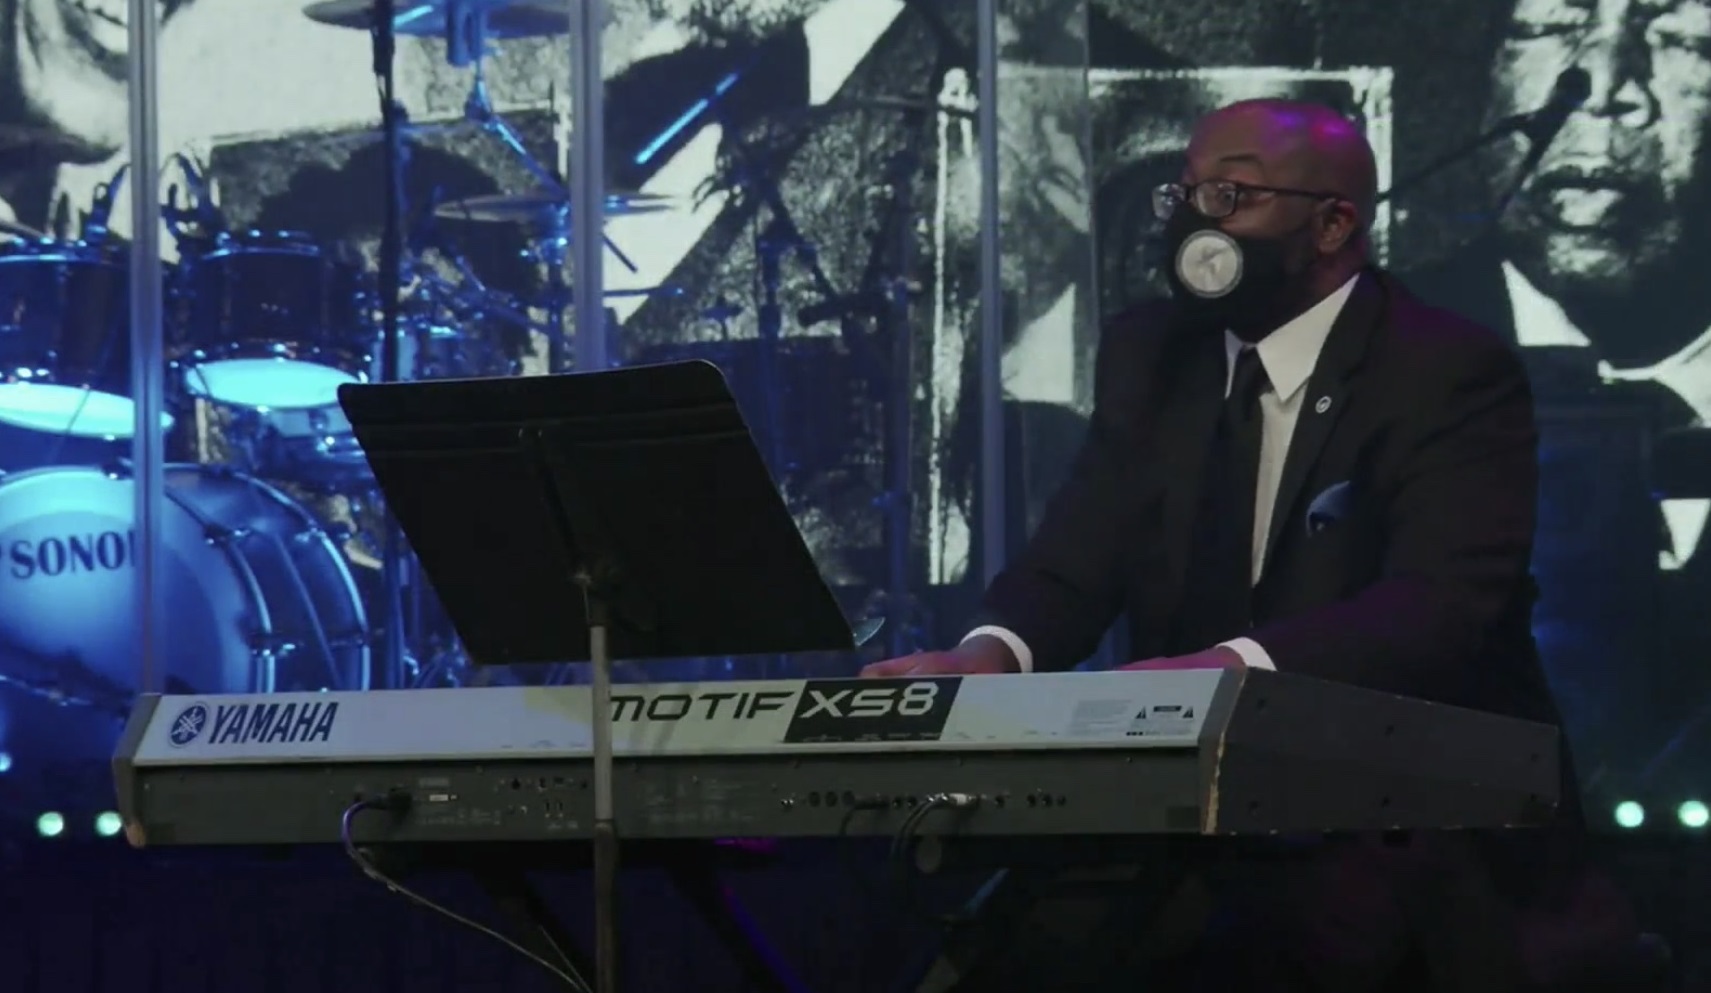 Felder says finding these curated opportunities can be challenging, so it’s important for him to stay personally energized about music. He sees himself as a “teaching artist,” meaning that he values the level of his own musical experience, while also trying to share that knowledge and love of music with his students.
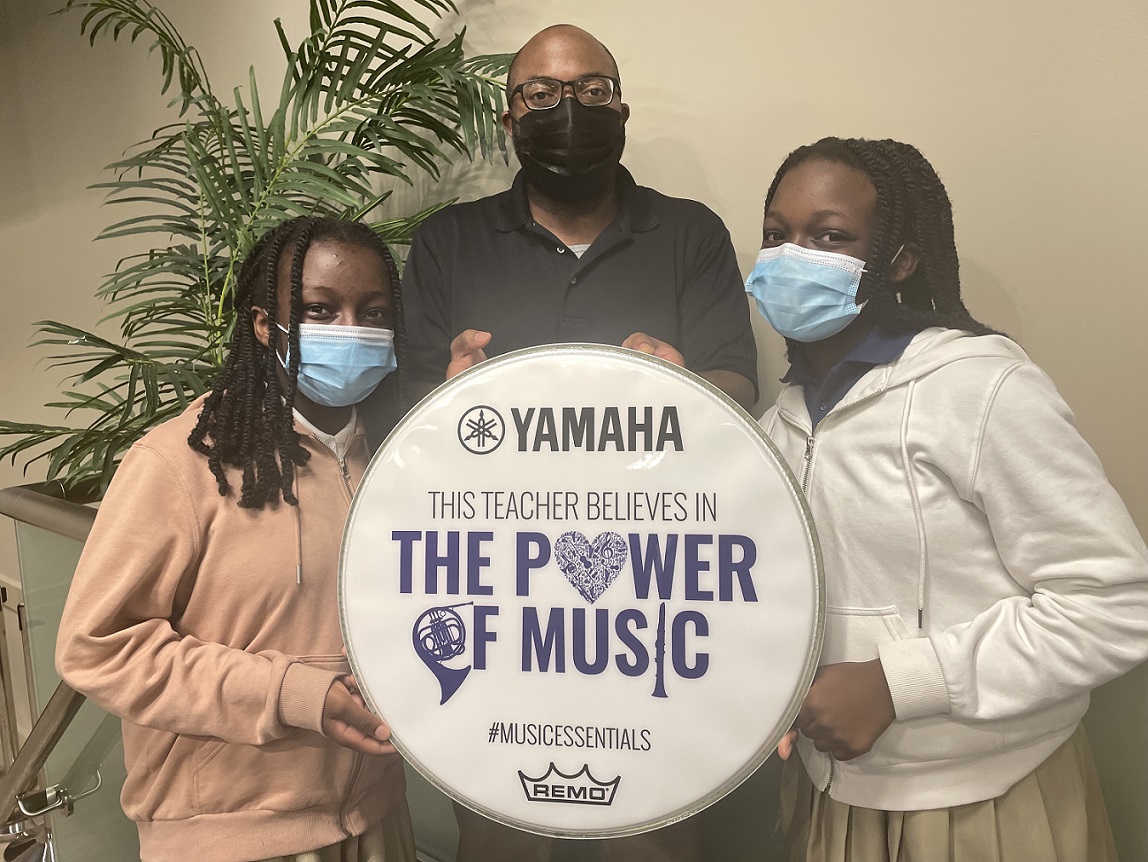 It’s also important to be transparent with your students. “Life is still happening to us,” Felder says.
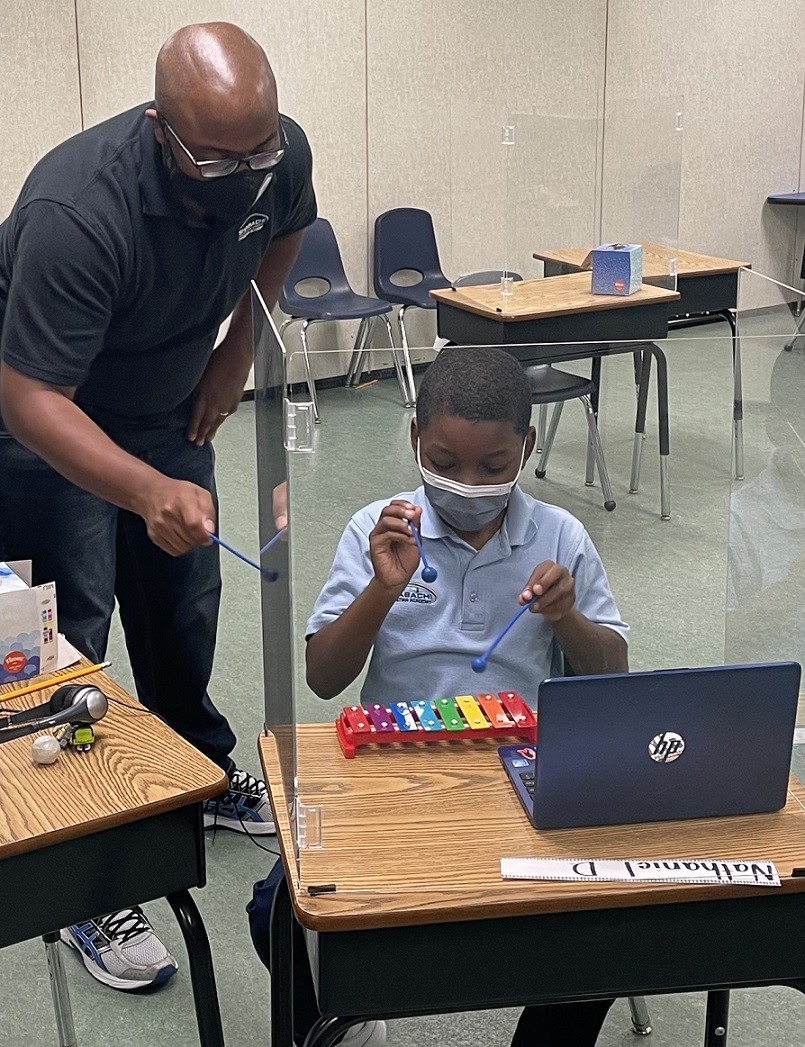 Felder insists that there is no cookie-cutter way to attempt intentional music programming and that each group of students should have curated programs for their own needs and situations. To be successful with this type of curriculum, Felder says you must find balance and learn what works best for each group of students. And, perhaps most importantly, it’s about staying flexible and being able to change direction when a situation arises that can’t be ignored.


 Early in my career, my approach to assessment was primarily based on two types of performance: pass-offs for individual students and performance assessment ratings for ensembles. Pass offs are a type of performance task, e.g., scales, rhythm sheets and excerpts from music, that students perform to demonstrate their level of proficiency. Performance assessments can include any contest, festival or competition in which students are evaluated and given a formal rating as a group. Many music educators are familiar with and utilize these systems because we experienced and excelled at these types of assessments when we were students.
 The Purpose of E-Portfolios
 You’re probably thinking: This all sounds great, but where do I find the time to construct, implement and grade all this!? This is a valid question. It took me almost four years to see my department’s e-portfolio come to fruition. It is not a quick, set-it and forget-it sort of task.


 The first We Are Nashville Festival took place in 2018 at
  With the pandemic still raging in 2021, Finney knew that the festival would need to be all digital, which he was excited to explore. Finney works as a Learning Technology Specialist for Metro Nashville Public Schools and assists educators with successfully integrating technology into their instruction. So, he interviewed local artists and music directors and provided digital resources for students and teachers.
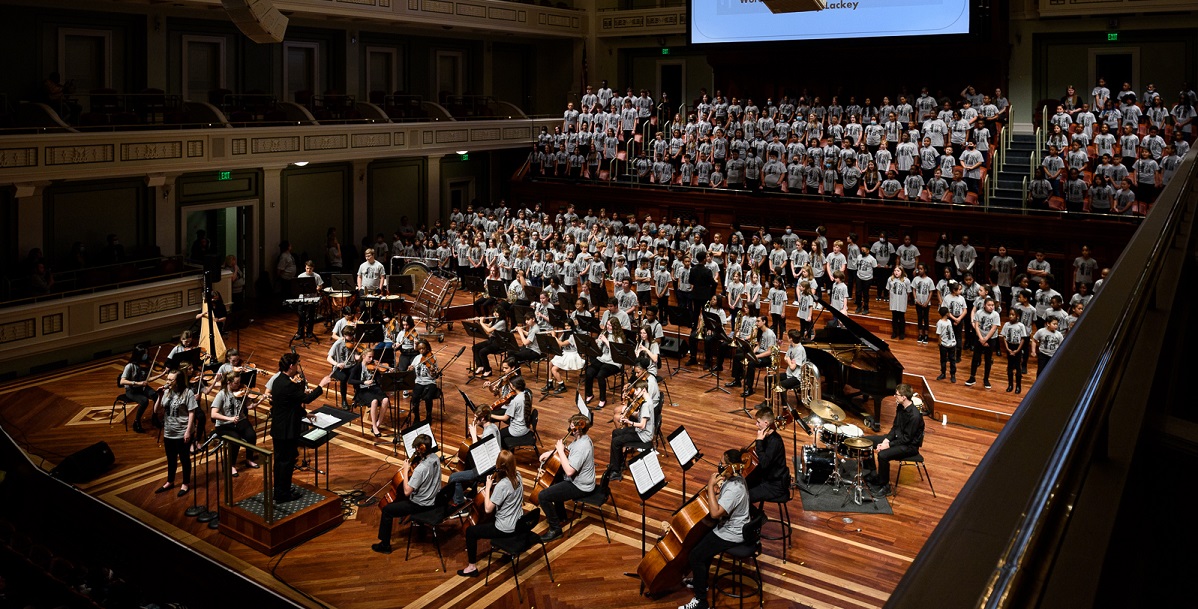 While elementary school students are in their general music experience, middle school and high school students arrive to practice and take workshops of their own. Then, they break apart and begin practicing their music in sectionals and tier-based rehearsals before coming back together for dinner. During dinner, the We Are Nashville student orchestra made-up of high school students from all over the Nashville area, begin their final run-through of music before the final dress rehearsal and show.
 He hopes that the elementary school students can look at the middle and high school students and envision themselves in their positions. Finney says that he receives feedback from teachers who say that their students want to join the middle school or high school orchestra or choir because they saw them perform at the festival. For Finney, that is what the festival is all about. He says it’s important for students to realize that “they’re just like me, or they look just like me, and they’re doing something I would love to do,” he says.


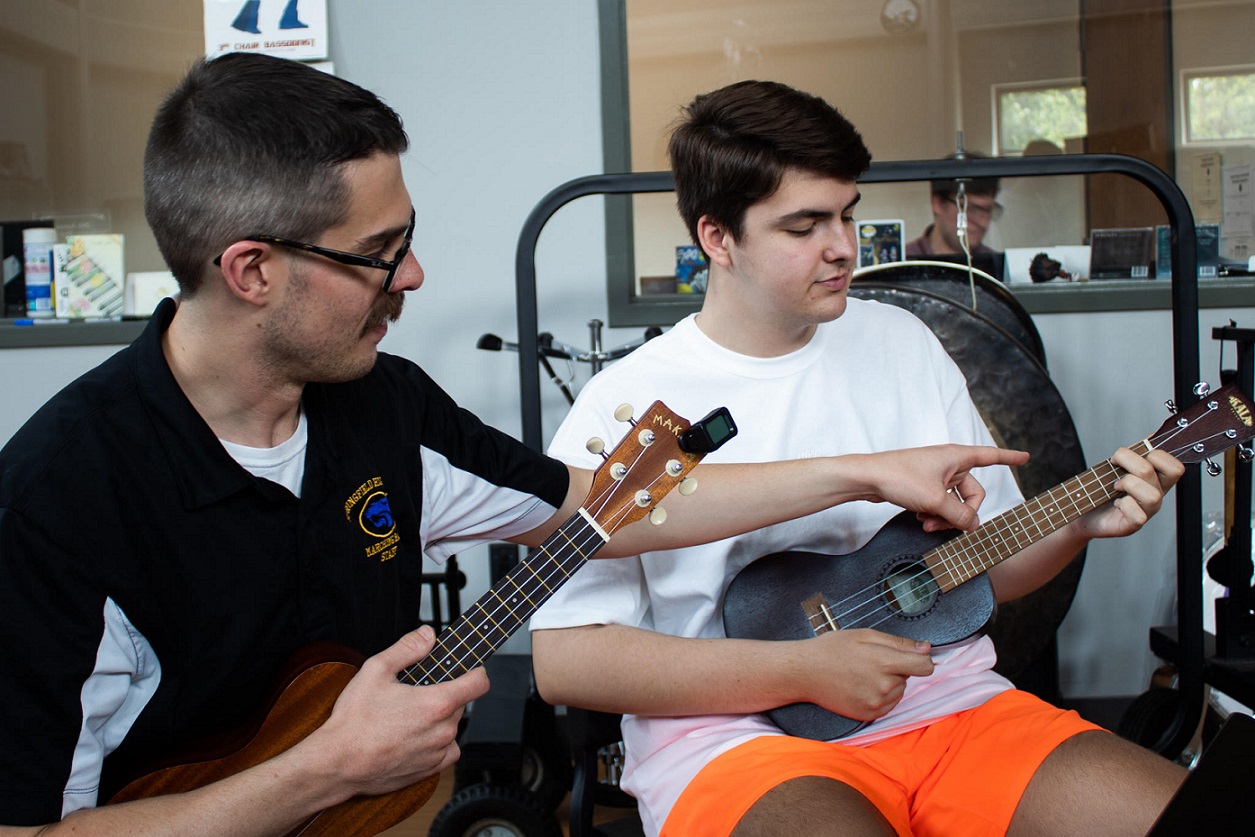 A proposal of the course was given to the building principal at the time, Dr. Joseph Hepp, a multi-instrumentalist in his own right, and reviewed by our district curriculum coordinators. After they approved it, the elective was added to the course offerings during course selection.
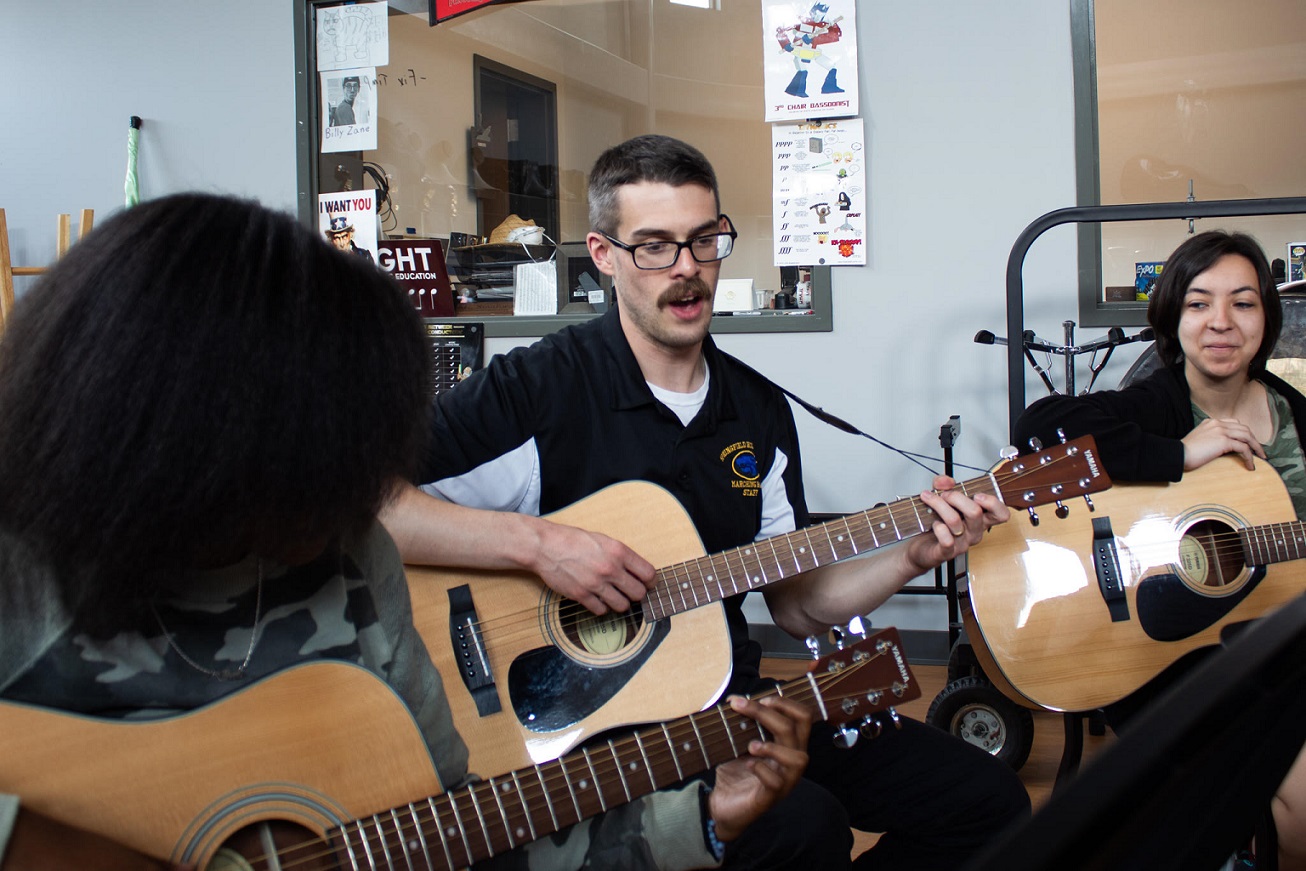 Once the course was approved, I began to write and design the curriculum as well as a scope and sequence for the course. I decided that students would spend half of the semester on ukulele and then transition to guitar. I wanted all my students to walk away with a skillset where they could continue learning, playing and enjoying music on guitar and ukulele beyond the class. Thanks to discussions and input from my colleagues, I determined that I wanted students to be able to meet two primary goals:
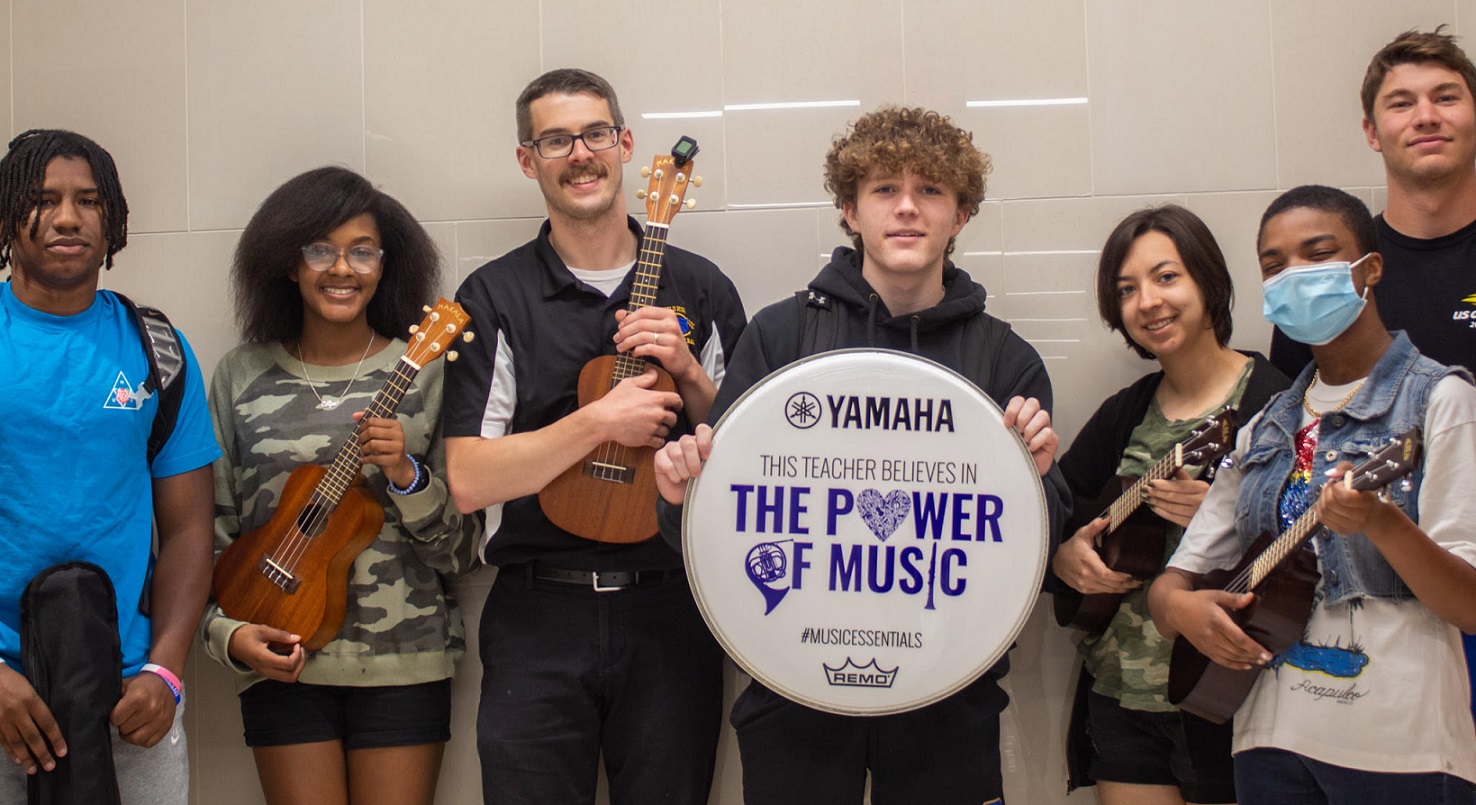 When it came to teaching common harmonies and progressions on the instrument, it was more difficult to find text and resources that met the needs of the class. While there are several popular methods for teaching harmony, few would effectively work for guitar and ukulele. For this reason, I ended up creating most of my own original resources (slideshows and handouts) to teach harmonies and chords with the aid of online resources such as
 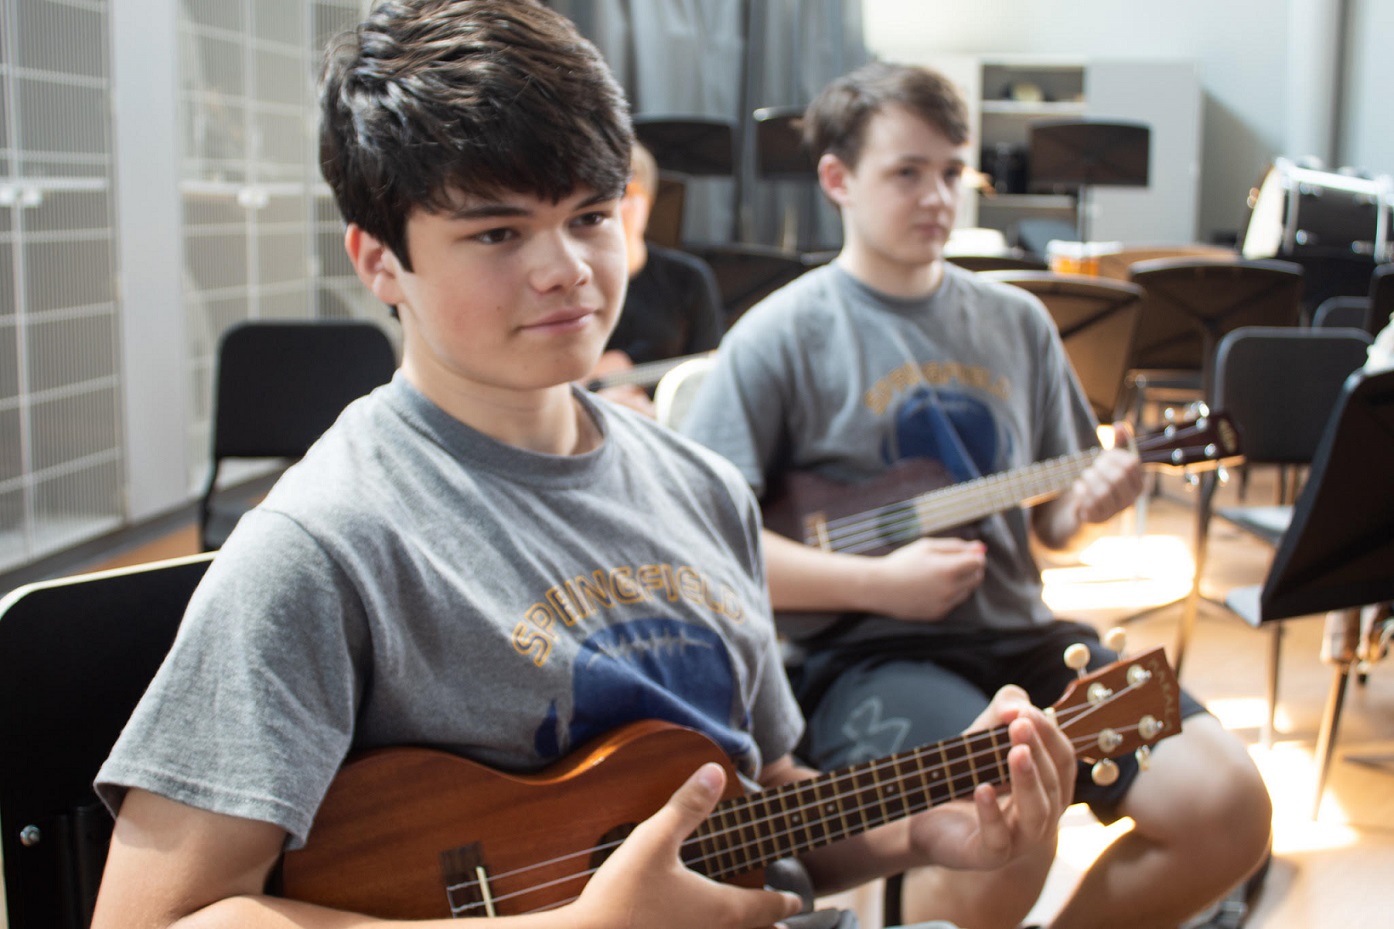 Along with the curricular support for the class, our district supported the purchase of a set of guitars and ukuleles through building and curriculum budgets. As the program expanded, we were able to use a combination of our department budget and curriculum budget to expand our inventory. Every student is assigned a guitar and ukulele during the course that they can use in class and take home as needed. If you are unable to secure a district budget funding source, I highly encourage looking into
 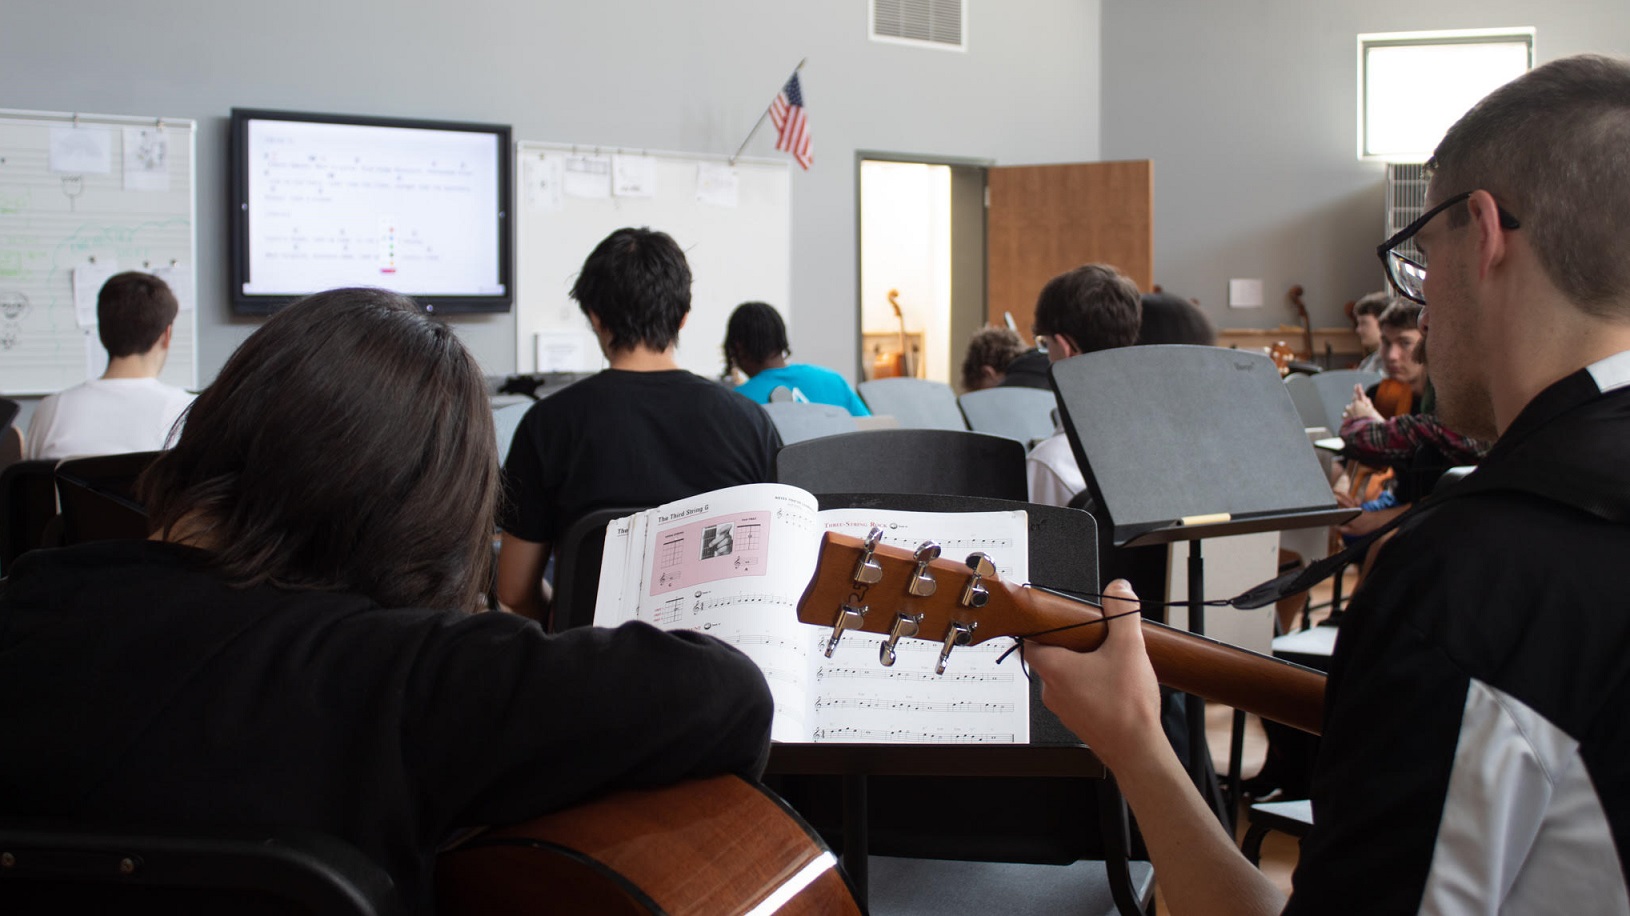 This guitar and ukulele elective has become extremely popular in our building! Last year, we ran six sections of the course taught by one other teacher and me and engaged approximately students in meaningful music making! One of the most surprising and rewarding pieces of feedback I received from students is how much they value being able to learn traditional music notation in high school!
 Fundamentals include all elements of the daily diet for the contest literature, including rhythm training, ear training, breathing exercises, buzzing for brass, long tones, lip flexibilities, harmonic slurs, articulation exercises, range builders, dynamic control exercises, scales, chorales, tuning sequences and more.
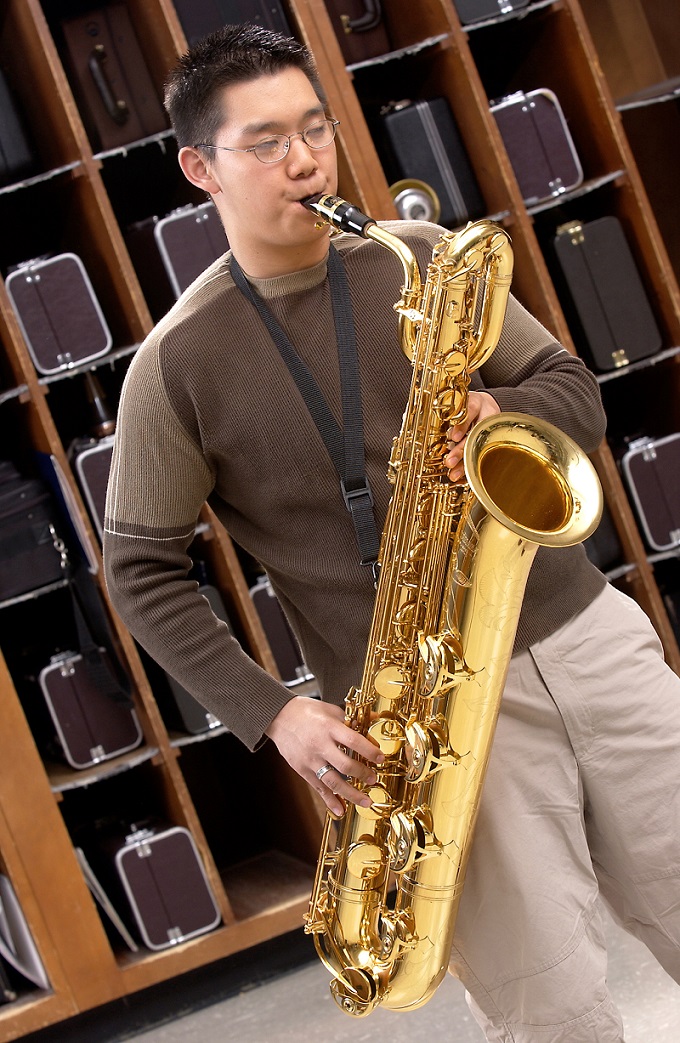 If we only have time for a very short warm-up, it must include a sustained long-tone exercise: a Remington/interval study or major/minor scales. It also must include a lip slur exercise for brass (either a soft, slow slur or something quick) and a harmonic slur for woodwinds. Sometimes we will have our woodwinds play a fast finger/technical exercise while the brass plays slurs for efficiency. And finally, the daily drill must include something to work tonguing and style. This could be multiple tonguing, fast tonguing or even learning to control accents, tenutos, staccatos or other styles students will need to succeed.
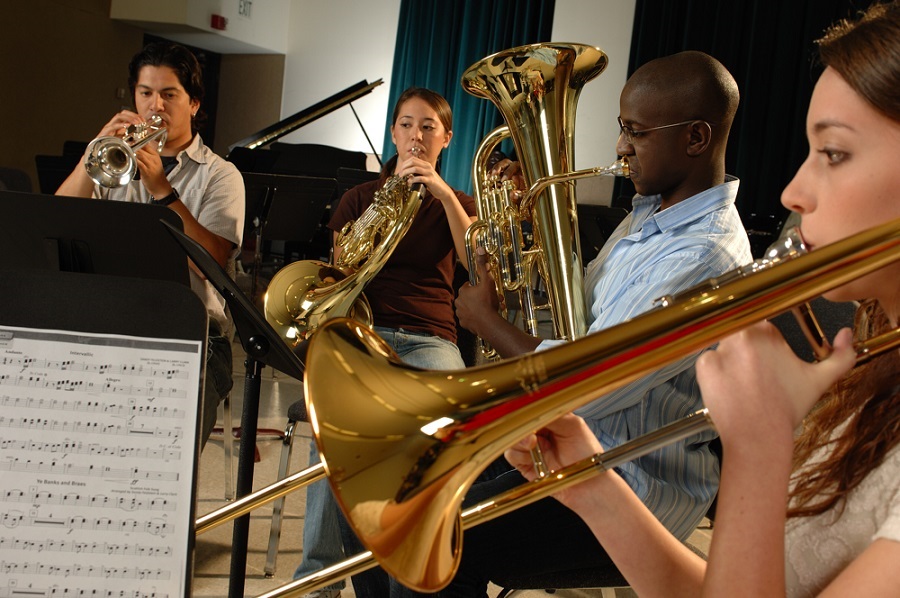 While we don’t try to “teach to the test” at Claudia Taylor Johnson, we structure our fundamentals/daily drill to address the skills needed for our performers to play our contest program at a high level. If we know that we are working on Borodin’s “


 Students have been taught to wash their hands after using the bathroom their entire lives, but hand-washing has felt like a new concept recently. The task of taking an entire class of students to wash their hands before music class is too clunky to do every hour. Instead, I have elected to allow students to self-regulate when they need to wash their hands or quickly use hand sanitizer.
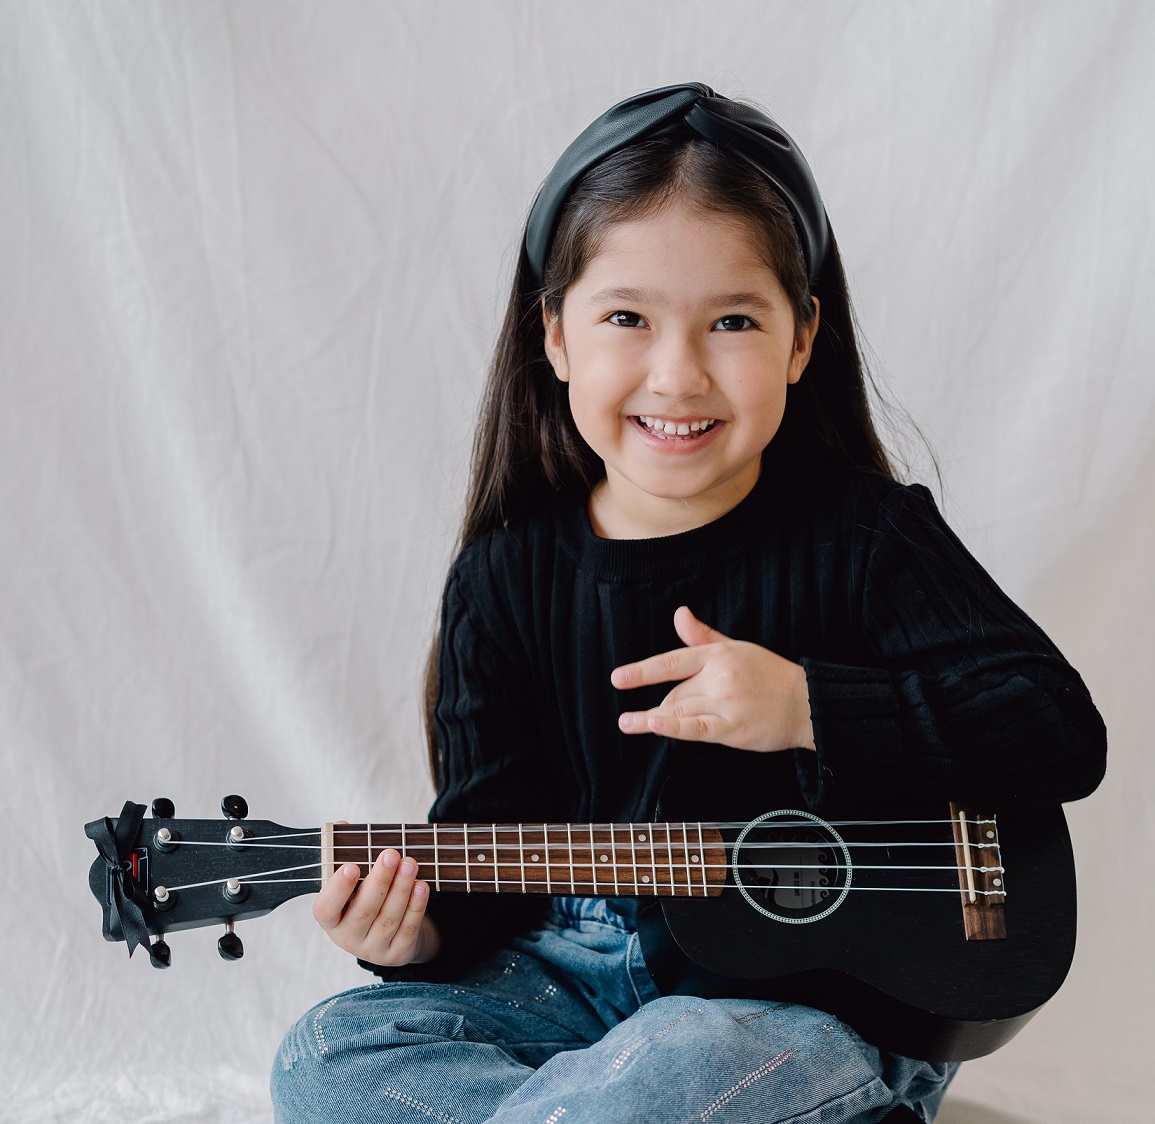 Less Sharing, More Concentrated Time
 When my district,
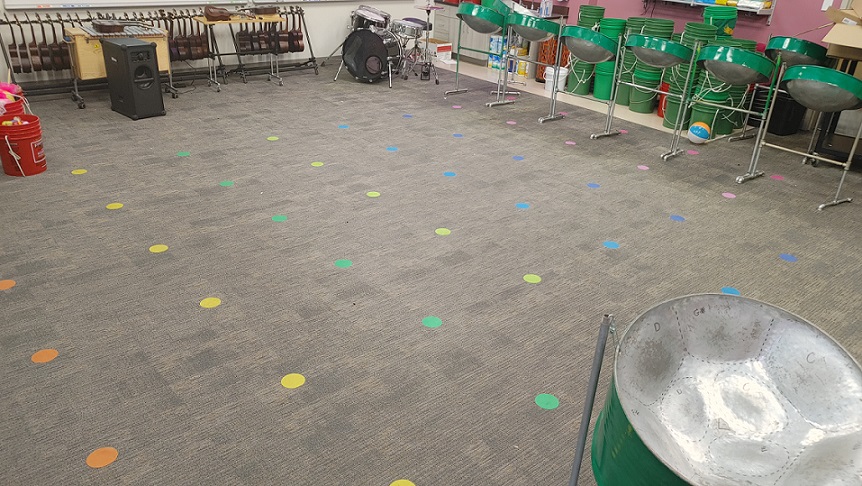
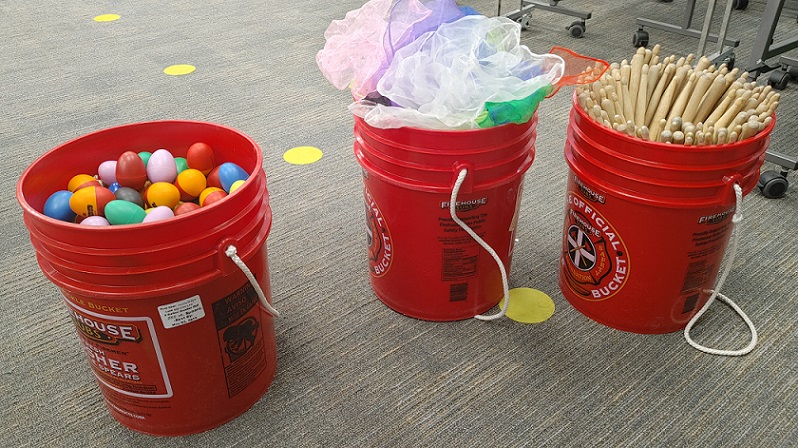


 The calendar for the upcoming school year has likely already been set. Make sure to map out your year, start by adding the following events to your work calendar:
 Once you have your calendar mapped out, you will have a better idea of when your first public performance will be and with which ensemble(s). You can begin to think about programming music. To keep it simple, try to find programs from the past three years of concerts to give you an idea of what music the ensemble(s) have performed. This gained insight can guide you toward a difficulty level. Rosters of your classes will also help you estimate expected instrumentation. From there begin pulling music from your library that is comparable to the previous year’s concert programs. I also encourage teachers to pull music that is on the easier side for sight reading at the beginning of the year. This helps to build confidence for the ensemble and for you to focus on musicianship versus notes and rhythms from day one.
 Now that you have spent time getting to know your inventory, calendar and creating your important support system within the school, make sure to reach out to your mentor and colleagues outside of your school. The true secret to success is having a support system that might include friends you graduated college with or past teachers who you now call your friends. Connect regularly with the people who will listen and offer advice when asked.
 Set boundaries with your work email. After a certain time at night, you are no longer on the job and all incoming emails can be read and responded to the next workday. The earlier you set these boundaries the better — parents and students will learn your communication habits. Stay strong when someone becomes upset that you did not immediately respond to an email that they composed at 11:00 p.m. Politely respond during your regular work hours and thank them for their patience.