As keyboardists, we get to provide the harmonic backdrop for the music we perform with singers and with other instrumentalists. Having a deep understanding of chords, voicings and harmonic movement allows us to do our job with confidence, creativity and color.
What’s A Chord?
A chord is simply three or more notes that are played at the same time. In Western music we tend to build those chords by stacking notes in intervals of a third (i.e., three or four half-steps). The main types of triads (three-note chords) are as follows:
The first chord shown is a C Major, built on the first, third and fifth tones of the C Major scale. If we lower the third by a half-step we get the second chord, a C minor. The third chord shown is called C augmented (as you can see, the plus sign is commonly used as an abbreviation), and it takes the major triad and raises the fifth a half-step. The final chord shown is called C diminished (commonly indicated, as you can see, with a superscripted “O”), and it has both a lowered third and fifth.
Listen to this audio clip to get the sound of each chord type in your ears:
To understand how these chord types occur in Western music, we can stack thirds on each of the notes of a major scale to get the following triads:
The Major triad occurs on the first, fourth and fifth steps of the scale. Does this remind you of anything? A blues chord progression, perhaps?
The minor chord occurs on the second, third and sixth steps of the scale, and the diminished chord occurs on the seventh step. Being able to discuss chords using this numbering system of scale steps is an important skill, since musicians often describe a chord progression this way, using the Roman numerals I, ii, iii, IV, V, vi and vii.
Note: When we discuss chords, we use the terms “root” (the fundamental note the chord is built on), “third” and “fifth” even though not every chord is built on the root note, or starting note of a given scale. For example, I can talk about the D minor triad as being built on the second step of the C scale, and say D is the root, F is the third, and A is the fifth of that chord. So don’t be confused by the difference between the numbering of the scale steps, or by the stacked notes of any given chord.
Building Up
If we add one more tone from the scale (a “scale tone”) — the one a third above the triad — we get what’s called a seventh chord:
But there’s an interesting twist here: If you compare these larger chords to the triads we previously built, you can see some important differences. For example, the new tone in the I and IV chords is a major third (that is, 4 half-steps) higher, which is why they are called major seventh chords, but the new tone in the V chord is a minor third higher (that is, 3 half-steps). This combination of a major triad with a minor, or lowered, seventh is called a dominant seventh chord — an important chord type we’ll be talking more about shortly. The new tones in the ii, iii and vi chords are also a minor third higher, but the combination of a minor triad with a lowered seventh is called a minor seventh chord. Finally, the new tone in the vii chord is a major third higher, and is called a half-diminished, or minor seventh flatted fifth chord.
There is an inherent tension in the dominant seventh chord, created by the third and seventh tones (the B and the F) that “want” to resolve back to the root and the third of C (the I chord of the scale we are basing our example on, which is called the key center):
The first measure shows a G7 (G Dominant seventh) chord resolving back to a C triad using an inversion of the G7 chord (an inversion is a rearrangement of the notes of a chord) — in other words, a V7 resolving back to the I chord. The second measure shows just the third and seventh of the G7, which wants to resolve to the root and 3rd of the C chord by moving inward. The third measure simply flips the order of the third and seventh of the G7 to resolve to the C by moving outwards. Listen to the natural way this tension and release occurs in this audio clip. You’ll find that it “makes sense” to our ears:
That tension inherent in a V7 dominant seventh chord “wanting” to resolve back to a I chord is a centerpiece of Western harmony, and we’ll be using that a lot in the harmony lessons coming in future “Well-Rounded Keyboardist” blog postings.
Harmony In a Minor Key
Every major key has a related minor key, which starts on the sixth step of the major scale, and the same concepts can be applied there. For example, C Major has a relationship to A minor, and we call that key the relative minor. The illustration below shows how they share both the same notes and key signature (in this case, no sharps or flats).
Notice that the V chord is no longer Major in this situation, and when made into a seventh chord it would not be a dominant seventh. Many early composers created melodies that raised the 7th tone of the scale — which we call the harmonic minor scale — to solve this issue (after all, that’s why it’s called “harmonic!).
Those chords can be extended into seventh chords to get the following:
This gives us back the same V7 (dominant 7th) chord that can resolve back to the i chord:
This audio clip demonstrates three ways you can use inversions to play a V7 resolving to the i chord in a minor key:
As we build on these principles, we’ll start to encounter even more colorful chords, such as the i chord (called a minor major 7th — a minor triad with a major third note stacked above it), the III chord (a major seventh with a sharp, or augmented, fifth) and the vii chord, which is a (fully) diminished seventh chord (that is, a diminished triad with another minor third stacked above it).
My wife is a remarkable woman, for a variety of reasons. One is that she forgives my chronic late-night infidelities with the harem of bass guitars I’ve accumulated over the decades.
That said, sometimes she will ask plaintively, “Why do you have so many of them?” The answer is simple: I love them all; they all do different things. To be honest, a long parade of basses have marched in and out my door over the years, but the ones with magical tone, responsiveness and striking looks have stayed put, due in part to the characteristics of the various woods used in their construction.
Each wood species has its own unique properties — such as hardness, resonance, responsiveness, weight and grain patterns — that make it an appropriate choice for a particular bass body, neck, fretboard, laminate or decorative veneer. Luthiers make common design decisions based on the interplay of these properties, but there is no “one size fits all.” The seemingly small nuances in the characteristics between woods can make all the difference in the world as to why a particular bass sounds, feels and looks so good in your hands. And once you’ve played a wide variety of basses, you’ll know which combination(s) works best for you.
Let’s take a look at the tonewoods most commonly used in bass guitars.
Alder – Often used in basses due to its comparative light weight, alder has a tight, hard grain pattern that’s best described as unspectacular. However, sonically, alder offers a warm, balanced sound — one that is neither too dark or too bright. In bass guitar bodies, it’s sometimes used on its own (as in Yamaha BB200 Series and BB400 Series basses) or in combination with maple (Yamaha TRBX600 Series, BB700 Series and BB Pro Series).
Ash – There are two types of ash: southern swamp ash and northern hard ash. Generally speaking, both have a more striking grain pattern than alder, and both sound notably brighter too. Swamp ash is relatively soft, which probably accounts for its tamped-down midrange response. Northern hard ash is a dense, heavy wood with snappy mids and an otherwise transparent sound that makes it a popular choice for bass bodies.
Basswood – Soft and light compared to other tonewoods, basswood isn’t known for its color or grain pattern … but that’s probably what makes it such a popular body wood. Sonically, it’s best described as transparent, with bumped mids and toned-down lows and highs, which makes for a high-performing, cost-effective choice, particularly for entry-level basses such as the Yamaha RBX Series.
Bubinga – Highly regarded for its strength and stiffness, bubinga is often used for bass necks, and sometimes for body laminates. However, it’s relatively heavy compared to woods like alder and ash, so it’s not typically used for bass bodies. But when it is, that extra weight makes for some otherworldly sustain.
Ebony – Dark as night and dense as rock, ebony is an exotic darkwood whose inherent characteristics make it a great choice for fretboards, as on the Yamaha TRBJP2 John Patitucci signature bass. With a bright attack similar to that of maple, ebony has a percussive, bell-like attack and resounding sustain. Because it’s heavily protected, however, it tends to be quite expensive.
Koa – A beautiful and extremely dense wood with a flamboyant grain pattern, koa is similar in looks and tonality to mahogany — though perhaps a bit brighter sounding — but much harder to come by, and therefore less popular. Its bold grain and golden tones make it a good choice as a top veneer, but it’s more commonly used in acoustic guitars rather than basses.
Mahogany – A very heavy, finely-grained, medium-hard wood often used in bass bodies due to its attractive grain, but equally suitable for necks due to its strength, warmth, resonance and sustain. It has lots of sonic qualities commonly associated with vintage basses, such as punchy midrange, pronounced lows and smooth, subdued highs. A prime example of mahogany in action can be found in Yamaha TRBX500 Series basses, which boast a solid mahogany body and a mahogany/maple neck.
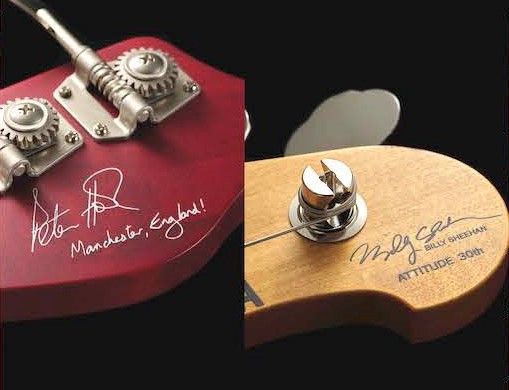
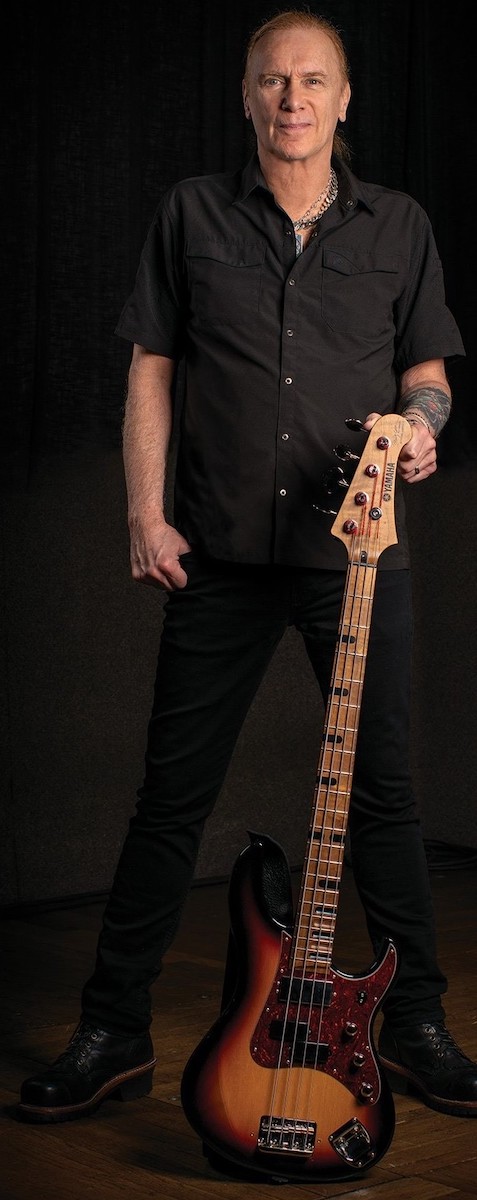
Maple – There are two types of maple (hard and soft), but hard maple is commonly used in necks due to its strength, density and weight. As found on the Billy Sheehan-designed Yamaha Attitude Limited 3 bass, maple necks — and particularly maple fretboards — are light-colored and bright-sounding, with a propensity for strong midrange and high-end sizzle without sacrificing any lows.
Maple is also a common laminate used in bodies to provide strength and midrange — as, for example, in Yamaha BB Series basses. Well known for its birds-eye, flame and tiger grain variations, maple also makes for an eye-popping veneer, as evidenced on the Yamaha TRBX604FM bass.
Rosewood – A very popular choice for fretboards, and for good reason. Rosewood is extremely hard, has a sexy grain pattern and is renowned for its sonic qualities: warmth, rich overtones, and lots of attack and projection across the entire range of bass notes. Brazilian rosewood, which nearly became extinct due to overuse, is now banned from being exported. Indian and Honduran rosewood are widely considered to be suitable replacements.
Walnut – Loaded with low-end pizzazz, along with consistent mids and brightness, walnut is generally punchier and warmer than maple. Easy on the eyes with a luxurious grain pattern, it’s also easy to lose sight of walnut’s weight — both for the sustain it provides and the upper-body workout it guarantees.
Wenge – Similar in appearance to ebony, wenge is more often used for bass necks, as opposed to bodies. Despite being hard and heavy, it isn’t as bright sounding as maple — it’s lively and punchy, but with thick fundamentals and steady midrange character.
Click here for more information about Yamaha basses.
You interact with your home technology multiple times every day, so choosing the right tech expert is vital for both a problem-free installation and years of enjoyment to follow. I have been a custom installation professional for over two decades and it still amazes me when someone hires a home tech integrator without doing any due diligence. Unfortunately, a lot of homeowners don’t realize that the relationship with their tech expert should be viewed as long-term, not as a one-off.
Here’s why: One, technology never stops changing; and two, technology is never 100% reliable. For those reasons, you will inevitably need an upgrade or a fix somewhere down the line, so you need to partner with someone who is knowledgeable, capable and reliable. Here are the things you should know before choosing a home technology integrator.
1. Make sure they have experience with projects similar to yours.
If the AV firm you’re considering is a specialist in 20,000 square foot businesses with complex control systems, they may not be right for you if all you want to do is have them install a simple 5.1-channel home theater in your living room. Likewise, if you have a large-scale full-home system or custom-built screening room, the guy that specializes in smart doorbells and entry-level audio components is probably not a fit. Get references for the firm from clients that have hired them to do projects similar to what you have in mind. It’s not out of line to ask the provider if you can tour a home they recently completed so you can get a sense of their craftsmanship and quality.
2. Verify that the installer is authorized to sell the products they offer.
You want to be sure that when you need service, you have a dealer that has formal relationships with the manufacturers and can stand behind the products they sell you. Purchasing from an unauthorized dealer may affect your warranty and ability to obtain service for the product. If an integrator is not an authorized dealer, they are not getting the latest training on how to properly configure and install the product.
3. Determine your service requirements.
Some companies only work 9 to 5 during the week, while others are available 24/7. Before hiring a firm, find out when they are available for service. Ask if their support is telephone only or if they will actually send a technician for an after-hours emergency. Most home technology firms offer remote monitoring. This is a great feature that you should consider, since it allows your integrator to check the health of your system remotely and even perform system repairs from their office or mobile device. A two-minute remote fix is a highly desirable alternative to waiting hours for a tech to show up at your home.
4. Don’t undervalue the importance of the installer.
A great installer is like a great chef. They can take a variety of ingredients and make them work together to create a perfect meal. Electronics is no different. You can have a fantastic surround sound system but if your installer cannot integrate it correctly with your video components, remotes, cable boxes, Wi-Fi routers/extenders and other smart products, you are not going to have a great experience. An installer needs to understand all of the disparate products individually and have a mastery of how they interface with everything else in the system. Not only that, they have to deal with products that change every six months! It is a hard job to do well … and an easy job to do poorly. Picking the right technology partner is crucial.
5. Check their certification.
Before you hire an AV installation company, go to the Home Technology Association™’s website (www.htacertified.org) to see if they have been certified. Every firm that has passed the certification has been thoroughly vetted, with all of their licenses, bonding and insurances verified, and all certified companies have submitted a minimum of nine references. There are hundreds of firms to choose from, so there should be several options for great installers in your city. The HTA website also provides a handy budget calculator to help you formulate a budget for your home technology project.
Click here for information about Yamaha AV products.
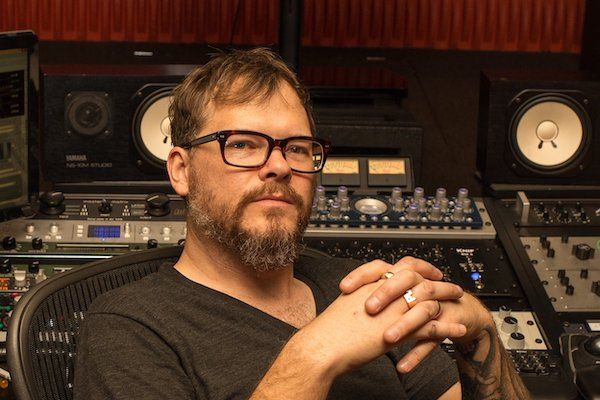
Each engineer’s mastering process is a bit different. While most of my projects involve a significant amount of analog processors, the way I integrate that gear with Steinberg WaveLab software is critical to my overall process. Here’s how the workflow will typically go on an album project: My assistant will load the tracks into WaveLab and I will then take the raw mixes and sequence them as the client requests in the Audio Montage window. Next, I will do rough spacing and rough fades as I listen, tweak and take notes of my analog gear settings.
Once that’s done, I like to listen to the album passively all the way through, maybe while I am answering emails or doing something else, just to absorb it as a whole. Then I go back and really concentrate on the individual tracks, roughing stuff in until I get each to a happy place. At that point I start doing captures in WaveLab (complete with the analog gear inline), on the lane right underneath the raw mixes.
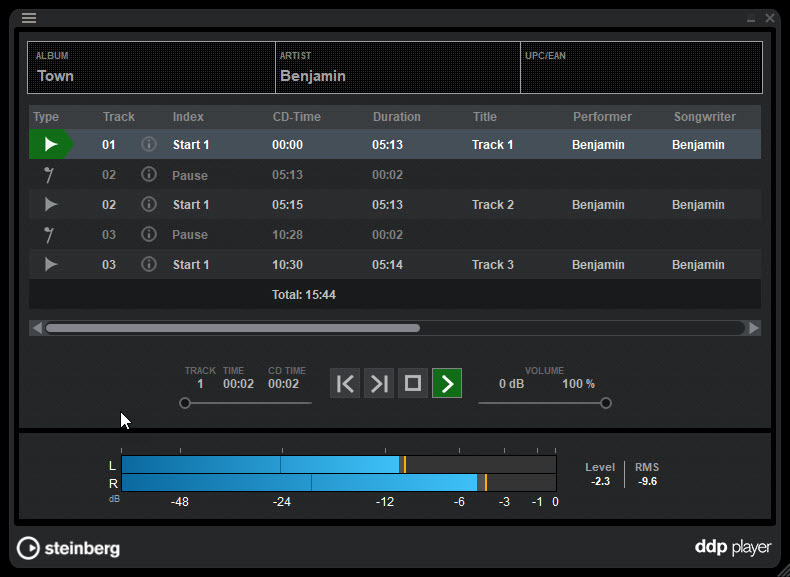
As I continue playing back the tracks, I’ll do any peak limiting or selective de-essing, and make fine tweaks digitally, including any equalization I might want to add after the analog gear. Finally, I render one continuous track and insert it into the same audio montage. From there, I can generate different versions and formats — say, 16-bit, 44.1 kHz, BWAV, MP3, high resolution or anything the client needs, as well as inserting metadata such as track title or ISRC (International Standard Recording Code). WaveLab helps make this process really fast and easy.
One WaveLab feature that I really love is Workspaces. These are layout templates that include the snapshots and the files you’re working with. As I’m doing a mastering project I tend to save a lot of different Workspaces. One, for example, will typically have the loudness meters up so I can see my unprocessed versus my processed levels. The metering in WaveLab is excellent, by the way. I always have the level meter, spectrograph and phase scope up on a secondary screen. They, along with my analog VU meters, are really all that I need.
I’ve been mastering with WaveLab for almost 20 years and over that time, I’ve developed a workflow that is very effective for me. It will open almost any file, and I like the layout — it’s really smooth and intuitive. If I need to remove anything spectrally, it’s really easy to do with a key command or by quickly pulling it down from the menu. And having a track underneath your unprocessed audio is great for easy A/B comparison listening. Plus, the ability to completely customize any window inside WaveLab is quite powerful: it lets me hide the features I don’t use on a daily basis to get rid of onscreen clutter.
I do pretty much everything in WaveLab, and I’ll be talking more about other ways I utilize it in future articles. Stay tuned!
In previous installments of this series of articles on the components of modern drum sets, we looked at snare drums, bass drums and toms. Now let’s focus on the bass drum pedal and hi-hat, both of which are essential parts of every drum set — and components that take a lot of abuse since they get stomped and kicked on a daily basis.
Don’t Tread on Me
The invention of the bass drum pedal in the early 1900s revolutionized drumming because it was the first time that one drummer could play the bass drum, snare drum and a cymbal at the same time. That solidified the idea of having just one drummer in a band — a trend that continues today.
Early bass drum pedals were crude contraptions by today’s standards, but over the years there have been many developments. For more information on the history of the bass drum pedal as well as the hi-hat, check out our blog post The Evolution of The Drum Pedal.
Direct vs. Chain Drive
The drive of a foot pedal is the mechanism connecting the footboard to the bass drum beater. Pedals using a metal strap for this connection are called direct drive, while those using a belt or strap are known as belt drive. Chain drive was developed in the late 1970s, borrowing the gears and chain from a bicycle. Yamaha bass drum pedals employ all three types of drives, and the company’s FP9 Series pedals can even be converted from chain drive to belt drive with the use of a standard drum key.
A direct drive link such as the one on the Yamaha FP-9500Densures a solid connection that doesn’t flex and is consistent throughout the motion of the pedal. The link is typically made of metal, though some manufacturers offer models that use plastic instead. Direct drive “pushes” the footboard back on rebound, giving the pedal a fast response with increased power and control. For this reason, direct drive pedals are often preferred by drummers who play heel-down and want speed and precision in their playing technique.
The first belt drive foot pedals used leather belts, but modern versions like the Yamaha FP-8500B use woven nylon belts for long life. Belt drive reduces friction and delivers a quick, light feel. It does not require lubrication, and in some cases, may be more quiet than direct or chain drive.
Chain drive is very popular these days due to its responsive action. However, heavy playing can cause a single chain to flex from side to side, and that’s one of the reasons why the Yamaha FP-9C and FP-9500C employ dual chains. The first chain-drive pedals used a geared cam but the FP-9C, FP-9500C and FP-8500C offer a gearless cam, which makes the action quiet and requires less maintenance.
Happy Feet
Adjustability is crucial when it comes to bass drum pedals, and when choosing one, you’ll want to make sure you can dial it in for maximum comfort and performance.
Every modern foot pedal has adjustable spring tension, but not all of them are created equal. Look for spring tension that’s easy to adjust and lock from the playing position like the one on the Yamaha FP-8500B or the unique Easy-Access Auto-Lock Spring Adjustment (Patent Pending) used on FP9 Series pedals.
Adjustable Cam
The cam is a crucial part of the foot pedal because energy is transferred from the footboard through the drive to the cam, which in turn propels the beater into the head. Round cams produce consistent force and feel throughout the entire stroke, which gives some players more control over their dynamics. An offset (oval-shaped) cam gains tension and produces more force as the pedal moves downward, increasing speed and adding power to the stroke. Offset cams are popular with players who like to “push into” their bass drum. Adjustable cam positions that alter the initial tension of the stroke (such as those offered by the Yamaha FP-9C) are a highly desirable feature in bass drum pedals.
Beater and Footboard Angle
The size and type of material used in a beater head affects not only the sound of the bass drum but the feel of the pedal. In general, the larger and harder the surface of a beater, the greater the attack. Felt is the most commonly used material, providing ample definition and a nice thump without the “clickiness” that harder beaters impart. Some beaters, like the Yamaha BT950 and those on the company’s 9500 Series footpedals, offer reversible heads, with felt on one side and a hard plastic surface on the other side. Yamaha FP9 Series pedals, which come with BT9 felt beaters, even offer adjustable weights — something that affects both action and responsiveness.
The closer a beater is to the bass drum head, the faster it reaches the head, but the bad news is that volume and power are reduced. That’s why many drummers who play softly prefer to set the beater angle around 60 degrees from the head. Drummers who play harder may prefer an angle of 45 degrees for increased volume. All Yamaha bass drum pedals provide adjustable beater angle.
Many bass drum pedals — for example, Yamaha FP9, 9500 and 8500 Series models — also allow separate adjustment for the footboard angle. Drummers who play heel-up might want a higher angle for the footboard, while drummers who play heel-down often prefer a lower footboard angle for less fatigue.
Double or Nothing
Other features to look for in a bass drum pedal include a memory lock for the beater shaft and a hoop clamp that’s easy to reach from the playing position. There are also double-pedal versions, such as the Yamaha DFP-9500D. Since the secondary pedal is not attached to the bass drum, it’s important that the secondary pedal has spikes to keep it from slipping forward.
Hi-Hats
The hi-hat (a combination of two cymbals and a foot pedal, all mounted on a metal stand) appeared during the late 1920s, evolving from devices known as the “snowshoe” and “sock cymbal,” the latter looking very much like a hi-hat without an elevated cymbal seat. Because it was too close to the floor, the sock cymbal could not be played with drumsticks, but somewhere along the way, it was raised up to a height where it could be played with sticks, thus the name “hi-hat.” It is generally agreed that jazz drummer Papa Jo Jones (a mainstay of the Count Basie Orchestra for many years) pioneered playing timekeeping rhythms on the hi-hat.
Hi-hat choices range from lightweight models such as the Yamaha HHS3 to the heavy-duty Yamaha HS-1200. Connection between the footboard and pull rod can be “direct pull,” as used on the Yamaha HS-850, or “chain pull,” which is utilized by the Yamaha HS-740A. Direct pull provides a strong, even feel all the way through the stroke, while chain pull creates a lighter action. Toggle link drive, featured on the Yamaha HS-1200T, is lighter at the top of the stroke and gradually becomes stronger as the footboard is depressed, resulting in a more expressive feel.
Features to look for when choosing a hi-hat include rotating legs for easy placement of multiple pedals (as found on the Yamaha HS-1200D), a cymbal seat with a locking angle adjustment, adjustable spring tension, variable footboard height and a locking clutch. Double-braced legs hold up to heavy playing, but single-braced legs leave more space for other pedals. Retractable spikes help prevent the hi-hat stand from creeping forward during playing.
Alternatives to traditional hi-hat stands include remote hi-hats that use cable drive, as well as closed hi-hat holders such as the Yamaha CHH-930, which fits any Yamaha tom holder or tom stand, thus allowing you to mount a pair of closed hi-hat cymbals anywhere in your drum set.
Foot pedals are key when it comes to comfort behind your kit, and they can open up a world of possibilities for your drumming. A little bit of experimentation and fine-tuning will ensure that your pedals provide plenty of kick!
We want to do our part to help music educators as you explore options and search for resources to facilitate online teaching.
Since teaching face-to-face is not possible, our educational partners and other companies are offering resources and solutions, including free lesson plans and subscriptions, to help you navigate these unchartered waters to teach music in new and creative ways.
As always, the music education community is showing its strength and supportive nature — this time by tackling online teaching and online learning together.
AmazingEducationalResources.com lists hundreds of sites that cover all subjects, including students’ social-emotional well-being. This list is updated regularly. Please be prudent and thoroughly research each company before signing up.
Below is a list of music-specific sites and sources. As more artists and educators post and create resources, we will update this list . Email us at educators@yamaha.com with questions or to submit a site to be included.

NAMM and Save the Music have similar lists of online resources for teachers.
Rodolfo Gonzalez, a Texas music educator, offer sheet music for beginner ukulele, bajo sexto, first studies for mariachi, elementary mariachi, guitar solos, basic music theory and basic arranging for mariachi, beginner melody books for strings, classical guitar and more.
University of North Texas: We Mean Clean project, which includes instrument hygiene and overall healthy behaviors for performing artists
Post-Pandemic Planning Guide from MusicEdNow, a cross-industry committee that includes representatives from Amro Music, the National Federation of High School Associations, Arts Ed NJ, Yamaha and select music educators
Yamaha is an active advocate for music education. We want to empower you as music educators to strengthen your programs in any way we can. Please register for the Yamaha Educator newsletter to read up on advocacy, professional development, information about instruments, resources, partnerships in education. Join the Yamaha Music Educator Community on Facebook.
It’s the night of the band concert, and the curtain will go up soon. You’re backstage bubbling with nervous excitement. Then, from the rear of the ensemble, one of your fellow trumpeters raises his hand and says, “My valves are sticky — can you help me oil them?”
This could never happen because all brass players know how to oil their valves, right? Unfortunately, all too often, this is not the case. To help clear up some of the mystery, here is the official Yamaha-approved method for oiling brass instrument piston valves.
Step 1: You’ll need both hands free, so place the instrument someplace where it can safely stay put, with the valves easily accessible. Sitting in a chair with the instrument on your lap is a good choice — if you’re worried about oil dripping on your pants, put a towel or rag underneath the instrument to catch the drips.
Step 2: Unscrew the top of the valve oil bottle and set the cap aside. It may seem silly, but it’s a lot easier to do this now rather than after the next step!
Step 3: Starting with the first valve, fully unscrew the cap at the top of the valve until it comes loose. Then use one hand to gently slide the entire piston assembly up until you can see the wide silvery-gray portion of the valve body. The piston doesn’t need to come all the way out of the instrument — as long as you can see the top of that wide area, you’ve pulled it out far enough.
CAUTION: The piston can be easily damaged if it’s dropped or banged against something, so be very careful while it’s unscrewed and exposed!
Step 4: Place several drops of oil around the top of that silvery-gray area and allow it to run down the side of the piston and into the valve casing. Don’t be afraid to use more oil than you think is necessary — any excess will drain out the bottom of the valve and will help keep the instrument clean by washing out dirt, bits of food, saliva or any other debris that may have found its way onto the valves.
Step 5: Carefully slide the piston back down into the casing, making sure that everything is still lined up the way it started. For Yamaha trumpets, you will see the valve number stamped into the metal near the top of the piston — this number should be facing toward the mouthpiece, so that if you were playing the instrument you would be able to read it. Depending on the instrument, there may also be an audible “click” as the piston guide locks into place, so listen for that click as a good sign that everything is where it should be. Once the piston is lowered all the way, screw the top cap back into place until it is tight.
Step 6: Repeat steps 3 to 5 for the rest of the valves.
Step 7: Once all the valves are back in place, work all of the pistons up and down a few times to help spread the oil around. This is also a good time to blow some air through the instrument to make sure everything was put back together correctly — do this once with all the valves open, and then again with all the valves pressed down. If the air feels blocked or restricted, go back to step 5 and re-check each valve to make sure each piston is lined up correctly.
Don’t Make These Mistakes
I’ll confess that when I first started playing a valved instrument, I developed a few bad oiling habits because no one had taught me the proper way to oil valves. The first was dripping oil down the top valve stem without unscrewing the caps. At the time, I didn’t know that there was felt underneath the stem that was absorbing all the oil, so the oil never got where it needed to go.
The second bad habit was squirting oil through the vent holes in the bottom valve caps. While some oil might have found its way to the proper place, I didn’t realize just how filthy the bottom caps can get since they’re like a lint trap collecting all the dirt and debris that drips down from the pistons. Any oil that did make it onto the piston would have picked up some of that debris and put it right back where you don’t want it.
Unscrewing the caps may seem like a complicated process, but even a beginner can learn to do this with a minimum amount of instruction and practice. My own son started playing trumpet in 6th grade, and he had no problems learning to safely oil his valves by this method. It’s also the best way to guarantee that the oil is getting right onto the sides of the piston where it will do the most good.
Spend a few minutes learning this process and you’ll have fewer stuck valves to worry about!
A subwoofer is a speaker that’s designed to reproduce very low “feel” frequencies, usually ranging from 30 Hz up to around 150 Hz. Adding a subwoofer to your existing PA will enable the system to produce lower frequencies, maximizing the impact of instruments such as bass, synths and kick drum, while at the same time increasing overall power and efficiency. If you’re using your PA system primarily for speech, you probably won’t need a subwoofer, but if you’re a DJ or mix for a live band, a sub or two can definitely add some low-end mojo to your gigs.
Adding a Subwoofer to Your System
Full-range loudspeakers are designed to reproduce frequencies down to around 60 Hz or sometimes a bit lower. (The Yamaha DXR12mkII, for example, goes down to 52 Hz.) That works fine for smaller rooms or in situations where the PA system doesn’t have to play music at high volume levels. When you’re ready to work in larger rooms at louder volumes, you can add a subwoofer such as the Yamaha DXS15mkII.
All subwoofers require a power amplifier, but some, like the Yamaha DXS Series, are active, meaning that they have built-in amps that are perfectly matched. (See my Tools of the Trade blog article Deciphering Power Ratings, Part 2: Powered Speakers for more information).
In order to integrate a subwoofer into your PA, you’ll have to make sure your system has a crossover. This is kind of like a traffic director for audio. It routes the lowest frequencies to the subwoofer, and sends frequencies above a certain point (the “crossover point”) to the full-range speakers. In the old days, crossovers were standalone devices that required a lot of work to adjust. Many modern speakers, however — including all Yamaha powered loudspeakers (such as the DXR mkII Series, the DZR / DXS XLF Series, the DSR Series, the DXS Series and the DBR Series — have a built-in crossover. With a complete Yamaha PA system, you’ll be able to easily add a subwoofer because the optimum crossover settings have already been determined.
Connections in Low Places
The interconnections for adding a subwoofer are usually pretty straightforward. Let’s suppose you have a pair of Yamaha DXR12mkII full-range loudspeakers and want to add a DXS subwoofer. As shown in the illustration below, simply connect the main left and right outputs from the mixer to the stereo inputs of the DXS subwoofer, then connect its stereo output jacks to the inputs of the two DXR12mkIIs. (The DXS output jacks can be used to connect full-range speakers or additional DXS subwoofers.)
Filter Me
Filtering is an important part of achieving optimum sound when using subwoofers. For example, the DXS12mkII has a rear panel switch labeled “Through/HF Post.” When set to “HF Post,” signals from its output jacks are processed with a high-pass filter (HPF) set at the cutoff frequency shown by the “X-Over” (crossover) switch. In addition, sound produced by the DXS12mkII is processed through a low-pass filter (LPF) to cut the range above the selected frequency. These filters ensure that there’s a smooth transition between the subwoofer and the full-range speaker without any bumps or dips in the frequency response. Since the DXR12mkII has a built-in high-pass filter, it’s easily integrated with subwoofers that do not provide a high-pass filter for the full-range outputs.
The “Through” setting is used when the DXS output is connected to a second DXS subwoofer—something you might want to do when you’re ready to play larger rooms or simply want more bottom end. As shown in the illustration below, the added connection is simple:
Using high-pass filters on full-range loudspeakers provides a few benefits. For one thing, because they no longer need to reproduce the lowest frequencies, there’s more power available for the range above the crossover point. (Be sure to check the manufacturer’s instructions to see which settings work best for your particular speakers.) This makes your system more efficient and also reduces a type of distortion known as Intermodulation Distortion (“IMD”), which is what happens when very low frequencies interfere with higher frequencies being produced by the same speaker.
Additional Sub Control
Many subwoofers have additional controls that can be used to fine-tune the system response. For example, the DXS15mkII “Level” control adjusts the output level of the subwoofer. Unlike high frequencies, low frequencies spread out in all directions, so you can position a subwoofer pretty much anywhere in the room, but in some cases inverting its polarity (phase) may improve low-frequency response—easily accomplished with the DXS15mkII “Polarity” switch, which sets the polarity of the subwoofer to normal or inverted. Similarly, the “Cardioid” switch can be used to cancel sound emitting from the subwoofer on the stage side and enhance it on the audience side. This depends upon the type and location of the speaker system, so use your ears to choose the setting that produces the best low-end. For more details on DXS15mkII settings, see the DXS Series owner’s manual.
Feeding Your Subs With an Aux
Another way of routing signal to a subwoofer is with the use of a mixer’s aux send. (See my Tools of the Trade blog article Aux Sends and Returns for more information). In this case, the main left and right outputs of the mixer should be connected directly to the inputs of the full-range speakers, with a post-fader aux send connected to the input of the subwoofer(s). Raising the channel fader feeds the signal into the main left and right speakers, and raising the aux send on the channel feeds that channel to the subwoofers.
The advantage of feeding subs this way is that signals that are not sent to the aux can never reach the subwoofer. For example, let’s suppose you forget to turn on the high-pass filter for a lead vocal channel. The signal from that microphone can include low-frequency rumble from the stage or handling noise produced when the performer grabs the mic. If those noises reach the subwoofers, the audience will hear thumping, and you’ll be wasting power and reducing the efficiency of the system. Using an aux send prevents this from happening because you’ll dial up the aux send (and hence the subwoofer feed) only on channels such as kick drum, toms, bass guitar and synths — in other words, just those sounds that have (and require) low-frequency content.
IMPORTANT: Be sure to choose a post-fader aux send to feed the subwoofer, so that when you raise or lower the channel fader, the signal sent to the subwoofer changes in proportion to the rest of the system. If the aux send is pre-fader, you might hear low-frequency rumble from a kick drum even when you have the kick drum fader all the way down.
Also be sure to turn on the high-pass filter for the full-range speakers and set the crossover points on the subwoofers and the full-range cabinets as recommended by the manufacturer. This ensures maximum efficiency of the system, as well as a balanced sound.
Adding a subwoofer or two to your PA system increases the power handling, maximizes overall SPL (Sound Pressure Level) and improves clarity in the upper frequency range — all of which means better sound at your gigs. Plus it gives your audience a chest-thumping experience they won’t soon forget!
One of the coolest things about making groundbreaking products is the way they inspire musicians to new levels of performance and songwriting. Take, for example, Yamaha TransAcoustic guitars. These remarkable instruments are able to produce ambient reverb and chorus without the need for any external pedals, effect boxes or amplifiers.
Yes, you read that right: the reverb and chorus literally comes out of the body of the guitar, surrounding you in the air. And if you do want those effects coming through a speaker, no problem: just plug it into your amp or P.A. system, thanks to the guitar’s built-in piezo pickup.
“As a songwriter, you want to get inside every chord,” says MJ Ultra, an LA-based singer/songwriter whose music has been featured in multiple feature films and television shows. Watch his classic reaction when we first put an FG-TA in his hands!
Ready to learn more? Check out these related blog articles:
Just like the Mac® versus PC controversy, or who the greatest NBA™/NFL™/MLB™ player of all time is, the question of whether expensive speaker cables are worth it often sparks a passionate debate. And like most great debates, there is no one simple answer.
Among the audio faithful, there is a wide gap between those who believe a $3/foot bulk cable is just as good as a high-end cable that costs $100/foot and those who wouldn’t dream of using a cable that only costs $3/foot in a system that costs $50,000. Who is right? In this article, we’ll make the case that the answer is more of a spectrum between those two end points than a definite point in-between.
Audio vs. Power
To help understand why a seemingly simple question like this is so controversial, consider that transmitting audio is much more complicated than transmitting, say, power. For example, a power cord just has to get one frequency of signal — 60 Hz — from the wall outlet to your coffee maker. The challenge with transmitting music is getting 10 octaves of frequencies to all arrive at the destination at the same time and at the proper level.
The Basics
Let’s start with some basic objective factors for evaluating how well a speaker cable does its job, which is carrying an electrical signal from an amplifier or receiver to the speakers that convert the signal to sound.
– Resistance. This is the most important characteristic. It’s a measure of how easily current flows through the cable, expressed in ohms, represented by the Greek letter omega: Ω. Fewer ohms, or fractions of ohms, means lower resistance (i.e., current flows more easily from the amp to the speaker).
– Gauge. The thickness of the cable, measured in American Wire Gauge (AWG). The smaller the gauge, the thicker the cable, with thicker cables having less resistance. Common sizes include: 16 AWG, 14 AWG and 12 AWG.
– Length. Longer cables create more resistance, so the distance from your amplifier to your speakers is an important factor in deciding what cables to use. Follow this rule of thumb: for longer distances, use thicker cable (smaller AWG).
Electrical Aspects
Beyond the basics, there are electrical aspects to consider, such as:
– Speaker impedance. The resistance of the speaker to the current from an amplifier is referred to as the load a speaker places on an amp, measured in ohms. Impedance determines how much current the amp can provide to the speakers, but, unlike resistance, impedance changes with frequency. In reproducing voice and music, an amplifier produces many different frequencies, so a speaker’s impedance is different at every frequency. To simplify this phenomenon, manufacturers list the nominal impedance of their speakers — for example, 4 Ω or 8 Ω. This is the value used in calculating the maximum run of speaker cable that can maintain resistance within the recommended limit (generally less than 5% of the speaker’s impedance).
– Inductance and capacitance. These are related to resistance, but they are frequency-dependent. For example, higher frequencies can pass through a capacitor more easily than lower frequencies. Likewise, lower frequencies can pass through an inductor more easily than higher frequencies. Cables inherently have a little inductance and capacitance, but since the ultimate goal is to have all frequencies arrive at the speaker at the same time, more expensive cables go the extra mile and take these factors into account.
– Conductor material. The purer the conductor, the more it costs. Copper is commonly used because of its low resistance and low cost. Silver has an even lower resistance, but is considerably more expensive. Manufacturers offer different price points by using different kinds of copper and silver, including oxygen-free copper, pure bare copper, tinned copper, silver-plated copper and various percentages of silver.
– Terminations. The material and type of connector used on the end of the speaker cable also affects the sound, but we’re going to keep this discussion to just the cable itself. For more information on terminations, see our previous posts on installing banana plugs and speaker cable.
In terms of the factors above, there are many reasonably priced options available, including the Monoprice 2747 12-gauge speaker cable chosen by Wirecutter as the Best Speaker Cable in 2019.
Snake Oil?
The main problem that expensive cables try to address is timing. And here’s where angry mobs start reaching for their pitchforks and torches, with terms like “snake oil” tossed around.
The science is this: Low frequencies travel straight down the middle of a conductor, while high frequencies tend to travel on the outside of the conductor. This behavior, which is known as skin effect, can cause low and high frequencies to arrive at the speaker at slightly different times. It’s a phenomenon that dulls the dynamics of the music and adversely affects the soundstage and imaging.
Expensive cables use many strategies to get all frequencies to arrive at the speaker at the same time and at the proper level, including:
– Dielectrics. A dielectric is insulation that keeps current from flowing between the conductors. In speaker cables, a dielectric is used to separate the positive and negative conductors. Dielectrics can be made of vinyl, Teflon™, polypropylene or even air. Different dielectrics are chosen for their flexibility and electrical characteristics.
– Conductor geometry. There’s more going on inside that cable than you think. Aside from what the conductors are made of, the way they’re arranged within the jacket (sometimes referred to as the “outer cover”) affects the performance of the cable. Two conductors arranged in parallel have higher inductance than a pair of conductors twisted together, which will have a higher capacitance. Expensive cables use different numbers of conductors in different arrangements to minimize factors that can negatively impact the sound, such as inductance and capacitance.
– Aesthetics. Even though most people think speaker cable should be heard and not seen, others think every piece of their setup should be a work of art, including the not-so-humble cables. If you want to step up from a white PVC jacket, you’ll find PVC in different colors, striped PVC and even braided jackets, topped off with connectors as shiny as candy apples.
Let Your Ears Be Your Guide
Audio pundits can spout facts and figures, but as the old saying goes, the proof of the pudding is in the eating. As with everything audio, the ultimate determinant of whether a product is subjectively “good” or “bad” is your ears. And the corollary to deciding whether a cable sounds good is deciding whether the price is worth it. If you are happy with a $3/foot cable and think it sounds great with your system, then your search is over.
On the other hand, if you are spending thousands of dollars on your components, taking the time to place your speakers precisely, and consider yourself an audiophile, you may appreciate the subtle differences that some expensive cables produce. In fact, the differences may not be subtle to you at all.
The bottom line is this: Wherever your speaker cables land on the spectrum between low-end and high-end, the important thing is that they sound good in your system to your ears. Follow that dictum and you’re bound to be satisfied with your speaker cables, whatever the cost.
Let’s celebrate Saint Patrick’s Day by paying homage to five of the most famous Irish musicians … including one that will probably come as a surprise:
1. U2
They’re inarguably the most well known band to ever come out of the Emerald Isle. Originally a six-piece, the group formed in Dublin in 1976. Within a few short years, singer Bono, guitarist David “The Edge” Evans and their compatriots Adam Clayton and Larry Mullen Jr. were selling records by the millions and setting attendance records in stadiums the world over. They’ve had so many hits over the decades, it’s hard to pick just one or two, but to get a flavor of the group’s powerhouse sound, check out “Pride (In The Name Of Love)” and “I Still Haven’t Found What I’m Looking For.”
2. Van Morrison
Born in Belfast in 1945, Van began playing guitar at the age of 11 and added piano and saxophone to his repertoire while still in his teens. In 1963, he formed the R&B group Them (who had a major hit in 1964 with his song “Gloria”) before launching a successful solo career and giving us two of the most quintessential sing-along tracks ever: “Brown Eyed Girl” and “Moondance.”
3. Enya
Born Eithne Pádraigín Ní Bhraonáin, she’s Ireland’s top-selling solo artist ever, with a distinctively esoteric musical style that includes folk melodies, extensive voice layering and dense reverbs, as exemplified in her hits “Orinoco Flow” and “Only Time.” Her songs have also been featured in the Lord of the Rings trilogy.
4. The Chieftains
Formed in 1963 under the leadership of Paddy Moloney, this group has become synonymous with traditional Irish folk music, with a sound that is almost entirely instrumental and largely built around uilleann pipes. Over the years they have collaborated with numerous artists, including the aforementioned Van Morrison, as well as Luciano Pavarotti, The Rolling Stones and Roger Daltrey.
5. Paul McCartney
Yes, that Paul McCartney. Like many Liverpudlians, Macca is of Irish descent, and, with his post-Beatles band Wings, he released a single entitled “Give Ireland Back to the Irish” in February 1972 as a protest to the events of Bloody Sunday, when British troops in Northern Ireland shot dead thirteen Irish Republican protestors. The record was immediately banned in the UK, and was largely overlooked in the United States too, reaching only number 21 on the Billboard Hot 100 … but it did top the national charts in Ireland.
With the passage in December 2015 of the Every Student Succeeds Act (ESSA), also known as the Elementary and Secondary Education Act, music was named as part of a “well-rounded education.”
A “well-rounded education” is defined in the law as “courses, activities and programming in subjects such as English, reading or language arts, writing science, technology, engineering, mathematics, foreign languages, civics and government, economics, arts, history, geography, computer science, music, career and technical education, health, physical education, and any other subject, as determined by the State or local education agency, with the purpose of providing all students access to an enriched curriculum and education experience.” (ESSA, Title VIII, Section 8002)
Each time the term “well-rounded education” is referenced in the law — over 20 times! — it reinforces the fact that music, as well as all of the other subjects listed, is essential.
What does this mean for music education? One of the most significant outcomes is that districts can now assess their ability to provide a well-rounded education, including music, and address any deficiencies using federal funds. Another plus for music educators is that federal dollars may be used to provide professional development to help support a well-rounded education.
In December 2019, ESSA received additional funds and among those categories that saw an increase are Title II-A, which will now receive $2.1 billion to support Effective Instruction grants, and Title IV-A, which will now receive $1.2 billion for Student Support and Academic Enrichment (SSAE) grants.
The SSAE funds are granted from the federal government to the states, which then re-grant them to districts through a grant application process. It is extremely important that educators, parents and school officials learn as much as they can about these resources and how to apply for them.
Here are a few steps to help educators get started.
Identify what types of SSAE grants have been awarded in past years (or enlist the help of a parent to do this). These are public funds, so the information can be accessed by calling the federal grants department at your state’s department of education. It might help to know if other districts in your state are receiving SSAE support. States may not be able to provide specific information on how the grants will be used at the district level, but once you find out which districts received funding, you can contact that district’s federal grants department for details.
Step 3: Set up Key Meetings
Once you have some understanding of what is in the law and how past grants have been awarded, meet with your principal or supervisor and ask about their knowledge of these resources. Remember, grant funding provides support for the entire school, so you will be considered a hero for bringing great information to your school leaders. If they are not aware, determine who in your district is responsible for writing federal grants then ask to meet with them for additional information and guidance. There are more than 13,500 school districts in the United States, and the vast majority of them has someone on staff whose job is to apply for federal grants. States may have varying application processes, and your federal grants staff person will be able to provide detailed information. It literally pays to find out all you can about the application process because some covered expenditures could include salaries, purchased services, instructional supplies and materials, professional and technical services, and instructional and non-instructional equipment.
Step 4: Perform a Needs Assessment
Meet with your music education colleagues and figure out what is lacking in your music program and what can be done so more students can be provided with access to music? NAfME provides a comprehensive resource to help with this process. The “Opportunity to Learn Standards” document provides recommendations for curriculum and scheduling, staffing, materials and equipment, and facilities.
Step 5: Provide a Well-Thought-Out Proposal
Use the guidelines provided by the grants professional in your district and put together a detailed proposal.
Step 6: Be Patient and Stay Positive
Wait for a response from your state but don’t be discouraged if funds are not awarded on the first try. These are annual grants so applications can be resubmitted in subsequent years. Do, however, follow-up to see how to better organize your application for the next round.
This is our time. Music education has never been in a better place to determine its own future. But it is up to us. Former Speaker of the House Tip O’Neill said, “All politics is local.” His quote accurately describes what lies ahead. So, familiarize yourself with the details of ESSA, meet with your music department to come up with a game plan and make that appointment with your principal.
This article first appeared in the Music for All National Festival program.
Yamaha is an active advocate for music education, and we want to empower music educators to strengthen their programs in any way we can. Please register for the Yamaha Educator newsletterto read up on advocacy, professional development, information about instruments, resources, partnerships in education and more. Join the Yamaha Music Educator Community on Facebook or email us at educators@yamaha.com.
Today’s televisions offer screen sizes and picture quality that greatly surpass that of previous generations. But figuring out what model to buy can be confusing, thanks to an alphabet soup of technologies. In this article, we’ll demystify some of the key terms to better inform your buying decision.
It All Started With HD
Just ten years ago, 1080P (the “P” stands for “progressive scan”) was the industry standard. This format was also known as “Full HD,” with “HD” standing for “High Definition.” (Older TVs offer only “SD” — short for “Standard Definition.”) Then came 4K UHD (“Ultra” HD), which until recently was the highest video resolution available. Now the shiny new format is 8K Ultra HD. Currently, you can buy 8K models in screen sizes ranging from 55″ to a whopping 98″. Some manufacturers are planning to release even larger models in the near future.
But before you rush out to buy an 8K set, you may want to wait for the content and supporting gear to catch up. Before I explain why, let’s quickly review how we define picture quality in TVs.
A Matter of Dots
A tiny dot called a pixel is the key to understanding TV (and computer) screen image quality. The images you see are composed of thousands or sometimes millions of pixels, depending on the format of the TV you’re watching on. The more pixels in an image, the more detail it can show. For example, the picture in a 1080P TV is comprised of 1920 x 1080 pixels. (The first number represents the horizontal plane and the second, the vertical.)
The 4K UHD standard consists of 3840 x 2160 pixels (over 8,000,000 pixels in total), which is almost four times the number of pixels of 1080P. The new 8K standard for TV is double that: 7680 × 4320 (over 33,000,000 pixels in total).
Besides the total number of pixels, a critical spec is the pixel density, which is expressed in pixels per inch (PPI). It measures the number of pixels in a square inch of a TV (or computer) screen — the higher the PPI, the better the image quality. The abundance of pixels in 8K Ultra HD is what makes it possible to support large screen sizes.
In Contrast
As if the terminology of TV formats wasn’t confusing enough, many 4K and 8K TVs also support HDR (High Dynamic Range), which is a technology that’s independent of the pixel dimensions. HDR was designed to improve both the contrast and the color on your TV. For example, a TV with HDR will let you see more detail in a nighttime scene, where the screen is dark.
You can also find TVs that offer an enhanced version called HDR10+, which delivers four times as much brightness as standard HDR. You’ll soon be seeing more and more TVs with HDR10+, and it seems likely that many new 8K TVs will include it.
Pixels In, Pixels Out
When I said earlier that you might want to wait for the content to catch up before purchasing an 8K TV, that’s because you can only reap the format’s full benefits if you’re watching programming that’s streaming in 8K. As of this writing, that doesn’t exist outside of Japan.
In the U.S., you can get plenty of 4K streamed content, and you can watch Blu-ray Discs™ in 4K if you’re using a 4K Ultra Blu-ray player … but no 8K as of yet. Even if it were available, it requires so much data to stream that you would need a super-high-speed internet connection, possibly more than your current ISP offers.
Fortunately, while you wait for the advent of 8K content and possibly faster internet service, you can watch 4K or even 1080P content on an 8K TV. What makes it possible is a technology called “upscaling.” An upscaling processor uses a process called interpolation (i.e., using known data points to fill in pixel gaps) to generate additional pixels and make the signal compatible. You won’t get the same quality as with native content, but it will still look sharp.
Some advanced AVRs (AV receivers), such as the Yamaha RX-V685 and AVENTAGE RX-A1080, also contain similar kinds of processors, enabling them to upscale lower-resolution content to 4K for display on a 4K or 8K TV.
Yamaha AV receivers also provide plenty of sonic benefits. They can enhance the audio in your home theater by amplifying it and distributing it to your surround sound speakers. These receivers also make a powerful hub for your Hi-Fi system, offering inputs for turntables and other external sound sources; they can also receive internet-based audio such as Spotify® or Apple Music®, as well as terrestrial radio. In addition, they can serve as the control center for a complete streaming MusicCast system, which is the Yamaha multi-room wireless speaker technology.
Are You Ready to Upgrade to 8K?
It seems pretty clear that 8K Ultra HD is going to be around for a long time (as TV formats go), and as more sets hit the market, native 8K content will become available. When that happens, you’ll be able to enjoy even sharper picture quality and more detail than you get from 4K UHD.
If you currently own a 4K TV, you might not want to ditch it for an 8K model just yet. If you wait a year or two, not only will the content catch up, but the prices of 8K sets will likely come down.
It’s a different story if you’re ready to upgrade from your 1080P TV, particularly if you’re looking to go up significantly in screen size. Even in that case, there’s a good argument to be made for skipping 4K altogether and buying an 8K set. That way, you’re future-proofed — at least for a while — and you can still enjoy all the 4K content that’s currently available.
One last thing: Believe it or not, 16K technology is here as well, although it’s not a consumer format … yet. It’s currently used for commercial applications where huge screens or multi-monitor setups that distribute the pixels across the various screens are required. But with the burgeoning popularity of immersive technology, it’s likely that someday you’ll have a massive 16K TV in your living room.
Click here for more information about Yamaha AV receivers.
The Yamaha EAD10 is an incredibly versatile device that can transform your acoustic drum set into a hybrid acoustic-electronic drum kit, making it a great tool for practice as well as performance.
It consists of two components: a sensor unit and a main module unit. The sensor is meant to be mounted on your bass drum hoop; its built-in stereo microphone is specially designed to pick up the sound of an entire acoustic drum set, allowing you to quickly record your acoustic drums (or send their sound to a P.A. system during live performance) and monitor them with full control over the volume in your headphones.
The main module provides hundreds of PCM sound sources and dozens of high-quality effects, along with a high-performance headphone amplifier that delivers the volume necessary when playing an acoustic drum set. It offers a series of large knobs that can easily be adjusted mid-performance, so that main control functions like volume and preset scene can be accessed easily, as well as LED indicators that enable quick and intuitive adjustment on even the darkest of stages.
When integrated with the Yamaha Rec’n’Share app (available for both Apple® iOS and Android™ devices), the functionality of the EAD10 is further enhanced. This powerhouse combination allows you to record audio and video while playing along with your favorite music, and to then upload the files to social media. Simply pick a song from your music library, and the app’s tempo detection lets you add a click, change the tempo and select sections to repeat for practice made perfect — you can even edit recorded audio.
Recently, Yamaha released free Version 2 firmware for the EAD10 that provides additional creative and educational tools that can help students with self-evaluation and when working with an instructor. In this article, we’ll show you how to upgrade to Version 2 and discuss the many new capabilities it adds.
Installation
Installing the V2 firmware into your EAD10 is simple and easy. Here’s a video that takes you through the process step by step:
Let’s take a closer look at each of the new features described in the video.
Talkback
The EAD10 main module provides a dedicated microphone button, located directly below the power on-off switch and to the right of the MENU button:
The new Talkback function added by the V2 upgrade enables easy communication between instructors and students without the need for extra microphones or speakers — even while wearing headphones.
Here’s how it works: During initial setup of the EAD10, the gain of the internal microphones in the sensor unit is set to capture loud sounds (i.e., the sound of the drums). For that reason, when you stop playing and start speaking, it may be difficult to hear yourself through the microphones because your voice is not nearly as loud as drums are. The new Talkback feature instantly changes the mic gain to a level that makes your voice easy to hear, and when recording using the Rec’n’Share app, it also enables you to hear your voice on video when you stop playing. Turning off Talkback returns the mic gain to its original setting.
There are several ways to control Talkback. It can be turned on or off by double-tapping the Microphone button, or you can use a foot switch (such as the Yamaha FC5 or KU100 kick unit) connected to the rear panel of the main module. A third option is using the EAD10 Pad Function to control Talkback using a trigger input, in which case striking a specific drum pad turns Talkback on and off.
Yamaha FC5 foot switch.
Yamaha KU100 kick unit.
Click Output Assignment
Being able to work with a click track is an important skill for any drummer. EAD10 Version 2 firmware provides several options for routing the click, so you can hear it in live performance, as well as while recording. Assigning the click to PHONES sends the click to the headphone jack only. Assigning the click to L&R + PHONES routes the click to the headphone jack as well as the main left/right outputs. Setting the click output to ALL routes the click to the main left/right outputs, the headphone jack and the USB audio output that is sent to the Rec’n’Share app.
Since the click is the tempo guide, being able to hear it clearly creates a solid audio reference for your groove. The Click Output Assignment feature makes it easy for you to ascertain whether your performance is in sync with the click, or if you’re ahead of, or behind the beat — vital for improving your drumming skills.
Noise Gate
If you’re recording in a noisy environment, the Microphone Noise Gate feature added by the EAD10 V2 firmware can be used to filter out background noise. It’s accessed by pressing UTILITY > GENERAL, then scrolling down to MIC NOISE GATE. To set the gate, first adjust the threshold all the way down to -90 dB, then turn it on. You won’t hear any difference yet because the threshold is all the way down, and so the gate will open in response to even very soft sounds. Listen to the background noise while slowly raising the threshold. When you hear the background noise disappear, stop. This sets a threshold that ensures the background noise will be filtered out, but your drums will still come through loud and clear. The Release adjustment permits the gate to close smoothly so you don’t hear any choppiness, such as the decay of cymbals getting cut off.
This is a great way to prevent background stage noise or audience chatter from sneaking into your performance between songs. It’s also useful in situations where you need to filter out environmental sounds like the whoosh coming from an air conditioner. You may not hear those kinds of noises when the drums are being played, but you’ll certainly hear them when the drums stop!
Low-Volume Drum Sets
The Version 2 firmware also provides support for an optional data file that includes 42 new Scene presets designed for consistent, accurate triggering from mesh heads. They allow you to construct an incredibly realistic, low-volume practice or performance drum set, while preserving all the other functions of the EAD10. (Here’s a video that shows you how to load these presets into your EAD10.)
To use these scenes, you’ll need to connect a set of triggers, such as the Yamaha DT-50S (designed for use with snare drum, rack tom and floor tom) and/or DT-50K (designed for use with kick drum) to the mesh heads and to the EAD10’s rear panel trigger inputs.
To ensure reliable triggering, set the tension of each mesh head high — if it’s too loose, false triggers can occur. Don’t use a felt beater on a mesh bass drum head because felt will shorten the life of the head considerably. Instead, use a plastic beater or place a bass drum patch on the head.
Extended Recording Time
Last but not least, the Version 2 upgrade extends your recording time to 90 minutes when using a USB flash drive, allowing you to record an entire set, rehearsal or lesson for review and evaluation.
All in all, the V2 firmware upgrade adds a wealth of useful features to your EAD10, and at no cost whatsoever. That’s what I call a real bargain!
Click here for more information about the Yamaha EAD10.
Click here for more information about the Yamaha Rec’n’Share app.
My 2020 got off to a flying start with a gig on New Year’s Eve. The very next day, I was recording tracks in preparation for the NAMM® show, where I’d be representing Yamaha Guitars.
Nothing motivates me to achieve a goal more than a deadline. If a deadline doesn’t exist, I create one for myself. In this instance, it was easy since I knew that when I got home from the show in California, I’d be finishing out my studio so that I could start filming a new guitar course for release this spring. I’d already bought all the audio/visual/lighting gear that I needed and figured out how to use it all by reading the manuals and watching YouTube™ videos. (Yes, sometimes it helps to read the manuals!)
I’d scheduled a week to build three barn doors and hang them for the studio backdrop:
The guitar in this photograph, by the way, is a Yamaha Revstar 502TFM with P90 pickups, a mahogany body and a gorgeous Vintage Japanese Denim finish on flame maple. It sounds great and looks great too!
I figured I’d then take a day to set up cameras, film lighting tests and record audio demos to make sure that guitars, backing tracks and microphones were balanced without clipping the input signals. Once those tasks were complete, I could start crafting the new course. But, needless to say, I couldn’t film content without planning for it first. To that end, I’d already visualized the concept, written a course outline, recorded the tracks, rendered chord/scale diagrams and completed a Mind Map of the workflow — more about this shortly.
In addition, setting a realistic goal for each day of filming would prove invaluable because I also wanted to edit and master each session before filming the next series of lessons. (Editing each day allows you to check that there are no glitches in the system before investing more time in the next session.)
In a similar way, I also apply a solid work ethic to my practice time and have formulated a series of approaches to achieving consistent progress and positive results. In this edition of the Calvo Report, I thought I’d share with you a few ideas on how to maximize your practice sessions and keep you moving steadily towards your musical goals.
Decide on a Big Picture
The first thing to do is take a moment to decide on a “big picture” goal. This could be as simple as learning a new song or as grand as touring the world with your dream band. Once you have a target desire, place a deadline on achieving that goal — for example, one week to learn the song and two years until the start of the tour.
Create a Mind Map
The next step is to create a mind map — a powerful tool I discussed in a previous blog posting. I like the visual aspect of mind maps because they incorporate color, shape and purpose. You can add sub-topics to your central theme (big picture) and designate the steps you need to take, in order of importance, to achieve your goals.
For example, suppose your goal is to become proficient improvising over an A7 chord using a dominant 7th arpeggio. Here’s what a mind map of that might look like:
Let’s look at each of these intermediate steps in greater detail:
1. Set your intention. Take a moment to set your intention for the task at hand.
2. Set time frame. Designate a length of time for each practice session and stick to it.
3. Visualize the chord. Visualize and name the notes of an A7 chord located at the 5th fret on a guitar.
4. Visualize the arpeggio. Find a fingerboard diagram of an A7 arpeggio shape located at the 5th fret. Visualize the arpeggio shape on the fretboard, and then “see” (in your mind) each finger playing each of the notes. Visualize this sequence of notes five times ascending and five times descending.
5. Pick up your guitar and play an A7 chord, name each note in the chord, and then apply the arpeggio shape to the fretboard without referencing the diagram. Finally, name the notes in the arpeggio. The quicker you get the information you’re learning “off the page” into your mind, the better. Visualization will help you achieve that.
6. Play a simple lick using the arpeggio tones, and then reference the chord immediately afterwards. This will help you associate the arpeggio with the chord and solidify the sound of each tonality.
At the end of your focused 15-minute practice session, you’ll have achieved one of your goals. Keep adding goals to your list until you accomplish the designated “big picture.”
The Video
Here’s an interview filmed last November in Nashville with guitar instructor Erich Andreas. The topic was “How to Practice with Intention,” although we actually went quite a bit deeper than that. I think you’ll enjoy watching it.
The Wrap-Up
Your mind is your most powerful asset. When we set our intention towards a specific goal and designate a series of smaller stepping-stones as a pathway towards that goal within a definitive timeframe, there’s almost nothing we can’t achieve. Give it a try!
Part 1 of this series presented an overview of the mixer functions and interconnection options offered by the Yamaha STAGEPAS 1K PA system. In this installment, Yamaha product manager John Schauer explains how to pair your Apple® or Android™ device via Bluetooth so you can wirelessly stream audio to the system and access the mixer from your smart device — critical features for the self-contained artist wanting to be able to control all aspects of their performance from the stage:
In the video below, John shows you how to use the STAGEPAS Editor app for complete control over all mixer settings, including summaries of each screen and tips for setting adequate headroom:
In a recent blog, I relayed a story about a producer who told me he hoped I would always be sad because I wrote great songs when I was depressed. He was speaking of one particular song he had worked on — the very first piece I got recorded.
Needless to say, I was an impressionable young writer at the time. What was I to make of that comment? Not that I disagreed that my sad song was a winner, but I wondered for quite some time if I was destined to spend my creative life on the dark side in order to stay on my game.
That was a long time ago. Looking back with what I know now, I realize that the producer’s wish was just one man’s opinion. In fact, my two most commercially successful songs were written from a place of joy, about how happy and empowered I felt. Nothing depressing about that.
Still, the idea that a composer can go inward and extract greatness from a particular emotion had me musing. Are songwriters most productive when they’re zombie-like from a breakup or under the spell of falling madly in love?
We’re all well aware that having the blues is a powerful precursor for making art. There are plenty of songs to prove it. (For example, “Layla” by Eric Clapton — a lament of unrequited love for his best friend George Harrison’s then-wife Pattie.)
You get the picture — all equally expressive and effectively executed.
In her article “You Don’t Have to be Tortured to Be an Artist,” author Caroline Beaton writes about Elizabeth (Eat Pray Love) Gilbert, who explains that “famous artists … glorified the idea that pain must precede creativity […] Marvin Gaye said that “Great artists suffer for the people” and Norma Maylor wrote, “Every one of my books has killed me a little more.” But … “she doesn’t buy the romantic idea that you have to kill yourself, or at least want to, to create great art.”
Adds Harvard researcher Teresa Amabile in an article on the Creativity At Work website, “There’s this widespread notion that fear and sadness somehow spur creativity. There’s even some psychological literature suggesting that the incidence of depression is higher in creative writers and artists.
“But,” she continues, “we don’t see it in the population that we studied” — 280 creative people working in various industries. Instead, she found that they “are happiest when they come up with a creative idea, but they’re more likely to have a breakthrough if they were happy the day before.” (Italics mine.)
Even when experiencing negative emotions, we’re most productive when there’s a “high clarity of feeling” — an awareness of one’s own emotions. I can offer anecdotal proof of that since I didn’t actually write that sad song (the one the producer was so enamored of) when I was in the throes of a break-up. I actually wrote it in retrospect, after I had some time to think long and hard about exactly what transpired, and why. I had survived and lived to tell the tale. I had already come out of the dark.
Eric Clapton notwithstanding, creative inspiration doesn’t always come from unrequited love. In fact, we can take romantic love off the menu entirely when looking to tap into our emotional well for inspiration. Consider the classic “Wonderful World,” in which Bob Thiele and George David Weiss remind us of the beauty all around us, or Jule Styne and Bob Merrill’s “People,” a song about humans needing each other. Listening to these songs, you believe the authors weren’t making it up as they went along but were passionately engaged in their topic. So maybe that’s it!
Music written from a “beige” state of mind will most always result in a beige song. So to answer the question at hand: Which emotion is the more provocative of the two — pleasure or pain? I’d say neither. Or both. Or all of the above. It’s not about whether we’re happy or sad, but how acutely and intensely we feel what we feel. I believe a composer’s best work will simply be the result of whatever it is they care most deeply about.
One day I hope to get a chance to explain this to that producer.
Just a few years ago, the Cincinnati Symphony Orchestra (CSO) performed “Rhapsody in Blue,” featuring its composer, George Gershwin on piano … despite the fact that Gershwin had been dead for 82 years.
This is no ghost story. Rather, it’s a tale of technology.
Gershwin’s piano part had actually been recorded in 1924 on piano rolls for the then-popular Duo-Art reproducing piano. In 2013, his performance was converted to MIDI data, and at the CSO concert, it was played by a modern state-of-the-art Yamaha Disklavier reproducing piano.
It sounds relatively simple, but in fact it was extremely challenging and labor-intensive to reproduce Gershwin’s part accurately and to make it possible for the conductor, Louis Langrée, and the orchestra to follow along with it. Here’s the story behind this groundbreaking performance.
On a Roll
When the Cincinnati concerts were in the planning stage, CSO production manager Alex Magg needed to find someone to handle the demanding technical challenges of the project. He reached out to Australian pianist and electronic engineer Peter Phillips, a leading expert on working with piano rolls and reproducing pianos, and someone with considerable experience combining replicated piano performances with live orchestras.
Another advantage to having Phillips on board was that he had already done the painstaking work of translating the original “Rhapsody in Blue” piano rolls to MIDI (the modern digital data format), using a “roll reader” device he had built by hand. The digitized results had previously been employed for a couple of other Gershwin-with-orchestra projects, one at Stanford University — which housed the original Gershwin piano rolls — and the other with the Sydney Symphony Orchestra.
Phillips was ably assisted by another highly-skilled pianist and technologist, Stella Sick, who is also a consultant for Yamaha. Sick is a recognized expert in historic performance preservation and engineering, so she was particularly well-suited for the CSO project.
Getting Started
One of the problems Phillips had encountered when overseeing previous “Rhapsody in Blue” performances was the way that Gershwin, who recorded it to the rolls as a solo piano piece, played it.
“Gershwin’s playing was quite free in some parts, with unexpected tempo changes,” he explains. “[But] because Gershwin was not constrained in his playing when making the roll recording, the solo accompaniment parts were often too wayward for an orchestra.”
Noting the problems that he had with keeping the orchestra in time during their presentation of “Rhapsody In Blue,” the conductor of the Sydney concerts, Guy Noble, suggested that Phillips create a “click” track (a metronome track used as a time reference) on his computer based on the tempos in Gershwin’s performance. That way, a conductor could listen on headphones during the concert to keep time with Gershwin’s piano.
“He [Noble] suggested the click track cover the entire performance, which would mean there would be no stopping and starting,” Phillips recalls. “I [felt] that this could lead to a loss of synchronism, and it was agreed to have three breaks. So began months of work to achieve this, with the aim of having the file ready should the Sydney Symphony Orchestra decide to take it on again.”
On to Cincinnati
As it turned out, the planned Cincinnati concerts presented the next opportunity. Phillips did correspond in advance with CSO conductor Langrée, but his first chance to rehearse with the orchestra (with Stella Sick sitting beside him to operate the computer) wasn’t until January 17, 2020, the day before the first performance.
Phillips had saved the three sections of click track — with their cues and the MIDI data to drive the Disklavier — as three separate files. One of Sick’s responsibilities on the project was to trigger those files to start at the correct times.
“Everything was cued up,” Sick remembers. “I just had to start one [file], and depending on how long the section was, I would key onto the next one and be ready for it while watching the orchestra.”
Phillips connected the MIDI output of the computer to the MIDI input of the Disklavier, and during playback all the keys and pedals moved just as they would have if Gershwin had been sitting there playing it himself — one of the instrument’s most astonishing features. Although Sick had plenty of prior experience with Disklaviers, she was still impressed with how well it reproduced Gershwin’s playing. “For the lack of a better term, it was like there was a ghost sitting there,” she says.
Run-Through
Despite the sophistication of the setup, the first run-through was anything but a success. “Shambolic” is how Phillips describes it. The synchronization between the virtual Gershwin and the real orchestra was far from perfect. Some of the problems occurred because Langrée had trouble hearing the click, which Phillips subsequently raised in volume.
“A conference was called, and we gathered in the conductor’s office to discuss [the issues],” Phillips recalls. “I had brought with me enough gear to revise the files, and we decided to break the file into ten parts, not three. [We also added] more verbal cues.”
At the next rehearsal, which was held the afternoon of the first performance, the results were markedly improved. “By dividing the file into sections that were logical and manageable,” says Sick, “We were able to give orchestra time to play things the way they were supposed to be played. They were not locked into the timing that “Gershwin” was dictating.”
Still, the desire for perfection resulted in Phillips and Langrée deciding to increase the number of separate files yet again, finally ending up with 12 different sections of click track. Amazingly, Phillips accomplished this additional bifurcation between the end of the rehearsal and the curtain going up just hours later.
The Curtain Goes Up
To the great relief of all involved, the initial performance was well-received. There were still a few glitches with synchronizing the piano and orchestra, but nothing so glaring that the audience would have noticed.
The second and final concert was presented the next day, and it went even better. “It finally came together, and this time we heard the orchestra and piano in full synchronism,” Phillips says. “While this was a huge amount of work, coupled with time constraints and inherent stress, hearing the audience react to Gershwin play his Rhapsody along with such an orchestra made it all worthwhile.”
Sick sums the experience up this way: “One of my friends — a wonderful pianist and a teacher — has said that once we stop focusing on the technology itself and instead talk about and enjoy the fruits of what it allows us to do, the technology has succeeded. That is exactly what happened in Cincinnati. Yes, of course, Peter and I focused on the technical details of making the performance successful, but the audience got to hear the real Gershwin, and the orchestra got to play with the real Gershwin.”
“I think there is a possibility it will happen again,” adds Phillips. If the results are anything like what the CSO achieved, one can only hope his prediction comes true.
Photograph of George Gershwin by Edward Steichen/Condé Nast via Getty Images. All other photographs courtesy of the Cincinnati Symphony Orchestra and courtesy of Peter Phillips.
Click here for more information about the Yamaha Disklavier.
Here’s a fun fact: All major sporting events are broadcast in HD, and sometimes even 4K UHD. The pictures are overflowing with detail. You can clearly see the distorted wince on a quarterback’s face as he’s being sacked for a loss, the tracking of a 1.6-inch golf ball through its entire 350-yard flight down an immaculately manicured fairway, even the clear rotation of a basketball as the game-winning shot drops through the net from behind the 3-point line. These fantastic images are simply mesmerizing — but the fun doesn’t stop there.
The right audio setup at your home — whether it’s a sound bar or AV receiver — can serve to perfectly complement the action you’re seeing on the screen. Just as a great surround sound movie soundtrack can suck you into the story and make you feel that you’re in the scene, the same can happen when watching live sports events at home … even though it can sometimes be a little trickier to optimize the settings for your sound bar or receiver.
That’s because not all live sporting broadcasts are mixed the same. There are simply too many variables — such as different venue sizes, sound levels and whether the event is occurring indoors or outdoors — for one setting to work optimally for them all. Are we watching the final hole of a championship golf tournament or the final seconds of the college basketball game-of-the-year? These are completely different sound tracks with different expected results.
That said, your AV receiver and/or sound bar will probably offer number of “modes” (preset settings) that can bring out the best audio experience for every type of sporting scenario. Here are some tips that will help you do exactly that.
Tips for AV Receivers
Most AV receivers will have a Straight Mode that provides the exact, unaltered decoding of the digital sound track. This is a good place to start, but won’t always yield the most exciting results. If there’s a Multi-Channel Stereo Mode (where the front stereo signal is mirrored to all connected speakers in pairs), this can work well if you’re having a party and people are watching the action from different areas of the TV room since it helps you hear the audio fairly equally in all of the speakers in your setup.
Most Yamaha AV receivers have a specially designed surround sound “Sports” Mode. This takes the digital bitstream from the broadcast and splits it up into 5.1 or 7.1 channels, but before sending that information to the speakers, some DSP magic is applied to the surround information, which makes it bigger and more enveloping while keeping the commentator’s voice focused in the center channel next to the TV screen. Sports Mode does a great job of making the stadium or arena crowd noise appear to come from all around, giving you the feeling that you are actually sitting in the stands watching the action live.
But the most important overall tip is this: Don’t be afraid of trying any of the available modes, and don’t limit yourself to using the mode as labeled. One of the so-called “movie” modes might give you the sound that’s perfect for a particular sporting event. To access different modes, cycle through the PROGRAM buttons on your AV receiver’s remote control. If you find your team isn’t winning with the current selected mode, it might be worth trying a new one to see if they can turn it around with that!
Tips for Sound Bars
If you’re using a Yamaha sound bar such as the YAS-209, there are several modes that can contour your system for the content you’re watching in order to provide the most realistic experience possible. As with Yamaha AV receivers, there’s a Sports Mode, and in many cases, this is the best choice for general sports viewing. But as we’ve mentioned, there are so many variables that sound engineers have to work with that there’s no one mode that works best all the time, so don’t be afraid to check out TV Mode or even Game Mode. The goal is to be enveloped by the ambiance of the venue while having the announcer’s voices generally focused on the screen.
Regardless of which surround mode sounds best to you, activating the Clear Voice function will often be the icing on the cake. This technology isolates dialogue, such as a commentator’s voice, and emphasizes it above crowd noise.
Whether you’re using a sound bar or an AV receiver, a quick exploration of the available settings and modes can enhance your viewing experience and bring you into the onscreen action. It’s all part of the fun of owning a quality surround system for your home entertainment. Enjoy the game!
Click here for more information about Yamaha AV receivers.
Click here for more information about Yamaha sound bars.
Click here for more information about the Yamaha YAS-209 sound bar.
In Part 1 of this two-part series, we looked at the gear requirements as well as mic placement and production techniques for recording vocal tracks. In this article, we’ll focus on something known as comping — that is, combining the best of multiple takes to create a composite “master” vocal track:
Every DAW has its specific comping features. We’ll be giving examples from Steinberg Cubase, but most are similar. They’re all designed to allow you to audition different takes and select the parts you want to use in your comped uber-take.
Get Recording
Before we get into the specifics of comping, it’s instructive to look at various ways you can record multiple takes of a singer. One way is to use your DAW’s loop recording feature, which, in Cubase, is called Cycle Recording.
It works like this: You set up a loop range, whether it’s one word, one phrase, one verse or one song — whatever length you want. Then, when you put the track into record, the DAW will continuously loop back to the beginning of the range and capture another take until you hit the stop button. The key here is that all the previous takes are saved as layers underneath. Cubase refers to each of these nested takes as “Lanes.”
If you don’t want to use loop recording but instead prefer to record your new takes at your own pace, your DAW may allow you to record multiple takes into one track. In Cubase, simply recording one track over another automatically saves the previous one as a layer underneath it, which can later be accessed for comping.
Another method for adding new takes in Cubase is to create a new Track Version, accomplished in the Inspector in the Left Zone of the Project window. As its name implies, a Track Version creates another track with all the same settings, and deactivates the one that was there. You don’t lose the previous track, though — you can easily switch between Track Versions.
Get Viewing
When you’re ready to do your comp, your DAW will offer you a way to see all the vocal takes so that you can combine them together any way you like. In Cubase, all you need to do is to click on the Show Lanes button, and any takes recorded on that track — either with Cycle Recording or simply by recording one track over another — will appear as Lanes.
If you used Track Versions, you first must select the track and go to Project/Track Versions/Create Lanes. That will turn your various Track Versions into Lanes; the original track at the top becomes the composite track, and the lanes underneath are where the individual takes reside.
Your DAW’s comping feature will contain a tool or method for selecting the range from within a take that you want to use. When you do so, the selection appears in the main track, replacing whatever was in the time range corresponding to your selection. In Cubase, you do this by choosing the Comping Tool, which looks like a hand and is found in the Toolbox near the top of the Project window. Just click and drag it to select any length of audio from a take and that section will immediately appear in the composite track.
Get Organized
Before you start assembling your comp, you’ll want to audition the various takes to determine which parts of each you want to use. Comparing multiple takes of an entire vocal part for a song by memory is next to impossible. If your DAW has a comments or notes section (like, for example, the Notepad in Cubase), sure, you could write down the sections that you prefer in each take, or you could use a text program on your laptop — or go really “old-school” with a pencil and paper — but none of those methods are particularly efficient.
A much better approach is to compare just one phrase at a time from each of the takes. By listening to a short section as the transport loops over it, you can compare the various takes back to back and decide which is best.
It’s also useful, although not strictly necessary, to slice up the various takes into their component phrases before starting the comping process — it’s helpful visually to see the differences between them and makes assembling the comp fast and easy. Cubase simplifies the process of separating phrases because the Comping Tool turns into a Split Tool when you press the Option key, allowing you to cut all the vocal takes at the same spot:
Get Comping
Ready to get started? Begin by looping the first phrase and listen to each take. In some DAWs, you’ll have to use the solo button next to each take to determine which one is audible. In Cubase, all you need to do is click on a take with the Comping Tool and it will be the one you hear. This makes it easy to listen to the phrase in each take, back to back.
Some people like to color-code each phrase — say, red for the best, blue for second best and green for third best. That way, your top three are marked in case you want to try different combinations of them. In Cubase, switch to the Object Selection Tool, select the section you want to mark, and go to Project/Colorize Selected Tracks:
Once you’ve decided on the sections you want in the comp, selecting those parts (in most DAWs) should automatically copy them to the comp track. In Cubase, you do this by dragging over your preferred sections with the Comping Tool.
Get Listening
Sometimes when you’re listening to takes for comping, it’s obvious which parts are the best. If you’re in doubt, my advice is to choose the phrases or sections in which the singer has best captured the emotion or vibe of the song, even if they’re not technically perfect. For example, sometimes there will be one take that’s got the right emotional content but has some pitch issues. Remember: Pitch problems can usually be fixed (for example, by using Cubase’s VariAudio feature), but there is no way to add emotion.
Sometimes you’ll have a section that’s strong overall except that the vocalist got carried away and sang too loudly on one word, causing the mic or mic preamp to overload, or the recording to get clipped at that spot. In a situation like that, you might try substituting a word from one of the other takes. Generally, it’s better to keep phrases intact from a take, but you can certainly substitute a word or two to make a fix, if necessary.
Get Fading
Whenever you make an edit in a track in your DAW, you run the risk of creating a pop or click at the edit point, especially if you’re putting two regions from different tracks together. For that reason, it’s usually best to insert crossfades (that is, have the first region fade out for a brief period of time while the second one fades in over the same period of time) at the boundaries of the various takes in the comp.
In a long song, however, doing this manually can get pretty labor-intensive. Cubase offers a handy feature called Auto-Fade that removes the tedium by creating crossfades automatically at any edit point, thus saving you the trouble:
The vocal is arguably the most important part of any song. With these tips, along with the ones provided in Part 1, you should have all the tools you need to get some great vocal tracks. Time to bring in the singer!
With four sizes from 18″ to 24″, Yamaha 9000 Series Impact Drums can play a dual role in your school’s music program, acting as a low extension for concert toms or as a responsive high extension for concert bass drums. They provide punchy, deep tones with excellent projection and offer a wider choice of instrumentation for a variety of musical needs.
Their 16″ deep birch ply shells (two inches deeper than most small bass drums) deliver rich low-frequency harmonics as well as outstanding definition and clarity. All shells and hoops are constructed using the original Yamaha Air Seal System, with air pressure utilized to achieve uniform thickness and roundness for excellent tone and durability. And, unlike conventional bass drum stands, FB-9000 Series Impact Drums can be set to place the top head at the ideal playing height and position, with ultra-stable legs that have been customized to allow ample height adjustment for standing performance, with clamping brackets that effectively prevent slippage. In addition, the claw hooks feature the same traditional design as most marching bass drum models, where the tops of the tuning bolts do not protrude above the top of the hoop, preventing contact while playing and allowing the player to concentrate more fully on their performance.
Check out the videos below to hear what these extraordinary drums sound like, and find out what James Beauton of UCSD, Matt Cook of the LA Percussion Quartet, Tony Nunez of Arcadia High School and Axel Clarke of CSULB think of Yamaha 9000 Series Impact Drums.
Click here for more information about Yamaha 9000 Series Impact Drums.
“Music for all, and all for music” is a goal that all music educators strive for, but unfortunately, access to music in schools isn’t a guarantee. Zip codes should not define a child’s education, but the grim reality is that demographics are changing in our country and schools. More schools have growing rates of students eligible for the Free and Reduced Lunch (FRL) program — a federal measure of poverty. This statistic often comes with unintended barriers, such as limited access to participation in music education. However, dedicated music teachers continue to find paths for students to be successful through the universal language of music, but in order to do this, funding is needed, which is why grant writing has become increasingly vital if the “music for all” mantra is to be realized.
Step 1: Tell Your Story with Data
Applying for grants is a long process, and we begin by compiling data and creating our narrative. The Sioux City Community School District (SCCSD) is an urban public school district located at the intersection of Iowa, Nebraska and South Dakota. As of October 2019, the SCCSD had a total enrollment of 14,274 students who attended 20 academic learning centers spread across the city. There are 6,656 students enrolled across 14 elementary schools, 3,356 students enrolled across three middle schools, and 4,262 students enrolled across three high schools. Ten of the 14 elementary schools and two of the three middle schools are identified as Title I schools.
Beginning in 2018, SCCSD became a majority-minority district (where the majority of the student body is nonwhite), serving students of high poverty with an average of 65% to 70% of students receiving FRL. Our student body is 35% Hispanic, 8% Black, 6% Two or more races, 3% Asian, 3% Native American, 1% Pacific Islander (combined 55%) and 45% White.One in five students is learning English as a second language. Every year, there are typically between 375 and 450 students who identify as homeless or in foster care.
Despite the fact that SCCSD is one of the poorest assessed-property-tax-per-student school districts in Iowa, we are proud of our kids and proud of the work our teams are doing to reach and help students of poverty. Our team has worked to decrease barriers and increase overall student enrollment in our performing ensembles (band, choir, orchestra) by 25% in grades 4 to 12 since October 2014. This increase highlights the incredible need for student access to district-owned instruments.
We use our data and our story to find grants to provide students with the opportunity to create, practice and perform music on quality instruments. Each SCCSD high school student is required to earn two fine arts credits for graduation. Unfortunately, the lack of access to instruments drives some students to take other fine arts electives (art, theater, music appreciation) when they might prefer music.
Our team worked to compile music-specific data for our grant applications.Data points include:
District data as noted in our story above.
Trends in participation over the past six years by building and by ensemble, including the number, percentage and demographics of students involved in each ensemble by grade level.
Instrument inventory and repair reports.
Number of instruments and type checked in/out to students each year by building (all of our instruments are bar-coded and in our district assets management system).
Prior to bar coding our instruments, our local music dealer — along with a trained repair technician and two representatives from Yamaha (one regional and one national) — came to help provide an analysis of our instruments. We spent a week going through every instrument in the district and identified each as usable (green tape), usable with repair (yellow tape) or not usable/not repairable (red tape).
After looking at our trends in participation and our district inventory, our team built the first of many five-year plans for instrument replacement and additional needs.
With help from our local music dealer, we identified instrument brands/models to be purchased district-wide for uniformity, consistency and, most importantly, durability. With 25% growth in our performing ensembles as well as the shift in demographics, our five-year plan has recommended purchases between $175,000 and $250,000. This plan originally included flutes, clarinets, alto saxophones, trumpets, trombones, violins and violas; however, due to the overall cost of the request, these instruments were tabled until the following five-year plan. In looking at inventory, it was critical to purchase instruments that would help balance our bands and orchestras.
Our district is able to provide in-kind resources such as certified music educators, curriculum resources aligned to the National Core Arts Standards, dedicated classrooms, instrument storage, repair and supply budgets, music storage, music stands and chairs, computers and instruments. However, funding still remains a challenge because our community is one of the property poorest districts in the state.
Pulling together all this data helped us formulate our story as we began to look for funding to provide music-making opportunities for all of our students and support the great work of our educators.
Step 2: Look for Appropriate Grants
Once we compiled the data, we knew we had a compelling story to tell. Our story has helped us search for and prioritize grants that align with our goals for SCCSD students and music programs, our strategies to measure our successes, and our overall budget (that includes in-kind items).
There is no set way to seek out grants. The search for funding is limitless — it can start by word of mouth, from corporate employees with foundations, from gift matches, through internet searches or from donations. Sometimes the search for grants is narrow to specific buildings in the district. At other times, the search is wide and looks through a district lens. Because we have already collected and analyzed the data, we are able to look at available grants and select the right data points for a specific building, multiple buildings or the entire district.
The process of finding grants that match your story can be as simple as a stroke of luck, or it can be a tedious and time-consuming process. Through conversations with other districts’ fine arts coordinators and representatives from instrument manufacturers, we have learned about many national grants that we are now exploring. We have also researched large companies with charitable foundations or arms to see if they are supporting music education.
Social media has also had an impact. The #musedchat group on Twitter has put us in touch with a large network of educators, school districts and companies. Staying up to date on research and related readings has sparked ideas and opportunities to think outside the box in terms of how to frame a story in a way that will capture the attention of grant funders. When grant opportunities are found, we compare the ask of the grant to our needs, purpose and priorities. With smaller-scope projects, we spend time looking locally for funding. Energy companies, banks, arts councils, etc. often provide these types of grant opportunities.
Using our data and story this past year, we showed a need within our district, which helped with conversations at budget time. In addition to an increased budget at the district level, we applied for and were awarded several grants at the local and national levels. We received grants from the Manilow Music Project ($20,000), Country Music Association Foundation($20,000) and our local Gilchrist Foundation ($30,000).
Step 3: Organize Your Information
As you consider supplementing your program through grants, there are many items that you will want to consider.
Know and understand your board policy as it relates to grant writing. For example, the SCCSD Grant Application Policy states, “It is the philosophy of the Sioux City Community School District to encourage the administration to seek and apply for state, federal, or privately funded grants. Grant applications should assist the District in advancing specific goals or objectives in line with the mission established by the Board of Education.”
Know your data.
Know your story.
Know your purpose or your “why.” For example, if the grant is funded, what investments will have the most impact for your overall program? If the grant is funded, but at a lower level than you requested, what will be your focus?
Have a budget proposal ready to go and ensure that it is aligned to your five-year plan. We worked with our local music dealer to create an editable Excel sheet (instrument/make/model/price) of all the instruments on our five-year plan. The file includes the number of specific instruments needed and a final price. This allows us to tailor the ask to the limitations of the grant.This budget also includes in-kind items.
Know what you are writing for and what the reporting expectations are in relation to the amount of the grant.
Understand if the instruments will be purchased for you or if you can use a local dealer.
Prepare a boiler plate with your demographic information, your “why,” and the impact the funding will have on your students, staff and community. Have this ready in case there is a short window of time to write and apply for the grant.
Send a letter of intent to local and national companies and foundations to see if they are looking to support an arts initiative. Be sure to include your story, your data, the lasting impact funding will have on students and the community, the impact the support will have on the company/foundation itself, and your contact information for any questions.
Print out or save the grant application to a working file so that you can edit or copy and paste into the application. Use the information that you have prepared on your boiler plate and edit it to address the questions on the application. This document is extremely practical because sometimes applications cannot be accessed once they are submitted.
Know and observe your deadlines. Don’t wait until the last minute to submit your grant.
If you find a grant and the deadline has passed, put a notice in your calendar to alert you when the application process reopens. This is generally quarterly or yearly.
People Who Can Help
Here are some key stakeholders to reach out to as you begin to seek out grants.
District administration for acknowledgement and approval to apply for the grant. Make sure to follow board policy on grant writing if there is one.
District office personnel who can provide needed data.
Proofreader who can double check your language and data.
Parents, community and business leaders who may know of opportunities for funding.
School/district foundations are great resources for writing grants. They understand the nonprofit-to-nonprofit business lingo.
After You Receive a Grant
Here are some quick tips and tricks after you receive a grant.
Know what the grant reporting metrics are in regard to expenditures, use of equipment and other requirements outlined in the grant.
Keep accurate records.
Talk to the finance department and find out where the money will be deposited. Also ask about the purchasing process: what paperwork is needed within the district and what approvals are needed.
How will instruments be added to inventory?
What receipts are needed for reporting metrics?
What other records are specified by the grant?
Know the guidelines of the grant — e.g., are you able to promote on the school’s website and social media? The more you can promote the items purchased with grant funds, the better. This helps tell the story for future opportunities.
Show appreciation by sending thank you letters upon receipt of the grant to everyone associated with it. Make sure to write these letters on official letterhead. Another option is filming and sending a video that shows students using the purchased instruments.
Stick to hard deadlines and dates as noted on the grants.
Everyone has a story to tell. Your success in grant writing will be determined by how well you align and organize your narrative, data and the lasting impact the funding will have on students and the community. When it comes to grant writing and soliciting grant invitations, you are limited only by your district board policies and your imagination.
The Sioux City Public Schools Foundationstarted an endowment for SCCSD music programs and has secured funding from individual local donors. In addition to all of the above resources, the endowment provides a yearly payback for instrument purchases as well.
I wish you the best as you begin your grant-writing adventure.
Yamaha is an active advocate for music education, and we want to empower music educators to strengthen their programs in any way we can. Please register for the Yamaha Educator newsletterto read up on advocacy, professional development, information about instruments, resources, partnerships in education and more. Join the Yamaha Music Educator Community on Facebook or email us at educators@yamaha.com.
I’ve touched on the question of nurture versus nature here before, but it’s something I’ve been thinking about more and more in recent days, as I’ve become engrossed in a book called “Guitar Zero,” by cognitive scientist Gary Marcus. It was first published some eight years ago and was even a best-seller for a time, but for some reason had slipped under my radar.
The subject matter is fascinating: At the age of 40, the author decided to try to learn to play guitar (a Yamaha acoustic, as it happens), despite having what he describes as no innate musical abilities whatsoever, including what he terms a severe case of “arrhythmia.” Not in the medical sense, as in cardiac arrhythmia — a potentially fatal tendency towards irregular heartbeats — but in terms of a hopeless lack of musical rhythm.
I myself have always been blessed with a strong sense of rhythm (one of the reasons I started my musical career as a drummer), but I have encountered this peculiar affliction at least once in my life, in the form of a woman seated next to me at a John Fogerty concert who insisted on clapping along to every single song as she squirmed excitedly in her seat. That on its own would have been unremarkable — except that this woman, amazingly, failed to ever put her hands together anywhere close to the beat. It was annoying and distracting, to be sure, but after awhile it became a kind of challenge for me, and I found myself silently rooting for her: “Come on, you can do it! You can get one of these beats right!”
But she didn’t. Not once.
Anyway, I digress. The challenge Dr. Marcus set out for himself was particularly daunting, given that he was attempting it at roughly the midpoint of his life. After all, numerous scientific studies have proven what we all know anecdotally: that children have a much greater capacity for learning than adults. Psychologists have long referred to our formative years as being a “critical period” when it comes to developing lifelong abilities. As Marcus puts it, “The idea is that there are particular time windows in which complex skills can be learned; if you don’t learn them by the time the window shuts, you never will.”
With this book, he sets out to not only refute the premise but prove it wrong, despite the fact that most master musicians start at a very early age — think Mozart, a child prodigy who was wowing audiences when he was just five years old, or Louis Armstrong, who first picked up the trumpet at age 12, or Paul McCartney, who wrote the song “When I’m 64” as a teenager. How well Marcus succeeds in his quest is open to question, since it’s impossible to objectively evaluate his level of proficiency. That said, he reports that, after a year and a half of fairly rigorous practice, he was “finally comfortable with many of the basic chords and could change between them smoothly, and at least roughly in tempo.”
Much of this comes down to muscle memory, of course; the more you practice forming chords on a guitar (or piano, or any instrument that allows chording), the better your fingers get at it — an inevitable (and quite wonderful) byproduct of dogged persistence. What was more interesting to me was Marcus’ description of how much his musical ear had improved over that period of time. “I was starting to be able to distinguish different musical intervals,” he writes, “and I’d learned to improvise and to make up my own music … well enough to jam with my friends.”
“I also understood the music I heard vastly better than when I’d begun the project,” he continues. “I could pick out bass lines, recognize different drumming patterns, and tell what techniques different guitarists used. I had developed a sense of arrangement and how different songs were put together … The differences in what I could perceive — and what I could produce — were truly astonishing.”
The important takeaway from all of this is that learning to play an instrument — not just intently listening to lots of music or taking a music theory class — improved the ability to understand music overall, at least in Marcus’ case. I’d be willing to bet that this is true for most people.
So if you’re of a certain age and regret the fact that you never learned to play a musical instrument — even if you consider yourself tone-deaf or rhythmically challenged — don’t despair … and don’t delay. You may be very pleasantly surprised at just how good you can get at it, and at the many unanticipated fringe benefits it can bring. As Dr. Marcus states at the conclusion of his book, “Maybe, just maybe, the art of reinvention and acquiring new skills can give us a sense of a life well-lived.”
Photo courtesy of Gary Marcus (garymarcus.com). Photo credit: Athena Vouloumanos.
On its own, an electric bass guitar makes very little sound at all. That’s why amplifying it to the point where it can not only be heard, but felt, is no small feat. There’s a lot of science — and art — that goes into designing and building a high-performance amp and a sweet-sounding speaker cabinet. But all you need to determine whether a bass rig sounds great or just meh is a little objectivity and a working set of ears.
Not satisfied with what your rig is delivering? Dig into the specs and maybe you’ll find that your amp doesn’t have enough power to deliver the current needed to accurately reproduce deep lows. In situations like that, when you play a low B on a five-string bass — or even a low E on a four-string — your sound will sag instead of making your chest pound.
Or maybe one day you’ll realize that your 2 x 15″ cabinet sounds noticeably shrill when you’re playing up the fretboard, due to the laws of physics that make it difficult for large speakers to accurately play high-frequency sounds. (This happens to varying degrees based on the relationship between the diameter of the speaker cone and the wavelength of the frequencies they’re trying to reproduce.)
And then, of course, there’s the age-old issue of speaker placement: Everything sounds fine when you play by yourself during sound check, but throw the entire band onto the same stage at full volume and suddenly you can’t hear yourself.
The good news is that all these issues can be dramatically improved, if not completely solved, by a technique called bi-amping. Ready to learn more? Read on …
How It Works
Bi-amping is accomplished by splitting the signal from your electric bass into two signals — one for the high frequencies and one for the low frequencies — and sending them to separate amps. In a typical bi-amp setup, the two signals are routed from the amps to different speaker cabinets — one to handle just the lows, the other to handle everything else. However, there are single cabinets that are bi-amp-capable too.
Some basses, like the Yamaha Attitude Limited 3, come equipped with separate outputs for the different pickups. This particular bass was designed in partnership with famed bassist and bi-amping pioneer Billy Sheehan. With the Attitude Limited 3, you can separately route the signals from the neck and middle pickups to individual amps, letting you take advantage of the inherent sonic characteristics of each pickup position. (Generally speaking, neck- and mid-position pickups are full of warmth and thickness, whereas bridge-position pickups are bright and ideal for an aggressive attack.)
Crossing Over
But what if you want to bi-amp and your bass only has a single output? No worries: You have a few different options. However, whichever option you choose, your bass signal has to meet up with a component called a crossover, which has the job of splitting the incoming signal into two signals, based on their frequency range. Crossovers can be standalone devices, but more commonly, they are either built in to your amp (as hardware) or effects unit (as software).
If you’re simply looking to split your signal for more efficient reproduction of your sound, having an amp with a built-in crossover (or using a standalone crossover) might be the best approach. But if you’re like me and are looking to use lots of different effects, using a multi-effects processor with a built-in virtual crossover (such as the Line 6 Helix®) is an interesting option to consider; this gives you the same sophisticated signal splitting at your fingertips, plus all of your effects can be consolidated into a single unit rather than sprawled out on the floor in front of you. You can use the Helix to apply chorus or fuzz, for example, to the higher frequencies while compressing the lows, keeping the fundamental bottom of your sound tight and controlled while adding as much or as little frill as you like to everything else.
Whether real or virtual, every crossover enables you to specify the frequency where your signal gets divided, thus serving as a kind of traffic cop at a fork in the road. The frequencies below the adjustable crossover point (i.e., the specific frequency denoting that fork in the road) will be sent to one amp, and the signal above the crossover will be routed to another amp, giving you distinct control over the tone and the volume of each.
Real-World Applications
I typically play my bass through an Ampeg™ SVT-4PRO amplifier running in bridged mono mode, but into two individual cabinets, each with a single 15″ speaker. It’s a perfect rig for most situations, but if effect pedals are going to be involved I’ll sometimes opt to bi-amp, in which case I swap out one of the 15-inch cabinets for a 2 x 10″ that gets stacked on top. The SVT-4PRO has a built-in variable crossover that I set to around 200 Hz so that the lows are isolated in the 1 x 15″ cabinet, leaving the 2 x 10″ to handle the mids, highs and all the gristle coming from the effects. (This is part of what makes the SVT-4PRO a true workhorse — it’s easily switchable for a variety of desired performance scenarios, including bridged mono, true stereo and full or shared bi-amping responsibilities with another amp. And that’s to say nothing about how great it sounds in each instance.)
With this setup, gobs of power are dedicated to reproducing the fundamental lows, while the mids and highs sound glorious whether I’ve got the slurp-and-burp pedal factory engaged or off. If played through my regular setup, things would still sound good, but when bi-amped, the sound is tighter and more articulate.
Keep in mind that this setup is not plug-and-play — it does require some tweaking to get it right. Every individual speaker and cabinet is designed differently, and different speaker configurations have different power-handling capabilities and sensitivity ratings. These variations can be even more pronounced if you mix and match speakers or cabinets from different manufacturers.
That said, getting it right isn’t that hard to do. Once you make the respective volume adjustments to blend the separate sounds correctly, you’ll be able to throw the entire kitchen sink at your bass rig with incredibly satisfying results — powerful and unencumbered lows mixed with punchy mids, crystalline highs and rich harmonic content. That’s about as good a starting point as there is, isn’t it?
I’ve been playing music for nearly fifty years now; I started when I was ten. I played in tons of different bands — everything from Elvis impersonator gigs and wedding receptions to garage bands and school shows, you name it. You have to do the grunt work — you can’t microwave this kind of thing. I was originally a street cat, playing by ear, then somebody made me learn how to read music. I got excited about that, and about listening to all kinds of music, learning new pieces and studying how they were put together.
I went to music school for about three years and studied classical bass, then left and found myself going to people for a tune-up, or trying to figure out stuff on my own. I learned piano, and some drums. All these things go into the pot, so when somebody like a Wayne Shorter calls you and asks you to create something out of nothing — and gives you the space to do it — you’ve got all of that in your back pocket. You can’t skip over those steps. You got to be working your whole life to be a well-rounded musician.
Someone who only has an academic music experience can talk to you about music, but sometimes they can’t play it yet. They’re not necessarily invested in the other part — the organic part. It’s about using your ear, not just technically playing your instrument. You have to understand how your instrument functions in a given style. You have to have a foundation before you can break all the rules.
I’ve been around Wayne for a long time. The first time I played with him was on his 1986 record Atlantis. Those were structured tunes, and the improvisation was on one chord that could go anywhere. It was much more traditional than what later happened with the Wayne Shorter Quartet, where he encouraged us to step out and create from nothing.
Some people think that creating music from nothing sounds scary, but it really isn’t because of the relationships the members of this quartet have with each other. One reason why that band has worked so well is because everyone’s really committed to structure, and everybody has studied music extensively. Not just in an intellectual and academic way, but by doing it, transcribing it, listening to it. It’s about being invested in rhythmic and groove music, where there’s a powerful rhythmic foundation that is unshakeable. We’re all composers, and when you have people who are invested in the way the music is put together, you collectively think about music in a different way.
In situations like that, you’re not thinking about your instrument and what you’re doing. Instead, you’re thinking about the whole arrangement, all the time. That changes the choices you make. You’re not thinking, “I’m going to play this cool little bass thing.” You’re thinking, “What did he just do over there? How can I support that? Let me play this little counter line. Oh wait, listen to that…” It’s a different thing. You have your composer’s hat on. Of course, you’re doing this intuitively. You’re not so cerebral about it — but it takes years to get to that point.
Recently, I’ve been spending a lot of time rehearsing with Wayne for an opera he’s writing. We’ve been working on this for a while, and now it’s to the point where we’re fleshing out parts for the singers and honing all the orchestrations. It’s been a long process, and it’s been a great experience because Wayne’s music is unlike any other music — it’s truly free jazz, in that he wants to create improvised compositions. [Pianist] Danilo Perez calls it “compromising” because we’re actually composing together, in the moment. The music has a lot more shape, form, rhythm, and harmonic and melodic counterpoint than most free jazz. Some of it is very textural, with moments where everybody hits it with a lot of density and freaks out. And then there are more predictable pieces where you play slowly and softly, then louder and faster. We play some of Wayne’s written parts too, but here the idea is to blur the line completely so that we are composing something in real time.
That’s a huge concept, one that’s based on a relationship built over decades — it’s actually been a stewardship. In fact, I learned how to become a mentor from Wayne, since he’s been my mentor. These days, I’m often the oldest guy in other sessions, but Wayne is almost always the oldest guy in the room wherever he plays. We’re always deferring to him because he’s a genius, first of all. Then, of course, he’s like our dad, and one of the sweetest guys in the world. After all is said and done, it’s because he’s a truly incredible person, and not just as a player or a composer.
In the Quartet, of course, we always defer to Wayne. Not only did he write the music, he has a vision unlike anyone else. So you check in and say, “Is this OK? What are you thinking here?” There’s always so much fun energy coming from him, and because he’s 85 years old, he provides lots of life lessons to embrace. Of course, you can learn from people younger than you too, and you should treat people with respect all the time. But sometimes you may have to step up and lead if someone needs help or inspiration … even if that takes you in a different direction.
For Wayne, it’s always about trying to take music to the highest level. But he shares it; he doesn’t hold on tightly and say, “This is mine.” That’s a lesson in humility — proof that there’s always still more to learn, no matter how old you are.
Yamaha introduced the first SILENT Bass™ — a revolutionary instrument that allowed bassists to practice and perform with authentic tone and feel but no acoustic sound — twenty years ago. The SLB300 and SLB300 PRO SILENT Bass models represent the latest generation of electric upright basses, with advancements that allow the player to control every aspect of their sound with the press of a button. Newly incorporated Studio Response Technology (SRT) provides realistic body resonance so that the performer’s own playing technique and nuances are delivered without compromise. In addition to a piezo pickup and EQ controls, it also provides three different high-end microphone models, from the clear, warm sound of a dynamic to the rich timbre of classic vintage vacuum tube mics. Unlike an acoustic bass, the SLB300 is an easily transportable instrument that can be packed into a TSA case without fear of being damaged en route, and it allows players to perform in places where they may have previously feared to bring an expensive acoustic instrument, such as an outdoor gig on a hot, humid day.
Want to know what top bassists Nathan East, Chris Minh Doky, Kenny Davis, Jim Widner and Charley Sabatino think of the SLB300 SILENT Bass? Check out the video!
Ready to learn more? Check out our blog article “Feel Through Your Five Senses” for an interview with SILENT Bass lead designer Shinya Tamura.
Click here for more information about the Yamaha SLB-300 and SLB-300PRO SILENT Basses.
There are now more ways than ever for people to watch their favorite movies and television shows. Gone are the days of being constrained by the fickle embrace of cable TV or the time-limited world of movie theaters. Instead, there are a myriad of places to stream content on demand with services like Netflix®, Amazon Prime, Max® and Hulu™, among others.
While it’s great to have options, not all subscription streaming services are created equally. Each may differ in both audio and video quality and settings — variables that have a direct impact on how you enjoy your favorite movies and shows at home. We’ve done the research on how the leading services stack up when it comes to audio and video capabilities, and here’s what we found.
Netflix
Leading the charge as the first company to let you stream content (along with DVDs in the mail — remember those?), Netflix offers thousands of TV shows and movies. With a more recent focus on original content, Netflix has made it a point to create more binge-worthy shows than movies, with the number of movies released dropping between 2010 and 2019 by over 1,400, according to third-party search engine Flixable. Note that, as with all streaming services, the audio and/or video quality of content is often a reflection of the year the movie or show was released.
Audio Quality
– The default playback is two-channel stereo.
– To enable 5.1 for compatible content, go to the Audio & Subtitles menu during playback and select the option.
– 5.1-channel surround sound is available if you listen through Dolby Digital Plus® (the established standard for home theater surround) with a compatible AV receiver or sound bar that automatically optimizes Dolby-encoded content. (Most Yamaha AV receivers and sound bars have this capability.)
– Dolby Atmos® is available with the Premium membership option only.
– For optimal sound quality, HDMI® cables are required for both Dolby Digital Plus and Dolby Atmos.
Video Quality
– Resolutions range from 720p up to 4K Ultra HD.
– Dolby Vision and HDR10 work with compatible smart TVs via their HDMI port.
– To watch content in 4K UHD, the following are required: a 60Hz TV (or computer monitor) compatible with Ultra HD streaming, a 25 Mbps or higher internet connection and a Netflix plan that supports 4K HD streaming.
– Adjust playback settings through your browser (not in the app).
– To learn more about your TV’s compatibility with Ultra HD, visit the Netflix Help Center:
Hulu
Like Netflix, Hulu offers lots of binge-worthy content, plus it also gives you the option to add live TV to the mix, similar to YouTube™ TV, Sling TV and AT&T TV NOW™.
Included for Amazon Prime members, Amazon Prime Video offers movies and shows that are available to stream, rent and purchase.
Audio Quality
– Listen via Dolby Digital Plus with a compatible AV receiver.
– For 5.1-channel surround, use an AV receiver with that capability and configure the audio settings on your smart TV or streaming device accordingly (most smart TVs come with 5.1-channel surround as a default setting).
– Enable surround sound through your streaming device by selecting a 5.1-compatible option from the device’s audio output settings.
– Offers 5.1-channel Dolby Atmos.
Video Quality
– Lets you stream in 4K and HDR (high-dynamic range) for brighter highlights and a wider range of detail.
– To enjoy 4K and HDR, you’ll need a compatible TV and content produced in that format. Newer content is typically released in 4K UHD and HD.
– You’ll need to do some online research to find out which content is compatible with each feature. Also refer to the Amazon Prime Video customer service page:
Max
Available both with cable packages and as a stand-alone app, this innovative network (previously HBO) has wowed audiences with top-notch content over the years, including shows like Game of Thrones and The Sopranos.
Audio Quality
– The default playback is two-channel stereo.
– For 5.1-channel surround, use an AV receiver with that capability and configure the audio settings on your smart TV or streaming device accordingly (most smart TVs come with 5.1-channel surround as a default setting).
– Enable surround sound through your streaming device by selecting a 5.1-compatible option from the device’s audio output settings.
– Dolby Digital Plus available with compatible AV receivers and streaming devices.
– HDMI cables are recommended for optimal audio playback.
Video Quality
– Max automatically plays the highest quality video available for your device and subscription plan. Titles available in 4K UHD are also available in HD on all supported devices.
Here’s a simplified breakdown of what each service offers in terms of both audio and video capabilities:
Bring It Home
Due to the restrictions of each streaming service on the market, you’ll want to give yourself the best chance at success by having the right equipment. We recommend that any TV used for streaming be a smart TV with at least 1080p video quality. 4K is preferable for the best picture, and is required if you want to enjoy 4K content.
For audio products, we recommend using an AV receiver that provides a minimum of 5.1-channel surround capability and offers Dolby Digital Plus at a minimum. (If space is a consideration, you can consider using a Dolby Digital Plus-compatible sound bar instead.) You might also consider an all-in-one home theater system like the Yamaha YHT-4950U, which includes an AV receiver and 5.1-channel speaker setup.
Dolby Atmos is a more advanced 3D immersive technology available in some AV receivers (such as Yamaha AVENTAGE RX Series models), but as mentioned previously, only Amazon Prime and Netflix offer Atmos-encoded content. If you do go that route, be sure to use HDMI cables (not optical) and purchase quality speakers designed for surround sound. Another option is to use an AV receiver with Surround:AI capability, such as the Yamaha AVENTAGE RX-A1080. Surround:AI is a proprietary artificial intelligence technology developed by Yamaha that analyzes scenes in real time and places each sound element (such as dialogue, music and ambient sounds) correctly within the sound stage in real time, thus enhancing and optimizing the audio of any streaming service, regardless of the audio format being used.
Now that you know what each major streaming service offers and how best to optimize your system to maximize your viewing and listening pleasure, your next binge-watching marathon will be better than ever. Time to get the coffee on!
For more information on how to create a surround sound system for your home theater, check out the following blog articles:
Developing a good sense of time and rhythm is an essential skill for every musician. Beginners are often guided to practice with a metronome, and it can be an invaluable aid, but I think musicians at all levels can make good use of a metronome. In this article, I’ll share some concepts on how to use one effectively — perhaps in ways you’ve never thought of.
What’s the Tempo?
One of the most common purposes for a metronome is to provide the intended tempo for a piece of music. Often, sheet music has a marking like this:
This indicates that each quarter note should occur at a rate of 100 beats per minute (BPM). If you don’t have the sheet music for a song you want to practice, but want to know its intended tempo, just head over to the internet and type the song’s name, followed by BPM. A slew of sites will pop up giving you the answer. Bear in mind that this only tells you the speed the piece should eventually be played at, because you should never start to learn a piece at the final intended tempo. First you need to learn the notes, work out fingerings, and rhythms — all things that initially should be done very slowly. Always be sure you get everything right at a much slower tempo before trying to speed it up.
Getting Started
Beginning students are often instructed to set their metronome to a medium slow tempo and then play a simple piece with all quarter notes. While this is a good way to start, it’s actually letting the metronome do too much of the work, plus that incessant clicking can get very annoying, so let’s look at some more creative options.
(Learning to play a scale or melody at an extremely slow tempo — say, 20 BPM — can be a great exercise in and of itself; as advanced players know all too well, super-slow tempos can sometimes be the hardest to play.)
In a recent posting, we talked about practicing scales/modes against a metronome, and about varying the octaves and rhythms as two octaves of eighth notes, three octaves of triplets, and four octaves as sixteenth notes. To experience this, let’s begin by taking one of the exercises from that posting, shown below:
The smaller cross-haired notes represent the metronome “clicks,” based on having it play quarter notes. After playing this a few times with your metronome set to 100 BPM, take the tempo down to 50 BPM and think of the clicks as representing half notes instead of quarter notes:
This will result in you playing the exercise at the same speed, but now you need to sub-divide each click into more units, and so you won’t be able to rely on the clicks as much. You can do this for any piece you are learning; just cut the BPM in half, and think of each note as twice the unit represented on your sheet music.
Less Is More
Now let’s take this concept a lot further. Here’s a simple bluesy chordal figure with a walking bass line:
After you learn the piece and are comfortable playing it with the metronome, try halving the tempo from 100 BPM to 50 BPM and let those clicks be the one and the three of your counting, as shown below:
The tempo will be the same, but now you have to rely on your internal clock a little bit more, instead of letting the metronome do all the work for you.
Next, try thinking of those same clicks as the two and four of your tempo, like this:
This might take some effort at first. What I do is listen to the clicks and then start saying “two” on the first click, and “four” on the next. When I get comfortable with that, I start filling in the other counts. So I am saying: two … four … two … four … two three four one two three four one two three four and so on.
This is the best way to use a metronome when playing jazz, for example, as it matches what a jazz drummer would do with the hi-hat, and it really gives the music a lift. You can practice playing melodies this way, or playing through the chord progression, or even soloing. Just be careful: It’s easy to turn the beat around so the clicks become the one and the three instead … at which point the jazz police will come and put you straight into jazz jail!
Take It Up a Notch
When you get comfortable with these “two beats to the bar” examples, you can go for an even harder exercise, like this one:
You need to cut your metronome tempo in half again, and now each click represents only one beat out of the four per bar. I like having it on beat three, but any beat is fair game! You get used to it by saying “three” with each click, and then fill in the rest of the counting as you can. Remember, this is the same tempo we’ve been using since the start of these chordal figure examples; we’re just playing around with how many clicks we hear per bar and where they’re placed.
Trust Your Timing Even More
All of these ideas can be done with any sort of basic metronome, but I found another great exercise while researching new ideas for myself. My search led me to this video, and the related website of guitarist Sean Driscoll. The concept I was drawn to is to leave entire bars of silence in-between some metronome counting, so you get to “fly solo” for periods of time without the metronome’s help. To do this, you’ll either need a highly programmable metronome app for your phone/device such as Time Guru Metronome, or you’ll have to custom-create click tracks or patterns with the appropriate periods of silence in your DAW or drum machine. Sean’s idea, which he calls “one, one and done,” involves having a single click on the one in bar one, another single click for the one in bar two, and then two bars of silence, like this:
Leaving all those empty beats gives you the chance to carry the time by yourself for longer periods, and it is instructive to see what happens when the patterns repeats and that first click comes back. Did your time drift?
Another fun variation is to try this with the metronome clicks on the two and the four, then leave the metronome out for two bars. This is similar to what we did earlier (albeit without the empty spaces):
Using your metronome in creative ways like these will help enhance your sense of timing and groove … and without boring you to tears. Have fun with it!
You wouldn’t dream of buying an automobile with a faulty engine. Nor would you spend your hard-earned dollars on a new refrigerator that keeps your food at a lukewarm temperature. You expect certain things to act a certain way, without fail, and everything else in your life to operate optimally.
The technology in your home should be no different. After all, there’s no reason for streaming music to not reach the speakers in your backyard, or for your internet connection to slow or come to a complete halt every now and then. And who wants to wait for the video on a big, beautiful display to buffer during the epic scene of a blockbuster movie?
Nonetheless, many homeowners just grin and bear it, throw up their hands, and chalk the matter up to the inherent trials and tribulations of owning smart home technology.
It doesn’t have to be like this.
Music can stream everywhere throughout the house without latency, which means that every speaker, no matter where it’s located, plays the song perfectly in sync — particularly important if you commonly stroll throughout your home when listening to music. You can be sure that every command sent to your whole-house system — whether by a mobile app, remote control, or voice-enabled device — reaches its destination fast and reliably. In fact, all your smart home devices can operate flawlessly. It all hinges on the quality of the Wi-Fi in your house.
The Importance of Speed and Bandwidth
Alas, Wi-Fi is far from perfect. For one thing, it comes in a variety of speeds, depending upon your internet service provider and the router you’re using. Needless to say, you should always opt for the fastest service and router you can afford, but any Wi-Fi network is only able to operate at full speed and full capacity if it has enough bandwidth. It’s like driving on a busy highway at rush hour. If you’re traveling on a single- or two-lane road, you can expect traffic jams and bottlenecks, but on a three- or four-lane road, you’re likely to move along at a much faster pace. In most households, there’s a lot of Wi-Fi activity going on 24/7. Anytime someone is surfing the internet, downloading videos or streaming music, bandwidth is consumed. When a lot of these activities are happening at the same time, the network can struggle to keep up.
So how do you preclude these issues? One twentieth-century solution would be to have everyone in your house — or all your equipment — take turns accessing the network. But that’s just silly in this day and age. Let’s take a look at some more modern approaches.
Repeat/Boost/Extend
Today’s typical router generally has more than enough reach to fill an apartment or small house with Wi-Fi, but it may not have the range to cover a larger home, which will result in dead spots cropping up. One of the easiest and most affordable ways to amp up your home’s Wi-Fi is by strategically placing one or more repeaters (sometimes known as boosters or extenders) around your home. These devices take the Wi-Fi signal coming from your existing router and rebroadcast it, effectively extending the overall range. This ensures that music streaming from a Yamaha MusicCast-enabled AV receiver or a MusicCast VINYL 500 wireless turntable, for example, will be able to reach those MusicCast speakers or sound bars located far away from your home’s router, all in perfect synchronicity and without dropouts.
Go Mesh
Even if you have excellent Wi-Fi coverage in your home, issues can still arise from the high amount of traffic on the network at the same time. That’s why you should consider installing a mesh network, which spreads your home’s Wi-Fi signal to multiple nodes positioned in various areas of the house instead of passing signals from point A (your router) to point B (the nearest access point). These nodes talk to each other to determine the quickest path for communications. In a smart home with a properly installed network, no matter how many people are simultaneously streaming data, video or music to and from various devices, nobody misses a beat.
Think Business, Not Residential
Today’s homes have networking requirements similar to that of businesses, so they are best served by the same type of enterprise-grade networking equipment that you might use at work, including the use of high-grade cabling capable of handling high-speed data transfer without dropout. This level of networking system is able to prioritize Wi-Fi traffic, which ensures that the songs streaming throughout your house won’t be interrupted when someone downloads a video. And as you add more smart devices, a high-quality networking system can be reconfigured with new prioritization parameters.
Hire a Professional
No matter how robust a networking system is, it’s only as good as the way in which it has been installed and configured. The best way to ensure that your Wi-Fi networking system has been installed correctly is to have a professional do the work. Yes, this will add to the cost, but what good is an investment in great equipment if it produces only mediocre results? A networking professional has the knowledge and tools to pinpoint possible Wi-Fi roadblocks in your home (concrete and metal are notorious for interfering with Wi-Fi signals), and to devise the appropriate solutions. Based on the layout and structure of your home and your networking needs, they can select the best equipment for the job, place networking devices where they will maintain the clearest, most reliable Wi-Fi connections, and configure the settings to best suit your household’s communications needs and entertainment enjoyment now and in the future — no matter how many new smart devices you add to your home.
Want to learn more? Check out these related blog articles:
In previous installments of this series of articles about the components of modern drum sets, we traced the origins of snare and bass drums and learned how they became an important part of contemporary music. In this installment, we’ll take a look at the tom, which was initially regarded as a sound effect, but is now an essential component of every drum set.
Originally known as a tom-tom, the tom is a simple drum that doesn’t require extra mechanisms such as a snare strainer (“throw-off”) or foot pedal. Most drum sets have a maximum of one snare drum and one bass drum (sometimes two), but there can be any number of toms of assorted sizes. Toms can be used for playing fills, adding color, or even as a substitute for cymbals.
History
The earliest toms go back to Asia in the later part of the 1800s, when drums known as “Chinese tom-toms” were made from simple wood shells. Diameters ranged from about 8 to 14 inches, with depths of only a few inches. These drums could not be tuned because there were no hoops or tuning rods; the skins (which were often painted with elaborate decorations) were simply tacked to the top and bottom of the shell.
As the modern drum set began to take form in the early 1900s, American drum manufacturers imported these toms, put their own logos on them, and offered them as part of their drum sets. Sometimes the toms were mounted to the bass drum hoop, and sometimes they were simply set on a “trap table” (a table upon which were placed various percussion effects). Larger toms were supported using tripod stands. It wasn’t until 1940 that tripods were replaced with straight, adjustable, metal legs attached to the shell. Toms with that kind of mounting were called “floor” toms.
In the 1920s, drummers began using deeper toms often mounted on bass drum “consoles” (rails), and those drums featured an exterior finish that often matched that of the snare and bass drum. By that time, the top heads could be tuned, but the bottom heads were still tacked on and could not be tuned. This was a big problem because the heads were made from calf or animal skin and were highly susceptible to changes in temperature and humidity. It wasn’t until the late 1950s that plastic drum heads (made of mylar, polyester, or a mix of the two) became available. This was a major breakthrough because plastic heads hold their tuning even when temperature and humidity change.
Sing, Sing, Sing
Legendary drummer Gene Krupa worked with drum manufacturers in the 1930s to develop the tom as we know it today. Krupa insisted that the top and bottom heads for his toms must be tunable. These revolutionary toms used metal hoops to hold the heads, along with tension rods (adjustable with a drum key) for tuning. Who could argue with Krupa? His drumming on Benny Goodman’s 1936 hit “Sing, Sing, Sing” includes what is still one of the most famous tom riffs in music history. Krupa also helped establish some of the now-standard tom sizes such as 13″ x 9″ and 16″ x 16″ (diameter x depth).
Mounting Options
During the late 1950s and early 1960s, tom mounting systems evolved from the rail to the sturdy tube-type systems we see today. As rock music became popular, drum sets tended to get larger, with some drummers using sets that included four or more toms of assorted sizes. Toms can be mounted on the bass drum, on floor stands, or — as is the case with floor toms — on legs with brackets that attach to the shell. They can also be mounted on racks such as the Yamaha Hexrack II. These not only make setup faster and easier, they also reduce the footprint of the drum set, as compared with using separate stands. Another benefit of using a rack is that some drummers prefer the sound of the bass drum when toms are not mounted directly to it.
Diameter and Depth
Today, the standard diameters for “rack” (i.e., mounted toms) are 8, 10, 12, 13 and 14 inches, while floor toms are usually manufactured with 14, 16 and 18-inch diameters. Shell depths can vary too: Standard depths are 8, 10, 13 and 16 inches. Yamaha Absolute Hybrid Maple mounted toms are available in traditional diameters, but can be ordered with slightly different depths.
As with other kinds of drums, the fundamental pitch of a tom depends upon the diameter and depth of its shell; as is also true with other kinds of drums, larger shells generally produce a lower pitch. Smaller shells provide more “snap” and respond quickly, while deeper shells provide increased projection, produce more overtones and add weight to the sound.
There are no rules regarding what tom sizes should be used for specific types of music. Many jazz drummers prefer 12″ x 8″ and 14″ x 14″ toms, while you’ll find 13″ x 9″ and 16″ x 16″ or 18″ x 16″ in rock kits. A fusion drum set usually has smaller sizes such as 10″ x 8″ and 12″ x 8″ mounted toms and a 14″ x 14″ floor tom. The bottom skin is sometimes removed (though more often for recording than live performance) for a louder sound and a more open tone with less resonance.
There are other types of toms available, such as roto toms (which have a single tunable head in a metal frame without any shell) and extra-loud concert toms, which have extra deep shells and may or may not have a bottom head. These are designed specifically to project through the sound of a full orchestra and are generally not recommended for use in drum sets, though they were employed by some rock drummers in the ’70s and ’80s.
Tom Materials
Tom shells can be constructed from fiberglass, acrylic and occasionally stainless steel, but wood is by far the most popular material. Wood shells are usually made from multiple plies of wood such as oak, birch or maple.
Oak is used in Yamaha Live Custom Hybrid Oak toms. This type of wood produces plenty of volume and projection and is known for its round tone, mellow highs and a warm low end. Made from a sandwich of oak plies surrounding a dense phenolic layer, the design of Live Custom Hybrid Oak shells emphasize attack while increasing the drum’s dynamic range.
Yamaha Recording Custom and Stage Custom Birch toms are manufactured from birch wood. Birch projects exceptionally well, which helps the sound of the drum cut through the mix. It produces a bright, lively tonality with an emphasis in the low and high frequencies, and slightly reduced mid frequencies.
Maple is one of the most popular woods for making drum shells and is used in Yamaha Absolute Hybrid Maple and Tour Custom toms. Maple shells offer a warm low end, slightly boosted mid frequencies and balanced low and high frequencies. Absolute Hybrid Maple shells combine maple plies with an interior layer of wenge — a hard and heavy wood which combines with the maple to produce a rich, clear tone at a wide variety of volume levels. Yamaha PHX (pronounced “phoenix”) drum shells are built from plies of jatoba, kapur and North American maple woods. This unique structure maximizes performance and increases the vibration of the drum head.
Maximizing Resonance
Toms are designed to resonate, but sometimes hardware attached to the shell can dampen that resonance. The Y.E.S.S. (Yamaha Enhanced Sustain System) I, II and III tom mounts featured on all Yamaha drum sets (with the exception of Stage Custom Hip and Rydeen models) acts as a shock mount system and minimizes contact between the shell and the mount, allowing the shell maximum vibration — hence, maximum resonance.
Lugs can also decrease shell resonance and that’s why the Absolute lugs featured on Yamaha Tour Custom toms are isolated from the shell with rubber gaskets.
A different approach is taken on Yamaha PHX toms, which use a hook lug system. These lugs are mounted on an area of the shell that produces undesirable overtones and then mutes those tones, allowing for a pure fundamental tone. The hook lug system also makes head changes fast and easy.
Toms provide a wide range of tonal options for your drum set and can also make it more fun to play. Best of all, you can start with just one or two toms and add more when you’re ready to expand your sonic palette!
For the past 35 years, the Yamaha YBS-52 intermediate baritone saxophone has been a mainstay of marching, jazz and concert band programs in thousands of schools in the United States and around the world. But we at Yamaha are constantly trying to improve our products, no matter how successful they are. This is embodied in the Japanese philosophy of kaizen, which means continuous improvement.
The perfect example is the YBS-480 intermediate baritone sax that debuted at the 2020 NAMM show and won the prestigious Best In Show award. Its redesigned bore and neck are modeled after the (now discontinued) Yamaha YBS-62 professional baritone sax to improve the sound of the horn, with changes to the bell to enhance intonation, particularly in the lower notes. But we didn’t stop there. We also updated the ergonomics to accommodate small hands, with redesigned key positions and a shorter bell, as well as a peg receiver that allows the use of an optional detachable floor peg to help younger students stabilize the instrument. The YBS-480 is also considerably lighter in weight than the YBS-62. Together, these improvements serve to make the YBS-480 more accessible to players of all sizes.
The overriding principle here is a simple one: If we can help make their first musical experience positive, more students will continue with their musical studies. The YBS-480 does just that.
Click here to learn more about the Yamaha YBS-480.
“To the girls, to the women, to the mothers, to the daughters who hear the music bubbling within, please speak up. We need to hear your voices.”
These were the words of Icelandic cellist-composer Hildur Guðnadóttir as she recently accepted an Academy Award® for Best Original Score, for the movie Joker. It completed her incredible sweep for the 2020 season, adding to her Grammy®, Golden Globe®, BAFTA, Critics Choice, and Society of Composers & Lyricists awards … and last year, she won an Emmy® too!
Her software of choice? Steinberg Cubase. In this video, she describes her approach to capturing audio and composing for film and television. “Music is such an important part of the story-telling,” she says, “and … there are so many elements you are working with: the pacing of the cinematography, the lighting, the movements, the acting … all of which affect the steps that I [take].” She also talks about how she finds Cubase ideal for assembling the elements she records, thanks to its intuitive design and tight integration between audio and MIDI.
Flying back to New York from LA after the recent NAMM show, I was treated to a 30,000-foot view of the Grand Canyon. Looking down at its majestic wonder, I reflected on how long it took to make such a marvelous creation — something that made me appreciate that we each have only so much time on this planet to do not only what we need, but want to do. There are lots of people who have told me they always wanted to go to a NAMM show, but have yet to do so. They really should, because the people I know who did make it out this year were rewarded with a learning, listening and musical experience that will resonate for years to come.
There are a number of reasons that I like going to this event. To begin with, I live in the northeast, so winters can be challenging to the mind, body and spirit. Feeling the warmth of the California sun in January does wonders to lift my spirits. Then there’s the meetup with a regular group of friends that I refer to as my “NAMMily.” It’s always great to catch up and talk about our musical adventures over the past year, but the primary reason I go to the show is to check out the latest musical equipment and technologies, and to gain knowledge. Needless to say, there is an amazing amount of all of it there, in one place at one time!
But with so many booths (there are literally hundreds of exhibitors) and so much noise, NAMM can be overwhelming. For that reason, I have found it best to go in with what I call an “attack list.” This is a list I compile ahead of time (based on the advance press releases most companies issue) of the various products that I want to see. Having face-to-face meeting with those who can explain the technology and demonstrate the gear to you at the booths is invaluable. I also put together a list of people I want to see who work at those booths. That’s the left-brain organizational component to my NAMM strategy. But then there’s the right-brain spontaneous component — the fun part — which is simply discovering things that I didn’t know about ahead of time. This is also where my NAMMily comes into play.
As we make our individual ways around the aisles, there’s a lot of texting back and forth between us as we come across a booth that has something interesting to see. Then we will either drop what we’re doing and meet up, or make a plan to get together and visit the booth later. This way, we keep the information flow to a manageable level; it’s also fun to take breaks for lunch together and compare notes about what we’ve seen and should see.
At this year’s show, one of the coolest meetups was at the Yamaha pavilion. The company has so many musical products (over 70 new ones at this year’s show alone, plus hundreds of other current ones), they can’t actually fit into the Anaheim Convention Center. Instead, they take some 34,000 square feet of space at the Marriott hotel directly across the road. I joined fellow NAMMily members Dave Koch (who’s a drummer and guitarist), Ray Levier (a drummer and producer who I’ve written about here previously) and his brother Greg (a keyboardist and piano technician) there and we spent an exciting couple of hours exploring the wide range of products on display and chatting with the helpful staff.
We then wrapped things up by trying out various pianos, digital keyboards and synthesizers. The best thing about visiting with a company as large as Yamaha is that it gave all of us the opportunity to learn about instruments we don’t play and open our minds up to new sounds.
Another benefit of going to NAMM is that you also never know who you will run into at the show. It seems there’s a famous musician at every turn! At the Yamaha pavilion, Ray ran into one of his favorites — drumming legend Steve Gadd — who had a new signature snare drum on display. Joni Mitchell was receiving a Les Paul Innovation award, and though she herself didn’t perform, attendees at the ceremony had the thrill of being in the same room with her.
Speaking of performances, it’s amazing how much music is happening at NAMM. This not only includes scheduled shows at a variety of stages and booths (including, this year, Yamaha-sponsored concerts by Earth, Wind and Fire, Kenny Loggins and Tower of Power) but any number of spontaneous jams that happen. I had a fabulous experience with just such spontaneity while checking out ukuleles, where a hot uke jam erupted, to the joy of not only those of us who participated, but the excited audience that quickly gathered.
So if you’re amongst those who have always wanted to go to a NAMM show but have yet to, my advice is, don’t wait another year. Even if you have to cross that Grand Canyon to get there, it’s worth it! There’s no other place where you can see, hear and feel so much technology and musical gear. Even better is to experience it with your friends and share in all the learned knowledge. And who knows, you may become part of your own NAMMily.
Photographs by Steve Leiken and courtesy of the author.
Ah, Valentine’s Day! Love is in the air, and chocolates and flowers abound. But music can also play a big role when it comes to romance. Here are the stories behind ten love songs sure to set the right mood.
1. Love Me Tender
This 1956 Elvis Presley hit put new words to an adaptation of the Civil War hymn “Aura Lee,” published in 1861. The principal writer was Ken Darby, though the lyric was credited to his wife Vera Matson … and to Presley, whose manager “Colonel” Tom Parker demanded that songwriters concede 50 percent of their credit — and income — if they wanted Elvis to record their work. When later asked why he named his wife as co-writer instead of himself, Darby replied sardonically, “Because she didn’t write it either.” Listen to it here.
2. I Can’t Stop Loving You
Country singer Don Gibson wrote this one hot afternoon in Knoxville, Tennessee in 1958. Four years later, Ray Charles only needed to hear the first two lines before deciding to record it for his album “Modern Sounds in Country and Western Music” … and the rest is history. Listen to it here.
3. And I Love Her
This classic Beatles song, featured in the 1964 movie A Hard Day’s Night, was sung and mostly written by Paul McCartney, though he had some help from John Lennon on the bridge. George Harrison contributed the signature acoustic guitar lick, underpinned by Ringo Starr’s gentle bongo drums. It’s a great example of how the individual strengths of the four members of the group meshed together so well. Listen to it here.
4. Your Song
Composed and performed by Elton John with lyrics by his longtime collaborator Bernie Taupin, this originally appeared on John’s self-titled second album, released in 1970. Interestingly, it was originally just the B-side to “Take Me to the Pilot,” but was preferred by the disc jockeys of the era, and so the two sides were flipped. Listen to it here.
5. Love Will Keep Us Together
First recorded by Neil Sedaka in 1973, this became a worldwide hit two years later when it was covered by The Captain & Tennille (keyboardist Daryl Dragon and his wife, singer Toni Tennille). The duo acknowledged Sedaka’s authorship—as well as his mid-1970s comeback — by working the phrase “Sedaka is back” into the song’s fadeout, accompanied by applause from the studio musicians. Listen to it here.
6. How Deep Is Your Love
This 1977 Bee Gees hit was a big part of the soundtrack to the film Saturday Night Fever … yet the brothers Gibb hadn’t seen the script for the movie when they wrote the song — in fact, they weren’t even certain that there would be a love scene in the film! Listen to it here.
7. I Want To Know What Love Is
The members of Foreigner weren’t sure that this power ballad should even be a single when they recorded it in 1984, with singer Lou Gramm concerned that it might do irreparable damage to their rock image. Songwriter / guitarist Mick Jones later told Billboard the track was released “because it was coming out at Christmas and it had the right kind of mood.” Listen to it here.
8. I Just Called To Say I Love You
Written, produced and performed by Stevie Wonder, this remains his best-selling single to date. Used in the soundtrack to the 1984 Gene Wilder movie The Woman in Red, the song won both a Golden Globe® and an Academy Award® for Best Original Song, as well as three Grammy® nominations. Listen to it here.
9. I Will Always Love You
Whitney Houston’s signature song, released to accompany the 1992 film The Bodyguard, was originally a Number 1 hit for the woman who composed the tune, Dolly Parton … not just once, but twice, in 1974 and again in 1982. Listen to the Dolly Parton version here, and the Whitney Houston version here.
10. Love Story
Taylor Swift wrote this 2008 hit about a real guy she was dating. Her family disapproved, inspiring her to base the song on the most famous love story of all — “Romeo and Juliet” — but this time with a happy ending. Listen to it here.
Today there are many options for turning your home into a smart home, including products that can be controlled by Alexa and Google Assistant™. The latest Yamaha MusicCast-enabled receivers, sound bars and wireless speakers work with these popular voice assistants and with the Apple HomeKit family of accessories to create the ideal entertainment setting in the comfort of your home.
Imagine this: You walk through your front door after a long day at work and your house welcomes you like an old friend. All you have to do is say, “Hey Siri®, I’m home.” The lights turn on, your thermostat sets itself to the perfect temperature and music from your favorite playlist plays. It’s good to be home!
In general, setting up smart home devices to be controlled by a voice assistant involves adding the devices to the voice assistant’s app. Because there are so many smart devices out there, hubs are often employed to help them all communicate through a common technology, like Wi-Fi. For example, if you’re using Apple’s voice controlled personal assistant, Siri, to interface with the Apple Home app, this may involve using the device manufacturer’s hub to enable the app to communicate with the device.
Adding a smart MusicCast speaker — or any smart speaker, for that matter — to the Home app is a simple process. All Yamaha MusicCast products made in 2018 or later work with Siri via AirPlay 2®, and sound bars are considered speakers in the Home app. For purposes of illustration, we’ll show you how to set up a Yamaha MusicCast 50 wireless speaker.
Before you begin, note that a robust Wi-Fi network is a must for any smart home. If you have a large home, a two-story home, or just a lot of devices streaming 4K content, gaming and competing for bandwidth, consider a mesh network to ensure fast, reliable Wi-Fi coverage throughout your house.
Here’s the step-by-step procedure:
1. Turn on the MusicCast 50.
2. Add the MusicCast 50 to the Home app. First, tap +:
3. Then tap Add Accessory:
4. Tap I Don’t Have a Code or Cannot Scan:
5. The app will display all the speakers it can find in your home. Tap MusicCast 50:
6. Assign the MusicCast 50 to a room, then tap Save:
7. Finally, tap Done:
Once you have the MusicCast 50 added to the Home app, you can add music to any scene, like these:
– Good Morning: Just say, “Hey Siri, good morning.” The lights turn on in your bathroom, the shades open in your bedroom, and the MusicCast 50 on your dresser starts playing your “wake up” playlist.
– Bedtime: Say, “Hey Siri, it’s bedtime.” The lights in your living room dim to 30%, the shades close, and soothing sounds play from the MusicCast 50 on your sofa table, so you can practice mindfulness for 10 minutes before going to bed.
Click here for more information about Yamaha MusicCast products.
Click here for more information about the Apple Home app.
I often represent Yamaha Guitars at the NAMM show — something I love doing. Preparation for events like this starts weeks in advance. It involves prerecording tracks, rehearsing solos, selecting songs and dialing in my gear for optimum sound.
This year, the night before the show, I was asked to perform on a nylon-string guitar at an industry reception. I chose the Yamaha SLG200N SILENT Guitar™ for this performance because it’s small and extremely travel-friendly when flying to gigs. I took some time to create a nice nylon-string tone in my Line 6 Helix® and started to rehearse a setlist of pieces for the gig. I decided on approximately 20 tunes, all popular instrumentals like “Change The World” and “New Kid In Town,” adding looped endings so that I could improvise melodies over the chorus sections.
I was also scheduled to perform for Yamaha on a shared stage early every morning. Knowing there would be little time for setup and teardown between artists, I decided to keep my rig simple. I decided to use a Yamaha Red Label FSX5, along with a couple of effects pedals, and I also took my own microphone — one that I know works well with my vocal tone. (It’s always good to have a mic on hand that you know complements your voice.)
All of this was in addition to my daily performances in the Yamaha Guitars pavilion, on three different stages. For these 30-minute time slots, I prepared backing tracks that would allow me to stylistically represent the Revstar series of electric guitars and their different pickup configurations: humbuckers, FilterTrons and P90s.
The Guitar
I also wanted to demonstrate the amazing SA2200semi-hollow body electric-acoustic guitar. This beautiful instrument is handcrafted in Japan and is, in my opinion, one of the finest guitars Yamaha makes. I decided to record a B minor blues backing track specifically for that instrument and the smoky tonality I knew it was capable of. As expected, the guitar paired perfectly with the track I’d prepared.
The Videos
A good friend of mine, Larry Seyer, happened to capture one of those performances, with me playing an SA2200 into a Line 6 Helix and a Line 6 Powercab® 212 Plus amplifier. Here’s the video:
Ready to start jamming along? Here’s the backing track on its own:
As the captions in the video indicate, the chord progression is:
I: Bmi7 I A/B I Bmi7 I A/B I Emi7 I Emi7 I Bmi7 I A/B I Gma7 I F#7 I Bmi7 I F#7 :I
As shown in the chart above, the A/B (“slash”) chord used here is also known as a B11. The best way to think of this chord is as a harmonic variation of the Bmi7. It still retains a Bmi7 tonality but gives us the additional tones of C# (Major 2nd / Major 9th) and the note E, which would be the Perfect 4th. Think of these additional tones as chord extensions of the Bmi7 chord.Given that we have these additional tones in the harmony — tones I call the “sweet” notes — I chose to use them extensively in the solo lines I played in the first video. Over the Bmi7 chord, I’m playing the B minor pentatonic scale and Bmi7 arpeggios, and over the A/B (B11) chord, I’m targeting the aforementioned chord extensions. Thoughtfully phrasing your ideas this way will bring your minor pentatonic playing chops to life and dramatically change your melodic palette over any blues progression.
Over the Emi7 chord sections, the E minor pentatonic scale will sound great. It also gives you all the chord-tone resolution points of Emi7, plus the Perfect 4th for additional tonal coloration.
Try using a G major 7th arpeggio to “outline” the Gma7 chord. You could also use the E minor pentatonic scale (i.e., the G major pentatonic scale). However, bear in mind that those scale choices won’t give you the Major 7th. This is one note you should be looking to hit if you want to sound like a guitar hero when playing over this kind of progression.
Similarly, an F#7 arpeggio is the perfect choice to nail the bluesy tone of the V7 dominant chord. A# is the Major 3rd of the F#7 chord and arpeggio — a note that will really stand out. Just make sure you don’t hit this tone over any other chord. If you do (by mistake), play it again, smile, give a thumbs-up and move on quickly!
Here’s another suggestion: try leading into the Gma7 and F#7 chords with the corresponding arpeggio two beats before the chord arrives in the progression … and then end your phrase over the chord instead of starting it there. I think you’ll like how that preempts the tonality of the chords in a very musical way!
If you aren’t used to combining different scales and arpeggios, this approach is going to present some challenges, but trust me, it’s worth it, because it will elevate your playing to a whole new level.
The Wrap-Up
When it comes to live performance, I don’t leave anything to chance. Preparing music that pairs well with the instruments I’ll be playing is imperative, and I always try to evoke the sweet notes and melodies that capitalize on the harmonic structure of the backing music and demonstrate the unique tonal characteristic of the guitars I’m playing. At the end of the day, it’s all about leaving the audience wanting to hear more!
In this video, Yamaha product manager John Schauer provides an overview of the mixer functions on the STAGEPAS 1K and goes through the available connections on the rear panel. Topics include the function of the EQ knobs, which affect not just one band, but multiple bands of EQ; the ability to connect three separate stereo inputs (including Bluetooth®); a description of the various types of onboard reverbs; the usage of an optional reverb foot switch (particularly useful for solo performers who need to mute the reverb when talking to the audience between songs); and the LINK jack, which enables you to add a second STAGEPAS 1K system for extended coverage or adding more inputs and mixer controls.
Do you ever feel like you’re stuck in your own muse? Same pen? Same screen? Same room? Same song? Left to your own devices, do you default to the same chord progression, the same verbs, the same mood?
Me too. I often wonder if I approached my craft differently — if I were (literally) in someone else’s shoes — would that influence my writing style?
Don’t get me wrong. I love my songs. They’re all my babies. My approach has served me well over the years. But there’s no reason why a creative person shouldn’t consider expanding their palette. We may surprise ourselves at what gets revealed. We may be delighted to meet pockets of persona that are happy to be heard.
I took a class in college called Clothing and Human Behavior, which put forth the notion that fashion can affect the way we feel and therefore how we think and operate. We’ve all experienced this, right? We walk with a less delicate gait in ripped jeans and combat boots than we do in a frilly dress and strappy heels. A more casual stride in T-shirt and sandals versus a three-piece suit and lace-up Oxfords.
There is actually a term for it: enclothed cognition. This describes the series of psychological changes that occur when we wear certain clothes: People unconsciously attempt to behave in ways that are congruent to their look. In other words, if we dress for the role, we will start to live it.
Is it possible, then, that the way we dress could influence the way we create music?
My personal go-to “uniform” is jeans and a white T-shirt. It’s the pairing in which I feel the most like myself. But what if I wore somebody else’s uniform? How would that girl act? More to the point, what song would she write?
I decided to experiment. One afternoon, instead of sitting at my desk (in jeans and T-shirt) behind my laptop with a mug of herbal tea, I grabbed a fedora, and a cigarette holder from my daughter’s old dress-up bin and headed across town to a sidewalk eatery. I ordered a glass of wine, dangled the holder between two fingers and opened my journal. That’s right … no screen! That alone is a game changer — the medium on which you plant your words also affects your expression.
It took a moment. Admittedly, I felt uneasy. There was a voice in my head saying: “I’m an imposter. Everybody’s staring!” But then, “Don’t be silly. Nobody knows who the real you is! Relax!”
I let myself imagine:
I am Joni
At a cafe
Wearing a beret
Near Les Champs-Élysées
I scribbled and sipped. Scribbled and sipped.
A few days later (assessment needs space), I read back my work and found the prose to be more whimsical than my usual cadence. The melody I’d imagined to go with them was more shapely and the “voice” uncharacteristically falsetto. I wonder why. No I don’t. 🙂
Next day, in overalls and flip flops, I headed to Venice Beach with my guitar. Instead of a melancholic ballad about some guy who messed me up in high school, out popped a ditty about … sunshine. I never write about sunshine. But perhaps my environment (the waves, the sky, the warmth), along with my “uniform” influenced my creative journey.
Horizons expanded, and enthusiastic about these detours, I vowed to add even more unfamiliar territory to my creative map in future. What else is in my closet?
Creativity is a never-ending adventure. There is no rule that says we must only draw from real-life experience. We’re just like actors on a stage, except we’re composing music. There’s nothing wrong with giving ourselves permission to pretend, to be in someone else’s head and borrow their voice — especially on the days when we’re blocked and could use a jump start.
In the words of Stevie Wonder, “Everybody needs a change. A chance to check out the new.”
In Part 1 of this two-part series, we talked about the difference in feel and sonic quality between entry-level “starter” instruments and more advanced models. In this installment, we’ll talk about other features that you should consider when deciding whether to step up to a better keyboard.
While many higher-end digital keyboards offer enhanced versions of the basic features found in entry-level keyboards, they often provide additional technologies designed to foster creativity and make it easier and more fun to learn and practice. Some of these may be more important to you than others, but here’s a quick summary of the kind of features you can expect to find:
– More notes. We’re not talking about more keys (although it’s true that most “step-up” digital keyboards offer more than the 61 found on entry-level ones — sometimes even the full 88 keys found on acoustic pianos), but how many notes the instrument can produce at a time — something called polyphony. You may think that with ten fingers you don’t need much, but the wash you get when you hold down the sustain (left) pedal on an acoustic piano and play arpeggios or clusters of notes is an essential part of the sound of the instrument. This technique can, however, quickly use up a lot of notes, so higher polyphony will always sound better in those situations. The Yamaha P-45 portable digital piano, for example, offers 64 notes of polyphony, while the next-level P-125A provides 192, and the top-of-the-line P-515 provides 256 notes.
– The ability to record your performances. Even some entry-level digital keyboards offer this feature (it’s great for evaluating your progress!), but typically limit the length of time or number of notes, and only enable recording to internal memory. More advanced instruments will allow you to record to USB thumb drives so you can export your audio recording to your computer or smart device for sharing with friends and further tweaking with the use of DAW (Digital Audio Workstation) apps.
– An auxiliary input so you can plug in your smart device or music player, allowing you to play along with your favorite artists and recordings.
– The ability to layer sounds and split the keyboard so you can combine, say, the sound of piano with strings or play one instrument (for example, bass) in your left hand and another with your right hand. If you’re taking lessons, you should look for a model (such as the Yamaha P-45) that offers a Duo mode, which splits the keyboard into two identical ranges so a student and teacher can sit side-by-side and play together.
– Onboard drum rhythms as well as a metronome. These allow you to jam along with something more interesting than a click sound, thus encouraging practice by making it a whole lot more fun.
– Accompaniments. These give you the sound of an entire back-up band, easily triggered by playing a single note in your left hand. Jamming along with a band is very satisfying and a big part of what makes keyboard playing so much fun, but it’s not always easy to get a bunch of musicians together in a room. This digital version is a lot more manageable, and higher-end keyboards offer a greater range of accompaniments, better-sounding virtual musicians, and more sophisticated ways of controlling the accompaniment. Some even offer advanced technologies that allow the virtual backing band to follow your performance instead of vice versa!
Higher-end digital keyboards like the Yamaha DGX-660 Portable Grand and most Clavinova, ARIUSand AvantGrandmodels provide most or all of the above, along with additional advanced features such as a “Piano Room” virtual space where you can choose from a variety of pianos and acoustic settings; a microphone input so you can sing along with your performance; wireless streaming from your smart devices; and compatibility with a wide range of apps such as Yamaha Chord Tracker, which analyzes the songs stored in your iOS® 15.2 or higher or Android™ smart device and displays the chord symbols for you, making it easy to learn your favorite tunes.
With these aspects in mind, you may discover that “good enough” simply isn’t good enough when it comes to buying your first (or second) keyboard. Happy shopping!
We all love a bargain. But there are times when you should consider not just how little you can spend, but how much you can get for your money. This is especially true when it comes to purchasing a musical instrument that can help you or your child enjoy learning and playing music for a lifetime.
In this two-part series, we’ll explore some of the reasons why “good enough” isn’t always good enough when it comes to buying a keyboard instrument.
Better Feel
Entry-level portable keyboards are a great starting point for every aspiring musician. Models like the newly introduced Yamaha PSR-E273 have 61 keys (enough to be able to play two-handed), built-in speakers and a headphone jack, plus plenty of sounds, drum rhythms and educational features that make it fun to learn and make music.
Because these instruments are designed for beginners, they’re easy to play. Maybe even too easy. That’s because they lack a “weighted” action: keys that provide enough mass, resistance and movement to enable the player to develop the technique, finger strength and muscle memory to be able to play a real piano.
The good news is that there are a number of digital pianos that provide this essential feature, and at an affordable price. For example, the Yamaha P-45, which has a full 88 keys, features a GHS (Graded Hammer Standard) action that replicates the weighting and natural feel of a piano — and, like a piano, it’s even a bit heavier on the lower notes and lighter on the higher ones (something called a graded action).
Other types of actions provide even more detailed touch and response. (You can learn more about various Yamaha actions here.) For example, the NWX (Natural Wood X) design adds more weight to the keys for a better touch response that helps to strengthen the fingers. It also adds a “damper” sensor to improve the response time for repeated notes, so the keyboard doesn’t feel sluggish. (For more information about the benefits of this third sensor, check out this video.)
The NWX action can be found in some top-of-the-line Yamaha digital pianos, including the portable P-515. But for the closest thing to an acoustic piano feel — without the maintenance and upkeep of a real piano — you might want to consider a Yamaha Clavinova. There are numerous models to choose from, but they are all housed in piano-like cabinets and come with full-length keys, all three standard piano foot pedals and a wealth of innovative features.
Clavinova CSP Series models utilize the GH3X action, along with wooden keys, while CLP Series and CVP Series models offer “Grand Touch” keyboards with full-length synthetic ivory and ebony keys. Grand Touch technology reproduces the kind of key resistance and natural return of the keys that is unique to a grand piano, resulting in a more responsive touch and a much more controlled, nuanced sound. Click here to learn more about its benefits.
Better Sound
While entry-level digital keyboards usually offer a variety of piano and other sounds, their sonic quality sometimes leaves something to be desired. The piano sounds in better digital instruments are generally much more realistic, since they have been “sampled” from real pianos, meaning that professional engineers make recordings of the notes and convert them into playable sounds that are triggered by the keys.
Of course, how good those recordings are, and which piano was recorded to make the samples are huge factors in their sound. Most Yamaha digital keyboards include samples of concert grand pianos costing well over a hundred thousand dollars — pretty impressive, especially when you consider that the instrument housing those samples costs a fraction of that. Some, like Yamaha Clavinova digital pianos and the P-515, even provide two or more world-class piano samples to choose from, giving you more sonic variety to choose from.
Other factors that contribute to sonic realism include how many notes are recorded (it’s not always all 88), how long those recordings are per note (a piano note takes a long time to decay, so the samples may sometimes be of only a small portion of the sound) and how many levels of touch are captured (the sound of a real piano changes as you play from soft to loud). In general, more of everything is better, but the tradeoff is that the added memory required to store and play back all the samples costs more money. That’s one reason why inexpensive portable keyboards rarely sound as good as more expensive ones, and why portable keyboards in general rarely sound as good as digital pianos.
In addition, digital pianos often add extra aspects to the sound. An example is the Yamaha Virtual Resonance Modeling (VRM) found in select Clavinova, ARIUS and AvantGrand models. This technological breakthrough recreates the natural reverberation and sympathetic vibrations that occurs inside a grand piano when the dampers are not touching the strings and a struck note causes other notes to ring gently — an important part of what makes a piano performance sound so warm and rich. Similarly, the “key-off” samples provided in some advanced digital keyboards (such as selected Clavinova models) deliver the slight change in sound that occurs when a damper falls back on the string after a key is released. They may be subtleties, but rest assured that you will hear the difference that technical innovations like these make to the sound of your instrument.
Last but not least, the speaker system built into a digital keyboard has an impact on sound quality. More power means you can get a rich, clear sound loud enough to feel like you are playing a real acoustic piano. In addition, larger speakers are better at reproducing the full range of tonalities, and sound good even at louder levels. As a comparison, the entry-level Yamaha P-45 comes with dual full-range 4.7″ round speakers, each powered by a 6-watt amplifier. That gives you pretty good sound, but when you step up to the Yamaha P-515, the two 4.7” x 2.4” oval speakers are not only powered by 15-watt amps, but they’re designed to handle just the lower-frequency bass sounds, since they’re supplemented by two additional 1″ inch tweeter speakers (powered by a separate 5-watt amp) to reproduce the higher frequencies. The end result is a more “hi-fi” sound, with a fuller-sounding bass and a crisper top end.
In Part 2, we take a look at other advanced features you can expect to find in “step-up” keyboards.
Recording compelling vocal tracks requires more than just putting a mic in front of a singer and pressing the record button. The success of a vocal session hinges on the gear and setup you use as well as psychological aspects such as making the singer (whether it’s you or someone else) relaxed and comfortable. In this article, we’ll take a look at each of these.
Mic It
When famous producers and engineers talk about how they selected a microphone for a particular session, they often mention how they had to make a difficult choice between several expensive vintage models to find the best one for a particular singer. For most home recordists, however, that’s a fantasy scenario. Particularly if you’re new to recording, you probably only have one or two relatively inexpensive mics to choose from.
But don’t despair. While it certainly helps to have high-end gear, you can still get a darn good vocal sound with almost any mic. The most significant X factor is the quality of the singer and the vocal performance.
That said, using the best mic you can will certainly help. (If you can’t afford to buy one, perhaps look into renting one.) Generally speaking, you’re likely to get superior results if you use a large-diaphragm condenser mic to record vocals. These models are designed to provide accurate reproduction and offer good high-end response, which flatters the human voice and helps in enunciation, thus making it easier to hear the lyrics being sung.
These days you can get a serviceable large-diaphragm condenser without spending a ton of money. For example, the Steinberg UR22C Recording Pack bundles an ST-M01 Studio Condenser mic along with a UR22C audio interface and a pair of headphones.
If you don’t have a large-diaphragm condenser, even a good quality hand-held dynamic mic designed for live performance can work. There have actually been tons of hit records made with such mics!
Place It
Mic placement will affect the vocal sound quite a bit. Ideally, it’s best to position the mic about three to five inches in front of the singer’s mouth, but try to make sure you have a pop filter (sometimes called a “pop screen”) between the mouth and the mic to reduce the pickup of plosives — popped Ps and other consonant sounds. Pop filters are inexpensive and well worth including in your studio arsenal, but if you don’t have one immediately on hand, position the mic so it’s a little above or below the singer’s mouth, and/or encourage them to move their head slightly off to the side when singing “p”s or “t”s.
Most vocal mics pick up audio in what’s called a cardioid pattern, meaning they’re most sensitive to signal coming from directly in front. That’s all well and good, but be aware that cardioid mics are prone to something called the proximity effect, which means that the closer you get to it, the more bass is added, thus accentuating the low end of the singer’s voice and making it sound “bigger.” You can use the proximity effect to your advantage to help beef up an otherwise thin voice.
(Pre)Amp It
The signal coming out of a microphone is very low level and has to be amplified to a higher level (called line-level) before being sent to your DAW. The device that takes care of that task is called a mic preamp. A mic preamp has significant impact on the sound quality and is almost as important as the microphone itself in terms of making a vocal sound rich and clean.
Most people in home studios use the preamp built into their audio interface, rather than a dedicated one. The quality of the preamp will usually be commensurate with the overall quality of the interface. The Steinberg UR Series and UR-RT Series interfaces incorporate Yamaha D-Pre mic preamps, which do an excellent job. UR-RT interfaces also include Rupert Neve transformers (Neve was a legendary analog console designer) which can be switched into the input circuit to add subtle saturation that imbues the signal with a pleasant “warmth.”
The other part of your audio interface that’s critical are its analog-to-digital converters (ADCs for short). When a vocal is picked up by a microphone and passes through a mic preamp, the signal is still analog, but it needs to be digitized to be sent into your computer’s DAW software. Just as with mic preamps, the converters in an interface can vary in quality; generally, the better the interface, the better all its components will be, and therefore the better the sound of the vocals you record with it.
Hang It
Unless your studio has professional acoustic treatment, you’ll probably want to minimize the acoustic reflections when recording vocals. Reflections are created by sound waves bouncing off the walls and coming back into the microphone slightly delayed from the direct sound. These can cause phase issues that degrade the overall quality of the recording.
There are several steps you can take to prevent this kind of problem. You can make your own absorbers by hanging up blankets or comforters in front and in back of the singer. These can be draped over mic stands or hung on the walls or even from the ceiling — whatever works. Alternatively, you can purchase a “reflection filter,” which is a small baffle made of absorbent material that sits on a mic stand behind the microphone.
If you can’t purchase one of these in time for your vocal session, or if you aren’t able to set up absorbers or baffles, it’s not the end of the world. I’ve recorded plenty of vocals successfully without them, but they’ll certainly help you get a more professional sound.
Vibe It
Now that we’ve discussed the gear, let’s get to the intangibles, the most important of which is coaxing the best performance out of a singer. One of the best ways to do so is by enhancing the atmosphere, or vibe, in your studio in a way that helps the singer relax. A calm singer is more likely to give a performance that best captures the emotion of the song. Lowering the lighting always helps, and having as few people as possible in the studio during the session is another good way of having the singer avoid nervousness and distractions.
One critical part of helping the singer relax is to create a headphone mix (a “cue mix”) that’s comfortable for them to sing to. In home studios, this is usually accomplished with an app such as the dspMixFX software that comes with Steinberg interfaces. The key is to dial in the right balance between the live vocal and the recorded backing tracks. If your gear allows you to add reverb or a little delay to headphones without it getting recorded, that can also help set the mood for the singer. Spend a little time at the beginning of a session making sure the vocalist is comfortable with the headphone mix, and be willing to tweak it until they are happy.
Last but not least, always ALWAYS make sure to record every word the vocalist sings — whether you’re ready or not. An old producers’ trick is to surreptitiously start recording when you’re ostensibly “still adjusting levels.” Sometimes the singer will be more relaxed and deliver a better performance when they think it’s just a level check and not an actual take.
Produce It
When you’re producing a singer, give only constructive criticism, or better yet, just be encouraging. Too much critique can cause a singer to tighten up and the vocal performance will suffer for it. If you’re recording your own vocals, stay positive.
Thanks to the quality and accuracy of modern pitch correction software such as the Vari-Audio feature built into Steinberg Cubase, a singer no longer needs to nail every note. Better to go for the most exciting, dynamic or emotional performance, and don’t focus too heavily on pitch. You can always tune a vocal after the fact, but you can’t make a low-energy or boring performance more exciting.
DAWs make it easy to put together the best bits from various vocal takes in the form of a “comp.” We’ll cover that process in Part 2.
Having a conversation about the greatest bass amplifiers of all time that doesn’t include Ampeg would be like trying to have a serious conversation about the greatest R&B singers without mentioning James Brown.
Ampeg’s influence on the world of bass amps cannot be overstated, but their bold concepts had a humble start. The company was founded back in 1946 when a 42-year-old upright bass player and jazz aficionado named Everett Hull stuck a microphone inside his bass and connected it to a radio. His wife dubbed the invention “Ampeg” because the transducer, or pickup, inside the bass was attached to the peg that supported the instrument. “Amp” + “peg.” Get it? Clever gal.
Hull successfully spread the word about his creation to bassists in big bands around New York City, who became intrigued by the idea of using his new-fangled pickup to amplify their sound. Their burgeoning interest meant Hull needed to quickly jump-start his production, leading him to form a short-lived company called Michael-Hull Electronic Labs with an amp designer named Stanley Michael.
In addition to selling Hull’s “Ampeg” pickup, they also sold a product called the “Michael-Hull Bassamp.” Although the company dissolved in 1948, Hull was convinced that he was onto something big and doubled down, expanding his rag-tag operation — now known as the Ampeg Bassamp Company — into a small New York City midtown location that gave him close proximity to numerous nightclubs and studios.
Hull and his new amp designers continued to refine and enhance new, better-sounding and more powerful bass amps. As endorsers signed up for the original pickup and the new amps, up-and-coming players took notice, and by the early 1950s, the Ampeg name began to take root. Interestingly, around the same time, a small number of companies started experimenting with related ideas for an electric bass. But Hull — whose musical taste was far more conventional than his inventions would suggest — didn’t think the electric bass concept had much of a chance. He was a jazz guy, after all.
The initial Michael-Hull Bassamp (aka the Model 770) slowly evolved through the early 1950s, incorporating larger speakers, more power, more expansive tonal control and cabinet porting. Innovative amps for guitarists and accordion players followed, but Ampeg’s first major success came with the arrival of designer Jess Oliver in 1956.
It took a while for Hull and Oliver to hit their stride together, but they knew they were onto something special with the 1960 birth of the Ampeg B-15 Portaflex, with its unique “flip-top” design. The B-15 was an immediate game-changer. Its design and sound relegated all other bass amps that came before it (and arguably many others that came after) to the toy bin.
By today’s high-powered standards, you might think this cute, boxy-looking amp should never leave the bedroom, but as thousands of recording studios and bassists throughout the decades can attest, the B-15 was and still is the gold standard for bass tone.
Although it went through many design changes and derivations between 1960 and 1980, all of the versions of the B-15 generally fit the same basic description: a tuned, double-baffle cabinet with a closed-back, featuring a sweet-sounding heavy-duty 15-inch speaker and a separate, shock-mounted tube laden amp head crouched on top of a dolly.
Still highly sought after by bassists young and old, the B-15 remains an important sonic benchmark in the music world. Today, Ampeg carries on the B-15’s rich legacy with the Portaflex™ Series of individual heads and cabinets, both of which marry undeniably cool design with an overarching vintage aesthetic.
The B-15, which was soon joined by the less renowned SB-12 and B-18 flip-top models (which provided 12″ and 18″ speakers, respectively), was the most prominent bass amp that Ampeg offered during the 1960s. Thanks to an influx of cash that came from taking the company public in 1963, other innovations for the lower clef were soon to follow.
Some were not exactly stunning successes. The Baby Bass, an upright instrument made from fiberglass that was small enough to be transported in a car seat (rather than tied onto the roof), wasn’t as well received by symphonies as Hull had hoped it might be, though it did meet favor with some Latin bands of the era. Nonetheless, Ampeg continued to dabble with adding instruments to its line, including a series of “horizontal” basses with scroll-shaped headstocks that never gained much traction, though they were used by Rick Danko of The Band and are prized by collectors today. But even after moving into a larger production facility to increase its capacity, the company remained poorly positioned to take advantage of the rock-and-roll craze of the ’60s largely because of Hull’s preference for jazz’s pure tone and his disdain for anything related to the rock genre.
By 1966, Ampeg’s sales and ever-expanding product line were cracking under the pressure caused by the company simply being out of step with the popular music of the era. First, Oliver left, and by the end of 1968, Hull himself had resigned from the company he had founded. New management was in place, new ideas were being bandied about, and in early 1969, a huge one took the music world by storm.
The Super Vacuum Tube amp, or SVT™ for short, was a 300-watt behemoth designed to sit atop a massive 8 x 10″ cabinet to deliver one of the most breathtaking bass sounds imaginable. Prior to the SVT, Ampeg’s most powerful amp had been the 55-watt B-25 (a tone monster in its own right), but when the SVT debuted, all conceptions of power and volume were shattered. The SVT was the first bass amp truly capable of handling arena rock volume and tone, and it remains synonymous with that ethos today, as seen and heard in Ampeg’s Heritage 50th Anniversary SVT as well as the Heritage SVT-CLamp paired with an SVT-810E cabinet. In addition, the Ampeg Classic Series offers a number of amp heads and cabinets inspired by the original SVT.
There probably aren’t two amps that could be more different than the B-15 and the SVT — designed nearly a decade apart by two entirely different teams — yet both are legendary in their own right. It’s a circuitous path from Everett Hull’s mic on a stick inside his upright bass in 1946 to the luscious B-15 of the early ’60s to the massive grinding sound of a modern-day SVT, but that path is a glorious one.
Ampeg changed corporate hands various times throughout the decades, and in 2018 the company became part of the Yamaha Guitar Group family. Yet the thread running through from 1946 to today remains intact. Ampeg’s history is one of building top-quality, innovative amps for serious bassists. You see it in the older amp designs just as you see it today in Ampeg’s modern SVT Pro Series. It’s the same unwavering focus on pure tone and power that has my basement loaded with new and vintage Ampeg gear, and I know I’m not alone. That would probably make Hull quite proud … just as long as no one told him we are all using his amps to play loud rock music. Savages.
Want to know more about the history of Ampeg? Check out the video:
Click here for more information about the history of Ampeg, and also check out the book “Ampeg: The Story Behind the Sound,” by Gregg Hopkins and Bill Moore.
Click here for more information about Ampeg products.
One of the most overlooked — you could even say underused — aspects of music is the element of surprise. This topic came up when I was interviewing Nashville producer Kyle Lehning some years ago, and xjvznqwrqh … BAM!
See what I did there?
OK, so maybe the element of surprise works better in music than it does in the written word.
Anyway, back to my interview with Kyle. We were discussing his observation that producers used to be less technically oriented and more like the listening public. “They would sit in a studio and their input would basically be either “that’s good,” or “that’s not good,” he explained, “and it would be up to the musicians to interpret what “not good” was. Usually getting a thumbs down forced the musicians to come up with something more interesting, more surprising, and/or more energetic.”
To illustrate the point, Lehning shared an experience he’d had. After giving an address to an undergraduate college class about record production, he and colleague Norbert Putnam (Elvis Presley’s one-time bass player and a producer of great renown himself) asked the students, “What is it you’re looking for when you go online?”
“One kid in the front row,” Kyle remembered, “raised his hand and said, “I just want to be surprised.” It was a real “wow” moment for me because, frankly, I’d forgotten that part of the job was to surprise people. All of which returns to the problem of being so technically savvy that you forget that it’s really all about keeping the listener interested enough to want to hear the next section of the song, that it’s all about keeping them wondering what’s going to happen next.”
In the world of classical music, the archetypal example is the second movement of Joseph Haydn’s Symphony No. 94 in G Major — often called the “Surprise” Symphony. It begins with a soft “Twinkle, Twinkle, Little Star”-like theme played by the violins, supported by a little bass underpinning. Then the theme is repeated, even more gently … only this time it’s followed by a sudden, fortissimo blast from the entire orchestra, complete with a thwack on the timpani.
Nobody is quite sure why Haydn chose to play this musical joke, but many scholars believe it was intended as a jolt to people in the audience who tended to fall asleep during soothing, slow moments. Whatever the reason, it definitely keeps you on alert during the rest of the piece. You listen closely as the variations unfold, expecting that Haydn is going to trick you again, but it never happens again. And one thing is certain: No one listening to this particular Andante is going to drift off.
In a similar way, it’s safe to assume that many audiences hearing Tchaikovsky’s 1812 Overture for the first time had the living you-know-what scared out of them by the firing of cannons — yes, real-life cannons! — during the over-the-top finale.
When it comes to surprises, maverick composer Charles Ives probably has no peers. He turned out a slew of unorthodox pieces in the early 20th century that are regularly interrupted by circus music, dance hall tunes, hymns, ditties, you name it. In a way, the disruptions are often so pervasive that the element of surprise seems somewhat diluted.
And then there’s jazz. As writer Whitney Balliett so succinctly put it, “Jazz is the sound of surprise.” It’s all about music invented on the spot, juxtaposed on top of the chord changes, sometimes deriving loosely from the theme, sometimes not. Every time a jazz great like a John Coltrane lifted the horn to his lips, listeners never knew quite what to expect … and to a large degree that is the appeal of the genre.
Surprises seem to occur with less frequency in contemporary music. I don’t know why that should be the case, unless it’s down to the pursuit of commercial success (which perhaps presumes that the majority of listeners favor formula over revelation). That said, there are many notable exceptions, such as Brian Wilson’s eccentric orchestration on his masterpiece “Pet Sounds” and the unexpected key modulations in The Who’s “My Generation.” Beatle John Lennon was a big fan of musical surprises, and often sprinkled them in his songs. Take, for example, “I Want to Hold Your Hand” — the group’s first US hit, and a record that inspired countless musical careers, including my own. The Fab Four kick off the song with four and a half bars of the bridge, played instrumentally. What makes it both striking and confusing is that it begins midway through the first measure, with the accent on the last eighth note of that measure instead of the downbeat of the next measure. The first (or even the hundredth) time you hear this, you’re thrown off balance by the ambiguity — you only recognize the beat after the first few seconds pass.
As a composer, Lennon would tease the listener with similar surprises for the rest of his time as a Beatle (interestingly, not so much in his solo career), from the musically unrelated bridge that comes from out of nowhere at the two-minute mark in “I Am the Walrus” to the extra bass drum hit at 3:24 in “Revolution 1” (a bad edit by engineer Geoff Emerick that Lennon insisted be left in) to the occasional 2/4 and 3/4 measures tossed into the otherwise 4/4 “All You Need Is Love” — a song that also begins with the fanfare from the French national anthem, the Marseillaise, and ends with saxophones playing Glenn Miller’s “In the Mood” and strings playing “Greensleeves.”
There are scientific studies for pretty much everything, and it turns out that there’s a reason why we love musical surprises so much. According to a recent article published by Futurity, researchers at Canada’s prestigious McGill University believe that these bits of ear candy actually light up the brain’s reward center, same as traditional rewards such as food or money.
That may be the chemical explanation, but for me it’s a total visceral thing. All I know is that whenever I encounter a musical surprise, it brings a smile to my face. And one thing this world surely needs is more smiles!
The beginning of any year is filled with promise from every walk of life. In the electronics business, there is no more exciting time thanks largely to one signature event: CES(the Consumer Electronics Show), held annually in Las Vegas. This is where the largest technology companies showcase their newest technologies and debut their soon-to-be-released products.
With more than 4,400 exhibitors and over 170,000 attendees from 160 countries, CES is one of the largest trade shows in the world. If you’re a fan of electronics — or even if you’re just curious about what kinds of new gadgets will be on sale in the coming months — then we’ve got you covered. Here are some of the hottest products to come out of this year’s show.
Get Smart
Back in December, Apple®, Google, Amazon and ZigBee (developer of wireless mesh networks) came together to create a smart home protocol called CHIP (Connected Home IP). This universal standard is meant to make smart devices — even those from different manufacturers — more compatible throughout the home, which is especially meaningful when it comes to Apple devices, since Apple has, up until now, been a closed-source company when it comes to software applications. Shortly before the show, Apple announced that it will release an open-source version of its Home app (which enables control of Home accessories) to accelerate the development of CHIP.
To demonstrate how the Apple HomeKit can work with a variety of products in a connected home, Yamaha presented a smart home room with Phillips® Hue smart lights, an LG™ smart TV and several MusicCast audio products, including two MusicCast 20 wireless speakers and a MusicCast 50 wireless speaker. The room showcased how a HomeKit hub can be used to create “scenes” throughout the home with customizable voice commands, such as “Hey Siri®, it’s movie time,” which turns on the TV and changes the lighting to set the mood for you to watch your favorite content after a long day at work. You can watch the full demo here.
If you’re in the market for a new TV, there are plenty to choose from on the market. Electronics manufacturer TCL has a TV that lets you integrate with Google apps like Google Maps™. You can search a Google Maps location on your TV and have it transfer seamlessly over to your smart phone once you’re ready to leave.
Samsung® is also launching an 8K Ultra QLED TV this year that has a feature called Multi View. This allows you to instantly cast your smartphone’s display onto the TV (all you have to do is tap it on the side of the TV) so you can, for example, watch a sports event live and see your social feed talking about it in real time, right next to it on the screen. For Apple users who might be concerned about it not working with Apple products, don’t worry — it’s compatible with both iOS and Android™ devices.
Fun and Games
During its CES 2020 keynote, Sony™ surprised everyone by introducing its first car — the Sony Vision-S. Don’t get too excited though, as it’s not intended to be sold to the public. Instead, this electric concept vehicle will serve as an internal prototype to test the company’s future technologies and showcase what those technologies can do when utilized in one contained ecosystem. The car includes a panoramic screen built into the dash, as well as the company’s virtual object-based 360 Reality Audio, 33 sensors and a variety of side-view mirrors and 3D camera technology to project a “safety cocoon” — a safe zone surrounding the car thanks to its 360-degree camera views.
On the gaming front, Google has recently introduced Google Stadia™, a cloud-based gaming platform that lets users play without the need for a physical console. All you need are a wireless controller (it can be an official Stadia controller or one from another company) and a Chromecast with Google TV™ device.
Top of the Heap
Speaking of awards, each year, CTA (the Consumer Technology Association, responsible for running CES) gives companies the chance to compete for the CES Innovation Awards. The program honors outstanding design and engineering in consumer technology products. Given how many companies have been trending towards the connected home and the IoT (Internet of Things), we thought it would be helpful to mention some of those winners.
As an extension of its smart home security ecosystem, Arlo™ won an award for its Arlo Floodlight™, said to be the first wire-free floodlight on the market. It has an integrated camera to add a layer of security to homes and can connect as part of the smart home through Arlo’s AI subscription-based service Arlo Smart. The camera features a 160-degree diagonal viewing angle and 2K HDR crisp video with color night vision capabilities.
For those looking to do presentations on the go, the Hachi Infinite is a portable short-throw projector that turns any flat surface into an interactive HD touchscreen of up to 100 inches. It lets you project onto a table or against a wall for added versatility, and also features voice control with Amazon Alexa.
That’s CES 2020 in a nutshell. From smart home innovations to gaming on the go and even a new car, it’s safe to say that we are entering an era of exciting possibilities. If you can’t attend CES next year, be sure to check back here for a recap of the latest trends.
Photographs courtesy of the author.
Read more related blog posts on how MusicCast can integrate with a smart home:
Once upon a time, mallet choices were limited. The hardness of a mallet was the most dramatic way to change the sound of an instrument. Today, a variety of percussion implements are available, which has complicated the selection process.
The age-old “use-a-harder-stick” solution to fix ensemble issues is no longer the only or best option. Mallet manufacturers now consider a range of characteristics, which allows directors and percussionists to make appropriate and nuanced selections for the challenges presented by different music compositions.
The following guide will help illustrate how the different characteristics of mallets affect the sound of a keyboard instrument so that students and conductors can make more informed decisions when purchasing and selecting mallets.
Before we begin, I want to emphasize that mallet choice isn’t the only way to affect the sound of a percussion instrument. I highly recommend reading James Campbell’s chapter — “Teaching Young Percussionists to Make Musical Choices” — in “The Drums and Percussion Cookbook.” He thoroughly covers touch and articulation.
In many cases, going to extremes in mallet choice requires percussionists to use touch to negotiate undesired sounds, which can create challenges. In other cases, switching mallets alleviates problems presented by extreme variations of touch and articulation that your students may have. It’s best to consider both touch and mallet choice in tandem when selecting sounds for a piece of music.
Hardness
Mallet hardness affects how overtones will sound and largely controls how bright the overall sound will be. Harder mallets are brighter, and softer mallets are darker. This is largely due to the dampening effect softer sticks have on the higher frequencies of an instrument. For this same reason, harder sticks tend to obscure the fundamental pitch while softer mallets can lack clarity in busy textures.
It is common for percussionists and conductors to go to a harder mallet when they need more volume. This usually leads to a brittle sound that, although more audible, isn’t always the most appropriate. Harder mallets also run the risk of introducing a “click” that isn’t usually considered a desired tone. Additionally, harder mallets can lead to premature wear and intonation problems with the instrument over time. For these reasons, many players avoid brass mallets on crotales (antique cymbals) or bell kits made from aluminum; instead, they favor aluminum or hard plastic mallets.
Always remember that the mallet should never be harder than the bar of the instrument. For example, on rosewood xylophones, use plastic, not metal.
Core Material
The mallet head consists of a core and, in the case of wrapped mallets, a wrapping. The material of the core can influence the sound independently of its hardness. Cores are usually categorized as rubber (also known as latex) or plastic (also known as synthetic). Overall, synthetic cores tend to have a brighter and clearer attack with a more staccato sound, while rubber cores tend to have a warmer, more blended attack with a more tenuto sound.
Unwrapped mallets come in an ever-increasing number of materials, but ultimately fall into the following categories: plastic, rubber, wood and metal. Rubber is the considered the softest core material. Wood is typically harder than plastic, but warmer. Metal is the extreme in hardness for mallets and should be limited to steel instruments, in most cases.
Weight
A mallet’s weight largely determines how full the sound of the instrument will be. Lighter sticks tend to produce delicate and legato sounds more appropriate for solo passages. Heavier sticks produce fuller and bolder sounds better suited for ensemble situations. Heavier mallets also have a higher limit to how loud they can sound before being overplayed and creating a distorted sound.
Weight used to be largely an issue of core material, but manufactures have been using brass to add weight to mallet cores, which has led to mallets with very specific balances and weights.
Lift is a large part of a percussionist’s touch and, as you would imagine, heavier mallets require more effort to lift. This can limit how staccato a student can play at first. With younger students, there is a risk of injury due to strain or tension from using heavy mallets.
Head Shape and Size
The size and shape of the mallet head determines the amount of contact the mallet has with the instrument, which affects tone. A wider contact surface usually leads to a less pointed attack while a narrower contact surface tends to lead to a more pointed attack. If the shape stays the same (ball, barrel or disc), larger mallets naturally have more contact area as well as more weight. For marimba and vibraphone mallets, the shape applies to the core, but can usually still be seen through the wrapping.
Ball: The most popular mallet shape is ball. Most marimba mallets and many vibraphone mallets have a ball-shaped core. Consider this the middle ground for mallet shapes.
Mushroom: Mushroom-shaped mallets are often used with the vibraphone. They tend to provide a slightly more pointed sound than ball-shaped mallets.
Disc: Percussionists who want the most pointed sound usually choose disc-shaped mallets. Some manufacturers shape disc heads for specific effects. Due to their short stature, disc-shaped heads are often used to reduce a mallet’s weight without changing the contact area.
Barrel: Barrel- or egg-shaped mallets tend to have very broad sounds. Due to their typically large size, these shapes are often used to add weight to the mallet and are often paired with a hard material to generate an aggressive, full sound.
Wrap
The wrap around mallets intended for marimba, vibraphone and cymbals affects the contact sound of the mallet. Different wraps used to be associated with specific instruments, but that is no longer the case.
Yarn: Yarn softens the contact sound, yielding a slightly more legato or open sound. Mallets wrapped in yarn are best for solo playing. In ensemble settings, they may help blend the instrument into the ensemble or smooth out rolls. Percussionists should also consider how tightly wrapped the yarn is. Looser wrapping exaggerates the softening effect of the yarn and allows for a “multi-tonal” effect. Tighter wrapping creates a clearer sound. Some manufactures use different types of yarn to create different nuances. The variety of possible sounds is numerous, but fairly subtle in the ensemble context. Beware that yarn is prone to wearing quickly when overplayed or used on metal instruments like vibraphone and cymbals.
Cord: Cord tends to create a more immediate sound with slightly brighter overtones because it is harder and usually wrapped much tighter than yarn. Cord-wrapped mallets are often used with marimba and vibraphone in ensemble settings as the instrument opens up faster and sounds clearer without the need for a harder mallet. This material also holds up longer and can elicit sounds from a wider range of instruments.
Rubber: Rubber, a less common wrapping material, tends to produce the most immediate response and most noticeable contact sound. Rubber-wrapped mallets can be extremely helpful in particularly thick orchestrations. They also can be used to emulate the sound of traditional xylophones and marimbas.
Cloth: “Parachute” or cloth wrap is a style of mallet where a sheet of cloth is draped over the mallet head and tightly tied. This type of mallet usually falls somewhere between rubber and cord in sound production.
Handle
Many percussionists debate whether the handle of a mallet influences the sound. The main concern with handles is the feel of the mallet when playing.
Wood: Wood handles provide more control, particularly when playing with four mallet grips. Due to the rigidity of wood, it is often used to make longer handled mallets, which can provide more leverage or reach.
Rattan: Rattan, a material similar to bamboo, provides more give and tends to feel softer in the hands. This give is thought to make rattan more forgiving to a wider range of touches and techniques without compromising sound. Due to its flexibility and the presence of nodes, rattan’s practical length is shorter than wood’s. It is also prone to warping over time. This can be undone, but it does introduce an additional concern.
Fiberglass: Fiberglass provides even more flex than rattan but doesn’t warp. Fiberglass handles usually are built in a two-step design comprising a plastic or rubber handle and a fiberglass shaft. These are either loved or hated by players. In the band room, you may need to worry about splinters if the mallets are abused.
My Choices
In my experience instructing ensembles, I have found that the most useful wrapped mallet is a medium vibraphone mallet with cord wrapping and a rubber core. Vibraphone mallets tend to be heavier than marimba mallets, generating a sound that can be heard over the winds and other percussion instruments. The cord wrapping maintains a clear articulation without going to a harder core.
Medium or medium-soft yarn mallets of a fairly heavy weight may be the second most useful as they blend the sound of the keyboards more during ballads and moments with thin orchestration.
When expanding the mallet collection of your percussion section, I recommend buying contrasting mallets rather than several hardnesses of the same type. Teaching students to use their touch to get brighter and darker sounds helps fill the gaps in your inventory. From a musical perspective, you are more likely to have an appropriate tool for the moment if your collection consists of contrasting rather than similar mallets. From an educational perspective, you are giving your students a larger tool box, which makes the challenge of selecting the right sound more intellectually rigorous and musical than pairing hard and soft with loud or quiet, which is painfully common in band rooms.
Marching bands are ingrained in our culture. You see them regularly at football games, school and college events, parades, military ceremonies and in organized competitions against each other. But how did they originate? In this article, we’ll take a closer look.
Two Varieties
Today in the United States, marching bands fall into two broad categories. One, referred to simply as “marching bands,” is what you’re likely to find at high schools, colleges, the military and in the competitive Bands of America program, which culminates annually in the BOA Grand National, Regional and Super Regional Championships.
The other is the drum and bugle corps (aka “drum corps”). Since 1972, this has mainly manifested itself in an organization called Drum Corps International (DCI), which has an extensive roster of corps nationwide and similarly holds annual championships every year.
Ancient Origins
The juxtaposition of musical instruments and the military goes back to ancient times. Armies used percussion and woodwind instruments as signaling devices that could cut through the din of a battlefield and transmit basic commands to soldiers.
The earliest military marching bands that historians have documented were from the Ottoman Empire in the 13th century. The Ottomans conquered vast swaths of territory in Northern Africa, the Middle East and southern Europe and brought their marching band tradition with them.
In the centuries that followed, the concept of military marching bands spread into northern Europe and eventually made its way to the new world.
Revolutionary Ensembles
In the 1700s, military marching bands appeared in Revolutionary-era America in the form of fife and drum corps. Fifes are high-pitched wind instruments whose piercing tones are audible at a great distance. The drummers in these corps used rope-tension drums, which were large compared to contemporary marching drums.
Fife and drum corps usually consisted of just a handful of musicians — often teenagers too young to fight — and provided not only battlefield communication, but music for drills and for when soldiers were on the march.
By the time of the American Civil War, fife and drum corps added the bugle as an additional melodic instrument. In addition, the rope-tension drums of that era were smaller, making them easier to march with at faster tempos. In those days, tempos ranged between 92 and 110 bpm.
Paging Mr. Sousa
Thanks in large part to famed composer and conductor John Phillip Sousa, marching band music expanded in terms of repertoire and instrumentation towards the end of the 1800s. Sousa wrote many iconic marches, including “Semper Fidelis,” the Marine Corps’ official song. He’s also credited with inventing the Sousaphone, a variant of the tuba, but with a wider bell, and a body shape that’s easier to march with.
Sousa conducted such ensembles as the Marine Band, the President’s Own Band — which played at presidential inaugurations and other state occasions — and later his civilian marching band, the Sousa Band. During Sousa’s era, marching tempos got faster. A good example is his iconic composition, “Stars and Stripes Forever,” which features a 120 bpm tempo.
Into the 20th Century
Around a hundred years ago, competitive drum corps were born in the form of programs sponsored by the American Legion and Veterans of Foreign Wars® (VFW). The first such corps, called the Senior Corps, was open to any age so that World War I veterans could participate. Later, in the 1930s, Junior Corps were formed, which had a maximum age of 21. “From after World War I until the mid to late 1960s, drum corps didn’t change very much,” says Dennis DeLucia, the color commentator for DCI broadcasts and one of the first musicians elected to the DCI Hall of Fame.
Loosening Up
By around the late 1960s, many who were arranging the music and designing the shows for drum and bugle corps were starting to become frustrated by the restrictions of key, instrumentation and tempo in the drum corps world. “Under the rules of the American Legion and VFW, you could only play what you could carry,” explains DeLucia. “Mallet percussion instruments were banned prior to the formation of DCI.”
But things were beginning to change. “Starting in 1974,” says DeLucia, “DCI allowed you to use one marching xylophone and one set of marching bells. In 1978, they allowed a marching marimba and a marching vibraphone.”
In the early ’80s, DCI made a rule change that ushered in the era of pit percussion. This allowed corps to supplement their marching instrumentation with a group of stationary musicians, called the “front ensemble.” Initially, the so-called “pit” was limited to large percussion instruments that couldn’t be carried while marching, but amplification was legalized in 2004, opening the gates to instruments that needed to be miked to be loud enough, such as marimbas. Electric guitars, electric and upright basses, and other “rhythm section” instruments were also approved at that time, followed in 2009 by electronic instruments such as synthesizers.
Enter Yamaha
Yamaha became a force in the marching band market in the United States in the 1980s. One of the reasons was the company’s “air-seal system” for drum construction. It offered superior consistency for making drum shells perfectly round — important for the drums to be easy to tune and to keep their tuning. For school band directors, those were critical attributes.
Another milestone occurred in the late 1980s, when bands and drum corps started to adopt a new type of snare drum head made of Kevlar or other types of laminated fabric — an innovation that also allowed the snares to be tuned much higher. However, these heads put more stress on the drums themselves, causing issues with breakage. In response, Yamaha was one of the leaders in developing a new drum design that could handle the higher-tension heads.
The company also made a considerable effort to find out what marching musicians needed out of their gear and developing products to match those needs — an initiative that continues to this very day. “They would bring some of their leading marching artists to the factory for two or three days at a time and literally work on shell depths for the tenor drums,” DeLucia says. “Does a 6″ tenor shell work better than a 6 1/2″ shell? What’s the best head configuration? All of those kinds of things were developed with useful input from the best marching instructors and players.”
In 1992, Yamaha became the first drum manufacturer to release drums in a variety of colors. Now, bands and corps had the option to purchase drums that matched the color of their uniforms. With the increased importance of the show aspects of marching music, particularly during competitive events, the ability to color-coordinate the instruments with uniforms was, and is, extremely important.
Want to learn more? Check out these related blog postings:
People often ask me how I got into mastering. I was a guy that played in bands my whole life, plus when I turned 18, I started working for IBM because I was also really fascinated by computers. The two interests led me to become involved in early computer audio.
What really sealed the deal for me was when I first saw a vinyl lacquer being cut, some 20 years ago. It really blew my mind. A friend took me to see the great Richard Simpson at his mastering studio in LA. It changed everything and I feel lucky that he let me be part of the whole experience. I went back there later that same week and basically begged him to teach me how to master. Later on, he came to work at Infrasonic, my mastering studio, and eventually I inherited his 1956 Neumann lathe. I spent a couple of years restoring it and that is the lathe we use in our Nashville studio now.
My mastering process today uses a combination of analog and digital gear. My main digital software is Steinberg WaveLab, which I’ve been using for decades. Up until recently I’ve been primarily running it on PC, but in our studios we have so many machines that we now run it on a combination of Macs® and PCs. I love the fact that it’s easy to use and works seamlessly on both platforms.
I use a significant amount of analog gear as well, and integrate it directly into Wavelab. A common scenario is that I will assemble the record there, do subtractive or corrective EQ in the digital world, and then send the signal to my favorite analog EQ processors. It’s a perfect combination for my needs.
So I got into mastering the old school way, first by cutting lacquers, and then adding computers into the process, along the way doing some audio engineering as well, both recording and mixing. A lot of people ask me what the differences are between mastering, recording and mix engineers. Well, typically, when you’re recording and mixing you’re working on one song at a time and concentrating on making that the best it can be. The mastering engineer’s job is to compile all of the individual mixes, knit them into a cohesive listening experience and deliver the final result for vinyl cutting, CD duplication and digital streaming. A mastering engineer is working on the project as a whole, trying to envision the listening experience rather than just focusing on an individual song.
That’s the background. Now let’s take a closer look at a topic that comes up often: how you should prepare your tracks for mastering.
Bus Processing
As a guy that used to be a mixing engineer, I love bus processing. I’m all about EQ and compression on the master bus. With that in mind, my philosophy is that you shouldn’t overprocess the mix. If you’re unsure about anything, do a mix without that processing. For instance, if you decide that you want to use limiting or compression on the bus and are not entirely sure if it’s right, it’s good to do a version without it … just in case. And if you are using mix bus compression and EQ, you should turn those on relatively early in the mixing process, because they will affect the sonic choices you make.
The same applies to bus limiting. I usually don’t recommend applying brickwall limiting when mixing, although I work with a number of top-notch mix engineers who almost always do so, and they do a really good job with it too. Typically, though, they are working in expensive rooms using high-end gear and listening through really great monitors. If you’re relatively new to mixing and your gear isn’t top-of-the-line — or if you’re mixing really hot — you might be tying the mastering engineer’s hands by preventing them from applying any necessary corrective measures to make the track sound good because everything is already cooked into the mix. My mantra is: don’t make it too loud, just make it sound good.
To Stem or Not to Stem?
The use of stems for mastering is another hot button for me. I typically don’t recommend creating stems [i.e., a set of submixes instead of a single overall mix] for mastering sessions. I feel a mixing engineer simply needs to create the best mix they can, and that a mastering engineer’s job is not to recreate the mix — it’s to enhance it and bring it to its fullest potential. Sure, I’ve mastered from stems when needed, but that’s usually a case where the artist needs to do a radio edit or something. But all in all, I don’t feel you should do stem mixing unless you absolutely have to.
Surrealist artist Salvador Dali once said, “Have no fear of perfection. You’ll never reach it.”
When Yamaha product manager Susumu Kumazawa was tasked with designing the two-channel Yamaha Flagship Hi-Fi 5000 Series, he began with the intent of aiming for perfection. What he soon discovered would change his own definition of what perfection was.
The “perfect” audio system is mostly subjective and is largely based on the individual taste of the listener and the type of music being listened to. That said, there are a number of key factors that must be taken into consideration when creating any Hi-Fi audio system: clarity, timbre, dynamics, definition, range and envelopment. From the electrical design to the aesthetic to the final sound quality, each element of an audio system must be scrutinized over and over until the direction is clear — not to mention the need to differentiate the system from those being offered by competitors. But sometimes you have to look beyond perfection to achieve your goal.
In this fourth and final installment of the Ultra Hi-Fi blog series of postings, we’ll explore the process that Kumazawa and the engineering team followed from concept to design to final product to create the Flagship Hi-Fi 5000 Series.
The Price of Perfection
One of the key concepts Kumazawa knew the system had to deliver was True Sound — the idea that there should be no barrier between the listener and the music, and that the listener should be able to hear the music just as the artist intended. To achieve this, he felt that he had to first identify his own personal connection to music. Accordingly, he turned his ear to the past and tapped into his own personal nostalgia.
In 2006, Yamaha introduced the A-S2000 amplifier and CD-S2000 CD player — products managed by Kumazawa, who took them to Europe as part of the official launch. However, the fruits of his labors did not meet with unqualified approval. “Some European reviewers said, “Your sound is perfect. But it’s not enjoyable. It doesn’t have musicality,”” Kumazawa recalls.
“Before I was an engineer, when I was a student, I loved music,” he continues. “[The philosophy was] “no music, no life.” I struggled with how to express enjoyment in music through products. But I’m an engineer, so I tried with technology to express musicality. So, before I design equipment, the concept is very, very important.”
Inspired by Music
To better understand how people get enjoyment from listening to music, he spoke with the chief Yamaha piano designer about sound and music from their respective viewpoints. “He said something interesting about openness,” Kumazawa remembers. “If there is a classical pianist playing in a huge concert hall, and you’re sitting at the top row of the hall, you should be able to hear them play pianissimo [very softly] but still have the sound reach you perfectly.”
This sense of openness would become one of three keystone ideas that Kumazawa would use to craft his audio goals with the 5000 Series, the other two being emotional connection and groove. He became convinced that the design had to feel special to the end user in the same way playing a musical instrument does when someone plays it. “Since we make musical instruments, touch is very important. This is why our products need to have a tangible interface,” he says. Once those concepts were in place, he was able to determine the necessary design elements. The C-5000 preamplifier and M-5000 amplifier, for example, offer a sense of rhythm with their physical design. The physical embodiment of music is represented by the vents on the top of each unit, which are similar to the lines of a stave in sheet music.
Challenge Accepted
When it came time to fabricate the actual components, it took 19 engineers in total, working closely with the Yamaha Research & Development and Production teams to create the four 5000 Series products.
There were several challenges that the engineers faced. One of the most daunting involved the construction of the left and right PCBs (Printed Circuit Boards) in the C-5000 preamp. In the early phase of development, the audio was not representing the soundstage correctly. The team made a breakthrough by unifying the two sides mechanically. This further emphasized the impact componentry can have on sound quality. “If you change the material of the circuit board, the sound changes,” Kumazawa explains. “Any part that is changed alters the sound.”
From initial concept to finished product, it took eight years to complete the NS-5000 speakers, three years for the C-5000 and M-5000, and five years for the GT-5000. And in order to showcase the uniqueness of the concept, no other Hi-Fi components were used as a comparison when building these products.
“Technically, we accomplished a perfect balanced audio transmission circuit, from cartridge to speaker output,” Kumazawa says proudly, “and our being part of a music company is clearly expressed by our system as a whole. Our motivation is that music should be expressed with more musicality. [This is why] we will keep challenging [ourselves].”
Like anything in life, when you are trying to achieve a goal, you need to be organized and have a clear sense of what you want to accomplish, and you have to go about achieving it methodically. It’s not enough to put in your 10,000 hours: you need to be targeted with your time. While we are all different and don’t necessarily share the same musical goals, I’d like to offer a number of suggestions that can help you effectively schedule your practice time and musical activities.
Prepare for Success
Practicing needs to be done with your full concentration, and without distractions. Here are some tips to make sure your situation is conducive to that.
Is your music space private, or do people walk through the area? It’s best to be alone. If other people have to be around, can you set things up so that you’re facing a wall, with possible distractions behind you?
Can you wear headphones so as to not be disturbed? (This also has the benefit of you not disturbing others.) All digital keyboard instruments provide headphone jacks. Practice time is the perfect time to use them.
Are you sitting in front of a computer screen? If so, turn off your email, browser and any sort of notification system that can distract you.
Likewise, turn off your phone, or set it to silent. You can return messages and calls later.
I have found — and many experts agree — that consistent dedication to practice on a daily basis is much better than a “cram” session or two per week. Both your fingers and your brain will absorb and master new tasks better when working on them over multiple sessions. So, if possible, try to carve out time every day for your practice regime. You may even find that being able to put in three or four brief practice sessions over the course of a day produces better results than trying to sit at the keyboard for many hours.
The goal is to always be practicing with full concentration and clear purpose, so after working on a repetitive task for a period of time (i.e., playing scales or a specific passage from a piece of music), try to get up for a few minutes and clear your head before moving on to the next phase. You’ll find that taking even short breaks can help you to return to the keyboard with renewed focus and purpose.
Define Your Goals
No matter what technical level you are at, what style of music you like to play, or what musical goals you have, these are the most common tasks that we keyboardists face:
Practicing scales, technical exercises and other chop-building activities
Learning/practicing compositions chosen to help improve your chops (i.e., Bach Inventions, Chopin Études, Bill Evans jazz transcriptions, etc.)
Working on stylistic elements like walking bass lines, chord voicings and inversions, etc.
Developing hand independence
Learning standards and other general purpose tunes as well as repertoire for specific playing situations (i.e., a new band, a worship service, etc.)
Memorizing repertoire
Developing transposition skills by playing tunes in different keys (this also helps in truly understanding a song’s harmonic and melodic structures)
Learning solos from recordings
Developing soloing concepts over chord changes
Refining rhythmic skills by playing along with recordings or backing tracks/drum grooves
Improving reading/sight-reading
Which of these are you facing? Think about it and write them down as a list. If you just say “all of them!” you need to prioritize and decide on a reasonable number of tasks to start with: You can always adjust your goals and add others later as you improve in some areas. Bear in mind that sometimes a gig (or something in your non-musical life) comes up that takes priority for a week or two; when things return to “normal,” you can return to your ongoing studies.
Establish Your Practice Routine
Now you can take your available practice time each day and break it up into the tasks you need to cover. Don’t forget that every good practice session needs to start with some simple warmup before you even touch the keyboard! This only takes a few minutes, and is well worth the time.
Once warmed up, I like to do some slow to medium exercises to get comfortable. Often I begin by just playing some scales at a moderate tempo. (A previous “Well-Rounded Keyboardist” column offered some suggestions for ways to practice scales.) A common trap you might fall into (I know I do!) is spending too much of my time on this task, so I suggest this take up no more than about 20% of your practice time. I tend to pick a few keys for each scale on a given day, and then play it in a few different keys the next day before returning to the first day’s keys, and so on. This way, I am getting some variety as well as some repetition.
Let’s assume you are approaching learning a new piece of music. This activity is going to change from day to day, as you first need to suss out the piece (learn the notes, the rhythms, fingerings etc.) and then later you will likely divide it into sections that you’ll play repetitively. Obviously you can’t do all this in one session, so I suggest you allot another 30% or so of your available time to this task. That still leaves you with around 50% of your available practice time to spend on other goals in your defined list.
Last but not least, whatever you do in your practice sessions, don’t forget to carve out some time to just play freely and have some fun!
The violin is one of the oldest instruments still in wide use all over the world. In fact, the earliest versions of these stringed instruments closely resemble what you see being played in your community’s orchestra today. The traditions of violinmaking have been passed down for generations, and some of the most sought-after vintage violins are from the 18th and 19th centuries.
The growth of school music programs in the 1950s sparked by the post-war baby boom caused greater demand for musical instruments in general, and violins in particular. Unfortunately, the age-old and venerated tradition of skilled luthiers making violins by hand gave way to more automated processes in the form of woodworking machinery to speed production and meet the increased demand. The result of these processes was a flooding of the market with violins that were out-of-tune, hard to play, and fragile. Ever since then, many students — and their parents — have had to choose between a cheap violin that may last only a few years and a very expensive, luthier-made instrument.
Nearly a decade ago, Yamaha sought to bridge the gap by providing those looking for a high-quality, durable student violin with an affordable instrument that had excellent playability and warm sound to inspire the next generation of young musicians. The result of those years of development is the YVN Model 3 family of violins, which embody the most significant technical advancements in violinmaking since the advent of the instrument hundreds of years ago.
Building upon methods pioneered by Yamaha in the manufacture of percussion and wind instruments, the YVN Model 3 is built with the accuracy normally associated with much more expensive hand-built models … and, as a bonus, they are more environmentally friendly.
Traditional methods of violinmaking involve the carving of solid wood into the tops and backs of the violin, yielding wasted material and inconsistencies caused by climate and material variations. The YVN Model 3utilizes the thickness and arch shape of traditionally made instruments, but its proprietary graduated “press-formed” spruce top offers exceptional resonance, and the three-layer construction of the tops and backs uses just one-third of the amount of wood previously consumed. These techniques give the instrument more consistency as it ages and when experiencing environmental changes such as alterations in temperature and humidity.
Whereas luthier-built violins rely on handcrafted techniques to build a violin, the YVN Model 3 is made with computer-assisted craftsmanship. This ensures that these violins are easier to service than traditional string instruments. Because every part — including those that have been historically difficult to repair — is constructed with a high degree of precision, repair and replacement are simple tasks, making it both faster and more cost-effective to keep a Model 3 in playing condition. Gone are the days when custom work was required to fix simple violin mishaps!
Click here for more information about the YVN Model 3 family of violins.
There is no bigger name in film scoring than Hans Zimmer. With an Academy Award®, four Grammys® and two Golden Globes® to his name, Hans is the head of the film music division at DreamWorks™ studios and one of the many music professionals and recording artists worldwide who use Steinberg Cubase. In this video, he describes his custom-built studio and talks about his long relationship with Cubase, focusing on one of its key advantages: giving composers the tools to work with classical orchestras, thus supporting the creation of new orchestral works for film scores.
Nylon-string guitars are a completely different animal than steel-string or electric guitars, right?
Well, that’s been the conventional wisdom … until now. But with the recent introduction of the Yamaha NX Series, you may have to reorient your thinking. That’s because these six innovative acoustic-electric nylon-string guitars have been developed with the needs of today’s performer in mind, with contemporary body styles and modern preamp and pickup systems.
If you’re an electric or steel-string player looking to explore the beauty of nylon-string sounds, you’ll want to check out the three NTX models — the NTX1, NTX3 and NTX5. They all have a slimmer neck profile, narrower nut width and thinner body than a typical classical guitar, thus providing a more familiar playing experience. In addition, their 22-fret necks (24 frets in the case of the top-of-the-line NTX5) extend their range beyond that of standard nylon-string instruments.
If you’re already used to playing classical guitar, the three NCX models — the NCX1, NCX3 and NCX5 — have a traditional neck profile and width, along with a standard nylon-string guitar body depth, but their advanced electronics ensure superior amplified sound.
All NTX and NCX guitars come in a variety of finishes and have solid tops of selected woods, including solid European spruce on the NTX5 and NCX5 models:
The NTX3, NTX5, NCX3 and NCX5 models incorporate the Yamaha Atmosfeel™ preamp / pickup system, which provides consistently balanced and natural sound even at full performance volumes. It’s accessed via three small knobs on the side of the guitar (Mic Blend, Master Volume and Treble EQ), allowing you to quickly dial in the desired settings, but under the hood there are three distinct components:
– An integrated undersaddle piezo pickup with individual string sensors that capture only the mid and low frequencies, thus eliminating the characteristic brittleness of piezo pickups.
– A unique synthetic sheet transducer that captures the highs.
– An internal microphone that captures overall body resonance and “airiness”.
NTX1 and NCX1 models incorporate the same integrated piezo pickup, along with preamps featuring 3-band equalizers with adjustable mid frequencies. But whichever model you choose, Yamaha craftsmanship ensures that all NX Series guitars have exceptional playability and tone.
Want to know what top guitarists Tim Pierce, Tariqh Akoni, Andy Abad, Mike Adams, Trev Lukather and Destiny Petrel think of the new NX Series? Check out the video:
Click here to learn more about Yamaha NX Series guitars.
I think we’ve all had this disparaging remark (or something similar) hurled at us by a friend, foe, relative or significant other at one time or another.
Well, there’s actually a good reason why at least part of you shouldn’t grow up.
It turns out that the childlike sense of wonder we all enjoy in our growing years can help us in our work and creativity by keeping things fresh and fun.
How do you actually go about taking that wonder and turning it into something you can use as an adult? It’s not complicated: Slow it down. Keep things uncomplicated. Be playful. And, perhaps most importantly, keep learning.
Slow It Down
We all know how fast our world moves. But by purposely slowing your mind down, you can more easily open it up to new ideas. A Psychology Today article by Greg Levoy entitled7 Ways to Spark Your Sense of Wonder recommends that the reader do exactly that, citing a book called Wanderlust, that, in the author’s words, “talks about a peculiar fashion in mid 19th-century Paris, in which strollers sometimes took turtles for walks in the parks, the better to slow their pace and maximize the connoisseurship of their amblings.” While we probably won’t be walking turtles, the point is clear. Just a few days ago I was deeply challenged by a piece of music I was writing, and I made a conscious decision to slow everything down in my mind. Sure enough, it opened me up to go in a successful new direction.
Keep Things Uncomplicated
Children keep things simple because they know no better. It’s an approach I try to take as often as possible, because in the world of writing music for television or film, one of the golden rules is that you can’t step on the dialog, ever. I recently did a session with a co-writer / orchestrator. She wrote a great melody, but I found myself telling her, “Perfect! Now take that and write the same thing with half the notes.” At first she laughed, but you know what? It worked. The final result had a two-note melody that kept the piece spacious and effective … and it achieved the goal of not interfering with the dialog in any way. While it’s not always the case, sometimes less is more.
Be Playful
Kids in a playground are the picture of innocence. They’re simply laughing, running, jumping and playing, with no sense of inhibition or self-consciousness. In the same way, one of the joys of sitting down with an instrument is to be playful. Sometimes I’ll pick up my guitar and just play, without intent or purpose. Similarly, if I’m in a room with some musicians and the idea is fighting us, I find it useful to step back from the seriousness and just play — usually some heavy riff like “Whole Lotta Love” or “Walk This Way,” just to lighten up the energy and break the tension. More often than not, we can then go back to our mission and get the work done … and with a happier, more positive feel.
Keep Learning
Children are sponges for information and knowledge from those who are smarter than they are. Levoy’s article recommends that you “seek out displays of mastery and genius. Immerse yourself in the works of anyone who’s won a Pulitzer, Nobel, Tony, Grammy, Oscar, Olympic or MacArthur award. Stop and stare whenever you enter grand lobbies and atriums. Get a season pass to the art museum. Put the Astronomy Picture of the Day website on the toolbar of your computer.”
A 2018 Time magazine special edition on “The Science Of Creativity” included an article by renowned Leonardo DaVinci biographer Walter Isaacson entitled Learning from Leonardo. In it, Isaacson notes that, “At a certain point in life, most of us quit puzzling over everyday phenomena. We might savor the beauty of a blue sky, but we no longer wonder why it is that color. Leonardo (DaVinci) did. So did Einstein, who wrote to a friend, “You and I never cease to stand like curious children before the great mystery into which we were born.” We should be careful to never outgrow our wonder years or to let our children do so.” Seems to me that DaVinci and Einstein were onto something!
Sometimes we need to be reminded that life, music and playing an instrument can and should be fun. While many of us take our jobs and careers seriously, there’s always room to simplify, to be playful and to keep learning. By retaining that childlike sense of wonder and applying it to our individual crafts, we can push forward while looking backwards.
You may have noticed that your mixing console has buttons labeled PFL, AFL, SOLO or CUE. All have the basic function of allowing you to hear a single channel (or bus) in isolation (something called soloing), but they also differ in important ways and have multiple usages. In this article, we’ll describe each, and tell you how to use them in live sound.
PFL
PFL is an abbreviation for “Pre Fader Listen” (or “Pre Fader Level”), and it’s a feature found on most mixing consoles designed for live sound. You’ll usually find a PFL button located near the fader of every input channel. When you press it, the sound from that one channel is routed to the headphone jack (often summed to mono, even if it’s a stereo channel), and all other signals are muted in the headphones. (If the mixer has a “monitor” or “cue” output jack, the PFL signal can usually be routed there, either instead of, or in addition to, the headphone jack.)
There’s also normally an LED associated with each PFL button so you can see at a glance which channels are being soloed; some consoles even have a warning light that blinks whenever one or more PFL buttons are pressed, so that you’ll know what you’re hearing in your headphones is different from what’s being heard in the main FOH (Front of House) mix. Turning off PFL is easy: All you have to do is press the button(s) a second time.
The key thing to remember is this: PFL does not isolate the channel in the main left/right mix; it only does so in the headphones (and/or a “monitor” or “cue” output). In other words, the sound coming from the PA during a show won’t be affected if you hit one of these buttons.
PFL can be helpful in a variety of situations. For one thing, it allows you to instantly identify whether or not a particular microphone or instrument is connected to your mixer. Simply put on your headphones and press the associated channel’s PFL button. If you don’t hear anything and the musician is playing or singing, there’s nothing connected there. PFL is also a great way to check wireless microphones before a show to make sure they are working!
Or suppose you’re mixing a show and you suddenly hear a hum through the PA system. As the old saying goes, “the show must go on,” so you can’t just stop the musicians and listen to each channel separately in an effort to find the problem. However, if you PFL each channel one at a time, you’ll be able to quickly find the source of the noise — and without interrupting or interfering with the show in any way.
Most mixers, including Yamaha MG and MGP Series models, allow you to PFL more than one channel at a time, which can be useful if you need to hear how two channels are interacting with each other. But remember that the signal you’ll hear in your headphones is pre-fader — so there’s no point in trying to create a mix by pressing PFL on a bunch of channels.
PFL also helps with setting input gains correctly — an important part of live sound called gain staging. Here’s how it works: The input channels on many mixers (including Yamaha MG Series models) provide a two-color LED to show input signal, where you’ll see green for “signal present” and red for “overload.” That’s useful, but there may be times when you want a more detailed view of the input level, like when you’re setting the gain on the microphone for a dynamic lead vocalist. Pressing the PFL button on a channel temporarily “borrows” the main left/right meter and reassigns it to that input channel, giving you a more accurate way to set the input gain. When you turn off PFL, the main left/right meter reverts to showing signal for the main left/right mix.
By the way, since PFL is pre-fader, you can actually have a channel fader all the way down while you set the input level, then raise it when you are confident that the input level is set properly.
AFL
AFL, which stands for “After Fader Listen” (or “After Fader Level”), is a function related to PFL, though it’s less commonly used and is usually applied to output buses (that is, collections of outputs) such as subgroups, aux send masters and stereo or mono master outputs, as opposed to individual channels. AFL, which is found on Yamaha MG and MGP Series mixers, is a great way to hear which channels are contributing to an output bus. For example, if you press AFL on the Aux 1 output of a Yamaha MGP32X, you’ll hear all of the channels that are being sent to Aux 1, which is really handy when you want to preview a monitor mix. Similarly, pressing AFL on a subgroup will allow you to hear all of the signals that have been assigned to that subgroup.
SOLO
Some mixing consoles simply offer buttons labeled “SOLO” instead of “PFL” or “AFL.” In those cases, you need to carefully check the documentation to determine if these are PFL or AFL. A word of caution: If channel solo buttons are AFL, they operate post-fader, meaning that the channel fader must be raised in order to hear the isolated signal in the headphones — which also means that the associated signal might be heard in the house mix.
In addition, if channel soloing on a particular console is AFL, pressing the SOLO button temporarily shows that channel’s input level on the main left/right meter, but the meter will be accurate only if the channel fader is set to “0” — that is,“unity” gain. (See our Tools of the Trade blog on gain staging for more information.)
CUE
Yamaha TF Series mixers provide CUE buttons for all input and output channels instead of PFL, AFL or SOLO. Pressing CUE on an input channel works the same as PFL, but you can choose pre- or post-fader listen (i.e., PFL or AFL) for the output channels. This gives you the option of listening to an output bus either before or after the output fader, enabling you to preview a monitor mix in your headphones before you send the signal to an onstage monitor. There’s also a choice of Mix Cue (where multiple channels can be cued at the same time) or Last Cue (where only one channel may be cued at a time).
SIP
Last but not least, be aware that some mixers (mostly those designed for recording and not live sound) have a feature called “solo-in-place” (SIP), which, unlike PFL, does affect the main left/right mix. If you’re doing a live show and you see buttons labeled that way, approach with extreme caution!
Every January, the entire musical instruments industry — manufacturers, dealers, artists, fans and the merely curious — convenes in Anaheim, California for the annual event.
If you weren’t able to make it to the 2020 show, these were some of the hottest new offerings from Yamaha.
YC61 Stage Keyboard
Reproducing authentic organ sound, control and expressiveness in a mobile package has long been a Holy Grail for keyboard players. The YC61 Stage Keyboard summons this spirit into the 21st century, with a newly developed Virtual Circuitry Modeling (VCM) tone generator that models the behavior of vintage electronics for an authentic tonewheel organ sound, along with a new VCM Rotary Speaker effect that replicates the two-speed spinning speaker typically used to amplify these organs. Organists will appreciate familiar controls such as drawbars and percussion switches, as well as the ability to customize “under the hood” parameters such as drawbar leakage, key click and rotor speed for an expressive and unique sound.
But the YC61 goes beyond organ sounds. Two comprehensive “Keys” sections offer authentic acoustic pianos, soulful electric pianos, realistic strings and brass, analog-style synths and more, plus dedicated effects like delay, chorus and distortion. And thanks to its aluminum construction, the YC61 is as rugged and roadworthy as it is light in weight — under 16 pounds!
SLB300SK Silent Bass™
The SLB300SK Silent Bass leads the next generation of electric upright basses, with advancements that allow the bassist to control their sound with the press of a button. The original design of the Silent Bass gave players a true ergonomic feel by including all the touch points of an acoustic upright bass. Newly incorporated Studio Response Technology (SRT) allows the SLB300SK to model an acoustic bass played through different high-end acoustic microphones, ranging from the clear, warm sound of a dynamic microphone to the well-balanced rich timbre of classic vintage vacuum-tube microphones.
The SLB300SK can be broken down into an easily transportable “subway friendly” instrument that can be packed into a TSA case without fear of being damaged en route. It also allows the player to perform in places where they may have previously feared to bring an expensive acoustic instrument, such as an outdoor gig on a hot, humid day.
NX Series Guitars
NAMM saw the debut of the new NX Series of nylon-string acoustic-electric guitars. The three NTX models (NTX1, NTX3 and NTX5) are designed to make it easy for electric and steel-string acoustic guitar players to add the warmth and beauty of nylon-string sounds to their tonal palettes. They have slimmer bodies, shallower neck profiles, narrower fingerboards and longer necks than most classical guitars, providing a more familiar playing experience. The three NCX models (NCX1, NCX3 and NCX5) have classical-style neck profiles and fingerboards and are designed for experienced nylon-string players in search of superior amplified sound.
The NTX3, NTX5, NCX3 and NCX5 models incorporate the Yamaha Atmosfeel™preamp / pickup system for consistently balanced and natural amplified sound. An integrated undersaddle piezo pickup with individual string sensors captures only the mid and low frequencies (eliminating the characteristic brittleness of piezo pickups), while a unique synthetic sheet transducer captures the highs and an internal microphone captures overall body resonance and “airiness.” NTX1 and NCX1 guitars incorporate the same integrated piezo pickup, along with preamps featuring 3-band equalizers with adjustable mid frequencies. Careful wood selection combined with renowned Yamaha craftsmanship results in instruments of exceptional playability and tone, and all NX guitars have solid tops, including solid European spruce on the NTX5 and NCX5 models.
SBP0F4H Stage Custom Hip Drum Set
The new SBP0F4H Stage Custom Hip drum set is a compact version of the Yamaha Stage Custom Birch, one of the most popular venue backline kits the world over. Designed for use in multiple genres and by a wide variety of drummers (such as street performers, educators, hybrid players using DJ/electronic gear and home recording studio musicians), this set is also a great at-home practice solution with low volume setups.
The Stage Custom Hip utilizes 100% birch 6-ply shells and includes a 20″ x 8″ bass drum for a deep low end as well as smaller footprint, a 13″ x 5″ snare, a 10″ x 5″ rack tom and a 13″ x 8″ floor tom that can be used as a snare tom, allowing drummers to explore new sounds with this one-of-a-kind drum set configuration. Additional features include steel triple flange hoops and a compact single tom holder for easy transportation. Stage Custom Hip Series drum kits are available in three beautiful finishes: Natural Wood, Raven Black and Matte Surf Green.
P22 SILENT Piano™
NAMM saw an announcement from Yamaha about several innovative upgrades to the company’s venerable P22 Upright Piano, which has been widely used by schools and music educators for nearly half a century. For one thing, a redesigned music rack area allows the entire width of the P22 to support sheet music — vital when an instructor or student is juggling multiple pieces. In addition, the fallboard now incorporates a soft-close mechanism to prevent dropping; instead, it slowly glides to the closed position even if someone attempts to slam it on purpose, thus protecting both errant fingers and the piano itself.
In addition, the P22 can now be fitted with optional Yamaha SC2 SILENT Piano technology, ideal for quiet practice or in a lab where multiple pianos are located in the same room. When activated, the sound no longer comes from the strings being struck but instead comes from a high-quality digital tone generator featuring the voices of the world-class Yamaha CFX and legendary Bösendorfer Imperial concert grand pianos, with accurate reproduction of all internal resonances, ensuring realism. The SC2 SILENT Piano system can also record performances internally or onto a USB thumb drive — a perfect way to evaluate students’ progress — and can interface to computers as well as the Yamaha Smart Pianist app. Dual headphone jacks make side-by-side practice possible, and the P22 SC2 can also output audio to a music lab system such as the Yamaha MLC-200.
PSRSX900/700 Arranger Workstations
Incorporating both content and powerful features from the flagship Yamaha Genos Digital Workstation keyboard, the new PSR-SX700 and PSR-SX900 Arranger Workstation keyboards are affordable all-in-one instruments ideal for composing, arranging and performing. They offer a brilliant 7-inch color touchscreen, along with six assignable buttons and a joystick controller for maximum expressive possibilities. There’s instant access to a huge variety of international content, as well as new Voices and effects inherited from Genos. Arrangements created with the built-in 16-track sequencer can be output as studio-quality audio files that can be played back on smart devices or computers.
The PSR-SX900 is equipped with a newly designed bi-amped Expansive Soundfield Speaker system that delivers full, balanced sound for both the player and the audience. It comes with 4GB of internal memory, 1337 instrument Voices, 56 Drum/SFX kits and 480 XG Voices, as well as 329 Multi Pad banks. In addition, there are eight insert effect slots, a Chord Looper function, Bluetooth® audio and Main L&R line outputs, plus Sub L&R line outputs and two USB ports. The PSR-SX700 includes many of the same features at a lower price point, with 1GB of internal memory, 986 instrument Voices, 41 Drum/SFX kits and 480 XG Voices, as well as five insert effect slots, 226 Multi Pad banks, Main L&R line outputs and one USB port.
YBS-480 Intermediate Baritone Sax
Yamaha intermediate baritone saxophones are used by thousands of schools in the United States and around the world. They have earned a stellar reputation for their outstanding playing characteristics, intonation and durability, and are sought after by scholastic marching, jazz and concert band programs. The YBS-480 Intermediate Baritone Saxophone unveiled at NAMM is the company’s first new baritone saxophone in 35 years.
The YBS-480 offers updated ergonomics to make it easier to hold. Also added is the ability to use a detachable peg, making the instrument more accessible to players of all sizes. The redesigned bore and neck are modeled after YBS-62 professional model Yamaha saxophones, which improve the intonation of the horn.
Gen III Chicago and New York Artist Trumpets
The Generation III Chicago and New York Artist Model trumpets are the latest and most advanced instruments in the renowned line of Yamaha Xeno Artist Model trumpets.
Intended to meet the critical demands of today’s top trumpet players, these instruments are celebrated for their responsive playing feel, nuanced sound characteristics and accurate, even intonation. The new Generation III models feature a redesigned two-piece construction valve casing, along with unified parts such as the water-key set-up and tuning slide radius. These design alterations create an improved upper register and sound throughout the range, and more stable intonation for players at all levels, especially those performing in the most critical situations. There are two Bb and three C models to choose from — the YTR-9335CHS III, YTR-9335NYS III, YTR-9445CHS III, YTR-9445NYS-YS III and YTR-9445NYS-YM III — making them ideal for a large variety of players, from those looking for a more modern style to those who prefer a more traditional feel and resistance.
THR-II Desktop Amps
These three new Yamaha THR-II desktop amplifiers provide guitarists with a perfect combination of professional-quality tones, convenient wireless operation, and stylish good looks — whether they are practicing, recording, or playing along with their favorite music.
Employing Virtual Circuitry Modeling (VCM) technology to deliver the tone, feel and expressive nuances of boutique tube amplifiers, all provide 15 different amp tones, three modeled microphone sounds for acoustic-electric guitars, three bass amp models, and three flat voicings for use with other instruments, as well as stompbox-style modulation effects and studio-quality reverbs and delays. There’s also a USB port for direct recording and playback, and bundled Steinberg software allows desktop and mobile recording. Bluetooth support allows wireless audio playback from paired devices, and the THR30II WL Wireless and THR10II WL Wireless models even come with a built-in rechargeable battery and an integrated wireless receiver which, when combined with an optional Line 6® Relay® G10T transmitter, offer players a fully cable-free experience. For more information, see our blog article “Spotlight on THR-II.”
Steve Gadd Signature Snare
The new Steve Gadd Signature Snare Drum commemorates a relationship of more than 40 years with renowned Yamaha Artist Steve Gadd, who has recorded with an array of distinguished artists, including Aretha Franklin, Stevie Wonder, Barbra Streisand, Paul McCartney, Al Jarreau, James Brown, Joe Cocker, Nancy Wilson, Bob James, Stanley Clarke, Al DiMeola, George Benson, Chick Corea, Steely Dan and Paul Simon.
To celebrate this milestone, Yamaha and Gadd worked together to release a signature snare drum with a 14″ x 5.5″ steel shell and a new Steve Gadd 10-strand wire, which enhances the snare articulation. Limited to only 200 to be sold in the U.S., the drum’s steel shell exterior and aluminum die cast hoops are set in a distinctive black nickel. Additional features include a Steve Gadd signature badge that accompanies the shell, a black tuning key and a special certification card.
DZR/DXS-XLF / CZR/CXS-XLF White Speakers
Yamaha also announced at NAMM that it is adding a white finish version for its powered DZR/DXS-XLF and passive CZR/CXS-XLF professional loudspeakers and subwoofers. These cabinets fit a broader range of sound system requirements, especially in spaces where aesthetics and design are equally important as sound coverage and performance, such as churches, museums and upscale environments like high-end retail or hospitality venues.
The DZR line of powered speakers, along with the DXS-XLF powered subwoofers, use high-performance components and the latest DSP to provide superior audio quality, with minimal latency and phase distortion. Both lines are available with optional Dante integration for flexible routing and easier system configuration and setup. The CZR series of passive speakers are ideal for installations using remote power amplifiers. Adding the companion CXS-XLF subwoofers extends a sound system’s bottom end down to 29Hz for bass-heavy content. All models are housed in a lightweight, durable, 15mm-thick plywood cabinet, coated with military-grade polyurea to withstand the rigors of travel, handling and weather.
See you at next year’s NAMM — and remember, if you can’t make the show in person, you can always catch the highlights here!
Click here to learn more about the full line of Yamaha products.
As an online guitar instructor and Yamaha guitar clinician, I like to share ideas and concepts with students that they can apply quickly to their own playing, with a minimum of technical effort.
I recently spent several days in Nashville filming two new guitar courses. One course focuses on the art of looping rhythm and lead guitar phrases, while the other demonstrates how to apply major and minor pentatonic scales (i.e., five-note scales) over modal progressions.
Both will be available for downloading in the near future, but in the meantime, I want to give you a taste of what’s to come with a lesson on evoking Dorian mode with the minor pentatonic scale — a shape every guitar player knows and loves.
Start Harmonizing
Let’s begin in the key of G and break down the notes, harmony and resulting modalities.
The G major scale consists of the notes G, A, B, C, D, E and F#.
As discussed in a previous posting, every major scale consists of seven tones, and those tones are used to build chords — a process known as harmonization. The G major scale harmony chords are Gma7, Ami7, Bmi7, Cma7, D7, Emi7 and F#mi7(b5). G major scale modes are created by simply inverting the notes to start on each scale degree (that is, step), as follows:
G Ionian = G A B C D E F# G with a tonal center of Gma or Gma7
A Dorian = A B C D E F# G A with a tonal center of Ami or Ami7
B Phrygian = B C D E F# G A B with a tonal center of Bmi or Bmi7
C Lydian = C D E F# G A B C with a tonal center of Cma or Cma7
D Mixolydian = D E F# G A B C D with a tonal center of Dma or D7
E Aeolian = E F# G A B C D E with a tonal center of Emi or Emi7
F# Locrian = F# G A B C D E F# with a tonal center of F#Dim or F#mi7(b5)
(Note: Modes are simply alternate scales created by starting at different steps within a scale. For more information, see my two-part blog series about major scale modes.)
I’m going to use the chords Ami, C and D from the G harmonized major scale to build an A Dorian chord progression. Typically, the first chord of the progression will be the tonal center resolution point of the progression. The tonal center chord determines the modality, as shown here:
Creating Melodies and Solos
Now that we have an A Dorian chord progression, we can assign the A Dorian mode (that is, the G major scale) to create melodic lines and solos. However, rather than using the seven-note Dorian mode, let’s use the five-note A minor pentatonic scale instead. This will give us all the chord tones of Ami7, plus the perfect 4th — a scale choice that’s going to sound extremely strong and powerful.
Using the A minor pentatonic scale alone won’t give us the characteristic note of the A Dorian mode (F#), but we can easily add that note … or we can simply play a B minor pentatonic scale by shifting the shape at the fifth fret up to the seventh fret. The notes we get by doing this are:
B = 9th of the Ami9 chord
D = Perfect 4th (this exists in the A minor pentatonic scale as well, although it’s not a chord tone)
E = Perfect 5th of the Ami9 chord
F# = Major 6th (the A Dorian characteristic note)
A = Root note of the Ami9 chord
As you can see, we get three chord tones of the Ami9 chord, as well as the Major 6th characteristic note, so a great approach would be to glide between the same minor pentatonic shapes at the two fretboard locations (fifth fret and seventh fret).
To give you even more options, try playing the same minor pentatonic shape at the twelfth fret (E minor pentatonic). Here are the notes of the E minor pentatonic scale:
E = Perfect 5th of the Ami9 chord
G = Minor 7th (b7) of the Ami9 chord
A = Root note of the Ami9 chord
B = 9th of the Ami9 chord
D = Perfect 4th (not a chord tone)
As you can see, the E minor pentatonic scale gives us four chord tones of the Ami9 chord.
The cool result of using all three fretboard locations is that playing the same lick in each location will yield varying notes, and therefore, different musical results. Give it a try! I think you’ll like being able to expand your musical palette simply by shifting the same information to a new location on the guitar neck.
The Video
In this video, fellow guitarist Brett Papa and I demonstrate how to use the three minor pentatonic scales described above to create beautiful Dorian-flavored solos:
It’s a great lesson that lasts about an hour, but I think you’ll enjoy the banter and the value of the tips and tricks being shared.
The Guitar
The guitar I’m using in this video is a Yamaha Revstar 502TFM that features a subtle flame maple top in a Vintage Japanese Denim finish. The body and neck are solid mahogany, and the fretboard is rosewood with jumbo frets and a 13-inch fretboard radius. The pickups are Yamaha P90 single coils; I especially like the tone of the neck pickup, which I think sounds really warm and bluesy. The guitar is running into a Line 6 Helix, and all the tones were recorded directly to Brett’s digital audio workstation.
The Wrap-Up
It’s easy to expand the potential and value of the pentatonic-based licks that are commonly used in improvisations simply by shifting them into different fretboard locations. Playing the same licks in new locations will yield fresh musical ideas that work independently or in combination with other locations. It’s a great way to improve instantly … by working smarter (not necessarily harder) on your craft.
It’s the most exciting time of the year for movie buffs. The 2020 Academy Award® nominations have just been announced, and you can start marking your ballot. If you didn’t make it to the theater to watch these nominated movies, not to worry: You can rent or buy them from your favorite streaming service … and have a much more relaxed viewing experience in the comfort of your home. Time to begin planning your watch parties!
Joker
This DC Comics™ origin story about Batman’s nemesis garnered 11 nominations to lead the field. Star Joaquin Phoenix’s gripping portrayal of the tortured villain gives nuance to the legend. For you audiophiles out there, this film’s nominations for score, sound editing and sound mixing make it a must for watching on your 5.1-channel surround sound setup. (Note that this movie may be disturbing to some viewers.) Nominations include: Best Picture, Best Director (Todd Phillips), Best Actor (Joaquin Phoenix). Available on Amazon Prime, Google Play, Vudu and YouTube™.
Parasite
This recent Golden Globe Awards winner for Best Motion Picture – Foreign Language tells the story of two Korean families at opposite ends of the social scale and an intruder who threatens the delicate balance of their fabricated relationships. Nominations include: Best Picture, Best Director (Bong Joon-ho), Best Foreign Language Film. Available on Amazon Prime, Vudu and Google Play.
Pain and Glory
Director Pedro Almodóvar’s autobiographical tale of an aging director looking back over key events that shaped his life features an outstanding performance by Antonio Banderas. Nominations include: Best Foreign Language Film, Best Actor (Antonio Banderas). Available on Amazon Prime and Vudu.
Once Upon a Time in Hollywood
This movie set in the 1969 Los Angeles film industry features the first pairing of stars Leonardo DiCaprio and Brad Pitt, with Quentin Tarantino at the helm. Nominations include: Best Picture, Best Director (Quentin Tarantino), Best Actor (Leonardo DiCaprio), Best Supporting Actor (Brad Pitt). Available on Amazon Prime, Google Play, Vudu and YouTube.
The Irishman
This subtly powerful depiction of the events surrounding the infamous disappearance of labor leader Jimmy Hoffa features living legends Robert De Niro, Joe Pesci, Al Pacino and director Martin Scorsese. Nominations include: Best Picture, Best Director (Martin Scorsese), Best Actor (Robert De Niro), Best Supporting Actor (Joe Pesci, Al Pacino). Available on Netflix.
Marriage Story
This compassionate look at a family’s emotional journey through the trauma of divorce features gripping performances and deft direction. Nominations include: Best Picture, Best Actor (Adam Driver), Best Actress (Scarlett Johansson), Best Supporting Actress (Laura Dern). Available on Netflix.
The Two Popes
The Catholic church is at a crossroads in this tale of outgoing conservative Pope Benedict and incoming liberal Pope Francis. Nominations include: Best Picture, Best Actor (Jonathan Pryce), Best Supporting Actor (Anthony Hopkins). Available on Netflix.
Judy
Renee Zellweger steps up to the challenge of playing screen legend Judy Garland. Nominations include: Best Actress (Renee Zellweger). Available on Amazon Prime, Google Play, Vudu and YouTube.
Rocketman
This fantasy biopic of pop icon Elton John recounts his flamboyant early years. Nomination: Best Original Song ([I’m Gonna] Love Me Again). Available on Amazon Prime, Google Play, Vudu and YouTube.
A Beautiful Day in the Neighborhood
Who better than Tom Hanks, recipient of the Cecil B. deMille award at this year’s Golden Globes, to play TV’s Mister Rogers in this tale of a skeptical reporter’s redemption through decency and kindness? Nomination: Best Actor in a Supporting Role. Available on Amazon Prime.
Knives Out
This entertaining old-school murder mystery from writer/director Rian Johnson (Star Wars: Episode VIII – The Last Jedi, Looper), features an all-star cast and plenty of plot twists and turns to keep you guessing till the very end. Nomination: Original Screenplay. Available on Amazon Prime.
Looking for more ways to enjoy your home theater? Check out these blog posts:
Recently, my father-in-law, Al Gorgoni, shared the notion that an artist doesn’t know where they’re going until they get there. Wise Al is well-acquainted with the mysterious thing we call creativity. He played guitar on hundreds of sessions in the ’60s, including one where he came up with the iconic riff on Van Morrison’s “Brown Eyed Girl.”
This observation stuck with me, and the next day I asked Al to elaborate. “I was reflecting on how we start from scratch a lot of the time,” he explained, “and think we’re writing about one thing but then it turns out to be another. We have to be open to where the journey takes us. Sometimes we just start and have no idea what’s going to happen.”
I concur. And that means if we’re feeling like our plate is empty, we songwriters may have to eeny-meeny-miny-moe a starting point: Perhaps we’re eight years old, standing at the kitchen counter helping Grandma bake muffins, only to find 20 minutes later we’re swimming in the ocean with a high school crush.
It reminds me of a well-known creative exercise where a writer is instructed to put pen on paper (with eyes closed) or fingertips on computer keyboard (with screen dark) and just begin writing whatever it is that comes to mind, stream-of-consciousness. (If it’s a melody you’re creating, as opposed to words, then a device should be used to record your humming or playing.) The point is that we should let our mind meander and enjoy the swerves, curves and speed bumps, and not concern ourselves with sentence structure, grammar, syntax or, more importantly, why we’re entering unexplainable, random or seemingly senseless territory. Unfinished business, or business that wants to be re-examined? Hard to know, but we felt a pull and we followed. And that’s good because writers write. Even when we think we have nothing to say. Even when we think we have no story.
All of which brings to mind an experience I had not long ago, when I spoke with a class of songwriting students at Cal Poly Pomona University. One student approached me afterwards and confessed that he was concerned with a new assignment: to write a song that tells a story. He asked me what he should do if he has no stories.
My first inclination was to suggest he change his major. But I reconsidered. He’s just learning how to tap into himself. Everyone has stories.
So we have a choice to make: We can avoid this leap of faith (like the reluctant student) or we can welcome the adventure. If we’re willing to travel, if we follow our muse unconditionally and trust in her guidance, we may stumble upon delicious (or uncomfortable) feelings we didn’t even know existed. We may be pleasantly surprised, or we may be horrified. Either way, all destinations matter. They’re all fodder, ingredients, material for stories.
Of course, sometimes we wind up writing about the same ex-love twenty songs in a row (lots of unfinished business!). It’s possible that each tale has a different ending, which makes sense because there are many nuances to a relationship: exhilaration in one song, heartbreak in another. (Side note: If you realize you’re writing countless songs about the same ex, you could call one of them “All Roads Lead To You.” Hey, I actually like that title … and, what’s more, I didn’t know it would fall out of my head until I got there!)
Or, as Wise Al put it: “Real art happens when we get out of our own way and let it come and go wherever it takes us, without thinking too much about it. Or not thinking at all. It’s like riding a joyous kind of vibration.”
It’s a sentiment that should give hope to every student of song, especially on those days they swear their well is dry. You’ve gotta get in the car, enjoy the ride … and have faith in the destination.
Not exactly. In fact, there are several kinds of pianos. For one thing, there are digital pianos, and there are acoustic ones. Digital pianos create their sounds electronically, and require power as well as speakers or headphones in order to be heard. Most digital pianos, in fact, play back samples — that is, digital recordings — of acoustic pianos. Acoustic pianos, on the other hand, create their sounds in air, by means of strings being struck by hammers and a wooden soundboard that serves to amplify the sound so that it can be easily heard, without the benefit of any electronic components, and therefore without the need for electricity, speakers or headphones.
As you might guess, the acoustic piano came first — in fact, nearly 300 years before the digital variety. The first pianos were large and therefore called “grand” pianos. But there’s a second, smaller variety of acoustic piano too: the upright, invented some 80 years after the grand. It has a lot in common with its forebear, but there are some significant differences too. In this article, we’ll take a look at both the similarities and differences.
The Grand Piano
As mentioned, grand pianos are the largest type, and frequently the most expensive as well. They offer a wide dynamic range, rich resonance, diverse tonality and responsive touch and for those reasons are generally the choice of professional musicians, particularly those playing classical music or jazz.
Grand pianos vary in size, from “Baby grand” models that can be as little as 5′ in length, all the way up to “Concert grand” models, which can be 9′ or more. One thing they all have in common are massive frames made of cast metal and horizontally mounted soundboards made of thin wood. Dampers lie on top of the strings, adjacent to the hammers, which are also horizontal, and the lid can be raised up to further project the sound. All grand pianos provide 88 ivory, wood or ivory-covered wood keys, and include a retractable cover that contains a sheet music stand and slides over, or folds down on the keys.
The term “upright piano” is somewhat confusing. It is sometimes used synonymously with “vertical,” although technically speaking, an upright is a type of vertical piano. Uprights take up much less space and tend to be less expensive than grand pianos. They are a favorite of music students and a staple of schools and conservatories all over the world, and their compact design allows them to be conveniently placed next to a wall or in a corner, making them a popular addition to many living rooms as well.
Like the grand, upright pianos vary in terms of size, materials and construction, but they all have wooden soundboards that are mounted vertically, with strings that stretch downward and are struck (and muted) by horizontal hammers and dampers. Upright sizes range from small “Spinet” models (popular up until the mid-twentieth century but rarely made today) of as little as 3′ in width, through “Console” and “Studio” models that vary in height but are generally 5′ wide. They may be smaller than their grand cousins, but all upright pianos offer the same 88 keys, usually made of wood or ivory-covered wood.
Yamaha makes a broad range of upright pianos, from the compact, entry-level b series to the U Series — the world’s most popular upright — to the YUS Series, which shares many of the features of CF Series pianos for a broad range of sonic tonalities more reminiscent of a grand piano than a traditional upright.
Differences Between Grand Pianos and Upright Pianos
As we have seen, two major differences are their size and the mounting of the soundboard and strings (horizontal in grands and vertical in uprights). But these factors have additional implications. For one thing, the larger size of grand pianos means that they have longer strings and larger soundboards, which impart a different tonality than do uprights. This also results in grand pianos having a greater dynamic range (that is, the difference between the softest sounds and the loudest sounds it can produce) than uprights. In addition, grand pianos emit sound from above, while upright pianos emit sound from the back end, which is usually placed against a wall. For those reasons, grand pianos can be much louder than uprights.
Another significant difference between the two is their “action” — the mechanism that causes hammers to strike the strings when a key is pressed — which is why they often feel so different to play. Because the strings are mounted horizontally in grand pianos, the hammers return to their rest position due to the force of gravity, under their own weight. In addition, grand pianos utilize a double escapement mechanism that allows keys to be played rapidly in succession, without first letting the key return all the way to its starting position. In upright pianos, where the strings are mounted vertically, the hammers rely on springs to return to the at-rest position. As a result, key repetition (i.e., when a player repeats notes quickly, such as when playing trills) is much smoother and faster in grand pianos than it is in upright pianos — to a maximum of roughly 15 times per second in grands, versus seven times per second in uprights.
Finally, while both grand pianos and upright pianos offer three foot pedals, they have slightly different functions. In a grand piano, the pedals are:
– Shift pedal (left pedal): Also called the soft pedal or una corda pedal. When depressed, this shifts the entire action assembly to the right, changing not only the volume of the sound, but also making slight changes to the tone. – Sostenuto pedal (middle pedal): This keeps the dampers raised and away from the strings of any keys played just before depressing the pedal, making it possible to sustain selected notes. – Sustain pedal (right pedal): Also called the damper pedal. When depressed, the dampers remain lifted even if the fingers are taken off the keys, thus sustaining all played notes.
In an upright piano, the pedals are:
– Soft pedal (left pedal): When pressed, all the hammers are moved closer to the strings, reducing the volume of the sound. – Muffler pedal (middle pedal): Also called the practice pedal. When pressed, a thin piece of felt is dropped between the hammers and strings, greatly muting the sound. – Sustain pedal (right pedal): Functions the same way as in a grand piano—when depressed, the dampers remain lifted even if the fingers are taken off the keys, thus sustaining all played notes.
Q. When did you know that you were going to make music the focus of your professional life?
A. Initially, I chose the flute as my instrument because of a program the Dallas Symphony had for elementary schools in the area. I was in love with the woodwind quintet and wanted very much to play the flute so that I could play the flute part in their arrangement of “Peter and the Wolf!” In high school, I was thrilled to realize that I could teach and make music as a career for the rest of my life. Prior to that, I wanted to be an astronaut!
Q. Other than music, what brings you inspiration?
A. Reading, yoga, walking on the treadmill, good friends.
Q. What book is on your nightstand right now?
A. “Bad Girls Throughout History” by Ann Shen and a daily devotional book. I also recently finished “Educated” by Tara Westover, which was so powerful!
Q. What is the most embarrassing moment of your life that you can share?
A. There are a few. Once I wore one blue shoe and one black shoe for a concert. Another time while talking about intonation at Murchison Middle School, instead of saying “pitch,” I said the “b” word! The kids laughed so hard! And finally, I can’t believe I actually rented “The Blues Brothers” to show at a middle school band pizza party. Luckily, no one complained!
Q. What piece of music do you wish you had written and why?
A. Hard to say. I love “Candide Suite” by Leonard Bernstein. I love to listen to it, and I love to perform it as well!
Q. Why is music important to humanity?
A. Because it is! Mothers sing lullabies to their babies. Children sing nursery rhymes. Students learn important mathematical/ historical facts to music. Countries have national anthems. Every civilization has made music to celebrate good times and lift up those who have fallen on bad times.
Q. What is your favorite guilty pleasure food?
A. Sunday champagne brunch at the Four Seasons Hotel Austin with my hubby.
Q. Which person from history, dead or alive, would you want to have lunch with and what would you discuss?
A. My grandmother, Hazel Chisum. But she would want to fix the lunch, I’m certain! We would talk about when she and my grandfather first married, all the wonderful things that have happened in my life, and her great grandson, Weston Floyd. I just recently discovered that she played guitar!
Q. What is your biggest pet peeve?
A. People who say mean things, and people who park poorly!
Q. Why is it important to protect access to music education?
A. Everyone is inherently musical. It’s crucial to develop that talent in every person. There are so many studies that validate the importance of music education for every child. Music is a language I believe everyone should be comfortable with in their daily lives.
When some people think of a home theater, they picture a dark, secluded room with a large projection system and lifelike 3D audio. When others envision the space, they simply see a flat-panel TV mounted to the wall and a basic soundbar attached underneath. The two are distinctly different, and so is the overall experience.
As the selection of audio and video equipment grows at a blistering pace, the definition of what constitutes a genuine home theater has become fuzzier. Is that simple, basic system occupying a portion of the living room a real home theater? Does it provide a sufficient level of performance to make it seem as if you have stepped into an actual movie theater? Are you totally immersed in the action? Do you feel transported to a new dimension of home entertainment? If you answered “no” to any of these questions, it may be time to rethink your current home theater setup.
Go for Quality Over Convenience
Thanks to the wide array of pre-packaged, turnkey “home-theater-in-a-box” (HTIB) solutions on the market, it’s become easy to purchase and set up a system in just about any room of the house. Modern TVs are slim and smart, speakers are small and often wireless, and with streaming services like Netflix®, you no longer need a media player to enjoy recent releases. It’s a convenient and straightforward solution, but unfortunately lacks the power and performance of AV gear engineered and designed for purpose-built rooms dedicated to the enjoyment of entertainment content. Bottom line: It takes high-quality products to create a high-quality entertainment experience — an experience that conjures all of the emotion and energy of a commercial cinema, and one that befits the classic definition of a “home theater.”
Immersive Audio is the Answer
Surround sound is a critical part of any home theater, and formats range from a basic 5.1 configuration (five speakers and one subwoofer) all the way up to the latest, object-oriented formats: DTS:X™ and Dolby Atmos®, which add overhead audio channels for height cues. Surface-mount speakers such as the Yamaha NS-IC800 can be placed on the ceiling to create the sensation that objects in the film, such as airplanes or rainfall, are coming from (and shifting) overhead. Combined with main speakers that “move” objects side to side as well as forward and backwards in the room, the sound becomes thoroughly lifelike and three-dimensional, immersing the home theater audience completely in the middle of the action — the goal of any high-quality cinema. Add in a technology like Surround:AI (a feature unique to Yamaha AVENTAGE receivers such as the RX-A3080), and the audio becomes even more impactful. This innovation analyzes movie scenes and adjusts the playback to optimize the effect of dialogue, background music and ambient sounds.
The audio impact you get from basic home theater systems designed for easy installation in a living room pales in comparison. You hear the airplane and rainfall clearly, but do you really “feel” them? It takes more than a modest speaker setup to reproduce the complexities of a Dolby Atmos or DTS:X surround sound format. For one thing, you need to select quality speakers built for use in a home theater. As an example, you might consider a pair of Yamaha Soavo NS-F901 floor-standing line speakers for the front left and right channels, augmented by Yamaha NS-333 bookshelf speakers for the rear and side channels. The all-important center channel (which mostly carries dialog) should be routed to a speaker specifically designed for that purpose, such as the Yamaha NS-C444.
Yamaha NS-333 bookshelf speakers.
Yamaha NS-C444 center channel speaker.
This brings up another point: How best to integrate speakers with the room design. If you thought it was tough to blend the speakers of a basic 5.1-channel surround sound system into the décor of a family room, the additional speakers of an advanced setup (such as the one being described here) can throw a real monkey wrench into the appearance of a typical living room or den. Plain and simple, the kind of high-quality audio system we’re talking about not only works better, it looks better in a room dedicated to the enjoyment of movies. Without the typical accoutrements of a family room to work around — light fixtures, artwork, furniture, etc. — speakers can be placed precisely where they should go for the optimal listening experience.
Lifelike, Larger-than-Life Video
Today’s slim flat-panel displays can be situated just about anywhere, and with screens large enough to pull viewers into the action, they offer a great alternative to two-piece projection systems … until you reach screen sizes upwards of 100 inches. Then, the solution becomes cost-prohibitive for most people, not to mention difficult to find the space to mount such a screen in an average family room. Installed in a dedicated home theater, however, 100-inch-plus screens and their companion projectors really shine. Those kinds of spaces afford plenty of real estate for a huge screen and video projector, and the price tags for these products are actually way less expensive than comparably sized flat-panel displays.
Perfect Viewing Conditions
There are many other variables that impact the quality of a home theater, such as seating, lighting, and control. A “true” home theater that’s purposely designed to provide the best viewing environment has no windows (or at least completely covers any windows that do exist) and provides the right amount of space for proper seating alignment. This prevents sunlight from washing out the image as well as the viewing fatigue that can occur from sitting too close or too far away from the screen — both common hurdles encountered in family room environments. And forget about becoming completely immersed in movies presented in a space other than a dedicated home theater: There are simply too many distractions. On the other hand, a custom-designed room set apart from the rest of the house makes it easy to escape and immerse yourself in your favorite movies … and it happens easily and naturally. You see, when it comes to home theater, “good” isn’t necessarily good enough.
To find a Yamaha dealer, use our dealer locator here. If you’re looking for a custom installer for a specific brand like Yamaha, we recommend you search locally (with a search engine or social community website) using the terms “home theater custom installers.” Availability of custom installers may vary based on region.
Automation is a powerful feature that’s available in all contemporary DAWs. It allows you to record the movements of a fader, knob or button that’s controlling a parameter in a track or plug-in. Those movements are then written into the file so they will recur the same way, at precisely the same time, each time you play back your song.
Using automation, you can fine-tune any track — both audio and MIDI — by making adjustments, large or small, one at a time. The most common application is to “ride” levels or pan a signal from left to right, but there are lots of other usages. For example, you could automate a delay plug-in to go into bypass on the last beat of a song so it doesn’t repeat after the track ends. Or you could change the vocal reverb to a different room size when a song gets to the chorus and then back again on the verses, or automate a filter on a soft synth to create a sweep. The possibilities are virtually endless.
Automation adds a level of precision to your mixing that was unheard of back in the analog days, when all mix moves had to be made by hand. Crazy as it sounds today, you’d often see several people gathered around a studio’s mixing console, each tasked with moving a fader or turning a knob or pressing a button at a specific point in the song because the engineer’s two hands were not enough to handle all the needed adjustments in real time! With automation, it’s like having an almost unlimited number of 100% accurate hands available to you.
Real-Time or Offline
You can record (aka “write”) automation in two different ways. The first is by turning on your DAW’s automation-write button for the target track (or tracks) and initiating playback of the song, then making whatever changes you like in real time. Steinberg Cubase, like most DAWs, offers track-specific automation read and write buttons in both the Project (edit) window and MixConsole window:
After you’ve written automation to a track, your DAW will either show you the automation data underneath it in a dedicated “lane” or overlaid on top of the track waveform. (In some DAWs you might have to manually open the automation view to see and edit it.) In Cubase, an automation lane opens up right under a track in the Project window as soon as you write any data to it. You’ll see the data in the form of editable “breakpoint” lines, which are also referred to as “automation curves.”
Not only do you get a Write button for automation, but a Read button as well. After you’ve recorded or entered automation data on a track, the Read button enables it on playback. If you turn off the Read button, the automation data will be ignored by the track until you turn it back on. Being able to toggle the automation on and off with a Read button is handy for comparing the automated version of a track against the original.
Touch / Latch Modes
Although there are some variances in how different DAWs implement automation, all offer a choice of automation modes, which govern how the fader, knob or button will respond when you release it. Two of the most common are touch and latch modes.
Touch mode is used when you want a parameter to go back to the previous level after you finish adjusting it. This would be used, for example, when automating a vocal track that has a volume level that’s mostly correct in the mix but needs a few tweaks because some words were sung too loudly or softly.
In that situation, you’d put your automation into touch mode, and when you got to a section you needed to fix, you’d move the fader to the desired point for as long as required, and then release it. As soon as you let go of your mouse button, the volume would revert to its previous level.
Latch mode (called “Auto-Latch” in Cubase) will instead keep the fader, knob or button at the value you change it to when you release it. This mode is useful when you want to alter a parameter and have it remain at the new value until or unless another automation change is made.
Let’s say you want to make the drums a little louder from the last chorus all the way through to the end of the song. In that case, you’d choose latch mode and simply push the drums fader up at that chorus, then release it. The volume would then stay at its new value unless you moved the fader again before the end of the song.
Luck of the Draw
An alternate method of writing automation data — one that’s particularly useful for extreme fine-tuning — is to manually draw changes using your DAW’s drawing tools. This method can be used both for entering automation data where none exists, or for editing existing automation curves. Typically, DAWs have both freehand line tools and tools that let you draw straight lines or specific shapes. The shapes are often useful for creating effects when automating effect or virtual-instrument parameters.
When you’re drawing automation, you’ll typically see little dots on the line, called breakpoints. These can be selected and dragged to change the shape or level of the automation line. The closer they are together, the finer the resolution of the line will be. If you have the “snap to grid” function turned on in your DAW, it will usually constrain your manipulation of automation curves to the selected grid value.
In any DAW, it can take a little while to get used to manipulating automation data graphically, but once you master the technique, you’ll be rewarded with extremely accurate control of all your mix parameters. In all likelihood, you’ll wonder how you ever mixed without it!
In this multi-part series, we take a closeup look at each of the components of the modern drum set.
In The Modern Drum Set, Part 1, we learned about the origins of the snare drum and how it became an important part of contemporary music. In this installment, we’ll take a look at the Big Daddy of Bottom End, the bass drum. Also known as a “kick” drum, the bass drum is usually the largest drum in a set and the only one played with a foot pedal. It typically sits on the floor, laid on its side, with the front head facing the audience.
Bass drums are used in just about every musical style, from jazz and classical to death metal — though they are used differently depending upon the genre. In contemporary music, the bass and snare drums are the most important components of the drum set, with the bass drum providing the “downbeat” on the one and three while the snare drum counters on the two and four. In jazz, the bass drum is often played very lightly to provide a pulse that is more felt than heard, but is also used to drop “bombs” (strong accents). In classical music, the bass drum provides dramatic thunder, and marching bands use it as a means of setting the tempo of the march.
Bass-ic History
The bass drum is a descendant of the davul or tabl turki (Turkish drum) dating back to the 1300s, making it one of the oldest percussion instruments. The davul was a double-headed, rope-tensioned drum with a diameter of 26 to 28 inches and was played with a wood stick or by hand. It was used by Ottoman military bands, but was also an important part of non-military music in that part of the world.
In the 18th century, Turkish troops and military bands made their way into Europe, where the davul was incorporated into music written by Gluck, Mozart and Haydn. Eventually, composers such as Berlioz and Verdi used the bass drum in their works, and it became an important part of the orchestral percussion section.
At the beginning of the 20th century, the invention of the foot pedal revolutionized drumming by making it possible for one drummer to simultaneously play a bass drum, a snare drum and a cymbal. The idea of having a single drummer in a band spread from the Big Band era and continues today — though there have been popular bands with two drummers simultaneously playing separate kits.
Construction Boom
Bass drum shells are typically constructed from multiple plies of wood such as birch, oak or maple. They can also be made from fiberglass, stainless steel and acrylic, but wood is by far the most popular material.
Birch is used to manufacture shells for Yamaha Recording Custom and Stage Custom drums. It emphasizes the low and high frequencies, providing a bright, lively sound with slightly reduced mid frequencies. Birch projects very well and can easily cut through a mix.
Maple is a very popular wood for making drum shells and is used in Yamaha Absolute Hybrid Maple and Tour Custom drums. It yields a warm low end, balanced low and high frequencies, and slightly boosted mid frequencies. Absolute Hybrid Maple shells use an interior layer of wenge, a hard and heavy type of wood that combines with maple to produce a rich, clear tone at all dynamic levels.
Oak, used in Yamaha Live Custom Hybrid Oak drums, produces a round tone, mellow highs and an extended, warm low end with plenty of volume and projection. Live Custom Hybrid Oak shells are made from a sandwich of oak plies surrounding a dense phenolic layer — a design that emphasizes attack while increasing the drum’s dynamic range. In addition, weights studded in the bass drum at the lug points attenuate low-mid frequencies for a tight, focused sound.
Yamaha PHX (pronounced “phoenix”) drum shells are made from plies of jatoba, kapur and North American maple woods. This unique construction maximizes projection and increases the vibration of the drum head.
Unlike snare drum and tom hoops, bass drum hoops are made from wood and use “claws” or “hooks” to hold the hoop onto the drum. The tension rods used with these claws can have T-handles to facilitate tuning or can be adjusted with a drum key.
What’s Your Size?
As is the case with any drum, the fundamental pitch of a bass drum is determined by the diameter and depth of the shell: larger and deeper shells generally produce a lower pitch. Deeper shells also provide increased projection, produce more overtones and add extra “boom” to the sound. In general, shallow shells respond faster and can produce a lighter sound.
Bass drums designed for use in drum sets come in a variety of diameters ranging from 18 to 26 inches, with average depths from 14 to 18 inches. Marching bass drums can be significantly larger, and the bass drums in some compact drum sets feature narrower depths. For example, the new Yamaha Stage Custom Hip bass drum has a depth of only 8 inches, making it easier to transport.
Shell diameters of 18 and 20 inches are popular for jazz, while diameters of 22 and 24 inches are standard for just about every other genre of music (though some heavy metal drummers prefer 26-inch bass drums for their extra low end). Using a bass drum with a large diameter means that your rack toms must be placed higher, so make sure you can get the toms where you want them before you commit to the bass drum size.
The Yamaha Stage Custom Bop Kit includes an 18-inch bass drum.
This Yamaha Tour Custom drum set has a 22-inch bass drum.
How to Avoid Creep’n’Roll
In addition to lugs, claws or hoops, bass drum shells often have extra hardware mounted on them. Legs or “spurs” attached to each side of the shell serve two purposes: They prevent the drum from creeping away from the player every time the pedal beater hits the head, and also help stabilize the drum so that it doesn’t roll from side to side. Some bass drum legs feature convertible tips, with rubber for use on hard floors and spiked ones for use on carpet.
The bass drum also has the important job of supporting the toms, so many come equipped with brackets mounted at the top of the shell, such as the ones used on Yamaha Live Custom Hybrid Oak drums:
These mounts usually accept a holder for one or two toms, but can also be used to mount cymbal holders. The tom holder is important because it’s the only way to mount two toms centered over the bass drum.
There’s a Hole in My Head!
Many drummers like to cut a hole in the front head of the bass drum, which increases the impact of the sound while at the same time making it easy to place a small blanket or pillow inside to dampen the drum’s resonance. A hole also facilitates microphone placement, and that’s important in situations where the drums are being recorded or amplified through a PA system. Jazz drummers, however, often prefer a pure tone and generally do not opt for a hole or any dampening inside the drum.
The bass drum is an important part of your drum set in terms of both the sound and the physical arrangement of the kit. A bit of planning and a visit to your local music shop can help ensure that you choose the right one.
Whatever sport you follow, it’s your time of year. I’m not a sports fanatic, but I enjoy sitting down in front of a good game every now and then. To me, watching professional athletes in their prime is very similar to watching professional musicians, not just in terms of their often astonishing proficiency but also the degree of dedication they have to their craft.
I’ve had the privilege of getting to know a number of celebrated musicians and take it from me, the old adage about famous people putting on their pants one leg at a time, same as everyone else, is completely true. Granted, these individuals were born with a certain amount of talent that you or I may not possess, but I’m convinced that the main thing that separates them from the rest of us is sheer doggedness.
The pursuit of perfection is an often frustrating endeavor, and one that comes at a price. An acquaintance of mine went to high school with someone who eventually became a major league pitcher, and quite a successful one at that. I once asked him what this person was like as a teenager, and his answer floored me: “I don’t know. I hardly ever saw him.” The reason was that this hurler-in-the-making had apparently spent most of his high school years on the practice field throwing hundreds of pitches all day long, thanks to his coach’s skill in writing notes getting his protégé excused from most classes — something that also left precious little time for social interaction with his fellow students. That hardly made him a well-rounded individual, but it did mean that he was able to impress the scouts when major league teams came a-calling.
Another friend of mine spent years touring with a world-famous rock guitarist. I remember asking him once what this superstar was like when the spotlight wasn’t shining on him. His reply was, simply, “He’s just like the rest of us … only less so.” He didn’t say it to be demeaning — he was just stating a fact. “Look, put a guitar in his hands, and on a good night, no one can match him,” my friend went on to explain. “But send him off to the store to buy a container of milk, and he’ll have no clue.” His point was that this individual spent so much time practicing, rehearsing, recording and performing that he had no hours left in the day to develop what most of us consider trivial living skills.
On the flip side, I know more than a few extremely talented musicians who never became household names despite their having far more ability than some who did. In some cases, this comes down to bad luck or being in the wrong place at the wrong time, but all too often, sad to say, the primary reason is that they gave up. Carving a career in the music business is monumentally difficult — in some respects, as tough a path to traverse as trying to be a successful actor — and it requires not just talent but total commitment, along with an unshakeable belief in oneself. When you add in the pressures of having to pay bills (few of us, after all, have trust funds to live off), it’s easy to see how potentially world-class musicians can fall by the wayside. Sure, some have regrets, but others revel in the freedoms that came as a result of their decision, such as the joys of raising a family — something that’s difficult if not impossible if you’re devoting every waking hour to honing your craft.
So next time you’re watching an exciting game or attending a stirring concert, take the opportunity to reflect on the time expended, dedication required and personal sacrifices made by those athletes or musicians. Then ask yourself: Do I have it in me to do the same? If the answer is yes, go for it!
I was just 14 when I discovered what I would end up doing for the rest of my life. And ever since catching my first break, I’ve been in demand as a session player. To me, that qualifies as being blessed.
I’ve literally been playing bass for a living almost every day for more than four decades. I can’t count all the studios I’ve been in, or the live concerts I’ve played. I’ve never stopped to think about what it is that makes people call me for gigs, but maybe it’s my focus on constantly keeping the highest standards for myself. It’s not just about setting standards for playing, either — it’s personal, spiritual, physical, mental and musical, and that includes walking into a studio with an upbeat attitude and good energy.
When I was growing up, there were so many great examples of bassists setting the bar high: Jaco Pastorius, Stanley Clarke, James Jamerson, Paul McCartney, Verdine White, Rocco Prestia, Ron Carter, Ray Brown, Anthony Jackson and so many others. I was in awe of how talented they all were, and I wanted to be in their club. Through their playing, they taught me to make every note count, to play something memorable. That was my focus, because doing it meant that maybe one day I might be worthy of being thought of by others in that same company.
Wes Montgomery is still one of my favorite artists of all time because of his choice notes, and the ease with which he played them. He just got to me right from the beginning. His note choices and his use of space — everything about what he did was consummate, and that’s what defines an artist to me.
It definitely affected how I play. My philosophy is more about which notes than numbers of notes. And I like to go for the rare notes. Harmonically, my approach is to figure out the most obvious, simplest, lowest common denominator note, and then I move on to figuring out what substitutions I can come up with. Maybe it’s the third, or the fifth, but whatever choice you make shades the music and gives it a complexion. Once I know the root and chord, I figure out what notes are available to me that will make someone go “ooh.”
It’s all about listening. Rhythmically, I stay conscious of what’s going on with the drums. Lots of drummers I’ve played with say, “When I put that kick drum down, there you are.” That’s because I’m listening.
I have the benefit of having had a musical education and background, but even with all of that, I’m still trying to let the music play me. It’s more of a spiritual approach than an academic one, though I ultimately draw on both. I listen, and then try to let the music tell me what it wants to hear. So it’s from the head, but much more from the heart.
With my background, I can technically play just about anything, but I usually choose instincts and spirit over virtuosity: things that move me emotionally. You don’t have to be a chop-buster to be a heartbreaker. There are some musicians who can’t read a note of music, but when you hear them play, you can tell it’s them. You hear their personality.
A good way for me to keep perspective is to think back to my early days, when I was fortunate enough to get my start with Barry White, playing on all his records back in the late ’70s. His way of putting a hit together meant giving everyone their part, and in those sessions, he had two bassists. He gave me what seemed like a simple part where I waited and played a sliding note; he gave the other player a part that required him to wait, and then play a snap. With him, all you did while recording was listen closely and play that one part, but what you ended up with was an amazingly structured bass foundation.
Those were the sessions where I met guitarists Ray Parker Jr., Melvin Ragin (aka Wah-Wah Watson) and Lee Ritenour, as well as drummers Ed Green and Gene Page, who arranged those records. They were the top guys, and when they heard me, they referred me to other gigs. Then, in the early ’80s, I got introduced to pianists Patrice Rushen and Bobby Lyle by flutist/saxophonist Hubert Laws, and they started going out and recommending me for jazz gigs.
Soon after that, I met Phil Collins and Eric Clapton, which opened up the rock-and-roll side of my playing. I also played on Anita Baker’s records, whose music wasn’t just four-chord pop hits — it was sophisticated and song-based, and that gave me a chance to be heard in the R&B world.
Every day I’m thankful for the path that music has led me down, and the blessed life it’s given me. I used to dream about playing with all kinds of great musicians, and it happened, and it just keeps happening. It’s all been too much fun!
Last November, Billie Eilish incited a twitter-storm when she appeared on Jimmy Kimmel Live! and revealed during an impromptu pop-culture quiz that she didn’t know who Van Halen was. The quiz was part of a goofy stunt premised on the fact that Eilish, despite her massive success, had not yet turned eighteen (she would on December 18th, a birthday that, happily, she shares with Keith Richards). Kimmel was seventeen in 1984, so the questions turned on how familiar Eilish was with whatever was big that year (Van Halen, Madonna, Huey Lewis, etc.). The short answer was, not very.
Fine, so far. Everyone over 35 has experienced that stunning moment when a young person has no idea who one of the idols of your youth is. Kimmel, who is fifty-two, was having some fun with this idea, and though she regretted feeling “so stupid,” Eilish was, too. The Internet, not so much. Ridiculously, Eilish was excoriated for being unfamiliar with a band that had its last hit years before she was born. Of course, she also had defenders, but even they didn’t seem to get the point. Judd Apatow, for example, posted, “As someone who has worked with many young people, they are inundated with new music, movies and TV. They don’t have the time to catch up on stuff from earlier decades. Ask a kid if they know what “Mash” is, or “The Odd Couple.” Ask them who Lou Reed is. They’re drowning in content.”
That statement seems to me to be entirely misguided, yet, as this tumultuous decade crashes to a close, it does get at something real about our rapidly fragmenting culture. That fragmentation — and the technology that makes it possible — is the true story of the music of the 2010’s, more so than the work of any particular artist. All you need do is walk through the streets of any city and find yourself dodging people lost in their smartphones, pricey headphones and every other manifestation of personal technology that allows people to disappear into their own private streaming world.
I don’t see anything wrong with that, although, as a native New Yorker, I will confess to missing the elegant choreography of people moving briskly through the streets, intent on their own destinations but efficiently aware of everyone around them. Moreover, I believe that the incredible access to music that our increasingly digital world provides means that we share more music across generations than we ever have before.
One of the key memes of the past year was, “OK, boomer,” the offhand, millennial/Gen Z dismissal of their elders’ patronizing lectures. And just as decades don’t divide as literally as they do on a calendar, “OK, boomer” is directed as much at Generation X — Jimmy Kimmel’s cohort — as baby boomers. Predictably, as soon as they learned they were being flipped off, older people began posting and writing about those selfish, unappreciative, uninformed youngsters — all but proving the point of the “OK, boomer” phenomenon in the first place. But I’ve found that, as long as you’re not condescending about your own tastes, young people are not only willing to be curious about them, but willing to share their own tastes with you.
As Apatow correctly pointed out, young people — and all of us, really — are “drowning in content.” It was recently announced that Netflix® alone had released more new shows in 2019 than all of broadcast and cable television combined had in 2005, and the company is scheduled to release even more next year. But many of those shows will include soundtracks that consist of both old and new songs. My fourteen-year-old daughter didn’t know or care much about Lou Reed when I published a biography of him a couple of years ago, but it definitely meant something to her when Finn Wolfhard, a sixteen-year-old actor on her favorite show, “Stranger Things,” mentioned him as an idol in an interview.
How did Toto’s “Africa,” a song from 1983, become one of the most fun memes of the past few years? Who knows? But one thing digital culture has done is flatten chronology. Young people encounter music from every period in all kinds of contexts without any indication of its provenance. Back in 2011, I remember teaching my writing students at the University of Pennsylvania about synesthesia, or sensory confusion (tasting smells or seeing sounds, for instance). As an example, I quoted Syd Barrett’s lyrics from Pink Floyd’s “Astronomy Domine”: “Lime and limpid green / the sound surrounds / the icy waters underground.” I mentioned that I wished I could play the song for them, but my classroom wasn’t outfitted with all the mod cons. One of my students, a seventeen-year-old freshman, raised his hand. He had Pink Floyd’s first album, The Piper at the Gates of Dawn, downloaded on his phone and was happy to play the song for us.
Pink Floyd remains a rite of passage for young music fans, and there are many others. But as our listening habits become more personalized, those rites of passage and new discoveries will likely become more individual and idiosyncratic. While Billie Eilish knew nothing of Van Halen, she was familiar with Madonna and Cyndi Lauper, which makes a lot more sense. When I took my daughter to see Katy Perry at Madison Square Garden in 2017, the opening act, Noah Cyrus, brought out her sister Miley and her father Billy Ray to play Billy Ray’s 1992 hit, “Achy Breaky Heart.” It was a lovely gesture: Her dad had never gotten to play the Garden when he was a huge star, so his daughters teamed up to give him the chance. He was thrilled. Now, of course, his appearance in the remix of Lil Nas X’s massive “Old Town Road” has made him a star all over again.
I was struck by one of the comments posted on Rolling Stone’s list of the “Best Songs of the 2010’s”: “It’s amazing how many of these songs I barely remember or never heard. I think the streaming age has made it impossible to have a cohesive, shared generational musical experience.” So true. When I speak to my students or to my daughter and her friends, it’s clear that, while they’re all listening to music, with few exceptions they’re all listening to different things. But their tastes shift quickly and so, given the amount of music they hear and have access to, I’m optimistic that the amount of sharing and eventual overlap will grow in the years ahead.
One development that will help drive the breaking down of boundaries is the continued erosion of genre distinctions. Performances like Beyoncé being backed by an HBCU marching band at Coachella, Justin Timberlake working with Chris Stapleton, and Carrie Underwood teaming up with Ludacris push everyone out of their comfort zone, including fans. In addition, when performed live on stage, such collaborations create the sort of highly desirable social media moments that drive viewership. Musicians, as a rule, are avid listeners, and, like their fans, they are now exposed to a greater array than ever before. That, along with the desire to make a bold move that can attract attention in a crowded marketplace, leads to a willingness to try something new, and I have no doubt we’ll be seeing more such experimentation. I don’t think anyone would ever have predicted that indie icon Bon Iver would become a favorite of the likes of Kanye West, Rick Ross, Travis Scott and Vince Staples!
One other thought: “Globalism” may be a controversial term in the political realm, but in music it’s simply a fact of life. “Despacito,” on which singer Luis Fonsi and rapper Daddy Yankee were joined by Justin Beiber (another collaboration), was perhaps the most popular song of the past decade. Psy’s gigantic dance hit, “Gangnam Style,” and the boy band BTS brought Korean pop music to the international stage in a major way. The borders of the digital world are far more porous than geographical ones, so we can look forward to many more developments along those lines.
Look, I totally get the “OK, boomer” thing. I laughed out loud when I first heard about it, and recalled my own eye-rolling dismissals of old people trying to tell me what “good music” was. Back then, it also depended on who was talking to me. When the Rolling Stones and Eric Clapton discussed the blues artists they revered, I spent a lot of time hunting for music made in the twenties, thirties and forties — tunes that young people now can find online in ten seconds. In 1965, Pete Townshend insisted that “I hope I die before I get old.” Cool. I felt that way, too. But The Who made a terrific album just last year, and I’m glad they’re still doing it and that I’m still around to hear it.
However divided our society may be now in so many ways, as far as music is concerned, I honestly believe that the kids are all right, and the old folks are, too. This past decade may have sent us all off in different directions, but I’m confident that we’ll find each other again — perhaps just in passing, but over and over again. Open minds — and open ears — would help. Hopefully, some of those old people so incensed by Billie Eilish’s ignorance of Van Halen will take the time to listen to her extraordinary music … and maybe she and some of her fans will check out Van Halen in turn. She shares a birthday with Keith Richards, after all — and “Running With the Devil” is a bop!
After the noise and excitement from your New Year’s Eve celebration quiets down, it’s a great time to kick back and watch a film or two in your home theater. Here are eight selections with an Auld Lang Syne twist, perfect for curling up with a warm blanket and enjoying on your big-screen TV and extra speakers.
Forrest Gump
This multiple Academy Award® winner is a great-looking and great-sounding film that will have you smiling broadly from start to finish. In one sequence, Gump (played by Tom Hanks) spends the 1972 holiday season and New Year’s Day with his lieutenant Dan Taylor, whom he saved during the Vietnam War. They later run a shrimp boat together and create the Bubba Gump Shrimp Company, after which they invest in Apple® Computer and become millionaires … and those are just a couple of the plot twists and turns in this powerfully moving film. Check out the trailer here.
Trading Places
In this 1983 comedy, Eddie Murphy is a homeless street hustler and Dan Akroyd is an upper-class commodities broker who are unwittingly involved in an elaborate experiment that entwines their lives. One particularly hilarious scene takes place onboard a Philadelphia-bound train on New Year’s Eve. It involves a gorilla — and that’s all I’ll say about it for now. Check out the trailer here.
Ghostbusters II
There’s nothing like having the likes of Bill Murray, Dan Aykroyd, Sigourney Weaver and Harold Ramis entertain you with some ghostly high-decibel adventure. When slime rises from the streets of New York City on New Year’s Eve and chaos ensues, the Ghostbusters intervene. They even get the Statue of Liberty into the action and drive it through the streets of the city! Check out the trailer here.
Dick Tracy
Based upon the comic strip sleuth of the same name, this visually stunning film is set in the 1930s and features a slew of colorful mobsters, kidnappings, card games and investigations, with a star-studded cast that includes Warren Beatty (as Tracy), Madonna, Dick Van Dyke, Dustin Hoffman, Mandy Patinkin, Paul Sorvino and James Caan. In one memorable New Year’s Eve scene, Tracy faces gun battles and action galore after interrogating the bizarre criminal called Mumbles (Hoffman). Check out the trailer here.
The Godfather Part II
Directed by Francis Ford Coppola and starring Al Pacino and Robert De Niro, this sprawling 1974 classic covers a span of more than half a century. Interestingly, the film was both a sequel and prequel to the original Godfather. In 1997, the American Film Institute ranked it as the 32nd greatest film in American film history. (TheGodfather ranked 3rd.) New Year’s Eve celebrations feature prominently during the mesmerizing scene where Michael Corleone (Pacino) finds out that his brother Fredo (John Cazale) betrayed him. Check out the trailer here.
New Year’s Eve
This 2011 romantic comedy takes place — you guessed it— on New Year’s Eve, with a series of intertwining stories and an all-star cast that includes Halle Berry, Jon Bon Jovi, Robert De Niro, Sarah Jessica Parker, Michelle Pfeiffer, Ludacris and Zac Efron. Directed by Garry Marshall, it’s a feel-good film with a driving New York City energy that will leave you hungry for more popcorn. Check out the trailer here.
The Poseidon Adventure
This 1972 multiple award-winner is considered by many to be the mother of all disaster films. It takes place on an aged luxury liner on her final voyage from New York City to Athens before being sent to the scrapyard. As the ship’s band rehearses for a New Year’s Day celebration, the captain gets word that an undersea earthquake has triggered a tsunami. The vessel is hit by the wave and capsizes, leading to a saga of survival … and the need for more oxygen. Check out the trailer here.
The Horn Blows at Midnight
This black-and-white 1945 chestnut features Jack Benny as the character Athanael, who plays third trumpet in a late-night radio show orchestra. One night, as the announcer drones on, he falls asleep and dreams he is a junior grade angel and trumpeter in the orchestra of Heaven, with the mission of destroying an over-indulging Earth by blowing his trumpet at exactly midnight on New Year’s Eve. With a doomsday plot like that, it may not sound like a comedy, but it’s actually hilarious! Check out the trailer here.
Full-length versions of all the movies listed here are available on YouTube™ and Amazon Prime except “The Horn Blows At Midnight,” which is available for streaming on Max.
When a saxophonesection “clicks,” it’s an awesome musical moment. These musicians are technically proficient, well-balanced, in tune and great communicators across the ensemble.
In any band, an outstanding saxophone section can bring an irreplaceable timbre and depth to the entire group.
One of the factors that contributes to this sound is a robust low saxophone section. Without powerful saxophone presence, the rest of the section can’t bring the same level of magic to the musical moment.
So, how do you bring this sound to your ensemble? Here are four tips to get your low saxes to the next level.
Tip 1: Low Saxes are Heavy, So Good Posture is Key
One of the most common challenges across all young baritone and tenor sax players is learning how to produce a strong sound with the weight of the horn bearing on them. Students need the proper equipment and training to help get them to produce a sound that supports the higher voices in the ensemble. Saxophone harnesses are a necessary tool to distribute the weight of the saxophone to not just the neck but also the larger muscle groups in the back and shoulders. Another important consideration is the possible use of a bari sax peg. In ensembles where the musician is sitting, the addition of a peg to support the saxophone’s weight on the ground can alleviate most, if not all, of the weight of the heavier saxophone.
The first thing most players notice is that it requires much more breath support to produce sound on the baritone sax than higher-pitched saxes. There are many approaches to solve this challenge, including introducing your baris to your brass section’s breathing exercises and using a harness to allow for better and deeper musical breathing through good posture (see Tip 1 above).
Another factor to consider is the balance between the mouthpiece tip opening and reed hardness.
Perhaps most important to the goal of filling up the instrument with sound is the instrument itself. Design changes in neck and bore design have made considerable improvements in the way a big instrument like the baritone saxophone responds. In the new YBS-480, the redesigned student baritone saxophone in the Yamaha lineup, the horn utilizes the neck and bore design of the professional Yamaha saxophones.
Tuning the lowest voices sets the intonation for the ensemble, but what if your students in the low saxes are struggling with getting their horns in tune? The first thing to confront (and accept) is that not all notes on the saxophone will be perfectly in tune, regardless of the set-up. To get an accurate pitch, experiment with fingering adjustments, chordal substitutions and having higher voices adjust to lower voices.
Low saxes especially have large variances in the way they play, especially if they’re vintage horns or have been put through years of abuse in band programs.
The YBS-480 was designed with a shorter bell to compensate for the typical tuning challenges of the baritone saxophone and is meant to bring better consistency and accuracy in difficult tuning situations.
Tip 4: What They Play Matters
Move the needle forward on your students’ sound by finding a setup that you know works for the environments your students play in and for the sound you want. However, even with the most careful, best-intentioned students and meticulous repair services, the lower saxophones tend to get beat up in band programs. The YBS-480 is meant to bring your baritone saxophonists the same durability, intonation and response of the last model (the YBS-52) but with notable improvements in pitch accuracy and the option to add a peg. Getting smaller-sized students playing the horn earlier is now a possibility with the option of screwing a peg (sold separately) into the attached receiver.
Here’s an indisputable fact for which I can personally vouch: Electric guitars make great holiday gifts. And here’s a second indisputable fact: Recipients of electric guitars won’t fully appreciate the gift unless they’ve got an amplifier to plug into. Granted, you can kind of hear the sound of unamplified electric guitar strings as they thwack against the frets, but how much fun is that, really?
If you’re just coming to this realization the hard way — i.e., you bought your loved one an electric guitar but neglected to get an amp to go along with it — don’t worry. You’re not the first person to make such an error, and it can be easily remedied. All you have to do is find a good amplifier to add to the equation.
Doing this may seem a little intimidating if you’re a newbie, but choosing a suitable amp is actually not all that difficult. The main reason is the rise of something called “digital modeling technology,” which convincingly imitates the tonal properties of a wide variety of amp types. In other words, these days, pretty much any guitar amp can sound like pretty much any other guitar amp.
So really, the main questions you need to ask yourself concern size and power output (the latter is measured in wattage). Your principal choice will be between smaller “desktop” amps and larger (but not necessarily huge) “traditional” models — though in many cases the most traditional thing about those will be their size and shape.
Desktop Amps
Just to be clear, a desktop amp has nothing to do with the virtual desktop on your computer; it’s not a piece of software and in fact there’s nothing virtual about it. These are actual amplifiers that are small enough to fit on an actual desktop. Take the Yamaha THR10II, for example. It’s just over 7 inches high, 14½ inches wide and 5½ inches deep. There are two different varieties of the THR10II (one has a built-in wireless receiver) but both come with dual 3-inch speakers and put out 20 watts of power — more than enough for learning purposes. Perhaps even more importantly, both have auxiliary inputs and Bluetooth® capability (so they can be used with smartphones, tablets and other music players) as well as headphone outputs so your child can practice to their favorite music in complete privacy … and without disturbing you, other family members, or the neighbors.
Obviously, desktop amps are perfect for practicing at home, but with the THR10II Wireless and larger, 30-watt THR30II Wireless models in particular, your child can practice pretty much anywhere, since they run both on AC power and on batteries. What’s more, their use of VCM (Virtual Circuitry Modeling) means that they can produce a range of sounds much bigger than they are. There are multiple amp tones to choose from, each offering a different amount and/or type of distortion — plus settings for bass, acoustic guitar and other instruments. Add two distinct effects circuits, one for modulation effects (chorus, flanging, etc.) and one for delays and reverbs, and you’ve got an amp that sounds great right out of the box. But if your child is not satisfied with the presets, he or she can download free THR Remote editor software (available for both iOS and Android® devices) which will allow them to tweak those amp tones and effects to their heart’s content.
Another nifty feature of THR-II amps is that they provide an integrated USB port and come with a bundled copy of Cubase AI software, making it easy to take the sound coming out of the amp and turn it into digital audio — going from an actual desktop to a virtual one.
“Traditional” Amps
You wouldn’t want to try putting most traditional guitar amplifiers on a typical desktop, and none of them run on batteries. But just as modeling technology has raised the potential of desktop amps, it’s also made a huge difference in what the so-called “traditional” amp can do. Line 6 is a company that has long been a leader in the development of modeling amplifiers, and they’re continuing their pioneering ways with the Spider V MkII Series.
There are six amps in the Spider V MkII line, each classified principally by its wattage, from the 20-watt 20 MkII to the 240-watt 240 Mk II and 240HC Mk II. As the wattage grows, so do the number of features that the amps offer. For example, the 30-watt V 30 MkII has 128 presets to the 16 in the V 20 MkII, while the V 60 MkII, V 120 MkII, and V 240 MkII all have a 60-second looping device built in, allowing users to play along with parts they’ve created themselves. But no matter which size and power level you choose, every Spider V Mk II model provides more than 200 types of modeled amplifiers, cabinets, and effects — meaning that your child can shift from a chiming, delay-heavy sound à la U2’s The Edge to a gritty Stevie Ray Vaughan-style blues tone with just a few button pushes. As a bonus, they also offer both a “classic” speaker mode for a traditional amp sound and a “full range” mode that lets the user plug in an acoustic-electric guitar or jam track playback.
Although desktop amps are more easily portable than traditional ones, the traditional style tends to work better in more professional settings, including the stage and recording studio. So if your loved one is planning on joining a band or is really taking his or her music seriously, you may be better off investing in a traditional amp right at the outset. That said, if you’re looking for a happy medium between the two styles, consider the Spider V 240HC MkII. It’s a 240-watt “head” (the part of an amplifier that does the actual amplifying) that, when plugged into a speaker cabinet, has enough power and punch for almost any venue. But the head doubles as a combo; in other words, it has speakers of its own built in as well. Two 4-inch speakers, to be exact, allowing for stereo sound reproduction with no cabinet required at all, and with physical dimensions that are comparable to the Yamaha THR-II amps.
The bottom line is that today’s entry-level amps are way less cumbersome and far more versatile than ever before, making them adaptable to all kinds uses … and good for years of enjoyment to come.
Click here for more information about Yamaha guitar amplifiers, cabinets and accessories.
Click here for more information about Line 6 guitar amplifiers.
You’ve finally decided to improve the sound coming from your TV – or you know someone who’d really appreciate better sound too – and you’ve decided that a new sound bar will make the perfect gift for them… or for yourself.
But which one to get? Here’s a quick overview of the key factors and features you should consider when buying a sound bar.
Surround Sound Capability
Despite their small form factor, sound bars can create virtual and true 3D surround sound. Digital sound projector sound bars do this by bouncing discrete beams of audio off the walls and ceiling of your room to create sound that comes from all around you. This method works well for rooms that have solid walls on all sides, but not as well for rooms that are more open.
Other types of sound bars use signal processing to simulate side and rear effects for virtual 7.1-channel surround sound. These sound bars work well in all rooms, but aren’t as effective as a digital sound projector sound bar in a room with four solid walls. So start by asking yourself the question: How is your room (or your friend’s room) configured?
Will It Fit?
Decide where you want to put the sound bar, and check the dimensions to make sure it will fit there. Keep in mind that some sound bars can be mounted on a wall (normally below the TV), and some are meant to sit on a tabletop below the TV. If the sound bar will be sitting on a surface, make sure it is not tall enough to block the TV.
What Can I Connect To It?
Consider what devices you want to connect to the sound bar. If the TV supports Audio Return Channel (ARC), you can connect it to the sound bar with an HDMI® cable.
If the TV does not support ARC, you will need to use an optical cable to connect it to the sound bar.
If you will also be connecting a game console, Blu-ray Disc™ player or a streaming media player (like an Apple® TV) to the sound bar, you will need more HDMI inputs on the sound bar, or you will need to connect the devices to the TV instead of the sound bar.
Connectivity
A sound bar is more than a speaker for a TV – it can be an entertainment source. Many come equipped with Wi-Fi, Bluetooth® or even AirPlay 2®, so you can play music from a phone or computer and listen to streaming services and internet radio through the sound bar. If enjoying music through your sound bar is key, check for connectivity options like these:
Subwoofer: Built-in or Stand-alone?
A subwoofer is a speaker that reproduces only the lowest bass frequencies. In other words, it puts the oomph in explosions and those low rumbles you can feel in your chest. It’s an integral part of any home theater system.
Some sound bars have subwoofers built in, while others come with separate subwoofers. Stand-alone subwoofers are often more powerful and effective than the built-in variety, but if there isn’t a lot of floor space where the sound bar is going to be positioned, you might want to go with one that has a built-in subwoofer. Built-in subwoofers can still sound great!
Voice Control
In this era of the smart home, remote controls are so yesterday. Voice control is becoming more and more standard with Alexa, Google Assistant and Siri® (via AirPlay 2) able to control many sound bars and speakers. Some sound bars like the Yamaha YAS-109 have Alexa built-in, meaning that you don’t need an external Alexa device to control them — you can talk directly to a YAS-209 and ask Alexa to turn up the volume or play music from a streaming service.
App Control
If you’re not comfortable with voice control, but you don’t like looking between the couch cushions for your remote control, many sound bars can be controlled with an app from your smartphone or tablet. Apps are especially handy if you’re playing music from a streaming service through your sound bar and scrolling through your playlists. For example, with the free Yamaha MusicCast Controller app, you can link MusicCast wireless speakers, sound bars and receivers in other rooms and control playback throughout your home from your smartphone or tablet.
Warranty
You hope you never have to use it, but it’s good to know how the manufacturer stands behind its product. The most common warranty period is one year, with premium brands like Yamaha offering two years.
Extras
You should also determine if there are other special audio and video features or compatibility that sets one sound bar apart from another. As an example, since the Yamaha YAS-109 has Alexa built-in, you can control an Amazon Fire TV Stick directly from the sound bar, asking it to play your favorite TV show or Amazon Prime movie.
How / Where / Features
The main thing to consider when shopping for a sound bar is how and where it will be used. In addition, when doing your research and reading reviews, identify the features that are most important to you. These are the factors that will enable you to choose the sound bar that is the best fit.
Click here for more information about Yamaha sound bars.
It’s that special time of year again when holiday music dominates the airwaves, stores, elevators and just about any other place you can think of — all to get us in the proper spirit to enjoy friends and family (not to mention shopping!). Here are the stories behind a dozen of the best-loved songs of the season:
1. Deck the Halls
One of the first Christmas carols, this is based on a Welsh melody from the sixteenth century, with lyrics added in 1862. Check it out here.
2. O Come All Ye Faithful
No one is really sure who wrote this! The oldest known manuscript is dated 1751 but the song may have been written as much as a century earlier. Check it out here.
3. Silent Night
This was composed by an Austrian schoolmaster in 1818. The melody that is used today differs slightly from the original rhythmically, and is also played at a slower tempo. Check it out here.
4. Jingle Bells
Written in 1857, this was actually intended as a Thanksgiving song but became associated with Christmas music in the late 19th century, when it was often used as a drinking song at parties: people would jingle the ice in their glasses as they sang. Check it out here.
5. Santa Claus Is Coming to Town
First sung on Eddie Cantor’s radio show in November 1934, this song found instant success, with half a million copies of the sheet music and more than 30,000 records sold within 24 hours. Check it out here.
6. Rudolph the Red-Nosed Reindeer
This 1949 hit by Gene Autry was based on the 1939 story of the same name popularized in a booklet distributed by the Montgomery Ward department store. Check it out here.
7. Little Drummer Boy
Originally known as “Carol of the Drum,” this was written in 1941 by composer and teacher Katherine Kennicott Davis. The most well-known recording of the song was made in 1958 by the Harry Simeone Chorale … but perhaps the most unusual was Jimi Hendrix’s cover version — his last recording prior to his tragic death in 1970. Check it out here.
8. White Christmas
Think the best-selling single of all time is a Beatles song, or perhaps something by Michael Jackson? Think again. This classic, written by iconic American songwriter Irving Berlin, has sold over 100 million copies worldwide, half of them the Bing Crosby rendition … although he had to re-record it in 1947 when the original 1942 master was found to be damaged due to frequent use. Check it out here.
9. Have Yourself a Merry Little Christmas
First introduced by Judy Garland in the 1944 movie Meet Me in St. Louis, but the Frank Sinatra version we all know and love was recorded in 1950, with slightly modified lyrics that changed the song’s focus from anticipation of a better future to a celebration of present happiness. Check it out here.
10. Blue Christmas
This was a hit for various country artists in 1950, but it was Elvis Presley’s iconic 1957 recording that cemented the song’s status as a rock’n’roll holiday classic. The King’s version is notable musicologically in that the backing vocals utilize numerous minor thirds (so-called “blue” notes) that act as a musical play on words. Check it out here.
11. Do You Hear What I Hear?
Twenty years after “White Christmas,” this was another holiday hit for Bing Crosby, even though it was actually written as a protest song in the midst of the 1962 Cuban missile crisis. Check it out here.
12. Feliz Navidad
Written and recorded by José Feliciano, this not only charted when it was first released back in 1970 but then proceeded to re-enter the Billboard Top 100 in 1998, and again in 2017 — a rare hat trick! Check it out here.
There’s nothing quite like the enveloping experience of a surround sound system. From virtual options offered by sound bars, to 5.1-channel discrete surround, all the way up to 11.2-channel systems, your home theater can be outfitted in a number of ways at a variety of price levels. Whether you choose to go the all-inclusive HTIB (Home-Theater-In-a-Box) route or piece your system together component by component, the audio portion of your favorite blockbuster movies, sporting events, video games and hi-def concert videos will perfectly complement the visuals on your home theater screen. After all, good picture deserves equally good audio.
Let’s explore what you need to know when you start on your quest to give the gift of surround sound.

Sound Bars with Surround Capabilities
The simplest and least expensive way to surround sound is to purchase a sound bar that offers virtual and/or 3D surround options such as DTS Virtual:X™, Dolby Atmos® or DTS:X™, all of which simulate sound effects that seem to move around you — even with a sense of height. Sound bars are relatively inexpensive and since they can be mounted on the wall or placed by your television, they take up very little space. Connectivity is easy too: All you need is a standard HDMI cable to hook up the sound bar directly to your TV. (Just make sure it supports the Audio Return Channel (ARC) feature. If not, you can also connect the sound bar via an optical cable.).
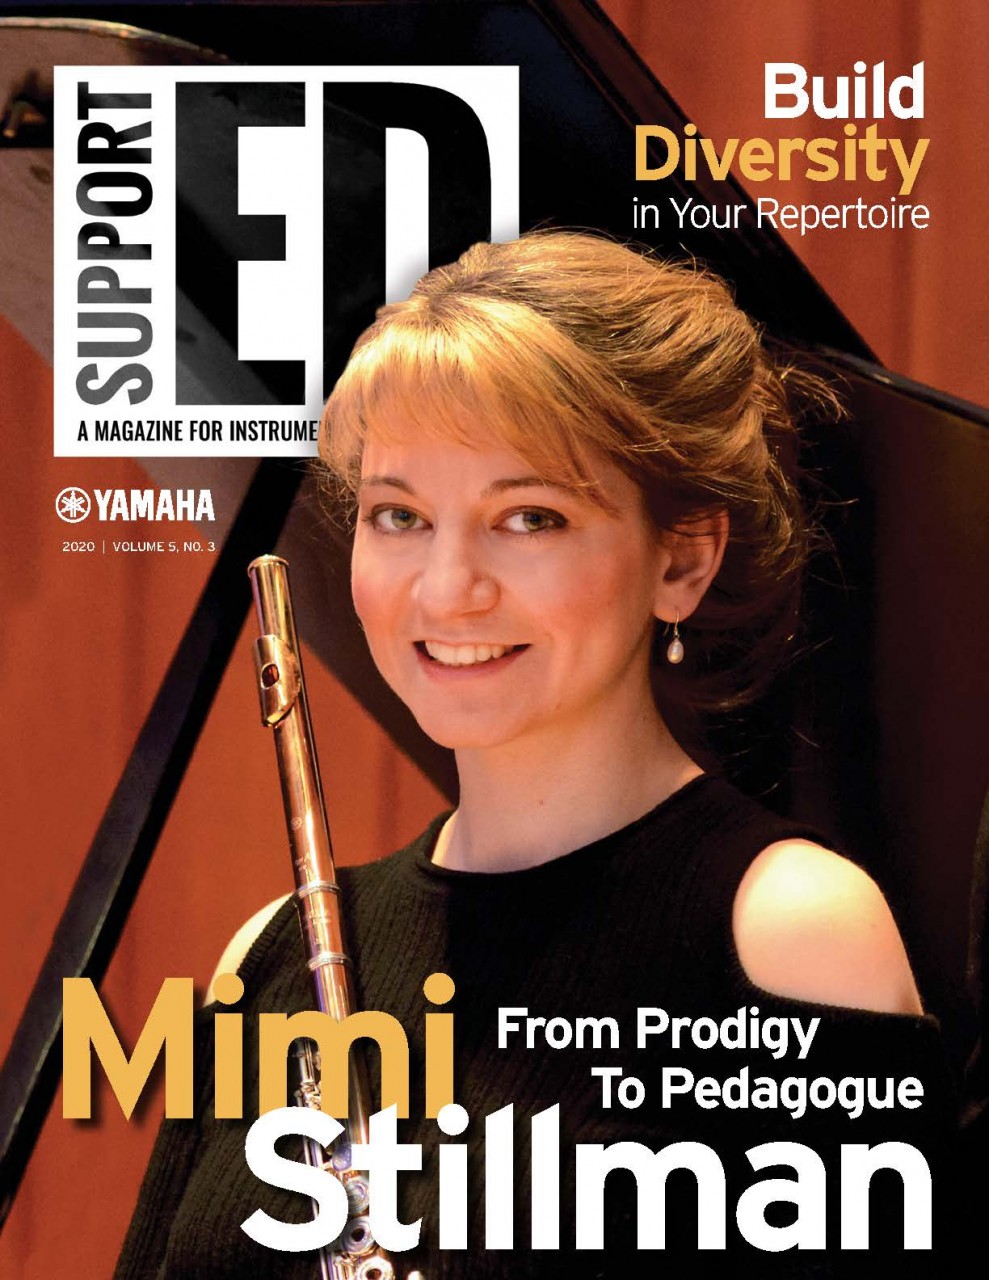
The Yamaha YAS-109 is a good example of an entry-level sound bar. It has Alexa built-in, along with subwoofers for deep bass, plus the ability to create virtual surround sound via DTS Virtual:X.
To take the sound bar experience a step further, check out the Yamaha MusicCast BAR 400. Like the YAS-109, it provides support for DTS Virtual:X as well as Wi-Fi®, Bluetooth®, Airplay 2® and Spotify Connect, plus voice control via Alexa and Google Assistant devices or Siri® via AirPlay 2. It includes a wireless subwoofer and because it’s part of the MusicCast family, you can easily create a 5.1-channel home theater by adding a pair of Yamaha MusicCast 20 or MusicCast 50 wireless speakers.
Home-Theater-In-a-Box (HTIB)
The next level up would be a complete integrated HTIB system that includes all the components and speakers necessary for a discrete (that is, non-virtual) surround sound experience. HTIBs come in a variety of sizes at different price points and with varying feature sets, but the Yamaha YHT-595OU provides particularly good value. It comes with five high-quality speakers (front left, center and right, plus rear left and right), a dedicated subwoofer, a MusicCast-enabled AV receiver and all necessary speaker wires. The big advantage here is setup time, which is pretty minimal. With such a system, you could be watching that surround sound movie before the popcorn is even popped!
Individual Components
If you’re shopping for a true audio connoisseur, you’ll probably want to purchase individual components so they can create their own custom surround sound system. This isn’t nearly as daunting as it may seem. (There’s a wealth of information on the subject online, and right here on the Yamaha blog: Check out the article “Home Theater Basics” or the four-part “Home Theater on a Budget” series.) The heart of any such system is an AV receiver, and the good news is that most of today’s receivers can output at least a 5.1-channel signal consisting of front left, center and right speakers, plus rear left and right speakers, along with a subwoofer (that’s the “.1” channel, which consists of low frequencies only).
A great example of an entry-level AV receiver is the Yamaha RX-S602. It has a low-profile slimline design and an abundance of features, including voice control via Alexa and Google Assistant devices or Siri via AirPlay 2, as well as full 4K Ultra HD HDMI support, along with Wi-Fi, Bluetooth, AirPlay 2, Spotify Connect and MusicCast multi-room playback options. If you want to avoid having to run cabling to the rear speakers in your setup, simply add a pair of Yamaha MusicCast 20 or MusicCast 50 wireless speakers.
Yamaha MusicCast 20 speakers.
Yamaha MusicCast 50 speakers.
For those who want to take their home theater experience beyond 5.1, you’ll need to start with a receiver that includes more speaker outputs. For example, to play back movies mixed in Dolby Atmos, you need a receiver with outputs for at least seven speakers and two subwoofers, plus, for the best immersive experience, at least two “height” speakers (which can be in-ceiling or upward firing). DTS:X has no official requirement in terms of the number of speakers (it adapts to however many your system has), but the more speakers, the better the experience. The Yamaha RX-A3080 offers 9.2-channel playback (with 11.2-channel processing) for playback of Dolby Atmos- and DTS:X-encoded material. It also features proprietary Yamaha Surround:AI® technology to automatically optimize the surround sound in real time. Like many other Yamaha AV receivers, the RX-A3080 also offers 4K Ultra HD support as well as voice control, Wi-Fi, Bluetooth, AirPlay 2, Spotify Connect and MusicCast.
Once you’ve selected the AV receiver, the next step is to choose the speakers for the system. This choice is largely subjective, so listen to as many as possible before making your final decision. Yamaha offers several good options for front and rear speakers, including NS-333 bookshelf speakers (designed specifically for home theater applications), or NS-555 floor-standing speakers, which have a three-way bass reflex design ideal for home theater.
The center channel normally carries dialog instead of music or background effects, and so the speaker you choose to carry that signal should ideally be designed for that purpose. A good option is the Yamaha NS-C444, which incorporates a two-way acoustic suspension and a waveguide horn that allows the sound waves to reach your ears without getting reflected off the walls.
Finally, you’ll need to purchase at least one subwoofer (though, depending upon system configuration, sometimes two are required). This is a specialized speaker that has one job, and one job only: to reproduce the low frequencies that put the punch in action such as explosions, fight scenes and car chases. An excellent choice is the Yamaha NS-SW100 powered subwoofer, which features Advanced YST II (Yamaha Active Servo Technology II) for stable and accurate response of everything from the rumble of action movies to the low notes in a favorite movie musical or live concert film.
Check Out the Video
Here’s a video that shows you how to take a surround system to the next level:
Whether you decide to purchase a sound bar, go the all-inclusive HTIB route, or select individual components, shopping for a home theater surround sound system can be fun and, dare we say, binge-worthy too!
Ready to learn more about surround sound? Check out these related blog postings:
A quality home theater system is essential if you want to experience your favorite blockbuster movies, TV shows and live concert videos in all their glory. But it can actually be much more than that. With a home theater, you can immerse yourself in the exciting visuals and sound effects of an action-packed video game, or enjoy your favorite music, audiobooks, satellite radio and podcasts in full fidelity for an audio experience like you’ve never heard before. With advanced technology such as Yamaha MusicCast, you can even stream content to several different rooms in your home simultaneously.
For the home theater newbie, all the jargon and tech-talk may seem daunting. But it’s actually not all that complicated. In fact, with a little knowledge and planning, the process of buying and assembling a home theater system is much easier than you may think. Let’s take a look at what you need to know to get started.
Video Options
Every home theater starts with video. For the best visual experience, go for the largest screen TV your budget allows. A 720p (HD) screen resolution is a minimum requirement and acceptable for broadcast content, streaming and DVD movies, but the more common 1080p (“Full” HD) will really bring those Blu-ray Discs™ to life. Taking things up a notch is 2160p 4K Ultra HD technology, which provides up to four times the resolution of 1080p and is the standard for TV. Most 4K sets are available with HDR (Higher Dynamic Range) technology, which further expands the color range and contrast of 4K Ultra HD content.
Recently, several manufacturers have begun to release TV models with 8K resolution, offering four times the number of pixels of 4K, so if you’re comfortable being an early adopter, that’s another option to consider.
Two Audio Approaches
When it comes to the audio side of things, there are two basic approaches you can take. One is to select each audio component individually. Alternatively, you can simply buy a complete system (often referred to as “HTIB” — short for “Home Theater in a Box”) that includes all the components you need. A good example of this is the Yamaha YHT-5950U, which includes a 5.1-channel AV receiver with numerous advanced features, five matched speakers and a 100-watt powered subwoofer.
Ready to Receive
The center of any home theater — the “brains” of the operation — is the AV (audiovisual) receiver. It provides the inputs and outputs to route signal to and from the various components in your system, such as your television, gaming console, Blu-ray Disc / DVD / CD player(s) and speakers. Some AV receivers even include Bluetooth® capability for wireless operation and connectivity to your mobile devices and Wi-Fi® networks.
There are five main features you should look for in an AV receiver:
1. The number and types of inputs and outputs
2. The number of speaker channels
3. Power rating
4. Wireless capabilities
5. Sound quality
While each receiver is different, some important input/output (I/O) options include HDMI®, optical, coaxial digital and analog ins and outs; USB port connections; headphone outputs; and, of course, speaker outputs. Your I/O and channel needs will depend upon how large or small you want your system to be (and it’s always good to have future expandability in mind), but having at least 5.1 speaker channels is a good starting point. Moving beyond that — up to 7.1, 9.1 and 7.2.4 — you may even want to incorporate a second subwoofer, where you would need a “.2” classified receiver, which features an additional sub output. The Yamaha flagship AVENTAGE RX-A3080 can output 9.2 channels (nine speakers and two subwoofers) and process up to 11.2 channels for those blockbusters released in Dolby Atmos® and DTS:X™. It also provides 4K Ultra HD HDMI support for higher-definition picture viewing.
As for power rating, the output of amplifiers is measured in watts (more specifically, watts per channel). More power doesn’t always translate into better sound, but in general, a 200 watt per channel receiver will be louder than a 50 watt per channel model … though not four times as loud.
Another important option in today’s receivers is the ability to wirelessly connect to modern devices such as smartphones, tablets and even speakers, and the Yamaha RX-V485 AV receiver provides options galore. It offers MusicCast as well as standard Wi-Fi (great for connecting to wireless speakers — see below) and even lets you use voice control from Alexa devices, Google Assistant devices, and Siri® via Airplay 2®.
Sound quality is both measurable and subjective, but it’s always a good thing when a receiver offers options to customize the sonics. Many Yamaha receivers offer a feature called YPAO™ (Yamaha Parametric room Acoustic Optimizer), which analyzes your space and components, then calibrates the speaker outputs for optimal listening.
Surround Yourself
Think stereo is good enough for a home theater? Think again. Once you hear your favorite movies and games coming at you in surround sound, you’ll wonder how you ever got along without it.
As we mentioned, the basic speaker setup for home theater is a 5.1 system. This includes main left and right speakers, a center channel speaker, left and right surround speakers (placed either in the rear of the room, or to the sides of the listening position) and a subwoofer for that extra low end (the sub is the “.1” channel). All these speakers — and more, if you have a 9.1 or 9.2 system — connect to the AV receiver.
There are also wireless speakers available that fit into any space and alleviate the need to run cables or having to drill holes in your walls and/or floor. The compact Yamaha MusicCast 20 is a good example of such a product, offering not only Wi-Fi, but AirPlay 2, Spotify® Connect and Bluetooth connectivity as well.
To the Bar
Another option is to utilize a sound bar instead of front left/right/center speakers (some even contain built-in subwoofers!). A sound bar is typically placed in front of your television or mounted on a wall, and is connected via an HDMI, optical or analog output. Some sound bars can decode Dolby and DTS encoded soundtracks for virtual surround sound, but if you prefer the real thing, you can easily connect a sound bar to a subwoofer and/or rear speakers — even wireless models.
Sound bars are a sleek option where space is at a premium, and, in certain setups, can even replace the need for an AV receiver. As an example, the Yamaha MusicCast BAR 400, with its Bluetooth capability, allows you to connect your smartphone so you can wirelessly stream music from your favorite source.
Subwoofer
The subwoofer is different from the other speakers and is designed to reproduce only low frequencies — the ones that can shake your room with every explosion and jet plane flyover, which is especially important in home theater. Overall, they add a fuller sound to the movies you watch, the games you play, and the music you listen to.
There are two basic kinds of subwoofers: powered and passive. You can connect either to your AV receiver or sound bar, but passive subwoofers need an additional external amplifier to drive them, whereas powered subwoofers (which are the most common type) contain their own built-in amplifier — and one that is properly matched, ensuring optimum performance. The Yamaha NS-SW1000 powered subwoofer, for example, includes an amplifier with a whopping 1,000 watts of digital power for maximum impact.
Unlike full-range speakers, subwoofers can be placed pretty much anywhere in a room. That’s because the human ear isn’t able to discern low frequency sounds as appearing from any particular place — in technical terms, their sound isn’t localized.
Extras
There are a few extra accessories to consider when putting together a home theater. For one thing, you’ll need cables: HDMI cables to get from the TV to the AV receiver, audio cables to connect speakers (unless you’re using wireless speakers), and, in all likelihood, other kinds of analog or digital cables that your various components may need. Some components include cables, but these are generally not of the highest quality, so you may want to invest in premium cables, easily obtained from any dealer or online retailer.
Other add-ons may include speaker stands (for optimum positioning), mounting hardware, and — perhaps most importantly — a comfortable chair for enjoying all the great experiences your home theater can bring.
For more information about home theater, check out the following blog articles:
Berard was part of the team that opened Fossil Ridge in 2004 and oversaw the explosive growth of the award-winning concert and marching band programs there.
Q. When did you know that you were going to make music the focus of your professional life?
A. I knew pretty early on in high school when I simply “found my place” in music. My music experiences in band, choir, theater, etc., provided me with a circle of friends, a home and a place to belong, and helped me understand myself and connect me to something larger. I was fortunate to have had incredible teachers and experiences at every level of my music education, and I was able to pursue many opportunities in and out of school.
I discovered so much great music during that time. Everything was interconnected — an album led to an artist who was influenced by so-and-so, and if you liked this then you’re really going to love that, etc.
I didn’t know what I was going to do at the time, but music spoke to me in a way that nothing else in school ever did, so there simply was no way that I couldn’t have music be central to my daily life. I have never regretted that decision for a moment!
Q. What is your favorite guilty pleasure food?
A. A good old Wisconsin Friday Night Fish Fry.
Q. Why is music important to humanity?
A. Because music does exactly that: Helps us understand our humanity. When we understand our humanity, we understand that all that seemingly divides us pales in comparison to what brings us together. It is our humanity that will bring solutions to our problems, and our humanity is understood through the arts.
Q. Other than music, what brings you inspiration?
A. Growing up on a lake in Wisconsin and having spent most of my adult life in Colorado, the beauty of nature has always been a central, inspirational and grounding force in my life. Aside from that, I am inspired by so many things — art, painting, dance, poetry, athletics, film, design — that the list is too long to enumerate. This may sound cheesy, but I find the most inspiration from people who “live their purpose” by relentlessly pursuing their passion with such conviction that you simply can’t deny their authenticity, vulnerability and impact.
Q. Which person from history, dead or alive, would you want to have lunch with and what would you discuss?
A. I would be interested in talking to President Barack Obama and hearing what he has to say about a wide range of topics.
Q. What is the most embarrassing moment of your life that you can share?
A. I called a student by the wrong name for four years! She finally corrected me at graduation. When I told her that I was really proud of her, she finally told me that her name is Catherine not Caitlin. She said that she didn’t have the heart to correct me after the first month or so of her freshman year!
Q. What piece of music do you wish you had written and why?
A. My “pop music” answer would be anything by the Beatles. Those songs are timeless and still resonate with people.
My “profound” answer is “Mass” by Leonard Bernstein. It is such an eclectic masterwork, combining so many different elements in such a unique way, spanning from comic and satiric to deeply moving and profound, intimate yet gargantuan. It is one of those works that I always discover something new in and moves me on an intellectual, spiritual and emotional level. The themes also resonate today every bit as vividly as they did when it was composed.
Q. What is your biggest pet peeve?
A. Sitting in traffic.
Q. Why is it important to protect access to music education?
A. Music and arts education is vital, maybe now more than ever, to our understanding of the human condition, the world around us and how we will forge our future. As John Lennon said, “You may say I’m a dreamer,” but I would love to envision an education system where every student is connected to a group of peers, a positive adult mentor and a community of people striving for a common purpose in an environment that promotes understanding, tolerance and acceptance. Students who participate in music on a regular basis have all this.
I believe the solutions to many of today’s problems could come from investing in students who are every bit as creatively, emotionally and artistically literate as we try to get them to be mathematically or scientifically literate in our school systems. Without access to arts education, a vast portion of the human experience is simply cut off from students in our school systems, and so often it is these artistic endeavors that provide the catalyst for success in other areas of school.
In this capacity, she presents sessions with practical success strategies for music educators at state music conferences, district in-service days and dealer workshops. Neel is also a Yamaha Master Educator.
Q. When did you know that you were going to make music the focus of your professional life?
A. I can’t remember a time when I didn’t know that my life would revolve around music. I started piano lessons in 2nd grade and was selected to be in a city-wide choir in 4th grade, but it was in the 8th grade that my junior high school choral director provided me with opportunities to accompany as well as conduct the school choir. That was it! Fortunately, he was also the high school choir director, so along the way, I was provided with many additional opportunities to expand on those experiences.
A. A high degree of excellence in any field inspires me and motivates me to continue seeking the same in myself. Having said that, I’m especially inspired by young people who have met and surpassed challenges and realized great success as a result of being actively involved in music-making.
Q. What is the most embarrassing moment of your life that you can share?
A. On a flight from Columbus to Boston, the plane experienced sudden and extreme turbulence while I was walking in the aisle. The flight attendant sternly told me to sit down and grabbed me by the shoulders and threw me over a man’s lap who was sitting on the aisle. The way I landed on that man’s lap on my way to plopping down in the empty middle seat was really embarrassing — there was some very awkward body contact! I ended up marrying that man, and we have been together for over 40 years. To this day, I believe that the turbulence on that flight was divine intervention!
Q. What piece of music do you wish you had written and why?
A. “Cockeyed Optimist” from South Pacific. It’s me to a T!
Q. Why is music important to humanity?
A. Music provides us with the ability to connect and communicate with one another in an honest and profound way that leads to bringing out the best in everyone. It is uniquely human and a vehicle of emotional expression that far surpasses the spoken word. It serves as a microcosm of emotions as evidenced by its powerful ability to transport us from one place to another in a matter of moments. It teaches us that the whole is bigger than the sum of its parts yet it completes us as individuals at the same time. Perhaps Henry Wadsworth Longfellow summarized it best when he observed that, “music is the universal language of mankind.”
Q. What is your favorite guilty pleasure food?
A. Peanut butter fudge — OMG!
Q. Which person from history, dead or alive, would you want to have lunch with and what would you discuss?
A. I would love to see “Hamilton” with Barack Obama then hang out afterward and talk about whatever comes up. Since he is such an authority on the Constitution, I would also love to spend time learning more about his interpretation of the intent of the Founding Fathers when they authored the original document.
Q. What is your biggest pet peeve?
A. Laziness — absolutely hate it!
Q. Why is it important to protect access to music education?
A. Music-making brings us together through the creative process and binds us for a lifetime. It transcends all cultures and teaches us acceptance and tolerance through the gestalt of the music-making experience. Not to minimize the innate value of performing great music, engagement in music programs also teaches students empathy and contributes to personal growth by developing characteristics that lead to the lifting of the spirit of mankind. We must continue to ensure that ALL students are provided with these life-changing opportunities.
As part of her True North approach to instructing, Dr. Emily Threinen sees opportunities to abandon the stick.
Specifically, the Director of Bands and Associate Professor of Music at the University of Minnesota recognizes when the baton is going to be helpful and when she needs to leave the podium to address an issue — especially with developing ensembles.
A Bright Light
Often, Threinen makes teaching rather than conducting her priority. “If an ensemble is having trouble hearing and playing with a steady internal pulse, a beautiful stick technique will likely not solve the problem,” she says. “With developing ensembles, I think much less about my conducting and much more about my teaching. Certainly, the two work together, but if the musicians need attention on fundamentals, especially related to hearing beyond themselves, I have to put my own desire to conduct aside to ensure we are achieving what is most important in the moment.”
Threinen has officially gone from student to teacher — full circle at her alma mater, no less — but she’s not done learning. Her style is creating a positive teaching approach, preferring the carrot to the stick.
“I have high standards for my ensembles and for myself, and I try to show this through my enthusiasm, joy and passion for the work and not with disappointment that it doesn’t sound as excellent as it could,” Threinen says. “Certainly, there are rehearsals where I get frustrated, but I try not to use my frustration as a motivator. I have discovered that sometimes this can make the learning process more about my goals and less about the students, the composer or the music. Finding ways to stay positive in my teaching is one aspect that keeps me growing.”
This thinking furthers Threinen’s view of what it means to be a music teacher. “At the core, I believe the role of a music educator, conductor and music advocate is that of a servant,” she says. “We serve those who are in our classrooms, ensembles, community, institutions and beyond.”
Threinen’s passion and overall approach hasn’t gone unnoticed by her peers. “She is tenacious in pursuing, uncovering and unleashing the potential within the players to realize what she has imagined the music to be,” says Threinen’s friend, Dr. Travis J. Cross, the chair of music at the University of California, Los Angeles.
Directional Aid
A positive approach doesn’t mean ignoring details or problems. While Threinen’s delivery is direct and efficient, she focuses on being encouraging, clear and purposeful with communication.
She is not afraid to tell students when the work isn’t their best. With developing ensembles, she shares how musicians can practice to improve and what specifically needs to be addressed instead of just saying that a passage doesn’t sound good or accurate.
“My goal is to create a productive, engaging and professional environment,” Threinen says. “I don’t like to have tension in the rehearsal space for me or for the ensemble. I’m quite intentional in my verbal directives, and I try never to make an individual feel bad about themselves. I strive to be positive and encouraging with every group I stand in front of, regardless of ability, age or experience.”
When it comes to working with students with varied capabilities, teachers and conductors have a tough decision of where to set the bar. “I try not to set my standard to the lowest or highest denominator; I shoot for three-fourths of the way up,” Threinen says. “I don’t want to make our collective goals unattainable, but I want to push all of my students and ensemble members beyond what they think they can do. People tend to rise when they’re challenged.”
For those students at the top, Threinen encourages teachers to help them find ways to branch out and excel outside of school by taking private lessons, auditioning for competitions and honor ensembles, and performing with regional youth or community ensembles. When she was a high school teacher, Threinen worked with high-achieving students through chamber ensembles and the International Baccalaureate music program, which focused on critical and independent thinking. She also mentored students to use their active listening and other skills to identify composers, cultures, periods and styles in the Minnesota Music Listening Contest.
Threinen knows firsthand the importance of teachers, particularly in the arts. She credits her high school music teacher, Tim Smith, for encouraging her to pursue a career in music. “I can’t thank all of my music teachers enough or express how much they changed my life,” she says. “I wouldn’t be the same person if it wasn’t for each of them. It’s important that all teachers and professors know that they make an incredible impact on students’ lives, often in ways they may never know.”
Pivotal Points
When it comes to working with students at different stages in their musical careers, Threinen uses her own experiences as a guide to decide when to focus on inspiration and when to look at the realities and challenges of the job market.
With high school students, Threinen encourages the love of music. “When I work with high school students, I try not to think about the responsibility of them getting a job,” she says. “My excitement for the art form is what I always try to impress upon them. The practicality around a career in music is real, but I aim to put that second to inspiration. With this age, I believe that fostering desire through encouragement is essential.”
Younger students have their own challenges. Threinen says it takes special and talented people to teach elementary and middle school. “There are so many other things younger students are thinking about at this stage when comparisons and self-identities start to take shape,” she says. “In middle school, music programs start emphasizing assessment and competition, which can change students’ perception of the essence of music and ensemble participation. Wouldn’t it be great if all music and ensemble programs could focus only on the music and the individuals creating it?”
With college-age musicians, Threinen remembers what she learned: Success has no singular definition and looks different for everyone. “At the end of college, I started to see that there was more variation in what success looked like than I originally believed,” Threinen says. “I have learned that there are infinite ways to be successful, and a career in music has many paths. I am practical with my collegiate students on the realities of the highly competitive job market, but I also try to encourage an open and opportunistic mindset.”
Steadfast and Sure
Threinen considers herself a lifelong student. As a music educator, she continues to use the skills that she has learned along her journey, including adaptability to varied situations.
“We all have our own barometer of what we will accept in a situation,” Threinen says. “Certainly, I have expectations, especially with musical elements in a score, but I also try to be flexible. I walk into every environment and try to adapt my expectations to what is in front of me. Each day in my job, each guest conducting engagement and each opportunity to teach is a chance for me to modify, refine and learn.”
Threinen adds, “What do I give to the music community? I give me as I am in the moment. I share my passion for music, my joy of teaching and my care for the people I am with. I do my best to be wholly present from our first introduction to the last double bar.”
When it comes to the trajectory of her career as well as those she nurtures, Threinen is proof that through hard work, dedication and flexibility, stars — North and otherwise — can be made, not just born.
Emily Threinen At A Glance
Bachelor’s: Double major: Clarinet Performance and K-12 Instrumental Music Education, University of Minnesota
Photos by Rob Shanahan for Yamaha Corporation of America
This article originally appeared in the 2019 V4 issue of Yamaha SupportED. To see more back issues, find out about Yamaha resources for music educators, or sign up to be notified when the next issue is available, click here.
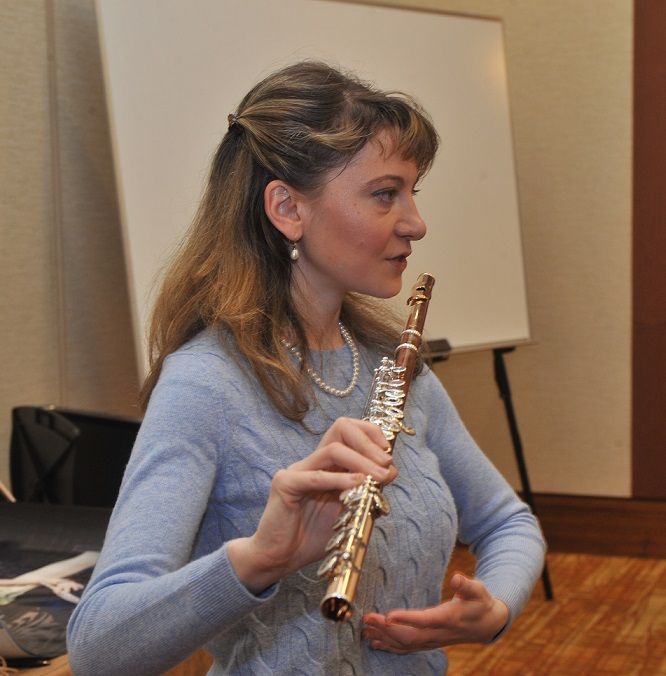
December is hectic for Jason Robb, director of bands at Rouse High Schoolin Leander, Texas. He runs two high school holiday concerts, six middle school concerts and a pancake dinner fundraiser for his booster organization.
Jason Robb, Rouse High School
He also holds student auditions for local band placements, participates in All-Region Band auditions and is involved with Rouse’s lock-in day of fun activities before winter break. Robb has learned, through trial and error, how to schedule events throughout the month without overwhelming his students or himself.
“One year, we had a concert on Thursday, lock-in on Friday and hosted a region band clinic and concert on Saturday,” Robb says. “It was so brutal. We now try and not have any events back-to-back.”
When the end of the year comes into focus, your schedule may be packed as you prepare students for concerts and events. Factor in other school commitments, such as submitting end-of-semester grades, and personal commitments like holiday shopping and entertaining, and you may become overwhelmed and overstressed.
“You come back from Thanksgiving break, and you basically have three to five weeks, and there isn’t that much time to get that stuff done,” Robb says. “As teachers, our job is to inspire these young leaders. If your cup isn’t full, you have nothing to pour into their cups.”
Here’s how to get through the busy month of December with grace.
Plan Ahead
Jenna Yee, Stiles Middle School
Figuring out your schedule weeks, months and even an academic year in advance will help things run smoothly.
“I really look at the calendar: How can we be more efficient, get more done without being at work all the time?” Robb says. “Be creative about ways to smush it down. … For example, how can you combine meetings?”
To stay on top of grading, Robb collaborates with his assistant directors, and everyone uses Google Sheets to stay organized.
Jenna Yee, band director at Stiles Middle Schoolin Leander, Texas, inputs grades weekly, including in December, so she doesn’t fall behind.
In December, Yee balances two evening concerts, daytime winter assemblies, performances at the elementary schools, and a Region Band Clinic and Concert on a Friday/Saturday that she chaperones.
Ask for Help
Seek assistance at home from relatives or at school from colleagues, students and boosters — even if you’re not accustomed to seeking help.
“As musicians, we’ve been competing since we were little, so we don’t like delegating,” Yee says. “Ask for help, regardless of who you’re asking it from.”
See if your partner can pick up the slack at home when you’ll be busiest, and return the favor when he or she is swamped.
“I feel like it’s a sliding scale,” Robb says. “I’m all in for the family sometimes, and sometimes it slides down, and I’m deep into work. When do I need to work? When do I need to pause and spend a lot of time at home? … It’s all about communicating.”
At O’Fallon (Illinois) Township High School, Dr. Melissa Gustafson-Hinds, director of bands and music department chair, relies on her assistant band director and an administrative assistant who was recently hired for her booster organization.
“If I didn’t get help, we wouldn’t be as successful as we are,” she says. “It is too much for one person to handle alone — almost impossible.”
If your staff is tapped out, look to volunteers. “It could be a parent or a super-smart student,” Gustafson-Hinds says.
Leading into winter break, Gustafson-Hinds manages several madrigal performances, a joint feeder concert with more than 700 musicians, a choir concert, a band concert, various community events, pep band events, concert band auditions, two district festivals, a parade on Thanksgiving weekend and four boosters meetings.
Prioritize Your Time
You may feel like there is always more to do to meet your year-end obligations, whether that means staying late after rehearsals or answering every email in your inbox. Instead, end your workday at a set time, then focus on your personal life.
“Once I started realizing the workflow never stops, you do what you can get to, and then you go home,” Robb says.
To stay organized each day, Robb relies on different apps, including Sparkemail, Google Docs and iCal. “If any one of these tools were taken away, I would not be able to survive,” he says.
Finding work-life balance is essential. “If you are at school, be all in at school. … Do [your tasks] well, so that you don’t have to redo them,” Yee says. “Then, when you’re at home, be home. There will definitely be occasions where a little bleeds through in both directions, but if there is a balance between school and home most of the time, it definitely makes things easier.”
During this busy time, you may not have as much time to prepare for the holidays as you’d like. But you can check everything off your list without compromising.
“I do almost all my shopping online. At this point, our Christmases are sponsored by Amazon Prime,” Yee says with a laugh. “When it comes to cooking and hosting, … my husband is more of a cook than I am. He deals with the food; I deal with the presents. It’s the delegation thing.”
Yee’s husband, Christopher, copes with his own busy work schedule as associate director of bands at Cedar Park (Texas) High School.
Schedule Self-Care
Melissa Gustafson-Hinds, O’Fallon Township High School
With so many obligations, you might be tempted to skip me-time to ensure that you meet all of your responsibilities. However, finding ways to pamper yourself can help make everything else easier to endure.
“If you’re a teacher, you’re giving year-round, but at the holidays, you’re giving more,” Gustafson-Hinds says. “You have to sometimes be the one [to say], ‘I’ve got to give to myself a little bit.’ [So] maybe I’m going to the gym, or I’m having dinner with friends. It’s scheduling a couple of things for yourself … just to cleanse yourself because we get so immersed in what we do.”
For best results, schedule self-care before you think you’ll need it. Whether you define self-care as daily workouts, reading in bed or getting a luxurious massage, add self-care appointments to your calendar and honor them as you would any other work commitment.
This article originally appeared in the 2019 V4 issue of Yamaha SupportED. To see more back issues, find out about Yamaha resources for music educators, or sign up to be notified when the next issue is available, click here.
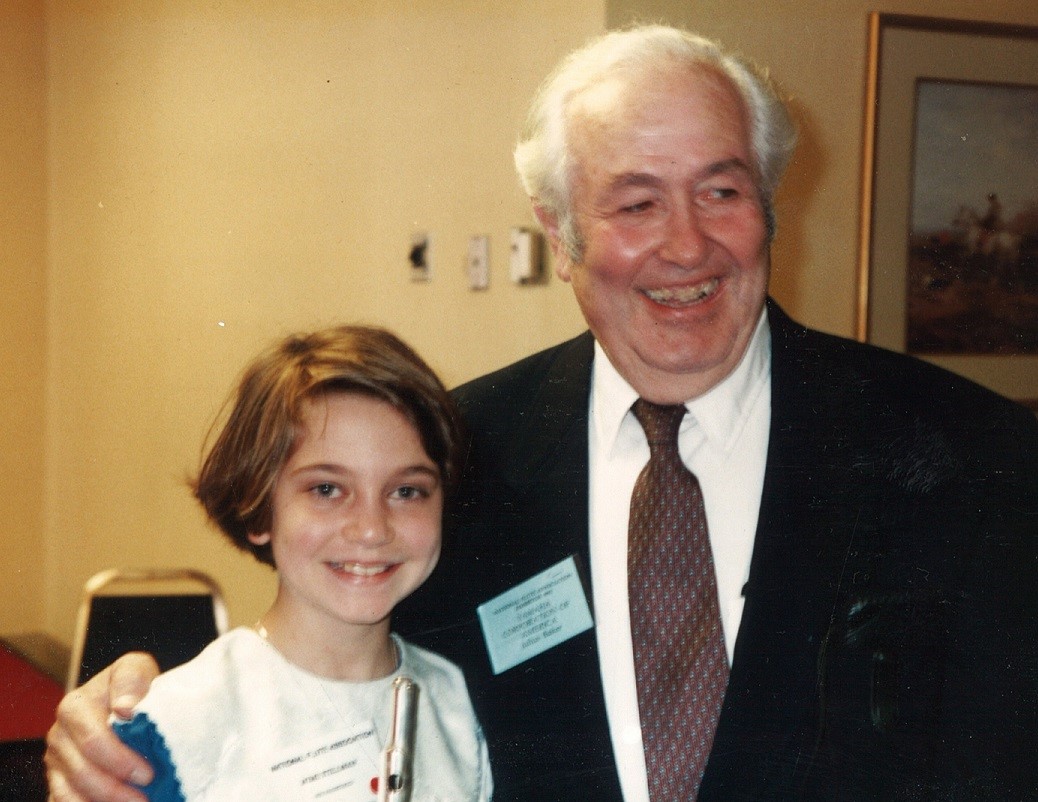
When working with Paige’s Music in Indianapolis, Indiana, local band directors give the game “red light, green light” a new twist.
Tim Dawson, Paige’s Music
Tim Dawson, director of school sales at Paige’s, works with band directors to put together presentations about instrument inventory based on red, yellow and green traffic lights.
All “red-light” instruments are not to be used anymore; “yellow” instruments need repairs or may need replacements in the future; and “green” instruments are in good condition. Directors then present this information to their school administrators to break down what services and instruments they need and why.
“It’s important that directors know their inventory [and] get their hands on the instruments to see what they have, what’s usable and what’s not usable,” Dawson says. “When a presentation is that clear, [it’s] more likely the directors will get what they need from the school.”
Like Dawson, school sales representatives at music stores work with directors to ensure they have the proper supplies to run their programs. Educators can reap the benefits of a strong relationship with store reps.
Focus Locally
Paul Ramsaier, Quinlan & Fabish
Working with local music stores has financial and strategic benefits for a music program. “We typically know the solutions and the brands that will serve the director’s program,” Dawson says.
Dealers can play a key role during the student membership and recruitment process. During back-to-school season, Quinlan & Fabish (Q&F) in Burr Ridge, Illinois, runs a Recruiting by the Numbers program. Representatives from the company visit schools throughout the Chicagoland area and set up stations for students to try instruments.
This process not only gets students excited, but it also helps with instrumentation. “Many students are immediately drawn to saxophone and percussion,” says Paul Ramsaier, school sales representative at Q&F. “Some of the instruments might not grab a student’s eye right away.With this recruitment program, each student will try at least one instrument from each instrument family including low brass and strings.”
Buying instruments locally can save replacement and repair costs. While inexpensive instruments outsourced from abroad may look appealing to a music department’s tight budget or to unaware parents of young musicians, working with a local store can be the most budget-friendly decision.
“Sometimes it becomes very hard to pass up the too-good-to-be-true deal, [instruments] made in another country and imported at a wonderful price,” Dawson says. “[But] it’s going to show in the quality and longevity of the instrument.”
Savings in purchase price can be wiped out if the instrument does not arrive in playable condition. “Maybe you save $50 on a cello, but you have to spend $100 to $150 to get that cello set up in playing condition,” says Cris Behrens, manager of Summerhays Music in Murray, Utah.
Track Inventory and Repairs
Cris Behrens, Summerhays Music
Behrens recommends that teachers view their music programs like businesses, which includes putting instrument purchases, repair costs and all other expenses into a spreadsheet.
Too often, Behrens has seen music directors repeatedly pour money into repairs on the same instrument when buying a new one would be more cost-efficient. “I’m surprised when teachers don’t keep track of repairs on their instruments,” Behrens says. “[If] you add up how many times [an instrument has] been in the repair shop, they could’ve bought a new one over that five-year period.”
Directors should also understand the school’s budgeting process. “The director has to know the ins and outs of when budgets are created, reevaluated, presented to the board and passed,” Dawson says.
Communicate Clearly
To best serve their programs, teachers should provide details to their purchasing departments. For example, in bid requests, educators should specify brands or models. If left open, the lowest bid might win, and the instrument quality may not be what the directors want.
“Communication is key,” Ramsaier says. “Make sure we know exactly what you’re looking for; don’t be afraid to be specific.”
A good relationship with a music store requires teachers to ask for help. “While I understand an educator’s need to assert independence, the purchase of new instruments is definitely a collaborative process,” Ramsaier says.
However, Ramsaier explains that educators should balance that need for independence with a desire to learn more.
Because music stores have relationships with many different school music programs, teachers can tap into that wealth of knowledge to learn what works for other organizations. If directors pay attention to aspects they like about another school’s program, they can work with the music dealer to follow that example. “If we have a director who comes in and says, ‘I want to outfit my wind ensemble with tubas, what does [this other] school use? I’ve heard them, and they have a wonderful tuba sound,’ we can guide them toward that model,” Dawson says.
Overall, think of instrument dealers as collaborators. “The music store can be your partner, a resource,” Ramsaier says. “Capitalize on that. Ask questions. Let them share their experience with you.”
This article originally appeared in the 2019 V4 issue of Yamaha SupportED. To see more back issues, find out about Yamaha resources for music educators, or sign up to be notified when the next issue is available, click here.
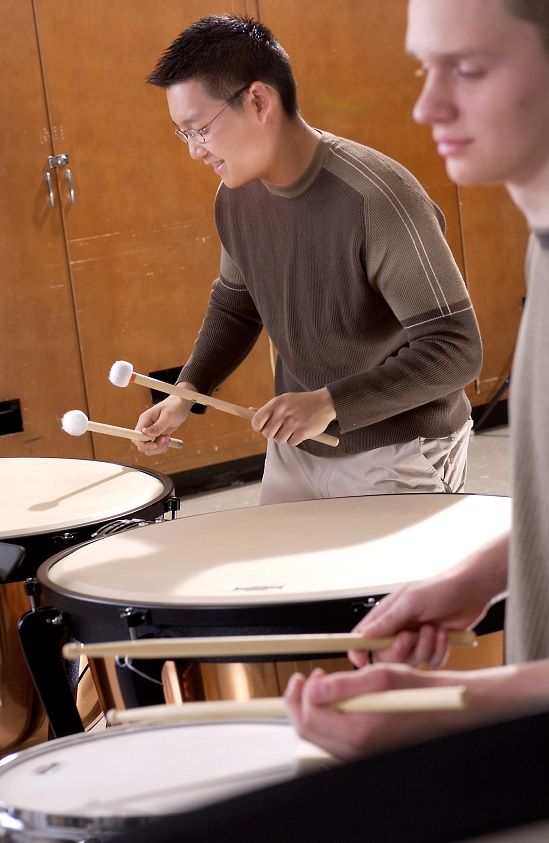
After their concert, they enjoy the rides at these Orange County, California, theme parks.
Playing at Disneyland or Knott’s is just one aspect of the Mater Dei Music Academy, an after-school program started by Mater Dei High School in Santa Ana during the 1970s. Attracting 300 to 400 students each year, the academy offers 4th- through 8th-grade students an ensemble music experience that they may not otherwise have.
Giving students performance experiences at a range of public venues is an important part of this program, says Taylor Smith, director of the Music Academy and associate band director at Mater Dei High School.
Justine Kadota joined the Music Academy for summer camp, then stayed with the program for two years playing trumpet in the advanced and jazz bands. “There is so much competition for kids’ attention that music often gets overlooked, which is to the detriment of their development,” says Susan Kadota, Justine’s mom. “The camaraderie and opportunity [at the academy] to put your musical ability to the test was great. This model is key to having kids appreciate music and set their sights on high school music.”
Open-Door Policy
Each year, Smith contacts 10 area private Catholic elementary and middle schools as well as homeschooled students to let them know about the Music Academy. “I have a very open-door policy,” Smith says. “Any student from another school or homeschool kids can find a place here.”
Mater Dei instructors teach Music Academy students at their local schools during the day and two evenings a week at Mater Dei High School. “The goal is to have the students play their instruments at least four times a week,” Smith says.
Finding the right days and times for rehearsals and events can be challenging, says Fernando Martinez, Mater Dei’s director of instrumental music. But with careful planning and consistent communication with parents, students, principals and instructors, the scheduling works out.
The Marian Alliance, three Catholic schools in inner-city Santa Ana neighborhoods, is among the schools served by the Music Academy. Overall registration at the Marian Alliance schools has been climbing, in part because instrumental music is a requirement in the curriculum through the Music Academy, Smith says.
Marian Alliance students receive scholarships and financial assistance to attend the Music Academy. Other students pay a small annual “suggested donation,” Smith says. “Through collaboration and partnerships with our local parish schools, benefactors and parent support, we’ve been able to establish something valuable. But there’s always room for growth.”
A New Stage Presence
Taylor Smith, Mater Dei High School
Smith joined the staff at Mater Dei High School in 2016 and has made a concerted effort to bolster the Music Academy’s image and experiences.
During Smith’s first year as director and with only a handful of days to prepare, Music Academy students were invited to perform an opening piece at the annual Mater Dei High School choir spring concert at the Segerstrom Center.
The students quickly learned and memorized the theme music from “Star Wars.” They performed on stage without formal attire or music stands and received a standing ovation. “We were able to talk about the program for about 30 seconds,” Smith recalls. “A couple of people were interested in donating to the program and wanted to know more.”
Today, Music Academy students still open the spring choir concert at Segerstrom, but they are more rehearsed, have a more polished stage presence and are set up as a concert band, wearing performance attire and playing seated while using music stands.
“When they get on stage, they handle themselves very well,” says Bruno Cilloniz, a Marian Alliance band director and Mater Dei percussion director. “It is awe-inspiring. As a director, it’s great to watch them savor every moment.”
Looking ahead, the Music Academy jazz band will be performing and competing during the Reno Jazz Festival at the University of Nevada for the first time in April 2020.
Recruitment Success
In 2019 the Music Academy won the silver award in the Music for All Advocacy in Action Award’s Beginning Recruitment Program category. “The award meant a lot to me, and the administration was excited,” Smith says. “It made me feel like I’m on the right track. My goal is to get music education in the private [education] sector in our area.”
That objective isn’t always easy, especially when public and private school funding for the arts is faltering in California. Some 88 percent of the state’s schools are failing to meet the California Education Code requirement of providing arts education, according to the arts advocacy group CreateCA.dreamhosters.com.
The Music Academy helps to fill this gap as well as serves to keep the arts thriving in Mater Dei High School’s instrumental program, which includes a marching band, color guard, concert band, wind ensemble, symphonic band, percussion ensemble, jazz band, string orchestra and a newly added guitar program.
Some Marian Alliance students, who enrolled in the Music Academy in the 5th grade, are now seniors at Mater Dei.
“We’re starting to see the fruits of our labors,” Cilloniz says. “They are amazing musicians and want to major in music and get scholarships at prestigious music schools around the country. The families are very appreciative.”
A key factor in the Music Academy’s success is that it brings students to the high school campus two nights a week, allowing them to get comfortable there. The 8th-grade Music Academy students get exposure to higher level music by performing with the high school band. The high school band directors also have an opportunity to watch the students who show the most promise.
Some, like 8th grader Derek Cornejo, who plays trombone, baritone and tuba, are invited to play in the high school marching band. He will attend Mater Dei High School next year.
“As a parent, music is an important aspect of [my son’s] education,” says Ed Cornejo, Derek’s dad. “It’s made him a well-rounded person. He’s enthusiastic. Derek comes home very excited about what he’s learned.”
As the Music Academy program continues to receive wider recognition, the most rewarding aspect for Smith hasn’t changed. He enjoys seeing the students’ excitement as they develop their musical ability and values building personal connections with the kids and their families.
“They always come up for a hug and their families do too,” Smith says. “Seeing the students light up and achieve something in their stressful world is gratifying. Some of these kids are the rocks of their family. … They need a place to feel comfortable, grow and stay connected.”
Photos Courtesy of Mater Dei High School
This article originally appeared in the 2019 V4 issue of Yamaha SupportED. To see more back issues, find out about Yamaha resources for music educators, or sign up to be notified when the next issue is available, click here.
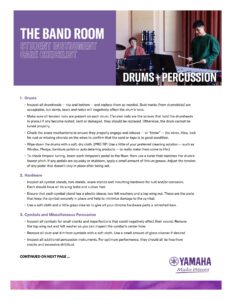
Rather than relying on external motivation, successful teachers inspire students to fuel their own flame to attain a higher level of mastery. To this end, Chris Gleason, instrumental music educator at Patrick Marsh Middle Schoolin Sun Prairie, Wisconsin, taps into “the deeply human need to direct [one’s life] and to learn, create and do better.”
Instrumental educators must teach students how to practice and encourage them when they are reluctant to do so. “Teaching practice methods in fundamentals may be one of the most important things I do from the podium,” says Nolan Jager Loyde, assistant director of fine arts over instrumental music at Round Rock (Texas) Independent School District.
Teachers need to create opportunities for autonomy, mastery and purpose — the three keys to intrinsic motivation. “Autonomy means to allow students to have a say in what they do, when they do it and how they do it,” says Gleason, who was named the 2017 Wisconsin Teacher of the Year and a semifinalist for the 2017 GRAMMY® Music Educator Award. “Mastery means becoming better at something that matters. Purpose means finding a cause [that is] greater and more enduring than themselves. I teach my students that talent is not born, but rather created.”
Nothing motivates students more than sounding good. “There needs to be an opportunity in every rehearsal or practice session to sound good,” Cross says.
Spark Ideas
Chris Gleason, Patrick Marsh Middle School
Teachers can guide students toward productive practice routines by asking questions to inspire reflection and self-assessment. Questions also empower students by encouraging critical thinking.
The best teachers ask the best questions. “They rarely tell learners anything but rather lead them to understanding,” says Gleason, who frequently gives presentations on “Lighting a Fire in Kids.” “I ask [students] things like, ‘How did things go this week?’ ‘Did you make the improvements?’ ‘What did you do to overcome challenges?'”
Gleason also ensures that students have spaces to practice throughout the day. “Our kids have access to practice rooms before and after school, during resource or study hall, and lunch,” he says.
If a high school or middle school doesn’t have dedicated practice rooms, directors can divide students into groups and have them practice in a windowed office that a director can monitor from the podium. “[This separation] allows students from one section to practice individually … while the conductor works with different sections,” Cross says.
Kindle the Right Habits
Nolan Jager Loyde, Round Rock Independent School District
Loyde assigns traditional practice logs but also finds value in student journals. “Students describe their methods of problem solving, tempos, measures, etc.” says Loyde, who presented a session to educators on “Teaching Students How to Practice” at the 2018 Music for All Summer Symposium.
When Cross was a graduate student, he realized that his most successful peers carried notebooks into every music lesson and rehearsal. Afterward, they would list their goals for the following lesson in their notebooks. “I watched a graduate performance major transcribe his goals to six pages of his notebook, which he used as a starting point for what he assigned himself to practice,” Cross says.
Neither Loyde nor Gleason require their students to practice for a specific amount of time. “It’s all about efficiency for me,” Loyde says. “I teach students to work until the task is complete, so it is important that they set goals.”
Gleason also encourages his students to set a goal and work toward that. “I teach them the importance of deep practice or that zone where we are most productive and focused,” he says.
Younger musicians often lack listening and self-assessment skills, Cross says. “I recommend recording and playback,” he says. “This is obviously much easier today than when I was in school.”
As a student Loyde created beats in GarageBand that helped him maintain tempo and pitch during practice sessions. He encourages his students to do the same. Or they can listen to a playlist and play along with the beat while woodshedding technique.
Catch Their Glow
Gleason has developed a strategy to deal with students who refuse to practice. “Educators must realize that we cannot control, force, manipulate or coerce students to do anything,” he says. “My role as an educator is to inspire students to be the best that they can be. I do this by preparing well, selecting great literature and caring about each student. I believe that if you teach to the heart, the mind will follow.”
This article originally appeared in the 2019 V4 issue of Yamaha SupportED. To see more back issues, find out about Yamaha resources for music educators, or sign up to be notified when the next issue is available, click here.
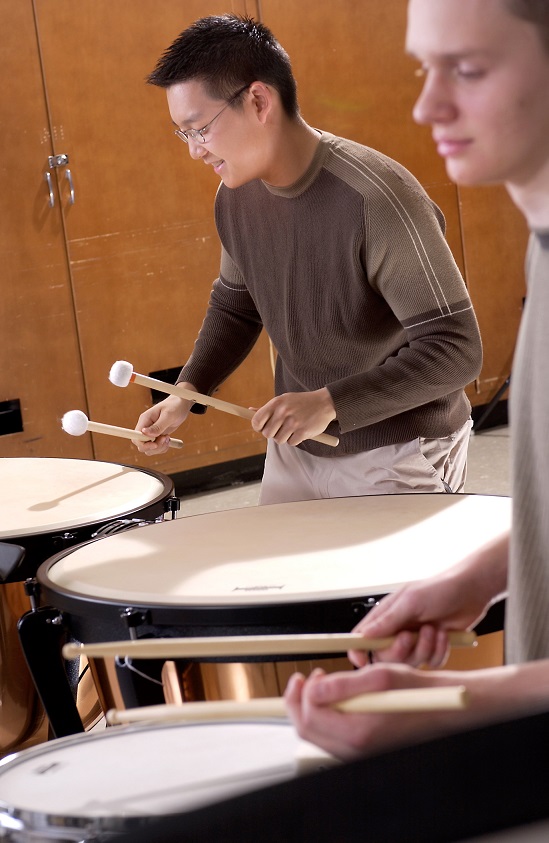
As a female Director of Bands and Associate Professor of Music at the University of Minnesota, Dr. Emily Threinen is aware of the importance of gender equality in music. “I believe that representation matters and it is important for women and under-represented people to hold positions of leadership and to be treated fairly and equally in all areas of the music industry — and beyond,” Threinen says. “Representation in such positions can empower younger individuals to see themselves in similar roles.”
While Threinen acknowledges gender imbalance and has experienced bias in her own career, she focuses her energy on striving for excellence through the lens of service. “As conductors, I believe our primary goal is to serve composers and their intent to the best of our ability,” she says. “As educators, we serve our students, our institutions, our communities and our profession. As advocates, we strive to connect outstanding work beyond our walls.”
Threinen understands the importance of having honest, open and sometimes uncomfortable conversations about topics related to women and under-represented people in the industry. “When asked questions about my gender, I tend to shift the question or change the perspective,” she says. “This is because in my work, I want people to see me as a conductor and educator foremost. However, I do recognize that identities and experiences are integral to who we are as artists.”
Knowing exactly how to address diversity and inclusivity in music programs and classrooms is not easy. “As educators, thinking critically of how we can continue to grow, support and be inclusive of all is essential,” she says. “Music rehearsals and classrooms are perfect spaces to unite people of varied identities, backgrounds and cultures to come together for one common goal — to make music.”
In addition to acknowledging that there is still work to do regarding representation, Threinen appreciates the groundwork that has already been done. “As a woman in my 40s, I stand on the shoulders of many women who have inspired me and paved paths ahead of me,” she says. “I also stand on the shoulders of men who have been instrumental in the advancement of women and under-represented people. We have much to do, but I believe we are in a better place today than we have ever been.”
This article originally appeared in the 2019 V4 issue of Yamaha SupportED. To see more back issues, find out about Yamaha resources for music educators, or sign up to be notified when the next issue is available, click here.
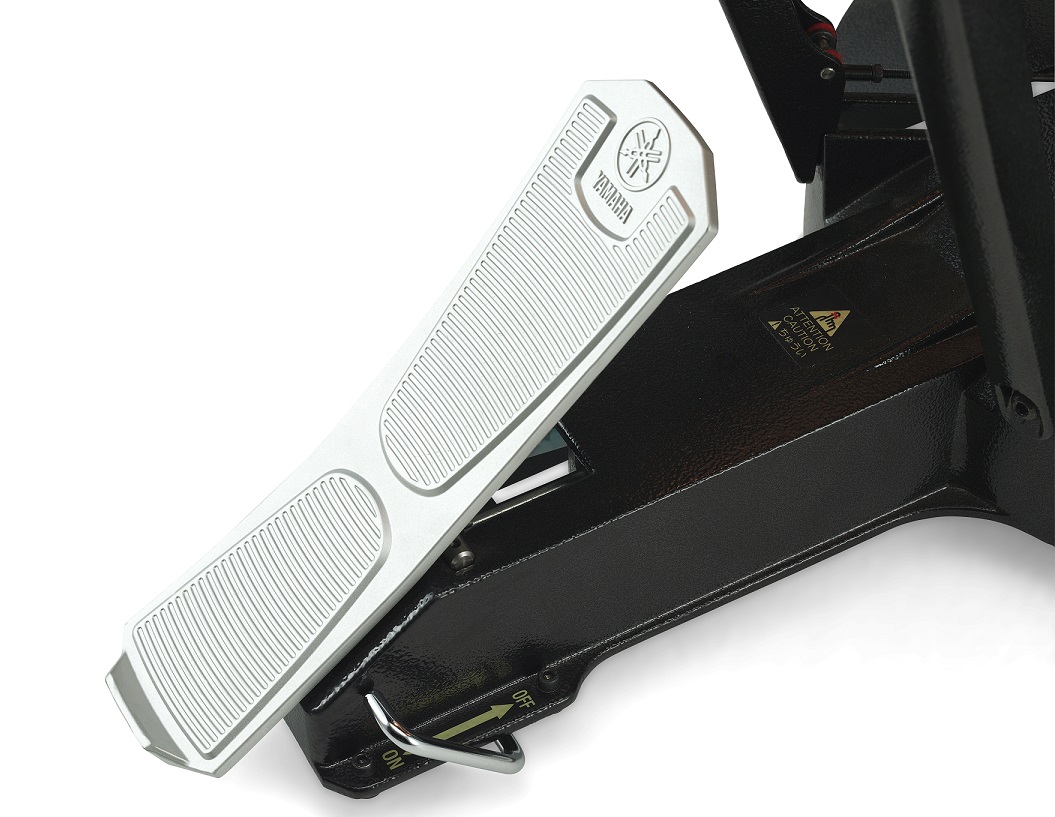
Q. When did you know that you were going to make music the focus of your professional life?
A. Growing up in Oklahoma where the weather is crazy, I always thought I would be a meteorologist. However, I owe my high school band directors for nurturing my love of music and for being such great role models as educators. It was as a junior in high school that I decided to pursue music education as a vocation.
Q. Other than music, what brings you inspiration?
A. There are many things, but great art and travel come to mind. Fortunately, I usually get to enjoy both with my wife. We love to travel and experience different cultures. It is inspiring to see our two young boys grow and develop. Every day is a new discovery.
I’m also fortunate to live in Colorado, a really beautiful place. I never take for granted the beauty of the mountains and how it feels to be at altitude.
Q. What is the most embarrassing moment of your life that you can share?
A. Both happened while conducting in costume, something I’ve sworn to never to do again. While I was on the faculty at the University of Michigan, Gustav Meier invited me to conduct Michael Daugherty’s “Oh Lois!” (from his Metropolis Symphony) for the annual Halloween concert. The schtick included me beginning the work dressed as Clark Kent, jumping into a phone booth (placed next to the podium) and emerging as Superman to finish the piece. Unfortunately, there was a wardrobe malfunction — the clasp on the cape broke, leaving me standing in a skin-tight costume, little red shorts and all, in front of 3,500 people in a sold-out Hill Auditorium.
The other embarrassing episode was years later, also at a Halloween concert, when I attempted to hop onto the podium (still not sure why), to conduct “Jupiter” from the The Planets by Holst, while wearing an alien mask. I couldn’t see clearly through the mask, misjudged the height of the podium, and fell and broke my fibula. According to the orchestra, what followed was the fastest tempo at which we had ever played it. The things we do for entertainment!
Q. What book is on your nightstand right now?
A. There are three books on my nightstand currently: Ron Chernow’s “Alexander Hamilton,”“Thinking Fast and Slow” by Daniel Kahneman (I’m curious to know if there are applications for musicians of his theory of the two systems that drive the way we think. System 1 is fast, intuitive, and emotional. System 2 is slower, more deliberative, and more logical), and “Quiet” by Susan Cain, which explores what it is like to be introverted in a society where extroverts tend to dominate.
Q. What piece of music do you wish you had written and why?
A. I have often said that Mozart’s “Don Giovanni” may be the most perfect work of art I have had the opportunity to conduct. Everything about it seems perfectly crafted and balanced.
On the other hand, it would be cool to have written a truly revolutionary work that shifted the paradigm of western classical music like Beethoven’s “Eroica” symphony or Stravinsky’s “Rite of Spring.”
Q. Why is music important to humanity?
A. Music is important because it allows us to express the inexpressible, to communicate who we are as humans. It is also important in the way it brings people together and teaches us to treat one another with compassion and empathy — two attributes that are needed more and more in our society.
Simply put, great art makes us better people. One of the most important attributes music and art teach us is empathy. This is not as easy to codify as test scores and brain development or teamwork and social skills. In my opinion, empathy is most central to the importance of music and art in our development as human beings. As Brian D. Cohen wrote on HuffPost, “The development of empathy in an individual from art mirrors the original derivation of the term; it is art that makes us empathic; art that models others’ inner lives for each of us; art that attunes us to experience and suffering beyond ourselves. It is imagination, the other signal attribute of creative thinking, that lets us see how the world can be changed to be better for ourselves and for others.”
I’m convinced of music’s ability to make young people more human, especially if the experiences are collaborative and involve emotionally expressive music making.
Q. What is your favorite guilty pleasure food?
A. I would eat ice cream every night if I could.
Q. Which person from history, dead or alive, would you want to have lunch with and what would you discuss?
A. There are so many and I will undoubtedly think of others later. However, there are two who have been on my mind lately. First, Abraham Lincoln — I am fascinated with the poise he demonstrated while under withering pressure and criticism and how he surrounded himself with people with differing viewpoints. I would also like to experience firsthand his intellect and homespun wisdom.
Second, Johannes Brahms because his music seems to be a reflection of his complex and enigmatic personality. The late piano intermezzi are so incredibly intimate, yet much of his other music seems more emotionally restrained and cerebral. I would love to learn more about what made him tick hoping it might help me in my pursuit to better understand and interpret his music.
Q. What is your biggest pet peeve?
A. People who are bullies.
Q. Why is it important to protect access to music education?
A. My wife recently taught music in an elementary school where, in her two kindergarten classes, there were 11 languages spoken. Many of them had limited or no English skills, but the music classroom was the one place where they could successfully assimilate and collaborate.
Large ensembles in our schools are also important in this regard and hold a special place in this process. In addition to being surrounded with great art and its beauty, we get to work with wonderful people and share an intimate communication and collaboration that many don’t have in their lives. Working with beautiful people who are all different, from different backgrounds, cultures, belief systems, races, creeds, orientations is the greatest blessing I derive from my job as a conductor.
John Coltrane said, “If you want to be a better musician, become a better person.” I would suggest it is also true that being a musician can make you a better person.
The middle school students in the program join the Mater Dei High School band — a close-knit group of about 50 — for several performances throughout the year.
To form a cohesive unit among students from a variety of schools and ages, Taylor Smith — director of the Music Academy and associate band director at Mater Dei High School in Santa Ana, California — created a mentorship program.
High schoolers, many who were once Music Academy students, partner with the younger musicians during weekly practice sessions. They work with the middle schoolers in their instrument sections on basic fundamental skills. The high school students receive service hours by participating in the mentor program.
“Even just sitting in the [younger] ensemble and playing along with them really helps,” Smith says. “The older students are working with students who are often just trying to make a sound. They get to inspire those students in getting comfortable with playing.”
This kind of student leadership reflects Mater Dei High School’s goal to “consistently raise the bar through positive reinforcement and motivation,” says Fernando Martinez, director of instrumental music at Mater Dei High School.
Music Academy students perform with the high school band at a football game in November, a Christmas concert, and at the high school choir concert, at which the high school band also participates, in March.
Smith hopes the mentor program perpetuates itself: As mentors become seniors and graduate, the incoming freshmen become new mentors to the younger students.
“We depend on that family atmosphere,” he says. “There’s not a whole lot of needing to inspire these kids. They’re just thankful to be here and perform with the high schoolers.”
Photos Courtesy of Mater Dei High School
This article originally appeared in the 2019 V4 issue of Yamaha SupportED. To see more back issues, find out about Yamaha resources for music educators, or sign up to be notified when the next issue is available, click here.
Yamaha Master EducatorRichard Floyd is State Director of Music Emeritus at the University of Texas at Austin. A recognized authority on conducting and music advocacy, Floyd pens a letter to his younger self, sharing advice, anecdotes and inspiration for a fulfilling career in music education.
Dear Younger Richard:
It’s 1962, and you are about to embark on an amazing lifelong journey. Let me remind you that you are not here today because you finally learned to play the chromatic scale at MM=144, discovered a new alternate fingering on your clarinet or mastered a challenging passage. You chose music because of an emotional connection. Music touched your heart and soul in a series of defining moments, and you realized that you couldn’t live without it and became consumed with the dream of sharing it with others.
Always remember that it is the art of making music that gives it true value. In truth, recreating notes on a printed page is no more or less rewarding than solving an algebra equation. No music has been created. But when those notes and rhythms are infused with your spirit and passion for creating and sharing beauty, the outcome is priceless.
Never lose sight of this reality. Trust me, it will be easy to become obsessed with personal achievements, extrinsic goals, a boundless litany of suggested strategies, endless competitions and alluring peripheral activities that disguise themselves as being central to the true purpose of music education. Do not be seduced by these illusions. If you remain ever mindful of those magical moments that ignited your fire for making and teaching music, and you strive to create those kinds of experiences with your students, you will enrich countless lives.
Continually remain a student and be good to yourself. Why? To paraphrase famed British conductor Simon Rattle, “The more you put into yourself, the more you will be able to give back to your students and to the music.”
To that end, strive daily to expand your horizons. Give yourself permission to “color outside the lines.” If you insist on staying inside the lines — or within the safety of your comfort zone — those lines will become your boundaries.
On your journey, take with you a fortress of great music that offers you inspiration, comfort and revival. There will be countless times when you will need to be reminded of music’s intrinsic place in your life and in the lives of others. Your musical fortress must reflect the greatest music that humanity has to offer. Be it Mozart or Mahler or contemporary composers on the cutting edge of compositional thought, make it the best of what is out there. And it must be a compendium of great music that constantly grows and evolves.
One of my favorite quotes is one by Ursula K. LeGuin: “It is good to have an end to journey toward; but it is the journey that matters, in the end.” Let that core reality be your guide.
And above all, never forget that life’s journey is a do-it-yourself project. It’s you — and only you — who can go for it!
Best,
Richard in 2019
This article originally appeared in the 2019 V4 issue of Yamaha SupportED. To see more back issues, find out about Yamaha resources for music educators, or sign up to be notified when the next issue is available, click here.
Dr. Elizabeth Lolli is the superintendent of the Dayton (Ohio) Public Schools(DPS), an urban district of 14,000 pre-K to high school students.
In 2016, she took the bold step of bringing back the DPS Music Education Program after a 10-year absence.
In addition to funding the purchase of new instruments for the district (some of which came through ESSA Title IV-A), Lolli hired full-time band and choral directors for each of the secondary schools. She also hired two arts education administrators to facilitate the adoption and implementation of an articulated, standards-based curriculum.
Today, every DPS elementary student takes music while enrollment in secondary programs has grown to more than 1,000 participants — 17.5% of secondary enrollment overall! Dr. Lolli is the embodiment of “making a difference.”
Q. When did you know that you were going to make music the focus of your professional life?
A. As a young child, I knew that I wanted to be a teacher. I loved to sing and participated in church and school choirs. It was in high school that I decided I wanted to be a music educator.
Q. What piece of music do you wish you had written and why?
A. Bach’s “Jesu, Joy of Man’s Desiring” because it is simply a beautiful piece of music. The melodic line and repetitive rhythmic pattern make my heart sing!
Q. What is the most embarrassing musical moment of your life?
A. It happened on the practice field during summer marching band camp. As a trombone player, I was always in the front row surrounded by boys. On this particular day, all I could think about was the fact that I would be taking my driver’s ed test right after band practice. Our director called on me to play the music as a spot check. It was the classic “Get It On” with the trombone slides in the beginning. I was so distracted because of my pending driver’s test that I couldn’t make my lips, tongue, lungs or slide work! I was so embarrassed!
Luckily, I passed the test later that afternoon, so I was able to turn my energy back to practicing. The next week when I was spot checked again on the field, I was ready and nailed it!
Q. What is your biggest pet peeve?
A. People who do not respect children enough to teach their very best every day, all day.
Q. Why is music important to humanity?
A. Music expresses the soul of the population. It expresses our cultural ideas and beliefs. Music also supports brain development and learning. We know the research on how music education affects math and reading. I have seen it in my own personal experience.
Q. Which person from history, dead or alive, would you want to have lunch with, and what would you discuss?
A. I would like to talk to Abraham Lincoln. I would discuss his presidency and his strategy and beliefs about the Civil War.
A. Worshiping in church and studying the life of Christ bring me inspiration. In addition, I am also inspired by young children as I see so much potential for success.
Q. What is your favorite guilty pleasure food?
A. Brownies and ice cream
Q. Why is it important to protect access to music education?
A. Music is vital to the whole child. Music education is an opportunity for children to learn about their culture, their heritage and their own preferences for listening. Rhyme, rhythm and repetition are all part of learning to read. Where else besides reading are these items taught? Music!
This article originally appeared in the 2019 V4 issue of Yamaha SupportED. To see more back issues, find out about Yamaha resources for music educators, or sign up to be notified when the next issue is available, click here.
Here, she focuses on how music educators have an opportunity to strive for inclusive musical experiences and repertoire for students and audiences. “Our music selections highlight our values. Making decisions on programming is incredibly personal, complicated, sometimes controversial and critical,” she says.
According to Threinen, contemporary concert programming features repertoire that “celebrates our past, defines our medium, challenges and inspires us, expands our aural expectations and includes multiple voices of representation. We may not always hit the mark, but I believe it’s important to try.”
“My advice is to continue to expand knowledge of repertoire and composers; have discussions with colleagues, community members and students; be aware of implicit biases; and consider how our repertoire choices may impact individuals or groups,” Threinen says.
This article originally appeared in the 2019 V4 issue of Yamaha SupportED. To see more back issues, find out about Yamaha resources for music educators, or sign up to be notified when the next issue is available, click here.

On a cold winter day, curling up on the couch with a warm blanket and putting on a feel-good holiday film like It’s a Wonderful Life, A Christmas Carol or Miracle on 34th Street might seem like the perfect idea. But there’s one catch — you may not be able to hear the dialogue clearly.
That’s because the soundtracks to many of these old classics were recorded using the less sophisticated audio formats available at the time — mono or stereo, both of which are limited in their capabilities, as compared to modern surround sound. So if you want to get the most of your holiday movie watching experience and not miss out on some of your favorite dialogue, you’ll need an upgrade. The Yamaha YAS-209 sound bar with wireless subwoofer is one such solution.
In addition to providing features like DTS Virtual:X™ virtual 3D surround sound, Wi-Fi® and Bluetooth® music streaming as well as Alexa built-in voice control, the YAS-209 offers proprietary Yamaha Clear Voice technology for enhanced dialogue clarity. To turn it on, simply press the Clear Voice button on the sound bar’s remote control, as shown in the illustration on the right.
In technical terms, Clear Voice emphasizes the vocal frequency ranges and harmonics for greater intelligibility, while at the same time, remaining frequency components are attenuated. In other words, it pushes background noise and sound effects to the back of the soundtrack where they belong so the dialogue is front and center — without you having to raise the volume every time your favorite character appears on-screen.
Clear Voice not only works with older films, but modern films with surround sound as well. A Christmas Story, Home Alone, and (dare we say) Die Hard are all enhanced both from a dialogue perspective as well as through DTS Virtual:X virtual 3D surround sound, so you’ll get the best of both worlds — from bone rattling explosions on the Nakatomi building to hearing John McClane insult Hans Gruber — all without lifting a finger to adjust the volume.
Richard Floyd is State Director of Music Emeritus at the University of Texas at Austin. His 55-plus-year career as a music educator and conductor began at Richardson Junior High School and J.J. Pearce High School before he moved to the collegiate level at the University of South Florida, Baylor University and the University of Texas. A recognized authority on conducting and music advocacy, Floyd is a frequent clinician, adjudicator and conductor. He is a Yamaha Master Educator.
Q. When did you know that you were going to make music the focus of your professional life?
A. I came to the realization in high school that music would be an essential necessity in my adult life. As I started looking at college catalogs the major “music education” leaped off the pages. From that point forward I never thought of making music and/or teaching music as a profession but rather a calling.
Q. Other than music, what brings you inspiration?
A. I am inspired by family, friends, the human spirit, the beauty of nature, passion for life and the unbridled love for learning that I see in the eyes of colleagues and students.
Q. What book is on your nightstand right now?
A. There is never just one. Right now, it’s John Grisham’s “The Reckoning,” David McGill’s “Sound In Motion” and David Brooks’ “The Road To Character.” Basically, the formula is one book for entertainment, one book for growth and one book for enlightenment.
Q. What piece of music do you wish you had written and why?
A. I can narrow it down to two. “O Magnum Mysterium” by Morten Lauridsen or Samuel Barber’s “Adagio for Strings.” They speak equally to the human spirit, and they are timeless in terms of their eloquence, simplicity and purity. They represent the absolute essence of the power of music.
Q. What is your favorite guilty pleasure food?
A. This is a no-brainer! Sunday champagne brunch at the Four Seasons Hotel Austin.
Q. What is your biggest pet peeve?
A. People who attempt or seek to make music for wrong, self-serving or superficial reasons.
Q. What is the most embarrassing moment of your life that you can share?
A. Nothing funny here. Shortly after becoming director of bands at Baylor University, I attended a prestigious music conference. I did so with the false illusion that I had “arrived.” In a matter of 72 hours, I painfully discovered how little I knew about the greater world of music and how much I had to learn to become the musician and teacher I hoped to be. It was a personally embarrassing and humiliating moment in my life.
Q. Why is music important to humanity?
A. I am not aware of a culture that didn’t have music in one form or another as an integral part of its civilization. I have come to believe that music is a human bonding agent and, in one form or another, is imbedded in our DNA. It is one of life’s essentials.
Q. Which person from history, dead or alive, would you want to have lunch with and what would you discuss?
A. There are so many icons that could easily be on my list. But, to be honest, I feel I know most of them intimately through their music, their writing, their vision or their place in history. With that said, perhaps the most compelling lunch engagement for me would be to dine with my father who died over three decades ago. I would love to tell him how much he continues to mean in my life and also share with him my journey since he died in 1982. It remains my hope and prayer that he would be proud.
Q. Why is it important to protect access to music education?
A. The term “music education” can mean different things to different people and in different cultures. Thus, I think it’s important that we don’t let this term get too limited in scope. With that said, let’s not mince words. Music in its countless guises is not important — it is essential. It is one of the priceless capstones of the human experience.
Q. When did you know that you were going to make music the focus of your professional life?
A. I don’t think I realized it while it was happening, but a particular high school experience shaped my life’s work. When I was at Marietta High School in Georgia, my high school band director, Boyd McKeown, had a leadership and community-service component that went with a first-chair position.The component was teaching lessons to elementary students during the summer. That community service was the seed that developed into my life-long love with teaching.
As a teacher, the most amazing experience is when a student gets it. They have that “aha classroom moment” and are able to understand and perform some passage in music. Then comes the “aha performance moment” followed by the “aha musical moment” when teacher and student experience a powerful connection to music.
I was a good player. I made First Chair All State and won the State Concerto Contest which led to a performance with the Atlanta Symphony. Everyone thought I would go to college and major in music performance. But I had been bitten by the teaching bug, so I chose to be a music education major — a decision I never regretted.
I loved teaching music! I loved sharing the gift of music! I always give thanks to Boyd McKeown for opening the world of sharing and teaching music with my students.
Q. Other than music, what brings you inspiration?
A. Broadway musicals and plays, reading and travel.
Q. What piece of music do you wish you had written and why?
A. You know I cannot be confined to one answer — music is too wonderful for just one answer! First on the list is James Whitbourn’s “Annelies,” which is a full-length choral piece based on the “Diary of Anne Frank.” It is a painfully beautiful moving story. Next on my list isGustav Holt’s Chorale from Jupiter (The Planets, Suite for Large Orchestra.) I love the beautiful soaring French horns and cello lines. Third, “Hamilton” by Lin-Manuel Miranda – because it is just the best!
Q. What is the most embarrassing moment of your life that you can share?
A. The Woodward Academy Band had an exchange program with the Wiltshire County Band program in southwest England. Every two years students from one of the schools would travel to Atlanta or Wiltshire to experience the culture and people of another country and perform in a combined concert. The staffs of the two schools would see each other every two years, and we became close.
In the 1990s, I was in London with 100 Woodward Academy band students. We had landed at Heathrow at 5 a.m., and we immediately embarked on a full day of sight-seeing. The teenagers weren’t fazed by missing a night’s sleep, but I was exhausted by 6 p.m. I could barely remember my name or the name of our school!
We decided to take the London Underground to the Piccadilly Circus area for dinner. When 100+ people arrive at the tube station late in the day who have to buy tickets, things don’t go as planned. We started buying tube passes from the machine on the wall — notice that the word “machine” is singular. We quickly depleted the supply of tickets from the machine, so we then had to buy tickets one student at a time from the one man in the one ticket booth.
While I was dealing with buying tickets, one of the other teachers told me that some of our students had decided that they would go to Piccadilly Circus ON THEIR OWN and had made their way to the platform. I wheeled around and said in my best mad mother/teacher voice, “If you are NOT from England, get off the platform and get behind this line on the floor in the ticket area … and STAY THERE!”
Then I turned around and continued buying tickets for the remaining students. A minute or two later, the same teacher told me to turn around. A large group of Woodward students were standing behind the line in the ticket area along with a family from Japan! My kids didn’t want to say anything because they thought I was already mad at them. So instead, my students looked at this Japanese family, and the family looked back at the Woodward students.
Yikes! I immediately went over to the family and apologized for my outburst and told them to please go to the platform and take their train.
After my adventure at the London Tube Station, every time Woodward visited London, the Wiltshire staff would always ask, “Has Rite caused any more international incidents in London’s Underground?”
Q. What is your favorite guilty pleasure food?
A. Ice cream
Q. What is your biggest pet peeve?
A. People giving a session on music, and the session is a lecture about music and you NEVER hear any music. Music is an aural art, people! It’s like telling someone about a piece of art and never letting them see it! Like David Bowie said, “Talking about art is like dancing with architecture.” WOW, that is my pet peeve.
Q. Why is music important to humanity?
A. Music, as with all the arts, makes us human. It is the most authentic kind of communication that includes everyone. Music builds community.
Q. Which person from history, dead or alive, would you want to have lunch with and what would you discuss?
A. I would want to dine with President Barack Obama and discuss his book “The Audacity of Hope.”
Q. Why is it important to protect access to music education?
A. Our educational system has lost sight of the importance of preparing a well-rounded educated person. We are so wrapped up in high-stakes testing, Common Core standards and STEM (science, technology, engineering and math) that we have forgotten the purpose of educating the whole child.
I believe that the arts are the only opportunity for children to become independent thinkers. Children must learn how to work collaboratively. When they can collaborate, they can build a better future for themselves and those around them. Musical ensembles provide such opportunities. All members of an ensemble are valued, and their contributions are important and needed by the entire group. Through instrumental music, students can work collaboratively and creatively, they learn to compromise, and they build a better community. I think the world would be a better place if all leaders had and valued music education.
Larry Gookin, Distinguished Professor and Emeritus Professor of music at Central Washington University, retired in 2015 after 34 years as the university’s Director of Bands.
Q. Why is it important to protect access to music education?
A. There are many extrinsic reasons for providing quality music education. Music performance helps develop creativity, confidence, perseverance, accountability, dedication, leadership skills, physical coordination, auditory skills and spatial intelligence. However, the primary intrinsic purpose of music performance is to communicate emotions.
Q. What piece of music do you wish you had written and why?
A. “Adagio for Strings” by Samuel Barber is so heartfelt and one of my favorite compositions.
Q. Other than music, what brings you inspiration?
A. Contemplative prayer and meditation.
Q. What is the most embarrassing moment of your life that you can share?
A. While in high school, I was playing the trombone solo to “Getting Sentimental Over You” with the jazz band, and I totally screwed it up. I asked the director if I could play it again. He turned to the audience and said that I would like to give it another try. The audience gave me a wonderful ovation for my eagerness to prove that I could do it. Unfortunately, it was much worse the second time!
Q. Which person from history, dead or alive, would you want to have lunch with and what would you discuss?
A. I would love to meet St. Francis of Assisi and talk about love.
Q. What is your biggest pet peeve?
A. My biggest pet peeve is that I don’t have a pet peeve.
Q. Why is music important to humanity?
A. Emotional expression is the paramount purpose of music. Humans have an innate desire and need to share emotions and feelings, and music provides this channel of communication.
Q. When did you know that you were going to make music the focus of your professional life?
A. When I was a junior in high school, I was asked to conduct a small ensemble in a musical. I was 16 years old and knew then that I wanted to become a music major in college.
Imagine for a moment that you’re an astronaut. You wouldn’t go up into space without having complete confidence in mission control, right? Well, the same is true for those who wish to explore the ever-expanding universe of audiovisual entertainment — only in this case the part of mission control is played by an AV receiver. All the components in your home entertainment system have to go through a receiver before anything reaches your eyes and ears. And it doesn’t matter how great any of those components are if you can’t depend on your receiver to deliver what they’re putting out.
Finding the right AV receiver is easier said than done, whether you’re buying one for yourself or as a gift for someone. There’s certainly no shortage of choices on the market, and many of today’s receivers offer a boatload of bells and whistles. In this article, we’ll talk about five important features you should consider.
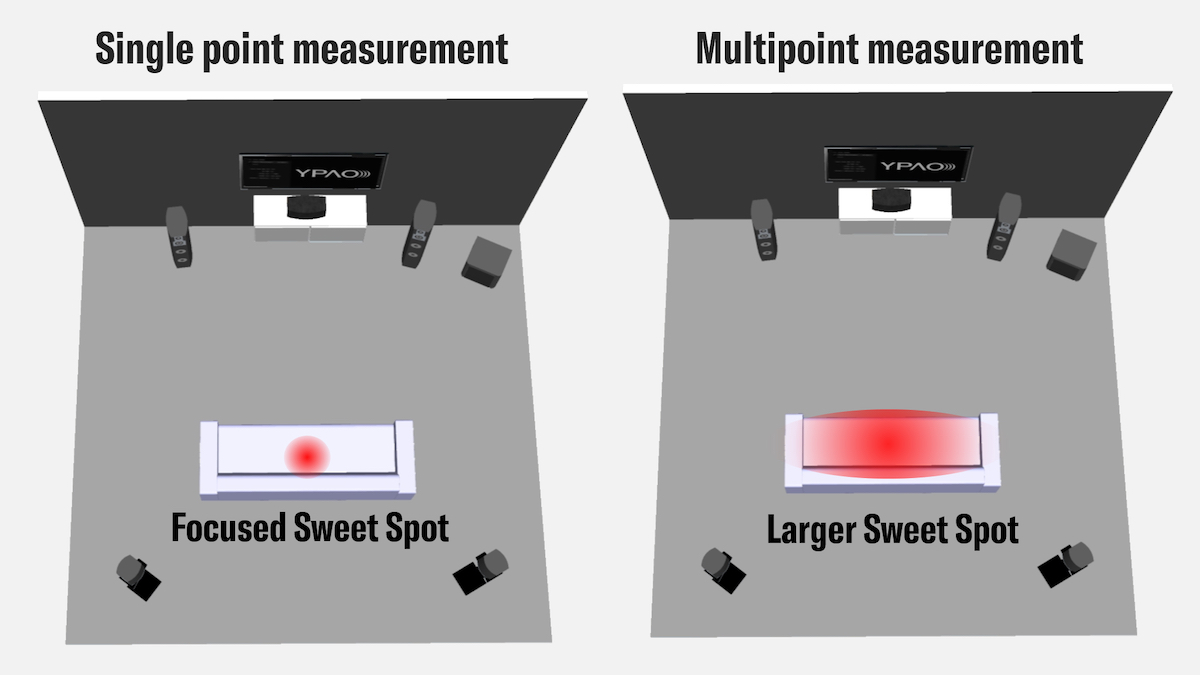
The Ear Test
Sound quality is far and away the most important AV receiver criteria — but it’s also the most subjective. Some people want the sound of a receiver to be completely transparent, while others prefer receivers that lend the audio an extra touch of brightness or warmth. Many Yamaha AV receivers offer a feature called YPAOTM (Yamaha Parametric room Acoustic Optimizer), which analyzes the components you’ve got and the space you’re in, then calibrates the receiver’s audio output to those specs so that you always get the best possible listening experience in your particular listening environment. (To find out more about YPAO, click here.)
Got the Power?
Every good AV system needs a powerful receiver, but figuring out the power rating of an audio component can be a challenge, with lots of numbers and strange terms getting in the way. The simple measurement of WPC (wattage per channel) is not necessarily going to help you very much, because it’s often determined in an old-fashioned way, by driving one channel with a simple test tone. This just isn’t realistic for a modern AV system, which uses at least two channels all the time (conceivably many more — see below) and is expected to cover an extremely wide frequency range with minimal amounts of THD (total harmonic distortion).
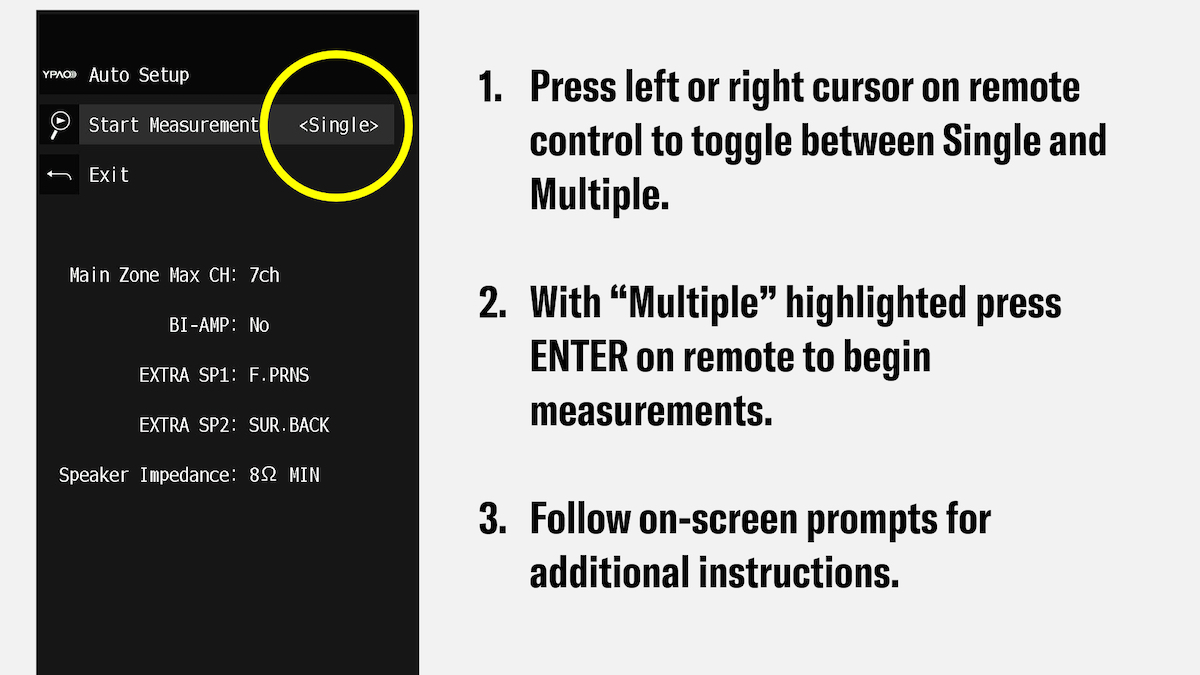
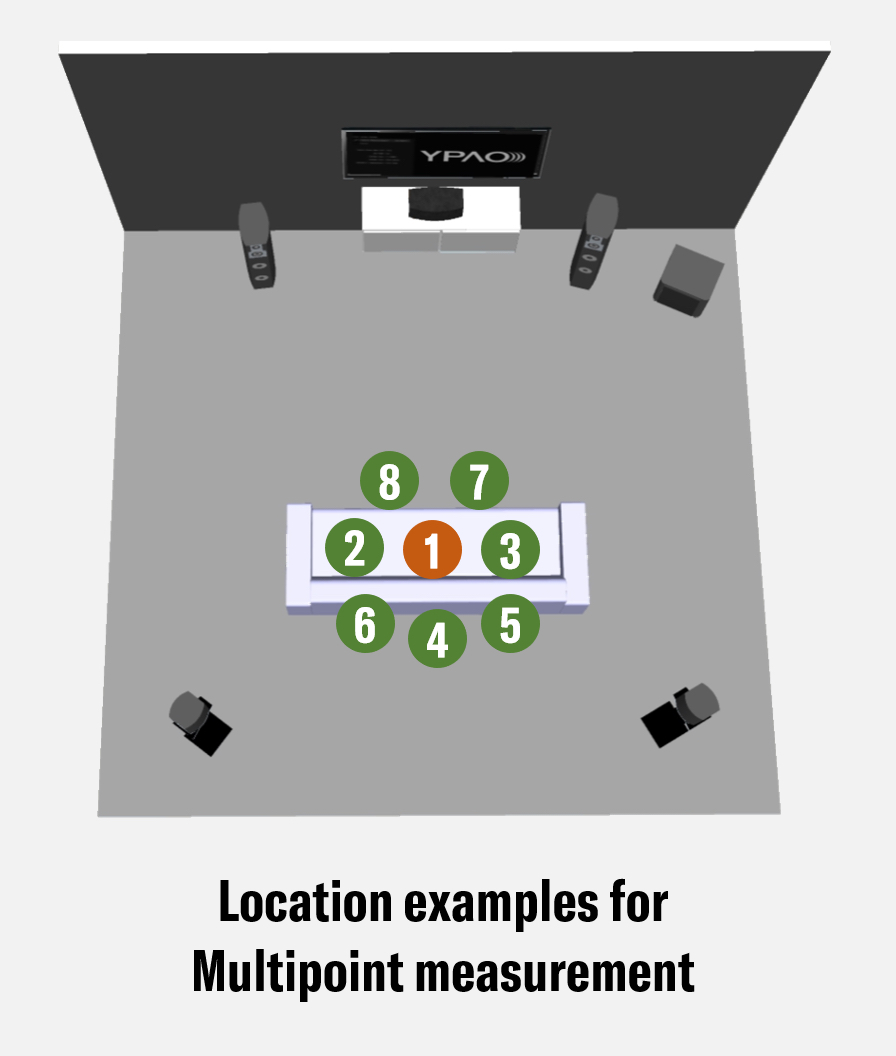
There’s a much better way to measure a receiver’s true power output, and that’s by seeing what happens when you drive two channels simultaneously with a wide range of tones — ideally everything between 20Hz and 20kHz (the range of human hearing). When measured by this standard, the Yamaha RX-V685, for instance, has an output power rating of 90 watts, with a THD of 0.06%. The 90 watts is far more than enough power for a standard-sized living room, and the extremely low THD value is a reflection of exceptionally clear sound quality.
Channel Changes
Let’s make the fairly safe bet that you’re interested in surround sound for your home system. The question is, how many channels will you need?
5.1 is the most common surround format. It consists of five discrete audio channels (the “5”) and one extra low-frequency (bass) channel designed to be routed to a subwoofer (the “.1”). 7.1 adds two more channels to the mix.
Once you move beyond 7.1 — to 9.1 or 11.1 — the additional channels are no longer discrete. Instead, they’re matrix-encoded, meaning that they are blended in with the real channels. It’s the job of your receiver’s processor to pick them out of the matrix and assign them to various speakers in the correct proportions, which makes your choice of receiver even more important.
Systems that are classified as “.2” rather than “.1” (5.2, 7.2, and so on) are designed to be used with two subwoofers instead of one, which gives a deeper sense of sub-bass and also enables the burden of the low end to be shared so that it doesn’t all depend on a single speaker. All Yamaha AV receivers allow for the use of at least one or two subwoofers.
The next step is multidimensional sound, in which there are height channels, which may come from in-ceiling or upward-firing speakers. Examples of multidimensional speaker configurations include 5.2.4, 7.2.2 or 7.2.4, where the last digit represents the number of height channels. Because there is essentially no limit to the amount of channels, this type of audio has to be matrix-encoded since dozens of discrete channels would require you to have dozens of speakers — an impracticality for most people. Dolby’s version is called Dolby Atmos®, while the format offered by DTS is called DTS:X™. All Yamaha AVENTAGE receivers and some Yamaha RX-V models have both Dolby Atmos and DTS:X capability.
Ins and Outs
Of course, a receiver has to be able to accommodate every other part of your system. Be sure to check the exact number and type of inputs and outputs needed for each of your separate components, and match them up with what the receiver is offering. Err on the side of too much rather than too little; after all, you may well want to add more components later.
As an example, the Yamaha RX-A3080 AV receiver provides a wealth of interconnections. In the back, there are seven HDMI® inputs, three HDMI outputs, one network port, three optical digital audio inputs, three coaxial digital audio inputs, ten analog stereo inputs, four composite video inputs and connections for an AM/FM antenna, plus outputs for up to eleven speakers and two subwoofers. In front, there’s a 1/4″ stereo headphone jack, a USB port, a 1/8″ analog mini-jack, and an input for the supplied YPAO microphone used to automatically calibrate the output of your speakers based upon the acoustic characteristics of your room.
Going Wireless
Not that long ago, you couldn’t put an AV system together without a bucketful of wires. That time has passed, and now a major test of a receiver is its ability to work with a variety of wireless devices. Some receivers, like Yamaha AV models equipped with MusicCast Surround, even allow you to use wireless surround speakers like the MusicCast 20 and MusicCast 50 to easily create a home theater with surround sound without having to run wires around your room. Connectivity via Wi-Fi®, Bluetooth® or AirPlay® 2 enables access to streaming services, as well as the music stored on your smart devices and computers; it also allows remote control from a smartphone or tablet.
MusicCast technology also allows you to add wireless speakers, sound bars or other devices in up to 31 other rooms at full fidelity, giving you the ability to listen to your favorite music throughout your entire home, all under the control of a simple app — and without the need for cabling.
Bonus Feature: Artificial Intelligence
If you’ve narrowed it down to two or three choices and are still looking for that feature that will distinguish one receiver from the rest, consider whether or not it offers artificial intelligence capabilities like Surround:AI™, the amazing breakthrough technology found in top-of-the-line Yamaha AVENTAGE AV receivers.
In a nutshell, Surround:AI instantaneously analyzes and optimizes the audio parameters for each scene of a movie in real time, creating the best possible overall sound effect for your home theater at every moment.
To find out more about Yamaha AV receivers, click here.
Anthony Maiello is Distinguished University Professor at George Mason University in Fairfax, Virginia. He was awarded the title of “university professor,” the highest rank given to Mason faculty.
Q. When did you know that you were going to make music the focus of your profession life?
A. When I was a young boy, my family watched “The Lawrence Welk Show” on TV. Myron Floren was the band’s accordion player, and I loved hearing him play. I started accordion lessons when I was in 5th grade and have played it ever since.
Unfortunately, accordion is not recognized as a “legitimate” major instrument for studying music in our country. My high school music theory teacher, Dr. Robert Campbell, was able to convince the dean of the School of Music at Ithaca College to give me one year to prove myself. I became a clarinet major after only five lessons before entering my freshman year at Ithaca College. The rest is history.
Q. What piece of music do you wish you had written and why?
A. “Symphony No. 5” by Ludwig von Beethoven is all about fate knocking at the door. What a powerful idea!
Q. Other than music, what brings you inspiration?
A. Helping others in any way I can. I recently became a Fairfax County auxiliary police officer. It required me jumping over many hurdles, including a 35-page background check vetting process that took almost a year to complete, a four-hour polygraph exam, a four-hour interview, four months of attending the Fairfax County Police Academy on evenings and weekends followed by four months training with an FCPD officer in a police cruiser to complete my training. I am required to volunteer 24 hours each month serving Fairfax County as a non-paid police officer.
Q. What is your favorite guilty pleasure food?
A. Ice cream and Cape Cod potato chips
Q. What book is on your nightstand right now?
A. I actually have four books. Two books are from my daughters. One contains my older daughter’s “Letters to My Dad” and the other is a book of poems by my younger daughter. The third book is St. Jude Prayers and Novena. The fourth book is “In Conversation with God.”
Q. What is the most embarrassing moment of your life that you can share?
A. Stopping an ensemble during a performance and starting over again.
Q. Why is it important to protect access to music education?
A. Music education touches the very core of our humanity. Every society has had some kind of music as part of its culture. We cannot live life to its fullest without music. I will never understand why budget cuts always target the arts. I will fight to my very last breath to keep music alive in the education of all mankind!
Q. What is your biggest pet peeve?
A. Inconsiderate people — people who always put themselves first, before others!
Q. Which person from history, dead or alive, would you want to have lunch with and what would you discuss?
A. Beethoven and his motivation for writing “Symphony No. 5.”
Q. Why is music important to humanity?
A. Music touches our hearts and souls in a way no other art form can. It keeps us in touch with our inner being and feelings, it motivates us, and gives us strength, hope and courage! Music also makes us cry, keeps us tender, caring, loving and thoughtful toward others. It is magical and the best “medicine” mankind has for the heart and soul!
I was born in 1966, the same year Yamaha first started making electric basses (as well as guitars and amps). So what, you ask? Well, for one thing, it means I’ve been circling the sun for a lot longer than I care to admit. It also means that Yamaha knows more than a thing or two about making great basses. They started strong — my ’72 SB-70 is an early example — and they keep getting better at it as time goes by.
Whether you’re buying your first bass, stepping up to one that better suits your evolving needs, or adding to your growing bass arsenal, the buying process is always an exciting one. Knowing what you need a new bass for, what features matter most to you and what you can afford are all factors that will help you zero in on your target. But know this: Yamaha’s got every angle covered with its RBX, TRBX and BB basses.
Let’s take a closer look at each.
RBX
If you’re a student or someone new to the world of bass playing, you might want to start by checking out the two Yamaha RBX models: the RBX170 and RBX170 EW. Both are four-string instruments with largely identical specs (though the RBX170EW has a slightly higher price tag thanks to an attractive mango veneer top on the body and headstock), but they’re both rather unique when compared to the packed crowd of beginner basses out there.
Yamaha RBX170.
Yamaha RBX170EW.
The lightweight RBX basses are very easy on the eyes, the back and the wallet, giving inexperienced players a serious yet affordable option packed with the kind of performance features and craftsmanship you’d expect from much more expensive instruments.
They’re perfect for honing your chops because they’re especially easy to play. Thanks to a double cutaway basswood body and a C-shaped, satin-finished bolt-on maple neck with a 24-fret rosewood fingerboard, both RBX models have a comfy, natural feel. The split- coil pickup in the middle and a single-coil in the bridge position give you sonic versatility for any situation, with low-end beefiness and lots of high-end articulation. RBX instruments are best for beginners looking for a very playable bass they can learn on and grow into. It’s also a great choice for intermediate bassists on a budget who need an instrument that delivers the goods and looks good doing it.
TRBX
The jump from novice to serious player comes not only with experience and proficiency, but also with the awareness that your bass needs certain design and performance characteristics — such as advanced pickups and active EQ circuitry, neck and neck joint construction, and body woods — to help you create your signature sound. Yamaha TRBX basses are designed for players who’ve had this realization and are ready to take things to the next level.
There are five “series” within the TRBX line: the 170 Series, 200 Series, 300 Series, 500 Series, and 600 Series. The lower the number, the less expensive the model and the fewer features offered, but make no mistake: these are all quality instruments.
Yamaha TRBX174.
Yamaha TRBX204.
The TRBX174 and TRBX174EW (with its exotic laminate top) are comparable to the RBX170/RBX170EW overall but boast a mahogany body instead of basswood for longer sustain and punchier mids. The TRBX204 comes with a basswood or alder body and is equipped with a two-band active EQ circuit — slightly more sophisticated than the fully passive RBX and 170 Series TRBX models, but not as high-tech when compared to the other TRBX models.
TRBX 300 Series, 500 Series and 600 Series instruments, all of which are available in both four-string and five-string configurations (click here for more information about the difference), are equipped with the same four-bolt neck joint as other Yamaha basses, but add a five-piece mahogany/maple neck, a high mass bridge, 3D sculpted bodies and two hum-cancelling pickups. The differences between the models come down to the choice of body woods (mahogany or flamed maple/alder) for tone and appearance, and the EQ circuits (EQ presets, two- or three-band EQ circuits, and/or active/passive switching).
Overall, the TRBX line represents a serious jump up from the RBX line, and all TRBX models deliver major performance for discerning players. This higher level of sophistication makes the TRBX 300 Series a tantalizing option for beginners who are willing to spend a little more. Intermediate and professional bassists who want refined control over their sound and are looking for a more responsive and inspirational instrument should consider the TRBX 500/600 models, all of which offer active/passive switching. (For more information on the differences between active and passive basses, click here.) The choice boils down to the sound and aesthetic you prefer.
Yamaha TRBX504.
Yamaha TRBX604FM.
BB
The Yamaha BB bass developed a cult-like following soon after its introduction in 1977. The current BB instruments have the same “built for the working bassist” intent but now flaunt a slightly thinner neck and a lighter body, improving playability on stage and in the studio without sacrificing any of their characteristic penetrating tone or punchiness.
Like the TRBX, the BB line encompasses several “series,” each offering models in both four-string and five-string configurations. The 200 Series basses are the least expensive; they offer a great alternative to intermediate players who expect solid performance and prefer a more traditional design than that of the progressive TRBX series. The 400 Series, 700 Series and Pro Series BB models all feature Graphtec nuts, a Vintage Plus Bridge (which incorporates “diagonal thru-body stringing,” where strings are angled at the saddle and pass through the instrument to the bridge at a 45º angle), and a six-bolt miter neck joint for improved sustain and enhanced resonance.
Yamaha BB234.
Yamaha BB434.
The 400 Series includes the BB434, BB434M (“M” is for maple fingerboard) and the five-string BB435 models. Each features VSC5b split- and single-coil Alnico V pickups. The 700 Series includes the BB734A and five-string BB735A. Both are switchable between active and passive modes, and feature alder/maple/alder body construction, VSC7b split- and single-coil Alnico V pickups, plus a heavier steel plate bridge for a brighter tone.
Last but certainly not least, the top-of-the-line Pro Series encompasses the BBP34 and five-string BBP35 models. These are passive basses equipped with VSC7b pickups, alder/maple/alder body construction, Vintage Plus Convertible stringing and a steel plate bridge. Notably, the BBP basses also feature proprietary Initial Response Acceleration (IRA) technology, which releases stresses created during construction by applying specific vibrations to the completed instruments for a “played in” bass.
Yamaha BB734A.
Yamaha BBP34.
The BB line is undoubtedly intended for serious bassists who play for a living or aspire to do so. I plugged a BBP34 into my ’67 Ampeg SB12 amp, and what I got back was nothing short of magic. The bass and the amplifier complemented each other perfectly, richly rewarding me with deep, buttery tone. From single notes, staccato riffs and full chords to sustained harmonics and languorous double stops, the BBP34 could do no wrong in terms of tone, intonation and action. For me, it was love at first sight.
So which bass are you? It’s a purely personal choice, but you’ll have a lot of fun figuring out which one best expresses your unique musical voice.
There’s Johnny Cash’s heartfelt “A Thanksgiving Prayer” at one end of the spectrum and Adam Sandler’s wacky “The Thanksgiving Song” at the other, but the truth of the matter is that there really aren’t many songs specifically written about Turkey Day. That said, here are the stories behind five of the best-known songs of gratitude … and one bonus Beatles factoid about an essential Thanksgiving condiment.
1. I’ve Got Plenty To Be Thankful For
Popularized by Bing Crosby, this was composed by iconic songwriter Irving Berlin for the 1942 musical Holiday Inn — a film that also included “White Christmas,” the best-selling single of all time. Check it out here.
2. What A Wonderful World
Originally recorded in 1967 by legendary trumpeter Louis Armstrong, this song found new life when it was used in the 1988 film Good Morning, Vietnam and re-released as a single, making the then 87-year old Armstrong one of the oldest artists ever to top the charts. Check it out here.
3. Thank You (Falettinme Be Mice Elf Agin)
This quintessential Sly and the Family Stone 1970 hit features an instantaneously recognizable slap-bass riff from the inimitable Larry Graham. The title is an intentional mondegreen — a fancy word for a phonetic spelling. (Say the song’s title out loud if its meaning isn’t obvious.) Check it out here.
4. We Are Family
Written by Bernard Edwards and Nile Rodgers (their first for any act other than their own band Chic) and performed by Sister Sledge, this feel-good celebration of friends and family came to epitomize the disco-influenced sound of the ’70s. Check it out here.
5. Thank You For Being a Friend
A modest hit for singer/songwriter Andrew Gold in 1978 (he once called it “just this little throwaway thing that took about an hour to write”), this was made famous seven years later when it was re-recorded by jingle singer Cynthia Fee as the theme song for the TV sitcom The Golden Girls. Check it out here.
Bonus Beatles Factoid
The urban myth is that John Lennon mumbles the chilling words “I buried Paul” during the fadeout of the group’s single “Strawberry Fields Forever,” but what he is actually saying is “cranberry sauce.” It was late November 1966 when the vocal was being laid down, and between takes the Fab Four were chatting about American Thanksgiving traditions — something that was clearly on John’s mind as he improvised on an open mic. Check it out here. (Lennon’s ode to Turkey Day occurs at precisely 3:58.)