
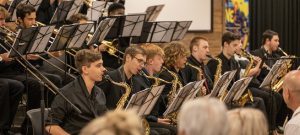
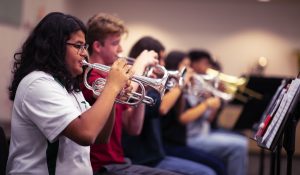
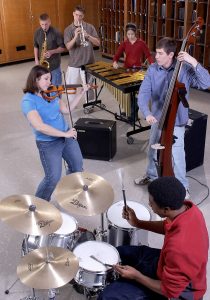
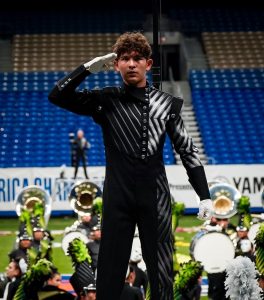
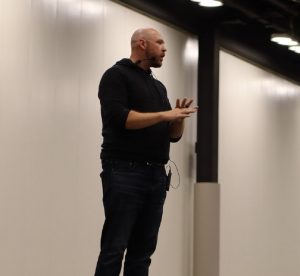
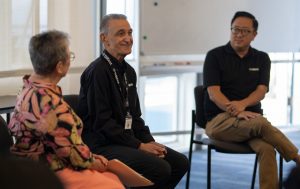
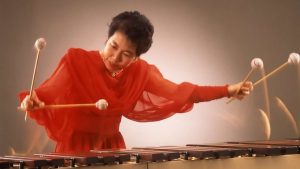
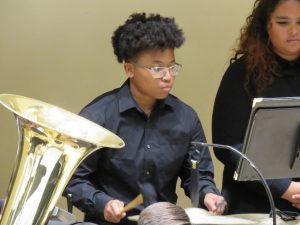
Incorporate Jazz in Your Classroom Daily
Jazz is an American treasure that is considered by many to be the most significant contribution to music. Historians have traced its roots back to Congo Square in New Orleans. Located at the mouth of the Mississippi River, the Port of New Orleans was a prime location for goods to be shipped in and out of the city. Travelers from across the globe were constantly coming and going from here.
There is no place like New Orleans. The music created in the city is organic and constantly evolving. It’s not a style that can be stamped, pressed and rolled off a cookie-cutter assembly line. With the constant influx of travelers during the city’s early history, New Orleans became the perfect melting pot to brew up the musical gumbo now known as jazz.
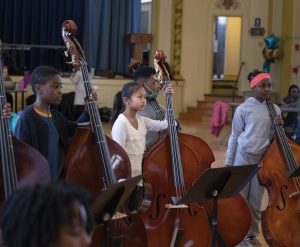
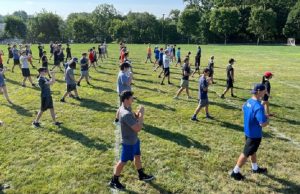
Schools, districts and band programs have evolved dramatically in recent years. Many band programs took a massive hit during the pandemic that set them back years due to the temporary pause caused by restrictions and outbreaks. In many cases, jazz bands have been one of the harder-hit components of school band programs. With fewer jazz bands in school programs, fewer young musicians are exposed to jazz, which is sad because kids who are introduced to it love it.
To keep a band program moving forward, you must capture the attention of young people. One way I have generated interest and increased retention in my program is by incorporating jazz into the curricula.
THE YAMAHA EDUCATOR NEWSLETTER: Join to receive a round-up of our latest articles and programs!

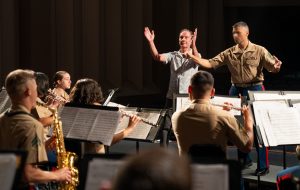
Make Connections with Jazz Repertoire
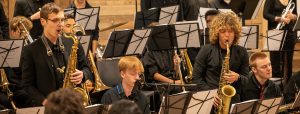
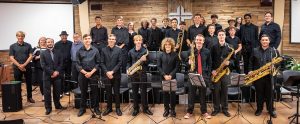
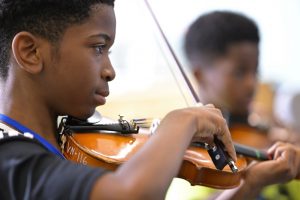
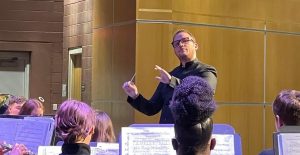
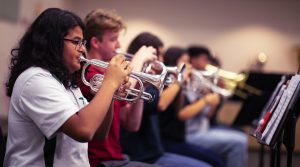
Keeping jazz alive in band rooms across the country is a vital piece of our American identity. I teach at Marrero Middle School, which is located just outside of New Orleans, where jazz is deeply rooted in the culture and daily life of young and old alike. Jazz incorporates improvisation, which offers young people a unique form of critical thinking and self-expression.
Make selecting jazz repertoire simple. For example, the musical notes used in Count Basie‘s tune “Splanky” are the same ones used in Stravinsky’s “The Rite of Spring.” The chords on Miles Davis’ “Kind of Blue” album were composed like those in one of Bach’s fugues. The point is that all styles of music have similar threads. Some of the characteristics that make different styles of music sound so different from each other are the feel, context and the way the phrases lay in correlation to the beat.
“Hey Pocky A-Way” by the New Orleans band The Meters has a totally different feel than anything else you will ever hear. It’s often described as having a very “New Orleans sound.” The rhythm section’s use of polyrhythms create a distinctive “language of rhythm” that is indigenous to New Orleans. Locals learn this unique rhythm the same way they learn to speak through continuous listening. In truth, jazz is like a language that requires exposure to fully understand.
Listen to Jazz Every Day
In order to encourage students’ interest in jazz, they must first be exposed to it. If we want our band to play jazz, they need to listen to it. A simple way to incorporate some jazz into the class setting every day is to turn on some jazz while students are setting up and packing up during each class period. Always pick high-interest songs.
Many younger kids like brass bands like the Dirty Dozen Brass Band and the Rebirth Brass Band. Modern brass bands play music associated with parades or other fun experiences, which helps capture students’ interest.
Whatever you choose, use music that grabs your kids’ attention. Once you have their attention, you can mix it up in any direction you want and expand their listening even further.
Introduce the Blues
Harmonically, so much of jazz is rooted in the blues, so I recommend introducing basic blues to your students. Make sure they know what notes make up the blues scale and the basic blues chord progression (which is standard progression). Teach them what notes they should use and which ones to avoid for improvisation purposes. Identify the patterns of a blues form and explain how these harmonic patterns are the same for so many songs. This will open up a young musician’s ears and understanding, which will eventually help them feel more comfortable with improvisation.
The long-term objective is to have students apply the information they are learning to any song. For example, you may get a new song written in a different key signature than the one the band has been practicing in class. Though the key signature may differ from song to song, the harmonic structure will likely be composed around the same blues form. Once the harmonic structure of the blues form is understood, students will be able to identify when there are minor deviations which, in many cases, are just examples of a slightly altered blues form.
Many jazz standards are composed entirely around the blues form, which makes the blues the perfect springboard to introduce students to improvisation. Eventually, when students begin to apply the knowledge they acquire, the transition to improvisation will be easier.
Know the Repertoire
Studying and knowing age- and level-appropriate jazz repertoire is vital to your group’s success. Are you looking to make an addition to a program with a new jazz band or do you have a well-developed, experienced jazz band? In either case, there are many suitable arrangements that are age- and level-appropriate.
For a young band that needs exposure to jazz, I recommend a simple melody like “C-Jam Blues.” This Duke Ellington tune is composed in a simple 12-bar blues form in the key of C. It provides students an excellent harmonic framework to work within.
If you think your band is still building toward a traditional big band arrangement, have the horns play only the melody at first. Focus on the band playing stylistically and accurately, and tell students to exaggerate those simple little phrases so they swing hard. This melody could be the foundation that the group builds on for the whole school year. Start with the entire band playing the melody and eventually move to a more traditional arrangement.
I also recommend opening up tunes like this to everyone even though jazz bands may not traditionally include some concert band instruments. Eventually, anyone can convert to a second instrument for jazz band purposes. When played correctly, someone can swing just as hard on a trombone as on a flute or clarinet.
Ear Training
To get buy-in from students, pick a melody of high interest to the band for ear training or have the band suggest a popular melody. One successful ear training method is to have the band learn the melody by ear collectively. Or give the band half the melody written out, then work together to figure out the rest of the tune’s melody. Both lessons work well, but one may fit your particular group of kids better.
Songs that I have used for this are “C-Jam Blues,” “Watermelon Man,” “Chameleon” and “Do Whatcha Wanna.” The melodies for these songs are simple enough that even young students can figure them out.
After the band learns the head, they typically dig into the charts because these are all such cool tunes. Even if you have a very young band, there are so many musical possibilities with these charts to expose young players to the possibilities of jazz.
After the head feels tight, explore transcribing a solo or a part of a solo, which can be done individually or as a group. The transcribing process forces students to open their ears.
Find a Mentor
Students who show interest in jazz must find a mentor who can help guide and mold them. All music students should have a mentor they look to for inspiration and guidance. Learning the many nuances of jazz from experienced musicians who have played it is the best tool any student can have. Getting a private instructor is always an excellent first choice, but this depends on the student’s home and financial situation.
If a private instructor is not possible, there is still a lot a student can take in from listening to old recordings and imitating the sounds of one of the many greats. There are also many free online resources that make it easier for students to find an excellent musician to model.
Exposure is the Goal
Remember that the overall goal is to expose students to jazz. The only way to preserve jazz is to introduce more young musicians to the art form. Even if you have a limited background in jazz, there are still plenty of possibilities to explore. Suppose you are just beginning to incorporate jazz into your curricula. Remember that whether you are playing a tune with a funky New Orleans street beat or watching a video of the Preservation Hall Jazz Band performing “When The Saint Go Marching In,” it is still exposure to jazz.
Draw from what you already know to get where you want to be. If your program does not currently have a full jazz band, you can begin by incorporating jazz into the curricula where possible. When you’re ready, start a smaller jazz band or combo, or form a more contemporary group that plays rock and brass band tunes. With time, add a standard jazz tune.
At the end of the day, music directors should play music that interests our students. That said, it is also our job to expose young musicians to music they aren’t familiar with. You can start by playing a classic rock tune that the kids know. Then begin to incorporate some arrangements from the more traditional big band repertoire, such as some Basie and Ellington standards.
Online Resources
There has been a tremendous increase in the use of technology in classrooms, especially since COVID forced just about every school into virtual learning. Here are two very thorough online resources that I have used to incorporate jazz education into my daily curricula:
- Preservation Hall Lessons: These online lessons are very well put together and include many musical elders. They allow anyone to learn the music directly from the original source of New Orleans jazz.
- New Orleans Jazz Museum Educator Resources: This is a great resource where you can learn about the history of New Orleans jazz through online virtual tours of the New Orleans Jazz Museum.
I would love to hear how you have built interest in jazz in your band programs or which jazz repertoire selections have worked for your band. If you’re looking for ideas to get a jazz program off the ground or are interested in jazz repertoire ideas, please contact me at JWilliamsband@yahoo.com or email educators@yamaha.com.
In addition to teaching and performing, I run a student jazz band called The Next Generation Jazz Band of New Orleans. Check us out on Facebook, Instagram and YouTube. Watch this video of the band performing “That’s It!”
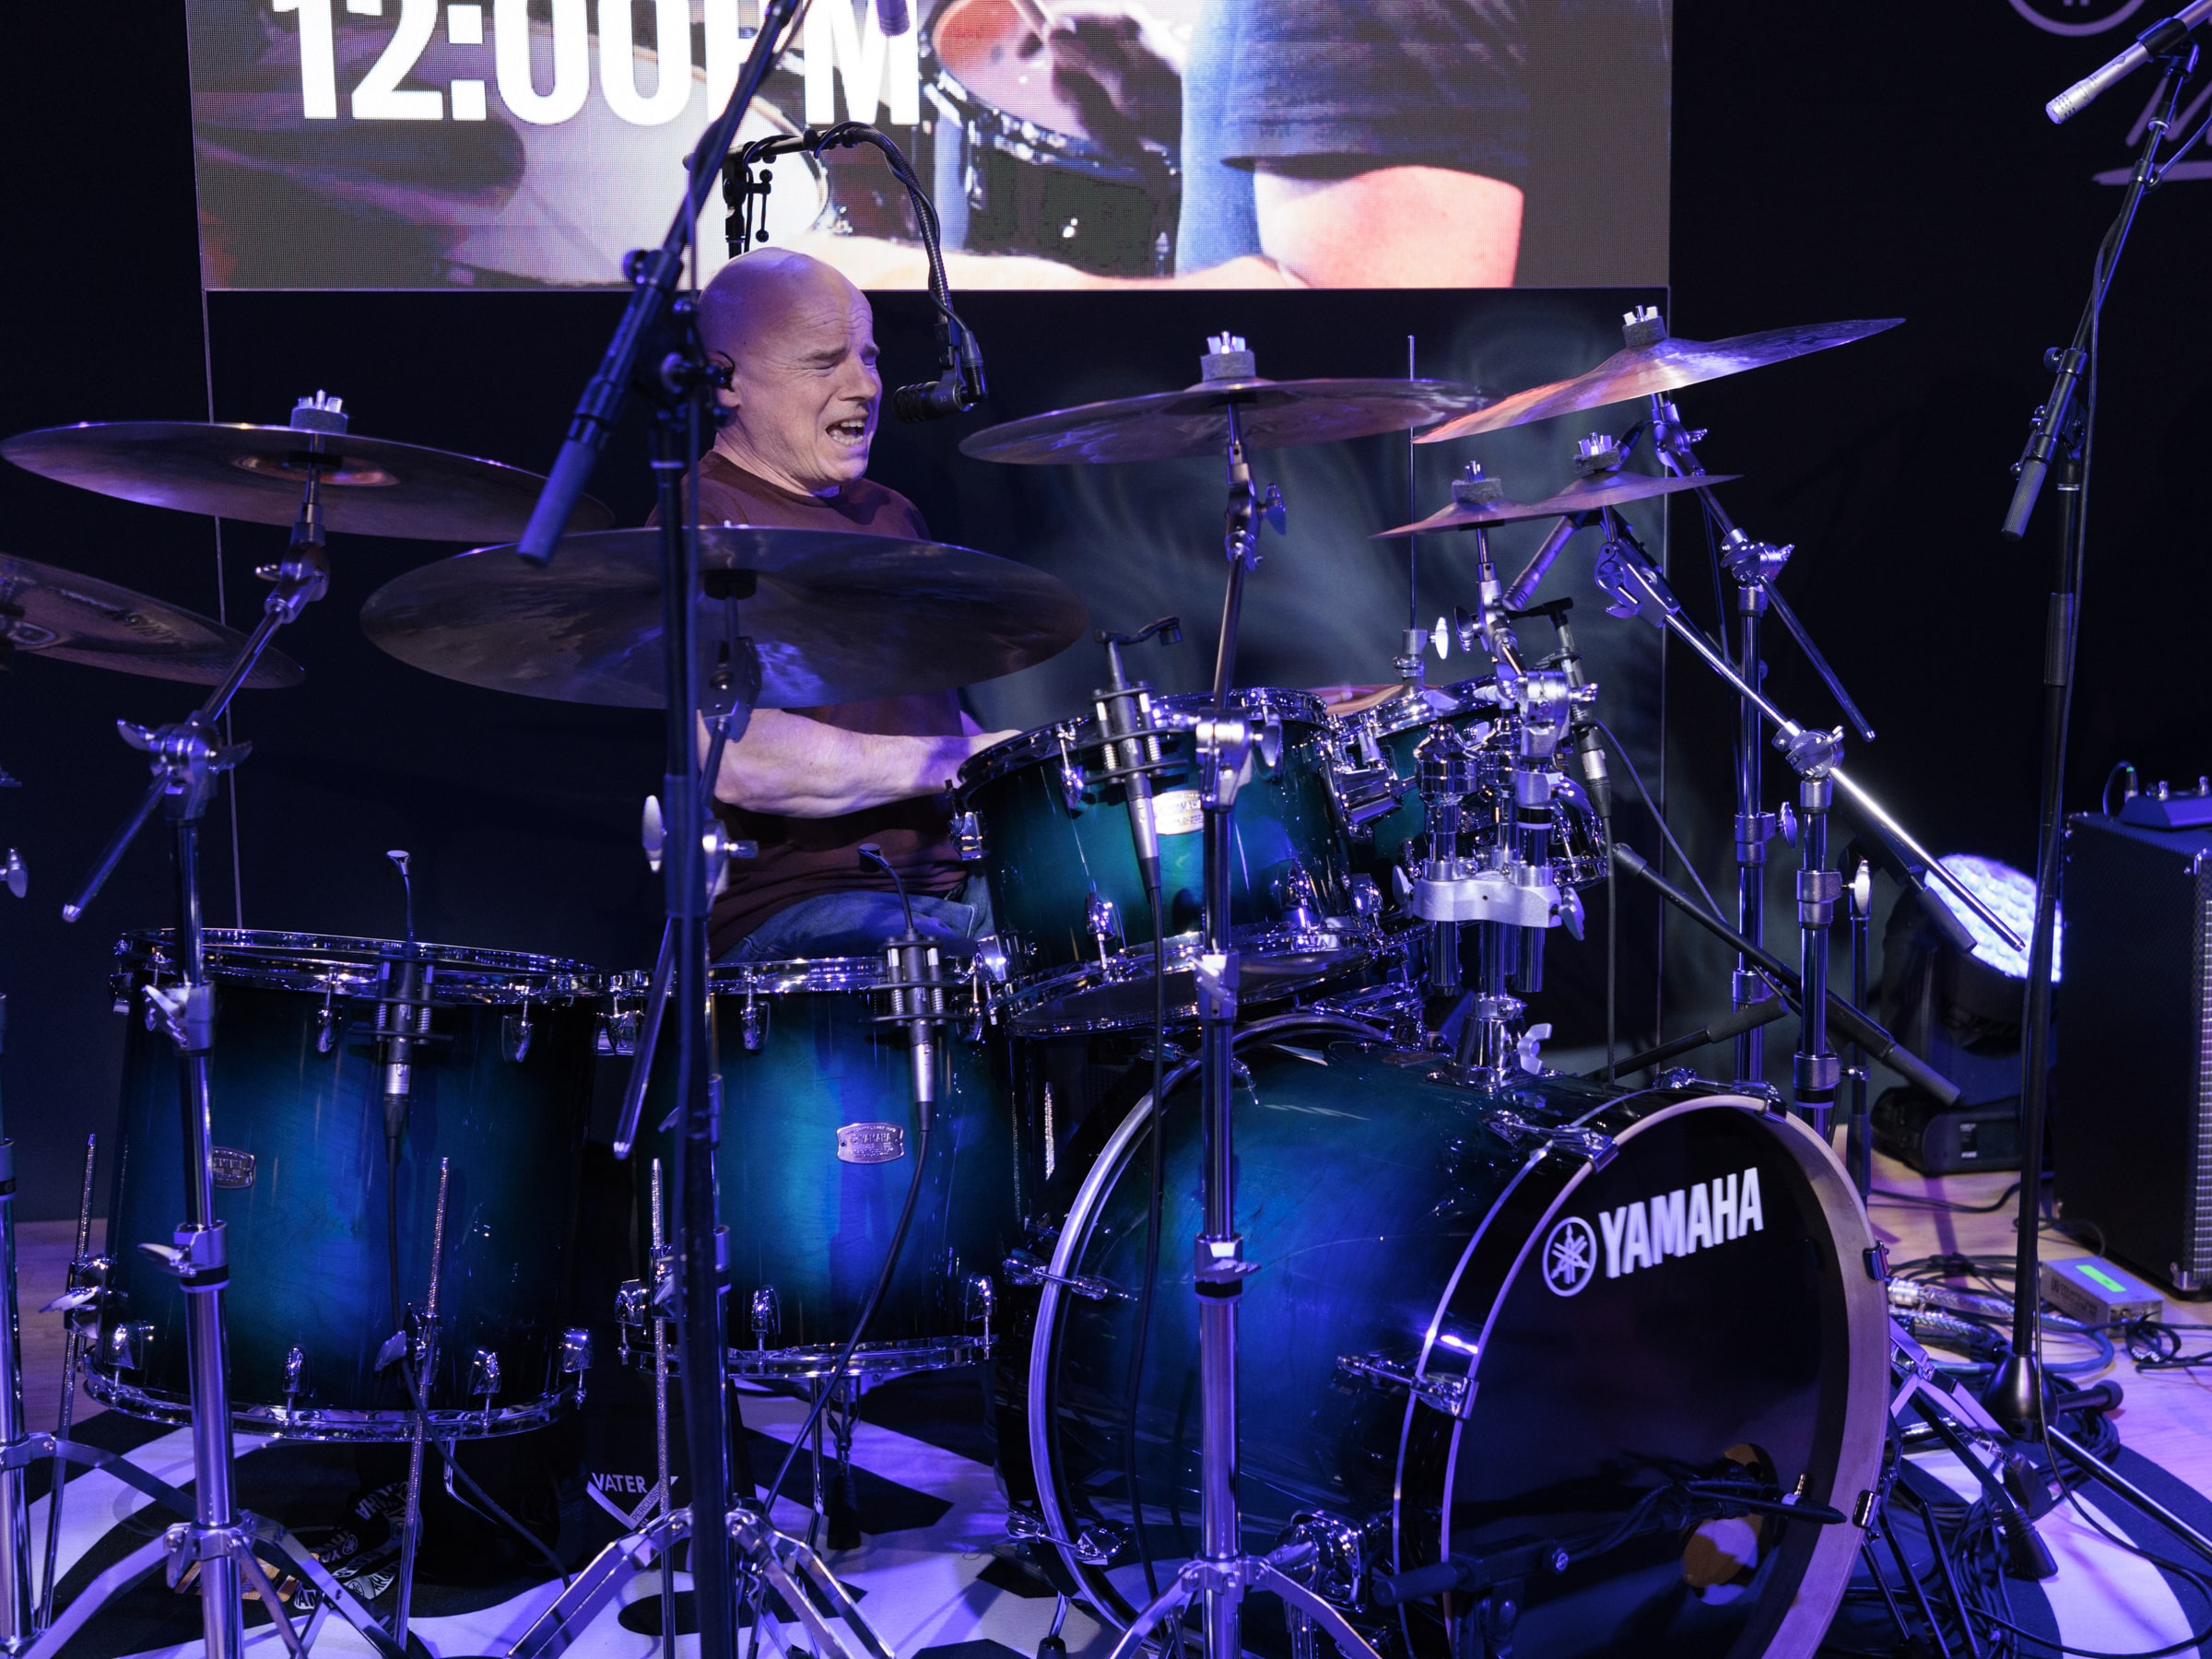
Top photo by Christopher Broome


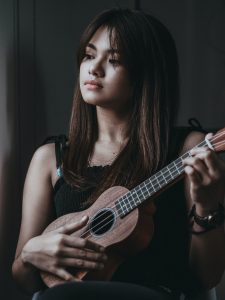 You easily can play complex chords on them. Many chords require just one or two fingers, which allows students to play their favorite pop and Disney songs without the insane stretches that might be required on the guitar (something that is great for kindergartners and students with small hands). Because of the ukulele’s unique tuning and its smaller fretboard, suspended and 7ths chords are easier to learn.
 Don’t start teaching with the instruments already in students’ hands. Instead, create a presentation on how to properly hold and use ukuleles, including examples of what not to do. Tuning, maintenance and how to put the instrument away should all be addressed a day before the instruments are put into their hands.
 If you don’t already have ukes in your classroom, you’ll need to do a bit of research. Most entry-level ukuleles cost around $50 to $60. Anything less than this are likely not high quality instruments. Entry-level ukuleles are usually made of wood or plastic. Most classroom sets are plastic, although there are a handful of economical wooden ones (such as those by Makala), but instruments made of wood require more care and are more susceptible to damage.
 I’m supportive of using both ukuleles and
 I enjoy live music, but hearing exceptional groups reduced my confidence. Still, it was important to continue this exposure, not only to continue getting examples of what I wanted, but for my own enjoyment as well.
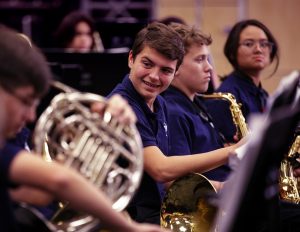 We know when something doesn’t sound like we want it to, but what do we do when we’re in the middle of rehearsal? If something sounds off but you can’t put your finger on it, start separating the parts. Break down complex pieces to understand them better.
 Whether they sound off or not, make a habit of tuning specific notes and chords to ensure uniformity. I started by picking one student to play a note. I then played my instrument and tuned to them. This showed an example of what “in tune” sounded like. Later, we started having kids tune to each other — just a couple each day.
 Delve deep into the music, studying one line at a time. I’m serious. Take a piece and plunk out every single instrument line on the piano, or grab an instrument and play through. Go through every line and see what your kids are actually playing. Then do it again. Then one more time.


 Directions: Assign an instrument to your students and, with the help of their parent or guardian, ask students to search online to answer a given set of questions. Some of these answers might be hard to find, but they’ll end their journey knowing a few more fun facts. Students can present these facts to the class, or the answers can be used to create an interactive round of
  Directions: Ask your students to craft a make-shift microphone, turn down the lights and throw their own karaoke night in the living room with their friends or family. Whether they use Disney singalongs or


 Recently, I took my students at
  Share Circle


 My favorite students are those who are always enthusiastic or engaged during my rehearsals, even when I knew they didn’t want to be there. The kids who made it easy for me to teach when maybe I didn’t want to be there. Kids tend to see their teachers as superhuman and expect us to always be at our best. On my most challenging days, the few kids who went out of their way to smile and say good morning or check in with me, made all the difference.
 I remember how it started in 2021 during the post-COVID re-boot. We were all looking for ways to boost morale and confidence. At a rehearsal early on during spring training, Gino tested the microphone. The kids couldn’t hear it from the field, so they started to scream “What?! What?! What?!” until Gino yelled, “Checking the microphone!” at a volume they could hear. They all cheered and screamed exuberantly.
 Greet your students daily — at the door or before your rehearsals. Say, “Good morning” or “Good afternoon” while making excellent eye contact, smiling and projecting. If students don’t respond, don’t take it personally. Teenagers mumble. You can inspire them to respond with your energy or teach them to respond.
 If a normally cheerful student looks sad or is acting out of sorts, take a second to investigate. “Hey, you normally answer many questions in rehearsal, but you seemed quiet today. Is everything ok?” When students have bad body language in rehearsals, don’t assume it’s a response to you, the rehearsal or even that the student realizes they have bad body language. We can help students learn the power of their body language through coaching and raising awareness.


 She made a youthful executive decision: “I’m not only going to become a music educator, but I’m also going to work in schools that have predominantly Black and brown programs.”
 Soon after her post traveled wide, Fripp was speaking on podcasts and headlining conferences. Additional social media posts followed, and she signed one as “A Passionate Black Educator.” Since then, the name stuck.
 She offers some tips to fellow music teachers. For people of color, she says, be proactive and speak up about your needs by getting involved with professional organizations and attending board meetings. “Don’t be afraid to use your voice, because you’re giving voice to the voiceless.” Fripp says.


 I highly value my music department teammates, but I had to learn how to be an effective member of the team. I had to open my mind to the concept that the success of my colleagues’ programs was just as important as mine. I came to recognize that many stakeholders view the department holistically and the success of any aspect of our music program was a reflection of our team. I learned how much we had to follow the motto of the Three Musketeers: “One for all and all for one.” Most notably, I realized that like most things in life, what we put into the team is what we will get out of it.
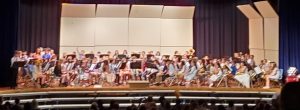 Your presence alone at a concert sends a clear message to your colleagues that you support them, their students and music education as a whole regardless of which ensemble or grade level is performing. Although showing up is meaningful, a great teammate takes it to the next level by assisting their colleagues during those stressful performances.
 Over the past several years, one of the greatest intrinsic benefits of attending performances throughout the district is connecting and advocating with administrators! Take the opportunity to highlight for a principal, superintendent or school board member some of the excellent music learning occurring throughout your district. Mentioning the growth of an ensemble or program is much more impactful to an administrator when the group is sitting on stage with big smiles.
 Offering collaboration as part of being a team player is cliche. In fact, suggesting collaboration alone doesn’t offer much value because all educators must collaborate throughout the day to do their jobs. What I’m suggesting is that great teammates collaborate creatively beyond the routine collective tasks and events we do as colleagues.
 The relationships you have with your colleagues matter! Everyone you work with doesn’t need to be a personal friend, but great team players work toward building healthy relationships with their peers. One of the best ways to do this is to gather with your colleagues outside of school. My department meets at least bi-yearly to share in fellowship as a districtwide music educator community.
 Embarrassingly, I didn’t learn about commissions until I went to college and met composition majors. People asked these composers to write music for them. What? That can happen?! As I became friends with some composers, I started to think about commissioning. Imagine being able to help my friends do what they love by doing what I love.
 I have heard a lot of music teachers say, “I only program good music.” However, we all know what that means: They only program the status quo because it is too much work to find something else. If this continues to happen, then music as an art form would never advance because people are afraid to challenge what we already know.
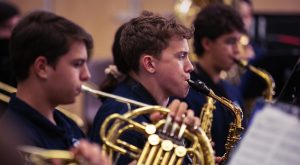 The beauty of a commission is that it is created for you and your group. It is like that new suit that took the tailor an hour to fit just for you, and when you get the finished product, it fits perfectly — and, boy, do you look good! With a commissioned piece, you can even share it with your colleagues who might have similar instrumentation.
 We are all artists. We know how difficult it can be to make a living by following your passion. Music is an undervalued and underappreciated profession. When you purchase music from a large music distributor, the composer probably is not making that much money from that purchase. I don’t think this is breaking news to anyone.
 I have a few different processes for finding the right composer. My first commission was with a composer named


 Sims first encountered GRR as a pedagogy during his college years, and then began developing his approach more with each teaching job. “I was a super nerd in college, so I read everything I could get my hands on,” he says with a laugh.
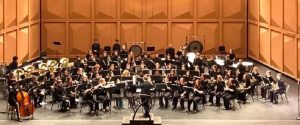 Once students have mastered analyzing their own performances during warmup, Sims starts letting them guide exercises in method books. Here, transfer of knowledge is key. Students learn to apply their critiques from the warmup to their analysis of the actual rehearsal. “Sometimes, kids will get stumped,” he says. “I can ask leading questions like, ‘During the warmup, you said tuning was an issue. What did we do during the warmup?’ And then [they fix it] almost immediately.”
 Middle school students are often in a developmental stage that blends high energy with social uncertainty. To keep his classroom running efficiently, Sims sets high expectations for his students’ maturity level. “Depending on the kid or the age level, sometimes it takes a little while to teach the maturity behind making intelligent musical comments,” Sims says. “Some students have a tough time either giving constructive criticism or receiving it.”
 By making an intentional effort to engage students with one another, Sims breaks down typical preteen cliques, helps students come out of their shells and builds the band into a cohesive unit. “What’s awesome is, whenever kids come into the band room for the first time, they’re all in these little friend groups,” Sims says. “As the year progresses, you’ll see them with a different group.”


 According to Griffin, there has been a noticeable lapse in the preservation of Cajun and Creole culture from her grandparents’ generation to her own. “I feel like our culture has just been slowly taken away from us, and we’re paying the price,” she says.
 Griffin earned a bachelor’s degree in music education at the
 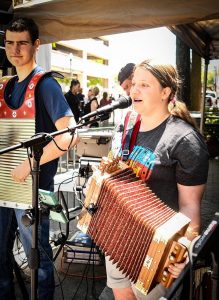 Two summers ago, Griffin along with her husband, Gregg, and another district music educator, started
 “Louisiana’s music culture is so rich with jazz and all these things that come from our state,” she says. “But in our school programs, our kids play mostly western, classical and noncultural music.”


 The good news is that there are many ways to create music for video games, so you can find what works best for you.
 Many short, repeated themes must be written. Video game composers specialize in incidental music, which is music written for something that isn’t music-centric (such as a symphony you’d buy tickets to see).


 Just make a short list of the things you teach in your classroom: dependability, responsibility, respect, encouragement, leadership, teamwork, how to grow from disappointment, how to win, how to lose, punctuality, dedication. The list goes on and on.
 With that in mind, I went to the head of our CTE department for the school district and had an open conversation about my desire to champion students who are excelling in multiple programs. My main talking point focused on my senior drum major who is an amazing leader, flute player, powerlifter and advanced welder! Wow! Let’s show off her amazing talents AND how incredible our school district, administrators and her parents are for helping her along this very diverse pathway. These are the stories we need to tell (and sell!).


 Letter names scribbled under every note.
 The basic principle of sound before sight is that aural comprehension precedes theory or grammar, similar to how humans learn language. Keep in mind that aural comprehension is not the same as rote memorization. The two can be distinguished by the following analogy: Imagine you had to memorize a speech in a language that you don’t comprehend. You might be able to say the sounds mostly correctly, but you don’t understand what you’re saying, nor could you use the words you’ve memorized to improvise new sentences. In music, a student might memorize a piece but make a pitch error and not notice. They may be unable to identify a tonal center or whether the piece is in major or minor. And perhaps they are unable to take an excerpt and transpose or improvise on it.
 Get ready for a hot take: A lot of sight-reading happening out there isn’t really reading at all. Stay with me. Often, sight-reading looks like giving students a new piece or exercise in their method book. They look at the sheet music but cannot hear what it would sound like in their head. So, they start to decode the first note symbol into the correct fingering, then the next and the next. Then they string it together, maybe with some unnoticed pitch errors. Were they reading?
 It has to be clear that notation is representation of a pitch, not of a letter name or a fingering: I postpone referring to notes by letter names for a few months in order to emphasize patterns and tonality. We use solfege or neutral syllables on each pitch. I start beginners on a one- or two-line staff to simplify patterns, emphasize the sound and symbol relationship, and deemphasize the inclination to name notes. Eventually I scaffold up to traditional notation.
 So, why does this shift to holistic music literacy matter? What are the stakes? I can’t say how many adults I’ve met who, at some point, got the message that they “just weren’t musical” or “just weren’t talented,” so they quit learning music. Unfortunately, this is still happening today. Stories like these, I believe, are the result of a way of teaching that often fails to impart holistic music literacy. The truth is: Musicality is an inherent human trait, just like language. With the right teaching, the musician in everyone can flourish.

 The goal of Notice-Shift-Rewire is to help master executive attention. What’s executive attention? It’s the complex way our brain sorts out all the incoming stimuli, blocking out what’s not important and focusing on what needs doing. Picture yourself having dinner with a friend: You are focused on the great story they are telling you, not on the random guy in the blue shirt at the next table over or the sound of your fork on your plate. When executive attention is poor, according to Klemp and Langshur, too many stimuli are competing, which makes us feel distracted, unfocused and stressed. (Sound familiar?) Add in today’s fragmented environment — awash with distracting social media, incoming texts and multiple screens — and our poor brains are swamped.
 The first part of the practice is to notice, or observe, what’s happening in your mind, using a neutral standpoint. Let’s say you had a really hard day teaching. You feel depleted and discouraged. Your brain starts whirring with negative, unhelpful thoughts — for example, “I should be better at this by now” or “I am not cut out for teaching.” But here’s the thing: Human brains are wired to glom onto more negative thoughts and experiences instead of positive thoughts and experiences. Giving negative thoughts more energy is what scientists call the
  Rewire
 Choose your cart carefully because it is your classroom. Helpful features to have on a music cart include:
 Hand Clapping and Cups: The smaller the instruments, the easier it’s going to be for you. However, this doesn’t mean that you can’t make great music. Prioritize small hand percussion instruments like scrapers, shakers and handbells. Don’t forget that our bodies can be instruments, too.
 Small Manipulatives and Other Helpful Items: Keep small items in your cart like scarves (for choreography), balls, hacky sacks, rubber dots, etc. that are portable, engaging and inspire movement. Other helpful things to keep on hand include mini whiteboards, golf pencils, scrap paper and blank staff paper.
 Teacher Tip: Take Up Space — Even if you’re always teaching in someone else’s space, you must think of it as your room until the bell rings. It’s also a valid move to ask the other teacher to leave their desk so you can take over, even if it’s uncomfortable at first.


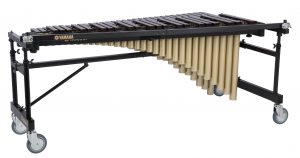
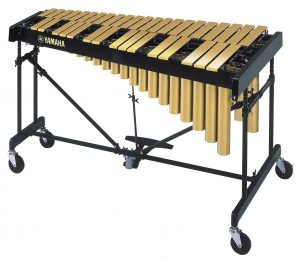 What’s the Difference Between Matte and Glossy?
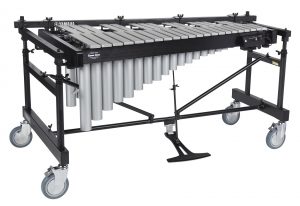 Vibraphone bars are graduated in size and length the same way they are on a marimba and xylophone. This means that the bars are at their largest in width and length at the bottom and gradually get smaller as the pitch rises. The same principle applies to a grand piano. When you look inside a piano, the strings attached to the higher notes are very short and thin, while lower pitches have thicker and longer strings.
 The vibraphone bars are tuned to A=442hz (like most other pitched percussion), however, if you are playing the vibraphone with a grand piano tuned to A=440hz, you might notice some tuning discrepancies. The vibraphone is technically 8 cents sharp compared to the piano and the rest of the ensemble. For this reason, companies will offer vibraphone bars tuned to A=440hz. This is only necessary when playing in smaller ensembles with a grand piano or other fixed pitched instruments, however, the difference isn’t noticeable in most scenarios.


 Early priorities included infrastructure, such as great trucks, great buses, great equipment. The next priorities included uniform and equipment sponsorships. Once these pieces were in place, the board secured the best teaching staff and administrators they could find. Then, they trusted those instructors and teachers to do their jobs and provided them with the resources needed to be successful. There was, of course, give and take, such as metrics, goals and incentives. The board provided fantastic oversight in the early days, but as the corps’ leadership became more solid, the board maintained its focus on fundraising and community involvement.
 On top of being a dedicated band parent, Don was a leading spinal surgeon in South Carolina, and he was positioned to rally the community to support the organization. He envisioned a support system for the Wando Band that could engage alums and other stakeholders to raise monies for the campus and the middle school programs. He was wholly committed to keeping band costs down and filling in the gaps in funding at the district level to enable Wando to remain competitive nationally. He also extended support to the middle school feeders that required additional funding for equipment or travel.


 We often think of recruitment as a one-night-only event. You show up, the kids see and/or try the instruments, and then they sign up. That’s it.
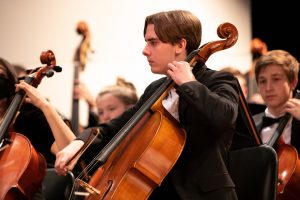 That first general music class visit in the winter is short! I demo all four string instruments and introduce our programs in about 15 minutes. I am saccharine sweet and bubbly. Why? Because kids have limited attention spans, and the worst thing I can do is drone on about class rules and logistics. No need to talk about rental fees or playing tests. They will come later. It’s easy to forget that a big reason kids join your program is because of you! Be energetic, welcoming and fun. They’ll leave thinking, “Wow, I want to be in that teacher’s class!”
 One year, our band directors were lamenting about their low numbers. It was noted that we had opt-in testing. Students had to turn in a form to try the instruments. That is a barrier to participation, and we want as few barriers as possible. So, we worked with our administration to switch to opt-out testing. Students are brought down to the try-on room as a whole class. Every student tries at least one instrument, unless they have a note from their parent/guardian asking them not to (which is incredibly rare). Upon making this change, our numbers skyrocketed.
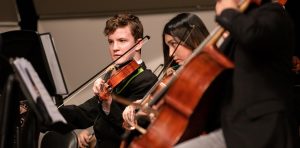 Because every student tries instruments, following up is a simple process. A letter goes out to all 5th-grade families, reminding them of the opportunity to join a music ensemble. Our secretaries help with the logistics. We skip the students who have already signed up and send a letter to everyone else.
 It’s Worth it!

 According to Sepulvado, the Teaching Lab’s focus on underserved forms of music education stems from a desire to make music more accessible to a wider variety of students. “One of the most important discussions happening in education is about equity and how to meet students where they are,” he says. “I’m a big believer in the importance of classical music and jazz, but I do think there’s tremendous power and value in having a class where students are playing music that they listen to and love.”
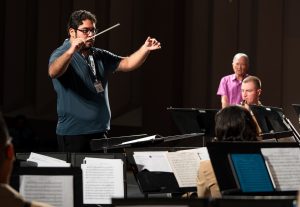


 Those of us who teach elementary music are often skilled at making handmade crafts, so why not put our talent to use? From sheet music plaques to music-themed throw pillows and jewelry, the ideas are endless. Plus, making handmade items for other music lovers is extremely gratifying.
 Church Musician
 Other Side Hustles


 Understanding various leadership models and theories can help a teacher-leader be better equipped to explore leadership opportunities within their schools as well as serve the greater community. Considering the attributes of an ideal leader, characteristics of traditional managerial theories are often superseded by human goodness virtues such as hope and trust.
 Successful teacher-leaders explore strategies and model continuous learning, reflective practices and promote higher levels of collaboration among colleagues. They work to consistently align instructional practices with school goals, mission and vision. They accomplish this by circling back to hope, which is the necessary access point that helps us find pathways to achieve goals and navigate around obstacles.
 There is a great responsibility that comes with leadership including the continual pursuit of enlightenment, seeing the bigger picture and rising above the hard and long days because your eyes are on the greater prize. I encourage you to continue expanding your knowledge base and forging collegial relationships to become the most effective teacher-leader and educator possible.
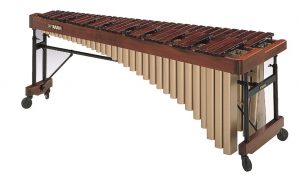 The
The 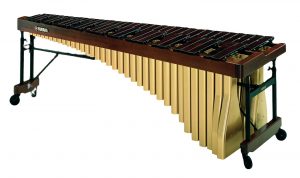 This instrument is considered the professional standard. Almost all modern marimba compositions are written for this instrument and nearly every piece that has been written for the marimba can be played on the 5-octave. It offers the widest range of notes as well as the warmest tone quality in the bass register.
 Rosewood feels much different to play because of the way it gives when you strike the bars compared to its synthetic counterpart. In the last decade, a great alternative to rosewood called padauk wood has become popular. While this wood doesn’t quite sound as full as rosewood, it is a great substitute for schools and musicians who can’t afford a rosewood instrument but still want a marimba that has the same feel as that of professional rosewood marimbas.


 1. Tunebat
 2. Chordify
 5. GetSongKey
 In which genre should we paint our new arrangement? If you have the luxury of choice, head over to


 The first step in developing this certificate was drafting and justifying my home department’s needs and resources — a multiyear process that highlights the tremendous inertia that resists change in music departments. My biggest challenge during this phase was getting everyone to vote on the proposal rather than just discuss it into oblivion. For two years, I missed our curricular proposal deadline before getting it done in time. In order to get it to a vote, I not only had a complete draft of the proposal, but I also had commitments for resources from within and outside of the department. A crucial piece of support was from the School of the Arts and the dean’s office that oversee our department. I was promised resources for this specific project, resources that my department spent time discussing how to reorient toward other projects.
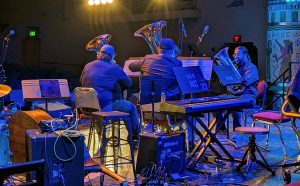 The second way that we have supported Boise State’s comprehensive music education mission is through our community partnership with
  Throughout the next semester, I gathered technical needs from each ensemble, scheduled photo shoots and wrote marketing pieces. The week of the festival, we loaded the gear on a flatbed truck that we borrowed from the theater department and went down to the Egyptian Theater for the show.
 The second BA project was for Chris Woods, a trumpet student of mine. I asked him, “What is one thing that you wish you could leave here having done that will help you with your career?” His answer: to record a solo trumpet album. Hardly anyone his age has a solo album, and it is something that could set him apart in his field. Furthermore, recording an album has so much more value than a one-and-done recital that you likely won’t want to use or save for any reason (such is the culture in music performance). I helped Chris plan out his album and repertoire. Then I talked him through what the process would look like if I was the producer/engineer and he was the soloist. He arranged rehearsals, booked spaces, marked up scores and prepared his music. As a producer, I set up the recording sessions and did the mixing and mastering. Throughout the process, I helped Chris understand the vocabulary, expectations and process that an artist would go through when recording a solo album. This was an invaluable experience for him. The first time he is recording a solo album on his own in the professional world won’t be the first time he has gone through the process. This album is set to be released on Spotify and be presented in our undergraduate research showcase this spring.
 I hope that my experiences have served to inspire and inform you. I encourage everyone to innovate in music despite how challenging it can be in our field. In music we not only resist innovation, but we actively teach students to NOT innovate. This is a major hurdle for us in higher education. We must retain that which enhances music careers and add that which enables them.


 Before I dive into directing tips, let’s look into the most common subgenres of jazz that I taught: big band Latin, swing and blues.
 When I first stepped in front of a jazz band, a lot of questions flooded my mind: How do I move? How do I cue instrumentalists? What kind of energy should I embody for these students?
 If you’ve been asked to begin directing a jazz band, you’ll need some repertoire. Pepper in some rock or pop tunes like “Eye of the Tiger,” but here is a short list of standards and charts to get you started:


 When I thought about leaving teaching, I surmised that quitting would fix all my problems. In one situation,
  Long Hours and Few Boundaries: I noticed that my energy levels varied. On Mondays and Tuesdays, I usually arrived to the office early, skipped lunch and stayed late. I justified this by seeking the reward later in the week for not having to work as much. On Wednesday, I started the day with the same schedule, but by 11 a.m., I was drained.
 I still managed an exercise routine, but what was once a positive part of my day turned out to be a struggle. I never like having to talk myself into doing something that I used to enjoy.
 Just focus on the positive, calm down, and stop worrying!
 We can only fix one thing at a time. It’s not fair, but it’s reality.
 Teaching may not be for everyone. And if it’s not, please do what is best for you. However, I urge anyone considering a change to follow their trail of breadcrumbs. Will that new profession make things better? Or will it run the chance of being a semi-permanent solution to a temporary problem?

 As a teacher, I continue this approach to music programming for my ensembles. We kick off each school year with a student survey. I also ask my students to give a copy of the survey to one person they know who is not in band so we could get a broader understanding of the most popular tunes at the time. The survey has just a handful of questions, along with room at the end for students to suggest what they would like the band to play this year. The band staff and our student leaders will then sort through all the surveys to find the most popular tunes and then discuss which songs we would like to arrange and when they would be performed. Knowing our students’ musical interests and having a sense of the school’s musical tastes as a whole helped us relate to students and build esprit de corps throughout the building.
 I am a strong advocate for student leadership. I believe that it is one of the best ways to empower tomorrow’s leaders in our field. One strategy that has worked very well for my programs is establishing student-led committees for our concert calendar. Because students know the importance of relevant repertoire selection across all aspects of the program, we have show-planning and dance-routine committees for our marching band, an arranging team that helps compose popular tunes for our concert and jazz bands, and a cool group known as “chamber grooves” that include students who love chamber music and would compose trending tunes and top 40 hits for our smaller ensembles.


 I worked at one school where the athletic account covered drumline bleacher stands and pep-band drum sets. It also provided funding for five pep band charts annually. (I was appreciative of this and let a coach or two pick some of the pieces that we ordered.)
 Ask the Community for Money: Community members such as small businesses, alumni and even former music parents can provide financial support. Be clear and concise in your request. Be mindful of the companies that want to sponsor you. Reputation and ethics are more important than fundraising.
 I Asked and They Said Yes! Now What?
 Outsourcing is OK: I was often in the position of wanting to do auditions or placements but not having the money or time. Outsourcing these jobs is OK if your district is fine with it. I never want to take work away from those who depend on judging or clinics, but if you have a larger program and little funding, consider completing these digitally. We moved to pay $5 for initial chair placements. Students spoke an ID number into a recorder and then performed their excerpts. I compiled the digital files and emailed them to off-site adjudicators who were professionals on each instrument. Our band parent association paid the adjudicators $5 per audition, and they emailed back results and feedback to over 125 students within 24 hours. Remote or outsourced judges are also an excellent option for a rural school that may not have regular access to other music teachers.

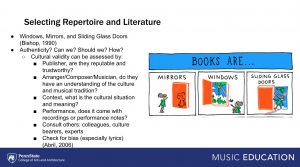
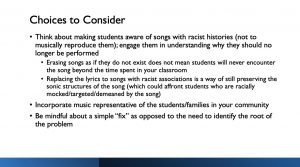
 Over the course of the unit, students were introduced to foundational aspects of sociocultural identity (visible and invisible), intersectionality, and they informally mapped and reflected on their own identity. They were encouraged to describe ways in which the components of their identity are represented and/or absent in the wind band music that they have performed, studied and consumed over their lifetime. The student responses were eye-opening.
 The student goal of programming concerts that more closely mirror our community has led to a multi-semester, student-driven research and grant-writing project that has resulted in successfully authoring three grants to diversify our available music library and concert programs. We have been awarded over $6,000 for new music! One award, an internal faculty-student research grant through Slippery Rock University, involves students developing a consortium to commission a composer to write a new piece for wind band that will be performed in the fall of 2023.
 The students drew several conclusions. First, this project cannot accurately account for the vast multitude and complexity of identity and diversity. Second, the students acknowledged that invisible diversity is not always easily accounted for nor is it always freely expressed. With these limitations in mind, the students chose to narrow their focus on three aspects of diversity: gender/gender identity and expression, race/ethnicity, and membership in the LGBTQIA2S+ community.
 To diversify the library, the students set the goal of identifying resources in the form of grants that might apply to this project. Focusing efforts first on internal grants, the following grant applications were submitted through Slippery Rock University for two separate projects. Benjamin Johnston, an undergraduate oboist and officer in the SRU Symphonic Wind Ensemble, served as co-author of each grant application. The grants were as follows:
 The two projects are now at the stage where financial resources have been generated to successfully move forward and we could not be more excited or grateful. As we transition into carrying out these projects, it is an opportune time to reflect on the impact that this has had on the students and the program. As a teacher, it has been humbling to watch students engage with issues of diversity within the profession. Over the course of the journey, students have been able to:
 All humans procrastinate to some level, and that’s due to a cognitive bias: They falsely believe that 1) tasks will magically become easier, and 2) we’ll have more time for the task. According to research published in 2022 in the journal
  Try the 15-minute trick. Set a timer and work on your task for 15 minutes. Just 15 minutes. When the timer goes off, you may find that you’ve gained some traction and are getting into the zone. Keep going if you want to. If not, take a break. Play the bassoon, pet your cat, call your sister. Then take another 15-minute whack. Time-management pros call this strategy “microproductivity.”


 The conference was shocking in many ways. I first attended recorder workshops where I felt most at home because I play the flute. The classes that pushed me out of my comfort zone were the interpretive dance sessions on the second day. I planned to sit and simply watch the workshop, but I quickly learned that that’s not how Orff is done.
 There are three Orff levels after which you are certified in Orff-Schulwerk. You are allowed to take only one level per year, and each level takes at least 60 hours to complete. AOSA recommends completing the levels within seven years, so you retain the material.
 Regardless of your students’ age, music learning should start with the body. One of the six principles of the Kodály philosophy — the body is an instrument — may be used as the basis for learning. It may or may not come as a surprise that many high school students have a hard time keeping a steady beat. If students are lacking the heart of the music, how can we teach them to be music literate in the absence of steady beat?
 Throughout all these activities, embed music theory so that students can ground their knowledge. Use numbers to count rhythms according to the meter so older students can quickly determine the difference between time signatures. Incorporate relay races or other challenge-type games to identify notes written on the grand staff to ensure that students are accountable for their musical knowledge. If you ever want to get an entire room of high school students completely silent and focused on their listening skills, create a game to correctly identify the intervals of step, skip and leap.


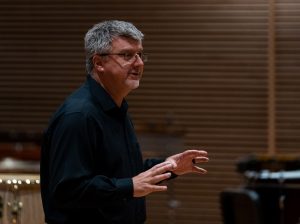


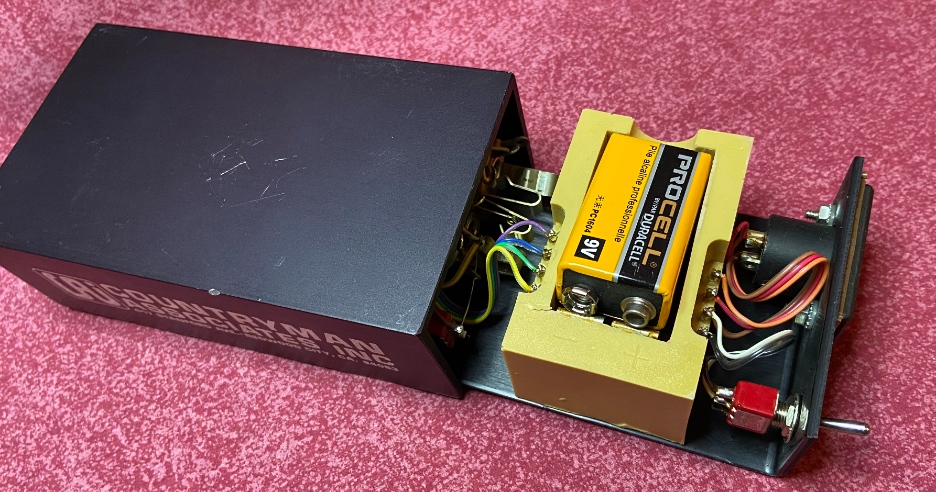
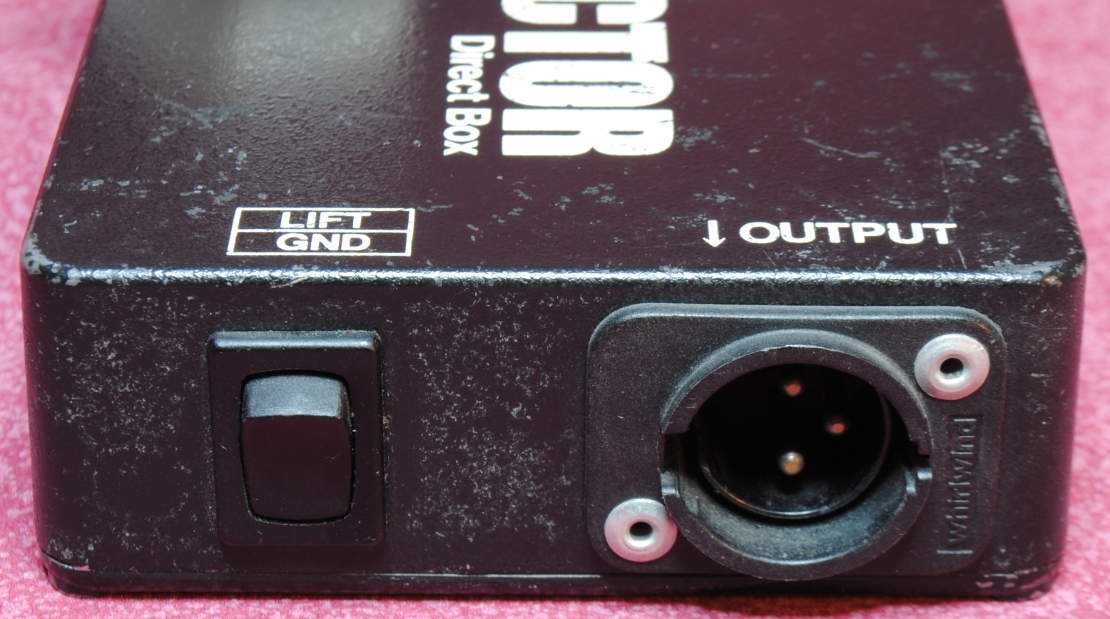
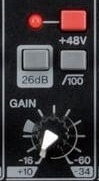
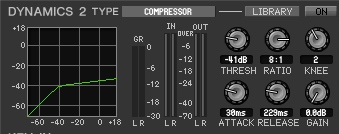
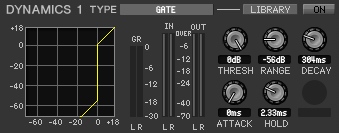

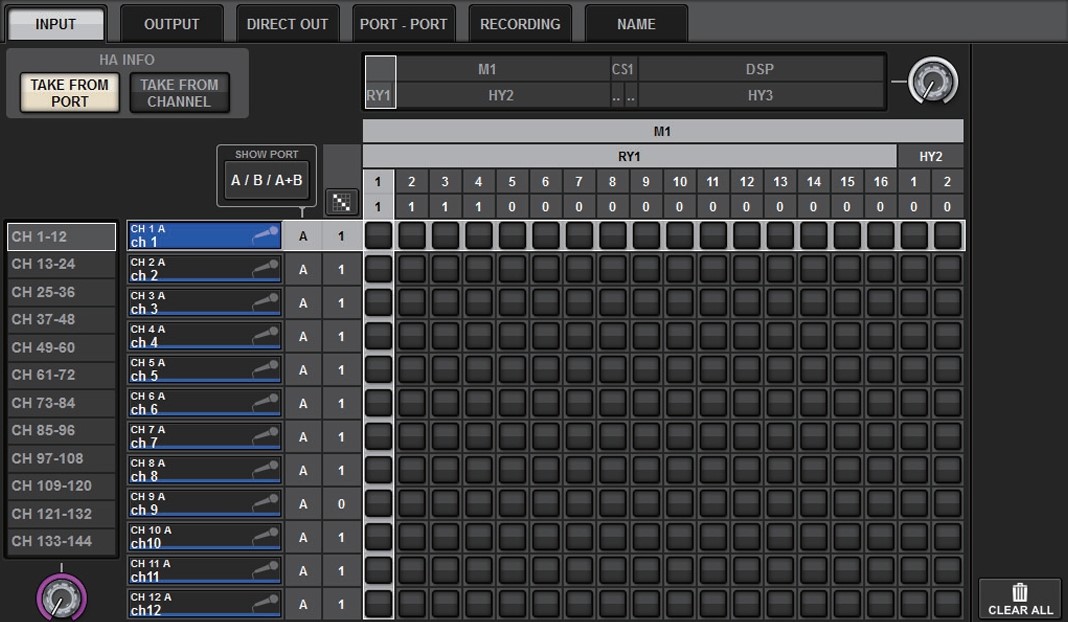


 Quick Fixes: I’ve found that quick fixes don’t usually work long-term. We could yell, threaten discipline, pile on false or excessive praise, let too much slide, be too harsh or ignore the problem. These tend to be Band-Aids at best and will sow seeds of discontent at worse.
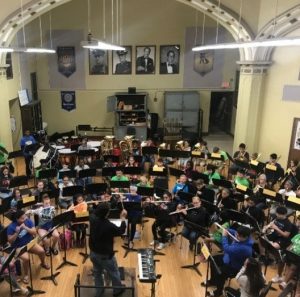 Understand Resources: Understand the resources available within your school. Education loves acronyms, and it can be confusing to keep BHT (Behavioral Health Team), BIP (Behavior Intervention Plan) and BMP (Behavior Management Plan) straight. However, speaking with your guidance counselors and social workers about possible resources for students in need can help you react quickly and effectively. We don’t have to do it alone, and — gasp! — someone else might be better equipped than you to help a student’s situation!
 Escalation / Everyone Loses: Avoid escalating the situation. Some students may feel like they have nothing to lose. For their sake and yours, avoid escalating and arguing. Not saying the first thing that comes to your mind or saying nothing at all could be helpful in stressful situations. Listening is always an effective strategy. Everyone loses when the teacher and student lose their cool.
 We can consider restorative practices in our classroom (my go-to resource is
 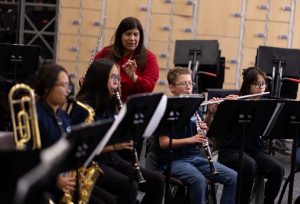 Not Admitting Mistakes / Not Apologizing: One of my favorite things about growing up in a low-income area and teaching low-income students is the honesty. Remember, some of our students may be living with adult responsibilities at home. Some won’t hold back on letting you know if you’re wrong in delivering content or mistreating someone. Once, in front of the whole ensemble, I got after a kid for missing a rehearsal. The student getting the reprimand didn’t say anything, but another student did.
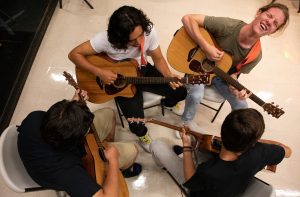 You guessed it: We must walk the walk. Students will absolutely call out hypocrites! Modeling what you consider to be the right behavior is easier said than done. What do I want from my students?
 Building a relationship with a student and teaching them to respect us is not the end point. If we stopped there, we would be giving the student an unrealistic view of the world — that they only need to adhere to certain rules, guidelines and norms to the people who put significant effort into them. Schools are trying their best to create individualized education programs for every student, and although I applaud these efforts, conformity and social norms are not always a bad thing. People achieve more by working together.
 Holding a flute correctly can be tiring, but holding it incorrectly causes a host of problems, including poor tone and muscle strains or sprains. Flutists are especially prone to neck pain and carpal tunnel, so it is imperative to keep an eye on their posture. Be sure that your flutists sit up straight and curve their wrists into a “C” position. Flutists should not lean their heads to the right (toward the flute).
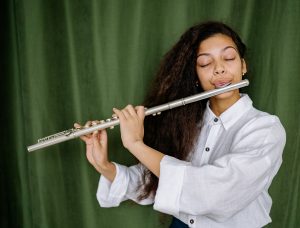 Another thing that is somewhat related to blowing down is note bending. This is a practice that flutist William Bennett swore by. He encouraged young flutists to bend the pitch of their note both up and down while they practiced long tones. This will help students strengthen their embouchure muscles, familiarize them with their instrument and find their tonal center.