Beginning percussion kits are perfect for students in elementary or middle school. These snare, bell and combo kits offer the portability, quality and sound that music educators and students need to get started in the band room.
In this article, we’ll explain the setup processes for all three types of student percussion kits. All are quick and easy, so your students can start playing right away!
Snare Drum Kit Assembly Instructions
1. Take the snare stand out of the case. There are two parts to the snare stand: the bottom and top halves.
2. Take the bottom half of the stand and loosen the bottom wing screw to unfold the legs.
3. Spread the legs wide enough so the stand does not wobble, then tighten the bottom wing screw.
4. Loosen the upper wing screw on the bottom half of the stand:
5. Insert the top half of the stand into the bottom half of the stand:
6. Tighten the wing screw when the stand is at the desired height.
7. Unfold the snare drum basket.
8. Take the snare drum and place it on the basket. Adjust the tension handle (shown below) to make the snare drum basket wider or narrower as necessary:
9. Check to make sure that the snare drum is only touching the rubber grips and not the metal part of the snare drum basket:
10. To change the angle of the snare drum, use the wing screw below the tension handle and adjust it to the angle that best suits your playing:
11. For quieter practice, follow these same steps and insert the practice pad instead of the snare drum.
Bell Kit and Combo Kit Assembly Instructions
Assembly for a bell or combo kit is similar to the snare drum kit assembly described above. In most combo kits, the snare drum and bells use the same bottom half of the stand; all you have to do is switch out the top half of the stand. It’s easy to tell the two apart: the top of the bell stand has four rubber grip points, while the snare stand has three.
Bell Assembly Instructions
1. Take the bell kit stand out of the case. There are two parts to the bell kit stand: the bottom and top halves.
2. Take the bottom portion of the stand and loosen the bottom wing screw to unfold the legs.
3. Spread the legs wide enough so the stand does not wobble, then tighten the bottom wing screw.
4. Loosen the upper wing screw on the bottom half of the stand:
5. Insert the top half of the stand into the bottom half of the stand:
6. Tighten the wing screw when the stand is at the desired height.
7. The top half of the bell kit stand unfolds in an upward motion:
8. Once unfolded, make sure the wide end of the stand is on the player’s left:
9. Note that there’s a threaded screw in the center of the stand, which aligns with the hole on the bottom of the bells. Make sure the bells touch the rubber grips to avoid any rattling.
10. To use this stand with a tunable practice pad instead of bells, align the bottom hole on the pad with the threaded screw in the center of the top half of the bell stand:
11. Twist to the right until the pad is securely fastened:
The kit is now all set and ready to play. See you in the band room!
Click here for more information about Yamaha student snare kits, student bell kits and Total Percussion combo kits.
Warshaw has lost two students as well as his wife to suicide, so he knows firsthand about the warning signs and the grief.
Music educators might have more personal relationships with their students than math or science teachers, so they may occasionally learn sensitive details about their students’ lives. What should they do with this information, and do they have obligations to help students in certain situations?
Because of various pressures during adolescence, students are at risk for mental health issues. Therefore, teachers should learn to recognize the signs of depression and suicidal thoughts, says Warshaw, a former band and orchestra teacher. Some school districts provide training.
Warshaw helped prevent one student from attempting suicide because he alerted the parents. “If someone had suicidal ideation, I would go with the student to the counselor,” he says. “If the student is mad at me, that’s the price I’m willing to pay to keep [him or her] potentially alive.”
Child Abuse
Barry Morgan
If a student mentions physical, emotional or sexual abuse, a teacher must report it to the authorities even if the student shared details in confidence.
“[Almost] all 50 states have some type of what we call the ‘mandated reporter statute,'” says Barry Morgan, the solicitor general of Cobb County, Georgia, and a former music educator in the Cobb County School District. “If we suspect child abuse, then we are to report it. There are criminal actions if you don’t follow the letter of the law.”
Rules vary by state, but a teacher who learns about suspected abuse must report the information to a specific school or law enforcement official within a prescribed time period. Then law enforcement will investigate.
Belligerent Students
Sometimes students act out in class. In some instances, problems outside the classroom may be to blame.
“Where kids will choose to vent is a safe space, and for a lot of them, [that’s] the band room,” Warshaw says. “They’re not lashing out at us. It’s almost always about something outside — a bad interaction with a classmate, maybe their boyfriend or girlfriend just dumped them, or it can be something else that is significant — maybe something is going on at home.”
Communicate about repeated disruptive events with your principal. “Make a written record through email: ‘This happened in my class today; this is what I’ve done,'” says Morgan, who runs legal clinics for music educators. “If things come to a head, and the teacher is accused of overreacting, he can show the steps taken and how he has followed policy and procedure.”
Occasionally, a student needs to be removed from the band program. See if the school administrators will intervene. “The last thing you want is to take a kid out of the program, and the principal forces you to take that kid back,” Morgan says.
Only remove students from the program as a last resort. “Band may be the only reason why they’re coming to school,” Warshaw says. “How arrogant of me to take that away from them. I may be making the problem worse.”
Alone Time with Students
Whatever the circumstances, avoid spending one-on-one time with students because it may appear inappropriate.
“False allegations are easy to make and sometimes very difficult to disprove,” Morgan says. “I hate it that teachers have to put themselves in a position to see all of the possibilities out there, but in this day and time, they do.”
Band students often trust their instructors, so they may feel like they can open up about their problems. “I would encourage them to talk to someone else — usually a counselor,” Warshaw says.
If you need to speak with a student privately, ask another teacher to be present or record the conversation if it’s legal in your state.
“Tell the student, ‘I’m recording this conversation, not because I’m going to share it with anybody, but because I record all of my conversations with students,'” Morgan says. “It might stifle the students’ willingness to really talk about what their issues are, [but] you have to protect yourself.”
This article originally appeared in the 2019 V3 issue of Yamaha SupportED. To see more back issues, find out about Yamaha resources for music educators, or sign up to be notified when the next issue is available, click here.
Denis DiBlasio is a natural improviser. He was about 10 years old when his music teacher wrote down a blues scale in F.
“He said, ‘Just make up stuff and use these notes,'” DiBlasio says. “I must have played that thing for two years. I just beat that thing to death.”
After spending so much time on the F scale, “I was upset when I found out there were 11 others. I thought I was ready for the road,” he jokes.
Humor and self-deprecation are big parts of the DiBlasio persona. He can poke fun at himself, knowing his reputation as one of the leading jazz saxophonists of his era is secure. DiBlasio spent many years playing with legendary bandleader Maynard Ferguson and is currently the executive director of the Maynard Ferguson Institute of Jazz Studies at Rowan University in Glassboro, New Jersey, where he also leads the jazz studies and composition program. In addition to teaching and playing the baritone sax, DiBlasio is a flautist, arranger and composer.
“Fun is a Great Motivator”
DiBlasio stepped into music rather than being pushed into it — though his parents were always supportive and enjoyed hearing him play. “I didn’t have a piano-playing mother who was like, ‘You need to do this, or you need to work like that,'” he says. “What was really important is that I was left on my own to figure it out, to play with it on my own. It was always my thing.”
Music appealed to DiBlasio for a simple reason, one that might seem radical in today’s overscheduled world. “I just think it was something that was fun, like other things were fun,” he says. “I don’t want to say practice wasn’t a chore, but there were times when I practiced a lot, and there were times I didn’t. I was a kid. I’d put it down for about a month, fool around, play sports, and I’d pick it up later.”
DiBlasio is quick to note that fun isn’t the same thing as a free-for-all. “I knew early on that the better you became, the more fun it was,” he says.
Learning to play an instrument takes discipline, and being a professional means many days consumed by hours of practice. But DiBlasio emphasizes that the point of all that work was always enjoyment.
“Fun is a great motivator,” he says. “[But] fun doesn’t mean you’re goofing around. You’re working hard. You’re working really hard. Coltrane practiced 11 hours a day. He didn’t do it because he hated it. He did it because he was driven. He loved it. Call it love, call it fun, call it whatever.”
DiBlasio didn’t commit to a life in music until he needed to choose a major in college at Glassboro State College (now Rowan). Other options included becoming a marine biologist or a veterinarian. He quickly realized that he didn’t want to be a vet. “There was too much math in it,” he says with a laugh. “I didn’t realize it was science. I thought you just played with animals.”
“All Juiced In”
So DiBlasio stuck with the sax. “The more you stay involved, the more you get involved,” he says. “Before you know it, you’re all juiced in with all these different activities, and you know a lot of people. … You have a big, wide-open group of friends. And it kind of went from there.”
After getting his master’s in studio writing and production at the University of Miami, DiBlasio earned a spot in Ferguson’s high-profile band. Even though he was a full-time touring musician for only about five years, DiBlasio continued to play on and off with Ferguson for decades.
DiBlasio describes Ferguson as a “musical big brother.” The bandleader’s career started in the 1940s and continued up to his death in 2006. Ferguson was, at different times, a session player for Paramount Pictures, a close associate of counterculture figures Timothy Leary and Ram Dass, an inventor of new brass instruments, a successful recording artist, and, of course, a bandleader who played all over the world and developed a reputation for nurturing young talent.
Part of the way DiBlasio keeps Ferguson’s memory alive is by telling stories. “Just go to YouTube and type in my name,” he says. “I posted about 30 stories about Maynard.”
DiBlasio has embraced the video-sharing site. He’s posted instructional videos on a range of topics. They’re short, funny and loaded with great suggestions. In fact, DiBlasio says that people who find him on YouTube often reach out to ask him to teach or perform. “They don’t know who Maynard is, and they definitely don’t know about my career,” he says. “But they’ve seen the videos.”
DiBlasio credits his time in Ferguson’s band with launching the rest of his career. “Everything kind of blew up after that, doing clinics and concerts and teaching,” he says.
But it’s not as simple as saying he became a teacher and enjoyed his happily ever after. It’s work.
“Nothing’s Wrong with Them!”
DiBlasio says that every five to seven years, he has to come up with a whole new way of teaching. “The way I’m teaching now has nothing at all to do with the way I used to teach,” he explains. “The 19-to-22 age range isn’t the same as 19 to 22 was when I started.”
For DiBlasio, teaching is a partnership with each student. In the same way that he changes the way he performs based on who he’s playing with and the audience, he changes the way he teaches based on what his students know and care about and their life experiences. “You have to tune in to them,” he says.
He remembers when students knew jazz greats like Buddy Rich, Count Basie, Duke Ellington and Woody Herman. But for many students today, “Count Basie might as well be Beethoven,” DiBlasio says.
He sometimes sees new teachers taken aback by how little their students seem to know about jazz, but DiBlasio sees this inexperience as an opportunity. “There are an awful lot of people who are interested in music but don’t know much about it,” he says. “As a teacher, you’re trying to bring them into it.”
DiBlasio says a typical reaction of a new teacher is: “These kids don’t know Count Basie. What’s wrong with them?”
DiBlasio practically roars his rhetorical response: “Well, nothing’s wrong with them! They’re fine!”
“Making Small Adjustments”
But DiBlasio readily admits that he went through a painful awakening. A few years after he started teaching, he complained to his wife. “I was resenting it,” he says. “I was saying, ‘These kids don’t get it.'”
At the time, his wife, Hilda, was teaching preschool children with learning disabilities or behavioral challenges. DiBlasio recalls that she lovingly dressed him down: “She told me, ‘You only know your topic. You know what it is. You don’t know what teaching is. Everybody knows content. Ninety percent of teaching is getting their attention.'”
Hilda went on to explain that a different tactic is needed with 3- to 5-year-old students with attention deficit hyperactivity disorder (ADHD). “She told me, ‘You want to teach them to count? You have to figure out how to make them want to,'” he said.
DiBlasio tells the story gleefully. “If you want pity, don’t marry a smart woman.”
But the humor masks a devotion to teaching and a huge heart for his students. It takes constant self-care to keep teaching fun. “Having a great attitude about teaching doesn’t mean that all your days are going to be great,” he says. “You have to work at liking it. It’s like tuning an instrument or paddling a canoe. It only looks like it’s going straight, but really you’re making small adjustments all the time. That’s what teaching is, at least for me. … If you’re not flexible as a teacher, you’re done.”
Like playing jazz, teaching involves listening and reacting. “You’re a psychiatrist one day, a coach the next day, the next one you’re their friend, the next one you’re their dad,” DiBlasio says. “If your radar is up and picking up their signals, you find yourself changing a lot. That’s what’s exhausting. Not that they don’t deserve it. They’re good kids; they’re great kids. I love it.”
Photos by Rob Shanahan
This article originally appeared in the 2019 V3 issue of Yamaha SupportED. To see more back issues, find out about Yamaha resources for music educators, or sign up to be notified when the next issue is available, click here.
Socialization is typically a byproduct of a music program. However, in one music class at Parkway Central Middle School in Chesterfield, Missouri, socialization is the goal.
Paul Holzen
Parkway Central hosts a chapter of United Sound, a national not-for-profit program that provides musical performance experiences for students with special needs through peer mentorship.
Parkway Central’s band director, Paul Holzen, says that 20 of his band students volunteer to be “Peer Mentors” and build trusting, caring relationships with exceptional students who might not otherwise have a chance to participate in a band program. They’re not molding special education students into musicians; they’re including them in the band as peers and as “New Musicians.”
“Music is just the vehicle we’re using to build these relationships,” says Holzen, who was named a GRAMMY® Music Educator of the Year Semifinalist in 2019.
Come, Be Friends With Us
Students with intellectual or developmental disabilities might spend most of their days in their own classroom. United Sound broadens their horizons and makes them feel part of the greater school community. “The band room is where friends [are found]; if we can open the door and say, ‘Come, be friends with us,’ then we’ve maybe made a lifelong change,” says Julie Duty, founder of United Sound.
Kacey Ruckstaetter’s daughter, Alaina, has been playing cornet as a United Sound musician for the past two years at Parkway Central and has built peer relationships with students who are not in her other classes. “As she walks the halls, students give her a high five and say, ‘Hello,’ because they know her from band class,” Ruckstaetter says.
For the first 15 minutes of the United Sound class, Peer Mentors encourage New Musicians to exchange personal stories. “They’ll ask them, ‘How are you doing?'” Holzen says.
Once the socializing is done, it’s time for music. Learning to play an instrument helps students with their artistic, cognitive and physical development, Holzen says. For at least one United Sound musician, learning the clarinet has strengthened her facial muscles, and her speech therapist has noticed the improvement, he adds.
Haleigh Stiens, Parkway Central’s essential skills and special education teacher, sees her students enjoying increased independence, applying social skills and relying less on adults. “I have a very wide range of students,” she says. “It’s astounding to see how much they’ve grown.”
Peers Supporting Peers
United Sound has 85 chapters — 18 at middle schools, 62 at high schools and five at universities — in 25 states. No matter the level, all chapters are 100% student-led. United Sound provides training and materials for teachers, student volunteers and the New Musicians.
Recently completing its second year, Parkway Central’s United Sound chapter meets weekly and has six New Musicians, each one taught by three Peer Mentors. “The students do all the work,” Holzen says. “They get to know their New Musician and develop a relationship.”
Working as a team, one mentor might model playing the instrument while another points to the music.
Directors just starting a United Sound chapter should place their trust in the Peer Mentors, Stiens says. “United Sound is really built on peers supporting peers and allowing them to cultivate a relationship without constant guidance,” Stiens says. “It’s beautiful to watch.”
Each year, Holzen appoints a president and a vice president among the Peer Mentors and communicates solely with them. They, in turn, communicate with the other mentors. Holzen’s system gives students a new perspective on leadership, understanding and awareness, important qualities for middle school students. “I’m helping them to be leaders, and it’s going down the chain,” says Holzen.
As far as teaching methods, Peer Mentors take their cues from Stiens and Holzen. “The best thing a mentor can do in the beginning is watch how teachers interact with their students,” Stiens says.
Stiens says that she has witnessed middle schoolers zoning out in the classroom, but it’s different with the United Sound Peer Mentors. They zone in, pay attention, listen, solve problems and create a bond with their musician.
Before student volunteers can begin teaching, they’re put through the paces of a training program. First, they watch two United Sound videos. Then, Stiens shares specific information about the musicians they’ll be mentoring. Some of her students are nonverbal, some have the use of only one hand, some don’t like loud noises, and some have vision impairments. She discusses strategies, communication and motivation. “I typically try to convey that each student is capable of achieving the same skill, but it will be in their own way,” Stiens says.
Overcoming Challenges, Reaping Rewards
United Sound is just a fraction of Parkway Central’s band program. Holzen is one of two band directors and the school’s fine arts department chair. Holzen and co-director Chris Higgins collaborate frequently as they teach 250 band students in 6th, 7th and 8th grades.
Starting the United Sound chapter as part of Parkway Central’s overall band program had several challenges. But once overcome, the rewards were significant.
The biggest problem was having too many students who wanted to be Peer Mentors. “I had lots of students interested in participating,” Holzen says. “I hope to always have that problem.”
Another challenge was persuading the Peer Mentors to embrace their instructional roles. Even giving simple fingering directions was difficult for them at first. “They’re not used to doing that,” Holzen says. “This challenge gets gradually easier.”
Holzen’s personal goal is to help all of the New Musicians move forward and feel like they are accomplishing something while feeling as though they belong.
Although United Sound meets during Parkway Central’s weekly structured enrichment periods and not during one of Holzen’s traditional band classes, the United Sound New Musicians are members of his band. When the band hosts its two yearly concerts, the New Musicians perform not as a separate ensemble but shoulder to shoulder with their Peer Mentors, who write musical parts specifically for them.
“If you only learned two notes all year, we’ll write you a modified part to this song that plays B flat and A at exactly the right time,” Duty says. “Every time that B flat comes around, you’re going to play that B flat. Everybody’s playing a part that meets them right where they are.”
Like any young musician learning an instrument, United Sound performers have practical challenges too. Initially Alaina had difficulty learning proper breathing technique to get sound from her cornet. “She persevered, and with the help of the band director and her Peer Mentors, after a year and a half, she finally succeeded in playing the cornet,” Ruckstaetter says.
Now United Sound is the highlight of Alaina’s week. “All weekend she would let the family know how excited she was about going to United Sound on Mondays,” Ruckstaetter says. “She enjoyed it so much that the program made an impact on our entire family.”
Alaina’s cornet playing has inspired her younger brother, who plays the trumpet, to apply to be a Peer Mentor next year. “He is so excited about the opportunity to work with students like his sister and help them learn [to play] band instruments and get to know them through United Sound,” Ruckstaetter says.
This article originally appeared in the 2019 V3 issue of Yamaha SupportED. To see more back issues, find out about Yamaha resources for music educators, or sign up to be notified when the next issue is available, click here.
A few times each semester, the band room at Hill Country Middle School in Austin, Texas, would fall completely silent.
Cheryl Floyd
As students walked to rehearsal, they saw signs reminding them that their rehearsal would involve no talking from anyone — not even the teacher.
After students took their seats, the instructor gestured for students to begin playing with information projected on a slide at the front of the classroom. On those silent rehearsals days, the room was filled only with the sound of music, not with voices. “It’s a big game,” says Cheryl Floyd, retired director of bands at Hill Country Middle School and now a Yamaha Master Educator.
Though Floyd’s silent rehearsals were effective for helping students focus on the music, they also required a high degree of trust between the students and instructor. “You have to have a routine for how you do things,” says Floyd, whose students looked forward to silent rehearsals as special occasions.
Rehearsal management techniques can vary quite a bit based on the ages and musical experiences of the students. Generally, the younger the students, the more energy they will have, and the more direction they will need.
To keep young musicians engaged, Beth Peterson, who is the assistant director of bands at Illinois, recommends directly modeling what the students need to do. “With beginning band, I would model with my trumpet all the time,” she says. “I would play a two-measure phrase and have them echo me.”
Stephen Peterson, who is currently director of bands at Illinois, has taught high school, college and graduate levels. “When I used to have problems with a [high school] student, you … never deal with that student in front of the whole group,” he says. “There’s no way you’re going to win that situation.”
With college-aged students, Peterson notes that students are serious about music and can often focus on musical aspects of the rehearsal. “They are adults, and I treat them as adults,” he says.
Though older students can often have an easier time maintaining focus, Floyd believes that younger students are up for a challenge. “They are a blank slate when they come to you,” she says of middle school students.
The Role of Music Selection
Dr. Elizabeth Peterson
According to Floyd, the music itself can also influence the level of energy in the room. Her students’ rowdiest days would often happen when the band rehearsed pep tunes for football games. “That’s what it’s supposed to do — stir up the crowd!” she says.
Consequently, Floyd planned for these days, knowing that the rehearsals would be less productive.
Beth Peterson agrees that music selection can be a factor in classroom management and recommends that teachers present about a dozen pieces to their students at the beginning of the term, then settle on three or four that prove to be the best fit once they get a better feel for their group.
“There’s no reason you have to determine what to play at your first concert the first week of school,” she says. “New teachers come in with a few pieces they know, and then they get down the road, and the music might be too hard, and they get stuck.”
Peterson says that when selecting music, it’s so important to include pieces written by a diverse group of composers — women and persons of color. “This will help all students know that they are being represented and included,” she says.
Change Challenges to Strengths
When teachers have some talkative students in their ensembles, don’t view them as problems, Floyd says. Use those students’ strengths. “Say, ‘Who’s the loudest here?’ and have [that student] be the keeper of the pulse,” she says.
In addition to extraneous talking, classrooms face a new challenge: technology. While cell phones can be a major distraction, Floyd recommends using them for the advantages they offer.
“You can have [students] record themselves, even when they can just play ‘Hot Cross Buns,'” Floyd says. “They think that’s amazing.”
Phone apps for metronomes or tuners can also be helpful.
Internal Motivation
Dr. Stephen Peterson
During the 2018 Music for All Summer Symposium at Ball State University in Muncie, Indiana, the Petersons each gave a presentation on rehearsal techniques in which they explained some ways to motivate students. Stephen Peterson recommends moving away from a top-down approach and instead engage students.
“If something’s out of tune, you might say, ‘What’s wrong here?’ [or for rhythm problems,] ‘Who’s responsible for this rhythm?’ ‘Who’s slowing down?'” he says. “It’s all about a higher level of learning where they’re involved in the process instead of waiting for answers.”
Teachers may also need to work individually with some students to come up with creative solutions to unique problems that arise. For example, Beth Peterson coached a student-teacher on how to motivate a child who was misbehaving. “[The student] wanted to switch instruments, so she set up a contract with him,” Peterson says.
After the student showed positive behavior in class, fulfilling his end of the contract, the teacher allowed him to switch instruments to the tuba.
Often, teachers must find out what motivates students and then use that internal motivation to keep rehearsals running smoothly. For example, Floyd keeps her students from talking during silent rehearsals by making them a special occasion. “You can’t do [a silent rehearsal] every day,” she says. “It would lose its charm.”
Because students put a premium on silent rehearsals, they naturally hold themselves and their peers accountable. “If anybody does talk, the other kids will put their fingers in front of their lips,” she says. “They don’t want the magic to be broken.”
In the end, finding the magic of classroom management takes both consistency and flexibility to set expectations for the entire class and handle the needs of individual students.
This article originally appeared in the 2019 V3 issue of Yamaha SupportED. To see more back issues, find out about Yamaha resources for music educators, or sign up to be notified when the next issue is available, click here.
How do you treat figures on the drum chart in big band and small group jazz? I want to provide some clarity for those of you who are jazz band educators who do not play the drum set. I also want to help folks who are interested in applying their drum set skills to big band or small group jazz playing.
The term “figures” simply refers to the written musical notes on the sheet music. For almost all instrumentalists, the task is to play exactly what is written on the sheet. For the drummer, a figure may mean one of three things: 1) play the exact figure, 2) do not play the figure or 3) play prior to the figure and then play the figure (more commonly referred to as “setting up” the figure). These scenarios can be daunting for inexperienced drummers because it can contradict much of their prior concert band training.
The decision to approach these figures in one of these three ways will differ depending on the director’s and the drummer’s tastes as well as the skill level and needs of the ensemble. Sometimes the figures should be played as written on the snare or bass drum; other times, the figures can be ignored altogether. Often, figures will be set up with fills.
Here are a few simple but effective mechanisms I have learned that have been helpful to both students and band directors when setting up jazz figures.
In Big Band for Figures Beginning on the Offbeat
To set up a figure beginning on the “&” (offbeat), I recommend playing the two eighth notes preceding the figure, and then the written note. (See Sample 1 below.)
With students, I begin teaching this concept using the “&” of beat 2 (4/4 time), as I find it is most accessible to the inexperienced jazz drummer. To set up a figure beginning on the “&” of 2, the drummer would play “(1) & 2 &,” which sets up and then plays the written figure. The two preceding eighth notes can be played on the snare drum, with the written figure accented with bass drum and cymbal.
Sample 1
If the desired musical effect is simply to accent the note without a setup, the time continues on the cymbal, and the note is played traditionally by the snare drum or bass drum.
I teach the “&” of beat 2 first, followed by the “&” of 3 and then the “&” of 4. I save the “&” of 1 for last because it requires starting the setup in the measure before the figure, potentially challenging for inexperienced drummers.
In Big Band for Figures Beginning on the Beat
To set up a figure starting on beat 2, stopping on beat 1 and leaving a space before playing beat 2 is a traditional approach. A drag, flam or even rolling into beat 2 can add some additional color, but stopping the beat before is very effective. (See Sample 2.)
In working with novice drummers, I have found that teaching beat 2 first is effective because stopping on beat 1 feels natural for many musicians. Once beat 2 becomes comfortable, I teach 3, then 4 — saving beat 1 for last. As with the offbeat figures, setting up beat 1 requires stopping in the bar before the figure, potentially tricky for some.
With small group jazz drumming, the figures are treated differently because, in general, the volume level of the group is lower than a full big band.
Many times, just lightly playing the exact figures with either the snare drum or bass drum gets the desired musical effect without setting them up. However, if the music calls for a figure to be set up, the same system I described for the big band works in a small group setting as well.
By playing the two eighth notes prior to an offbeat figure and stopping one quarter note before a figure on the beat, setting up and playing figures becomes an easy process. This system is also helpful when reading a chart for the first time as it provides a clear approach to playing the figures.
For those of you working with drummers, this system gives you a way to break down this skill into easy and repetitive tasks.
Ultimately, deciding how to approach figures in the drum chart is a collaborative process between the band leader and the drummer and should always be communicated openly.
This article originally appeared in the 2019 V3 issue of Yamaha SupportED. To see more back issues, find out about Yamaha resources for music educators, or sign up to be notified when the next issue is available, click here.
I am interviewing prominent people, some in the music industry, others not. For this Q&A, I talked to rapper, songwriter, producer and multi-instrumentalist Jameyel Johnson, better known as J. Dash.
At the 2019 National Association of Music Merchants (NAMM) Music Education Advocacy D.C. Fly-In to the capital, where NAMM members gathered to lobby members of Congress for positive music education measures, I had the opportunity to meet J. Dash. His personal, long-term relationship with music inspired and absolutely captivated me. I was struck by his sincere desire to influence lawmakers through his unbridled enthusiasm for music education and his genuine passion and commitment to help young people realize success through the arts.
Q. When did you know that you were going to make music the focus of your professional life?
A: I always knew that I wanted to create music, professionally or not. It became a career goal when I was 14 years old and heard “Up Jumps Da Boogie” by Timbaland & Magoo. That was the first time I remember thinking, “I want that to be how I make money for the rest of my life.”
Q. What piece of music do you wish you had written and why?
A: “Exit Music (For a Film)” by Radioheadis one of the most hauntingly beautiful pieces of music, in my opinion. It strikes a chord with me that vibrates down into my bones every time I hear it. Music that does that is special, and I’m pretty jealous that I wasn’t in the room when that one was made.
Q: What is your biggest pet peeve?
A: Ego
Q: Why is music important to humanity?
A: Music is not just our history; it is our time machine to the successes and tribulations of the past. It is a way to preserve the energy of an individual or group of people through time. What is crazier than feeling the emotion an artist or composer intended hundreds of years after the inspiration was felt? If that doesn’t blow your mind and express the importance and magic of music, then I don’t know what will.
Q. Other than music, what brings you inspiration?
A. My experiences and the experiences of those closest to me usually become the seed for many things that I create. I also have an interest in astrophysics, which strangely sparks inspiration from time to time as well.
Q. What is your most embarrassing musical moment that you can share?
A. It’s kind of lame, but falling off of the stage, although not unique to me, is never fun. There was a particular live performance in a small town with an even smaller venue where the stage was not a common shape. The room was filled with people, I assumed there would be more stage where there wasn’t, and down I went. I kept performing and kind of laughed it off, but it felt like it happened in slow motion, which made it even more of a nightmare.
Q: What’s your favorite guilty pleasure food?
A: Sour worms
Q: Which person from history, dead or alive, would you want to have lunch with, and what would you discuss?
A: There are way too many, and my answer would probably change depending on when you asked me. But today, I would have to say Prince. Considering what he did for popular music, the consistency in writing hit songs, the variety of instruments he played, and how he chose to market himself, I’m pretty sure it would be the most interesting conversation I ever had.
Q: Why is it important to protect access to a musical education?
A: Beyond the fact that learning music improves students’ test scores and has been known to increase confidence, it gives them a reason to go to school when they otherwise may not have one. With so many things stacked up against the next generation, it is our obligation to do what we can to give every single child the best opportunity for a well-rounded education that includes music and the arts.
This article originally appeared in the 2019 V3 issue of Yamaha SupportED. To see more back issues, find out about Yamaha resources for music educators, or sign up to be notified when the next issue is available, click here.
Below, he pens a letter to his younger self, sharing advice, anecdotes and inspiration for a fulfilling career in music education.
Dear Younger Kevin:
There’s one piece of advice that I want to emphasize as you embark on your career as a music educator — be patient!
Be patient and stop worrying about the things you can’t control! Don’t focus on “what is good for me” but rather on “what is best for your students.” Remember, the real joy as a teacher is making a difference in the lives of the extraordinary individuals you have the privilege to teach every day.
You entered this profession because you wanted to be a difference maker. All of the students in front of you — yes, even the most challenging ones — possess the potential for something great. Be the difference in their lives and the catalyst that propels them to greatness.
No two students learn the same way. Be patient, get to know them and search out what motivates them. Don’t compare them to one another. Don’t allow a day to go by without acknowledging someone’s improvement. Avoid comparing your performance ensemble to someone else’s. Every situation is different.
Never forget to show students through your actions what they can become and are capable of as individuals. Remember that the performing arts is a discipline, and mastering a discipline will take time — so be patient!
Celebrate the small successes one day at a time and stop worrying about whether your students will get it. Some of your best moments as an educator will not be when the audience is watching. The process is what matters!
Focus on what needs to be done today to make your students better than they were yesterday. Be patient as you work toward developing a growth mindset in your organization.
Your responsibility is to focus everyone on the long-term goals, but remember that short-term goals allow long-term goals to reveal themselves. Provide daily goals and acknowledge when they are achieved. Remember, you are building a culture, and it will take time. Remember, excellence is not a destination, and never mistake activity for achievement. Quality matters!
Through your example and consistent standards, students will have opportunities to develop their own habits of excellence. The ultimate goal is for students to take responsibility for their own learning. Guide them to make independent decisions that release the artistry and passion inside of them. Take pride in the everyday. It will be hard … really hard. Be patient and make no excuses.
The hard work will build character and pride. Ultimately, inspire students to a way of doing and being that allows them to move forward and make positive impacts in all aspects of their lives. Inspire them to be the best versions of themselves and never forget to acknowledge the greatness, artistry and potential within them, and always remember … be patient!
Best,
Kevin in 2019
This article originally appeared in the 2019 V3 issue of Yamaha SupportED. To see more back issues, find out about Yamaha resources for music educators, or sign up to be notified when the next issue is available, click here.
When asked if his experience improvising in jazz impacts his ability to stay flexible as a teacher and performer DiBlasio recalls what jazz pianist Denny Zeitlin said in an interview with Monk Rowe: There are three reasons people don’t succeed as improvisers.
1. They need to be in control.
2. They’re afraid of looking bad and making a mistake.
3. They sabotage their own success out of guilt.
“Flip it and ask, what do I get from jazz and improv?” DiBlasio asks. “It’s probably taught me not to worry about being in control. It’s probably taught me not to worry about failing. And I don’t have any guilt about liking it or being good at it. Those are the gifts from working with jazz.”
Photo by Rob Shanahan for Yamaha Corporation of America
This article originally appeared in the 2019 V3 issue of Yamaha SupportED. To see more back issues, find out about Yamaha resources for music educators, or sign up to be notified when the next issue is available, click here.
United Sound is a nonprofit that provides musical performance experiences for students with special needs through peer mentorship.
United Sound has found a unique way to take the abstract concept of rhythm and make it concrete to students with special needs. Each page in United Sound method books is divided into two parts. The top of the page features a traditional staff, like one would find in any musical notation, but with the traditional notes removed and replaced with images of foods.
A cake represents a quarter note. Donuts, which can be eaten faster, represent eighth notes. A bowl of soup signifies a half note because it takes much longer to eat it.
“Everything is also spatial, so … the half note is literally twice as long as the quarter note,” says Julie Duty, founder of United Sound. “Because a longer note is [spatially] longer, suddenly for a beginner, this makes perfect sense as opposed to having to decode that this dot is different from [that] dot.”
Below this “tasty” music notation, the United Sound method books also show the song or musical passage in traditional notation, so that teachers can transition their students to traditional musical notation at a pace that’s comfortable for each person.
Finale, the music notation software, has written United Sound’s font into its product and offers it is as a free download here.
This article originally appeared in the 2019 V3 issue of Yamaha SupportED. To see more back issues, find out about Yamaha resources for music educators, or sign up to be notified when the next issue is available, click here.
United Sound is a nonprofit that provides musical performance experiences for special-needs children.
Are you interested in starting a United Sound chapter at your school? You can get started by following a few easy steps.
First, this program is a partnership between music and special education teachers. If you already know someone in the special education department, reach out to him or her and then complete the teacher registration form on UnitedSound.org. If not, register alone and United Sound will send you materials for starting that conversation.
Once registered, both teachers will participate in a training session to learn everything they will need to know and to get comfortable “trading roles.” Special education teachers have the primary role of training and helping the Peer Mentors, while music teachers will continue to do what they do best: Teach music to the New Musicians. In this way, teachers aren’t expected to do anything they’re not already comfortable doing. Following the training session, both teachers will receive everything they need to get students registered, train Peer Mentors and begin!
United Sound is a turnkey program and includes training sessions for the Peer Mentors (including videos and materials), specialized method books to help guide Peer Mentors in the teaching process, and lessons plans to get your group started.
This article originally appeared in the 2019 V3 issue of Yamaha SupportED. To see more back issues, find out about Yamaha resources for music educators, or sign up to be notified when the next issue is available, click here.
Most of us stream music from our phones or computers, but serious music lovers know that nothing compares to the experience of listening to vinyl records.
For all the sonic benefits, though, proper care of vinyl is necessary for truly enjoying your music. Watch vinyl expert Phil Shea as he covers the ins and outs of how to clean your record collection.
For more tips on caring for vinyl, check out our other articles:
In a recent article here on the Yamaha blog entitled “Choosing the Right Drumsticks,” we told you how to select the ideal pair of drumsticks. In this article, we’ll broaden the scope by discussing drum brushes and multi-rod sticks.
Brushes
Looking to increase your range of expression? Try using brushes. Your style of playing and the tonality you achieve will be completely different than when you use sticks. Because they produce a softer sound, brushes are employed most often in jazz. However, they can be effective in any style of music in which you’re trying to achieve a subdued feel, such as ballads, blues or country.
Playing with brushes.
Since there are many different types and varieties available from various manufacturers, the best way to determine which ones to buy is to go to your local music store and try them out. There are as many playing styles as there are drummers, so there really is no one answer to the question, “Which brushes are right for me?”
That said, your decision-making will factor in such things as the materials used, weight and size, and the way the brushes “catch” on the drum head. Let’s take a closer look at each.
Brush Materials
Brushes usually incorporate wire bristles, but some use bristles made of nylon or plastic. Wire works well in small club environments and yields the traditional smooth, swish sound. Nylon and plastic produce a louder sound when striking drums or cymbals, making them more suitable for larger venues, but their sound is noticeably more subdued, duller and warmer. Plastic bristles are also bendier, and so they tend to get “left behind” more when sweeping. However, they readily spring back into shape and so are less likely than wire brushes to be permanently bent. Another benefit to plastic and nylon bristles is that they do not rust like wire does.
In some brushes, the bristles have been given strengthened rubber tips or even metal beads, allowing you to play harder — with a pronounced, snappy sound on both drums and cymbals — when you pull the bristles all the way in, almost like having a pair of multi-rod sticks (see below).
Retractable brushes let you adjust spread.
Sometimes, the bristles can be retracted by means of via a pull-rod on the back end of the brush. These kinds of brushes are more versatile since you can precisely set how far out you want the bristles to go, thus altering how closely grouped they are and the spread of the fan, allowing for different playing styles and sounds. For example, a sweeping brush needs long, extended bristles, while shorter, more tightly gathered bristles are preferable when striking drums or cymbals since they allow for harder contact, and thus a sharper attack.
The downside to retractable brushes is that, over time, the moving parts can get jammed and damage the wires, so fixed brushes often last longer. However, since fixed wires can’t be hidden away for storage, you need to be very careful not to bend them — something not easily done in a busy stick bag.
In wire brushes, the quality of the wires has an obvious effect on tonality, as well as how long the brushes will last. Wires come in a variety of gauges, from light to extra heavy. The lighter the gauge, the more mellow the tone, although light-gauge wires tend to get a bit “wobbly” after being used a lot. Heavier gauges tend to stay more consistent over time and produce a louder sound with a more pronounced attack. Which you choose largely depends on the kind of music you’ll be playing.
Weight and Size
Though the handle of the brush doesn’t greatly affect its sound, it does change its feel. Handles are most commonly made of plastic, rubber or wood. Brushes with plastic handles are more lightweight, while the ones with rubber handles offer better grip. Those with wooden handles are great for drummers who want to feel the weight of traditional sticks in their hands. Those with plastic and rubber handles are better for players who want something lighter. It’s always worth checking reviews, since some handles tend to break easily.
There’s no set formula when it comes to the length of handles. Some drummers like having longer handles because of their hand size, while others feel they have better control with shorter handles. Again, it’s best to try out as many different brushes as possible before deciding which ones are right for you.
Catch
The way the bristles of different brushes make contact with (“catch”) on the drum head can vary as well. For that reason, brushes tend to work better on coated heads than clear heads, since there’s a little more friction. (We’ll be talking about drum head choices in a future article here on the blog.)
Over time, the bristle ends of wire brushes tend to bend, and different sounds can be achieved, depending on whether that bend faces upward or downward. For example, if the bend faces upward, a greater surface area of the wire is put in contact with the head, making for a smoother, fuller swish sound and less chance that the tip of the brush will get caught on the drum head. However, if it faces downward, you’ll get a more pronounced sound. Again, the choice is a personal one, and it largely depends upon the genre of music you’re playing.
Multi-Rod Drumsticks
Doing an acoustic gig where regular sticks are too loud but brushes are too soft? Multi-rod drumsticks (sometimes known as “bundled-dowel sticks,” “hot rods” or “rutes”) represent the middle ground in volume, plus they allow you to add a whole new palette of creative textures to your drumming.
Multi-rod drumsticks.
Like brushes, they’re available in a wide variety of configurations, sizes and weights. Some use bamboo or birch dowels — literally bundled together within a plastic sheath — while others utilize material made from straw, nylon, fiber or plastic, all available in a variety of widths. Their handles can be made of wood, rubber, vinyl or plastic, and adjustable O-rings in some models allow you to change the spread of the dowels much as you can with a pair of brushes.
These drumstick alternatives deliver a soft, intimate sound for unplugged sets and a fat sound when recording, but perhaps the coolest thing about them is that they are much more responsive than standard sticks, or even brushes. You’ll find that every different multi-rod model produces its own distinct timbre when used to strike drums, cymbals or other percussion instruments, yet all of them provide you with an expanded degree of control over both attack and volume. When subtlety rather than bombast is called for, they can be an especially effective tool … yet your drumming will still be heard loud and clear without ever overpowering delicate instruments like acoustic piano or guitar.
What does it take to inspire you? Maybe all it takes is seeing some kid walking to school carrying an instrument case and you find yourself wishing that instrument was in your hands. Or maybe you’re a parent and you wish it was in your child’s hands. If it’s always been your dream (or your child’s dream) to play a musical instrument, the only way to realize those ambitions is to take action.
What are you waiting for?
I can say without hesitation that taking up the guitar as a kid was one of the best decisions I’ve ever made. (I’ve written about it here on the blog.) Not only has it bought me a lifetime of joy, but unbeknownst to me when I started, it has turned into a full-time career. But in order to follow my dream and play guitar, I had to take action first.
It didn’t end there, either. As my composing career progressed, I realized that I needed (and wanted) to also learn to play keyboards in order to improve my musicality. Once again, I took action by finding a suitable teacher, and I’m happy to report that I’ve developed a fair degree of proficiency. Sure, it’s taken time, patience and practice, but like the guitar, playing keyboards has bought me countless hours of pleasure. Of course, as with guitar, I’m still learning and discovering. That alone brings me a sense of accomplishment — something I experience every time I master a new chord progression or lick.
Whenever I’m looking for a new source of musical inspiration, I will go out and buy myself something new for my studio. It can be as big as a guitar or as small as a shaker or tambourine. What I’ve found when I acquire a new guitar, for example, is that I play differently on it, which in turn spurs my mind to create new sounds. Not only do I find it fun to research different instruments and then try them before I buy, but once each new instrument is in my hands, I’m as excited as I was when I got my first guitar! The point is, in order to get that rush of inspiration, it requires a degree of effort on my part.
Earlier this year, I tried out an electric cello (something I’ve also written about here), and I’m hoping to buy one soon. I’ve already been online watching videos and researching which model would be best for me. Even though I don’t know how to play cello, it’s something I know I’ll enjoy and, who knows, maybe I’ll get good at it!
Of course, taking action sometimes involves a bit of uncertainty or risk. In an Entrepreneur magazine article entitled “The Best Time to Take Action Is Now,” author Jeremy Ellens notes, “Often times, there is so much to do, and we have so many great ideas, that we struggle to take massive action on any of them. Maybe we think that we can’t move forward with something without it being absolutely perfect.” The moral of the story is this: Don’t fear imperfection; even baby steps in a positive direction are a good thing. With that in mind, why not take a chance and treat yourself to what you’ve always wanted?
Maybe taking this action is not for yourself. How about getting your kids to take up music and learn to play an instrument? The benefits of playing an instrument and learning how to play music have been proven in countless ways, from increased focus and mathematical brainpower to the simple joy of playing and interacting with others. And if you don’t want to be the one to do it, hearing your kids play for you might be just as good … maybe even better!
Lewis Carroll, author of Alice In Wonderland, once said, “In the end, we only regret the chances we didn’t take, the relationships we were afraid to have, and the decisions we waited too long to make.” Why regret what you didn’t do? Just think of all the fun you’ll have with that musical instrument you’ve always dreamed of playing, and how much it will enrich your life, as well as the lives of your family and friends. Yes, summer is over and the cool weather is upon us, but that doesn’t mean you can’t heat things up by taking positive action. Make this your time to shine!
One of the problems that faces working bands who carry their own PA is the constant setup and breakdown. It’s bad enough that you have to move all that gear, but then once you’ve arrived at the gig you have to set everything up and dial in your settings. Mixer settings in particular are very important because the console is the hub for all the signals coming from the stage. Fortunately, digital mixers can make your life easier by providing the ability to save and recall scenes (sometimes called “snapshots.”)
The idea of scene memory comes from the old days when live engineers at festivals would take a photograph of an analog console after soundcheck for each band. When showtime came, they’d use the photo as a reference to reset the console to the same settings as the soundcheck. It wasn’t perfect, but it was better than starting from scratch.
Digital mixers such as the Yamaha TF1 can do this for you because the mixer surface is really just a controller for the software inside — it’s almost like having a big mouse with a lot of buttons and switches. And, just like any other software program, you can store and retrieve files for later use. In modern digital mixers (including all current Yamaha models), scene memory allows you to store every setting for every channel, including mic gain, equalization, compressor and gate settings, fader level, pan position, aux send settings, group assignments, and effect settings. Scenes are stored in the mixer’s permanent memory, so you won’t have to worry about losing your settings in the event of a power failure.
Let’s take a closer look at how this little miracle of modern sound mixing works.
Making a Scene
A scene is created in a digital mixer (you can’t create them in analog consoles) simply by adjusting your settings, then saving them into a library.
All Yamaha digital mixers provide this capability, and even provide scene templates such as General Band and Jazz Combo to get you started. Scenes are accessed from a library, where you’ll see the name of the scene and its creation date:
A Scene Library shows a list of available scenes, with store and recall buttons.
To store a scene, select a scene number and touch the Store button, then name it using the onscreen keyboard that appears:
An onscreen keyboard allows you to name scenes.
Yamaha TF Series mixers provide two banks with 100 scenes each, so you can store up to 200 scenes. Why would you need so many of them? Read on …
Scene Memory Applications
Let’s suppose that you’re mixing a five-piece band with lead vocal, guitar, keyboard, bass and drums. At soundcheck everyone in the band plays while you adjust settings for mic gain, faders, EQ, effects and monitor levels. When you’re satisfied with everything, you store these settings as a scene. And those settings probably include sending the lead vocal to all of the monitor mixes so that everyone in the band can hear it.
But what happens if there’s a song where the drummer sings the lead vocal? In such a case, there will be a lot of changes that need to be made, such as muting or lowering the lead vocal mic in the house mix, unmuting the drummer’s vocal mic, changing the aux send levels for those microphones, adding reverb or delay to the drum vocal, and turning off or resetting any effects in the lead vocal channel. You also may need to adjust the EQ or compression for the drum vocal microphone. That’s a lot to do on the fly! Scene memory enables you to create one scene for use when the lead vocalist is singing, and a different one for when the drummer is singing. Recalling a scene is instantaneous, so you can easily cue up scenes in the library and recall them in-between songs:
A Scene Library enables you to cue different scenes and easily recall them.
If the band performs in a lot of different venues regularly, you can create scenes for each one. Say they perform at a small coffee house during the week where the drummer plays hand percussion and everyone shares one monitor, but at a large club every Saturday night where everything on stage (including a full drum kit) is run through the PA. You can set up a scene with one monitor mix and no drum channels for the coffee house gigs, then have a completely different scene for the large club.
Scene memory is especially useful in House of Worship applications. During the service when the musicians are playing, you’ll want all of those inputs to be live in the PA system, but when it comes time for the minister to deliver a sermon, those channels should be muted. You could easily build a separate scene for the sermon where only the minister’s microphone is open, or perhaps a different microphone is switched on for the minister, and the instrument channels are muted.
Additional Scene Features
Some digital mixers enable you to “safe” or “filter” certain parameters such as a particular channel, so that when you recall a scene, that channel remains unchanged. Most mixers also provide a default or initialize scene that resets the mixer to factory settings so that you can always go back to a clean starting point. In addition, there is usually some kind of mechanism that prevents you from accidentally overwriting scene memory settings. In Yamaha mixers, this takes the form of a little padlock icon next to each scene memory (see the first illustration above); you have to take the extra step of clicking on the icon to unlock it before you can overwrite the contents — a great safety feature.
In addition, Yamaha offers free editing software for the TF Series, QL Series, CL Series and their flagship Rivage Series digital mixers, allowing you to work “offline” and create scenes without actually having the mixer in front of you. These scenes can be stored to a USB thumb drive and then loaded into the mixer when you’re ready to gig — saving time for setup and sound check.
Yamaha digital mixers offer a USB port so you can load scenes from a thumb drive.
In the latest firmware version (4.01) of the TF Series, you can also fade scenes rather than have abrupt changes that might disturb quiet passages; this feature can also be used to fade a vocal microphone, for example. You can adjust the fade times between scenes as well as which inputs are affected.
Scenes allow you to instantly switch between different mixer configurations. Creating and storing them may take a little while to accomplish, but I guarantee they will save you a lot of time and effort in the long run!
Let’s face it, there aren’t nearly enough holidays that give you the chance to talk differently. There are plenty of days dedicated to food, like National Sloppy Joe Day, and days dedicated to obscure professions, like National Auctioneers Day, but nothing really comes close to Talk Like a Pirate Day.
What’s even more cool is that, aside from being able to say words and phrases you rarely get to use (like “Yarrrgh!” and “Avast ye, matey!”) you don’t need to make up an excuse for watching great pirate-themed cinematic moments in the comfort of your home theater.
And, just as no two buccaneers are cut of the same jib, there are plenty of movies from all pirate-y walks of life to watch (as well as great sound tracks and effects to listen to) in celebration of Talk Like a Pirate Day … or any day, for that matter. Here are our top picks.
1. Captain Phillips – “I’m the Captain Now.”
Filled with spine-tingling suspense, this is the moment when the Somali pirate leader makes it known that he is in cha’rge of Captain Phillips’ doomed freighter. The scene offers up great acting, a powerful score and tension thick enough to cut with a knife. Check it out here.
2. Pirates of the Caribbean: Curse of the Black Pearl – Jack Sparrow vs. Barbosa
As the benchmark for modern day pirate movies, and the juggernaut that would launch a multi-million dollar franchise, this film set the bar high. Led by Johnny Depp’s excellent performance as Captain Jack Sparrow, it’s got everything from exciting ship battles to romance to daring sword fights, like the one in this clip. Note the combination of music and clashing swords, as well as some great back-and-forth dialogue that will make you choose between pirate accents when you quote it with friends. Check it out here.
3. The Goonies – “Hey You Guys!”
Few scenes have the staying power of this epic moment when Sloth and Chunk unite to save their friends in this classic adventure flick … and none stand out more from a pirate’s perspective. Check it out here.
4. Hook – Peter Pan Confronts Captain Hook
This 1991 live action sequel to Peter Pan may have the cheese factor dialed up to 10, but it also features great performances from Robin Williams and Dustin Hoffman, as well as an amazing film score by John Williams. Keep an ear out for little details like swords clanging and feet shuffling on the deck of Captain Hook’s ship. Check it out here.
5. The Princess Bride – The Sword Fight
If you’re not a fan of standard pirate talk, here’s an alternative, courtesy of the witty banter in this scene between the Dread Pirate Roberts (Carey Elwes) and Inigo Montoya (Mandy Patinkin). This classic movie duel is fun to watch on any home theater but even more so when you’re listening over a quality sound system. Check it out here.
6. Summer Rental – The Love Boat
Sometimes you just need a laugh. Such is the case with this silly sailing scene that features John Candy and Rip Torn drunkenly singing the theme to “The Love Boat,” accompanied by the sounds of water sloshing against the side of the boat and ship bells in the distance. Check it out here.
7. Master and Commander: The Far Side of the World – “Straight at ‘Em.”
Although set in 1805 during the war between the British and French navies, and therefore not officially a pirate movie, the characters often talk like pirates by using nautical and sailing terminology. This is a great flick to watch with a full surround sound system too. From the rumbling of cannon fire and its aftermath, this opening scene features a wide variety of sound effects, including feet shuffling and sails blowing in the wind. Hold fast! Check it out here.
A barrel from one clarinet may fit onto another model or even brand of clarinet, but be aware that it may not give the best results. That’s because the barrel does a lot more than simply connect the mouthpiece to the top joint.
Clarinetists often describe barrels by their length, with 66 millimeters being the most typical length. In theory, a longer barrel should make the instrument flatter in pitch, much like pulling out a saxophone mouthpiece or a flute headjoint. While this is generally true, barrels of equal length can be quite different on the inside.
Clarinet barrel length.
The bore (that is, theinside diameter) of the barrel is just as important to tuning as the length is. A larger diameter shortens the sound wave and sharpens the pitch. To further complicate things, most barrels are tapered, meaning that the bore at the top of the barrel is different than the bore at the bottom of the barrel. This taper can be unique to the clarinet model, and a barrel with a different taper will have different tuning tendencies. Most barrels are slightly larger at the top, but some are larger at the bottom, and others may have no taper at all.
Clarinet barrel bore.
The bottom line is this: Don’t just grab any random barrel for your clarinet! Be sure to get the one that was designed for it. If a change needs to be made for a specific purpose, get some expert help from a clarinet specialist to guide the process.
Click here for more information about Yamaha clarinets.
Technology never stops. Just when you think you’ve got the latest and greatest speakers, displays, networking and controls for your home, something better comes along. And there’s no better place to experience the next big thing(s) in home technology than at the Custom Electronics Design and Installation Association (CEDIA) Expo.
This annual event, held in Denver this year from September 12 – 14, brings together businesses and innovators from a diverse cross-section of the home technology industry. Attendees are mostly tech integrators — the professionals who are trained at customizing, configuring and installing gear in consumers’ homes. They come to discover innovative solutions that can enhance the comfort, efficiency, enjoyment and value of their clients’ homes, but there’s no reason to keep it all a secret. In this article, we’ll explore some of the major trends in home technology at the show.
Health and Wellness
In the past, when people thought about “healthy homes,” indoor air quality came to mind. While this is still an important component of healthy living, the ability to create a home environment that’s more peaceful and serene is clearly the next phase. On display at CEDIA was lighting from Lutron that simulates sunrise and sunset and syncs up with our circadian rhythms to promote a better night’s sleep, along with home theaters that can transition into meditation/relaxation rooms by altering the audio, video and lighting. Of course, whole-home music systems like Yamaha MusicCastcan bring the sounds of nature to every room in your house — a proven technique for relieving stress and anxiety.
Artistry in Audio
Hydro dipped speaker grilles.
Speakers are going through a major cosmetic makeover. Models that can be recessed into the wall and ceiling surface like in-wall and in-ceiling speakers from Yamaha are starting to be joined by speakers that double as pieces of artwork. Some feature grilles that can be customized to display images from professional photographers or custom metal artwork. Others use a method called hydro dipping to apply images directly to the grille. The result is a speaker finished to look like wooden boards, granite or even shrubbery — a perfect blend for outdoor environments.
Modern TV Cabinets
Just when you thought the wooden TV cabinet of the ’50s and ’60s was long dead, it’s making a comeback … sort of. Numerous manufacturers have given the antiquated TV cabinet a fresh, modern look, offering an alternative to the über-popular yet often cosmetically disruptive method of mounting a display to the wall. For example, Salamander Designs’ “The Wall,” which originated in commercial settings, incorporates a cabinet with a panel onto which a display can be mounted. The unit is modular, which means the finish of the cabinet door and panel can be updated and/or a new TV mounted at any time. In addition, the entire unit can be repositioned, moved to a different room or relocated should you move into a new house. Try doing that with a wall-mounted display!
“The Wall.”
Counterbalancing this blast from the past was the look forward to the emergence of 8K. There was a significant increase in the number of booths showcasing the latest capabilities for 8K displays and projectors as integrators prepare for deeper adoption of the ultra high-resolution technology.
Artificial Intelligence
Imagine walking into a room and having the lights dim to your preferred level, while at the same time your favorite playlist broadcasts through in-ceiling speakers and motorized draperies open to reveal a view of the garden. Systems are being designed to recognize the identity of each family member and automatically adjust the room environment accordingly. RoomMe, for example, is a system made up of small sensors placed by the entrance of each room. As you pass by a sensor, an app on your phone sends information to a third-party control system which sets the lights, thermostat and other smart devices.
This hands-off approach to home control is an alternative to voice control, which has become increasingly more prevalent, as demonstrated by Yamaha at CEDIA. With a few simple verbal commands from compatible devices recognized by the latest line of Yamaha MusicCast devices, the video, audio, shades and dimmable lighting adjusts to prepare the space for ultimate movie viewing. A myriad of controls and integrations were used to demonstrate the flexibility of a MusicCast system, including Josh.ai, Alexa and RTI.
Yamaha also demonstrated Surround:AI — the industry’s first and only artificial intelligence available in an AV receiver. This technology analyzes the sound profile five times per second and optimizes it for the ideal listening scenario automatically. With Surround:AI, you no longer have to worry about losing the remote and adjusting volume levels, allowing you to instead get lost in your favorite movies and shows.
Residential and Commercial Crossover
Home technology products and systems have become so reliable, powerful and sophisticated that many of the solutions initially intended for home use are finding their way into restaurants, bars, offices, retail shops and other commercial environments. The XDA-QS4500RK Quad Streamer from Yamaha is one example. It can deliver music to four listening zones with eight channels of amplification, making it powerful enough for both homes and small businesses. For integrators who need more power and flexibility, the company also demonstrated its Commercial Installation Solutions (CIS), designed to help deliver ideal sound in commercial spaces. This includes Dante, which Yamaha CIS has incorporated for the last five years.
Yamaha XDA-QS4500RK Quad Streamer front panel.
Yamaha XDA-QS4500RK Quad Streamer rear panel.
And just as there are commercial applications for residential products, there are residential applications for systems typically found in commercial settings. As homes become increasingly more reliant on Wi-Fi, networking systems with bigger bandwidth — the kind historically found in businesses — offer huge benefits to homeowners. Helping bridge this gap is Access Networks, a company that offers a range of products designed for both businesses and homes.
Tech for the Kitchen and Bath
Hydra indoor waterproof display.
The kitchen and bath could be considered the last frontier for technology in the home. But those of you with a need to be connected 24/7 will be happy to hear that a number of manufacturers are starting to make inroads into these two territories, with products designed specifically for the kitchen and bath. Seura, for example, offers its Hydra line of indoor waterproof displays. Ideally suited for the kitchen and bath, they install flush with the wall surface and are framed in a variety of decorative finishes like stainless steel, brushed gold, and pearl white.
Kohler, meanwhile, was showing an entire ecosystem of smart bathroom appliances called Konnect, whereby a single Alexa command can activate and set the water temperature of a Kohler smart shower as well as activate music. It can even enable a vanity mirror to provide information like traffic and weather reports!
For the past few decades I’ve been writing songs for and collaborating with established recording artists. My job description has included helping them define themselves and offering a safe space to explore their feelings. I’ve been part Muse, part therapist, part fun hang. I’ve loved every minute of it and I’ve enjoyed some notable success.
Me, taking that leap.
But now, as some of you may know, I’m taking a leap of faith as I attempt the difficult transition from songwriter to artist. For the first time in my career, I’m recording my own album — stepping out into the frontline, so to speak. I’ll be re-imagining some of my more familiar songs (“Bitch,” “What A Girl Wants,” “Almost Doesn’t Count”) and also debuting some of my personal favorites that never saw the light of day.
Scary.
But mostly exciting.
Up until now I’ve been the accommodator, privy to the goings-on inside the minds of artists while writing their records. And I assure you there’s a lot going on in there.
First and foremost, an artist wants to feel authentically connected to a song. (Of course, their A&R person’s opinion matters as well, since the label will ultimately decide what’s marketable.) In addition, they’re projecting what the critics might say, hoping their fans will dig the direction, and, if I’m brought into the picture, trying to navigate that annoying little voice in their head that tells them co-writing with a professional songwriter will diminish their cred. As you can see, there’s some calculation involved during the creative process.
That said, I always listen to their concerns and voice an opinion when I have one. But to be perfectly honest, sometimes I find their thought process neurotic. The suggestion that we write a song at a fast tempo because there are already too many ballads on the album is ridiculous. Or that we pen something non-relationship-centric because there are too many love songs. That’s just nuts. Write what’s on your mind!
Side note: In 2007, Sara Bareilles’ A&R people felt that a love song was what was missing from her album-in-the-making and they insisted she write one. Defiantly she went home, wrote “(I’m Not Gonna Write You A) Love Song” and ironically had a big fat hit.
Calculating is the worst thing an artist can do for their art.
But that’s easy for me to say. Because here I am, seven songs in the can and I’m internalizing the same way all artists do.
For instance, I’m listening back and wondering if I need more songs with faster tempo. (Left to my own device, I’d write a ballad every day.) I’m asking myself if the recordings we’ve done thus far are too love-heavy. Wouldn’t something in 6/8 break the monotony of all the 4/4? As if that wasn’t bad enough, I’ve come to realize that I default to the same strum every time I pick up a guitar, so many of my songs have identical heartbeats. Disaster! And I obsess that no two songs in a row on an album be in the same key — a pet peeve. My ears enjoy a tonal shift in between tracks. (Will that matter to my listeners? Who knows.)
But my main concern is that, in having written for so many artists from all different genres (Keith Urban to Britney, Jessie J. to Reba, The Pretenders to Xtina), I’m stylistically all over the place. It’s like a burrito, kale salad and a pizza all on one plate. I worry that this is going to be too much of an eclectic listening experience, as opposed to a consistent cuisine all throughout the meal.
Maybe I’m just as neurotic as my colleagues on the other side of the table. Maybe I’ve been overthinking with the best of them. Maybe it’s not as easy as I thought to simply write what you love and sing it.
So I say this to all those artists I judged: I’m sorry! I get it! Now I know how it feels. Making an album is a complicated and personal process.
To be fair, however, when I take a step back and ask myself what I would tell myself if I were my own best friend, it would be this:
It’s not your intention to be a new break-out Diva. You’re not vying for artist of the year. Your record doesn’t have to be one consistent vibe. It’s meant to be more of a collection … a celebration of songwriting. After all, songwriters are artists too. And I need to fly that flag.
I’d love to see performers take the opportunity to put themselves in the accommodator’s shoes every once in awhile — to step behind the curtain and let the other gal shine. Maybe more of us should swap creative roles as an exercise in life. We’d all understand each other a lot better.
I hope to start sharing the music with you soon. It will most likely be released in dribbles, as is the custom these days. One single at a time until bam! … the whole album drops.
But of course, no two songs in a row in the same key!
If you’ve made a similar transition, or are contemplating one, I’d love to hear about it. I look forward to reading your comments on my Facebook Page.
Berklee College of Music in Boston is one of the leading institutions for contemporary music education in the U.S. In addition to turning out highly proficient musicians and composers, it designs its curriculum to give its graduates the best shot at getting work in the competitive music industry. To that end, the school recently decided to begin using Steinberg Cubase as the digital audio workstation (DAW) software in its Film Scoring program.
Making the Decision
A change like this doesn’t happen overnight. It required a lot of advance discussion and planning, and began with the purchase of Cubase licenses for key members of the faculty who are involved with teaching film scoring. That allowed them to get familiar with the software before the fall semester, at which point incoming film scoring students all received their own copies of Cubase.
Steinberg Cubase.
Following the Industry
So what made Berklee decide to make the switch? One reason is the feature set offered by Cubase, particularly in the MIDI editing area — something that’s of critical importance when it comes to composing for film. “It’s a great piece of software, a really powerful tool,” says Sean McMahon, who recently became chairperson of Berklee’s Film Scoring Department. “Cubase does a great job of getting out of the way and allowing a composer to be creative.”
But the primary impetus was the belief of the administration and faculty that Cubase represents the future in the very competitive area of film scoring. “We like to be a microcosm of the industry and model it closely [so we can] prepare our students for the reality of what they’re going to face,” McMahon explains.
Berklee took advantage of its alumni network, including those working as film composers, to take the temperature of the market. “We’ve done surveys of alumni,” McMahon says, “and the faculty are all practitioners. They’re industry professionals, so they’re plugged in as well.”
The Pathway In
The need to be fluent in the software that’s most popular with working pros is particularly crucial in the film composing world. “We think being compatible with your peers is really important,” McMahon explains.
In addition, the path to success in this field often involves starting as a composer’s assistant. Through internships and entry-level jobs, budding film scorers learn the ins and outs of the business and make invaluable contacts.
“It’s important that we prepare our students for these types of jobs,” McMahon says. “At first, composers don’t need assistants for their musical chops or compositional skills; they need them for their technical skills. So, if you want to get a job with a composer who’s a Cubase user and you [yourself] don’t use Cubase, odds are you’re just not going to get it.”
MIDI Orchestration Power
Most film composers initially write and arrange their scores in their studios, creating parts using sampled MIDI orchestral instruments. Much later in the process, these parts are replicated and replaced by real orchestral musicians. But during the initial writing phase — and when the composer is working with the director to refine the score — the instruments typically remain virtual.
As a result, the ability to manipulate MIDI orchestrations is critical, and Cubase’s toolset for this is extremely powerful. McMahon provides an example: “It’s fascinating what you can do with articulations — something Cubase calls “Expression Mapping.” Let’s say you had a Violin 1 (first violin) line. If you were writing it on paper, you could indicate pizzicato, staccato, legato. There are all kinds of bowings and articulations you could use.”
“In the past,” he continues, “to manage the plethora of different articulations for a single track within a DAW, composers would need to use [tools that] were awkward and could be confusing in the orchestration process. But with Cubase’s Expression Mapping, the composer can instantaneously change articulations at the note level instead of writing them in as MIDI note data. That’s pretty sophisticated and has many benefits.”
The many articulations available in Cubase’s Expression Map setup.
Open the Dorico?
McMahon is also intrigued by the integration of Cubase and Steinberg’s Dorico music notation software. He sees this as being particularly helpful for converting MIDI scores into playable parts. “I’m an orchestrator by profession,” he points out. “Composers give me MIDI files, and I convert them into a coherent, comprehensible musical score for musicians, for human beings.”
It’s a complicated task, what with the different transpositions required for various orchestral instruments. But McMahon thinks Dorico has great potential for speeding up the process, and is currently considering it for possible future use within the film scoring curriculum.
Steinberg Dorico.
But that’s for a later date. Right now, the emphasis is getting film scoring students up to speed on Cubase … and according to Bruce Bennett, Berklee’s Senior Director of Technology Services, there’s even a chance that Cubase’s role at Berklee could increase beyond the Film Scoring Department in the years ahead. “It’s such a good toolset for creativity — orchestral or otherwise — that it may organically grow with our students elsewhere at the institution,” he says. Stay tuned here for future developments!
Photograph by Cheryl Fleming.
Click here for more information about Steinberg Cubase.
Click here for more information about Steinberg Dorico.
Click here for more information about the Berklee College of Music.
Two million are going. Another 1.5 million — and growing — are interested. And that’s just the RSVPs from those on Facebook who plan to storm Area 51 on September 20.
The plan is multifaceted, but simple at its core: Meet up in rural Nevada, coordinate parties, penetrate a restricted area and see “them aliens.”
What could go wrong?
Actually, lots. For one thing, according to a military spokesperson, “any attempt to illegally access military installations or military training areas is dangerous.”
And even if you were to pull off a successful naruto run, outsmart the authorities and make it into this highly classified United States Air Force facility, who could possibly know what you’ll encounter?
Hollywood, that’s who.
Here are some top movie scenes to prepare you for what to expect if you someday come face-to-face with another life form.
1. Mars Attacks!
If you’re storming Area 51, leave your pets at home. Even if they’re service animals. Especially if they’re birds; and, more specifically, doves. In fact, avoid wearing white altogether. Check it out here.
2. Signs
Let’s say you make it past security and into Area 51. Assuming that this Air Force Facility doesn’t use TSA screening processes, you might even make it in with some water. Not only will this keep you hydrated in the desert, it might also double as a defense mechanism if the aliens are unkind. Check it out here.
3. Monsters vs. Aliens
All branches of the military were mobilized for this encounter, with POTUS himself making first contact. This may be our favorite way for communicating with alien life forms to date. Check it out here.
4. The Day the Earth Stood Still
The Earth has changed a lot since 1951. In fact, September 20, 2019 might be referred to as The Day the Earth Naruto Ran. If Gort-like creatures are locked up in the facility, they’ve hopefully evolved with more grace and dexterity since the OG. Regardless, approach with caution. Check it out here.
5. Alien 3
We’ve all heard of a wolf in sheep’s clothing. How about an alien in a dog? Expect the unexpected in Area 51. Check it out here.
6. Artificial Intelligence (A.I.)
Not only has Haley Joel Osment seen dead people (like, all the time), he’s also seen these curious forms of existence. Check it out here.
So, rather than rally around the “they can’t stop all of us” battle cry, think about how much better it would be to instead spend the day watching any or all of these movies in the comfort of your home. It’s easy to find out where they’re available to rent or stream for free: simply go to JustWatch. If you find something on Netflix®, here’s how to get the best audio.
For the best audio experience to complement the extra-terrestrials onscreen, be sure to connect your AV receiver or sound bar via HDMI to the ARC input on your 4K Ultra HD TV. The latest gear from Yamaha allows you to enjoy the benefits of eARC.
Yamaha does not endorse or condone the actions of any group or groups encouraging a visit to Area 51.
Dorico music notation software is right at home in the music classroom. Dorico supports teaching music theory and composition through its algorithms.
The software ensures that music is always expressed according to the established practice, with rhythmic groupings and enharmonic spellings automatically calculated.
Dorico is easy to learn and simple to use, with a user interface that invites student-led exploration. Dorico is the only music notation software that combines beautiful notation with a powerful sequencer-style piano roll view, encouraging students to learn notation while providing a familiar way in.
6 Key Things About Dorico
The software offers a simple, streamlined user interface that fits comfortably on a single display, with fast keyboard access to every feature. There’s no need for external keypads, MIDI devices, etc. It’s ideal for student laptops.
Dorico’s rich understanding of music theory ensures that the music is always rendered clearly and unambiguously, no matter how complex the rhythmic or harmonic situation.
Music educators can create assignments and learning materials quickly and easily with powerful and flexible page layout features.
The software’s superior support for modern techniques of composition — including open meter, complex tuplets, microtonality and more — allow music educators and musicians to directly communicate their musical ideas and reduce the number of workarounds necessary in other scoring software.
Dorico’s high-performance audio engine and world-class virtual instruments help you refine your musical ideas before the music hits the stand.
A simple conversion kit allows you to trade up from Sibelius or Finale through a multi-seat cross-grade.
A 30-day free trial version for educators is available here.
When I moved to Hawaii four years ago, I formed a band and began gigging at various resort venues on the islands. At the same time, I was also regularly performing as a solo artist, singing and playing acoustic guitar (both steel-string and nylon-string) and/or electric guitar, often accompanied by prerecorded backing tracks.
As anyone in a band knows, working with other musicians requires more than just musical chops — you also need great communication and interpersonal skills. (Scheduling often becomes a long stream of emails between band members to determine availability, and finding regular gigs that pay enough to support professional musicians may be the hardest part of all!) I love playing with a band, but there are a lot of benefits to working as a solo musician … although that, of course, also comes with its own set of unique challenges.
In this article, we’ll discuss what it takes to “go solo” and explore some performance options.
The Skills
Working alone is not for everyone, so be sure to consider whether you have the self-confidence to be the focal point of your performances, along with the entrepreneurial skills, tenacity, talent and motivation to run your own career.
As a solo performer, you’ll need to be not only the artist, but also the manager, booking agent, roadie, sound man, accountant and guitar tech. I’ve had to wear all those hats, and it has definitely fine-tuned my ability to deal with most situations. When a string breaks mid-song, you better know how to quickly replace it!
The next thing to consider is whether you are going to sing as well or whether you’re going to perform purely as an instrumentalist. I prefer to sing and play, as this gives the audience a more complete musical experience.
That said, some venues prefer instrumental background music to allow the customers to talk without any vocal distractions, and I’m certainly prepared to be flexible in those situations. Piano or nylon-string guitar work well for those kinds of gigs. I’ve spent time developing a complete set of instrumental music for solo nylon-string performances. If I’m doing a purely instrumental gig and am playing locally, I’ll use my Yamaha NCX1200R nylon acoustic-electric guitar; if I’m flying to a show, I’ll take my Yamaha SLG200NW SILENT Guitar™ so I can put it in the plane’s overhead compartment.
Yamaha NCX1200R.
Yamaha SLG200NW.
The Repertoire
One of the best things about a solo career is that you always get to choose the songs you play. I’ve made it a rule not to perform any music that I don’t like. Trust me, if you’re going to play the same songs several nights a week for months on end, you’d better like the material. If you write your own songs and they are consistent musically with your cover tunes, consider playing some of those songs in your set as well.
Build a set of songs that will cover a three-hour show (approximately 30 songs) — more if possible — to give you options.
The Vocals
One of the most difficult things for me to maintain is the ability to sing and play guitar for hours every evening. (Most venues will want you to perform three one-hour sets.) I strongly suggest exercises to warm up your vocal cords before a performance. In addition, make sure you’ve placed your songs within a comfortable range for your voice. In order to warm up, I deliberately start my first set with the easiest songs to sing. I’m also not concerned with replicating the key and performance of the original artist; I do my own thing.
The Stagecraft
Unfortunately, stagecraft is something that many solo performers overlook, but it’s something you really need to pay attention to. Your music can’t say it all — you need to entertain your audience as well. You need to learn how to interact and engage with them; you also have to learn when it’s best to talk between songs, and when it’s more appropriate to say nothing.
I loop and improvise at the end of each song to extend my performance and to add instrumental variety. Having a guitar that is easy for me to pick, strum and improvise on for long periods of time is also a huge consideration. I make a point of keeping my improvisations to a minimum and reference the melody often. Remember, most audiences aren’t guitar players!
The Gear
As you develop your set, take time to consider the sound you are looking to achieve. What is the best guitar to support your voice, and can you sustain playing it for long periods of time? Will you be using effects, an amp or playing directly into a P.A. mixer?
Experiment until you find a unique voice and tone to express your music fully. Try different microphones and reverb types until you get the clarity and character you need. Don’t be afraid to use EQ and compression, either. A quick online search for some suggestions on how to process guitar and vocals for live sound will get you in the ballpark. (Be sure to check out our series of “Tools of the Trade” articles here on the Yamaha blog.) You can always fine-tune your sound from there.
Yamaha STAGEPAS P.A. systems come in a variety of power options and incorporate equalization and reverb on every channel. These complete integrated systems are extremely lightweight and portable, and they offer more than enough inputs for any solo artist … or even a small band.
Yamaha STAGEPAS 600i.
My performance requirements are extremely diverse, so I’ve found a way to achieve everything I need by using a Line 6 Helix guitar processor. On any given day, I may be playing live, hosting a clinic, demoing at a trade show, tracking a studio session or filming a teaching video, so I’ve optimized my Helix effects to sound great with a variety of acoustic and electric guitars.
Line 6 Helix.
With this one box, I can process my vocals, dial in any style of guitar sound, insert percussion loops, engage the real-time looper and use the built-in expression pedal for fade-outs. All of my set-lists are stored to the eight user locations for instant recall.
The Video
In this video, I’m performing at a house concert in Corona, California using a Yamaha A Series AC5R guitar, set to an equal blend of mic modeling and piezo pickup. The guitar, vocals and percussion loops are all running into a Line 6 Helix and a Yamaha STAGEPAS 400 P.A. system.
The original song I’m performing (“Dewdrop Inn”) was written by me and Dylan Altman.
The Wrap-Up
After four years working as a solo artist, I’ve witnessed exponential growth in my musicality and confidence onstage. My artistry as a vocalist is melodically consistent with my guitar improvisations and I use harmonic progression and rhythmic feel to craft arrangements into my personal interpretations of classic songs.
When it’s you under the lights representing your art, there are no excuses, no drummer to blame or safety net to catch you when you have a tough night. Going solo will hone your skills, sharpen your business acumen and give you a platform on which to develop your own unique sound. I highly recommend it!
You woke up this morning brimming with energy. The sun was shining brightly, the birds were singing a merry tune, the fresh-brewed coffee hot and strong. The homemade granola you had for breakfast was so healthful you could almost feel your cells thanking you as the nutrients coursed through your system.
Next, a brisk jog to your local convenience store, where you bought a scratch-off lottery ticket and won ten grand. Inspired, you returned home and picked up your guitar and all of a sudden that chord progression you’d been struggling to master fell into place easily.
OK, reality check.
More likely, you woke up half-asleep, or half-hungover. The skies were depressingly gray and the only sound you could hear was your neighbor’s lawnmower or snowblower. You burned your toast and you’d run out of coffee the day before, so there was no benefit of caffeine and therefore no hope of a jog. No matter; the last time anyone had won a scratch-off at your local convenience store was back in 1992.
And that chord progression? Fuhgeddaboudit.
Those of us who are perfectionists are forever doomed to disappointment, for this is an imperfect world. But that doesn’t stop many of us from trying to create perfection anyway. And you know what? That’s a wonderful thing.
Throughout the entire history of mankind, people have always challenged the “impossible” — sometimes with magnificent results. Light without fire? Couldn’t be done … until Thomas Edison proved otherwise. Horseless carriages? No way … until the automobile came along. Wireless transmission of audio and video? A pipe dream … until the age of radio and television.
Other times, the outcomes are, well, somewhat less positive. For centuries, inventors labored in vain to build a perpetual motion machine, with a notable lack of success. For nearly a thousand years, alchemists struggled to find a formula that would turn base metal into gold, and not one of them managed to come even close.
And almost since the dawn of man, composers have attempted to write the perfect song.
Have any succeeded? Well, the answer is, of course, purely subjective, so it’s up to you to decide. For me, the more interesting question is, what would the “perfect song” entail, and what kind of reaction would it evoke? Fans of the 1970s Monty Python comedy show (and I’m certainly one of them) may recall the group’s brilliant sketch called “The Funniest Joke In The World.” The premise was that the joke was so funny, anyone who read or heard it promptly died from laughter. Would the best song ever written be so universally stirring that hearing it would cause the listener to break down in tears, or enter a nirvana-like state of joy and contentment?
In her recent “Song Envy” article here on the Yamaha blog, my colleague Shelly Peiken touched on the subject, talking about what she termed “WiWi” (short for “Wish I Wrote It”) songs, and the importance of using them as sources of inspiration, not frustration. I couldn’t agree more!
In the article, Shelly asks that readers consider their own personal top “WiWi” songs. After some deliberation, I decided that mine has got to be the Smokey Robinson classic “You Really Got A Hold On Me.” To my way of thinking, it’s got everything the ideal song needs: a catchy title, a relentless guitar hook, simple yet memorable lyrics, stop times that continually resolve and reconstruct the tension, and a call-and-answer chorus that lives like an earworm in your brain for days afterwards. I especially love the Beatles’ rendition, which features uncannily tight three-part harmonies courtesy of Messrs. Lennon, McCartney and Harrison.
Yet, for all my enthusiasm, I think that relatively few people would characterize this as a “perfect” song, if only for the simple reason that it wasn’t a huge hit for The Miracles, or The Beatles, or, for that matter, the Supremes or the Temptations (both of whom also provided worthy covers).
Many would rate Paul McCartney’s “Yesterday” as the greatest contemporary song ever written, yet McCartney himself has frequently cited Brian Wilson’s “God Only Knows” as his personal choice. Magazine polls (again, purely subjective) often include Bob Dylan’s “Like A Rolling Stone,” Freddie Mercury’s “Bohemian Rhapsody” and/or John Lennon’s “Imagine” in their top five. There are arguments for and against any of these, but, once more, I would make the case that none are “perfect,” if for no other reason than that none enjoy universal acceptance. (For every fan of “Yesterday,” there’s going to be someone who can’t stand “God Only Knows,” and vice versa.)
Not that any of this should stop you from attempting to write the perfect song. Just like Edison or Marconi, you may be the one who succeeds where everyone else has failed, to the benefit of us all. As author and motivational speaker Les Brown once said, “It is better to aim high and miss than to aim low and hit.” You may be frustrated by the lack of perfection in this world, but that’s no reason to end your pursuit of it.
In honor of Star Trek Day, here’s a look at just how influential the franchise has been.
Believe it or not, the original Star Trek television series only ran for three seasons — from 1966 to 1969 — yet it became an enduring cultural phenomenon and spawned numerous spin-off series and a movie franchise. Its catchphrases still resonate in our most nerdy moments (“Dammit, Jim! I’m a doctor, not a …”), and some technology that first appeared on the original series (TOS) and Star Trek: The Next Generation (TNG) has actually become reality.
Thanks to Gene Roddenberry, the visionary science fiction writer who created the series and its spinoffs, we were treated to these glimpses of the future back in the ’60s, and they became so familiar we almost took for granted that they would one day be real. Here are seven Star Trek technologies that actually did go from fantasy to reality.
1. Automatic Doors
Even though they were actually operated manually behind the scenes, those ship doors that opened automatically with that pleasing sound at the approach of crew members were a small thing that was a big thing. These days, of course, we have doors that swing open when you get close to them and even freezer cases that light up automatically when you walk down a grocery store aisle.
2. Communicators
Although flip phones have come and largely gone already, they did look suspiciously like the communicator that Enterprise crew members whipped out of their waistbands to communicate with each other.
3. Microtape
Floppy disks are so yesterday now, but in the ’60s, Spock was ahead of his time as he carried information he could insert into a computer on little plastic cards called microtapes.
4. Big Screen Displays
Today, we take it for granted that 80″ TVs are widely available for every home theater, but the crew of the Enterprise enjoyed a huge display on the bridge where they could see who they were communicating with on another ship, or just the vast expanse of space before them.
5. Voice Control
Computer, who needs keyboards? Way before Alexa, there was the Enterprise computer, voiced by Gene Roddenberry’s wife Majel Barrett, who also played Nurse Christine Chapel in the original series. To get the computer to do something — even something that required complicated programming — all you had to do was ask: No need for keyboards or mice. Sound familiar?
6. Virtual Reality
The Holographic Environment Simulator, or holodeck, simulated any setting and situation the crew members could imagine, such as Data playing poker with Albert Einstein, Sir Isaac Newton and Stephen Hawking. We’re not quite there yet, but technology like Oculus virtual reality headsets is taking video games a tantalizing step closer. Holograms also reached another level of popularity and technical excellence when deceased rapper Tupac Shakur’s hologram performed live at the Coachella music festival in 2012 with Snoop Dogg, Dr. Dre and others.
7. 3D Printers
In TNG, these molecule synthesizers could produce everything from clothing to food. Today, 3D printers can print food and even human organs, although not quite with the same ease as on the show.
It’s exciting to imagine what the future holds and what the next visionary will show us. Until then, happy Star Trek Day! Live long and prosper.
Learn about how to create the perfect home theater with which to watch Star Trek:
The sound of chimes (sometimes known as “tubular bells”) resembles that of church bells, carillon or a bell tower. Sound is produced when the metal tubes in a set of chimes are struck along their top edge using a rawhide- or plastic-headed hammer called a chime mallet. An attached damper pedal allows an extended ringing of the bells.
Here’s an annotated illustration of a typical set of chimes, followed by a description of the main components, in alphabetical order:
Base. The bottom support for the instrument.
Caster. Casters allow the chimes to roll freely, making transport and setup easy. They are usually equipped with locks, which should be engaged whenever the chimes are in use.
Chime Cord. Each tube is hung using a separate cord, allowing it to resonate freely. Chime cords are made of string covered in plastic.
Damper Box. This stops the tubes from ringing. Additionally, it keeps the chime tubes from moving freely during transport.
Damper Box Wing Bolt. This connects the upper pedal rod to the lower pedal rod. Unlock and remove this wing bolt to remove the damper box during disassembly.
Damper Pedal. Depressing this disengages the mechanism in the damper box, allowing the tubes to ring freely. Letting up on the pedal re-engages the damper box, thereby stopping the tubes from ringing.
Damper Stopper. When pushed in, this allows the chime tubes to ring freely without the use of the damper pedal.
Hangar Assembly. This holds all the chime tubes in place with the use of the chime cords.
Lower / Upper Pedal Rods. The lower pedal rod attaches to the damper pedal. The upper pedal rod attaches to the underside of the damper box.
Natural / Accidental Tubes. The standard range of chimes is C4 – F5, including both natural and accidental notes; the longer the length of each metal tube, the lower its pitch. In addition, the tubes in a set of chimes can vary from 1 1/4″ to 1 1/2″ in diameter.
Side Columns. Two long posts on either side of the instrument that support the entire frame assembly.
Wing Bolts. Used to attach the side columns to the base.
Click here for more information about Yamaha chimes.
Equalization (“EQ” for short) is the process of altering the tonal balance of an audio signal to improve its sound or make it fit better with other signals. There are two main ways in which EQ is used. One is to reduce or remove unwanted information by cutting selected frequencies or frequency ranges. The other is by boosting to emphasize them more.
In this article, we’ll offer some practical advice for using EQ during recording and mixing. But first, let’s talk about the various different types of equalizers and filters you’re likely to encounter.
Equalizer Types
There are three basic types of equalizers:
A graphic equalizer provides a number of preset frequencies, each of which can be boosted or cut with a slider, making it easy to see the tonal change you’ve made (hence the term “graphic”).
Graphic EQs offer fixed frequency bands.
They’re easy to use but offer less control than a parametric equalizer, which lets you choose your frequencies, along with the width of the frequency range (called “Q”) and the amount of boost or attenuation. Having an adjustable Q is particularly helpful because it lets you control how wide the equalization will be on either side of the selected “center” frequency. If you need to be “surgical” with your application of EQ — in other words, if you want to affect only a narrow frequency area — set a high Q, which gives you a tighter bandwidth. If you want to process a broader range of frequencies, set a lower Q.
A parametric equalizer.
There are also semi-parametric equalizers that offer a choice of frequency and boost/cut amount, but no Q control — in other words, their bandwidths aren’t adjustable, making them less useful than fully parametric equalizers.
Filter Types
Filters are the components in equalizers that alter the frequency content of audio signals. Let’s look at some of the most common filter types.
Peak Filter. Also known as a bell filter, this has its center frequency in the middle, and falls off to either side.
A typical peak filter shape.
Notch Filter. These are designed for cutting or boosting extremely narrow frequency ranges, or even a single frequency. They’re rarely used in recording, although live sound engineers often use them to remove specific frequencies that are causing feedback. (For more information, see our “Tools of the Trade” blog articles on How to Fight Feedback.)
Shelving Filter. Sometimes known as a “shelf” filter, this is designed to boost or cut everything either above or below the center frequency. There are two types: high-shelf filters, which affect everything above the frequency you set; and low-shelf filters, which affect everything below it.
Low-shelf (left) and high-shelf (right) filters.
One application for a high-shelf filter would be to gently boost the high-frequency range to create a brighter, more sparkly sound — often referred to as “adding air.” Low-shelf filters are commonly used to reduce (or, in musical genres such as EDM, sometimes increase) the bass frequencies of a source such as kick drum or a low synth tone.
High-Pass and Low-Pass Filters: These filters attenuate only — they don’t boost. They are used to roll off frequencies below or above a user-selected cutoff frequency. The slope setting (also known as “Q” or “Q factor”) makes the roll-off steeper or more gradual.
High-pass (left) and low-pass (right) filters.
Somewhat counterintuitively, a high-pass filter is typically used to remove rumble (from mic stands or the floor) since it “passes” (lets through) audio above its frequency setting, while rolling off those frequencies below. Conversely, a low-pass filter is typically used to reduce high-frequency noise like tape hiss since it rolls off audio above the cutoff frequency setting and passes what’s below.
Another name for high-pass and low-pass filters are high-cut and low-cut filters. As if the nomenclature wasn’t confusing enough, low-cut is the equivalent of a high-pass filter, and high-cut is the same as a low-pass filter.
Keep It Gentle
It’s usually better to cut than to boost when applying EQ. That said, you will end up doing both during a typical mix. (You’d be tying your hands if you never boosted!) Just be aware that boosting adds level — you’re increasing the signal in a particular frequency area, so the overall signal will get louder. Too much of a boost can cause a track to clip and distort, so it’s best to keep it as gentle as possible. When it comes to cutting frequencies, there’s less of a downside, other than the possibility of making a track too dull (by attenuating too much top end), thin (by attenuating too much low end) or hollow (by attenuating too many mid frequencies).
Hearing is Believing
Many of today’s EQ plug-ins offer excellent visual feedback that shows you graphically what the frequency content of your track is. For example, Steinberg frequency (included with Steinberg Cubase) offers a real-time analyzer that shows you the levels of the various frequencies as the song plays. Such displays can be super helpful in deciding where to apply a boost or cut.
Steinberg frequency real-time analyzer.
That said, don’t merely go by visual indicators — make sure to listen as well! After all, EQ is an audio process, and so you should evaluate its effects audibly. For a final check, consider closing your eyes while listening, so you’re not distracted by the visuals.
Sweeping it Up
If you’re having trouble figuring out a problem frequency on a track (as would occur if you’re trying to reduce resonance or sibilance, for example), a useful way to find it is with a method referred to as “sweeping.” Use a bell filter with a high Q (narrow bandwidth) and temporarily push the gain up high.
Sweeping helps find a problem frequency.
Next, slowly move the frequency knob across the spectrum until you hear the problem become exaggerated. At that point, you’ve found the troublesome frequency and can change the boost to a cut to see if it fixes the problem.
Making it Clear
Many recording and mix engineers use high-pass (or “low-cut”) filters to remove unneeded frequency information from below the effective or desired range of both instrument and vocal tracks. If you don’t high-pass at least some of your tracks, you may get a build-up of low frequencies that will detract from the clarity of your mix.
High-passing unneeded frequencies on a guitar track.
Here’s an easy way to figure out what frequency setting to use when doing this. Slowly raise the high-pass filter’s frequency knob as you’re listening to the track in solo. When you hear the audio start to thin out, back it off to just before that point. Then take the track out of solo and double-check your setting with the full mix. You can experiment with various Slope or Q settings to see which sounds best; the gentler the slope, the more gradual the roll-off.
No Magic Bullet
EQ can solve a wide range of problems, but it’s no magic bullet. If one of your tracks was poorly recorded, and EQ is not helping, the best — and, believe it or not, often the fastest — remedy is to re-record it, if possible. When you do, try to eliminate whatever the problematic factor was, whether it was mic placement, an inferior instrument or a bad performance.
STORIA is a new series of stylish and great-sounding Yamaha acoustic-electric guitars designed for beginners. Their smaller body and shorter length, combined with a low string height and a narrow neck with rounded edges, make these instruments not only comfortable to hold but easy to pick up and play whenever inspiration strikes.
In addition to their appealing finishes, tasteful inlay work and champagne gold tuners, STORIA guitars feature superb workmanship, solid tops, brass bridge pins and Yamaha passive undersaddle pickups, which provide a warm and natural-sounding acoustic tone when the guitars are amplified. All three STORIA models have FS (Concert) body shapes with mahogany backs and sides, nato necks with walnut fingerboards, urea nuts and saddles, and 25″ scale lengths. Complementary inside colors and sound hole inlays complete the designs.
STORIA I, STORIA II and STORIA III.
STORIA I has a solid Sitka spruce top with an off-white semi-gloss finish and ivory body binding. The mahogany back and sides have a natural finish, the inside is light blue, and the rosette is inlaid with ivory and mahogany. STORIA I has a clear yet rich sound.
STORIA II has a solid mahogany top with a natural semi-gloss finish and a 3/16″ (5mm) beveled edge. The mahogany back and sides have a natural finish, the inside is ultramarine, and the rosette is inlaid with ivory and abalone. STORIA II has a warm, well-balanced sound.
STORIA III has a solid mahogany top with a chocolate-brown gloss finish and black body binding. The mahogany back and sides have a chocolate-brown finish, the inside is wine red, and the rosette has ivory, red wine, and black inlays. STORIA III also has a warm and well-balanced tonality.
Ready to give STORIA a listen? Check out the video:
Click here to learn more about Yamaha STORIA guitars.
With Labor Day just around the corner, here are some interesting factoids about ten of the most iconic songs about working … and enjoying the fruits of your labors.
The title of this classic 1964 Beatles hit (in which John Lennon sings plaintively about “working like a dog”) came from a Ringo Starr malapropism when the drummer was asked one morning if he’d slept well. Shaking his head no, Ringo explained that he’d had “a hard day’s night.”
Merle Haggard’s famed 1969 country song features a lyric that extolls the virtues of hard work and sacrifice despite the resulting fatigue and stress of raising a large family. As a bonus, there’s some fine picking from longtime Ricky Nelson / Elvis Presley guitarist James Burton.
Cleveland disk jockey Donna Halper played this Rush song on the air in early 1974, even though the group were unknown in the States at the time. The working-class listeners of the city loved it, which resulted in the group landing their first U.S. record deal. The band were so grateful, they dedicated their next two albums to Halper!
Written and performed by Dolly Parton for the 1980 film of the same name, this ode to America’s office workers garnered Parton an Academy Award® nomination and two Grammys. The percussion in the verses is the sound of a typewriter, though when Parton originally wrote the song, she devised the clacking rhythm by running her acrylic fingernails back and forth against one another.
This 1982 hit by Canadian rock band Loverboy was inspired when guitarist and co-writer Paul Dean took a walk on the beach one Wednesday afternoon. It soon dawned on him that much of the area was deserted. “I was wondering, where is everybody?” he later recalled. “I guess they’re all working … and waiting for the weekend.”
According to singer and composer Huey Lewis (of Huey Lewis and the News fame), this 1982 song was semi-autobiographical, describing past jobs he had before becoming a musician, including time spent as a truck driver, busboy and bartender. In 2007, Lewis re-recorded the song as a duet with country music superstar Garth Brooks.
Co-written by disco queen Donna Summer, this 1983 hit was inspired by an encounter that Summer had with an exhausted rest room attendant at the famed Los Angeles restaurant Chasen’s. The music video for the song became the first by a female artist to be placed in MTV’s “heavy rotation.”
This sardonic 1984 look at the American Dream had its genesis when singer/songwriter John Mellencamp was driving along an overpass on the way to his home to Bloomington, Indiana after flying into the Indianapolis airport. “There was an old man sitting outside his little pink shotgun house with his cat in his arms, completely unperturbed by the traffic speeding along the highway in his front yard,” Mellencamp recalled.
This 1987 hit by the group Bon Jovi tells the tale of Tommy and Gina, a young working couple just starting out, and the way they face life’s struggles. Versions of the song have appeared in the music video games Guitar Hero and Rock Band.
In this inspiring track from the 2009 Bruce Springsteen album of the same name, The Boss speaks to the benefits of hard work, carrying on despite adversity and never giving up. The song’s glossy production features partly submerged “la-la” backing vocals and an instrumental break that has Springsteen whistling against a baritone sax line.
Today, with so many people listening on earbuds, small Bluetooth speakers and computer speakers, it’s easy to forget how good music can sound on a first-rate stereo system. Imagine sitting in the sweet spot in your favorite armchair, with nothing between you and a pair of top-quality speakers playing music from a high-grade turntable through a clean, powerful amplifier. Now that’s the way to listen to your favorite artists!
But creating an ideal listening experience isn’t accidental — it takes planning. The good news is that putting together and setting up a system of this caliber is easier than you might think. Here’s what you need to know to dial in the perfect two-channel experience:
1. Amp It Up
Having a quality amplifier to drive any Hi-Fi system is critical. You want to get a unit that delivers clean wattage, provides plenty of headroom (that is, extra power in reserve) and accurately reproduces the signal coming from the turntable.
One good option would be the Yamaha A-S1200. It’s an integrated amplifier, which means it contains both an amp and a preamp in a single unit, allowing for a visually cleaner setup, with fewer wires and components.
The A-S1200 pumps 90 W per side (into 8 ohms) and delivers amplification that, in conjunction with quality speakers, allows you to hear the finest details in your music. In addition, this sleek unit sports classic vintage-style VU meters on the front panel for level checking (they look really cool too!) and plenty of inputs and outputs on the back.
Yamaha A-S1200 integrated amplifier.
2. Choose the Speakers That Sound Best to Your Ears
Picking the best speakers is largely subjective; what one person likes, another may dislike, so you’ll want to audition lots of different ones before settling on the pair that delivers the sound you want to hear. You do, however, want to look for speakers that reproduce the entire frequency spectrum from lowest lows to highest highs with clarity; you also want them to provide good stereo imaging. Yamaha Soavo NS-F901 speakers meet all those requirements, and more. They’re 3-way, front-ported, tower-style units that contain a pair of 6.5″ woofers for bass, a 5″ midrange driver and a 1″ dome tweeter, all designed to deliver natural sound.
Yamaha Soavo NS-F901 speakers.
In addition, the NS-F901 cabinets come with two sets of speaker input jacks on each, which gives you the option to make a bi-wired connection. Why bi-wire? It can increase your sound quality by reducing distortion caused by resistance in the cables.
You can bi-wire from an amp with only one pair of outputs, but the previously mentioned Yamaha A-S1200 offers a separate pair of speaker outputs that make the process simple and straightforward. Just connect both sets of right outputs — positive and negative — to the corresponding inputs on the right speaker, and both sets of left outputs to the jacks on the left speaker, as shown in the illustration below:
Bi-wiring NS-F901 speakers from an A-S1200 amp.
3. Get the Right Spin on Things
In a system that will primarily be used for listening to vinyl, the quality of the turntable is hugely important. If it can’t deliver the necessary sonics, the rest of the system won’t have quality audio to work with … and you know the old saying about garbage in, garbage out.
That’s why you might want to consider the Yamaha MusicCast VINYL 500 turntable that features a belt-drive motor to help limit vibration noise and a straight tonearm for a more open sound.
Yamaha MusicCast VINYL 500 turntable.
The MusicCast VINYL 500 also features a slew of networking features, so you can stream music from a mobile device into your main system. Plus, if you ever decide you want to put additional speakers in other rooms of your house or apartment, you can transmit the music coming from the turntable wirelessly with the use of Yamaha speakers such as the MusicCast 20 or MusicCast 50.
4. Use Appropriate Cabling
Cabling is a controversial issue in the audiophile world. You’ll find passionate arguments pro and con as to whether premium speaker cables really make a difference. Like speaker preference, this is somewhat subjective, but physics does tell us that the thicker the wire, the less electrical resistance. That equates to more of the signal getting through, and potentially better sound quality.
To be sure that your cables are not detracting from the sound quality, it makes sense to err on the thick side by choosing 10AWG or 12AWG cables (AWG stands for American Wire Gauge, a cable-thickness standard; the lower the number, the thicker). As for the interconnect cable between the turntable and amplifier, avoid the really cheap stuff and you should be fine.
5. Ready, Get Set Up
Once you have all the components in hand, it’s time to configure your system in the room. Start by placing your speakers, bearing in mind that their optimal location depends on the size and shape of the space. One proven method for calculating speaker placement is to use the so-called “rule of thirds.” Here’s how it works: In the direction that your listening position will face, visualize dividing the room into thirds. Put your listening position at the virtual one-third line from the wall behind you, centered in the room.
Then put the speakers at the virtual one-third line from the wall behind them. Once that’s done, you’ll be able to figure out the best distance between them by creating an equilateral triangle with the listening position. Angle (“toe-in”) the speakers in about 30 degrees, so they’re pointing directly behind your head when you’re in your listening position. (Check out this online speaker placement calculator for more setup options based on your room dimensions.)
A setup using the rule of thirds.
If circumstances don’t allow for using the rule of thirds, at least be sure that neither speaker is closer than about 6 inches from the wall or a corner — a foot or two away would be even better. Otherwise, you’re going to get a bass buildup that will muddy the sound. Also, be sure to keep speakers as far from corners as possible, because that can cause similar problems.
If your room is full of hard surfaces, you’ll hear too much reflected sound, which can cause phase distortion and mess up your imaging. Putting down a carpet or putting up curtains are two good ways to add absorption. Placing upholstered furniture like chairs or couches in the room can also help.
If you’re setting a room up to be a dedicated listening area, you’ll probably be able to move any furniture that’s in the way so you can configure the speakers and listening position as described above. But if you’re putting your system into an existing living room or den that has other purposes and furniture in place, you may have to compromise a little with your setup.
6. Do Any Necessary Tweaking
Once you have your speakers positioned, connect them to the amplifier. (This should always be done prior to powering up the amp!) When making speaker connections, be careful not to plug a negative cable to a positive terminal or vice versa. Also be sure that you’ve connected the left output from the amplifier (or outputs, if you’re bi-wiring) to the left speaker and right to the right.
Sit in your listening position and test the sound with an album you’re familiar with. If you’ve set things up correctly, it should sound like the music is coming from in-between the speakers, not directly from either speaker.
For additional assurance that your system is performing optimally, consider using a vinyl test record such as the Ortofon Test Record. Such products include many different audio tests, with a variety of test tones that play through your speakers to check system setup and performance.
Once you’ve got everything set up and sounding the way you want, you’re ready to spend some quality time with your LP collection. Sit back and enjoy!
Here are some related blog posts that provide additional information about Hi-Fi audio:
In Part 1 of this two-part article, we discussed the origins of slide guitar playing as well as the different types of slides, plus guitar setup tips and the tunings that work best. Now let’s move on to basic slide playing technique.
Choose a Finger
The first step is to decide which finger to wear the slide on. There’s no right or wrong answer, although the ring finger is probably the most popular. You can find examples of great players that use the ring finger (which was favored by Duane Allman, whom we mentioned in Part 1), as well as those who favor the middle finger and the pinkie. It may take some experimentation until you find what’s most comfortable for you.
The ring and middle fingers offer you more strength and allow you to use a larger, heavier slide. However, the pinkie has one huge, practical advantage: you can play chords with your remaining three fingers in-between your slide parts. Your ability to play chords is much more limited if you wear a slide on the middle or ring finger.
Basic Technique
One significant way that slide playing differs from conventional guitar playing is that you place the slide over the fret itself, rather than in the space between frets. With slide playing, intonation (that is, the ability to play exactly in tune) is crucial. One of the earliest things you should practice is proper slide placement, so that notes aren’t a little flat or a little sharp. You also want to approach as many notes as you can from either below or above, so that you’re sliding into the note (typically from either a half or whole step away) instead of just hitting it dead on.
Place the slide directly over the target fret.
Another part of slide technique that will help you with both intonation and expressiveness is vibrato. When you sustain a note, you should create a vibrato by quickly moving the slide side-to-side over the fret. In the audio example below, you’ll hear the same phrase twice. The first time, there’s no vibrato on the sustaining last note; the second time, there is. As you can hear, the difference is substantial!
Most electric slide playing is done through amps, with the gain turned high and/or with the use of an overdrive or distortion pedal. You’ll find you’ll get a lot more sustain that way. However, for learning, you should also practice with clean sounds, as they’ll help you hear what you’re doing more clearly. The rule of thumb is simple: if you can make it sound good clean, it’ll sound even better dirty.
Taming Stray Notes
Another fundamental technique of slide playing is dampening (i.e., muting) the strings that aren’t being played. If you don’t dampen effectively, you’ll not only hear notes you don’t want, but there will be lots of noise from the slide running over the strings and frets.
Here’s an easy way to practice dampening. First, place your slide over the third and fourth strings at the 7th fret. Play those two strings and slide up to the 12th fret. Now take the fingers on your left hand that are behind the slide and lay them down lightly on the strings, then try playing it again. The notes should sound clearer because the non-used strings are being muted by your fingers behind the slide. (If you’re wearing the slide on your pinkie, use your first and middle fingers for dampening.)
In this next audio example, you’ll hear the same riff played twice: the first time without any dampening and the second time with dampening. Note the difference in clarity:
Most slide players pluck the strings with their fingers, rather than using a flat pick. This allows you to get a lot more control over which notes you play, plus you can take advantage of thumb-and-finger combinations that are impossible with a flat pick. What’s more, you can use some of your right-hand fingers, along with the back of the palm of your hand, to do additional dampening of the strings, as shown in the photo below. This will make your tone even cleaner.
Most slide players use their fingers, not flat picks.
Bear in mind that we’ve only covered the basics here. There are plenty of online videos that can take you a lot further, so check them out to learn more. Good luck and happy sliding!
Welcome to Part 2 of this two-part article about the Super Articulation voices contained in select Yamaha keyboard instruments, including Genos, Clavinova CSP, CVP-700 series, CVP-800 series, and the PSR-S775, PSR-SX700, PSR-S975, PSR-SX900 and PSR-A3000. “SA voices,” as they are known, allow you to access different sonic effects depending upon how you play the keyboard or use the pedals.
In Part 1, we focused on the various articulations that can be applied to a saxophone voice. Now let’s shift our focus to the articulations that can be applied to guitar and clarinet voices.
Hammer-On
As mentioned in theprevious article, there are thumbnails to the left of some voices in the voice selection screens of most Yamaha instruments. If you see an “S.Art” or an “S. Art2,” that’s an indication that it’s a Super Articulation (or Super Articulation 2) voice:
Let’s begin our exploration by calling up the Super Articulation (S.Art) Concert Guitar voice:
As we discussed in Part 1, many Super Articulation voices allow you to create a realistic legato when going from one note to another. (Legato is an effect whereby a wind player does not “re-tongue” their instrument when playing a new note, thereby slurring from one note to the next.) In the case of a stringed instrument like a guitar, the equivalent of not “re-tonguing” is called a “hammer-on,” whereby you go from a lower note to a higher note on the same string without re-picking it: the fretting hand simply pushes the string down on the neck of the guitar.
The Concert Guitar voice replicates that effect in a similar way, so, for example, if you play a C note and then the adjacent D in a legato way (with a low velocity), you will hear a realistically played “hammer-on,” with no second string attack, just a higher pitch:Now try playing those same two notes again but instead play them staccato (i.e., lift your hand off the keyboard between notes). This time, you’ll clearly hear the sound of a string being re-plucked. As with all Super Articulation voices, these are actually two completely different recordings of a guitar being played two different ways!
Pitch Slide (with velocity)
If you repeat the same exercise, but play the second note with a very high velocity (while still holding down the first note) you’ll hear a pronounced slide effect instead.
Pitch Slide (with left pedal)
Alternatively, if you press and hold that C note again, then press down on the left pedal on a Clavinova CVP/CSP, the pitch will slide from a C to a D as if a guitarist bent the string to make the pitch go up:
Body Taps (with center pedal)
As we saw in Part 1, pressing down on the center pedal of a Clavinova CVP/CSP while playing a Super Articulation woodwind voice can produce breath noises or key noises. Doing the same while playing a Super Articulation guitar voice can produce body-tapping sounds:
You can effectively intersperse these into the notes as you play, as though the musician’s hand is alternately tapping the body and playing strings.
Fret Noise
Fret noise is caused by a finger moving on a string while positioning the hand for the next note. Fret noise effects can be easily added to many Super Articulation guitar voices, depending upon how you play or use the pedals.
The easiest way to generate a fret noise on demand is to use the left-hand (sustain) pedal as follows:
1. Play a note softly on the keyboard, then press down on the sustain pedal to hold it. When you release the pedal, you will hear a hand mute the string.
2. Now play several notes at the same time with a much harder velocity, and hold them with the sustain pedal once again. This time, when you release the sustain pedal, you will often hear fret noises of varying volumes.
Harmonics
A harmonic on a guitar is a bell-like tone that’s produced by lightly touching a string in a specific place with your fretting finger as you pluck it with your other hand.
To hear this recreated in a Super Articulation voice, start by calling up the Folk Guitar Harmonics voice:
This voice allows you to instantly access harmonics from the keyboard by simply pressing down on the center pedal (Clavinova CVP/CSP). Begin by pressing down on the sustain (left) pedal and play a few notes. Then stop playing, and as those notes continue to ring, press down on the center pedal as well. Now play a few additional notes to add some harmonics to the notes already being held. Guitar players will freak out when they hear this!
Glissando
On a synthesizer, a feature called “portamento” makes it possible to slide between notes without actually hearing the intermediate notes clearly — something that’s also very easy to do on stringed instruments or on a trombone.
However, a clarinet (like a saxophone) has keys that define notes, so a glissando on these instruments cannot be a smooth slide but must instead be a series of quick notes played in succession. Many Super Articulation 2 (SA2) clarinet voices contain an authentic glissando played by a talented musician. To hear how this works, start by calling up the Romance Clarinet voice:
Glissandos with this voice are available if you play any 7th, M7 or octave while holding down the root note:
For example, if you hold a low C note and play any of these intervals above that key, you will hear a beautiful glissando between the bottom note and the top note. This is one of my favorite things to do with any SA2 voice because it always surprises people when they suddenly hear this in the middle of a piece!
Note that you can also activate the glissando on this clarinet voice by pressing down on the center pedal either before you play a note (in which case you’ll hear a glissando up) or after you play a note and release it (in which case you’ll hear a glissando down).
On other SA2 voices, pressing a pedal while you play or release a note enables you to add other articulation effects such as bend up/down, brass falls, etc.
Keeping Track of Articulations
This brings up an important feature. To keep track of all the hidden special articulations (and pedal assignments too), it is useful to refer to the Information (i) screen for each voice. You can call up the Information window of the selected voice by touching the S.Art or S.Art2 icon that appears to the upper right of the Voice name on the Home display:
Alternatively, you can select the Information (i) button below the voice selection screen:
That about wraps it up for our introduction to the power of Super Articulation, but there’s a lot more to explore, so roll your sleeves up and dig in — you may well discover some new things about familiar voices!
As the sounds and fun of summer fade into memories, we parents start focusing on getting our kids ready for school. New clothes, school supplies and thoughts of activities to sign them up for are all part of the mix. As you make these preparations, don’t forget to think about getting your children involved, or re-committed, to studying music and playing an instrument.
The question is: Which instrument? A keyboard — especially a digital one — is an excellent choice, for several reasons:
1. It’s easy to get a good sound right away.
2. Being able to play keyboard can easily lead to getting involved in extracurricular activities at school, church and other social gatherings.
3. It delivers the sound of an expensive acoustic piano at a fraction of the cost.
4. It never needs tuning.
5. In addition to acoustic piano, it offers additional sounds (such as electric piano, pipe organ, harpsichord — even the sound of a full string orchestra) to keep your child’s interest.
6. It provides speakers but also provides a headphone connection so your child can play without disturbing others — something that also enables them to not feel self-conscious when first working on their lessons.
Let’s take a look at three Yamaha digital keyboards you might consider for your child as they get ready for the school year.
A Very Good Place to Start
The Yamaha P-45.
You might want to begin by taking a close look at the Yamaha P-45 digital piano. Though entry-level (and priced that way too), this instrument offers 88 weighted action keys that provide the touch and response of a real piano — a crucial feature for developing technique. The keys on the P-45 even go from heavier on the lower notes to lighter as you play higher, just like those on an acoustic piano. It also sounds very much like a piano costing tens of thousands of dollars, with a built-in reverb effect that simulates four different ambient spaces, from a small room up to a large concert hall.
The P-45 has ten sounds in all, any two of which can be layered together at a time; there’s also a useful learning feature called Duo Mode, which splits the keyboard into two equal zones of acoustic piano, so a teacher and student can sit side-by-side and share instruction and performance as if they were sitting at two adjacent pianos.
The P-45 can also be connected to a computer so your child can benefit from the many educational and edutainment music software products out there. This connection also allows students to record their performances and then listen back to further hone their skills. There are a number of included accessories, too, such as a sustain switch that acts like the damper (right-hand) pedal of a piano, and a music stand to hold your child’s songbooks and lesson materials. Last but not least, the P-45 weighs in at only 25 pounds, making it portable and easily transportable.
Moving on Up
The Yamaha YDP-144.
If you’re looking for a more sophisticated digital keyboard for your child, you might consider the intermediate-level Yamaha Arius YDP-144 — an instrument that looks a bit more like a piano but is much more affordable than a real acoustic piano.
The YPD-144 comes with a built-in stand, accompanying bench, and an integrated music rest. It offers the same keyboard action as the P-45, but has an improved sound: that of the top-of-the-line Yamaha CFX 9-foot concert grand piano. It also has three times the polyphony of the P-45 (that is, the number of notes that can sound at one time), so it provides a much more realistic playing experience.
Speaking of realism, the YPD-144 has all three traditional pedals that are found on a real piano, with a unique feature called Damper Resonance. This recreates the sound of all the strings vibrating slightly when the damper pedal is pressed down, making the sound fuller and more alive. The onboard speakers are also larger than the ones in the P-45, with more power as well.
Your child can record their playing directly on the YPD-144 without the need for an external computer, and 50 classical songs are built-in for study and enjoyment, along with an accompanying book of the scores. The YPD-144 also works with an amazing app called Smart Pianist, available for Android™ and iOS, which can listen to the songs stored on a smart device and analyze and teach your child the chords to allow them to play along. (Click here for more information about how this works.)
When Only the Best Will Do
The Yamaha CLP-785.
When you look at your child, do you see a budding concert pianist? You can encourage their development by investing in a Yamaha Clavinova model such as the flagship CLP-785. This no-compromise instrument showcases all of the company’s digital expertise and tradition in acoustic pianos, in a stunning upright piano design brimming with features and quality.
For one thing, the CLP-785 boasts a Grand Touch keyboard action that closely reproduces the mechanism of an acoustic piano for incredibly realistic dynamic and expressive performance, with synthetic ebony and ivory key surfaces that feel like the real thing. (There are even wooden white keys!) The sound of the previously mentioned CFX concert grand piano is here, along with a digital sample of a Bösendorfer Imperial concert grand, one of the most coveted pianos in the world. But the CLP-785 isn’t just about piano — there are a total of 53 instrument sounds onboard, along with 14 drum kits for play-along rhythm, as well as a full 480-voice sound set that allows your child to play back music files purchased or downloaded from the internet. There are also numerous effects such as reverb and chorus — some of them binaural for enhanced headphone listening — as well as 3-way speakers and a whopping 300 watts of power for a truly inspiring sound.
Like the YDP-144, there’s compatibility with the Smart Pianist app as well as onboard recording, but here there are 16 tracks available so your child can create full-fledged masterpieces without the need for an external computer or software. In addition to the supplied 50 piano songs, the CLP-785 has a whopping 303 lesson songs to aid in your child’s study and practice. They can even play along to songs stored in their smartphone or tablet via Bluetooth®.
Whichever of these three instruments you choose, you will be helping your child in their studies in school while at the same time preparing them for a lifetime of musical appreciation and music-making.
Click here for more information about the Yamaha P-45.
Click here for more information about the Yamaha Arius YDP-144.
Click here for more information about the CLP-785 Clavinova.
We all know that music can impact our moods. There are songs that relax you and those that push you to work hard; songs that make you reflective and somber, and those that uplift and inspire. Beyond just making us feel, psychologists have found that music and music therapy can contribute to good health in a number of different ways, from lessening anxiety to improving self-expression.
1. It reduces anxiety and physical effects of stress
2. It improves healing
3. It can help manage Parkinson’s and Alzheimer’s disease
4. It reduces depression and other symptoms in the elderly
5. It helps to reduce symptoms of psychological disorders such as schizophrenia
6. It improves self-expression and communication
My brother Michael has a lot of experience in this field — he’s a licensed social worker who serves as chief executive officer of West Bergen Mental Healthcare in Ridgewood, N.J. “Therapists use music to help patients manage their thoughts and feelings,” he explains. “Exploring what music helps them feel more relaxed or more positive can be a very strong therapeutic tool to uplift the patient’s spirits.”
One of the best ways to evoke good feelings in our daily lives is by streaming a great playlist. There are countless playlists available in every musical style on all of the streaming services. Spotify, for example, offers Discovery Weekly, which creates playlists based on your personal listening habits. I turn to those sometimes when I just want to try something different or listen to music I might not think to play on my own. There are also curated playlists available, categorized by Genres & Moods in Spotify’s Browse section. Perhaps best of all, playlists can be shared with friends and family, so you can spread the good vibes.
I often use playlists, depending on not only what I’m feeling at the time, but how I want to feel as the day and evening progress. For example, when I first wake up in the morning, I tend to listen to Chillout playlists on Spotify. My favorite is called Morning Dose of Chillout. It’s just over an hour of nice, easy tracks that help me set the pace for my morning routine … and it goes great with coffee!
I have also assembled a number of playlists for specific purposes. I’m a lifelong guitar player, but there are still times when I need some extra motivation. When that happens, I call up a custom Pandora playlist I’ve created that contains selected tracks from all my personal rock guitar heroes. It immediately makes me feel good, not only because I like the songs and players, but because it inspires me to keep playing and become better. I have raucous playlists for working out and quiet playlists for when I do yoga (one of my favorites is a Spotify playlist called Spa, Calm Meditation; Refresh, Rest and Relaxation — 60 songs that really put me in the right frame of mind). I also have playlists for vacations (predominantly reggae) and playlists for dinnertime (mostly jazz, which I find helps aid the digestion).
Perhaps the most eclectic collection I’ve found on Spotify is called the Superior Study Playlist. This 925-song (really!) assortment is described as “Vibe: Focus music with minimal lyrics.” It includes a wide variety of genres, including classical, soundtracks, instrumental versions of popular songs, lo-fi, post-rock and much more. While I have not come even close to listening to it all just yet, I’ve found it to be a useful blend of tracks that let me work and concentrate while still listening in the background.
So whether you want to feel inspired to climb a mountain or just climb onto the couch, crank up your smartphone, car stereo or home audio system and check out some playlists on your favorite music streaming service. Create some of your own or listen to curated ones. Delve in, discover new music and don’t forget to share!
Check out some of our related blog posts to help you best enjoy streaming music:
What’s the ideal drumstick? It’s the perfect combination of balance, response and feel … for you. What may be a good choice for one drummer may be completely unsuitable for another, so don’t just rely on a friend’s or teacher’s advice. Your optimum drumstick will depend on many factors, including the style of music and the type of drums or drum kit you play.
Everything that goes into a drumstick’s design — the material it’s made of, along with its weight, diameter, length, tip and taper — determines the way it feels in your hand. In this article, we’ll discuss these factors and give you some helpful tips for selecting the sticks that can best help you achieve your drumming goals.
Drumstick Materials
Drumsticks are, of course, most commonly made of wood, although you can also find ones constructed of carbon fiber, plastic or aluminum. Beyond the fact that they offer more rebound, the main advantage of those alternate materials is durability: those sticks last a lot longer than wooden ones. However, most purists insist that wood is the only way to go.
Weight, density, texture, resonance and flexibility all vary from one type of wood to another. The most popular woods used in drumsticks today are maple, hickory and oak, although birch, ash, rosewood, lancewood and ebony are also sometimes employed.
Maple is ten percent lighter in weight than hickory, which allows drummers to use larger diameter sticks without them being too heavy, making them a good choice for small playing environments or subtle musical genres like jazz or soft rock. Because of their fine grain pattern, maple sticks have the greatest amount of flex; however, they also wear out faster than other types of wood.
Hickory sticks are resilient, responsive and sturdy, and can absorb the shock of a hard-hitting drummer; they also tend to be the most comfortable, making them a great choice for most drummers.
Oak is the densest and heaviest wood option, so oak sticks can withstand more intense playing styles and will last the longest. Drummers using oak sticks can play louder with less effort. On the downside, oak does not absorb shock quite as well as hickory or maple.
Weight, Diameter and Length
The weight and diameter of a drumstick is indicated by its number and letter — numbers range from 1 to 9, and letters from A to CC. The higher the number, the lighter the stick, so, for example, a 7A is lighter than a 5B. The letter indicates the stick’s diameter, so a 5B stick is thicker (that is, larger in diameter) than a 5A stick. This means, of course, that a 5B stick of the same length as a 5A stick will be heavier, too, but only slightly. The most common sticks in use today are 2B (a thick, heavy stick), 5A and 5B (intermediate diameter/weight), and 7A (thin and light).
Drumstick lengths generally run from approximately 15 to 17 1/2 inches and are categorized as small, medium, large, extra large and double extra large; the latter is used mostly in marching bands, where the sound really needs to project. The length of the stick you’ll be most comfortable with largely depends on the size of your hands, and, if you’re playing a drum set (as opposed to an individual marching or concert drum), how far away the different components are from where you’re sitting.
What makes things slightly complicated is that these three factors are largely interdependent, so it’s all a tradeoff. Played with the same degree of force, a stick with a thicker diameter creates a louder sound than one with a thinner diameter. However, a stick with a thinner diameter is both lighter and faster, and so it allows you to play with greater ease, though at the expense of volume. (Note that a thinner stick will also produce a more intense sound from the drum at lower volume levels, whereas a thicker stick requires more velocity to achieve that same sound intensity.) The length of the stick affects its leverage and reach around the drum set. Shorter and lighter sticks produce a more delicate sound and require greater effort to play louder. Longer and heavier sticks allow louder play with less effort.
Tip
The tip at the end of the stick is the part that comes into direct contact with drums and cymbals and so it has a major impact on the tone.
There are several different shapes of drumstick tips, including round, diamond, teardrop, acorn, arrow and barrel. Round tips strike the drum or cymbal with the same surface area regardless of the angle of the stick, so the sound is consistent. Because beginners do not usually have a steady stroke, a round tip helps to smooth out their sound. Because barrel tips tend to be the largest and heaviest tip types, they generally produce the loudest sound and so are suitable for rock music or whenever you need to be heard over amplified instruments. With other types of tips, drummers can create different nuances by altering the angle of the stick and thus the surface area of the tip that contacts the drum head or cymbal. Musical genres that demand a more delicate and varied expression are therefore best played with diamond, teardrop, acorn or arrow-tip drumsticks.
In addition to the shape, the material a tip is made of also affects the tone. Often the tip is the same wood as the rest of the drumstick, but there are also sticks with tips made of plastic or nylon. Plastic is harder than wood, so the attack is more delineated; as a result, using sticks with those kinds of tips results in a harder, cleaner tone. Nylon tips are much more durable than either wood or plastic, but when used on cymbals can produce an unpleasant over-bright sound.
Taper
A drumstick’s taper refers to the length of the distance between its full diameter and the point where it meets the tip. Taper is a big factor in a stick’s balance and also in how quickly it rebounds (sticks with no taper have almost no rebound). A stick with a long taper has more “give” and offers a faster response, while a stick with a short taper will be stiffer and therefore provides additional strength. If you’re a heavy hitter or mainly play rock/metal, short taper sticks will probably work best for you. If you play jazz or other genres that require more dynamics, go for long taper sticks. If you’re looking for a versatile stick that can play any genre, medium taper sticks are the best choice.
Auditioning Drumsticks
As we stated at the beginning of this article, when it comes to drumsticks, one size does not fit all. A 7A is a good choice for someone with small hands, like a young student, while a 5A or 5B will work best for average-size teenage or adult hands.
A good way to audition drumsticks is to gather a number of them of different sizes. Then take the thinnest, lightest stick and wave it around, followed by the thickest, heaviest one. From there, try gradually thinner sticks and select the thickest one that you find easiest to wave. Use those sticks to play a couple of hits on a drum or practice pad. If your stroke seems a bit off-kilter, try a slightly thicker or thinner model until you settle on the sticks that give you the most control. Control is everything — especially for beginning drummers — and finding the correct drumstick is a crucial element in developing proper technique.
Finally, before you buy a pair of wooden drumsticks, roll them on a flat surface to make sure they are straight and not warped (the tips should not be bobbing up and down). Try to find a pair that rolls evenly, with the tip remaining centered as it rolls. In addition, take a moment to gauge the relative weight of each stick in your hands — each should ideally weigh the same.
Next month we’ll talk about how to choose the best drum brushes and multi-rod sticks. Until then, happy drumming!
Playing with a slide opens up expressive and unique sonic territory for guitarists. But even if you’re an experienced player, it isn’t something you can just pick up and start doing well. It requires adjustments in technique — and sometimes even to your guitar — not to mention plenty of practice.
In this article, we’ll look at the origins of slide guitar and cover slide types, guitar setup and suggested tunings. In Part 2, we’ll discuss basic playing techniques. Ready to begin? Let’s dive in …
In the Beginning
Slide guitar has its origins in the blues of the Mississippi Delta, where slides were often used on metal-body resonator guitars. After the solid-body electric guitar arrived in the late 1940s, its additional sustain gave slide a whole new sound. Among the best known early electric slide players were Elmore James and Muddy Waters, both huge influences on Rolling Stones guitarist and co-founder Brian Jones, who helped spearhead the popularity of blues music in the 1960s.
Towards the end of his Beatles career and on his solo records, George Harrison frequently played slide guitar (most famously on the intro to his hit single “My Sweet Lord”), but it was Duane Allman of the Allman Brothers Band who truly revolutionized the technique, with a swooping, melodic style that helped bring the sound of slide guitar to a much wider audience, in turn influencing a whole new generation of musicians.
Slide Types
Slides come in a variety of materials, sizes and weights. Most are either metal (steel or brass), glass or ceramic. All have different tonal qualities. As a rule, metal slides tend to be heavier, which provides more sustain, and they have a more robust and brash tone. Glass slides are lighter and smoother sounding. Ceramic slides tend to split the difference in both weight and tone.
Some different slide types and sizes.
Of the three, metal slides are the least expensive and also the most durable (glass and ceramic slides can break when you drop them), so it probably makes sense to start with one of those. As you begin getting comfortable with slide playing, experiment with other types of slides to see which you like best.
Setting Up Your Guitar
To play slide effectively, you can’t have super-low action (string height) on your guitar. The slide will bump against the frets, and the notes won’t sustain fully. You may have to raise your guitar’s action a bit to get the best results. (If you’re not comfortable doing this yourself, hire a skilled luthier.) Adjust it so that it’s high enough for slide, but not so high that it hinders your standard playing. Using a lighter slide will mitigate the need for higher action to some degree, but probably won’t completely alleviate it.
Choosing a Tuning
Open tunings, such as open E (E-B-E-G#-B-E), open A (E-A-E-A-C#-E) and open G (D-G-D-G-B-D) are favored by many slide players, as are variations with the same string-to-string intervals, but tuned to a different root note.
Most slide open tunings are tuned to a major chord. So, as long as you put the slide on the fret corresponding to the chord being played at a given moment, you’ll have a chordal note readily available on every string, and other complementary tones, such as flatted 7ths, available nearby. This also allows you to play single-note lines, double stops and chords with your slide.
Slide playing in open tuning is more positional than standard lead guitar, and is not as focused on scales and arpeggios. To play against a minor chord, you have to avoid the major third or move the slide down a fret if you’re playing single-note lines.
Unlike open tunings, standard tuning only offers clusters of two or three major chord tones on a fret. This makes it more challenging in many ways than playing in open tuning. However, if you’ve already played guitar for a while, you should be familiar with notes and positions on the fretboard, which is an advantage.
Available note clusters for an E chord in standard tuning.
If you’re looking to play both rhythm and slide, standard tuning is worth considering, as is using a pinkie slide. I like to play in a modified standard tuning where I drop the high E string down to a D. This gives the first four strings the equivalent relationship of the first four in open A or open G tuning, and still leaves me with strings 2 through 6 (which I leave in standard tuning) for playing chords.
Go to Part 2, where we talk about slide playing technique.
We’re in those dog days of August when the thermometer starts approaching triple digits, the sweat runs off your brow and you stick to your chair every time you get up. Fortunately, there are several ways to combat the heat. Ceiling or desk fans are always helpful, and if you’ve got an air-conditioned office or house, that can serve as a refrigerated sanctuary. You can always take a dip in the pool … if you’re lucky enough to own one (or have an accommodating neighbor). Heading to the beach is a good option, too … if you happen to live near one, that is.
If none of those options are viable, you may think that you have no choice but to start melting into a puddle, but you’d be wrong. The solution is simple: Put on some cool music. You’ll be amazed how it can help turn a scorcher into a total chill-out zone.
The Beach Boys were one of the first major artists to capitalize on the surf craze of the ’60s, and many of their early songs evoke the salty breeze of the ocean as they stream out over your playback system. But if you’re really suffering from the heat, you may want to check out the little-known “Cool, Cool Water” from the group’s 1970 Sunflower album. It’s mostly a wordless tone poem, but it features the immortal lyric “In an ocean or in a glass / Cool water is such a gas.”
Other great cooling (and cool) songs I like to listen to on a hot day include “Summertime” by DJ Jazzy Jeff and The Fresh Prince, “Jamming” by Bob Marley and “Summer Breeze” by the Isley Brothers. It’s not just the lyrics and music to these songs that I love, but how they work together to make you feel good and want to get up and get your groove on.
And then there’s the classic “Saturday in the Park” by Chicago. The instant I hear the rollicking piano intro, I can feel my spirit lifting. “People dancing, people laughing / A man selling ice cream.” This lyric is not just a description of a scene, it is a scene. It makes me want to be in that park, and no matter where I am or what I’m going through, a smile comes to my face and the temperature seems to drop. If that isn’t the power of music, I don’t know what is!
Sometimes in the midst of summer I will put on “Christmastime Is Here” by the Vince Guaraldi Trio, which is one of the most popular holiday recordings of all time. Crazy? I don’t think so. In fact, this is one piece of music that instantly cools me down. There has been more than one occasion when I’ll have it pumping out of my car stereo on a hot day and roll down my window. Inevitably, passersby give me a smile and a thumbs up.
The reverse applies as well. Next time you venture out on a frigid morning with numb hands and your frosty breath hanging in mid-air, think of Sly and the Family Stone’s “Hot Fun In The Summertime.” I guarantee you’ll suddenly feel a bit warmer! Or put on Martha and the Vandella’s “Heatwave,” or “Summer In The City” by the Lovin’ Spoonful, with its intense lyric “Hot town, summer in the city / Back of my neck getting dirty and gritty.” How can you not feel a bit of a relief after hearing that, even if there’s 10 inches of snow outside your window?
This is a phenomenon that’s actually well-documented. “The mind and body are connected,” notes author Julia Lehrman in a PsychCentral.com article entitled How Music Can Boost Your Mood. “Music often makes us want to move, inspiring us to dance or exercise. This helps release endorphins and serotonin in the brain, so we feel better and adopt a naturally more positive outlook. Combining music with movement is a potent way to improve your mood with the potential for long lasting effects.”
So while the heat is here, think about the songs you like that bring that cool, joyous feeling to you, and play them! And when winter returns, get some songs ready to bring your mind, body and spirit back to the warmth of the sun. Take advantage of the fact that music has the power to change how we feel, think and act and you’ll stay temperate no matter how frightful the weather outside.
Did you ever have the experience of connecting a bass or keyboard to a mixer and feeling like something just doesn’t sound right? There’s a reason for that. Your instrument — whether it’s an electric bass, electric guitar or keyboard — isn’t happy being plugged into certain types of inputs, even if they use the same connector. The good news is that you won’t need to send your instrument to a shrink! You just need to connect it to the proper input.
As we discussed in a previous Tools of the Trade blog post about connections, the 1/4-inch TS connector found on many mixers (and most electric instruments) can be used for multiple purposes. For example, Yamaha MG Series mixers have 1/4-inch inputs designed to accept line-level signals from devices such as keyboards, electronic drums, music players, DVD or CD players, as well as external effect processors. So, yes, an electric bass or guitar can be connected to a 1/4-inch line input, but that doesn’t mean it’s the optimum connection.
What’s the Difference?
There are three main differences between an instrument signal and a line signal:
1. An instrument signal is much weaker than a line signal, so an instrument requires more gain to achieve the same level.
2. An instrument signal is unbalanced. You can read more about the technical differences between balanced and unbalanced signals in the Tools of the Trade blog posting about connections we mentioned earlier, but one of the important points is that, to avoid noise and interference, unbalanced cables should not be run for lengths of more than about 15 or 20 feet.
3. Almost all electric guitars and basses are high-impedance devices, but line inputs are low-impedance. Impedance refers to how easy or difficult it is for electricity to flow from one device to another at different frequencies, and it’s something that has a huge impact on the sound of an instrument. For example, the pickups of an electric bass are designed to be connected to the input of a bass amplifier, which is also a high-impedance device. When you connect an electric bass to a line input, the pickups do not produce the sound they were intended to. You may experience noise and a loss of low frequencies.
All of those differences add up to this one simple fact: When you connect an instrument to a line input, it won’t sound the way it’s supposed to.
A direct box or “DI” (short for Direct Inject) solves all of these problems. Using a 1/4-inch instrument cable, you connect the instrument to the input of the direct box. Then, using an XLR cable, you connect the output of the DI to a microphone input on your mixer. The mic preamp inside the mixing console can then be used to adjust the signal to a suitable level. (Note: The XLR inputs on most modern Yamaha mixers, including the MG Series, can accept a very wide range of signal levels and for that reason are labeled MIC/LINE inputs.)
A direct box also converts the unbalanced instrument signal to a balanced signal, so you can run it from the stage all the way to the mixer at front of house without any signal degradation.
Finally — and perhaps most important — the DI provides an input with the proper impedance. The instrument acts like it’s connected to an amp and sounds the way it was intended. By the way, pretty much all DIs provide a “parallel” (sometimes called a “through”) output jack so you can simultaneously connect the instrument to an amplifier, allowing you to hear the instrument onstage while also sending it to the mixing board. The illustration below shows how this works:
A DI allows an instrument to be connected to both a mixer and an amp.
How Does it Sound?
The sound of an electric bass or keyboard through a DI is desirable because it is clean and typically has a very clear, solid low end. Sending this signal directly to the PA system also means that there’s no need to place a microphone on the instrument amp, and that avoids the issue of other sounds (such as drums) leaking into the mic. (Most electric guitar players prefer to use an amplifier to get their sound, so it’s rare to use a DI on those instruments.)
The output signal from some electronic drums, keyboards, and basses (particularly those with active pickups) can sometimes overload the input of a DI, so most direct boxes provide a pad switch that reduces the input sensitivity to prevent distortion. A pad may also enable the DI to accept the speaker output of an amplifier:
Some DIs can accept an instrument input or an amp speaker output.
Hold Your Ground
In our Tools of the Trade posting Cleanliness is King, we talked about the fact that noise can be generated when an audio device is grounded in more than one place. Using a direct box to connect an electric instrument to the PA system and a stage amp at the same time could cause a ground loop, as shown in the illustration below:
Connecting a bass to an amplifier and mixer can cause a ground loop.
That’s why most direct boxes have a ground lift switch that breaks the ground loop by disconnecting the ground on the XLR output, eliminating the hum that can result from a ground loop:
The ground lift switch on a DI can safely break a ground loop.
If you’re not sure whether or not to use the ground lift, try both switch positions and use the one that produces the least amount of noise.
Built-In DIs
You may have noticed that some mixing consoles, such as the Yamaha EMX7 and EMX5 powered mixers, have a special input with a switch labeled “Hi-Z” — an abbreviation for high impedance. When the Hi-Z switch is pressed, the line input is changed into a high-impedance instrument input, allowing you to connect an instrument directly to the mixer without the sound being altered.
Hi-Z switch.
Using a DI will require a few more cables than simply plugging your instrument straight into a mixer, but the benefits are well worth it: You’ll get a better sound and have the ability to easily solve any grounding issues.
Every string player knows the importance of bowing, and having the right bow, in order to produce the best sound possible from their instrument. Here are six questions and answers about bows that may help you better understand the role they play:
1. What’s the difference between wood bows and synthetic bows?
Wood has always been the main material in bow making. Exotic woods from South America have been the top choice because of their density and straightness. Pernambuco and Brazilwood are the most common.
The 20th century brought about synthetic materials like fiberglass and carbon fiber. These materials allowed bow makers to experiment with a modern material that was more resistant to warping and wearing. Try both and decide which you like best!
Yamaha carbon bows.
2. What is camber?
Camber is the bend that the bowmaker puts into a straight bow stick during crafting. It must be done very carefully, using heat to bend the wood into the correct shape. Camber allows the bow hair to be tightened up and provides springing tension that players use for slow (legato) and fast (spiccato) passages.
3. Does the rosin I use make a difference?
Made from the sap of pine trees, different rosins are made for different instruments. Typically, a dark rosin will be softer and stickier and therefore better for use on larger instruments like cello and bass. Lighter rosins allow the bow to move quickly over the strings, making them more suitable for violin and viola. It’s impossible to say that one rosin is “better” than another, so it’s up to the player to decide what rosin feels best.
4. Is it easier to make a bow or a violin?
This is a long-standing debate. There are violin makers and there are bow makers and rarely do you see someone who does both. Both are a dedicated craft and they both require a combination of woodworking and science. One thing is for certain: The violin maker and the bow maker rely on each other for success.
5. Does the bow’s hair really come from a horse?
Yes, it does. The hair comes from the tail of the horse and is vital to the instrument’s sound. While modern synthetic materials have attempted to duplicate the function of natural horsehair, so far nothing has successfully equaled what nature has provided.
6. Where does the bow frog get its name?
The bow frog is the end part of the bow that encloses the mechanism responsible for tightening and holding the bow hair ribbon. And the answer to this question is: No one really knows for sure. One theory is that it’s because it somewhat resembles the amphibious animal of the same name. Another theory comes from the equestrian world, where the lower part of a horse’s hoof is called the frog. Yet another theory says that the inventor of the modern bow frog was named Helmut Gorf, and the part was respectfully named for him, using his last name spelled backwards. Which do you believe is most true?
In 1985, I graduated from the Hastings College of Arts and Technology in my native England, with an Advanced Craft diploma in Decorative Painting.
I used my extensive training to great effect while living in Nashville some years later, decorating many prestigious new homes. I specialized in “old world” interiors, where my European training and English heritage gave me the visual awareness to replicate Renaissance-era living spaces within new construction architecture.
One of my hand-painted ceiling designs.
Visual Appeal
My love for the guitar is similarly grounded in artistry and the aesthetic appeal of a beautiful instrument. The graceful contours, natural grain of exotic tonewoods and vibrant (or distressed) colors resonate with me on a very deep and personal level.
I’m not a guitar snob, but I literally won’t play a guitar if I don’t like the way it looks. I’m not interested in the prestige of owning particular instruments or having the latest technology. If I’m not “feeling it,” then I won’t go any further trying to make a connection.
When I see a guitar I like, there is a gravitational pull towards it, an intrigue to explore its capabilities beyond the initial fascination. Will the sound of the instrument resonate with me to the same degree as the visual component? If my body likes the sonority of a guitar and its “voice” speaks to my sensibilities, there may be a bond forming that can’t be ignored.
Even when I find a special connection with an instrument, I give a lot of thought as to whether it’s worth the financial commitment. If I can justify the purchase and the guitar will be put to long-term creative use, I’ll consider investing in the relationship. Some guitar collectors purchase stunning vintage instruments and keep them locked away in bank vaults while they accrue in value. I understand the financial rewards, but it just seems unethical to me that a resonant instrument be imprisoned like that and never played to make music.
My Guitars
The guitars I own are used on a regular basis and I take care of them when they need attention. New strings, setups and moderate humidification are simple requirements that keep them performance-ready at all times. I have a specific use for each of the guitars in my collection, and they all fall into one of three broad categories: Nylon-string, acoustic steel-string and electric. I have specific instruments in each category that I use for studio recordings and others that are optimized for live performance, clinics and travel.
Because I often film clinics and lessons, another very important aspect for me is how a guitar looks on camera. Instruments that have high-gloss finishes often create too much of a glare from the studio lighting, and therefore take longer to capture in a natural way. Similarly, the sheen from a new maple fingerboard reflects the light in a way that can be very distracting for the viewer who’s watching your fretboard hand in close detail.
Like most guitar players, I have favorites. Some guitars that look as good as they sound are nice to have sitting around the studio, while others are kept in their cases, ready to go to the next gig.
Over the past couple of years, I’ve often used my Yamaha Revstar 720B for video work. The “hand-rubbed” flame maple top and rosewood fingerboard present a stunning combination of coloration, and the instrument exhibits a very low-luster sheen, which is perfect under studio and performance lighting.
Yamaha Revstar 720B.
The Yamaha SILENT Guitar™ series combines unique modern guitar design with extremely useful functions. The onboard effects, tuner, mic modeling, auxiliary input and headphone jack are perfect for silent practice or backstage warmups. Live performance is feedback-free due to the fact that there isn’t a sound hole to produce resonant feedback loops. And if you travel, you’ll appreciate having a full-size guitar that fits into a gig bag half the width of any other gig bag due to the removable upper body frame. That’s a lot of extremely useful attributes in one guitar. My SILENT guitars also get more compliments than any of my other guitars!
Yamaha SILENT Guitar.
Last but not least, the three new Yamaha STORIA acoustic guitars have been carefully crafted with attention to detail for an aesthetically pleasing and extremely playable guitar. Each features a concert-size body design with solid mahogany back, sides and neck. The STORIA II and III have a solid mahogany top, while STORIA I sports a solid spruce top with an off-white semi-gloss finish.
The Yamaha STORIA guitar lineup.
Wine red interior.
Special design touches that really make these guitars the centerpiece of any room are the champagne gold tuners, rosette inlays and the interior colors of ultramarine, light blue and wine red. Instant playability has been enhanced by producing a short scale, narrow neck with rounded fret edges (rolled edges) and a comfortable string height at the saddle and nut.
I’ve found that the tone of these acoustic guitars is perfect for songwriting and recording, plus the built-in passive undersaddle pickup can deliver your sound directly to the P.A. or studio mixer for live performance or recording, making the instrument extremely versatile.
The Video
I recently used a STORIA III guitar to compose and record the original music for the official STORIA product launch. In my studio, I used a combination of microphones and the passive pickup to capture all the rhythm and lead tones you hear in this video:
The Wrap-Up
I believe a “love affair” with a new guitar occurs at first sight. The initial spark develops into a musical bond when we discover that magic happens when we finesse the strings and listen carefully to the response. As I’ve discussed in a previous blog post, these are the resonant frequencies that flow between you, the guitar and the air in-between.
Your passion for the aesthetic is arguably as important as the function, playability and tone of your instrument. Finding all those attributes in one “perfect” instrument is the guitar nirvana we all seek!
The Comparison Game. I play it. Do you? We know we shouldn’t. But we’re only human.
It happens to the best of us. We hear a piece of music or a song that someone else wrote — one that’s so disarming that we stare aimlessly at a wall with an acute sense of inferiority — and tell ourselves we’ll never write anything as good.
A while back I coined an acronym for a song that does this to you: WiWi — as in, Wish I Wrote It.
When we’re under the spell (or curse) of a WiWi Song, we want desperately to claim that song as ours in exchange for the ballad we wrote the week before that has a hook we can’t remember.
Even though I’m pretty creatively “woke” when it comes to envy, if I’ve had writer’s block for a while I’m definitely more prone to crossing over to the dark side. We’ve all heard the expression “compare and despair.” That’s what I’m talking about.
And then, after despairing, we humans may ask for more trouble because when we’re obsessively infatuated with someone else’s song we may try to copy it. Not necessarily word for word or note for note, but the emotional tone. The imposter will always pale, though. Why? Because it wasn’t organically inspired. It was born of envy. And we simply can’t do what someone else does as good as they do it.
Conversely, it’s helpful to remember that there is something you do that nobody does better than you. An individual’s creative DNA is uniquely their own. Just like no two fingerprints are alike, or no two voices are exactly the same.
What is that thing you do, anyway? It’s not so much a style (i.e., soulful, ironic, confessional, feel-good, uplifting, heart-wrenching, nostalgic) as it is a nuance — a subtle slant within a niche. The way Bruce Springsteen can hone right in on the plight of the working man, or Julia Michaels can tap into a teenage girl’s insecurities.
Ask yourself why that gem you penned a few months back resonated so powerfully with almost everyone you played it to — the song you wrote when you weren’t trying to cop a tasty hit or stay within the boundary of an algorithm. You were probably waiting patiently for your muse that day and when she finally arrived, she brought with her your truth.
So next time you try to get inside somebody else’s heartbeat, remember: The best thing you can do for your own creative health is march to the beat of your own.
Here are three of my WiWi songs:
“I Touch Myself” (written by Billy Steinberg, Tom Kelly, Christina Amphlett and Mark McEntee, performed by DiVinyls)
Marching snare drums are designed for precise articulation, powerful projection and durable performance.
Here’s an annotated illustration of a typical marching snare drum, followed by a description of the main components, in alphabetical order:
Air Vents. These allow air to escape from inside of the drum. Without them, the drum would sound muffled.
Badge. This is where you find the serial number and model number of the drum.
Batter Head. The top head of the drum that is played with drumsticks. For maximum volume and stick articulation, this is often made of Kevlar material and tuned to a high tension.
Bottom Hoop. The very bottom rim of the drum, normally made of aluminum alloy. This is used to tune the snare head.
Butt Side Strainer. This is where the snares attach to the drum, opposite the release strainer.
Fine Tuning Adjustments. These allow the snare strainer to be adjusted vertically and horizontally.
Removable Feet. These provide protection when the drum is placed on the ground.
Shell. Typically made from wood, the shell is the “body” of a marching snare drum. It projects the sound, and a consistent, handcrafted shell makes tuning easy. A 45-degree bearing edge is often utilized on the bottom side to ensure proper snare articulation.
Snare Head. The drum head on the bottom of the drum. This interacts with the snares to create a buzzy sound.
Snare Strainer. The system that holds all the snare strands in place. Fine tuning adjustments may be made to either tighten or loosen the snares.
Snares. Synthetic strands or “guts” that give a snare drum its characteristic buzzy sound.
Sound Posts. These attach the tube posts to the shell, helping to eliminate unwanted overtones.
Sound Tube. Connects the top and bottom hoops to the drum.
Suspension Hoop. Usually made of aluminum alloy, this takes the tension of the batter head and protects the wood shell from breaking under extreme pressure.
Tension Rods. Steel rods that allow the top and bottom drum heads to be tuned.
Throw Off. This allows the player to turn the buzzy sound on and off by engaging or disengaging the snares.
Top Hoop. The very top of the drum, normally made of aluminum alloy. This is used to tune the batter head.
Tube Posts. These help to reduce overtones from the vibrating drum shell.
Click here for more information about Yamaha marching drums.
Art appreciation and freedom of expression are the tenets of every tattoo shop. Beyond the buzz and hum of artists at work — and the occasional audible intake of breath from a patron — there’s another tie that binds. It’s the music that permeates the parlor, and it plays a role in defining the culture.
Sometimes the soundtrack is a community experience, such as a Spotify playlist everyone can rally around. Other times it’s incredibly personal and inspiring — a collection of songs specially matching a mood or a moment. Whether it’s background music or the anthem of the day, a tattoo parlor without music is like an ocean without waves. It just isn’t right.
Small Business, Small Challenges
Your neighborhood tattoo shop is rarely a feat of new construction. It takes years of planning and apprenticing, plus searching for the right location — one which can expand over time and as the business grows.
Located just a few blocks east of the historic circle in Old Towne Orange, California, Old Towne Tattoo Parlor is home to about ten artists. You won’t find a Boingo hotspot sticker on the door, but that creates space to connect in different ways once you step inside.
The foyer is flanked by two working areas, where the artists divide and conquer. Music from the foyer fills in the corners, powered by a PC, Spotify and a computer speaker system.
Just as the artists each have their own style and client list, they also have their own tastes in music. An in-ceiling speaker system isn’t part of the equation here. In fact, even if that was in the cards, such an application wouldn’t feel right. Leave that for the nail studios and hair salons. A tattoo parlor requires something more tangible, more personal and, perhaps most importantly, more customizable.
By Design
While the existing computer setup currently centralizes the music, it’s nearly impossible to expand and share evenly with the other rooms without wires.
That’s where a multi-room audio solution such as Yamaha MusicCast comes in. MusicCast allows you to start with a single speaker and connect more of them in different rooms as you grow. It’s been a favorite in homes for years, and it’s certainly aligned with how music can be shared and enjoyed in small business spaces as well.
Olde Towne Tattoo Parlor recently added two MusicCast 20 speakers — one in each working area. After setup via the MusicCast Controller app, the options and combinations for the music in the space really start to take shape. Each speaker can play independently of each other or be linked together to play the same music in both rooms.
The artists at the shop are rarely far from their iPhones® and iPads®, which allow them to easily stream directly to the speakers or link them together via AirPlay® 2 functionality. If their hands are full, no problem. They can summon Siri® for an assist to skip a song or get a new playlist going.
The speakers can also be controlled with an Alexa device or Google Assistant, or via the MusicCast Controller app for iOS and Android™ devices. And if the Wi-Fi gets spotty, individual playback is available via Bluetooth®. So, whether it’s a Motown playlist for all or a Pink Floyd album for a select few, the music can be shared or siloed accordingly.
MusicCast technology may have been designed for the home, but as the artists at Old Towne are discovering, it can also be enjoyed at work!
All photographs courtesy of the author.
For tips on setting up MusicCast in your space with the tech you have on hand, check out these blog articles:
Mixing, by its very nature, is a complex activity with a lot of moving parts. You’ve got a multitude of tracks that need to be adjusted individually for level and panned in the stereo spectrum. Some will also need to be processed with equalization and gain reduction such as compression or limiting. You’ll also be automating levels and adding effects like reverb and delay, among many other tasks.
Your project will likely also include auxiliary channels, sub channels and a master bus (in Steinberg Cubase, they’rereferred to as FX Tracks, Group Tracks, and the Main Out, respectively) and they’ll need attention too. In short, you’ve got an awful lot to keep track of during a mix, so to help avoid confusion, it’s best to start the process with your session as organized as possible.
Order Out of Chaos
Task number one is to put your tracks in a logical order. The easiest way to do that is to arrange all the instrument and vocal tracks by type. In other words, put all the drums together, all guitars, all keyboards and so on.
Within each category, you’ll also want to arrange the tracks in a way that makes sense to you logically. For example, if you have multitrack drums, you might want to order them something like this: kick, snare, hi-hat, toms, overheads, and room mics:
These tracks are arranged by type and are in logical order.
In Cubase, the easiest place for rearranging the order of tracks is the Track List in the Project Window — simply click on a track header and drag it up or down to change its position. The order of tracks in the Mix Console will mirror what’s in the Track List. As you pass each track in the list, you’ll see a green line that shows the location of where the track would move to if you release the mouse button.
Next, check the track names to make sure they make sense and will not confuse you during the mix. If you want to rename a track, simply double-click on its name. It will become highlighted and allow you to type in something new.
The Color of Music
Once you’ve got your tracks in order and correctly named, it’s also helpful to color-code them. Doing so allows you to know at a glance what kind of track you’re looking at in the Mix Console or the Track List.
There’s no right or wrong when it comes to color choice. I like to color drum tracks blue, bass purple, electric guitars red, acoustic guitars orange, keyboards green, and vocals pink, but everyone does it differently. Use whatever scheme you like, but stay consistent from project to project so that you commit your system to memory:
The track order and colors match in the Track List and Mix Console.
To change the color of a track in Cubase, first select the track header and then go to Project/Colorize Selected Tracks, which opens the Colorize window. If the window says “Colorize Selected Objects,” it means you currently have an Object (audio or MIDI event) selected. Before you change the track color, you need to deselect the Object (clicking in an empty part of a track lane will do it) and then click on the track header. The Colorize window should then switch to saying Colorize Selected Tracks:
The Colorize Selected Tracks window.
Next, click on a color, and it will change both the track header and all the Objects in selected tracks as well.
Fold it Up
Especially if you have a high track count in your session, you can make your Track List more compact and clean-looking with the Track Folders feature in Cubase, which lets you enclose any group of tracks you select. (Note that Track Folders do not appear in the Mix Console.) If the folder is open, the tracks are visible, but if it’s closed, they’re hidden inside the folder.
Track Objects from Folder Tracks not only have a unique look, but can be edited as a group. You can even nest folders inside folders:
Open Track Folders show their contents.
Track Objects in a closed folder.
Once you have tracks in folders, you can solo and mute the entire folder with buttons on the folder track. They’re also handy for splitting the main workspace vertically, with the Track List above and the Mix Console in the Lower Zone (you may need to first click Lower Zone button on the upper right to open it up, and then choose “Mix Console” on the bottom left):
Putting tracks in folders saves screen space.
To create a Track Folder, select the Tracks from the Track List that you want to include, then go to Project/Track Folding/Move Selected Tracks to Track Folder.
Mark it Up
Adding markers to the beginning of each song section — such as intro, verses, choruses, bridge, etc. — not only helps you see where you are in your song at a glance, but it also gives you an easy way to jump to specific parts of the song during the mix.
First, however, you must create a Marker Track, which is one of the track types you see when you use the Add Track function (Project/Add Track or right-click in the Track List). Once you’ve created it, you can use the Add Marker button to put a marker at the current cursor position: (Make sure to turn on the Grid and set it to Bar if you want to create markers precisely at the beginning of measures.)
The Add Marker button.
Open the Marker Window (Project/Markers or Command (Control)+M). You’ll see a list of the markers created. Here you can name your markers (which I highly recommend), delete them or change their location.
You can make the transport jump to a specific marker by clicking in the Locate (>) column next to it in the Marker Window, or in the Marker Inspector (you can open the latter by clicking the Inspector tab with the Marker Track selected). Cubase also offers another type of marker called Cycle Markers for saving left-to-right locator positions:
The Marker Window.
Ready to Rock
If you’ve taken all the steps outlined here, your mixing will be well-organized and streamlined. This will not only make you more productive but also allow you to concentrate more on the most important (and most fun) aspect of mixing — the creative part.
The tone of both metal and wooden instruments comes primarily from the material from which they are made, as well as playing technique. Although the finish applied during manufacture is designed principally for protection from the acids in your skin, it will also have some effect on the instrument’s sound.
When a brass or woodwind instrument is played, the vibrating column of air inside the instrument creates vibrations in the body material. These vibrations can be allowed to occur as freely as possible — like those in an instrument without lacquer or plating — or controlled with the use of a finish. The heavier the finish, the more the vibrations will be dampened. The ideal instrument has a clear, pronounced core sound, with a full range of rich overtones.
The four drawings below show how the tone differs between unlacquered instruments (i.e., those without a finish), those that are lacquered and those that are silver-plated. The finishes are shown in ascending order of thickness, and thus ascending order of impact on the instrument’s sound. In all cases, there are two parts to the sound: The core of the note (represented by the solid circle in the middle) and the overtones (shown by the halo around the circle.)
Unlacquered / No Finish
The core of the note is clearly present, and can be made even more dominant with heavier gauge metal as part of the body. Around it, the overtones are varied and heightened, with some notes sounding stronger than others.
Silver-Plated
Because of the added weight of the silver-plating, the core sound of the note is more prominent, but the overtone peaks are also more even, giving a smoother, rounder sound. This kind of instrument will respond consistently throughout its range.
Clear and Gold Lacquered
Lacquer coatings are usually thicker than electroplated silver finishes. This means that, depending on the design, the harmonics can be dampened further, giving a more linear response and fewer overtones. The core of the sound may be more prominent as well.
Black Lacquer
Black lacquer is much thicker than clear or gold lacquer. This means that the instrument has even more tightly controlled overtones for a darker, richer sound. The core of the sound is most prominent in black lacquered instruments.
Ultimately, you need to let your ears be your guide, but hopefully this information will help you at least narrow down the sound you are looking for!
Click here to learn more about Yamaha brass and woodwind instruments.
One of the most profound experiences of my life was attending a lecture by astrophysicist Dr. Stephen Hawking at a trade show in the 1990s. Hawking, who passed away last year, was one of the greatest scientists of all time — right up there with Einstein — despite suffering from ALS, a debilitating condition that caused him to be almost completely paralyzed for much of his life.
Dr. Stephen Hawking.
There he sat on stage, his broken body slumped over in a wheelchair, painstakingly using his pinky (one of the few parts of his body that he could still move at that time … though he was also able to manage a wry smile every now and then) to advance through an array of PowerPoint slides, delivering revelation after revelation to a spellbound audience. There were thousands of us in attendance, yet you could literally hear a pin drop, so focused were we all on what Hawking had to “say,” courtesy of his laptop’s speech synthesizer. The power of his mind was awe-inspiring. I remember thinking at the time, he’s exploring concepts that would never occur to 99% of us. Perhaps even more astonishingly, he was giving us answers to questions that it would never occur to most of us to even pose.
One of those questions was: Are we alone in the universe? Hawking’s answer was a resounding no. A series of slides cited irrefutable statistics: There are hundreds of billions of galaxies in the observable universe, each containing trillions of stars, a certain percentage of which likely have planets revolving around them, a small percentage of which likely contain the elements needed to support life (i.e., oxygen, carbon and other organic chemicals). The conclusion was inescapable: It was a virtual mathematical certainty that life must exist elsewhere, probably on many different worlds, not just one or two of them.
Then he dropped a bombshell. Why then, the next slide asked rhetorically, have we not heard from these other living beings yet?
Hawking’s theory: Because life as we know it is a human conceit. We assume that the evolutionary process here on Earth (i.e., simple one-celled creatures mutating over a long period of time into complex animals with increasing brain size) is universal … literally. But, he asked rhetorically, is it not just as possible that the process of evolution is completely different on other worlds? Is it not just as possible that what we consider “intelligent” life is completely different elsewhere? That what those life forms need to survive and evolve is completely different from what we need? That their means of communication is completely different from anything we are capable of perceiving?
My mind was blown that day — I could almost feel my head going poof! — and it continues to be blown whenever I think back to that magical afternoon when the greatest thinker of our time shared his ruminations in a darkened auditorium with a few thousand privileged souls. And make no mistake — I consider myself privileged to have been there.
The recent 50th anniversary celebrations of the first moonlanding (an event recalled so profoundly here by my esteemed colleague Anthony DeCurtis) stirred my memories of the Hawking lecture, and also got me thinking about the Voyager 1 probe launched by NASA in 1977.
Voyager 1 is currently the farthest human-made object from Earth. It’s already reached interstellar space and will encounter its first star in about 40,000 years. Even though astronomers believe this particular star may not have planets revolving around it that can sustain life, this is nonetheless significant because the probe houses a time capsule intended to communicate to extraterrestrials a story of the world of humans on Earth. Inside the capsule are numerous written documents, drawings and photographs, plus two phonograph records (talk about the resurgence of vinyl!) that present a variety of natural sounds, such as those made by surf, wind, thunder and animals (including the songs of birds and whales), as well as spoken greetings in 55 ancient and modern languages … and music.
The Voyager 1 record cover.
The aliens who are fortunate enough to encounter these records and figure out a way to play them (pictorial instructions are included) will be treated to a variety of selections, including Bach’s Brandenburg Concerto, Mozart’s The Magic Flute, Beethoven’s Symphony Number 5 and Stravinsky’s The Rite of Spring, a momentous work whose tumultuous debut was described in one of my previous blog postings. Also included are performances by bluesman Blind Willie Johnson and jazz legend Louis Armstrong, as well as Chuck Berry’s raucous “Johnny B. Goode,” a mainstay of every bar band on the fine planet we humans inhabit.
Will “Johnny” eventually assume that same status on other planets light-years away, with twelve-legged aliens duckwalking across the rickety stages of extraterrestrial drinking establishments serving cocktails made from nitric acid and sulfur, garnished with a plutonium twist? Likely nobody reading this blog (much less the author) will be around to find out the answer to that question.
But I sure would like to think so. And I have a feeling Stephen Hawking will be dancing along.
Photograph of Stephen Hawking by Paul. E. Alers/NASA via Getty Images; photograph of the Voyager 1 record cover courtesy of NASA.
Recently, I had a unique experience with the Yamaha CG-TA classical TransAcoustic nylon-string guitar. Flamenco guitarist Hernan Romero (he’s worked with Al DiMeola, Stevie Nicks and The Guitar Trio, among others) and I literally took a brand new CG-TA out of the box, tuned it up and immediately started recording some television cues.
Romero with the Yamaha CG-TA.
What made this especially fun is that Romero, despite being a veteran guitarist with many different nylon, classical and flamenco-style guitars in his arsenal, had never had the TransAcoustic experience before. Like the other guitars in this series, the CG-TA can produce astonishing chorus and reverb effects in the air … without the need for an amplifier. (For more information about how this remarkable system works, click here.)
The look on his face was priceless!
Within a few notes, Romero was struck by not only the comfortable feel of the instrument, but by what was coming out of the sound hole. “It was immediately inspiring,” he told me later. “I had never heard a guitar that had adjustable reverb and chorus projecting from the sound hole! The fact that it sounded this good, and that it was a nylon guitar, made me want to start tracking right away.”
The CG-TA is not shy on quality features. It includes an Engelmann spruce top, ovangkol back and sides, nato neck wood, a flat radius classical neck shape with rosewood fingerboard and 25.5″ scale length, gold tuning machines, a rosewood bridge and urea nut, and a saddle with a 2″ width.
Since I own a CG-TA acoustic guitar and have previously blogged about how I like to record its effects, I decided to approach this recording in the same fashion, using both the built-in pickup and an external microphone. This allows me to adjust between the two, as needed, when it’s time to mix the tracks.
With the TransAcoustic reverb and chorus effects enabled and dialed in to Romero’s liking, I connected the 1/4″ output to one channel of my DAW and an omnidirectional Earthworks QTC-50 to the other channel. I then panned them to opposite sides in Romero’s headphone feed to give him a spacious “vibe.” Note that the TA reverb and chorus were not only captured by the microphone, but were also output via the DI signal.
Here are a series of audio examples so you can hear the actual tracks. The first audio file is the first rhythm pass with only the built-in CG-TA guitar effects. The DI signal is panned hard left and the microphone signal is panned hard right (you can also hear a little bleed from the percussion track playing in the headphones):
Here’s a brief snippet of the DI signal on its own. Again, this includes both the TA reverb and chorus effects:
Here’s that same snippet, but with the microphone on its own. Note that the effects are still heard because they are literally projecting out of the guitar’s sound hole:
Here’s the second pass in full, which adds the melody plus a light solo section. Here, the microphone is panned at 11 o’clock and the DI is panned hard right. To augment the CG-TA chorus and reverb, I also added a touch of delay and chamber reverb to the signal using plug-ins in my DAW:
Here’s a mix of the two passes:
Lastly, here’s the final mix of the entire track, including both guitar passes plus accompanying bass, drums and percussion:
Impressed? So was Romero. In fact, he was so inspired by the sound of the CG-TA that he took the guitar home with him after the session. Wish me luck in getting it back!
Photo courtesy of Romero.
Click here for more information about the Yamaha CG-TA Classical TransAcoustic Nylon guitar.
Say hello to the Clavinova CVP800 Series — a musical entertainment center that brings the sound of not just one, but two of the world’s finest and most prominent concert grand pianos (Yamaha CFX and Bösendorfer Imperial) to your fingertips, as well as hundreds of other ultra-realistic instrument sounds.
All three models — the CVP-805, CVP-809 and CVP-809GP — offer a wealth of interactive features capable of making music fun for anyone, regardless of skill level or experience. These include:
– Grand Touch keyboard action: The most advanced digital piano action Yamaha has ever made, reproducing the touch and dynamic range of a concert grand better than ever. It features an escapement mechanism that reproduces the feel of an acoustic piano as it goes through the let-off and drop of the hammer when a key is played very softly.
– 88-key linear graded hammers that give each key a unique weight for the smoothest playing experience from high to low. The CVP-809 and CVP-809GP models also feature carefully adjusted counterweights for improved playability when playing pianissimo and better key return in rapid passages.
– Synthetic ebony and ivory keytops for classic piano touch.
– The Genos Sound Engine from our flagship arranger workstation that provides outstanding playing response as well as hundreds of high-quality instrument Voices and professionally arranged Styles and Accompaniments.
– Binaural sampling technology for three-dimensional sound that recreates the perspective of the player position through headphones.
– A large color touchscreen so you can easily see the state of Voice and Style assignments and quickly access and adjust numerous settings.
– Karaoke fun: Simply plug in a microphone to sing along with on-screen lyrics. You can even add lush harmonies to your singing voice with virtual backup singers!
– A Chord Looper that allows you to record and loop your chord progressions, freeing you up to experiment with two-hand playing or soloing without having to worry about playing the changes.
– A Playlist function that lets you attach a number of settings (such as Style, MIDI/audio song, Registration Memories, etc.) to any song entry you create for instant recall when it’s time to perform.
– An enhanced Piano Room so you can select from even more pianos and choose the type of room you’re in.
– In Session Mode you can even invite a small ensemble along to play with you and record your performance with a built-in recording studio.
– Bluetooth® audio support that enables you to wirelessly connect your iPhone®, iPad® or iPod Touch® so you can listen to, learn and play along with your favorite songs.
– Super Articulation Voices (CVP-805) or Super Articulation 2 (SA2) Voices (CVP-809/809GP) that intuitively reproduce the natural expressive nuances of non-keyboard instruments such as flute or guitar, allowing you to achieve realistic expression, both automatically and with the use of switches.
The CVP-805 is available in matte black or polished ebony finishes, while the CVP-809 is available in polished ebony or polished white finishes. The flagship CVP-809GP is housed in a polished ebony grand piano cabinet.
CVP-805 (matte black finish).
CVP-809 (polished white finish).
CVP-809GP.
Ready to see and hear the CVP800 in action? Check out this video:
When an oak tree falls, its spirit must be honored. Yamaha has done just that by handcrafting an instrument that will be treasured for generations: the all-new Live Custom Hybrid Oak drum set.
Everything about these groundbreaking drums is designed to enhance the dynamic range by accentuating attack and projection with incredible attention to detail. The shells incorporate a traditional Japanese uzukuri handcrafted finish, which creates a unique look that defines the expression of oak. They feature a dense phenolic sheet sandwiched between two sheets of oak ply, with thick steel hoops for a tighter sound and sharper response. The advanced Y.E.S.S. III tom mount further reduces acoustic dampening, allowing the shell to vibrate more freely, thus bringing out more of its natural sustain and volume. Weights are studded in the bass drum at the lug points to attenuate low-mid frequencies for a more focused sound. Even the floor tom bracket is special; it includes wing bolts and is designed to clamp tightly on the leg without damaging it — a feature that saves time onstage and delivers optimum decay control.
Check out this way-cool video that demonstrates the awesome sound — and look — of Yamaha Live Custom Hybrid Oak drums:
Click here to learn more about Yamaha Live Custom Hybrid Oak Drums.
Multi Pads are some of the coolest buttons on Genos. In this article, I’m going to show you just how versatile and inspirational these beautiful backlit buttons can be.
First off, let’s define what they are, and what they do. At their essence, Multi Pads are used to play back prerecorded rhythmic and melodic sequences. What’s more, by utilizing an Audio Link function, you can create unique new pad content with your own audio (WAV) data for playback during performance.
Even though there are only four Multi Pad buttons, there are virtually limitless combinations of what can be done with them. In total, Genos allows you to store up to 448 banks of Multi Pad data … times four! That’s a total of 1,792 delicious musical phrases, loops, custom WAV data and more, all at your fingertips.
The Multi Pad buttons reside within the Multi Pad Control section on the front panel, right below the six Assignable buttons. When a Multi Pad button is lit blue, that’s an indication that it contains content, and so pressing the button will play back whatever musical or rhythmic phrase is assigned to it. Unlit buttons contain no content — in other words, they’re empty.
To get the ball rolling, let’s start by pressing the SELECT / SYNC START button just to the left of the Multi Pad buttons:
This will open the Multi Pad Category search screen, where you’ll see 16 different categories of musical selections, each with a wide variety of tasty loops and phrases. (Note that each category can contain multiple pages of content as well, so go ahead and explore!) Select the SteelGtr category in the upper left hand corner, then select Steel8BeatStrum1:
Hit EXIT to leave this screen, and then press Multi Pad Button 1. You’ll hear a steel-string guitar start to strum.
Note that Multi Pad content by default is tied to Genos’ Master Tempo, which you can see when you view the selected Style:
To increase or decrease this tempo, simply press either the TEMPO – or + buttons, or tap in the tempo you want using the TAP TEMPO button:
Now this is where things really start to get interesting, because Multi Pads can trigger their stored content either independently (that is, without a Style also being played back) or while a Style is playing back, so you can easily add their stored content to the music you are performing live.
In addition, if ACMP (Auto-Accompaniment) is engaged during Style playback, Genos will not only analyze your chords as usual, but will also change the key of all active Multi Pad content (except drum and percussive loops). Alternatively, you can change the key of an active Multi Pad without a Style playing back by simply activating the LEFT part.
That’s just how simple it is to use Multi Pads on Genos — and just how much they can add to your live performance. Thanks for tuning in, and as always, don’t forget to keep practicing!
Yamaha saxophones have been in production for many years and numerous design changes have been made to better our instruments. As a result, however, information is sometimes needed to fit a new or different neck to some older instruments. Here are some tips on how to identify and address these differences.
Original design.
New design.
As shown in these images, when a current neck is used on some older model saxophones, the octave mechanism (floating lever) cannot reach high enough to actuate the neck octave key. (These images are that of an alto, but it is the same for a tenor.)
Original design neck on an original design body.
New design neck on an original design body.
The tenon diameter on the older and the newer design is the same, although some final fitting by a qualified technician may be necessary, as in any neck change. However, the neck register key contact point is lower on the original design.
Vinyl extension tube.
Vinyl extension tube after installation.
A simple extension can be made by replacing the plastic silencer tube with a longer piece of vinyl or other tubing. This allows the artist to evaluate the playing characteristics of the neck. Once the neck is selected, a more permanent extension may be made from brass stock and silver-soldered to the body octave key, if desired.
The chart below presents an overview of the models (past and present) that are equipped with the different design styles. All current Yamaha “Custom” branded aftermarket necks (such as the C1, E1, and V1) use the new design neck register key.
ALTO AND TENOR SAXOPHONES
Original Design
New Design
YAS/YTS-875
YAS/YTS-875EX
YAS-875EXII
YAS/YTS-82Z
YAS/YTS-82ZII
YAS/YTS-62 (1980-2002)
YAS/YTS-62 (2002-present)
YAS/YTS-61
YAS/YTS-52
YAS/YTS-475
YAS/YTS-480
YAS/YTS-300AD
YAS/YTS-200AD
YAS/YTS-26
YAS/YTS-23
YAS/YTS-21
Click here for more information about Yamaha saxophones.
Once upon a time, all the cool kids had a stereo system so large it had its own zip code. What’s more, all the receivers, amplifiers, turntables, equalizers and other gear were left out in the open to be ooohed and ahhhed over.
That said, those early days of home audio are certainly nothing to scoff at. After all, it was the era of in-your-face audio that kick-started the industry, eventually growing from a niche market of gear-heads into a mass market of music lovers from all walks of life.
But as home audio evolved, with new formats, new types of content and new modes of listening, so too did the form factors of the equipment delivering the tunes. Some gear — like receivers and amplifiers — began to shrink in size, becoming more streamlined and vastly easier to integrate into family rooms, dens … wherever. What’s more, the slimmer, sleeker components could go toe-to-toe with their larger, boxier predecessors, turning home audio into a luxury that everyone — from hard-core music enthusiasts to casual listeners — could appreciate and enjoy.
Accelerating the evolution were the introductions of new technologies like Wi-Fi-and BluetoothⓇ-enabled audio systems, sleek sound bars and smart voice-controlled speakers. These days, you can have your music wherever and however you like to listen to it … no matter what type of music you like, or the size or layout of your home. After all, music is meant to be heard, not seen! Fortunately, there are many approaches you can take today to ensure that all that great audio never interferes with the cosmetic details of your home.
Here are some aesthetically friendly ways to do just that.
Surround Sound, Hold the “Spaghetti”
Home audio encompasses more than just gear designed to your music listening pleasure. Surround sound systems for home theater setups are part of the realm, too. But physical wiring used to be the only way of getting audio from a receiver to your speakers — and when there are speakers that need to get placed at the other end of the room, things get considerably more complicated.
Fortunately, the days of snaking wire behind baseboards, underneath carpeting or simply laying the spaghetti as close to the wall as possible are over. Thanks to wireless products like Yamaha MusicCast speakers, sound bars and AV receivers, there’s no need to get messy to enjoy surround sound. The carpeting and baseboards stay put, the walls and floors remain unmarred, and you can have your system up and running in almost no time. Plus, since there’s no speaker wiring required when using a pair of wireless Yamaha MusicCast 20s or a MusicCast 50 for your surround sound speakers, this type of surround sound system can be easily reconfigured should you rearrange the furniture.
Yamaha MusicCast 20.
Yamaha MusicCast 50.
Hi-Fi Goes Wi-Fi
Vinyl is experiencing a rebirth (for five reasons why, click here), and Yamaha is one of the only manufacturers giving turntables a modern twist by building in Wi-Fi capability. This means that the album spinning on a single turntable, when connected to a MusicCast whole-house wireless audio system, can be heard in every room of your home — even out on your patio or in your backyard. Instead of being sequestered to a single space to listen to your records, you can spin and stroll anywhere you like, never missing a beat or cluttering up your home with multiple turntables — or even a receiver, for that matter. Plus, when the album is over, you can stream via built-in services such as Spotify from your mobile device to all the connected speakers.
The Yamaha MusicCast VINYL 500 turntable is a perfect example of how this technology works. Simply put it where it looks best, plug it in, turn it on and kick back while it delivers rich, full-sounding audio to every MusicCast-enabled wireless speaker in your home.
Yamaha MusicCast VINYL 500.
“Blendable” Speakers
One of the most effective ways at downplaying the visual aspects of a home audio system is by building the speakers into the walls or ceiling. Recessed flush with the wall or ceiling surface, they blend seamlessly into the home environment. What’s more, the grilles of many of these types of speakers can be painted to render them even more inconspicuous.
However, despite their cosmetic attributes, built-in speakers can be tricky to install. Freestanding speakers afford a simpler installation, and many, like the Yamaha MusicCast 20 and MusicCast 50, have been purposely engineered to maintain a low profile. To ensure that your speakers complement the room design, look for models that can be ordered in different colors — black and white are usually standard choices. If they’re wireless, all the better, since you can tuck those kinds of speakers anywhere, freely reposition as necessary, and add more easily to expand your home audio system. What’s more, they can be controlled by your favorite voice assistant, whether you’re using a device powered by Alexa, Google Assistant or Siri.
The Supermodel of Speakers: The Sound Bar
There’s no way around it: Speakers and component systems take up a lot of space. For rooms short on square footage, a sound bar offers a space-saving alternative that looks great. Long and thin, they are the supermodels of the home audio world and complement a flat-panel TV perfectly.
But they’re not just a pretty face. Packed into the sleek housing are a number of speakers and technologies. A sound bar like the Yamaha YAS-109 does the job of the left, right, center and subwoofer channels of a surround sound system, plus it even offers built-in voice control via Amazon Alexa; some, like the Yamaha YAS-209, even add the ability to create virtual 3D effects and a wireless subwoofer for extra bass.
Yamaha YAS-109.
Yamaha YAS-209.
A sound bar also gives you lots of placement options: Mount it to the wall, place it on a table, or put it on a shelf above or under your TV — whatever works best.
Home Audio: A Happy Marriage of Design and Technology
Technology is rarely considered a thing of beauty, but in the world of home audio, form and function go hand-in-hand. As audio components continue to change in size, they also are packing in more capabilities, precluding the need for wiring, huge equipment racks, and all the other elements that can compromise the aesthetics of a home. Want to have numerous large components filling your space? The option is still there, if that’s what you’re looking for. But these days, fashion-forward receivers, turntables, speakers, sound bars and the like are endowing beautiful homes with equally beautiful music.
Click here for more information about Yamaha MusicCast.
Click here for more information about Yamaha AV receivers.
Click here for more information about Yamaha in-home speakers.
Click here for more information about Yamaha sound bars.
Click here for more information about the Yamaha MusicCast VINYL 500 turntable.
This is our 500th article on the Yamaha Music blog!
The 2017 NAMM show was memorable for a lot of reasons. New products, cutting-edge technologies, informative demonstrations, great musical performances, fun parties — you know, all the usual things.
But what was unusual at that year’s show was that it was witness to the birth of a blog. This one, in fact. They say that from small acorns, mighty oaks do grow — and that’s certainly been the case for us.
As we celebrate our 500th posting, join us for a look back at where we started, and how far we’ve come.
Humble Beginnings
Phil “Bad Mister” Clendeninn.
Our “official” launch date — the date this website was turned on — was January 19, 2017. There were exactly 53 postings at the time, including more than a dozen installments of Yamaha clinician Phil “Bad Mister” Clendeninn’s Mastering Montage series. There were also numerous contributions from our Consumer Audio folks, including the timeless “Why Are the Numbers on My AV Receiver Volume Control Negative?”, which turned out to be one of our most popular postings ever. Rounding out these initial offerings were articles geared towards guitarists, keyboardists, marching band and orchestral percussionists, violinists, and brass players interested in learning more about their instrument’s mouthpieces. Several of these articles included “behind the scenes” videos too — one of our earliest innovations.
By the end of 2017, visitors to our blog could avail themselves of nearly 130 articles on a wide variety of subjects, including postings by and for music educators, in addition to articles aimed at music students and/or their parents. Our range of topics broadened as well, to include postings about drums and drumming; advanced technologies such as our company’s latest developments in Artificial Intelligence and Disklavier Education Network remote auditioning; instrument design and development (including an interview with the designer of our SILENT Bass); and musical events Yamaha participates in, such as the Monterey Jazz Festival. In October of that year, we published our 100th posting, “The Yamaha Story,” celebrating the long history of our company.
Along with the broadening of topics, our audience was growing too, with roughly 5,500 visits to our blog per month. But that, it turns out, was just the tip of the iceberg.
Gaining Momentum
Shelly Peiken.
In 2018 we began running a regular series of columns, starting with the very first posting, written by our executive editor, veteran music journalist Howard Massey. This was followed shortly thereafter by monthly and bimonthly contributions from Grammy-nominated songwriter Shelly Peiken, guitarist / TV composer Rich Tozzoli, guitar instructor / clinician Robbie Calvo, music software developer Craig Knudsen and keyboardist Gabriel Aldort.
Rich Tozzoli.
They were soon joined by a number of prestigious guest columnists, including Rolling Stone contributing editor Anthony DeCurtis, New York Times best-selling author Daniel J. Levitin, leading MIT neuroscientist Dr. John Gabrieli and Wall Street Journal contributor Marc Hopkins.
Anthony DeCurtis.
Daniel J. Levitin.
Dr. John Gabrieli.
Marc Hopkins.
We were also able to secure the services of some of the finest music journalists in the business, including ex-Musician magazine editors Mac Randall and Michael Gelfand, as well as regular EQ and MIX contributors Steve La Cerra and Mike Levine, consumer audio writer Lisa Montgomery (whose work has appeared in Electronic House and CE Pro magazines) and longtime Keyboard Magazine columnist (and author of the popular “Keyboard For Dummies” book) Jerry Kovarsky.
Mac Randall.
Michael Gelfand.
Steve La Cerra.
Mike Levine.
Lisa Montgomery.
Jerry Kovarsky.
2018 also saw a series of postings written by end users, starting with Steve Rizun’s “What Drumming Means to Me.” Subsequent articles in that vein have focused on keyboard and guitar playing, along with a fascinating look at the “Practicing / Jamming / Creating Trichotomy.” For those readers unable to attend NAMM in person, we also started running NAMM highlights, showcasing the major product releases from Yamaha, while continuing our coverage of new technologies, with articles explaining how to use Amazon Alexa with MusicCast and the secret behind the unique sound of Yamaha TransAcoustic guitars, which can create reverb and chorus effects without the need for an external amplifier.
Another major development in 2018 was the ability to embed audio files within postings, literally bringing sounds to life as you read about them. (Check out articles such as “How To Record TransAcoustic Guitar Effects” and the two-part “Altered Tunings” series for examples of how much this enhances the blog experience!) We also added interactive search capabilities, making it easier for you to find the articles that interest you, along with dedicated Facebook/Twitter Share, Email and Print icons that float alongside every posting.
All this hard work paid off. By mid-September we hosted our 250,000th visitor, and by the end of the year, monthly traffic had improved to an average of more than 32,000 visitors per month — a more than 600% increase over the preceding year. Clearly we had gained a serious following … and things would only get better.
Today … and Tomorrow
It didn’t take long for our next milestone to be achieved: just 19 days into the new year, our blog received its 500,000th viewing, and January also marked the first month in which more than 75,000 users paid a visit, many of them returning several times, as reflected in the 100,000+ “sessions” that occurred that month.
Rory Kaplan.
Continuing in the tradition started in 2018, we welcomed a number of new guest writers, including ex-Michael Jackson keyboard player Rory Kaplan, who described his encounter with the new Yamaha CP88 Stage Piano as an “introduction to an old friend.” We also initiated new Guitar Basics and Home Recording Basics columns for those new to the world of guitar and digital recording, respectively. In the area of AV, we took both a look back (“The History of Hi-Fi”) and a look ahead, with a three-part series on how to stream music from various sources. Other tech-oriented blog postings described how 21st century composers are using the Yamaha Disklavier in their work, how to use remote control in live sound mixing and a close-up look at (and listen to) Atmosfeel™, the latest and most advanced line of Yamaha acoustic guitar pickup systems.
With 500 articles and counting, there’s sure to be something on the Yamaha blog of interest to every musician and music lover out there. We’ve got a lot of great things planned for the months ahead, so stay tuned to this space. Who knows? You might just be our one millionth visitor!
When it comes to our drumming idols, we can usually identify them by their signature snare drum sound. Think about these drummers and see if you can hear their sound in your head even without listening to them: Elvin Jones, Dave Weckl, Steve Jordan, Matt Cameron, Anton Fig or Steve Gadd.
Not that hard, is it?
That’s because they all have a memorable sound.
The snare drum is the main part of your drum kit and is therefore the key element in creating your individual sound and style. Picture the joy you’ll get when you’re driving the groove with a perfectly phat snare, or that great feeling of control when you’re cracking rimshots at will. Those are the kinds of ultimate goals every drummer aspires to.
When it comes to creating your signature snare drum sound, here are the things you need to keep in mind.
1. Choose the Right Snare Drum
Wood or Metal Shell?
Snare drums come with either wood or metal shells. Maple, birch, oak, mahogany and walnut are some of the more commonly used materials in wood shells. The sound of these drums is generally fat and warm — think Anton Fig.
Yamaha Live Custom Hybrid Oak wood shell snare drum.
Steel, brass, aluminum, copper, bronze and titanium are some of the more commonly used metal shell materials. The sound of these drums is generally bright and ringy — and they can really cut through a mix. (Think Matt Cameron.)
Yamaha Recording Custom brass metal shell snare drum.
The best rule of thumb is to build up your snare drum collection so you have multiple wood and metal models that will work in different environments and musical settings.
Size Matters
Snare drums generally come in diameters from 12″ to 15″, and in depths from 4″ to 8″. Smaller diameter drums (12″ and 13″) will have a higher tuning range than larger 14″ and 15″ drums. Drums with shallower depth will give you more of a crack, whereas an 8″ deep drum will give you a fuller tone.
Head Type Matters Too
Drum heads come in coated or clear varieties and can be single- or double-ply.
Coated heads are a great option if you are playing with brushes or want a warmer sound.
Clear heads have more attack and yield an open, bright sound.
Single-ply heads have a bright, natural and resonant sound. They are great for jazz and lighter playing styles that require more articulation.
Double-ply heads have fewer overtones, are warmer sounding and are the choice for heavier hitters that require more durability.
This snare drum has a coated head, while the other drums have clear heads.
2. Tune Your Snare Drum Carefully
The tuning of your snare drum is one of the most important elements in attaining a signature sound. To a large degree, it’s a matter of personal taste. Do you like a lower, fatter sound or a higher pitched sound? How does the drum feel at the different tunings? How does the drum sound at your ideal tuning when it’s mic’d up through a sound system?
Unless you are playing the same type of environment and music night after night, your sound and tuning could change somewhat, every time you play. Mine does, and there is nothing wrong with that. It’s about adapting to your surroundings and realizing that the snare tuning that worked so well at an outdoor gig last night might not work in tonight’s small indoor club gig, with all its commensurate volume issues.
Similarly, choosing an 8″ x 14″ snare drum tuned up super tight for a jazz gig might not be the best option, while a 5″ x 14″ with a medium tuning would most likely feel better to you and be a more suitable choice.
3. Make the Sound Appropriate for the Music You Are Playing
For instance, if you are playing in an industrial rock band, you might want a metal drum tuned high with a nice crack to it. If you are in a country band, you might want a deeper, wood snare tuned medium to low in order to create a fatter sound.
If you are doing a good deal of studio work, you will need several different snare drums to better serve the style of song you are working on. If you’re mostly gigging live, you’ll probably have to get by with just two. This gives you flexibility and also gives you a backup in case you break a head or some other component fails.
In my band, we play rock covers from the ’60s to current and have a repertoire of over 400 songs. That requires me to have a snare sound that will work with a wide range of songs — songs that were recorded with many different snare drums. Obviously, I can’t change snare drums between songs or retune my one drum for each song to match that specific sound perfectly, so I have to find a nice middle ground using a tuning that’s not too high or too low. I often carry one wood and one metal snare on these gigs, giving me options depending upon the song list we’re playing on any given night.
4. To Muffle or Not to Muffle? That is the Question.
Muffling can greatly affect a drum’s tone, sustain and volume. Some drummers don’t like to add any muffling to their snare – they prefer the wide-open tone that includes a little ring in the decay of the sound. Others prefer to deaden that ring a bit to control and tighten up the sound.
There are many options out there to muffle your snare. In the ’60s and ’70s, drummers would sometimes put a wallet or piece of cloth on the edge of the batter head. (Beatles drummer, Ringo Starr, used a pack of cigarettes!) My preferred method is to take a small piece of duct tape, roll it over itself and stick it to the edge of the head. Many drummers have ridiculed me about this, but it works!
Today there are many other options available to muffle the sound. These include:
– Moongels or gel stickers
– Control Rings
– A product placed on top of your snare drum such as jingles or the Big Fat Snare Drum
– Cutting out the center of an old head and placing it upside down over your existing head, or even just using the upside-down head without the hole cut out
5. Tailor Your Sound to Your Environment
It goes without saying that snare drums can be very loud. That’s why you need to take into consideration the acoustics of the environment you are playing in, so that your snare sound complements the room and doesn’t obliterate it.
For example, I recently played in an airplane hangar. It was really big and really loud! In any large room or hall, you should opt for a lower tuned and somewhat muffled snare so you can better control the volume.
Of course, if you’re playing an outdoor gig, you usually don’t have to worry about the volume or the often tricky acoustics of indoor venues. This is a great opportunity to use a louder, more open sounding snare drum tuned higher if you so choose.
If you are practicing in a somewhat dead-sounding bedroom with carpet on the floor and have forgiving family members and neighbors, you can use more of an open, ringy sound.
Conversely, if you are practicing in your garage with concrete floors and no soundproofing, go for lower tuning and some muffling to produce a fatter and more controllable sound that your neighbors will appreciate.
As you can see, there are many variables and options in choosing the snare drum that is right for you and then putting all of that together to create your own signature sound. The key is to experiment and continually try out new things, with a goal of developing your own instantly recognizable sound!
Photos courtesy of the author.
Click here for more information about Yamaha snare drums.
On his 1967 album Axis: Bold As Love, Jimi Hendrix wondered what would happen “if 6 turned out to be 9.” The mystical implications of those digits (both are multiples of the magic number 3) would not have been lost on Hendrix, but he was also pondering the upside-down quality of that time and envisioning what might happen by the year that would, at least symbolically, end the era that had already become known as “The Sixties.”
By the time 1969 arrived, it was pretty evident that whatever utopian hopes the Sixties generated were unlikely to be realized. Martin Luther King, Jr. and Robert Kennedy had been assassinated within two months of each other in 1968. The Democratic National Convention in August of that year had turned into a pitched battle between the Chicago police and antiwar protesters. Richard Nixon had been elected president in November of 1968 and was inaugurated the following January. He had run on a “law and order” platform that served as the template for many of the culture clashes that still rage today. The conservative Silent Majority were pitted against young counterculture insurgents who viewed themselves, in the words of the Jefferson Airplane, as “outlaws in the eyes of America.”
I was one of those kids. Growing up in Greenwich Village within walking distance of the Bitter End, the Café Au Go Go, the Fillmore East and a dozen great record stores, I was obsessed with rock & roll. I listened to it (and read about it) constantly. By the summer of ’69, I had seen the Rolling Stones, the Who, the Jefferson Airplane, Traffic, Jimi Hendrix, the Doors, B.B. King, Joni Mitchell and too many other artists to count. I was ravenous for it; music gave my life meaning. I was also draft age, unfortunately. I turned 18 less than a month before Apollo 11 blasted off into space, with the Vietnam War going full force. I was about to attend college but sensed that those deferments would soon end. It was a heady time, with more transporting music than I ever could have dreamed of, but there was a tense underpinning to it all.
During his campaign, Nixon promised that he had a “secret plan” to end the hostilities. That plan turned out to be so secret as to be nonexistent. The war dragged on, with more than five hundred thousand American troops facing enemy fire in a country smaller than California, suffering tens of thousands of deaths and casualties. Yet ironically the music our soldiers were listening to were the songs of the very artists — Hendrix, the Doors, Marvin Gaye, Creedence Clearwater Revival, the Temptations — who were creating a soundtrack of rebellion and escape. Whenever anyone mentions the great divisions of our own times, I think back to those days fifty years ago. For better or worse, the parallels are chilling.
Still, a few points of unity stirred back then and the ideal of space travel was one of them. It wasn’t entirely untainted, alas. By 1969, any major project the US government undertook became suspect for its potential military or surveillance applications. Nonetheless, the sheer vastness of space, not to mention our shared status as human beings on a planet floating in a mysterious universe, made it possible for anyone to look up into the skies and see what they wanted to see, dream what they wanted to dream. They are called “the heavens” for good reason. Whatever your politics, whichever side you were on, you had reason to want to go there.
Once President John F. Kennedy declared in 1961 that America would land a man on the moon before the end of the decade, space themes began weaving their way into popular culture — TV in particular. “Star Trek” debuted in 1966 and rested on the premise that space was the “final frontier,” vowing to take viewers “where no man has gone before.” In “I Dream of Jeannie,” space travel joined with romance as an astronaut stranded on a remote island discovered a lovely genie in a bottle. “The Jetsons” imagined a space-age future just as “The Flintstones” captured how the glossy future just around the corner made our lumbering, sub-lunar world seem like the Stone Age.
Apollo 11 astronaut Buzz Aldrin on the moon.
As always, music was at the center of everything. All those shows had theme songs that seemed ubiquitous. The moon, of course, retained the power it has always held as a symbol of romance. Indeed, Frank Sinatra’s exuberant version of Bart Howard’s “Fly Me to the Moon” became the first song played on the moon when astronauts Neil Armstrong and Buzz Aldrin gave it a spin on a portable tape player after the Apollo 11 landing. Yet popular culture, characteristically, found ways to capture some of the fears — and some of the cultural ambivalence — that countered the triumphs of the Apollo missions. Even an elegant pop ballad like Jonathan King’s “Everyone’s Gone to the Moon,” a Top 20 hit in 1965 (and another song listened to by the Apollo 11 crew during their flight), treated the moon as a source of alienation. And David Bowie’s “Space Oddity,” released the week before the Apollo 11 launch, imagined a technological breakdown resulting in Major Tom’s being forever lost in space. That song was inspired by Stanley Kubrick’s 1968 film 2001: A Space Odyssey, which made brilliant use of classical pieces like “The Blue Danube” and Also Sprach Zarathustra, but also envisioned a future in which the very technology that made space travel possible would put human life at risk.
Of course, the actual moon itself landing couldn’t have been more inspiring. I watched it with my mother in our family’s apartment and even as a teenager the implications of it loomed large for me. It seemed much more than a purely American achievement of “one small step for man”; indeed, it was truly “one giant leap for mankind.” It suggested that there was nothing our shared human vision couldn’t engage and accomplish. The question arises at every moment of social convulsion: “Can’t we all just get along?” In July of 1969, the resounding answer was yes.
But whatever was happening on the moon, the realities of life on Earth could only be held at bay so long. Just weeks after the moon landing, the Tate-LaBianca murders in Los Angeles chilled the heart of a community that had been one of the hotbeds of Sixties musical and cinematic creativity. In contrast, less than two weeks after that, the Woodstock Festival offered a prospect of peace and love. By the end of the year, however, the mayhem and murder at the Rolling Stones’ concert at the Altamont Speedway in California eviscerated the hippie dream.
Events moved at a strange pace in the Sixties, simultaneously fast and slow. So much happened in such close proximity, but, as George Harrison once described to me about that era, “you could say any year from 1965 up to the Seventies, it was like … those years seemed to be a thousand years long. Time just got elongated. Sometimes I felt like I was a thousand years old.” So that first moon landing was both a monumental event in human history and just another milestone that got immediately swept up in the head-spinning tumult of the times.
Space travel soon receded as an American priority, but as the psychedelic music that accompanied the dawn of the space age suggested, profound journeys don’t always head outwards. Pink Floyd’s Dark Side of the Moon, for example, charted for more than 2 1/2 years following its initial release in 1973, and continued to chart on a regular basis until 1988. To this day, it remains an essential experience for any young person exploring the wonders of classic rock — and the search for personal identity.
The “Blue Marble” photo.
When I think about space travel myself, I often conjure up the extraordinary “Blue Marble” photograph of the Earth taken by the crew of Apollo 17 (the final Apollo flight) on their way to the moon in 1972. There is our planet, our shared home, so beautiful and exhilarating to see. The true meaning of all we had accomplished came clear to me when I saw that image. From outer space, we could achieve a previously impossible perspective on our own world, an appreciation for the life we know that would lend real meaning to even our farthest flung explorations. “If you know what life is worth / You will look for yours on Earth,” Bob Marley sang in 1973. The heavens, then, might prove a good deal closer than we could have believed.
By now we all know Alexa, Amazon’s cloud-based voice service that controls many smart home devices. Having an Alexa built-in device like the Yamaha YAS-109, YAS-209 or ATS-2090sound bar makes controlling your home entertainment system more convenient than ever.
Setting up the YAS-109 / YAS-209 / ATS-2090 is a breeze. Once it’s connected to your Wi-Fi network, all it takes is a few taps in the Yamaha Sound Bar Controller app to connect Alexa — no need to set up any other devices on your network.
Once that’s done, you can control your sound bar by asking Alexa to turn the volume up and down, like this:
“Alexa, volume up.”
These sound bars have a handy ducking feature, too, which means that when you say the Alexa wake word, the volume will lower (“duck”) automatically so that Alexa can hear your command more clearly. What’s more, forward-facing microphones ignore sound that might be bouncing off your TV wall, making it easier for Alexa to hear you. You can also activate Alexa by pressing the Alexa button in the upper left-hand corner of the sound bar’s remote control, as shown in the illustration below:
And here’s where Alexa really ups her game, because she can also control Fire TV through your sound bar. After linking your sound bar and your Fire TV in your Alexa app, simply say something like this:
“Alexa, play District 9”
and Alexa will find the movie title on Fire TV. If you say a TV series, Alexa will show the last episode you watched or the first episode of the first season if you haven’t watched the series before. No more hunting for the remote control between the couch cushions! Search for your favorite shows and movies or discover new content simply by asking Alexa.
Alexa built-in is a great way to listen to music too. You don’t even have to bother with connecting your phone to your sound bar via Bluetooth. Just say:
“Alexa, play Old Town Road”
Alexa accesses Amazon Prime Music’s over two million songs by default, or up to 60 million songs with Amazon Music Unlimited if you are a subscriber. (You can change the default music service in the Alexa app.) Explore new music and let Alexa get to know you with commands like these:
“Alexa, play some country music”
“Alexa, I like this one”
“Alexa, who sings this?”
“Alexa, play more like this”
Of course, you can control playback with the usual play, pause and skip commands.
You can also ask Alexa to do those basic things that we’ve come to depend on, such as:
– Create lists, reminders and timers
– Report the weather or the news
– Shop
Alexa built-in is always improving, with new commands added through updates to the Sound Bar Controller app. Make sure the app is always up-to-date by opening it often!
If you have a MusicCast sound bar or receiver, like the MusicCast BAR 400 or an AVENTAGE receiver, you can do even more with an external Alexa device like an Echo or Dot. Click herefor more information.
If you notice that you or your student is having trouble creating a sound on their clarinet or saxophone, it’s best to start at the source — check the mouthpiece! Here are some helpful hints for solving potential problems in terms of reed placement and ligature issues.
Reed Placement
The tip of the reed is typically lined up flush with the tip of the mouthpiece. Depending on the player, the exact position may be slightly adjusted to fit personal preference. There can also be quite a bit of difference from player to player when it comes to the position of the ligature (see below).
Here are two common problems caused by incorrect reed placement:
– Reed placement below the tip of the mouthpiece. This will cause the reed to cave in on itself, causing the sound to be brittle and bright. In some instances, it may result in no sound at all!
– Reed placement above the tip of the mouthpiece. This will cause the reed to feel much stiffer or harder than it was intended to, resulting in fatigue for the player. In addition, the sound will be diminished, both in terms of volume and quality (there may be a fuzziness to the tone).
Centering the reed is always tricky, especially for less experienced players. I recommend slipping the ligature over the mouthpiece and then guiding the reed into place gently.
Ligature Positioning
A ligature is basically a clamp that holds a reed in place on the mouthpiece. Finding the best fit and style of ligature is very subjective, especially since there are many different types of woodwind mouthpieces with varying outer bore dimensions. For that reason, there may be some trial and error involved in locating the right ligature for your playing style.
Using a ligature to attach a reed.
In particular, the front part of the uncut / bark section of the reed is very important in that it needs to be in good (and consistent) contact with the table (the flat portion) of the mouthpiece. Your ligature should help maintain that contact without smashing the reed and causing excessive indentations. If you notice spit or moisture coming out of the sides of the reed from about halfway up the “vamped” (cut) section of the reed (i.e., where it comes in to contact with the mouthpiece) to the bottom of the reed, then either the ligature is not creating a good hold on the reed or the reed is warped.
Advanced clarinetists especially should check to make sure that they can grasp the ligature and move the mouthpiece to an A clarinet if necessary, without the reed moving or the ligature coming off.
Click here for more information about Yamaha clarinets.
Click here for more information about Yamaha saxophones.
In this video, product specialist Chris Anthony demonstrates how to use the onboard Styles and Voices of an arranger keyboard such as the Yamaha PSR-S670to recreate the sound and feel of a worship song, using the Planetshakers “Endless Praise” as an example. By breaking down the recording into its components, he explains how a simple pattern can build and develop, and shows how to edit onboard PSR Styles to emulate those kinds of dynamic changes. Also included is a demonstration of how to use the built-in drum pads for loops, as well as the usage of Registration memories for storage and instant recall. By the end of this eleven-minute video, you’ll be able to construct a version of the song inside your PSR keyboard that rivals the original!
Click here to learn more about the Yamaha PSR-S670.
The marimba is a percussion instrument consisting of a set of wooden bars struck with yarn-covered mallets to produce musical tones. Metal resonators (sometimes called resonator tubes or resonator pipes) are suspended beneath the tone bars to amplify their sound, with the length of each resonator varying depending on the pitch of the bar; the lower the note, the longer the resonator. The bars of a marimba are arranged like the keys of a piano, with the groups of two and three accidentals raised vertically, overlapping the natural bars to aid the performer both visually and physically.
In addition to solo performances, marimbas are used in woodwind and brass ensembles, jazz ensembles, marching band (front ensembles), drum and bugle corps, and indoor percussion ensembles. They are also sometimes used in orchestras.
Here’s an annotated illustration of a typical marimba, followed by a description of the main components in alphabetical order:
Frame. A durable frame provides lower support while horizontal legs maintain stability, and therefore the playability of the instrument.
Gas Spring. A height adjustment feature that allows for the most comfortable playing position for different players.
Resonators. The length of these metallic tubes is specific to each note, optimizing the projection of each tone bar.
Rail. These wooden crossbars support the tone bars. Never push or pull a marimba by the rails!
Reinforcement Stay. This provides structural rigidity that prevents the frame from sagging in the middle.
Slant Shaft. Provides additional structural integrity to protect the marimba from sagging over time.
Tone Bars (Natural / Accidental). The bass notes are on the far left-hand side where the thickest bars on the marimba are located. As you move to the right, the bars become smaller and smaller, and the pitch becomes higher.
I have always been able to “see” notes and scales on a guitar fretboard as shapes and boxes that fit together like pieces of a puzzle. By visualizing patterns and memorizing them, I could move up and down the neck quite easily. They all made sense to me on a level that seemed deeper than just strumming a few chords.
For some reason, I’ve also always had an innate sense of rhythm. Even as a beginner, I could navigate odd meters such as 7/8 or 11/12. My brain would simply lock into whatever the meter was, with little effort. Not only that, I was able to play on top of the beat, on the beat or just behind it with ease. No conscious thought went into any of these abilities — they just seemed to be something that I could feel inside my soul.
I don’t know why I was blessed this way, but if I have to come up with a possible explanation, it may be that, from the time I was an infant, I always loved listening to music. What’s more, as I listened, I was always somehow able to break down musical passages — even complex ones with a great deal of instrumentation — into their individual parts. My colleague Howard Massey posted a blog here not long ago that explored the subject of predisposition, and how much it may or may not play a role in the development of musical skills. Since I had little formal training, I have to conclude that in my particular case, these aptitudes came mostly from instinct.
By the time I reached high school I had joined a jam band with some friends. We were just experimenting, having fun, trying new things and, most importantly, listening closely to each other. We would try out all kinds of odd meters when we played — even polyrhythms, with two meters playing against each other simultaneously. I also learned the benefits of crafting repeating patterns, then adding a twist. For example, if you play the first six notes in a major scale and at the same time another musician plays just the first five notes in that scale in the same meter, they form a mathematical pattern that cycles within itself in all sorts of interesting ways. Later, when I was learning to play bass, I would listen to Led Zeppelin records and focus in on what John Paul Jones was playing. I literally became a better player just by hearing how his parts fit into the entirety of a song.
Through the years, my comprehension of what I was listening to improved, and my tastes broadened too. I had long loved rock, jazz, funk and reggae, but now I started taking an interest in classical music as well. Understanding the range and timbre of each symphonic instrument and the ways they interacted to form a cohesive sound was like turning on an aural light bulb. Even just learning how the string sections of first violin, second violin, cello and basses are positioned from left to right on stage helped me better “hear” the overall string work as a whole. The same applied to knowing that the french horns, trumpets, trombones and tubas were laid out the same way from left to right, typically positioned behind the flutes, clarinets, oboes and bassoons. I will never forget the first time I put on headphones and listened to a performance of Beethoven’s Fifth by the London Symphony Orchestra and heard the various parts and sections pan naturally in stereo as they were performed. It was so amazing I listened ten times in a row!
I’ve also learned an incredible amount by observing the artists I’ve been lucky enough to work with. Sitting next to guitarists like Al DiMeola and Ace Frehley and watching what they do and how they do it allowed me to pick up many tricks of the trade. Not that I could play like them, or wanted to, but I found that I was able to apply the small details that I saw and heard to my own style. Of course, not everyone has that privilege, but watching great performances on TV or online can be almost as constructive … especially if there are lots of close-up shots of fingerings.
Researchers have been able to quantify the benefits of listening to music. They have found that this activity engages broad neural networks in the brain, including those regions responsible for motor actions, emotions and creativity. An associate professor of psychology at the University of California Davis Center for Mind and Brain by the name of Petr Janata has even been able to create a model for mapping the tones of a piece of music as it moves from chord to chord and in and out of major and minor keys. What’s more, he discovered that the brain is able to sense these tonal progressions in the same region that is used for experiencing memories. (No surprise there, since we’ve all had the experience of a favorite song triggering recollections of meaningful times in our lives when we’ve heard it, including, in many cases, the first time we heard it.)
So the next time you’re listening to music, take the time to separate yourself from the music as a whole and hone in on a single part, then break it down. Think about how the individual components make you feel, then see if you can apply some of that to your own work. You’ll undoubtedly discover that listening and learning can truly be a potent combination.
But amplifying an acoustic guitar in a way that actually makes it sound like an acoustic guitar? That’s an assignment that’s challenged design engineers for nearly a century.
Microphones or Pickups?
Up until now, the approach that best captures the instrument’s distinctive tone has been to stick one or more good microphones in front of your guitar. But although this works well in a recording studio context, it’s of limited use when you’re onstage with a band. Unless, that is, you don’t mind the potential havoc (like feedback or loss of signal) that any sudden movement can cause to your overall sound — or you just love standing in the exact same spot for your entire set.
If you take external mics out of the equation, you’re left with pickups. Yet none of the three main types of pickups used for acoustic guitars — magnetic, piezo and transducer — is a perfect solution in itself to the tone problem since each has both advantages and drawbacks. (See our blog article “Getting Amplified” for more information.) This is why, in more recent times, guitarists and guitar manufacturers have frequently taken to using multiple pickups in a single instrument. By placing different pickup types in different areas of the guitar’s body, it’s possible to create an amplified sound that better replicates the instrument’s acoustic tone at all frequency ranges.
Enter Atmosfeel™: The Best of Both Worlds
The new Yamaha Atmosfeel pickup and preamp system (available in the “X” models of the FG Red Label acoustic guitar series: the dreadnought-size FGX3 and FGX5, and the concert-size FSX3 and FSX5) uses the best of both worlds. The only obvious sign of the Atmosfeel’s presence in these models is a set of three small knobs — Mic Blend, Master Volume, and Bass EQ — on the side of the guitar. But these simple knobs control a complex pickup network inside the instrument, comprised of a piezo sensor, a mini-microphone and a unique synthetic sheet transducer.
As is typical in acoustic-electric guitars, the piezo sensor is located in the bridge. What’s not typical is that the piezo is set to capture only the instrument’s lower frequencies. This addresses the main problem that many players have with piezo pickups: their harsh, brittle-sounding high end. To handle treble frequencies instead, the Atmosfeel system employs an ultra-thin sheet transducer — a new, proprietary Yamaha design — which is located under the guitar’s soundboard, below the saddle. Finally, the mini-mic, placed inside the body on the left side of the upper bout, fills out the low and mid parts of the sonic spectrum. In short, the piezo picks up how the guitar sounds where the strings meet the bridge, the sheet transducer picks up the vibrations of the top soundboard, and the mini-mic picks up the resonance inside the body. Put all three together and you’ve got a full representation of an acoustic guitar’s natural tone.
Create Your Own Custom Blends
The outputs of the piezo and sheet transducer are pre-mixed within the Atmosfeel’s preamp to give you the best mix of low and high, but the output of the mic can be regulated, which is where the Mic Blend knob comes in. Turn it all the way to the left and you hear only the piezo and transducer; turn it all the way to the right and you only get the mic. If you’re playing solo, you might want to opt for more of the midrangey mic sound in your mix, while the more defined highs and lows of the piezo/transducer sound may be preferable for players who need to be heard over a full band.
The next knob over on the Atmosfeel is the important, but self-explanatory, Master Volume. A little more explanation (but not much) is necessary for the final knob, Bass EQ. It controls a peaking EQ filter, which boosts or lowers particular frequencies in the low-mid range — the very kinds of frequencies that can lead to unpleasant onstage feedback when turned up too loud.
Putting It Through Its Paces
Yamaha FGX5.
I tested out a prototype of a Yamaha FGX5 acoustic guitar to hear how the Atmosfeel system would respond in both live and recording situations. When played at relatively high volume through an amplifier or P.A., the tonal difference produced by turning the Mic Blend knob back and forth between all-pickup (left) and all-mic (right) was substantial. All-mic sounded more natural — more acoustic-y, if you will — but lacked some definition. All-pickup had plenty of definition, but occasionally a note cut through a little too much. Setting the knob right in the middle at 12 o’clock proved to be a happy medium indeed, unifying the lows, mids, and highs to create a clear, bell-like tone. The Bass EQ knob, meanwhile, served its function perfectly. If I left it turned up all the way at a high volume, feedback would eventually ensue (surprise, surprise), but gradually turning it down while simultaneously raising the amp or P.A. volume worked an impressive magic trick: Not only was there no feedback, but the higher volume compensated for the attenuation of the lo-mids, making it seem as if no tonal change had occurred.
Here are three audio clips of the FGX5 played through a guitar amp with the Mic Blend knob turned all the way to the left (all pickup), all the way to the right (all mic), and at 12 o’clock (equal blend of both). Both the Master Volume and Bass EQ knobs are at 12 o’clock in all three examples:
Plugging the FGX5 directly into a recording interface produced similar, though more subtle results. (Perhaps the lower volume used in the recording studio had something to do with this.) Here are three audio clips of the FGX5’s output, as recorded in a DAW. As in the previous three clips, the Mic Blend knob is first turned all the way to the left (all pickup), then all the way to the right (all mic), and finally to 12 o’clock (equal blend of both). Again, both the Master Volume and Bass EQ knobs are at 12 o’clock in all three examples:
Of course, you should let your own ears decide whether the sound of the Atmosfeel is right for your playing style. But here’s one thing that nobody’s ears can deny: This is one pickup system that makes an acoustic guitar actually sound like an acoustic guitar — and that’s no easy feat.
Click here for more information about the Yamaha Atmosfeel system.
Click here for more information about Yamaha Red Label acoustic guitars.
You’re setting up for a gig. You connect all of your equipment, turn on the PA … but instead of hearing clean, crisp sound, you are greeted with a rude hum.
Don’t worry, it’s not something you’ll have to live with. Here are some tips to help you find and eliminate the source of such gremlins.
Start From The Ground Up
IEC cable.
One of the most important things you can do to fight noise in your PA is make sure that your gear is properly grounded. Live sound gear such as mixers, amplifiers and powered speakers usually connect to AC outlets using a detachable, grounded IEC cable. This has a female connector on one end and a three-pin plug on the other with two flat, parallel blades and a round or U-shaped pin.
That round or U-shaped pin is the ground — it literally creates a connection between the mixer and the earth, and that’s important for two reasons: First, it’s a safety precaution ensuring that a circuit breaker will trip if a hazard such as a short is encountered. Second, the ground pin drains unwanted signals to the earth, so that you won’t hear them. Make sure you feel some resistance whenever you plug a cable into an AC outlet, with the outlet firmly gripping the plug — that way, you can be pretty certain that the ground pin is connected and doing its job.
IMPORTANT: If someone has removed the ground pin from an AC power cable, the cable should not be used because it presents a safety hazard. For the same reason, frayed AC cables or cables with cracked insulation should be tossed in the trash. You might even consider cutting the ends off the cable to make sure it isn’t used again.
Continue Troubleshooting
Once you’ve confirmed that your gear is properly grounded, you can continue troubleshooting. This process applies to any PA system, but let’s say for the sake of example that your PA consists of a Yamaha MG20XU mixer and a pair of Yamaha DXR12mkII powered loudspeakers. Start by powering everything down and disconnecting the cables between the MG20XU and the DXR12mkIIs. Then turn on the speakers and listen. You may hear a very faint hiss coming from the speakers, which is normal — but you should not hear any buzz or hum.
Turn off the speakers and connect the mixer outputs to the speaker inputs. Bring the faders down all the way, turn on the mixer and then turn on the speakers or power amp. If you hear hum, you may have what is known as a ground loop. A ground loop is what happens when equipment is plugged into AC outlets in different locations, and is then connected together with audio cables that have their shield connected to ground — which applies to most audio cables.
For example, suppose that the mixer is plugged into an electrical outlet at front-of-house, while the speakers are plugged into an electrical outlet near the stage. The mixer and speakers will be connected using TRS or XLR cables, both of which have grounded shields. If the electrical outlets are on separate circuits, you’ll probably experience a ground loop because their grounds are slightly different. That’s what produces the hum.
There are a few different ways to solve a ground loop. One is to use a power strip to feed AC to all of the gear from the same electrical outlet, which virtually guarantees that you won’t have a ground loop. That’s not always possible, so another solution is to use an isolation transformer between the mixer outputs and the inputs to the powered speakers or amplifier. An isolation transformer disconnects the audio ground between the devices, breaking the ground loop. Lastly, some equipment may have a “ground lift” switch that can solve the problem by disconnecting the audio signal ground from the earth. (Next month we’ll talk about how a Direct Injection box, known as a “DI,” can help solve ground issues with instruments like electric bass and keyboards).
Other Sources of Interference
A variety of external signals can interfere with audio. Radio Frequency Interference (“RFI”) is produced by TV and radio stations, cell phones, Wi-Fi and Bluetooth devices, microwave ovens, two-way radios, wireless microphones, and even certain types of lighting systems. These signals can leak into the audio path, creating noise. Fortunately, the metal chassis of a mixer, amplifier or powered speaker serves as a shield from RFI and absorbs these signals, so as long as the chassis is correctly grounded (see above), RFI will be directed into the earth where it is harmless.
Interference can also be created when AC cables are run alongside audio cables. You can avoid noise by crossing the cables at 90 degrees to minimize the area where the power cable is near the audio cable. This is less of an issue with speaker cables because the signal from a power amp is very strong compared to that of a microphone or line-level signal.
Lighting dimmers and fluorescent work light fixtures can also be a source of noise. Turn off any such lighting that’s in the vicinity of your PA to see if that solves your noise issue.
Now that you’ve completed this troubleshooting, power the system on and bring up the faders one at a time, starting with the master fader. You should not hear any hum or buzz … but if you do, it’s time to check your audio cables.
Cables Get No Respect
Cables take a lot of abuse. They get yanked, stepped on, run over by flight cases and doused with beer, so it’s a good idea to inspect all your cables for damage before and after every gig. Examine the outer sheath of the cable, which is typically made of flexible plastic. Any cable that has breaks or openings in the outer jacket should be replaced. Connectors should be shiny, clean and straight. Oxidation on the contacts can cause intermittent audio or buzzing. Use contact cleaner on a soft, clean cloth to wipe off TS and TRS connectors, removing any dirt that may build up over time. Don’t use anything abrasive on connectors.
XLR connectors with dirty pins (left) and clean pins (right).
XLR connectors are a bit of a challenge to clean because the contacts are more difficult to access. A cotton swab with contact cleaner on it is helpful when cleaning the pins on a male XLR. Cleaning the sockets on a female XLR connector is tricky, but one effective method is to spray some contact cleaner into the sockets and use a plastic toothpick (the kind with the little brush on one end) to gently remove foreign matter, as shown in the illustration below. Don’t push anything larger into the sockets because that will spread the contacts and create an intermittent connection.
Use a plastic toothpick to clean female XLR connectors.
As we saw in our Tools of the Trade blog post about interconnections, audio cables can be balanced or unbalanced, and both types have a ground or shield wire. It’s very important that this wire not be damaged, loose or frayed. There’s not a lot of real estate inside a TS or XLR connector, so if something gets loose, there’s a good chance that the wires will short, making the cable noisy or intermittent. If you suspect that’s the case, open the connector and look for broken or shorted wires. If you have any doubts, send the cable to that Great Gig in the Sky. You won’t regret it.
Frayed wires inside audio connectors can cause shorts.
Sniffing out these audio gremlins is not the most glamorous (or fun) part of doing live sound, but once you know what to look for, you’ll have an easier time making your PA run quiet and clean.
In Part 1 of this two-part article, we discussed the major scale and the process of harmonization, focusing on Ionian mode, with definitions of each of those terms. This month, we’ll examine Dorian mode, which puts a completely different spin on the music you create.
The Dorian minor scale is built from the second scale degree (i.e., note) of the major scale. Playing a major scale from the second note to the same note an octave higher will give you the unique intervals of Dorian mode. (Intervals are the distances in pitch between notes.) A II mi7 chord is built by selecting consecutive 3rds from the tonic of Dorian mode. (The first note of a scale is called the “tonic” and the first note of a chord is referred to as the “root.”)
The natural minor scale has a minor sixth interval, whereas the Dorian minor scale has a major sixth interval. It’s this variation that gives Dorian mode its unique, sought-after sound.
Dorian mode is often favored by rock and jazz-fusion players soloing over static or descending II mi7 – V7 chord progressions. The major sixth of the scale adds tension to the II mi7 chord, and a strong “release” and resolution of tension when it becomes the major 3rd of the V7 chord.
Moving from Ionian to Dorian Mode
Let’s start by doing a quick review of the harmony and theory presented in Part 1 for a reminder of the scale tones, chord harmony and the corresponding scale modality. We’ll continue to use the key of A major as an example.
The seven notes of the A major scale (A Ionian Mode) are:
A – B – C# – D – E – F# – G#
The seven chords that are built by harmonizing the A major scale are:
As you can see, none of the notes or chords have changed from the A major scale — we’ve simply shifted the focal point for harmonic and melodic variation within the same major scale intervals.
Dorian Chord Progressions
All chord progressions consist of two or more chords. A Dorian chord progression will not only contain the II mi or II mi7 chord, but it will also resolve and sound complete and “rested” when ending on that chord. (As described in Part 1, this is called the tonal center of the chord progression.) Typically, the first chord of a sequence will be the tonal center. For example:
I: Bmi7 I A E I Bmi7 I A E :I
Obviously, playing the progression will be the ultimate test as to where our ear hears the resolution point, but in this case, it’s definitely the Bmi7 chord. Take a moment to play this progression a couple of times and end on the Bmi7. You’ll hear the chords naturally gravitate towards resolving at that point.
Melodic phrases don’t need to start on the tonic of the Dorian mode (in this case, B), but phrasing lines and licks towards the tonal center and its chord-tones will be the key to melodic soloing. The chord-tones of Bmi7 are B, D, F# and A. These are the four tones that will sound the most resolute when sustaining notes and ending your phrases.
As described in Part 1, each major scale mode has a characteristic note that evokes the flavor of that modality. The characteristic note of the A Ionian mode is the major 7th (G#). The characteristic note of the B Dorian mode is the major 6th (also G#).
It’s not compulsory to use the characteristic note within your melodies, but if you want to bring out the “flavor” of Dorian mode you may want to target and incorporate it into your phrases. Bear in mind, however, that the characteristic note may not be the best tone to sustain over a Dorian chord progression. Let your ears be the guiding factor into what works over any given series of chords.
The Video
Here’s an example of how to use Dorian mode from my “Master of Modes” series of video lessons available at RobbieCalvo.com:
This is the B Dorian chord progression I’m playing over:
I: Bmi9 I Asus A E/G# :I
The first note of the opening phrase in my solo is C#. I’m accentuating and sustaining this note for some time, and it works really well because it’s an additional chord tone that I added to Bmi7 to create a Bmi9 chord.
In addition to the 9th, my first two phrases resolve on F# (the 5th) and B (the root of Bmi9). It’s not until the third and fourth phrases of my solo that I really start to accentuate the Dorian characteristic note of G#.
Listen to the solo a couple of times to hear the effect that the characteristic note has on the mood of the composition. I’m also repeating melodic motifs and leaving lots of space between each phrase to let the melodies breathe and stand alone as independent musical statements. (Click hereto view a transcription of my solo.)
The Guitar
The Yamaha Design Concept guitar in this video is based on the standard Revstar RS502T model, with a few modifications to the hardware and finish. The “Ice Blue” color is standard on Revstar RS320 models, but here it serves as a striking backdrop to the black Rautia humbucking pickups, tailpiece and scratch plate. While filming, I was concerned that the gloss finish would create a reflective glare, but it was perfect on camera and stayed in focus the entire time.
The neck and back of the guitar are treated with a translucent eggshell finish that allows the auburn tone of the mahogany neck and body to glow through it. The “dry” feel of the finish also facilitates effortless position shifts on the fretboard.
The Rautia pickups retain a smooth clarity when overdriven and respond beautifully to personal dynamics and the subtle nuances of single-note lines. The guitar tones sit nicely in a busy mix, making it perfect for video projects and recording sessions.
The Wrap-Up
The music we craft changes in terms of mood and emotional response when we alter the harmonic structures to resolve to the unique tonal centers found within the major scale. Even after decades of playing and teaching, I’m still amazed at how the Ionian and Dorian major scale modes can produce completely different content using the same seven notes.
NOTE: There are five more major scale modes to discover, each with their own unique flavor. If you’d like to continue your study of the major scale modes, my new video course “Master Of Modes” is available at http://www.robbiecalvo.com. The course contains eight video lessons and seven studio tracks, as well as tab, notation, scale/arpeggio diagrams and text for each of the modes.
It’s finally going to happen. With the upcoming release of Apple’s new operating system for Mac computers (MacOS Catalina, scheduled to arrive in late September 2019), Apple will flip the switch and shut off iTunes for good. But don’t panic. All that time and effort spent creating playlists and purchasing your favorite tracks wasn’t wasted. That music will still live on your computer (in the new Apple “Music” app that will replace iTunes), and you can keep it alive through the power of streaming … just perhaps not the way you might think.
If you’re a fan of streaming music from your mobile device to speakers throughout your home, MusicCast is your ticket to digital freedom and unleashing your iTunes library. The MusicCast Controller app allows you to stream music to any room of your house using a number of different options, including Bluetooth®, Apple Music® (via AirPlay) and other streaming services. You can also stream music you have stored on your device or on a local network.
If you’re using a PC computer, you’ll want to check out our blog article “How to Stream Music From Your Computer.” To stream from an Apple computer such as a Mac or MacBook, read on.
Setup Requirements
In order to access your music, you’ll need to establish a connection to the iTunes collection on your Apple computer using the “Server” button on the MusicCast Controller app, as shown in the illustration on the right. This will allow you to access any downloaded or backed-up music files you have previously purchased and stored on your computer or NAS (Network Attached Storage) device such as a thumb drive or external hard drive. A third-party service is required to connect your streaming capabilities via MusicCast with the stored content on your Mac. There are a number of free and paid software options to choose from to accomplish this. We recommend you do some research online to find the service that’s right for you. For the purposes of this tutorial, we’ll be using the free media server software called Plex.
Using Plex
1. First, find and download Plex Media Server to your Mac. Then, under the Plex Media Server drop-down menu, select “Mac OS”:
2. You’ll be prompted to give a name for your stored media folder. Keep it simple:
3. Now you’ll be asked to add your iTunes library or libraries. (You’re not limited to just one library.)
4. Click Next and you’ll see the following screen signaling the end of the process. Click Done and you’ve completed the connection!
5. While still in Plex, click on Settings in the left panel, then scroll down until you see “DLNA” towards the bottom of the Settings section. Click on it and look for the check box line that reads “Enable the DLNA server.” Make sure the box is checked (it should be already). This will allow the software to connect via Wi-Fi, and by extension, MusicCast:
6. Finally, go back to the MusicCast Controller app and click the Server button, which, as shown in the screenshot on the right, should now be showing the folder you shared through Plex. And that’s it! You can now listen to your collection of stored music through MusicCast and enjoy all the versatility that comes with it.
Aside from connecting to your iTunes library, Plex also scans for all music files on your computer that can be enjoyed with the MusicCast Controller app, including AAC, ALAC, E-AC3, FLAC, MP3, M4A and WAV. Click hereto learn more about Plex Media Server and its capabilities.
For more ways to enjoy music at home, check out these blog articles:
We asked them to share their thoughts on each other as colleagues and friends.
Eric on Jauvon
“Jauvon’s spirit is so strong. He’s the coolest dude in the world and one of the most positive people I’ve ever met in my life. I feel fortunate to have known him for some time now. He’s just so consistently positive, no matter what’s going on in his life, and I have so much respect for him and his ability to do that.
“No matter how tough times are or things get, he’s just Jauvon. He’s got that insurmountable force of positive energy. It’s truly a rare thing.
“He’s just a great, great guy. His spirit is a great reminder for me to always be positive no matter what’s going on. I’m the luckiest guy in the world that I get to work next to him almost every day.”
Jauvon on Eric
“Eric is a great colleague, a great musician and my closest friend in D.C. We have similar teaching styles. I love how driven he is and how smart he is with managing his time. He’s just very intelligent. Period.
“The greatest thing I learned from Eric is how he deals with conflict: resolving it quickly in the easiest, most thorough way. I want to resolve it thoroughly, too, but I have no problem engaging, and that doesn’t always work out well. Eric’s smart about reverse-engineering to get a result that is most advantageous.
“We both want to make each other look good, which is why we work together so well on stage. When one of us makes a mistake, we’re both really quick to say, ‘My bad.’ When something’s wrong, we look internally first, not looking to lay the blame at someone else’s feet.”
photo by Rob Shanahan for Yamaha Corporation of America
This article originally appeared in the 2019 V2 issue of Yamaha SupportED. To see more back issues, find out about Yamaha resources for music educators, or sign up to be notified when the next issue is available, click here.
You can feel the enthusiasm and hear the reverberating sound of music and movement. Every summer, 75 high school students in Fort Worth, Texas, hone their percussion skills.
The summer camps — two choral, one percussion and one theater tech (in which students learn about backstage mechanics) — are underwritten by Performing Arts Fort Worth (PAFW), which operates Bass Performance Hall, and made possible through private donations and foundations.
A Village of Partners
The five-day High School Percussion Camp brings 75 students from Title 1 schools to Bass Performance Hall. The camp is built on a strong partnership between PAFW and the Fort Worth Independent School District (FWISD). Local educators support the camp while sponsors such as Yamaha, Innovative Percussion, Marimba One, Sabian and Remo provide financial support.
Oftentimes, the camp participants have no dedicated percussion instructor on staff at their schools. “They [have] never worked with a professional musician other than their band director or choir director,” says Sue Buratto, The Children’s Education Program director.
The camp recruits well-regarded local educators as volunteer instructors. “We have an amazing staff of top educators from around the Fort Worth area who teach at the camp,” says Dr. Brian A. West, the camp’s director as well as the coordinator of percussion at Texas Christian University. “These include university professors and public school educators from FWISD and from other local school districts.”
The camps also receive support from friends, family and foundations. “Our development department has been very successful in finding families and foundations in the area that want to help with these kinds of programs,” says Buratto, who started The Children’s Education Program 20 years ago.
Most camp participants are in the free or reduced lunch program at their schools, so PAFW feeds the students as well as transports them to and from the camp. Feeding 75 campers can be an expensive undertaking. Luckily, area food banks and college cafeterias are always searching for ways to keep their staff employed during the summer. They donate sandwiches and bottled water to the camps. Corporations donate snacks. “It is a total partnership; it truly takes a village,” Buratto says.
West advises music directors who want to form similar camps to partner with local educators, school districts, universities, performing arts organizations, local music vendors, music corporations and anyone else who could support their endeavor. “Having support from a broad variety of sources is very helpful with this kind of project,” he says.
Blood, Sweat and Volunteers
Emmnauel Flores
Brian A. West
PAFW and FWISD staff members work together to coordinate the transportation of campers to and from Bass Performance Hall, meeting throughout the spring to strategize on pick-up and drop-off locations and bus routes. Logistics, Buratto says, is one of the most laborious facets of running the percussion camp.
Each year Emmanuel “Manny” Flores, director of percussion at Southwest High School in Fort Worth, secures all the equipment necessary to run the camp. He is also one of seven volunteer instructors. “Without Manny, our camp would have a very hard time running,” West says. “While the camp does own a wonderful set of Yamaha drums, we need many more instruments for the students to perform on. We borrow instruments from some of the FWISD schools. This is a key partnership and a large part of our success.”
West and the instructors are not the only volunteers on hand for the week. Over the years, a dedicated core of volunteers, some of whom have grandchildren in the camp, work to distribute music, paperwork and food during camp hours. They also guide students to sectionals.
“[Volunteers] create a safe environment for students, so all they have to worry about is making music,” Flores says.
Steady Growth
Buratto started Bass Performance Hall’s summer percussion camp in 2014 after learning about the frustrations of band directors, who “felt that many times the rhythm section, which is, after all, the backbone of a large ensemble, was a little lost in the shuffle of trying to get the clarinets to play on pitch and getting the trumpets to attack together,” Buratto says.
Only 25 students signed up that first year. “Students didn’t want to give up a week of their vacation,” Buratto says. Now percussion camp is “a thing to do,” she says.
The camp has been successful for two reasons, according to Dr. Jim Yakas, who directed the camp until 2016.
First, Bass Performance Hall and FWISD bought into the concept from the beginning. “This made the job of the camp directors and staff very easy,” says Yakas, who is now the director of percussion studies at VanderCook College of Music in Chicago.
Second, the camp’s staff comprises local music teachers, who then encourage students to attend. “We understood the importance of providing a great experience for the students the first year, so the word would get out that this was an amazing camp,” he adds.
Yakas advises young teachers to connect with students outside of their own schools. “Find ways you can use the power of the arts to have a lasting, exponential effect on your community,” he says.
More than Just Music
Music instruction is not the only thing that the percussion students receive during their week at camp. “The staff at PAFW, the camp staff and all of the volunteers shower these students with attention, education and love,” West says.
The Children’s Education Program summer camps have served more than 4,000 students since their inception. The success of the percussion camp, however, is not measured solely by the number of students it has served. Campers grow as musicians and as individuals, rising above challenging personal situations.
“We work hard to discuss leadership skills, professionalism and a much broader array of topics,” West says. “We’ve seen so many students grow into leadership positions at their schools and continue to develop as young adults.”
Some students, says Flores, come from schools that don’t have percussion directors, making their percussion units auxiliary to the band. “When they come to camp and start to really dig in, they see all the great things that percussion provides,” he says.
group photo by Kayce Pulliam; all other photos by Brian A. West
This article originally appeared in the 2019 V2 issue of Yamaha SupportED. To see more back issues, find out about Yamaha resources for music educators, or sign up to be notified when the next issue is available, click here.
Below, he pens a letter to his younger self, sharing advice, anecdotes and inspiration for a fulfilling career in music education.
Dear Younger Doug:
As I reflect on my 23 years as a music educator, I want to share my knowledge and give you six pointers that will help you as you start your career.
Stay Organized: Keep a constant to-do list and write things down so you don’t forget. Stay ahead of your classes and always be prepared for rehearsal.
Delegate: Find tasks (setting up chairs and stands, organizing music, etc.) that responsible students or parents can handle to free up your time to prepare for rehearsal. Use (or organize) a parent booster group to help with fundraising and other support.
Communicate: Make sure to communicate with everyone more than once. Your students, colleagues, coaches, administrators and parents are juggling a million things. Consistent reminders of concerts, extra rehearsals and trips — through different channels (website, email, letters home, face-to-face meetings, etc.) — will help. Sure, you will always have kids say, “I didn’t know we had a major festival performance this weekend,” but they will be the minority.
Stay Positive: You will lose your cool early on and get frustrated with students who don’t seem as interested or intense about music as you are. You just graduated with a degree in music education, landed your first job and are ready to change the world in small-town Ohio. But you have to understand that students have a lot going on in their lives. If they have a bad attitude, it could be a personal issue at home, hormones, hunger, being scared or intimidated, … and often it has nothing to do with you or music. Stay positive and calm. Take a deep breath and realize that these are children who are still learning how to deal with their emotions. You most likely will win them over, but as Theodore Roosevelt said, “Nobody cares how much you know until they know how much you care.”
Document: It’s vital to document everything, especially disciplinary situations or difficult meetings with students or parents. Stay professional during parent meetings — listen without interrupting, speak with a caring tone and cite your documents if needed. (My principal once told me this very thing after a parent meeting.) You are there to help the student, not prove who is “right” or “wrong.”
Keep Growing and Learning: Last but not least, keep growing as a musician! Observe fellow directors as much as possible, score study more advanced music, keep working on piano and other instruments you teach, make time to play and perform on your primary instrument, go to concerts and listen to great music.
Remember, you have chosen one of the greatest and most rewarding professions in the world.
Good luck!
Douglas in 2019
This article originally appeared in the 2019 V2 issue of Yamaha SupportED. To see more back issues, find out about Yamaha resources for music educators, or sign up to be notified when the next issue is available, click here.
Even the most accomplished band directors can feel a bit out of their league when teaching strings for the first time. Both Dean Westman, performing arts department chair and orchestra director at Avon (Indiana) High School, and Glenn Fugett, director of bands and orchestras at the Nashville School of the Arts, remember having an uneasy feeling when they were asked to create new orchestras at their respective schools. However, both successfully extended their achievements in band to build extraordinary strings programs.
Dr. Paula Krupiczewicz, an accomplished viola player who has performed with artists such as Placido Domingo, Joshua Bell and Sir James Galway, started from the beginning when she was asked to teach orchestra. At the time, she didn’t have an education background but instead leveraged her talents as a musician to advance students’ skills. Now Krupiczewicz has spent more than 10 years as the orchestra director at North Cobb High School in Kennesaw, Georgia.
Westman, Fugett and Krupiczewicz share their tips for teaching strings with success.
1. Surround Yourself with Mentors
Dean Westman
Find a mentor, whether a private lesson teacher or an orchestra director who also started with a band background, and “start picking their brains,” Westman says.
Westman launched the Avon orchestra program in 2007 with just 40 6th-grade beginners. Since then, it has grown to more than 600 students in grades 6 to 12. In 2018, the symphony orchestra won its first Indiana State School Music Association Concert Orchestra Championship, and Westman was inducted into the Bands of America Hall of Fame.
In 2015, when Fugett began teaching strings at the Nashville School of the Arts, he turned to Westman for advice. “Find somebody you can reach out to as a mentor, somebody who speaks your language, who you can hang out with and talk [to], preferably somebody who has done this,” says Fugett who spent the previous 29 years developing successful band programs at two Texas schools — Westlake High School in Austin and Legacy High Schoolin Mansfield.
2. Take Lessons
Acquire a fundamental understanding of string instruments by taking lessons, which will also foster an appreciation for the difficulty of learning how to make a great sound, Westman says. He took violin lessons years ago with his daughter when she was in elementary school to observe the teaching method while learning as a beginner himself.
“Going through that process was a game changer for me to have the most basic level of understanding,” he says.
3. Start with the Basics
Paula Krupiczewicz
Last summer, when Krupiczewicz taught a symposium to band teachers, many of them said they were told they would have to teach string instruments in the fall. Krupiczewicz, who regularly performs with the Georgia Symphony Orchestra, set them at ease.
Producing the right tone is a big challenge for students, Krupiczewicz observes, and the right sound starts with instrument setup and hand position. “I tell my students, ‘It’s like pulling water out of the well; pull the sound from the bottom of your instrument,'” she says. “It’s a happy medium of bow weight, bow speed and the left arm pulling down to let the strings vibrate and the instrument resonate to create a rich, warm, big sound.”
4. Do Daily Warmup Exercises
Practice and warmup exercises are key. Fugett suggests using the book “Daily Warm-Ups for String Orchestra” by Michael Allen. The first exercise in the book focuses on tuning, which Fugett uses for the first six weeks. “I use the book to develop sound quality, tuning, articulation and stylistic bowings,” Fugett says.
5. Hire Top Clinician
Bring in the best string players and clinicians to work with students. Guest artists not only help students improve but also inspire teachers to study how the experts rehearse their students.
“To become the best, surround yourself with the best” is an adage that Westman lives by. He says, “Make [your students] as great as you can.”
Encourage students to take private lessons and use the competitive All-State process in your area to further develop individual musicians, Fugett suggests. Intensive training for students allows them to become better players. “If they master those etudes, they’re becoming a fine high school player,” he adds.
7. Give Yourself Credit
Glenn Fugett
And finally, remember that band director skills apply to teaching strings. Westman says that he was afraid that students wouldn’t want to join the orchestra because he was a tuba player. He soon realized that they didn’t care what he played; they were all making music together.
Fugett agrees. “If you’re successful as a band director, you’re going to be successful with strings as well. Music is music.”
This article originally appeared in the 2019 V2 issue of Yamaha SupportED. To see more back issues, find out about Yamaha resources for music educators, or sign up to be notified when the next issue is available, click here.
Jauvon Gilliam and Eric Shin aren’t well acquainted with the oft-repeated saying, “When one door closes, another opens.” For this powerhouse percussion duo, opportunity repeatedly knocks, and doors keep opening wide. Shin’s and Gilliam’s plates are more than full. Both are percussion lecturers at the University of Maryland School of Music, where Gilliam is also co-director of percussion studies. Both are principals — Shin on percussion and Gilliam on timpani — for the National Symphony Orchestra (NSO) in Washington, D.C. Both are also fairly new successful entrepreneurs, and both have equally successful spouses and young children.
There’s no big secret behind their success — just an old-fashioned combination of passion and grit as well as “uncompromising determination and a positive attitude,” Shin says. “I like doing many things at once and being engaged in them all at a deep level.”
Gilliam’s philosophy — “working harder and smarter, so that when the time comes, your average is better than everyone else’s best” — worked well for him when he landed the NSO timpanist position.
In 2009, he packed his drums into a rented minivan and made two 26-hour cross-country trips once for the initial NSO audition and a second time for the callback. He prepared for the latter by contacting and playing for several major timpanists between Winnipeg, Manitoba, Canada, and Washington, D.C.
In the Music Room
Gilliam won his first national piano competition at age 11 and received a full scholarship in piano performance to Butler University in Indianapolis, but he switched to full-time percussion at the urging of Jon Crabiel, one of his teachers.
Shin started off playing the piano too, but it didn’t capture his imagination like the drums.
Gilliam and Shin met in 2001 at the Cleveland Institute of Music, where they both studied with renowned timpanist Paul Yancich, a “perfectionist who has figured out every technical aspect of playing timpani and at the same time is a total natural,” says Shin.
“[Paul] instilled in me this ‘sponge’ mentality,” says Gilliam about his teacher turned friend and colleague. “He is a very cerebral man of few words when it comes to teaching, but he knows so much. You have to listen up. It might be subtle, but he’ll teach you what you need to know. You learn more by watching him than during lessons because he’s so good.”
In the Classroom
Yancich and other early mentors helped mold Shin’s and Gilliam’s teaching styles.
Gilliam figures out what makes students tick and uses that to fuel their individual fire. The most successful students are those who soak everything up, he says.
“I’m a pretty enthusiastic, all-in, hands-on, engaging teacher,” Gilliam says. “I like to dive deep into the hows, whys, wheres and whens — the synesthesia of it all — hearing colors and seeing palettes. All these things create an atmosphere of timpani culture, and my students just eat it up. They’re fast, eager learners who immerse themselves in the culture, attend concerts, listen to recordings and ask the right questions.”
Gilliam’s definition of professional success is simple. “I want my students to achieve excellence with a happy heart,” he says. “I have a great passion for music, obviously, but also a passion for showing students how awesome it is to do what you love. As long as they’re happy and decent human beings, then I’ve done my job.”
Shin describes his teaching approach as “relaxed,” but says that he can be very demanding. “If you take what [students] bring to the next level, they’re refreshed, energized and curious, and they return prepared to learn more,” says Shin.
He reminds his students to nurture their curiosity and passion for music and seek musical experiences to keep them focused and engaged. It’s easy for students to get stressed, so Shin encourages them to recast their mindset to “busy” rather than “stressful.”
“Everything becomes easier as soon as a student views something as positive,” Shin says.
Shin tells his students to connect with music by attending a performance or using their time in a practice room “almost as meditation, an escape.” He emphasizes the importance of practice and often repeats the famous words of Vince Lombardi, the legendary Green Bay Packers coach: “Practice doesn’t make perfect — perfect practice makes perfect.”
Shin values honest, transparent communication with his students. “It’s a balance as educators that we’re all trying to achieve.I will always work with [students] and respect where they are mentally,” he says.
In the Front Office
Eric Shin at SEOULSPICE
If performing and molding future professional musicians weren’t enough, both Gilliam and Shin work overtime as successful business owners.
Shin became a restaurateur in 2016 with SEOULSPICE, a fast-casual Korean restaurant that now has three locations and is soon to be franchised. It serves as a way for Shin to flex his artistic muscles in different ways, from creating the menu and designing interior spaces to launching the website, and creating branding elements, marketing and more.
Opening day was a little insane. About 30 minutes prior to opening, a line wrapped around the block, so the fire department was there. To make matters worse, they ran out of food in four hours. “It was crazy, exciting, fascinating and busy in all the best ways,” says Shin.
Jauvon Gilliam at Capitol Percussion
Shin adds that the diversion of opening SEOULSPICE served a definite purpose. “I had only been with the orchestra a few years,” he says. “Being an orchestra musician can be very stressful, especially when you’re a principal. You have all these responsibilities. I found that having other commitments eased that pressure.”
Gilliam’s Capitol Percussion, founded in 2014, offers instrument, backline and sound equipment rentals, which is perhaps a more logical, natural extension for a musician. But he, too, makes no bones about the hard work that’s required. “Educators and business owners have to be good time managers,” he says. “You can’t half-ass anything. If you don’t do the work, nobody else will. You just put your head down and do it.”
In the Cloud
Both Shin and Gilliam use various tools to keep it all together.
“You grow a business, then you hire people who are smarter than you to eventually do the things you don’t need to do,” Gilliam says. “I’m getting to that point. I’m a busybody, and I embrace it.”
Gilliam also emphasizes the importance of technology. “Having the tools in front of you to be able to do what you need to is vital,” he says. “The fact that I’ve held the NSO job for a while gives me some leeway to put more energy into my business. I’m up early. I’m up late. I work during orchestra breaks and lunch hours. Everything is mobile; my business is on the cloud. I work whenever I can to reach out to a client, send an invoice, ensure we have the right equipment or talk to my operations manager.”
Shin also harnesses the power of technology to help manage his time and keep everything running smoothly. “Apps and calendar alerts are my lifelines,” he says. “I also use a free web-based program called Trello for the restaurant, and I use Google Drive to plot out orchestra stuff in advance and share it with my colleagues and NSO management.”
In Personal Spaces
No one man can go it alone, and both Gilliam and Shin know this.
Teamwork among family, colleagues, friends and employees help make the dream work, according to Shin. “Surround yourself with the best employees, and take better care of them than yourself,” he says. “Respect fellow musicians, spend quality time with friends and family, and be consistent with sacred times together. It’s important to be connected with everyone in your life.”
Strong human connections keep Gilliam going as well. “I surround myself with people and mentors who know more than I do,” he says. “That’s how I grow. Also, a mantra from Nelson Mandela works well for me in business and in the orchestra: ‘It is better to lead from behind and to put others in front, especially when you celebrate victory when nice things occur.’ I try to be in the moment where I’m at, but the hustle never sleeps.”
Both strongly believe that their music backgrounds make risks less intimidating.
“So many of my friends said I was crazy to open a restaurant,” Shin says. “They said it was risky to enter an industry where so many fail. My response was ‘What possibly could be riskier than going to school and getting a music degree and trying to land an orchestra job?'”
photos by Rob Shanahan for Yamaha Corporation of America
This article originally appeared in the 2019 V2 issue of Yamaha SupportED. To see more back issues, find out about Yamaha resources for music educators, or sign up to be notified when the next issue is available, click here.
An act of kindness can spark a decades-long mentor relationship. Dr. Reginald McDonald remembers when Herb Cox, a former band director, stepped up to help him tune his middle school concert band.
Reginald McDonald
McDonald says that several of his students were not sitting correctly, making tuning stressful and labored.
“[Cox] just politely asked me, ‘Do you mind if I do it?’ [and] … he just came off so subtle and demonstrated to me and the kids how different they sounded,” recalls McDonald, now the director of bands and orchestra and associate professor at Tennessee State University. “I respect him, and I appreciated [his] approach to taking a stressful situation and calming the waters.”
McDonald still considers Cox a friend and mentor 25 years later, and he has tried to learn something new from Cox every time the two see each other.
Between the valuable insight, strong support and lasting friendships, mentor relationships are a must for new music educators.
Matching Mentors and Mentees
Mark Nicholson
Professional associations can be great places to locate mentorship opportunities. For example, the California Music Educators Association (CMEA) created a mentorship program in 2015.
“If you’re teaching English or math, there tends to be several teachers in that subject area, but if you’re the music teacher, oftentimes you’re the only music teacher on that campus,” says Mark Nicholson, CMEA mentorship program chair. “So, many times they feel as if they’re on their own island, and they don’t have anyone to call upon who has that particular music expertise and background. That’s why we find it so necessary to offer this support that’s not there right now.”
After mentors and mentees apply, CMEA pairs the individuals, paying close attention to their disciplines, goals, teaching philosophies, backgrounds, experiences and geography.
“Maybe a music teacher has to lead a guitar class and isn’t familiar with that situation, so it’s important to find a mentor who has specific experience in guitar ensembles,” Nicholson says. “It’s also important that we find a mentor who’s fairly close in proximity to the mentee, so that they can get into the classroom and develop more of a personal relationship.”
New teachers can also find their own mentors through their prior student teaching, current school district, music conferences and other national organizations. A good resource is the Music for All Interstate-65 Corridor Project that helps urban music educators along I-65 in the Midwest and South share resources, network and participate in professional development.
For relationships to prosper, mentors and mentees must have communication and trust. Through CMEA’s program, educators sign a partnership agreement that includes their goals, expectations and communication strategies. They also sign a confidentiality agreement, something band directors say is a must to facilitate open and honest discussions without fear of repercussions.
Mentors must also assure their mentees that they are on “equal footing” and are approachable, says Michael Stone, CMEA’s past president and its current music supervisors representative.
Guiding the Next Generation
Michael Stone
Even though college classes and student teaching equip new educators with several tools, some situations must be learned in the field, and mentors can fill those gaps, says Zachary Harris, concert band director and low brass instructor at William Carey University in Hattiesburg, Mississippi. For instance, mentors can coach young professionals on how to set up their events calendar, plan their trips, create budgets, pick music for their performances and work with band parents.
McDonald adds that a mentor can also “minimize the depth of mistakes” when new teachers do make errors in their classrooms.
New teachers shouldn’t expect one person to provide all the help they need. Stone, who is also the visual and performing arts coordinator at Bakersfield (California) City School District, says he learned different lessons from different mentors. One offered advice on how to inspire his students and community while another helped Stone learn the details of various instruments, and a third mentor helped him develop his philosophies about music education.
Recognize What Works for You
Zachary Harris
A mentor’s advice may not always work with the new teacher’s program or community, notes Harris, who also chairs the Urban Education Advisory Committee that oversees the I-65 Corridor Project. If new teachers “try to model after this person, and your community isn’t accepting the way they do it, then that could be damaging to your program,” he adds.
While mentors should listen and give advice, they should also let new teachers spread their wings and learn what works for their music programs. For example, teachers can provide general advice on tuning a band correctly but let the new teachers experiment with different warm-up techniques for tuning, Harris says.
Mentorship relationships typically don’t evaporate into thin air once new educators gain their footing. Harris still has weekly or monthly conversations with two of his mentors. “Once you establish that relationship, you have it for life because you never stop learning,” Harris says. “There’s always going to be something new or something different.”
This article originally appeared in the 2019 V2 issue of Yamaha SupportED. To see more back issues, find out about Yamaha resources for music educators, or sign up to be notified when the next issue is available, click here.
For every piece of music that somebody loves, somebody else will feel indifferent towards it. You can drive yourself crazy trying to please everyone. But then again, creating art to please others is not the point of art.
When we sit down to create, who are we really trying to please, and why?
The answer to the “who” is: yourself. I’ll get to the “why” shortly.
When we look back, art that will be remembered is art that was created from a deep need to express oneself without the influence of an outside force or opinion.
Listeners can intuitively sense authenticity — something personal yet universal and unique. Those are the songs they keep close to their hearts and eventually sing to their children.
Here I am, getting in the zone.
Admittedly, I’ve written some songs that I’ve tried to convince myself I like because:
1. of the time I invested in writing them
2. I don’t want to disappoint my co-writer, who thinks it’s the best thing since the Smartphone
But if I’m not excited to revisit those songs, tweak them or finish them, then I know that something is up. So I’ve come up with a way to measure whether I’m truly in love with what I’ve created. It’s called The Morning After Test, and it goes like this:
When you wake up the day after you compose a piece of music, is it the first thing you think about, even before coffee or a kiss?
If the answer is yes, you’re golden. It’s that simple.
All those outside opinions from people who mean the world to you can really mess you up. Thing is, if you’re making your own album, it’s going to represent you even after you’re gone from this earth. So write and choose wisely.
And now for the “why.”
No matter what, there’s never any guarantee that your album is going to be a success. If you record only the songs you believe in and the record doesn’t get the critical attention you dreamed about, you’ll still have your soul intact. You’ll still have had that irreplaceable feeling of creating and sharing something real that you’re proud of.
But if you let other peoples’ opinions dictate your path and then the album doesn’t fly, you’ll have, for lack of a better word, failed with a body of work that you didn’t believe in to begin with. Not a good feeling at all. Life’s too short.
Back in 1971, Rick Nelson (the former teen idol known as “Ricky” Nelson) played a concert in Madison Square Garden. He was received well initially, when he played some of his old hits, but when he moved on to some newer material, he was booed — a traumatic experience, but one that inspired him to write the hit song “Garden Party,” which revived his career a year later. Like Rick, I’ve learned my lesson well: You can’t please everyone, so you’ve got to please yourself.
So have fun, experiment, explore, make mistakes — it’s all part of “songwriting cardio.” But when the time comes to choose your babies, get a good night’s sleep and then wake up and see what’s on your mind. Hopefully your favorites will reveal themselves before the coffee. Or the kiss.
Coordinating the transportation of 75 students to and from Bass Performance Hall is a challenging task. But that feat may pale in comparison to coordinating the transportation of the equipment that those 75 students need in order to participate in the five-day camp.
For the past four years, that job has belonged to Emmanuel “Manny” Flores, who is director of percussion at Southwest High School in Fort Worth and a volunteer instructor at the camp. Flores starts by taking inventory of the equipment that he can access at Southwest High School. His inventory includes four Yamaha Acoustalon marimbas, two xylophones, four vibraphones, two glockenspiels and a full set of Yamaha marching equipment. What Southwest can’t supply, Flores borrows from a middle school he works with and then adds his own personal equipment.
As the first day of the percussion camp approaches, Flores gets a handle on exactly what equipment he needs. “We start to really look at numbers,” Flores says. “We look at instrumentation. How many snare drummers are coming to the camp? How many bass drummers? Then I start filling in the gaps. If I’m out of equipment, I start reaching out to other percussion directors in the school district. [My goal is to] make sure that every student has an instrument by the time camp starts.”
Percussion directors around the Fort Worth school district are always willing to help Flores with his instrument needs. “They’re on board with the Bass Hall Percussion Camp,” Flores says. “They have students attending. Even those who don’t have students attending, for whatever reason, are at full support.”
The weekend before the camp meets, Flores rents two 26-foot box trucks. One carries front ensemble equipment like keyboards, auxiliary equipment and stands. The other carries the battery percussion.
Flores enlists the help of Southwest High School students and percussion instructors from around the district to load the trucks. “We literally just put it inside those two trucks,” he says. “It’s worked every year getting all that equipment in those two trucks.”
Flores and another percussion director drive the two trucks to Bass Performance Hall on Sunday. When Monday rolls around, Flores and the campers unload the trucks and get to work.
When the percussion camp is over, the various pieces of equipment are loaded up and returned to their original schools.
This article originally appeared in the 2019 V2 issue of Yamaha SupportED. To see more back issues, find out about Yamaha resources for music educators, or sign up to be notified when the next issue is available, click here.
Responsible financial planning by the booster club is critical to the short-term and long-term success of your music program.
To optimize the budgeting process, I recommend involving someone who knows the organization and someone who has finance experience.
Take the First Steps
Start early — at least six months before the year starts. Don’t rush the process.
Organize a budget committee in order to gather fresh views and share the workload. Up to six people would be the optimal size for the group as too many opinions can cause timelines to stretch and create more ideas than the organization can fund.
Budget the income first, so you can then prioritize expenses. Consider income that will be generated from individual fees, donations, fundraising and other sources. Budget fundraisers based on realistic targets, not stretch goals. Use financial history when applicable — but always anticipate new situations.
Be Realistic
One of the most challenging elements of the budget process is anticipating uncollectible fees. The board and staff need to have honest and open conversations about this topic: Does your organization exist to educate and train all interested students or only the students who can afford to participate?
Use a financial aid process to assist parents who cannot afford the fees. The financial aid may be funded by sponsors, alumni programs or other sources. The budget process must capture all of the variables related to this area.
Be supportive of the directors’ needs, but realize that the booster organization has a fiduciary duty to track and spend funds in the most responsible way for the program. Be prepared to offer alternatives or tradeoffs to requests, if needed, and always work hand-in-hand with the director on final decisions.
In order to stretch the funds further, consider secondhand dealers for uniforms or equipment. Many large programs that have incredible funding will buy uniforms every five to 10 years, and their “old” gear can be a great investment.
Discretionary line items for supplies and for the director to use should be included to provide flexibility because every single item cannot be identified before the year starts. Put proper controls in place for approval of these items to have appropriate oversight on spending decisions.
Look at the Horizon
Budget for reserves. Accumulate funds for future large purchases such as uniforms, instruments or trips. The capital purchases process must have a multiyear view and involve input from several stakeholders. It requires discipline by all involved but is a better approach than trying to use special fundraisers for these large purchases.
Build the expense budget based on the needs of your organization and not based on what other programs do in your region or state. Each program is different and must operate within its means. Your program must clearly define success, so that everyone understands what the budget is trying to accomplish.
Remember all Stakeholders
A strong relationship with the school system administration is critical. Administrative support can often save large sums of money for boosters. For example, the school district may offer insurance, maintenance on vehicles, staff and facility use for performances and fundraisers. Quantify the dollar value of this school system support, so the organization understands the monetary impact from the administration.
The budget data should be presented in summary to the entire booster club. If certain stakeholders have interest in details, they can discuss matters with the booster club treasurer in a private meeting.
Determine key milestone dates to review actual results compared to budget expectations. Often there are timing differences, but if a variance is not going to align to budget expectations, the disparity needs to be identified and managed. If revenue is below budget or expenses are over budget, adjustments must be made in areas that are not yet committed in order to balance the year.
A sound financial plan can lower stress and allow more time for the booster club and directors to focus on musical objectives rather than balancing budgets.
This article originally appeared in the 2019 V2 issue of Yamaha SupportED. To see more back issues, find out about Yamaha resources for music educators, or sign up to be notified when the next issue is available, click here.
In Part 1 of this two-part article, we described the importance of creating templates in Steinberg Cubase 10 and walked you through the initial steps of how to do so, including creating “model” audio tracks. Now we’ll finish up the Template by adding effects, virtual instrument tracks and more.
Insert an Effect
Let’s start by adding the effects that are typically used on a track when mixing, such as a favorite compressor or EQ plug-in. (Cubase tracks already include a 4-band EQ, which you can use if you’d prefer.) By pre-configuring these essential plug-ins, you won’t have to load them into each track every time you record a new one. If you don’t have effects that you use regularly, don’t worry about it: you can always add them as needed later on.
There are a couple of different ways to add effects to a track. First, let’s Insert an effect. With the Left Zone open (Command+Option+L on Mac or Windows+Alt+L on PC), select a track in the Track List, click on the Inspector tab, and open the Inserts tab. There you’ll see empty insert slots for adding any effect(s) you’d like to have on your track:
Channel Insert slots in the Inspector.
Now all you have to do is click and release the empty Insert slot to reveal the list of effects in your computer, sorted by manufacturer name. Click on the effect you want, and it will load into that slot.
Another way to insert an effect is to open the Right Zone (Command+Option+R on Mac or Alt+Option+R on PC) and select the Media tab. You’ll see an Icon for VST Effects. Open it and choose the effect you want to add, then drag it into the middle of the track in the Track List (make sure the green arrow points inside the track header):
Dropping an effect into a track.
Set Up an FX Channel
Most likely you’ll want to include a reverb or two, and possibly a delay, in your Template. It’s usually best to put ambience effects like reverb and delay on FX Channels, which can be accessed from multiple tracks via a Send; this also has the advantage of saving CPU resources. (Reverbs, especially, tend to consume a lot of CPU.)
To set up an FX Channel, right-click in the Track List and choose FX Add Effect Track. That will once again bring up the Add Track window — this time set up for effects — where you can choose the effect you want and select its stereo/mono and output configurations:
The Add Track window for FX Channels.
You’ll also see an option called Folder Setup. This allows you to choose whether you want your FX Tracks to be stored inside a dedicated FX Channels folder in the Track List (“Create Inside Folder,” where any subsequent FX Tracks would also be added), or outside as separate items (“Create Outside Folder”). Track Folders let you organize multiple tracks in a single container that can be collapsed to save space.
FX Tracks in the FX Channels folder.
Next, open the Inspector for one of your audio or instrument tracks, and click on the Sends tab. (You can also use the track’s Sends tab in the Mix Console.) This will open a window that shows the name of the effects in the FX Channels you’ve created. Click on the one you want for that send, then right click on it and choose Activate Send. Repeat this process for any other send effects that you want on that track.
First choose an FX Channel (A), then activate it (B).
At any time during recording or mixing, you can click on the Send and drag upward to increase the amount of signal being sent, or downward to decrease it. Send levels can be saved in your Template too.
Virtually Certain
If you use virtual instruments a lot, it can be handy to have your “go-to” instruments pre-loaded in your Project Template. The setup options are similar to Insert effects: Right-click in the track List and select Instrument Track. This will open the Instrument Add Track window, where you choose the instrument and its output configuration:
The Add Track window for Instruments.
You can also add an instrument by clicking on the VST Instrument icon under the Media tab of the Right Zone and dragging the instrument to the Track List. Cubase will then automatically configure its track and output settings.
Whichever method you choose, once an Instrument Track has been created, you have the option to select any sound from the instrument’s collection, and it will be there, waiting at your fingertips, whenever you load a Project Template:
You can even include a particular Instrument preset in your Template.
Ready to Rock
If you’ve been following along, you now should have a Template with your “model” stereo and mono audio tracks configured — which you’ll copy and paste as needed during recording or mixing — as well as your favorite effects and virtual instruments.
You can also configure your Project Template to open with a custom window setup. For example, if you want a separate Mix Console window to open in addition to the Project Window, simply open it, resize it (if needed) and place it where you want it to go, before you save the Template. When you next load the template, the windows will open exactly as you saved them.
Save It and Load It
As we described in Part 1, the save process for templates is simple: Just go to the File menu and select the Save as Template option. This will bring up the Save as Template dialog box, where you can name your Template, add a description and even assign it to a category. You can also rename the Template and delete the ones you no longer need.
When you’re ready to start a new project, simply choose File/New Project (or press Command+N on the Mac or Alt+N on the PC). The Steinberg Hub will open. Click the More tab, and you will see a list of your saved Templates. Select the one you want and press the Create button to get started.
Bear in mind that we’ve only scratched the surface in this two-part article: A Project Template can actually contain just about any customization you create, from special routing to track colors to mixer settings and much more. As you get more facile with Cubase’s deep feature set, you’re sure to find other items you want to include.
The world of streaming music can sometimes seem a bit bewildering. After all, there are so many services out there, each with its own unique feature set, usually related to audio quality and ease of use.
If you shop online, you’ve likely used or are at least familiar with Amazon. The company offers literally thousands of products for sale (not just books!), including high-tech items such as Kindle e-readers and Amazon Echo devices, with low prices and a Prime membership option that adds fast, free shipping and numerous benefits, including Amazon Prime Music.
Yes, you already have free access to over two million songs as part of your Amazon Prime membership. If you’re not a Prime member — or if two million songs isn’t enough to satisfy your deep craving for great music — you can get 58 million more (for a total of 60 million songs) for $9.99 a month by signing up for an Amazon Music Unlimited membership.
One big advantage of Amazon Music is that it allows you to listen to your favorite songs offline without the need for Wi-Fi or using cellular data: simply download any music you want to take with you before leaving home. This is great if you’re facing a long plane flight and don’t want to have to listen to the chatter or snoring of those around you.
To use Amazon Music, simply download the Amazon Music app from the iTunes® Store or Google PlayTM. To play a single song, log in and pick the song you want to hear, then press Play. Or you can create a playlist by clicking My Music, then Create New Playlist:
You can stream Amazon Music directly to any of your MusicCast devices from the MusicCast app. Just pick Amazon Music from the Sources screen. You’ll be asked to log in to your Amazon account, then you can stream away!
To make it even easier to stream music with Amazon, Yamaha has built Amazon Alexa directly into the YAS-109 and YAS-209 sound bars. This allows you to use Alexa to interact with Amazon Music directly instead of having to use your mobile device.
Check out some of our other blogs regarding streaming services available through MusicCast:
Everywhere around us is cacophony — small and large movements of air caused by a variety of stimuli, from street traffic to the leakage of high frequencies from the earbuds of the person sitting next to you on a bus; from the roar of jet planes to the thrumming of cicadas; from the hammering and sawing of building construction to what Joni Mitchell so aptly termed the “hissing of summer lawns.”
And then there’s the sweet sound of music.
What is it that differentiates between the two?
According to Merriam-Webster, music is an “agreeable sound,” one which has “rhythm, melody or harmony.” Noise, on the other hand, is an “undesired” sound that “lacks agreeable musical quality or is noticeably unpleasant.”
Fair enough. But so subjective! In fact, depending upon the listener, almost any sound can be said to have some degree of musicality. Furthermore, what one person may consider agreeable, another may consider undesired and noticeably unpleasant.
Then there’s the issue of loudness. Pretty much any sound, no matter how soothing it may be at a moderate volume, turns into nasty, irritating — even painful — noise when it gets cranked up too loud. This has nothing to do with personal taste: it’s pure physiological response — the body’s natural defenses when it senses that it’s under attack. How loud is too loud? According to the Hear the World Foundation, exposure to as little as 90 dB of sound — the approximate background level of a crowded restaurant with poor acoustics — can cause hearing loss if sustained over a short period of time.
I recently came across an article called “The Many Colors of Sound,” in which author Megan Neal describes the scientific differences between white, pink, brown, blue, gray and other varieties of noise. White and pink noise were familiar terms to me — they’re random (or at least quasi-random) signals used by audio engineers and audiophiles to align sound systems, and are also employed by noise machines used as sleep aids. I was not familiar with the other varieties, but the article provides definitions for each that make logical sense. Especially fascinating is the description of brown noise, which is not named after the color but instead because its changing frequency content resembles that of Brownian motion, the random movement of particles in liquid.
Much as recording engineers disdain noise, taking great pains to eliminate things like drum pedal squeaking and mic stand rumble, musicians shouldn’t think of it as being a purely bad thing. For centuries, classical composers have been inspired by the sounds of nature — sounds that many of us might consider noise in a different context. Think Vivaldi’s The Four Seasons, which incorporates bird calls in Spring, swarms of wasps in Summer, hunters’ horns in Autumn — even the narrator’s chattering teeth in Winter. Think Rossini’s Storm (from the William Tell Overture), which evokes the fury of an approaching squall, or Debussy’s La Mer, with its rolling waves of music that depict the motion of a swelling sea.
Man-made “noise” can serve as an inspiration too. In recalling the genesis of his groundbreaking composition Rhapsody In Blue, George Gershwin said, “It was on the train, with its steely rhythms, its rattle-ty bang, that is so often so stimulating to a composer — I frequently hear music in the very heart of the noise … And there I suddenly heard, and even saw on paper, the complete construction of the rhapsody, from beginning to end.”
In the early 20th century, “modernist” classical composers such as Edgard Varèse began to explore the use of noise-based sonorities in an orchestral setting — work that would prove to be a major influence on a young Frank Zappa. These would evolve into compositions known as “noise music” that challenge the distinction between musical and non-musical sound. Examples include works by Stockhausen, LaMonte Young, Glenn Branca and John Cage — all precursors to the so-called “industrial music” of the ’70s introduced by artists like Throbbing Gristle and Cabaret Voltaire. In popular music, guitarists like Jimi Hendrix and Jeff Beck made “noise” elements such as distortion and feedback an integral part of their sound — a tradition that continues in today’s thrash-metal bands and the like. Even mainstream rock musicians such as The Beatles (in the tracks “Tomorrow Never Knows” and “Revolution 9”) and Lou Reed (in his double album Metal Machine Music) have dabbled in this interesting, if at times obtuse, genre.
The bottom line is this: What is and isn’t noise — and whether or not you consider it intrusive or inspiring — comes down to individual perception.
I personally venerate the absence of noise. I live in a rural setting, on many acres of land, with the nearest neighbor barely visible and rarely heard. Whenever I travel, ear plugs are a necessity. My in-laws, on the other hand, live in a busy suburban cul-de-sac, with next-door neighbors that have approximately 47 SUVs in their driveway (OK, I exaggerate … a little), any one of which is being started up every few minutes, or so it seems. When my brother-in-law comes to visit, he has to bring a white noise sleep machine because he finds our house too quiet.
When it comes to noise, it’s like apartment house sense and apartment house rents — as Paul Simon’s memorable lyric says: “Remember, one man’s ceiling is another man’s floor.” So keep your ears open to the possibility that something “undesired and noticeably unpleasant” may in fact serve as your next musical inspiration.
I used to be cynical about the idea of a signature bass. The concept struck me as a marketing ploy whereby a star player put their John Hancock on the headstock of a marginally different version of a familiar bass design, in exchange for some cash.
All that changed when I laid my eyes and hands on the three Yamaha basses bearing the names of Billy Sheehan, Nathan East and John Patitucci.
It didn’t take long for me to realize that these instruments are made with intent, each one wholly unique, and each embodying the qualities, characteristics and idiosyncrasies of their namesakes. There’s no missing the fine contours, the quality materials and the glistening finishes. But it’s when you plug in and feel the resulting sound that their true character shines through.
In fact, the more you play these instruments, the more insight you gain into how each of these great players thinks about the bass. And with that realization comes the reward of directly benefitting from their years of painstaking work, in partnership with the luthiers at Yamaha, to create what they believe to be the perfect bass.
Let’s take a closer look at each.
Attitude Limited 3
Billy Sheehan with the Yamaha Attitude Limited 3.
Niacin bassist Billy Sheehan has deservedly built a reputation as a melodic and explosive player whose blistering technique pushes the limits and tolerances of what a normal bass is capable of withstanding.
As you might expect, the Yamaha Attitude Limited 3 bass he co-designed is anything but normal, but perhaps not for all of the reasons you might think. Sure, you can’t help but notice those high-register scalloped frets for the G and D strings. And then there’s the stock D-tuner for dropping the E string. But what helps give the bass its unmistakable mojo is essentially hidden, explains Sheehan.
“It’s that neck-to-body joint. One of the big problems I had with my old P-bass was that when I bent the neck and pushed from behind for some dive-bomb vibrato at the end of a song, the neck would shift in the pocket,” he says. “So I had to pound all kinds of shims in there and stand on it with my full body weight to push the neck and body together, then take a giant screwdriver and torque those four screws down with everything I had.” Instead of all that rigamarole, the Attitude boasts a five-screw miter-bolted neck joint that creates a rock-solid connection between neck and body for extraordinary resonance and (even) Sheehan-proof structural integrity.
Preferences for neck profiles are subjective, but for my tastes, this neck nails it — fast and comfy from top to bottom, with a factory set-up that was awesome out of the case. Marry that neck and neck joint up with an aggressive-sounding split-coil front pickup in the traditional position and a thunderous rear humbucker, and you’ve got … well, attitude to spare.
The controls are intuitive but powerful, and there are recessed stereo output jacks (switchable to mono) for splitting the instrument’s output to separate amps. No surprise there, given that the overarching idea behind Sheehan’s design was to use the front pickup for the harmonic content, and the rear pickup for the deep bass, each through its own amp. The bottom line: Innovation and individuality shine through in Sheehan’s playing and his sound, and both come through loud and clear in this bass.
BBNE2
Nathan East with the Yamaha BBNE2.
Not just any musician can jump between gigs with Eric Clapton and Phil Collins to Herbie Hancock and Daft Punk, but humble, unassuming Nathan East has done just that, establishing himself as an A-list session and touring player thanks to his unshakeable sense of groove. Simply put, the man is like his bass lines, and so is his signature bass, the Yamaha BBNE2.
“This bass took a few different incarnations to get where we are today,” says East. “I had come from the J-bass world, so I started with that tighter, tapered spacing but added the fifth string. And we did lots of research and development on the pickups and the scale length. Those were priorities, but balance was an important part of what I wanted out of this particular instrument.”
“There are a lot of beautiful basses out there where the woods and the shapes and everything about them is so sexy — everything except the functionality,” he adds. “I wanted to prioritize functionality, and being that I was going from different genres and going from the studio to live settings, I needed a one-size-fits-all bass that I could play anywhere and everywhere.”
To which I would add: this is a beautiful bass. So beautiful, in fact, that other musicians in the store where I demoed it kept interrupting me to talk about how sexy it is. The one I played had a sumptuous white finish, and the neck-through design, individual bridge saddles, upper cutaway contours and sleek control knobs provide aesthetic appeal, in addition to the important functional roles they play.
But East’s top priority was creating a utilitarian bass, and the BBNE2 delivers. First of all, there are gobs of tone. From remarkably tight lows to growling mids and slinky highs, you can carve pretty much any sound you want here, despite the instrument being surprisingly light in weight. I can also say without hesitation that it is the most perfectly balanced bass I’ve ever played, without the slightest hint of neck dive or heaviness on the shoulders.
My hands are on the small side, and so the necks on five-string basses can sometimes feel too chunky, but the BBNE2’s neck offers familiar spacing and low action up and down the fretboard. It obviously tapers outward as it meets up with the body, but I wasn’t conscious about readjusting my left hand to reach the upper frets across the strings, and to me, less thinking and fewer awkward stretches equate to better playing. This may be a streamlined bass, but it packs extraordinary tonal diversity and playability into a seemingly simple but deceptively seductive design.
TRBJP2
John Patitucci with the Yamaha TRBJP2.
To understand John Patitucci’s impact on the bass, you only need to take a look at the company he keeps. Best known for both his upright and electric bass playing in jazz circles (and as a teacher too), Patitucci has recorded and performed with great musicians across all genres such as Wayne Shorter, Dizzy Gillespie, B.B. King, Pat Metheny, Sting and Carly Simon, just to name a few. His association with Yamaha dates all the way back to 1985, when he was playing with keyboardist Chick Corea’s Electric Band. Soon thereafter, he began working with the company’s luthiers, with whom he co-designed a number of basses (including the workhorse TRB) before starting work on the 6-string Yamaha TRBJP2.
“Flexibility was always the goal,” he says. “We decided to make it a bolt-on neck so that we didn’t lose that core sound that a lot of the old 4-string basses have … that sound people are attached to, which I love, too. The solidity of the bolt-on neck affects the bass’s resonance and helps with the bottom and the foundational frequencies.” Other areas of focus included the TRBJP2’s oversized double-coil Alnico pickups and creating a proper cutaway for slapping. “On a 6-string, it’s hard to do,” he explains, “but we’ve got a little cutaway under the string so you can get your fingers in there.” The instrument’s active preamp is another important factor in delivering the kind of bottom end that you rarely get from a 6-string model.
There’s no mistaking the quality of this instrument the moment you see it. When I opened the case and spied the brilliantly figured top of the four-ply laminated body and attractive inlays along the ebony fretboard of the super long 35-inch scale neck, I felt like I was jumping into a sports car. That wide 26-fret neck seemed a bit intimidating at first to a 4-string player like myself, but its shallow and flat profile, immaculate fretwork and gloss polyurethane finish actually make it very easy to play. In addition, there are a ton of controls (master volume, pickup balance and a 3-band EQ), so it was easy to dial in the sounds I was after.
Like a precision racecar, the TRBJP2 offered full-throated performance and responded as if it were a part of me, delivering crisp, chiming highs, earthy mids and deep lows, with lots more left in the tank for those players who really want to push the limits.
So there you have it: Three great players, three great instruments. I highly recommend you give them a test-drive at your local music retailer!
Thanks to The Music Zoo in Farmingdale, NY for providing access to these instruments.
Click here for more information about Yamaha basses.
There’s a lot to celebrate this July 4th. Not only is it Independence Day, it’s also the debut date of Season 3 of the Netflix hit show Stranger Things. When you’re done barbecuing and watching fireworks, you can settle down to watch this memorable cast of characters as they deal with life, love and the paranormal — not to mention some downright scary monsters — in the made-up town of Hawkins, Indiana in the 1980s.
To get you revved up for the debut, here are ten of the best scenes from Seasons 1 and 2 to enjoy in your home theater. Dim the lights, crank up those subwoofers and surround speakers, and prepare to be terrified! (Note: there are spoilers galore in this article.)
1. Season 1, Episode 3: Will Tells Joyce to Run
12 year-old Will Byers has been kidnapped and brought to “The Upside Down,” a parallel dimension filled with demonic creatures. Joyce, his mother, has been desperately searching for him. She becomes convinced that her son can communicate to her through electricity and so she rigs her house up with Christmas lights, including some that correspond to letters in the alphabet, which she’s painted on her wall. After some initial flickering, he sends her an ominous one-word message: “Run.” Then all heck breaks loose. This scene has no music, just some incredible sound design … and it will send shivers up your spine. Check it out here.
2. Season 1, Episode 6: Mike Jumps Off a Cliff
Will’s buddies Dustin and Mike are accosted by a pair of bullies who threaten Dustin with a knife unless Mike jumps off a cliff into a gorge. After trying to decide what to do, he finally jumps … but as he’s falling, their new friend Eleven uses her psychokinetic powers to stop him in mid-air and save his life. Music is building throughout, helping to ratchet up the tension, but it stops completely when Mike jumps, and the contrast between its intensity and the near silence of the fall adds an extra touch of drama to the spectacular visuals. Check it out here.
3. Season 1, Episode 7: Eleven Flips a Van with Her Powers
The friends are riding their bikes when confronted by the evil Dr. Brenner (Matthew Modine), who arrives with a crew of men in white vans. After a short chase scene, our heroes are cornered, and it looks like they’re about to be captured. Just in the nick of time, Eleven uses her mental powers to flip one of the vans in the air, blocking the other two as it lands and allowing the kids to escape. There’s a fantastic slow-motion shot of the van flying through the air backward, underpinned by powerful audio. Check it out here.
4. Season 1, Episode 7: Building a Sensory Deprivation Tank
Eerie synth music and sound effects accompany the protagonists as they finish building a sensory deprivation tank in a small swimming pool — something that will allow Eleven to enter The Upside Down to look for Will. After she gets into the water, there’s a crack of thunder guaranteed to shake your subwoofer … and suddenly Eleven is alone in the other dimension. Check it out here.
5. Season 1 Episode 8: Fighting the Demogorgon
Will’s older brother Jonathan and his friends Nancy and Steve wait in the house, hoping to trap the monster known as the Demogorgon. Eventually the creature appears and a close-quarters fight ensues. The terrifying fracas features fast edits, monster roars, gunshots and even the sickening sound of Steve’s baseball bat studded with protruding nails hitting the Demogorgon’s stomach. Finally, they light the monster on fire in a spectacular ending to the scene. Check it out here.
6. Season 1, Episode 8: Will is Found
Joyce and Jim Hopper (chief of the Hawkins Police Department) are walking inside The Upside Down wearing protective suits and helmets, looking for Will. What you mostly see is darkness, punctuated by moving flashlight beams, all underpinned with spooky low frequency sound effects. They find a dead body (at which point you hear a huge, subwoofer-rattling synthesizer chord), which fortunately isn’t Will. When they do find him, however, he’s not in great shape, and Hopper has to pull a disgusting looking bug-like creature out of Will’s mouth to help save him. Check it out here.
7. Season 2, Episode 1: Will Sees the Shadow Monster
In the Season 2 premiere episode, Will is standing by himself (or so he thinks) in the hallway at the laboratory where The Upside Down was discovered. He suddenly sees the Shadow Monster — a giant swirling, gaseous thing — coming at him through the walls. He runs outside to escape, but the monster emerges from the building as a vast apparition that towers over Will, filling the sky. It doesn’t end well for Will, as the monster catches him, infiltrates his body and takes over his mind. The scene features both astonishing visual effects and massive monster sounds. Check it out here.
8. Season 2, Episode 6: Steve Fights the Demo-Dogs
The kids hide inside an old school bus, hoping to trap the creature that was once “Dart,” a lizard-like animal that could fit in the palm of Dustin’s hand but is now a giant dog-like monster. When their original bait doesn’t work, Steve steps outside with his spiked baseball bat, hoping to draw out the creature. This dark and tense scene builds in tension as first one, and then two other creatures appear. Pulsing synths and brilliant sound effects — notably the crash of the monster throwing itself against the bus — make this scene a scary, audio-visual feast. Check it out here.
9. Season 2, Episode 8: Escaping the Building
The Demogorgons have gone on a killing spree at the laboratory, wiping out much of the staff in horrible fashion. The kids, who were inside the building at the time and somehow survived, manage to escape with Chief Hopper’s help … but Joyce’s boyfriend Bob is still stuck inside. Lab director Dr. Owens (Paul Reiser), who is trapped in the facility’s video monitor-equipped security room, gives Bob instructions via radio, guiding him out of the building and helping him avoid the monsters — well, almost. Fantastic action, animation, sound effects and an unexpected ending make this nightmarish scene truly unforgettable. Check it out here.
10. Season 2, Episode 9: Steve and Billy Fight
For once, it’s not human versus monster, but human versus human as Steve and the thuggish outsider Billy duke it out in the living room. Steve gets the worst of it and is getting a serious (slow-motion) beatdown until Billy’s sister Max stops her brother in his tracks with a hypodermic needle to the neck. Compelling visuals and a deft mix of music, dialogue and sound effects help make this scene memorable. Check it out here.
“It’s sad that music has been cut from our public schools” is a sentiment that, unfortunately, is heard all too often these days. But I’m happy to report that the winds are changing.
In my role as partnerships and alliances manager for Yamaha Corporation of America, I’ve had the opportunity and privilege to partner with The National Association of Music Merchants (NAMM) and other organizations at two annual events aimed at improving state and federal funding for music education. The first of these focuses on state legislators in Sacramento, California, while the second provides an opportunity to meet members of Congress in Washington, D.C., to appeal for maximum funding for music education under the federal Every Student Succeeds Act (ESSA).
The goal at this year’s Sacramento event was to urge the state of California to meet or exceed the national funding average ($12,252 per pupil) in order to provide high-quality standards-based music programs — along with visual and performing arts programs — taught by credentialed teachers. The day of advocacy included delegate training and musical performances by eight student ensembles, along with meetings with the governor’s staff and state lawmakers. One of the highlights for me was an incredible performance of the “Star-Spangled Banner” by the Consumnes Oaks High School‘s vocal ensemble — one of the best renditions I have ever heard.
A week and a half later, I flew to Washington, D.C., for the 2019 NAMM Music Education Advocacy Fly-In. There, I joined delegations from 39 other states — a total unmatched in the Fly-In’s history — to amplify the team’s collective voice. The size of the audience was also unprecedented, with the 40 combined state delegations holding a record number of 230 meetings with U.S. Representatives and Senators and their legislative staffs. The California delegation alone visited 19 such offices, and I’m happy to report that all the officials and staff we met with received our team warmly and were receptive to our message, which was this: Increasing ESSA grants to the maximum allowable level gives schools more resources and flexibility to build and improve their music curricula and programs.
Left to right: Joe Lamond, President and CEO, NAMM; David Jewell, Yamaha; Jonathan Gilbert, Legislative Director for Congressman Mike Levin; Congressman Mike Levin, 49th District, California.
Each year the Fly-In brings together a group of delegates that believe in the power of music and its benefits. As part of our discussion with federal legislators, we relate stories of how music has impacted particular individuals. One very special story came from California Delegate Rebecca Apodaca about an elementary school-age deaf girl who found that playing the violin with her friends helped her come out of her shell. Not only did it give her the confidence to eventually join the high school cheerleader team and go on to win Miss Deaf America, but the vibrations from the violin on her jaw as she practiced ignited her senses to the point where she regained partial hearing! Playing the violin was life-changing for this young lady, who went on to become an actress.
When I last attended the D.C. Fly-In in 2017 — an experience I wrote about here — our theme was “Get It Done.” And we did indeed get it done: $700 million funding was approved in fiscal 2017-2018 and $1.1 billion for fiscal 2018-2019.
This year, the theme was “Let’s Be Clear: Let’s Be Perfectly Clear” because our mission was to persuade Congress to boost funding to $1.65 billion — the maximum amount authorized by the statute. Time will tell if that amount is approved but hopefully our federal legislators will share our vision of a world in which the joy of making music becomes a precious element of daily living for everyone; a world that nurtures in every child a deep desire to learn music and a recognized right to be taught.
My son is a recent college graduate and he’s a perfect example of why I advocate for music education. He was the product of public-school music education, and I consider that one of the reasons for his success. So get involved!
I serve on the Anaheim Elementary School District’s Creative Council. Five years ago, our district had zero music instruction. Today, all 23 elementary schools have a full-time music teacher. I’m proud to have played a small role in that success story and am determined to do all I can to keep the momentum going.
Yamaha is an active advocate for music education. We want to empower you as music educators to strengthen your programs in any way we can. Please register for the Yamaha Educator newsletter to read up on advocacy, professional development, instruments, resources, partnerships in education. Join the Yamaha Music Educator Community on Facebook. Email us at educators@yamaha.com.
Super Articulation voices are a category of special sounds contained in select Yamaha keyboards* that allow you to access different sonic effects depending upon how you play the keys or use the pedals. Suddenly, breaths, taps, slides and knocks are available to the keyboardist in a real time!
In Part 1 of this two-part series, we’ll focus on typical articulations that can be applied to a saxophone voice; in Part 2, we’ll explore guitar and clarinet articulations.
Voice Categories
If you look carefully at voice selection screens on certain Yamaha instruments, you’ll sometimes see thumbnails to the left of each voice, with labels like Natural, Sweet, Live, Cool or S. Art:
Here’s what these categories mean:
Natural
– acoustic classical instruments
– stereo sample
– classical focus with a natural ambience
Sweet
– solo acoustic instruments
– mono sample with recorded vibrato from actual instrument
– modern focus with ambience
Live
– ensemble acoustic instruments
– stereo sample
– modern focus with ambience
Cool
– electronic instruments
– stereo sample
– recorded through an electric amplifier
We’ll be focusing on the last category — the “S.Art” (short for Super Articulation) voices, including the “S. Art2” ones:
What Is “Super” Articulation, Anyway?
In music, the word “articulation” usually refers to the transition or continuity between notes. This is often reflected in specific instrument performance techniques when going from one note to another, such as staccato, legato and slur.
Call up the “S. Art” Saxophone voice on your instrument and let’s try it out!
Polyphonic versus Monophonic
All Super Articulation voices are unique because they can be either polyphonic or monophonic (usually called POLY or MONO), depending upon how you play on the keyboard.
For example, when you play a chord (i.e., several notes at the same time), you will hear all the notes sound at once (POLY):
However, with a Super Articulation voice, if you hold down one note first, and then play a second note while holding down that first note, the instrument automatically switches to MONO, allowing you to only play one note at a time. So to play a very clean, very fast trill, simply hold down one note and then repeatedly play another note, over and over:
Using this technique, you can create some of the best executed trills you’ve ever heard!
Breathing
When you select any Super Articulation Voice, the function of the pedals is switched automatically to control articulation effects. One of the most basic and simple articulations is the breathing of a musician before they start playing. On many S. Art voices, pressing the center pedal creates the sound of a musician “breathing in,” as though taking a breath for the note they are about to play:
To use this effectively — especially in quiet passages — play a few notes on the keyboard, then stop playing completely. In the silence, press the center pedal to hear the long breath, then start playing again. (Note: Pressing a pedal for a S. Art saxophone voice produces breath noises, but for some other brass or woodwinds sounds, it creates key noises instead.)
Legato (Slur)
Many Super Articulation voices allow you to create a realistic legato when going from one note to another. This is an effect whereby the musician does not “re-tongue” their instrument when playing a new note, thereby slurring from one note to the next.
In “S. Art” voices, this is automatically generated when you play two notes in a legato manner on the keyboard; i.e., keeping the first note held momentarily while playing the second note, as opposed to lifting your hand up between notes. In the case of the Super Articulation saxophone voice, if you play a C note and then an adjacent D in this manner, you will hear the note change seamlessly, as though a saxophone player played it in a single breath.
Contrast this to lifting up your hand between these two notes, where you can distinctly hear the note being “re-tongued” by the player. The reason they sound so different is that they are actually two completely different samples of a saxophone!
* Genos, Clavinova CSP-150, CSP-170, CVP-701, CVP-705 and CVP-709/709GP, and the PSR-S775, PSR-S975 and PSR-A3000.
In 2006, I came back from a summer trip to Paris with an amazing story to tell.
On one day – it happened to be June 21 – thousands of musicians started showing up on street corners, taking out their instruments, and playing. As I walked across the city, an endless procession of music came into my ears: individual accordion players, a brass quintet, kids playing Suzuki pieces on a digital piano, some kind of Scandinavian rock band, a hip-hop cypher, a choir of retired women singing pop songs, with hints of even more music around every other corner. It was impossible to miss. The city had turned into a huge open-air stage for what’s known as the Fête de la Musique (or Faites de la Musique, which translates as “Make Music”). All this, I learned, was taking place that day not just in Paris, but in every city in France … and it had been going on for decades.
A few days later, I landed back home in New York. Instead of hearing music on the streets, I heard the familiar sounds of sirens and horn honking. But it didn’t have to be this way. Surely, I thought, New York is teeming with musicians – amateurs and professionals of the most diverse kind – who would love to come outside for a day to meet each other, play together and share their music, if given the chance.
I started telling people about the “Make Music” day that I had witnessed, and how we should do it in New York in 2007. I talked it up to my musician friends, old colleagues, cultural institutions, music schools, city officials, community organizers, media outlets, and everyone else I could think of.
What surprised me most were the blank looks. Even among cosmopolitan New Yorkers, almost no one had heard of the Fête de la Musique. I showed pictures I had taken of performances in Paris, recited statistics from the French Ministry of Culture, and still there was a feeling of disbelief. It almost seemed too simple. You mean, you tell people they can come outside and play music? And then … they do?
All the way up to June 21 that year, I spoke with hundreds of people making plans for the first “Make Music New York” day and I felt that same hesitation. An older woman in a Harlem apartment building was going to wheel her upright piano into the elevator, and down onto the street for a Make Music New York block party. That sounded amazing, but a heavy lift for someone barely five feet tall. Would she really go through with it? I told her about Carnegie Hall’s plans for the event, and about all the young rock bands coming out in Williamsburg. The message I was trying to convey was: You are not alone! You’re not going to be the only one at the party! But even I wasn’t sure what to expect.
And then the big day came. I brought my saxophone over to a West Village street that had been closed off for Make Music Day. More than a hundred musicians had gotten there before me, and had already started playing Terry Riley’s In C. On the sidewalk near my office, some teenage tap dancers set up and had a recital. A friend reported that a Brazilian Samba band had been briefly rained on but they went under some scaffolding and had a terrifically loud time. An official from City Hall told me that she had seen a woman playing an upright piano that had been wheeled out onto the street in Harlem. All in all, 560 outdoor musical events took place for the first Make Music New York. It was not as many as in Paris, but it was a start.
Over the following years, Make Music New York grew in size, reaching a peak of 1,355 participatory musical events in 2014. Each year, the blank looks became less blank. Now that people had seen it, the idea seemed straightforward, even obvious.
And as word got out about the New York event, and the NAMM Foundation started to promote it, Make Music Day began to expand across the country. It is now celebrated in over 85 cities in the United States on June 21st, encompassing over 5,000 events. Make Music China began in 2016, adding another 4,000 events to the calendar. Make Music Day UK, Make Music Argentina, Make Music Australia, and Make Music Lagos each launched in the last few years and are growing quickly.
Every year, this holiday is spreading to more and more of the world, taking the form of the local musical culture everywhere it goes. (Editor’s note: We mark the day each year with performances by local bands comprised of our employees and a friendly “Yamaha Idol” competition.) You no longer need to go to France in order to experience every kind of music on June 21. Just grab an instrument, step outside, and follow your ears!
Photos by Kris Connor/Getty Images for Make Music Day and Brad Barket/Getty Images for Make Music Day
Click here for more information about Make Music Day.
When the dust has settled and the history of 20th and 21st century pop music has been written, there’s no doubt that Yamaha Artist Elton John will go down as one of the most influential artists and composers of the era. His catalog of recordings spans fifty years and counting, and includes 33 studio albums, 120-plus singles, eight soundtracks, and more than a dozen compilations, combining for sales of more than 200 million units worldwide. More importantly, the man has given us some amazing songs. Here are my top ten picks, in chronological order.
1. “Rocket Man” from Honky Château, 1972
A great story about an astronaut who’s homesick, “Rocket Man” features tasty instrumental and vocal contributions from Elton’s backing band of the era (guitarist Davey Johnstone, bassist Dee Murray and drummer Nigel Olsson), all wrapped in a stunning production by Gus Dudgeon. Check out the shimmering acoustic and slide guitars in the chorus, and the way the reverb on the lead vocal subtly grows in intensity as the song fades on “I think it’s gonna be a long, long time …” Listen here.
2. “Daniel” from Don’t Shoot Me I’m Only The Piano Player, 1973
Elton’s performance is both understated and fragile in this atmospheric song about a returning Vietnam war veteran coping with a disability and seeking anonymity. It’s also one of the few EJ recordings in which he plays an electric piano as opposed to an acoustic piano. Listen here.
3. “Funeral for a Friend / Love Lies Bleeding” from Goodbye Yellow Brick Road, 1973
Imagine the nerve of a pop artist opening an album with an instrumental that’s almost six minutes long! With its spooky synth effects, it starts like the soundtrack to a horror movie, but just when you’re not sure where this epic track is headed, the band segues into the rocker “Love Lies Bleeding,” providing a hint of what’s to come on the masterpiece that is Goodbye Yellow Brick Road. Listen here.
4. “Saturday Night’s Alright for Fighting” from Goodbye Yellow Brick Road, 1973
If this song doesn’t get your adrenaline pumping, you might want to see a doctor. The band revs up pretty hard on this one, which has been a staple of FM radio since its release. Elton spits out the aggressive lyrics with a serious dose of attitude, accompanied by rapid-fire piano playing that might have left the keys smoldering. Listen here.
5. “Grey Seal” from Goodbye Yellow Brick Road, 1973
This may be one of the lesser-known EJ songs, but it kicks butt right from the count-off, with an uplifting chorus and a pumping bass that somehow never gets in the way of the piano. Listen here.
6. “Don’t Let the Sun Go Down on Me” from Caribou, 1974
This iconic ballad begins with just piano and a ticking hi-hat supporting the heartfelt vocal. Tension builds through the first verse until the whole band kicks in on the chorus, with lush backing vocals that wouldn’t be out of place on a Beach Boys album — not surprising given that they’re supplied by, among others, Carl Wilson and Bruce Johnston. When Elton sings “These cuts I have, they need love to help them heal” in the last verse, there’s not a dry eye in the house. Listen here.
7. “Ticking” from Caribou, 1974
A heart-wrenching tale of a disturbed youth who goes off the rails, Elton’s exquisite rendering of this hidden gem alternates between quiet desperation and rage. The bare-bones arrangement consists almost entirely of voice and piano, supplemented by a touch of synth that builds to a powerful climax as the song ends. Listen here.
8. “Someone Saved My Life Tonight” from Captain Fantastic and The Brown Dirt Cowboy, 1975
When this nearly seven-minute track was released, the record company wanted to edit it down to a radio-friendly length, but EJ wasn’t having it. Good for him, because it became a hit anyway, and good for us since we all got to hear every emotional note of this amazing song. The slowly building dynamics and the desperation heard in Elton’s voice when he sings “Thank God my music’s still alive” still make the hairs on the back of my neck stand up every time I hear it. Listen here.
9. “Believe” from Made in England, 1995
This song is heavy, not so much because of the instrumentation but because of the combination of the message — a testimony to the power of love — and Elton’s defiant performance. Yes, the snare sound may be a bit dated, but the rest of the production’s big-ness stands up well. Listen here.
10. “The Ballad Of The Boy in The Red Shoes” from Songs From The West Coast, 2001
This album may not have been EJ’s best-known, but there’s not a bad song in the bunch, with this one being the standout for me. It has the vibe of a track that could have been on his 1969 debut album Madman Across The Water, yet it still sounds contemporary. Listen here.
The first time I heard a recording of myself playing drums with a band was an ear-opening experience. It wasn’t terrible, but it sounded nothing like the way I imagined it in my head. Every song sounded like we played it so fast! Surely, there was something wrong with the playback (this was in the days of tape).
There wasn’t.
It was actually me. I was playing just about everything too fast, and I guess the band didn’t mind or notice it because they went along for the ride. It only became apparent to me when I stepped back from playing and listened from a different point of view. That’s when I realized how important it was to record — not just performances, but practice sessions as well.
What’s Goin’ On?
When you’re playing — especially with a band — there are a lot of things happening simultaneously. There’s the physical aspect of playing the drums, such as stick movement, coordinating your limbs and keeping time. Then, there are the mental aspects: You’re trying to lock in with the bass player, while listening to other band members for cues on the arrangement. Or you might be distracted and thinking about paying the bills when you get home.
That’s some serious multitasking, and that’s why it becomes difficult (if not impossible) to judge your own performance while you’re playing. Recording your rehearsals and gigs is a great way to “get outside yourself.” It gives you an objective way to listen, so you can evaluate and analyze your performance without any distractions.
How to Record
There are many different ways to record your drums. Most smartphones have built-in audio and video recording capabilities, and that’s probably the easiest way to get started. You may, however, run into problems with distortion because the microphones built into most phones are not designed to handle the loud volumes produced by an acoustic drum set. And even if they can handle the level, they don’t sound very good. Plus, if you’re playing electronic drums, you’ll need some sort of adapter cable to patch the output of the sound module to the input of your phone.
Other options include the use of external mics and/or third-party recording apps for your smart device, or using DAW (Digital Audio Workstation) software on your computer, but that’s going to get complicated and expensive really fast.
Fortunately, there are a number of affordable and easy-to-use practice tools available to make recording your drums easier. For example, the Yamaha EAD10 is a combination electronic/acoustic drum module that incorporates stereo microphones for recording your kit, along with some important practice features such as a metronome and a music player. You can use a pair of isolating headphones such as the Yamaha HPH-MT7 Studio Monitor Headphones to monitor your drums through the EAD10 microphones along with a metronome or music track. (Make sure the headphones are set to a safe volume level to protect your hearing!)
The Yamaha EAD10.
Not only will you be able to record your performance, you’ll be able to overdub your drums to any song that’s been loaded in the EAD10 from a USB flash drive. (Overdubbing is the process of recording a new part while listening to playback of an existing recording). When you’re done recording, you can play back the file and hear your performance along with the song. This will allow you to concentrate on listening to your drumming in an objective manner, without the distractions that happen while you’re actually playing.
Record and Share with Rec’n’Share
If you have an iPhone®, iPad® or iPod Touch®, you can use the free Yamaha Rec’n’Share app to record audio and video and easily share the files with your friends. Rec’n’Share is compatible with the EAD10 and DTX-PRO modules as well as with Yamaha DTX6 Series,DTX402K, DTX432K and DTX452K electronic drums. It allows you to overdub your drums to a song and then play back the recording with separate control over the volume levels of the drum track and the music.
In addition, when you import a song into Rec’n’Share, the song file is analyzed for tempo and a click track is generated, making it easier for you to play along. If you have a tough time hearing a fill or deciphering a particular section of the song, Rec’n’Share can slow down the tempo and/or loop any section so you can play it over and over again. Rec’n’Share also makes it quick and easy to upload files to social media for your friends to see and hear, so you can get feedback on your performance.
The Yamaha Rec’n’Share app.
Improve Your Track Record
An important benefit of recording practice sessions is that it allows you to monitor your progress. Record your first attempt at learning a song — even if you don’t know it very well — then save that performance with a date and time so you can continue to work on it. You don’t need to record every run-through, but after you feel you’ve made some progress, record another take. Compare that take with the first one. Listen to the newest take and ask yourself the following questions: Am I playing the parts correctly? Am I rushing or dragging the fills? Am I following the dynamics of the song? How does it feel? Are my drum and cymbal hits creating flams with the original drums? (That would indicate that you are behind or ahead of the original track). Make notes and continue working on the song.
Most importantly, don’t be discouraged if your first recording doesn’t sound as good as you expected — that’s the whole point of learning! You’ll improve as you continue to practice.
Click here for more information about the Yamaha EAD10.
Click here for more information about Yamaha DTX6 Series electronic drums.
Click here for more information about the Yamaha Rec’n’Share app.
The upside of technology looks something like this: It’s cool. The downside? It doesn’t always work. Or, worse: your gear ages faster than you’d like and becomes obsolete.
Plugging it back in repeatedly doesn’t work. No matter how many times you shake the remote, you can’t get a pulse. Why? It could very well be that the hardware and software of the gear itself wasn’t built to scale with the latest technologies.
Meet HDCP. Your home theater components have it, whether you know it or not. But your gear’s ability to support the latest version, HDCP 2.3, could make all the difference in enjoying your 4K content and more. Here’s why.
What is HDCP?
Protecting copyrighted material is a big deal. That’s why HDCP — an acronym for High-bandwidth Digital Content Protection (the “b” is silent) — came along. It’s a security feature that encrypts digital signals from one product to another. Think of it as a digital handshake that creates a secure connection between a source and display.
HDCP requires compatibility between products in order to ensure that the digital content being communicated is protected. If there’s no compatibility, there could be no signal.
Products with HDCP can be grouped into three buckets:
1. Source. This is where the signal starts. It could be a gaming console, 4K Blu-ray player, cable box or media streamer. You get the idea.
2. Repeater. These are the products that take the HDCP signal from a source (say, a 4K Blu-ray player) and send it to the sink (TV). AV receivers, sound bars, splitters, repeaters, switches and wireless transmitters are the most common.
3. Sink. This is where the source signal is going. TVs and digital projectors are the frontrunners.
What About HDMI?
HDCP is different than HDMI, but they do work hand-in-hand.
HDMI is the optimum connection for delivering high definition content between sources, sinks and repeaters. You have to crank up the specifications to HDMI 2.0 in order to pass 4K content to TVs and components.
And that’s where HDCP comes in. It’s the encryption technology that was designed to prevent illegal copying of 4K Ultra HD content as it’s transmitted via HDMI. HDCP 2.3 is the latest version. It provides the most secure digital handshake between a source, sink and repeater.
Why Compatibility Matters
If your gear doesn’t have the latest HDCP encryption technology, you could have some compatibility issues down the road. A product with HDCP 2.3 can send a signal to any HDCP-compliant device through HDMI. A product with older HDCP encryption technology can’t necessarily scale up. Think of it as a first-generation iPhone® trying to run an app only available for iOS 10 and higher. It’s not going to happen.
Some TVs, AV receivers or sound bars, for example, only support the HDCP encryption technology that came as factory standard with them. As encryption standards evolve, not all of them are built to receive a firmware update to the latest standards (currently, HDCP 2.3.) If this seems like a big deal, it is. Here’s why: the signal may not pass through, and you might miss out on enjoying your 4K content. Sure, you could cobble things together without HDMI connections, but you wouldn’t be enjoying the full potential of your gear, let alone 4K content.
Yamaha Products With HDCP 2.3
At Yamaha, we focus on both quality and performance. In fact, over two generations of our AV receivers — plus our latest sound bars — were designed to be compatible and updateable to the latest HDCP encryption technology. Earlier this year, the following products received a firmware update to HDCP 2.3:
Timpani heads do not need to be changed very often – we recommend every 1 to 2 years – but it’s still important for band directors to know how to change them. Unfortunately, many directors don’t know how or think it’s too difficult. Yes, changing drum heads on timpani is more involved than it is for tom or snare drums, but anyone can do it. Here’s how.
Determine the Head Sizes You Need
Unlike other concert drums (i.e., tom, snare or bass drum), timpani heads typically need to be two inches larger than the actual timpano. This is because they extend beyond the edge of the bowl. When purchasing a replacement head for a 32″ timpano, you need a 34″ head; a 29″ timpano requires a 31″ head, etc.
Unlike other concert drums (i.e., tom, snare or bass drum), timpani heads typically need to be two inches larger than the actual timpano. This is because they extend beyond the edge of the bowl. When purchasing a replacement head for a 32″ timpano, you need a 34″ head; a 29″ timpano requires a 31″ head, etc.
You can, of course, determine the diameter of your timpano head with a measuring tape, but identifying it on Yamaha timpani is extremely easy. Just find the model number of the drum, which is on the badge located under the counterhoop directly above the pedal.
On the badge, you’ll see a set of numbers like TP-3323, TP-4323, TP-6323 or TP-7323. “TP” stands for timpani. The first two numbers indicate the Series. The last two numbers are the size of the timpani. So, TP-3323 is a 23″ timpano in the 3300 Series.
Depending on when your timpani was purchased, the first two numbers may be different than those listed here, reflecting older Yamaha lines. Regardless, the only numbers with respect to the size of the timpani are the last two.
Once you know the model number, you can find a list of appropriate timpani heads from Remo or Evans. You can also use an iPhone app called TimpHeads.
Determine the Type of Heads You Need
There are several types of timpani heads. Whichever one you choose, it is important that all your timpani have the same type of head so that they match in sound and appearance.
There are several types of timpani heads. Whichever one you choose, it is important that all your timpani have the same type of head so that they match in sound and appearance.
Timpani heads can have an aluminum insert ring, a steel insert ring or no insert ring around the collar of each head. Insert rings raise the head above the counterhoop by a small amount.
We recommend heads with an aluminum insert ring. For one thing, they provide a thinner bearing edge for the head to rest upon, thereby increasing tuning consistency and making the head seating process easier. In addition, aluminum insert rings will not rust when taken outdoors.
Yamaha timpani come with Remo RC-Series Renaissance® Hazy Aluminum Insert heads. Remo makes timpani heads in both clear and hazy versions, but the hazy version is stronger and has a darker fundamental with a more focused tone.
Collect the Necessary Tools and Materials
Here are the tools and materials you will need to change timpani heads:
Timpani mallets
Rags
Timpani tuning key
Lithium grease
Steel wool
Tape measure
Marker
Softball or block of wood
DrumDial, a tool that allows equal amounts of pressure to be measured at each tension rod to ensure even tuning.
Teflon tape
Change the Heads
Put the pedal to the lowest position (heel down) and place a softball or block of wood under the pedal.
Using a timpani drum key, loosen all of the tension rods.
Note the position of the counterhoop — when you put it back on the drum, it must be in thesame position. One you’re satisfied you know exactly how it is positioned, remove the counterhoop and set it aside.
Remove the old head.
Wipe out the bowl and clean the bearing edge with a rag.
Apply Teflon tape to the bearing edge.
Put on the new timpani head. Make sure that the logo is opposite the playing area, with the seam 90 degrees (3 or 9 o’clock) from the playing area.
Inspect the counterhoop and clean with rags if necessary. If there are any rough spots on the bearing edge, smooth them out with steel wool. Make sure the tension rods are free of dirt and are properly lubricated with lithium grease.
Put the counterhoop back on and finger-tighten all of the tension rods.
Use the tape measure to center the head on the bowl.
Place your foot on the heel of the pedal and remove the softball or block of wood.
Slowly raise the pedal to the highest position.
Tighten the tension rods to tune the top note of the range of the drum.
Use the DrumDial to make sure there is even tension on all of the tension rods. This is also known as “clearing” the head.
Let the drum sit for a couple of days and then check the range.
Clear the head again.
For more information, Remo offers a detailed video series showing how to change timpani heads.
Perform Regular Maintenance
Performing regular maintenance is important for both the timpani and their drum heads. Every other week, check to make sure the drums are in the correct range. The chart below shows the standard tonal ranges for Yamaha timpani:
Plastic heads stretch, and if the timpano is not in the correct range, the pedal will slip or not stay in place. While you are checking the range, use the DrumDial to make sure that the head is still cleared (i.e., that there is even tension at all of the tension rods).
In addition, you should lubricate all moving parts with a lithium grease spray every month. At the same time, clean the base and struts with a dry cloth to remove dust or excess dirt. For more information, refer to our Timpani Maintenance blog post.
We suggest changing timpani heads every 1-2 years, depending on how much the timpani are being used. It’s a longer process than changing standard drum heads, but it will definitely improve the sound of your ensemble!
I’ll never forget my first guitar. It was purchased by my parents at a small local music store in New Jersey when I was about 13 years old. I remember seeing it hanging on the wall next to all the cool records. Being inspired by KISS at the time, as well as other friends who played guitar, I decided that was the instrument I wanted to play. Who knew that little three-quarter size Yamaha FG-45 would send me on a path to a lifetime of music?
The guitar came in a cardboard box, and that’s what I kept it in. Since this was before the internet and online lessons, my parents got me a guitar teacher who came to the house every week. It was a starter instrument, so it was hard to play at first, but I didn’t care about the deep grooves the strings were carving into my fingertips. I was more interested in the musical grooves I was creating as I practiced hour after hour.
After a few years on that FG-45, it was time to step up. By then, some of my friends were already in bands playing covers of Led Zeppelin, Pink Floyd and Aerosmith tunes, and so my folks eventually gave in to my incessant lobbying and got me a beginner’s electric guitar and a small amp.
Working with the same teacher, I started moving on from the basics and began to seriously study different musical genres: jazz, blues, rock and reggae. That teacher, who now plays in a successful reggae band, is still a friend of mine, and I often sit in with his band when I see him.
My parents could clearly see (and hear) that I had a knack for the instrument, and so they stepped up again and bought me a professional model electric guitar — one that I still own and play. I have a vivid memory of how proud I was showing it to my friends when I first got it, and the fact that it still gets used in my work makes me even prouder.
Despite the fact that they were not musical at all, my parents could also see that the guitar kept me focused. But what I’m betting they did not realize at the time was that, in addition to getting better as a player, I was improving skills that would serve me well for the rest of my life.
I didn’t know it at the time, either. But it hit me all of a sudden me when I viewed the TED-Ed animation “How playing an instrument benefits your brain.” Neuroscientists, according to author Anita Collins, have determined that playing a musical instrument engages nearly every area of the brain at once — especially the motor, visual and auditory ones. As with any other workout, a structured disciplined practice in playing music strengthens those brain functions, allowing us to apply that strength to other activities. And because crafting music also involves understanding its emotional content and message, musicians often have higher levels of executive function, which is a category of interlinked tasks that include planning, strategizing and attention to detail.
As I get older, I find myself increasingly appreciative that my parents let me study guitar and supported me with instruments and lessons; they also let me rehearse in the basement with my band, and even set up a recording studio there so I could further learn my craft. You never know what doors might open when you apply yourself, and when you encourage others. For me, a lifetime of music all started with that first Yamaha FG-45.
One of the problems with mixing live sound is that you can’t always put the Front of House console in the best mix position. Yikes! It’d be nice to have an area smack in the middle of every club where you could set it up, but that isn’t always possible. Sometimes there isn’t enough room, or a club owner might not want to give up space where patrons can be seated.
Of course, if you’re playing in the band that you’re mixing, you need to keep the console on stage with you. Actually, when you think about it, there are a lot of good reasons to have it there. The stage is where the instruments and microphones are located, so why go through the hassle of running cables out into the house? This way, you can keep the cables short (which is always a good thing) and avoid the need for an expensive (and heavy) snake. Also, it’s easier to hook up your stage monitors because all of the connections are nearby, where they need to be.
Either way — whether your mixing console is located onstage or in a less-than-ideal spot out in the room — you’ll be walking back and forth between the audience area and the mixer all night, making adjustments, going out to listen, making more adjustments, and on and on. (At least you’ll get your daily exercise at the gig!)
What a pain! Wouldn’t it be great if you could instead control your mixer remotely?
If it’s a digital mixer, there’s a good chance that you can. (Most analog mixers cannot be remote controlled.) Many current Yamaha digital mixers, including the TF-Rack and all of the mixers in the TF Series, can be controlled via an iPad®. Some digital mixers have built-in Wi-Fi routers, but most that can be remote controlled also provide a wired network connection — usually an Ethernet port — on the rear panel:
Rear panel Ethernet port on the Yamaha TF-Rack.
How Does Remote Control Work?
You’ll need a wireless access point to create a control network for your digital mixer. That’s not as scary as it sounds: you really just need a Wi-Fi router, because most routers have a built-in access point. Yamaha recommends a router that’s at least 802.11g, 2.4 GHz compatible, but for the fastest communication you’ll want one that can use the 802.11n wireless mode at 5 GHz. Most routers have this information printed right on them. The network you set up is referred to as a VPN (Virtual Private Network). You’ll also need a CAT5 (Ethernet) cable for connecting the router to the mixer.
The final piece of the puzzle is software for your tablet or smartphone. Yamaha offers two options: TF StageMix™ for the iPad, and MonitorMix for the iPhone®, iPad or iPod Touch® — both available free of charge from the Apple® App Store. Once you’ve installed the software on your mobile device, simply configure the network settings the same way you would to access your Wi-Fi network at home. It’s a good idea to use a password for your control network so that unauthorized people can’t access your PA system. (The mind boggles at the possibilities!)
Yamaha TF StageMix.
Once you have the network configured, you’ll be able to control your mixer from your smart device. An iPad running StageMix gives you access to most every parameter of a Yamaha TF Rack or TF Series mixer, including EQ, aux sends, dynamics, effects and libraries:
Controlling EQ from Yamaha TF StageMix.
This will make your life easier in many ways. First, you’ll no longer need to worry about where to set up the mixing console. Wherever it’s located — even if it’s onstage — you’ll be able to walk around the room while actively mixing. This is really valuable because, due to the nature of acoustics, the sound at the mix position can often be very different than it is in other parts of the room. By using remote control, you’ll be able to hear what other people are hearing from their various locations around the room, which will give you the ability to optimize your mix for the majority of listeners.
Plus, in many cases (for example, when using TF StageMix to remotely run a Yamaha TF Rack), you’ll see screens on your remote device that are similar to those when running the mixer from its front panel, so there’s little or no learning curve involved.
Control Your Monitor Mixes Too
It’s not just FOH mixes that can be controlled remotely. Adjustments to the monitor mixes can also be made while you stand onstage in front of a monitor — even during a show — instead of trying to mix monitors from a position in the house or off to the side of the stage. You can give separate control of these mixes to performers for adjustments too!
For example, mobile mixing apps such as Yamaha MonitorMix allows individual wireless Aux mixing of CL/QL/TF Series mixers from up to ten iPhone, iPad, iPod Touch or Android devices simultaneously.
Yamaha MonitorMix.
As described in our Tools of the Trade blog post about aux sends and returns, you can use a separate aux send for each musician’s monitor mix to give them control over their individual level. With apps like MonitorMix, they can control that send wirelessly from their smartphone.
Some remote control apps provide a very simple interface whereby there are faders for a stereo mix of the band plus just one or two specific vocal or instrument channels that can be used if a performer wants “more me.” More advanced apps like MonitorMix allow control over every channel of the monitor mix. As you’d expect, changes made in one musician’s monitor mix does not affect the others, nor does it affect the Front of House mix. MonitorMix can also simplify the mix process by creating personal groups of instruments such as drums or backing vocals, and providing remote control over the group with a single fader. You can even create individual device passwords so that musicians don’t have access to each other’s monitor mixes — something that could otherwise result in a lot of shenanigans (not to mention confusion!) on stage.
Using mobile devices to control your digital mixer can help your shows run a lot smoother. Remote control rules!
You like music. Maybe you’ve been downloading music for years. You might have even gone through the arduous process of digitizing your CDs and cassette tapes. They now reside on your computer. You’d like to stream them. But how?
The Yamaha MusicCast Controller app doesn’t discriminate between streaming sources. Whether it’s one of the nation’s most popular streaming services or music you have stored on your device or on a local network, you can share it with every room of your house. Want to know how? Read on.
The Server Button
The purpose of the “Server” button in MusicCast Controller (shown on the right) is to allow you to access music files that you have downloaded or backed up. Those files are usually located in a particular folder on a hard drive — either one inside your computer or an external storage device like a thumb drive. With MusicCast, you can play those files back in any or all rooms in your multi-room home audio system.
Don’t touch that Server button just yet, though! Before MusicCast can see this content, you need to activate a feature on your computer called media file sharing.
Media File Sharing
There are several methods for accessing your music depending on how your network is set up. For instance, if your router has a USB port configured as a NAS (Network Attached Storage) input, you’re ahead of the game. Simply connect a high capacity USB thumb drive or hard drive with all your music stored on it (or as much as you can fit on the drive). Touching the “Server” button in MusicCast Controller will give you access to all the music stored on the drive.
If that feature is not available on your router, you can add a dedicated NAS server to your network. Here’s how to activate media sharing on a PC that’s running Windows 10:
1. First, you’ll need to turn on the sharing function of your PC. From the search bar, type “Control Panel”:
2. From the icon view, navigate to the “Network and Sharing Center”:
3. Select “Change advanced sharing settings”:
4. Click on “All Networks”:
5. Click “Choose media streaming options”:
6. Click on the “Turn on media streaming” button, then hit OK:
7. Type in a name for your media library, then use the tick boxes to decide which devices will have access to the media stored on your PC’s music folder. Finally, hit OK:
8. Finally, close out all windows. MusicCast Controller can now see the music stored in your Music media folder.
For more ways to enjoy music at home, check out these blog articles:
The major scale is one of the most commonly used scales in western music. Famous composers have used this scale for centuries to write incredible masterpieces, including Mozart’s Piano Sonata No.16 in C Major:
A major scale consists of seven notes with a consonant and uplifting tonality that evokes positive and happy emotions. (In other words, it sounds harmonious and resolute, as opposed to a dissonant tonality that sounds discordant and unresolved.) When inverted to start on the sixth step (“degree”), it becomes a natural minor scale, sometimes referred to as the “relative minor” to the major scale. For example, starting on the note “A” in a C Major scale results in an A Minor scale, which, like C Major, has no accidentals. A relative minor scale shares the same key signature as its major scale “cousin” but, in contrast, it sounds sad and melancholy.
Why do these two interrelated scales evoke completely different musical flavors and emotional content? The simple answer is that, despite consisting of the same seven tones, they have different tonal centers.
A tonal center is the resolution point and resting place of a chord progression, and it’s crucial to understanding the major scale modes. (Modes are simply alternate scales created by starting at different steps within a scale.) Because each mode has its own distinct set of intervals, each has its own characteristic tonality.
Let’s dig into a little harmony and theory in the key of A to give you a visual overview of how it all works.
Harmonizing The A Major Scale to Create Chords
Every major scale consists of seven tones, and we use those tones to build chords — a process known as harmonization.
The first chord of a scale is created by stacking every third tone. In the case of the A Major scale, it looks like this:
A – B – C# – D – E – F# – G#
The resulting chord is an A major seventh, referred to as an Ama7, or Amaj7. (Note that simple three-note “triad” chords without the seventh omit the “ma” or “maj”; such a chord in the key of A would simply be called an “A.”)
The second chord of the scale is built by stacking every third tone from the second degree. In the case of the A major scale, this would be B:
A – B – C# – D – E – F# – G# – A
The resulting chord is a B minor seventh, referred to as a Bmi7 (or simply Bm7).
We continue this process until we have seven chords, each having one of the seven major scale tones as its root note. For example, the seven major scale chords in the key of A are as follows:
Chord progressions are created by choosing two or more of the chords derived from a scale. Typically the first chord will be the tonal center of that progression.
For example, when we have a four-bar progression that consists of the three chords shown below, we can assume that the tonal center of the progression will be A Major. We can confirm this by playing the progression and listening to where the chords sound “rested” and resolved.
II: A I D E7 I A I D E7 :II
Now that we’ve determined the tonal center of the chord progression, we can use the A Major scale to improvise over the progression. Phrasing your lines and licks towards the tonal center chord (in this case, A) and resolving to those notes (in this case, A, C#, E) is the key to making the melodies you play over this progression sound strong and resolute.
Resolving to the first chord this way is called playing in theIonian mode. “Ionian” is simply a Greek word used to denote the first mode of the major scale. Each major scale also has a characteristic note that evokes that mode’s unique tonal flavor. The characteristic note in the Ionian mode is the major 7th (that is, the seventh degree of the major scale). Targeting the major 7th (in the case of the A Major scale, the note G#) will evoke the Ionian modal sound.
The Video
Here’s a video I shot recently as part of my new “Master of Modes” series of lessons available at RobbieCalvo.com:
This is the chord progression I’m playing over:
II: A/C# D5/2 I E/G# A5/2 :II
(Note:A 5/2 “slash” chord contains only the root, fifth and second, with no third.)
As you can hear, this progression continues to resolve to the first and last chords (both are A Major chords). Listen carefully to my performance. It’s in Ionian mode, with my phrases resolving to all three chord tones of the A Major chord (A, C#, E). You’ll also notice that I’m periodically flavoring my solo lines with the Ionian characteristic note of G#.
The Guitar
The Yamaha Design Concept guitar used in the video is one of eight instruments produced to display at the 2019 NAMM show. It’s a Revstar 502T with an Ice Blue finish (same as the stock model RS320) but with custom black hardware, Grover locking tuners, Rautia Guitars pickups and a wonderful satin finish on the back and neck. In my opinion, it’s visually stunning and sounds just as good.
Design Concept guitars are built by master luthier Pat Campolattano to help Yamaha Guitars evaluate tonewoods, hardware, pickups and finishes … and sometimes just because they look cool!
The Wrap-Up
Literally millions of classic songs have been written with the seven notes of the major scale. But by simply inverting the scale to resolve to each of its seven tones and chords, we can compose music with new harmonic and melodic variety, color and mood. I sometimes wonder if all of the musical permutations have been thought of … and then I hear a new piece of music that sounds totally fresh, unique and inspiring. Perhaps with a little creativity, we can discover even more magic within those same seven notes!
Join us again next month for a discussion about Dorian mode.
When I first decided I wanted to be a professional songwriter, I would have done anything to get in the room with writers who were better than me. It was something they — the mysterious “they” who know everything — called “Writing Up.” I imagine this would apply not just to songwriting, but to film composing, guitar shredding, even tennis playing! Everyone, in fact, should strive to Write Up, no matter what level you’re at. That’s how you improve your game.
That’s why I was so stoked back in 1990-something when, during a meeting at a record label, Jay Landers, the A&R man in attendance, put a call in to Albert Hammond (who wrote “It Never Rains in Southern California” and “Nothing’s Gonna Stop Us Now,” among other classic songs) and asked if he would consider co-writing with an unknown.
Albert didn’t flinch.
A week later I showed up at his door in Reseda, California with a couple of song “starts” (the seed of an idea) and a smile. Albert suggested I sit at the keyboard and freestyle while he sat by my side in a red velvet high-backed chair (like a king on a throne) and considered my moves — basically blocks of four-chord progressions with an occasional syncopation thrown in randomly. “Eighth-note-heaven” was another go-to maneuver. Very sophisticated … NOT. Who ever said you had to be a virtuoso to write a song? I’d be in a lot of trouble if that were the case.
Albert was directing me this way and that: “Go here! No, go there! Use the IV chord!” Who was I to question him? He of many huge copyrights. Me of no-name.
I did my best. When you get in the room, that’s what you do. (Actually, what am I saying? You should always bring your best.)
Albert and me, circa 2013.
At the time, it felt like I was doing the heavy lifting. But for every chord progression I put forward, Albert pulled out a hook. Amazing. How does he do it? I remember thinking. Hopefully, from him I will learn.
Working with Albert definitely made me better. And, reciprocally, I choose to believe that I offered him something of value as well — if not decades worth of experience, then perhaps a little songwriting cardio. 🙂 He enjoyed it. It was obvious. We had a whole lotta fun. And we got that song recorded, too. Here it is! (The production is admittedly a little dated, but 25 years later it’s still bringing in some $$).
In order for a coupling of a newbie and a seasoned pro to thrive, the pro, in my opinion, has to be willing to play the roll of mentor. It’s not the same dynamic as a one-on-one with a peer of equal skill. That said, every new collaborator — young or old, green or uber-successful — draws something different out of their partner, just like the color red looks different next to blue than it does next to yellow. Even if you’re a jaded journeyman, you still may discover something new within yourself that you never realized you had before.
Funny thing is, I used to be that newbie. But over time, roles change. I am now the more mature and accomplished veteran (how does that happen?) just like Albert was for me. And because we vets came of age with a guitar in hand (or a piano at our fingertips), we usually bring singer-songwriter style contributions — an idea, an angle, some irony at the end of a story. Whereas a younger writer, who’s more in touch with modern arrangements (and algorithms) tends to have the tricks up their sleeve — sound bites, catchy phrases, mainstream structure. They often take my idea and put it in a trendier “package.” And let’s face it: No matter how stellar my concept is, if I want my song to get covered, I have to consider incorporating something contemporary into it.
A generation gap in a writing room can be just what the doctor ordered. Looking back, I think Albert needed some fresh blood in his creative life. And now, at least once in a while, I do too. So let’s keep trying to Write Up. If everyone does their job it can be a rewarding and productive experience. Don’t worry, the tables will turn soon enough. And hopefully everyone will get a chance to sit on the other side.
Alfonso Cuarón’s black-and-white masterpiece Roma won the 2019 Oscar for Best Achievement in Cinematography, among many other accolades. But did you know that this visually stunning movie was also nominated for best sound mixing and sound editing? To hear why, watch this clip.
If you have the right setup, you can hear Netflix® streaming that same great audio in Dolby Atmos® — the three-dimensional surround sound technology used in movie theaters — right to your home theater. As we explained in a previous blog posting, Dolby Atmos is object-based, which means that individual sounds can be programmed to move around the room — even above and behind you —independent of the speaker configuration, thus creating a truly immersive entertainment experience. Netflix has been streaming Dolby Atmos since 2016, but the big news is their recent upgrade to streaming high-quality audio.
Netflix defines their high-quality sound as being “perceptually transparent,” meaning that at 768 Kbps for Dolby Atmos content, even though the sound is compressed to conserve bandwidth, you can’t tell the difference between it and the original source.
Netflix also adopted a strategy they use for video called adaptive streaming. With adaptive audio streaming, the bit rate of the audio is automatically adjusted based on the quality of the internet connection, and in a seamless way that avoids rebuffering. The result is better sound even when your network is struggling.
To enjoy the full benefit of Netflix’s high-quality audio and Dolby Atmos, you need:
1. Dolby Atmos content. If you have a Dolby Atmos capable system and a Netflix plan that supports streaming in Ultra HD, available titles will display this icon next to their description:
2. A Netflix streaming box that is Dolby Atmos-capable, such as an Apple TV® 4K. Alternatively, you can use any Dolby Atmos-capable TV that supports both eARC and Dolby Atmos audio with Netflix. (A list of compatible devices can be found here.)
3. A Dolby Atmos-capable AV receiver such as a Yamaha AVENTAGE model manufactured since 2017.
As the race for audience share heats up, content providers must not only offer new binge-worthy series and must-see movies, but also raise the quality of their streaming to make the in-home viewing experience rival that of the movie theater. Dolby Atmos’ three-dimensional surround sound puts you right in the center of every epic battle. In any competition between content providers, home theater enthusiasts are the winners!
Imagine this: A brilliant song idea suddenly comes to you, and you want to record a rough demo of it while it’s fresh in your mind, so you launch your DAW and create a new empty file. Then you think it through a little more and decide that you should probably generate a few audio tracks in advance to use for recording vocals, guitar and bass, as well as some virtual instrument tracks for the drums and keyboards. Then you realize that you’re also going to need a reverb, and maybe a delay or two; perhaps a chorus or a flanger as well …
In some DAWs, by the time you get everything set up, your muse may have deserted you altogether. Wouldn’t it be great to instead be able to open your DAW with all of those tracks and instruments and effects pre-configured so you can dive right into recording? By giving you the ability to create something called a Project Template, Steinberg Cubase lets you do just that. Better still, you can create as many of them as you want, so you can instantly start making music the next time inspiration strikes. (Templates are handy for users of all levels, by the way; for example, many composers rely on them for immediate access to different instrument and sound configurations they use regularly.)
Here are the steps for building your own Project Templates.
What’s the Hub, Bub?
By default, the Steinberg Hub screen appears when you launch Cubase. It shows you the latest news and info from Steinberg on one side and Project information on the other. The latter includes icons for Recording, Scoring, Production and Mastering. Clicking on any of these will open lists of factory Project Templates, any of which you can use as is, or as starting points for creating your own template. (Note that the Project information area offers the same choices as the Project Assistant window, which you can open by pressing Command+N on a Mac® or Control+N on a PC.)
Let’s instead create a new Project Template from scratch. To do so, simply click on the Create Empty button in the bottom right-hand corner of the Project area of the Hub screen, as shown below:
The Hub screen.
An empty Project will appear, which will serve as your blank canvas. Next, go to the Project Menu, choose Project Setup (Shift+S), and a window will open that lets you configure numerous settings for your Project — or in this case, for your Project Template:
The Project Setup window.
Ready Get Setup
The critical settings in the Project Setup window are all under the Record Format category, so don’t worry about the others for now. Here, you’ll choose the bit depth and sampling rate for audio in your project, as well as the type of audio files that will be generated by Cubase. As a general rule, higher bit depths and sample rates offer better quality, but create larger files and tax your computer’s processors more. In addition, your audio interface might limit the bit depth and sampling rate choices you can make, based on what it supports. In most cases, you’ll probably be satisfied with the quality of 24-bit or 32-bit Float files at 44.1kHz or 48kHz.
For Record File Type, the default is Wave File. You might want to switch it to Broadcast Wave File, which is the same except for extra timing information stored in their headers — something that can be useful when moving files from project to project.
Tracking Your Tracks
The idea of a template is to build as “typical” a setup as possible. Rather than trying to estimate how many mono and stereo audio tracks I’ll need for a typical recording, I find it easier just to create one of each, which I’ll refer to here as “model tracks.” From these, I’ll make as many copies as necessary during my recording by using the Duplicate Tracks command, which is available by right-clicking in a Track in the Track List. (If you’d prefer to set up multiple mono and stereo tracks, wait until after you’ve fully configured your model tracks first, including adding any effects, which I’ll explain in Part 2.)
To create a track, right-click (or Control-click on a Mac if you don’t have a two-button mouse) in an empty part of the Track List, then choose Add Audio Track from the resultant menu. That will bring up a dialog box that lets you specify a stereo or mono track, configure inputs and outputs, and more:
The Add Track window.
For the first one, choose Mono as the track type and fill in whatever is typical for your setup in the input field. (Most likely it would be input 1 on your interface, but you can change it during recording if need be.) Leave the Audio Outputs box set to Stereo Out, which sends it to your master output. You can also name your track here. For now, call it Mono Audio. Next, repeat the process, but this time, create a stereo track.
Further down the Add Audio Track menu is a choice called Using Track Preset, circled in red in the screenshot below:
The Add Audio Track menu.
This opens the Choose Track Preset window, where you can find pre-configured tracks of all types, including mono and stereo audio tracks that are set up for various instrument types and genres and even have effects already added. If you like, set your model tracks up using these; you can always customize them later.
The Choose Track Preset window.
To save the template you’ve created thus far, go to the File menu and select the Save as Template option. This will bring up the Save as Template dialog box, where you can name your template, add a description, and even assign it to a category. You can save as many templates as you want. You can rename them, and delete those you no longer need from either the Save Template dialog or the Project Assistant window (Command+N or Control+N, depending upon whether you are running Cubase on a Mac or a PC).
The Save Template dialog.
In Part 2, we’ll add effects, MIDI instrument tracks and more to our template.
The vibraphone (also known as the vibraharp or vibes) is the most recent addition to the lineup of orchestral percussion instruments, with its early beginnings dating back only to the 1920s vaudeville era.
The vibraphone can produce a variety of timbres, from dark and mellow to shiny and bright. The sound comes from a series of tuned tone bars being struck by mallets, with a general range of three to four octaves, depending on the model. Aluminum is used for these bars because it has a much longer decay time than the wood or synthetic wood type product used in marimba or xylophone bars. Metal resonators (sometimes called resonator tubes or resonator pipes) are suspended beneath the tone bars, with the length of each resonator varying depending on the pitch of the tone bar; the lower the note, the longer the resonator.
One of the most distinctive aspects of the sound of a vibraphone comes from motor-driven rotating disks (called “fans”) situated at the top of each resonator. When engaged, this causes a small fluctuation in pitch, resulting in a vibrato effect (hence the name “vibraphone”), along with some volume change, resulting in a tremolo effect. As the motor speed is adjusted from slow to fast, these effects become more pronounced.
Here’s an annotated illustration of a typical vibraphone, followed by a description of the main components in alphabetical order:
Casters. These allow for easy transport and can be locked for stability.
Controller. This provides the user controls for the motor. A quiet motor with silent pause and fan speed slider controls allows musical expression without unwanted noise. Some controllers offer a “memory pause” feature that remembers where the fans are when you turn on the motor so that they stop or start in the same place when the motor is paused or removed from pause.
Driver. Another name for the motor that drives the fan belts.
Fan Belt. A rubber belt that rotates the resonator fans.
Frame. A durable frame with horizontal legs is best for stability, and therefore playability. In some vibraphones, the frame is height-adjustable, allowing you to set the most comfortable playing position.
Pedal. Similar in function to a sustain pedal on a piano, its wide surface allows pedaling of the instrument from all playing positions on the keyboard.
Pedal Stay. Stabilizes the frame and holds the pedal in place for easy movement.
Resonators. The length of these metallic tubes is specific to each note, thus optimizing the projection of each tone bar.
Tone Bars (Natural / Accidental). These are made of aluminum and come in various finishes, most usually anodized matte silver, glossy gold or matte gold. The bar sizes also vary. Non-graduated bars help to keep vibraphones compact, while thicker bars allow for more projection and full tone.
Here are some additional considerations when it comes to the care and maintenance of your vibraphone:
– Never strike the tone bars with glockenspiel mallets or any other solid objects. Doing so can dent or scratch the tone bars or alter the bar pitch.
– When moving a vibraphone, do so gently, avoiding shocks and impacts. Ensure that the power adapter is disconnected, and the caster stoppers are unlocked. Lift the instrument slightly whenever moving it over surfaces that are not smooth or flat.
– When transporting a vibraphone by car, first dismantle the entire instrument and pack it securely in a soft case. Be sure to always transport the bars in a separate bar bag.
– Tone bars can be cleaned using a silicone cloth or any soft, dry cloth. Stains that are still visible may be wiped off with a small amount of ethyl alcohol applied to a soft cloth. Never use thinner, benzene or a wet cloth.
Most days when the weather is cooperative, I like to take a midday break by bringing my young German Shepherd to nearby Vassar College. The world-famous liberal arts school is just a short drive away, and Sophie loves roaming the expansive lawns and greeting students as they make their way from one stately building to the next. It’s good exercise for the two of us — both physically and mentally — and something we very much look forward to as part of our daily routine.
The 150-year-old campus is exceptionally beautiful. Dotted with soft alcoves under shady trees, and stone benches inscribed with inspirational poetry, it was clearly designed to promote scholarly thought. One can well imagine a young Edna St. Vincent Millay or Meryl Streep reveling in the peaceful surroundings as they lay on the grass or sat on one of those benches, studying their textbooks or perhaps just dreaming of the life that lay before them.
Today? Not so much. In fact, it’s rare to see even a single student not staring at their phones zombie-like as they walk along Vassar’s winding pathways or sit on one of those benches or stretch out on one of the verdant lawns. Now, I understand the importance of being connected 24/7 to many people these days — especially millennials, for whom it seems to be almost an obsession — but where does it leave the space for the quiet contemplation necessary for a mind (especially a young mind!) to blossom?
It’s not just Vassar, of course, and it’s not just college campuses. Walk the sands of any beach as waves lap gently upon the shore; hike through dense forests or to the top of distant hilltops for a glimpse of vistas rarely seen; enter the hallow halls of a museum to gaze upon a painting or photograph or sculpture by a master artist; attend any concert, any performance, any undertaking intended to uplift the spirit. Doesn’t matter where or when or how life-changing the event could be: I guarantee there will be somebody gaping at their phone, taking pictures, shooting videos, sending texts, posting to social media, or, worst of all, talking loudly. It is as if documenting the experience has become more important than having the experience. What a pity.
Sophie photobombs.
Smart as she is, there’s no question that Sophie does not possess a fraction of the intellect of any of the students at Vassar. But I would argue that in those moments when she is playfully tossing a pine cone in the air or sniffing the breeze to try and catch the scent of another dog, or chasing in vain after a bird flitting from bush to bush, she is infinitely more connected than those students who, though surrounded by a paradise of sorts, choose to instead immerse themselves in a virtual reality of meaningless texts and social media updates.
I know there are some who will view this as a rant by some aging, out-of-touch guy. But I see it more as a lament — a longing for something that seems to be lost more and more with each passing day, something that used to be such a vital part of who we are as human beings.
“Take the time to smell the roses” is amongst the hoariest of hoary old clichés, but I would submit that it, and all of its corollaries (i.e., “take the time to enjoy the view,” “take the time to listen to the music”) is perhaps the most important of all of life’s lessons, for we all eventually reach the point where memories are pretty much all we have. Why limit those memories to a view of the world through a 2 ½ inch glass screen?
What makes a smart home smart? It’s not just the integrated connectivity between devices; a lot of the brain power comes from human planning — determining how all the components will work together, and then implementing that plan in a seamless way. Some advanced options require the services of a professional custom integrator (the “CI Guy”). But you can certainly create the foundation of a smart home experience on your own before calling in the cavalry. Here are some tips to get started.
Begin with Audio
A great way to integrate your audio system with your smart home is by using MusicCast, a wireless technology developed by Yamaha that allows you to seamlessly connect multiple devices on the same Wi-Fi network. You can link MusicCast-enabled devices in order to play different music in individual rooms (or the same music in all rooms simultaneously) and even create a wireless 5.1-channel surround setup to maximize the sonic experience of your favorite content.
To begin, download and open the MusicCast Controller app, then click on the settings button in the top right corner:
Choose “New Device,” then select the device you want to add and follow the steps to completion. MusicCast Controller will do the rest!
Add Voice Control
Voice control has become an integral part of every smart home. From coffee makers to thermostats to window shades, you can control it with your voice. Your experience with audio can be the same.
To set up voice commands within MusicCast, go to Settings and scroll to the bottom. Since all Amazon Alexa and Google Assistant devices are compatible with MusicCast, you’ll see both options:
Choose the one you want and follow the setup instructions. (They’re slightly different for each.) For example, here are the instructions for Google Assistant:
There are two types of skills that can be downloaded for Alexa: MusicCast Smart Home skills, which include basic commands like “Alexa, turn on the Living Room” and MusicCast Skills, which are more complex and require an additional invocation of “ask MusicCast to” (i.e. “Alexa, ask MusicCast to turn on the kitchen”).
Actions on Google commands on MusicCast require a similar invocation, such as “Ok, Google, ask MusicCast to set volume to 30 in the den.”
For a complete list of voice control commands for both devices, click here.
Lights, Cameras, Action
There are plenty of ways for the DIYer to round out their smart home experience — lights, for example. Instead of having to walk up to a lamp and physically switch it on, simply connect it to a smart plug and control it with your phone or with any Google Home or Alexa device using voice commands. There are also smart bulbs you can place directly into the lamps themselves.
For home safety (and to avoid having to pull your keys out of your pocket every time you come home!), there are a number of smart lock solutions on the market, not to mention video doorbells, thermostats and wireless cameras. Some manufacturers offer multiple devices that all work with one another and are easily voice-controlled by both Alexa and Google Home devices.
Every day, more and more convenience-based products are being introduced. Bear in mind, however, that the more devices you add to your smart home, the more work you might have to do to get them all installed and set up. Sometimes less is more, especially when it comes to technology.
Helping Hands
If you’re looking for a more advanced smart home options that fall outside your DIY wheelhouse, consider consulting with professional automation companies such as Josh.ai or Control4. Learn more about custom integrators and where to find them here.
For more information on voice control devices and how they work with MusicCast, check out these blog articles:
The French horn has the widest tonal range of all brass instruments. Its extremely rich, soft timbre gives it a special quality somewhere between brass and woodwinds, enabling it to blend well with the sound of many other instruments. It is also one of the more expressive instruments, thanks to the player’s ability to alter the tone and fine-tune the pitch by putting a hand in the bell.
Want to learn more? Read on.
History
The original horn was simply an animal horn. It’s likely that people from ancient times turned the horns of their prey into musical instruments. This description both explains the origin of the instrument and the etymology of the word “horn.”
Until the middle of the sixteenth century, the horn was used by hunters as a means of communication during the hunt, and thus the body of the horn was wound in large coils so that it could be carried on the shoulder and sounded while riding a horse. In addition, the bell faced to the rear to keep it from getting in the rider’s way.
The horn is very similar to the trumpet in that sound is produced through the vibration of the lips. Maybe that’s why the horn has a history of development almost identical to that of the trumpet. Horns made up to the middle of the nineteenth century are called “natural” horns because of their basic structure, which consists of a large bell, a single coiled tube and a mouthpiece.
The pitch of these instruments could only be changed by changing the vibration of the lips, and even then it was only possible to produce a tone within the natural harmonic … meaning that it cannot play chromatic scales. This state of affairs led eighteenth century horn players to come up with the idea of sticking a hand in the bell to produce tones outside the instrument’s natural harmonic — a technique that came to be known as hand-stopping.
Despite this new technique, the range of tones possible with the horn was still very limited. In addition, the tones and pitches were unstable, and the timbre of hand-stopped notes had a muffled quality. The resolution to this problem came in the mid-nineteenth century with the development of what was known then as the “valve horn” — a horn whose effective length could be altered instantly by opening one or more valves like those on today’s modern instruments.
With the arrival of the valve horn, horn players could finally (and easily) play a stable chromatic scale. The end of the nineteenth century saw the invention of the double horn, which combined two tubes of different lengths, and in the twentieth century, the triple horn was invented. Today, there are other musical instruments that include the name “horn” (i.e., “Alto/Tenor horn,” “Baritone horn,” etc.) but the instrument that directly evolved from the original horn is commonly called the French horn.
The French Horn Family
The F single horn
This is the F single horn, sometimes simply called the F horn. Single horns like these are lightweight and less complicated than double horns, making them ideal for new horn students.
Yamaha YHR-314II F single horn.
The B♭ single horn
The pitch of the B♭ horn is a fourth higher than the F horn, and so this instrument has a brighter, clarion tone. However horn music is written in the key of F, and so transposition is necessary when playing the B♭ horn.
Here are two audio examples that allow you to contrast the timbre of an F single horn with that of a B♭ single horn:
As mentioned above, hand-stopping is one of the techniques that is unique to the French horn. However, sometimes the pitch becomes slightly higher when a horn is hand-stopped, with no appropriate alternate fingering. For that reason, the B♭ single horn and the B♭/High F descant double horn (see below) has an extra valve called a gesttopft key to alter the pitch slightly.
Yamaha YHR-322II B♭ single horn.
The F/B♭ full-double horn
The F/B♭ full-double horn is the most common and widely used horn today. It includes both the F and B♭ “sides” of the French horn (and their respective timbres) within a single instrument. There are also F/B♭ semi-double horns that consist of a B♭ single horn with both a B♭ and a supplementary F crook, making it as light as a single horn.
Yamaha YHR-567 F/B♭ full double horn.
The B♭-High F descant double horn
The B♭-High F descant double horn has the same basic structure as a full-double horn, but the F side of the horn is pitched one octave higher than that of a full-double horn. This allows the instrument to perform in a higher range.
Yamaha YHR-881 B♭-High F descant double horn.
The triple horn
The triple horn is really a full-double horn that also includes a high-F horn for playing in the higher ranges. Although the overall range of the horn is technically unchanged, the high-F side of the horn allows it to be more stable in the higher range.
Yamaha YHR-891D triple horn.
Here’s a chart showing the range of the different types of French horns:
Music educators should not overlook selecting a proper saxophone mouthpiece for students in saxophone method classes and for beginners.
Students and parents might assume that because mouthpieces typically come with the purchase of new saxophones (and in many cases, resale saxophones), the mouthpiece that is included is the best choice. This is not necessarily true!
So, what mouthpiece should student saxophonists, including those in university-level saxophone method classes, utilize? Music teachers should stress that appropriately selected, professional-level mouthpieces will often dramatically improve the general playability of high-quality, student-level saxophones. Students will likely experience far better results in response, tuning, articulation and tonal-dynamic control.
Student-model saxophones do not typically come with professional-level mouthpieces. However, when schools purchase quantities of instruments for class instruction, music directors should try to negotiate the inclusion of medium-faced, professional mouthpieces as part of the purchase. This could increase the total purchase price – professional mouthpieces are, after all, more costly – but the money will be well spent!
Visual Evaluation
Students in saxophone methods classes and beginners may not know how to evaluate mouthpieces, but this is a skill they should learn because it will be extremely useful if they choose to be music teachers themselves!
Examples of basic visual mouthpiece inspection include:
the exterior of the mouthpiece, including the table, should be clean and free of chips and other damage.
the chamber of the mouthpiece, including the baffle, arch and walls, should be clean and free from damage.
the tip rail should be symmetrical and free from scratches, chips and other obvious damage.
the side rails should be identical and symmetrical, and free from chips and other damage.
Mouthpiece Patches
Some saxophonists put a self-adhesive patch on the top portion of their mouthpieces. These patches, which are widely available in a variety of thicknesses and types, protect the mouthpiece from the teeth, minimizing scratches and dents. Some players say that it is more comfortable playing with their teeth making contact with a “textured” patch versus the hard and sometimes slippery surface of the mouthpiece.
Perhaps the most significant consideration when choosing mouthpiece patches is the thickness of the patch. This is purely a personal comfort decision. Thinner patches preserve the basic feel and size of the mouthpiece itself while still providing some added comfort. Thicker mouthpiece patches may feel “spongy” to some saxophonists. Students should experiment with different patches to find the right thickness and texture for them.
Tone Quality — What’s Your Desired Sound?
It is common to credit the mouthpiece with the tone produced by a saxophonist. Quality saxophone mouthpieces play a vital role in allowing a player to achieve desired results. The key word here is “desired.”
The most important factor that determines tonal quality (or tonal “style”) is the model of tone that a player has in his or her mind’s ear before blowing the instrument. This is the conscious or subconscious “desired” tone and can be referred to as a “mental concept” of a tone prior to producing it.
The saxophone can produce a wide range of tone qualities, and depending on the player, this can be positive or negative. The flexibility of the saxophone tone, especially when subjected to the myriad of mouthpieces and facings available, can be a help to the experienced player and a hindrance to the uninitiated. Proper instruction with a saxophone specialist as well as listening to live, high-quality saxophone performance is invaluable.
Historically speaking, DI signals from acoustic guitars (that is, the “Direct Inject” signal coming from the instrument’s internal pickup system) tend to have a bad reputation. In some instances, the sound they deliver can be overly nasal and midrangey, sometimes to the point of being completely unrealistic.
Fortunately, technology has evolved over the years, and the Yamaha AC5M guitar is a perfect example of this, with an advanced pickup system designed to deliver great sound. In this article, I’ll tell you about a recording technique I’ve developed for the instrument that embraces both its internal electronics and the use of an external microphone. The end result is a clean, clear and full acoustic sound perfect for every application.
The Guitar
Yamaha AC5M ARE guitar.
The AC5M ARE is a concert body cutaway guitar with a solid mahogany back and sides, a solid Sitka spruce top and interior scalloped bracing. Features include Gotoh open-gear tuners, an African mahogany neck, and an ebony fingerboard and bridge. Like other guitars in the AC5 (and AC3) series, it includes Yamaha SRT2 electronics. This flexible system offers both a piezo-type pickup and digital models of vintage studio microphones, with the ability to create custom blends of the two. The “ARE” in the name stands for “Acoustic Resonance Enhancement,” a proprietary process developed by Yamaha that delivers the warm tonality of aged wood.
The Technique
While this guitar is stage-ready right out of the case, I wanted to take it for a spin in the studio and use it on some TV sessions. After a little experimentation, I discovered that combining the AC5M’s pickup system (both the piezo and the mic models) with an external omnidirectional mic gave me the best results. This setup also has the bonus of offering maximum sonic flexibility when it comes time for mixdown.
For my first cue, I tuned the AC5M to a DADGAD tuning, and placed a capo on the 4th fret. This gave me a nice open sound from which to work. For the first pass, I used the SRT2 Mic2 setting (a model of a Royer R122 active ribbon microphone), enhanced with a small amount of added room reverb, courtesy of a plug-in on my DAW. Here’s what it sounded like:
At the same time, I also placed one of my omnidirectional microphones a few inches from the 12th fret and recorded it on a second track. In this next audio clip, you can hear a blend of both the external mic and the AC5M mic model:
As I mentioned in a previous blog posting about recording TransAcoustic guitar effects, I often double my parts in order to get a bigger guitar sound. I don’t just copy and paste the first one — I play it again. While there will be slight imperfections between the two passes, they help create a subtle, natural-sounding chorus.
Accordingly, for the second pass, I played the part again, this time just using the DI from the AC5M piezo pickup. While not as natural-sounding as the mic models, it still adds a certain midrange characteristic that I quite like:
Then I added the sound from my omnidirectional mic (again, recorded on a separate track) to help thicken things up:
Finally, I combined both takes and panned them to opposite sides:
This technique yielded four tracks (AC5M mic model, external mic, AC5M pickup, external mic) that I could mix and match to get the tone that best fit the production. The end result was a bigger, cleaner, punchier acoustic sound than I could have achieved using either an external mic on its own or any of the three DI options (piezo pickup, mic model 1, mic model 2) offered by the AC5M SRT2 system.
Curious as to what the final result sounded like, with all the other instruments added in? Here it is:
So don’t be afraid of the DI, especially when it sounds this good!
Click here for more information about the Yamaha AC5M ARE A Series acoustic guitar.
The process of purchasing timpani for your music program may seem like a difficult undertaking for many different reasons. For one thing, it’s a major investment. In addition, these large percussion instruments take up a lot of floor space and so storage may be an issue. Moving them can be problematic, there are a lot of moving parts to keep in good repair, and at the end of the day probably only a few students will end up playing them anyway.
So where does one begin? The good news is that with a little knowledge you can easily determine what you require to support the needs of your program. As you begin gathering information, here are a few tips to help make the process as easy as possible:
1. Understand the purchase process. For a middle school or high school, buying a set of four or five timpani may be the largest single purchase the music program will ever make. That’s why it’s particularly important to meet with your principal or fine arts administrator to understand the process. Be clear on who has the final say on the procurement. This is important to ensure that what is purchased is what you are recommending. The last thing you want is for a lower-priced model with undesirable features to be swapped in at the last moment by an administrator just for the sake of saving a few dollars.
2. Know your budget. Timpani are not inexpensive, so do your research. Get a sense of what you can afford and whether you need to fundraise additional money. Money can be saved if you get only what you need and do not overspend in buying beyond the needs of the program.
3. Don’t be afraid to ask for advice. Ask your collegiate band director and percussion friends for the brands they prefer or used in college. Was the company sales representative available when needed? Were the timpani easy to tune? Do the timpani stay in range? Only previous owners/users can answer these questions accurately.
4. Consult with your local music dealer. Local dealers are a great resource, especially if they’ve been in business for a long time. Ask them which timpani manufacturers they like to work with when buying stock for their store. Which instruments hold up over time? Which manufacturers can provide parts without delay? How long does it take to get delivery? In addition, ask the dealer if they will help you unbox the timpani and get them tuned up upon delivery.
5. Choose the correct bowl type. Most timpani are made of copper, while other models are made with aluminum or fiberglass. Copper timpani are suitable for levels at high school and above, while hammered copper bowls are intended for collegiate level and professional use. Aluminum and fiberglass are utilized in portable models designed for beginning band, worship services and community theatre applications.
6. Choose the correct head type. Be sure the heads that come installed on your timpani are not an off brand. A top tier branded timpani head will be much stronger and will last longer in outdoor environments and bad weather. If the timpani are used for both indoor and outdoor applications, plan on replacing the heads at least once a year.
7. Check the pedal operation. Every brand of timpani has a pedal that varies in comfort. Most pedals are either spring-fed or hydraulic. The action of the pedal should be tested for smoothness of operation prior to purchase. A pedal that creaks when moved can be unnerving. Be sure to try the pedal from every brand so you can get a feel for each pedal type.
8. Ensure that the timpani you purchase come with proper casters. Large casters are needed to navigate the terrain to and from the band room, the practice field, and the performance hall, and if you are moving timpani often, durable casters are a necessity. In addition, you want casters that lock and will tilt each timpano towards the player. These kinds of casters keep each drum from moving side-to-side or back-and-forth during play. Adjusting the tilt of each timpano allows the playing angle to be adjusted for the needs of each player.
9. Protect your investment. To keep each timpano in optimum shape for years to come, ensure that your timpani come with head covers and drop covers to protect them from the damage that heat and moisture can cause. (Make sure to place these covers on each timpano after every use.) And remember, timpani should never be used as a table!
For more information, check out these other blog articles:
Brass players are always looking for ways to be more consistent and to improve their performance. Not enough can be said about the value of hard work and practice, but there is a simple procedure that will improve your instrument’s response and tonal quality, in addition to helping players be more consistent. It does not involve any tricks or accessories, nor is it even difficult to do.
What’s the secret? Simple: Clock your mouthpiece.
Why Is It Important?
Your mouthpiece and the way it is set into a receiver has a large impact on how an instrument develops sound. Most players just take their mouthpiece, plug it in, and play. But how it is inserted in terms of its rotational position can make a big difference sonically … and that’s what “clocking” a mouthpiece is all about.
Let’s start with the basics. In a brass instrument, sound energy is created by the player buzzing into the mouthpiece cup. This energy then travels through the mouthpiece before entering into the instrument’s leadpipe. The rotational position of your mouthpiece will affect the amount of sound energy, response, and even the amount of harmonics present in the sound. In a favorable rotation, more of the sound energy is used to develop sound, hence greater efficiency; in a less favorable position, there is less efficiency, meaning that the sound energy is dampened. Dampening slows response, lessens clarity, and reduces the number of harmonics defining the sound, thus making it less bright.
For every player, there is a mouthpiece rotational “sweet spot.” When you find that sweet spot, you are discovering the most efficient way to play your instrument. Most musicians honestly do not know how well their instrument can perform until they discover the optimum mouthpiece rotational position via a procedure called clocking the mouthpiece.
How to Clock Your Mouthpiece
The first step is to pick an identifying mark or stamp on your mouthpiece. This can be the first letter of the manufacturer’s name or a number that indicates the size. Next, you’ll be playing a short selection of music (such as a scale or étude) repeatedly as you rotate the mouthpiece to different clock positions. Start with your mark at the 12 o’clock position and play your selection, then rotate to the 3 o’clock position while paying close attention to the response and sound. (It can be helpful to have someone else listening during the test, as judging your own sound can be difficult.) Repeat this process, going between the 12 and 3 o’clock positions to understand the difference between the two. You will find that one position plays and sounds better. (Most players are surprised at this; even professional musicians often cannot believe there is a difference.)
Once you decide which one is better, continue the process, this time comparing between the 3 and 6 o’clock positions, then the 6 and 9 o’clock positions, and finally, the 9 and 12 o’clock positions.
Next, with your mouthpiece at the best rotational position you’ve discovered, try playing a musical phrase you find challenging. You should soon learn where you play the best — and, more importantly, which rotational position is the most difficult for you. No one purposefully sets out to make their instrument harder to play, but you may have been doing this inadvertently for years without knowing it!
We have found one consistent thing about clocking a mouthpiece: When a player finds a favorite spot, the next favorite spot will invariably be directly opposite (that is, 180 degrees away). Conversely, the two spots 90 degrees from the best one (i.e., a quarter turn left or right) are normally the ones that are harder to play.
The benefit in clocking your mouthpiece goes back to what we discussed earlier, about the way that sound energy is generated. Controlling that energy flow and maximizing its efficiency will enable you to play even better!
Click here for more information about Yamaha mouthpieces.


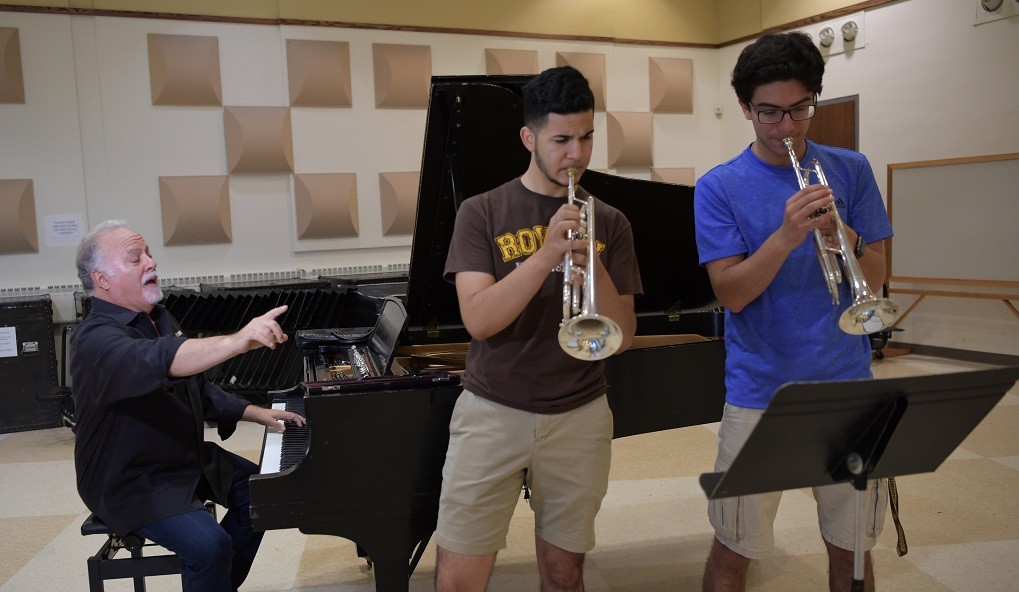


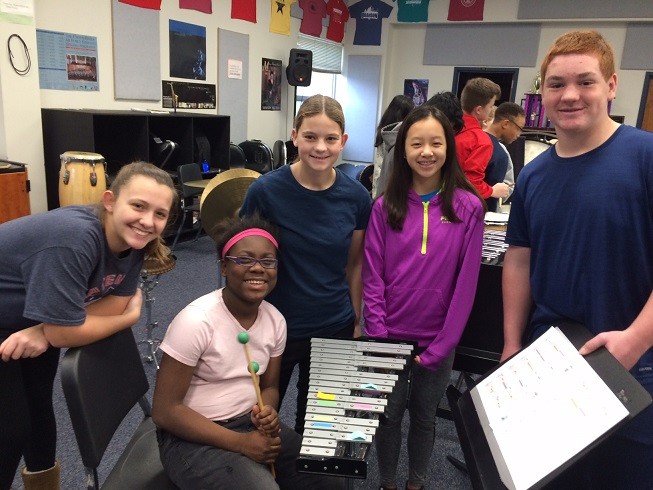


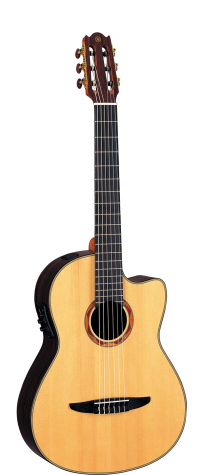
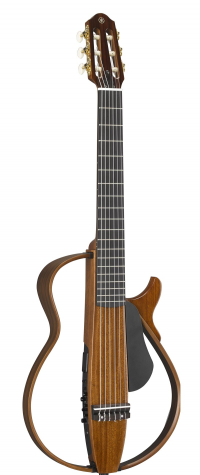


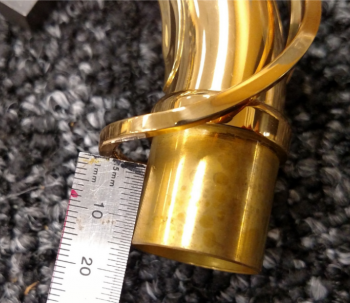
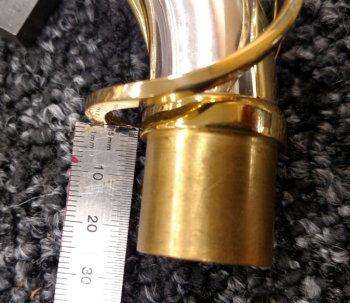


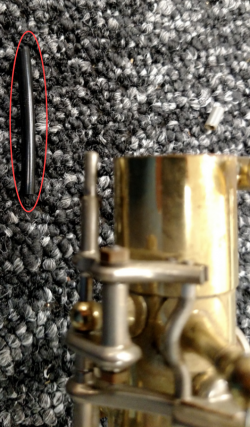


 Gilliam won his first national piano competition at age 11 and received a full scholarship in piano performance to
  Yancich and other early mentors helped mold Shin’s and Gilliam’s teaching styles.