Top Five Patriotic Songs

The Fourth of July is all about fireworks, picnics and patriotism. Let’s take a look at the history of the five patriotic songs most closely associated with this proud holiday tradition.

1. The Star-Spangled Banner. Written in 1814 and inspired by the bombardment of Fort McHenry in Baltimore during the War of 1812 — a battle ultimately won by the U.S.—this was not actually made our national anthem until 1931. Lawyer and amateur poet Francis Scott Key — an eyewitness to the event — wrote the lyrics, which were later set to the tune of a popular British song written by John Stafford Smith. Interestingly, Key’s original poem had four stanzas, though only the first is commonly performed. With a range of 19 semitones, the song is notorious for being very difficult to sing, as many attendees to sporting events can testify.

Artist rendering of an historic battle.
The bombardment of Fort McHenry.
Gentleman in period suit with short beard.
Samuel Francis Smith.

2. My Country ’Tis of Thee. The lyrics to this song were written by Samuel Francis Smith in 1831, when he was just 23 years old. The source of the melody, however, may surprise you: It’s the same as that of the national anthem of the United Kingdom, “God Save the Queen.”

3. You’re A Grand Old Flag. This spirited march was composed by vaudeville song-and-dance man George M. Cohan in 1906 for his stage musical George Washington, Jr. It was made famous by James Cagney, who portrayed Cohan in the 1942 movie Yankee Doodle Dandy — a song also penned by George M.

Cover of sheet music with stylized flag stripe and drawing of a revolutionary officer.
Original sheet music for “You’re A Grand Old Flag.”
Closeup of a woman smiling with short curly hair.
Kate Smith.

4. God Bless America. Composed by famed songwriter Irving Berlin in 1918, his 1938 revision was made famous by singer Kate Smith during World War II and in the post-war years. Interesting factoid: It was the official campaign song for President Franklin Delano Roosevelt in 1940, as well as his Republican opponent, Wendell Willkie.

5. This Land Is Your Land. Interestingly, this was written in direct protest to “God Bless America,” when Woody Guthrie decided in 1940 that he was sick of hearing Kate Smith sing it endlessly on her radio program. Guthrie penned the lyrics, which he then set to the melody of a Carter Family tune called “When the World’s on Fire.” The song became an anthem for many of the folk artists of the 1960s, and was covered by Bob Dylan, The Kingston Trio, The New Christy Minstrels, Pete Seeger, and Peter, Paul and Mary, among many others.

Photo of a man in his 30's with a lit cigarette hanging on his lip while he strums an acoustic guitar.
Woody Guthrie.

Everything You Need to Know about Lossless Audio and ALAC

If you’re an audiophile (or just someone who appreciates high-fidelity sound) and you haven’t taken advantage of a technology called lossless audio compression, you owe it to yourself to check it out. That’s because music processed this way can be downloaded quickly and streamed in real time — without sacrificing any audio fidelity.

Here are the ins and outs of how it works.

At a Loss

To put lossless technology in its proper context, let’s start by looking at lossy audio compression, a related process that’s in much wider use. If you’ve streamed music on Spotify®, TIDAL or Apple® Music®, or if you’ve downloaded songs from iTunes®, chances are what you’ve been listening to has been converted to MP3, AAC, WMA or some other lossy format, which means it’s literally not all there.

Data compression takes full-bandwidth music files and reduces their size significantly, using a codec, which is short for “code/decode.” These are usually software-based, though there are some hardware devices and chips that carry out this function. Either way, the job of a codec is to encode the audio information on one end and decode it on the other.

Lossy codecs decrease the size of a music file by looking for and removing specific frequencies that, for psychoacoustic reasons, your ears either won’t be able to hear or are not likely to notice are missing. For example, some frequencies mask others at specific amplitudes (levels). The algorithm in the codec knows it can discard the data representing those masked frequencies at any point in the song where the levels match those amplitude criteria.

When you play or stream a compressed file, your phone, tablet, computer or receiver automatically uses the appropriate codec to decode the compressed data. But here’s the catch: with lossy compression, the frequencies removed during the encoding process do not get restored when the file is decoded back into audio.

Squash that Data

The reason that data compression is necessary is that uncompressed music files are large and often unwieldy. They contain too much data to stream in real-time, take a long time to download and use up a great deal of hard drive space.

If you convert uncompressed audio to a lossy format, you can reduce its file size significantly, depending on the bitrate setting. Expressed in kilobits per second (kbps), the bitrate indicates how much data-per-second was used to encode the audio.

The higher the bitrate, the better the quality, but the larger the file size. If file sizes get too large, you might have trouble streaming if you don’t have a fast Wi-Fi connection. Because of that, most streaming music sites allow you to select a lower (“normal”) or higher bitrate. Here’s the TIDAL screen that offers this option:

Screenshot.
TIDAL lets you choose higher or lower bitrates.

The specific bitrates available depend on the format and/or streaming service being used. For example, the MP3 format supports bitrates from 96 to 320 kbps, while Spotify offers bitrates of 96 kbps (for mobile devices) and 160 kbps (on desktop devices); subscribing to Spotify Premium unlocks access to 320 kbps audio streaming.

A CD-quality (16-bit, 44.1kHz) WAV or AIFF stereo audio file takes up approximately 10.6 MB of data per minute of music. With lossy compression at a bitrate of 128kbps, you can reduce the file size to just under a megabyte, as shown in this illustration:

Diagram showing compression ranges.
One minute of music uncompressed and compressed.

If you’re curious to compare the sizes of various audio formats at different resolutions and bitrates, you can find several file size calculators online, such as this one.

Can’t Win for Losing?

Lossy compression has a lot of practical advantages. It can reduce a digital audio file by as much as 90 percent, and a lot of people can’t hear the difference between the original and compressed audio. But, it’s not a win-win for everyone. Audiophiles, audio professionals and others keenly aware of fidelity can tell the difference, and most don’t like what they hear.

Typical complaints are that lossy compressed music sounds tinny, a bit distorted and lacking in dimensionality. In addition, the lossy compression process, particularly at low bitrate settings, can sometimes result in unwanted “digital artifacts.” One of the most common of these imparts a swirly, almost underwater sound to certain frequencies or frequency ranges.

To the Rescue

If you’re one of those discerning people who finds the sound of lossy compression problematic, lossless audio compression is a viable alternative. It shrinks audio files enough to enable streaming, fast downloads and reasonable file sizes for storage without discarding any audible information. Audio decoded by a lossless codec sounds virtually identical to the original.

While lossy encoders find and remove actual frequency content to slim down an audio file, lossless encoders work differently. One of the methods they use is to find and remove all the spaces (even the smallest ones) in the music. During playback, the decode process restores the spaces correctly.

Because it doesn’t discard any actual audio data, a lossless codec can’t reduce the file size as dramatically as a lossy one. Most compress the originals by between 50 and 60 percent, depending on their settings.

ALAC

There are quite a few lossless data compression systems in use today, but perhaps the oldest and most well-known is FLAC (Free Lossless Audio Codec). It’s an open-source codec introduced back in 2001 that’s renowned for its fast processing. Three years later, Apple released their own proprietary system called ALAC, short for “Apple Lossless Audio Codec.”

Although its processing is not quite as speedy as FLAC, ALAC is fully supported in iOS and iTunes, which is crucial if you own an Apple device. The entire Apple Music catalog is available in ALAC format. These files are usually stored in an MP4 container and have the .m4a file extension.

Most streaming services now offer “high-resolution” audio options, which use lossless codecs. Typically, you have to pay extra for these, but Apple Music recently announced that lossless streaming using ALAC is available to basic subscribers at no additional cost. To turn it on or off, all you have to do is go to the Settings menu in your iOS device. Here, you can also choose the audio quality for streaming and downloading audio: lossy AAC, standard lossless ALAC (for a maximum resolution of 24-bit/48 kHz) or High-Resolution lossless ALAC (for a maximum resolution of 24-bit/192 kHz):

Mobile screenshot.
Apple Music ALAC quality settings.

ALAC is not just for Apple, however. Other companies license the codec to use in their music-playing products. For example, Yamaha offers ALAC decoding in all its current MusicCast-enabled products.

Not at a Loss

The differences in fidelity between lossy and lossless compression are often more subtle than you might expect, though of course, a lot also depends on the quality of your playback system. That said, if you have the ability to directly compare the same piece of music in a lossy-compressed format such as MP3 and a lossless format such as ALAC, you’ll probably be able to hear a clear difference … and you’ll probably find the latter to be superior. If you want to try out your own ear, you can find comparative listening tests on this website.

Whether you have “golden ears” or not, if you’re a music lover, you’ll almost certainly appreciate the improved fidelity of music that’s been compressed in a lossless fashion … plus you’ll have the peace of mind that comes from knowing that the decoded audio you hear will be essentially equal in quality to the original.


Click here for more information about Yamaha MusicCast.

Click here for more information about Yamaha YH-E700A wireless headphones.

Create a Happiness Playlist

Mark Mallman is a Minneapolis-based songwriter, composer and performer. He’s written music for TV, has released eight albums, and his epic work, “Marathon III,” went on for 78 hours and spanned 576 pages of lyrics.

A few years ago, he had an epic episode dealing with anxiety and depression — and he turned to music to help him heal. He shared his experience in the book “The Happiness Playlist: The True Story of Healing My Heart with Feel-Good Music.”

We asked him about his song list, and how students (and educators!) can use the idea of a happiness playlist to bolster their own mental health.

Trauma Trigger

In 2013, Mallman’s mother died of suicide. Soon afterward, he started getting panic attacks. During a panic attack, the brain region called the amygdala is hyperactive. With it stuck in high gear, people feel like they are choking or going to pass out, or even that they are dying. Panic attacks usually start quickly, peak within 10 minutes and end within 30 minutes, according to “What Happens in the Brain When We Experience a Panic Attack,” an article from Scientific American.

“I don’t know if her suicide triggered them,” says Mallman. “I don’t want to blame her. Suddenly everything was scary.”

Mallman had played the piano since age 3, and composed music since 10. But now, even music felt frightening. “The music I usually turned on was now scary. It couldn’t be in a minor key,” he says. “It couldn’t have the word ‘death’ in it. It had to be something you would play for someone under age five.”

It took him about three months to dial down the panic disorder with medications, and about three years to truly feel like he had figured things out. “I say, dimes make dollars; that is, a lot of small solutions instead of one big one. One of the tools I used to manage was creating my happiness playlist,” Mallman says.

Black woman smiling with eyes closed and headphones on, sitting at outdoor table The Happiness Mix Project

Mallman remembers making mixed tapes for road trips, back when people made mix tapes for friends, special occasions or to woo potential love interests. He found that creating the right list of songs helped him feel calmer. For a year, he listened constantly to his happiness playlist, and these days, he listens to it if he’s feeling anxiety. “It’s something I integrate into my day-to-day existence,” he says.” (His playlist is on Spotify.)

“I dissected what makes a song happy,” says Mallman, who read books such as Music, The Brain and Ecstasy: How Music Captures Our Imagination by Robert Jourdain. “When you’re in anxiety and panic, that is in the brain, it’s not real. It’s the amygdala misfiring. The quickest way to get rid of a panic attack is to stop thinking about it. Anxiety takes a bit longer to deal with. It helps if you can engage the body more than the mind.”

So, what makes a song happy? “Funkiness, funk, funk, funk,” says Mallman. “I would say a beat that you can dance to. Songs with fluffy lyrics. Happy songs don’t concern the brain, and nonsense lyrics work. ‘Happy’ by Pharrell Williams is a great example of what makes a happy song. It’s a universal dance song with repeated lyrics that encourage singing along, without thinking. In that way, dancing is mindful meditation.”

He also found that songs that recall childhood work well, like “Potato Chips” by Slim Gaillard.

“I think you can divide happy sounds into two groups. The gentle songs that say, ‘you are okay,’ like ‘Friendship’ by Pops Staples or ‘Try’ by Pink. These are like therapeutic mantas.” Then there’s the dance tempo songs, he says.

“I can’t really say if there’s a specific time signature,” he muses. “I didn’t put Peter Gabriel’s ‘Solsbury Hill’ on my list but almost did. It’s in an odd time signature.”

That song is in 7/4, reports Billboard in an article about “Solsbury Hill,” which also notes a “beating heart of the drum thump, steady throughout, keeping the song even-keeled, marching forward and undeniably alive.” Which sounds like a pretty good state of being, come to think of it.

While Mallman doesn’t think songs are a cure-all for depression and panic attacks, it helped him cope well enough that he wrote his book, which came out in 2019. In April 2021, he also released a companion album to the book called “Happiness”listen to a song from the album on SoundCloud.

Happiness in the Classroom

Mallman recommends that music educators create their own happiness playlists with students. “Amass a group of songs, and as you listen to them as a class, have the kids write down their emotional response — not their intellectual response,” he says. “They will start to learn how songs can guide our emotions.”

female Asian student walking while listening to music on earphonesOnce students can tell a sad song from a scary song from a happy song, he says, “I would say, let’s recognize we can use songs to feel better when we feel sad, and start asking the ‘why’ questions.”

As a class, you could start a collective list of happy songs (you may need to throw out some ideas to get it rolling). “Or the class could collectively write a happy song, based on the other happy songs,” he suggests. “Figuring out what song makes you dance the most is a great way to start accessing this idea. You can manifest joy in the brain via your body. Get students to recognize what makes them want to dance and then go from there.”

The past decade has seen a shift in our understanding of emotions. “Rather than being inevitable, hard-coded experiences, researchers now think emotions are malleable, and people have more influence over them than previously thought,” reports NPR in the article “Stuck in a Rut? Sometimes Joy Takes a Little Practice.”

With schooling, Mallman says, we can wind up with a lot of job skills, but not a lot of people skills. “Music is a way to open up that emotional intelligence. To learn and accept our emotional complexity. Emotions are a part of being human.”

Learning how songs make you feel and how to choose the right music to match what you need means that you will have the ability to define your emotions. That’s a pretty powerful tool.

Yamaha Advanced Nylon-String Guitar Technology: A Closer Look

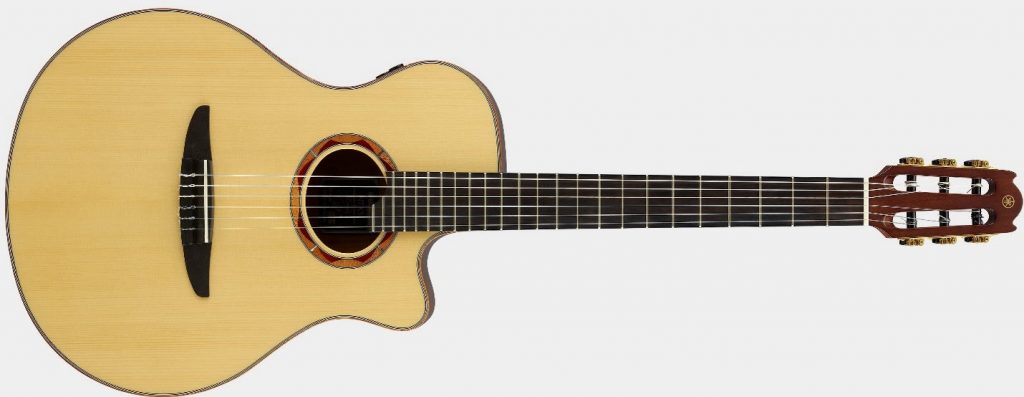
Yamaha NX Series nylon-string acoustic-electric guitars combine the latest in modern technology with traditional build and look. The various models differ in terms of body size and neck width, as well as the tonewoods and electronics used, but they all sound great whether played acoustically or connected to an amp. In this article, we’ll take an up-close look at the technical innovations that make these instruments unique.

Atmosfeel™

The NCX5, NCX3, NTX5 and NTX3 models come equipped with the proprietary Yamaha Atmosfeel pickup and preamp system, which takes the best elements of a piezo pickup and a microphone and combines them with an ultra-thin synthetic sheet transducer.

Man seen in 3/4 profile playing an acoustic guitar. There is a headline of "Atmosfeel" and specific features indicated.
Yamaha Atmosfeel system.

This sheet transducer contact sensor, located below the saddle, is responsible for the higher-end treble frequencies and soundboard vibrations. The piezo pickup is equipped with individual string sensors and is located where the strings meet the bridge. It’s designed to reduce the harsh high frequencies often associated with this type of pickup — in essence, it captures only the guitar’s mid and low frequencies. Finally, the mini-microphone, mounted just inside the body near the left upper bout, provides additional low and midrange frequencies. When these three elements are combined, the full frequency range of the guitar is reproduced in all its glory.

The entire Atmosfeel system is controlled from a simple three-knob panel mounted on the left side of the guitar so it’s easily accessible when you’re playing the instrument. These allow you to adjust Master Volume, Treble EQ and Mic Blend.

Closeup of knobs on side of body of acoustic guitar.
NX Series Atmosfeel controls.

Master Volume, as you might expect, sets the overall output of the system, while Treble EQ cuts or boosts high frequencies using a peaking filter. Mic Blend determines the amount of mic signal. When turned fully counterclockwise, you’ll hear a premixed blend of the transducer and piezo pickup. When turned fully counterclockwise, 50% of the mic signal is added to the mix. While these guitars sound quite natural with the piezo pickup and sensor alone, the mic signal adds a whole new dimension of clarity and width. Together, this trio of controls provides a broad range of tonalities and sonic options.

In addition to being useful when recording in the studio or practicing through an amp at home, the Atmosfeel system provides excellent onstage sound with reduced potential for feedback.

Signature Bracing

As described in our “Step Up to a Better Acoustic Guitar” blog, the internal design of guitar bodies — their bracing in particular — impacts how the sound from the strings resonates through the instrument’s body and therefore has a significant effect on the tone. To increase the low frequency response of NX Series nylon-string guitars without sacrificing durability, Yamaha engineers made several refinements to their inside bracing, using precise measurements and experimentation to refine the natural characteristics of the tonewoods used in the construction of the instruments.

A.R.E.

With over 100 years of piano-making and decades of acoustic guitar design, you might expect that the engineers at Yamaha possess exceptional woodworking skills, and you’d be right. The A.R.E. technology (short for “Acoustic Resonant Enhancement”) used in many Yamaha acoustic guitars is a patented, non-chemical process that uses controlled temperature, humidity and pressure to alter the structure of wood all the way down to a subcellular level. This helps the wood sound like it’s many years older than it is … and when it comes to guitars made of choice tonewoods, that’s a good thing!

Side by side graphic of sound waves.
The benefits of A.R.E. treatment.

This treatment is applied to wood panels that are carefully dried and cut before they are incorporated into guitars, helping to improve sound transmission and resonance, and allowing the wood to vibrate more easily. A new guitar with A.R.E treatment resonates more like that of a vintage instrument that has been played for many years. That adds up to sparkle in the highs, depth in the mids and extra response in the lows, which, simply put, makes for a better-sounding nylon-string guitar with greater tonal richness and extra sound projection.

The advanced technology incorporated into Yamaha NX Series nylon-string guitars allows them to meet any challenge, whether they’re played subtly in a carefully controlled studio environment or onstage at full performance level. Try one out and see for yourself!


Check out these related blog articles:

Introducing the NX Series

Step Up to a Better Acoustic Guitar

Atmosfeel: The Next Generation of Yamaha Acoustic Guitar Pickups

Atmosfeel Technology Comes to the Nylon-String Guitar

A Quick Guide to Yamaha Acoustic Guitar Pickup Technology

Tips for Playing Nylon-String Guitar


Click here for more information about Yamaha NX Series nylon-string guitars.

Justin Perkins

In this video, mastering engineer Justin Perkins discusses working with Steinberg WaveLab at his Mystery Room studio. Perkins’ background is in recording and mixing, including a stint at famed producer Butch Vig’s Smart Studios in Madison, Wisconsin. In 2009, he made the move to Milwaukee and shifted his focus to mastering.

In comparing the crafts, Justin points out that in mixing, “you have access to all the elements of the song and you can really paint a sonic soundscape. Mastering is [more of] a micro-art; it’s the art of attention to detail, to subtlety. It’s the art of knowing what not to do.”

“When I was transitioning from mixing and producing into mastering,” he adds, “I knew that I needed a special piece of software that wasn’t doing what my DAW was doing. Mastering [isn’t just] about stereo bus processing — there’s a whole lot of stuff that happens after it. So WaveLab was perfect for me, because it did all the things that my DAW couldn’t do: sequencing the songs, applying the processing that’s needed, working in all the different delivery formats. It’s a whole different world sending out master files for final distribution than it is just sending out stereo mixes for approval.”

Justin also appreciates the benefits that WaveLab brings to his workflow. “I know some people who have to use two or three different apps to do their mastering. WaveLab is designed to let you work just in one application for the entire process. For me, it creates an almost frictionless workflow where I’m almost not even thinking about the software anymore, which allows me more time to think about the music. It helps you stay in the zone and focus.”

“WaveLab really is an all-in-one mastering solution,” Perkins concludes. “It’s a really full-featured program, and it’s got such a special set of tools. If you’re serious about mastering — whether you’re a professional mastering engineer or a mix engineer that sometimes has to master your own projects — there’s really nothing like it.”

Check out these related articles.

Click here to learn more about Steinberg Wavelab.

How to Transpose

As a keyboardist, you will likely be called upon to accompany a vocalist on occasion. However, there will probably be times when the song they choose will not fit their vocal range if played in the original key (i.e., the one used in the recording).

Perhaps some of the highest (or lowest) notes are just a bit out of their range, or maybe a female singer wants to perform a song originally written for by a male singer, or vice versa. If they are having trouble hitting higher notes, you’ll want to move the key down. If the song travels very near or even below the lower end of their range, you’ll want to move it up. Either way, to help them sound their best, you’ll need to change the key — a process called transposing.

On a digital keyboard or piano, transposition is easy: all you have to do is press a button (usually labeled “Transpose”). After you set the amount up or down by the desired number of semitones, you simply keep playing in the written key, and the instrument will do the rest for you. (This video covers the basics.) Just be sure to reset the transposition value back to 0 when you’re done playing the song!

On acoustic piano, however, the process is quite a bit more challenging. Here are some helpful tips on how to do it.

The Importance of Rehearsal

Often, you and/or the singer won’t know there’s a need to transpose until you do your first run-through of the song during rehearsal. (Yes, you absolutely should get together and rehearse before the performance!) During the run-through, listen for issues like notes out of the singer’s range, and whether the timbre (tonal quality) of their voice changes unpleasantly when they hit certain notes. Be sure to play the whole song, not just the beginning: often it’s in the middle of a tune that the melody changes more.

Bear in mind that when you support a vocalist, you shouldn’t be playing the song directly from the sheet music (if you have it on hand), as you don’t want to be playing the melody — that’s the singer’s job! So you are only concerned with the chords, and perhaps some signature melodic phrases that may occur in the intro, etc. (I am assuming that you know how to play chords and have some understanding of harmony. For a refresher, I’ve covered the subject in this blog and this one.)

If you are working with an experienced vocalist, they may already know what key they prefer to sing the song in. Even better, they might have a chord chart for you to use — it’s always good to ask in advance.

The “Brute Force” Method

This is a good way to approach changing the key of a song when you have the sheet music or chord chart to work from. Here’s an example of what a chord chart of a simple pop tune chord progression might look like:

Musical annotation.

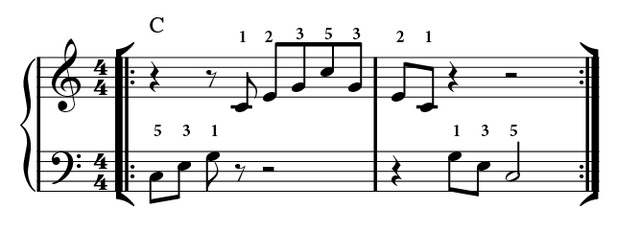
And here’s how I might opt to play those chords:

Musical annotation.

If the singer and I come to the realization that the key needs to change, the first decision is: How far off is it? If they can get through the piece okay but a few high notes are hard to hit, then you can transpose it down by a small amount. If the whole song feels uncomfortable, you’ll need to move it to a key further away. To do this, you need to be familiar with the concept of intervals between notes. These are expressed in terms like a half step, a whole step, a major third, a perfect fourth, etc. My two-part “Playing By Ear” blog will help you review the concept.

Let’s say you only need to lower the key of the song by a whole step (two half-steps). As you look at each chord on the chart, simply think of the note that is a whole step lower than what’s on the page. In the chart shown above, the first chord is a C major triad. So you need to think and play a B-flat major triad instead. The second chord is an E minor, so play D minor instead … and keep doing this all throughout the tune. If it’s hard for you to do this in your head, get a pencil and write in the replacement chords you need to use. Here’s that chord progression, modified to play a whole step lower:

Musical annotation.

And here’s how I might play these chords:

Musical annotation.

Let’s try the same concept, but now we’ll bring the tune up a perfect fourth, so instead of starting on C Major, we’ll start on F Major:

Musical annotation.

I’d likely voice the chords like this:

Musical annotation.

It may take you some time to get comfortable with doing transpositions this way, but it will become natural the more you practice it.

The Numbering Method

Most music is set in a given key, which means it is based on the notes of a scale, be it major or minor. At the start of the first line of the sheet music or chord chart, you’ll find a number of sharps or flats; these tell you which notes are to be played on the black keys instead of the white keys. This is called the key signature. If you already understand this concept, and you know your major and minor scales, you can use that knowledge to help transpose songs.

To show you how this works, let’s return to our original example, which is in the key of C major, with no sharps or flats:

Musical annotation.

(Yes, I know there is a B♭9sus4 chord in the third bar — I’ll deal with that in a moment.)

Roman numerals are commonly used to denote the relationship of a chord to the key center, with a “I” indicating the root chord, “V” indicating the chord built on the fifth step of the scale, etc. Uppercase numerals are used to designate major triad-based chords, while lowercase are used for minor or diminished-based chords.

Here’s how the chart above would be numbered:

Musical annotation.

The great thing about using numbers this way is that the chord progression becomes “universal” — it can be applied to any key. That’s why this is the most common way that musicians communicate with each other about tunes and chord progressions.

As you can see, the chords in the first two bars are from the key of C Major, but in bar three, the B-flat root tone occurs outside of the C Major scale. That’s no problem; instead of vii, it’s called a flat vii (♭VII), using the uppercase roman numeral with the 9sus characters to denote that it is a Dominant ninth chord that has a suspended fourth in place of the usual third. In this fashion, any chord can be described relative to the key center and assumed scale.

Best of all, when it comes time to transpose, all you have to do is think of the new key signature/scale, keeping the roman numerals intact. For example, if we wanted to lower this chord progression by a full tone, the chart would look like this:

Musical annotation.

Again, the chords might be played like this:

Musical annotation.

As another example, let’s say we need to raise the song to the key of E Major. Here are the transposed results and the possible voicings:

Musical annotation.
Musical annotation.

Make it part of your practice routine to take songs you know and play them in other keys. Work on your knowledge of and comfort level with intervals, as these will allow you transpose in your head quickly and easily. You can even sharpen your transposition skills when away from the keyboard — just look at some music and think through the chords in different keys.

All audio played on a Yamaha P-515.


Check out our other Well-Rounded Keyboardist postings.

Click here for more information about Yamaha keyboard instruments.

Case Study: A 10-Year Growth Plan for Enrollment, Facilities, Instruments and Staffing

Claudia Taylor “Lady Bird” Johnson High School in San Antonio, Texas, opened in 2008 as the seventh comprehensive high school in the North East Independent School District (NEISD).

I am lucky to be Johnson’s band director since the school opened, and I have worked enthusiastically with our staff and community to grow the music program.  I started teaching at Johnson my first year out of college, so I have “grown up” with the campus, and it has been a remarkable journey to see so many lives changed coming through the school’s band program.

Because Johnson was constructed on top of one of the tallest hills in Bexar County, the community dubbed it the “City on the Hill.” The campus is colorful and vibrant to match the wildflowers that Mrs. Johnson shared with the country as first lady. (There’s a Lady Bird Johnson Wildflower Center at the University of Texas at Austin.) The school opened with about 1,800 students, splitting from Ronald Reagan High School after receiving approval from the community in a 2005 bond. I was a student-teacher at Reagan in 2007, the year prior to the split, and helped navigate the transition for Johnson’s band members from Day One with my friend, mentor and colleague, Alan Sharps, who recently retired after 40 years of teaching. Together, we opened and established the Johnson program.

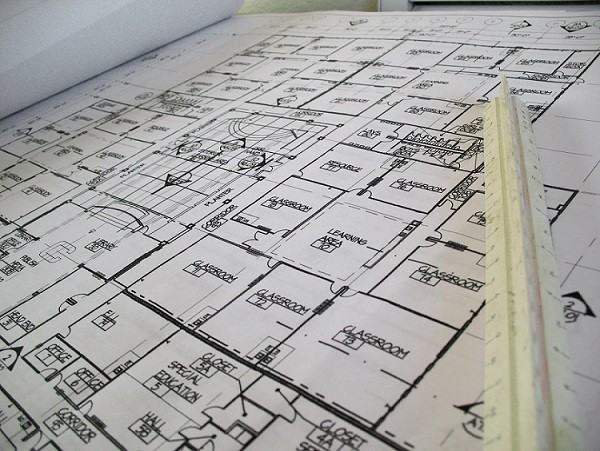
Construction of Johnson High School's new band hall Looking at an explosion of population on the northside of San Antonio, the NEISD 2005 bond aimed to relieve stress on Reagan, which had a capacity of 3,000 students, but enrollment was approaching 4,000. The initial plans for Johnson provided for a capacity of 3,000 students, but during construction, administrators approved an additional wing that expanded capacity to 3,200. The new campus included a 4,000-square-foot music rehearsal hall.

Because of unprecedented rainstorms in 2006, campus construction fell behind schedule. Johnson opened in 2008, but with only 70% of the campus operational. The cafeteria, athletic fields, auditorium, library and many of the classrooms weren’t functional until Christmas.

However, the show must go on! For our 2008 band camp, the Johnson band rehearsed at neighboring James Madison High School, and we quickly learned that the field was inundated with fire ants. The kids remained positive and had a great sense of humor as they dodged the ant mounds, and the parents worked to eliminate the threat, but the fire ants proved to be worthy adversaries over our two-week camp.

Through most of that first school year, students worked through the challenges of continued construction and a less-than-smooth transition to their new campus, but they maintained the very best attitude. I think the challenges of Johnson’s first year created our culture of flexibility and adaptiveness, which, 12 years later during the COVID-19 pandemic, proved to be invaluable traits to help the band win its first state championship in the face of tremendous adversity.

Less than 10 years after Johnson opened, the school’s music program had grown so much that it required a new hall. During this time, the campus had doubled its instrument inventory but needed more, and music staff expanded from three full-time band directors to four.

Johnson successfully received community support, and in 2018, construction began on an additional $2 million, 3,500-square-foot band hall next to the campus’ existing facility.

Gain Support by Educating Administrators and the Community

When pursuing anything that involves asking for funding — additional facilities, equipment, staffing, etc. — I find that the single most crucial piece of the puzzle is to patiently educate stakeholders. Administrators and parents may or may not realize your needs until they can see them spelled out clearly with facts and supporting data.

By examining other districts with similar demographics and learning from others, we were able to entice stakeholders to see the value in our proposal. We shared good news about our program’s accomplishments and demonstrated the value of the financial investment, which helped support a growth-minded vision. We began the process by sharing facts and evidence and then followed up patiently and consistently. With time, the Johnson band directors successfully made their case for expansion.

District’s Guiding Principle: Equity

NEISD is a socioeconomically and ethnically diverse district that spans over 144 square miles on the northcentral and northeast side of San Antonio. The district was formed in 1950 and has grown from one high school to seven, 14 middle schools and over 40 elementary schools that serve nearly 68,000 students.

Equity is the guiding principle for the school district. Whenever the district builds a new school, it also targets one of the older schools for additions or demolition and reconstruction. Over the last two decades, NEISD has rebuilt from the ground up two of its original high schools and significantly added to or remodeled four other schools, including Reagan, which opened in 1999.

The district has also torn down and reconstructed several aging middle schools to provide new academic wings, and fine arts and athletic facilities. District planners and leaders meet annually with campus administrators and community members on the (CBAC) to identify new or replacement construction priorities and plan a vision for these subsequent upgrades. In other words, by the time construction is wrapping up on one bond, the district is already preparing to float another to address needs and improve the experience of its students.

Traditionally, when floating a new bond, the district approaches a “wish list” that focuses on seven categories, five physical construction and two related to bond management:

  1. Safety and security
  2. Instructional technology
  3. District operations
  4. Extracurricular Programs (athletics and fine arts)
  5. District Facilities
  6. District Bond program management (financial management)
  7. Bond Global Contingencies (financial management)

Johnson’s new band hall fell into category #4. Here is the breakdown and project list from the NEISD 2015 bond.

The 10-Year Growth of Johnson’s Band

When Johnson opened in 2008, the band hall was built based on the model used in other district high schools. The 3,904-square-foot building had a capacity of 195 students. Johnson also boasted a smaller “ensemble” classroom with an additional capacity of 38 students. The facilities were adequate for the band size of 150 in 2008 and could comfortably accommodate up to 200-250 students.

Johnson High School's old band hall

Year 1, 2008-2009 — 150 students in band: The band opened with smaller junior and senior classes that were split from Reagan, a heathy-sized sophomore class (40-50) mixed from Reagan and  and a strong incoming freshman class from Tejeda Middle School (50-60).

Year 2, 2009-2010 — 190 students: With a small senior class graduating from the year before, the band added another healthy freshman class and rapidly approached 200 students.

Years 3 to 5, 2010-2013 — 220 students: With a single middle school feeder, the Johnson band stabilized at around 220 total students with four full classes that ranged in size from 40 to 60 students in each grade. Growth had stagnated in the North San Antonio area due to the economic downturn of 2008-2009, and the school enrollment remained flat at around 2,500 students.

During the fall of 2011, NEISD narrowly passed a bond that included the construction of the district’s 14th middle school, which would be a second dedicated feeder for Johnson. The construction of the new middle school was controversial because several of the middle schools surrounding Johnson had plenty of capacity, and growth in the North San Antonio area was reasonably flat to negative.

Fortunately for the Johnson band, the construction meant a new infusion of numbers and talent. Instead of 300 students in a single middle school band, future projection models showed 550 to 600 students in two middle school bands.

Years 4 to 8, 2013-16 — 260 students: As the economy recovered, construction of new homes in the Johnson attendance zone began to grow gradually. Tex Hill opened in the fall of 2014, just three years after the bond passed to build the campus.

In the fall of 2013, the Johnson band exceeded 250 students, and rehearsing the entire marching band together indoors became impossible. The band started utilizing orchestra, choir and any available spaces in the fine arts wing during the school day.

Our color guard numbered 40 members for the 2013-2014 school year, and the entire team could not rehearse inside the current band hall due to space constraints. With the campus growing, gym space was at a premium, and our color guard often had to split into two groups to rehearse. Half of the flag students would be inside with the color guard director; the other half was outside, rehearsing with student leadership and a band director supervising.

After Hill opened, Tejeda continued to flourish, and projections based on retention and the 2014 size of the sixth-grade class between the two middle schools showed that the Johnson band would reach 350 students within three years.

We shared the 2014 projections that forecasted that the incoming 6th-grade band class would nearly double — from 100 beginners to 200 — and demonstrated the down-the-line impact on Johnson High School’s band program.

We initially requested a portable for additional rehearsal space during the day. But, as the CBAC was meeting in the fall of 2014 to discuss floating another bond in 2015, we began to discuss the idea of expanding the band hall capacity at Johnson and other campuses in the district that were seeing similar growth.

Johnson High School's new band hallThe CBAC identified Reagan, Johnson and Winston Churchill high schools for band hall expansion projects on the 2015 bond. Legacy of Educational Excellence (LEE) and MacArthur High would also receive upgrades to their band and fine arts facilities, but not additional capacity, with bond funds. Theodore Roosevelt High School had already received a new fine arts facility in 2008, and Madison welcomed a new fine arts facility as a part of the 2011 bond. In the end, the district listened to its teachers, band parents and administrators and significantly improved the fine arts facilities at all seven high school campuses.

Year 9, 2016-2017 — 303 students: The Johnson program surpassed 300 students in the band as projected.

Year 10, 2017-2018 — 350 students: Contractors broke ground on Johnson’s new band hall at the end of the school year in 2018 and completed the project in the summer of 2019, in time for the 2019-2020 school year. The new facility added nearly 3,500 square feet of space and an additional capacity of 175 students. It included a small classroom for instruction, a new office, a new storage room and additional instrument locker storage. The original architect for Johnson High School also designed the addition to provide for continuity. The addition looks like it was there from Day One.

The larger Johnson band has benefited tremendously from the additional capacity granted through the 2015 bond. With the new facility, the capacity at Johnson is over 400 students now. All band students also have enough locker space for equipment.

With COVID-19 challenges, the additional space was invaluable as we split bands into smaller groups. Band enrollment dipped to 310 due to the pandemic, but numbers have bounced back, and we are currently sitting at 335 for the 2021-2022 school year.

Johnson High School's drum majors and head band director with champion trophy at UIL competition in December 2020

Staffing and Team Teaching

As we approached an enrollment of 300 students in the 2015-2016 school year, we met with our principal and requested hiring a fourth band director. Our orchestra program was also growing, so administrators decided to support both disciplines and hire a single director who would split time between band and orchestra. The additional staff member was a blessing in managing the transition from 290 students to 350 in the band and the orchestra’s growth to 150 students.

The four directors at Johnson work together closely, but each has a defined role. I am the Head Director, which is like the CEO of a corporation. I chart the overall course for the program, manage communication, coordinate fundraising and engage with the middle schools daily to recruit and retain students. I also conduct the wind ensemble/honor band and direct and program the marching band. The Associate Director, which was the position Mr. Sharps held, is the eyes and ears of the program and has his/her hand in everything the Head Director does, but also focuses on the jazz program and co-conducts the wind ensemble/honor band.

The two Assistant Directors manage the inventory and music library, and they conduct the non-varsity and sub non-varsity concert bands. The Assistant Director for Percussion teaches percussion for grades 6-12 and manages building events/facilities. The Assistant Director for Band and Orchestra co-conducts the full orchestra and teaches music theory.

We team teach all the concert bands, even though someone will ultimately conduct them at University Interscholastic League (UIL) Marching Band Contests. By taking this team approach, our students benefit from the strengths and personality that each director brings to the table.

If it’s not possible to have a team of directors at your high school, or if you’re limited to one assistant, try to team teach as much as possible with other music teachers in your district or department. Bring together choir, orchestra and band, or team teach with the middle schools. Band directing can be lonely, and having one or more partners is powerful.

Growing the Instrument Inventory

When the Johnson campus opened in 2008, the construction project was over budget due to the additional G-Wing added to the campus midway through. This resulted in across-the-board cuts to equipment purchases, including musical instruments, chairs, stands and more.

The band opened with enough instruments for a program of 150-175 students and shared equipment with Reagan. As Johnson’s program grew, administrators promised to allocate monies each year to purchase additional instruments to bring the equipment capacity to match the 350-member Reagan inventory before the split.
As other schools in our district saw their band programs declining, administrators permitted Johnson to borrow out-of-circulation instruments from those campuses. From 2008 to 2015, Johnson slowly added to its inventory while continuing to borrow from other campuses to meet our needs. By 2015, the band inventory matched the one at Reagan, and we began to focus on replacements and upgrades.

We constantly communicated with administration and other band directors to borrow out-of-use instruments on other campuses and maximize the use of resources. Today, this practice continues in our district as schools regularly share equipment to save money and apply toward replacement and upgrades. We have been careful to service, clean and maintain our original inventory since 2008 so that instruments did not fall into disrepair. Now, we work with our middle schools in our cluster to identify needs that will benefit all three schools before we purchase additional instruments. 

Johnson High School band members volunteering at the San Antonio Food Bank Urban Food Farm

Pay It Forward

Our earliest goal was for Johnson to serve as a shining “City on the Hill” full of positive energy for music education. We realized the unique privilege afforded to us by our community and that our challenges were unique to our situation. But our hope was to share what we learned through the process of building a successful program from scratch and to drive conversations about the “what ifs.”

Mr. Sharps and I are both non-native Texans — we did not grow up in the UIL or Texas band culture, but we came here to learn and be a part of it. I believe that Johnson has benefited from our desire to bring together multiple schools of thought from all over the country, and I encourage band directors to learn from great programs in every city and every state. In our view, success is not dictated by trophies or accolades. Often our greatest success as music educators is rooted in the small “gems” that we learn from one another’s programs.

Johnson regularly engages four to five student teachers each year in hopes of giving back to the music education community and ensure that we support the future of our profession. We are always open to visitors. We share our ideas and give generously as so many have helped us, and we hope that the ideas we have provided will help someone else grow and improve their music program.

A Quick Guide to Weighted Keys

You’re about to buy a digital keyboard instrument. One of the many questions you need to ask yourself is: Do I need one with weighted keys?

The answer mostly comes down to whether or not your ultimate goal is to play piano. (If you’re already a pianist, you’ll definitely want an instrument with weighted keys, for reasons we’ll explain shortly.)

In this article, we’ll take a look at the benefits offered by weighted keys, and will discuss the various systems in common use today. Ready to learn more? Read on …

What Are Weighted Keys?

As the name implies, these are keys to which weights have been added so as to simulate the complex mechanics that occurs when a key is depressed in an acoustic piano — a series of levers that eventually cause a hammer to strike a grouping of two or three strings. This system has a natural weight or resistance that you can feel as you play a piano, and it’s that resistance that helps you gauge how hard to hit a key to get the sound you want. Use a delicate touch and the note will be soft and less strident; strike with greater force and the extra pressure will cause the hammer to hit the strings harder, resulting in a louder, brighter sound.

Graphic showing a mechanism for testing key's weighting.
A complex series of levers are attached to each key of an acoustic piano.

Unweighted keys (which are usually spring-loaded) are most often found in synthesizers and entry-level digital keyboards. Digital pianos, including some portable models as well as most “stage” models (keyboards designed for live performance), will typically have weighted keys. Yamaha Portable digital pianos, as well as our two Stage Pianos (the CP73 and CP88) combine portability with weighted keyboards. Yamaha ARIUS digital pianos all have weighted keys and built-in consoles. And the entire premium Clavinova digital piano line provides fully authentic touch thanks to cutting-edge technology such as weighted “Grand Touch™” keyboards that feature real hammers and graded action (see below for more information).

Interior view of the Grand touch keyboard.
Acoustic piano hammer mechanisms.

Go Where the Action Is

The “feel” of an acoustic piano is most often described as its “action.” This can be adjusted by a skilled technician so that the pianist encounters greater or lesser resistance as notes are played. The difference in action is one of the main reasons why playing a grand piano feels very different than playing an upright model. Because the strings are mounted horizontally in grand pianos, the hammers return to their rest position due to the force of gravity, under their own weight. In addition, grand pianos utilize a double escapement mechanism that allows keys to be played rapidly in succession, without first letting the key return all the way to its starting position. In upright pianos, where the strings are mounted vertically, the hammers rely on springs to return to the at-rest position. As a result, key repetition (i.e., when a player repeats notes quickly, such as when playing trills) is much smoother and faster in grand pianos than it is in upright pianos — to a maximum of roughly 15 times per second in grands, versus seven times per second in uprights.

Unlike acoustic pianos, the sounds made by digital keyboards do not come from the vibrations of strings. Instead, the sounds are generated from streams of numbers — numeric emulations (“samples”) of acoustic pianos and other instruments. The weighted keys in digital keyboards often incorporate physical counterweights and/or hammers to evoke the sensation of playing an acoustic piano, and the feel of these instruments is also referred to as their action.

Let’s take a look at the three weighted actions most commonly used in digital keyboards.

1. Semi-Weighted

As mentioned previously, most entry-level digital keyboards and synthesizers have unweighted keys. However, some intermediate models offer a semi-weighted action. These instruments incorporate spring-action keys with more resistance than those found in an unweighted keyboard, providing a playing experience which is more responsive to your touch.

2. Hammer Action

Digital instruments with a hammer action keyboard include a mechanism that replicates that of an acoustic piano. This is usually achieved by the attachment of a physical lever system and hammers to add more resistance to the keys you’re playing.

3. Graded Weighting

Every single key on a grand piano keyboard is weighted differently. This is because the strings for each note are slightly thinner and shorter in the treble register, becoming thicker and longer towards the bass register. As a result, there is greater resistance when playing low notes than when playing high notes. In other words, a heavier touch is required in the left hand and a lighter touch in the right hand. To emulate this in a digital piano, the keys are often individually weighted, with the lower keys heavier than the higher ones — something that’s called graded weighting.

Yamaha Weighted Key Designs

Yamaha has been building acoustic pianos for more than a century. This long experience has allowed us to develop a number of innovative keyboard actions for our digital instruments. These include:

Graded Hammer Standard (GHS)

Graded Hammer Standard (GHS) action incorporates real hammers and is found on many Yamaha digital pianos, including ARIUS PDP Series and Portable P-Series and DGX-Series models. Instruments with GHS actions are ideal for beginners that want to start getting used to the feel of an acoustic piano. They deliver the graded, weighted touch piano teachers recommend for building proper technique.

Graded Hammer 3 (GH3) and Graded Hammer 3 With Escapement (GH3X)

Utilizing the same hammering system and spring-less mechanism as a concert grand piano, GH3 and GH3X actions accurately reproduce the touch of an acoustic piano, from the heavy feel in the lower register to the lighter touch in the upper octaves. It also allows the player to feel the weight of a key when depressing it a second time, even when the key has not yet been completely released.

In addition, the GH3X action incorporates an escapement mechanism. In a grand piano, this moves the hammers away from the strings quickly after they are struck in order to prevent any interference with string vibration; it also produces a slight clicking sensation when the keys are pressed gently. The GH3X mechanism reproduces this sensation near the bottom of the key dip. It has been designed in such a way that the click is discernible only on the lightest keystrokes, similar to the keyboard of a grand piano. This keyboard action has also been adjusted to provide additional friction that balances key repetition and response without impeding performance.

You’ll find GH3 and GH3X actions on Yamaha Clavinova CSP-150 and CVP-701 digital pianos, as well as the ARIUS YDP-165 and YDP-S55 models.

Yamaha GH3 keyboard action mechanism.
GH3 action.

Grand Touch Keyboards

The Grand Touch keyboards offered by all Yamaha Clavinova CLP Series and select CVP Series models provide a detailed grand piano feel that allows for uniform tone control, precise rhythm and smooth melodic expression.

An important part of this is the use of differing weights and key returns for each one of its keys, similar to that of an acoustic grand piano. Grand Touch keyboards also provide an escapement mechanism, similar to that employed by GH3 and GH3X keyboards, along with extended key length, which gives the player extra leverage for better expressive control, even when playing at the backs of keys.

Yamaha Grand Touch keyboard escapement mechanism.
Grand Touch keyboard escapement mechanism.

The Benefits of Weighted Keys

In order to develop proper piano technique, players need to feel that they are pushing against a key to play a note, and they also need to experience the sensation of the key pushing back up when returning to its resting position. In a digital instrument, this can only be accomplished with the use of weighted keys.

Weighted keys also encourage finger strength, just as lifting weights in a gym encourages arm, back and leg strength. The principle is the same: The more you lift a heavier weight, the easier it is to lift lighter weights.

Non-weighted keyboards can be fine for the casual player, or for someone who only ever intends to play organ or synthesizer. But if you learn or practice exclusively on non-weighted keyboards, you will likely find it difficult to make the transition to acoustic piano. So if your ultimate goal is to play piano, weighted keys are really the only way to go.


Check out these related blog articles:

What’s the Difference Between a Grand Piano and an Upright Piano?

What’s the Difference Between a Digital Keyboard and a Digital Piano?

Buying Your First Digital Keyboard

Which Digital Piano Is Right for Me?

Step Up to a Better Keyboard, Part 1: Feel and Sound

The Rebirth of the Stage Piano


Click here for more information about Yamaha digital pianos.

Click here for more information about Yamaha stage keyboards.

How Does a Vinyl Record Make Sound?

Vinyl records may have been around for over 100 years, but it’s a format that’s still going strong. Whether it’s the tactile feel of holding an actual record in your hands, the joy of laying down the stylus needle or just the pleasure of sitting back and hearing a great recording while enjoying cover art and reading extensive liner notes, vinyl provides an experience unlike any other.

Making Waves

Listening starts with sound waves, which are simply vibrations in the air. A vinyl record provides an analog representation of those waves.

The trick is that these sound waves have to get from the recording studio — where the musicians create, produce and mix the music — onto a vinyl record that you can play in your home. (Today’s records are actually made of polyvinyl chloride, which is a type of plastic; nonetheless, many people simply refer to them as “vinyl”.) The process is quite fascinating.

Onto the Lathe

Once a final mix is created (whether digitally or on analog tape), it is played back and the signal routed into a device called a cutting lathe; this usually occurs at a specialized facility called a mastering studio. Using a diamond needle, the lathe cuts a continuous spiral groove into an aluminum disc covered in lacquer; this groove, which runs from the outside of the disc to the inside, is an analog representation of the sound waves.

Closeup of the grooves on the aluminum disc.
Record grooves.

The groove is actually V-shaped, and each side of the groove “wall” carries one of the stereo signals. The right channel is carried by the side closest to the outside of the record, and the left is carried by the inside wall. The frequency and amplitude (volume) information are a reflection of the groove’s width and depth. If there’s too much bass, a needle could literally jump out of the groove! It’s the job of the mastering engineer to get it just right when doing the transfer to vinyl.

Once a lacquer master has been created on the lathe, it is used to make a metal stamper, which has ridges instead of grooves — almost like a perfect “negative” copy of the lacquer. The stamper is then loaded into a hydraulic press and pushed into soft vinyl to create the final record, which typically comes in 7-, 10- and 12-inch diameters.

The Record Player

Record players (commonly called turntables, for reasons I’ll explain in a moment) are electromagnetic devices that convert the vibrations encoded in the grooves of the vinyl into electrical signals. The record is placed on a turntable, which is a circular plate usually covered with rubber to prevent scratching. The turntable then rotates via a belt or direct drive system to spin the record at a set speed of 33 1/3, 45 or 78 RPM (Revolutions Per Minute).

The actual transformation of energy is the job of the cartridge, to which is attached a stylus — a needle made of a hard substance like a small piece of industrial diamond. These sit on the end of a tone arm mounted on the record player; as the record spins, the tone arm follows the grooves and spirals inward. (Note that the size and shape of the tone arm can also affect audio quality.) As it does so, the stylus “rides” in the grooves carved in the vinyl, which carry the amplitude and frequency of the audio, as well as the left and right stereo information. The vibrations picked up by the stylus travel to the cartridge, where they are converted to an electrical signal.

Turntable seen from above.
The Yamaha GT-5000 turntable has a short, straight tone arm for pristine audio.

Cartridges come in two types: moving magnet (MM) and moving coil (MC), each of which have slightly different output levels. Your receiver amplifies the electrical signals generated by the cartridge to the level necessary to drive loudspeakers and/or headphones.

The Preamp

If your record player has a phono preamp stage, it can be connected to a dedicated phono input on your receiver, if it has one. This not only raises the level of the signal coming from the cartridge, but serves another important function. When records are cut to vinyl, high frequencies are boosted and low frequencies reduced (attenuated). This is known as the RIAA (Recording Industry Association of America) equalization curve, which became the de facto industry standard way back in 1954. The application of this curve not only helps preserve the sonic quality of the original master but also helps reduce groove damage and allows for the creation of longer LP recording times by keeping the grooves small.

Turntables that have a built-in preamp typically offer a stereo “Line” output (which can be connected to any standard receiver line input or even directly to self-powered speakers) in addition to a phono output that can only be connected to a receiver’s phono input. For example, here are the dual outputs offered by the Yamaha MusicCast VINYL 500:

Sideview of closed turntable with clear cover.
Yamaha MusicCast VINYL 500 line and phono outputs.

The Yamaha TT-S303 takes a slightly different approach: It offers a single stereo output that can be switched between line-level (“EQ Thru”) and phono-level (“EQ ON”):

Sideview of turntable with closed clear lid.
Yamaha TT-S303 switched output.

All Yamaha AV receivers and amplifiers can easily integrate with pretty much any turntable. The flagship A-S3200 integrated amplifier, for example, has a phono input that can accommodate both MM (moving magnet) and MC (moving coil) types of phono cartridges. Note that, if your AV receiver does not have a dedicated phono preamp, it can be purchased separately and easily added to your system.

So jump aboard the vinyl train and dust off some of your favorite records … or buy some of the exciting new releases that are available today. Either way, the joy of placing that needle down and hearing the audio magic happen will bring a smile to your face and pleasure to your ears.


Check out these related blog articles:

Here’s What You Need to Know About Vinyl

Appreciating Vinyl Records … and the Best Way to Enjoy Them

Five Reasons Vinyl Is Making a Comeback

Top 10 Vinyl Albums for Audiophiles

10 Hip-Hop Albums That Sound Great on Vinyl

Spotlight on Vinyl Subscription Services

Hi-Fi Starter Guide

Dialing in the Perfect Two-Channel Experience

How to Connect a Turntable to an AV Receiver

The Difference a Tonearm Makes

Seven Fun Places to Put Your Wireless Turntable

Get Your Party Started with the MusicCast VINYL 500

Shopping for Vinyl

Caring for Vinyl

How to Clean Vinyl Records


Click here for more information about Yamaha turntables.

Pride Month Special: Breaking Barriers

In honor of Pride Month, I spoke to three inspiring Yamaha artists in the LGBTQ+ community about their unique journeys. From a concert pianist to a flute player to a Southern rock ‘n’ roller, these trailblazers shared how their identities impact their artistry, how they’re redefining their craft and why music has the power to build bridges.

Intersectional Identities

All three artists I spoke with discussed how being musicians and members of the LGBTQ+ community are both innate and deeply connected parts of who they are.

LG, who founded queer Southern rock band Thelma & The Sleaze in 2010, started playing music in her teens and came out as lesbian early on. “I’ve never really not been out, and there’s never been a separation of music and my sexuality,” she says. “They’ve always gone hand-in-hand.”

Woman with long hair and a t-shirt rocking out on a guitar on stage.
LG.

Jeffrey Khaner, long-time principal flutist with the Philadelphia Orchestra and a Juilliard graduate and professor, also discovered an early passion for music. “After I started playing flute in seventh grade, it never really occurred to me to do anything else,” he says.

Khaner also knew he was gay early in life but never felt the need to hide it. Over the years, when fellow college students or colleagues at new jobs cautioned him about being out, he remained true to himself and let his music speak for itself. “It was something I sort of worried about for an instant, then I thought, look, if they’re going to have a problem with it, it’s going to be their problem,” he says. And nobody ever gave him a problem.

Bald-headed man with cropped white beard in a black button up shirt looking over his left shoulder.
Jeffrey Khaner.

The Life-Saving Power of Music

The experience of coming out due to gender identity can be challenging, as it was for Sara Davis Buechner, an award-winning concert pianist and professor who fell in love with music as a toddler.

Buechner was assigned male at birth and experienced gender dysphoria at a young age, but at the time, with social stigma and scant information on being transgender, coming out seemed impossible. Instead, she used music to soothe her soul and express herself.

In her early teens, she couldn’t put her feelings into words but found solace by attending the symphony. “When I was in the concert halls and heard the music exploding forth, it was my ‘it gets better’ therapy,” Buechner says. “I knew that if I followed the music in me, it would always lead me to something true and honest and beautiful. And it did.” Focusing on her art for her first 35 years supplied Buechner with a steady source of therapy, beauty, culture, and calm.

Middle-aged woman with light hair and glasses playing a grand piano on stage.
Sara Davis Buechner.

Turning Tides

In her thirties, as Buechner’s career soared, she took a hard look inward. It was the late 1990s, and bolstered by newly available information and community online, she decided it was time for Sara’s debut.

Though Buechner gained a sense of inner harmony, colleagues treated her poorly, and her career fell flat. “I lost professional connections, I was basically fired from my job, conductors who used me a lot stopped answering calls, and chamber music [work] just disappeared since people didn’t want to play with me,” she says. Struggling to make a living, Buechner relocated to Canada, where she wasn’t well known and could make a name for herself on her musical talent alone.

Buechner has recently observed a sea change, as some conductors who previously abandoned her now want to reconnect and work with her again. “I’ve had to swallow my anger and pride a bit,” she says, “but people evolve and change and learn to be better, so I try to focus on the goodness of that.” She also appreciates how, for her younger colleagues and students, being LGBTQ+ is a non-issue; instead, it’s all about the music.

Additionally, with the new cultural focus on diversity, Buechner says the part of her identity that once damaged her career is now an asset — and, she reports, her calendar is the fullest it’s ever been.

Blazing Trails

While LG’s performances sometimes take her places that may not be LGBTQ+-friendly, she refuses to live in fear. “Being in an all-female queer Southern rock band, you need to confidently walk into every room like you own it, or you’ll be blocked at every turn,” she says.

And though being gay is a huge part of LG’s identity, she doesn’t want to be pigeonholed or appeal solely to the LGBTQ+ community. She’ll take a gig nearly anywhere, and she’ll be herself and say what’s on her mind in hopes of using her platform to create change and cultivate acceptance.

LG views performing in even the most unwelcome spaces as a way to effect change and build bridges, despite the fact that she may have to deal with people trying to shoot her down in the process. “I’ve forced myself to be in those spaces, because I know that if I can get into a room with a bunch of people who have had no exposure to radical queer culture, and they say ‘Hey, I love rock ‘n’ roll, I love babes, I love hair, I love amps, I love guitars’ — well then, guess what, jerk, you love queers too!”

Buechner has adopted a similar approach. Instead of avoiding areas that feel unsafe or unfriendly to trans people, she takes the risk and uses it as an opportunity for representation and bridge-building. Even in towns where she thinks it might be an issue, people come up to her after concerts to thank her for her visibility. “It means a lot to them that someone like me makes an appearance, goes on stage, and says, this isn’t an impediment — this is who I am and I’m proud of it.”

Expanding Diversity in Repertoire

Buechner says the current explosion of awareness of social justice issues in America is long overdue, and notes that the classical music business has a history of lacking diversity both in performers and in repertoire.

Her awareness of this began when she was studying at Juilliard and needed to develop sight-reading skills. Buechner visited the school library in search of sheet music and was astounded by how much piano repertoire she was unfamiliar with. She began spending hours daily at the library honing her sight-reading ability and learning music that is rarely heard. Ever since, Buechner has made it a personal mission to include lesser-known music into her concerts, and has noticed other performers starting to do the same.

Khaner has also observed this shift. Not only has the industry been forced to find new ways to make and present music, he says, but it has led to more exploration of music by women and minorities.

“I’ve been introduced to music that I’d never heard of,” Khaner explains. For example, the Philadelphia Orchestra’s music director Yannick Nézet-Séguin (who is also gay) made it a priority to perform and record the symphonies of Florence Price, an early 20th century female Black American composer. “They’re wonderful symphonies,” Khaner says. “I thought, how had I not heard of her or known of these before? How had they not been recorded?”

Leaving a Legacy

As he reflects on his legacy, Khaner has found meaning in mentoring the next generation of flute players. He’s astounded by their confidence and ability to play new, technically demanding flute music that would have been considered unplayable years ago. Whether his students continue with music or not, he aims to leave them with the unique problem-solving skills that one develops from performing music. He also believes the creativity fueled by the events of the past year has opened doors to countless new possibilities for artists.

Khaner has also left his mark by expanding the traditionally limited repertoire for flute players. The best composers typically just wrote for piano and strings, he points out, so he’s transcribed music for flute, has had music written for him and has also premiered a large amount of new music. Khaner’s career hit another high note when he worked with Yamaha to create a custom flute on a scale suited to his orchestra’s pitch, which has since been adopted by other professional flute players.

LG is also proud of breaking cultural barriers and creating more acceptance and understanding in the industry for those who follow. She has a rotating lineup of musicians in her band, and she uses this as an opportunity to mentor young female musicians amidst what she calls ‘the boys club.’

“These girls want to play with me and learn what they aren’t going to learn in music college,” she says. “Not just how to be good at music, but how to be iconic inside your scene.” She confesses that knowing she’s inspiring other women and queer people helps motivate her to keep the band going.

Buechner feels equally inspired by the younger LGBTQ+ artists she’s worked with, such as Jared Miller, a gay former student of hers who’s now a successful composer in Canada, as well as the Brooklyn-based organization ChamberQUEER. While Buechner is blown away by young musicians living authentically so much earlier in life, she makes sure to share her story and the LGBTQ community’s history to help keep progress moving forward rather than in retrograde. “When I’m speaking to young people about being trans and what it was like growing up trans, I try to really communicate to them that their voice matters, their activism matters, their concern matters,” she says. “They need to know if they don’t fight for their rights and for humanity and their equality, we could go backward very easily.”


For more information, visit:

http://thelmaandthesleaze.com/

https://iflute.com/

http://saradavisbuechner.com/

How to Find (and Stay on) Your Own Unique Path

For over a decade, music has been a central part of my personal and professional life. I’ve interviewed and written about hundreds of artists, from Lady Gaga to the next up-and-coming guitar player. What’s more, my wife is a radio DJ who receives song submissions for the airwaves on an almost hourly basis. So when it comes to the scope and landscape of the music industry, I’ve seen how much of the sausage is made.

When it comes to getting new work noticed, I’ve learned one lesson above all others: Be yourself. But what does that mean, exactly? Aren’t we always being ourselves by default? To some extent, that’s true. But what I’m talking about here is leaning in and doubling down on what makes you you.

In other words, believe in what makes you stick out, not fit in. Don’t run from it. Embrace it.

With that in mind, here are six ideas to help you find, and stay on, your own unique musical path.

1. Don’t compare yourself to others.

There’s an old saying: “Comparison is the thief of joy.” While it’s important to learn from other people along the way, it’s equally important not to imitate their journey. Prince would not have been Prince if he tried to be just like Jimi Hendrix. David Bowie wouldn’t have been David Bowie if he wanted to sound, look or carry himself like Frank Sinatra. It’s hard to forge your own path instead of following someone else’s, but in the long run, it’s almost always what’s best. Sure, going it alone can be scary, but the things you’ll discover along the way will be more personal. And it’s what’s most personal that leaps off the proverbial page.

2. Take risks.

Standing out requires a leap of faith. You have to believe you have something to say and you have to be willing to say the things no one else will, can or has. You have to take risks and create what you’d like to see in the world. First, see how well you stand on new ground. Then risk it all again and leap off for even fresher terrain. You’ll likely find new inspirations to fuel your next work.

3. Don’t conform.

As human beings, most of the time, we just want to fit in. We don’t want to feel ostracized so we tend to try not to rock the boat. But as artists, we have to stand out or else our work can get lost, like the static in white noise. So don’t try to conform to what’s around you. Instead, be the most expressive version of you, even if it means breaking the mold.

4. Follow your curiosity.

What interests you is truly a sacred thing. It’s your instinct, your internal voice speaking directly to you, saying, “Hey, let’s check this out! We want to know more about this!” There’s likely a good reason for it, too. So trust your curiosity. It’s your guiding light in an unknowable future.

5. Learn from others.

Absorb as much as you can from others, then leave the rest for later (or never). As Shakespeare once noted, “All the world’s a stage.” But the world is also an encyclopedia. So take in new ideas or philosophies, and by all means try them on for size — but if they’re not for you, discard them and move on.

6. Find your voice … and believe in it.

Finding your own voice and believing in it doesn’t mean you shouldn’t want to evolve. But it does mean that once you’ve identified what makes you unique, you need to cultivate it. Someone else may have a roaring bonfire going, but that’s okay. Creativity is not a race. Your journey is singular; your fire is your own. Let the spark inside you flicker at first, then help it grow into a flame that can light the way for others.

Case Study: From a $67 Budget to Success — A Four-Year Journey

After two years of teaching elementary general music, I was ready for a change, so I applied to a music education master’s program and for more band jobs.

Luckily, I was hired to teach band at Meadows Elementary and Robinson Middle School in my current district, the Topeka Public Schools. Eager to start my new position, I quickly learned that there were significant challenges and hurdles in my path.

Year 1: Budget and Bellwork             

During the first year in my new position, the biggest challenge was little to no budgets in place for my middle and elementary school bands. I also faced additional hindrances including no organizational methods in place, low enrollment numbers, poor instrumentation, students’ lack of musical background knowledge, and a mistrust from administration on the “loyalty” of a traveling teacher. I knew that I had to tackle these issues one by one in order to make progress.

My top priority was budgets. The middle school principal at the time did not understand the cost of band items because the previous director taught band, orchestra and choir, and she spent all  her budget on equipment for the musical.

I asked the principal, “What is the budget this year?” Her response was, “I think that $200 for the music department should be good.” My mouth dropped. Split three ways between band, orchestra and choir, that meant my budget for the middle school band was $67 for the whole year. With that paltry budget, I could barely afford to replace the frayed and broken mallets in the old, busted percussion cabinet. I then asked if there was a repair budget and was told that one did not exist. Oh boy.

Robinson Middle School Band in music room wearing masksThankfully, our district had recently made the music librarian the de facto music coordinator for the district, so I went to him and asked for his help and support. Additionally, I came up with several plans of my own. I was not allowed to charge band participation fees, but I could charge instrument rental fees. We have some instruments in the district rental pool, and some instruments at the schools. For the school instruments, I could charge the same rental fees as the district, and I used that money to fund a repair and supply budget. This went into effect almost immediately.

We didn’t have many extra winds instruments for rental, any our percussion equipment was severely lacking. I have since acquired marching bass drums, a vibraphone, chimes, congas, timbales, bongos and various small percussion instruments.

I also did a bit of advocacy and asked the principal to fund some items that our band program needed. I sent her a priority-ranked wish list (which included  flutes, trumpets, trombones, chimes, a vibraphone, bongos, cabasa, concert toms, a tambourine, a triangle and beater, marching bass drums and a sousaphone), found some refurbished/used instruments from a local repair shop, and she was able to get some instruments through the general fund.

At the middle school, we could not have specific club/activity fundraisers (only school fundraisers are allowed) so I needed to get creative. Thanks to a band parent, I found a great solution the following year.

For lack of musical literacy, I had an easy solution. Students were required to do some sort of bellwork at the beginning of each class. My initial plan was for students to get their instruments ready, get their music in order according to what was written on the board, sharpen pencils, etc. The principal said that a writing component or thinking question was required because we were working on literacy as a building. So, I revised the bellwork: Students copied down a music vocabulary word and definition from the board into a spiral notebook. Students could use their notebooks to ask questions about music and think about music while using their expanded musical vocabulary.

Then, using the ideas from “Threading the Concept” by Dr. Debra Gordon Hedden, I took the vocabulary word and taught it as a concept in several different parts of the rehearsal including the warmup, listening, rhythmic focus, skills and drills, and the repertoire. I also grouped the vocabulary entries into units that I could pre-test/post-test to check for understanding as well as grade for completion in the notebooks. This procedure of one vocab word per day with an entire lesson focused around that word and organized into units worked remarkably well toward those music literacy goals.   

I didn’t want to rock the boat too much that first year. My main focus was adding the vocabulary notebooks and getting the budgets right.

Year 2: Recruitment and Resources

For the following year, I had a longer list of things to focus on: recruiting, communication, budgets (which is always on my list) and instrumentation.

Recruiting: My recruiting efforts began at the end of my first school year. I took my current music students and planned an elementary school tour. We went to five different elementary schools, performed, ate lunch at a park and promoted the summer music program.

When I received my enrollment numbers the following year for the middle school, they went up from 48 to 68 – an increase of more than 40%! However, I still had a very small band class at my elementary school, so I had to rethink how to build my program there.

Robinson Middle School band performing on stageTo recruit students for the beginning band at Meadows Elementary, I made sure to talk to all 5th graders on the third day of school along with the elementary strings teacher. She played her instruments, and I played several winds instruments including clarinet, trombone and trumpet. We answered questions and handed out interest forms, which also helped with instrumentation as we could assign students to their first or second instrument choices.

During my second year, elementary band and strings were at the same time as PE and music, which was not ideal. I spoke to the principal, and band and strings were moved to different times, such as during lunch recess and library time, but these times did not work either. Finally, band and strings were scheduled during the independent work block, and this has worked well for me and my students.

Band class at Meadows Elementary is 35 minutes every day. At the beginning of the school year, I see woodwinds on Mondays and Wednesday, brass and percussion on Tuesdays and Thursdays, and everyone on Fridays. Toward the middle of the third quarter, I switch to seeing all students every day to prepare them for middle school, where I see all band students every day for 42 minutes. This schedule has been super helpful in retaining students as I am one of my own feeder schools for Robinson Middle School.

We also started instrument information and placements in the spring with 4th graders. Students filled out forms listing which instrument they liked and which instruments they could play, and then students ranked their top five choices. We kept these records each year and passed them along to other teachers in our district if students moved. By placing students on the right instruments for them and getting the schedule under control, I tripled enrollment at my elementary school — enrollment grew from 12 to 36 — and my middle school numbers grew to 98 students. For the 2020-2021 school year, I was supposed to have 104 students in the middle school band, but unfortunately due to COVID-19, this didn’t happen.

Organization and Communication: For my second year, I wanted to work on organization and communication. Because I had more time to prep, I created a band handbook that I provided to all students. It included a parent signature page and outlined all of my expectations, performance dates, grading policies and everything else that I thought my students and parents needed to know. I also created a Facebook page for my middle school band. The handbook and Facebook helped me start building more relationships with band parents and families who could see exactly what was happening and when in multiple formats. Here is the 2019 RMS Handbook.

Budgets and Fundraising: My budget increased for my second year to $500 for my middle school band alone, which was seven times more than my first year! Then a band parent, who was on the PTO, approached me with some ideas. She said that the PTO would pay for a bus for our tour of elementary schools and other local venues to perform, as well as to travel to contests if we played at the pancake feed. No problem.

She also suggested that we have a bake sale at our concerts. What a great idea! At the first bake sale, we made $50, and I was so excited. Now parents have come to expect a bake sale, so we make over $250 at every concert, and we have four concerts per year. This money has allowed me to purchase equipment for the band, offer instrument rental scholarships, send kids to music camps, purchase supplies for students and more. All of the food is parent-made. I usually bring some baked goods, too, and I talk it up a lot. Kids are excited to buy Mrs. Antonetti’s cookies. We have also added bottled water to our offerings.

Instrumentation: I talk about all of the different types of instruments in my ensembles, and I frequently play different instruments in class. This really grabs the attention of many of my students. I keep saying things like, “If you improve on this instrument, then maybe in January, you can try this other instrument.”

When switching students to different instruments, I try to keep them in the same family. For example, I will find a saxophonist with a big, powerful sound and put him or her on tenor, then eventually bari. Or, I’ll try to find a clarinet student with a big, full sound to play bass clarinet. Or, I’ll take some strong trumpet players and switch them to horn.

I have had a lot of success with switching trumpet players who can only get the first four notes on trumpet to treble clef baritone. I had two students who struggled with trumpet. I switched both to baritone, and they could both instantly (within the same class period of getting the instrument) play the B-flat scale that they had been struggling with all year. I eventually switched one of those students to tuba.

My middle school students come from several different elementary schools with different teachers, so for percussion, we jump into snare, bass and mallets from the beginning. They all rotate instruments between each scale pattern, method book exercise, etc., and I assign them different parts on each of the pieces we do so that no one is funneled into being a certain “type” of a percussionist. This has worked well for my students.

Year 3: Amplify and Expand

By my third year, I had several great things in place. My goal was to continue with what I was doing and amplify, expand and get creative. I was able to reach these goals in several ways:

  • Started to streamline my organization and processes for teaching concepts. For example, I worked on folder organization, vocabulary units and physical visual aids to help teach abstract concepts.
  • Expanded the use of the vocabulary journal to include gluing in diagrams and answering questions so that it was more like an interactive notebook.
  • Included more project-based learning such as a composition project, improvisation and more reflections. In order to introduce composition techniques to young students, I used chance music activities such as this chance composition worksheet with pentatonic scales and dice. These worksheets help bridge the gap of knowledge for students who have never done any composition before. Encouraging creativity and helping students make a plan (even if it was based on chance) motivated them to take positive risks in the classroom.
  • Encouraged more students to participate in solo and ensemble festivals, and I helped to revitalize the middle school solo festival at Washburn University.
  • Continued the bake sales and kept looking for alternate and creative funding.
  • Expanded the repertoire list at my school to include more diverse composers and representative literature from various cultures and backgrounds. I have really tried to include more female composers and LGBTQ+ composers in my literature selection. Some of those have included Julie Giroux, Alex Shapiro, Randall D. Standridge, Anne McGinty, Robert Sheldon and more. I have also included band arrangements of folk music from other countries such as Japan, Ireland, Africa (Swahili), China, Russia, Guatemala, Cuba and more.

Year 4 and Beyond

Topeka High School marching band practicing on field With each year of experience, I have gained more confidence as a music educator and have found better ways to be effective, efficient, and to challenge and support my students in the classroom. I have brought in guests from universities and local businesses to talk to my students and broaden their understanding of music. I have commissioned new works for my band as part of a consortium. I have taken my groups to festivals, tours and on trips to enrich their band experience. I just want to continue to challenge my students and let them experience life through the power of music.

For the 2021-2022 school year, I am moving to Topeka High School as the head band director. Some of my goals in this new position is to do more fun things in band since we did not get to have as much fun during the year of COVID. I also want to work on music and rhythmic literacy, and some fundamentals because we missed out on so much instructional time this year. I also want to work on empowering student leadership to have a more active role in coaching younger students. We have a bit of remediation to take care of, but we are going to have fun doing it!

DTX6 Deep Dive, Part 5: A New Level of Playability

Yamaha DTX6 Series electronic drum kits incorporate innovative features that take electronic drumming to new heights of expression. Regardless of your playing style, a DTX6 kit can capture all the energy and emotion you put into a performance, and will inspire you to keep on playing.

Use Your Heads

All DTX6 drum kits come equipped with an 8-inch Yamaha XP80 snare pad. The playing surface on this trigger pad is made from TCS (Textured Cellular Silicone), a foam material that emulates an acoustic drumhead. Air bubbles in the material act as a cushion for your drumsticks, providing excellent feel while ensuring reliable triggering, quiet performance and reduced fatigue. What’s more, TCS heads never loosen, so the feel remains consistent even when you hit the pads hard during a long performance or practice session.

Closeup of drumstick striking and compressing foam.
TCS provides realistic rebound.

To increase pad sensitivity and eliminate crosstalk to other pads through transmission of vibration, the XP80 has a floating structure that isolates the TCS head from the rest of the pad. Even when you’re slamming the snare pad, you won’t have to worry about other pads being accidentally triggered.

Cross-section of mechanism.
The XP80 floating structure.

Zone In

The XP80 has three zones, allowing it to react like an acoustic drum. Striking the XP80 on the TCS surface produces a head sound; striking opposite sides of the rim produces different rim sounds.

Closeup.
The XP80 zones: head (blue), closed rim (pink) and open rim (green).

Each XP80 zone can layer up to four voices, and each layer can be set for different levels of velocity sensitivity, so the pad can play different sounds depending on how hard you strike it. For more information on how to layer voices, see Part 4 of this series.

Three-zone construction is also employed in the Yamaha PCY135 13-inch ride cymbal pad included with all DTX6 Series kits. In addition, it offers positional sensing, which permits different sounds to be played from different areas of the pad such as bell, edge or bow — just like a real cymbal. As with the XP80, each zone of the PCY135 can layer up to four voices, with different velocity sensitivity for each layer.

Table with dial indications.
DTX6 cymbal pads feature three zones with multiple layers.

All cymbal pads supplied with DTX6 kits feature “choke-ability,” whereby grabbing the edge of the pad chokes a crash cymbal or mutes the ride cymbal, creating authentic playing action. A stopper pin mounted to the cymbal holder prevents the cymbal pad from rotating, ensuring that the pad always faces in the correct direction. An output level control on the pad can be used to adjust the trigger signal to suit any style of playing.

Hats Off to You

DTX6K3-X and DTX6K2-X kits are outfitted with a Yamaha HS-650A hi-hat stand and RHH135 hi-hat controller, a 13-inch moving hi-hat pad that also employs positional sensing.

Image of highhat stand with hi-hat installed.
The RHH135 trigger pad works with any Yamaha hi-hat stand.

The RHH135 is capable of playing closed edge, open edge, closed bow, open bow, foot closed and foot splash sounds, and when used in combination with the HS-650A, it performs just like a real hi-hat — you can even adjust the tilt angle for the bottom cymbal! The HS-650A also has a sturdy tripod design to ensure stability, along with heavy-duty spurs that prevent hi-hat “creep.”

Create Your Own Custom Setup

Setup and positioning of DTX6 pads is made easy using the RS6 Electronic Drum Mounting Rack included with DTX6K2-X and DTX6K3-X kits. Designed especially for use with electronic drums, the RS6 is a compact rack system with L-shaped legs that stand up to the heaviest playing, while allowing flexible placement of the pads, foot pedals and supplied DTX-PRO module.

View of setup equipment.
The RS6 rack provides set-it-and-forget-it stability.

The RS6 is lightweight, can be set up by one person in minutes, and occupies minimal floor space. The height of each rack arm can be set independently, and the left side of the rack permits the hi-hat stand and kick pedal to be placed exactly wherever you want for maximum comfort — even if you use a double kick pedal like the Yamaha DFP-8500C. What’s more, the KP65 and KP90 kick drum pads supplied with DTX6 kits are large enough to easily accommodate two beaters from a double pedal, plus they support connection of an additional external pad if you decide to expand your kit. The output level of either can be adjusted for maximum sensitivity while eliminating double triggers, even when you’re playing fast rhythms.

Closeup of mechanism.
The KP90 kick drum pad.

A Yamaha CL-940B ball clamp is used for the snare holder. It mounts on an independent rack arm, enabling adjustment across a wide range of positions, so you can set the snare pad precisely where you want it.

Closeup.
The snare pad mounts on a ball clamp.

Crash cymbal holders are also mounted on independent arms, using clamps that pivot 360 degrees so you can offset the position of the cymbals from the tom pads. Both cymbal and tom clamps attach to any RS6 rack arm and rotate 360 degrees, making it a breeze to achieve any mounting angle while creating your own custom setup. The clamps hold tight under all playing conditions and are secured using easy-to-grip finger bolts and key bolts that accept a standard drum key. The DTX-PRO module mounts to an independent arm that can swing to the right of the floor tom pad, keeping it within arm’s reach for convenient control while making sure it’s out of the path of drumsticks.

Closeup.
TCPL500 tom clamp.

Yamaha DTX6 trigger pads and the RS6 rack system produce a playing experience that’s true to playing an acoustic drum set. Now your electronic drum kit can be your electronic dream kit!


Check out the other installments of our five-part “DTX6 Deep Dive” series:

Part 1: The Kit Modifier

Part 2: Recording Options

Part 3: Training Tools

Part 4: Customizing, Importing and Layering Sounds


Click here for more information about Yamaha DTX6 Series electronic drum kits.

Exploring the Levels of Yamaha Audio Room Calibration (YPAO™)

If you own or are considering buying an AV receiver, one of the first things you’ll want to do is calibrate your system to your room — something that allows you to get the most out of the content you listen to. For all Yamaha AV receivers, this is done via a proprietary technology called YPAO™ (short for Yamaha Parametric room Acoustic Optimizer).

Graphic showing the pattern of sound dispersion in a living room.

There are several levels or grades of YPAO technology that are implemented into different Yamaha products. All Yamaha surround receivers are capable of speaker equalization and distance measurement, but some add Reflective Sound Control (R.S.C.) and multi-point measurement capabilities (click here to learn more about these features).

To help you gain a deeper understanding of what YPAO can do, this article will focus on the advanced angle and height measurement algorithms available in the latest high-end Yamaha AVENTAGE receivers.

Speaker Placement Suggestions

By the early 1990s, surround sound was widely being used not only in theaters, as well as recording and broadcasting studios, but even in home playback systems. It soon became obvious that best practice recommendations were needed as to where to actually place these surround speakers in a room. For example, if a re-recording engineer were to create a surround soundtrack while monitoring through a studio’s proprietary speaker positioning and the final tracks were played back on a system that had a different speaker configuration, the in-home or theater experience would not be what the engineer envisioned.

Graphic showing ITU-R 5.1 channel speaker placement.

As a result, the International Telecommunication Union developed the ITU-R 775 speaker placement standard for multi-speaker surround sound systems. As surround technologies advanced, the addition of more channels called for addendums to the original standard.

In today’s home theaters, the Dolby Laboratories suggestions for speaker placement are most commonly used. They are closely based on the original ITU-R standard, with added recommendations for the positioning of surround back speakers and overhead speakers. The goal is to allow the listener to reproduce the sound designer’s creation as accurately as possible at home.

Graphic showing Dolby Laboratories 7.1 channel speaker placement.

A perfectly designed home theater will follow these guidelines and deliver great results. If your 7.1-channel surround system is within these speaker placement tolerances, congratulations! Your system will likely accurately reproduce cinematic audio as the creators intended.

Graphic with headline of Symmetrical Sound Field.

Most home theaters, however, do not meet those “perfect” criteria, since physical objects like doorways, windows and furniture will take priority over speaker placement, resulting in uneven sound field recreation.

Graphic showing un-even sound field.

To place audio content within a “perfect” sound field, a tight adherence to speaker placement is necessary. This is particularly important when applying Yamaha proprietary CINEMA DSP enhancements to your listening experience. Knowing that such perfection is not often achievable, Yamaha developed an advanced workaround: YPAO.

YPAO Angle Measurement

Three legged angle measurement stand.

Using a specially developed microphone stand and some very advanced processing, the YPAO calibration system automatically locates the exact angle of each speaker in the room relative to the prime listening position. This angle measurement data is passed on to the built-in CINEMA DSP processor to generate a perfectly symmetrical and balanced sound field. Once applied, it allows a movie soundtrack to be enveloping without any noticeable acoustic “holes” or overloads in the sound field.

Graphic with symmetrical sound field with incorrect speaker placement.

Plugging in the microphone and following the simple on-screen prompts, a full one-time calibration can be done in less than 10 minutes. The YPAO stand should ideally be screwed to a camera tripod for a sturdy foundation, placed at ear height and located in the prime listening spot. The number one position on the stand should be pointed in the direction of the center channel. The calibration process will send a quick set of test tones to position one, then pause and wait for you to place the microphone on position two and then again for position three.

YPAO Height Calibration

The angle calibration does a great job of locating your horizontal 5.1- or 7.1-channel surround system, but what about overhead speakers? Knowing where those are located above your listening position is just as crucial.

Three legged stand with center vertical pole.

The addition of a fourth microphone position mounted above the plane of the three horizontal positions gives the YPAO measurement system the extra data it needs to locate the overhead speakers in a 3D space. Knowing the exact placement of all the speakers in the room allows YPAO and CINEMA DSP to generate a seamless and enveloping sound field that will virtually transport you from the physical confines of your listening space.

Graphic.
3D corrected sound field.

If you’re like the majority of us who can only dream of a custom-built room specifically for home theater use, the YPAO angle and height measurement tools will get you most of the way there. Once you’ve run through the calibration, you can start enjoying content in your newly configured home theater the way it was meant to be heard.


Check out these related blog articles:

How to Calibrate Your AV Receiver with YPAO

How to Recreate the Movie Theater Experience at Home

How to Burn-in Speakers

How to Install In-Ceiling Speakers


Click here for more information about Yamaha AVENTAGE receivers.

Case Study: A Performing Arts Academy Offers Individual Learning and Career Exploration

Imagine training as a music educator while you’re still a senior in high school.

That’s what Dani Buschini, a recent graduate of Orange Lutheran High School in Orange County, California, did during the 2020-2021 academic year. As her capstone project for the school’s Performing Arts Academy, she taught and conducted “The Seal Lullaby” by Eric Whitacre in the student-led spring concert.

The Performing Arts Academy is one of six academies at Orange Lutheran, and all provide specialized instruction so students can explore potential career paths. Students apply to academies during their sophomore year, participate in their junior and senior years, and receive an endorsement on their diploma upon successful completion of the work. In addition to performing arts, the school offers academies in business, humanities, ministry, STEM and visual arts.

The Performing Arts Academy has multiple pathways; students can choose from instrumental music, acting, dance, musical theater and vocal music. Instrumental music is the only one with specific concentrations: music education, composition and performance.

female student conducting

Instrumental Music Specialization

Director of Instrumental Music Aaron Zeilinger explains that academies “bundle current higher educational offerings with field trips, master classes and extra projects.”

He provides college-style programming and nearly individual learning to hone the passions of his students. All of his instrumental music academy students take Music Theory 1 and 2, but the rest of their coursework varies.

Music education and composition students study with Zeilinger independently after school. Education students learn score study, lesson prep, classroom management, as well as conducting and educational concepts, while composition students work on preparing original pieces to be debuted in spring of their senior year. Performance-focused students must take private lessons in their instrument and plan a 30-minute recital. All must also participate in honors-level ensembles.

As a result of their varying interests, culminating senior projects have been diverse. In the 2016-2017 school year, Zeilinger’s composition student wrote two original works, one for wind ensemble and one for string ensemble. For the wind ensemble, he created an original march, called “Old Hundredth,” that drew inspiration from the marches of Karl King and John Philip Sousa. The string ensemble piece, called “Rush,” was based on scale patterns in increasing and overlapping forms to weave an intricate, almost mathematical-style composition. In 2019, a performance student played the “Concerto in E Minor: Movement 1” by Felix Mendelssohn on violin as well as arranged “Time” by Hans Zimmer for three violins and a piano.

Collaboration with other classes has also been encouraged. For example, “we had the Acting 3 class write a monologue as an intro to one of our concerts,” Zeilinger says.

Customized and Student-Driven Program

If students are interested in teaching at younger levels or in music technology, Zeilinger says that he would find ways to make those experiences possible. “I want each student to pursue what they are truly passionate about and have a culminating project that represents their unique abilities and desires,” he says. “It’s very student-driven.”

In fact, Zeilinger’s overall philosophy with all of his students has been to “support them where they are and where they want to go,” he says.

As a faith-based private high school with no specific feeder programs, Orange Lutheran has a student population of 1,355. About 250 to 300 students overall participate in performing arts with 50 involved in instrumental music each year. Approximately 12 students per year have chosen to participate in the Performing Arts Academy with one to three involved in the instrumental music program. Students at Orange Lutheran are not required to enroll in an academy, but those who do can participate in as many as they want after their successful application.

All 50 instrumental students — whether or not they are in the academy — have a plethora of musical opportunities. Orange Lutheran has a marching band, wind ensemble, string ensemble, chamber ensembles, full orchestra, jazz band, jazz combos and percussion ensembles.

Zeilinger who is also the corps director with the Impulse Youth Arts Organization in Buena Park, California, is the head teacher for all of those groups — anything instrumental except the praise band — and he brings in coaches where needed.

female clarinet student In past years, Zeilinger has even taught hand bell and steel drums when students express the desire. “When I see the interest, I’m going to go down that path because I want my students’ high school experiences to be memorable. … My program is really focused on developing the desire among students to pursue something they’re passionate about.”

All students have a chance to make decisions for the spring Student Showcase. Zeilinger will ask students what they are passionate about and run with it. “My main purpose in education is providing experiences for the kids who want it,” he says.

The need for customization has arisen due to the wide variety in students’ instrumental experiences. For instance, Zeilinger might have musicians who have taken private lessons since the age of 2 and others who have just started learning their instruments a few months ago. “I have to figure out how to meld that into an ensemble that everyone feels excited about,” Zeilinger says.

Master-Class Experiences

As part of the academy experience, about three master classes are available for students to join each year. “I normally bring in people from industries that students wouldn’t have access to on their own,” Zeilinger says.

These professionals have included studio musicians, studio arrangers, a Broadway composer and a group called LALA Brass.

While all performing arts participants have access to the master classes, academy students are required to attend at least two per year and get exclusive privileges, such as more intimate Q&A sessions or the opportunity to work directly with the guest artist in demonstrations.

Evolution and Expansion

The Performing Arts Academy has made changes to its structure over time. “It’s been a continually evolving process,” Zeilinger says.

In the first year, each director bundled up existing coursework and put it into the academy pathways. During faculty meeting days, instructors brainstorm ways to improve the academies. Creation of the new dance program is one example.

male student playing the pianoStarting in the 2021-2022 school year, students will have the option to participate in the academy and benefit from a field trip to the Los Angeles Philharmonic and master classes without the capstone project, or take the academy honors track with all of the individual and culminating work. The Performing Arts Academy staff believes that more students would participate if they didn’t have the pressure of pursuing the stand-alone project, Zeilinger says.

“We’re continuously coming up with ideas to make this more defined and … worth their time,” Zeilinger says.

In the future, Zeilinger says that he would like to pivot the instrumental music program to offer all types of specialties without specific divisions, to offer AP Music Theory and to coordinate with state colleges.

While approximately 70% of the Performing Arts Academy students have pursued the discipline in college, about 30% do it just for fun. “The parents and students … are always thankful that they get to do something like this,” Zeilinger says “It is 100% my philosophy to try and give students something unique in high school before they get into college. … High school is the last chance to try something without it affecting the rest of your life. That’s why I offer so many things. … I want students to walk away from high school having done something really cool [and] special.”

Light My Fire

Jose Feliciano’s soulful rendition of the Doors’ ode to seduction, “Light My Fire,” is one of my favorite covers of all time.

The title also speaks to me about how I might rekindle a creative flame that’s suffering from burnout. Over the years I’ve come to recognize certain things I can do to keep from getting frustrated and giving up too soon. I touched on the subject in a previous blog entitled “Blocking Writer’s Block,”but since my own discoveries about helpful habits are constantly expanding, I’d like to take it a bit further here.

Here we go!

1. If you want to write a song that evokes a certain mood, first try listening to other songs that make you feel that way. The intent is to simply access and absorb that feeling so you can offer it up yourself. For example, give Pharrell Williams’ “Happy” a listen if your song is carefree, or Olivia Rodrigo’s “Drivers License” if you want to channel that disappointed heart.

2. Trust in the morning. A good night’s sleep is incredibly restorative. Your brain is working even when you’re not wracking it. Sleep is where tired synapses and cells recharge. You’ll be surprised how fresh you feel when your alarm goes off.

3. If you can’t get un-stuck, walk away. Make a sandwich. Call your mom. Allow yourself some retail therapy. Ignore creative block as you might a high school crush back when you played childish games. Watch how fast “it” comes back.

4. Do not be a slave to that screen, no matter how helpful a rhyming dictionary or search engine can be. Get up and move. Motion stirs up natural word-play and, at times, even unexpected rhyme.

Digression alert: I’m actually tapping this article while on an elliptical machine. Added perk: Workouts go much faster when your mind is active. Even faster than they do when you’re (passively) listening to music.

5. Check out an old photo album — hard copy or digital — and wait for the feels you used to feel for an old flame. There’s nothing like the memory of that magical summer with the One That Got Away to trigger a vulnerable opening line. Case in point: “Almost made you love me,” the first line of my song “Almost Doesn’t Count,” fell from my lips while turning the pages of an album of my own.

6. Pick up a different instrument. You don’t have to play it well. In fact, it’s probably better if you don’t because you’d be too in control. And that’s not what creativity is about. Happy accidents can happen when you stumble on the keys or fumble with the strings!

7. Seek out a new collaborator with a different sensibility. Just when you have no idea how to advance your song, they very well might know exactly what to do. Your rut is their no-brainer. And their rut is yours. If you’re lucky enough to find each other, you’ll want to hug and kiss constantly. Even jump up and down. I’m not kidding. I speak from experience.

8. If you’re getting bored of your own predictability, have a listen to other songwriters. For example, check out the way Silk Sonic changes key on “Leave The Door Open.” I might not have thought to go there myself, but I totally dig it so maybe I’ll consider something like that in the future. There’s no right or wrong — just an invitation to open your mind and widen your palate.

9. Less is more. Sometimes we overthink and want to make all of our creations masterpieces, even though many of today’s pop songs are actually more like nursery rhymes. Consider a simpler, sparser lyric on a verse, or a chant instead of a conventional bridge.

10. Go easy on yourself if you just can’t get into the zone. We’re not supposed to be in that space every day; otherwise, there would be no need to differentiate the area by calling it “the zone.” Maybe today just wasn’t the day. But it’s no time to wallow in the mire. Let it go. Because you know what they say about letting go: If it comes back, it was meant to be yours.


Check out Shelly’s other postings.

Surround Sound Systems Explained: Dolby®, AURO-3D® and More

You’ve got the large screen television fired up and the popcorn and drinks ready to go. What’s needed to complete this picture? A good surround sound setup to envelop you in audio.

There are a number of ways to get that surround experience from your favorite movies, TV shows and video games. In this article, we’ll take a look at some of the most popular technologies for achieving immersive audio at home.

Dolby® and Dolby Atmos®

Dolby is a company that has been around since the mid-1960s. Their first system, which helped reduce tape hiss on analog recordings, was called Dolby Noise Reduction®. Since that time, they have introduced numerous multichannel encoding technologies, including several designed for use in home setups. These include Dolby Surround Sound®, Dolby Digital®, Dolby Pro Logic®, Dolby EX® and Dolby Digital Surround EX®.

Here, “encoding” refers to a process by which multichannel digital audio is converted into two compressed channels (i.e., stereo) so that it can be easily stored and streamed. Devices capable of decoding this data (typically AV receivers) then restore it to its original multichannel format.

In 2012, Dolby Atmos was introduced. It expands on basic 5.1- or 7.1-channel surround sound by adding height channels. This allows for a sense of three-dimensional audio with the use of in-ceiling or upward-firing speakers. In recent years, a growing number of film releases and television series have become available in the Atmos format, further expanding its reach and popularity.

Atmos provides up to 64 channels of audio by combining front, side, rear, back, and up to four overhead speakers with a sophisticated audio processing algorithm that adds spatial information for a totally immersive experience. Sound “objects” (such as, for example, a helicopter flying by) are carefully positioned by a re-recording mixer during post-production and their movements are reproduced as the Atmos-encoded stream is decoded. Most current Yamaha AV receivers, including all AVENTAGE RX-A and RX-V models, support Dolby Atmos. What’s more, the RX-V6A can create “virtual” height channels for Atmos-encoded streams even if no overhead speakers are connected! (Click here for more information.)

Front and right view of receiver.
Yamaha RX-V6A AV receiver.

DTS®

DTS, short for Digital Theater Systems, is a competing surround sound technology that debuted in 1993. The company’s first system, used for the film Jurassic Park, was a 5.1-channel encoder/decoder that employed a slightly higher bit rate than Dolby Digital, so some listeners may perceive a slight increase in audio quality.

Like Dolby, there have been numerous DTS variants over the years, including DTS® ES™, DTS® ES Discrete 6.1™, DTS® EX Matrix 5.1™, DTS® 96/24™, DTS HD® DTS® Neo:6™, DTS Neo:X™, DTS® X™, DTS® Virtual:X and even DTS® Headphone:X™.

DTS:X is an object-based multichannel format that uses height channels to deliver a three-dimensional sound experience. Introduced directly to the home theater market in 2015, it can support up to 32 speaker locations. Unlike Dolby Atmos, DTS:X can work with any standard 5.1 or 7.1 system by allowing you to arrange the speakers in whichever way fits your space and letting the receiver’s auto calibration feature maximize your sound setup. It also allows you to manually adjust sound objects, so you can make that spaceship flyover even louder, or raise the level of the center channel dialog. Most current Yamaha AV receivers, including all AVENTAGE RX-A models and the RX-V6A, support DTS:X. (The RX-V4A supports DTS-HD.)

DTS: Virtual X employs proprietary audio processing technology to analyze the incoming audio in real time and create a 3D experience with a sound bar, without the need to connect extra height speakers. It can also work with any standard 5.1- or 7.1-channel audio system. Most current Yamaha sound bars, including the SR-B20A and YAS-109, offer DTS:Virtual X decoding.

Close-up of a long thing speaker mounted on the wall horizontally under a flat screen TV.
Yamaha SR-B20A sound bar.

Surround: AI

View of a remote control.
RX-A8A remote control (AI button circled in red).

Surround:AI is an object-based surround sound format developed by Yamaha — the only AV receiver technology that uses artificial intelligence to increase audio clarity and space, automatically creating a fully enveloping 360-degree sound field. It works seamlessly behind the scenes by analyzing and adjusting the audio portion of the film in real time, at up to five times per second.

The technology, available in select Yamaha AVENTAGE AV receivers such as the RX-A4A, focuses on individual sound elements such as effects, dialog, ambience or music. This enables sonic components such as the all-important dialog to become more distinct and present in your speakers.

It also takes the worry out of selecting a different listening mode for each type of program. With Surround:AI, there’s no need to dig into the parameters and tweak, since it automatically enhances each scene through its intelligent DSP processing of the content. Simply press the “AI” button on your AV receiver’s remote and Surround:AI will take care of the rest.

AURO-3D

AURO-3D® is a next-generation technology that virtualizes sound from beyond the ceiling and floor for a three-dimensional audio experience. During decoding, it adds one or two height layers on top of a traditional surround mix. There’s also an optional third layer that can be placed above those for an increased sense of height, which is especially good for sound effects and “fly-overs.”

The height information is captured during recording or created during post-production and is combined with a standard 5.1- or 7.1-channel audio stream. This AURO-3D mix can then be decoded and played back by any AV receiver with an AURO-Codec decoder. Always on the cutting edge, Yamaha has new receivers coming out soon that will feature this exciting technology.

No matter which surround system you choose, Yamaha has you covered!


Check out these related blog articles:

Home Theater Basics

How to Shop for a Surround Sound System

What’s So Good About Dolby Atmos and DTS:X?

What Is Dolby Atmos Height Virtualization?

What Is Surround:AI?

Virtual Surround Sound and Yamaha Sound Bars


Click here for more information about Yamaha AV receivers.

Click here for more information about Yamaha sound bars.

Timpani Bowl Construction

There are many types of timpani, each with various types of pedals and different types of bowls and bowl materials. Options can be numerous, and needs will vary by the requirements of the ensemble. In this article, we’ll discuss the unique manufacturing process that Yamaha uses when making timpani bowls.

The Importance of the Timpani Bowl

When it comes to the construction of a timpano, the bowl has the greatest impact on sound. The type of material and the shape and thickness of the bowl all play a considerable role. An instrument that is musically consistent from one size to another allows the band director to focus on teaching, and when it is easy to discern pitch, students are better able to learn proper timpani tuning.

Choosing the Bowl Material

The first step in the bowl manufacturing process is choosing the right material. Yamaha makes five different models of timpani, utilizing two different bowl materials: copper and aluminum. Only high-grade copper (1.5 mm thick) and aluminum (3 mm thick) are used.

Timpani Image A

Timpani Image B

Aluminum has sonic properties that are very close to copper; it’s also recyclable and is a better alternative to fiberglass, another common bowl material. In addition, aluminum can be repaired if it is damaged, while fiberglass cannot.

Cutting and Spinning

Next up is cutting and spinning the material. A special machine takes a large square sheet of copper or aluminum and spins it very slowly to a specific size, depending on the ultimate size of the bowl. It’s important to ensure that density and consistency is maintained as the material is spun into shape.

Timpani Image C

Timpani Image D

An arm connects to the flat sheet and slowly pushes it around a steel mold. These molds vary in size, depending upon the size of the timpano. The spinning process ensures that the metal consistency is even throughout the entire shape of the bowl, so the sound can resonate freely. In addition, the bowls have no seams, which can interrupt and interfere with the sound waves traveling inside.

Forming of bowl from cut circle of copper.

Annealing

During the spinning process, the bowl must be annealed. This is a heat treatment that alters the physical properties of a material to increase its ductility and reduce its hardness, making it more pliable. This process involves heating a material above its recrystallization temperature, maintaining a suitable temperature for an appropriate amount of time, and then cooling it. Copper needs to be annealed many times in order to reshape it and maintain a constant thickness throughout the bowl. This level of detail leads to greater tuning accuracy and more consistent quality of sound.

Timpani bowl in metal box with fire being applied.

Sanding, Polishing and Hammering

After the bowls are spun, they get a sanding and a polish to clean them up inside and out.

Timpani Image G

Timpani Image H

On YTP-7300 and TP-8300 Series timpani, a hammering process follows. This makes the material denser and gives the timpano a darker tone, helping to hide the fundamental pitch and focusing the third overtone, so it sounds clearly — an important part of the sound of a timpani. Yamaha TP-8300R Series timpani have close to 30,000 hits on each bowl.

Closeup of hammered finish on copper.

Degreasing, Lacquering and Baking

The bowl is then washed in a four-step degreasing process — a series of four baths to ensure it is clean before the lacquering process. This is important so the finish adheres correctly. The bowl is then set aside to dry for a short period of time.

Timpani Mage J

Timpani Image K

Once completely dry, each bowl is given a light coat of clear lacquer. This imparts a shiny exterior finish that will pop visually on any stage.

Person wearing PPE spraying lacquer on an inverted timpani bowl.

A large oven is then used to bake each bowl up to 300 degrees. This ensures that the lacquer is completely dry and hardened before moving on to assembly with the frame and timpano head.

Man moving a timpani bowl into or out of a large metal cabinet.

Final Assembly

During assembly, the bowl is placed into a frame where it is freely suspended by a suspension ring. This limitation on pressure allows the bowl to resonate to its fullest potential. Just as in brass instruments, a heavy frame promotes more resonance. Yamaha frames are comprised of heavy die-cast aluminum, which minimizes vibration transfer, allowing the timpano to project even more.

Framework being built onto timpani bowl.

Lastly, each timpano is put through a final inspection. This is when the drum is tuned to the expected range. The head is adjusted a few times each day to ensure that it’s seated properly, and the pedal is engaged multiple times so that it works smoothly. Every Yamaha timpano is played and thoroughly tested prior to being shipped. This way, it’s ready to go, right out of the box.

Closeup of a line of timpani being played.

The innovation you find in Yamaha timpani is a combination of skilled craftspeople, high-quality raw materials, and the latest in manufacturing techniques and technology, borne from years of research and development. From the symphony hall to the band room, the football field to the recording studio, there is a set of Yamaha timpani for every application.

Also check out these related blog articles:

A Brief History of Yamaha Timpani

Anatomy of Timpani

Buying New Timpani? Here’s What You Need to Know

How to Change Timpani Drum Heads

Timpani Maintenance

Caution! Are You Moving Your Timpani Correctly?


Click here for more information about Yamaha timpani.

Tips for Playing Nylon-String Guitar

As a musician, I rely on my cache of instruments to create the tones and textures needed for each individual recording session, project and performance.

Could I play most pieces of music on just one guitar? Probably, but certain instruments produce tones that are more appropriate for certain genres of music, arrangements and mixes. That said, choosing the right acoustic guitar will largely come down to experience, taste and price. Let’s take a look at some of the most important factors that differentiate between guitar types.

Size

Body shape and size have a major impact on an acoustic guitar’s projection and tonality. A compact parlor-size instrument, for example, is great for finger-style passages and blues slide, while a larger concert-size model is excellent for fingerpicking, strumming and accompanying a singer-songwriter.

Sound

In general, steel-string guitars produce a bright, focused sound, while nylon-string guitars are typically softer- and warmer-sounding. Of course, nylon-string guitars can be quite dynamic when played in flamenco and Latin styles, but generally speaking these instruments will have less presence than their steel-string cousins.

A big factor in this is the type and combination of tonewoods used. Quite often, classical guitars will have tops made of cedar, as opposed to spruce, which is typically used for steel-string acoustic instruments. Traditional classical guitars also usually feature “chunky” necks and wider fingerboards with a flat radius. (Yamaha NTX nylon-string models are the exception; they offer a neck profile closer to that of an electric guitar.)

String Tension

String tension is considerably less on nylon-string guitars than on steel-string models, meaning that the strings will be softer on the fretting hand fingertips. (We all know how painful it is to practice before we’ve built up those hard skin calluses!) That’s one reason why nylon-string guitars are particularly well-suited for beginners.

Musical Genre

Steel-string acoustic guitars personify the sound of country music, and are also frequently used in pop and rock. Nylon-string guitars have been used throughout history in almost every musical genre. We may associate it more with classical, flamenco, Latin, jazz and folk music, but a well-played nylon-string guitar can sound exceptional in any genre, when used in the right context.

Nylon-String Guitar Playing Tips

1. Use the correct picking hand technique. I’m a bit of a traditionalist when it comes to picking techniques on nylon-string guitar. For one thing, I use my fingers almost exclusively — even for single-note lines — as opposed to using a pick. For that reason, I keep my nails long in order to achieve a clean and crisp sound for chordal parts and subtle melodies … and if I strum the strings, I use the back of my fingernails and thumbnail in a downward and upward motion, similar to the way a pick held between the fingers and thumb is used.

Of course, you can use a pick if you’d like to, but I think you’ll find it takes away from the desired tonality of the instrument. However, if you have an intricate solo line that’s just too hard to articulate with your fingers, try using a medium-heavy or extremely heavy nylon pick that allows for a smooth sound and string attack, as if you were using your fingers.

2. Use the correct fretting hand technique. For the cleanest tones, it’s always best to keep your fretting hand fingers directly facing the fretboard. You should find this a little easier to achieve on a nylon-string guitar than a steel-string model due to the wider fretboard and string spacing.

Also, when playing a nylon-string, vibrato on single notes is typically achieved with a side-to-side motion instead of the up-and-down motion used on steel-string guitars.

3. Use the right touch. Generally speaking, you’ll want (and need) to play with a lighter touch on a nylon-string than on a steel-string. Take some time getting used to this new dynamic before embarking on a gig or session.

4. Set the action sufficiently high. Playing a nylon-string guitar with a low action will require a seasoned playing technique to produce a clean sound without the strings slapping against the fretboard in an undesirable fashion.

5. Choose the right strings. Gauges of nylon strings are measured in tension rather than thickness; you can choose between light, medium, normal, medium-hard and hard tension strings. If you are new to the classical guitar, I’d recommend choosing normal tension strings until you develop a style that requires an alternate string set. If your style requires a more dynamic sound, or you have extremely strong hands, try using a harder tension string.

By the way, nylon strings won’t come supplied with ball-ends to secure the string at the bridge. A tying technique is employed for this, and it may take some time to get it right. Nylon strings will also need to be fed through the slot-head design and secured around the tuning post to stop the strings from slipping once tuned. (See illustrations below.) You’ll notice that the silver-wound sixth, fifth and fourth strings will stay in tune overnight, but the other (all-nylon) strings often detune quickly when not in use.

Calvo Neck

Calvo Fret

The Video

All the guitar parts in this video were performed on nylon-string instruments. The finger-style rhythm parts in the video were played on my trusty Yamaha NCX1200R (sadly now discontinued) — its larger body size and distinctive tonewoods yield an extremely well-balanced, warm sound for chordal passages. I double-tracked those parts direct to the recording software, where I added some light compression and ambient reverb.

The dynamic intro and top-line melodies in the video were played on a Yamaha CG-TA TransAcoustic nylon-string guitar. Its smaller body size and slightly higher string tension were perfect for those brighter, expressive phrases that stand out from the underlying rhythm part. I miked the CG-TA at the neck join using a pair of condenser microphones in an X/Y pattern, using a touch of the onboard hall reverb for the melodies to give those single-note lines more sustain and acoustic presence in the mix.

In the introduction, I’m articulating the descending and ascending legato scale runs with my thumb and fingers, but I’m playing the chord accents with the nails on my picking hand. This downward fast arpeggiation allows the notes in each chord to ring out distinctively, from low to high.

The melodies in the main body of the piece are also articulated with my picking-hand fingers and thumb. I’m outlining the Fma7(#11) and E7 chords with double-stop sixths to accentuate that E Phrygian modality. The Phrygian mode is often used and associated with Latin styles for its exotic sound.

The Guitar

Acoustic guitar in a park setting.
Yamaha CG-TA TransAcoustic guitar.

The CG-TA features an ovangkol back and sides, an Engelmann spruce top, and a rosewood fingerboard and bridge. For those of you who aren’t familiar with this technology, TransAcoustic guitars feature onboard effects that are available even when the guitar isn’t plugged in (they appear at the instrument’s output jack too, courtesy of the built-in piezo pickup), making them perfect for ambient inspiration anywhere you go. These effects include sweepable room and hall reverb, plus a dedicated chorus that adds anything from subtle to extreme amounts of modulation to the sound.

The Wrap-Up

Every guitar player should own a distinct palette of instruments, as tonal options and variations will quickly become a part of your unique sound. Adding a nylon-string guitar to your arsenal will require (and inspire) new ways of performing, but you’ll be rewarded with an expressive and eloquent “voice” that will help broaden your sonic horizons.

Photographs courtesy of the author.

Check out Robbie’s other postings.

Click here for more information about the Yamaha CG-TA TransAcoustic nylon-string guitar.

Join Our Educator Community!

You work tirelessly to bring music to more students, and that’s why Yamaha supports you as you bring the art of music-making to life.

Join our biweekly educator newsletter to receive a round-up of our latest articles and programs.

Here are the top 5 reasons to subscribe to the Yamaha Music Educator Newsletter:

  1. You’ll be joining over 14,000 of your peers to further fuel your passion for music education
  2. From recruitment to teaching tips, you’ll receive the tools you need to boost your program
  3. Be the first to know about the latest professional development opportunities available to you
  4. Stay up-to-date with our latest instrument maintenance guides
  5. Ignite creativity in your musical classroom with new activities and worksheets
To get you started, check out three of our most popular articles enjoyed by music educators:

We hope that the real-world information that you will soon be receiving will energize your creativity as you continue to build your program. Here’s a sneak peek at what you can expect!

Sign Me Up

We’d love to hear from you, let us know what you’d like to see in future newsletters.

Contact Us

Case Study: Use Intellectual Discomfort to Expand Music Offerings

Music teachers are unique individuals, but they often share a few common traits.

If you asked them why they chose to teach music, you’ll often hear that they had an incredible experience growing up in their school music programs. Many will point to a former teacher, an experience or a collection of experiences that guided them in their career choice.

A Preference for Teaching What You Know

All music educators want to give their students musical experiences that are just as good as, if not better, than the one they received. This is where an important split forms. Some teachers’ experiences were wrapped around their concert band, string orchestra or concert choir. For others, it was their jazz ensembles. And still others point to their experiences in show choir, pep band, marching band, pops string, etc.

Platteville High School's 2021 senior music students during their annual senior trip. Often, teachers are intrinsically driven to make the favored ensemble from their past the highest quality possible because they have such a clear picture of what they want, they know what success looks like, and they have a strong connection to that particular ensemble.

In my case, I had fond memories of my concert band and marching band experiences. When I started in my current position at Platteville High School in Wisconsin, I hit the ground running and made changes to those portions of the music program. It was easy for me to identify topics that needed to be taught with a fresh perspective, and, more often than not, I knew what I wanted and how to do it. After a short time, my concert and marching programs looked uniquely different than they did prior to my arrival. Members of the community were coming to me and commenting on how they noticed and appreciated these changes, and I felt good about the direction we were headed.

I assume other music educators have probably had a similar experience in their own programs.

From Cruising Attitude to Discomfort

I quickly reached a spot, which I refer to as “cruising altitude,” with my program. However, I quickly became dissatisfied with the idea of maintaining. I had never faced this before. I suddenly realized that I didn’t want to have a great program, I wanted to build a great program.

This brought me some alarming insight: I wanted to improve the quality of my program but I didn’t know how. I brought the program up to my minimum expectations, but I had exhausted my knowledge and experience. I was faced with the reality that although I had a desire to continue growing, improving and providing opportunities for my students, I had run out topics that I felt comfortable teaching.

I had reached the end of the sidewalk, and I was faced with a decision. Do I settle for what I had already achieved or do I enter the unknown? If I continued forward, I would be forced to teach topics as I learned them in real time. Said another way, I would be required to live in intellectual discomfort.

Embrace Your Shortcomings

The idea of living in intellectual discomfort isn’t well-loved. Teaching topics that you are intellectually uncomfortable with is horrifying! Upon the realization that I would be embarking on a journey into the unknown I was, well, uncomfortable.

My shortcomings fell into three categories:

    1. I was stretching myself past my deepest understanding,
    2. I hadn’t received any formal training,
    3. Or worst of all, I hadn’t received training AND I had zero hands-on experience.

I knew that I would run into scenarios where I wouldn’t have the answer on hand or where a student would know more about a topic than I did.

First, I lacked a depth of knowledge regarding jazz. Second, I wanted to enrich the curriculum for my marching percussion and color guard sections. While I had some experience with these topics, I was woefully unprepared to teach these groups myself. Finally, I wanted to delve into the world of digital music production — something I knew essentially nothing about and had no experience with whatsoever.

Diving into Jazz

I waded into these topics by swallowing my pride and seeking information from people with more experience and knowledge than me.

I attended workshops on how to listen to and digest jazz music, and then I spent multiple hours each day listening to different jazz artists. I sought out jazz clinicians and paid them to come to my school and work with my jazz band, and while they worked with my group, I vigorously took notes in the background much like a practicum student — in full view of my students. I subbed in rehearsals with local jazz bands whose skills drastically outpaced my own to see the real application of the skills that I was learning.

Slowly, my eyes started to open to how vast my lack of understanding actually was. I graduated from not knowing what I didn’t know to knowing what I didn’t know — a huge step!

Specialized Staff for Drumline and Color Guard

As the marching season approached, I began to look around the country at what other successful programs were doing. I realized that although the schools around me were doing good things with their marching bands, this focus narrowed my vision to look at models exclusively based on proximity.

I noticed that the strongest programs had specialized instructors for color guard and drumline. The best programs did not have a single instructor doing everything because those instructors had come to the conclusion that they couldn’t be experts in every area.

I decided to follow suit and appealed to my administration for support to give our students a richer marching band experience. When I laid out my plan, the administrators were open to the ideas and supported my recommendation to bring in additional instructors. This was largely thanks to my earnest effort to offer more to students rather than easing the burden on myself.

Digital Music Outreach

The most formidable challenge on my list, digital music production, started with the consideration that modern music education needed to pivot to match what modern musicians were doing. Having zero knowledge on the matter, I drew a terrible sketch of a floor plan of what I thought a recording studio looked like. I pitched the idea and the drawing to my principal, who was interested but skeptical because no school in our area offered anything remotely similar. He wisely saw that I had heart but not much more.

Hopeful, I did what anyone would do. I Googled every term I could think of and quickly realized that I couldn’t learn everything on my own. My colleague and I began to reach out to recording studios for help in creating this new course on digital music production. Not only were these artists willing to help, they explained everything to us from construction of their physical spaces to recommending types of hardware and software.

About this time, I began my master’s degree at the University of Illinois and I took a course on digital music production and modernizing music curriculum. This further opened my eyes to the possibilities of a music production course at our school. By this time, we were able to secure several grants to cover the cost of converting a storage room into a recording studio. Every step of the way, we consulted with musicians who knew far more than we did.

Caption: Platteville recording studioIn the fall of 2019, after two years of learning, consulting and writing grants, we had a recording studio in our school! I remember feeling confident that I knew what I didn’t know on the first day of my Digital Audio Production class. Little did I know that I was peering into a doorway of doorways!

This class has probably generated more humbling intellectual moments for me than the rest of my cumulative teaching experience. In my effort to build the plane while it was flying, I was forced to see that students had to be stakeholders in the design of the course. Not only that, I had to accept that students could meaningfully contribute toward teaching about new tools. Although it was uncomfortable, I welcomed when a student knew something I didn’t and wanted to share it with the class in a positive way.

In all these instances, the story was the same: I saw my shortcomings, accepted them, made them known to myself and my students, and used every available resource to move forward. There were uncomfortable moments along the way, and more than once, I worried that my boss would wander into the room and think that I was an ineffective educator. What I didn’t consider was that these intellectual risks that I took were signs of a strong teacher, not a weak one.

The Results So Far of My Intellectual Discomfort Experience

Four years of living in intellectual discomfort has radically changed my perspective as a teacher. My program grew in vast ways, but not in the ways that I expected.

Platteville High School's keyboard work stations in its digital audio classroom.For instance, our marching band went from a three-set to a 60-set show and started participating in the Wisconsin School Music Association’s State Marching Championship. Our jazz band split into two ensembles and won recognition at the University of Wisconsin Platteville Jazz Festival, a local competition, for the first time in decades. Two of our students were selected for the state honors jazz band — a first in school history. The pep band has exploded in popularity with the addition of a rock combo, and we have built strong relationships with the sports boosters and families of student athletes. Our concert program is tackling projects that extend far beyond the boundaries of the band room.

We have more students enrolled in music than we have had in quite a long time thanks to the addition of digital music production. We went from 29% our of student population enrolled in music during my first year of teaching to 33% in 2019.

COVID-19 threw us a curve ball — instead of 24 students, our digital music class could only accommodate 10 students during the pandemic. However, the administration has seen the value of the class and has asked us to build a Digital Audio Production 2 course.  

Shift Your Focus from Quantity to Quality

When I first started this process, I foolishly convinced myself that, like most music teachers, I should focus on enrollment numbers. As long as the number of students in concert band is high, my program is good. While there’s nothing wrong with increasing enrollment numbers, I understood that what truly matters — and what I truly wanted — was to improve the quality of the offerings. Seen another way, I shifted my focus from quantity to quality during this experience.

This shift resulted in several instances where I was incredibly uncomfortable teaching a particular topic. I’m not ashamed to admit that students have taught me things that I have now incorporated into my regular teaching.

I am also aware that I have a LONG way to go on almost every topic I’ve covered here. So, I’m excited at the prospect of putting myself in more uncomfortable intellectual situations!

Showing my students that it’s okay to be wrong and demonstrating what it looks like to be a lifelong learner are powerful teaching tools. Beyond that, I have noticed that my students are far more willing to open themselves to making mistakes as a way to improve. I firmly believe that this has led to a higher level of retention in my program.

If I were to summarize my entire experience with intellectual discomfort, this quote from Columbia University Professor Randall Everett Allsup (in “Popular Music and Classical Musicians: Strategies and Perspectives”) is the most applicable:

“I realize that discussions about music that include more than its structural components can make a music teacher feel suddenly unsafe and unmoored. But the lack of safety is not the same as danger. Predictability, in music and in teaching, is rarely a place of deep insight.”

My advice for music educators: Embrace your shortcomings and the challenges before you. It’s okay that you’re not the expert in the room all the time. Cruising altitude is comfortable, but intellectual discomfort is much more exciting and meaningful for you and your students.

Five Ways to Get From Noodling to Live Performance

I never, ever thought I’d play in a band. Or perform on stage for anyone. I never thought my time spent musing alone would extend past the four walls of my bedroom.

In the long run, maybe that’s what helped make it all happen.

I got my first guitar, a six-string acoustic, when I was a freshman in college. A few months beforehand, I’d seen a songwriter on TV, accompanying himself on guitar as he performed a Beatles song on the anniversary of John Lennon’s death. I watched as thousands in the audience were enraptured. “I need to learn how to do that,” I thought.

It wasn’t so much the act of performing live that drove my interest. Rather, I wanted to understand the instrument. I wanted to know what it was like to pluck an E-string and to have the sound ring out.

When I got that first axe, I honestly didn’t want to sign up for any lessons. I didn’t want to do anything but noodle away at my own pace, whenever and however I chose. I picked that guitar up and put it down some 50 times a day. If it had been a dumbbell I would have slowly turned my arms to Arnold Schwarzenegger’s.

Somehow, I ended up playing in numerous bands, recording dozens of songs in prestigious studios and opening for prominent, Grammy-winning acts on big stages. I swear, I never thought this would happen. But if I think about it, I know how it did.

Based on my personal experience, here are five tips for getting from noodling to performing. With these in the back of your mind, you too may end up becoming a musician … whether you wanted to or not.

1. Play Often

Yes, practice can be painstaking and arduous. And while it’s necessary at times, what’s more important is for you to keep your spirit up and your appreciation of music intact. If your practicing is breaking the will to move forward, something is wrong. Put down the intricate sheet music and learn a favorite TV theme song instead, or vice versa. Playing often is the key to improvement, but enjoying it is the key to playing often.

And what you play doesn’t have to be strenuous. For guitar players, it can just be putting your fingers on the frets and moving them around. To use a fitness analogy that a wrestler friend once told me, “All that matters is that you go to the gym. Once you’re there, whatever happens is fine.” Just go, then decide if you’re tired.

2. Be Silly

The best musicians in the world like to goof off, whether backstage, during rehearsal or even in the middle of a performance. So let yourself do it, too. Nothing should be totally serious. Stress can easily become your foe.

Musicians can often find new tricks or sonic phrases — even discover an otherwise unimagined spark — when just goofing off. Offering yourself the chance to literally “play” and take the pressure off is important. We can learn as much about our craft when we’re smiling as when our brow is furrowed.

3. Focus (Sometimes)

While enjoyment is paramount, when you’re feeling particularly studious, make sure to spend time on the basics. Mastering scales and key signatures, along with learning how to read tabs and sheet music, can lead to more options for you whether or not you decide to get together and play with others. Music is like any language; to be able to “speak” it, you need to learn some of the rules. There’s no need to overload yourself, but gaining a solid grounding in basic musical principles can go a long way.

4. Follow Your Curiosity

Along the way, if you feel a desire to play with other people — whether in a loose jam session or in front of a live audience — do it. Your curiosity and creative instincts will determine your level of investment in music, as well as your point of view in the art form. But remember: Just because you play on stage once doesn’t mean you have to repeat the experience if you dislike it. Similarly, just because you jam with someone, doesn’t mean you’re now in a band. Your time is just that: yours. Find the best environment for you.

5. Listen

Your ear will teach you a great deal. Listen to the other musicians you play with; listen to yourself as you noodle absentmindedly. But most of all, listen to your heart the whole way through.

Key Takeaways from FAQs on ESSER and GEER Funds

On May 26, 2021, the U.S. Department of Education released a Frequently Asked Questions (FAQ) on ESSER and GEER funds.

This document helps educators justify how and why they can access these funds for their program. There are 78 questions and answers about COVID-19 relief funds, and while some parts may seem very technical and dry (which they are…), I have pulled out some highlights and key takeaways that you can bring to your principal to access money for your program. As you may know, these funds provide schools with over $200 billion of emergency relief funds to address the impact of the COVID-19 pandemic.

The FAQ document is split into 5 sections:

    1. Overview of ESSER and GEER funds
    2. Reopening schools safely and promoting the health and safety of students, staff and the school community
    3. Advancing educational equity in COVID-19 response
    4. Using ESSER and GEER funds to support educators and other school staff
    5. Additional fiscal considerations

Click here if you need help decoding the acronyms used in this article.

Show Me the Money

The COVID-19 relief funds (CARES, CRRSA and ARP) give schools money to ensure a safe and healthy return to school, while addressing learning loss and establishing equity. ESSER specifies that there are 15 areas of “allowable use” in every state, and this FAQ clarifies how funds can be used.

“… allowable uses of funds and describe how these funds may be used to implement actionable strategies to meet the urgent needs of students and educators as LEAs and schools work to return to and safely sustain in-person instruction, address the educational inequities that have been exacerbated by the COVID-19 pandemic, and address students’ social, emotional, mental health, and academic needs. …

“The DOE encourages States and LEAs to use the funds described in this document to safely reopen schools, maximize in-person instructional time for all students, and provide opportunities to address the impacts of lost instructional time resulting from the COVID-19 pandemic. When making decisions about how to use ESSER and GEER funds, States and LEAs are encouraged to take into consideration how the funds can be used to address inequities, including focusing supports and services on students from low- income families, students of color, students with disabilities, English learners, students experiencing homelessness, children and youth in foster care, migratory students, children who are incarcerated, and other underserved students who have been disproportionately impacted by the pandemic.”

Before you start asking for funds, you should use these questions to determine if an activity is an allowable use of funds:

  • “Is the use of funds intended to prevent, prepare for, or respond to the COVID-19 pandemic, including its impact on the social, emotional, mental health, and academic needs of students?” 
  • “Does the use of funds fall under one of the authorized uses of ESSER or GEER funds?”

In reading the FAQ, it is apparent that the federal government wants these funds to concentrate on the safe reopening of schools for all students while maintaining safety protocols and advancing educational equity. While these funds have been available for over a year, most educators and even administrators are still learning about how these funds can be used as well as how to access them. We need to do our part to make sure these funds will be used to support music programs in our schools.

Key Takeaways

I want to spotlight a few specific questions. As you begin to draft your plan, these FAQs will help you address concerns from your administrator.

C-2. How may an LEA use ESSER and GEER funds to support students who have lost instructional time due to the COVID-19 pandemic?

ESSER and GEER funds may also be used to provide a variety of activities and supports to help improve the achievement of students to address the impact of lost instructional time due to the COVID-19 pandemic. For example, funds may be used for costs associated with evidence-based approaches to accelerating learning, high-dose tutoring, leveraging technology to provide embedded assessment and differentiated instruction, diagnostic and curriculum-embedded assessments, and extending the school day or year to provide additional time for student learning, enrichment, and support. These costs may include supplementing the salaries of educators and other qualified personnel to perform additional services. ESSER and GEER funds may also be used to support the costs associated with hiring additional teachers and teacher aides to provide intensive support to students. ESSER and GEER funds may further be used to provide professional development to educators on research-based strategies for meeting students’ academic, social, emotional, mental health, and college, career, and future readiness needs, including strategies to accelerate learning without remediation or tracking.

Music educators can use these funds for summer opportunities including:

  • Marching band sectionals
  • Beginning band or string classes
  • Producing a musical
  • Teaching music technology classes (notation, writing beats, film or video game scoring)
  • Bucket drumming ensembles
  • General music instruction with recorders or pianicas

Not only can you teach these classes, but these funds can also be used to hire private lesson teachers and coaches.

 C-3. How may an LEA use ESSER and GEER funds to support students’ social, emotional, mental health, and academic needs, including by hiring support personnel such as nurses, counselors, and social workers?

An LEA may use ESSER and GEER funds, including the 20 percent of ARP ESSER funds set aside to address the academic impact of lost instructional time, to support students’ social, emotional, mental health, and academic needs, including by implementing school-wide strategies that enhance supports and interventions for students as well as targeted assistance for students who need such supports. For example, an LEA might hire additional personnel to prioritize student well-being and health by increasing student access to teachers, nurses, guidance counselors, social workers, and other support personnel.
horns marchingband pexels curioso photography 343683      An LEA might also address the needs of students arising from the COVID-19 pandemic by using ESSER and GEER funds to implement or expand arts programs, such as music programs, including purchasing instruments; expand sports programming so more students can participate; or initiate clubs, such as a robotic or STEM club.
LEAs should also work to ensure that schools are implementing instructional practices that are culturally responsive and that incorporate trauma-informed pedagogy in response to the COVID-19 pandemic.

We all know the benefits of music education and how it can support our students’ social, emotional and mental health needs. Why not use this money to start or expand your music programs? Don’t forget that purchasing additional musical instruments and mouthpieces for each student eliminates sharing and falls under allowable use #5 of ESSER funds.

C-25. What kinds of summer programs may ESSER and GEER funds support?

ESSER and GEER funds may provide broad support for summer learning and enrichment programs. Given that this summer affords students a critical opportunity, LEAs should consider a variety of options for procuring summer services with ESSER and GEER funds, including programs run by non-profit or community organizations as well as those run by the LEA. Effective summer programming can address students’ social, emotional, mental health, and academic needs through a combination of activities that include strong partnerships with community-based organizations and other summer providers, including summer camps. These partnerships can help to sustain these programs and can also support programs in rural and remote communities.

Partnering with a non-profit or community arts-based organization can be beneficial for both your students and the community.
 D-1. May an LEA use ESSER and GEER funds to stabilize and support the educator workforce?

Yes. An LEA may use ESSER and GEER funds to stabilize and support the educator workforce and to support the conditions that will allow schools to return to in-person instruction. This may include using funds to pay teacher salaries and avoid layoffs. Funds may also be used to address educator shortages exacerbated by the pandemic by hiring new teachers, including expanding student access to a well- prepared and diverse educator workforce.

If All Else Fails, Don’t Forget Allowable Use #1

The federal government has allocated more money than ever before, and school districts are struggling to keep up with all aspects of the COVID-19 federal relief funds. Over the past months, educators have told me that their district says that “music and the arts don’t fit into the allowable uses.” This is not true. The language for allowable use #1 of the ARP Act states that funds can be used for:

Any activity authorized by the Elementary and Secondary Education Act of 1965.

ESEA includes the Every Student Succeeds Act (ESSA), and both spell out that music is a part of a “well-rounded education.”

Action Items

ESSER and GEER funds can be used to pay teacher salaries and avoid layoffs. We must maintain our programs and address our students’ social, emotional and mental health needs. Start now, do your homework and meet with your supervisor to make sure your voice is heard to determine how these funds can be used to support your program.

Additional Resources

Frequently Asked Questions: Elementary and Secondary School Emergency Relief Programs Governor’s Emergency Education Relief Programs

Roadmap to Reopening Safely and Meeting All Students’ Needs

Decoding Acronyms

  • ARP Act = American Rescue Plan Act
  • CARES Act = Coronavirus Aid, Relief, and Economic Security Act,
  • CRRSA Act = Coronavirus Response and Relief Supplemental Appropriations Act
  • DOE = U.S. Department of Education
  • ESEA = Elementary and Secondary Education Act
  • ESSA = Every Student Succeeds Act
  • ESSER = Elementary and Secondary School Emergency Relief
  • GEER = Governor’s Emergency Education Relief
  • LEA = Local Education Agency (aka School District)
  • SEA = State Education Agency (aka State Department of Education)

Allowable Uses of ESSER and GEER Funds

ESSER spells out “allowable uses” in each of the COVID-19 federal relief funds. Below is the list of 15 allowable uses from ESSER III, which is part of the ARP act: 

    1. Any activity authorized by the ESEA, the Individuals with Disabilities Education Act (IDEA), the Adult Education and Family Literacy Act (AEFLA), or the Carl D. Perkins Career and Technical Education Act of 2006 (Perkins).
    2. Coordination of LEA preparedness and response efforts with state, local, tribal, and territorial public health departments, and other relevant agencies, to improve coordinated responses with other agencies to prevent, prepare for, and respond to coronavirus.
    3. Activities to address the unique needs of low-income children or students, children with disabilities, English learners, racial and ethnic minorities, students experiencing homelessness, and foster care youth, including how outreach and service delivery will meet the needs of each population.
    4. marching band 4758762 1280Developing and implementing procedures and systems to improve the preparedness and response efforts of LEAs.
    5. Training and professional development for LEA staff on sanitation and minimizing the spread of infectious diseases.
    6. Purchasing supplies to sanitize and clean the facilities of an LEA, including buildings operated by such agency.
    7. Planning for, coordinating, and implementing activities during long-term closures, including how to provide meals, technology for online learning, guidance on IDEA requirements, and ensuring other educational services can continue to be provided consistent with all applicable requirements.
    8. Purchasing educational technology (including hardware, software, and connectivity) for students served by the LEA that aids in regular and substantive educational interactions between students and their classroom teachers, including low-income students and children with disabilities, which may include assistive technology or adaptive equipment.
    9. Providing mental health services and supports, including through the implementation of evidence-based full-service community schools.
    10. Planning and implementing activities related to summer learning and supplemental afterschool programs, including providing classroom instruction or online learning during the summer months and addressing the needs of low-income students, students with disabilities, English learners, migrant students, students experiencing homelessness, and children in foster care.
    11. Addressing learning loss among students, including low-income students, students with disabilities, English learners, racial and ethnic minorities, students experiencing homelessness, and children in foster care, of the local educational agency, including by
      • Administering and using high-quality assessments that are valid and reliable, to accurately assess students’ academic progress and assist educators in meeting students’ academic progress and assist educators in meeting students’ academic needs, including through differentiating instruction.
      • Implementing evidence-based activities to meet the comprehensive needs of students.
      • Providing information and assistance to parents and families on how they can effectively support students, including in a distance learning environment.
      • Tracking student attendance and improving student engagement in distance education.
    12. School facility repairs and improvements to reduce risk of virus transmission and exposure to environmental health hazards, and to support student health needs.
    13. Inspection, testing, maintenance, repair, replacement, and upgrade projects to improve the indoor air quality in school facilities, including mechanical and non-mechanical heating, ventilation, and air conditioning systems, filtering, purification, and other air cleaning, fans, control systems, and window and door repair and replacement.
    14. Developing strategies and implementing public health protocols including, to the greatest extent practicable, policies in line with guidance from the Centers for Disease Control and Prevention for the reopening and operation of school facilities to effectively maintain the health and safety of students, educators, and other staff
    15. Other activities that are necessary to maintain operations and continuity of services and continuing to employ existing staff.


Yamaha is an active advocate for music education, and we want to empower music educators to strengthen their programs in any way we can. Please register for the Yamaha Educator newsletter to read up on advocacy, professional development, information about instruments, resources, partnerships in education and more. Join the Yamaha Music Educator Community on Facebook or email us at educators@yamaha.com.

How to Connect a Sound Bar to a TV with HDMI® ARC

When the HDMI® 1.4 spec was introduced back in 2009, it included a new protocol designed to significantly improve the audio experience for television viewing: ARC, which stands for Audio Return Channel.

HDMI ARC makes it possible to simplify your TV setup while improving your ability to configure and control your system. Ready to learn more? Read on …

ARC Basics and Benefits

To make an ARC connection, simply plug an HDMI cable into the dedicated ARC jacks on both devices. As shown below, these are usually clearly labeled:

Closeup of rear panel.
The HDMI ports (circled in red) on the Yamaha YAS-109 sound bar.

One of the key benefits of ARC is that it supports bi-directional audio through a single HDMI cable. That means the audio can travel both “downstream” (from your TV to your sound bar or AV receiver) and “upstream” (from the sound bar or AV receiver back to the TV), assuming all components are ARC compatible. As a result, you have a variety of options for interconnecting the various devices you’re using.

Another benefit is fewer cables, since you don’t need to use a separate optical cable to send audio from your TV to your sound bar or receiver. With ARC, a single HDMI cable carries both audio and video.

As an example, let’s say your home audio setup consists of a smart TV, a Blu-ray player, a game console and an ARC-capable sound bar such as the Yamaha SR-C30A, SR-C20A, SR-B20A or YAS-109. As shown in the illustration below, simply use HDMI cables to connect the Blu-ray player and game console to the TV. With this configuration, the HDMI ARC connection will carry all the audio from your devices to your sound bar, plus you’ll also be able to control all the source-switching from your TV’s remote.

Diagram.
One way to configure HDMI ARC.

You can use the remote for even more functions by engaging an HDMI feature usually called Consumer Electronics Control (CEC), though different manufacturers refer to it by a variety of names. This allows you to use a single remote to control power on/off, audio level and other essential functions of any ARC-connected devices. So, with HDMI ARC, not only will you have less cables, but fewer remotes to deal with.

However, the CEC feature isn’t necessarily plug and play. You typically must go into your TV’s settings to activate it. Not all remotes or TVs offer this feature, so make sure the one you have (or are considering buying) does.

Extra Flexibility

ARC’s two-way audio capability gives you additional setup flexibility. For example, you could use your sound bar as a hub — as long as it supports ARC and has multiple HDMI inputs.

To do that, you’d connect the TV to the sound bar using ARC and plug any game controllers and Blu-ray players to the HDMI inputs on the sound bar. Now, you’ll not only have audio going from the TV to the sound bar, but video from the game controller and Blu-ray player getting passed through from the sound bar to the TV:

An alternate way to configure HDMI ARC.

This kind of setup can be really helpful, particularly if you have a wall-mounted TV where connected HDMI cables are run through holes drilled in the wall.

Yet another alternative setup is possible if your home setup includes an AV receiver that supports ARC, such as the Yamaha RX-V6A. You could use the receiver as the hub, connecting it to the TV through ARC with one HDMI cable and plugging Blu-ray players or game consoles into the receiver using HDMI. In case you’re wondering, ARC doesn’t have anything to do with the functioning of Blu-ray players and game consoles, so there’s no need to worry about their compatibility.

View of front of unit and remote control
The Yamaha RX-V6A AV receiver.

ARC vs. Optical

Even if you’re happy with using an optical (TOSLINK) cable rather than ARC for sending audio from the TV to your sound bar or receiver, it’s worth comparing the two. You might change your mind.

Both formats are superior in sound quality to analog (RCA cables). Both can handle compressed, multichannel audio up to 5.1, and neither can handle 7.1 audio, although an advanced version of ARC called eARC can. (More on this later.)

Optical cables have better shielding than HDMI and are therefore less susceptible to interference. However, ARC is superior to optical when it comes to bandwidth — that is, the amount of data it can handle at a given time. As a result, it’s able to support a couple of Blu-ray formats (specifically, Dolby® TrueHD and DTS-HD Master Audio™) that optical can’t.

One downside to ARC is that audio coming from a set-top box or other peripherals can sometimes get slightly delayed, which can cause annoying lip-syncing issues. Also, if your system requires cable runs of over 15 feet, you may have signal loss problems with HDMI.

Hop Aboard the eArc

HDMI 2.1, announced in 2018, brought a significant improvement to the ARC standard. It’s called eARC (the “e” stands for “enhanced”), and it has more robust capabilities than the original ARC.

If you have an HDMI 2.1-compatible TV and audio device (for example, a Yamaha RX-V6A AV receiver), you can take advantage of more powerful audio formats. That’s because eARC supports uncompressed 192kHz/24-bit audio, along with 5.1- and 7.1-channel uncompressed audio. It also supports several compressed formats, including DTS-HD Master Audio, DTS:X®, Dolby TrueHD and Dolby Atmos®.

Another advantage to eARC is that it includes lip-sync compensation, which takes care of the sync issues you may encounter when using ARC.

It’s worth noting that, to enjoy the full feature-set of eARC and HDMI 2.1, you’ll want to purchase new Ultra-High-Speed HDMI cables. HDMI 2.1 and eARC are backward-compatible, so you can use your old cables but won’t reap all the benefits of the latest technology.

Ready to Use

Manufacturers have included ARC on HDMI TVs and audio devices for quite a few years now, so most likely, your gear is compatible. To find out, just look for the word “ARC” on one of the HDMI ports on your TV and sound bar or AV receiver.

If you’re purchasing new gear for your home theater, be sure to look for HDMI 2.1-capable products. They’ll allow you to utilize eARC technology, which can significantly raise the multichannel audio capabilities in your home theater.

Check out these related blog articles:

Raiders of the Lost eARC

HDMI 2.1: What It Means for Gear and Gamers

There’s a Sound Bar for Every Space and Budget

Virtual Surround Sound and Yamaha Sound Bars


Click here for more information about the Yamaha SR-C20A sound bar.

Click here for more information about the Yamaha SR-B20A sound bar.

Click here for more information about the Yamaha YAS-109 sound bar.

Click here for more information about the Yamaha RX-V6A AV receiver.

Think Like a Drummer, Part 2

In Part 1 of this two-part series, I discussed the pros and cons of using MIDI and audio loops to create realistic-sounding drum parts. In this installment, I’ll show you techniques for putting your drum track together.

It’s About Time

Whether it’s MIDI or audio loops you’re using, the more you can think like a drummer when putting the parts together, the more realistic the results will be. For audio loops, find a song grouping in a loop collection that fits the feel of your song and is close or identical in tempo. If you’re using MIDI loops, you’ll need to time-stretch it to make it fit. (See Part 1 for more info.)

When you’re assembling audio loops, it’s critical to have your grid snap on and set to bars. That way, you can drag and drop loops, end to end, and they’ll stay in time with the song.

Screenshot.
A song-length audio-loop drum track.

The Sum of the Parts

A real drummer generally plays different variations of a particular feel or style for each song section. If you want authenticity, you need to replicate that concept in your loop part. For example, verses are typically simpler or lower in energy than choruses. And if a song has a bridge, it will usually have a feel that’s different from the rest of the song, which means the drum part will change as well.

By the way, there’s nothing wrong with choosing a “basic beat” loop for each song section, then using the same ones each time those sections repeat — as long as you create variety with fills. That said, if you have a slight variation in, say, the second verse, it might make sense to use it again for a verse later in the song.

Screenshot.
A MIDI drum track made from loops.

Fill ‘Er Up

Whether you’re using audio loops or a MIDI drum instrument, it’s essential to have a good selection of fills on hand before you put your part together. Drummers almost always play a fill in the last measure of a section to help propel the song into the next part, and the fills are often only in the second half of that last measure.

If you’re using a MIDI virtual drummer such as Groove Agent SE5 in Steinberg Cubase, you can easily grab a fill from another song. Because it’s MIDI, the instrument will play it with the same kit sounds, so it should fit nicely if it’s stylistically similar … assuming the mapping (i.e., the placement of samples on specific MIDI notes) is the same. If it’s different, you may have to move certain notes in the loop so the correct samples get triggered.

With audio loops, using fills (or any loops, for that matter) from outside the song grouping is next to impossible. That’s because kits from different collections are recorded in different studios with different drummers and won’t sound at all alike.

Often, it can be difficult to find enough fills, because the creators of the collections didn’t provide enough of them for a full-length song. In those cases, you’ll have to repeat some of them. When that happens, try to space the repeats apart as much as possible. Listeners are less likely to notice a fill that’s used in the first and fourth verses than one that’s used in the first and second verses.

Another problem with fills from loop collections (both audio and MIDI) is that they’re often a full measure long and too busy. They might sound cool on their own, but in many songs they’ll seem like overkill.

Sometimes you can successfully use the last two beats from a measure-length fill. If it sounds good, replace the first half of the measure with a repeat of the basic beat you’re using for that section.

In the following graphic, you’ll see part of an audio loop drum track. The purple is the basic beat for the verse; it lasts four measures and has a little flourish at the end. After that, the same section was copied and pasted, but the last measure was replaced by a fill consisting of two beats of the basic beat (shown in green) and the last two beats of a fill (shown in red):

Screenshot.
The second half of a fill (in red) inserted.

Whenever you’re assembling audio loops, if you hear any glitches at the edit point, a short crossfade will often smooth it out. Just be careful not to make it so long that it lessens the impact of the hit.

Adaptation

Often, you’ll find you have a loop that works with your song’s basic groove, but needs to be adapted in places. With MIDI loops, it’s easy to make changes. But with audio loops, it’s not always possible to edit and move drums or cymbals within a loop. When it is doable, you often must finesse the edits to make them sound realistic.

For example, let’s say your song has an eighth-note anticipation to start the measure, and you want to move the bass drum back from beat one of the loop so it’s hitting in the right place. In this graphic representation, the beat you want to move is at the left edge of the blue event, circled in red:

Screenshot.

Here’s how to accomplish it:

1. Turn the grid snap off, select just the bass drum, and split it to make it a separate event:

Screenshot.

2. With the grid snap set to sixteenth notes, drag the bass drum hit earlier by an eighth note:

Screenshot.

3. You now have a space between where the bass drum is, and where it was. Listen to how it sounds in the context of the song. If there’s a noticeable dropout, you can try lengthening the right edge of the event, revealing more of the audio after the edit point:

Screenshot.

A Crash in Time

Many audio loops have crashes on the downbeat (beat 1). But, inevitably, you’ll run into places where you don’t have a version of the loop you want to use that has a crash.

An easy solution is to create a separate stereo audio track for your crashes (and any other drum samples that need to overlay the main loop track). Typically, a loop collection will give you individual samples for all the kit elements. Find crash samples you like (even if they’re from a different collection) and place them in that second track, so they’ll play along with the loops:

Screenshot.
Create a separate track for your crash samples.

Mixing with Audio Loops

With MIDI virtual drummers like Groove Agent SE, adjusting the mix of the kit is usually easy because most have powerful internal mixers. But with stereo audio loops, you have no way to address kit elements individually. And, although they’re usually well mixed (at least when heard on their own), there will be times when the loop simply doesn’t work so well in context with the rest of your mix.

If you need to make a simple mixing change, such as raising the bass drum or reducing the snare, you can try using EQ. The idea is to boost or cut a frequency range corresponding to the kit element you’re trying to affect, as shown in the illustration below:

Screenshot.
Boosting the kick in an audio loop with EQ.

This type of adjustment is almost always a compromise, but can sometimes work. If you want complete mixing control of drum loops, you must find multitrack ones. There are multitrack collections available, but there are fewer to choose from than the large number of stereo loops available.

A Strong Foundation

It’s best to record the other instruments (except for reference tracks) in your song after you have the drum loops in place as a groove reference. Drums are foundational to most musical styles, so you want to overdub to them whenever possible. If you record everything to a click and then add the drum loops later, you may discover that other rhythmic elements (i.e., rhythm guitars, keyboards and bass) aren’t locked in with the loops.

The reason is that every drummer interprets time in a slightly different way, and those variations are what create a drummer’s “feel.” Some play a tiny bit ahead of the beat, others a little behind it (see Watts, Charlie). So, if you record your instrument parts to the metronomic rhythm of the click, the musicians will be using a different rhythmic reference and won’t be able to make their parts groove with the drum loops.

You don’t need to have your entire drum track in place before you start overdubbing instruments (although that’s ideal), but you should at least have a basic beat chosen from a song in a loop collection. Create a temporary drum track that repeats that beat throughout the song so you can record your other parts to it.

The Last Hit

In situations where recording a live drummer isn’t practical, drum loops — whether MIDI or audio — are the next best thing. You’ll have more flexibility with MIDI loops but more authentic sound and feel with audio.

Whichever you choose, keep in mind the techniques described in this article. They’ll make it easier to put together authentic-sounding drum parts.


Check out our other Recording Basics postings.

Click here for more information about Steinberg Cubase.

Case Study: A 3-Week Fine Arts Exploratory Course More than Doubled Band Enrollment

In less than three weeks, the Ralls County R-II School District in Center, Missouri, more than doubled its beginning band program.

Before Director of Bands Douglas Schaffer, a 2021 Yamaha 40 Under 40 music educator,  joined the district in 2019, only 24% of 6th graders signed up for band at Ralls County Elementary. Though they were required to participate in fine arts, many students favored art or general music. (Choir becomes an option in 7th grade, and the district does not have orchestra ensembles.)

After a mandatory exploratory fine arts program was launched at the start of 6th grade, band enrollment rose to more than 60% and almost 80% of those students remained in band when they transitioned to Mark Twain Junior High. Schaffer sent home this letter to parents to explain the exploratory course.

“Elementary art translates into middle school art, but elementary music does not necessarily translate to playing an instrument,” Schaffer says. “When most kids are coming into 6th grade, and they’re looking at picking their elective, they have this big mental block about band. … One of the things I heard [from students was], ‘I don’t know how to play an instrument.’ … [Because of] those preconceived notions, I wasn’t getting them in the door. I had to show them that they can actually have success on an instrument.”

Program Implementation

With an average of 60 students in each grade at Mark Twain Junior High, the 6th grade students separate into four groups and rotate between band, art, general music and gym during the third hour of each school day. After 2½ weeks, students decide which fine arts class to keep.

“I demonstrate the instruments [flute, clarinet, trumpet, trombone and percussion] for them and get the mouthpiece in their hands,” Schaffer says. “I’m able to get them to test and try out those instruments. … It’s actually showing the kids that they can make a sound on the instrument.”

At the start of 2019, Schaffer rotated and sprayed down four or five mouthpieces per instrument for each class. With COVID-19 safety guidelines in the fall of 2020, the school used CARES Act funding to purchase 20 Wind Instrument Try-Out Kits that include a simulated flute headjoint, woodwind mouthpiece with synthetic reed, and brass mouthpiece with two cup sizes. Made of plastic and rubber, the fake mouthpieces and reeds could be washed in the dishwasher each day.

“That made people a lot more comfortable than sanitizer spray,” Schaffer says. “These will have some longevity. We’ll be able to keep them for years to come and use them often.”

Students’ ability to try the instruments before they commit accounts for 90% of the exploratory program’s success, Schaffer believes. The other 10% happens through relationship building. “They need to be convinced that they want to commit the next year … and potentially the next seven years [with me],” he says.

This chart shows the growth in 6th grade band students.

Schaffer believes that the exploratory program could be implemented at any school, increasing or decreasing its duration depending on the number of total students in the grade.

Multiple Points of Contact

Though an instrument fair could accomplish similar goals — and the district will be hosting one this spring — Schaffer says that some students would slip through the cracks. With an instrument petting zoo or fair, “you only get the [kids] who want to go,” he says. “You don’t catch every student. The advantage of the exploratory class is that I get to put a horn in the face of every 6th grader in the school district.”

young female trumpet player sitting on steps and practicing Schaffer and the art teacher now start the recruiting process by visiting 5th grade classes together. “[The art teacher] takes a couple examples of artwork, and I do a quick breakdown on [the process of band].”

In addition to showing 5th grade students the instruments, Schaffer makes sure to play a fun song from Disney or Pixar. Schaffer will also take some musicians from the high school band for a concert.

“I’m going to have three or four points of contact with these kids before I even try recruiting them with the exploratory class,” he says. “I have 18 little brothers or sisters in this 5th grade class right now. … That’s one of the awesome things about building a program in a small school [district]. Eventually it does become a self-fueling machine where kids just want to do it.”

Though more students are now choosing band instead of art, the exploratory program has benefited both groups. “The art teacher and I understand that it’s a symbiotic relationship,” Schaffer says. “If he has an art class of 40 or 50 kids, he’s doing a whole lot of generalized stuff. If he has a smaller class, he can build better artists and keep them in his program for a longer period of time. Our art program is rocking.”

As for his own bursting classroom, Schaffer welcomes the larger class sizes. “Band teachers are a different breed,” he says. “For me, it’s never an issue having more kids in the room. … We just stay busy every second of every day. I don’t give them a chance to make bad decisions.”

Marching Ahead

Schaffer, who also teaches the 7th/8th and high school bands, implements a similar progressive approach for retaining students between junior high and high school.

junior high winds ensemble In his first couple of years at his previous position at Laquey (Missouri) School District, he noticed that he didn’t retain anyone between 8th and 9th grade. After speaking to a student, Schaffer realized that the high school commitment felt overwhelming in comparison to the junior high schedule.

“It clicked,” he says. “We were trying to go from two concerts and maybe one concert festival in middle school to five football games, four marching competitions, two or three concert festivals, [and possibly] jazz band in the high school. Well, that is a really big jump.”

At Laquey and then at Mark Twain, Schaffer started a junior high parade band. Mark Twain 7th and 8th graders participate in three marching events — two of which are combined with high school activities.

“I recruit 6th graders by showing them what 6th grade band is. I retain middle schoolers by showing them that this is what high school is,” Schaffer says. “If you do three parades in middle school, the five or six that the high school has isn’t so scary anymore. I [also] take them to multiple concert festivals, so they can get used to what high school is like.”

In 2020 when most band competitions were being canceled, Schaffer even created his own local festival, the Mark Twain Invitational, featuring parade, field, indoor guard and indoor percussion categories. Both Mark Twain’s junior high and senior high participated. “It was a great day for us last year, pandemic and thunderstorm notwithstanding,” Schaffer says.

As a result of these various initiatives, Schaffer has an impressive retention rate — about 75% to 80% between 6th and 7th grade, 92% to 97% between 7th and 8th grade, and 100% for high school. While at Laquey, Schaffer had increased total band enrollment from 30 to 135 in 6th through 12th grade within four years.

Just Ask

Getting buy-in for program expansion or funding has never felt difficult for Schaffer. “What did [I] do to convince admin to do this? I just asked,” he says. “I didn’t have anything written up. I didn’t have any proof.”

“I’ve been lucky to have admins who want to grow the program, who want to see children have opportunities,” Schaffer says. “They want to see students succeed. They’ve been very open to stuff that [might] look unorthodox in other years [or in other places].”

Schaffer, who mentors young directors, says that instructors need to get more comfortable seeking out support. Administrators will typically not approach teachers to find out what they need, he adds. “You are your program’s biggest advocate,” he says. “You need to go to the office to ask. [Don’t be] afraid to go to your admin with unconventional ideas. [They] are going to be approachable because they understand that they hired you to be the expert in your room.”

Cultures in Harmony: The Heritage of Asian American Pacific Islander Music

In celebration of AAPI Heritage Month, I recently spoke with three Yamaha artists about how they weave their respective cultures into their music and how their artistry seeks to bring communities together. Each artist spoke passionately about their beliefs in the power of music to unite us all in harmony.

Early Instrumental Inspiration

For acclaimed marimba player Naoko Takada, witnessing Akiko Suzuki, a student of world-famous marimbist Keiko Abe, perform at an all-girls cultural festival in Japan changed her life when Naoko was just eight years old. “She looked so elegant,” Takada remembers. “I didn’t [even] know what a marimba was. I thought it was some kind of furniture that makes beautiful sounds.” After the performance, Takada sought out Suzuki, and later Abe, for lessons and devoted herself to the instrument. That initial inspiration became her calling, and Takada has since toured the world, performing solo recitals in Carnegie Hall, Konzarthaus in Berlin, the Kennedy Center in Washington D.C., and Suntory Hall in Tokyo.

Woman on stage playing marimbas.
Naoko Takada.

Six-time GRAMMY® winner and ukulele musician Daniel Ho similarly credits Hawaiian slack-key guitarist George Kahumoku Jr. for helping first guide him as a young artist. “Kahumoku Jr. taught me traditional Hawaiian repertoire on guitar and ukulele,” Ho says. “We’ve recorded 13 albums together now, and four of them have won Grammys, so he has changed my life in a big way, [and] also in a cultural way. It was his openness and humility that allowed me to learn not only the songs, but also more about [native] Hawaiian culture [so I could] really immerse myself in it.”

Yvette Young, guitarist, visual artist and songwriter in the band Covet, received inspiration from her family. Her cousin Clara Yang, in particular, has been a consistent source of motivation. “She is such a talented pianist, and [is] carving out a solid career for herself as a professor at a major college, while also working as a touring pianist,” says Yvette. Young also credits her parents, who emigrated from China, with introducing her to the joys of playing instruments at a young age. “They were the ones who encouraged me to learn piano and violin in the first place,” she says. “I may not have appreciated it at the time, but I certainly am grateful now that they started me so young and raised me in such a musical household.”

Bridging Cultures

Hawaiian-born Daniel Ho has made a decades-long career out of partnering with artists around the globe to keep traditional music alive, shared and archived. Through his work, he has seen how musical collaborations between different cultures can elicit camaraderie and help form genuine bonds.

Young man in hat playing an acoustic guitar.
Daniel Ho.

On one recent recording, he traveled to Taiwan to record with native Aboriginal tribes. The resulting album, On a Gentle Island Breeze, was nominated for a Grammy, with Ho playing piano, slack key guitar and ukulele alongside five different tribes, incorporating their indigenous songs and melodies. There is a centuries-long connection between Taiwan and Hawaii that can be traced back through linguistics, and Ho felt privileged to be given the opportunity to create music that blended their cultures. “My idea was to build a frame around the traditional music without touching it at all,” he explains, “and then construct counterpoint and harmonies derivative of their traditional melodies. The Aboriginal elders appreciated that I was not [altering] their music — just supporting and framing it.”

Melody and the Rhythm of Language

Combining different cultures is also a big part of Naoko Takada’s work as a performing artist and marimba professor at the University of Southern California. Though Takada came to America at age 19, she reports that she still incorporates the linguistic style and rhythm of her native Japanese language into her playing and instruction methods.

For example, she emphasizes the Japanese concept of “ma” (loosely translated as “empty space”) to her students. “When I teach, I always say, ‘Music doesn’t end when the notes end,’” she explains. “When you are playing an instrument like a marimba, vibraphone or even piano, sometimes the silence is the beauty.”

Similarly, Takada often incorporates the rhythm of the traditional haiku poem structure (five- / seven- / five-syllables) into her playing. “The music of five notes or seven notes, or a combination of five or seven, makes [it] like a little fun conversation,” she says.

Empathy in Music

The idea that music and the arts can help create understanding gives Yvette Young hope for unity during times of divide. “Art can build empathy by helping people feel more comfortable with their own identities and more grounded in their emotions, [as well as] how they relate to the rest of the world,” she says. “I think the world would be a far kinder place if people just felt more heard. Art and music can be a fantastic way to confront and heal that dissonance.”

Young woman playing guitar on rooftop.
Yvette Young.

Part of the reason Young feels this can happen is the introspective nature of art. “Art can propose questions and encourage people to look within,” she says, “which I don’t think many people are comfortable with at times. Music and the arts can help people link up with the deeper parts of themselves, and [so they] are such important outlets for people to have so they can explore their own identity and purpose in the world.”

Living in Harmony

“World music, to me, is the purest connection of sound to emotion,” says Daniel Ho. And the harmony that music can bring to people is a message he continually shares, both as an instructor at the Yamaha Musician’s Creativity Lab and through his work as a musician and artist.

For a recent Los Angeles County Holiday Celebration, Ho created a song called “Colors in Harmony.” He explains its meaning this way: “If we work together and respect each other, we can create harmony and actually all live a better life. I wrote a verse that goes, ‘Here we gather from afar / Hear our song of peace / Woven melodies we are / Living colors in harmony.’ The woven melodies represent each of us, as individuals, and the colors refer to our many cultures. ‘Colors in Harmony’ is my way of saying if we all did good things and respected each other, and not hate each other, that’s the answer. It starts at home, and it starts with yourself.”

Photo of Daniel Ho by Lydia Miyashiro-Ho


For more information, visit:

www.naokotakada.com

www.danielho.com

www.yvetteyoungmusic.com


Greg Lukens

Greg Lukens began his career in the music business as a roadie for Janis Joplin in her early touring days before going on to do live sound for Rush and eventually becoming a highly sought-after mixing and mastering engineer — all despite being blinded at an early age. In this video, he invites us into his home studio in Alexandria, Virginia, where he discusses how he uses Steinberg WaveLab for a variety of applications — not just mastering, but even for providing audio for flight simulators.

“My visual imagination is making up a view of what the music is,” he explains. “The real-time 3D spectograph that’s in WaveLab is a view of audio that I have been calling up [in my mind] for the last 45 years.”

“As an early adopter, I have enjoyed Steinberg’s continuous attention to the detail of its audio engine,” he adds. “The file playback is better than any of the media players that audio files use. One of the gems I’ve discovered in WaveLab is the new tube compressor. You could have convinced me that it’s an analog insert of my favorite tube compressor! It’s fun to be able to take a piece of music that was recorded in 1968 and apply today’s technology to bring that old recording to the place that I remember.”

Lukens is also a big fan of the WaveLab Global Analysis tool. “Its power in editing music is a wonderful thing, but its ability to understand audio data that’s not music is equally powerful. To understand and mark the peak energy [of a file] is really fascinating.”

He also utilizes numerous MasterRig templates in order to speed his workflow. “It provides a valuable set of great-sounding tools,” he says. “Everything is uniform; everything is consistent. You can rearrange the [plug-ins] and everything stays the same as you reconfigure them … and, by the way, it happens to sound wonderful.”

“WaveLab is not just an editor,” Lukens enthuses. “It’s a complete mastering suite that allows you to do any or all of the processing that today’s music needs.”

Check out these related articles.

Click here to learn more about Steinberg Wavelab.

Why Do AVENTAGE Receivers Have a Fifth Foot?

Yamaha AVENTAGE AV receivers are widely known for their meticulous design and powerful surround sound capabilities. Many of their unique features are unseen. But one of their most notable is actually in plain sight: a fifth foot under the chassis.

So why this extra appendage? Let’s find out.

Design Considerations

With most high-end audio products, mechanical engineers spend significant planning resources to reduce the amount of vibration and resonance permeating throughout the chassis. In fact, chassis stability is a consideration even before the electronic engineers finish building the circuit boards. Decisions like where to place the power transformer and where to mount the heat sinks and amplifier modules are all made in the early design stages.

Why is a Solid Chassis So Important?

The solidity of the chassis has great significance due to a phenomenon called microphonics, whereby electronic components can generate a small electrical signal (or a variation in signal flow) when vibrated from an external source. When designing electronic circuits to precisely reproduce every nuance of an audio signal, every detail must be considered, and so vibration reduction is very important.

Structural Reinforcement

View of interior of the unit.

The best architecture for high-end audio is to use a symmetrical layout, where the amplifiers for the left side of the room are on one side of the chassis and the amplifiers for the right side of the room are on the other side. This provides better channel separation between the left/right signals, spreads out the cooling heatsinks for more efficiency and makes room for the power supply to be placed in the middle of the chassis. Mounting the power supply in the center is beneficial because it shortens the distance to the individual channels. Shorter distance means less impedance for more dynamic sound reproduction.

The transformer is the heaviest component in an AV receiver; however, suspending it in the center of the chassis is usually the furthest point from the four supporting feet in the corners. Mechanical designers account for this with the addition of metal brackets and mounting hardware to give the transformer a solid platform for mounting. However, even with all this reinforcement, the transformer’s inherent mechanical vibrations can migrate through the chassis and eventually induce very small vibrations to the sensitive electronics on the circuit boards.

Problem Solved

View of the bottom of the unit with the fifth foot dead center of the bottom.

Yamaha engineers came up with a simple but unconventional solution: simply add a fifth foot under the massive power supply for additional stability. It performed as theorized, resulting in lower chassis vibration with more detailed sound imaging and higher dynamics. Hours of critical listening tests proved that such a seemingly simple solution worked well.

Tripod holding a small rectangular unit in a room with a grid-tracked floor. There is a small electronic unit on a pad that is on grid track in front of the unit on a tripod.

To quantify these results, Yamaha engineers identified a Laser Doppler Vibrometer (shown in the illustration above) as the perfect tool for the job. This test instrument reflects a calibrated laser beam off the surface of the chassis and measures where and how much mechanical vibration is present. When the fifth foot was first used, the laser’s measurements indicated a dramatic decrease in chassis deflection (vibration). With the unit still connected to the vibrometer, the engineers experimented with different materials, shapes and pad materials for improved results before selecting the final design.

View of bottom of unit. Fifth foot is visible on center of edge of bottom.

New and Improved

The latest AVENTAGE AV receivers have undergone a substantial upgrade of internal chassis reinforcements that even further stiffen the structure. Always looking to get better results, engineers revisited the mechanical testing room to confirm that the theorized upgrades, in fact, performed as expected. Not surprisingly, the chassis was much more rigid. Further testing revealed that the point of maximum deflection or vibration was no longer located directly under the transformer. In fact, the extra rigidity of the new chassis moved the location of greatest vibration to a different zone of the bottom panel. Final experimentation found that mounting the fifth foot towards the front of the new AVENTAGE models provided up to 10 times improvement in vibration reduction.

Closeup of front center of unit with fifth foot visible.

The bottom line is that mechanical stability is paramount for precise sound reproduction. Yamaha uses a simple but extensively tested method for providing the best possible sound for your investment. But don’t take our word for it. See — and feel — it for yourself!

Check out these related blog articles:

What’s the Difference Between 4K Ultra HD, 8K UHD and HDR10+?

HDMI® 2.1: What It Means for Gear and Gamers

What is Dolby Atmos Height Virtualization?

How to Recreate the Movie Theater Experience at Home

The History of AV Receivers


Click here for more information about Yamaha AVENTAGE AV receivers.

Top 10 Piano and Digital Keyboard Practice Tips

It’s always fun to add a new song or piece of music to your repertoire. But to really learn a new piece of music, you need to take a focused and results-driven approach — and you also need to understand that true practice is much more than just playing something over and over again.

Here are 10 tips to help you work smarter, use your time efficiently and attain great results in record time.

1. Listen Before You Play

Whether it’s a classical composition, a pop or show tune or something else, hopefully there is a recording or video that first attracted you to it. With the score or sheet music in hand, listen to the piece a few times, following along with the music. This way, you know what it is supposed to sound like and can better interpret the written music as you start to work on it. If there are multiple performances available — even from different performers — so much the better. Listen for how they each treat the piece and decide which way(s) you like the best.

2. Warm Up

Just like any form of exercise, it’s important to stretch and warm up your muscles before every practice session. My very first Well-Rounded Keyboardist blog offered multiple tips for doing just that.

3. Avoid Distractions

You need to give your practice time your full focus, so before you sit down at your keyboard, silence your phone, turn off notifications on your computer/tablet and take necessary measures to forestall any other household activities that might interrupt and distract.

4. Read It Through

The first time you work on a new piece — even before you actually start to play the composition — you should read it carefully, paying attention to many things.

First, check the key signature so you know what sharps or flats you will need to be playing.

Next, familiarize yourself with its road map — in other words, the places where there are repeat signs, first or second endings and things like D.S., D.C. or Coda signs. (More information about these terms can be found here.)

You may also need to work out fingerings for any tricky or difficult passages. Best to do this right up front so you can be consistent in your performance and not instill any bad habits while practicing.

5. Slow It Down!

One of the most common mistakes players make when learning a new piece is playing it too fast. The temptation is to immediately play the music at the tempo it was recorded at, or intended to be, but don’t do it! Practice is a special task of digesting what is being asked of you, following the printed music, and training your fingers and your mind for what is required. Getting it right at a very slow tempo first is key. Then, when you’re ready, you can gradually increase the tempo in stages.

6. Break It Up

When you are first learning a piece, it’s best to break it up into smaller sections to work on. Most music has logical sections or phrases that you can use to decide these groupings, whether it’s the verse of a song or the repeating theme of a sonata. These could be as small as a few measures, or as long as a page or two, but they will inevitably be easier to learn than the whole tune.

As you work through a section, you may find an especially tricky phrase due to the fingering required, a large jump in range, or a difficult rhythm that has to be maintained between the hands. Stop and focus on those bits, even if they are only a few beats in duration. Repeat and drill those problem areas until they become comfortable, then go back to the longer phrase or section and integrate your newly mastered phrase back into the form.

And remember: Practicing is not performing. That means there’s no need to always start at the beginning and work your way through the entire piece. You’ll be freshest at the start of your practice session, and you don’t want to wait to encounter trickier sections later on, when you may be getting a little tired. My advice? Some days, start in the middle instead. It’s only when you have made significant progress with a piece that you should try to play it all the way through from start to finish.

7. Hands Alone

When you come to a difficult phrase, stop and work on each hand by itself a few times. This way, you can really pay attention to what you are doing. When you get comfortable with one hand, you can go back and put the two parts together. Combined with a slow tempo, this technique will help you master these trouble areas quickly so they become second nature.

8. Memorize It

The sooner you can stop looking at the music as you play, the better. Without the visual distraction of following the score, you can concentrate on what you’re doing, and what you’re hearing. I know this can be difficult for some (it’s my Achilles Heel for sure!), but the sooner you can get the piece memorized, the faster your progress will be.

9. Record Yourself

When you’re in the throes of playing, you already have a lot on your mind, making it hard to judge your progress. Recording yourself and then listening back gives you the focus and objectivity to really hear what is going on. Many digital pianos have a built-in recorder function, and most smartphones and tablets come with a memo recorder app that will do the trick. (No need to spend money on something fancy.) Recording your practice allows you to sit back and decide what’s working well and what needs more effort. It may even spur you to try a different approach altogether.

10. Be Consistent

Practicing daily — at the same time each day if possible — will deliver better results than trying to cram in longer sessions two or three times a week. Even if you’re busy, try to practice at least five times a week. You are training both your muscles and your mind to perform a task, and doing it often is key.

At each practice session, limit the time you spend on a new piece to 15-20 minutes, tops. Then get up for a few minutes and grab a drink of water (or do some other small task) before returning to your practice, mentally refreshed.


Check out our other Well-Rounded Keyboardist postings.

Click here for more information about Yamaha keyboard instruments.

Top 10 Drum Practice Tips

There are no shortcuts to becoming an excellent drummer. It requires time, a plan, commitment, desire, consistency, perseverance and patience.

However, certain aspects of what (and how) we should practice have been handed down for decades. Some are based on custom, intuition, hearsay, trial and error, or tradition … but not all are based on facts. My years of research in neuroscience have led to designing some more effective ways to practice and learn to play drums.

Based on these findings, here are the top 10 recommendations I make to my students:

1. Know the How and the What

How to practice is just as important as what to practice. Spend 75% of your practice time in the learning zone and 25% in the comfort zone. We’re in the learning zone when we work on things that challenge and stretch us; we’re in our comfort zone when we’re playing things we can already do fairly well. The learning zone is where improvement is made.

2. Identify Your Goal

If your ultimate goal is to make music with other musicians, then always keep that as your target when you select things to practice and study. For example, if you want to improve your jazz or Afro-Cuban drumming, identify or have your teacher recommend specific things to work on and listen to that are consistent with that goal.

3. Practice the Way You’ll Play

As much as possible, practice the way you’ll play, which is in context with music. In other words, don’t just practice free-form: play along to recordings, loops, etc., and in a wide range of tempos, volumes and styles.

4. Track Your Progress

However you obtain it, feedback is critical to your development and to the avoidance of acquiring bad habits. So, in addition to listening to many different recordings of music and drummers, you should also listen frequently to recordings of yourself in order to track your progress and recognize any weaknesses in your playing. Beginning students should share those practice recordings with their teacher, who can identify issues to work on; advanced players can do this on their own. Here’s a good habit: Try and record yourself every time you practice, even if it’s just for a couple minutes playing on a pad, to evaluate what you’re doing and how you’re doing it.

One of the most effective tools for obtaining instant feedback is an electronic drum kit (I recommend Yamaha DTX6 Series electronic drums). Many have built-in recording capability and the ability to connect a laptop, tablet or smartphone, making it easy to record, edit, store, share and evaluate your progress.

5. Mix It Up

After practicing something for twenty to thirty minutes, move on to something completely different. Then, the following day or two, return to practice the original idea, relying on your memory. This learning process is known as interleaving. In contrast, a more typical but less effective form of practice is called massed or block practice, where you spend hours working on one specific thing. When you do this, you may feel like you’ve attained some mastery, but it is short-lived.

Also, mix it up by practicing many different styles of drumming and music in order to expand your own unique musical voice. Music and drumming are becoming more homogenized, with styles overlapping and new hybrids springing up all the time. When it comes to both listening and playing, it helps greatly to draw from many different sources.

6. Create and Improvise

Use your imagination when practicing. Learning becomes unlimited through what’s known as elaboration, which is adding your own elements and ideas to what you’re practicing — in other words, making it your own. This will promote both learning and memory, and help bridge the gap between practice and performance.

7. Understand What You’re Learning

Just having the ability to physically play something is not enough. Understanding what you’re learning — and why — makes information useful, usable and transferrable. Read and study articles, interviews, transcriptions, books, magazines and websites.

8. Focus

Keep your practice focused and free from distractions like texting, watching TV, checking social media, etc. Thinking that you can multi-task while focusing on your practice and learning is a myth. Although you may be able to drive a car and listen to music at the same time, learning and developing advanced skills requires intense focus — so put your smartphone in another room and concentrate.

9. Sleep and Rest

Get enough rest and sleep — at least 7 to 8 hours a night. This is the critical time when your brain moves what you’re learning from short-term into long-term memory, which hastens development and growth. Plus it’s almost impossible to concentrate and learn if you’re tired! In addition, it’s highly beneficial to both learning and motor skill growth to take a break every 60 or 90 minutes and just relax a bit and expand your view from narrow to wide — take a walk, meditate, call a friend. Deep focus followed by relaxation is an excellent formula for practice and development.

10. Be Patient and Have Fun

When stressed and frustrated with your practice or playing, remember why you probably started playing in the first place — because it was fun! Some ideas and ways to play can be learned fairly quickly; other aspects can take many years. Commit to lifelong learning and improvement in drumming (as well as in all areas of your life!), and have a great time doing it.

For more information, visit https://www.dicciani.com.


Check out these related blog articles:

Practice Exercises for the Beginning Drummer

The Benefits of Recording Drum Practice and Performance

How to Practice Drums Without Disturbing the Neighbors

Five Reasons Why You Should Practice On Electronic Drums

Three Ways That Apps Can Help Your Electronic Drumming

How To Get the Most Out of Your E-Drum Metronome


Click here for more information about Yamaha drums.

Click here for more information about Yamaha electronic drums.

A Quick Guide to Yamaha Acoustic Guitar Pickup Technology

While it’s great to play an acoustic guitar unamplified, something special happens when you plug it in. With both steel-string and nylon-string instruments, the sound gets bigger, bolder and takes on a new dimension.

Have you ever wondered which acoustic pickup will work best for you when you want to play plugged in? Let’s check out what Yamaha has to offer.

SRT

When it comes to acoustic guitar pickups, Yamaha has a long legacy of technological innovation. Their APX line of acoustic-electric guitars, which debuted in 1987, featured hexaphonic pickups that offered a separate pickup for each string. Also included were preamp switches for mono or two different stereo output options.

In 2010, the company unveiled a technology called Studio Response Technology (SRT), which allows guitarists to achieve a distinctive tone by creating a custom blend of microphone and piezo pickup sounds. SRT combines advanced DSP technology with state-of-the-art recording techniques, so you can get studio-quality sound directly from your guitar’s output jack.

Piezo (short for piezoelectric) pickups, which are normally placed under the saddle of an acoustic guitar, only capture the sound of the strings and not the air moving around the instrument. Microphones capture the sound of the air, but the best results are achieved only when high-quality mics are used and the ambient space is carefully controlled, as you would find in a professional studio. SRT gives you the best of both worlds, allowing you to combine the bright, crisp sound of a piezo pickup with the warmth and organic, natural sound of a digitally-modeled microphone (in the case of advanced SRT2 technology, your choice of two vintage mics), along with the ambience of a professional studio environment.

Long thing pice of metal with an L-shaped piece at end.
SRT pickup.

In addition to a Blend knob that allows you to mix between the pickup and mic model, the SRT system includes low/mid/high frequency controls and a Focus/Wide knob to adjust stereo imaging. There’s also a built-in tuner, Automatic Feedback Reduction (AFR) and a Resonance control.

Acoustic guitar.
Yamaha A5R ARE.

All Yamaha A Series acoustic guitars are equipped with SRT pickups, as well as the following L Series models:

  • LL6 ARE / LL6M ARE
  • LS6 ARE / LS6M ARE
  • LL16 ARE /LL16M ARE / LL16-12 ARE
  • LS16 ARE / LS16M ARE

In addition, all Yamaha SILENT Guitar™ SLG Series models are equipped with SRT pickups.

TransAcoustic

Yamaha TransAcoustic guitar technology was introduced in 2016 and was first implemented in select L Series models. This revolutionary system utilizes a small metal disk called an actuator, which is installed on the inner surface of the guitar back. The disk vibrates when the strings are played; these vibrations are conveyed to the body of the instrument, and then out the sound hole into the air, enabling the creation of authentic reverb and chorus effects without the need for any external effect devices or amplifiers.

TransAcoustic (TA) guitars are also equipped with a piezo pickup, which captures the sound of the reverb and chorus produced by the actuator, as well as that of the strings themselves, sending the effected signal to the instrument’s output jack.

Because they can be played with or without effects, TransAcoustic guitars are eminently suitable for both live performance and recording. Three simple controls on the instrument allow you to turn the TA system on and off, blend the amount of chorus and reverb and select either Room or Hall reverb. In addition, a Line Out knob enables you to set the level of the piezo pickup.

Acoustic guitar.
Yamaha FG-TA TransAcoustic guitar.

The lineup of Yamaha TransAcoustic guitars includes:

  • LL-TA, FG-TA and FGC-TA (steel-string, traditional western-size body)
  • LS-TA, FS-TA and FSC-TA (steel-string, concert-size body)
  • CSF-TA (steel-string, compact parlor-size body)
  • CG-TA (traditional, classical nylon-string)

Atmosfeel

Atmosfeel made its debut in 2019 with the release of Yamaha FG/FS Red Label steel-string guitars, and it has since been incorporated into selected NX Series nylon-string guitars.

This unique system consists of a trio of elements: a piezo sensor mounted in the bridge, a mini microphone inside the guitar body and a proprietary synthetic sheet transducer underneath the soundboard. The contributions of the separate elements can be easily combined and custom-blended using three knobs on the side of the instrument.

Image of guy playing an acoustic guitar. There are titles of "Atmosfeel" with the built-in microphone, undersaddle pickup and contact sensor identified on the guitar.

In order to account for differing sonic properties, the piezo sensors on the nylon-string models vary slightly from those used in steel-string models. Specifically, their midrange has been revoiced, and a Treble knob replaces the Bass EQ knob to help accentuate the high frequencies.

Two acoustic guitar.
Yamaha NCX5 (left) and NTX5 (right).

Yamaha guitars equipped with the Atmosfeel system include:

Red Label:

  • FGX3 / FGX5 (steel-string, dreadnought size)
  • FSX3 and FSX5 (steel-string, concert size)

NX Series:

  • NCX3 / NCX3C / NCX5 (traditional classical nylon-string)
  • NTX3 / NTX5 (nylon-string with a slimmer neck profile and thinner body)

No matter what your musical preferences are, Yamaha has an acoustic pickup system that will suit your needs!


Check out these related blog articles:

Getting Amplified

Step Up to a Better Acoustic Guitar

Discover Yamaha TransAcoustic Guitars

How Yamaha TransAcoustic Guitar Technology Works

Which TransAcoustic Guitar Is Right for Me?

MJ Ultra and the FG-TA TransAcoustic Guitar

“Breaking Amish” With My Yamaha FG-TA

Nylon TA on TV

Her Name Is Ruby

How to Record TransAcoustic Guitar Effects

Introducing the New Generation of Yamaha Red Label Guitars

Introducing the NX Series

Atmosfeel: The Next Generation of Yamaha Acoustic Guitar Pickups

Atmosfeel Technology Comes to the Nylon-String Guitar


Click here for more information about Yamaha A Series guitars.

Click here for more information about Yamaha L Series guitars.

Click here for more information about Yamaha SLG Series SILENT Guitars.

Click here for more information about Yamaha TransAcoustic guitars.

Click here for more information about Yamaha FG/FS Red Label guitars.

Click here for more information about Yamaha NX Series guitars.

What’s the Difference Between a Digital Keyboard and a Digital Piano?

If you (or your child) is new to the world of digital keyboards, there are a wide array of options available to you — so wide, in fact, that it can sometimes appear overwhelming.

Digital keyboards, portable keyboards, arranger workstations, digital pianos … what’s the difference between them? In this article, we’ll describe both the differences and the commonalities.

Acoustic vs. Digital Keyboards

First, though, it’s important to understand the difference between an acoustic instrument (like a grand piano, for example) and a digital one, which lies solely in the way they make sound. The sound of an acoustic piano is actually the sound of physical strings vibrating in the air, which occurs when they are struck by hammers, as a result of keys being pressed. Although piano is by far the most common acoustic keyboard instrument, there are others as well, including harpsichord (which also has strings) and celeste (which instead has bells).

In contrast, digital instruments (including both digital keyboards and digital pianos) make their sound electronically. In other words, they require an amplifier and loudspeaker (or connected headphones) in order to be heard; without an amp and speakers (which are often built in), you wouldn’t hear anything, which is why digital keyboards make no sound when they are turned off.

Boy playing a digital piano while wearing headphones.
Yamaha P-125a portable digital piano.

What’s more, the sound made by these instruments begins life as a series of numbers (i.e., digits — hence the name “digital”), same as data in a computer. This works in a very similar fashion to the way your laptop, smartphone or tablet stores and plays back your favorite tunes, except that in the case of a digital keyboard or piano, the numbers are describing a single sound (played back at a pitch corresponding to the note being pressed on the keyboard), as opposed to a complete song. This is why most digital instruments (including virtually all digital keyboards and digital pianos) can be easily connected to laptops, smartphones and tablets, allowing you to record your performances and play along to your favorite songs, even while practicing over headphones.

Digital Keyboards vs. Digital Pianos

Digital pianos, as their name implies, are designed specifically to have the sound and feel of acoustic pianos — and sometimes to look like them as well. Digital keyboards, on the other hand, typically offer a wider range of sounds, but rarely have the feel or look of an acoustic piano.

Here are their main differences:

Number of Keys

Digital pianos will almost always have 88 keys, the same as an acoustic piano. Some digital keyboards also come equipped with 88 keys, but more commonly have 61 or 76 keys. Their keys are sometimes smaller, too.

An electronic keyboard musical instrument.
Yamaha PSR-EW425 76-key digital keyboard.

Feel

The keys of a digital piano will almost always be weighted, giving them a feel very close to that of an acoustic piano. (Yamaha digital pianos such as Clavinova, Arius and Portable P-Series and DGX-Series models have graded weightings, where the “action” is heavier in bass notes and lighter in treble notes, like an acoustic piano.) Their keys may sometimes be made of wood or synthetic ivory and ebony, giving them a tactile feel similar to that of pianos.

Digital piano in a living room setting.
Yamaha Clavinova digital piano.

In contrast, the keys of most digital keyboards are unweighted and are almost always made of plastic. Many digital keyboards, however, offer touch-sensitive (sometimes called velocity-sensitive) keys. Though this is not the same as weighted keys (there is no “resistance” when you depress them), this feature does cause sounds to get louder and/or brighter as keys are struck with greater force, similar to what happens on an acoustic piano.

Quality and Quantity of Sounds

As you might expect, digital pianos tend to have better quality piano sounds than most digital keyboards. The recordings (“samples”) of the acoustic pianos stored in their memory are often multi-layer — that is, taken over many different key ranges and at multiple degrees of intensity — giving them a great degree of realism. Digital pianos may also offer a number of advanced features that help to further the acoustic piano experience. For example, selected Yamaha Clavinova models employ Virtual Resonance Modeling (VRM), which simulates the distinctive reverberation generated by the body of a concert grand piano as it resonates when notes are played.

However, the tradeoff for these kinds of precision piano sounds is that there is often less memory space for other types of sounds. For that reason, you’ll generally find more, and a larger variety of sounds in a digital keyboard than in a digital piano, though in some cases the piano sounds won’t be quite as high quality. With so many different sounds at your fingertips (including drums and percussion), it’s easy to construct “one-man-band” arrangements in most digital keyboards. This is especially true of instruments called arranger workstations (or digital workstations), which typically provide many hundreds of sounds as well as sophisticated onboard accompaniment and recording tools. Yamaha Genos digital workstations, for example, offer 1,710 voices, 550 accompaniment styles and 216 arpeggio types, along with dozens of sophisticated effects like reverb and chorus — you can even apply various vocal harmony effects to your voice as you sing.

A large electronic keyboard instrument.
Yamaha Genos digital arranger workstation.

Size, portability and price

For the most part, digital pianos tend to be considerably larger and heavier than digital keyboards, which are designed with portability in mind. Many digital pianos are actually built into wooden piano-like cases (for example, Yamaha Clavinova and Arius models), and, as you might expect, these are primarily intended to be used in one place. There are, however, portable digital pianos like the Yamaha P-Series or DGX Series, which combine authentic piano sound and feel with the ability to be easily transported.

Digital piano keyboard on a desk in front of a window in a highrise apartment.
Yamaha DGX-670 portable digital piano.

On the whole, though, if you intend to make music on the go or will need to bring your instrument to rehearsals and performances, you’ll generally be best served with a digital keyboard. Some, like Yamaha PSR Series instruments, literally weigh just a few pounds and take up very little space; some models are battery-operated and small enough to tuck under your arms and be played anywhere!

Digial piano keyboard.
Yamaha PSR-E273 portable keyboard.

Both digital pianos and digital keyboards offer benefits not available from an acoustic piano. For one thing, even the most expensive digital piano is likely to be less costly than most acoustic pianos; for another, digital instruments are much easier to maintain, and you never have to tune them. However, the advanced features, size and weight of most digital pianos tends to make them costlier than digital keyboards, which are generally quite affordable. But there are many exceptions to this rule, and you’ll find both kinds of instruments at a wide variety of price points.


So, which should you buy — a digital keyboard or a digital piano?  The decision is largely determined by how important a true piano sound and feel is to you. But there’s one inescapable fact: Whichever you choose, a lifetime of musical pleasure awaits!


Check out these related blog articles:

Buying Your First Digital Keyboard

Which Digital Piano Is Right for Me?

Choosing the Right Keyboard on a Budget

Choosing the Right Keyboard When You Have Space Limitations

Step Up to a Better Keyboard, Part 1: Feel and Sound

Step Up to a Better Keyboard, Part 2: Advanced Features


Click here for more information about Yamaha digital keyboards.

Click here for more information about Yamaha digital pianos.

Click here for more information about Yamaha digital and arranger workstations.

Top Scenes to Demo Your Home Audio Gear

You just got a new sound bar. Or maybe an AV receiver. Now it’s time to make it shine.

Getting new audio gear can be as exciting as it is overwhelming. We polled our resident audio experts for the scenes they use to demo their home gear. These include setups with the following:

– Sound bar

– AV Receiver with 5.1.2-channel Dolby Atmos®

– AV Receiver with Dolby Digital 5.1™

Take a look and try them out!

Sound Bar Demo

Title: Starship Troopers

Scene: Klendathu Drop

Time Mark: 59:21 to 1:07:12

Gear: Yamaha SR-B20A sound bar

When stepping up from your TV speakers to a sound bar, you want to demo dynamic content that shows off the full frequency and dynamic range. Action and sci-fi movies check all the boxes. Starship Troopers is a big, loud, fun action movie set in space, chronicling the war between humans and an insect-like alien race.

Long thin speaker laying on a counter underneath a flat screen TV which hangs on the wall above it.

What to Listen for:

While this is an invasion / attack scene, some of the most ear-catching moments come from the low end. Listen for the roar of the spaceship engines as they move through space and touch down on the planet, the slam of the loading ramps, the stomping of feet as the soldiers run through the battlefield, and the litany of explosions throughout the battle. It’s at these moments when features like 3D virtual surround sound and built-in subwoofers really make their presence known.

This clip also showcases the sound bar’s high-frequency and midrange capability. Listen for each character’s breath as they run toward certain death, the metallic rattle of the trooper’s gear, and the crisp, clear dialogue (“Remember your training and you will make it back alive!”), all perfectly balanced with the rest of the audio. It’s loud, intense and graphic, so be sure to take stock of who may be around you (especially if they’re sleeping!) before you try it out.

AV Receiver with 5.1.2-Channel Dolby Atmos Demo

Title: Ready Player One

Scene: The First Challenge

Time Mark: 12:26 to 16:55

Gear: Yamaha RX-V6A AV receiver, NS-IC800 in-ceiling speakers

Steven Spielberg’s Ready Player One has long been one of the best home theater demos. Not only does this movie allow your gear to display the brilliant CGI animations with crystal clarity, but it also features an outstanding Dolby Atmos soundtrack designed by Gary Rydstrom, also known for Jurassic Park, Saving Private Ryan, T2: Judgment Day and Ad Astra.

The vehicle race through New York City has everything you need to demonstrate the full capabilities of a 5.1.2-channel surround setup. As a bonus, it includes several well-known vehicles in pop culture, including the DeLorean from Back to the Future, the original Batmobile, Stephen King’s Christine, Bigfoot, Speed Racer’s Mach 5 and even the van from A-Team.

Modern living room with couch facing TV and surround sound speakers.

What to Listen for:

The scene begins with a low rumble from a bridge forming, followed by fireworks soaring overhead from the Statue of Liberty. Enjoy the softer audio subtleties there, because once the race starts, it’s nonstop, jaw-dropping mayhem.

You can feel the powerful impact of cars smashing into barriers and collisions from other vehicles in all directions. It’s surround sound at its best, with each speaker accentuating the sounds of tires bouncing and screeching, plus the low-end roar of Kaneda’s red motorcycle (from Akira) as it weaves in and out of traffic.

All this action provides your subwoofer with a nice, punchy workout, which shines in conjunction with a wide variety of atmospheric sounds in the surround and Dolby Atmos height channels. Perhaps the best is saved for last, as King Kong leaps from the Empire State Building and pursues Parzival to the finish line, stomping on top of buildings and bridges along the way.

AV Receiver with Dolby Digital 5.1 Demo

Title: Twister

Scene: Tornado / opening scene

Time Mark: 00:01 to 04:40

Gear: Yamaha RX-A2A AV receiver, NS-1000 speakers, YST-SW800 subwoofer, NS-IC800 in-ceiling speakers

The whole point of building a home theater is to transport you from reality and into the movie’s action. With that guiding principle, this 25-year-old classic can go toe-to-toe with any modern film. You not only hear it — you feel it. For the most immersive experience, it’s best experienced on a surround sound system enhanced with overhead speakers.

Modern living room with couch facing large flat screen TV. The TV is flanked by tall speakers.

What to Listen for:

You see a farm in the Central Plains. A storm is imminent. Listen to the wind begin rustling through the trees and the sound of debris blowing around the yard. All your speakers will be engaged at this point and your subwoofer will start coming to life.

You then get taken inside a farmhouse. The dialogue from a TV weather broadcaster is clear, and the creaking of wood flooring inside the house is distinct. The storm continues to build outside the home.

The final minute literally speaks for itself. The soundtrack takes over and your receiver, speakers and subwoofer flex to their full potential. After the storm passes, the scene is virtually silent. It takes a handful of seconds to realize that you too are holding your breath.

Go ahead and breathe. You’ve just experienced the very reason you invested in a home theater.


Looking for more tips to set up and dial in your gear? Check out these blog articles:

How to Install Banana Plugs on Your Speaker Wire

How to Connect a Turntable to an AV Receiver

How to Configure an AV Receiver for Gaming

How and Why to Bi-Amp Your Speakers

How to Connect a Subwoofer to a Sound Bar

How to Install Speaker Wire

How to Install In-Ceiling Speakers


Click here for more information about Yamaha sound bars.

Click here for more information about Yamaha AV receivers.

The TikTok Vintage Resurgence

Since its 2016 launch, TikTok has grown tremendously in popularity, with its usage skyrocketing over the last year. Now, the video-sharing app boasts at least 100 million users in the U.S. and at least 689 million international users. This boom has led to the resurgence in popularity of a number of vintage artists, songs and albums, either through users creating new clips or adding original songs. A lot of these have also generated dance challenges and memes — both planned and improvised — resulting in these iconic recordings and artists once again being pushed to the forefront of cultural trends.

Let’s take a look at some of the most popular TikTok videos that have contributed to this vintage resurgence.

“Dreams” — Fleetwood Mac

TikTok user @doggface208’s video of him skateboarding while mouthing the lyrics to Fleetwood Mac’s “Dreams” and drinking a jug of Cran-Raspberry juice became a viral sensation last year, when everyone was still reeling. Though it was improvised, watching doggface208 at his most carefree and relaxed was the panacea everyone needed at that difficult time. In fact, his video became so big that Fleetwood Mac’s Mick Fleetwood did his own rendition, though it appears he’s on the back of a truck instead of skateboarding. Fleetwood Mac’s song “Dreams” was included on the band’s eleventh studio album, Rumours, which was released in 1977. That year, the song peaked at No. 1 on the Billboard Hot 100 as well as the Billboard 200. After the TikTok video came out, the song went from streaming at around 490,000 times a day to over a million times a day, while sales tripled in less than a week.

Lil Nas X ft. Billy Ray Cyrus — “Old Town Road”

Billy Ray Cyrus’ career saw a resurgence when he hopped on the remix to Lil Nas X’s breakout hit “Old Town Road.” While the song soundtracked a number of TikTok videos, the remix also spawned one challenge in particular, which involves dance moves for spending money, playing a guitar and driving a car. Lil Nas X released the original version of the song in December 2018, which saw so much popularity that he recorded and released the remix with Cyrus in April 2019. Both peaked at No. 1 on the Billboard Hot 100 and appeared on Lil Nas X’s debut EP 7 in 2019 as well.

The Chordettes — “Mr. Sandman”

The Chordettes’ 1954 hit song “Mr. Sandman” saw a resurgence on TikTok in 2019 with two popular videos making the rounds online. TikTok user @enochtrue videoed himself lip-syncing the song’s iconic “bum bum bum,” as well as the first chorus, using the app’s nine-split-screen filter, making it look like he was an entire barbershop quartet (plus five). That same year, user @jade13tr created a similar video with her cat Ed performing a dazzling dance routine.

Gwen Stefani’s “Hollaback Girl” x Beyoncé’s “Yoncé”

While TikTok user @marie.brukerikkemer created the remix of Gwen Stefani’s “Hollaback Girl” and Beyoncé’s “Yoncé,” it’s unclear how the song clip became popular on the platform. The beginning of the mashup features the intro to “Hollaback Girl,” which then flows into the second verse from “Yoncé. The sound generated a number of complex dance challenges that younger girls and women have gravitated towards. “Hollaback Girl” appeared on Gwen Stefani’s debut studio album Love. Angel. Music. Baby. in 2004, while “Yoncé” was a hidden track on Beyoncé’s song “Partition” from her 2013 self-titled album.

Jason Derulo — “Ridin’ Solo”

TikTok was responsible for the revival of Jason Derulo’s 2006 single “Ridin’ Solo,” which appeared on his debut and eponymous album. While the song didn’t garner a challenge per se, a lot of the videos that employ the sound clip hinge on dating and relationships. In another viral video using the same sound clip, user @mootopia and a plastic fish in her lap are sitting on a couch mouthing the lyrics.

“Whatta Man” — Salt ’N’ Pepa ft. En Vogue

While it’s unclear when or how Salt ‘N’ Pepa’s 1993 song “Whatta Man” first saw a comeback on TikTok, it does seem that a majority of the videos have to do with women lusting after a man. A number of them specifically reference actor Chris Evans — who played Captain America in the Marvel Cinematic Universe — and a particular video of him walking down a hallway. “Whatta Man” featuring En Vogue appeared on Salt ‘N’ Pepa’s fourth studio album Very Necessary, which peaked at No. 4 on the Billboard 200. “Whatta Man” also reached No. 3 on the Billboard Hot 100.

Ariana Grande’s “Motive” x Nelly Furtado’s “Promiscuous”

TikTok users love to blend songs, and a perfect example is the mashup of Ariana Grande’s “Motive” and Nelly Furtado’s “Promiscuous.” They were given the challenge treatment earlier this year, with @samobam0 choreographing a dance that includes the tornado arm move. While Grande’s song “Motive” with Doja Cat arrived on Grande’s 2020 album Positions, Furtado’s older song “Promiscuous” saw a full revival: the version featuring Timbaland was released on her 2006 album Loose.

“I’m a Slave 4 U”— Britney Spears

Britney Spears recently re-emerged into the cultural zeitgeist following the New York Times documentary Framing Britney Spears, which examines her career and delves into the complexities of her father’s conservatorship. Around that same time, her song “I’m a Slave 4 U” also saw a renaissance on TikTok. While the track led to several dance routines, one of the more popular ones was choreographed by @thesharptwins; another, similar challenge was created by user @ssneha.r. “I’m a Slave 4 U” was the first single released from Britney’s 2001 album Britney, which hit No. 1 on the Billboard 200.

Soulja Boy’s “Pretty Boy Swag” x Two Door Cinema Club’s “What You Know”

Another good mashup that TikTok has spawned is the lyrics from Soulja Boy’s “Pretty Boy Swag” superimposed over the beat from Two Door Cinema Club’s “What You Know.” The remix led to several variations of a dance challenge, with one of the first and most popular coming from users @sharlizetrue_, @pressleyhosbach and @shariahtrue. Soulja’s “Pretty Boy Swag” was the first single from his 2010 album The DeAndre Way, while “What You Know” appeared on Soulja Boy’s debut album Tourist History.


TikTok videos are best enjoyed on quality headphones. Click here for more information about Yamaha wireless headphones.

Acoustalon™ Marimba and Xylophone Tone Bars

Yamaha draws on all its resources when choosing materials for the production of musical instruments. In particular, the company’s vast experience selecting the finest woods for pianos, guitars and drums has been extremely beneficial in the search for materials to be used in marimba and xylophone tone bars. As the need for alternatives to wood became clear, a synthetic material by the name of Acoustalon was developed by Yamaha to accurately reproduce the sound of wood. Let’s take a closer look at this remarkable material.

Closeup of a marimba with Acoustalon.
Yamaha Acoustalon tone bars.

The Inspiration Behind Acoustalon

The inspiration for Acoustalon actually came from the Yamaha sporting department! While Yamaha has grown to become the world’s largest manufacturer of musical instruments, as well as a leading manufacturer of semiconductors, audio/visual and computer-related products, the company has also produced items such as skis, golf clubs, ski boots, tennis rackets and archery equipment.

Research and trial production of fiberglass-reinforced plastic (FRP) began by applying the painting technology cultivated in the woodworking field. Full-scale production and sales of FRP products commenced in the 1960s and 1970s, and the material soon became incorporated in interior car parts and furniture.

What is Acoustalon?

Acoustalon is not a molded product. Instead, strands of a fiberglass material are adhered together throughout the full length of the tone bar to give an acoustical resonance similar to that of natural wood like rosewood or padauk. Its holes (called “Sonic Tone Holes”) are not bored through the length of each bar, but are instead extruded from a slurry mix. The presence of these holes increases the surface area of the bar and brings the bar’s tone closer to that of natural, porous wood.

By creating Sonic Tone Holes at the extrusion stage, the pitch is also closer to that of a wooden tone bar. Another byproduct of this innovation is that Acoustalon tone bars can be manufactured with the same dimensions as the wooden sound board they are attached to.

Closeup image.
The Acoustalon Sonic Tone Holes.

The Advantages of Acoustalon

Although rosewood is often regarded as the material of choice for marimba and xylophone tone bars, Acoustalon provides an excellent synthetic option. Its outstanding tonality and natural feel make it easy for players to transition from wood bars. Acoustalon is also exceptionally stable and durable, making it a perfect choice for school music programs and drum corps that spend a lot of time outdoors.

Humidity

Unlike natural rosewood, Acoustalon is totally unaffected by changes in humidity. As shown in the illustration below, its pitch remains centered regardless of the moisture content in the atmosphere. This is because synthetic materials do not take on water like wood.

Graphic.

Temperature

The tuning of any instrument will be affected by changes in temperature, but as you can see from the illustration below, tone bars made of Acoustalon will change much less than those made of rosewood, making their tuning more stable in comparison to a wood bar.

Graphic.

This level of detail leads to greater tuning accuracy, an easier process of tuning each wood bar and improved sound. The benefit to both the student and the music educator is a level of quality and consistency; the benefit to us all is the conservation of precious wood resources.

Also check out this related blog article:

What’s the Difference Between Marimba and Xylophone?


Click here for more information about Yamaha marimbas.

Click here for more information about Yamaha xylophones.

The New Normal

“Nerv-i-cited” is how my daughter describes the feeling of being simultaneously excited and nervous.

As the pandemic evolves, it’s only natural that music educators will feel extra excitement and trepidation about the start of school this fall. What will it be like once in-person classes resume around the country? How will students, teachers, families and administrators navigate the transition? Let’s look at some of the trends that are shaping the “new normal,” and what opportunities may lie within them.

Anxiety All Around

teacher student whiteboard airfocus MyXr1AbAjJU unsplashAs they return to “normal,” students may be dealing with grief over lost loved ones and worries about feeling safe. On top of that, they have the evergreen stressors, such as going through puberty, concerns over their appearance or being bullied. Parents are likely feeling anxious, too, with their own worries about employment, physical safety and learning losses for their children.

In their professional lives, music educators may be feeling anxious and in a state of mourning because according to Berkeley News, workplaces will never quite be the same again. (Teachers may be dealing with trauma, stress and grief in their private lives as well.)

Here are some ways to soothe anxiety:

  • Create routines because they make people of all ages feel more secure.
  • Focus on what is within your control, such as planning a great new lesson and activity for your students.
  • Go at your own pace. Extroverts have been keen to head to concerts, parties, movies, the theater … but for an introvert, these might be overwhelming. Baby steps and smaller group outings are fine until you feel back up to speed.

Home Schooling Remains a Force

According to this article on Education Week, an unprecedented number of parents decided to home school their children during the 2020-2021 academic year, which created “a shift that could have lasting effects on both public schools and the home-schooling movement.” Christopher Lubienski, a professor of education policy at Indiana University, told EW that the pandemic may cause a long-lasting increase in the number of families choosing to home school, giving it a more mainstream appeal. “People who haven’t really thought about it before suddenly saw themselves forced into [home schooling], and then realizing that it’s something they can see themselves doing,” he explained.

For educators who teach private lessons, a boom in home schooling could open up opportunities to work with new students, as families who have been relying on a school music program may instead seek lessons from a qualified instructor.

This home-schooling trend could affect funding for public school music programs, as school districts may need to compensate for fewer enrolled students.

Outdoor Classrooms

Open-air education is another trend that accelerated due to the pandemic — and it’s being embraced for long beyond. “Forest schools” and outdoor classrooms foster movement, creativity and sensory experience, reports EdSource. While they have been used primarily for young children, they hold potential for K-12 students.

In addition to an increased sense of wellbeing and lesson retention for students, outdoor education also leads to higher job satisfaction for teachers, according to the World Economic Forum. Are there ways you can get your music students out into the fresh air? Perhaps an outdoor amphitheater can be used, for example.

airline travel post pandemic lukas souza 5KRFOTnpnnY unsplashRoad Trip!

Students and their families will likely be traveling again, as people are re-booking travel that was cancelled during the pandemic, and they are planning to travel more in the future. According to vacation home rental company VRBO, which conducted a survey among 8,000 people, 82% of families already have travel planned for 2021, and 65% plan on traveling more than they did pre-COVID. As for 2022, “that is going to be a record year, I think,” hospitality executive Jon Grutzner told CNBC. You may notice students slipping away a few days early, prior to an official holiday break.

Self-Care

relax pexels andrea piacquadio 846080

During the pandemic, self-care became more than a buzzword — it became essential. With burnout and stress at all-time high levels in society, and especially for teachers, self-care finally got the legitimacy it deserves. As we ease back into a more face-to-face society, keep the trend going with simple self-care practices such as:

  • Setting flexible goals instead of endless and unrealistic lists of to do’s.
  • Having healthy boundaries, such as “I don’t answer work email past XX time.”
  • Indulging in restful sleep.
  • Enjoying healthier food choices.
  • Creating a home environment that feels like a soothing sanctuary with pleasant lighting and scents, and soft materials.

Think about things that supported your mental and physical health during the pandemic, and what is worth keeping as a new habit. Maybe you rediscovered the joys of a daily walk, or found an online streaming yoga class, or learned to play a new instrument.

The best thing we can all do is to take the transition gently and being open to possibility. The world is not the same as it was, and we are not the same people we were. But here’s to creating something new in the upcoming school year and seeing where the journey takes us.

How to Play the High Notes on Your Guitar

I’ve always loved how logical the piano keyboard is. Seven octaves (plus a minor third) of chromatic tones, color-coordinated in ebony and ivory to indicate the sharps, flats and naturals. Better still, the distance between each note is always the same, regardless of the octave.

If only things were that simple for guitarists! We need to navigate the fretboard in a very different way. For one thing, the distance between frets gets smaller as you go higher and higher up the neck (for reasons detailed in the blog posting “Why Do the Spaces Between Frets Grow Narrower Down the Neck?”), limiting the space we have to articulate melodic and chordal passages. In addition, we have to deal with the fact that the interval between the G and B strings is a major third, but is a perfect fourth between the other string pairs. We also must account for open strings within our chords and memorize which notes fall within each fret location.

Perhaps we should all get bonus points for even attempting the intrepid journey from our guitar’s lowest notes to its highest ones!

In this article, I’ll offer some tips on how to get positive results no matter what notes you’re playing, along with some specific advice about what to do when you are running out of oxygen in the upper stratosphere. Note that, like electric guitars, some acoustic guitars have cutaway designs that make life easier for those who like to venture all the way up the fretboard. The techniques discussed in this article apply to both, and will allow you to go as far as you possibly can on any given instrument, electric or acoustic.

The Lowdown

Guitar players that primarily stay in the open position (close to the nut and headstock) will appreciate the open space between the frets in this area. If you also have large hands, guitars with wider fretboards (i.e., a wider nut width) are available to accommodate you.

When I’m working with a new student, I often suggest they use a capo to place chord voicings higher up on the fretboard in order to reduce the size of the chord or scale shape. The student can then move the capo down the neck, one fret at a time, until the shapes are manageable in every location.

The Fingertips

Unless a barre is required, I’m a huge advocate of playing chords and scales with the fingertips — in other words, with the tips of your fingers facing the strings at a 90-degree angle to the fretboard. This will keep chords nicely articulated and free from choking or buzzing on adjacent strings. This technique will also produce clean results when you climb further up the neck.

The Wrist

Reducing the amount of bend in your wrist will allow the tendons and fingers to move with fewer restrictions. The best way to achieve this is to place the guitar on your right leg (if you are right-handed) and rotate the guitar at a 45-degree angle to your body. As shown in the photographs below, moving the guitar headstock away from you at this angle will straighten the wrist and make articulations along the full length of the string much easier.

Seen from above a closeup of the position of the hand and wrist high on the neck of the guitar.
Seen from above a closeup of the position of the hand and wrist lower on the neck of the guitar.

Classical Posture

Right-handed classical guitar players do something very similar: They rest their instrument on their left leg, raise their left foot on a low footstool and angle the headstock upwards at approximately 45 degrees. (Left-handed players do the opposite.) Again, this approach allows for a smooth transition of fretboard locations and keeps the wrist relatively straight. Here’s a short video that shows how it works:

Standing Up

Of course, we want to look as cool as possible when we perform, and we’ve all seen the guys that have their axe slung super low when they rock out. It may look the “business,” but the unmistakable fact is that it’s really hard to play when the wrist is bent to such a degree. Instead, raise the guitar strap to support the instrument as if you’re at a sitting position, then position the guitar away from you at 45-degree angle. It still looks pretty cool, and trust me, you’ll be able to play much better.

Mind you, I’m not advocating having the guitar under your chin at gigs … unless you’re in a Merseybeat tribute band!

Action/String Tension

Unless you’re playing slide guitar, you’ll almost always want to make sure that your guitar has been set up with the lowest possible action — that is, with the strings as close to the fretboard as possible, without any buzzing. This is especially important as you play further up the neck, where the action will get higher and the string tension will increase.

This means that any articulations will need more finger strength, and that the time it takes for the string to reach the fret wire will take longer. That’s a good reason why you should practice scales at every possible fretboard location to get used to these variances. Play along to a metronome or groove track and record yourself playing in both the lower and upper regions. If there are timing discrepancies, you’ll want to make the appropriate adjustments. Keeping your fingers close to the strings at all times will help reduce timing errors due to the two distances (fingers to strings and strings to fret wire) changing.

Scale Length

Guitars come in various scale lengths, and different lengths change the fret spacing, so finding a guitar that works for your hand size and playing style is crucial. Scale length also impacts string tension — the longer the guitar, the greater the tension. For example, a scale length of 25-1/2 inches has a higher string tension than a guitar with a 24-3/4 inch scale length.

Neck Join

The place where the guitar neck joins the body will also have a big impact on the playing range of your guitar. Guitars that join at the 12th fret will have less range than those with a 14th fret neck join. If playing in the upper ranges is an important part of your repertoire and style, this should be a very important factor in deciding which guitar to buy.

String Gauge

It may be worth experimenting with string gauges too. If you’re struggling with medium- to heavy-gauge strings (i.e., 12s or 13s) in any area of the fretboard, you may want to try a lighter set, such as 11s. This will often affect the tone, but is well worth the trade-off.

Man in the Mirror

Practicing in front of a mirror is also a good idea. You’ll be able to see the transitions and fret spacings more easily, and it may also allow you to see any problem areas in your technique or posture.

Whether or not you expect to be playing in the high register of your guitar very much, I advise you to practice your scales, arpeggios and chord voicings in every fretboard location. As you do so, work your way upwards to the highest area in which you can play comfortably. Understand that this is actually the highest range of your guitar regardless of how many frets you see; if you can’t reach them, you can’t use them!

Lowering your thumb to the lower bout of the neck will also help you reach the upper strings in the higher ranges of the fretboard.

Try playing the following three musical exercises of the harmonized E major scale and focus on making all the fretboard transitions smooth, with open strings ringing out without a buzz. This will help you adjust to the fret spacing of your particular instrument.

Graphic showing string fingering.

The Video

In this video, I’m playing a Yamaha SLG200NW SILENT Guitar — a nylon-string with a classical neck width that is uniquely qualified for recording, live performance and, of course, silent practice sessions thanks to its headphone jack. It also offers an auxiliary input for jamming to tracks and some wonderful onboard effects. (The electronics on the SLG200N and SLG200S models are identical, but their necks are slightly narrower, making them a great choice for people accustomed to electric guitars or those players with smaller hands.)

Notice how the 12th fret neck join and the generous cutaway allows me to easily access those upper frets and navigate the full length of the fretboard, creating vertical and horizontal melodies using chords, double-stops, arpeggios and single-note solo lines.

The Wrap-Up

Before purchasing any new guitar, consider its body style, neck join and pitch range to be sure it fulfills your musical needs and style. Once you’ve made your decision, be prepared to make any and all necessary adjustments to your posture, fingering and timing. The full range and potential of the instrument will then be yours to explore with relative ease.

Photographs courtesy of the author.


Check out Robbie’s other postings.

Click here for more information about Yamaha SLG Series SILENT guitars.

Nobody Does It Better

As a teenager I remember how viscerally I was drawn to Carly Simon and her confessional style of lyric writing. Every candid disclosure (“That’s the Way I’ve Always Heard It Should Be,” “Anticipation”) made me feel closer to her even when her admissions weren’t pretty or strong — especially when they weren’t pretty or strong — because she trusted me with her secrets. Her honesty about her own emotional vulnerabilities and weakness was an integral part of her craft. Nobody did it better. It was Carly’s superpower.

Then there was Bob Dylan, who wasn’t anything like Carly. (Can you imagine Bob crooning “Anticipation?”) Yet … wow. He cut right to the bone. It was brutal and brilliant! Nobody did it like Bob. It was his superpower.

Taylor Swift is a master at channeling the hearts and minds of young women in love — and those who want to be. And then there’s Joni’s Mitchell’s insightfulness. Burt Bacharach’s melodies. Bruno Mars’ soul. Pharrell Williams’ joy.

It’s tempting to want to jump into someone else’s lane, especially when we admire their work. In fact, I came up with a term for these kind of songs: WIWI, as in “wish-I-wrote-it.” But just because I wish I wrote “I Can’t Make You Love Me” doesn’t meant I could have done it as well as Mike Reid and Allen Shamblin. One size does not fit all.

No doubt I adopted a confessional palate from Carly Simon but I’d like to think I accessorize my work through my own personal lens. If you read my blog postings regularly, you won’t be surprised to learn that I spend quite a bit of time pondering my inner workings and trying to accept myself as I am — flaws and all. So perhaps that’s my superpower: writing about self-identity and vulnerability. Looking back, I can see that out of the thousands of songs I’ve penned in my professional career, the handful that have struck the strongest chord (no pun intended) and have also garnered the greatest commercial success have been the ones that have circled those introspections.

It took a while to realize that I’m better at writing the personal stuff than the party song. Sometimes I wish it were the other way around. But I’ve come to accept that party songs are simply not my thing.

Have you ever thought about what your superpower is? Doing so requires that you step back from your work and consider which of your songs have resonated most deeply with listeners … and why. Identifying that thing you do best can be a lifesaver when you’ve ventured too far out of your zone and lost your way. Knowing what that power is can help you get back on the right path.

This concept doesn’t pertain to music-making alone, either. In a Muddy Colors article entitled “What Makes Your Art Unique,” visual artist Dan Luvisi writes, “Every artist has their own unique and individual style. If you know how to recognize it, and can perfect or master it, that’s what allows you to stand out before anyone else. … What’s important not to do, is try to mimic someone (else’s) style because you simply enjoy it.”

Let’s face it. In this this algorithm-centric music-creating culture, it’s tempting to follow the leader and forget that our most important asset is our own voice, our own nuanced way of looking at the world, love, friendship, intimacy, values … life. Better to ask ourselves what sets us apart instead of how can we blend in.

So open your closet. Find your one-of-a-kind red cape. Dust it off and trust it. It’s a good bet you’ll wear it well.


Check out Shelly’s other postings.

DTX6 Deep Dive, Part 4: Customizing, Importing and Layering Sounds

The DTX-PRO sound module furnished with all Yamaha DTX6 Series electronic drum kits comes loaded with 40 preset kits built from a library of over 700 amazing drum and percussion sounds. In addition, you can create up to 200 of your own customized user drum kits from the factory sounds and/or imported WAV files; you can also craft complex layerings of sounds and/or switch between sounds depending upon how hard you hit the drum pads. In this Deep Dive, we’ll show you how it all works.

Substituting Instruments

The drum kits in the DTX-PRO are collections of sounds called Instruments (“Inst” for short) such as kick, snare, toms, cymbals and hi-hat. Changing the Instruments in a preset kit is an easy way to build your own customized kit.

When the DTX-PRO is first powered on, it displays the Kit Screen:

Screenshot.
The DTX-PRO Kit Screen.

Pressing (F1) opens the Inst Select Screen where you can view the category, number and name for any Instrument. Simply tap the drum pad for the one you want to edit, then use the scroll wheel or the +/- pads to audition different Instruments. The down arrow scrolls to the next page, where tuning, muffling or cymbal size can be changed. You can also press F3 to import your own custom WAV file and use it as an Instrument. (More about this shortly.)

Screenshot.
The Inst screen.

Here’s an audio clip of me playing DTX-PRO preset kit P001 (“AbsoHybridMaple”):

Compare that with this next example, where the kick and snare Instruments have been changed to “18MpleAHM2” and “13×6 Brassy,” respectively:

This next clip is of the same “13×6 Brassy” snare Instrument, but with its tuning changed to -3.00 (that is, down three semitones). You can hear how even this slight change in tuning alters the attitude of the entire kit.

Similarly, changing Cymbal 2 to Perc 127 (“Tamtam”) gives the kit a very different flavor altogether:

Use Your Voice … and Get in the Zone

The Kit Edit menu gives you another way to access Inst Select, plus it provides access to an important parameter called voice.

Screenshot.
The Kit Edit menu, with the voice option circled in red.

A voice is the sound that makes up an Instrument. Voices can consist of either internal sounds or imported WAV files. Some Instruments (such as kick and toms) utilize one voice, but others use multiple voices. A snare Instrument, for example, is usually constructed from three different voices: one for the head, one for the open rim (rim shot), and another for the closed rim (cross stick). When you change a snare Instrument, all the voices are changed.

Different voices can be played from a multi-zone pad such as the Yamaha XP80, which is divided into three zones, one for each voice.

Diagram indicating knob and settings for zones.
The three zones of the XP80 pad.

Any voice can be assigned to each of these zones. For example, you can assign an acoustic drum sound to the pad head, a tambourine to Rim A, and a cowbell to Rim B — enabling a unique performance on your custom kit. These settings are stored to each User kit you create.

Importing Sounds

One of the most exciting DTX-PRO features is its ability to import up to a thousand WAV files (mono or stereo) that can then be used to create custom Instruments. First, you’ll need to copy the files you want to import onto a USB flash drive (tip: copy the files directly onto the root directory of the flash drive; if you copy them into a folder they may not be recognized). A list of compatible USB devices can be found here.

Next, go to the Kit Screen, press F3, and tap the Instrument pad you want to edit. The scroll wheel or the +/- buttons will then take you through the list of WAVs that are on the connected flash drive:

Screenshot with annotation.
The DTX-PRO Import screen.

Once you find the WAV you want to import, press F3 again. The DTX-PRO will display a confirmation screen; pressing F1 (Yes) will import the file to the Instrument, and the pad will now play the imported WAV file.

When an audio file is imported to an Instrument, a multi-zone pad will play that sound regardless of which zone is struck. However, you can also import an audio file for use as a voice, in which case a different WAV sound can be assigned to each zone of a pad. To do this, navigate to Menu -> Kit Edit -> Voice. Use the down arrow (F2) to highlight Import Voice, then press F3. Tap the zone of the pad you want to edit, select a WAV from the flash drive, then press Import (F3) to confirm your choice. You even have the option of importing different WAVs to different layers (see below).

Layering Sounds

Adding to the versatility of DTX6 kits is the fact that different sounds can be layered together. Every zone of every pad has four layers (A, B, C and D), and each layer can play a different voice. The Yamaha PCY135 multi-zone pad is capable of playing up to 12 voices!

Diagram.
The PCY135 multi-zone cymbal pad has four layers per zone.

Voices can be stacked so they play simultaneously, or they can be played sequentially. It is also possible to create velocity switching so that the voice changes, or a second voice is added, when the pad is struck with a certain strength.

To demonstrate, here’s me playing preset kit P002 (“Steel Ring”):

And here’s how that same groove sounds when a tom is stacked on the snare pad. Every time the snare pad is struck, you’ll hear the snare layered with a tom:

Layers are edited by navigating to Menu -> Kit Edit -> Voice and then pressing F3, which brings you to the Trigger Input Source screen:

Screenshot.
The Trigger Input Source screen.

Tap the pad (trigger) and layer you want to edit, then press the Exit button. This takes you to the Voice Select screen, where you can choose the voice to be played for that particular layer. (Tip: When working on layers, turn on the PAD LOCK [F2] to ensure that you don’t accidentally tap another pad and edit it instead.)

Screenshot.
The Voice Select screen.

You can also use layers to change the sound of an Instrument through velocity switching, where striking a pad with a certain strength causes different layers to play different voices.

Screenshot.
The high and low velocity limits of a layer are set in the Kit/Voice Menu.

To demonstrate how this can be used, here’s a simple figure played on a snare drum:

Here’s the same rhythm, with Layer A playing the same snare as in the previous clip, but with the other layers modified as follows: Layer B plays a high tom on medium-soft strikes, Layer C plays a mid tom on medium strikes, and Layer D plays a low tom on the hardest strikes.

Insertion Effects

You can also noticeably change the sound of the Instruments in your custom kit by adding effects. In addition to the Kit Modifier effects we talked about in Part 1 of this series (EQ, Transient and Comp [compressor]), you can apply Insertion effects to each individual Instrument. These tend to be quite dramatic and can take your sounds in a new direction. To demonstrate, here’s preset kit P13 (“Modern Country”) without any Insertion effects:

Inserting the Dynamic Flanger on the snare drum produces this very cool sound:

And adding the Dynamic Ringmod effect to the toms results in a drum kit that sounds like it could be from outer space!


Ready to learn more about customizing sounds? Check out this video:

Check out the other installments of our five-part “DTX6 Deep Dive” series:

Part 1: The Kit Modifier

Part 2: Recording Options

Part 3: Training Tools

Part 5: A New Level of Playability


Click here for more information about Yamaha DTX6 Series electronic drum kits.

Top Five Cinco de Mayo Songs

Cinco de Mayo is not just about margaritas and Mexican food. Here are five iconic songs (what other number could we possibly choose?) that celebrate Mexico’s rich cultural heritage.

1. La Bamba

This Mexican folk song has long been an anthem of cultural pride and resistance — and it’s also the very first song sung in Spanish to hit No. 1 in the United States. The seminal 1958 recording by Richie Havens, a then 17-year-old kid from the San Fernando Valley, was similar to the popular rendition sung by Andrés Huesca in the 1940s, but with a distinctive rock’n’roll beat. Nearly thirty years later, the cover version by East LA band Los Lobos topped the charts … and their music video would win a 1988 MTV Video Music Award too. Listen to the Andrés Huesca version here, the Richie Valens version here, and the Los Lobos version here.

2. Oye Como Va

Written in 1962 by Tito Puente and popularized by the rock group Santana in 1970, this feel-good song will have you doing the cha-cha in no time flat. Carlos Santana’s arrangement dispenses with the brass section in the original version, but adds Hammond B-3 organ and rock drums, with his electric guitar front and center, soloing up a storm and carrying the main melody — a melody that in Puente’s version is played by piccolo. Listen to the Tito Puente version here and the Santana version here.

3. Bidi Bidi Bom Bom

No Cinco de Mayo playlist would be complete without a Selena track. The chorus of this catchy 1994 tune suggests the palpitating heartbeat of the lovestruck. After a shot of tequila, you might even try to bust out your best Selena dance moves. Word to the wise: Don’t. Listen to it here.

4. Amor a la mexicana

Thalía has been dubbed the “Queen of Latin Pop” with good reason: she has sold over 25 million records worldwide. This sultry pop cumbia (a style of music that originated in South America, with sensuous dance movement as an important element) became one of her biggest hits upon its release in 1997. The lyrics celebrate love, Mexican-style, with “horse, boots and sombrero; tequila, tobacco and rum.” Listen to it here

5. Parrandera, Rebelde y Atrevida

This 2005 song, written and sung by the late Jenni Rivera, features lyrics that are at once defiant and liberating. Early in her career, Rivera was criticized for performing traditional banda music — not least because it’s a genre that has long been male-dominated — but she persevered, and by the time of her tragic death in a 2012 plane crash, she had become one of the best-selling, and best-loved Mexican-American artists of all time. Listen to it here.

Think Like a Drummer, Part 1

For many musical styles, there’s nothing like a real drummer. But capturing the sound of a drum set — be it acoustic or electronic — is not practical in most home studios. For one thing, there’s often not enough physical space to set up a kit; for another, multiple mics and/or multiple input channels on a mixer or audio interface are required to do the job right.

Fortunately, there are numerous tools that you can use to create authentic-sounding drum tracks even in the most modestly sized (and/or modestly equipped) home studio. Here, in Part 1 of this two-part article, I’ll show you how to incorporate drum loops — both audio and MIDI — and talk about the advantages of each. In Part 2, I’ll offer specific tips for programming your own drum parts.

Audio Drum Loops

There are millions of electronic beat loops widely available, and many audio drum loops capture the feel of a real drummer, but those made from recordings of actual drummers playing acoustic drums are the most authentic-sounding option for putting together a drum track. There’s no shortage of such loops out there; in fact, your DAW may very well include some. Steinberg Cubase, for example, comes with several libraries of drum loops.

The basic idea is simple: Once you’ve found loops that fit the feel of your song, you drop them into a track in your DAW, one after the other, and construct a complete drum part that way.

Screenshot.
Constructing a drum part by placing audio loops end to end.

Audio drum loops come in many forms, but the great majority are stereo recordings edited into a one- to four-measure (sometimes more) pattern. Most come as WAV files, but you’ll also find them as AIFF files and in other formats that allow for automatic time-stretching in specific applications. (See the “Tempo in a Teapot” section below for more about time-stretching.)

Loop collections are often broken up into different song groupings, typically separated in folders. Each grouping contains an assortment of loops based around a single groove. As you assemble your song-length drum track, you pick and choose from loops representing various generic song sections (i.e., verse, chorus, bridge, etc.), along with a variety of variations and fills. (More about fills shortly.)

Screenshot.
An audio loop song folder containing beats and fills for a variety of song sections.

Song groupings usually have generic names such as “Motown 120,” “Slow Funk 85” or “Trainbeat 160,” although sometimes their titles are more descriptive, hinting that they’re in the style of a well-known song. The number in the titles refers to the tempo in beats per minute (BPM).

Although most loop collections are stereo, you can also find multitrack drum loops on the market. These allow you to do the drum mix yourself but are much more complex to work with. If you’re into mixing your own drums, you might want to consider such products.

One-Shots

Most audio loop collections (such as the one provided by Steinberg Groove Agent SE, a plug-in included with Cubase) also come with a folder of one-shot samples that you can drag or import into an audio track (separate from your loop track) to add an accent (sometimes called a “hit”) here or there. For example, you’ll probably want to add crash cymbals at appropriate spots in your song.

Screenshot.
A crash cymbal hit underneath a drum loop track.

Tempo in a Teapot

Audio loops will only play in time if they match the tempo of your song. One easy way to make sure that happens is to find the loop grouping you want to use ahead of time, and then set your project to the tempo of the grouping before you start recording.

But if you can’t match your song to the loop’s tempo, you can match the loop’s tempo to your song. Most DAWs, including Cubase, feature sophisticated time-stretching capabilities that can adjust a loop’s tempo without changing its pitch. As long as the time-stretch is no more than roughly 15 BPM up or down, it should sound fine. If the difference is larger than that, however, the process can cause your loops to sound unnatural. Use your ears to determine what works and what doesn’t.

Cubase offers several options for time-stretching audio, including Musical Mode, which automatically matches loops to the project tempo. You can also accomplish this manually by changing the Project Selection Tool to Sizing Applies Time Stretch, and then just stretching the loop to the nearest barline, as shown here:

Three screenshots.
Step-by-step method for manual time-stretching in Cubase.

MIDI Drum Loops

Drum loop collections can also come in MIDI format. These can be used with a software-based sampler or a dedicated app such as Groove Agent SE. Many such instruments come with a large selection of MIDI drum loops. (In Groove Agent SE, they’re called “Patterns.”)

Screenshot.
Some of the many MIDI “patterns” that come with Groove Agent SE.

If you’re going for the sound of real drums, look for MIDI loops that were created by capturing the data of a skilled drummer playing an electronic kit. While not quite as realistic as audio loops, they can still capture the drummer’s feel and sound quite authentic.

One of the big advantages of using MIDI loops is that, unlike audio loops, you can change the sounds at will. For example, let’s say you like the pattern being played but don’t care for its sound. No problem — simply load another set of drum samples until you find what you like.

MIDI loops can also be edited a lot more easily and deeply than audio loops. It’s especially easy to move, add or remove drum hits.

Screenshot.
MIDI drum loops provide more editing flexibility.

Also, with the exception of multitrack drum loops, you can’t change the mix of an audio loop appreciably. MIDI drum instruments provide significantly more mixing options. Many of them (including Groove Agent SE) come with built-in virtual mixers that let you process and adjust individual drums to your heart’s content.

Screenshot.
Groove Agent SE offers a sophisticated built-in mixer.

Hand Made vs. Loops

Some people like to “play” in their MIDI drum parts from a keyboard controller. That works best for genres in which the drums will be heavily quantized, because it’s hard to imitate the feel of a drummer when you’re tapping on a keyboard. It’s usually more effective to use loops that were recorded by a real drummer, either in audio or MIDI format.

In Part 2, we’ll get into the nitty-gritty of putting together a song-length drum track.


Check out our other Recording Basics postings.

Click here for more information about Steinberg Cubase.

The History of Musical Genres, Part 6: Rap and Hip-Hop

The terms rap and hip-hop are often used interchangeably to refer to the music alone, but hip-hop encompasses a larger cultural aesthetic that includes DJing, MCing, break-dancing and graffiti art as well. The difference between these terms is best expressed by New York rapper KRS-One on his 2018 single “Hip Hop vs Rap,” where he explains that rapping is a skill, but hip-hop is a lifestyle.

In this final installment of our “History of Musical Genres” series, we’ll take a look at the rise of both, exploring their cultural and musical significance, as well as highlighting some of the key players in the vibrant rap and hip-hop scene.

Early Practitioners

Rap music began to develop organically in the late 1970s and early ’80s, thanks largely to the creative efforts of three Bronx DJs: Grand Master Flash, DJ Kool Herc and Afrika Bambaataa. Perhaps not coincidentally, it was during this period that turntables became instruments through the technique of “scratching,” where DJs dropped a needle onto vinyl records and then moved them back and forth manually to create percussive sounds. By playing two turntables with the same record, so-called breakbeats could be extended to give MCs time to rhyme without getting in the way of the song’s vocals. “I’m actually readjusting time,” Flash explained in a 2016 story in the New York Times. “I’m taking this break, it’s 10 seconds, I’m making it 10 minutes [and] you don’t know when it’s beginning or ending.”

The first rap song is thought to be the 1979 release of “Kim Tim III (Personality Jock)” by The Fatback Band, but the track served as the B-side of a R&B tune and consequently never garnered much attention. It wasn’t until the Sugarhill Gang’s release of “Rapper’s Delight” later that year that rap music was thrust into the public consciousness. Before this, early rap artists couldn’t envision how their live shows could be condensed to 3 minutes, the average length of a pop record.

When the original 12-inch version of “Rapper’s Delight” hit the airwaves, it defied radio norms, coming in at 15 minutes long. “And yet, Black radio started playing it,” writes Elizabeth Blair in a 2000 story on NPR. “So much so that the Sugarhill Gang recorded a seven-minute version for pop stations and introduced the Black neighborhood sound of the 1970s to white listeners.” Adds journalist Harry Allen in that same article, “‘Rapper’s Delight’ was kind of like the thing that said, ‘This is how we’re going to do it.’ And then everyone else said, ‘Oh, I get it.’”

The other gamechanger, “Planet Rock,” by Afrika Bambaataa & the Soulsonic Force, was a gift to partygoers and break-dancers everywhere. The song was clearly electronica, but with hip-hop sensibilities. Released in 1982, it was a mashup of the Kraftwerk tracks “Trans-Europe Express” and “Numbers,” enhanced by synth stabs and robotic MC chants. More importantly, it was the song that brought drum machine beats to hip-hop. In a Rolling Stone list of the 50 Greatest Hip-Hop Songs of All Time, Chuck D of Public Enemy says, “‘Planet Rock’ is as important as Willie Mitchell or Booker T were to the Memphis scene. There hasn’t been a song like it in hip-hop since.”

Throughout the heyday of rap, hip-hop was largely a performance art experienced at parties that lasted for hours. Yet as the decade progressed, it became apparent that the fledgling genre had more to offer than party rhymes and dance beats. The epic song The Message by Grandmaster Flash and the Furious Five delivered a vivid picture of the struggles endured by many living in inner-city neighborhoods across America: incivility, poverty, homelessness and hopelessness. Though the group was reportedly initially reluctant to record the tune because it wasn’t a party song, it had an immediate impact. “The world (me included) absolutely froze in its tracks in the week it debuted on radio in June of ’82,” said The Roots drummer Questlove in Rolling Stone. “Hip-hop was known as party fodder, a fad. ‘The Message’ pulled a 180 and proved it could be a tool of sociopolitical change.”

Channeling the spirit of director Spike Lee’s film “Do the Right Thing,” the work of the rap group Public Enemy doesn’t simply describe the condition of disenfranchised people, it urges the listener to confront the maladies head on. Their 1989 release “Fight the Power” was written specifically at Lee’s request and is a call to action. “I wanted it to be defiant, I wanted it to be angry, I wanted it to be rhythmic,” said Lee in a 2020 article in Medium. “I thought right away of Public Enemy.”

Contemporary Rap / Hip-Hop Artists

Other standout artists who have been pivotal to the development of rap and hip-hop include Jay Z (born Sean Carter), who has been a dominant and creative force in popular music for decades, as well as one of the greatest MCs to ever hold a microphone. He’s also a prolific songwriter known both for his solo projects and collaborations with artists like Rihanna, Mariah Carey, Pharrell Williams, and his wife, Beyoncé. The Brooklyn native was also the first rapper inducted into the Songwriters Hall of Fame. He saw his selection as both a personal victory and an accolade for all hip-hop artists, tweeting: “This is a win for US. I remember when rap was said to be a fad. We are now alongside some of the greatest writers in history.”

Missy Elliott was the first female hip-hop artist to be inducted into the Hall of Fame. Elliott was recognized for her six studio albums and songs such as “Get Ur Freak On” and “Work It.” She was also lauded for her songwriting chops in service to other popular artists such as Whitney Houston, Aaliyah, Mary J. Blige and Ciara.

Christopher Wallace, who recorded as The Notorious B.I.G., sounded as if an asthma attack was imminent before every verse. And that was the genius of his delivery. “Biggie’s voice doesn’t sound like anybody else’s,” wrote Frannie Kelly in a 2010 story for NPR. “It’s plummy, wheezy, humid. It sounds like it comes from deeper in his chest than other people’s voices.” Wallace, who also went by the monikers Biggie Smalls and Biggie, was taught diction and phrasing by jazz saxophonist Donald Harrison. “We worked on various tonguing and speed and agility,” Harrison recalls. “You have to slow things down really slow and take the time to phrase each note.” During his career, Wallace worked closely with the producer and rap artist Sean Combs, who recorded as Puff Daddy. Some of their popular collaborations include “Hypnotize,” “Mo Money Mo Problems” and “Juicy.”

The Impact of Technology

Hip-hop is a genre that relies heavily not only on the creativity of its artists but also on the technology available to bring those songs to life. Since the beginning of rap, producers and artists have mined previously recorded music to help drive their songs. “Rapper’s Delight,” for example, is supported heavily by the 1979 disco hit “Good Times” by the R&B group Chic. The ultimate example might be Public Enemy’s “Fight the Power,” which incorporates 21 distinct samples, including snatches from James Brown’s “Funky Drummer,” Sly and the Family Stone’s “Sing a Simple Song” and “I Shot the Sheriff” by Bob Marley and the Wailers.

Recently, NPR explored the creative use of samples in a video series that features top producers discussing their craft. One clip shows DJ Premier expressing his excitement over Screaming Jay Hawkins’ primal shriek in the 1956 classic “I Put a Spell on You, which formed the heart of one of Premier’s best-known beats: Notorious B.I.G.’s “Kick In The Door.” In the clip, Premier is seen snatching fragments of sound from the record and using it to create new rhythmic motifs. “How could you not want to mess with that?” he says. “Sampling is a dope way of making hip-hop records that sound pure to the way that I was introduced to it. There’s nothing more pure than the sampling format.”

Now more than four decades old and still going strong, it’s clear that both rap and hip-hop are no longer fads but lasting musical genres. And there’s little doubt that its popularity will continue to grow because it attracts creative people from a wide range of disciplines — rappers, dancers, musicians, DJs and techno-wizards — all of whom have something to say.


Check out the other articles in our “History of Musical Genres” series.

The Role of Piano in Jazz

Jazz is a uniquely American idiom that developed in the early 20th century as an outgrowth of blues and other musical genres. One of the most important of these genres was ragtime, an African-American makeover of European waltz and march themes, played on piano and syncopated (“ragged”) so that the beat of the melody played by the right hand fell between the steadily marching pulse of the left hand, instead of on top of it.

Though it enjoyed considerable favor for a couple of decades (as epitomized by Scott Joplin’s “The Entertainer” and “Maple Leaf Rag”), ragtime proved to be more of a fad than a lasting form of musical expression and was soon eclipsed by the massive popularity of jazz. Yet its enduring influence persists to this very day in the choice of jazz band instrumentation, which almost always includes piano in addition to a lead instrument like saxophone and/or trumpet, accompanied by a rhythm section of bass and drums.

Why Piano?

The piano is unique among most musical instruments in that it can play both melody and harmony simultaneously, making it capable of serving in either an accompanying or a lead role In that sense, you can think of it as the ideal ensemble member — a major reason why jazz composers and bandleaders have long relied on the instrument.

In jazz, the piano typically provides a syncopated chordal underpinning while the sax, trumpet, or other lead instrument plays the main melody or takes a solo, switching to a central role when the pianist metaphorically steps forward to take his or her own turn in the spotlight.

Giants of Jazz Piano

Most musicologists consider the colorfully named Jelly Roll Morton to be the father of jazz piano. He skillfully blended blues and ragtime, in the process liberating the latter from its musical limitations, as personified in his 1915 “Jelly Roll Blues,” said to be the first published jazz composition. Morton was also one of the prime originators of the “swing” style, where selected notes are played in a laid-back fashion, slightly behind the beat, with the overall accenting shifted to the off-beats, giving more weight to the second and fourth beats instead of the first and third, as had been the custom previously.

Man in tuxedo sitting at a piano.
Jelly Roll Morton.

The 1920s marked the golden age of jazz piano. Prominent practitioners of the era included Thomas “Fats” Waller, James P. Johnson and Willie “The Lion” Smith, all of whom played important roles in the development of the punchy, ragtime-derived style called “stride.” Another key player was Earl Hines, a member of trumpeter Louis Armstrong’s groundbreaking groups of the era. Hines’ unique improvisations incorporated melodic phrasing that echoed the leaps and twists of Armstrong’s lead lines, thus propelling jazz piano to new heights.

In the late 1920s, Edward Kennedy “Duke” Ellington rose to fame through his long residencies at (and radio broadcasts from) the renowned Cotton Club in Harlem. Though thought of primarily as a prolific and influential composer, Ellington was also a gifted pianist, and his sparse stylings as he comped in support of the soloist did much to further the role of piano in modern jazz.

Man in tuxedo playing piano.
Duke Ellington.

The following two decades would see the rise of the big band, featuring large ensembles that played a more rigid form of jazz, relying more on written compositions and arrangements than improvisation. Although most bandleaders were wind players such as trombonists Glenn Miller and Tommy Dorsey or clarinetists Benny Goodman and Artie Shaw, big band instrumentation always included piano. On occasion, they were even led by the pianist, as was the case with the Duke Ellington and Count Basie Orchestras.

Another standout of the era was Art Tatum, who is regarded by some as the most technically complete jazz pianist of all time. Tatum established new ground through his innovative use of reharmonization, unusual chord voicings, and bitonality (playing in two keys simultaneously) … and it’s said that more than one budding jazz pianist gave up altogether after witnessing Tatum’s staggering virtuousity in live performance.

Smiling man in profile playing piano.
Art Tatum.

The 1940s and 1950s saw the rise of bebop, a subgenre of jazz characterized by blistering fast tempos, frequent key changes and intricate melodies full of surprising twists and turns. The main force behind bebop was the cerebral (yet self-taught) pianist Thelonious Monk, one of the most inventive musicians of all time. Whereas most jazz pianists tended to play sparse chords in the left hand and eighth or sixteenth notes in the right hand, Monk combined an active right hand with an equally active left hand, fusing stride and angular rhythms that utilized the entire keyboard. And in an era when fast, dense, virtuosic solos were the order of the day, Monk was famous for his use of space and silence.

Man in checked jacket wearing a porkpie hat and glasses playing piano.
Thelonious Monk.

The late 1950s/early 1960s saw the rise to prominence of legendary jazz pianist Bill Evans, who played on trumpeter Miles Davis’ groundbreaking Kind Of Blue album and would later almost singlehandedly invent the conversational piano-bass-drums jazz trio format. Evans’ impressionistic sound, influenced by European classical music, featured syncopated and polyrhythmic melodic lines, and would come to influence a generation of pianists, including McCoy Tyner, Herbie Hancock, Keith Jarrett and the late, great Chick Corea.

Corea, a Yamaha Artist who won 25 GRAMMY® Awards, was one of the primary architects of jazz fusion, the subgenre that came to predominate the jazz of the 1970s and beyond. As both a soloist and with his group Return To Forever, Corea embraced both traditional piano and modern keyboard instruments such as synthesizers, skillfully blending Latin music elements with rock and funk-oriented sounds, in the process breathing new life into jazz and introducing it to a worldwide audience of millions. Spanish rhythms and the precise percussive sound of Afro-Cuban piano were key ingredients of his playing, along with a strong melodic sense and a crisp, distinctive touch at the keyboard.

Man playing a Yamaha piano.
Chick Corea.

The latest generation of jazz pianists includes forward-thinking musicians like Yamaha Artist Gerald Clayton:

Now more than a century old and counting, jazz piano continues to push the boundaries, maintaining a long tradition of musical innovation and bold exploration.

Photographs by Hulton Archive/Getty Images, Bettmann/Contributor, JP Jazz Archive/Getty Images, AFP/AFP via Getty Images and Rob Davidson at the Yamaha Artist Services New York piano salon.


Check out these related blog articles:

The History of Musical Genres, Part 2: Blues and Jazz

Genius Is As Genius Does

The Sounds of Silence


Click here for more information about Yamaha pianos.

A Brief History of Yamaha Guitars

Yamaha guitars have captivated the ears of listeners and players for over 60 years. The company’s wide range of acoustic and electric models remain ubiquitous in every kind of musical genre, from classical to folk to hard rock. Renowned for their playability and durability as well as their distinctive look and tonality, these guitars have been played by generations of musicians and have appeared on countless numbers of recordings and concert stages.

Let’s take a look back at the decades of innovation and craftsmanship that have made Yamaha guitars a mainstay of modern music.

1966 – 1969

Yamaha entered the global guitar market in 1966 with the release of the FG180 folk guitar, which was developed using a proprietary design and engineered in-house. Its symmetrical dreadnought-style body featured slightly emphasized cutaways, resulting in  a rich, bright tone and excellent sound projection. This was one LOUD guitar!

Acoustic guitar.
Yamaha FG180.

That same year saw the introduction of the company’s first electric models: the SG-3 and SG-2 (the latter was used extensively by guitarist Link Wray), which featured custom-designed pickups, bridge and whammy bar, with a retro-futuristic look that seemed to embody the era of surf music.

Electric guitar.
Yamaha SG-2.

Spanish guitar maker Eduardo Ferrer, who studied under Spanish master Antonio de Torres, would visit Yamaha headquarters in Hamamatsu, Japan in 1966. Before the end of the decade, the company would unveil its first classical (GC5/7/10) and flamenco acoustic guitars (GC Series) — crafted by luthiers with training from Ferrer — along with its first semi-hollow-body electric models (the SA-50 and SA-15).

Electric guitar.
Yamaha SA-15.

1970 – 1979

During the first half of the 1970s, Yamaha expanded its acoustic offerings. Two 6-string folk guitar models (the FG-1500 and FG-2000) and a 12-string variant (the FG-2500) arrived in 1971, combining old-world build quality with modern specs and superior materials such as solid spruce tops and solid jacaranda backs and sides.

Acoustic guitar.
Yamaha FG-1500.

A line of L Series acoustics (“L” for “luxury”) followed in 1974. These high-end guitars were characterized by their sustain and balanced highs and lows. The GC-30 custom classical guitar, utilizing the design techniques of Spanish guitar-making auteur Manuel Hernandez, was also released that same year.

As Yamaha cemented its place in the acoustic market, it also perfected its electric guitars. It was 1974’s SG-175 that laid the groundwork for the SG Series, which would remain popular for decades. Famously, Yamaha built a custom SG-175 for guitar legend Carlos Santana. This was his main instrument throughout the 1970s.

Electric guitar with embellishment on face.
Yamaha SG-175B.

The SG-175 evolved into the beloved SG-1000 and SG-2000 models in 1976. The latter’s neck-through structure, sustain plate and semi-open humbucker pickup applied new innovations and technologies that would come to define the SG Series. Numerous electric models would be introduced soon after, including the SF-700, SC-1200, SA-2000 semi-hollow-body and SJ-800.

Close-up of electric guitar face and strings.
Yamaha SG-2000.

Another highlight of the decade was the company’s first full hollow-body electric model, the AE-2000. Arriving in 1978, the instrument was embraced by many leading jazz guitarists of the era thanks to its warm tonality and remarkable specs that included a carved solid spruce top, set maple neck, African Blackwood bridge and 20-fret bound ebony fingerboard with diagonally-split block inlays.

1980 – 1989

The music industry shifted towards digital and synthesized sounds throughout the ’80s. As trends changed during that decade of flashy glam and excess, so too did the instruments. The futuristic Yamaha SF-7000 electric, for example, offered different bridges for each model, giving players multiple options depending on their playing style.

On the acoustic side, the company’s GC-70/71 classical models maintained tried-and-true design philosophies while updating to 1980s standards, thanks to input from players around the world.

Acoustic guitar.
Yamaha GC-71.

And then there was the eminently shreddable RGX-1212, introduced in 1986. Its sharp angles and 3D headstock capture the glory days of heavy metal, proving that Yamaha could also realize a thoroughly modern guitar.

Magazing advertisement for electric guitar "RGX Sensation" with images of the different colors available and description of features.

Another innovation came in 1987 with the APX line of electric-acoustic guitars, which boasted hexaphonic piezo pickups that offered a separate pickup for each string, along with preamp switches that allowed for multiple output settings (mono or two different stereo options). The instrument’s smaller body also reduced the possibility of onstage feedback during live performance.

Acoustic guitar.
Yamaha APX50BB.

1990 – 1999

Having long since established its presence in the guitar market, Yamaha continued to flex its creativity in the 1990s. The PACIFICA 912 electric guitar, for example, was originally developed in 1990 in partnership with the company’s Los Angeles custom shop, designed to meet the needs of top session players. However, it (along with the entire PACIFICA line that followed) soon became a popular choice for both entry-level and advanced players — a popularity that continues to this very day.

Close-up of the face of an electric guitar.
Yamaha PACIFICA 912.

2000 – Present

At the turn of the new century, Yamaha released one of their most experimental instruments: the SLG-100N SILENT Guitar™, precursor to today’s line of SLG-200 Series instruments. Its ghostly, minimalistic design (like a guitar without a body) delivered ultra-quiet results, allowing players to practice anywhere without disturbing others.

Electric guitar with an open body.
Yamaha SLG-100N SILENT Guitar.

This proved to be a harbinger of things to come, as Yamaha guitar technology continued to advance by leaps and bounds. The SRT (Studio Response Technology) system introduced in 2010 revolutionized acoustic guitar pickup design, rendering a studio-like sound, as if the guitar is being recorded by a vintage condenser mic. As implemented by the current second-generation SRT2 systems incorporated in today’s A5 Series and LL Series guitars, controls allow the user to switch between two microphone types, as well as blend between the piezo pickup and digital mic modeling.

Closeup of long thin L-shaped piece of metal.
Yamaha SRT acoustic guitar pickup.

In 2016, Yamaha unveiled what is arguably one of the most significant acoustic guitar innovations of all time: TransAcoustic technology, which enables the creation of authentic reverb and chorus effects inside the instrument itself, without the need for any external amplification or effects devices. First implemented in the LL-TA and LS-TA models, today’s lineup of TransAcoustic guitars includes a wide array of instruments in different sizes and shapes, including a classical nylon-string model, the CG-TA.

Acoustic guitar.
Yamaha CG-TA.

In 2019, Yamaha introduced a new pickup/preamp system called Atmosfeel™, comprised of a piezo sensor, a mini-microphone and a unique synthetic sheet transducer. The piezo picks up the low frequency sounds where the strings meet the bridge, while the sheet transducer picks up the higher-frequency vibrations of the top soundboard, and the mini-mic picks up the resonance inside the body. The three signals can then be custom-blended together to provide a full representation of an acoustic guitar’s natural tone. Atmosfeel technology was first implemented in selected Yamaha FG Red Label steel-string guitars and has since been incorporated into the company’s upgraded NCX and NTX series of nylon-string acoustics.

Photo of someone playing an acoustic guitar. There is a title on upper right of "Atmosfeel" and there are three lines with text to point out locations of "Microphone", "Undersaddle Pickup" and "Contact Sensor".

The music world — and, by extension, the tastes and styles of guitarists — is constantly in flux. Yet for more than half a century, Yamaha guitars have retained their prestige thanks to the diligence of designers, builders, developers and the feedback of players. From the first FG180 folk guitar to the latest TransAcoustic models, Yamaha continues to pave the way.

Check out these related blog articles:

Step Up to a Better Acoustic Guitar

The SILENT Guitar Speaks

Discover Yamaha TransAcoustic Guitars

Which TransAcoustic Guitar Is Right for Me?

Nylon TA on TV

Getting Amplified

Atmosfeel: The Next Generation of Yamaha Acoustic Guitar Pickups

Atmosfeel Technology Comes to the Nylon-String Guitar


Click here for more information about Yamaha guitars.

Case Study: Summer Composition Program Addresses Gender Gap

Ever since I can remember, I have been writing music. I premiered my first real composition, entitled “The Mysterious Island,” when I was 8 years old.

It was a solo piano piece that, upon later reflection, was a blatant rip-off of “Under the Sea” from “The Little Mermaid,” a movie that I was obsessed with at the time.

I don’t remember thinking too much about composition as something special or noteworthy. Writing music felt like a natural way to respond to the music that I was already engaging with in my life, and it didn’t feel very different from playing pieces out of my beginner piano book. I was encouraged by my parents and piano teacher to keep writing, so I did.

A Tough Realization

I continued to study and write, and when the time came to start thinking about college and career, I knew that I wanted to study music composition. It was around this time that I started to pay closer attention to the composers whose works I was assigned in ensembles or lessons, and noticed a trend: These composers were often deceased, white and male. I remember a point when I realized with a start that I had never played a piece by a female composer (at least, not knowingly).

Discouraged, I thought that perhaps music composition may not be the right path for me. How could I succeed in a field that clearly didn’t value the works of living, non-white and non-male composers? I seriously considered applying to schools for music education instead, even though I had no interest in becoming a public school teacher.

Despite these major doubts, I did apply to composition programs and was accepted at Temple University in Philadelphia. Thrilled to start studying composition in a more formalized way, I was disappointed to discover that I was the only female in the entire undergraduate composition department. Clearly, there was a real, tangible gender disparity, which was majorly affecting the demographics of the field at the entry point to the professional sector.

Several years passed, and although I grew more confident in my own abilities as a composer and in my feeling of belonging in the field, I never forgot that critical moment during the application process when I almost abandoned my dream of becoming a composer. Without the extra encouragement from my parents and music teachers, I may very well have chosen a different path.

I wanted to do something for the next generation of young composers to give them that extra support and help to work toward a more diverse music composition field. I eventually came up with the idea of a summer composition program for young female and nonbinary composers.

The Idea

The camp, which I dubbed the Young Women Composers Camp, began as a relatively simple idea: a one-week day program for local high school students in Philadelphia, hosted by Temple University’s Boyer College of Music. I went to David Brown, the administrative dean, who immediately gave me the green light to formulate plans for the program. I decided I wanted to include the following:

  • Daily seminars in a variety of topics related to composition, providing students with the tools they need to begin or expand their musical experimentation
  • A presentation with a guest composer
  • One-on-one lessons with a composition instructor
  • A rehearsal and recorded performance of a new piece for a professional resident ensemble
  • Daily choir rehearsals to rehearse works by female composers, giving students the chance to embody the role of a new music performer and get that perspective on the process

In order to develop a program that was truly inclusive, I also decided that we would not charge an application fee nor would we require students to have any composition training or experience.

Refining the Plan

Young Women Composer Camp performanceAfter the initial draft was completed, it was clear that one week was not going to be enough time, so I expanded the summer program to two weeks. To help with the next phase of planning, I hired Temple’s music studies coordinator Julia Alford to be the program’s administrative director, and music studies chair Cynthia Folio to be our faculty director.

With Cynthia’s assistance, we secured a seed grant of $10,000 from Temple University, providing us with enough start-up funds to begin hiring faculty. We wanted to focus on amplifying women in every aspect of the program and chose to hire female guest speakers and performers (the one exception was our music tech director, Adam Vidiksis, who runs the tech program at Temple).

Our first resident ensemble was ATLYS, an all-female string quartet that had already planned to be in Philadelphia in July. We hired a composition instructor who was already working at Temple at the time and decided that Cynthia and I would serve as instructors for the remaining seminars and lessons. We subsidized general tuition to just $350 in the hopes of appealing to students (and their parents) who may not be able to afford the higher costs of other summer composition programs.

I created the Young Women Composers Camp website in the fall of 2017 to advertise the program, and we began accepting online applications that following spring.

First Camps: 2018-2019

camp attendee embracing an instructor at Young Women Composer CampJuly 2018: After about a year and a half of planning, we arrived at our first program in July 2018. We had 18 students in attendance. About half were from out of town and lived in the Temple dorms, and the rest of the students commuted to and from campus each day. Within the first day, our students formed a strong bond, and the mutual support that they provided one another was beautiful to witness.

Many students wrote their first composition at the camp, and all 18 received their first professional premiere and recording. We provided students with several anonymous evaluations throughout the program, and received overwhelmingly positive feedback, alongside many helpful suggestions that we were able to implement along the way. One student wrote “This is the most challenged musically (in a good way) I have felt in a long time!”

Watch the concert from the 2018 program.

July 2019: Our 2019 camp ran in a similar, slightly expanded way. We brought in an additional composition instructor, guest composers Jennifer Higdon and Andrea Clearfield (who each ran a master class) and performers from The Philadelphia Orchestra to serve as our resident ensemble. We raised our general tuition to $700 (not including optional housing), but offered significant financial aid to students who qualified, thanks mainly to support from individual donors and a few local foundations.

Watch the concert from the 2019 program.

Going Virtual in 2020

Because of the COVID-19 pandemic, our 2020 summer program deviated significantly from what we had initially planned. In early April, we announced a completely virtual program. We made a few major changes to the program:

  • Reduced daily seminar time to a maximum of three to four hours to minimize screen time
  • Expanded our eligibility to include female and nonbinary undergraduate students, to compensate for the many music programs that were cancelled
  • Lowered our tuition cost to $350 and offered significant financial aid
  • Transformed the mandatory choir component to an optional virtual choir project, which was opened up to the general population
  • Hired individual performers from the International Contemporary Ensemble and Variant 6 to perform solo compositions, rather than have students compose for ensembles

instructor at Young Women Composer Camp writing on white boardWe had no idea how many applications we would get, so we changed our financial model to pay our instructors a variable rate per student rather than provide them with a base stipend. This made it simple for us to scale the program as needed. By the time July rolled around, we were surprised and thrilled to welcome 50 students (a three-fold increase from previous years) tuning in from all across the United States, Canada, Asia and Australia.

The addition of undergraduates enhanced the program in ways I couldn’t have imagined. High school students were able to hear directly from undergrads about what it is like to study composition in college, and the college students were able to get some informal mentoring experience. Our shared community got a bit richer, and the overall response from students was incredibly positive:

“Another cool part about being an undergrad/generally older is that I feel like I’ve found peers, not just mentors, in the instructors and guest speakers. That might be my most surprising takeaway from this program. I’m friends with legit composers! It’s decimating my imposter syndrome! Very cool.”

“I can’t thank you enough for giving me this wonderful opportunity. This camp will always remain as something very special in my life.”

“I’m so grateful I got to attend this camp! It really changed how I think about composing, and how I believe in myself. I never realized how valuable it was even just to know there are other girls and folks out there who are my age, and who compose! Before YWCC, I think I grew up subconsciously believing that I could not become a “real” composer […] I can’t express how priceless this opportunity was to me.”

Watch the concert from the 2020 program.

2021 and Beyond

notes on paper and on tablet at Young Women Composers CampOur 2021 program, which will take place virtually in July, will feature returning instructors inti figgis-vizueta and Flannery Cunningham, new instructor Bahar Royaee, guest composer Courtney Bryan, and resident ensembles andPlay, Mazumal and Peridot Duo. We will again welcome undergraduates to join us, and plan to do so going forward once the camp meets in person again. I look forward to getting to know a new class of young composers, as well as checking in with some familiar faces.

Some big changes are on the horizon for our program. We recently incorporated as an independent nonprofit, having moved away from the fiscal sponsorship model, which will enable us to expand the program beyond a two-week summer camp. We hope to launch several other programs, including a virtual mentorship program and a year-round composition studio for high schoolers in Philadelphia.

Additionally, we are planning to change our name to be less exclusive of our nonbinary students. Although nonbinary students have been directly invited to participate since the inception of the program in 2018, our organizational name does not make this inclusion clear. We are planning to work with 2021 students to put together a short list of possible names for our organization, which will be discussed and finalized by the Board of Directors this fall.

From a personal standpoint, I have been utterly changed by this program and its three classes of brilliant, insightful, and passionate composers. I learn so much from them each summer, and they help me make the program better. I am grateful for the relationships I’ve formed with these students, and am excited to see how the organization grows in the years to come.

Case Study: Expanding the Footprint of a Storied Music Program

In the summer of 2018, I began my tenure as the director of bands at Shelby County High School (SCHS) in Columbiana, Alabama.

Columbiana is the county seat of the smaller of two counties that make up the greater Birmingham area.

SCHS has a long history of superior performance in all aspects of the band program, but I wanted to widen its footprint. My first task was meeting with the band boosters, our primary fundraising and support group. I told them that I wanted to take the program to new heights.

My first question: “What is our most pressing need as a band program?” The answer was not a surprise — funding!

The band boosters historically raised enough money to fund the program’s necessary equipment and needs. The primary source of funds was the concession stand from football games, and in total, the boosters brought in just under $20,000. Band members paid a participation fee that primarily financed the marching band season. A few extra dollars went toward concert band-related expenses, such as music and travel to state assessments and honor bands. Little money was left for significant purchases.

Must-Have: New Uniforms

However, the boosters wanted more, and frankly, our program needed more, especially new uniforms and instruments. Our first attack plan was uniforms. In 2018, the marching band uniforms were 18 years old. The typical lifespan of a uniform is 7 to 9 years, which meant that the SCHS students were marching in uniforms that were twice their age. Throughout the years, the band program added newer models of the same design, but everyone was ready for a new look.

Shelby County High School band entering football field for performance The school year began with band camp, and I hit the ground running by getting to know the students and community members. At the conclusion of the fall semester, the boosters had raised their concession stand money for the year, but we still needed more money. Going around our small town, I met many people who wanted to support the band. I spoke with my administration about launching a fundraising capital campaign to donate for new uniforms. I decided to send sponsorship letters, which included incentives to businesses. These businesses would have the opportunity to have their names/logos displayed at games, on our website and at other public display areas. Additionally, I added incentives for parents and students to go out and secure these sponsorships. We split the donations 50/50, meaning the student who sold the sponsorship received 50% of the funds directed toward their band account. The other 50% went to our uniform campaign. In two months, more than $17,000 was raised through this campaign, putting our total for uniform funding over what we needed.

With the combination of booster fundraised money from the concession stand and the sponsorships, we ordered 65 new uniforms for the marching band for the 2019 season. There was even additional money to purchase a sound system to amplify our front ensemble, leading to a new program element.

Securing Grants for Beginner Instruments

Now it was time to tackle the next problem. To significantly expand and grow the program, we had to increase enrollment in our lower levels with a primary focus on the beginner level.

At the start of the 2019-2020 school year, our school district’s fine arts supervisor emailed all the fine arts teachers about a grant opportunity by our state department of education. The grant program, Alabama Art Education Initiative, is set up by the legislation to offer schools and community organizations the opportunity to apply for grant money to fund arts programs. Over a three-year process, each program can receive up to $40,000 to apply to their school or organization projects.

I began to formulate my idea but wasn’t sure how to develop the words. I researched and found this writing prompt: You are a superhero. How will you save the world?

That prompt was a lightbulb moment for me. I had found a way to craft my grant application. I focused on funding instruments for all beginner band students for middle school. Why? Because more beginning band students would lead to high attendance rates, which would lead to more student involvement in high school. More high school involvement leads to higher graduation rates and test scores, when then leads to more scholarships for college students. More college graduates in the area leads to an economic boom in the community, which would turn into a higher standard of living. You can see how I thought of this as saving the world, at least our little corner of the world.

Shelby County High School band and color guard performing on football fieldThe first year of the grant offered $16,000, 20% of which had to go to professional development. With these funds, I planned to repair all school instruments, so they could be used, and purchase some new instruments to start a supply to offer students. With grand funds in the subsequent years, I would add to the collection of instruments.

I finished writing the grant application and submitted it on Halloween 2019 and thought, “There is no way I will get this.” I had never received a grant before, and all I could do was wait and hope.

Almost four months later, we finally heard back. We had been selected as one of the recipients of the grant! I don’t know how I made it to the front office, but I’m sure my screaming down the halls disrupted all the AP classes that meet outside my band room.

We shared the news, and I started prepping the inventory and purchasing new instruments. With this additional funding and the savings from the capital campaign, the boosters had excess money at the end of the 2019 concession stand season. We decided to use those funds to bring in private instructors for masterclasses once a week for each section.

Everything was going remarkably well — we had new uniforms, new equipment, free beginner instruments, private instructors, community backing, and the band was scheduled to go to New York and Disney. Our footprint was expanding and at a much faster rate than I had thought possible.

Then COVID-19 struck, and everything stopped.

Pandemic Positives

Instead of dwelling on the negative aspect of COVID-19, I want to look at how the SCHS band program improved during the pandemic. The students grew musically because we spent a lot more time working on fundamentals and building our individual skills. When we finally came together in January 2021 as a full ensemble, we performed at a higher level.

Financially, we allocated more grant money for more instruments because professional learning in the traditional sense had been put on hold. As a result, we now have a more extensive instrument inventory for the middle school.

And finally, COVID-19 has allowed me to reevaluate music education and the mental health of my students. Performances are essential, but I found that individual achievement leads to an outstanding overall performance. While we didn’t perform in the usual way this year, our moments together have been memorable and have led to real growth in the program. More SCHS students have made county, district and state-level honor bands than in previous years, and the band was invited to perform at the national level at the 2022 President’s Cup, which is sponsored by the U.S. Army’s “Pershing’s Own” Band.

Because of the reset of the 2020-2021 school year, I have focused on recruiting and building on what we have. I secured more grant money this school year to add to the beginner program instrument inventory at the middle school and start funding the high school with 50 additional uniforms, bringing the total to 115 uniforms. The beginner program now offers enough instruments for the following instrumentation for beginner level, with plans to expand each year:

  • 4 flutes
  • 1 oboe
  • 9 clarinets
  • 3 alto sax
  • 1 tenor sax
  • 10 trumpets
  • 2 French horns
  • 8 trombones (3 are F attachment horns)
  • 2 euphoniums
  • 3 tubas
  • 4-6 percussion

All in all, more than 45 students can participate in the beginner band at the middle school for free. If the numbers continue to grow for beginner band, the total 6-12 music program will double in size in next four years.

In addition to the $52,500 in grants that I secured in two years, the boosters no longer have the financial burden of funding uniforms and equipment needs. They also do not have to fund professional learning for two years. As a result, they purchased four new concert tubas and a contrabass clarinet for the high school program, a purchase that would not have been possible without the previous fundraising efforts. The release from financial burden is allowing the band program to flourish at the middle school and SCHS.

New School Year, New Show

Shelby County High School band members wearing masks and performing Dia de los Muertos routineNext school year, the marching band will be back up and running at full capacity with a new show called “Royals of Rock.” We will chronicle a performer’s journey to become a rock legend by learning from the masters like Chuck Berry, the Beatles and Queen, all while being mixed in with Lorde’s “Royals.” We will have a full touring schedule and plan to take the next step and compete at our state championship contest. We will have more instrumentalists on the field than in the four previous school years — and in new uniforms! Our Symphonic Band will perform for the first time on the national stage in April 2022.  Students will be playing on high-quality instruments from grades 6-12 and will be given weekly lessons by some of the top musicians in the area.

I still remember responding to the band boosters with an enthusiastic, “OK, we can do this!” We’ve accomplished a lot in two years, but there’s still more I plan to do to improve the SCHS music program.

Alexander Brandon

With more than 20 years of sound design experience and major game audio production credits (including Tyrian, Jazz Jackrabbit 2, Unreal, Unreal Tournament, Deus Ex and Deus Ex Invisible War), Texas-based Alexander Brandon counts on Steinberg Nuendo to deliver the best immersive sound, spatial audio and audio rendering for film, video and game music. In this video, he explains why and gives a crash course on producing audio for gaming.

Brandon has been using Nuendo since 2002. “[It allows me] to build anything I need content-wise,” he enthuses, “with instantaneous connectivity straight into game engines like Audiokinetic Wwise. And because it connects directly to the game software, I don’t need engineers, I don’t need third-party software; it’s all self-contained and that just makes the process of creativity that much easier.”

“It’s rare to see pro audio [companies] working with different industries,” he adds. “Particularly games, because they’ve been separate for so long and there are a lot of commercial and technological considerations about how they would work together. But Steinberg took those steps and said, ‘Hey, let’s incorporate game audio. Let’s take these professionals seriously and provide them the tools they need.’”

In addition to its gaming-specific features, Brandon is also a big fan of Nuendo’s MediaBay. “It’s something that I use constantly. It’s where all of my sounds live, and their metadata instantly gets imported so that I know what I’m looking at; I can sort by duration [for example] and just drag it into my Project. So my building blocks come from MediaBay.”

Brandon also finds himself frequently using Nuendo’s Renamer tool in conjunction with script spreadsheets. “It enables me to apply filenames to the same order of takes in a single track,” he explains. “That’s something that game software has needed for quite some time, because all of that was done by hand before; [with Nuendo,] it’s automated.”

Another Nuendo feature Alex finds especially useful is its ability to do offline file processing, particularly since modern games can often contain many thousands of files. “You can add plug-in effects; you can change the volume of files; you can change their format or rename them. Being able to do all these things in batches is super-important.”

“Particularly with the game functionality, it’s a no-brainer,” he affirms. “Every game audio engineer should use Nuendo.”

Check out these related articles.

Click here to learn more about Steinberg Nuendo.

How to Build the Ideal Gaming Station

Setting up and finding the right equipment for your gaming station can be quite daunting. In this article, we’ll provide the information you need to take your gaming experiences to the next level.

These are the five factors that go into building a gaming setup that will last you for years:

1. Console

​The key element is, of course, the console. There are a variety of consoles available that suit different setups. The recently released Xbox™ Series X offers some of the best specs around: a 12 teraflop GPU, 16 GB of memory, one terabyte of storage and a 3.8 GHz CPU, along with a very large library of games. Another great option is the Nintendo Switch™, which allows you to take the console gaming experience with you wherever you go. It features many titles from familiar franchises such as Super Mario™, Legend of Zelda™ and Super Smash Brothers™.

2. Video Display

​It goes without saying that video resolution is crucial for the gaming experience. You need a great TV to support the increasing detail and complexity found in modern games. A 4K/120 TV featuring HDR10+ is the best current option in terms of resolution and frame rate. Even if you can’t afford a high-end display like that, I suggest you ditch that old 720p TV: 1080p should be your minimum resolution. Having a high frame rate is particularly important since it makes the action smoother and faster. Finding a TV with a low input lag is also vital to your new setup’s success. A low input lag allows you to act quicker. There are few things worse than losing a game because your button click didn’t go through fast enough!

3. Audio Gear

​If you’re a serious gamer, you should forget about using the speakers built into your TV. Instead, connect a sound bar like the compact Yamaha SR-C20A or the beefier SR-B20A, which has dual built-in subwoofers for an extended low end. The benefit of a sound bar is that it not only amplifies the audio and improves fidelity but also creates a much more immersive and gripping experience.

Gaming setup with three desktop screen, controller and keyboard. There is also a long horizontal sound bar speaker centered below screens.
Yamaha SR-C20A compact sound bar.

For even better audio performance, consider an AV receiver with 5.1-channel surround sound capability such as the Yamaha RX-V4A.

View of front right corner of unit.
Yamaha RX-V4A AV receiver.

Another accessory that will enhance your setup is a pair of gaming headphones. These provide high-quality audio and can also double as a headset to communicate with other players.

4. Connections

​Of course, you’ll need the correct cables to bring everything together. Good quality HDMI cables are key. These are used to make the connections between your console and TV, as well as to your sound bar or AV receiver. (Some sound bars require optical cables instead.) If you are using a discrete surround system with separate speakers for each channel, be sure to use a low gauge speaker cable — ideally, 12 or 14 gauge.

I also recommend using an Ethernet cable to connect your console directly to your home router. This will give you faster and smoother internet access than a wireless (Wi-Fi) connection. As a result, you’ll have faster download speeds and a steadier connection for all your multiplayer games.

5. Seating

​This may seem like the least important component, but the fact of the matter is that you can’t game effectively without the proper seating … no slouching on the sofa! A well-constructed gaming chair provides not just comfort but also support for the back and neck. This will allow you to enjoy those long late-night sessions without the strain you’d find with a traditional chair.

It’s also important to consider the distance between your chair and your video monitor. Sitting too close could create strain on your eyes over time, and sitting too far could make seeing smaller objects in the game difficult. A minimum distance is 1.2 times the screen width, and I wouldn’t sit any farther than 3x the screen width. Find your perfect distance by trying various distances and seeing what is most comfortable for you. Happy gaming!

Special thanks to Ethan Thies.


Check out these related blog articles:

Home Theater Basics

Three Reasons to Upgrade Your Sound System for Modern Gaming

New Gaming Features You Can Enjoy in Your Home Theater

How to Configure an AV Receiver for Gaming

How to Connect Nintendo Switch to Your TV, Sound Bar or AV Receiver

What Is HDR10+, and What Does it Mean for Your Home Theater?

What’s the Difference Between 4K Ultra HD, 8K UHD and HDR10+?

HDMI 2.1: What It Means for Gear and Gamers


Click here for more information about the Yamaha SR-C20A compact sound bar.

Click here for more information about the Yamaha SR-B20A sound bar.

Click here for more information about the Yamaha RX-V4A AV receiver.

Reharmonizing Songs, Part 3

In Part 2 of our exploration into reharmonizing songs, we began substituting chords to provide color — chords that didn’t have any specific functional behavior, or in some cases, didn’t even come from the implied key center.

In this article, we’ll continue that journey by introducing some advanced structural concepts.

Move Your Bass Notes

Since we’ve seen that pretty much any chord that fits the melody note or phrase is fair game, try to use some methodology to help find your way within all the available possibilities. One way to do that is to move your bass notes, either upwards or downwards.

The melody that we’ll be working with is similar to the one we used in Part 1 and Part 2 of this series:

Musical annotation.

In this first example, I’ll start with a C bass note, and keep ascending upwards every two beats, varying the chord types as I go:

Musical annotation.

As you can see (and hear), the bass line is climbing by half-steps from the beginning all the way into beat 3 of Bar 4. I end that bar with a chord labeled as an F half-diminished 7th, with the last melody note spelling out the 6th or 13th of that chord. That’s also a common way of playing a G dominant seventh chord with a flat 9th and flat 13th, without the root in the voicing. Jazz pianists often play these rootless voicings so they can stay out of the way of the bass player, who will usually be playing the root (amongst other notes). So this chord does have a function, wanting to resolve back to a C chord (also played as a rootless voicing). I did this to give the listener a sense of conclusion.

Note that I am always observing good voice leading, which means moving the notes as smoothly as possible from chord to chord. My voicings are coming from a modern jazz sensibility, and I am making use of a lot of stacked fourths in them, which is a sound associated with the late, great pianists McCoy Tyner and Chick Corea. Specifically, look at the inner voices of the D-flat chord in Bar 1, the lower four notes of the following D minor, the inner voices of the E-flat, and the unique chord employed at the start of Bar 4.

Now let’s look at a different type of reharmonization using an ascending bass line:

Musical annotation.

Here, I start again on a C, but this time I begin climbing in whole steps for the first three chords (C to D to E), before going to half-step climbs (E to F, to F-sharp), etc. Within the first few chords you can see (and hear) that I am not in any specific key. I’m making my choices by following the bass line idea, fitting chord sounds to the melody, and specifically trying not to deliver any functional resolutions or expected sounds.

Had I, for example, chosen some type of A minor after the E dominant 7th chord in Bar 2, you would have had an expected resolution, and the piece would sound more tonal. But the atypical F minor voicing I chose signals that we’re not going for the usual stuff, and I tried to carry that flavor forward in the next couple of voicings. After the A-flat major7th voicing, however, I felt I was painting myself into a corner if I kept climbing, so I jumped back down to give myself some room to move.

Descending Bass Line Ideas

Now let’s try using a descending bass line instead:

Musical annotation.

This example is actually pretty tonal, and it uses a number of functional chordal passages, especially in the last two bars. It demonstrates how non-standard voicings can work … if they’re surrounded by more typical chords.

Let’s try another descending approach:

Musical annotation.

The first couple of chords sound pretty tonal/functional, but I did that so I could surprise you all the more in Bar 3, where I wanted to present unusual and interesting chordal choices … though admittedly, that E minor voicing is very difficult to play. When you get to the A-flat voicing in Bar 4, it seems like a resolution: it sounds “at peace” and final. But that’s a false feeling that I tried to extend by making the next few voicings also very smooth, with no tension in the chord structures. The D-flat hangs nicely in the air, and then resolves back to C to end the harmonic journey where we began.

One more example of how to use a descending bass line:

Musical annotation.

This time I chose not to start on a C — remember, anything is possible! We begin with some parallel major7th chords, similar to an exercise in Part 2. Yes, the D note doesn’t quite “fit” with the G-flat chord, but it goes by quickly. After the Esus chord, I use some parallel minor chords, followed by parallel Major 7th chords with sharp 11ths. The whole example is anchored by the constant use of the same structure in the left hand: notes stacked in fifths, with very wide/open voicings. That construct is, however, abandoned for the last chord in bar 4, which is a dissonant poly chord: think of it as a G triad played over a D-flat triad, even though I left out the third (F) of the left-hand D-flat chord. It resolves nicely into the C minor 6th, thanks to the good voice leading.

Freedom to Choose

Although you should get comfortable with approaches that use some sort of rule or structure to define your movement, at the end of the day you are, of course, free to do whatever you want. That means you can pick any chords and voicings that sound good to you, with no logic or explanation needed.

Let me show you some choices that I like. For example:

Musical annotation.

I suggest you first just try playing the two-handed chords that I placed below the melody:

Musical annotation.

As you can hear, they are beautiful and moody-sounding chords that have no functional relationship to each other, or to any specific key signature. I chose them because I liked their sound, and they do support the melody, albeit in unexpected ways. By letting them ring for the whole bar, they also convey a more relaxed feeling, and don’t need to relate to the next chord; this way, they come as a surprise each time.

One last, even more imaginative example:

Musical annotation.

Here we start out on a very colorful chord, and then follow it in the second bar with a cool descending inner-voice movement on the E dominant 7th. The B half-diminished voicing is an unexpected surprise, as is the “lift” you get from the B-flat minor that follows it. In Bar 4 I chose to mirror the descending melody by using an ascending bass movement, until the jump up on beat 4. That goes into another cool, dissonant type of voicing, which isn’t easily represented by a chord symbol but I think of as an A-flat triad over a Dsus voicing (there’s those fourths popping up again!). That “tension” chord resolves nicely into the last chord, which has a unique sound thanks to the use of the 2nd in place of the 3rd … and now the fourths show up in the right hand.

In practice, I would mix these exotic flavors into my arranging and playing; just like a good spice in a recipe, you don’t want to overuse them. Too much of this kind of reharmonization and your music won’t seem grounded — unless you are choosing to play more freeform, in which case you should go for it!

All audio played on a Yamaha P-515.


Check out our other Well-Rounded Keyboardist postings.

Click here for more information about Yamaha keyboard instruments.

What’s the Difference Between a Flute and a Piccolo?

Think the piccolo is just a pint-sized version of a flute? Think again. While the flute and piccolo look similar, there are numerous differences that make these two instruments unique and give them their own distinct character and sound.

Before we jump into the details, though, let’s take a brief look at their long and intertwined past.

From Reeds and Bones

Dating back to the Paleolithic era, the earliest forms of the flute were made from bone and reeds and featured a small number of finger holes. The term “flute” was initially used to describe a wide variety of pipe wind instruments, including those held vertically (like a recorder) and horizontally (like today’s flute).

The Baroque era of the 17th century marked the start of development of the modern flute with the introduction of the first key and tapered body shape. A smaller version was developed in tandem, eventually becoming the piccolo we know today. Over the next century, parts for flauto piccolo (“piccolo” is Italian for “small”) started to appear in orchestra scores.

By the 19th century, flute engineering reached a pivotal point under wind instrument manufacturer Theobald Boehm, who is known as the father of the modern-day flute. Boehm introduced a metal instrument that had many keys and an evenly cylindrical shape, which he accommodated by adding a lip plate and riser. These revolutionary enhancements enabled greater pitch control and tonal stability.

The Flute’s Mini-Me

The two instruments have many things in common. Both are woodwinds, both are held the same way and both have a similar playing technique: sound is created by blowing air over an embouchure hole in the mouthpiece and notes are selected by pressing various keys or key combinations on the body of the instrument. They also utilize many of the same fingerings, and are both pitched in the key of C.

Closeup of a flute.
Yamaha YFL-482H flute.
Small flutelike instrument with black finish and sliver keys.
Yamaha YPC-87R piccolo.

Additionally, the flute and piccolo share similarities in the way they are maintained. A slim, fuzzy cleaning rod that looks like an oversized pipe cleaner is used to wick away condensation on the inside of the tubing. In addition, regular use and polishing with a soft cloth help to keep the metal keys and tubing shiny and safe from discoloration.

The Devil’s in the Details … and High Notes!

The main differences between the two instruments lie in their size, construction and note range. The flute is about 26 inches in length and is assembled from three separate pieces: the headjoint, body, and foot joint. The standard concert flute has 16 tone holes and wider tubing than the piccolo, with a diameter of about three quarters of an inch on the inside. The flute’s larger design allows for a deeper sound and broader range of notes that covers three octaves, starting at middle C.

The piccolo is half as long, measuring approximately 13 inches. The inside of the tubing is only about half an inch wide — that is, a quarter-inch narrower than the flute —  and tapers at the end. (The piccolo body also retains the subtly tapered design of the Baroque flute.) With only headjoint and body pieces, the piccolo is missing some of the key work found on the foot joint of the flute. Therefore, the piccolo is pitched nearly an octave higher than the flute. The tone holes and keys are also smaller in size and placed closer together, which may make fingering easier for some players.

Graphic illustrating the range of a picolo versus a flute.

Although a smaller volume of air is needed to play the piccolo, players must use a faster stream of air to support each note, especially the higher ones. Due to the difficulty of sustaining tones on the piccolo, playing notes in tune is more challenging on the piccolo than on the flute.

Flutes are most often crafted in a variety of metals such as alloyed nickel, silver, and even gold, while piccolos tend to be made from wood with metal keys, although there are also plastic-bodied piccolos such as the Yamaha YPC-32. These types of instruments are not quite as bright in sound as metal piccolos, but they are less expensive and more durable against the outdoor elements, making them a popular choice for students and marching ensembles.

Black and silver plastic flutelike instrument.
Yamaha YPC-32 plastic piccolo.

Interestingly, and less commonly, flutes have even been made of all glass, but these instruments typically serve more specialized roles in folk or period music.

Sonic Qualities

For centuries, the flute and piccolo have played significant roles in the magic of storytelling through music. The flute is known for its graceful, celestial sound — a gentle tonality that blends well with other instruments. Like the violins in an orchestra, flutes are often heard playing the melody. From love themes to flowing rivers and birdsong, the dazzling flourishes and trills that are characteristic of the flute have been used by composers for centuries to evoke passionate emotions and the sounds of nature.

The piccolo is renowned for its capabilities in the highest register. Like an excited younger sibling, the piccolo likes to imitate its older flute brother or sister in the way it looks and acts, but with more energy and a much more piercing voice. And even though the piccolo has become a mainstay of many orchestral woodwind sections, where it is primarily used to produce tension and excitement (as well as, on occasion, humor), its unique tonal qualities make it a great fit for marching bands too. John Philip Sousa’s The Stars and Stripes Forever is an iconic example of the infectious energy that the piccolo can add to a march.

Getting Started

Learning how to play these instruments is a great place to begin your musical journey and spark your imagination. Yamaha has a great “how to” guide on the basics of playing the flute as well as a resource for parents on starting to play in school band.

While flute and piccolo can be played fairly interchangeably, it’s generally best to start with the flute. This will give you a great foundation to work from and will help you build endurance as you learn a broad range of notes and hone your technique. When you move on to learning how to play the piccolo, you will fine-tune your ear and build confidence. (Piccolos are not instruments for the shy!) And if you join a marching band, don’t be surprised if the tuba players give you envious looks at your pocket-sized instrument.

Whether you want to get lost in the sounds of nature, feel love in the air or get energized by the beat of a march, the flute and piccolo have much to offer.


Check out this related blog article: Genealogy of the Flute Family


Click here for more information about Yamaha flutes.

Click here for more information about Yamaha piccolos.

Case Study: Practice Not Required

Yes, you read the title of this article correctly — please proceed with caution because this topic may offend most music teachers.

I teach at Joliet Central High School, a low-income, high-needs population school and serve as the ensemble director, chamber ensemble director, general music teacher and even applied instructor. It’s a lot to handle.

Many of my students live in rented homes or in apartments, and their landlords may not allow them to play loud instruments. Students often share bedrooms with siblings and cannot practice in the common areas of the house. Other students share an instrument and cannot take the instrument home. And many of my students work outside of school. Playing instruments or singing after school or on weekends is not an option for most.

That’s why I have worked to build a program that does not require practice outside of school. I am aware of the limitations this presents, and I’m continually seeking ways to adjust the program curriculum and requirements, but right now, this is our reality.

When people learn about my “practice-not-required” philosophy, they have asked some pointed questions, including the ones below.

Are the upper-middle class and wealthier students actually practicing more?

Joliet Central High School band performing on stageAnecdotally,  I don’t think they are. In my experience and discussions with teachers in these areas, I think a few other elements are in place. Suburban schools may have lower instances of mobility and chronic absenteeism than a low-income area school. Less movement means that more suburban students go through an entire school system from kindergarten through high school compared to their low-income area counterparts. Wealthier students are also in the classroom more.

Other influences may contribute to a perception that more affluent students practice more, including a more extensive music staff and private lessons, both on- and off-site. I’m the only band director at Joliet Central High School. The only time we get additional help from a musician is when I host a student-teacher. Other schools with an assistant or a small staff may be able to work out homogenous groupings or instrument/voice specific sessions that allow smaller groups to learn about particular voice or instrumental techniques.

I’m not saying that suburban or wealthier schools don’t deal with a lack of practicing. This perception is just amplified in a low-income area.

Do students really need to practice outside of school?

It depends on your schedule, but if your groups meet every day or close to every day, I don’t think it’s necessary. And, I don’t think my students have time to practice. Furthermore, the minute we tell kids to practice, we turn music-making into a chore. Singing or playing their instruments is something that students have to do instead of something they get to do.

Here’s an example of the “chore” of practicing from my childhood.

I remember that I hated practicing when I was a kid. It didn’t seem to have any goals, and it was never-ending. After three years in the band, I made little progress, so my mother made me practice. My band director, Mr. Russell, recommended practicing 30 minutes a day. My mom set a timer for 40 minutes because she knew I’d complain and mess around for 10 minutes. I worked through our band book  and some band music, and I got better. I was second to last chair trumpet in 6th grade and came back in 7th grade to take the first chair spot.

I felt better when I played, and I kept practicing because I now had a goal of competition or a result. It was not because I liked playing the trumpet or liked band music.

Eventually, I decided I wanted to be a band director, so I kept practicing. I practiced for hours on weekends and even started making money by teaching lessons and playing trumpet for wedding ceremonies. I graduated high school and enrolled in college, where I also had to continue practicing for a grade and practical experience.

After getting my first job, I slowed down my practicing schedule. I played in some community bands, taught lessons and played the occasional wedding, but playing my instrument was no longer the priority that it used to be. After a few years, six months would go by without me touching my instrument. Christmas and Easter gigs and the occasional in-class demonstrations would get the dust off of the instrument. Does this sound familiar?

I do recognize and appreciate the discipline, consistency and opportunities that came from practicing my instrument. I wouldn’t be a very effective music teacher without those hours of practice.

Besides me, two other high school classmates went on to become music teachers. I know that the other students in band did not practice much, if at all, outside of the classroom. And you know what? They still sounded pretty good. I even see some of them at our alumni band events.

How could you say this? I thought you were one of us!

I say it very cautiously. I am one of you!

I believe that the idea of every child must practice is a Utopian concept that we may never achieve. Practice might not be necessary for most students. Students, teachers and families are busier today and dealing with more stress. I firmly believe that schools should be resources for their community, but I also don’t think that we should infiltrate or force ourselves into people’s homes. We can undoubtedly give students the option and provide supplementary resources for those who ask for them. Still, when I’m physically at home, I want to be available for my family or pursue other personal interests. My students should have that same opportunity.

I also believe that the students who want to practice will find ways to make it happen. Exhibiting control only through what we have direct influence and impact on can reduce stress on all of us while still maintaining high learning standards.

How do we expect student musicians to get better?

Joliet Central High School band rehearsing in music roomWe can give students the skills to practice if they want to or have the time to practice. Explain your practice techniques and goals during a class. If your students haven’t heard you play, perform for them. I’m happy to say that I’ve had a resurgence in playing my instrument in recent years. I use it almost daily in class for a demonstration or to sit in the band when a student conducts.

Perform the highest quality and most engaging and connected music that you and your group can agree on. Students will play music that they like. How many band directors have heard unprovoked outbursts of “Seven Nation Army” at the beginning or end of rehearsals? Save the pedagogy and concert literature for the classroom. If you want students to play outside of class, give them music that they know and like, which will have a higher chance of getting the instrument out of the case. I don’t know of many students or parents who want to repeatedly listen to a third trumpet part or a two-note alto part with no context. However, a solo they pick or even a melody from a pop song may encourage one of those students who cannot practice at home to be creative.

We can also avoid generic practice and reading logs. These become assignments for parents or an exercise in shared deception. Inaccurate times may be unintentional; my wife and I have had our fair share of forgetting to log our children’s 20 minutes of reading every day and then guessing the night before the reading log is due.

Consider individual and group goals and break down the necessary steps to achieve these goals. Involve the students in this process. For example, our decision to eliminate a practice requirement forced us to make a choice as a group — did we want to focus primarily on individual skills to develop soloists, or on making the best collective ensembles that we could have? Of course, we wanted both, but the students and I chose to focus on the group effort.

I am aware of the limitations of this, and I’m continually seeking ways to adjust the program curriculum and requirements, but right now, this is our reality.

Pack your class sessions and rehearsals with content from bell to bell. When meeting in person, alter the classroom environment and materials to resemble what a student might see in a private or small group lesson. Many method books and literature offer adaptable parts for various instruments.

You can also get creative with some existing methods. For example, alternate parts so all students, not just the top musicians, are experiencing a variety of challenges. In the case of technique, plan exercises that simultaneously hit multiple areas. I routinely use an articulation exercise, but I altered it to tune chords over fundamentals at the same time. I also utilize exercises that provide lip slurs for brass, chromatics for woodwinds and rudiments for percussion at the same time.

These ideas can lead to developing a practical, comprehensive routine for your ensemble.

After reflecting on your situation, consider developing a method that can help provide comprehensive performance-based music education for your students who are unable (or unwilling) to practice outside of ensemble rehearsal.

What are the elements of your routine?

It’s important to find materials or method books that fit your needs. I use Dan Moore’s “Important Ingredients,” Richard Williams and Jeff King’s “Foundation for Superior Performance” (affectionately known as the Blue Book), and the Bravo Winds Series Publications’ “Basic Training for Concert Band,” “Sonority for Concert Band” and “Harmony Training for the Ensemble.”

** Budget Tip: Check with your school to see if the music department can get in on money allocated for textbooks, saving you money in your budget.

** Slightly Related Budget Tip: If you have a pep band, see if your athletic department will purchase pep band music for use at athletic events, saving you even more money or freeing up cash for other sheet music or methods.

Every rehearsal includes exercises to improve airflow, tone production, articulation, intonation, technique, endurance and musical fluency. Most rehearsals include exercises to develop rhythm, sight-reading, theory and transposition. Some rehearsals include activities to address special techniques on specific instruments, such as percussion rudiments or stopped horn.

From the methods above, I designed a routine that hits most musical elements while avoiding monotony. We mix and match exercises and often work to combine tasks to save time. Note: percussion is on keyboards by default for all routine tasks unless specific parts are available, such as in “Foundations for Superior Performance.”

Here is a sample of my ensemble routine.

Here is a sample of my rehearsal plan.

Although most of our students will not play their instruments outside of a class or concert, the exercises and techniques included in our routine help create and improve beginning and intermediate individual musicians while improving the ensemble as a whole. I work with students who reach advanced levels on a case-by-case basis and provide them additional opportunities such as performing as soloists with the band.

A final thought: Focus on what is realistic for your group. Students can achieve technical prowess, but it may not be what a group excels in right away. Starting with the development of a good tone and a basic to intermediate sense of intonation can open many doors for a student and performance ensemble.

What do your groups sound like if they don’t practice?

Quality and opinions are always subjective, but what I can tell you is that our group received more opportunities by streamlining our goals and focusing on what we could do during classroom time to achieve those goals.

Joliet Central High School band in uniformWhen I first started this approach, I noticed a decline in participation in solo and ensemble contests. Participation in our district and state music education conferences remained the same, but we also had few students qualify for this over the past 20 years. However, our group performances increased in both quality and quantity. State festival invitations started coming in. College bands began inviting us to perform on stage with them, and we were even accepted into two national-level performances.

Smaller sections of the band started to break off on their own to form smaller chamber groups. All of a sudden, our students were playing about 75 gigs a year in the community as flute ensembles, brass duets, jazz combos, etc.

I stuck to the no-practice concept. I let those small groups rehearse during the large band rehearsal. Those small groups kept going, and after a couple of years, I noticed that more students were starting to participate in solo and ensemble festivals again. We still have few students doing actual solos, but two years ago, we had a 20-year high for student participation. I also started providing opportunities for senior soloists, which has increased the level and quantity of student solo work.

Are you surprised by this twist ending?

By not requiring practicing, our students may have been inclined to practice more. The reasons vary. For some students, the success of the larger ensemble provided them with the drive to take their own performance seriously. They found time before, after and during school to get in a few repetitions of a difficult passage. Other students did not technically practice more but could use their time more productively in the ensemble. Other students were just defiant! If an adult told them to do something, they naturally would not want to do it. Once they were told that they didn’t have to practice, they were more inclined to let their intrinsic motivation take over, which sometimes led to playing the horn or singing outside of class.

For most students, the opportunity to perform in chamber groups with music they were able to choose was enough to increase the time spent playing and their performance ability.

This content is from the book “High Needs, Monumental Successes: Teaching Music to Low-Income and Underserved Students” by Don Stinson. Copyright © 2021 GIA Publications, Inc. Reprinted with permission.

Upcycling

Upcycling is a trend that sees the creative reuse of products or materials as something entirely new. An initiative called Yamaha Cares Upcycle, part of the company’s employee-led Yamaha Cares program, is taking the lead by enabling musical instruments that are no longer fit for playing to be transformed into canvases for creative expression.

Yamaha recently donated more than 200 slightly blemished guitars, cellos and violins to four local not-for profit organizations: Able ARTS Work, Anaheim Elementary School District, Boys & Girls Club of Buena Park, and KatrinaKures/Children’s Hospital of Orange County. The organizations then collaborated with students, teachers, families, employees and local artists to turn the instruments into works of art. As shown in these illustrations, some chose to paint scenes on the front or back of the instruments, while others chose to repurpose them entirely into useful or decorative items such as lamps, spice racks and bird feeders.

Carlos Arredondo 607 X 1160

Katrina Kures Crop 607 X 1160

Maria Arroyo Galaviz Crop 610 X 1160
<

EPI 610 X1160

Lamp 607 X 1160

CHOC Guitar 607 X 1160

Yamaha Cares Upcycle provides an innovative way for organizations to raise funds for their art and music programs. In addition, it reduces the amount of waste that ends up being sent to a land fill.

An exhibition of upcycled Yamaha instruments was recently held at the Able ARTS Work Gallery at 6420 E. Pacific Coast Highway in Long Beach. The students of Able ARTS Work received a 50 percent commission on pieces sold, with the other 50 percent supporting their “A Home of Our Own” campaign, which aims to purchase a permanent building and gallery for its adult day program for adults with disabilities. Artwork from the other three organizations received 100 percent of sale proceeds, with funds destined to enhance music programs and fund research for Type 1 Diabetes.

For more information about Yamaha Cares Upcycle, be sure to check out this video featuring artist Chariya Bissonette.

Photographs courtesy of Able ARTS Work, Anaheim Elementary School District, Boys & Girls Club of Buena Park, and KatrinaKures/Children’s Hospital of Orange County.


To learn more about the organizations involved, please visit:

Able ARTS Work Gallery: https://www.ableartswork.org/
Anaheim Elementary School District: https://anaheimelementary.org/
Boys & Girls Club of Buena Park: https://theplaceforkids.org/
KatrinaKures / Children’s Hospital of Orange County: https://for.choc.org/KatrinaKures2021


Click here for more information about the Yamaha Cares Program and to apply for a grant, product donation or upcycled instruments for your school or non-profit program.

Case Study: How Popular Music Education Transformed a Texas Program and School

When I started at St. Michael’s Catholic Academy in Austin, Texas, about 10 years ago, I was faced with two challenges: low student program participation and school size.

My vision for revamping and growing the music program centered on finding solutions to both, beginning with student recruitment.

Thinking Outside the Box: Recruitment and Retention

At the beginning of my tenure, less than six students were in the music program. The first step I took was to identify extracurricular music students and invite them and their friends to join the program, not only as musicians, but in a variety of associated roles. Today, approximately 25% to 30% of the student body — or 115 students — participate.

I was able to recruit over 20 students to join that first year. Basically, my approach was to identify that one student who could help. I also targeted freshmen and sophomores because I wanted them to becomae the long-term backbone of the program. I identified a “friend group” and convinced them to join as freshmen. Most of the students in this initial class had little to no experience with music, but they were all excited to be in a class with their friends. That first year focused on coming up with fun ways for them to enjoy music class together.

From there, the next step was to make joining the music program fun and interesting for all students. As a small school, we were not equipped to compete in the usual marching band or orchestral arenas. Being in Austin, Texas, we were minutes away from large schools with successful marching bands the size of our entire student body. Most of our students played guitar, piano and strings — not brass, woodwinds and percussion, so we just didn’t have the instrumentation to go the marching band route.

By this time, I had already developed an affinity for the “popular music education” movement and wanted to explore that approach to make studying music more attractive and relatable to prospective students.

During the first year, I focused on student retention, and I reached out to students individually to find out what they didn’t like at their previous school that deterred them from joining music class at St. Michael’s. Most of their answers revolved around “it wasn’t fun” or “we didn’t play music that I liked.” Coming from a traditional music education background myself, I knew exactly how to build and maintain a competitive marching band or orchestra program, but it was clear that my students were not enthusiastic. Many wanted to learn guitar or piano so they could play with their friends in social settings. They also wanted to play music that they listened to on a regular basis. I decided to start a beginner guitar and drum set class the following year hoping that would pique student interest, which it did.

I was encouraged by St. Michael’s administration to think outside the box, so I began to envision a program unlike any other in Austin. School administrators gave me the green light to move forward because they saw this new program concept as an opportunity to offer something truly unique that was not available at other area private or public schools. Luckily, our investment needs were not extensive, and we gradually accumulated materials, ancillary staffing, equipment and software over time.

I had a limited budget at the onset and purchased a simple drum set and two amplifiers to go along with a basic PA system that was already at the school.

Football Game Performances

In Texas, high school football games are community events. Clearly, I needed an alternative solution to a marching band to get the same community buy-in for St. Michael’s. The answer: A drumline with all of our music students that would perform in the stands during the game. Initially, it was a volunteer student spirit group that eventually became completely led and run by students.

St. Michael's CruBand performing at tailgateTo address the halftime entertainment dilemma, I went with a Super Bowl™-style halftime show that featured our rock bands. This effort entailed procuring custom-made equipment carts to mobilize all the gear. The following year, we started performing at halftime with our rock/country/pop bands. Because the program was steadily growing, and the students were so excited to perform, we also built a wooden stage outside the stadium for tailgate concerts before the games. Today our football game atmosphere reflects a school-wide festival with pregame concerts, barbecues as well as cheerleader and dance team performances.

We were able to purchase all the gear, equipment and supplies necessary to do this for under $10,000, which is a fraction of what it would have cost to start a marching band program.

Growth and Creating Curriculum

By the third year it was clear that our program was very different, and I embraced this new direction wholeheartedly. Participation went from 4, 24 to 50+ in the first three years, and it kept steadily growing. At the end of the fourth year, I had my first graduating class of musicians, most of whom comprised the group of 20 students I convinced to join the program as freshmen.

The biggest challenge for maintaining the program was finding the curriculum, which was virtually nonexistent. So, I began to create my own. I had operated a music entertainment company in Austin for several years and worked with and hired professional musicians, so I made a list of the attributes that I liked in the musicians I would hire. I spoke with countless musicians and asked them, “What do you wish you had learned in music class when you were in high school?” With that inventory of knowledge, I developed a curriculum to teach those skills, which led me to the idea of creating a non-profit organization called Modern Band Lab, whose goal is to help provide a place for educators to go to find resources and materials for transforming their music classrooms.

During my journey I discovered other educators and organizations who held similar views that music education did not have to exist only in the traditional band/choir/orchestra world.

How It Works

Integration: The popular music education approach is applied not only across all the different music bands — Varsity Symphony, Crusader Bands, Praise Band, Drumline — but it is also integrated with other fine arts programs, such as film, dance and visual arts.

The Varsity Symphony fuses elements of popular music and technology. Crusader Bands (or CruBands) perform at home football games (including the pregame tailgate), pep rallies and other school functions. Their halftime shows are done in collaboration with the drill team and cheerleaders, who excite the crowd with choreographed routines. Chapel services feature the Praise Band, and students in the Tech Crew use professional sound equipment to enhance musical performances of all the bands.

Steve Moreland wearing mask with student in music room The new focus of the music program has transformed the campus with music becoming a part of everyday school life. The music room was reconfigured to be more student-centric. Instead of walking in and seeing rows of chairs, the room is set up like a live music studio with all the equipment hooked up and ready to provide an atmosphere where students can walk in and begin playing. Seating is set up in a circular fashion where everyone can look at each other and efficiently communicate during rehearsals and easily walk between stations. The idea is that everyone’s part is just as important as the other, and for music to come alive, everyone needs to do their part.

The overarching goal is to help students become comfortable being around technology and equipment that they will likely encounter outside of the classroom and to encourage experimentation. All components are wired up and connected to a computer so that students can instantly record any idea they happen upon during rehearsal. Every student in our program knows how to set up, operate and break down a basic PA system with microphones, in addition to knowing how to hook up their instrument to a laptop.

Posters of legendary artists and album artwork cover the walls to help inspire the students. There is an upright piano in the entrance of the room to encourage students to come in and start playing. Inexpensive LED wall lights are placed around the room to give a cool vibe so that the music room is the coolest place on campus, which makes students visit more often; in doing so, they almost always find time to play or practice, further instilling the lifelong passion for music.

St. Michael's open mic Music students also host “Music-On-The-Deck,” an open-mic performance on the outdoor stage during lunchtime on Fridays during which anyone on campus may perform. Students bring blankets and picnic while listening to their peers play and sing.

Leadership: Our vibrant and active Music Leadership Team comprises between 10 to 15 students each year. Students who are interested go through an interview process with me and then are elected by their peers. These student leaders help plan, organize and host on-campus concerts using project-management skills and creativity. They also play an integral role in our halftime performances.

St. Michael’s is blessed to have strong parental support, and we benefit greatly from their involvement in performances and donations of all kinds. We even have a dad band, and our dads play a huge part in our pregame tailgate activities by barbecuing and helping set up the grounds for each football game. Several of them began playing music with their kids on stage, which eventually led to assembling a band of their own.

Cross-Collaboration: Collaboration is key within the music program and among the other fine arts programs.

We began collaborating with our film department by creating one music video a year. Film and music students work together in creating the overall appearance and storyline of the music video. Students may recreate a famous video or produce an entirely original creation, sometimes showing how music can be a catalyst for significant social change and progress.

In cooperation with our dance department, bands play music for dance choreography routines. If halftime band performances call for backup dancers, then they would join forces. Our visual art students help design posters and album covers for our student bands in addition to providing an art gallery reception at all performances. In addition, theater department students help with lights and emcee duties for shows.

Modern Band Lab

A popular outgrowth of our music program was the creation of the Modern Band Lab. The lab involves nine student bands, and one of its more ambitious goals is to create a student-run record label. Students learn how to take an idea from conception and work all the way through to distribution.

I developed an entire Modern Band Lab curriculum, for which St. Michael’s is the flagship school. The course curriculum itself has become part of a nonprofit company, which is also called Modern Band Lab, as a resource for other schools that are interested in starting Popular Music Education and Modern Band Lab at their schools.

Additionally, we’ve cultivated an environment where students are hungry to create and record. In our intense January three-week “Record Your Own Song” class, students learn the entire process of collaborating, recording and producing a song with other students. They are exposed to everything from tracking, editing, mixing, mastering and publishing (or sharing their music with others). Their music is then posted to our SoundCloud account, and recently, our more experienced students have posted their music on Spotify and Apple Music.

Teaching During the Pandemic

We successfully adapted our music program to distance learning at the beginning of the pandemic (we received coverage from the Associated Press and local NBC affiliate KXAN) because students were already using online and collaborative tools. I engage with students on Discussions (in Blackboard) where I ask questions and students post their answers for everyone to see. Students send me videos of themselves performing, and I usually post these on Fridays. I discuss lessons and answer questions during Zoom classes, and I often upload lessons on YouTube. In Google Classroom, weekly assignments are broken down into different tracks based on students’ interests or instruments. Many of these assignments require student collaboration, so even though they aren’t physically in a classroom, students work together. Examples of weekly assignments include:

  • guided listening (where students listen to an album with commentary from me telling them what to listen for)
  • music technology (students use online music tools like Soundtrap)
  • drums (students learn some famous drumbeats and record themselves playing along with a track)
  • fingerpicking on acoustic guitar
  • creating a music podcast

You can get an inside glimpse into our program in this video.

Looking to the Future

Future plans for St. Michael’s music program include developing the nonprofit Modern Band Lab company to bring this option to schools that may fall within the same framework as our own. I also plan to shoot some specialty videos as resources, such as setting up a music room and showcasing the music recording class while we work to formally launch the student-run record label.

The overarching goal is to cultivate students as lifelong music consumers and patrons, regardless of whether they ultimately choose music for college or career. I like to think the proof of our success is that I regularly get photos and videos from St. Michael’s alumni showing them enjoying music in many different settings — whether it’s a family gathering, a gig or releasing an album. That’s the lifelong music patron we strive to encourage. Of course, we have students getting into top-tier music schools, such as Belmont University, Berklee School of Music and Eastman School of Music, or majoring in music technology and music business. We have received many accolades from students and parents about the impact the St. Michael’s music program has had on their lives and education.

We will continue to think outside the box and look for further opportunities to promote the arts in our students’ lives in and out of the classroom.

How to Host a Virtual Watch Party

If we’ve learned anything from the events of 2020, it’s that the party doesn’t have to stop just because we’re keeping our distance from one another.

Technology has unleashed all kinds of interesting ways to stay connected and entertained. We’ve all gotten used to conducting business meetings, celebrating birthdays, touring vacation spots and experiencing a whole new way of looking at the world virtually, through the screens of our computers. Popular streaming services like Netflix®, Amazon Prime, Hulu™ and Vudu® have done their part by offering a huge amount of digital content to consume instantly in the comfort of our homes.

Virtual watch party extensions and apps turn an otherwise solitary pastime — viewing TV shows and movies — into a fun, engaging social event. Not only are they a great source of real human engagement, they’ve become one of the hottest and safest ways to spend quality time with friends and family.

Here’s what you need to know to get the party started.

Choose a Theme

Just as you would when hosting an old-fashioned, face-to-to face party at your home, start by choosing a theme and build your guest list around it. Is there a new rom-com on your radar? Invite people who dig this genre, too. Live sporting events and action flicks might appeal to a completely different set of friends. Music lovers in your social circle might enjoy watching a concert together, while parents of young children will gather for a family-friendly film. Think beyond movies, too. Viewing a mini-series or TV sitcom can become a weekly event, and watching awards shows with others will certainly stir up some lively commentary.

Find a Common Platform

As the host, it’s up to you to choose the viewing platform. Consider your audience when you do this. You might be comfortable installing a third-party extension to your Netflix account. Grandma? Maybe not. At any rate, your watch party guests may have a little pre-party preparation to do; at a minimum, they’ll all need to subscribe to the streaming service that you select.

You’ll also want to consider just how interactive you want your party to be. For example, the Netflix Party and Hulu Watch Party apps let you and your guests text each other as you watch, while Scener offers a live video chat feature and TwoSeven supports both audio and video chat for sharing reactions in real time, as does the Metastream app, which allows you to watch videos on a wide range of platforms, including Netflix, YouTube™ and Hulu, as well as niche platforms Twitch and Crunchyroll. When you’ve settled on a show or movie as well as a platform and viewing time and day, send your invitations. They’ll arrive in your guests’ email inbox with all the particulars.

Pre-Show Housekeeping

If you and your guests engage in audible conversations during the watch party, know that, depending on the size of your gathering, things could get chaotic. For this reason, it may be wise as the party host to ask guests to save their remarks until the show or movie has ended, or until it’s paused for an intermission. (Some extensions let you handle this through a virtual remote, which often provides other controls as well.) You might also want to decide early on to mute everyone’s computer microphones during the viewing and leave the chatter until the show ends.

Direct the Dialog

The whole point of a virtual watch party is being able to immerse yourself in the on-screen action while also engaging with your attendees. Conversations flow smoothly and movies sound better when you can clearly hear the audio, so make sure your computer is up to the task. Solid, reliable, internet connectivity is critical to both audio and video clarity. Adding a sound bar like the Yamaha SR-C20A or high-quality speakers (go for a surround setup if possible) can make a world of difference too.

Closeup of a sound bar under a computer screen on a desk.
Yamaha SR-C20A sound bar.

Another option that’s helpful if your viewing environment suffers from a lot of background noise is donning a pair of headphones. This will allow you to block out ambient sound in the room. Consider opting for a wireless design like the Yamaha YH-E700A so you can stay connected to the conversation even if you need to run into the kitchen to grab a snack.

Closeup of woman wearing headphones.
Yamaha YH-E700A wireless headphones.

Set the Stage

A brief show-and-tell before the movie or show begins is always good for setting a tone for the event and prompting lively conversation (as moderator, be sure to give all your virtual guests a chance to chime in). Asking guests to wear costumes is another way to get the conversation started. Their attire can follow the theme of the video, emulate a favorite character of a sitcom … really, anything at all. These kinds of extra touches just may be what it takes to make your virtual watch party a standout event that friends and family will talk about long after the final credits roll.


Click here for more information about the Yamaha SR-C20A sound bar.

Click here for more information about Yamaha YH-E700A wireless headphones.

A Musician’s Guide to Getting Your Work Out There, Part 2

As described in Part 1 of this two-part series, being a musician today often means you’re also a small business owner, requiring that you undertake hours of promotion, marketing and administrative work to get a leg up.

In Part 1, we provided tips for getting your music played on the radio, placed in TV spots, featured online and in livestreams, as well as offering some common-sense approaches for getting publicity and finding a manager.

In this installment, we’ll talk about how to distribute your music (including getting it pressed on vinyl) and land it on prestigious playlists, along with getting exposure on social media. Last, but by no means least, we’ll discuss how you can protect your work and advance your career by finding a qualified entertainment attorney.

Distribution: Plan Ahead

With everything it takes to write, record, finish and promote a new album (even just a new single), it can be hard to remember all the important-though-small steps required along the way for a successful campaign. One of those often-forgotten steps is distribution: that is, getting your record into music stores (both digital and physical) so your audience can buy it. This is a necessity if you’re unsigned, yet it’s something that unfortunately comes to many artist’s minds only when it’s too late. Connecting listeners with your work takes time. So to best serve both yourself and your audience, you need to plan ahead, usually many months in advance.

Man in an outdoor setting. He's wearing sunglasses and a t-shirt with the words "Commercial Records Astoria Oregon" on the front of shirt.
Skip Werner.

Skip Werner, vice president of Burnside Distribution in Portland, Oregon, says that this kind of approach can be key when trying to reach a broad audience. “Coming up with a game plan to schedule releases gives you a much better opportunity for success. Having goals in mind [and a] history of past successes is also helpful.”

Models for modern music distribution evolve often. As a result, Werner recommends creating and cementing a personal relationship with your chosen distribution company. That way, if there is a problem or necessary change, the distributor can work with the artist to find a nimble solution.

Vinyl Album Pressing: Know Your Audience

Increasingly, we live in a digital world, which means our audience largely engages with music digitally too. But there are still those who enjoy listening to and owning their music in physical formats. Whether they are audiophiles who appreciate the difference in audio quality of a vinyl album versus an MP3, or they simply like to collect records rather than store music on the Cloud, it’s to your benefit to offer your music in tangible ways.

The most important thing to remember when committing your recording to vinyl is to understand who might be buying your albums once they are pressed. Are they into collectables, multi-colored vinyl albums, elaborate cover artwork? Are they concerned with audio quality only and not visual aesthetics?

“Vinyl is not inexpensive to make,” points out Matt Earley, vice president of sales and marketing for Gotta Groove Records in Cleveland, Ohio. “All of these considerations will help guide a band into what type of vinyl package they may want to consider and at what budget.”

Young man with facial hair smiling.
Matt Earley.

Earley also cautions that, when preparing to commit your music to vinyl, you should have the best audio quality source (properly mixed and mastered) ready for the company doing the pressing. Be prepared and don’t cut important corners.

Landing on a Playlist: Connections Make a Difference

Man in 3/4 profile with hills behind him.
Mark Diamond.

It’s no secret that getting your songs on a prestigious Spotify® playlist can go a long way towards gaining new fans and increasing revenue. But how is this done? Is there a Spotify email to reach out to? Well, not exactly. Oftentimes, landing music on a playlist means doing the legwork to meet, talk and engage with curators behind the scenes.

While it can be very tough to get a song placed on a famous playlist like the Spotify “New Music Friday” mix, there is hope. Bear in mind that there are also myriad other playlists outside the most trafficked ones. Sometimes casting a wide net is best.

Pacific Northwest musician Mark Diamond has had the good fortune of landing many of his songs on online playlists; in fact, for the past three years, he has been making a modest living doing so. “Real connections are totally underrated,” he says. “Not just with people who work at Spotify, but the people who can add you to their independent playlists. Make sure to reach out and thank as many of them as you can. They’ll remember you for that. Streaming and playlisting can always be taken away, but true connections with fans cannot.”

Social Media Marketing: Persistence is Key

As a musician and music writer, one of the challenges I hear most is how vexing it can be to manage artist social media accounts. On one hand, it seems so simple: just post interesting things! But in another, more nuanced way, the job is much harder, requiring a great deal of time and dedication. My recommendation? If you’re not into social media, hire someone who is.

Young woman in a white pant suit with black blouse and glasses.
Ellie Vann.

Ellie Vann is a freelance social media manager for a number of bands in the Pacific Northwest. She’s also worked on social media campaigns for organizations like the Seattle Theatre Group and Seattle Secret Shows. Her initial aim for each of her clients is to grow their accounts by at least 50%, which could mean an increase in dozens, hundreds or even thousands of followers. More followers means more engagement, which can often mean more income for an artist, too.

Vann’s top tips for expanding social media reach are:

– Use hashtags. They’re an effective means of introducing your content to new people and can significantly increase engagement. Even adding a #music or #localmusic can go a long way.

– Spend 20-30 minutes per day “liking” and commenting on other posts that use your same hashtags. This engenders follows from those accounts. In addition, make sure to reply to comments people make on your posts.

– If you post on one of the “big three” social media giants (Instagram, Facebook, Twitter), be sure to also share it to the other two.

– Use Instagram’s story highlights feature. Presentation is key and this is a great way to accentuate the content you post.

Finding an Entertainment Lawyer: Get Recommendations

Looking for the right lawyer to represent you may seem intimidating, but it can be important to start the search early in your career. And when I say “right” lawyer, I mean specifically an entertainment attorney. Entertainment law is quite different from real estate law or estate planning; the local attorney your family uses most likely does not have the skill set required to practice this kind of specialty. Worse yet, they may not be forthright enough to admit to their lack of knowledge in that specialized field if it means turning down a fee or retainer.

The best way to find the right attorney is to seek recommendations from trusted friends and colleagues. You may not know a famous or even semi-famous musician yourself, but the Six Degrees of Separation dictum says that you probably know someone who knows someone who does. You need good, trustworthy people in all positions on your team, and the lawyer is no exception. In fact, he or she may be the key member.

“I honestly think,” says Austin Santiago, founder of the artist management agency Build Strong, “that a good entertainment lawyer is a more important early member of the artist’s team than even a manager. In fact, they probably know some good managers who might take you further than you could imagine!”

Man with facial hair with water in background.
Austin Santiago.

New musicians may say to themselves, “I haven’t even released a record yet, so why would I need a lawyer?” The answer is, because when a record release opportunity presents itself, you want to be prepared; you may not be given a whole lot of time to review and/or negotiate a contract when lightning strikes. For that reason, locating an entertainment lawyer can be crucial in the beginning stages of artist development.

Time to go out and start building a career! The ride may be bumpy at times, but the rewards can be well worth it.

Photographs courtesy of the contributors and Aleigh Michelle.


Check out “A Musician’s Guide to Getting Your Work Out There, Part 1.”

Note: Yamaha does not endorse any of the individuals or companies named in this article.

Finding (and Funding) a Way for Music

We can all agree that the conditions surrounding the COVID-19 pandemic have been challenging in ways no one could have anticipated. These circumstances have brought about new processes, new thoughts, new connections and new obstacles.

No matter what, music educators like us have always found a way to keep the success and health of our students at the forefront of everything we do. Providing students with the best possible musical experiences is our primary goal. Finding ways to help students achieve requires high-quality instruction, appropriate facilities, and quality instruments and equipment. All of these components have a common need: funding.

The “Fun” in Funding?

Acquiring and maintaining proper funding for school music programs has been and always will be a principal concern for music educators at every level and in every state. Many programs rely on a combination of district and fundraising dollars to provide for their students. Sometimes, and unfortunately, programs rely entirely on monies provided by outside sources. Often, music programs find themselves far short of their actual needs.

Music educators must balance their professional fundraising and marketing skills and teach a little music here and there. Even school systems with tremendous community support and significant financial resources find themselves with unanticipated or additional needs at various times through the years.

ESSA and Title IV-A: A Winning Combo

Currently, there are some special grant programs for education that are part of larger COVID relief packages that you can read about here. In this article, I’m focused on funding that is tied to the Every Student Succeeds Act (ESSA), which passed in 2015. ESSA’s hallmark for music educators and our students is its provision for a “well-rounded” education for all students, which means that the arts are now an essential part of every student’s academic experience. Of course, music educators have always known this, but now everyone else does too!

One of the most exciting and impactful provisions of ESSA is the availability of Title IV-A funds. These grants are provided to states to provide students with additional educational opportunities, courses, healthy and safe schools, as well as teacher training, equipment and supplies.

Of course, one of the essential elements of any instrumental music program is access to instruments. There is simply no substitute for having the ability to provide quality and reliable equipment

Success! Now for the “Fun”

male student playing baritoneLocated in metropolitan Atlanta, the Cobb County School District is the 23rd largest school system in the United States. With over 107,000 students in 111 schools, we are the second largest school district in the state of Georgia.

In grades K-5, all students receive music instruction from a certified music teacher as a part of their school day. In grades 6-12, each of our 25 middle schools and 16 high schools offer band, chorus and orchestra classes. All told, over 70,000 students participate in our music programs each and every year.

Our music education programs are incredibly fortunate to enjoy incredible community support year in and year out. Our families consistently rank participation in fine arts programs as a top priority in their students’ educational experience. The Cobb County School District’s leadership understands the value that the arts have in the lives of every student and work tirelessly to provide the teachers, facilities and equipment necessary to increase student success.

As a result, our fine a rts department was given access to $150,000 in Title IV-A funds this school year. As a department, we decided to distribute funds among our music, theatre, dance and visual arts programs.

male and female student holding violins For instrumental music, we provided band and orchestra instruments for programs with the greatest need. The school district provides funding yearly for larger and more costly instruments and equipment, including low-brass instruments, double reeds, low saxophones, percussion, cellos and basses. Other instruments like violins, violas, flutes, clarinets, trumpets and alto saxophones are usually provided by the students themselves

Recently increased student enrollment in many of our band and orchestra programs have produced a need to help provide these smaller instruments and equipment so that any student who wishes to participate can do so without financial concerns as a possible barrier

We provided this rationale to our Office of Support and Student Services, which administers Title IV-A funding for our district, and we were approved immediately. We were then able to provide many instruments to schools for distribution to our students to grow with and enjoy.

Looking Ahead

Going forward, we intend to continue to provide instruments and equipment, including updated technology for our music programs. There are numerous possibilities for this renewable funding source, and it can indeed alter the trajectory of music education in every school district.

Create a win-win situation for your students, district and community. Learn how your district distributes and uses Title IV-A funds. Run, don’t walk! You can help provide a significant positive impact on student lives TODAY.

Yamaha is an active advocate for music education, and we want to empower music educators to strengthen their programs in any way we can. Please register for the Yamaha Educator newsletter to read up on advocacy, professional development, information about instruments, resources, partnerships in education and more. Join the Yamaha Music Educator Community on Facebook or email us at educators@yamaha.com.


DTX6 Deep Dive, Part 3: Training Tools

Yamaha DTX6 Series drum kits are much more than just great-sounding electronic drums. The DTX-PRO module furnished with all DTX6 Series kits also has a Training Mode with exercises that make practicing fun and productive. In this article, we’ll explore how these training exercises can help you become a better drummer, whether you’re just starting out or are an experienced player.

Entering Training Mode

The front panel of the DTX-PRO has a dedicated button (circled in red in the illustration below) that takes you straight into Training Mode:

View of electronic drum module control panel with button circled.
The DTX-PRO Training button.

The +/- rotary control and +/- buttons scroll through the different options. All training exercises allow you to use the volume knobs on DTX-PRO to balance levels between the live drums, audio and the click.

Training Songs

The DTX-PRO module has a built-in library of 37 “training songs” in varying tempos and musical genres. Simply listen to the reference drums and play along, either by ear or by following drum scores (available for download in PDF form here). The reference drums and click can be turned on or off, and the tempo can be varied from 30 to 300 BPM. This is a valuable tool for both beginners and experienced players who want to master different types of grooves.

Part Mute

Part Mute training offers a different way of playing along with the training songs, using a setting called Auto Mute. When Auto Mute is on, the reference drum track plays until you start hitting the pads. If you strike only one pad (snare, for example), that instrument mutes, but the other instruments in the kit continue to sound. If you play all the pads, all the instruments in the reference drum track are muted. If Auto Mute is turned off, the complete reference drum track plays along with your pad strokes.

Part Mute also gives you the ability to mute any of the following instruments in the reference track: hi-hat, snare, kick, toms, cymbals, bass or “other” (which mutes all the instruments except drums and bass).

Screenshot.
Part Mute allows you to choose which instruments to mute.

Muting “other” enables you to isolate the bass and lock in with it — a fantastic practice tool for players at any level. Also, muting selected instruments in the reference drums can make it easier to concentrate on learning one part of the kit, which is especially useful when playing a new genre of music for the first time.

As we explained in Part 2 of this series, the DTX-PRO USB-TO-HOST port can be connected to a computer for recording to DAW software such as Steinberg Cubase AI (which comes bundled with the DTX-PRO). Recording a Part Mute (or any training session, for that matter) and listening back is a great way to objectively evaluate your playing and monitor your progress. In addition, the click can be turned on while using Part Mute, so you can record with it and judge your timing accuracy.

Song Part Gate and Song Score Gate

Training songs 1 through 10 offer two special features called Song Part Gate and Song Score Gate.

Song Part Gate breaks up the song into small sections, giving you the ability to learn just one segment at a time. A section is played repeatedly over a user-specified period of time (up to 3 minutes in 30-second increments, or for 5, 8 or 10 minutes) — just choose the setting that gives you sufficient time to comfortably learn and then play the part.

Auto Mute is employed here too, so you’ll hear reference drums until you start playing the DTX6 pads. In addition, playing a pad out of time causes that instrument to mute, so you’ll know right away if you’re locked into the track. While you’re playing, the screen on the DTX-PRO displays an accuracy rating based on one of four training levels that you can choose. Higher levels require more accurate playing; when you’ve nailed the part, you’ll score 100%. Additional parameters that can be adjusted for Song Part Gate include click on/off and ignore timing for selected instruments.

Song Score Gate is similar, except that you play through an entire song instead of one section at a time. I suggest you work through Song Part Gate before attempting Song Score Gate because trying to learn all the sections at once could be overwhelming.

Rhythm Gate and Rhythm Gate Triplet

These exercises are designed to improve your timing. They can be played to a click or to any of the training songs.

When using Rhythm Gate, you strike pads along with the click. If the strokes are in time, you’ll hear them, but if they’re not, the gate will mute them. Higher difficulty levels require more accurate strokes. A timing indicator on the DTX-PRO screen (shown below) has separate meters for hi-hat, snare, kick, toms, and cymbals, so you can see whether you are rushing or dragging on a particular instrument. If you do rush or drag, the sound will be muted.

Screenshot.
The Rhythm Gate timing indicator shows if you are playing ahead or behind the beat.

The beauty of both Rhythm Gate and Rhythm Gate Triplet is that you can use them with patterns as simple or as difficult as your level of playing permits. Beginning drummers, for example, can start with a simple pattern like this:

Musical annotation.
A basic pattern for Rhythm Gate training.

Intermediate or advanced players can work with more complex patterns like this one:

Musical annotation.
A complex pattern for Rhythm Gate Triplet training.

Both Rhythm Gate trainings offer a timer, as well as the option to mute the reference drums, turn click on/off, and ignore training for individual instruments. I suggest you use Rhythm Gate for practicing eighth and sixteenth notes, and Rhythm Gate Triplet to practice triplets or any of the songs that have a shuffle feel, such as Song 09 (“Jazz”), 04 (“Rock2”) or 12 (“PopShuffle”).

Dynamic Gate

Dynamics are an important skill for any musician, and Dynamic Gate develops your control over loudness and softness by ensuring that your strokes are played at a consistent level. Whenever you strike a pad with the correct dynamic, the drum will sound, but if you hit it with the wrong dynamic, the drum will be muted.

Screenshot.
Dynamic Gate allows you to set high and low thresholds.

You can set thresholds between light and medium strokes, or between medium and hard strokes. Dynamic Gate can be played with or without the click; using it with the click ensures that you don’t speed up when playing louder — a common problem with beginners.

Measure Break

Measure Break gives you a way of working on the accuracy of your internal metronome. Here, the click alternates between on and off. You choose the length of the exercise (from 2 to 10 measures) and the number of measures (from 1 to 9) during which the click is heard. When the click stops, simply continue playing; if your timing is steady, you’ll still be in time when the click resumes. Record this to DAW software and play back the results for a quality-control check on your internal clock!

Change Up

If you like the idea of shifting between different rhythms while maintaining a steady tempo, you’ll love Change Up training, where you’re presented with a variety of rhythms ranging from half notes to sixteenth note triplets; you then select which ones to play. The rhythms can be looped one, two or four bars, and strokes played out of time will be muted.

Screenshot.
Change Up offers seven different rhythms to practice.

Beginning drummers may find it easier to start with either the straight or the triplet rhythms, while advanced players can challenge themselves by mixing the different rhythms. Once you’re familiar with the various rhythms, you can mute the reference track and play to only the click.

Fast Blast

How fast can you play? Fast Blast counts the number of strokes played in a given amount of time ranging from 30 seconds to 10 minutes. It records the number of strokes on each instrument and remembers your high score even after the DTX-PRO is powered down. It’s a great tool for monitoring the progress of your speed, as well as for increasing stamina.

Rec’n’Share

One of the most fun ways to practice on DTX6 drums is by using the free Yamaha Rec’n’Share app, available for both iOS and Android™ devices. This is an especially important practice tool because it lets you record audio and video of your performances.

Rec’n’Share allows you to import music files and automatically creates a click track for them, making it easier to play along with the song. Playback speed can be slowed down, and you can loop any section of the song — helpful for learning complex drum parts.

When you’re ready for a take, you can overdub your drums to the song while recording to your smart device. During playback, you have separate control over the volume of the music and the drum track.

Once you’re satisfied with the performance, you can edit the start and end of the file, then email it to your teacher for instant feedback, upload it to a file-sharing app or post it to social media. Watching videos of your own performance will also help you see if you are playing with proper technique and posture.

Ready to learn more about the training features of the DTX-PRO? Check out this video:

Check out the other installments of our five-part “DTX6 Deep Dive” series:

Part 1: The Kit Modifier

Part 2: Recording Options

Part 4: Customizing, Importing and Layering Sounds

Part 5: A New Level of Playability


Click here for more information about Yamaha DTX6 Series electronic drum kits.

The Modern Mixtape

Back in the day, mixtapes — whether compiled on CDs or cassette tapes — were used as a tool for community and as a means for musical exploration. They provided a way to share the music that’s special to you with others and allowed you to celebrate special events (such as weddings, anniversaries, Sweet Sixteens, pool parties, whatever) and/or convey your feelings (for everything from a promising first date to a devastating breakup). Today, we have streaming services to help facilitate that concept, with considerably more functionality and arguably greater effectiveness.

Technology has allowed music to become more accessible to the current Generation Z than any previous age groups. In this article, we’ll explore the means for making modern mixtapes using streaming playlists. First, though, let’s take a look at the Bad Old Days.

Cassette and CD Limitations

Audio cassette with a label handwritten with the words "mix tape".

Mix CDs and cassette tapes were limiting because they’re static. Once you burn a CD, there’s no going back; once you record a cassette tape, the tunes can only be played back in that same order. True, you could skip around during CD playback, but this could result in noticeable delays that interrupt the vibe. Besides, the mixes you’d created usually had a particular flow in mind, so playing the tracks out of order defeated the purpose.

Both media also imposed restrictions on the length by only having room for a certain number of minutes — in the case of CDs, usually a maximum of 74; in the case of cassettes, a practical limit of 45 minutes per side. That said, there were special CDs that could accommodate up to 80 minutes, at the expense of some audio fidelity, and there were also 120-minute cassettes offering an hour per side, but the tape was so thin they were prone to breakage and so were definitely not something you’d want to play often.

Before the 1990s, music collections lived largely on vinyl (happily, that’s the case today too, thanks to a recent resurgence in sales). Soon thereafter, CDs started to rule the world and collections shifted to the small metal discs, often assembled in massive CD binders that weren’t quite as heavy as lugging around stacks of vinyl, but hefty nonetheless.

File-Sharing

Then came file-sharing services like Napster®, which freed the world from the necessity of tying music to any form of physical media. These services allowed you to acquire a digital version of an album or single after its release by transferring MP3s and zip files over dial-up or broadband internet connections — ripping tracks just because you could. It would take hours to download entire albums onto the computer, and if you were lucky, you had a separate line for the internet and didn’t tie up the phone. Luckier still if you didn’t accidentally download a virus.

The next inevitable step was to take your favorite songs and carefully burn a mix of them to CD to give to a friend or bring to a party — a task that peer-to-peer file sharing services like Napster, Limewire and Kazaa made easier since you could download individual MP3s rather than sifting through full albums. (Unfortunately, the latter two — and other, similar services — were eventually shut down when they were hit with lawsuits.) It was a step in the right direction … but you were still stuck with the limitations of CD, as described above.

Modern Streaming Services

The earliest file-sharing services were soon replaced by iTunes®, and now streaming services like Spotify®, Pandora®, Apple Music®, Amazon Music, TIDAL, Qobuz and Deezer have taken over, their vast libraries containing almost every song you could ever want.

By shifting the focus to playlists, these services have brought the concept of the mixtape into the digital age, as well as enabling mass-sharing of a set of songs. Through these platforms, the listener can listen to official song collections or custom-create their own playlists, share them with friends, and make them private or public — the latter option opening them up to collaboration.

Spotify, for example, has flagship entities like Rap Caviar and Today’s Top Hits, but the platform also creates special Daily Mixes based on who you listen to — an easy route for musical exploration. Similarly, Apple Music creates stations based on artists you’ve listened to before. Both services additionally boost the user experience with features like lyrics and music videos that appear when songs play.

Screenshot of app.

Unlike mixtapes created on physical media, playlists can last for many hours, and while they can be crafted in a certain order, many are meant to be played on shuffle as a way to keep things fresh. Best of all, playlists make it easy to be creative, and to better cater to specific moods, seasons, or marking special moments. Ultimately, playlists on streaming platforms are ever-moving and ever-changing, and so can easily adapt to the shifting musical landscape.

Gen Z and future generations may never quite understand the pain and patience of pocketing your allowance and saving up money to buy an album — or of working to find, gather and curate a mix. It was fun while it lasted … but with the emergence of playlists, there’s no question that we’ve moved on to a better way of doing things.

Photograph courtesy of Vandidcam.


Check out this related blog post: Inspirational Playlists


Yamaha MusicCast, which is built into many of the company’s home audio products and is compatible with all major streaming services, makes it easy to distribute your favorite playlists wirelessly over all the speakers in your house — even those out on your patio! Click here for a list of MusicCast-enabled products.

Click here for more information about Yamaha AV products.

Scales, Shapes and Contours

In a recent blog posting, I explored the value of a music education and the career opportunities it can provide.

Of course, it takes much more than an education to forge a pathway to superstardom. Diversity, tenacity, creativity and consistency (as well as good social skills) will also need to be a part of your personal repertoire.

For example, guitar players know that when you learn a new chord, you also need to learn alternative shapes, inversions and alterations of the same chord along the entire fretboard. Similarly, in addition to memorizing harmonic note clusters, you should also know which scale they are derived from, as well as the scale position they occupy. Multiple fingerings of the same scales will also need to be burnt into your muscle memory before you can even start to weave interesting melodic lines and employ the plethora of expressive techniques available to you.

Did I mention that learning the guitar is a lot of hard work?

Trust me, it’s worth it, because these kinds of deep understandings will open up a whole new musical world just waiting to be explored. In this article, we’ll take a look at a few of them.

Scales

Scales can be defined as a series of single notes organized into a specific order of intervals. The seven tones of the major scale, for example, adhere to the following formula:

whole tone – whole tone – semitone – whole tone – whole tone – whole tone – semitone

This formula allows us to replicate the same scale in all 12 keys. I view scales as the “tools” we use to create our melodies and improvisations.

Shapes

Scales can be inverted along the fretboard to create new shapes. Each of these shapes contain all the same notes; however, the fingerings change to accommodate the specific interval formula. For example, the first pattern of the G major pentatonic scale starts with the note G at the third fret, as shown in the illustration below. The second pattern, however, starts on the note A at the fifth fret and has a completely different shape. These varying shapes offer new possibilities and creative ideas.

Guitar scale diagrams.

Interestingly, even if we know all the possible scale patterns needed to play a particular melody, our fingers and creative sensibilities often favor certain shapes when we create lead lines and improvise solos.

Contours

I definitely have my favorite shapes of the pentatonic and major scale modes. Within these go-to favorites, I find contours that I like and use these “shapes within shapes” to begin the search for motifs (short melodic phrases) that I then develop into longer solos or guitar hooks.

Sometimes these same contours can be found within the other scale patterns. As luck would have it, this gives us alternate note choices. In effect, we get the same rhythmic motif with a fresh set of tones.

I employ this approach much of the time, and it’s definitely become an integral part of my sound and style.

Arpeggios

Arpeggios can be found within scale shapes too, which means you’ll be able to identify chord-tone resolution points within your scales. These triad or seventh-chord arpeggios are also excellent sources of melodic nutrition and will provide the strongest consonant resolutions.

Adding a Ninth

I’ve developed a way of adding the ninth (i.e., the major second an octave higher) to my chord arpeggios in order to create two-notes per string arpeggio patterns that are similar in layout to pentatonic scales. The ninth isn’t necessarily a chord-tone resolution, but it allows me to create the contours I’m looking for.

For example, as shown in the illustration below, an E7 arpeggio will often produce patterns with only one note on each of the strings. Adding a ninth to these creates two-notes per string patterns. These are not dissimilar to major and minor pentatonic scales shapes, and therefore allow us to create licks that are reminiscent of pentatonic scales, but with more chord-tone resolutions.

Guitar arpeggio diagrams.

Chromatic Magic

Connecting chord tones with chromatics (notes between the scale or chord tones) adds an air of tension before resolving each phrase. These “flavor” tones will also give your fingers a smooth way of flowing through and connecting multiple scale patterns. Just remember: Chromatic notes are passing tones, so don’t try to stop there for any amount of time!

String-Skipping

If you ever find yourself playing linear scale runs that seem to go nowhere and have little or no character, try skipping a string within your patterns to widen the intervals. This may take a little practice if you’ve never tried it, but the results can be distinctive and musically delicious.

I look for intervallic contours too. Design with your eyes and re-model the shapes you see into new licks and phrases.

The Video

In this video, I’m playing four-bar phrases from within all five patterns of the D blues scale, using many of the techniques and principles described above. I’m also leaving four measures of space for you to jam along between the riffs so you can develop solid phrasing concepts of your own.

Think of this as a musical conversation: Listen carefully to my phrases and try to respond rather than react. Package each phrase so that it resolves without stepping on my licks.

Note that all the guitar tones for this video were created with the Line 6 Helix modeling processor and recorded directly to my computer software.

The Guitar

The (now discontinued) Yamaha Revstar 720B used in this video is one of those guitars that works for most musical styles. It can be smooth when you’re playing jazz and blues, yet it really rocks when you want it to. The traditional, time-tested mahogany and flame-maple tonewoods add warmth and sustain to every note and its Filtertron-style humbuckers are the perfect conduit for noise-free, expressive delivery.

Electric guitar.

Yamaha Revstar 720B.

The Revstar range of guitars are also available with P90 pickups and a wrap-around bridge as an alternative to the supplied Filtertrons and Bigsby tremolo.

The Wrap-Up

Take some time to explore the landscape of your scales, shapes and patterns, and you’ll be rewarded with new horizons and exotic vistas for your digits (as well as your musical creativity) to explore. Take it from me: it’s an endeavor well worth pursuing!


Check out Robbie’s other postings.


Click here for more information about Yamaha Revstar guitars.

Click here for more information about the Line 6 Helix guitar processor.

Celebrate Your Musical Heritage with the PSR-A5000

The United States is a country that has a uniquely diverse ethnic population, with many different cultures blending together to make the proverbial “melting pot” that so defines us. Wherever you travel in this vast nation, you can’t help but experience the cultural influences of each region: The food is amazing, the hospitality is warm, and the music is melodic, fun and energetic.

Enter the new Yamaha PSR-A5000, which gives you the ability to celebrate your heritage and the flexibility to perform music from all over the world.

A digital keyboard.

More than just an ordinary Arranger Workstation, this is an instrument that inspires. In addition to providing the sound of standard instruments such as piano, guitar, organ and drums, it offers over a thousand high-quality authentic Voices from countries such as Morocco, Tunisia, Turkey, Iran, Egypt, Lebanon and many more, all recorded in professional studios. There’s also expanded drum kit functionality that allows you to play 128 mapped instruments optimized for World Music finger drumming on a keyboard — even exclusive key-off sample technology for percussion instruments such as the Riq and Darbooka.

In addition, the PSR-A5000 offers a wide variety of special features, including:

– A real-time scale tuner with 12 scale types and five instantly recallable memories

– Velocity-sensitive crossfade portamento, allowing smooth, expressive transitions between successive notes

– A new responsive key-bed action

– The ability to utilize multiple time signatures within a single Style

– Plenty of memory so you can load optional regional expansion packs from countries such as Iraq, Mexico and India

– A Chord Looper that lets you prerecord a chord sequence, freeing your left hand from playing chords during live performance

– A Style Section Reset function that allows you to instantly jump back to the downbeat — a real lifesaver in live performance when a vocalist or other instrumentalist wanders off-beat!

The PSR-A5000 includes built-in speakers, a dedicated mic/instrument input (great for karoake!), hundreds of high-quality onboard effects, a joystick controller and a large full-color screen display that makes navigation easy. Composers will find it inspiring, live performers will be able to make that wedding extra special, and families at home can gather around and experience the songs from their ancestral countries.

Side view of a digital keyboard.

It’s human nature to want to maintain ties with your heritage, and a big part of that is the culture of your people … especially the music. The PSR-A5000 is truly a world instrument that’s capable of bringing us all a little closer together.

On a personal note, be sure to check out the WahdaKabira Style (a dance rhythm from my native country of Jordan) in the Shami category, shown below. I created this, along with many other PSR-A5000 Styles.

Screenshot.


Ready to learn more? Check out the video:

Click here for more information about the PSR-A5000.

Collaborating with Your Dreams

Have you ever conceived a song inside a dream? Or at least stumbled on the essence of a lyric or melody that had been eluding you for weeks?

If the answer is yes, I’m not surprised.

You may be familiar with Paul McCartney’s recollection of how “Yesterday” came to him in golden slumber. It was originally called “Scrambled Eggs” — not exactly a sizzling title, but the right number of syllables and the beginning of an epic song’s evolution.

Recently I was intrigued by an online article about “lucid” dreaming — the state in which a dreamer is aware that they’re dreaming. Recent findings show it’s actually possible for the dreamer to influence the outcome of a lucid dream by taking control of the narrative or the characters — metaphorically grabbing the steering wheel — if they’re mindful enough to initiate the action.

There’s no guarantee you’re going to lucid dream, of course. However, apparently you can be trained to “go there” by receiving a signal during your slumber that was established beforehand, while you were awake. A beep. A finger snap. The dreamer can then twitch or move their eyes in response to the cue, signaling they heard it and that it registered.

So if this kind of subconscious cueing can manipulate behavior in our dreams — that is, give us the power to shoo away a nightmare or say the words we’ve longed to say to a dearly departed loved one — I wonder if it could free up creativity as well, like it did for Sir Paul.

It appears so. In fact, as one researcher puts it, “People often use lucid dreaming … for a kind of artistic, creative inspiration.” In a Psychology Today article entitled “Do Lucid Dreams Promote Creativity?” author Patrick McNamara adds, “People who learn to ‘incubate’ a problem in their dreams are often able to reliably dream up a solution — one that may not always solve the problem immediately, but that they later judge to have been significantly helpful in devising a ‘real’ solution. Lucid dreaming, in particular, has been positively linked both with creativity and with problem-solving successes.”

I consider sleep a valuable collaborator. I have yet to pen a “Yesterday,” but I’ve noticed that if I doze off while obsessing over a lyric I often continue the quest into my dream life … even without being prompted. In the morning (or perhaps later in the afternoon), it occurs to me that the words on the tip of my tongue were born in that fuzzy vignette.

Imagine how much more productive my dreams and I would be as a team with some direction!

Taking things a step further, couldn’t the power of suggestion during a state of clarity yield deeper truths? This is an ingredient that’s not always as accessible as a songwriter might hope. There’s all sorts of baggage that separates us from it. Yes, it can be a painful place to go, but sometimes it’s a place we need to go. From authenticity come the songs that make eyes widen, cars pull over, hearts beat faster. We can do it. It’s just that we may need a little help now and then — an accomplice’s voice encouraging us to grab the wheel.

With the help of an awake person, it could be possible to combine the logical advantages of being conscious with the creative world revealed in our dreams. What a powerful combination!

Perhaps you have a “sleep partner” who’d be willing to participate in some experimental songwriter dream-therapy with you — someone who would wait until you’re very still and breathing deeply and then whisper into your ear: “What are you really trying to say in your new song?” “Do you feel something that makes you uncomfortable?” “Is there a tonal range you’re neglecting to explore?” As songwriters, these are all questions we should be asking ourselves.

Oh, did I mention that the iconic opening riff to the Stones’ “Satisfaction” revealed itself to Keith Richards in a dream?

It did.

I think I feel a nap coming on.


Check out Shelly’s other postings.

Cult Classics, Part 2: Vintage Yamaha Gear of the 1980s

It was a decade of decadence. With iconic albums like Thriller, classic films like Back to the Future and pop-culture trends like spandex, mullets and arcades, the metaphorical sports car trunk of the 1980s was filled to the brim with a unique brand of creativity. The audio gear was no exception.

If the 1970s were considered the golden age of Hi-Fi, the 1980s were more of a transitional period with regard to home audio. Yamaha continued to improve traditional analog audio devices, but more importantly, the technical innovations of those years laid the foundation to bring us into the age of digital audio.

PX-1 / PX-2 Turntables (1978, 1980)

Turntable with lid open.
Yamaha PX-1 turntable.

Yamaha broke with conventional turntable design with the PX series of turntables. The flagship PX-1 was only sold overseas but the PX-2 drew a lot of attention here in the U.S.

Closeup.
PX-1 tonearm.

The linear tracking mechanism employed by PX models conquered the long-standing problem of tracking error. By copying the linear characteristic of vinyl cutting lathes, the stylus was always perfectly perpendicular to the record groove across the entire album. The +/- 0.15 degrees or less of error was 20 times more accurate than a modern S-type tonearm. In addition, the tracking servo used LED opto-coupler light-sensing modules, which were very new at the time. These touchless sensors sent tracking position signals to the motor drive system for perfect alignment.

Notice there is no finger lift on the head shell. The tonearm position control was electrically controlled from buttons on the top of the turntable. The controls, labeled UP and DOWN, LEFT and RIGHT, made placing the needle on the record kind of like driving a spaceship. It was a very cool way to impress your friends!

CD-1 CD Player (1982)

Closeup of CD player with drawer open.
Yamaha CD-1 CD player.

The dream of digital audio became a reality with this first-generation CD player. Instead of bringing the disc to the motor mechanism, a single press of a button brought the entire playback system out to the user with a Star Wars-like motorized transport system.

A second motorized drawer revealed an impressive number of programming buttons: Yes, you could program which order to play the songs on a disc! A primitive method for making playlists, for sure, but very advanced technology for the time.

CD-1 owners had to pay some $1,400 (over $4,000 in today’s currency) for all this cutting-edge technology. And with the unit weighing in at almost 30 lbs., there was no question that you were buying a very substantial piece of audiophile gear.

B-6 Power Amplifier (1981)

Pyramid shaped electronic item.
Yamaha B-6 power amplifier.

The 1980s saw many advancements in power amplifier technologies, and the 200 watts per channel B-6 was loaded with innovation — most notably an X-Power supply and X-Amplifier circuitry.

Instead of regulating the power after it was converted inside the unit, X-Power modulated the amount of current going into the unit itself. The B-6 was fully capable of blowing household circuit breakers if it needed extra power, i.e., blasting music for a party.

The X-Amplifier circuitry monitored the audio signal for high amplitude transients and activated a secondary high voltage power supply to pass extremely high dynamics. These circuit designs were crucial to the amplifier’s very high efficiency and allowed it to be housed in a unique chassis without the need for huge cooling heatsinks.

Unsubstantiated rumors suggest the mythical healing powers of the pyramid were employed to achieve the extremely low 0.003% THD distortion level. Even if not true, the look of the B-6 was truly eye-catching.

K-1000 Cassette Deck (1982)

Closeup of the control panel.
Yamaha K-1000 cassette deck.

Cassettes were the most common recording format in the 1980s because of their simplicity. Unfortunately, the cassette system was originally developed for voice dictation and not intended for high-fidelity music. However, the consumer audio industry was full of bright engineers who were determined to fit a square peg into a round hole. The three-head (record, playback and erase) K-1000 did a pretty good job by incorporating Dolby and dbx noise reduction. But the cassette mechanism itself was the masterpiece of this deck; dual capstans were used to precisely tension and track the tape across the heads while maintaining exact speed though the entire tape. This sophisticated mechanism was employed in several generations that followed. Why mess with perfection?

CD-X1 CD Player (1984)

View of CD player with drawer open.
Yamaha CD-X1 CD player.

The high cost of early CD players kept them out of the hands of the general population. Yamaha saw a need and proceeded to meet it. The CD-X1 was the industry’s first under-$500 CD player. For the first time, digital music was available to the masses.

During the 1980s, Yamaha was expanding their proprietary Large-Scale Integrated Circuit (LSI) manufacturing capabilities. The YM3511 CD controller and the YM2201 demodulator became industry standards as many manufactures integrated these chips into their own products.

The YM3511 was responsible for laser focus, tracking servos, tracking motors and spindle motor disc speed. The signal generated from the laser was then sent to the YM2201 for processing and demodulation to usable digital audio. These two chips replaced multiple densely packed circuit boards, achieving lower production costs and greatly improved reliability.

M-80 Power Amplifier (1984)

Closeup of the control panel.
Yamaha M-80 power amplifier.

The monster M-80 is still recognized today for its distinctive LED bar graph power meter display, which practically begged the user to crank it up fully — something that left no doubt as to how much power was being pushed to the speakers. But behind the mesmerizing display was an absolute beast of an amplifier.

The amp boasted a whopping 250 watts per channel and a tracking power supply that engaged when high power dynamics were needed. Different from a switching power supply, which shifts to maximum voltage when triggered, this tracking supply followed the output signal and always maintained a several volt distance from the signal for very efficient high-power generation. Two large transformers were required to supply all this power.

The M-80 was actually more than just about muscle. An Auto-Class A switch re-biased it for 30 watts of pure class-A power, and if the input needed more than the 30 watts (for example, to light up the meters to full-scale) the circuit would seamlessly switch to a Class-A/B operation. This was the best of both worlds: audiophile nuance and big-time power.

DSP-1 Sound-field Processor (1986)

Photo of the front panel and the remote.
Yamaha DSP-1 sound-field processor.

Most would agree that the DSP-1 was the most significant Yamaha product of the decade. This unique processor was able to transform the acoustics of your listening room to that of a world-famous venue. This was a true acoustic recreation, too — not merely a simulation of a sound designers’ perception of what a concert hall should sound like.

In creating the DSP-1, Yamaha sent engineers to some of the world’s most iconic performance venues to capture their acoustic signatures. The parameters of frequency response, along with reverberation and decay times, were all captured in three dimensions, using specialized hand-built equipment. The data was then integrated with the newly developed YM3804 digital processing chip. The final result was called Digital Sound-field Processing.

By overlaying the acoustic blueprint of a selected performance venue, your listening room was sonically transformed into the environment where you would expect your favorite artist to perform. Listening was no longer constricted to the fixed acoustics of your home.

Although it was originally created for two-channel listening (home surround sound hadn’t been developed yet), the DSP-1 led the way for modern Yamaha technologies such as Surround:AI, which uses artificial intelligence to contour DSP parameters in real-time.

Centennial Series (1987)

View of unit and remote.
Yamaha CX-10000 preamplifier.
View of unit.
Yamaha CDX-10000 CD player.
View of unit from above.
Yamaha MX-10000 power amplifier.

1987 marked the 100-year anniversary of Yamaha, and to commemorate the event, the company’s engineers were freed from all budget constraints to create a very special line of separate audio components called the Centennial Series.

This system was noteworthy for its all-out disregard of having to hit a pre-determined price point — a design engineer’s dream. There were so many innovations incorporated into these components, it’s hard to list them all. Their price and weight alone should give you an idea of the build quality of these beauties:

CX-10000 preamplifier: $7,500 (approx. $17,000 in today’s dollars), 55 lbs.

CDX-10000 CD player: $3,000 (approx. $7,000 in today’s dollars), 65 lbs.

MX-10000 power amplifier: $7,000 (approx. $16,000 in today’s dollars), 94 lbs.

Very limited numbers of each were brought into the U.S. market, making them quite rare. When they do show up on the secondhand market, they typically sell quickly. If you are lucky enough to locate one, be prepared to pay in the $15,000 range for the amplifier itself. Luxury never goes out of style!

R-9 Receiver (1986)

View of control panel.
Yamaha R-9 receiver.

The R-9 was the first Yamaha receiver with video switching, making it the precursor of the modern AV receiver. There were three composite video source inputs: Two were labeled VCR, with input and output switching for video tape recording and dubbing.

But the R-9 was more than just a video switcher: It was equipped with an Auto Class-A circuit that could output up to 5 watts of pure Class-A amplification before switching to standard Class-A/B for higher power needs.

RX-1130 AV Receiver (1989)

Closeup of front panel.
RX-1130 AV receiver.

Finishing up the decade, Yamaha launched their first surround sound AV receiver: the RX-1130. This forward-thinking product had four built-in amplifiers and Dolby® surround decoding. (This was before the introduction of Dolby® Pro Logic® with its center channel capability.) It packed a punch, too, with 125 watts to the front speakers and 30 watts per channel to the rears (plenty since Dolby surround sound offered limited bandwidth for the rear speakers). The addition of S-video switching made the RX-1130 highly desirable to not only audiophiles but the videophiles of the day as well.


While the 1970s refined the boundaries of two-channel listening, the 1980s expanded on that foundation and sprinkled in some groundbreaking digital technologies we rely on to this very day. If it wasn’t for the innovations of the ’80s, digital music, surround sound decoding and video integration as we know it today would never have happened.


Check out these related blog articles:

Cult Classics Part 1: Vintage Yamaha Gear of the 1970s

Cult Classics Part 3: Vintage Yamaha Gear of the 1990s

The History of Hi-Fi

What is an Integrated Amplifier?


Click here for more information about Yamaha AV receivers.

Click here for more information about Yamaha Hi-Fi components.

Click here for more information about Yamaha speakers.

Launching a Music Business Program at Your High School

Many students dream of becoming performers, but because it is so highly competitive, that world can be brutal and disheartening.

Others choose to follow in the footsteps of their favorite music teacher and pursue a degree in music education. There are others who love music but are just not interested in either of these two careers and, of course, as much as all of these young people might enjoy music-making, some just do not possess the skillset to establish a career that requires an advanced level of performance abilities.

Interestingly enough however, there is a plethora of careers in the music field that current students may know nothing about that could be “just the ticket” to allow them to discover a rewarding career by combining their love of music with the business of music. In fact, there are undoubtedly a number of other students who have not chosen (or been able) to participate in the existing music program who would still love to learn more about these possibilities. It can certainly be agreed upon that performers and educators have careers that are focused on actual music-making, but can one also have a career in music yet not be a practicing musician as part of their day-to-day responsibilities? The answer is a resounding YES!

East Central High School: How It Started

There is a growing industry which includes marketing, promotion, technology, law and general music business that is a wide-open job field for our students. When an objective look was taken at the music programs at East Central High School (ECHS) in San Antonio, Texas, it became clear that a music business program could be designed that would meet the needs of the music students and at the same time, reach out to a significant segment of our campus population to those who longed to learn about music, but who were not musicians.

garage band hernan carlos hxqFzAN 5dw unsplashIt all started when a group of students approached me to ask if they could use the choir room for what would eventually become the afterschool Musician’s Club. In the process of agreement, I became the sponsor of this fledgling group of garage band musicians. Each Thursday, we met for an hour after school. These students were passionate about the music industry.

Before too long, I started to notice that these students were sharing PowerPoint presentations on how to get a gig, what to do when negotiating money for performing, how to travel with the gear and many other topics pertinent to music business. Eventually, the students planned a weeklong music festival that took place each morning before school. It featured a variety of bands and solo artists representative of a myriad of diverse styles. The choir room became the performance venue, which was packed for five full days, and the music emanating from “the scene” was mostly original material written by the members of the Musicians’ Club.

Attending UTSA’s Music Biz Day Conference

The students were ecstatic when the University of Texas at San Antonio (UTSA) invited us to their Music Biz Day Conference. This event became the catalyst for accelerated conversation on the subject  of  developing a high school curriculum for Music Business and Entrepreneurship. This was when I fully realized how much our students were hungry for structured classes such as these. Each ECHS student who attended the conference wrote a reflection on their experiences. One particular student summed it up best when he wrote:

Getting to hear from so many people who have a passion for music and who have had success in a career they love was amazing, especially because a lot of times pursuing a career in music is discouraged. Plenty of times, I’ve heard people say that I would have more success in another field, but hearing about how through passion, dedication and hard work, finding success in this field is possible. It’s made me even more excited about the possibilities in my future.

ECHS’s Music Business and Entrepreneurship Program — A Success!

Subsequently, I invited Dr. Stan Renard, coordinator of the UTSA Music Marketing Program to help us kick off the newly designed music business course that would begin the very next school year. Nearly 400 ECHS students expressed a high interest in taking the class. It was settled! After going through the necessary administrative hurdles to put a new class on the list of course offerings, the program was launched!

In these few short years, we have seen our program bring in students from throughout the entire campus. Today, the ECHS Music Business and Entrepreneurship program continues to expand, even in the unique climate of the past year. We are continuing to add new classes to supplement our two-year music business curriculum and still, the students keep coming. Many of our graduates have entered the music industry directly from high school  and others have chosen to continue their music business studies in college.

Music business education is adaptable to any demographic profile and molds to meet existing needs in a school or district. In addition, music business education is cross-curricular and also addresses the skillsets taught in the STEM pathway. Finally, remote learning is probably here to stay — at least in part. Music business education works on a digital platform just as easily as in person. Unlike a traditional music class where directors have scrambled to create a way to teach and assess a performance-based class virtually, music business is interactive and frees the teacher to design lessons that can be assimilated through a variety of mediums.

Moreover, what if such a program could not only become an enhancement to any music program, but also serve as an attractive option to students and thus bring into the fold the very group of students who otherwise would never have been part of the more traditional music coursework? Any student who is savvy in music or production, creates music on a laptop, plays in a garage band or has the desire to learn these skills, would now have a home in a much more comprehensive music program that will lead to a mosaic of experiences for all.

Reimagining the Vibraphone

The vibraphone (sometimes known simply as “vibes”) has only been around since the early 1900s, so it’s a relatively new instrument. Nonetheless, it had a major impact on the sound of music during the mid-20th century, and is still commonly used in jazz, where it often plays a featured role.

While the instrument resembles a marimba or xylophone, a vibraphone employs metal tone bars made of alloy that are suspended over a resonator with a motor-driven fan at the top of each resonator tube that creates a vibrato effect — hence the name vibraphone.

The vibraphone also has a sustain pedal similar to the one found in a piano. The pedal operates a felt-covered damper bar, which moves up and down against the tone bars. When the pedal is up, the damper touches the tone bars to produce a muted sound. When the pedal is down, the damper is pushed away, and the tone bars ring out (i.e., sustain) for a few seconds or until they’re muted by the damper being released by the pedal. (Click here for more information about the components of a vibraphone.)

Vibraphone.
Yamaha YV-3030MS vibraphone.

The growth of school music programs in the 1950s sparked by the post-war baby boom caused greater demand for musical instruments in general, including mallet percussion instruments such as the vibraphone. Over time, the vibraphone was incorporated into collegiate-level percussion performance education. It is now a standard member of the modern percussion section for orchestras and concert bands at all levels of instruction.

Early models of Yamaha vibraphones included several unique features for young players, including height-adjustment capability, non-graduated bars, a variable speed motor and silver matte bars. After several years in development, the YV-2030MS and YV-3030MS models introduce new innovations to make the musical journey of young percussionists a more meaningful experience. These models offer a level of performance that satisfies a broad spectrum of users, from beginning band to high school students.

Here are some of their main features:

Gas Spring Height Adjustment

Both the YV-2030MS and YV-3030MS incorporate a gas spring height adjustment mechanism, making it easier for players of any stature to set the instrument to the ideal height.

View from side showing the three different height options.

Previous models used a sliding height-adjustment mechanism that required a coordinated effort by two people. In contrast, the gas spring height-adjustment mechanism only requires one person for safe, easy height adjustment. The improved operation of this system also allows for quick adjustment from player to player during a concert or rehearsal.

In addition, there are two vibration-damping rubber joints mounted below each side frame, circled in red in the illustration below. These components make height adjustment even easier by eliminating the need to keep the instrument level while adjusting its height. They also reduce floor noise that can occur when the instrument is played.

Side view of vibraphone with height adjustment mechanism indicated.

Damper Belt

On previous models, the damper bar and pedal were linked by a metal rod that could be accidentally bent if a user attempted to adjust the instrument’s height without first loosening the rod’s wing bolts. In the YV-2030MS and YV-3030MS models, the metal rod has been replaced by a belt to eliminate this problem — an innovation inspired by the design of Yamaha drum set pedals. Since the wing bolts are replaced by a buckle, there is no chance they will be misplaced or lost. The use of a belt also ensures that slippage cannot occur when the damper pedal is pressed.

Diagram.

Damper Bar

Compared to conventional damper mechanisms that use a pivoting damper arm, the redesigned mechanism used in the YV-2030MS and YV-3030MS models allows the damper bar to move perpendicularly to the natural and accidental tone bars. This allows all the bars to have an even damper and release at the same time. In addition, since there is no longer a damper arm, there is no danger of getting fingers caught in the damper arm mechanism.

Diagram.

Bar Material

A consistent touch in vibraphones not only enables a larger dynamic range, but also imparts a warmth to the tonality. The new bar material employed by the YV-2030MS and YV-3030MS produces an even gentler tone that blends well with other instruments in ensembles. These bars are made of the same aluminum alloy used in Yamaha celestas.

Side-by-side closeup of vibraphone bars on left and a piano looking instrument on right.

Variable Speed Driver

A common problem with vibraphone motors is that they can be quite loud; over time, they can even create an unwanted noise. YV-2030MS and YV-3030MS motor noise has been reduced by approximately 25% compared to previous models. This has been accomplished by using an ABS plastic material for the motor box rather than steel.

Components.

Additionally, the vibraphone variable-speed driver for the YV-3030MS includes a pause memory feature previously available only on high-end models, significantly enhancing the overall value of the instrument. This allows the fans to always stop at the memorized position when paused for non-vibrato playing, ensuring that consistent volume is maintained even when the driver is stopped and started multiple times.

This level of detail in Yamaha vibraphones leads to a greater level of playability, more consistent quality of sound and the removal of unwanted frame and motor noise — important benefits for both students and music educators alike.

Check out these related blog articles:

Reimagining Chimes

Anatomy of a Vibraphone

What’s the Difference Between Vibraphone, Glockenspiel and Chimes?


Click here for more information about Yamaha vibraphones.

The Importance of Archiving and Backup

Okay, you’ve spent days, weeks — even months — carefully crafting, recording and producing a song you think is pretty great. After innumerable overdubs, mixes and remixes you’re almost done.

Then one morning you go to open the project file to give it one last listen … only to discover that the hard drive you stored it on has crashed.

Yikes!

There are two endings to this tale, one happy, one tragic. In the happy ending, you’ve been regularly backing up your data, so you can easily open the file from another drive.

Unfortunately, it’s the tragic ending that happens way more often, and it goes something like this: the crashed drive contained the only copy of your song, and all the painstaking work that went into recording it is probably gone forever. OK, perhaps you can go to a data recovery service to try to salvage what was on the drive, but there’s no guarantee that it will work, and it will likely cost you hundreds of dollars to even make the attempt.

IT professionals know that it’s not a matter of if a hard drive will fail, it’s a matter of when. And compromised hard drives are not the only way to lose data, either. Accidental erasure is another potential problem, as are files that for some reason have gotten corrupted and won’t open.

Most home recordists (in fact, most computer users in general) don’t start backing up regularly until after they’ve gone through the misery of losing some important data. Don’t be one of them. Instead, do yourself a favor by implementing a backup strategy now. The only way to avoid data disaster is to be proactive.

In this article, we’ll provide suggestions for backing up your DAW data, along with best practices for saving while recording and mixing, as well as a how-to for archiving completed projects.

It Pays to Save (As)

Data pros use what’s called the “3-2-1 rule” when developing their backup strategies. That means the goal is to have three copies: the original file and two backups, one of which is stored offsite, either in a physically different location, or on a cloud-based service such as Dropbox™ or Google Drive™.

Diagram.
The 3-2-1 rule calls for two copies besides the original, one offsite.

If that sounds like overkill, you can keep your data reasonably secure with a “2-1” strategy instead; that is, two total copies of your project — the original file and one that’s stored offsite or in the cloud.

To make that latter strategy work, it’s best to follow certain procedures for saving your DAW projects. Most importantly, save multiple copies of your project file (within the same folder) as you go, using the “Save As” (not the Save) command. That will create a digital “paper trail” of the progress of your project over time. Not only does this effectively protect your music from drive crashes and data corruption, but also from yourself.

What do we mean by that? Well, if you only ever work on one copy of your song and you make changes or mix decisions that you regret, you have no easy way to revert to the way it was before. But if you save incremental versions using “Save As…” — preferably at least a couple of times every time you’re working on the song —  you’ll always be able to retrace your steps and find the version you saved before you introduced the problem.

Screenshot.
Using “Save As…” regularly makes it possible to retrace your steps.

As an alternative to manual saves, many DAWs also offer automatic backup (“Auto Save”) options that create copies of your file as you go. For example, Steinberg Cubase lets you choose how often to make a backup and how many backups to keep. The backed-up files show up in your Project folder with the .bak file extension and an incremented number.

Screenshot.
Auto Save options in Cubase’s preferences.

In addition to periodically saving new versions, you should also use your DAW’s plain vanilla Save command often. There are few things more frustrating than doing a great take or coming up with an inspiring new patch on your soft synth, only to have your computer crash before you’ve had a chance to save it.

Got Your Back?

The “2-1” strategy also requires that you copy the entire project folder for your song to a cloud-based storage service (or to a thumb drive or portable hard drive that you take to another location) at the end of every working session.

Cubase makes this process easy with the File menu “Back up Project” command. When selected, it lets you choose a destination and then opens the Back up Project options dialog, shown below. At this stage, simply uncheck all the boxes and give your backup a name that includes an incremental number or date.

Screenshot.
The Back up Project Options dialog in Cubase.

If you’re using a DAW that doesn’t have a similar feature, you can manually copy your entire project folder (which includes both the project file and audio files) to your backup drive. Start by just copying it to the main directory of your backup drive. Don’t put it in the specific song folder until after you’ve renamed it with an incremental number or date after the song name. This way, after your first backup, subsequent backups won’t have the same name inside the same folder.

Depending on how many times you reopen the project before you complete it, you’ll end up with several copies of your project folder, including the project data and the associated audio files. Yes, you’ll use up a lot of disk space, but as we’ll see shortly, you’ll be able to erase most of the folders when you’re ready to archive the project, thus freeing the disk space for future use.

Screenshot.
Multiple copies of the project folder, saved in a master folder.

If you want to be “3-2-1 rule”-compliant,” also make a local copy of the project folder to a local drive that’s not the one you record to, using the same folder-naming structure as you used for the backup drive. If you later need to access your backup for whatever reason, simply choose the most recent of the project folders on the drive.

Save It for Later

Once you’re finished with your project (including mixing and mastering), it’s time to archive it. Create a special folder for this purpose on your cloud-based service (as well as on your local backup drive if you’re using one). Your DAW should have a feature that allows you to save a copy and keep only the active audio files from the project. That can save you a lot of space, wherever you’re archiving to.

Cubase users can once again use the “Back up Project” feature. This time, check the Minimize Audio Files, Make Direct Offline Permanent and Remove Unused Files options, as shown below:

Screenshot.
The Back up Project Options Dialog set for archiving.

Make sure that your final mix and any mastered files are in the archive. Once they’ve been archived, you can delete all the incrementally saved project folders on your backup drive, which will free up a lot of space.

If you want to really future-proof your archive, you can also do bounces of each individual track, including effects, panning and automation. This is accomplished by soloing each track and then bouncing it to disk — just make sure any send effects are also soloed. The Audio Export function in Cubase can do a batch export of multiple tracks with or without processing, taking a lot of the tedium out of this, but even if you have to do your bounces one track at a time, you’ll receive a major benefit: If for some reason you need to reopen the project down the road and you no longer have access to your DAW or plug-ins, you’ll still be able to recreate the mix.

It’s essential to keep one local copy of your archive, because there’s always the chance that you’ll decide to stop paying for the cloud-based service or possibly that it will go out of business. In either case, you could lose access to your data.

A No-Lose Scenario

So far, we’ve only discussed backing up individual music projects, but you should also regularly back up your entire recording drive — something that can easily be done with automated backup software like Chronosync. Also consider making a bootable backup of your system drive, where your programs reside.

Screenshot.
Chronosync automatic backup software.

However you choose to go about it, be sure to set up a backup system that’s relatively easy to execute while providing you with the necessary level of data security. Although it might seem a little onerous at first, you’ll soon get into a routine, and it won’t seem like a burden. And you’ll be able to sleep better at night knowing that your data is protected!


Check out our other Recording Basics postings.

Click here for more information about Steinberg Cubase.

DTX6 Deep Dive, Part 2: Recording Options

Recording acoustic drums can be a challenging process that not only requires a lot of expensive gear such as microphones, preamplifiers and processors, but also a physical space built for that purpose. Yamaha DTX6 Series electronic drums make it easy to create great recordings because the DTX-PRO module (furnished with all DTX6 kits) is already loaded with a library of expertly-recorded drum sounds. Using the DTX6, you’ll be able to record with professional results and concentrate on making music. Let’s look at the different ways that DTX6 drums can be recorded.

1. Internal Recording

The DTX-PRO provides a built-in recorder, accessed by pressing the button of the same name on the front panel:

Photo of control panel.
The DTX-PRO module, with the Recorder button circled in red.

Once that button has been pressed, the DTX-PRO enters Recorder Mode; pressing the F1 function button directly below (the button marked “•”) initiates recording.

Screenshot.
The DTX-PRO internal recorder screen.

There are numerous options regarding what sound sources are recorded. The drums, of course, are always recorded but, in addition, you can also choose whether or not to record the internal click, audio fed into the DTX-PRO AUX IN jack (from a smartphone, for example) and/or audio coming from a computer via the rear-panel USB TO HOST jack:

Screenshot.
Three different audio sources can be recorded along with drum sounds.

Recording along with the click is a great way to work on your timing — when you play back the recording, you’ll easily be able to hear if you are in sync with the click. You can also change the playback speed over a range of +/- 50% — another great practice tool.

Up to 90 seconds of audio can be recorded into the DTX-PRO internal memory. However, this memory is volatile (meaning that the recording will be lost when the DTX-PRO is powered off), so you’ll want to be sure to save your recording to a USB flash drive connected to the rear-panel USB TO DEVICE port before turning off the unit. (A list of compatible USB devices can be found here.)

Plugging in a USB flash drive automatically increases recording time to 90 minutes, plus it allows you to name, store and recall your recordings. It also adds some interesting recording and practice options — for example, if you load your favorite songs or accompaniment files onto the flash drive as stereo WAV files, you can listen to them on connected speakers or headphones and play along with them. The DTX-PRO recorder even permits simultaneous recording and playback, so you can overdub your drums to the song while recording to a new audio file, and then play it back — a great way to monitor your progress when you’re learning a new song.

It’s worth noting that the level of the drums in the recorded file remains consistent regardless of the DTX-PRO Master Volume knob, while the level of the song being recorded can be set using the DTX-PRO Audio Volume knob.

2. Record to a Computer

The aforementioned rear-panel USB TO HOST port also allows you to connect the DTX-PRO to a computer using a standard USB Type B cable. Making this connection enables the DTX-PRO to stream audio and MIDI to and from any DAW (Digital Audio Workstation) software without the need for any additional hardware. The DTX-PRO even comes bundled with Steinberg Cubase AI music production software, so you’ll be able to quickly record, play and edit your drum performances and songs.

Screenshot.
Steinberg Cubase AI.

There are several ways to record in Cubase using the DTX-PRO: You can record MIDI data, audio files, or both at the same time. Recording MIDI data gives you powerful editing options such as quantization, which can align your performance to the click. Listen to this audio clip, and you’ll hear a MIDI recording of DTX-PRO drums as they were originally played. The performance is OK, but it’s not perfectly locked to the click track.

Compare that to the next audio clip, where the MIDI track has been quantized:

You can hear that the performance is now locked to the click. If you’re worried that quantizing might make the drums sound robotic or stiff, Cubase offers “soft quantize” and “groove quantize” features that correct the performance without making it sound mechanical.

Another powerful option that’s available when you record MIDI drum data is that you can easily go back and change the sound of your DTX-PRO kit to fit the production … and without having to redo your performance. For example, this audio clip was recorded using DTX-PRO preset kit P006 (“VintNashville”):

Since MIDI was recorded along with the audio, the MIDI track can be used to trigger a different kit. Here is the same exact performance, only this time the DTX-PRO is playing kit P008 (“Black Vinyl”):

In addition, the cut, copy and paste functions in Cubase make it possible to change the arrangement of a song at any time without needing to re-record the drums.

3. Use Rec’n’Share

One of the most exciting ways to record and practice with the DTX6 (or any Yamaha DTX Series drum kit, as well as the Yamaha EAD10 Electronic Acoustic Drum Module) is using the free Yamaha Rec’n’Share app, which records audio and video of your performance to any iOS or Android™ device.

Screenshot.
The Yamaha Rec’n’Share app.

Rec’n’Share can import a music file, analyze it for tempo and then generate a click track that you can play along with. Playback speed of the audio can be slowed down, and any section of audio can be looped — which is a tremendous help when you’re learning complicated music.

When you’re ready to record, Rec’n’Share lets you overdub your drums to the song while recording the audio and video to your smart device. You can then play back the recording and separately control the volume levels of the drum track and the music. Once you have a performance you’re happy with, you can edit the beginning and end of the file, then upload it to a file-sharing app, post your performance to social media or email it to your friends for instant feedback.

(Note that the DTX-PRO connects to your smart device via the USB TO HOST port, so you’ll need a cable that has a USB Type B connector at one end and an appropriate connector for your phone at the other end.)

4. Use the Analog Outputs

The rear panel of the DTX-PRO provides a pair of standard 1/4″ L/R audio outputs that can be connected to any recording device that has analog audio inputs. The downside to this “plain vanilla” approach is that it doesn’t take advantage of the many advanced capabilities described above. On the other hand, it does allow you to record your drumming to just about anything out there, from a vintage analog tape recorder to the most advanced digital system.

Ready to learn more about the recording features of the DTX-PRO? Check out this video:

Check out the other installments of our five-part “DTX6 Deep Dive” series:

Part 1: The Kit Modifier

Part 3: Training Tools

Part 4: Customizing, Importing and Layering Sounds

Part 5: A New Level of Playability


Click here for more information about Yamaha DTX6 Series electronic drum kits.

Fix It: Snare Drum Rolls Teaching Tips

Close your eyes for a moment and imagine a time when you were conducting on the podium and cued a much anticipated, exposed and important snare drum roll. What did it sound like?

Perhaps it was smooth, expressive and confident — maybe the result of assigning your best snare drummer to the part. Or perhaps it was choppy, crushed or uneven, leaving your student deflated or even unaware of what a good roll should sound like.

The goal of this article is simple: To help your students become more confident playing buzz/multiple bounce/concert rolls on snare drum. While this goal might sound simple, it certainly is not easy because mastering the snare drum roll is a lifelong quest for even the most seasoned professionals.

Snare Drum CSM 1450One of the things that makes the snare drum and snare drummers special is the capacity and responsibility to lead. Whether laying down a powerful backbeat on drum set, executing a delicate passage in orchestra or cleaning a showstopping feature in drumline, the snare drum acts as the “nucleus” of percussion — the center from which everything else derives.

So much of what our students learn from snare drum study — technique, tone, touch, control, speed, rudiments and reading skills — can be applied to other percussion instruments. This is called “transfer value.” For example, matched grip snare drum technique and hand motion, with slight modifications, can be applied to two-mallet keyboard, multi-percussion, drum set, timpani, steelpan, marching tenors and bass drum, concert bass drum, suspended cymbal, temple blocks, castanets, congas, djembe, cajon and others.

Download this Yamaha Drums and Percussion Care Checklist for Students now!

As we know, rolls are a percussionist’s way of sustaining sound on snare drum. In my experience, students struggle with playing good rolls because of four common problems. As you work with your students to address these problems, their confidence will grow and their rolls will improve, even before the sticks touch the drumhead.

 READ: Enhance Snare Drum Performance with Instrument Selection, Preparation and Tuning

Fix It: Unclear Concept of Sound

The first problem students encounter is that they simply don’t know what a good roll is supposed to sound like. They don’t have a concept of sound in their minds and ears. I learned this concept from Gary Cook, my professor at the University of Arizona. He gave cymbal clinics and emphasized that to play cymbals well and execute a good crash, you first had to know what a good crash sounded like. You had to have a concept of sound in your mind. He encouraged us to listen to recordings of great orchestral cymbal players, attend live concerts and record ourselves in the practice room. Over time, we developed our “ear chops” and awareness for what a quality cymbal crash sounded and felt like. We had an ideal standard and a goal to strive for.

The same process can be applied to rolls. Encourage your students to listen to recordings, watch videos, record themselves and attend concerts by professional symphony orchestras, wind ensembles, concert bands, percussion ensembles and percussion soloists. Encourage them to take private lessons and watch and listen to their teacher demonstrate and model an excellent snare drum roll.

One resource I use and recommend for developing a concept of sound on snare drum is Rob Knopper’s Delécluse: Douze Études for Snare Drum. In 2014, Knopper, a percussionist for New York’s Metropolitan Opera Orchestra, recorded all 12 of the Delécluse Études for the orchestra’s 50th anniversary and interviewed Delécluse before he passed away in 2015. Although these etudes are advanced, they provide wonderful input for listening and developing a concept of sound.

By listening to a variety of orchestral/concert snare drummers, both past and present, your students will become more confident knowing what a great snare drum roll sounds like, leading directly to a higher standard and expectation of what they are working toward.

 READ: Pick the Right Drumsticks and Mallets

Fix It: Unnecessary Tension

Snare Drum Rolls 3

Another issue that is common among young players, especially when they roll, is unnecessary tension. Tension can appear in the hands, wrists, arms and shoulders, or even the back, neck and face. Tension in these areas grow without trust in one’s technique. Too much tension when playing rolls will lead to a choppy, crushed and uneven sound.

One of the best mindsets I have come across for staying relaxed and alleviating tension is “letting the sticks do the work.” To use our cymbal analogy again, this is the mindset I use to teach crash cymbals by letting the cymbals do the work. Young cymbal players tend to overplay, opting for an excessive, forceful or aggressive approach.

Another analogy I use is the “bird grip,” borrowed from legendary jazz drummer, Jim Chapin, who was a student of Gus Moeller, creator of the Moeller Technique. The technique develops relaxed movement, flow and efficiency when drumming. In the instructional video, “Speed, Power, Control, Endurance,” Chapin says of the grip, “Think about holding a fledgling bird in your hand, a bird that would escape if it flies or moves around too much, but you don’t want to hurt it.”

To improve your students’ confidence as well as the quality of their rolls, start by introducing them to these two concepts — letting the sticks do the work and the bird grip. Then, give them a fundamental buzz exercise like Four or Eight on a Hand.

In the video, “4 Steps to Build a Smooth Buzz Roll,” Knopper says, “Step one is to work on the individual buzzes [and] start focusing into the quality of the buzzes.”

For young players, start with one hand at a time by dropping the stick on the head, allowing it to bounce multiple times. Use the arm to provide weight behind the dropping motion, rather than using the wrist (more about arm in “Unused Arms” below). Keep the dynamic level at a mezzo forte or softer for now. With a comfortable and secure fulcrum, experiment with your grip using a scale of 1 to 5, with 5 being the most relaxed.

Remember to let the sticks do the work and try to get as many bounces as possible from each hand. As you practice, be aware of density (how many bounces) and shape (volume consistency of bounces) with each stroke.

Going back to the video, Knopper says, “Step two is to make sure your right hand buzzes and your left hand buzzes sound the same.”

He goes on to say that “step three is the transition from right to left and left to right. You want it to be seamless so you can’t tell when one buzz stops and the other starts. …Work on right to left and repeat it, and work on left to right and repeat it.”

Step four is “building it back into the roll,” Knopper says.

After practicing single-handed buzzes, start alternating and overlapping two buzzes (RL), three buzzes (RLR), four buzzes (RLRL), etc. until a smooth slow roll is achieved.

READ: Anatomy of a Snare Drum

Fix It: Unused Arms

Another issue young players run into when playing rolls is using their wrists instead of their arms. Without question, this idea is counterintuitive, as the majority of snare drum technique involves the wrist as the primary “lever.” By moving the sticks up and down with the wrists, they become perpendicular to the drumhead, allowing them to rebound when playing full/legato/rebound/free/piston strokes. In contrast, using the arm as the primary lever keeps the sticks flatter, lower and more parallel to the drumhead, allowing them to strike the head at an angle more conducive to multiple bounces. Because the arms are a larger muscle group than the wrists, their additional weight will improve stamina, power and endurance, especially for loud and fast rolls. According to St. Louis Symphony Orchestra principal percussionist Will James in his book, “The Modern Concert Snare Drum Roll.”

Using the arm to create the roll stroke is probably the hardest aspect of the concert roll to understand because for years we have been taught that the wrist controls the snare drum stroke. This is absolutely true for individual, single strokes! However, when multiple strokes are desired, the wrist becomes much less effective and efficient. Many players suffer from tendinitis and sore wrists and hands. A large part of their pain can be traced back to abuse of their wrists by trying to execute a snare drum roll using the wrists as the catalyst…The stroke to create a single stroke and the stroke to create a multiple bounce stroke are entirely different because the energy needed to create a multiple bounce stroke is significantly greater.

The best analogy I have found for using the arms when rolling is called “The Chicken Wing Technique” by Ted Atkatz, former principal percussionist of the Chicago Symphony Orchestra. The idea behind the Chicken Wing is to use your arms, elbows and even shoulders in a way that mimics a chicken flapping its wings. This arm motion becomes the primary lever and allows the player to relax and avoid tension and fatigue resulting from playing primarily with the wrist.

In his book, “The Regimen,” Shaun Tilburg, principal percussionist of the Phoenix Symphony Orchestra, writes, “Rely heavily on your arm for the stroke, minimizing any wrist break. This will facilitate consistency as well as tension free speed.” This technique has served me well playing rolls at all dynamics and tempos and has become my default approach.

Fix It: Undefined Roll Bases

The final problem that can affect a young player’s confidence playing rolls is not having a grasp of roll bases. Roll bases are also known as “skeleton rhythms” and refer to the underlying rhythm or “skeleton” within a roll. The skeleton is similar to a check pattern, where a basic rhythm is played first before anything else like flams, diddles or, in this case, buzzes are added.

For rolls to begin and end in time and sound smooth, expressive and confident, students must decide on a roll base. A good question to ask is, “What roll base will sound best given the tempo and dynamics of the music?” The two most common roll bases are 16th note and triplet bases. One of the two will usually work, depending on the tempo and dynamics called for. However, odd roll bases such as 5s and 7s are also good options, especially for more advanced players in order to “balance the hands” and remove any strong-hand dominant pulses in the roll.

In his book, “Dr. Throwdown’s Rudimental Remedies,” John Wooton, professor of percussion at the University of Southern Mississippi, writes, “Try to end on the opposite hand that you start with when playing orchestral rolls. This gives the illusion of no pulsation because it is hard for the listener to detect the odd number.”

In general, the softer you play, the slower your roll base and the more bounces you need per hand. The louder you play, the faster your roll base and the fewer bounces you need per hand. Check out some examples from the video “Shaun Tilburg’s Regimen: Fundamental Roll Techniques.

One of the most effective strategies I have found to develop my skills as a percussionist is to practice slowly. In fact, a quote I share with all my students is: “Slow practice equals fast progress. Fast practice equals slow progress. No practice equals no progress.” Snare drum rolls especially benefit from and respond to slow practice because it’s easy to “hide” buzz quality and length when rolling fast.

The Best Roll Exercise

Hands down, the best roll exercise I have come across in my 25+ years of teaching percussion was published in the Percussive Arts Society digital publication Rhythm! Scene (which is now PAS’ official blog). The exercise, “The Silky Smooth Soft Roll” by Phillip O’Banion, director of percussion studies at Temple University, takes you through half note, quarter note, eighth note, triplet, 16th note and quintuple roll bases at a soft dynamic level.

To me, “Silky Smooth” is pure gold because it works and allows me to focus on my concept of sound, unnecessary tension, the Chicken Wing technique and roll bases separately as well as together.

Snare Drum Rolls 1

Advice for Music Educators

Many years ago, I attended the National Conference on Percussion Pedagogy and heard a quote by Dr. Dennis Fisher from the University of North Texas that changed how I play and teach. He said “40% of the music is written down, 60% is not.”

When I share this quote with my students, I hold up a printed part and tell them, “This isn’t music. This is just a piece of paper with black notes on it. Music is what comes out of your instrument, and more importantly, what comes out of you as a player.”

I then ask them what 40% will earn them on a test or assignment and watch the dots connect. Uncovering and discovering more of the 60% — the music that is not written down — is their new job.

What is the 60%? Phrasing, dynamics, touch, expression, musicianship, interpretation and sound quality — all attributes that go beyond just playing the right notes and rhythms.

It is important to communicate to your students that it is okay to go beyond playing the notes in front of them, sometimes referred to as “playing the ink.” After all, learning the notes is the first step, not the last. While many young players might think they are “finished” when they learn the part on the page (the 40%), this is only the starting point.

The 40-60 mindset can be applied to any instrument, piece of music or technique, including snare drum rolls. By addressing an unclear concept of sound, unnecessary tension, unused arms and undefined roll bases, your students’ confidence will begin to soar, but only with practice.

“Prove to your hands that you’re serious,” I tell them. “If you want to improve, you have to practice consistently. Aim for 6 days a week, with one day off to rest, recharge and recover, like an athlete.”

To inspire your students, ask them to prove to their hands that they’re serious by earning the confidence that inevitably comes from commitment, sacrifice and preparation. And the next time you are conducting and cue a snare drum roll, trust their technique and aim for the 60%!

References

Enhance Snare Drum Performance with Instrument Selection, Preparation and Tuning

I clearly remember the first time I heard – or rather, felt – a snare drum. It was during the annual Memorial Day parade in my hometown of Montville, Connecticut, and I was no more than 5 years old.

Marching Snare DrumsAs the parade floats passed by my family, I could hear something rumbling and sensed a quickening of energy from just over the hill to our left. It was the high school marching band! As the students emerged before us, the crisp, throaty timbre of early 1980s marching snare drums resonated to a fever pitch throughout my entire body. I’ve been chasing this feeling ever since.

The snare drum occupies a unique place in Western music in that it exists in a variety of styles: concert band, orchestra, traditional rudimental drumming, contemporary marching percussion, percussion ensemble and all of the styles relating to drum set. It often serves as the technical foundation for young percussionists before they branch off to other instruments. Even as percussionists are often separated by specializations and stylistic interests, most of us have at least the snare drum in common.

As there is no shortage of articles written on snare drum playing techniques, grips and methods for the developing young player, I would like to discuss how instrument selection, preparation and tuning work together to enhance a performer’s sound and how sound can be changed to suit different playing situations. Although the technical control of the snare drum rests in the hands of the percussionist, the creativity and fun of playing this instrument is increased when the ears and mind are trained as well.

Download this Yamaha Drums and Percussion Care Checklist for Students now!

Instrument Selection

If your school music room or band/orchestra hall has more than one snare drum, you have a choice! Listen to each drum and imagine what style of music it would best serve. If you’re not sure, listen to recordings and watch videos of others playing the same music.

Take note of the size of the drum and the material from which the shell is constructed. Typically, a drum with a metal shell will produce a brash, resonant sound – appropriate for a large orchestra or band passage (think “Star Spangled Banner” or Shostakovich’s “Symphony No. 10”). On the other hand, a drum with a wooden shell is more subdued, mellow and perhaps articulate (Gould’s “American Salute”).

The standard snare drum size is 14 inches wide and 6 inches deep – with a shallower piccolo-sized drum creating a higher pitch and a deeper field drum dimension creating more of a roar that would be appropriate for a Sousa march.

Snare Drum CSS 145

Instrument Preparation

While the shell and dimensions of a drum are unchangeable, many variables in how a drum can be prepared (specifically drumheads, snare and muffling preparations) can greatly affect its sound. In fact, a less expensive snare drum can often be transformed into a quality-sounding instrument if these factors are carefully considered.

For concert band and orchestra playing, a coated batter (top) head will give an appropriate balance of articulation and resonance, while clear plastic is more appropriate for concert toms. A clear plastic snare side head often works well on the bottom of the snare drum, allowing the snares to resonate and the drum to sing.

Snare selection also greatly affects the characteristic sound of the instrument. Wire snares allow a resonant, washy sound, while cable or gut snares produce a crisp, articulate effect.

Once snares have been installed on the drum, experiment with the tension to achieve the desired response and sound.

External dampening can be used to change the sound of a snare drum. These are available commercially, often as gels that stick to the batter head or materials that can be placed on the instrument. I find that a standard handkerchief provides a low-cost option for dampening. It can be folded and placed on various spots on the drumhead to achieve a variety of options that balance articulation and resonance. For example, a handkerchief folded into a small square and placed on the back edge of the drum will produce a different effect than one spread out across a wider portion of the playing surface. A simple binder clip can be used to fasten the cloth to the rim of the drum, preventing it from sliding around while playing. This is a great option if you only have access to one instrument but want to create a variety of different sounds.

Snare Drum Stand OSM1450

Tuning

Tuning matters! Even in a beginning band or orchestra class, wind and string students are reminded of the importance of pitch and work to achieve proper tuning. Although a practice drum pad is a portable, quiet and cost-effective resource for percussionists, it does not require students to learn about the importance of proper tuning. Have your students perform, at least part of the time, on actual drums!

Snare drum tuning is not an exact science, but two main concepts should be explored: articulation and resonance. If a drum is lacking articulation and crispness, try tuning the bottom head a half-step higher than the top head. This is particularly relevant with deeper-shell drums, such as marching snare drums and concert field drums. Pitches A and B-flat are good starting points but use your ear to experiment and find the combination that works best. If you desire a lot of resonance, especially from a shallower-shell drum, try using the same pitch for both top and bottom heads. Consider using unison A pitches. The sympathetic vibration of the unison pitches will allow greater resonance. Again, the key is to use these ideas as a starting point and experiment because factors such as shell depth and thickness, snare selection and head thickness factor greatly into drum response.

Drum selection, preparation and tuning are relevant throughout percussion students’ careers — from their first experience in the school’s band or orchestra to more advanced studies when they acquire more instruments and branch out into more performing situations and styles. As music educators, we must teach students how to create the best possible sounds, but we must also open their minds to the creativity and experimentation that makes percussion instruments fun!

Check out these videos about Yamaha concert snare drums:

Fix It: Bass Drum Teaching Tips

I recently reached out to a small group of my University of Kentucky alumni, who teach band and orchestra in public schools.
I wanted advice from educators who are in the trenches every day, so I asked them: “What are common problems that beginner and intermediate student musicians encounter regarding the bass drum?”

It’s easy for directors to overlook the significance of having an experienced, competent student musician playing a bass drum part, especially in the middle school band setting. Often, directors assign the best “note readers” to mallet instruments, students with the best “chops” to snare, students with the best “ear” to timpani and then assign everyone else to accessory instruments.

Download this Yamaha Drums and Percussion Care Checklist for Students now!

It turns out that one of the least-experienced percussionists will often be assigned to play the bass drum. And why not? After all, the density of the music is fairly low on the bass drum part. However, the reality is, if the pulse and/or impact moments on the bass drum part are not precise, the entire ensemble sound output can become unfocused.

Why is the bass drum player special? They are a soloist!

Fix It: Bass Drum Placement in the Ensemble

The percussion section is normally the farthest section from the conductor. The low instruments, such as timpani and bass drum, should be placed in the rear center of the band/orchestra, with the timpani placed closest to the low brass. I like to place the cymbals and gong closest to the bass drum to make unison attacks easier to execute and balance.

Think of the bass drum heads as searchlights — the sound projects best in the direction they are pointed. However, the direct sound of the bass drum heads when pointed at the audience can be too articulate and harsh. I recommend that the bass drum shell be vertical with the heads facing the “wings” (perpendicular to the front of the audience). This gives the bass drum a warmer tone and makes it easier to blend with the ensemble. Some composers have asked that the bass drum shell be positioned on a horizontal angle with the playing head facing the ceiling. This scenario should be used sparingly to create a special dramatic effect or where the bass drum is a solo part.

Fix It: Stay in Time

In the band/orchestra, sound travels from the back to the front. It’s difficult for student musicians to listen “forward” to synchronize with others because of the nature of sound traveling in the direction the instruments are pointed. If you listen to another musician playing in front of you, you are receiving their sound after they played it — the longer the distance between players, the wider the sound lag.

Tempo and pulse control can begin to fluctuate in large ensembles if the player listens to the wind players in front of them for precision. In these situations, it’s best to focus on the conductor’s movement and rely on his or her communication of the pulse. The bass drummer should focus his or her awareness of the movement of the bass drum beater and move to mimic the conductor’s actions. Your arms will keep you steady and your body motion will help you keep time.

Fix It: Where to Strike the Head for the Best Tone

Choose a specific playing area and use this as a reference point for achieving the desired sound. Aim for the correct playing area, not just the correct note. Achieving consistency in the playing area is the first step toward playing with consistent, quality tone.

Think of the bass drum head as a three-ring target. The outer ring is closest to the rim and should be used when performing a sustained roll. This playing area offers the most resonance. Players can experiment to find the best “sweet spot” that produces the proper, sustained tone.

The center “bulls-eye” is reserved for creating special effects. This playing area offers the darkest sound with the least resonance. Experiment with mallet choices to produce effects like “thunder,” “cannon shots” and other secco notated sounds.

The middle ring is reserved for most general playing. This playing area offers a balance of sustained and full tone. Moving the mallet toward the center yields a darker tone — move away from the center for a brighter tone.

THE YAMAHA EDUCATOR NEWSLETTER: Sign up to receive real-world advice, tips and instrument guides!

Fix It: Stop the Bass Drum from Ringing

Bass Drum

Composers always notate when to start the sound of a percussion instrument, but rarely when to stop the sound. Choose to dampen the bass drum only when appropriate. Because percussion instruments have a natural decay, they should normally be allowed to sustain. Students should be flexible when interpreting note values and rests on percussion instruments. Rests are often used to make percussion rhythms clearer and easier to read and do not always indicate note length or when to dampen the sound. I use a lambswool car wash mitt for dampening — it doesn’t make any extraneous contact sound. I hold the mallet in one hand and the mitt in the other.

  • Let the bass drum vibrate freely if it’s supporting a melodic line or if it connects musical ideas.
  • Dampen the head to mirror the note lengths of other instruments. Partial dampening can provide extra clarity to an active part. Drape a towel, mute or soft cloth over the head to achieve a drier tone quality.
  • Leave only the last note of a phrase sounding along with the rest of the band/orchestra. You may have to reach out and give both heads a “hug” to stop all the sound.
  • Avoid “choking” a note by dampening too quickly. Allow the tone of the instrument to fully blossom before dampening.

As music educators, you can teach your students to play drum rudiments and scales, but it’s not always easy to teach internal pulse and musical awareness. Student assigned to play the bass drum have a lot of interpretation decisions to make to produce the proper sound in any given situation.

The bass drum is unique in that it offers frequencies lower than nearly every other instrument in the ensemble. It provides “body” to the overall sound as well as rhythmic pulse and foundation. The players who perform on bass drum are responsible for being the heartbeat, the impact, the pulse and low-end timbre for the entire ensemble. With proper instruction, they can become a vital asset that you can’t beat!

Mark Roos

Mark Roos has written music for many of today’s top TV shows, including The Blacklist, Murder One, Keeping Up with the Kardashians and Jerry Seinfeld’s Comedians in Cars Getting Coffee. His tools of choice are Steinberg Cubase and WaveLab, paired with UR824, UR44 and UR22 audio interfaces. In this video, he explains why this all-Steinberg chain helps spark his creativity and facilitate his workflow, and also demonstrates a couple of his favorite production tricks.

Inspired by famed film composer Hans Zimmer, Roos began using Cubase in 2006. “I use it for all my audio recording and all my MIDI, then I [import the files] into WaveLab,” he explains. “I have mastering presets there that I use on everything.”

“The Steinberg engine sounds amazing,” Roos enthuses. “There is an audible difference between the Steinberg sound and [that of] other DAWs. I can actually tell what DAW has been used [on a score], based off of just the sound. My clients notice the difference too. There’s no boominess to the bass, nothing brittle about the way the highs are sounding — something that can be truly atrocious in digital — so, really, Steinberg products are my secret weapon.”

Because he does a great deal of field recording, Roos has amassed a library of over 300,000 custom samples, all meticulously organized in MediaBay. This allows him to freely import any of his sounds directly into the Cubase Project window or via the Steinberg Padshop granular/spectral synthesizer plug-in or Caleidoscope sample library.

Roos attributes the speed of his workflow to the seamless integration between Steinberg software and hardware. “It means that I’m able to focus on creating and delivering the very best product to my clients,” he says. “Steinberg is an integral part of my sound, and they are the reason why [clients] keep coming back.”

Check out our other Steinberg Stories.


Click here to learn more about Steinberg Cubase.

Click here to learn more about Steinberg Wavelab.

Click here to learn more about Steinberg interfaces.

10 Hip-Hop Albums That Sound Great on Vinyl

Vinyl sales are enjoying a resurgence, and that’s great news for us listeners because it gives artists a great reason to continue to release their albums in the long-playing format. And, as any audiophile will tell you, vinyl provides a much more engaging listening experience than streaming, with a warmth and a fidelity that digital simply can’t deliver, especially when the record is being spun on a quality turntable.

Here’s a list — in no particular order — of ten must-have hip-hop LPs that showcase the best of the genre.

1. Donuts – J Dilla

The late hip-hop producer J Dilla created Donuts while suffering from ongoing health issues, recording 29 of these 31 tracks from his hospital bed. The project illuminated his keen ability to piece together a collection of chopped-up vocal and instrumental samples, pushing the outer limits of instrumental hip-hop and providing aspiring beatmakers with a blueprint on how to create something on their own. It also showed the depths of Dilla’s artistry and how he was able to express emotion without ever saying a word. A prime example is the track “Don’t Cry,” which sounds particularly inspiring on the 7-inch vinyl release. The song begins with an homage to ’60s soul crooners Blue Magic before shifting gears to show off Dilla’s modern approach with layered vocal and beat samples.

2. The Low End Theory – A Tribe Called Quest

In the opening moments of The Low End Theory, Quest rapper Q-Tip notes the parallels his father once made between hip-hop and bebop by calling out how things go in cycles. Along with fellow group members Phife Dawg and Ali Shaheed Muhammad, he uses the next 48 minutes to intensify the connection between the two genres. With their acknowledgment of jazz and those who laid the groundwork — with a guest appearance from iconic jazz bassist Ron Carter — Tribe ultimately ushered in a fruitful era of jazz-influenced rap. This is especially notable on tracks like the double bass-led “Buggin’ Out,” the hopeful and forward-thinking “Vibes and Stuff” and the hip-hop classic “Scenario.”

3. Bizarre Ride II the Pharcyde – The Pharcyde

Following A Tribe Called Quest’s lead, The Pharcyde emerged as one of the first West Coast rap groups with a jazz aesthetic. This was their debut cypher-style album, framed by uninhibited, comedic storytelling. Mostly produced by J-Swift, Bizarre Ride II sees the four MCs — Imani, Bootie Brown, Slimkid3 and Fatlip — shooting the breeze as they recount past adventures and misdeeds, all while lobbing “Yo Mama” jokes at the listener. The group’s high energy is enough to keep you hooked, but the layered use of sound effects, sampled instruments, record scratches and drum grooves (check out “Officer”) offers a rich and deeply textured listening experience. The album also includes one of the group’s biggest hits, “Passin’ Me By.”

4. The Miseducation of Lauryn Hill – Lauryn Hill

The Miseducation of Lauryn Hill signaled Hill’s deep plunge into her identity as she broached a number of themes, including heartbreak, motherhood, oppression and spirituality. This was her solo debut following Fugees’ disbanding, where she coupled her sublime vocals and heady raps with a discerning blend of hip-hop, R&B, reggae and pop. Miseducation remains a juggernaut to this day, an album teeming with real-world vignettes and sharp prose that peaked at No. 1 on multiple charts, went multi-platinum, and landed Hill five Grammys. Highlights include guest appearances by Carlos Santana (“To Zion”) and Mary J. Blige (“I Used to Love Him”), as well as one of her biggest hits, “Doo Wop (That Thing),” a crisp merging of horns, piano, and classic vocal stylings that really pop when you listen on vinyl.

5. Madvillainy – Madvillain

MF DOOM and Madlib make up Madvillain, with this, their only album, often touted as the crème de la crème of DOOM’s catalog. The 22-song project — largely comprised of tracks that clock in at around the two-minute mark — takes the listener on a surreal madcap ride through deeply dug samples that establish shapeshifting grooves. “Accordion,” for example, is built upon a dreamlike foundation, while “Bistro” incorporates harp, strings and a sampled voice that bounces between left and right speakers — an effect that really comes to life on vinyl. The closing song, “Rhinestone Cowboy,” even offers a lyrical nod to fans’ frenetic anticipation for the album, when unfinished bootlegs surfaced before Madvillainy’s arrival.

6. Supa Dupa Fly – Missy Elliott

Missy “Misdemeanor” Elliott’s debut album Supa Dupa Fly lives in near-myth, a record she and childhood friend Timbaland created in just two weeks. Though she was an established songwriter, Missy didn’t intend to become a solo artist, but this seminal album showed her unquestionable talent as a vocalist and musical visionary. And while it arrived around the same time as influential works from 2Pac, Biggie, Fugees, A Tribe Called Quest, Lil’ Kim and more, Supa Dupa Fly stood out for its snapping bass, grandiose horns, boom-bap beats and raw electric energy, which meld into a cohesive and compelling sound on vinyl. Standout tracks include “Beep Me 911,” “Sock It 2 Me (feat. Da Brat)” and “Izzy Izzy Ahh.”

7. Reachin’ (A New Refutation of Time and Space) – Digable Planets

Digable Planets filters their jazz and funk-laden hip-hop through an intuitive flair for world-building. With Reachin’, the MC trio — Butterfly, Ladybug Mecca and Doodlebug — focuses on the minutiae of New York, setting their magical realm against a backdrop of an ever-moving place, resulting in an album defined by its free-spirited lack of overanalyzing. One track that represents this mood perfectly is “Pacifics (Sdtrk “N.Y. Is Red Hot”),” which makes powerful use of percussion elements like a repeating pitched bell hitting twice every measure and a percussive synthesizer that takes over towards the end of the track, bouncing between the speakers as the other parts fade away.

8. Whack World – Tierra Whack

Composed of 15 one-minute songs, Tierra Whack’s intricate and dreamlike debut swarms with imagination, as she briefly replaces our realities with her own. While the tracks cycle through themes like death, self-care, grief and insecurities, we’re given a moment to quickly reflect before she moves on, though it isn’t nearly long enough. Between Tierra’s lyrical agility, captivating hooks and kaleidoscopic melodies, there’s a lot to digest in Whack World, and the album’s brevity (which allowed it to be cut LOUD) makes it an especially captivating listen on vinyl.

9. Laila’s Wisdom – Rapsody

Laila’s Wisdom was framed as a dedication to Rapsody’s late maternal grandmother, Laila, but also to the rapper’s outlook as a modern Black woman, addressing subjects like police brutality, social media, toxic love and more. It took two years to meticulously craft this record, and it shows, in the carefully curated, high-profile features starring Kendrick Lamar, Black Thought and others — and in the consummate blend of soulful samples (“Pay Up”) and luminous instrumentation (“Nobody”), largely handled by Rapsody’s mentor, 9th Wonder.

10. Telefone – Noname

Prior to the arrival of Noname’s debut mixtape Telefone, we only caught glimpses of the Chicago rapper’s flair for spoken word lyricism on her guest spots with Chance the Rapper, Saba and Mick Jenkins. But here, Noname fully unravels her joy and grief as she gives the listener an intimate look at her hometown. This is a recording that hinges on tender pianos, xylophones, wind instruments and Noname’s often somber wordplay, all of which coalesce on vinyl for a hypnotizing listen.


Check out these related blog posts:

Top 10 Vinyl Albums for Audiophiles

Here’s What You Need to Know About Vinyl

Appreciating Vinyl Records … and the Best Way to Enjoy Them

Five Reasons Vinyl Is Making a Comeback

Spotlight on Vinyl Subscription Services


Click here for more information about Yamaha turntables.

Reharmonizing Songs, Part 2

In Part 1 of this three-part series, we covered functional harmony and traditional concepts for making a song more sophisticated. In this installment, we’ll explore harmony as color, without worrying about function or even staying within a key center.

Anything Is Possible

Start with an understanding that any given note can be treated with a wide selection of possibilities when it comes to making it a part of a chord.

To illustrate, here are some ideas for how a C can be incorporated. In this first example, it’s serving as the root. (Note: A low bass note has been added to this and the following six audio clips to help you hear the chord qualities more clearly.)

Musical annotation.

Now let’s think of a C as being the third of a chord. This gives us the choice of either an A minor or A-flat major chord quality:

Musical annotation.

Or we can treat it as the fifth of a chord, which gives us these possibilities:

Musical annotation.

If we think of it as the sixth (or 13th) of a chord we get these options:

Musical annotation.

If we use it as the seventh of a chord, it will be some type of D or D-flat chord type:

Musical annotation.

If it is the ninth (or a second) of a chord it will be some sort of B-flat, B Dominant 7th or A Dominant 7th chord:

Musical annotation.

Finally, if it is used as the fourth or the 11th of a chord, we get these choices:

Musical annotation.

For many people, this is a mind-blowing array of possibilities — I’ve listed almost 70 choices! Given so much latitude, it can be difficult to know what to do. So it helps to start with some guiding principle to help you to explore this newfound freedom.

Creating Structure Within Chaos

Musical annotation.

A good place to start is to choose one particular chord quality and then use it for every subsequent chord change. To illustrate, let’s use a melody that I employed in Part 1:

In this example, I’ll be using all minor chords, but note that the melody can be any part of the chord, from the root all the way to color tones like the 9th and 11th:

Musical annotation.

Here are the same harmonies, but with jazzier voicings:

Musical annotation.

Because you’re not clearly in any given key, the sound is open and floating; I especially like the “lift” that the last chord provides.

Of course, there’s always another way to do things, so here’s a different set of options:

Musical annotation.

Or, using more advanced chord voicings:

Musical annotation.

This exercise is a great place to start since you don’t have to worry about choosing from so many possibilities — you know that all your chords are going to have the same quality, so you can just search for a sound that supports the melody.

Finally, let’s try to change the chords more often, using some advanced voicings:

Musical annotation.

It’s good to try different chord qualities, so here’s a version based on all major seventh chords, including the use of the sharp-11th color tone:

Musical annotation.

Note that I often added 9ths and 13ths to my voicings — I even “cheated” by using a 6/9 chord in Bar 3.

Here are another set of choices:

Musical annotation.

The G-flat chord voicing in Bar 3 is a bit unusual: I think of it as an A-flat triad over a G-flat triad, even though I left out the D-flat of the lower triad.

Admittedly, these have been some of the most complex examples I’ve offered in any “Well-Rounded Keyboardist,” so take your time going through them. Click here for the final installment in this three-part series, where we continue exploring ideas for giving structure to your playing by using non-functional harmonic ideas to add color.

All audio played on a Yamaha P-515.


Check out our other Well-Rounded Keyboardist postings.

Click here for more information about Yamaha keyboard instruments.

A Guide to Bass Fingerboards

Just about everyone has heard the phrase, “where the rubber meets the road.” It refers to the critical moment of truth where an idea or theory is tested or where an effort translates into a result. In the context of playing the bass, this happens when you press a string down on the fingerboard so that a note sounds when that same string is plucked, picked or slapped with your other hand.

Whether fretted or fretless, the fingerboard is where the action is. It makes sense, therefore, that the materials chosen for the fingerboard — usually a wood such as rosewood, maple or ebony, or possibly even a synthetic material — play a big role in the sonics, as well as the look and feel of the bass.

In this article, we’ll take a quick look at some of the materials used to make bass fingerboards. We’ll start with the big three — the most popular and common choices — then quickly run through a handful of more exotic and synthetic options. Finally, we’ll examine how fingerboards interact with the neck materials to influence the sound of the bass.

The Big Three

Rosewood

Rosewood is a porous, oily wood renowned for its warm, rich tonal character that mellows out strident highs, which is probably the reason why it’s the most popular choice for bass fingerboards. It has a distinctive, earthy color too — dark brown, like chocolate, with some redness to it — and there are mainly two types: Indian rosewood and Brazilian. (The latter is harder and denser, but more rare, and therefore much more expensive.) Rosewood is the fingerboard material of choice for most Yamaha BB Series basses.

Electric bass guitar.
Yamaha BB734A bass.

Maple

This popular light-colored sustainable wood is hard and typically has a tight grain pattern, but fancier cuts can come with a beautiful flame, curly or birdseye grain. Maple fingerboards lends basses a very bright, sparkling tonal quality, with lots of sustain. However, unlike rosewood, maple doesn’t have a high oil content, so it requires a gloss or satin finish. When the finish wears away over time, the wood in those naked spots turns a weathered grey. The Yamaha Billy Sheehan Attitude 30th Anniversary bass is a shining, scalloped example of maple’s vibrant glory.

Electric bass guitar.
Yamaha Billy Sheehan Attitude 30th Anniversary bass.

Ebony

Close up of an electric bass fingerboard.

There are two type of ebony you’ll typically see on basses — Indian and Macassar. Usually a deep, dark brown or even completely black, ebony delivers snappy highs and beefy lows. Hard, heavy and dense, it withstands string wear better than most other woods. The Yamaha Nathan East Signature BBNE2 bass features a distinctive all-ebony fingerboard inlaid with figured abalone, as shown in the illustration on the right.

Electric bass guitar.
Yamaha Nathan East Signature BBNE2 bass.

The Other Contenders

Laurel

A great alternative to rosewood, laurel has a slightly more pronounced grain structure and a similar tonal quality. Laurel fingerboards are found on some Yamaha RBX Series basses.

Electric bass guitar.
Yamaha RBX170EW bass.

Cocobolo

This tropical hardwood is similar to rosewood in both tone and oil content, and is available in a wide variety of colors. It has a straight grain pattern and is harder than ebony, which makes it a great choice to resist the grinding string wear of roundwound strings. Incredibly dense and hard, it is known to dull saw blades quickly, and like ebony, is quite expensive.

Pau ferro

The import/export regulations in place for rosewood to keep it from being overharvested have helped to elevate pau ferro’s popularity as a suitable and inexpensive substitute. To my ear, it’s a relatively neutral-sounding wood with a bit of snap, landing somewhere between rosewood and maple.

Walnut

Revered by furniture makers for its beautiful, undulating grain pattern and rich, chocolate color, walnut has a warmth to its sound, but it’s an expensive material and probably more of an aesthetic choice than a sonic one.

Wenge

This looks like a chic version of rosewood — in a good way — and sounds a lot like it too, with an earthy tone.

Synthetics

Ebanol

Essentially the same material used to make bowling balls, this looks and feels a lot like ebony, but is smoother and harder.

Phenolic

This synthetic is created from glass, cotton and/or paper fabric heated under pressure with resin to create a highly durable material. Naysayers accuse it of sounding like plastic — whatever that means — but I’d say it’s maple-esque, with tight, pronounced highs.

Richlite

Manufactured from resin-infused paper and phenolic (see above), richlite is often touted as a synthetic replacement for ebony and boasts similar sonic qualities.

Rocklite

These man-made synthetic wood products with their own “grain” patterns also look, feel and sound very similar to ebony.

Neck Materials Accentuate the Positive

While the fingerboard makes a big impact on your bass’s sound, so do the materials used to make the neck (usually wood, but sometimes synthetics like carbon graphite or metals like aluminum). The neck’s main job is to provide stiffness that can withstand the constant pressure of your strings, but it also adds to the sonic character of the bass. Keep in mind that the fingerboard is bonded to the neck, so different combinations of materials will influence the sound in different ways. A good way to illustrate these nuances is to compare the various Yamaha Signature model basses:

– The Billy Sheehan Attitude 30th (as well as its older relative, the Attitude Limited 3), has both a maple fingerboard and a maple neck. This all-maple sandwich helps deliver a full-bodied, aggressive tone with tight lows, growling mids and brights that sizzle, along with gobs of sustain.

– The Peter Hook Signature BBPH features a rosewood fingerboard married to a 5-piece maple and mahogany neck. Upper register lines sing sweetly on the rosewood, while the mahogany accentuates the harmonic mids and blends them with the maple’s innate brightness.

Electric bass guitar.
Yamaha Peter Hook BBPH bass.

– The Nathan East Signature BBNE2 employs a 5-piece maple/mahogany neck with an ebony fingerboard that helps give it snap and tonal consistency.

– The John Patitucci TRBJP2 fuses a three-piece maple neck with an ebony fingerboard for clear, glistening articulation.

Electric bass guitar.
Yamaha John Patitucci TRBJP2 bass.

Each of these basses sound, look, and play great, but the choice of fingerboard, neck and body materials made by these Signature artists helps give their namesake basses their unique sound and appeal. There’s an important lesson to be learned there!

Check out Michael’s other blog posts.


Click here for more information about Yamaha basses.

Tower of Power Celebrates Their 50th Anniversary

The year was 1968. The music scene was exploding, and kids were starting bands in garages everywhere.

One of those kids was a Bay Area tenor sax player by the name of Emilio Castillo, and when he met baritone saxophonist Stephen “Doc” Kupka that summer, there was an immediate synergy.

Castillo 2 800
Emilio Castillo.
Kupka 800 X 988
Stephen “Doc” Kupka.

A couple of years later, fortified by the addition of drummer David Garibaldi and several other musicians, they formed the legendary band Tower of Power … and they’ve been going strong ever since.

Man sitting at drum kit flashing the peace sign.
David Garibaldi.

Garibaldi is still amazed at the amount of musical diversity that was going on at the time. “There was music of every possible type in your ears at all times,” he says. “There was funk. There was jazz. There was Latin. There was world music. There was classical music. And the Bay Area musicians were this mix of all of this.”

“With Tower of Power, it was all in,” he adds. “Music all the time. We’d rehearse every day. We were making it up as we go along — kind of like what we do now!”

“We all hung out together,” says Castillo. “We were all friends and we partied together, but we were all out there trying to outdo each other.”

All these years later, Tower of Power is still together, celebrating their 50th anniversary and still trying to outdo one another every time they take the stage or enter the recording studio.


Musical Roots

“They say that we don’t pick music, music picks us,” says trumpeter Sal Cracchiolo, who joined the band in 2011. “My parents said I used to sing all the time when I was a newborn. Both of [them] were music teachers and they [started] me on piano at 4 years old. I learned how to read music before the alphabet.” Nonetheless, he soon decided that piano was not the instrument for him … and neither was accordion, or violin or drums. Someone with a lesser musical inclination might have given up at that point. But not Cracchiolo, who discovered the trumpet when he was 12 years old and quickly fell in love with the sound of the instrument.

Man blowing a trumpet onstage.
Sal Cracchiolo.

A number of other ToP members report starting out on a different instrument than the one they’re best known for. Kupka, for example, started on oboe but switched over to baritone sax in his college years because he wanted to play rhythm and blues. Garibaldi initially wanted to play trumpet, but found himself practicing violin instead because his elementary school band had run out of trumpets to give out. It was only when that didn’t work out that he discovered the joy of drumming.

Trumpeter Adolfo Acosta is actually one of the few bandmembers who started out on the instrument he plays in the group. “I was in 4th grade and we [were given] the opportunity to play an instrument,” he recalls. “We got to choose one and I wanted the trumpet because it looked easy: just three valves. It wasn’t easy and it still isn’t easy! But it was fun, and I really enjoyed it. When I got to 7th grade, I heard the junior high jazz band at assembly. I had no idea what jazz was, but that changed my life. I got fired up. All through high school [I was playing] in a jazz band, listening to jazz and other types of music with horns and horn sections.”

Man blowing a trumpet.
Adolfo Acosta.

Developing a Cohesive Sound

“One thing about this band is that, even if someone isn’t feeling up to snuff, it doesn’t matter,” says keyboardist Roger Smith, who has been with the group since 1998. “You gun up, you get on stage, and you put it out. Everybody wants to bring their A-game to help the collective and that’s all the time. We can be on the road 150 days a year and every night we try to bang it out hard, try to bring it.”

“We’ve played together for so long, it’s [become] intuitive,” Castillo explains. “All the horn players know when we’re going to cut off so we all go together. If they’re holding [a note], we all do that together [too].”

“[Another] important factor is that we really enjoy each other as people,” adds Garibaldi. “To me, that really makes the music terrific. We came up in the era when you had a band, you wrote songs together, you did all your music together, so … we have a collective sort of mentality. Everybody takes a lot of pride in what they do and it’s awesome to be able to [make music] with a bunch of people who have a really high standard. When you come to see us play, you’re seeing a really good team; people who really know their role, yet everybody does their thing. Everybody stays in their lane, but we do it together. That’s not always easy, but that’s what we do and I think we do it really well.”


The Yamaha Relationship

Another big part of Tower of Power’s cohesive sound is the fact that many of the musicians — including the entire horn section — use Yamaha instruments, thanks to a decades-long relationship with the company. Garibaldi, for example, has been playing Yamaha drums since 1982.

“I don’t think of myself as a great saxophone player,” explains Castillo. “But just playing a Yamaha saxophone, immediately I was more in tune … which was invaluable! Immediately the sax section was fatter and nailing things harder.”

Man playing saxophone.
Tom Politzer.

“Because we are all playing instruments that are easy to play in tune, [we] have great chord sounds from the bottom to the top of the horns,” adds saxophonist Tom Politzer. It’s a sentiment shared by trumpeter Cracchiolo. “It’s nice to have everyone playing a Yamaha,” he says, “because the timbre of the horns blend together a lot better.”

Adolfo Acosta has been playing a Yamaha Bobby Shew model 6310 trumpet since 1989, at a time when he was studying with the legendary jazz trumpeter. Sal Cracchiolo, who also studied with Shew, plays a second-generation Yamaha Bobby Shew YTR-8310Z trumpet. “It makes my life and my job easier,” he enthuses. “It sounds great, it plays in tune and it’s a quality instrument. At this point in my life, I can afford to play anything, but you want to play something that is going to help you produce the sound that you hear in your head. Trumpets are known as the ‘coil of toil,’ but you don’t want it to fight you. And the people at Yamaha have been very gracious. They’ve treated all of us like family.”

Politzer agrees. “The thing I love about the company is their desire to make the best horns in the world,” he says. “I’m honored to play their instruments. Their flutes are ridiculous. Their clarinets are awesome. Everything they make is first quality.”

Making it All Worthwhile

When asked what keeps Tower of Power motivated, Cracchiolo says, simply, “The opportunity to make music. [Considering] all the years that you dedicate your life [to this], when you get to this point, it’s the payoff. There’s no feeling like when all of a sudden the magic happens; it’s indescribable. You work and you sacrifice everything for those moments when you get to play. It really is special.”

“[It’s] the honor and privilege of walking in front of a packed house that’s there to see you,” adds Politzer. “You hit the stage and you see everybody looking up at you and it sort of transforms you.”

Current and Future Projects

Gauging from the obvious level of enthusiasm coming from all the bandmembers even after all these years, it seems certain that Tower of Power will continue to be an important part of the musical landscape for the foreseeable future. They hope to resume touring once conditions allow, and their latest album, 50 Years of Funk & Soul: Live at the Fox Theater has just been released, available as a 3-LP set, a 2-CD/1-DVD package or single DVD, as well as via digital streaming.

“That was a really special gig,” says Castillo. “We had (former ToP member and Saturday Night Live Band musical director) Lenny Pickett playing sax with us, with Chester Thompson on organ. There was a seven-piece horn section and two extra background vocalists. It was a phenomenal night.”

Asked to sum up his experience with Tower of Power, David Garibaldi says, simply, “There was nothing like it and there’s still nothing like it anywhere.”

Adds Castillo with a laugh, “People come up to me at clinics and they say, ‘Do you have any advice [for musicians starting out]?’ I say, ‘Yeah, start a trio.’ Logistically, a 10-piece band is very difficult, but it’s who we are, and we are very proud of it.”

Large band on stage.
Tower of Power take the main stage at the 2020 NAMM show.
Photographs courtesy of Robert Steshetz/Steve Leiken/Yamaha.


For more information, visit towerofpower.com

What’s the Difference Between a Trumpet and a Cornet?

At first glance, trumpets and cornets appear to be very similar. But they actually have some significant differences, as well as slightly divergent lineages. Let’s take a closer look at these two distinctive brass instruments.

Origins

Horns have been used throughout history, for everything from battles to birthday parties. Rudimentary horns were made from many different materials, including wood, clay and even human bone. Examples date back to 1500 B.C. in Egypt, China and Scandinavia. The Moche people of ancient Peru painted images of trumpets as far back as 300 A.D. In the ancient Greek and Roman eras, metallic trumpets were used for marching in wartime. Eventually, almost all European royalty had trumpet bands that played military fanfares, although it wasn’t until the seventeenth century that the trumpet came to be used in musical ensembles.

Drawing of an early trumpet.
Ancient trumpet made of clay, found in Peru.
An early trumpet.
An early trumpet.

Early trumpets had a very simple shape, with a flared bell at the end. The trumpeter could produce only a very limited number of notes by varying his lip movement and the speed of his breath. When it was necessary to play songs in different keys, differently tuned horns had to be used. For the trumpeters of the era, looking after all these instruments and carrying them around was very troublesome.

All this changed when, in around 1810, the valve was invented. By changing the path taken by the trumpeter’s breath, a valve serves to alter the length of the instrument’s interior, limiting how far air has to travel inside the “bore” and resulting in a greater number of possible notes. Valves made it easy to change the length of the tube, thereby enabling chromatic scales to be played on the trumpet.

The makers of trumpets were, however, slow to implement valves, which led to the development of the cornet in the 1820s. For many years, composers wrote separate musical parts for the two instruments. The trumpet would simply play blaring flourishes while the cornet, with its system of valves, would handle the more delicate, nuanced melodic requirements.

Today, there are two types of valves: piston and rotary. The two function differently and therefore produce different tones. Piston valves, which are more responsive, help to create a quicker, brighter sound compared to the rounder tone produced by rotary valves.

Closeup of someone's hands as they play trumpet.
Piston valves.

In the jazz bands of the early 20th century, the cornet was initially preferred to the trumpet. One of the earliest practitioners of the genre, Charles “Buddy” Bolden, was a cornetist, and the legendary Louis Armstrong also began on the cornet before switching permanently to the trumpet in 1926, when its brighter, more pronounced sound started to become more popular. Other famous and influential trumpeters who have stretched the boundaries of the instrument include Miles Davis and Dizzy Gillespie.

Similarities Between the Trumpet and Cornet

Beyond the fact that both trumpet and cornet are brass instruments, they are also played in a similar fashion. Sound is created in each by buzzing one’s lips into a metal mouthpiece. A player can produce different notes by subtly tightening or loosening their lips, facial muscles and/or jaw (that is, their embouchure), as well as by pressing different valve combinations (see below). Higher notes are produced by tighter contractions and lower notes by looser ones.

Close-up of a modern trumpet seen in profile.
Yamaha YTR-9335CHS trumpet.
Close-up of modern cornet seen in profile.
Yamaha YCR-8335 cornet.

Modern trumpets and cornets have three valves. As described previously, valves effectively alter the length of the instrument’s interior, making it possible to play every note in each musical scale. The note played is determined by the specific combination of valves the player presses on the horn, along with the embouchure. If the player doesn’t press any valves, the instrument is said to be in “open position,” in which case the aperture of the embouchure (that is, the shape and size of the opening in the lips) is the sole factor in determining the note that is sounded.

Differences Between the Trumpet and Cornet

While both instruments look generally similar, a cornet is smaller than a trumpet, and often rounder in shape. Another big difference is the size and shape of each instrument’s interior chamber, known as its bore.

A trumpet has a cylindrical bore, which results in a bright, piercing sound, while a cornet has a continuously conical bore, which provides a warmer sound. (Their larger-sized brass instrument cousin, the flugelhorn, offers an even softer tone due to its larger, rounder and even more conical bore.)

“As with all wind instruments,” explains Yamaha Product Specialist Austin Snowden, “everything affects everything. For example, a large bore trumpet versus a medium bore trumpet is going to feel different. The large bore will require more air to fill up the tubes and that can sometimes drastically change how a player uses their energy with the instrument.”

Diagram of crosscut of a trumpet.

In addition, cornet mouthpieces are deeper than most trumpet mouthpieces, which also contributes to that instrument’s warmer, less piercing sound, making the cornet better suited for some brass ensembles. The cutting sound of trumpets, in contrast, make them suitable for use in a wide range of musical genres, from jazz to orchestral.

Instrument Keys and Types

There are several different types of trumpet and cornet, including the smaller piccolo trumpet and the soprano cornet. The piccolo trumpet is half the size of a normal trumpet and is pitched an octave higher. Piccolo trumpets are also commonly made with four piston valves, not three, as with standard trumpets.

Graphic.

B-flat is by far the most common key for trumpets. “These kinds of trumpets can be seen in all types of genres and ensembles,” says Snowden. “C trumpets may be the second most common; they are more often used in orchestral settings or if a wind ensemble piece calls for it specifically. These trumpets have a slightly different sound characteristic than a B-flat one, which is usually thought of as brighter. All the other key variations (i.e., D, E-flat, E, low F, and G) are typically specialty instruments.”

Cornets are also most often in the key of B-flat. However, E-flat cornets are sometimes used in brass band settings. Specialty cornets are also occasionally made in the key of C.

So next time you see what you think is a trumpeter playing a trumpet, look (and listen) a little more closely. What you actually may be seeing is a cornetist playing a cornet … or vice versa!


Yamaha offers a wide range of trumpets and cornets, from beginner-level to expert, for use in brass ensembles, jazz bands and orchestra.

Click here for more information about Yamaha trumpets.

Click here for more information about Yamaha cornets.

Click here to find a Yamaha trumpet or cornet dealer near you.


A woman playing saxophone and using a tablet.

DTX6 Deep Dive, Part 1: The Kit Modifier

One of the great things about playing electronic drums is that you can change sounds more easily than you can on acoustic drums. Unlike an acoustic drum set (where you’d need to retune the drums, change the heads and/or adjust muffling, etc.), the sound of an electronic kit can be altered with the push of some buttons.

The Kit Modifier section of the Yamaha DTX-PRO module (furnished with all DTX6 Series and DTX8 Series electronic drum kits) makes this sonic transformation easier and faster than ever before — all you have to do is turn just three knobs to dial in the sound you want! In this article, we’ll take a deep dive into how this unique feature works.

Closeup of control panel.
DTX-PRO with the Kit Modifier highlighted.

Easy Access, Instant Visual Feedback

The Kit Modifier enables you to personalize the sound of the 40 preset kits, and also provides a way for you to build new kits that inspire creativity. (Up to 200 user kits can be stored in memory.) It’s comprised of three controls: Ambience, Comp (compression) and Effect, all prominently featured on the front panel of the DTX-PRO, so you always have fast access to them. There are also LED rings around each knob, giving you instant visual feedback. The three controls can be used individually or in combination with one another, and their settings are stored along with the drum kit you’re modifying or creating.

Closeup of the control panel.
LED rings around the Kit Modifier knobs provide instant visual feedback.

Ambience

Let’s start with the Ambience control on the far left. There are two options available, called “Ambi” and “RealAmbi.” We’ll talk about both in detail shortly, but whichever you choose, the Ambience knob sets the overall depth (that is, amount) of the ambience, which can be added to an entire kit or to each Inst (instrument) in the kit independently — for example, if you want to apply it to the snare but not the kick drum.

For most DTX-PRO preset kits, turning up the Ambience Kit Modifier knob adds only the RealAmbi effect (in increasing amounts) until the knob reaches the 12 o’clock position; as you turn the knob past 12 o’clock, the Ambi effect takes over to produce longer reverb times and larger spaces. There’s even an edit menu parameter called Curve, which allows you to create custom transitions between RealAmbi and Ambi as you turn the knob, but the bottom line is this: lower settings give you more room sound, while higher settings give you more radical reverbs and special effects. You’ll quickly find the setting that works best for you as you cycle through different kits.

RealAmbi

The DTX-PRO module offers more than 700 new drum, cymbal and percussion sounds, all recorded by experienced engineers in some of the world’s finest recording studios. For many of these samples, the actual room acoustics were also recorded (in stereo) at the same time. These RealAmbi room acoustics are added to the direct sound of the samples for a high level of realism and a natural playing experience.

Graphic of drum with annotations.
Many DTX-PRO drum sounds were recorded with real room ambience.

Here are some audio clips that let you hear how RealAmbi room acoustics add to the sound of two different DTX-PRO drum kits. First, here’s preset kit P001 (“AbsoHybMaple”) with the Ambience Kit Modifier turned all the way down:

Compare that to the sound of the same kit with the RealAmbi room acoustics added:

Preset kit P020 (“Engraved”) also incorporates RealAmbi room acoustics. Here’s how it sounds with the Ambience Kit Modifier turned all the way down:

And here’s how it sounds with RealAmbi:

Ambi

Ambi offers a variety of reverbs such as Hall, Room, Plate, Stage and Space Simulator. Since they are generated using DSP (Digital Signal Processing), it’s possible to create bigger spaces than those provided by RealAmbi.

To hear how this sounds, let’s start by listening to preset kit P005 (“SwedishMetal”) with no Ambience Kit Modifier:

Here’s how it sounds with the Room 1 Ambi effect added:

And here’s the same kit with Hall1 Ambi:

Quite a difference!

DSP also makes it possible for Ambi to generate combinations such as Reverb+Gate, Reverb+Chorus, Reverb+Phaser, Reverb+Flanger, Reverb+Harmonic and Reverb+Ringmod. These all permit editing of reverb time, as well as low and high EQ, plus modulation where applicable.

Check out preset kit P002 (“Steel Ring”), with no Ambi added:

When Reverb+Gate is added using the Ambience Kit Modifier, it sounds like this:

Pretty extreme, I know … but you get the point.

Changing the Ambi effect to Reverb+Flanger creates a Led Zeppelin-like “swishy” sound:

And Reverb+RingMod can be used to create a clangy, metallic effect that sounds like this:

Compression

Compression is something that’s used (sometimes overused!) on just about every modern recording, and it’s often applied to drums. It smooths out the overall volume level by making loud sounds softer, so that no instrument “sticks out” as being noticeably louder than the others. Once the louder sounds have been made softer, the overall volume level is usually decreased, so most compressors add “make-up gain” to restore the lost level. That’s how the DTX-PRO Compression Kit Modifier (the knob in the center) can make drums sound louder.

In the following audio clip, you’ll hear preset kit P013 (“ModrnCountry”) with the Compression Kit Modifier turned down all the way (no compression):

Here’s how that same kit sounds with the Compression Kit Modifier at 12 o’clock:

Compare that to the sound of the next clip, where the Compression Kit Modifier has been turned all the way up:

When drums are compressed, they sit in a mix at a more consistent level. The Compression Kit Modifier also emphasizes the attack of each drum, helping them punch through a busy mix. It can also bring out the resonance in toms, making them sound fuller and rounder.

Effects

The Effect Kit Modifier (the knob on the right) provides simultaneous control over three separate effects, labeled MFX, FX1 and FX2.

MFX

Short for Master FX, these effects are applied to the entire drum kit. There are more than 20 different types of MFX, including Analog Delays, Flangers, Phasers, Lo-Fi, Dynamic RingMod, Presence and Harmonic Enhancer. Some of the DTX-PRO preset drum kits already have an MFX enabled, but you can easily add or change the type of effect.

Screenshot.
The Master FX Type and Depth can be changed from the MFX edit screen.

The Effect Kit Modifier knob generally controls the depth of the MFX, but for some types of effects, it instead changes a different parameter. For example, if you set the MFX to “Analog Delay 2,” the knob changes the delay time; for some of the modulation effects such as “2 Modulator” and “SPX Chorus,” the knob changes the modulation speed. An MFX effect can be bypassed by setting its Type to “Thru.”

FX1 and FX2

Also under the control of the Effect Kit Modifier are two additional effects, labeled FX1 (Effect 1) and FX2 (Effect 2). Options here include Gated Reverb, Reverse Reverb, Early Reflections, Tempo Delays, Chorus, Modulation, a variety of Flangers, Detune, Phase, Wah, Ring Modulation, Auto Synths and Pitch Change.

Unlike MFX, these effects can be applied to individual instruments with the use of the DTX-PRO internal mixer. For example, let’s say you set FX1 to “Tempo Delay 8th” and FX2 to “Classic Flanger.” You can then send the toms to FX1 and the cymbals to FX2. The Effect Kit Modifier knob will control the overall amount of both, plus the MFX, if there is one. In this case, the DTX-PRO Tempo knob will control the delay time for “Tempo Delay 8th,” giving you fast access to both depth and timing.

Screenshot.
The DTX-PRO mixer allows you to send individual instruments to each effect.

Let’s listen to how effects are used in some DTX-PRO preset kits. Here’s the sound of preset kit P015 (“OldenDays”) with the Effect Kit Modifier knob turned all the way down (fully counterclockwise):

Notice that there’s no delay. Compare that to this next audio clip, where the Effect Kit Modifier knob has been turned up so you can hear the delay:

As the Effect Kit Modifier is turned up, the intensity of the delay increases.

Here’s another example. Preset kit P021 (“Filter Smack”) sounds pretty normal when the Effect Kit Modifier is turned down:

But when you turn up the Effect Kit Modifier, it’s transformed into a spacey, synth-like drum kit:

Sometimes, turning the Effect Kit Modifier down changes the sound of a preset kit dramatically. For example, the Effects Kit Modifier for preset kit P023 (“RadioDark”) controls a filter. When the kit is recalled, the Effect Kit Modifier is turned up almost all the way, resulting in this low-fi sound:

However, if you decrease the Effect Kit Modifier by turning it counterclockwise, the filter opens, making the kit sound more hi-fi:

A World of Possibilities

Don’t forget that you can use any or all of the DTX-PRO Kit Modifier controls in any combination. Together or separately, they open up a world of possibilities for you to create distinctive-sounding drum kits on the fly.

Ready to learn more about the Kit Modifiers? Check out this video:

Check out the other installments of our five-part “DTX6 Deep Dive” series:

Part 2: Recording Options

Part 3: Training Tools

Part 4: Customizing, Importing and Layering Sounds

Part 5: A New Level of Playability


Click here for more information about Yamaha DTX6 Series electronic drum kits.

Spring Cleaning Special: How to Dust and Clean Your Audio Gear

Unfortunately, there’s no way around it. Like everything else in your home, audio gear gets dirty over time.

And as the days grow longer and the sun shines brighter, the layer of dust that’s accumulated on your home electronics equipment becomes more noticeable — and smudges and fingerprints on dials, knobs, and faceplates make things even more unsightly. Just like lamps, artwork, upholstery, windowpanes and other interior elements, your audio devices have gone through a long, hard winter and deserve a thorough cleaning. It’s good for their well-being, and yours.

Beyond the aesthetic improvement, clean AV receivers, amplifiers, turntables, speakers and other equipment work optimally and enjoy a longer life. At the same time, the removal of dust and dirt from those devices contributes to a healthier home environment — something that’s especially important these days. After all, you can’t avoid touching the gear or their remotes, so it’s wise to regularly disinfect them to help prevent the spread of germs.

Last but not least, when you take the time to restore the original luster and gleaming front panels of your AV products, the entire room just looks and feels better. It’s like having that fresh, new-car smell after your vehicle has been detailed — you can’t wait to get behind the wheel and take it for a spin. When your audio gear is clean, using it is a more pleasurable experience.

How Dirty is Your Audio Equipment?

Given that the average U.S. home collects 40 pounds of dust each year, odds are that your AV equipment is getting a good coating of it. Worse yet, dust can stay suspended in the air for days, so even doors can’t stop the microscopic particles from floating inside equipment cabinets and depositing in every nook and cranny.

It’s easy to spot this build-up on the exposed portions of gear, but don’t forget about rear panels and cabling — those areas accumulate plenty of dirt and dust that can be easily overlooked. Unfortunately, dust and dirt will attract moisture and form a corrosive layer of material that can eventually degrade the sound and be damaging to exposed connectors, relays and switches — even internal electronic circuitry.

When and What to Clean

A yearly spring cleaning of your audio gear should usually suffice, as long as it’s thorough. Of course, weekly wipe-downs with a microfiber cloth or feather duster are never a bad idea. But for that annual deep clean, you’ll want to disconnect and dismantle everything to get at all the places you can’t ordinarily reach. Disassembling also gives you a chance to reorganize components if necessary, untangle cabling, and refamiliarize yourself with the various parts of your overall system. And who knows: Once you are able to see what’s at the back of the rack, the lack of a particular input or a dent in a side panel might be all the inspiration you need to treat yourself to a new piece of equipment. Your car gets a yearly tune-up, so why not your audio system too?

Don’t forget to include the speakers while you’re cleaning your audio system. Even small, unobtrusive ones like the Yamaha MusicCast 20, MusicCast 50, NS-SW050 subwoofer or SR-C20A sound bar can gather significant dust over time. Be aware that grille material is delicate and can be easily damaged if you press too hard on it while cleaning, so it’s best to remove the grille covers from the speaker housing and clean them separately, laid out on a flat surface.

And while the shelves, cabinets and other storage spots are empty, take advantage by running a vacuum hose and/or a damp cloth over them — you might even want to apply some touch-up paint or stain if necessary. Dust bunnies thrive on solid surfaces and corners, so this may be the messiest part of your cleaning project. But don’t neglect to include those areas, as the last thing you want to do is return nice, clean audio equipment to a dirty environment.

How to Clean

Start by gathering the following supplies:

– Mild liquid cleanser diluted with water in a spray bottle

– Microfiber cloth

– Cotton swabs

– Lint roller or brush

– Vacuum with a soft brush cleaning attachment

– A compressed air canister

– Alcohol-based disinfectant wipes

– Two small sponges

– A soft cotton towel

Avoid using materials that are coarse and abrasive like paper towels and harsh ammonia-based solutions.

Once you’ve got your cleaning supplies in hand, here are some pro tips for how to use them:

First and foremost, always unplug your gear from AC power when doing any kind of deep cleaning!

To rid surfaces of dust and fingerprints, apply a light spritz of cleaning solution onto a slightly damp microfiber towel and then use it to wipe the surfaces gently.

Closeup showing someone's hand with a soft cloth cleaning the vents on a piece of audio equipment.
Clean your AV receiver with a slightly damp microfiber towel.

To remove dust from around dials, knobs, terminals and connectors, use a cotton swab.

To eliminate dust and debris from vents and fans, try a blast of compressed air or a swipe of a soft vacuum brush.

As a final touch, apply a disinfectant wipe across all remote controls, as these are what get handled the most. Removing the accumulation of oils and dirt will make them feel like new again.

Speakers require some special treatment. After removing their grilles, gently pass a lint roller or a soft vacuum brush over the fabric to remove the dust. Be careful! The goal here is to clean the fabric without stretching it. If the speaker has a removable metal or plastic grille, it can be cleaned with a soapy sponge, rinsed with a second sponge that’s holding clean water and then dried with a soft cotton towel.

Closeup of someone's hand with soft cloth cleaning a speaker grill.
Remove your speaker grilles and clean and dry them separately.

An Afternoon Well Spent

Dust and dirt are not just an aesthetic issue. They can actually be real detriments to the performance of your audio and AV system, and while an occasional pass of a duster is helpful, doing a periodic deep clean can do a world of good. If you want to get the most out of your gear, I suggest you add the chore to your annual spring-cleaning routine. Trust me: It will be an afternoon well spent!


Click here for more information about Yamaha AV products.

Strong Bonds: The Value of Teacher-Student Connections

“I remember that guy!” My husband was on vacation with his best friend since 1st grade, and they were laughing and reminiscing about a terrific teacher they’d had 40 years ago.

Did this teacher set them up for better mental and physical health later? According to the research, the answer is yes.

We often think about the sweet power of friendship between children, and the intense friendships that form between adolescents. But close, positive bonds with teachers are also important and can have long lasting effects on health.

Research published by the American Psychological Association in the journal School Psychology looked at the relationship between warm, supportive teachers and how healthy their students later turned out to be. It looked at data from 20,000 participants in the United States, following them longitudinally for 13 years from 7th grade into early adulthood.

Researchers assessed the physical health of the subjects, measuring quantitative factors such as blood pressure and body mass index. They also asked them about their mental health. And they asked questions such as: “How often have you had trouble getting along with your teachers?” and “How much do you agree your teachers care about you?”

Participants who had reported good relationships with their peers and teachers in middle school and high school had better health outcomes in their early 20s. But interestingly, because the study also included 3,400 pairs of siblings, the researchers could study whether family background was a factor. Once family background was accounted for, only the link between good teacher relationships and adult health remained significant.

The Ramifications

“This research suggests that improving students’ relationships with teachers could have important, positive and long-lasting effects beyond just academic success,” the author of the study, Jinho Kim, Ph.D., wrote. Kim is an assistant professor in the Department of Health Policy and Management at Korea University.It could also have important health implications in the long run.”

As a music educator, you already know the power of inspiration and how important teachers are. The study’s results suggest that teacher relationships are even more important than previously realized and that schools should invest in training teachers on how to build warm and supportive relationships with their students, according to Kim. He observes, “This is not something that most teachers receive much training in, but it should be.”

Little Ways to Build Positive Relationships with Students

Let’s start with the little details — the most basic ways to build a positive relationship with your music students.

  • Ensure you are pronouncing students’ names correctly, and not using any nicknames without expressly checking first. If there are multiple students in the class with the same name, discuss how they would like to be referred to, instead of just assuming one person will be Samantha but the second Samantha will be Sam. The wrong name can really chafe.
  • If possible, stand at the music room door to greet students as they come in for class.
  • Make sure all students can hear you. Speak clearly and move around the room to engage with everyone.
  • Provide clear communication, with plenty of advance notice of any musical performances, recitals or audition opportunities. Remember the adage “some people don’t read and some people don’t listen,” so verbal and written information are both valuable.

Big Ways to Foster Meaningful Teacher-Student Bonds

Then there are the bigger-picture ways of encouraging participation, self-expression and a sense of community within your student groups. These take more effort, but lead to lasting positive relationships. A good resource for creating defining, unforgettable moments is the book “The Power of Moments,” by Chip and Dan Heath.

  • Provide ways for students to touch base outside of the classroom. This might be holding regular office hours and encouraging drop-ins, or you could have a classroom “Talk to Me” box, where students can drop in their thoughts.
  • Ask students about the music they are listening to. Encourage them to bring in new sounds and ideas from their personal experience. Which artists do they like? Can some of these artists become topics of research or fodder for performance?
  • Provide opportunities for students to take excursions to live local performances, with a variety of settings and genres.
  • Flip the script by having students teach a portion of a lesson. They might, for example, open the class by giving a short presentation on a historical period or a famous musician. Plan some lessons that involve collaboration between students, working in small groups, to foster collaboration.
  • Mix up the type of instruction for multisensory appeal. Some music students do well with tactile experiences like coloring different notes with bright hues, while others might respond best to watching a funny video, and still others might enjoy a “game show” style quiz to encourage memorization.
  • Lastly, look for students who seem to be acting out — oftentimes they need positive attention, but aren’t sure how to go about getting it. Dr. Chawanna Chambers reflects that choosing authenticity, valuing students’ voices in the classroom and empathizing with their experiences is key when working with all students, and especially so-called “tough” students. She shares more insights here.

Every student needs a champion, and you might be just the person for that role!

A Musician’s Guide to Getting Your Work Out There, Part 1

Today, being a musician often means you’re also a small business owner. It requires that you undertake hours of press, promotion, marketing, fundraising and administrative work to get a leg up. And when your job is a being a songwriter, you have more responsibilities than just plucking a guitar or penning a chorus. But fear not — we’re here to help.

In this two-part series, we’ll explore avenues for artists that may seem too difficult to traverse alone. Consider this your guide through the potential pitfalls of your progress. You have your songs in hand, but now what? How can you showcase them? How can you get your music played on the radio, placed in TV spots, featured online and in livestreams? How do you get publicity, find a manager?

We’ve asked the professionals these questions — everyone from radio DJs to publishers of blogs — so that you can get the answers you need. Armed with this information, coupled with some perseverance and a little bit of luck, you’ll be able to take your career to the next level and get your work out into the world.

Getting Your Music on the Radio: Keep It Simple

There are many kinds of radio stations, from college to commercial. So, the first question is: Where do you want your music played? One way to get your music on radio is to pay someone to promote your work, though that can be a very expensive undertaking. What if you don’t have a big budget? In that case, the first place you should look to are radio stations that have an established policy of giving exposure to independent musicians. For example, KEXP 90.3 FM in Seattle, Washington is both accessible and far-reaching; people tune in from all over the world to listen to the handpicked music the station plays.

Young woman wearing headphones and speaking into a microphone with the call sign of KEXP on it.
Eva Walker.

While KEXP is known for indie rock, the station plays everything from jazz to country, soul to electronic. For DJ Eva Walker, who hosts both specialty and drive-time weekday shows, it’s not about the numbers of followers. It’s about authenticity of art.

“Honestly,” she says, “if the song sounds like nothing I’ve ever heard before, it has a good chance to be played. I skim through press releases and sob stories because I just want to hear the product. I want something that stands out, that makes my stomach drop.”

Walker also points out that there are some more effective ways of communicating than others. “Make sure I can stream the song on something other than Spotify®, like SoundCloud or Bandcamp. And make sure your email isn’t too long. Give me a quick introduction. I don’t need a memoir.”

Television, Movie and Ad Placement: It’s About Fit

Young woman looking over her shoulder smiling at camera.
Shayna Casey

The best thing an artist can do to try and get their music placed in television, movies or ads — something that generally requires a music publisher — is to first do some research. If you do the appropriate background work, you may find a publisher that you click with; in fact, you may be just the fit they need on their roster.

“Ultimately,” says Shayna Casey, creative director of L.A.’s Modern Works Music Publishing, “you want to find a team that’s going to work best for you and vice versa.” When deciding whether or not to take on a new client, she says a band with buzz can be enticing, but much more than that, it’s about synergy. “I’m pretty honest and upfront. If I don’t feel confident that I would be able to deliver what an artist is looking for, then it’s probably not the right fit for either party.”

Last but not least, artists should always keep their worth in mind and their brand uncompromised. In other words, don’t simply make exposure the ultimate goal: It’s important to stay true to yourself.

Livestreams: Make the Most of Them

Man with short hair and close-cropped facial hair smiling into camera.
Gordon Brown.

Livestreams likely won’t ever replace playing on stage, but they are an acceptable substitute well worth pursuing, especially these days. His company has helped hundreds of bands reach their audiences over the past year.

Gordon Brown, founder and chief executive of LoudSwell.com, reports that his company has received “countless messages from viewers who tell us that watching a livestream of their favorite band made them forget, if only just for a moment, about all of the chaos in the world. That is an enormous benefit.”

When undertaking a livestream, Brown suggests the following:

– Don’t livestream for free; ask your fans to kindly tip.

– Don’t take a set break. An internet audience has a shorter attention span than audiences in clubs or other venues, and there’s a better chance they’ll leave.

– Strive for high quality but don’t break the bank for it.

– Aim to make your livestream more of a show. Involve a Q&A or tell a story.

– Promote it days in advance, if possible.

For more about livestreaming, check out our blog “Top Ten Tips for Livestreaming Your Music.

Getting Exposure Online: Building Trust

Man in glasses holding a camera. Appears to be taking this picture of himself via a mirror.
Mark Redfern.

If you’re seeking exposure online, it can be a good option to hire a publicist. Just make sure you choose someone who has an existing relationship with major media outlets. Yes, it can be costly, but if you hire the right person (again, do your due diligence!) it really can help.

Mark Redfern runs the tastemaker music and entertainment web site Under The Radar. As an established outlet, they’re often inundated with requests from artists. While it can be hard to say what any particular outlet looks for in a band, a common mistake that artists make is not understanding what the publication is fundamentally all about. “We’re an indie rock magazine,” explains Redfern. “When a nu metal band or straight-ahead country artist submits music saying they are ‘perfect for [us],’ it’s easy to ignore that email.”

How To Get Publicity: Talking Points

If you don’t hire a press representative to help get your music exposure, don’t fret. There are other ways to form relationships with the media. The first step is to identify writers who seem partial to your genre, then read their work and become familiar with the outlets they write for. Everyone wants media exposure, but when you’re starting out, it’s best to send your music to outlets that you are familiar with and are a good match. That way when a connection is made, it’s an authentic one. It’s fine to follow up with a writer or editor a week or so after your initial correspondence, but remember, these folks receive tons of emails every day, so be professional and courteous. There’s a fine line between perserverance and being a pest!

Once you’ve made that connection and someone is interested in featuring your work in their publication, they might also ask you for an interview. This can be daunting at first, but after you do one or two of them, you’ll find that they become second nature. Here are some important tips to keep in mind from someone (me!) who has interviewed hundreds of artists and even taught classes on the subject:

– Try to think of three to five “points of interest” that are unique to you and don’t feel bad about steering the conversation toward them at any time.

– Writers are interested in finding a good story. Do your best to give them one!

– Be kind, professional and on time.

Finding Management: Making the Right Connection

Man in coat, cap and sunglasses faces the camera.
DeVon Manier.

Bands often say they want management. But management comes in many forms, from the buttoned-up executive to a more casual roadie — even a trusted relative who may have little or no experience. At the end of the day, an artist must look in the mirror and consider what is needed to advance and maintain their career.

DeVon Manier is a manager who has worked in the music industry for decade; he knows what it takes to grow a group from grass-roots, from the ground up. But for Manier, the effort can’t be applied to just anyone. There has to be a relationship and potential for growth.

“To me,” he says, “the most important thing is good music, and music or personalities that can form a meaningful connection to fans. This stuff is priceless. The rest is mostly sales and marketing.”

So in your search for a manager, there’s one thing to keep in mind above all else: dialogue. “Communicate, communicate, communicate,” Manier advises. “It’s the key to success.”


Click here for Part 2, in which we discuss distribution, vinyl/CD pressing, getting and maintaining an online presence, and more.

Photographs courtesy of the contributors.


Note: Yamaha does not endorse any of the individuals or companies named in this article.

Music Direction in the Digital Age

The concept of the TV talk show with a house band has been around since the 1950s, but technology has enabled the bands of today to do things never before imagined. Leading the way in these forward-thinking methods is Grammy®-winning Yamaha Artist Jason Halbert, music director for The Kelly Clarkson Show.

Halbert is a keyboardist who honed his chops on the road, working for acts such as Lady Gaga, Billy Ray Cyrus, Reba McEntire, Clay Aiken, Justin Guarini and most importantly, Kelly Clarkson. His touring duties have taught him all aspects of the business: not just playing and leading a band, but related skills such as synthesizer programming and creative use of computer software.

A Gateway to Success

It was a chance backstage meeting with then-American Idol judge Randy Jackson while Halbert was on tour with Nick Carter of the Backstreet Boys that proved to be a gateway to success. Nine months later, Randy called out of the blue and offered Jason the job of putting together and leading the band for the winner (Kelly) and runner-up (Justin Guarini) of Idol’s first year competition. “That one call really changed my life,” recalls Halbert. “I’ve been with Kelly for every show since that first tour: it’s been quite a journey.”

Jackson became an important mentor to Jason. “Randy taught me the power of staying in your lane and serving the music and the artist,” Halbert recalls. “He taught me to find the joy in picking the right musicians, finding the right parts for the song and for the artist, and not holding your own musical tastes as so precious.”

A Fresh Challenge

After years of touring, recording, songwriting and production, Jason found himself with a fresh challenge: assembling a band for the TV talk show that Clarkson launched in 2019. Being a new and untested show, the production had to start small, so Halbert was limited to using just a four-piece ensemble — keys, guitar, bass and drums — but his extensive technology chops aided him in putting together backing tracks to augment the sound when needed.

As Halbert notes, the demands of preparing and delivering a TV show are daunting. “When you’re touring, you have four to six weeks to put a two-hour show together, and then you go out and play that for a year or more,” he says. “Television is a whole different medium because of the workflow and time constraints. It’s all about time management, fast learning, quick improvisations and knowing a huge variety of genres and styles. On tour, whatever happens on any given night is a momentary thing. On TV, your performance lasts forever, so you want to deliver the best quality within those really tough time limitations.”

The pressure is even more intense when doing a TV program that airs daily, as Clarkson’s does. “We’re doing 180 shows a season, we’re taping six shows a week — two a day — and I get one four- to six-hour rehearsal with the band every Monday,” Halbert explains. “During that session we have to learn six new songs for Kelly to perform, plus 12 bumpers [short clips of music used to transition in and out of commercial breaks – Ed.] per episode, so you’re looking at 80 pieces of music per week.”

Creating so much music with so little rehearsal requires a great deal of organization and adaptability. The process starts with Jason writing the bumpers — usually just eight bars going into the break and four bars coming out — but he strives to make each one musically meaningful. He mocks them up using computer software and sends them out for the band to listen to. The on-set audio system allows them to quickly preview each cue in their in-ear monitors right before they need to play it, as a quick refresher, and to establish the tempo. This also allows Jason to rapidly shift gears if there’s a change in mood during the talk segments and he needs to call up a more appropriate cue.

For the songs that Kelly performs, Halbert works with the show’s vocal director beforehand to pick the right key for her and work up an arrangement, at which time he also puts together a quick recording with guide vocals. The band members learn their parts, go over them at the weekly rehearsal, and then, just before taping, they get together with Clarkson for a quick run-through. “This works for us because we’ve been together for 18 years now, [so] at this point I know what [Kelly] likes,” Jason explains. “There have only been a handful of times where she listens to my arrangement and says, ‘You’ve cut out my favorite section!’”

A Change in Workflow

Of course, the events of the past year caused a significant change in the workflow. After taking a short hiatus, the show decided to come back with everyone working remotely from home. The amount of weekly prep and music remained the same, but now the band had to record their parts individually, using their smartphones to capture their performances. Kelly Clarkson too would be performing from her home in Montana, recording into a smartphone as she monitored the band’s backing track via earbuds. “It amazes me the quality of sound and performance we got from Kelly that way,” Halbert says. “We learned to do a little bit of processing to get rid of noise and some of the room sound.… It worked surprisingly well.”

Thankfully, that only lasted two months, and then Jason and the musicians returned to the TV studio, where they all had enough space to perform while socially distanced from one another. Kelly remained at home, but at least now the band could play live together, which gave a new level of energy to their (and Kelly’s) performances. At some point, the producers came up with the idea of having screens placed in the seats so the band could have a live-but-virtual audience again. When Halbert saw how well that worked, he asked if the same approach could be taken to add some extra players when needed: horns, strings, even background vocalists. The producers quickly agreed, and so another level of pre-production fell on Jason’s shoulders; now, not only would he have to arrange the tunes for the expanded lineup but the extra players would have to record their parts at home (both sound and visuals), and then the band would play live along with those pre-recorded parts for a fuller and more visually appealing presentation. This innovative approach reached a peak for the show’s 2020 Christmas specials, where the band was supplemented by as many as 11 additional players.

Yamaha Instruments Play an Important Role

Jason’s main show rig includes a classic tonewheel organ and a Yamaha MONTAGE synthesizer, as well as a Clavinova piano. “I have a MONTAGE in my office where I do all my arranging / pre-production work,” he says. “I use it for literally everything except organ, and I love the Live Set feature: I use it to run my whole show setup.”

“Not only does the MONTAGE have great [presets],” he adds, “but I’ve been taking advantage of their sound-sharing site (Soundmondo) for when we are doing ’80s and ’90s tunes. It takes me no time to go there, type in the song name, and bam! — there’s a perfect recreation of the sound. All the bread-and-butter keyboard sounds I need are so perfectly dialed in that I’m just pulling up presets. I’d love to be that guy that tells you I am crafting these amazing custom sounds, but I’m not, and I don’t need to be.”

Attractive young bald male musician with a guitarist in the background and a wall of framed gold albums smiles for camera.

Playing for the Screens

Looking ahead, Jason says this: “We’ve hit a good stride, and things are running smoothly. Of course we want to get back to having a live audience and the energy that brings, but we’re happy to be playing for the screens until then.” And so too are the millions of people who watch The Kelly Clarkson Show.

Photo credit: NBCU/Weiss Eubanks.


For more information about Jason Halbert, visit www.jason-halbert.com.

Reimagining Chimes

The instrument known as chimes (sometimes referred to as tubular chimes or orchestral bells) is not that old, having first appeared in England around 1886. Orchestras needed something to replicate the sound of church bells. It was determined that hanging a variety of tuned metal tubes not only offered greater rhythmic precision than a flat set of box bells, but also provided a clearer tone with fewer high harmonics.

As the popularity of the instrument grew, with it often being used in 20th century American music and film scores, demand also increased, especially with school band and orchestra programs. However, over time, these instruments became quite large and unwieldy, making them difficult to transport. It was also a challenge to keep them in tune and difficult for students to play with confidence since more schools were taking chimes out onto the field for marching band performances. Enter the Yamaha redesign featured in the company’s YCH Series chimes.

Refined Design

To command a presence onstage, an instrument not only has to sound good, it should be visually appealing. While a grand piano takes up horizontal space, chimes take up a lot of vertical space. Chimes will be seen from the far reaches of any musical venue, and once played, will immediately call attention to the percussionist. YCH model chimes follow the design aesthetic of a Yamaha grand piano. An instrument that looks great will not only inspire the musician but will reward the audience with the enjoyment of watching the player.

Two pictures of instruments. On left, a photo of two sets of tubular bells and on the right, the view of the strings of a grand piano as viewed from above.

Improved Sound

Yamaha YCH Series chimes have longer sustain than previous models. By using acoustical analysis, the design team found that the second and fourth harmonics in previous models were decaying at a faster rate than other harmonics, as shown below. A means was found to lengthen this decay. This was accomplished by changing the shape of the head cap, changing the application of the plating on the tubes and ensuring the raw material was more consistent in shape and thickness. These alterations worked together to enhance the volume and provide more pitch clarity. They also helped to ensure that any slight cyclic variation or “warble” in the individual harmonics of previous models was eliminated.

Graphics representing cyclic variation of warble in instruments.

Improved Playability

Several new ideas were brought to the table to make chimes easier to play:

– A redesigned head cap. This provides a wider sweet spot, so it is easier to for a younger player to produce optimum tone (see the illustration below). In addition, the redesigned head caps are silver-colored, contrasting nicely with the gold-colored tubes for an easier visual reference.

Graphic.

– Improvements to casters. It’s important for chimes to be both stable and level during use. A swivel prevention caster was therefore added to prevent any side-to-side movement of the frame. The Yamaha YCH-7018 casters also offer height adjustment. This is important because, if the chime tubes are not properly centered in the damper box due to an uneven playing surface, the tubes can touch the damper felt, thereby reducing sustain and deadening the tone. Adjustable-height casters make it easy to level the instrument so the chime tubes hang away from the damper felt.

Graphic demonstrating above description.

– Improved damper function. In previous Yamaha model chimes, the damper box moves side-to-side. The revised damper box moves front-to-back instead — the opposite direction from how the tubes move when struck. By aligning damper movement with the front-to-back motion, the damping response is notably improved. This makes it easier for the percussionist to stop the extended sustain of the redesigned chime tubes at the most musically appropriate time.

Graphic demonstrating above description.

– Redesigned hanger. The distance between the natural and accidental (sharp/flat) chime tubes has been reduced to make playing fast passages easier, especially for younger players. This allows players to strike each chime cap with greater accuracy and confidence.

Graphic demonstrating above description.

– Lower playing position. The overall height of the instrument has been reduced, thereby lowering the playing position for players of smaller stature. Additionally, the accidental chime tubes on the YCH-6018 are 13 centimeters lower than previous Yamaha models. This allows younger players to reach them with greater ease.

Image with graphic overlay demonstrating above description.

Improved Handling

As every band director knows, the process of hanging chime tubes requires time and care. Most chimes attach tubes using a plastic-covered wire, which can make it difficult to adjust the wire length, so the tubes are perfectly horizontal. If they are not aligned correctly, less-experienced players have a greater chance of striking an incorrect note.

Yamaha YCH models feature a system with wires that have ball ends that simply hook into slots on the hanger, making it much quicker and easier to hang the tubes. With these chimes, it’s easy to achieve a perfectly horizontal tube alignment for optimum playability:

Closeup image and graphic displaying detail for how the individual pieces are wired together.
Closeup images with graphic overlay demonstrating action described above.

Additional Improvements

– Damper rod clamp. The damper rod clamp system has been redesigned for greater clamping strength and a more secure hold that prevents slippage when the damper pedal is pressed.

Graphic demonstrating what is described above.

– Floor noise reduction. The hanger unit is now connected to the side frames via vibration-damping rubber, which reduces the effects of floor noise while performing.

Closeup with specific items described above identified.

– A flexible tube arrangement. A full complement of damper holes is provided in the sharp/flat chime tube row, allowing any arrangement of chime tubes to be used. All available spaces can be used for a total of 21 tubes if desired. Since the position of the low C tube is not predetermined, complete freedom in terms of layout is provided, even when special-order chime tubes are used.

Graphic demonstrating what is described above.

Want to learn more? Check out the video:

Check out these related blog articles:

Anatomy of Chimes

Seven Things About Chimes You May Not Know

What’s the Difference Between Vibraphone, Glockenspiel and Chimes?


Click here for more information about Yamaha chimes.

Meet Yamaha Master Educator Mirian Conti

Mirian Conti is a concert pianist and a faculty member of of the Evening Division of The Juilliard School in New York City.

Her passion for helping young pianists across the world inspired her involvement in education, and she integrates new technology including the Disklavier in her teaching. Conti approaches keyboard pedagogy by teaching how to play the piano while always discussing the work itself and its historical context. Her extensive career as a solo piano artist has helped craft a practical, hands-on approach for students.

Referencing her own performance experience, Conti tells students that to succeed as a solo pianist they must be ready to perform at any moment. Her main priority is helping students achieve technical proficiency and better interpretative skills while observing a strict approach to the composers’ instructions.

When speaking to educators, Conti describes the piano as a centuries-old friend who’s been there through the happy and nostalgic moments, always filling us with emotion. Understanding the importance of keyboard pedagogy for the future of music education, she says, “Scientifically speaking, learning the piano — and music in general — helps to develop the parts of the child’s brain that pertain to the functions of coordination, speed and sensitivity, thus speeding up the learning process.”

Conti’s understanding of community and the need for a support system is ingrained into her work with educators and students alike. “Always be grateful to those who helped you start your life and career,” she says. “We cannot do this alone. We need each other. The solo pianist needs family, friends, sponsors, teachers, an audience. We become successful because of all the help and support we received throughout our life. We must be always grateful for that.”

Conti speaks from personal experience to prepare students for the journey ahead, thankful for her “thoughtful and supportive” husband who understood the sacrifices and struggles that can accompany a successful performance career.

Some of Mirian Conti’s session titles are:
  • Chopin Complete Mazurkas, a two-day session of the Chopin Mazurkas, a must in every classical pianist’s repertoire
  • The Americas, a selection of North and South American piano literature from the 18th to 21st centuries
  • Unusual Spanish and Latin American Classical piano music
  • Various piano literature courses that can be produced on demand or custom made for different levels of students: baroque, classical, romantic and contemporary piano repertoire.

To learn more about clinics by Mirian Conti, please contact Jalissa Gascho at jgascho@yamaha.com.
Photo by Grendel Foto, Argentina

Meet Yamaha Master Educator Frederic Chiu

Frederic Chiu is an Assistant Professor of Piano at Carnegie Mellon University in Pittsburgh, Pennsylvania.

He believes that piano playing embodies the best of humanity and sees the world of keyboard pedagogy through a lens of “Body/Mind/Heart.” Chiu embraces what at first glance may appear to be nontraditional techniques, including cooking and meditation, but these practices perfectly integrate into the overall wellness of the student.

Chiu explains to educators that he looks for “piano-playing solutions outside of music, and for life solutions in piano playing.” For his cooking class series, he designed the menu to support various techniques that students learn through experience and then apply to their playing. The result is an interactive, fun experience that highlights a holistic approach to piano playing.

“My priorities with students involve giving them a constant reminder that the solution they are looking for very often does not lie in the playing, but more often in the thinking or the feeling that they need to generate,” says Chiu. “If I can teach my students to have a perspective of observing themselves, then I think they can solve their own problems more and more.”

Chiu is an expert at learning to adjust the recipe when needed, remembering back to a period when he didn’t have access to a piano and had to find inventive ways to learn without an instrument. During that time, he discovered that looking at a situation from a different perspective leads to more creativity, passion and curiosity. He is now able to apply this knowledge to the classroom, offering educators and students a truly unique approach to studying music.

Inspired by projects that bring a new perspective to something known, Chiu sees himself as a bridge from the known to the unknown and seeks to bring students and educators into this amazing world of possibility.

Some of Frederic Chiu’s session titles are:
  • New Pedal Techniques: Rethinking Basic Pedal Usage
  • Meditation for Pianists: The Other Half of Mental Practicing
  • Disklavier: Uses in the Teaching Studio and on the Traditional Concert Stage
  • Learning Without the Instrument
  • Emotional Practicing
  • Stage Fright: A Practitioner’s Perspective
  • One for All: The Essence of Playing the Piano
To learn more about clinics by Frederic Chiu, please contact Jalissa Gascho at jgascho@yamaha.com.
Photo by Chris Craymer

What Is an IPX Rating and What Does it Mean for Headphones?

Have you seen the term “IPX rating” when shopping for personal electronics? It’s a measure of how water-resistant a device is. Particularly if you’re shopping for headphones or earbuds, a product’s IPX rating can be a significant factor in deciding what to buy.

All in a Name

Technically, an IPX rating is called an IP Code, which stands for “Ingress Protection Code.” We’ll explain how the “X” got there and what it means shortly, but first, a little background.

The IP rating standards are published and maintained by an organization called the International Electrotechnical Commission. In addition to quantifying “liquid-ingress protection” (in English, water resistance), IP codes also quantify the amount of “solid-particle ingress,” which is tech-speak for dust resistance.

The format of an IP Code rating is simple. It starts with the letters “IP,” followed by two digits. The first digit is for dust resistance; it ranges from 0 to 6. The second is for water resistance, and it ranges from 0 to 8. The higher the number, the greater the protection. IP34 or IP68 would be examples of IP Codes that cover both types of ingress, the latter being the highest rating possible.

The X Factor

Now, let’s bring the “X” into the equation. Consumer products, for the most part, don’t have dust-resistance ratings. (More commonly, this is applied to industrial products.) When no rating is available, the IP format calls for an “X” to replace the number. So, for example, a rating of IPX4 would indicate that no dust-resistance information is available, but there’s a water-resistance rating of 4.

Because of the lack of dust-resistance information for consumer products, their ratings almost all begin with IPX. As a result, IPX has become the colloquially accepted prefix for water resistance only.

What’s in a Number?

Now that we’ve gotten that out of the way, let’s talk about what the water-resistance numbers mean. Here are the basic definitions for each level, shortened and paraphrased for clarity:

IPX0: Has no special protection from water.

IPX1: Protects against dripping water falling vertically.

IPX2: Protects against dripping water falling vertically with the product tilted by as much as 15 degrees.

IPX3: Protects against water sprayed at any angle, up to 60 degrees vertically on either side.

IPX4: Protects against splashing water from any direction.

IPX5: Protects against jetting water from any direction.

IPX6: Protects against powerful jetting water from any direction.

IPX7: Protects against temporary immersion in water. (Up to 30 minutes at a maximum depth of 1 meter.)

IPX8: Protects against continuous immersion in water.

How High the Rating?

When you research IPX ratings online, you’ll find a variety of opinions regarding the specific protection level you need for various situations. Probably the best way to evaluate which IPX level will work for you is to think about how you may encounter water when wearing your headphones or earbuds. Look at the descriptions of the IPX ratings and decide which offers you the protection you need.

For example, if you only use your earbuds when you’re going to sleep, you’d probably be fine with IPX1. Or if the only moisture that might hit your wireless headphones or earbuds is water spraying from the sink when you’re washing dishes, then an IPX3-rated product should suffice.

On the other hand, if you wear your earbuds outdoors, rain or shine, you may want to go for at least an IPX5-rated product such as Yamaha TW-E7BTW-E5B  or TW-E3C true wireless earbuds because hard rain can actually be very similar to jetting water.

A pair of earbuds.
Yamaha TW-E7B earbuds offer IPX5 protection.

Runners and others who wear earphones during workouts also have to factor in sweat. And then there are people who can’t be without their tunes even when swimming. If that’s you, you might want an IPX7- or higher-rated product. Yamaha TW-ES5A true wireless sports earbuds have an IPX7 rating and are suitable for pretty much every activity, including swimming.

A pair of earbuds.
Yamaha TW-E5A sports earbuds offer IPX7 protection.

For more on shopping for wireless headphones, check out this blog.

Butterfingers

Higher IPX ratings don’t always equate to higher prices. A lot has to do with the quality of the product beyond its ability to resist water.

If you’re going to buy a pricey pair of headphones or earbuds, you might consider getting a product with a higher IPX rating than you need. Think of it as an insurance policy. Even if you only use your earbuds in the house, you might accidentally drop them into a sink or bathtub full of water, in which case that IPX7 or 8 rating will save you.

One complication you’ll probably encounter is that not all products have IPX ratings at all. Some may come with manufacturer claims of “water-resistant” or “waterproof,” but those terms are vague and not quantifiable. If you want the comfort of knowing how much protection your earbuds or headphones have, shop only for IPX-rated products.

There is certainly no shortage of them on the market. To get a sense for the variety, try searching online for “IPX5 wireless earbuds,” or “IPX8 headphones,” etc. (or whatever level of water resistance you want). You might be surprised at the range of choices you’ll be presented with.

Without question, IPX ratings are beneficial when you’re in the market for new headphones or earbuds. Understanding their meaning makes you a more savvy shopper and helps ensure that the products you buy have the appropriate water protection for the activities you engage in.


Learn more about Yamaha true wireless earbuds.

Remember Me

They carried me into her house when she was just 10 years old — a gift from her parents. They felt it was time to graduate from the tiny plastic toy piano they had given her for her fifth birthday, and I was the graduation present.

They paid $150 for me and maybe that’s more than I was worth at the time. After all, I was used and rickety and old. And I was odd looking. See, most pianos are black or walnut or white. But not me. My surface was neither satin nor shiny but a chalky stucco-like texture, with splotches of black lacquer splattered about — a real ugly duckling.

She didn’t care. She was excited to have me. I was excited, too. I had a new human and I would do my best to make her happy. Though my ivories were loose (come to think of it, so were my ebonies) and tuning me was a bit of a challenge, we bonded from the moment we first met.

With her fingers on my keys she created her first original melodies and words to go with them. She called them songs. I felt purposeful and appreciated for being able to give her musical explorations a more grown-up sound than that silly plastic toy could muster.

She played me in the morning before she went to school and as soon as she came home. She loved me unconditionally.

Her mom arranged for piano lessons but I knew she was happiest (an instrument can feel their human’s energy) doing her own thing: absorbing the creations of Burt Bacharach and The Beatles by playing their records over and over again and then forming tunes of her own by trying different combinations of my keys until she heard something she liked.

Her parents left us alone, undisturbed in that little alcove on the bottom floor of their split-level home. They let a young songwriter discover herself without interjecting their opinions. It was a good decision. It let her be unselfconscious and free.

Oh, once in a while her mom would call down from the kitchen, “That’s a nice one, honey!” or “Did you write that one, Shell?” I could tell that my human took pride in knowing that her mom was listening. Her dad was listening too, even though he didn’t usually say much.

My human has since grown up and written lots of songs — even a few you might recognize. (I take some credit for that!) And when she had a daughter of her own who showed an interest in art, she let her little girl discover herself too, maybe chiming in once in a while about how much she loved a stick figure on a chalk board, but giving no direction, making no suggestions. That’s when I remember hearing my human tell a friend, “There’s no need for a critic at the very beginning of anyone’s creative journey. There’s time for that.”

Those seem like really good words to me.

Years later, after both of my human’s parents had passed away, I was carried out of that house the same way I was carried in. Little by little, people, some of them strangers, came to claim desks and lamps and … finally, me. My human was so sad about the loss of her Mom and Dad and the sale of the house in which she grew up, we never had a proper goodbye.

But that’s okay. I know she loved me. Memories count for a lot.

Pianos have souls. Guitars and violins too — whatever instrument it was that ushered you toward your calling, whether it was your first or your last or somewhere in-between. I hope you remember them as fondly as you would a childhood friend or pet. They were, after all, half of the relationship you had with one of the most important loves of your life: Music.


Shelly’s memories of her first piano can be found in her blog post “Your Instrument Is Your Inspiration.

Check out Shelly’s other postings.

How to Configure an AV Receiver for Gaming

Every retro gamer remembers it well: your first video game console. You went to the store, waited in line, paid, went home, unboxed the console, plugged it in and turned on the TV. That was it — all you needed to enjoy gaming at its finest, right out of the box. Today, thanks to technological innovations and way more features, there’s a bit more required to create the most realistic gaming experience possible.

Modern consoles require some basic knowledge to connect to a TV, but on top of that, they require another step that some might not consider critical: configuring your audio setup for maximum impact. This is especially important considering the multitude of new gaming features available on modern consoles for you to enjoy.

To achieve this, you’ll need some quality audio gear. A sound bar can be a great place to start for setup simplicity. But if you have the space and want to unleash the full capabilities that your favorite video games can throw at you — from footsteps to explosions — an AV receiver (“AVR”) is highly recommended.

There are plenty of audio configurations you can use to enjoy games, but the ideal starting point is a 5.1-channel setup, which includes an AVR, a center channel speaker, two front channel left/right speakers, two rear surround sound speakers (also left/right) and one subwoofer (the “.1” in the “5.1”). In this article, we’ll show you how to configure an AV receiver specifically for gaming.

Making the Connections

We recommend using Ultra High-Speed HDMI® cables for all connections to your TV and gaming console(s) to ensure you capture the best audio quality and all available features; this will also allow you to be ready for the future. To walk you through the setup process, we’ll use the Yamaha RX-V4A AV receiver, a great multi-purpose unit.

View of front of electronic unit.
Yamaha RX-V4A AV receiver.

Simply follow these easy steps:

1. Unplug your AV receiver.

2. Using high-quality speaker cables, connect your speakers to the receiver.

3. Connect your gaming console (or consoles) to the HDMI inputs on the rear of the receiver. (The HDMI connectors for the RX-V4A are shown below.)

View of the back panel of the unit with the connectors indicated.
RX-V4A HDMI connectors.

4. Connect the receiver’s HDMI Out to your TV’s HDMI input. If your TV has an HDMI port that includes the word “ARC,” use it for this purpose. ARC stands for Audio Return Channel, and it offers the important benefit of reducing the number of cables between your TV and AV receiver. It also improves the sound quality and latency of the audio signal much more accurately than other methods, allowing a full high-resolution multichannel audio signal to be distributed to your speakers via the AVR without downmixing to conserve bandwidth. Also be sure to check which HDMI input on your AVR supports the type of TV you have. If you have an 8K TV, for example, your AV receiver may not support it. For further help, download the Yamaha AV Setup Guide app here.

5. Finally, plug your receiver’s power cable back in.

Now you’re ready to test your connections. First, turn on your gaming console, followed by the AV receiver and the TV. Then, using the TV remote, cycle through the Input buttons to select the connected input, at which point you’ll see your console’s home screen. Your AVR’s display should also show the name of your gaming console.

Playing with Sound

Before you can enjoy the full potential of your favorite games, you’ll need to make sure your AV receiver and speakers are calibrated. Many Yamaha AVRs support a technology called YPAO (short for “Yamaha Parametric room Acoustic Optimizer”) and come supplied with an auto-calibration microphone. To calibrate your audio system, simply plug it into the input on the front of the receiver and follow the on-screen instructions. (Click here for more information.)

Image of microphone and its cable/connector.
Yamaha YPAO auto-calibration microphone.
Closeup of the remote control with the specific buttons circled.
Yamaha remote Program buttons.

Next comes the fun part. Start up your favorite game. Initially, your receiver will be in Straight mode, which is the standard starting mode. To alter the output you hear over your speakers, start cycling through the Program buttons on your remote control as you play. These take you through various DSP (Digital Signal Processing) modes; in Yamaha AVRs, these are created via a proprietary technology called Cinema DSP 3D, which combines measured soundfield data with digital signal processing to create more realistic soundscapes.

The RX-V4A offers 17 different DSP modes to choose from, including nine in the MOVIE category that you can use for games, such as Action Game, Roleplaying Game, Spectacle and Adventure. There are also several modes optimized for music (i.e., Hall in Munich, Chamber, Cellar Club, etc.). Don’t let the name of the mode fool you — go ahead and try each mode on any game and see what fits best. You never know what you’ll find!

The discovery process doesn’t end there, either. There are individual audio enhancers as well, such as Dialog Level Adjustment, Extra Bass mode, and for those without the space to place surround speakers behind the listening position, Virtual CINEMA Front, which gives you 5-channel surround sound with all speakers lined up in the front of the room. You can also customize your own DSP by fine-tuning various parameters, such as delay and reverb level.

If you’re looking for a little extra out of your surround speakers, you can alter their levels to your liking; simply go to the speaker settings menu and adjust each speaker manually. When doing so, make sure that Adaptive DRC, which automatically adjusts the dynamic range (that is, the difference between the loudest and softest sounds) is set to ON. This will ensure that, whatever game you’re playing, the volume doesn’t exceed an optimal listening level during the loudest moments. Keep in mind that every receiver is different and you should consult your receiver’s manual for more details before adjusting speaker volumes (you can read and download the RX-V4A user guide and other support materials here).

To capitalize on the kinds of realistic soundscapes that developers are creating in games like Gears 5, it’s important to be aware of the full range of features your AV receiver has. For example, a number of exciting new HDMI 2.1 features have been added to Yamaha AVRs such as the RX-V4A. These include enhanced eARC, Auto Low Latency Mode, Quick Media Switching and HDR10+, as well as a video upgrade for 4K/120 and 8K/60 video resolution. These features are particularly important due to the capabilities of current consoles like the Microsoft Xbox™ Series X, which offers all of these and more.

View of console and the controller unit.
Xbox Series X video game console.

The beauty of using an AV receiver that’s been configured for gaming is that, with only a few simple tweaks, you can make any video game sound much closer to what the designers intended. And once you’ve configured the audio to your liking, you can make further choices about audio gear. For larger systems, like 7-channel, 9-channel, 11-channel and beyond, you’ll need more speakers and an AV receiver capable of handling those extra speakers (such as the Yamaha RX-V6A, which supports up to 7.2 channels and offers advanced technologies like Dolby Atmos and DTS:X). When it comes to great audio for gaming, more speakers and additional AV receiver features are always better!


Check out these related blog articles:

Three Reasons to Upgrade Your System for Modern Gaming

New Gaming Features You Can Enjoy in Your Home Theater

How to Calibrate Your AV Receiver with YPAO

Gaming in Dolby Atmos®: An Interview with Josh Osiris

How to Connect Nintendo Switch™ to Your TV, Sound Bar or AV Receiver

Raiders of the Lost eARC


Click here for more information about Yamaha AV receivers.

How School Service Music Stores Can Help Music Teachers Access ESSER Funds

As one of the closest partners in music education, a school service music store can provide invaluable help to teachers navigating Elementary and Secondary School Emergency Relief (ESSER) funding requests.

From helping to complete a needs assessment to adding a supportive voice in lobbying administrators to sharing what is working for other teachers, the educational rep from a local music store can be a subject-matter expert, a shoulder to lean on and a sherpa, all rolled into one!

What are ESSER Funds?

If you’re unfamiliar with ESSER funds, check out our updated overview of the CARES Act.

ESSER funds are allocated to local educational agencies (LEAs) that then disperse them to individual schools to provide support for emergency relief funds to support continued learning for K-12 students. These funds — more than $67 billion — come with a deadline —they are for immediate use and must be spent within one year.

The National Federation of State High School Associations (NFHS) put out this fact sheet about available funding from the CARES Act.

_______________________________

“…now is the time to plan with school administrators about how this funding can support arts education. Reach out to your building principal to discuss the resources that are necessary to conduct arts classes safely in-person. The principal will either have spending authority on the funds or will be able to help submit a request for arts-related purchases at the district level.” 

— ArtsEdNJ, CARES Act Funding Guidance for
Schools/Districts Supporting Arts Education

_______________________________

Ask for Help

Navigating a process that changes from district to district and state to state can be challenging for professionals with all the time in the world to unravel it. For busy teachers, finding the most efficient route from “need” to “money” is even more critical. Your local educational rep will have experience working with other teachers and can share key insights or tips on how to move quickly to claim your share of the funds for your students.

How Dealers Can Help Teachers

The National Association of School Music Dealers hosted a webinar and panel on March 4, 2021, to help school music store staff prepare and mobilize to help teachers submit requests for use of ESSER funding.

Give a Note Foundation posted this blog about How to Get ESSER Funds for Your Music Program.

Educator Success Stories

More Resources Coming

Bookmark this page. We’ll continue to add video interviews with teachers just like you who have navigated their local system to find and access ESSER funds. You can hear directly from them about what worked  and what didn’t  to help you maximize the benefit of ESSER funds for your program.

Have you already successfully accessed ESSER funds for your program? Email us at educators@yamaha.com so we can share your story!

Yamaha is an active advocate for music education, and we want to empower music educators to strengthen their programs in any way we can. Please register for the Yamaha Educator newsletter to read up on advocacy, professional development, information about instruments, resources, partnerships in education and more. Join the Yamaha Music Educator Community on Facebook or email us at educators@yamaha.com.

Home Studio Troubleshooting Tips, Part 2: Computers and Software

Digital recording gives us massive power to record, edit, and manipulate audio. But with all that power comes the instability inherent when using a computer and software. We have to learn to navigate the crashes, corrupted files and other gremlins that are an annoying but inevitable part of the process.

In Part 1 of this two-part series, we talked mainly about troubleshooting issues with your audio gear. This time around, we’ll focus on how to navigate problems with your DAW and the platform it’s running on.

Troubling Results

Just like with audio hardware, it helps to use troubleshooting techniques to narrow down the possible causes of computer- and software-related issues. For example, let’s say you’ve opened an existing project in your DAW. When you hit play, the transport and meters — including the main output — are moving, but you hear no sound.

Here’s a step-by-step approach to identifying the cause of this common problem:

1. Confirm that your speakers and audio interface are powered up and connected.

2. Assuming they are, try opening a different audio app on your computer, like an editor or even Spotify. Do you hear audio now? If you do, you’ve eliminated your computer, speakers and interface as being the cause of your trouble. You can therefore deduce that the problem is in your DAW.

3. Check your DAW’s output assignments and make sure that you’ve selected your interface as the active one.

4. Check to see if perhaps you’re sending the audio to the wrong output(s).

Screenshot.
Here, the main outputs aren’t connected to the interface.

5. If you still haven’t found the problem, try opening another project. Does it play back normally? If it does, then there’s something specific to the original project file that’s causing your troubles.

The All-Purpose Fixer

If you’re working in your DAW and it starts acting glitchy, try these steps:

1. Save the session and quit the program. Then reopen them both. Sometimes restarting the application is all you need to fix your glitch.

2. If you’re still having issues, the next thing to try is rebooting your computer by selecting Restart. It’s amazing how many problems, both big and small, completely disappear with a reboot.

Screenshot.
Rebooting your computer can solve a multitude of issues.

Glitchy performance often happens after you’ve been running your computer for awhile and have been opening and closing lots of applications. Sometimes, after you close them, programs or utilities fail to free up the RAM they’ve been using (RAM stands for Random Access Memory, which is the short-term data storage your computer needs to run any applications). That failure causes what’s referred to as a “memory leak,” and your computer stops functioning at 100%. Rebooting restores the memory to its default state and wipes away problems related to memory leaks.

After you’ve rebooted and everything’s running normally, minimize the number of applications you have open when using your DAW. That will leave more RAM available for it.

Plug and Not Play

If you’re experiencing frequent crashes when using your DAW (or perhaps are unable to open a particular project file), the problem likely stems from a conflict between your DAW and a third-party plug-in (or plug-ins). Try these steps:

1. Update your DAW and plug-ins. Sometimes problems happen when you haven’t updated some component of your software for awhile.

2. Also check with the developers’ websites to see if new versions are available. Depending upon the operating system of your computer, you may find greatly improved performance when running newer software.

3. Ensure the firmware and driver software of your audio interface is up-to-date (on Mac computers, most USB interfaces are class-compliant and don’t need drivers).

In the case of a project that crashes when you attempt to open it, try this:

1. Open an older version or backup of the project, starting with the most recent one.

2. If it doesn’t open, try the next oldest until you find a version that will open.

3. When you find a version that opens, think about whether you’ve installed any new plug-ins after that version was created. There’s a reasonable chance one or more of the new plug-ins could be the culprit.

4. Make sure your DAW and plug-ins are updated to the latest version.

5. If that doesn’t help, consult the plug-in’s manual to see how to temporarily uninstall it, and do so.

6. If the project now opens, the plug-in was the issue.

Freeze, Unfreeze

Another issue that DAW users face is maxing out their CPU. This can occur from having too many tracks, virtual instruments and/or plug-ins open. It’s not a glitch, as such, but it means you’re overusing your processing resources.  If that’s happening to you, here’s what to do:

1. Increase the size of the audio buffer. Lower buffer settings give you less latency (delay) when recording but tax your CPU more. If your CPU is getting overwhelmed, it can degrade the quality of the digital audio, or the transport might stop altogether and display an error message.

2. As a general rule, use a low buffer setting when you’re recording and a higher one when you mix. In Steinberg Cubase, you can access the buffer setting by opening the Studio menu and then choosing Studio Setup. When the window opens, press the Control Panel button, and you’ll see a pull-down for setting the buffer size, as shown in the illustration below:

Screenshot.
Adjusting your audio buffer can help alleviate strain on your CPU.

3. If you’re still having CPU issues after increasing the size of the audio buffer, try freezing some of the tracks. This option, which is available in most DAWs, temporarily renders the track as an audio file that includes the processing of any plug-ins that were on it. You get the CPU savings because it disables the plug-ins.

Screenshot.
The track freeze button in Cubase is in the Inspector.

Once a track is frozen, you can still change its volume and panning, but you can’t edit it or change the plug-in settings. A frozen track uses only a fraction of the CPU that it did in its unfrozen state. If you need to edit it later, you can always unfreeze it.

In Cubase, when you freeze an Instrument Track, you have the option of freezing the entire track or just the instrument. You can still adjust processing plug-ins on its channel if you do the latter, but not the instrument itself.

Above All, Stay Calm

The tips offered in this two-part series should help you handle some of the most common technical issues you’re likely to face in your studio.

Of course, there are countless other potential gremlins specific to the particular combination of gear and software you have in your setup. Whatever the issue, the most important thing is to stay calm and assess your problem logically.

If you’ve followed the troubleshooting suggestions above and are still stumped, it’s time to do some online research, starting with FAQs from your software and/or computer manufacturer. Also be sure to check out the many online forums out there, where you can find out if other users are having the same problems you’re experiencing and what the solutions might be. (Steinberg maintains forums for all of its products — just click here.) If all else fails, you can always call or email tech support for your DAW or computer manufacturer. In some cases, that process can be tedious and/or time-consuming, but sometimes it’s the only option. But the bottom line is this: If you’re patient, careful and methodical, you can fix most problems that you’ll encounter.


Check out our other Recording Basics postings.

Click here for more information about Steinberg Cubase.

A Brief Guide to Electric Guitar Tonewoods

Even people who don’t know a whole lot about guitars generally understand that the tonewoods used when building an acoustic model are essential to its sound. (That’s a subject you can find treated in greater depth here).

When it comes to electric guitars, though, the waters get a bit murkier. Because the central contributors to the tone of solid-body electric guitars are its pickups, you might think that such instruments could be constructed out of just about any material and still sound good. So why even bother with wood in the first place? And if there’s a reason, does it really matter what woods you use?

The answer to the first question is this: Wood is used in solid-body electric guitars primarily because qualities like feel, weight and look can be just as important to guitarists as tone. In addition, even though an electric guitar isn’t designed to project a sound out to an audience without amplification, the resonant properties of its woods — particularly the ones used in its body — still have a significant impact on the way it sustains a note.

As to the second question, the answer is: It does matter, because due to their particular blend of the qualities mentioned above, some woods just plain work better for electric guitars.

Here’s a primer on the woods most commonly used in modern electric guitars, broken down into the three core parts of the instrument — body, neck and fingerboard — each requiring different characteristics from the wood used in its construction.

Bodies

The way a wooden body resonates in response to strings vibrating is a key factor in the sound of any type of guitar, acoustic or electric. That’s why, for example, rosewood in all its varieties is treasured by luthiers; it resonates with great warmth, generating lots of overtones. However, because rosewood is classified internationally as an endangered species, its trade is restricted, so building a guitar entirely out of it is a pricey undertaking. It’s also a tough proposition for your back and shoulders, as a solid block of rosewood is mighty heavy!

That’s why makers of solid-body electric guitars tend to look for woods that combine good tonal properties with reasonable weight and affordability. From lightest to heaviest, the woods most commonly used for electric guitar bodies are:

– American ash

– South American alder

– Asian or South Pacific agathis

– American or Canadian maple

– African mahogany

Mahogany is second only to rosewood in both its tonal richness and its weight; the African variety is one of the few mahoganies not currently classified as endangered. Agathis is tonally similar to mahogany but not as heavy.

Electric guitar.
Yamaha REVSTAR RSP20CR.

The original Yamaha REVSTAR Series of solid-body electrics (like the RSP20CR model shown above) had maple/mahogany or flame maple (a more dramatically grained type of maple) bodies; current REVSTAR Series guitars have chambered bodies that utilize similar tonewoods. Most models in the Yamaha Pacifica Series have bodies of maple, alder, flame maple, or some combination thereof — the sole exceptions are the PAC1611MS Mike Stern signature model, which has a body of light ash, and the PAC012, which sports an all-mahogany body.

Electric guitar.
Yamaha PAC1611MS.

For hollow-body electric guitars, the luthier’s calculations change somewhat. Here, the tonal properties of a wood become more important, and weight is less of a consideration. The Yamaha SA2200 hollow-body electric utilizes laminated sycamore, with a center block of softer maple to help with resonance and stability.

Necks

The weight of a guitar neck, though significant, is less crucial to a player than the way it responds to the hand. Necks need to be hard enough to remain stable and withstand years of use, but they also need to be soft enough to feel comfortable. American and Canadian maple provide a happy medium here and are frequently employed for electric guitar necks, along with African mahogany and nato, a softer type of hardwood from Indonesia.

Most Yamaha REVSTAR guitars have mahogany necks (the exception being the RS320 and RS420 models, which optionally are available with nato necks), while Pacifica instruments all have maple necks; the SA2200 hollow-body has an all-mahogany neck.

Fingerboards

Of an electric guitar’s three principal wood components, the fingerboard suffers the most daily wear and tear. It’s therefore important to use a type of wood that’s as hard and durable as possible. Prime contemporary candidates include:

– Palisander (a variation of Indian rosewood, now primarily harvested from Africa due to international restrictions)

– American and Canadian maple (flame maple being the most common, but the more elaborately grained bird’s-eye and quilted maple getting frequent use as well)

– African and Southeast Asian ebony

The Yamaha SA2200 hollow-body electric guitar sports an ebony fingerboard, while all Yamaha solid-bodies opt for rosewood with two exceptions: the Pacifica PAC112VM, which has a maple fingerboard, and the Pacifica PAC012, which is available with either a rosewood or walnut fingerboard.

Electric guitar.
Yamaha SA2200 with ebony fingerboard.
Electric guitar.
Yamaha Pacifica PAC112VM with maple fingerboard.
Electric guitar.
Yamaha Pacifica PAC012 with walnut fingerboard.

In the end, of course, a lot of the considerations about electric guitars — including the woods they’re made of — are matters of personal taste. If you prefer a heavier body or a harder neck, you’re not making the “wrong” choice, as there is no such thing. Nonetheless, it’s helpful to have some basic knowledge of the kinds of wood that go into most electric guitars. That way, you’ll be informed enough to make the right choice … for you.


Click here for more information about Yamaha electric guitars.

Reflections on Black History in Music

In commemoration of Black History Month, I recently had the opportunity to speak with celebrated Yamaha artists Dan Rouse, Lara Downes and Terri Lyne Carrington about the legacy of Black music via their personal musical influences. They also offered their hopes for the music industry going forward — to not only recognize the past, but build toward a more equitable future.

Looking to The Past

Beautiful woman seen in 3/4 profile. She has shoulder length ash brown hair, light brown skin. She is wearing a short sleeved sweater set and wearing silver necklace and rings.
Terri Lyne Carrington.

In a career spanning forty years, acclaimed jazz drummer, composer, activist and educator Terri Lyne Carrington has earned the rare distinction of playing alongside some of the most influential jazz musicians, including Dizzy Gillespie and Herbie Hancock. Carrington was formally mentored by jazz greats Jack DeJohnette and Wayne Shorter, but hesitates to offer up just one or two names as influences. “It’s all a continuum,” she says. “It’s about building on the things and the people that came before you, and it encompasses all of these other people, including people who weren’t famous.”

As a multifaceted artist, Carrington has looked to many individuals to inform her work as an educator as well as a gender justice activist. “When I started teaching 15 years ago, Roy Haynes was a big influence, because I realized how important he was in the modernization of jazz drumming,” she explains. In addition, her close friendship with Angela Davis and encountering the music of Sweet Honey In The Rock® as a teenager opened her up to the ways social justice could guide her own work. “[Sweet Honey In The Rock and its founder Bernice Johnson Reagon] were big influences on me because it was the first time I really connected with some of these subject matters that I hadn’t been thinking about before. The power of putting this type of subject matter in songs is so important and impactful.”

For musical director and keyboardist Dan Rouse, an early love of Stevie Wonder has been a constant source of inspiration. “Growing up in a very Christian Black home, we couldn’t really watch or listen to much other than gospel, but Stevie Wonder was one of the exceptions,” he remembers. Rouse’s love of Stevie Wonder has served to influence his approach to music when working with artists such as Patti LaBelle and the Village People. “He really shaped how I think as far as being new and fresh with my sound,” Rouse says. “I’m always trying to be creative and think outside the box.”

Smiling man with brown skin wearing orange sweater on stage at a synthesizer keyboard.
Dan Rouse.

Black Composers Overlooked

For centuries, the contributions of Black composers in Western classical music have been overlooked. Pianist Lara Downes recalls, “As a classically trained artist I literally had no role models or mentors or teachers in my actual, physical life who were of color. The only person that I had any contact with was Andre Watts, who was touring extensively.” This lack of representation galvanized Downes to do her own research and find ways to shine a light on unsung composers of color. “That’s the motivation I’ve had to seek out my connections with this lineage and legacy of Black composers, because it just felt so alienating and isolating to be making my musical way [with a canon that] didn’t reflect me at all.”

Woman in a black dress and suede boots seated casually with her legs crossed an her head resting lightly on her hand on a piano bench with a grand piano open behind her.
Lara Downes.

Discovering a piece by Florence Price around 15 years ago changed the course of Downes’ career. “I found one piece of hers and I started playing it a lot and experiencing a really intense response to it. It’s a piece that takes the spiritual ‘Sinner, Please Don’t Let This Harvest Pass’ and turns it into a very romantic piano showpiece. Years later, lots of her music was found in an abandoned house outside Chicago and I started going into those manuscripts. Just last year I put out an album of her piano works. The most meaningful thing to me is that she was [a Black woman] operating in this totally white male world, and yet the sound of her music remains authentic to herself.”

Living Legacies

The works of the great musicians that influenced Carrington, Rouse and Downes have also shaped how they consider the legacy that they themselves will leave. For Carrington, it’s less about stature as one of the top drummers in the world and more about what she can offer in working toward a just society as both an artist and educator. “I feel like I’m just getting started. Once I embraced gender justice in music, everything else opened up. The universe supported me to dedicate myself to this work. That’s how I know I’m doing the right thing.”

Similarly, Downes hopes that her presence can offer support to future generations of classical artists. “[I want my legacy to be] just that I was here, so that the next generation of little brown and Black kids who might want to make a way in music don’t have to look hard to find someone who looks like them — that they don’t have to dig in archives and bang on doors, and can just live their lives and make their music in a space that acknowledges them and honors them — a space where they belong.”

For Rouse, daring creativity is the key to the legacy he hopes to leave behind. “I want to be remembered as someone who explored. There were times where we were looking at music and saying we got it all figured out, and then jazz comes [along], then rock. All these genres came about from someone taking the time to explore. In my years of playing, I feel like I’ve been getting closer to finding a sound that’s new and fresh, and that’s what really inspires me. I want to be known as someone who introduced something to the world.”

A Look Ahead

Text box

The global events of the past year have had significant impact upon the livelihoods of many artists and musicians around the world. For the fortunate musicians who have been able to maintain their artistic output — or even in some cases increase it — this moment has also been a time to reflect on how the industry can change for the better. Carrington hopes that these events have been a wake-up call for everyone, especially as it pertains to the values we want to uphold. “We have to look at how we’ve invested in or benefited from a racist and sexist culture. Everybody has to look at that, starting with themselves,” she says.

Downes is hopeful that in the near future, the world will include more care, justice and representation in a way that moves beyond cosmetic fixes and is anchored in real change. “I hope that we hold onto the lessons that we’ve learned about balance, respect, and redefining what we mean by audience and community,” she says. “I’ve seen artists be so innovative and courageous this year. The conversations that I’m having with institutions are about building long-term relationships and about really serving local communities. Diversity is not just a box that you check. It’s an actual piece of your work that you do every day.”

Photograph of Terri Lyne Carrington © Tracy Love; photograph of Dan Rouse © Beth Saravo; photograph of Lara Downes © Jacob Blickenstaff.

Want to learn more about the works of Black composers? Be sure to check out Rising Sun Music and follow their Spotify® playlist.


For more information, visit:

www.terrilynecarrington.com

www.laradownes.com

https://danrousemusic.github.io/danrousemusic/

Try this Creative Composition Activity

Ignite creativity in your musical classroom with a new activity.

I developed this lesson for teaching composing and arranging while also giving students an opportunity to work on sight reading. Download the worksheets below and try this activity in your classroom. This activity will spark imagination and, as an added bonus, it’s aligned with the National Core Arts Standards.

THE YAMAHA EDUCATOR NEWSLETTER: Join to receive a round-up of our latest articles and programs!


Activity

  • Download the activity sheets. There are three sheets depending on the level of your students.
    • Level One: Eighth and Quarter Notes and Rests
    • Level Two: Eighth, Quarter and 16th Notes and Rests
    • Level Three: Eighth, Quarter, Triplet and 16th Notes and Rests
  • Each sheet is split into 12 musical snippets. Pick a sheet and print (or write out) the music examples. Cut out each musical example to create 12 separate snippets.
  • Put the cut-up snippets into a paper bag. You can also lay them out on a desk or table with the notation facing down (similar to the game Memory).
  • Pull one piece of paper out of the bag (or turn it over) and place it face up on a table or music stand. Continue until you have six snippets.
  • Count and clap through the arrangement of rhythms. [NOTE: There are over 479 million combinations!]
  • Place the snippets back in the bag (or face down on the table), mix them up and repeat the process.

Watch this video to see how this activity works!


Application

There are many creative applications for this activity. I have successfully used this process with my percussion students. Here are some suggestions to use this activity for in-person and virtual teaching.

  • Play scales with the resulting rhythms.
  • Use breakout rooms and have students perform their arrangements for each other.
  • Teachers can create an arrangement, take a photo with their smartphone, screen-share and then ask students to perform for the entire class.
  • Have four students each create a 4-measure arrangement. Then have them perform this four-part arrangement for the class. They can also record their arrangement on an app like Acapella and share with their friends and families.
  • Using a 4- or 8-measure arrangement, have students perform it as a round.
  • Use these rhythms as the basis for composition. Students can use a major scale and write a melody using the rhythms that were created by this exercise.

This activity is not limited to rhythms. You can create short melodic snippets and use the same process. If you are teaching a percussion class, use the 40 Percussive Arts Society International Drum Rudiments, cut out various rudiments and put them together into a composition. These are just a few suggestions that I have come up with. If there are other applications, please email me and I will add them to the list above with the appropriate credit.


Creation

These worksheets were created using Dorico. If you are new to Dorico, download a free 30-day trial and check out the worksheet handout in the Quick Start Guide.

If you would like the Dorico template for the level 1 creative composition activity, please email me. By using this template, you can change the rhythms and add melodic notation. This is a great activity for the “Creating” standard in the National Core Arts Standards  — the possibilities are endless. Get out there and create!

Please send me your worksheets, and I will add them below.

Cult Classics, Part 1: Vintage Yamaha Gear of the 1970s

From bellbottoms, feathered hair and discos to eight track players, leisure suits and the pet rock, the 1970s left its mark as an unforgettable part of the 20th century’s pop culture zeitgeist. But the ’70s were also considered the golden age of Hi-Fi. Before home computing, mobile phones, CDs and digital audio, wide-screen TV, VCRs and the internet, if you had a little extra money to spend for home entertainment, pretty much your only choice was Hi-Fi audio gear. The focal point of many living rooms was the audio rack, and much pride was taken in how your audio system compared to that of your friends.

For Yamaha, this Hi-Fi boom was a great time to jump into the home audio arena in the U.S.  Being known primarily as a musical instrument manufacturer, Yamaha wanted to offer products to complete the entire cycle of music creation, performance and ultimately playback — everything you need to enjoy music.

The U.S. Hi-Fi market was already filled with many established companies producing great products. Yamaha understood this and knew they had to make their first impressions stand out in order to be successful for the long run.

In this article, we’ll look at some of the many iconic Yamaha products from that decade and see how the company earned its reputation for quality Hi-Fi gear.

CA-1000 Integrated Amplifier (1973)

1970's era stereo component.
Yamaha CA-1000 integrated amplifier.

The CA-1000 integrated amp was the product that put Yamaha on the map. This beauty was loaded with cutting-edge features that included:

1. A Class A operation switch that changed the biasing of the output stage. When in class A mode, the amp’s output power was rated at 10W. Although the power is lower, enthusiasts appreciated having this audiophile capability. For high-power-needs, all users had to do was to flip the switch to A/B mode.

2. A continuous variable loudness control, which was much more flexible than the industry’s common “loudness” on-off switch. Continuously variable loudness remains a popular feature in Yamaha products today, almost 50 years since its introduction.

3. Flexible input and output connectivity, which are the big reasons for choosing an integrated amplifier. The CA-1000 had two phono inputs and selectable MC or MM phono preamps. In addition, tape recording was very popular in the 1970s, so there were connections for two tape decks as well as left and right microphone inputs with specialized high-performance preamp stages.

4. Three sets of speaker terminals, allowing the user to select between individual speaker pairs or combine the 2nd or 3rd pairs with the main speakers for additional sound output.

B-1/C-1 Components (1974)

Two amplifiers stacked on top of each other.
Yamaha B-1 basic amplifier and C-1 control amplifier.

In order to be considered a legitimate player in the Hi-Fi market, Yamaha had to appeal to the separate component enthusiast. The B-1 basic amplifier and the C-1 control amplifier were up to the task. Instead of buying off-the-shelf components to build these, Yamaha went all-in. The B-1 used a proprietary Yamaha SIT Vertical Field effect transistor (V-FET), the first commercial application of this type of semiconductor. The V-FET sound characteristics closely matched that of the triode vacuum tube, with all its sonic warmth and musicality.

While the B-1 was the star of this stack of separates, the C-1 was a worthy companion with a multitude of audio innovations. For one thing, its all-FET signal path was the perfect sonic match for the B-1. What’s more, the impressive-looking front panel, with its comprehensive array of controls, gave the hobbyist bragging rights over their fellow audiophiles. Besides the great sound, who wouldn’t want all these buttons and controls at your fingertips?

There was also a third member of this family — the rarer UC-1 optional meter and speaker switching unit that could be attached to the front of the B-1 or set on a special wood tabletop stand with a special connection cable. The ability to switch between five different speaker systems, all with volume trim settings, made this unit popular with Hi-Fi dealers to help the customer audition and select the right pair of speakers to complete their system.

NS-1000M Speakers (1974)

Two speakers side by side.
Yamaha NS-1000M speakers.

Even if you only have a casual awareness of vintage Yamaha equipment, NS-1000M speakers should be familiar to you. These speakers are famous for their use of pure beryllium dome mid-range drivers and tweeters. Due to its physical properties of light weight, high rigidity and propagation velocity, beryllium was theorized to be an excellent material for speakers. Unfortunately, the brittle nature of the metal made it not commercially viable for manufacturing. Yamaha developed a unique vacuum deposition molding process that produced a diaphragm from 99.99% pure beryllium plasma. The NS-1000M continued in the Yamaha line-up through the late 1980s and they still have a strong following today.

CT-7000 FM Tuner (1975)

1970's era stereo component.
Yamaha CT-7000 FM tuner.

Building a legacy of world-class audio products requires designing products for all listening platforms. Yamaha engineers were determined to create something special with the CT-7000 FM tuner. Remember, there was no internet, no streaming services and no compact discs yet, so the available sources of the era had to be maximized for performance. Today, the CT-7000 is considered one of the finest FM tuners ever.

Notable features included:

1. Touch-sensitive Auto Fine Tuning. When the user touched the tuning knob, the AFC (Automatic Frequency Control) was disabled, allowing for manual tuning to the desired station. Upon releasing the knob, the AFC circuitry would automatically engage to keep the tuner centered on the station’s frequency. This was pretty advanced stuff at the time!

2. A multi-path signal output on the back panel that could be connected to an oscilloscope to get the user’s directional antenna positioned precisely toward the broadcasting station for the best possible sound. If you didn’t have an oscilloscope handy, there was a meter switch that changed the signal strength meter to a multi-path indicator. Not as cool as the oscilloscope but very effective nonetheless.

3. A forward-thinking IF (Intermediate Frequency) output on the back panel. This is where you could connect a Quadraphonic decoder for 4-channel listening. This technology never really made it past the experimental stage and into prime time, but if it did, the CT-7000 was ready.

4. The inside was even more impressive than all the specs put together. Besides having a first-ever seven-stage gang tuning capacitor, every stage of the FM signal path was individually shielded from all the other stages with stainless steel covers.

Cover removed from an FM tuner.
An inside view of the Yamaha CT-7000.

TC-800GL Cassette Deck (1976)

Slant front unit with buttons and knobs.
Yamaha TC-800GL cassette deck.

This mid-1970s cassette deck was noteworthy on several levels. The most obvious is the look of the unit itself. Yamaha teamed up with renowned Italian architect/designer Mario Bellini for this radical departure from the more common top-loading decks of the day, which also put the impressive array of controls at an angle for better visibility and usability. Thanks to its looks, the TC-800GL served as the focal point of many home audio systems, but underneath the edge-cutting design was a high-performance recording machine. This deck was often used for recording live events because of its left and right microphone inputs and the ability to run on nine C-cell batteries, providing two hours of recording time (there were no lithium batteries back then). It’s a good thing it ran on AC as well!

YP-800/1000 Turntable (1976)

Turntable with clear hinged lid open
Yamaha YP-800/1000 turntable.

This full-featured direct-drive turntable is still highly collectable today. To maintain a stylish, clean look, the integrated strobe light was mounted under a flush-mounted glass window, revealing a mirror for viewing the strobe marks etched underneath the platter. What’s more, an onboard bubble level made it easy to dial in the adjustable feet for perfect leveling.

A powerful 12-pole brushless DC-Servo direct-drive motor provided precise speed control, and there were separate speed trims for 33 and 45 RPM (revolutions per minute) play. The static balanced S-type tone tonearm was selected for the lowest possible tracing distortion. There was even an ultra-smooth oil-damped cueing mechanism, which provided an elegant feel when dropping the needle onto vinyl.

HP-1 Headphones (1976)

Over the head wired headphones with large ear pads.
Yamaha HP-1 headphones.

The HP-1 represented the company’s first entry into the headphone market. Like many Yamaha audio products introduced in the U.S. in the 1970s, these had many unique features. The creative skills of Mario Bellini were once again tapped to design the look and feel of these headphones. Their open headband and fabric head strap made them light and comfortable, good for hours of non-stop listening. It’s a good thing, too, because the sound from the orthodynamic diaphragms (known today as planar magnetic diaphragms) was extraordinary. Yamaha engineers developed a manufacturing method to sandwich a very thin polyester diaphragm imbedded with a thin copper conductor in-between two specially designed magnet structures. Similar in concept to the electrostatic speakers being experimented with at the time, the sound was open, full range and very musical.

CR-2020 Stereo Receiver (1977)

Large 1970's era stereo receiver.
Yamaha CR-2020 stereo receiver.

Just a few short years after entering the U.S. Hi-Fi market, Yamaha upped their game with the introduction of this still highly-prized second-generation stereo receiver. Building on the success of the CA-1000 integrated amplifier (see above), the CR-2020 added three meters — one of them a multi-function display. With a button press, the second meter switched to a FM signal Q meter for fine tuning. After tuning in the station, the user would press the button again and the meter would resume indicating amplifier power. Different from the more commonly seen signal strength meters of the day, “Q” displayed the measured noise of the intermediate frequency (IF) stage in the tuner circuit before the FM signal was converted to audio. While signal strength and quality are not necessarily interchangeable, Yamaha focused on quality, which is a better method for receiving the best possible audio performance.

NS-10M Speakers (1978)

Side by side speakers.
Yamaha NS-10M speakers.

Expanding on the growing reputation of the NS-1000M, the NS-10M began its legacy as an affordable monitor-style speaker that any audio enthusiast could afford to own. Built primarily for home use, its sonic qualities quickly became desired by recording studios and permeated the recording industry. More than four decades later, NS-10Ms, with their recognizable white spruce cones, are still a common sight in recording studios around the world, and in recognition of their popularity, Yamaha received a Technical Grammy Award in 2007 for outstanding technical significance to the recording field. Although the company ceased manufacturing the NS-10M in 2001, there is still a vibrant second-hand market and a dedicated fan base for these humble little speakers.

There’s More to Come!

In the 1970s, Yamaha laid an impressive foundation for success in the U.S. Hi-Fi market with a wide range of products marked by innovation, usability, reliability and, of course, sound quality. Many of those early products are considered classics and are considered must-haves for collectors of vintage audio equipment from the golden age of Hi-Fi.

But it was only the beginning. Technologies will always evolve, and Yamaha intends to remain a vital part of the Hi-Fi community well into the future. Who knows? Maybe in 40 or 50 years we’ll be talking about a few models in today’s current lineup.


Check out these related blog articles:

Cult Classics, Part 2: Vintage Yamaha Gear of the 1980s

Cult Classics, Part 3: Vintage Yamaha Gear of the 1990s

The History of Hi-Fi

What is an Integrated Amplifier?


Click here for more information about Yamaha Hi-Fi components.

Click here for more information about Yamaha speakers.

Ian Kirkpatrick

LA-based Ian Kirkpatrick writes and produces songs for some of the biggest names in the pop world, including Dua Lipa, Jason Derulo, Selena Gomez, David Guetta, Justin Bieber and Britney Spears. In this video, shot in his home studio, he talks about how important Steinberg Cubase is to his creative process and describes some of his distinctive production techniques.

Looking back on his introduction to Cubase more than a decade ago, Ian says, “I stumbled around a lot of DAWs for awhile, looking for one [that allowed me to] do the things that I was hearing and imagining. I ended up with Cubase because it was the only DAW where I could move as fast as I was thinking.”

In particular, he relies heavily on Cubase’s MediaBay feature to help speed his workflow, as it enables him to quickly and easily search through the more than 300 gigabytes of samples and loops he has collected through the years. “I don’t know how anyone works without something like MediaBay!” he says emphatically. “It’s essential for me as a starting point.”

Kirkpatrick’s Mac-based software rig is supplemented by a Steinberg AXR4 interface and a MIDI keyboard, and not much else. “All of my favorite production tricks are things I do in Cubase,” he explains, which accounts for his minimalist setup, with little in the way of outboard gear.

Ian is an especially big fan of Cubase’s editing features, as evidenced by the way his face lights up when he talks about his work on Jason Derulo’s hit “Want To Want Me.” “If you look at the session file, the edits are all lined up perfectly,” he enthuses. “There are a lot of acoustic guitar stabs in there, and I would use the real-time Time Stretch feature to extend the notes to the point where I would get these artifacts — it was as if Cubase was trying to make sense out of me stretching the notes so much. The sustain of the guitar notes would then change, too, and I would blend that in with regular guitars and synths. That’s what made those stabs sound unique, like one unit.”

Cubase played an equally big role in Kirkpatrick’s production of “New Rules” by Dua Lipa. “Going into the drop of the chorus for that song, there’s a chop that’s made up of a loop that I don’t think I would have been able to do without Cubase” — specifically the way the Slip function allowed him to look inside the loop and transpose tiny parts of it in real time, with rapid changes in pitch that made for a compelling sonic tapestry.

“If you can’t work as fast as your ideas come to you, you’re really selling yourself short,” he says. “If you can’t properly execute your ideas as fast as you’re coming up with them, you’re not using the right DAW.” Clearly, Cubase is the right DAW for Ian.

Check out these related articles.

Click here to learn more about Steinberg Cubase.

Meet Yamaha Master Educator Andrea McAlister

Andrea McAlister is Professor of Piano Pedagogy at Oberlin College and Conservatory in Ohio and embraces the magic of communicating through music and cherishes the opportunity to help students learn to play piano. She engages her students’ curiosity and guides them through the learning process by drawing them into the music and giving them the tools not only to reproduce a piece, but also to create. She encourages her students to use their imagination freely, experiment and push boundaries in interpreting music and composing.

During her sessions and workshops for educators, McAlister emphasizes the importance of group learning because it demands accountability and requires students to work together to achieve a common goal. Relationship-building and establishing trust are key elements of McAlister’s teaching style. Agreeing with a favorite quote by Frances Clark, McAlister believes that educators “teach the student first, the music second and the piano third.”

McAlister always seeks to show up and give students her best, even on “off days.” She tells educators, “I need to bring my best because that’s what my students need. In addition to being their piano teacher, they may need me to be a good listener, a strong shoulder to cry on, someone to offer advice. They deserve my best day, every day.”

At 10 years old, McAlister knew that she was destined to follow in her parents’ footsteps and become a teacher. She understands that music educators have a special relationship with their students, and credits two meaningful professors with nurturing her and helping shape her own path into keyboard pedagogy: applied instructor Richard Morris and pedagogy professor Michelle Conda from the University of Cincinnati College-Conservatory of Music. She now seeks to recognize those early “sparks” in her students and help to nudge them in the right direction.

Some of Andrea McAlister’s session titles are:
  • The Language of Praise and Feedback
  • Lesson Planning with the Brain in Mind: Proven Ways to Stimulate and Motivate
  • The Art of Questioning: How to Ask the Right Question at the Right Time
  • Teaching with Technology

To learn more about clinics by Andrea McAlister, please contact Jalissa Gascho at jgascho@yamana.com

Reharmonizing Songs, Part 1

Throughout various “Well-Rounded Keyboardist” postings I’ve presented ideas about functional harmony and passing chords that can be used to add color and sophistication to your playing. Let’s pull all that together with some additional concepts to expand your chordal vocabulary.

A Quick Review

The most important concept of functional harmony is based on the “pull” of a dominant-seventh chord wanting to resolve, since it occurs as a V7 chord in a key and wants to resolve back to its root (the I chord).

Music annotation.

This same harmonic “pull” occurs in minor keys as well:

Music annotation.

We can use this harmonic “expectation” to set up any chord by preceding it with a Dominant seventh chord a fifth higher than it. This example takes each scale-tone chord and does just that, with a little added melodic movement for color:

Music annotation.

There is another chord type that offers the same type of expected resolution: the diminished-seventh chord, found on the seventh step of the Harmonic minor scale chords. This chord can resolve back equally well into a minor or major chord.

Music annotation.
Music annotation.

Listening to this sound, it is very close to a V7 chord with an added flat-ninth: it shares all the upper notes of that chord without the bass note:

We can use diminished chords to set up each of the scale tone chords like this:

Music annotation.
Music annotation.

In Part 2 of my “Functional Harmony” blog, we discussed the common chord progression called the ii – V – I, which makes up an important part of the jazz harmonic vocabulary, and has been used for countless open-ended jams:

Music annotation.

Note: In bars 3 – 4, I play a comping figure for soloing on a ii – V progression. Countless rock and jam bands have been known to play for hours on this!

Music annotation.

We’ve also discussed the idea of using scale tone chords as passing chords between two existing chords in a progression, as in this example, where a G triad is used to connect between a C and an A minor chord:

There’s no rule that says a chord can only be played over its root tone — as you can see from the above example, I put the G over its 3rd, the B note. Using the 3rd, or the 5th, or even the 7th is a great way to keep the bass line moving in step-wise motion, rather than always jumping around to the root notes.

Putting It All To Use

Armed with this vocabulary of harmonic devices, you can start taking a song and making it more your own by adding some simple reharmonizations. For example, here’s a common four-chord progression with a basic melody:

Music annotation.
Music annotation.

Using some simple chord voicings, you might play it like this:

Now let’s add some Dominant 7th chords to set up a few of the existing chords:

Music annotation.

In the first bar, I added the C Dominant 7th to set up the F major chord in bar 2. Notice how I labeled it as a V7 of IV (“V7/IV”) to show how it functions in relationship to the F chord. Similarly, I added the E Dominant 7th in bar 2 to set up the coming A minor, and the D Dominant 9th to set up the G chord in bar 4. While these all work, it’s generally more effective to mix up the approaches to adding more harmony instead of using only one device over and over.

Music annotation.

That brings us to this example:

Here, I still use the C Dominant to set up the F, but I play the 3rd of the chord in the bass for some movement, and added the 9th tone to my voicing. To set up the A minor in bar 3, I preceded it with the G-sharp diminished chord for a different color, along with a nice bass line climb. Then, thinking of how to travel to the G chord, I decided to move my bass line back downward and added some extra chords, delaying the arrival to the G. So the C triad over the G is a good scale tone chord choice, and on the way to the F6 (also a scale tone chord) I slipped in a little bit of chromaticism with the F-sharp half-diminished chord (F-sharp minor 7th with a flatted 5th). I chose that chord quality because, other than the F-sharp note, all the other notes come from the scale of C major.

This next version starts by using the concept of the ii – V chord to set up the F, so we have a G minor 7th that also needs to include the melody note, which is the 4th, or the 11th of the chord (we call it the 11th since there already is a 7th in the voicing):

Music annotation.

The melody makes the C Dominant 7th a 9th chord, and then for the F chord I added a 2nd to the voicing for a nice color, continuing the sophistication of the preceding chords. I also decided I wanted the bass to climb up to the A minor, so I got fancy and used the D Dominant 7th to precede the G bass note so that neither chord is using roots for the bass notes. This sound is used often in gospel and church hymnal music, and should sound familiar to your ears. Finally, I set up the G chord with its V7 (D-Dominant 7th) and used a colorful suspended 4th to 3rd resolution for the G to keep the harmony moving a bit.

This next approach explores the use of mostly scale-tone chords, with an ascending bass line up through the whole C scale:

Music annotation.

The only non-scale color is the F-sharp, which I again use to climb into the G, but this time I use that F-sharp half-diminished chord to climb into the C with the G in the bass.

Next up is another approach based on bass line movement, but this time we’re going to descend, and go further outside of the scale tone choices.

Music annotation.

The second chord in bar 1 is the C Dominant 7th, which wants to resolve to the F chord, but the voicing is fancier, putting the flatted 7th in the bass, and resolving into the 3rd of the F chord. Then I slip chromatically through an A-flat (making the F chord a minor) to get to that same C over G in the bass. Just as I did two examples ago, I then use the F-sharp half-diminished to go into the F, but that is followed by two scale-tone chords, with nice color from the melody notes making them minor 11th voicings. My reason for doing so was to balance out the more elaborate travels away from the key center in the first half of the progression.

Finally, let’s wrap things up with this decidedly jazzy approach:

Music annotation.

This whole example makes use of the concept of tri-tone substitutions for the usual Dominant 7th chords that would be normally be employed to set up each chord in the original progression. (See the “Let’s Get Fancy” section at the end of that blog for further explanation). The “fancy” F-sharp Dominant chord is a substitute for the usual C Dominant 7th, just as the B-flat Dominant is a substitute for the usual E Dominant. And the A-flat Dominant acts in place of a D Dominant to set up the G in the last bar. To change up the movement, I climb up from the G to head back to the inevitable C (the I chord); this also serves to make the chord choices a bit more interesting.

We covered a lot of ground here — all of it based on functional harmonic ideas. Click here for Part 2, where we go into some more advanced territory.

All audio played on a Yamaha P-515.


Check out our other Well-Rounded Keyboardist postings.

Click here for more information about Yamaha keyboard instruments.

The Bass Recorder Takes Center Stage

If you’ve watched Disney Plus’ live-action Star Wars™ series The Mandalorian and heard the show’s otherworldly-sounding theme song, you might be hard-pressed to identify the instrument playing those haunting opening notes.

Guess what? It’s a bass recorder. And while you may think that this is an instrument you’ve never heard before, you may be in for a surprise when you find out some of the hit songs and other soundtracks in which recorders have played an integral role.

First, though, a few facts about this fascinating instrument.

What Is a Bass Recorder?

The recorder that you (and countless students) probably played in elementary school was most likely a soprano recorder, which is actually one of the smallest instruments in a whole family of recorders. (There’s also a smaller version, called the sopranino recorder.) Next in size is the alto (sometimes called the “treble”) recorder, followed by the tenor recorder and the bass recorder, which plays a full octave below the alto recorder (its lowest note is F3). There are even larger versions — the “great” bass recorder and the contrabass (sub-bass) recorder — though these instruments are rarely used.

Graphic.
The recorder family.

“Recorder predecessors go back many thousands of years,” notes Matt Kerns, Yamaha Marketing Manager for Winds and Strings Accessories. “Archeologists have found artifacts that they believe are vertical flutes, so they are really kind of fundamental to human nature.”

The recorder evolved into its current state during the Middle Ages in Europe, starting in the second half of the 15th century Renaissance. Its “golden age” is considered to be the 17th to mid-18th century, during the Baroque period, and even though the instrument continued to be used well into the early 19th century classical period, it eventually faded in popularity. The bass recorder seems to have first appeared in the early 17th century.

Popular Usage

They may have fallen out of favor in classical music, but recorders are often used in contemporary rock music as well as movie soundtracks. Songs like Led Zeppelin’s “Stairway To Heaven,” the Rolling Stones’ “Ruby Tuesday” or the Beatles’ “The Fool On The Hill” are dominated by the instrument, and, thanks largely to composer Ennio Morricone, recorders came to define the sound of spaghetti westerns such as “The Good, the Bad and the Ugly,” which has one of the most recognizable and influential soundtracks in history.

“People may think of the recorder as a kids’ instrument because it’s what they start on in elementary school,” says Kerns, “but they have a very ethereal, mystical sound to them. The bass recorder in particular has a certain unique quality to it and I think that’s why it ends up being used as a special effect so frequently.

Tall woodwind instrument with mouthpiece at an angle from rest of body.
Yamaha YRB-302B bass recorder.

The Bass Recorder Steps Into the Spotlight

For the opening melody to The Mandalorian theme song, Oscar® and GRAMMY®-winning composer Ludwig Göransson decided to feature a bass recorder. Other than having played a child’s recorder as a young boy in school, Göransson had no previous experience with the instrument. In one fascinating YouTube interview, he says that, since he didn’t know how to play the bass recorder, he spent hours experimenting with it free-form, connecting with his “inner child.” As he sat practicing, in what he describes as an almost meditative state, one simple phrase kept coming back to him over and over again. That melody ended up serving as the memorable opening notes to the show; they not only usher in every episode, but are sprinkled throughout the soundtrack.

Modern Recorder Design and Digital Emulation

Image of a digital saxophone.
Yamaha YDS-150 digital saxophone.

Up until the mid-20th century, recorders were traditionally made from wood, but technological advancements have allowed them to be made from plastic as well. These instruments (like the one used on the show) deliver a similar sound but are more affordable than their wood counterparts, making them accessible to more people.

Recorders have entered the modern digital age, too. For example, the Yamaha YDS-150 digital saxophone offers a wide range of voicings, including some that can be customized to emulate the sound of a bass recorder with the use of a companion app. The YDS-150 offers many non-saxophone sounds such as pan pipes, harmonica and shakuhachi, as well as 73 different soprano, alto, tenor and baritone sax sounds.

Try to listen for the sound of the bass recorder in other songs and soundtracks. You might find yourself so inspired that one day you’ll want to play one yourself or incorporate it in your own recordings!


Check out these related blog postings:

The Recorder: It’s an Instrument, Not a Toy

Recorders: Baroque vs. German

Eco-Friendly Plastics from Plants

What’s the Difference Between an Acoustic Saxophone and the YDS-150 Digital Saxophone?


Click here for more information about Yamaha recorders.

Click here for more information about the Yamaha YRB-302B bass recorder.

Click here for more information about the Yamaha YDS-150 digital saxophone.

Test

test

Tips for First-Year Music Teachers from the 2021 “40 Under 40” Educators

Starting a new job is always stressful.

As a first-year music educator, you must familiarize yourself with your new school, administrators, staff and fellow faculty members, not to mention your students and parents. Then there’s concerts, competitions, lesson plans, assessments — the list is long.

We asked our 2021 “40 Under 40” educators what three tips they would offer to first-year music educators. Heed their advice as you start your career, and remember that as demanding as the work may be, the rewards are limitless, especially when you consider the lifelong impact you will have on a generation of music students.
Martindale Matthew 475Matthew Martindale, the Director of Bands at Shelby County High School and Columbiana Middle School in Columbiana, Alabama, says to:

1. Don’t rush the process. Very early in my teaching career, I was always focused on the next thing, the next concert, the next year — and the list goes on. Take each day for what it is. If the students are learning how to play concert D, don’t worry about concert E flat.
2. Collaborate with colleagues. Early on you will probably be in a situation where you are the only musical option in town, or even in your entire system. Talk with other directors close by. Call your high school band director. I still talk to my high school band directors. You will be amazed at the knowledge you can gain from them.
3. Take time to get to know your students. If they have your trust, you can do amazing things musically.


Snipes WillieWillie Snipes Jr., Director of College Bands at Miles College in Fairfield, Alabama, offers these three tips:

1. Never make a decision without seeking God.
2. Hang around successful music educators.
3. Never sacrifice music education for personal gain.


Bock JennJenn Bock, Assistant Band Director and Marching Band Director at Highland High School in Gilbert, Arizona, advises new teachers to:

1. Find a mentor. It may be from your student teaching, a current colleague or someone else in the field you admire.
2. Ask questions. If you don’t know the answer to something, find someone who does. Reach out to others in the field who are experts in the areas that you need to grow.
3. Learn your secondary instruments. Early in my career, I chose a new secondary instrument to focus on each year. I would warm-up with the kids in class on it, practice it and at least be able to play it at their level, so I could model good tone production on every instrument for them.


Villanueva EJ 475 cropEJ Villanueva, General and Instrumental Music Teacher at Orange Grove Elementary School in Anaheim, California, says to:

1. Find a mentor/support system that understands what you do (for example, a veteran music teacher).
2. Connect with your students and care for their interests.
3. It is okay to make mistakes — be honest about them and learn from them. Your students and fellow staff will respect you for it.


Alcantara JavierJavier Alcantara-Rojas, Director of Instrumental Music at Granite Hills High School and Director of the GREAT Academy in Apple Valley, California, says, “My three tips for first-year music educators is to learn, learn, learn.”

1. Learn from your students and community. Find out about their interest and weaknesses.
2. Learn from your colleagues. Talk to other amazing directors and ask for advice.
3. Learn from yourself. Do what you can, it is enough.


Zeilinger Aaron2Aaron Zeilinger, Director of Instrumental Music at Orange Lutheran High School in Orange, California, offers these three tips:

1. Listen to fantastic ensembles as often as you can. I find that if I can attune my ears to spectacular musicians, I keep my aural image focused on something I can strive for.
2. Connect with colleagues often. This does not always have to be other music directors; engage with other teachers and discuss teaching. I find that good teaching is universal, and I am constantly inspired by excellent teachers in other departments.
3. Remember that your students are just that — students. They are dealing with many items in their life that drastically shape their future. A superior festival rating or a 1st-place trophy will not be as impactful as a supportive and safe environment. Focus on the students and everything else will fall in line.

Paschke BeckyBecky Paschke, Instrumental Music Director at D’Evelyn Junior/Senior High School in Denver, Colorado, says:

1. Always remember to be kind.
2. Everyone has their own teaching style. It is ok to emulate master teachers, but you need to develop your own style and be authentic.
3. This past year, we have all learned not to take anything for granted. Approach every single day with passion and enthusiasm. 


Cox TiffanyTiffany Cox, Director of Bands at Lake Worth Community High School in Lake Worth Beach, Florida, advises new teachers to:

1. Stay true to yourself. In education, it can feel as if you have to create a personality that aligns with being the “perfect educator.” While it is important to be professional, you will be a far more effective teacher if you use your natural personality in your teaching. Be quirky, be nerdy, be funny — but be yourself!
2. Invest in your students, not the program. People talk all the time about successful programs and the ratings they get at festivals or the legacy of the band director. But that’s not the important stuff. You’re creating the leaders of tomorrow in your band room. Make sure that they are encouraged and supported in their passions (musical and non-musical).
3. Find a mentor. Through my research, I’ve found an incredible amount of evidence that a mentor can make or break the first few years of teaching. No one can do this job on their own — you’re going to need help. Don’t be afraid to reach out to other directors and if you feel awkward doing that, send me an email or find me on social media and I’ll be happy to help you out!

Sahely MeganMegan Sahely, Director of Orchestras at Leon High School and Raa Middle School in Tallahassee, Florida, recommends that first-year educators:

1. Recognize that music means something different for each of your students. Not every kid wants to be a professional musician or teacher, and your class may not be the central identity factor for many of your students. That’s ok. You can strive to create a culture of musical excellence that still welcomes students who have a more casual relationship with their instrument. This is one of the keys to creating lifelong music lovers. Students who graduate from this program may not pursue music professionally, but they will always look back fondly on the memories, relationships and music that they made as a part of your program.
2. Find allies amongst your colleagues and treat everyone that you encounter with respect. With the support of your school secretary, custodial staff, hall monitors, accountant and administrators, your program can grow and thrive.
3. Your to-do list will never be completed, so learn when to be done for the day. Setting boundaries that protect your personal time and personal life will create long-term mental health benefits by protecting you from overwork and burnout. 


Gibb Clark AndrewAndrew Gibb-Clark, Director of Choral Activities and Fine Arts Department Chair at Highland High School in Highland, Illinois, points to these three keys:

1. Be flexible, adapt and improvise.
2. Always focus all your efforts on the students, fight for and do what is best for them, always!
3. Don’t take things personally and be willing to be there for your students for more that just what they are doing in your classroom. Building strong caring student relationships is the most important!


Adelmann ChristineChristine Adelmann, Band Director at Gompers Junior High School in Joliet, Illinois, recommends that first-year teachers:

1. Make the effort to familiarize yourself with your students’ cultures, home lives, interests and overall value as individuals — not just as music students. Making genuine connections is how we as educators provide safe learning environments where students can make mistakes, learn and grow.
2. Remember that all kids are good kids. Approach your students with empathy by trying to understand their perspectives. Provide them with opportunities to show good character.
3. Don’t be afraid to admit when you are wrong. Respect your students enough to own your mistakes.


Stinson DonDon Stinson, Director of Bands at Joliet Central High School in Joliet, Illinois, says:

1. Don’t be afraid to have your mentors/teachers watch you teach. I waited too long because I was intimidated.
2. Every rehearsal/class session should include insistence, consistency and persistence from the classroom leaders.
3. We can’t do this alone. Seek help when needed but offer as much help as you seek.


Kaflik ChrisChris Kaflik, Director of Bands at Brownsburg High School in Brownsburg, Indiana, offers these three tips to new teachers:

1. Go out and observe other teachers. It does not have to be someone “famous.” Almost every teacher has a new trick that you can add to your toolbox. Even after you’ve been teaching for years, observe others. Then, take what you learned and apply it to your teaching style. Don’t try to be somebody else as a teacher, be you. But you can use elements of the approach you have observed in others.
2. In terms of being a band director, don’t think of it as a job. It is a lifestyle. That does not mean you have to live and breathe your program in any unhealthy way, but it’s not a “9-to-5” job. The more you invest in your students, staff and program, the more you will get out of them.
3. Don’t be afraid to get out of your comfort zone — I mean that in a number of ways. Learn and play instruments that you are not great at, try different/new teaching techniques/strategies, be willing to have a personality in front of students that is not your “default” everyday “self” if they need that.


Cooney MeganMegan Cooney, Director of Athletic Bands and Associate Director of Bands at St. Ambrose University, Davenport, Iowa, says to:

1. Make sure you thoroughly develop your own teaching, artistic and musical values before you lead a group of people. You cannot lead others before you spend time with yourself.
2. Always advocate for what is best for your students, the program and yourself even if it is not widely accepted.
3. Know how to hustle and be a good hang. So much of our job, whether it be playing gigs, recruiting for our ensembles, fostering great relationships with parents and/or administration is dependent upon our ability to relate and talk with people. People can decipher whether you are genuine and really know your stuff very quickly. 


Bechard DavidDavid Bechard, Director of Instrumental Music at Wahlert Catholic High School, Dubuque, Iowa, says the keys to success are:

1. Music selection: Do less, better. Select quality literature that your students will be able to play well. Success is good for recruitment and retention.
2. Make friends with the custodial crew. When you need things on concert day (or any day), they will be saviors.
3. It’s not about YOU — it’s about the kids.


Antonetti Jennifer2Jennifer Antonetti, Instrumental Music Teacher at Topeka High School, Robinson Middle School, Meadows Elementary School in Topeka, Kansas, tells first-year music educators to:

1. Ask questions! Mentor teachers, your co-teachers and administrators are here to help you, but we don’t know what you don’t know or what you need help with.
2. Keep good records of your inventories like instruments, uniforms, equipment, lockers, finances, music library, etc. You need to know what you have and what you need for budget purposes, and you don’t want to use your budget to pay for something again that was lost when you didn’t have a record of it.
3. Keep a “smile file” of all of the sweet notes that people write to you and all of the cute pictures that students draw for you. The smile file is a great resource for you to be able to look at and read when you have a “down” day.
Bonus: Keep a small bag on hand with things that you might need for a personal emergency in your classroom.


Cox LydiaLydia Cox, Chorus and Digital Music Teacher at Crosby Middle School in Louisville, Kentucky, says to:

1. Prioritize building relationships.
2. Give your students a voice.
3. Remember that every educator has been a first-year teacher! We have all experienced the tremendous learning curve that comes with being a new teacher but investing in your students and showing them that you care is vital in creating a successful and lasting classroom culture!


Zilisch Cory 475Cory Zilisch, Director of Orchestras at Westport Middle School in Louisville, Kentucky, offers these tips to new educators:

1. Be creative. Don’t be afraid to try new things and venture off the beaten path.
2. Don’t forget why you were drawn to music. Try to create that opportunity for your students.
3. Ask for help! The best educators are the ones who constantly ask for help, or learn new things to perfect their teaching. 


Matchim DavidDavid Matchim, Director of Bands at Centennial High School in Ellicott City, Maryland, recommends that first-year music educators:

1. Work as hard as you can, be the person you want your students to be and celebrate the small things.
2. Keep your focus on making your students the best people and musicians they can be, and the rest will fall into place.
3. Don’t make it about you.


Schaffer DouglasDoug Schaffer, Director of Bands at Mark Twain Junior/Senior High School in Center, Missouri, offers these three tips:

1. Be a part of your community. Go to the games. Chaperone the dances. There’s no better feeling than knowing that your community knows a) you’re the band guy and b) you care.
2. Find a mentor. There’s always something you don’t know. Find someone who knows it. There’s always someone who is willing to help, be it literature suggestions, clinics or to just have general conversations.
3. Put in the time to build something. It takes time.


Swick Tyler1Tyler Swick, Elementary Music Educator at Robert and Sandy Ellis Elementary School in Henderson, Nevada, says:

1. I would tell a first-year educator to understand that they are completely unprepared for the job that they are about to take on. You may be a fantastic musician and have a heart of gold, but no one can teach you how to be ready to teach, relate to and nurture the next generation of students. Their successes and failures are constantly shifting, and as soon as we understand how to teach them, they grow up and the next generation shows up.
2. The second tip is that aural theory is as important as your college professors told you it is, and we should all be sorry we blew that class off.
3. Lastly, the landscape of education will only become more digitized, and your skills as a beginning educator will be enhanced by your vast experience with technology. Lean into your comfort with computers, videos, audio and all things digital because the students need that from you going forward.


Irish DavidDavid Irish, Director of Orchestras and Associate Director of Concert Bands at Palo Verde High School in Las Vegas, Nevada, recommends that first-year teachers:

1. Get master educators in front of your group and learn from them.
2. Prioritize your physical and mental health.
3. Each year gets easier with experience. It’s a marathon, not a sprint.


Vicchiariello VincentVincent Vicchiariello, Director of Bands at Nutley High School in Nutley, New Jersey, says essential things to keep in mind are:

1. Be dedicated — the hours are long and it is one of the hardest jobs, bust it is also the MOST rewarding.
2. Don’t be afraid to ask for help. Everyone in the music world wants to help one another.
3. Be yourself. Students want you to be human and see who you are.


Nagy Phil1Phil Nagy, Music Teacher at McVey Innovative Learning Center (part of Hilliard City Schools) in Hilliard, Ohio, offers this advice:

1. Give yourself grace! You won’t have time to do everything you want to do.
2. Take care of yourself. Like the airplane safety routine, secure your own oxygen mask before helping others. You can’t give of yourself to your students if you are not well.
3. Become really good friends with the custodians and secretaries, they can singlehandedly make your job easier! 


Sleppy Jason 2Jason Sleppy, Band Director at Mason Middle School and Marching Band Director at Mason High School in Mason, Ohio, says:

1. You cannot do it alone. You will have many demands for your time during your first year, but don’t underestimate the energy you need to invest in forming relationships and teams. Seek out mentors to bounce ideas off of and develop great relationships with the individuals you work with. Essentially, team up with your parent booster group. They will be absolutely essential in creating rewarding experiences for students.
2. Gratitude: It is easy to get caught up in things you think aren’t going right. A school day is a constant onslaught of challenges from parents, students and faculty. Don’t forget about everything that is going well and let that fuel your motivation to continue.
3. Patience: The first year will be bumpy, and if we are being honest, most educators don’t feel like they “know what they are doing” for 10 years (or ever!). Use every situation to learn what works and what doesn’t. Look in the mirror often, as that is where the problems and solutions lie. The second year will be immensely easier.


Fields CarmenCarmen Fields, Choir and General Music Teachers at Edgewood Middle School in Trenton, Ohio, offers these encouraging words:

1. Teach what you love. When you teach from your heart students can tell. So, if you’re passionate about opera or the oboe, find a way to tie it into your curriculum. Don’t be afraid to have fun.
2. Show where you came from. I love showing old videos, some good, some not so good, of me performing, as well as doing non-musical things like riding ATVs or driving Corvettes. I have seen huge payoffs and connections with students.
3. It will get better. The first year is overwhelming for everyone. You can do this! 


Walck TimTim Walck, Director of Music at Austin Area School District in Austin, Pennsylvania, recommends that first-year teachers:

1. Be authentic and genuine.
2. Set goals, and then processes to achieve those goals for yourself, and your students.
3. Budget time for yourself to recharge and refresh. In order to care for others, you must first care for yourself.


Busch ErinErin Busch, Executive Director of Young Women Composers in Philadelphia, Pennsylvania, says:

1. First, don’t be too hard on yourself! Constructive criticism is a good thing and helps to strengthen your work over time, so don’t take it personally when things don’t go perfectly.
2. 
Next, create a game plan but don’t be afraid to deviate from it. Improvising isn’t just something that happens on stage; it happens in the classroom, too, and can be often better than what was planned.
3. Finally, disrupt the canon! Mozart, Beethoven and Brahms are all important composers, but there is so much more out there that students need to hear.


Velez Celina2Celina Velez, Music Director at Cayuga Elementary School in Philadelphia, Pennsylvania, offers these tips:

1. Be ready and then be ready to improvise. Be prepared and decide ahead of time to enjoy creatively solving the problems that will pop up.
2. Celebrate everything. Celebrate all your students’ musical and academic achievements and celebrate every possible holiday/feast/community event. These occasions give students more performance opportunities and introduce them to a diversity of musical styles.
3. No one can compare. Do not compare yourself to the previous music teacher or even your own musical upbringing. Look at your students, get to know them and decide to bring them two steps farther down this musical road than what they think they can do.


Gamon Michael2Michael Gamon, Fine and Performing Arts Chair and Center for Creative Arts Director at Harrisburg Academy in Wormleysburg, Pennsylvania, offers these three tips:

1. If you want to instill a love of learning in your students, be ecstatic about how much you love to learn.
2. What makes a great musician makes a great teacher. Be flexible, detail-oriented and positive under pressure.
3. Performance, music and art are more powerful as acts of giving than as acts of self-expression.


Campos JacobJacob Campos, Director of Bands at Franklin High School in Franklin, Tennessee, recommends that first-year educators:

1. Put your ego aside and keep it there forever. Ask questions without any shame. Find the best teachers in your area, state and nationally, and email or call them with questions. Every good teacher likes to help the next generation because they remember what it was like to get started as a music educator.
2. Find your weaknesses, accept them and study. Read articles and books, and ask about pedagogy and strategies in all the areas you feel uncomfortable.
3. Remind yourself why you teach daily. Start with: “What good shall I do today?” And remember it’s about the students not the subject. You can perform way more elite works when you are attentive to your students; interested in their lives, hopes and dreams; and actively working to build those relationships. 


Garfield Willie 475Willie Garfield, CEO of Garfield Institute of Music in Memphis, Tennessee, says to:

1. Perfect your skills and knowledge in music education as much as you can.
2. Learn the business side of music education — grants, state licensing and local funding.
3. Remember that you’re not only a music educator but a role model, and you will change lives.


Moreland SteveSteve Moreland, Director of Fine Arts at St. Michael’s Catholic Academy in Austin, Texas, says the keys to a successful first year is:

1. Creativity is the prerequisite for innovation. Think outside the box and don’t be afraid to take risks.
2. Sometimes it’s best to just learn the hard way about what works and what doesn’t because those lessons seem to stick with you longer.
3. Take care of your behind-the-scenes teams such as the facilities, cafeteria and office workers. These people are just as important to the success of your program as anything else, and they are often the most overlooked.


Teed BrianBrian Teed, Director of Percussion and Associate Director of Bands at Wakeland High School in Frisco, Texas, offers the following advice:

1. Take a breath. First-year music educators are often so eager to make an impact on a program that they often focus their energy toward tasks or situations that they do not need to focus on just yet. You do not need to transform the entire program in your first year.Show up every day with a consistent welcoming personality toward your students and your co-workers and everything else will fall into place. Don’t try to change too much your first year, give it time and see why things are the way they are before you implement change.
2. Constantly learn.Open your perspective as to what the music classroom can be. Make the realization and be okay with the fact that there are many different ways to approach teaching and conveying our passion to our students. The best in our field will present a tailored combination of everyone else’s style and approach but with their own personal ambitions.
3. Find your community.We have all been where you are. We have all had the same thoughts you have. We all want you to be successful and for your students to have an enjoyable experience with music. The world is getting smaller and smaller, so it is easier to find people to talk with, don’t be afraid to post your questions to a group page or walk into your co-worker’s office down the hall. Build your community and grow your support system. You are not alone.


Moore MattMatthew Moore, Associate Band Director and Director of Percussion at V.R. Eaton High School in Haslet, Texas, recommends that first-year educators:

1. Be transparent. Making mistakes is the gateway to growth in life and music. When you acknowledge your mistakes, your kids are more likely to grow through theirs.
2. Every group of kids is different. Your teaching style, curriculum and approach might land perfectly with some classes of students but not others. Young teachers may have self-doubt when everything doesn’t go according to plan. Make adjustments as necessary, but don’t lose your confidence.
3. Take time for yourself and your family. Our jobs can sometimes feel like everything else must be sacrificed, but you can still be an amazing educator while striving to live with balance. This will help you feel fresh and ready for more for years of music education.


Jimenez EricEric Jimenez, Assistant Director of Bands at Prairie View A&M University in Prairie View, Texas, says:

1. In this profession, you need someone to help guide you. My first recommendation would be to find a mentor with experience in the areas you need the most assistance. Areas of need could be specific to who you are as a person or the population you are serving.
2. Secondly, structure your daily tasks and responsibilities to have time for yourself, family and friends. This organization will help create longevity in this career.
3, Lastly, relationship building with your students should be a primary teaching strategy. Your students will enjoy making music with someone they trust, respect and enjoy.

Lipman JarrettJarrett Lipman, Director of Bands at Claudia Taylor “Lady Bird” Johnson High School in San Antonio, Texas, offers these wise words:

1. On your hardest days, and you will have hard days, always remember why you got into teaching. Think about what and who inspired you and try to instill that same passion into your students.
2. Remember, band is your life, it is not necessarily your students’ life. Push them hard on the clock, but respect their time and consider what they have going on both on and off campus outside of band.
3. Magical musical moments last a lifetime. Make a point to soak up every moment and encourage your students to do the same. Time flies and you don’t want to look back and wish you had enjoyed moments that you allowed yourself to stress over.


Vento Banda GiselleGiselle Vento Banda, Music Specialist at Parkdale Elementary School in Waco, Texas, offers these recommendations:

1. When I was teaching in Italy, I learned that emotions generate learning. My first tip is to develop a humanistic relationship with your students, or scholars as I like to call them.
2. My second tip is to remember to honor your mental and physical health. It is not necessary to give everything you have, leaving nothing for yourself.
3. Finally, it is imperative that we educate others about the value of our profession.


DiMassimo ChrisChristopher DiMassimo, Assistant Director of Bands at Rachel Carson Middle School in Herndon, Virginia, says to:

1. Develop a routine to make your life manageable — get up early, set up a budget, meal prep and plan, plan, plan!
2. Build relationships! Get to know the office staff, custodial staff and non-arts teachers. Go to school sporting events and after-school activities, so you can cheer your students on and show your face outside of class.
3. Observe other music teachers and ask questions! Get into the mind of other music teachers and figure out HOW they think.


Cooley KevinKevin Cooley, High School Band, AP Music Theory and Digital Audio Production Instructor at Platteville High School in Platteville, Wisconsin, tells first-year teachers:

1. You do not need to reinvent the wheel! Most teachers are happy to share their content with you if you ask.
2. Work hard for your students but also carve out time for your personal life by setting boundaries between your work and home life.
3. Every teacher has moments of doubt and it’s okay to feel frustrated from time to time, but don’t let those moments trick you into thinking that you aren’t making a difference in the lives of your students.

Check out tips for first-year music teachers from the 2025 “40 Under 40,” 2024 “40 Under 40,” 2023 “40 Under 40” and 2022 “40 Under 40” educators for more invaluable advice!

New Direct-to-Digital Releases for 2021

The events of the past year have impacted many aspects of our lives, including the way we watch movies. During 2020, with box office receipts tanking, movie ticket sales dropped by a whopping 80 percent. As a result, studios started releasing movies directly to streaming services rather than waiting until sometime after theatrical release, as had been the custom previously. In 2021, that trend seems to be accelerating.

With so much great content becoming available for home viewing, now is an opportune time to upgrade your home theater setup. Obviously, picture quality is a huge part of the experience, but we’ll be focusing on sound in this article.

Let’s start by looking at some of the first-run movie content that’s coming your way direct-to-digital this year.

Netflix®

You probably won’t be surprised to know that Netflix, whose business model is based around delivering streaming content, will be the most prolific provider of original movies in 2021, with plans to release 70 original films. And that’s in addition to all of its streaming series, both new and returning.

Because it contracts with other studios to produce many of its movies and binge-worthy shows, Netflix can put out a prodigious amount of content. However, as of this writing, the company has only announced specific movie release dates through mid-March. Some highlights include Malcolm and Marie, (February 5), Space Sweepers (also February 5), To All the Boys: Always and Forever (February 12), Pelé (February 23) and Yes Day (March 12). Many of the most anticipated Netflix movies scheduled to debut this year don’t yet have release dates. These include Don’t Look Up, Army of the Dead, Red Notice and Tick, Tick, Boom.

Netflix supports 5.1 compatible content through Dolby Digital Plus™, the established home theater surround standard. If you have a Netflix Premium membership, you can stream the audio in Dolby Atmos®, assuming that:

a) your streaming device and sound system support it, and

b) the movie or show offers it.

An Atmos system is like a surround setup on steroids. Not only does it spread the sound among speakers placed around the room, but it also features overhead speakers to provide the added dimension of height. (For more information, check out this blog.)

HBO Max™

The big news out of HBO is that, following on the heels of its recent, and extremely successful release of Wonder Woman 1984, HBO’s parent company Warner Brothers is releasing all of its 2021 movies on HBO Max (now justs Max) the same day they go to theaters. However, the films will only be available for streaming for 31 days after their release date.

Some of the high-profile movies with firm release dates include The Little Things (January 29), Judas and the Black Messiah (February 12), Tom and Jerry (February 26), The Many Saints of Newark (a Sopranos prequel, coming March 12), Godzilla vs. Kong (March 26), Mortal Kombat (April 16), The Conjuring: The Devil Made Me Do It (June 4) and Space Jam (July 16). Several other films have “expected release dates” rather than firm ones. These include In the Heights (June 18), Dune (October 1) and The Matrix 4 (December 22).

HBO Max is now broadcasting in 4K and supports Dolby® Digital 5.1 surround and Dolby Digital Plus (which can handle 7.1 channels). The service did offer Wonder Woman 1984 in Dolby Atmos, so wider Atmos support seems likely in the months ahead.

Amazon Prime Video

In 2021, Amazon Prime will also be entering the direct-to-digital arena. The highlight so far will be Coming 2 America (March 5), with Eddie Murphy reprising his role from the original 1988 film of almost the same name.

Amazon Prime supports Dolby Digital Plus and Dolby Atmos.

Are You Ready?

One of the prerequisites for a having truly cinematic experience in your home theater is a surround sound system. With one, you’ll be able to get a lot more enjoyment from streamed content, including the direct-to-digital releases listed here. What’s more, you don’t necessarily need surround sound to be Dolby Atmos-capable … although that would be the ultimate.

If you are thinking of upgrading to a surround system, it makes sense to use an AV receiver as the hub. Good choices here include the Yamaha RX-A2A, RX-V6A or RX-V4A, all of which provide the ability to receive, amplify and output multichannel audio.

Front and right corner of an AV Receiver. It looks like a small black box with small legs and a dial on front.
Yamaha RX-A2A AV receiver.
The 7.2-channel RX-A2A, for example, supports Dolby Atmos, DTS:X and Yamaha Cinema DSP, among other formats. It also lets you stream music over Bluetooth® — you can even connect a turntable if you want to spin some vinyl between movies.

Remember that your ability to stream high-quality multichannel audio depends not only on your sound system but also on whether your streaming device or smart TV — and the movie or show you want to watch — supports the particular audio format. You could have a super tricked-out Dolby Atmos setup, but if your smart TV doesn’t support it, or the movie doesn’t offer it; you’ll have to listen in a less immersive format.

Go to a Bar

Even if you don’t have the budget or space to put in a multi-speaker surround system, you can still improve your audio experience significantly over what’s being delivered by your TV speakers by adding a sound bar, which is typically mounted right under the TV.

For example, the Yamaha SR-B20A is equipped with two woofers, two tweeters and two subwoofers. It will provide a much fuller sound, with tons more bass than you’ll get from TV speakers. If you don’t have a lot of space, consider the compact Yamaha SR-C20A, which is just a shade under 24″ wide.

Long thin speaker on a table.
Yamaha SR-B20A sound bar.

The SR-B20A supports DTS® Virtual:X™, which creates a virtual 3D surround experience from 5.1-channel, 7.1-channel and even stereo signals. For the latter, it “upmixes” the stereo audio to simulate a surround mix and spreads the sound around the room with its multiple speakers and some creative digital signal processing (DSP). Many sound bars also let you stream Bluetooth audio to them from your mobile device, giving you another way to listen to music.
For more details on buying a surround system for home theater, check out our blog How to Shop for a Surround Sound System and watch this video.

No matter what audio setup you end up with, the plentiful releases planned for 2021 will provide you with a great opportunity to immerse yourself (pun intended) in first-run movie-watching experiences from the comfort of your home. Only time will tell whether the direct-to-digital movie trend will continue at this level going forward, but it’s certainly possible. In the meantime, enjoy your home theater!


Be sure to read our “Comparing Streaming Service Audio and Video Quality” blog for more information about the leading streaming services and the audio formats they support.


Also check out these related blog articles:

Home Theater Basics

Building the Ideal Home Theater

How to Recreate the Movie Theater Experience at Home

How to Maximize HBO Max

How to Shop for a Sound Bar

There’s a Sound Bar for Every Space and Budget

Virtual Surround Sound and Yamaha Sound Bars

How to Connect a Sound Bar to a Computer

Introducing the SR-C20A Compact Sound Bar

Top Five AV Receiver Features


Click here for more information about Yamaha AV receivers.

Click here for more information about Yamaha sound bars.

Click here for more information about Yamaha speakers and subwoofers.